
-
Featured Gallery Photo
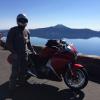
 CLASS at Infineon 2007

In 2007 I attended one of Reg Pridmore's CLASS days at Infineon and it was a blast. A sunny mid-May track day in NorCal is damn hard to beat.
photo used with permission, credit: Ian Donald - http://iandonald.com/
Copyright
© Ian Donald
Last Three Days Content
Showing topics, images, blog entries, files and events posted in for the last 3 days.
- Past hour
-
Hello. I have a problem with VFR800 ABS 2006. After replacing the timing chains, a problem appeared. The problem is similar to this one, unfortunately topic is archived. When bike doesn't start I found out there was no spark. The gas pump was working when I turn on ignition (so HISS nothing to do with it). I checked battery voltage 13.8V without load and 9-10V when starter works. I decided to change battery. I replaced battery and bike starts. Battery voltage under load was 11-12V. But some times bike doesn't start (no spark). I think It is an electric problem. Can you tell me the control points and voltages to check supply to ECM? I checked GND contact block on the left side near the headlight, it is Ok Also I don't understand this comment from topic: "I would start checking the Grounds and 12v Supply voltage to the ECM. You need to have a solid GROUND back to the Negative of the battery on the ECM Gray connector B1,B2 and B14. You need to have a solid 12v at switch ON at B12. You can simply back probe the ECM Gray Plug. " Where can I find B1,B2 and B14 connectors and which wires have to check?
- Today
-
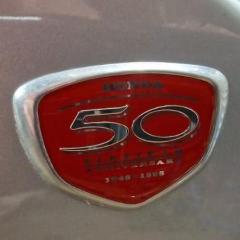
Welcome to the site, rare nice looking Honda 50th anniversary VFR! Congrats on finding one in such good condition.
-
I'm 5'10" and have no problems with the T-Rex sliders as far as banging my knees. Right one was a bit of a bear to get tightened up (very small space to get the wrench on the nut). I'm thinking they will complicate taking the side fairings off. Have to be careful not to scratch the fairings on the backs of the sliders.
- Yesterday
-
Building a Nice VFR with lots of different parts
squirrelman replied to lastfleetadmiral's topic in Earlier VFRs
without doubt this is the BEST rebuild EVER of that model VFR and shows imagination and refinement, and its fully museum-worthy. much respect 😉 -

Looking for STL file for cover/ UPPER COWL 64591MBG000
Mohawk replied to xweb's topic in Fifth Generation VFR's
Where are you ? I have a set of Chinese replica fairing ones. -
Hay Peeps, Hope all u guys are doing well. I agree with the general consensus that the 5th Gen OEM Showa rear shock is a bit lacking in some ways, to me it always feels a bit harsh & over damped, even set to manual's recommended settings, shocks still in great condition for it's age though, never leaked any oil. So recently been thinking of sourcing a new shock, prices aint cheap, we're talking £350-£450 for a basic emulsion type shock, which isn't worth the asking price for a same spec design shock that I already have as OEM, may be they're more suitably valved for a heavier bike & better ride, but I can't justify the expense for such a basic shock. I've done some research, considered a few shocks that would physically be a suitable donor for this project. Discovered that a ZX10rr Twin tube compact alloy shock had been fitted to a 5th Gen, forum member never updated his work on spring weight/dimensions/damping settings used after fitting, so I'm unaware if he failed with this mod or had it re-shimmed to suit the 5th Gens spring weight or is still riding on the original valve shimming set by Kawasaki? I accept the ZX10 shock is a tad shorter stroke, valve shim stack may well be unsuitable in it's current ZX10 spec, as its spec'd for a much lighter bike, but the general compact design lends itself to being a great shock to use, valve shims can always be sorted at a later date once the physical barriers have been overcome, which is where I am now, hence I thought I'd share my exploits for those that might be interested. I kept an eye on eBay for a few months & eventually sourced an as new zero miles 2019 ZX10rr shock off eBay £120 posted. Shock came with the upper steel mounting bracket, I did consider modifying this top mount it until I discovered an all alloy unit from a Gixxer 1000 had the correct inner dimensions to match the ZX10's upper shock bush, plus it easily cleared the top of the shock, so grinding out wouldn't be required. eBay to the rescue again, Gixxer alloy top shock mount £8 posted. Next barrier was get the ZX10 shock/Gixxer top mount combo to match the OEM shock & top mount dimensions. OEM shock is 325mm centre - centre plus top mount. ZX10 shock is a tad shorter, at 309mm, which isn't such a bad thing as it turns out, using the alloy Gixxer top mount gave me more than enough material to use to match the OEM length plus a bit more to factor in some adjustability on ride height too. ZX10 shock appears to be used upside down, as it's a twin tube compact unit, it makes no odds which orientation it's used in. So on the 5th Gen, it'll need inverting, bringing the threaded pre-load rings & damper adjusters to the top & accessible on the 5th Gen thru the left side frame above the chain guard. Upon measuring the ZX10 shock, I found both upper & lower mounts are the exact same internal bore dimensions, so I pressed out the rubberised steel bushing & needle roller bearing flipped the shock pressed the bush into the other end, shock is now inverted, with the lower needle roller bearing issue to figure out. After some measuring & head scratching, I found the now bottom eye to be too narrow, 39mm was my goal, after studying potential bearing options, I decided to keep the ZX10's OEM inner bearing top hat bushings, but these would no longer be a direct fit in the other end on of the Zx10's shock, internal bores are the same but not the width's so thinking cap on, sussed out that using 2 narrower needle roller bearings would work centred in the shock eye, this would leave me with enough room for a pair of dust seals & using the original bearing top hat bushings would give me an excess width of 4mm, inner section of the top hats was 3mm too short so bushings would bind & lock solid the bottom eye, so this was spaced out with 3x1mm brake hose banjo sealing washers, I had some in stock that fit inside the needle bearing with clearance. 2 appropriate sized needle rollers fitted into bottom mount with dust seals, top hat bushing spaced out internally, correct clearance so no metal - metal contact like the OEM shock is plagued with between the triangle plates, ZX10 top hat width was now 43mm, so needed reducing externally by exactly 2mm each bush to get a total bottom width of 39mm, it's now a perfect fit between the alloy triangle plates & no metal to metal binding. Now to figure out how this Gixxer alloy top mount will work. Gixxer mount is a really chunky bit of kit, so I elected to cut down the 20mm diameter thread section, leaving enough material to accept the original lock nut, I ground off the steel locking section & lost only 1mm from the nut, further measuring up proved the nut to be too thick, so I cut the nut in half & inverted the big nut, this could now be used as my ride height adjuster, bottomed the nut on the alloy mount, ground a flat on the nut so it locked against the under side of the bikes frame mount, proved to work as expected, a lot of careful measuring, I decided to leave it 3mm longer than my original plan of matching the same dimensions as the 5th Gens OEM shock & mount combo. So at this point I have a nearly ready to install shock & top mount which is plus 3mm, plus option to increase ride height by another 4mm by using the Gixxer's inverted top nut, 1 turn out gave an exact 1mm of added shock length & gave approx 2-3mm bike ride height increase. Gixxer top mount now needed some way to bolt it into the 5th Gen, 2 options came to mind, drill out the centre & thread it to accept an M10 bolt from above or loctite a high tensile M10 bolt into the Gixxer mount & bolt the shock in place so it mounts the same as the 5th Gen's OEM mount does. I already had a spare Gixxer mount in case I screwed up this one, but it turned out bang as measured, I have no complaints so far. 1st shock install into bike gave +5mm on ride height (measured on centre stand). ZX10 OEM spring is way too weak @ 95nm to support the 5th Gen's girth. 1st spring I tried was a 115nm K-tech left over from a previous project, this gave far too much static sag. Pulled the shock, fitted a 125nm K-tech, a bit better, but still too much sag. I then discovered the OEM Honda spring was a claimed 130nm, albeit a tapered progressive coil of sorts, at the time I thought this 130nm to be incorrect, as I'd tried a 125nm & it proved to give way too much sag, I didn't know at the time that the OEM 5th Gen shock has a ton of pre-load, slept on it & figured out this was my main issue causing excess sag as bikes sagging on its weaker end coils & these need a good amount of pre-load to get the spring to work enough to support the 5th Gen weight. As my test springs are 155mm & not the correct 170mm length, I didn't have any suitable spacers at this time to add to the spring to get nearer the optimum 175mm, surely this is what's causing my excess sag? I'd convinced myself I need an even heavier spring than a 130nm. Back on Ebay again, found an as new 160nm K-tech spring £40 posted, albeit a 155mm length, I took a punt & bought it. A friend builds race cars for a living & has access to all manner of useful bits n bobs, I had a rummage in his spares box & found some race shock pre-load alloy lock rings, my pal turned these down on his lathe while I waited as the inner bore was a bit too small to fit the ZX10 shock, £20 changed hands & I walked away with a smile on my face & 3 anodised alloy spacers to play with. A few days later the 160nm spring arrived, back in the garage, pulled the shock again, stripped it down, played around with these fancy looking new spacers, I could only make use of 2 spacers which gave me an added 20mm, so I'm now at 170mm of spring/spacer stack height. Fitted em back onto shock, spring compressors had to work a bit harder due to the longer stack height, ZX10 shock only has 25mm of pre-load thread to play with, I easily achieved 20mm of sag with the 160nm spring & spacers, but it was near the end of my available 25mm of pre-load thread. I didn't have a helper to measure sag with me onboard, so I've no idea at this point. A road test is imminent once i get the new tyres on & wheels repainted. If rider sag proves to be inadequate, I'll have to source a new 175mm x 160nm spring from K-tech, no big deal really, this will take my total build cost to less than £300, which aint bad for a shock of this spec imho. Currently into this shock mod for less than £200. Rebound damping has 4.5 turns, I'm now @ 2 turns in from fully out which is enough to damp the spring at the top of its 1st bounce. Compression also has 4.5 turns, I'm at now @ 2 turns in from fully out, seems enough as a starting point, so hopefully I have enough damping adjustability without pulling the shock again time & getting the shims doctored at my local bike suspension guru's Ohlins service shop. I'll update my findings after a road test, fingers are crossed. Bye for now👍

-

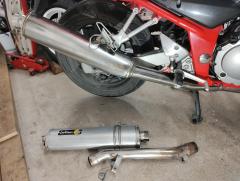
New 5th/6th/8th gen performance header now in production in USA
ducnut replied to sfdownhill's topic in Exhaust Systems
Unslip the slip joints a bit and get everything loose and floating. You’ll need to work your way around to each exhaust port, tightening a bit at a time. I don’t mean tightening the pipe all the way in; just equally moving each head pipe in, by using the nuts. While doing that, keep working the slip joint, incrementally moving it together. The gist is to equally move everything into place, until the headpipes are seated. I didn’t use a torque wrench and I’d suggest you don’t either. The studs are quite small and it doesn’t take much to damage them, strip them, or even pull a stud out of the head. Using just your hand, you can better feel when something is not right. The main thing is to just take your time and equally ease everything into place. - Last week
-
-
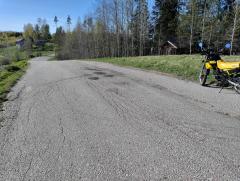
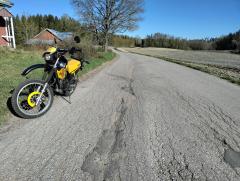
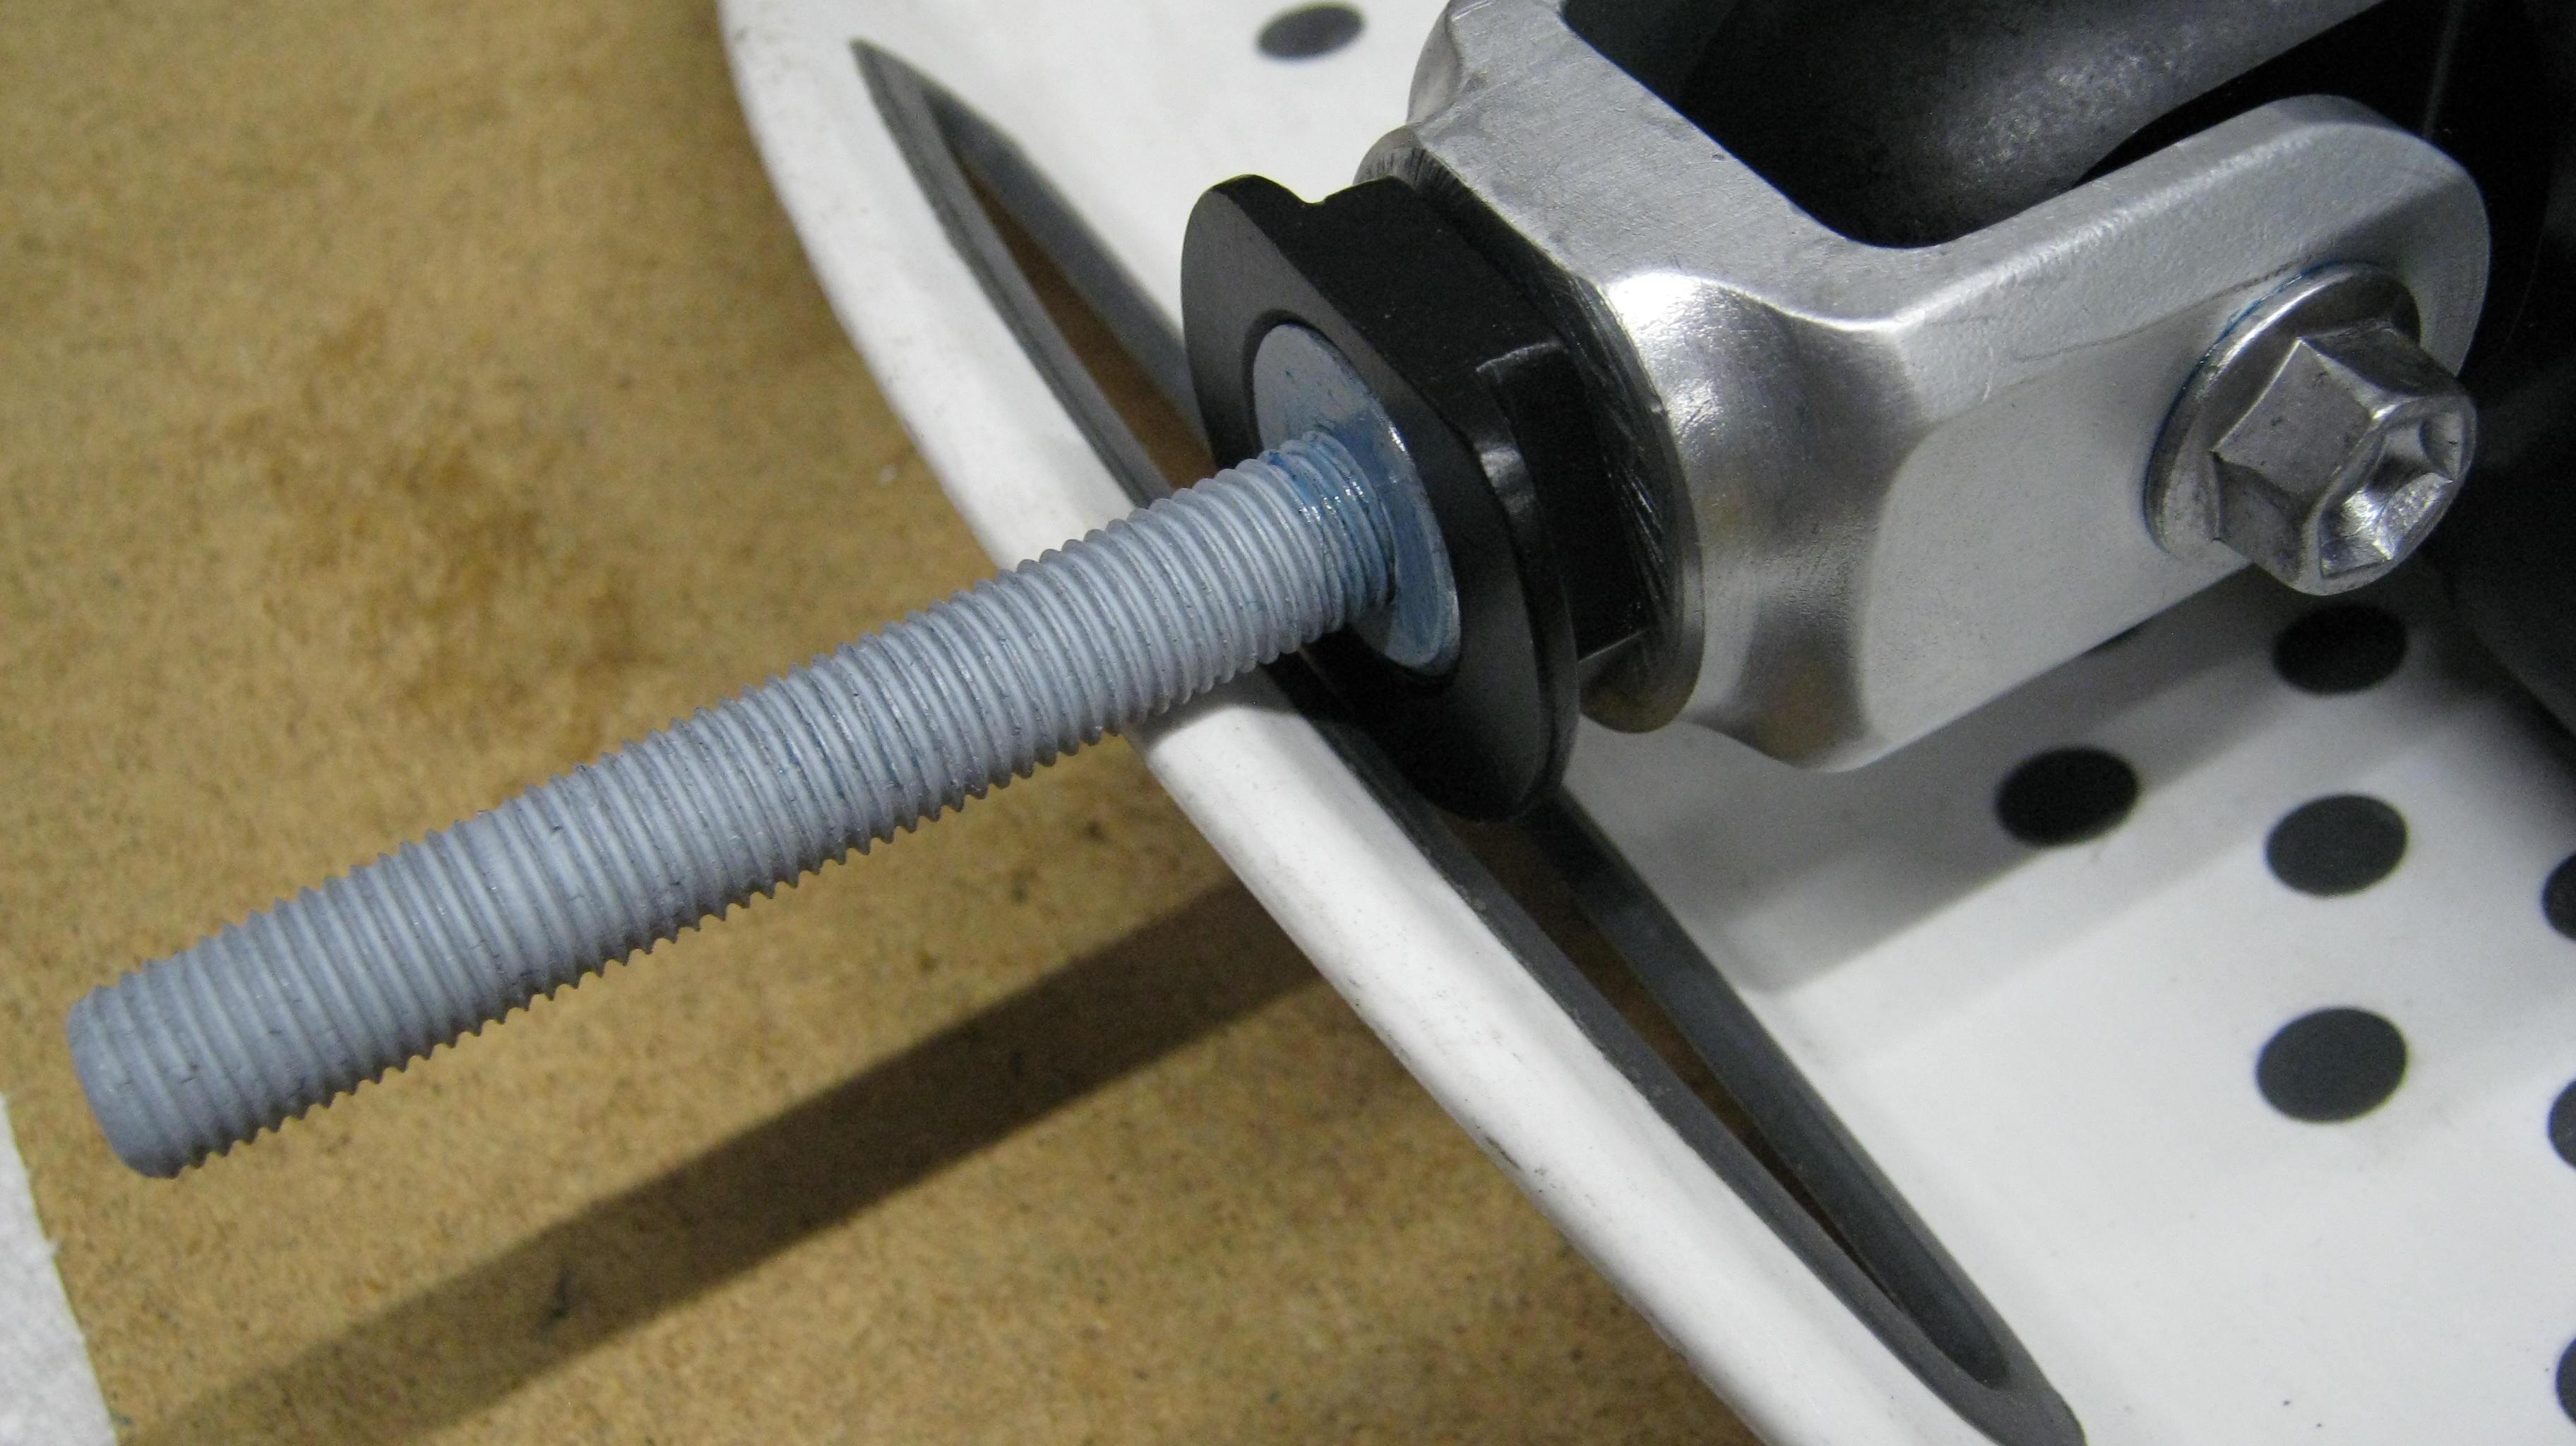
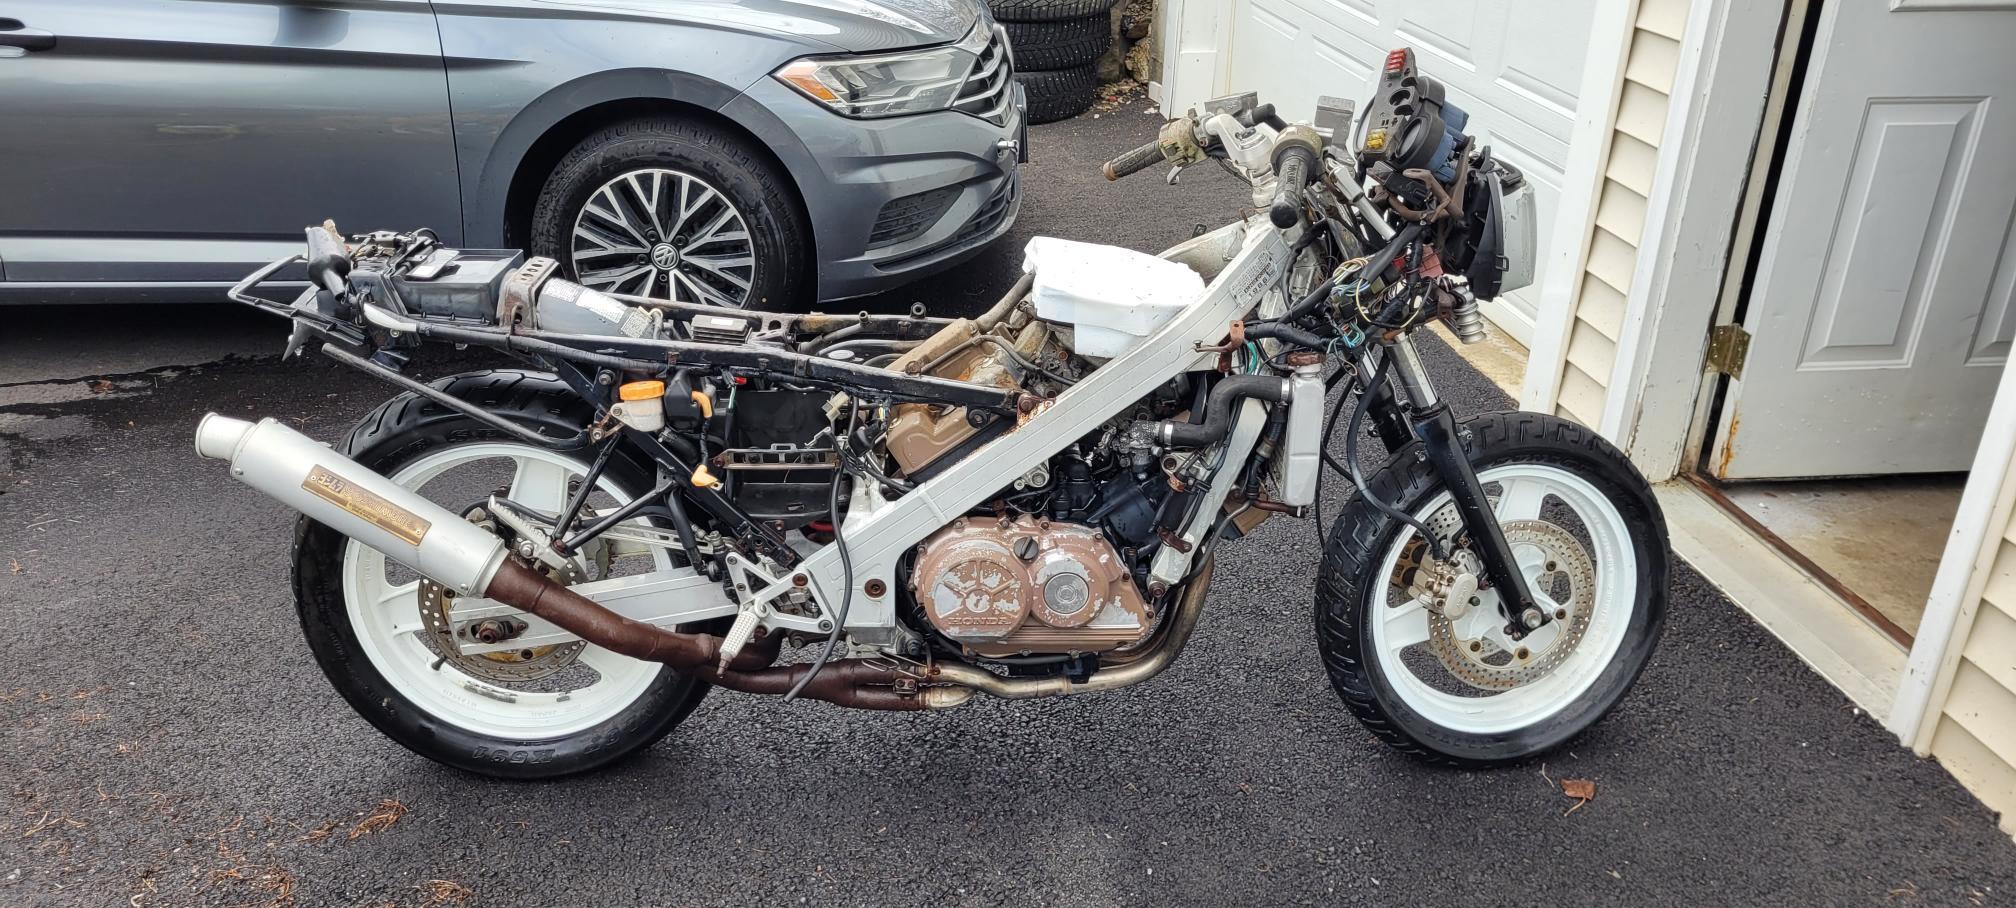
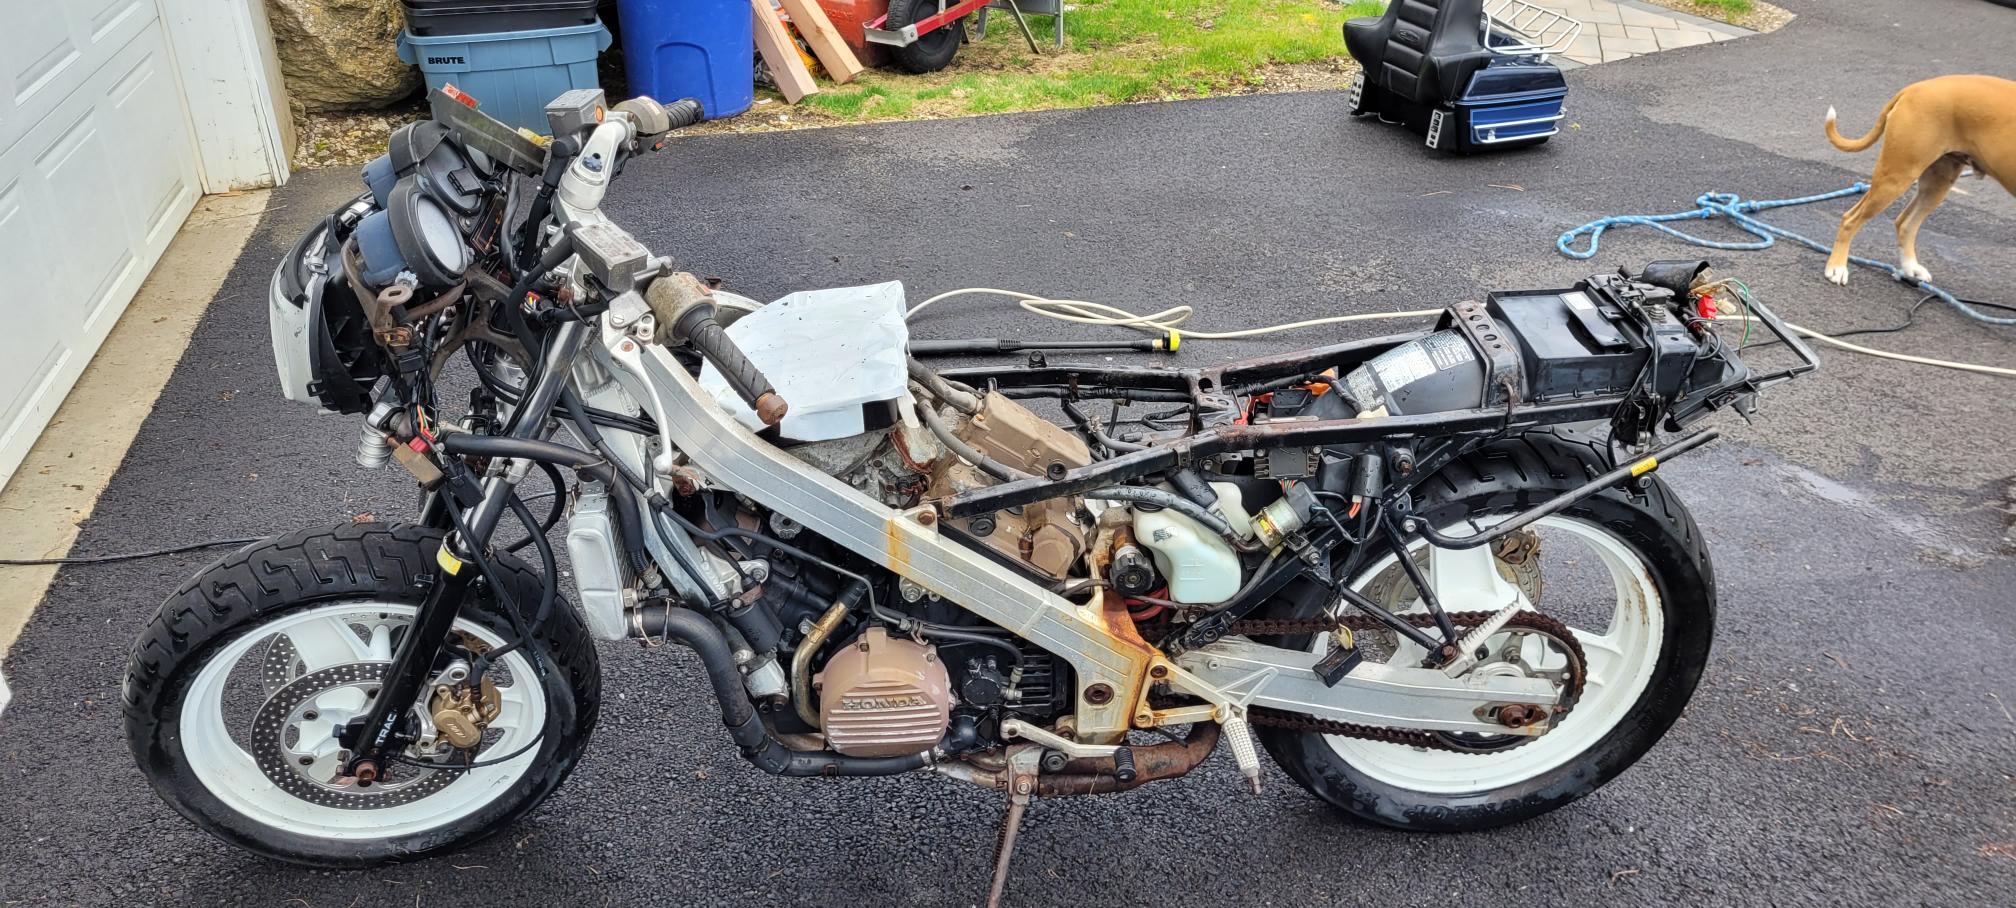
Finally got this project under the pressure washer, now I can better see what's going on. Plenty of frame polishing, parts refinishing and painting/powder coating, fork seals, fuse block cover, new rear tail light (help a brother our here if you got one), glass seals on the instruments seem to have a problem as water just got in there when I washed it. Wheels have to be cleaned up as It sat in the woods for a while, rear rim has a small spot of rust, brakes are gonna need a full rebuild both front and rear. Now the engine, turns freely but certain it's gonna be milky mess as penetrating oil seeped right past the plugs, guess we will know more tomorrow as I get into it. The carbs are a mess a run thru the ultrasonic will tell us the direction on that. transmission however looks perfect. Tires are almost brand new. Rear suspension cleaned up bright red on the spring...happy dance 🙂 still looking for a set of front lower side fairings that won't drain my bank account.
-
Bandit now has a OEM silencer Did a test ride whit XT today Not so nice. Should top 135km/h bt actually doesn't do much more than 100km/h, ok on small twisty tarmac roads but awful on gravel bits. You have to keep taco between 6-8k to have some movement. This was a bike I dorled after as a teenager, but a total disappointment for real, how can some folks love this bike? Not my cup of tea or this example does have some issues, strange through it starts ok, runs okay and has good compresson... Bike is listed Amen
-
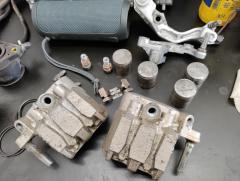
Brake calipers are cleaned Ultrasonic cleaner is nice
-
From the album: Anything goes!
-
From the album: Anything goes!
-
From the album: Anything goes!
-
From the album: Anything goes!
-

Shift/ Gear shaft support for 5th Gen?
bmart replied to NorthernV4's question in Modification Questions
I saw that. Seems like a solution without a problem to me. -
So great to see a 3rd gen!
-
Thanks! Yes, UK variant Gen1 had the square clocks. Yeah, good shout but checked also. I have another knuckle in the post from Germany so i have a fall back if needed. Ill see if i can get some video this weekend. 👍
-
For those who have posted WTB listing. Do not proceed with any transactions at the suggestion of new members who provide email address (that are supposedly real members email address ) stating that those real members have what you are looking to buy. The email address is not that of the real member and it's a scam .
-
I have a gas tank for a 87 VFR700 has 1 small dent no rust in tank. Email me I can send some pictures.


-
Blogs
-
- 122
entries - 565
comments - 289735
views
Recent Entries
 Latest Entry
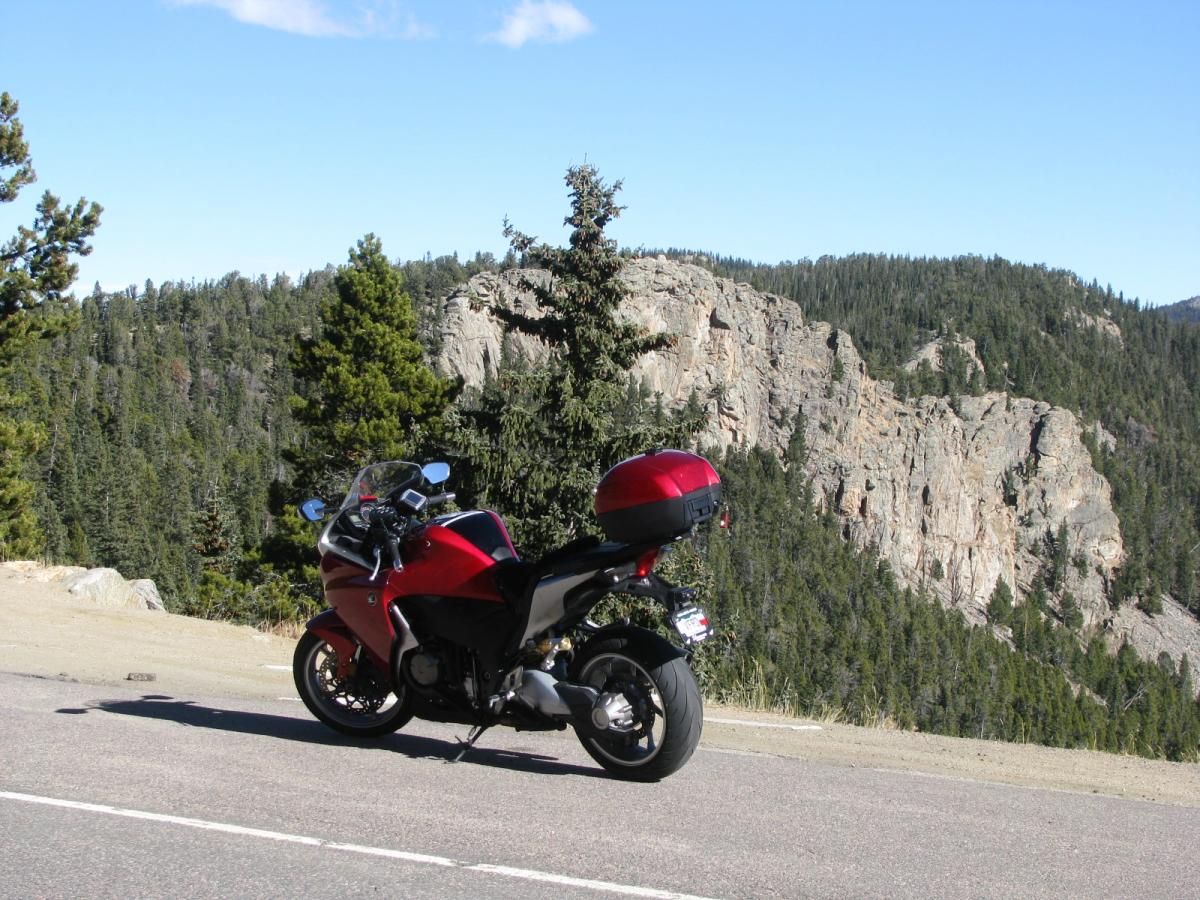
The Last Day Of Good Riding Weather
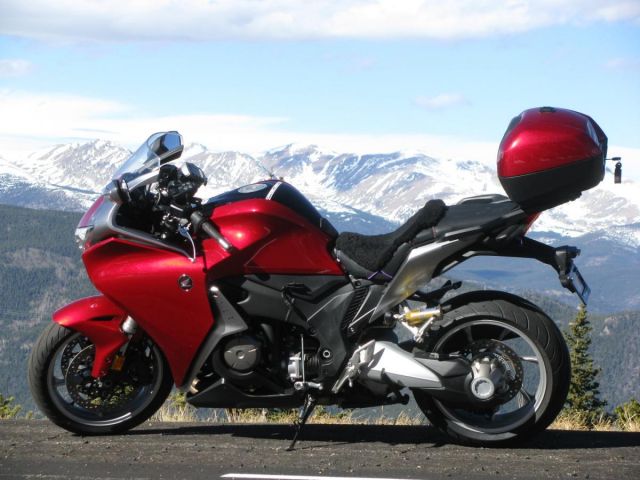
Juniper Pass
I took a day off from work and also from my bicycle training to take out the Veefalo one last time before the weather turns ugly, supposed to snow the rest of the week and possibly start sticking to the ground along the Colorado Front Range. I took a leisurely pace up hwy 105 toward Morrison and got reacquainted with the bike since its been over a month since I took any sort of twisties on it at all, hwy 105 is a scenic ride along the front range between Denver and Colorado Springs, its mostly easy fast sweepers and lite traffic so its a favorite road of mine when going north. Then I have to negotiate a bit of traffic near Highlands ranch and up hwy 470 into the mountains. I decided to take the Morrison Exit and try either Lookout Mountain or head up Golden Gate Canyon - this time it was Lookout Mountain, I was sort of making it up on the fly as I went along. Lookout Mountain is my old bicycling haunt from my days while I was working at Coors, its a killer ride and all uphill - I don't think I could do it today If I had to, not quite there yet! I saw a whole bunch of riders doing it though and wished I was in shape enough to be there doing it as well. 30 more lbs and I will be able to do it! On this day I would do it on the Veefalo instead.
I took a video from the gateway to the top at the Lookout Mountain State Park, getting past riders, the guy in the green jacket actually pretty much astounded me with how far he had gotten in the short time it took me to set up my camera, some 3 miles at least and up to the gateway from the turn off at hwy 6! Amazing I thought. I took the first two turns slow then got more comfortable as I went up further, till I was doing well, I made some gearing mistakes and took the tight 15mph marked hairpins in the wrong gear so I lugged it a bit on one or two. Still enjoyed it though and then got off at the top and hiked over a rock outcropping for an overview of the road for the pictures below.
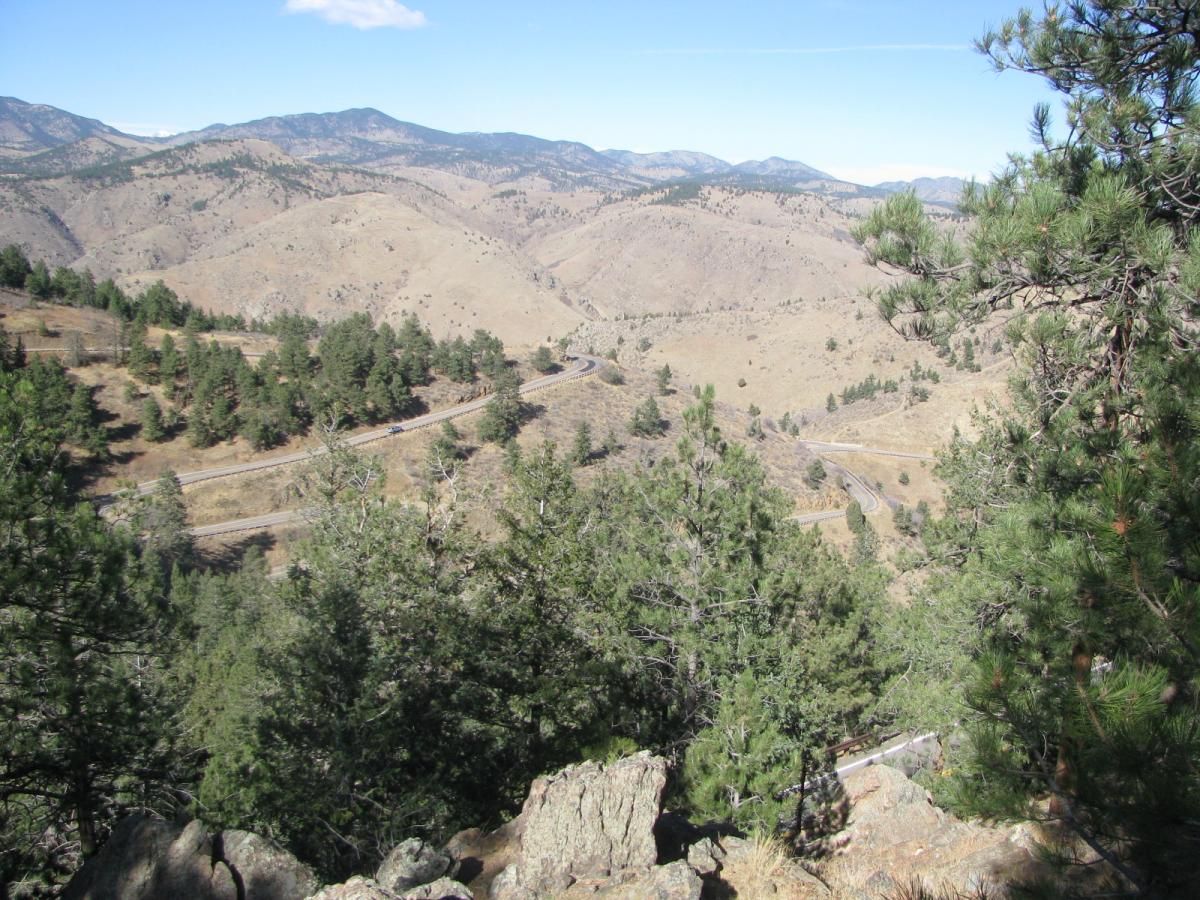
Lookout Mountain - Golden Colorado
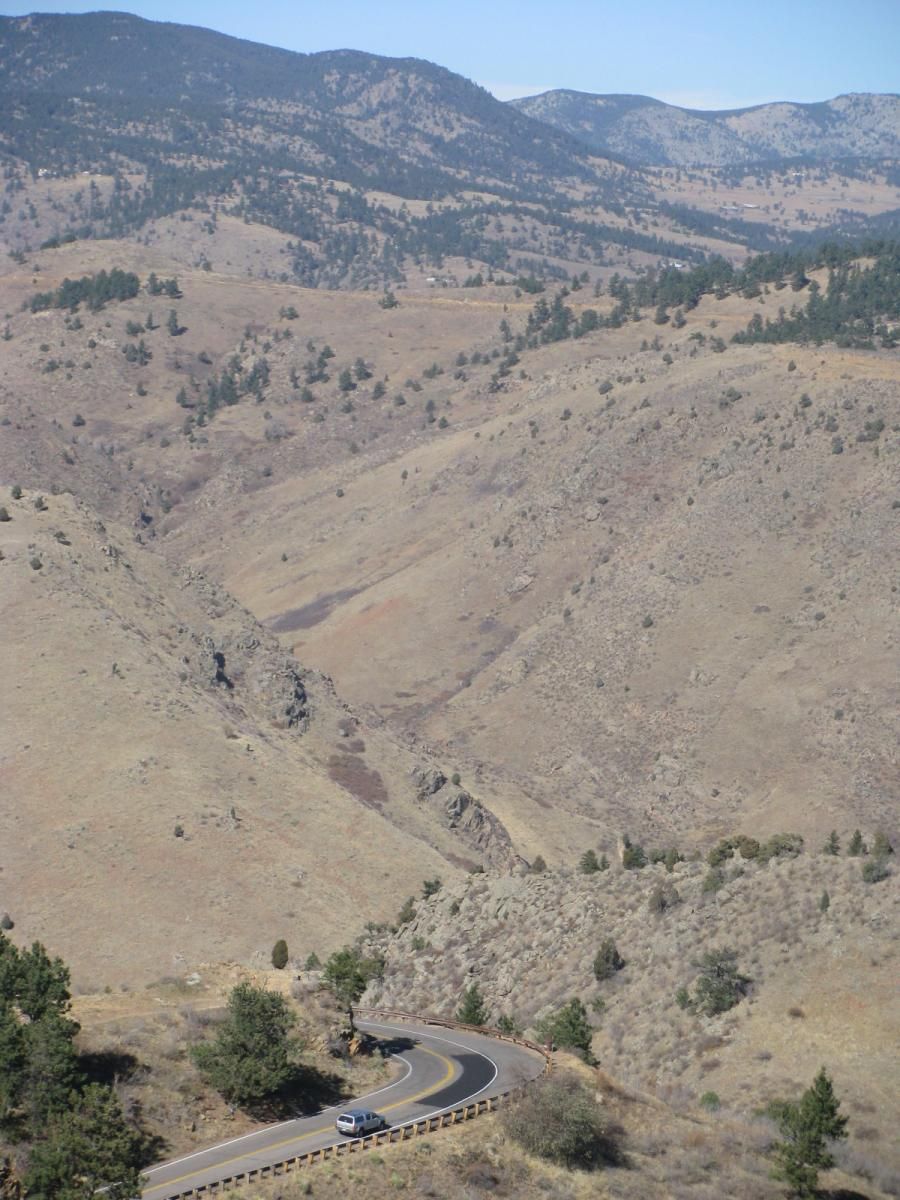
Zoomed in
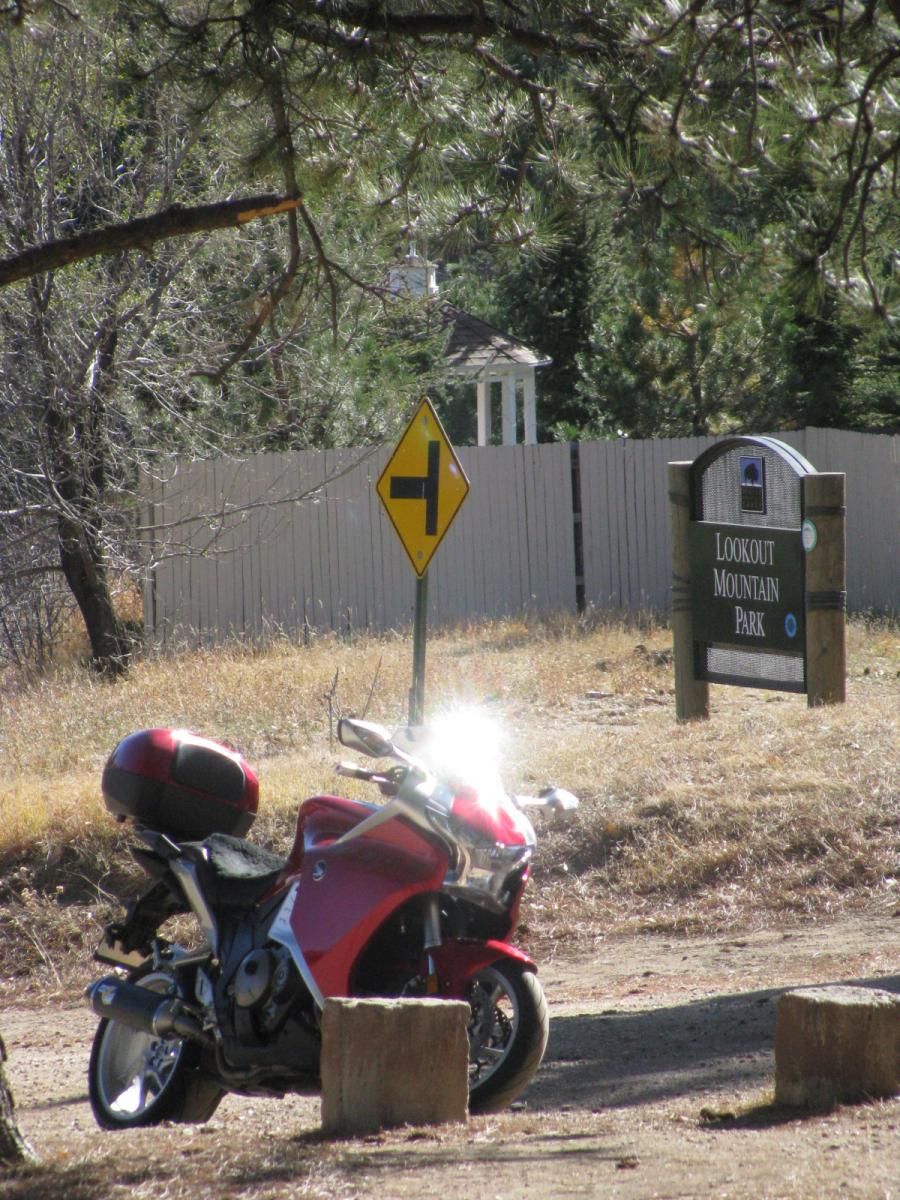
Lookout Mountain Park top of the mountain
From there I headed up interstate 70 to Idaho Springs for a beer at the Tommy-knockers brewery, I was the only customer in the joint - slow day for them so they treated me like a king! I got a nice tour of the place sort of impromptu, they made me a nice Pastrami sandwich on rye and with the brown ale it was fantastic. I must say the beer is much better there than in the bottles - its always good at the brewery. I am glad I stopped
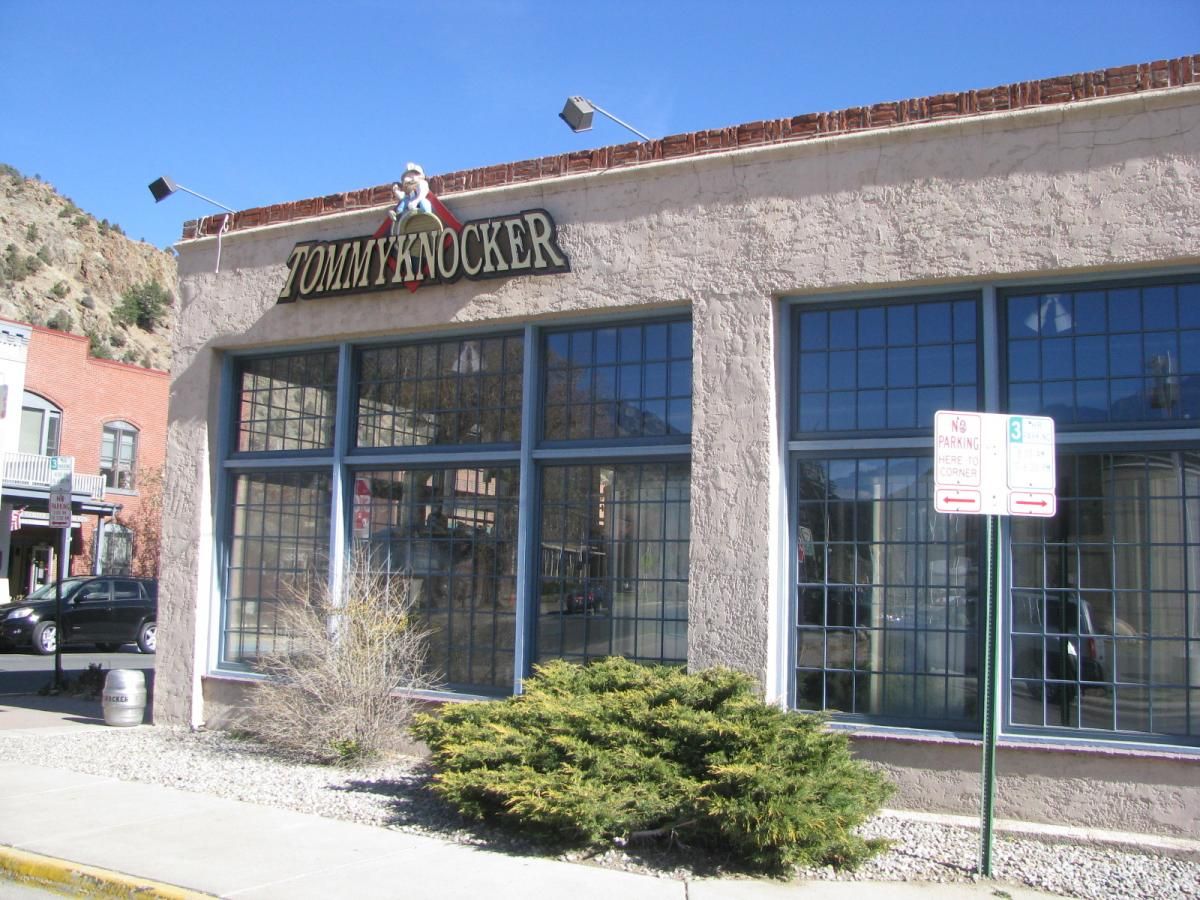
Tommy-knockers Brewpub Idaho Springs
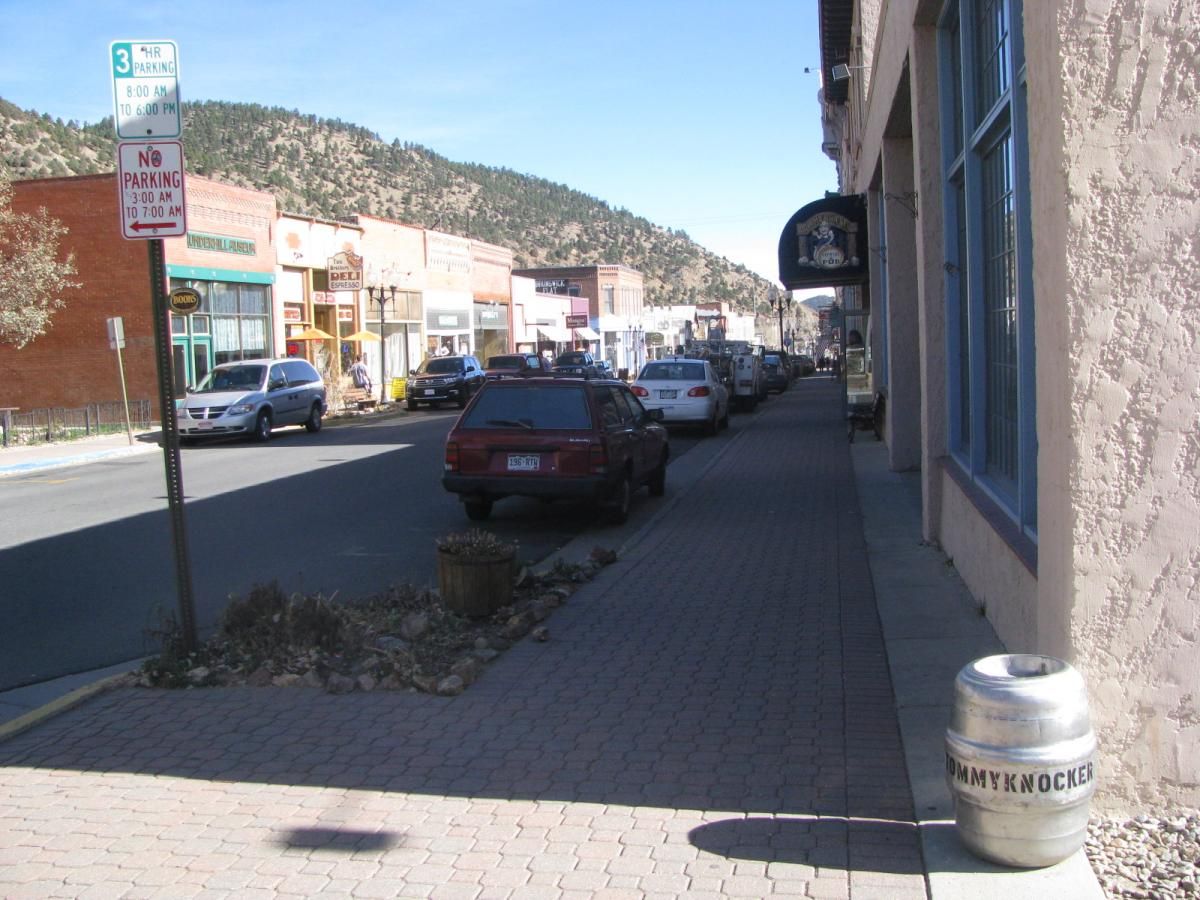
Idaho Springs Colorado
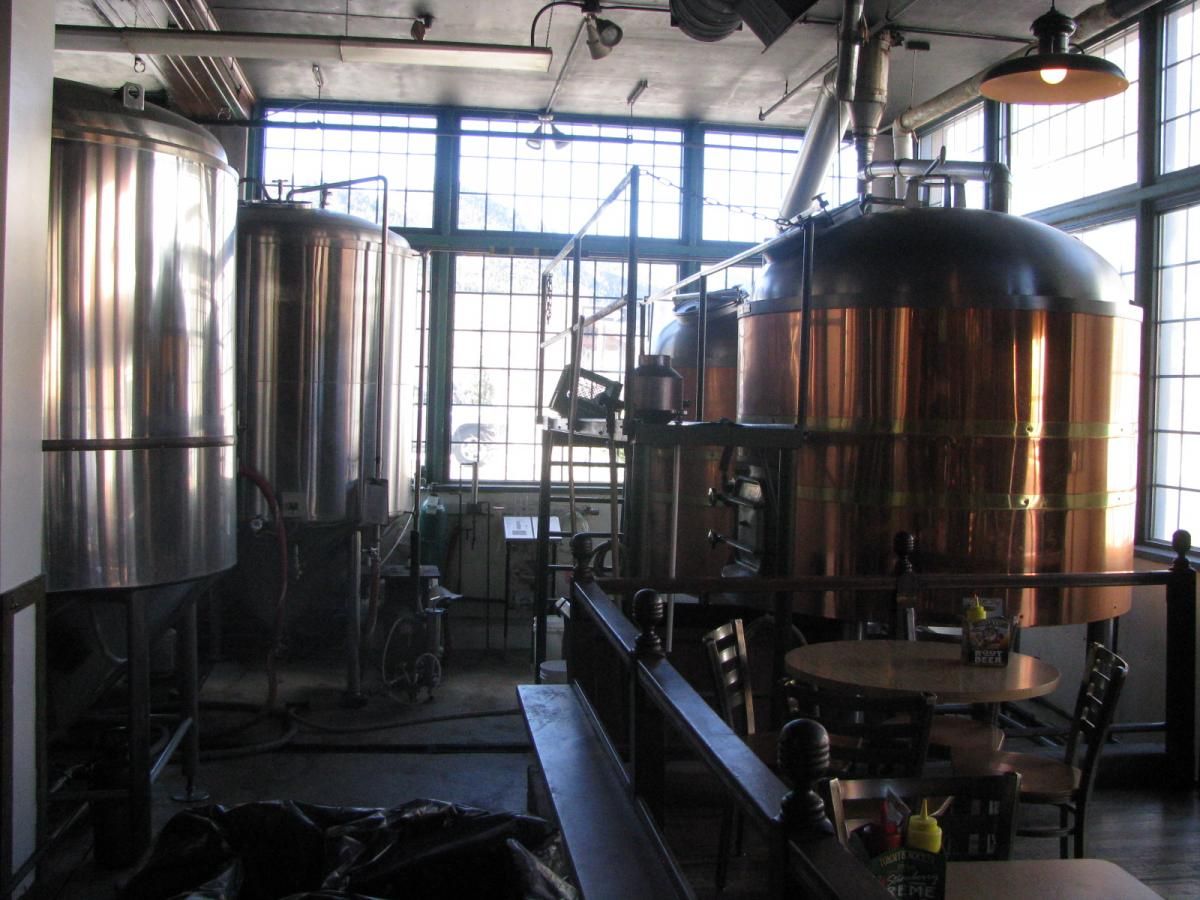
Mashtuns and fermenters
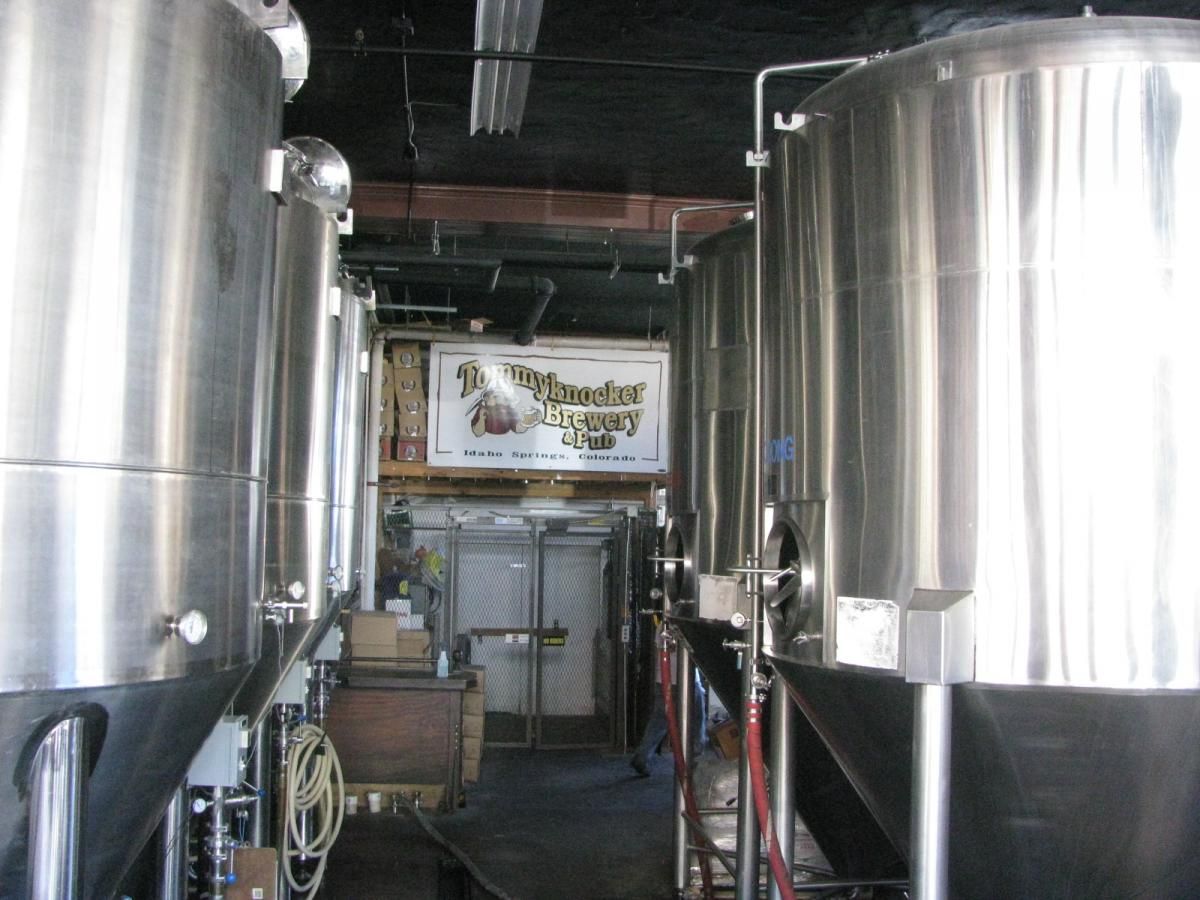
Rows of fermenters
I finished my lunch and since the road to Mount Evans is right there I headed up Squaw pass hoping to get in some nice pictures I wasn't expecting what I found, ICE IN ALL THE SHADY PARTS
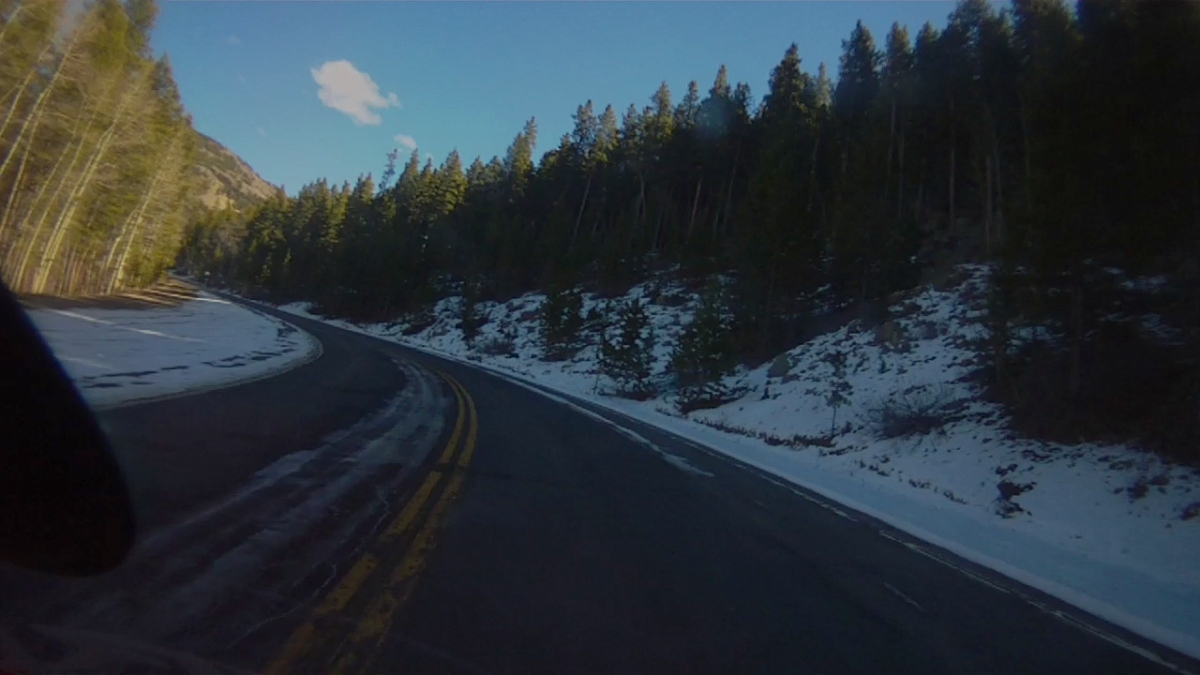
Icy patches on Squaw Pass definitely taking it easy on that road
There were some section where the ice covered the whole road for 300 yards or so I had to roll through it with my legs out to help keep the bike from sliding and falling over, I took it real slow. A Ford pickup was right behind me so I pulled over to let him pass but the guy was going slower then even I was so I pressed on - in places where I could see I just cut over to the oncoming lane and out of the ice where the sun was shining on the road more, but some places there was not alternative so I just had to go slow, good thing it wasn't slick but rather they tossed some gravel over the worst parts so I had some traction!
I did stop for pictures in all the best spots
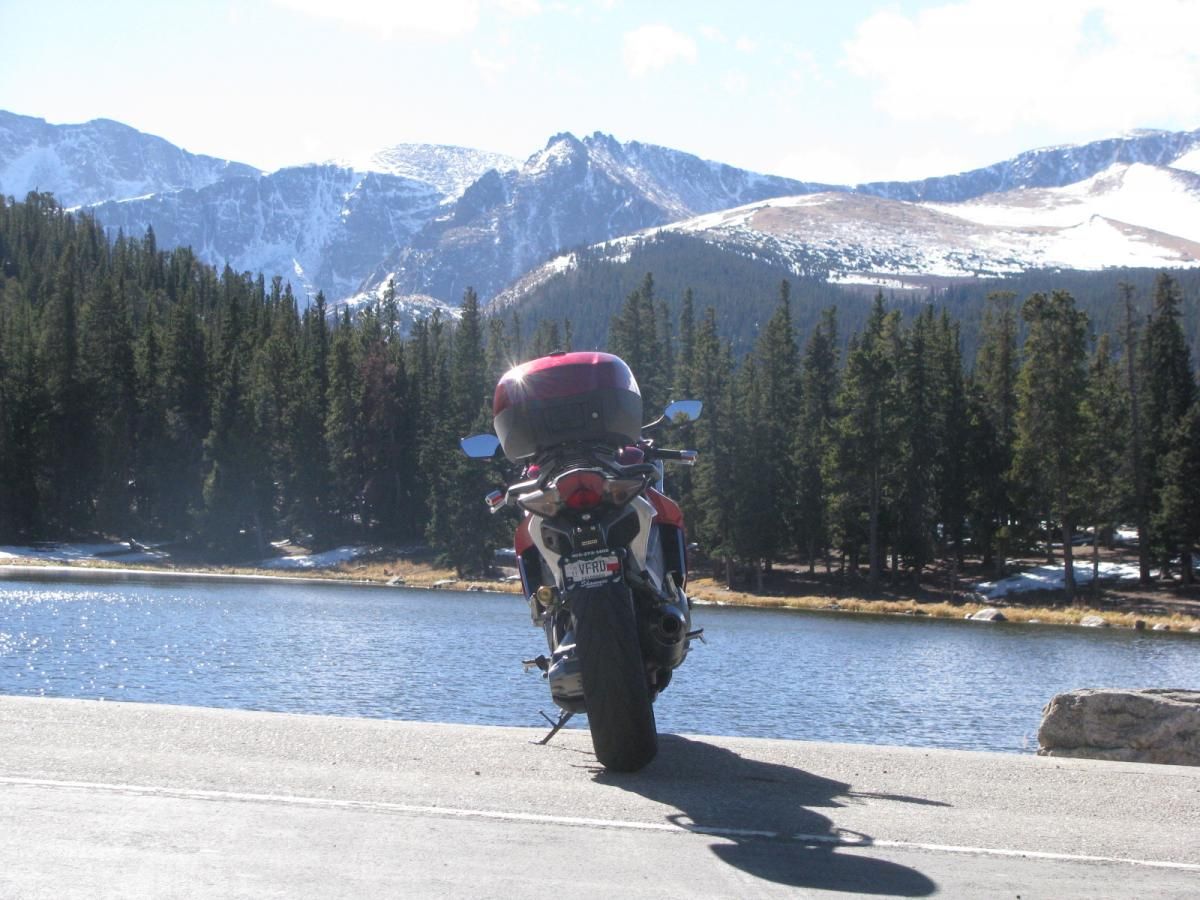
Echo Lake at Mount Evans showing off my new plate
Elephant Butte Park and Denver

Close up
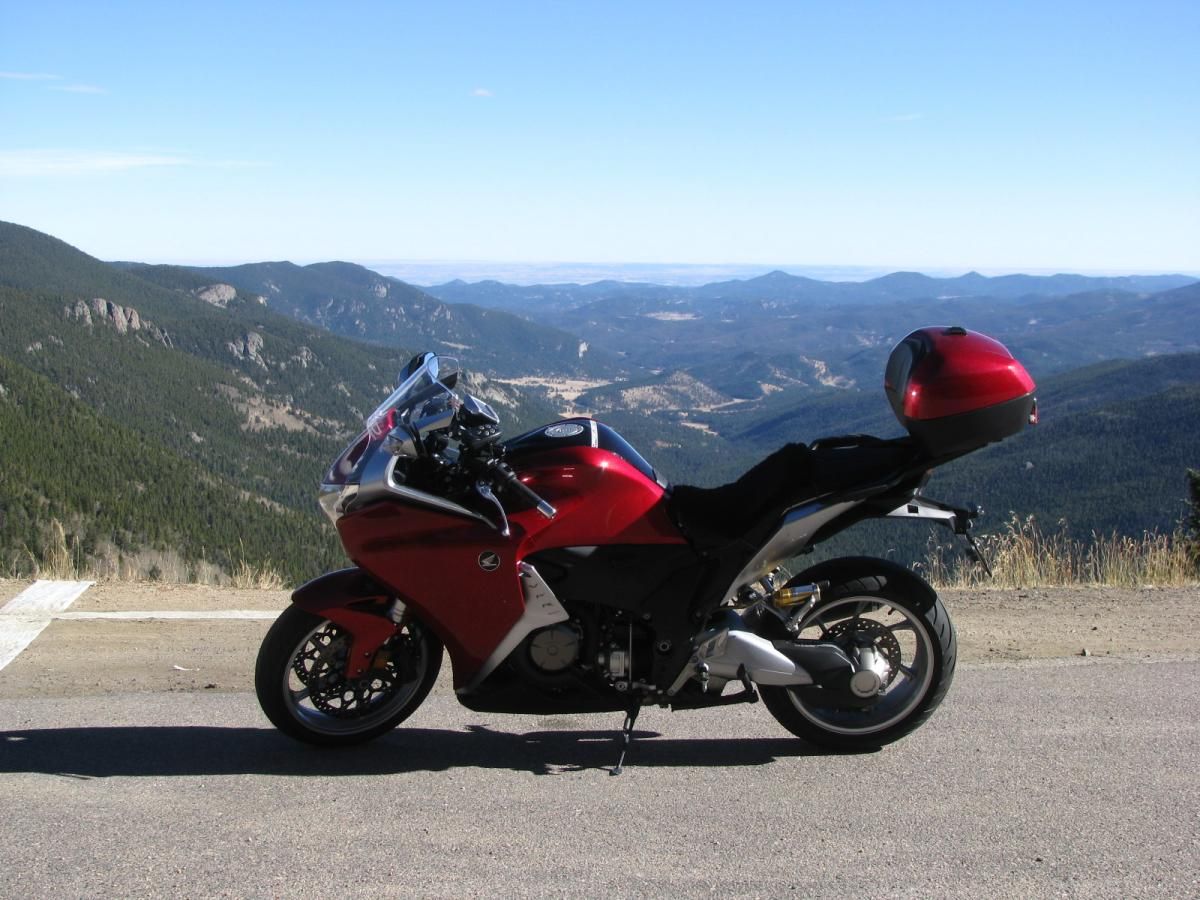
Veefalo on Squaw Pass

Juniper Pass
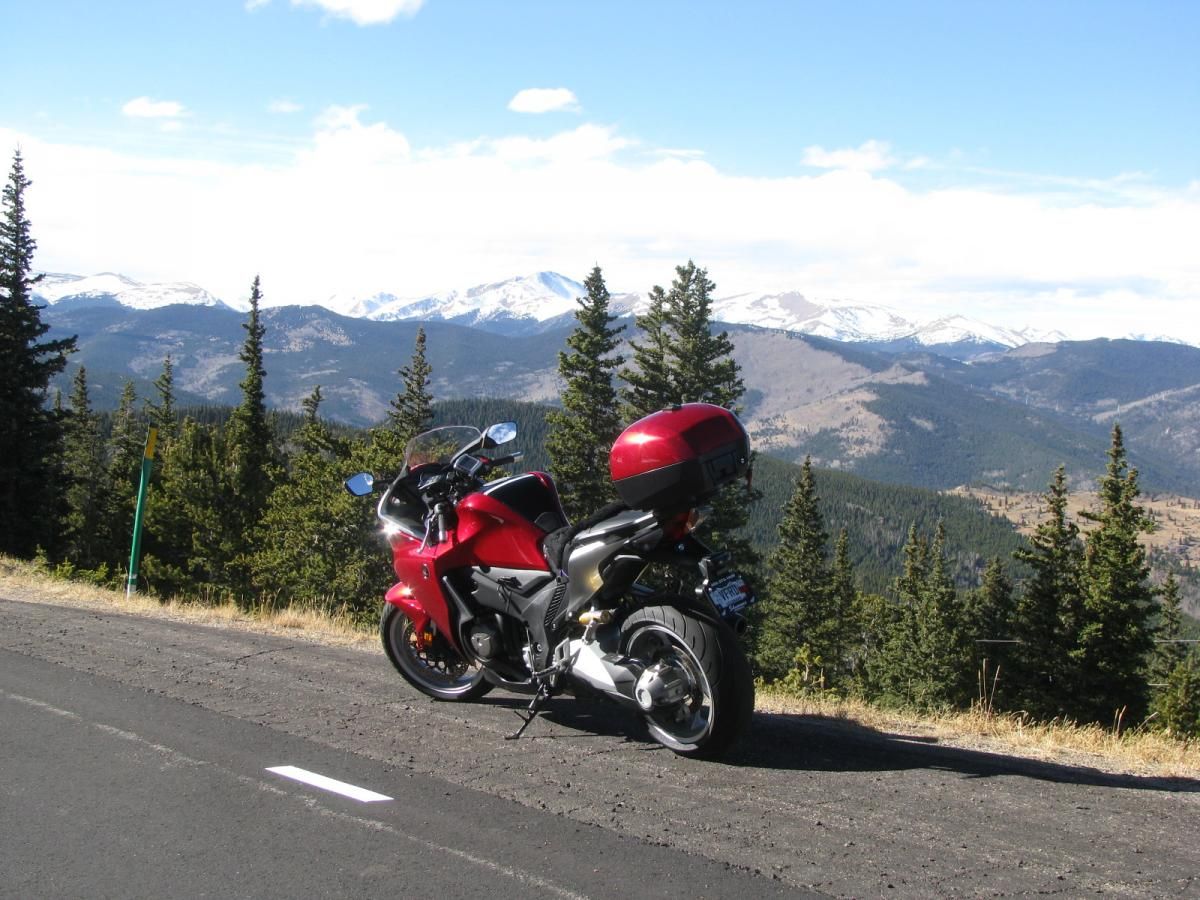
Juniper Pass
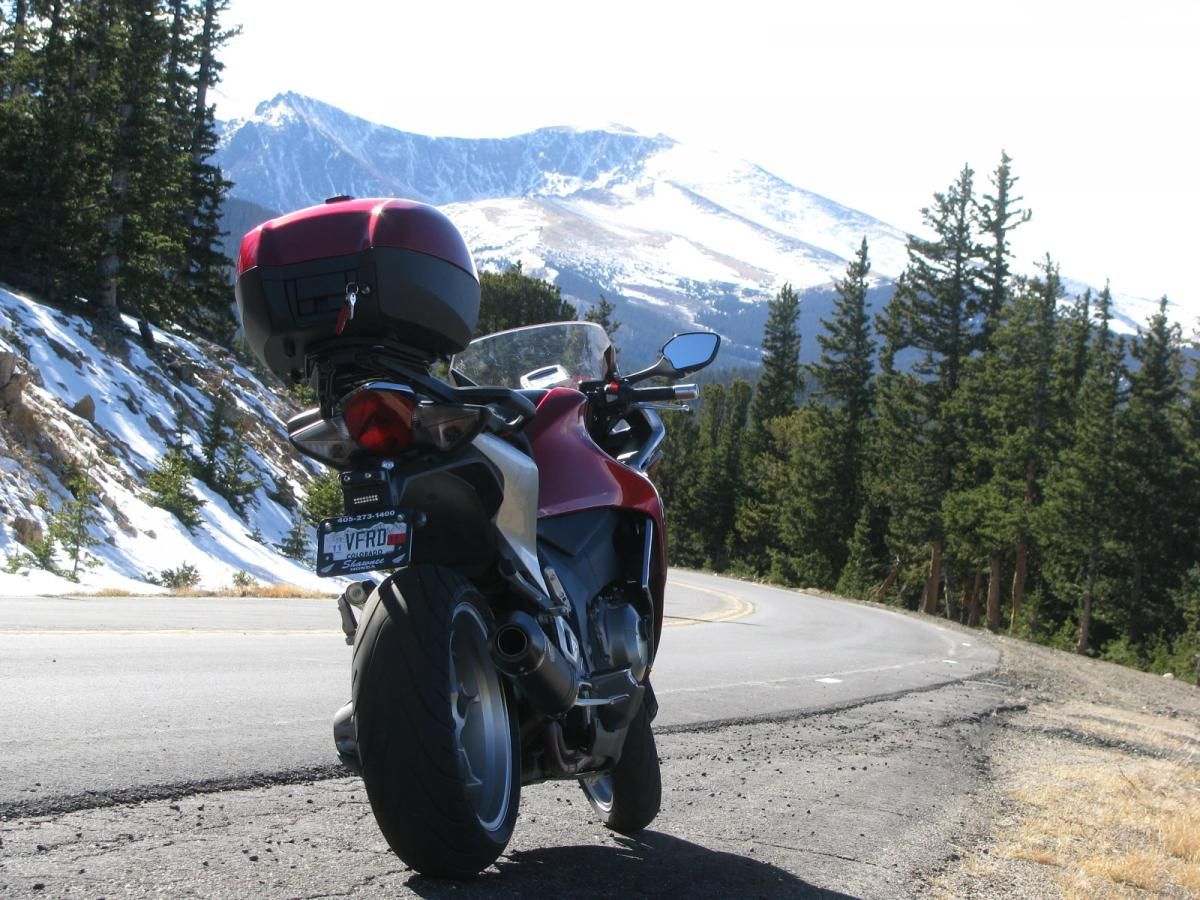
Mount Evans
My route A is home B is Tommy-knockers
- 122
-

- 8
entries - 77
comments - 31491
views
Recent Entries
 Latest Entry
I Am Back !

Not that it matters and not that I expect anyone had noticed, but to those who sent me "where are you?" I would like to say I am back. Not only that I am officially returning to VFRD after nearly 2 months break but I have also ridden my Hawk last weekend and had FUN! Let me restate that; I had major fun riding! Something I have almost given up on.
Most of you have been riding your whole adult lives and riding is not only a hobby to you, it is part of you. But I started riding three years ago and even though I have encounter some setbacks, till this spring I loved riding with whole my heart. However, I have always considered riding as my hobby. As a hobby which suppose to make my life better, more fun and more rich. Life is too short to do something which we don't fully love.
My love of riding received a first major scar this spring: I lost a friend on the racetrack. He was a total stranger who offered me his help after I lowsided at CMP track last year. I still remember hearing his "Hi, my name is Todd, do you need help?" while I was duct-taping my roadrash from ripped jacket. He helped me straighten up the shifter and we kept in touch. The next time we saw each other was the day he died.
With 9 months delay, I can say that Todd's death shook me more than I have realized. It rooted fear in me which was fueled by seeing and hearing about others getting hurt over and over again. If I was to summarize this year - it would be one big accident report. I became sensitive to every broken bone, every roadrash, every lowside. And even though I did 10 track days this year, I became slower and slower and slower. Suddenly, I have acquired this 'grandma' riding style on the road, frozen with fear that behind every corner there is car standing in my lane, or major sand trap or deer staring at me ... I was crippled with fear not only for me about also for my fellow rider.
So, at the end of this year, I rode more and more by myself. I could not bear the feelings of responsibility for others on the road and my lines were crippled by my own fears. It all culminated this fall at WDGAH. In a freaky accident Love2rideh82crash was taken down by a truck crossing into our lane. I was done. I finished the weekend, locked the VFR into a garage and took a break.
Until the last weekend, I pretended that motorcycles do not exists. As a last instance after 2 months break from riding, I decided to go to CMP track to see if I can still have fun. I also felt like I should go for the memory of Todd. I went and I had fun! I had much more fun than I expected and the most fun on track I can remember. Suddenly the whole track connected into an uninterupted line of turns and I felt one with the bike riding around! I was giggling like a little girl in my helmet and keep on giggling ever since

Granted I was not the fastest one and through out the weekend, I have never exceeded about 60% of my riding abilities, but I had no "oh-shit" nor 'blond' moments. I could have maybe go faster, I could have brake later for the turns and I could have lean further, but I am no Rossi nor Stoner. I decided to ride for fun and I had amazing blast riding well within my comfort zone.
I was proud of myself when, after bandaging Ricks arm, I was able to distance myself and go back to riding without the year-long fear. I did feel bad for him but the feelings were not crippling my lines nor my mind. And when a total stranger came to me and said "Hi, my name is Todd", my heart stopped for a minute though but I suddenly knew that my life went a full circle. I probably will never win MotoGP :idea3: , but I am back! :wheel:
- 8
-
-
VFRD Mission Statement
For owners of the Honda Interceptor and related Honda V4 motorcycles, for the purpose of mutual help concerning safe riding, maintenance, and performance of their motorcycles.
Contributions - VFRD is a member supported website with no commercial advertising

-
Forum Statistics
-
Total Topics25.6k
-
Total Posts355.2k
-
-
Who's Online (See full list)
-
Member Statistics
-
Upcoming Events
-
Latest Classifieds
-
-
Top Downloads
-
-
Popular Contributors
-
1
-
2
-
3
-
4
-
5

-
-
Blog Statistics
-
Total Blogs116
-
Total Entries345
-
-
Gallery Statistics
-
Blog Entries
-
-
Blog Comments
-
-
By interceptor69 · Posted
Oops. I do believe I know how to post YT videos or they wouldn't be on YT. However I may have screwed up copying the link to the playlist. Thanks for the helpful comment. -
I think that you might not know how to post videos. You're in your YT studio in these links. You need the link to the actual video.
-
-
-
-
Most Contributions
-


until