Featured Gallery Photo
 IMG_20260515_143135

Out with old, in with the (slightly) new(er)
Latest Topics
-
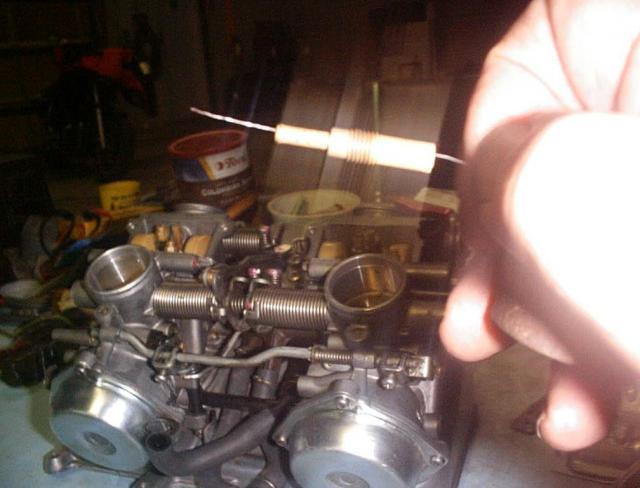
I'm doing a full strip and rebuild of the carbs on my 1997. It's 29 years old, had been standing a bit in the covid years and one of the carbs is flooding. I'd rather do this myself and learn than not know what has happened to them at an average shop or hunt down a specialist. I'm following the Honda service manual with Haynes as a backup of necessary. There are two sets pictured earlier on in this thread as I had designs to, well have two sets, but more about that later. For now, ju
-
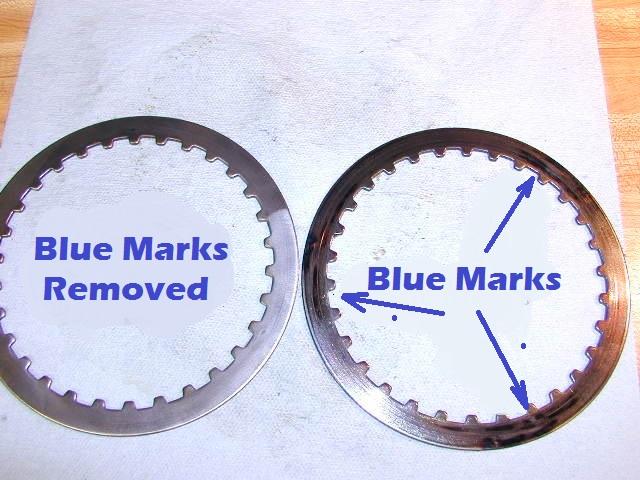
My -97 VFR750 clutch has started to slip at full throttle, it's got 80k kms / 50k miles on the meter, clutch is easy to maneuver and operation is smooth so I guess the hydraulics are ok and my plan is to replace the clutch discs. I bought a kit with new gasket, springs and friction plates, downloaded the service manual from here, (thanks a lot for that!). The job seems pretty straight forward, but i haven't tried it before, are there difficulties that might occur or special tools nee
-
I hope that you enjoy these! https://photos.app.goo.gl/kUctG3mzhcMHUo397 Feel free to share the link with buddies if you think that they would enjoy them. There was a LOT more there than when I saw it many years ago.
-
This one is for @Skids and his mates who go to Northern France for Remembrance....
-
2010 vfr 1200 fork seal change and now I'm stuck. The inverted forks have a bolt on the exterior bottom of the forks that secure the internal damper. When I attempt to remove the bolt the damper inside the fork tube just spins. Damnit! Honda has a special tool (07ymb mcfa100) which is a long rod with tabs on the end that you insert in the tube to hold the damper and keep from spinning. Obviously I don't have this tool and don't want to be down while on order or unnecessarily invest money for


.thumb.jpg.6b9488d9849fb7037caa4c17228db2ab.jpg)

Latest Posts
-
The feet of the air stacks sit on these tabs. More silicone grease
You have to juggle the stacks in the chamber base to get everything to back. It's a bit of a fiddle.
You can see here I have put a brass elbow in (as advised earlier) because the original rubber pipe has a preformed bend the plastic cannot make. I have also gone for these stainless clips - even then the elbow was sloppy so I bound it with some PTFE tape, which research suggests is OK for petrol.
It may not look that great but it all tests petrol tight. What do you all think? -
Not too much to say about reassembling the individual carbs, the only awkward thing is getting the new choke plunger seal in, see the video linked from here. The best thing I could come up with to seat it was a crimp end for cycle cables and lean on it
Super clean float bowls 😸bit of silicone grease to hold things
Then just following the Honda manual for recombining them. Threading everything through the choke bracket - I'm using Tygon tubing for the fuel, retaining the original protector sleeves -
yes, i got a kit with metals. The old ones were looking like retirees so i'm happy i got them.
-
I hope that you enjoy these!
https://photos.app.goo.gl/kUctG3mzhcMHUo397
Feel free to share the link with buddies if you think that they would enjoy them.
There was a LOT more there than when I saw it many years ago.
Latest Classifieds
-
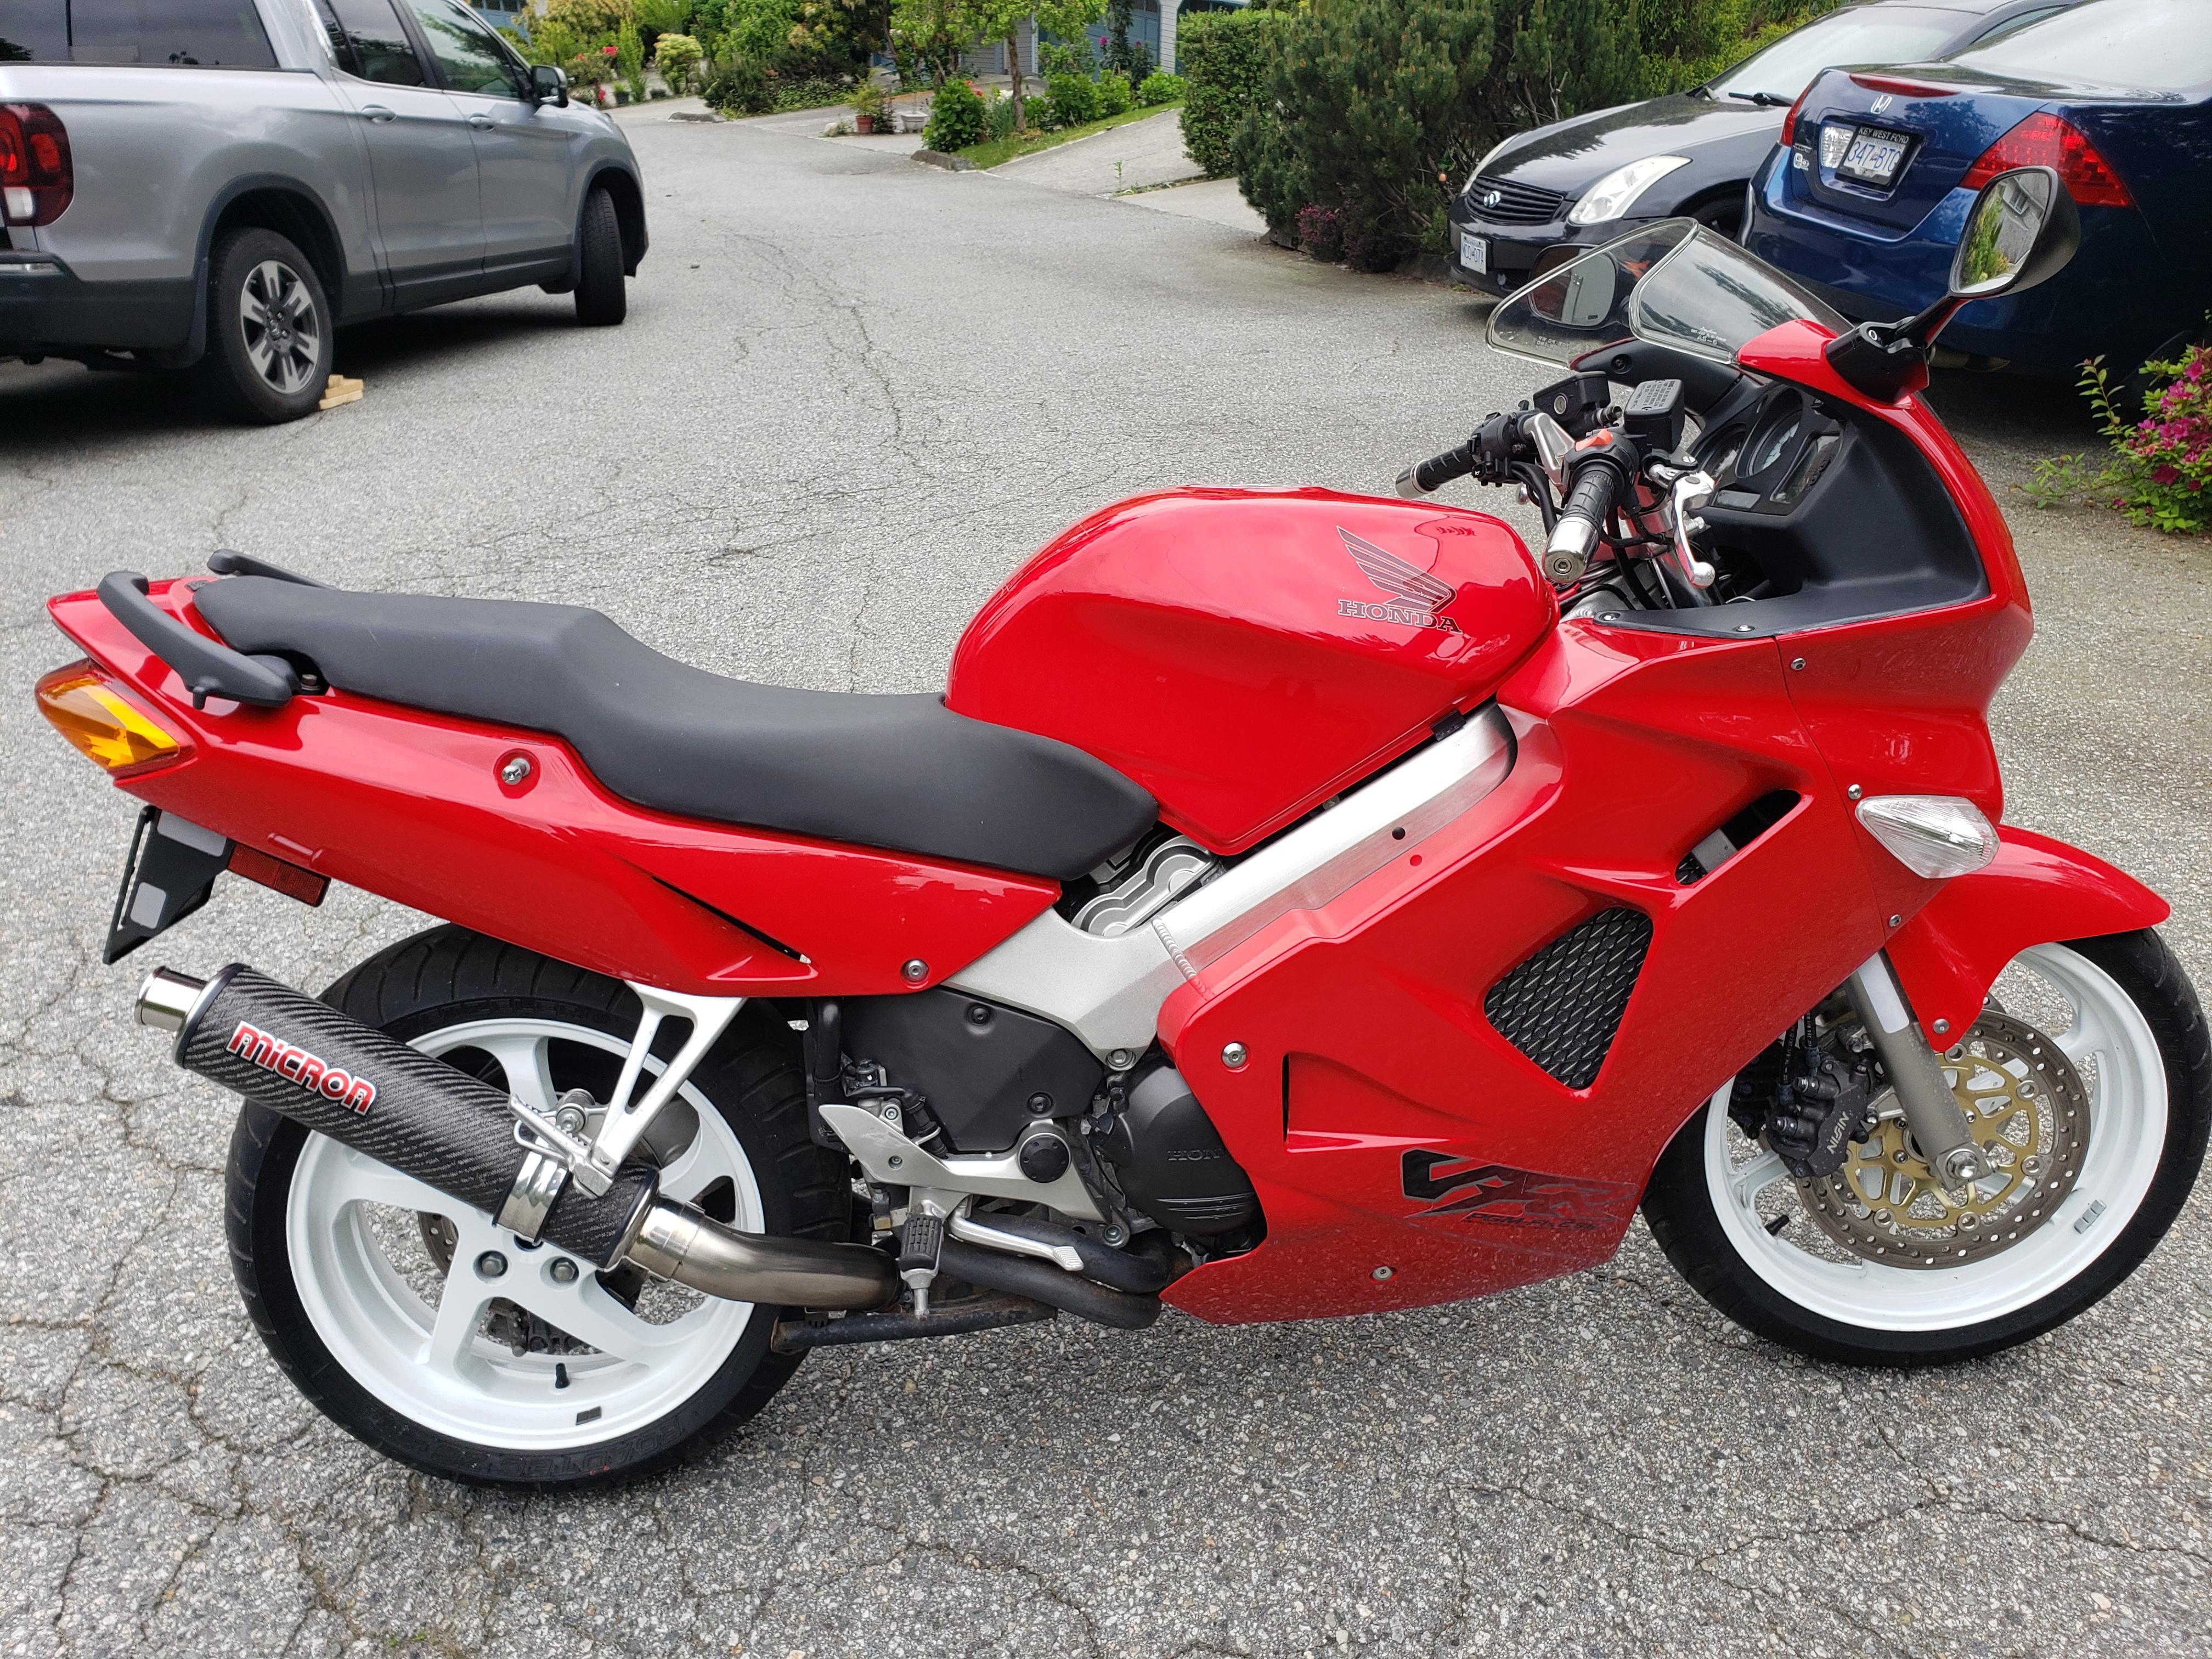
BC, Canada. I have 2 VFR's up for sale. 1998 red that is in awesome shape, 47k kms or just under 30k miles. $6k Cad or $4408 usd. Metzler tires with half life left. (sold) 2000 blue that just needs paint. Bought of guy whos girl dropped it. He put chinese plastics on that looked okay but I hated it and sold the plastics in picture. I have repaired the original plastics and is ready for prep and paint. Bike runs great with under 50k ms. $4k cad or $2940 usd
-
Selling an almost new Power Commander 6 for a 1998-2009 VFR800, Dynojet Part number PC6-16005, bought new and only used on bike for about a month. Only selling as I have acquired a Rapidbike Race for my 06. Asking $300 plus shipping *Will add photos this weekend when I remove it from the bike, comes with original box as well
-
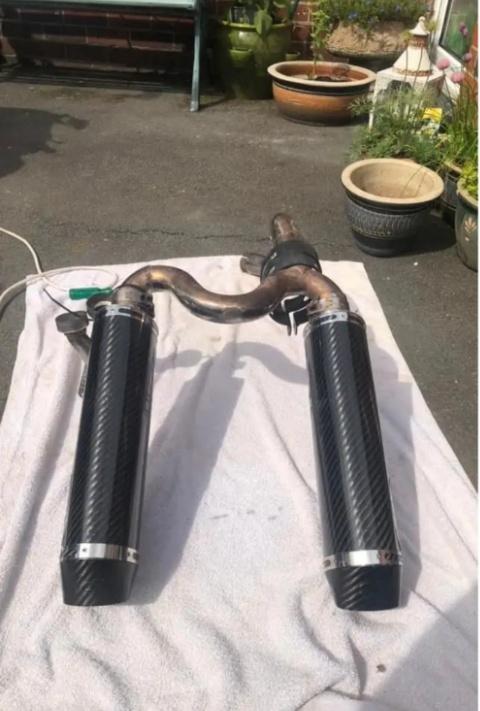
Scorpion carbon exhaust for sale, really good condition! $300 Email me at morrisbrettandrew12@gmail.com If interested
-
Scorpion carbon exhaust for sale, really good condition! $300 Email me at morrisbrettandrew12@gmail.com If interested
-
Just bought the bike and I'm looking for side cases and top box with mounting hardware.