-
Featured Gallery Photo
 IMG_3021.JPG
All Activity
- Today
-
To add to what everbody is saying... here's the circuit diagram.... Not a fan of that circuit breaker from the Roadstercycle kit, prefer a HD fuse holder, large enough to take the current... Such as a MetriPack 630.... example from Cycleterminal.. -- about half way down the page... https://www.cycleterminal.com/fuse-boxes.html Also this waterproof style from DelCity... https://www.delcity.net/store/fuses-fuse-accessories/holders-circuit-taps/atc-ato-blade/inline-water-tight-red-with-leads/78335/ The R/R connectors are here from Cycleterminal.. https://www.cycleterminal.com/furukawa-qlw-250.html In general since I am a OCD foole, I prefer to build the harness myself and use Marine grade wire, usually I get it from DelCity.. https://www.delcity.net/store/wire-cable/ancor-marine-grade-tinned-primary-wire/ DelCity is great for general wire em up supplies too.... Best wishes to all..
- Yesterday
-
Hi gig, Thank you for your donation of --. We look forward to improving the forums with your donation. Thanks VFRDiscussion
-
- 1
-

-
Did you check the main fuse, as well as the lesser ones?

-
Forget the hotel towels or robe, I know what I'm sneaking out in my suitcase!
-
with the kit, you run the stator directly to the reg and then the reg directly to the battery, bypassing the stock harness.
-
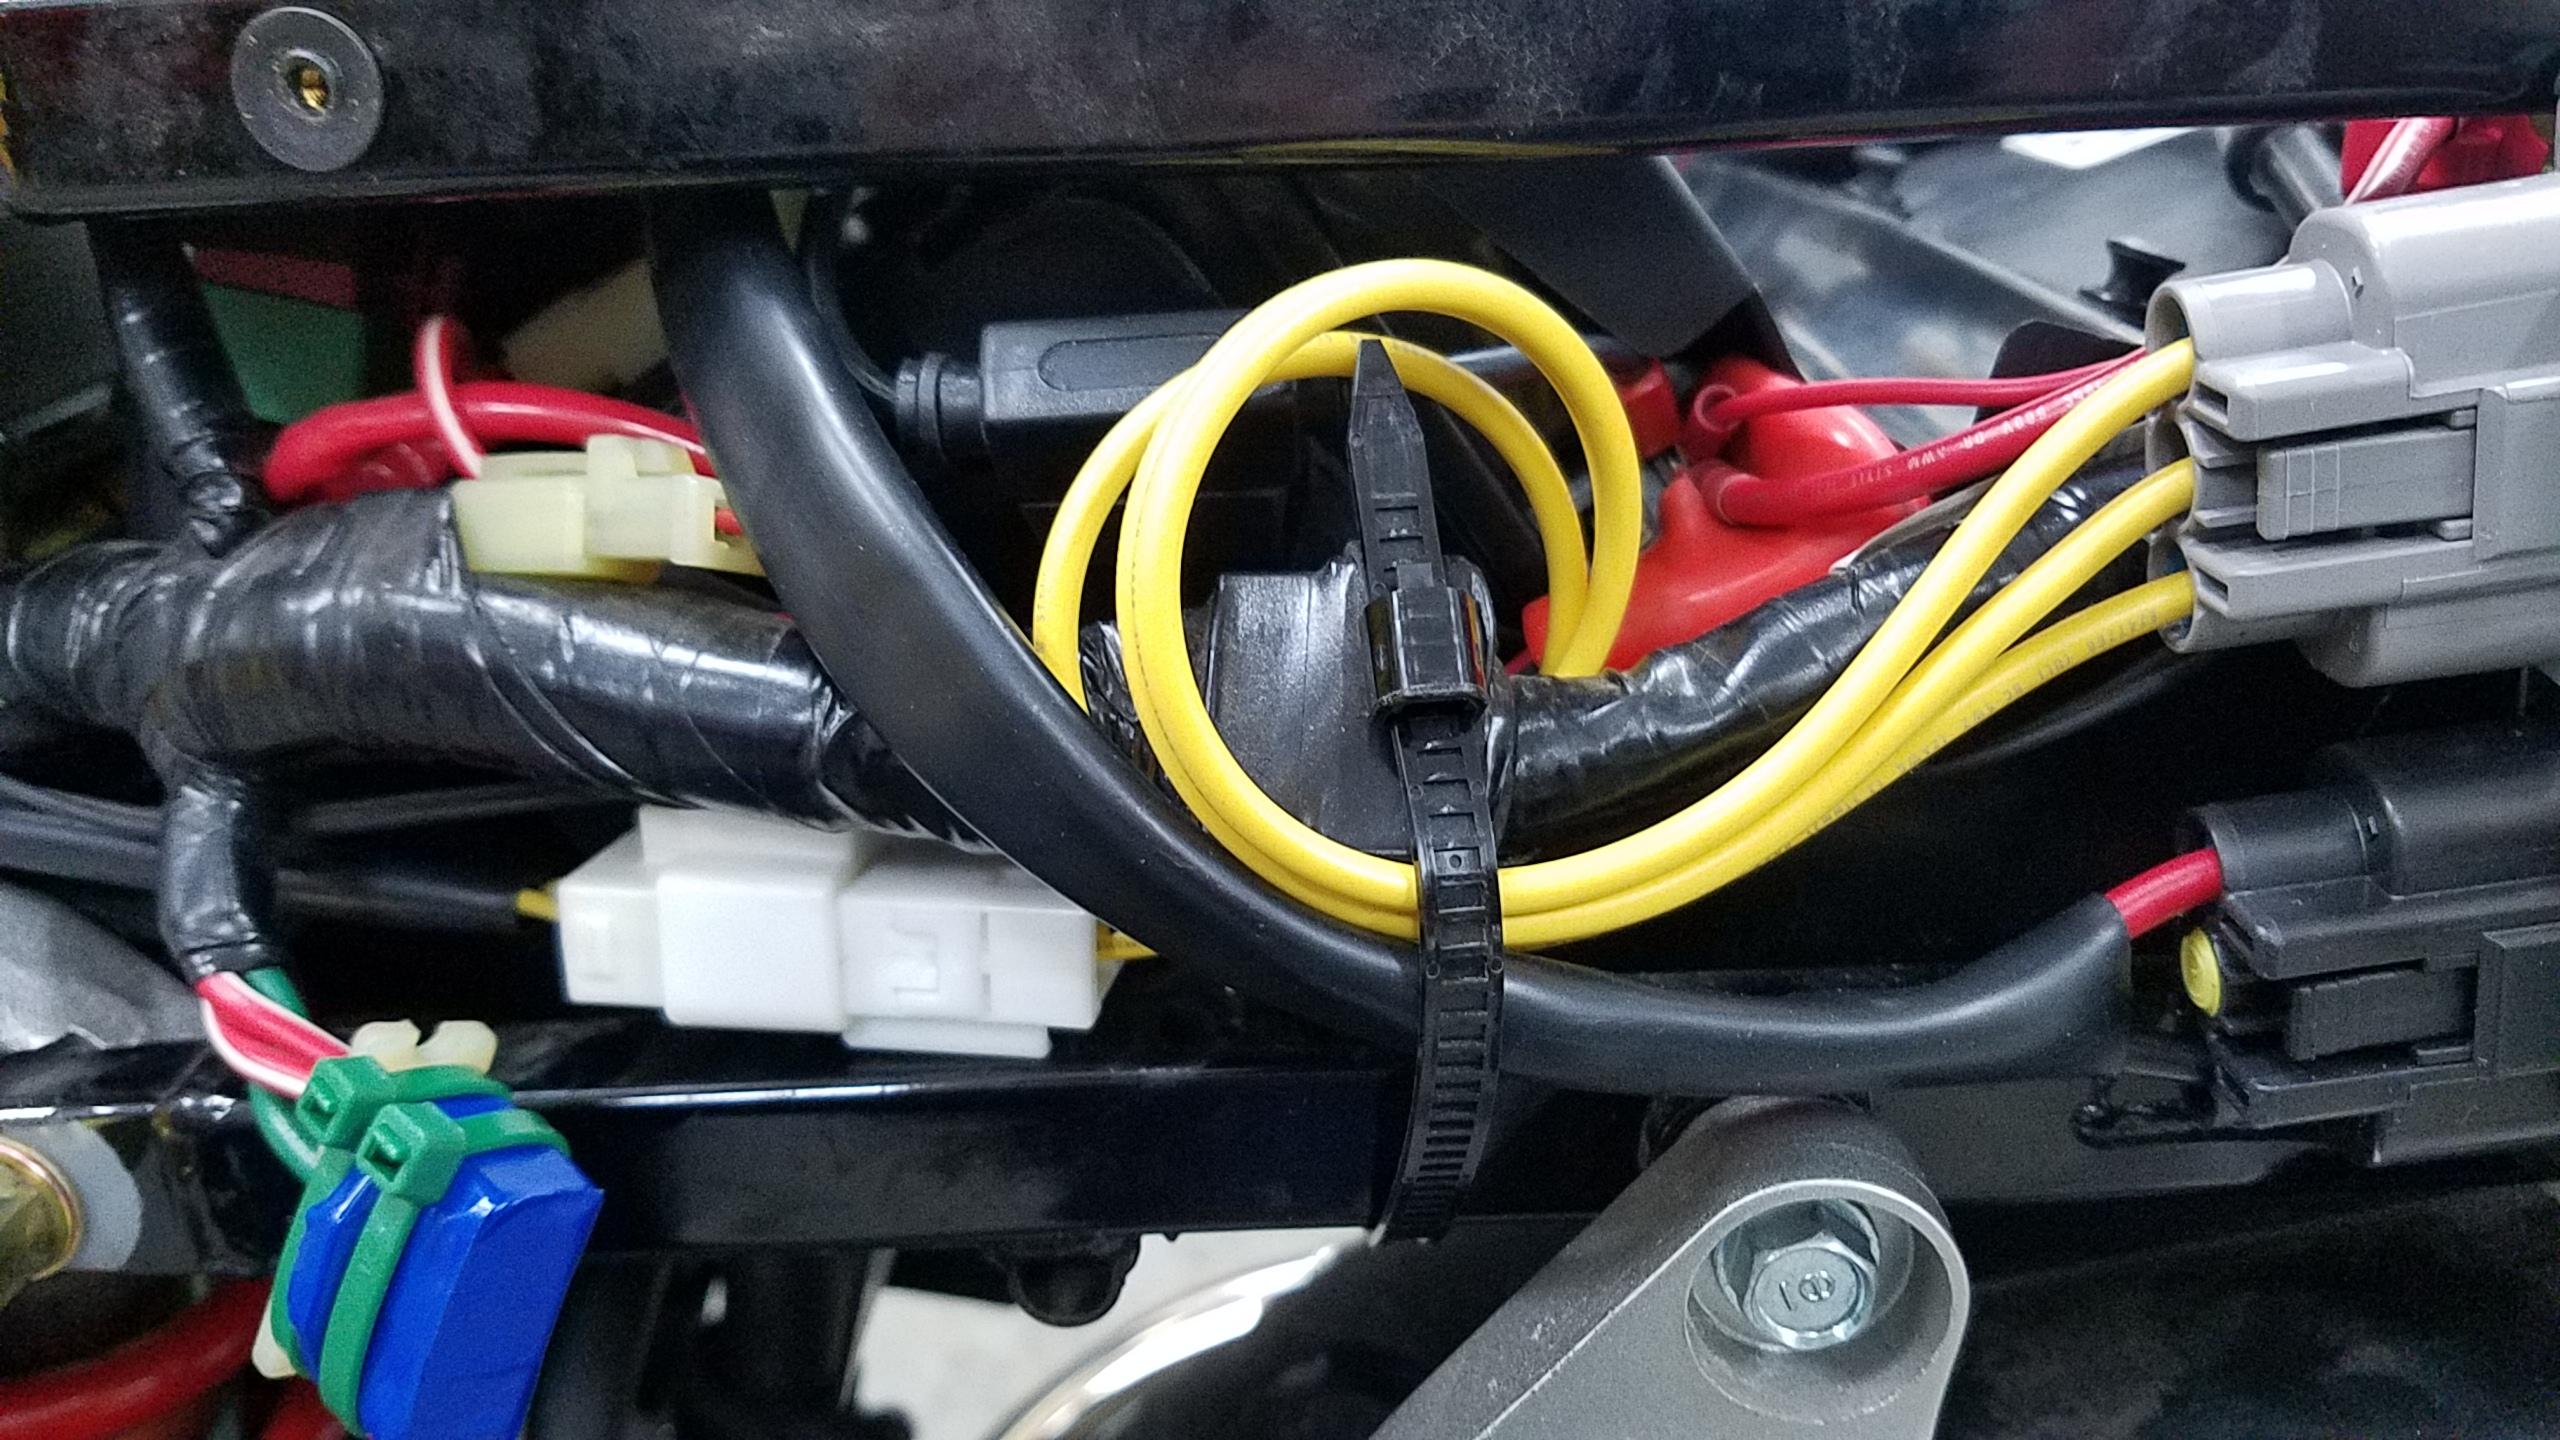
Question for the group. From your pictures it looks like you have a three-pin connector (yellow wires) and a two-pin connector for the other wires. I have the three-pin connector, but I have a four-pin connector with two red and two green wires. What am I missing? Are you combining the reds and greens together somehow?
-
Dragged it out from winter hibernation & let it warm through & checked everything through ready for getting back on the road in April 😁👍
-
A few days back I tried to crank my 2012 VFR1200 FD, which was still connected to the battery tender. When I turned the ignition switch to the on position, I heard a small pop and the dash went totally dark. Nothing works: starter, lights, nothing. I've checked all the fuses under the seat and they're all good. I've run out of ideas. Any help would be greatly appreciated.
-
The 5th gen is known for wearing out its clutch springs I have had 2 sets on the same clutch. Then replaced them with heavy duty versions.
-
The SMC is as the name suggests, just another master cylinder, similar in operation to the master cylinder on the hand or foot brakes. If there is fluid passing the seals then either the seal is knackered or the bore is corroded.
-
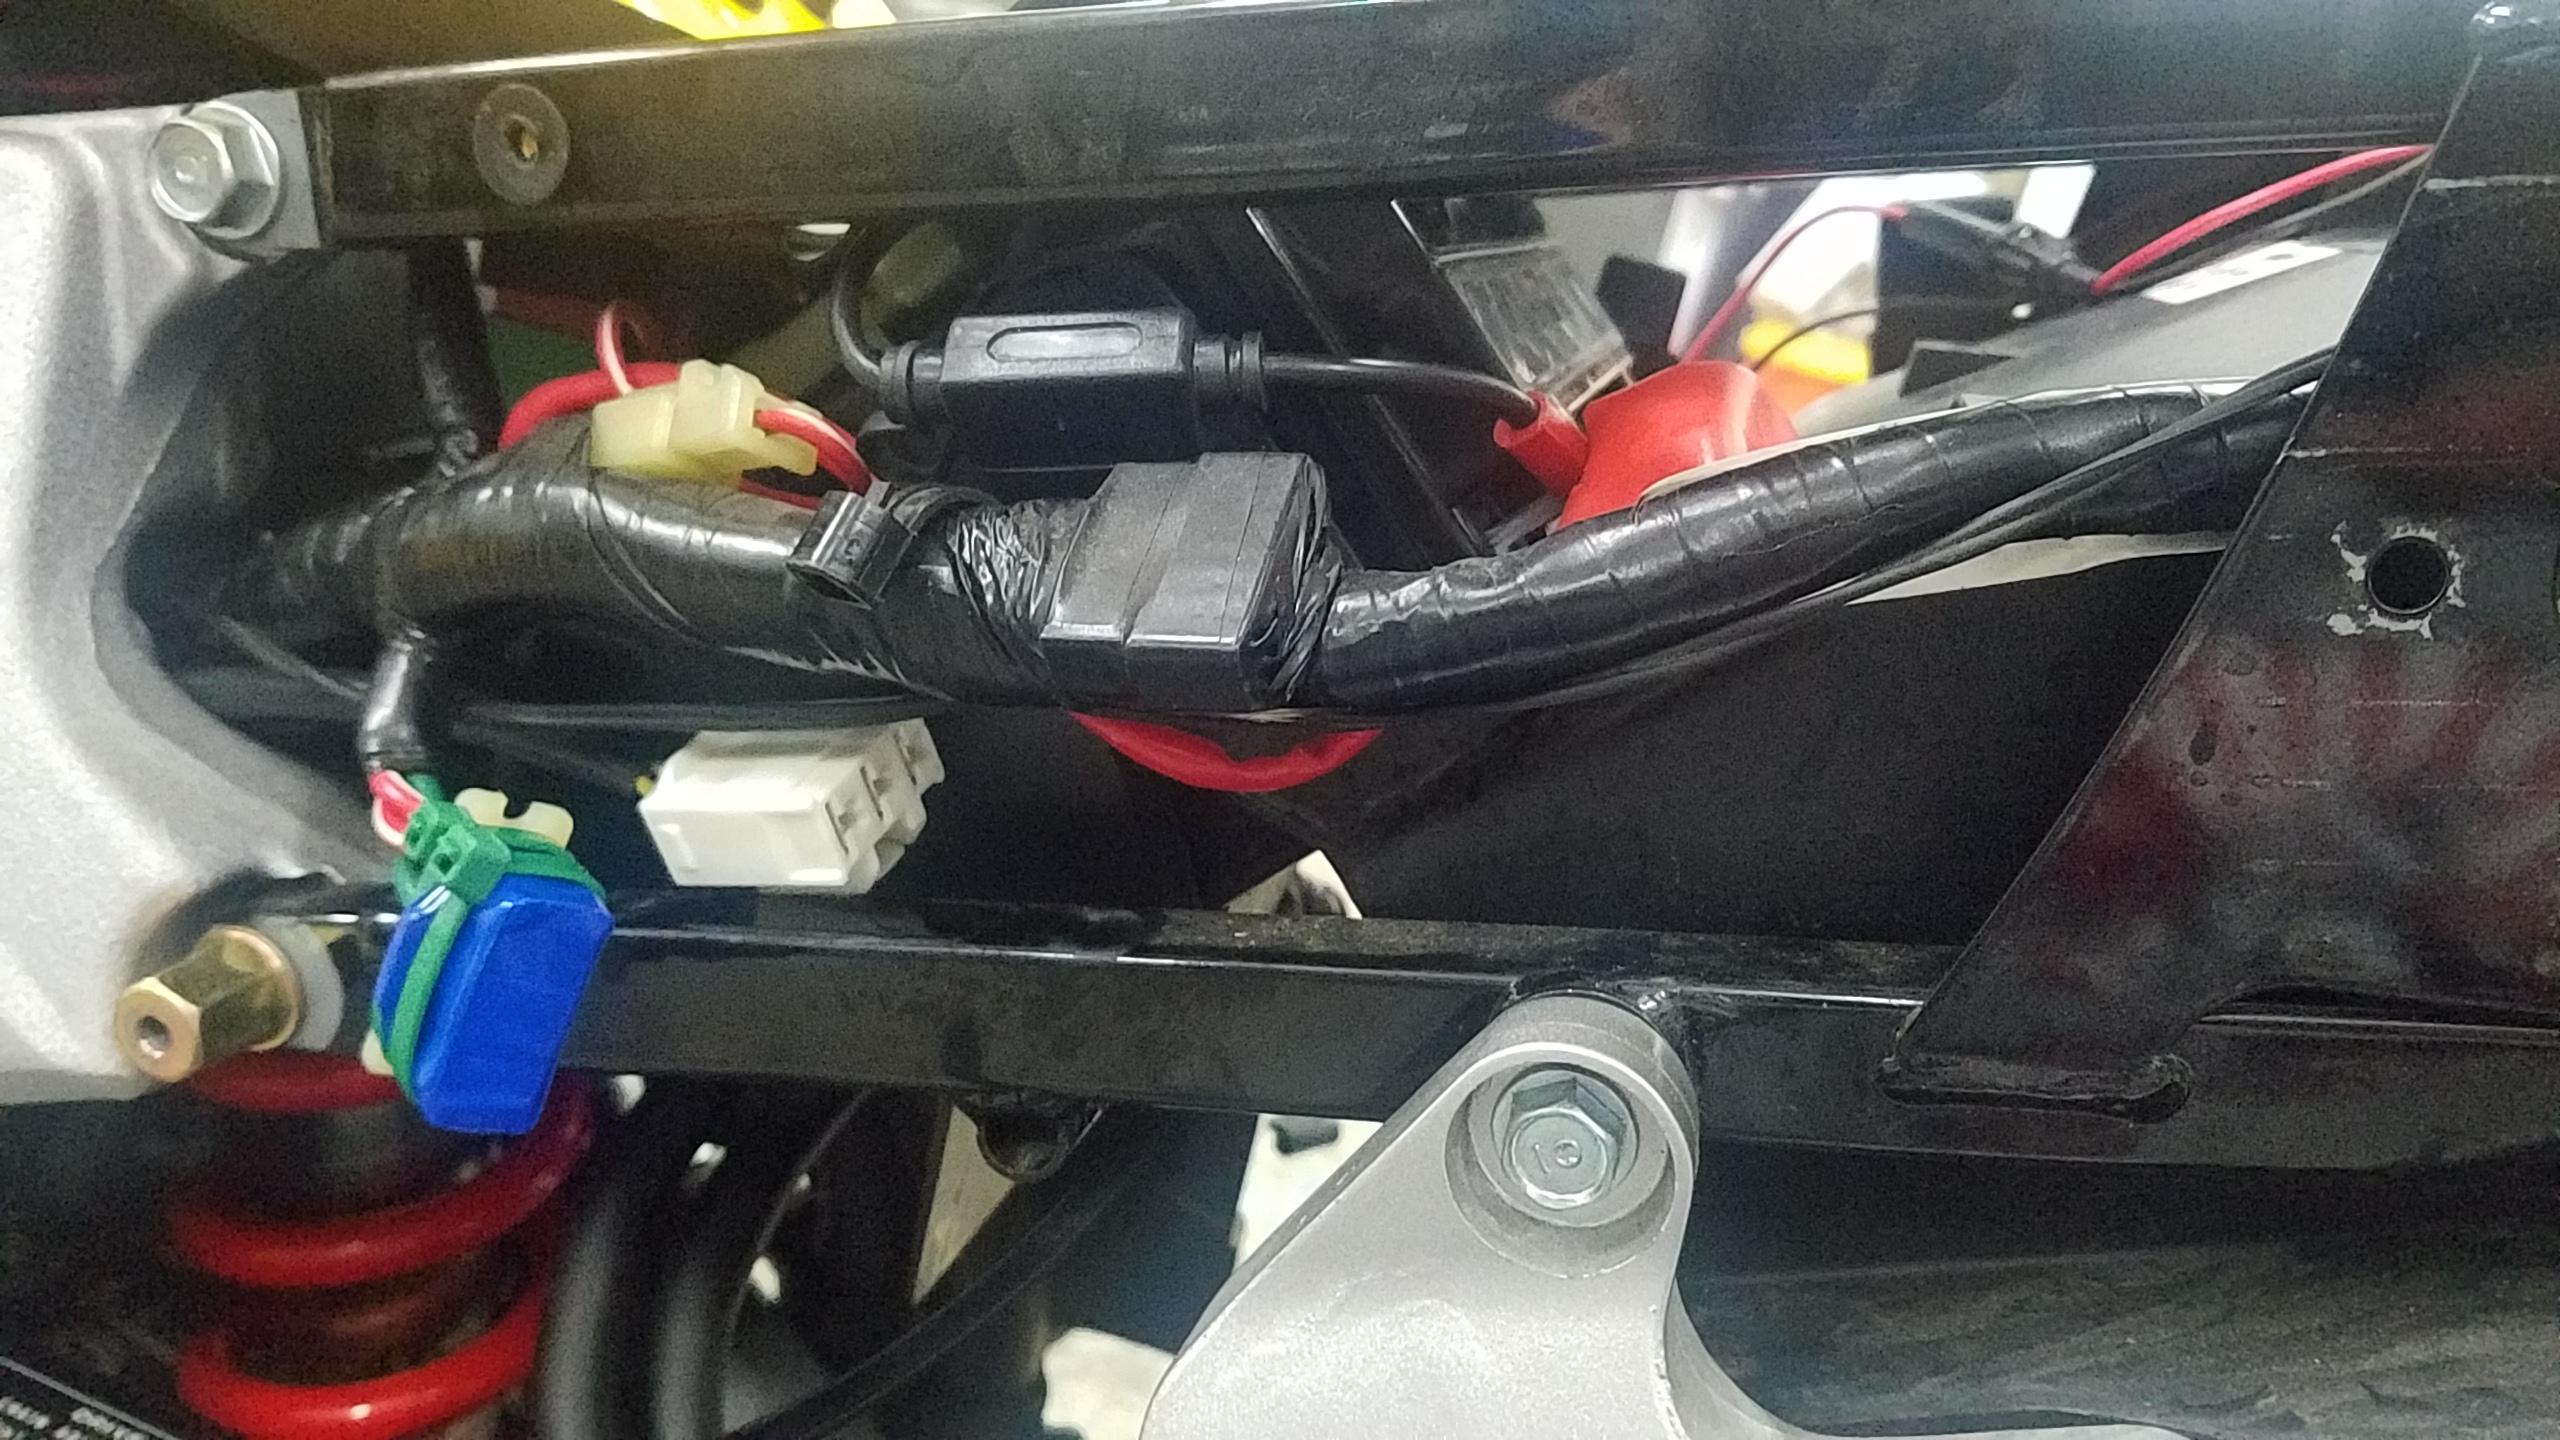
Well, lots of good advice and great photos posted here. Think the guys have you on the right track. I'll post this just for reference should you want to save a few dollars and still have an OEM Shindengen regulator. A Regulator/Rectifier from a 2013/17 Honda CB500X is a Shindengen FH020AA. I got a used one for $26 shipped on Ebay, there is one on there now for $34. A connector kit from Cycleterminal was $23 shipped. Both items were courtesy of Mello Dudes suggestions. 12 ft of tinned 14 gauge yellow marine wire was $12 at my local ships chandlery. So my total was $61. Hope this is of some value to you and others.
-
 Thank you so much! It's very appreciated. I'll take a look at the manual for sure and see if with your explanations that helps to guide me in the right place. Sounds like I need to do some more digging. If nothing else, I'll get to learn something new!
 -

'98 VFR Electrical Problem - Help!
Captain 80s replied to JimMoore's topic in Fifth Generation VFR's
I finally got a Riv-Nut installer and a wide variety of Metric Riv-Nuts a couple years ago. Invaluable. Love it! In some cases where thickness allows, you can also spot-face what is being bolted there the thickness of the nut lip for a flush, sturdier install. I realize a R/R is not one of those cases. -
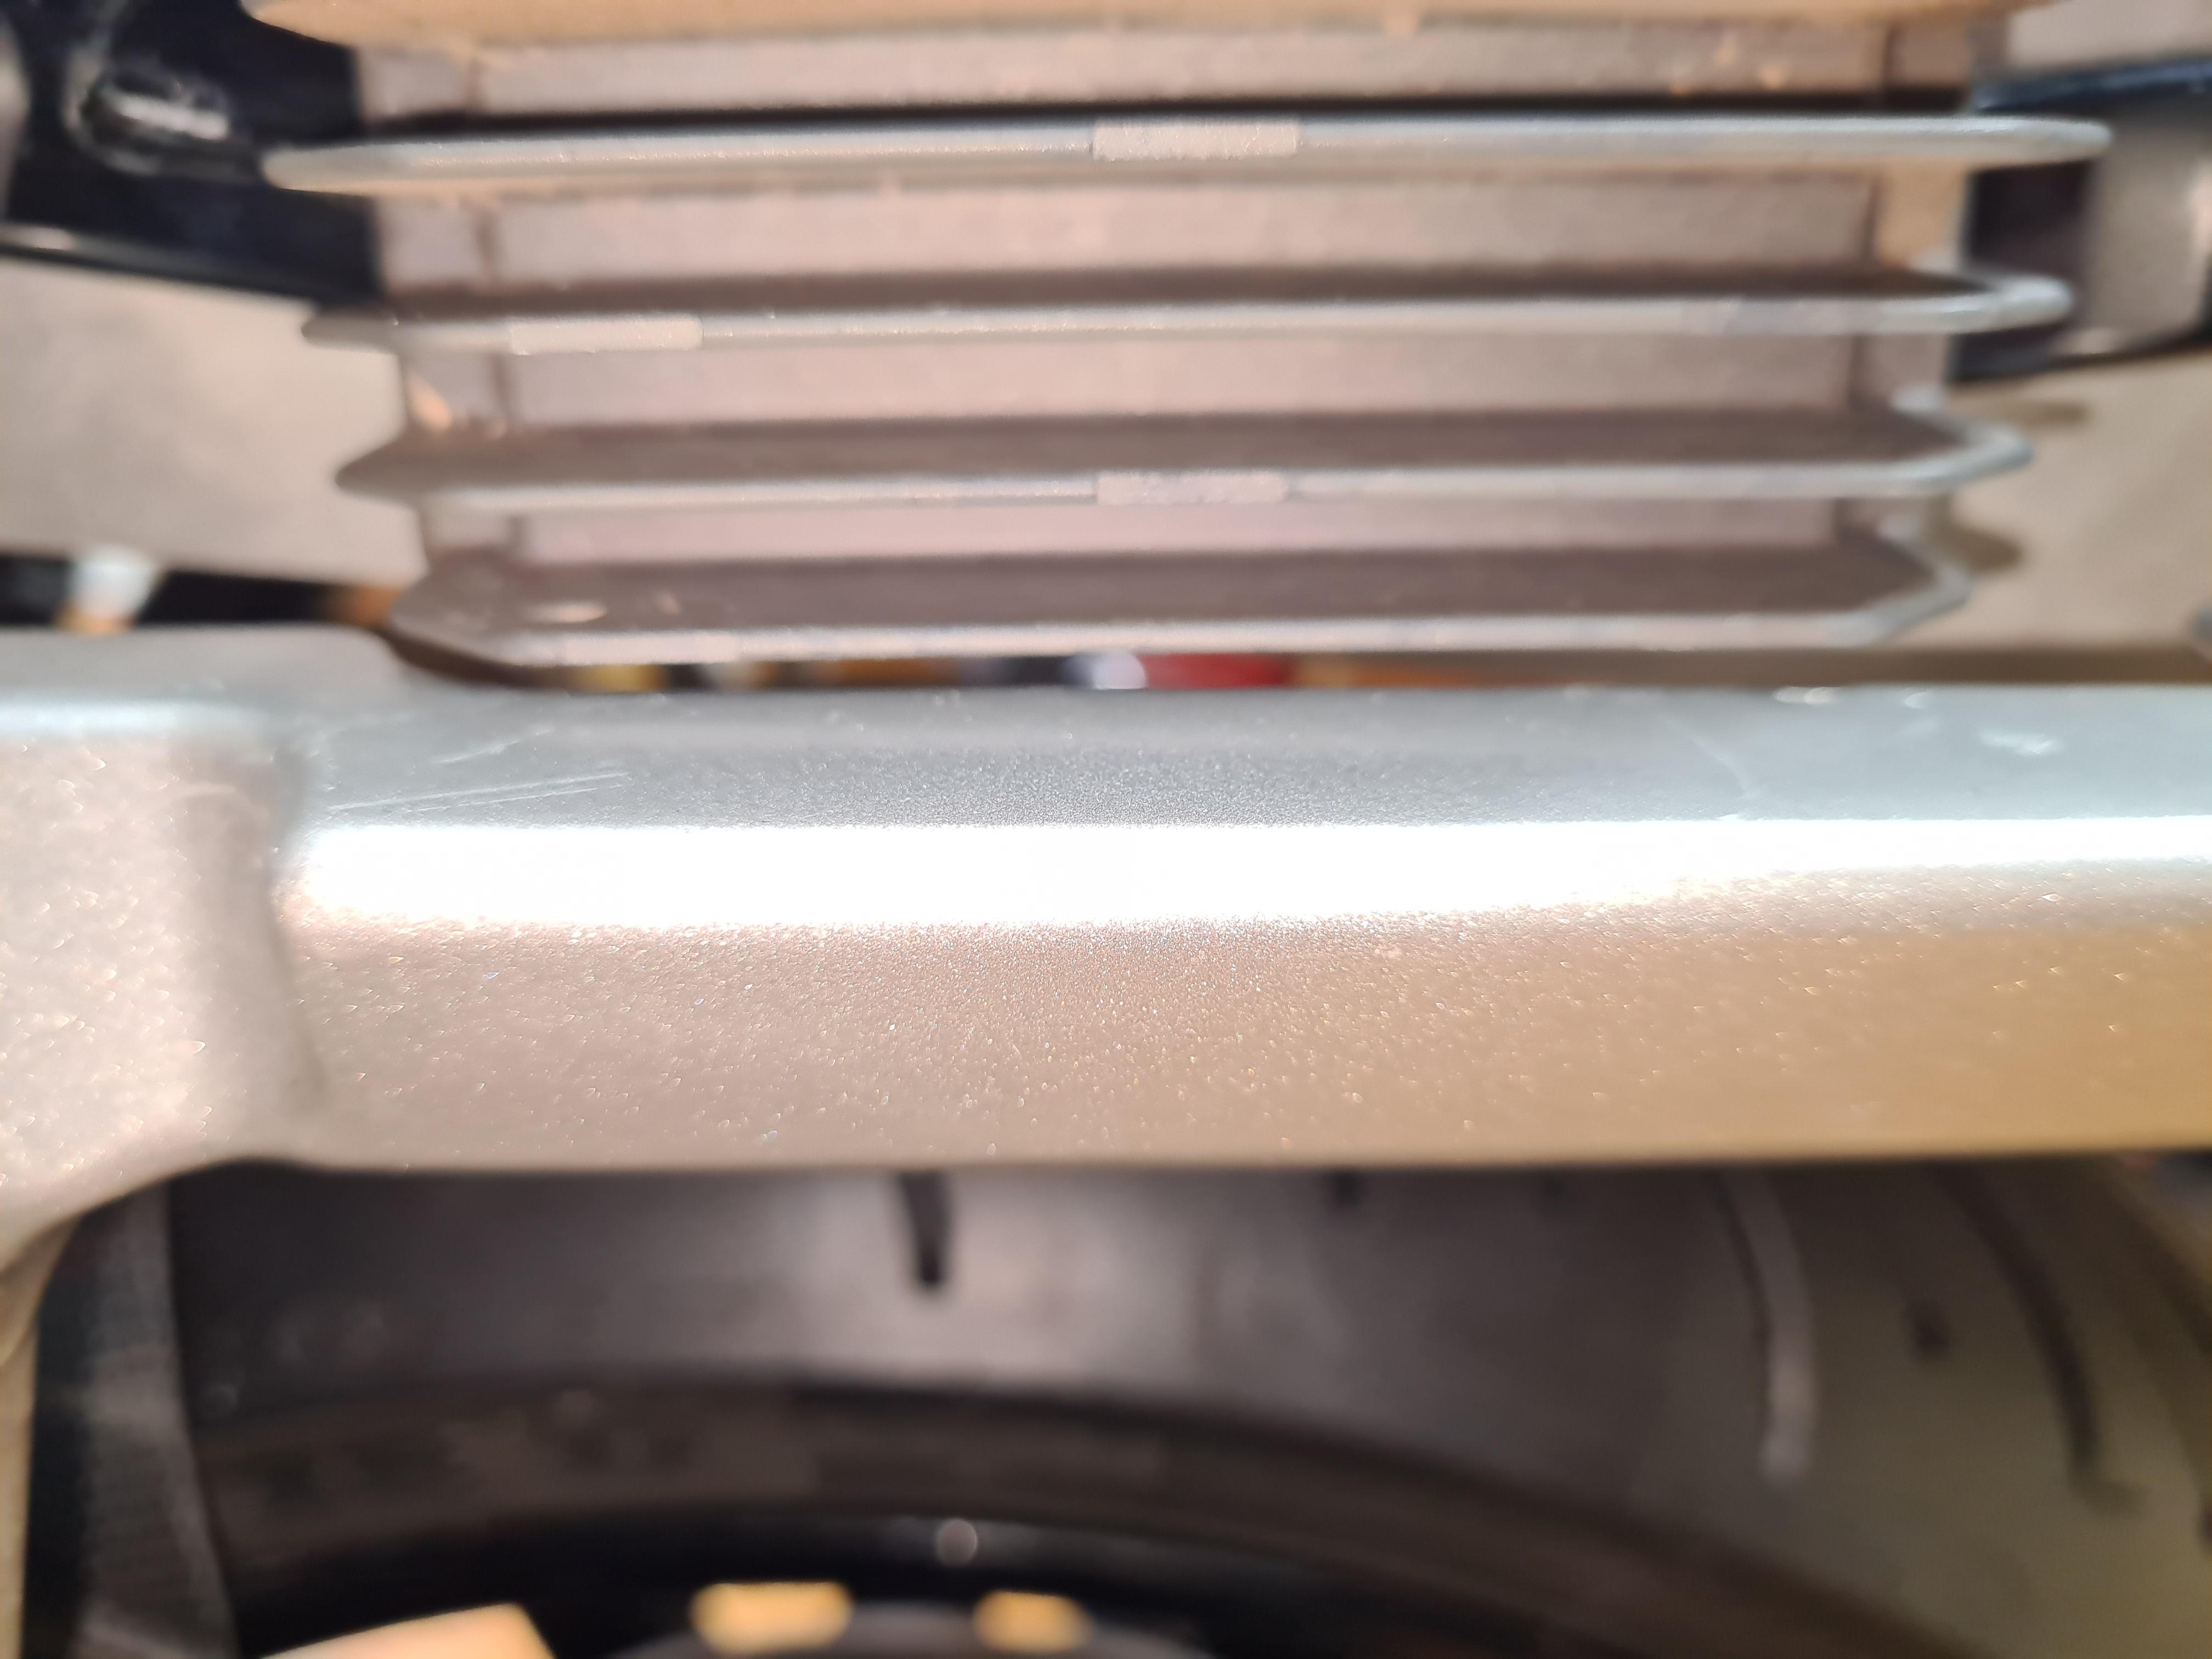
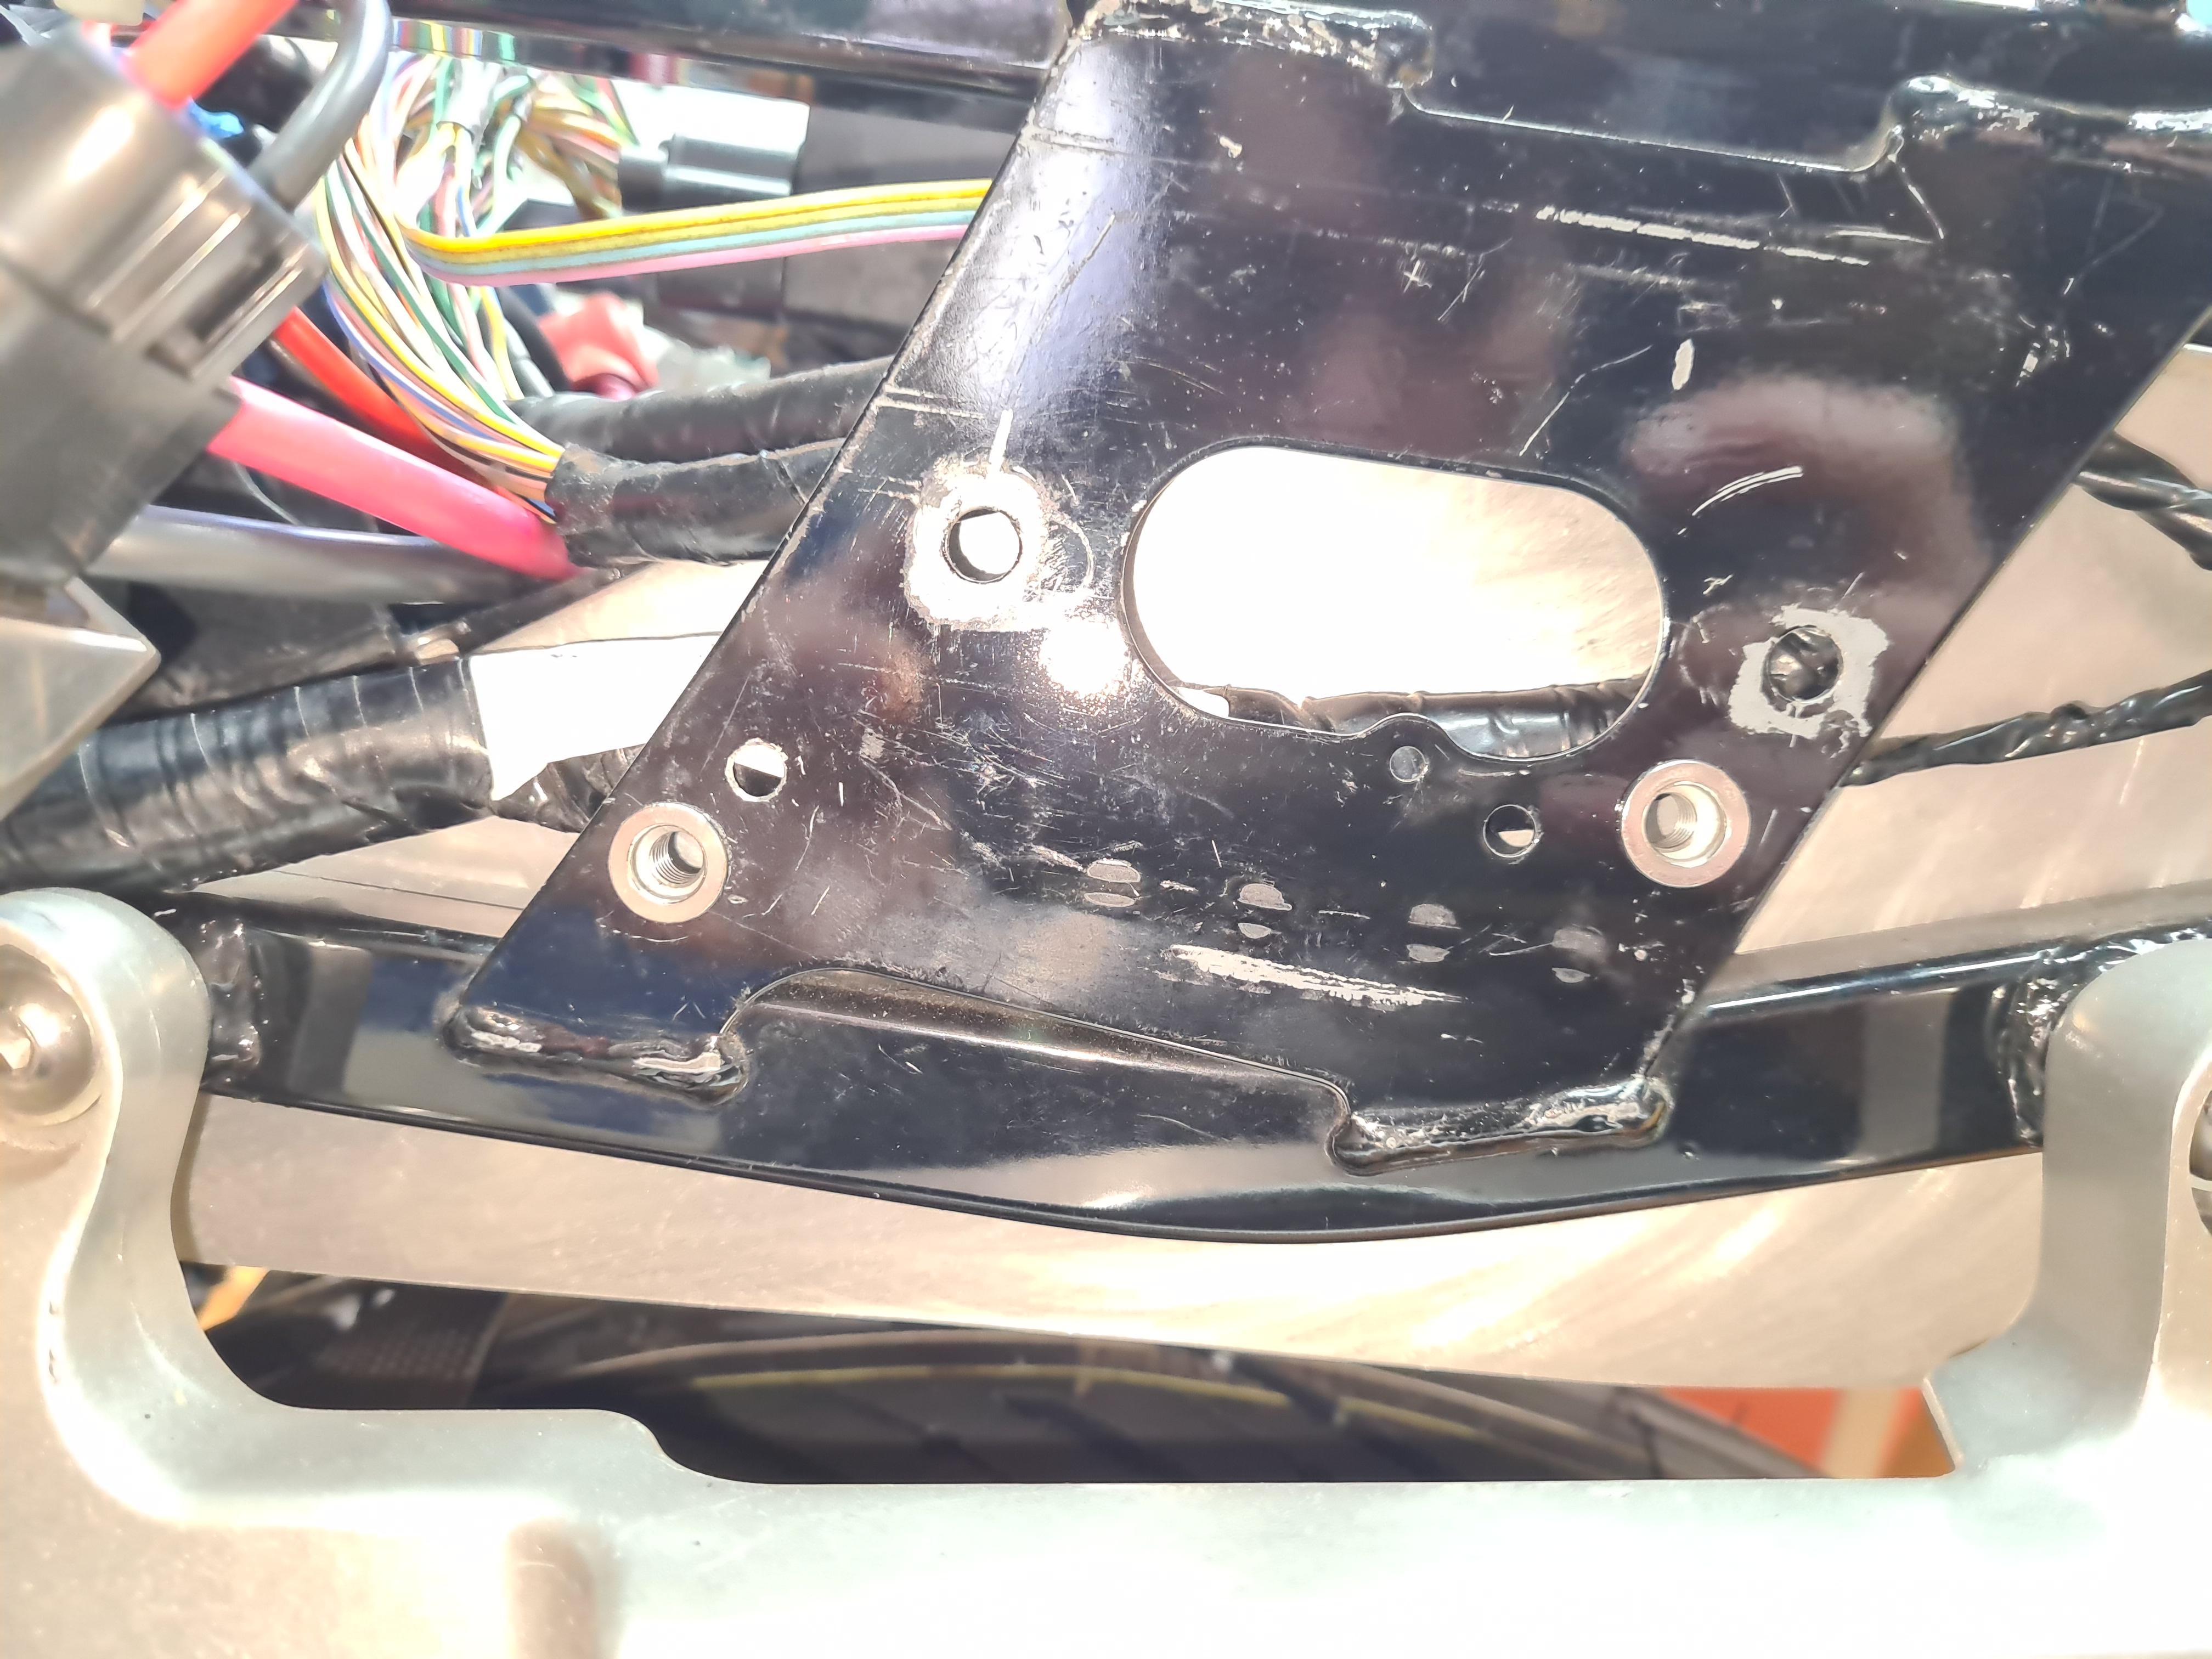
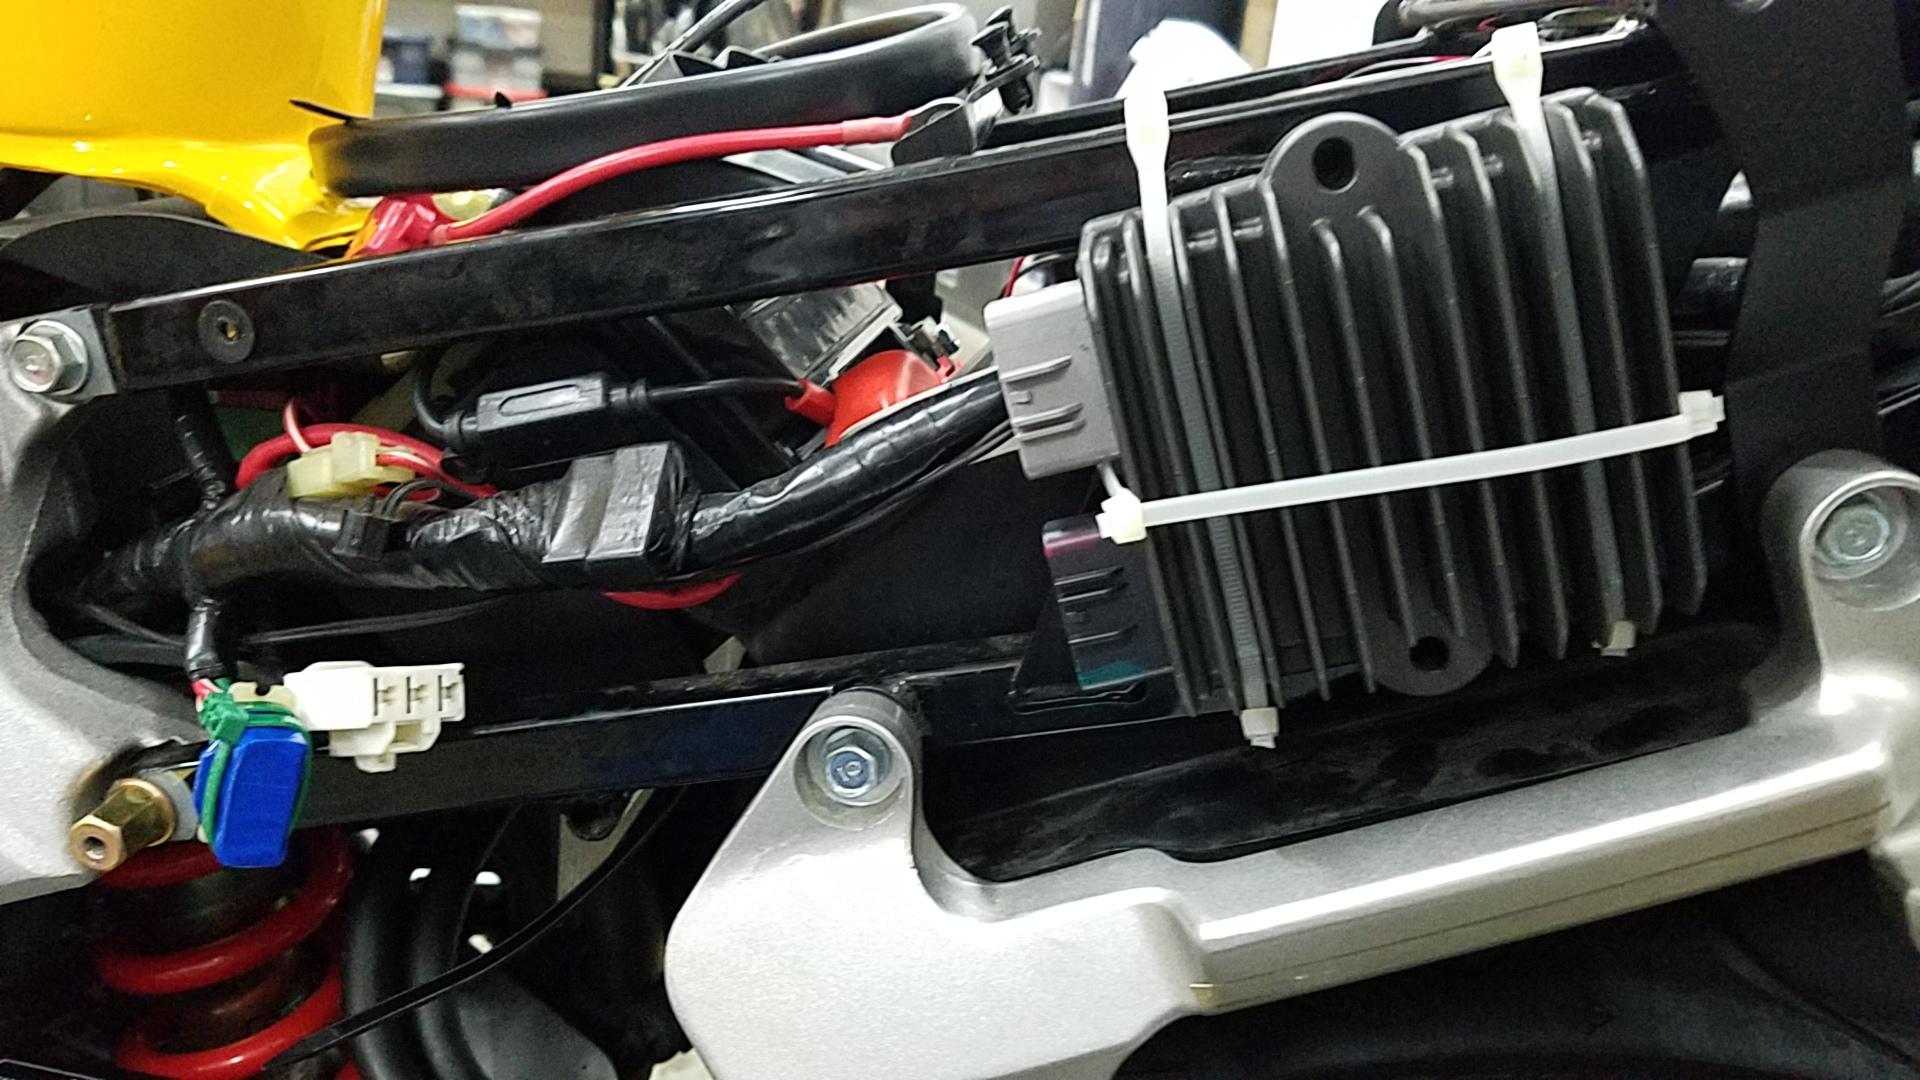
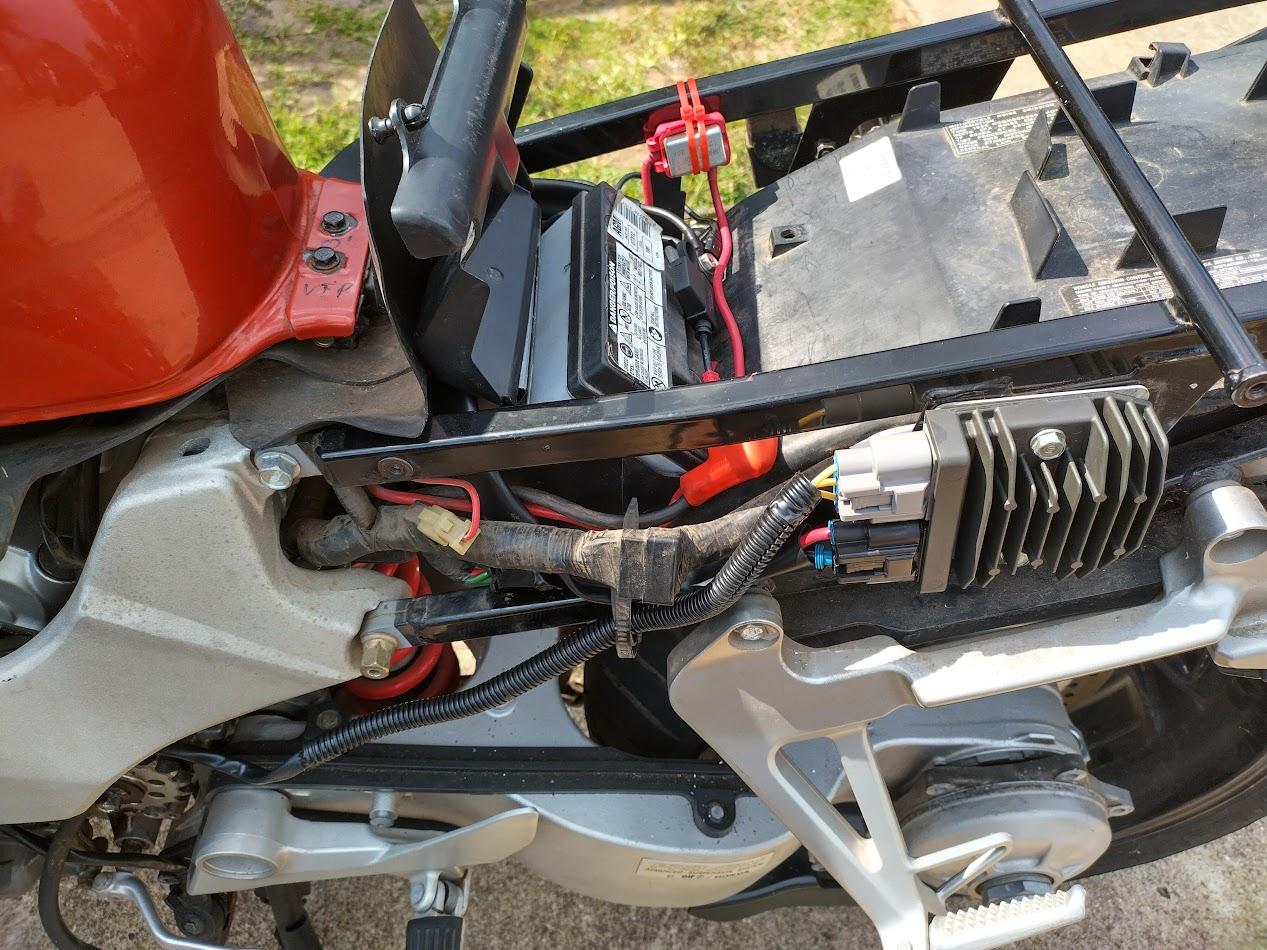
And at the other extreme, I mounted my 5th gen's Shindengen series SH-847 reg/rec vertically like this, using M6 Riv-Nuts: It's mounted just above the grab handle: Here's where I added the stainless Riv-Nuts to the OEM reg/rec mounting plate: (I love Riv-Nuts!) If you look closely at this pic (and the first one), you can see where I've trimmed one of the Furukawa sealed connectors to clear the rear cowl--just in case. But, overall, the SH-847 reg/rec fits in the OEM location (just), with no drastic modifications required. Ciao, JZH
-
Hey Seb, a quick (practical) question I don't recall being mentioned in this (or any other A&A supercharger-related) thread, but how do you deal with the crank timing marks being blocked by a big pulley shaft stuffed into the timing cover? I was thinking about this the other day when I was (briefly) considering checking the valve clearances on my "Yellow Peril". Ideally, the OEM timing marks would have been transferred to the new pulley and the timing cover so the crankshaft position could be determined without disassembling anything, but AFAIK that was not contemplated as part of the A&A kit. (Dan did a great job developing the kit, but I don't think he spent a lot of time thinking about ongoing maintenance--and why no Rotrex oil cooler?!?) The "manual" way of finding TDC for each cylinder, of course, would be to pull the spark plugs for each cylinder and use some kind of probe to find the highest piston point, but timing marks were originally provided by Honda because using them is a lot easier! (Also, you have to make sure the TDC you're looking at is on the firing stroke or the exhaust stroke, by checking whether the valves are closed or open.) A bit of a pain to do all that, but I guess it's the only way to do it (if the timing marks have not been transferred). I've got a windowed clutch cover ready to go on this bike (along with a load of other stuff) after I get it NL-registered, so I will think about addressing this issue then, but I was wondering if you'd maybe come up with another solution? Cheers, JZH
-
It shouldn't. Have a look here.
-
During the winter months I did the following on my '02 VTEC. - Cleaned the combustion chamber of the no.2 cylinder because of accumulated carbon deposits with . I have a separate thread on that. Cleaned the other cylinders a bit, wasn't necessary but I did it anyway. Used Protec Carbon X K1+K2 cleaner. - Oil Motul 7100 10w40 and HiFlo filter because the oil was contaminated by the cleaning agent - 25k km after the last adjustment I measured the valve clearances on normal valves, all were spot on except the problematic no.2 cylinder had an exhaust valve tighten a lot because of extreme heat of combustion caused by high compression due to carbon buildup. Ignored the VTEC valves as the tolerance is much higher. - Removed the water pump as it was leaking oil at the shaft seal and coolant at the hose connection. Cleaned it up from corrosion, put new seals, added some black silicone on the areas that had pitting. Tightened the clamps on the three coolant hoses inside the Vee of the engine as they were leaking. Managed to tighten them without removing the throttle body. Removed the cam chain tensioner to gain access to the clamp bolt that's upside down. Put new coolant in. - Put a new seal on the oil cooler pipe, where it connects to the sump as it was leaking - Overhauled the forks with a rebuild kit. New bushings, fork seals, top seals, bottom washers, dust caps etc. Motul 10w oil, 120mm air gap because of linear springs. - New clutch cover gasket, borrowed a crank sensor to troubleshoot some issues, turned out it wasn't the source of the problem. - Replaced the rear brake pads. EBC HH - Bought a used kickstand sensor off ebay as the connector has disintegrated on mine. Had a head scratching moment because when the kickstand is down the bike thought it's up. It turns out the 2010 VFR uses the same kickstand sensor and wiring but the connector uses different pins. The two wires connect first and third pin for the 2002, while the 2010 connects first and second pin. Weird. Disassembled the connector and rewired it so it works correctly on my bike. Lot's of work but the bike is ready for the riding season. I hope the coolant hoses don't give me much trouble. They might need replacing next winter. Had a first proper ride with a VFR buddy, it was nice.
-
 The bike does not have an IACV like a car. Instead it has 4 starter valves that each allow air into their respective throttle bodies when the throttle butterflies are closed. Simply put, valve no 1 is the fixed reference valve and the other 3 are set against it's vacuum setting at specific values. A sensor on the fi system detects the volume or air allowed in by the starter valves and meters the appropriate amount of fuel for idle. If they are out of synch you'll get lumpy idling and running particularly at lower revs. A split hose or out of adjustment will have similar effects So, my best guess is that in order of likelihood your problem could be due to sticking starter valve plunger(s), a disconnected, broken or split vacuum hose, starter valves out of synch or a fuel supply issue. Having said that, I am assuming the bike is regularly serviced and the air filter isn't clogged. Why not download the manual from the downloads section of this site and have a look. Replacing hoses is quite straightforward but synchronising valves is a bit more involved. Cleaning valve plungers may require the throttle bodies to cone off the bike unless you can get in there with a cleaning spray without affecting the adjustment. There are others here who have done extensive work in this area of the bike and may be able to offer more specific advice
 -
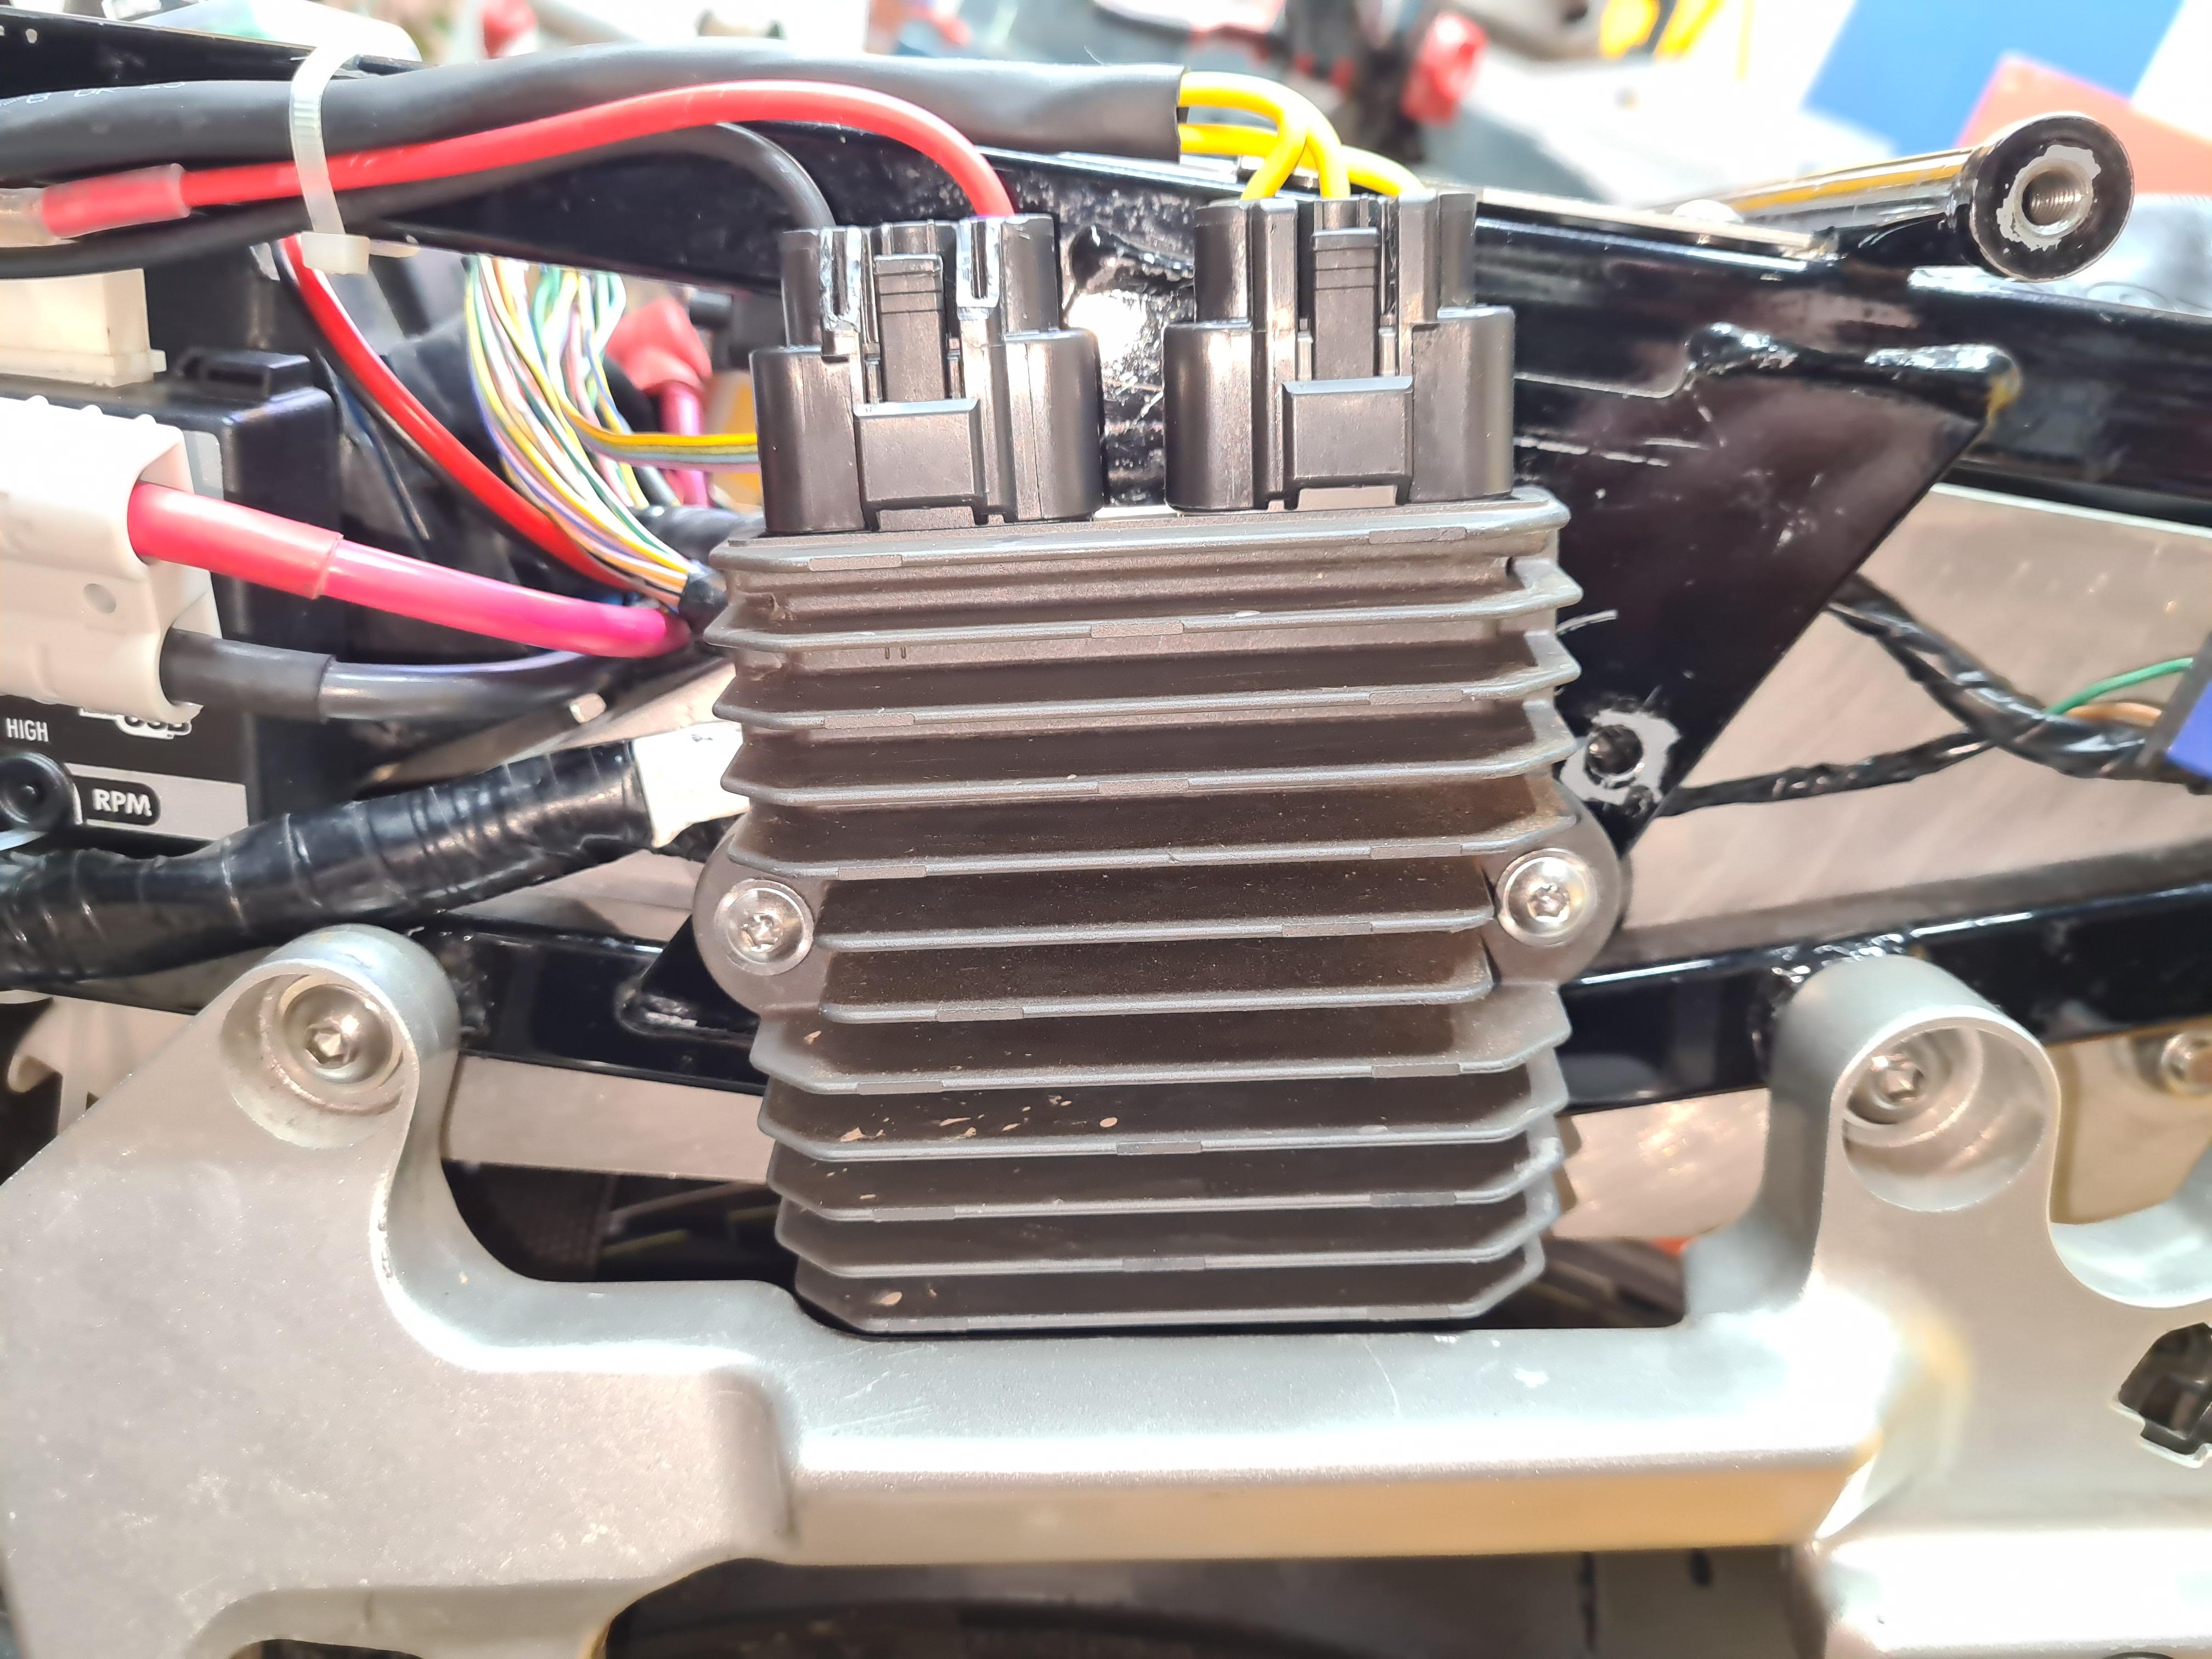
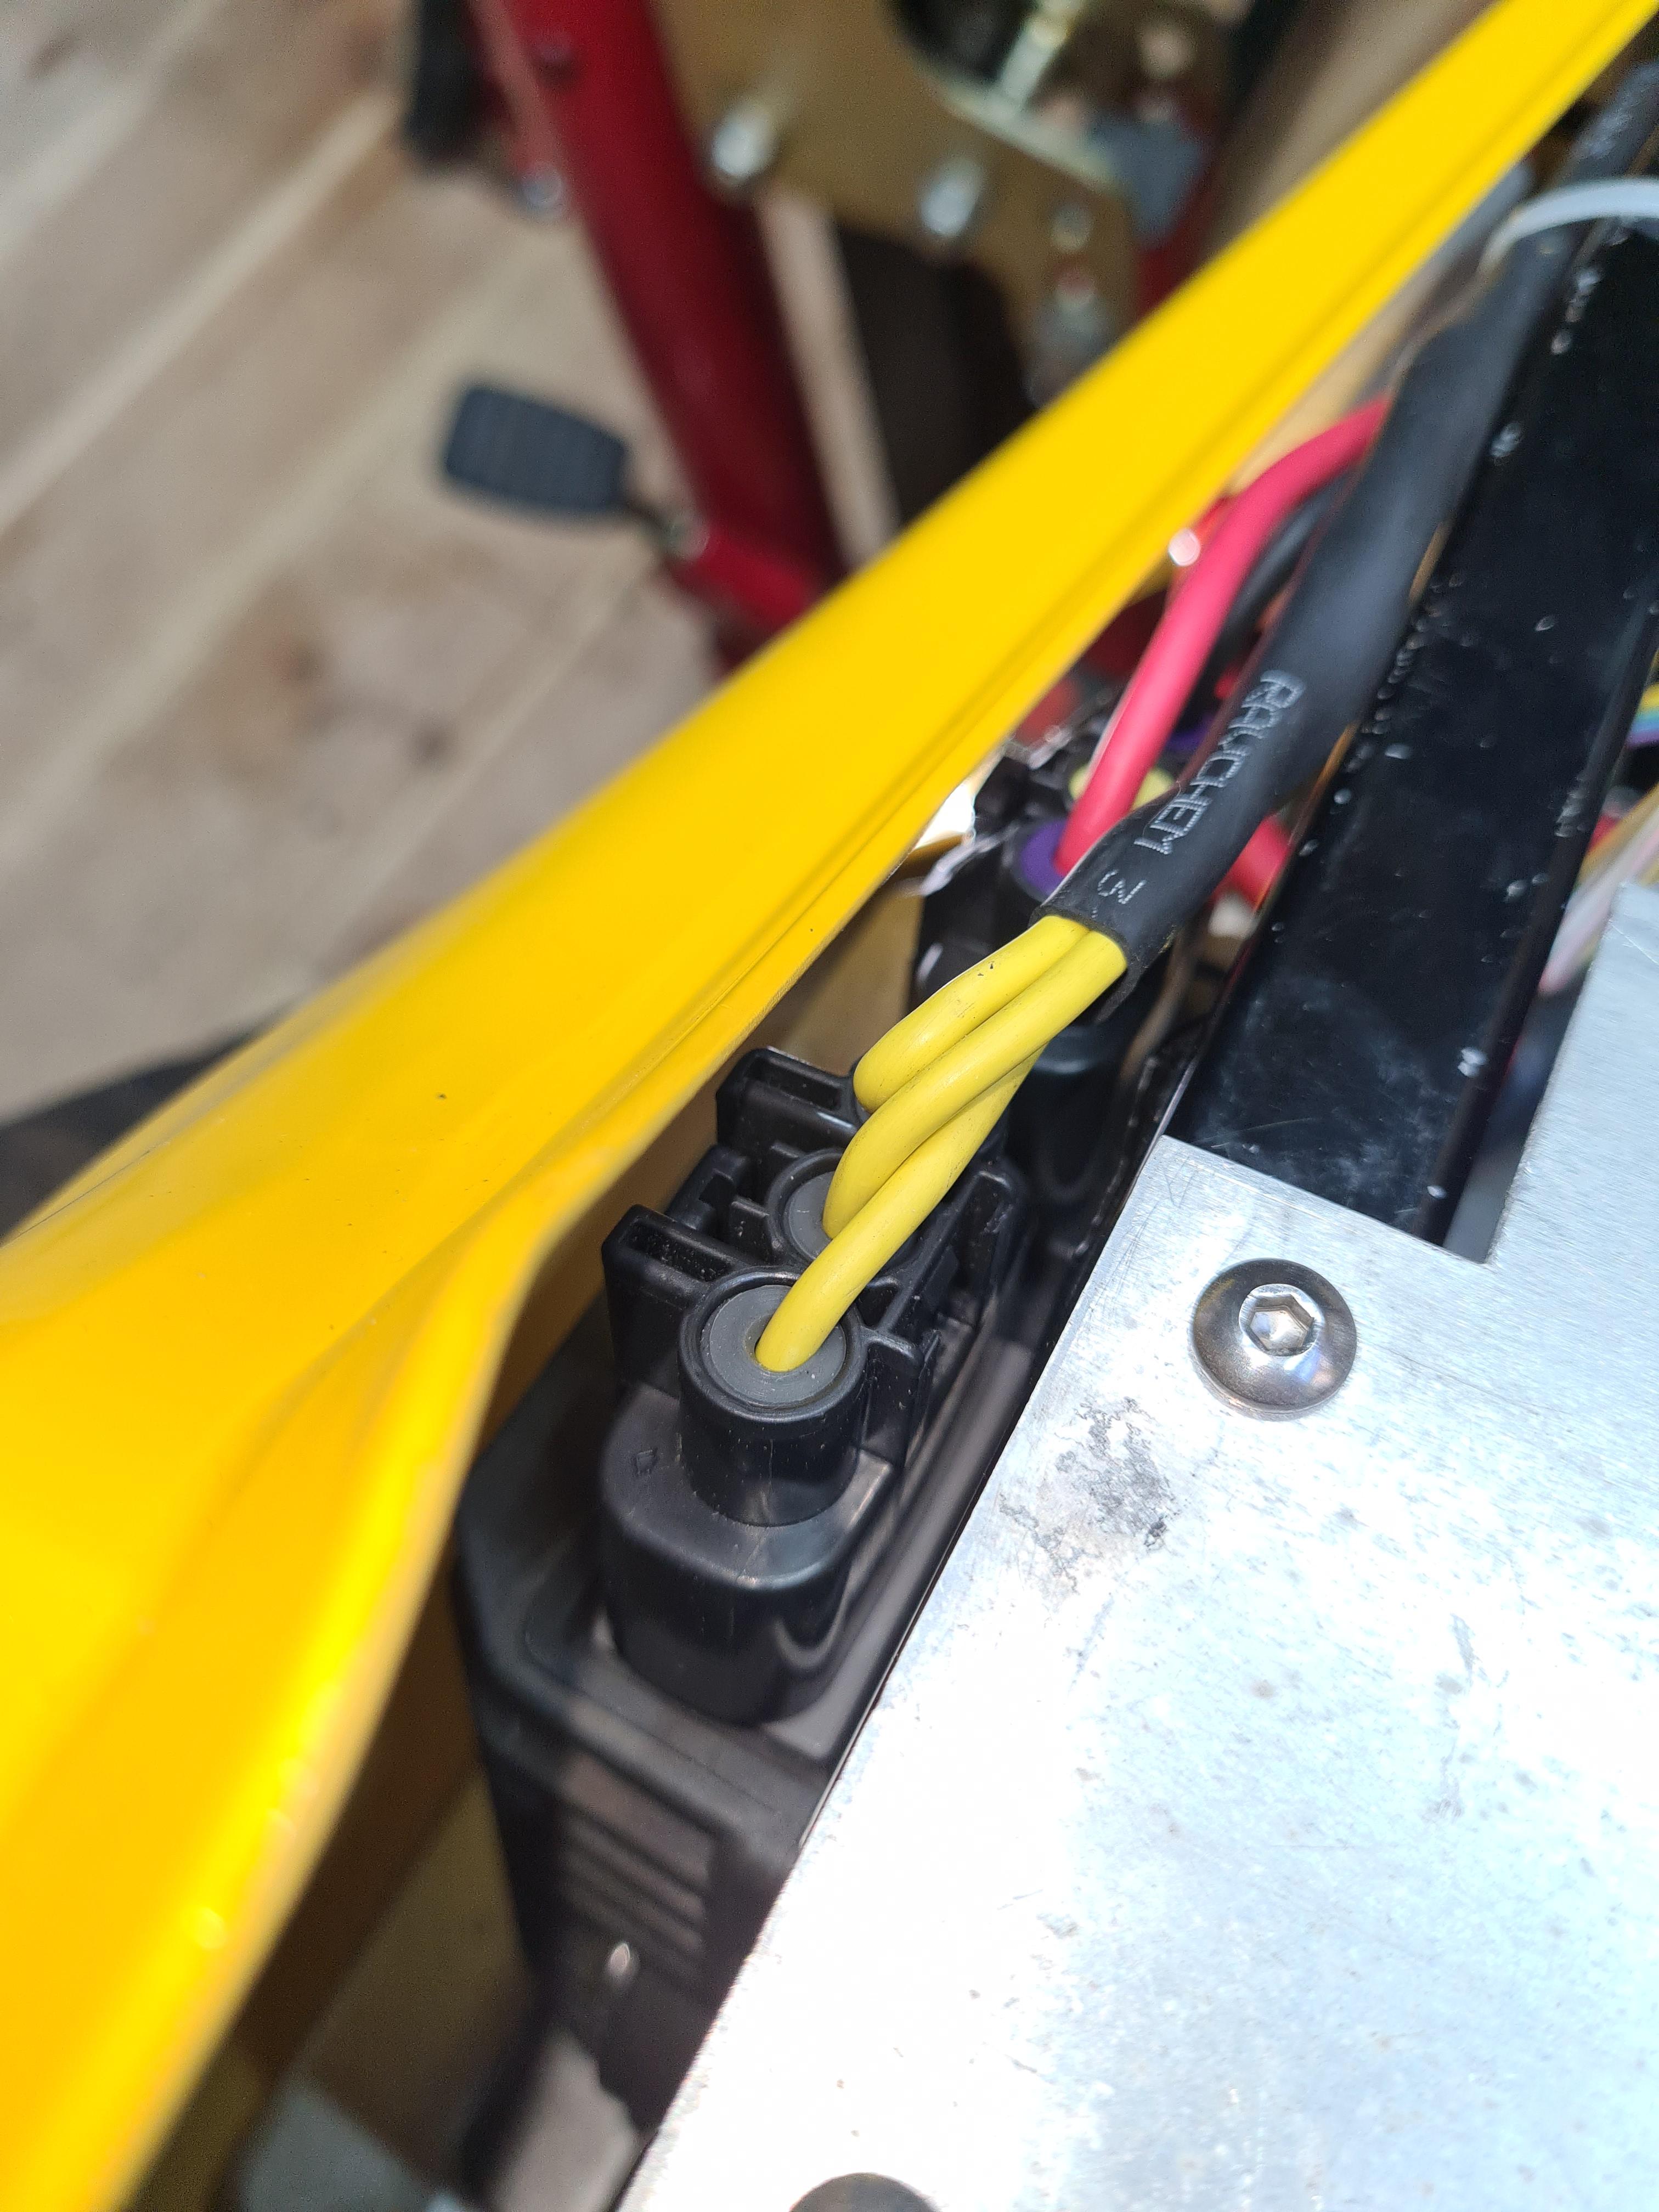
My install, for more reference. I went with plugs instead of solder, and ties instead of bolts.
-
I went to bleed the brakes this morning - secondary master cylinder is shot. This bike is testing my patience!! I now see there is a slit in the dust boot, but I assume fluid shouldn't get as far as the dust boot anyway? actuate the smc while bleeding and fluid is pouring out the slit in the dust boot. I haven't opened it up to see exactly how it works so now I either need to replace the smc, entire caliper + smc or rebuild the smc. I'll have a look later and see which is the most cost effective. Frustrating as the caliper itself is in good condition - it was an ebay part I bought ages ago so no recourse on it.
-
Sometimes, and I'm not sure if this applies to newer models, Honda specified plugs with two different heat ranges. Which one you fitted depended on how you expected to use the bike, i.e., street or racing. But specifying two different manufacturers for the same spark plug is probably to allow flexibility of supply and/or preference. Ciao, JZH
-
Cman, your VFR will have either a set of NGK spark plugs or a set of Denso ones. Honda, and all manufacturers, often source parts from more than one source. Another example is with tires where, for my 2009 VFR, the owners manual lists Dunlop, Metzler, and Bridgestone models.
-
Why are there 2 different plugs on my 2015 Intercepter Deluxe? According to the Cylinder Head OEM Parts Diagram. 12 SPARK PLUG (IMR9D-9H) (NGK) 31911-HW1-671 12 SPARK PLUG (VNH27ZB) (DENSO) 31912-HW1-671
-
yeah, 18 volts is...suboptimal. most everyone here (including me) recommends the reg/rec kit from https://roadstercycle.com/, it's a very well put-together kit that's easy to get a clean looking installation from. also being a mosfet-based reg it runs much less hot than the stocker.


-
VFRD Mission Statement
For owners of the Honda Interceptor and related Honda V4 motorcycles, for the purpose of mutual help concerning safe riding, maintenance, and performance of their motorcycles.
Rules of the ride - No one goes to jail, and No one goes to the Hospital.
Contributions - VFRD is a member supported website with no commercial advertising.

-
Forum Statistics
-
Total Topics26.8k
-
Total Posts364.9k
-
-
Member Statistics
-
Upcoming Events
-
Latest Classifieds
-
-
Top Downloads
-
-
Popular Contributors
-
Blog Statistics
-
Total Blogs116
-
Total Entries345
-
-
Gallery Statistics
-
Blog Entries
-
-
Blog Comments
-

-

By vfrpilot28 · Posted
I enjoyed reading this and seeing your story. For the love of motorcycling! -
-
By interceptor69 · Posted
Oops. I do believe I know how to post YT videos or they wouldn't be on YT. However I may have screwed up copying the link to the playlist. Thanks for the helpful comment. -
 I think that you might not know how to post videos. You're in your YT studio in these links. You need the link to the actual video.
-
-
Most Contributions
-


.thumb.jpg.6b9488d9849fb7037caa4c17228db2ab.jpg)