-
Featured Gallery Photo
 Arches NP, 1996.jpg

Copyright
© Lorne Black
All Activity
- Today
-
UPDATE - turns out that the ST cables that I had purchased in 2022 are the 1300 ones, and not the 1100 ones. I had even started a thread on a comparison of the two cables for the 5th Gen which I totally forgot about 🙄........Post Covid Brain Fog sucks! The best advice came from SEBSPEED. I posted a couple of links about the Japanese police VFR800P bikes with the high handlebars if anybody is interested. The ST1300 cables do have a minor length issue which has been pointed out by SEBSPEED and Gaz66 above, but they are usable if one does not have access to 'perfect' cables like the Webike ones. AnikMankar did use the ST1100 cables with his Helibars and has posted images of this elsewhere on this forum.
-
May I suggest you avoid the RDW-station in Waddinxveen? With an import from outside the EU, inspection is more thorough/involved. I am not a gynecologist but I know a C... when I see one..
-
 GarethVfrWales80 joined the community
 -
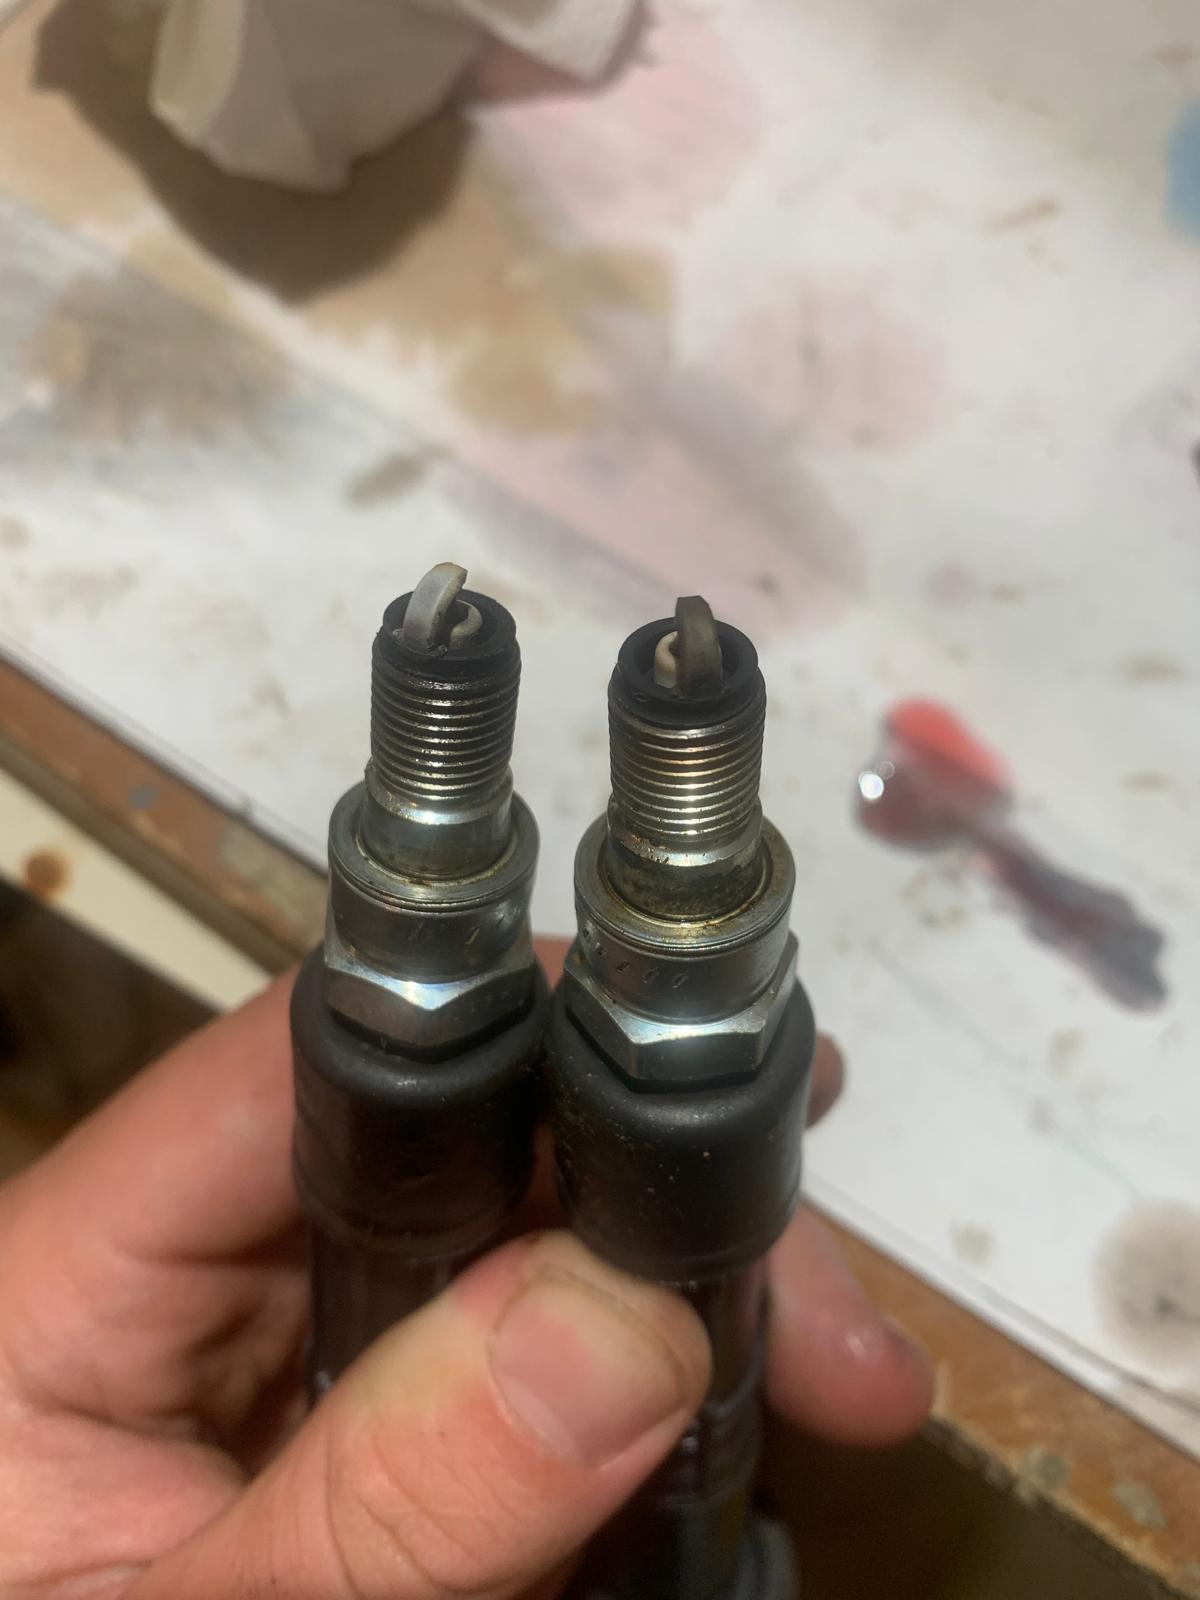
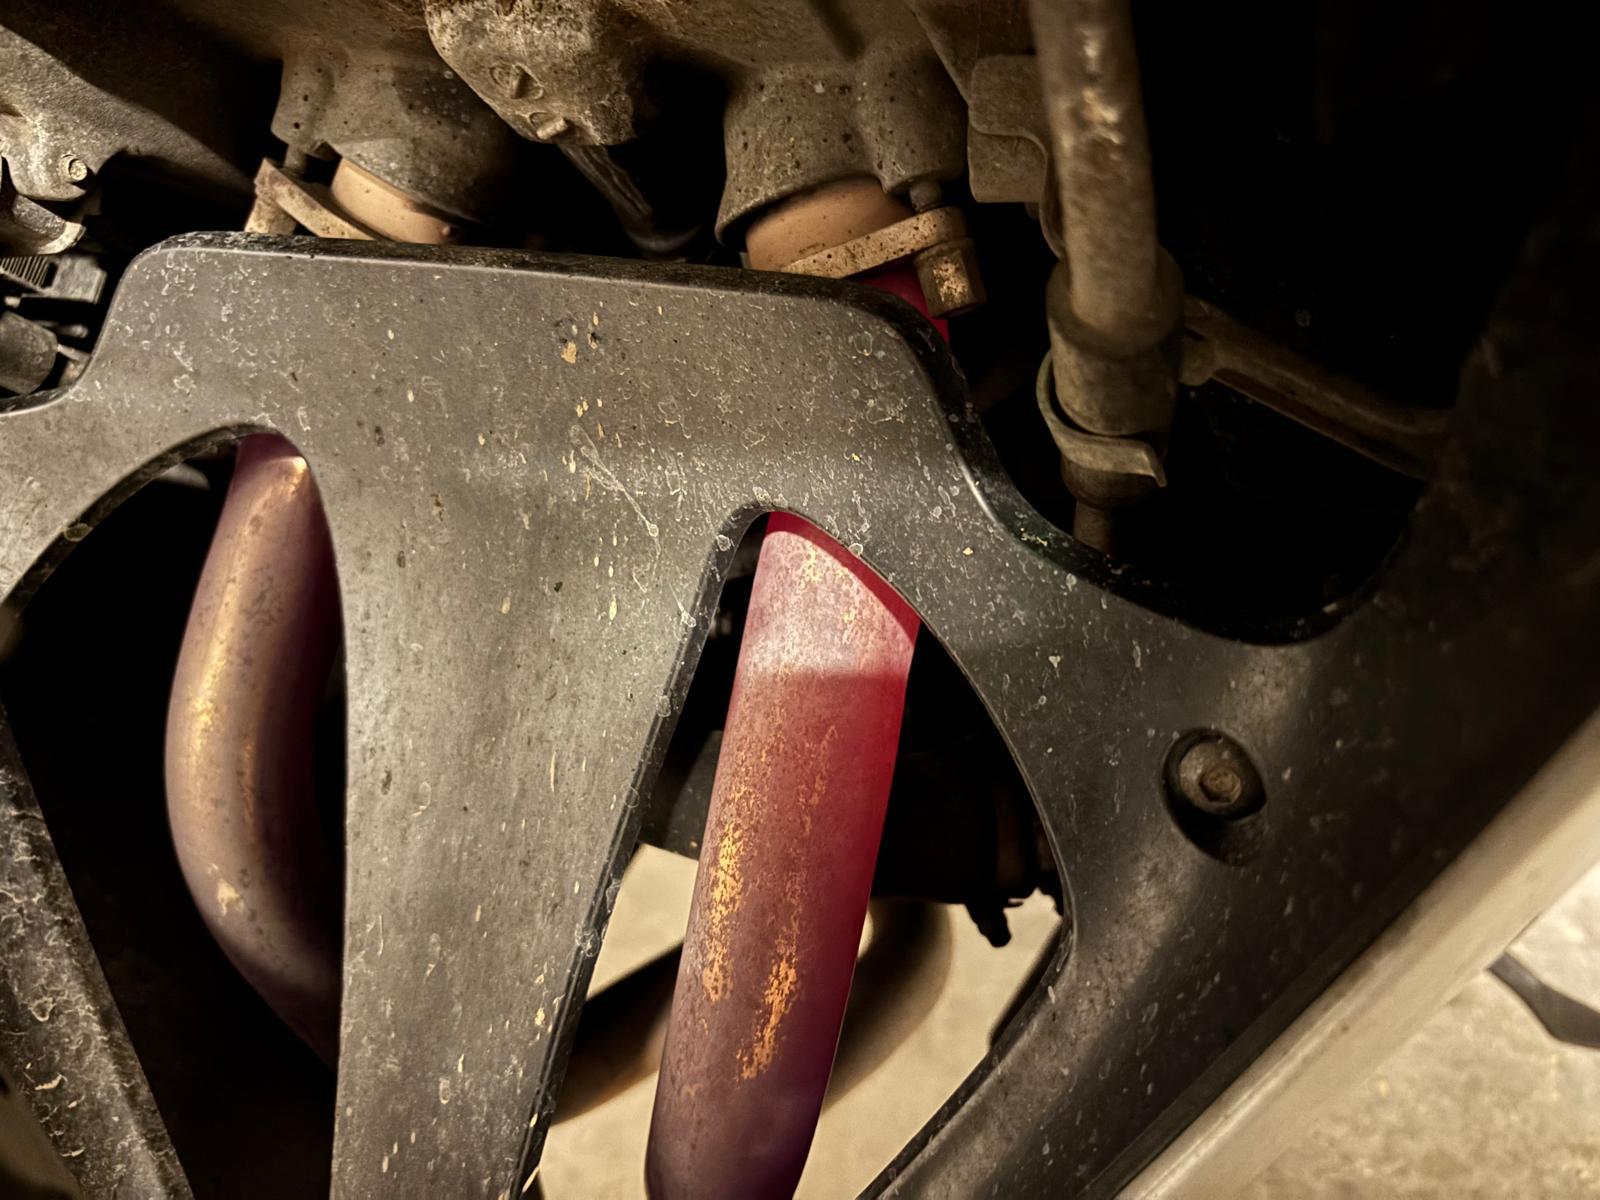
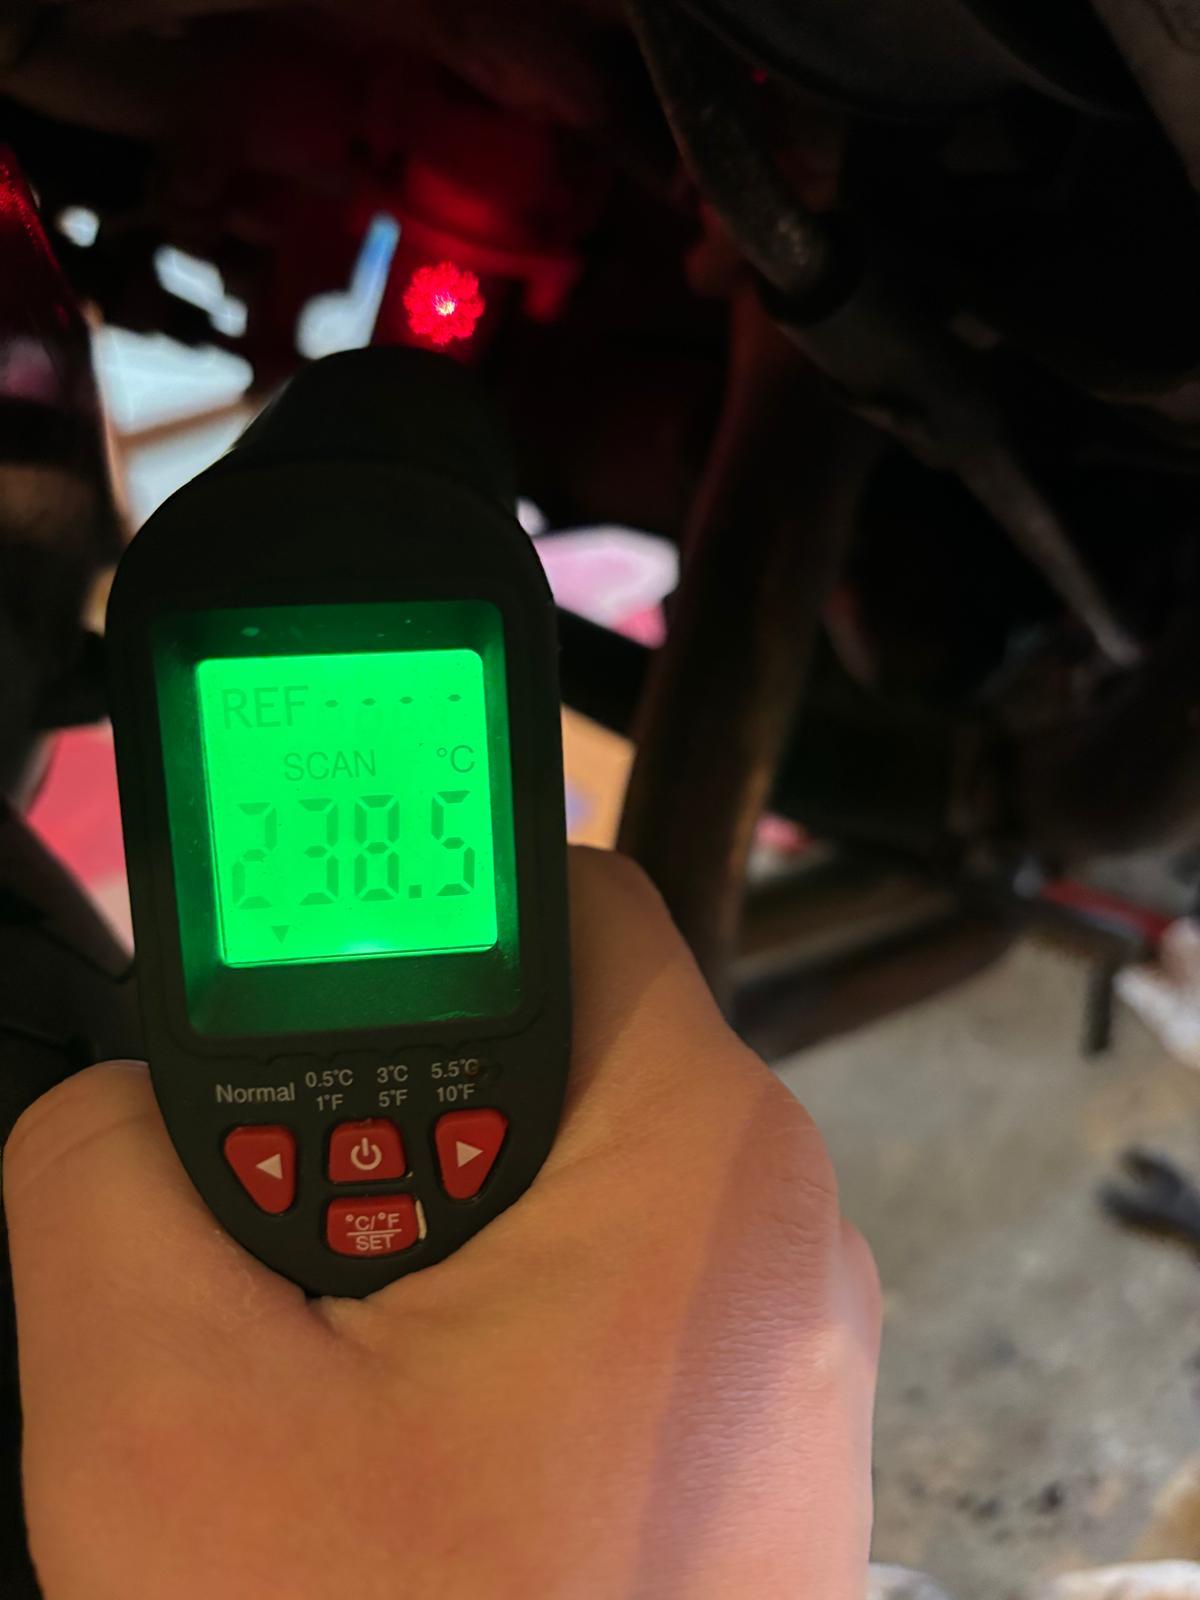
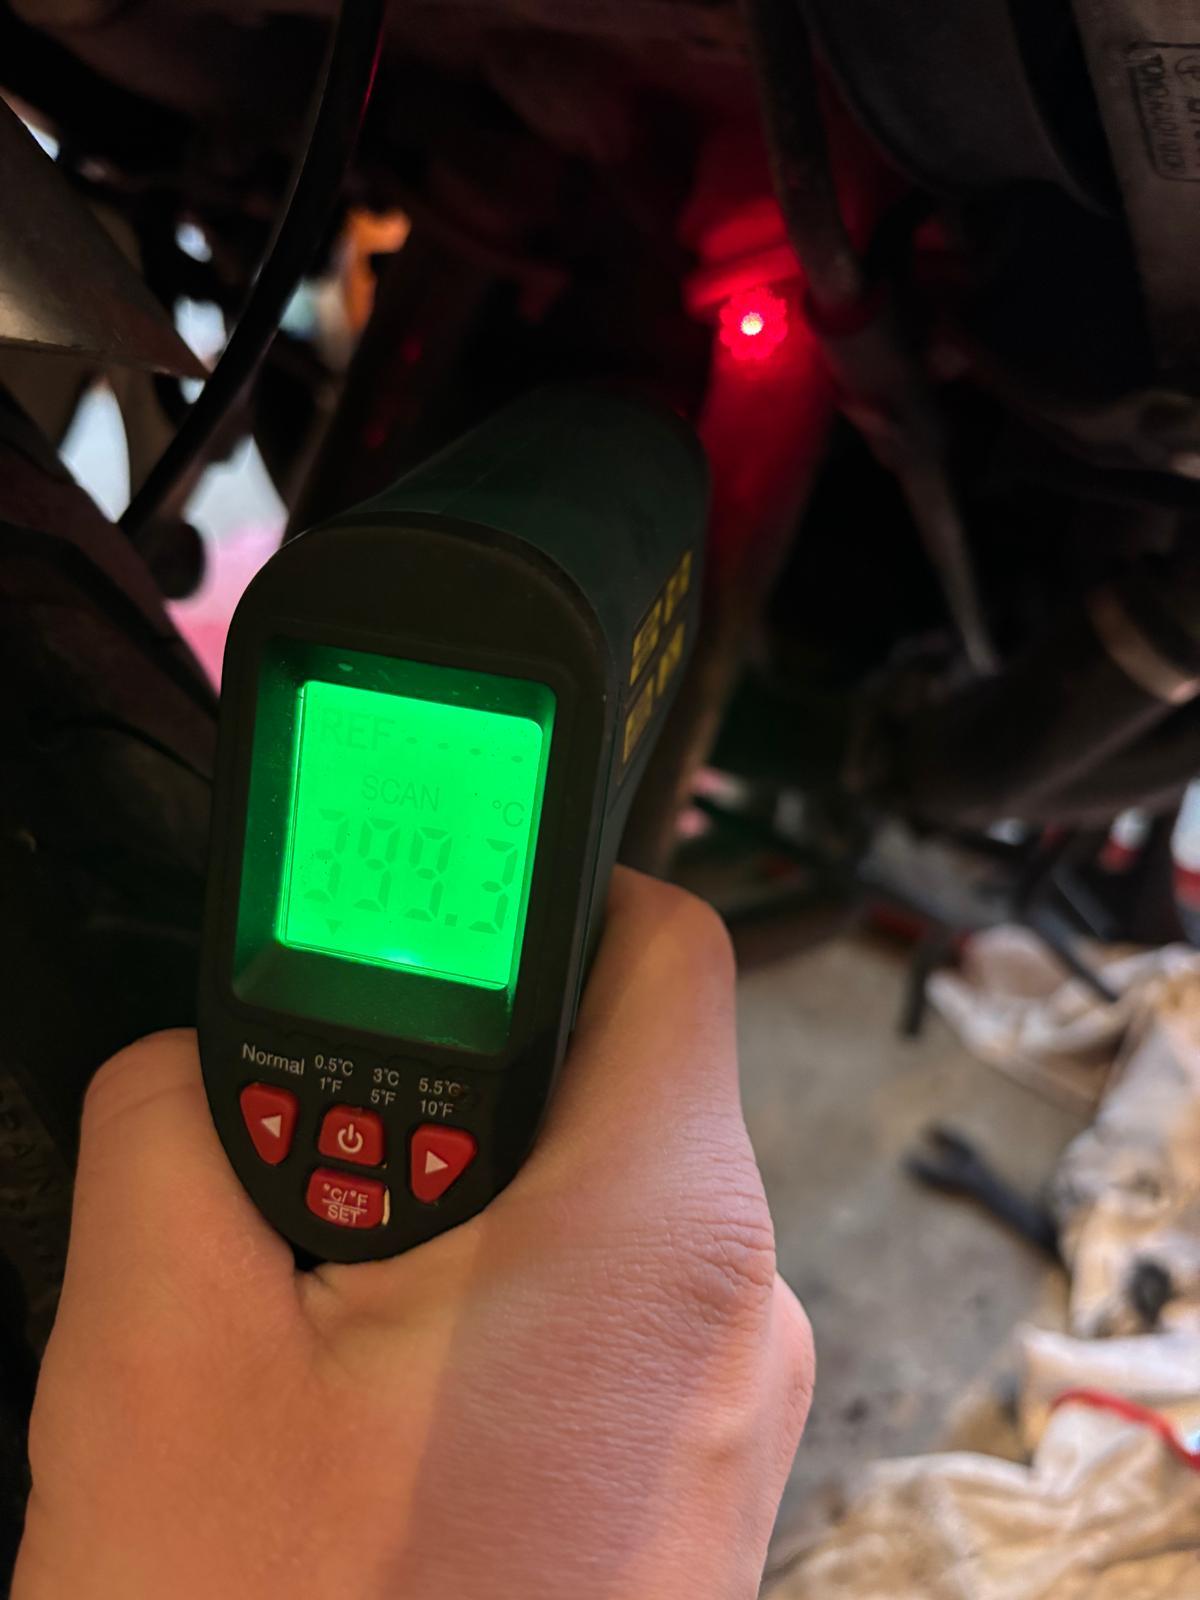
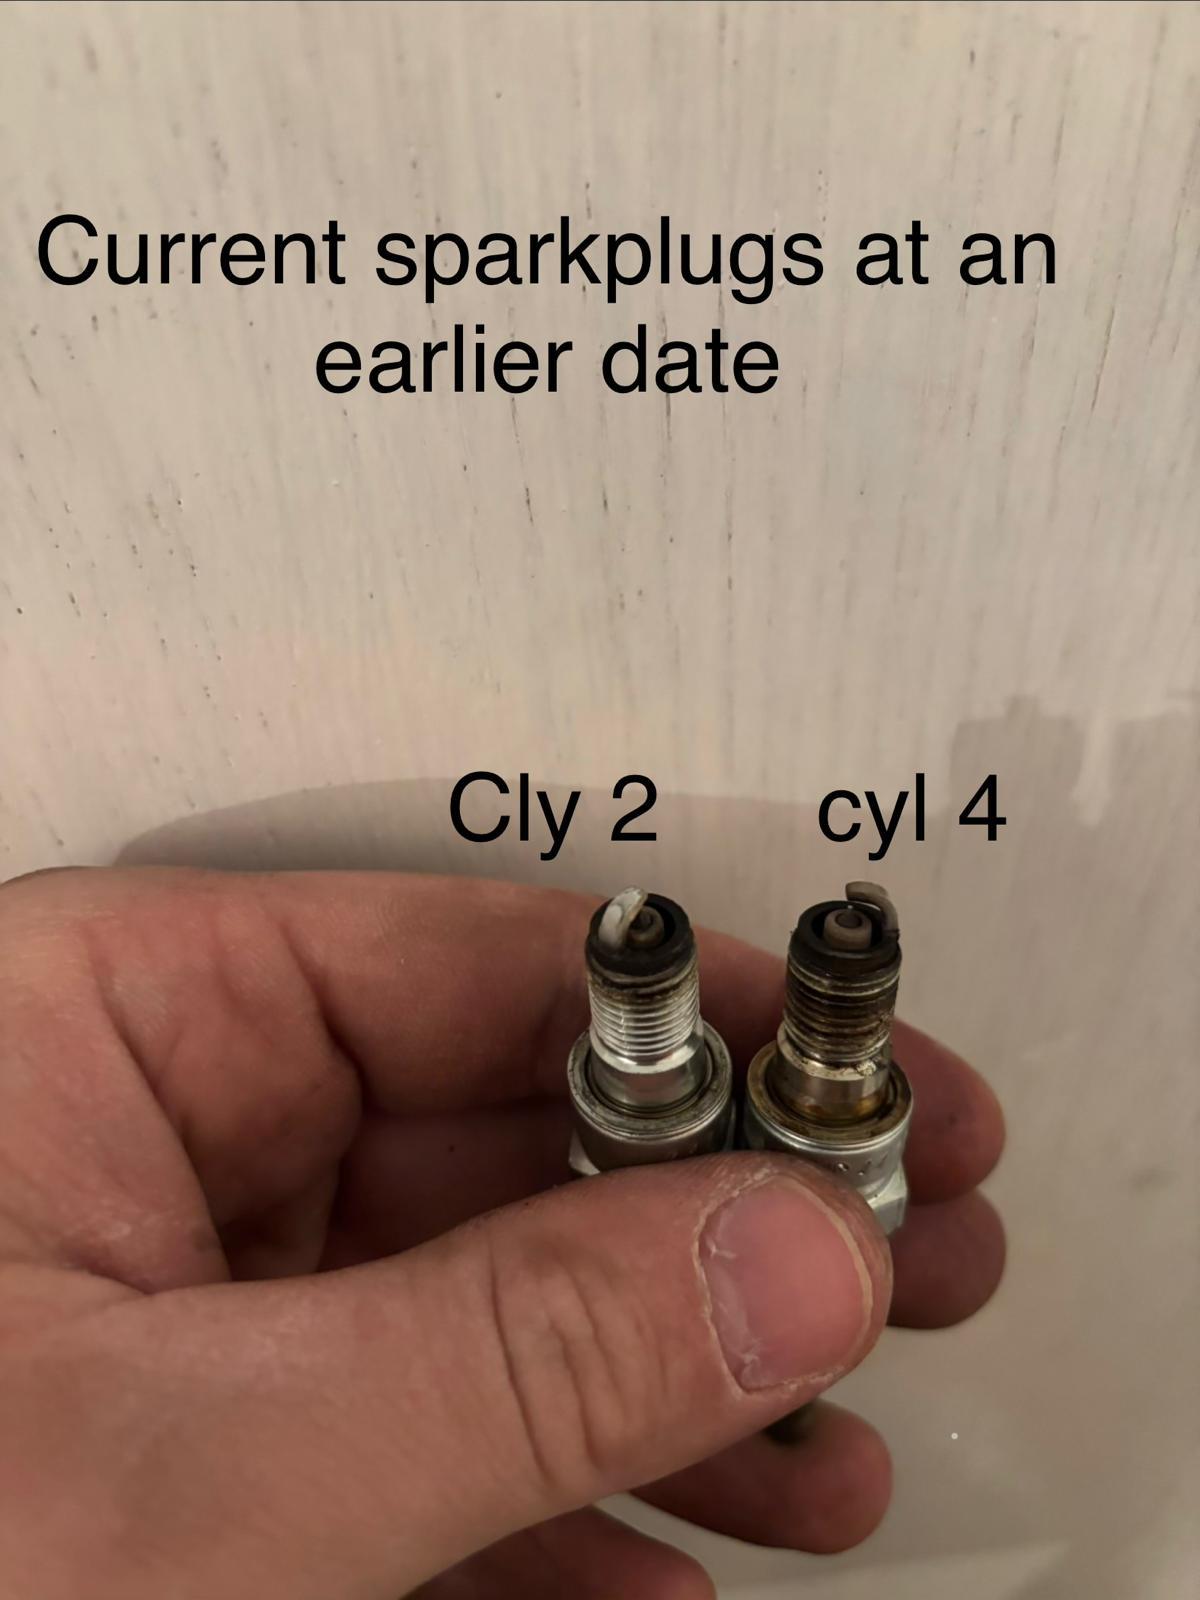
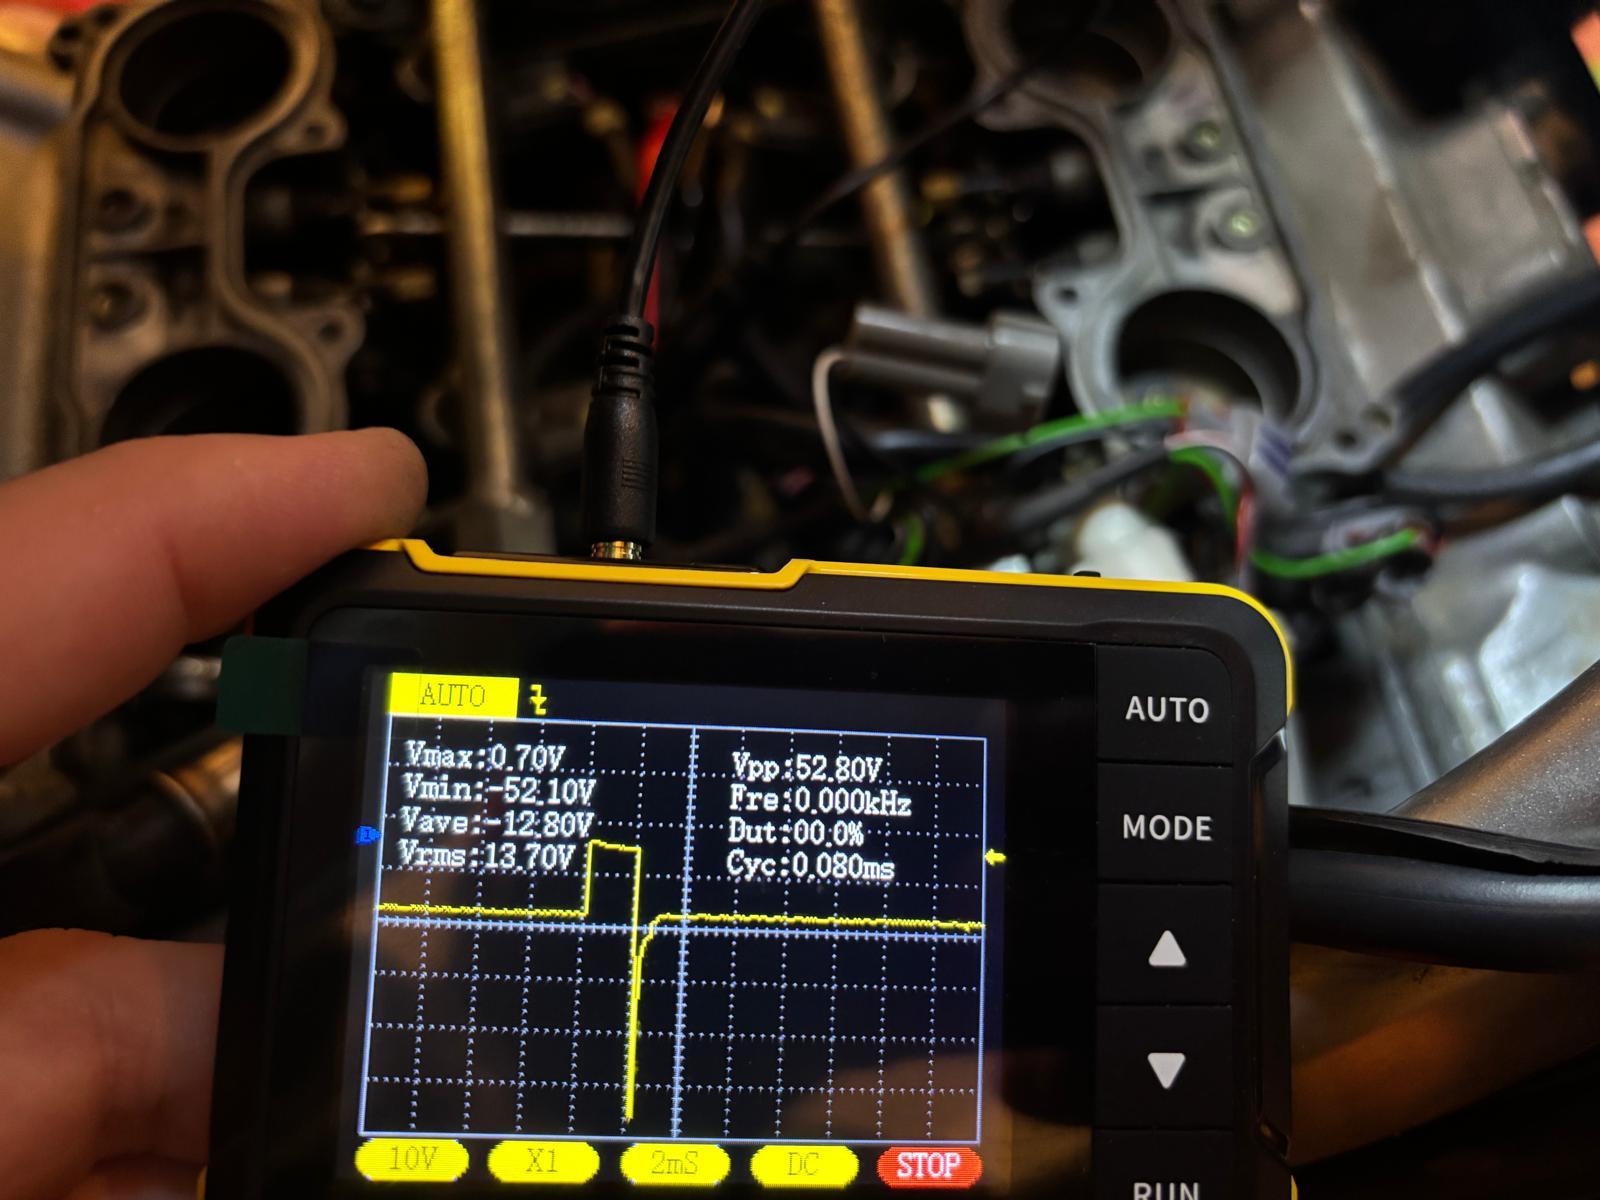
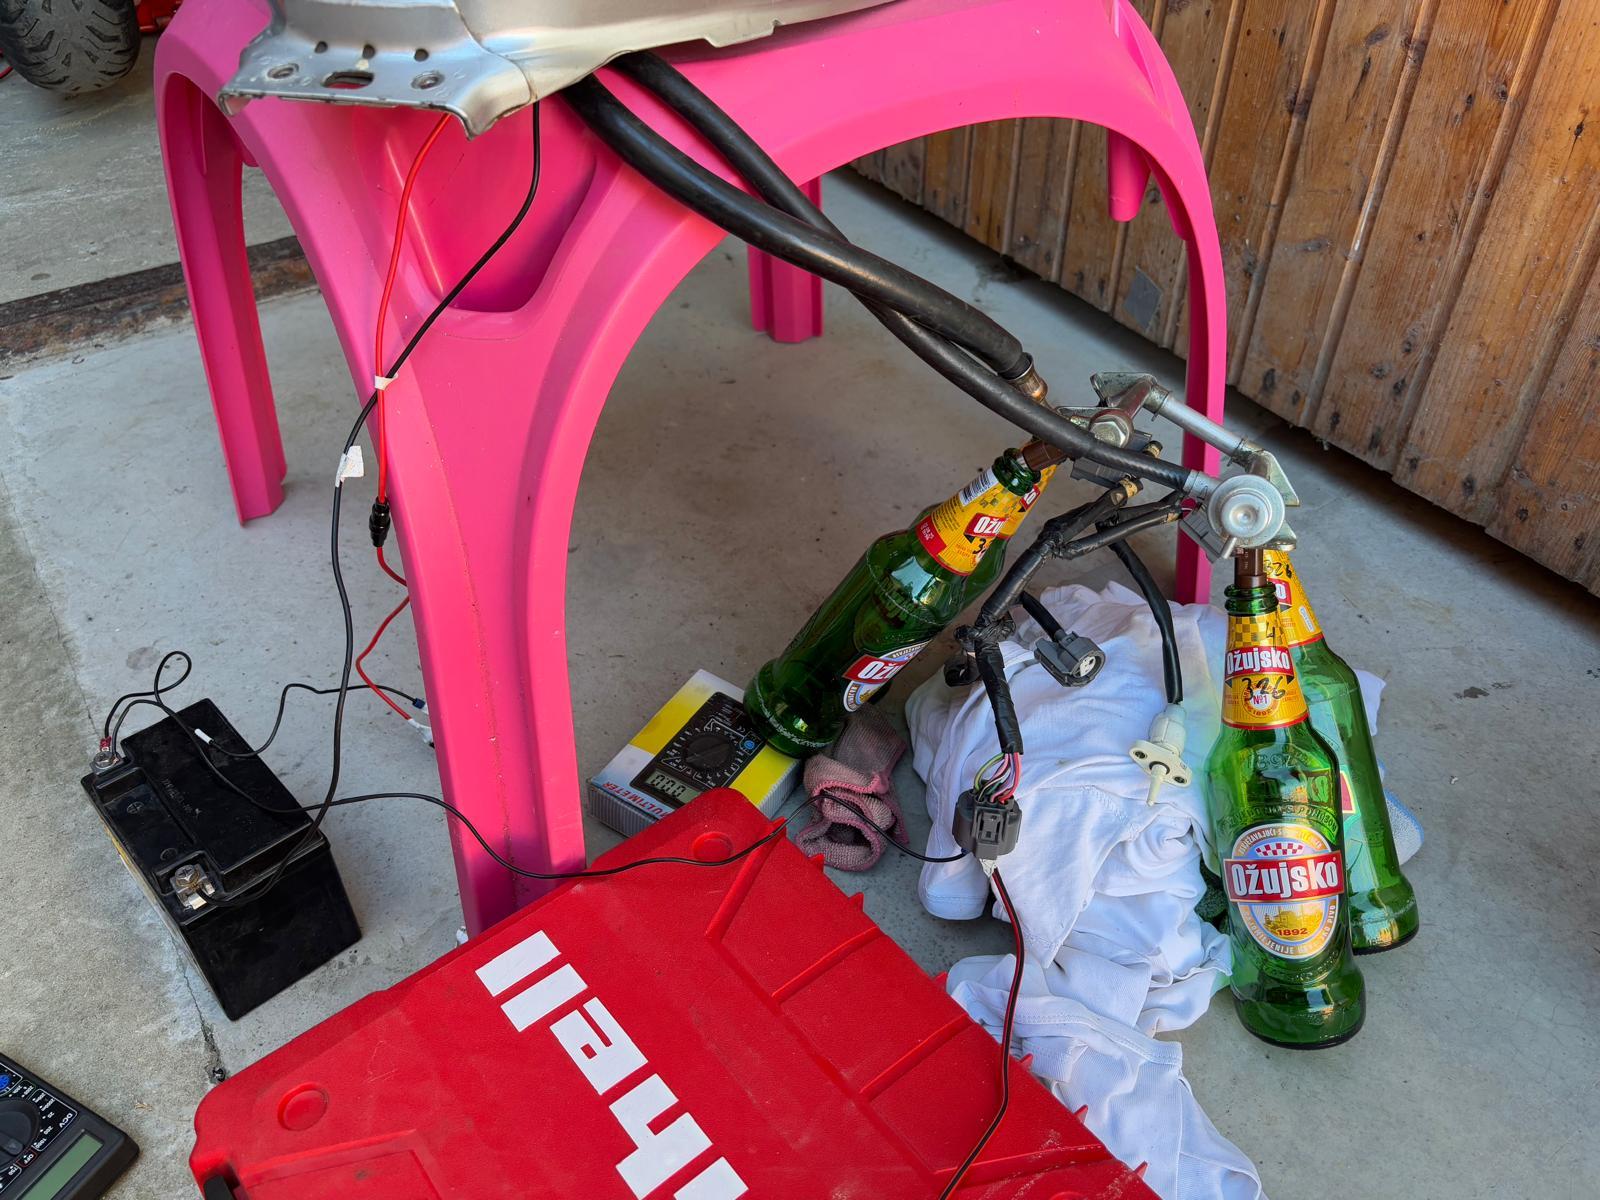
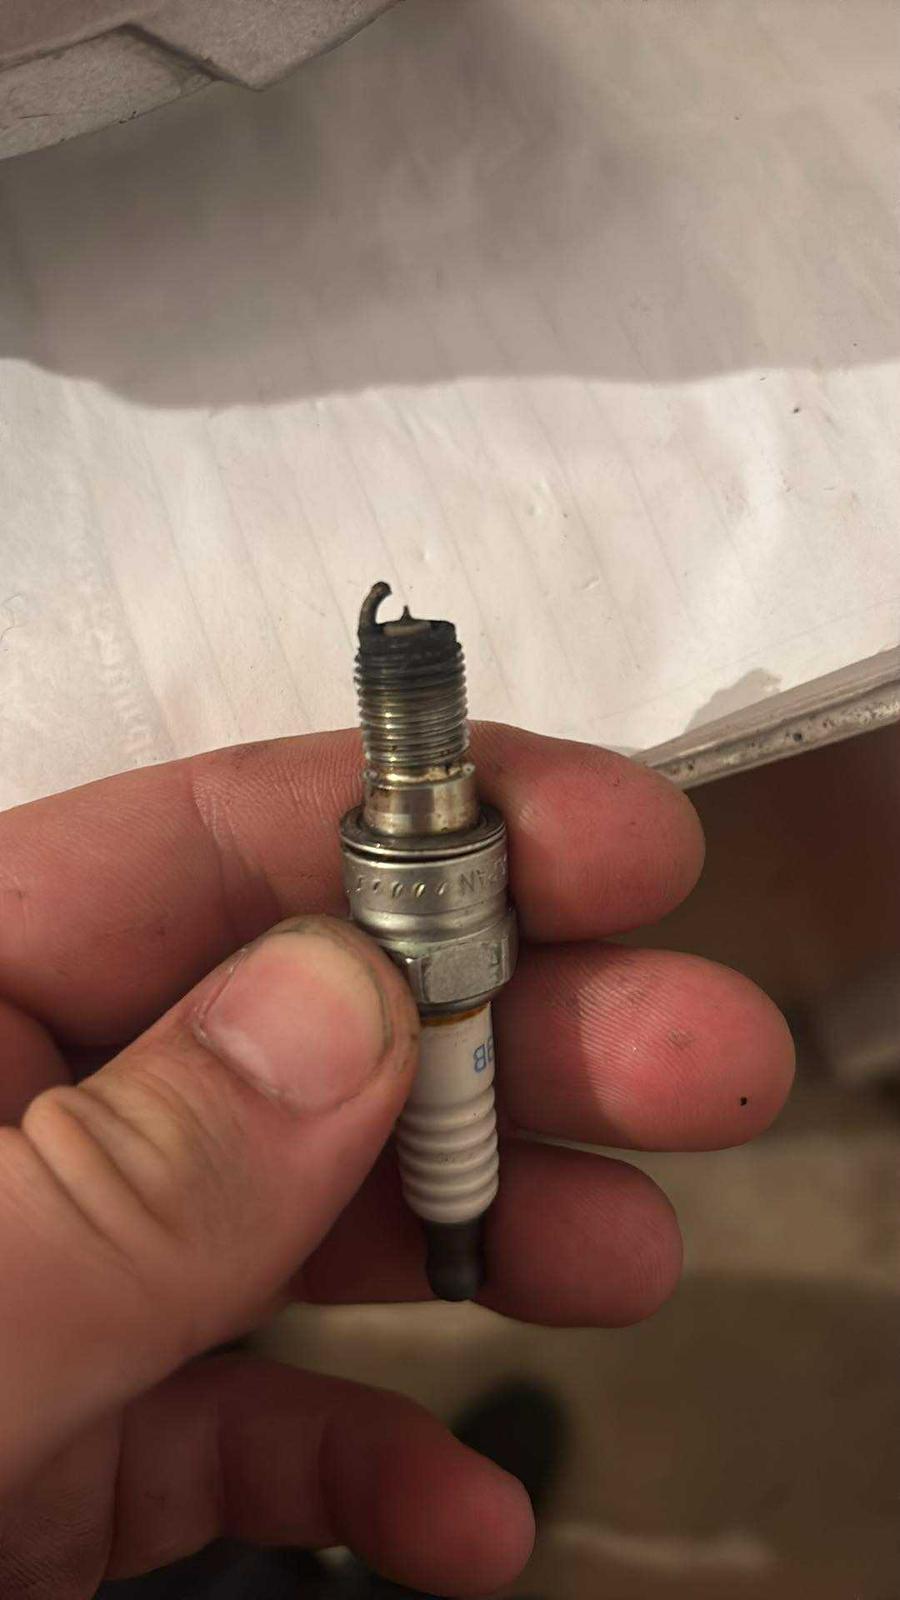
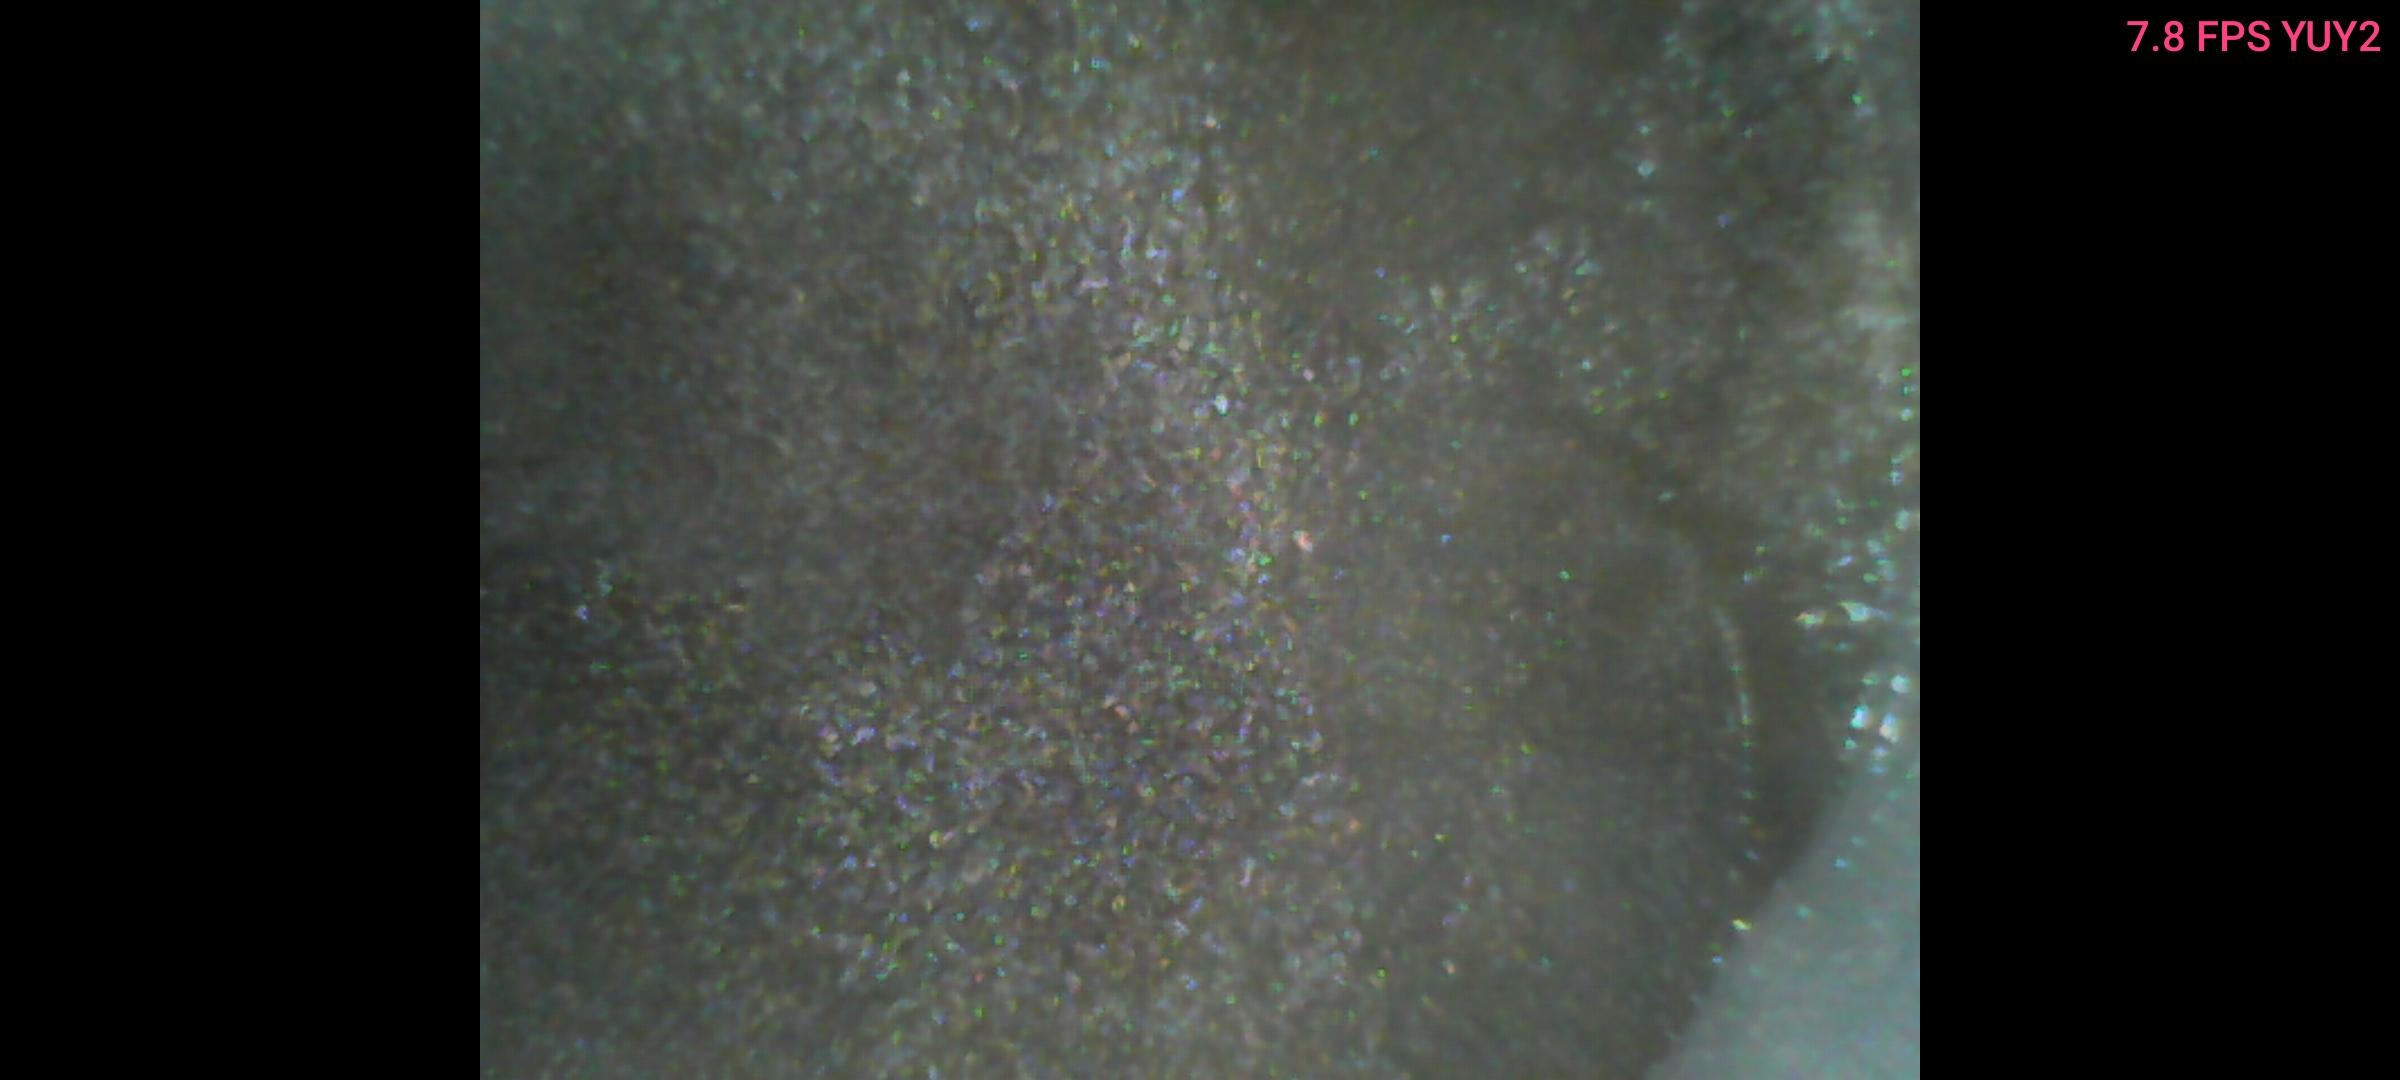
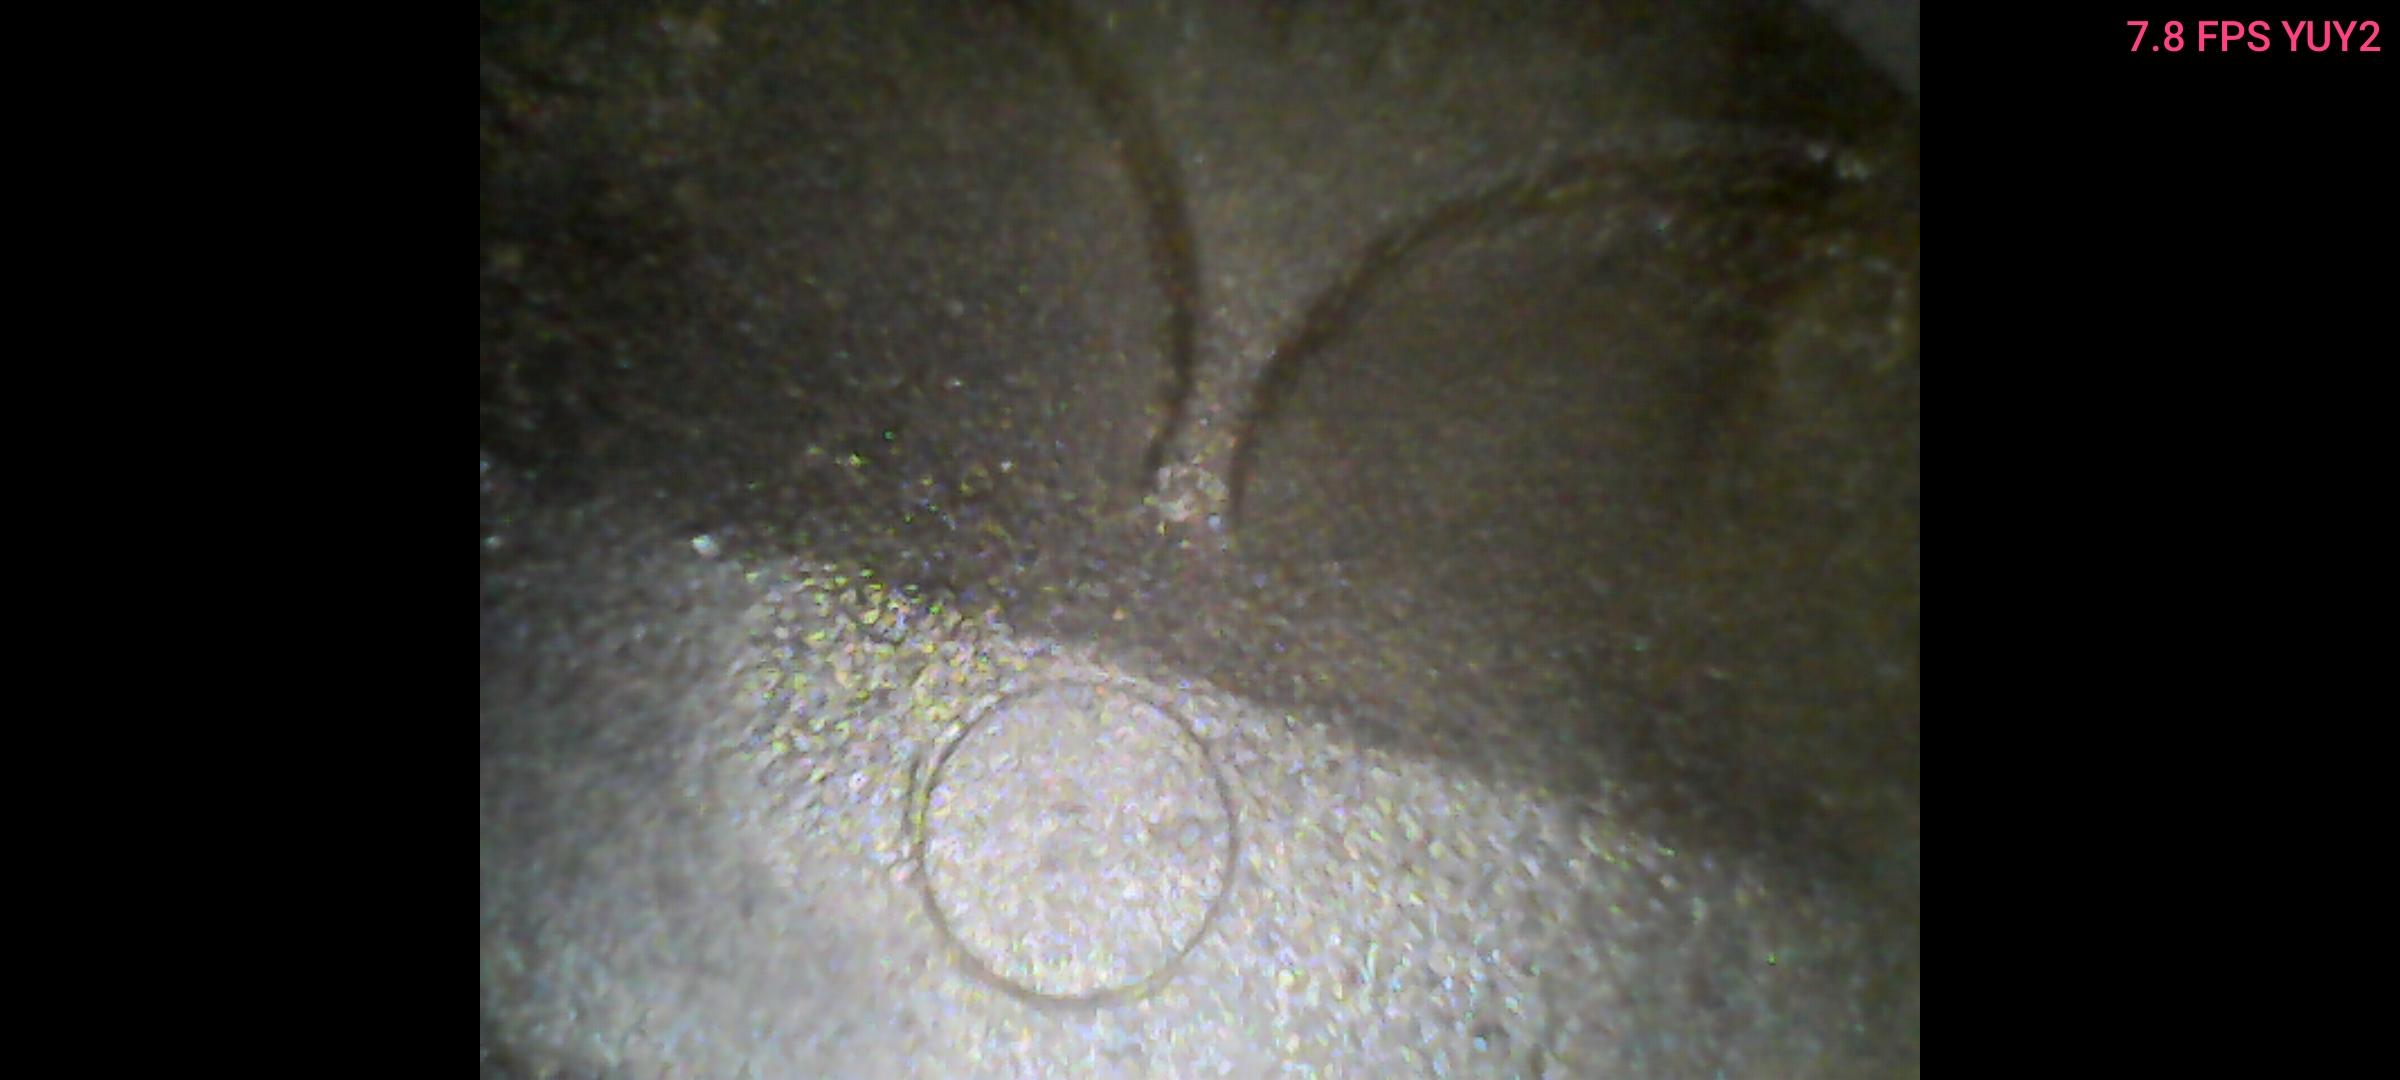
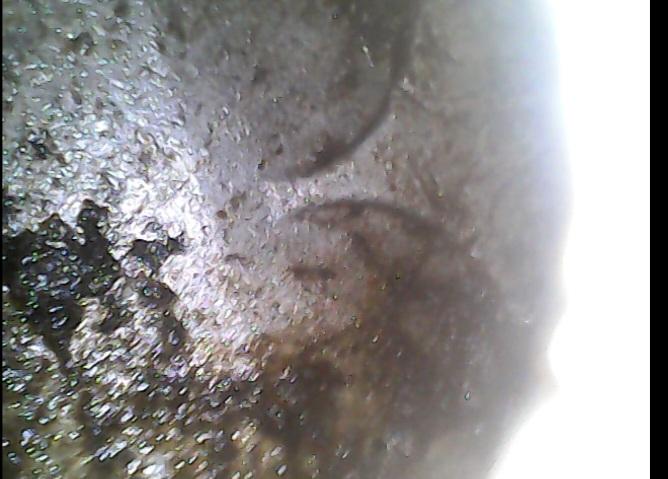
Hi, it's me. The guy with the weirdest issues ever. It's a long story, but has been resolved. Enjoy. I bought the bike for cheap with 57k km, four and a half years ago. I changed the plugs at 72k km. Noticed the plug on no.2 cylinder was white. Assumed it's running lean on that cylinder. Had the injectors ultrasonically cleaned, changed the vacuum hoses and thought it would fix it. It didn't. Continued riding and thinking what else could be wrong. I bought a set of Chinese injectors for testing. No change. Swapped the OEM injectors back. Swapped the injector subharness and the whole electrical harness chasing one other issue. No change to the plugs. Did the valve clearance check and adjustment and starter valve sync. Compression was fine, slightly lower in cylinder 2 but only around 5%, not enough to sound an alarm in my head. I added the Rapid bike racing and wideband lambda sensor for tuning purposes as I upgraded the bike in many ways. Through testing and logging confirmed that he cylinder no2 is not lean. In fact it's pretty much spot on. Fast forward to this spring, I turned the bike on in the garage, let it warm up a bit while I put on the rest of my gear. Garage is not very well lit and I noticed the cylinder no2 header glowing. The picture is overly dramatic as the phone can pick up more infrared light and show it as red compared to our eyes. Still, it was visibly glowing, just not as much as the pics show. I confirmed my observations with an IR thermometer. The cyl no2 header was 100-150C hotter than the cylinder no.4 at all times, even during warmup it heated up much quicker. Took the sparkplugs out again. Much worse than before. This was around 90k km. Went on the hunt again. Swapping coil position, swapping plug position, swapping injector position, put Chinese injectors in again, confirmed the AFR was good by adjusting fueling and moving the wideband sensor from bung to bung, confirmed that the injector pulses were right and as reported by rapidbike software using an oscilloscope. Tested the OEM injector flow rate by making a DIY flow measuring device. Confirmed the flow is identical across all injectors by weighing the amount of fuel sprayed by activating all injectors simultaneously trough a makeshift harness. Couldn't get to the bottom of it. I gave up again, packed it all up and continued riding trough the spring and summer season. I noticed if I hammer on the bike on the highway the oil level drops. I assumed it's evaporation from extreme heat and high oil temp. Also, it's an old engine, closing in on 100k km so I thought a small amount of oil consumption at extreme loads isn't weird. Continued hammering on it. After one very hard ride thought the twisties I used the highway to get back home quicker. Blasted it to top speed and continued hammering at 180-200km/h for 40km. The Fi light turned on, I stopped it blinked the code for crank position sensor. The bike started cutting out briefly at random moments. I disconnected the rapid bike system, the Fi light went away and the bike didn't cut out anymore. Could at least ride safely. The idle dropped however. Felt like it was running on 3 to 3.5 cylinders. Got home, took the sparkplugs out. The no2 sparkplug has melted away. I lowered a boroscope into the cylinders. Piston no2 had tons of carbon deposits. The valve recesses were rounded off by thick deposits, hardly distinguishable. The circular protrusion that was visible on other pistons wasn't visible on piston no2. For reference this is how other cylinders looked. This is where I finally found the source of the issue. It all clicked. The slightly lower compression is a sign of cylinder and/or ring wear. It lets oil into the cylinder, mostly noticable at prolonged high loads. It accumulates deposits. They increase compression a lot, which leads to premature ignition and extreme temps. The headers glow, the sparkplug goes white and eventually melts. I bought PROTEC P4650 CX Carbon X combustion chamber cleaner and went to work. Took 10-15 cycles of cleaning but eventually it cleaned up. I helped break up the deposits by inserting a bottle cleaning brush in the cylinder and spinning it around. It really helped a lot. Here's a pic during cleaning process. In the end it was fully clean, just a shiny piston crown. I checked the valves. The extreme heat wore the valve seat on the exhaust side. I adjusted the normal exhaust valve on cylinder no2. Fortunately the compression stayed the same, the valve itself didn't burn. Other valves were fine after 25k km. With the cleaning done, oil changed and new sparkplugs in it fired right up. No Fi light, no cutting, idle restored, headers didn't glow and IR thermometer confirmed the temps are similar between all cylinders. Took it for a test ride, everything was fine. Connected back the Rapid bike system once I confirmed everything works. Wow, Rapid bike really makes a huge difference. Took it for a second test ride. Made sure to blast it on the highway. Took the sparkplugs out after 70km of mixed riding and a 30km highway blast. Sparkplug was brown-ish like it should be. Lowered the boroscope in the cylinder no2. Deposits already started forming. The circle on the piston crown wasn't visible. The deposits form on the center first. It is what it is. The engine runs great again. I'll use the fuel additive every now and then to help clean the deposits. I think the additive will work well on fresh deposits. Old, dry and crusty deposits need harsh chemical cleaning and mechanical agitation. Fresh, wet deposits might clean up with only the fuel additive. If needed I'll buy another set of Protec K1+K2 combustion chamber cleaner and clean it again in a year or two. Engine rebuild is prohibitively expensive, it's better to buy a used engine. If I find one for a good price I'll buy it. For now this engine will do the job.

-
Sometimes you just get a big surprise Watching this YouTube Video of 19 oddball motorcycle's left my mouth open My old TRX 850! Not a video I have posted through, a owner after me. But you can't say it's not my old TRX, there ain't 2 in yellow whit those front turn signals, twin headlights and gpz600 mirrors 😁
-
- Yesterday
-
Yellow Peril build thread!!?😛
-
Not the usual smoke/mirrors/AI bot/photo shop/Nigerian scammer drivel. Fingers crossed also.
-
It's a Christmas miracle. Looking forward to reading about your adventures on the yellow peril.
-
 Swampdonkey joined the community
 -
Yesterday on YouTube HRC MotoGP released an audio clip of: "The first sound of new era" "The 850cc MotoGP is here" Well, it's new a V4
-
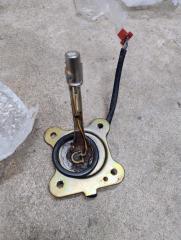
A Christmas present for the Transalp has arrived Will look nice on it after it's painted in 1987 white color 👌
-
Thanks for sharing Fabio. There's nothing like a little quality time on a motorcycle to help sort out one's thoughts and emotions. It is my preferred type of therapy.
- 1 reply
-
- 1
-

-
Hi Sirbike! I remember the name from the ST1300 site and also met you when you stopped out to help me with some ST questions. Cool to see you here! I have since sold the ST1300 and gotten a 2014 Valkyrie and 2010 VFR1200F. Jim
-

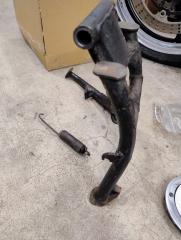
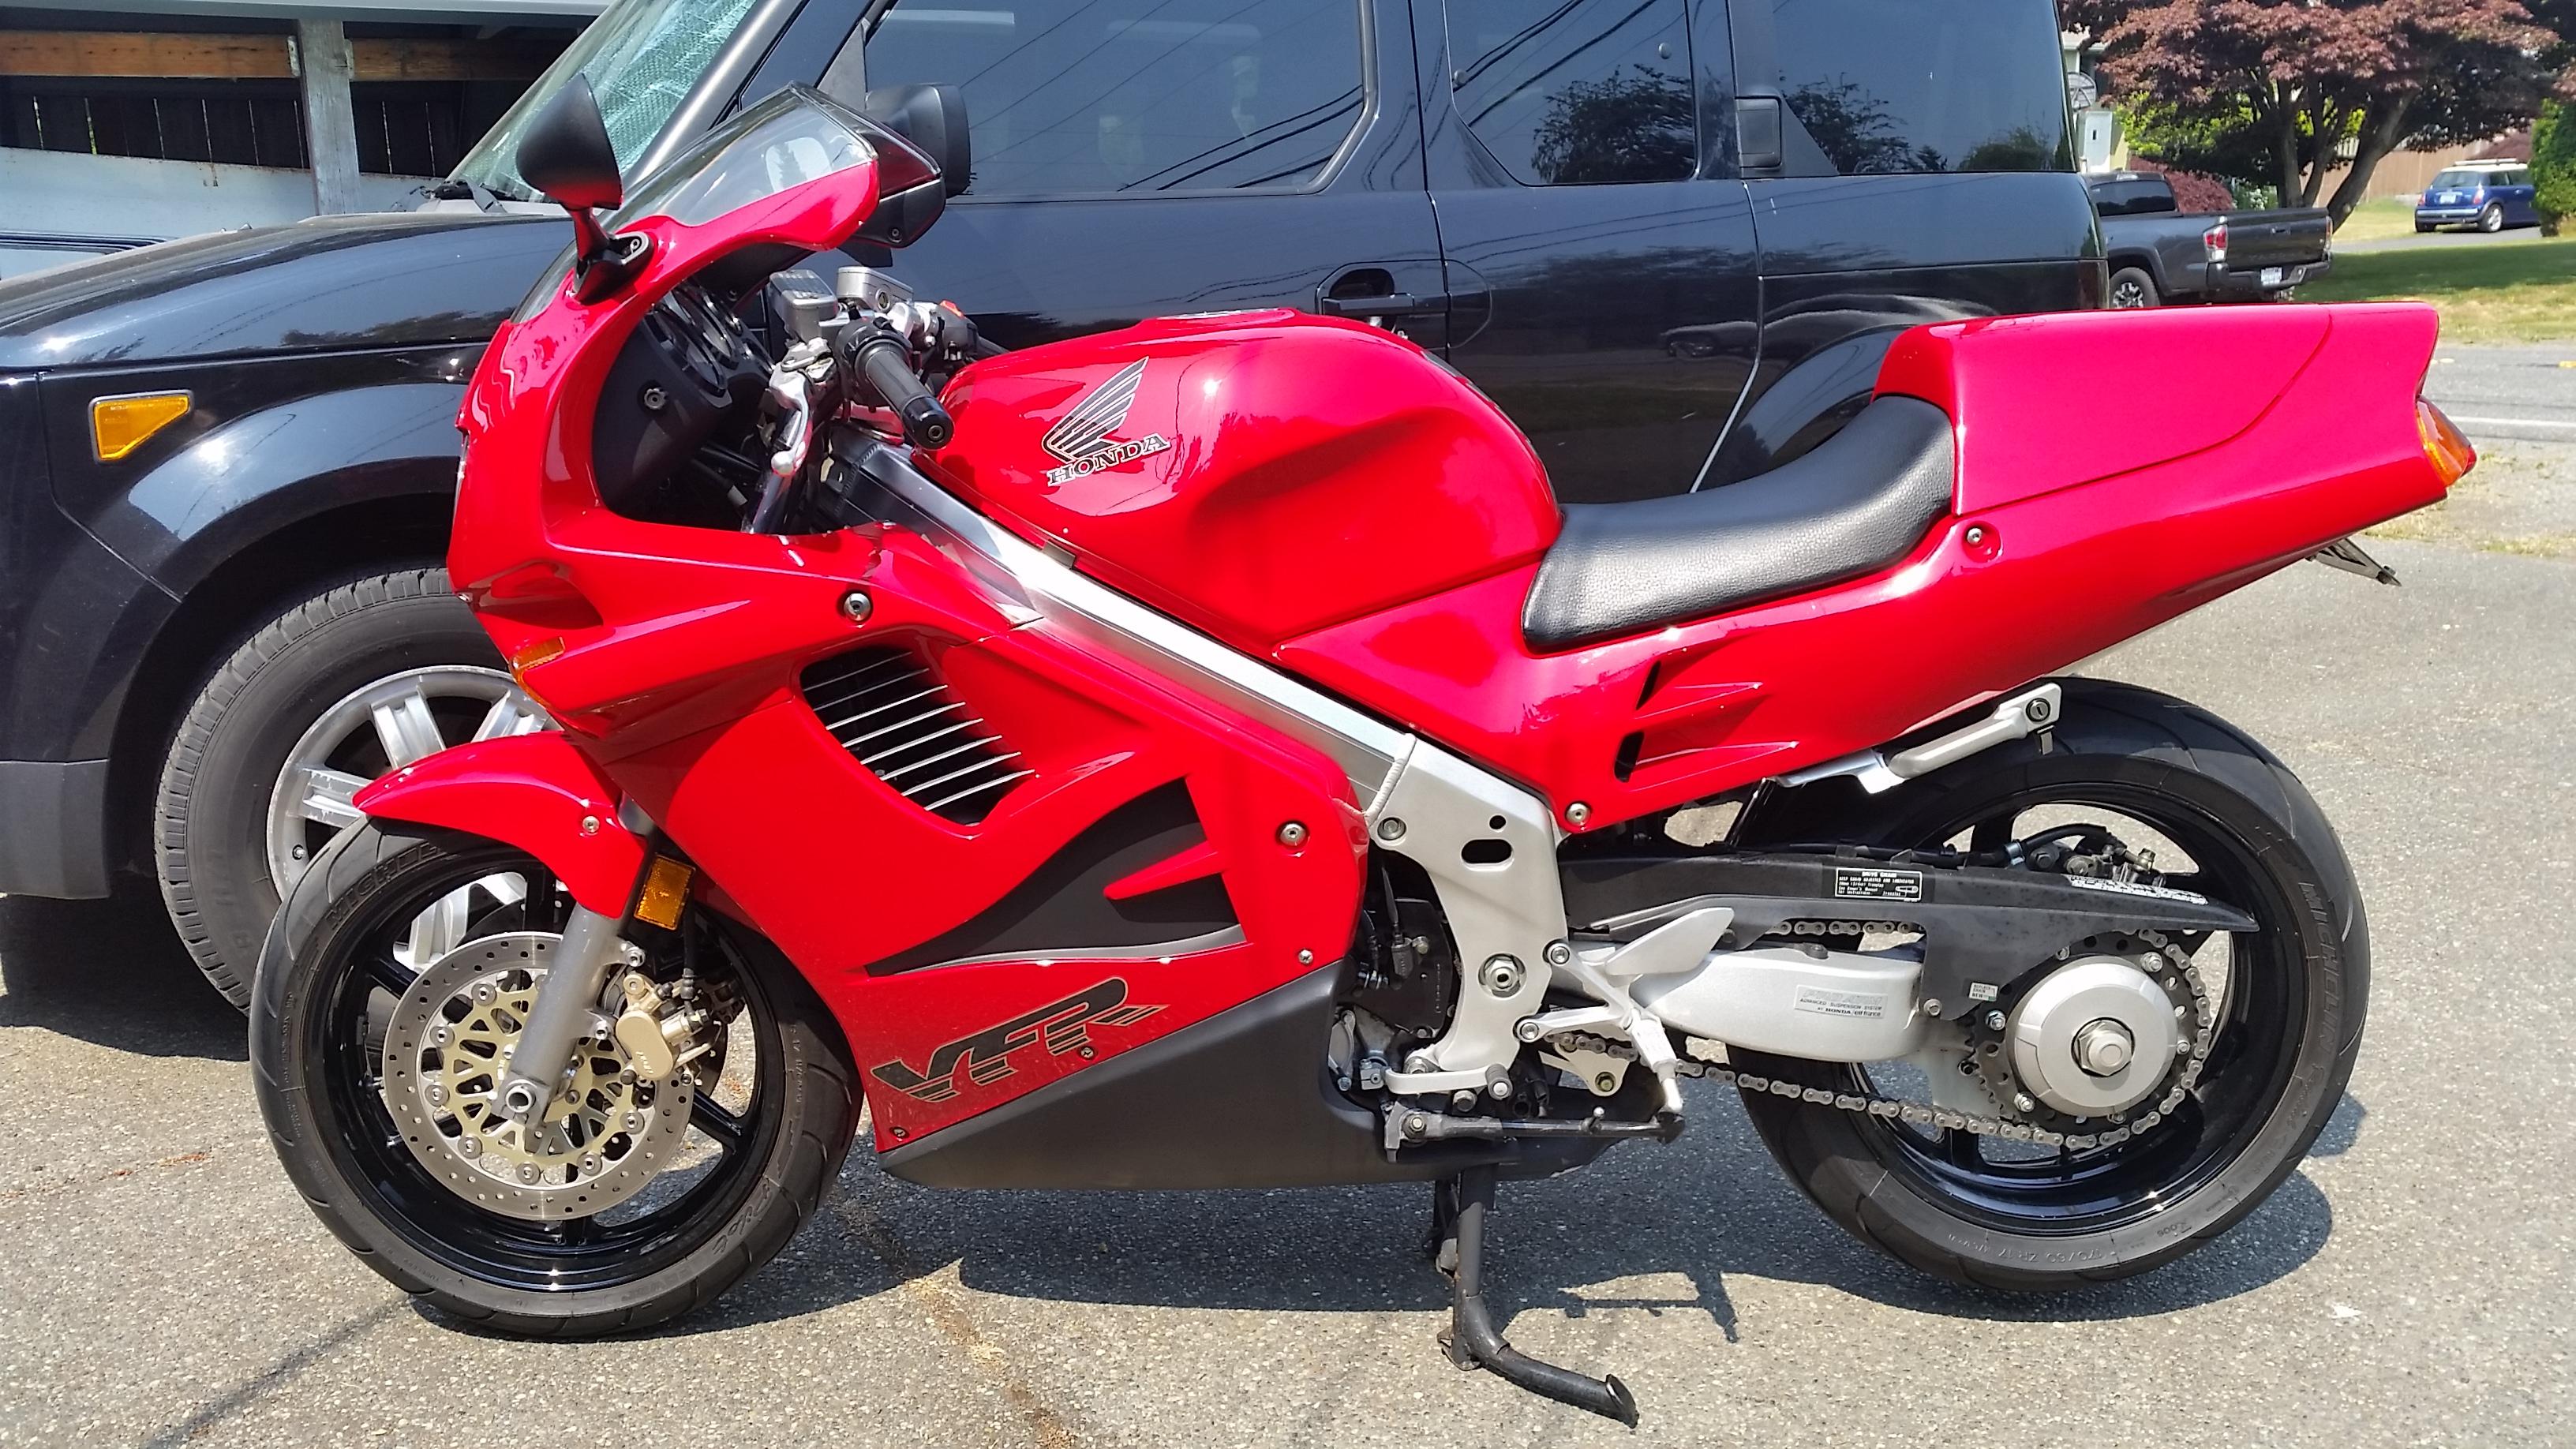
Has my VFR750 been lowered at the rear ?
Captain 80s replied to Smarty750's question in Modification Questions
My RC26 build, I initially used CBR triples. Pretty much maxed out what the swingarm could take as far as rear ride height and has short CBR forks. Also zero sign of instability, at any speed. Frequently got the front end air-born at near triple digits on a particular stretch of road. No drama at all when the tire came back down. I switched to 41mm VFR triples, but not because of any dislike of the handling. Only because the lower triple was designed to interact properly with the frame stops. The bike got "livelier" at low/moderate speeds with the VFR triples. Still rock solid at any speed.
-
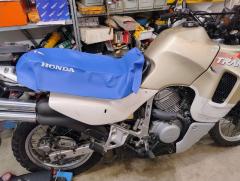
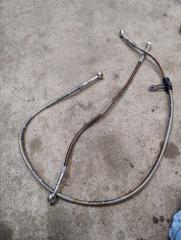
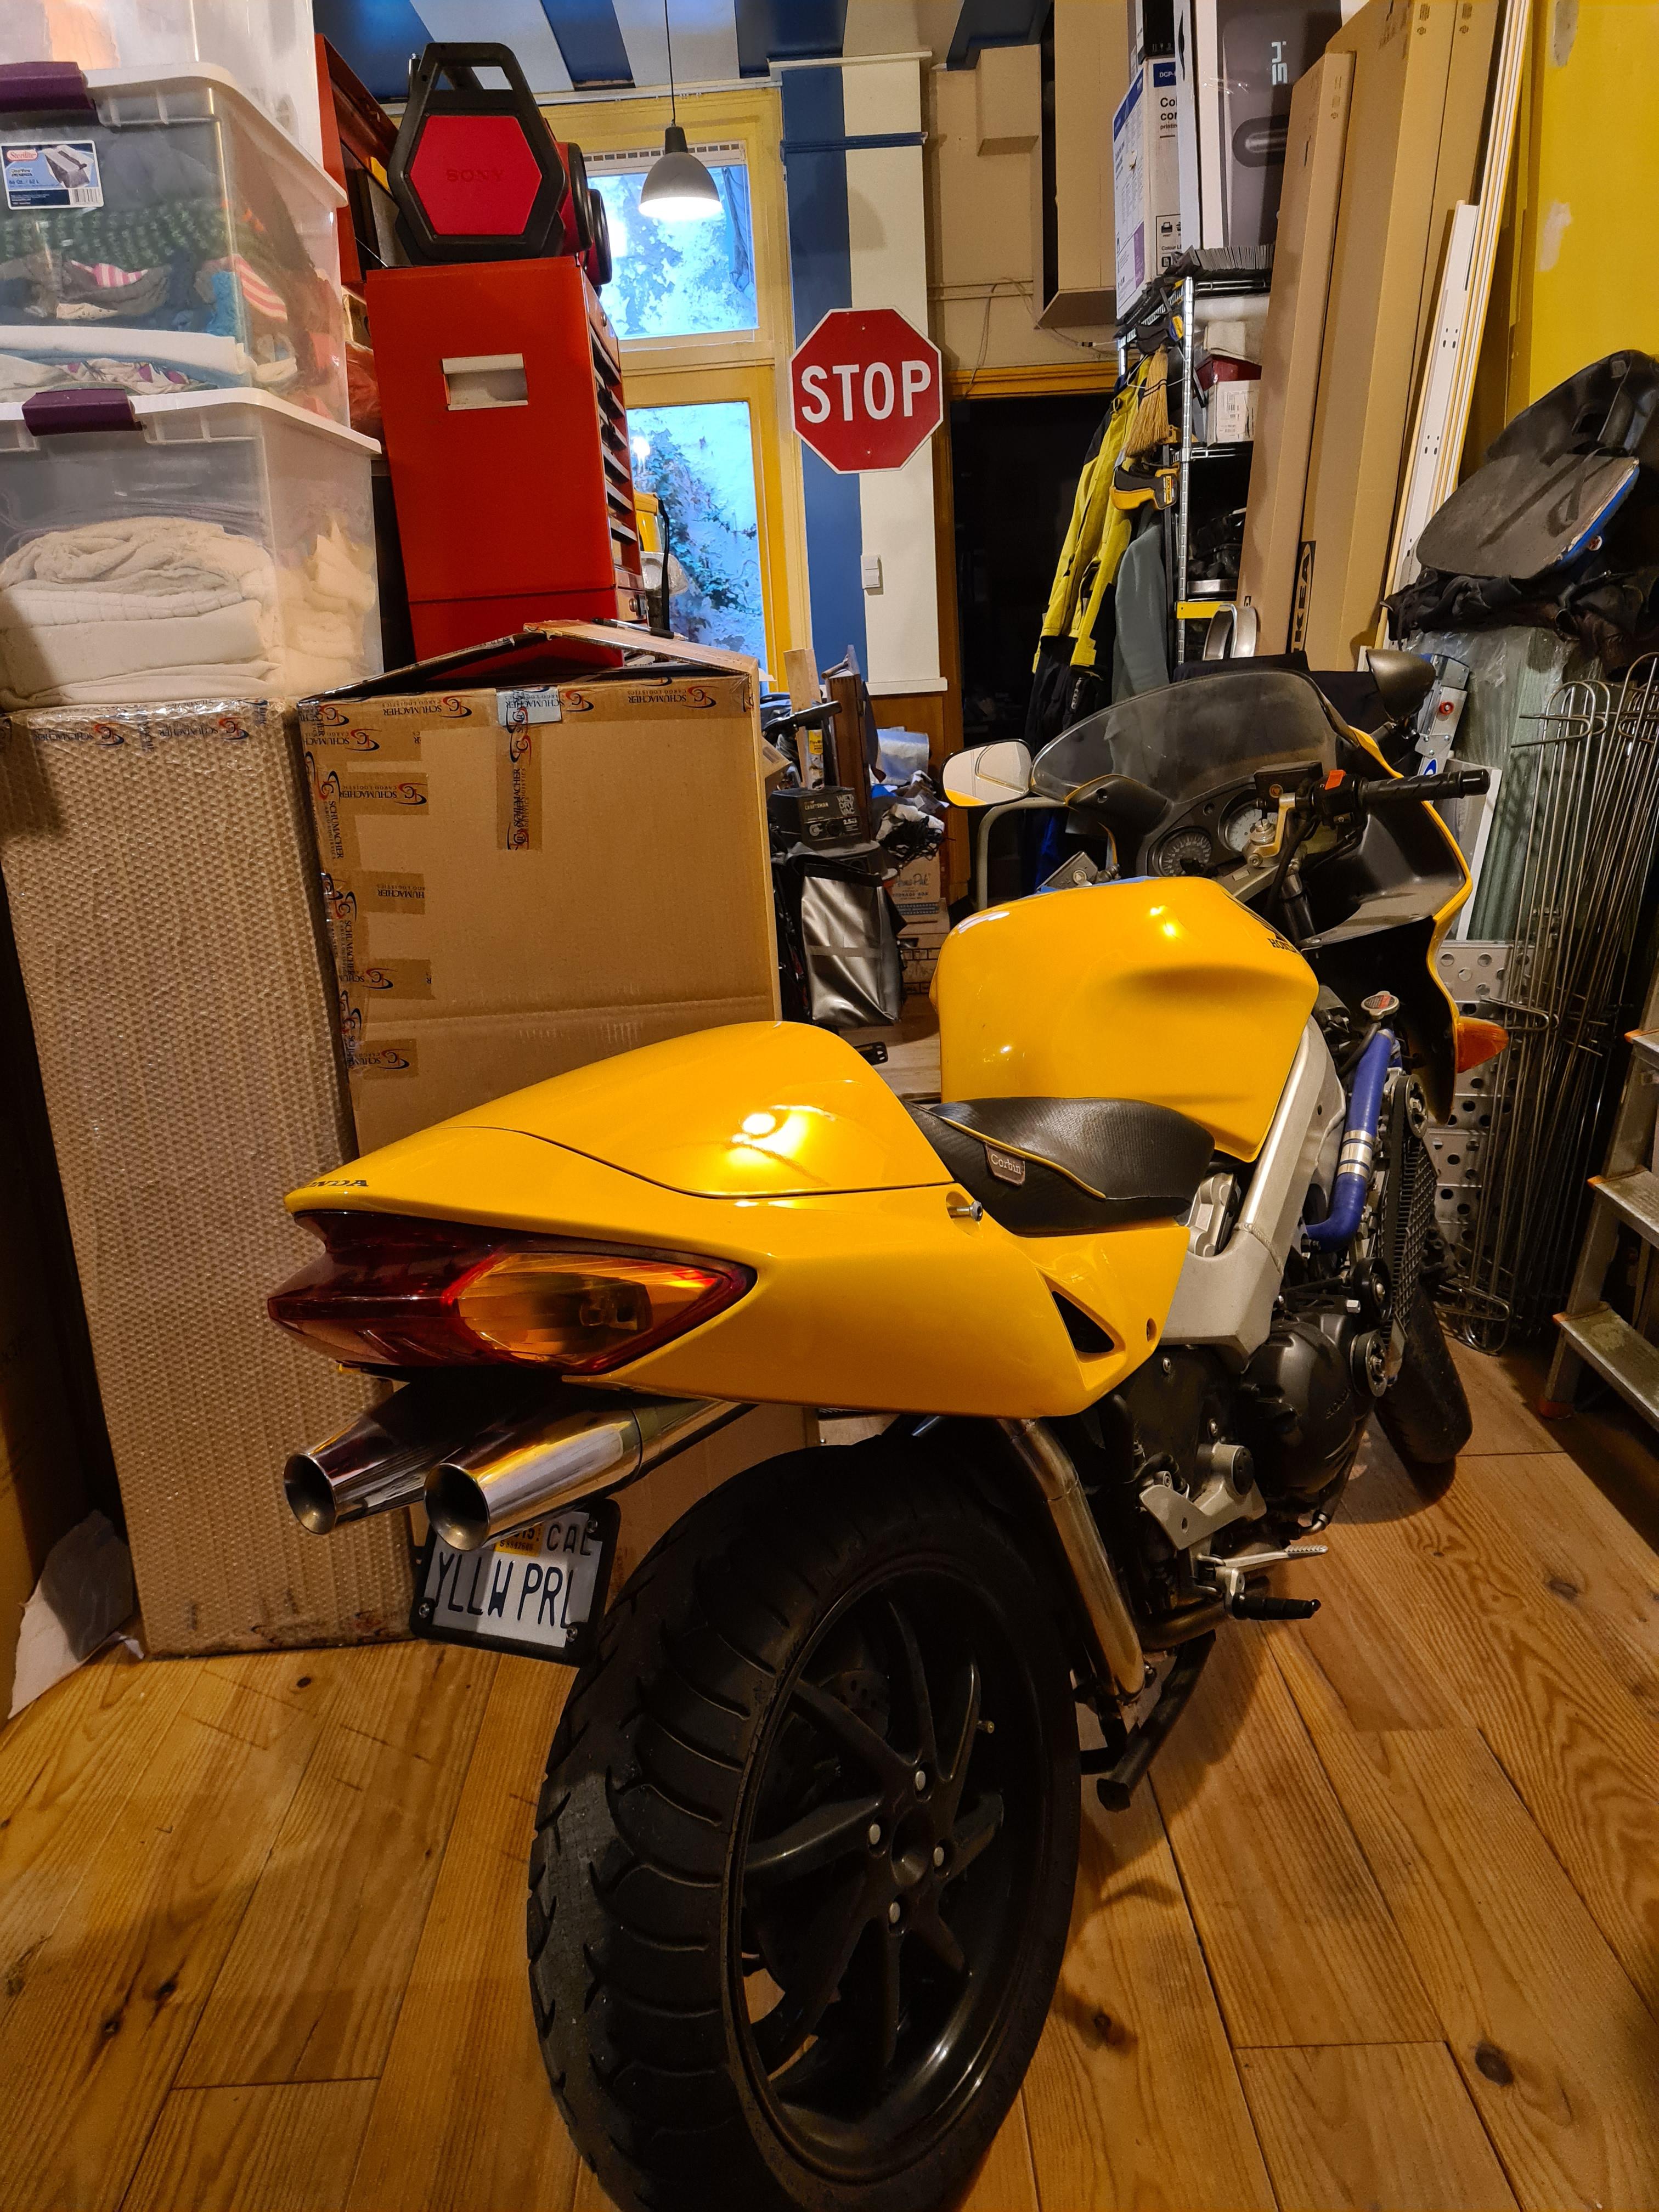
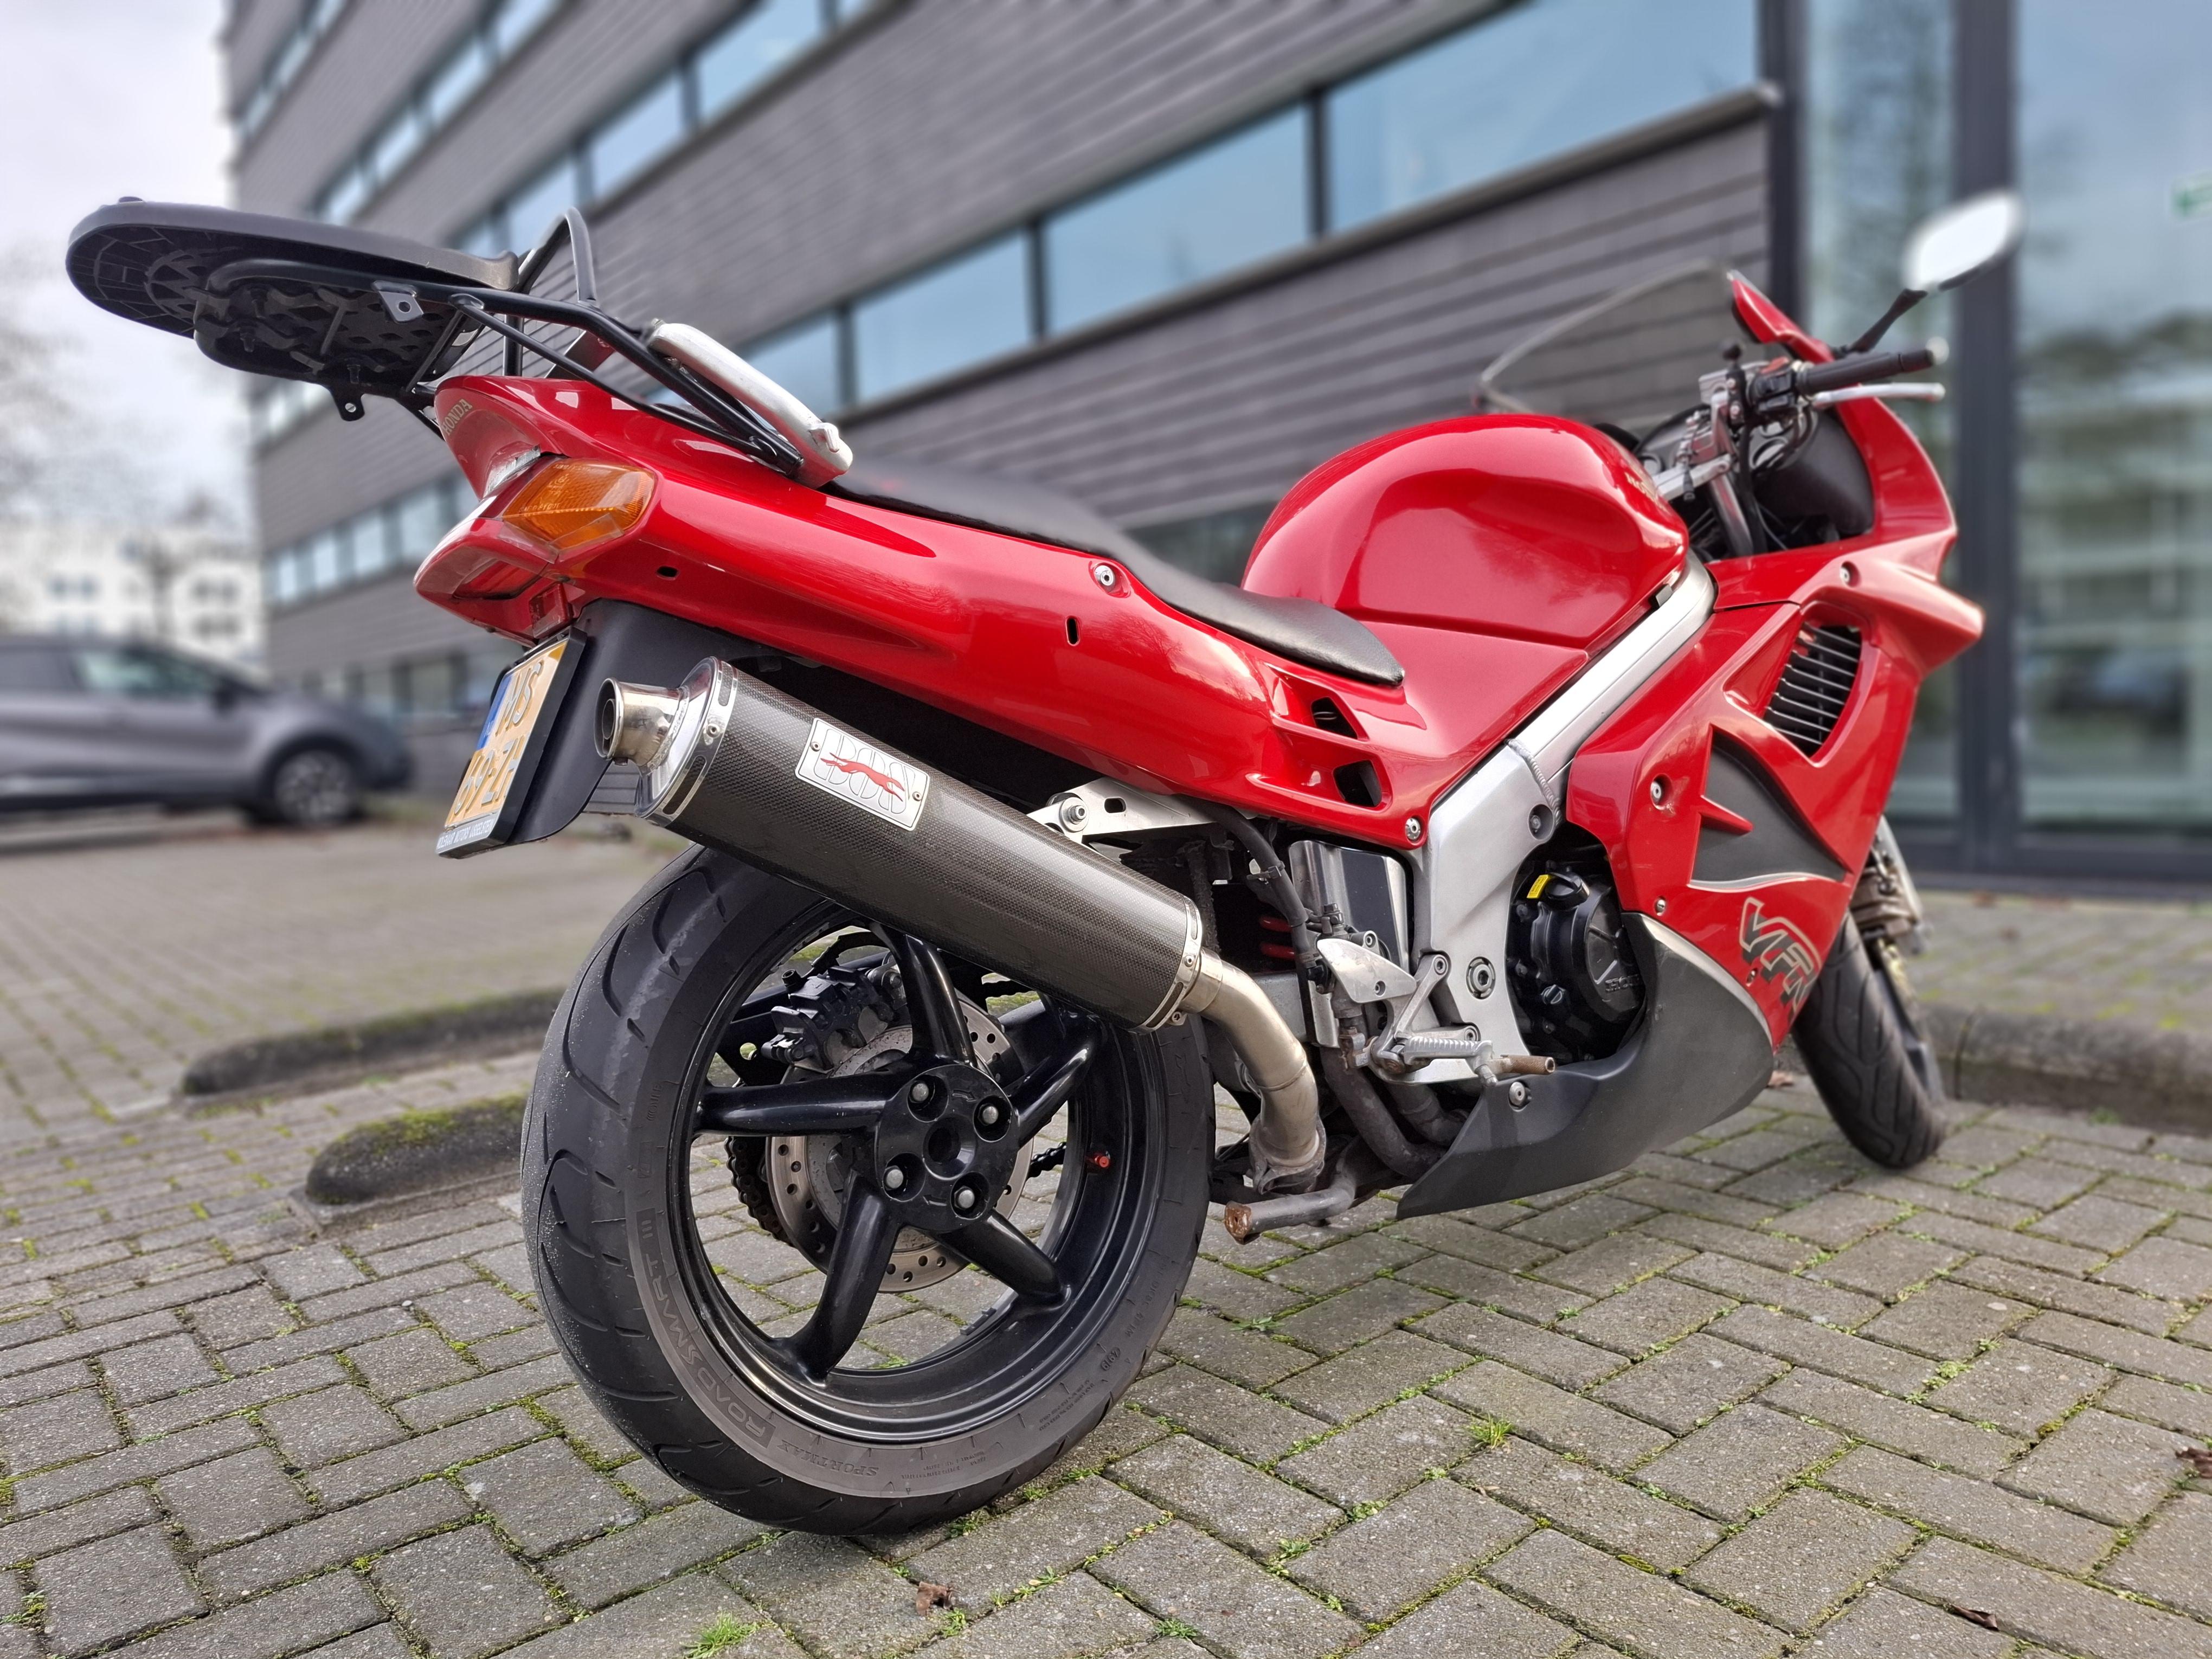
Santa (or is that Sinterklaas?) came early this year! After over a year in transit and storage (and importing company hassles), my yellow bike is finally in its new home in the Netherlands. I hope the change in weather isn't too much of a shock for the old girl... As this is the only bike I have here, and it's now officially winter, I think I will take this opportunity to finish the brake and suspension upgrades. It's already cleared customs, so inspection and registration in NL can probably wait for a few months. I have an SP1 front end (with a matching Pearl Yellow mudguard from some sort of CBR900RR, I believe) and will do the same de-linking and brake-line-through-the-swing-arm I did last year on the blue bike in London. I'll also swap the Compufire reg/rec (don't ask) for a proper Shindengen SH847 and finally trim the RHS fairing to clear the supercharger belt. However, I've noticed that the tires have great tread...but have a DOT code from 2008! Ciao, JZH
-
 Shaun01 joined the community
 -

Has my VFR750 been lowered at the rear ?
JZH replied to Smarty750's question in Modification Questions
Might have to do with the fact that the VFRs (RC36 and RC46, anyway) all have a 40mm fork offset to start with, whereas the CBR900 and VTR1000 have 30mm offset. (VFR1200 splits the difference at 35mm.) Thus, raising the rear of a typical VFR nudges it towards/into sport bike territory--without straying into the steering-damper zone... Ciao, JZH -
Oh... I guess it could have fallen into the wrong box of parts, lol. (Better to learn that now than when I'm all set to install it in my 5th gen!) Cheers, JZH
-
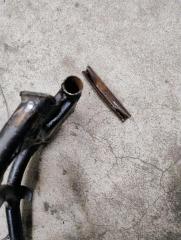
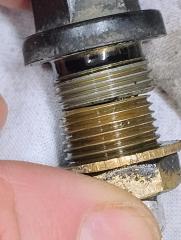
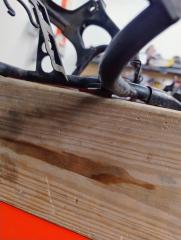
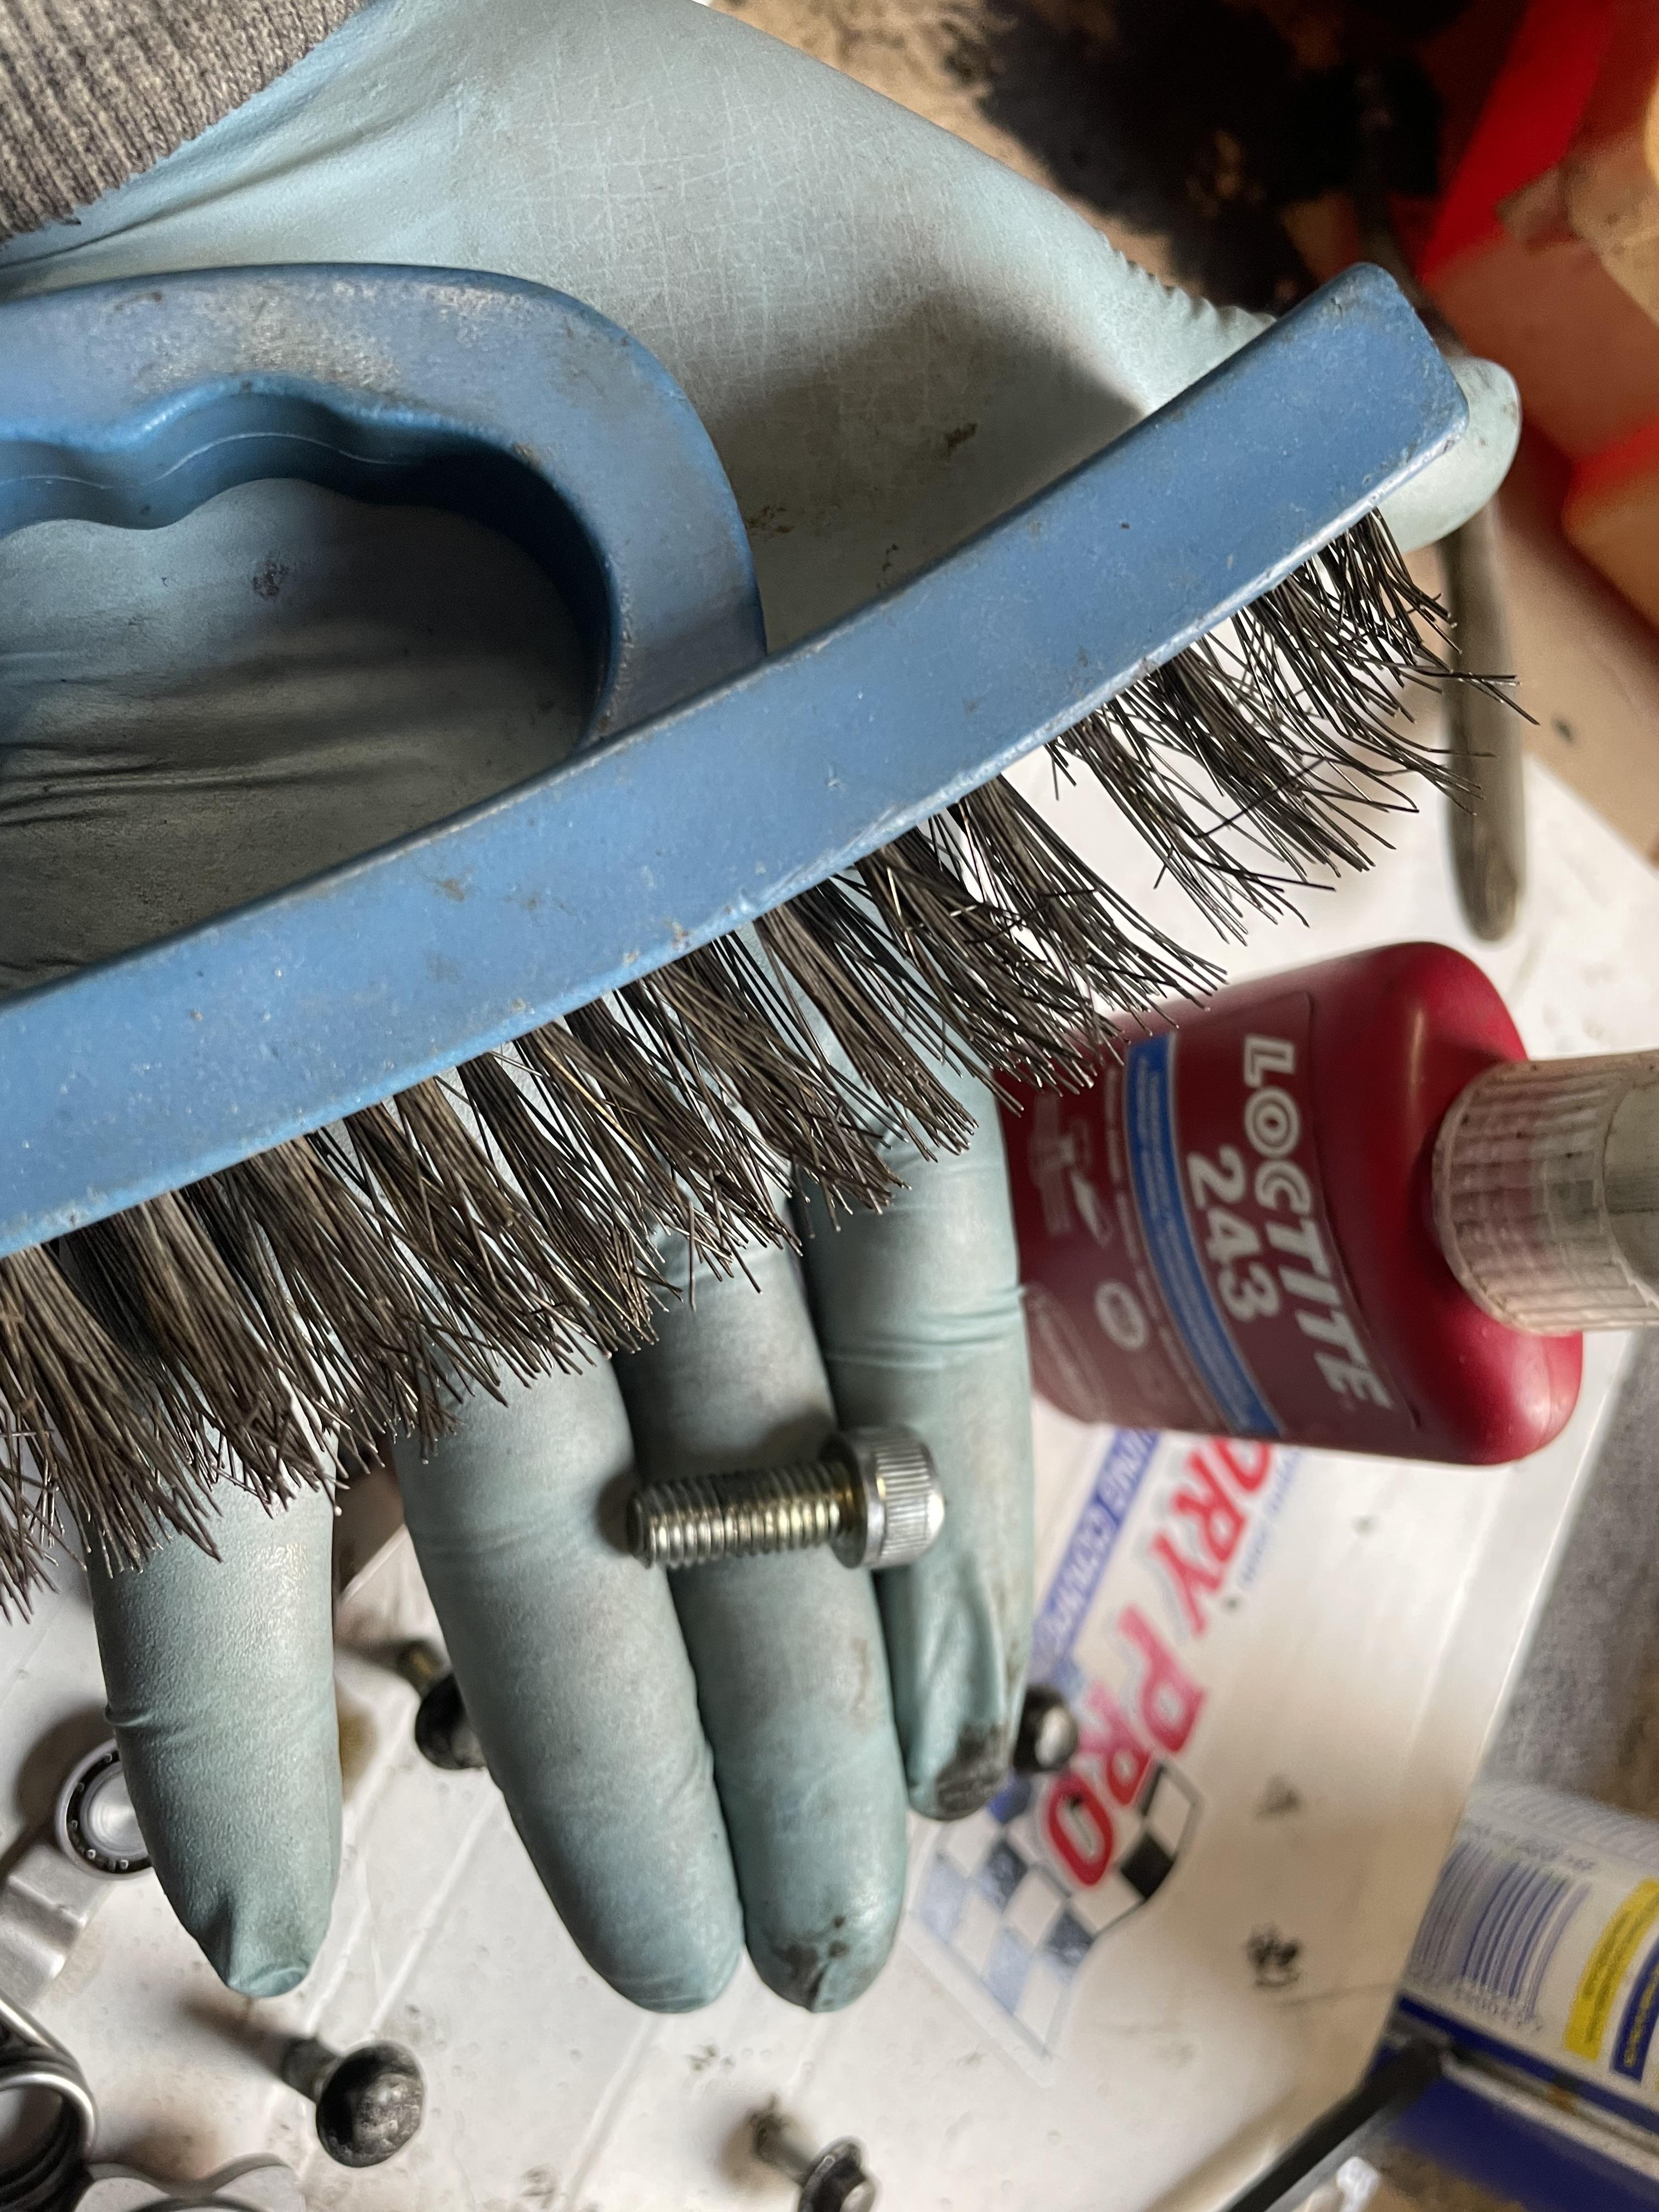
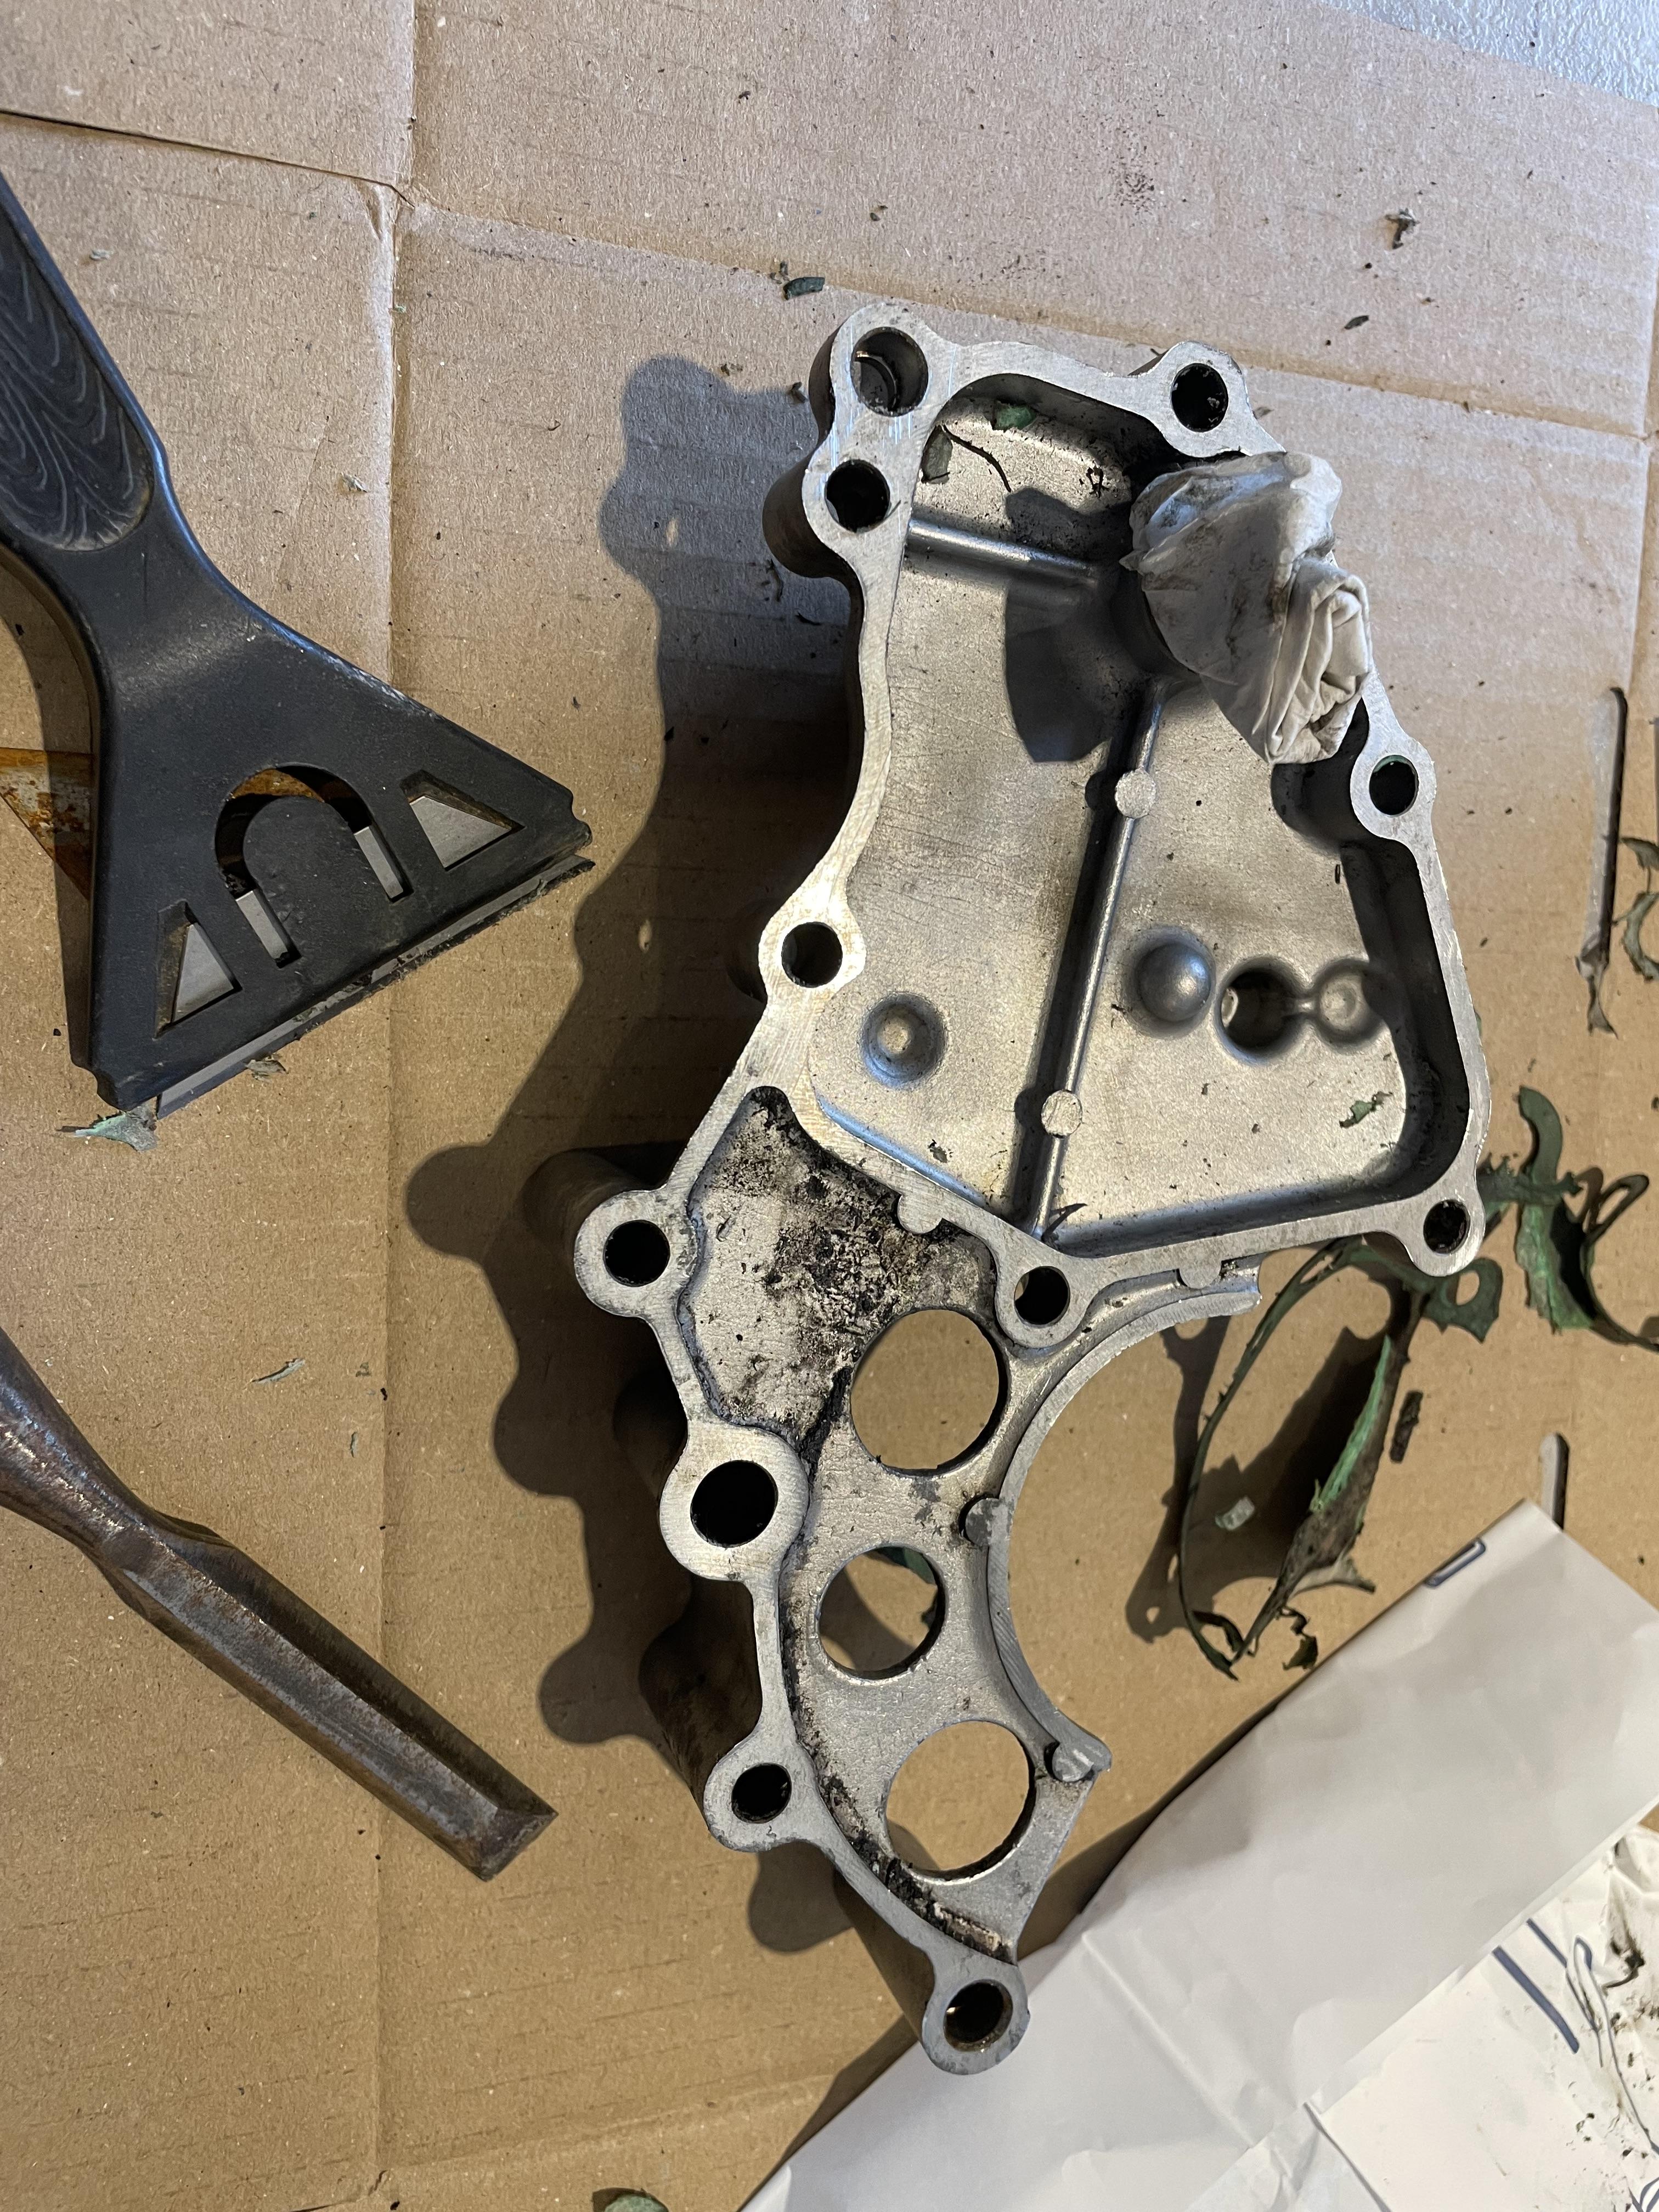
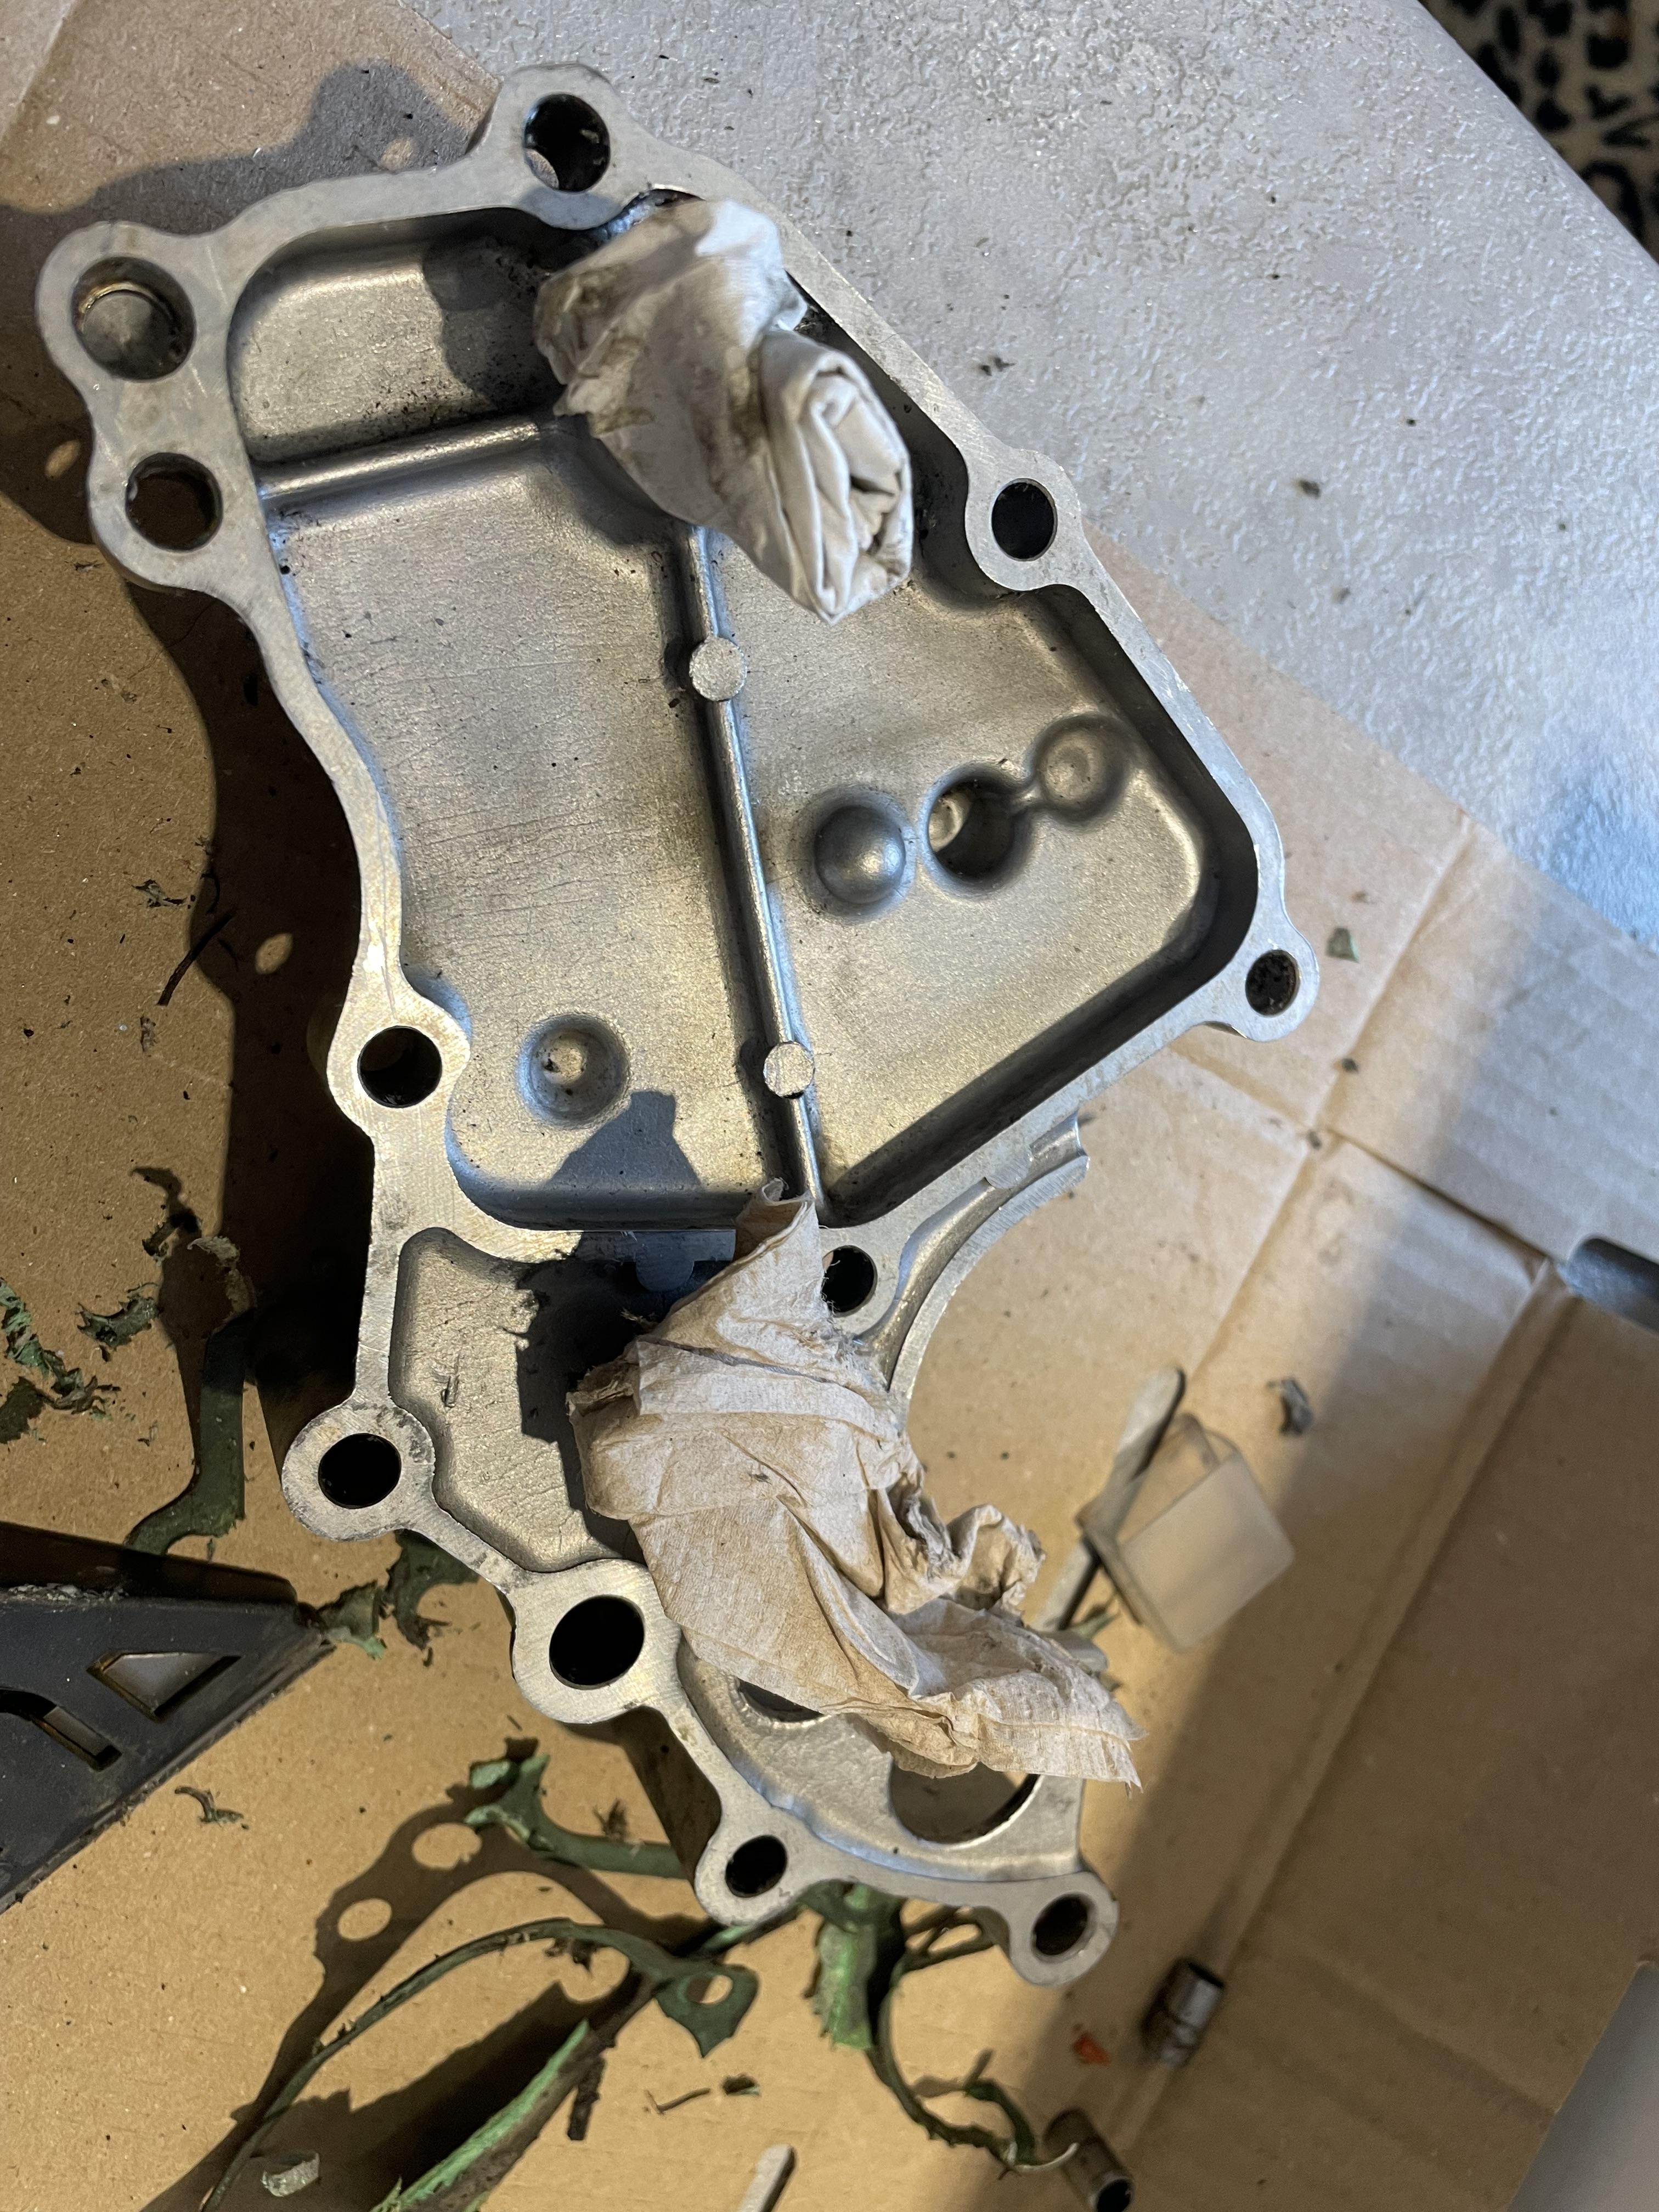
Few things to say: Stainless bolts into aluminum is a big no-no. Look up galvanic corrosion. You can try coating them in some kind of anti-sieze, but my experience is that doesn't work all that well on stuff that doesn't get dis/re-assembled on a regular basis. Screw extractors don't work all that well on small, soft, fused stainless fasteners. You don't want to end up in reverse drill bit Heli-Coil land. I have some hard plastic wedges for popping covers off without gouging them. They work well, and are dirt cheap so easily replaced when they fail. Wood works well too in a pinch. A chisel X-Acto blade works great for scraping gaskets, and is more forgiving than a hardened scraper on aluminum. Clean the crud off before you start work so you don't become a human rag. Other than that looks great!
- Last week
-
Very informative write up.👍
-
And that bike, if wrapped in VFR style bodywork with suitable sport touring ergos could be the thing we'd all hoped for; all day comfort, sporting intent, less mass and more power and torque. We will see.....
-
I saw this story and ran here to see if anyone commented on it. I’d love this to be true but Honda is definitely releasing a V3 with an electric supercharger next year. Why would they also go for a V4?
-
.thumb.jpg.6b9488d9849fb7037caa4c17228db2ab.jpg)
VF500F2 Aka MBD Incubation Period At Least 52 Years
Dutchy replied to Dutchy's topic in Earlier VFRs
Quiet in the office at 07:15 Still a looker 31 years on..
-
 markovitch joined the community
 -
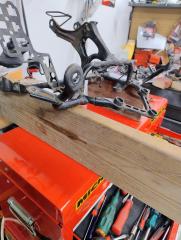
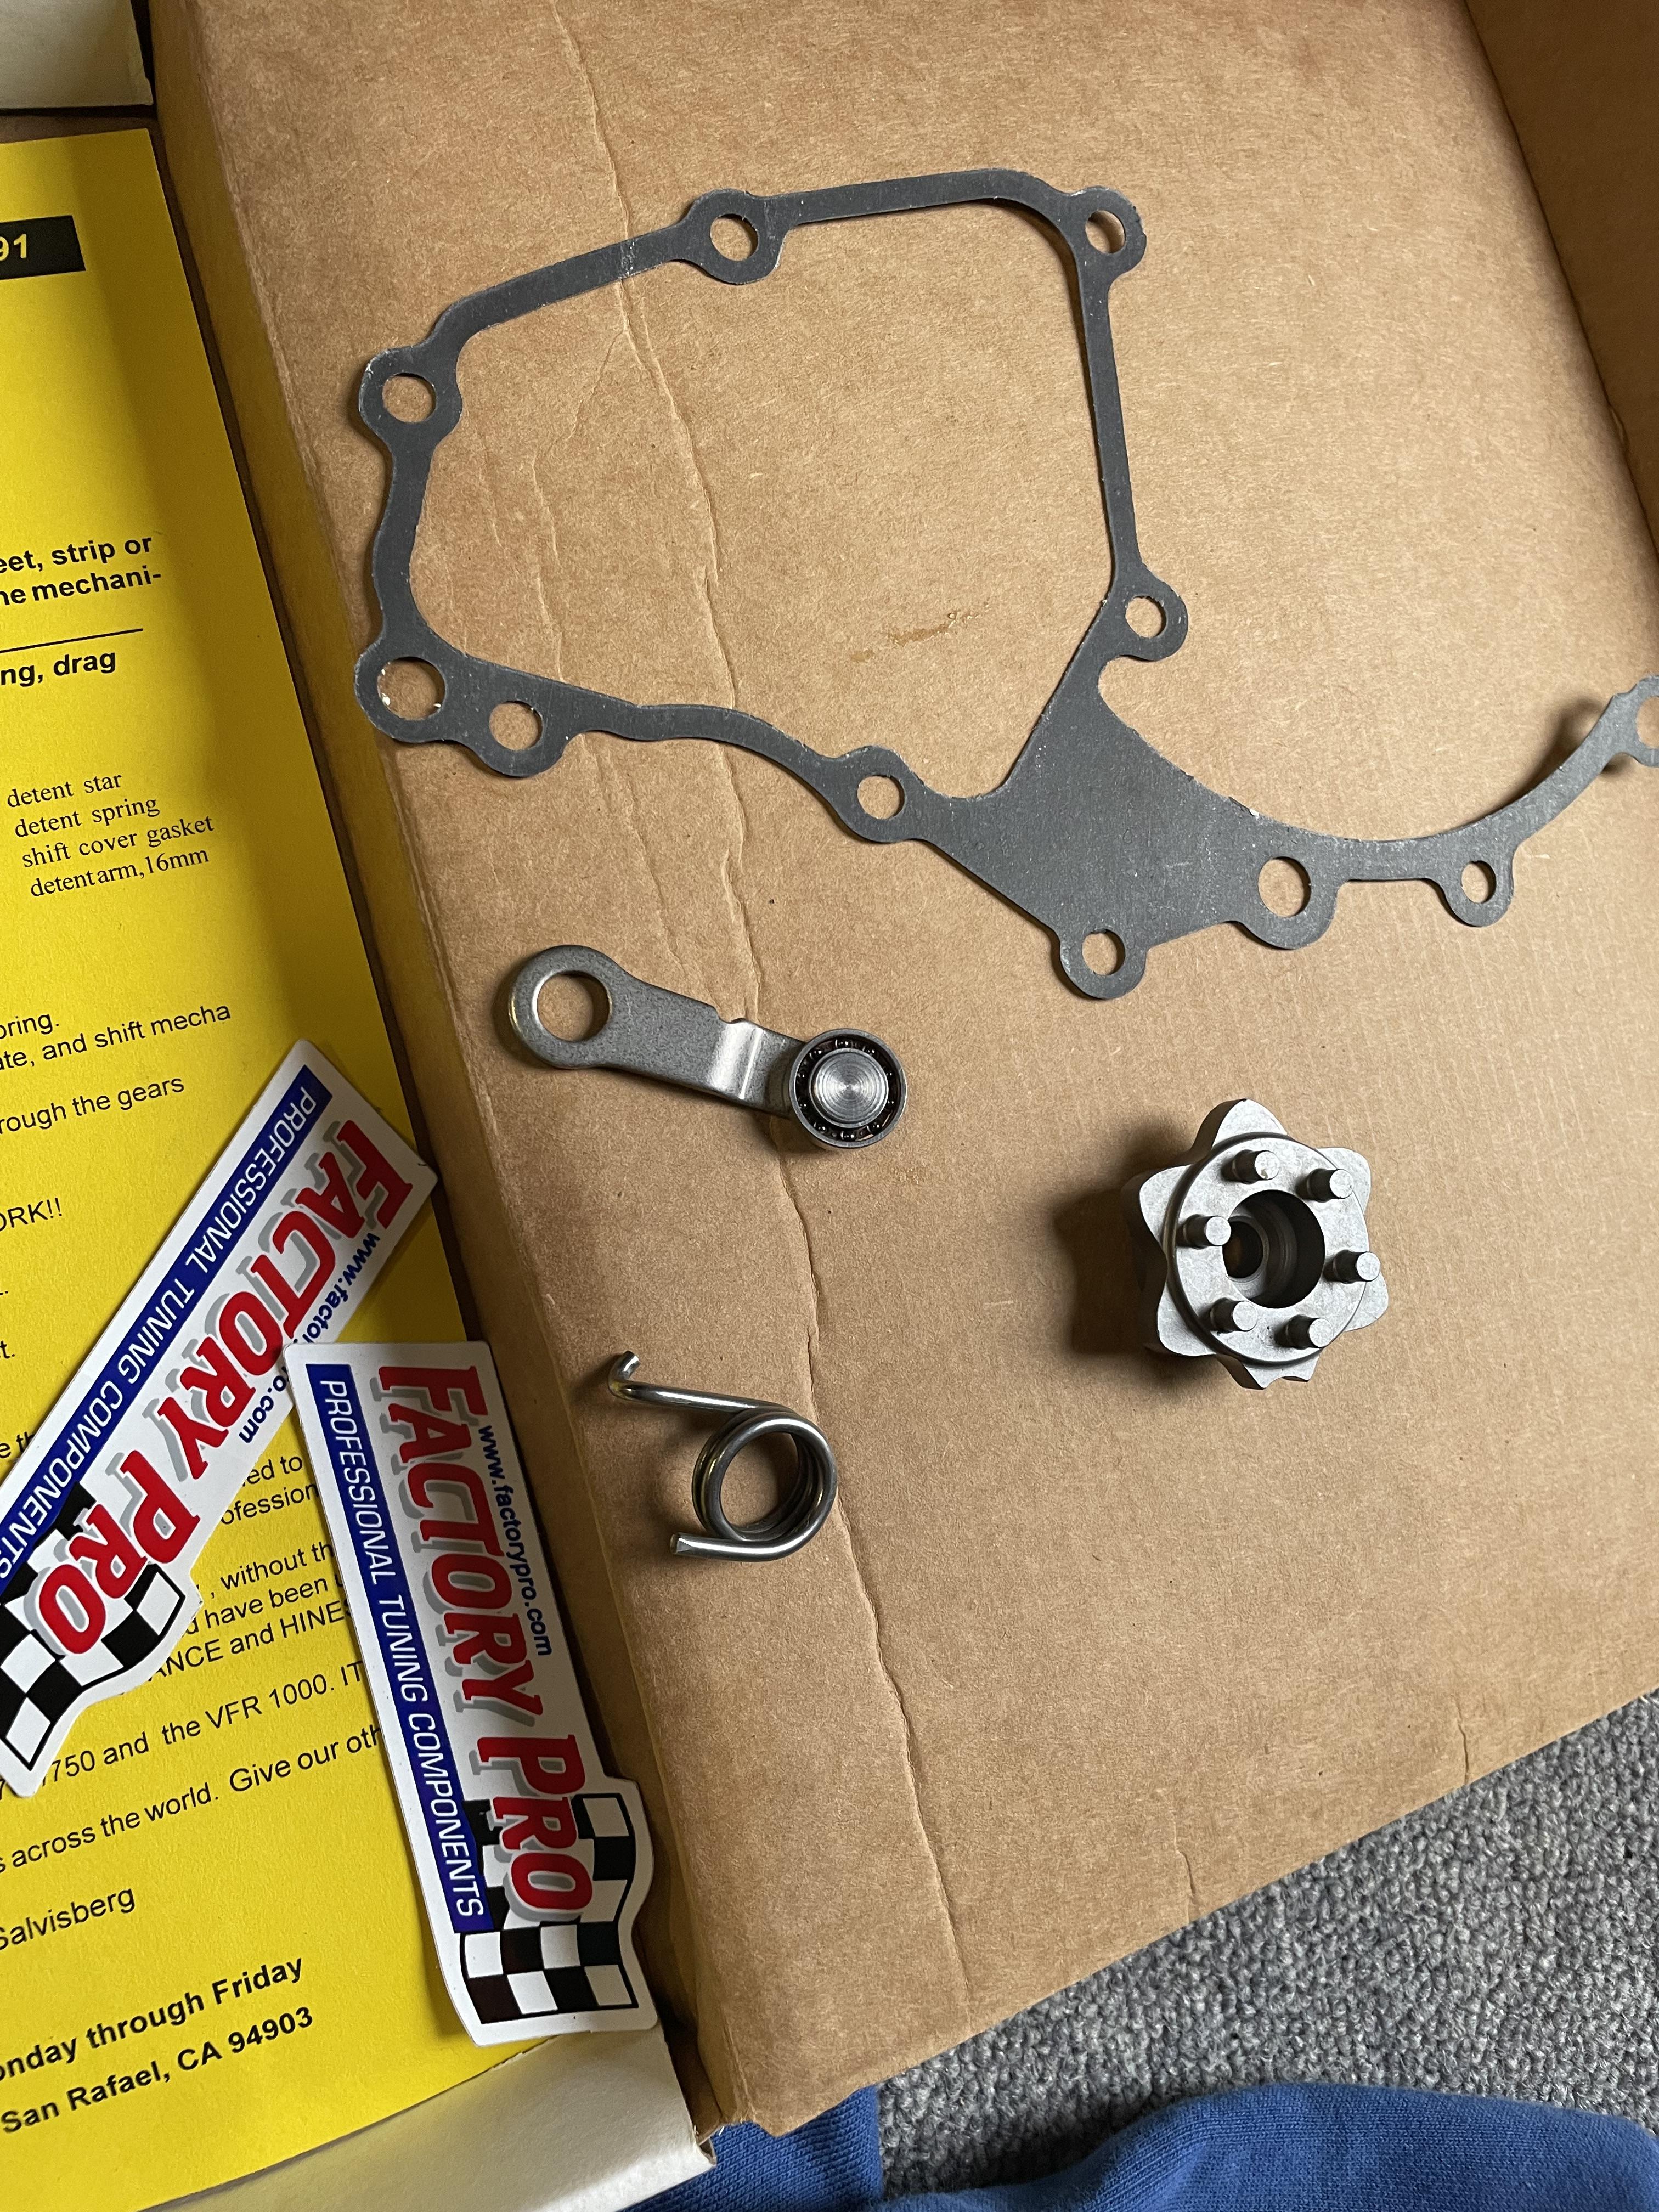
Cool thread, @Gaz66. Sounds like you’re in the UK, and I’ve just gutted a Factory Pro star kit to my 5th Gen. if you want my old star and arm you can have them free - just cover postage. I’ve seen people modify these by rounding the peaks. This helps the shift happen faster, but you need a stronger spring to stop it popping out. Roller bearing also helps. Guy on YouTube does it freehand - it’s not rocket science. I’d just use a bench grinder with a flat plate. PM me your details and I’ll get it to you. Send your number and we can talk it through.
-
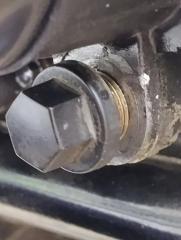
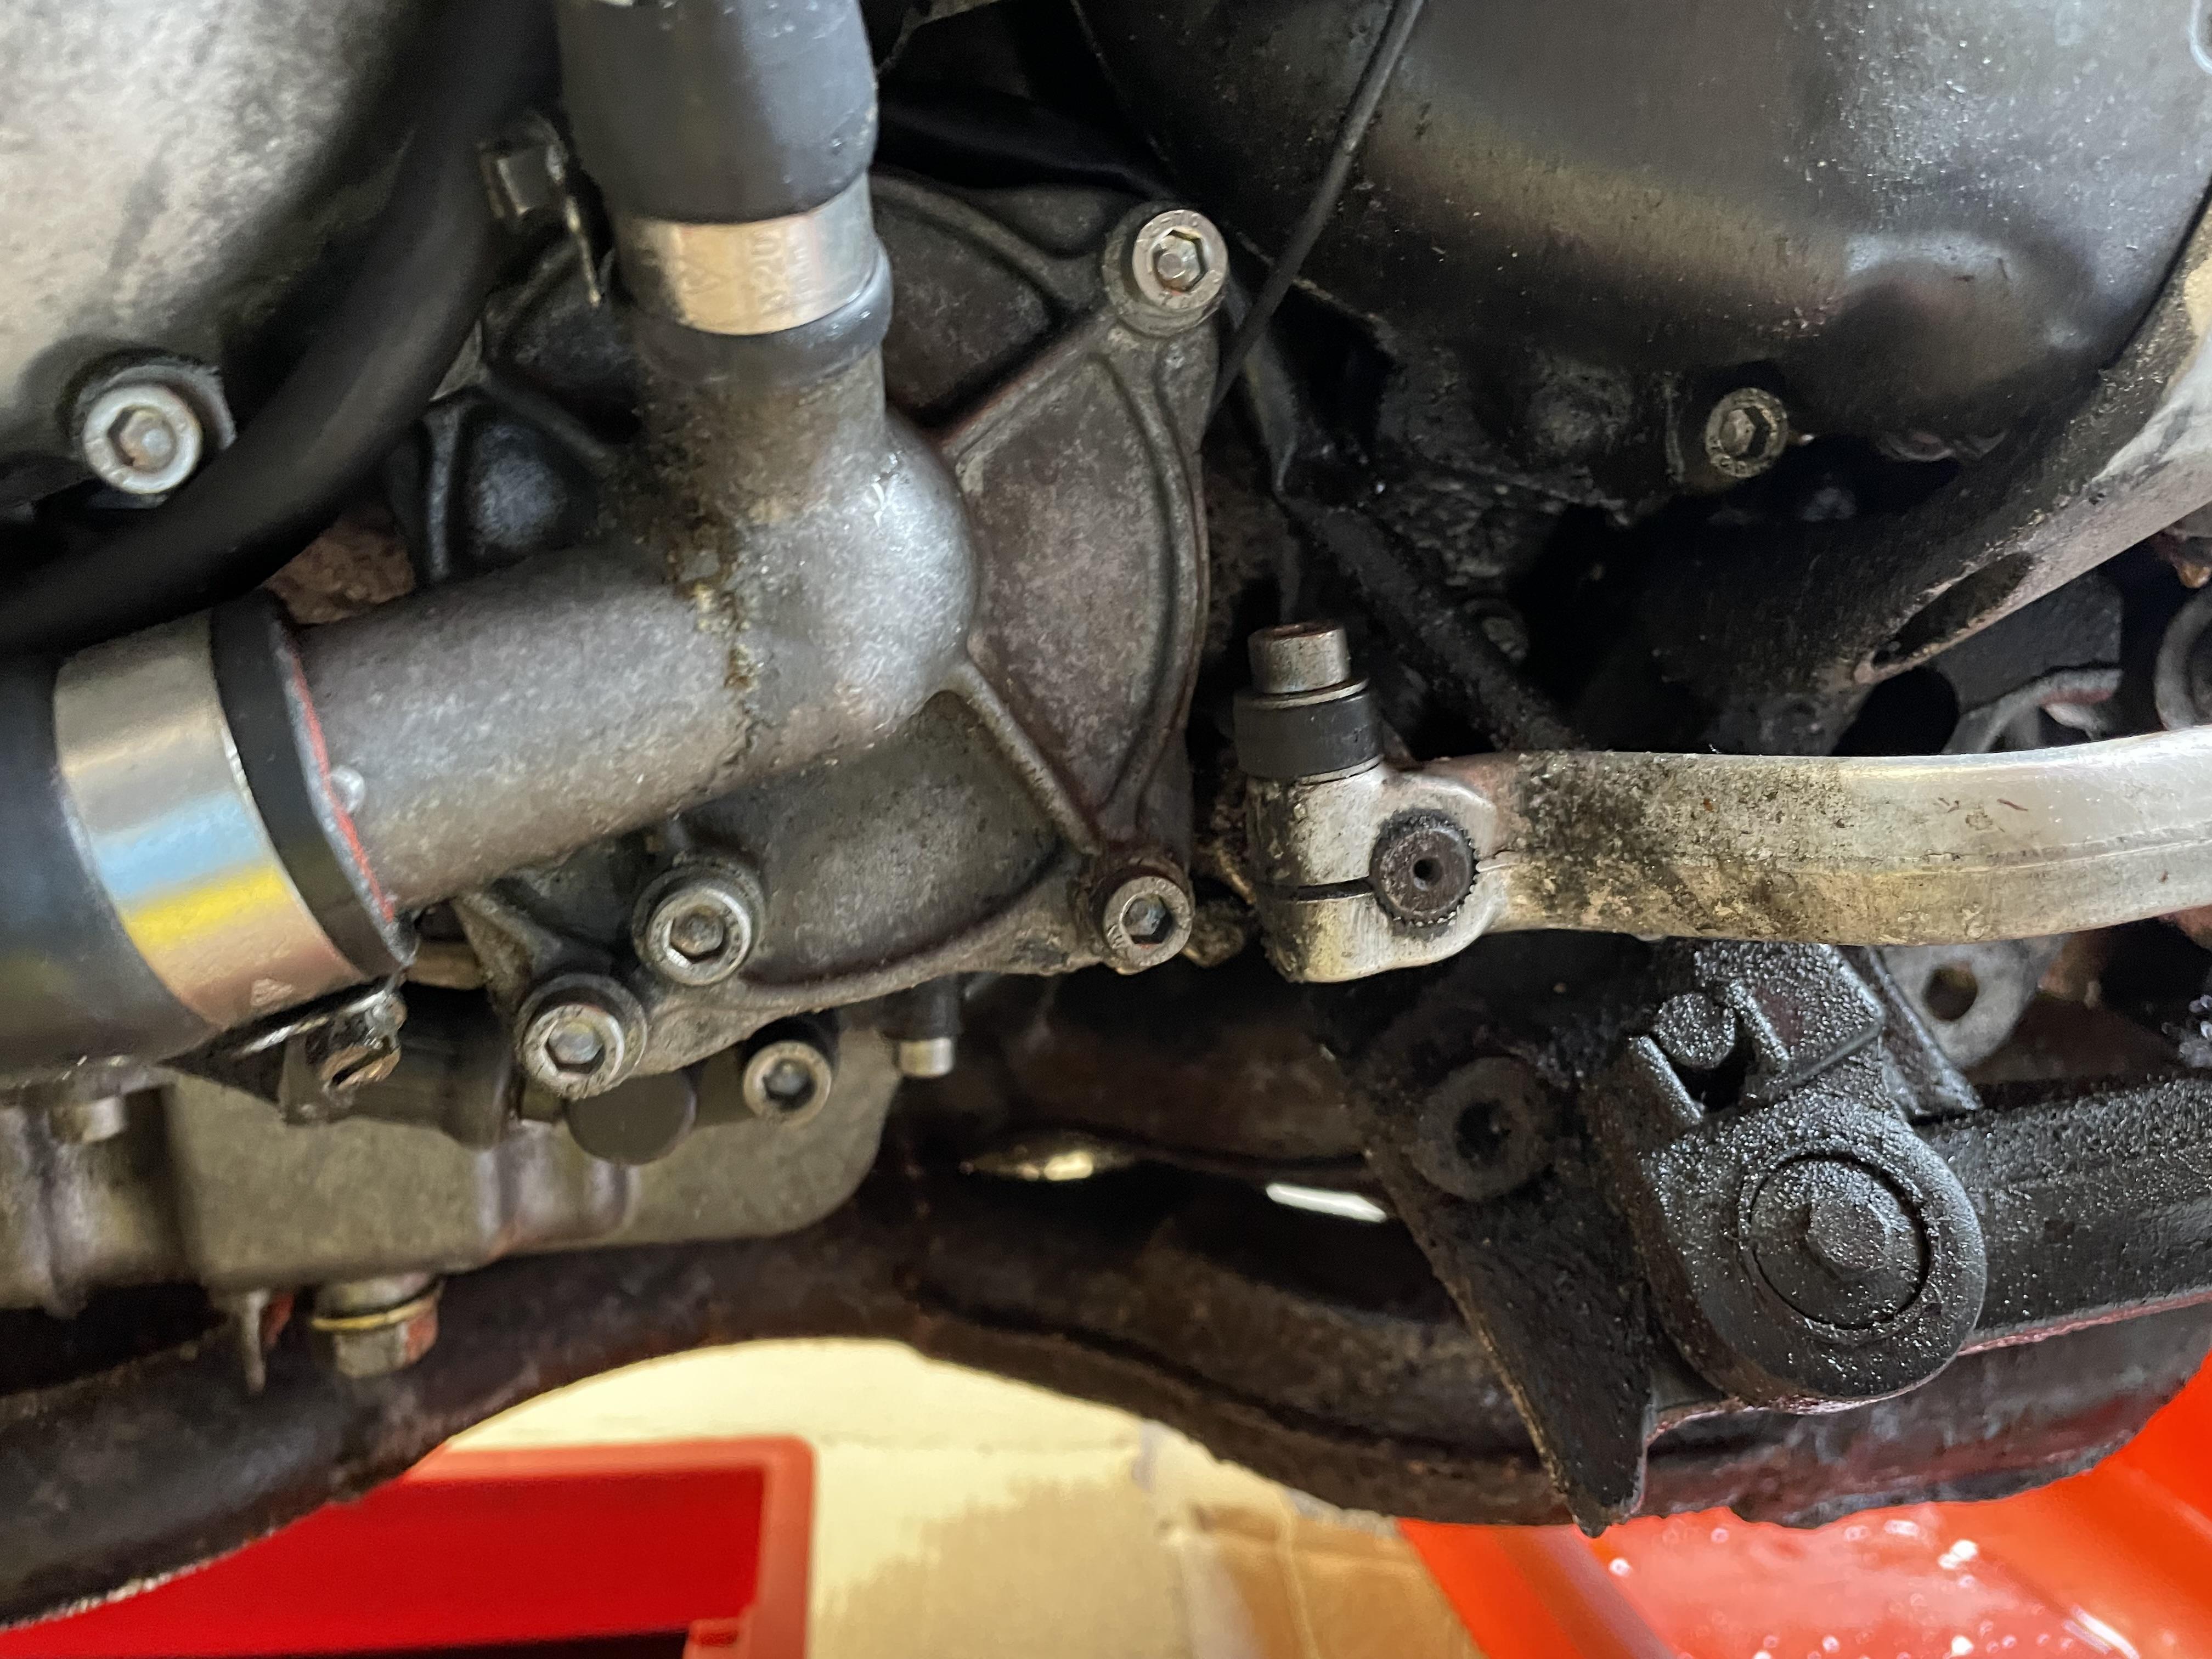
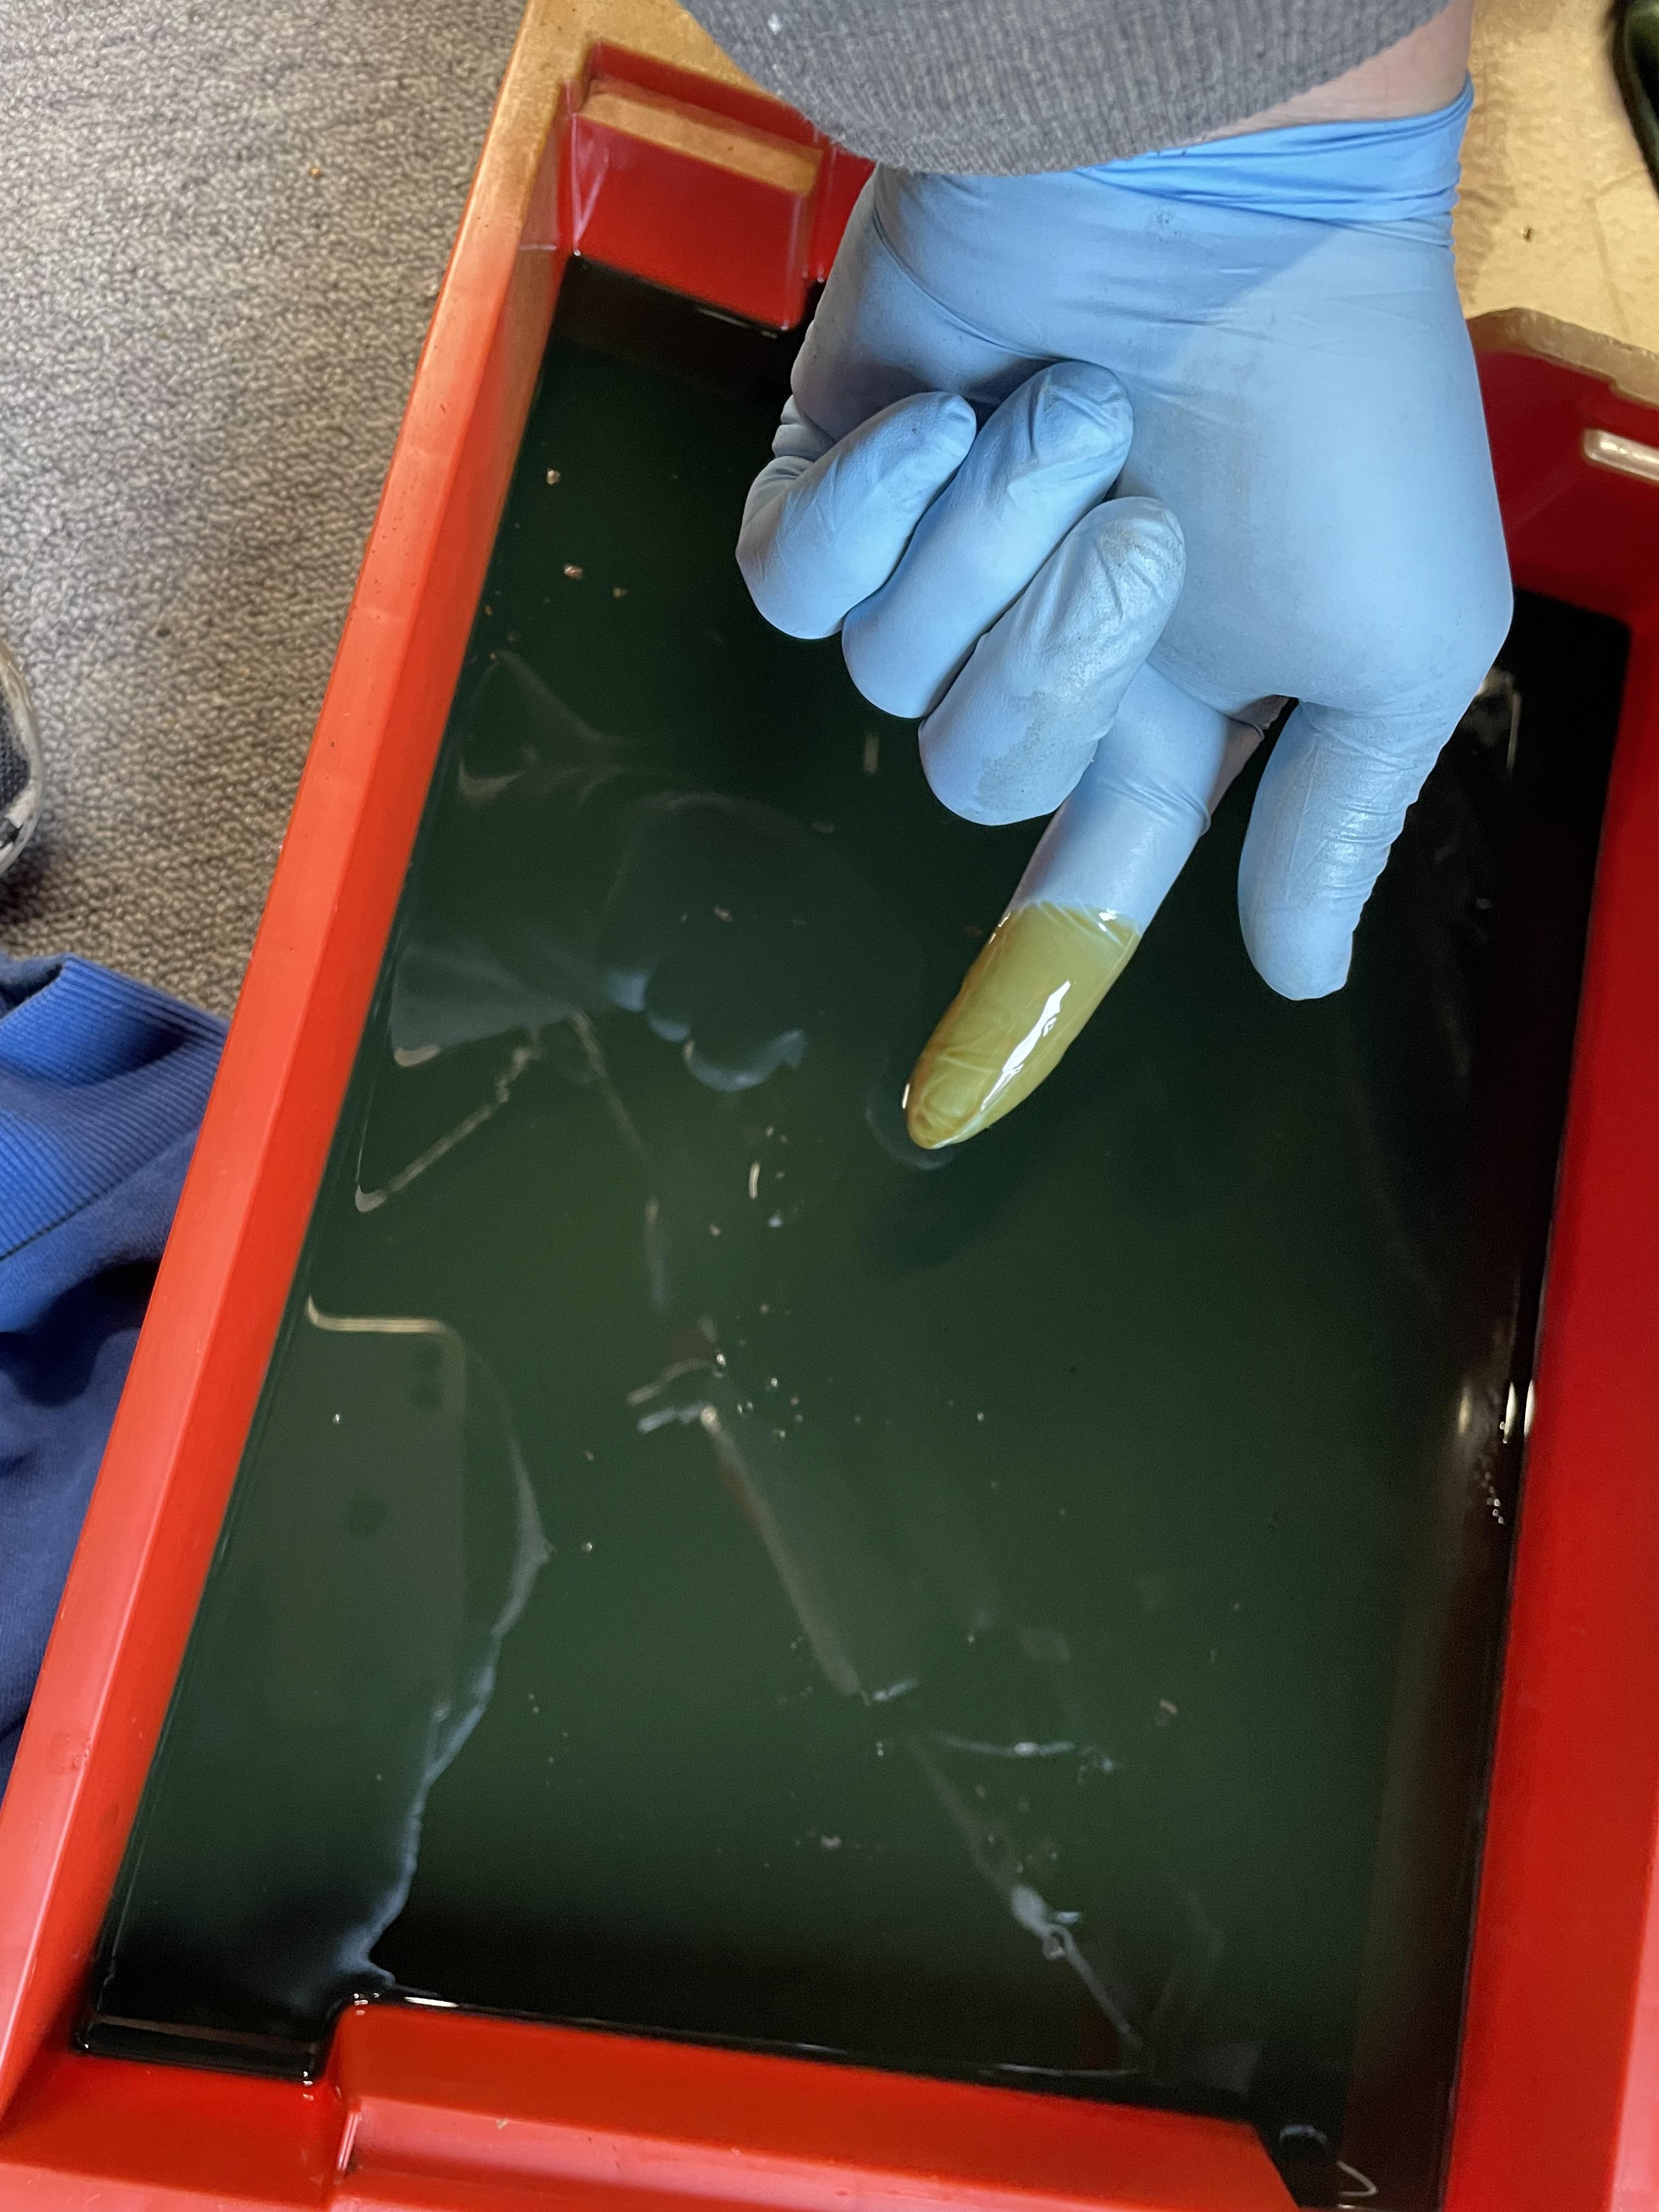
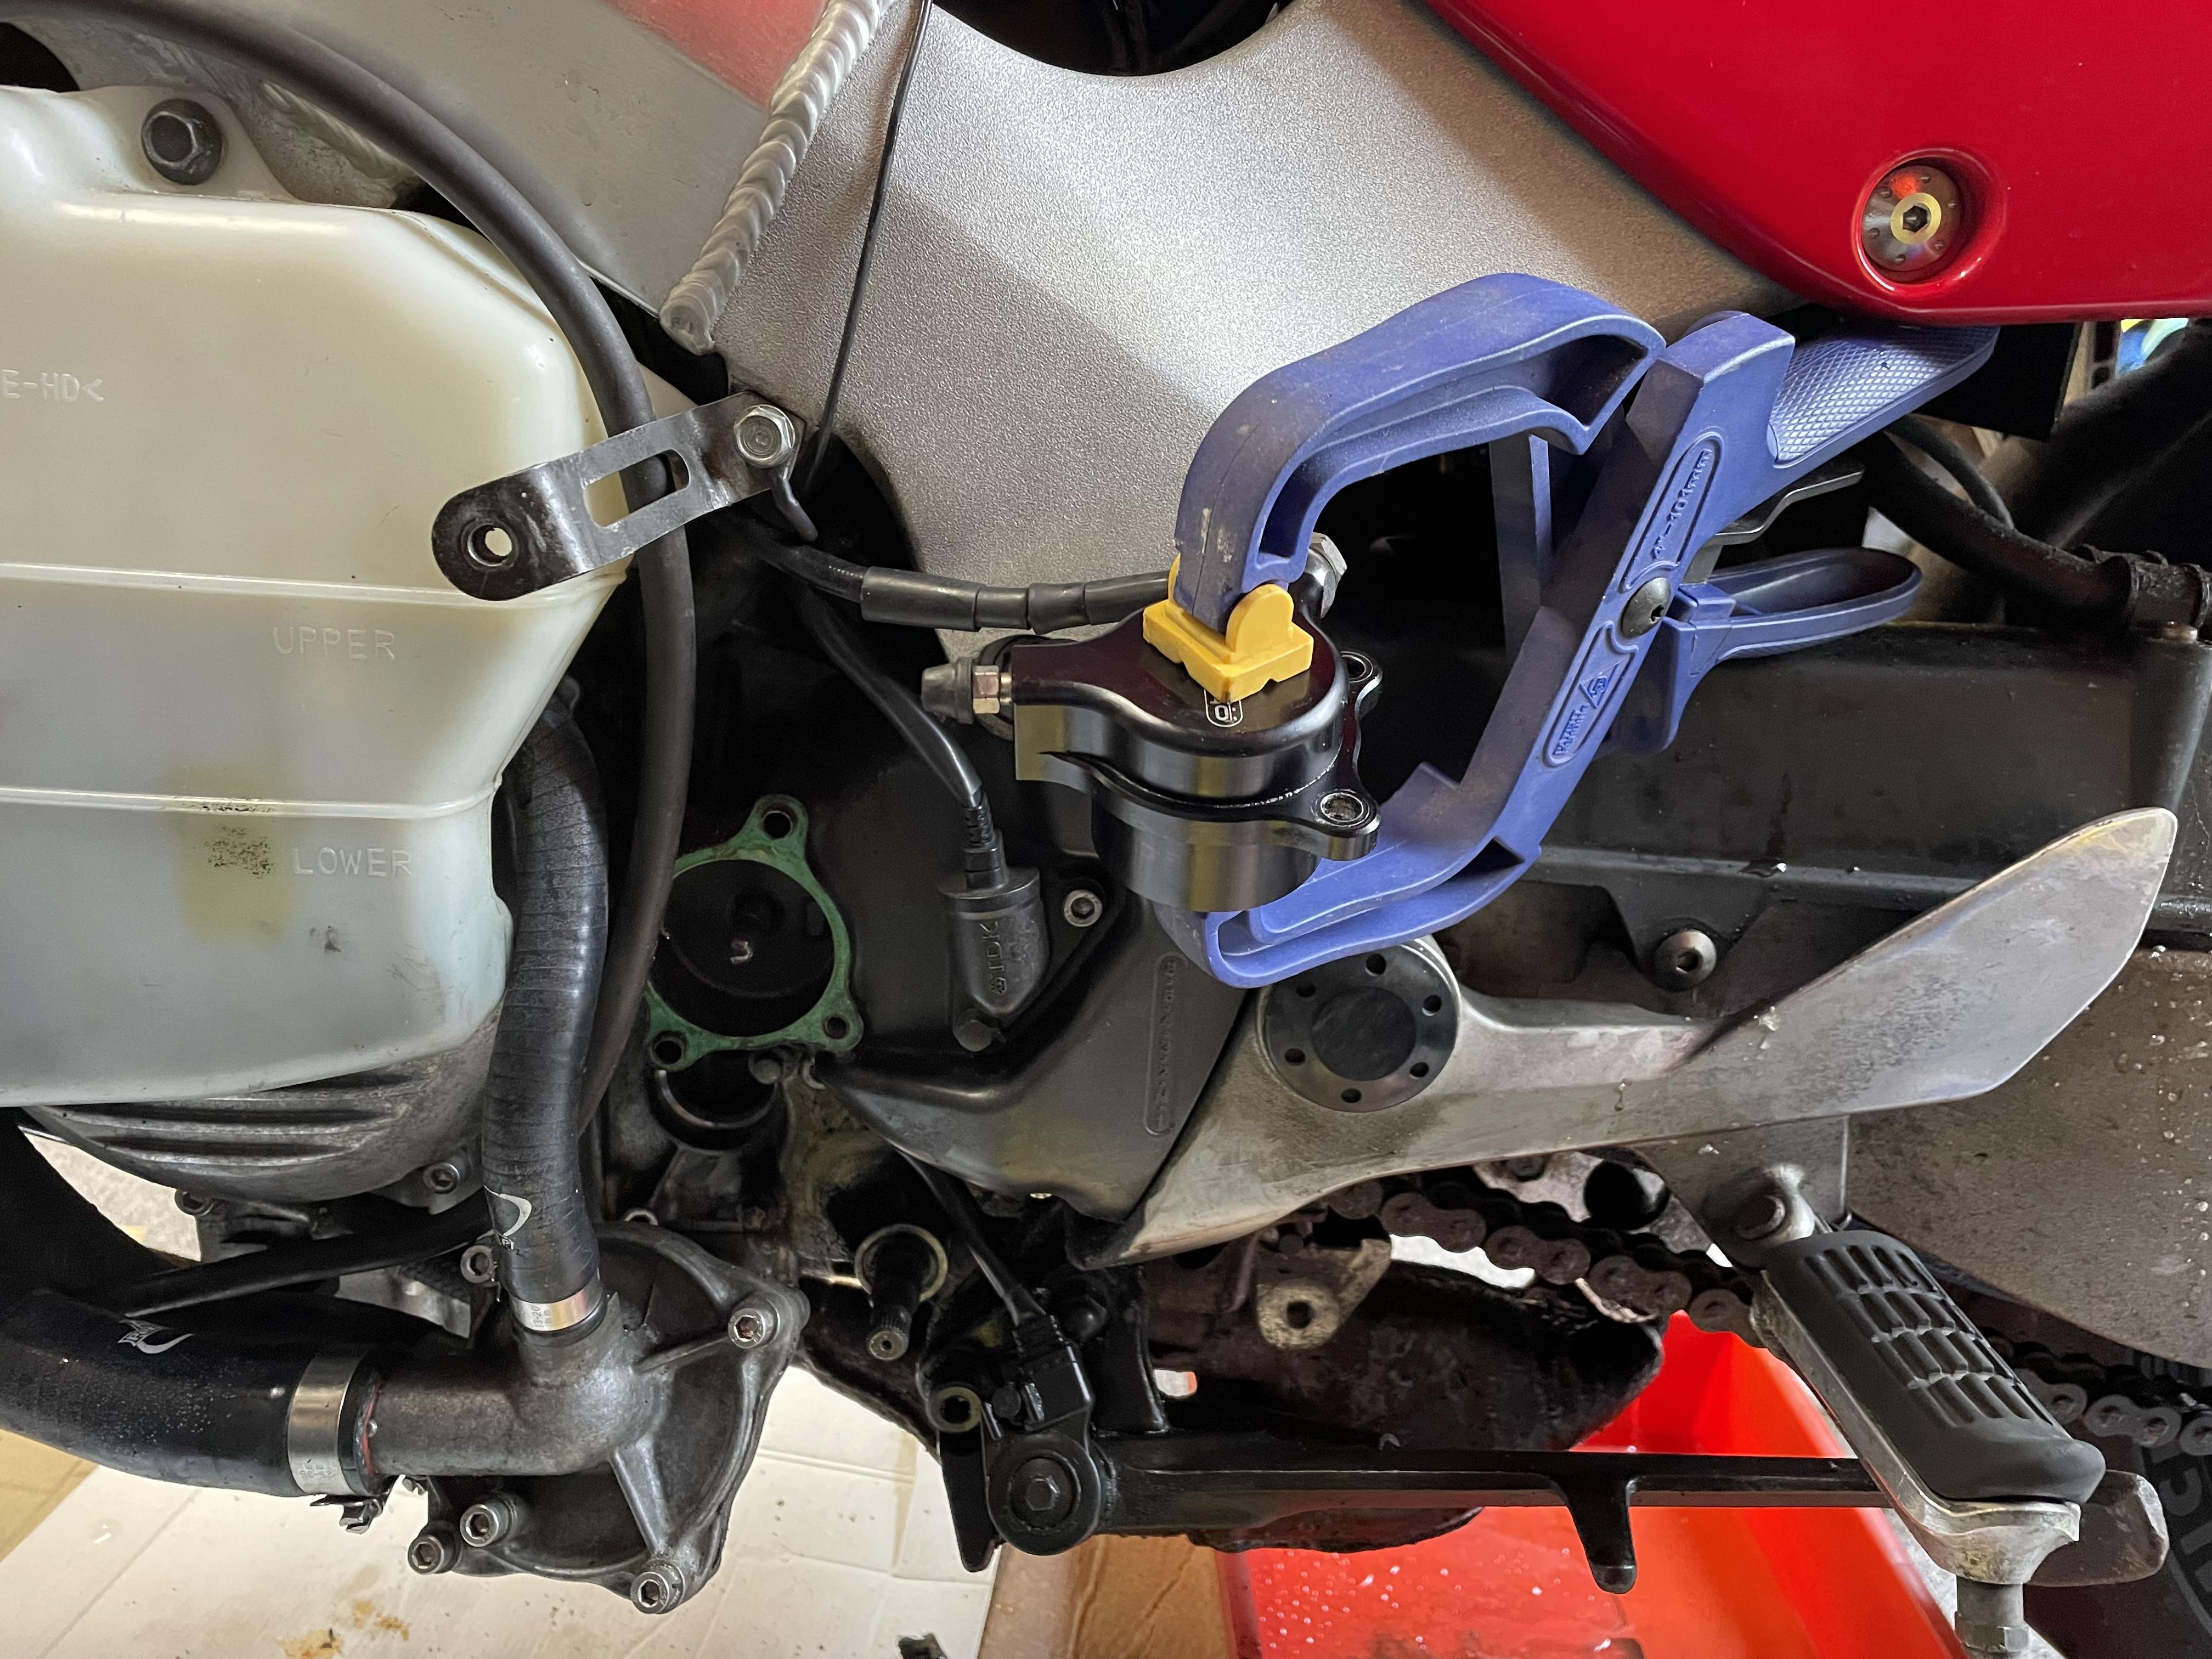
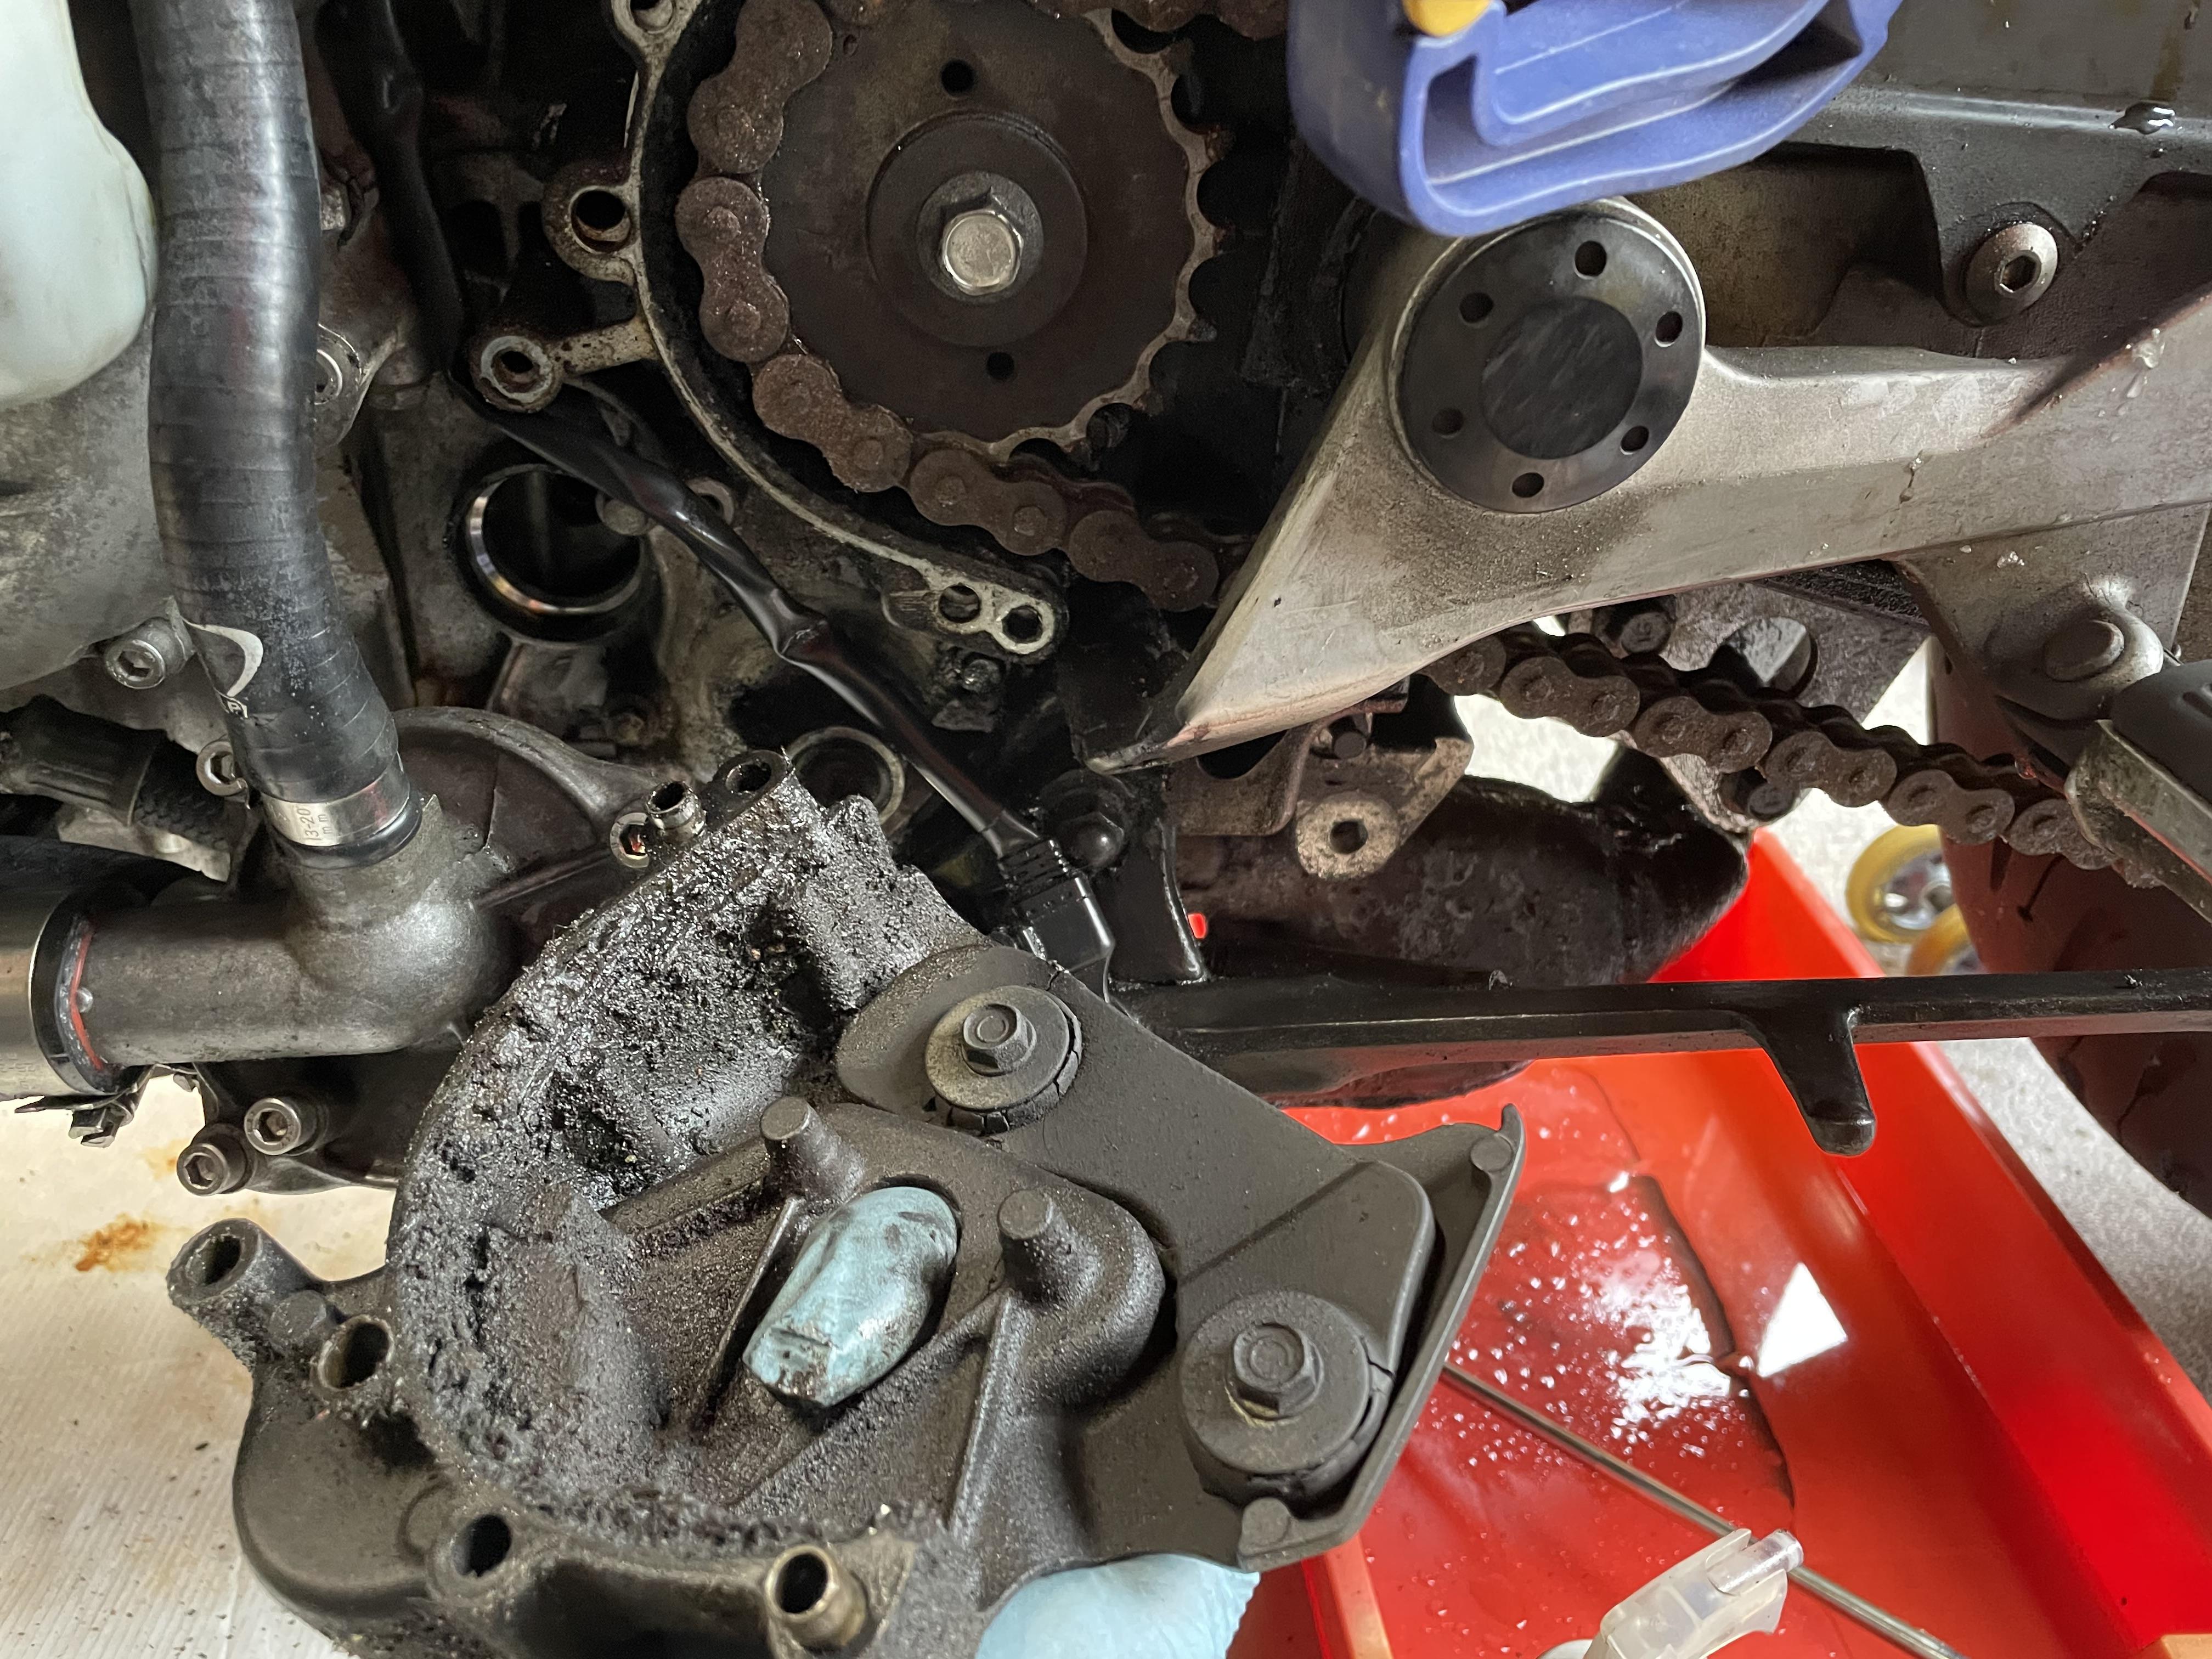
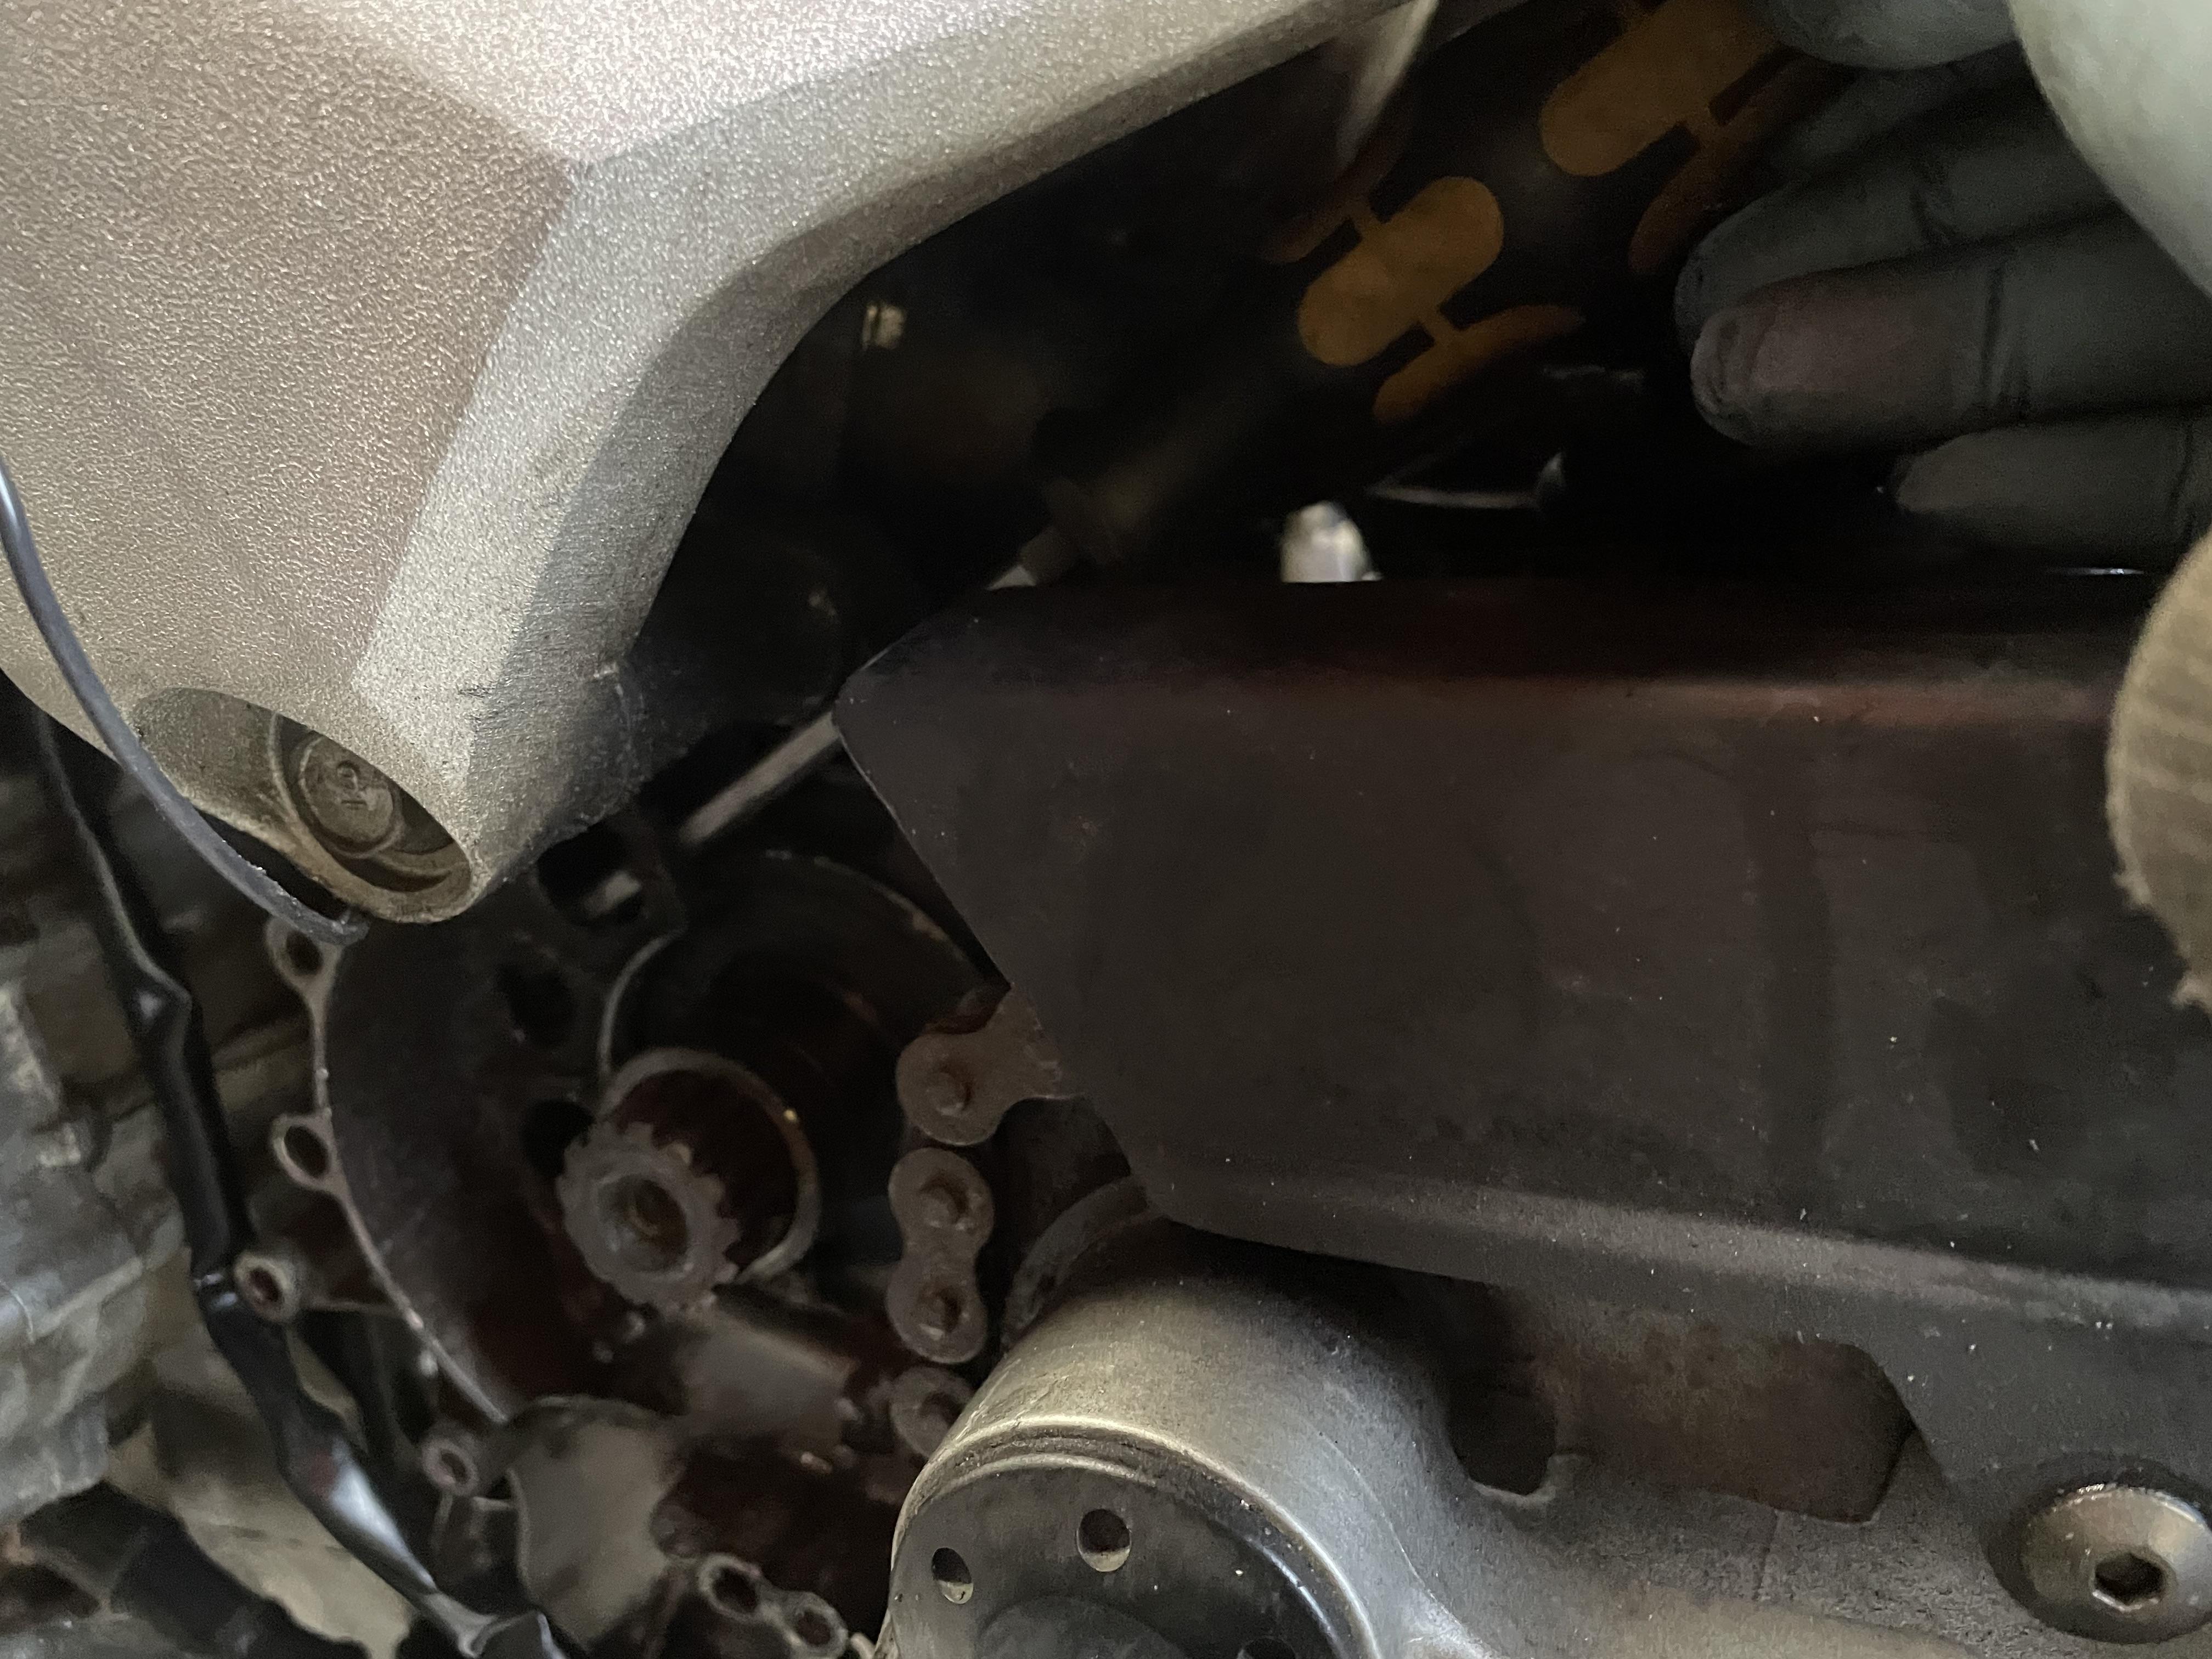
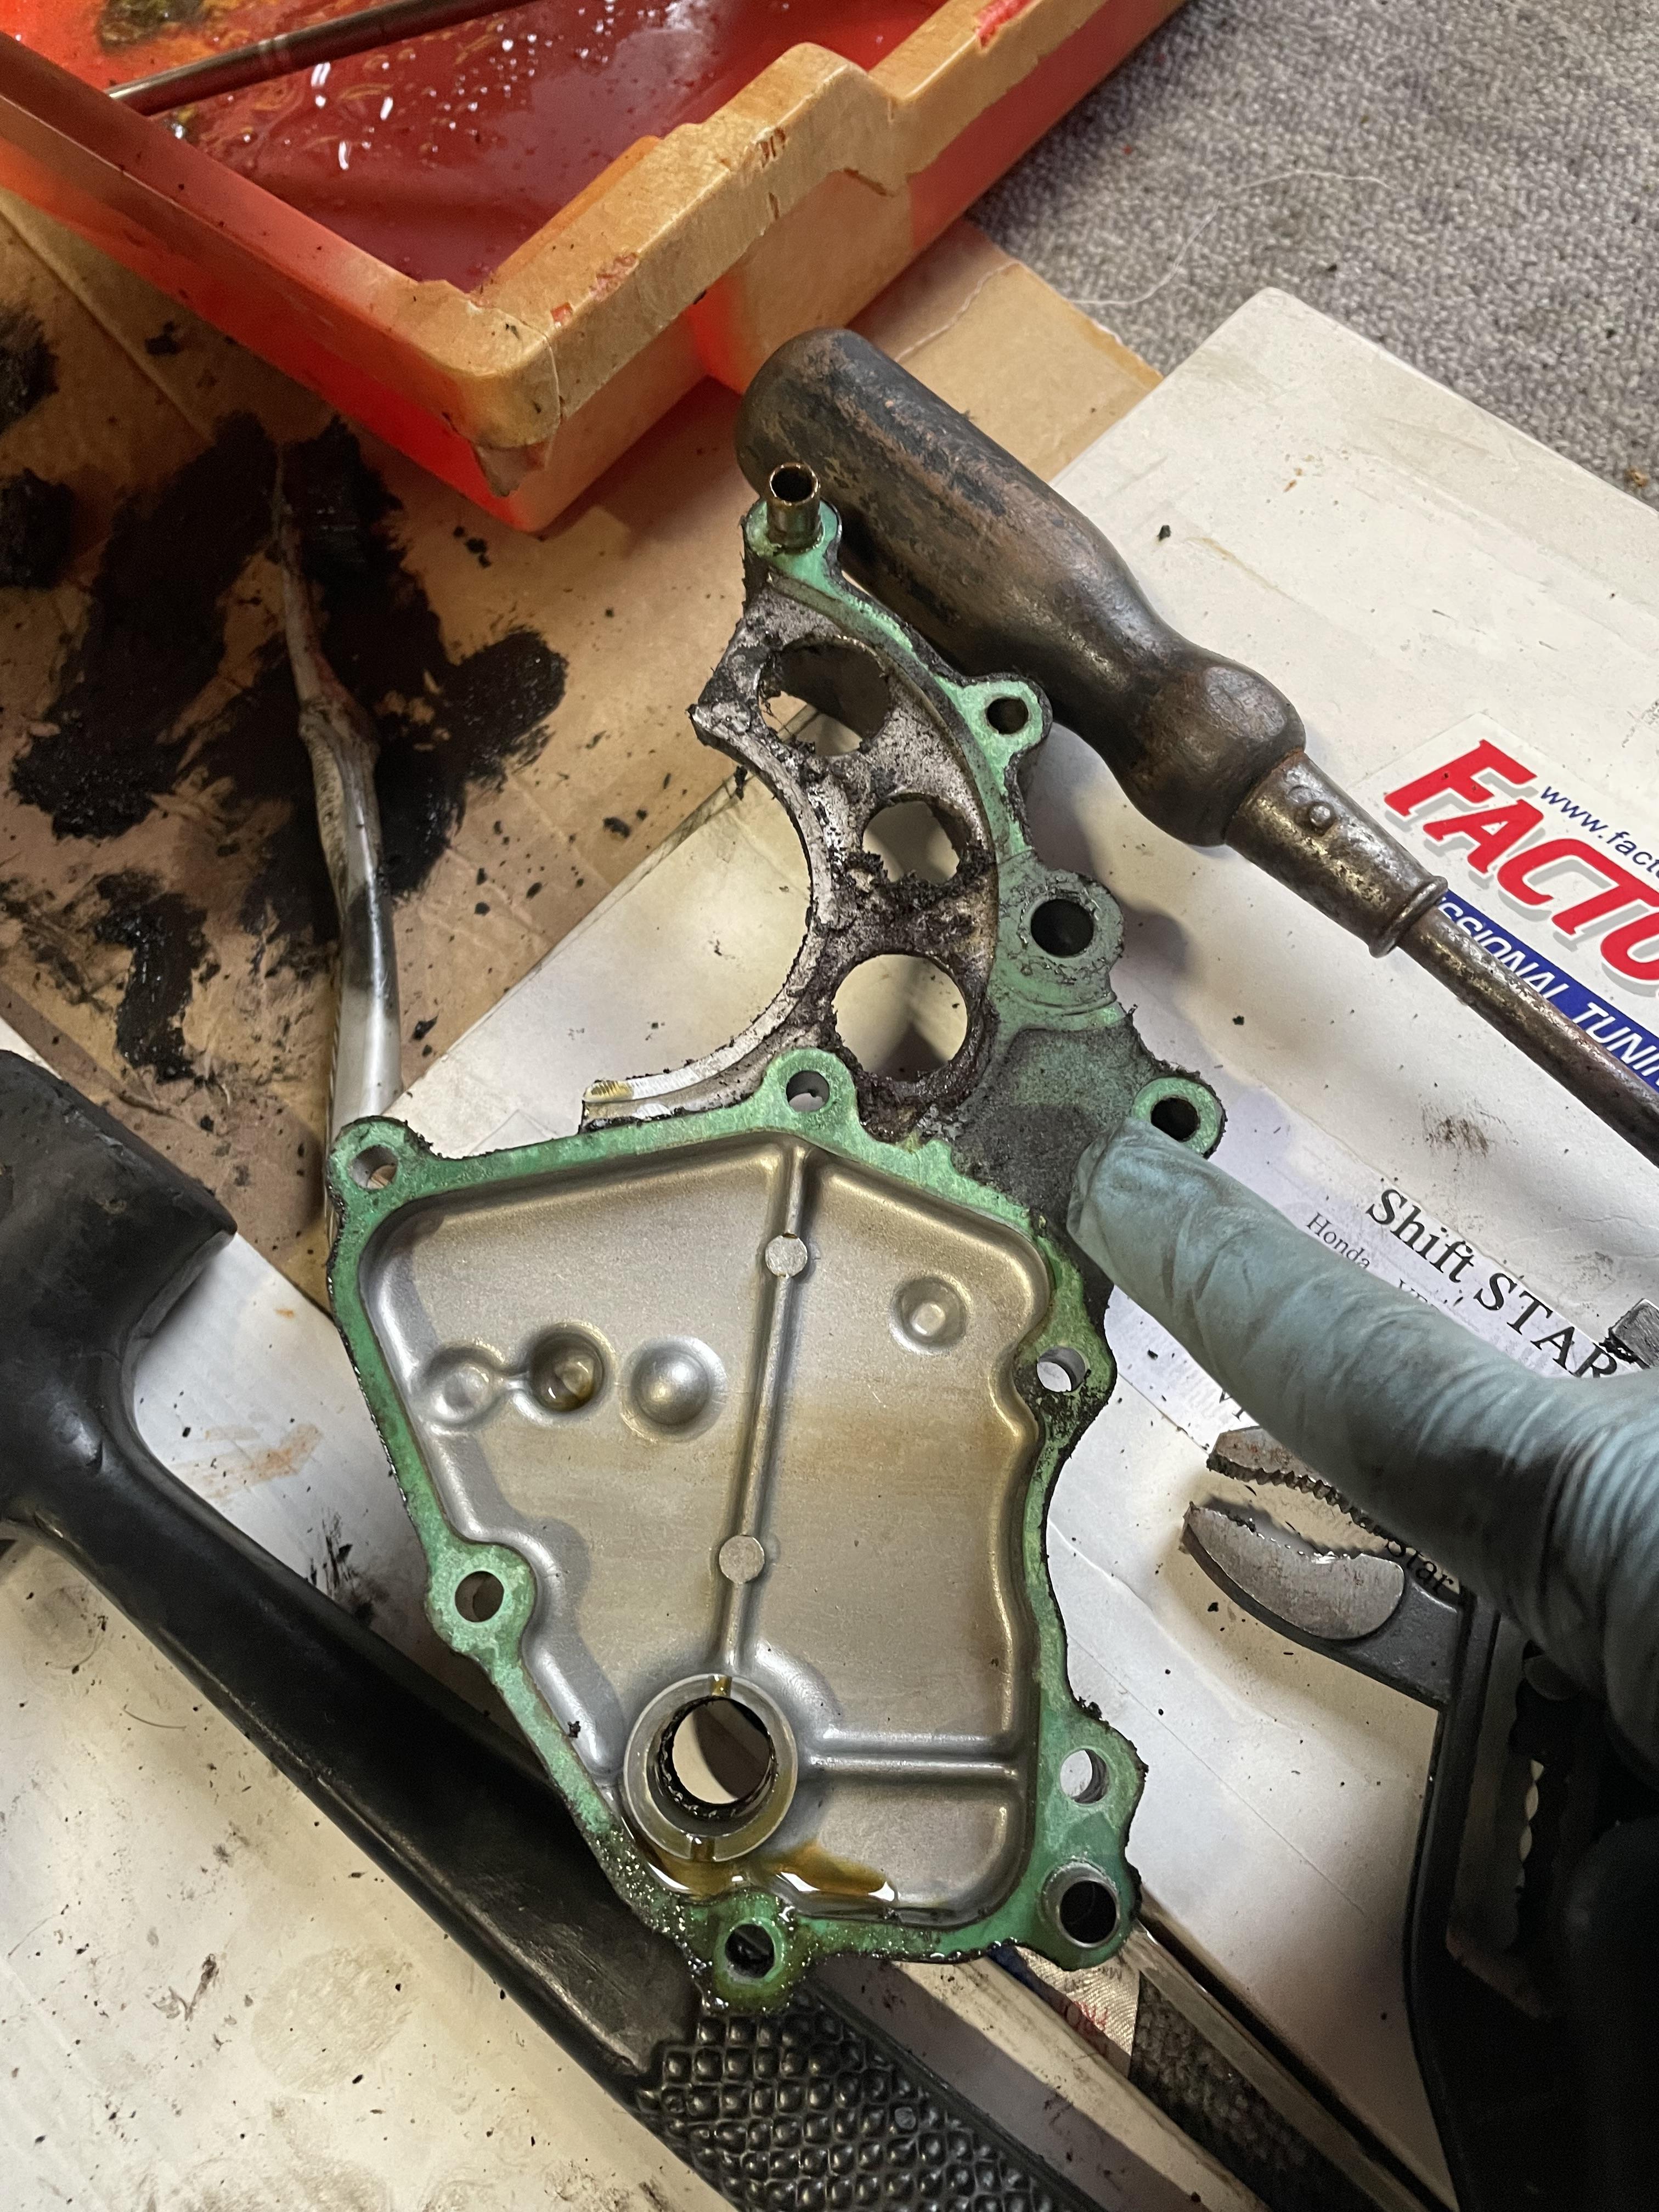
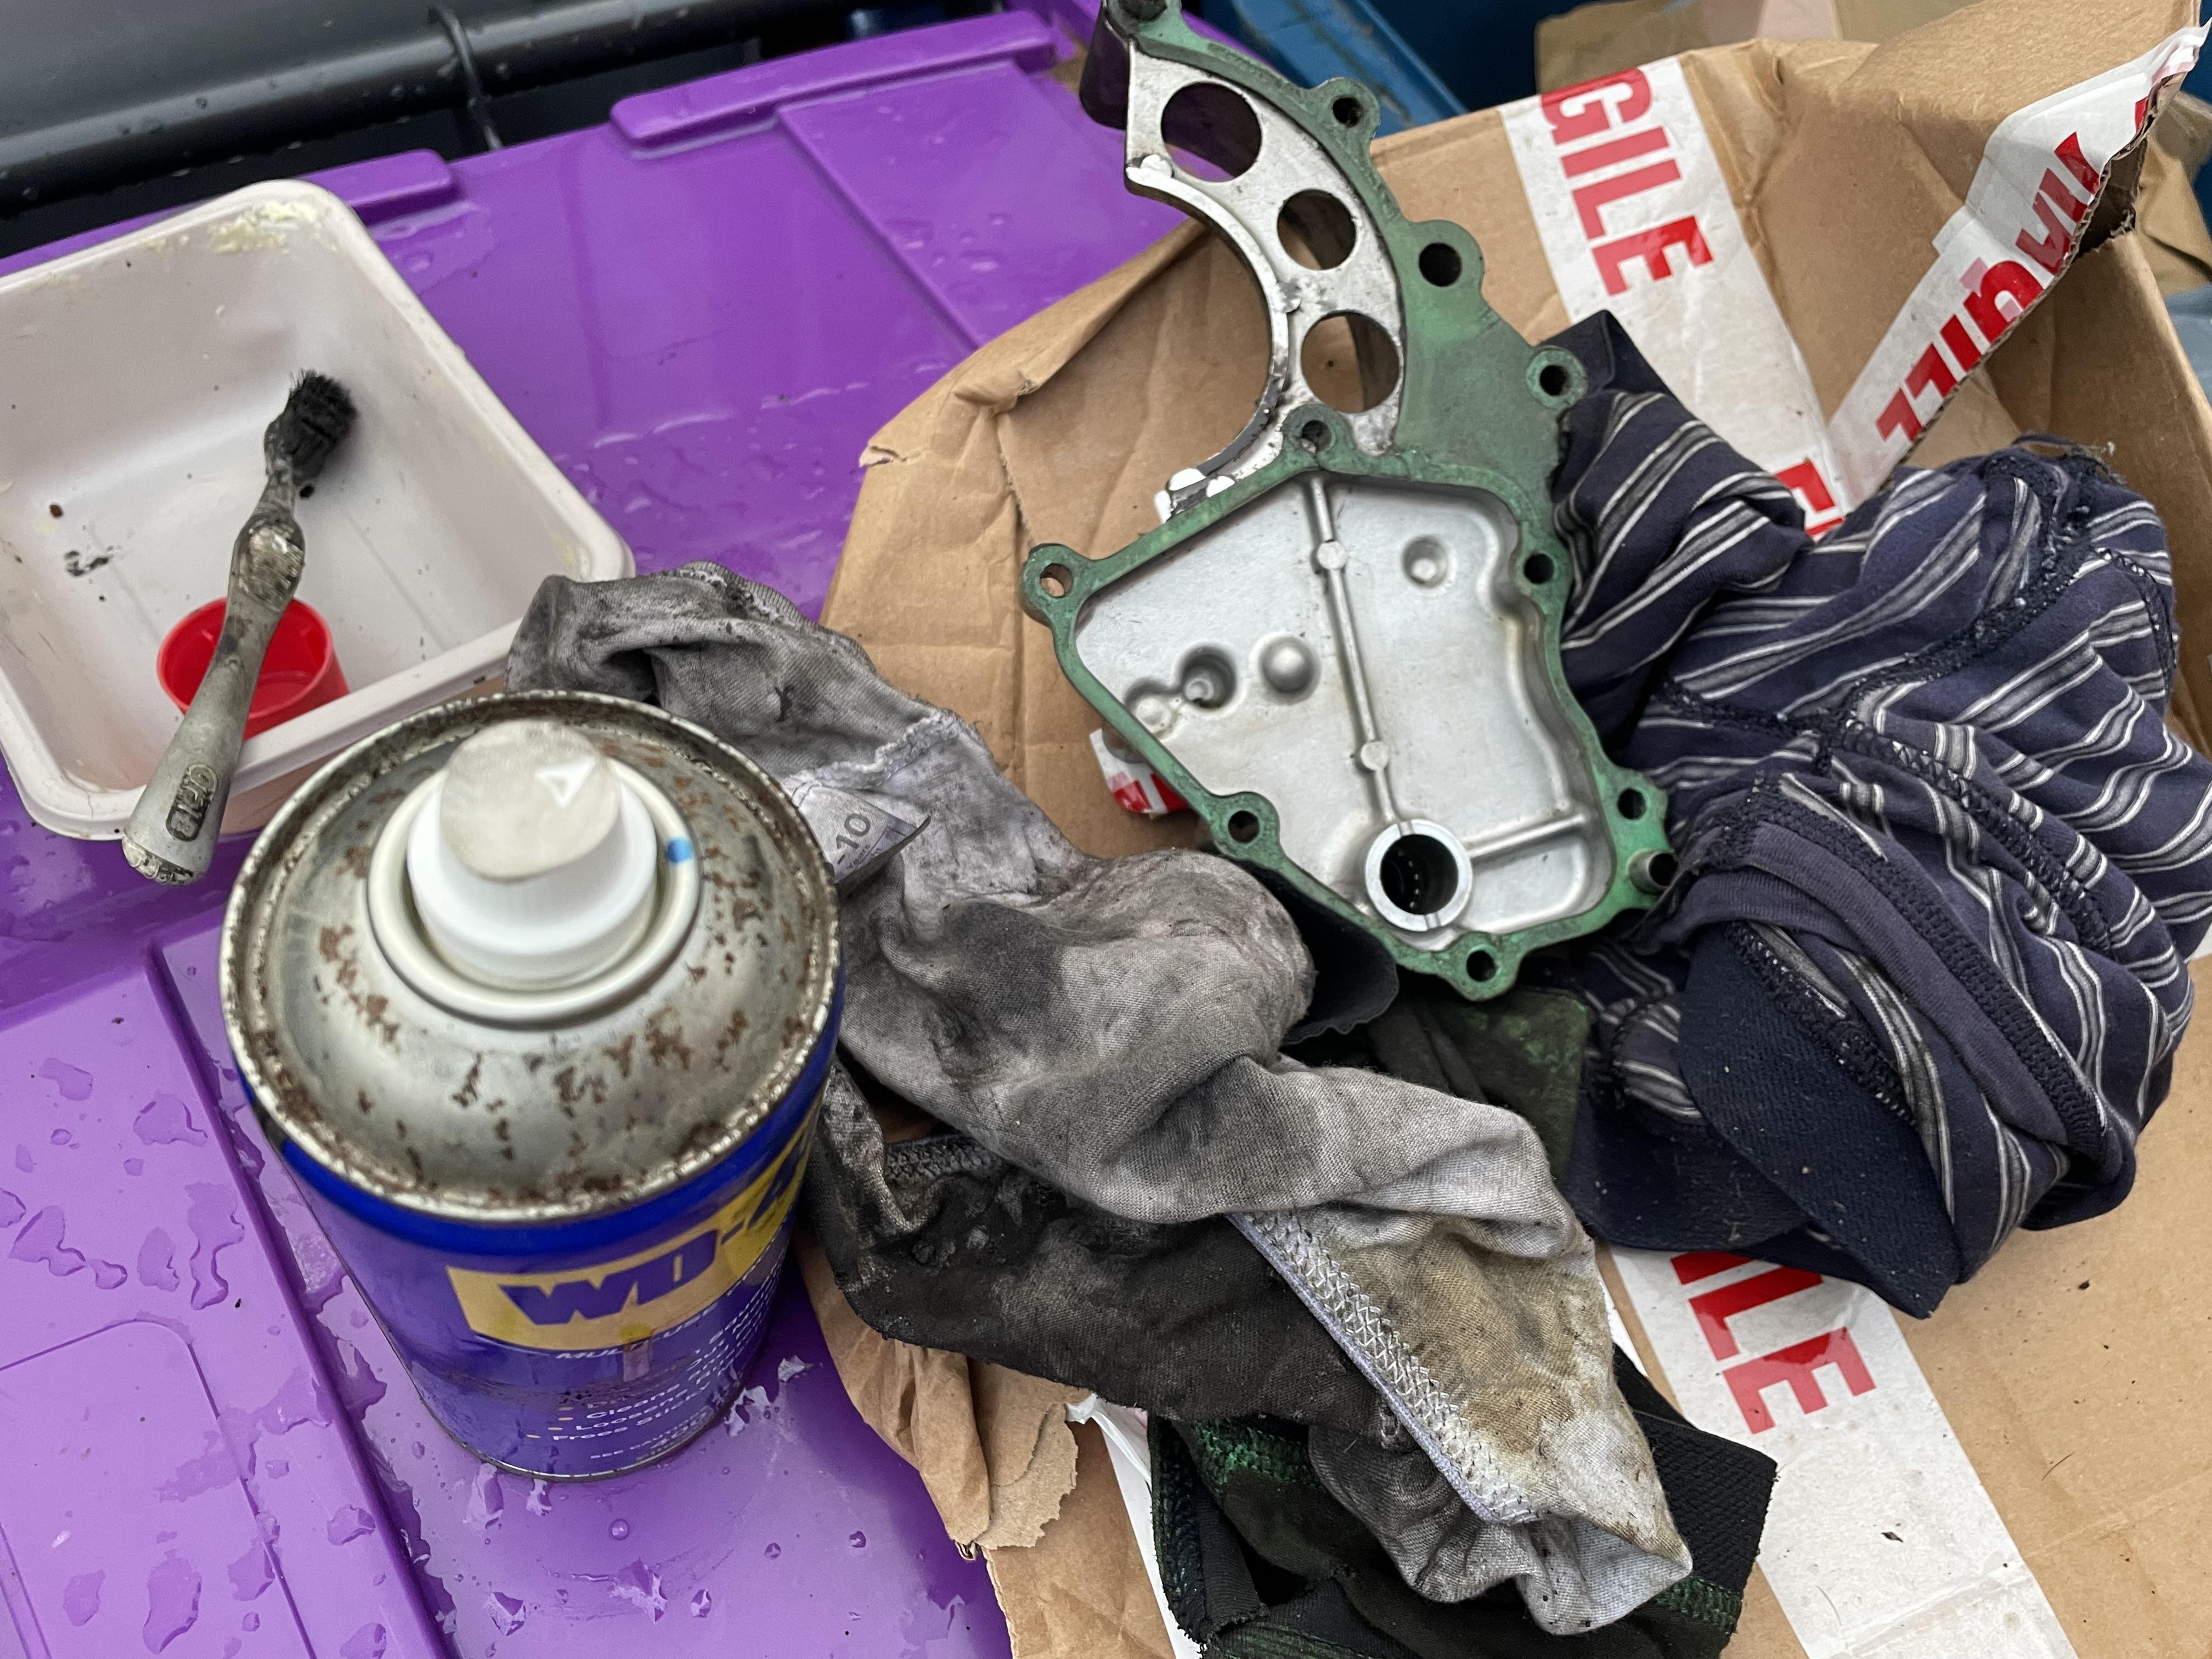
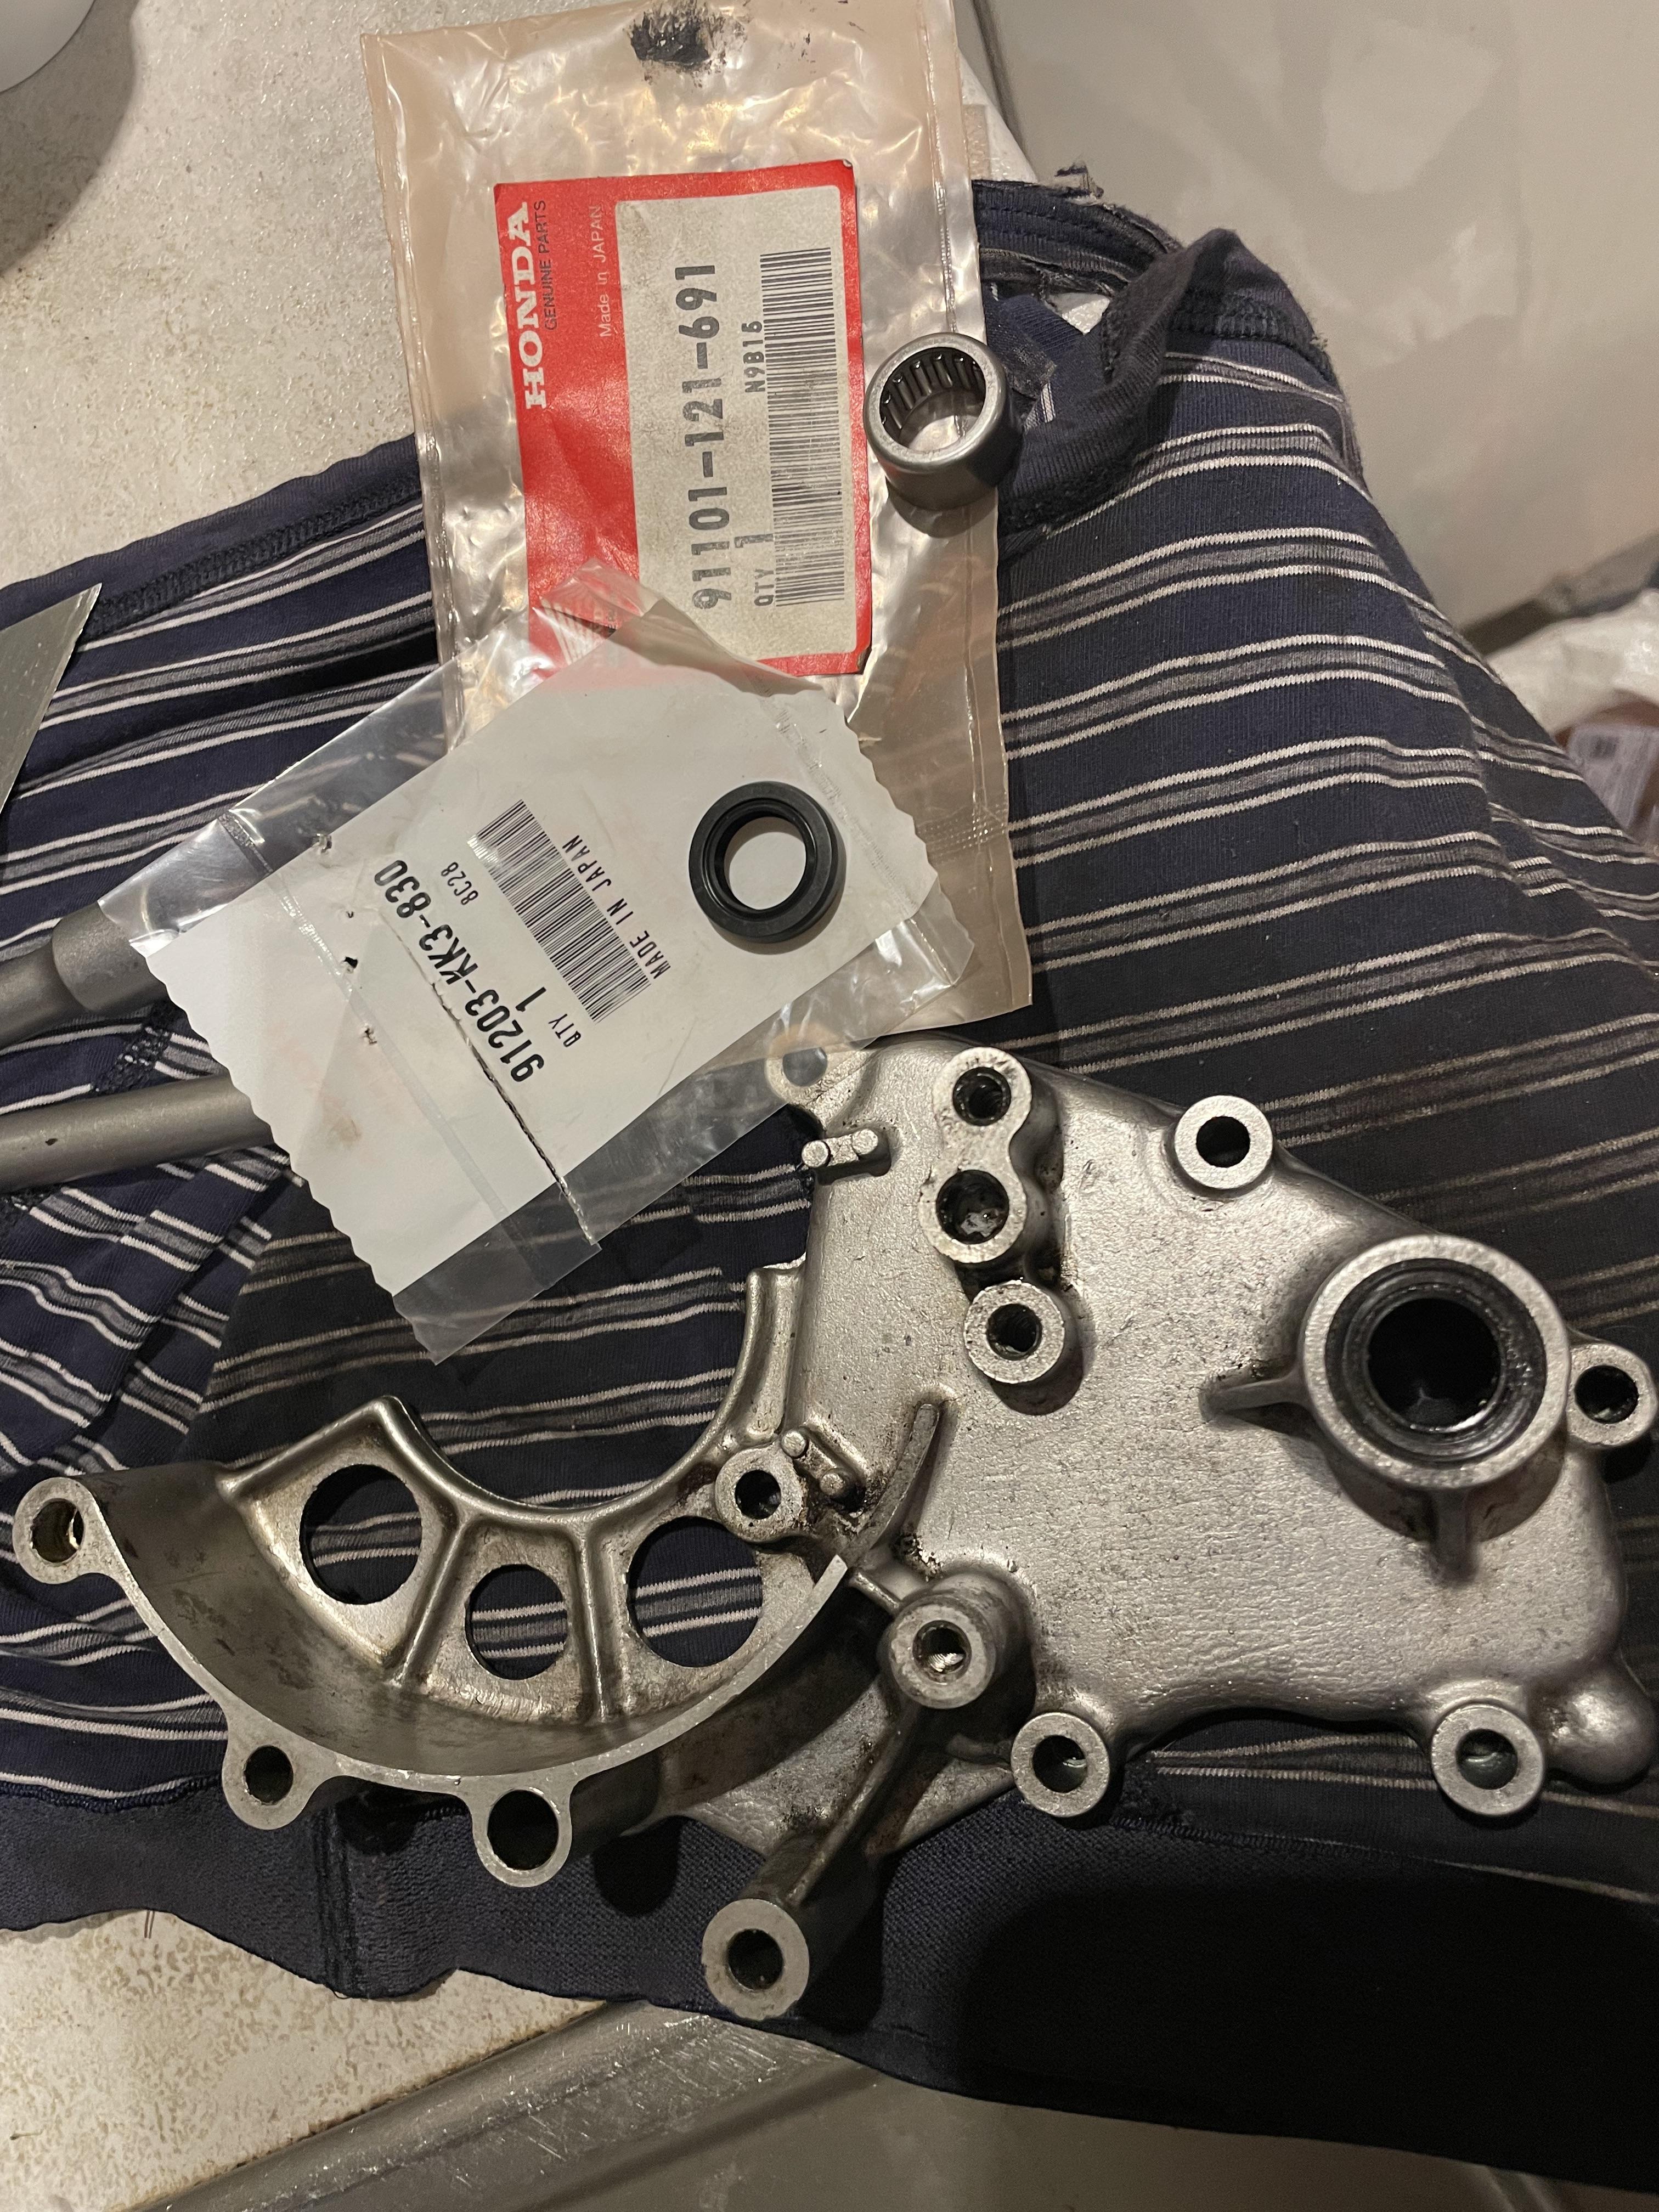
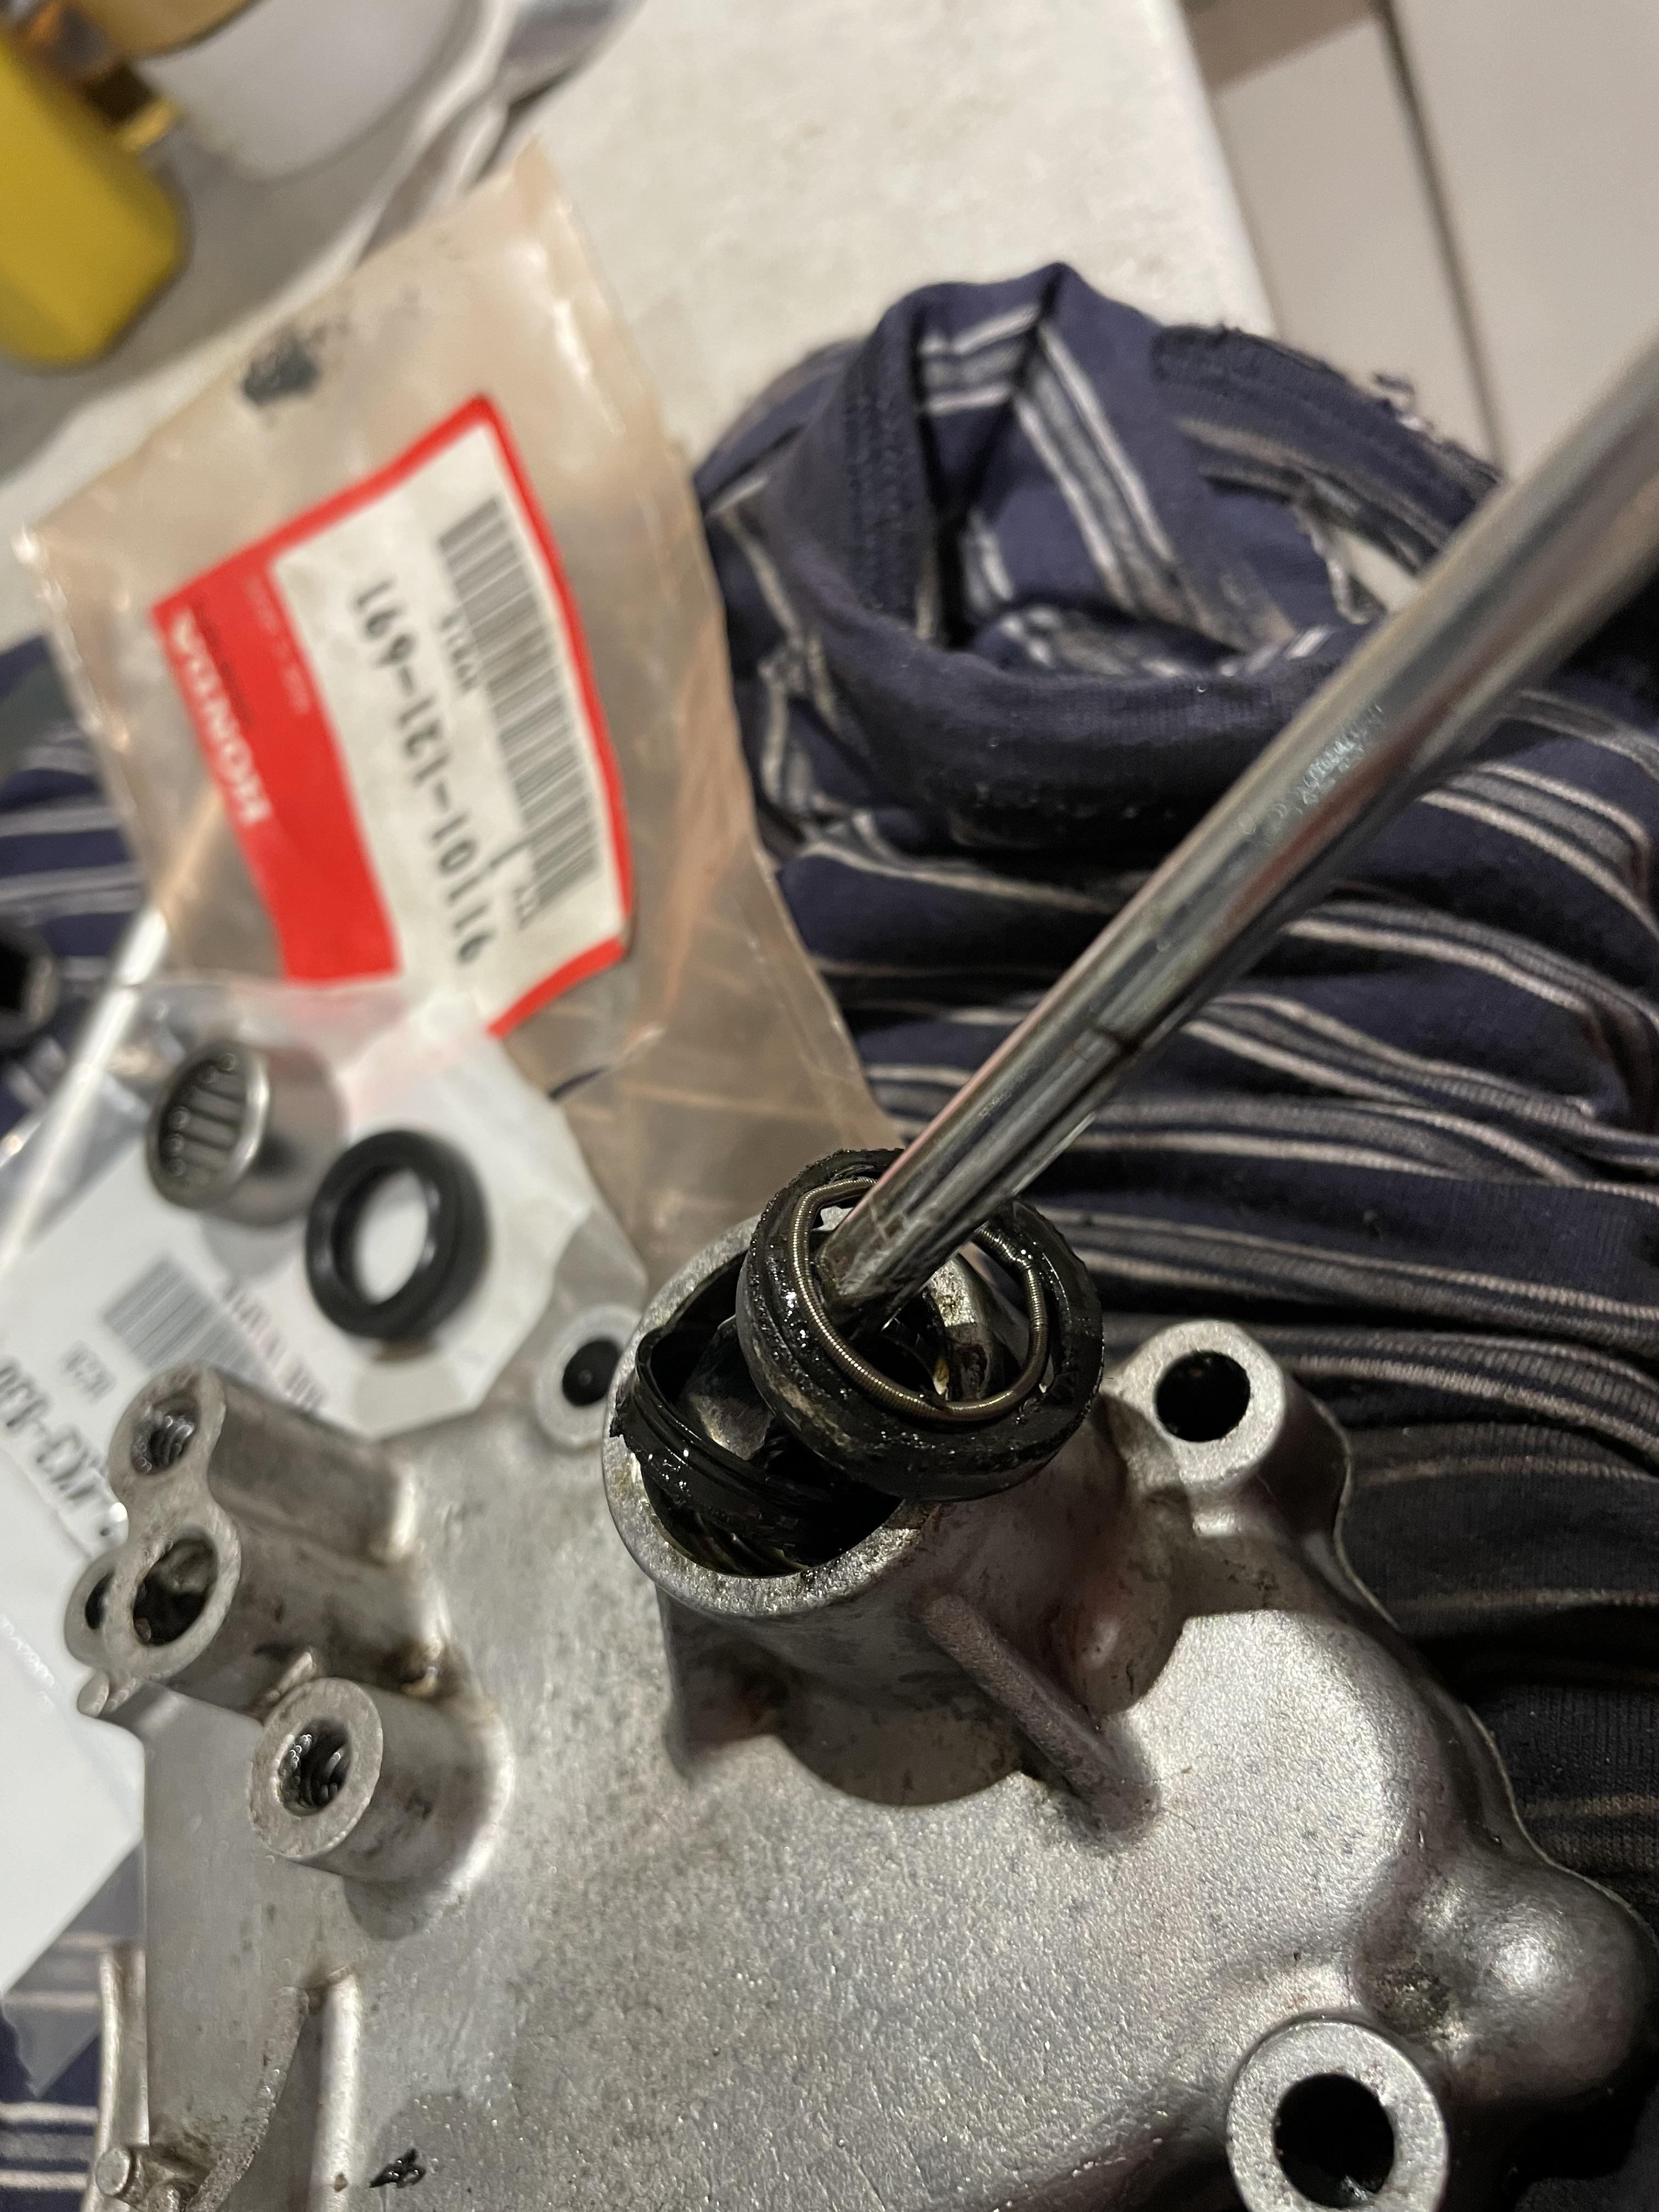
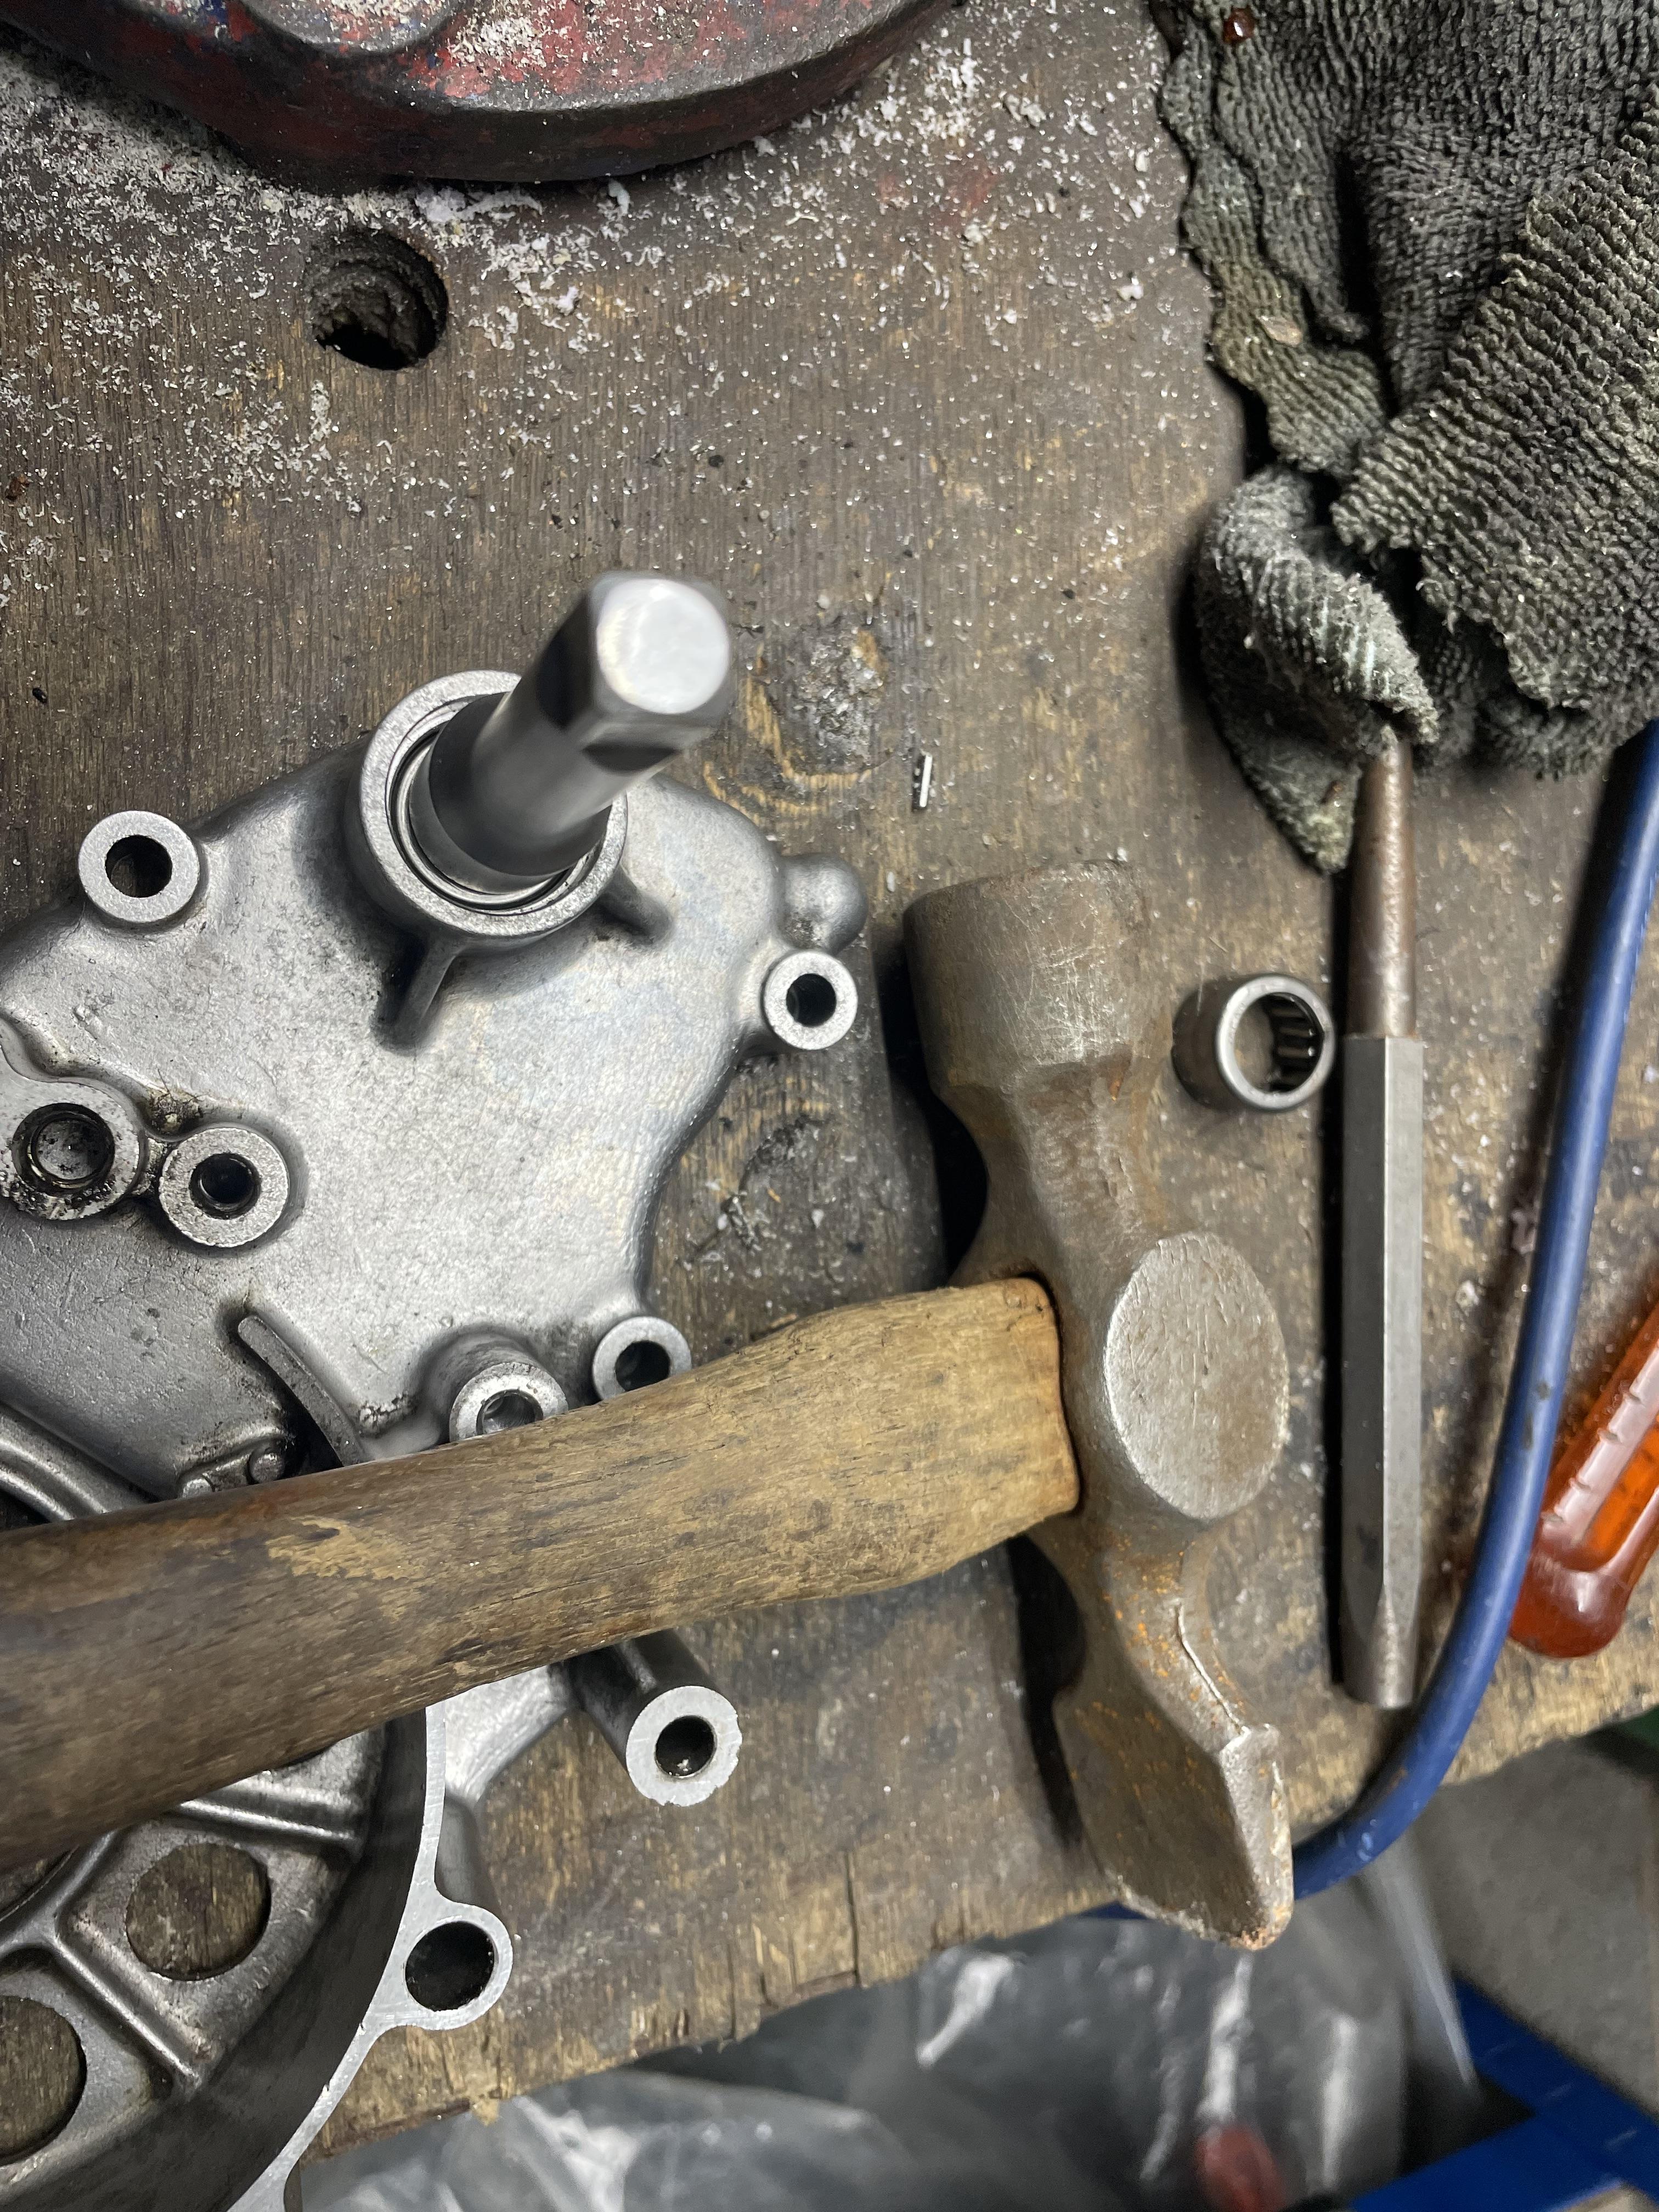
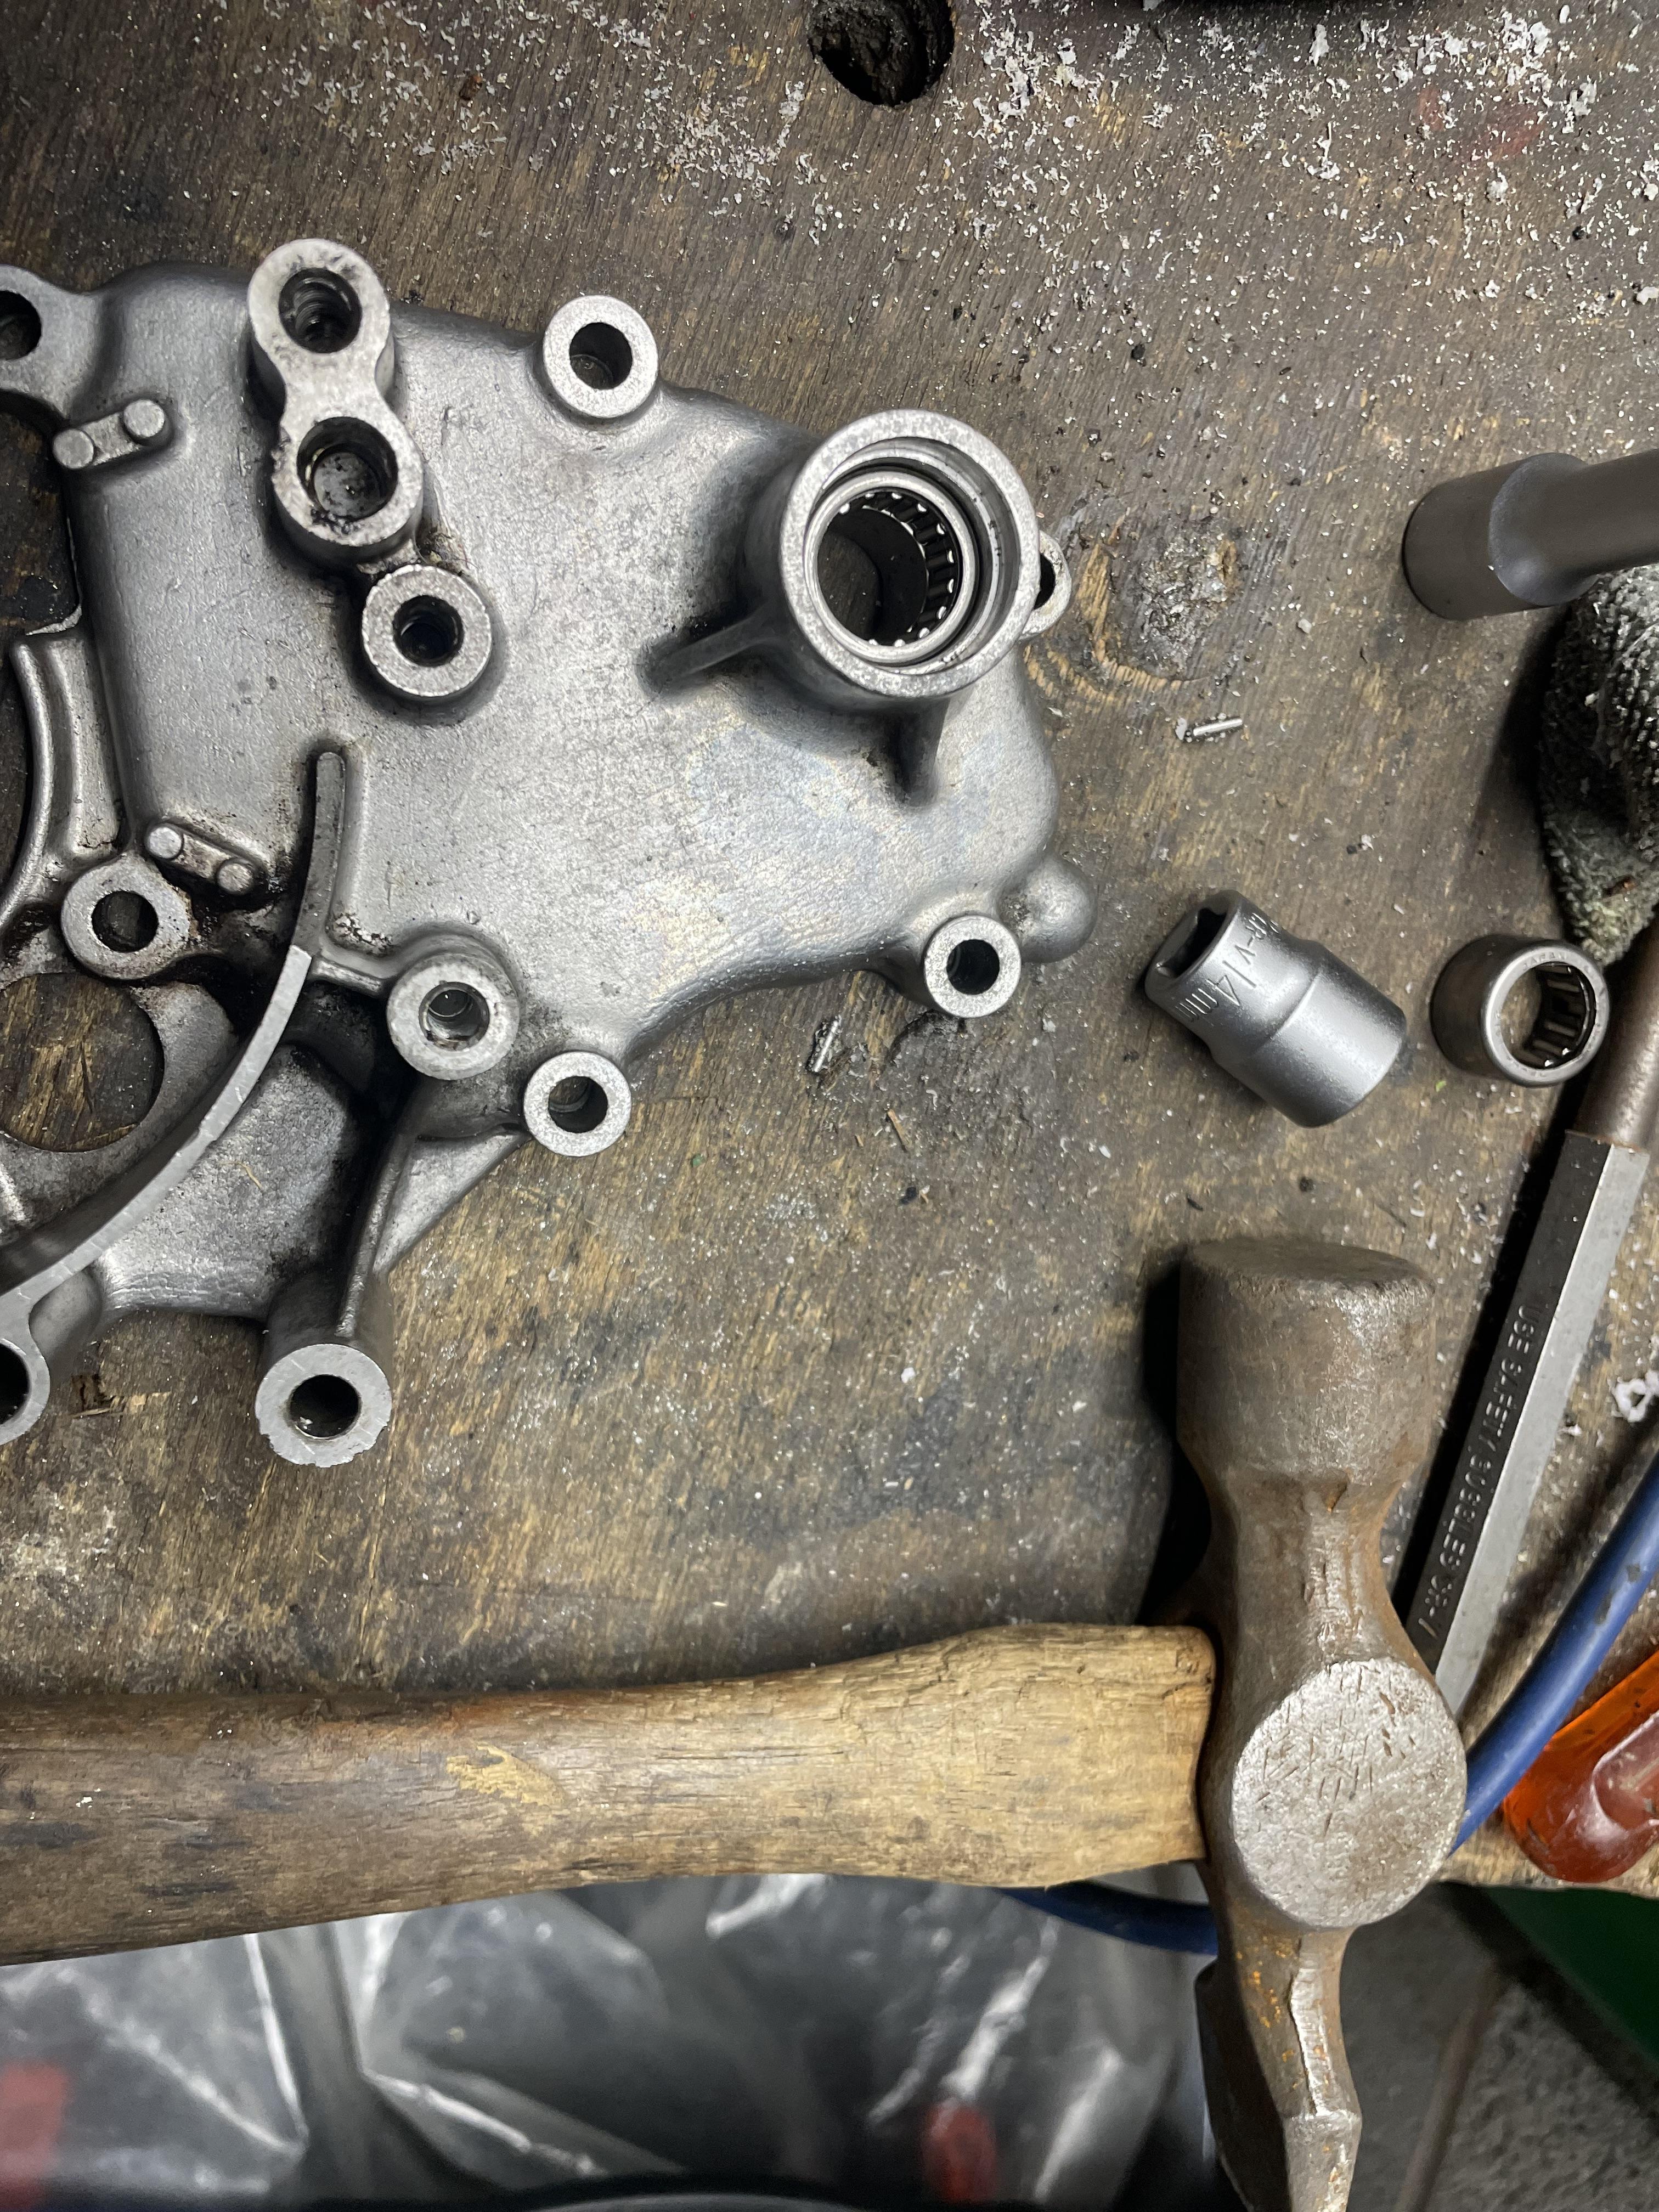
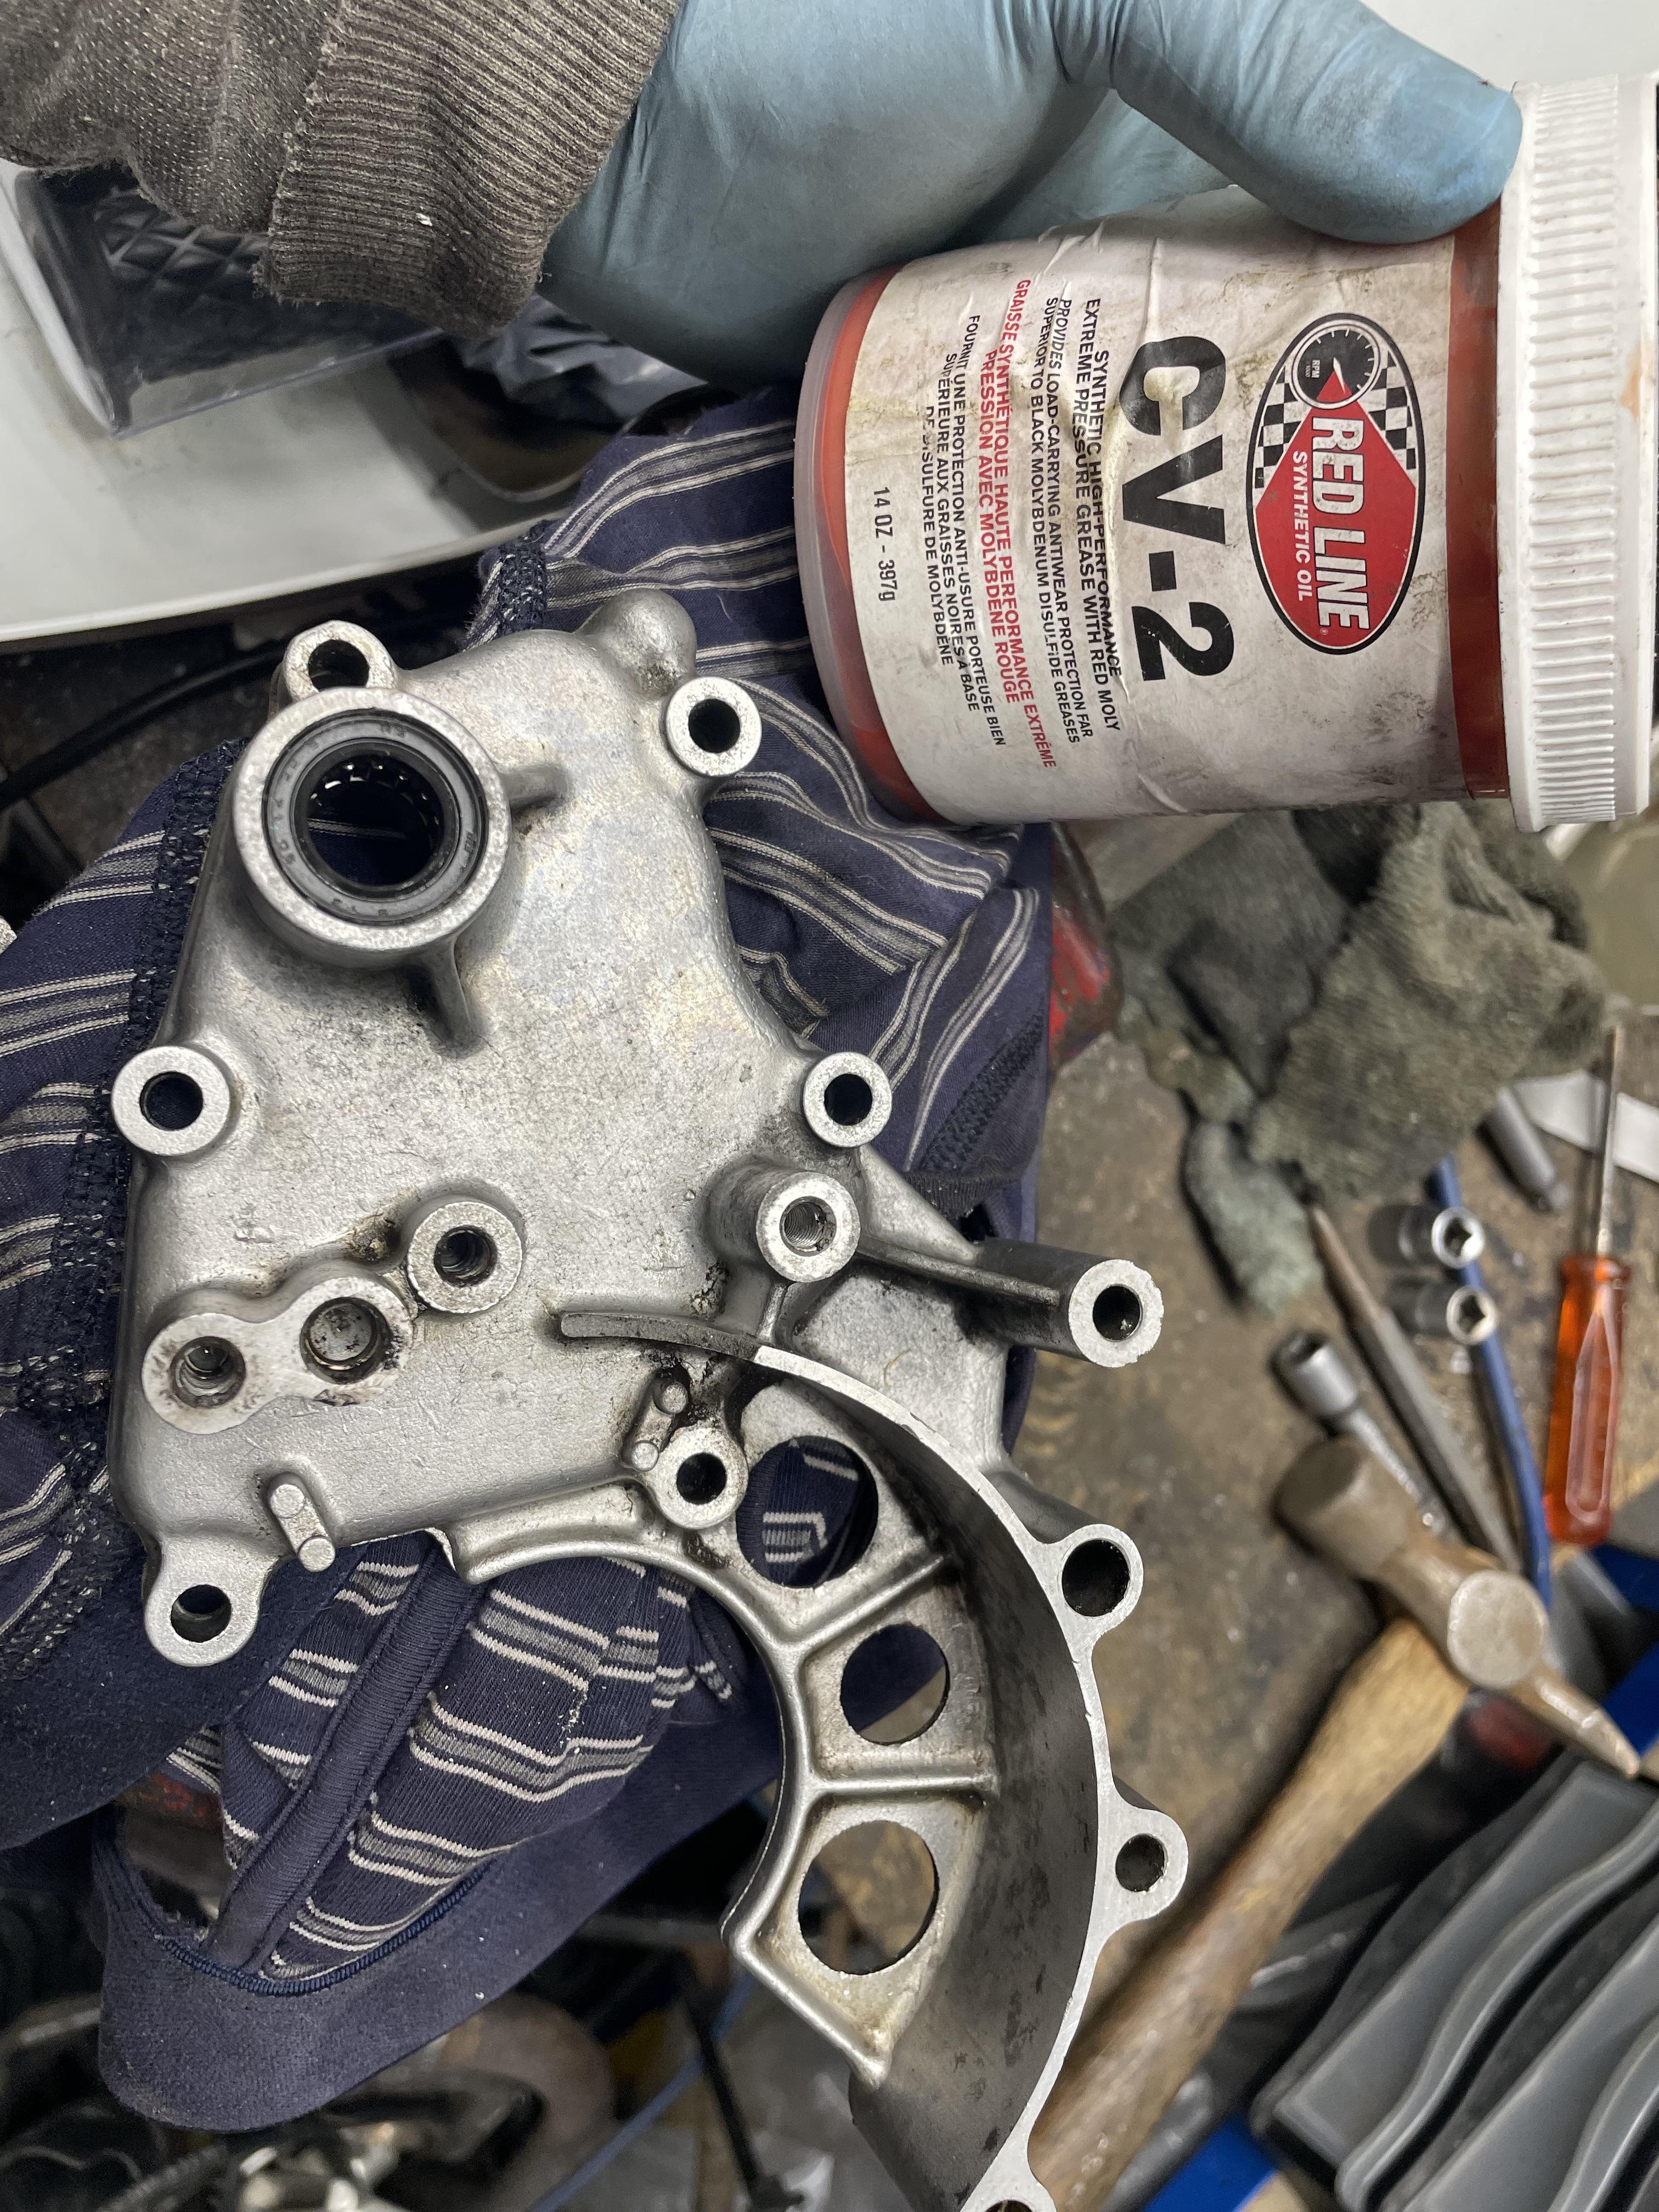
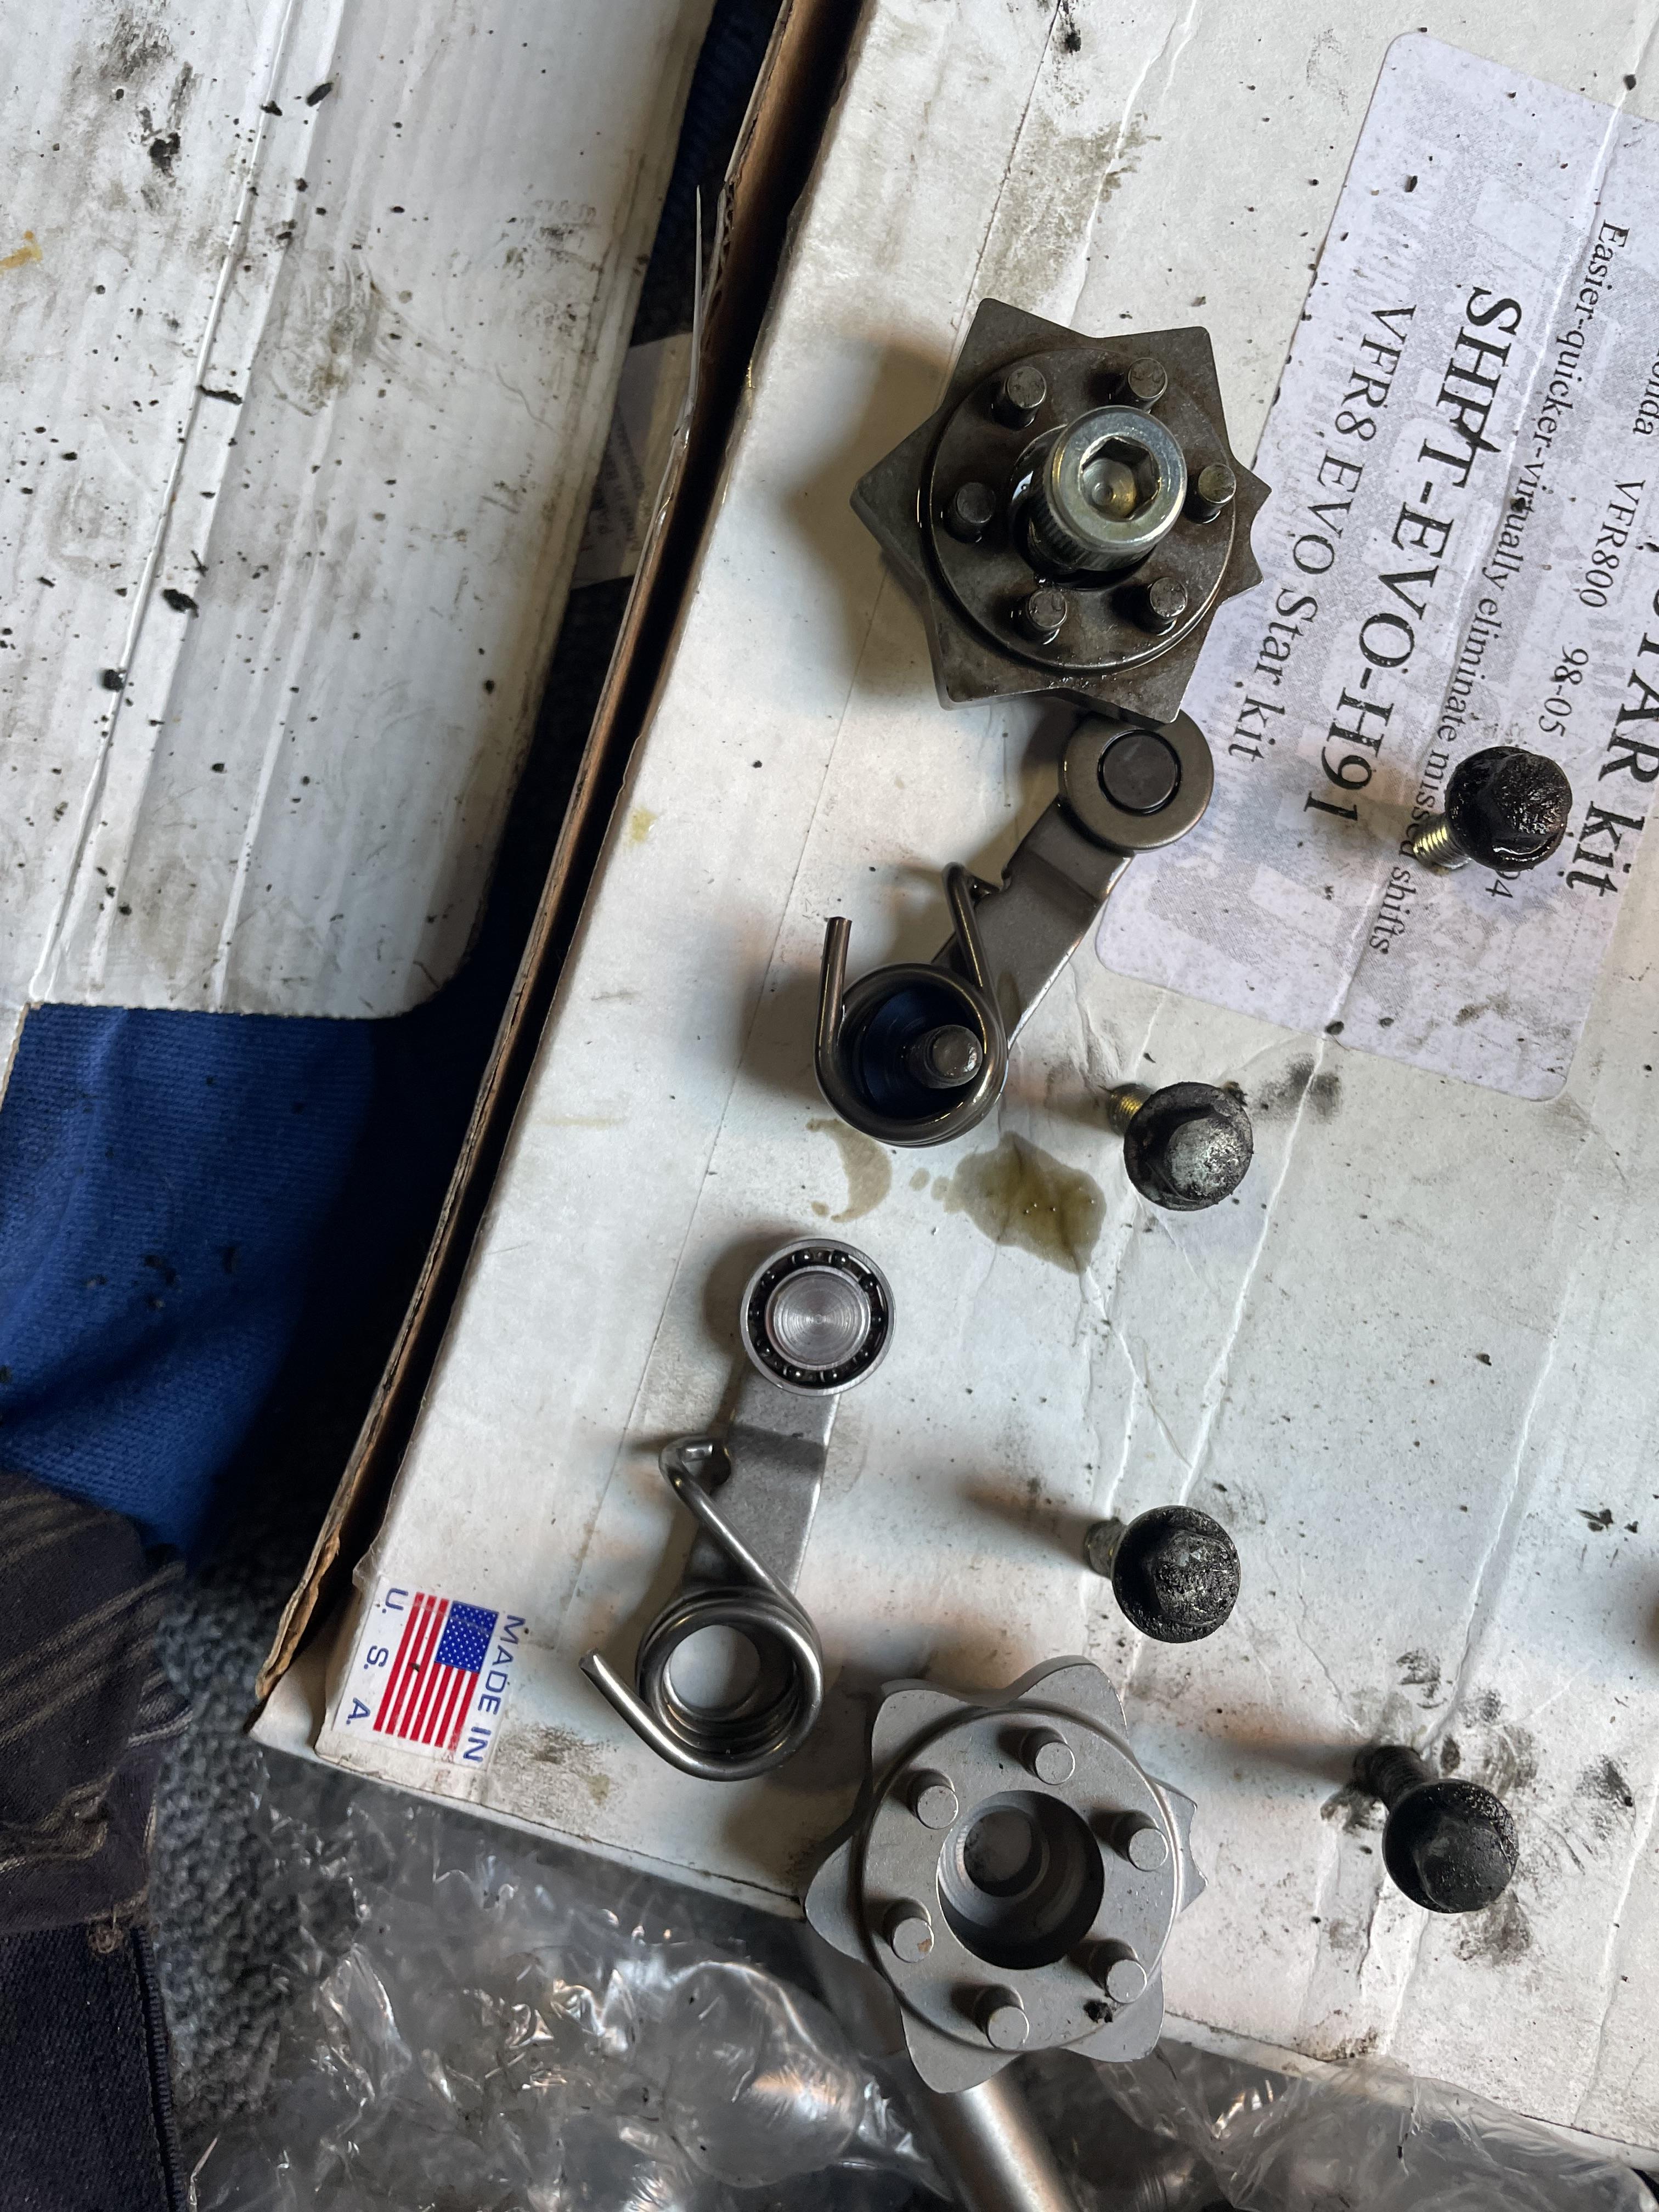
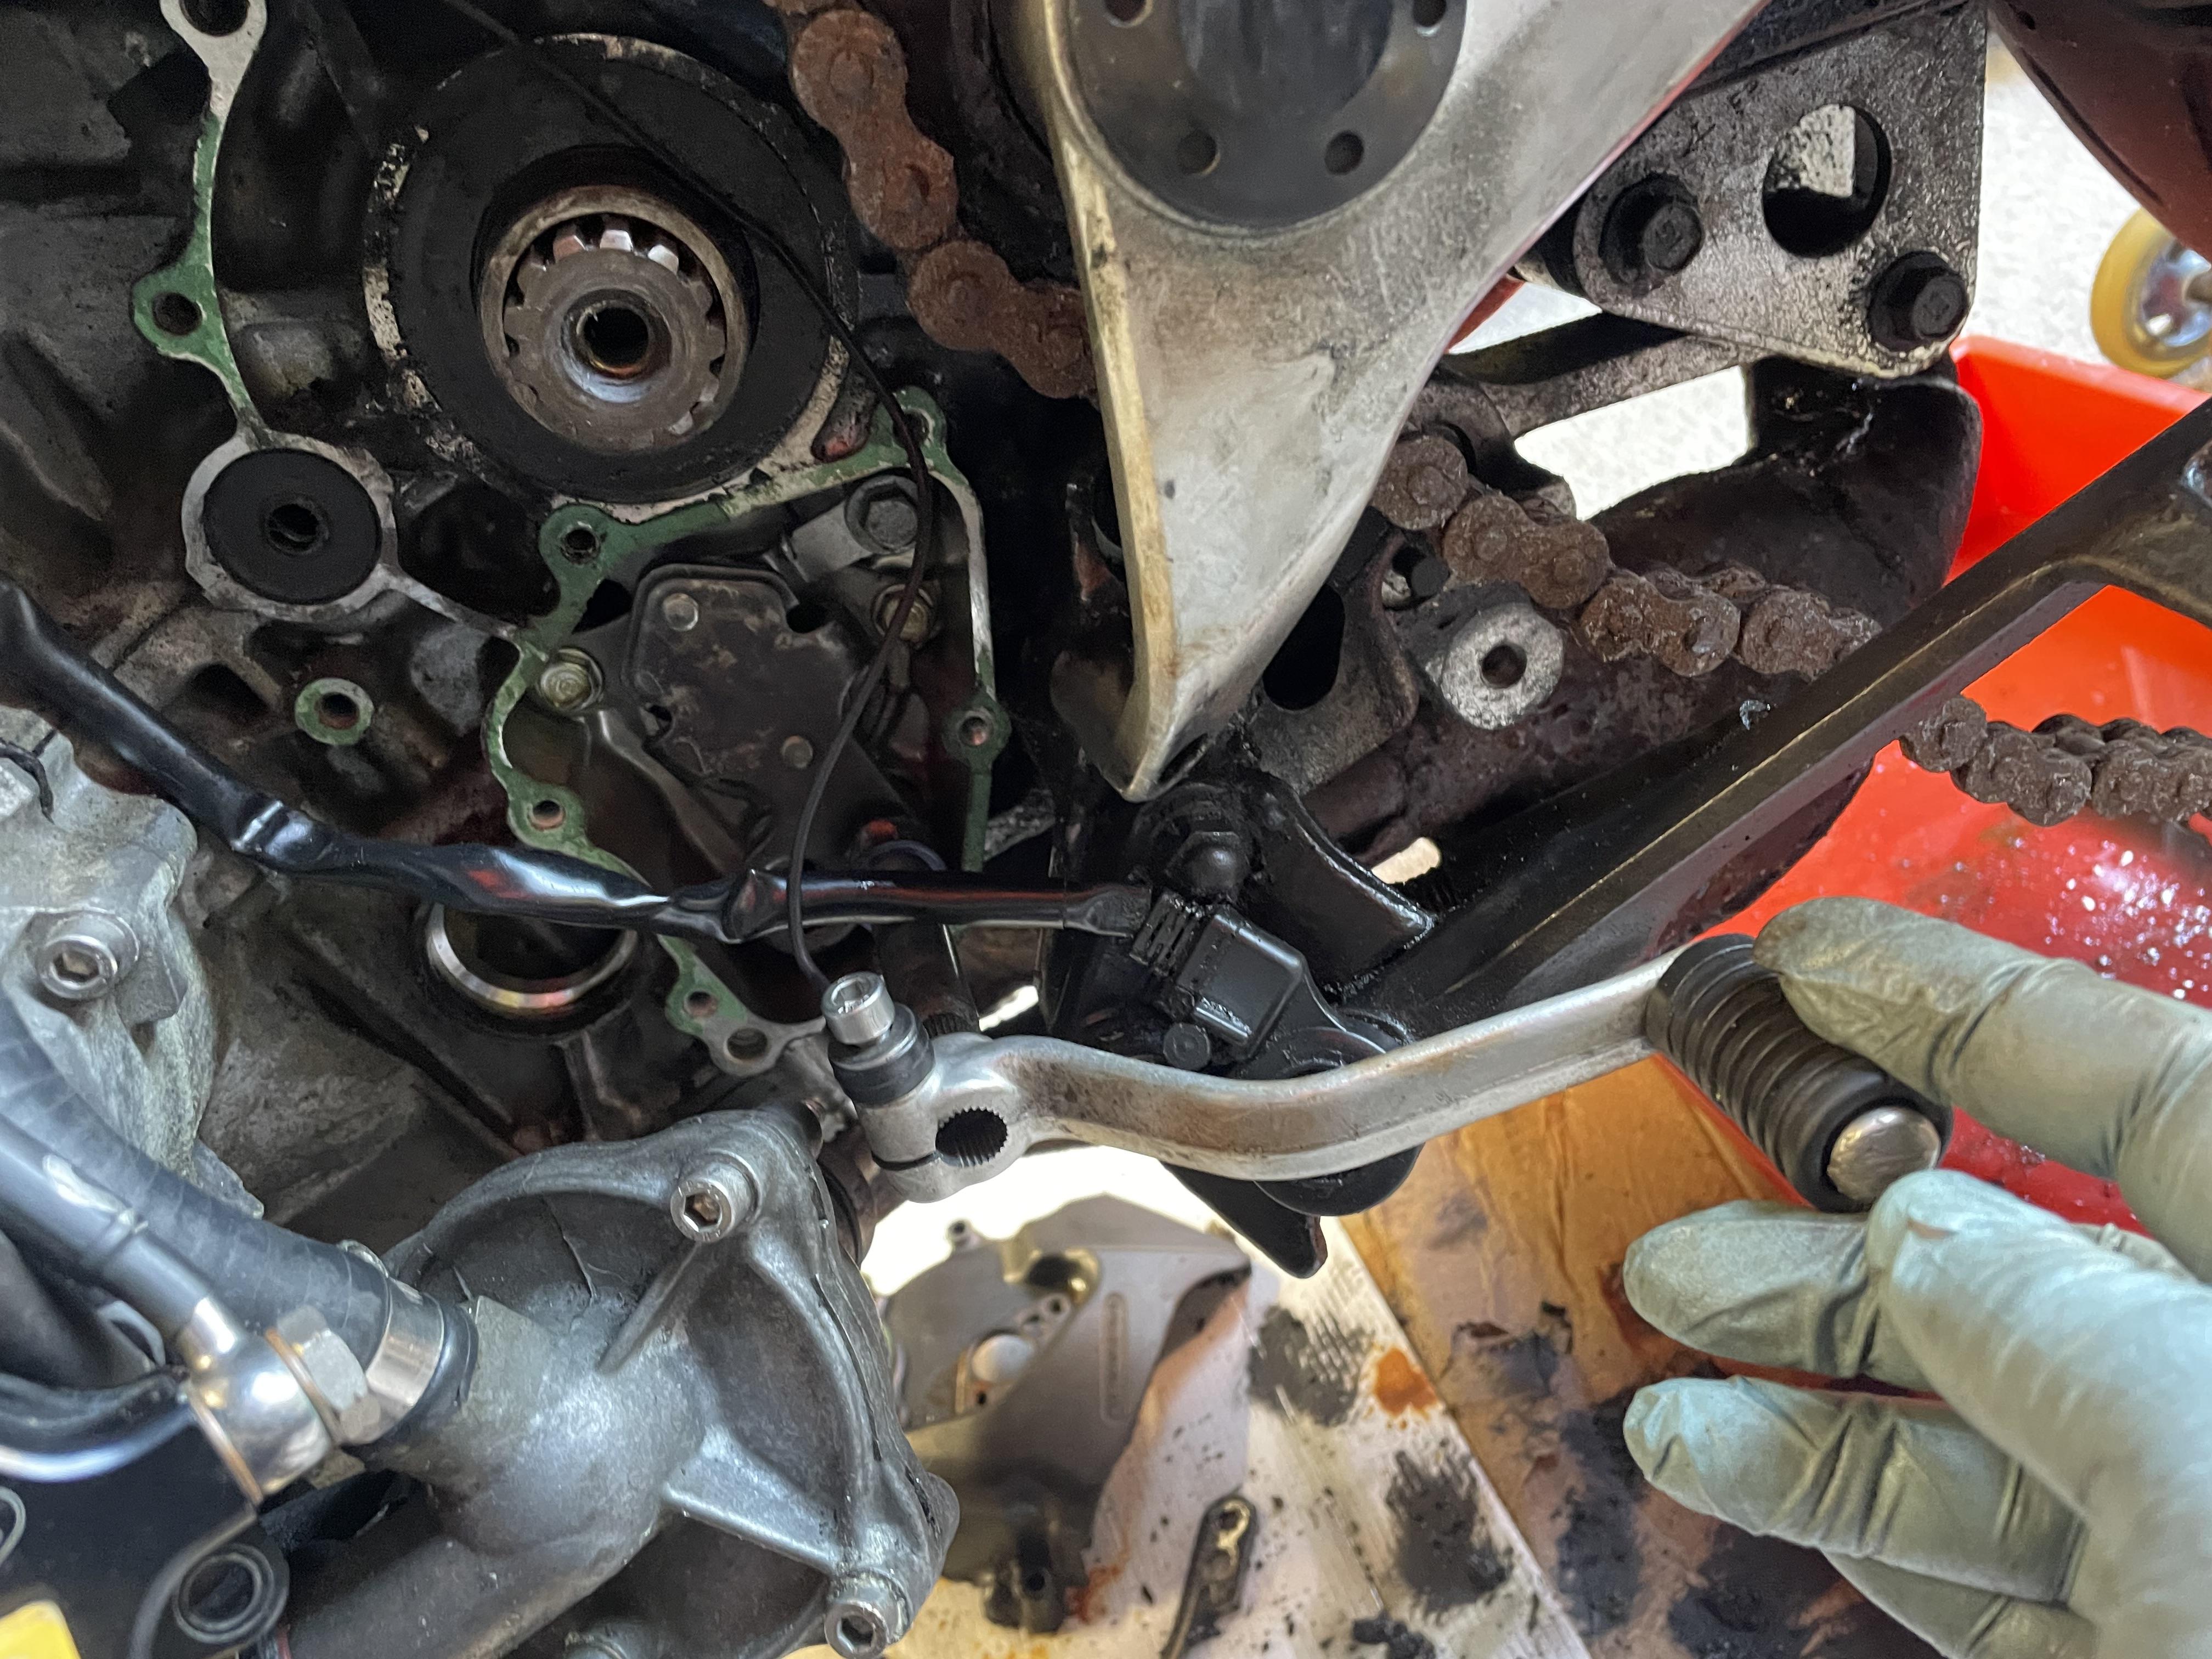
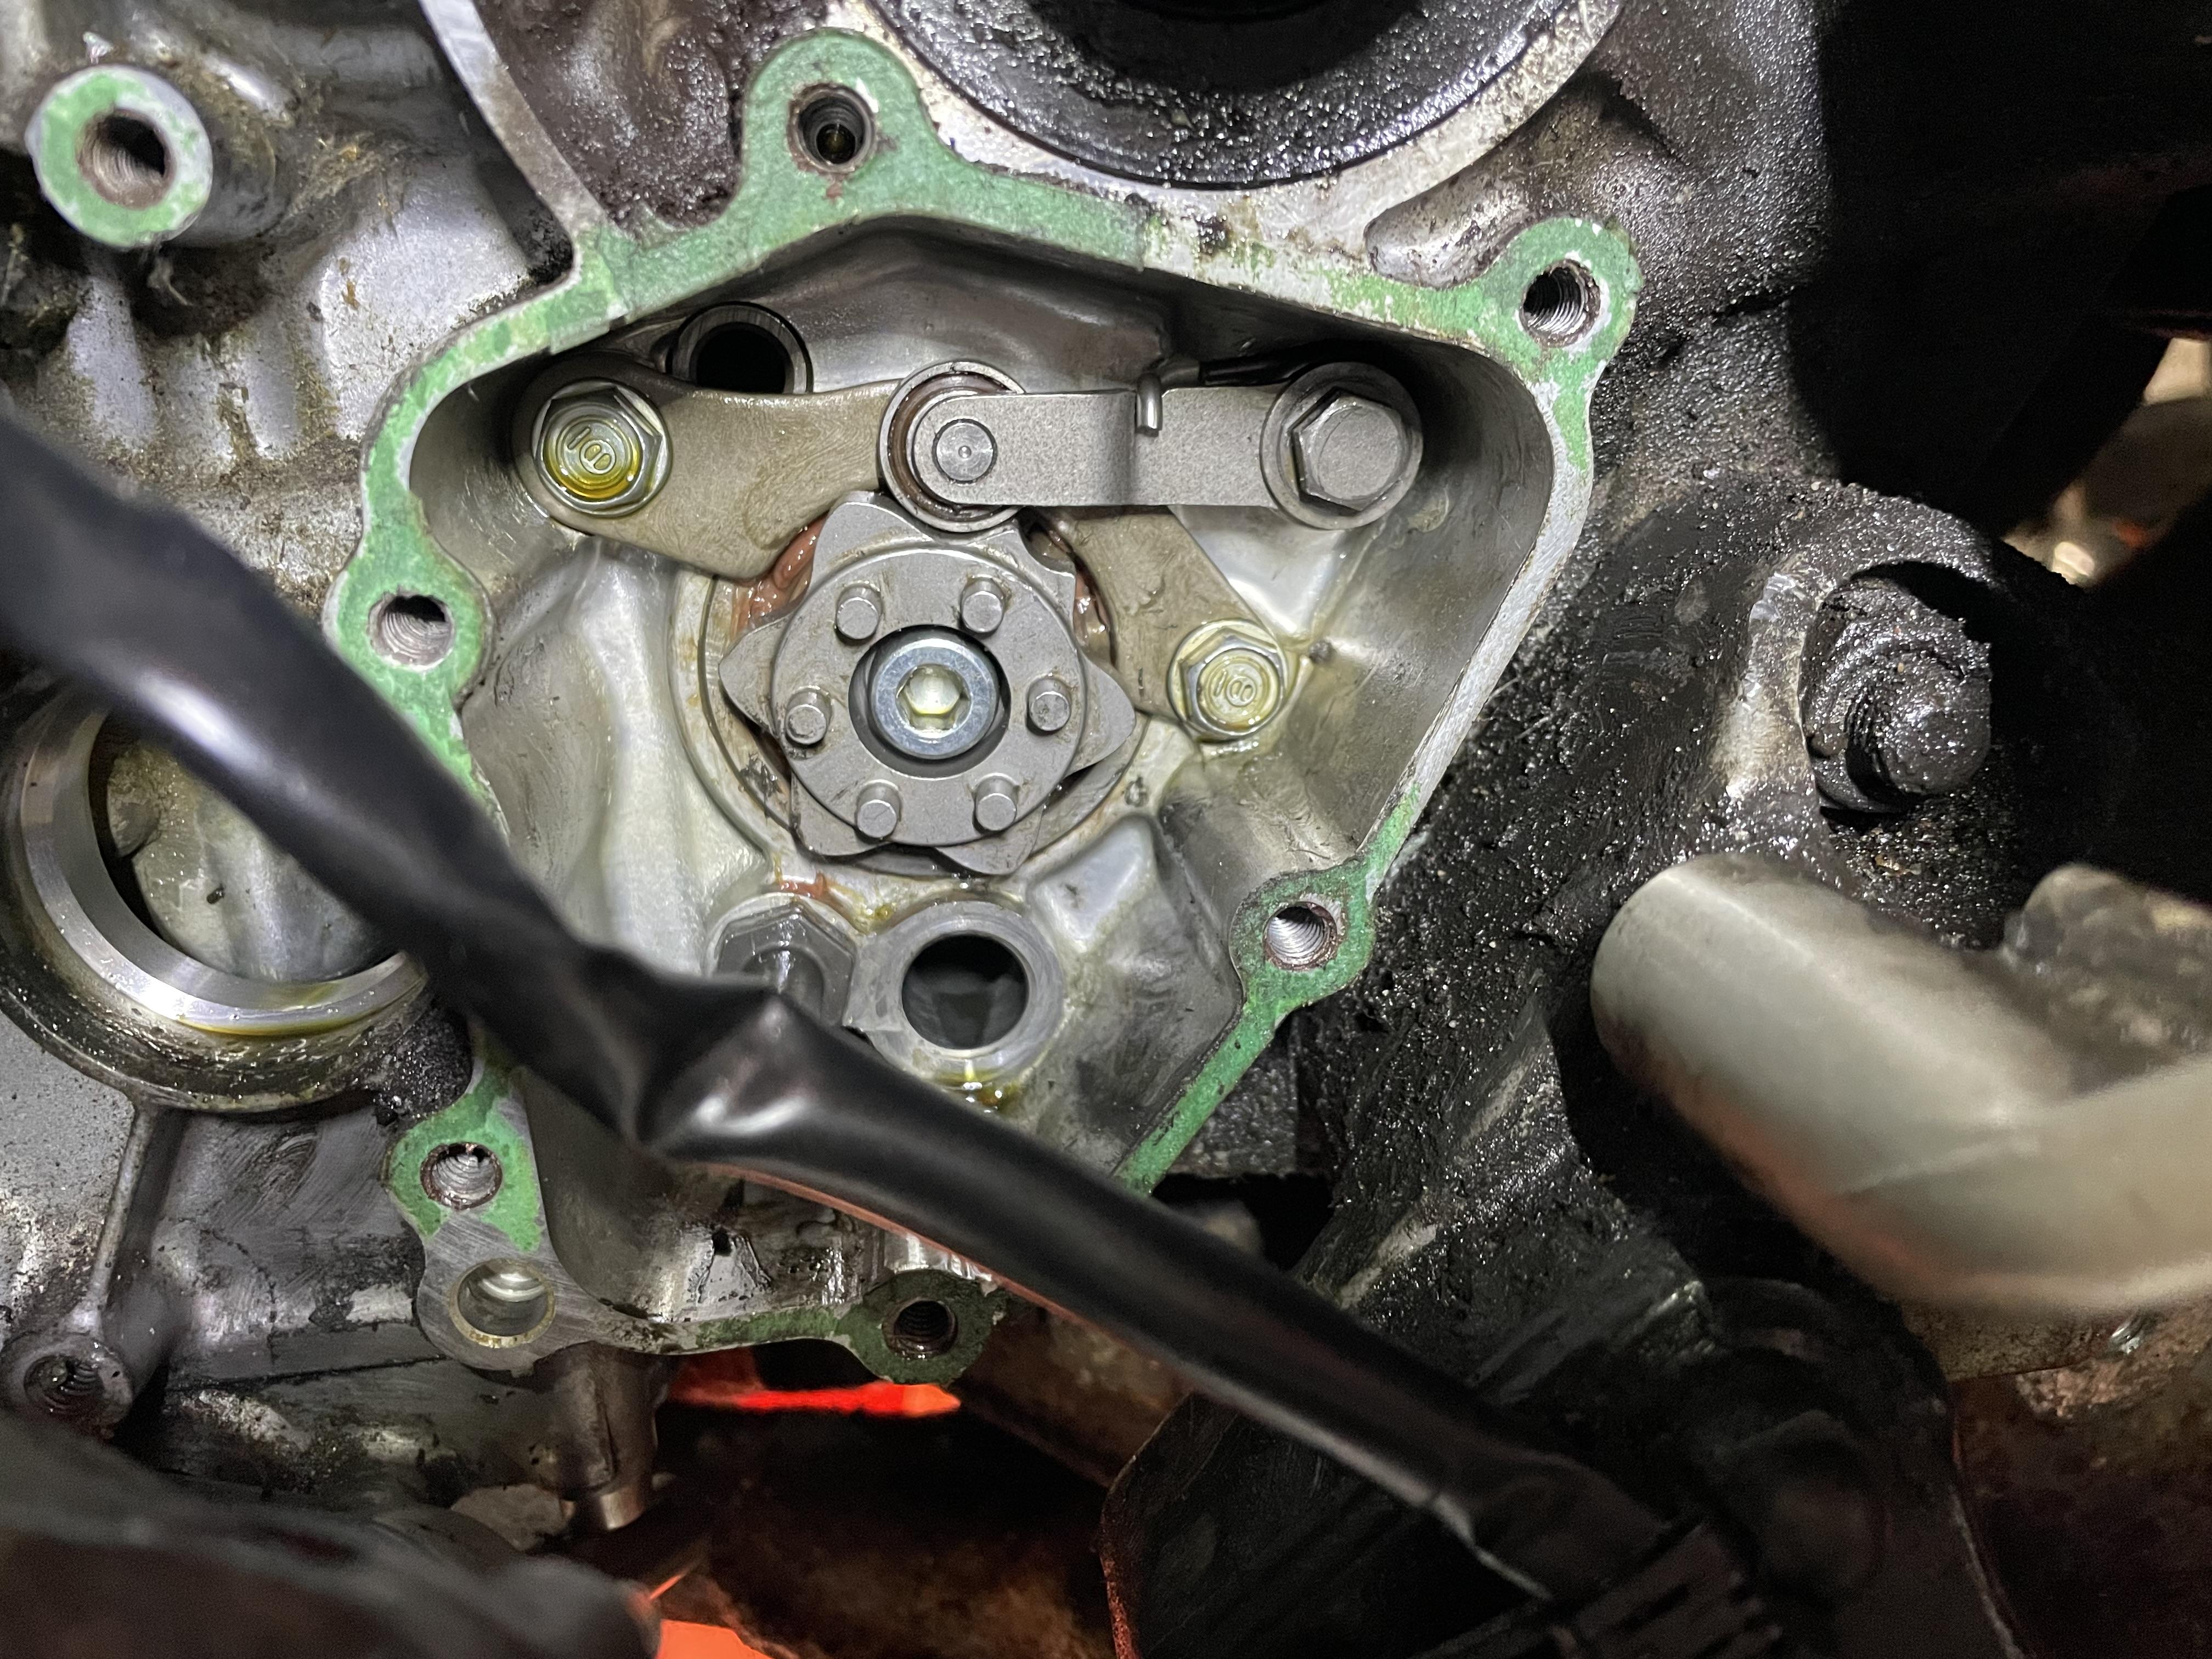
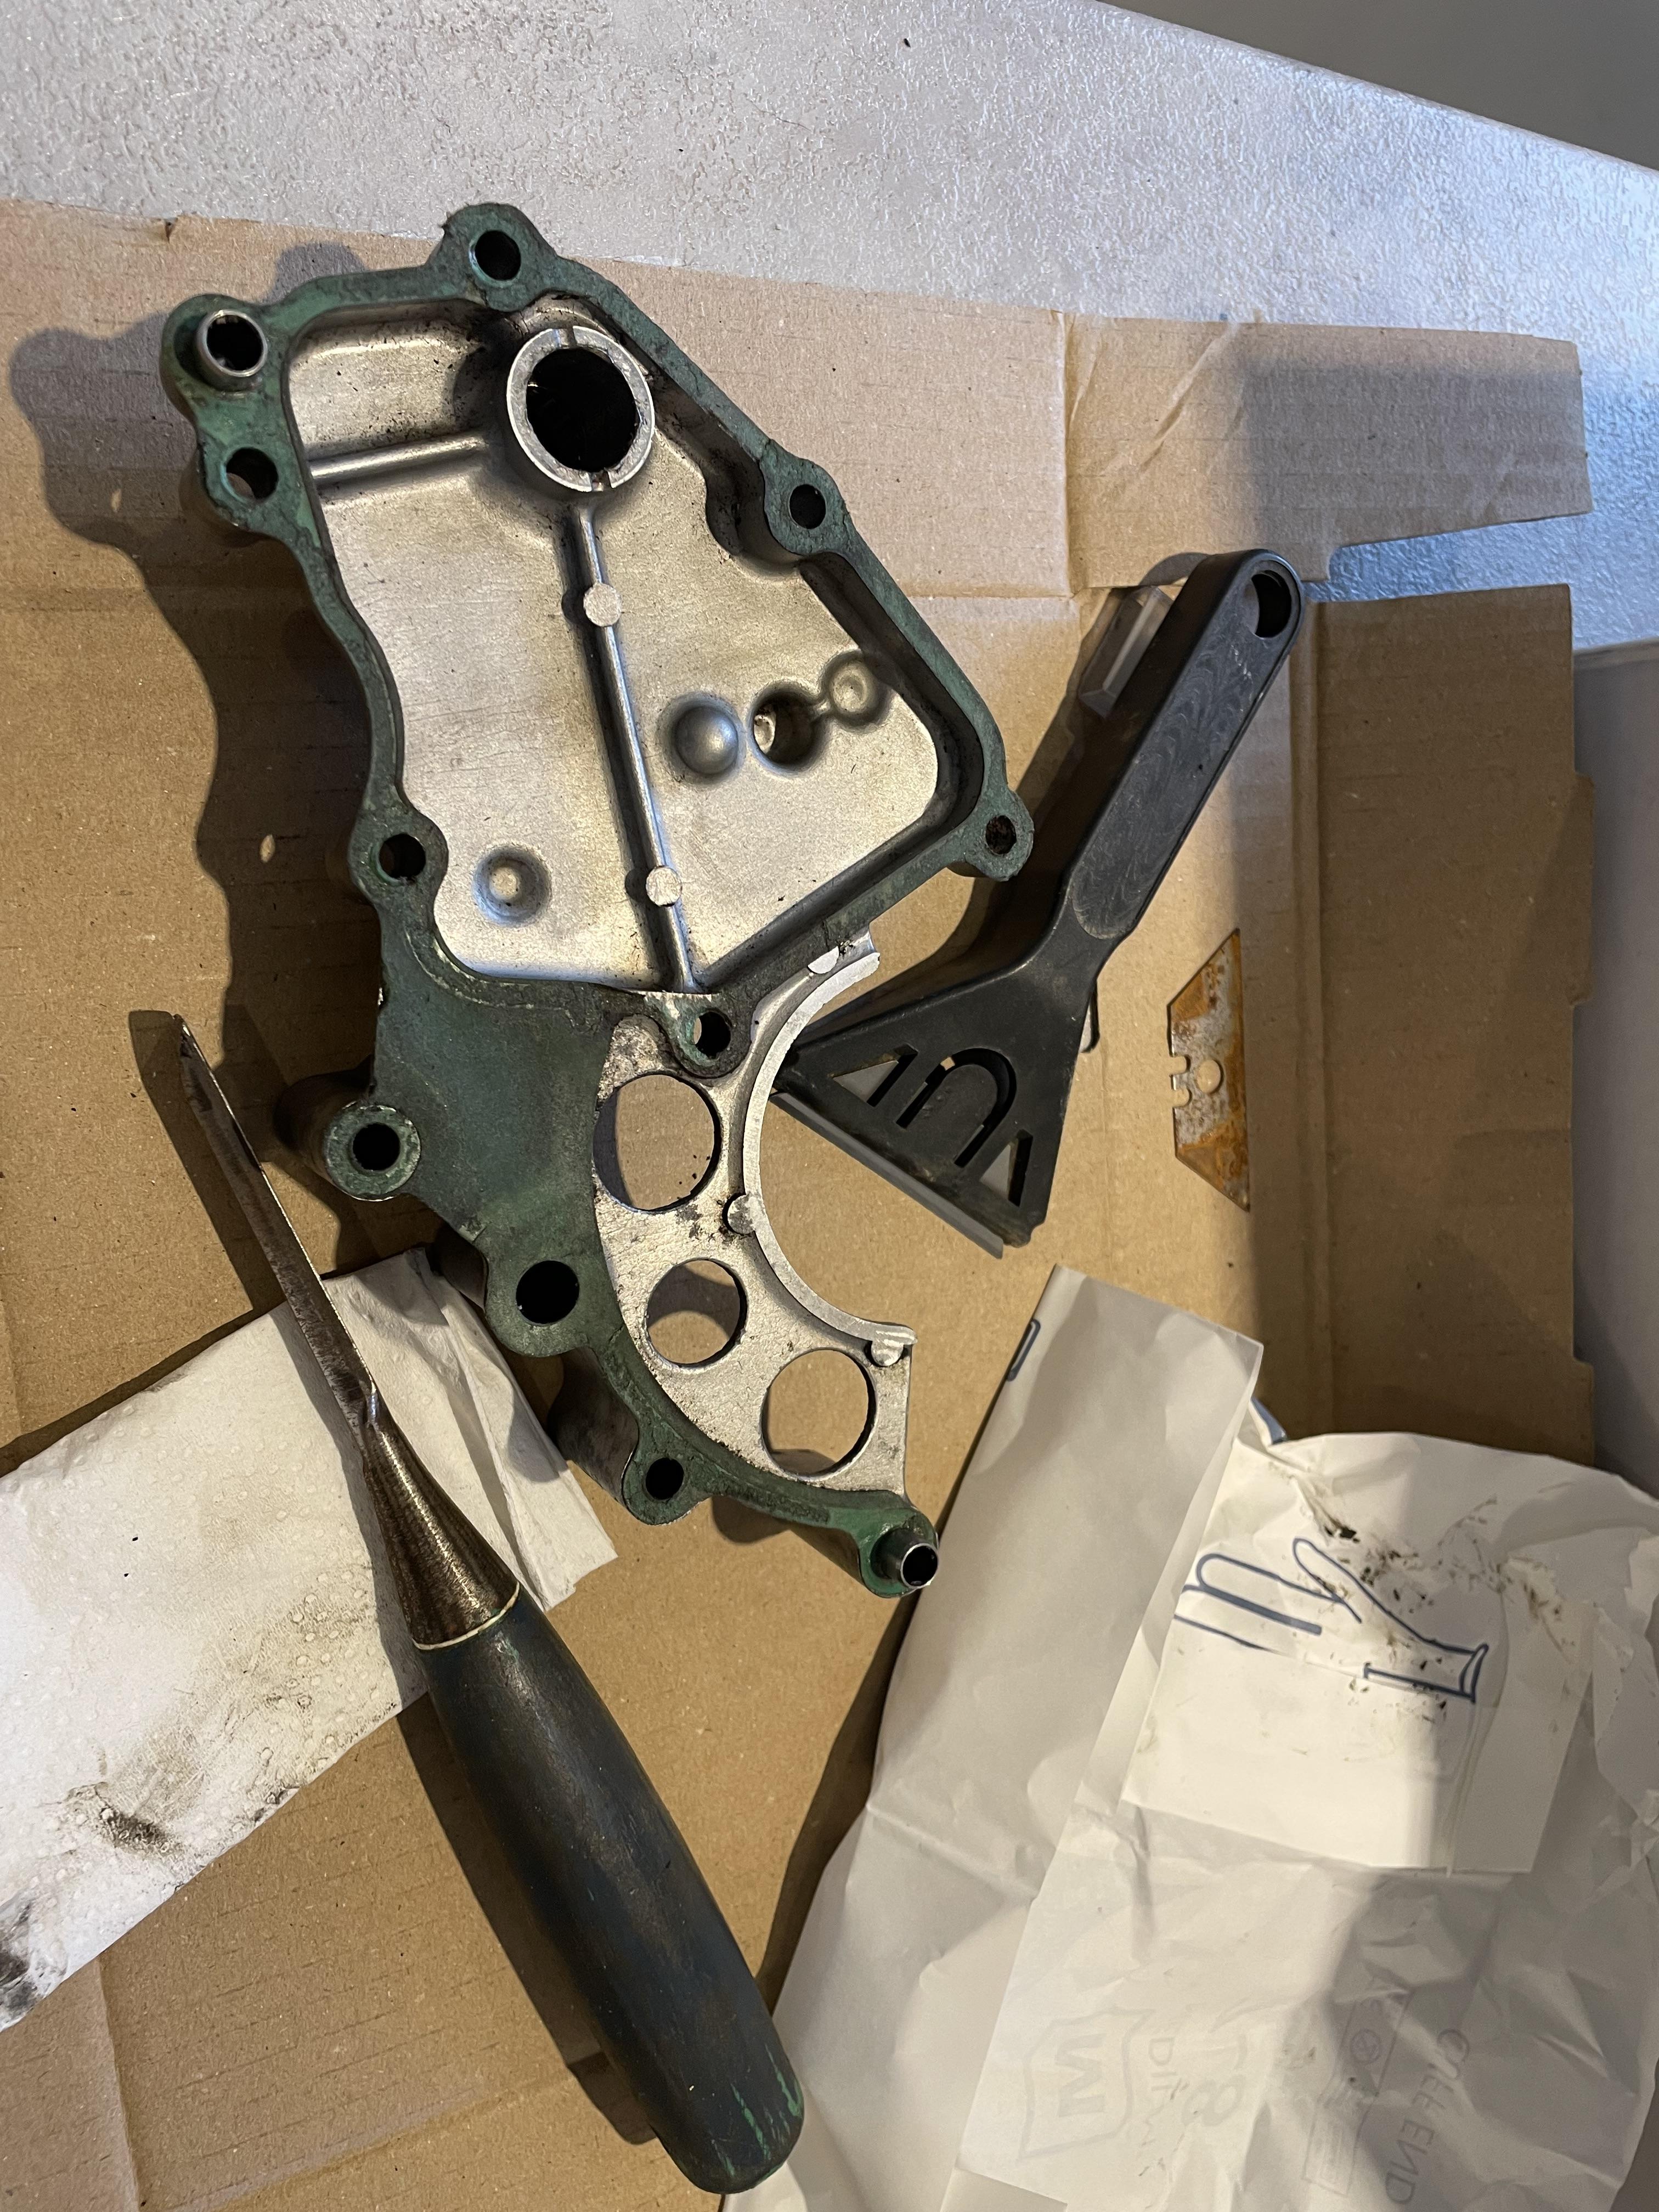
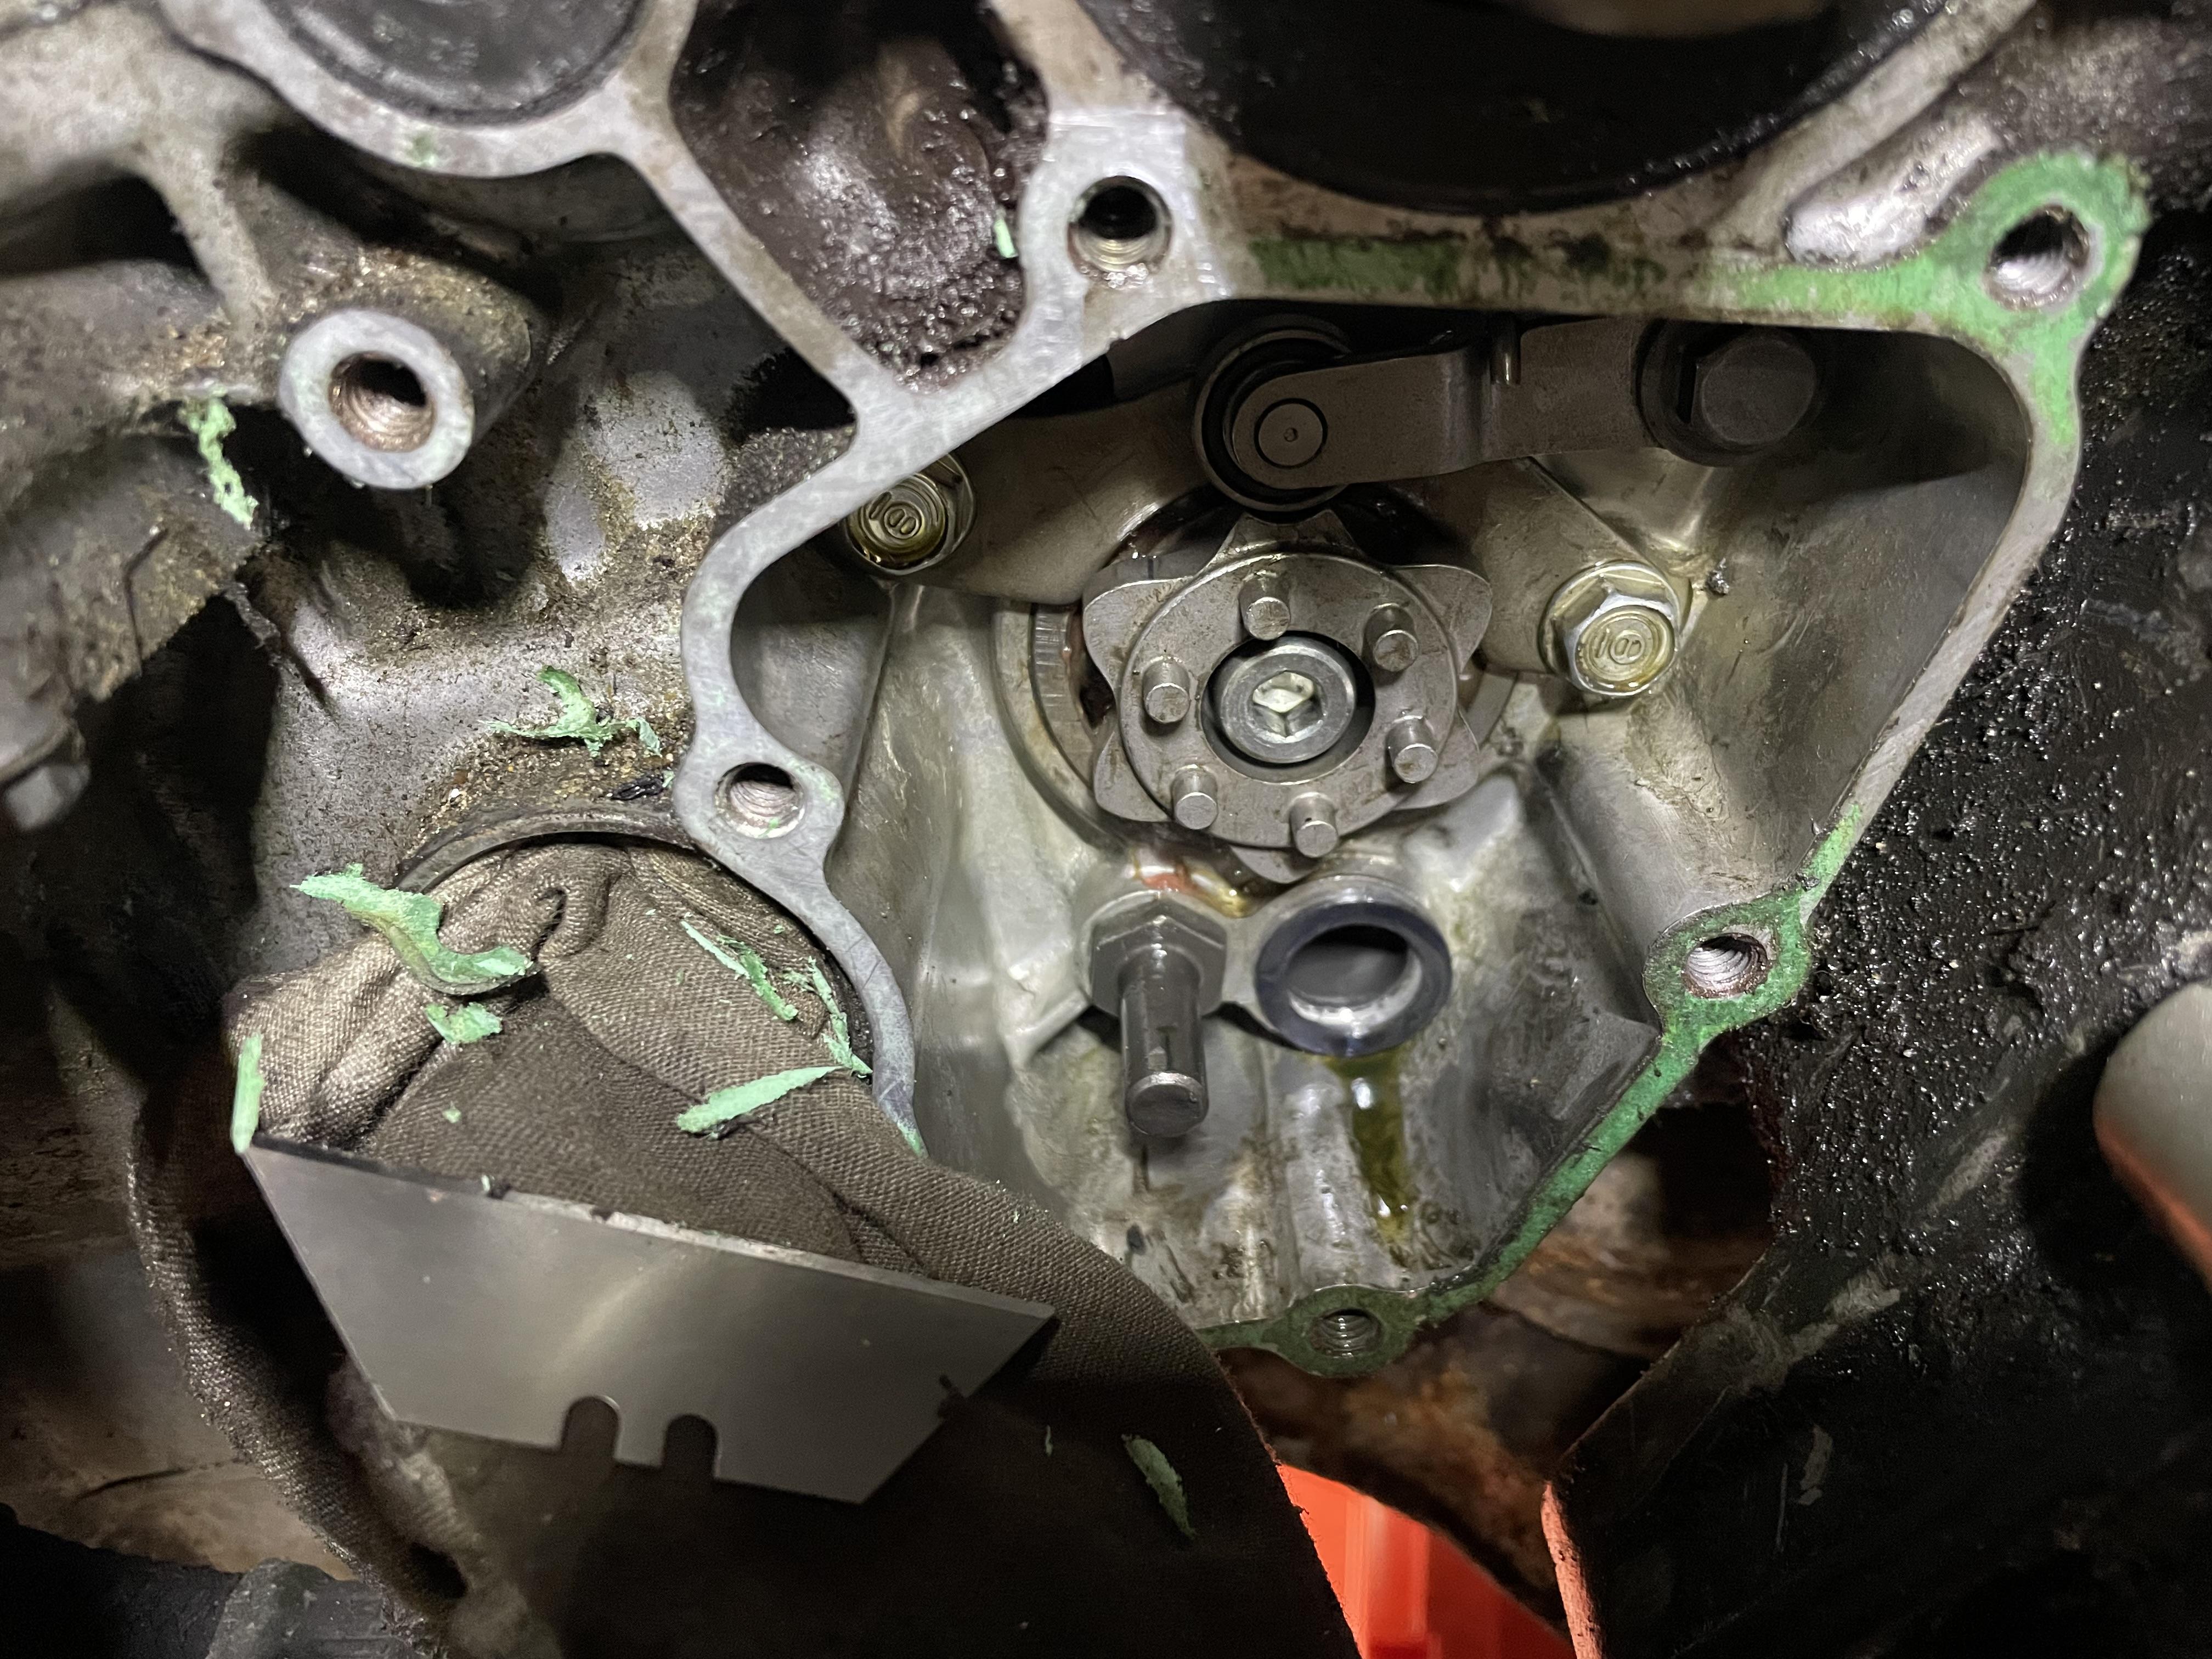
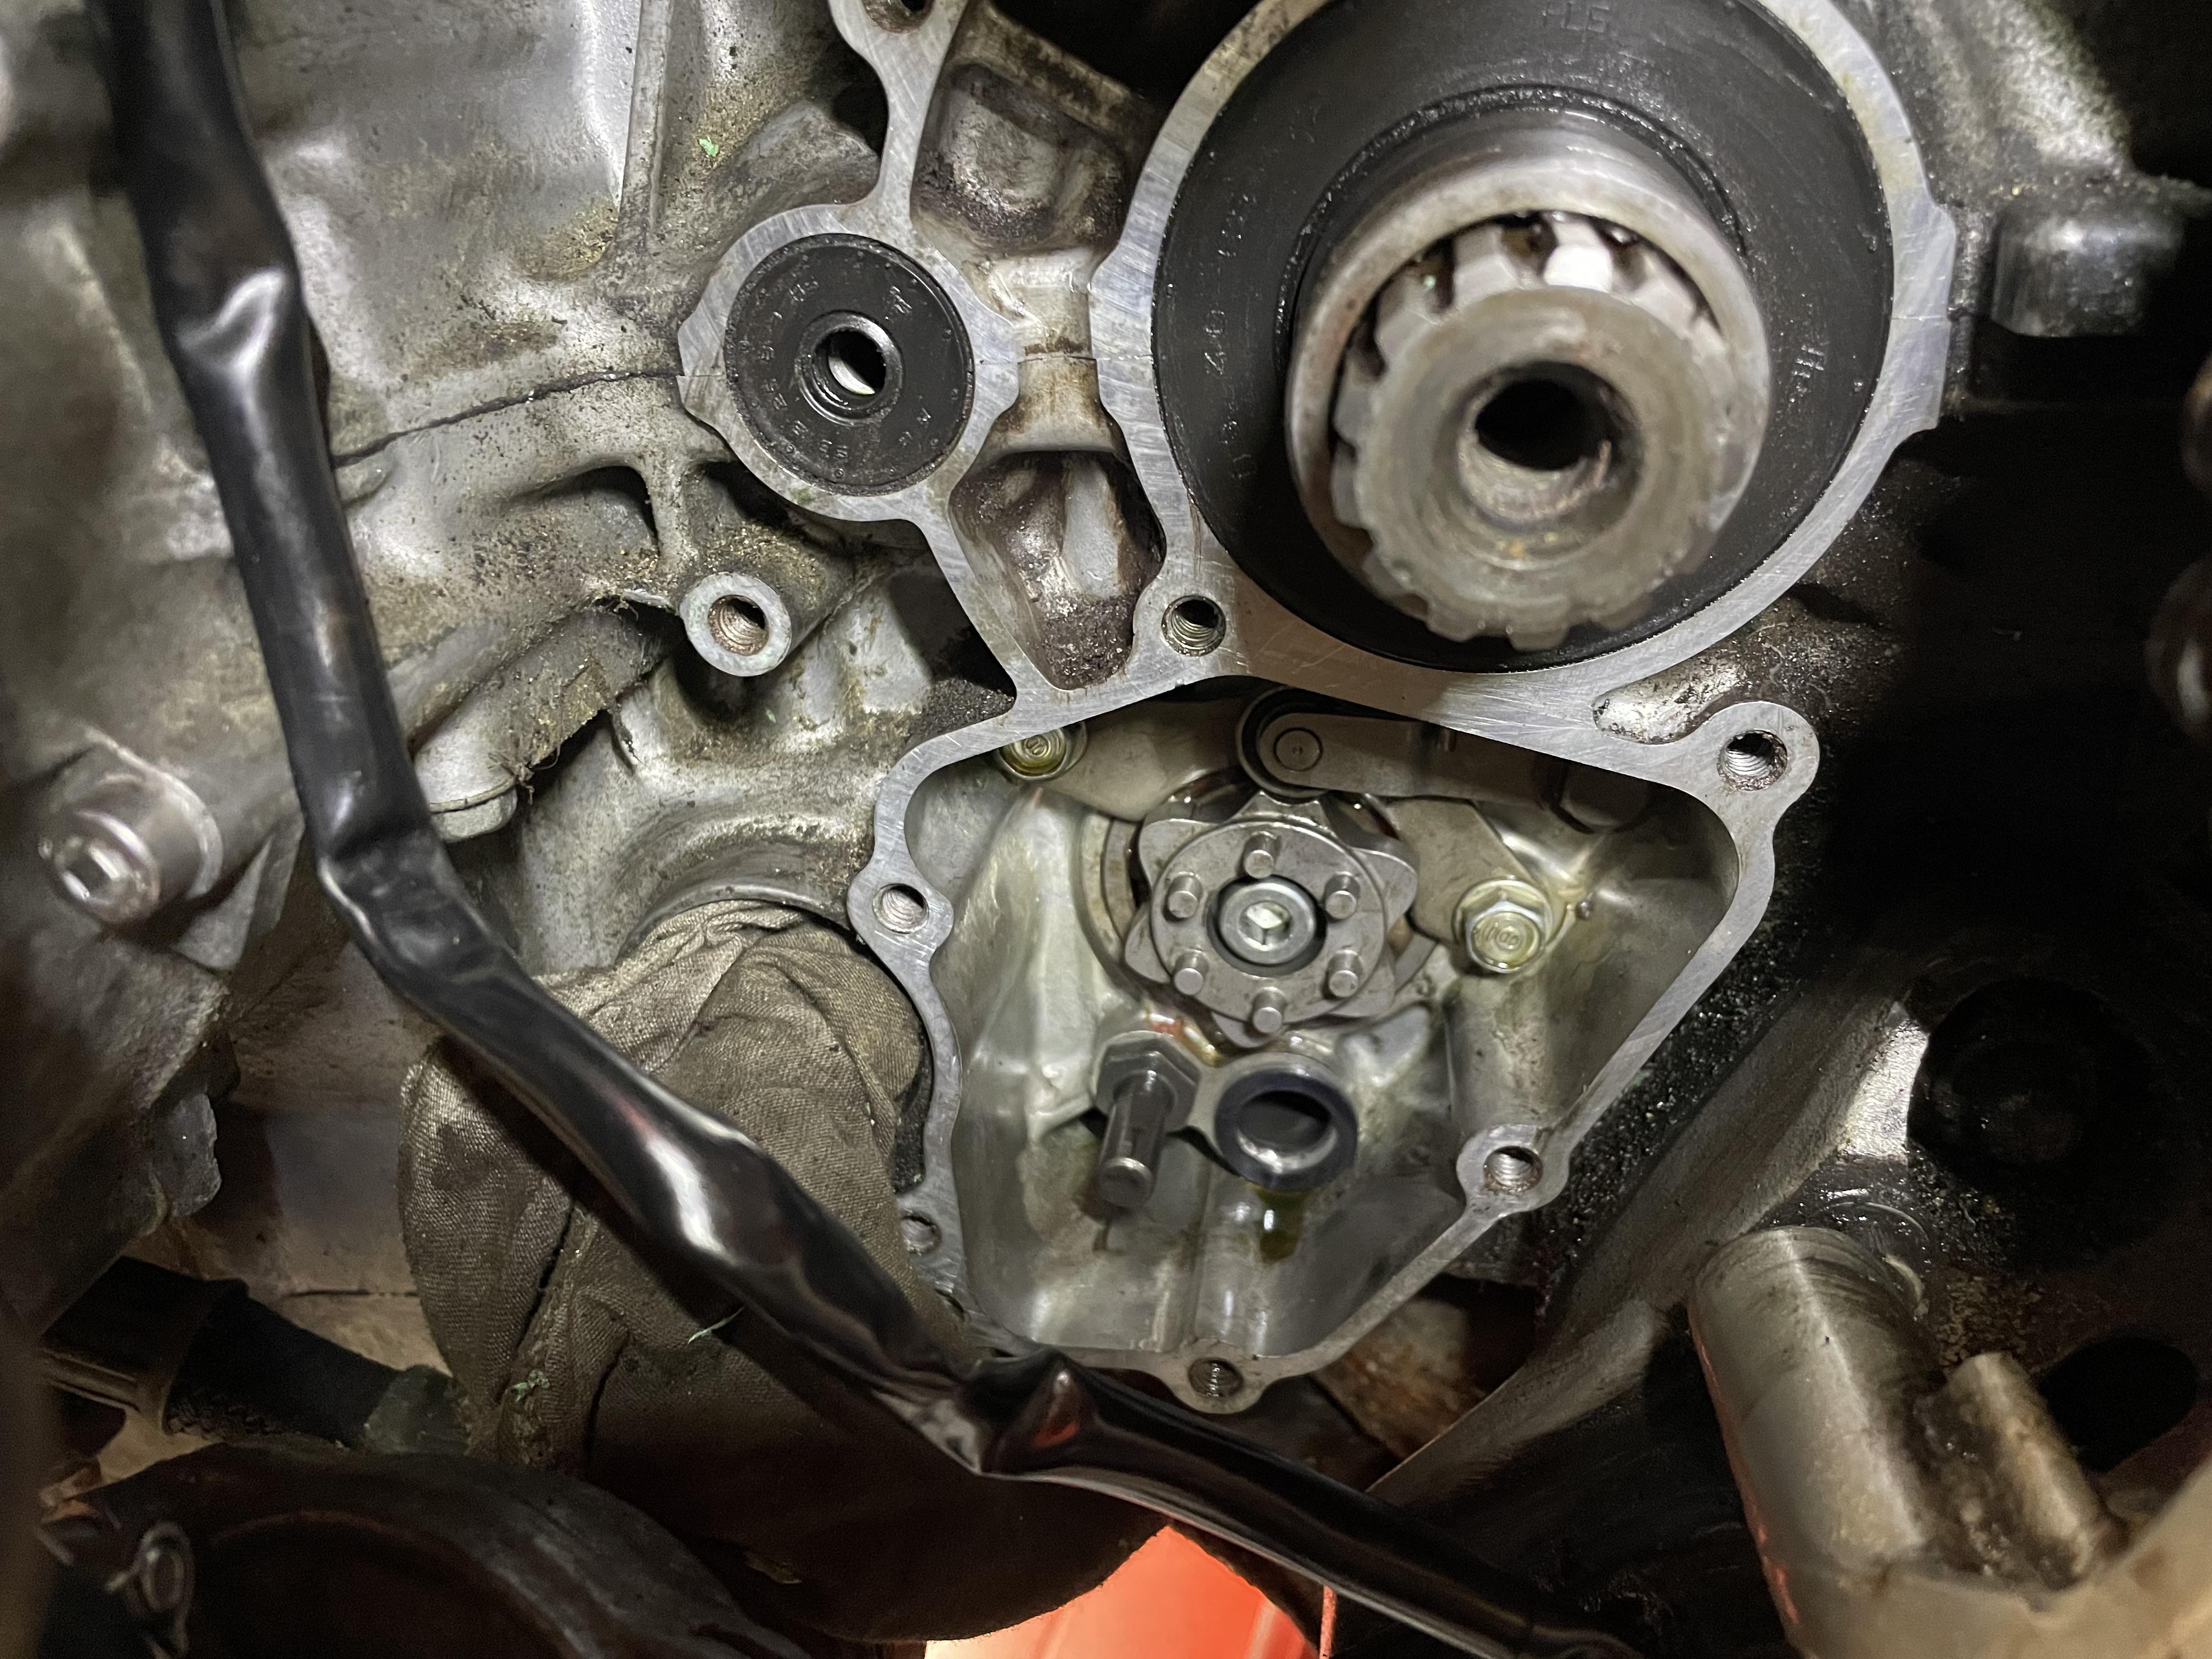
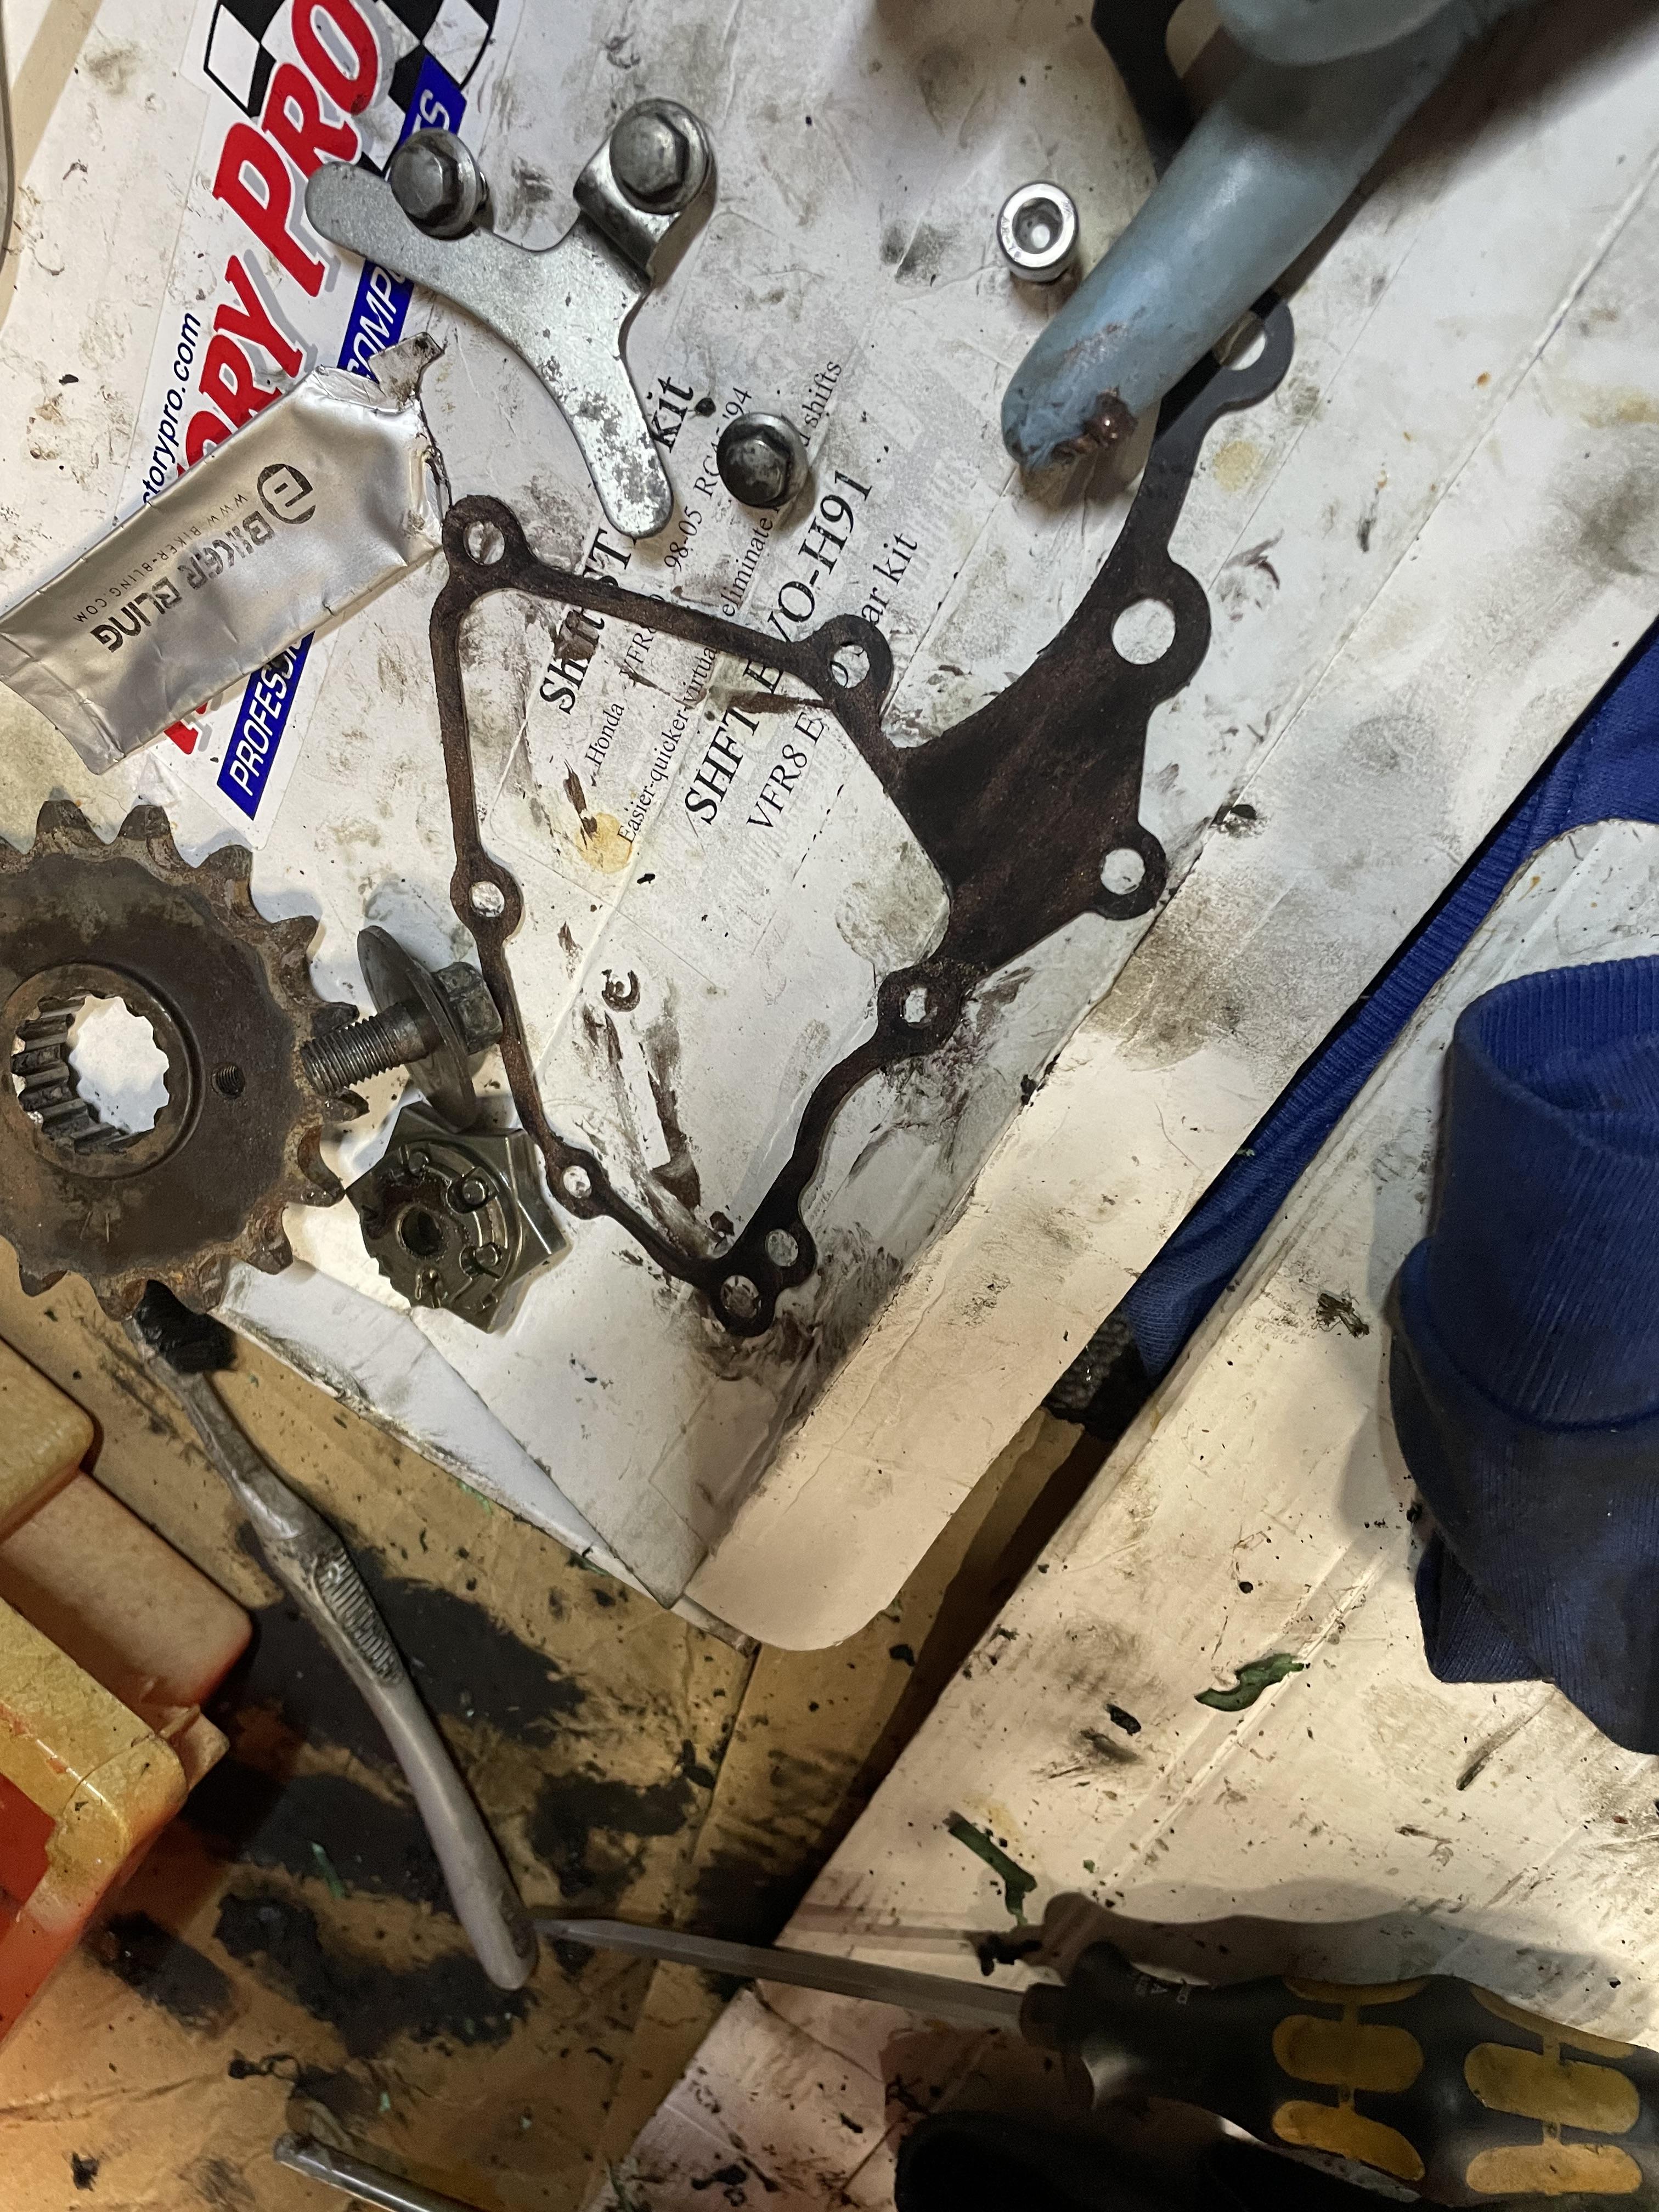
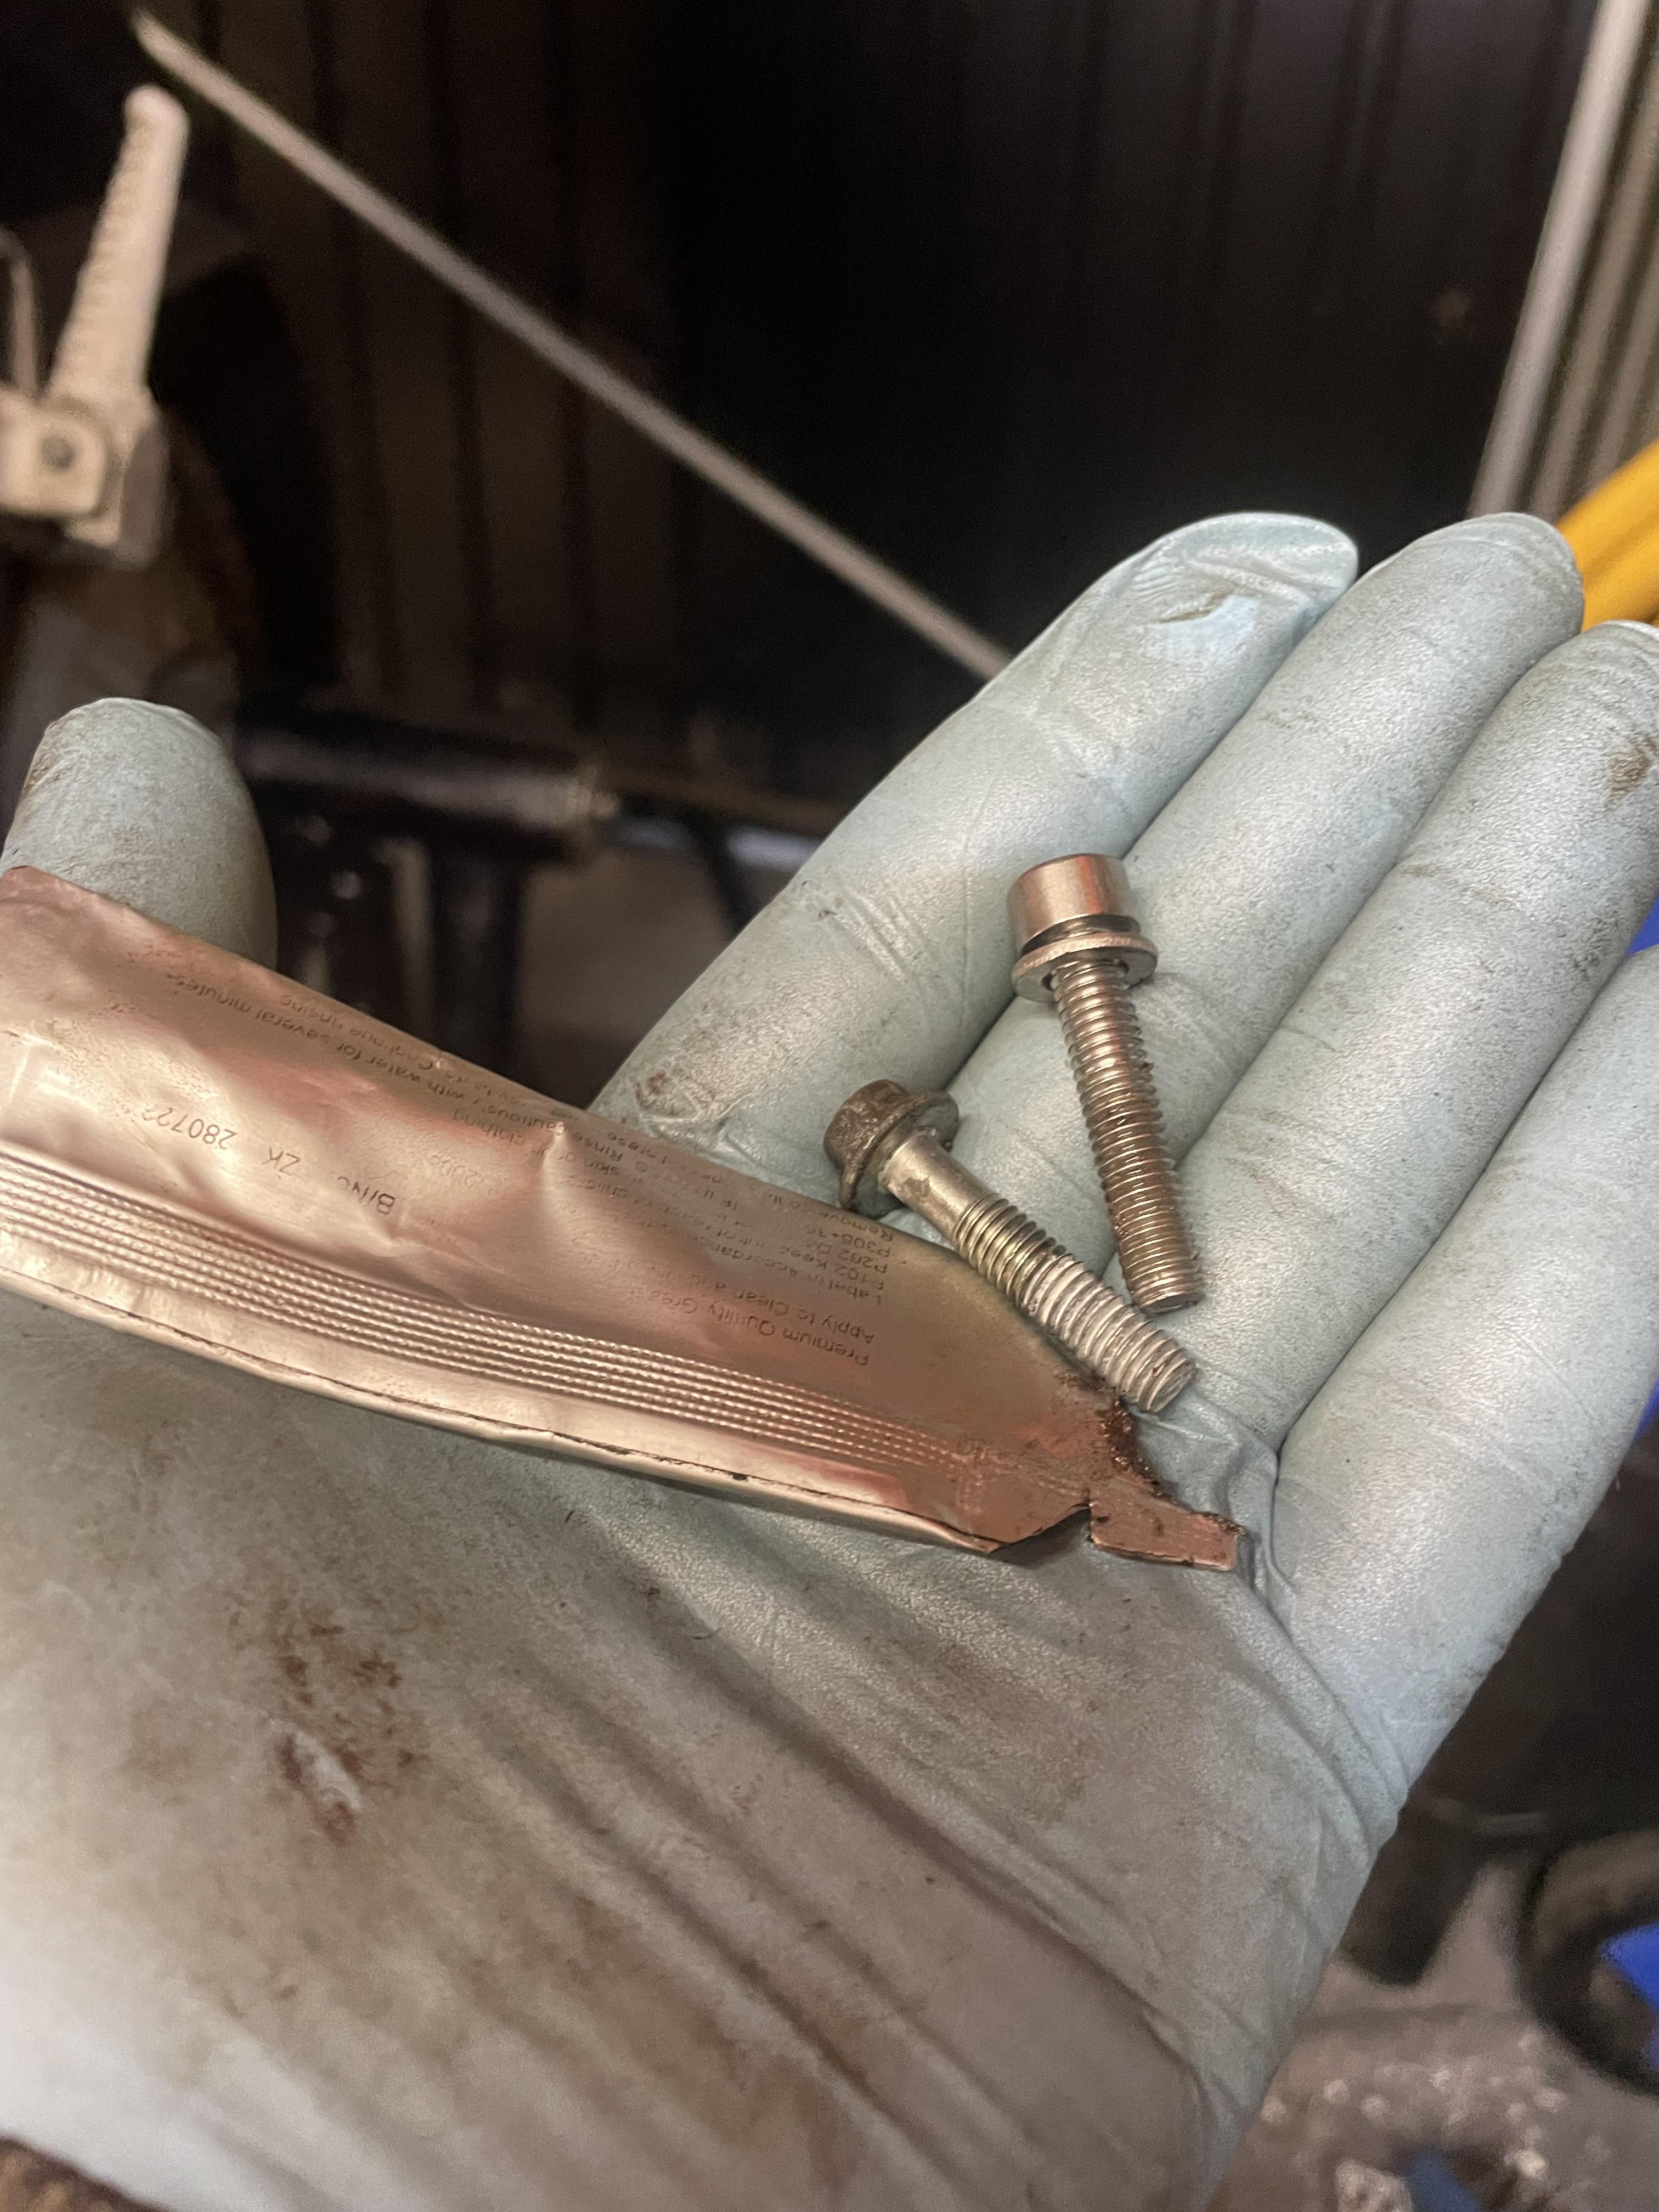
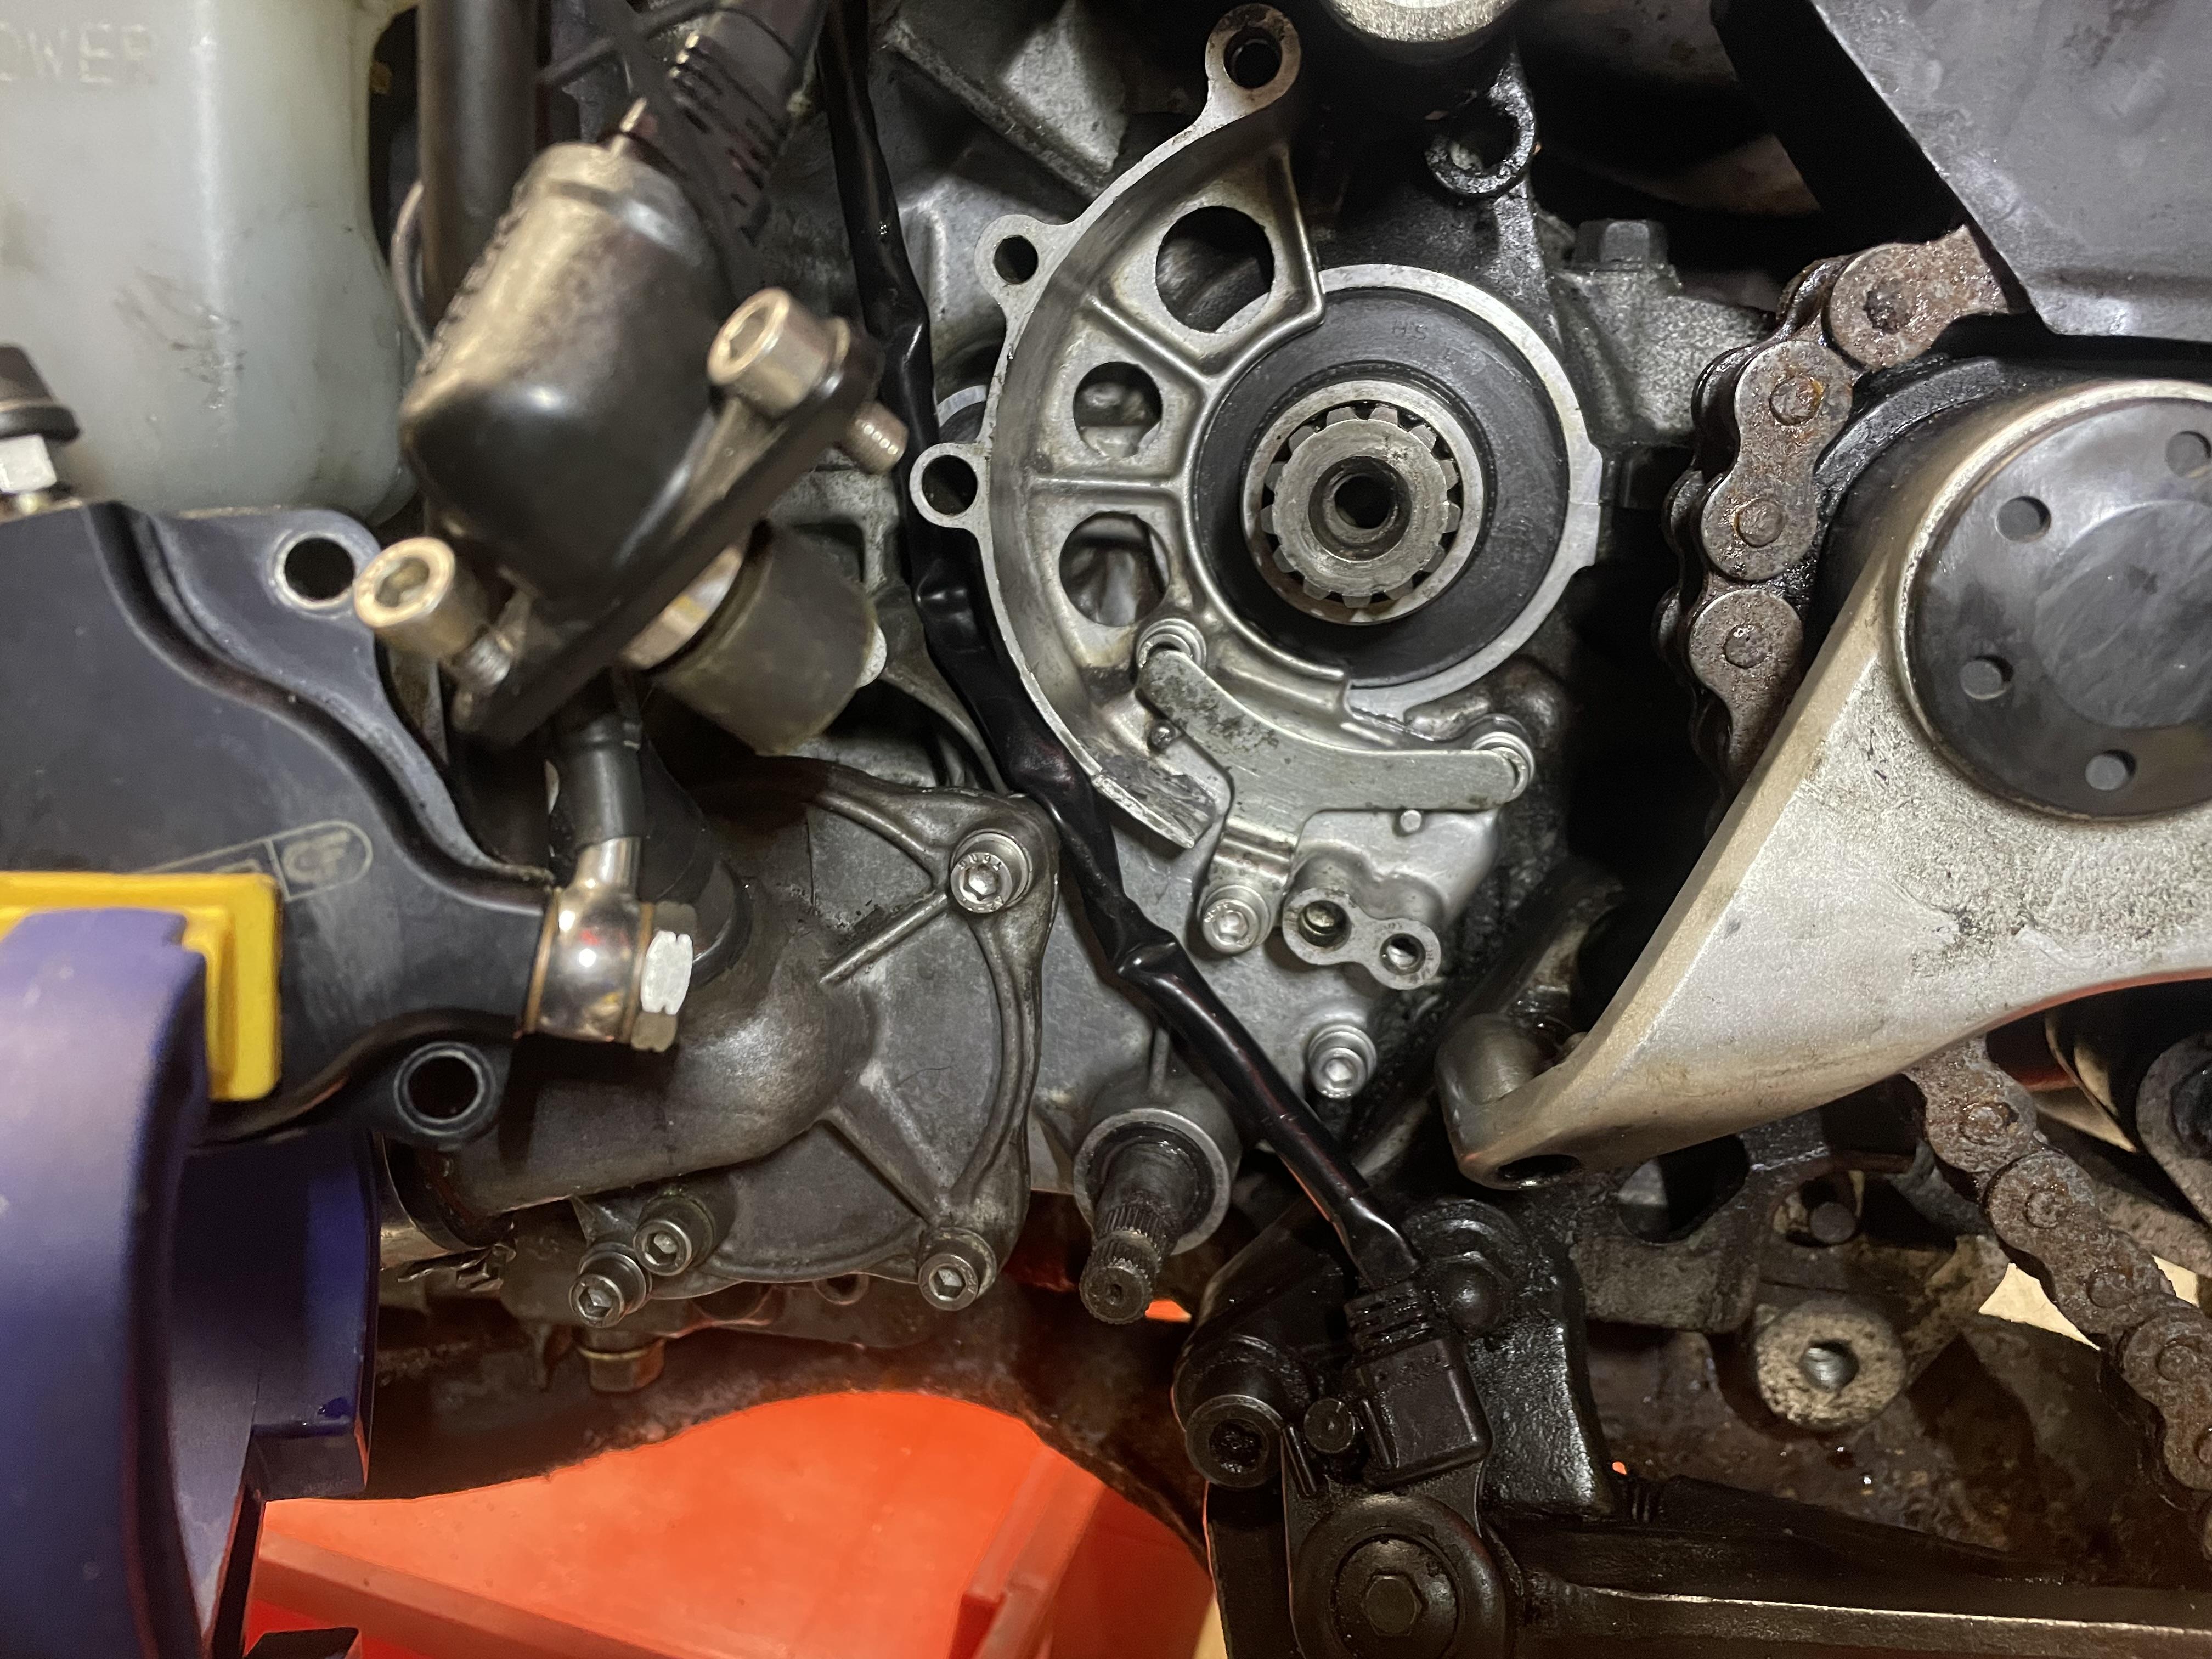
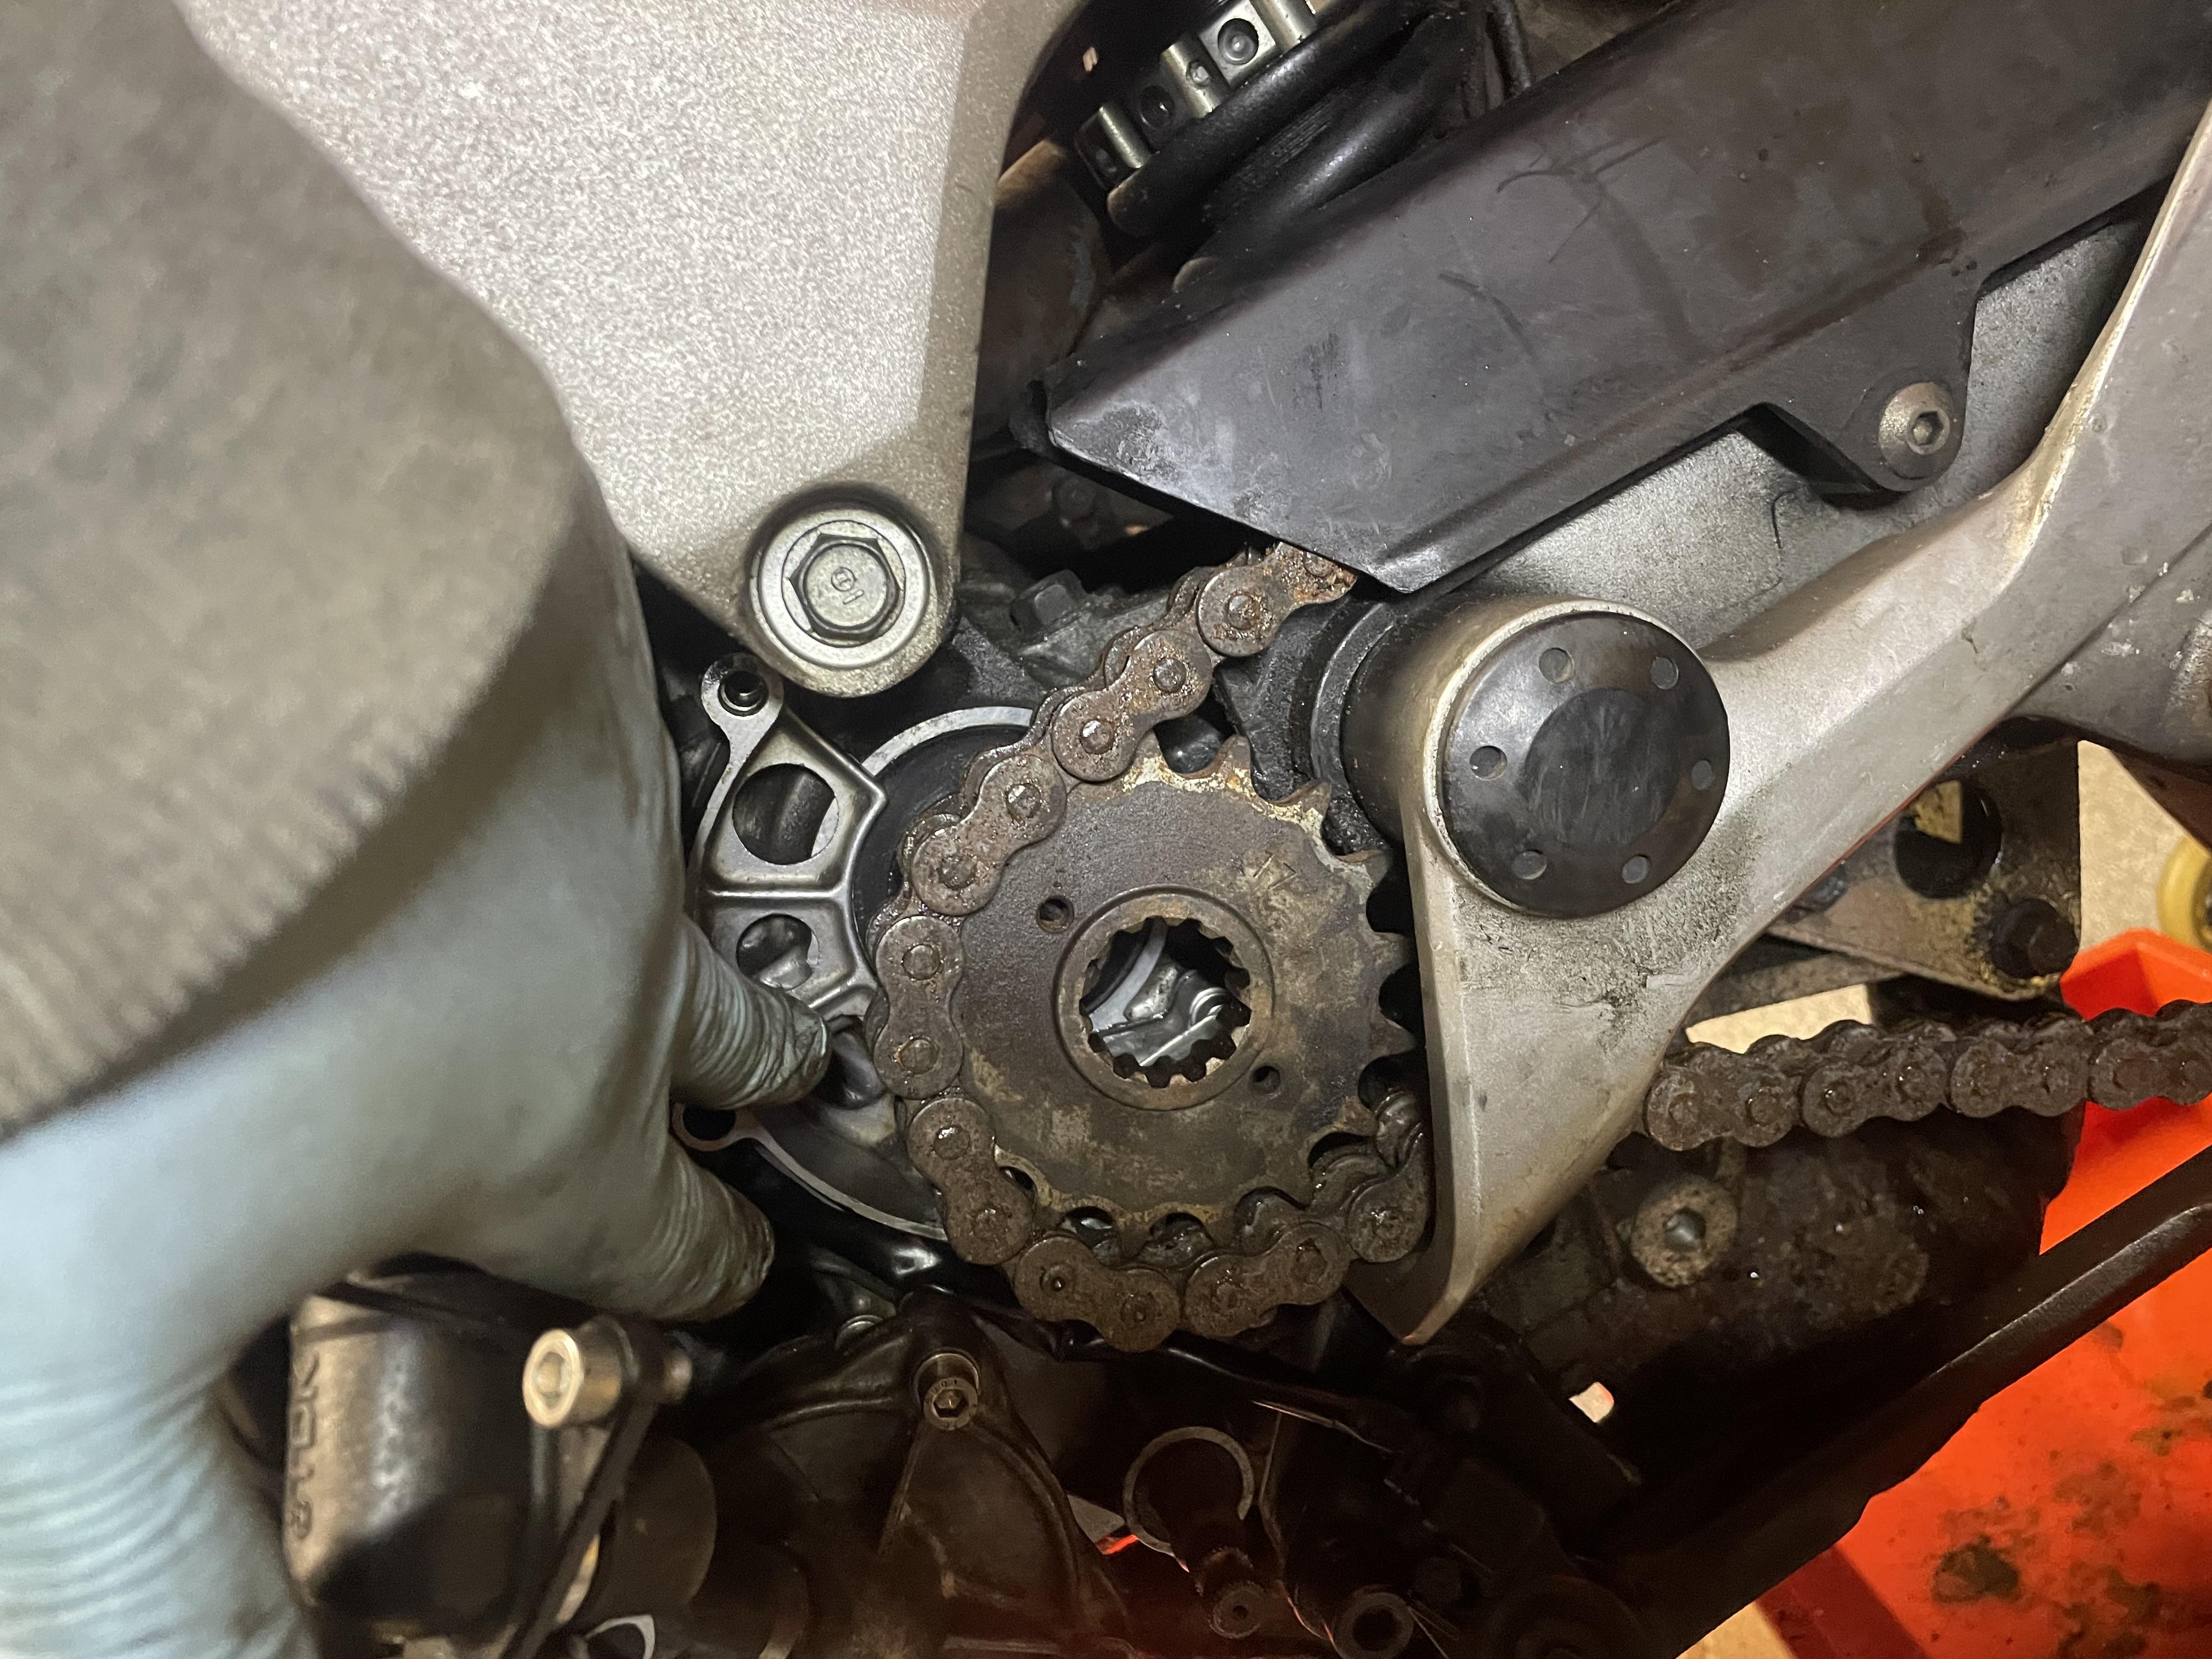
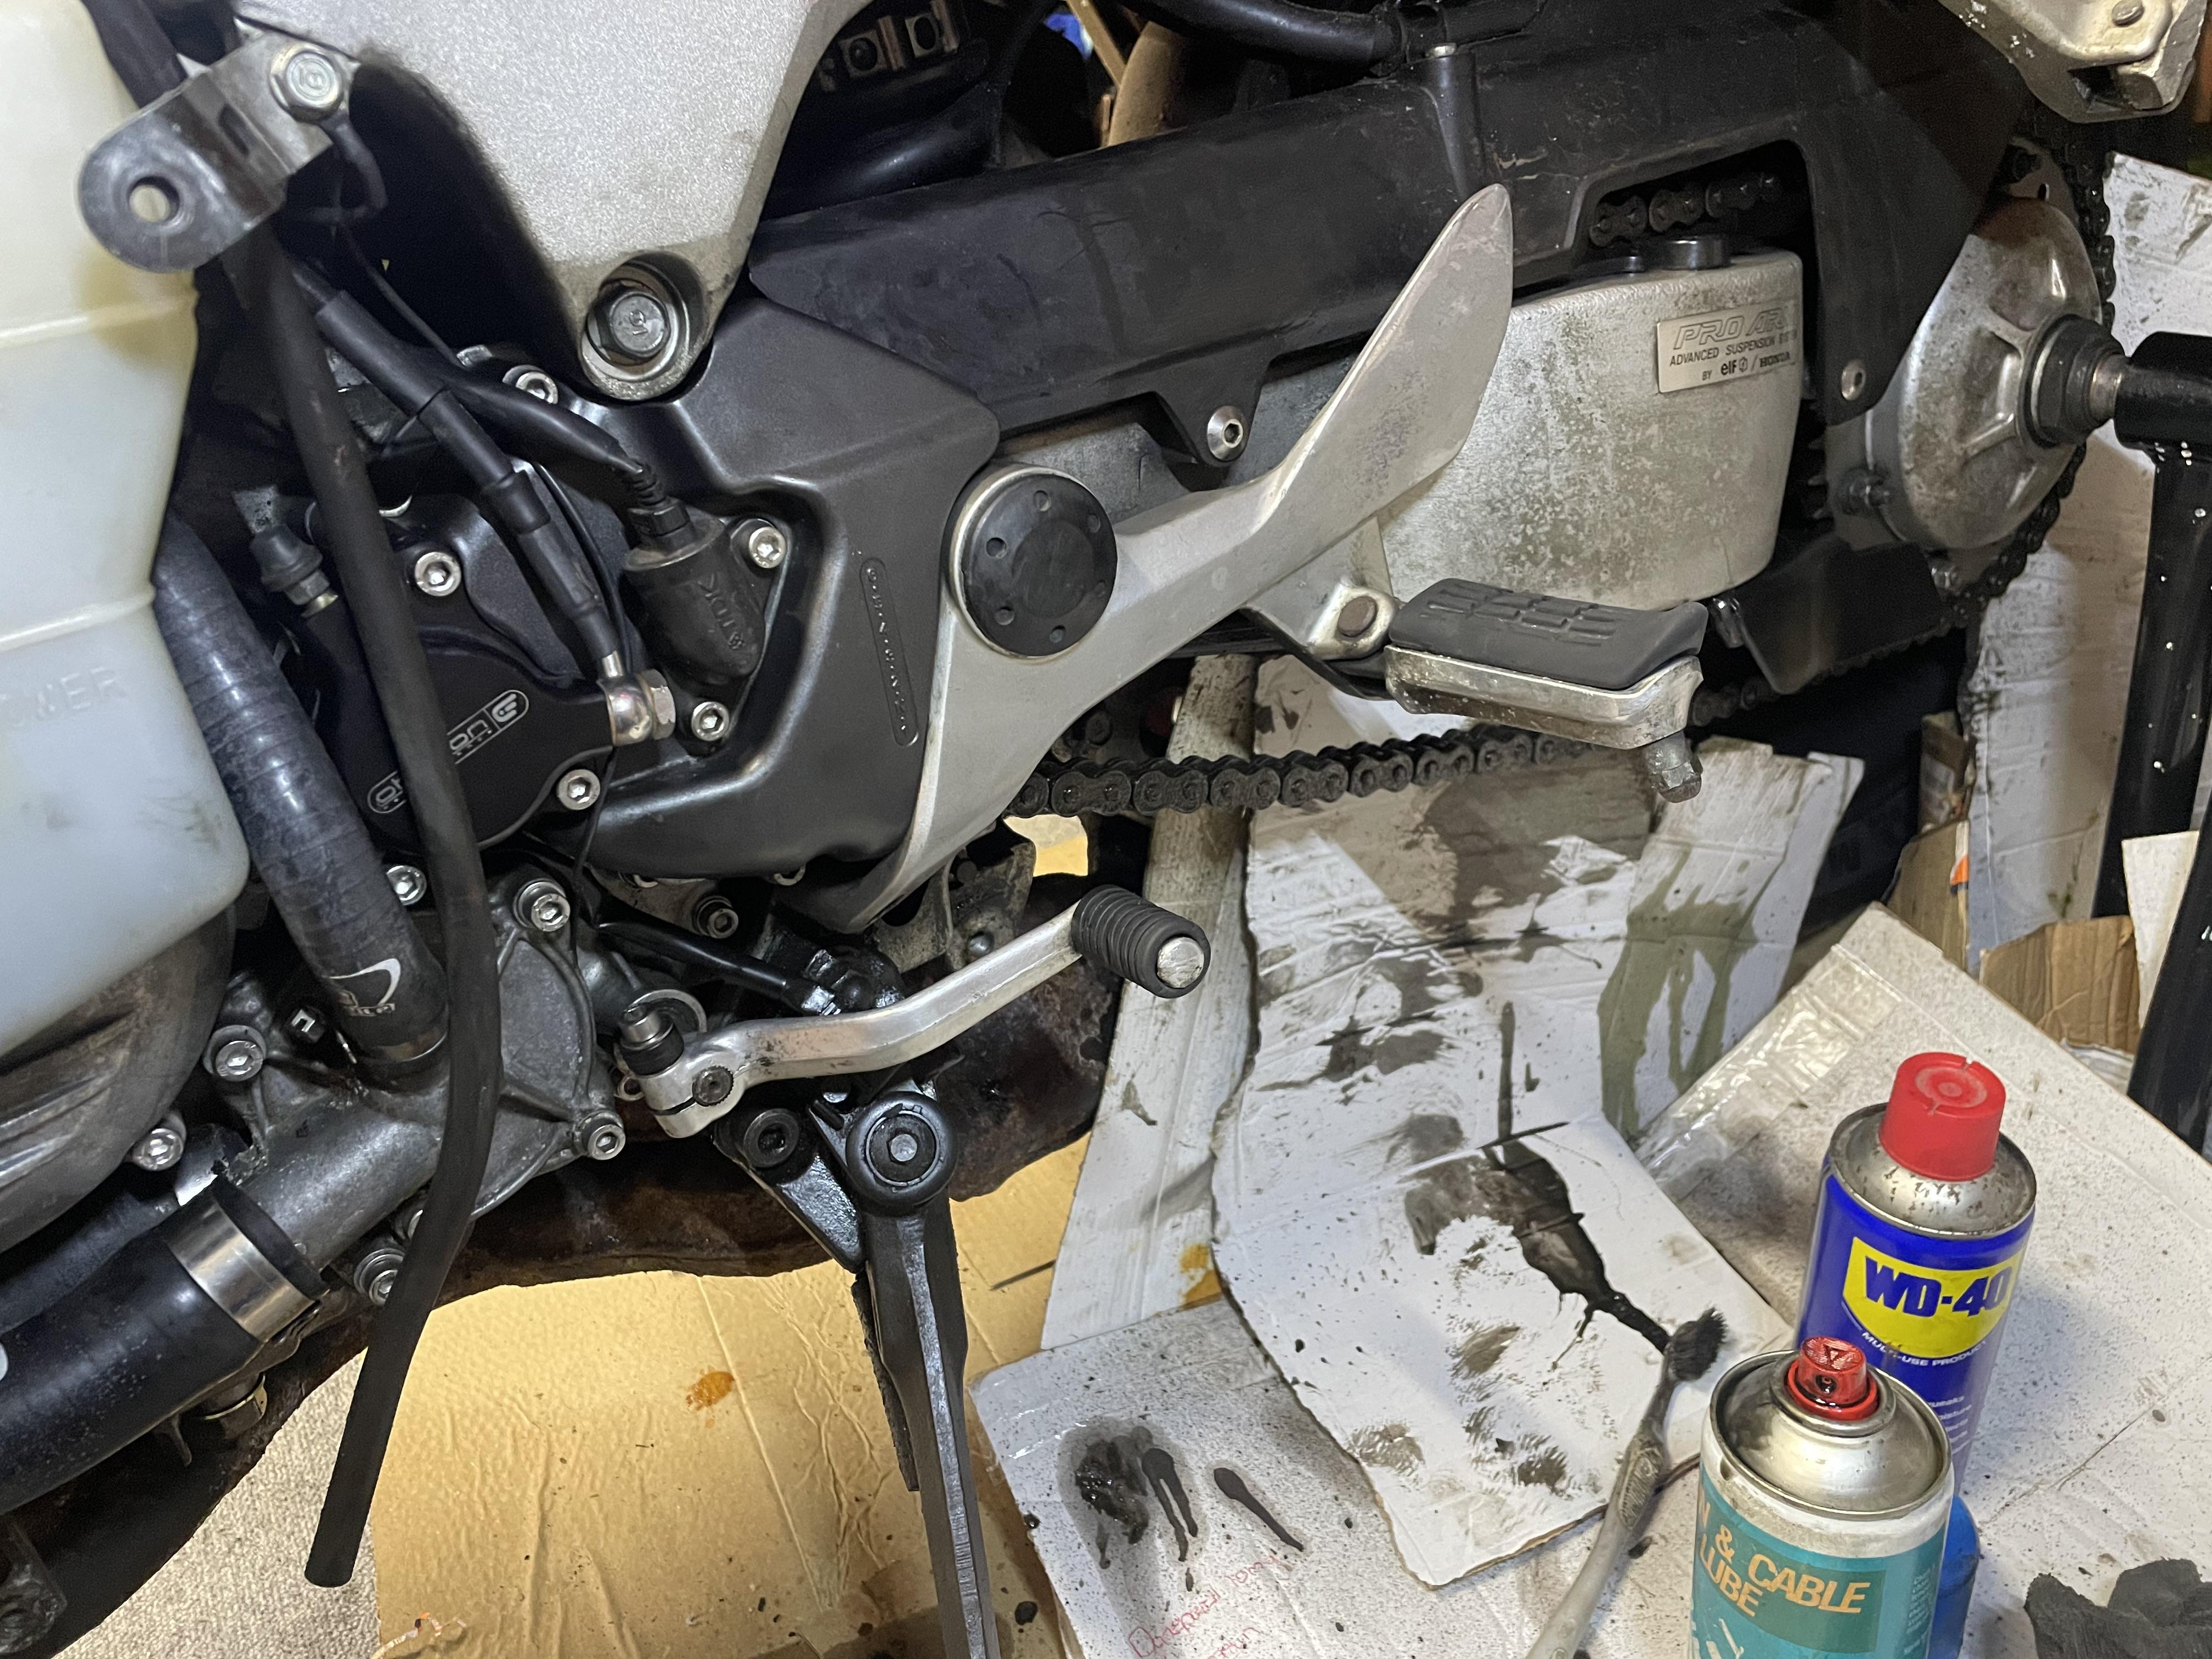
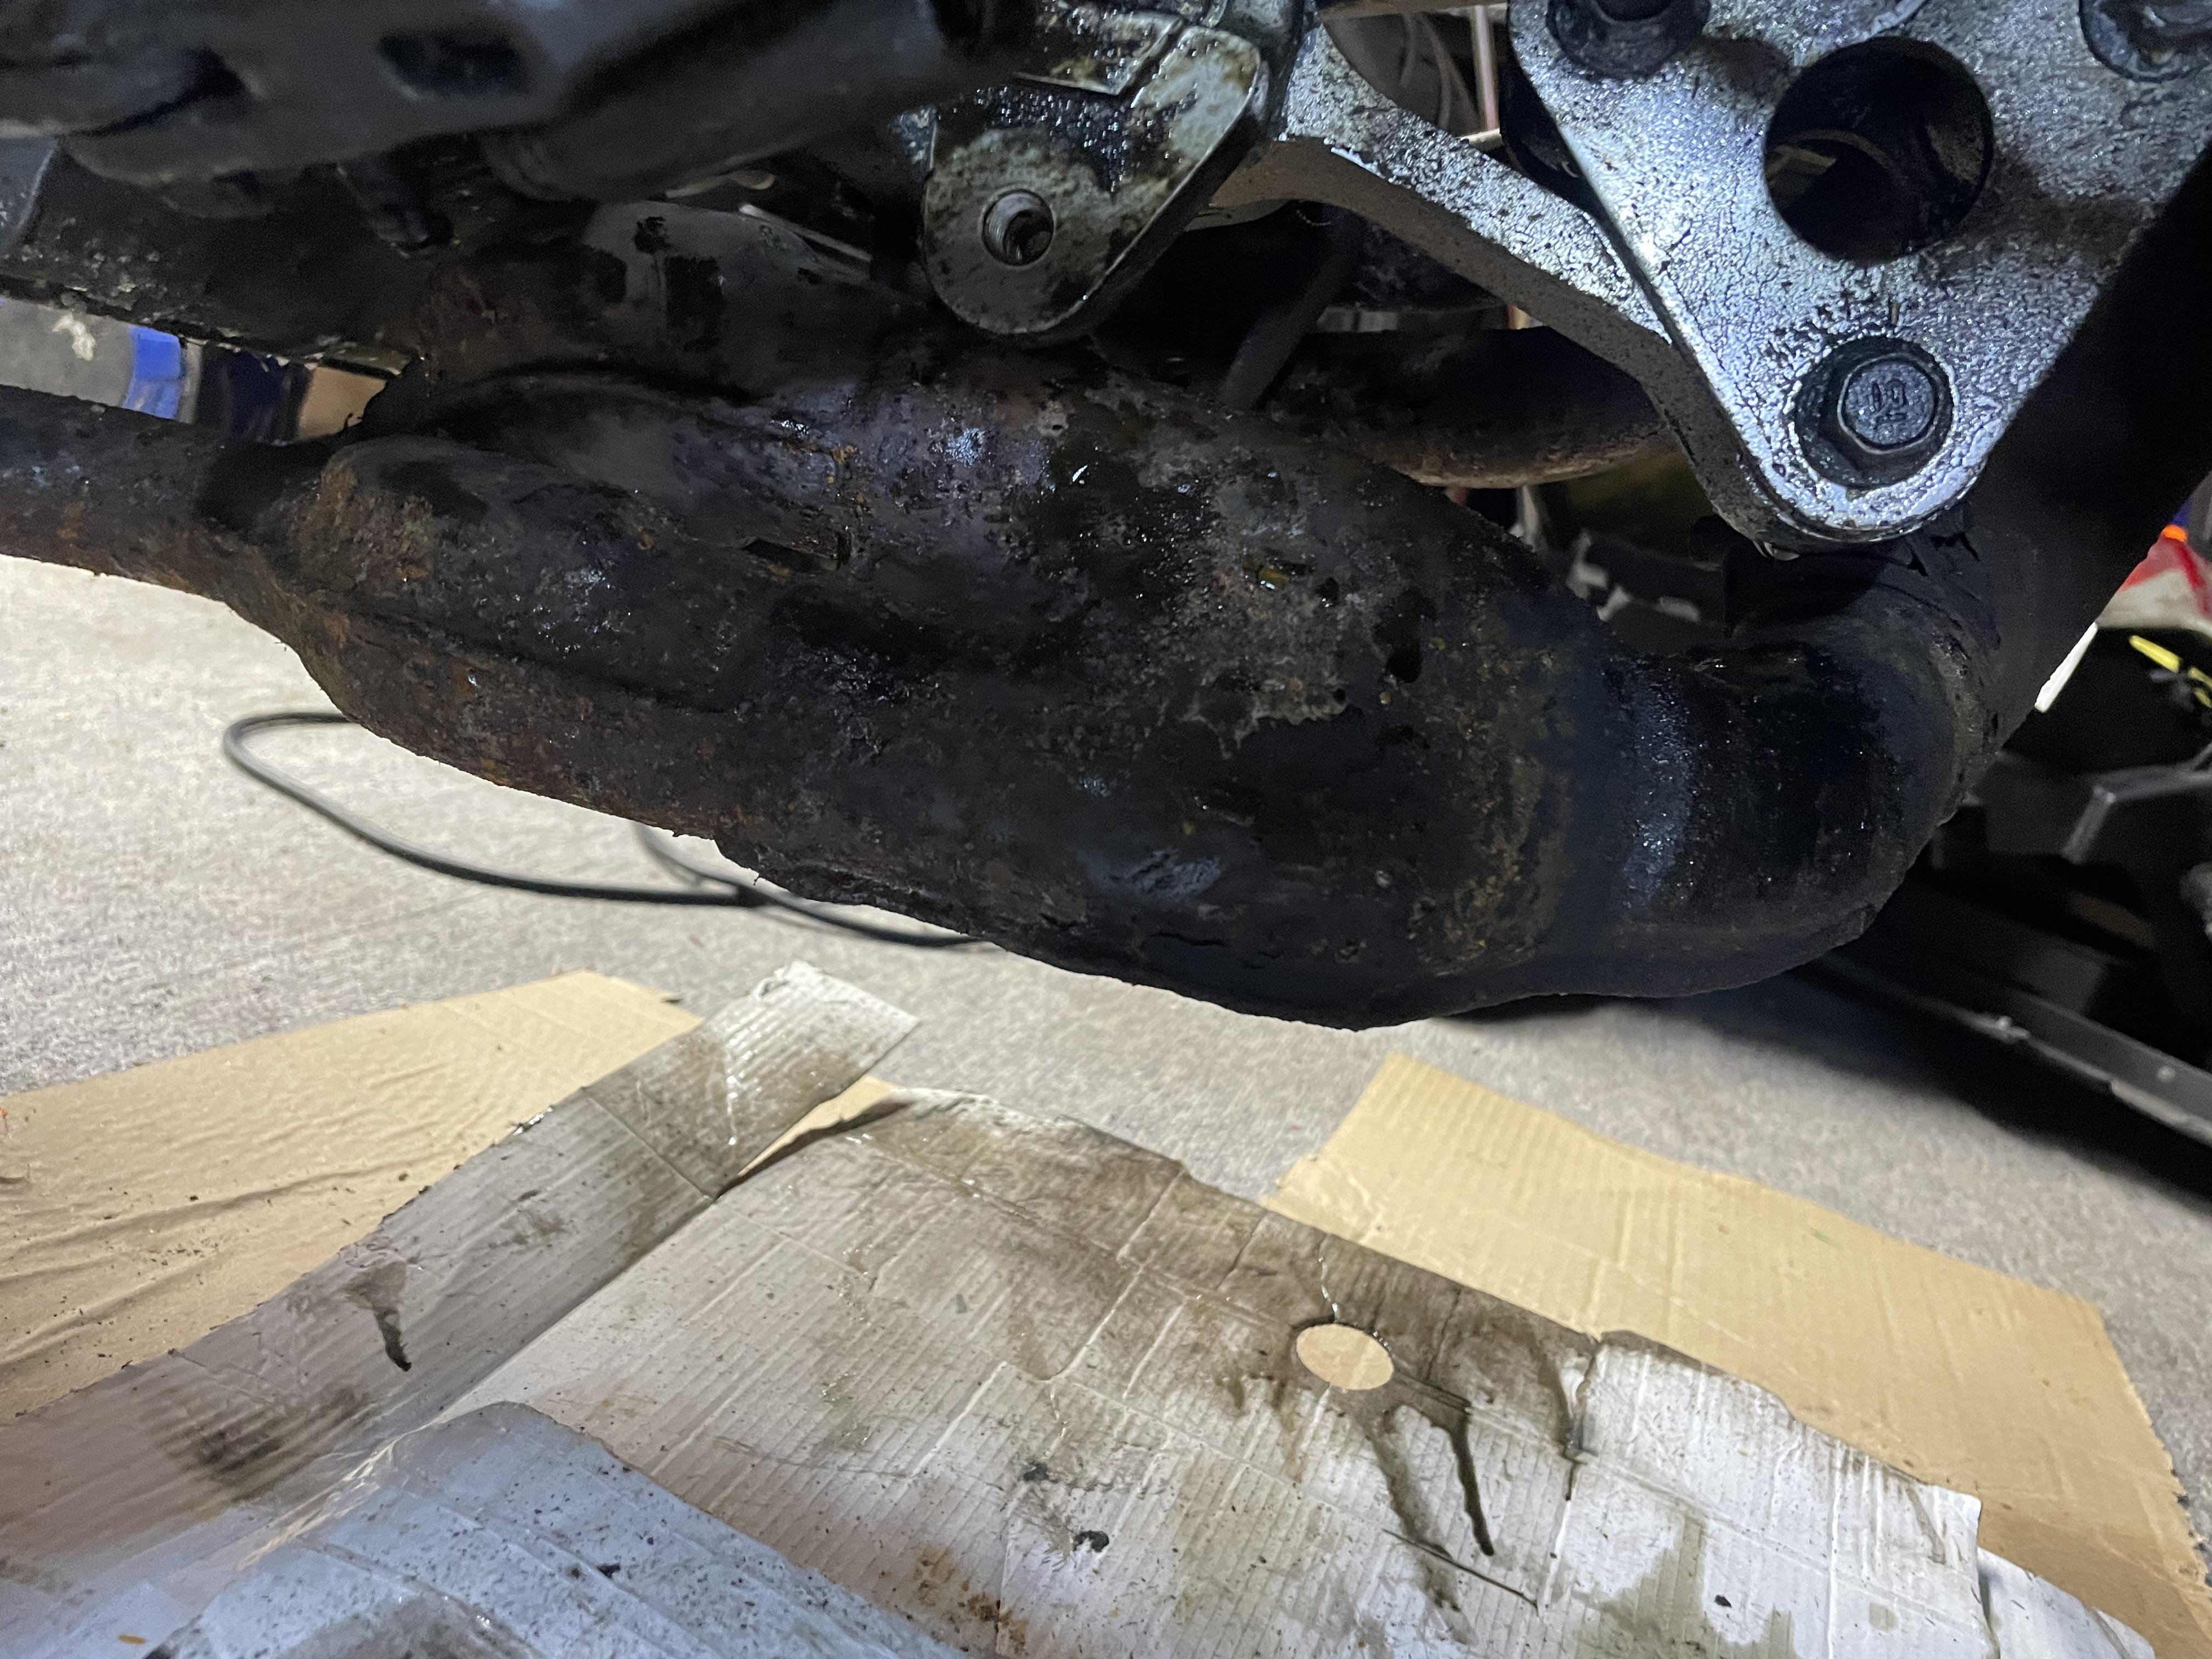
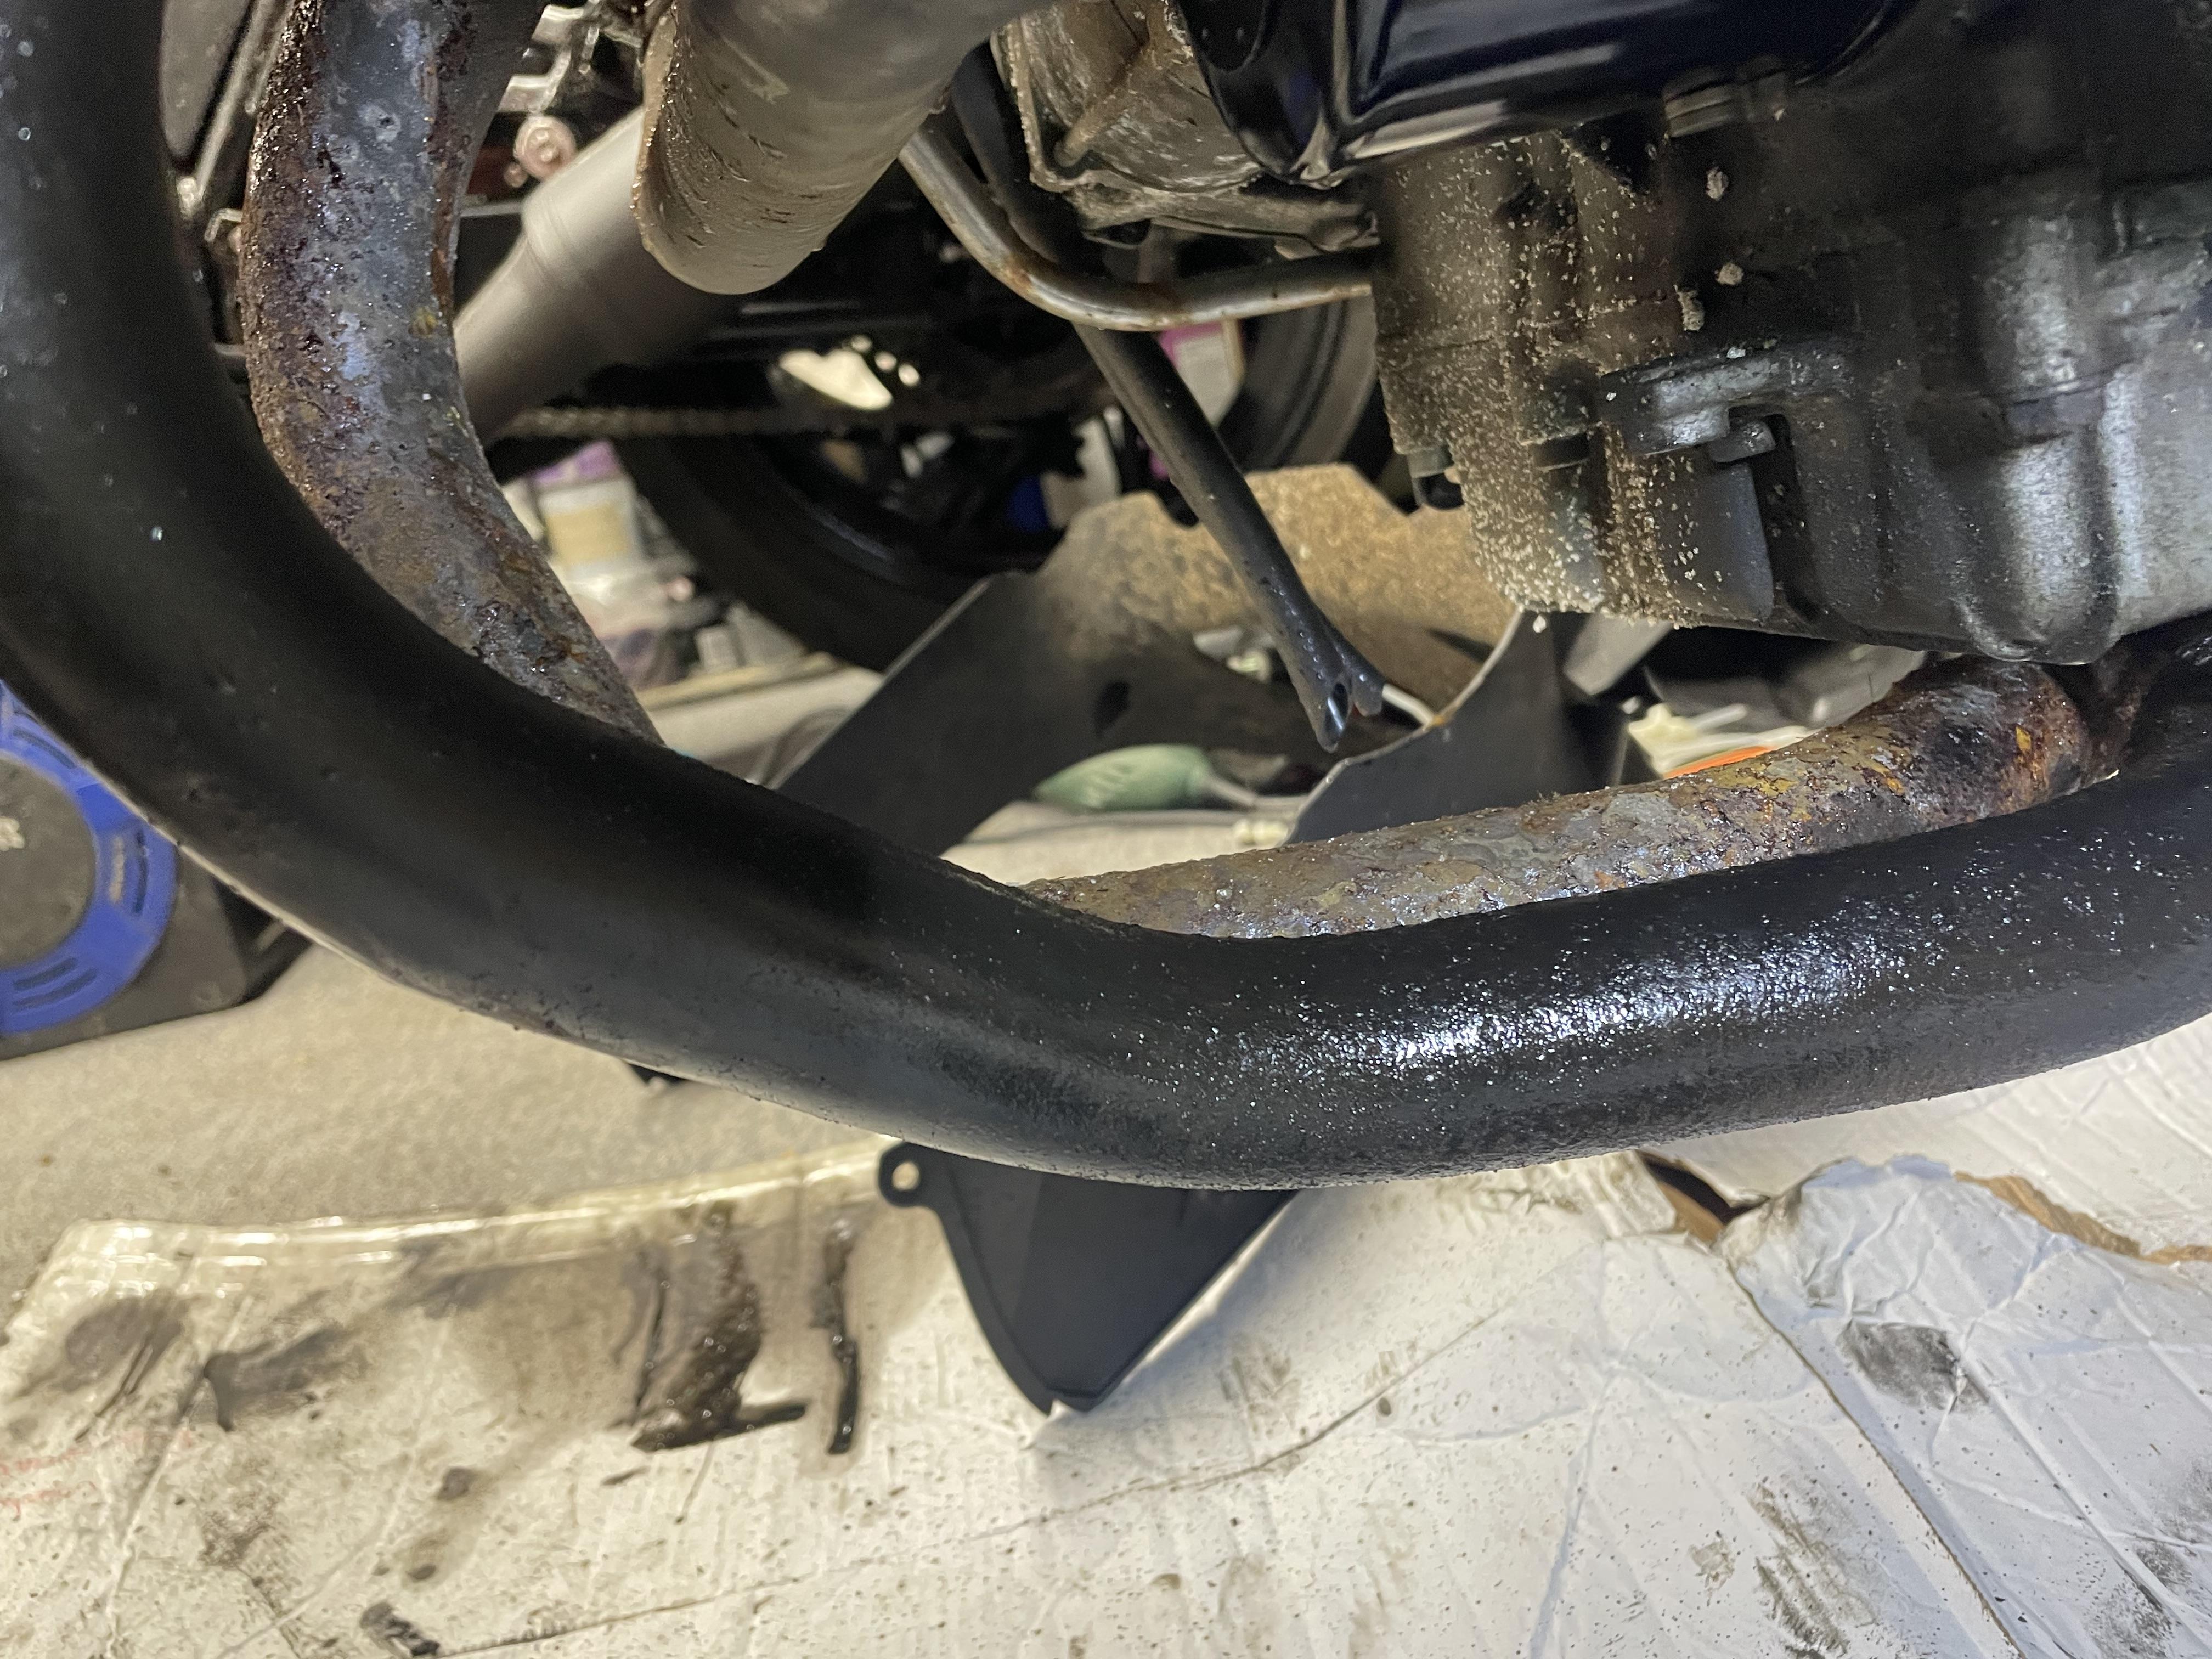
It’s been a while since I posted due to “life” happening. Thought I’d update with some winter maintenance. Oil-and-filter change this season after 5,000 miles, including two track days and a dyno tune. Using good oil pays dividends when you’re bouncing it off the rev limiter. Motul 300V still looks good despite the thrashing it got this year. Still smells like bananas! Oil still kind of yellow… Few flecks of fine metal at the bottom of the oil pan, as expected… With the oil out, it’s a perfect opportunity to fit the Factory Pro Shift Star and Detent Arm kit from our last group buy. Another member changed his mind after I bough it for him, so it’s going on my bike! I leaned heavily on @kaldek post here for directions. Big thanks, mate! Kaldek’s guide is great so I’m not going reinvent the wheel. If you’re fitting one of these, use his awesome guide. Here’s my kit, which includes the shift star, detent arm, detent arm spring and gasket…and some cool stickers! First job is to tear away at the shifter housing to get at the clockwork. Clamp to keep the clutch slave piston from popping out… Marked the gear shifter with a punch so it can go back on at the same angle. Look at the filth from a British winter! If it was filthy outside, it was grotesque inside. All that chain grease and road grime congealed together. Chain looking poorly too… The inner shifter cover is a BITCH to get off but I found one spot you can get a screwdriver behind GENTLY… After finally wrestling it off, I realised there is one good spot you can put your fingers behind this cover and pull it off. Bit of a cleanup with WD40 and some rags… New shift shaft bearing and seal while we’re in there. You can see a little piece of the inner cover broke off (right end of the crescent) More of that later… Old seal and bearing removed. No science here - just screwdriver and hammer on the inner race of the bearing. Torching the outer housing helps get it out a bit easier… Used a socket to drive the new bearing in. Again, some heat to expand the hole makes it easier. Seal just pushes in with a slick of grease. Pushed some good grease in to the bearing… Back to the broken piece. I tried to braze it back on but failed as the sliver was too small. JB Weld to the rescue! Here are the OE parts (top) vs the Factory Pro parts (bottom). The new shift spring is a bit firmer. The shift star has rounded edges so gears click in better. The arm has a ceramic bearing on the end, as opposed to the plain bearing on the OE one, so should roll over the start points nicer. Some good grease thumbed into the shift bearing. You can see the little post on which the shift star orients itself. I turned it all the way clockwise (1st gear) Shift Start bolt gets threads cleaned and loctite applied. Few notes not on Kaldek’s thread: 1. You don’t need to put the bike in gear to loosen-or-tighten the shift star bolt. It just rolls all the way to 6th gear when you undo it, and rolls all the way to first gear when you tighten it 2. The shift star has a single hole in the back that fits on the shift post. BUT, the star doesn’t go deep enough to make good contact and it can slip out of the post. You have to be gentle and make sure it goes directly on the little post 3. You MUST cycle through all the gears when you’re done to make sure the shift star is in the right position. It’s the only way to tell as you’re working blind and by feel Here are all the parts installed, in 1st gear position. Once the star, arm and spring are installed, I put the shifter shaft in and the temporarily fitted the gear lever to cycle through the gears. Unfortunately the old gasket tore as it came off, so it needs to be replaced. Used a new razor blade and a wood chisel to scrape it all off. Hateful job but needs to be smooth for a good seal. Don’t worry about polishing, though: paper gaskets need the little scratches to adhere. Looking decent after 20 minutes… Now to do the same on the engine side. Will this nightmare never end! At long last! Make sure to clear all bits of gasket from internal areas and I blocked off the water pump hole. Time to dit the new gasket. I don’t want it tearing again if it ever needs to come off again, so I smeared the engine side with some copper grease. This way it’ll come off on the cover side, which is easier to scrape if necessary. Replacing bolts with stainless as I go. Brake fluid leaks of the past aren’t kind to OE bolts. Pulling the sprocket back on to the shaft is ALMOST impossible if you don’t slacken off the chain but it can be done if you’re stubborn like me. Would have been quicker and easier to slacken the chain but…yeah, stubborn! All back together. FINALLY! Whilst covered in muck and crying on my knees, thought I’d clean and adjust the chain. What’s a bit more filth, eh? WD40 and a toothbrush to clean, followed by chain lube and a rag to finish. Then, whilst covered in even more muck, what’s a little bit more, eh? So I thought I’d give the rusting exhaust a coat of black stove enamel. This is a tip from @Dutchy, thanks mate. Looks much better than rusty brown! Here’s a “before”… Compare the coated tube to the uncoated one behind. Big difference. Im a little disappointed the black heatproof paint didn’t last even one year. After sandblasting, coating and oven baking I was hoping it would perform better. Anyway, the bike is almost ready for next season. Just needs a bath and an ACF50 rubdown. Roll on 2026!
-
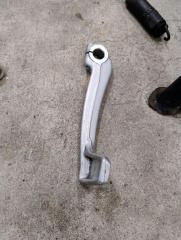
Has my VFR750 been lowered at the rear ?
Captain 80s replied to Smarty750's question in Modification Questions
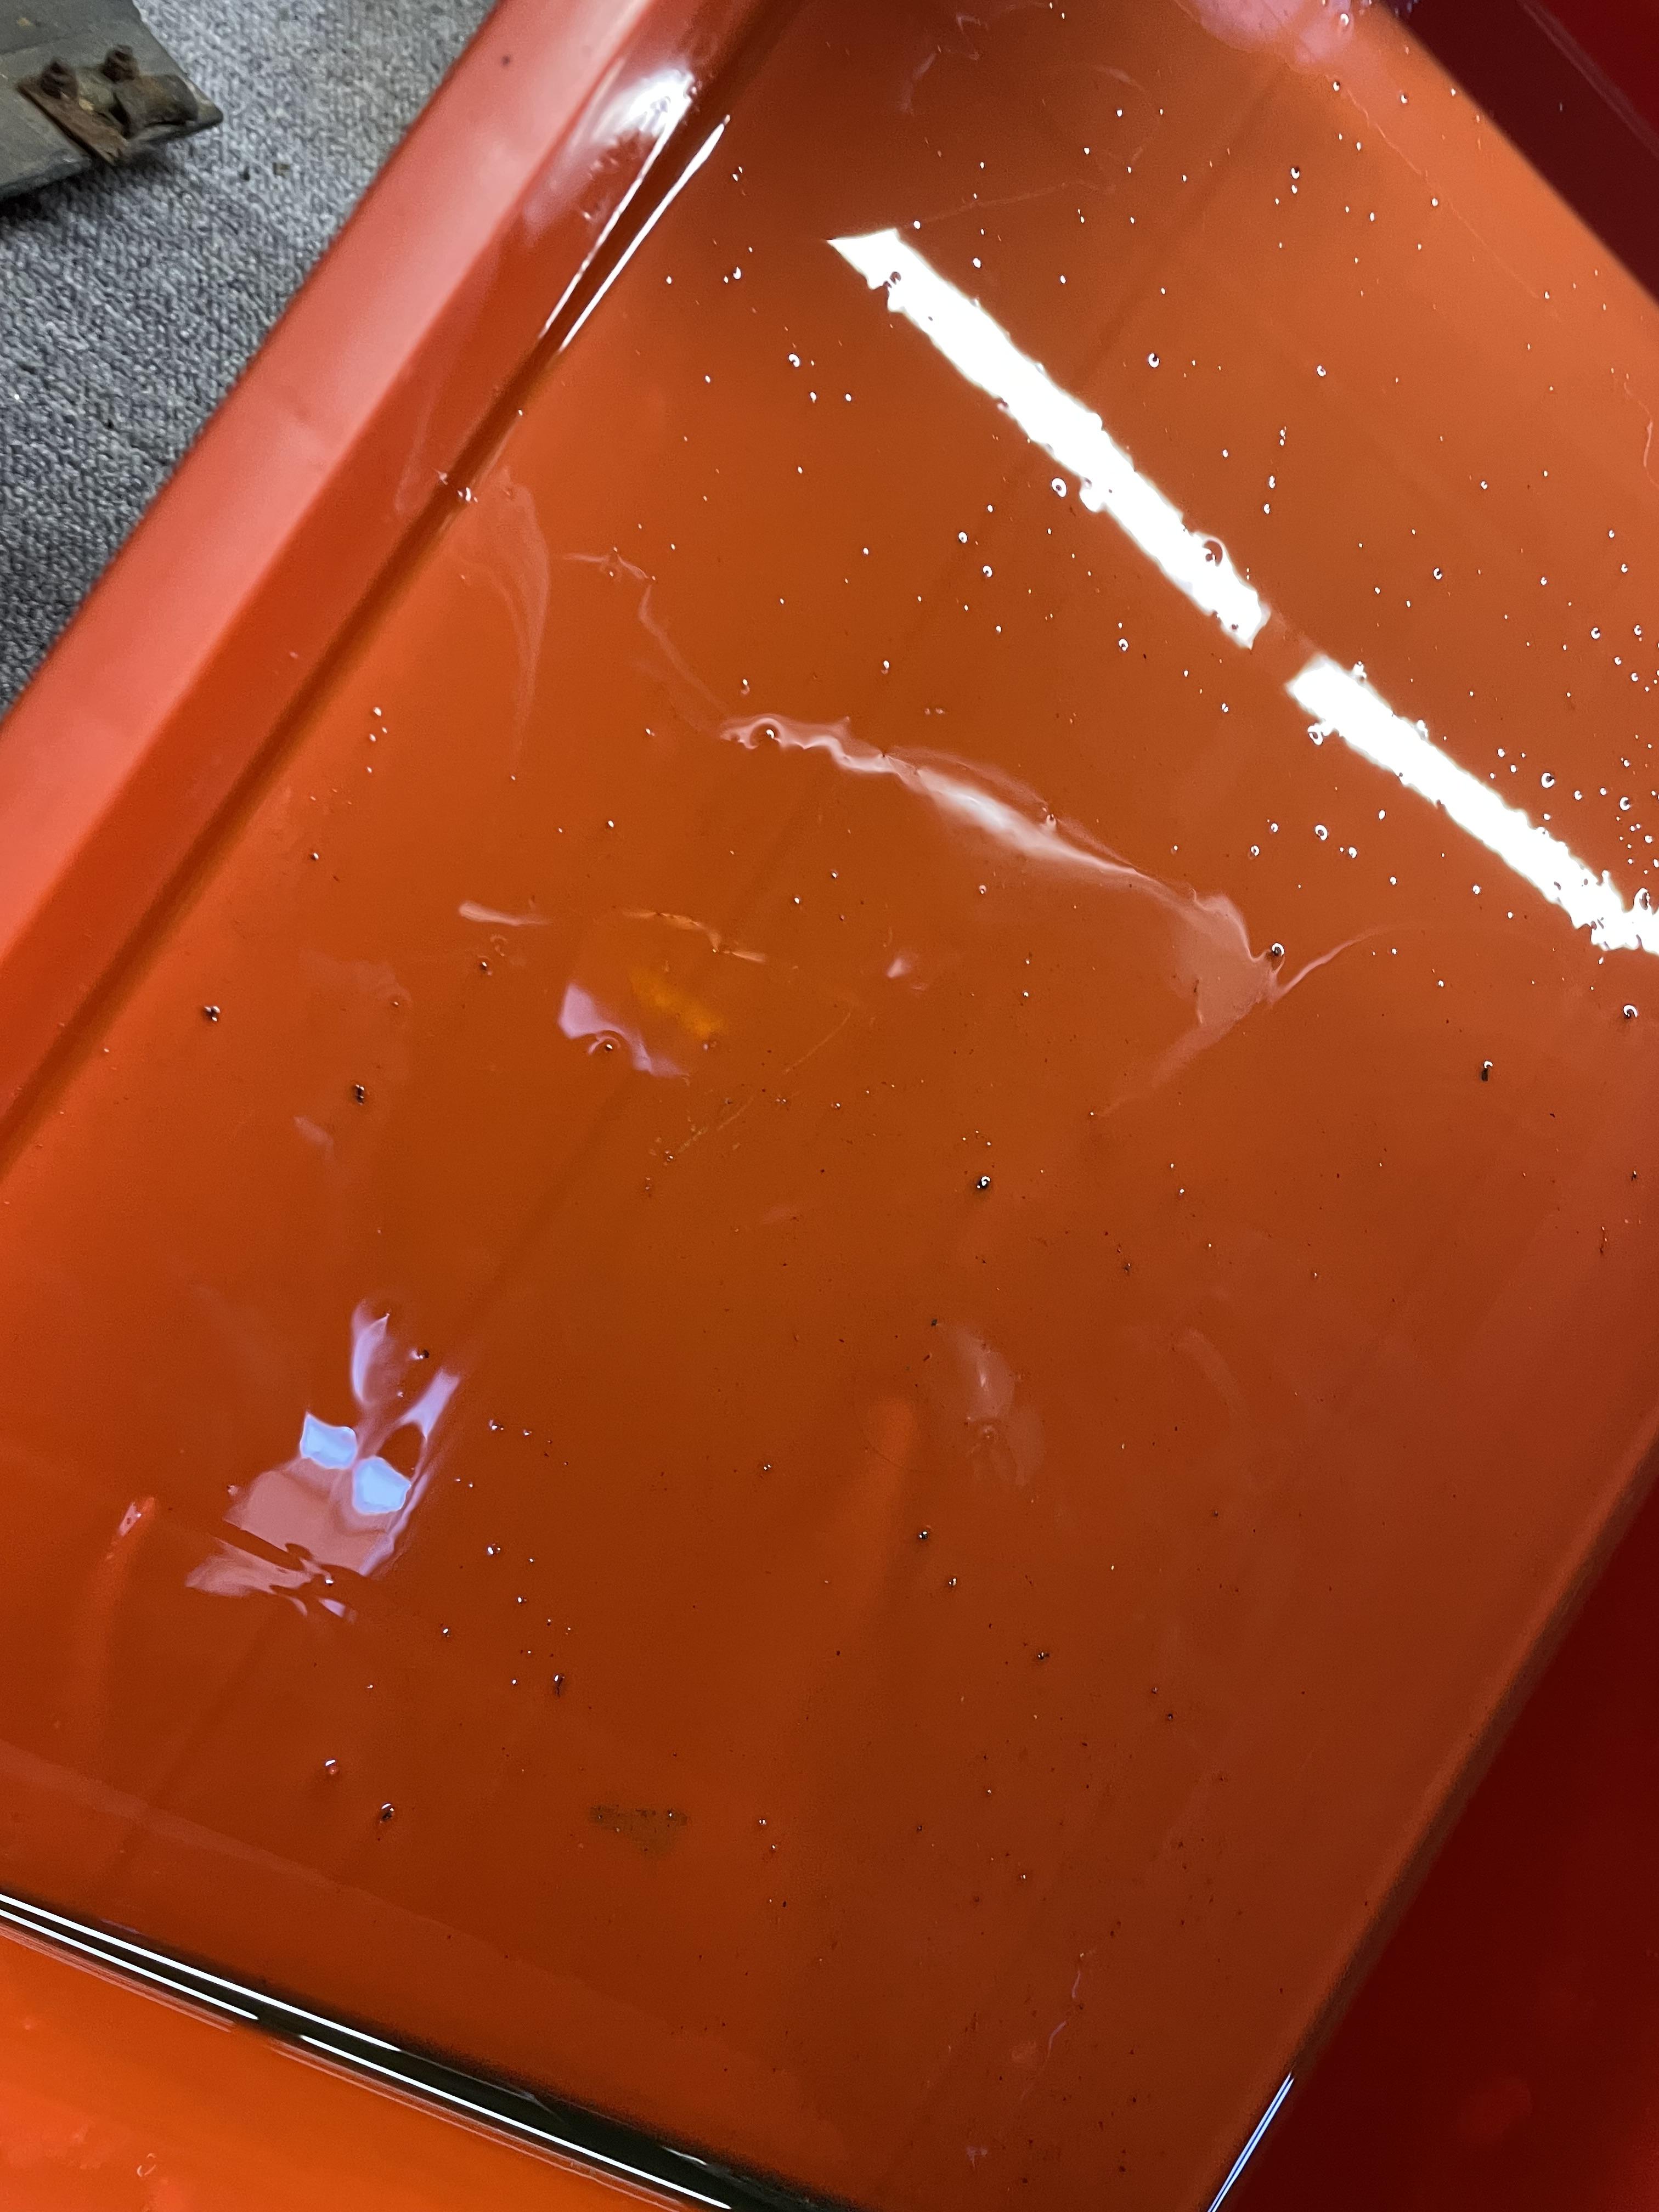
Shiny only proves they're, well, shiny. The bike does not look lowered to me. Here is my stock suspension 95 before I started modding it. What the preload/sag is set at, how heavy the rider is, and the resulting laden geometry /ride height is also unknown.
-

Has my VFR750 been lowered at the rear ?
lalan45 replied to Smarty750's question in Modification Questions
Sounds like you might indeed have a lower setup — that shiny linkage is a good clue. I don’t have exact ride-height numbers, but measuring from the floor to the top of the rear subframe or swingarm pivot and comparing it to stock specs should tell you if it’s been lowered. If you get those measurements and share them, folks here can help you confirm before you order the Thurn riser links.


-
VFRD Mission Statement
For owners of the Honda Interceptor and related Honda V4 motorcycles, for the purpose of mutual help concerning safe riding, maintenance, and performance of their motorcycles.
Rules of the ride - No one goes to jail, and No one goes to the Hospital.
Contributions - VFRD is a member supported website with no commercial advertising.

-
Forum Statistics
-
Total Topics26.7k
-
Total Posts363.5k
-
-
Who's Online (See full list)
-
Member Statistics
-
Upcoming Events
-
Latest Classifieds
-
-
Top Downloads
-
-
Popular Contributors
-
Blog Statistics
-
Total Blogs116
-
Total Entries345
-
-
Blog Entries
-
-
Blog Comments
-

-

By vfrpilot28 · Posted
I enjoyed reading this and seeing your story. For the love of motorcycling! -
-
By interceptor69 · Posted
Oops. I do believe I know how to post YT videos or they wouldn't be on YT. However I may have screwed up copying the link to the playlist. Thanks for the helpful comment. -
 I think that you might not know how to post videos. You're in your YT studio in these links. You need the link to the actual video.
-
-
Most Contributions
-