Stray
-
Posts
615 -
Joined
-
Last visited
-
Days Won
18
2 Followers
About Stray

Stray's Achievements
")


-
I hear you, Captain. I could “deepen” the groove my helmet would sit in, for example? Thanks for your input!
-
I lift my front end with a pulley from the ceiling, strapped to the handlebars. It’s quick and easy and cheap. This allows me to remove tge front wheel and full fork assembly for rebuilds. Can you hang the front end off the ceiling? The front end is quite light and can be lifted by hand.
-
what have you done in the hope of increasing the powers
Stray replied to Timuli's topic in Sixth Generation VFR's
This has been a fantastic thread to read - thank you so much for sharing! I wish you the very best in your efforts. -
Hello All, Im looking for two items and hoping someone in here will flog them to me: 1. VFR750 RC24 pillion seat cowl. I believe this is what we call the 1st Gen From around 1984? Any condition 2. VTR SP1/2 V piece. The bit that joins the two side fairings at the front, just behind the front wheel. I'm based in the United Kingdom but happy to look at offers from abroad so long as shipping makes sense. Thanks everyone! Stray
-
Damn it Captain, you’re always right and make me rethink!
-
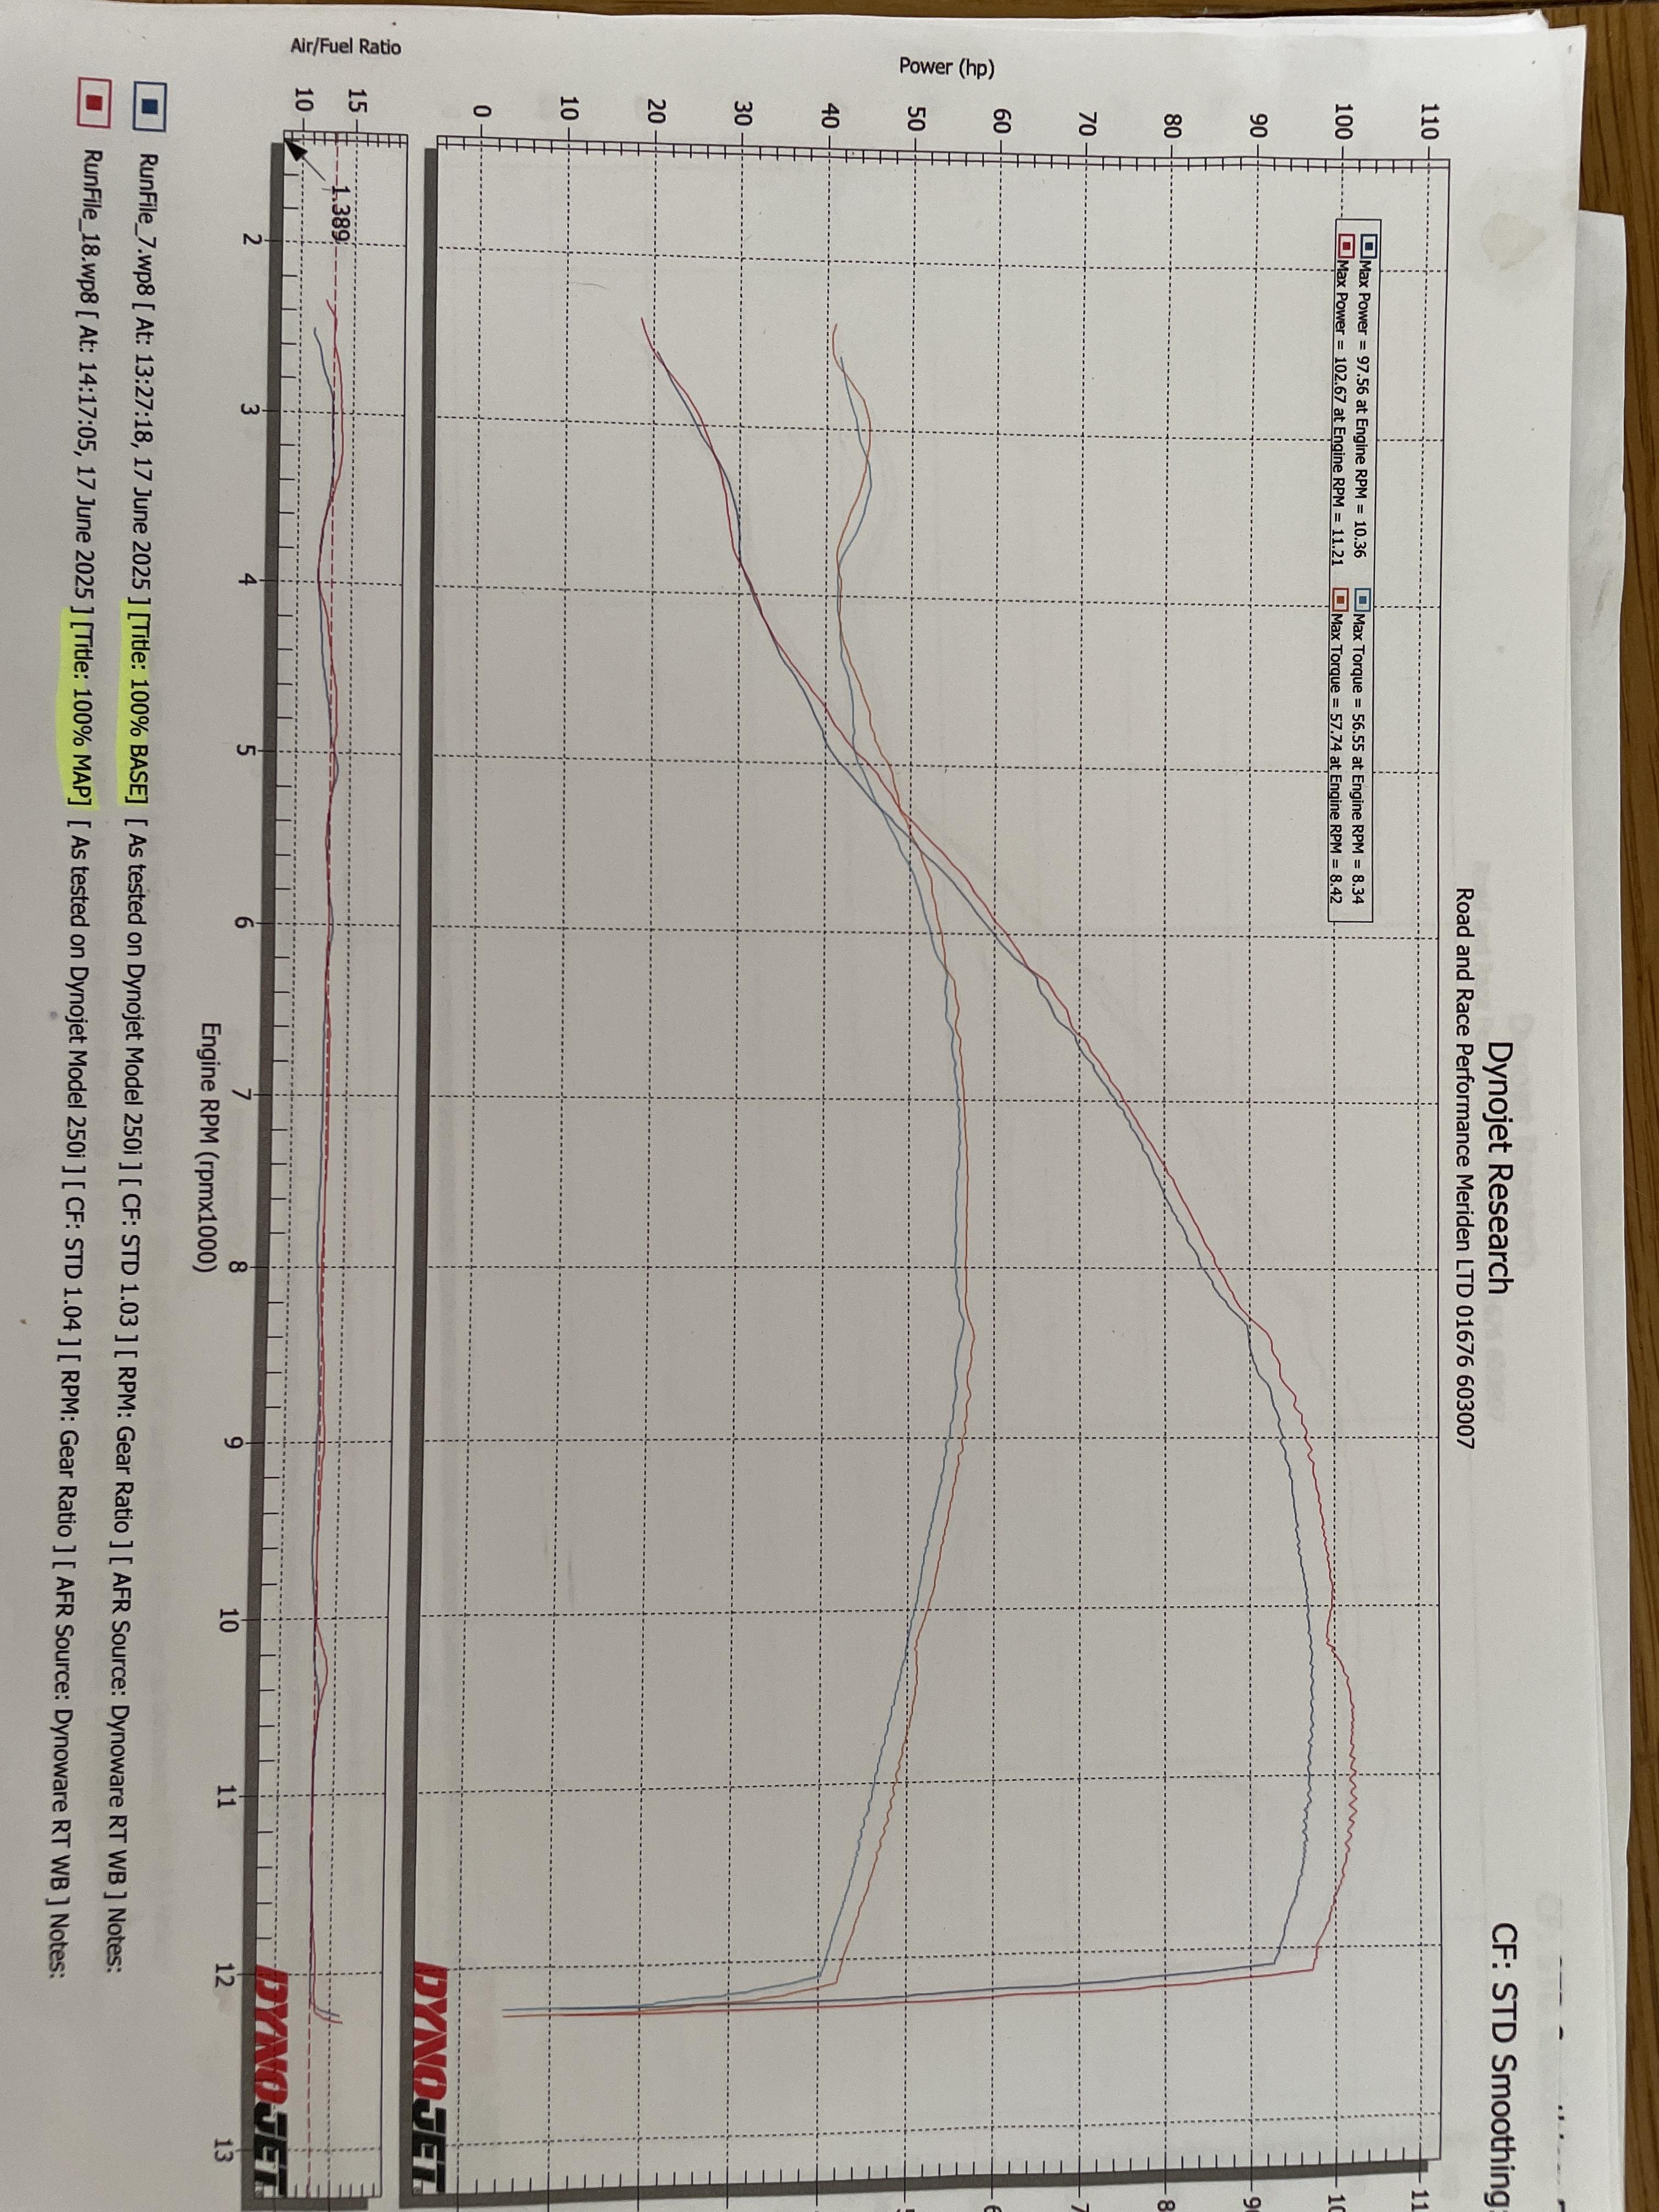
Quick biker’s fairy tale for you guys. 5th Gen had a Rapid Bike Racing but she wasn’t completely satisfied and wanted “more”. So she skipped off to the woods and found RRPM in Meriden (where classic Triumphs used to be made). A nice man called Nick took the little 5th Gen into a dark cave and thrashed her mercilessly for 2.5 hours. She screamed LOUD!!! IMG_7441.mov You can see the puff of smoke as he lets off the throttle. She was rich when she went in… IMG_7446.mov …she was lean and mean when she came out. Breathless and powerful! Well, sort of. She went from 97-104BHP. That’s a 7% increase, which isn’t bad but I was hoping for more at the top. Midrange feels really creamy, though… Dyno results for the numerically inclined: He has an RC45 in his stable, so I didn’t mind waiting! Mods include: - Black Widow exhaust silencer with catless 1998 header - Open airbox with Pipercross filter - Uprated clutch springs (no slipping) And they lived happily ever after.

-
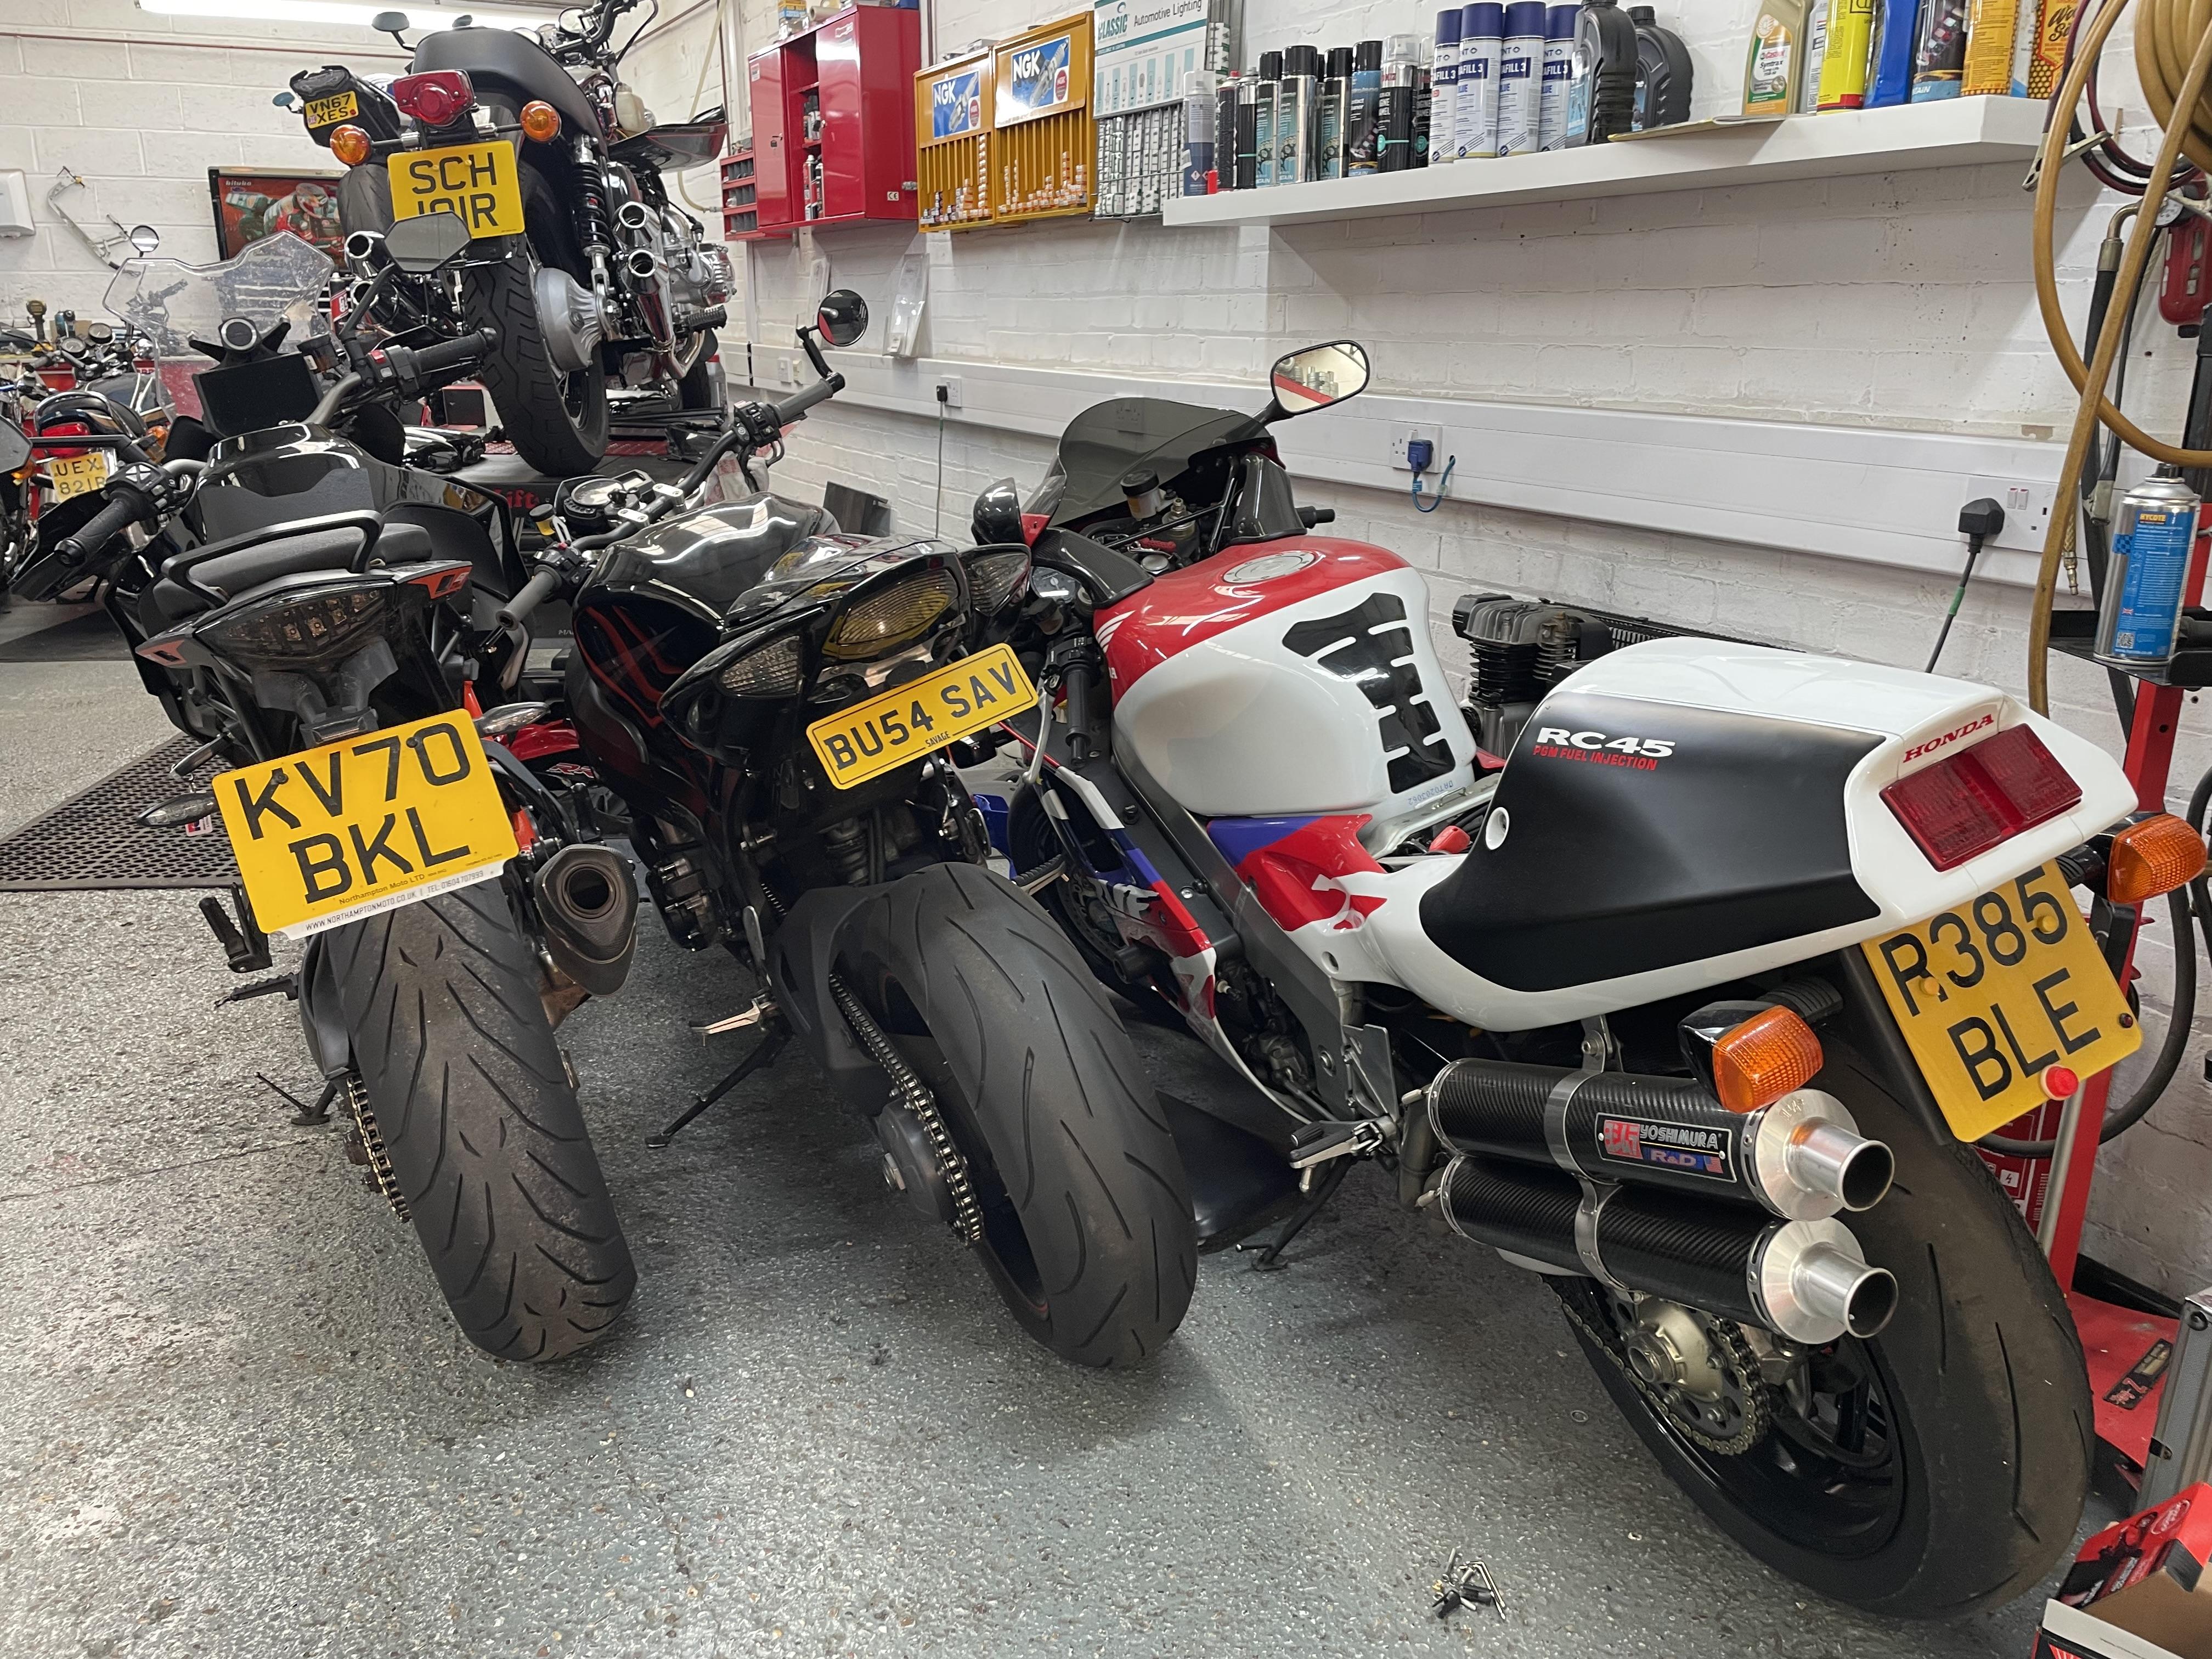
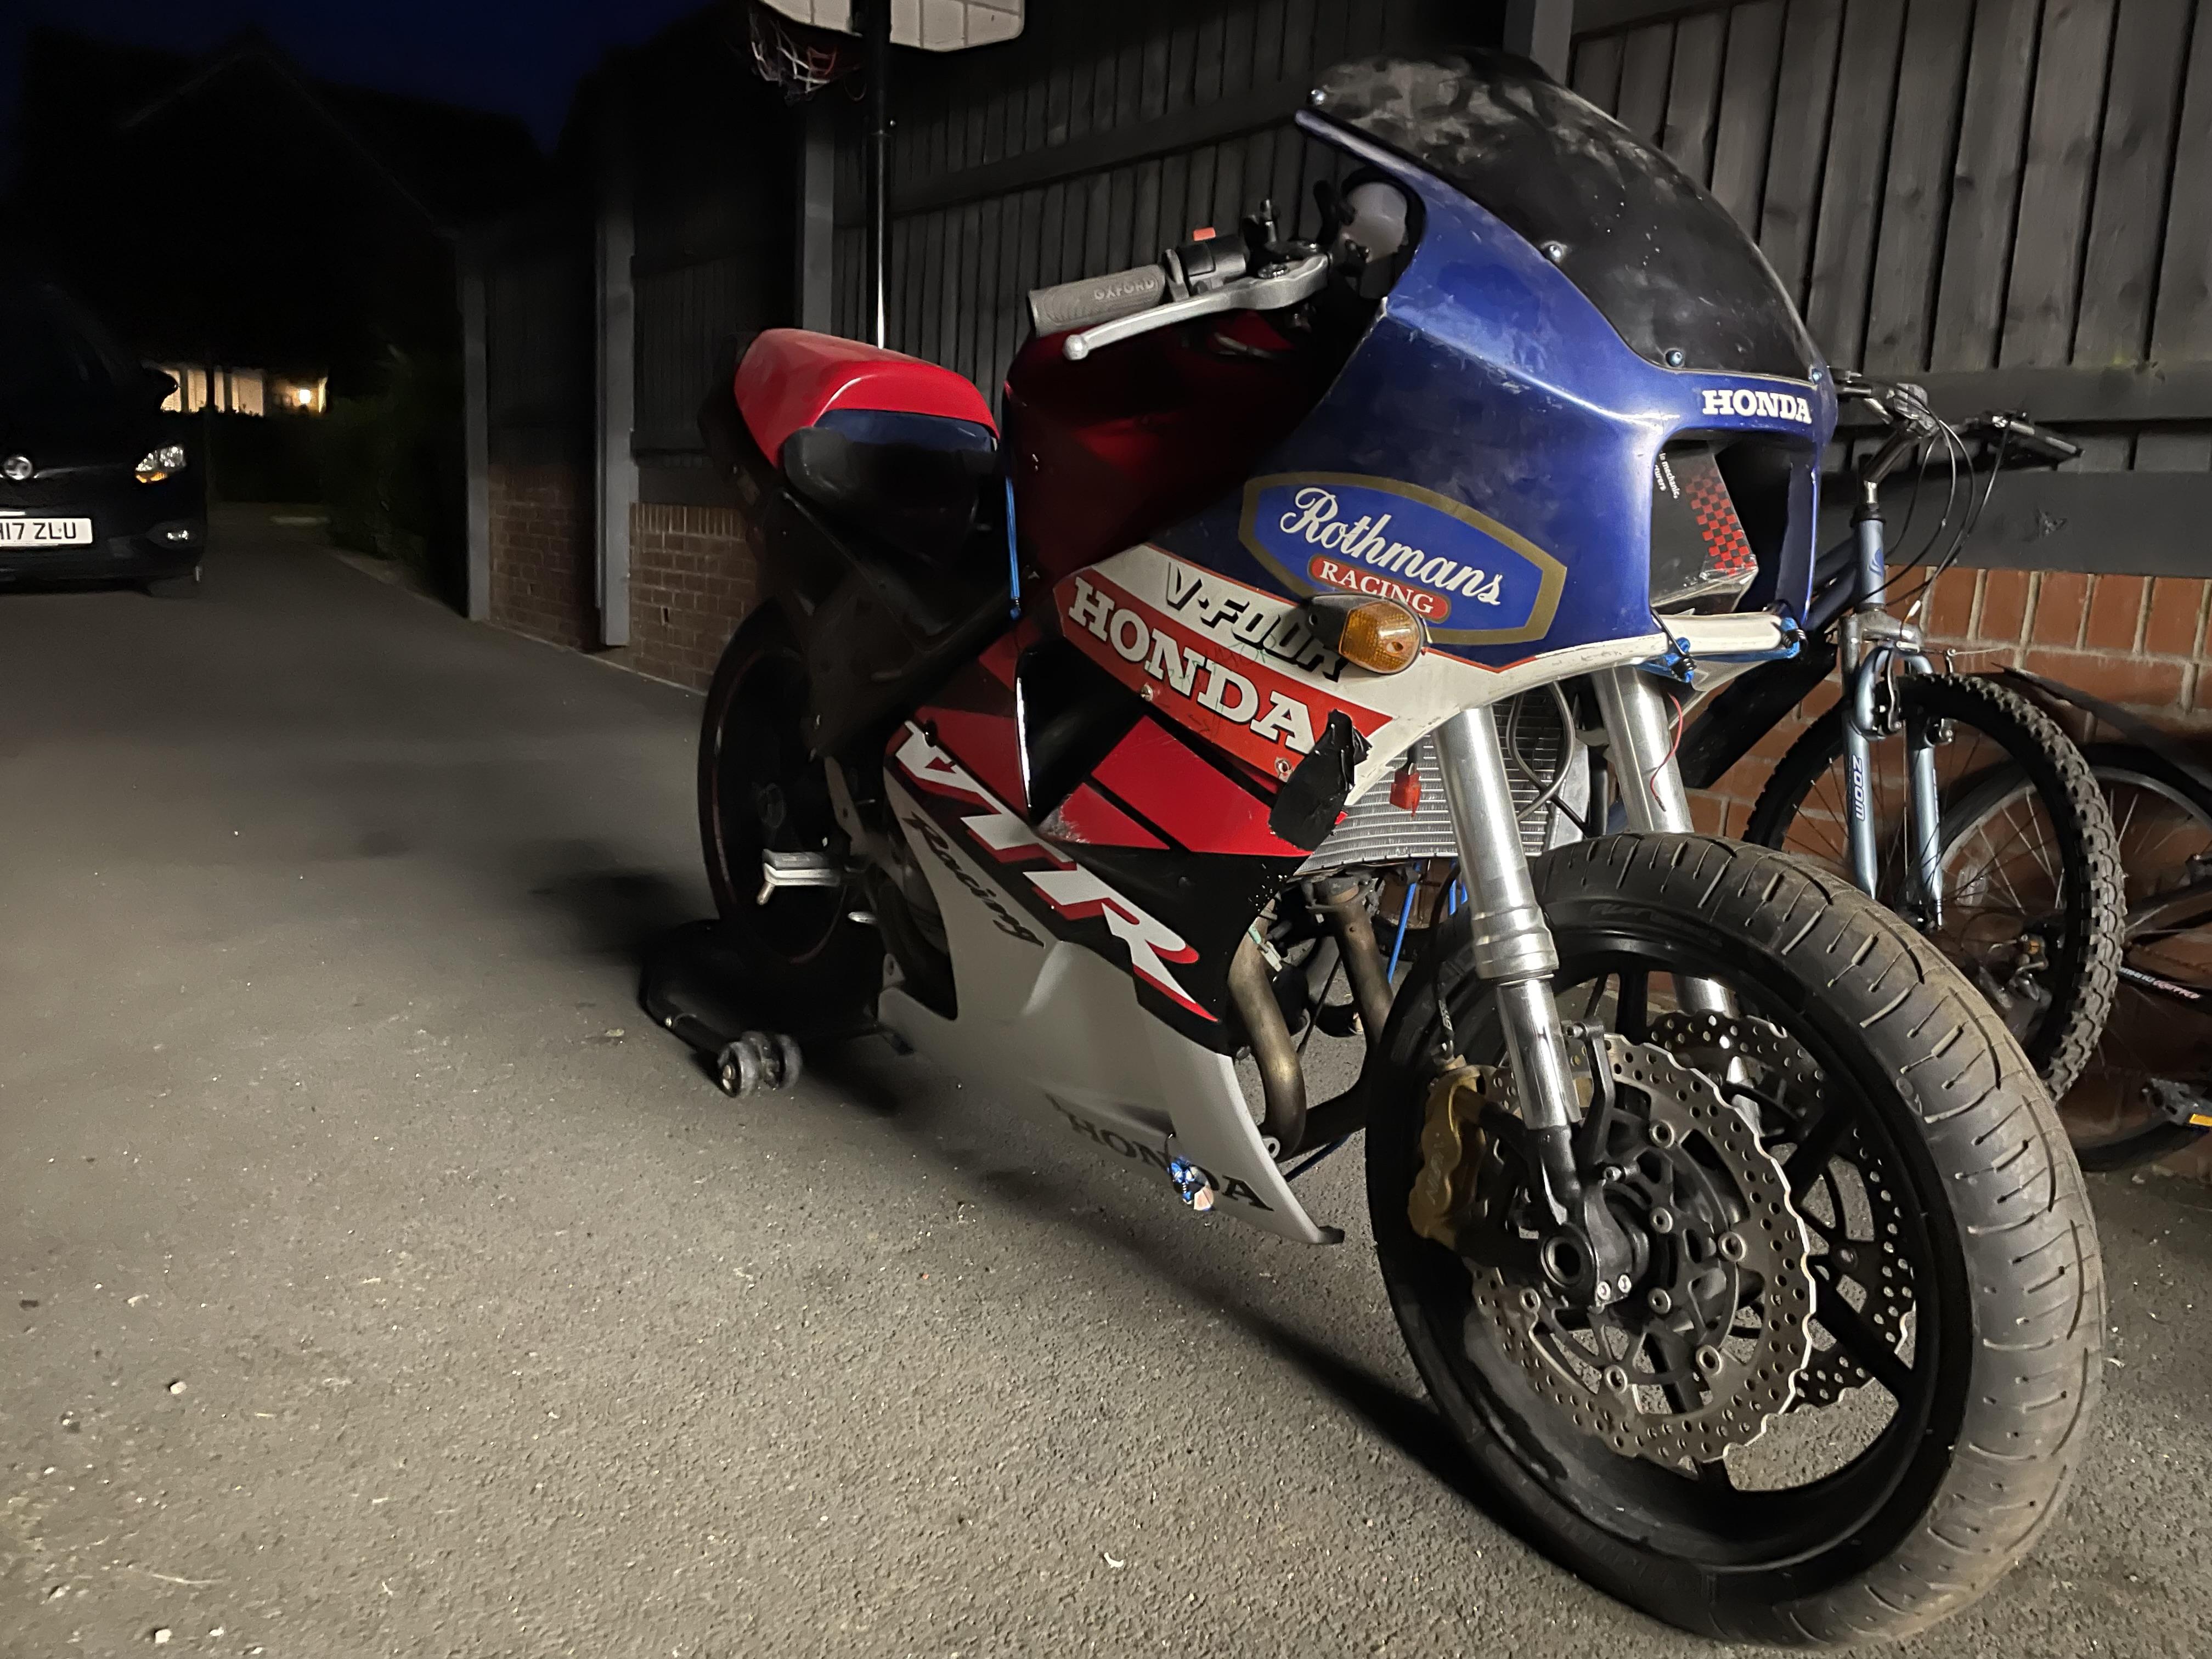
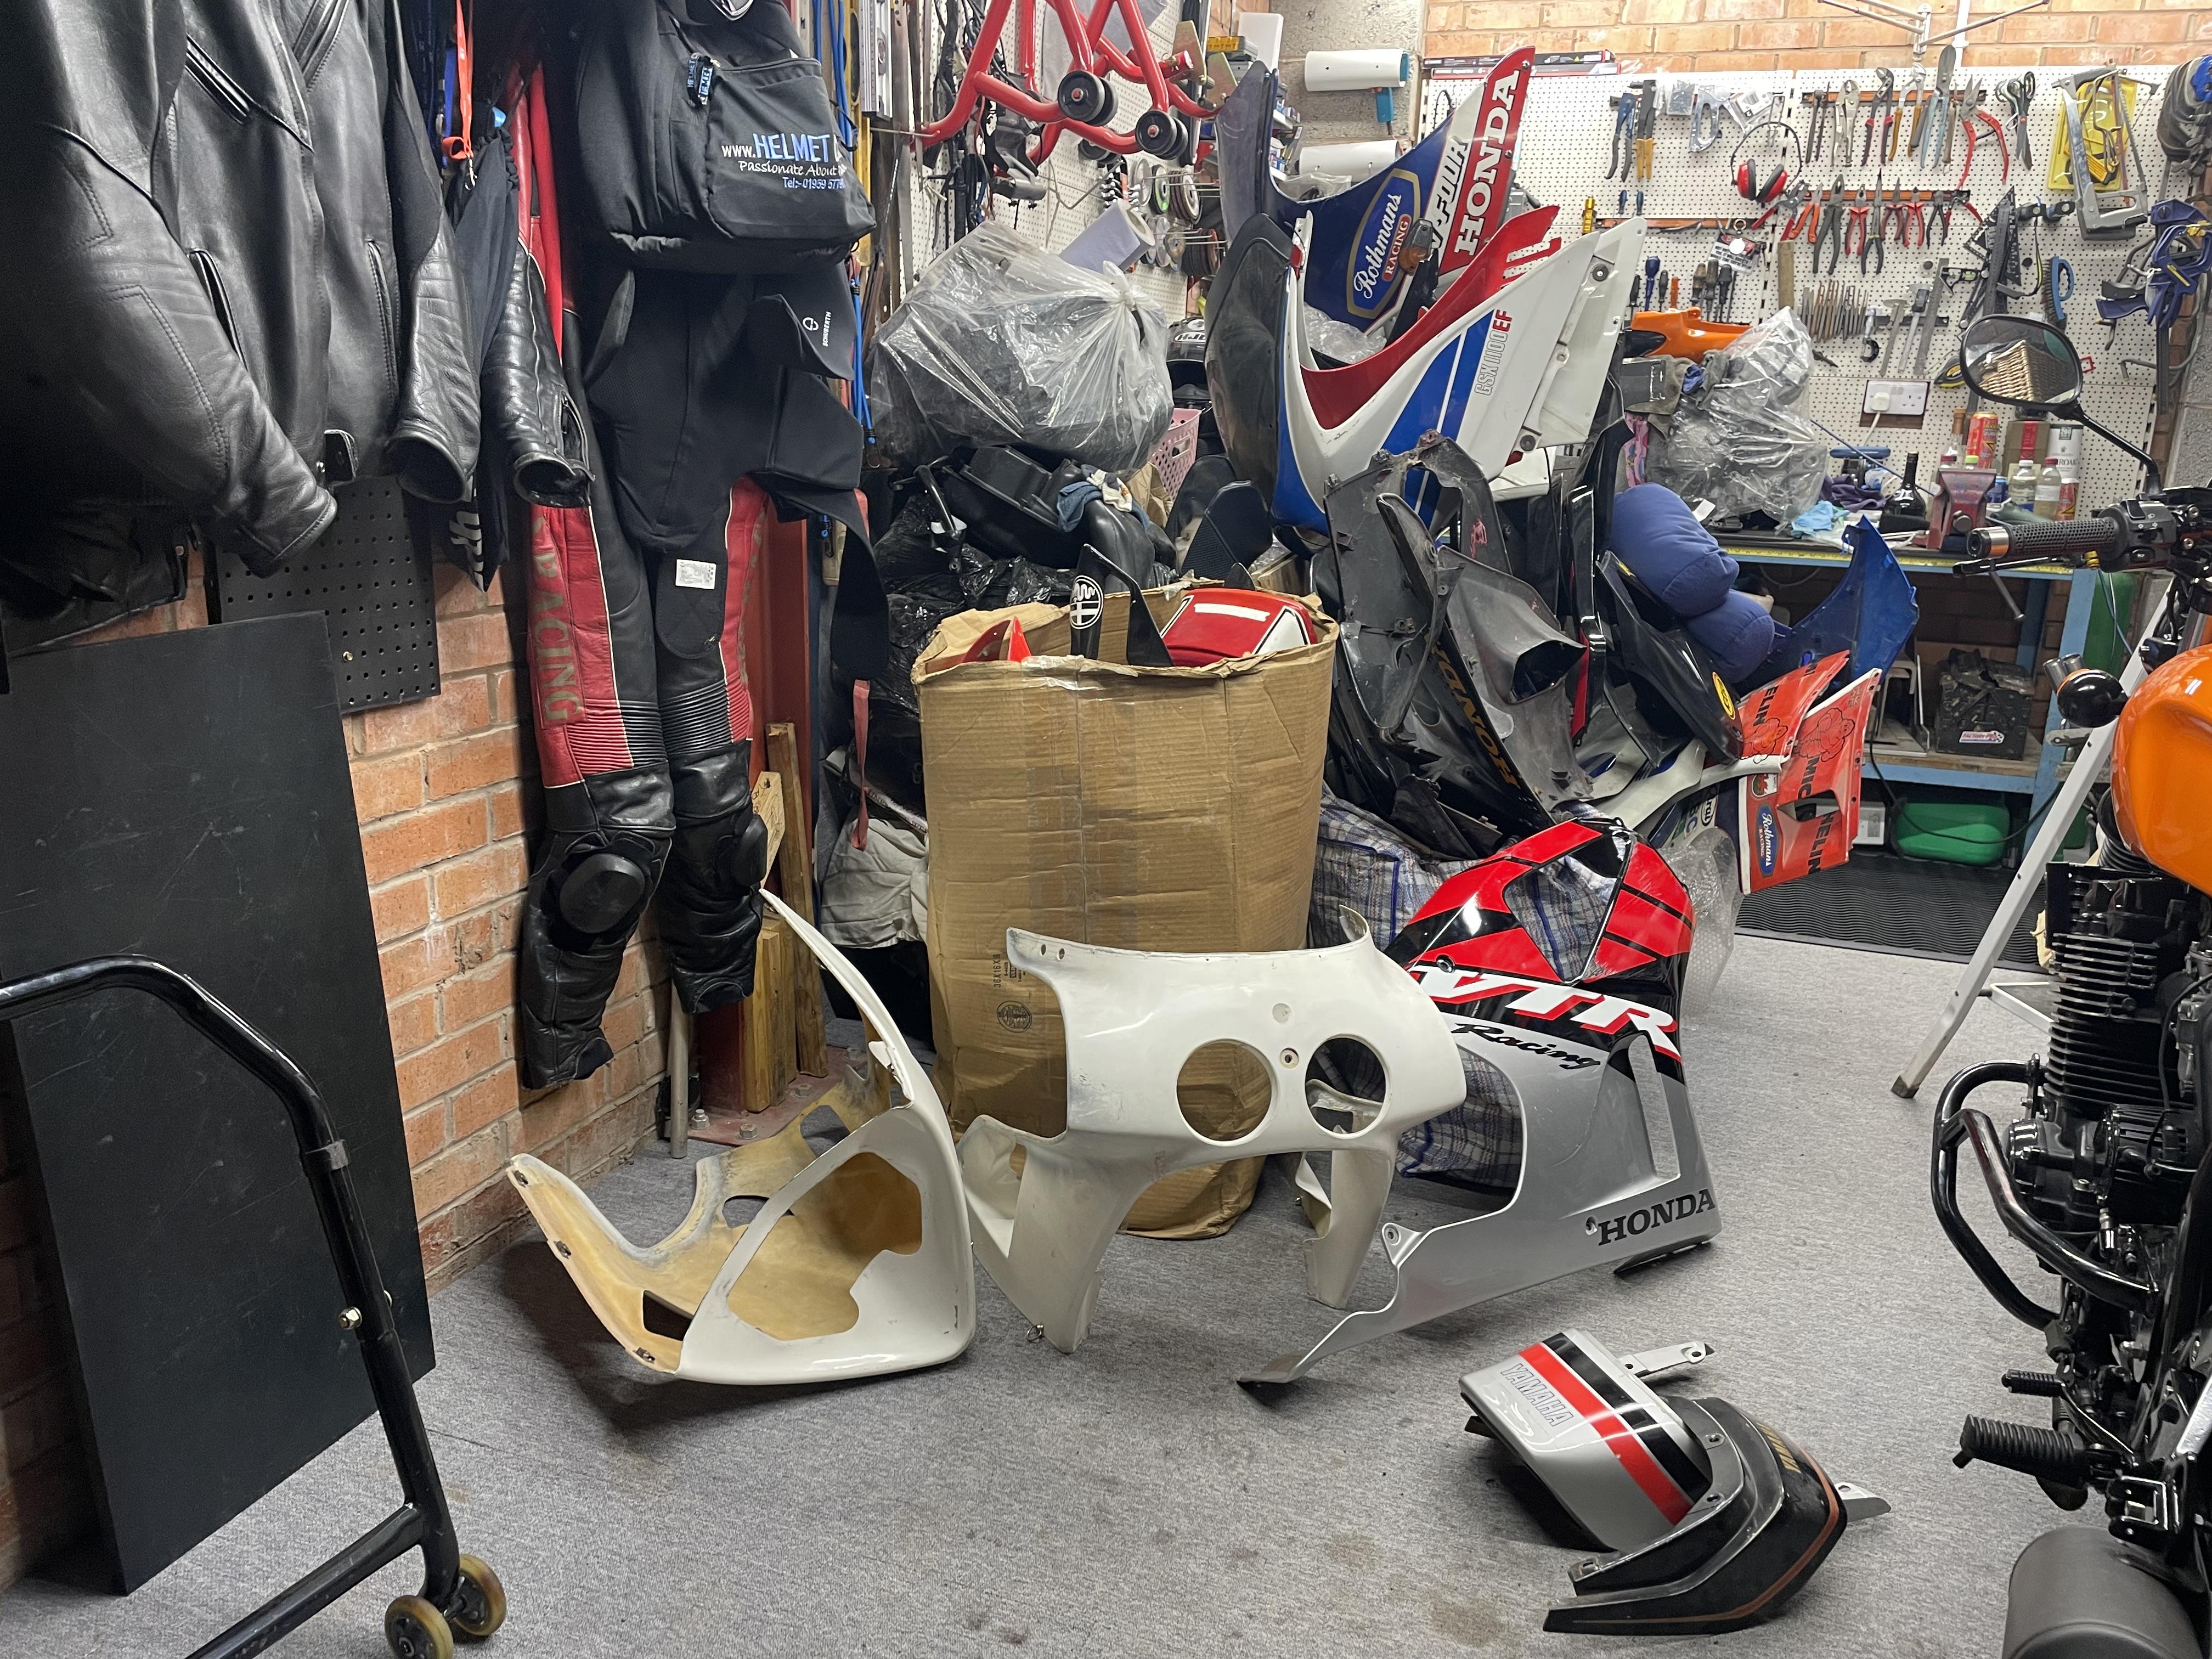
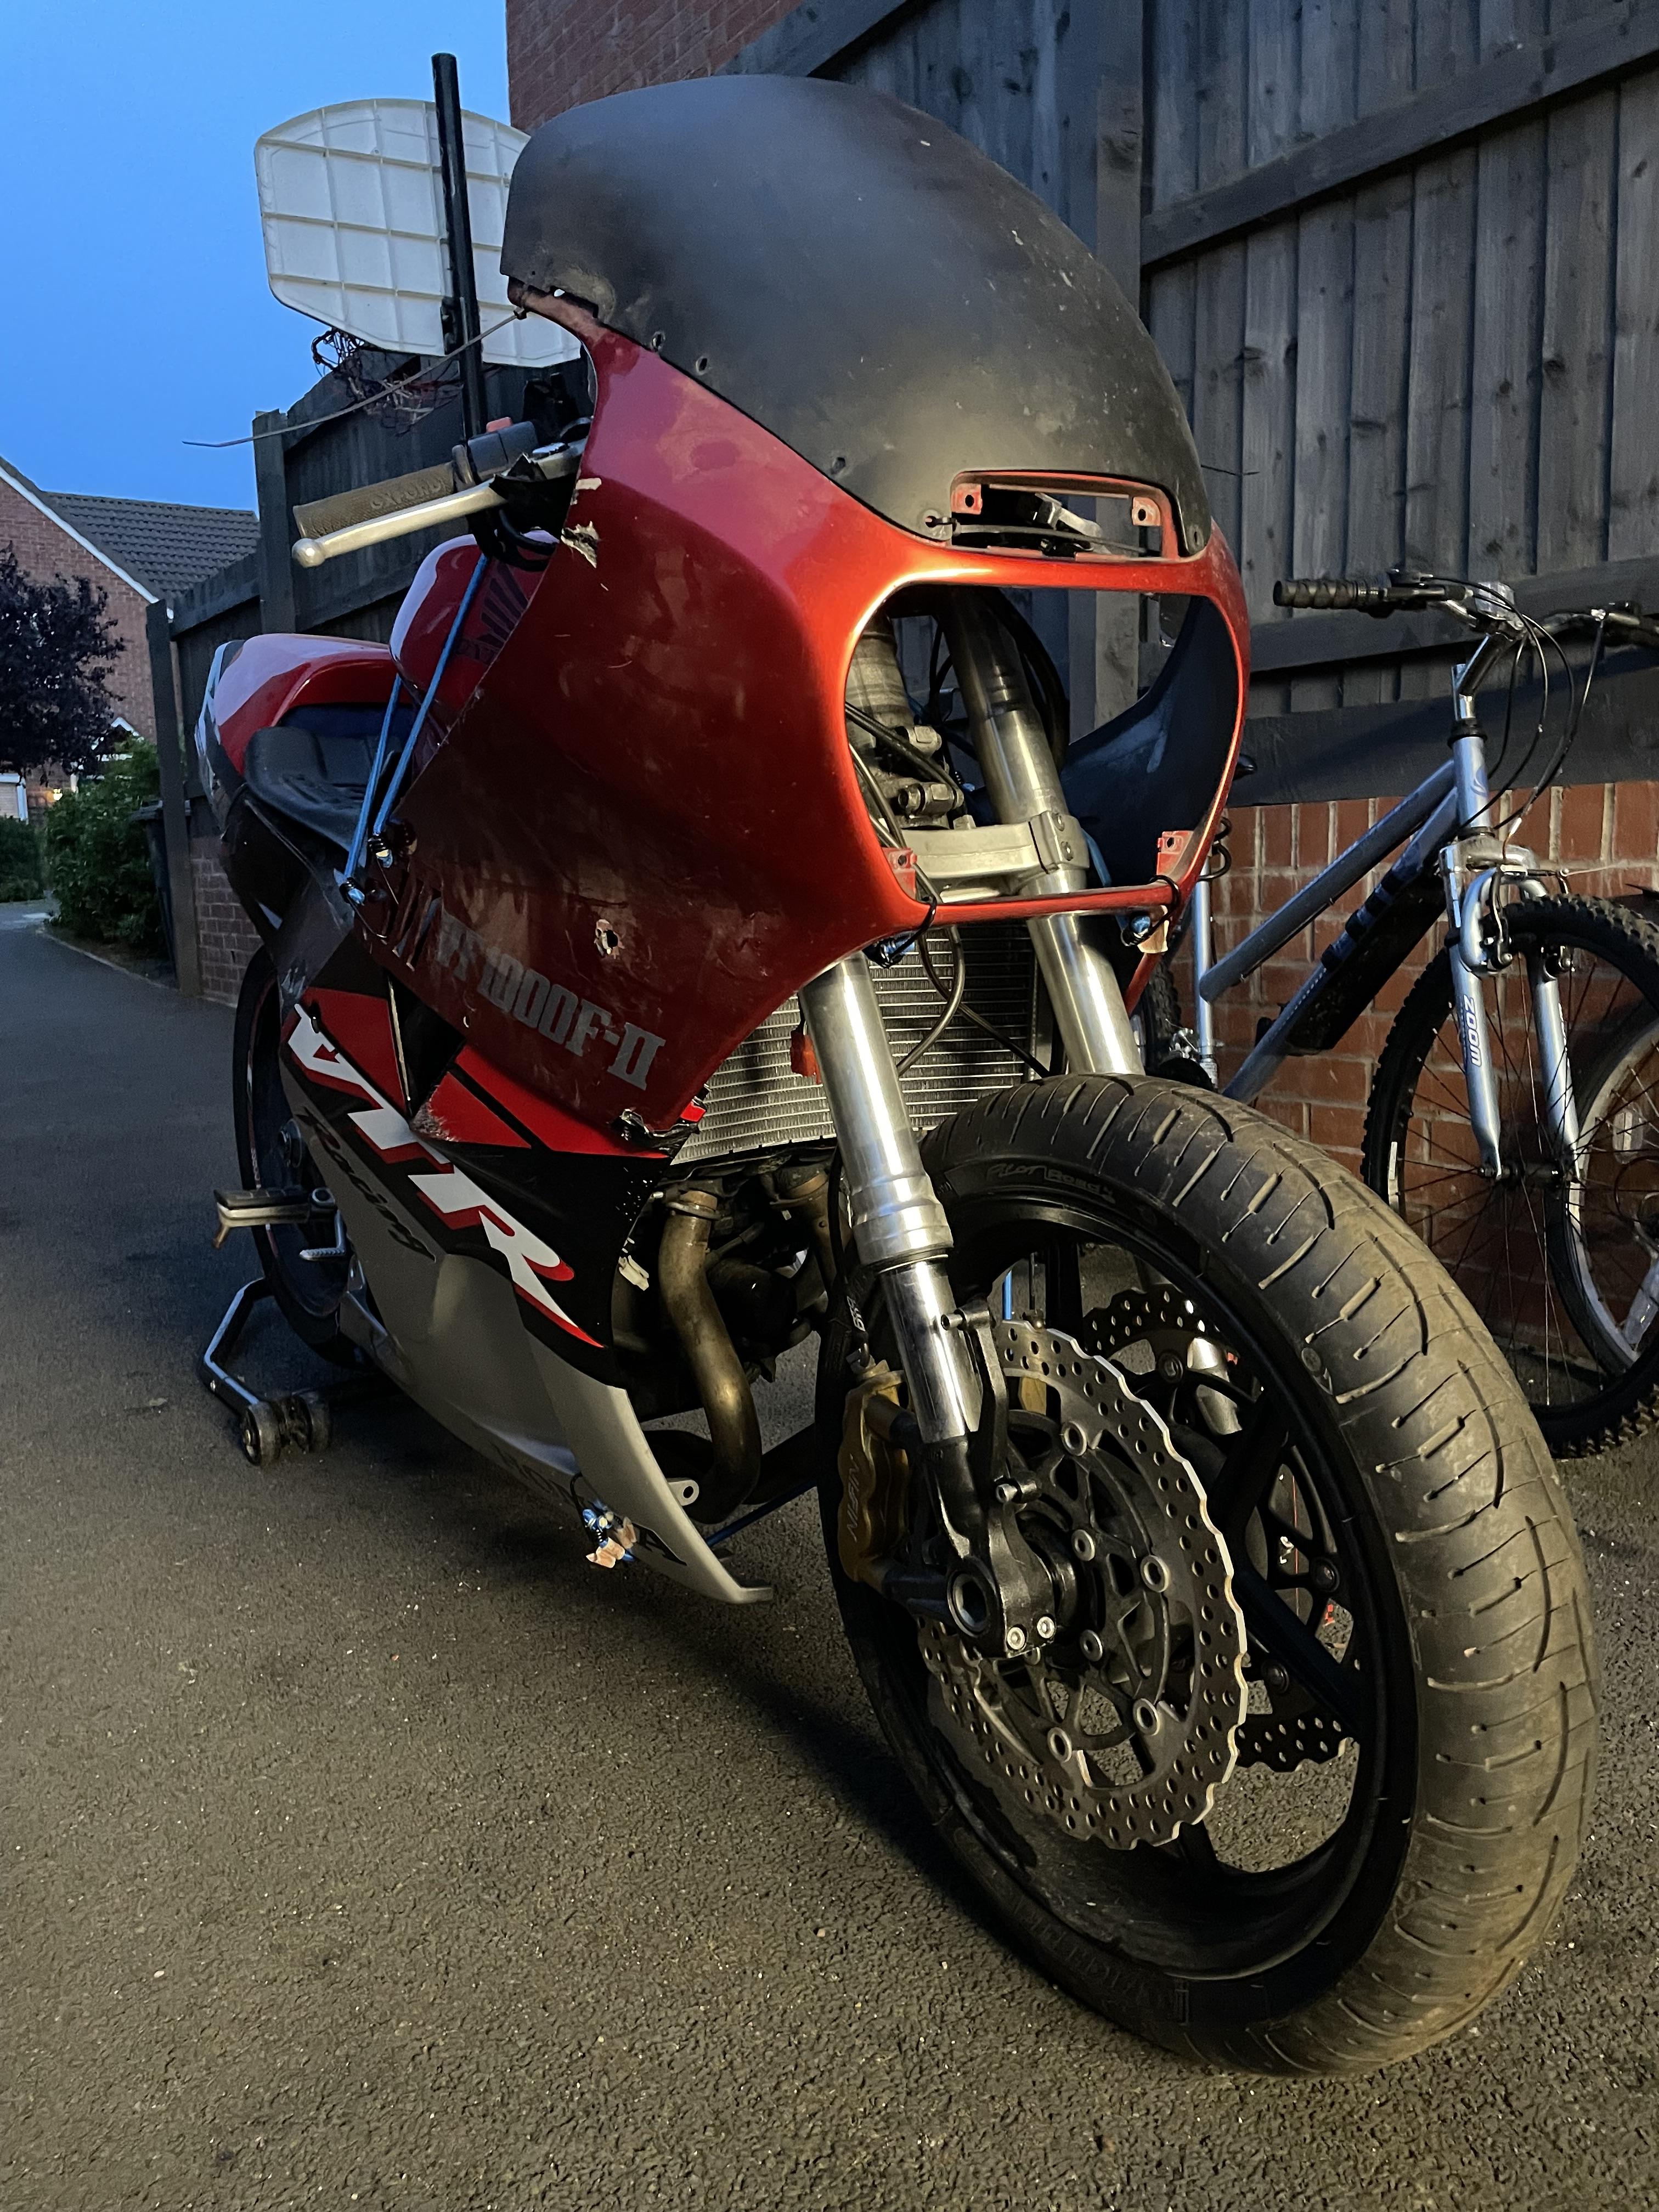
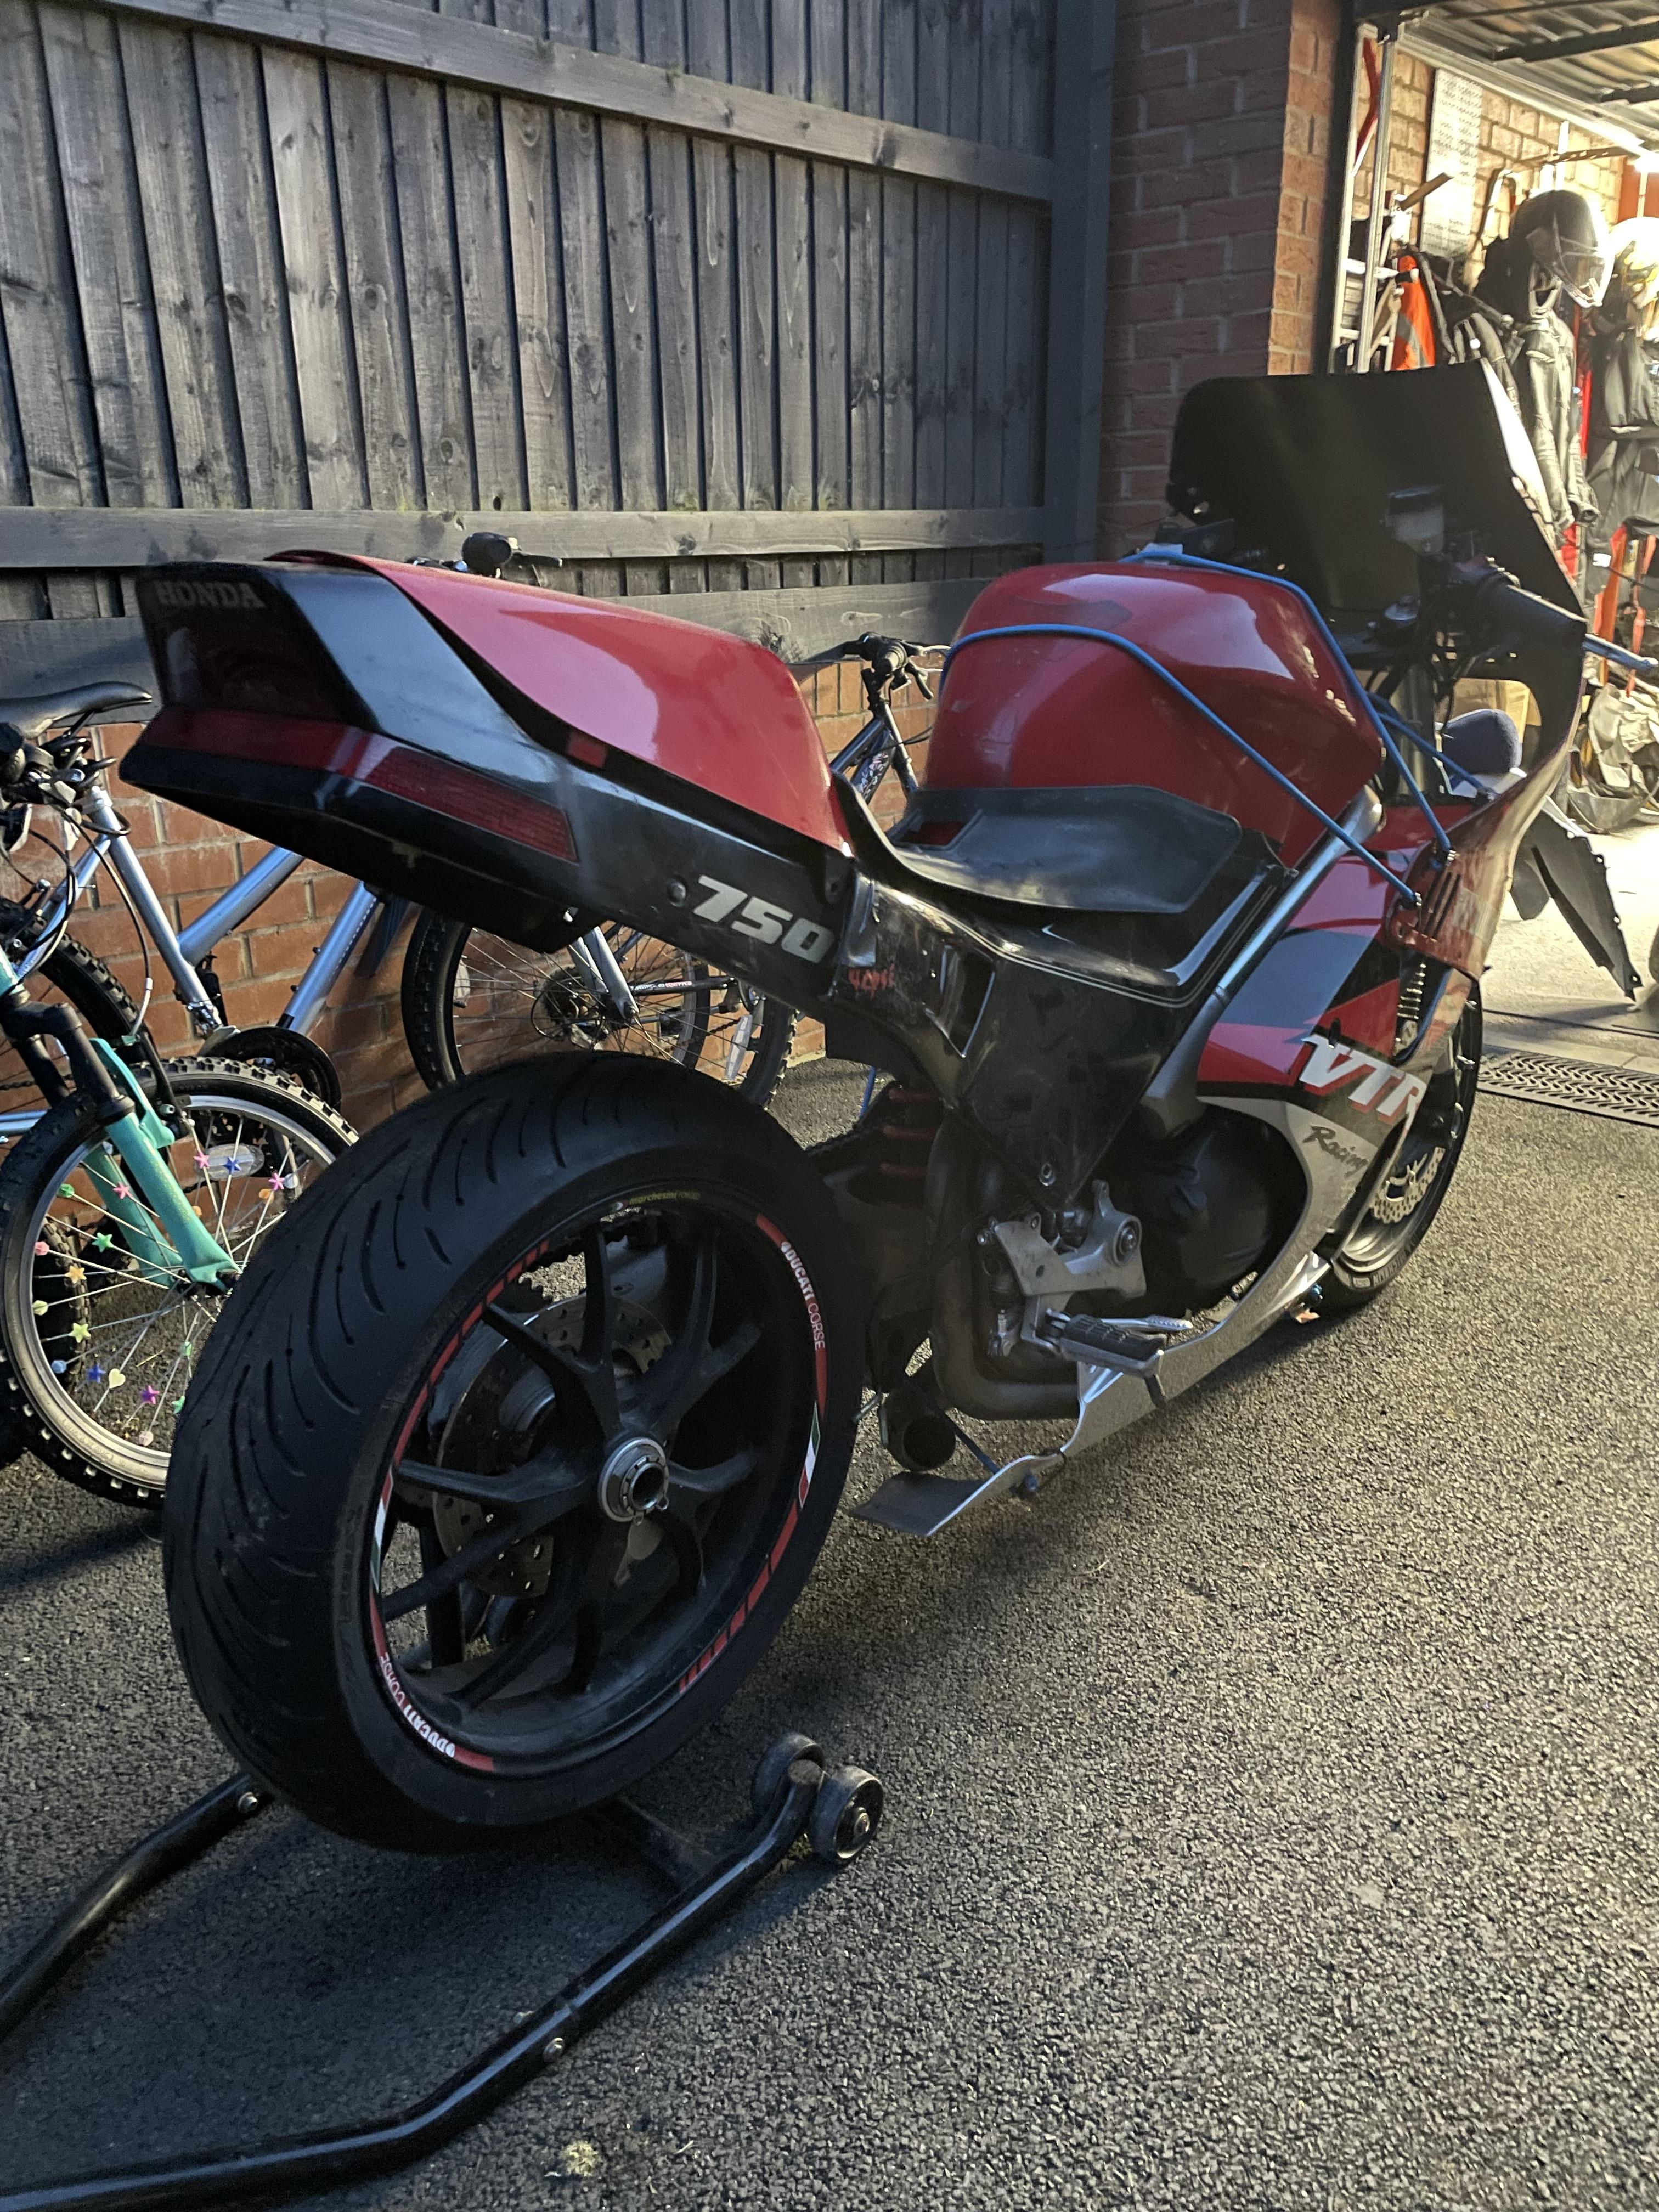
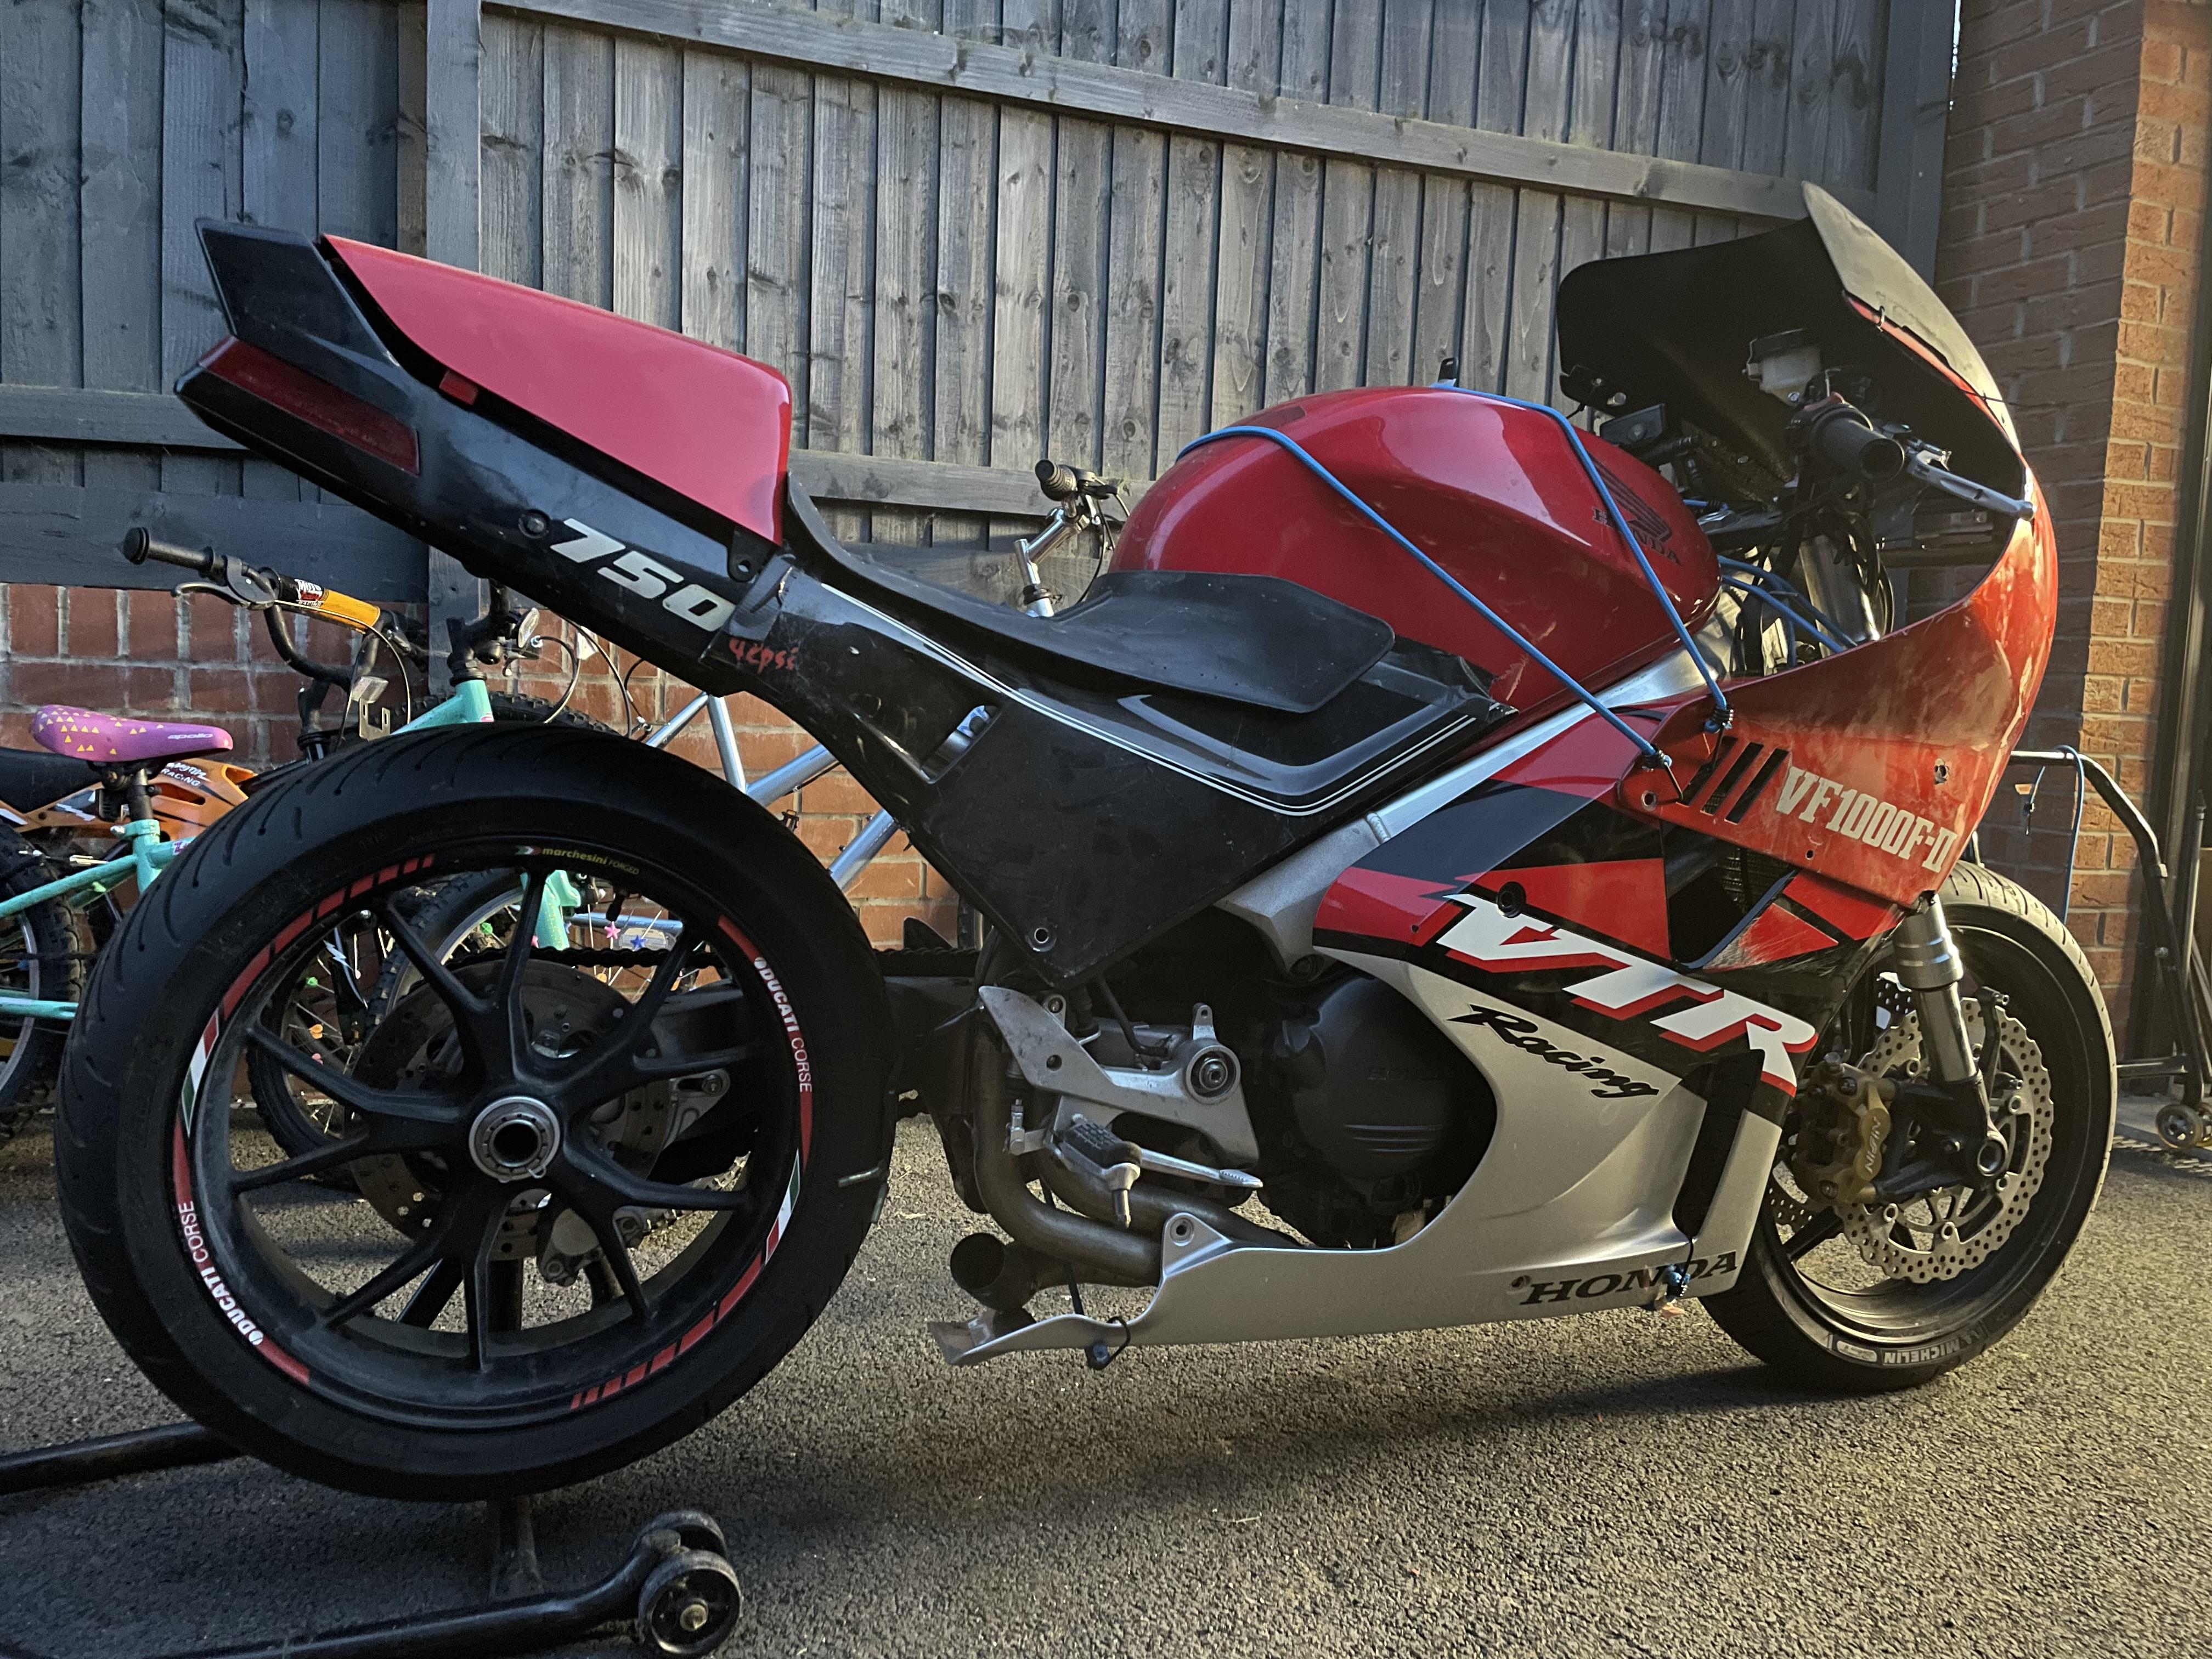
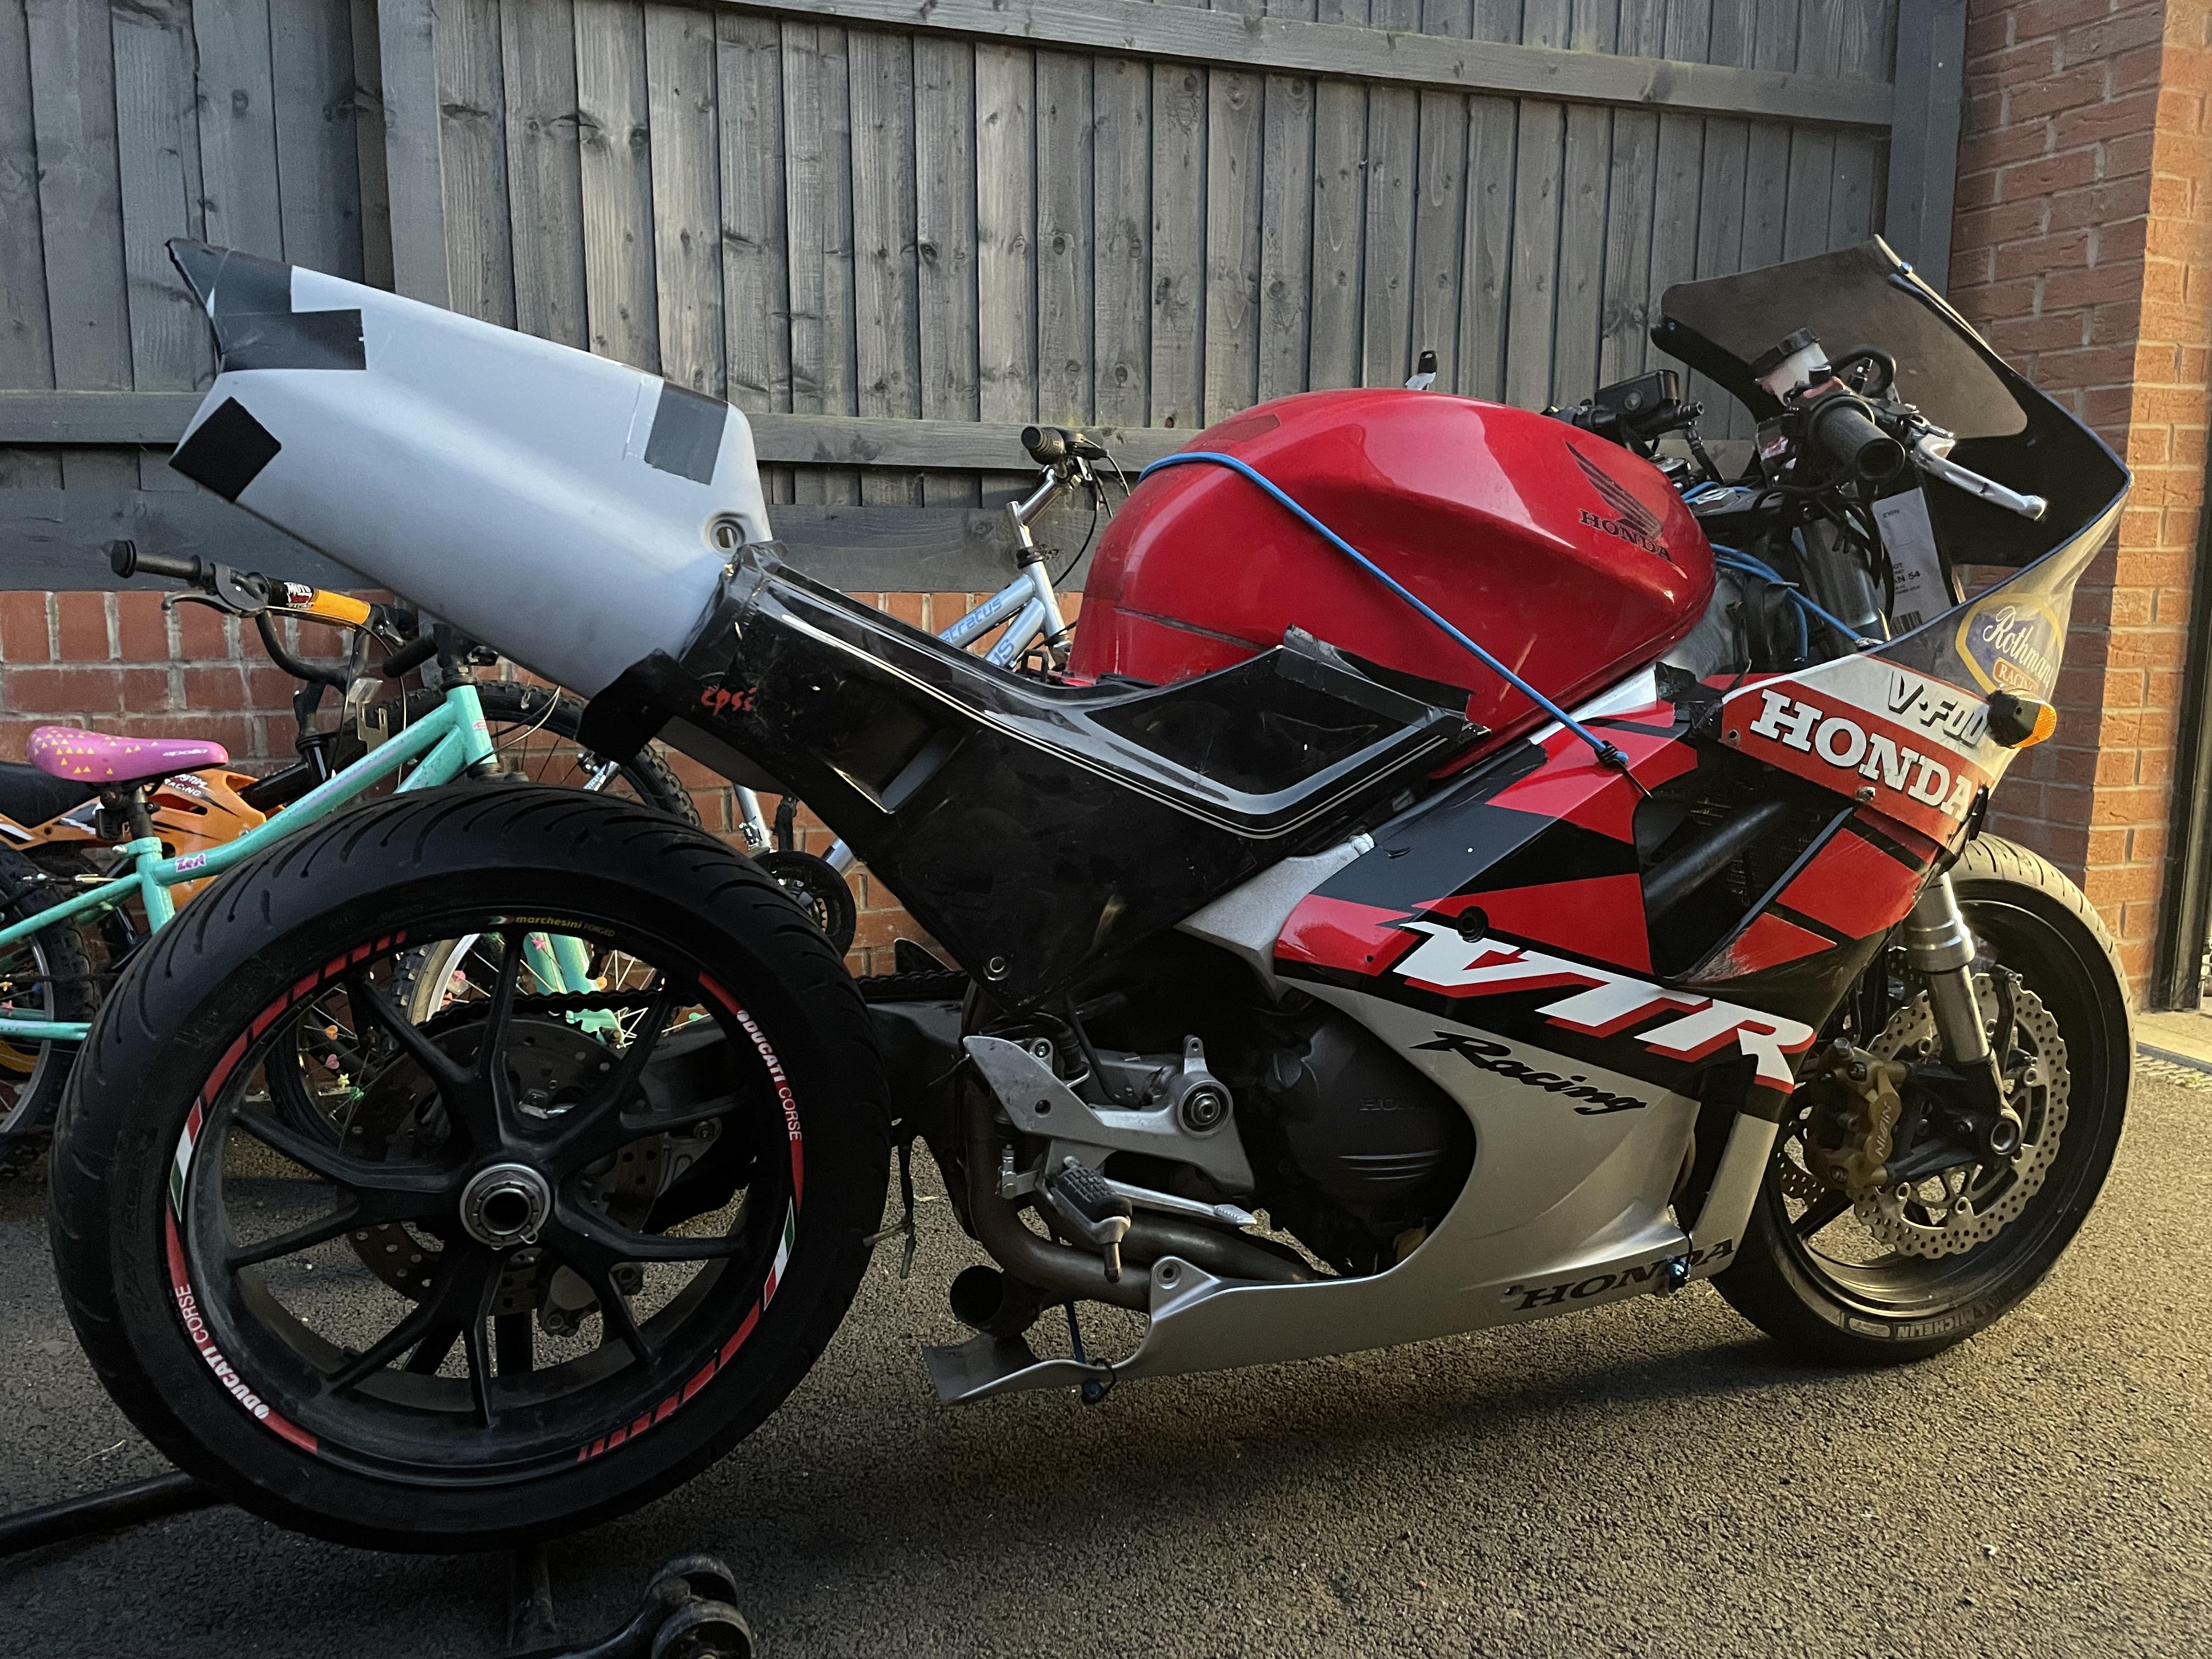
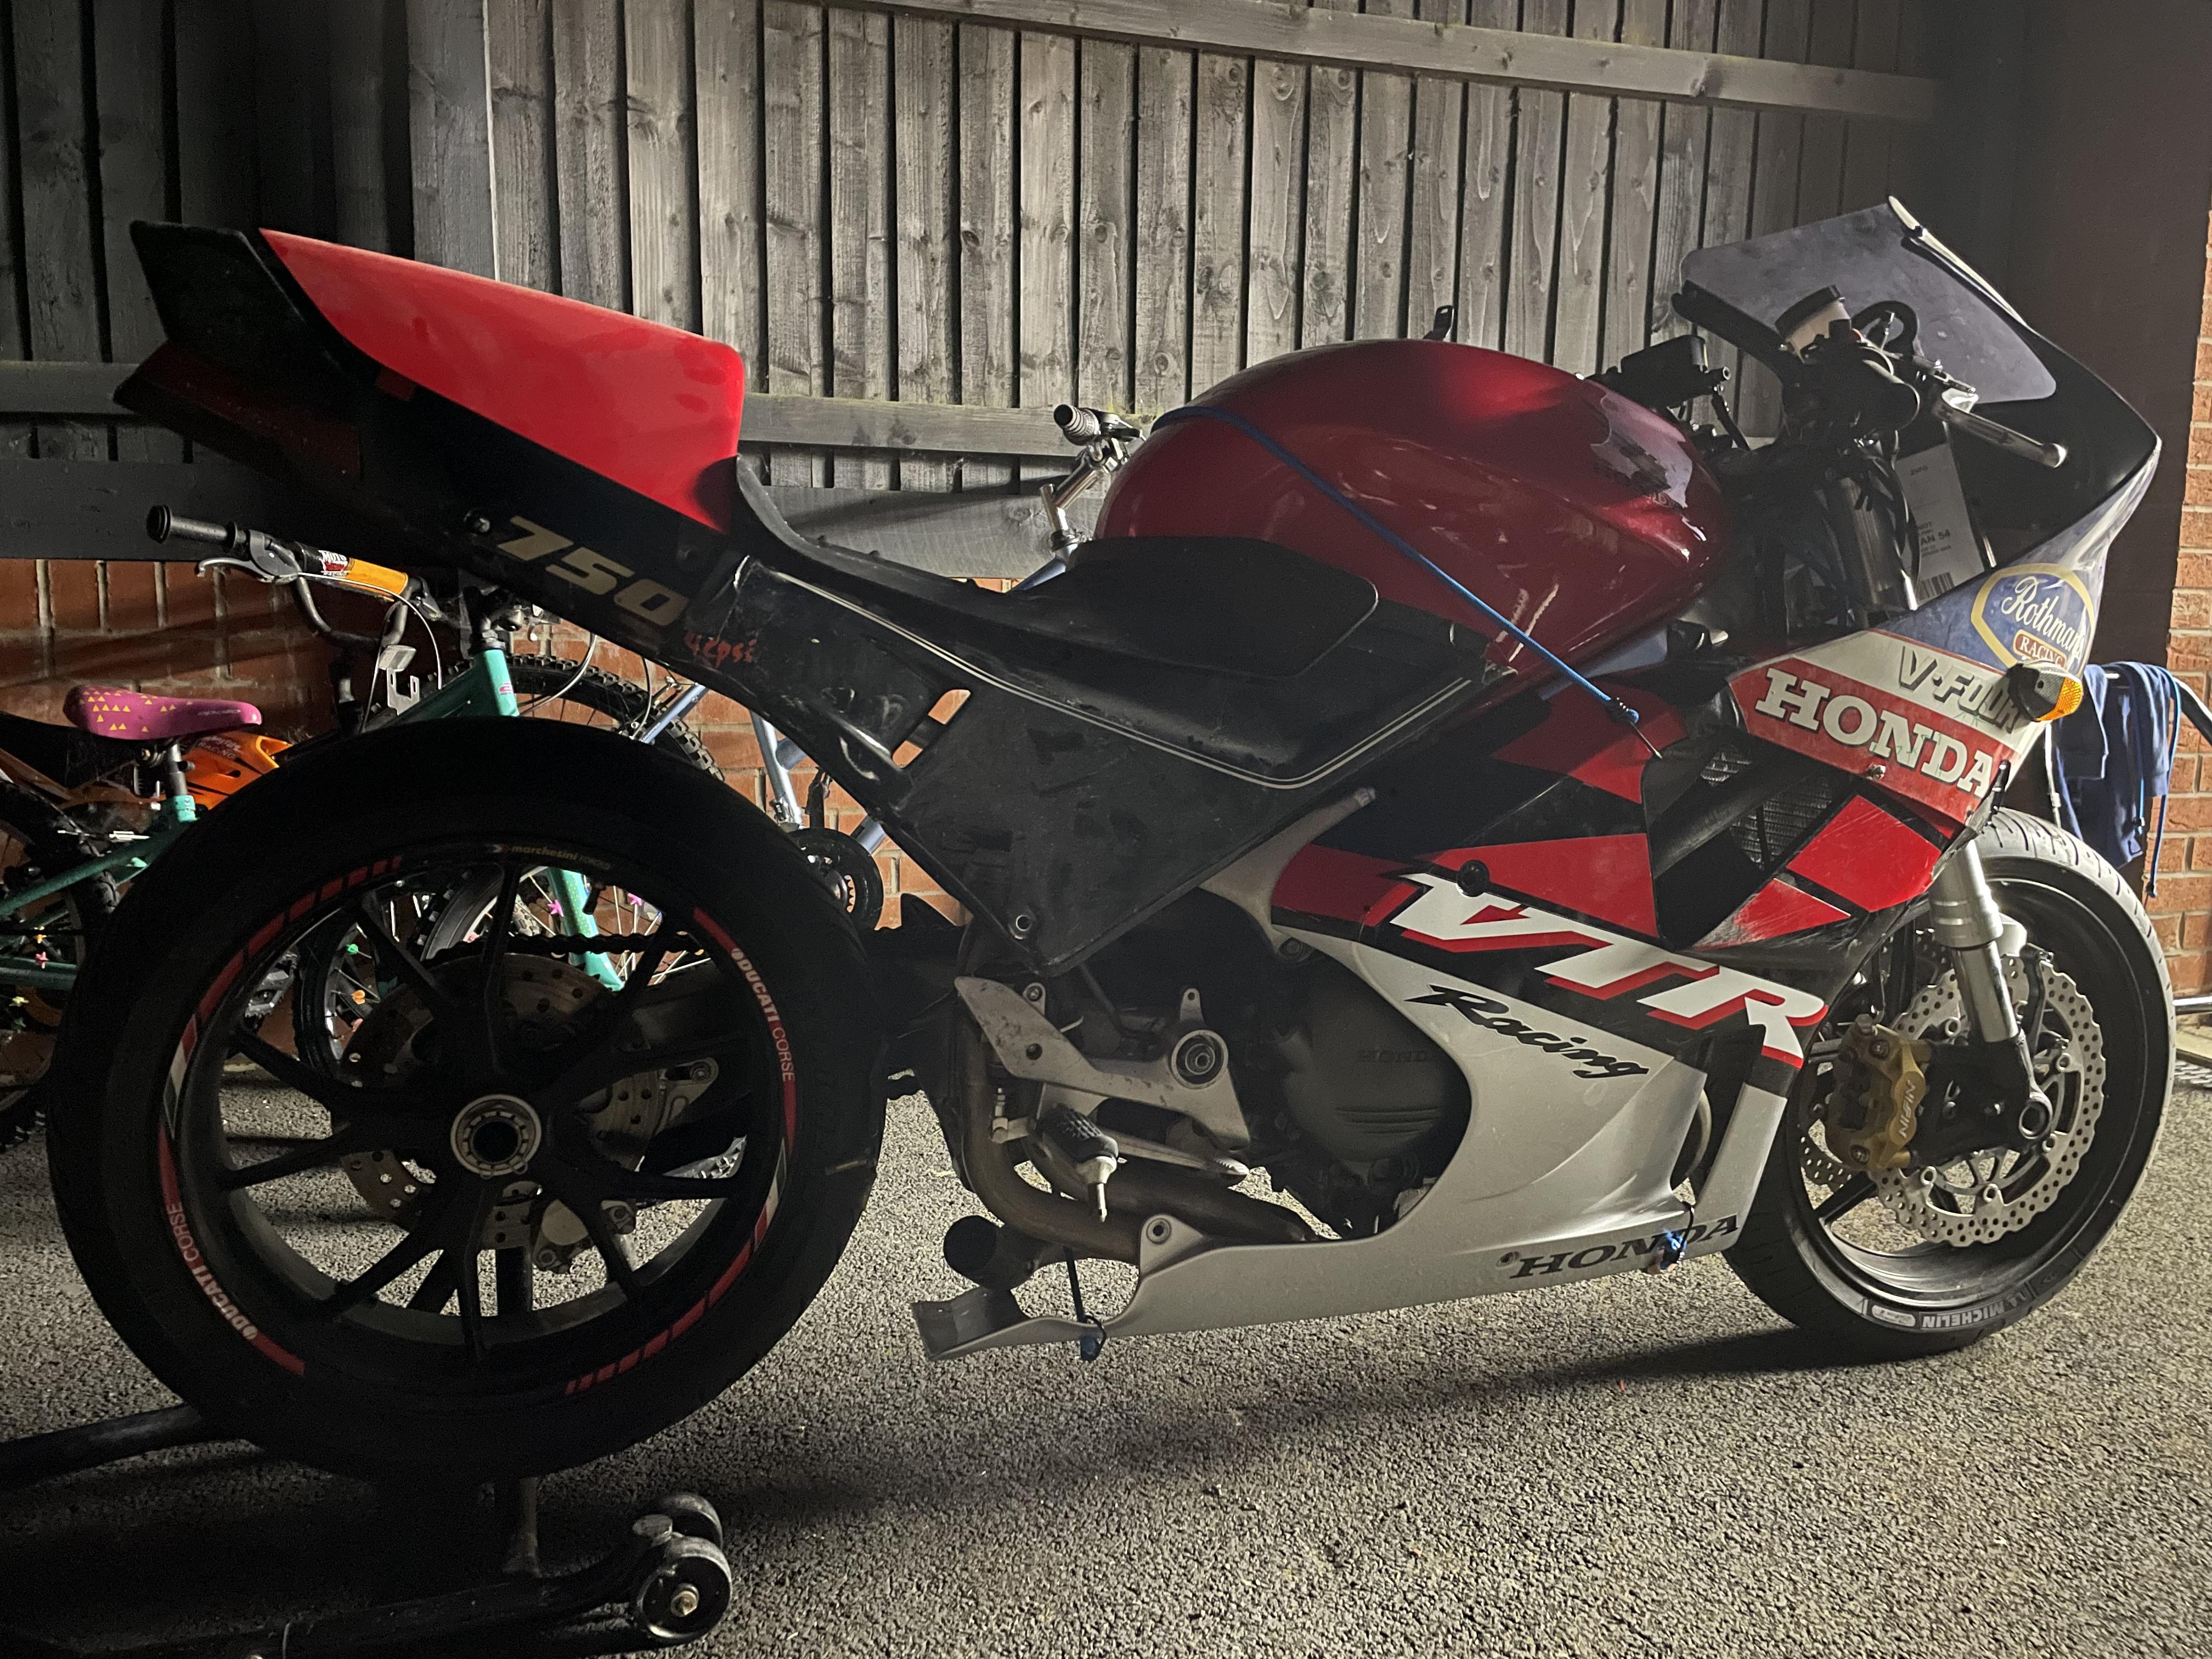
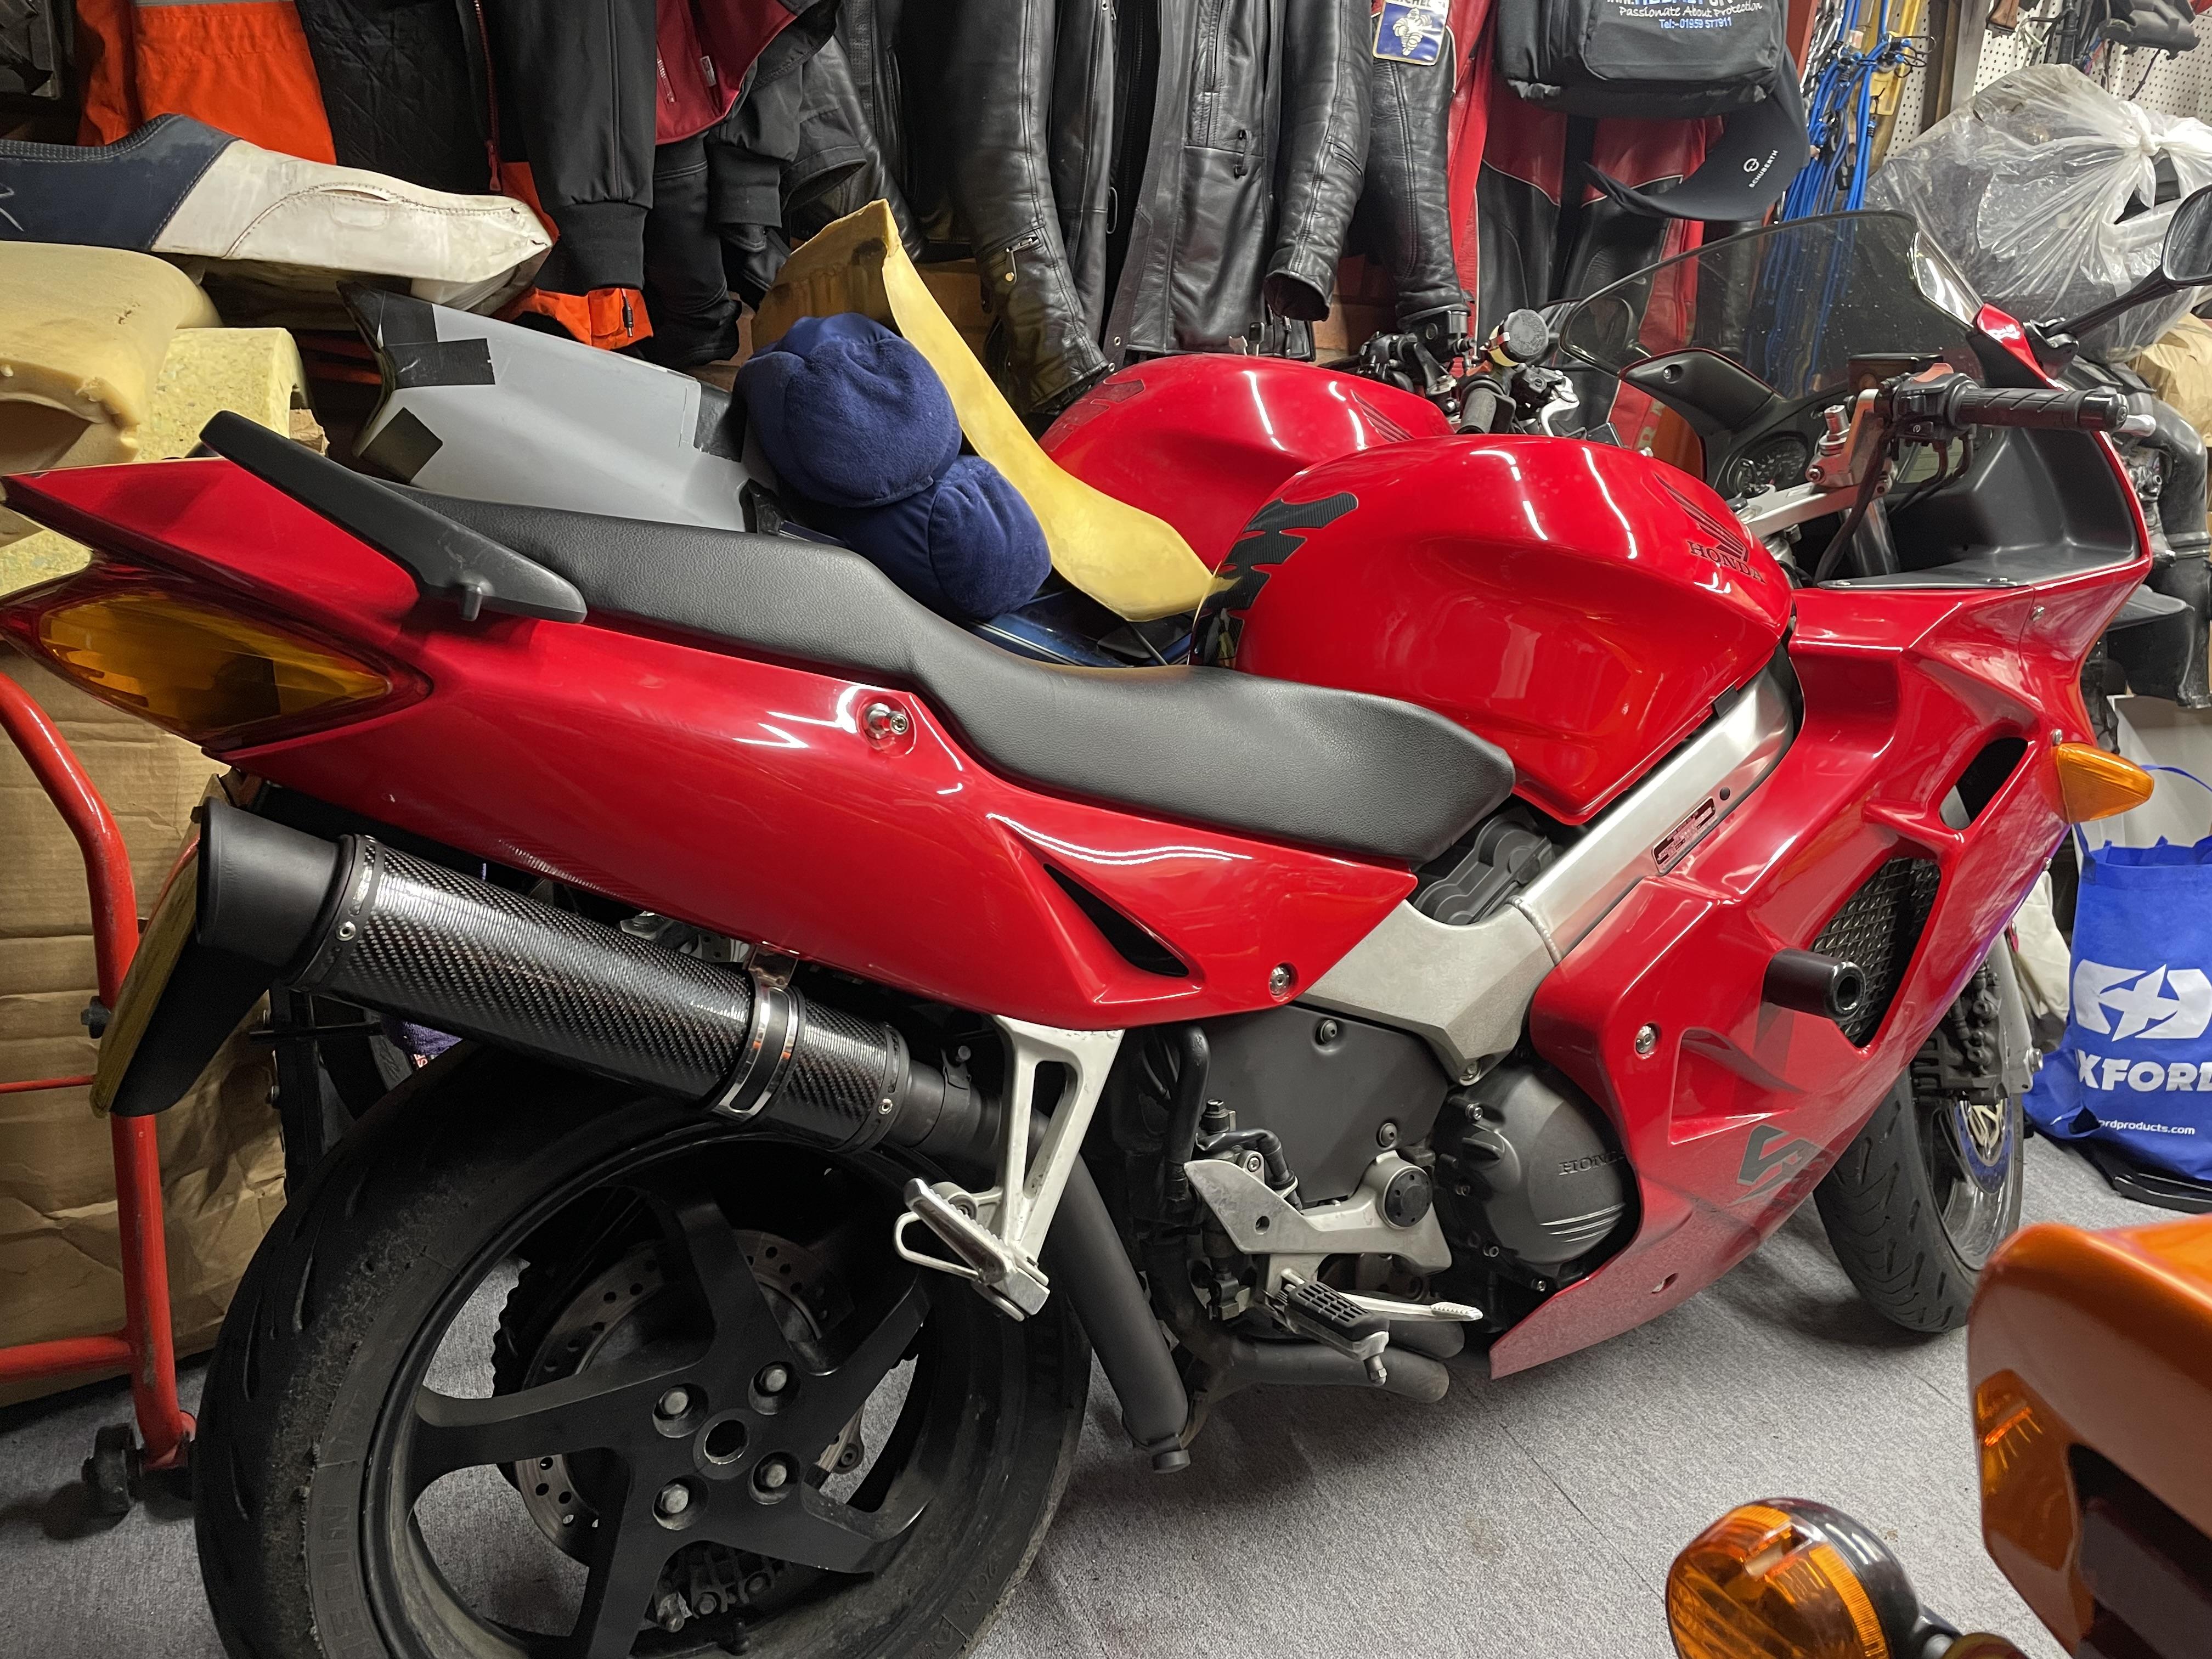
Hello All, It’s been some time since my last update so thought I’d pop in with a request: does anyone have an RC24 pillion seat cover they’re prepared to sell me? I’ve decided to finally pick a look and go for it, even if it’s not perfect, and the combo of choice is: 1. VF400/500 top fairing 2. VTR1000 SP2 side fairings 3. VFR750 1984 RC24 tail (shortened) That’s my 5th gen pillion cover on for trial but I’d like an RC24 (1st gen?) cover so it matches the seat fairing. Anybody got one they’re prepared to sell (based in UK)? My pole of “trial” fairings is getting out of hand now so have to finish this project and get my garage back! In there, you’ll find: - Ducati 1198 (in the box) - RC30 from Harris - VTR SP2 - CBR600 F2, F3, F4 and later models all jumbled up - Early Fireblade 900 and 919 - Leon Camier’s BSB GSXR600 carbon fairings (seriously!) - GSX1100F - VF1000F - Triumph 675 (3rd gen) - VF400 with sides and belly pans - VFR750 - Suzuki GS650 - Honda NS400 - Honda CB250 - Yamaha XJ650 - Honda MC18 - Honda MC21 - And a whole bunch of others I can’t quite recall just now Garage looks like a breaker’s yard - it has to stop!!! Doesn't look too sad with the VF1000 front but it may be too big visually for the rest of the bike… Happy to have feedback and vitriol! Please, if you have a spare VFR750 1984-88 pillion cowl kicking around, get in touch. Best, Stray
-
As Mohawk says, you can tune it any way you like. Mohawk’s blue 5th gen with RB (and MANY other mods) pulled away from mine cleanly at all speeds. I didn’t have a RB then. Oh, and Mohawk is a better rider than I am too! Since fitting the RB the bike has more urgency and feels smoother. Will get it tuned in the summer if I can find a decent Rapid Bike centre. NOTE 1: I had to go through Cal Sport in the UK to get a 5th gen map and harness. The main distributors no longer support the 5th gen. NOTE 2: I “believe” the harness for both 5th and 6th gen is the same…please do your own research to confirm, though.
-
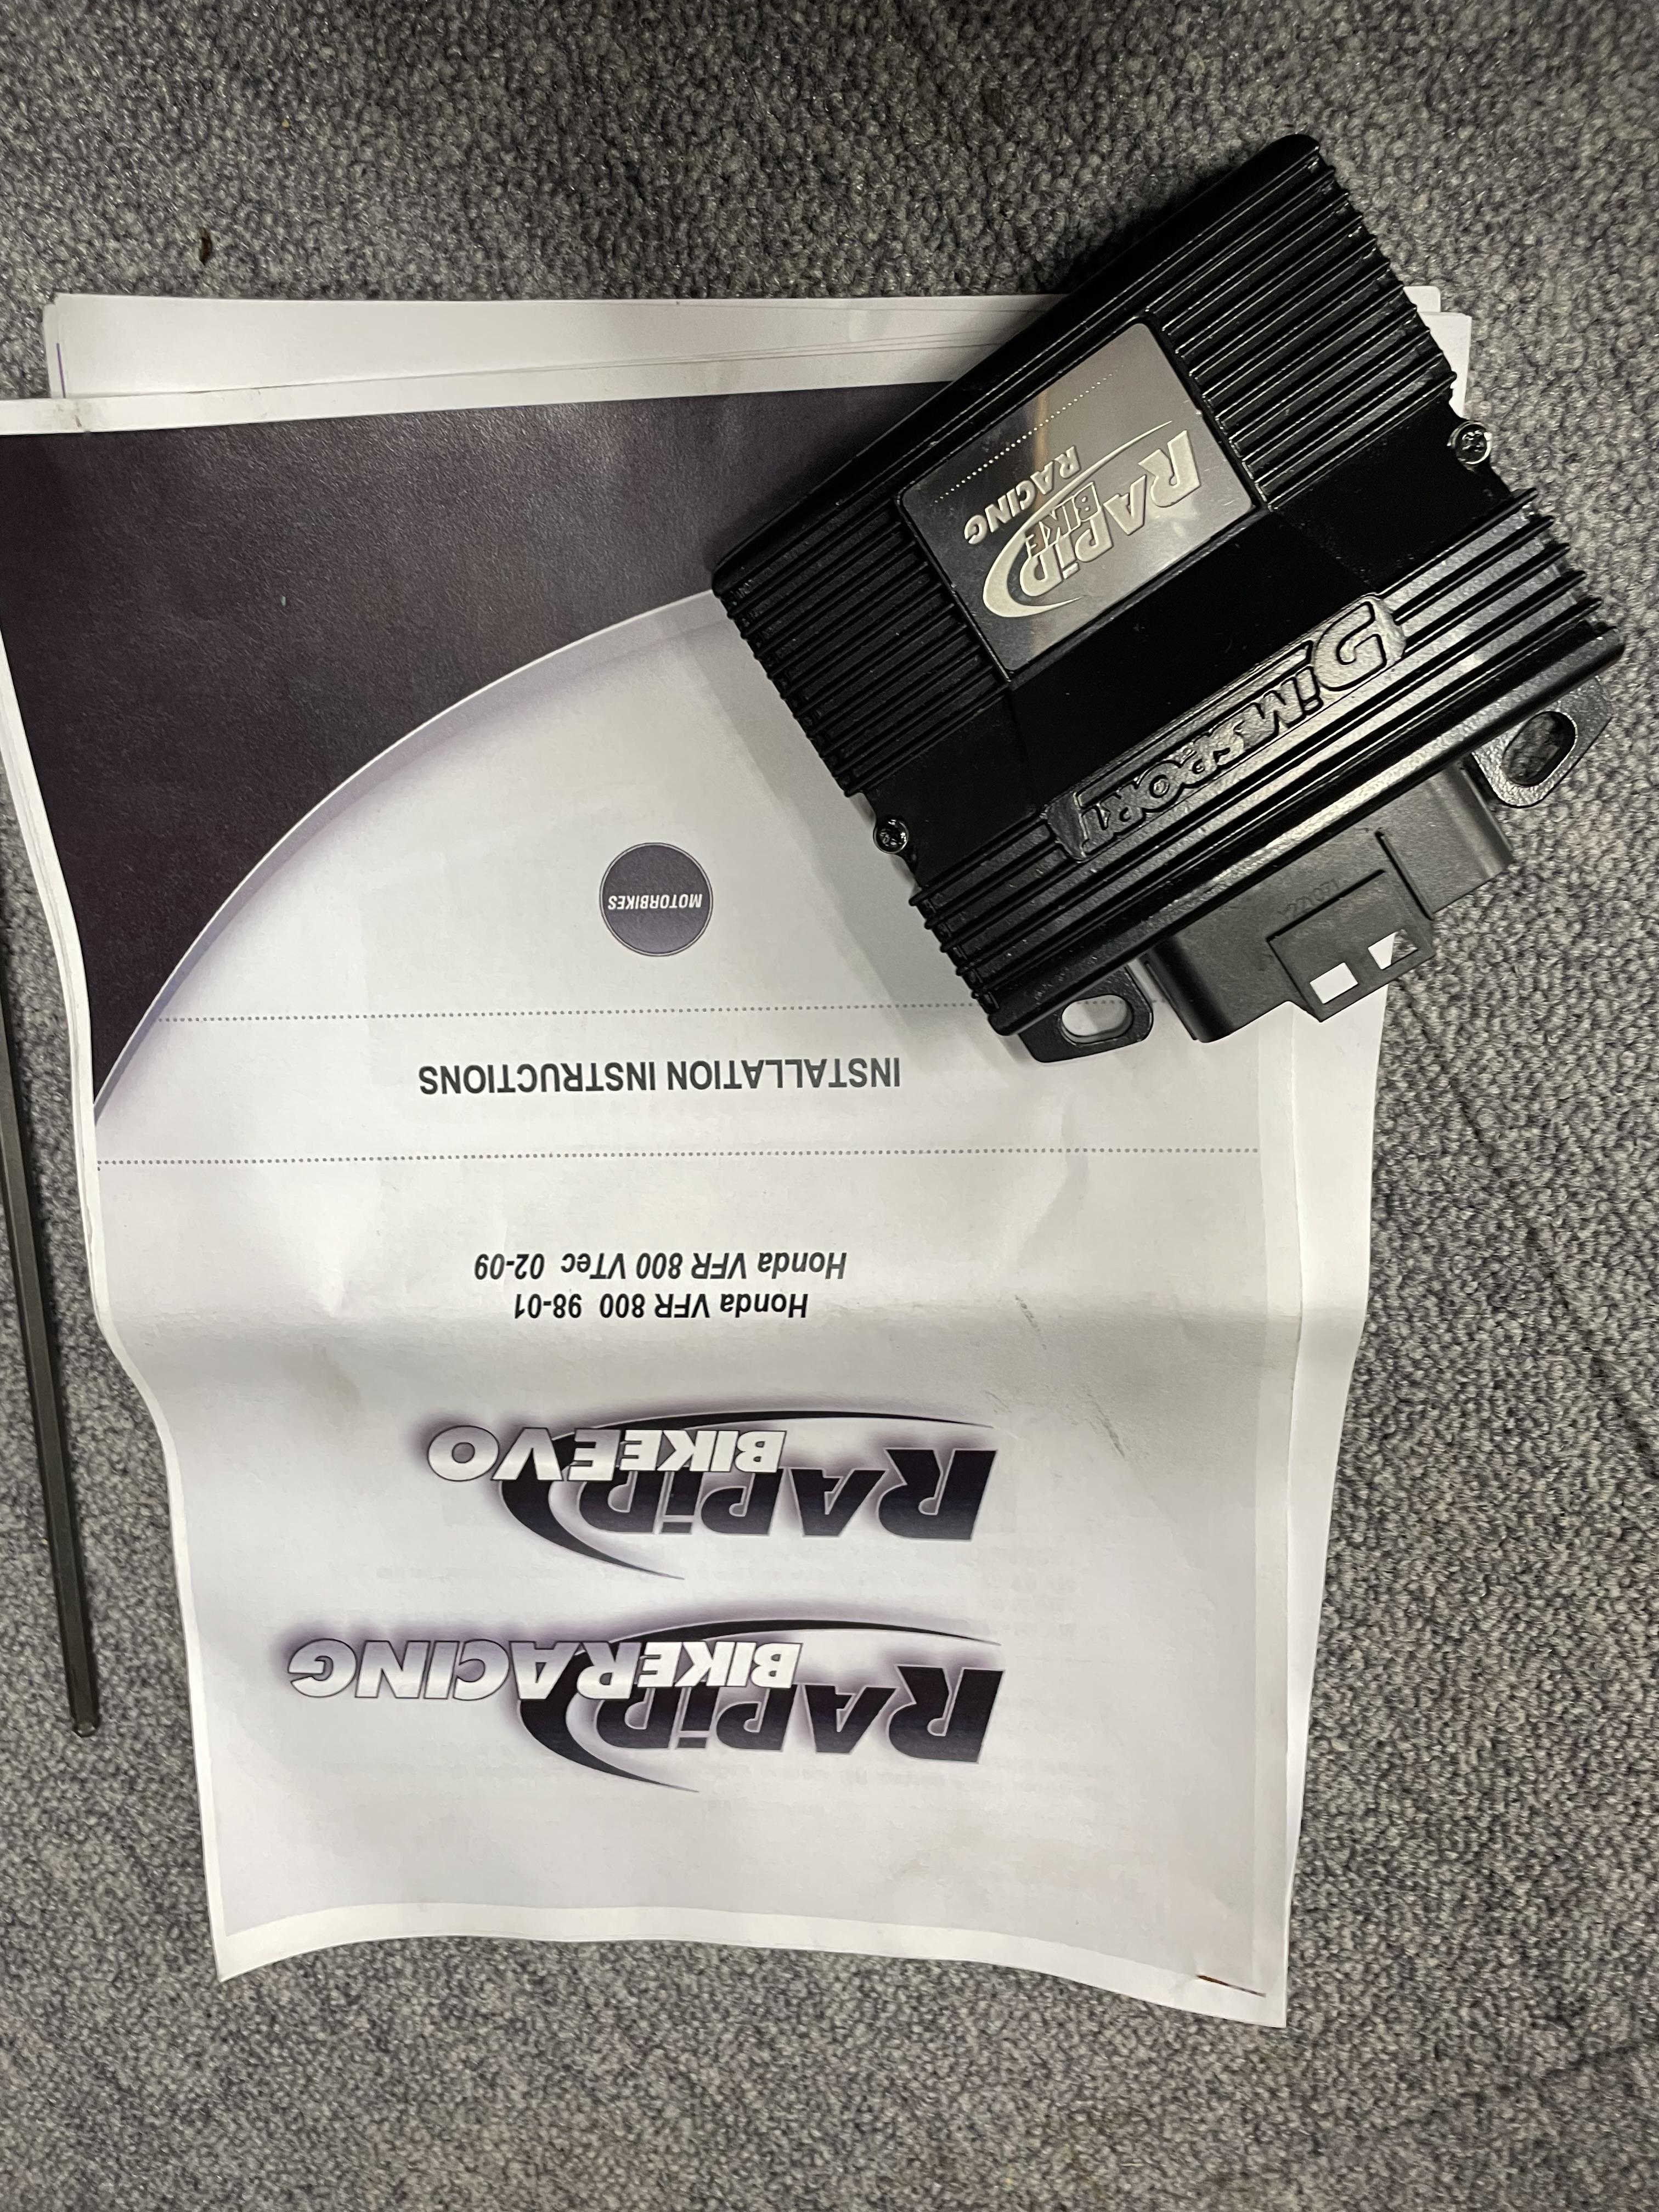
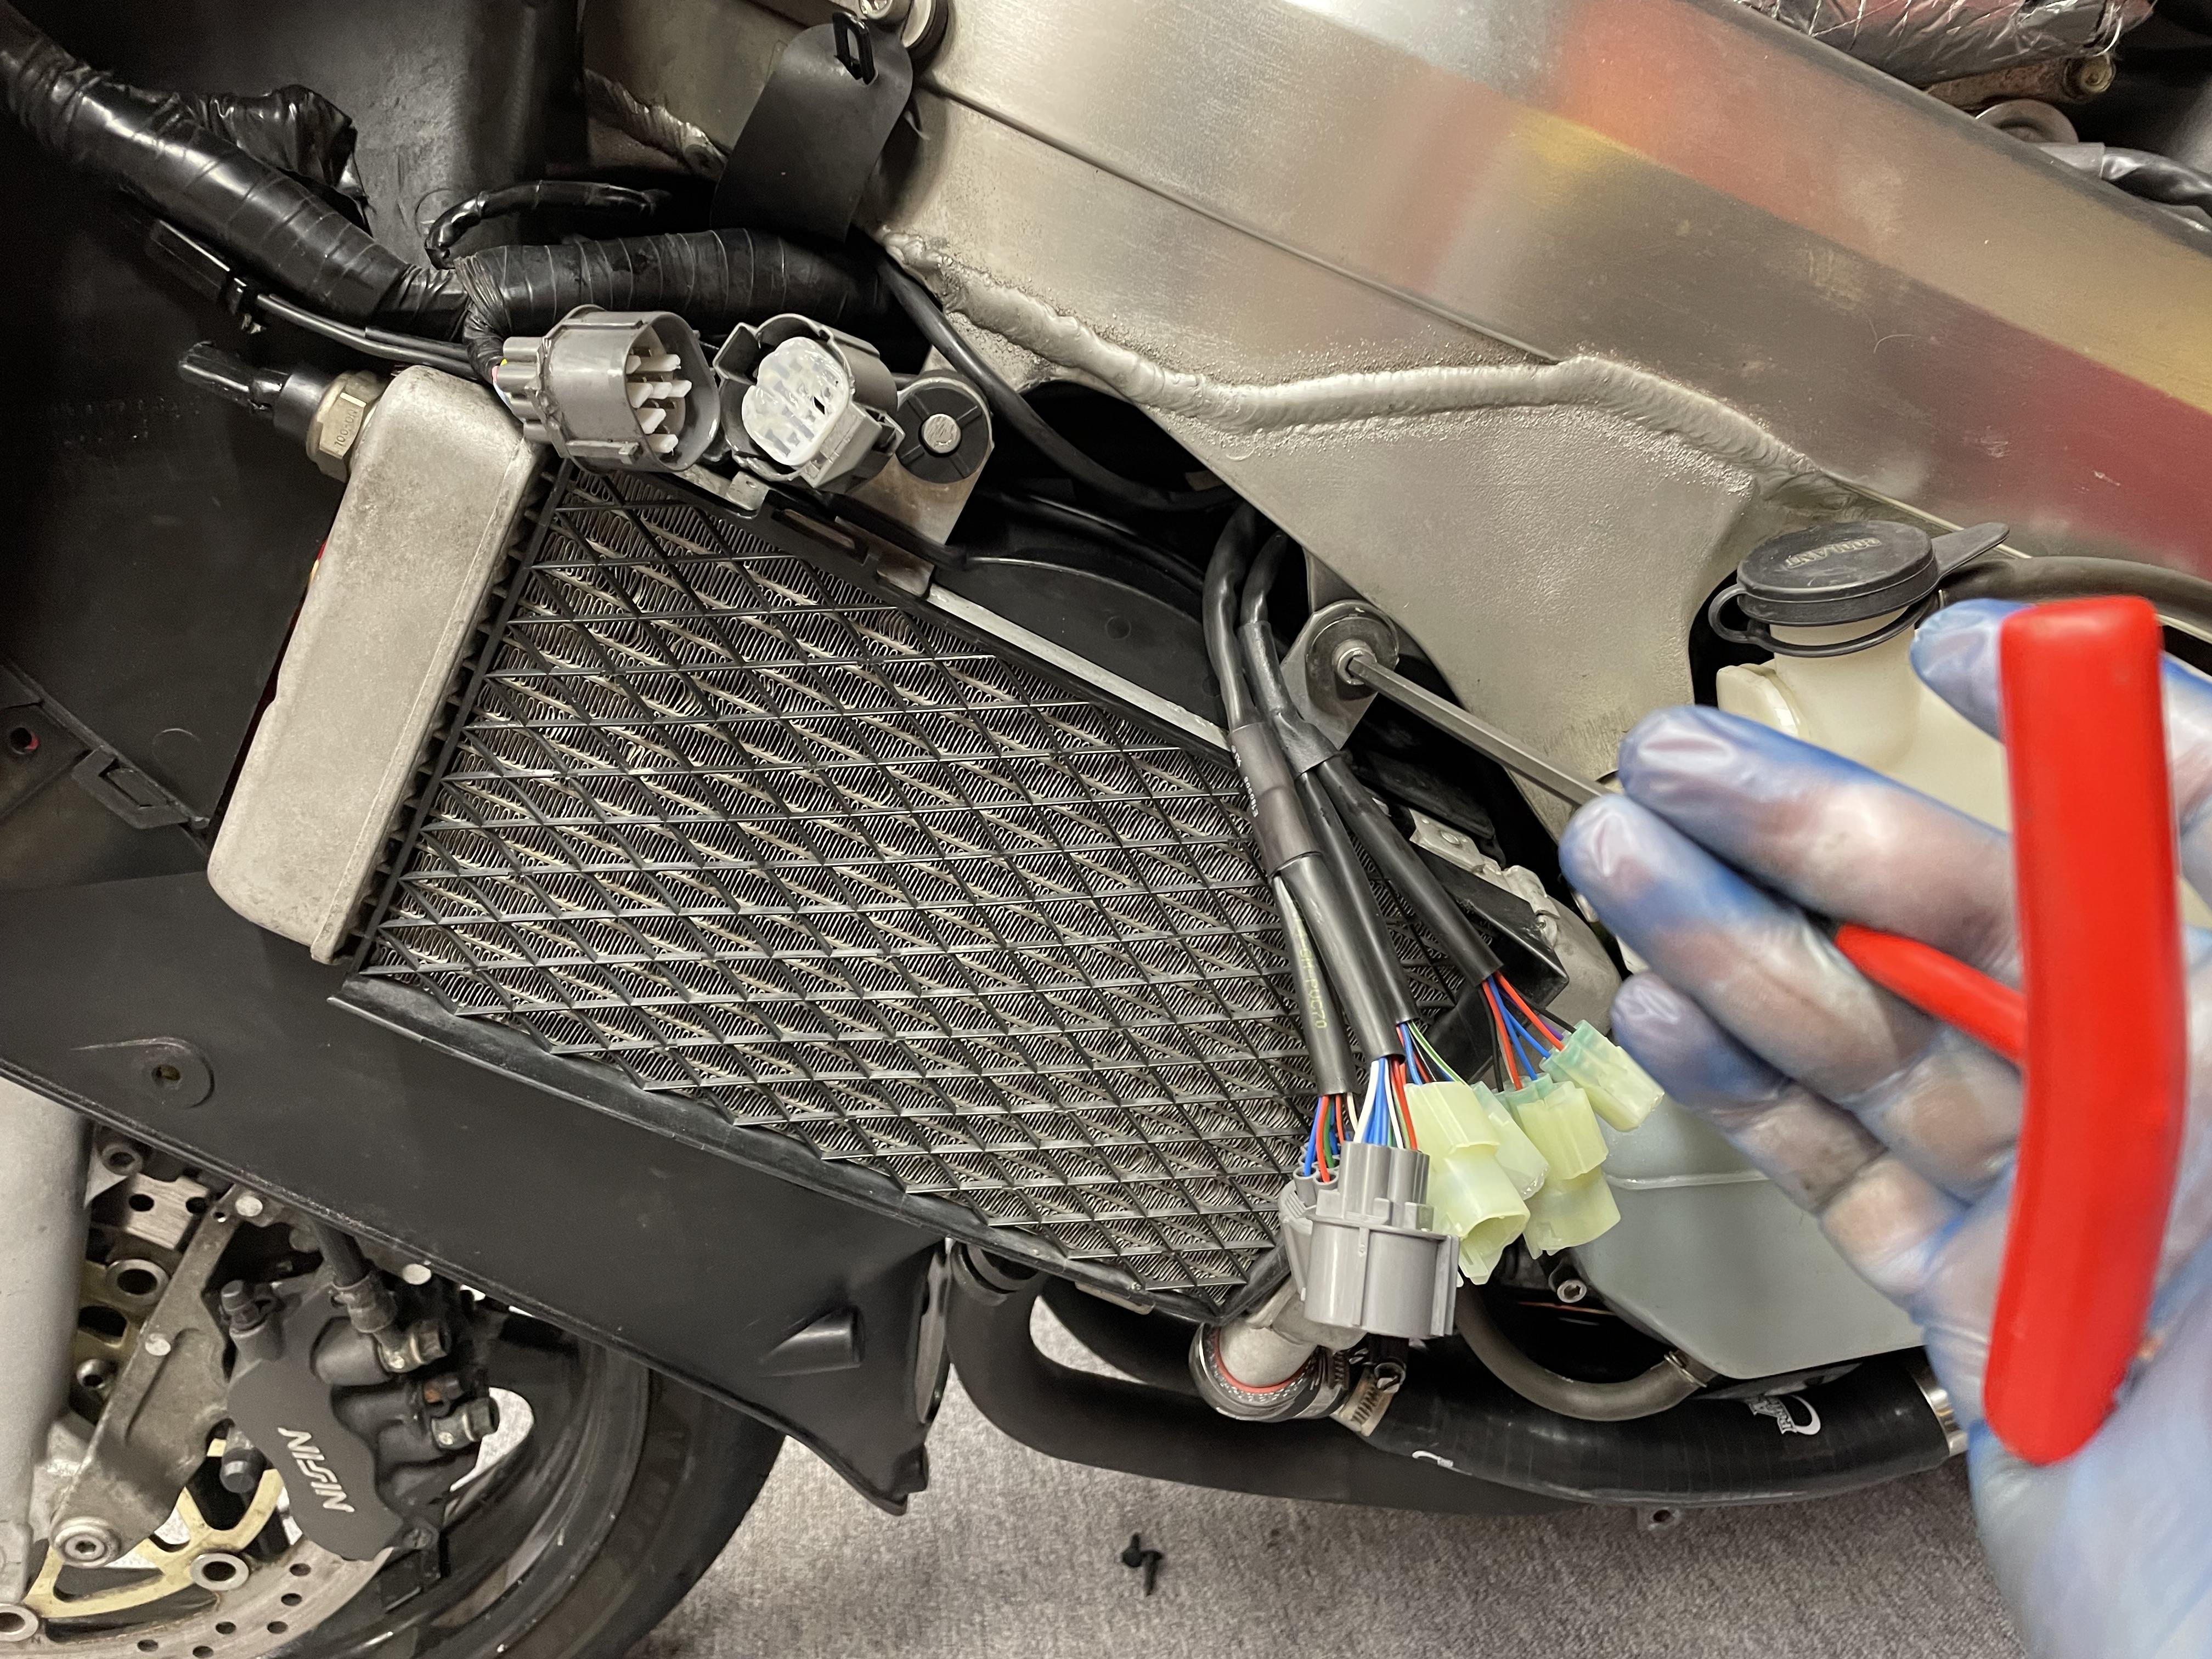
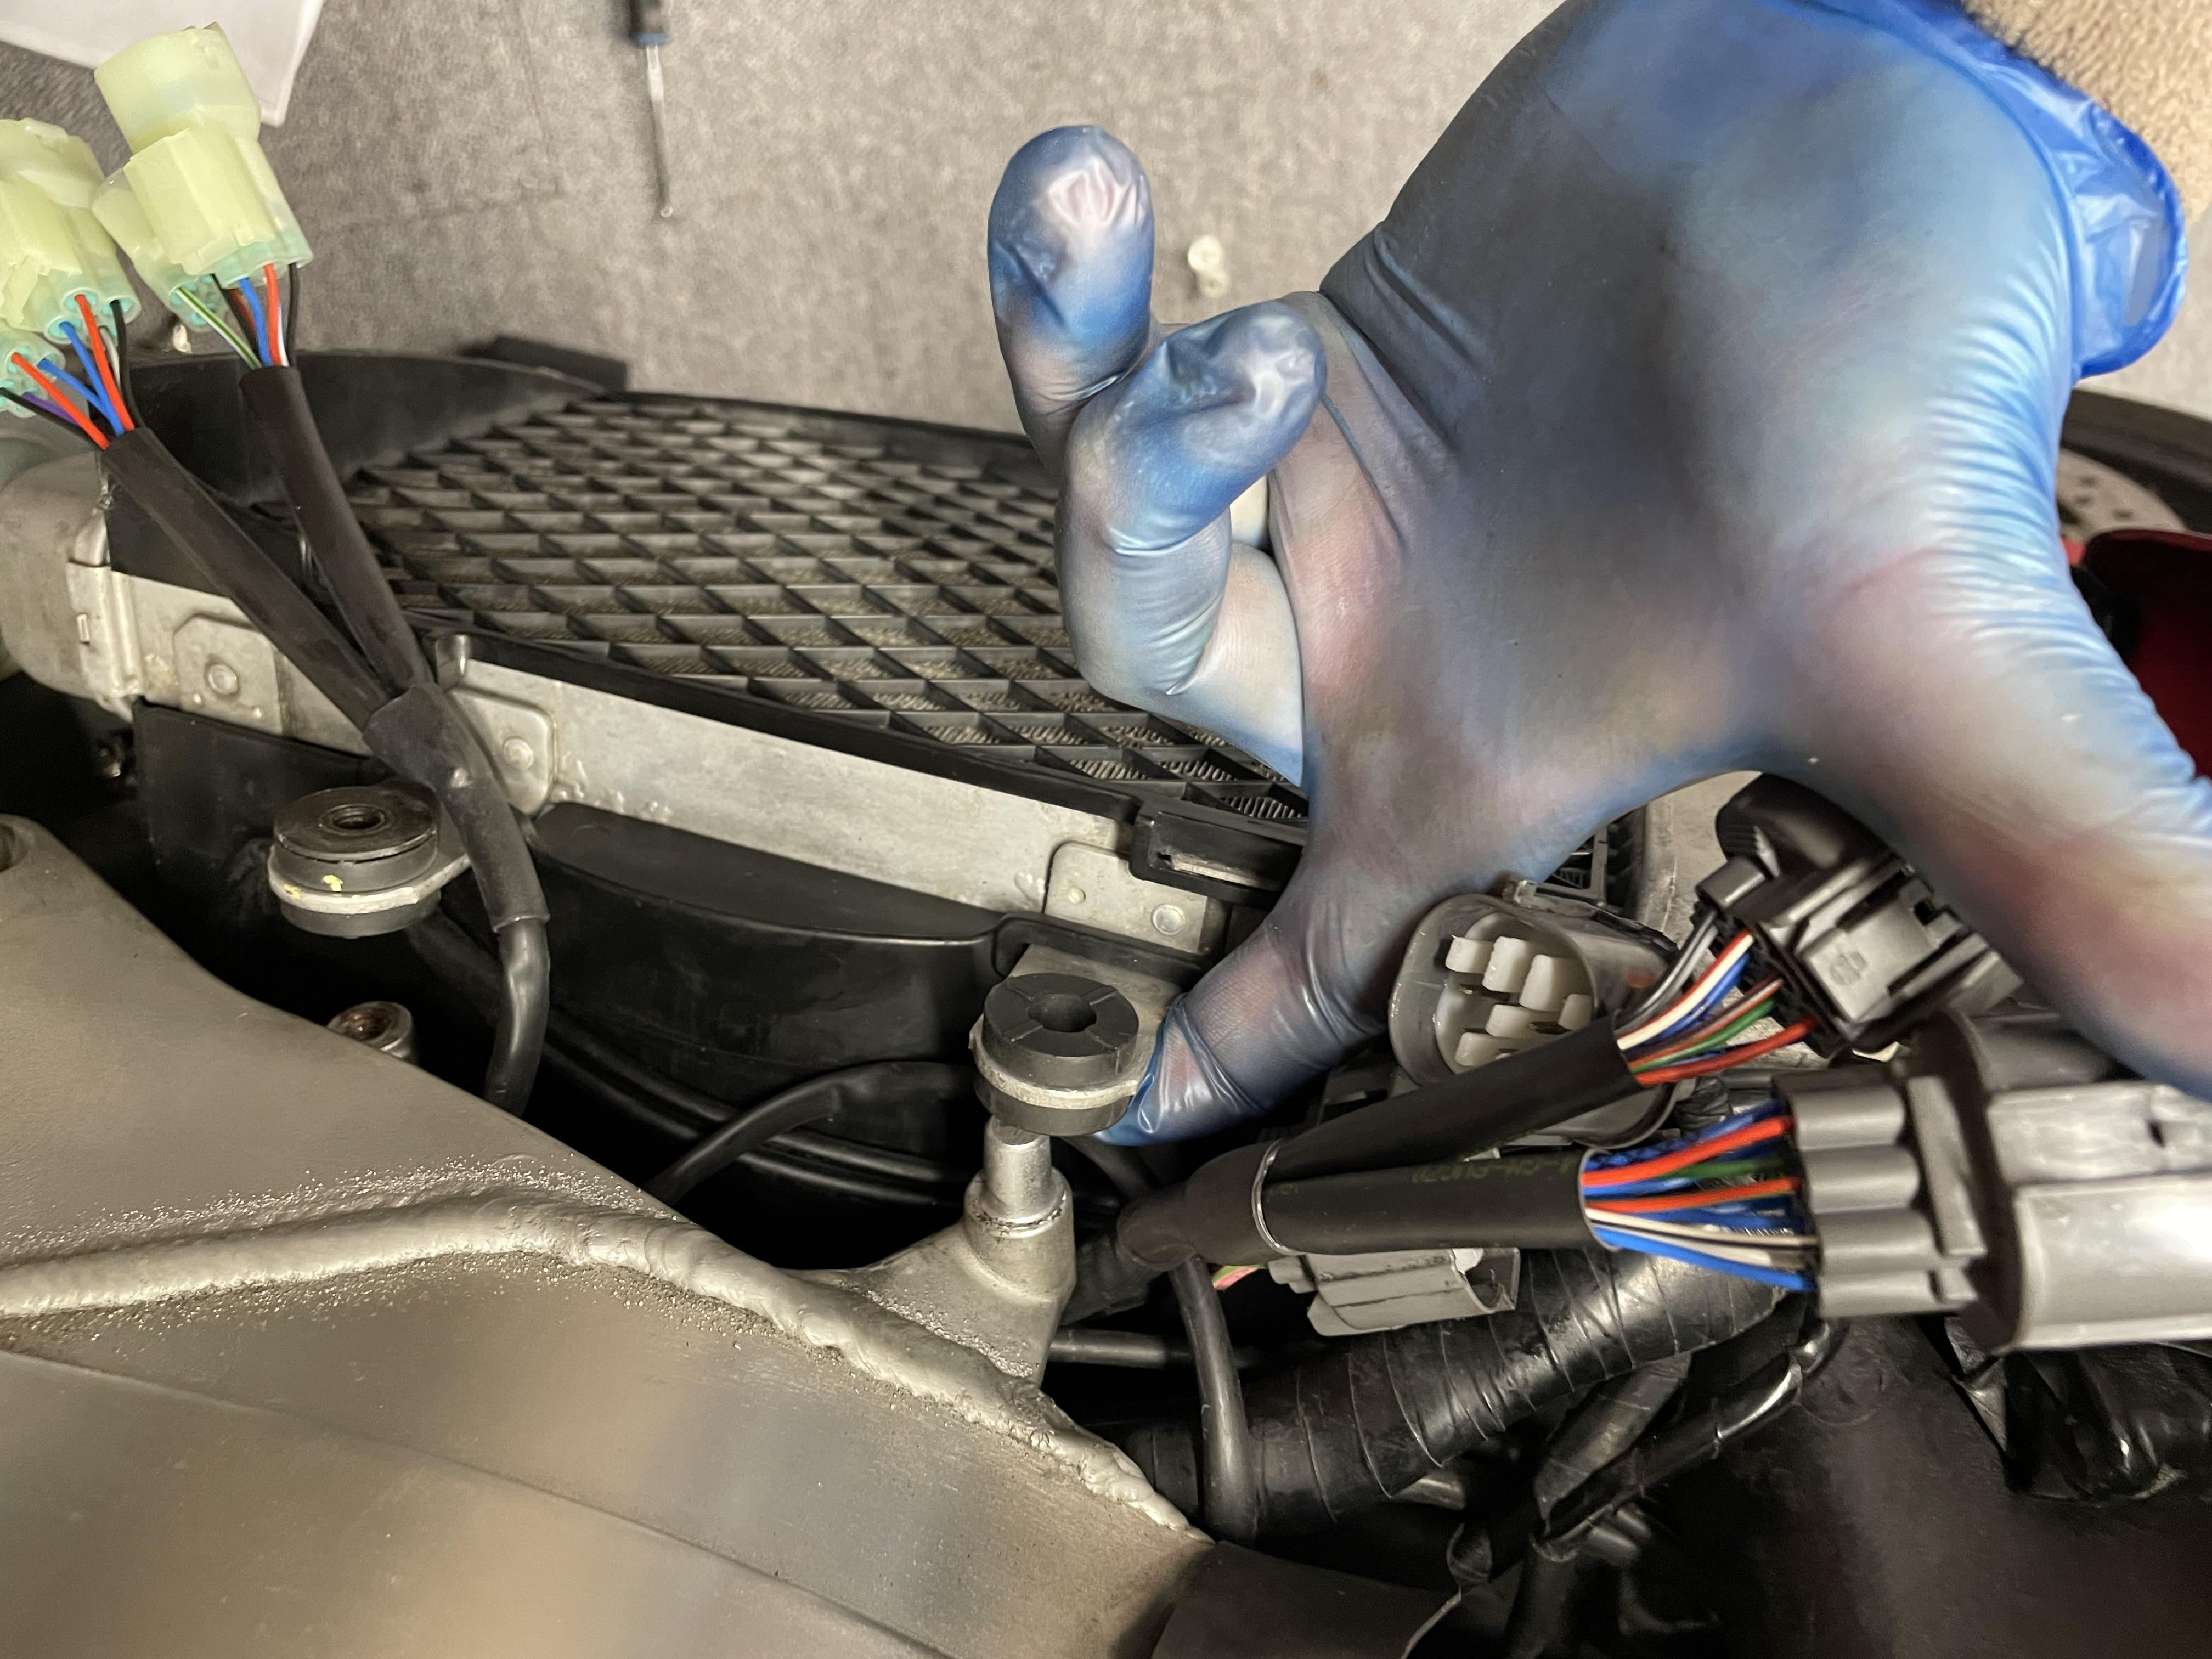
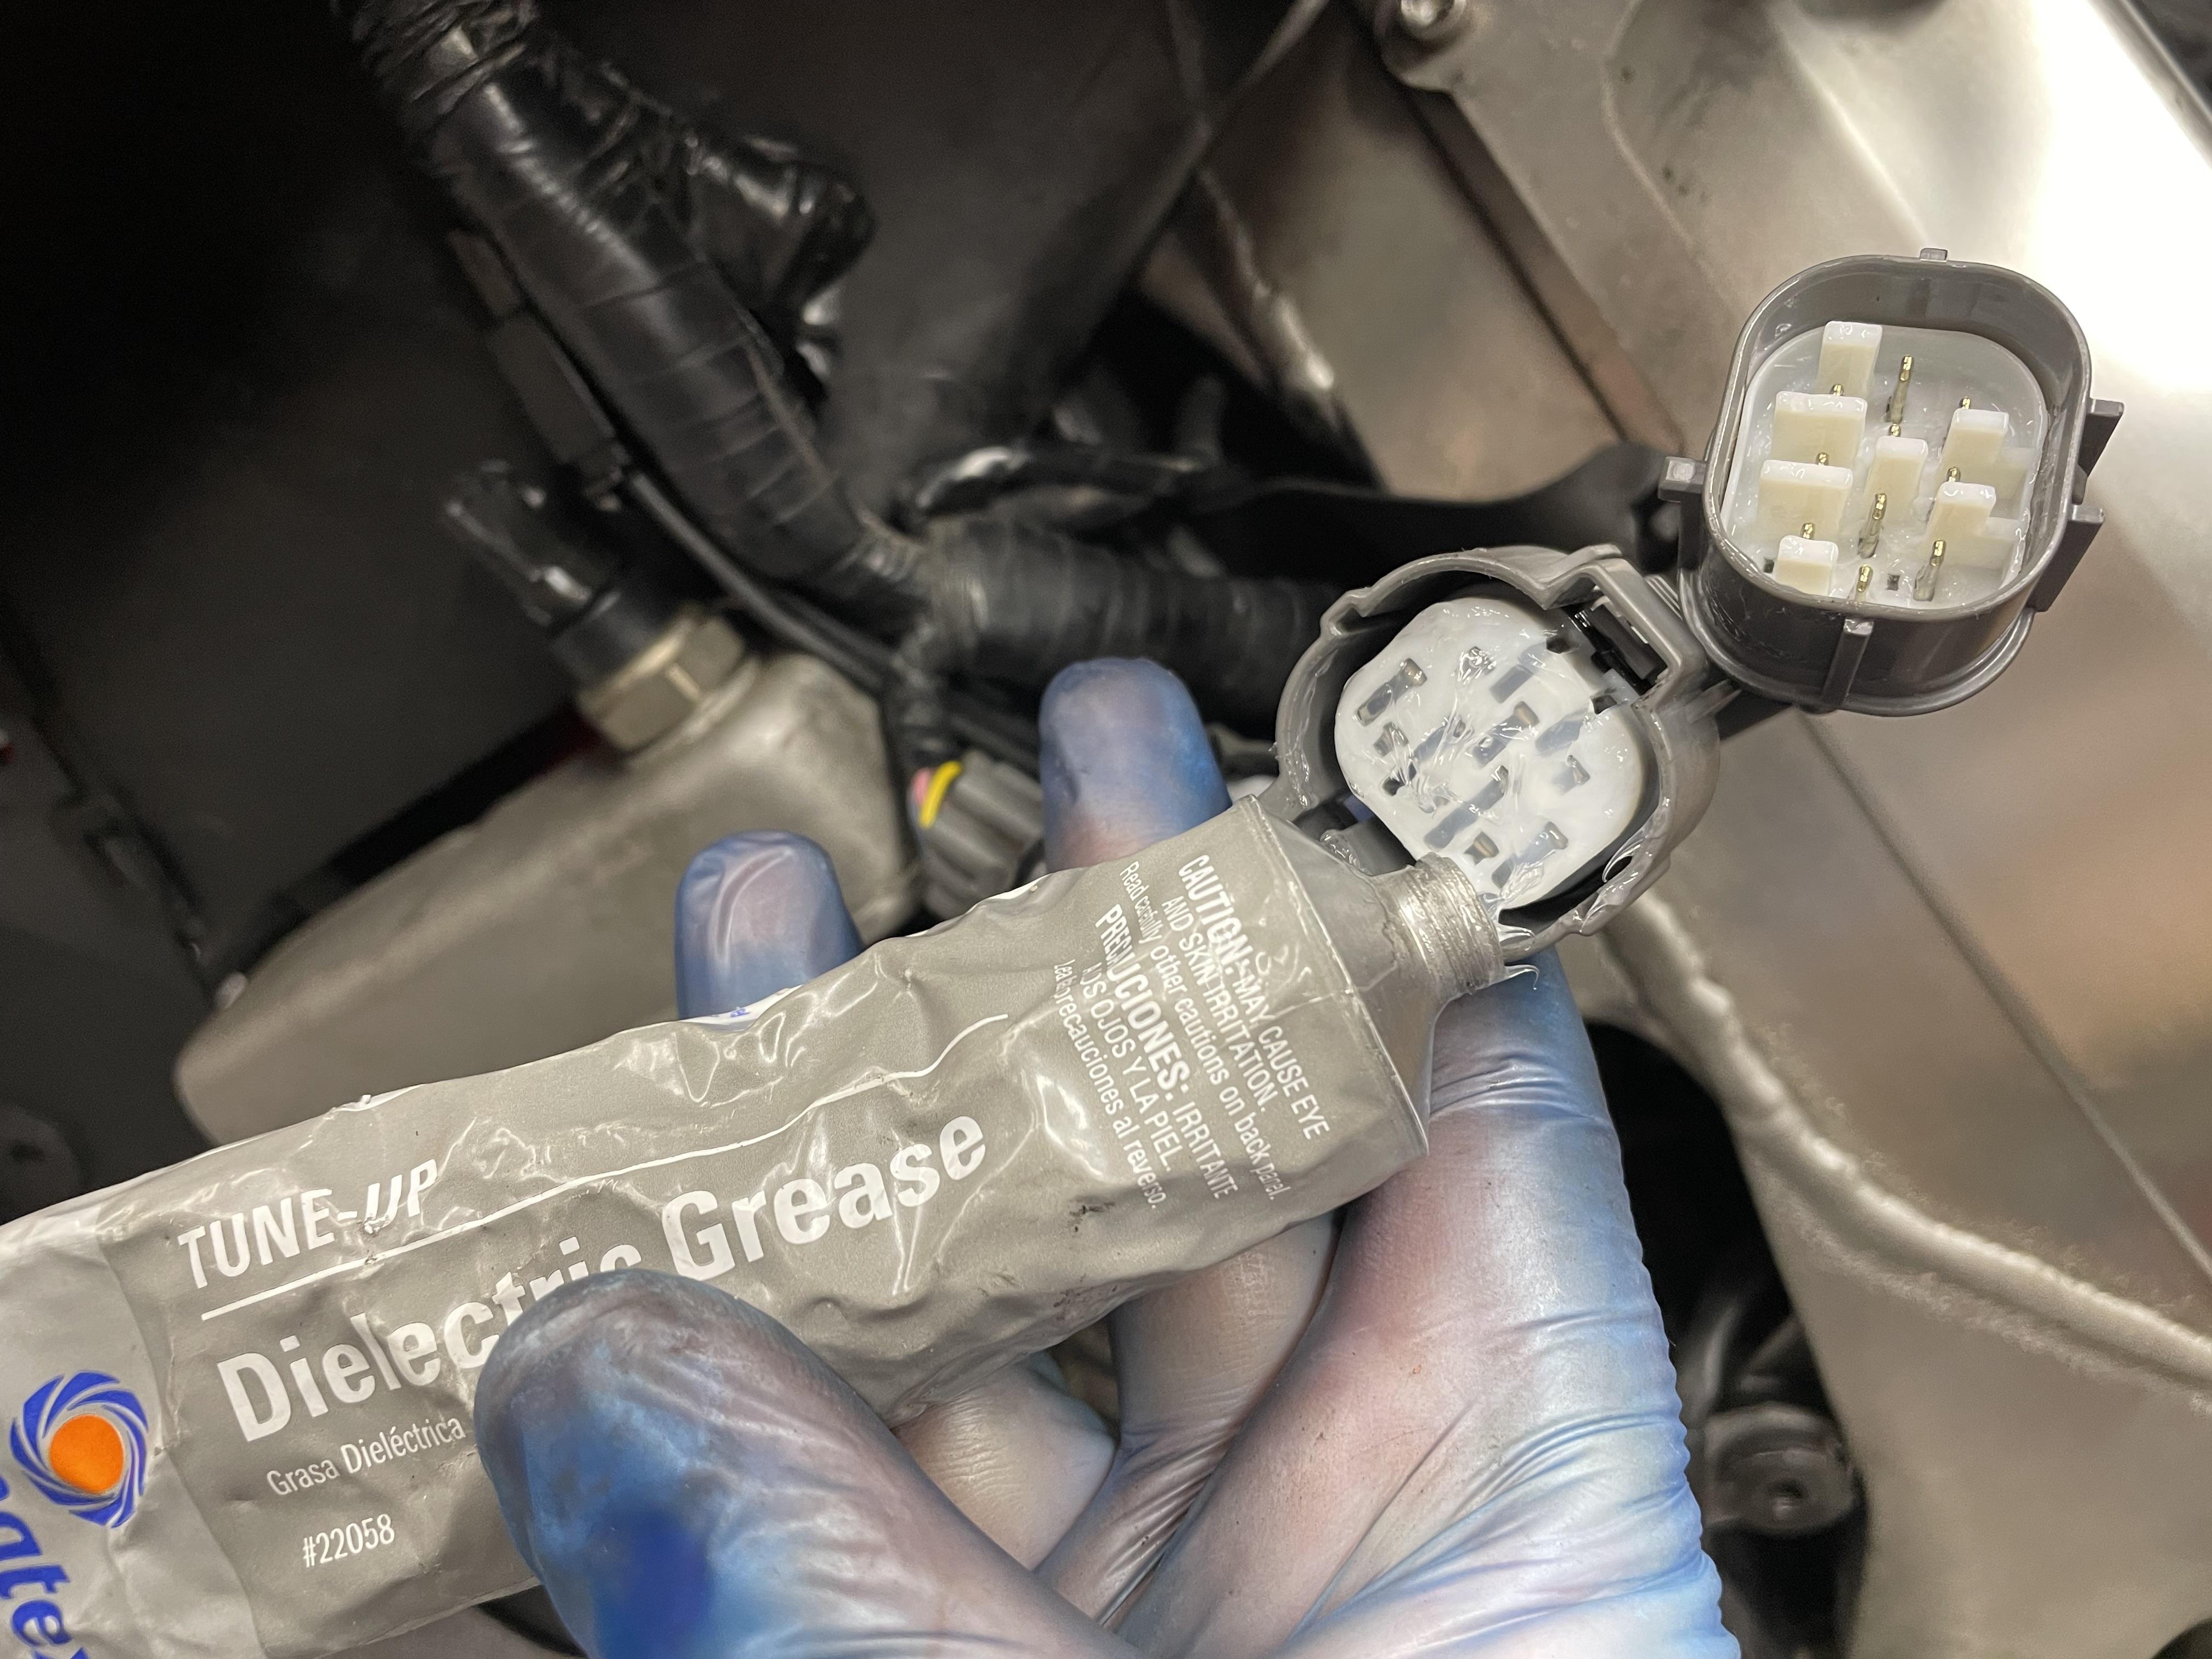
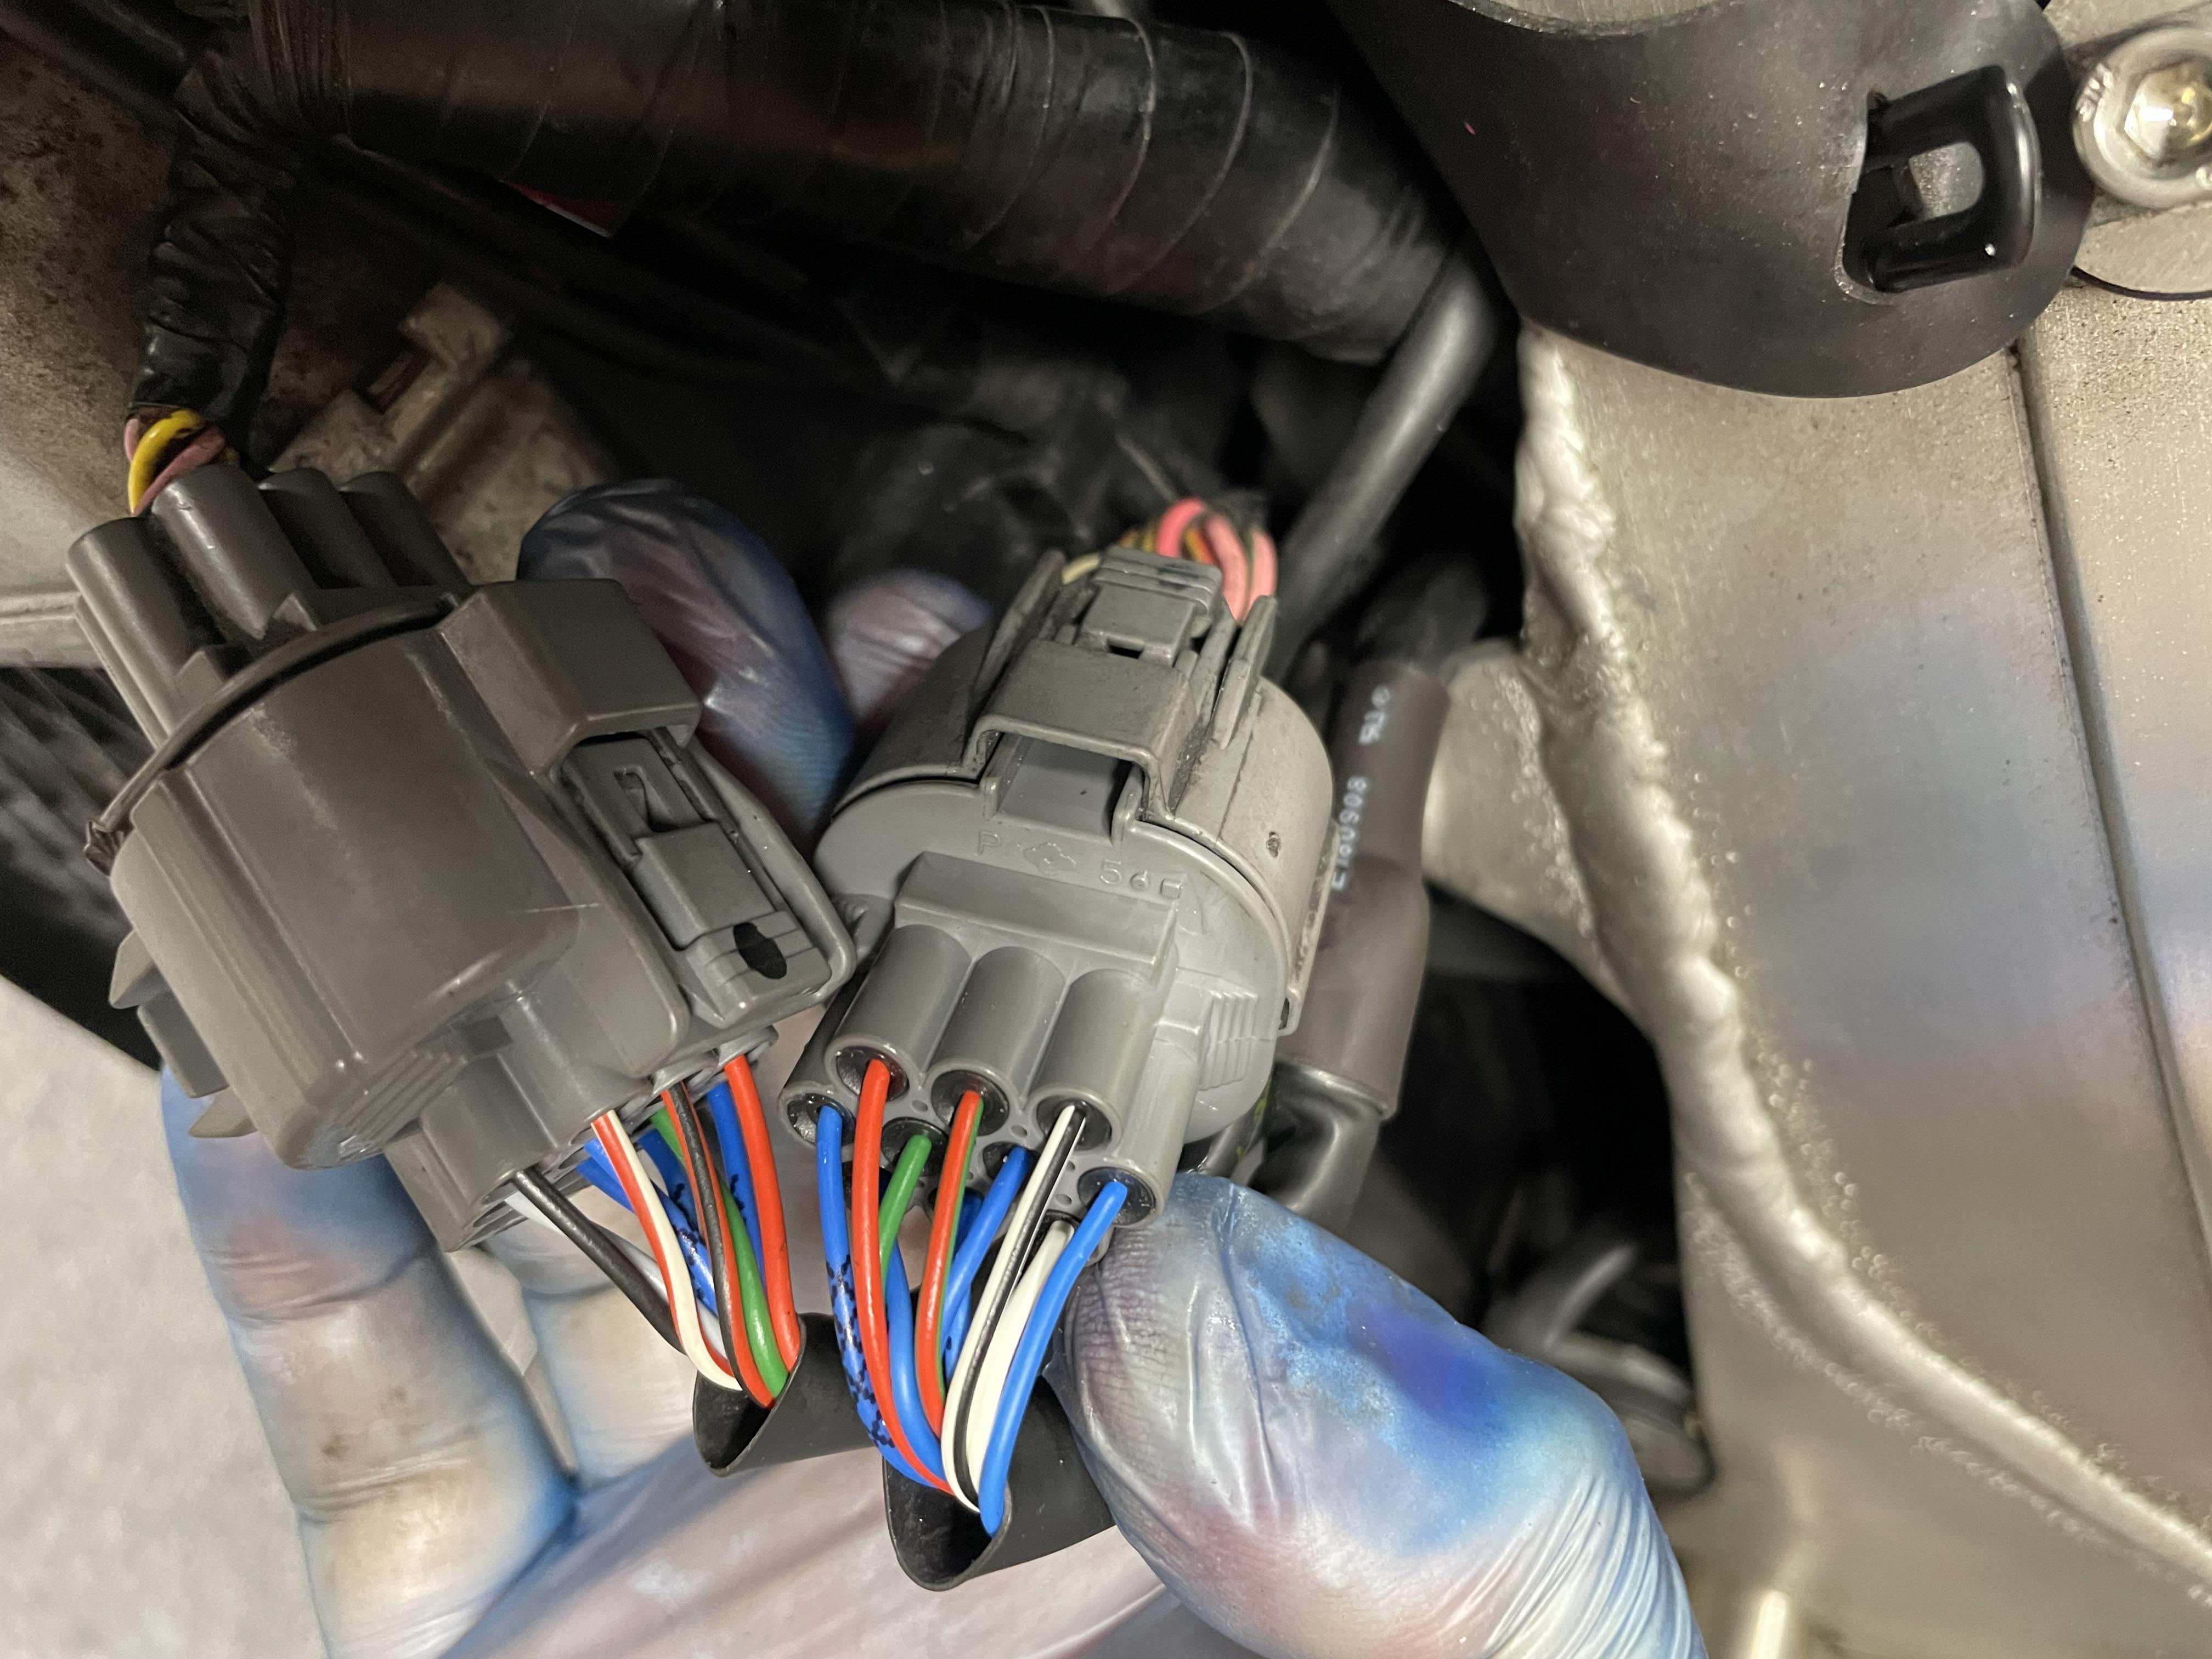
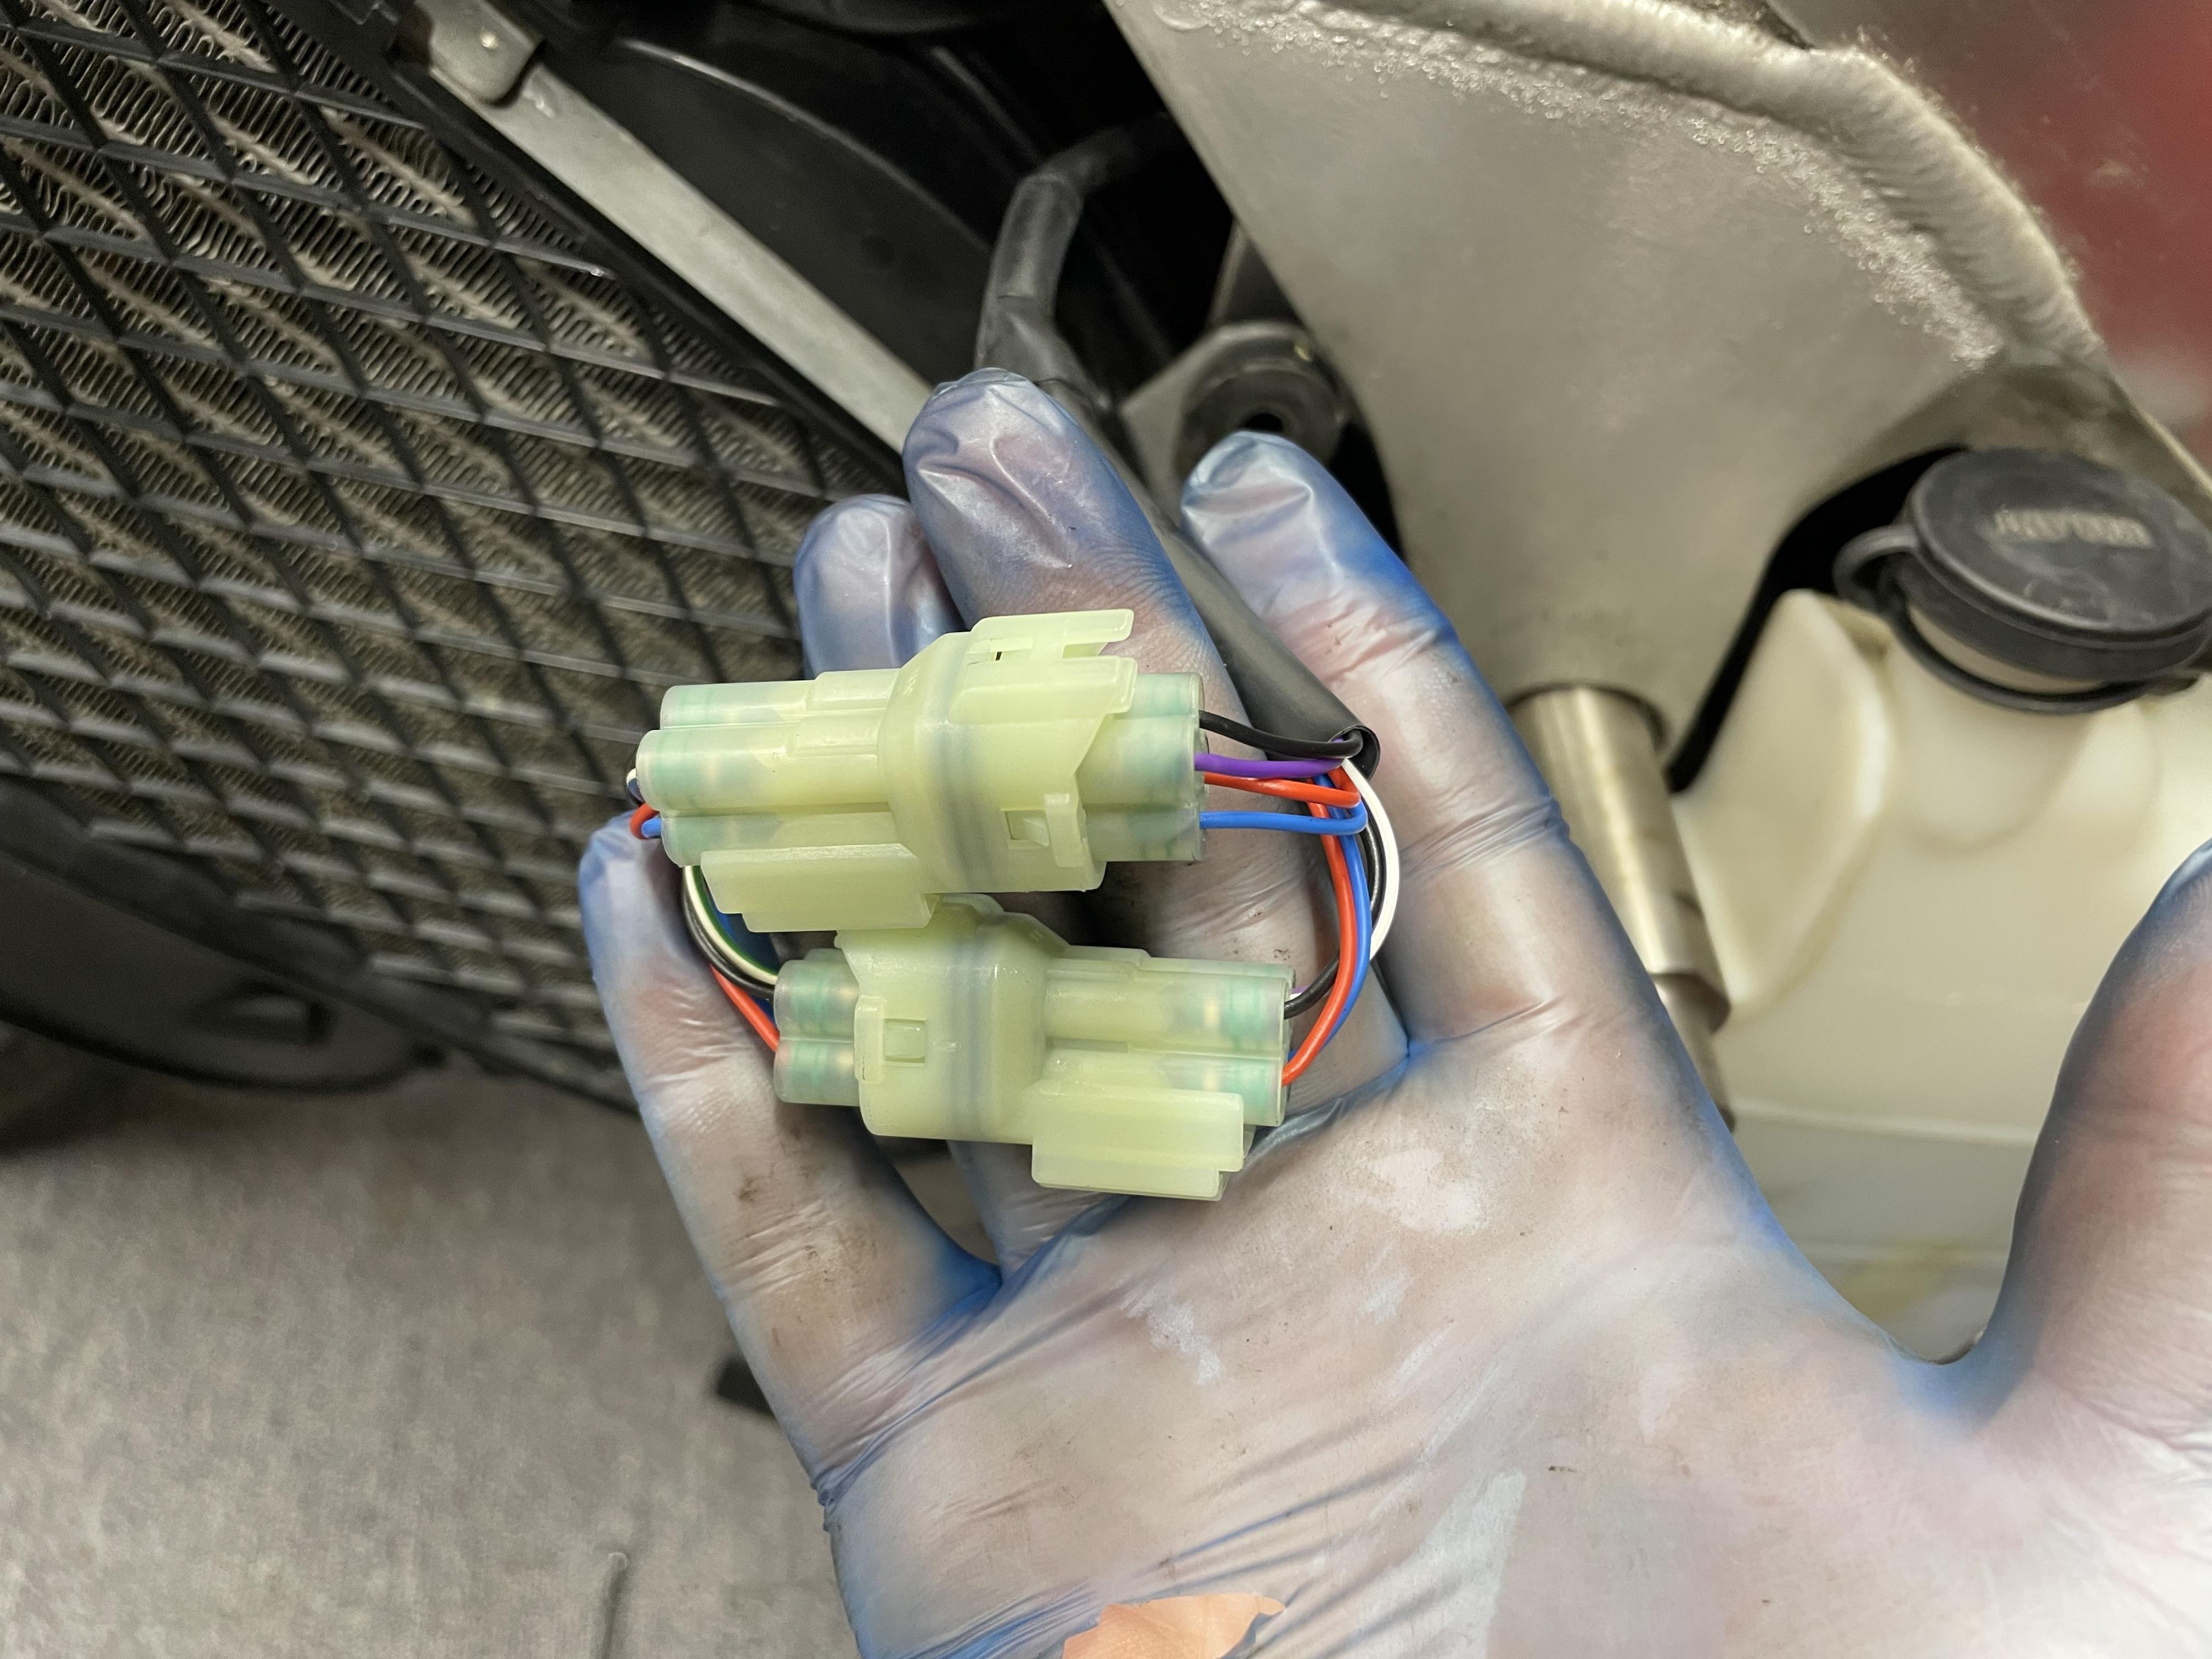
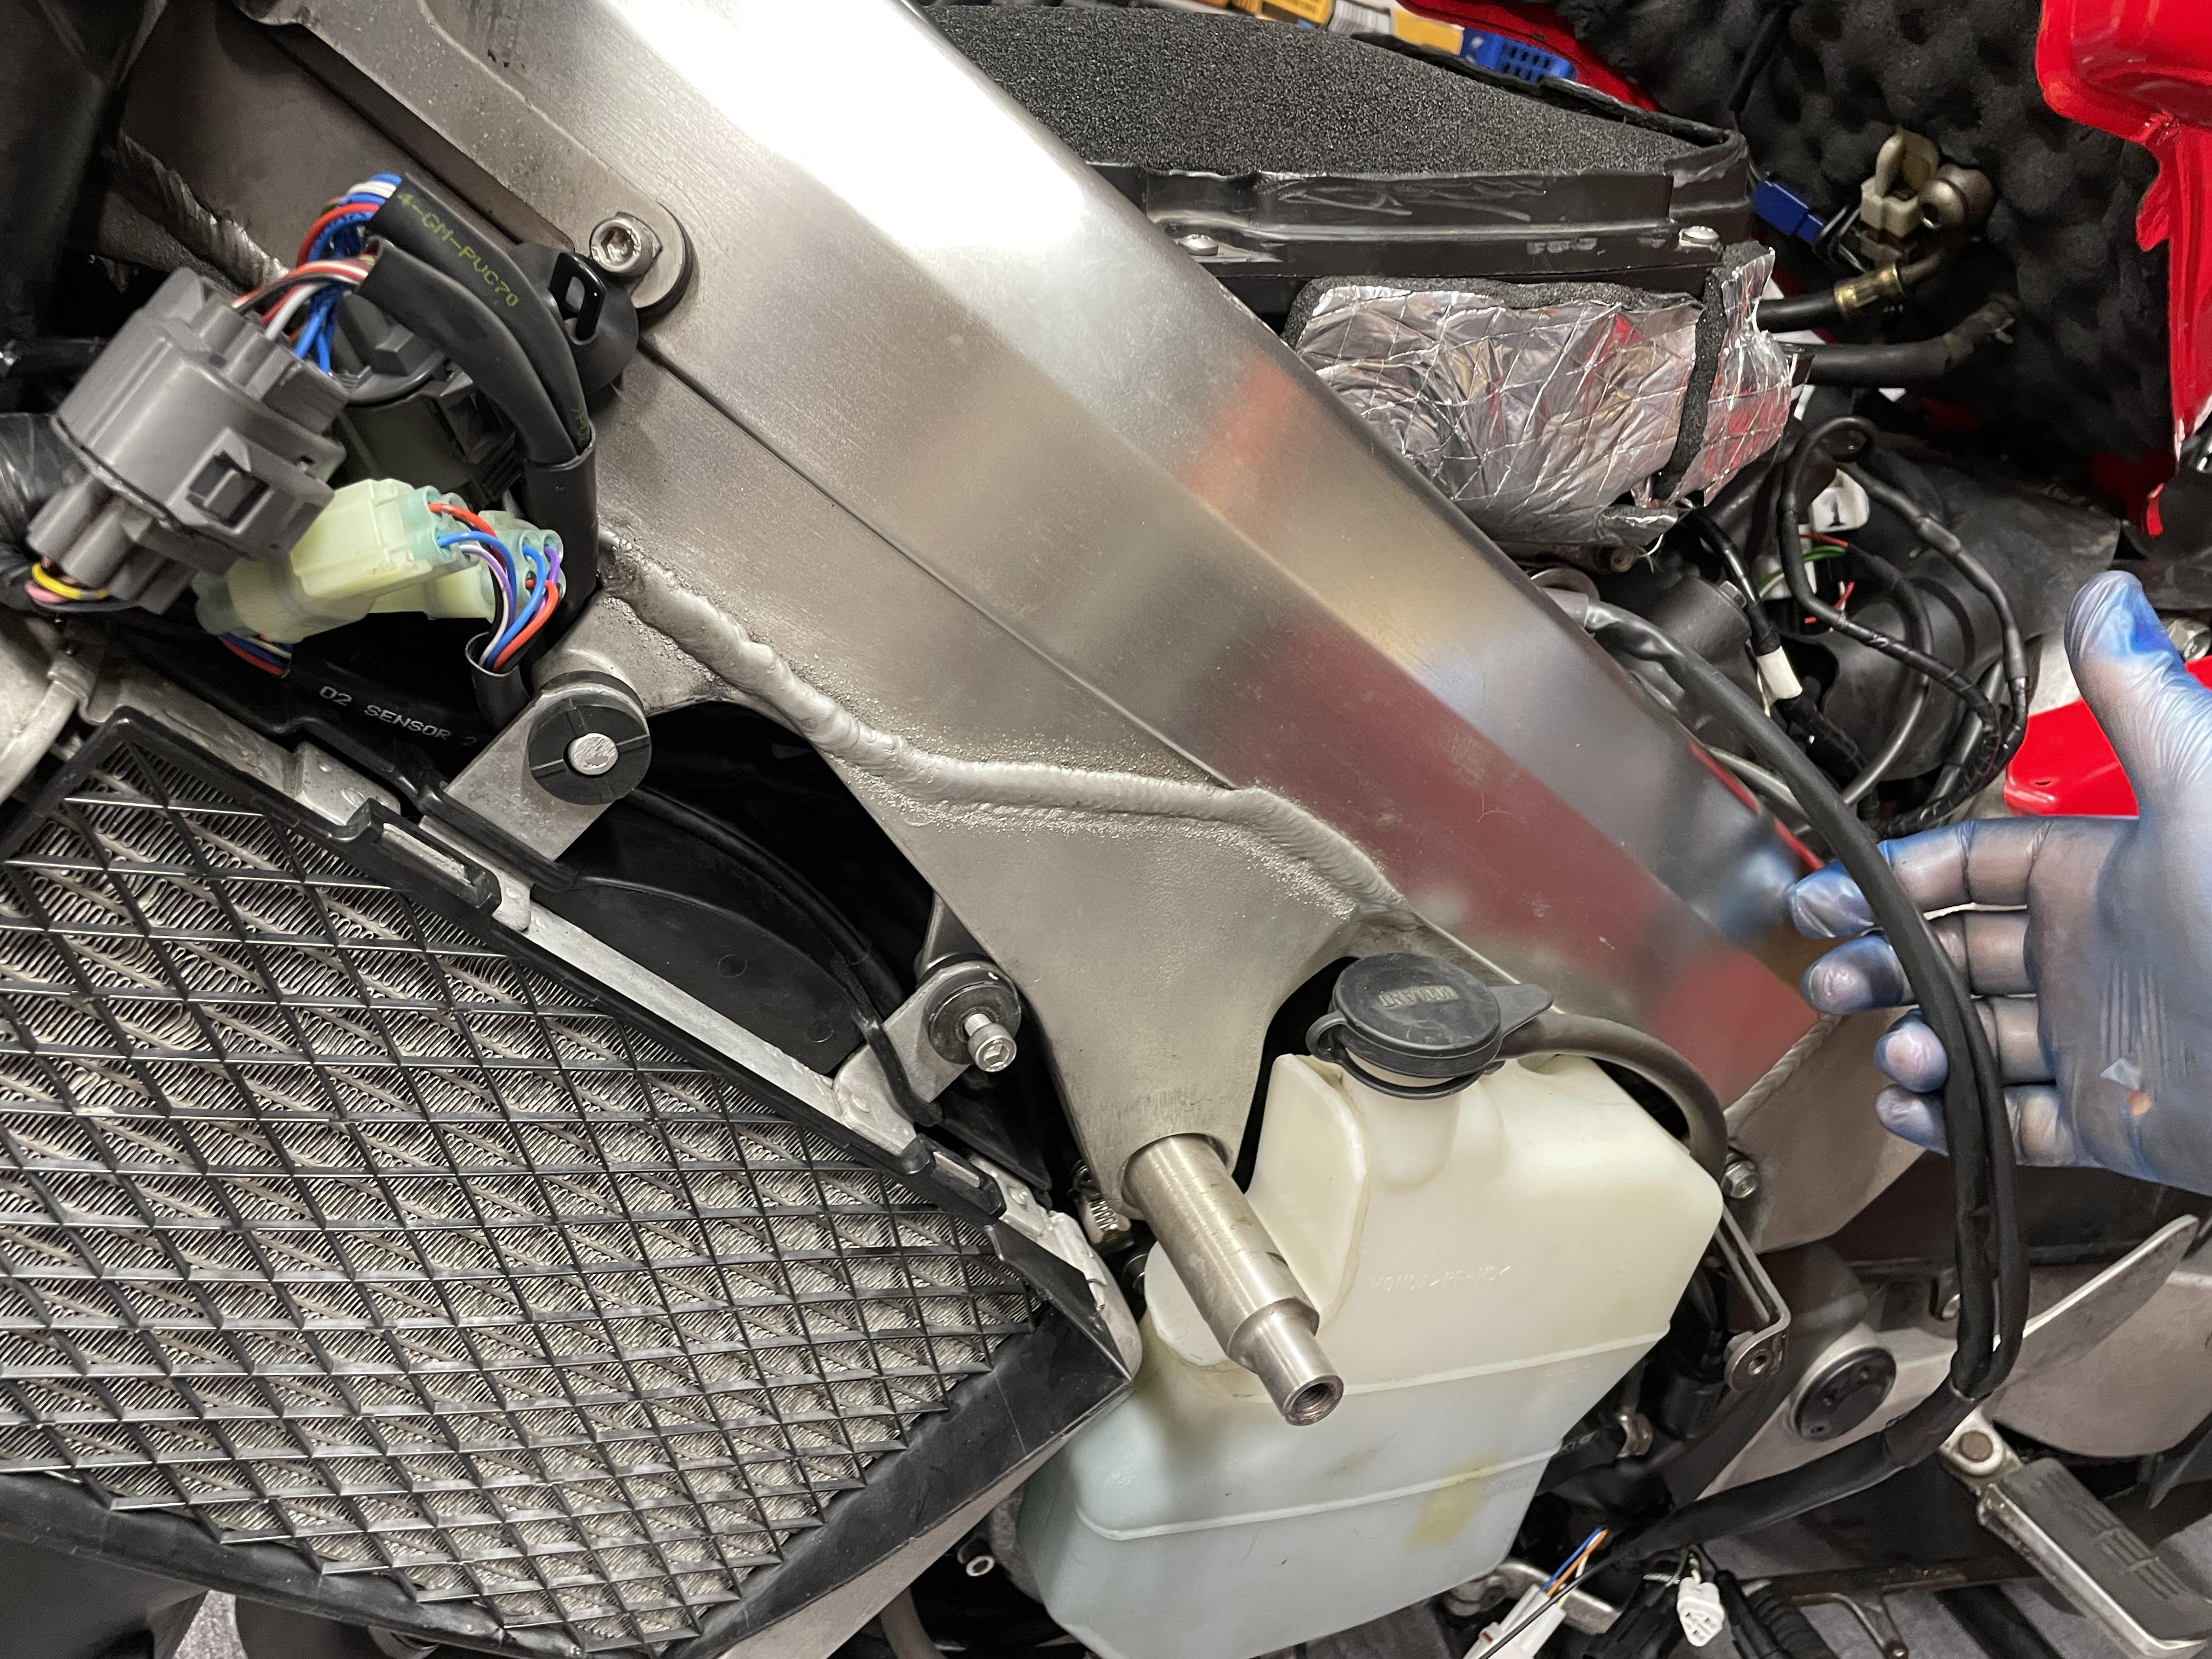
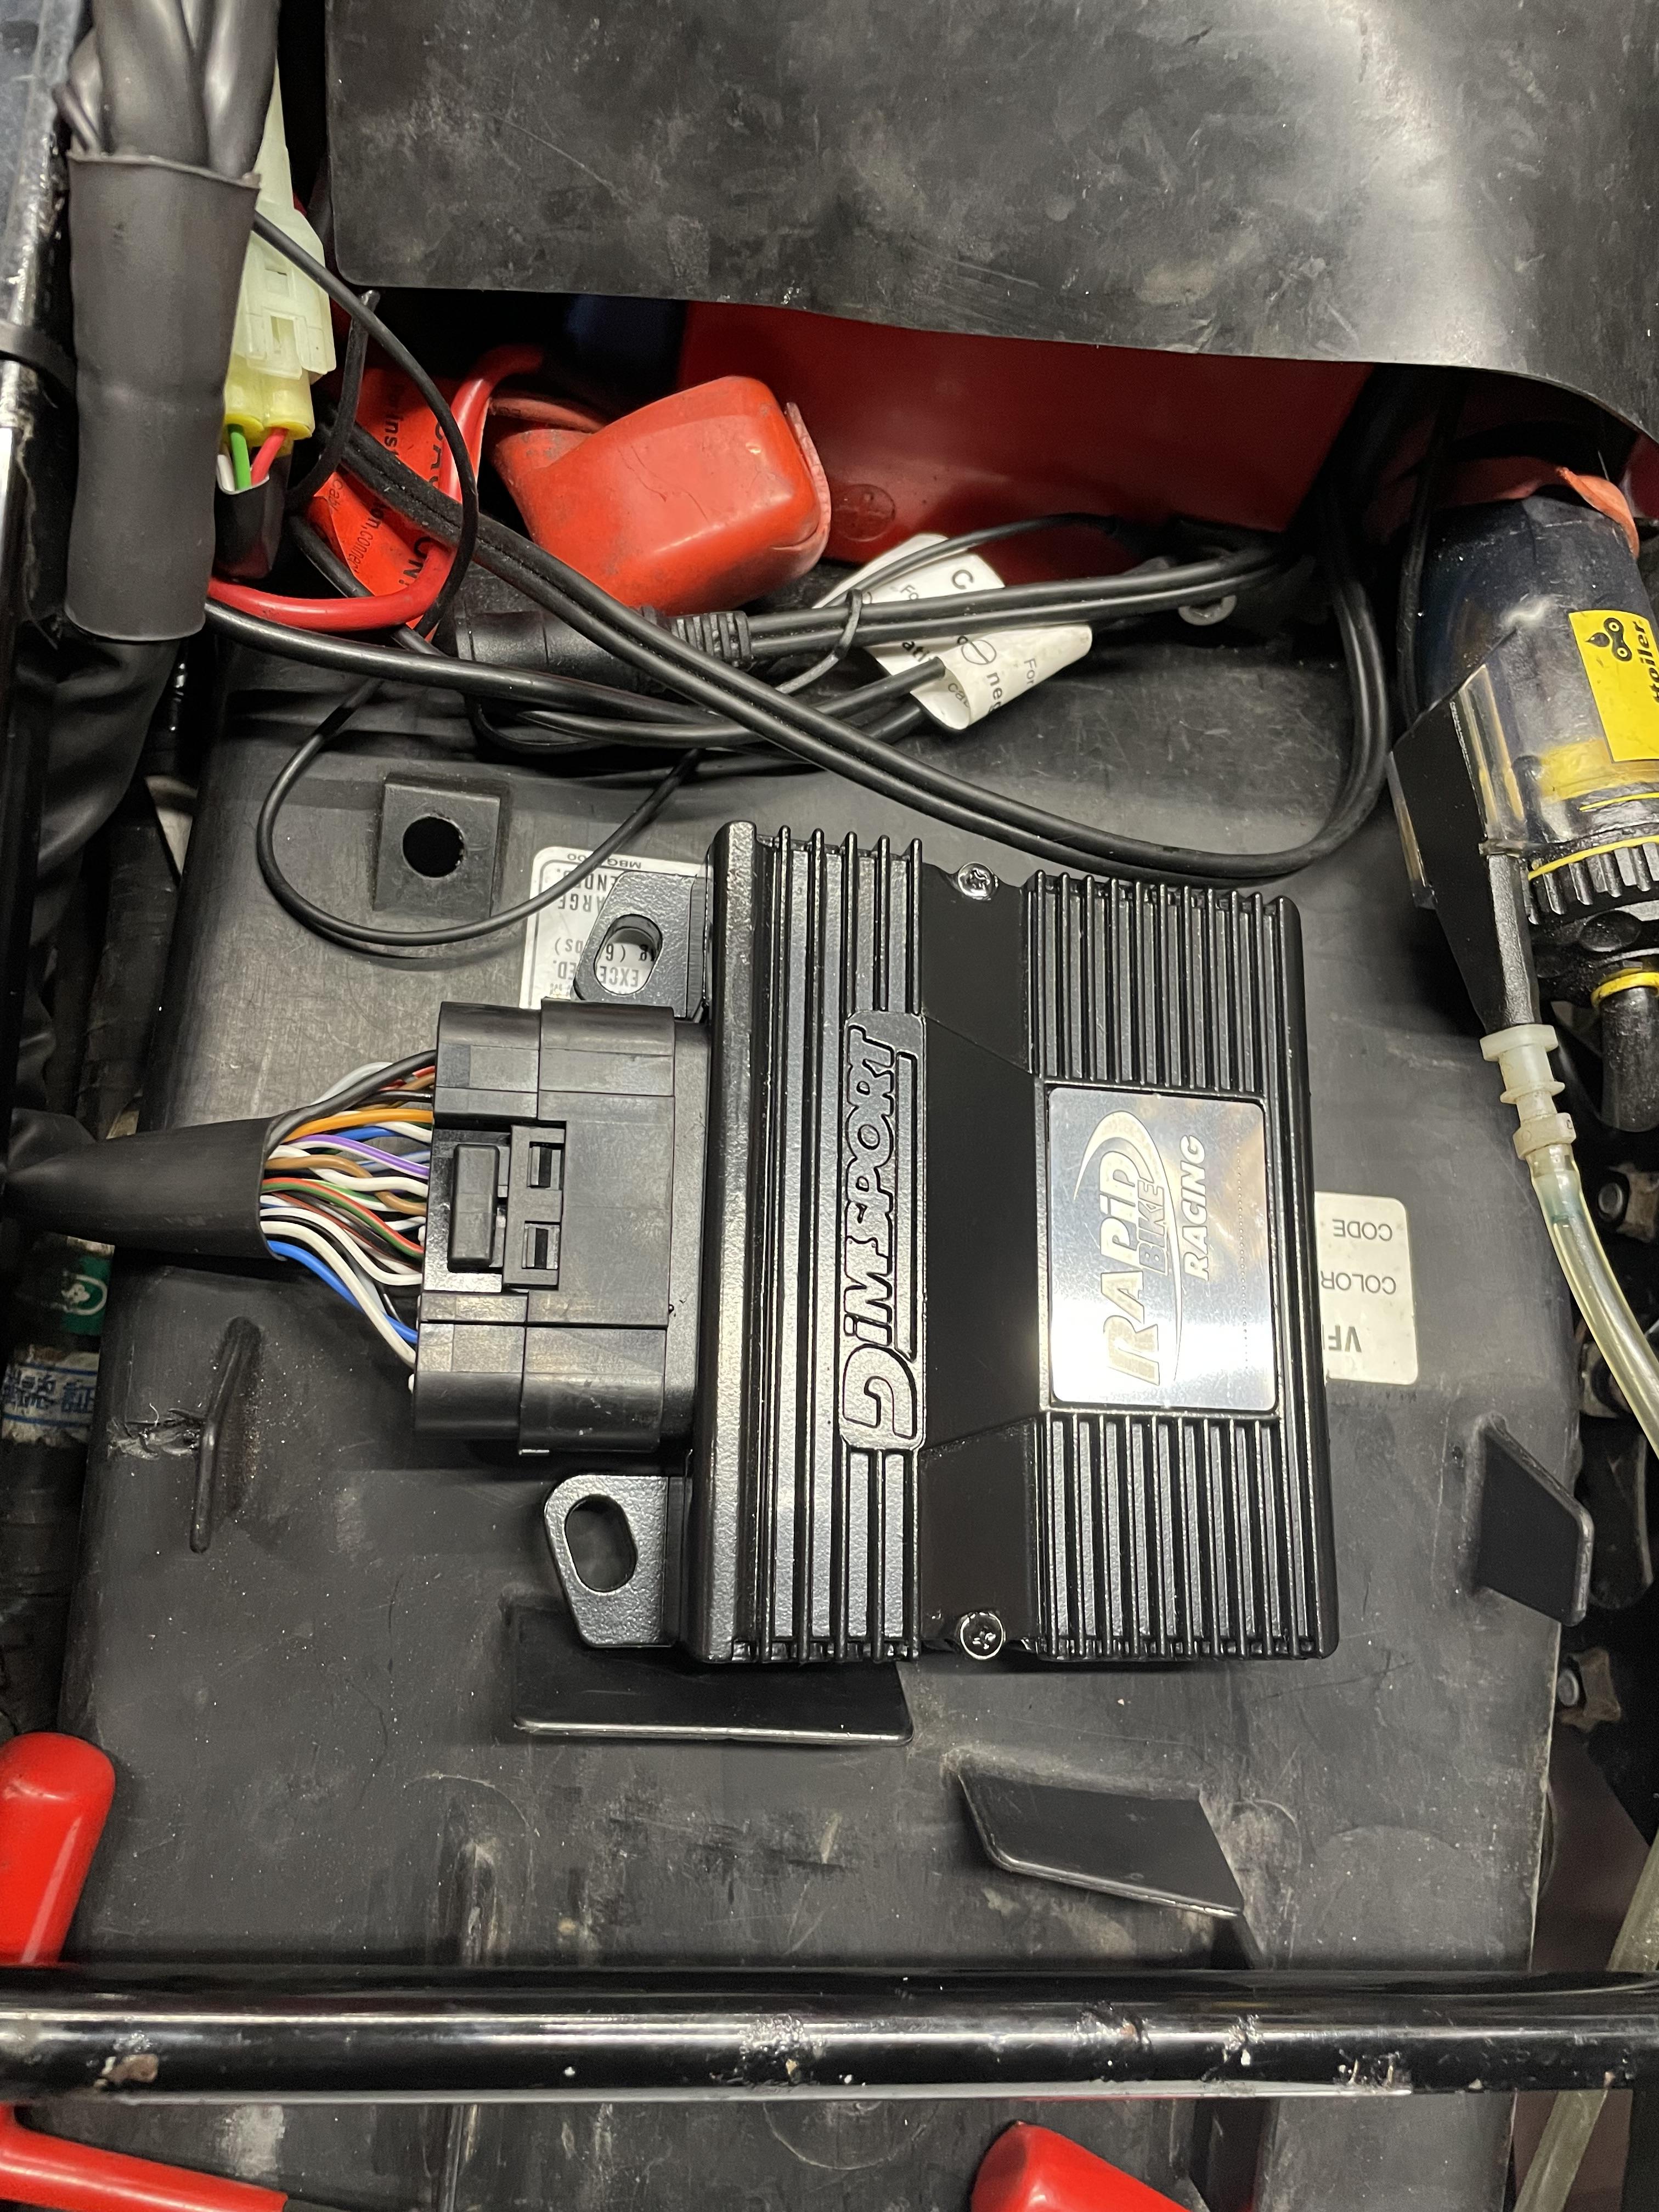
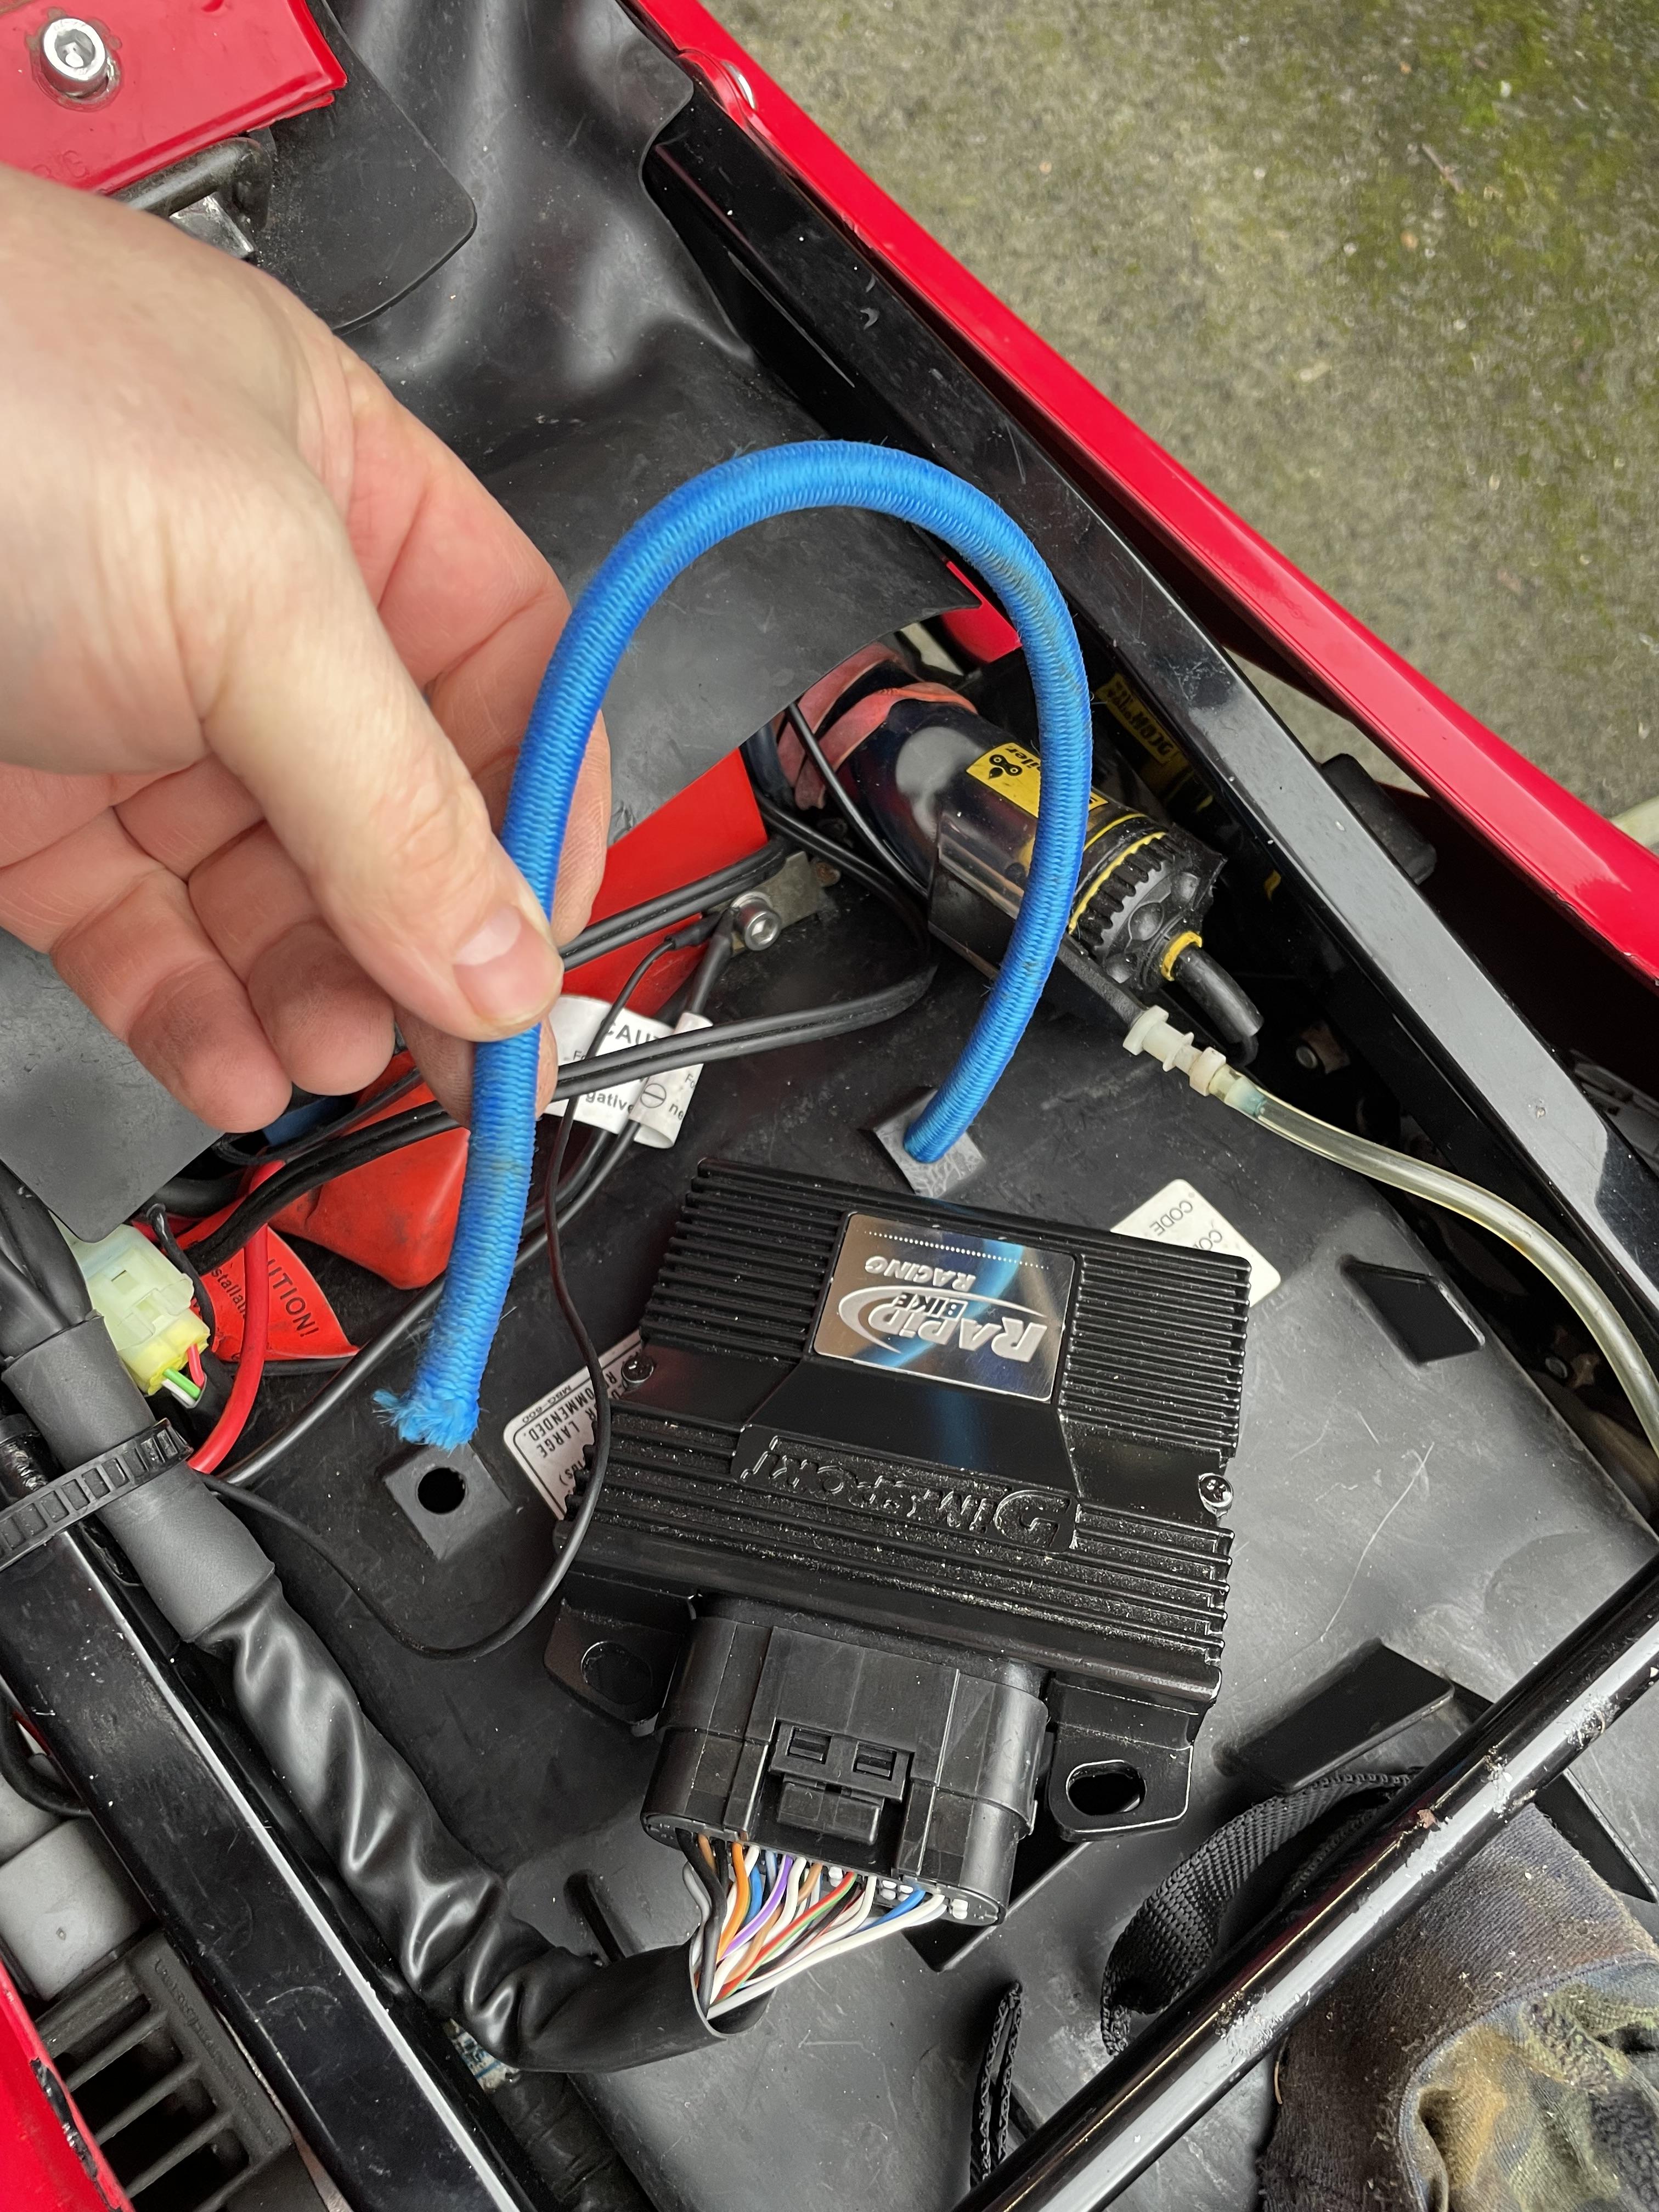
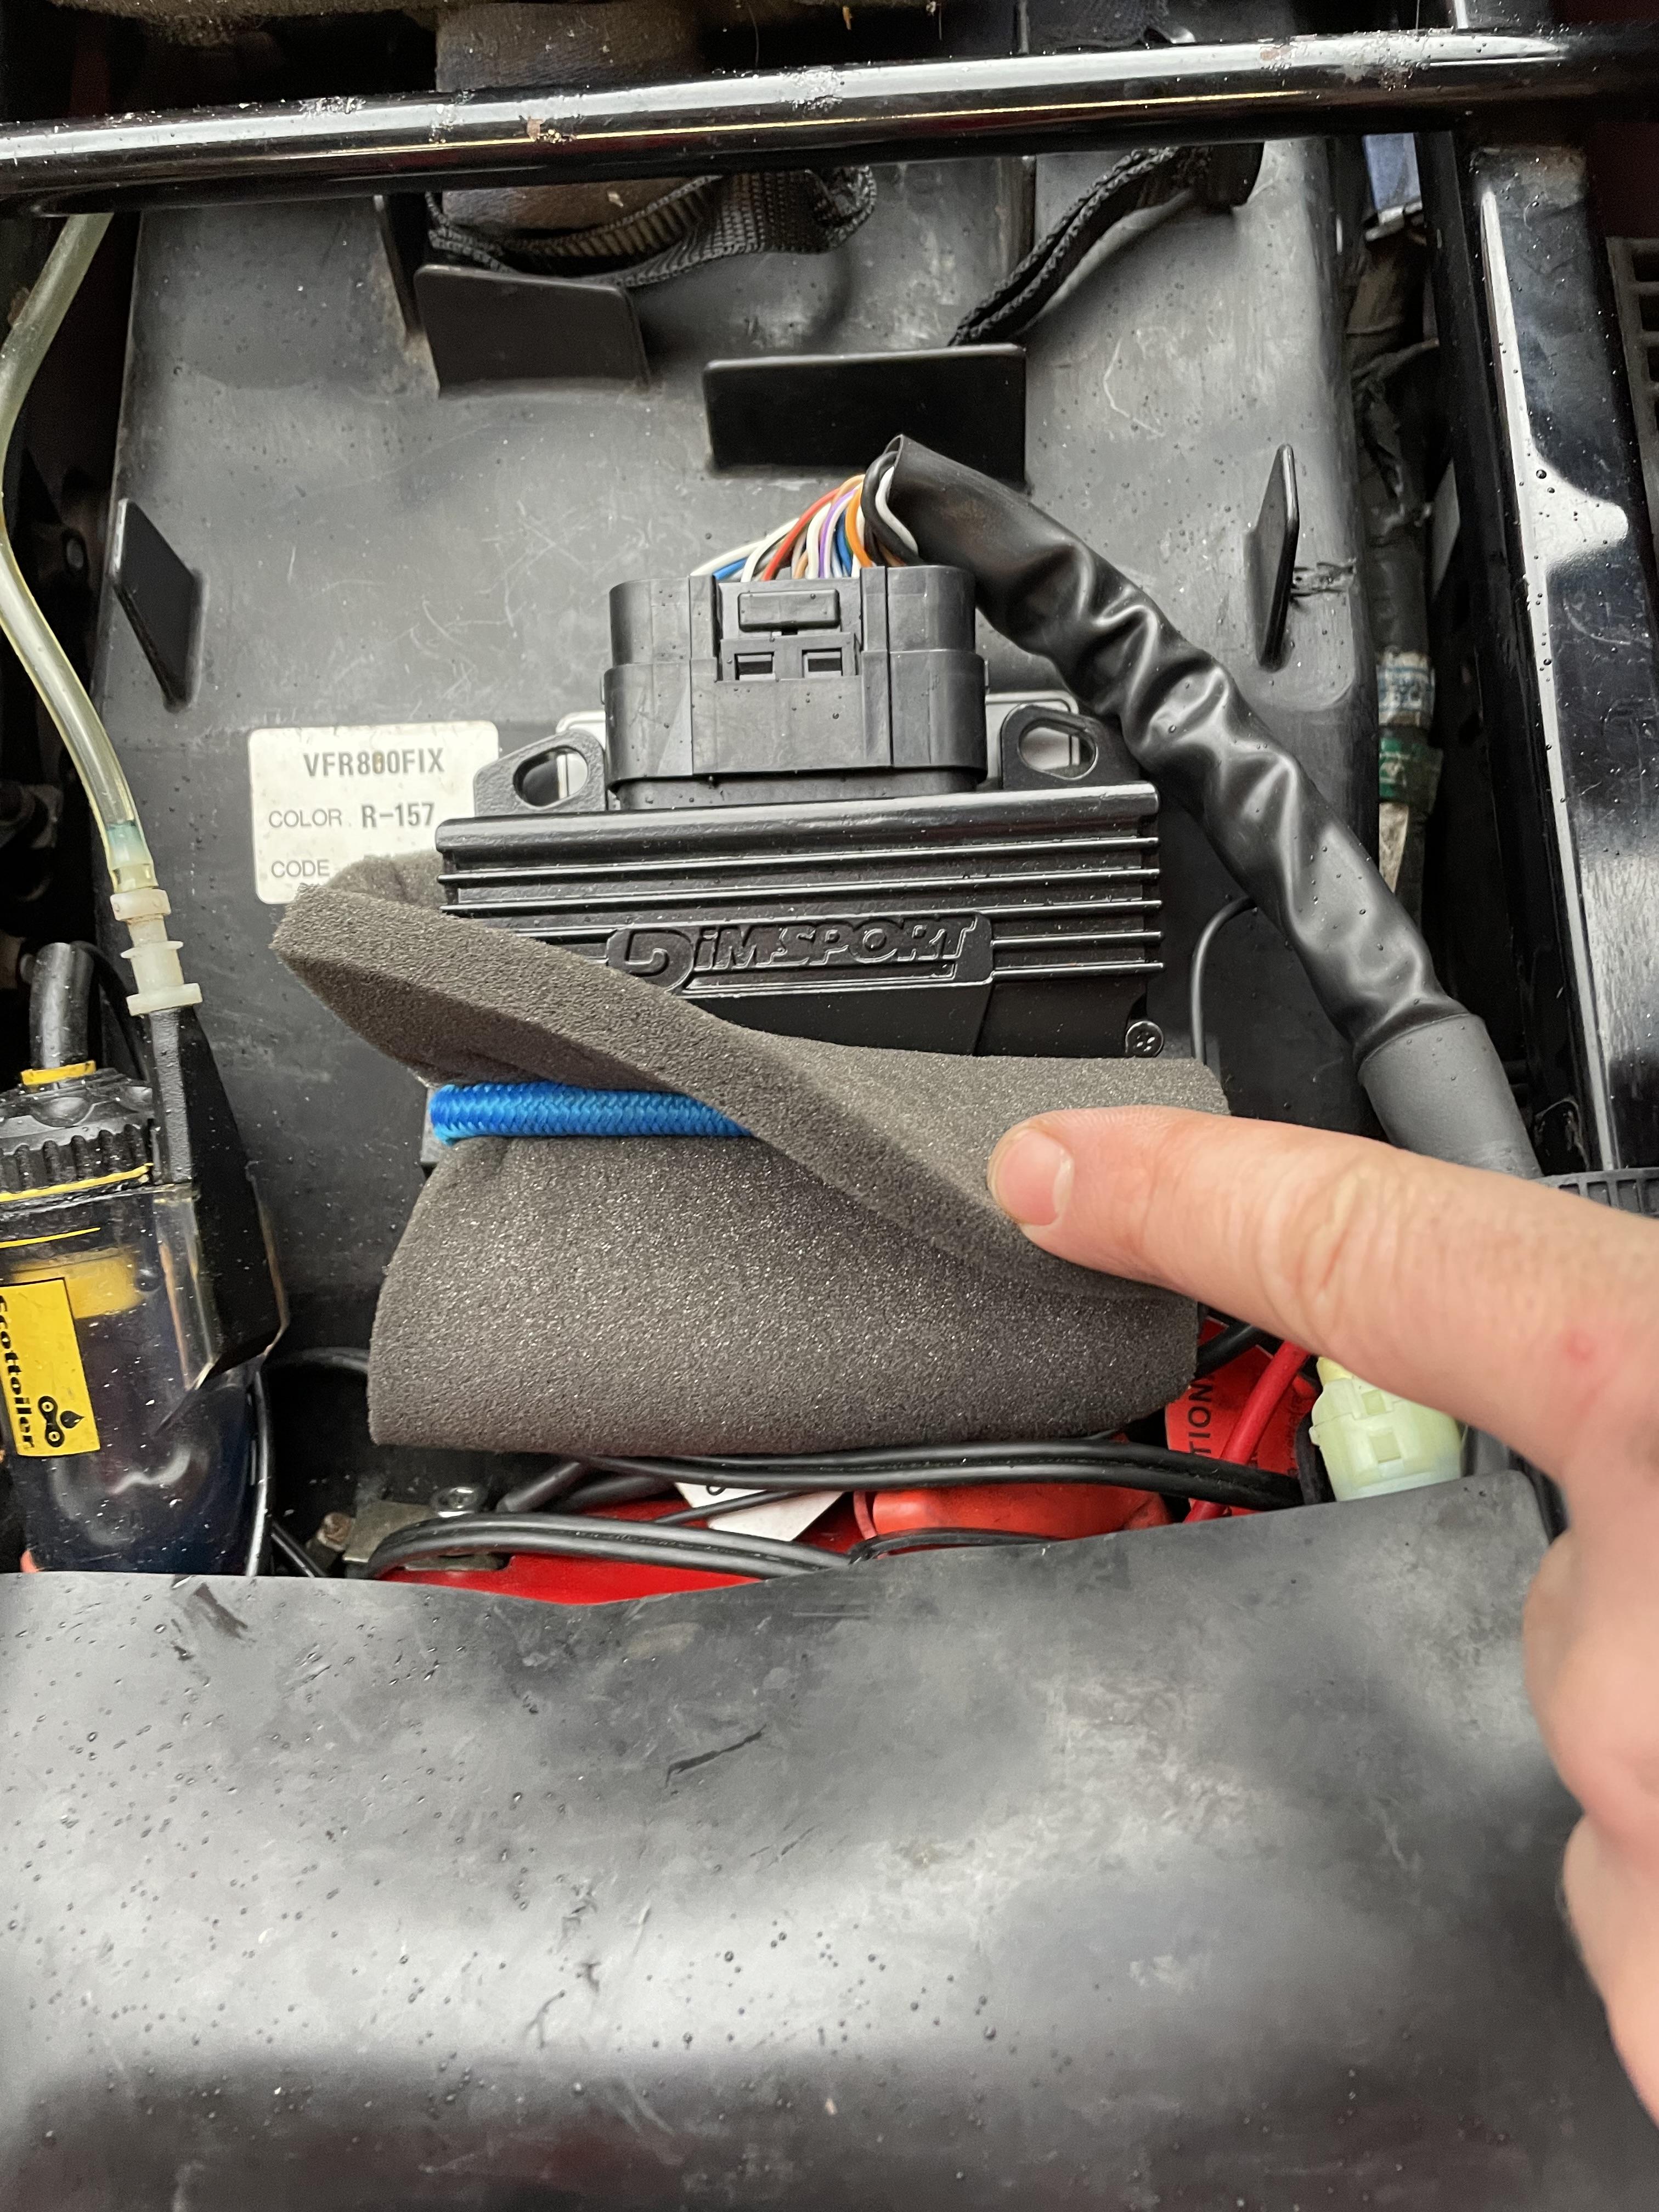
It seems I’ve forgotten to update about the Rapid Bike Racing fuel module fitted! Bought module from an S1000 and sent it in for a 5th gen map and harness. So excited when it finally came back! Had to disconnect the big harness plug up front left (it’s on the right fur 6th gen’s). Requires dismounting the left radiator from its perch. Dab of dialectic grease between the connector pins and plug the Rapid Bike wiring into it. Here you can see the OEM and Rapid Bike plugs all nestled together. I ran the wiring along the inside of the frame where the OEM wiring is. Module itself under the seat, just behind the battery. Needed to devise a way to mount it that is removable for servicing. Solution: bungee cord passed through the battery cover holes in the undertray… Tied underneath the undertray and wrapped some soft sponge around the module to insulate from vibrations. Done! Got to say, it is SOOOO much smoother now, and keeps pulling to redline without dropping off. This caught me out as I rely on hearing the drop-off in power to click into the next gear, but this just kept pulling cleanly until I was bouncing off the rev limiter. Wow! The 1998 models don’t have O2 sensors so I can’t rely on Rapid Bike self-tuning. Need to get this to a dyno tuner for an old-school static tune. Any recommended tuners in the UK? Ideally who have Rapid Bike software?
-
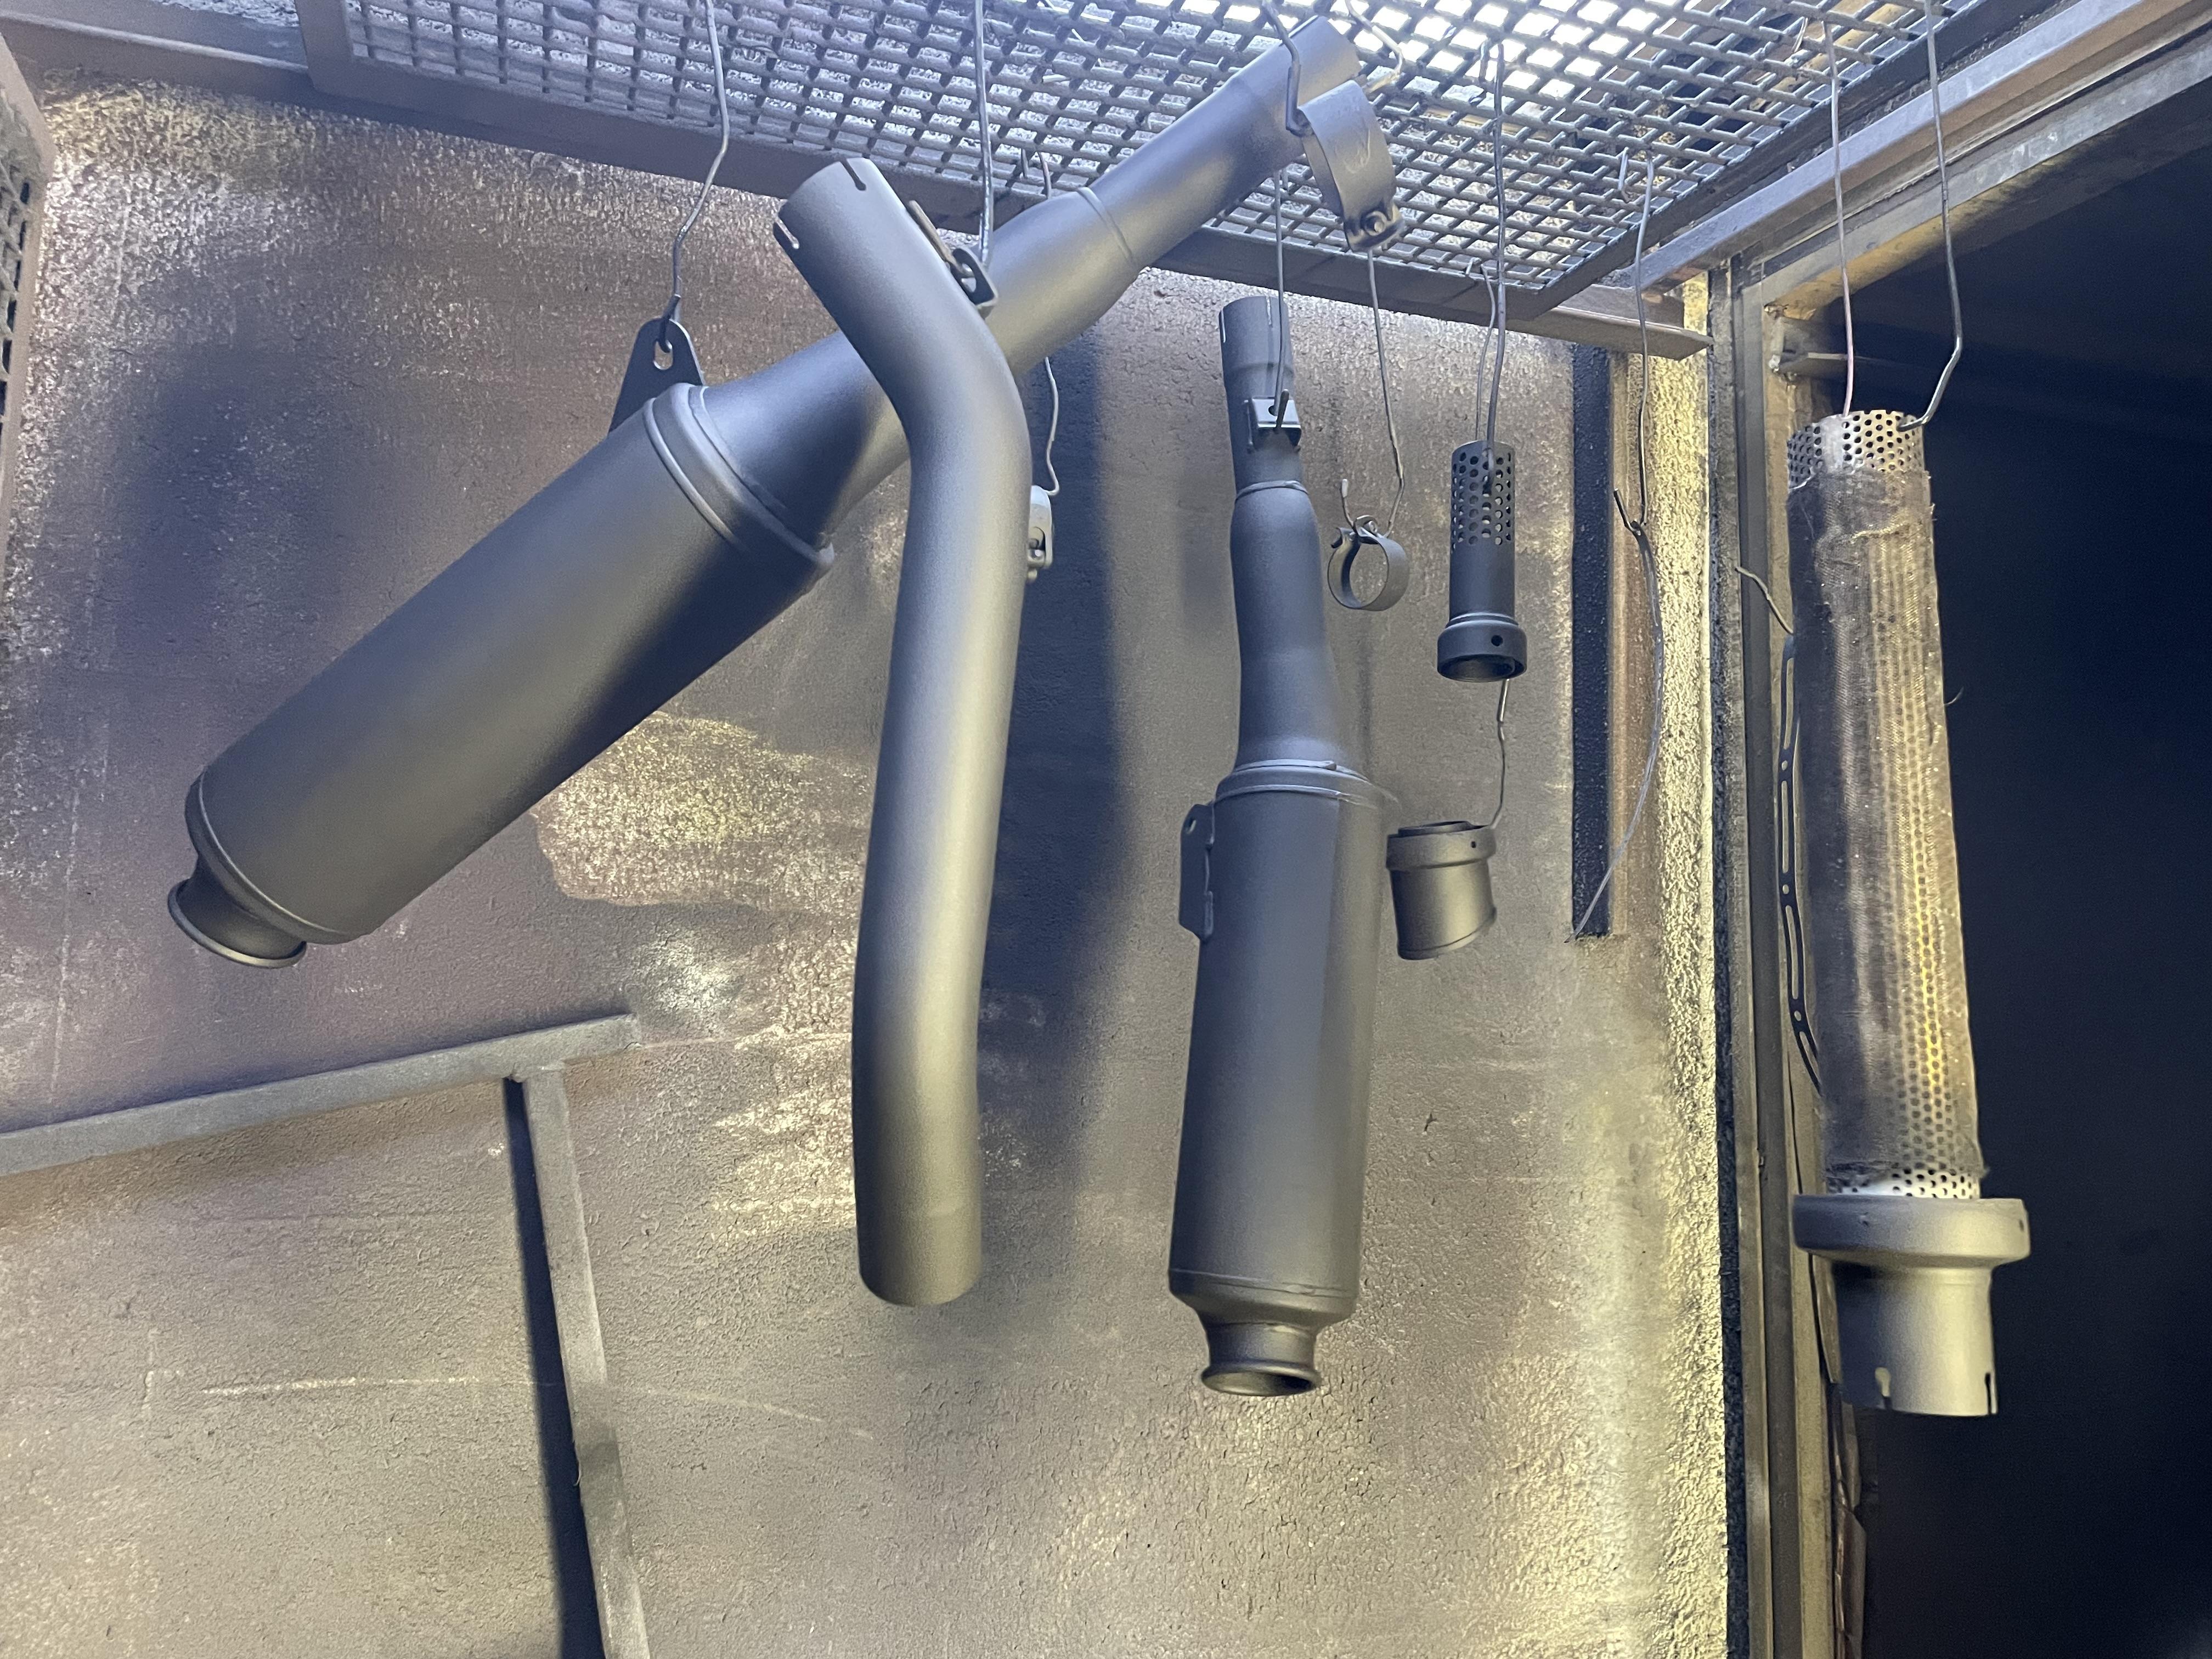
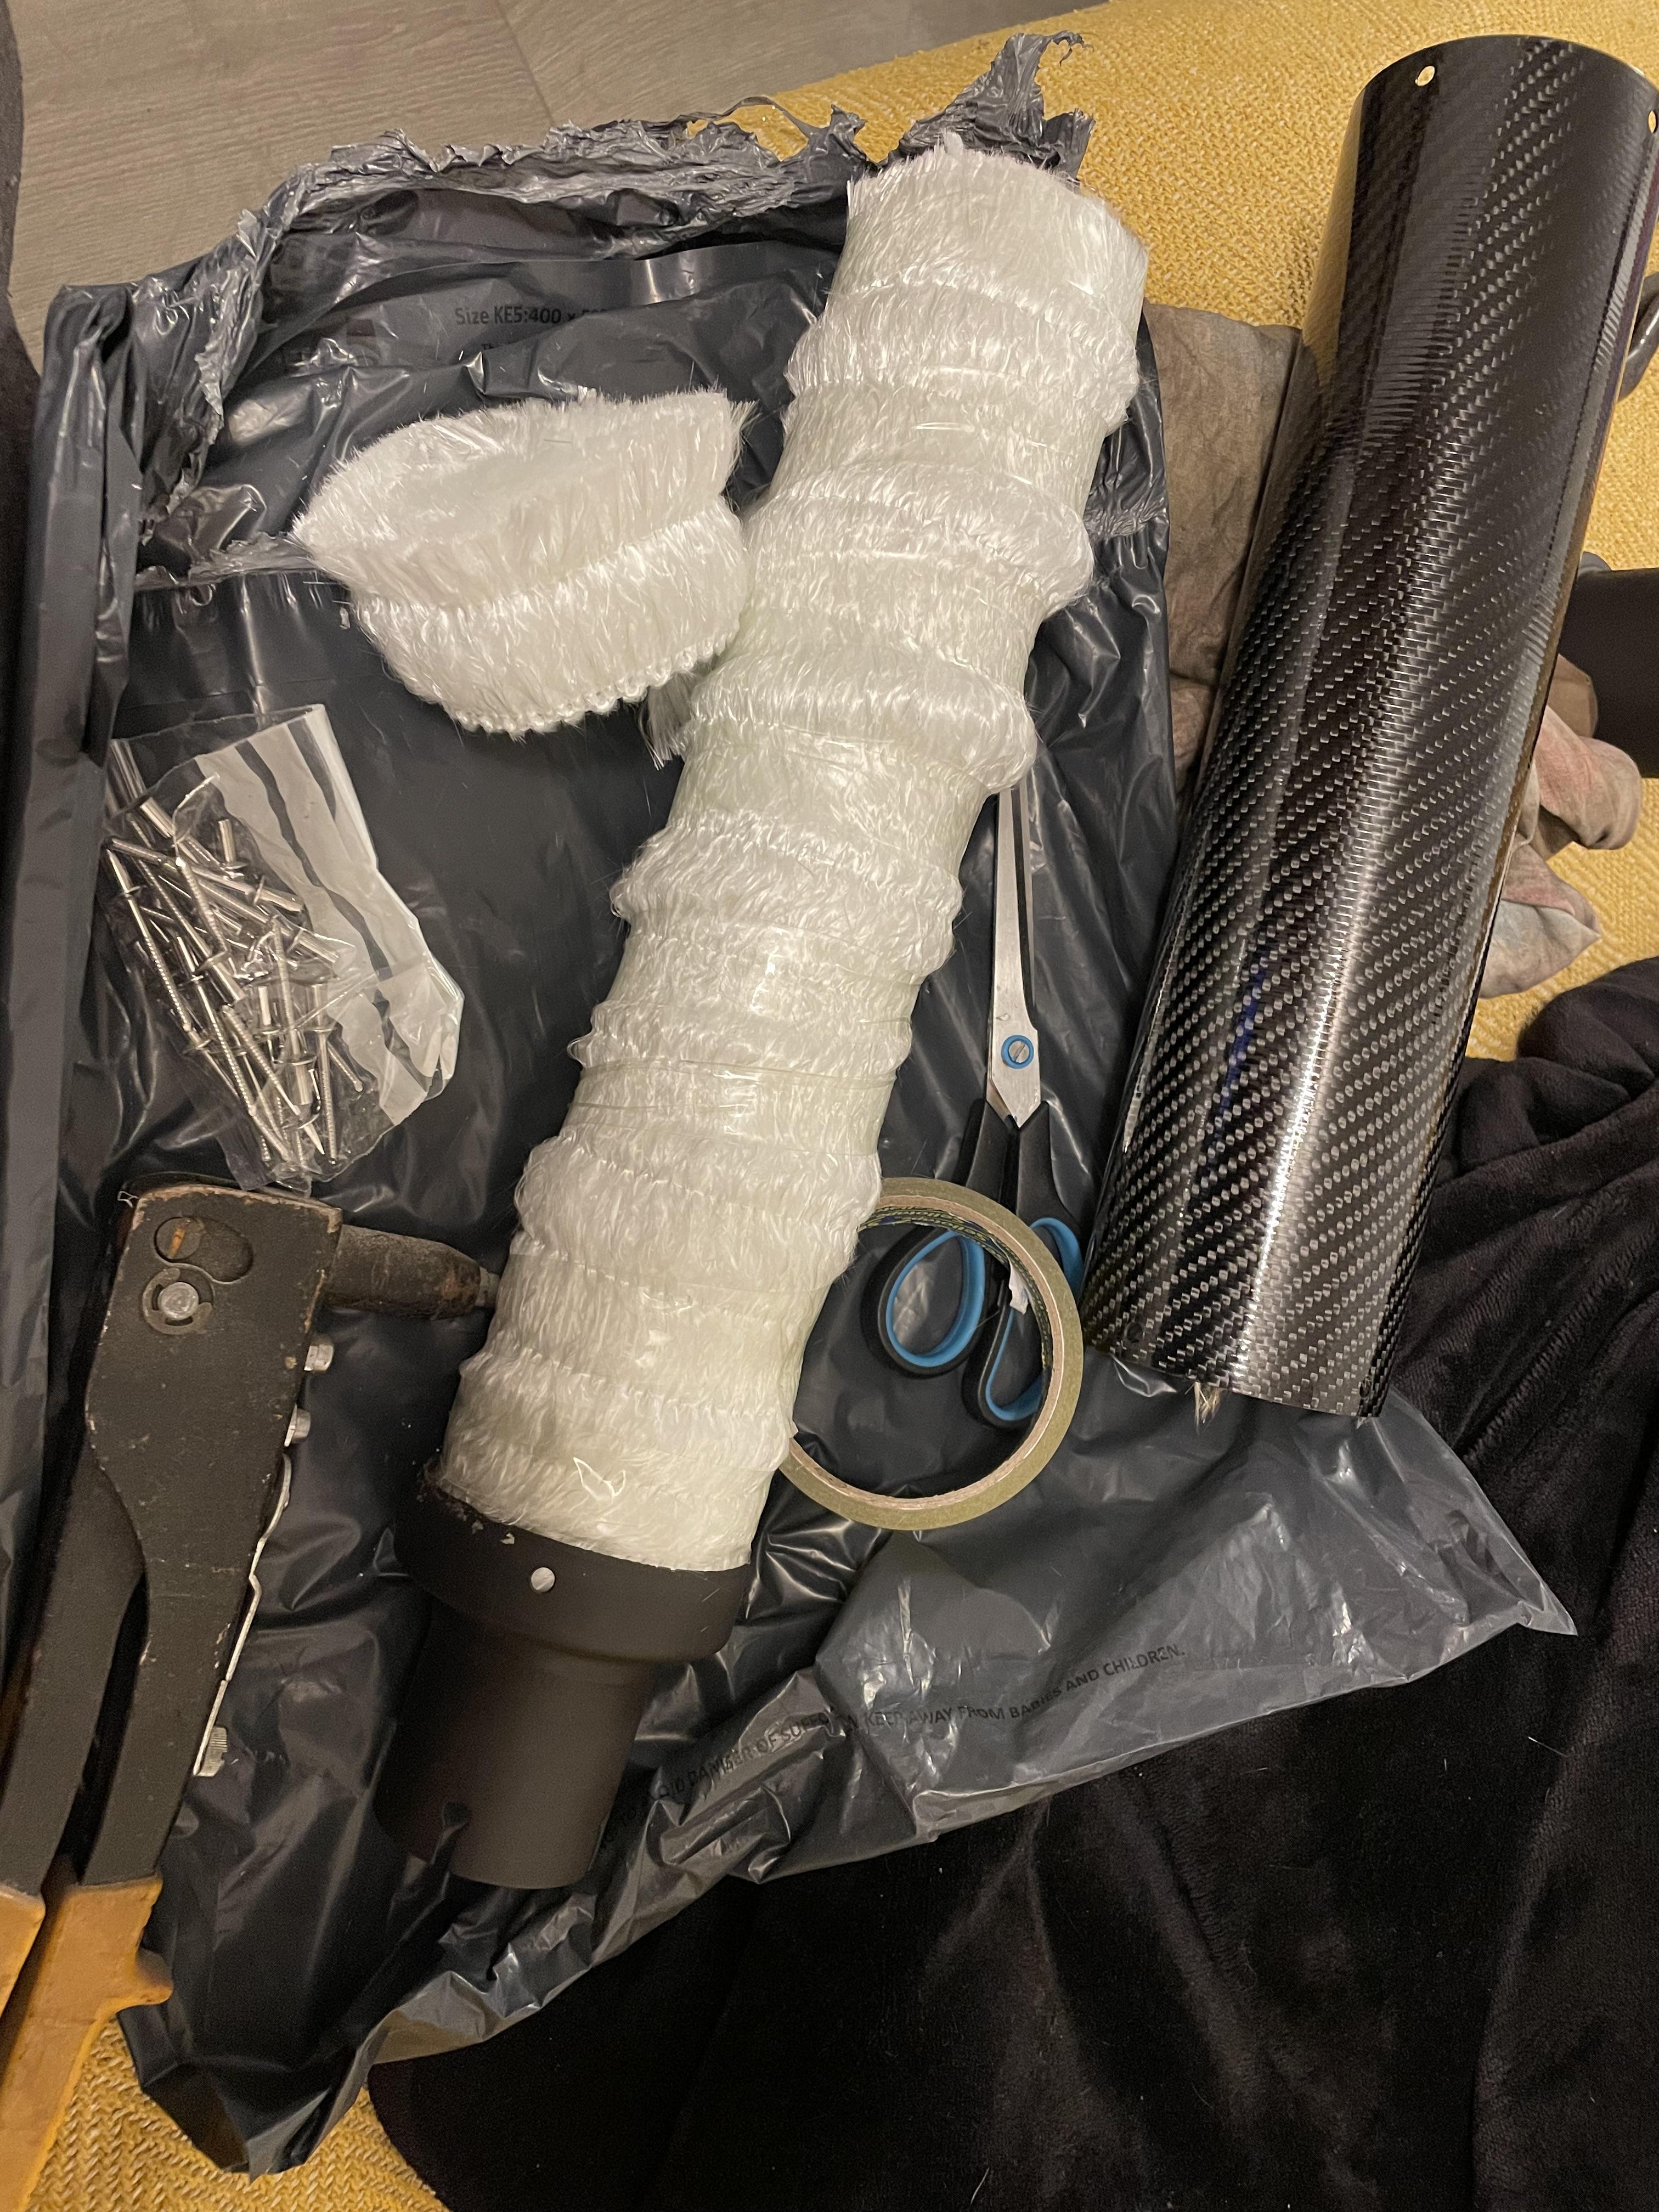
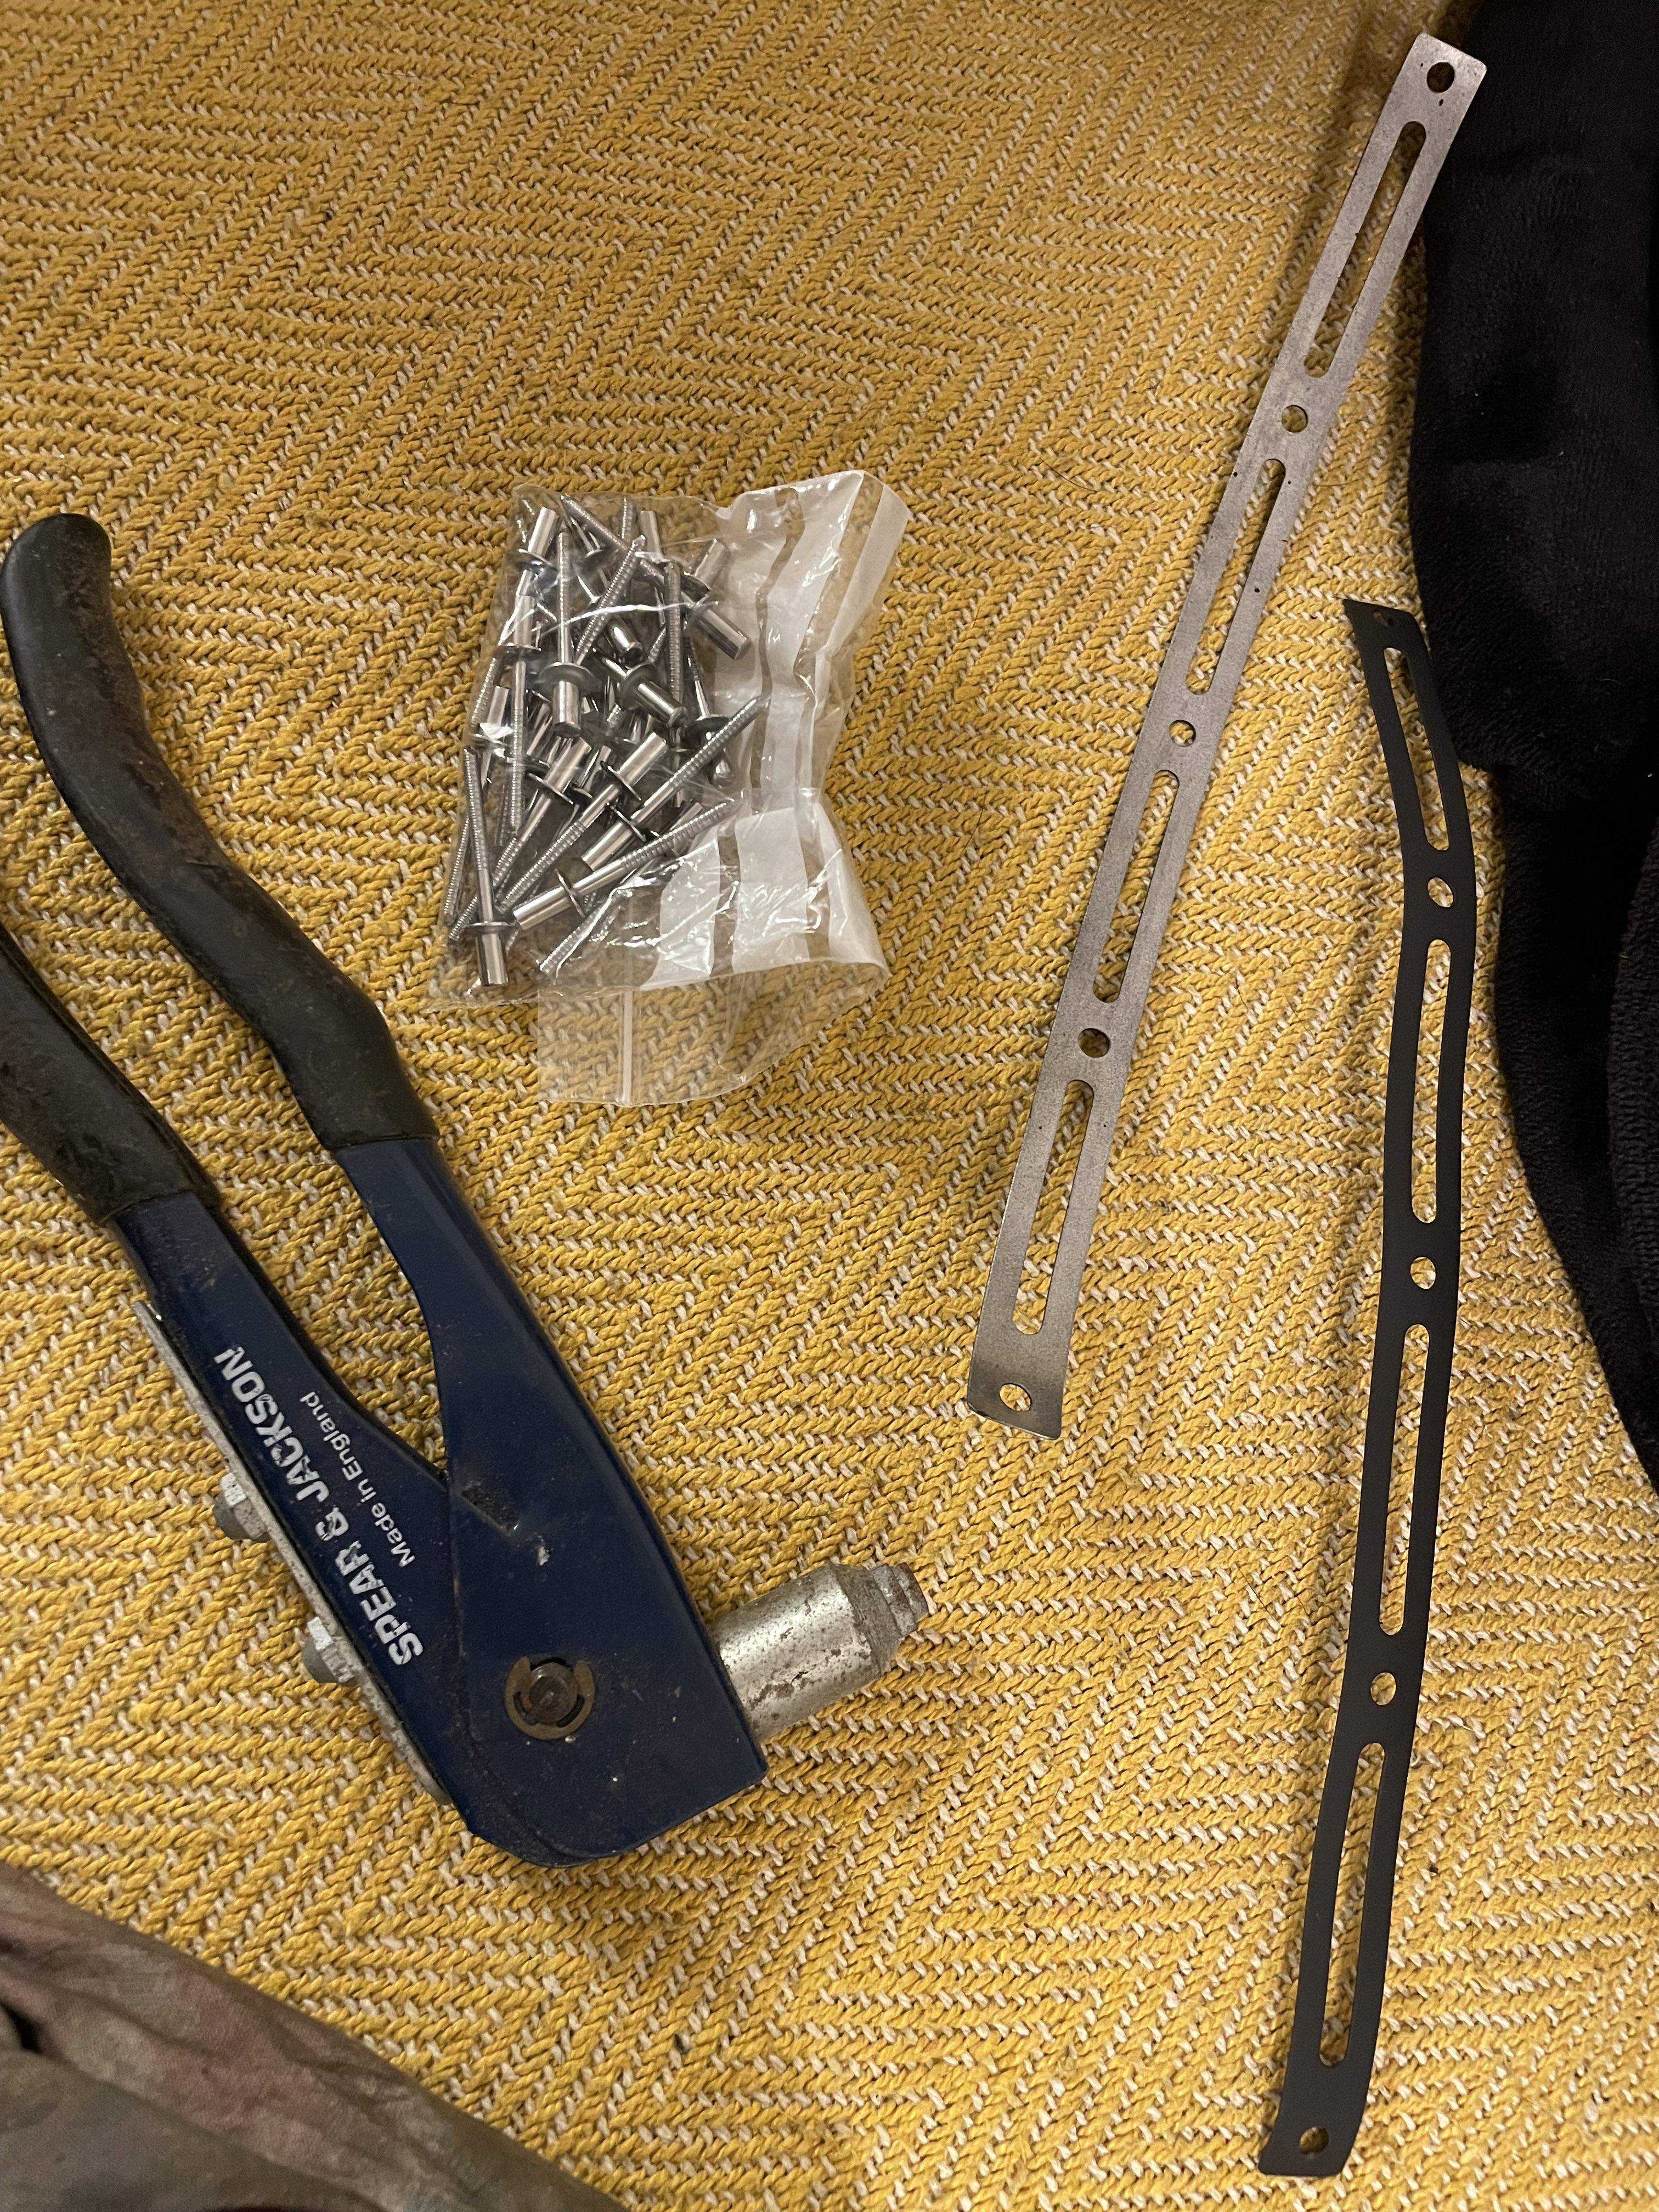
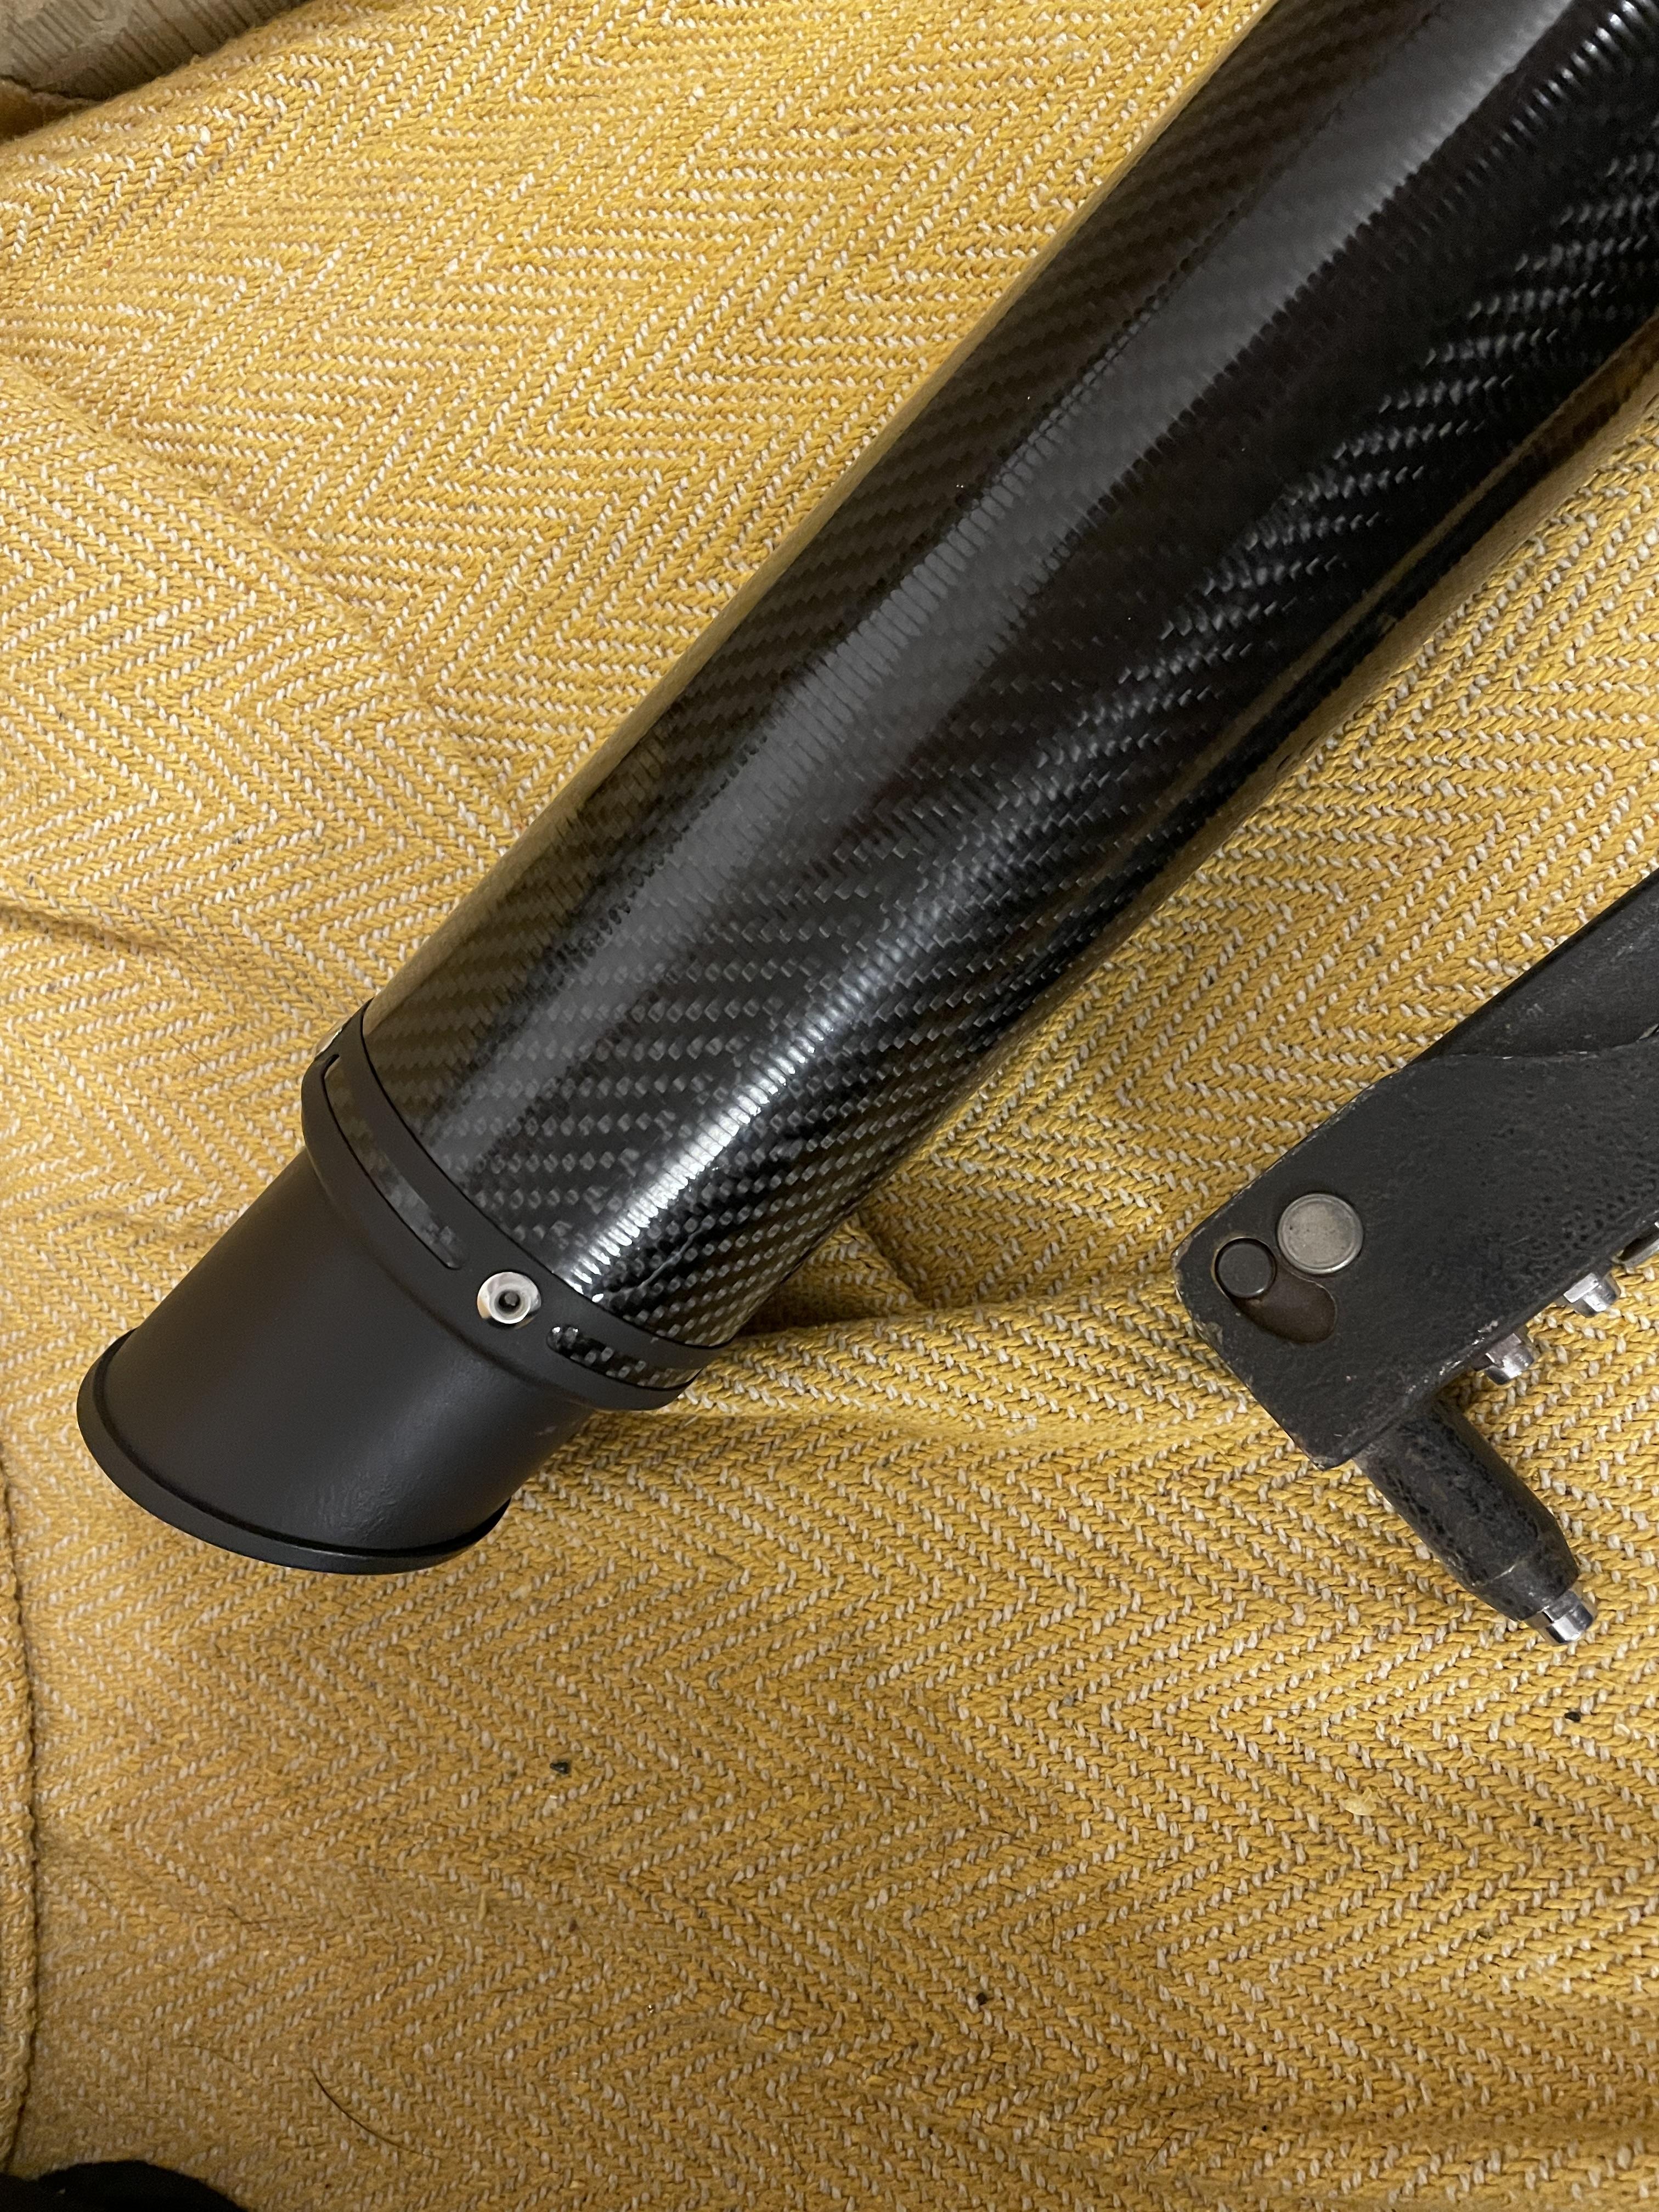
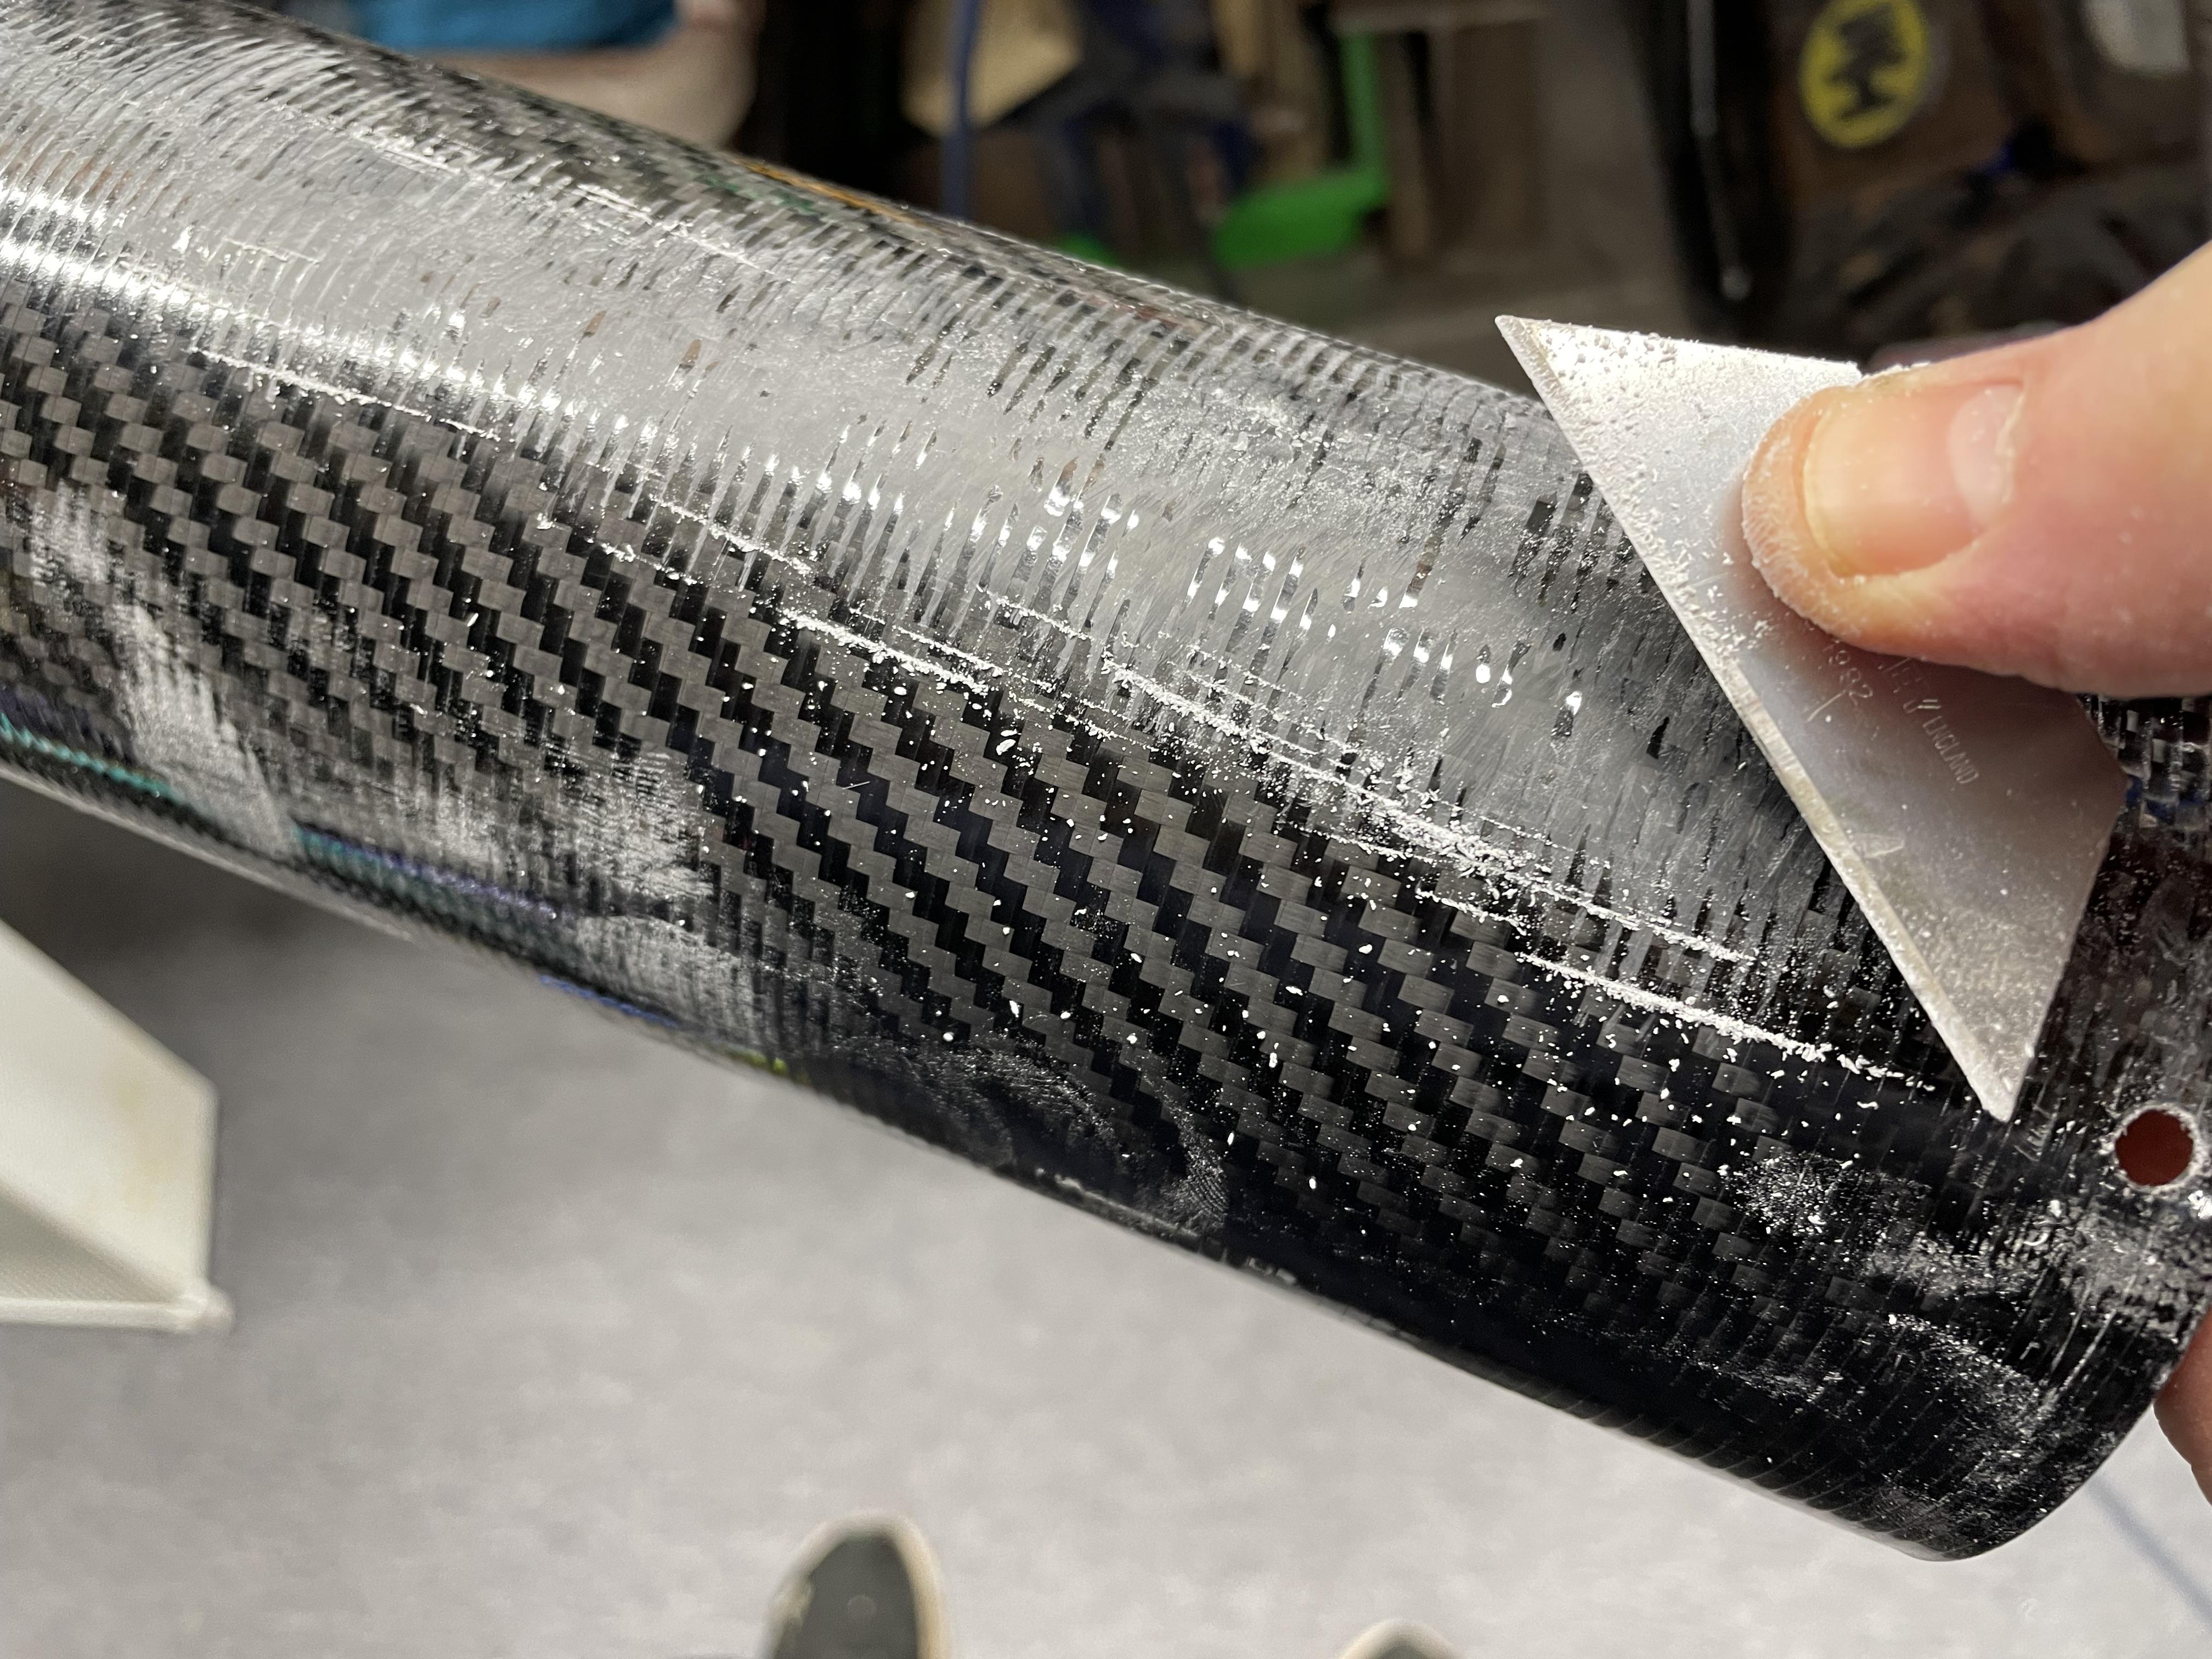
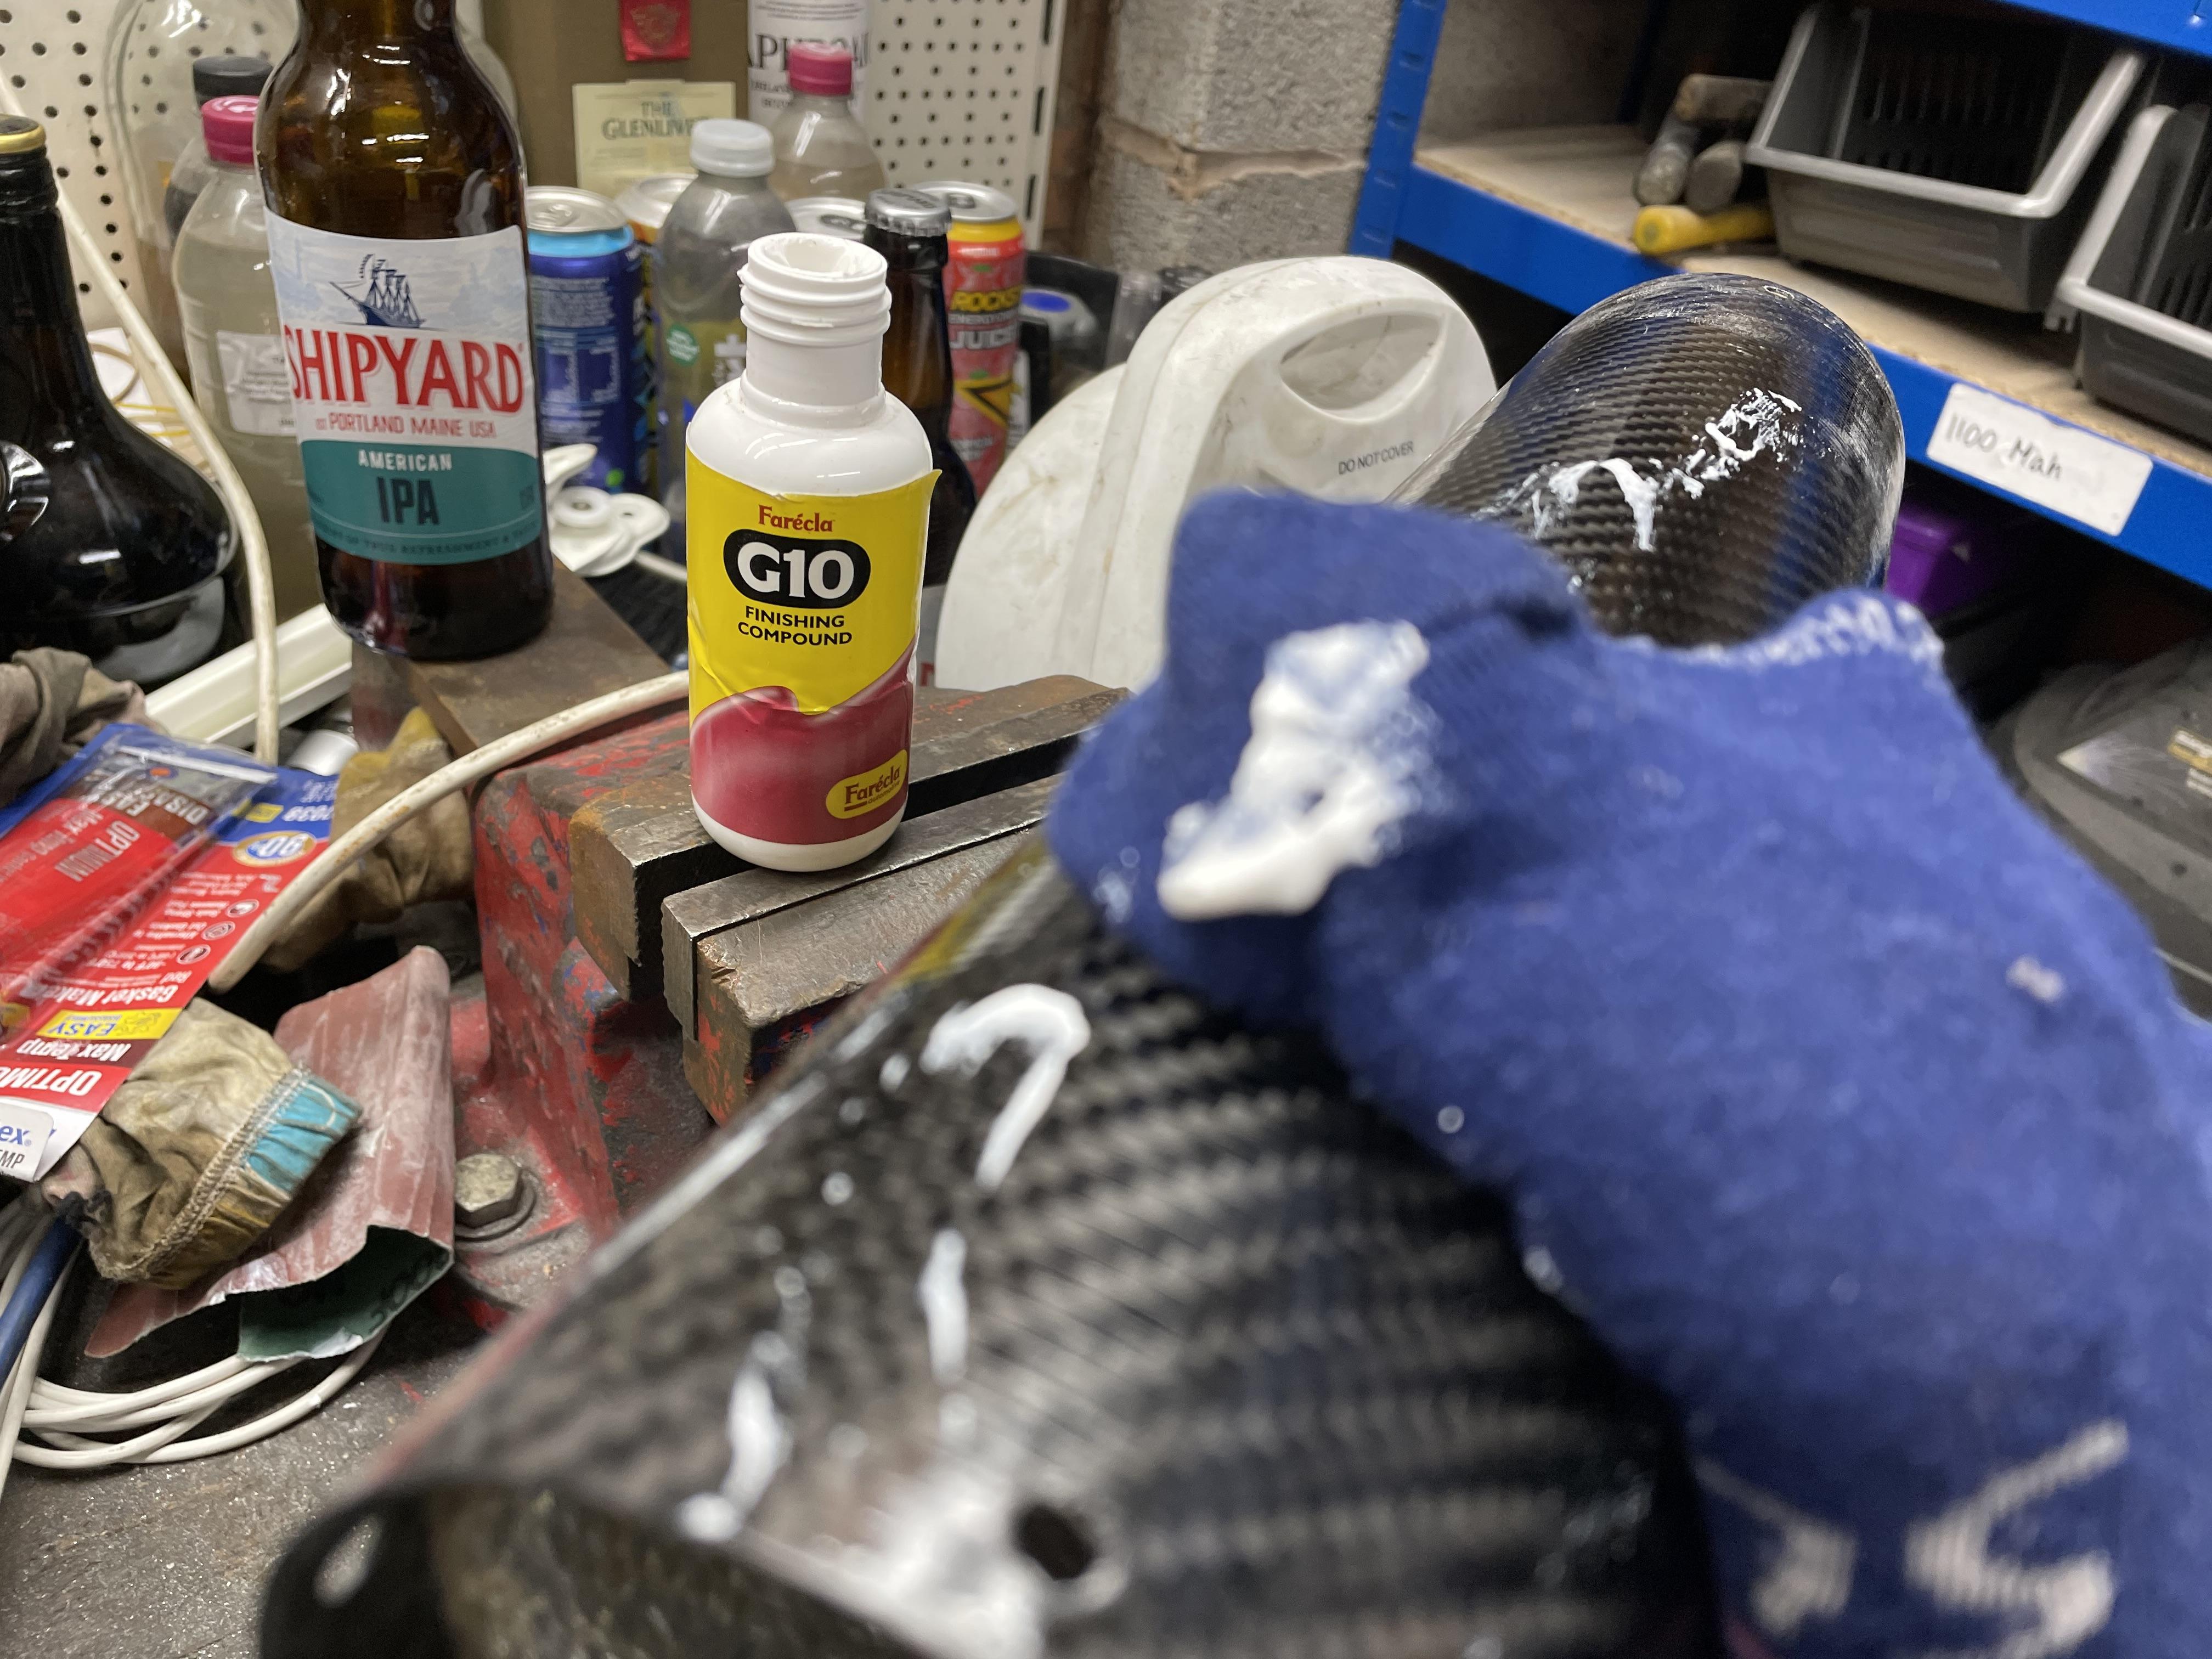
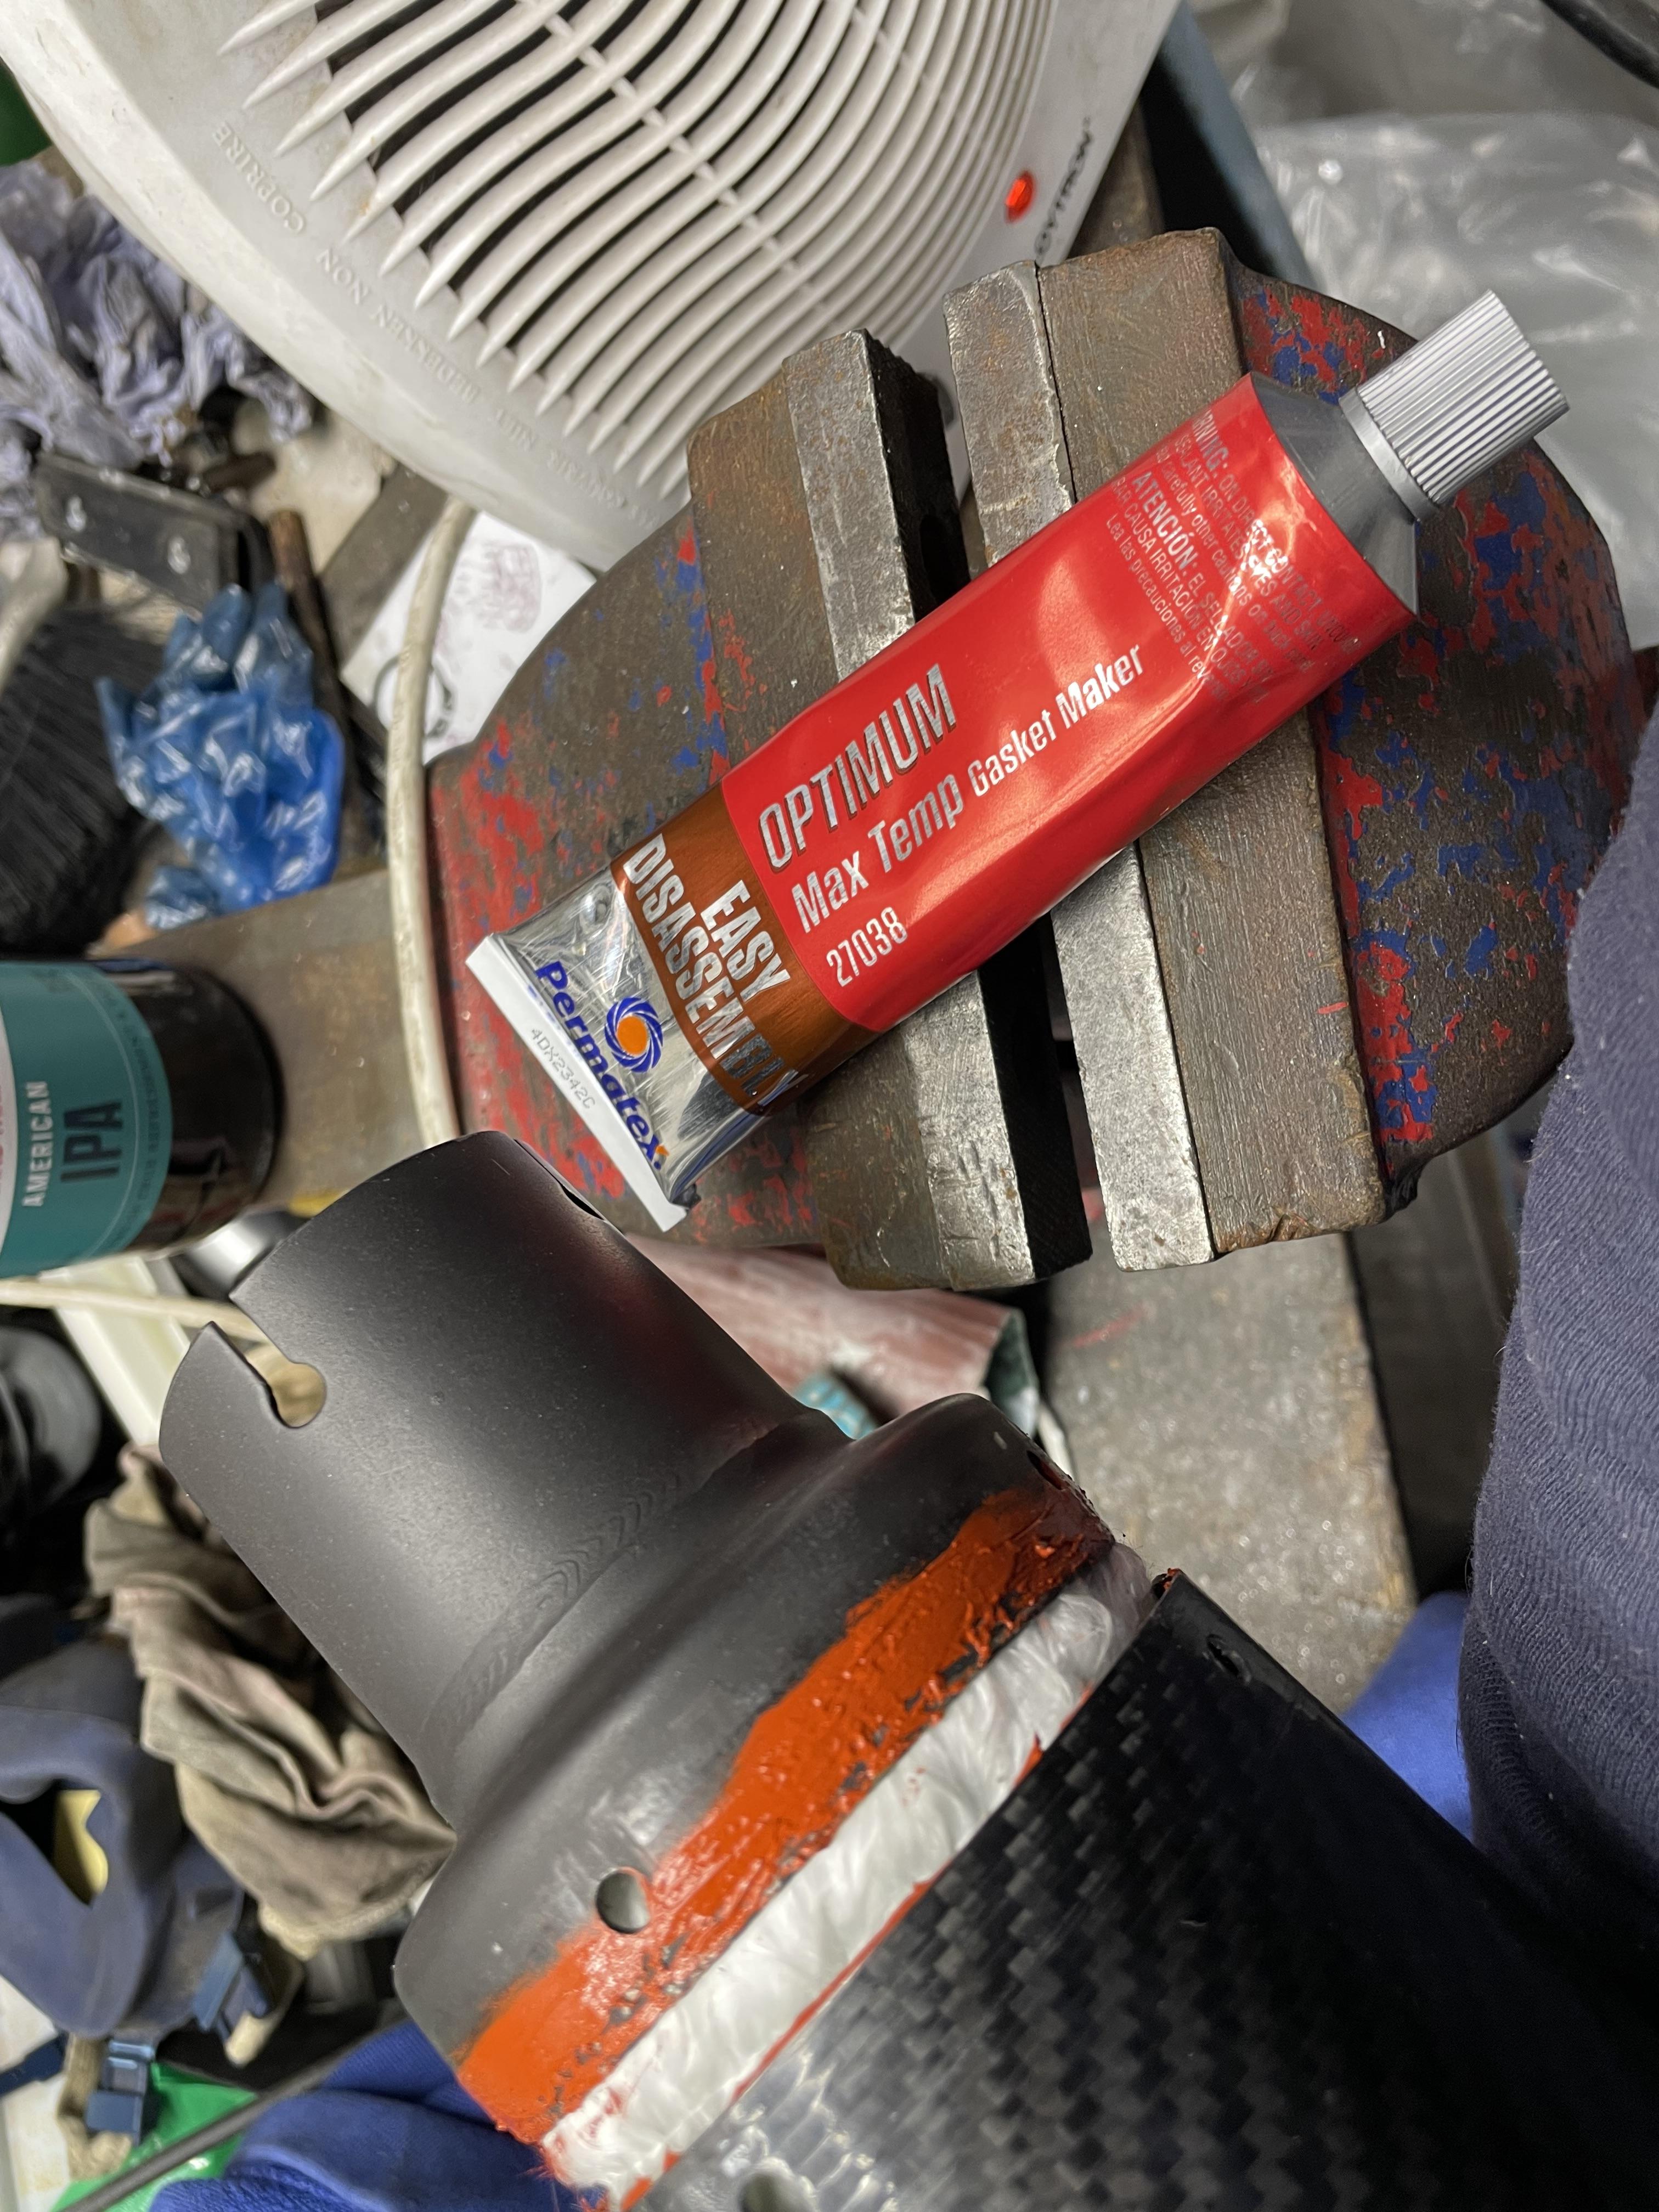
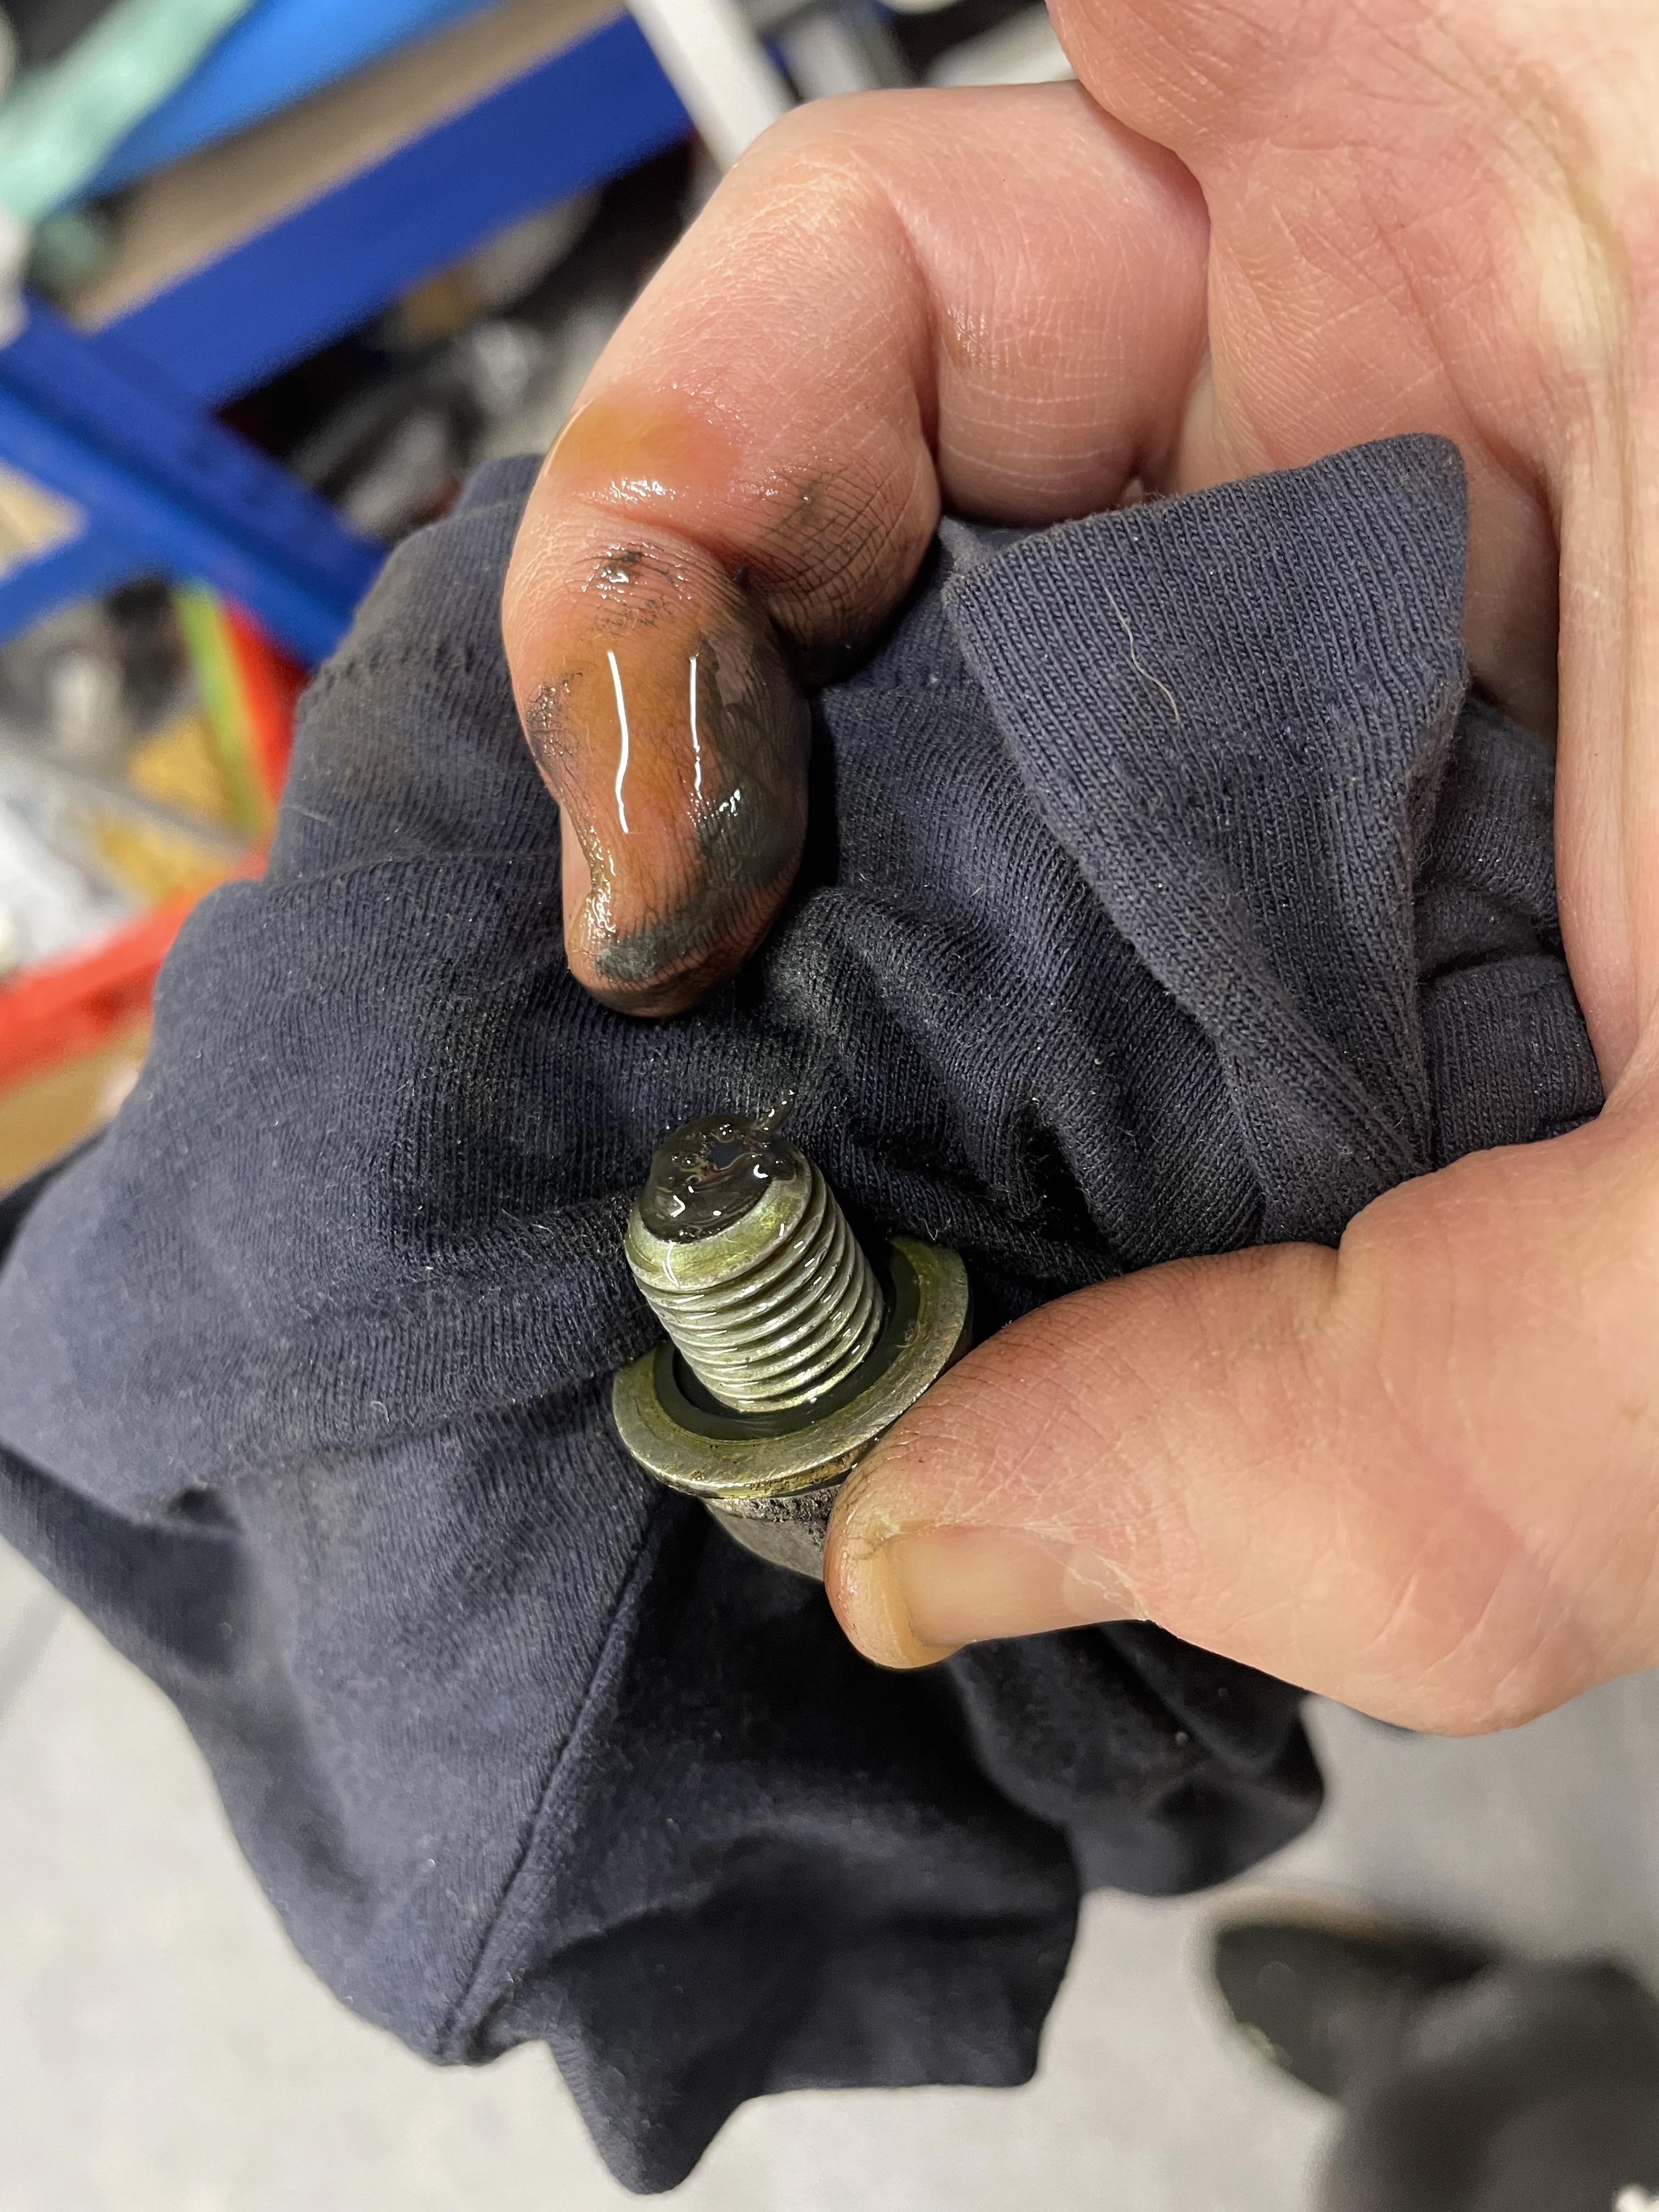
Sooo, a small update to show I repacked the exhaust and changed oil/filter. After my Donnington adventure with Mohawk I realised the high mount Black Widow is the exhaust equivalent of a g string. Looks nice but doesn’t actually add any discretion. First job is to take the muffler apart (drilling stainless rivets is a pain in the @ss!). Then, blast, paint and bake the link pipe and metal parts of the muffler, including the straps. Here they are hanging in the paint oven. The other two mufflers are for another bike…ignore these. Gave the carbon sleeve a scuffing and coated with HXT high temp gloss clear. Got some ugly runs and scraped them off with a razor after paint dried. Then polished the scrapes out with some rubbing compound (G10). Picked up some Accoustafill (supposed to be good stuff) and wrapped it round the inner tube, held tight with delitape. Tape will burn off as the exhaust heats up and the stuffing expands to fill voids. New gas-tight stainless rivets too. Permatex exhaust RTV on the ends to keep it all gas-tight. Looking pretty good! Only I misaligned some holes and had to drill out the rivets again… Scaffold tube is useful for bending the link pipe. Then all minted and buttoned up. Followed by oil and filter change, ready for next season. The sump plug magnet did its job and picked up some iron “powder”, but nothing unusual. Just enough to smear my finger. thought there’d be more bits in the used oil after two track days and some missed gear changes at high RPM as I was calibrating the quickshifter, but there was nothing. In fact the Motul 300V oil looked great. Still yellow and smelling of bananas!
-
Thanks for your input, RdChinoy. I had no idea the steps were useful! As far as I understood, things needed to be “matched” as close as possible. I’m certainly no expert so grateful for any tips. Is this commonly understood in tuning circles?
-
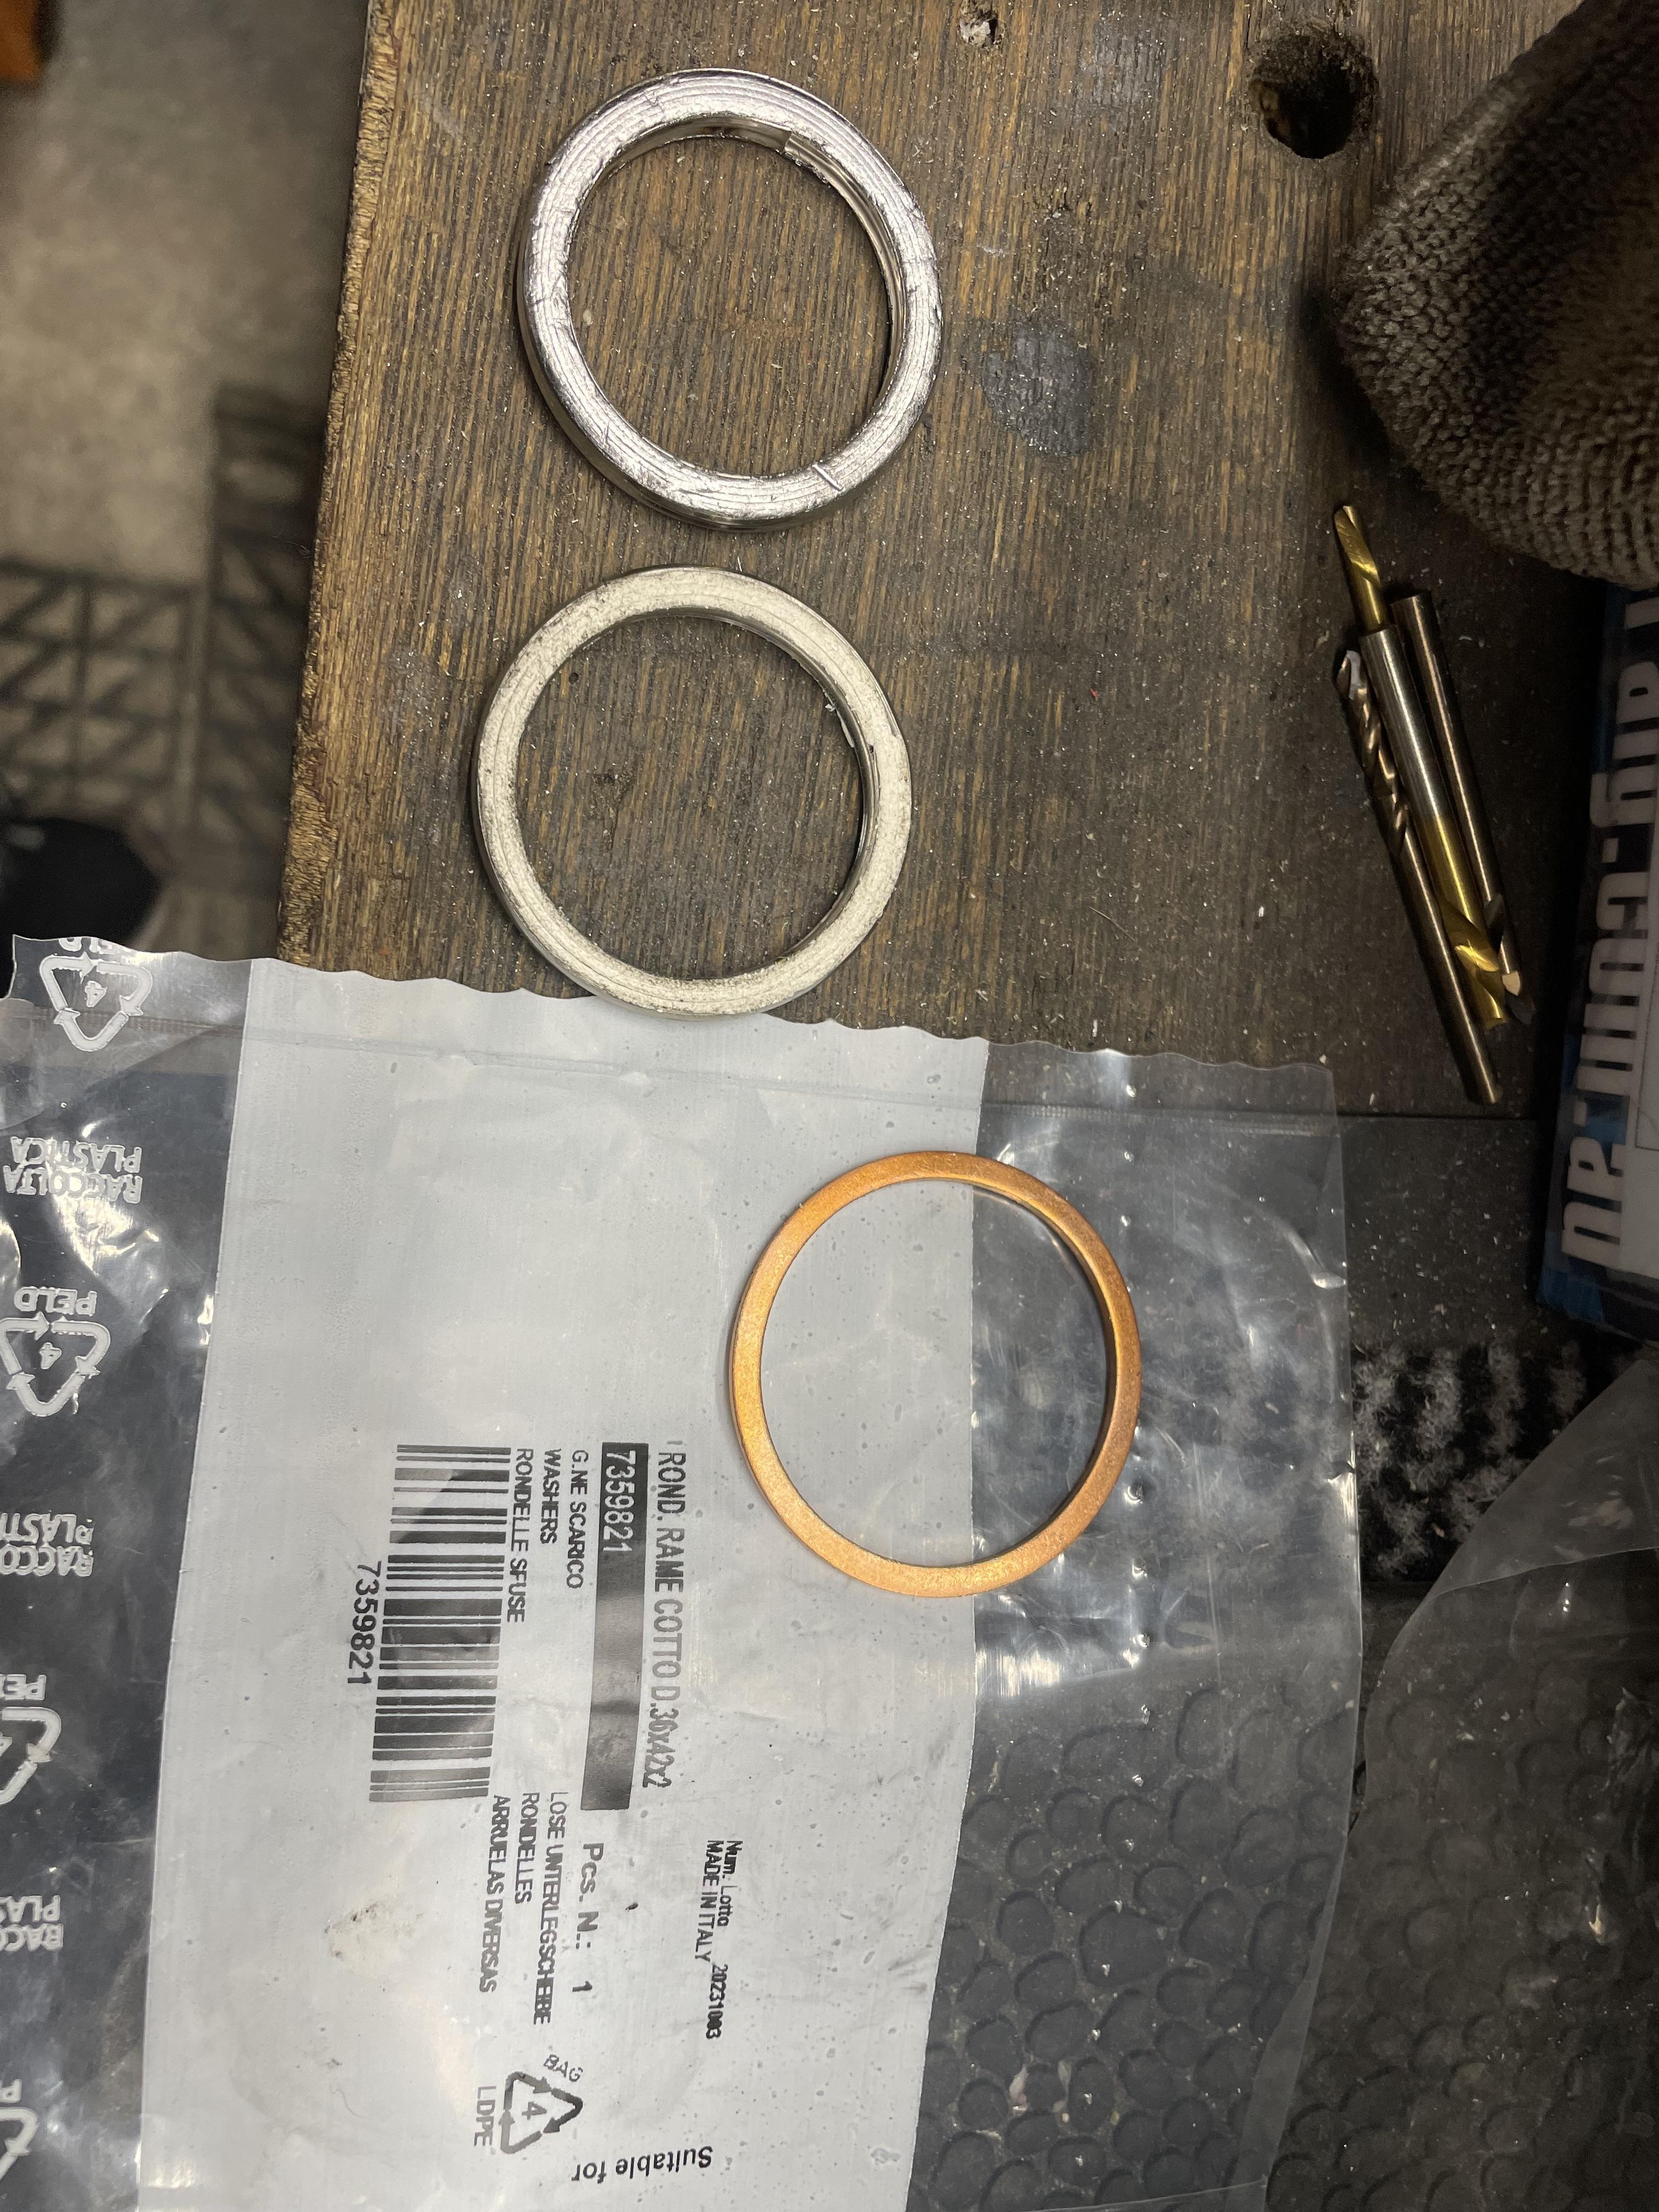
Hey Tirso, I’m jealous of your WILD headers, made possible by the awesome duo of Duc2V4 and the late-great SFDownhill! The Kawasaki part number is 7359821 My concern is that you’d need a 100% perfectly flush fit to make this thin washer work. Are the WILD headers made to that super high standard? Maybe you’d be safer using the GSXR750 gaskets everyone else is using (they are 41x35mm), or maybe you could double up the Kawasaki ones. I don’t have the guts to try the Kawasaki gaskets even with OEM headers. Maybe I was overcautious but it’s a real b!tch of a job to redo if it leaks.
-
Thanks for chiming in, Grum. Really appreciate your input. This really helps! Thanks again, mate. One of your older posts on here tipped me off to swap the Baro sensor for the MAP sensor. Afraid I couldn’t confirm the old MAP sensor was faulty. Frankly I couldn’t understand the readings in the service manual. And there’s nothing in the Haynes manual. Any idea how I can test it, please? I think you’re right - there must have been some historic codes on there (possibly from the old faulty RR throwing up lots of codes). Think I got lucky and cleared the codes by accident trying to jam the jumper wire in the fault code plug. The proper procedure is to jam in the jumper wire, turn on the key, take out the jumper and put it back in within 5 seconds, no? Think I must have done this by accident whilst fumbling about. Now the FI light is bright red for a few seconds whilst the pump primes and then goes dull red after. The dull one stays on. Could it be because the FI light bulb has been swapped out for LED? I think it was you who said this might cause it to stay lit in a very old post somewhere. Thanks again for your advice, Grum!!! I think you’re right again!
-
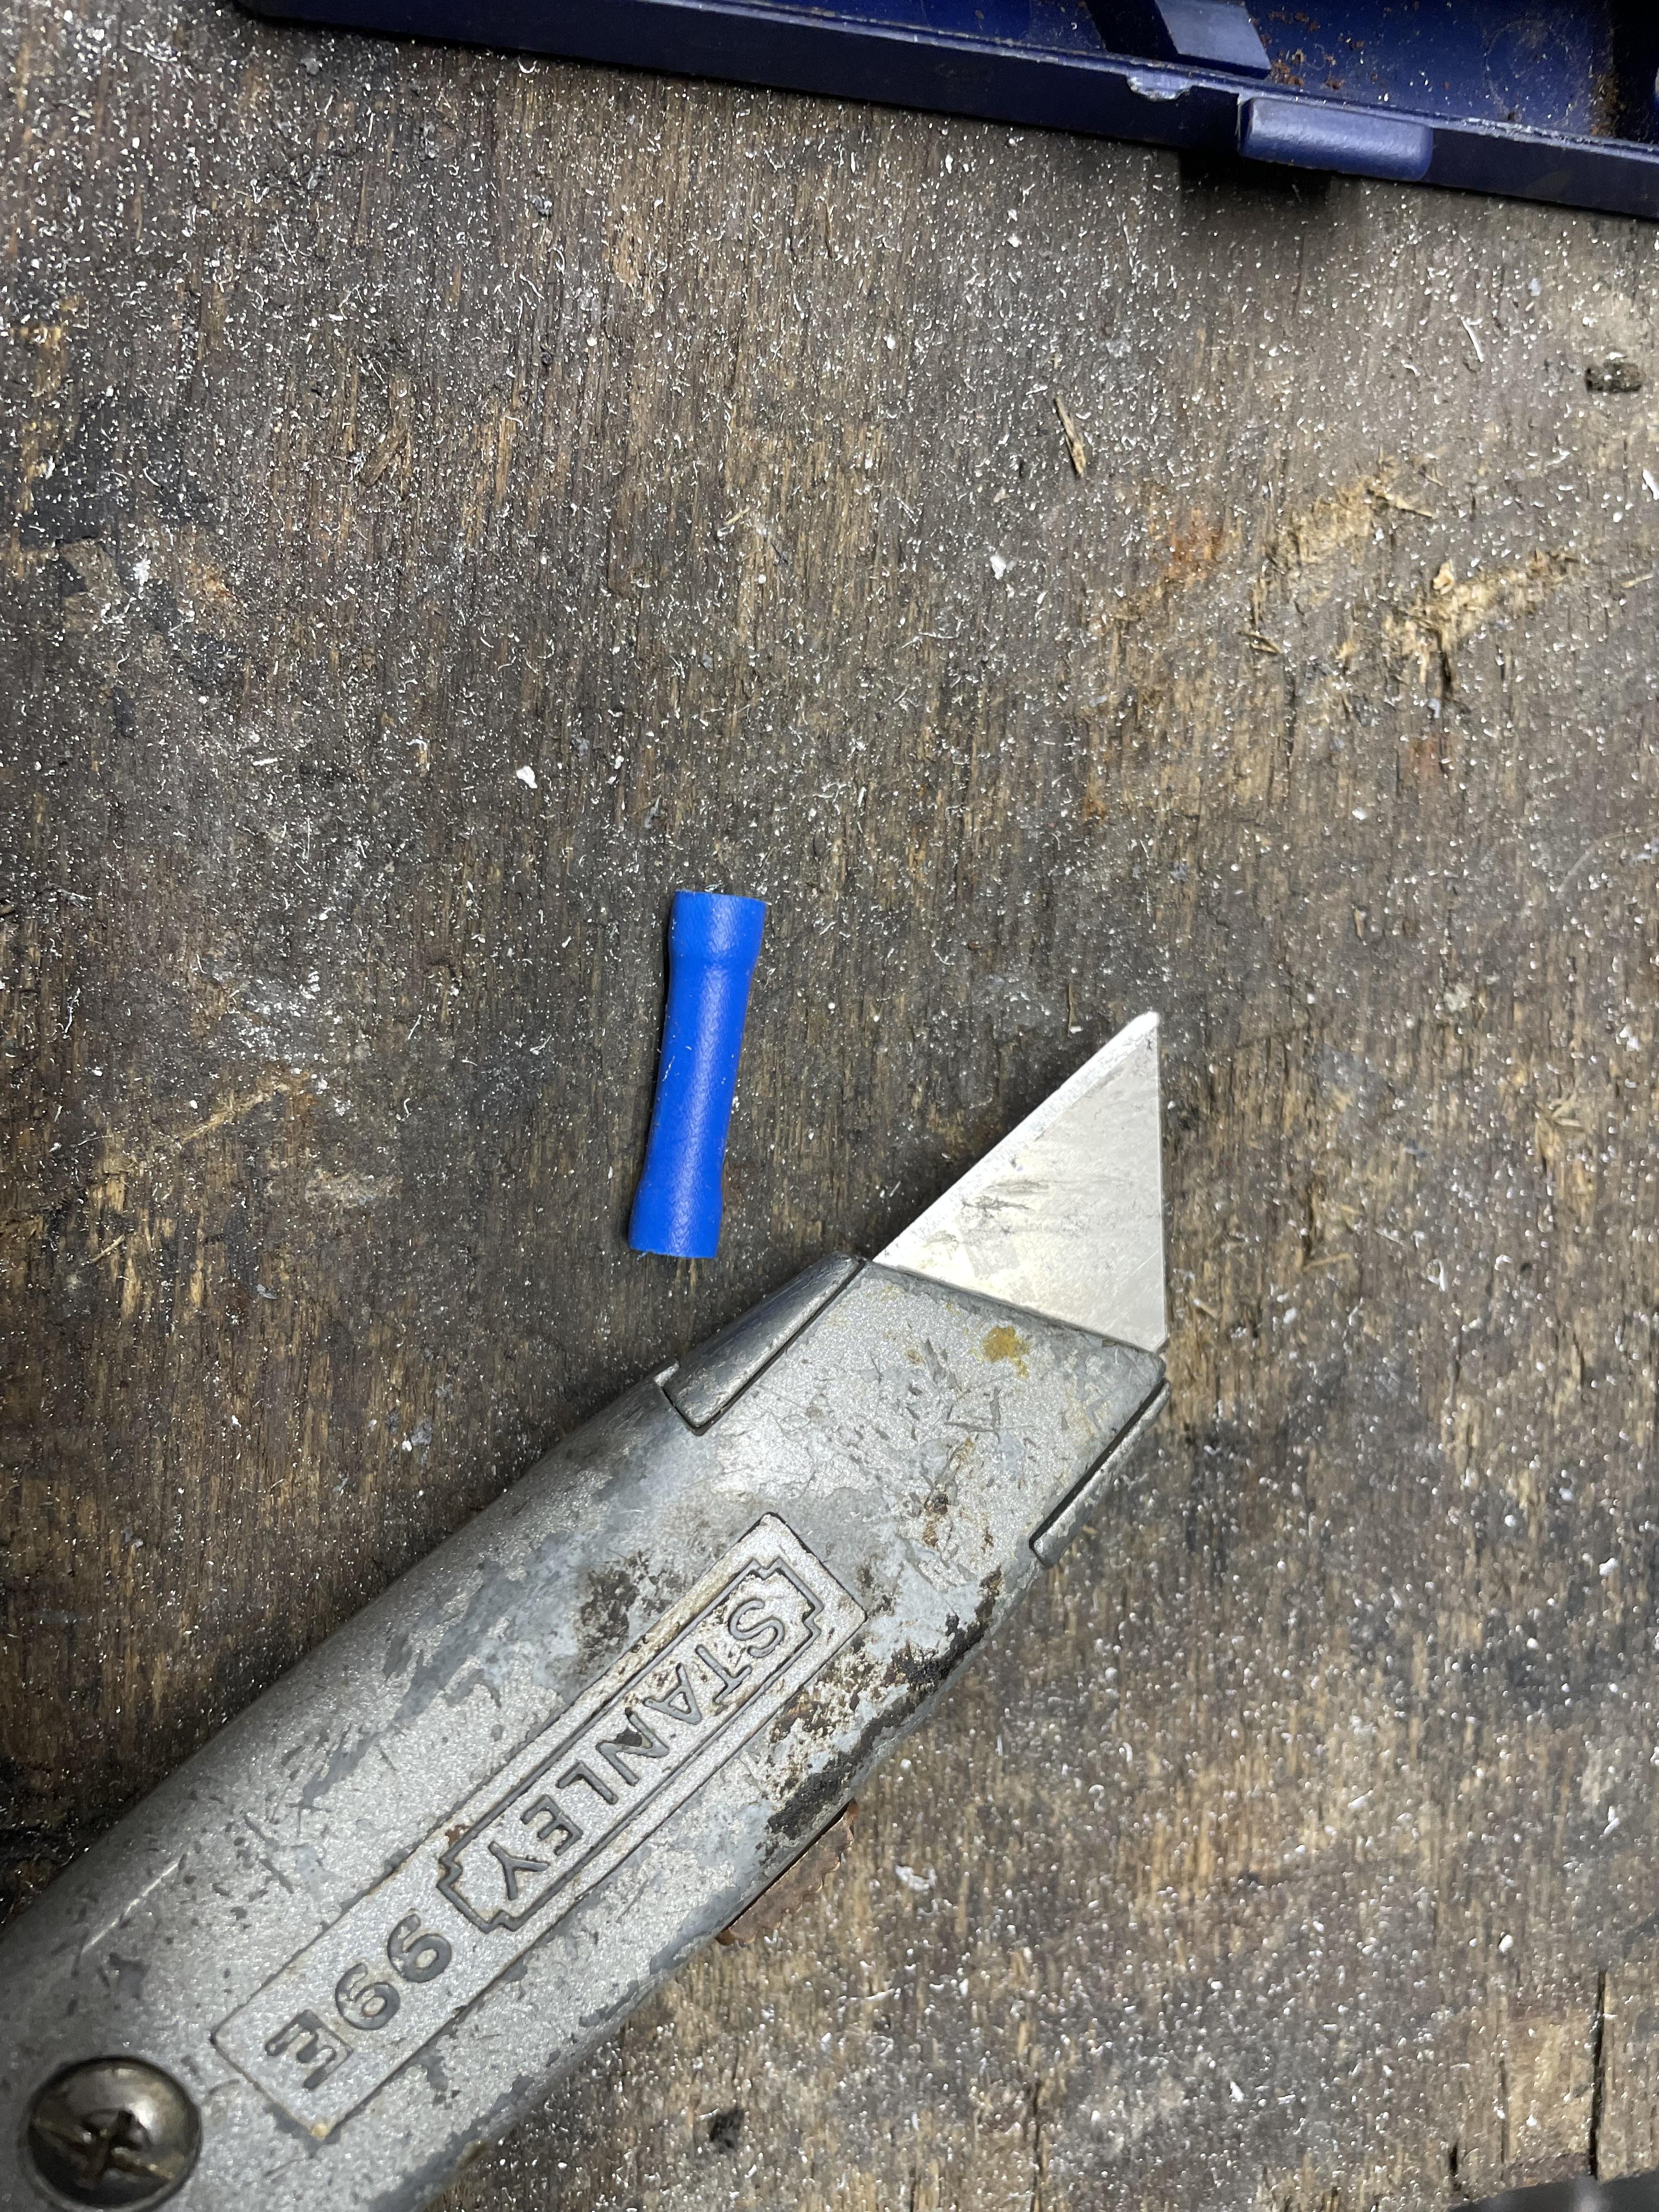
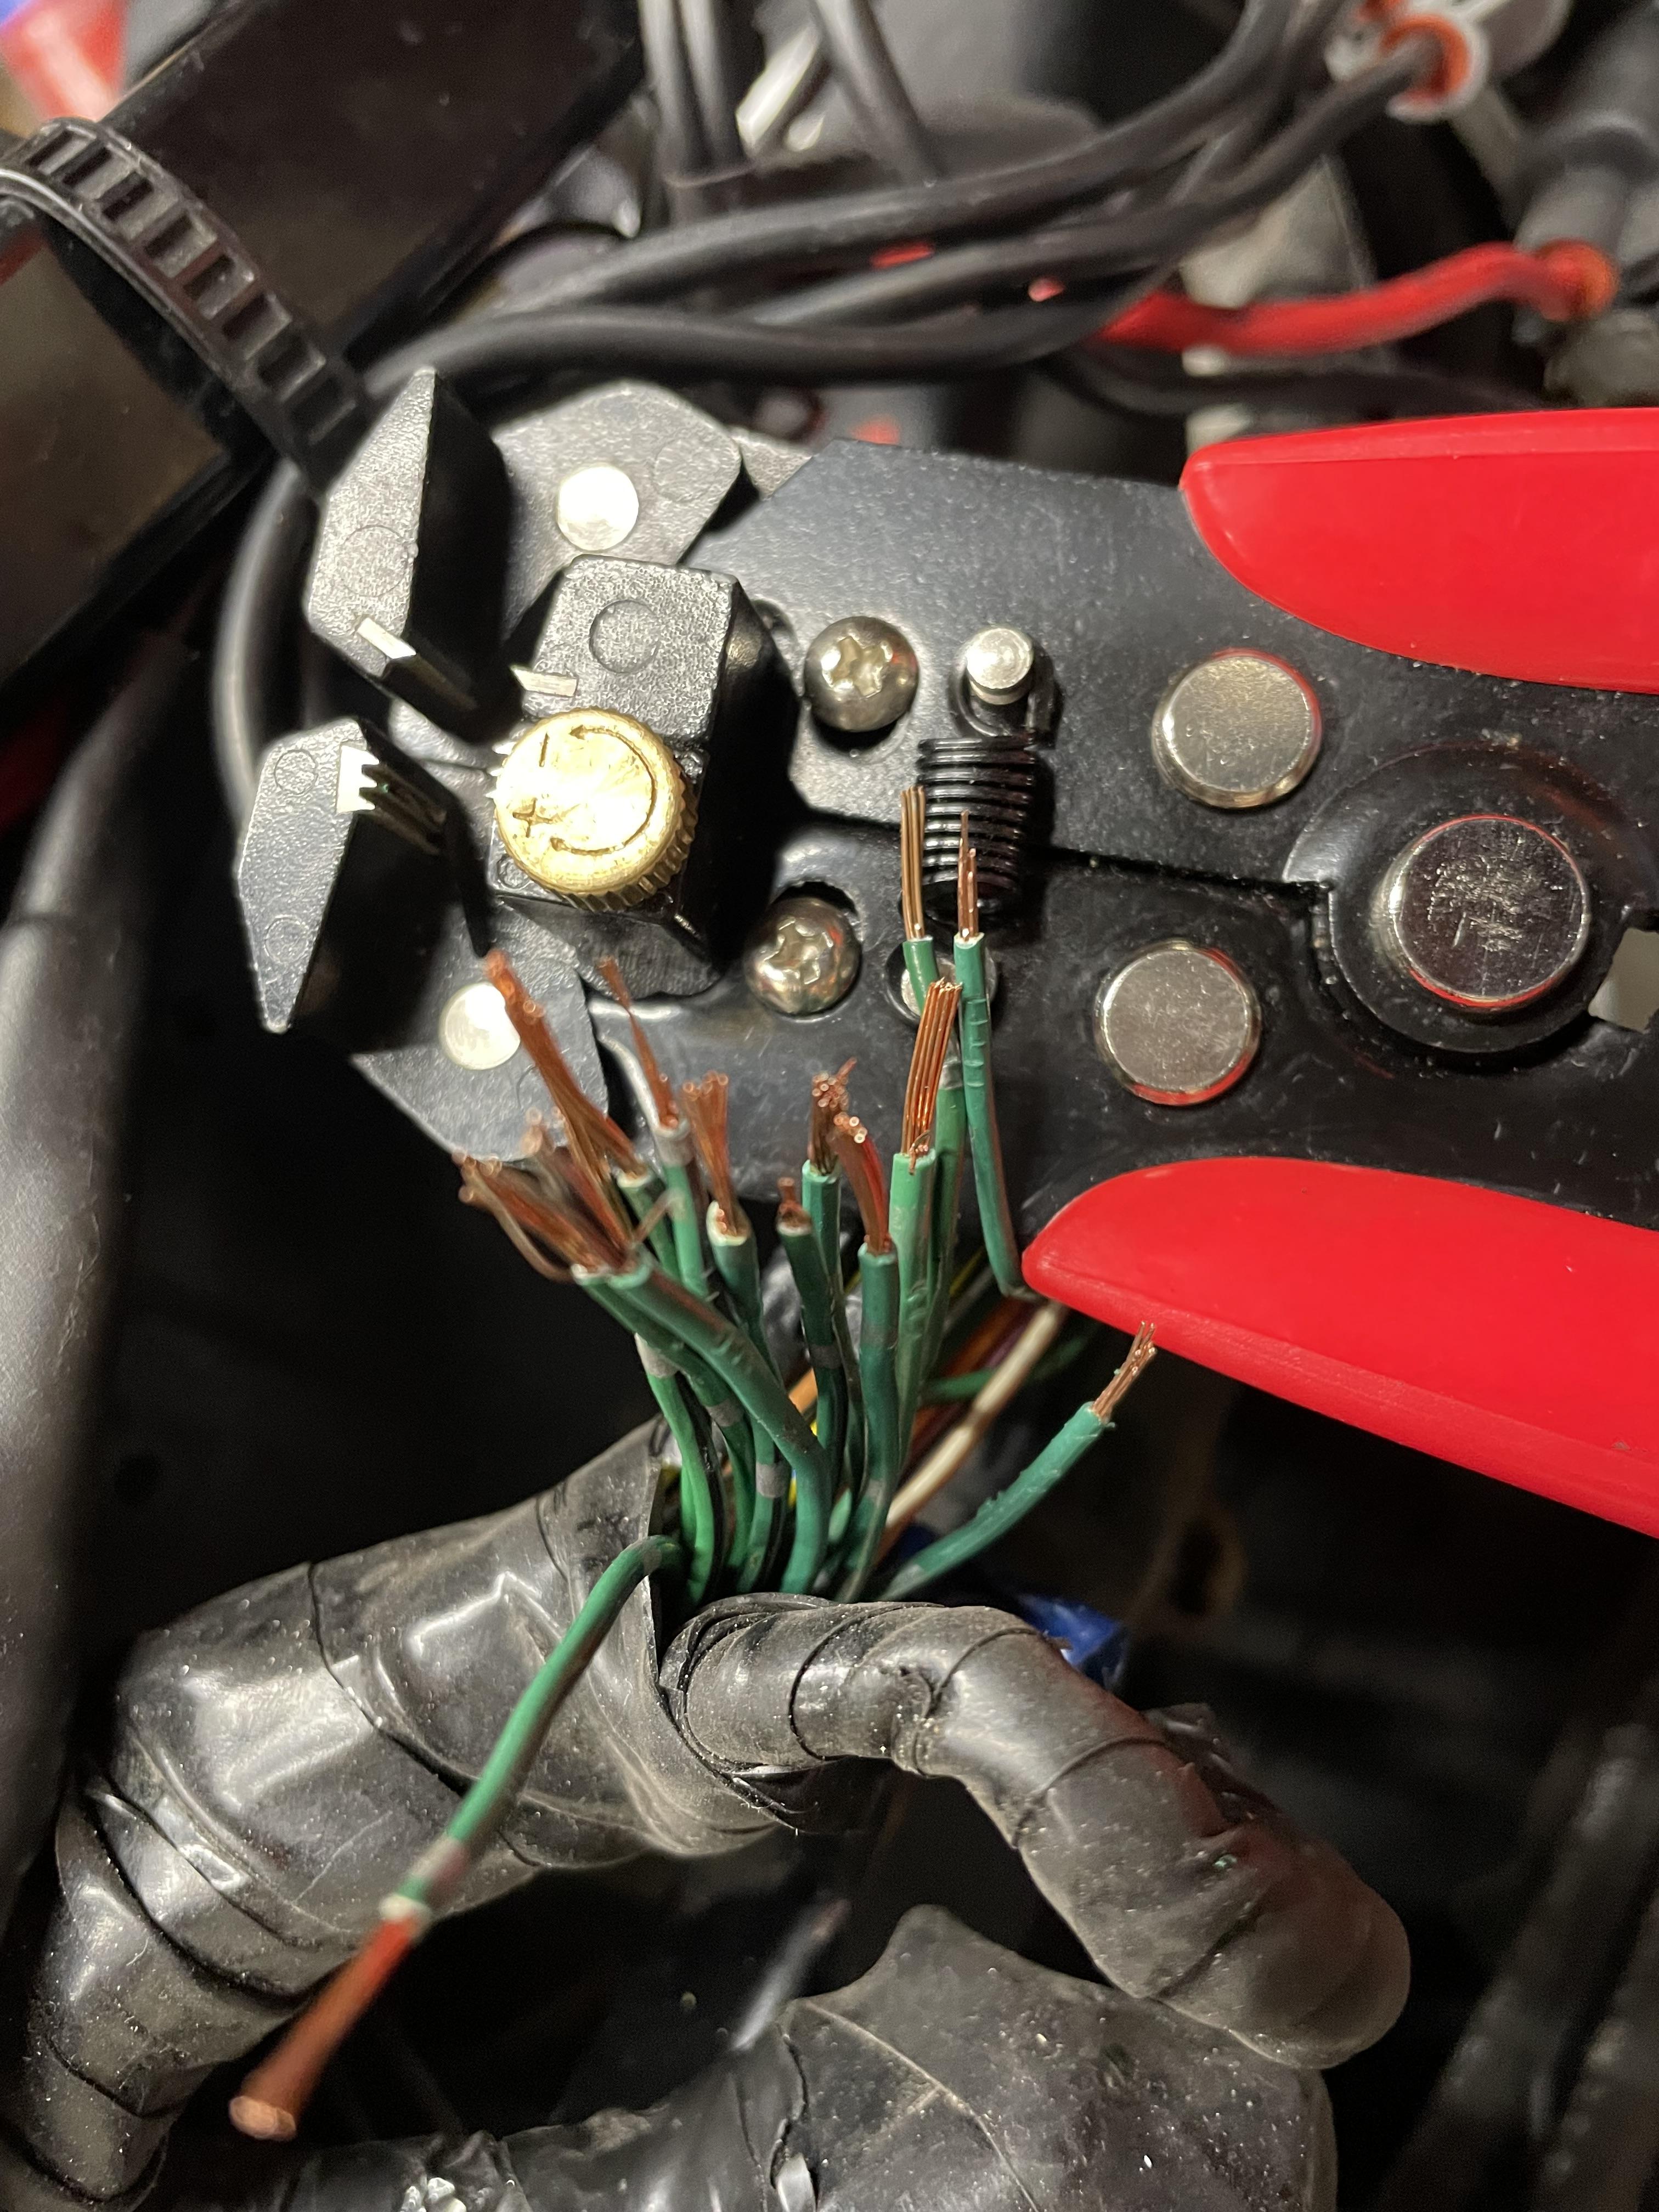
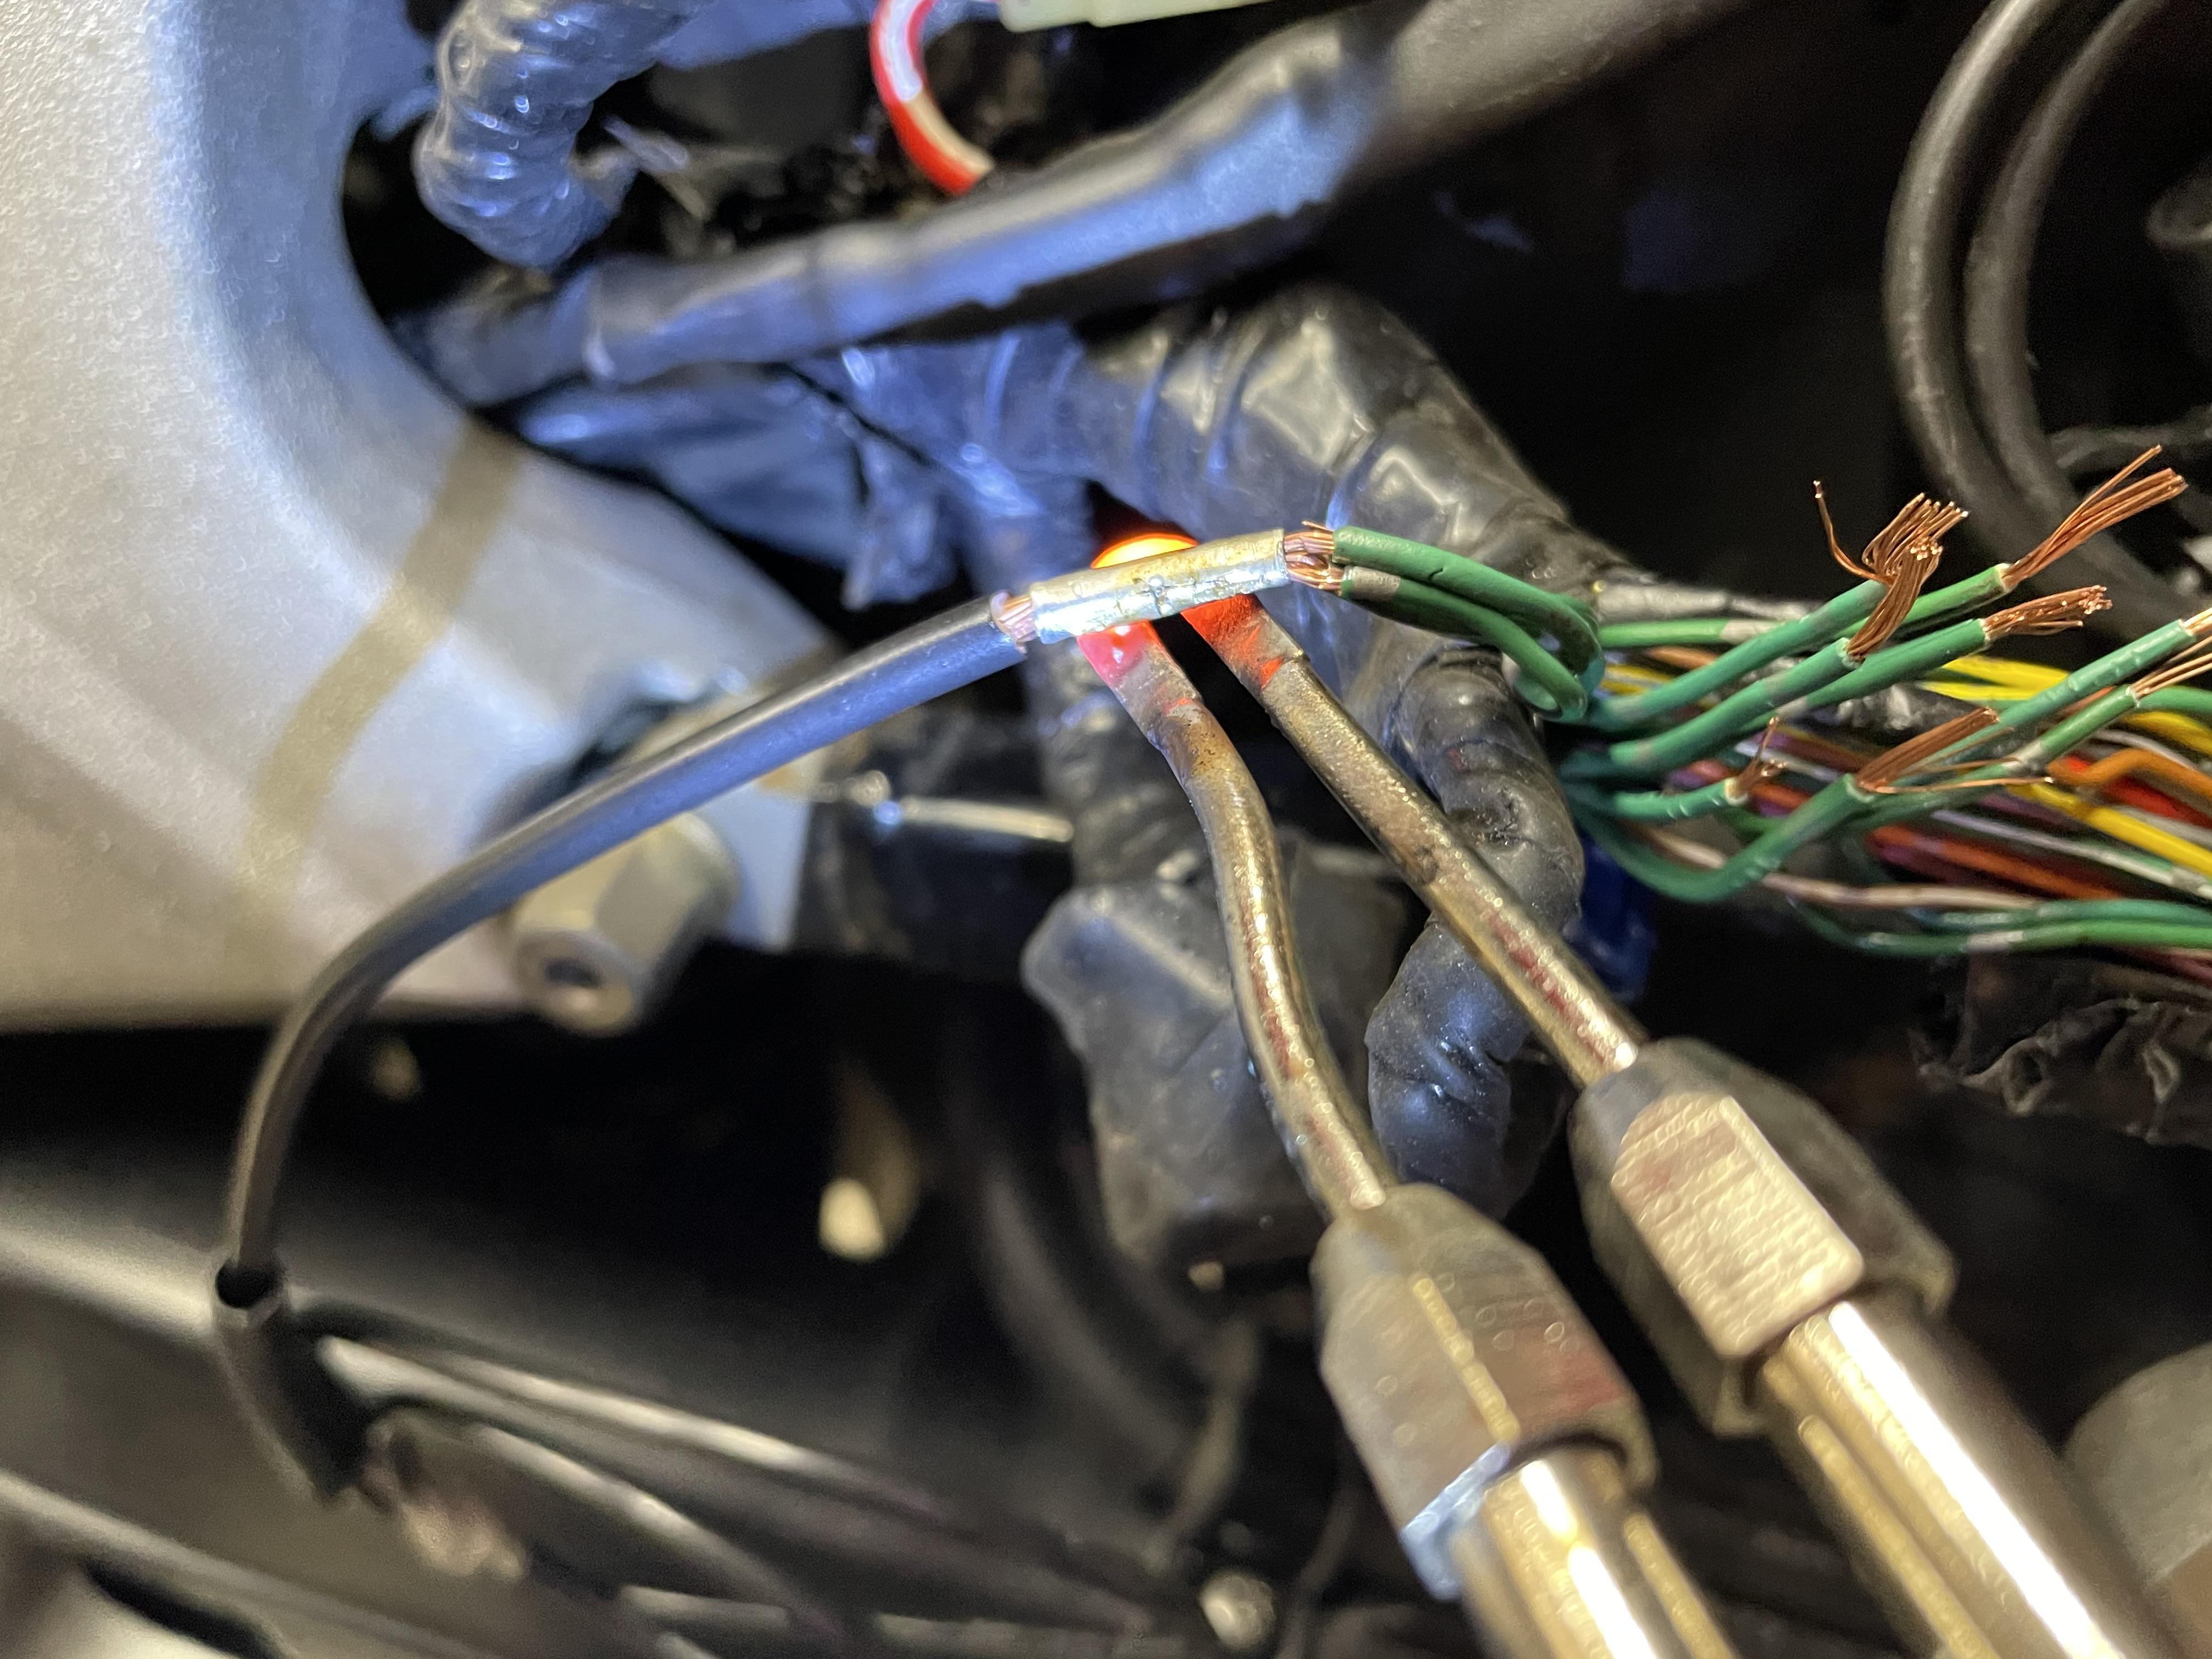
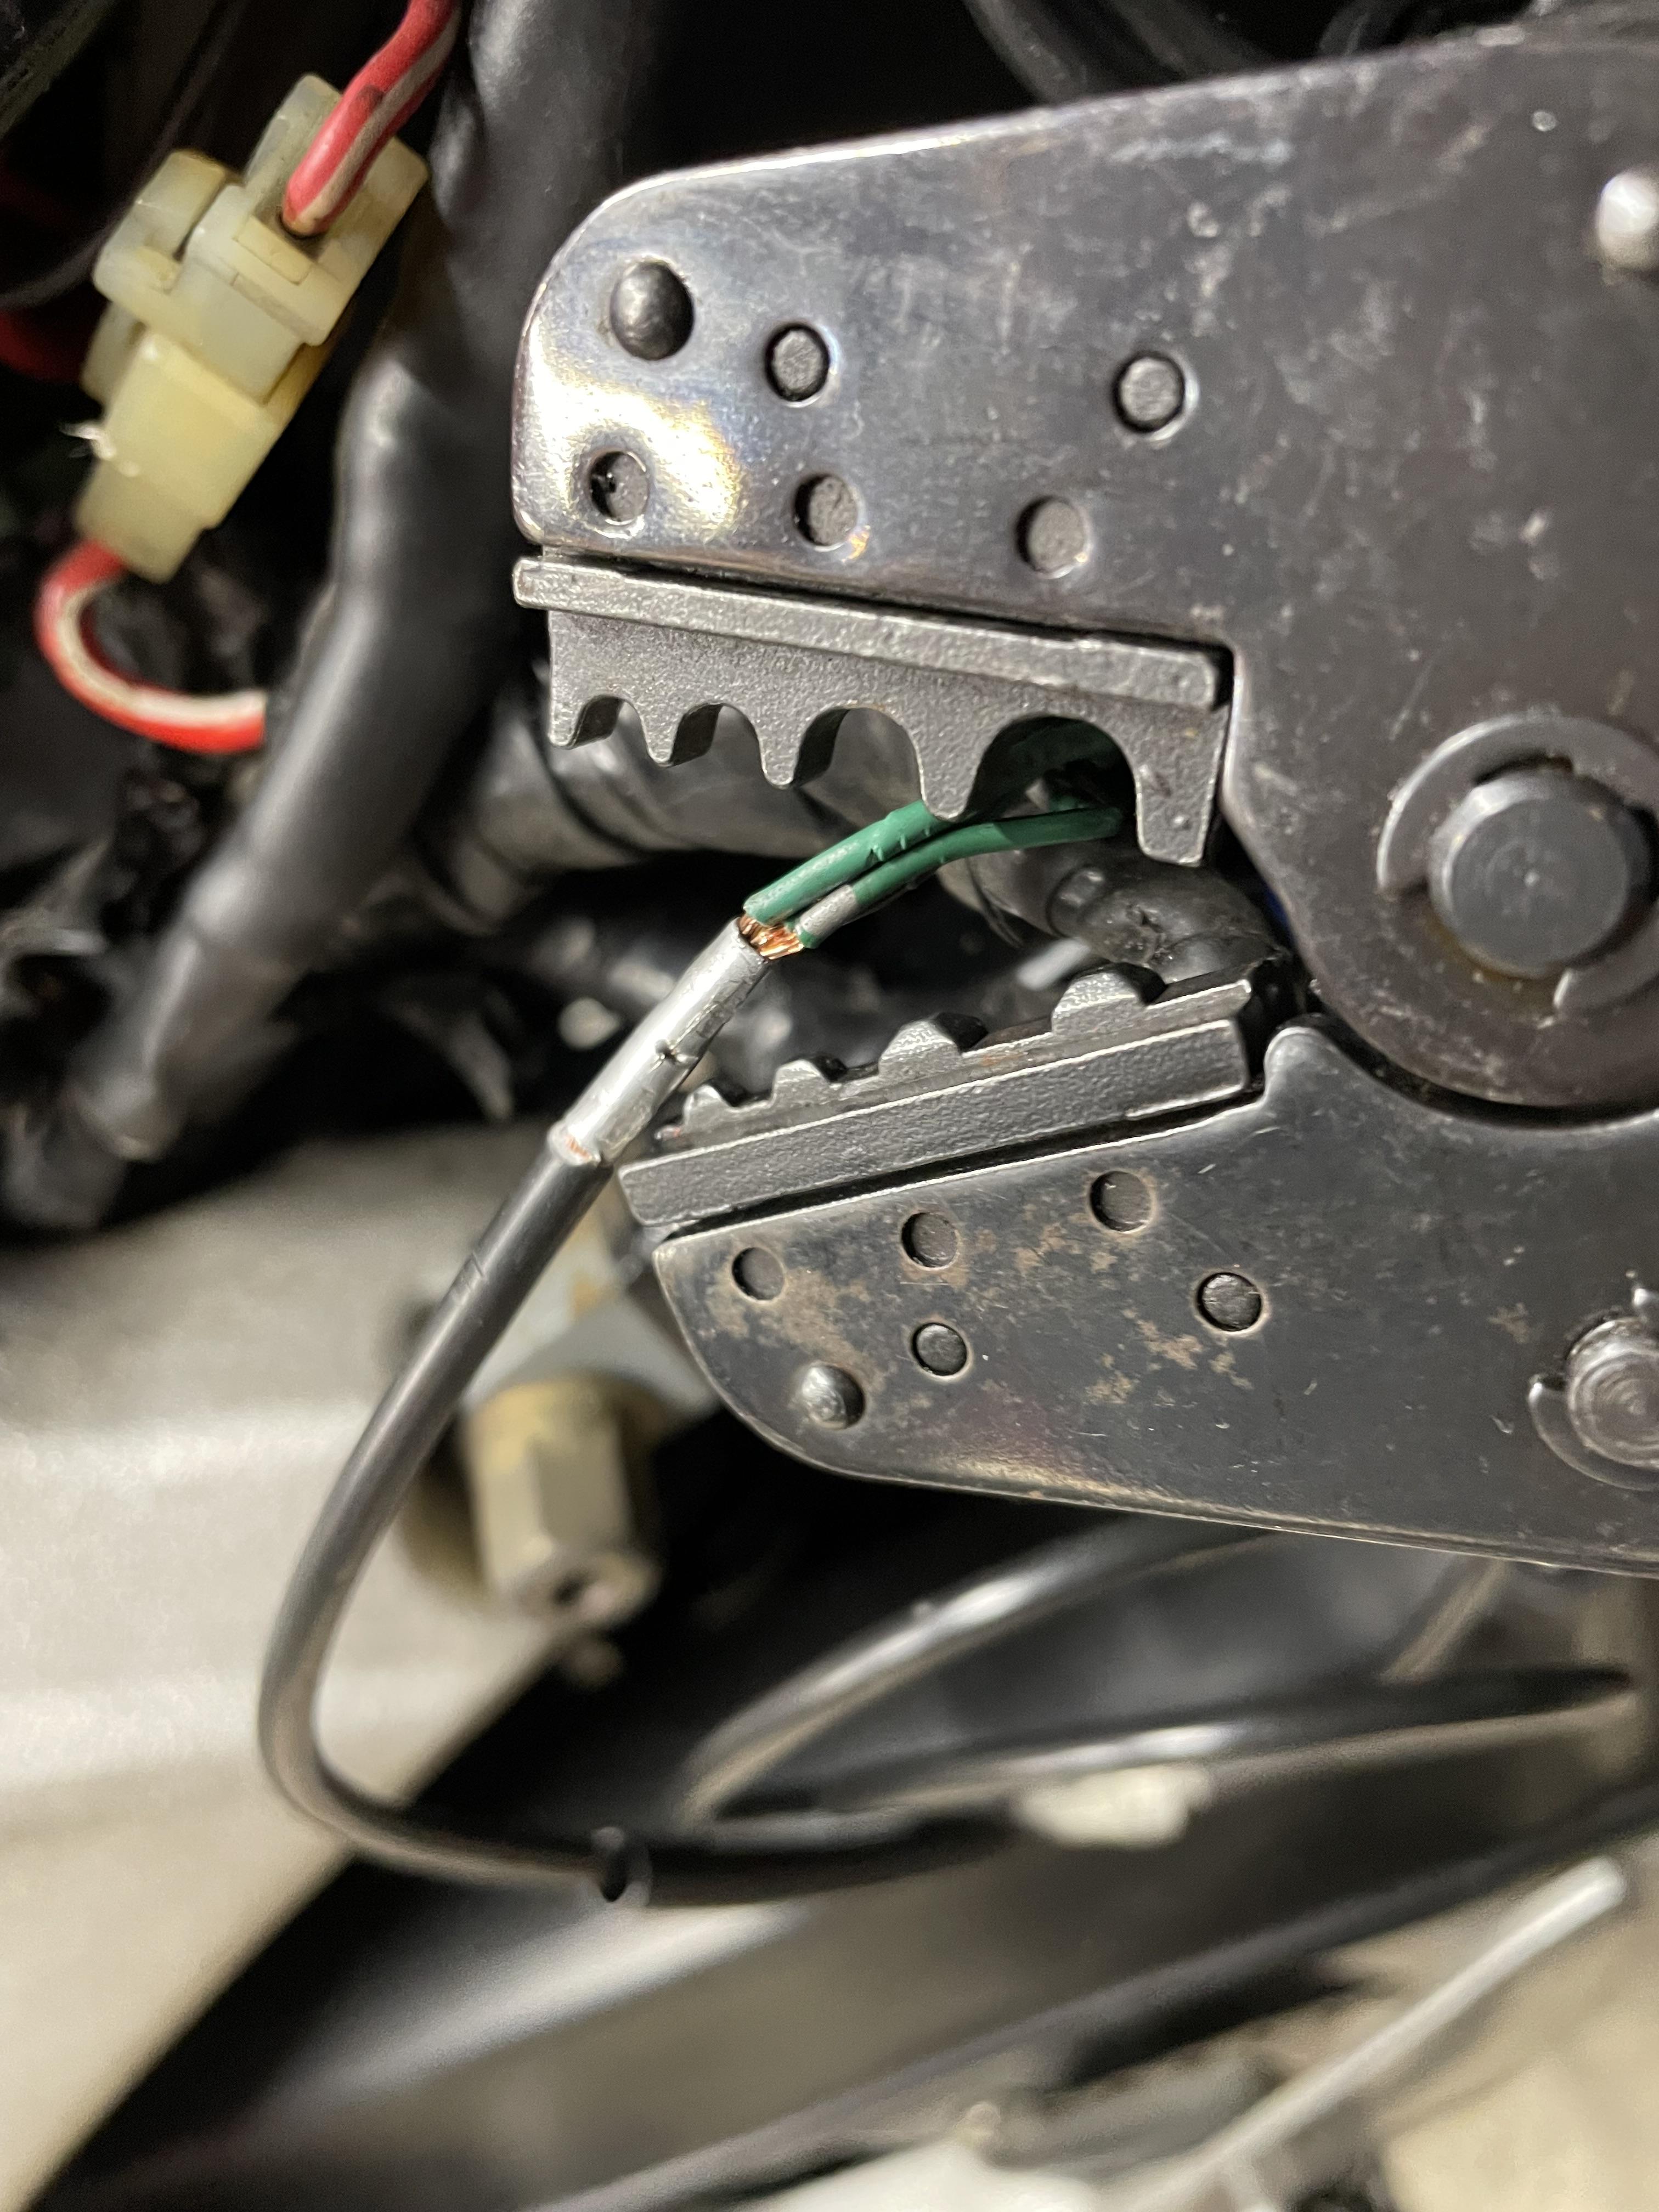
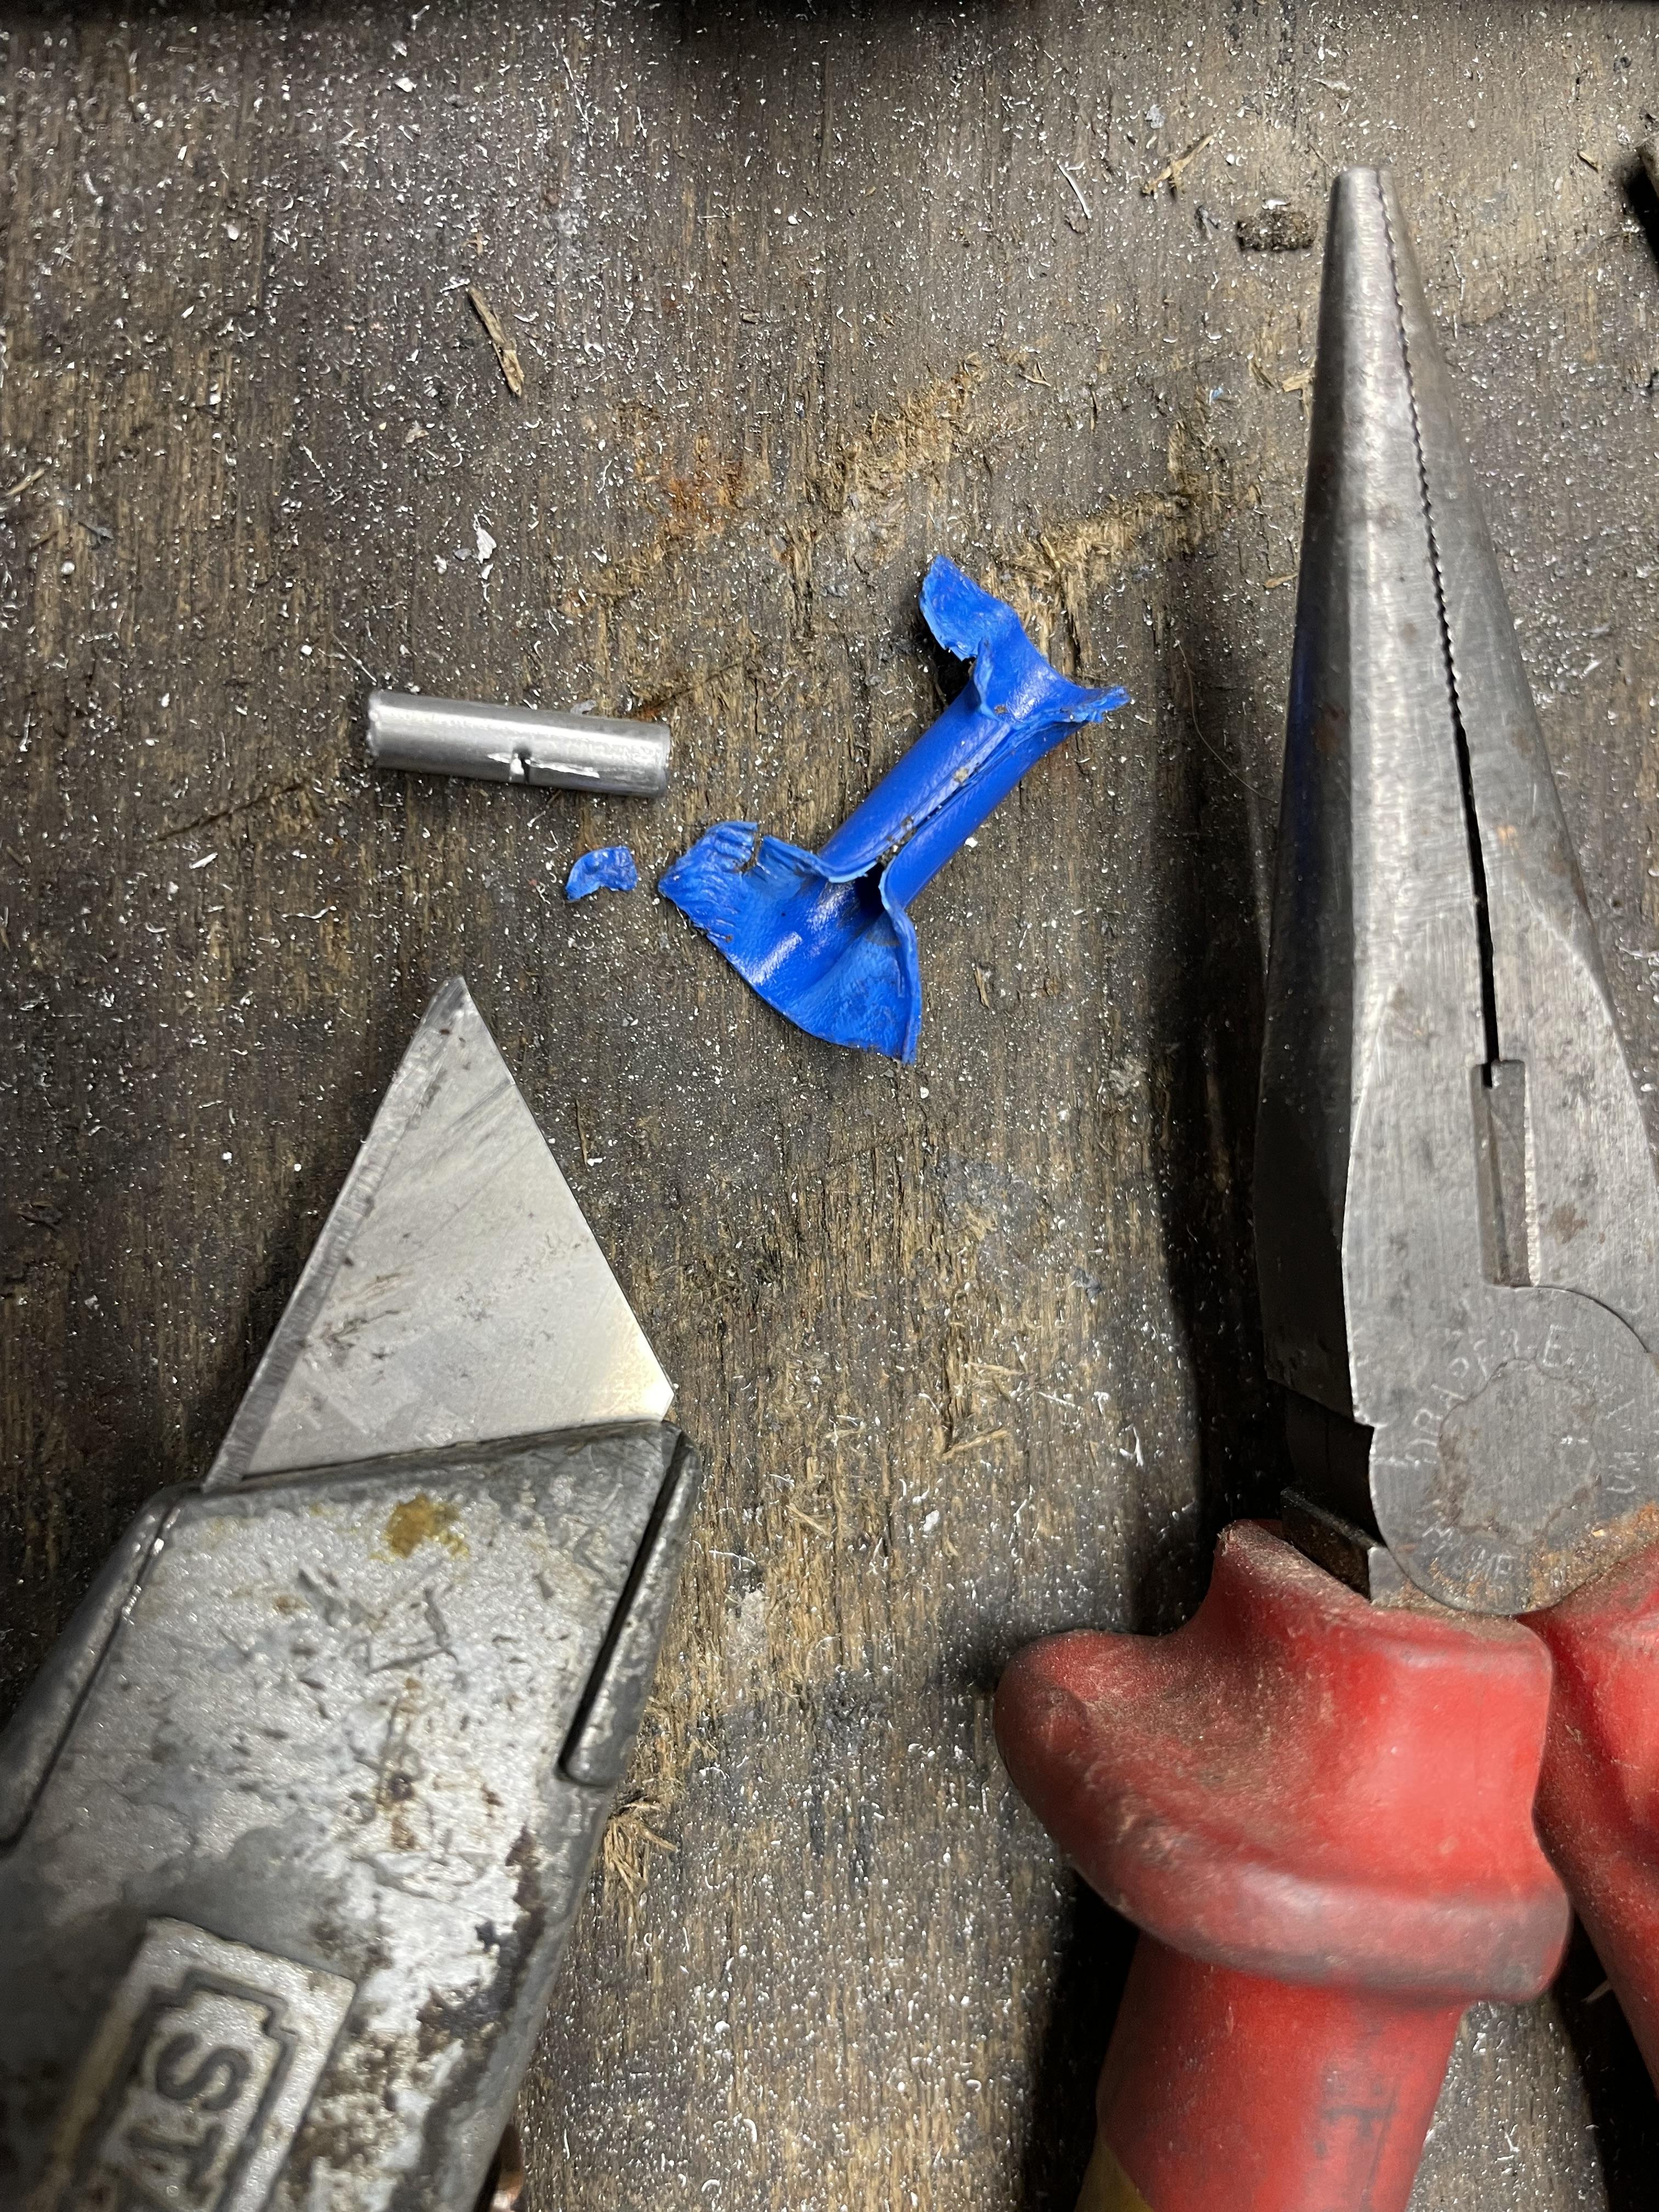
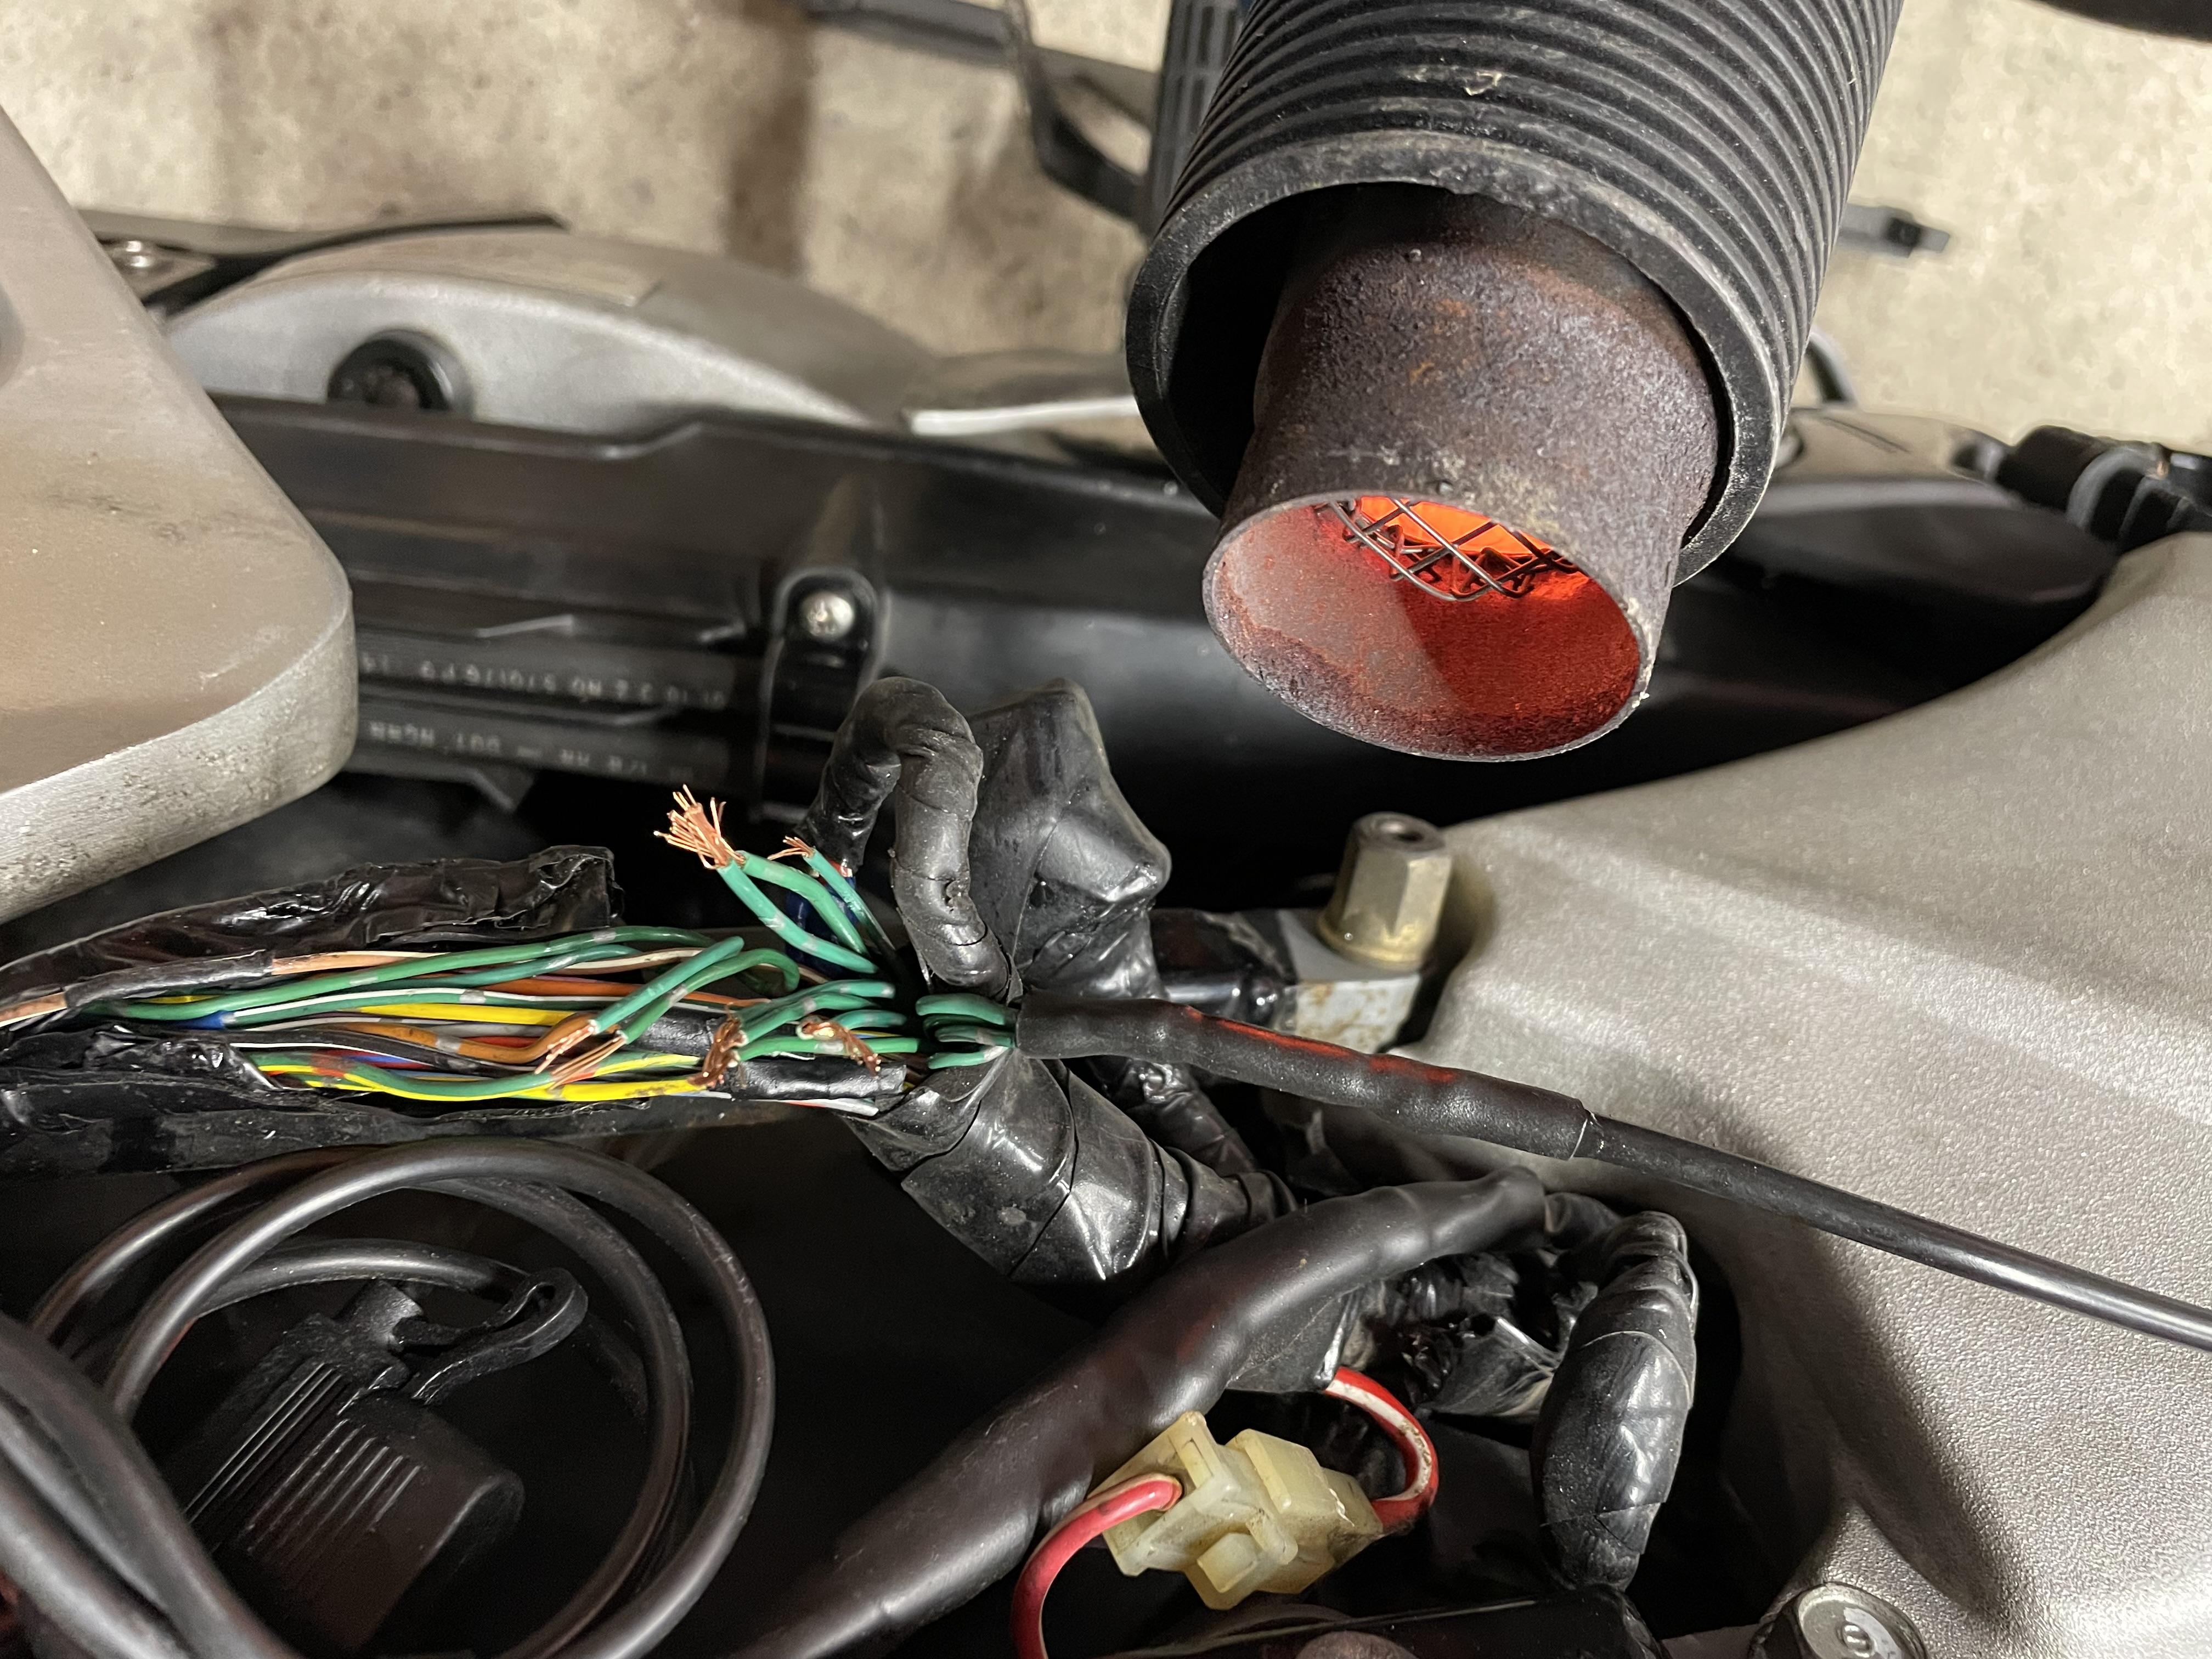
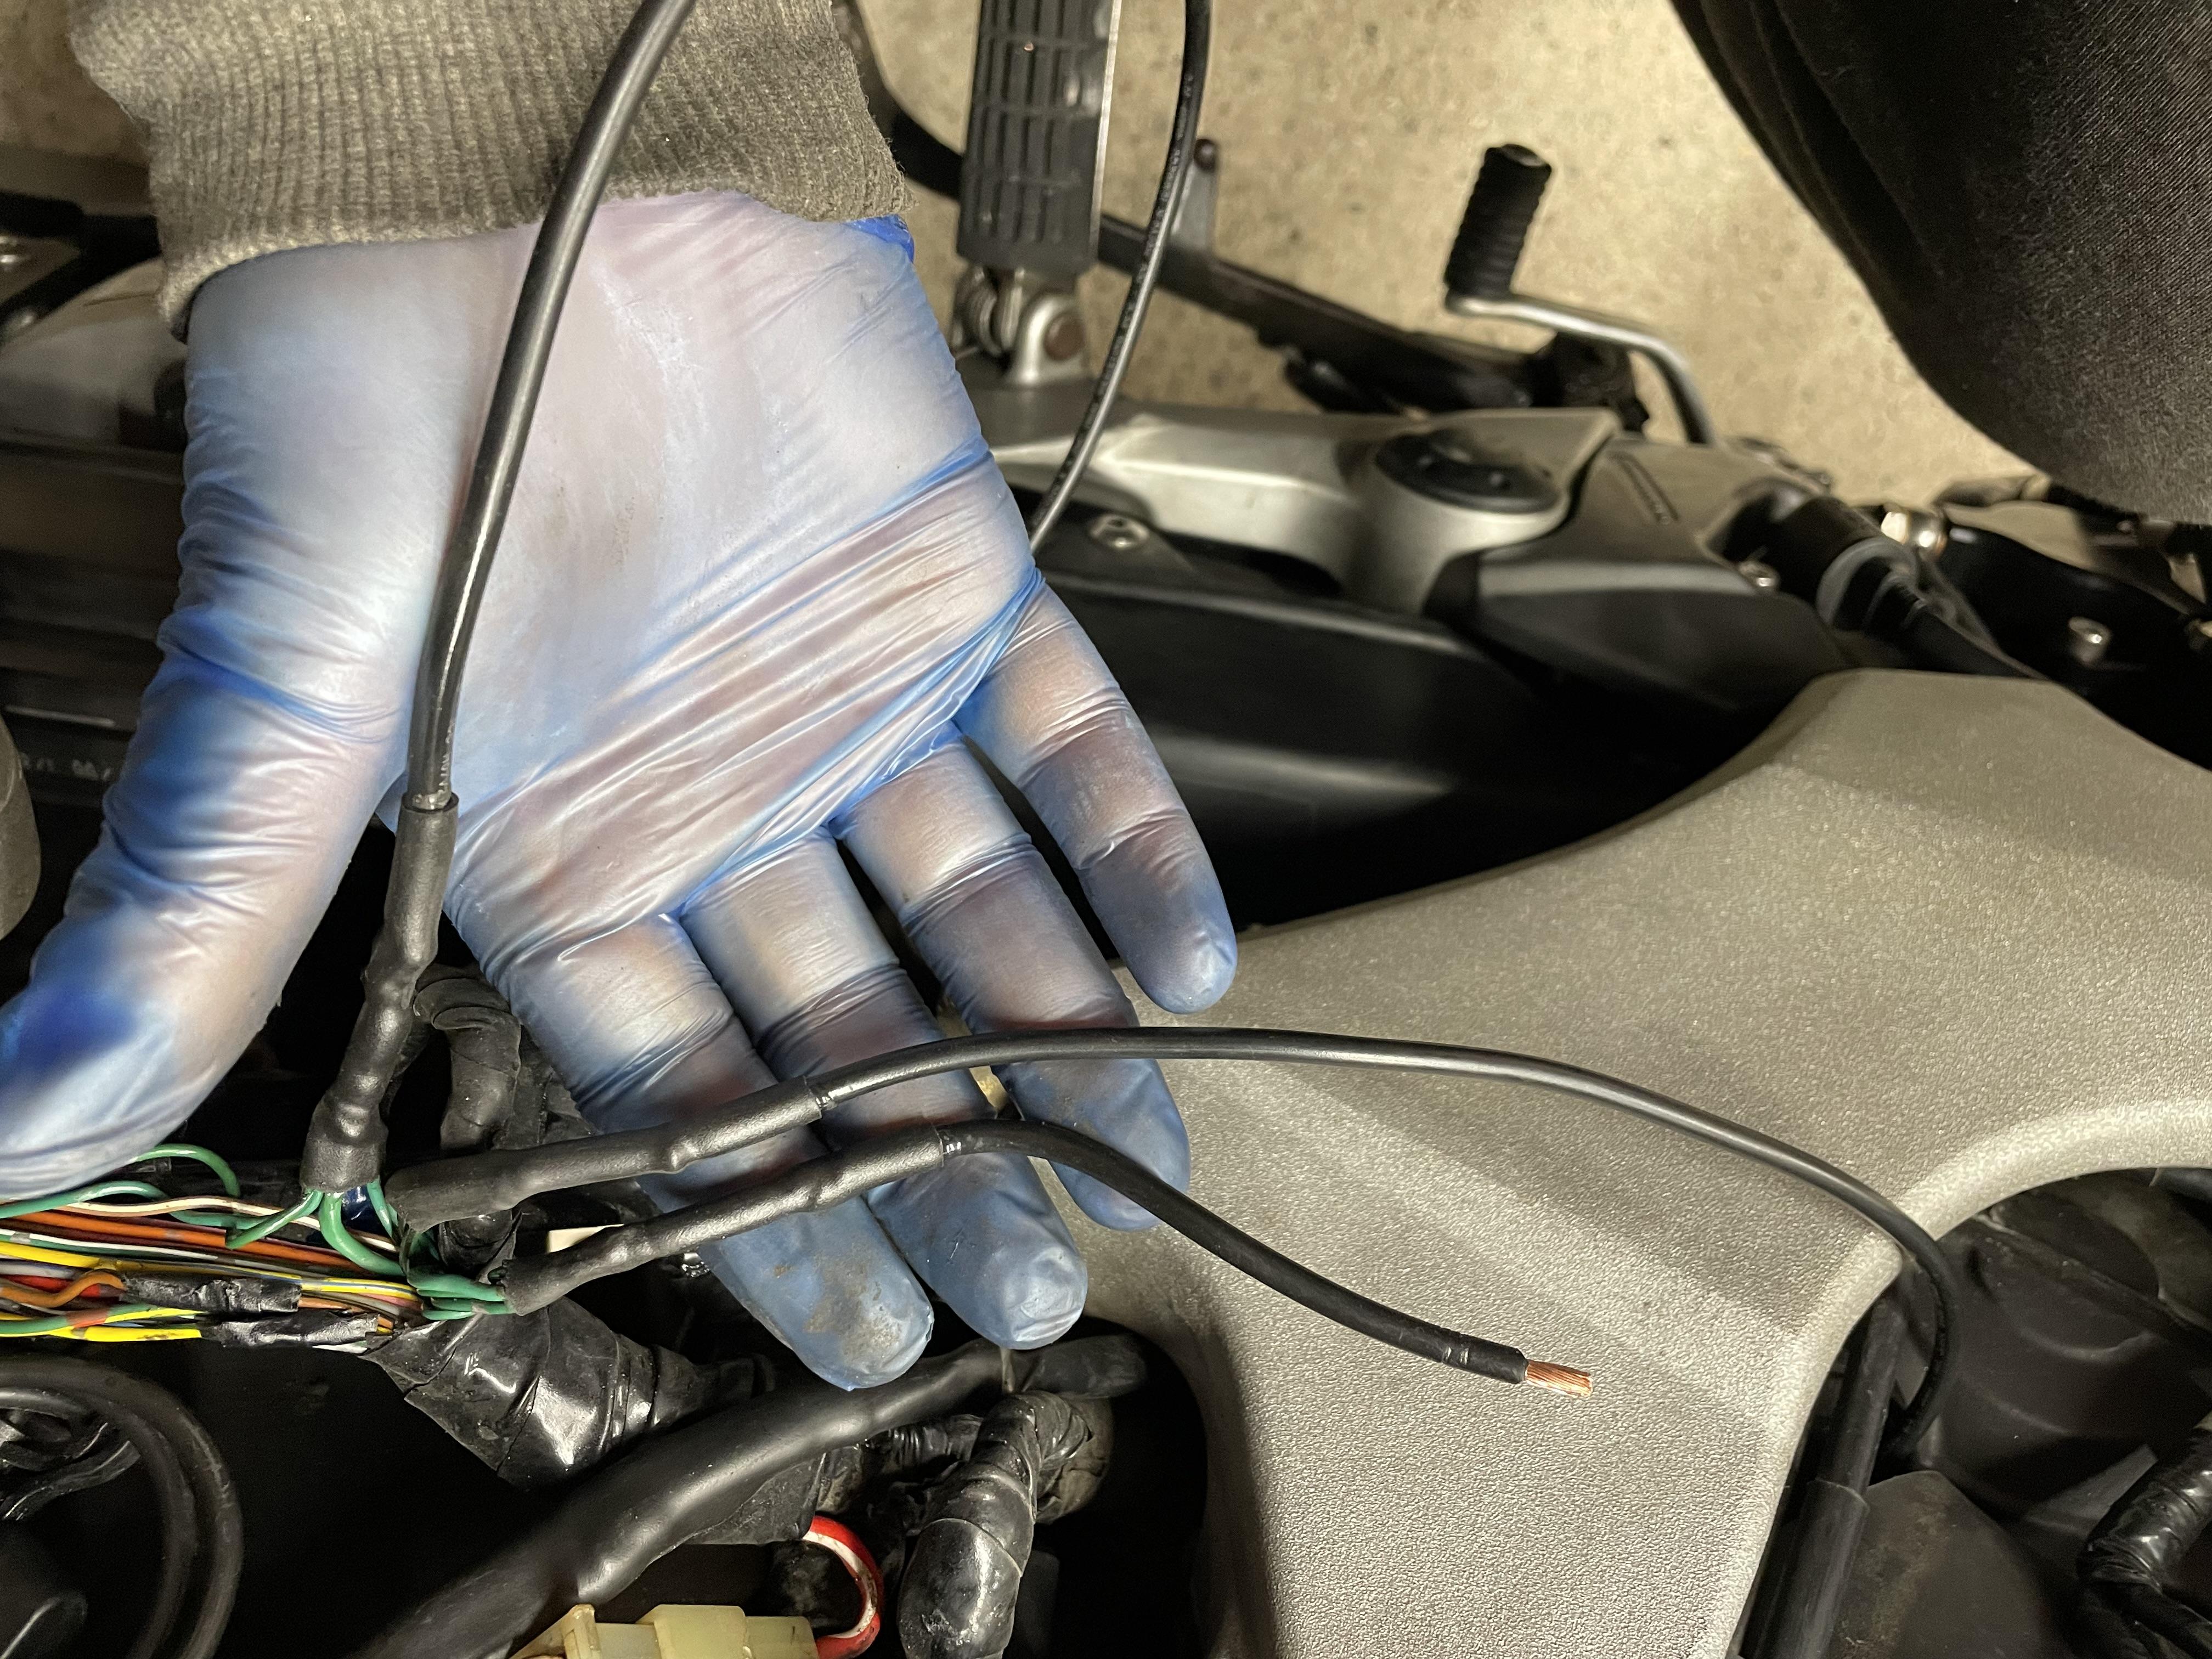
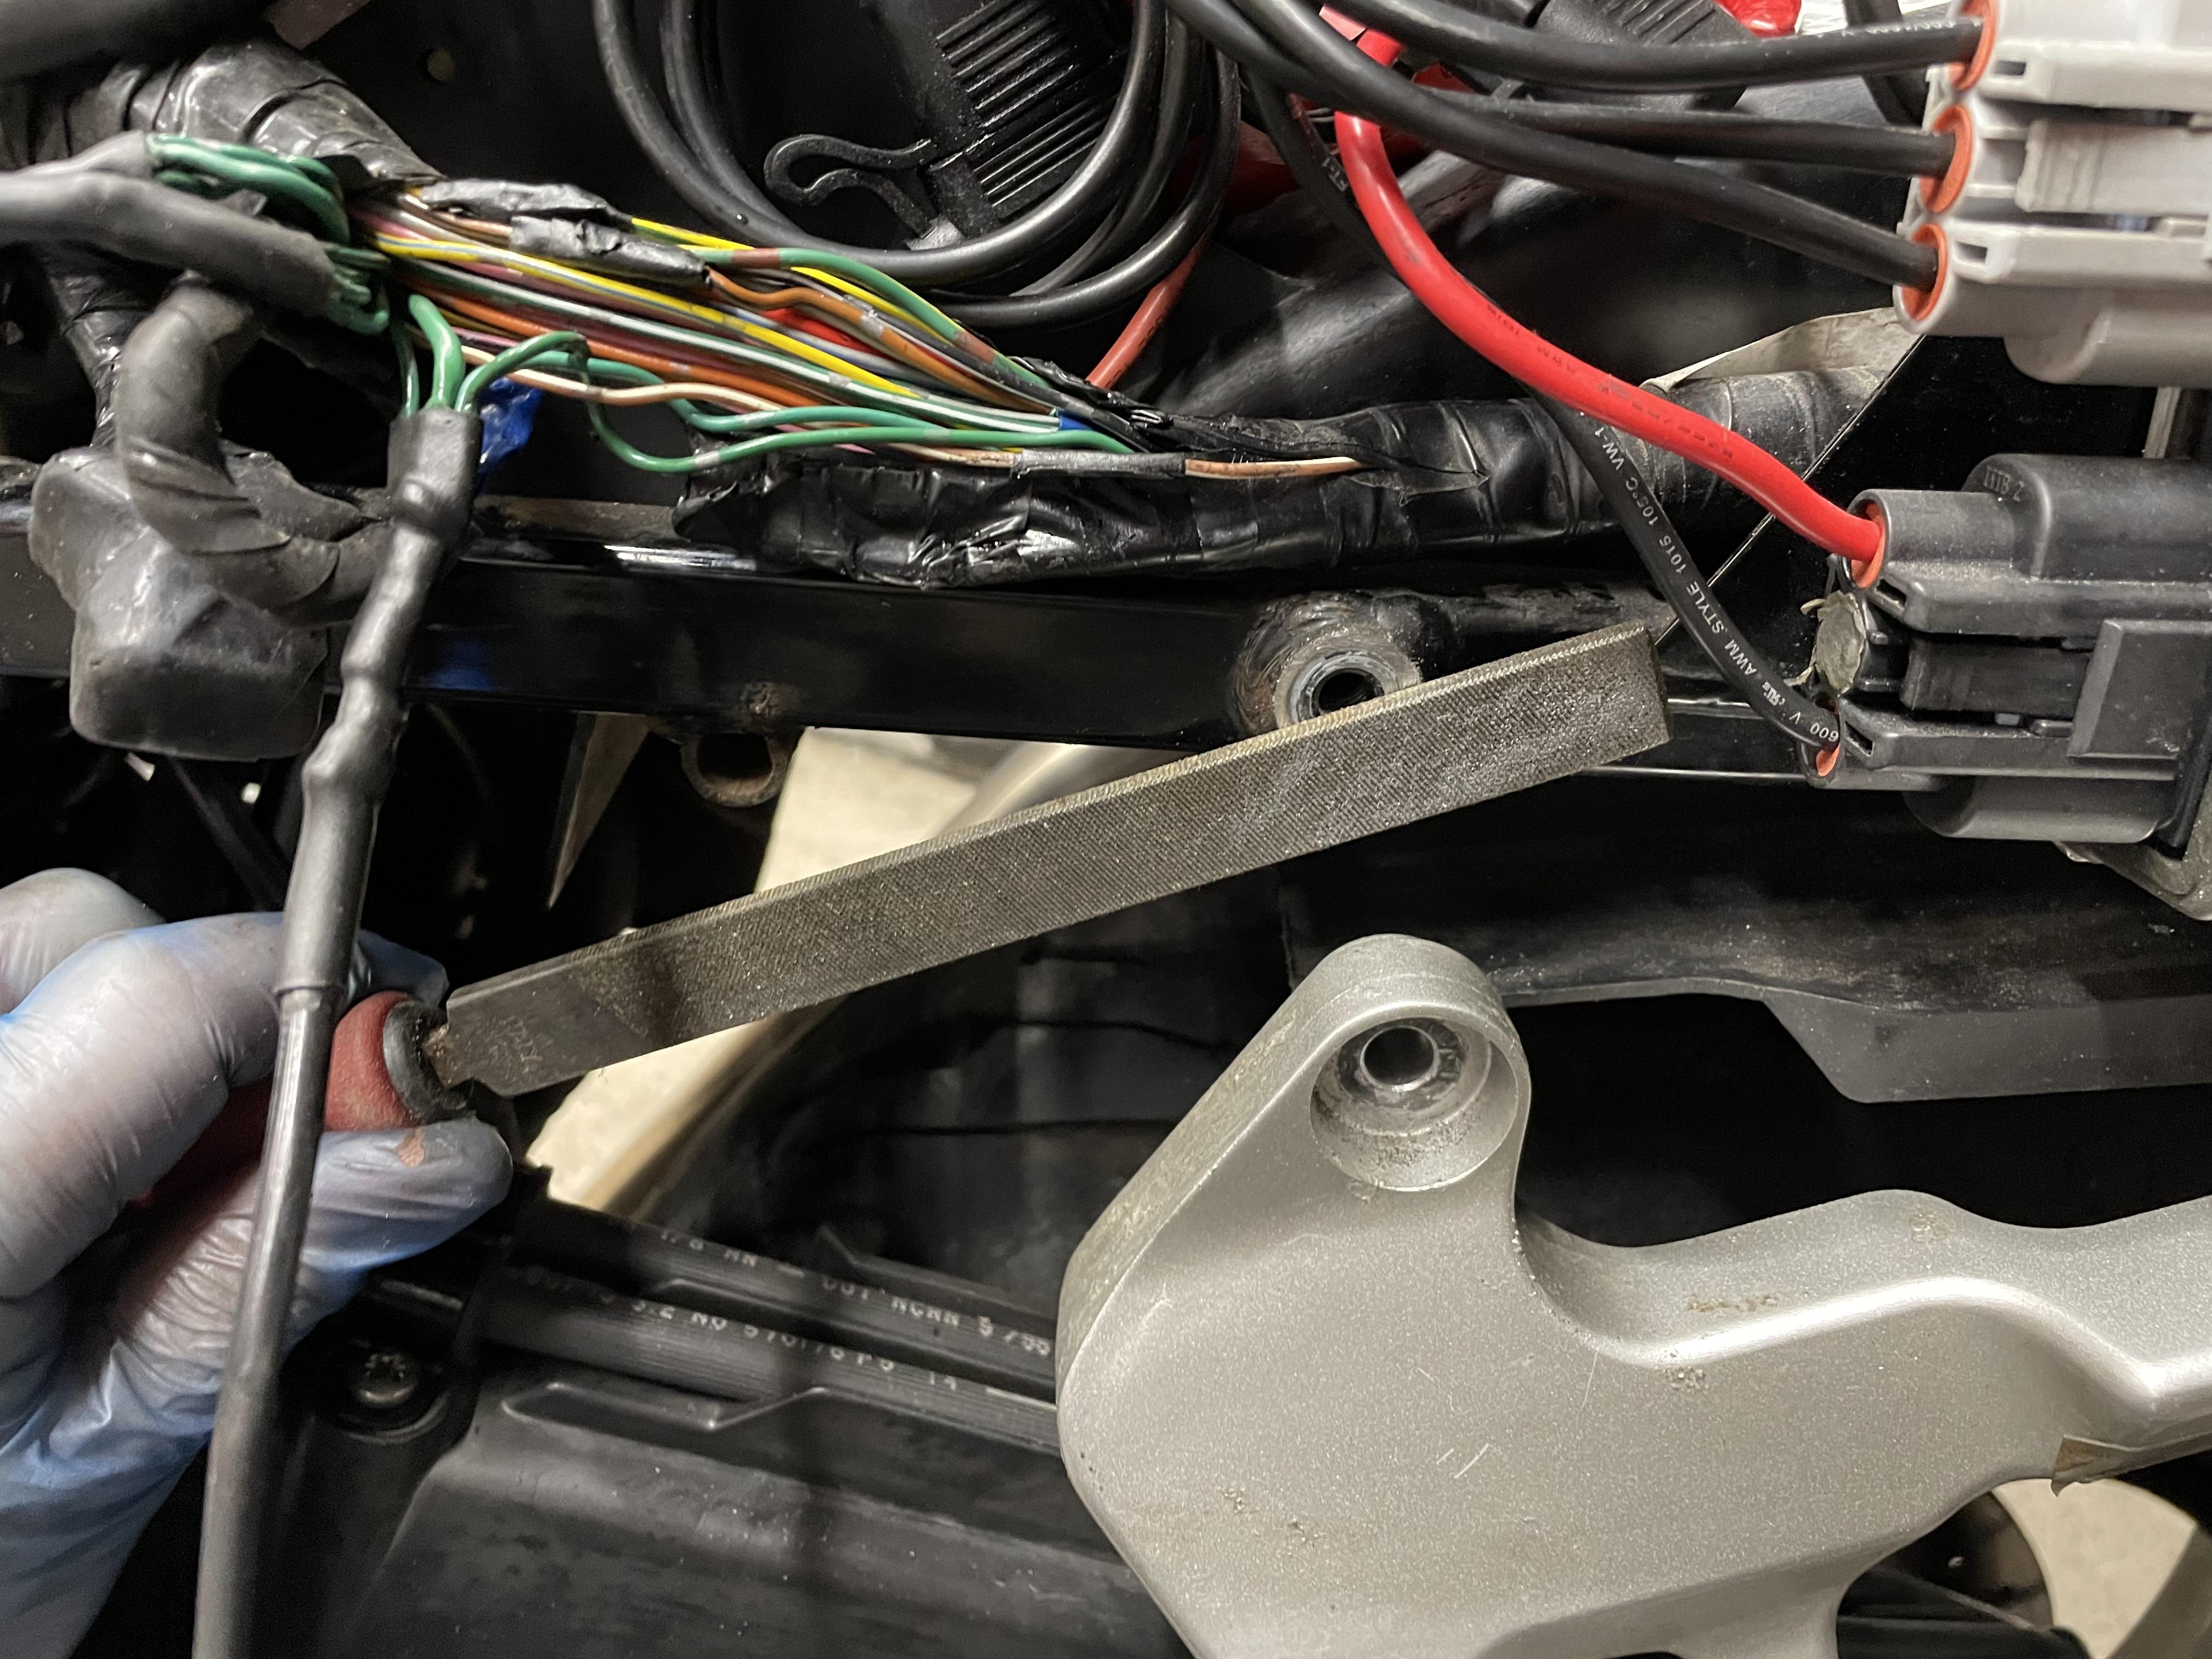
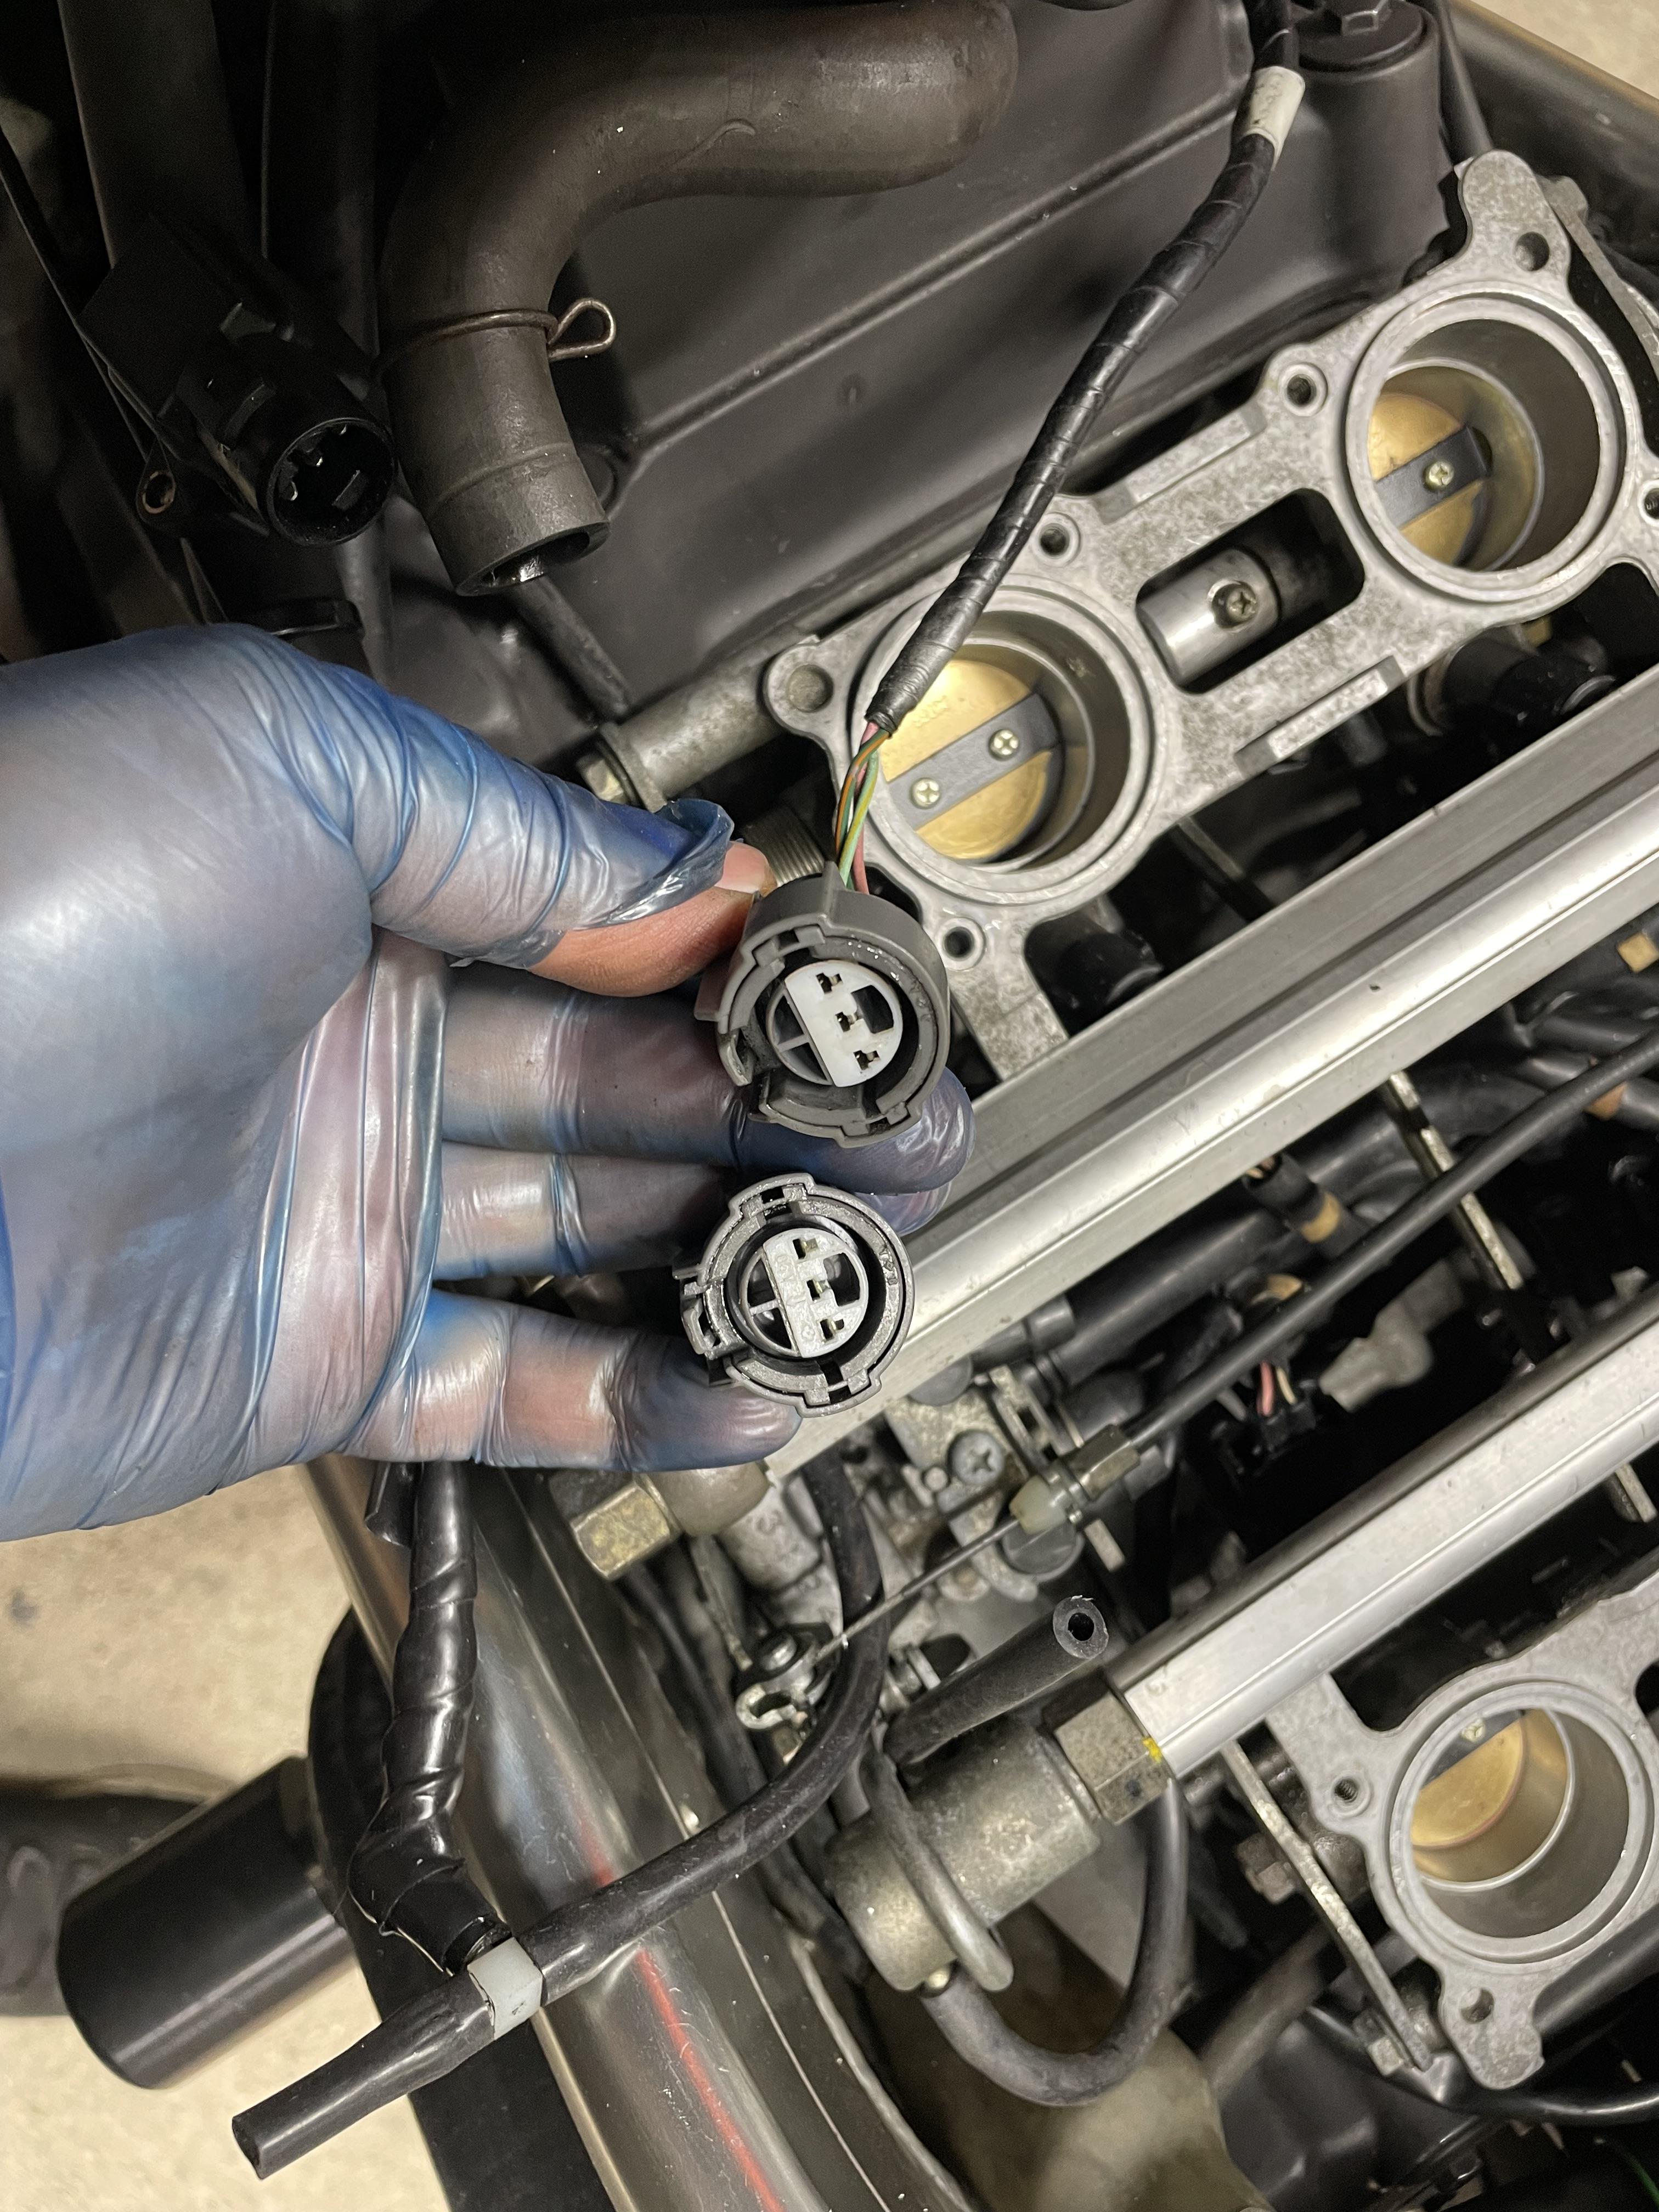
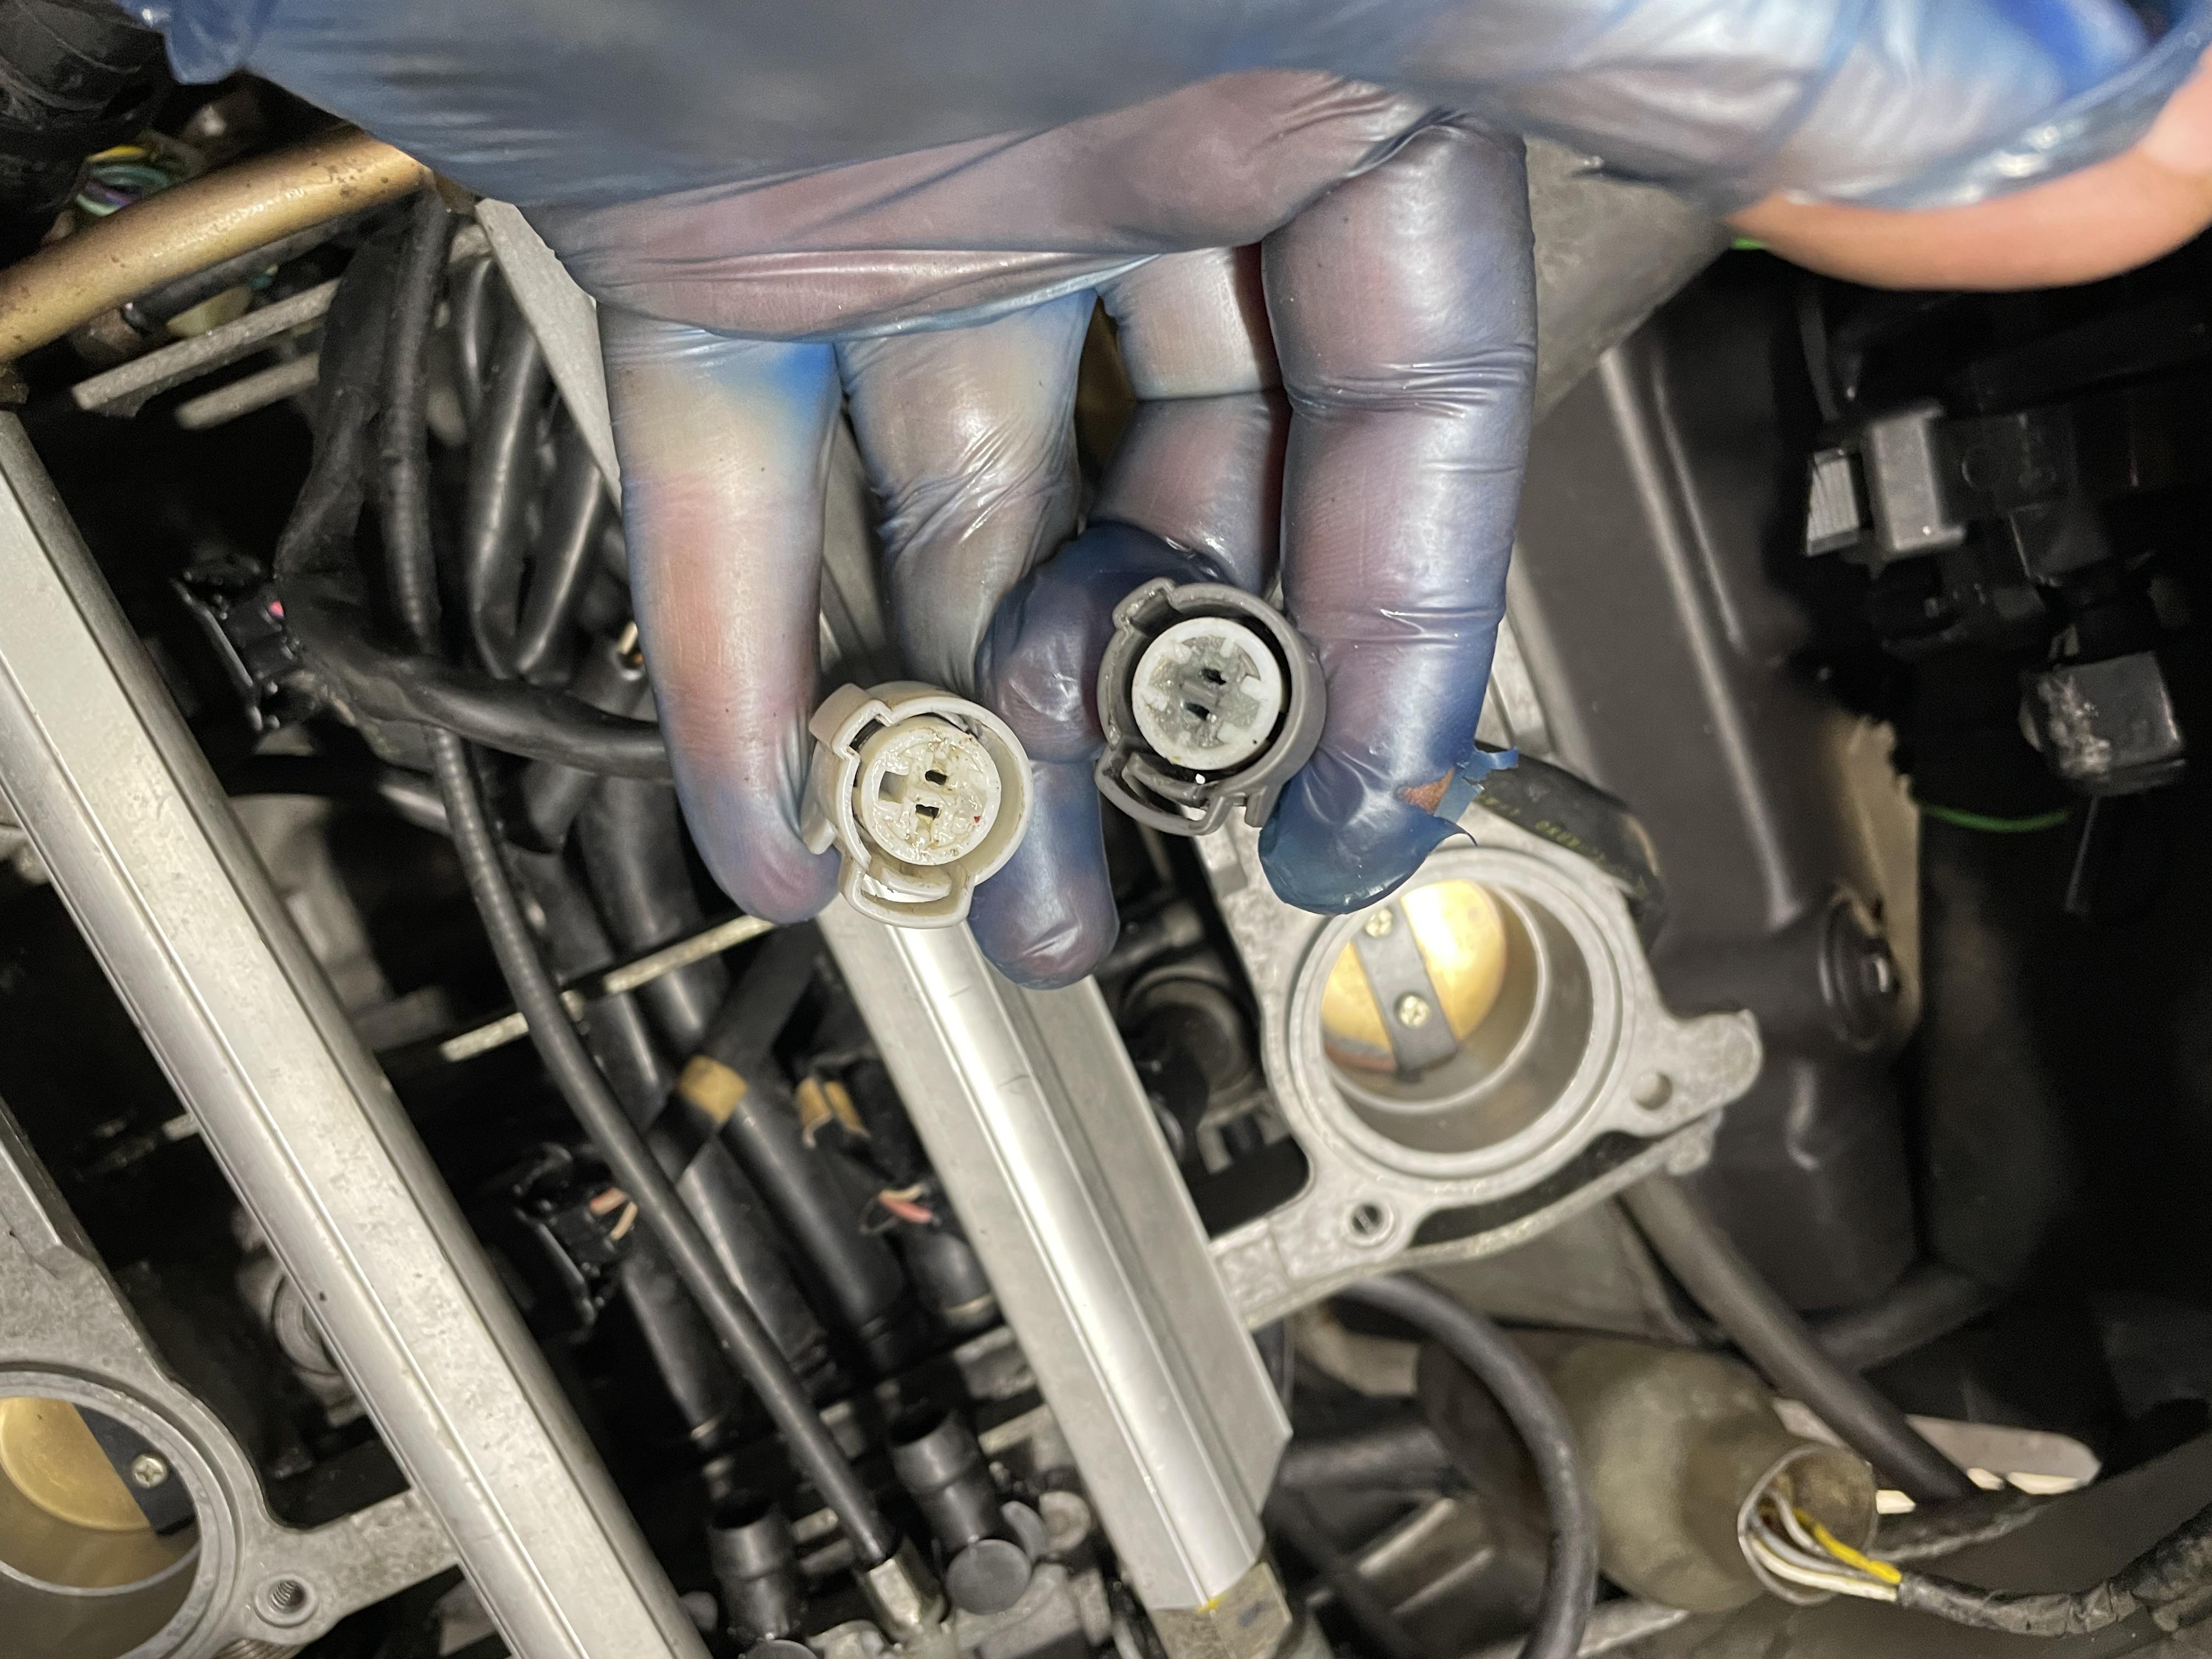
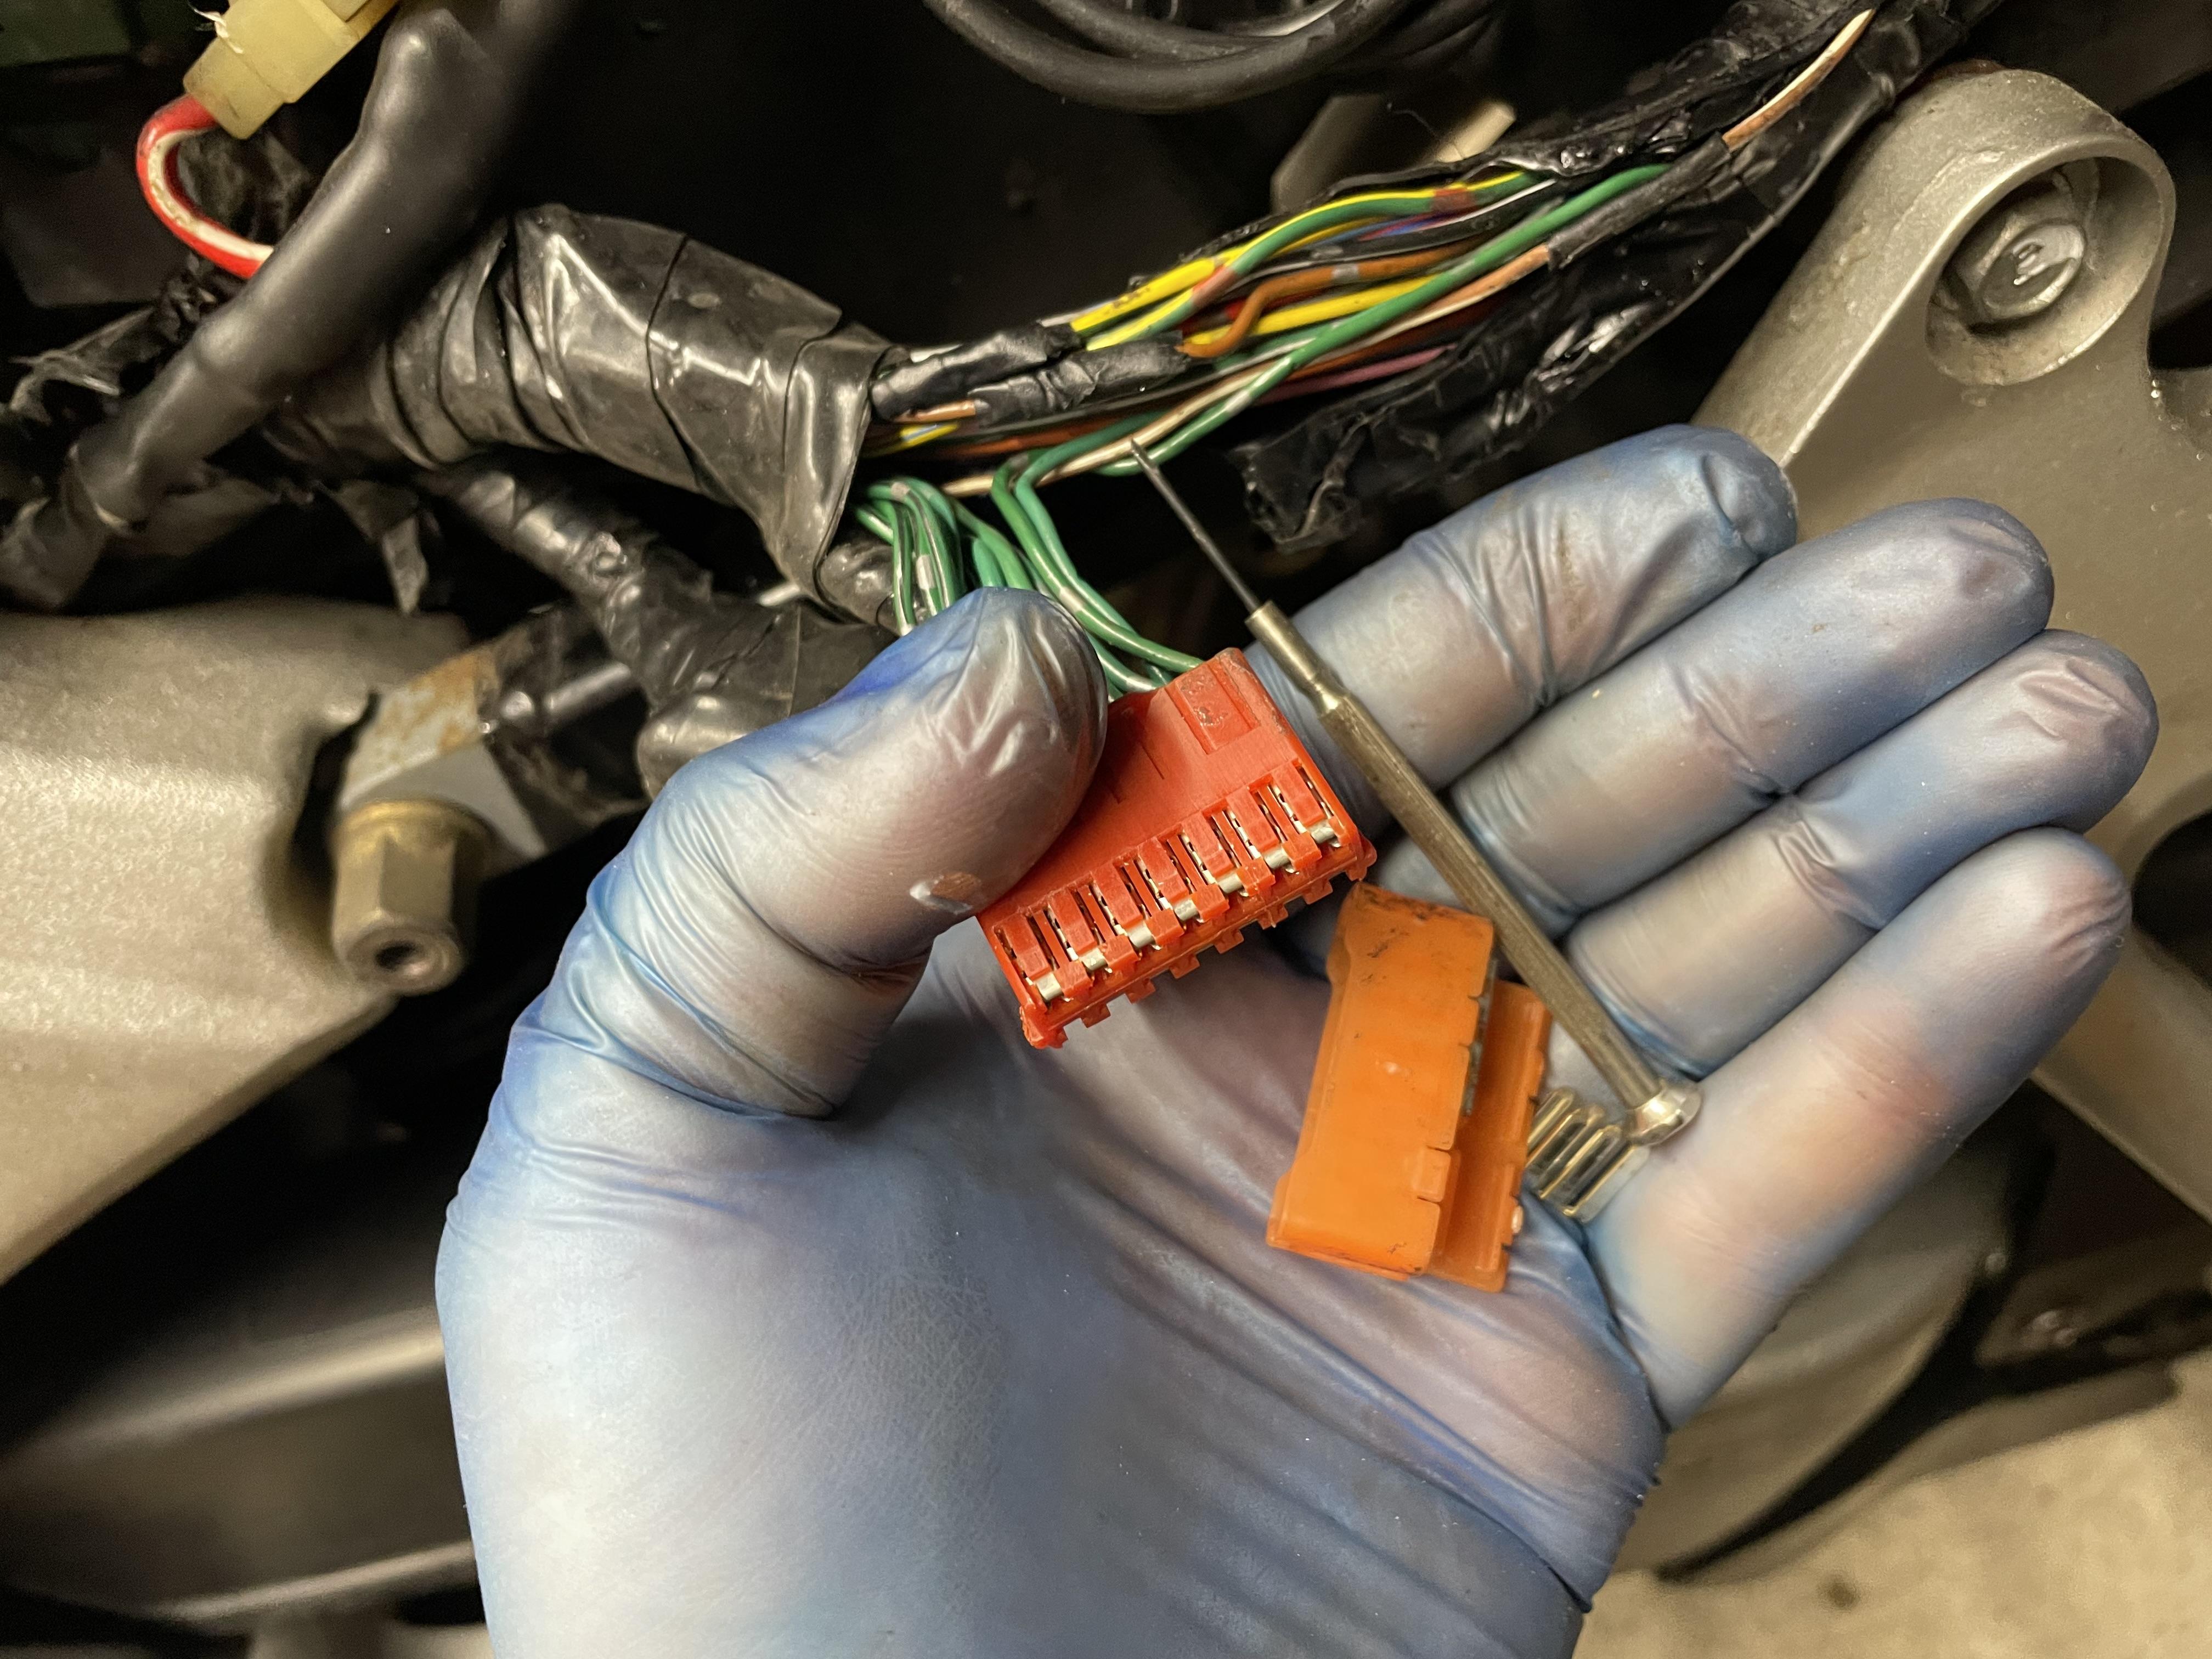
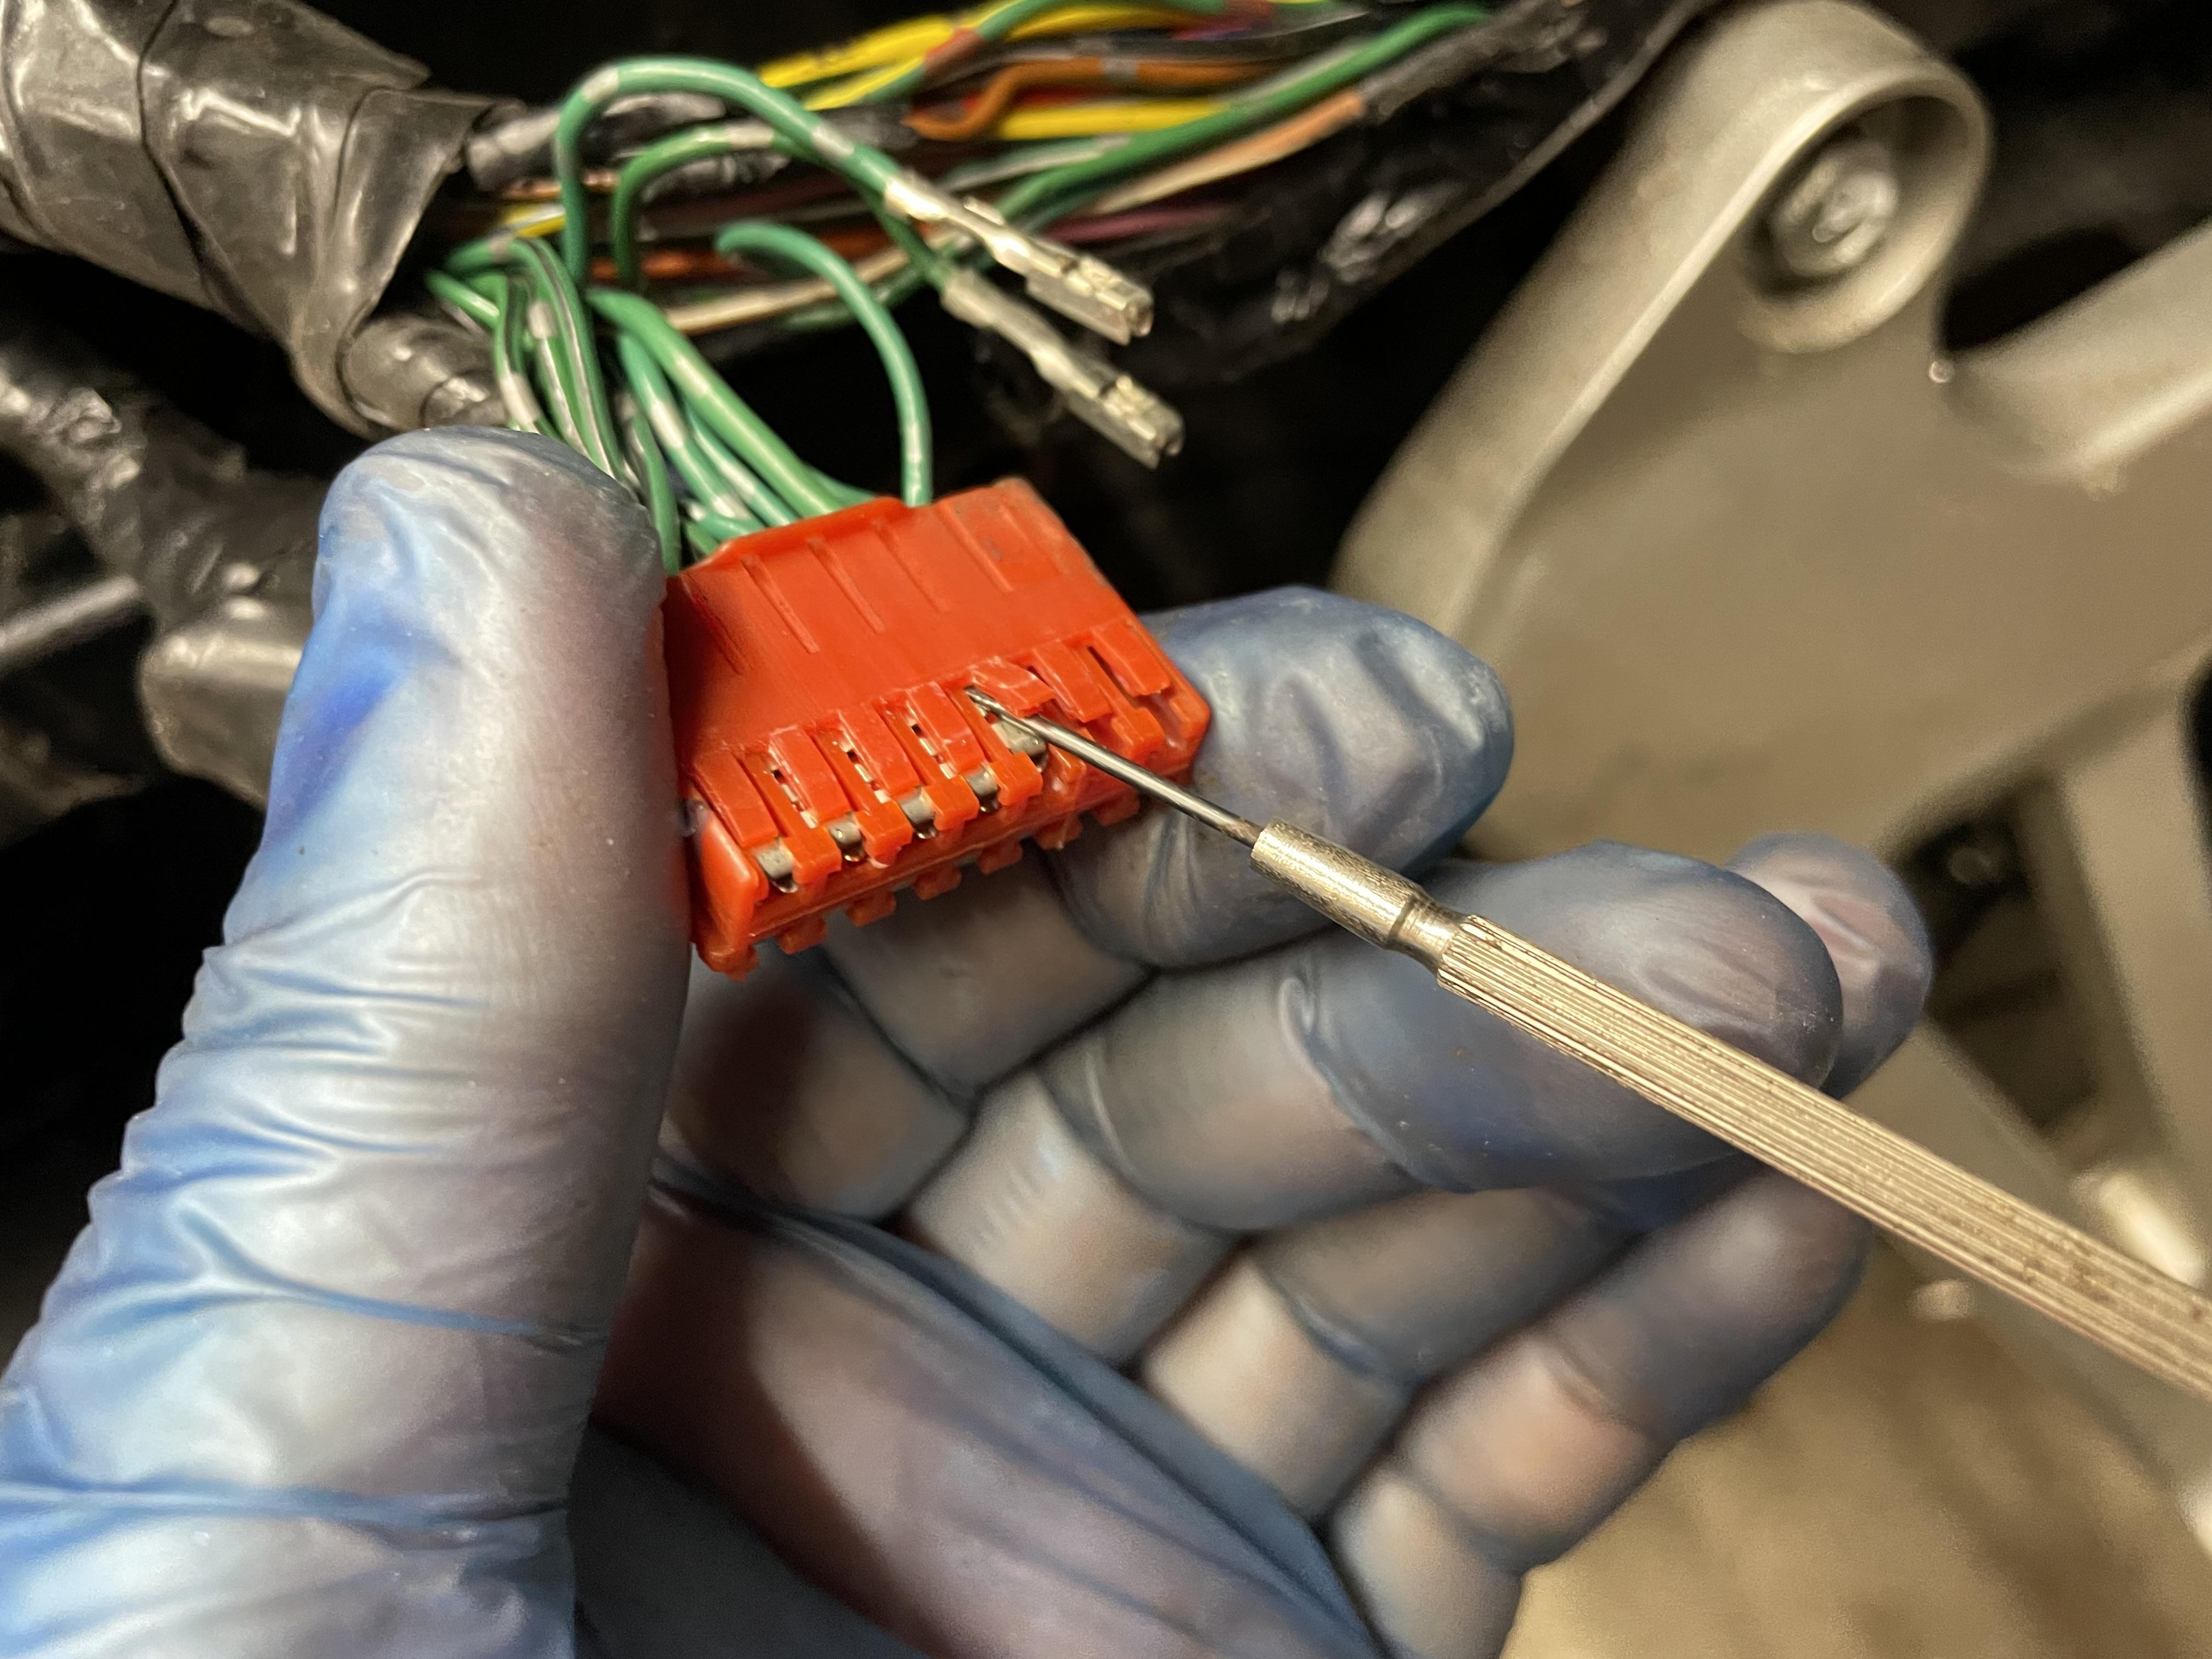
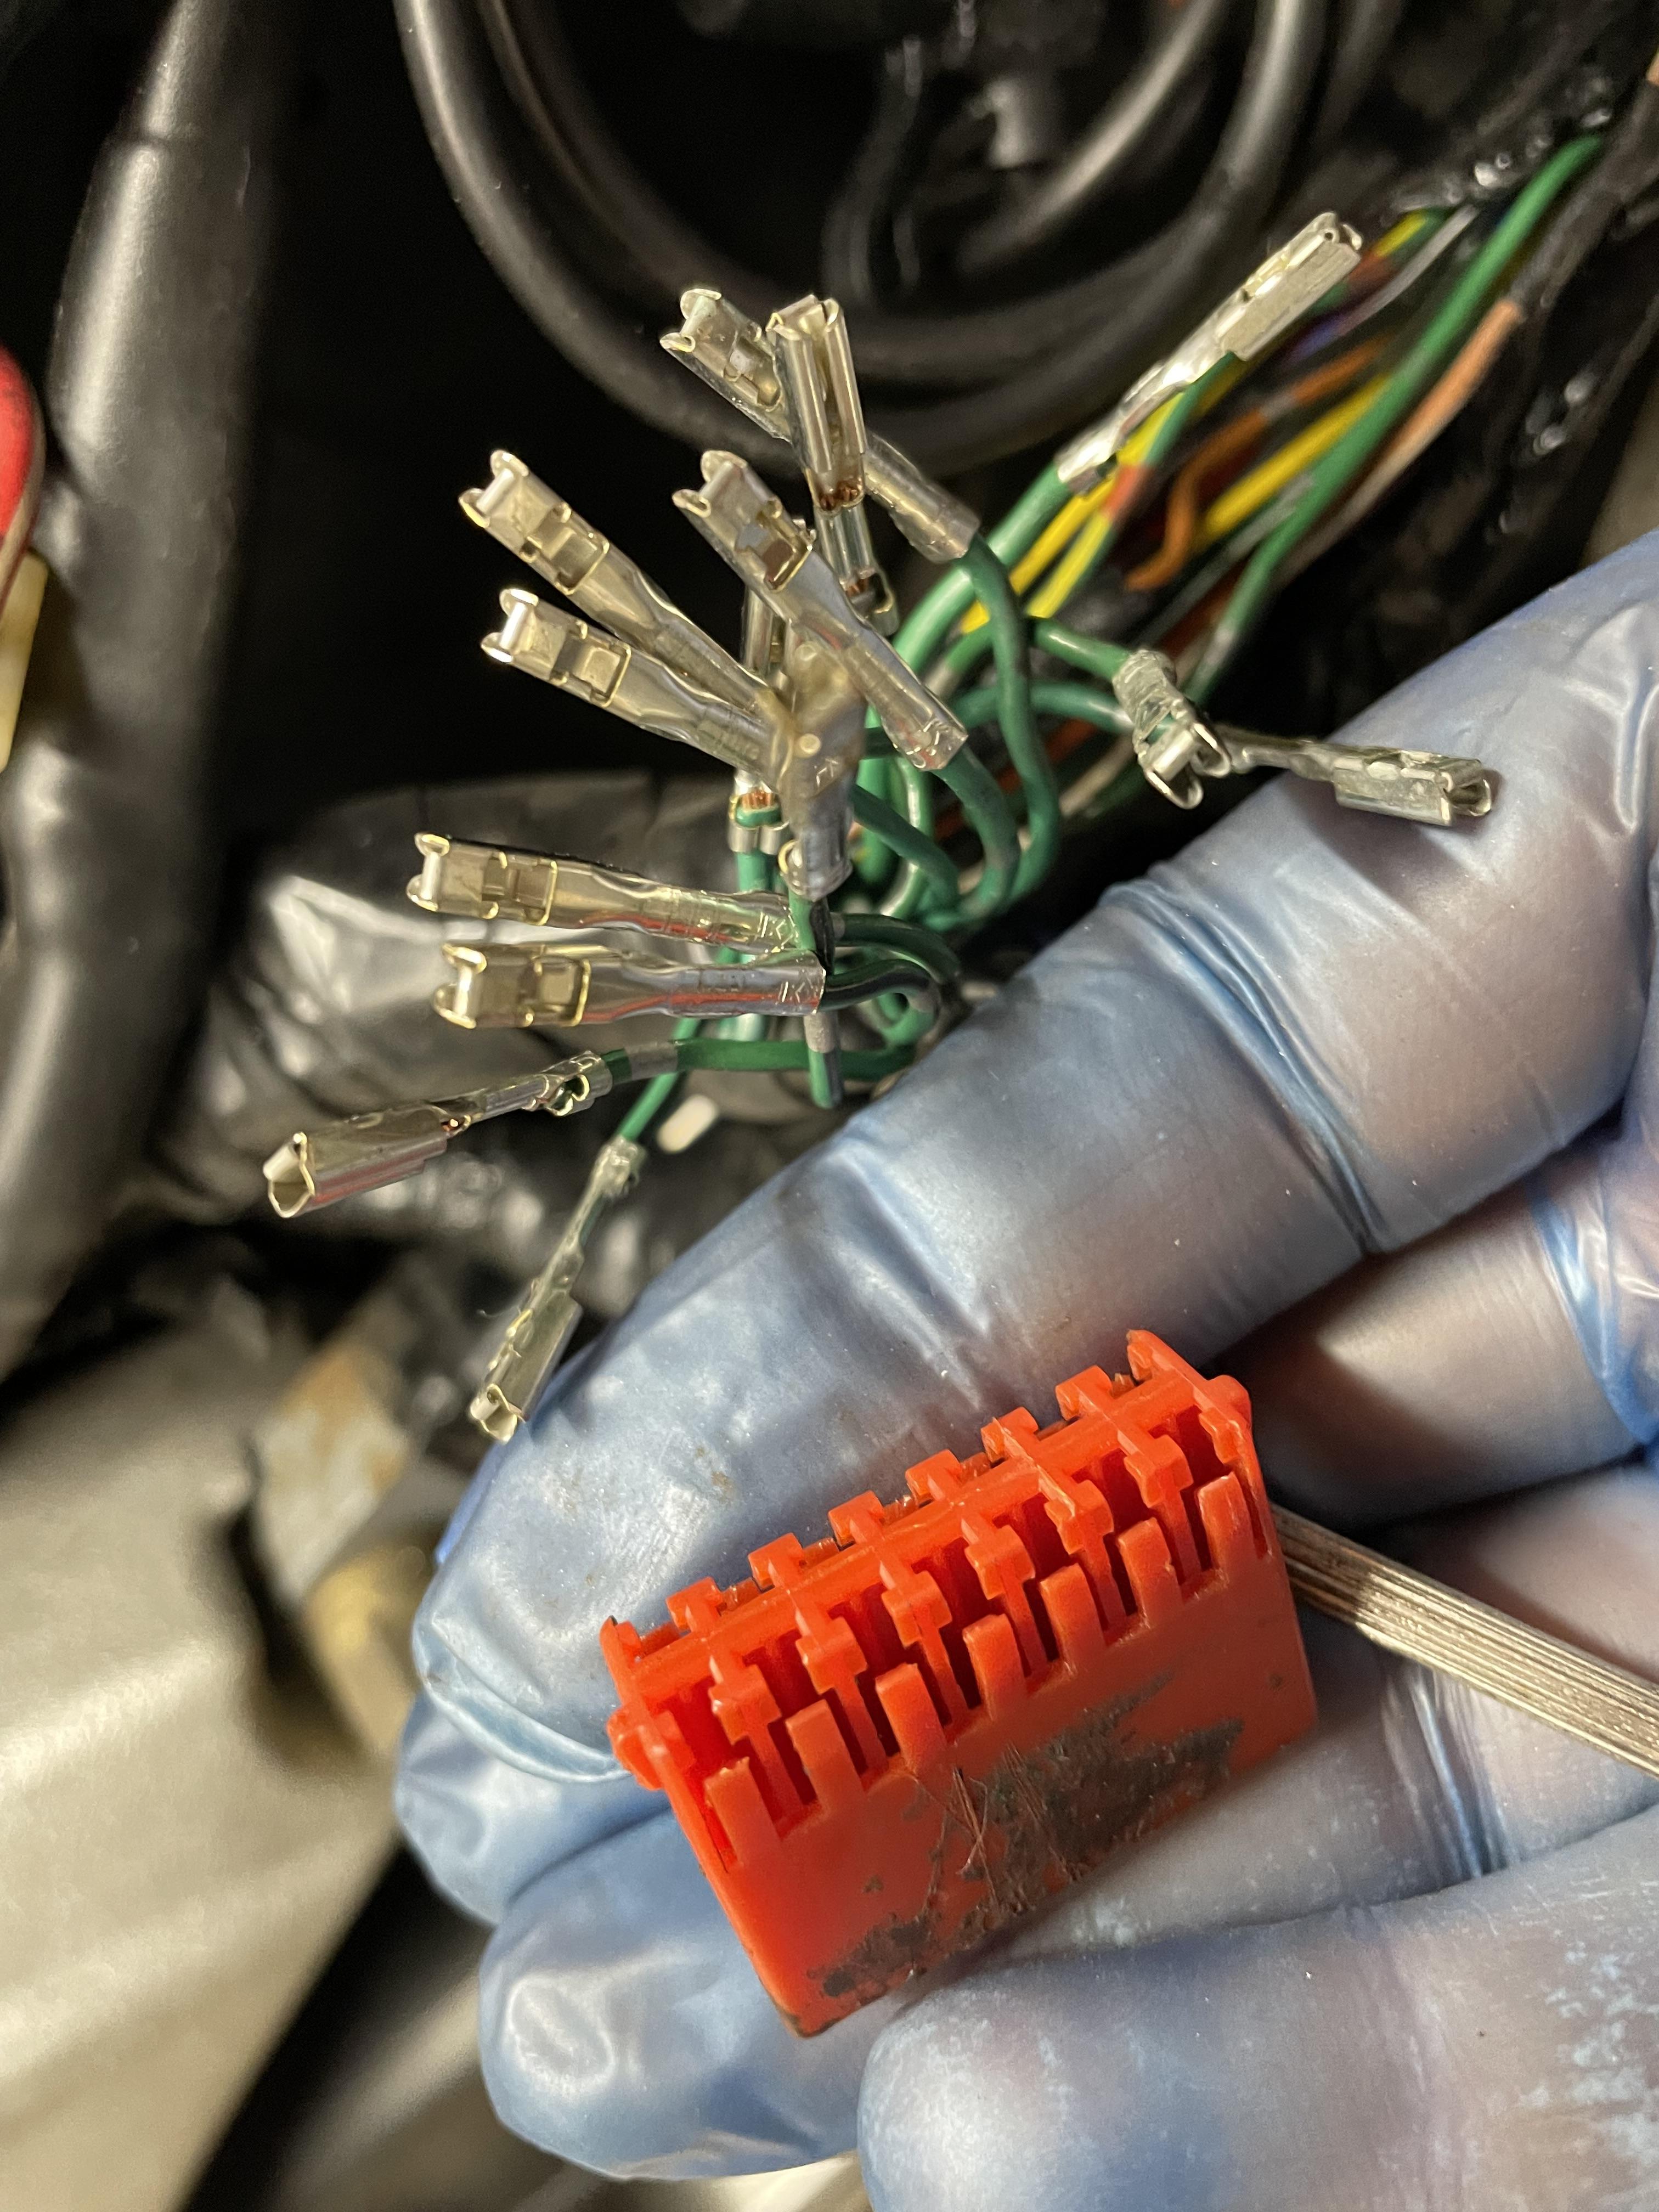
I HATE ELECTICS!!! The Fi light was on all day at Donington and when I bridged the diagnostics plug the light blinked a million times. It gave every single fault code in the book (TP sensor, MAP sensor, ECU etc). So I thought maybe the infamous orange earthing block might be causing it. Best to cut it out and run cables to earthing points on the frame instead. Here I’ve dug it out of the wiring harness on the left of the bike, near the battery box. Had to cut away some of the harness wrapping to find it. Prized the lid off with a jeweller’s screwdriver, which also helped release each pin by lifting the retaining tabs. It looked in good condition and was probably working fine but I’ve come this far so may as well cut it out. All pins out now. But how to solder them all together? There are too many! So I separated them out into three bunches and found a suitable cable (12 gauge) to fuse each group. Connectors cut off and wire stripped back. Liberated the metal tube from inside a bunch of insulated crimps. Crimped about 5 wires at a time into one end, and the 12 gauge cable into the other end. Then solder…except these wires were now so thick even my 200w soldering iron could t heat them enough. Eventually I got angry and used the blowtorch! Followed by adhesive heat shrink over the join. 3 new earth cables formed. Soldered a copper ring terminal onto each wire. Now to sort a decent earth connection using the rear footpeg bolt. Had to file the paint and grime away to clean metal for a solid electrical path. All slathered with copper slip. Was very proud of myself when everything fired up and worked properly…but that didn’t address the error codes. Fi light still blinking like a disco! Racking my brain now to work out what the problem might be. Tested the TPS which gave good readings. Checked all plugs in case I didn’t click one home properly, or maybe plugged them in wrong. I thought the plugs were all unique and couldn’t be mixed up but that’s wrong! MAP and TPS plugs are exactly the same. They even have the same coloured wires feeding into them which is REALLY unhelpful! Swapped the MAP and TPS plugs but the fault codes didn’t change. All the faults still indicated. Had a look at the Flapper plug and MAF plugs, which look similar but not identical. Tested the MAP sensor but couldn’t quite understand the values in the service manual. So I swapped the MAP sensor with the Baro sensor from the back of my race bike on a whim…and IT WORKED! Odd thing is ALL the error codes went away now. Solid red Fi light. How strange. Did I say I HATE electrics?
-
I think the VFR is a great platform for endurance racing. Would love to do a 12 or 24 hour session on one with a team of riders!