Stray
-
Posts
585 -
Joined
-
Last visited
-
Days Won
14
Content Type
Forums
Profiles
Gallery
Blogs
Downloads
Events
Everything posted by Stray
-
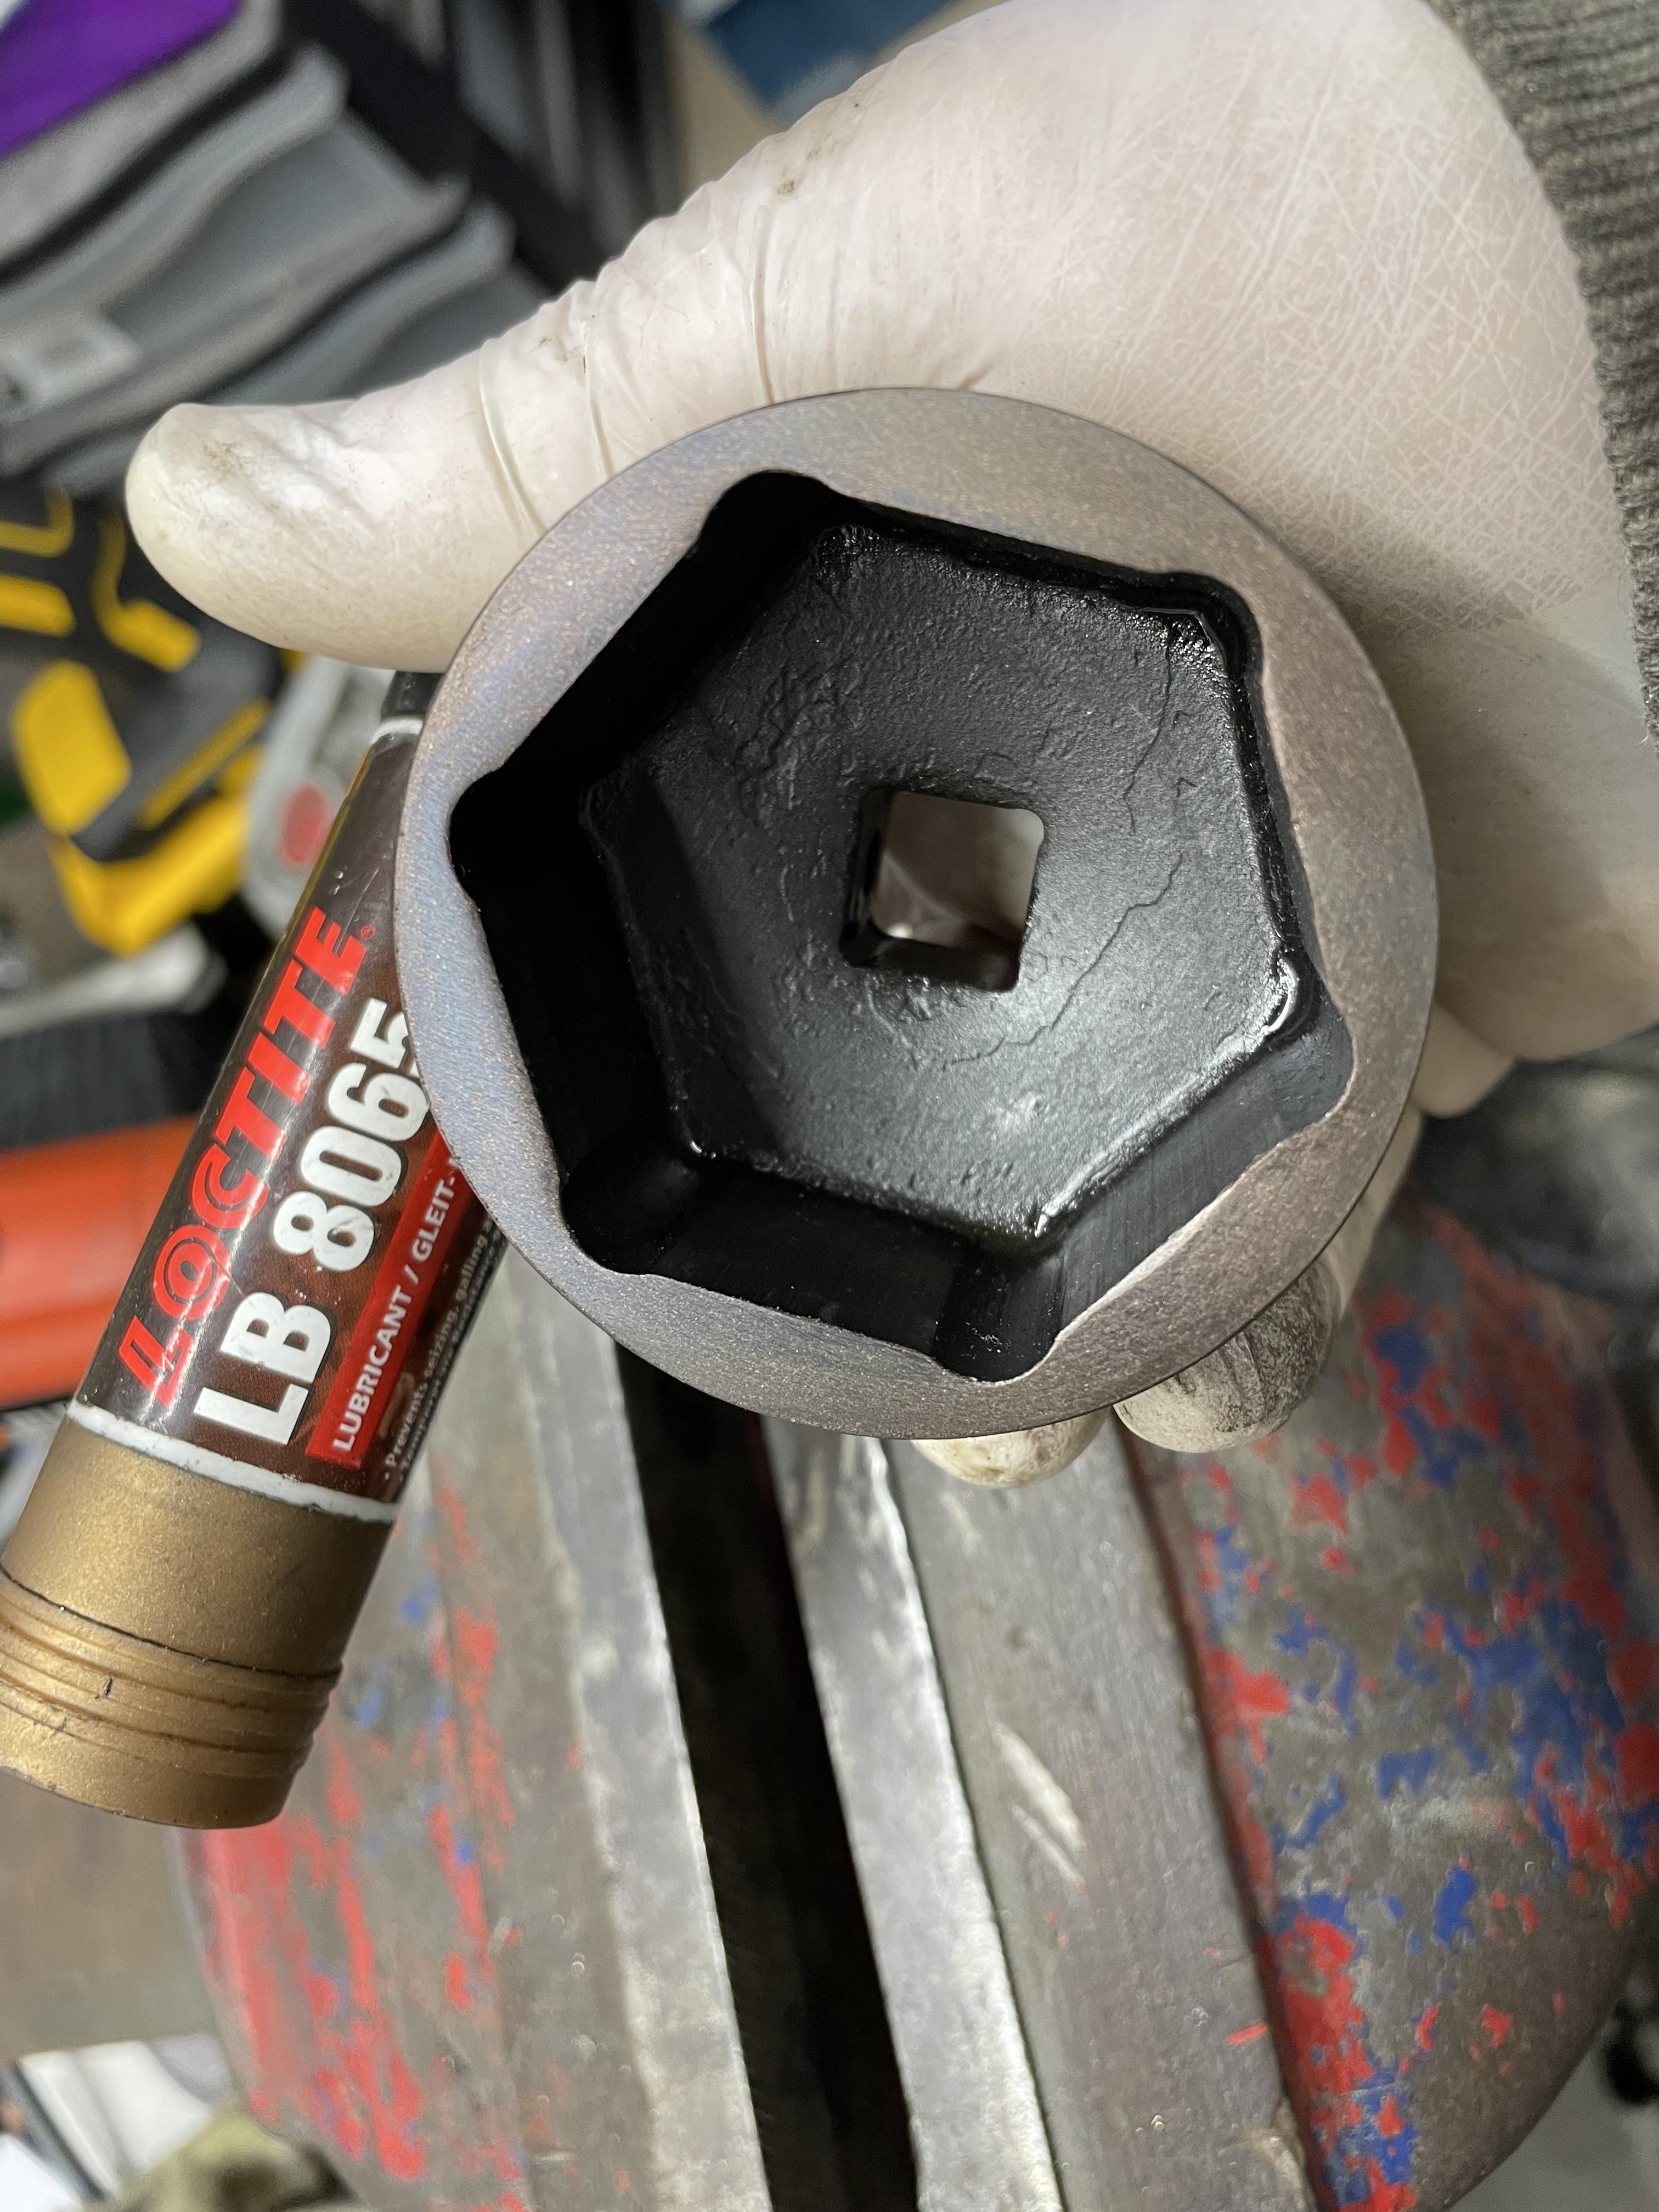
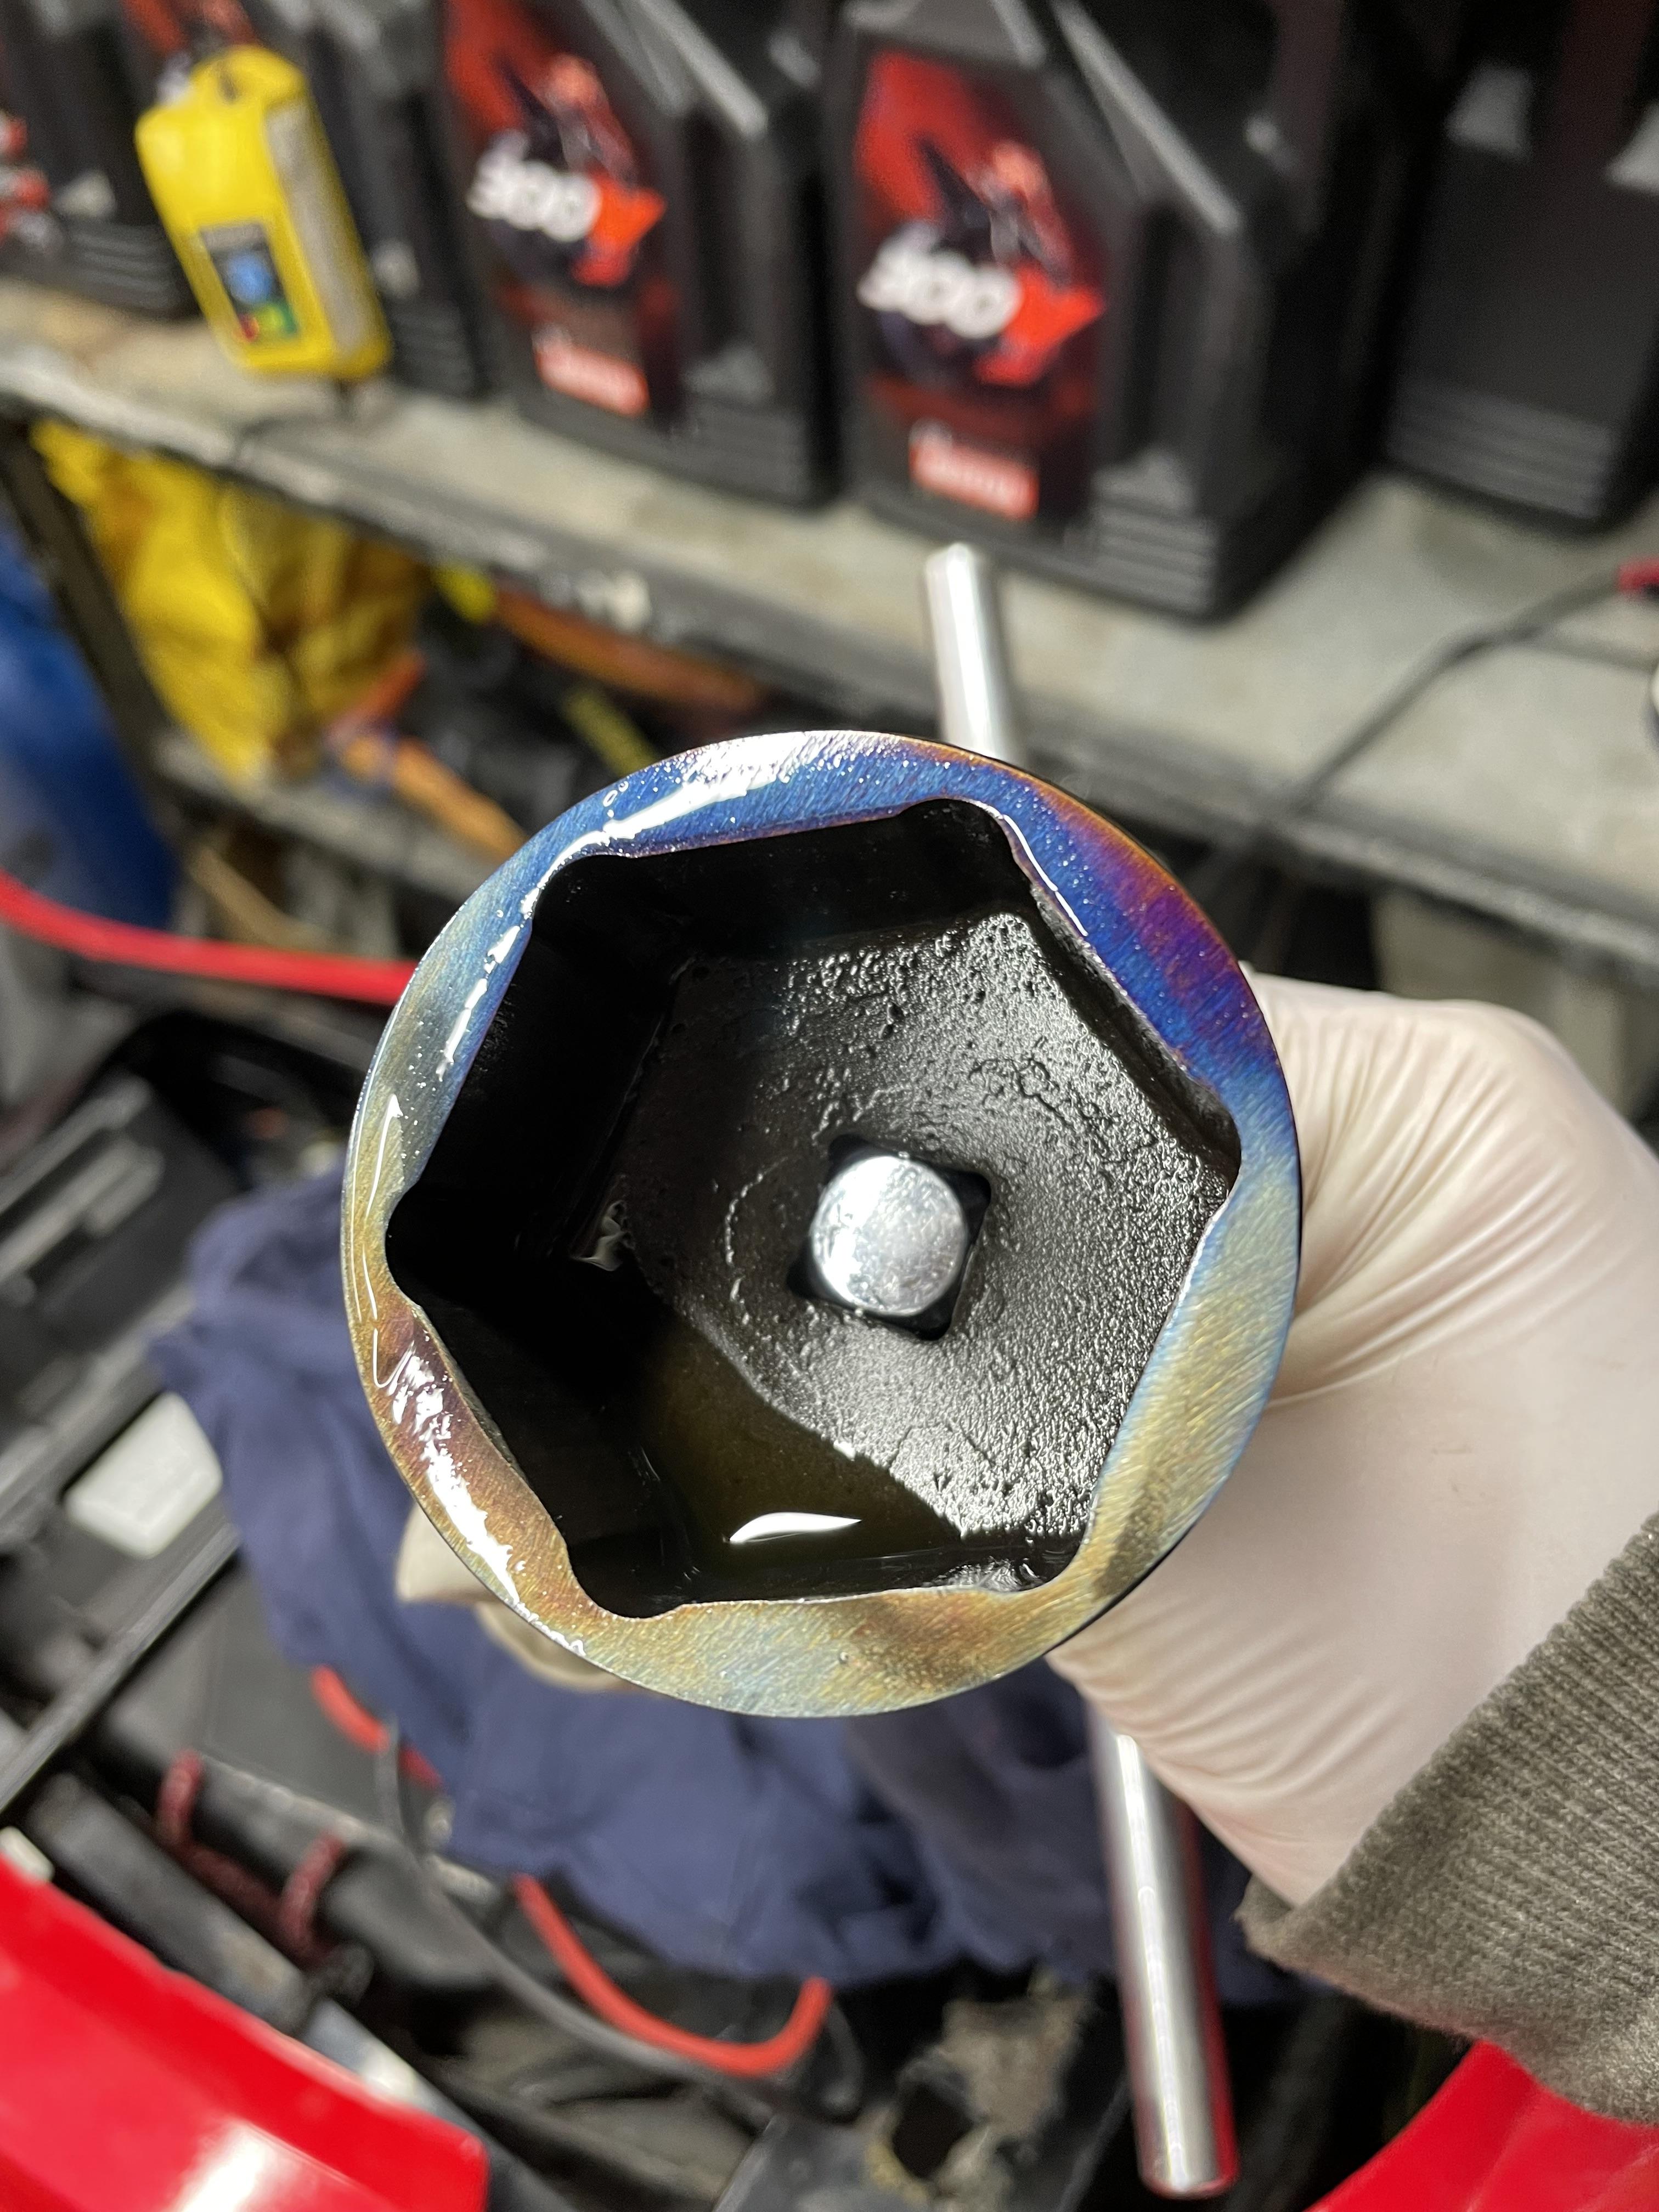
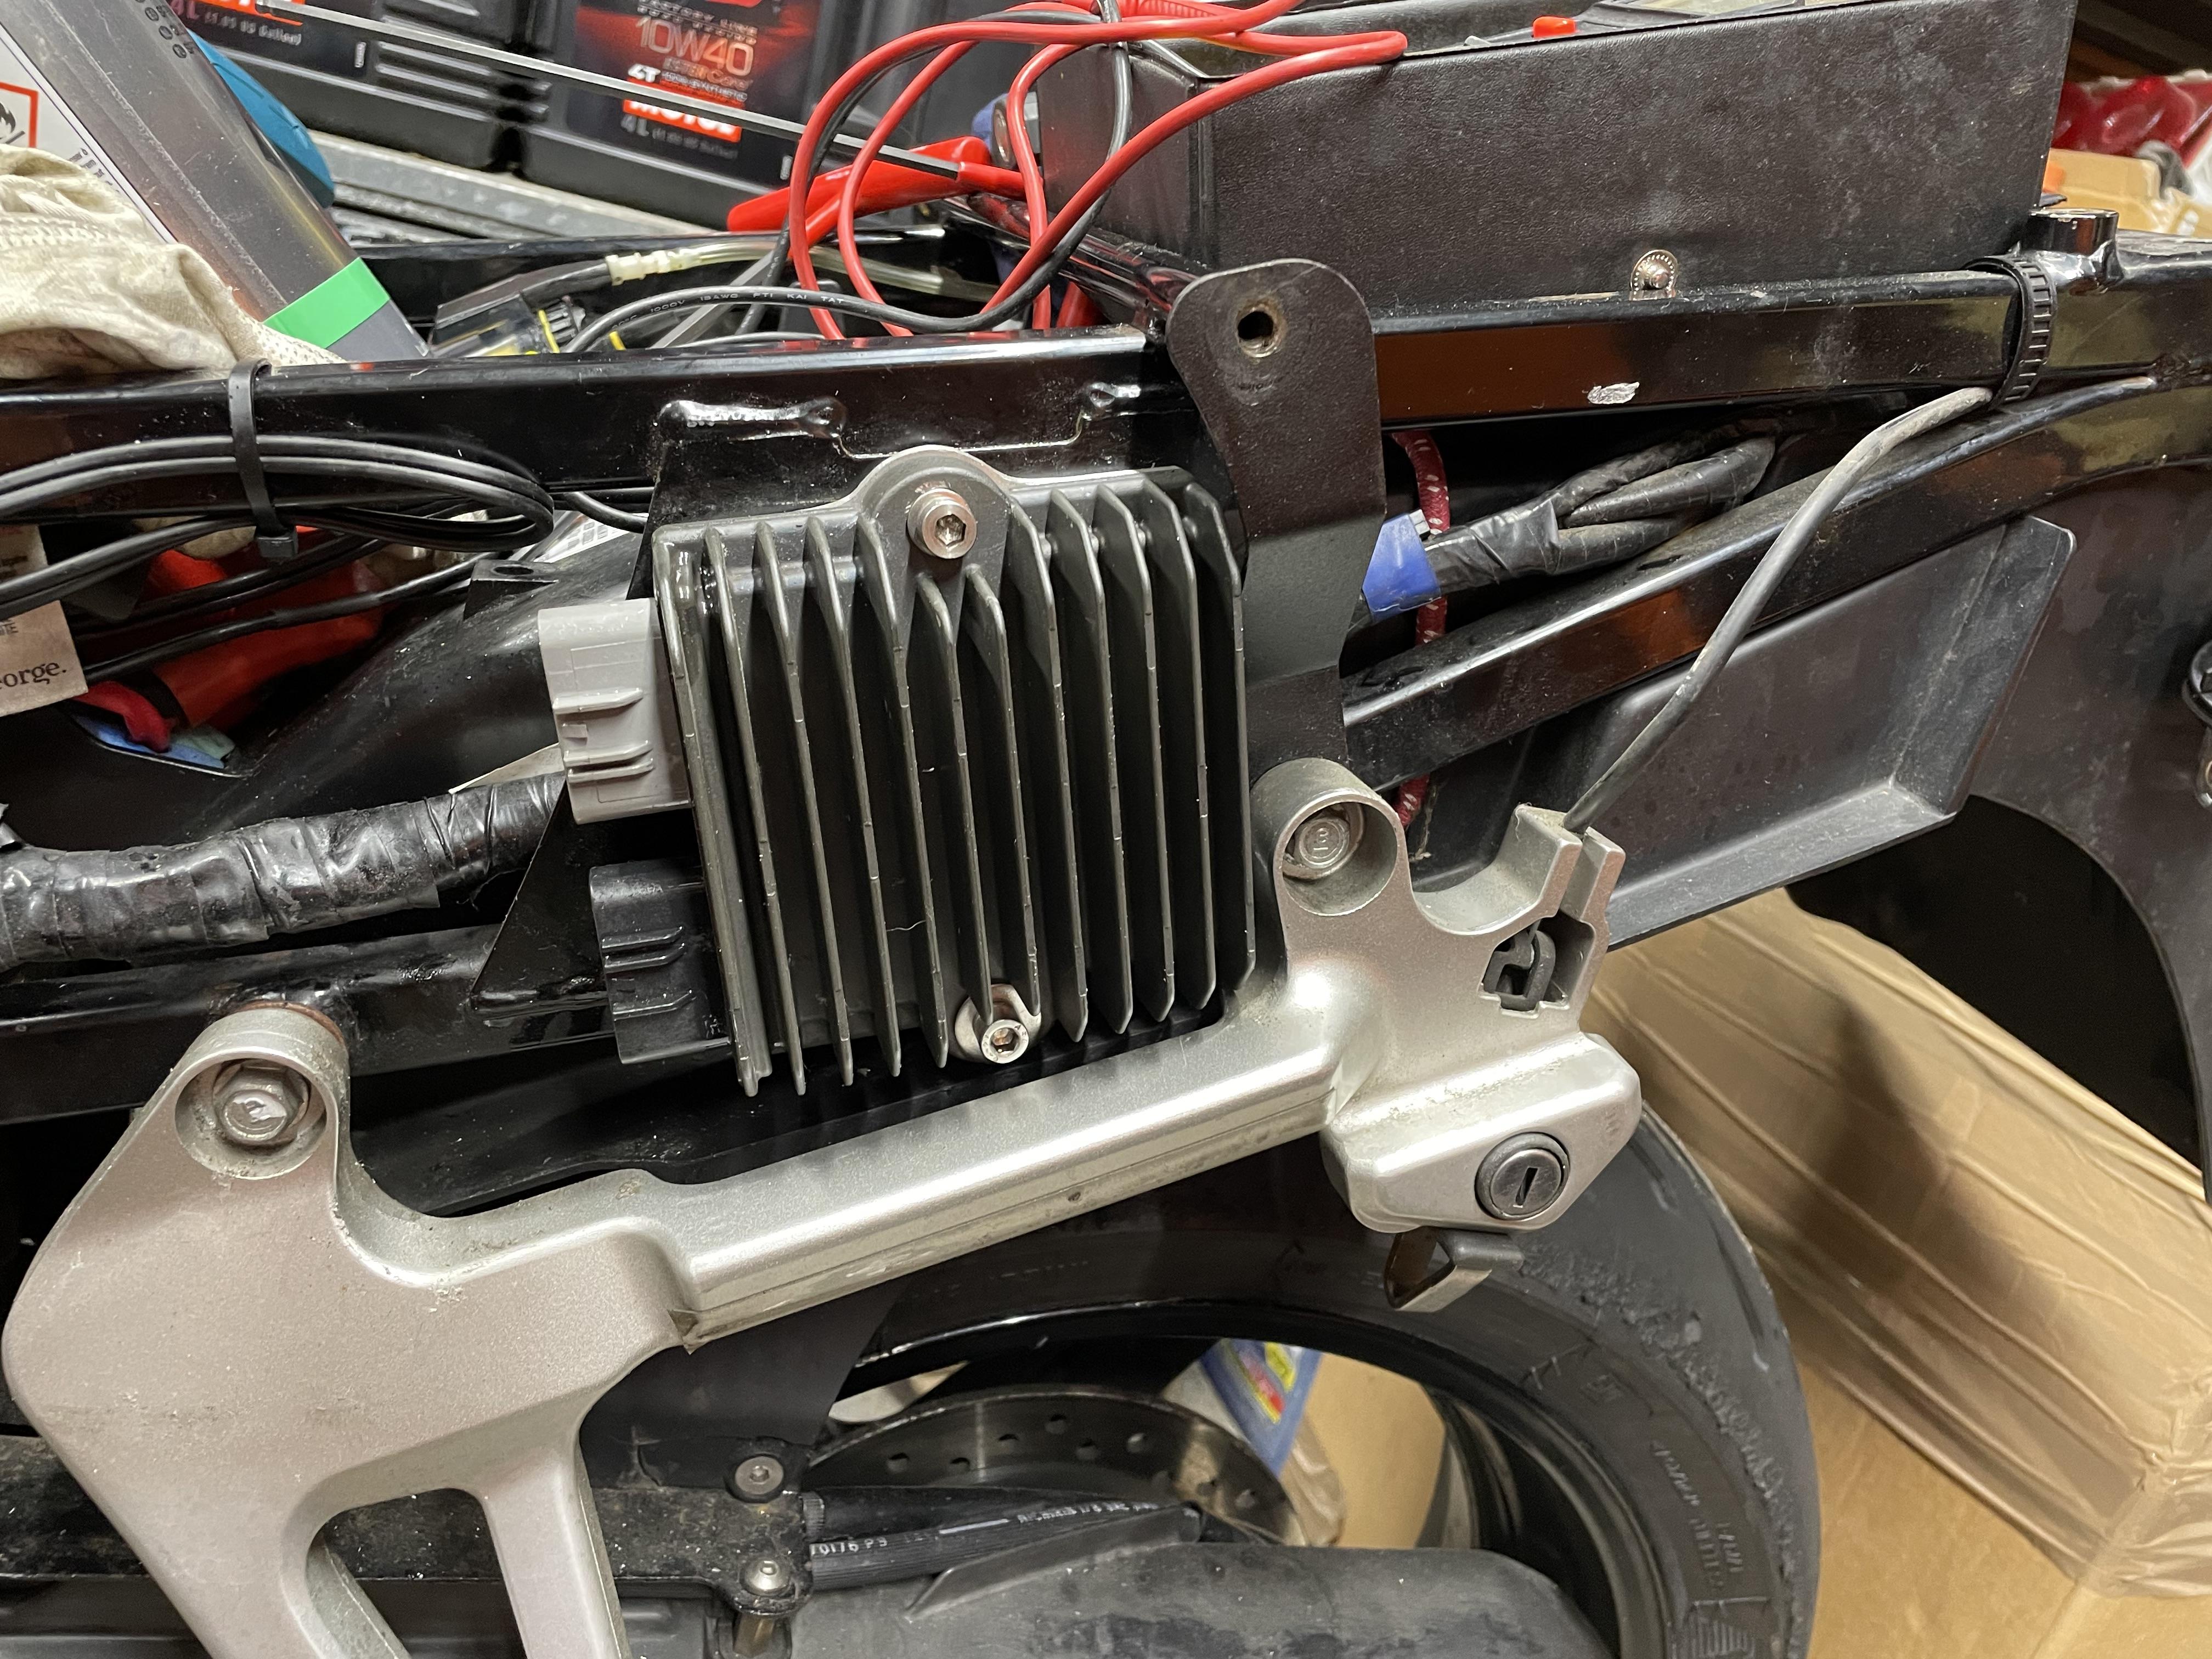
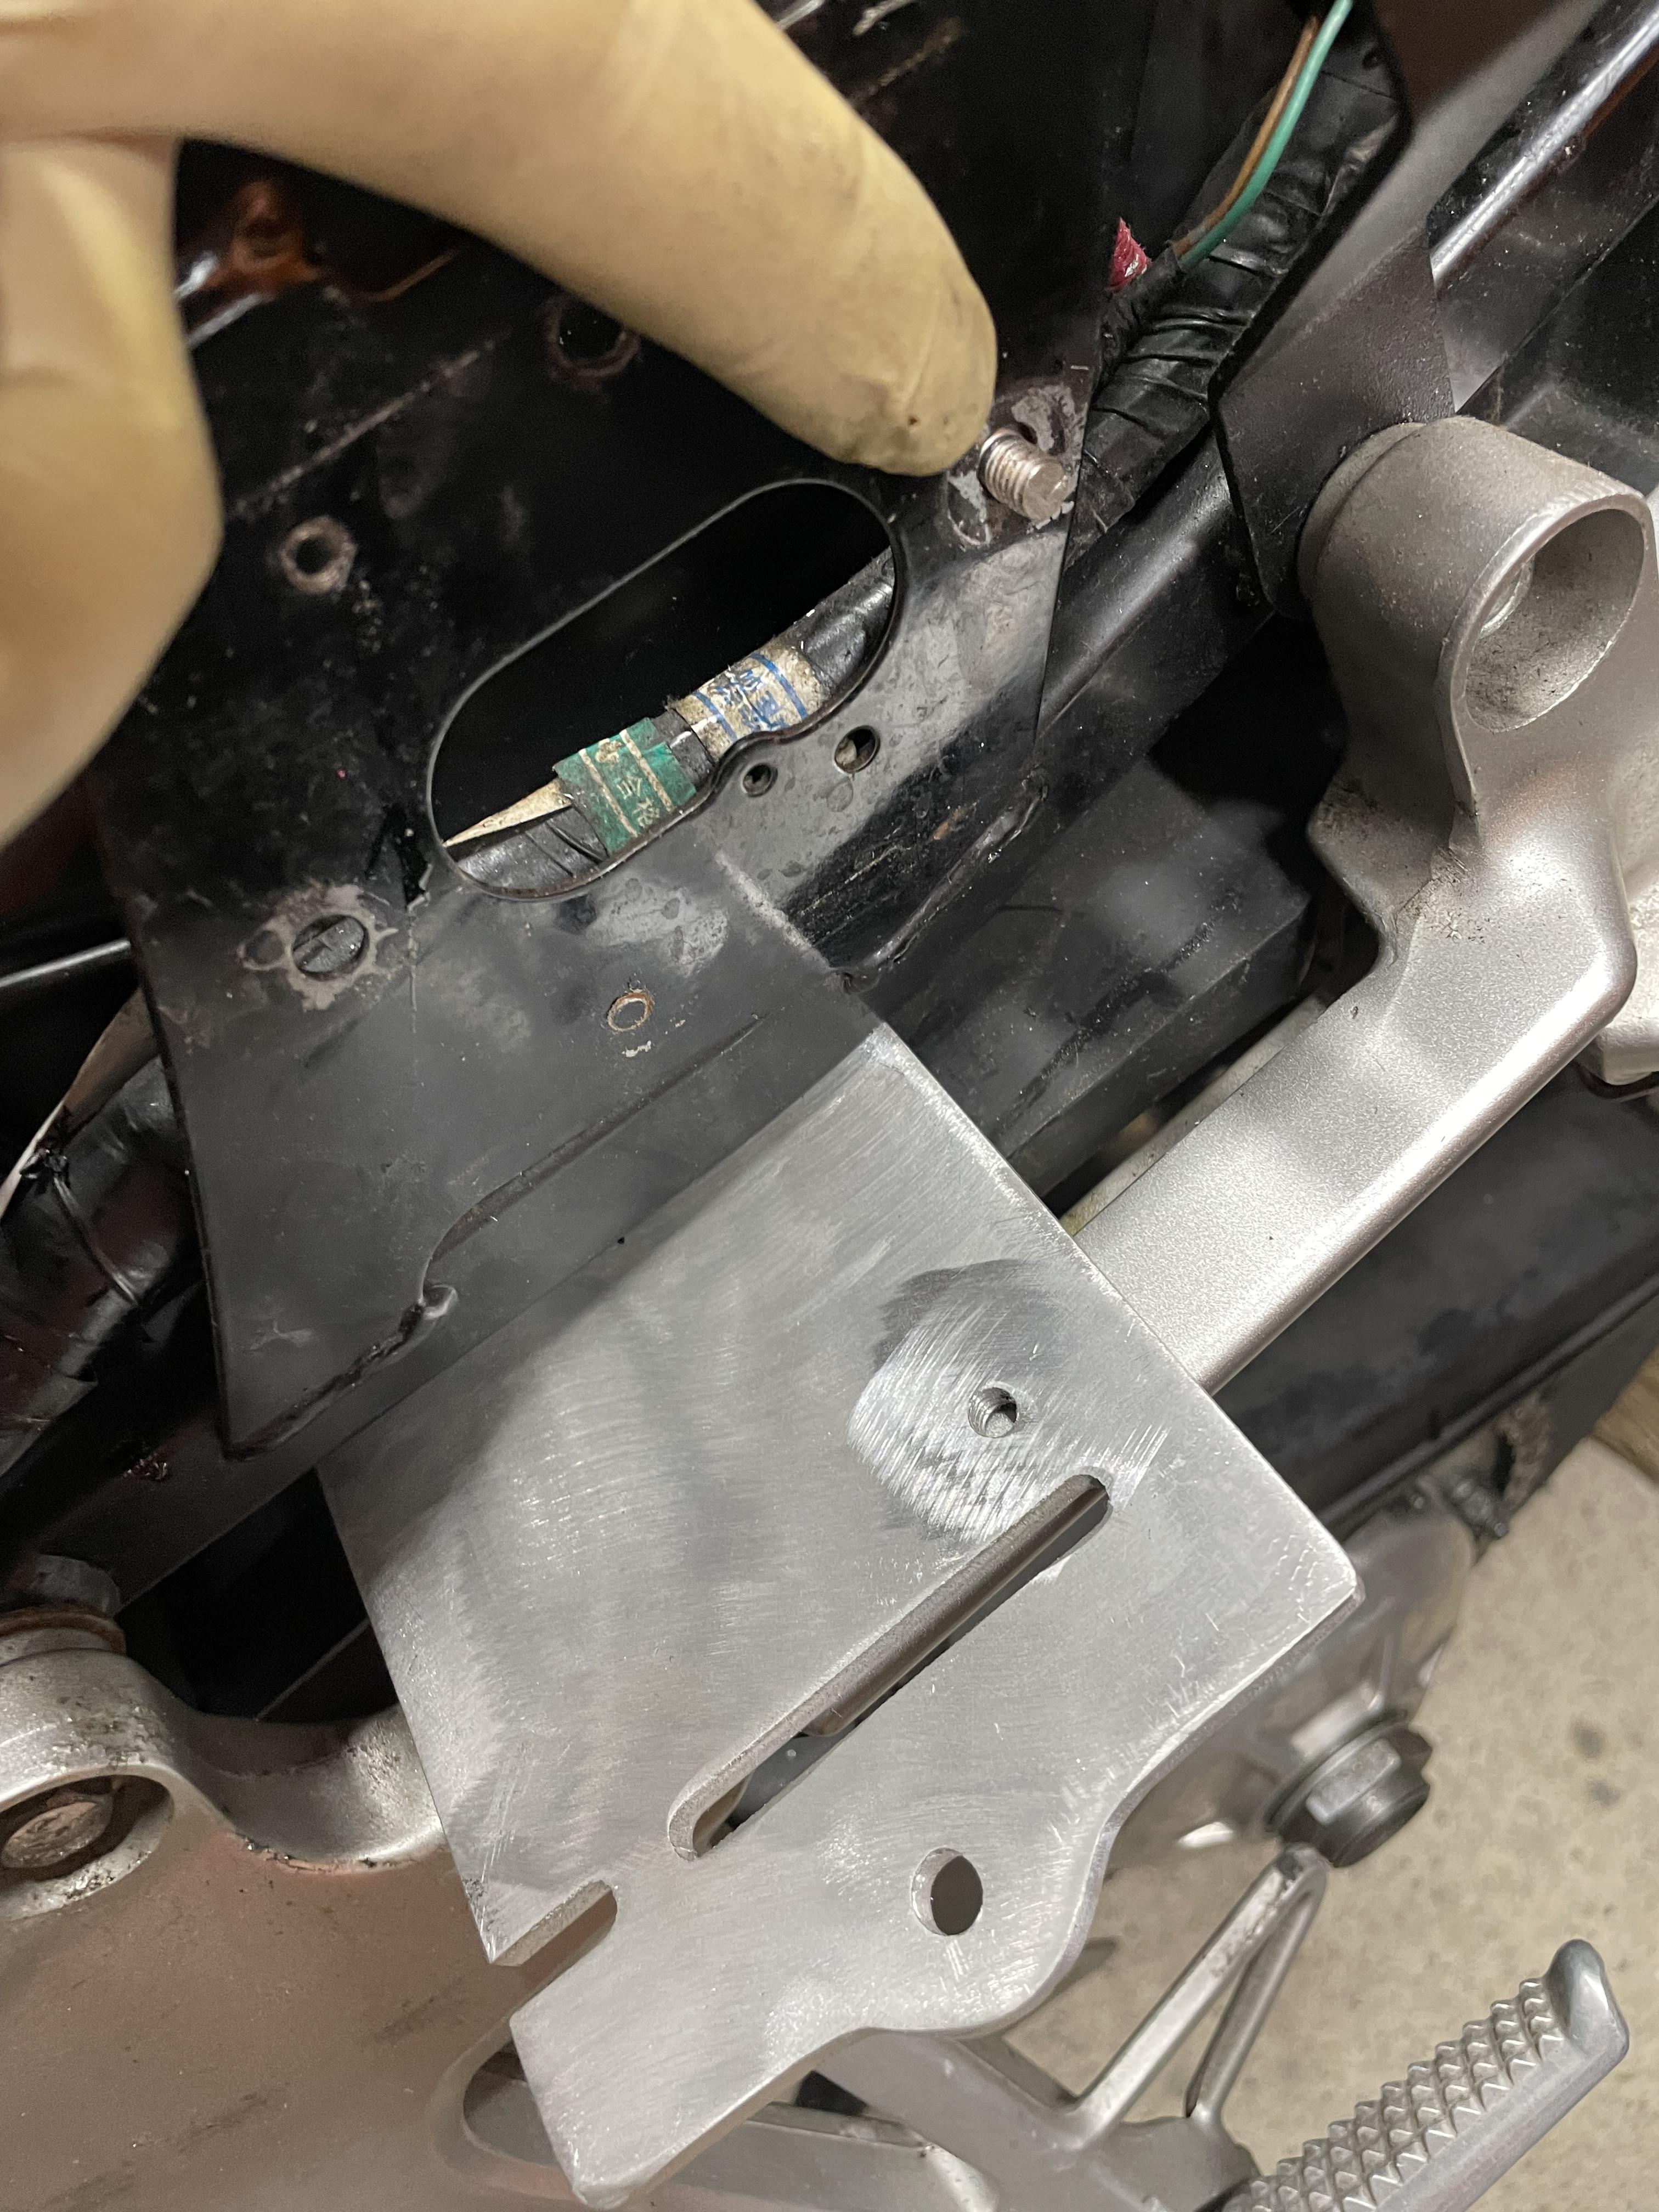
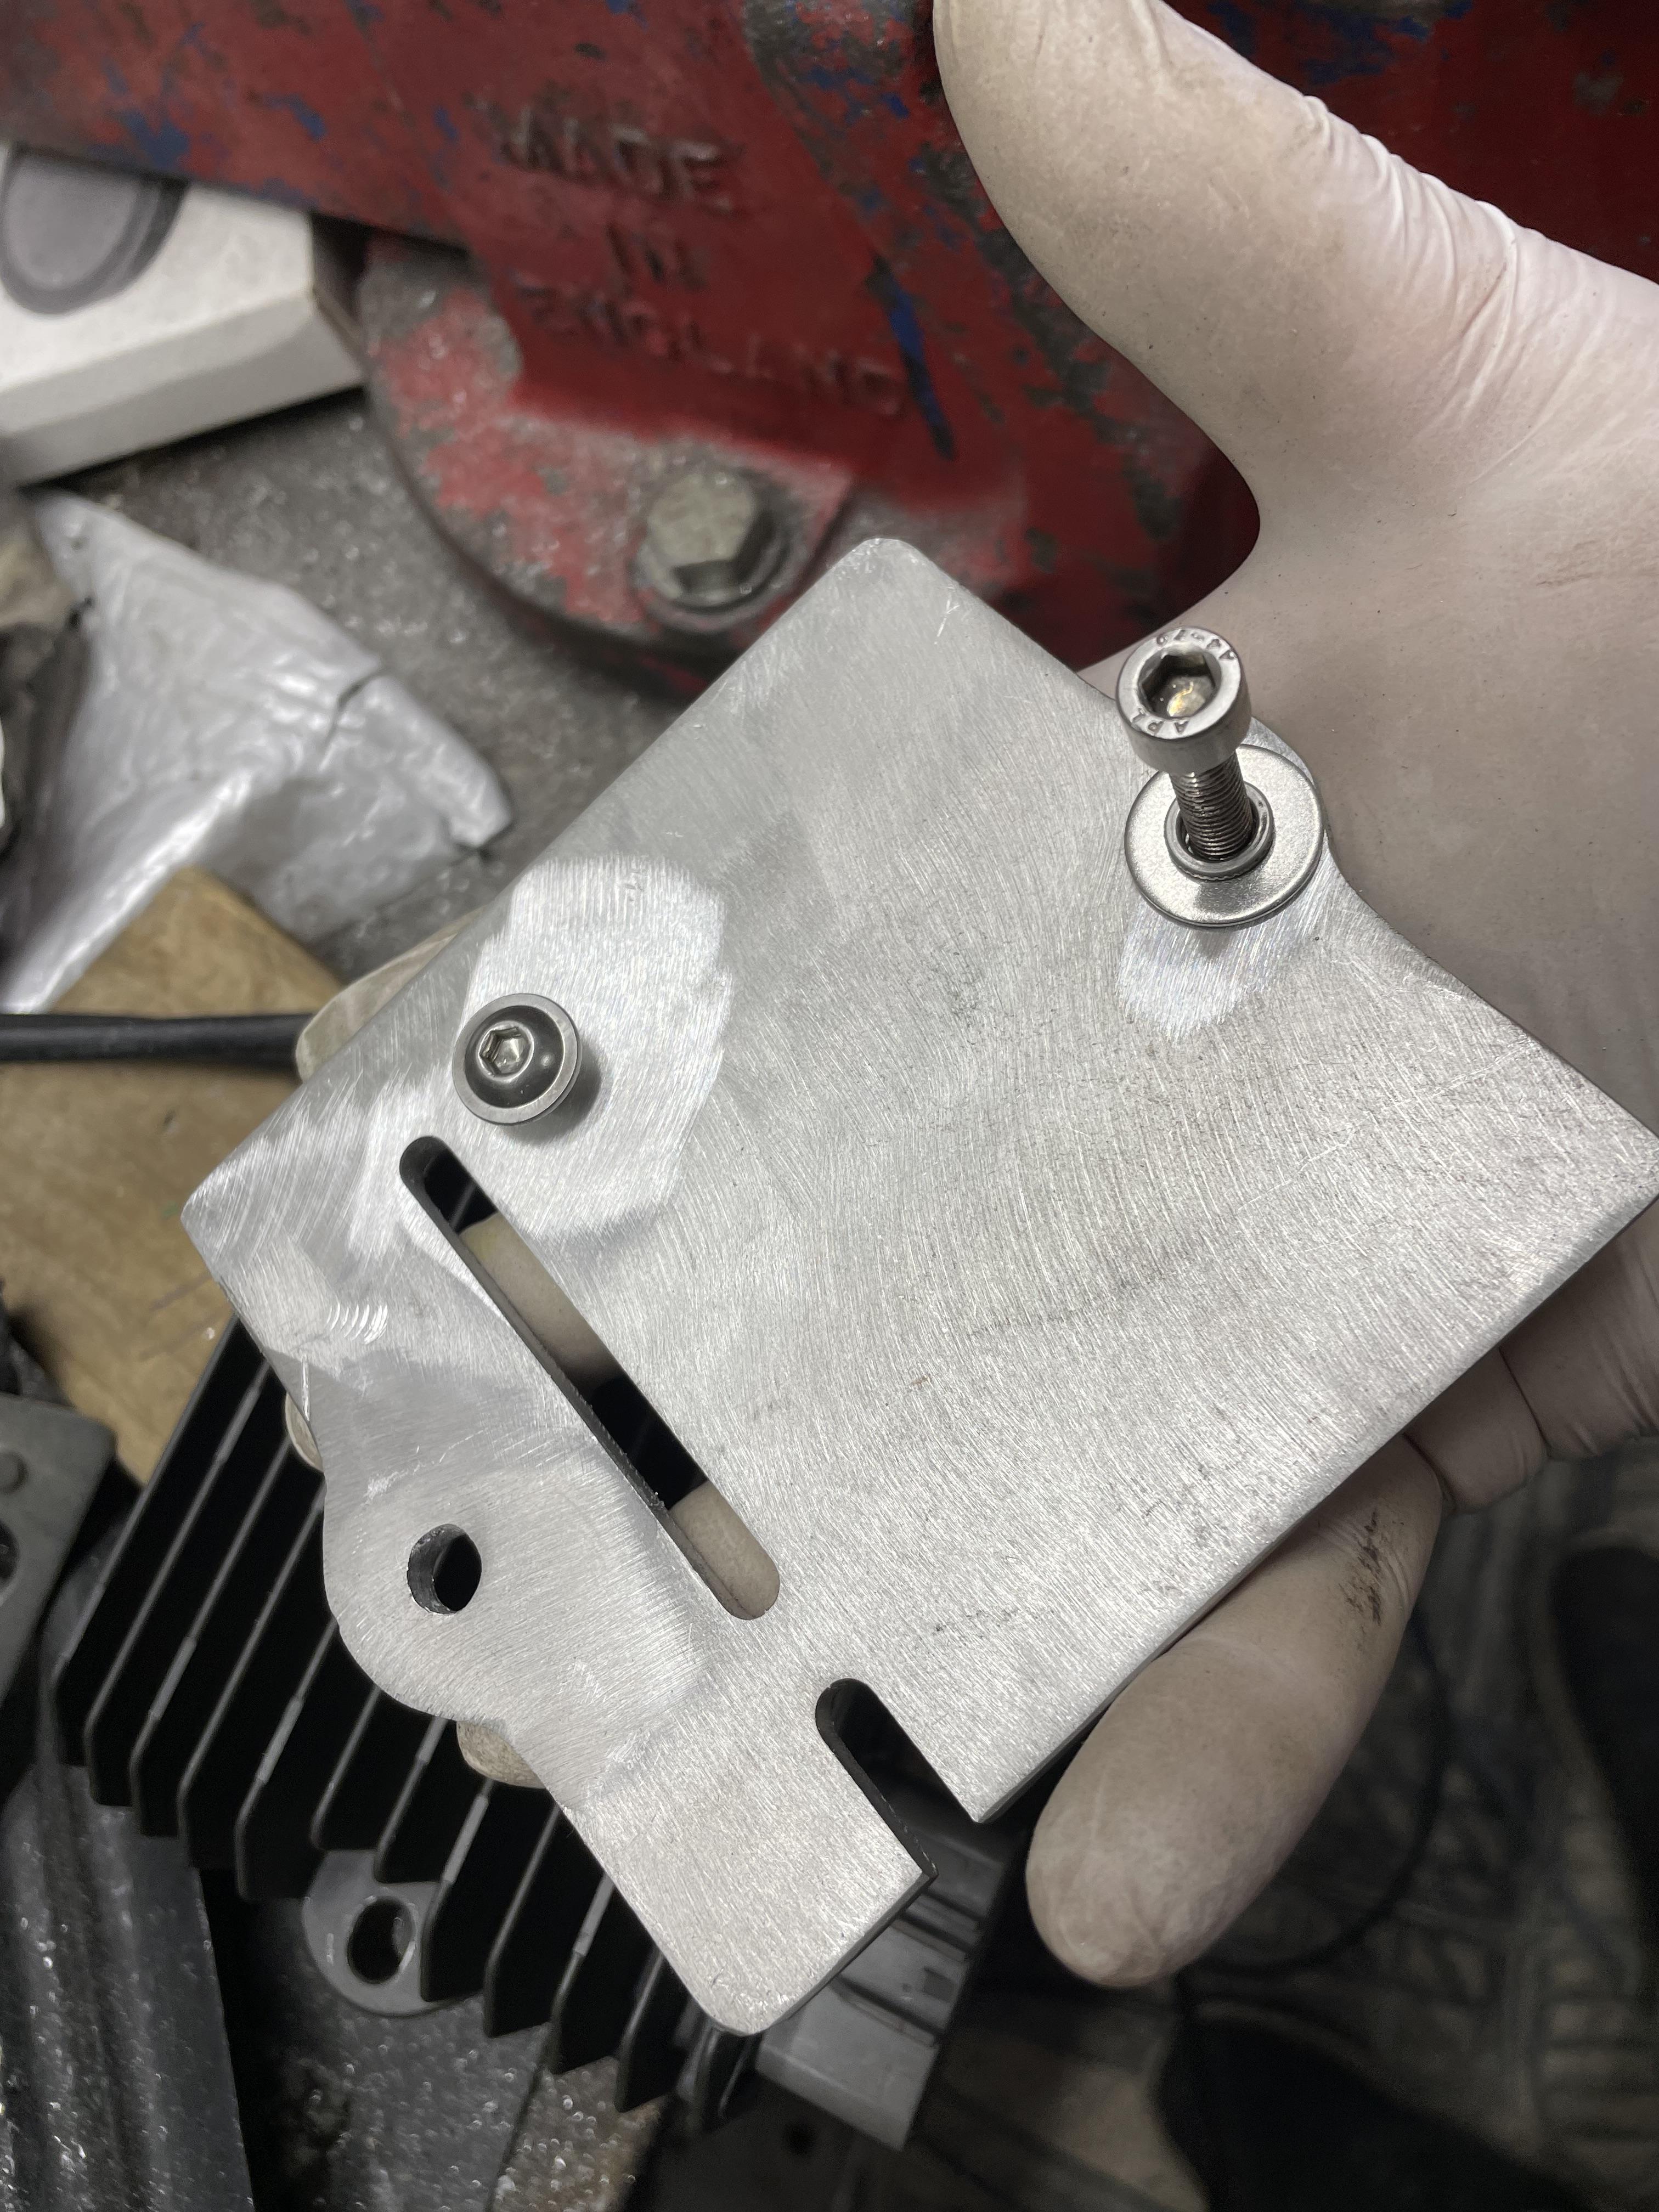
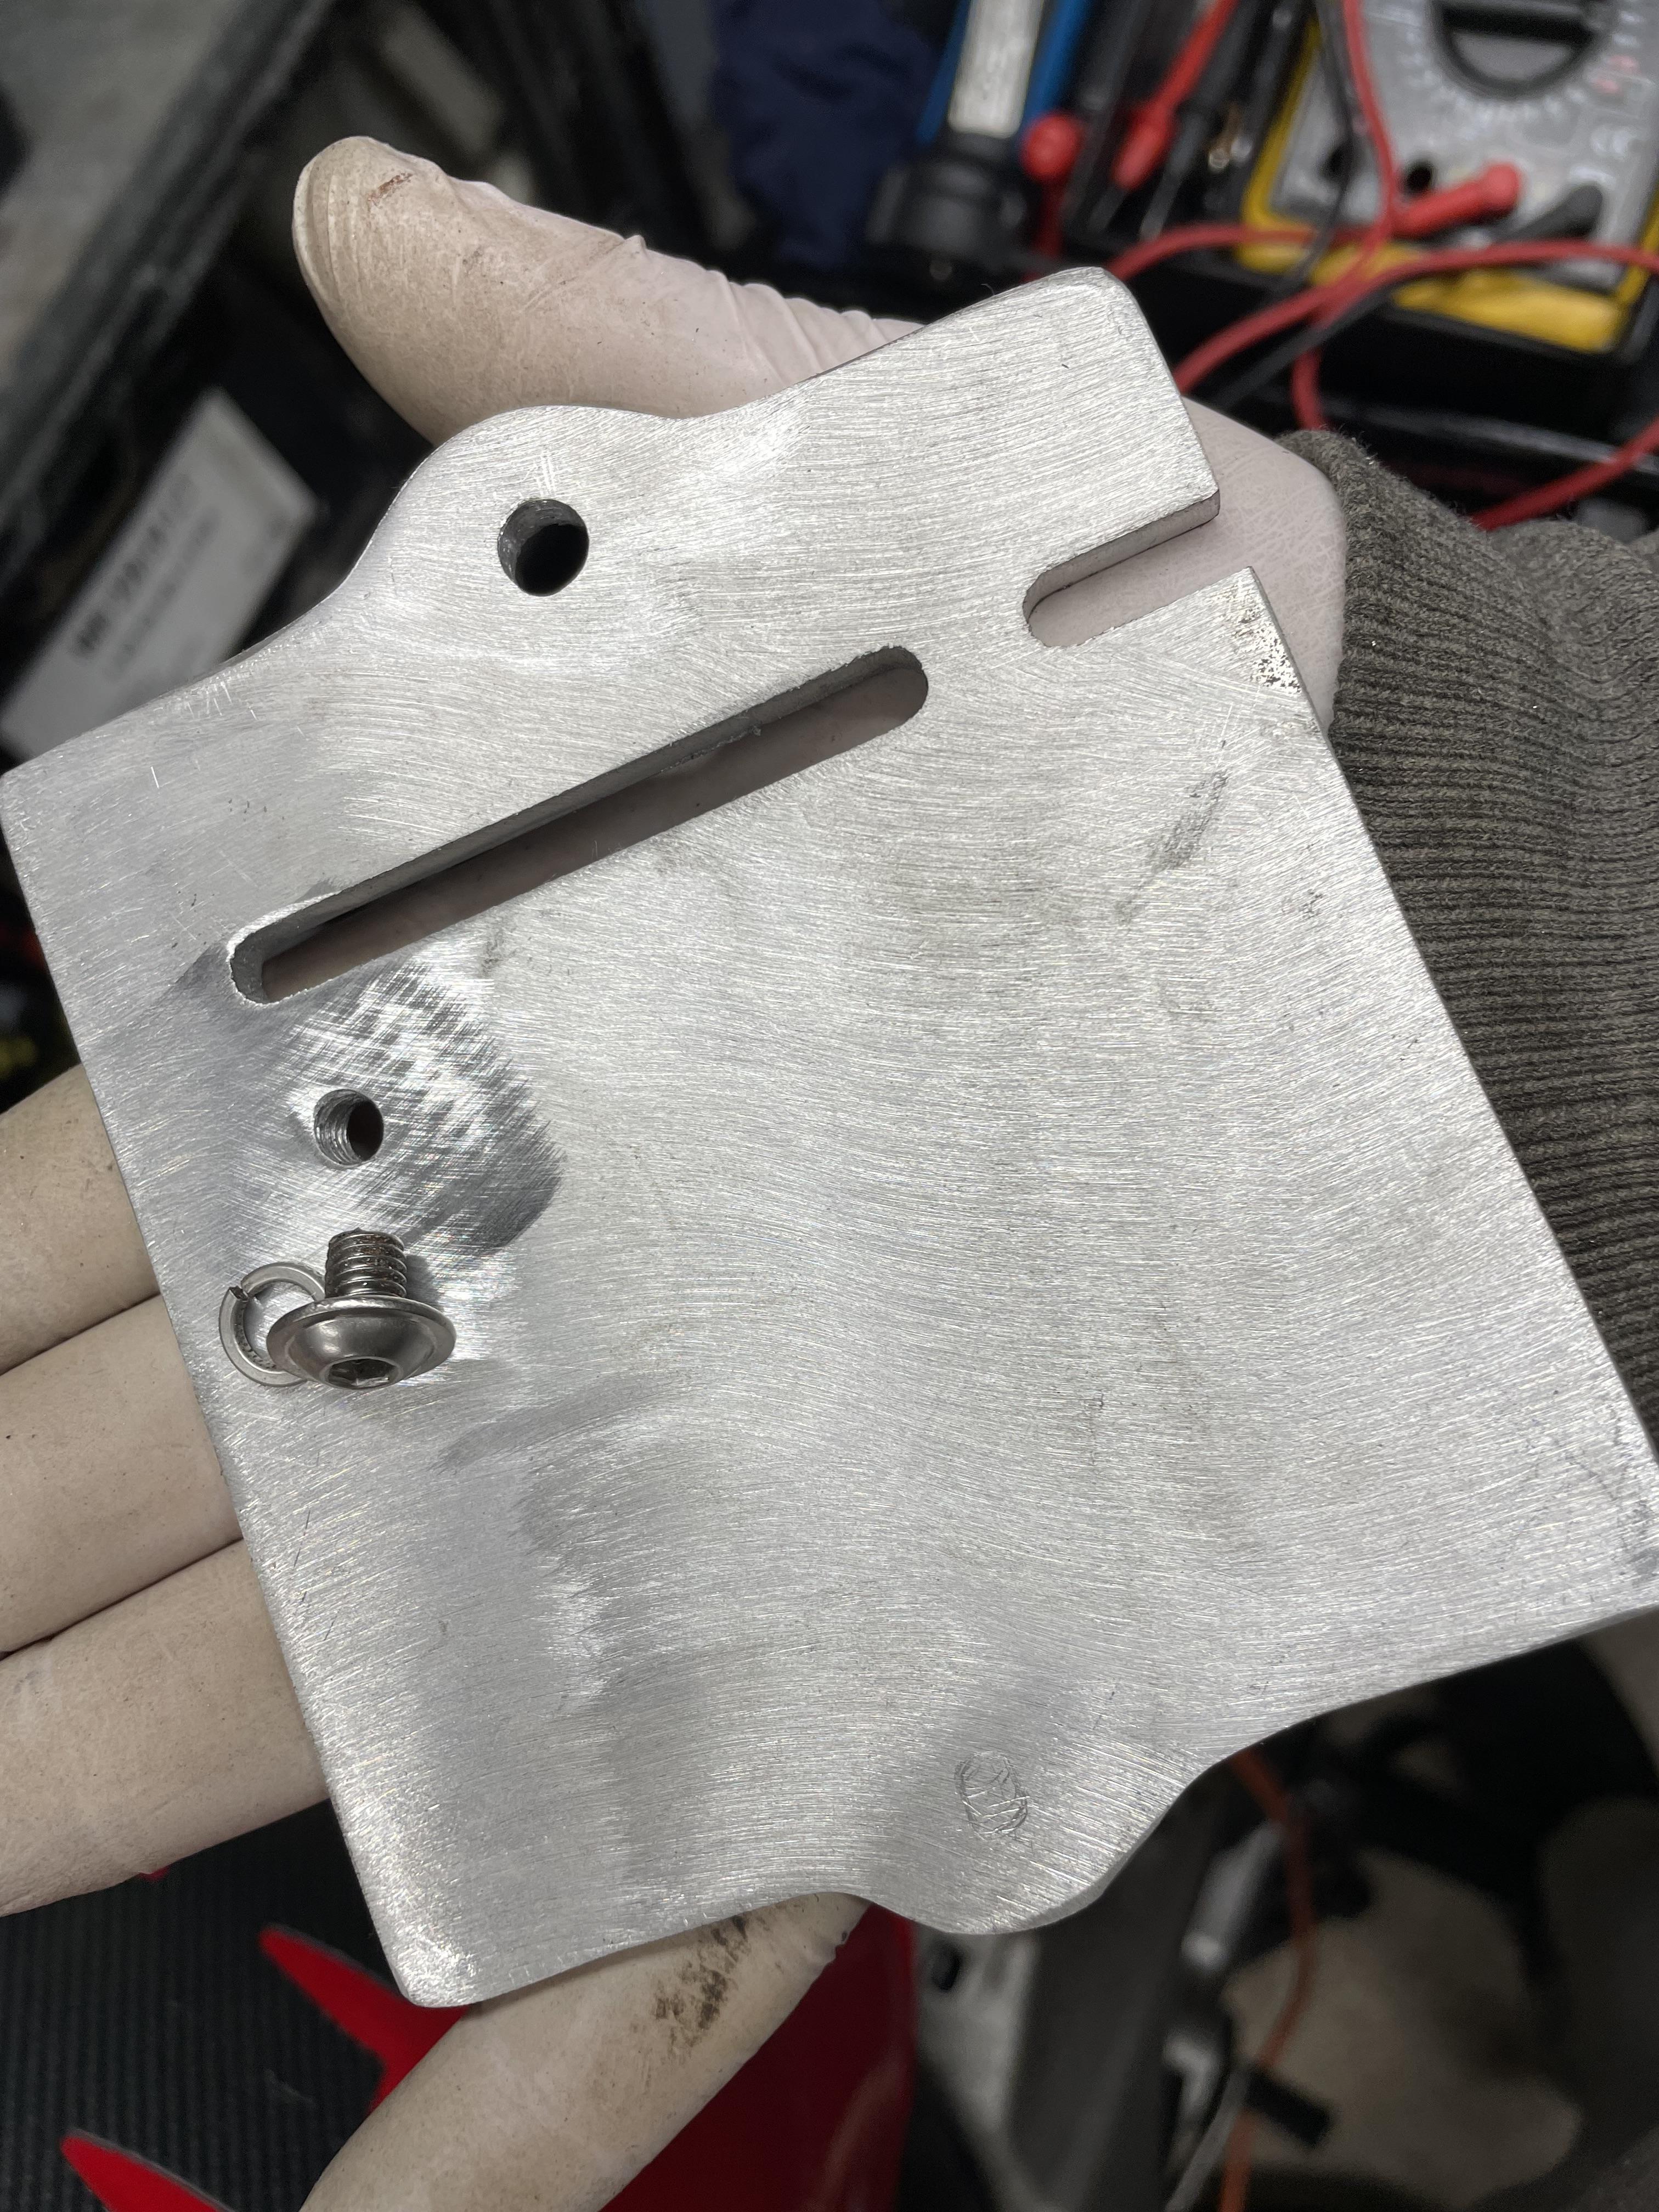
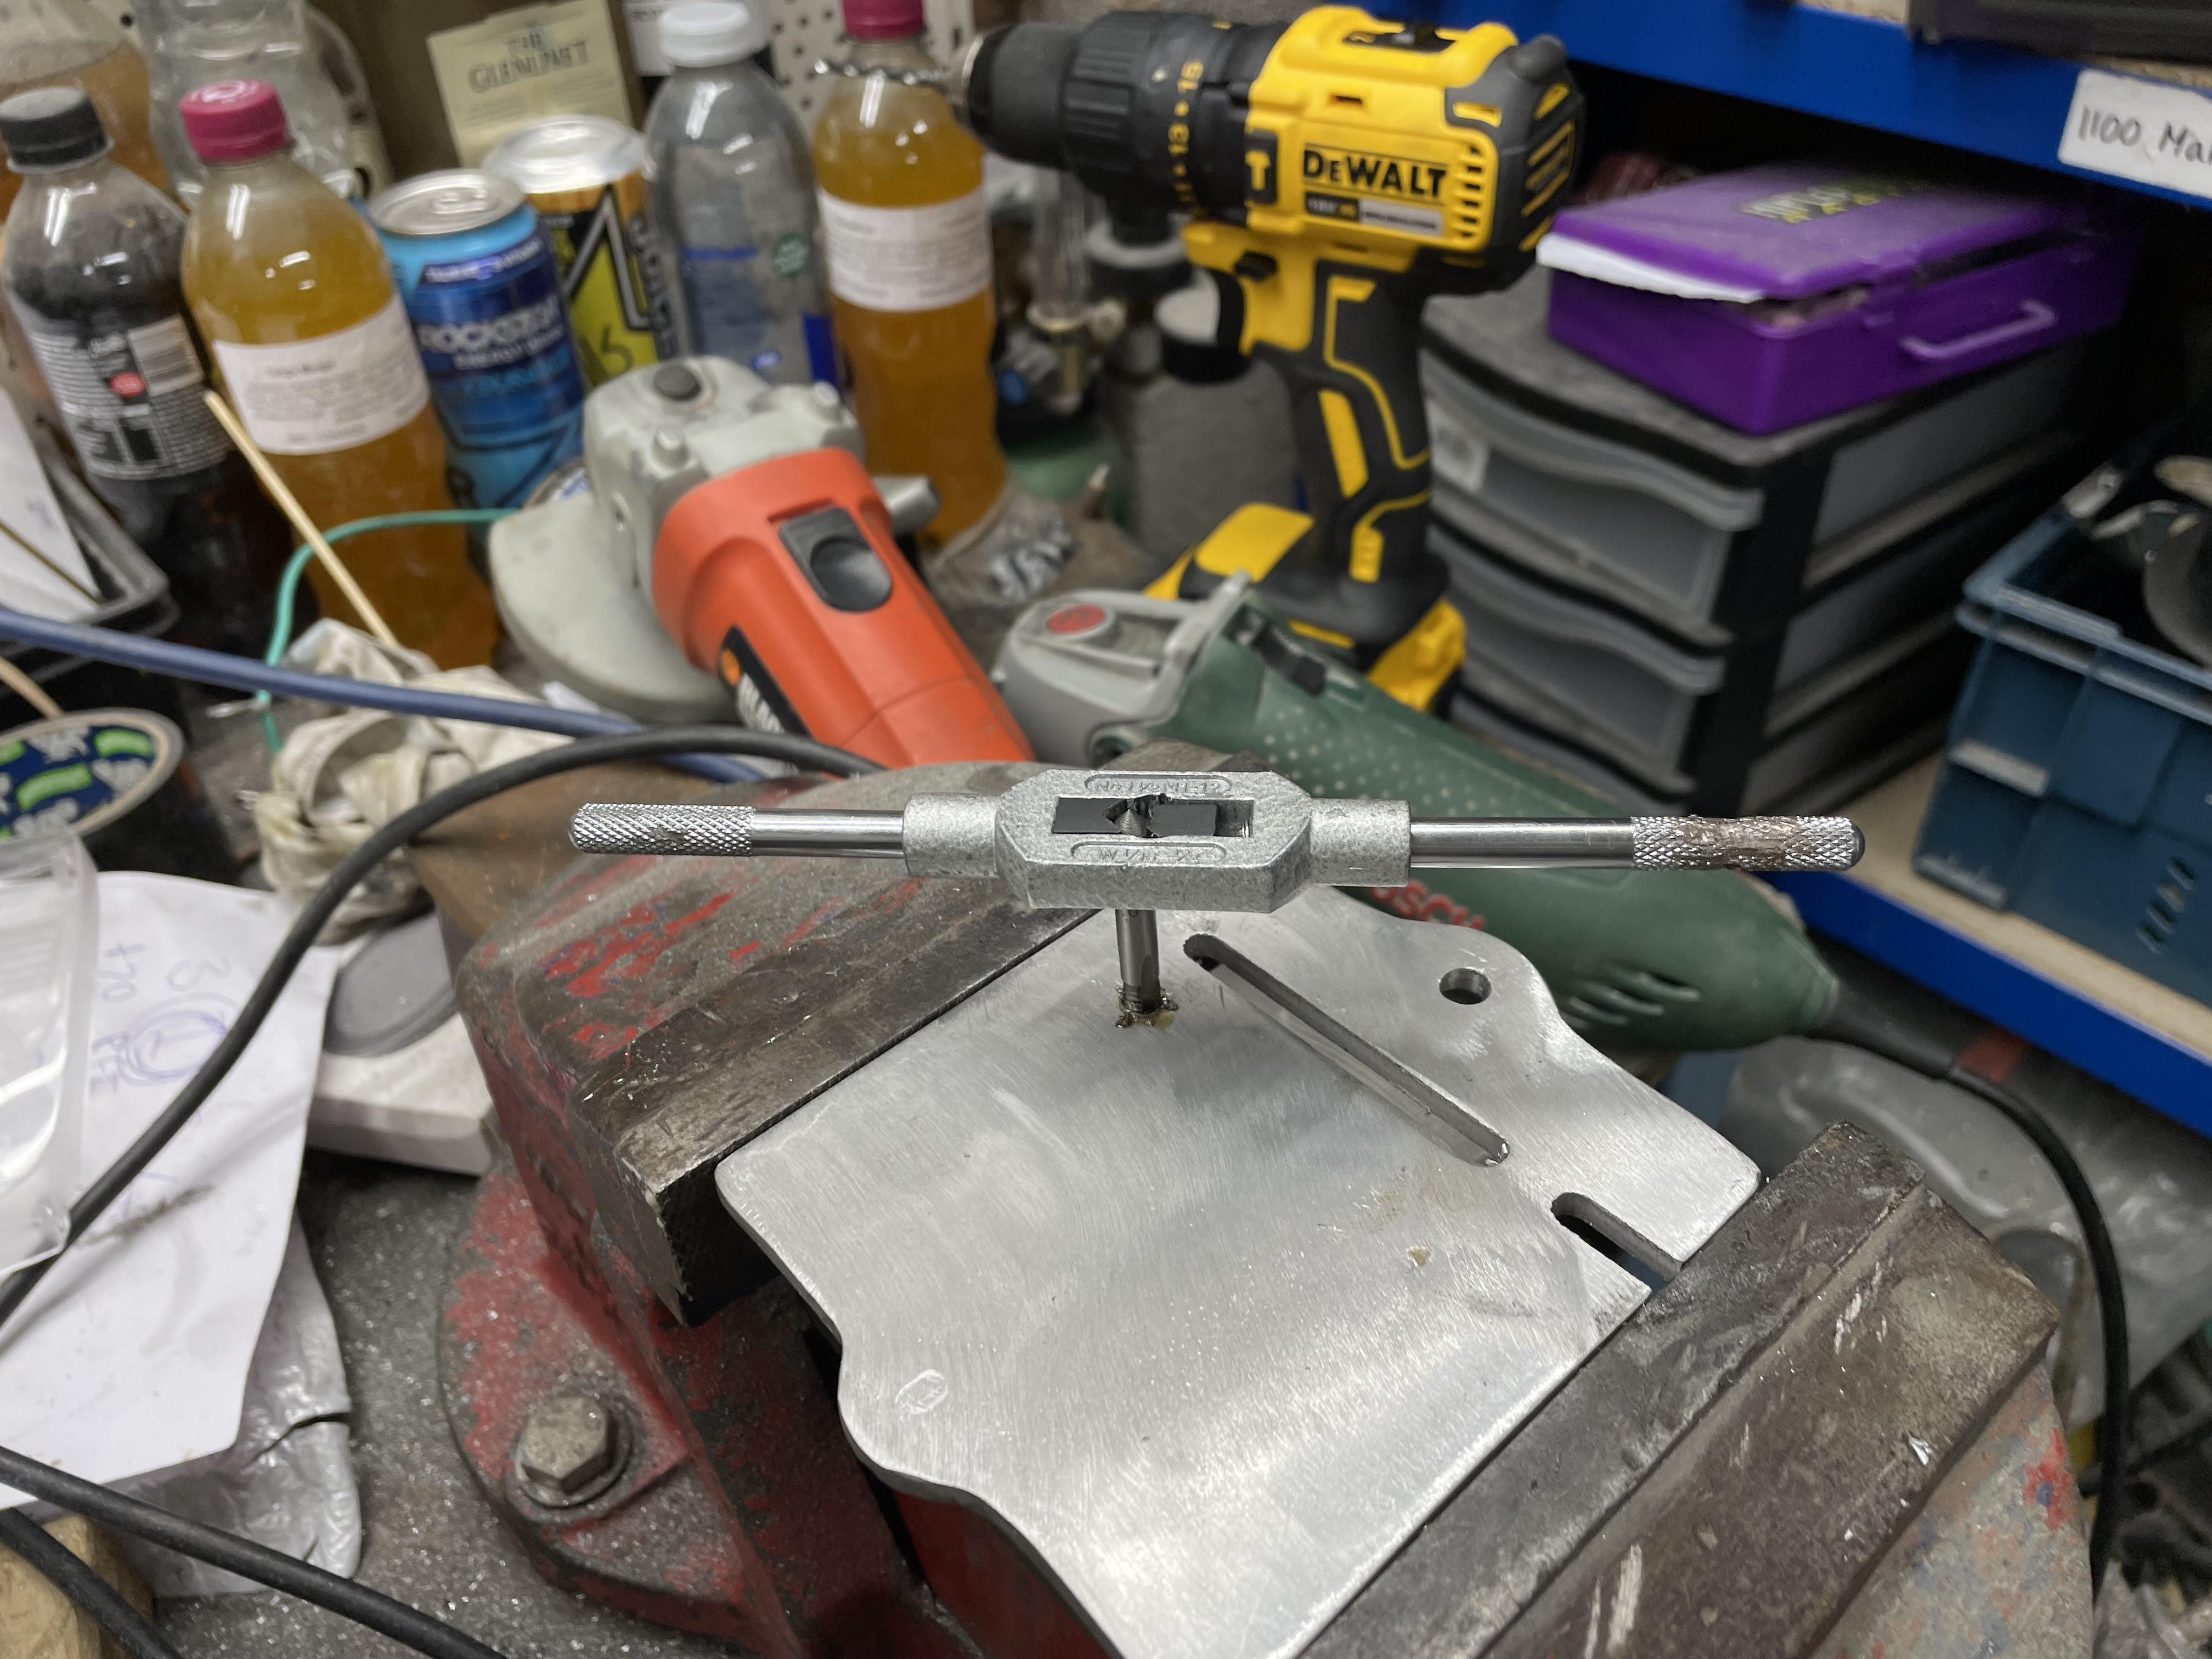
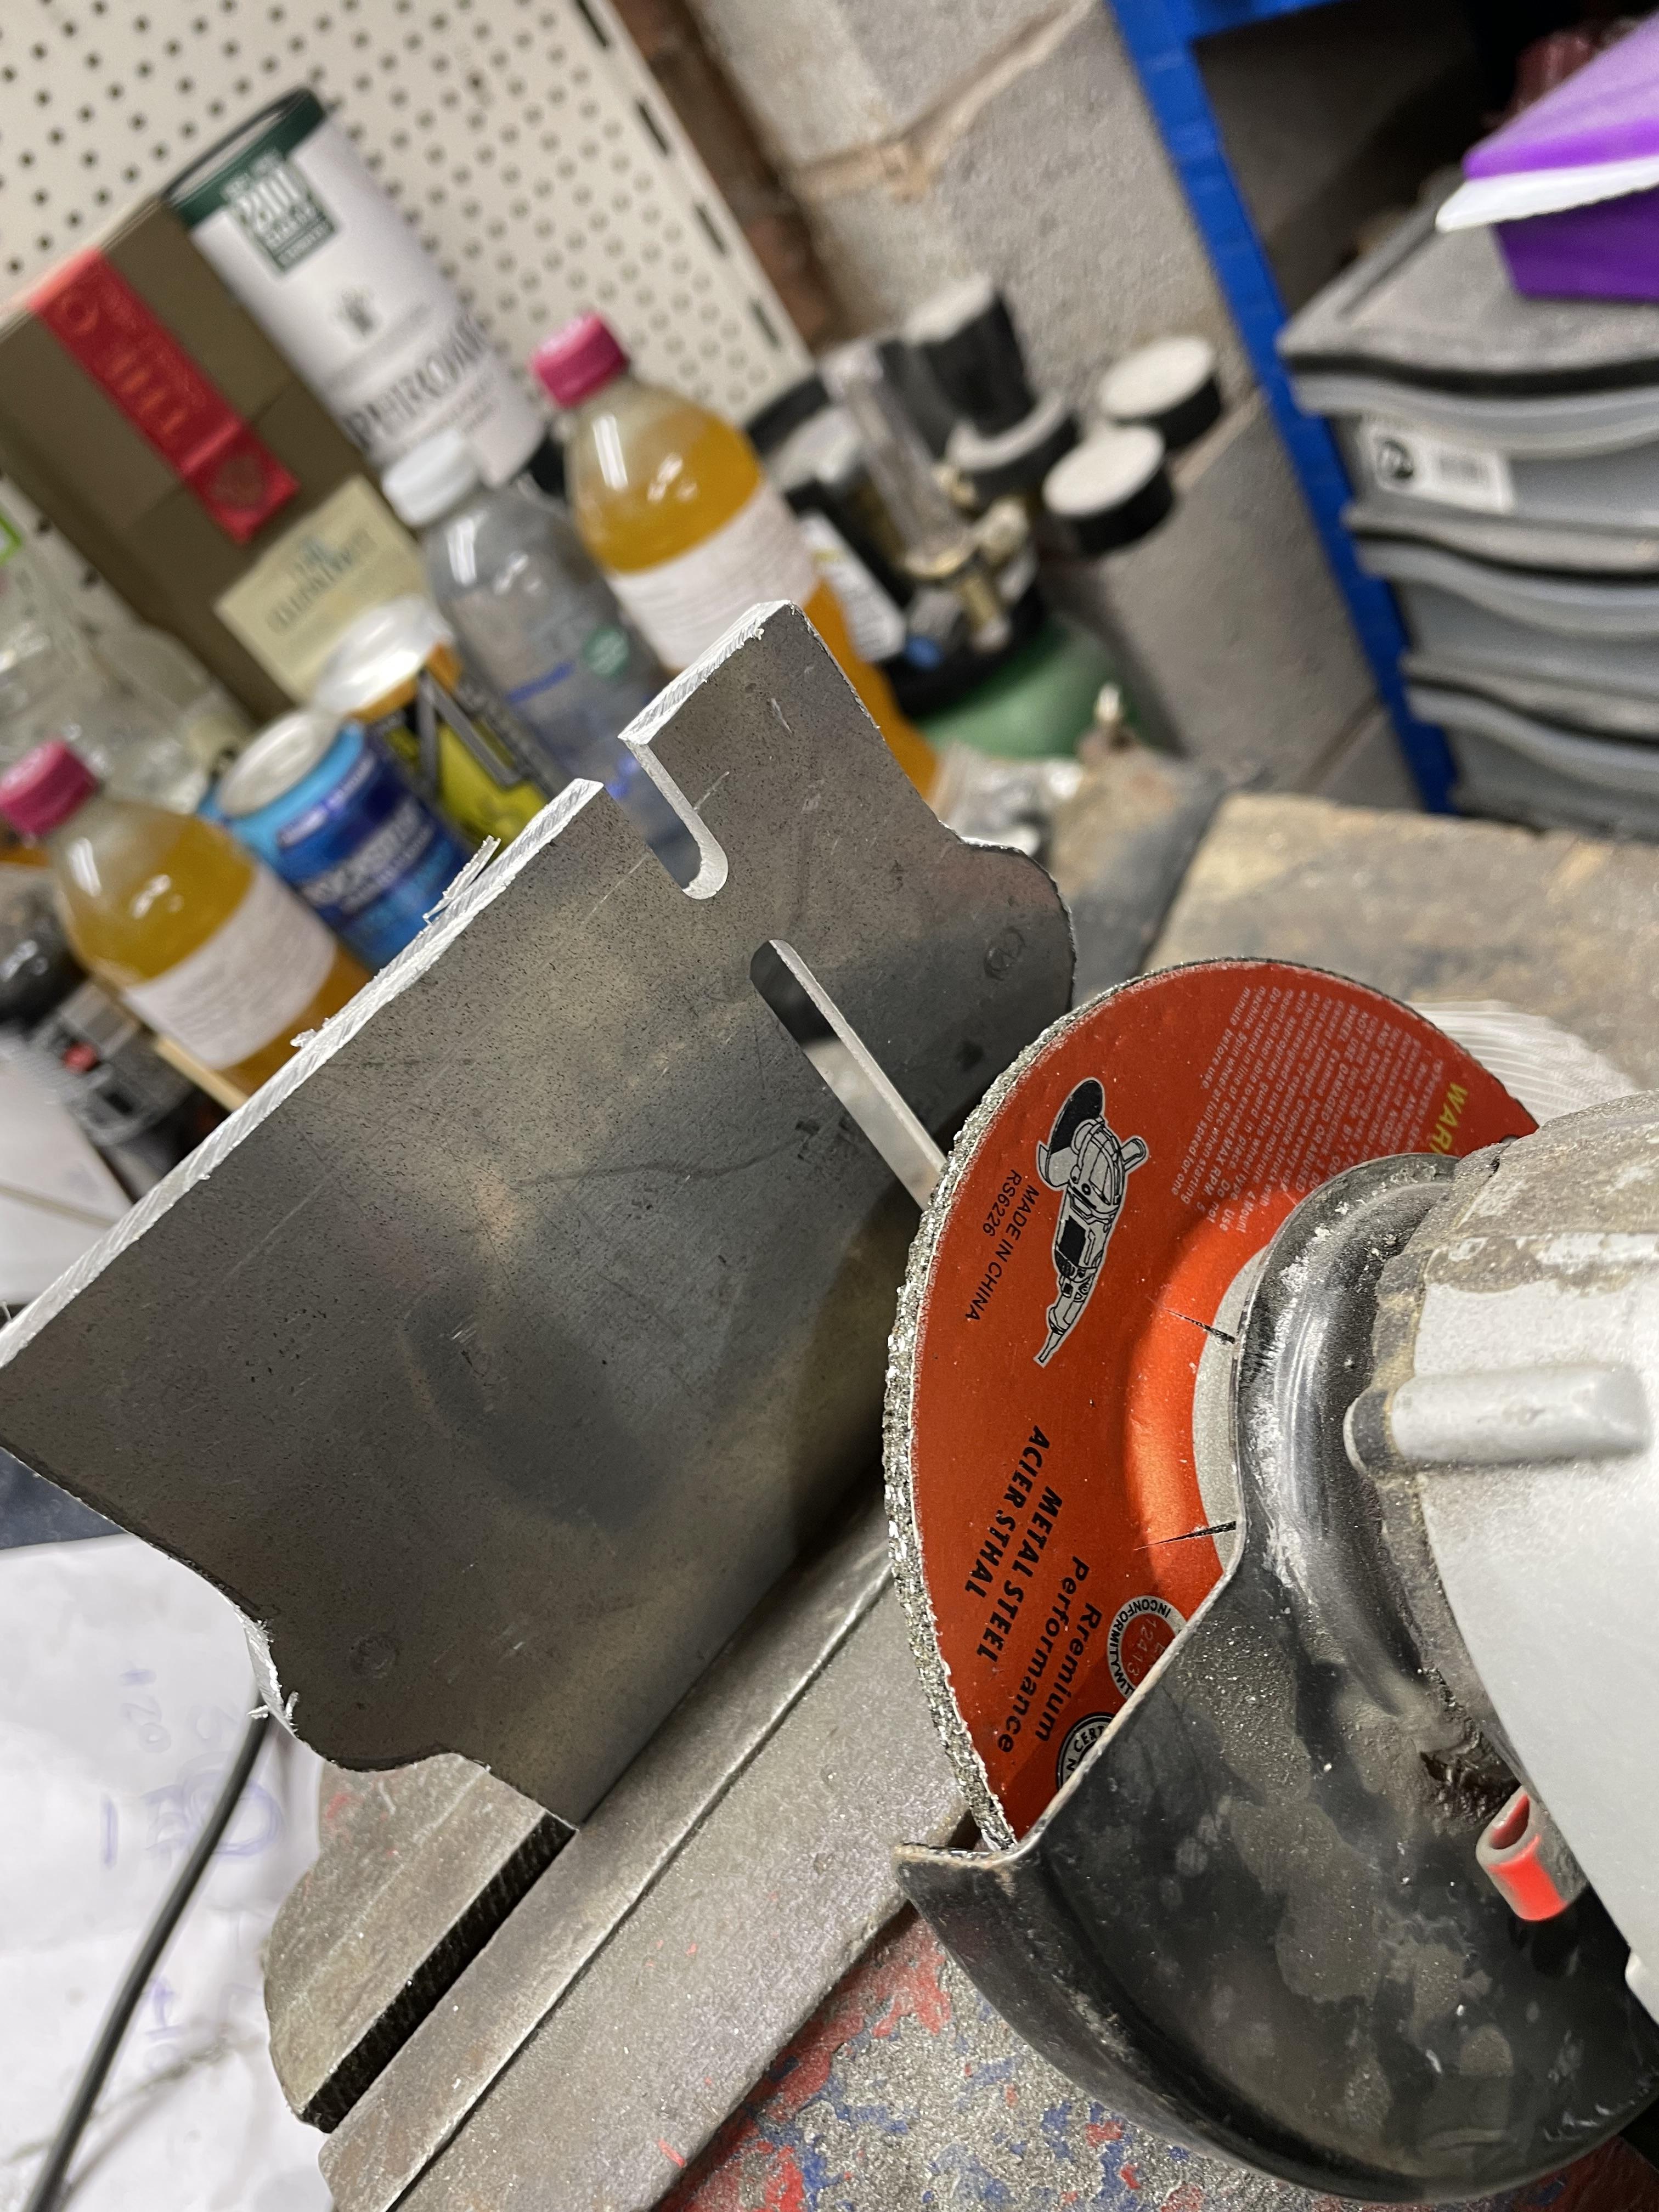
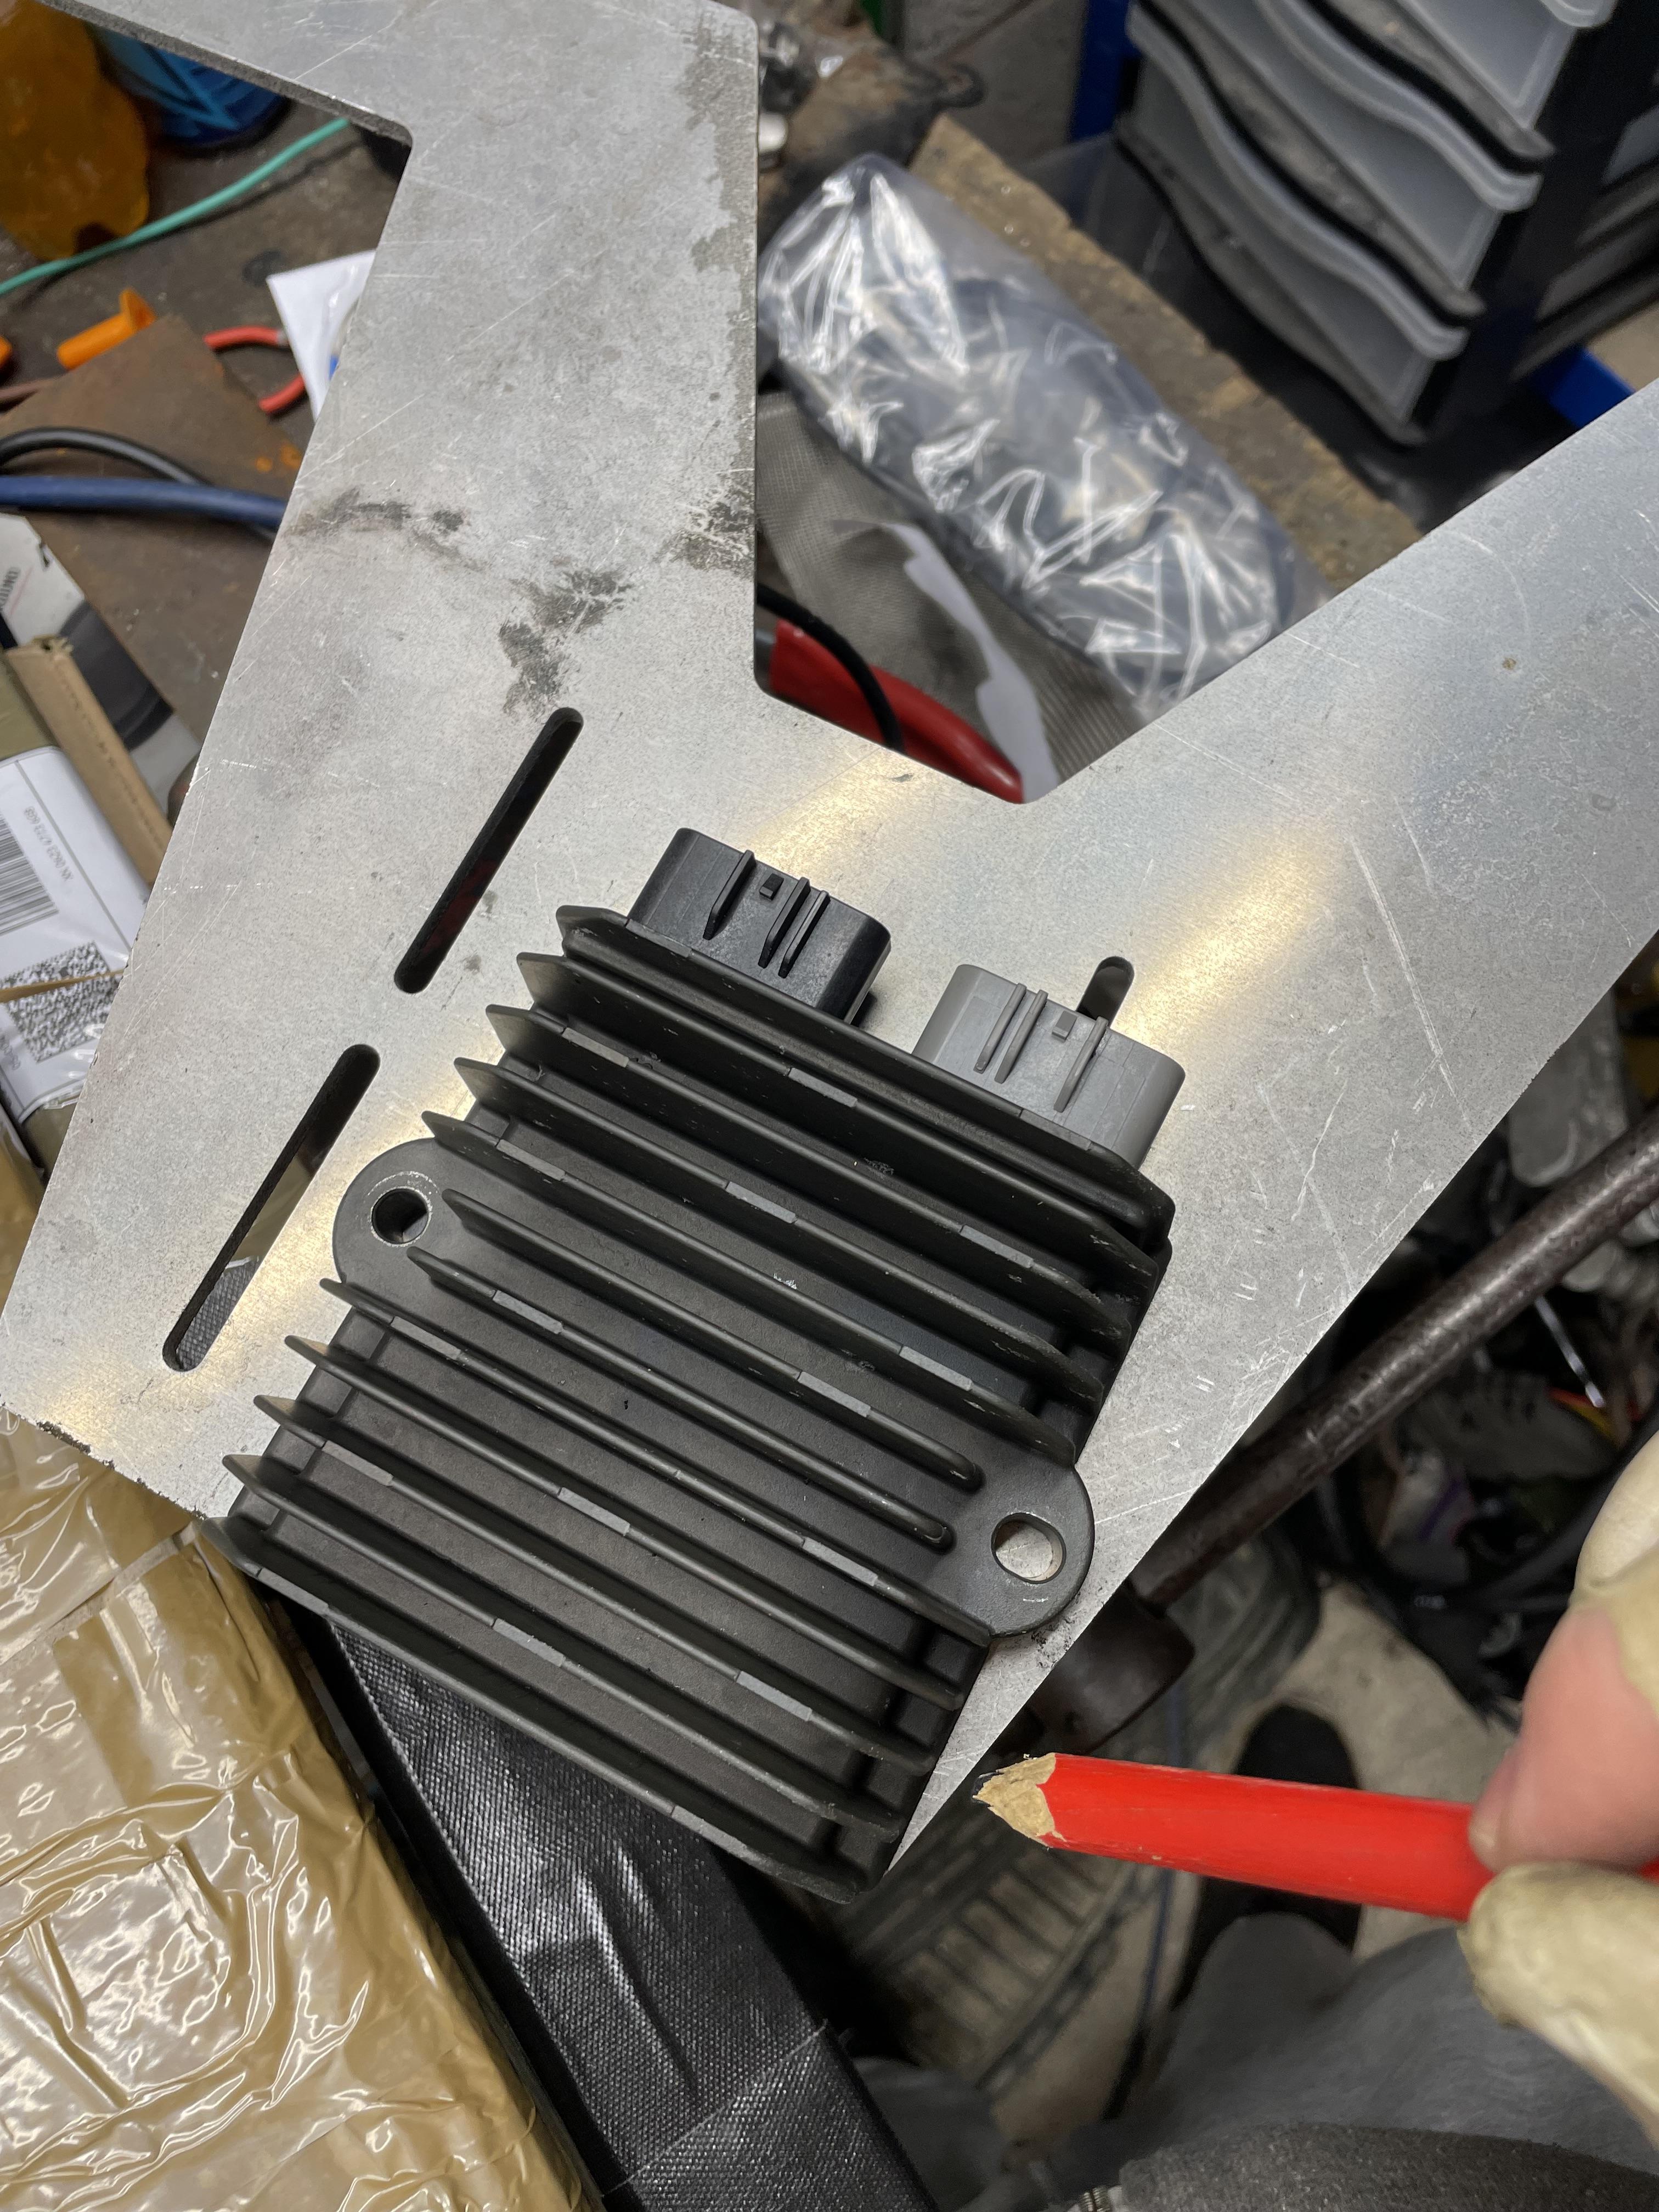
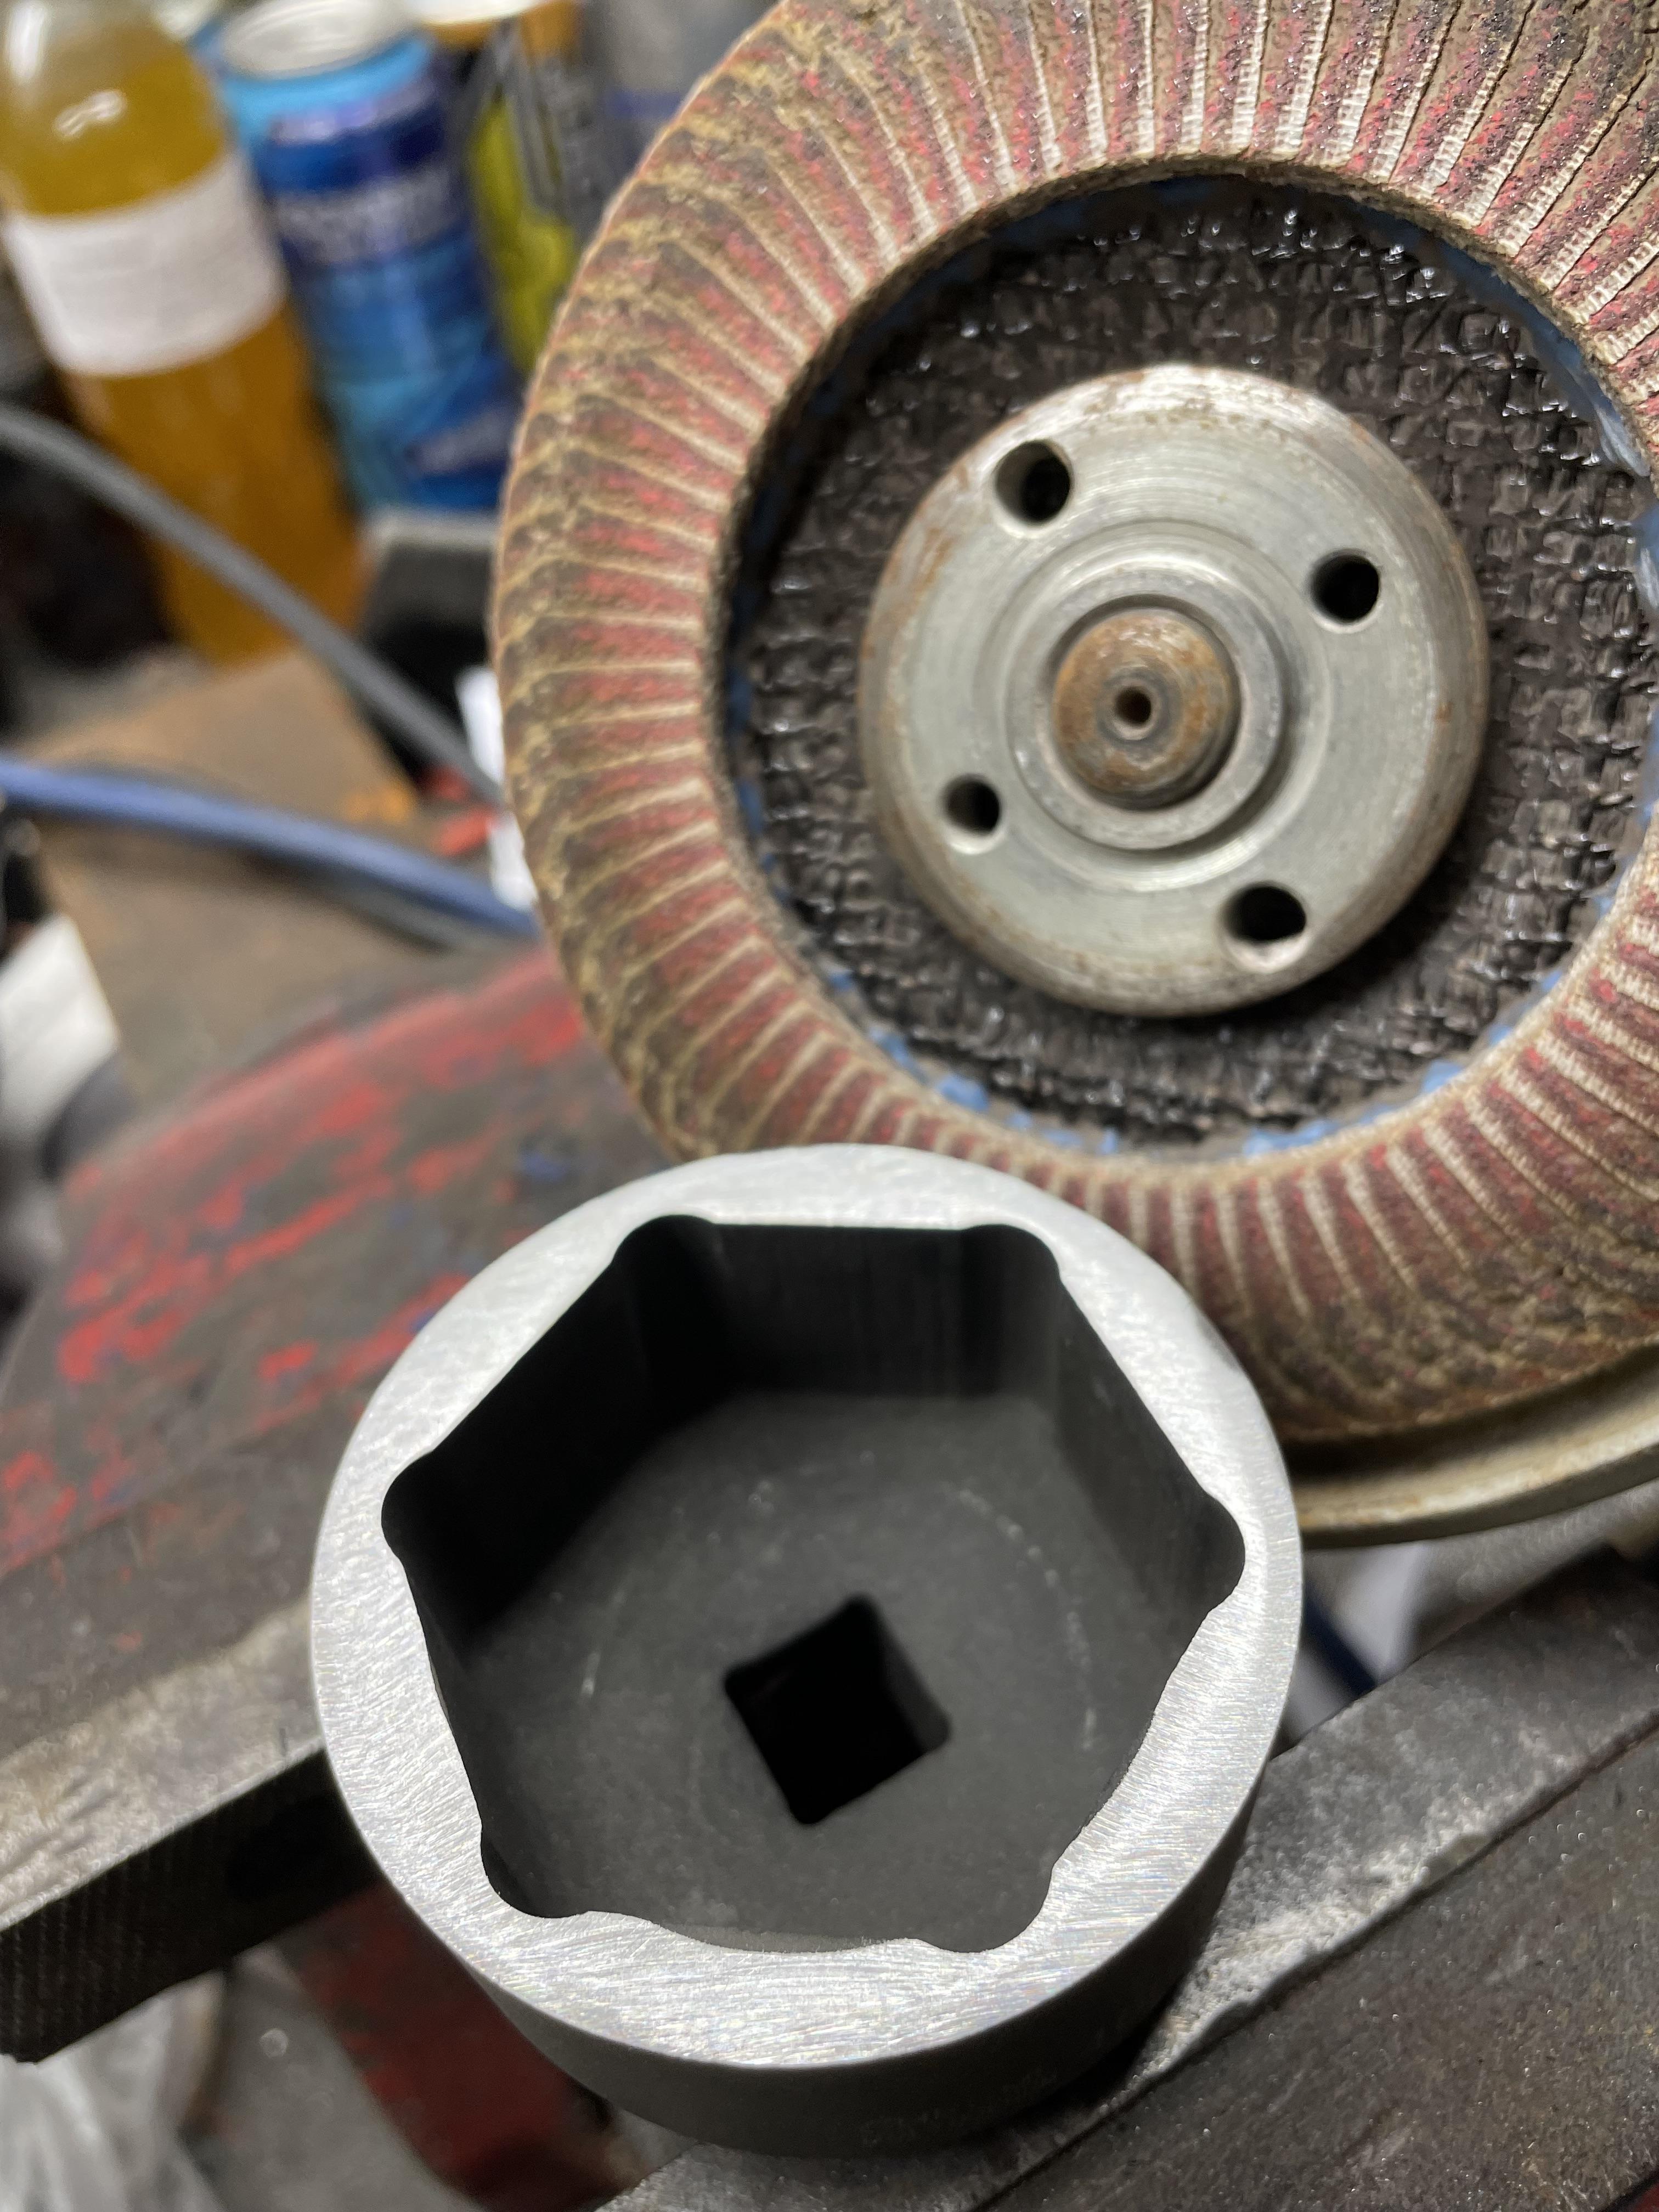
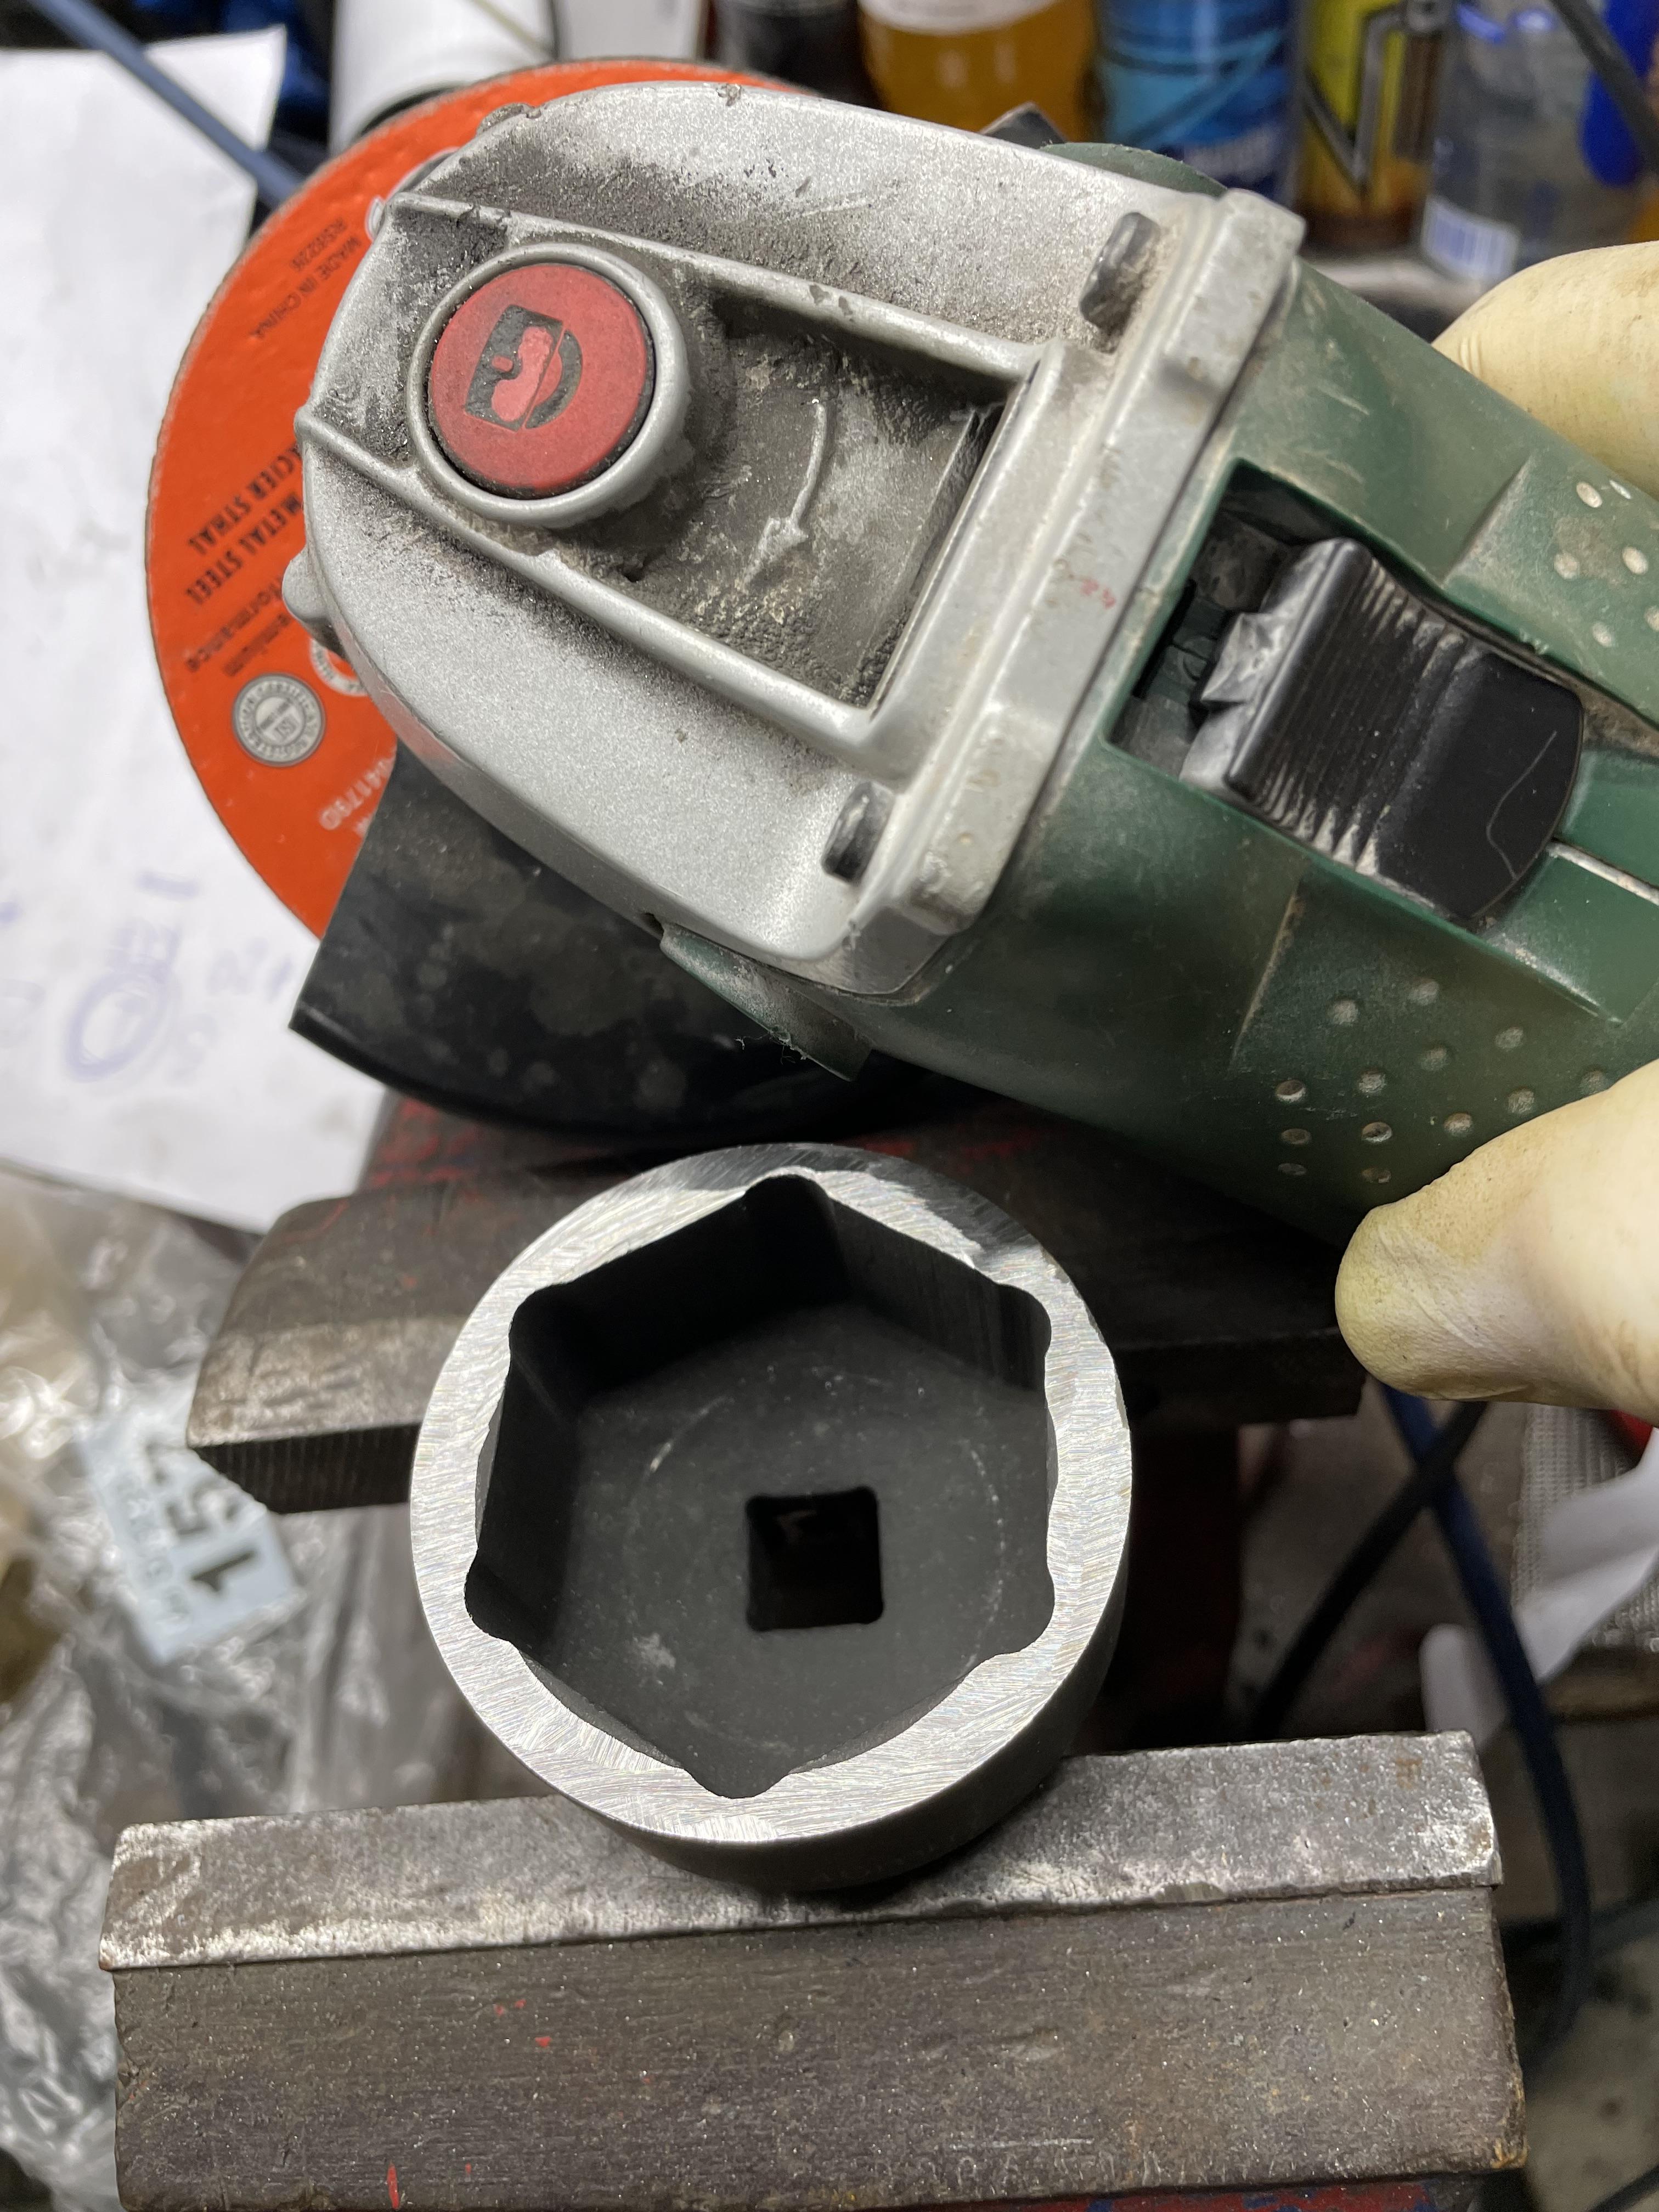
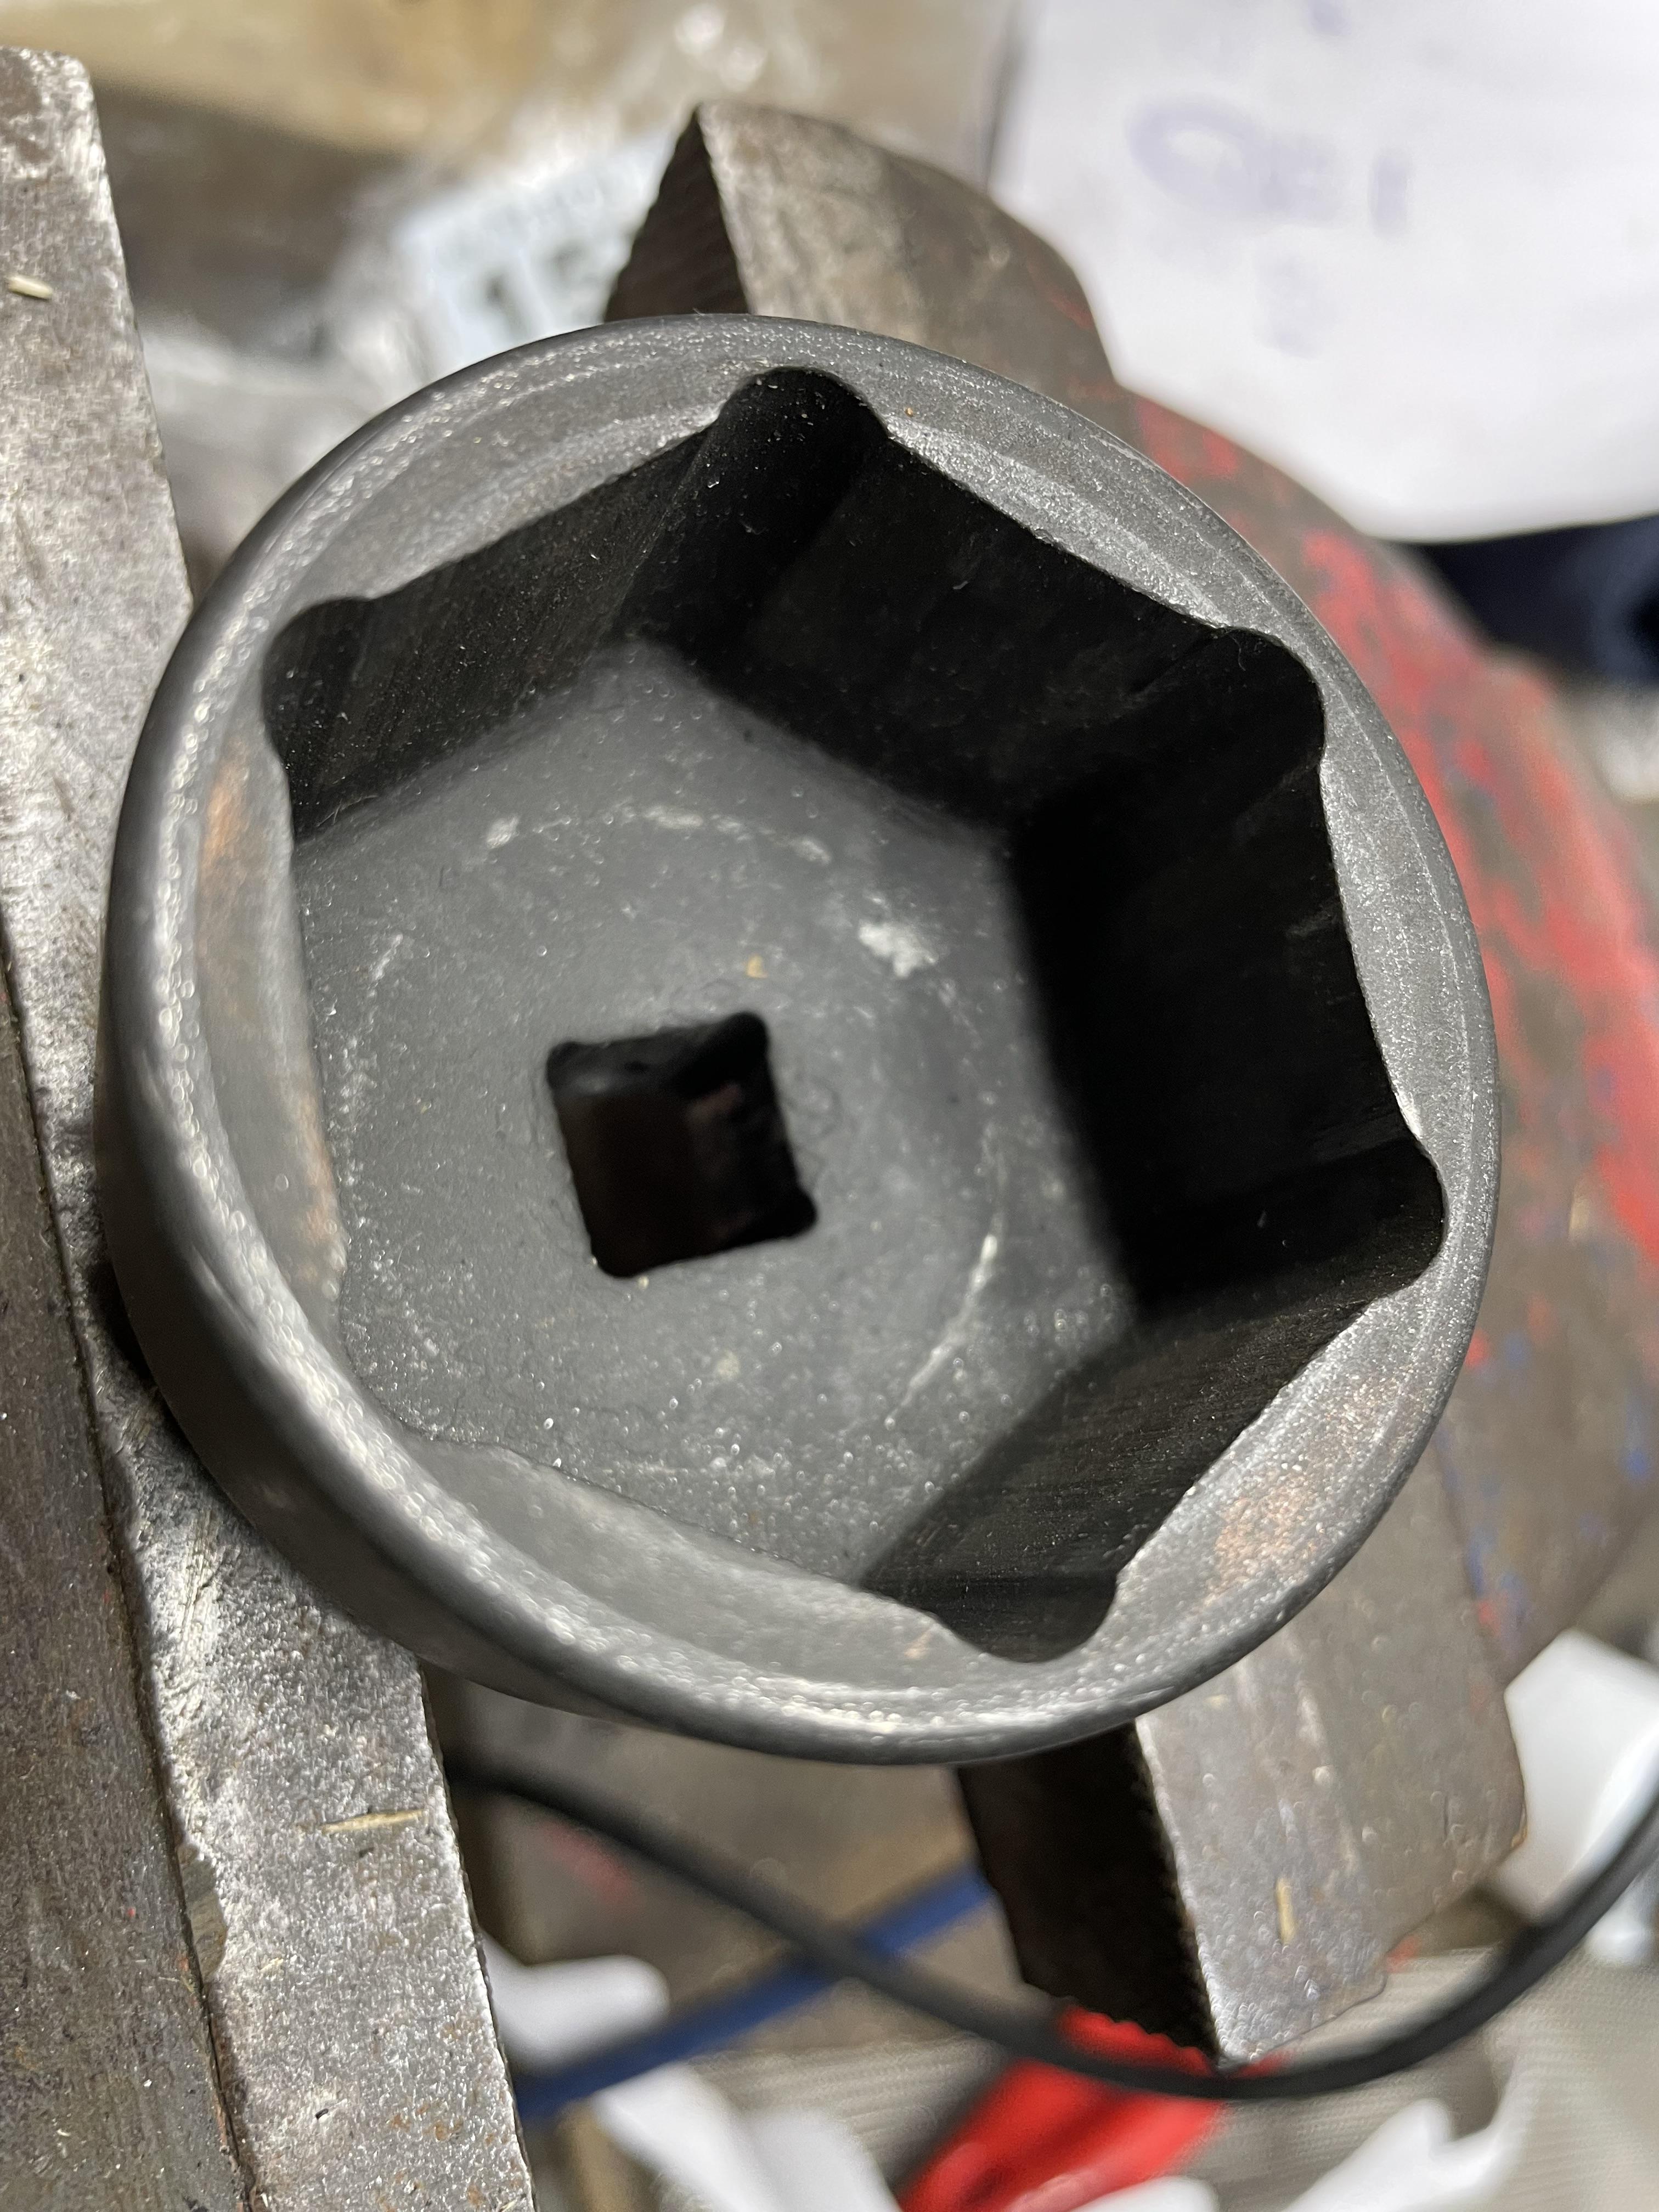
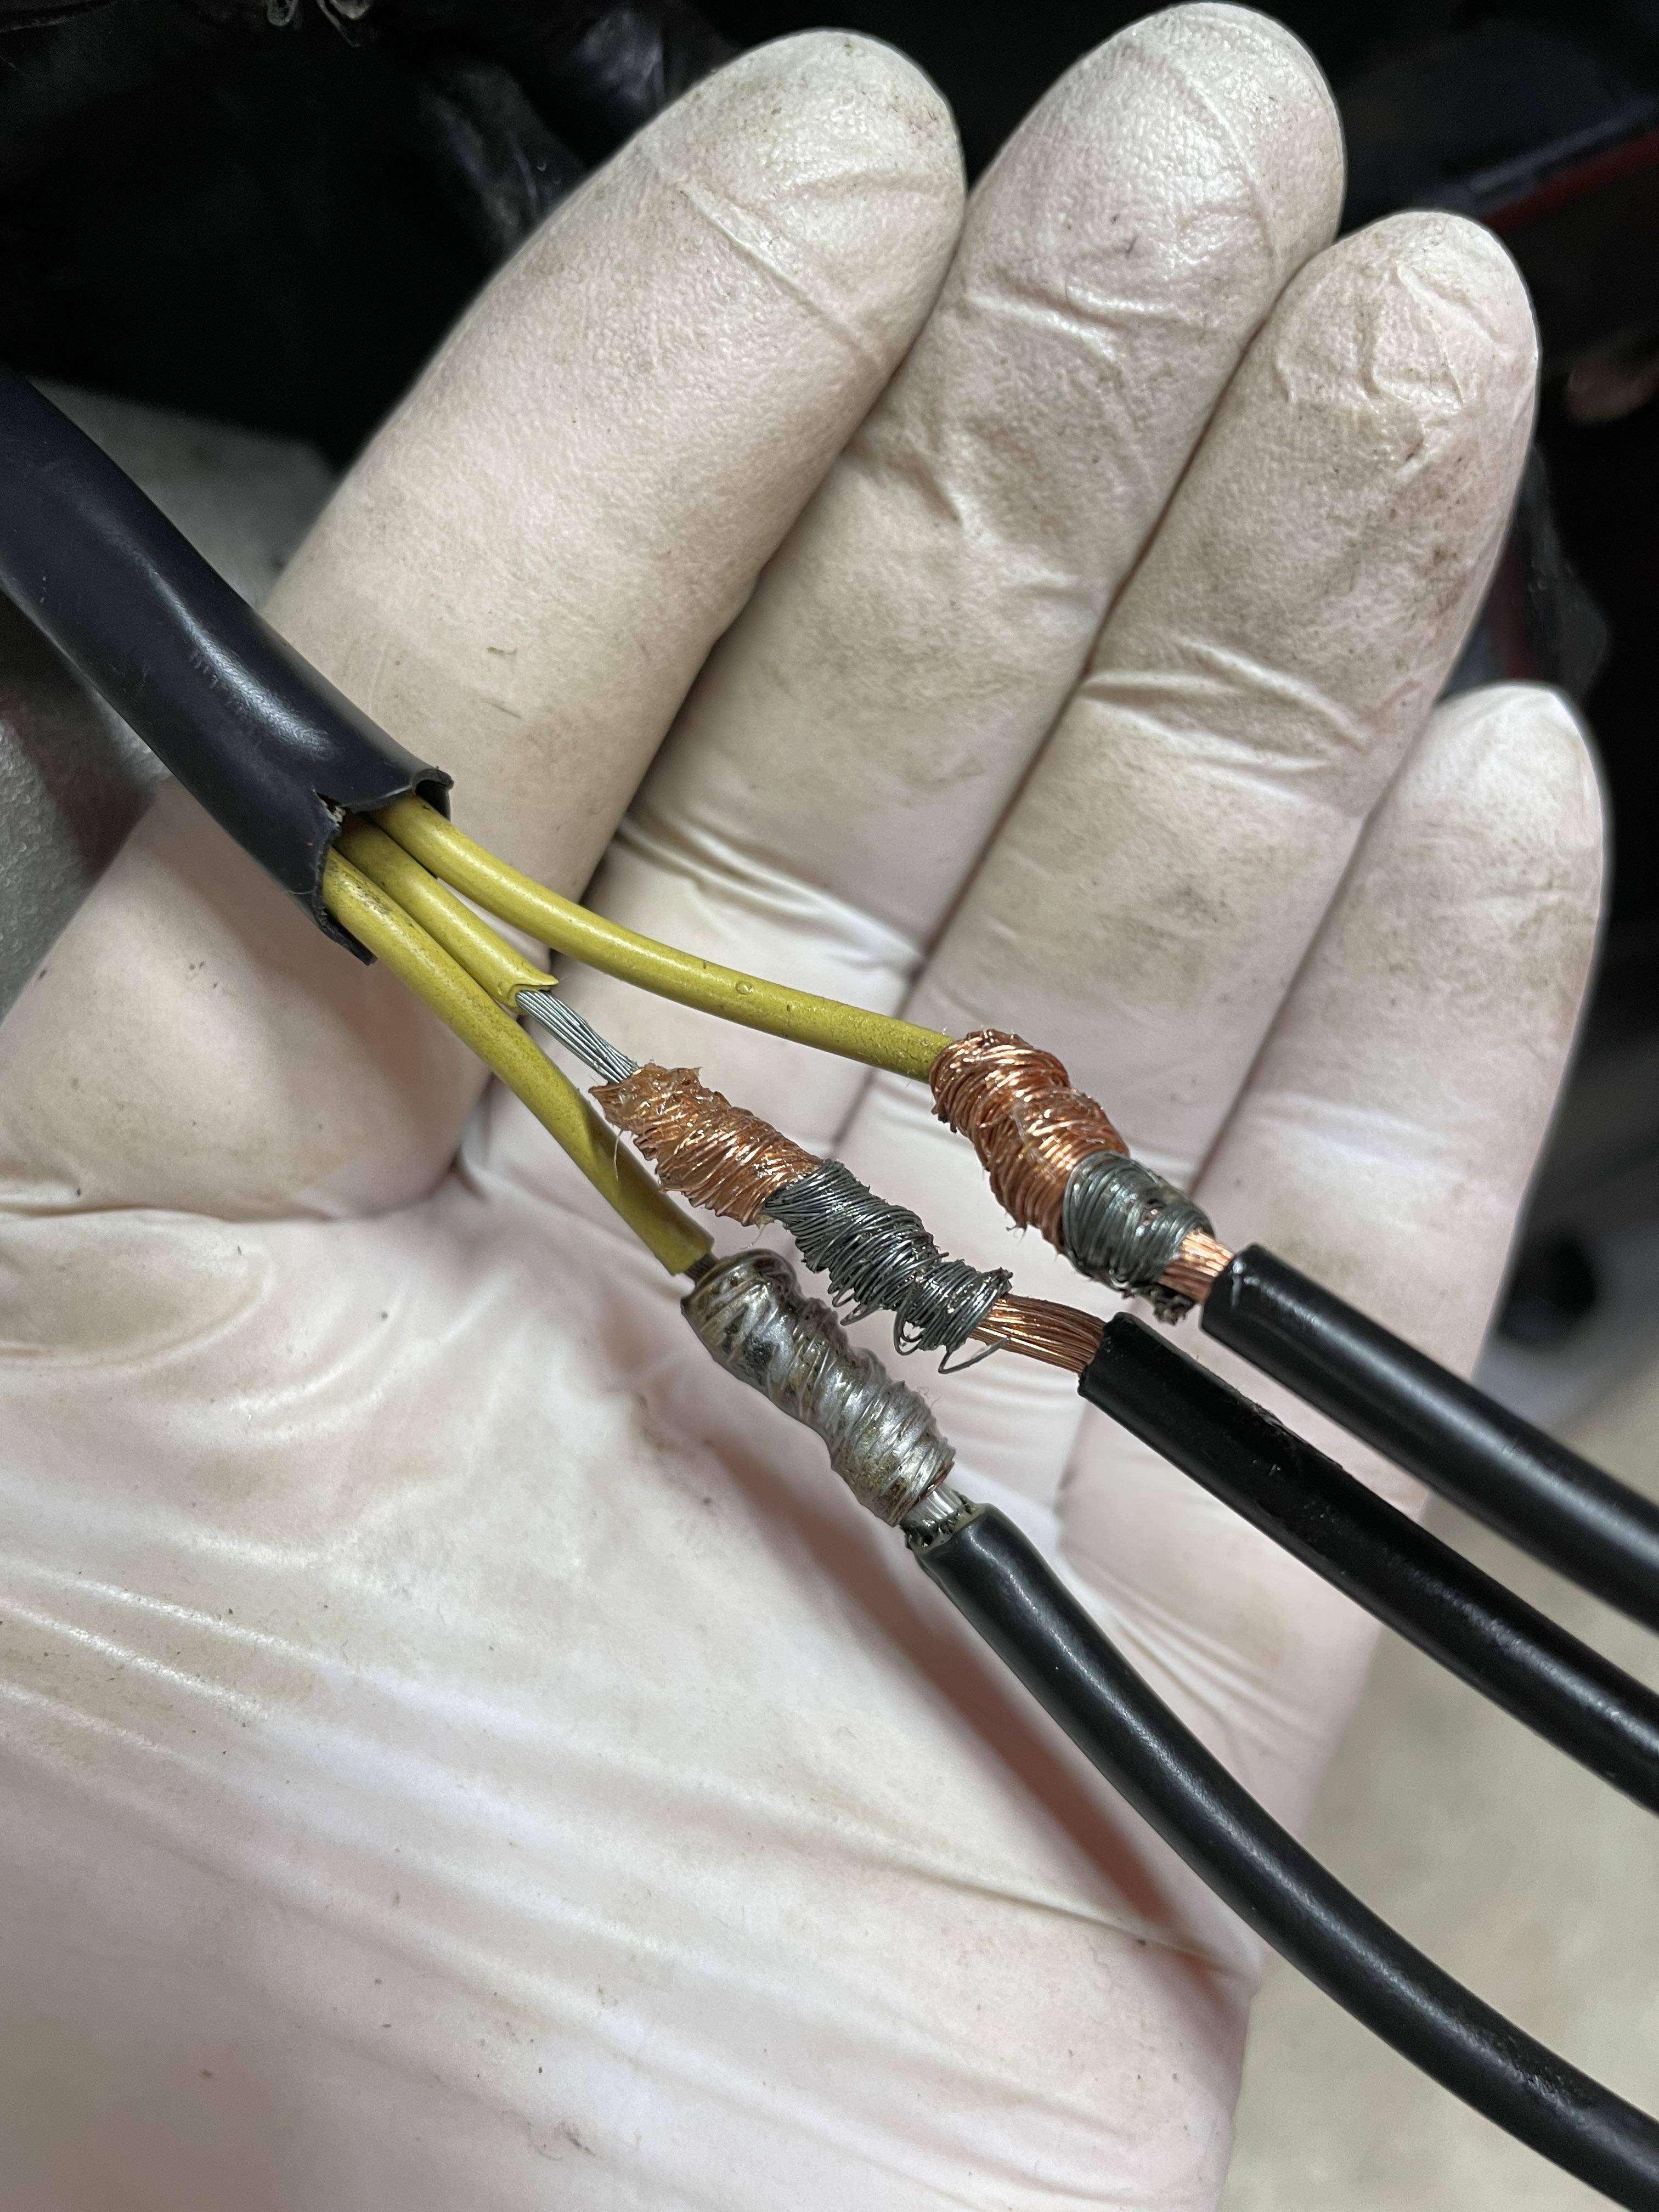
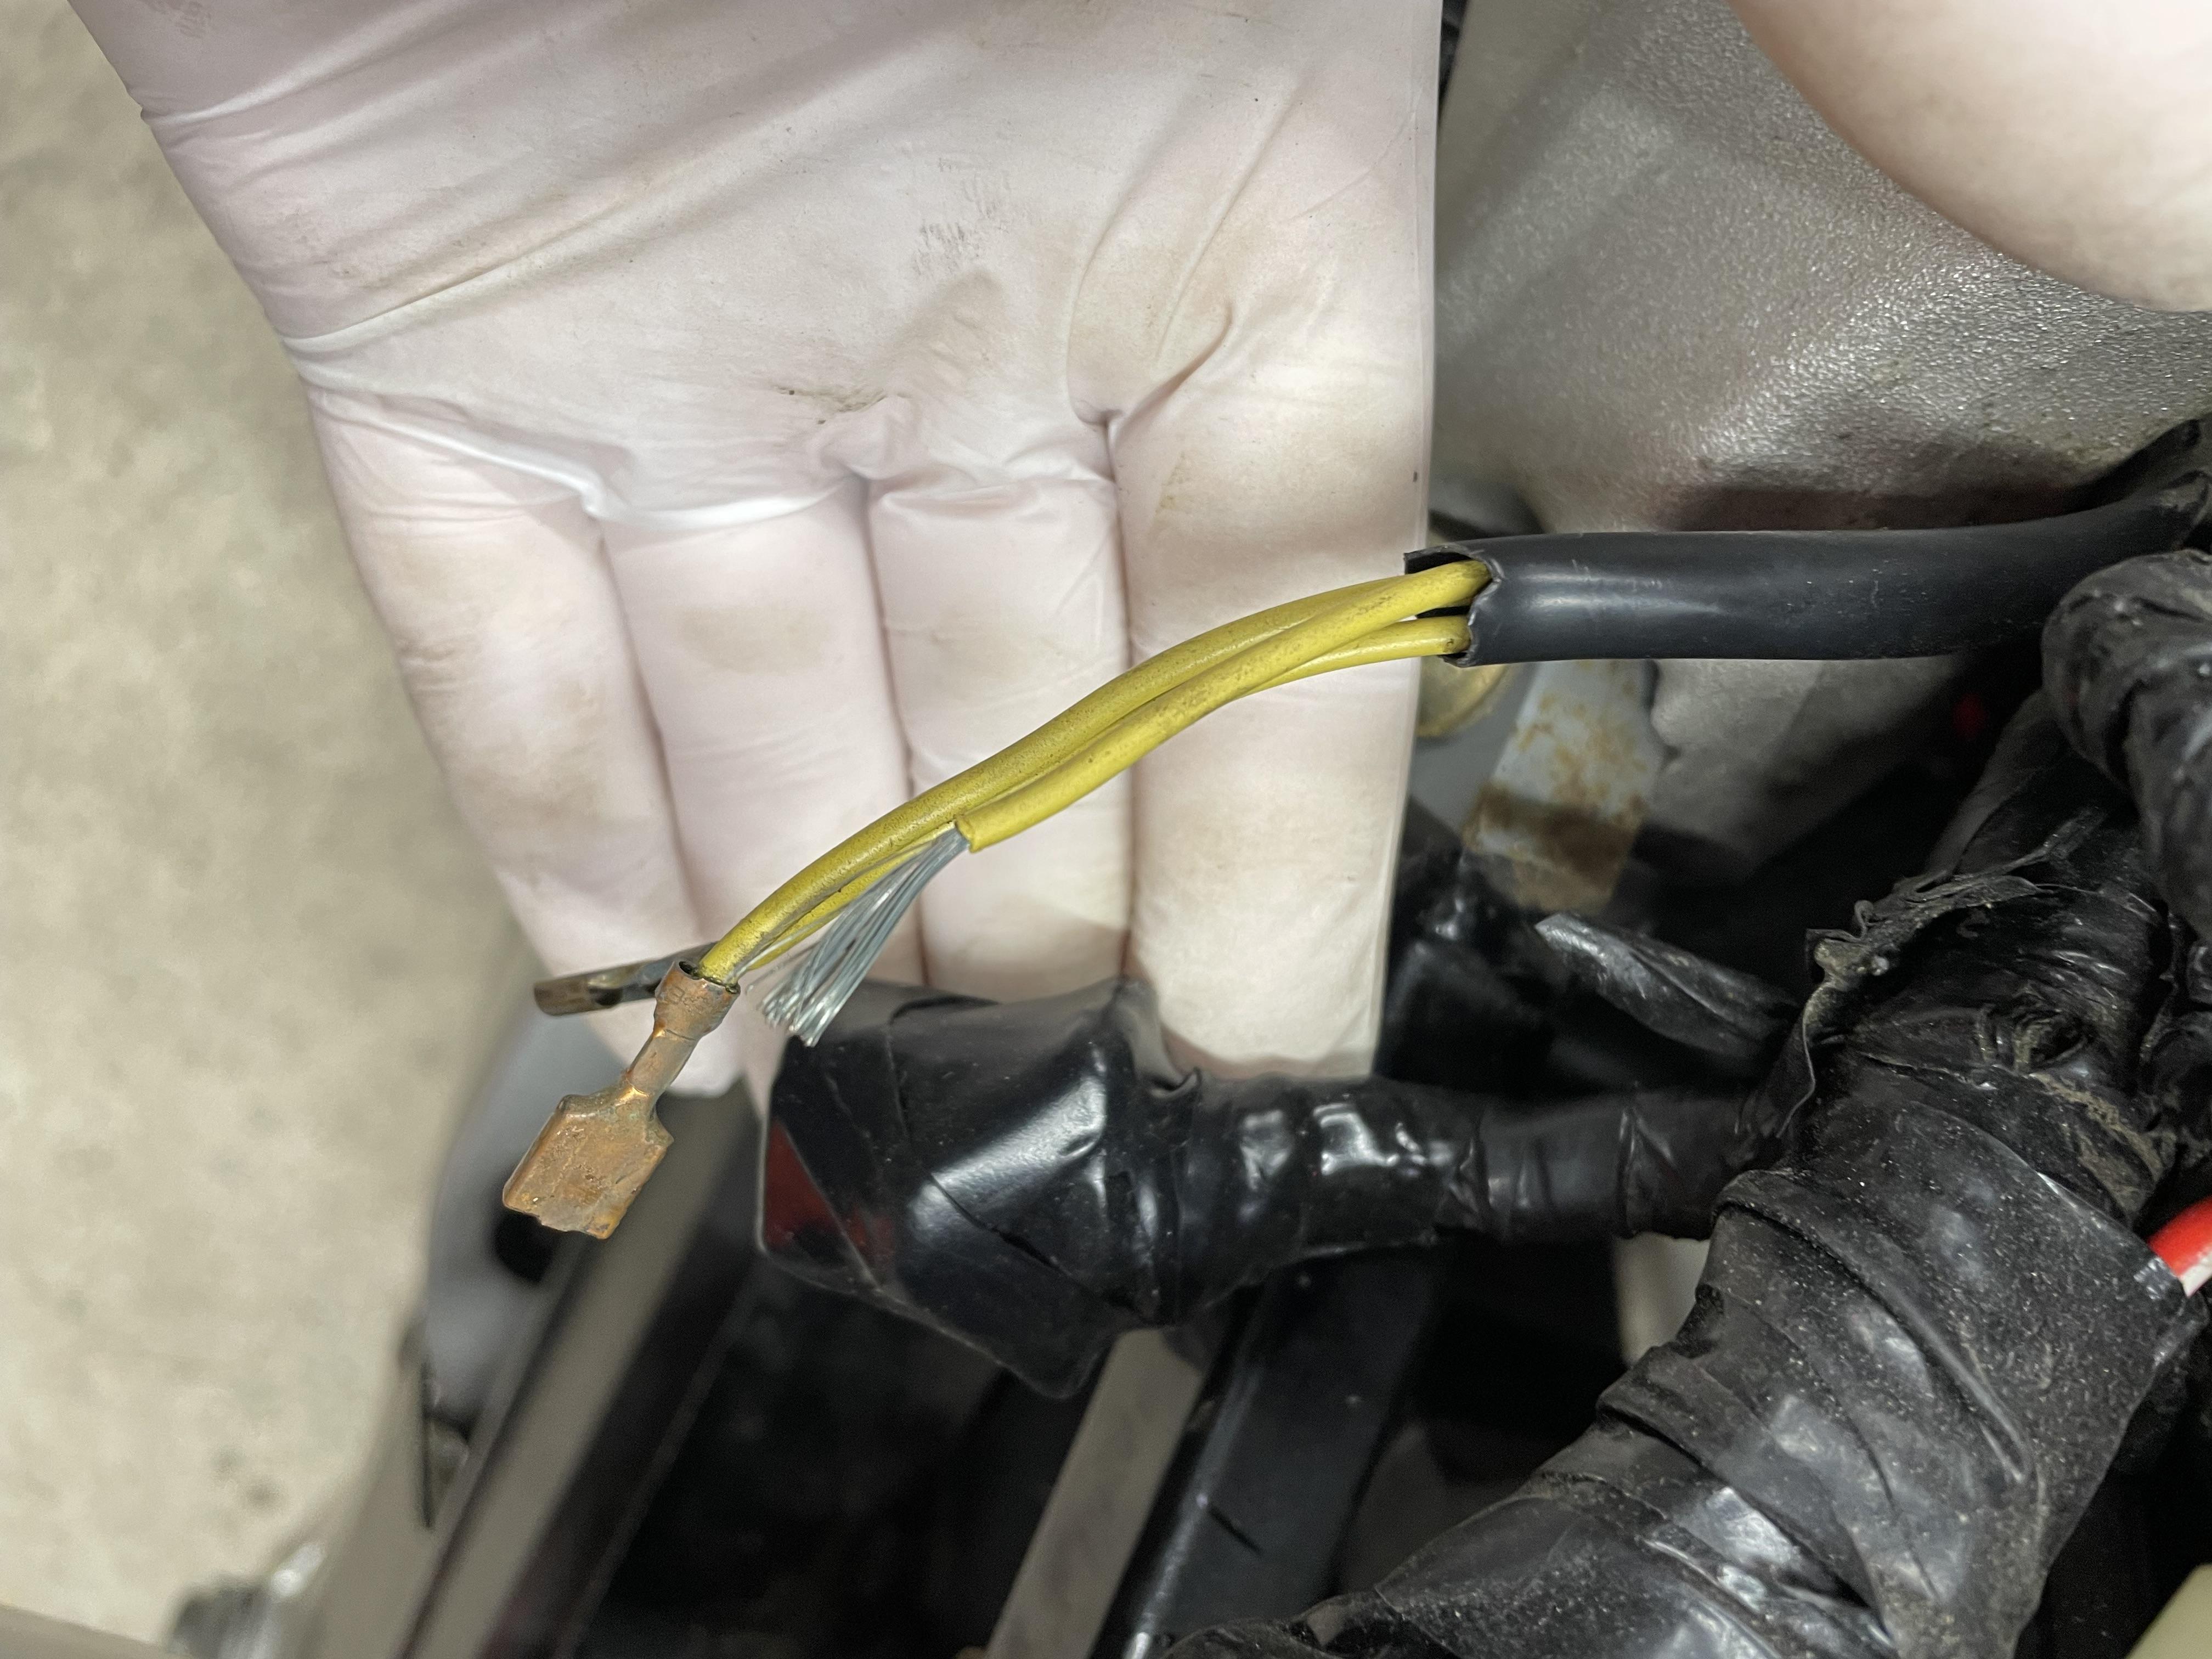
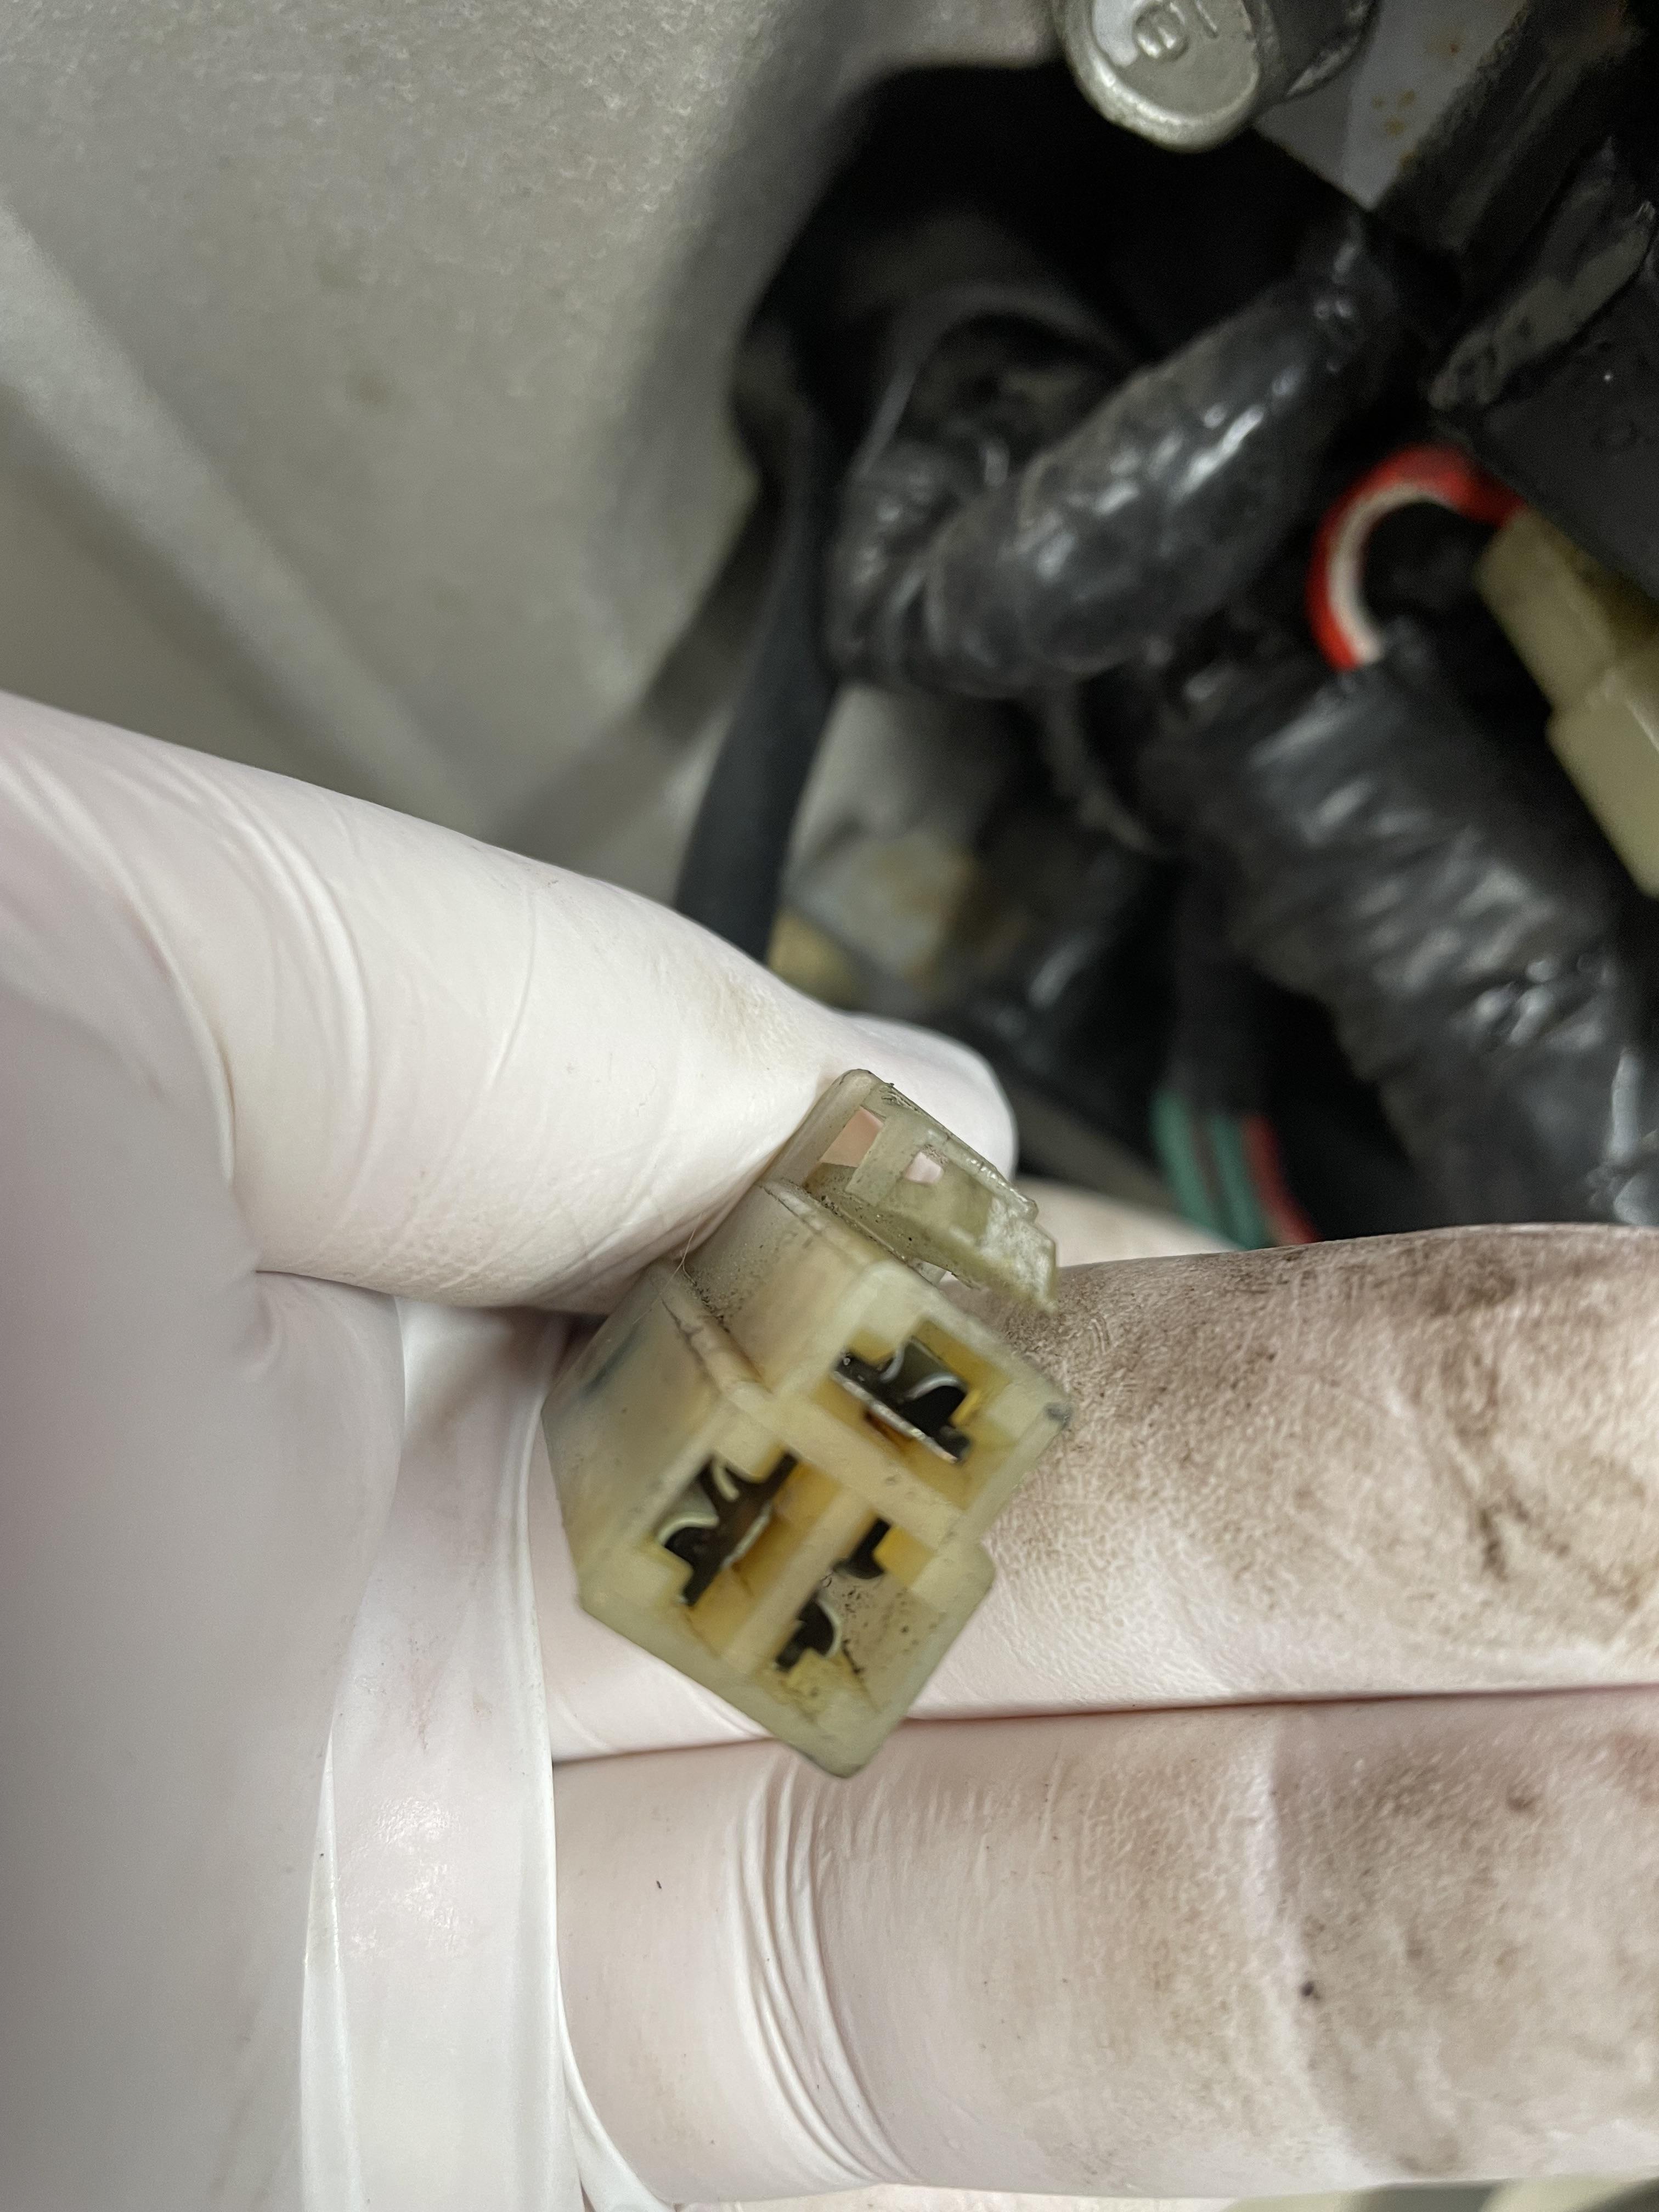
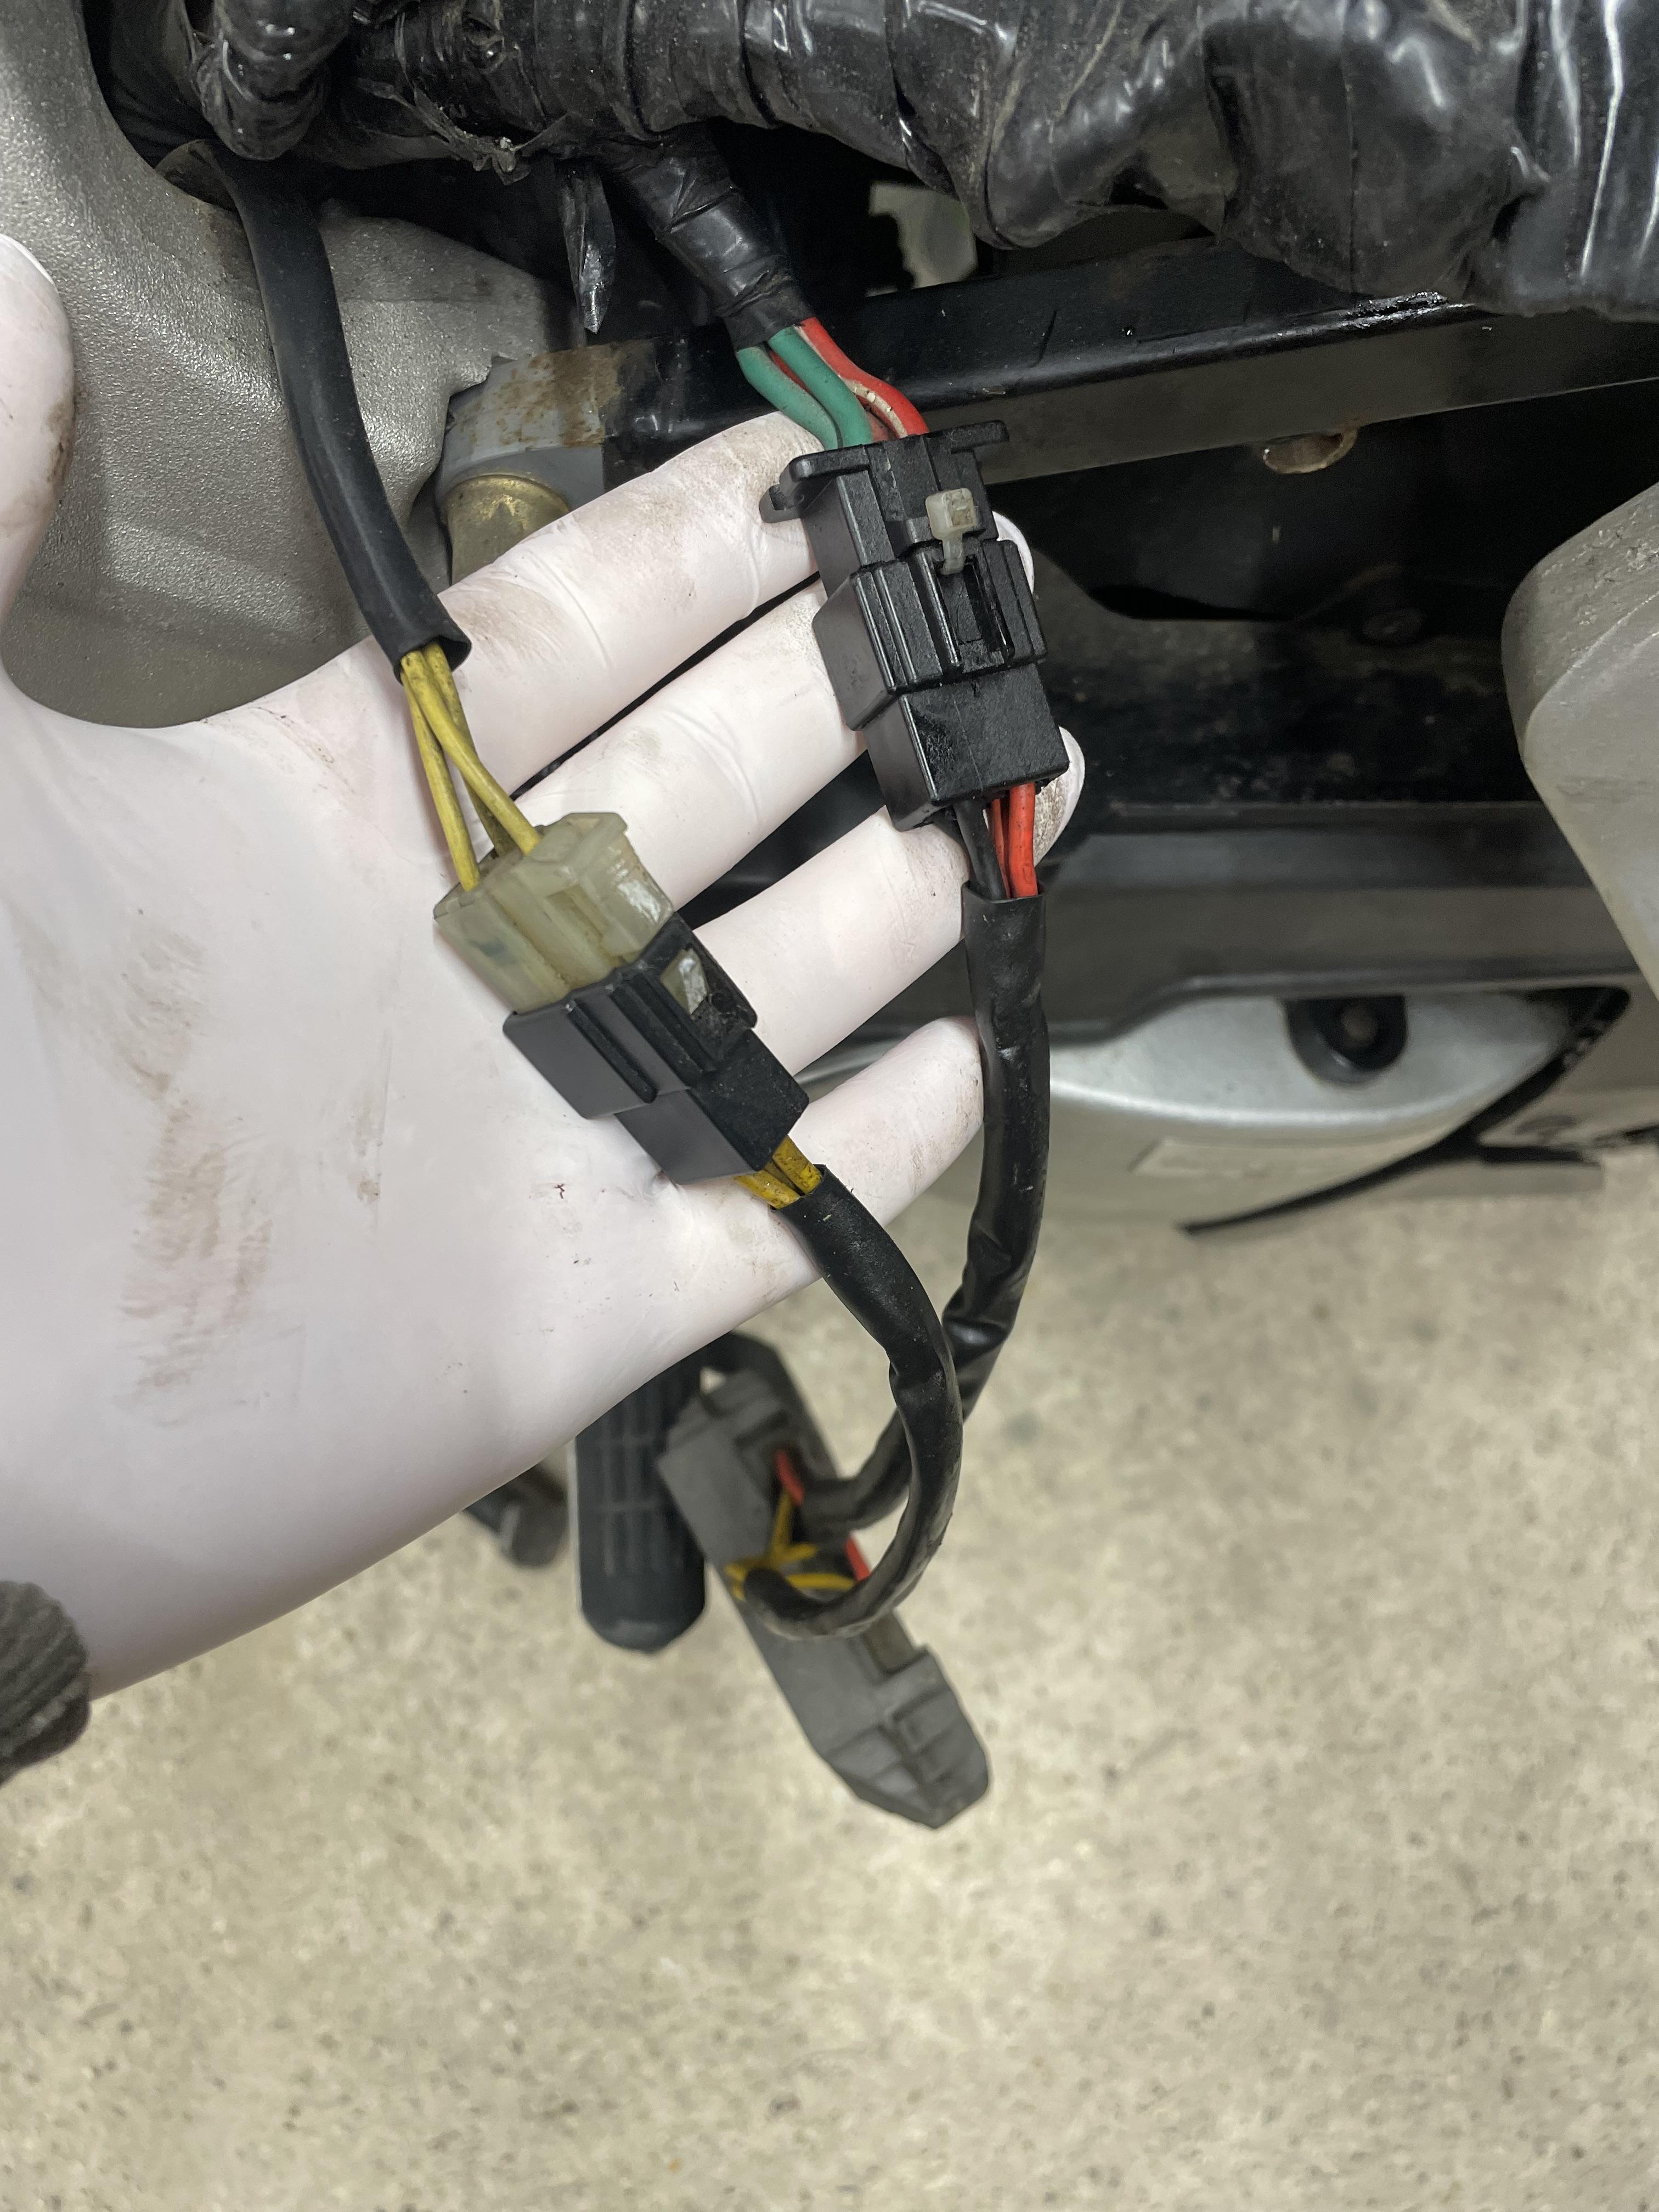
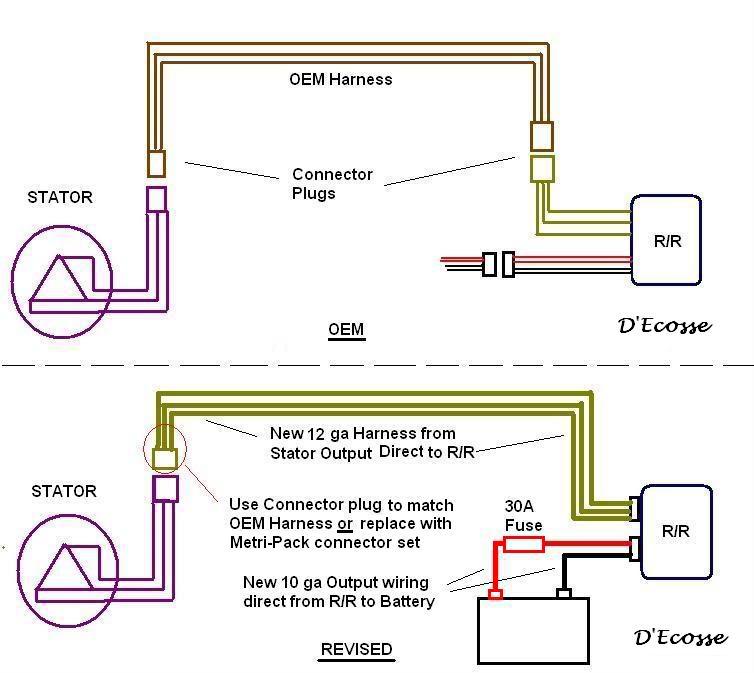
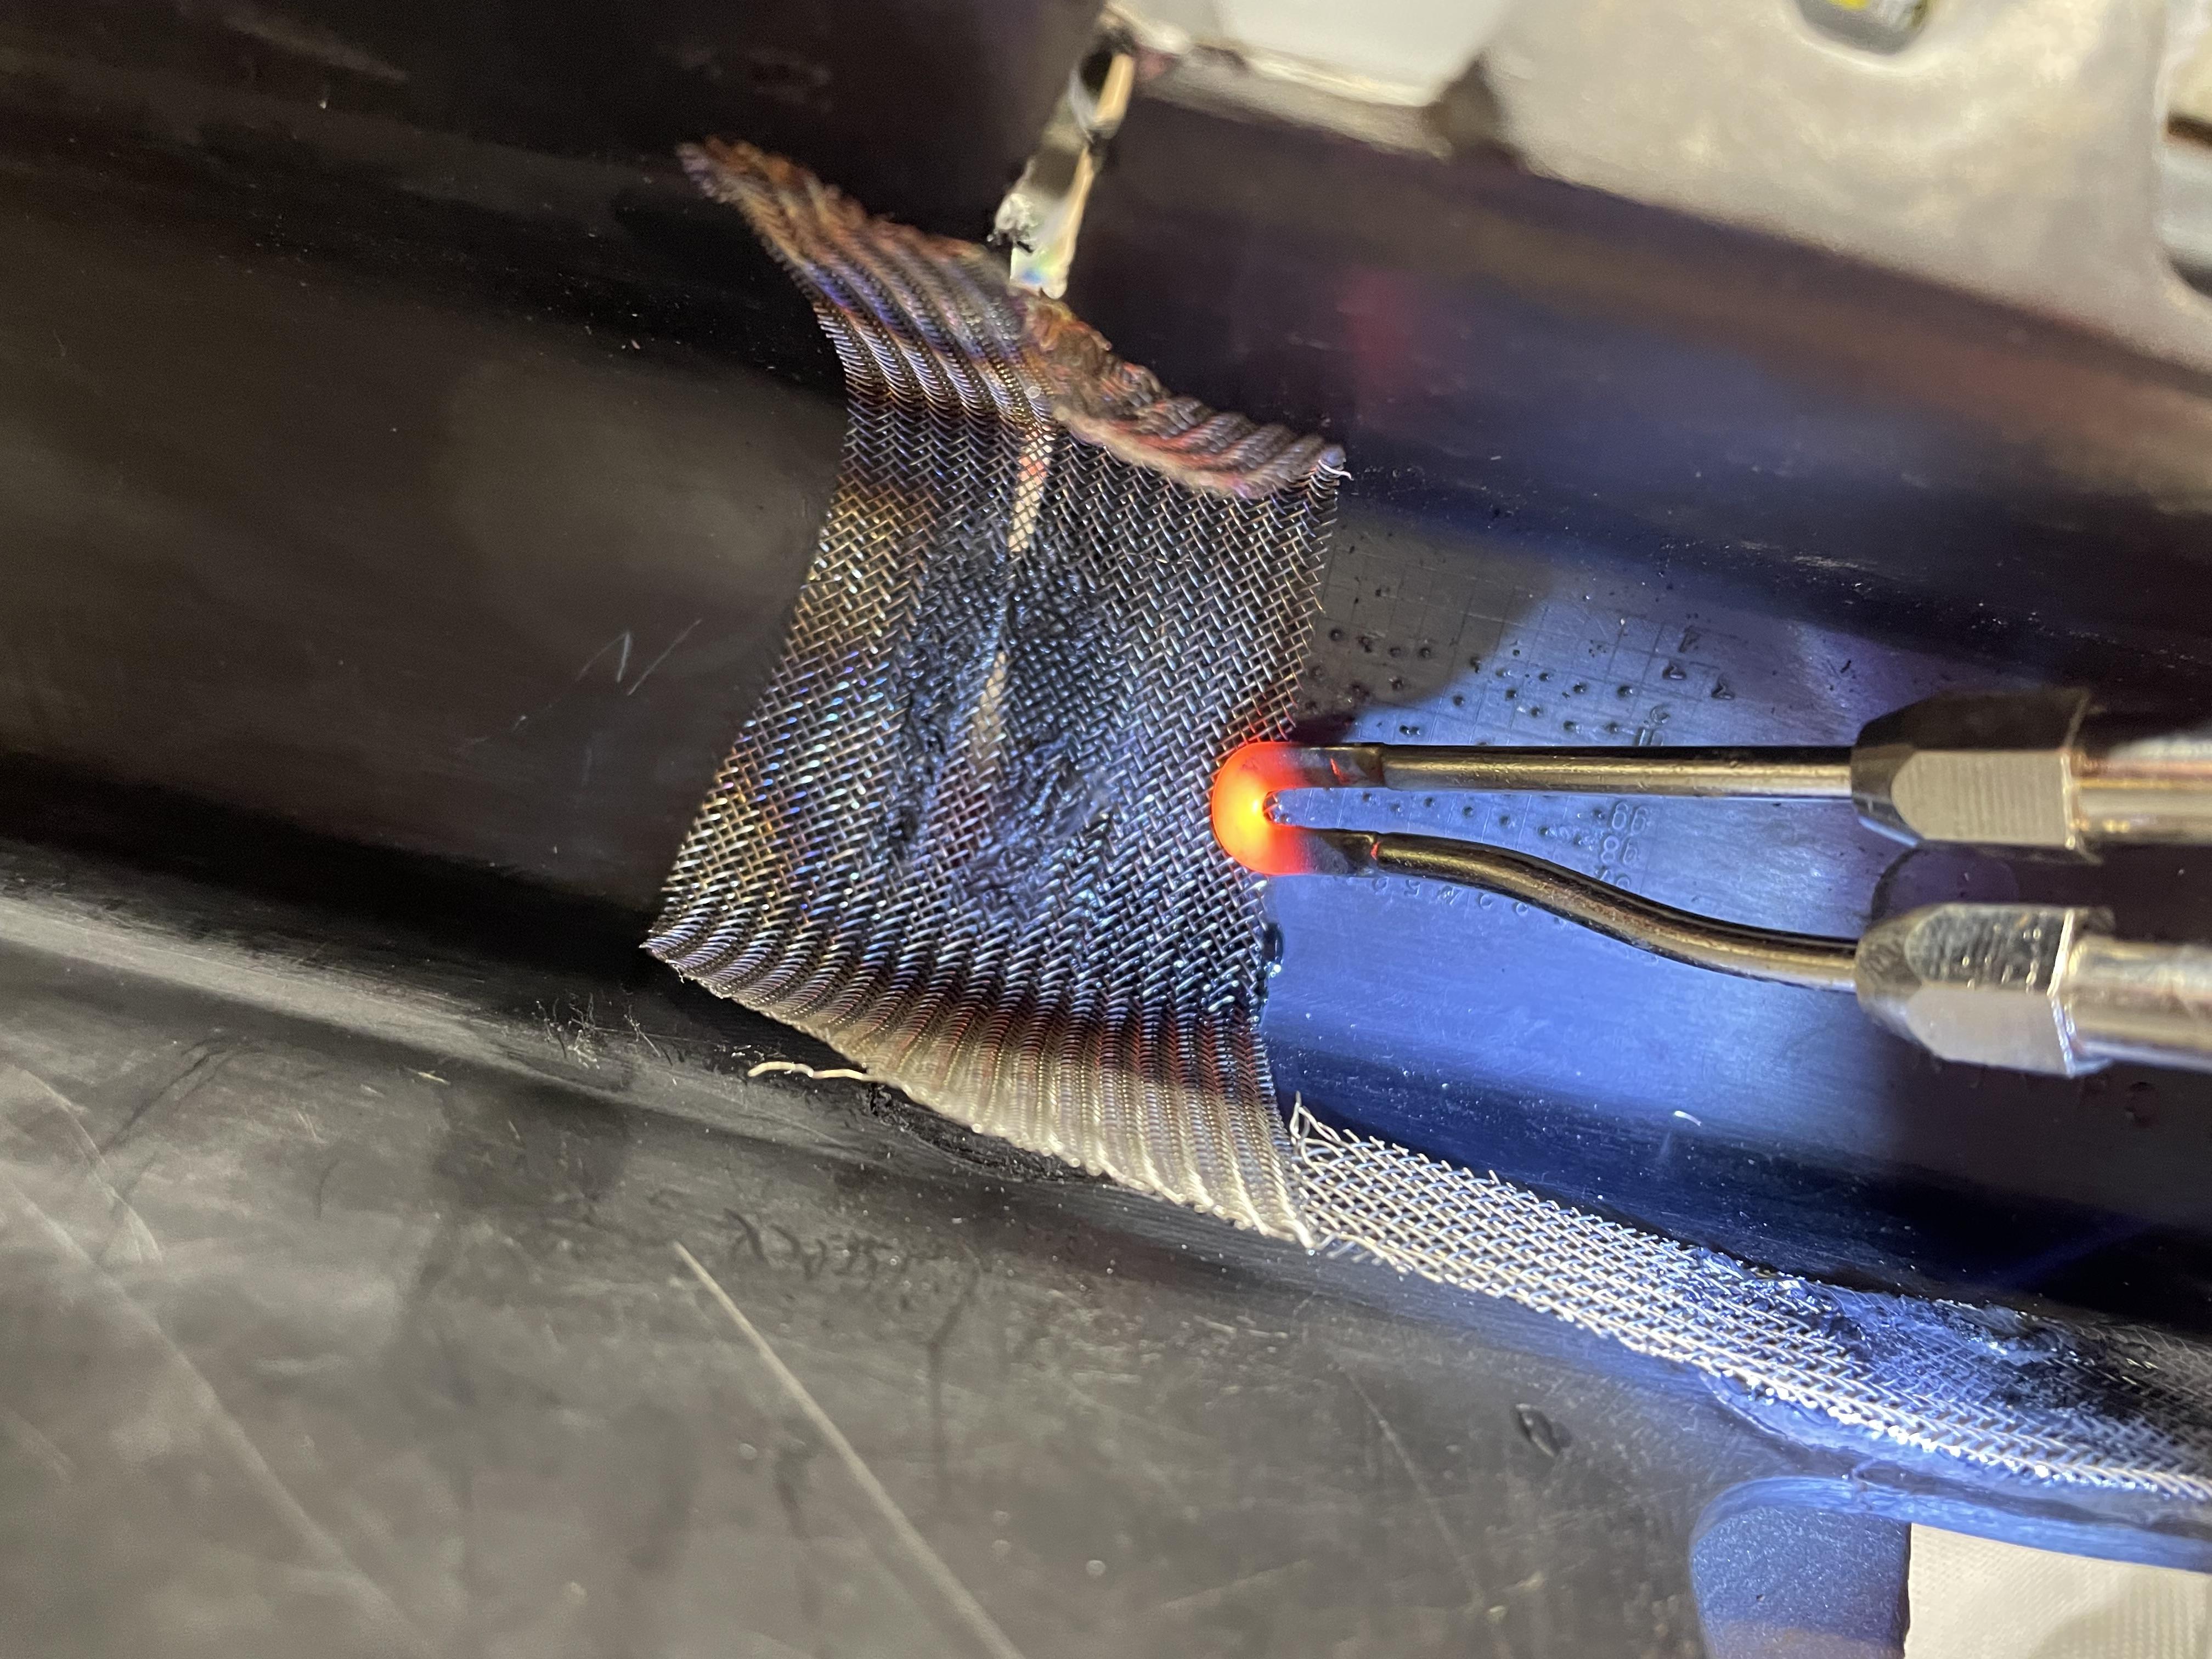
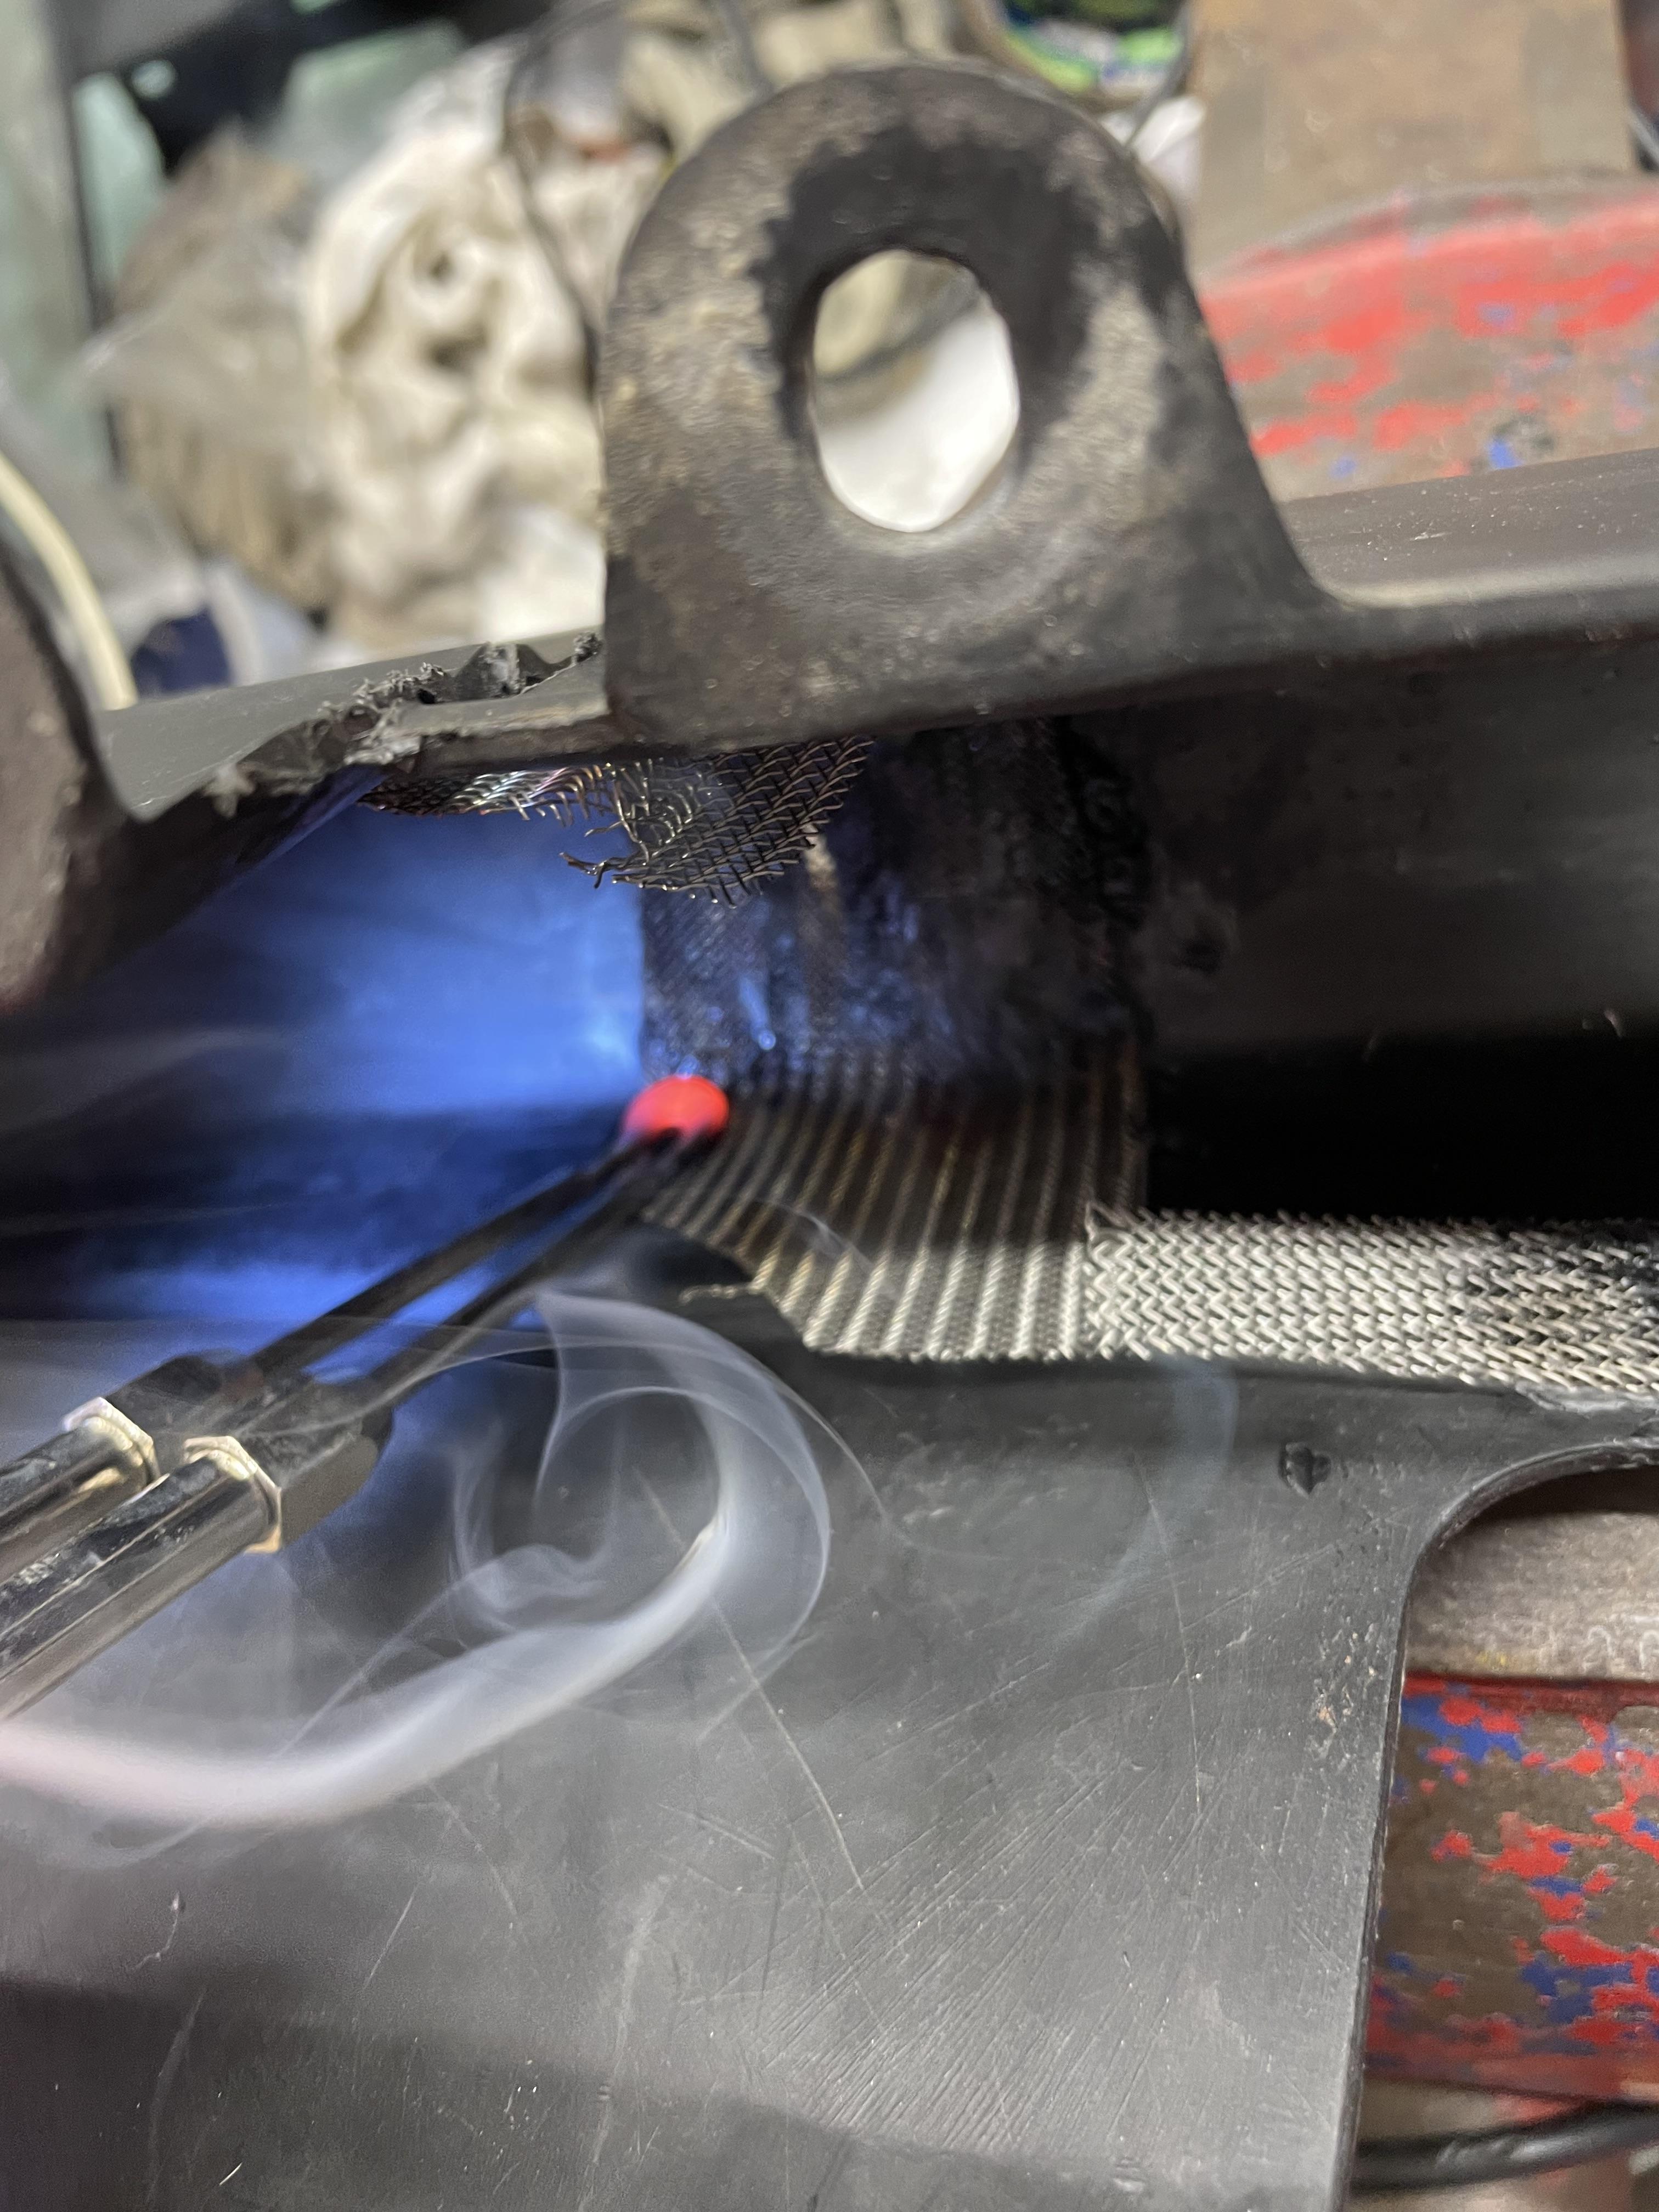
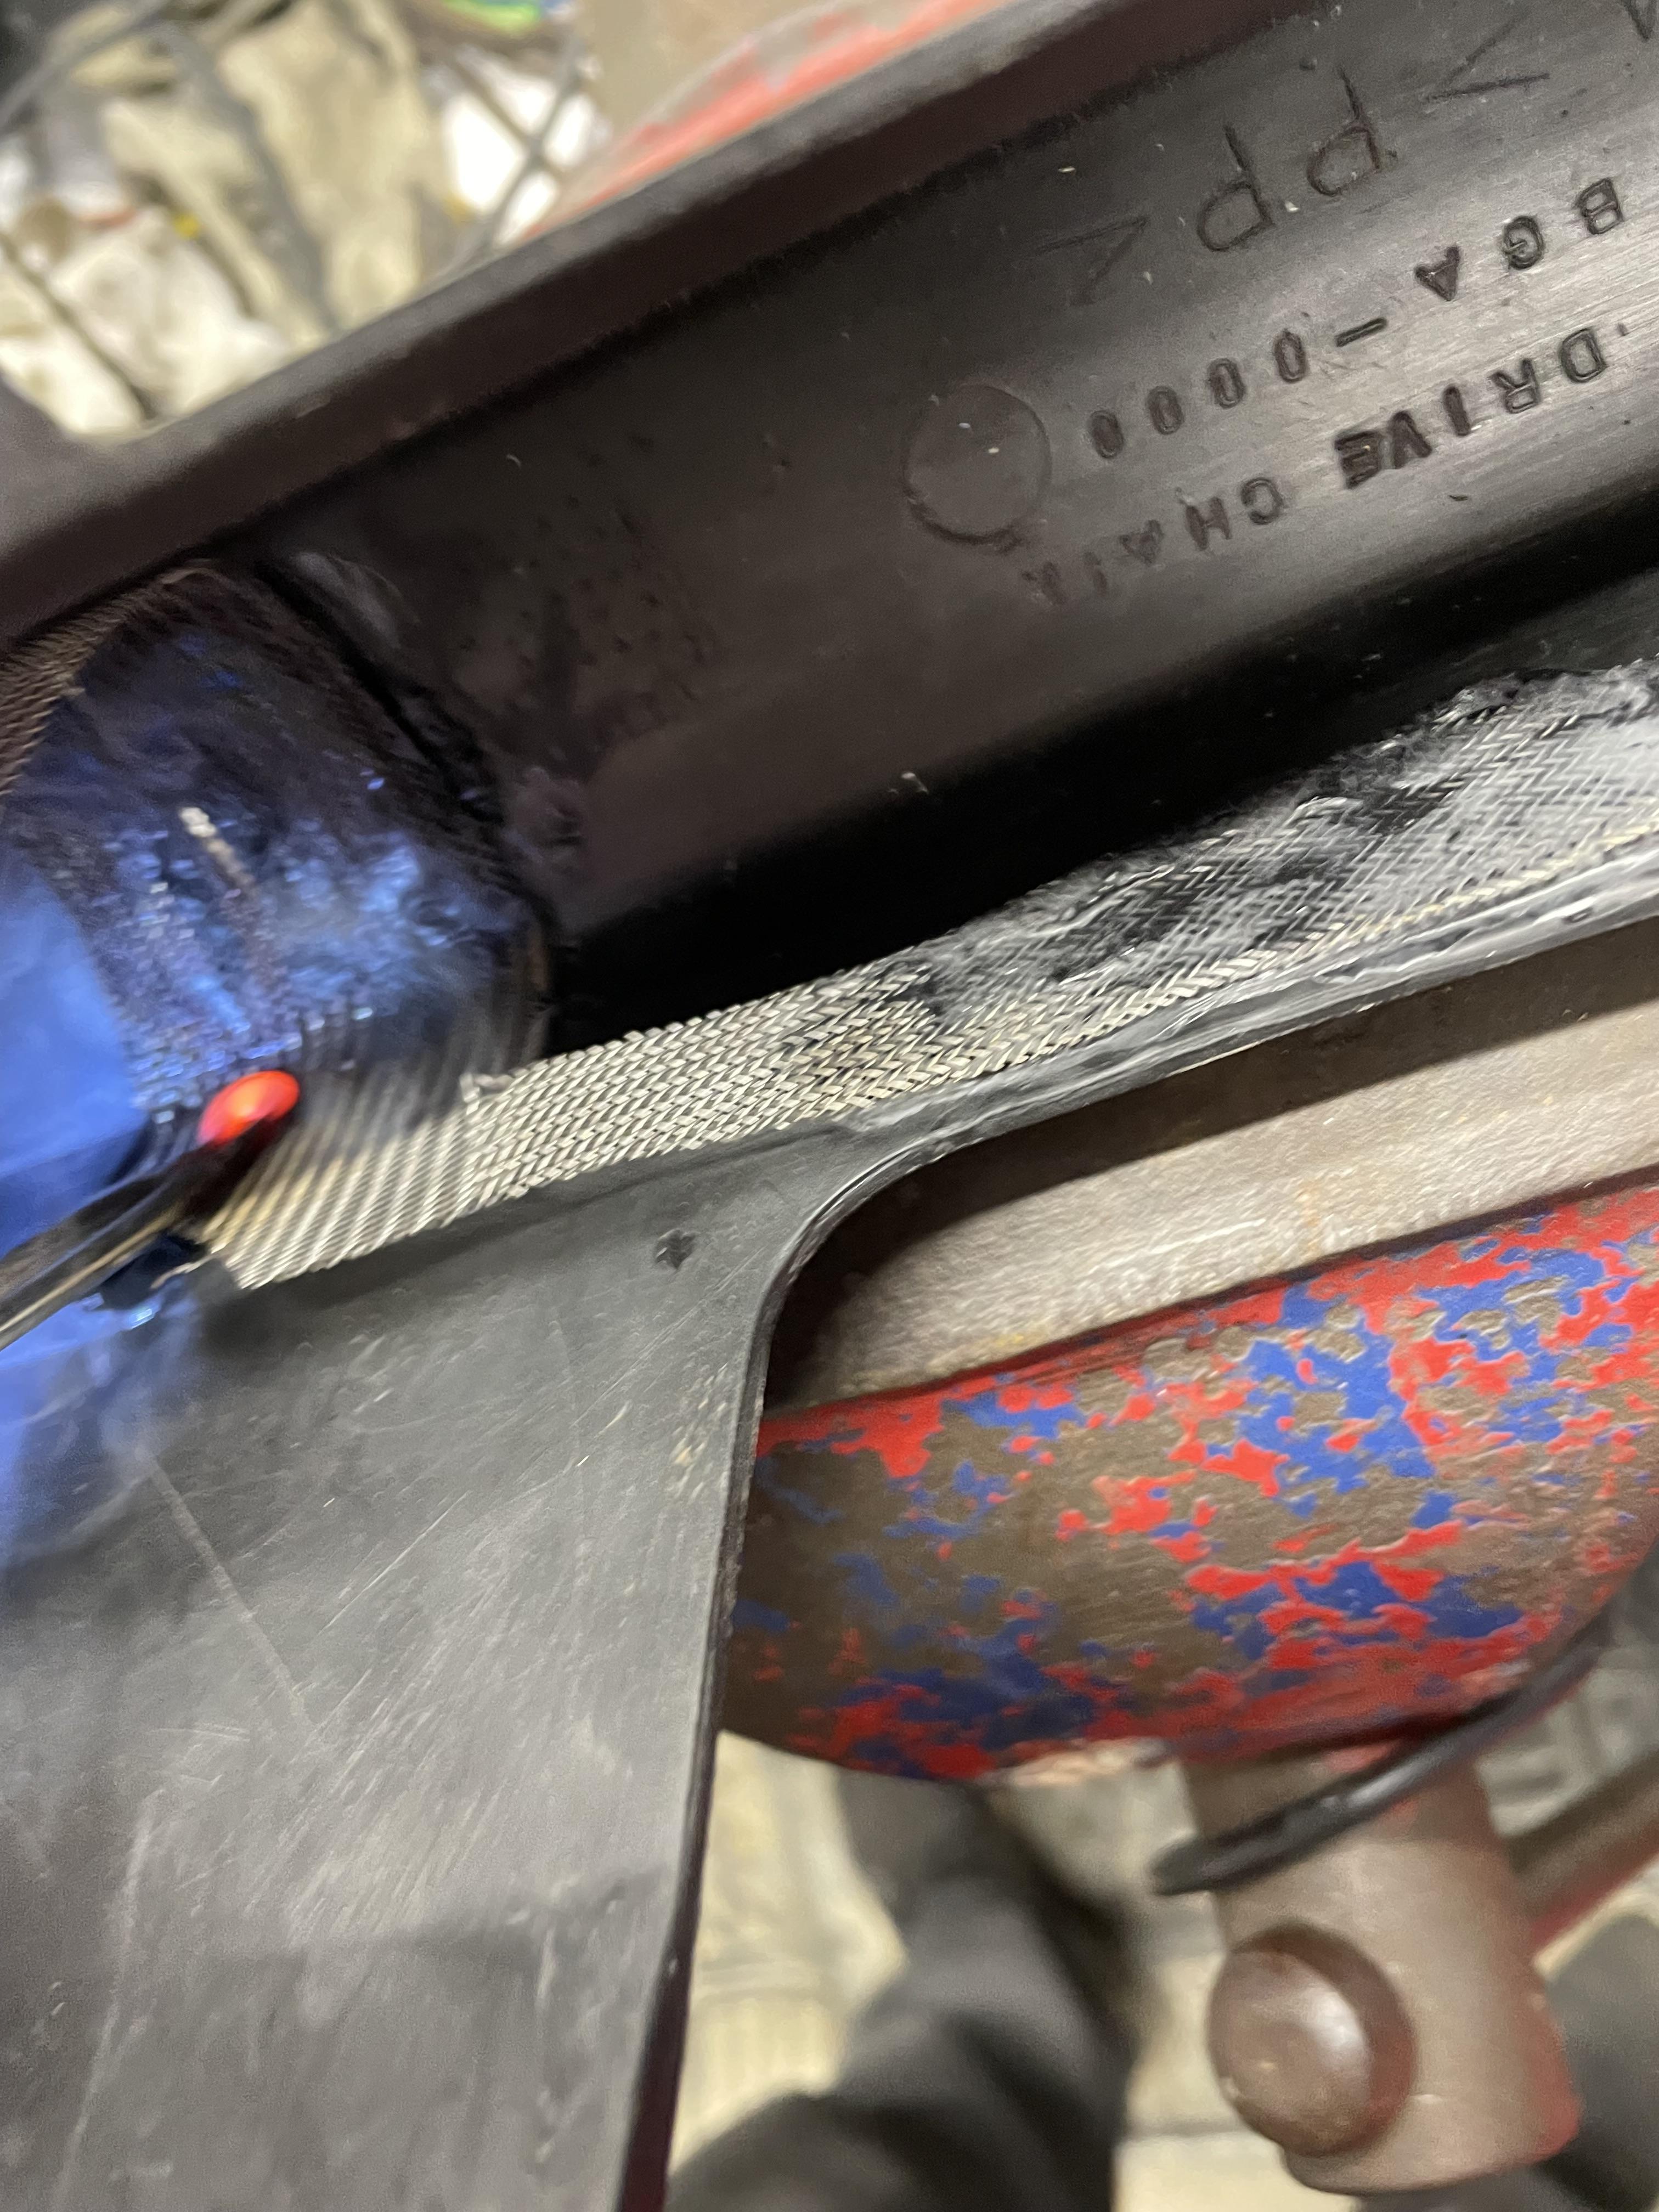
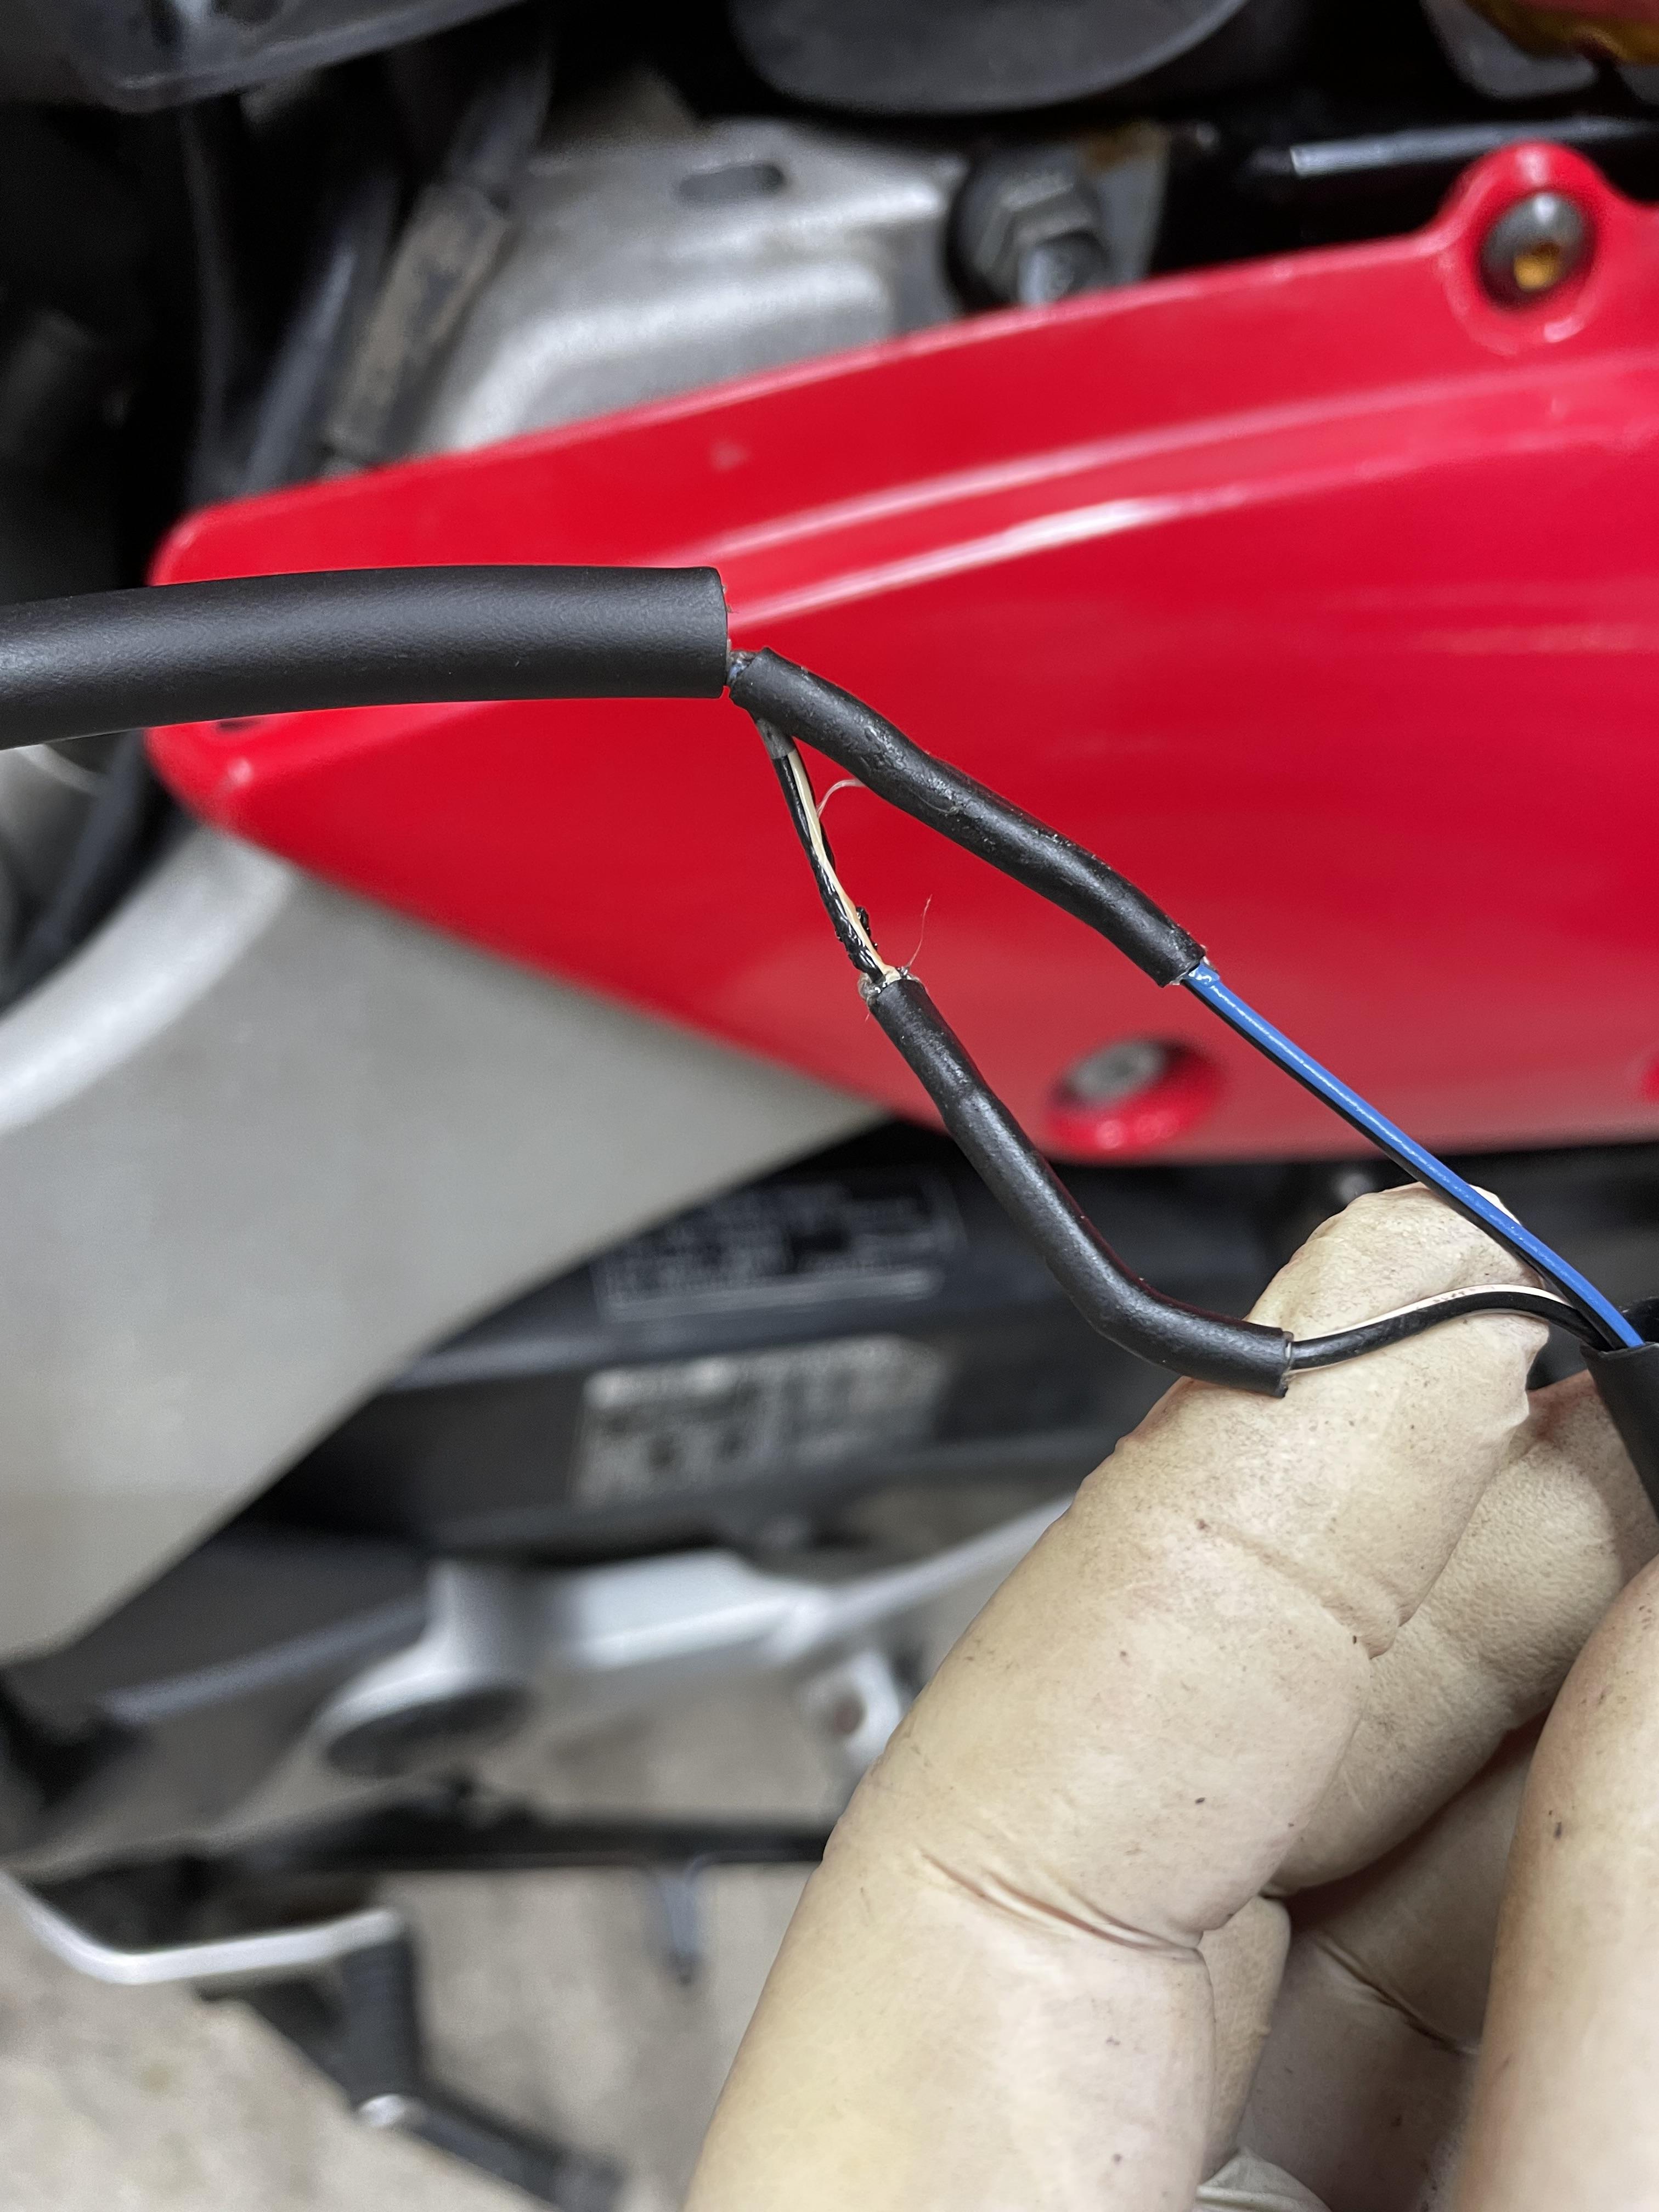
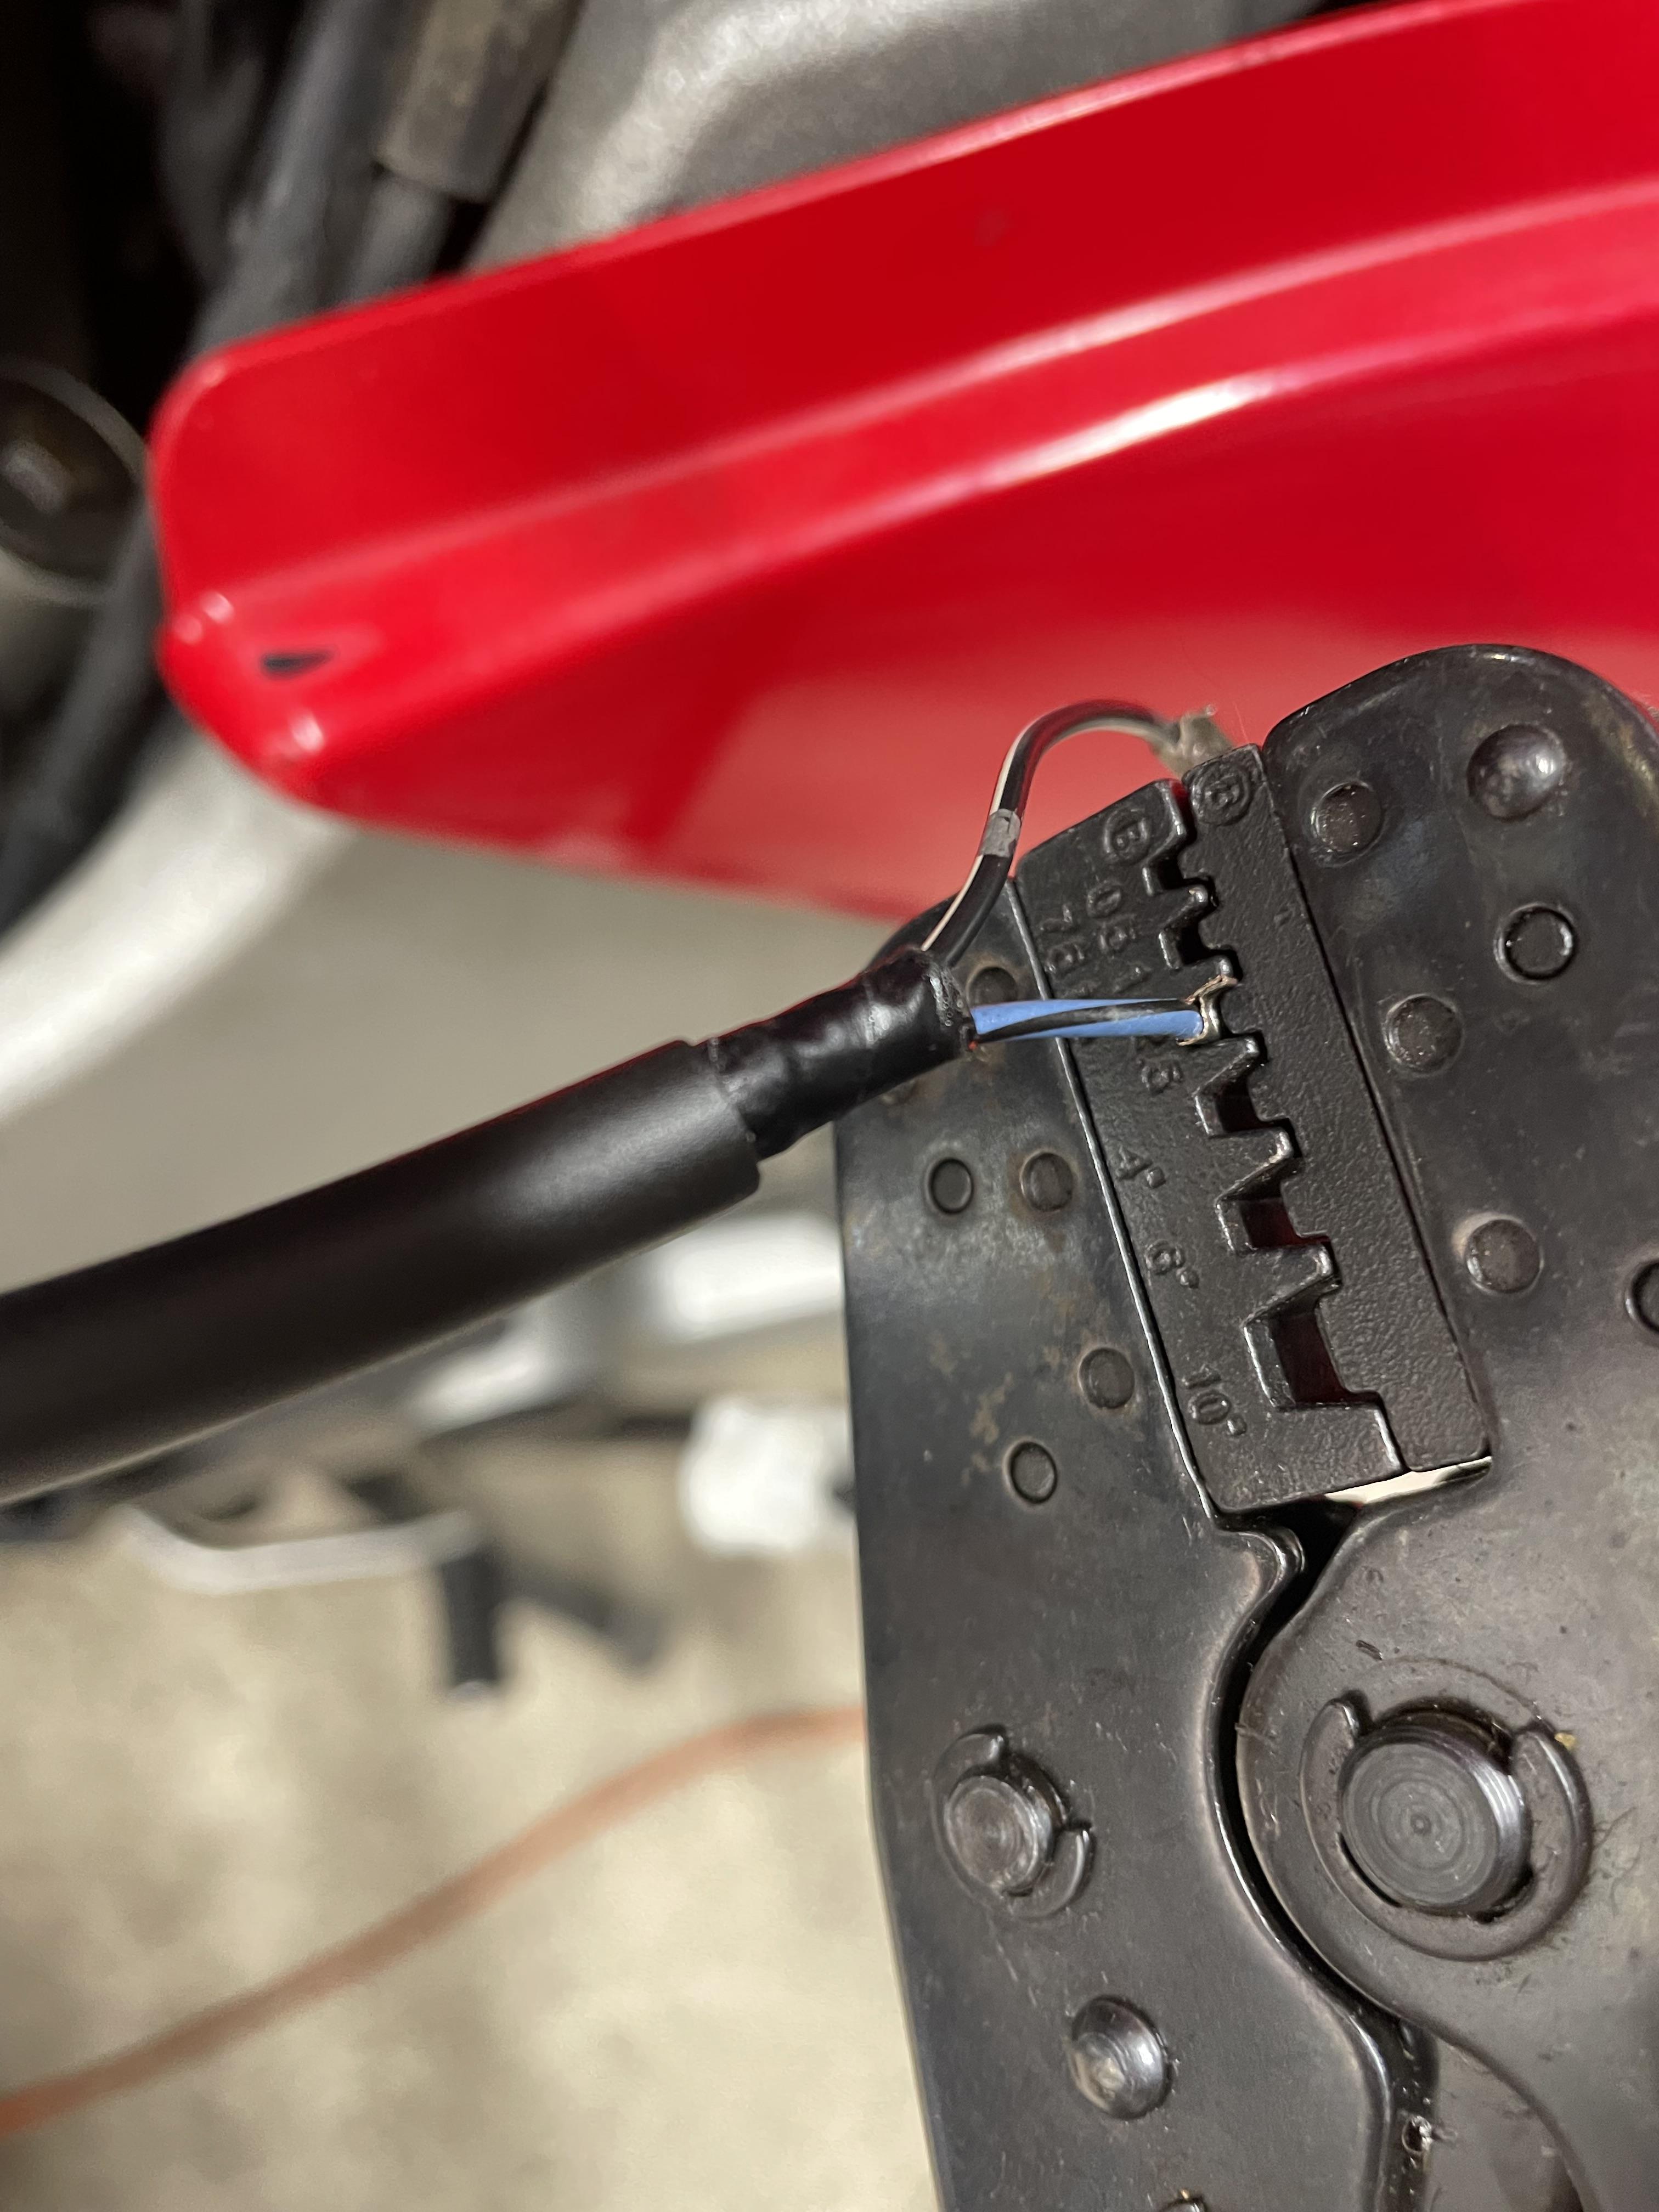
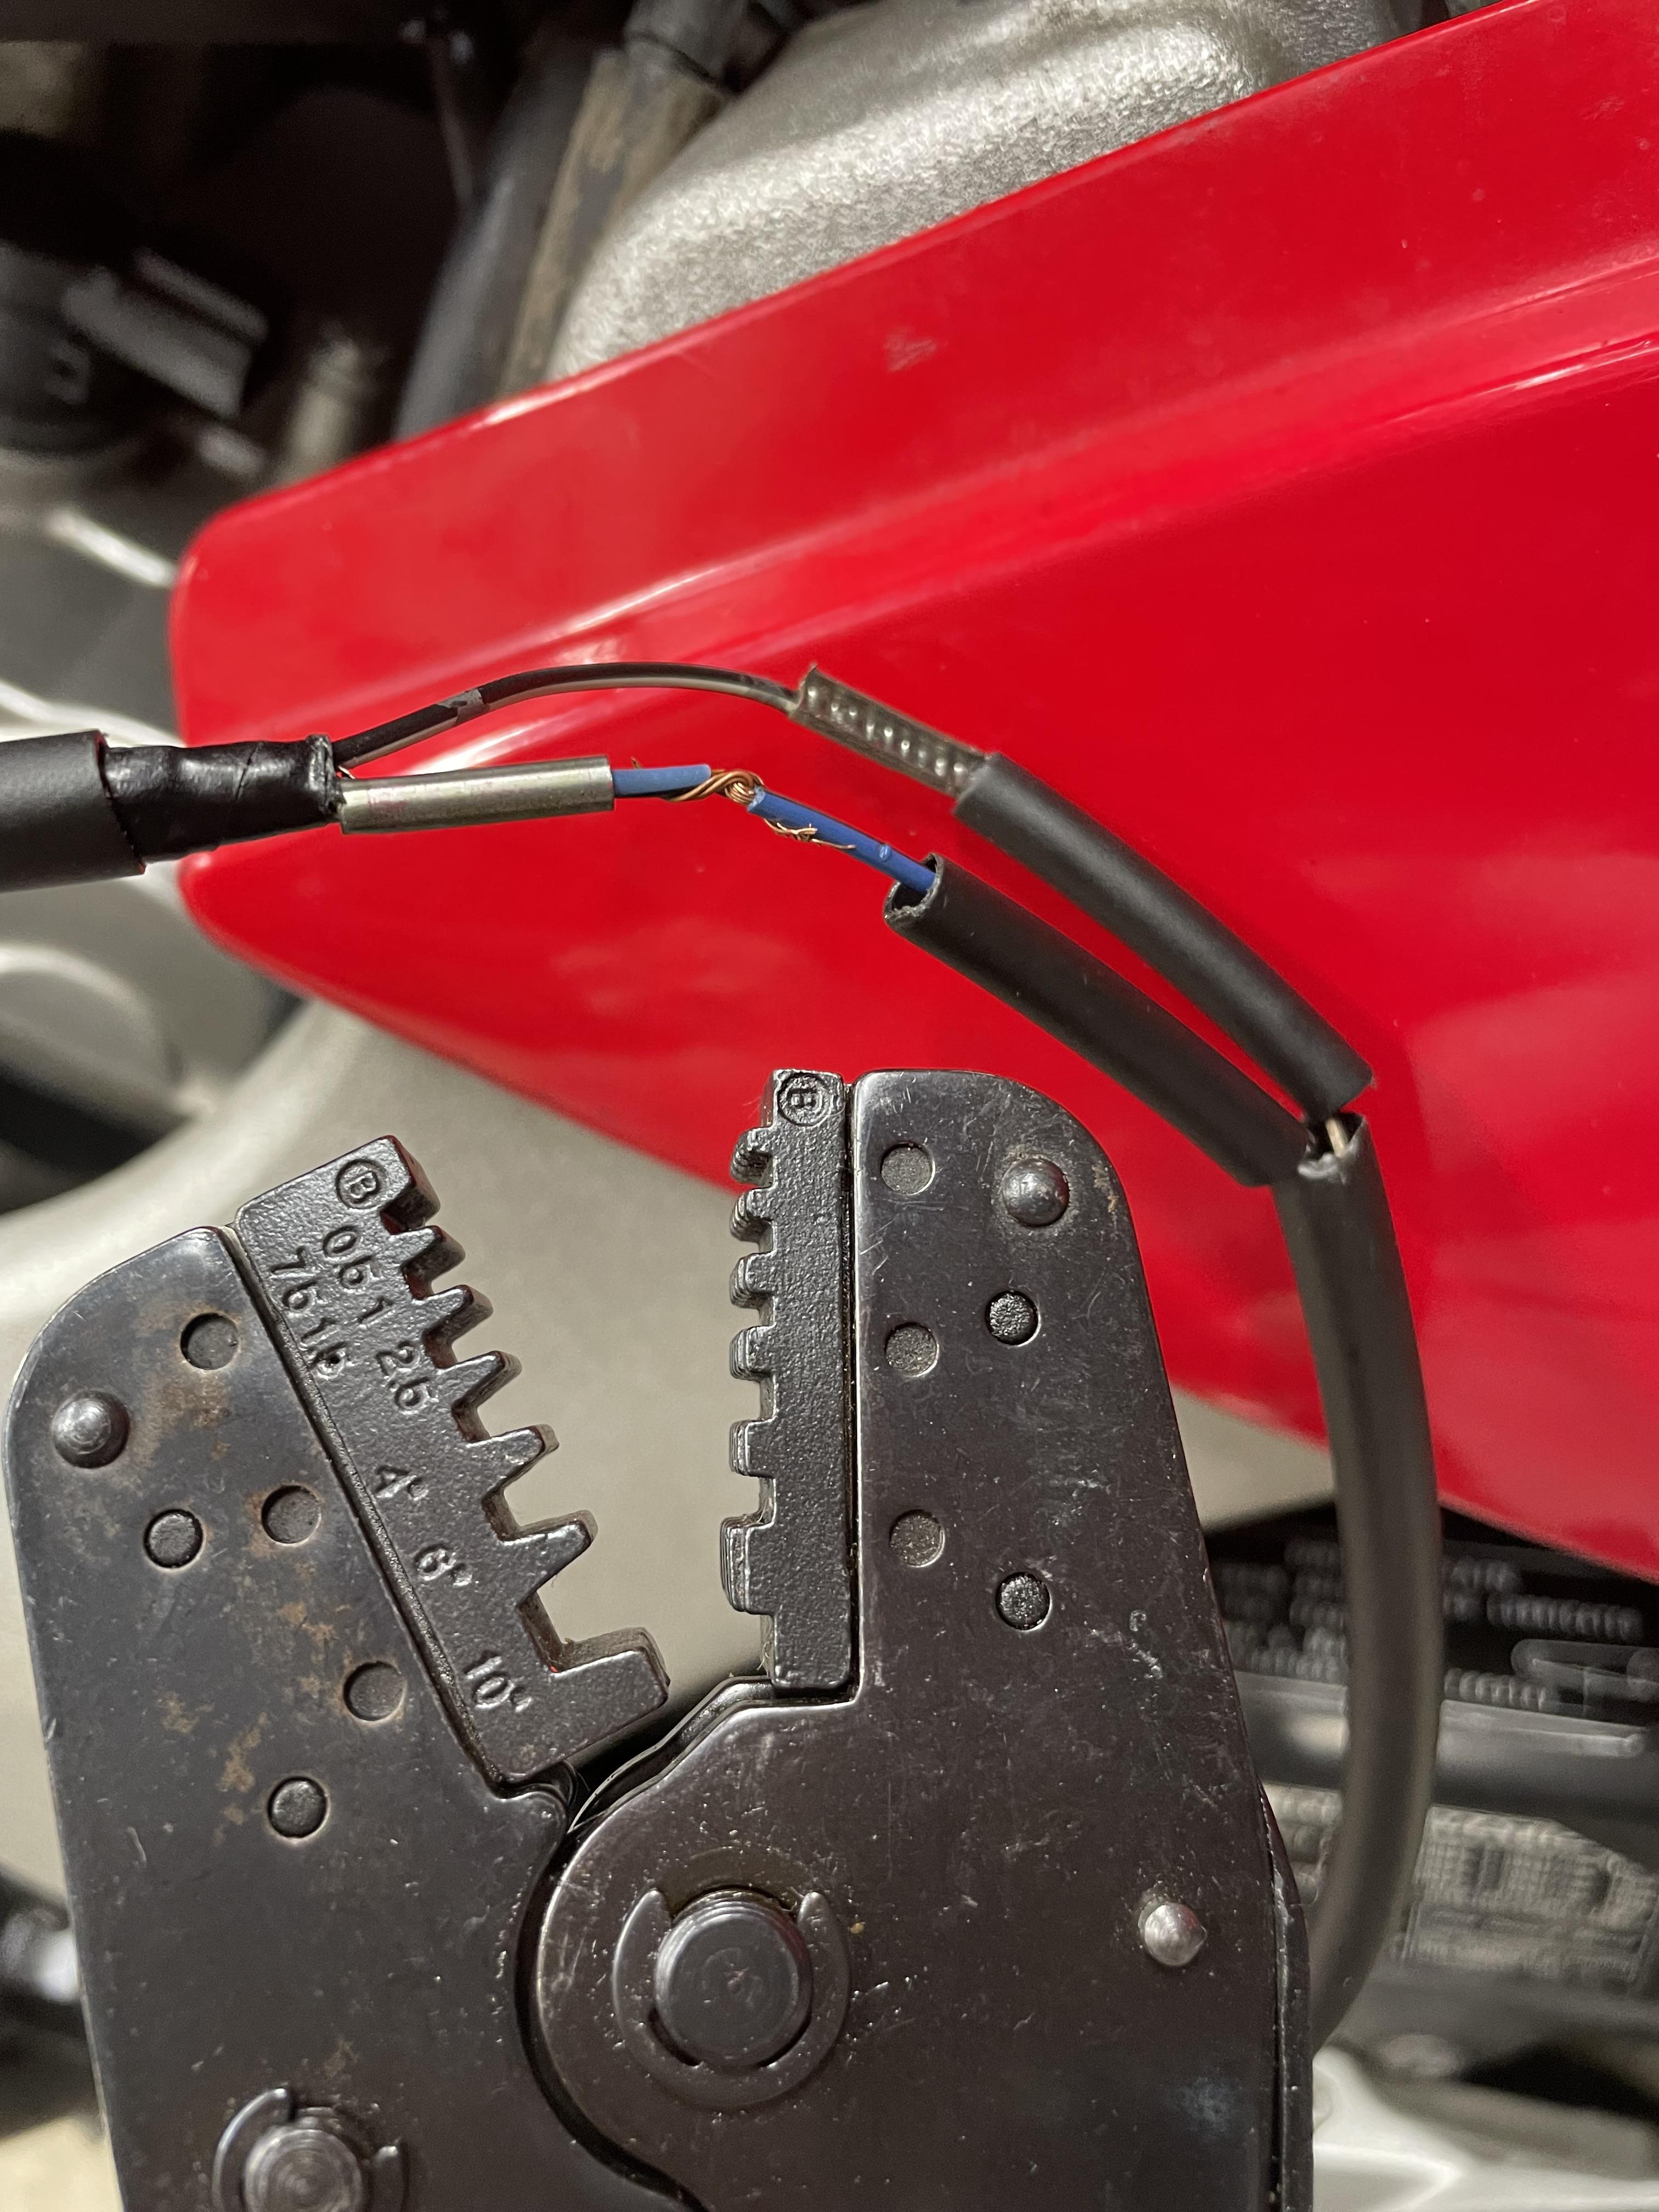
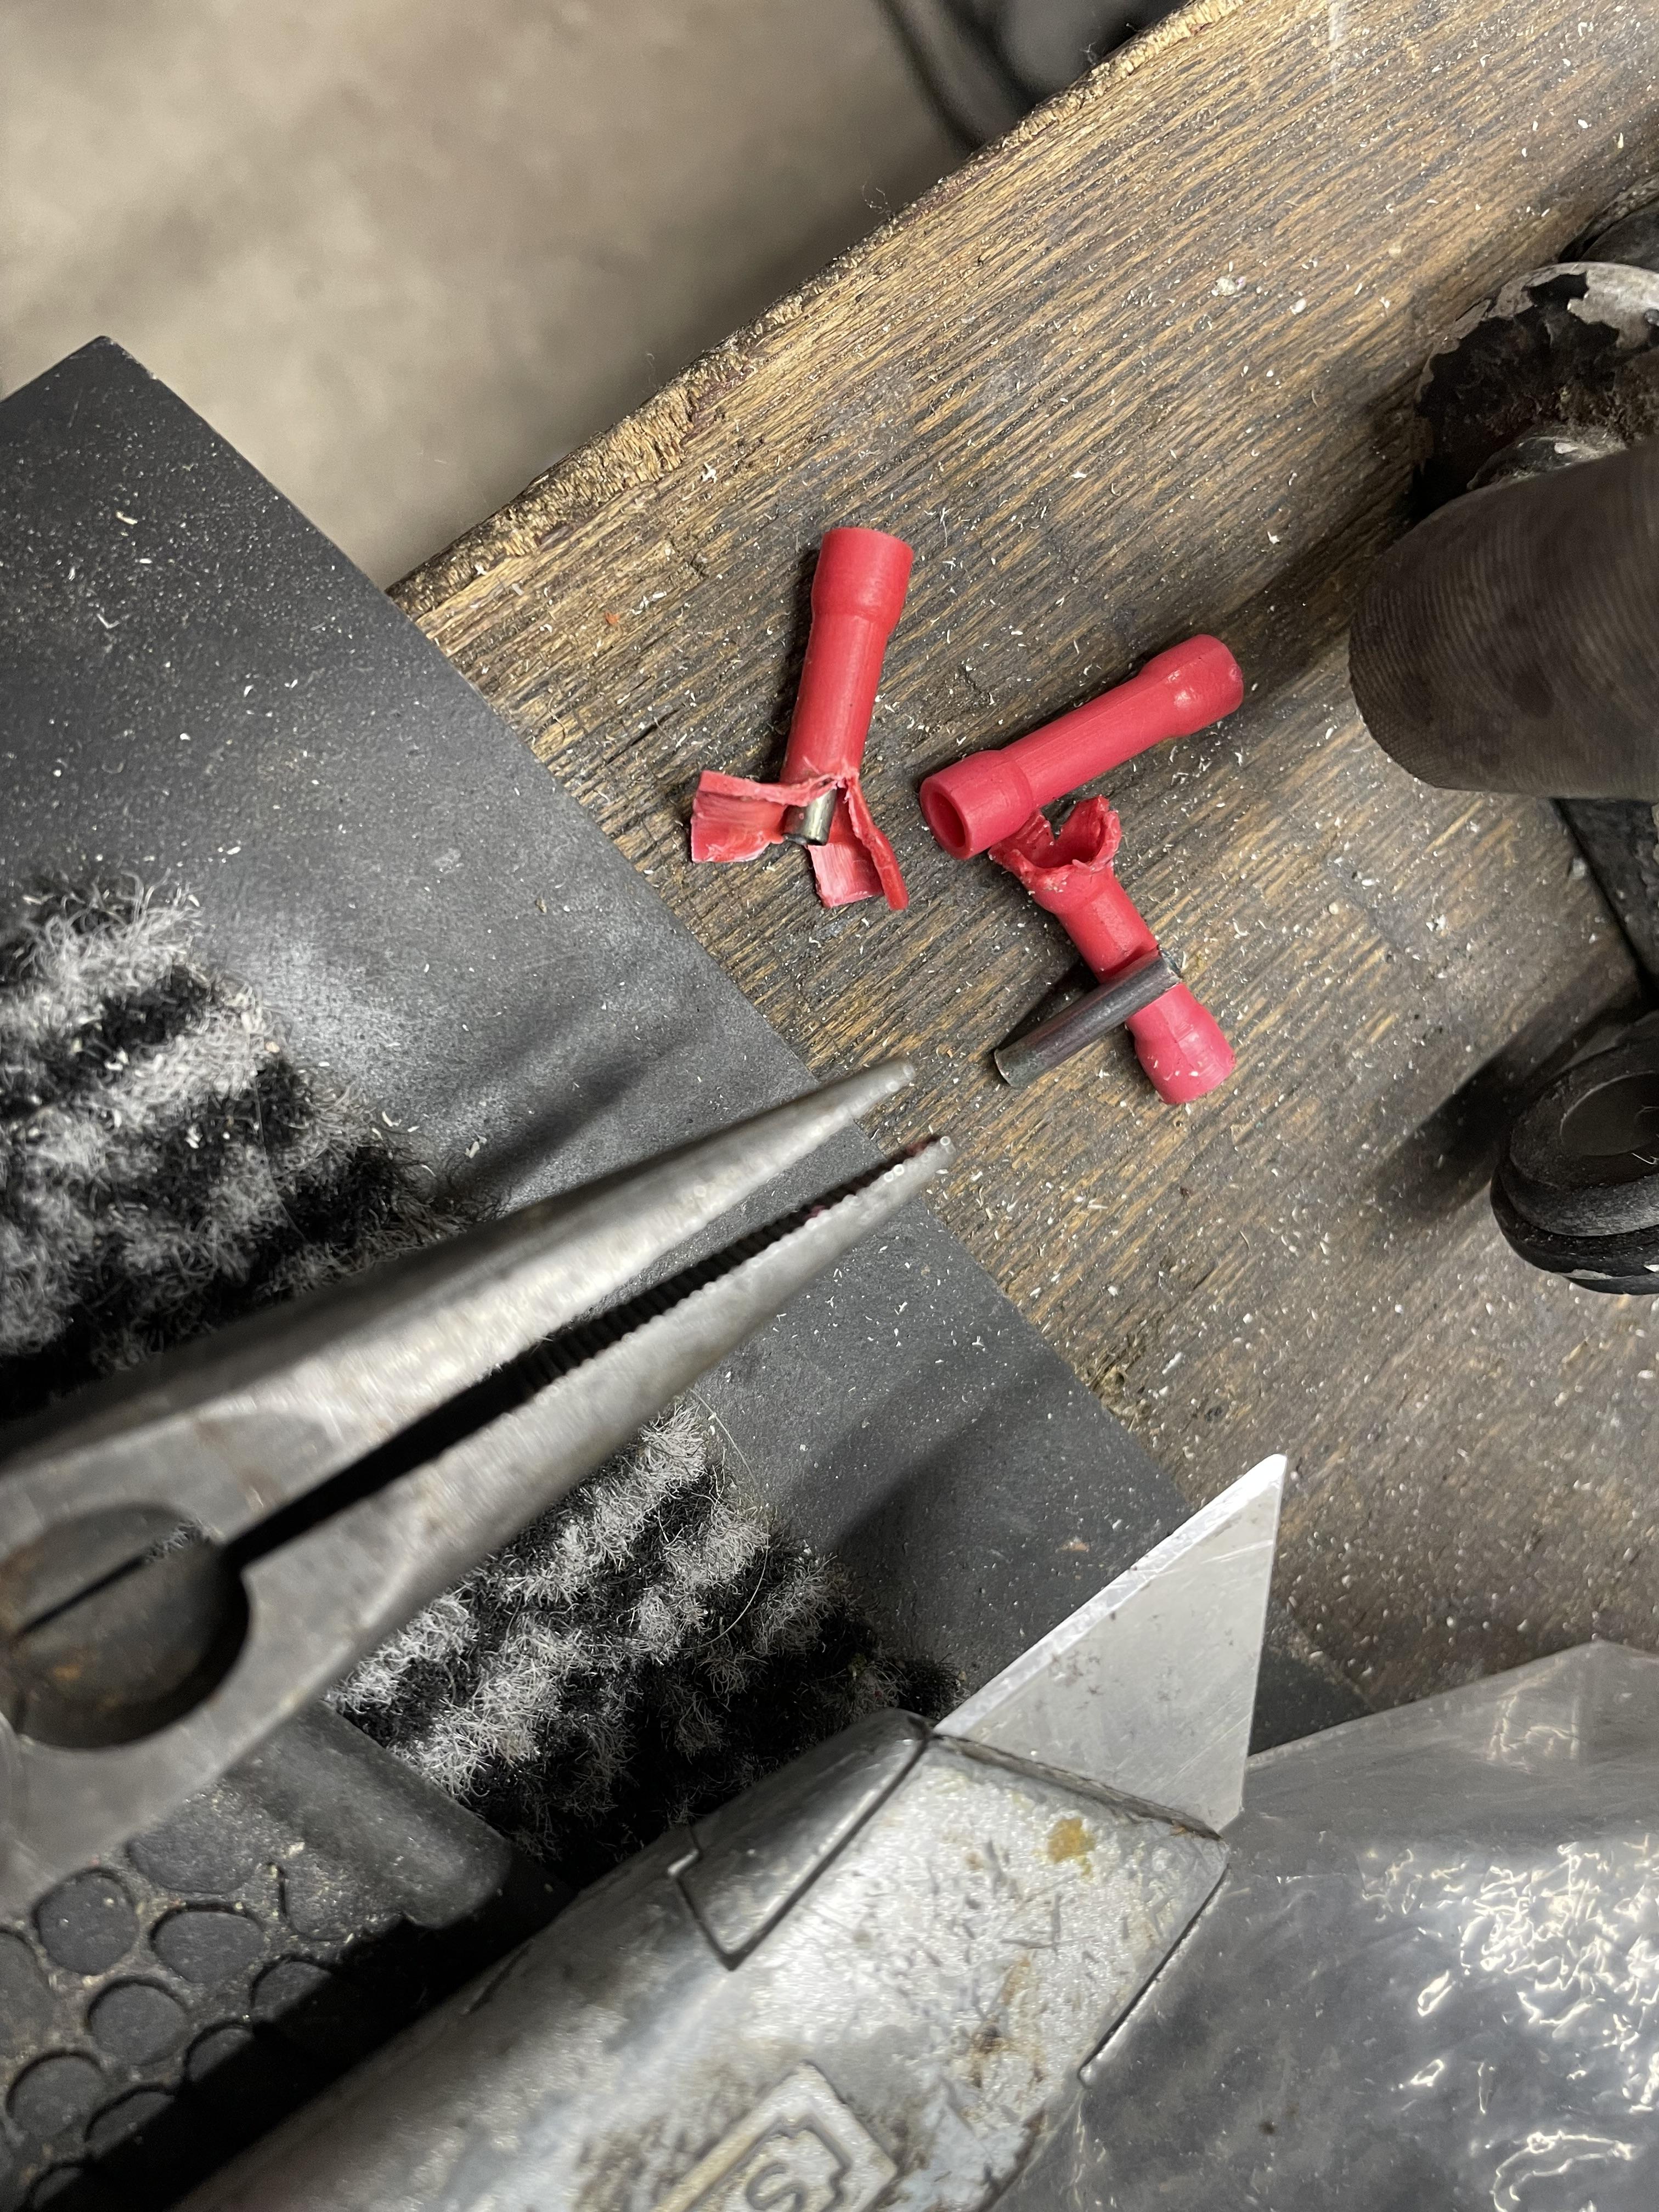
Little update as I scored a Shindengen SH847AA regulator on eBay and fitted it to the 5th gen Donkey. It will help save the stator as these regulator rectifiers don’t get too hot, and only draw the required current (as opposed to shunt types that draw all the current all the time and convert any excess to heat). If you’re looking to buy one, these are fitted to the big late model Suzuki VStrom (not the little 600’s). Anything after 2014. Bought a Furukawa crimp and plug kit to match, as well as some heat shrink and terminals to do the job right. Wiring as per this image: First step is to wire the new plugs. I used some high-amp cable from the shelf, which was slightly too thick but OK. Proper crimper also utilised. For this mod you don’t use the charging connector anymore (black, green and red cables) and wire the regulator rectifier directly to battery instead. Just tape up the connector and forget about it. I used self amalgamating tape. Then time to cut off the stator connector (3 x yellow cables) and wire it all up directly. You can see early signs of overheating and corrosion on the connector below. Couldn’t get butt crimps that would connect two different gauge cables so I used a variation of the Western Union/Linesman Splice, followed by solder, a coating of dialectic grease and heat shrink. Then more heat shrink over all three cables and a third round over the top of that. Nothing like a bit of over-engineering to give peace of mind and some strain relief to the joints. Once the regulator’s location was decided, I chose to make an aluminium heat sink to soak away any excess heat generated. This isn’t strictly necessary as I’ve run this setup bolted directly to the subframe in the past with no ill effects (the SH847 doesn’t generate nearly as much heat as other regulator types) but it’s comforting to over-engineer. First, trace the outline on a pice of scrap 5mm aluminium plate. Then get busy with the hacksaw, grinder and flap disc. Cut-and-shut job is good enough for a part that will never really be seen. Then, drill and tap some holes to mount the regulator and the plate. This took some thinking… The m6 and little bolt below go through the INSIDE of the subframe and the bolt finishes flush with the plate so it doesn’t interfere with the regulator, which needs to lie flat against the plate. All three holes now complete. The empty one goes to the top, and bolts both regulator and heat sink plate using a new hole I drilled through the subframe side plate. The muddle hole shows the small bolt that goes through the back of the subframe and holds the heatsink plate on. It’s fitted on the wrong side in the picture as you wouldn’t be able to see where it goes otherwise. The bolt near my thumb holds the bottom of the regulator onto the heatsink. Bolt had to be cut shorter in the end to stop fouling against the subframe lower tube. Below I’m pointing at the little bolt coming from the inside of the subframe to thread into the middle hole of the plate. Was a b!tch to fit, if I’m honest! All mounted up, greased and sealed, with strain relief in the cables via zip ties. All that work and barely visible with the seat off but at least the charging system is now sorted. This means the regulator won’t fry the stator, or overheat on track days (when there’s little electric draw due to headlights off and high charge rate due to high revs) or kill my lithium Iron battery. Now back to the race bike, I had to grind down the lip of the Ducati wheel nut socket. My socket had a chamfered edge that caused it to slip off the low-profile nut. The nut is only about 5mm wide and takes a HUGE amount of torque to fasten (almost 200nm!), so easy for the tool to slip off. Before with chamfered edge… After a clash with the angle grinder… After a tickle with the flap disc… So how do I rust-proof the polished edge? Answer: heat blueing. Heated the edge to blue/purple. One edge got away from me and went to straw yellow, but that’s OK as it’s not hot enough to change the temper of the S2 steel (you need to go to cherry red for that!). And then dunk into some diesel oil to Parkerise the surface. Here it is right out of the oil quench. And again after a slick of copper grease. Lighting doesn’t show the blueing very well but it’s there, albeit dulled by the copper. One more little win in the bag!

-
Thanks Mohawk. Silicone oil is also good. If anyone has really hard ones (behave!), I’ve personally had great success with a dunk in Salicylic Acid (AKA oil of wintergreen) and thinners at 50:50 mix. Takes between couple hours and couple days depending on how far gone they are. I’ve revived truly ancient rubber parts this way. Even badly cracked stuff. Cart racers use it on their tyres to make them grippy. Can be used on old hard shoe soles too if you’re careful. But at £20 it’s often easier to just pick up some nice condition ones off eBay.
-
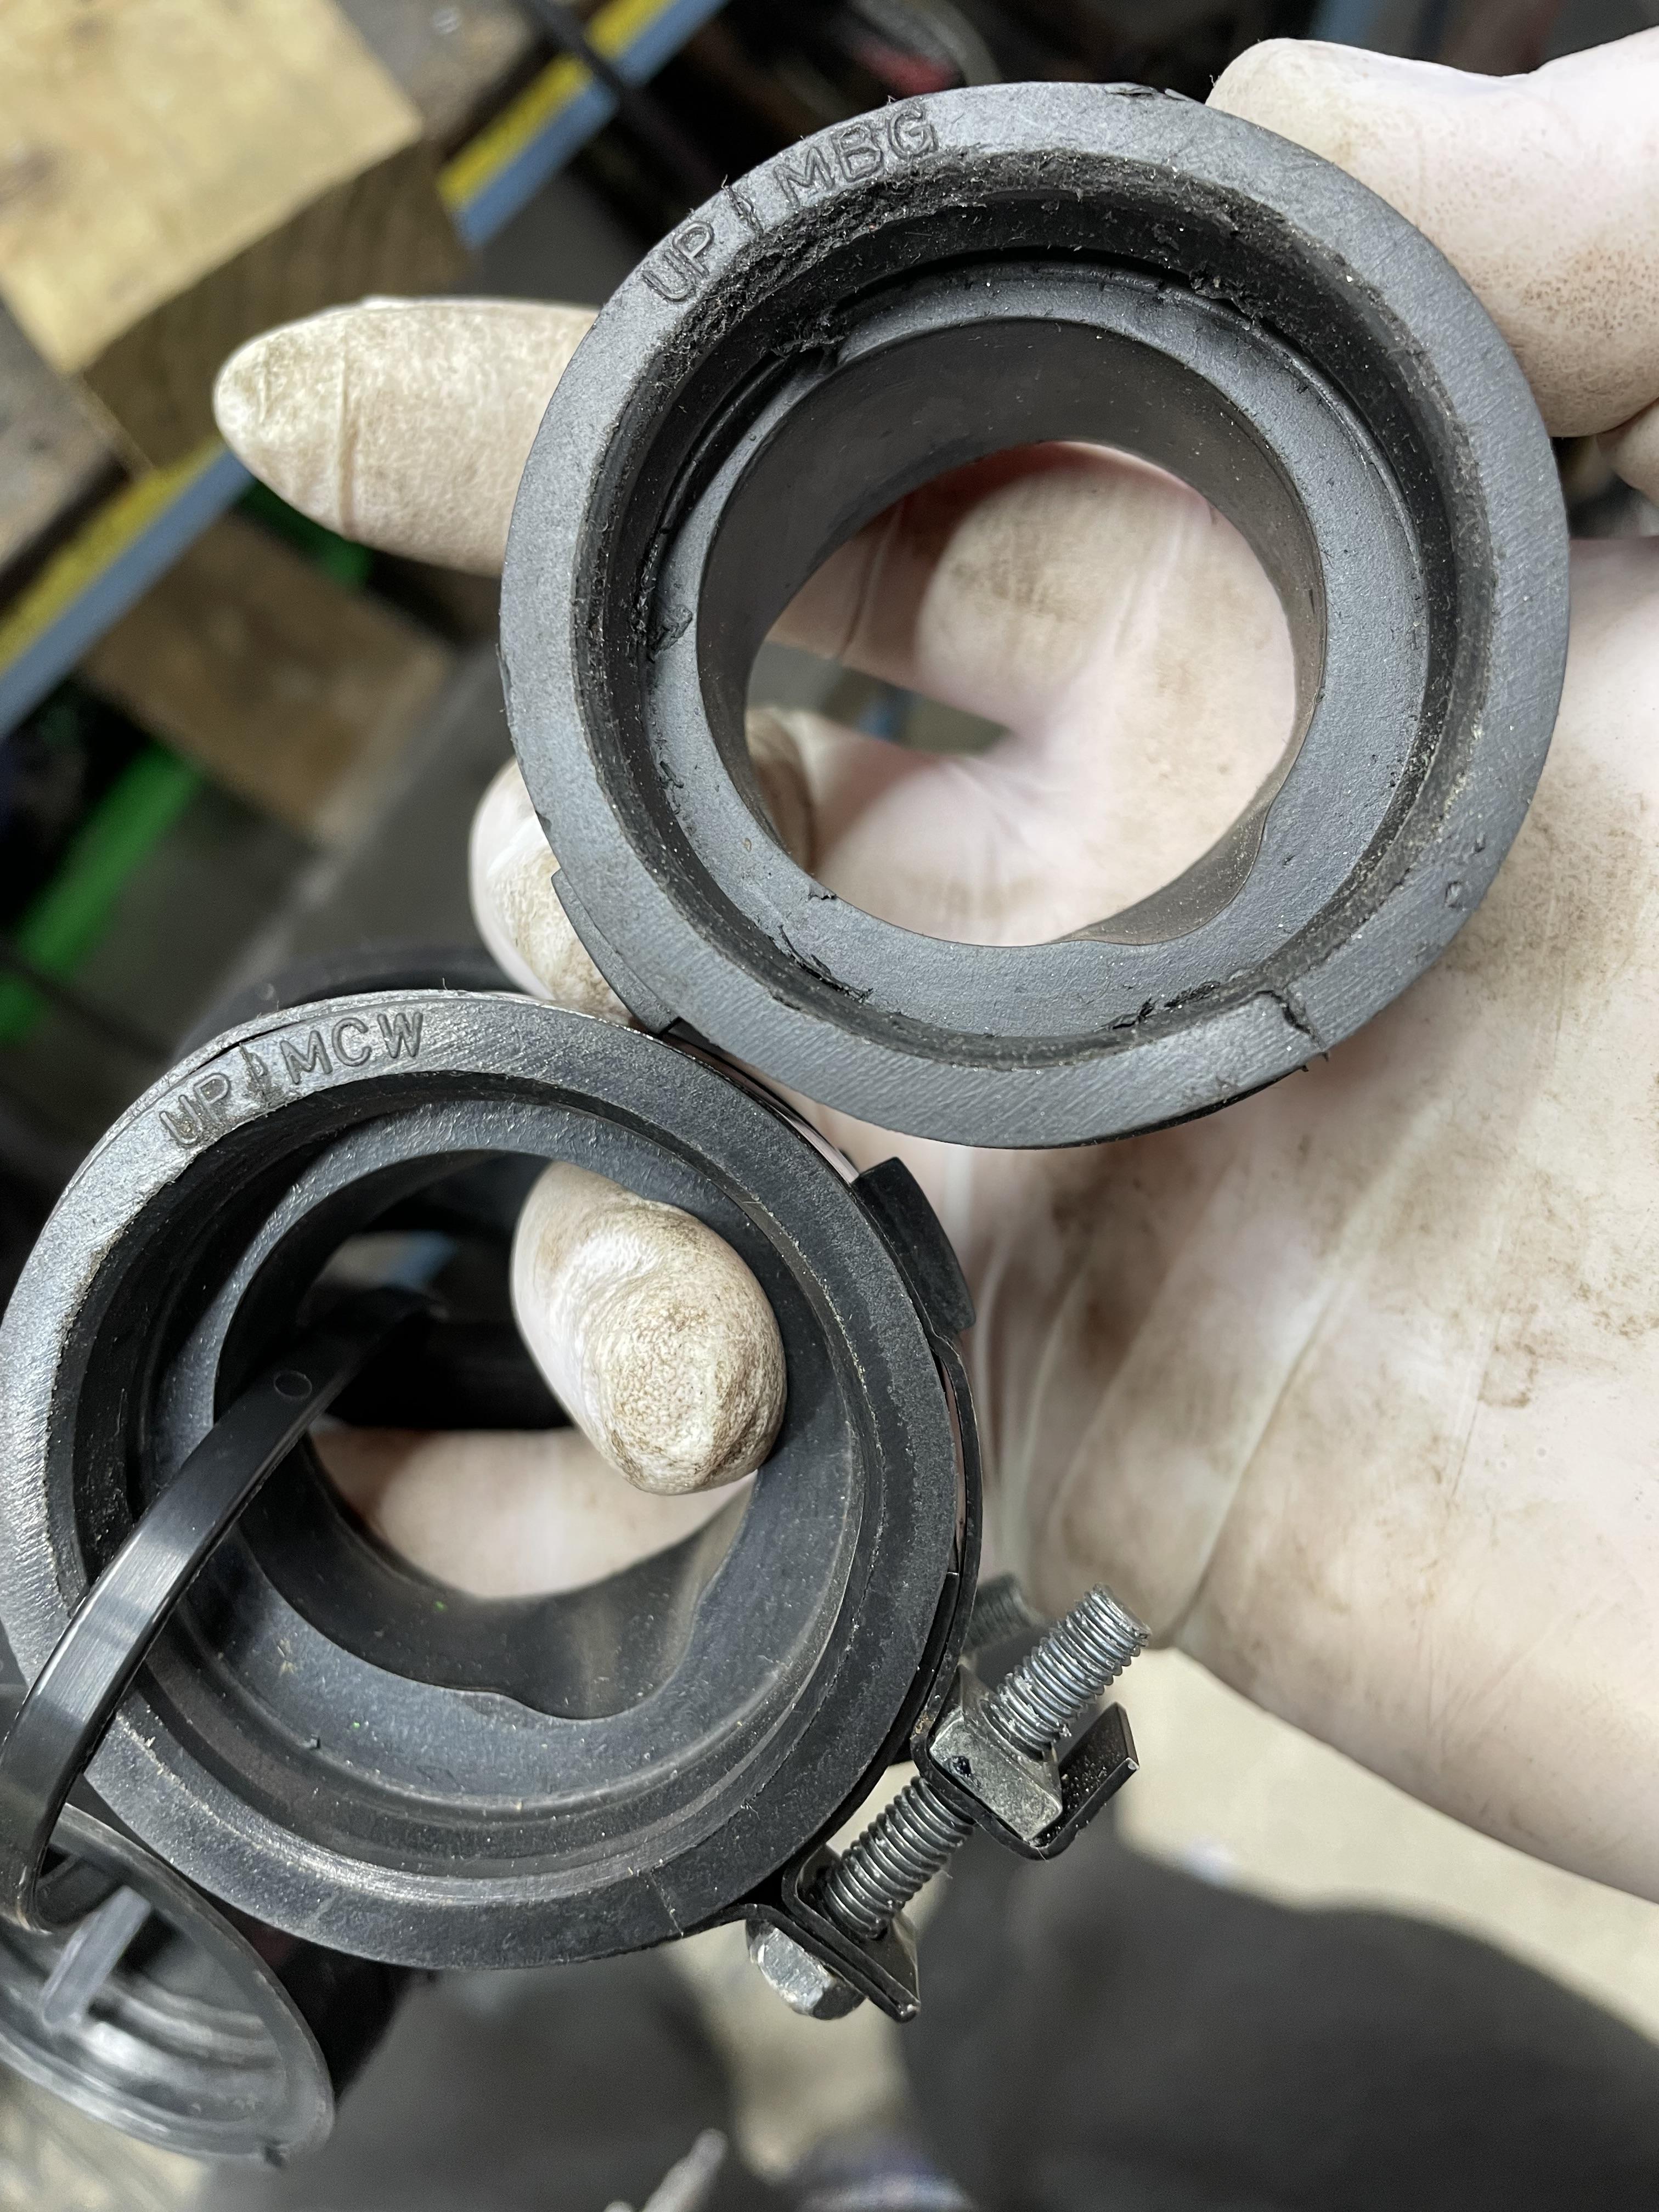
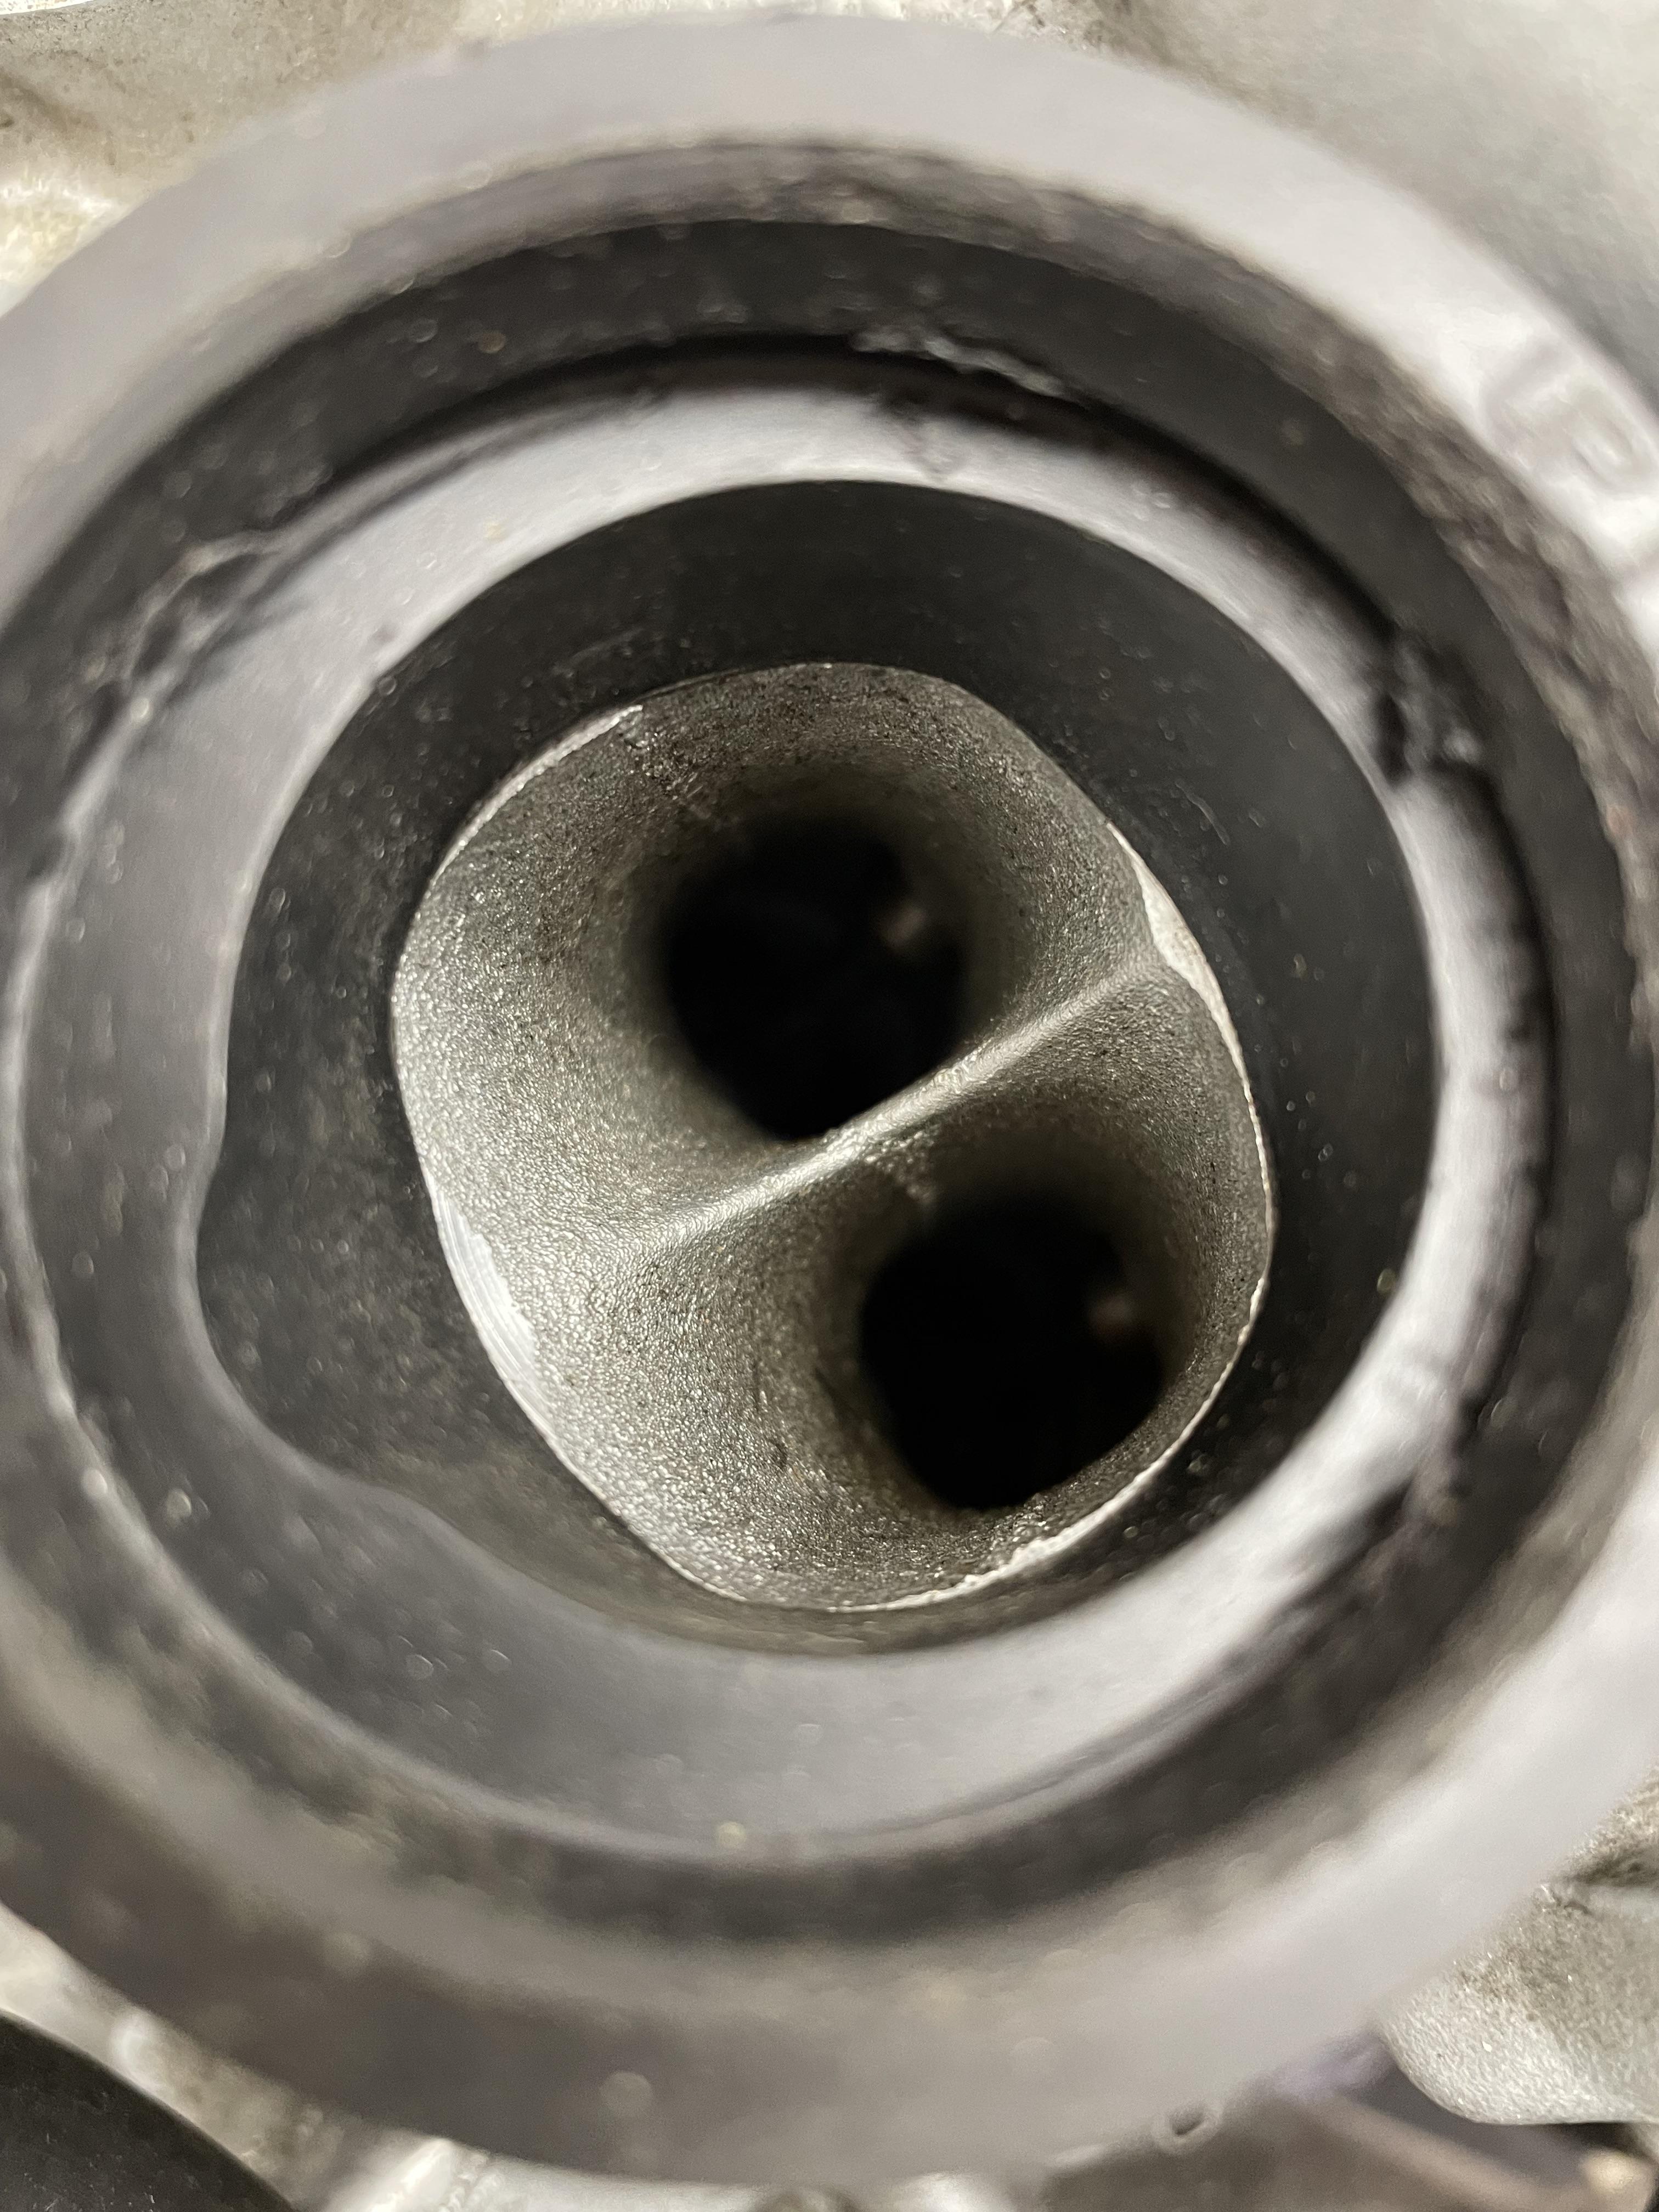
Quick update on throttle body intake rubbers: looks like all 800 generations are the same. VFR Crossrunner 800 on the left and old hardened 5th gen on the right. Even the locating tabs for clamps and engine intake are a match. Same internal and external dimensions too. I’d assume 6th gen would be the same? The clamps are different though - new ones are better as they have hex head drive alongside the JIS Phillips. Rubber intakes are also a decent match for the engine ports. Considering they are rubber items, there’s very little protrusion so flow looks smooth. Finally, for anyone wondering if a front rad fits the 5th gen fairings, it does. I threw the fairings on quickly to show there’s ample room. But the vents are in the wrong place so you’d have to figure that out to keep your engine cool. Looks nice with the MC21 tail. The RC24 front bit in blue isn’t necessary but you’d have to massage the front part of the MC21 seat fairing to blend with the tank. You COULD fit this on your stock subframe but you’ll have to cut the corners off the back and the fairing will leave the bottom rail exposed just above the footpegs and a bit under th seat hump. Cutting and rebelling would make a neater job. Stock solo seat (cut off the pillion part) fits fine. You’ll also have to fabricate brackets for the rear light and exhaust hanger, and an undertray (original will hang below the fairing near the tank). Just in case anyone was planning to do theirs.
-
Thanks mate. When you explained it last time I just blinked at you without understanding. This really helps immensely! By the way, this bike and I owe you a great debt, Mohawk. And there are 100’s of VFRs wearing mods you pioneered out there, alongside my own. Good shout vfrcapn, and thanks for explaining the 2 part bit. Will ring them next week.
-
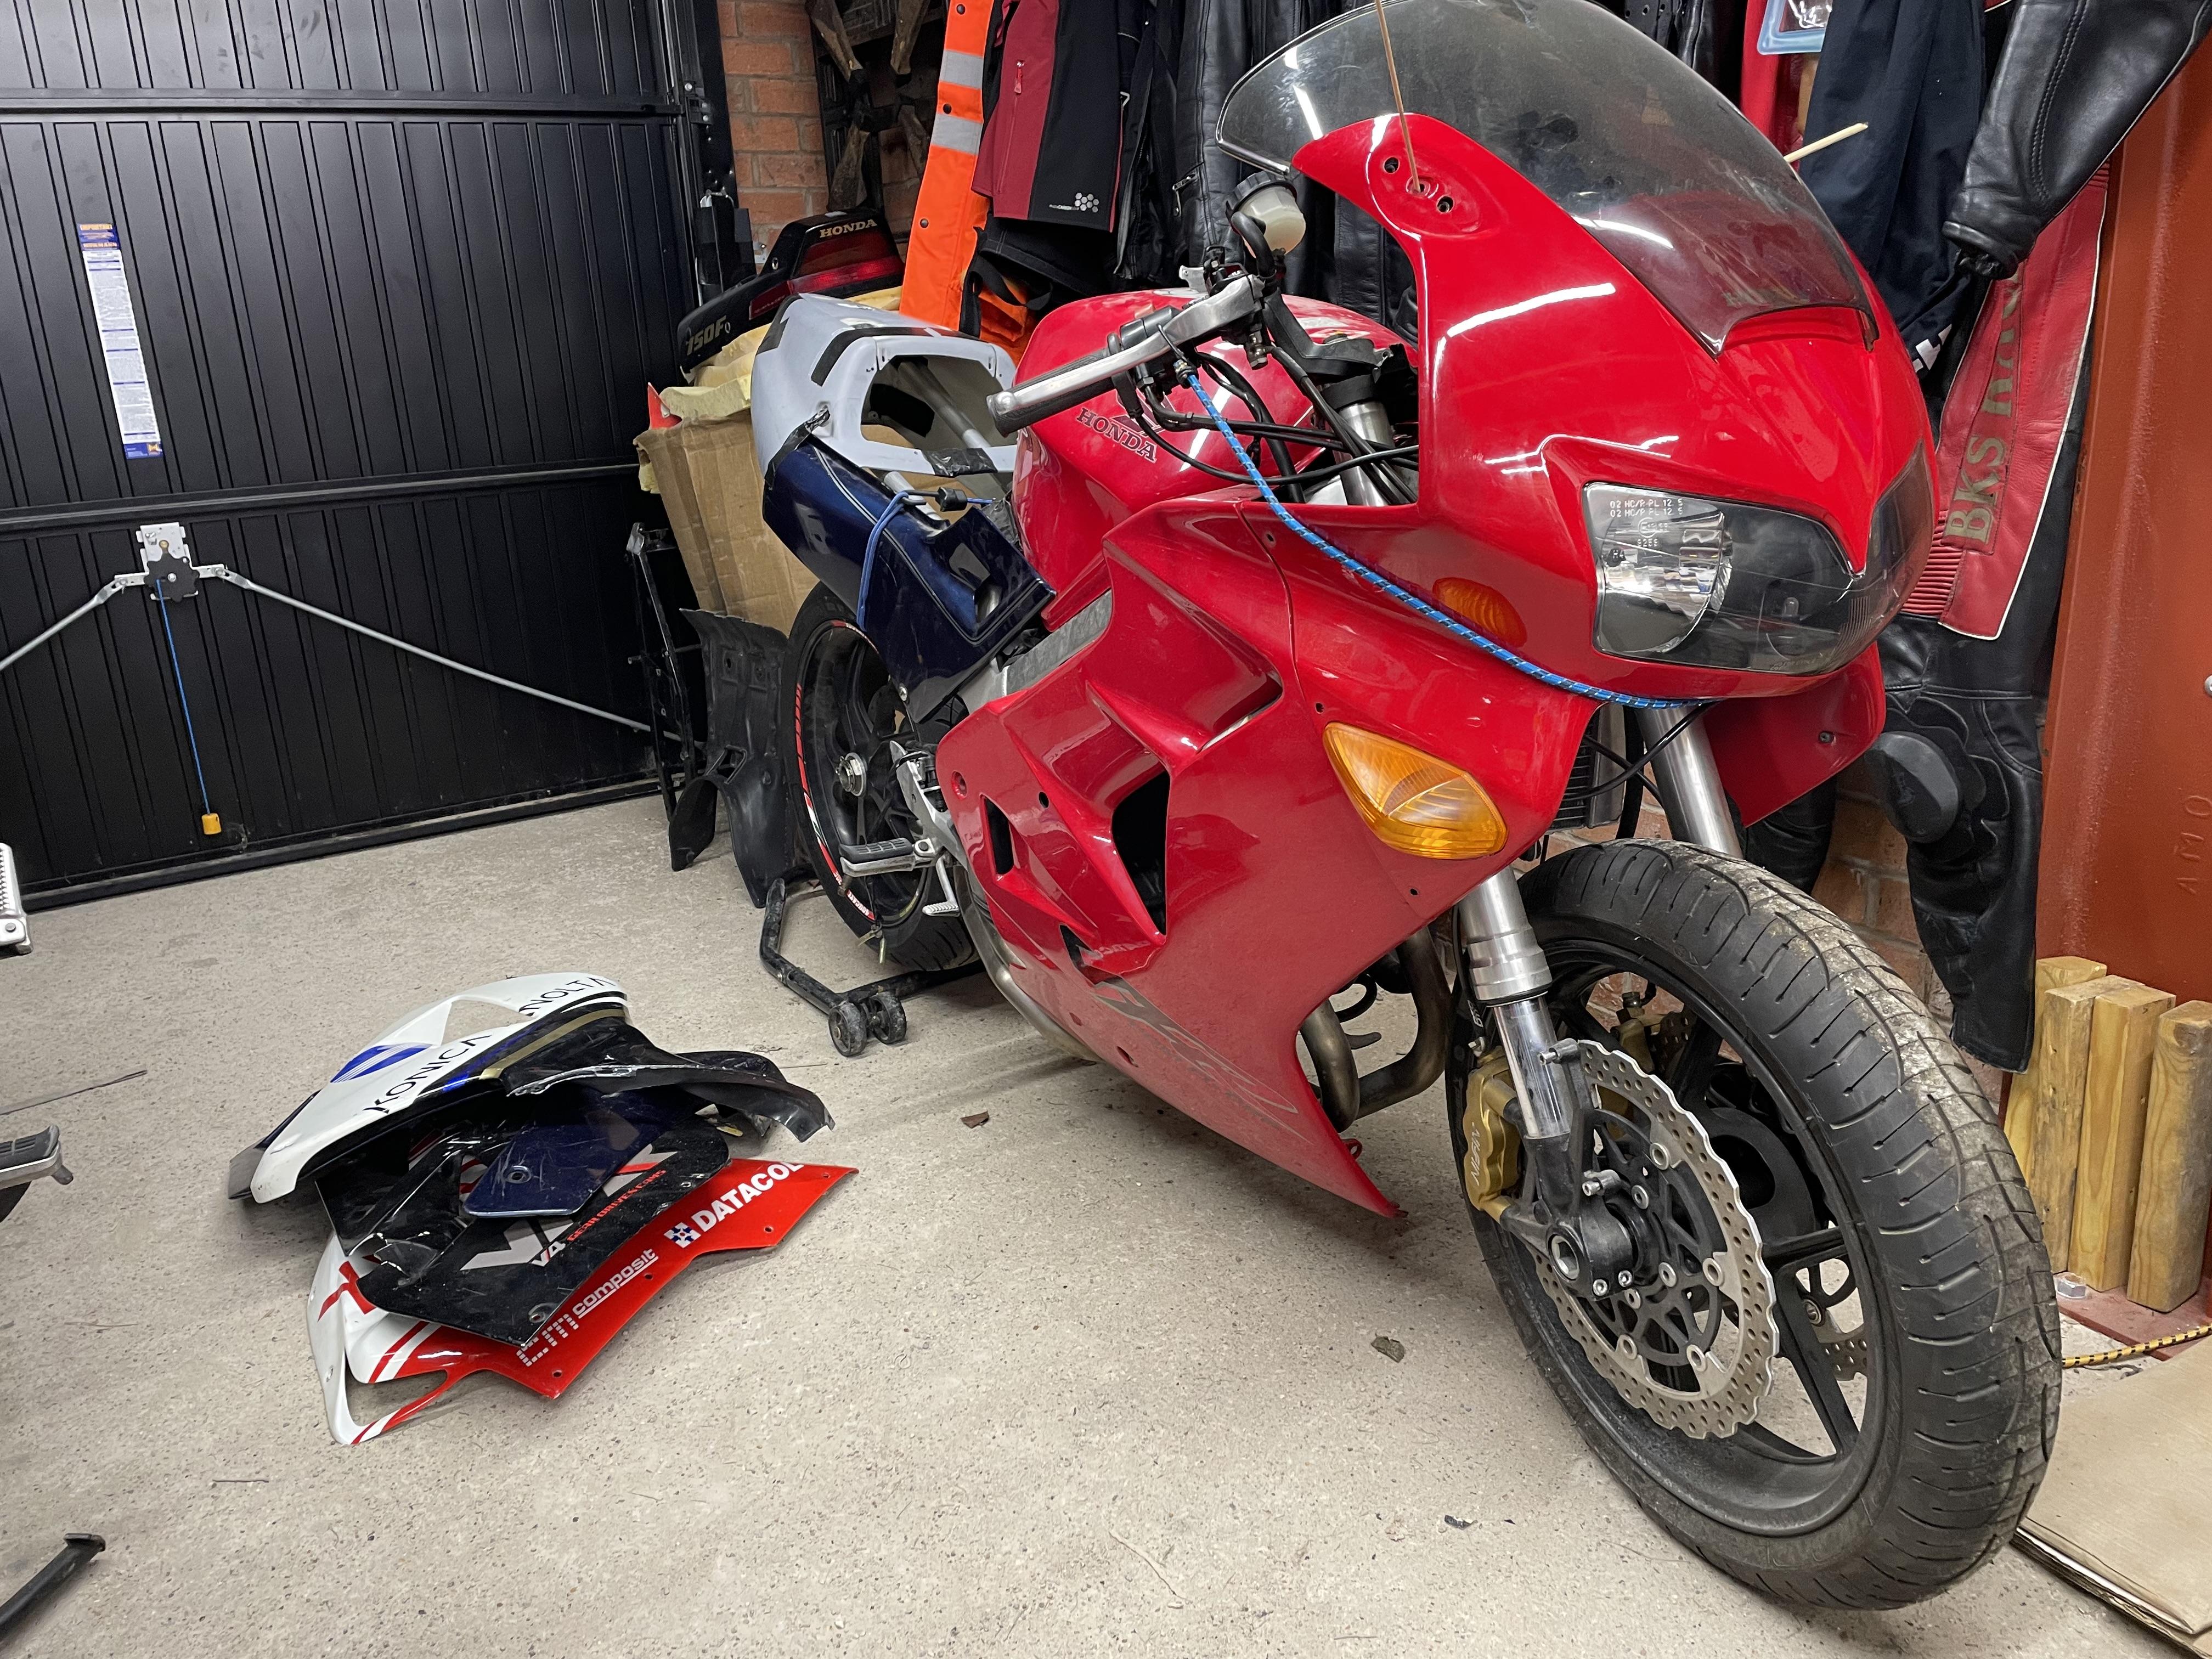
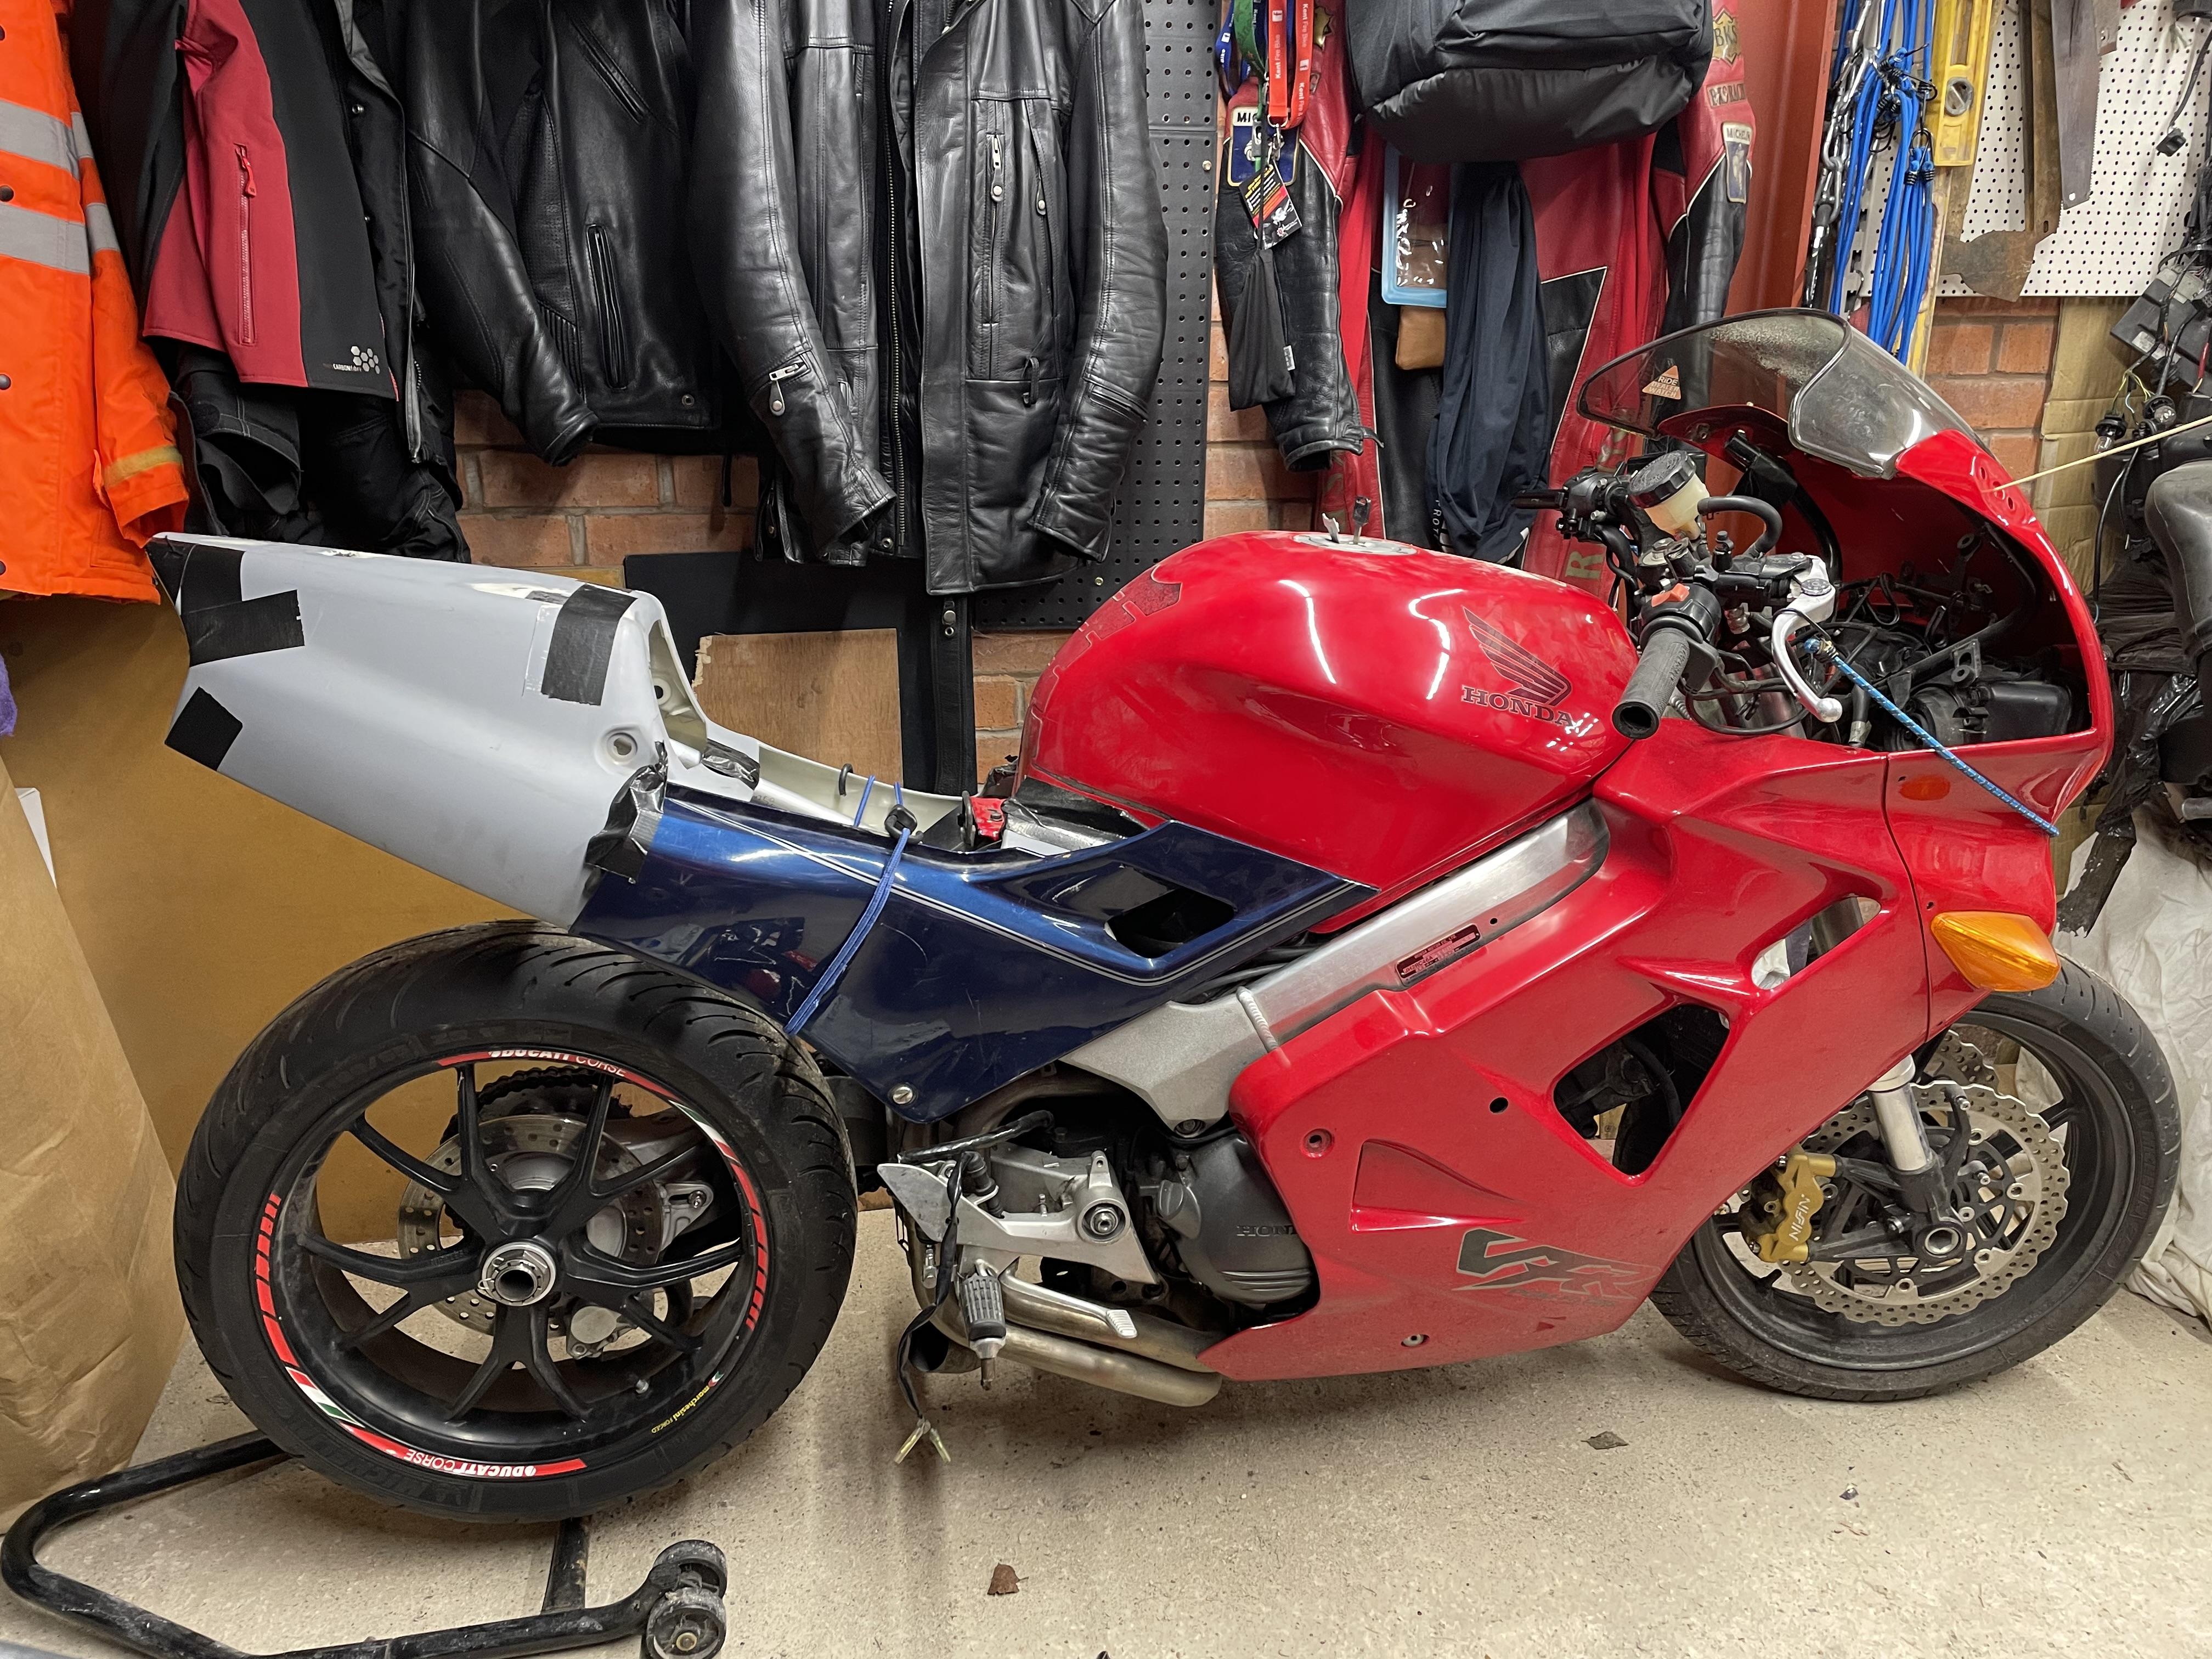
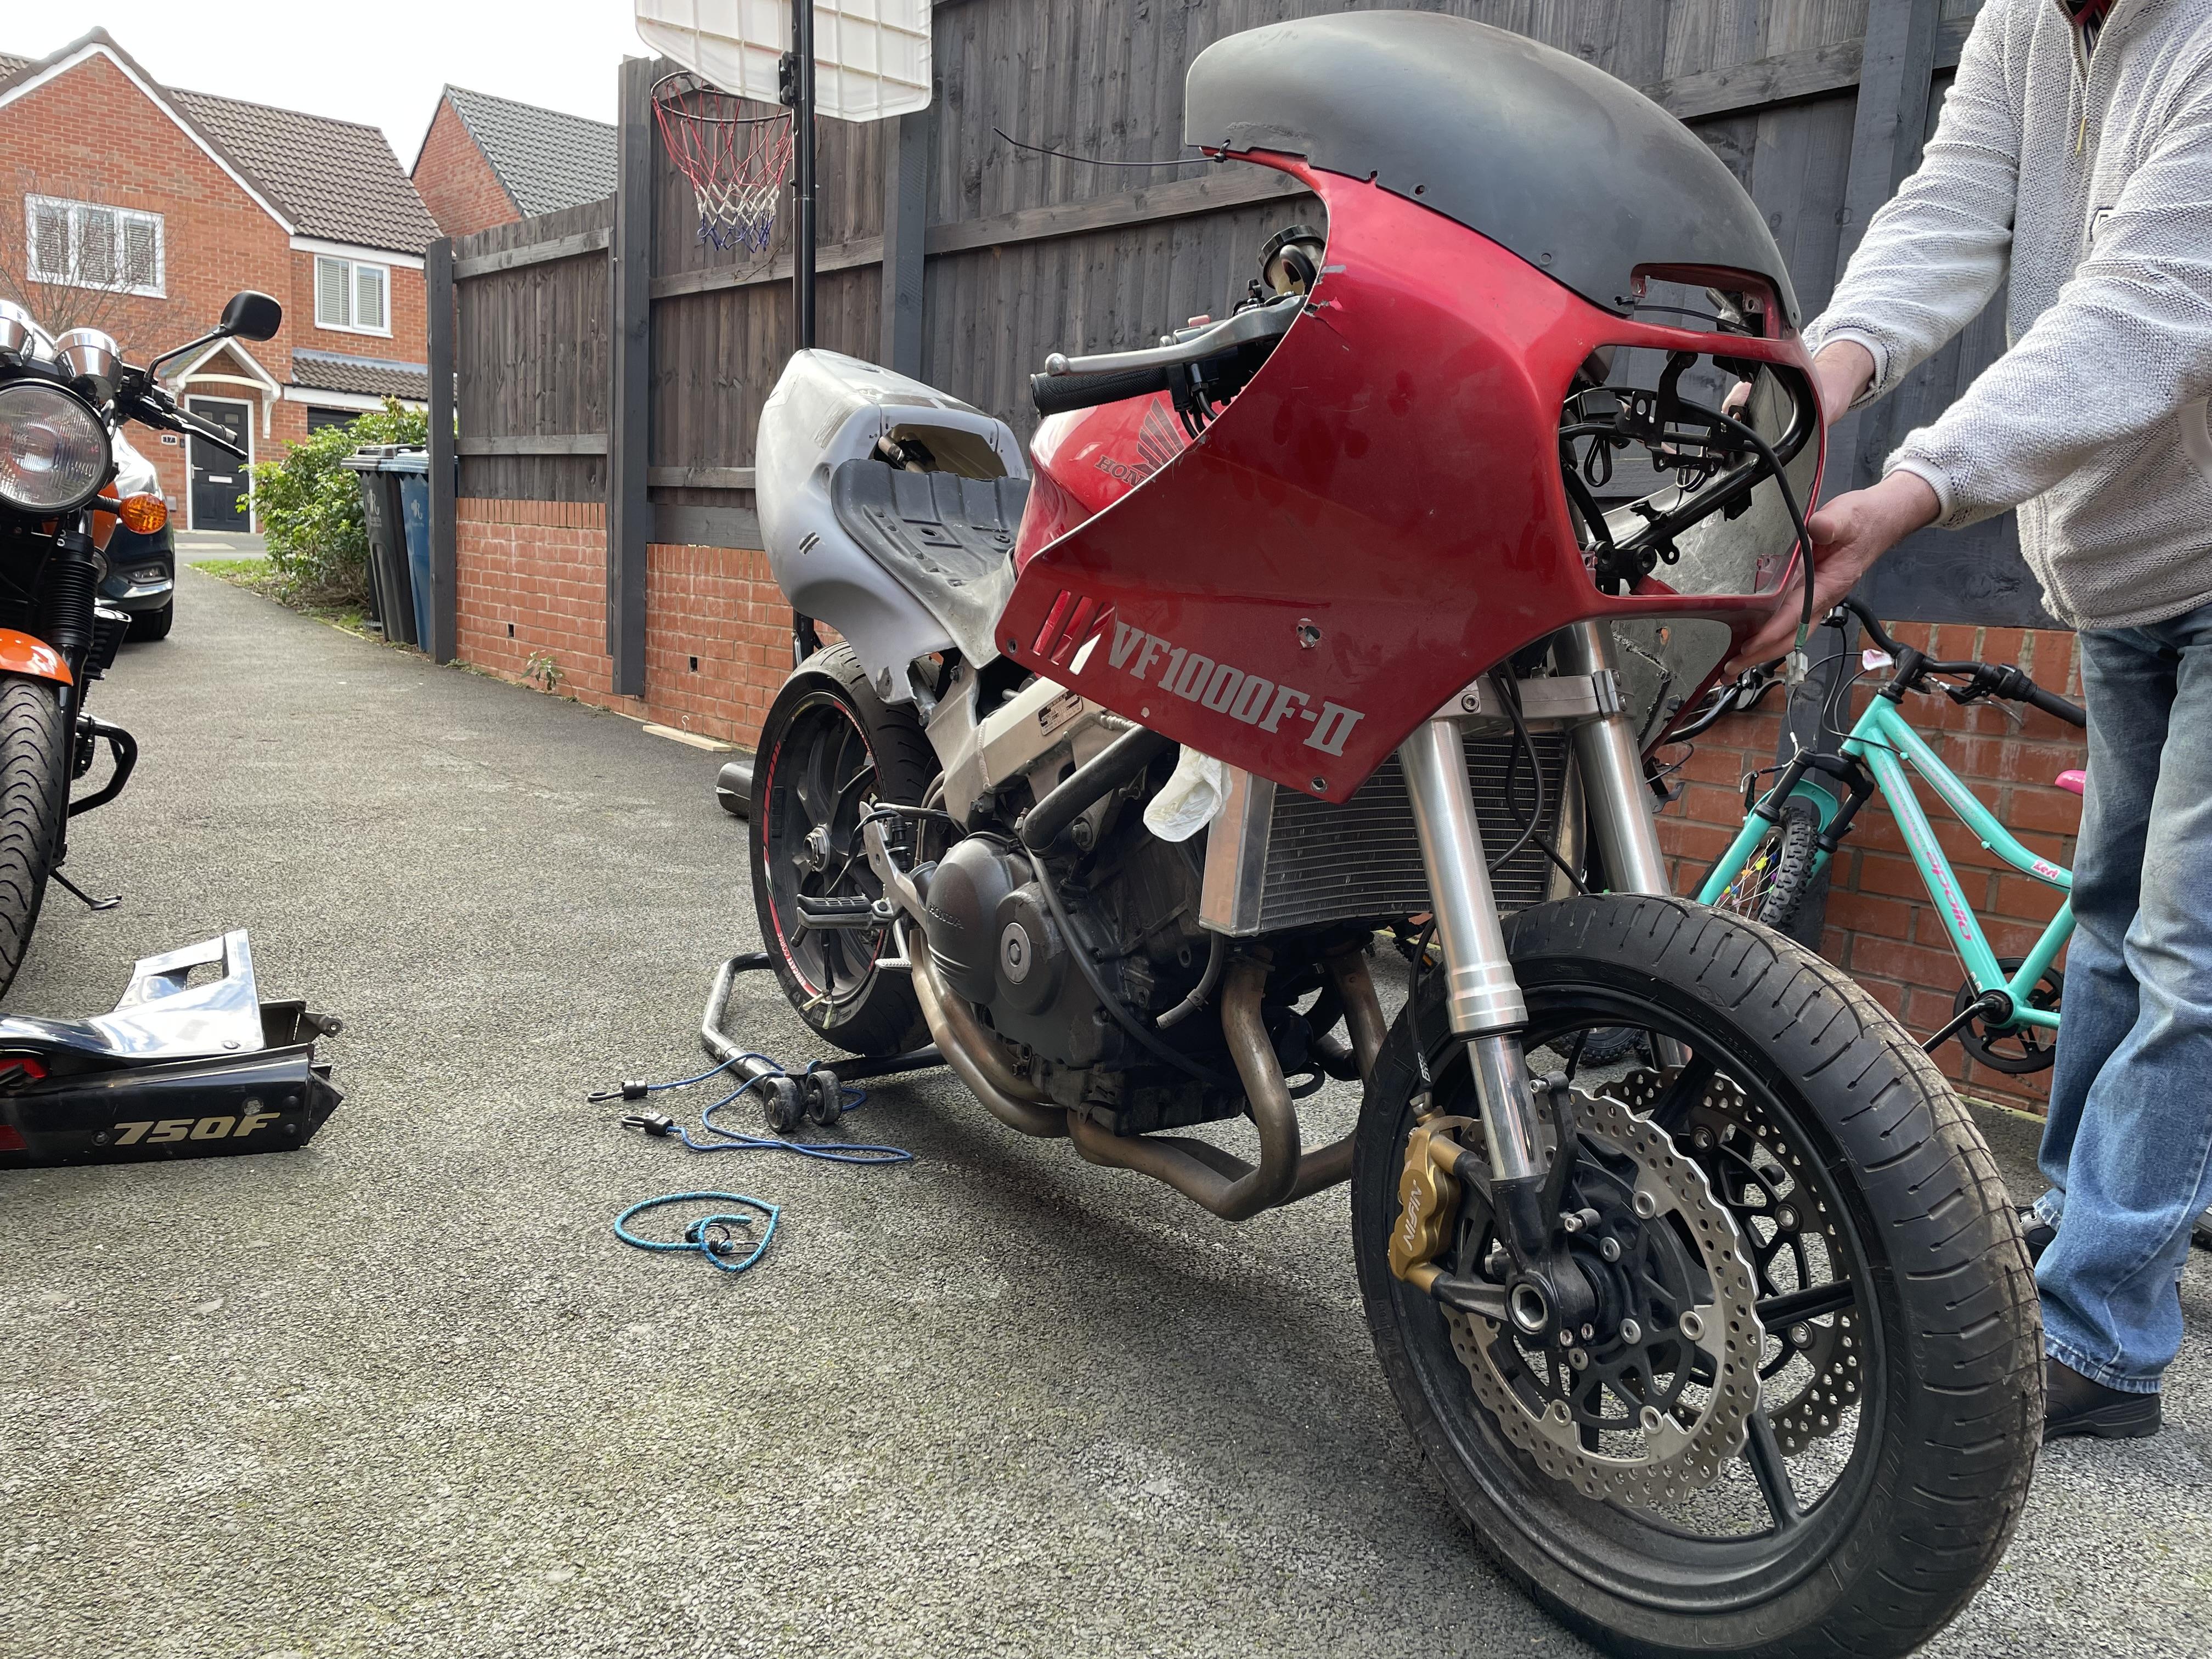
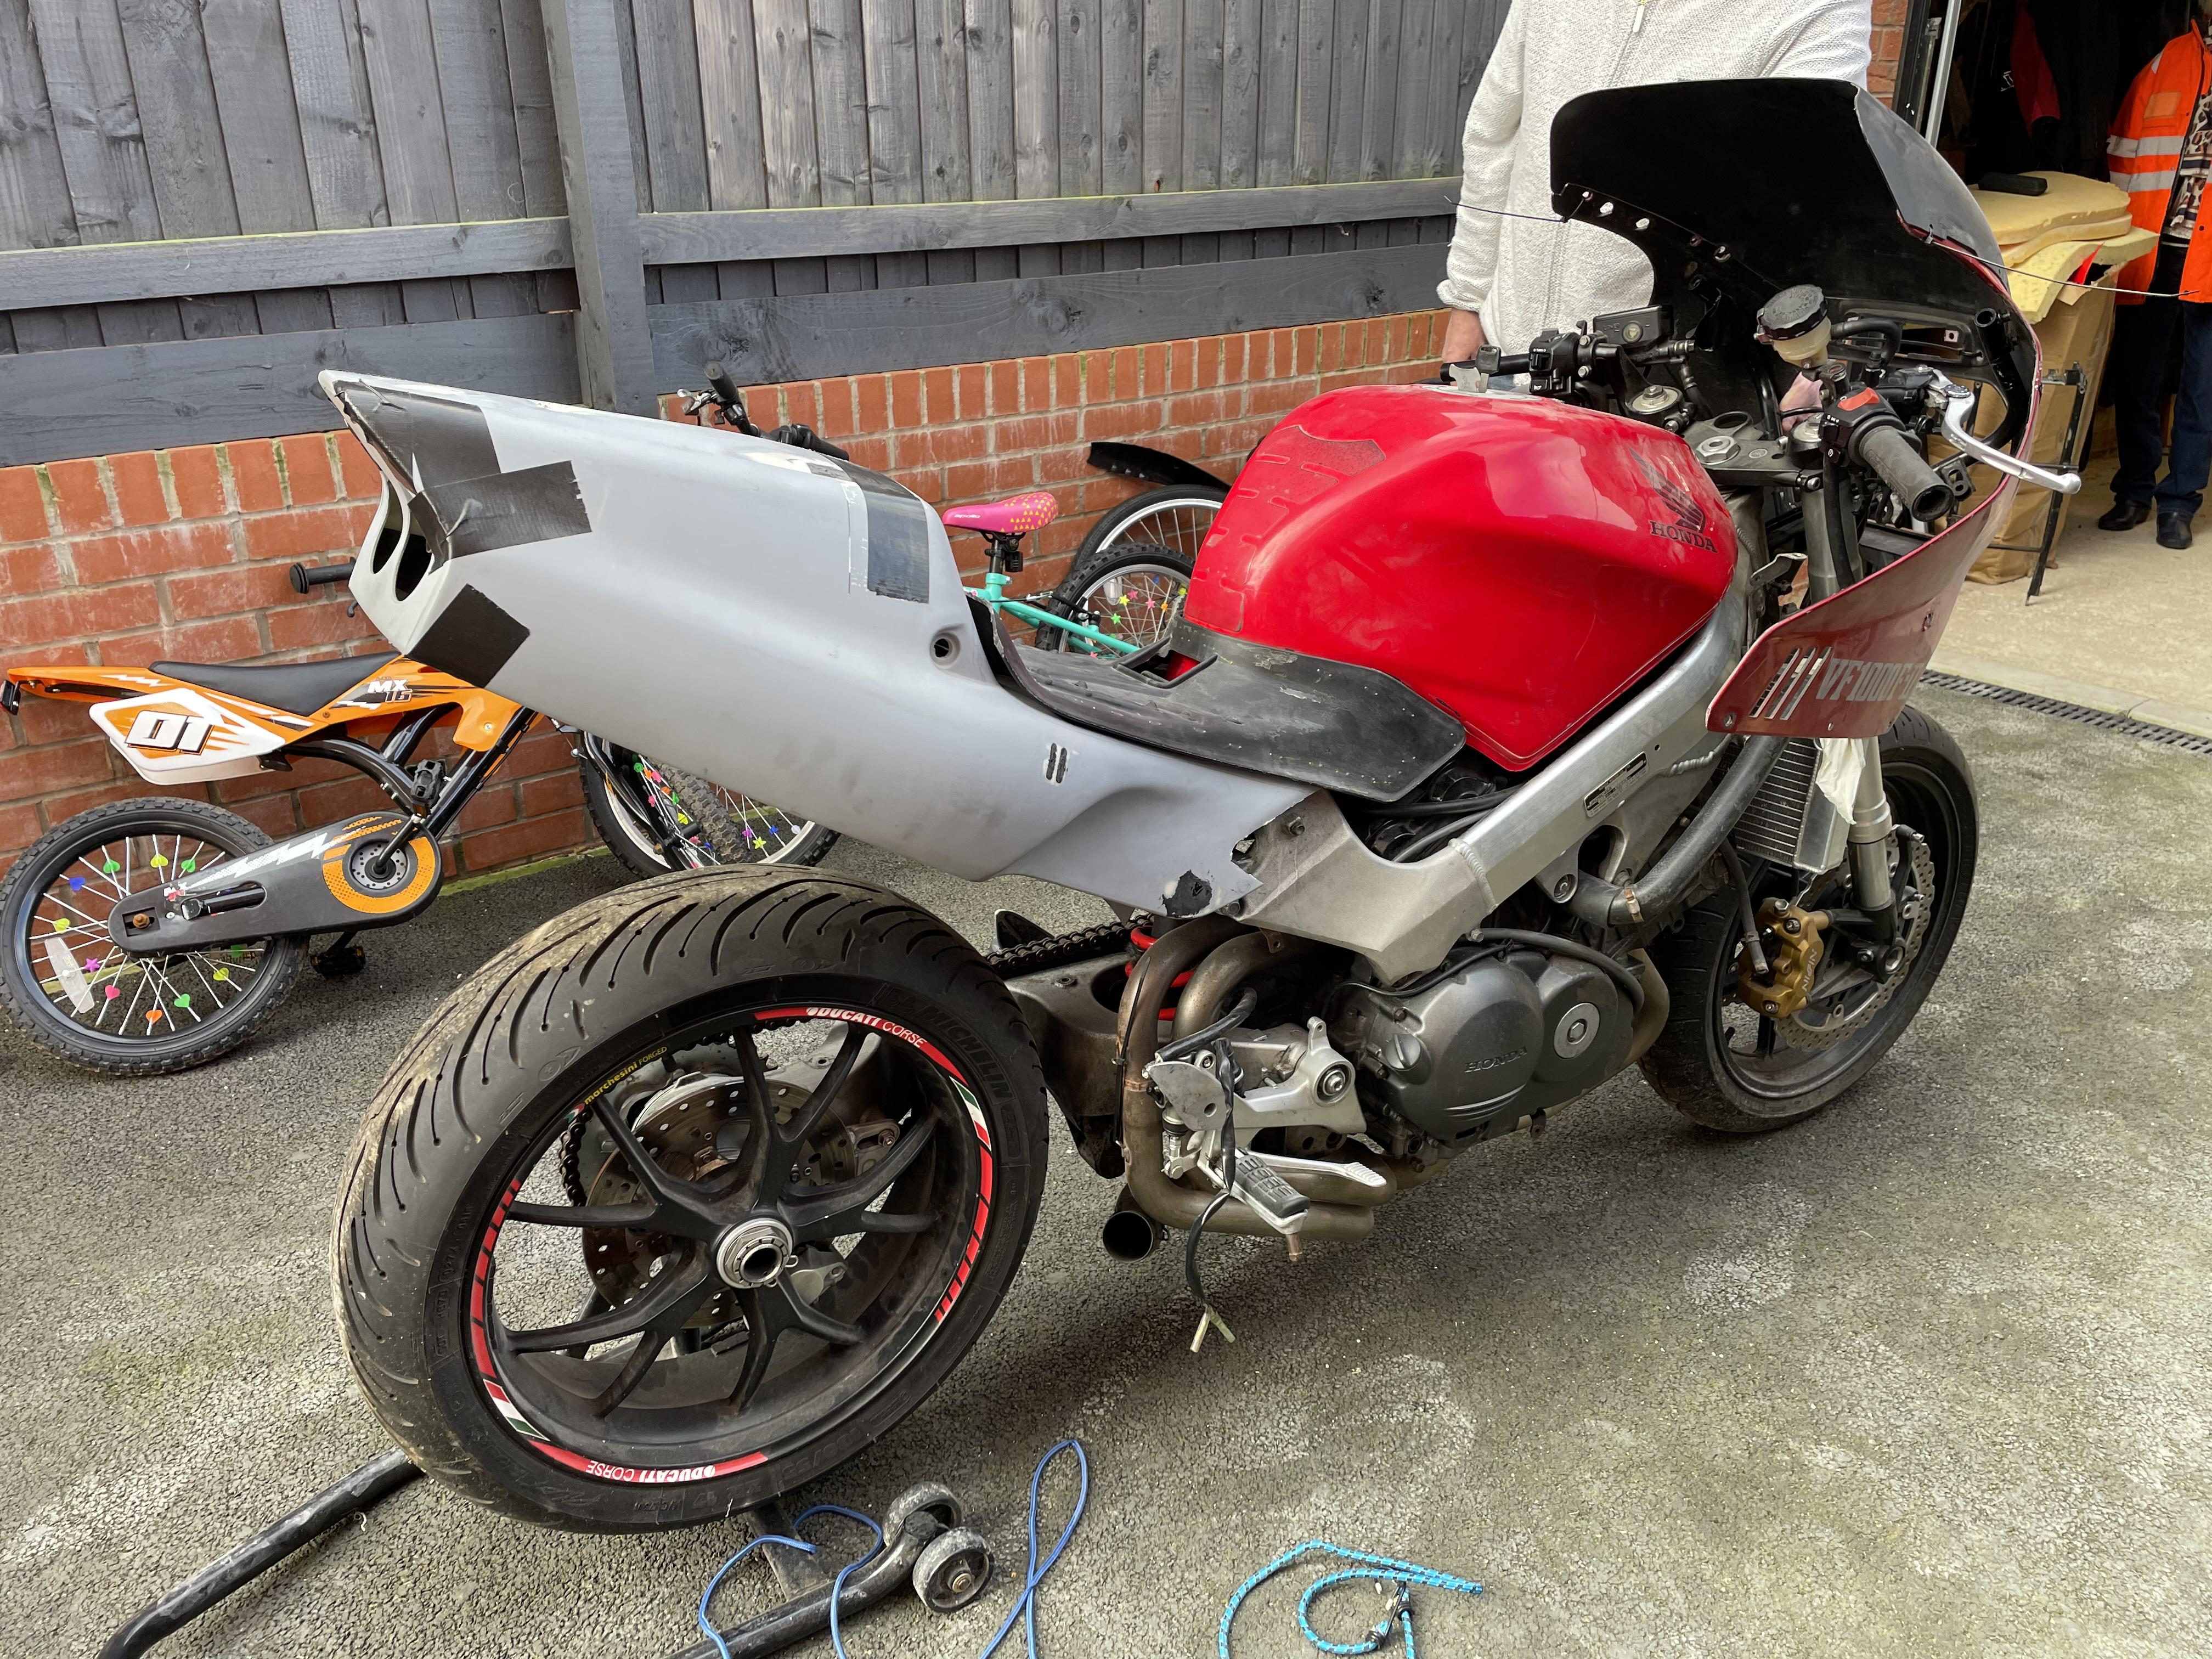
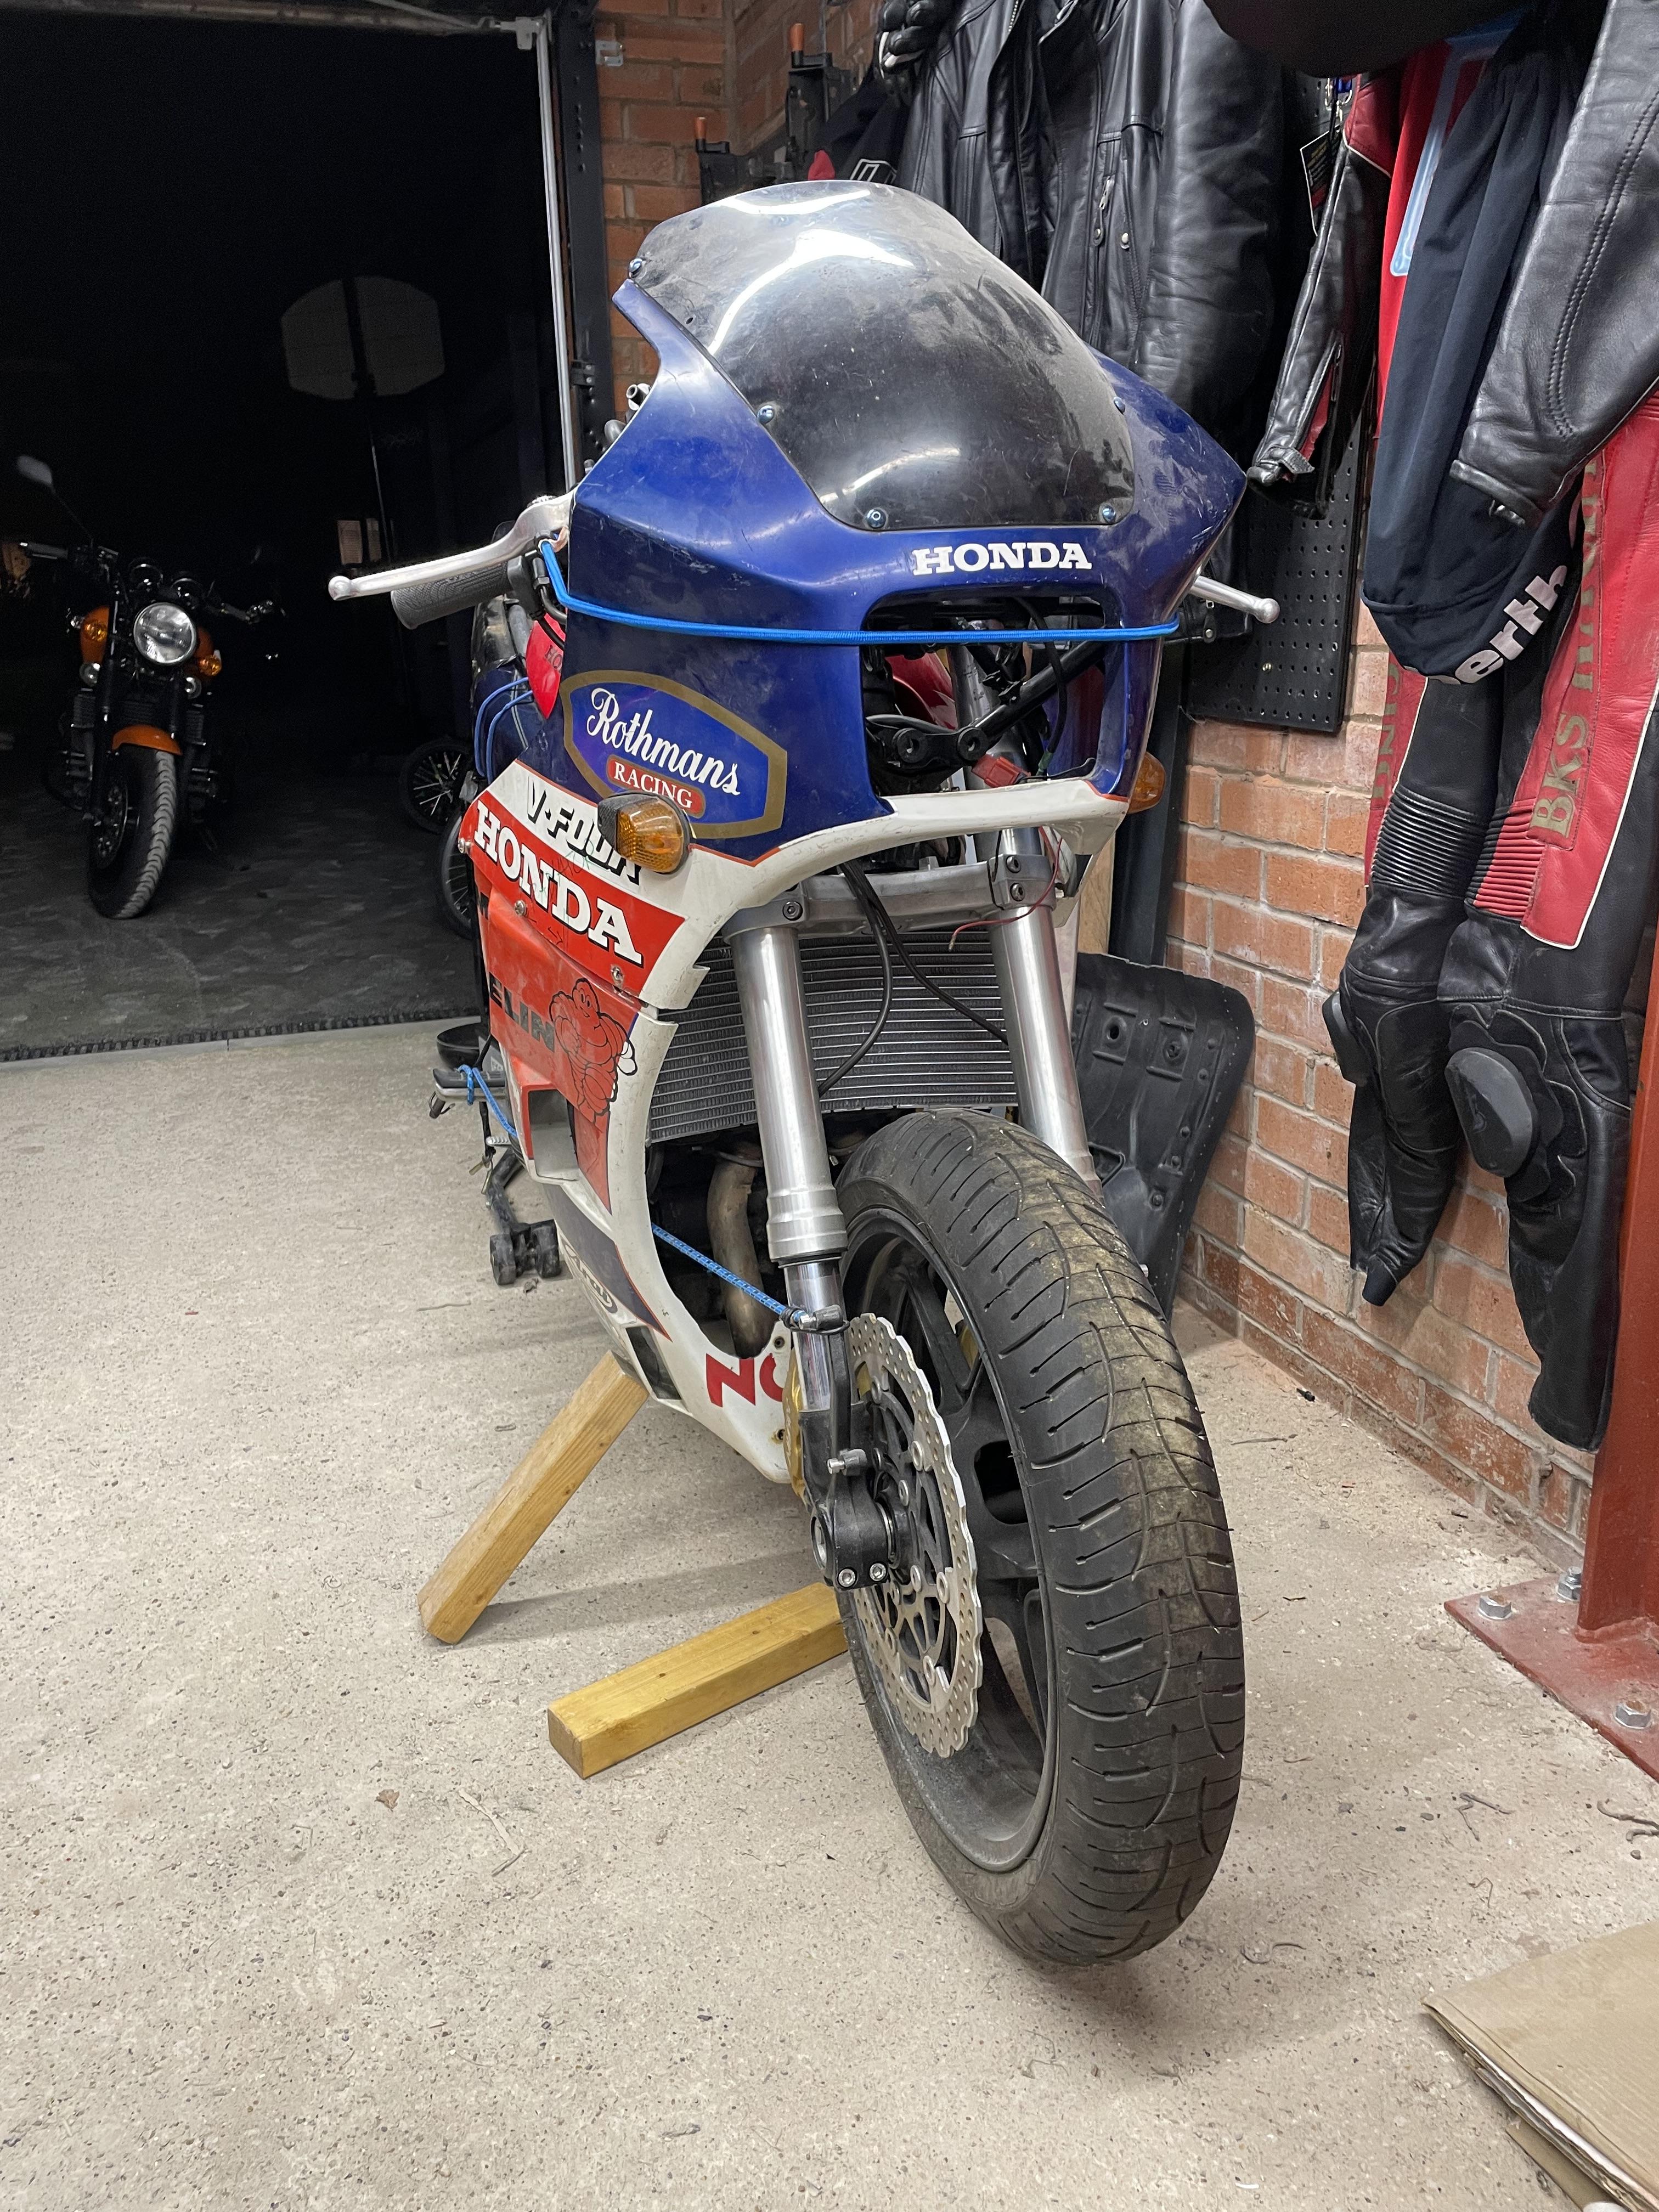
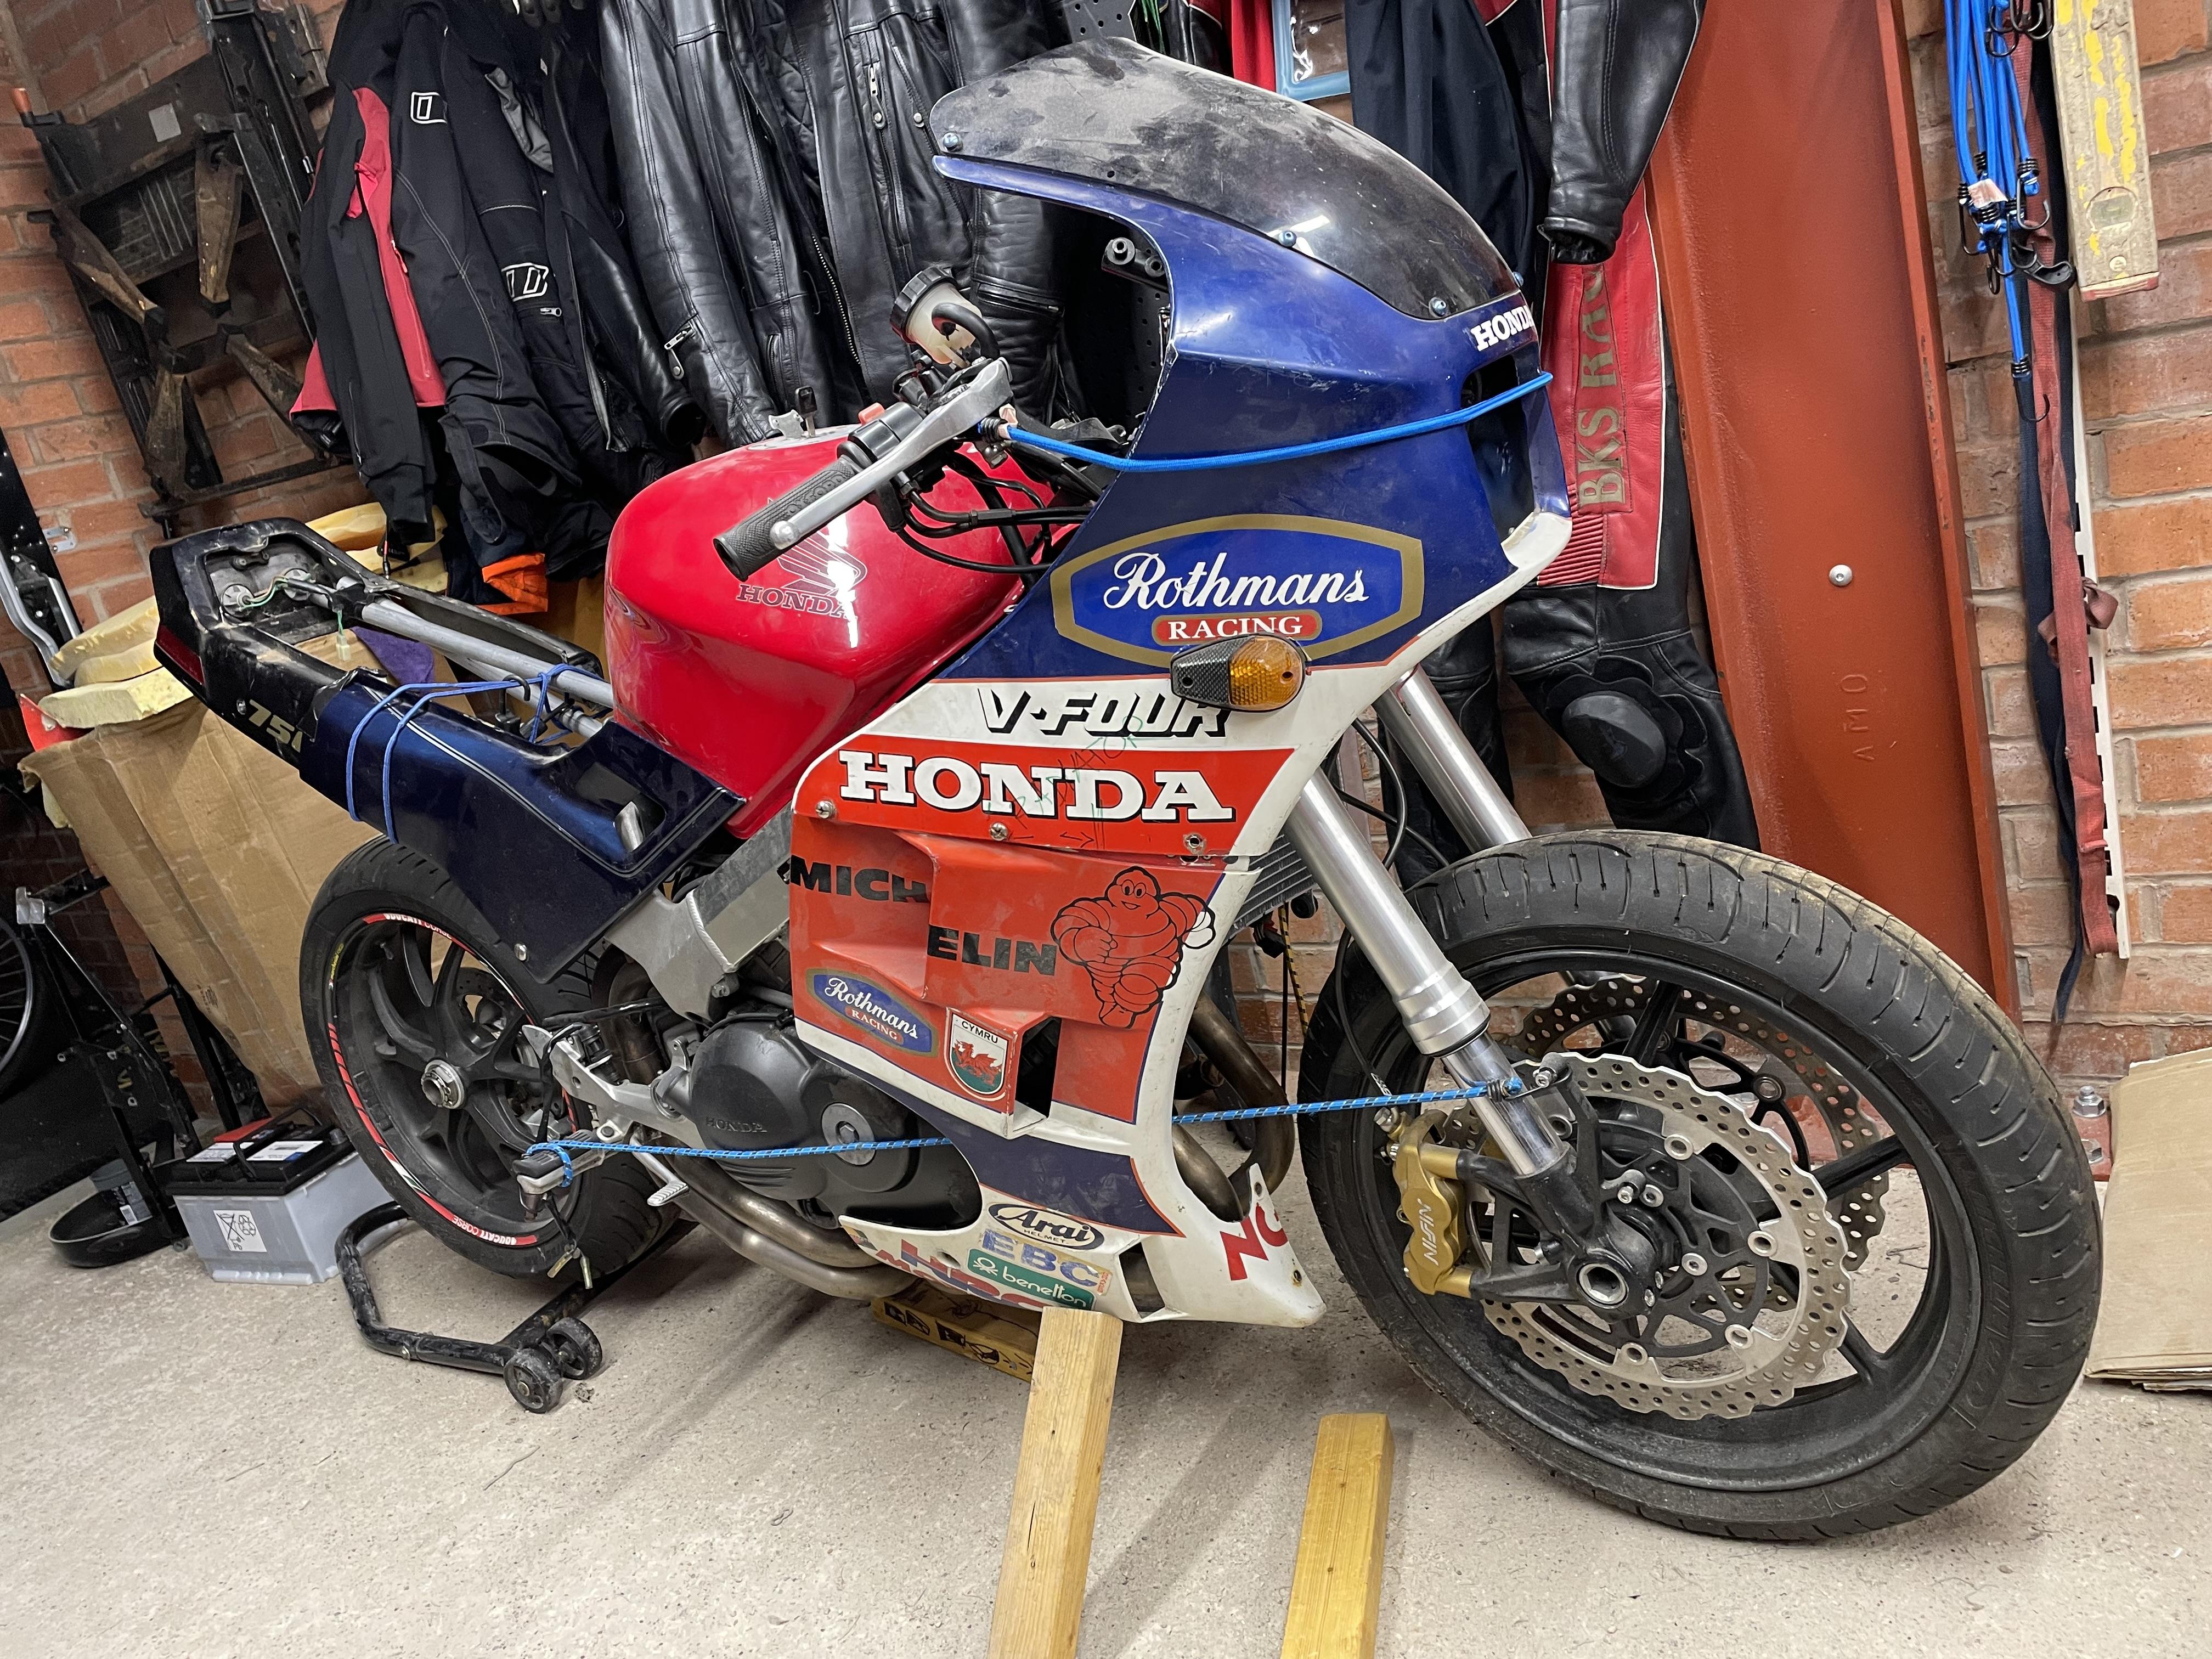
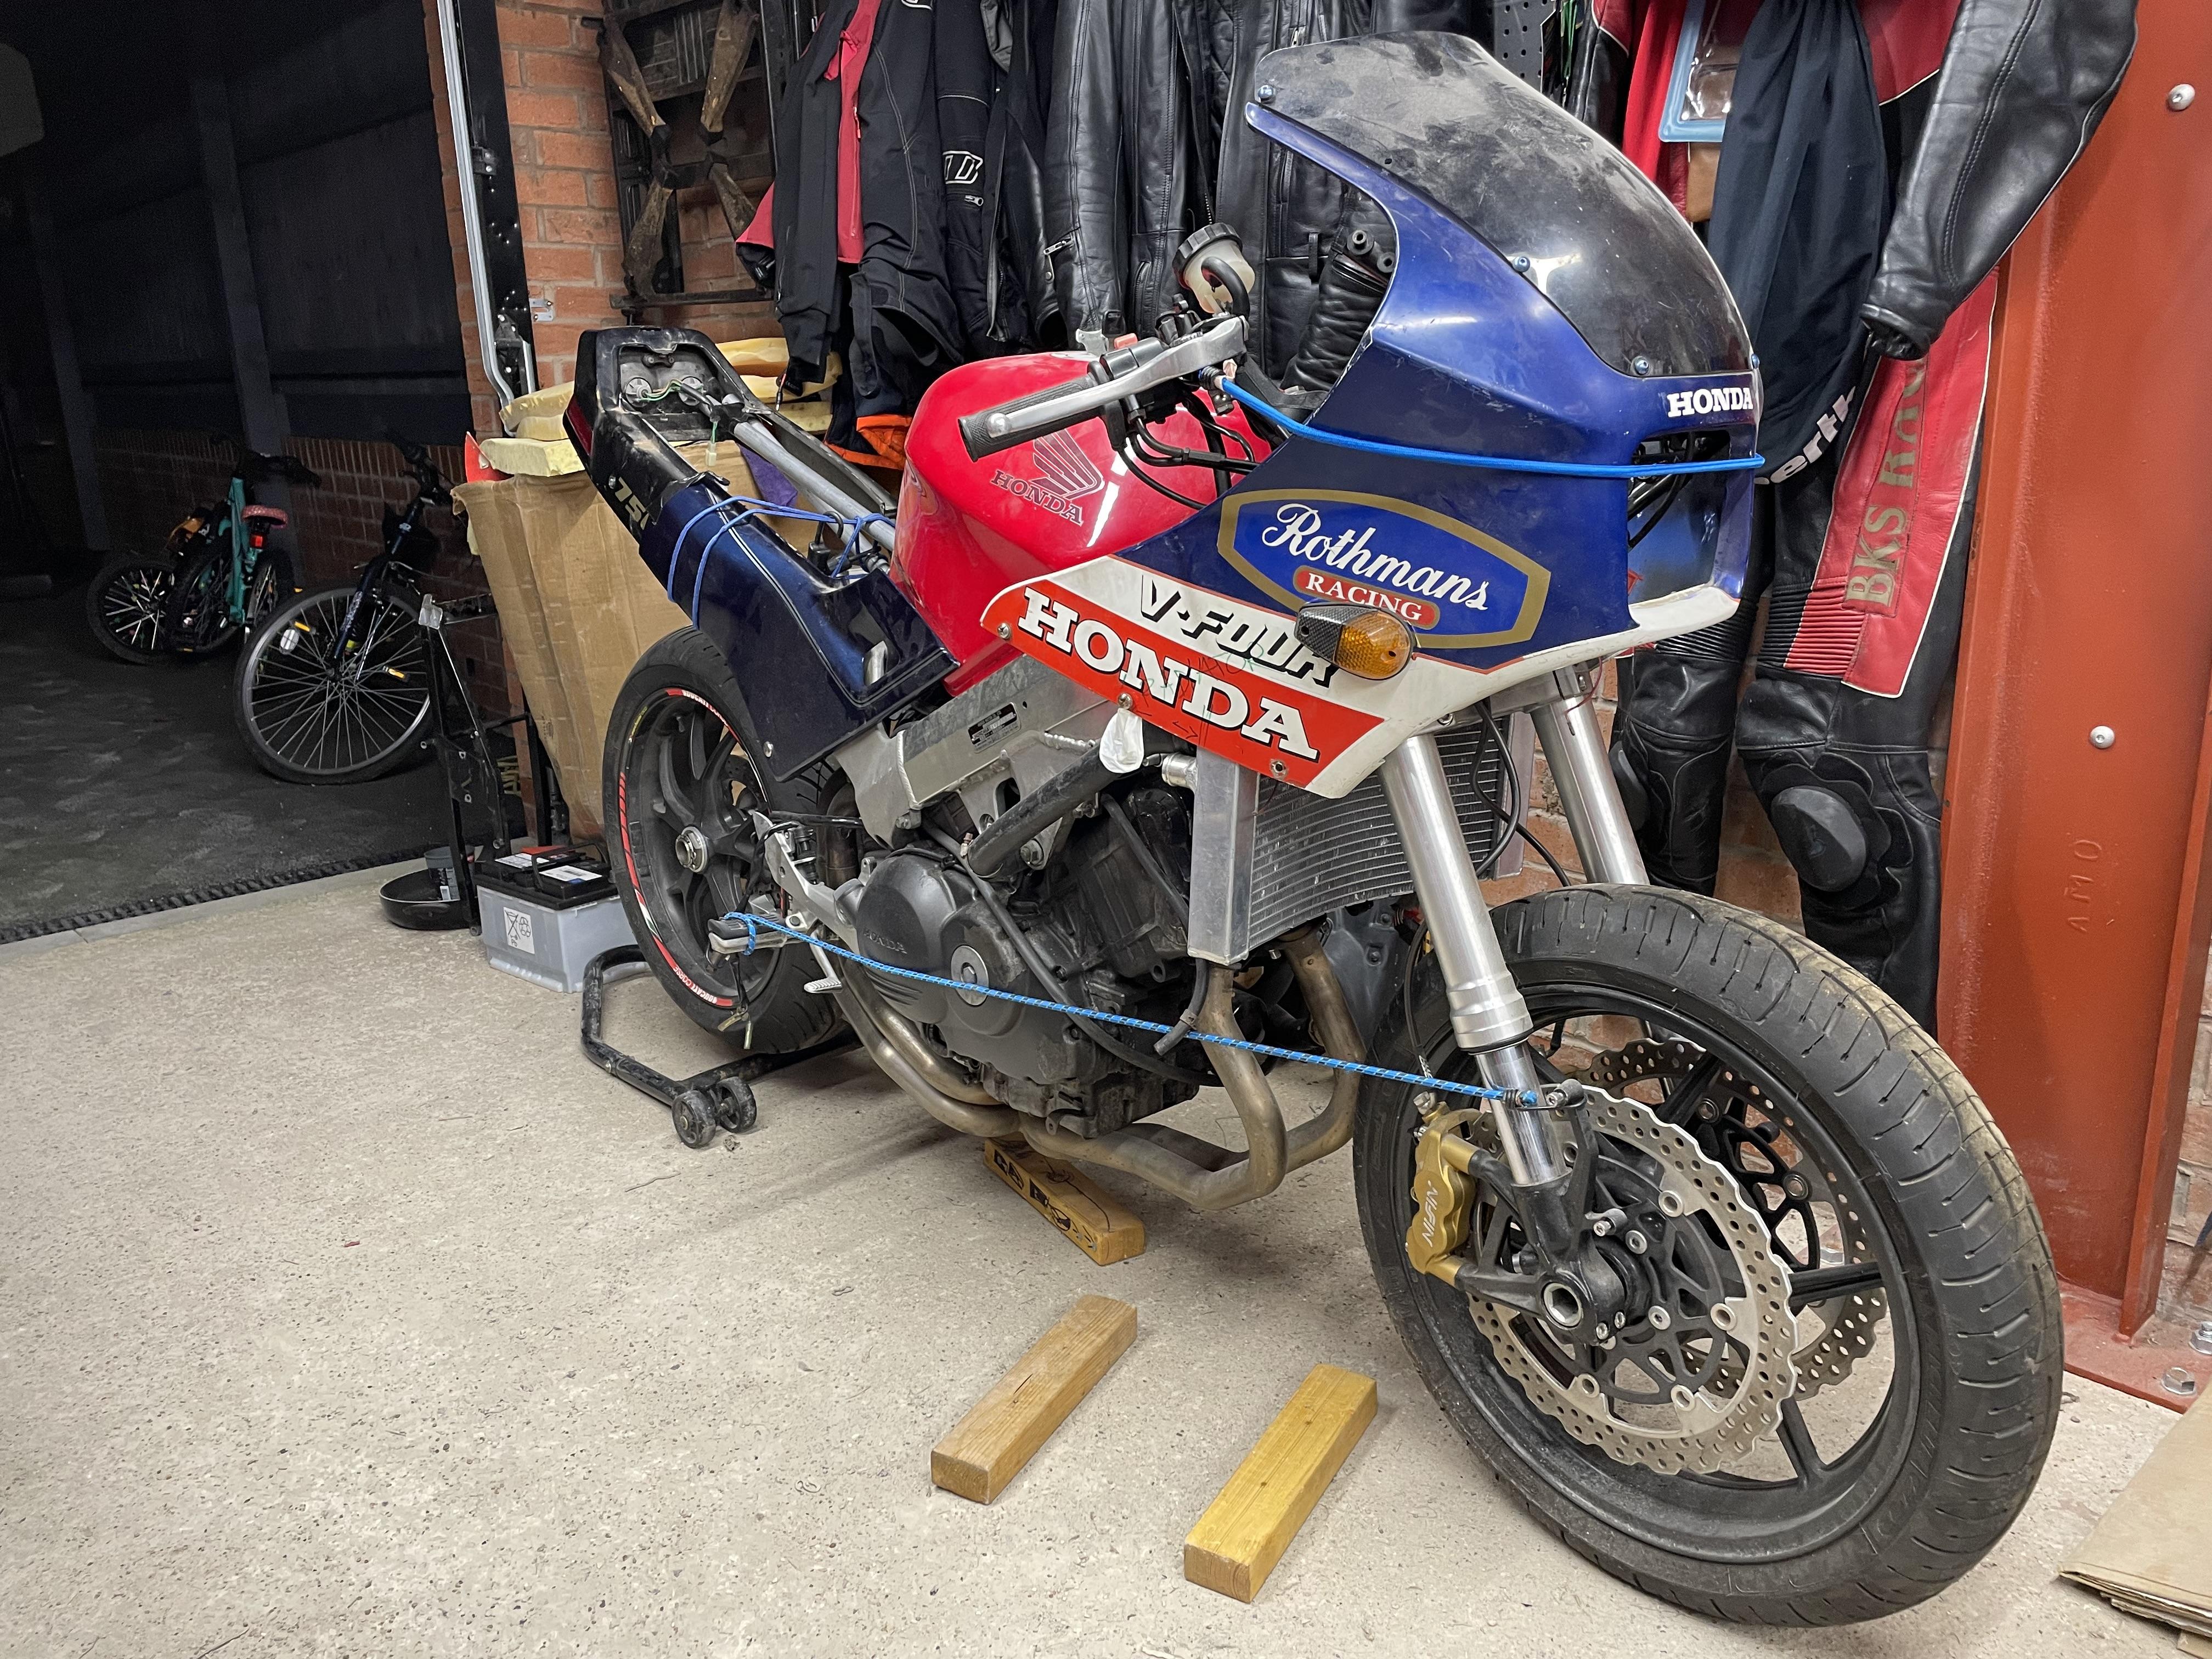
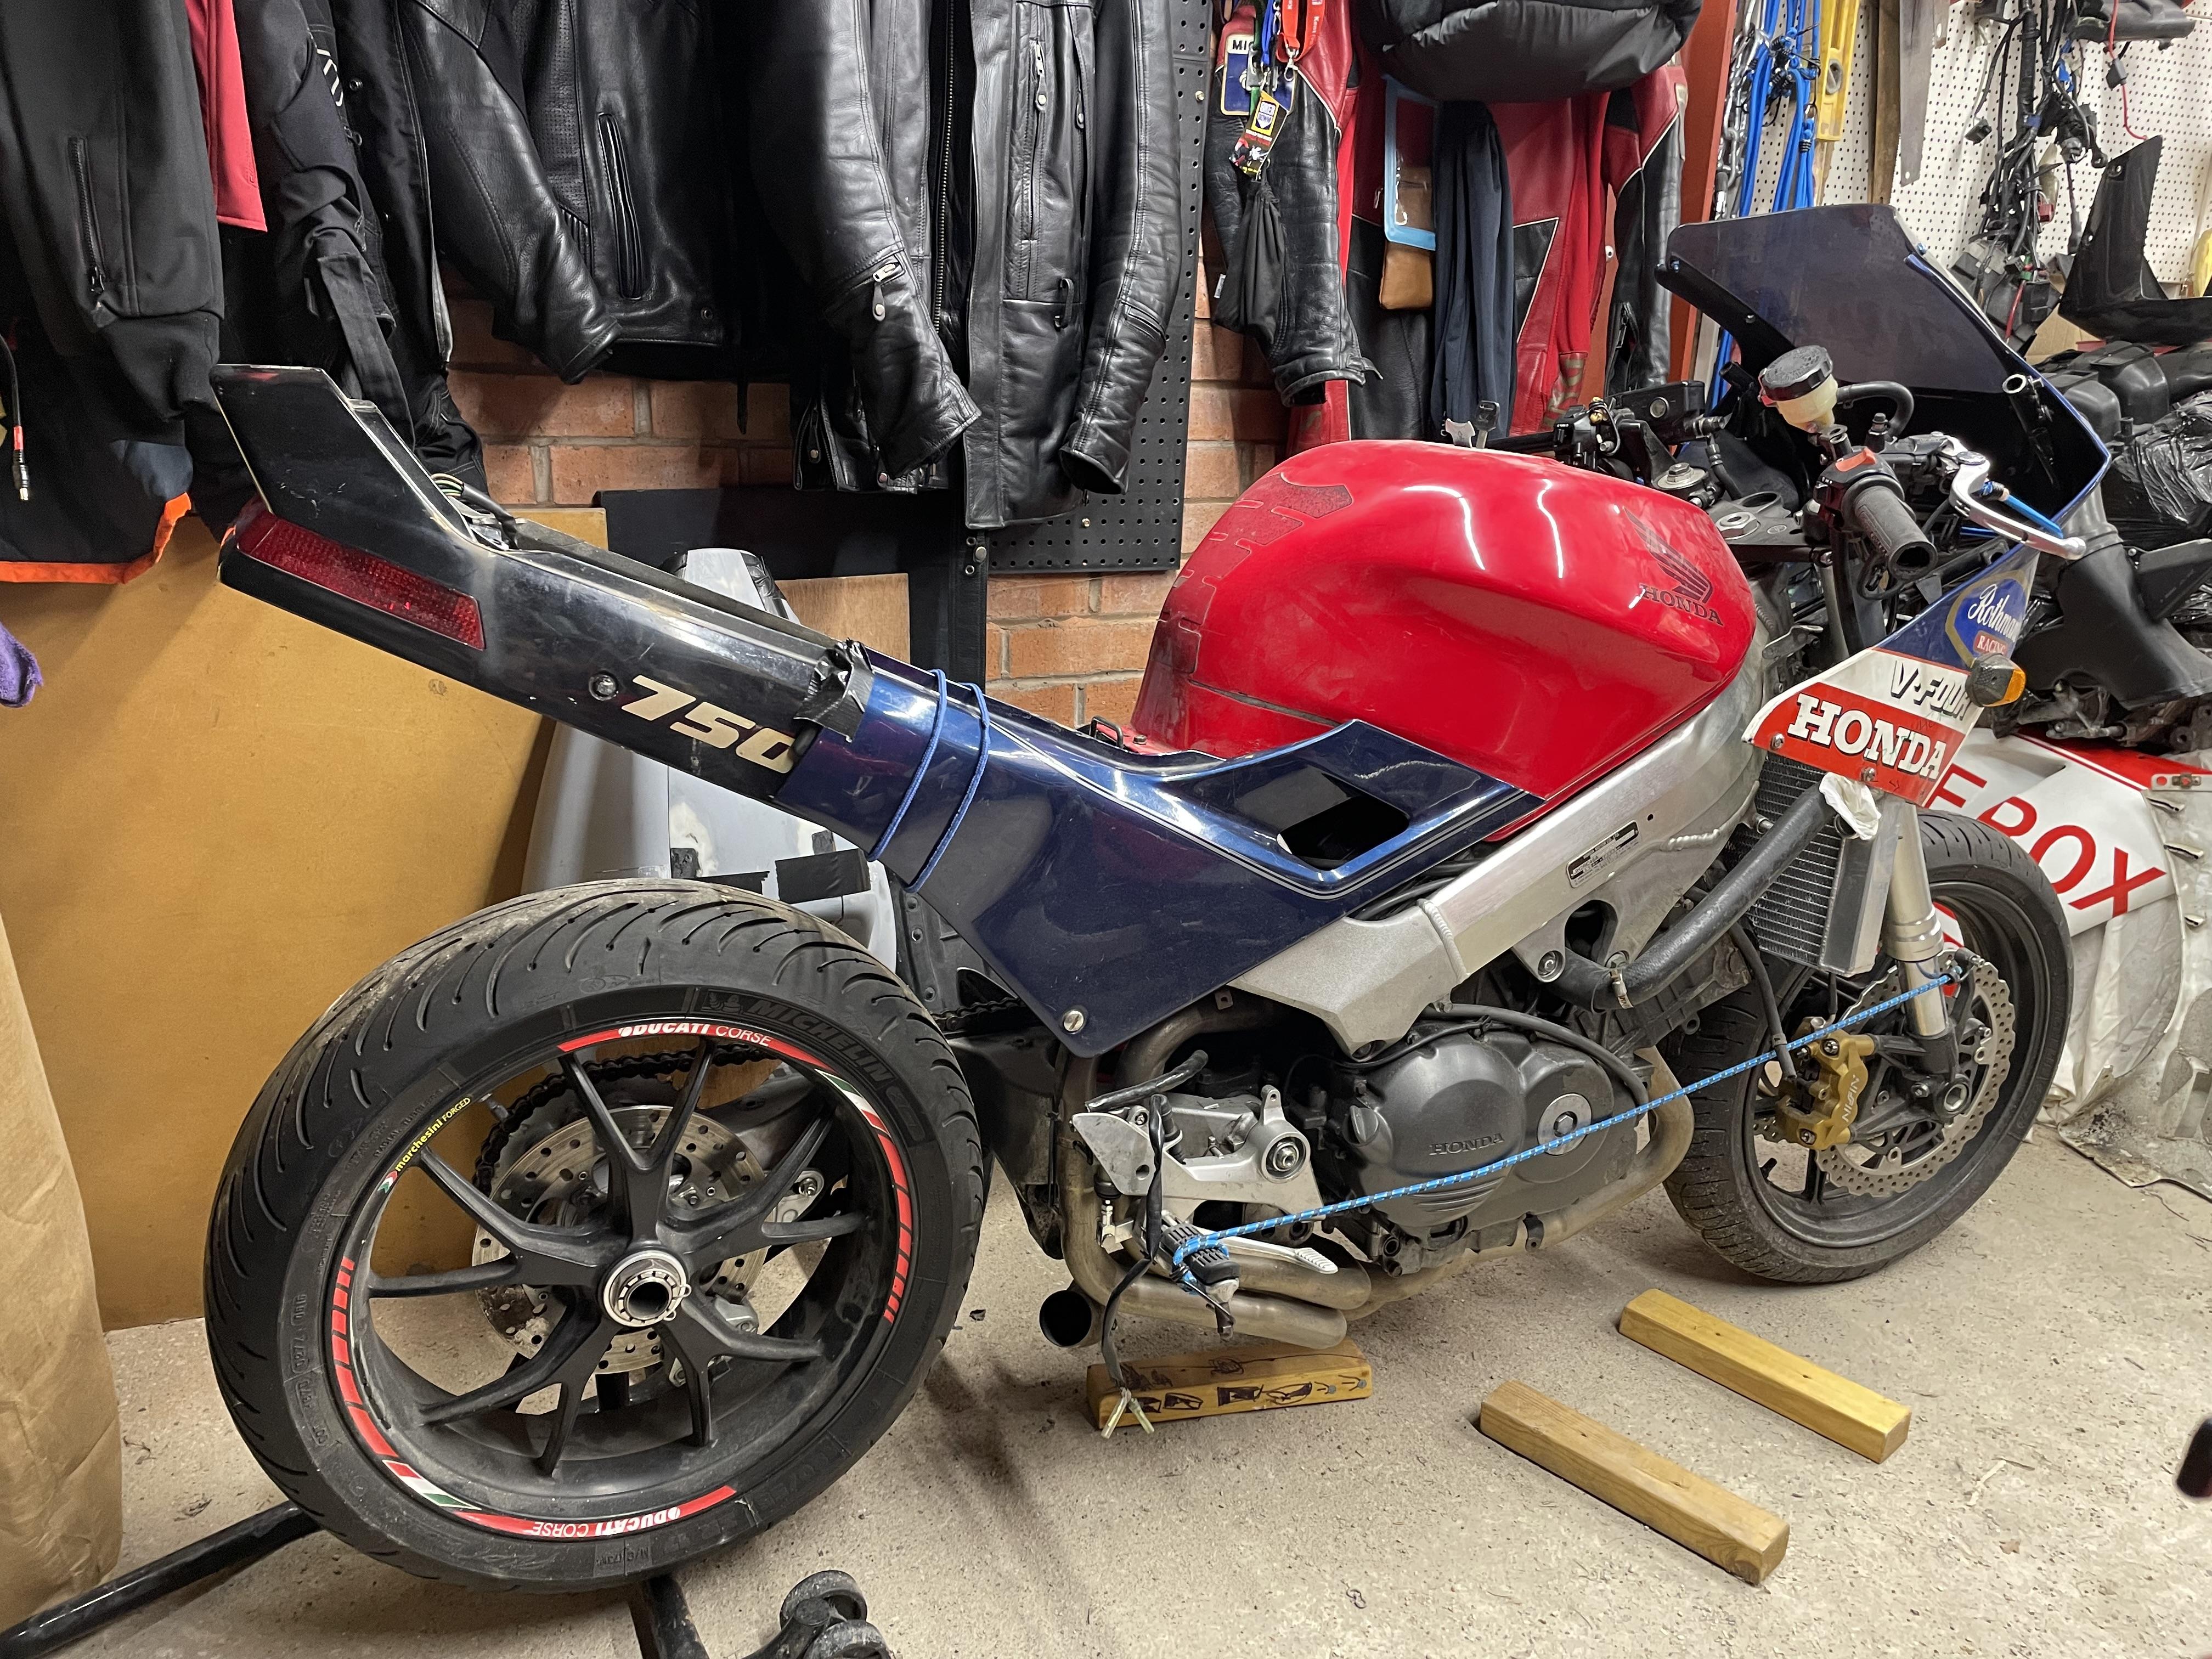
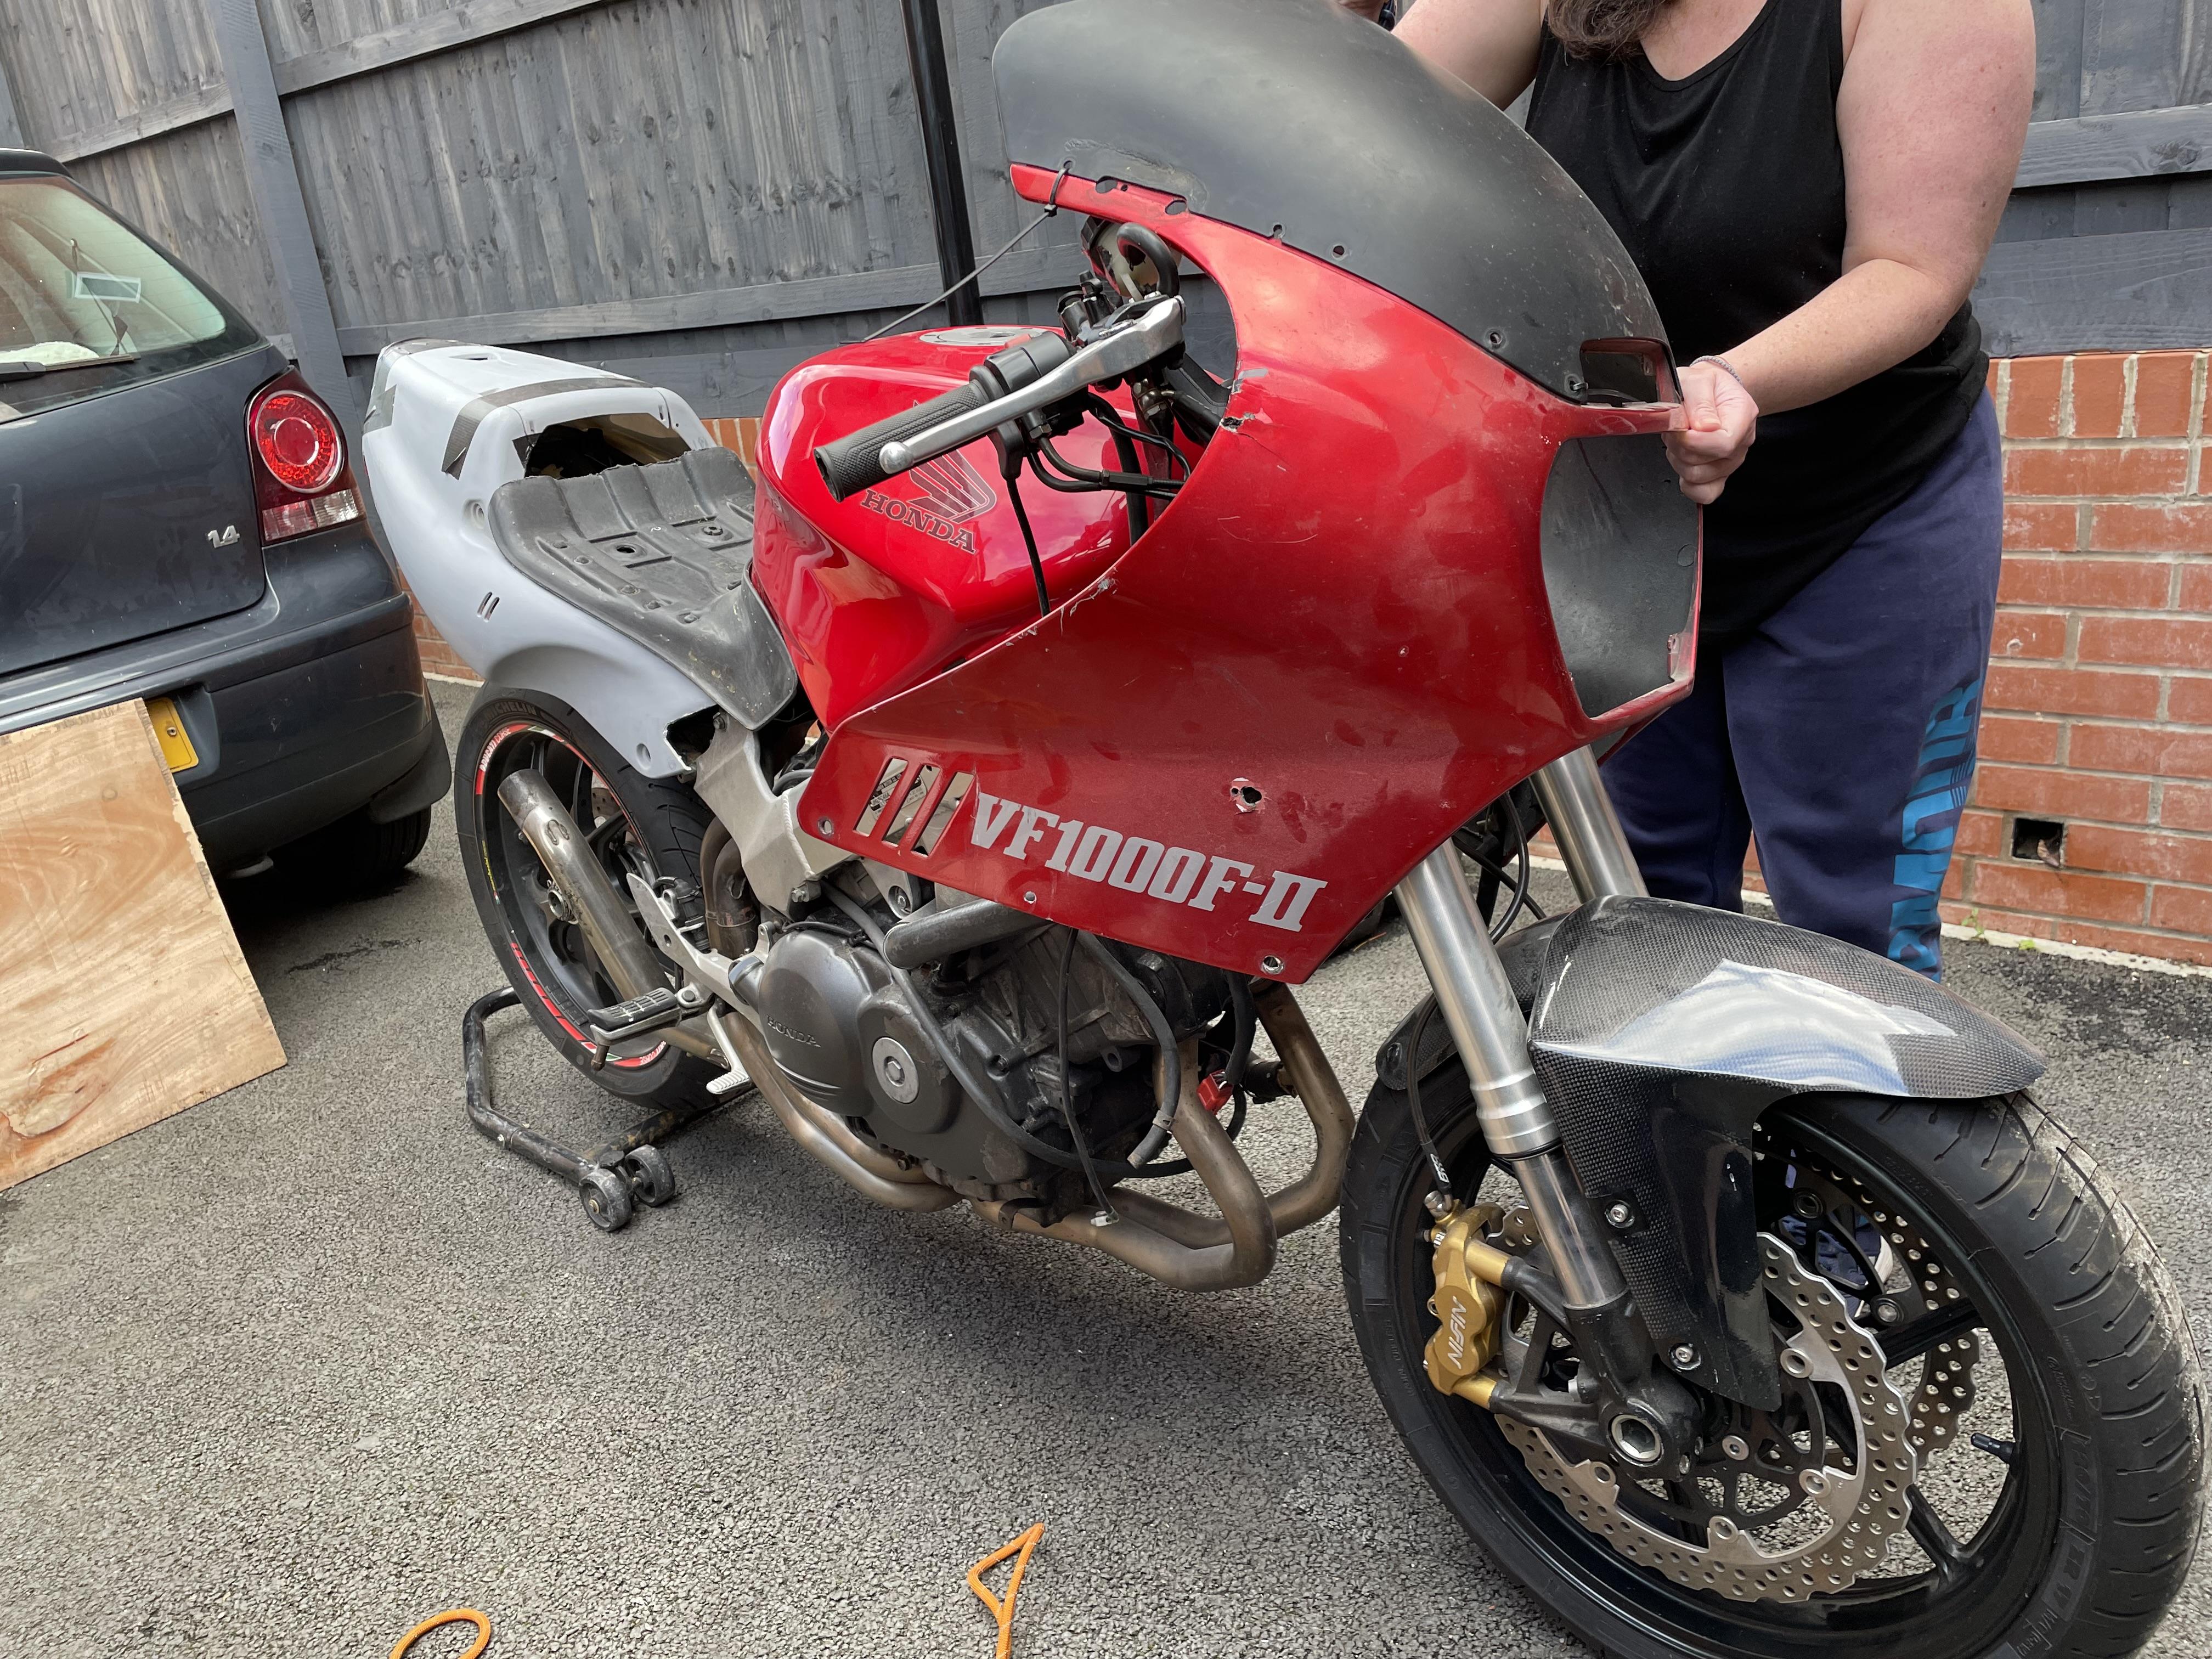
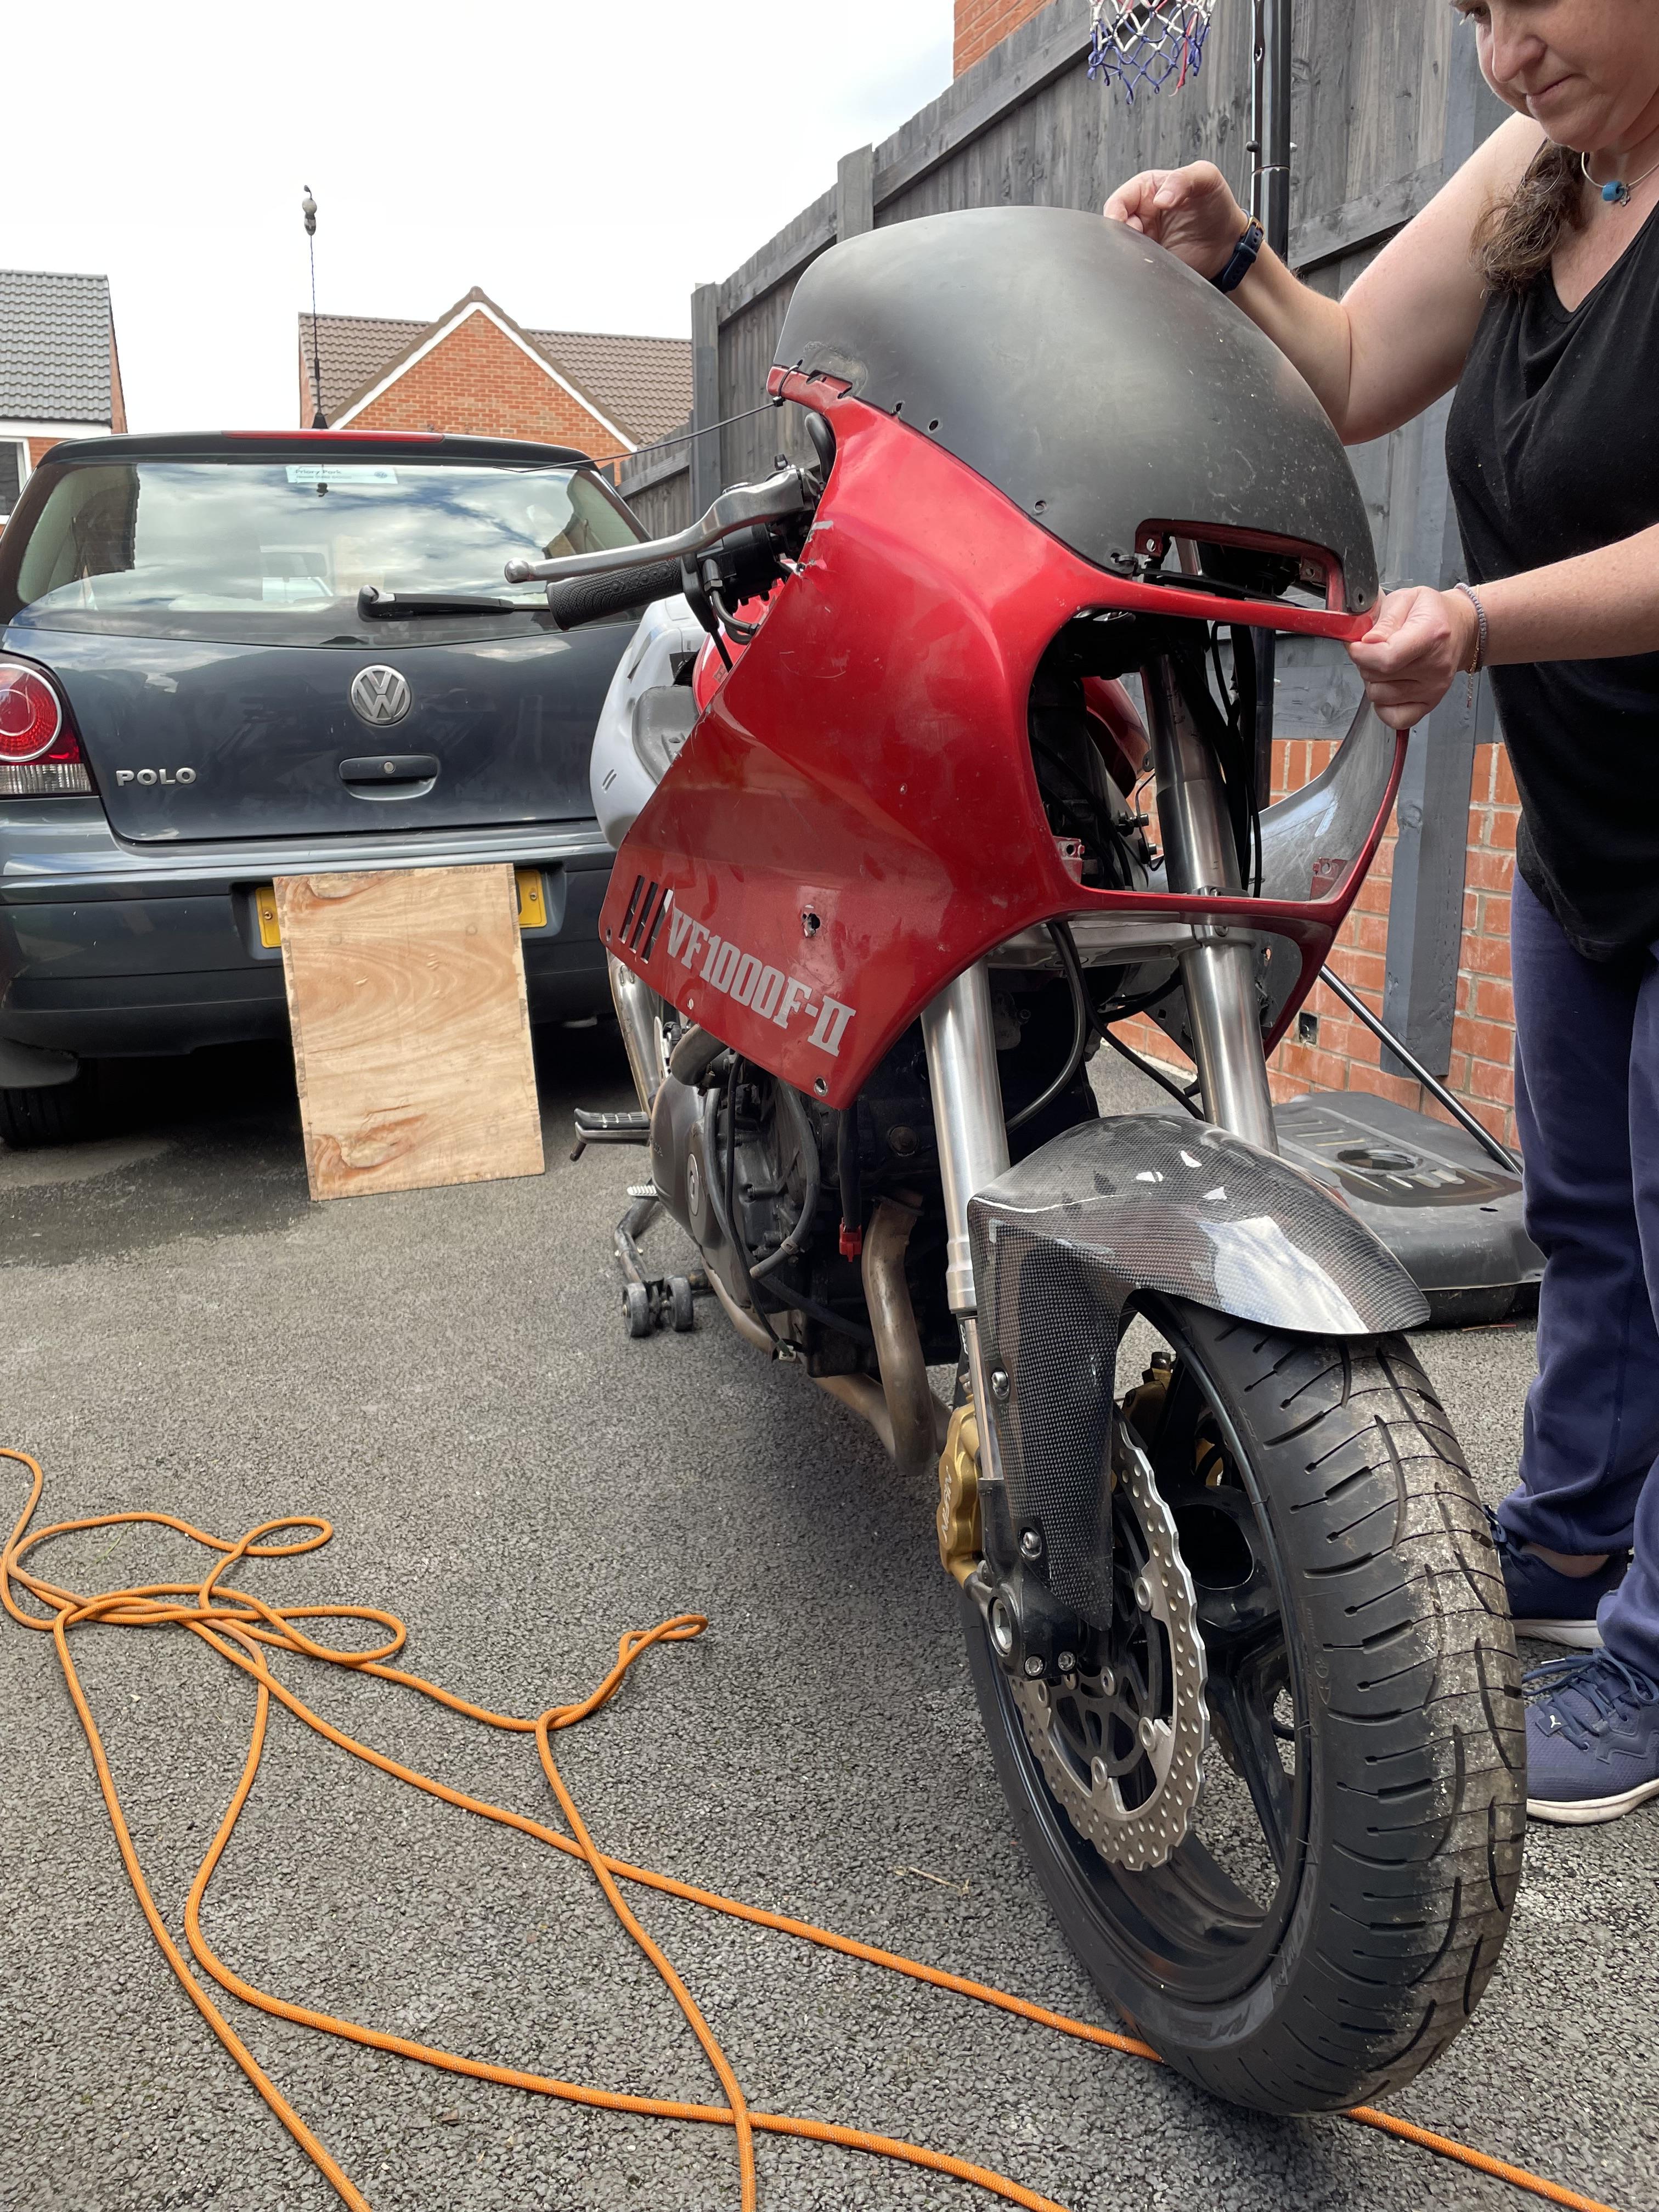
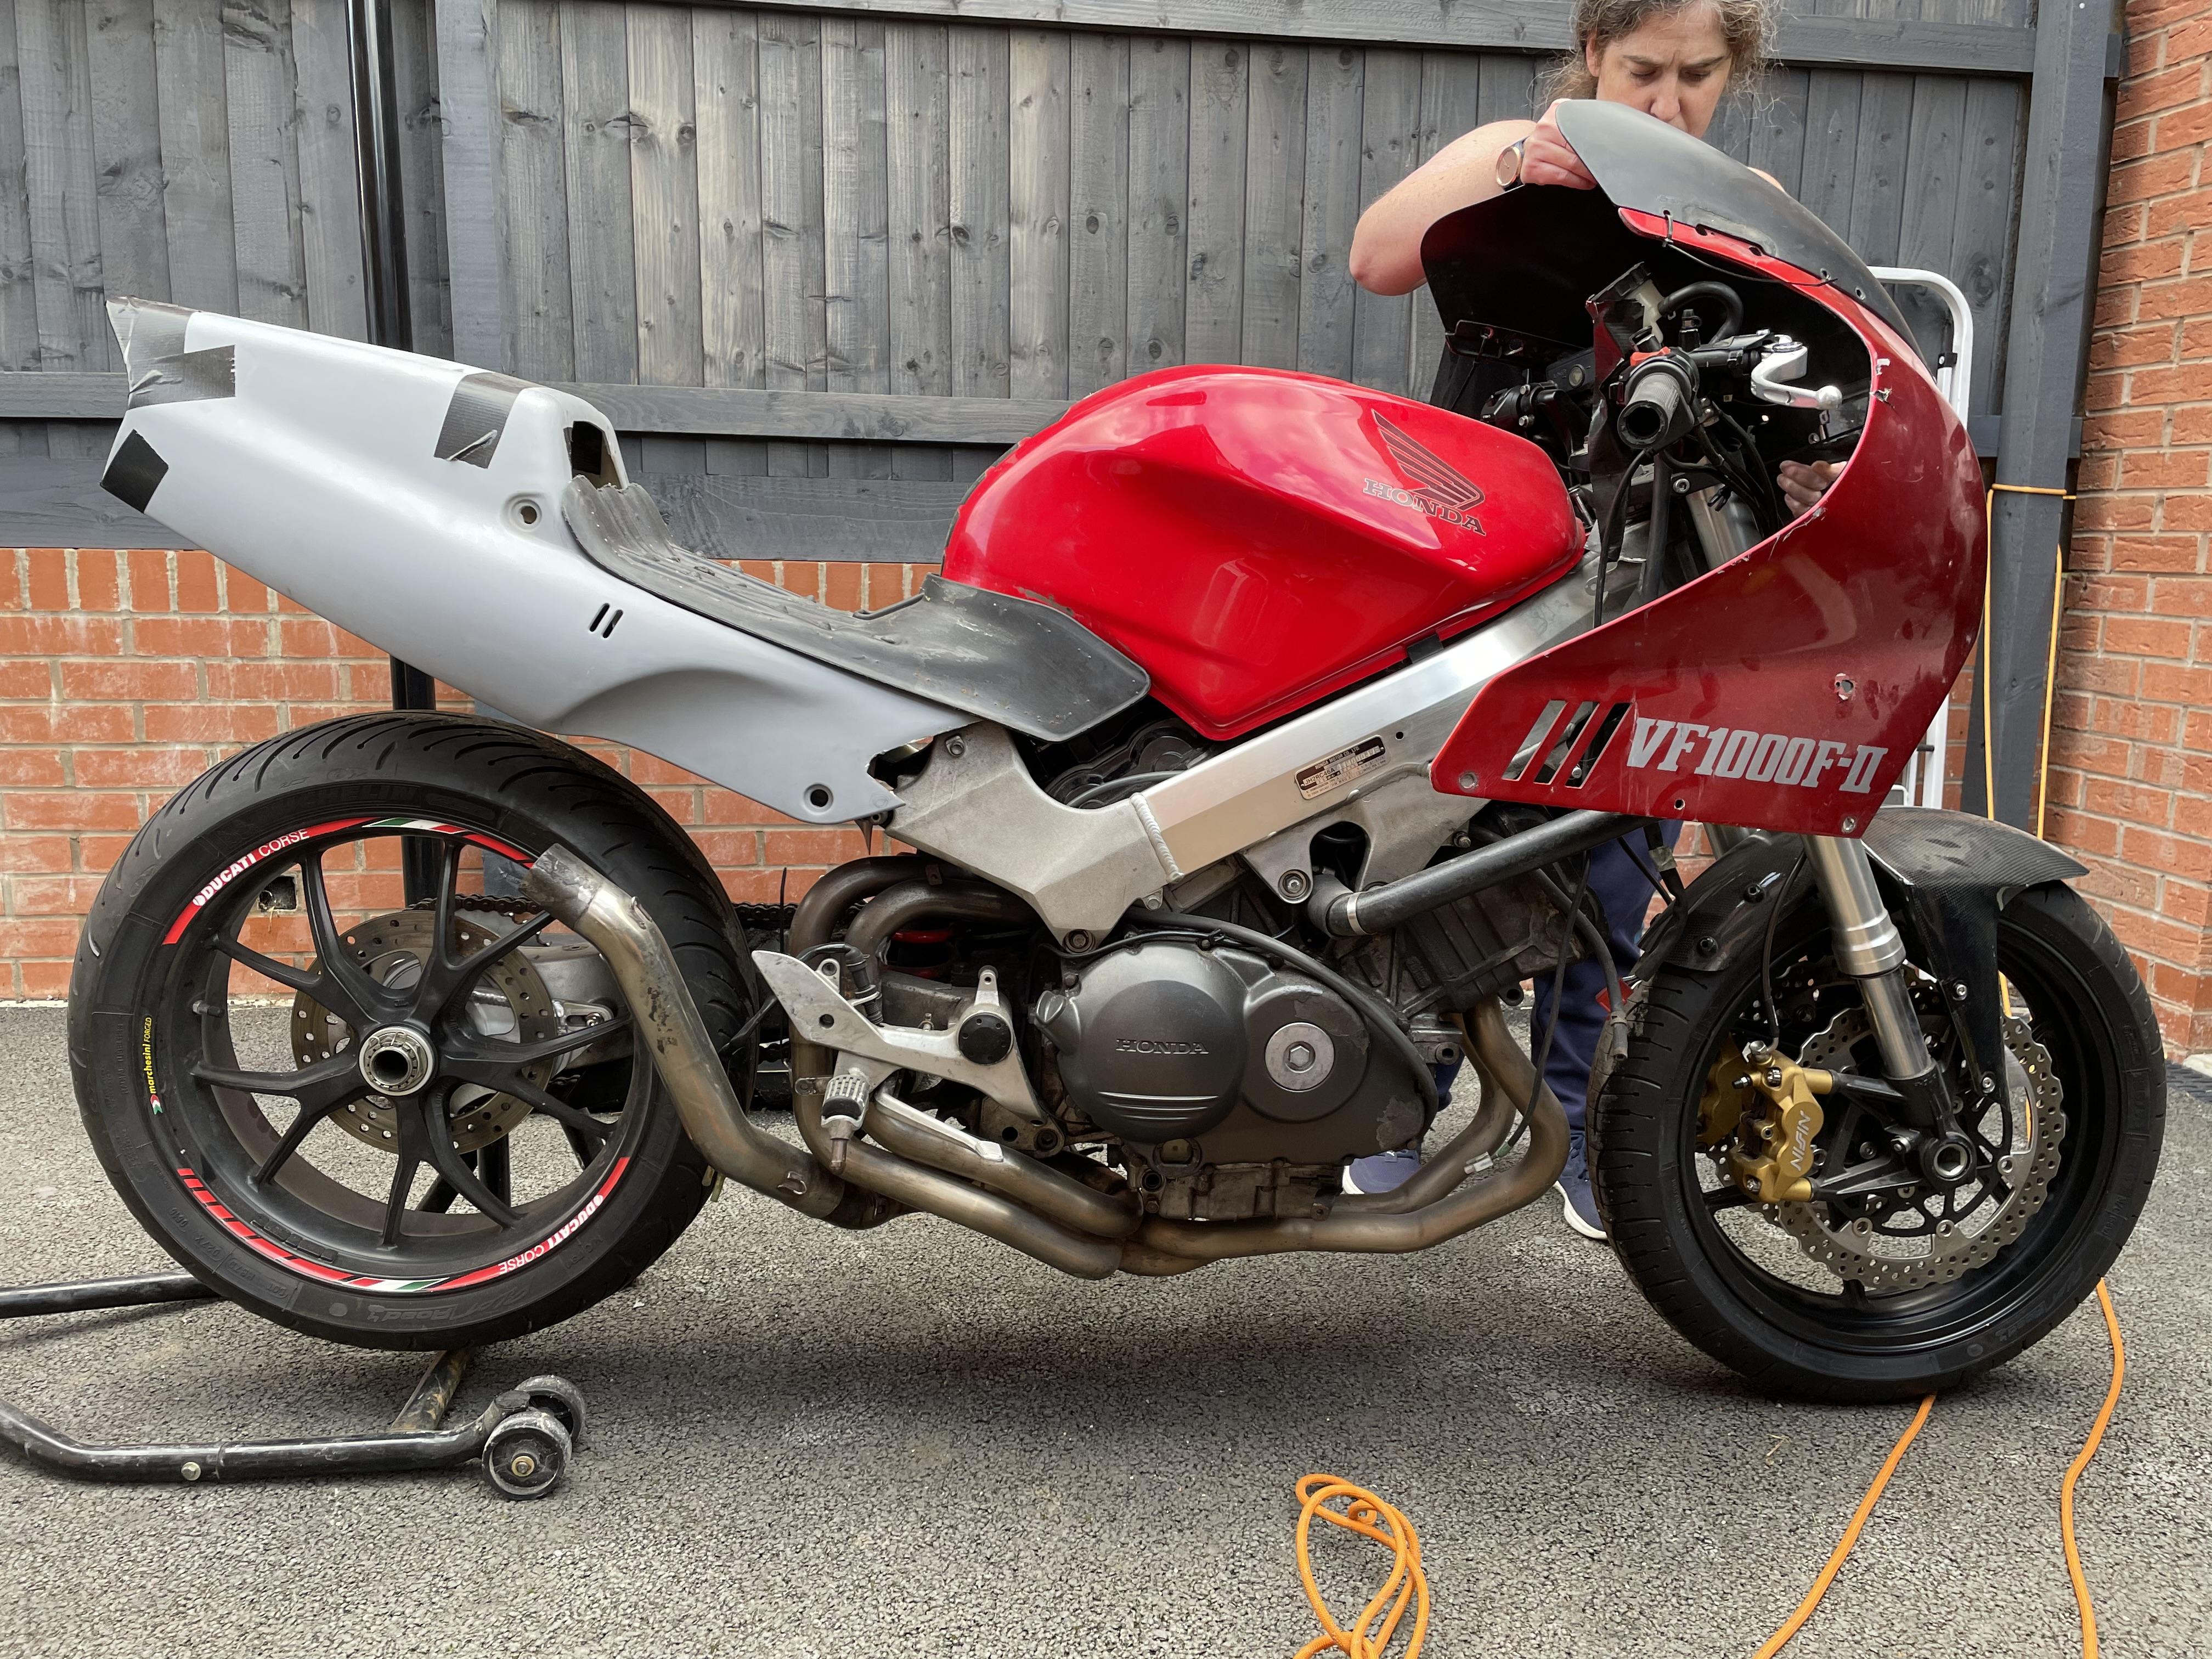
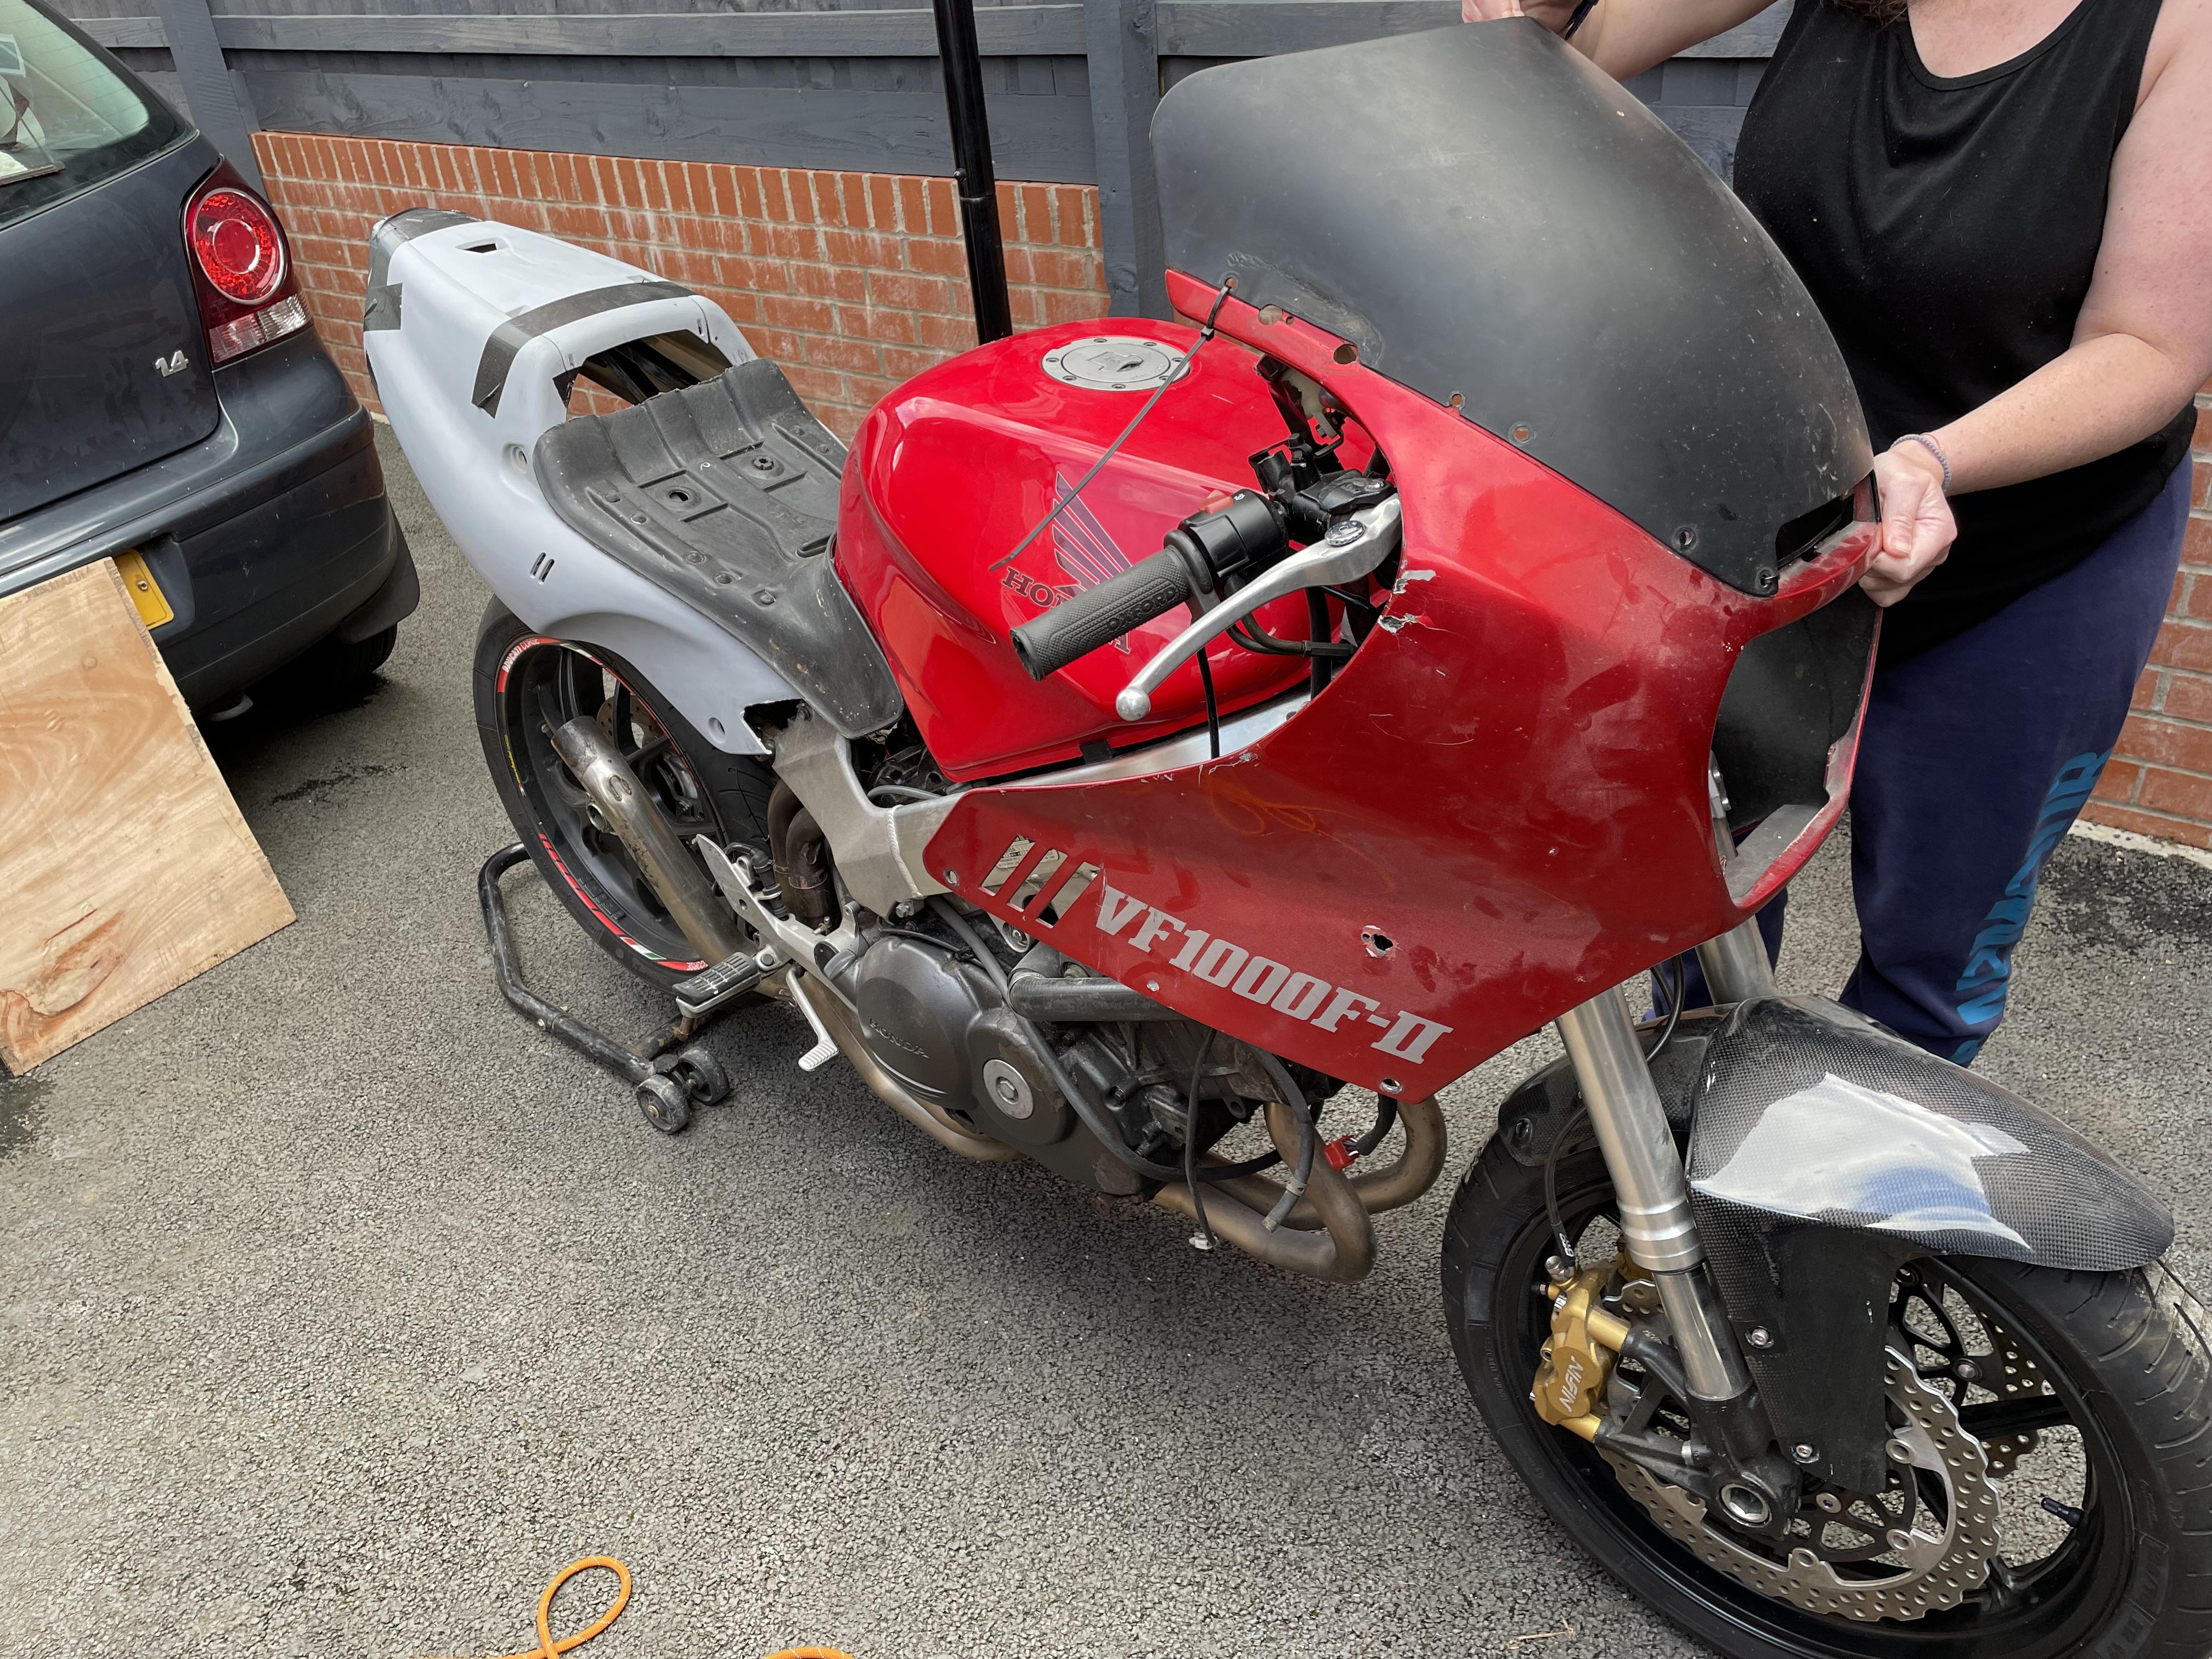
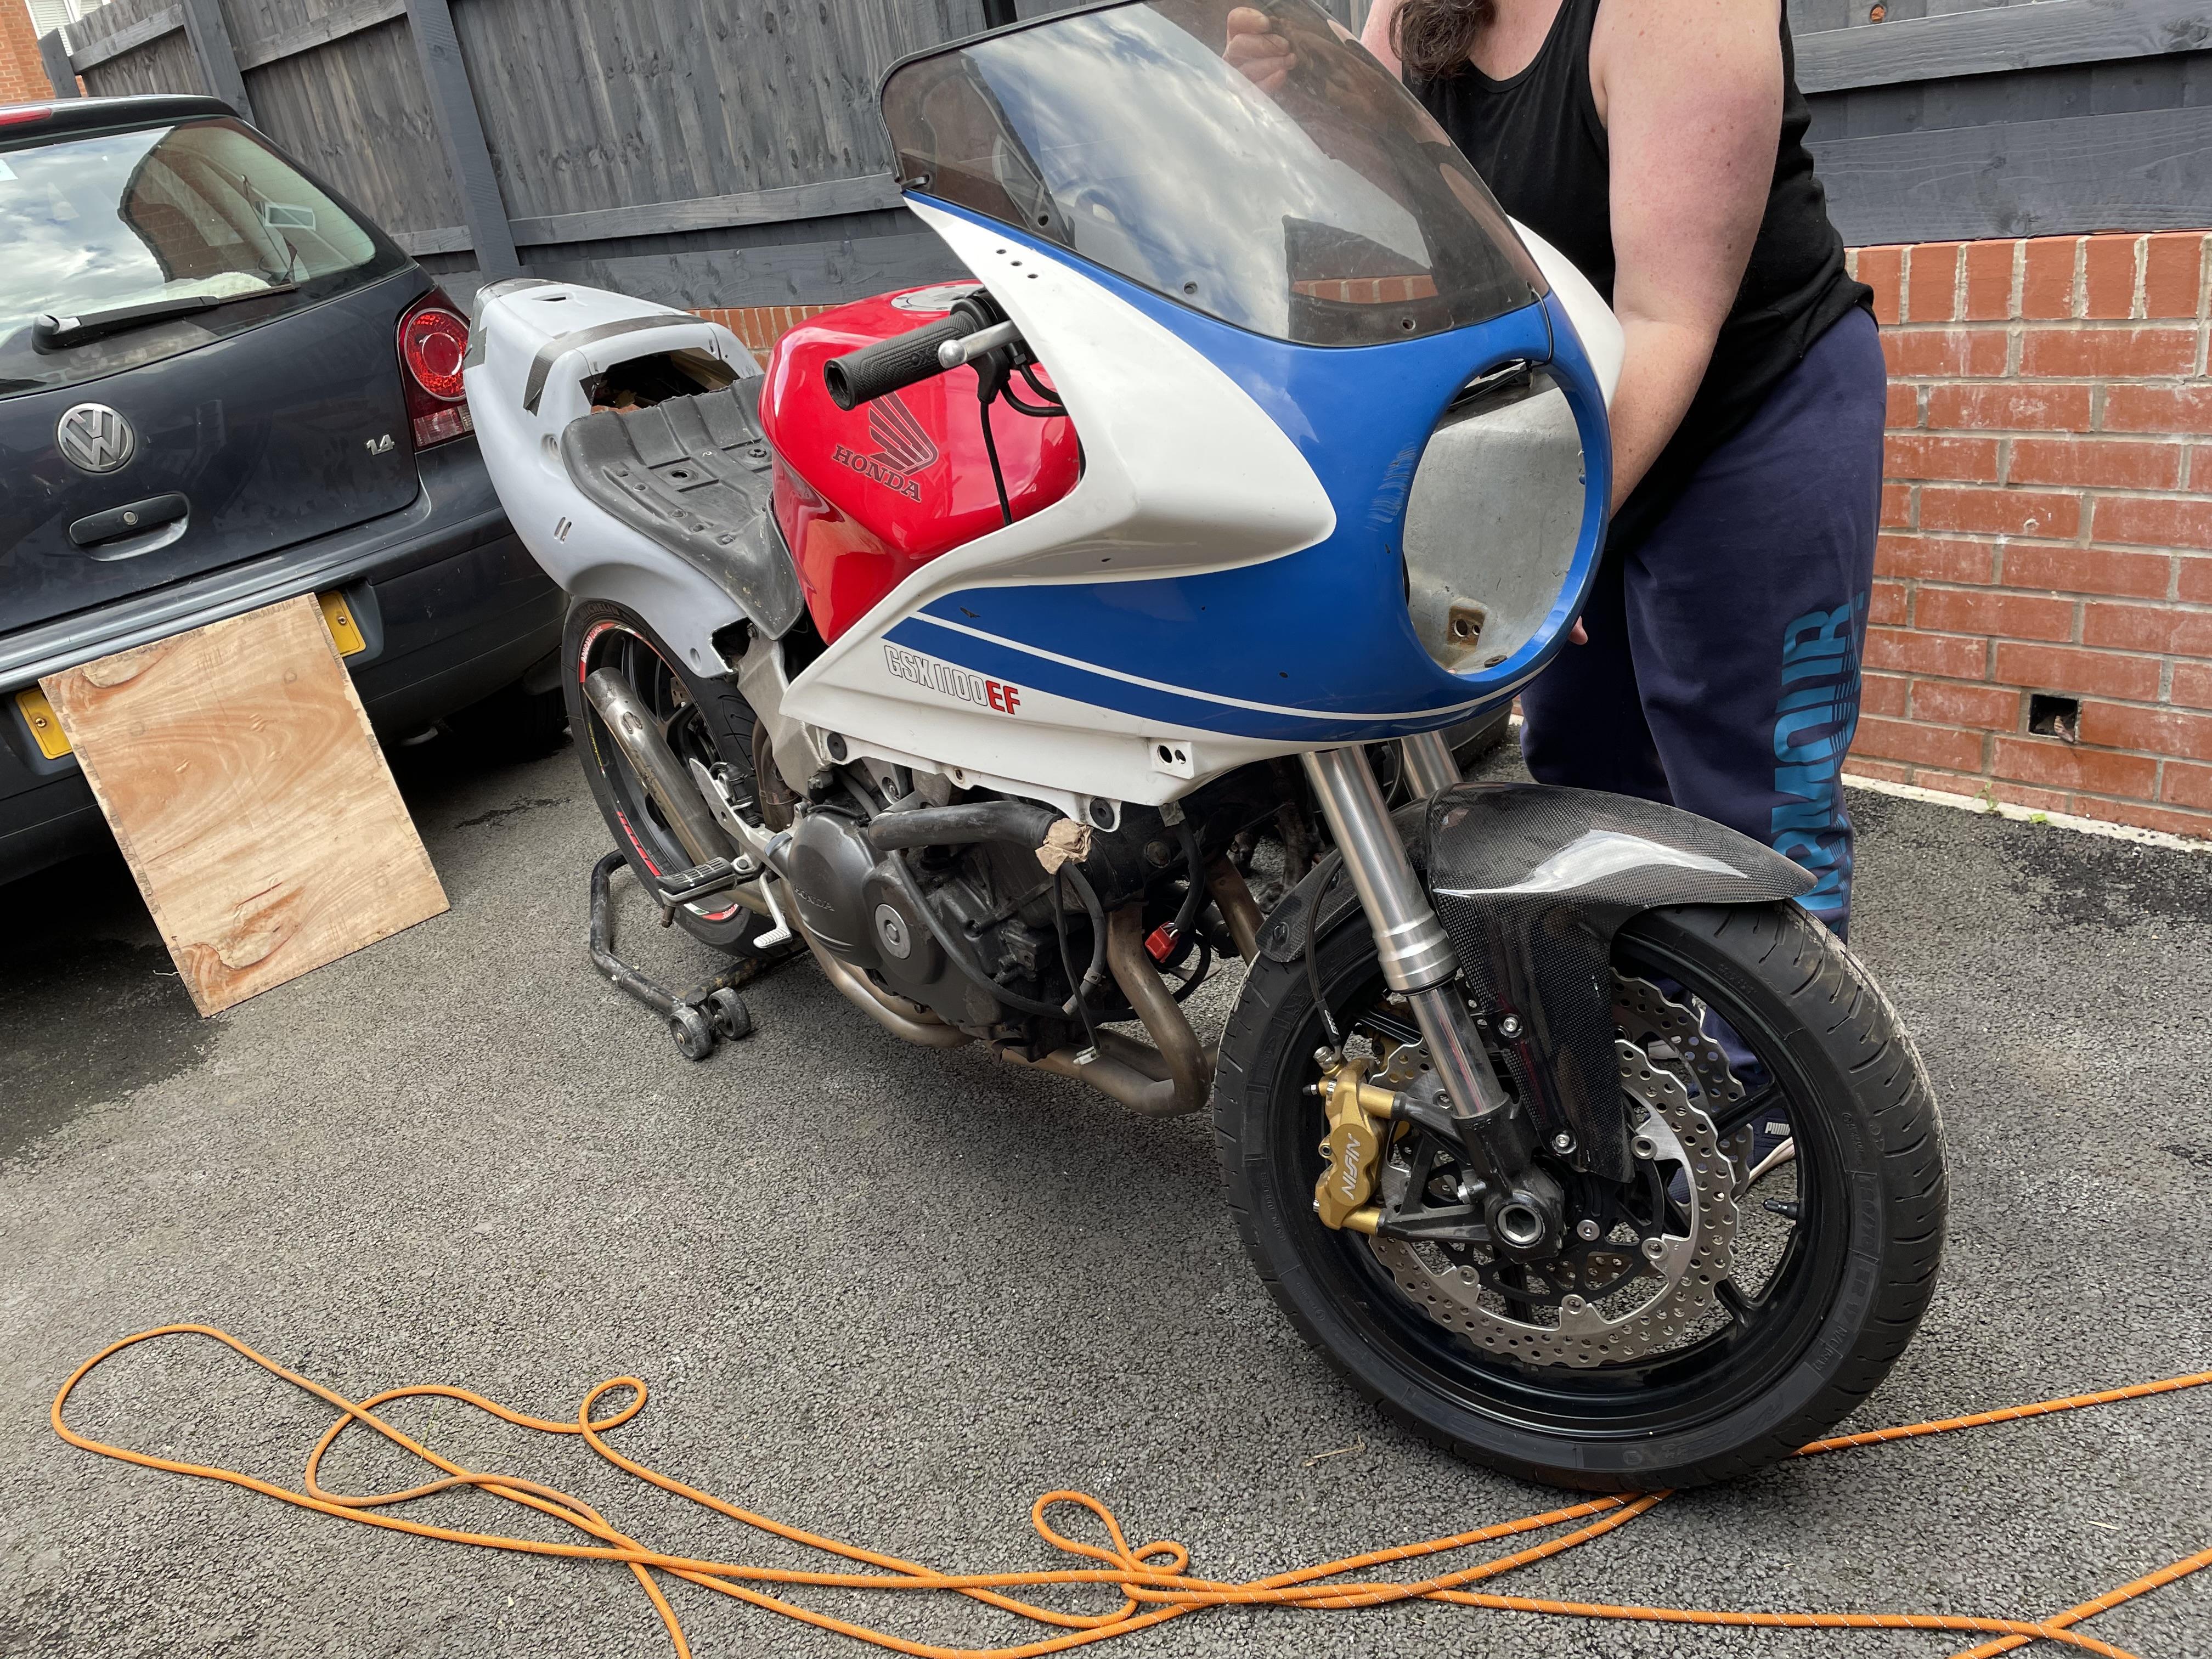
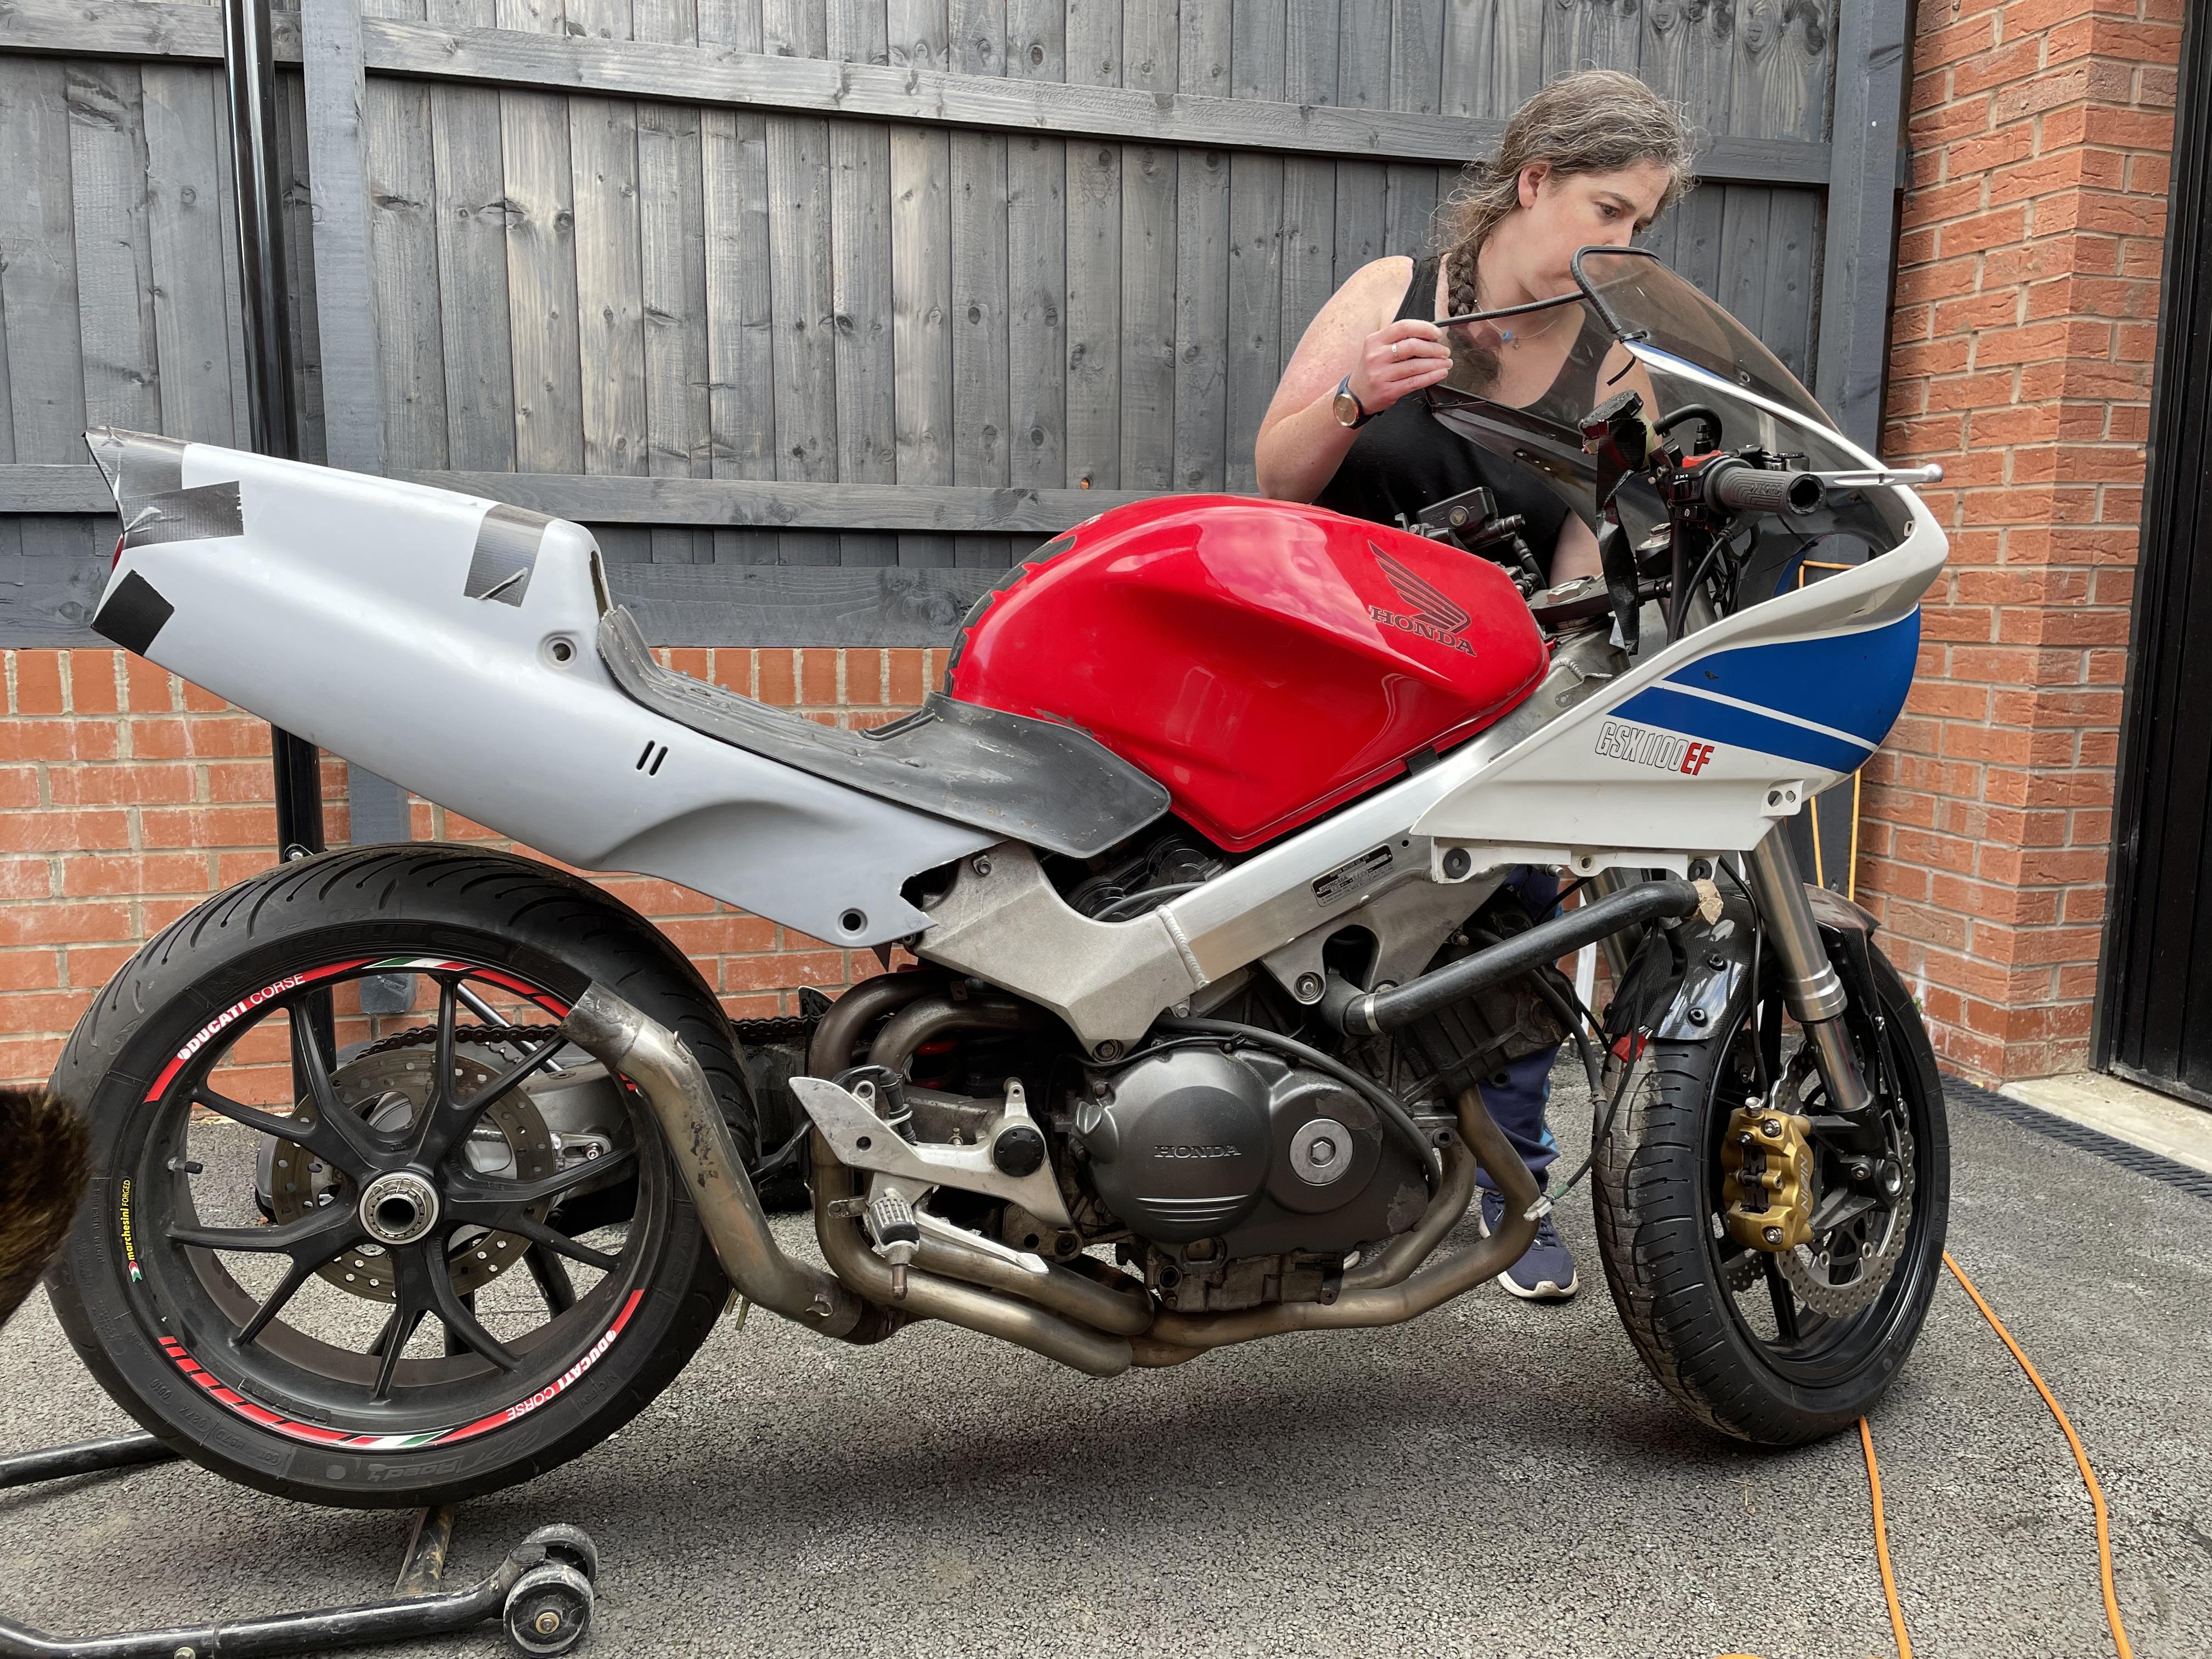
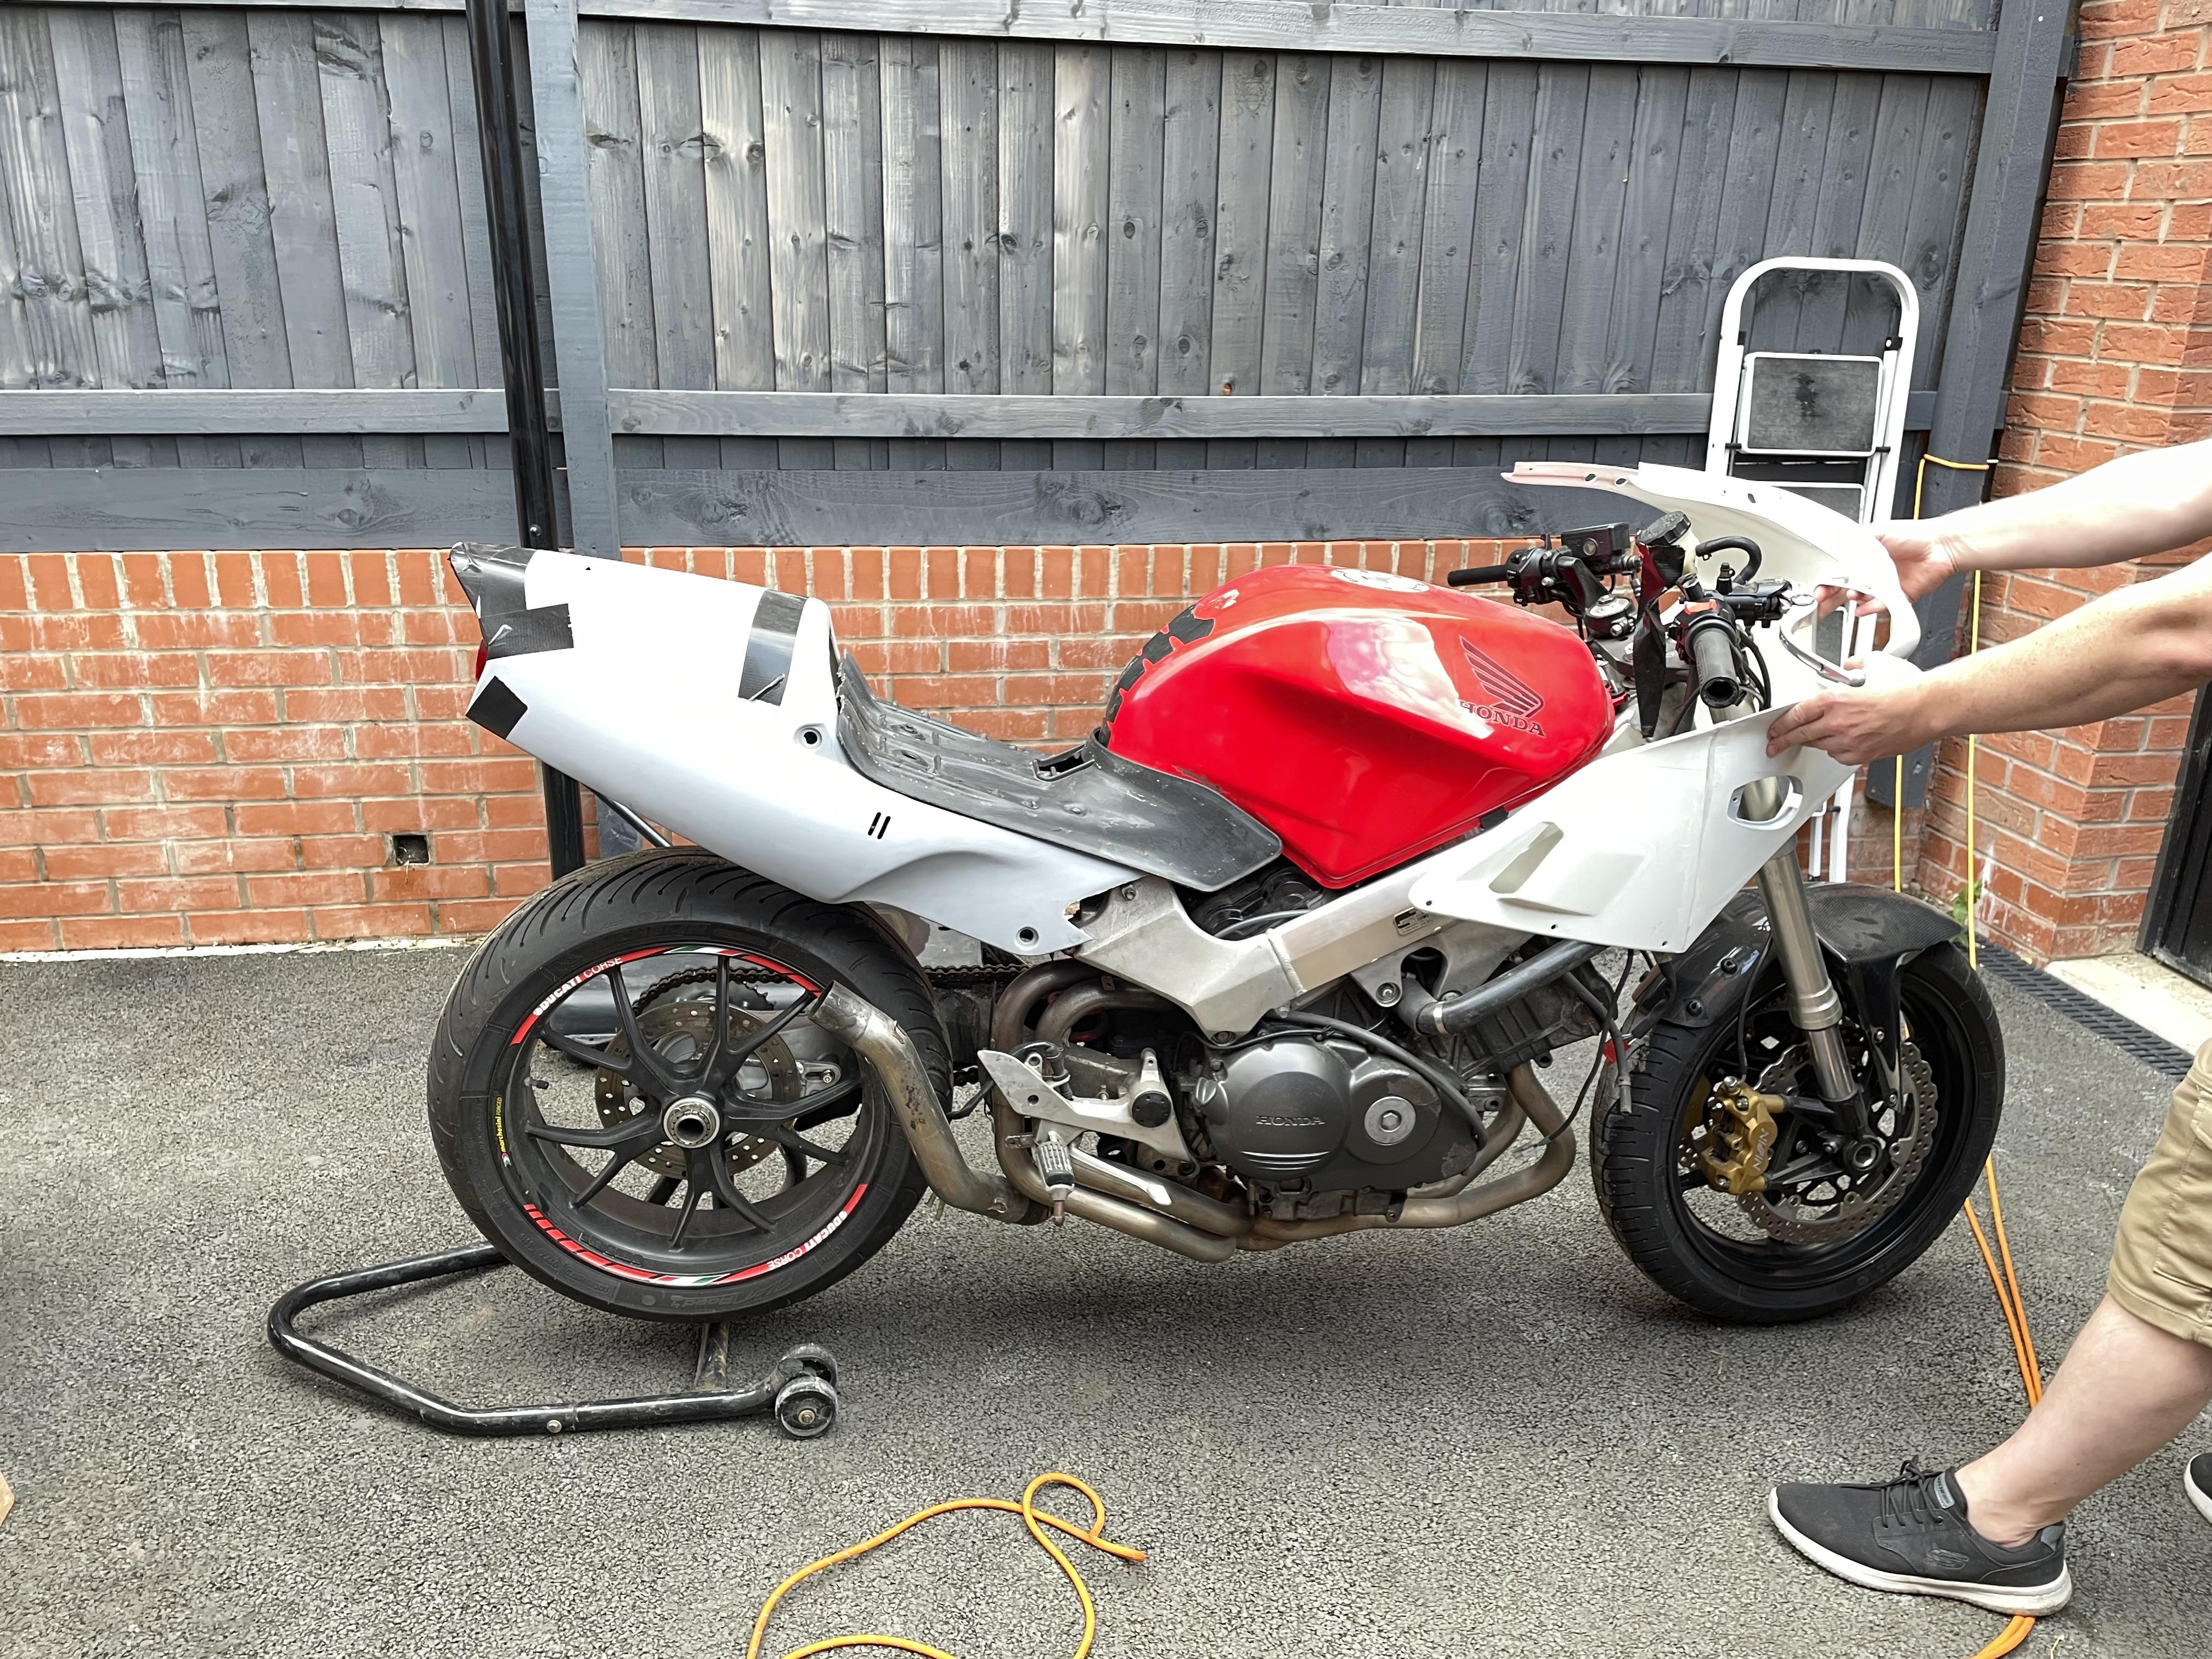
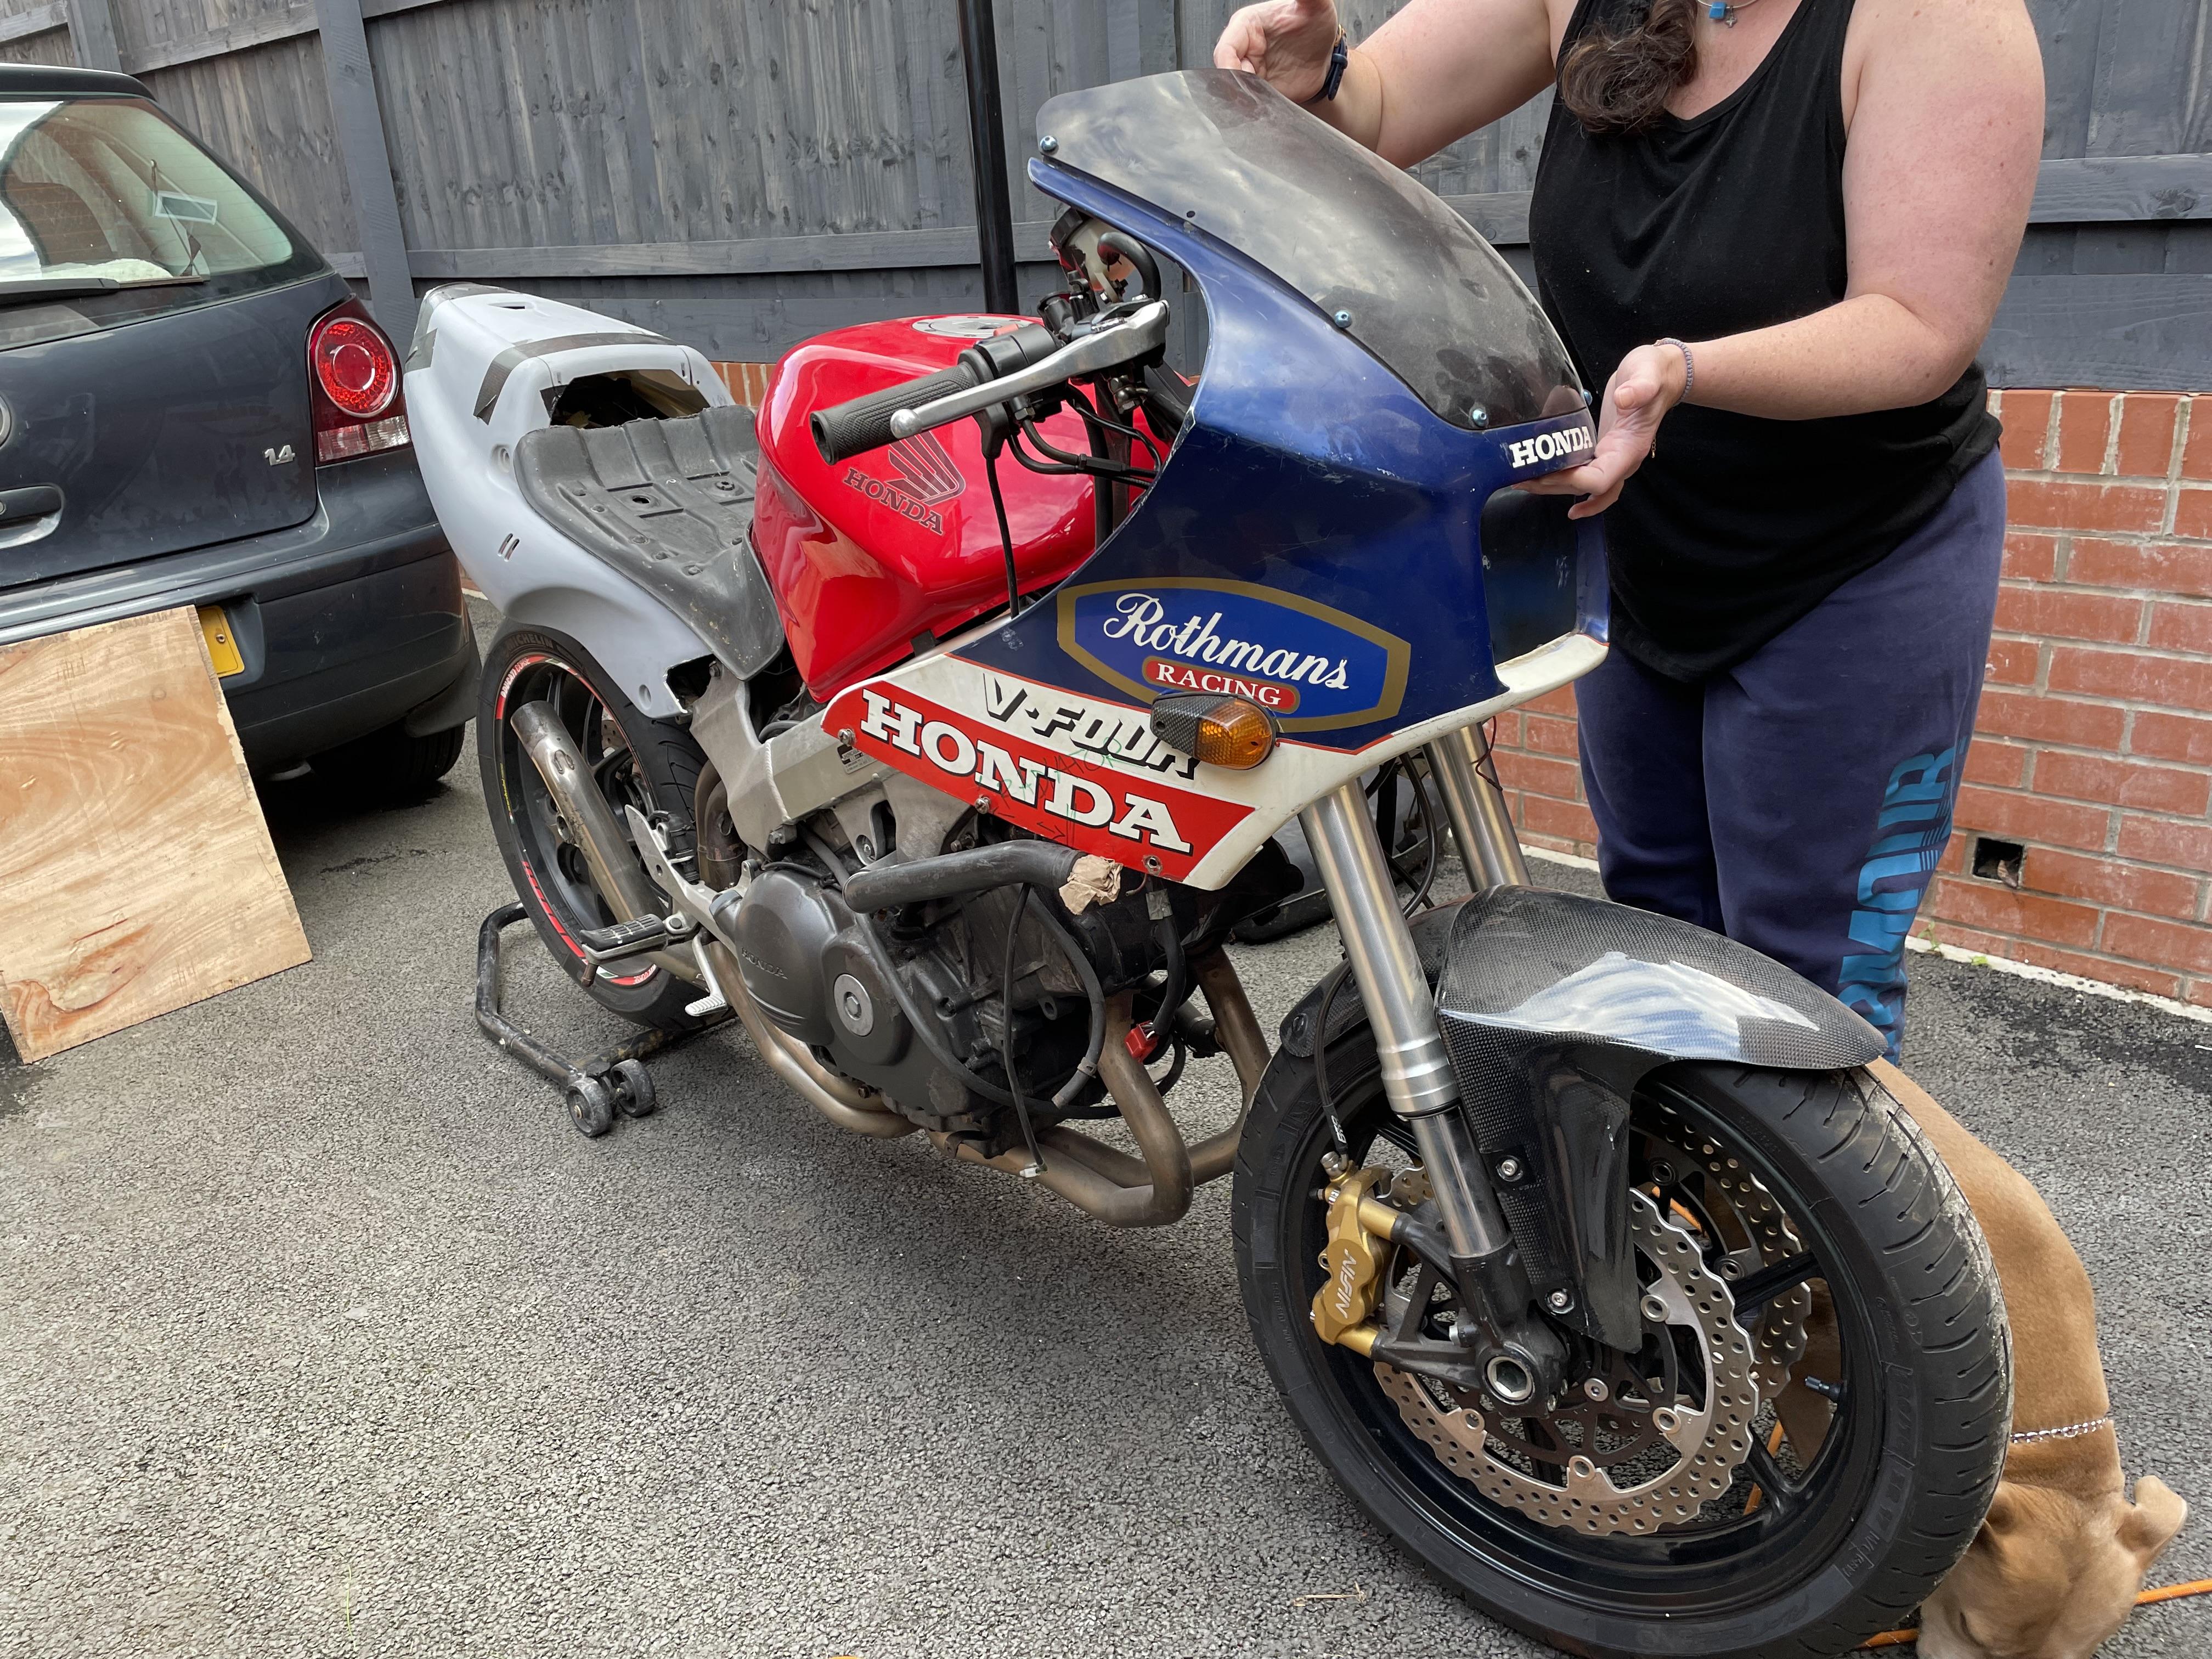
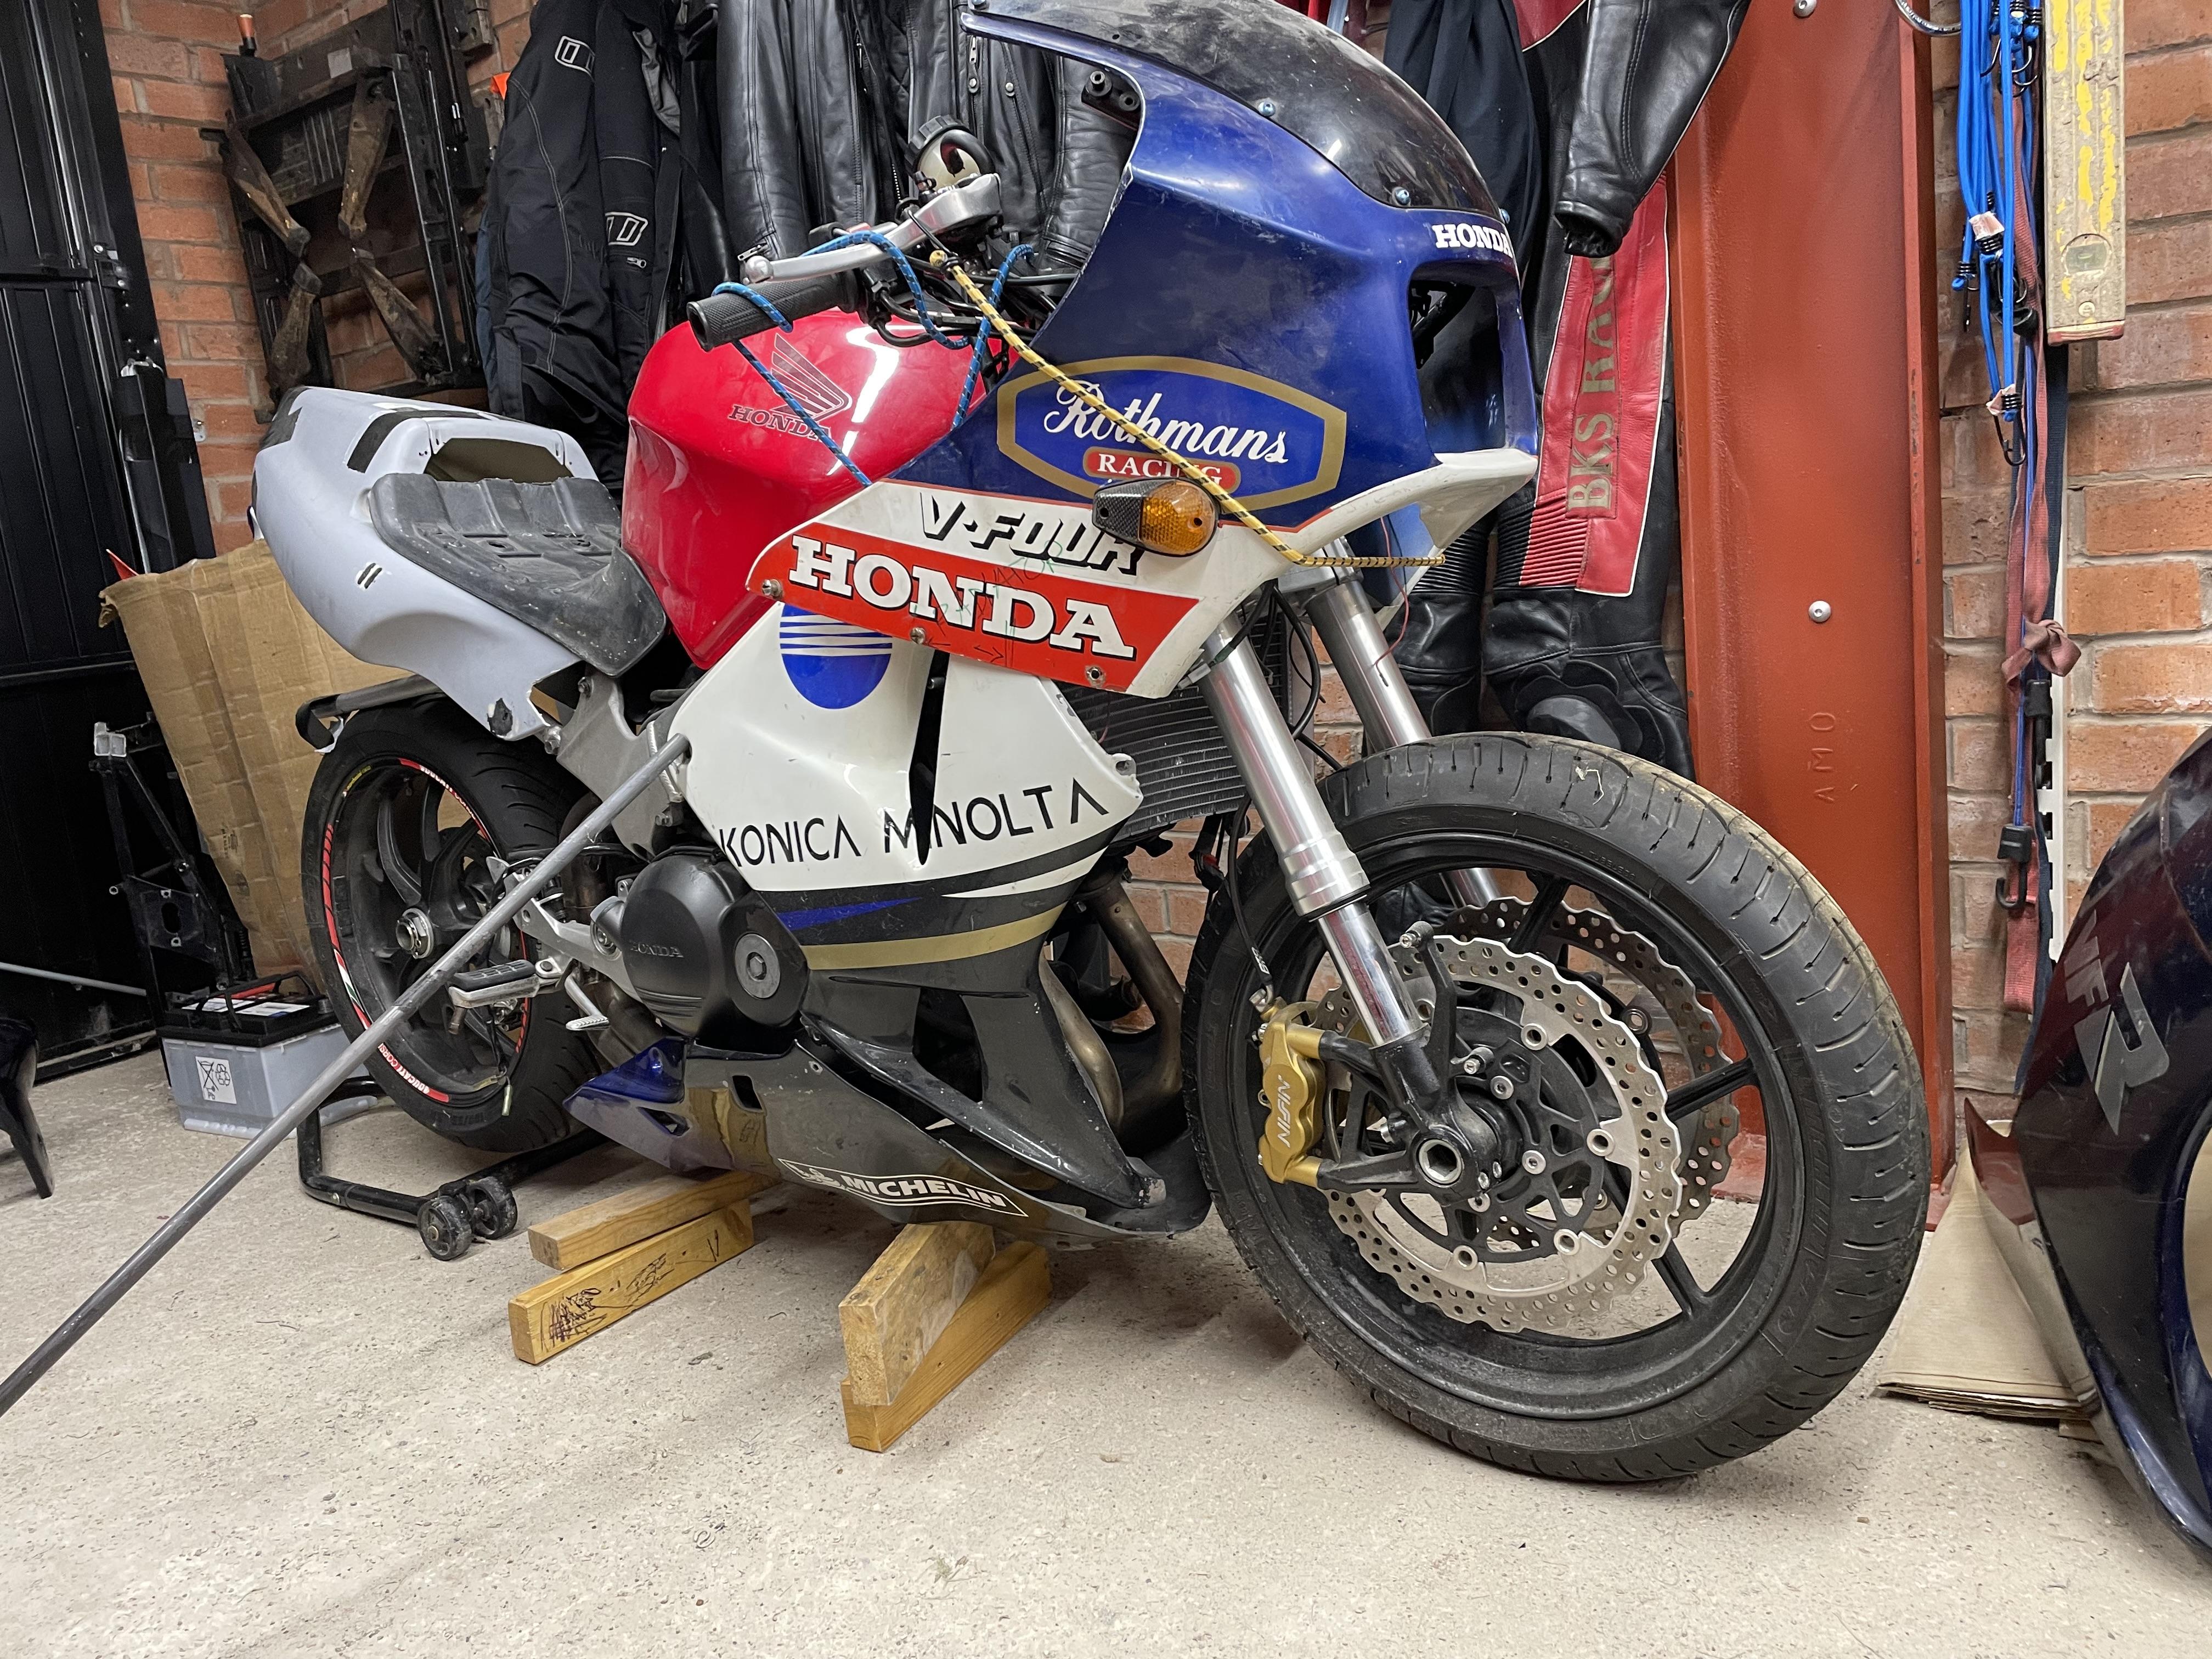
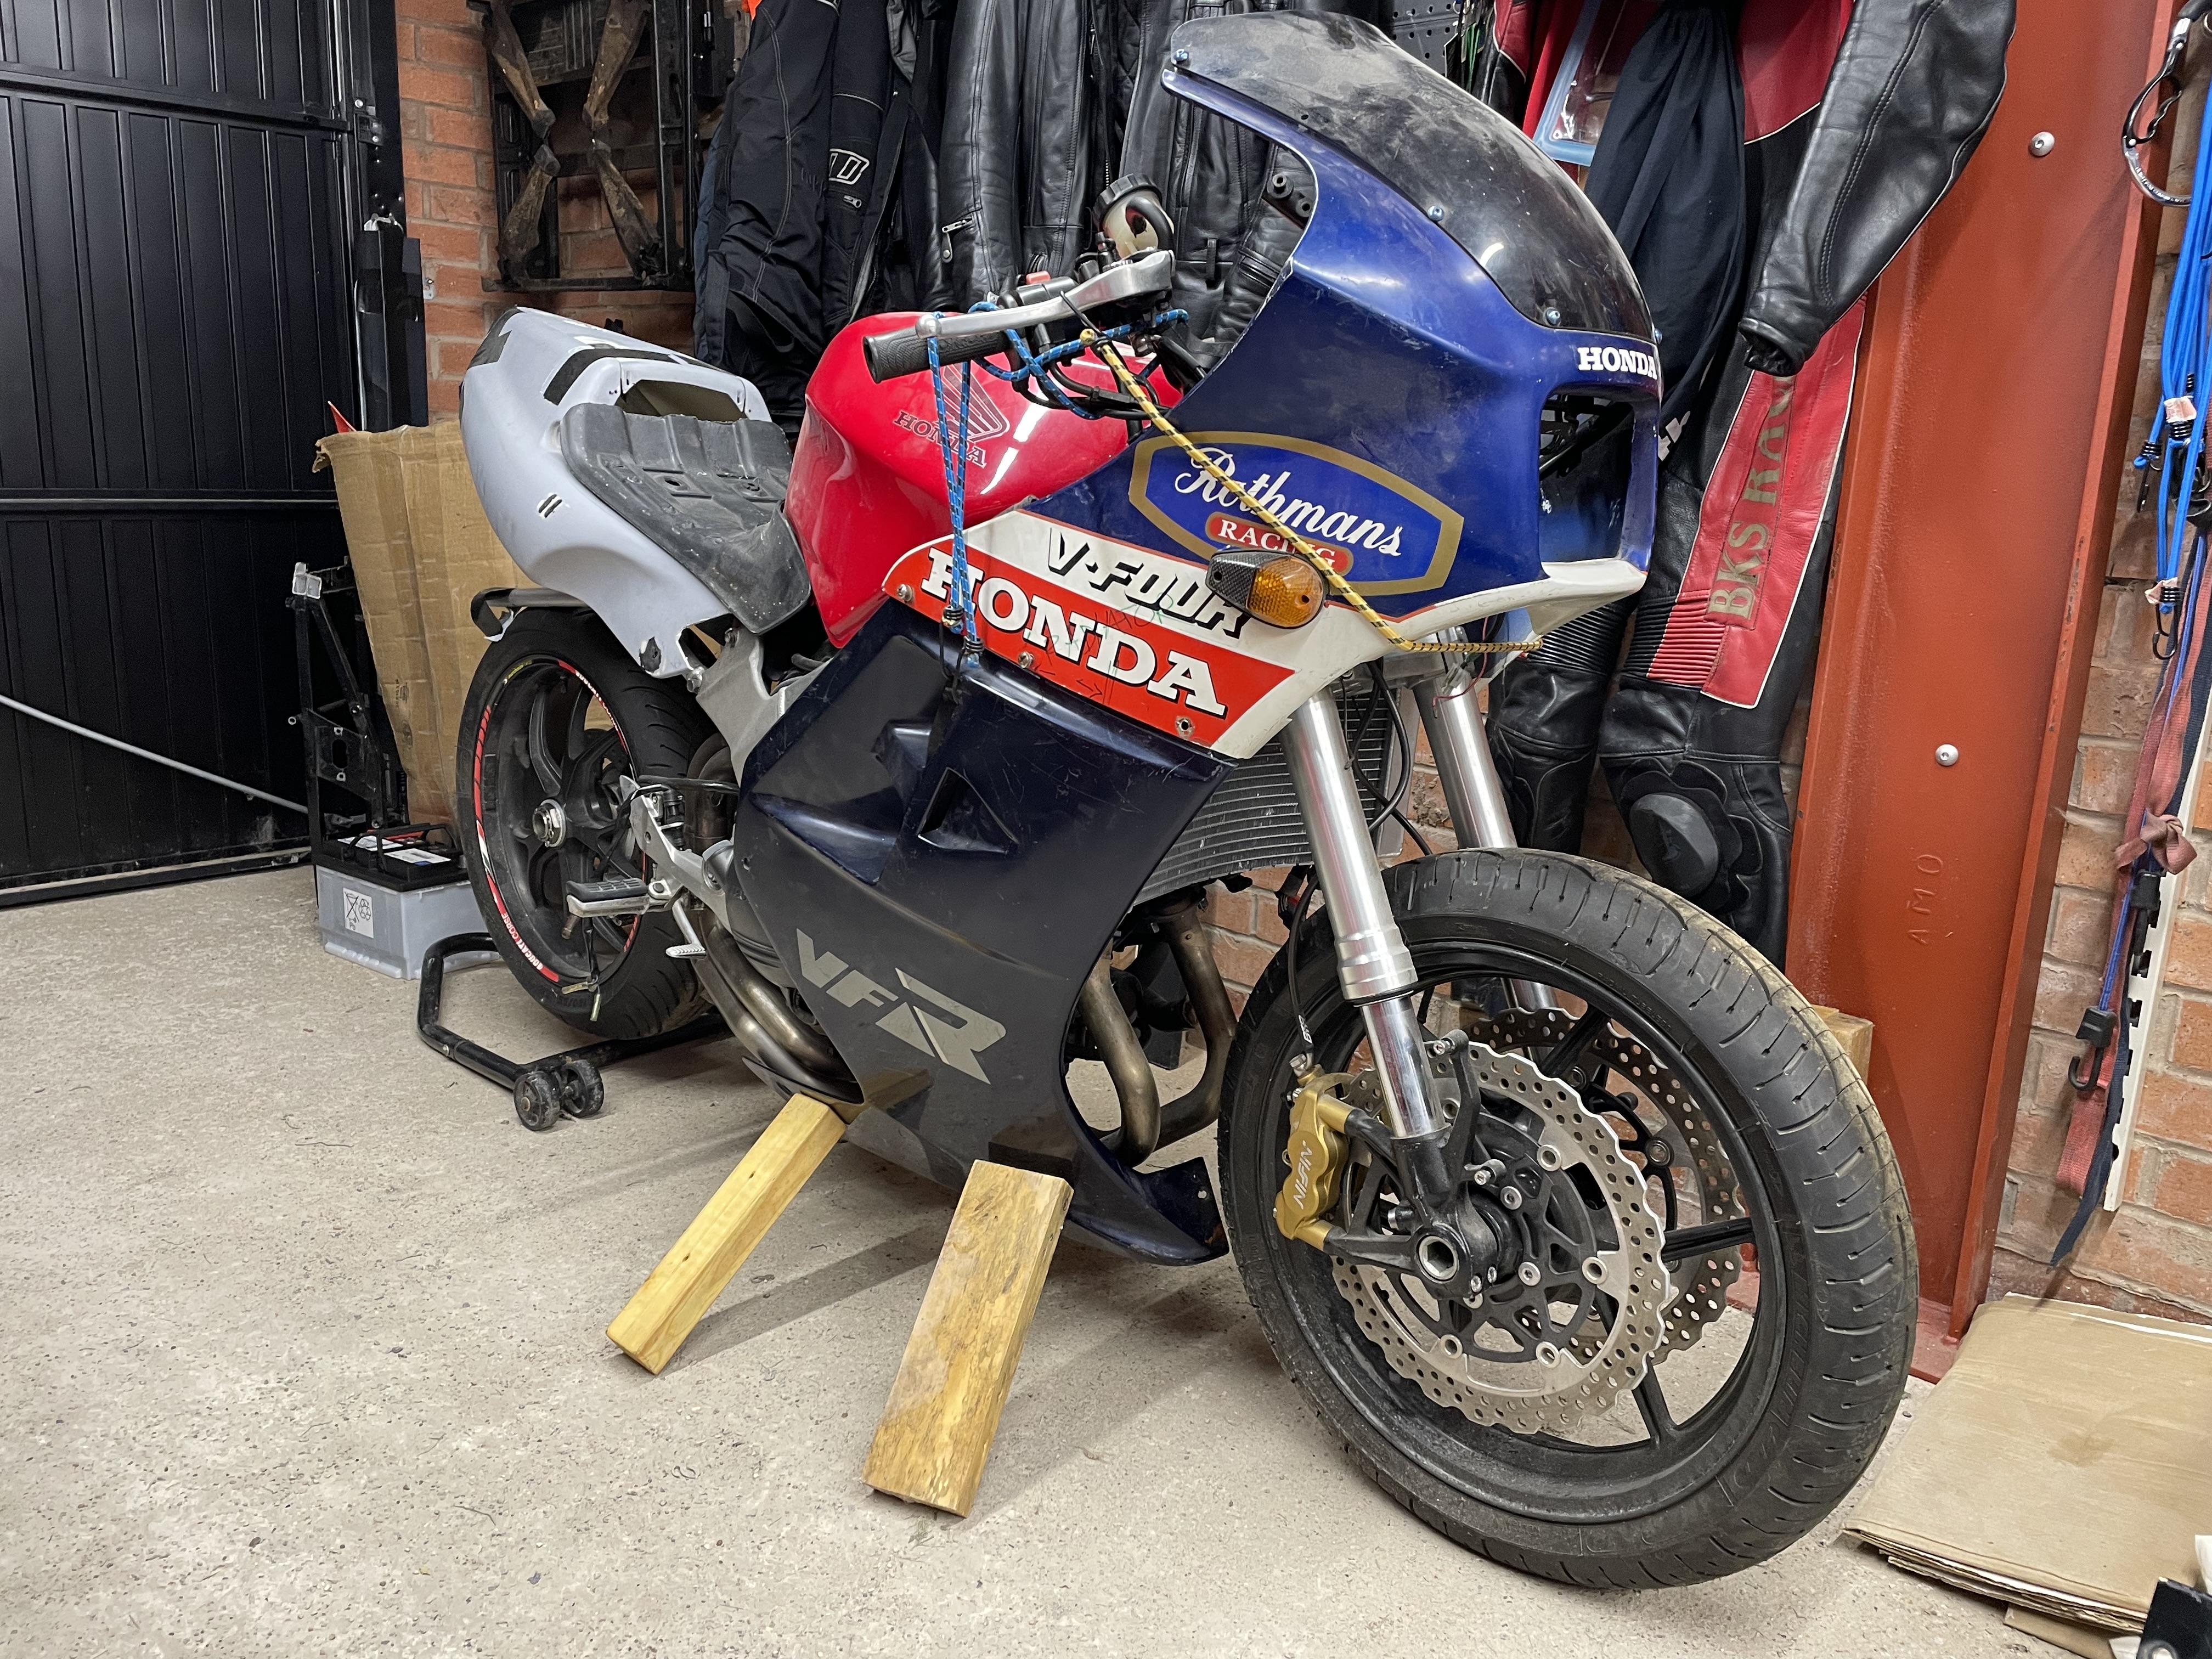
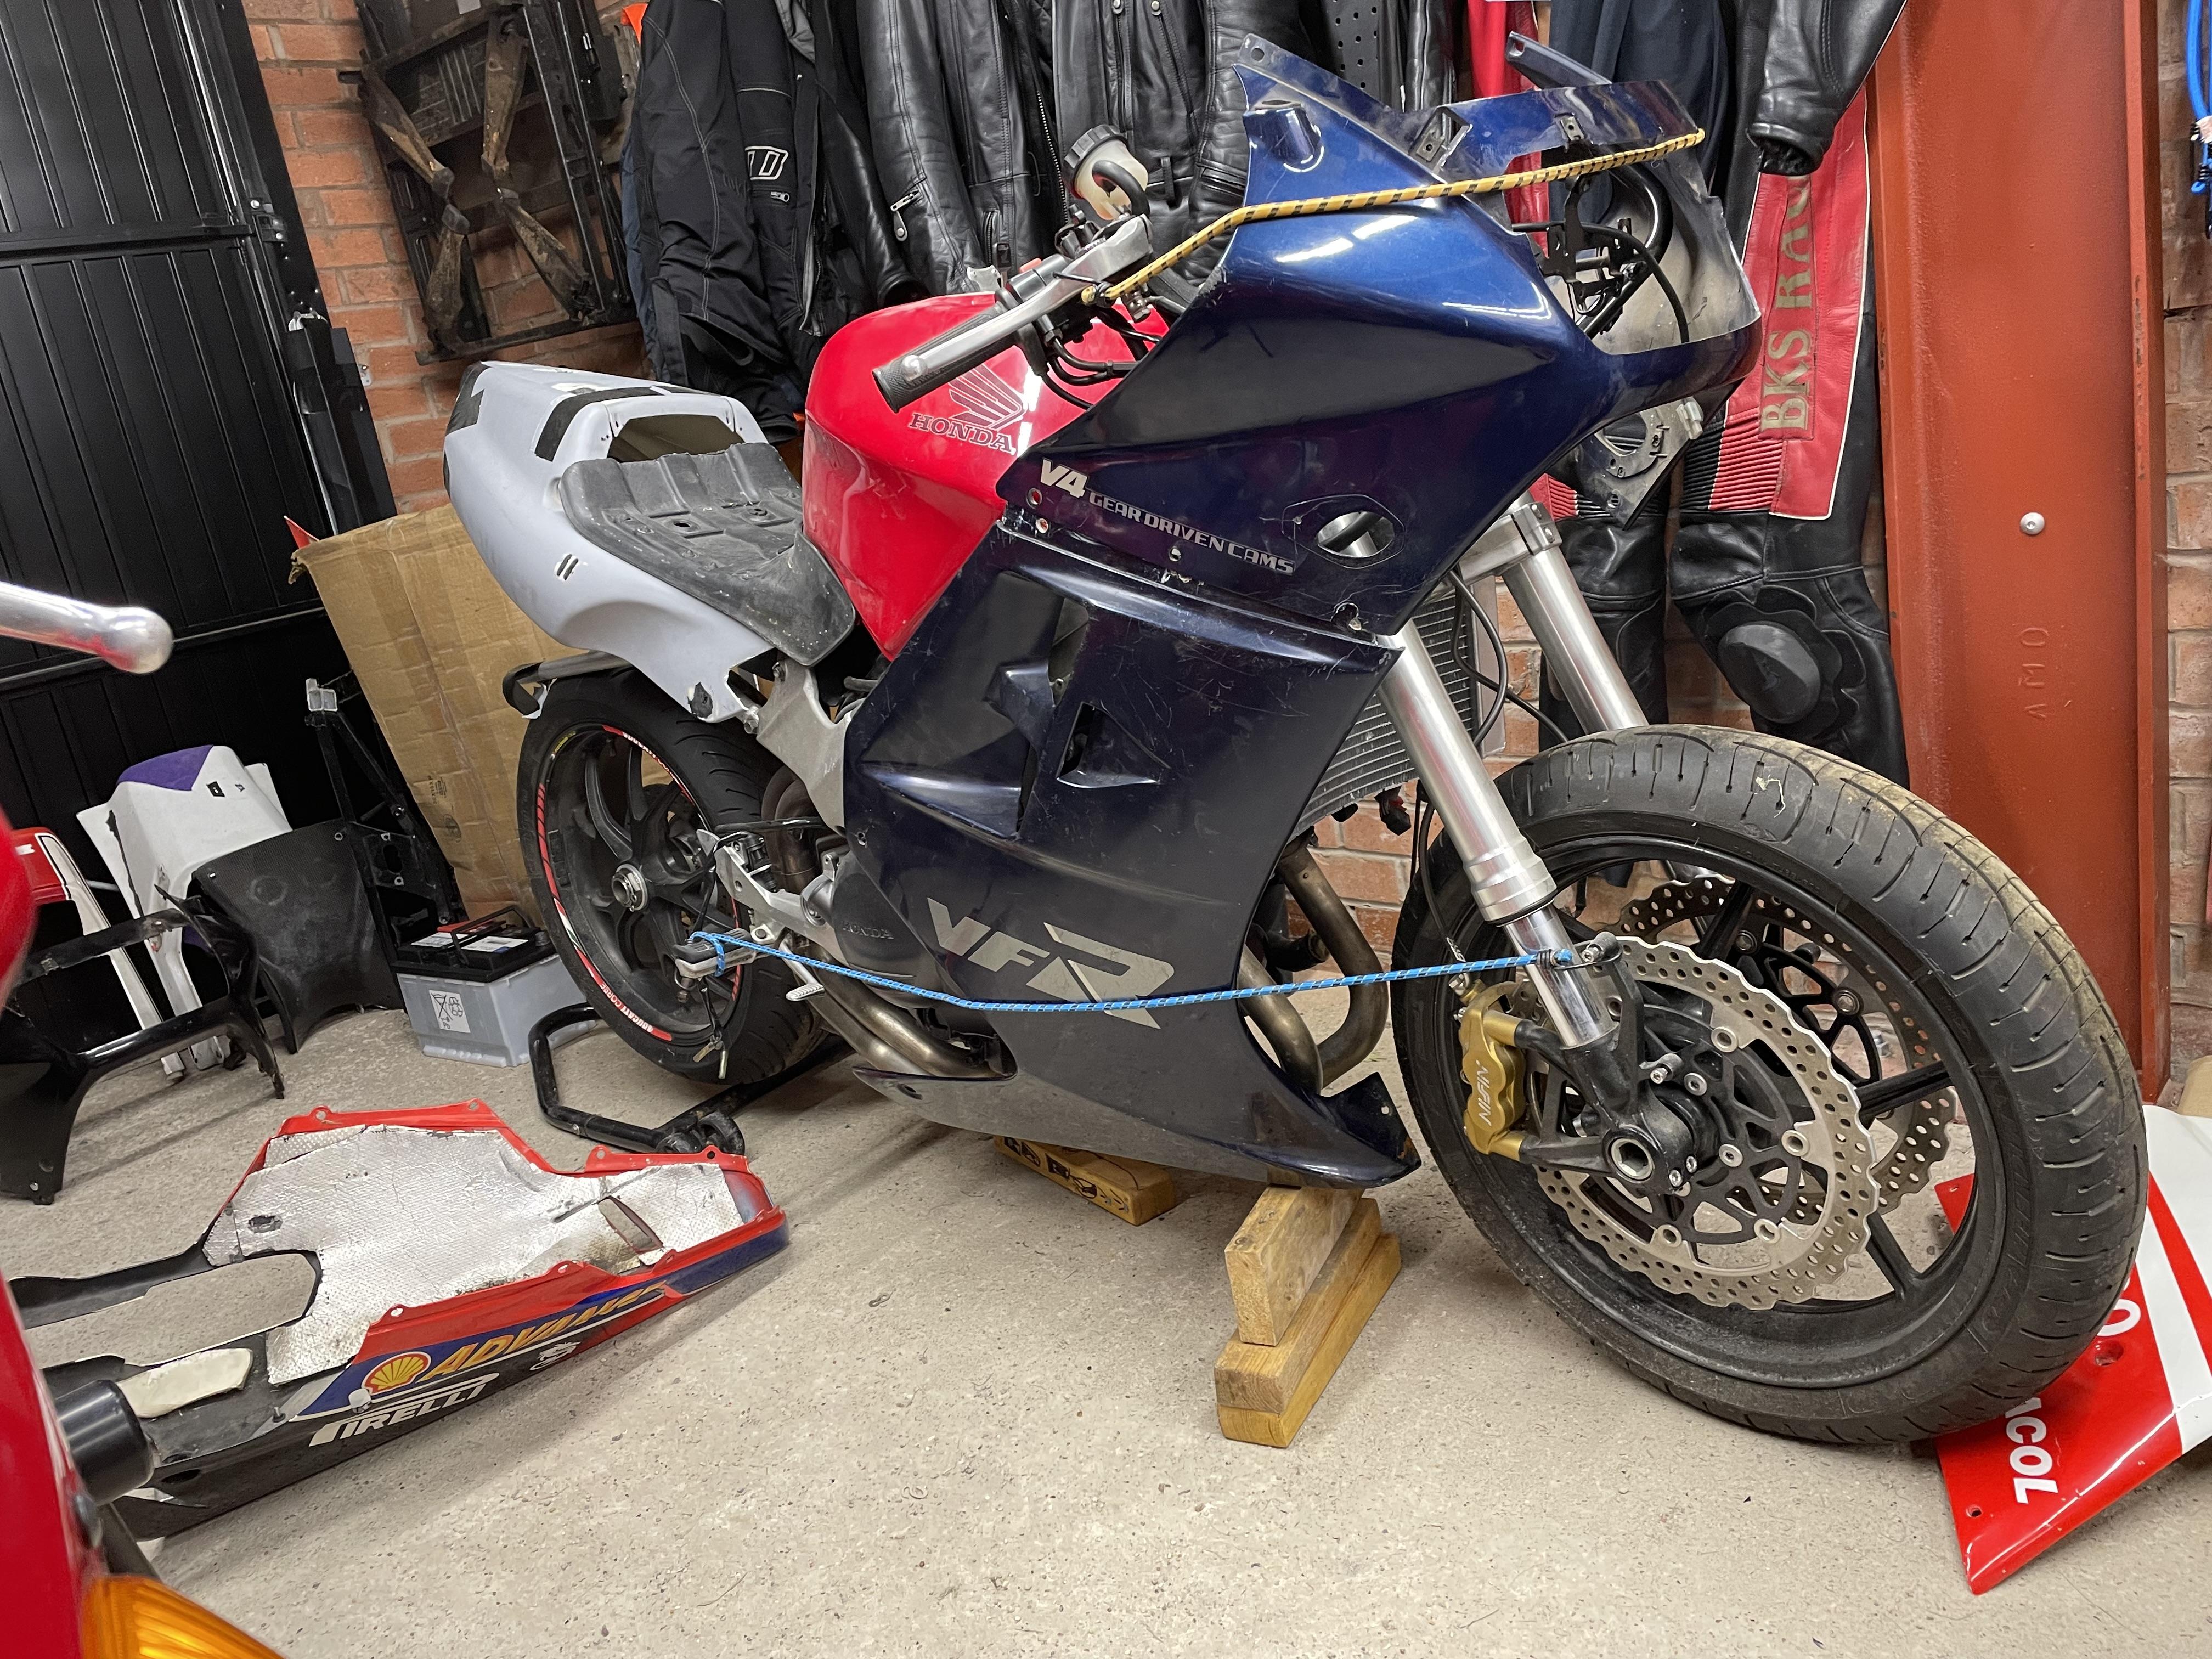
Back to the bodywork, and based on advice from here I’d settled on the VF400/500 front with the VFR750 RC24 tail. Nice slim design with a narrow tail to match. Makes the bike look smaller/lighter/faster. This is the sexy image I had in mind: What I didn’t expect was a celebrity intervention that would derail my plans completely. Incensed at my lack of skill and direction, none less than the legendary Mohawk himself came to the house and chastened me with a lecture on aerodynamics, rear seat drag and aesthetics. Very sternly, loudly and in person. There was much finger pointing and violent gesticulation! As if not crushed enough, his missus then lectured me on cleanliness, organisation and the efficient use of garage space. Feeling suitably chastened, I couldn’t possibly argue with any of it. Mohawk has instructed me to build this: VF1000-F2 Bol d’Or front with MC21 tail piece. And if Mohawk says it must be so, then so it shall be. Who am I to refuse! It’s hard to visualise as the panels are different colours and not entirely in the right position. So here are some pics of the respective bits on other bikes for reference. VF1000-F2 front with minor modifications (Check out the saddle on the first one!): MC21 tail on a VF1000R: Still planning to have side fairings and a belly pan. These will be bodged up after the front fairing and seat are situated. Side vents possibly from a CBR600RR and maybe a NACA duct thrown in for fun. Let’s see how we get on…
-
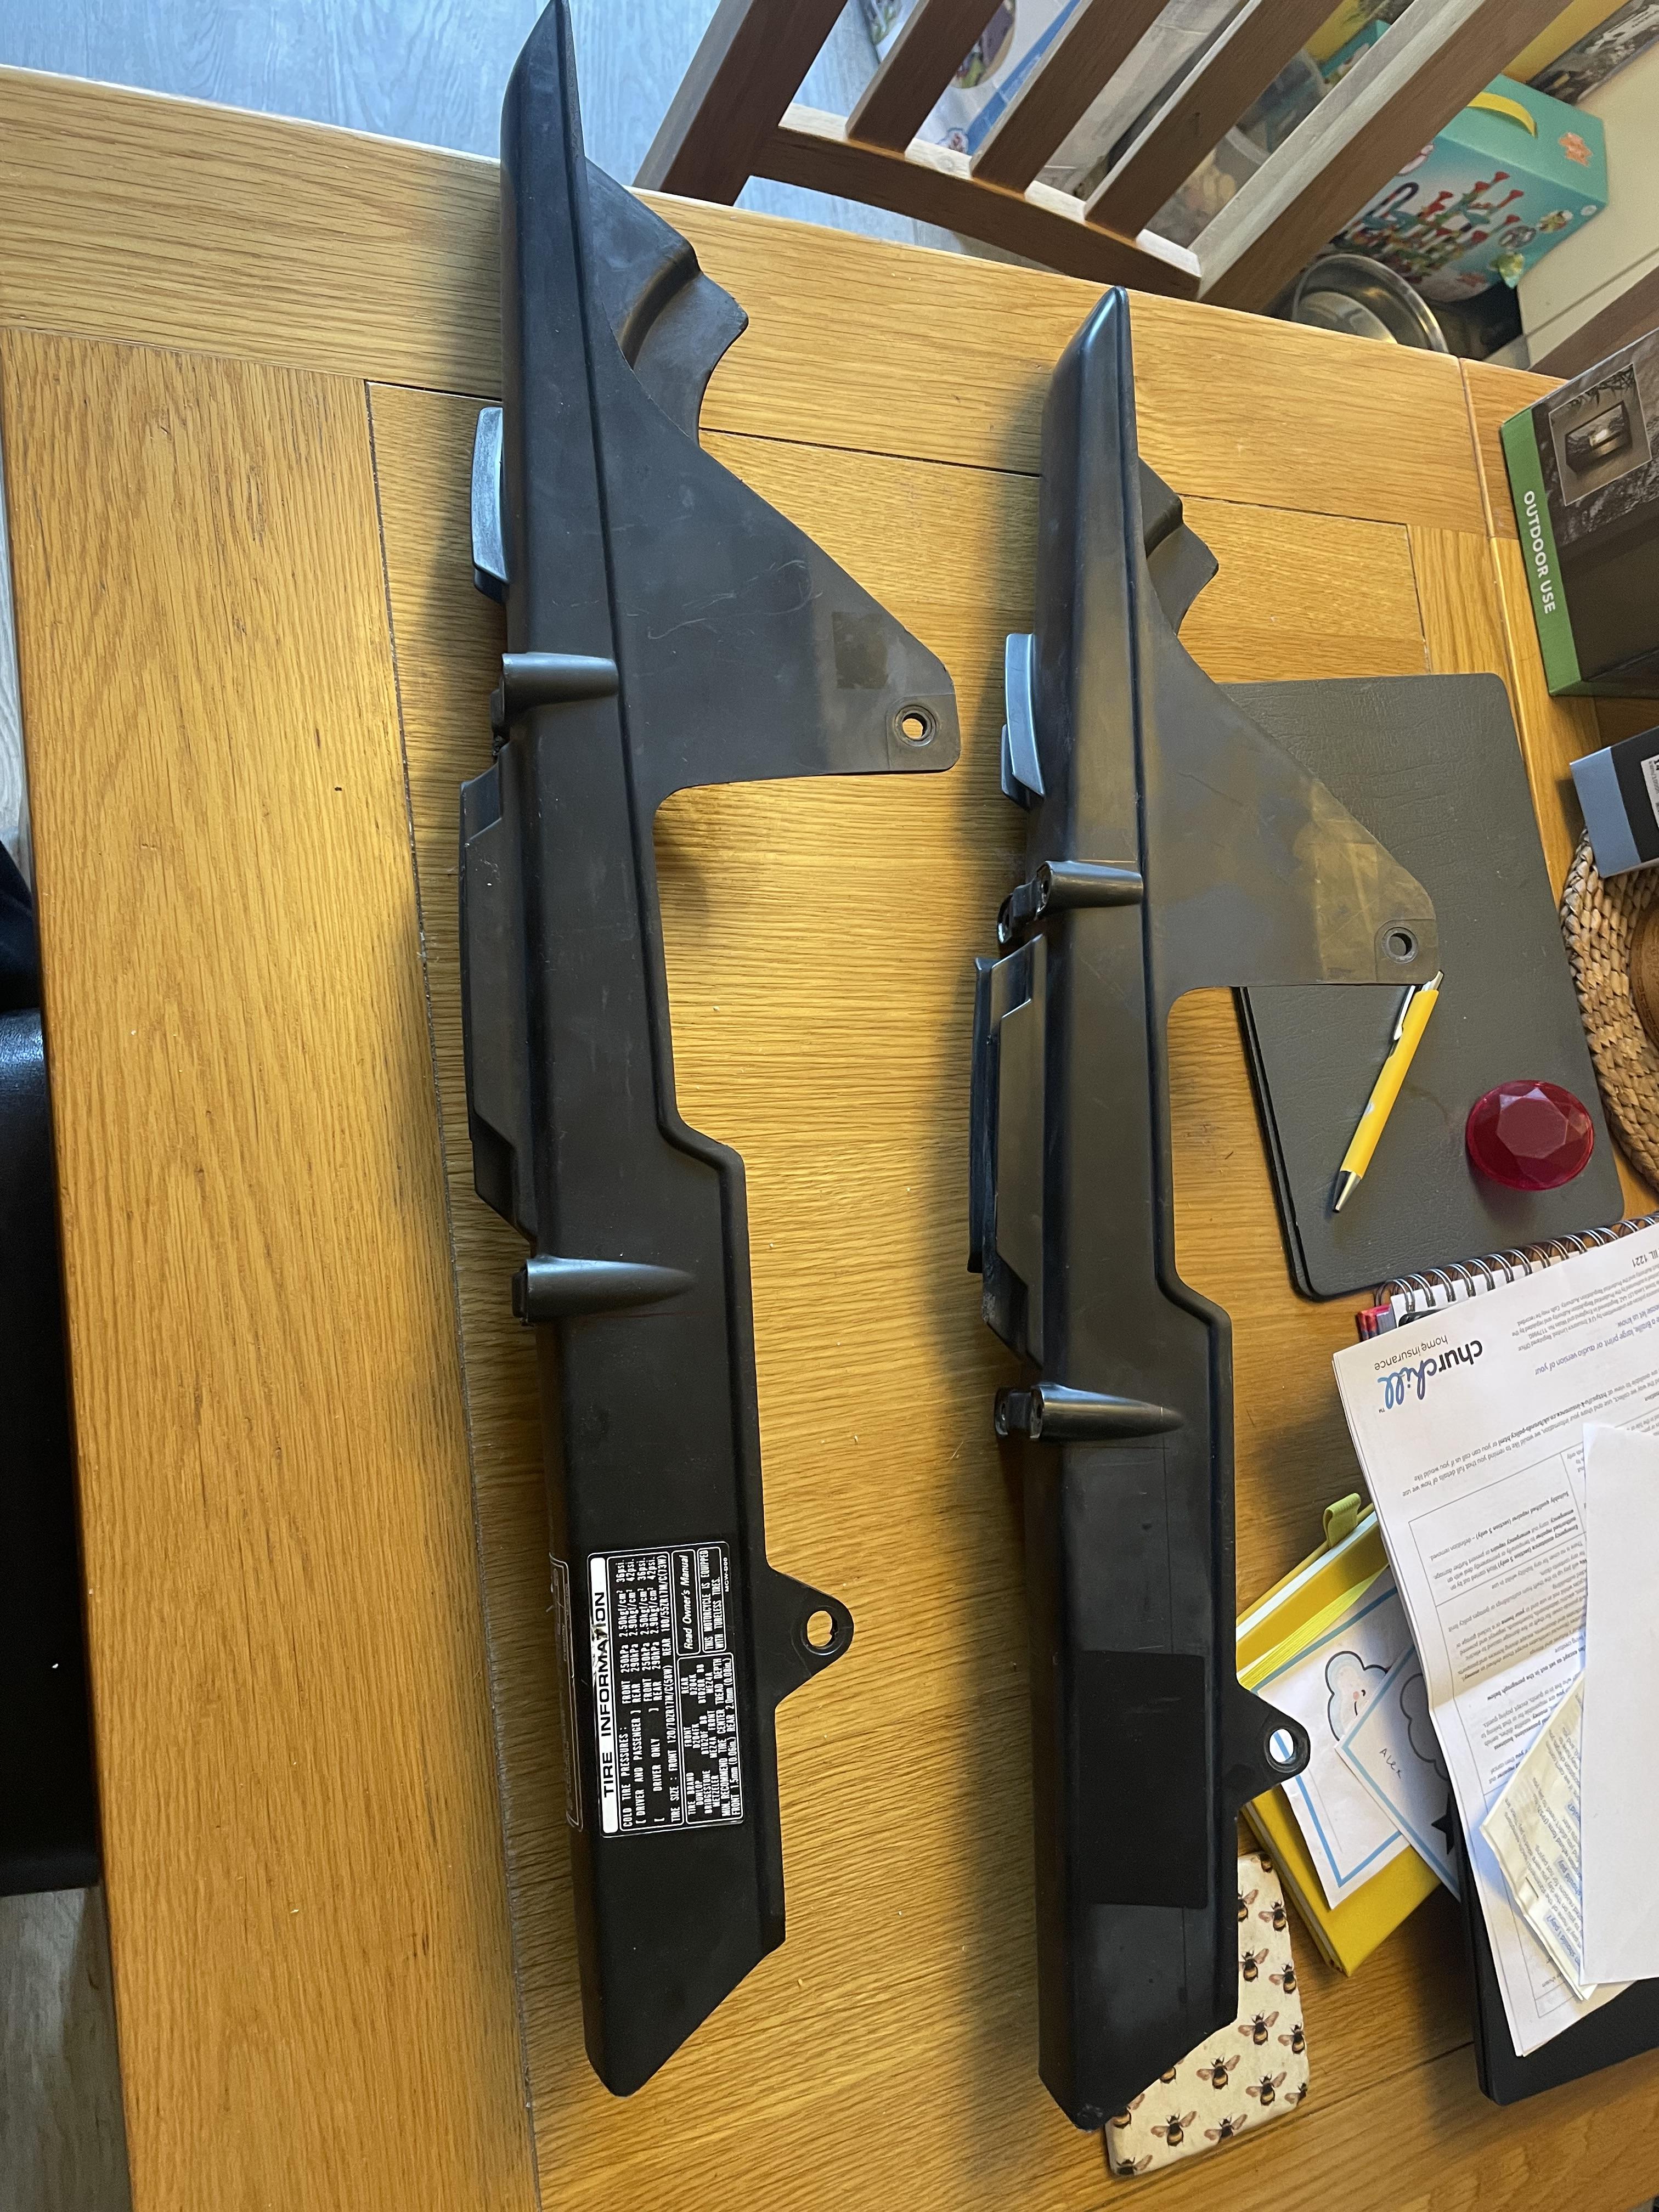
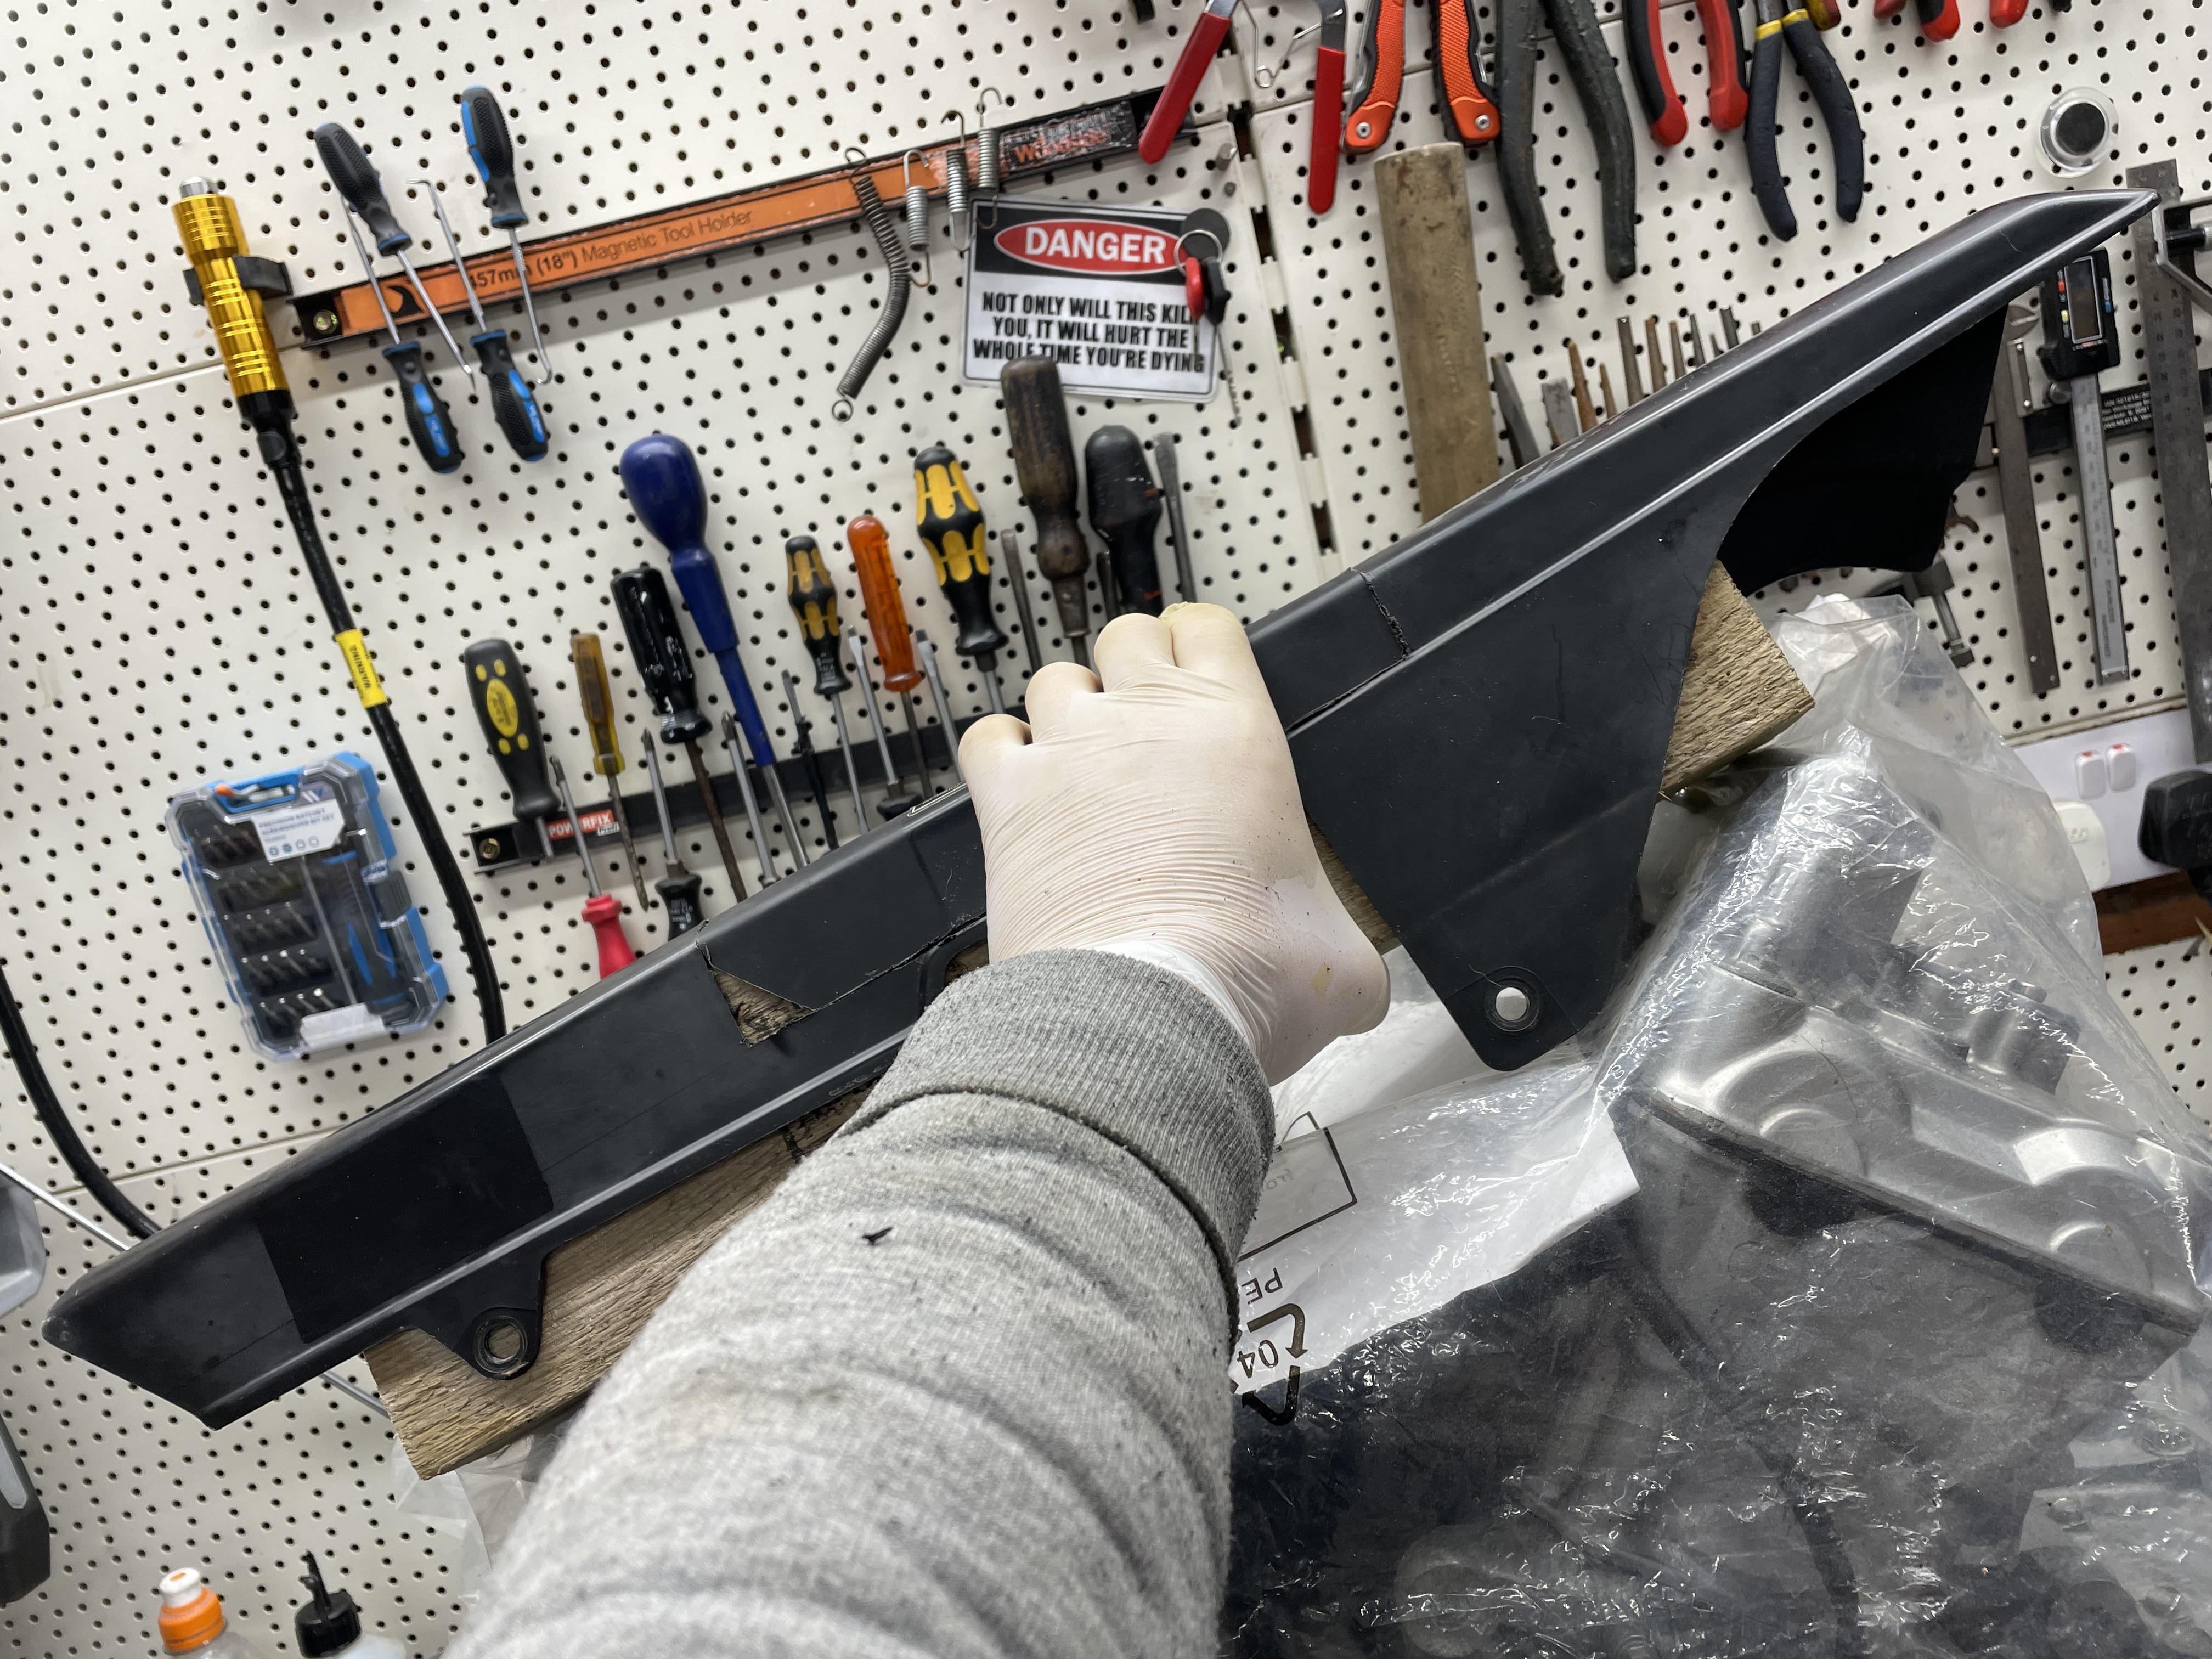
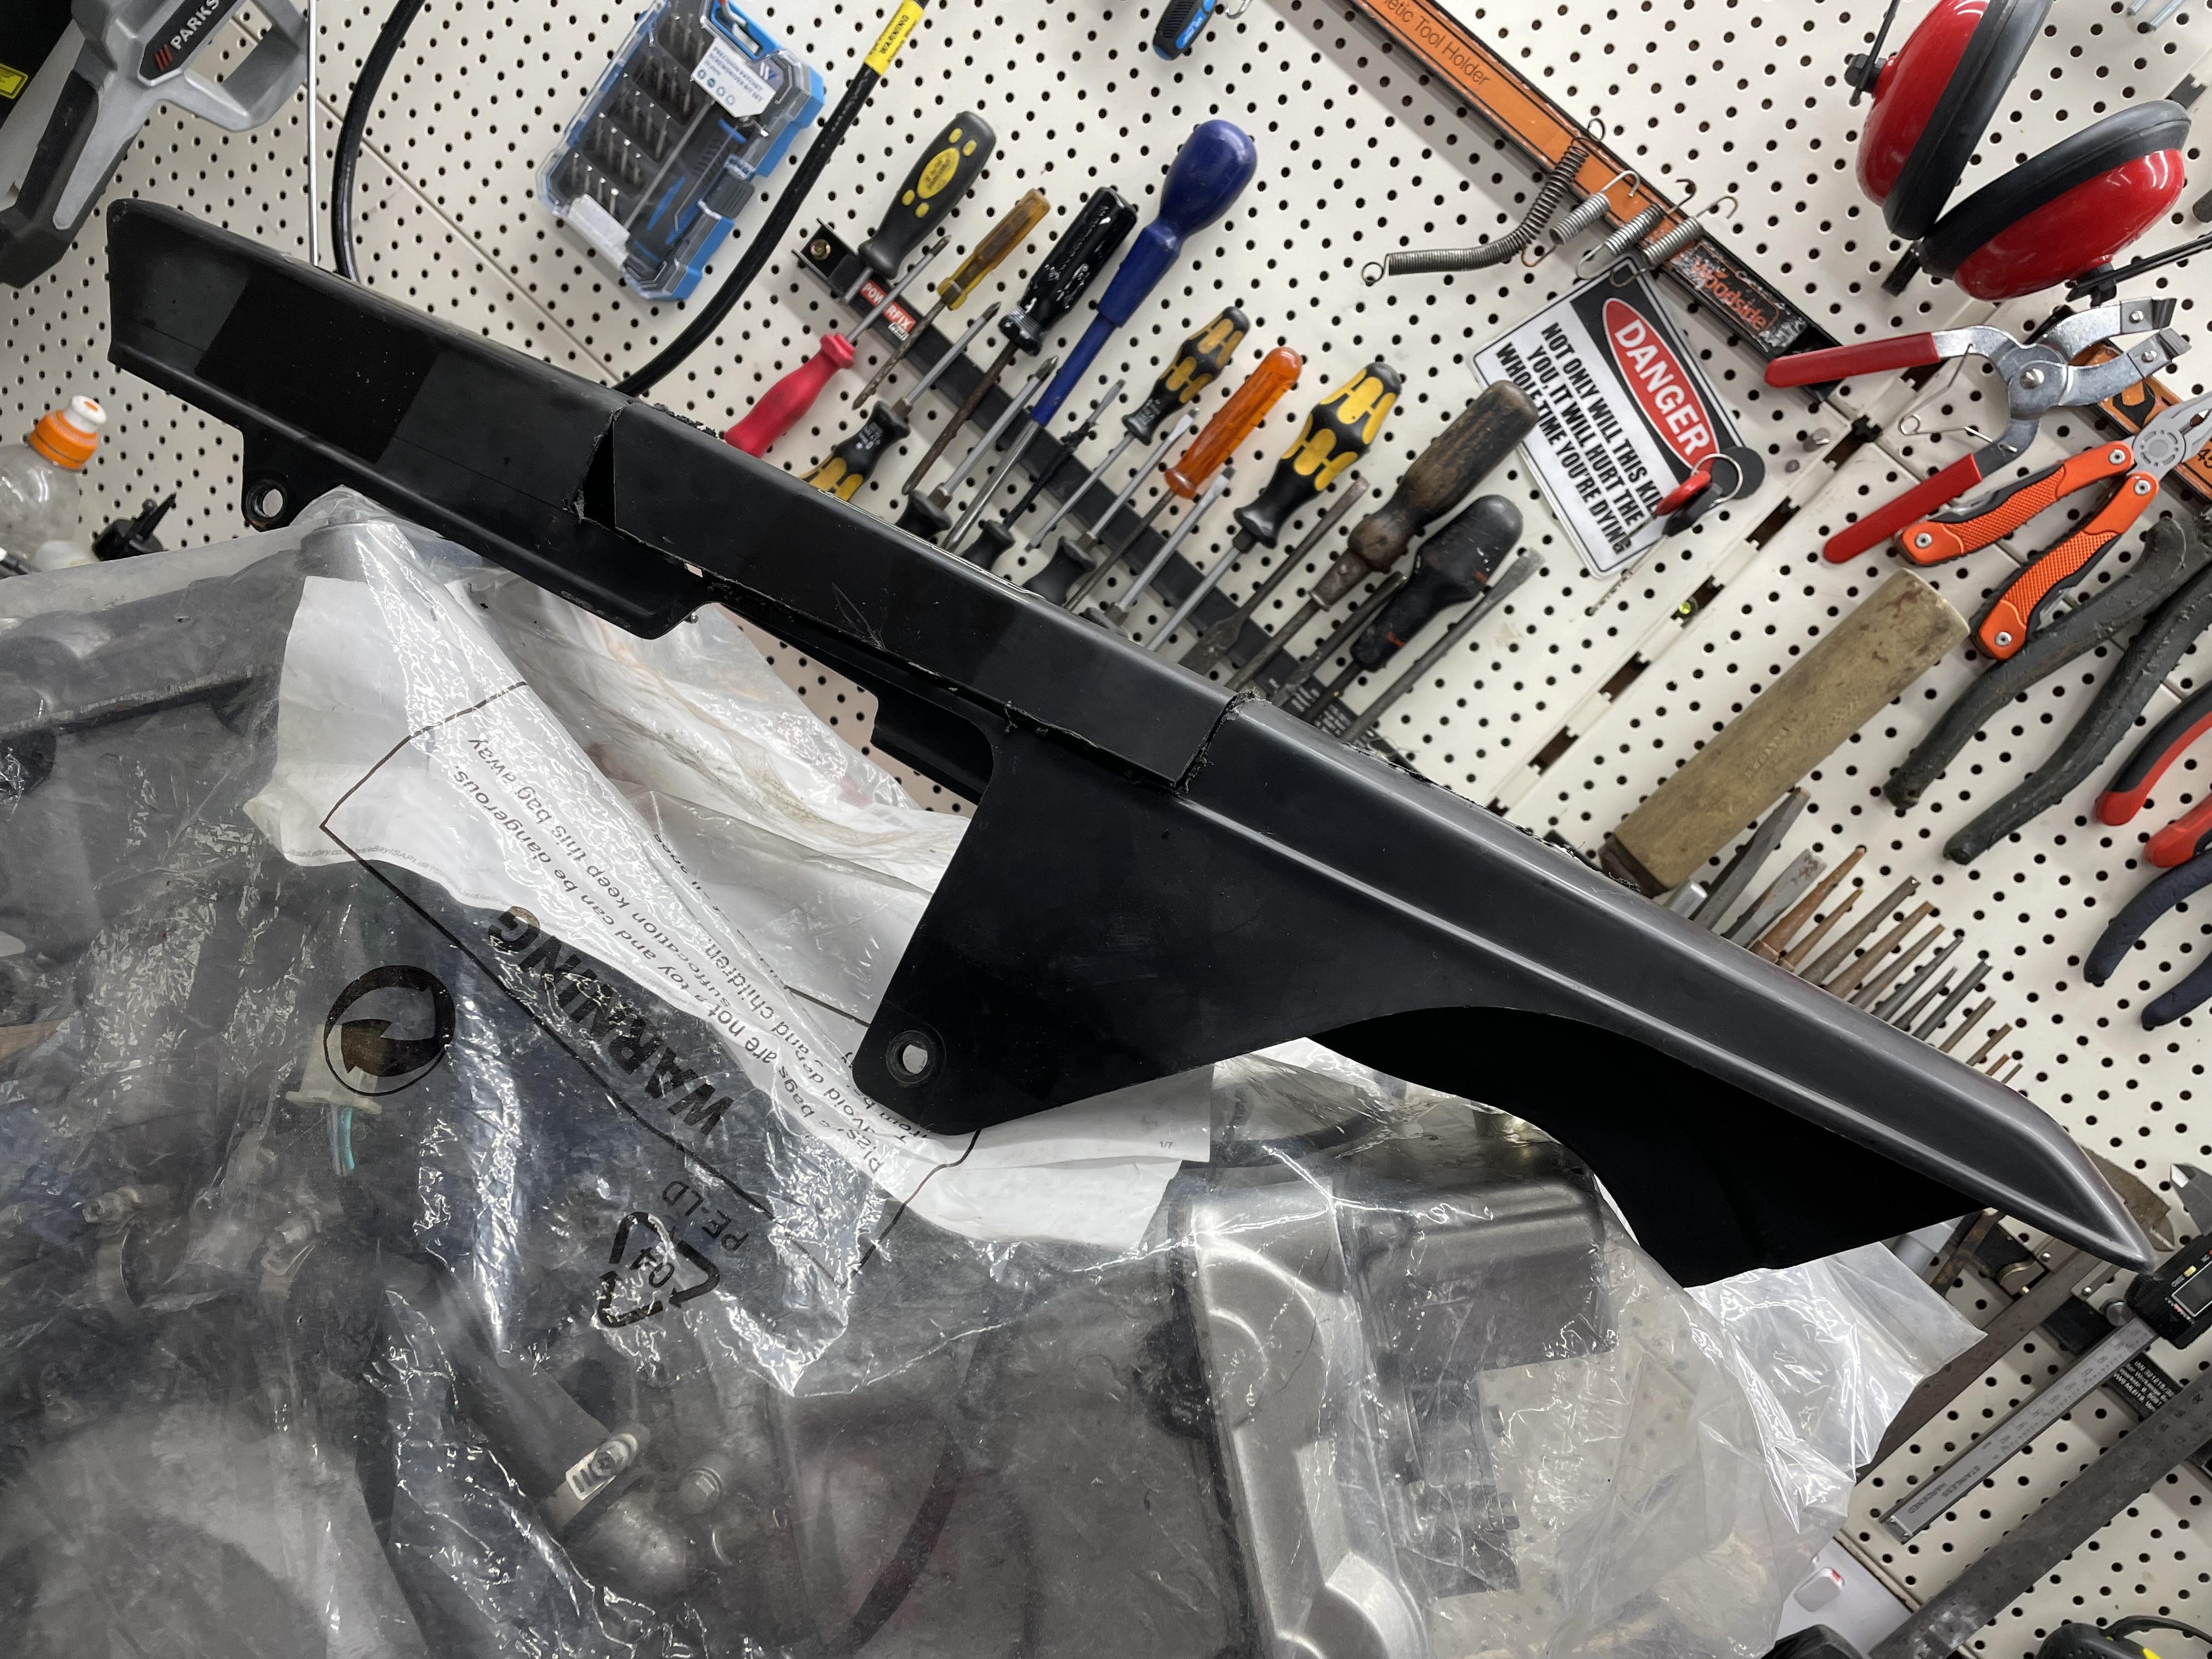
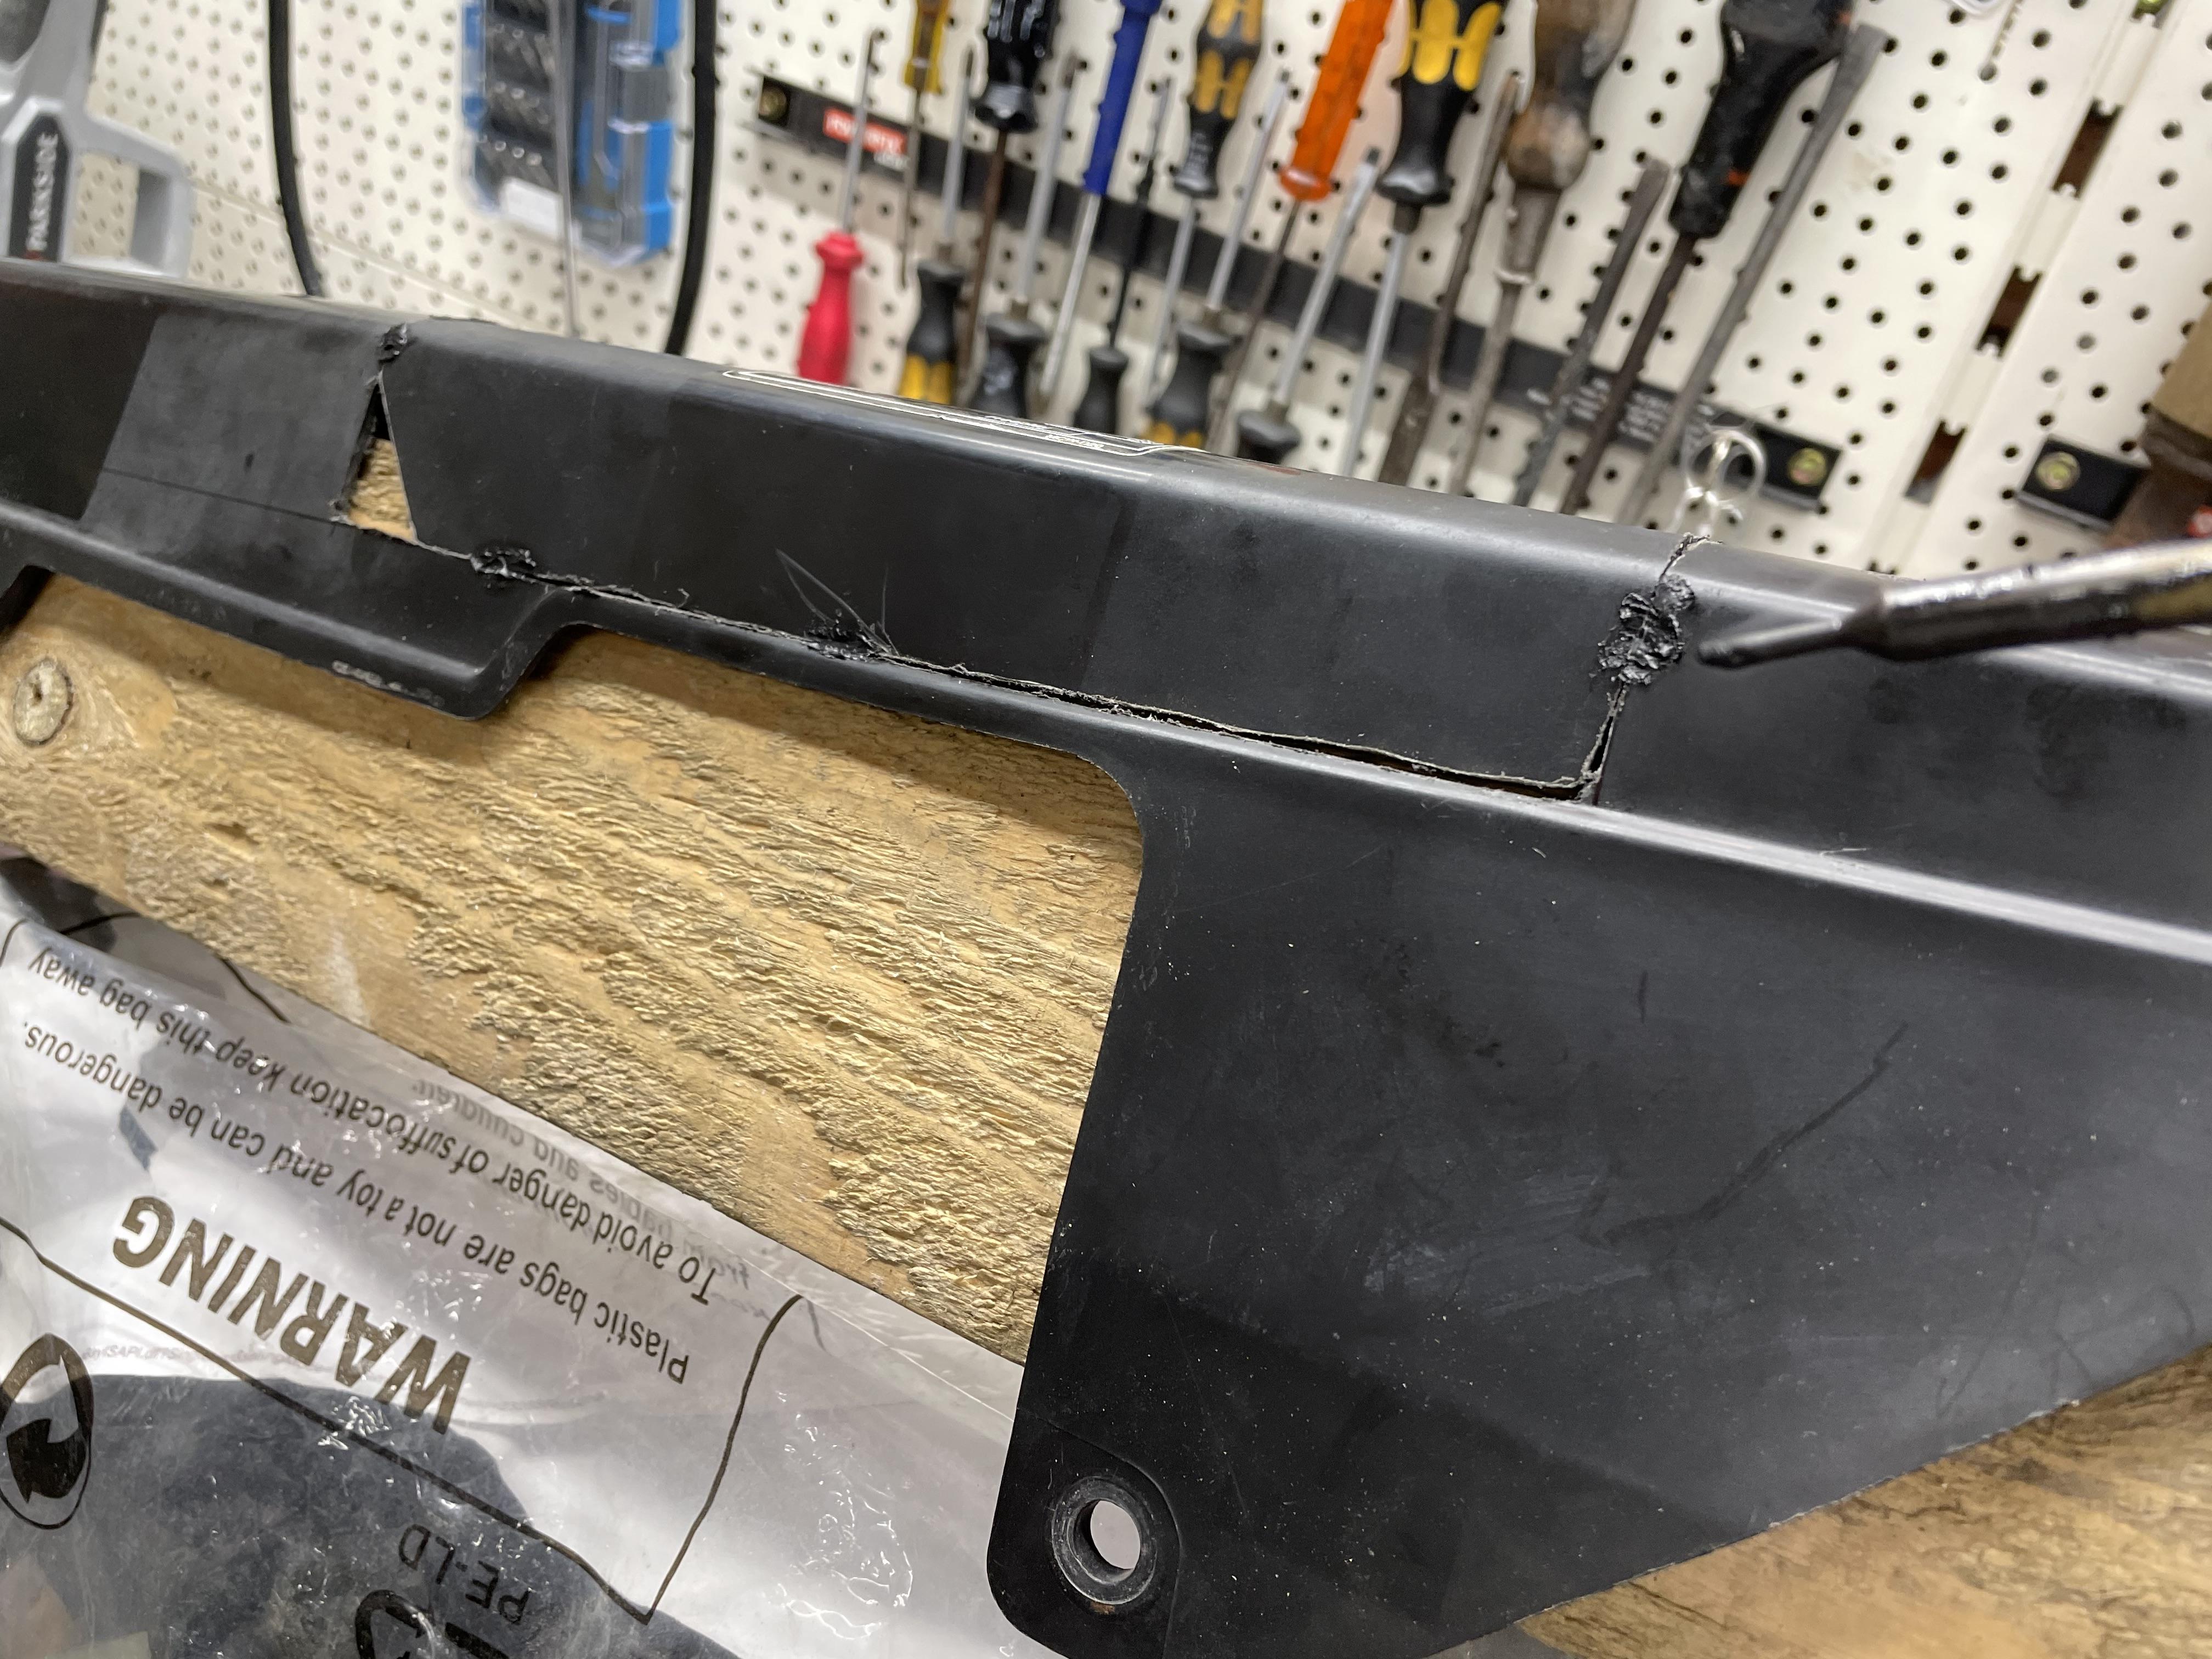
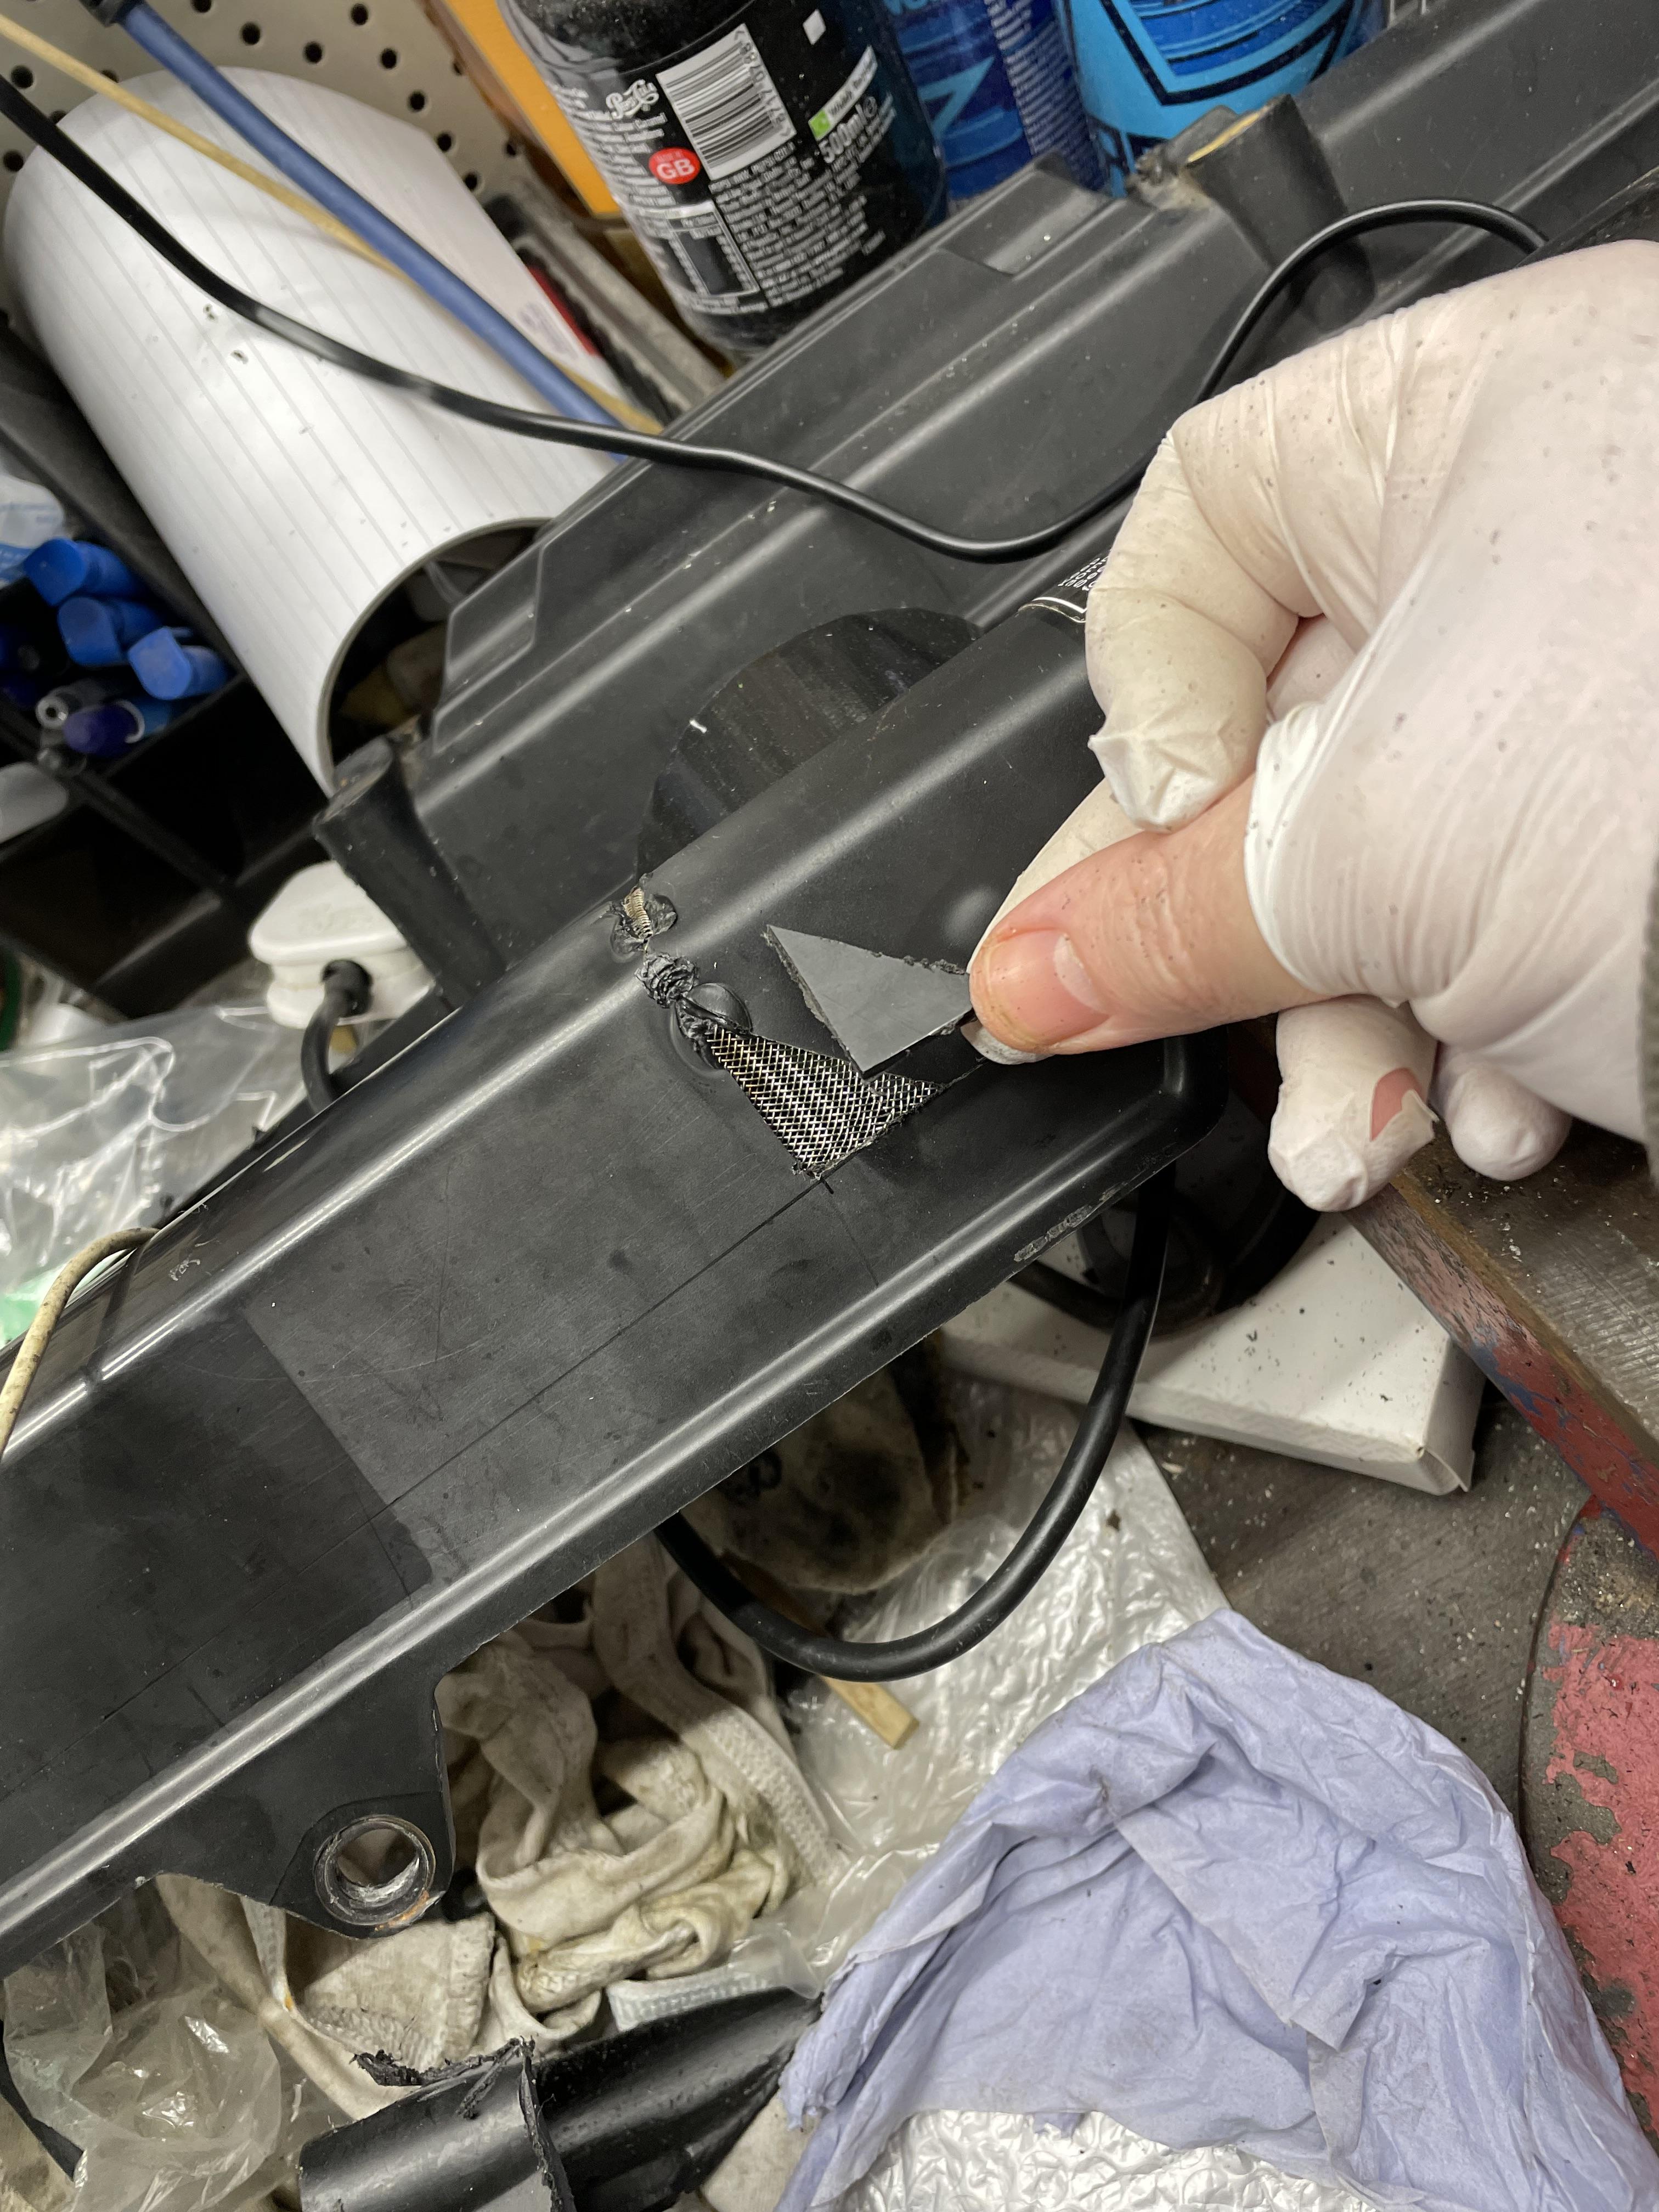
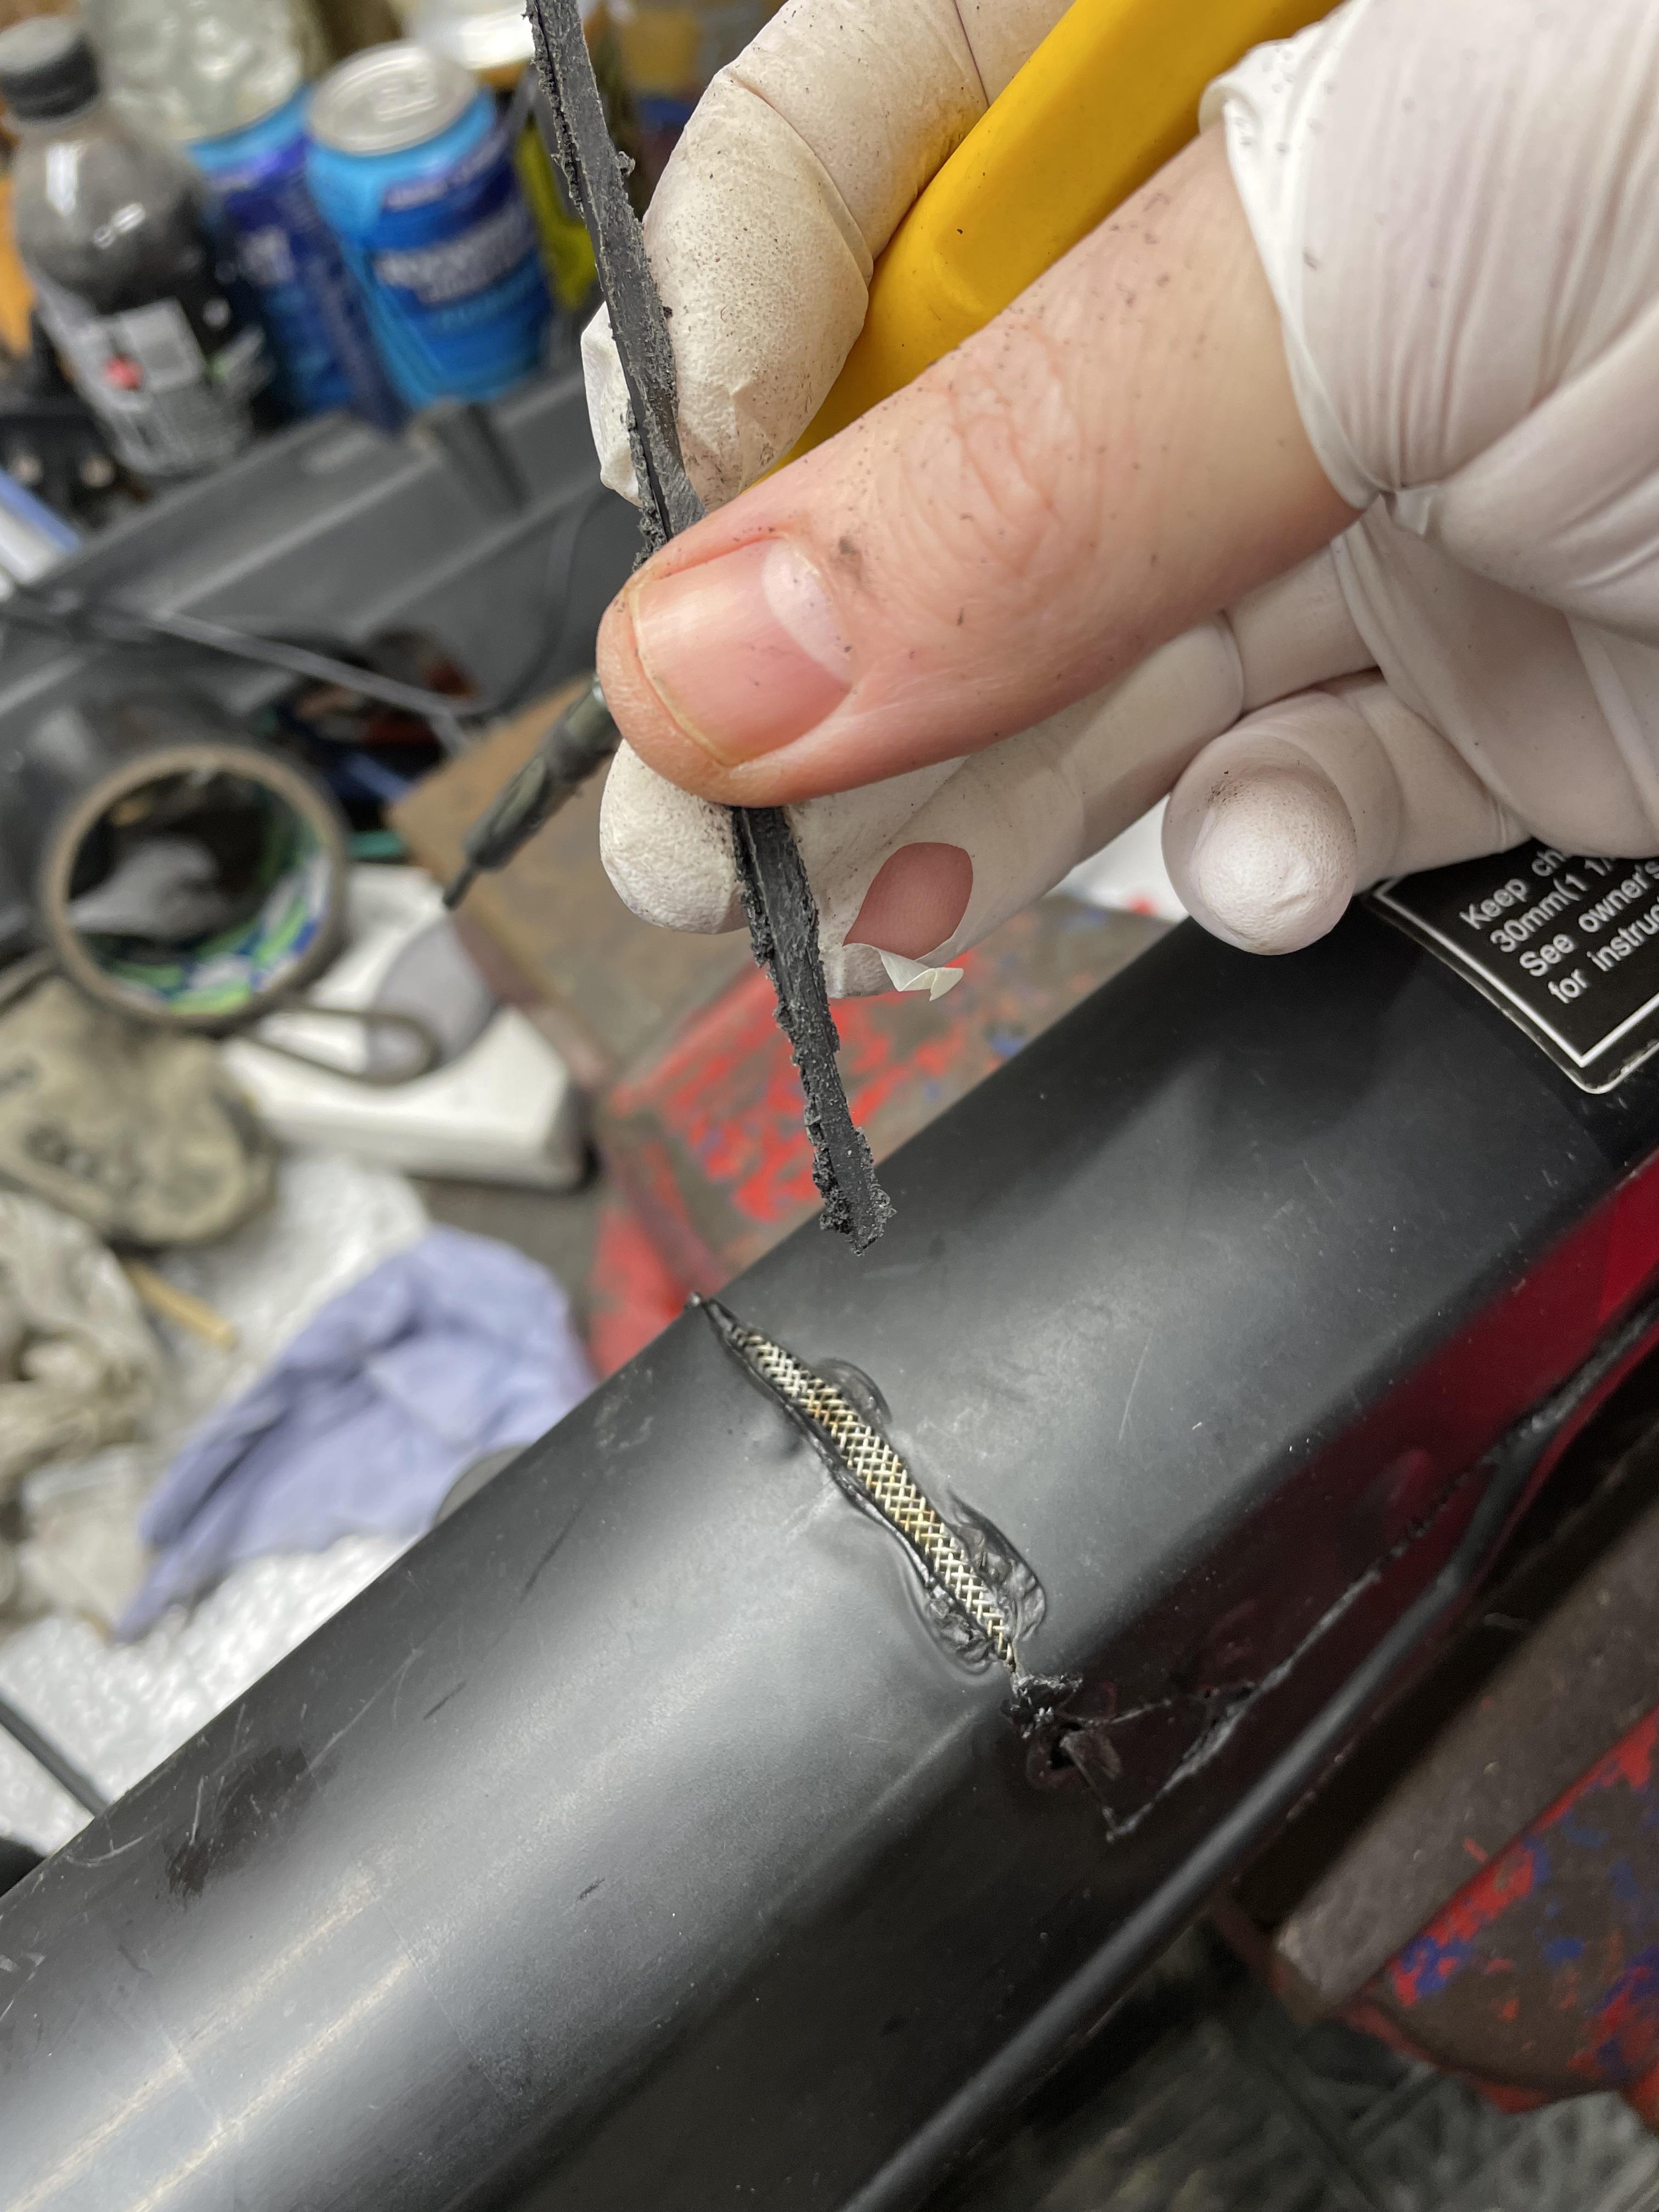
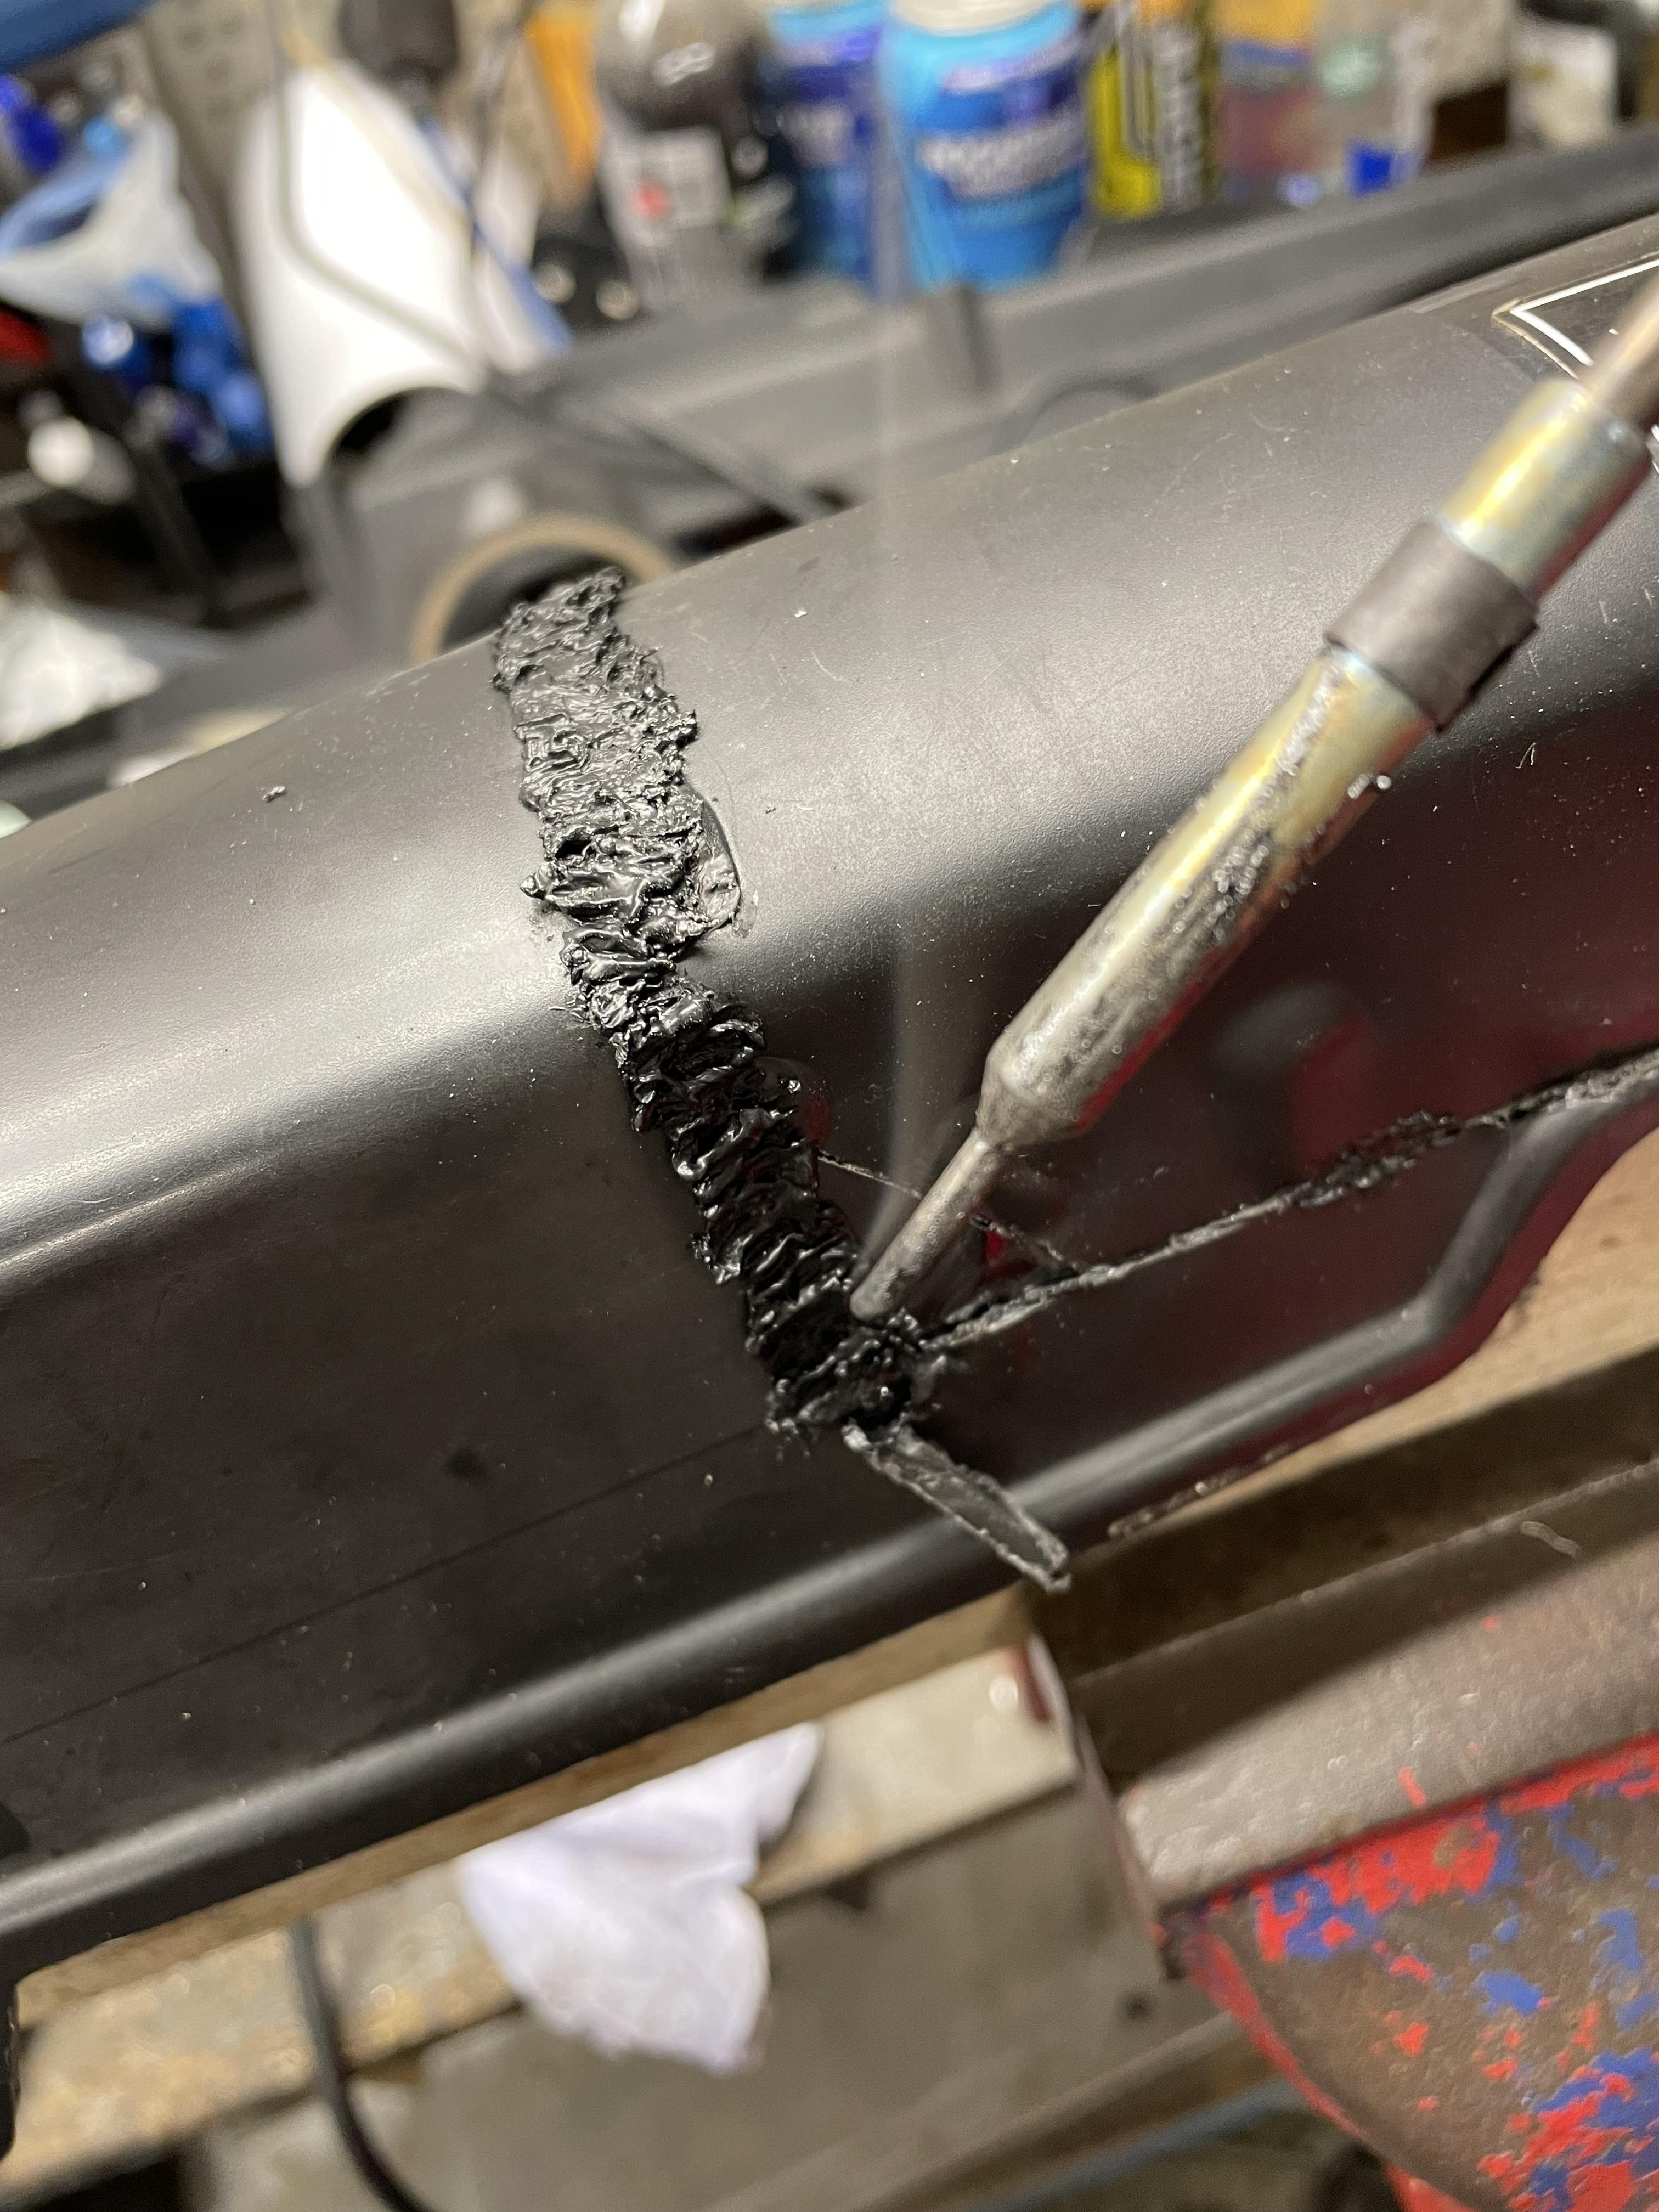
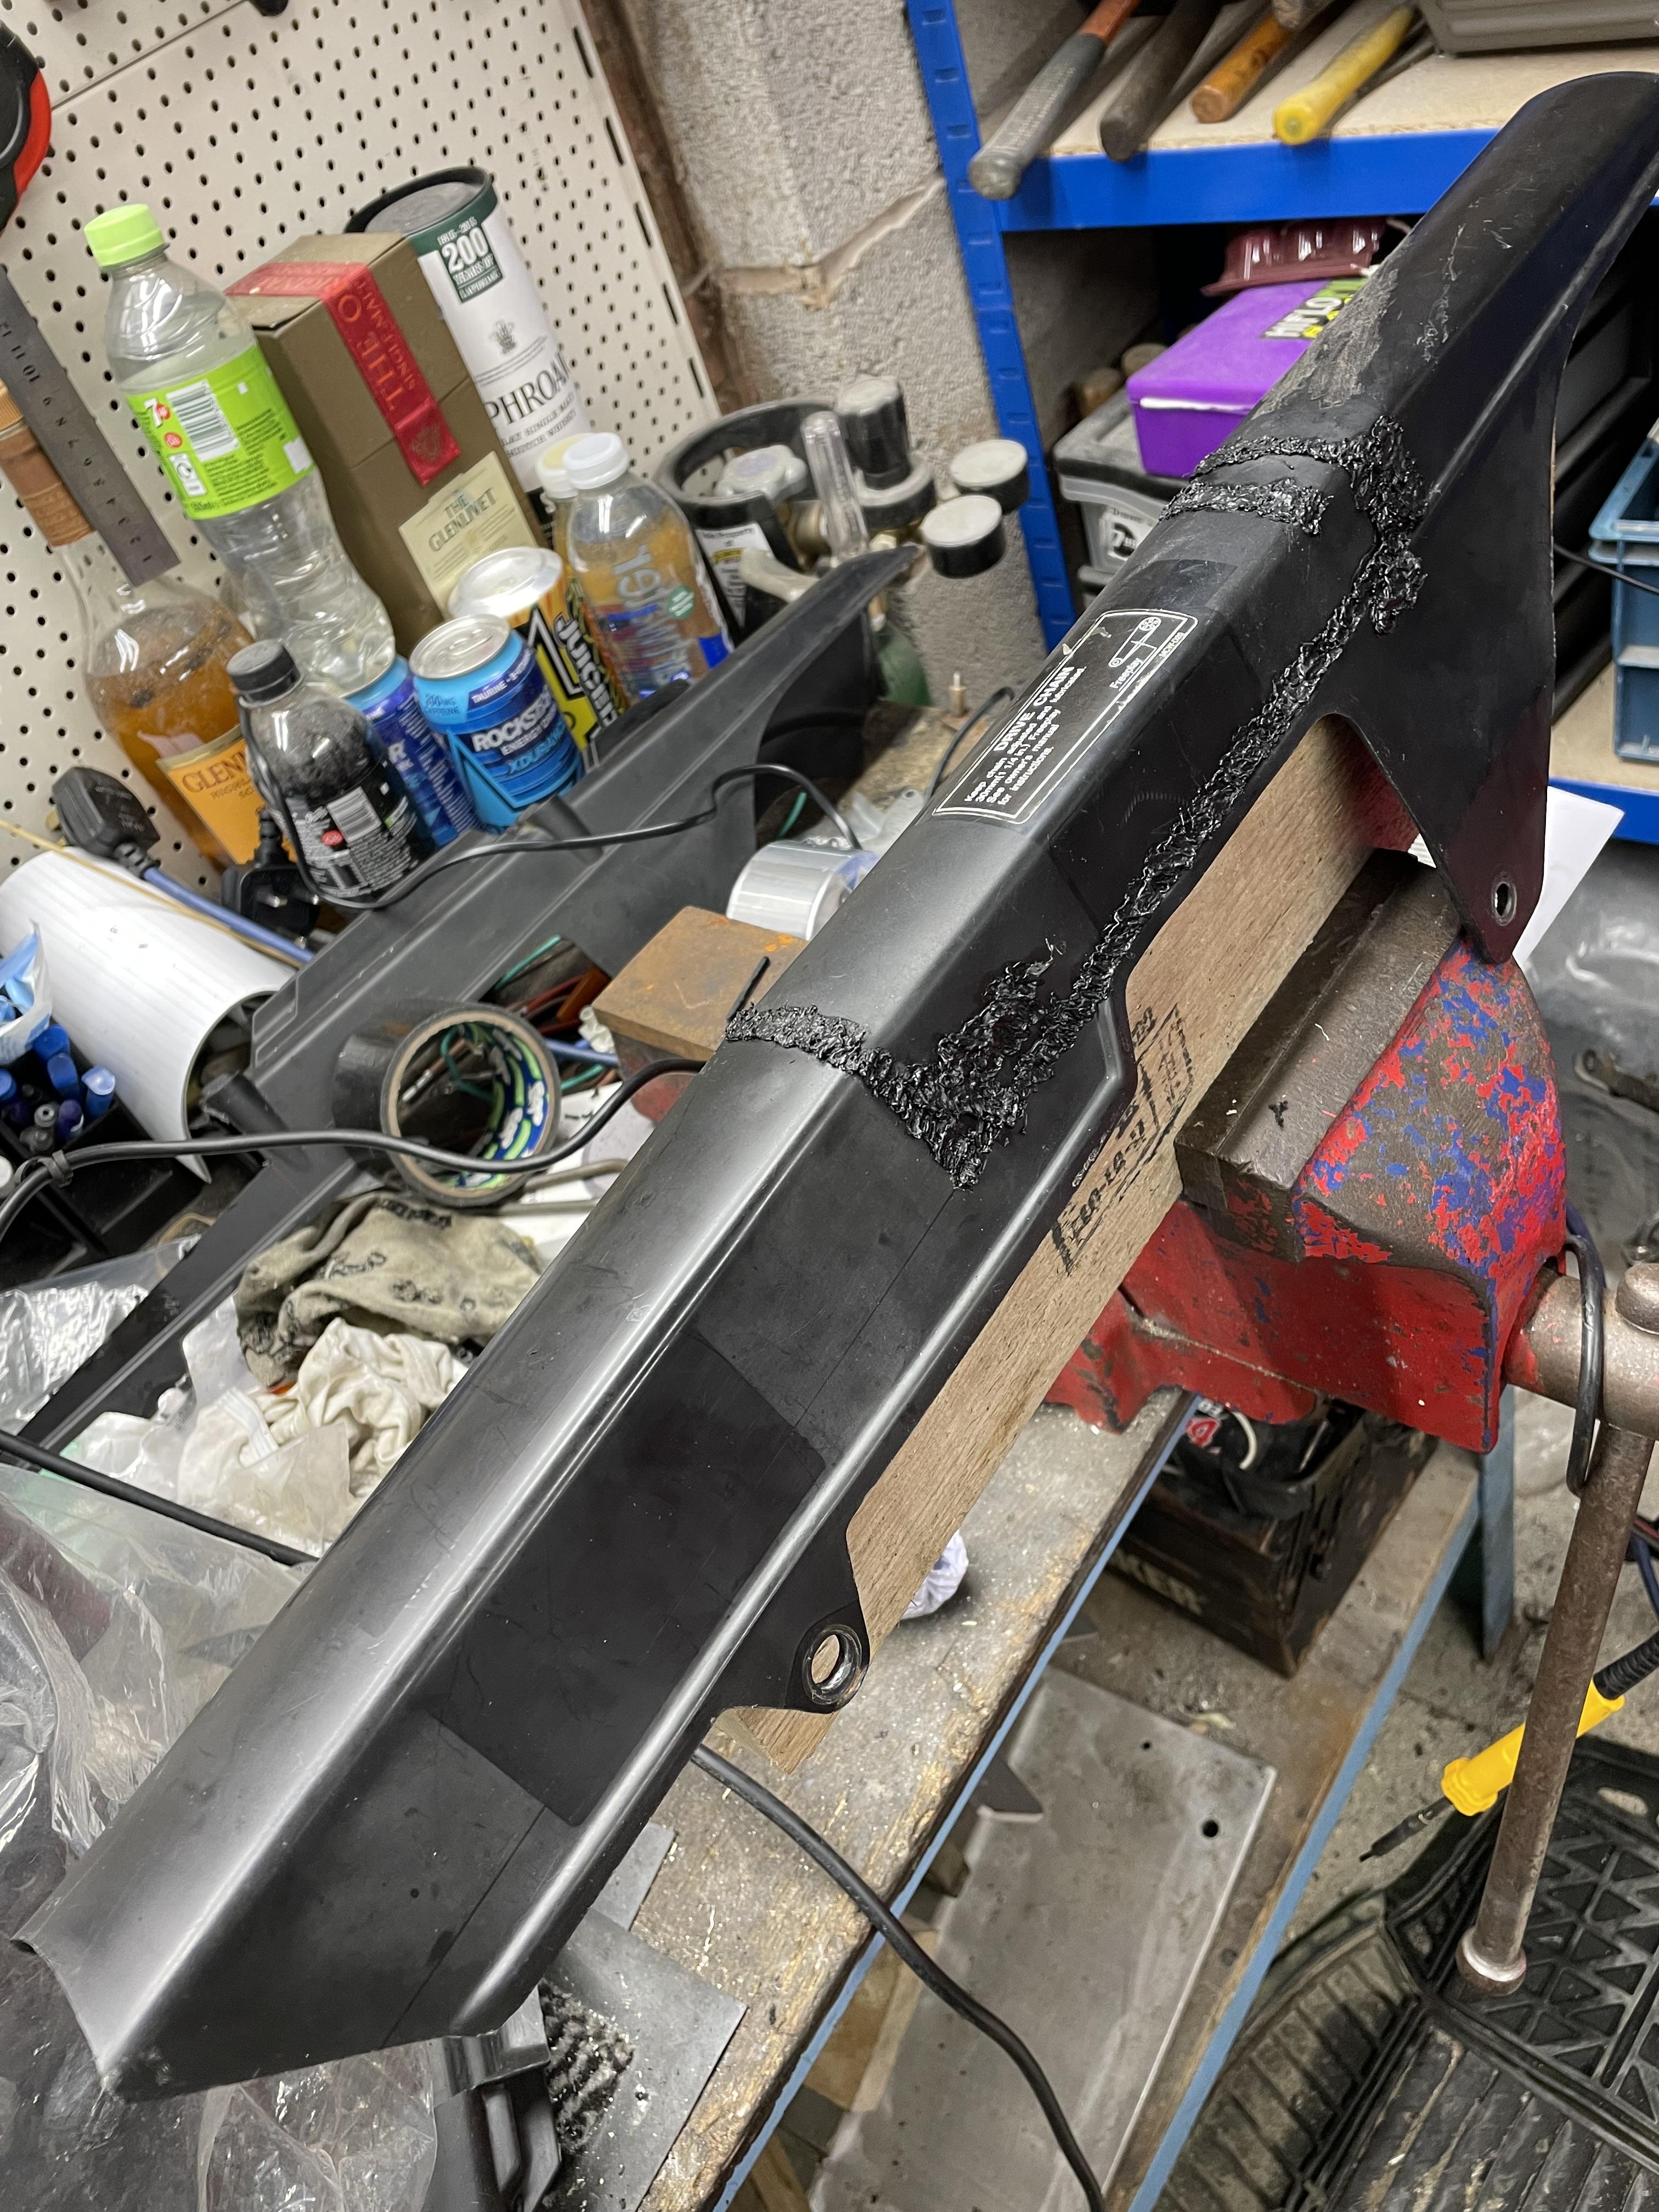
So I‘ve been wrestling with the chain guard and how I can make a smooth one without all the brake line holders on top (my brake line runs through the swingarm as per the mod on this forum, so the brake line channels are an eyesore). This particular project failed but I’m including it here to: 1. show that in real life we sometimes lose a few battles but that doesn’t mean we will lose the war 2. plastic welding Polypropylene is possible but not nearly as easy as ABS For the uninitiated, polypropylene is what our airbox, chain guard and speedo surrounds are made of. ABS is what our fairings are made of. If you wanted to modify your airbox this method will work. But it’s hard to make pretty so it didn’t work for this chain guard project. First thought was to cut off the top of my 5th gen chain guard and replace it with the top off another bike. Got my hands on a selection of chainguards to experiment with. Below from top-to-bottom are VFR Crossrunner, 5th/6th gen and Honda CBR1100XX Blackbird. Architecturally the 5th, 6th and Crossrunner parts fit the same. But the flat top off the Blackbird is too narrow and short to work as the VFR piece is a bit wider than all my other bikes (probably due to the extra strength needed for the brake hoses running along the top). Next thought was to cut the offending bits off the centre of the VFR guard and replace them with the smooth bits off the front of another VFR guard (brake hose stays are only in the middle of the VFR chainguard). So bought a second VFR chainguard and got busy chopping/welding. 5th and 6th gen units are exactly the same. Here’s the trial fit after quite a lot of fine grinding: cutting out the centre piece off chainguard A and slotting in the front part from chainguard B. Has a nice and smooth profile without any brake hose stays. Just what I wanted! Soldering iron used to “tack weld” the two pieces together, strong enough to let me work on them later. You can see gaps where the front piece from guard B wasn’t quite long/big enough. No problem - we can fill these gaps with offcuts later. Next, get yourself a nice stainless sieve and harvest the mesh for internal support. Used the bigger soldering gun to heat the mesh and melt it into the plastic, forming a single part when it cools. With hindsight, I should have used much smaller bits of mesh as they are a heat sink and I really had to crank up the power on the solder gun. This, in turn, warped the plastic somewhat. Can get really smoky so do this in a well ventilated area and don’t breathe the fumes. Helps if you keep your head below the welding point. Basically, the “welding” technique is to use strips of the parent material (cut from discarded pieces of chainguard), and melt them into the cracks with a soldering iron. A bit like welding in that you have to achieve decent penetration (not that kind of penetration!) and ensure both the filler material and the piece itself melt into each other properly. This is hard to do with Polypropylene, especially if all you have is a soldering iron pressed on the filler material. It’s also why the project failed (see further below). Once the main bits are “welded” together, time to cut out some pieces and fill in any gaps. The pieces will be melted from the back onto the stainless mesh, and then all cracks welded with filler. And we end up with something like this. Looking good and ready to finish off by grinding/filing/sanding down the “welds” to create a smooth surface. Unfortunately, this is where it all falls down. The polypropylene didn’t melt uniformly into itself and there were granular bits in the welds. Sanding the welds down exposed these granular bits which came off in chunks, leaving ugly scars. Also, I had no idea how to grind/sand off the welds along the horizontal fold and keep them dead straight. Impossible to do by hand so I’ve abandoned the project on these grounds. Having said that, if you ever needed to repair a polypropylene part or modify your airbox, this technique works a treat. Just not really good for pretty things in this case (not by hand anyway). So I’m open to ideas for a smooth top chainguard if you have them. Otherwise I may have to bend one out of aluminium or something.
-
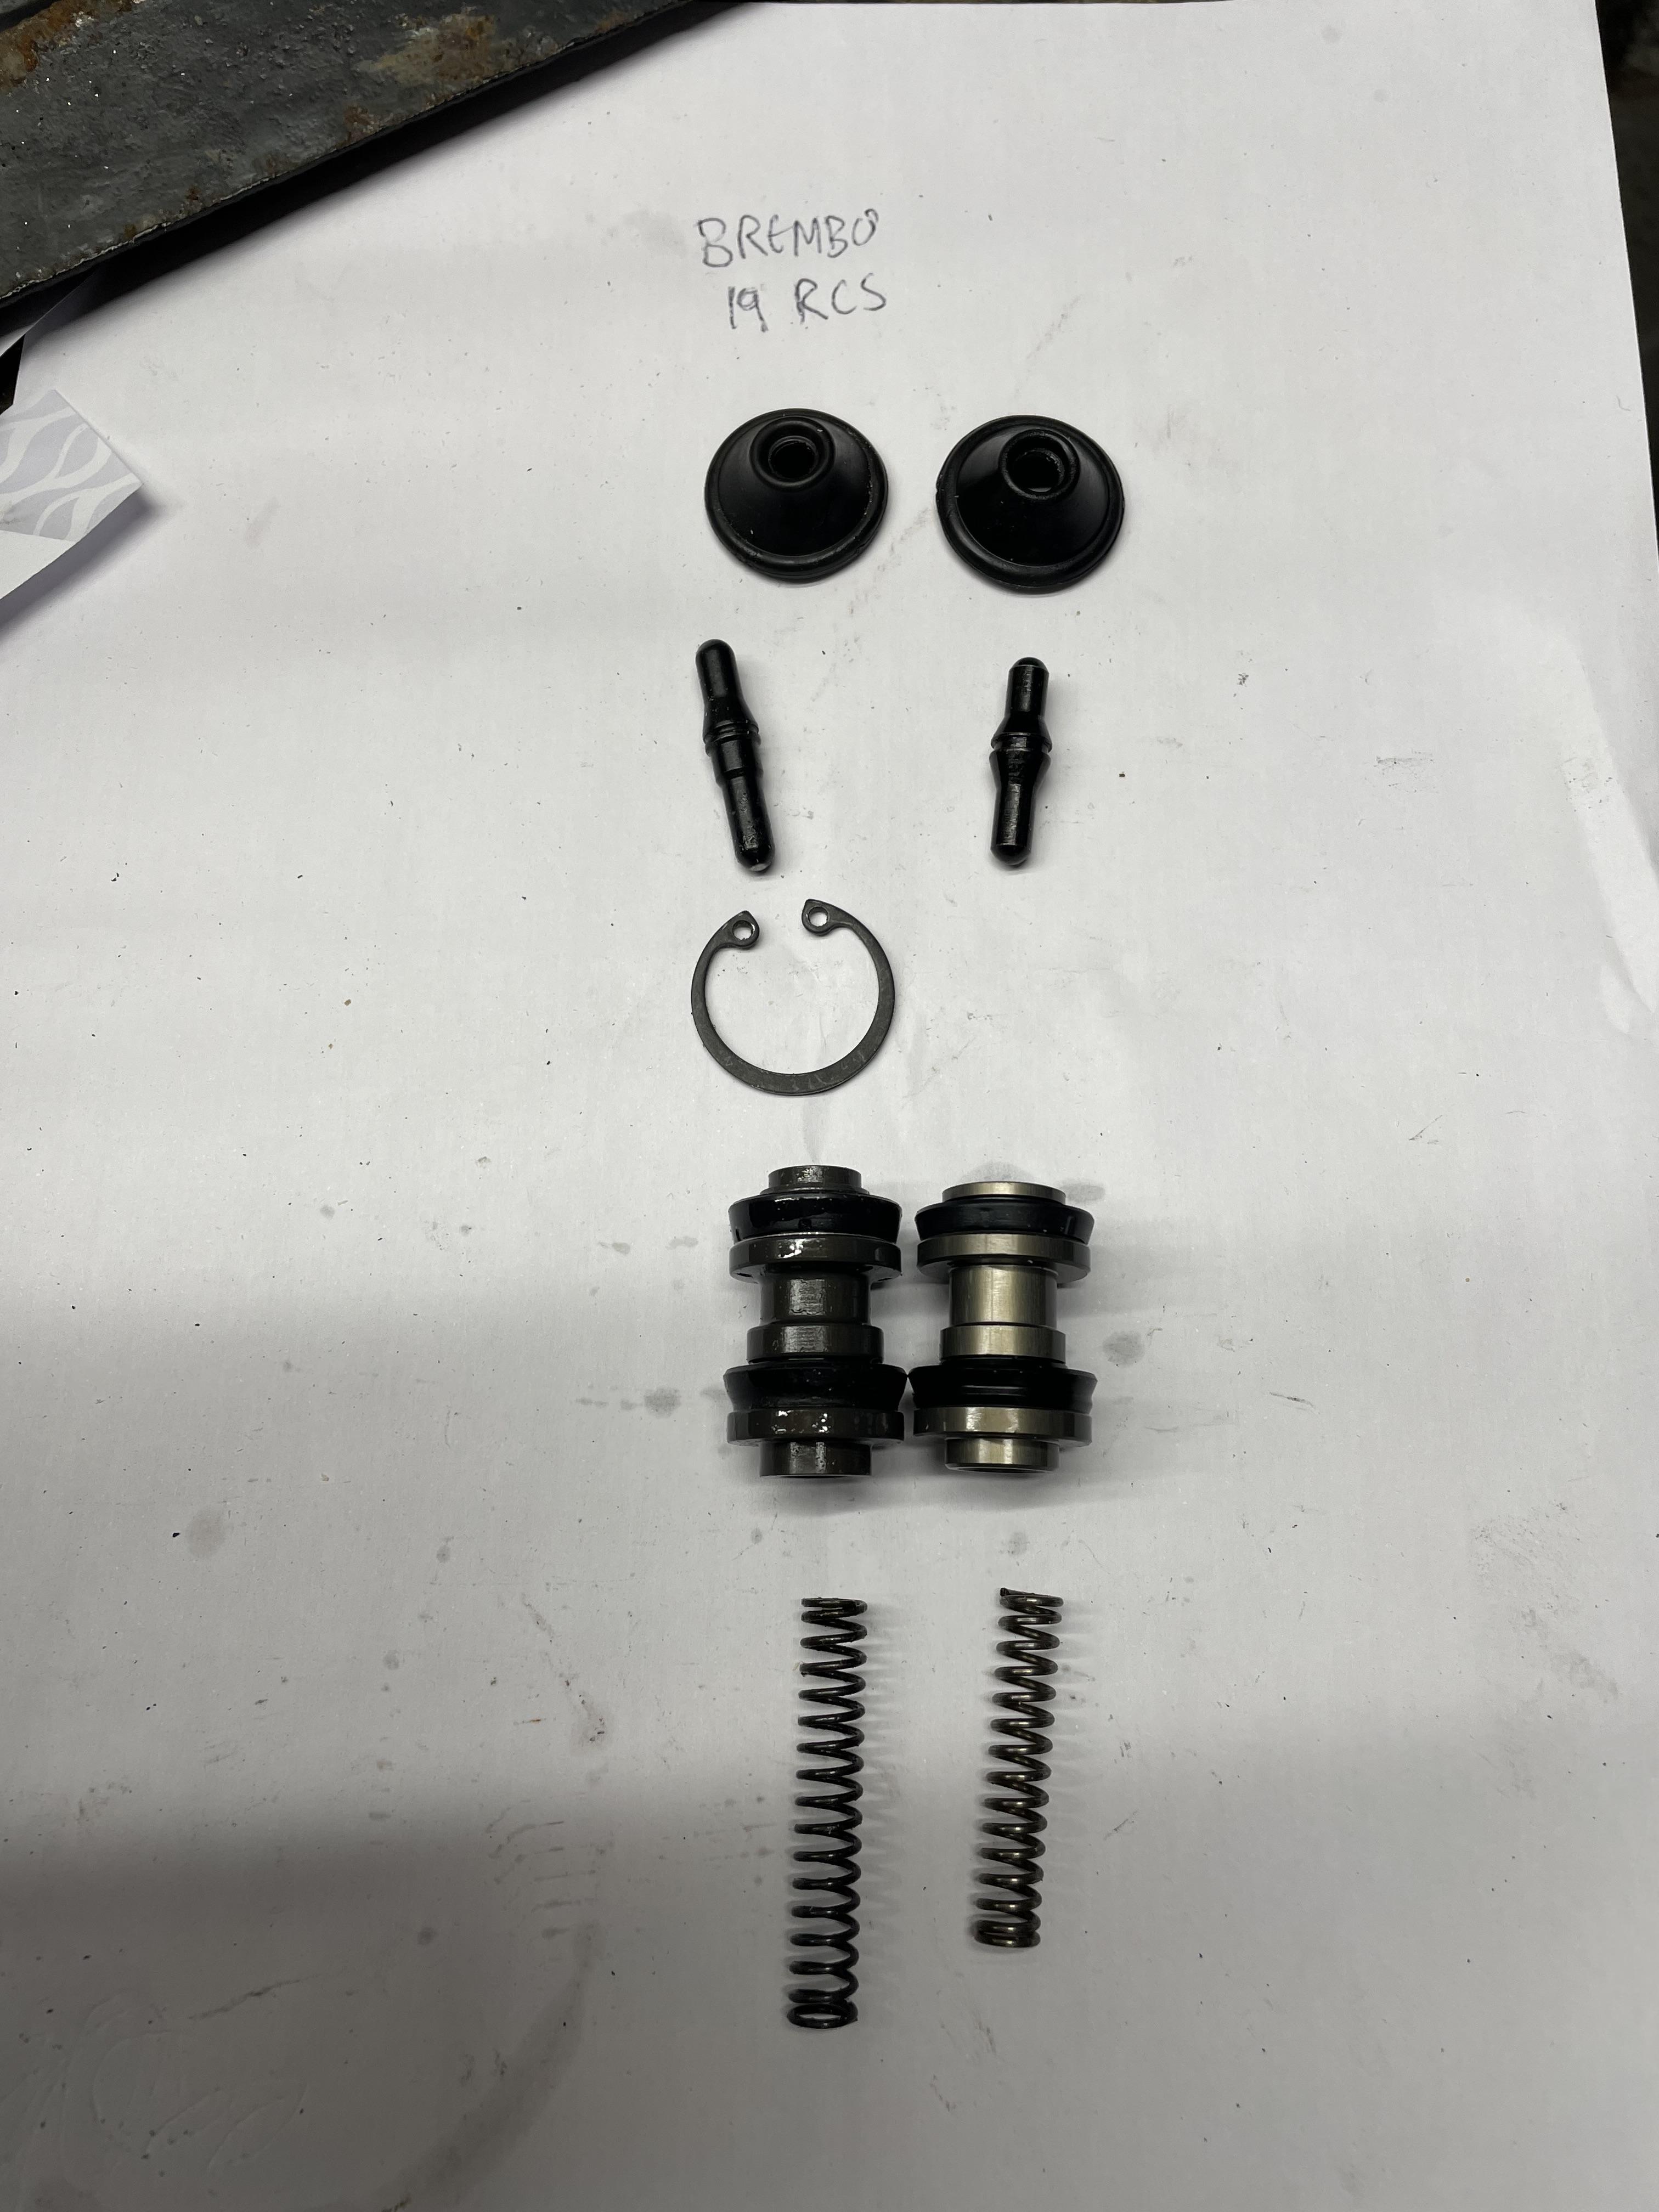
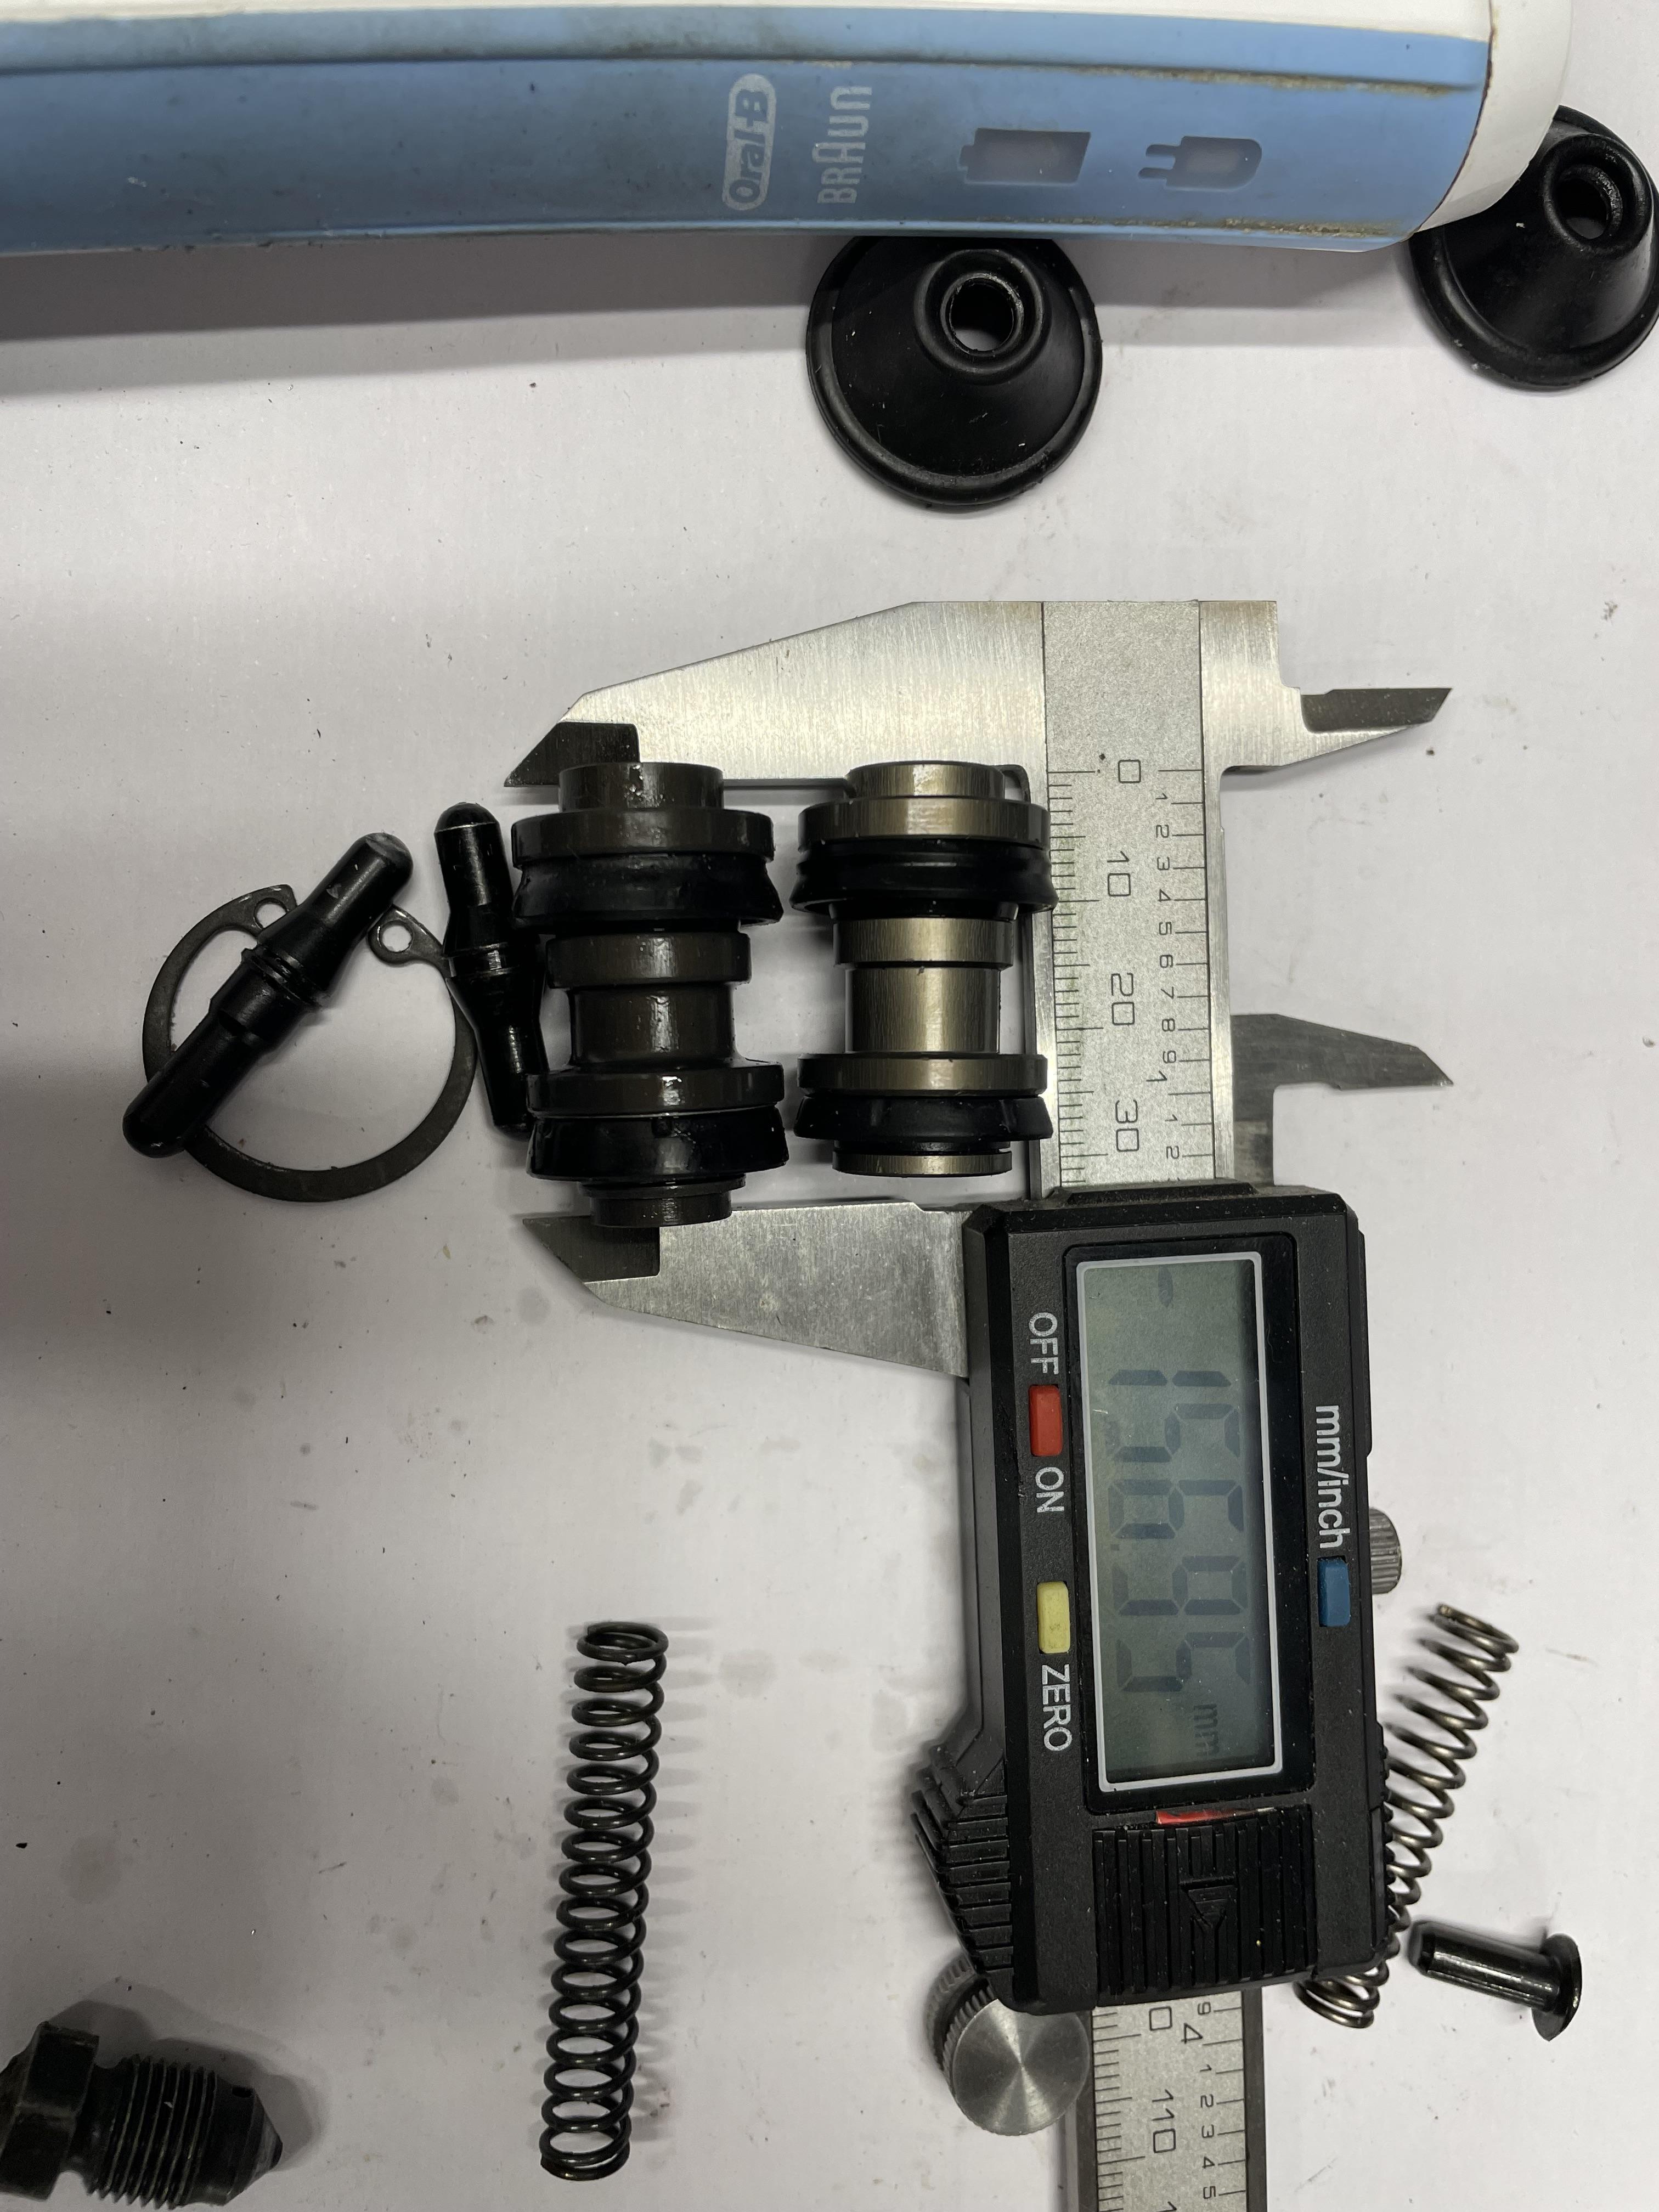
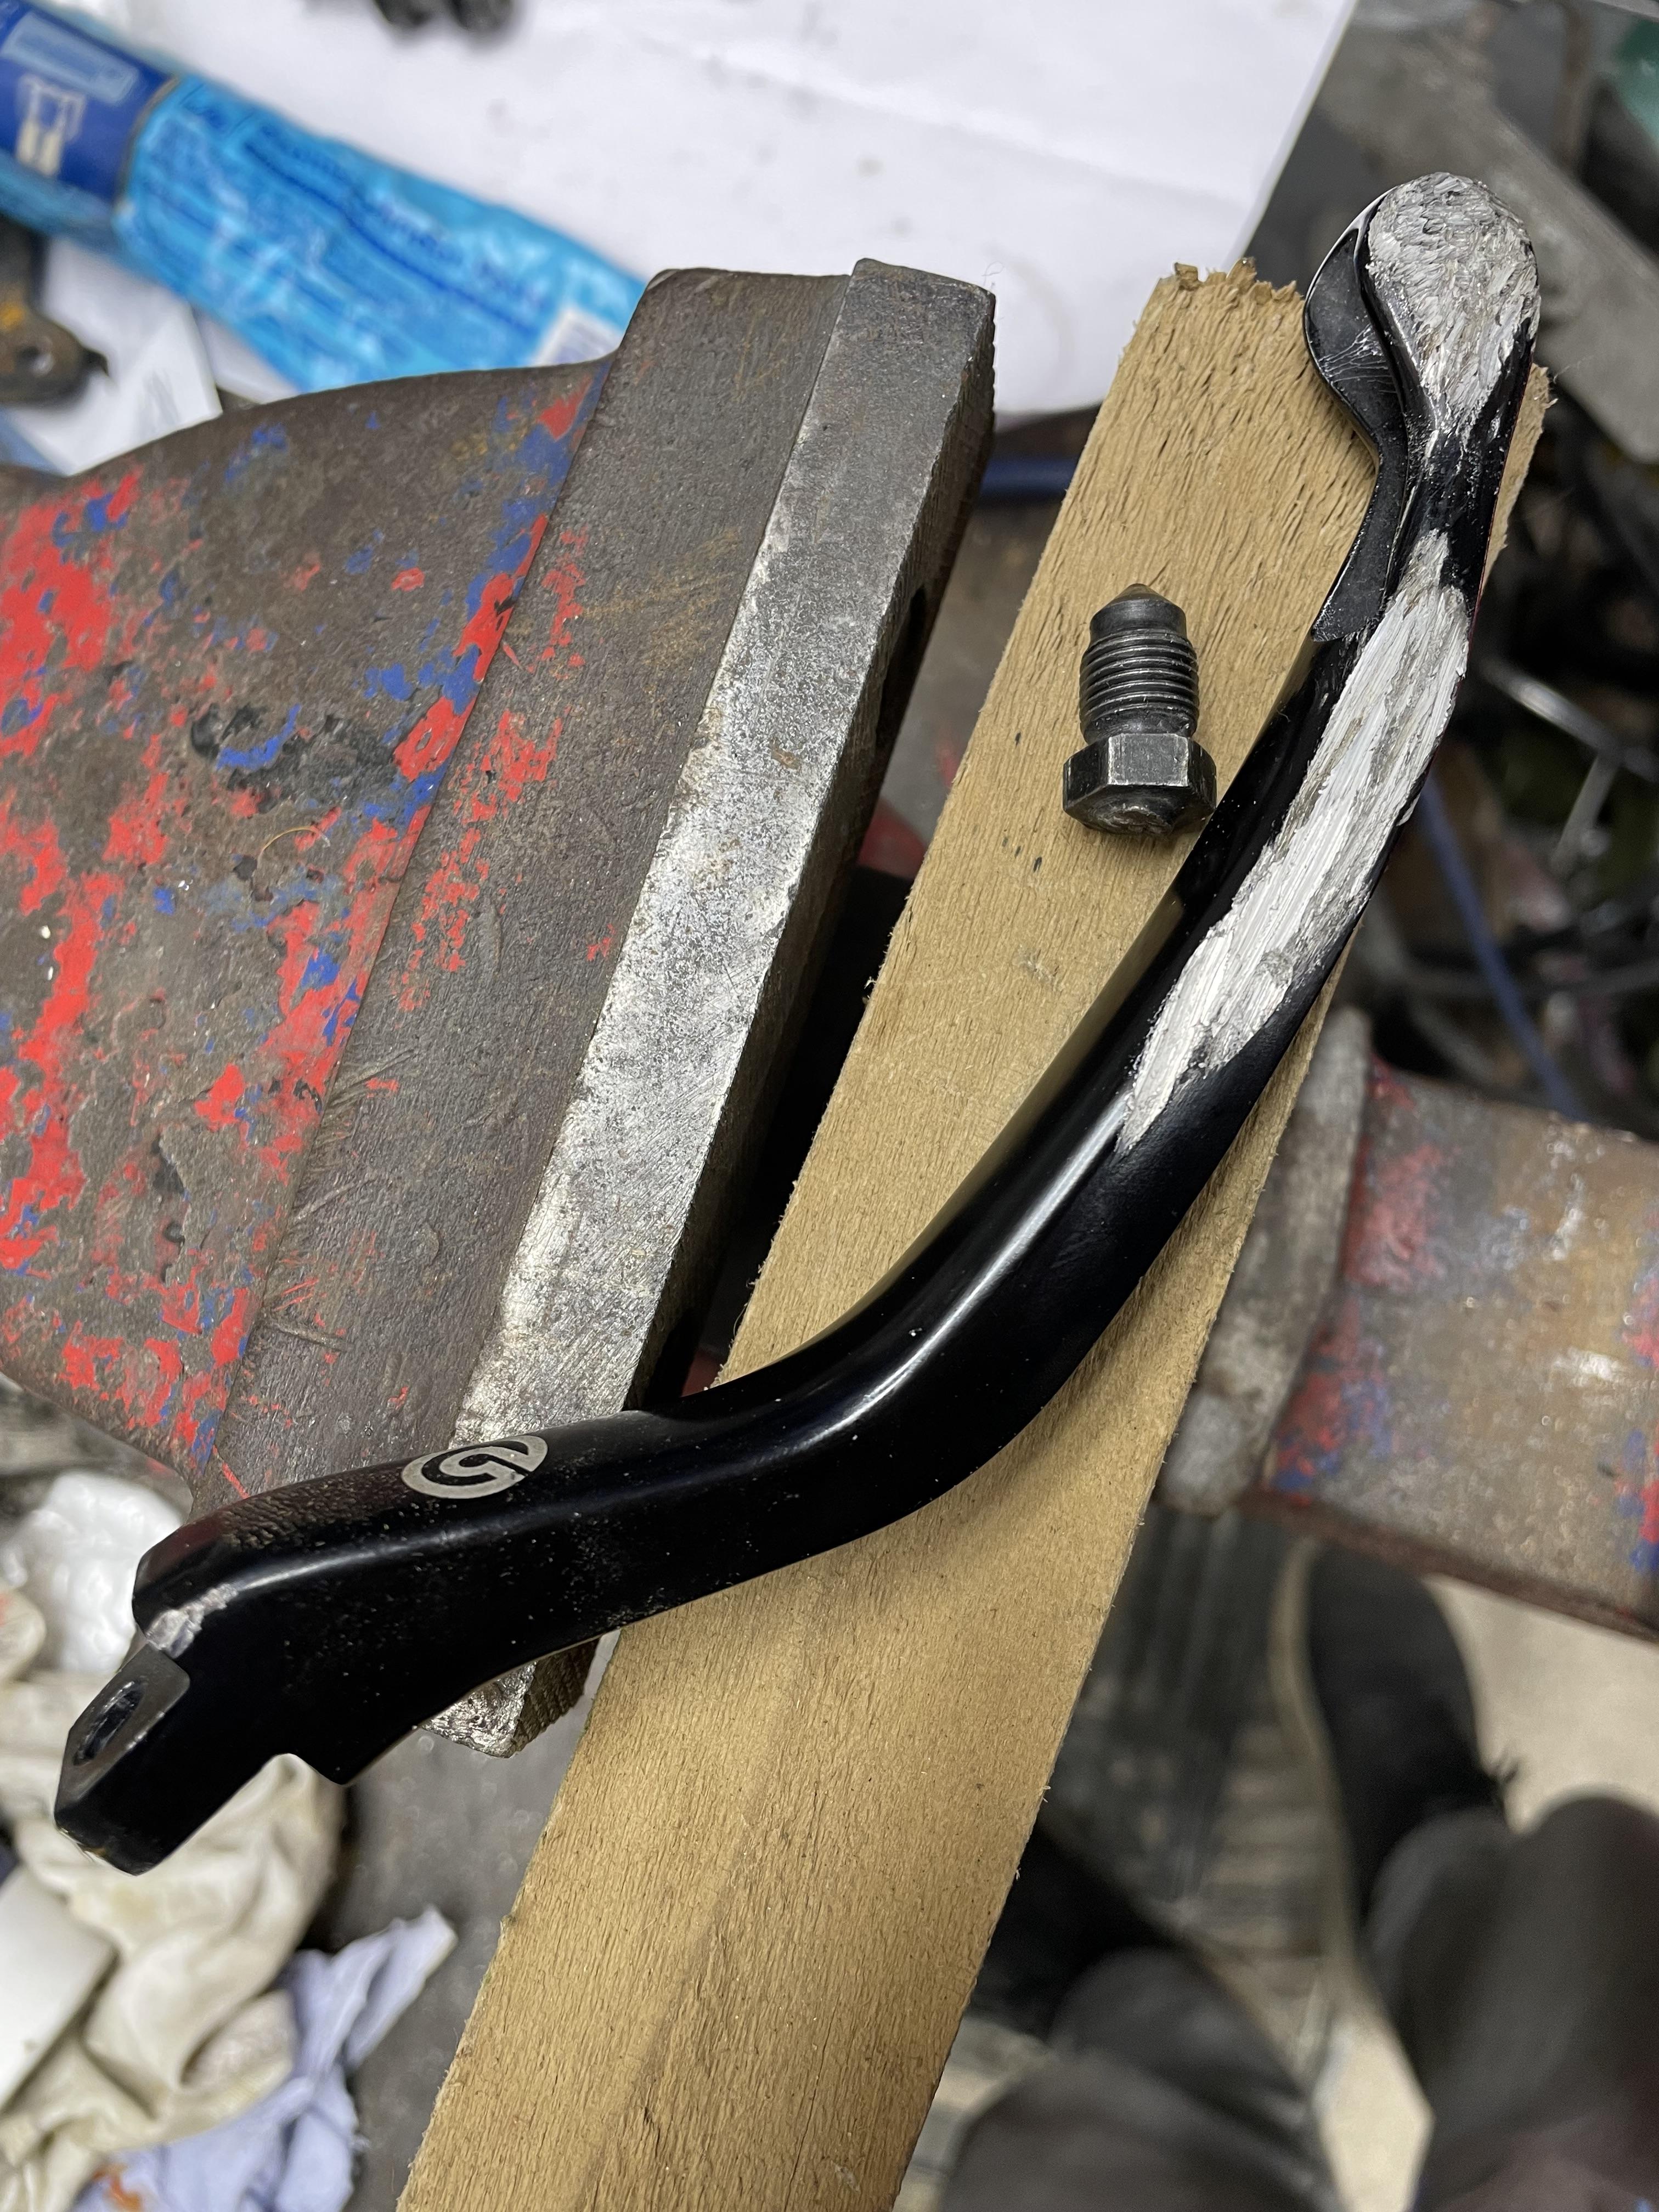
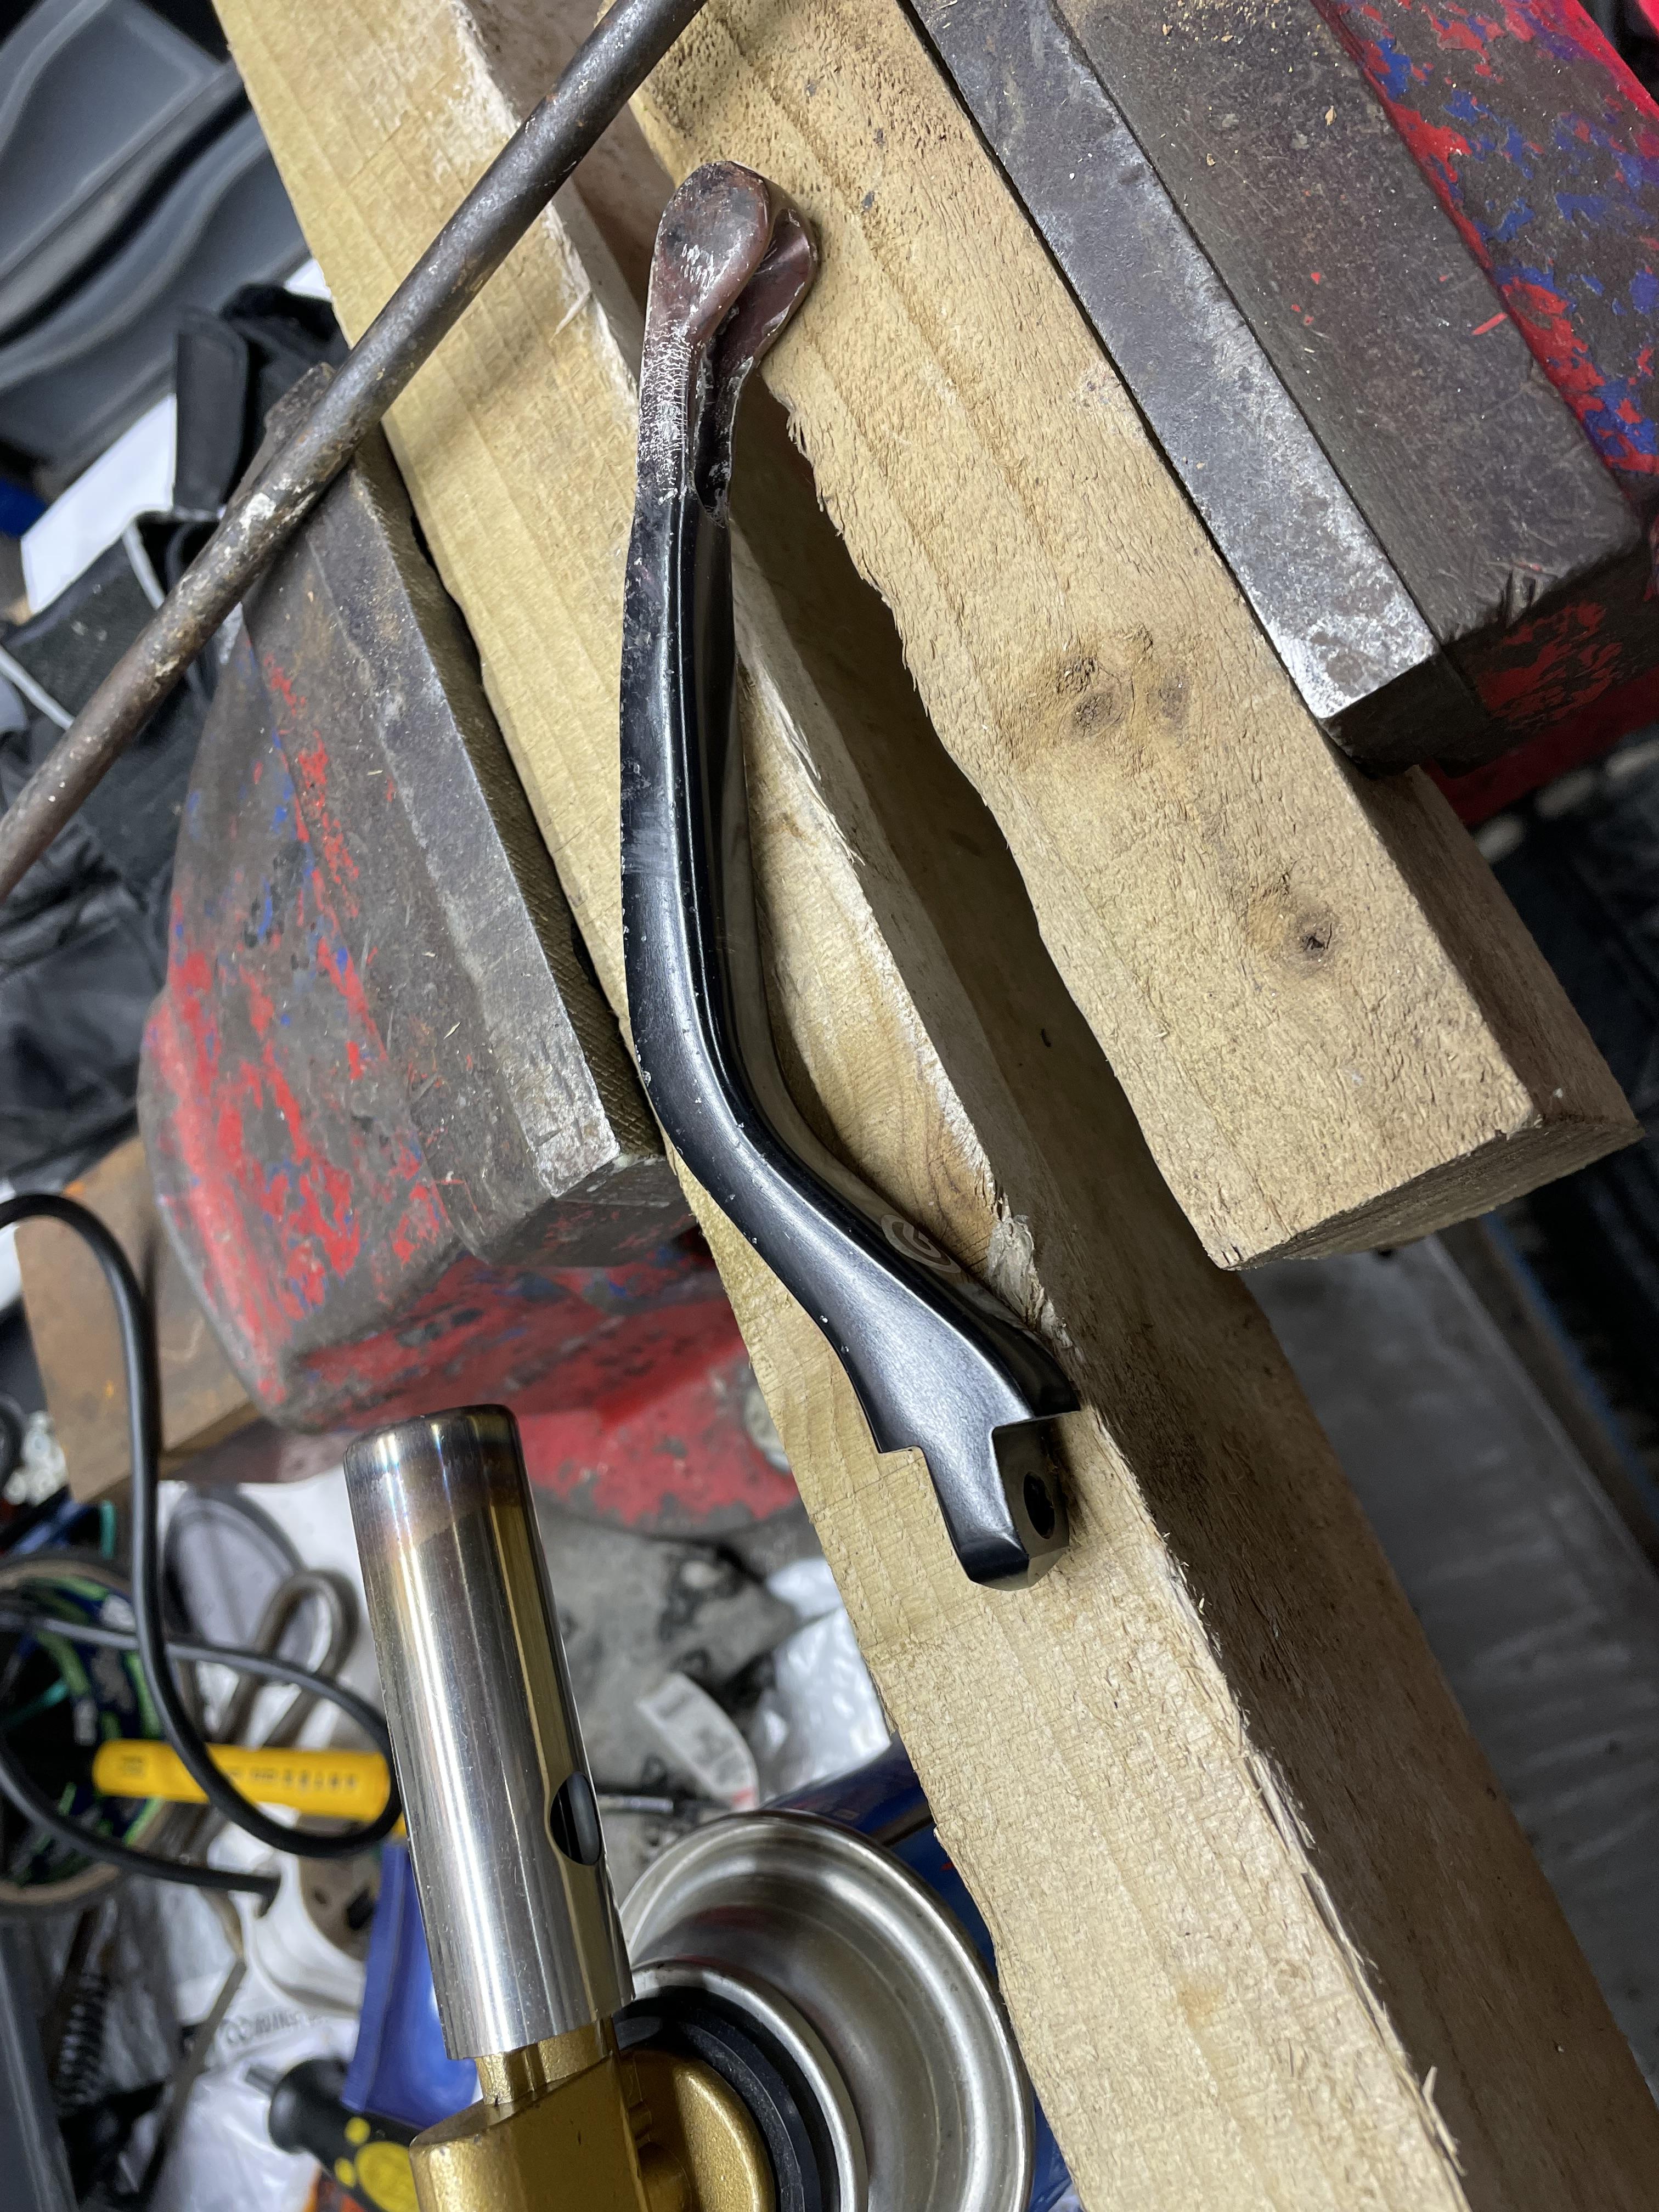
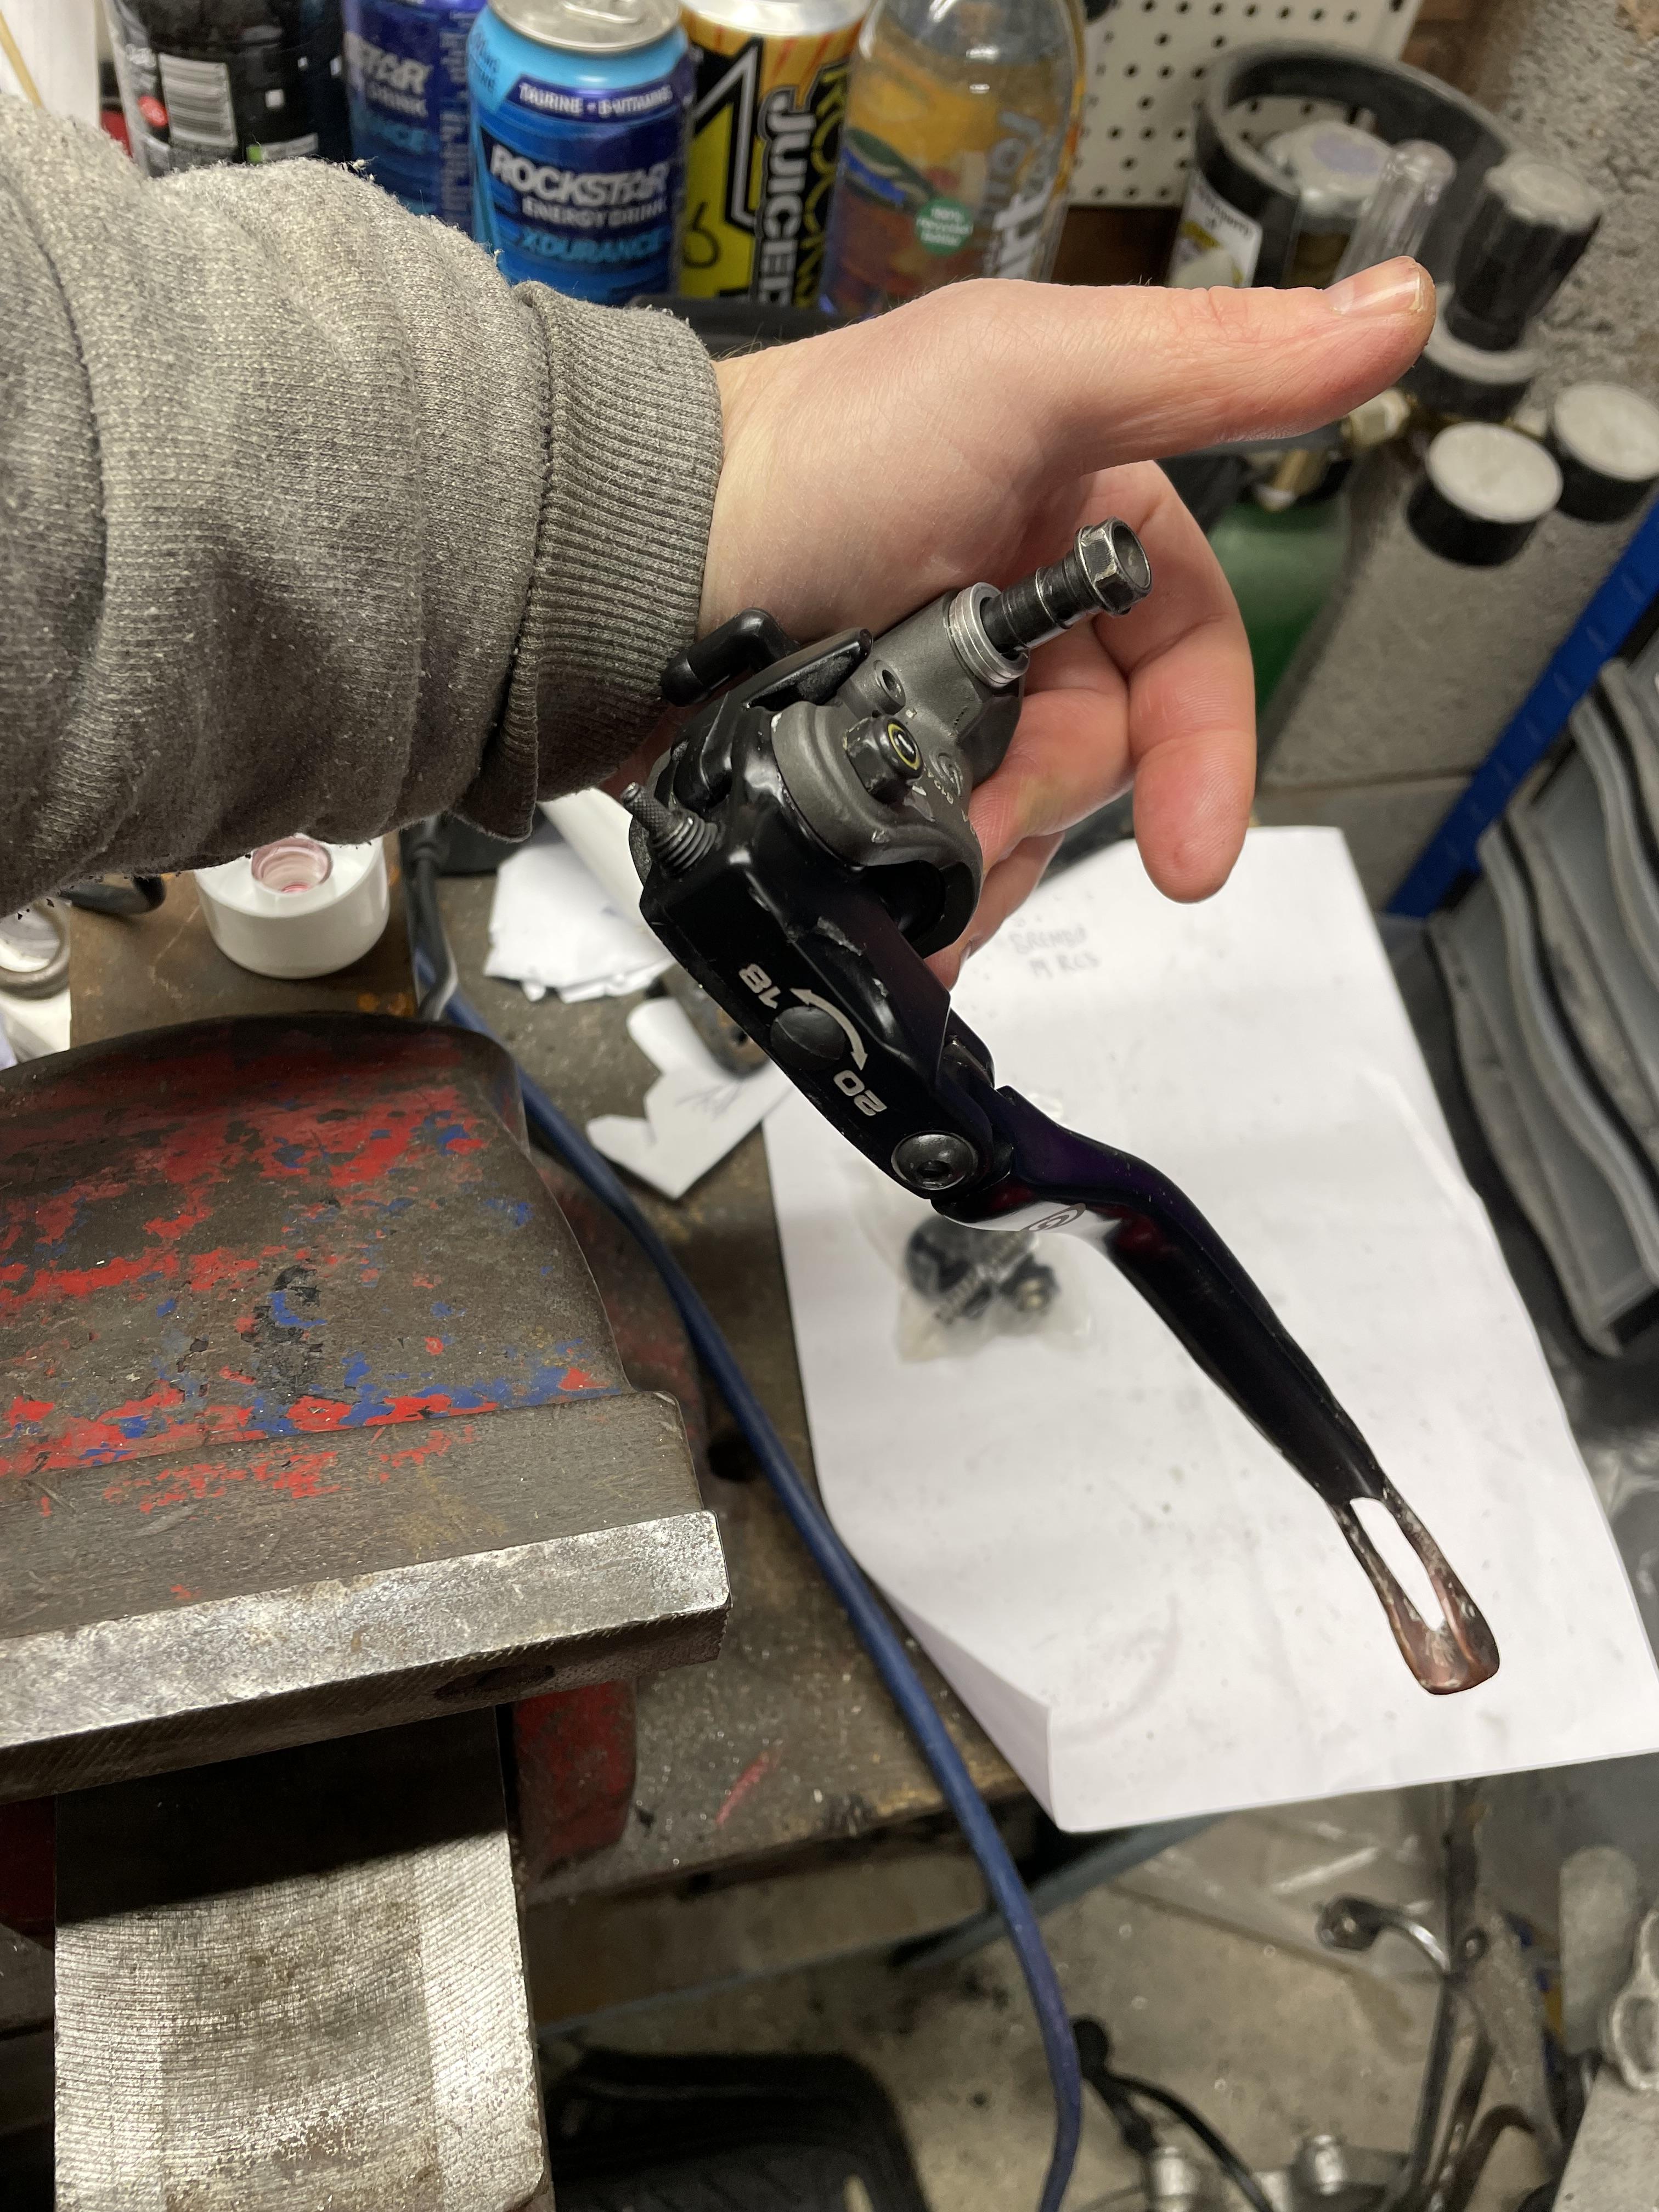
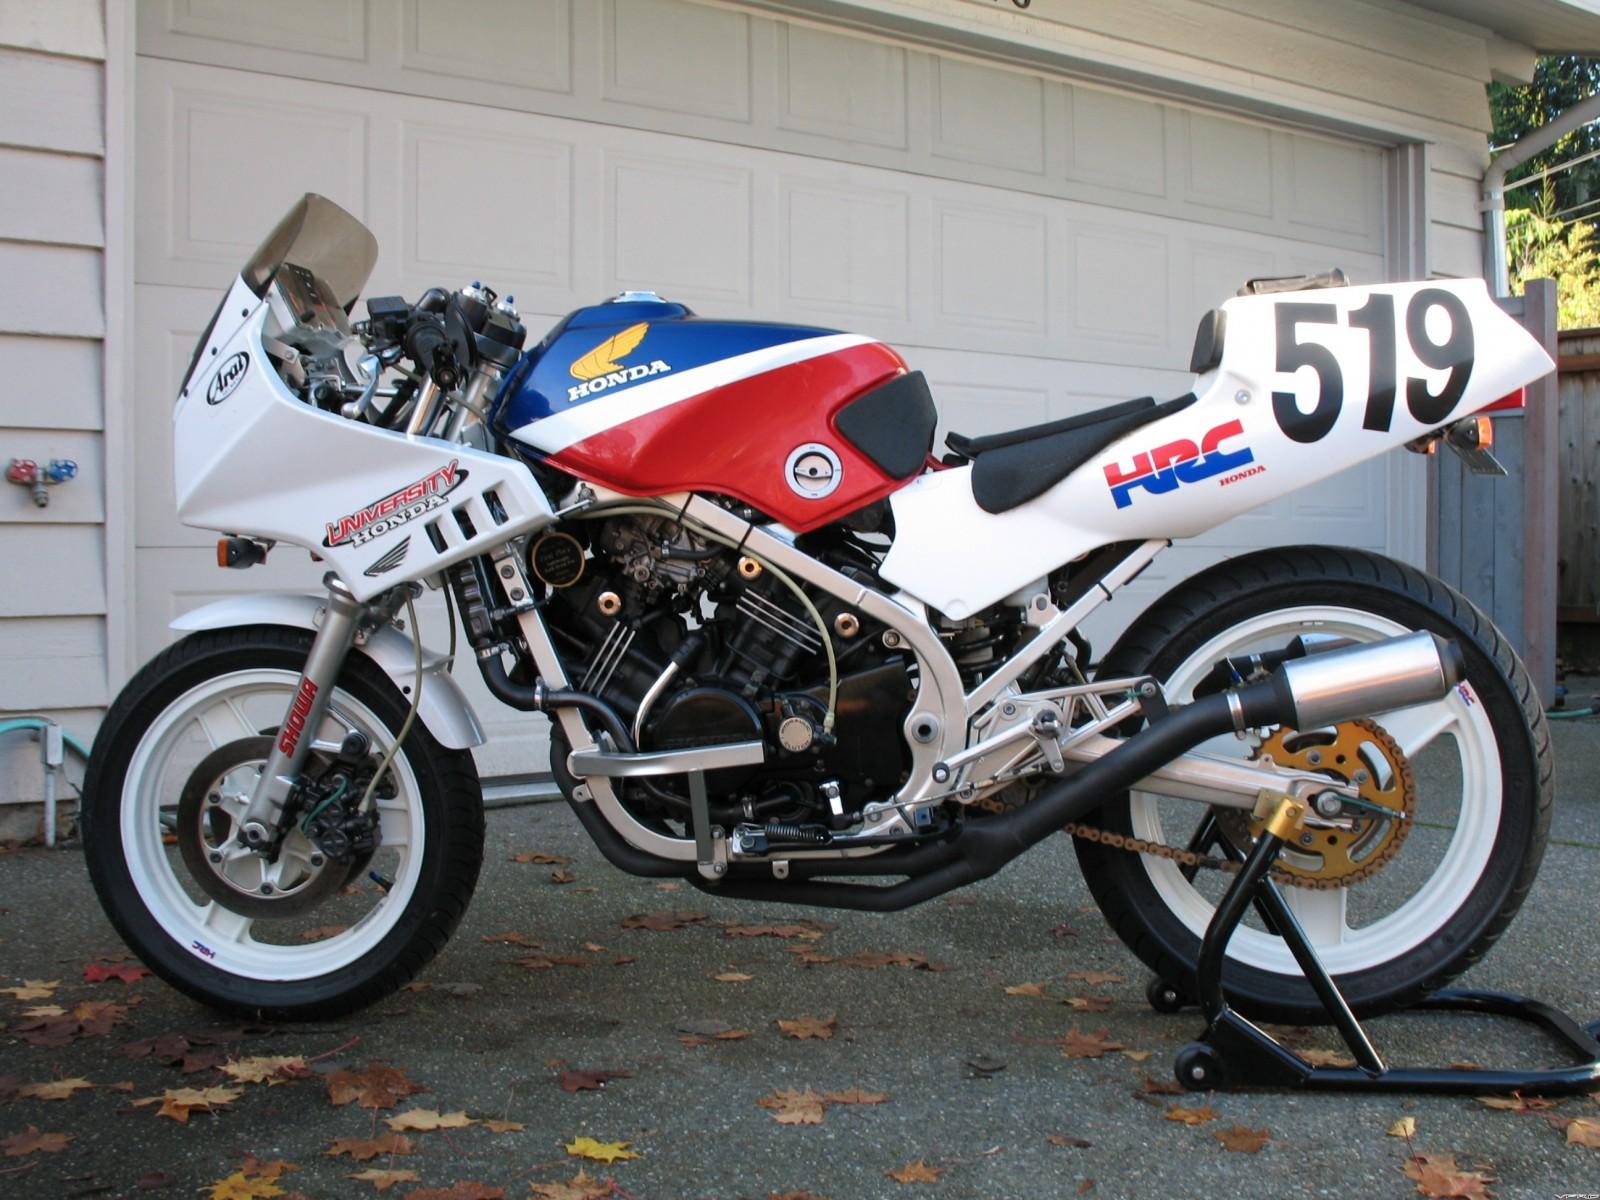
Captain, is that #519 bike yours? It IS fucking cool! Thanks for your thoughts, gentlemen. Looks like I’ll be following your advice. So a 1/4 fairing up front and the RC24 tail out back. Belly pan and some bodged radiator vents TBA. Here we go… In the meanwhile, got my hands on a badly crashed Brembo 19RCS brake master cylinder to match the Nissin radial calipers on the front. Big risk as these aren’t supposed to be rebuildable…but they can…kind of. Got a Brembo 19mm repair kit for another model and harvested the seals. The new piston, spring, spacer and plinth were all wrong. Original piston and spring seemed reusable (I “stretched” the spring a bit before reinstall). I’m not sure pistons really wear out as the seals do all the work. Please correct me if wrong. Reassembled with silicone brake grease and tungsten disulphide in the pivot pin: moves nicely. Brake lever was badly damaged and I was going to replace it but then saw the prices: OUCH! Time to try a repair with blowtorch, an old pair of motorcycle gloves and various other tools. Before blowtorch: After blowtorch: Bleed nipple also ground down from crash. Snapped but luckily was able to remove it. New Ti one ordered. Much swearing later and it’s passable. Needs sanding and paint to finish but will work fine for now. Finished product (just needs sanding and paint on lever): Just to add this took about 1.5 hours of messing about. Most of that was taken up looking for little parts I’d dropped amongst the detritus on the floor. Even the little ball detent for the 18-20 adjuster (try putting that back together without swearing!). Need to clean up the floor!
-
Thanks for sticking with me, Captain. It’s agony trying to choose and I keep going back-and-forth on all the options. Can’t make my mind up and this must be driving you crazy! Now I have your attention, and seeing you like the #519 VF500, how about this VF400 fairing (very similar to VF500 UK model), and with a VFR 1st gen tail (tail like the #1 2nd gen above but chopped down 3 inches - try to imagine the seat)? With side fairings that will need “massaging” and the vent replaced… And again with just the 1/4 fairing (I’d have to blend this into the tank somehow)… I quickly threw an RC30 fairing from the loft on but radiator will need trimming to make it fit. Just for shits and giggles. But hard to picture it in place as the headlight bracket pushes the upper too high and the radiator pushes the lower too low. Side vent section would need massaging to match the frame angle better but I think there’s room for the high bars at full lock Will try to post a better view of the RC30 in the next couple days when I get more time. Thanks Gaz. Yes, Motogadget Unit Blue does just that. One single wire from the battery runs headlights, indicators, ignition, dash and accessories (horn, phone charger etc). No flasher or other relays required either - it’s all in the unit, which is smaller than a box of 20 cigarettes, has a built in alarm and headlight/tail light modulator options. Only the ECU and ignition wiring remains stock. Unfortunately they can’t confirm it works on the 5th gen as it has fuel injection. It’s designed for carbed bikes. Still working on the “fairy dust”. Trying to stay ahead of spiralling petrol prices…
-
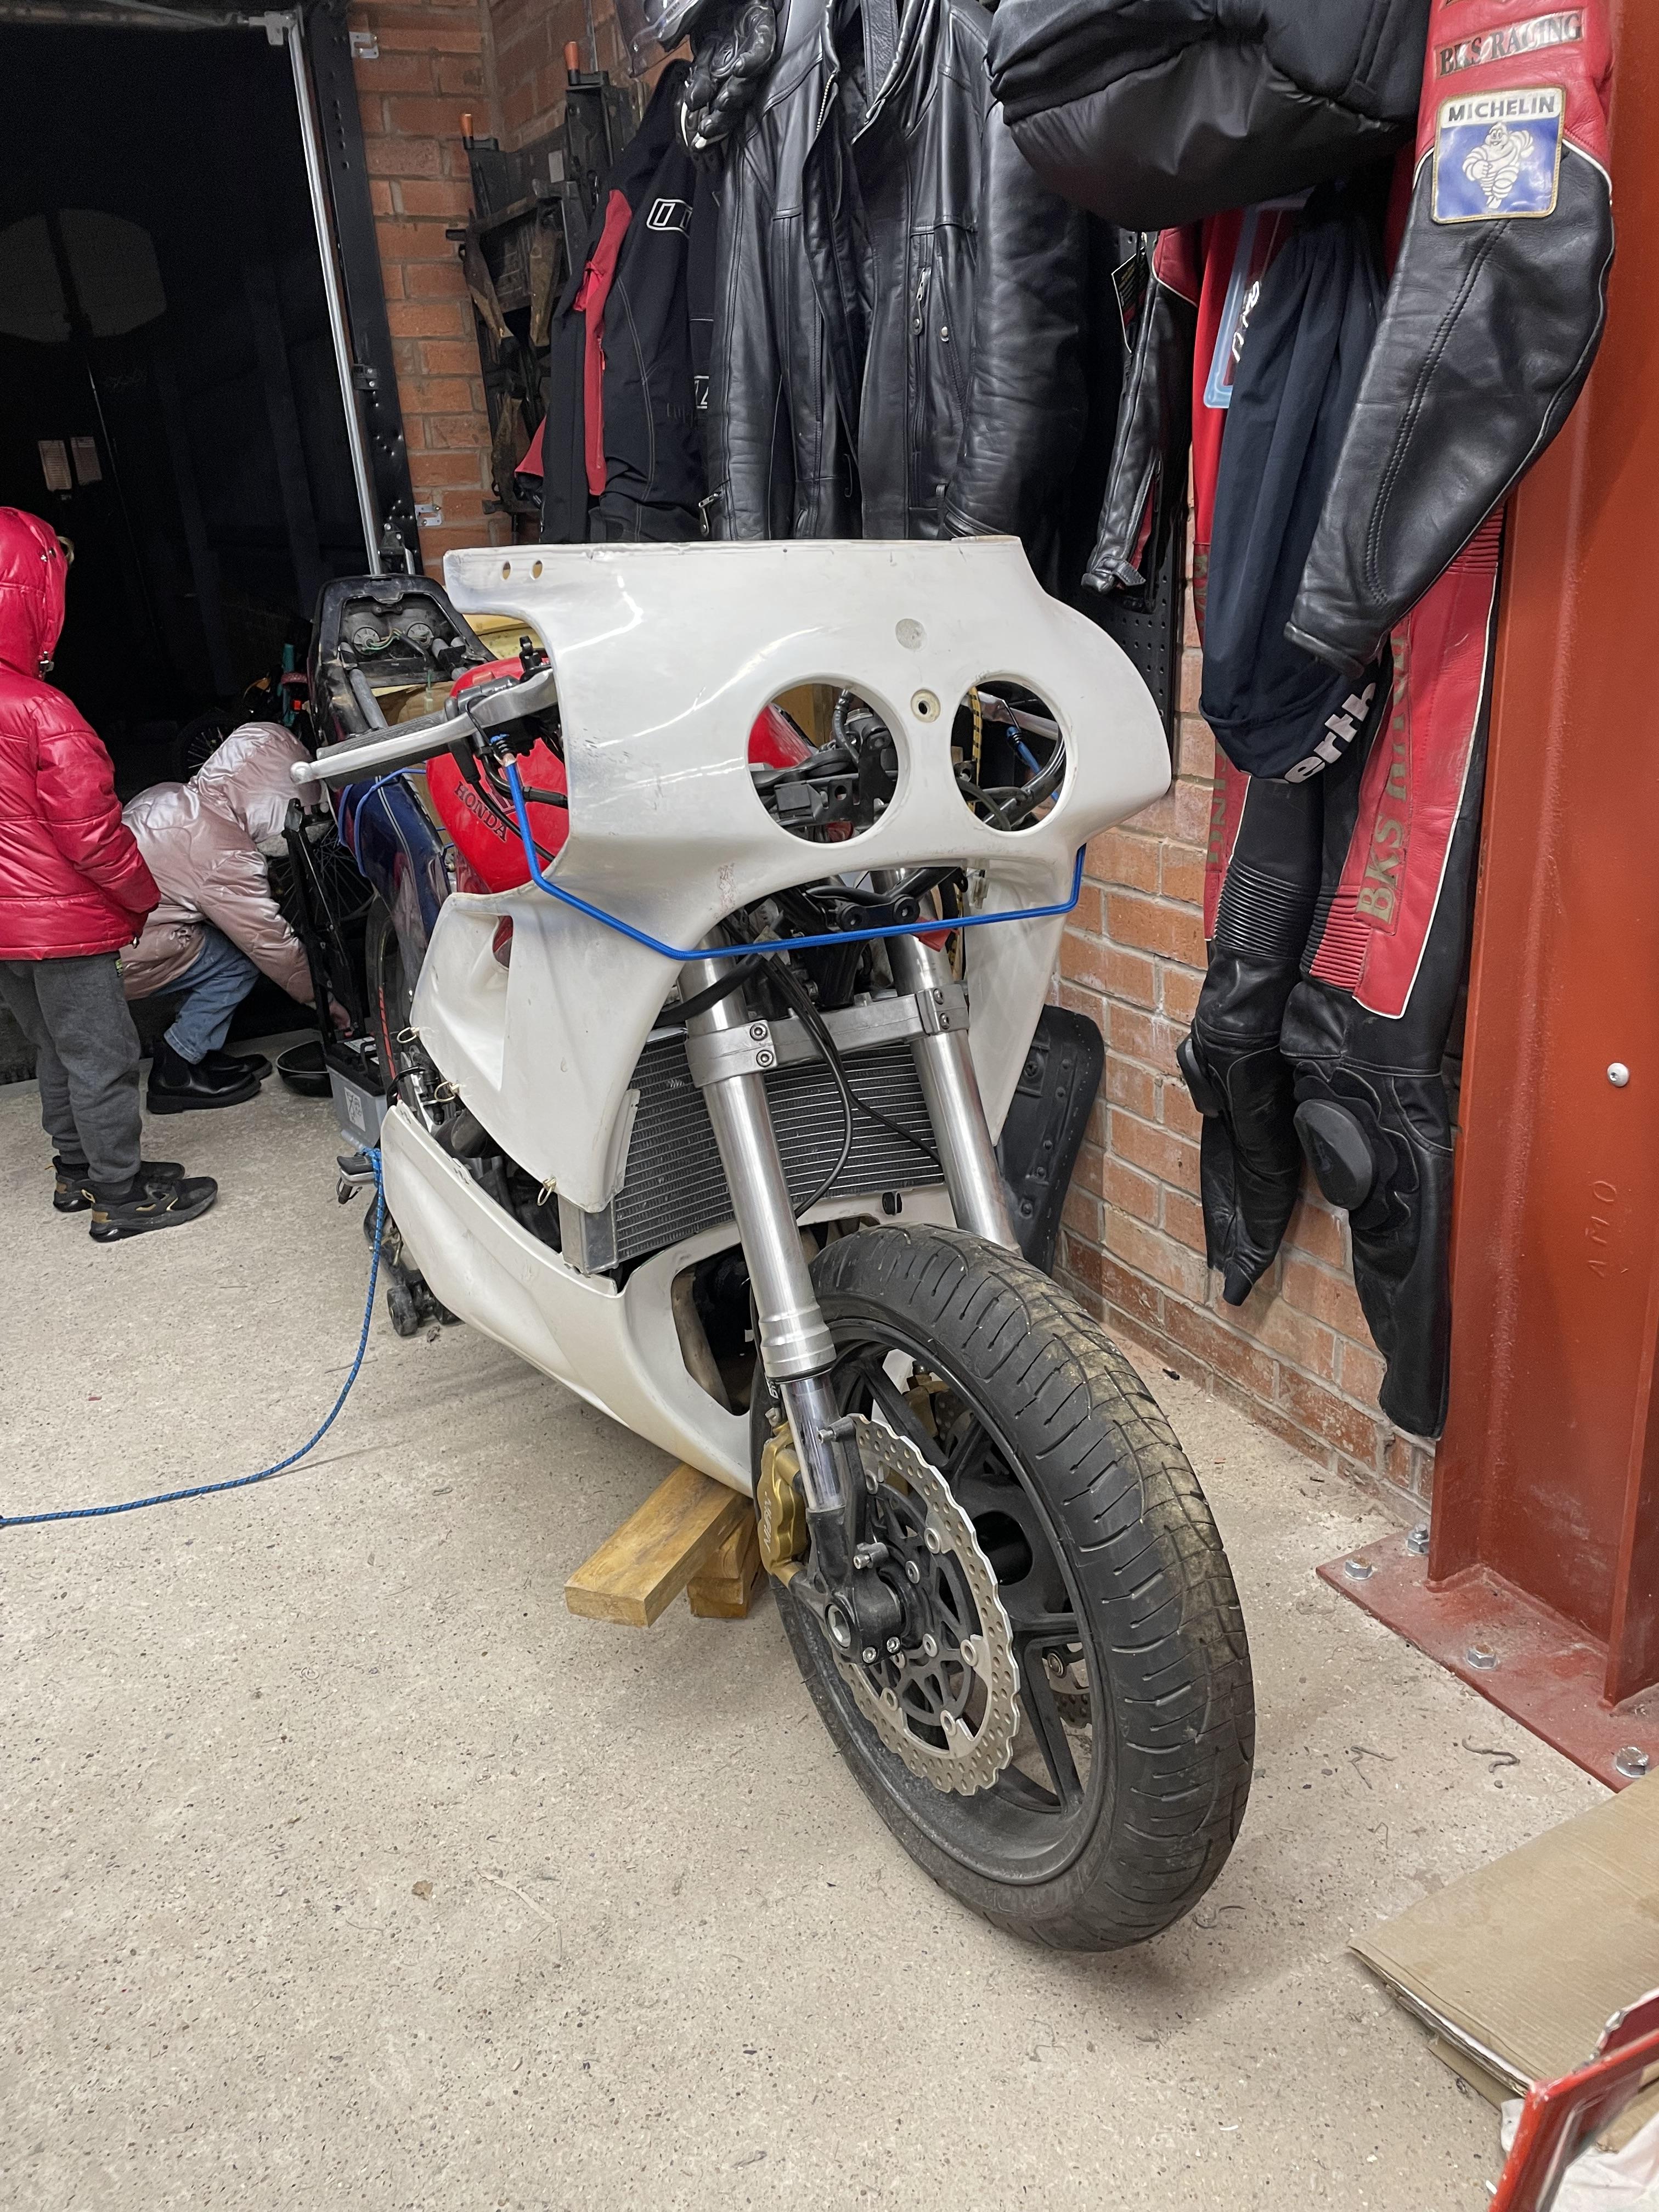
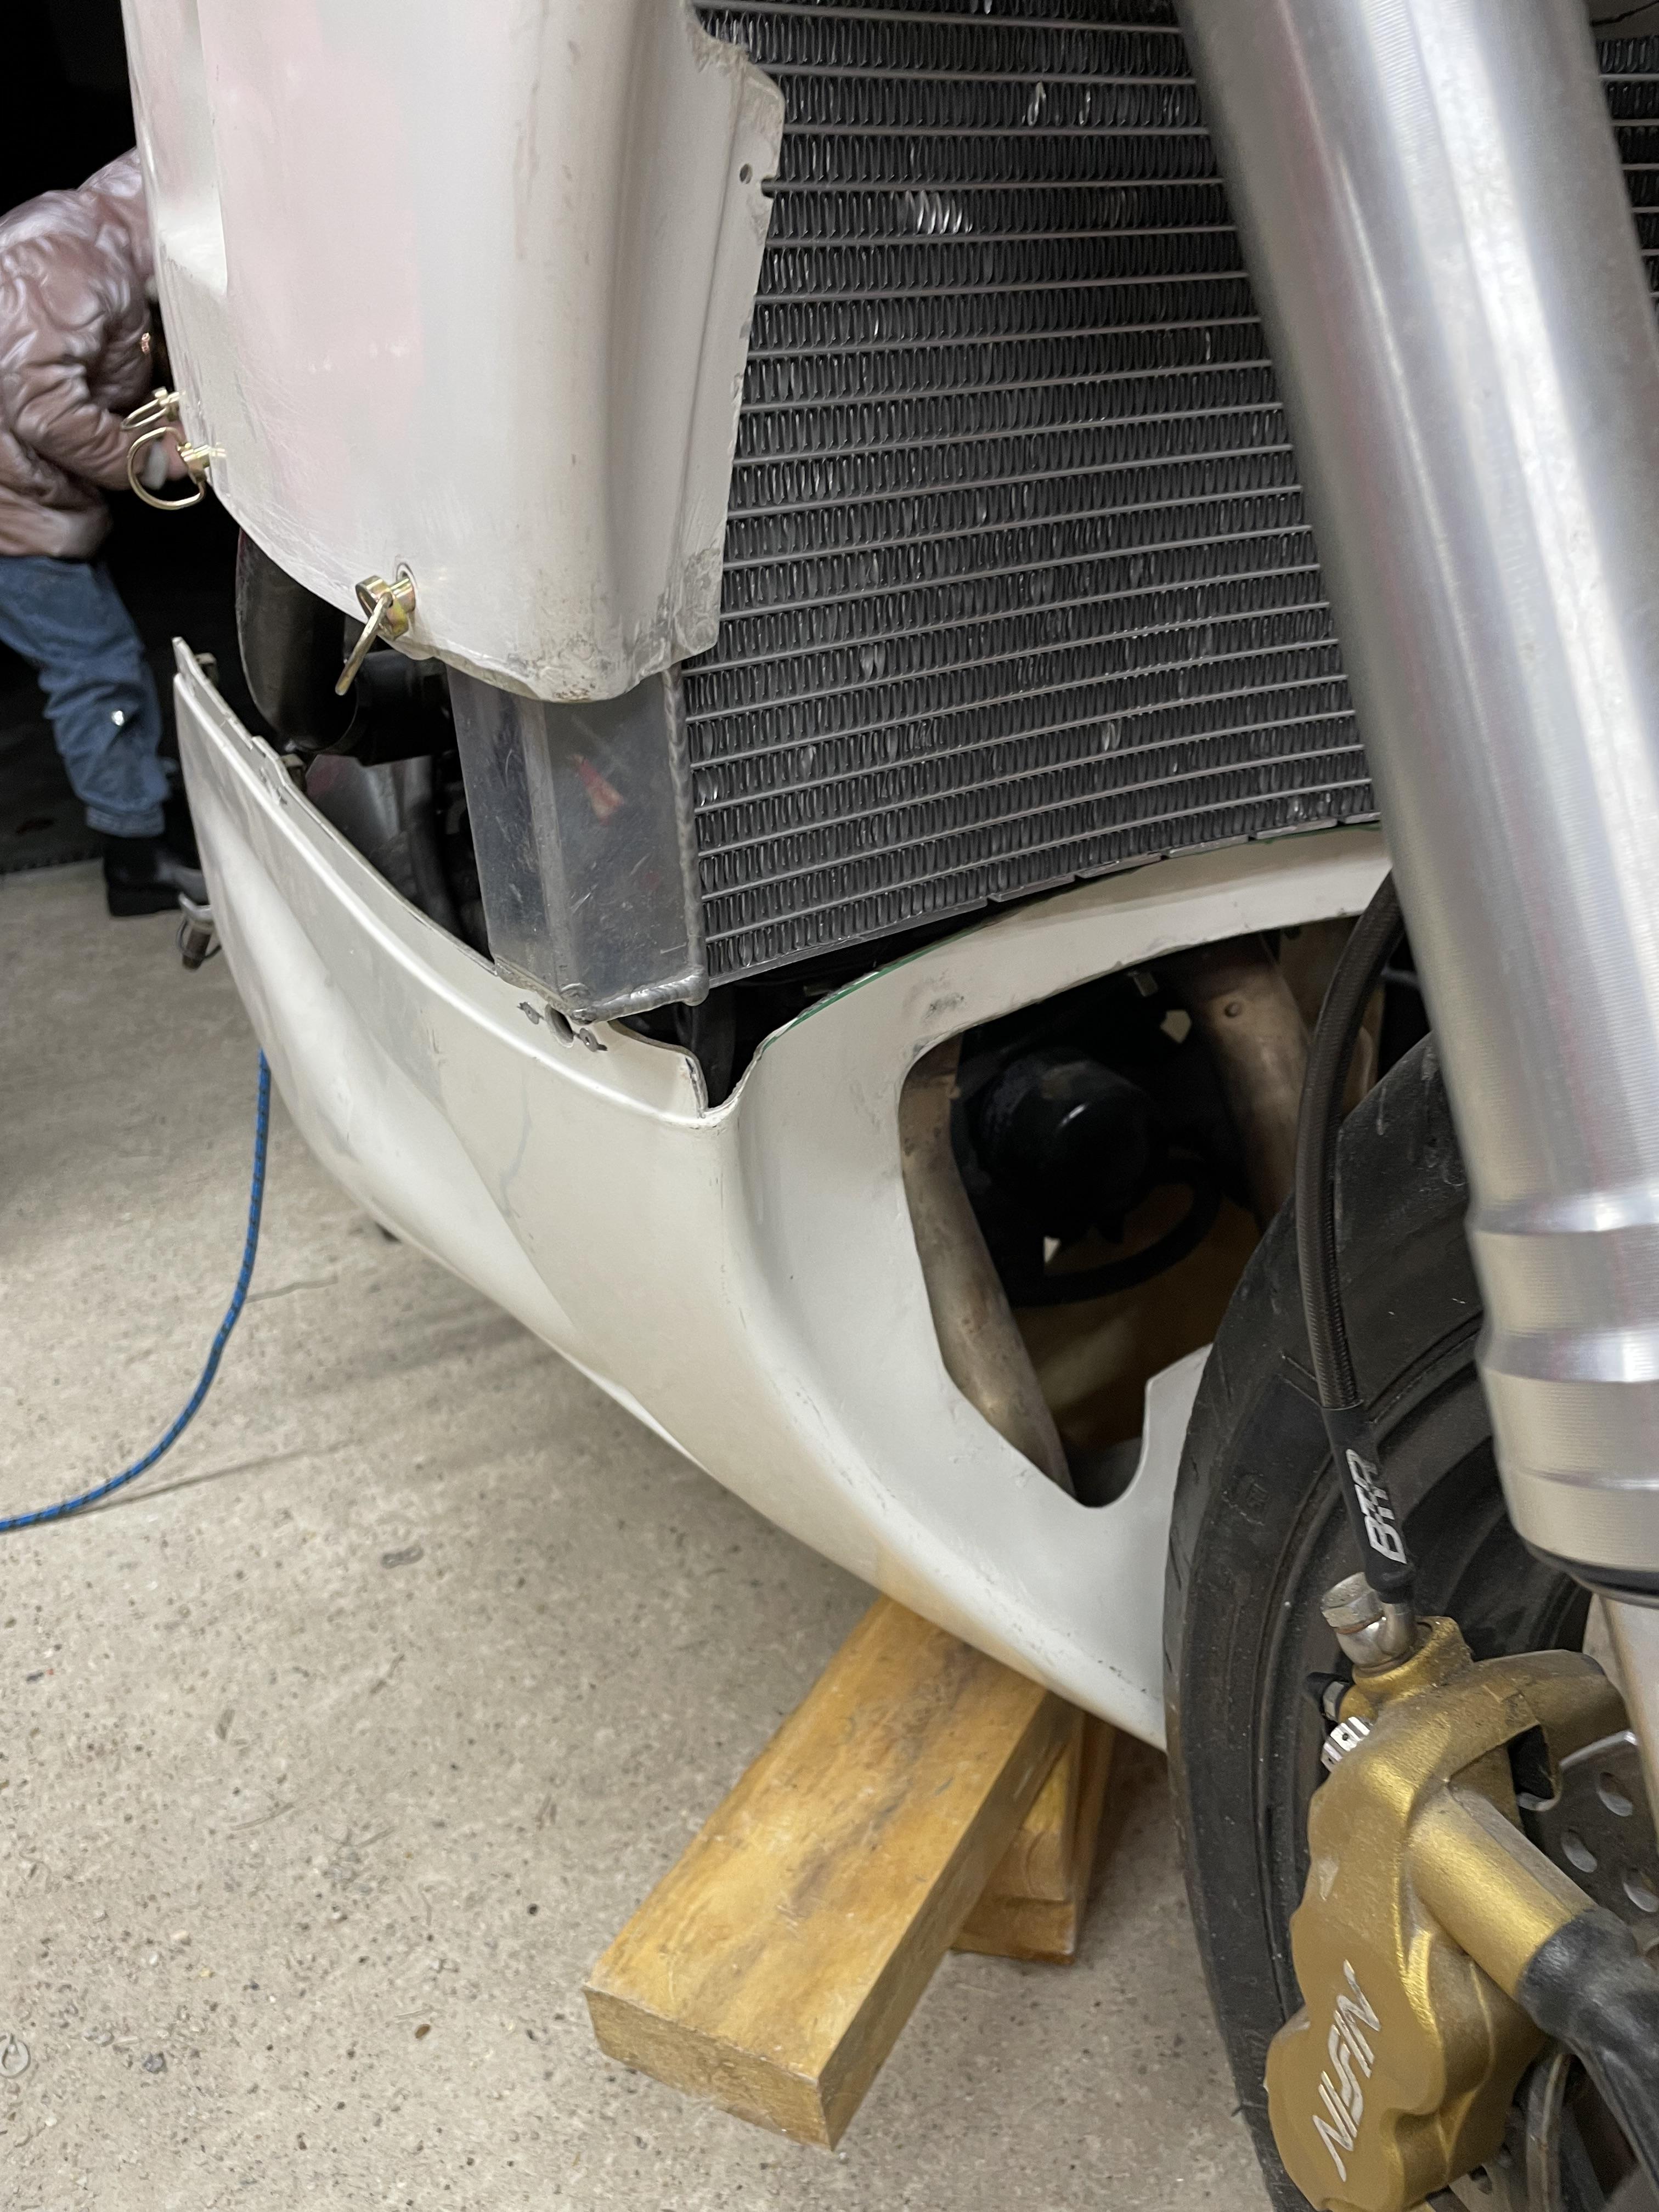
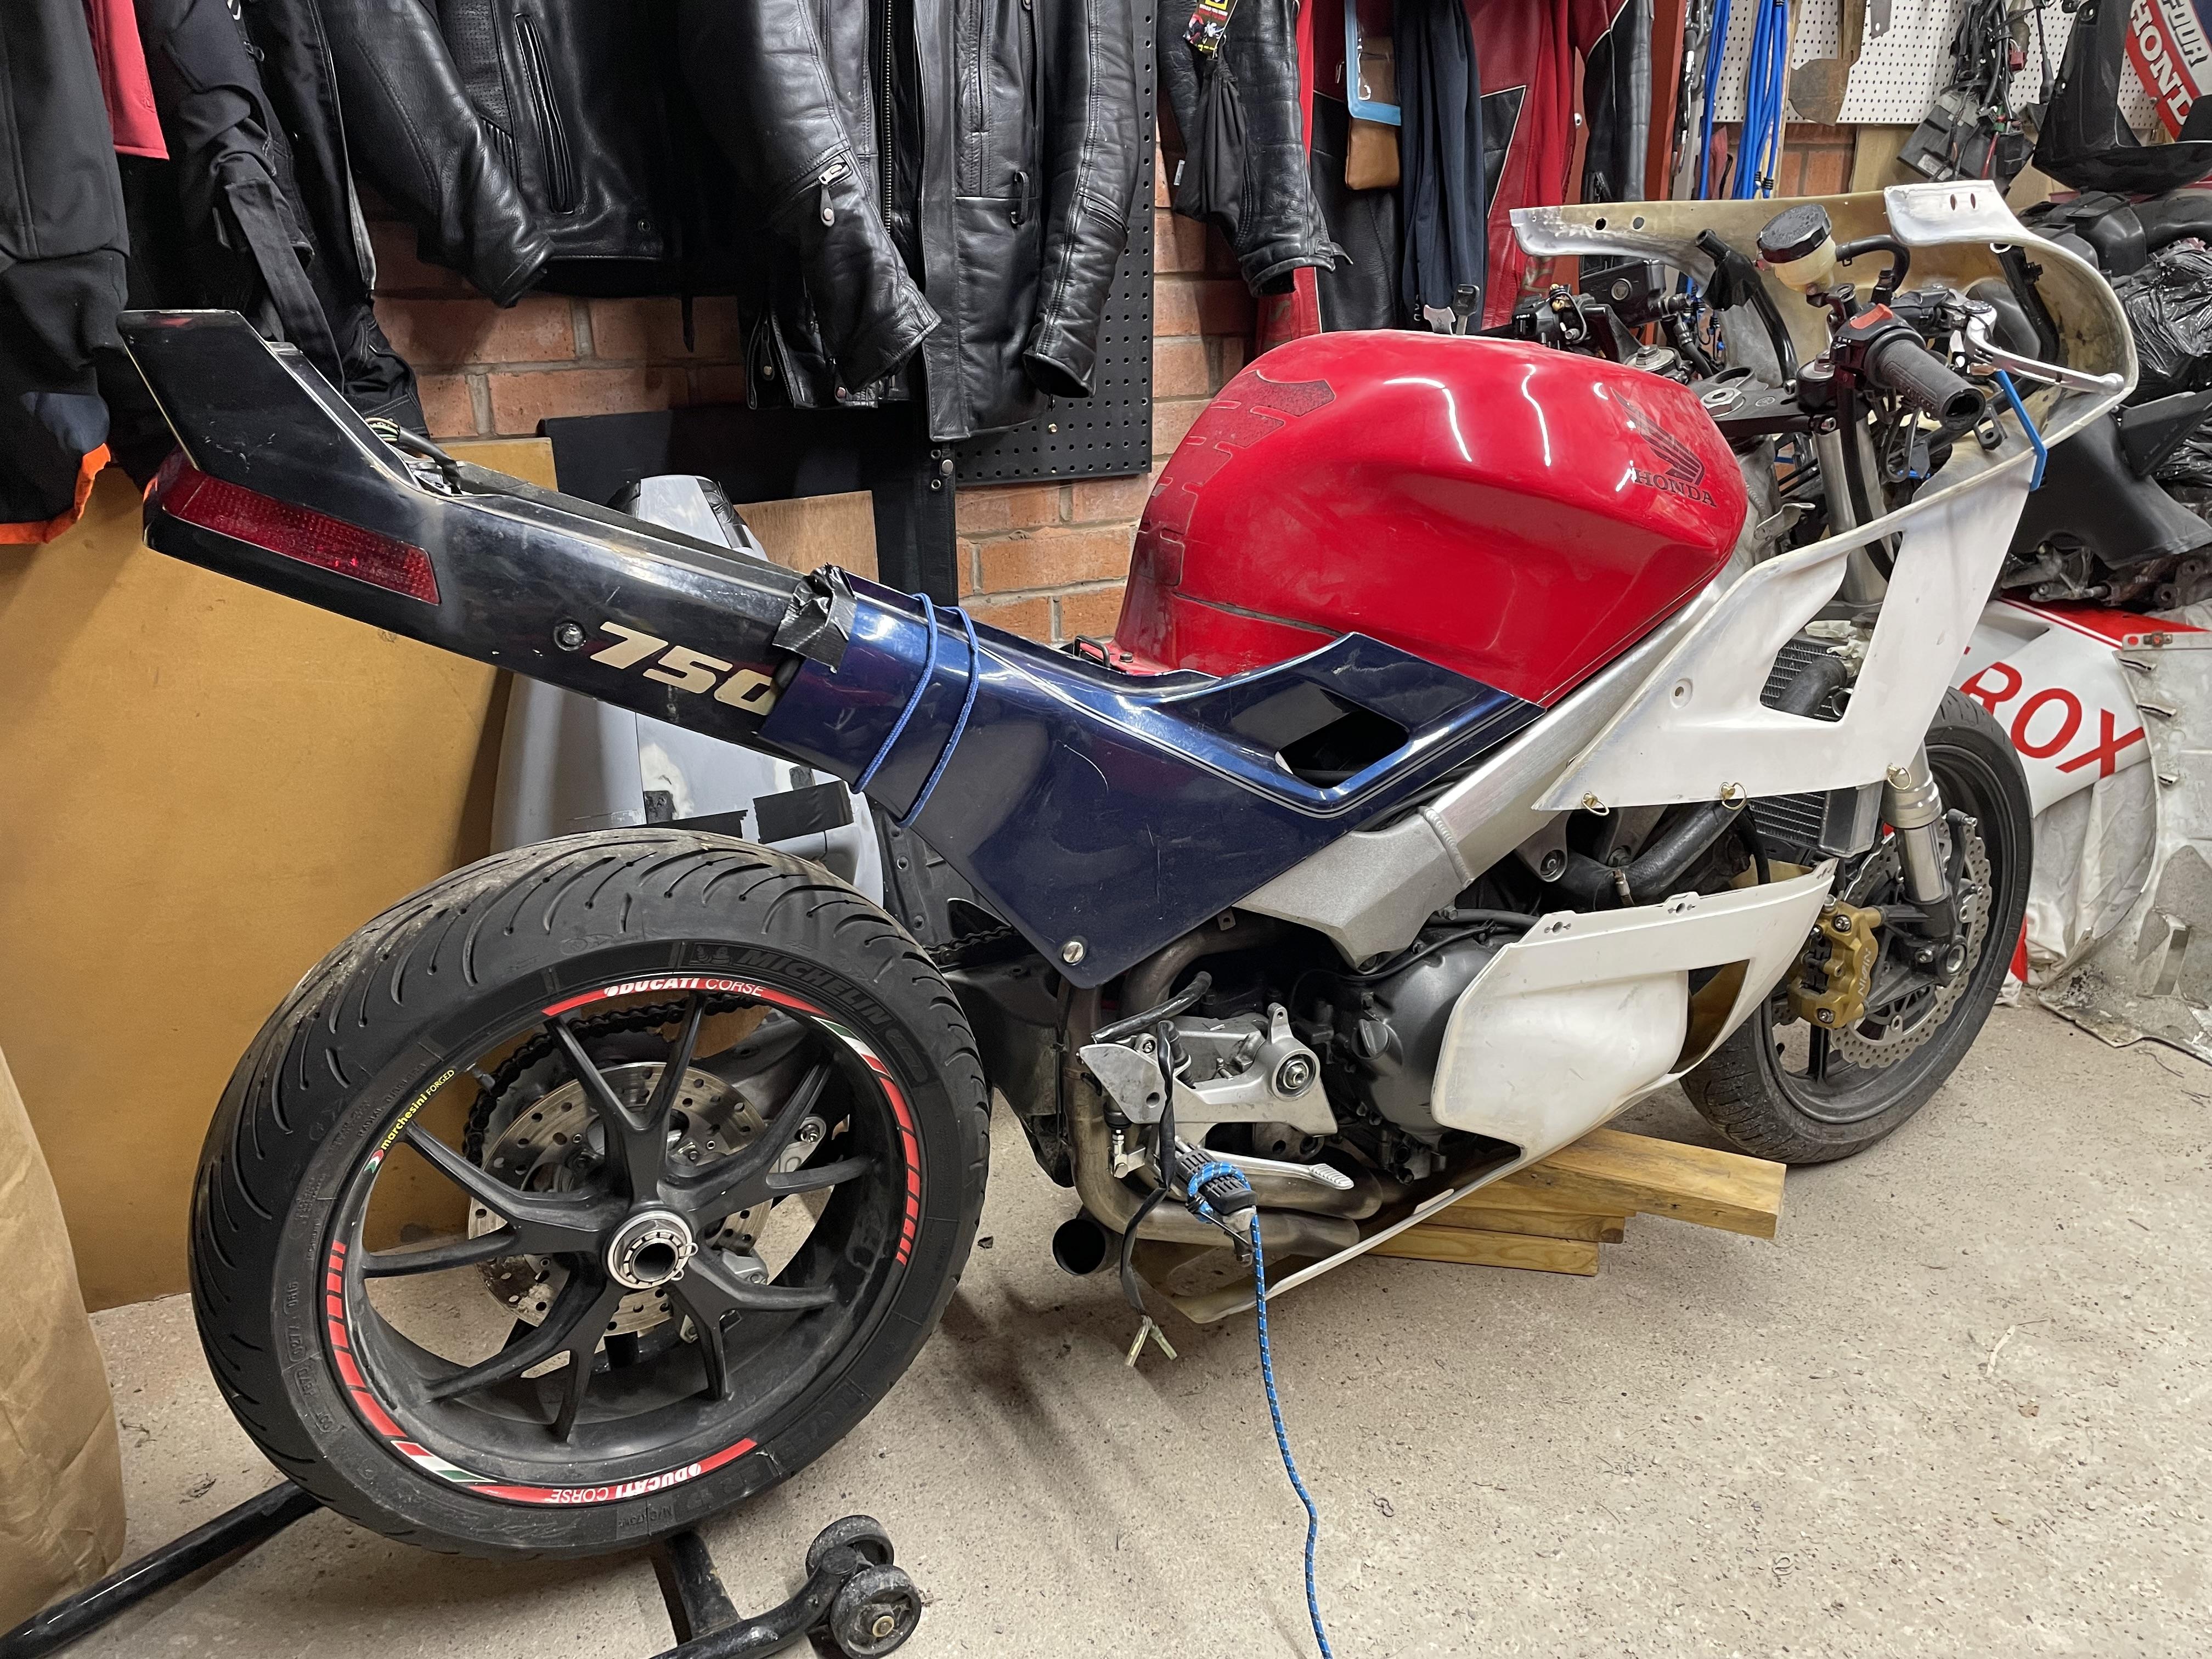
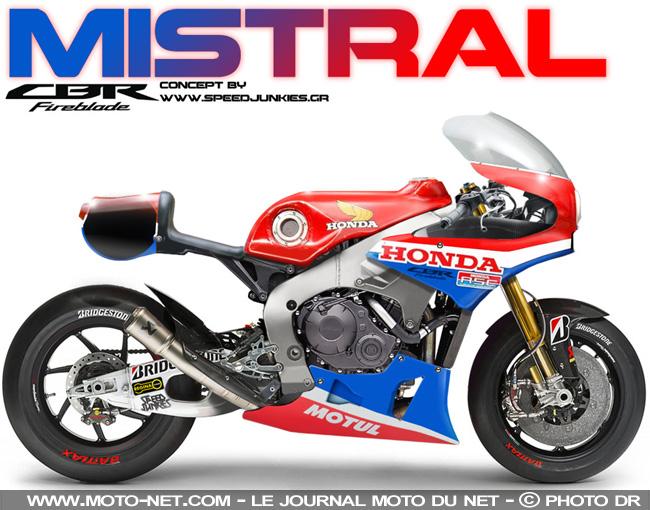
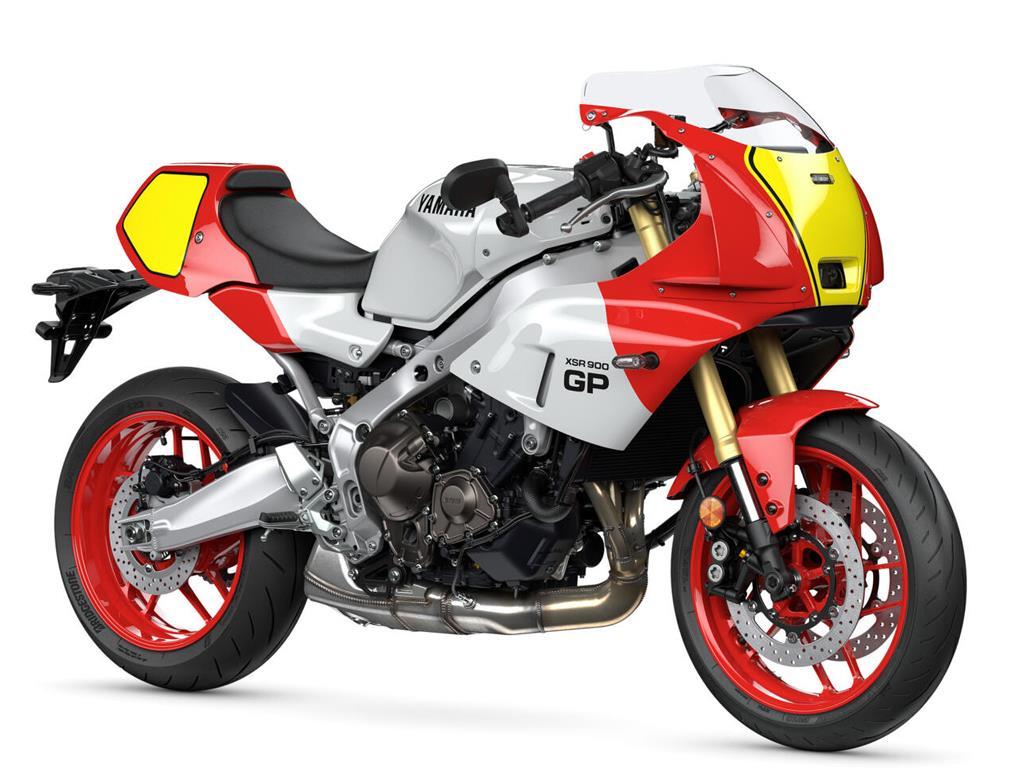
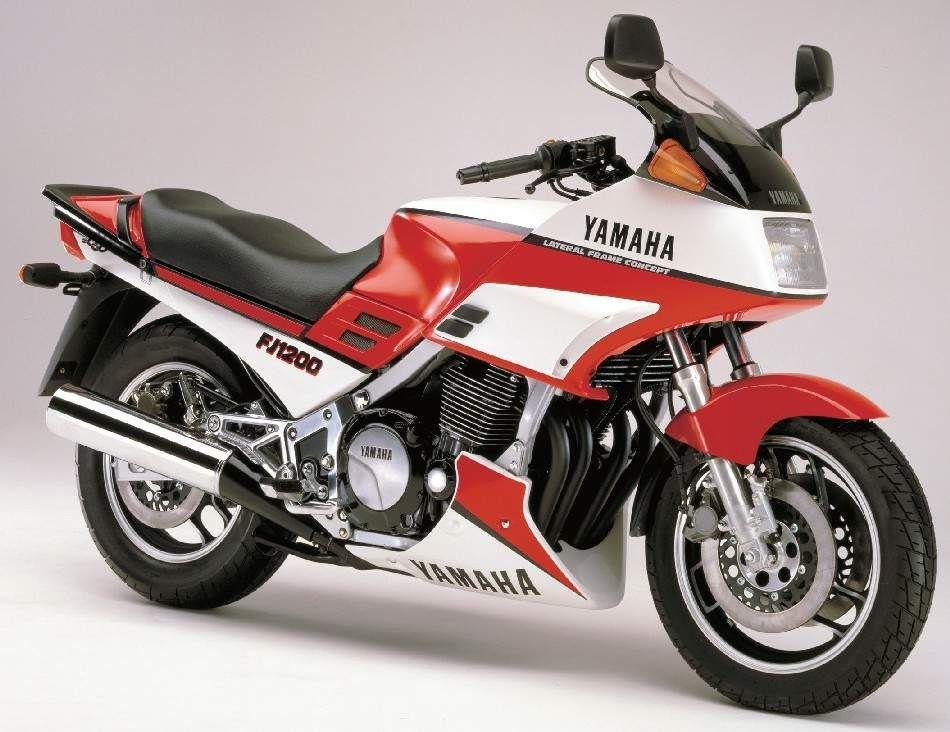
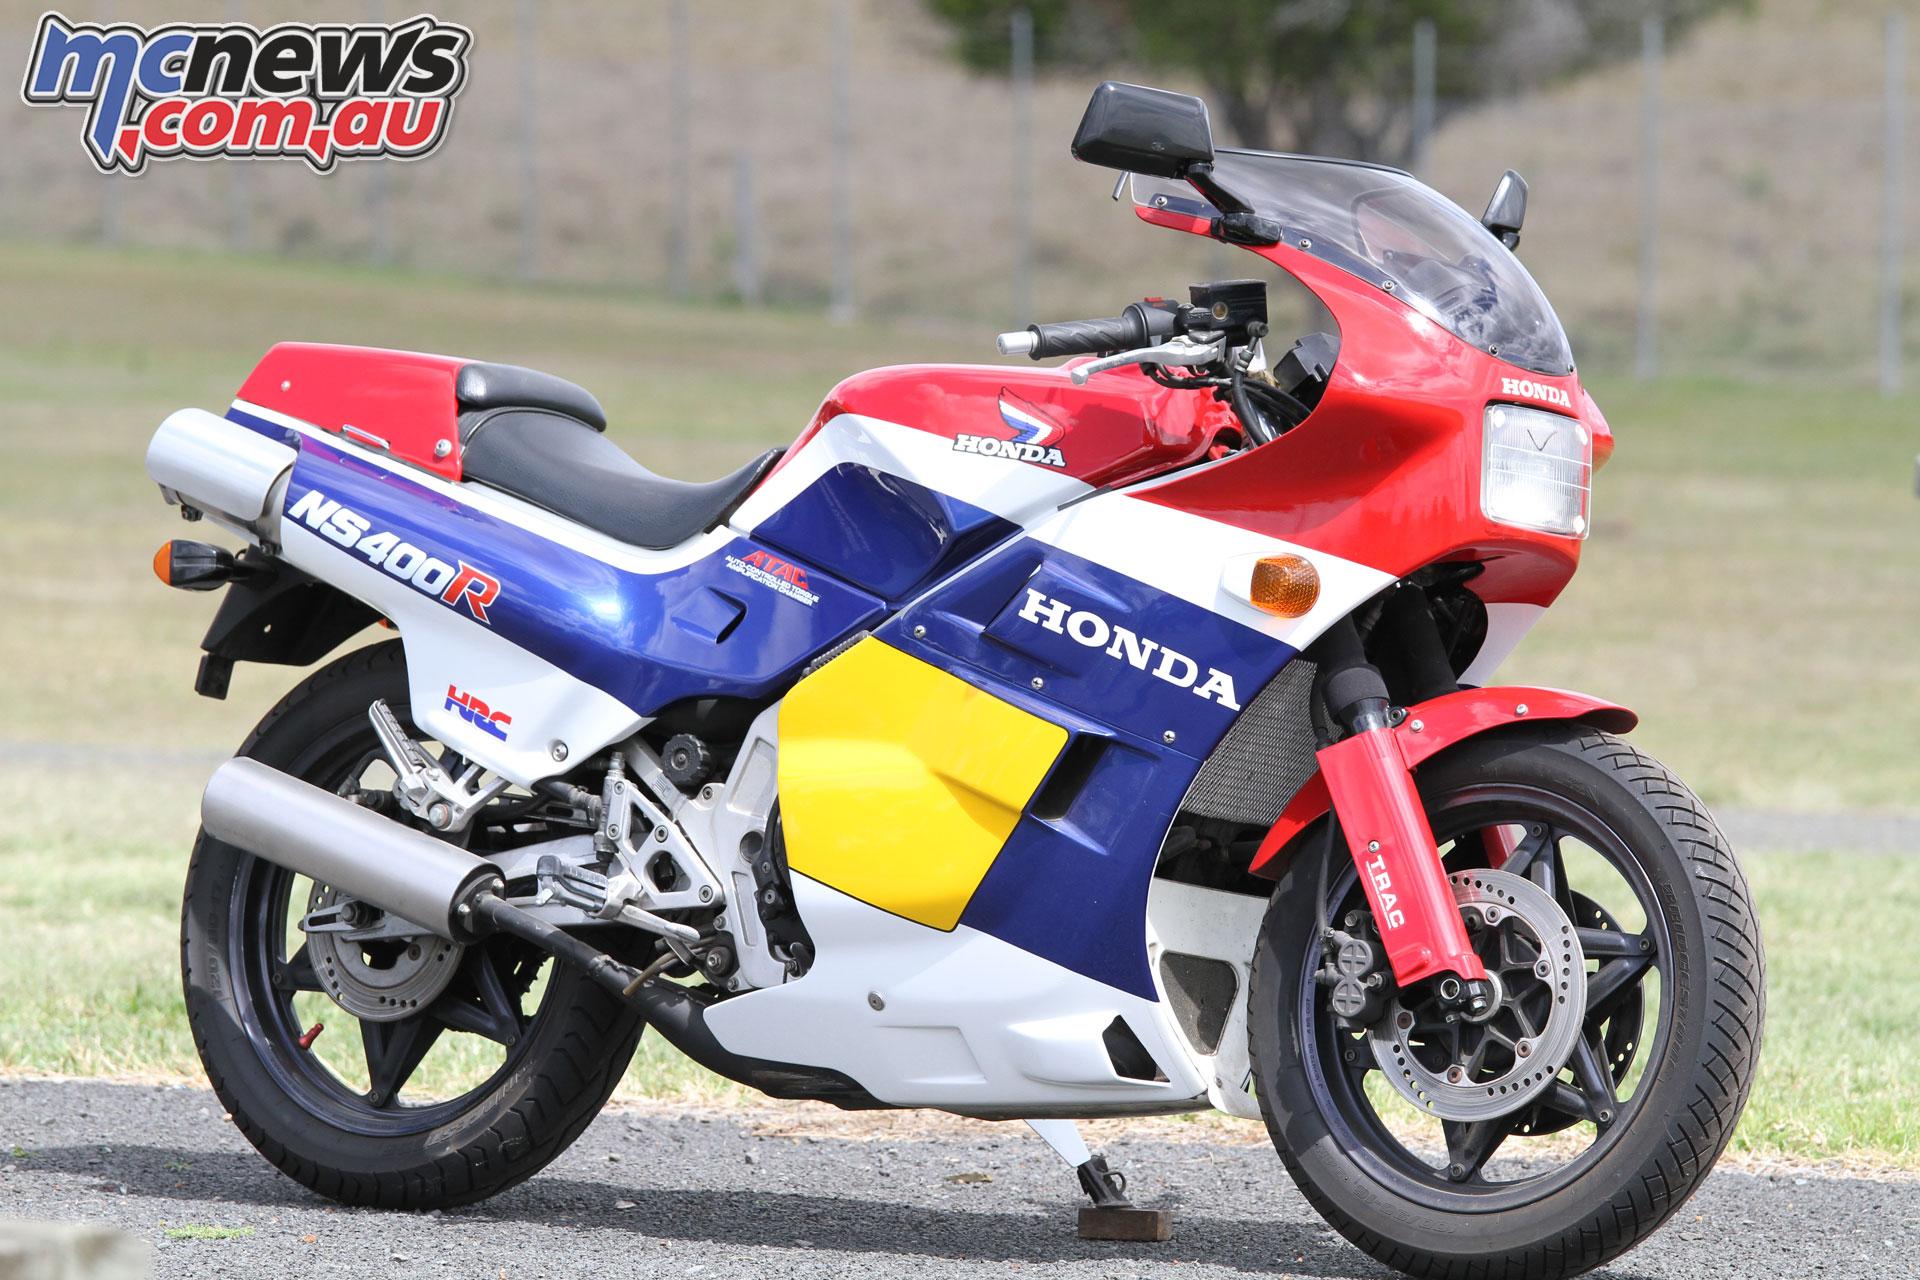
All right folks, back to the racer front fairing ideas and I need your help! I’ve posted some pics below to get creative juices flowing but please don’t limit yourself to these. Only parameters are: 1. Must accommodate high bars because I’m old and brittle 2. Must be functional 3. Must look fantastic (subjective, but don’t want to be laughed at!) Honda RS1000 Honda RS1000 lookalike CBR900RR with RS1000 looks Same again but different fairing Some sort of custom fairing for an RS1000 CBR600RR with Ducati 900SS front fairing cut down a bit at the bottom CBR900RR early FireBlade (got an RC30ish vibe going on) Yamaha XSR900GP Yamaha TRX800 with modified headlight BMW with what looks like a Yamaha TRX800 front fairing Another BMW with cool unknown fairing Yamaha FJ1200 - integrated indicators are a bonus but doesn’t scream “sexy” Kawasaki GPZ900 Kawasaki GPZ900 with added mid-fairings Ducati 750F1 Suzuki XR69 Suzuki GSX1100 Slabside Dustbin fairings. Look cool but impractical as can’t turn the front wheel to full lock and ground clearance at the front is compromised. Also death weave with crosswinds… VTR1000 Firestorm VTR1000 Firestorm with a cool fairing VFR800 5th gen Bioblade (thanks Mohawk!) VFR800 custom fairing (looks like a Batwing cut to pieces?) VFR750 (2nd gen?) endurance racer NR750 - body kits available that might fit but the front isn’t what I’d call handsome NC30/35 - somebody on this site fitted NC30/35 fairings to a 4th gen so it might work. But pics are long gone so can’t really tell for sure… VF500 Endurance racer VF750 VF1000 (F1?) VF1000R with same NSR250 tail I have VF1000R with custom front fairing VF1000F2 Bol d’Or with cut down tail NS400R - nice but might be too narrow for my radiator… So what are your thoughts?
-
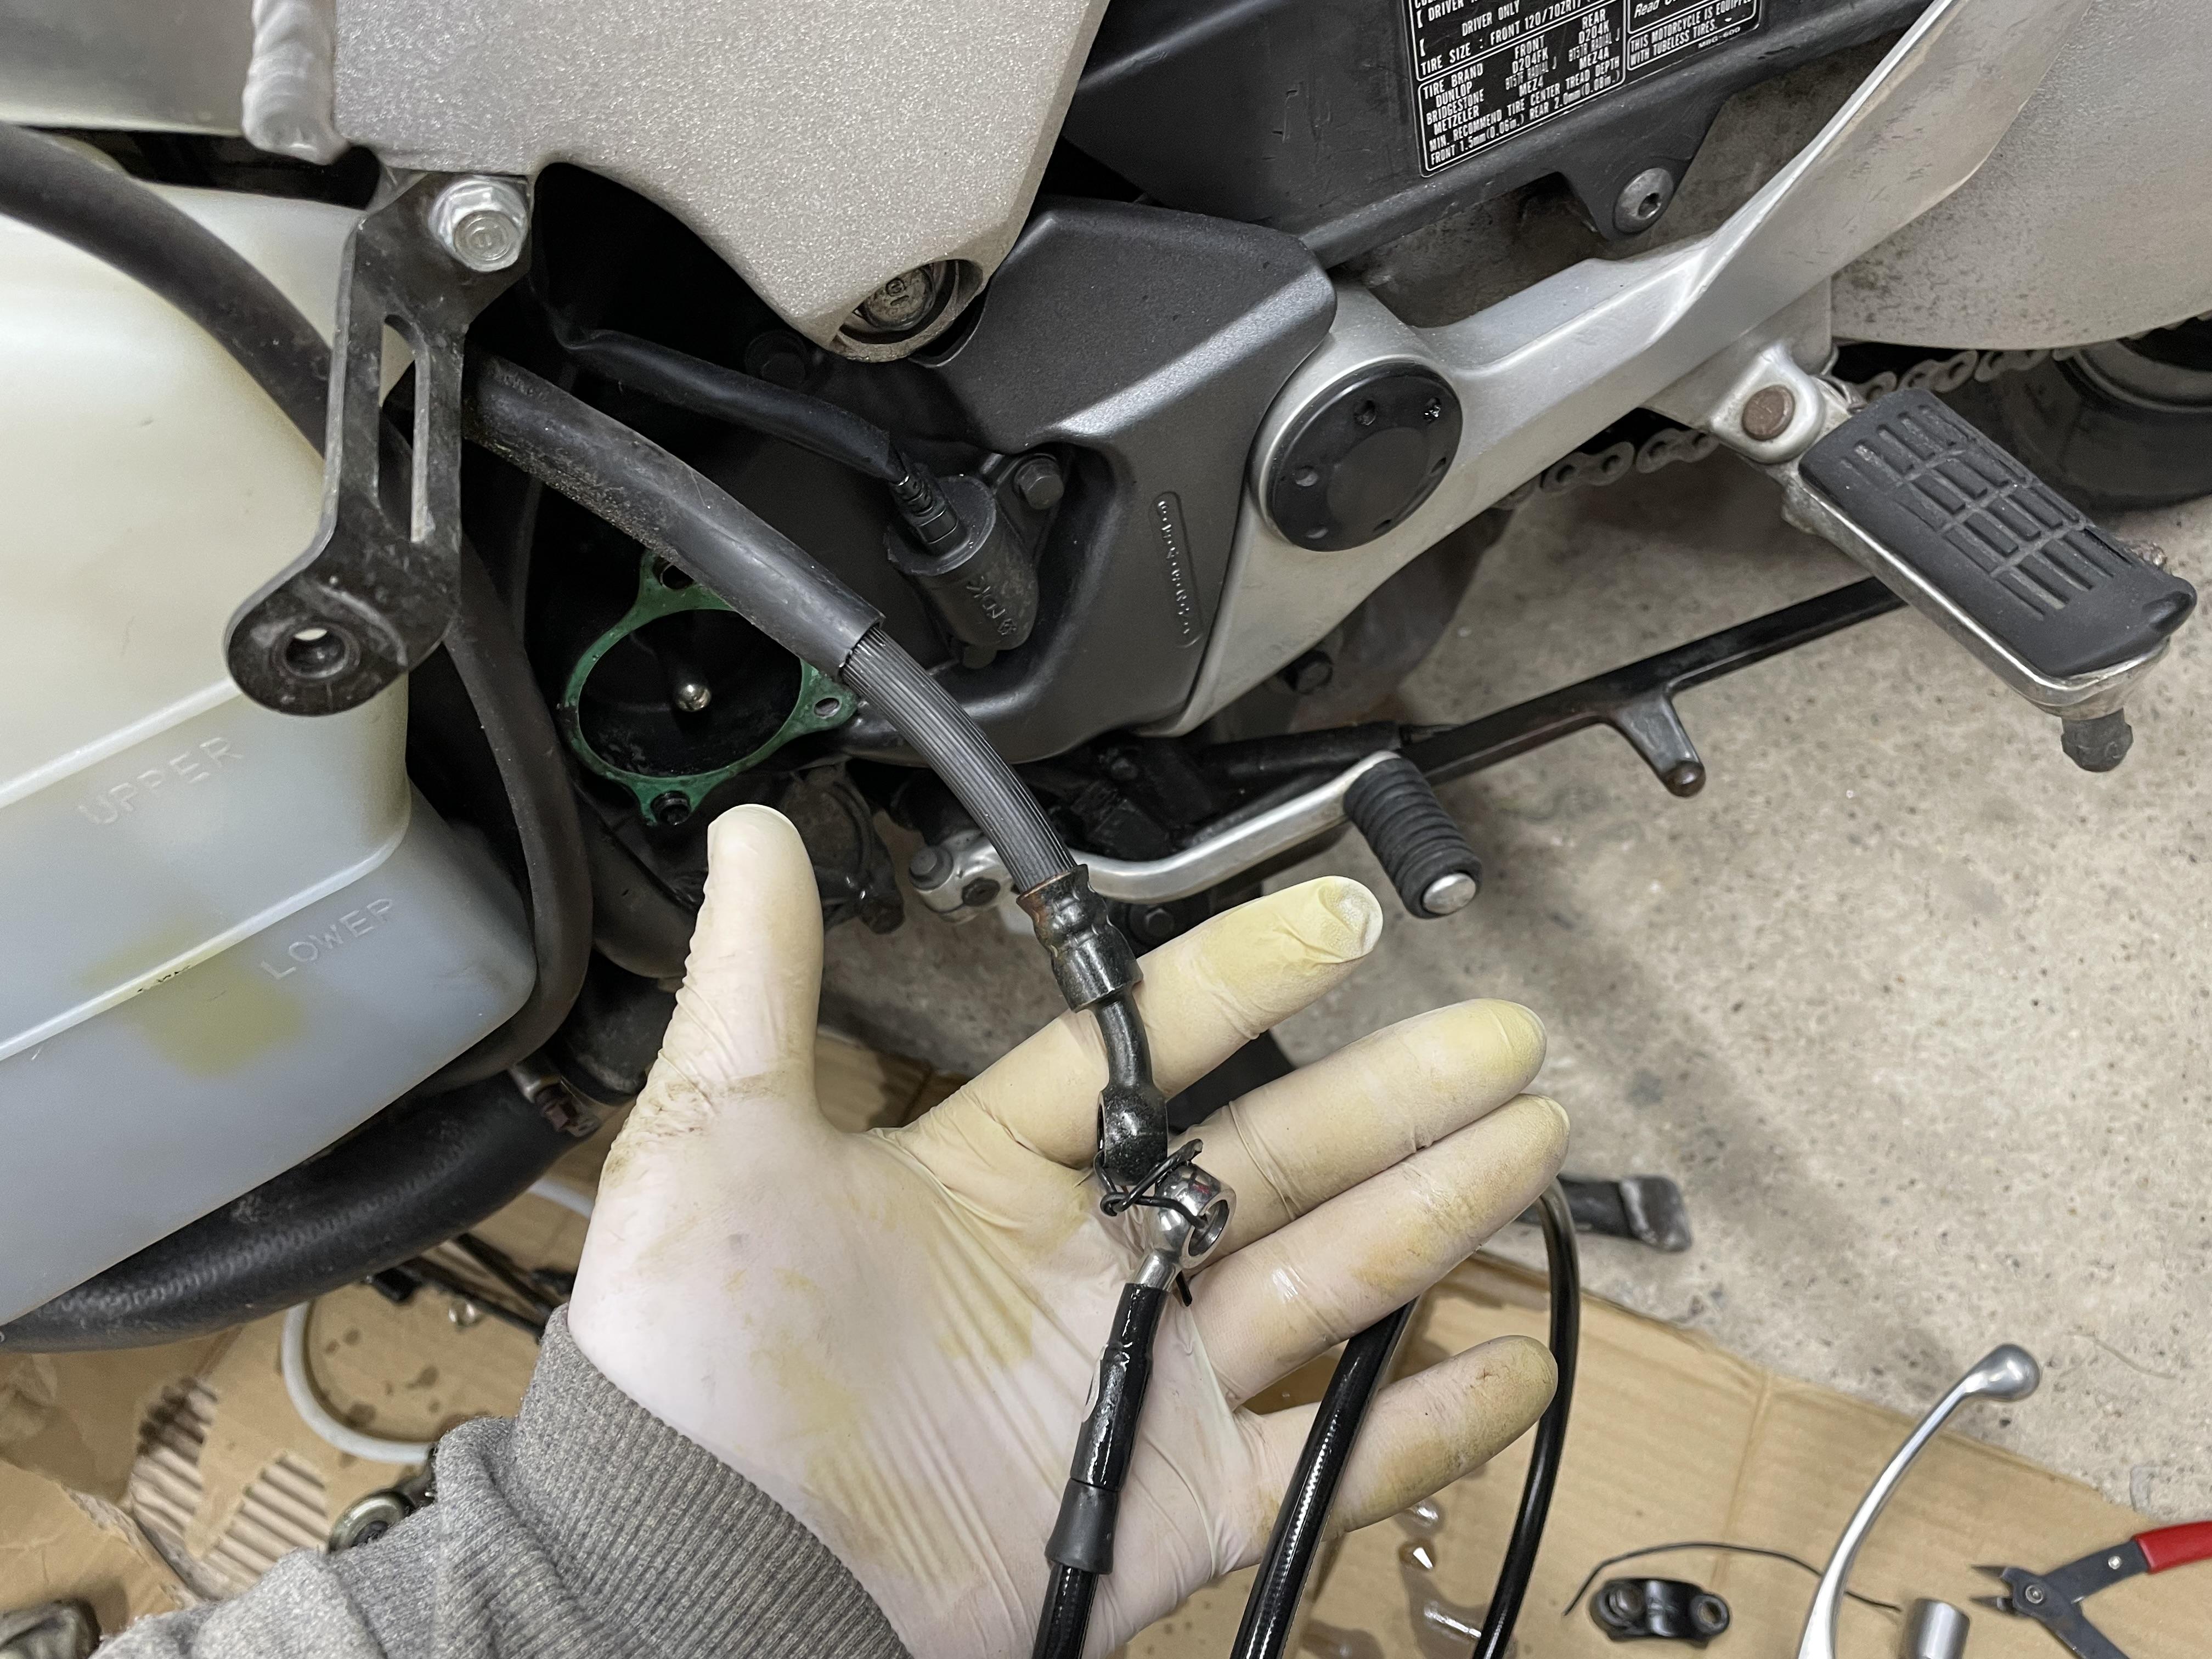
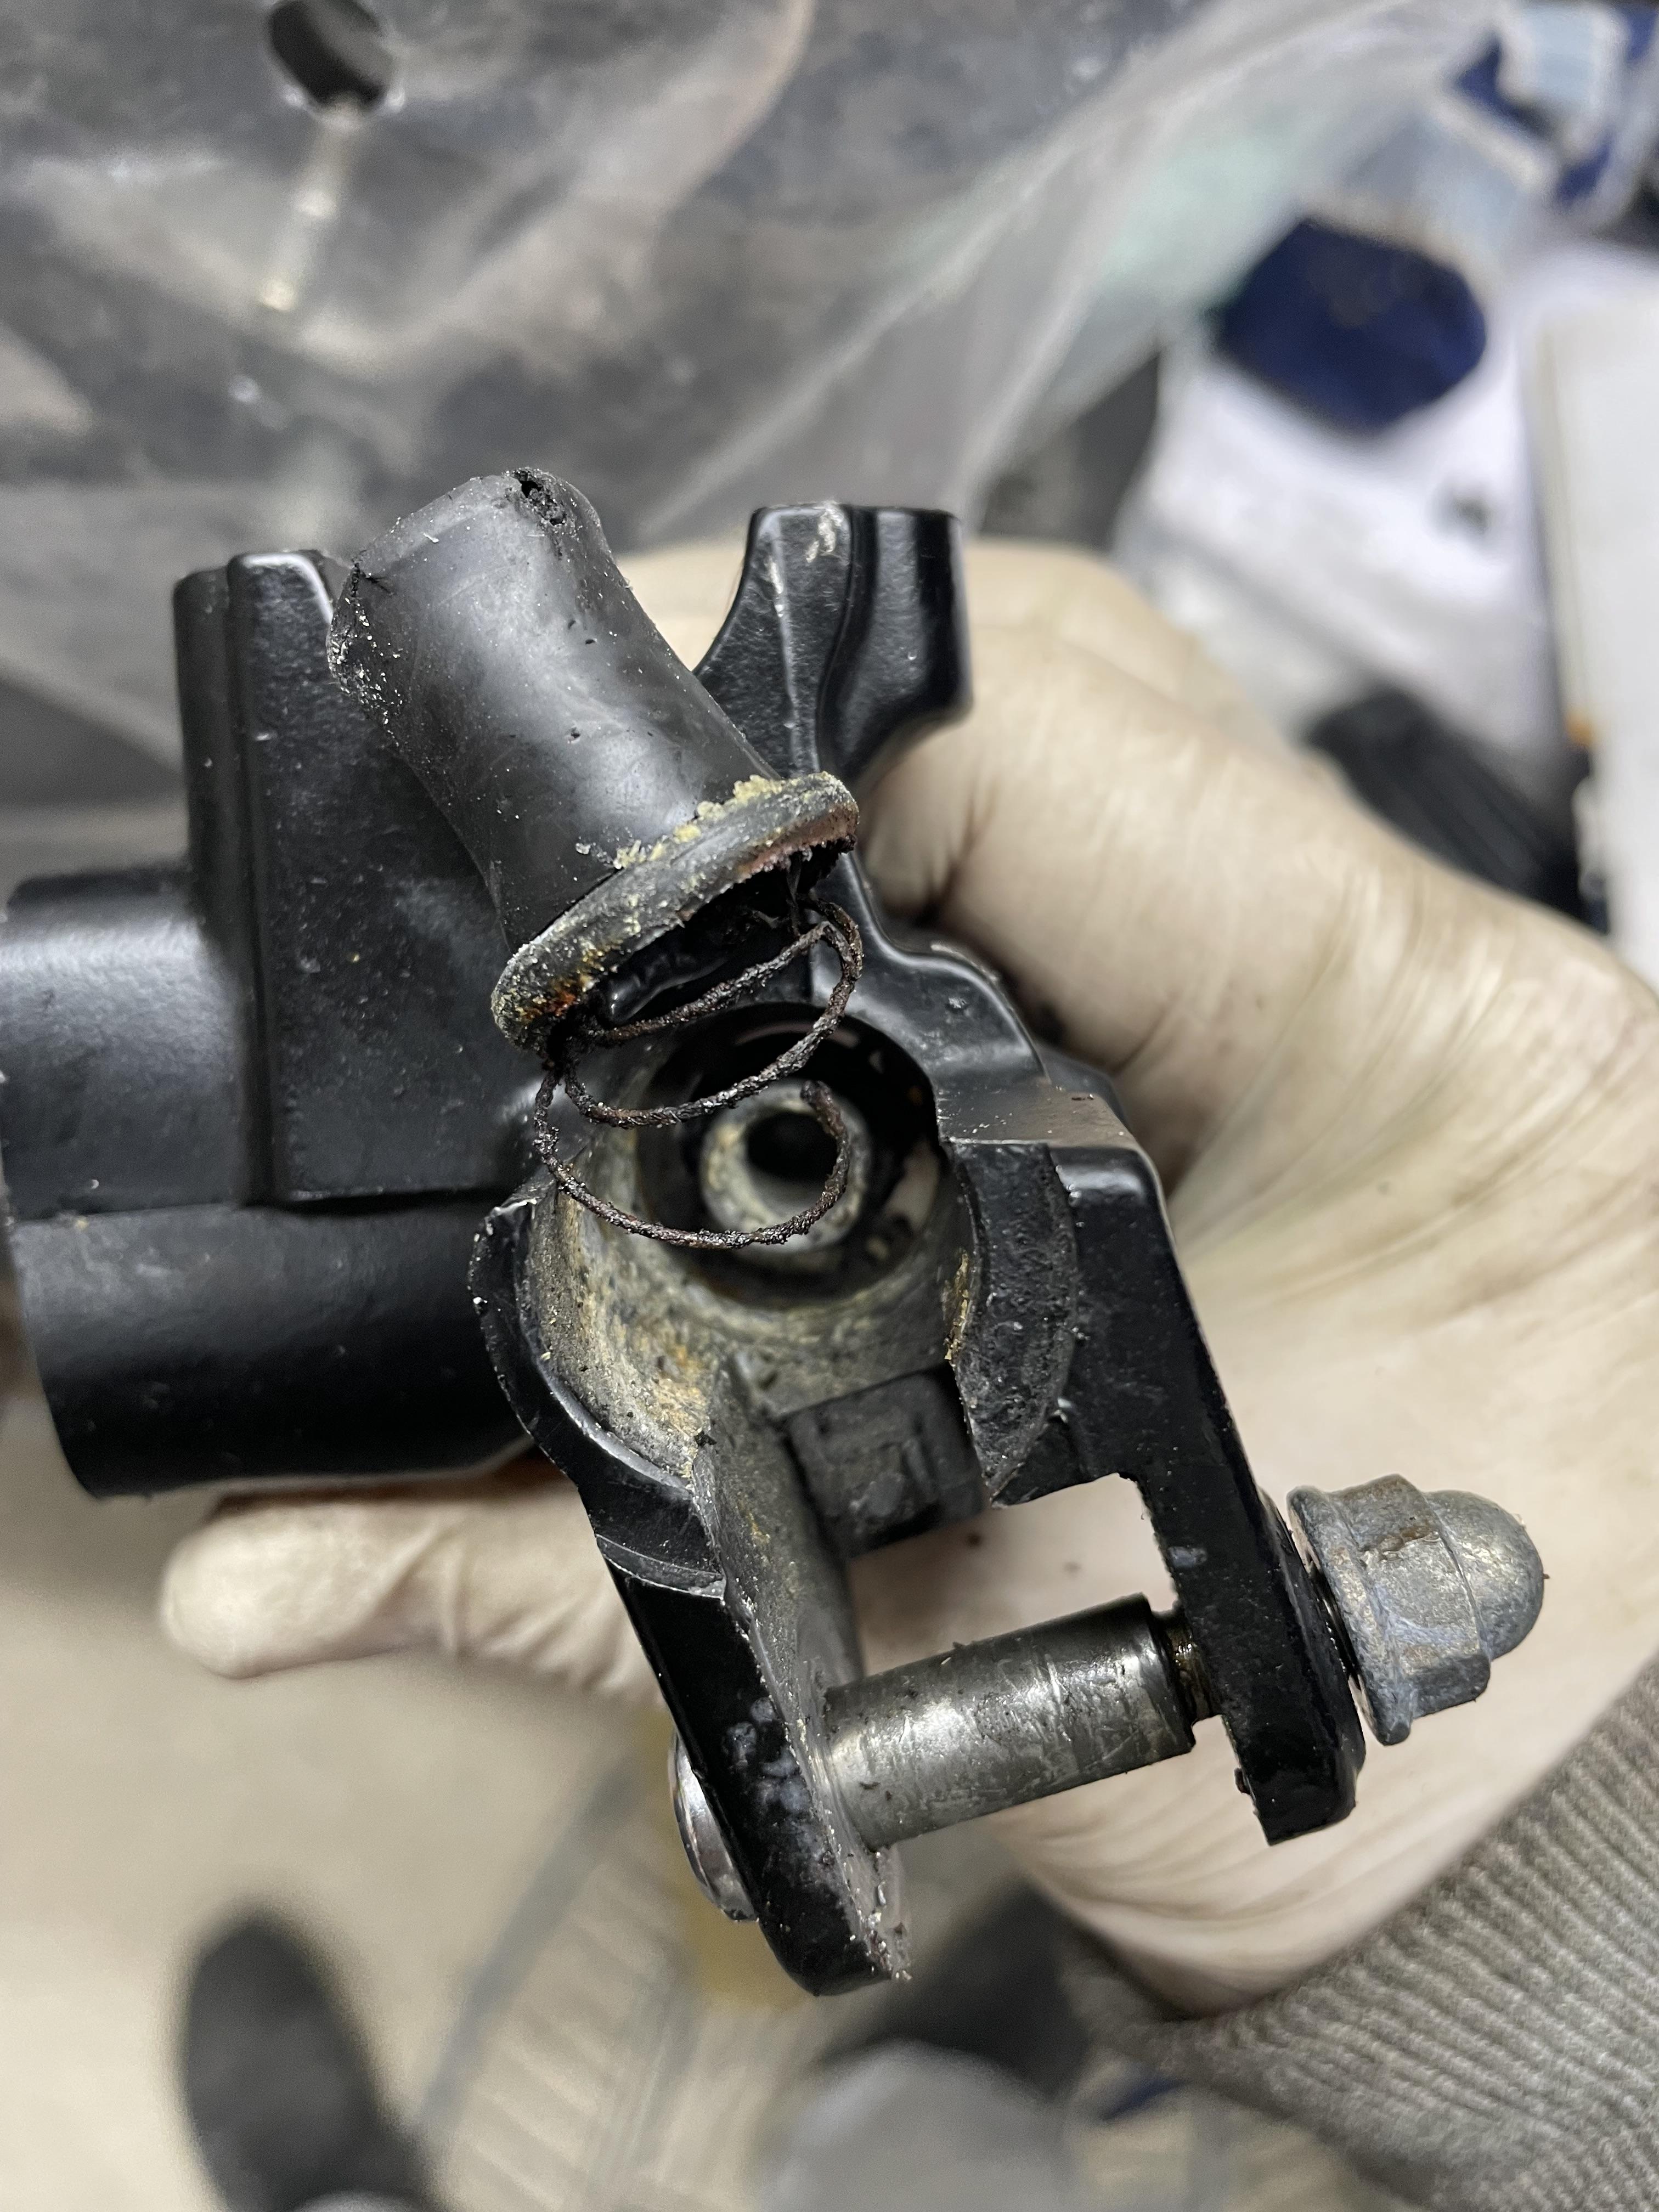
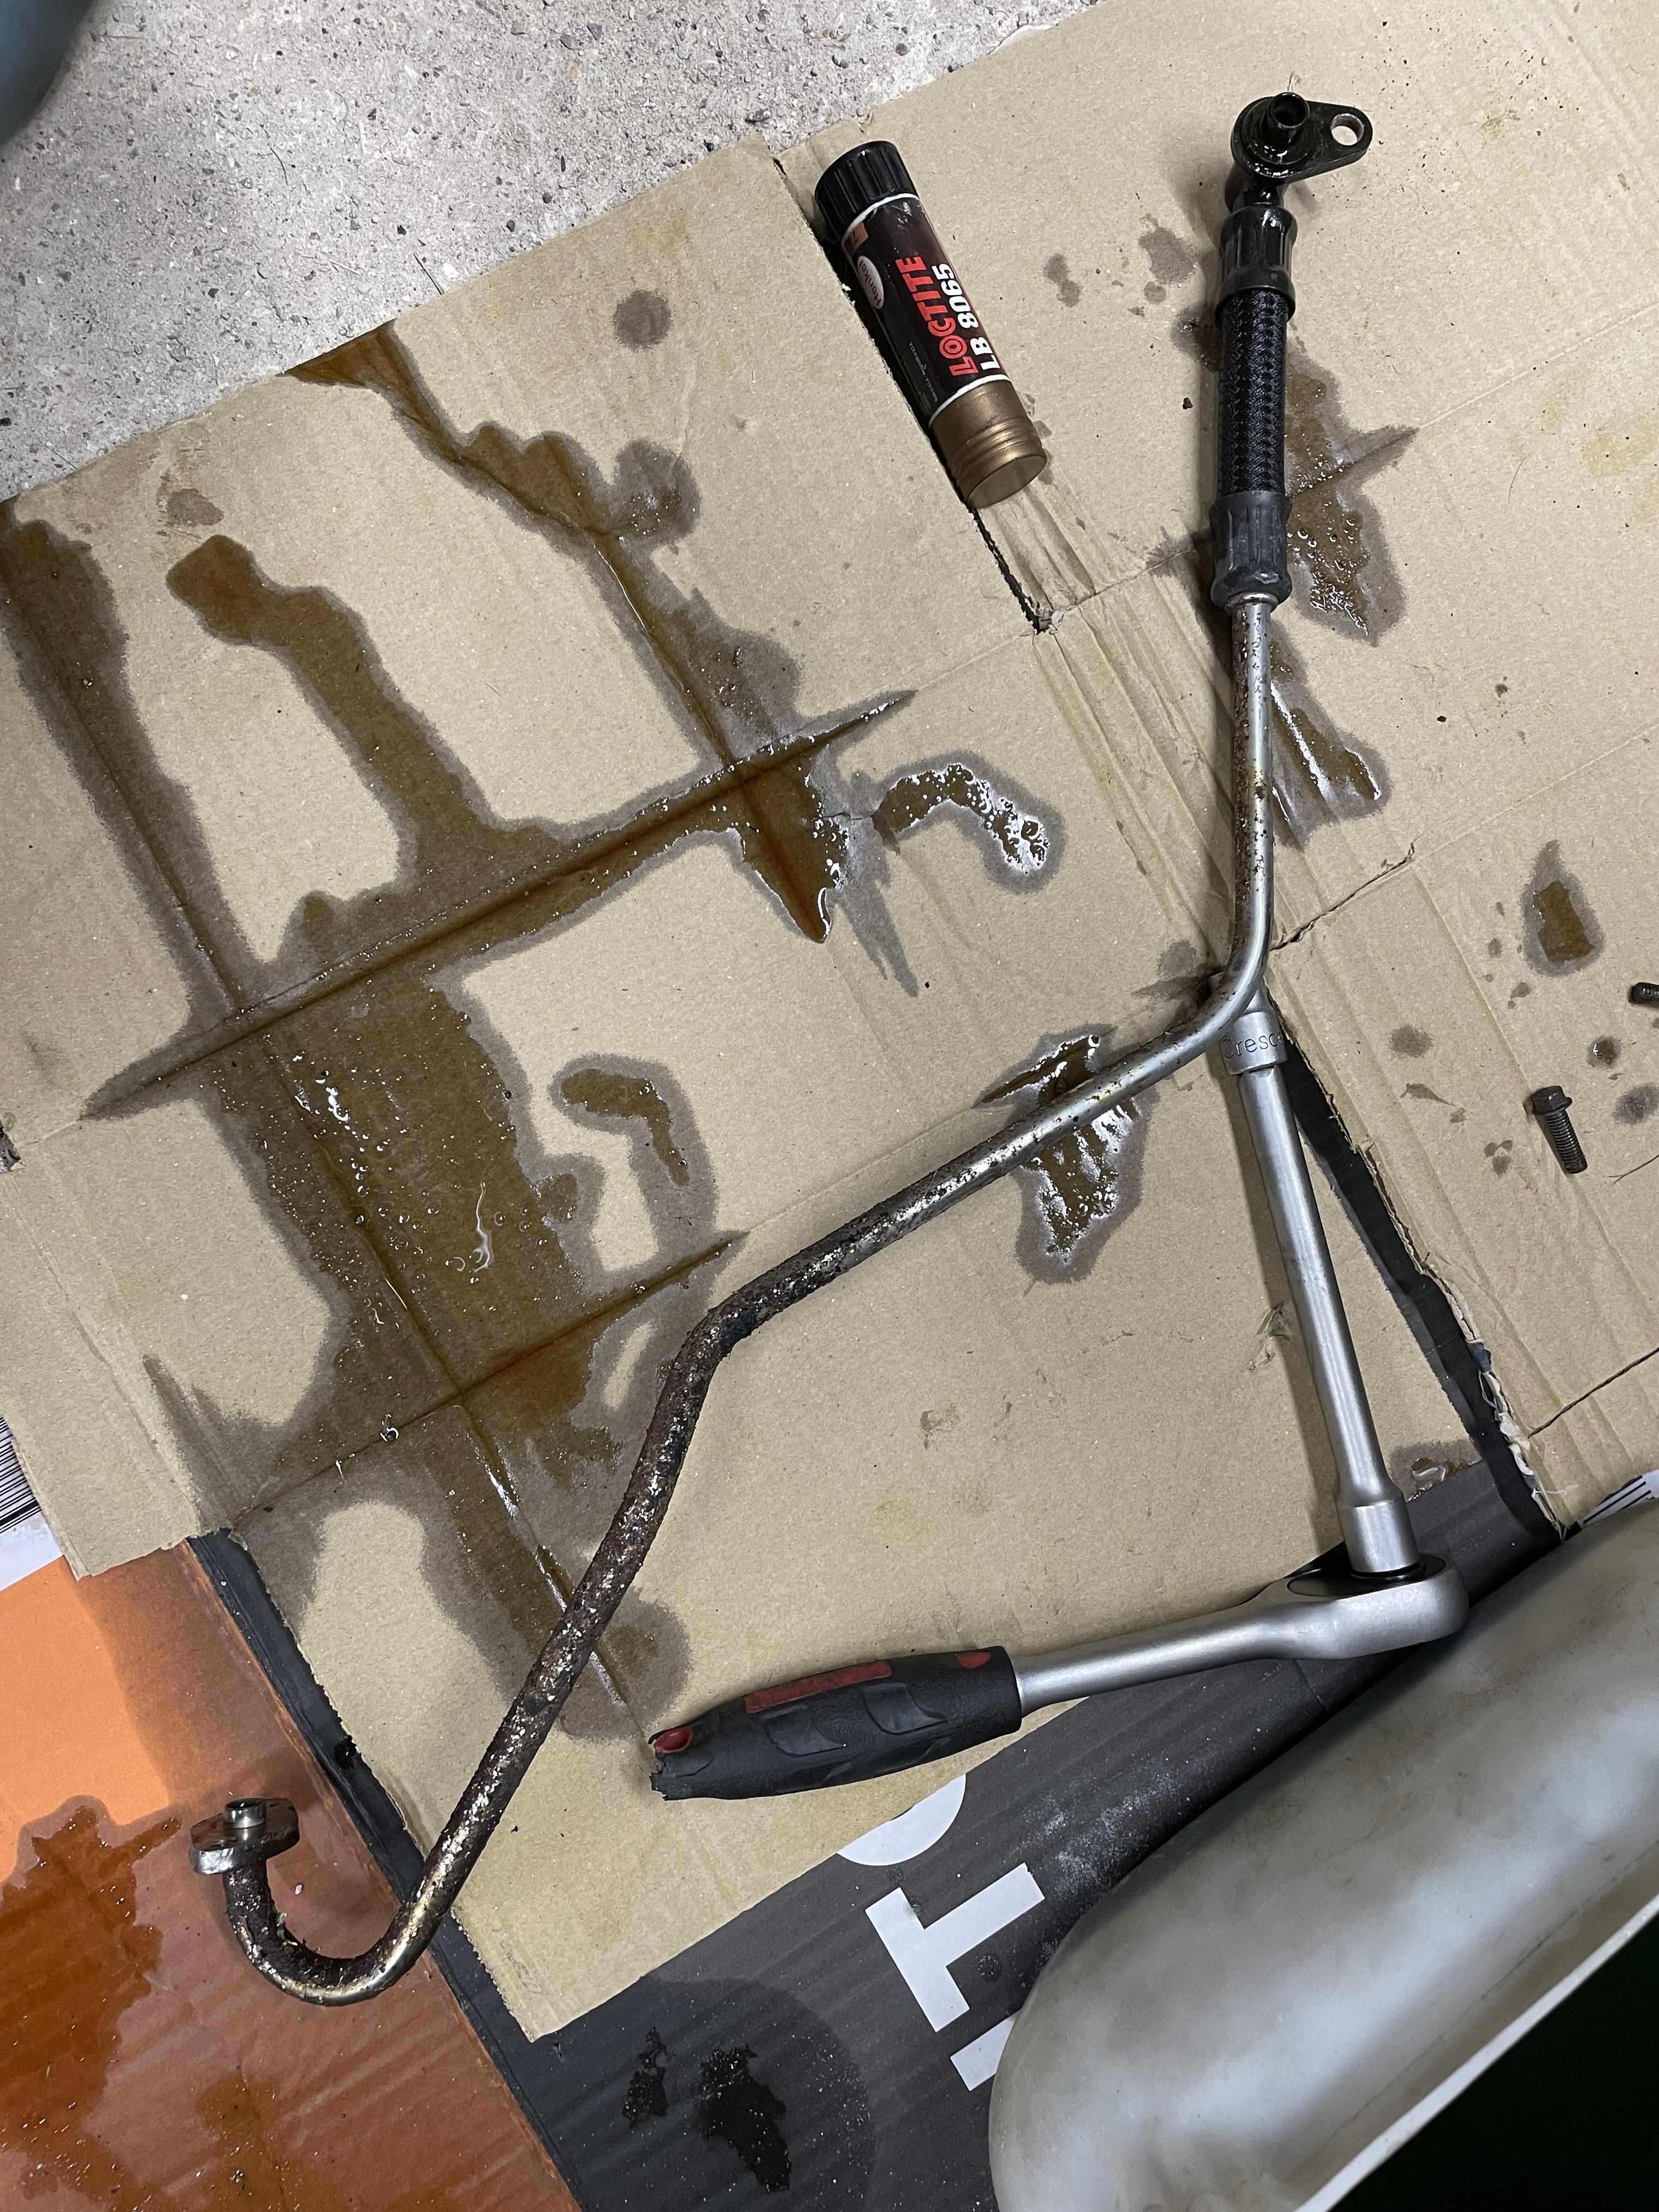
Clutch action on the Donkey was a bit heavier due to the 6th gen clutch springs installed last year. Not really a problem but thought I’d try improving comfort in traffic. In another thread we’d established the 6th gen master cylinder has a smaller piston than the 5.1 gen (1/2 inch vs 14mm) so this should give me better leverage over the slave and a softer hand action. Also fitted an Oberon 38mm slave (vs 36.5mm) which should further improve the action. First step was to rebuild the 6th gen clutch master with a Tourmax kit as it was crusty! Had an old braided brake line same length and banjo angle as the VFR clutch hose so decided to fit that too. Didn’t want to dismantle the bike again so tied the new line onto the old one with some wire and pulled it through. The rebuild kit didn’t have a seal for the lever push rod thingie which had split, so I pulled the old piston seal off and reused that instead. Piston seal is slightly bigger and actually seals better. Here it is fitted and the lever cleaned/lubed up. Luckily the 5th gen lever fits on the 6th gen unit (mine came without a lever). Everything fitted together and bled with fresh brake fluid. Has solid feel but lever tied back to the bar overnight just in case there are any bubbles still trapped in there. New unit looks exactly like the old one. View of the “open” airbox and ghetto phone holder (from a bicycle!) if anyone is interested.
-
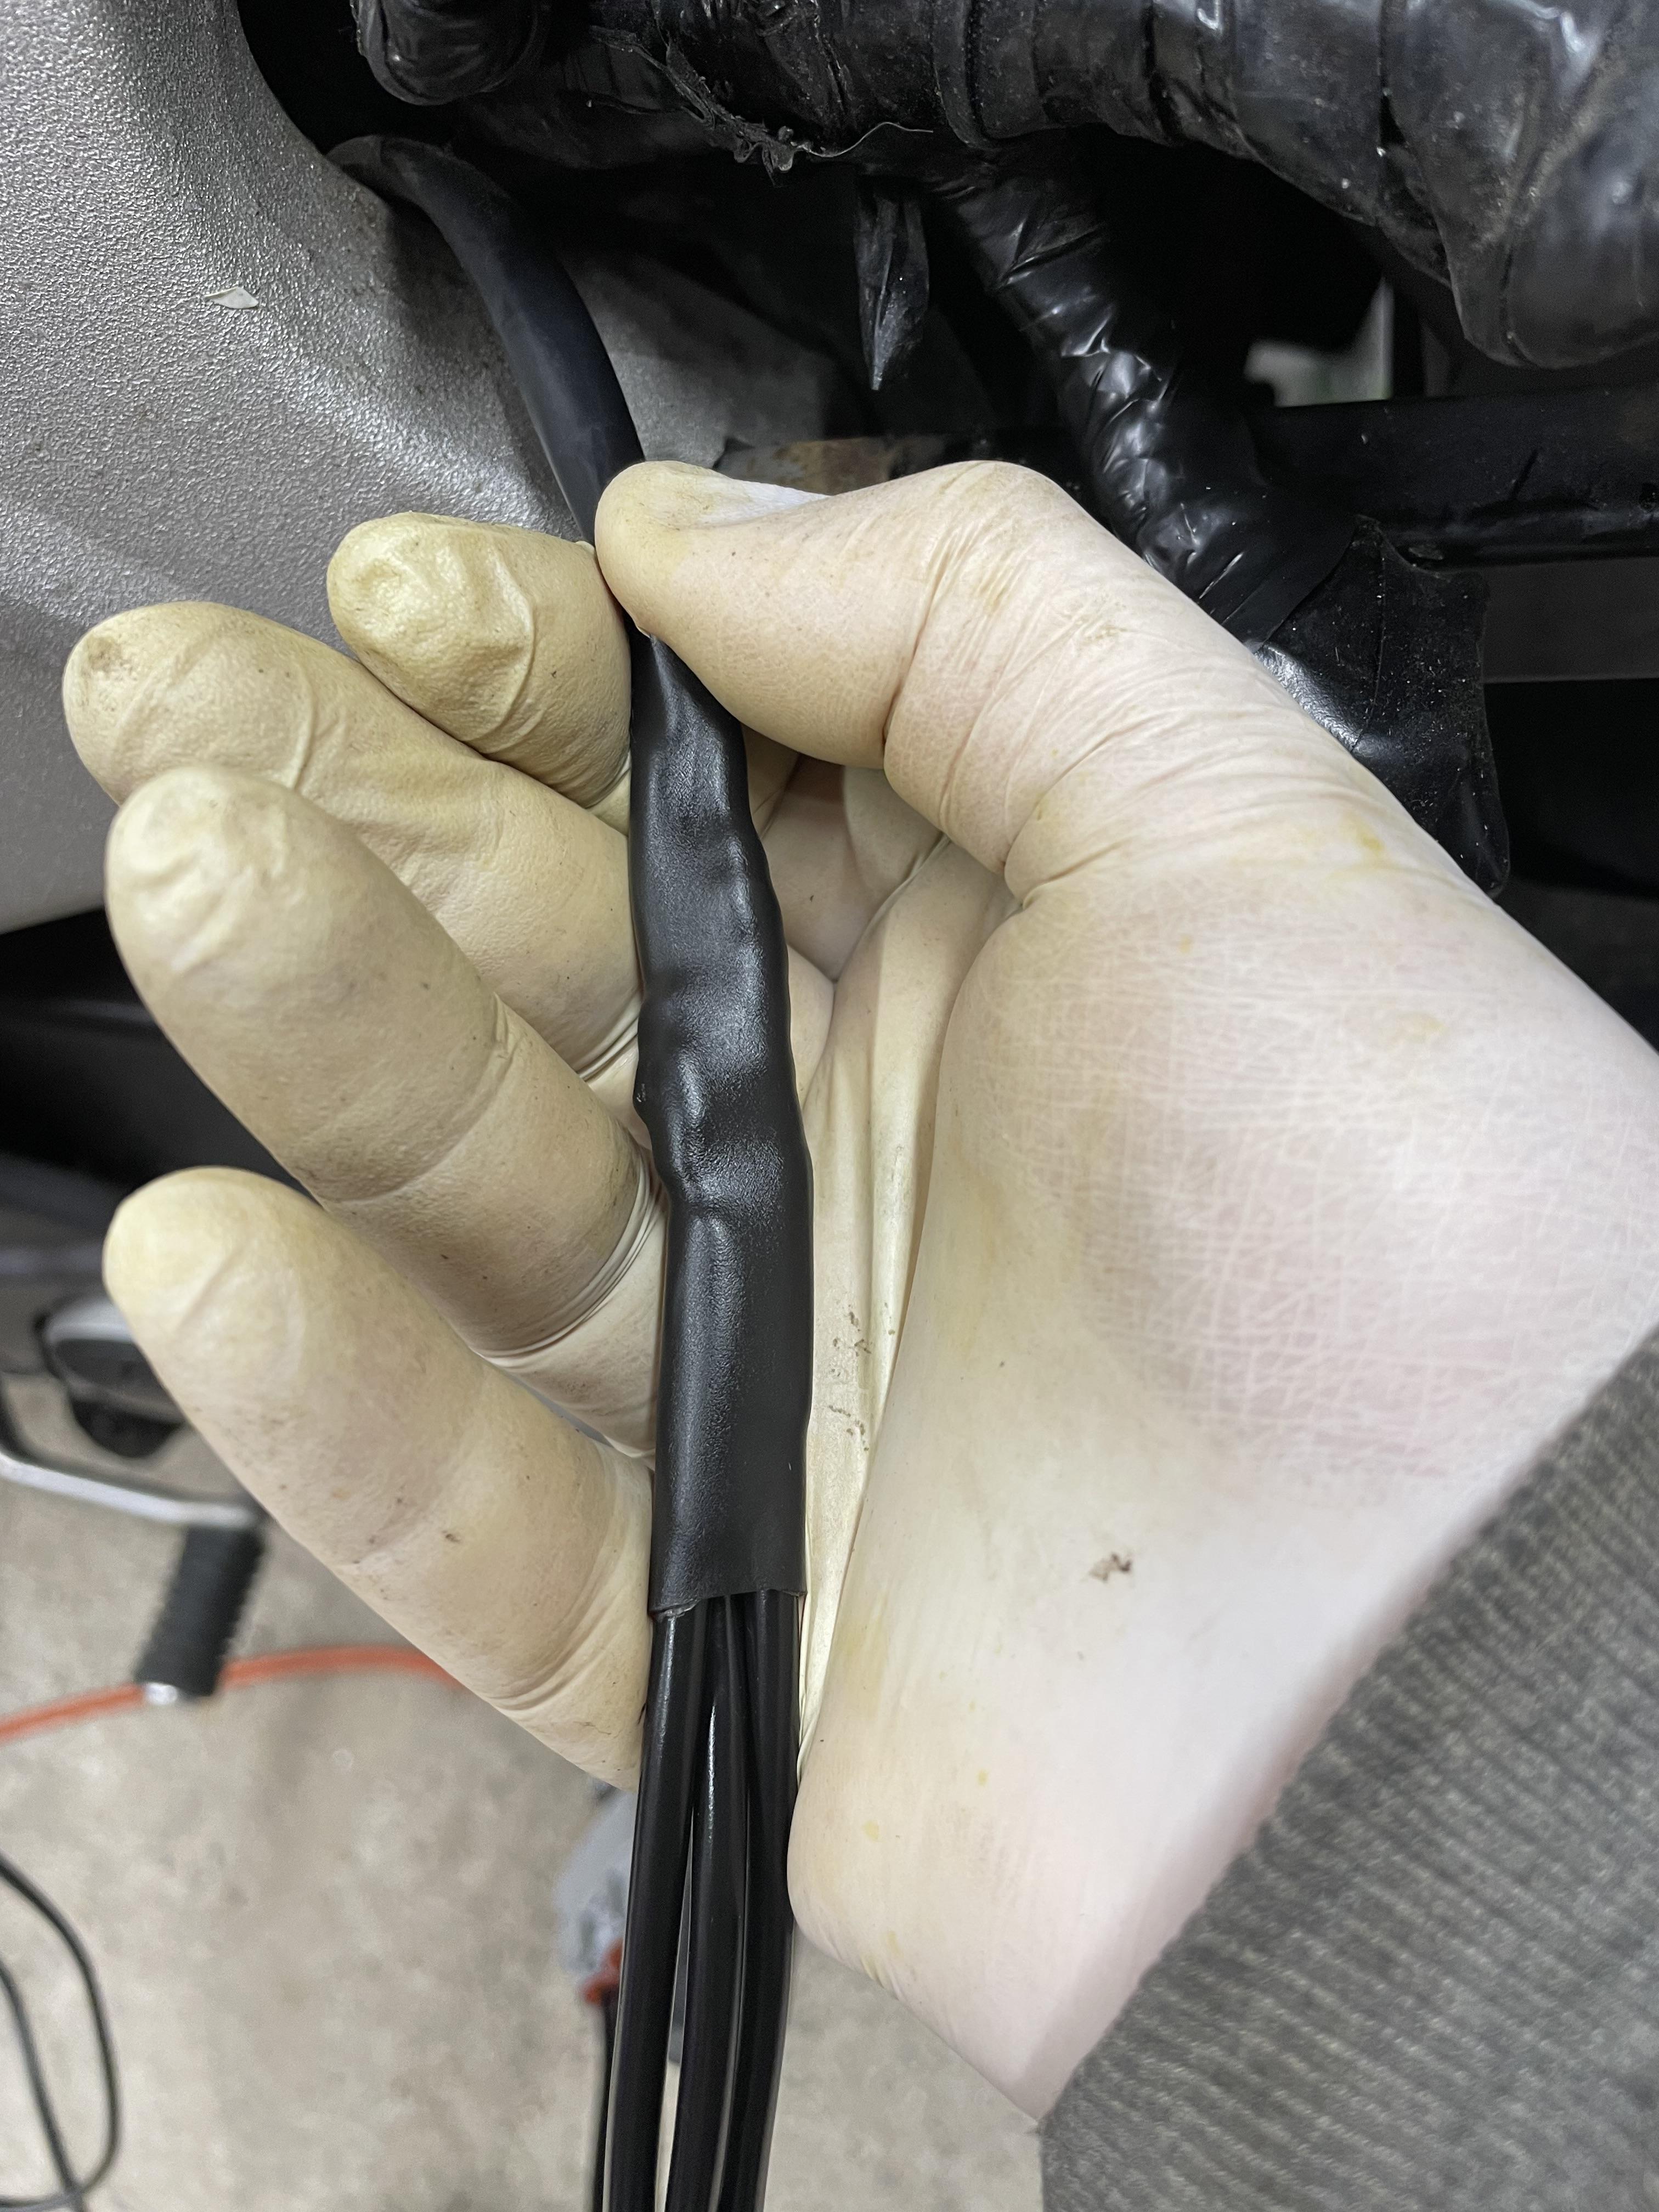
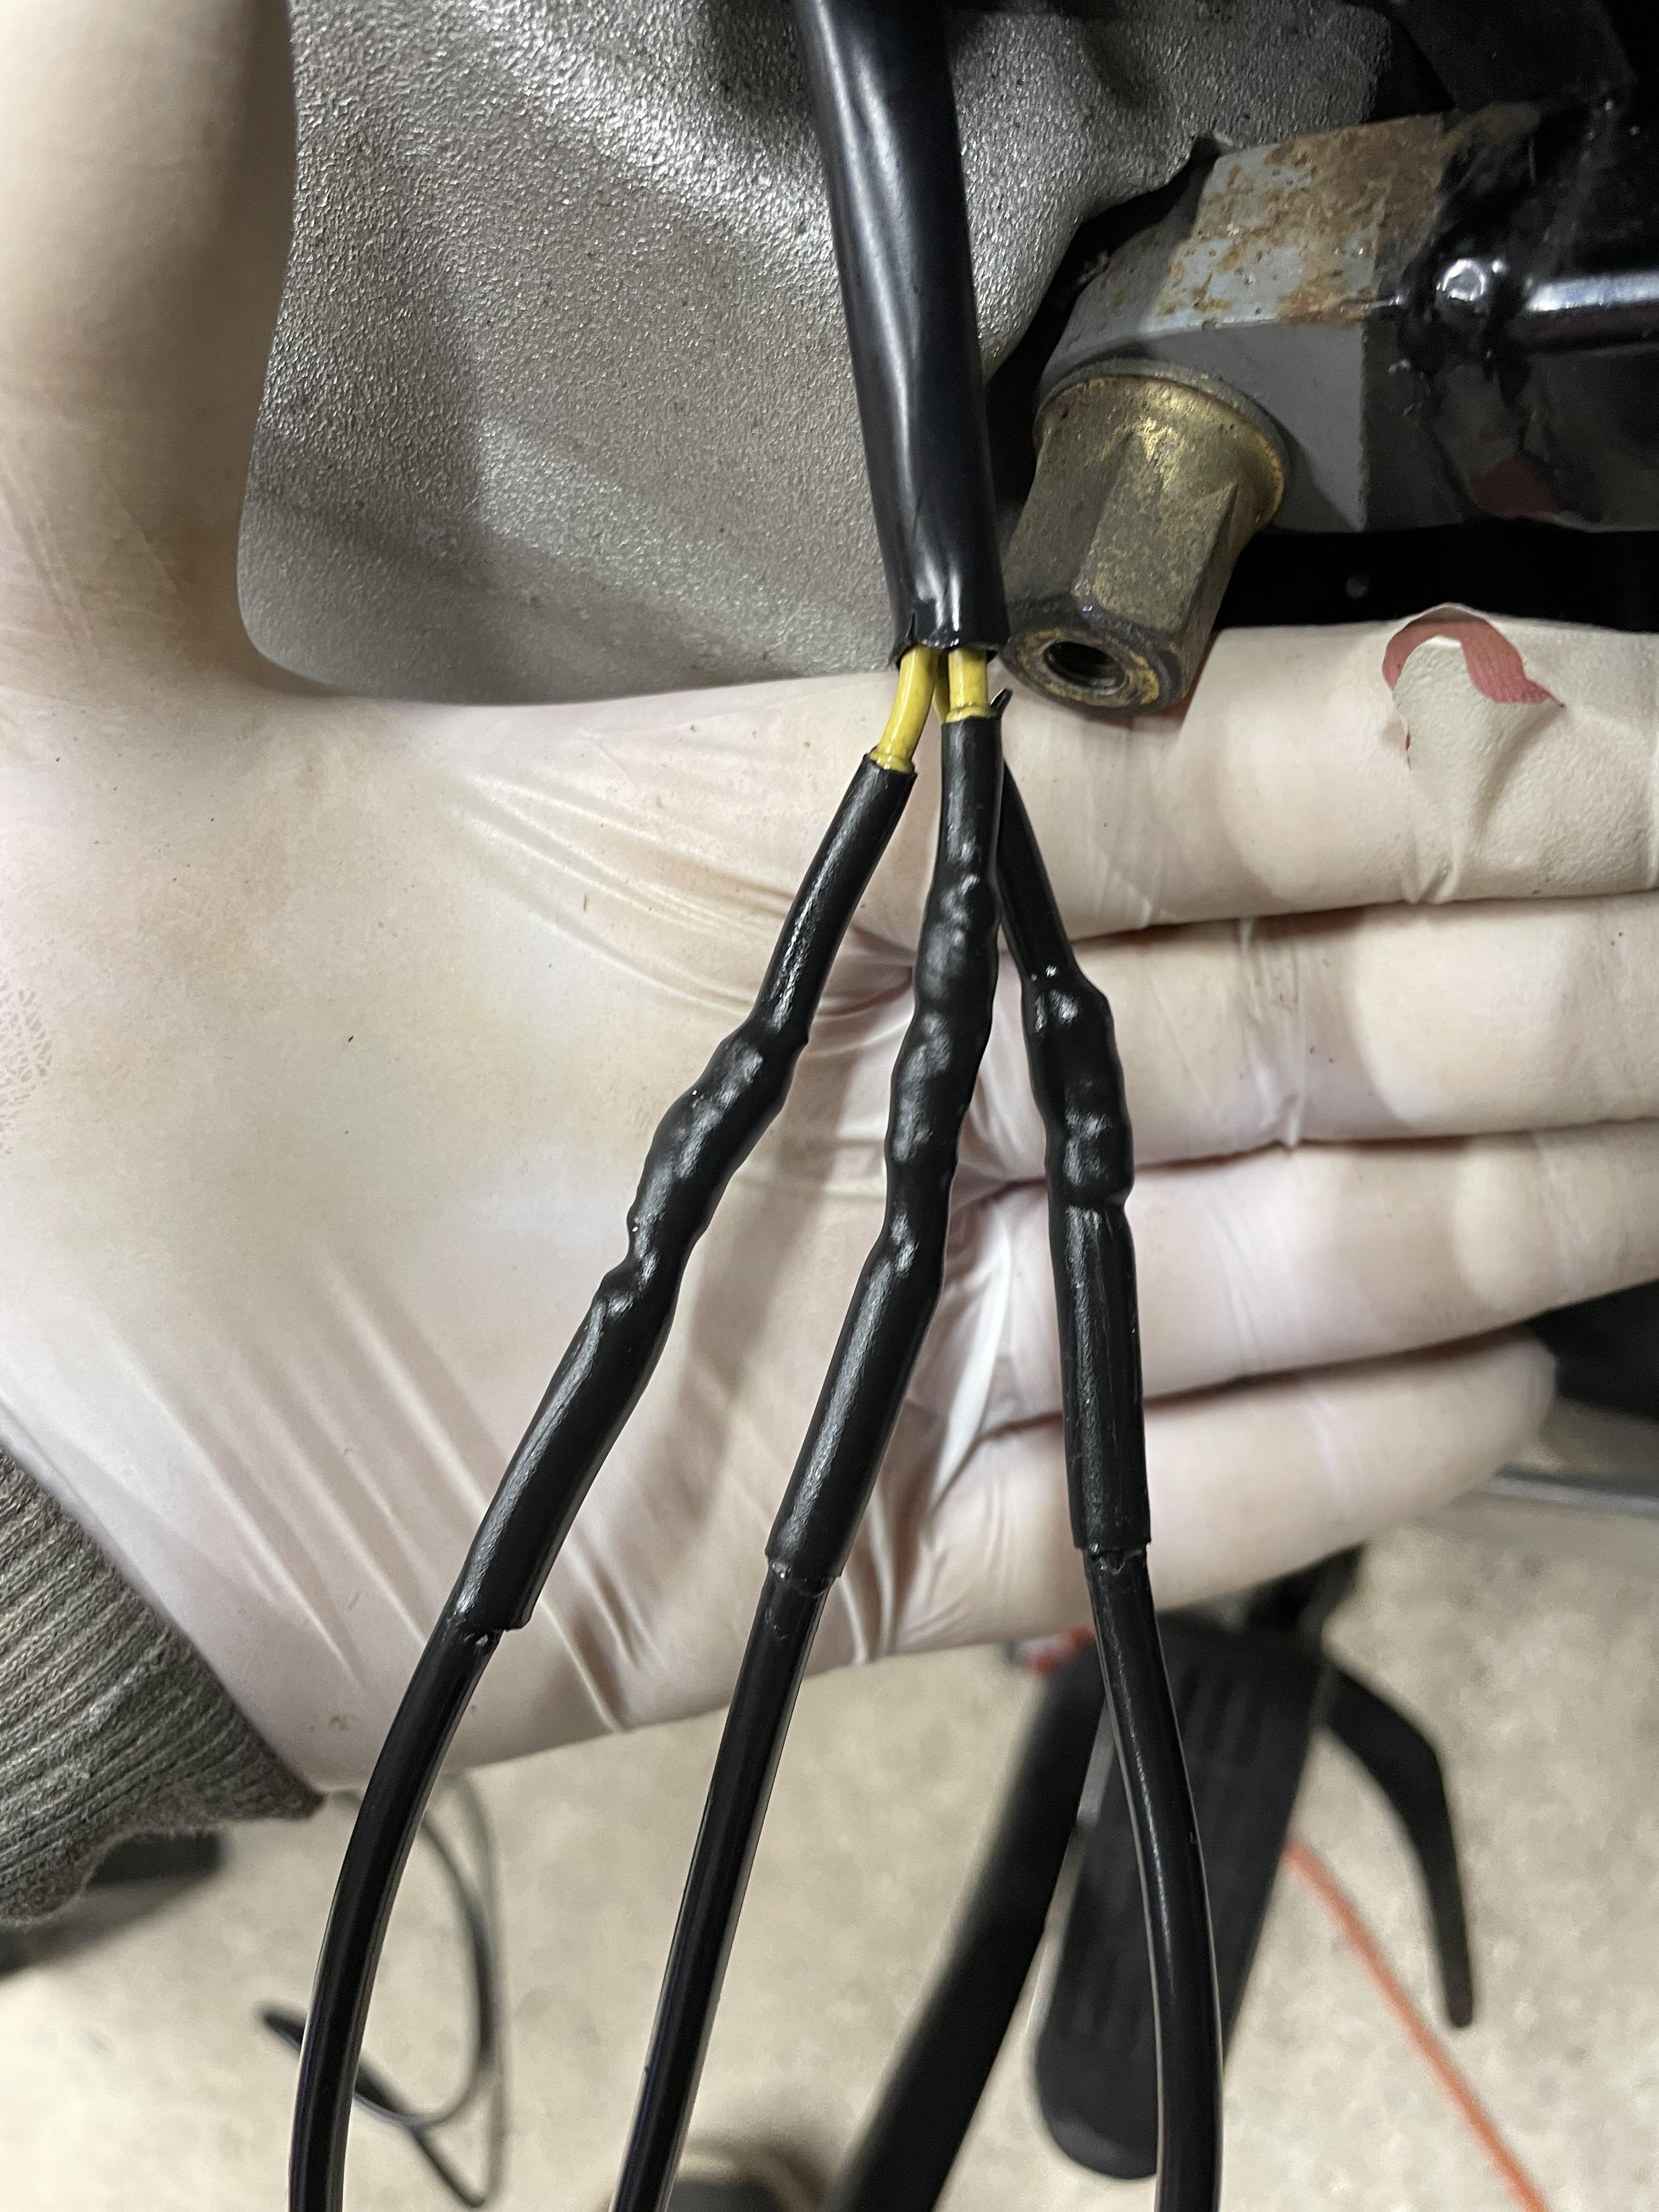
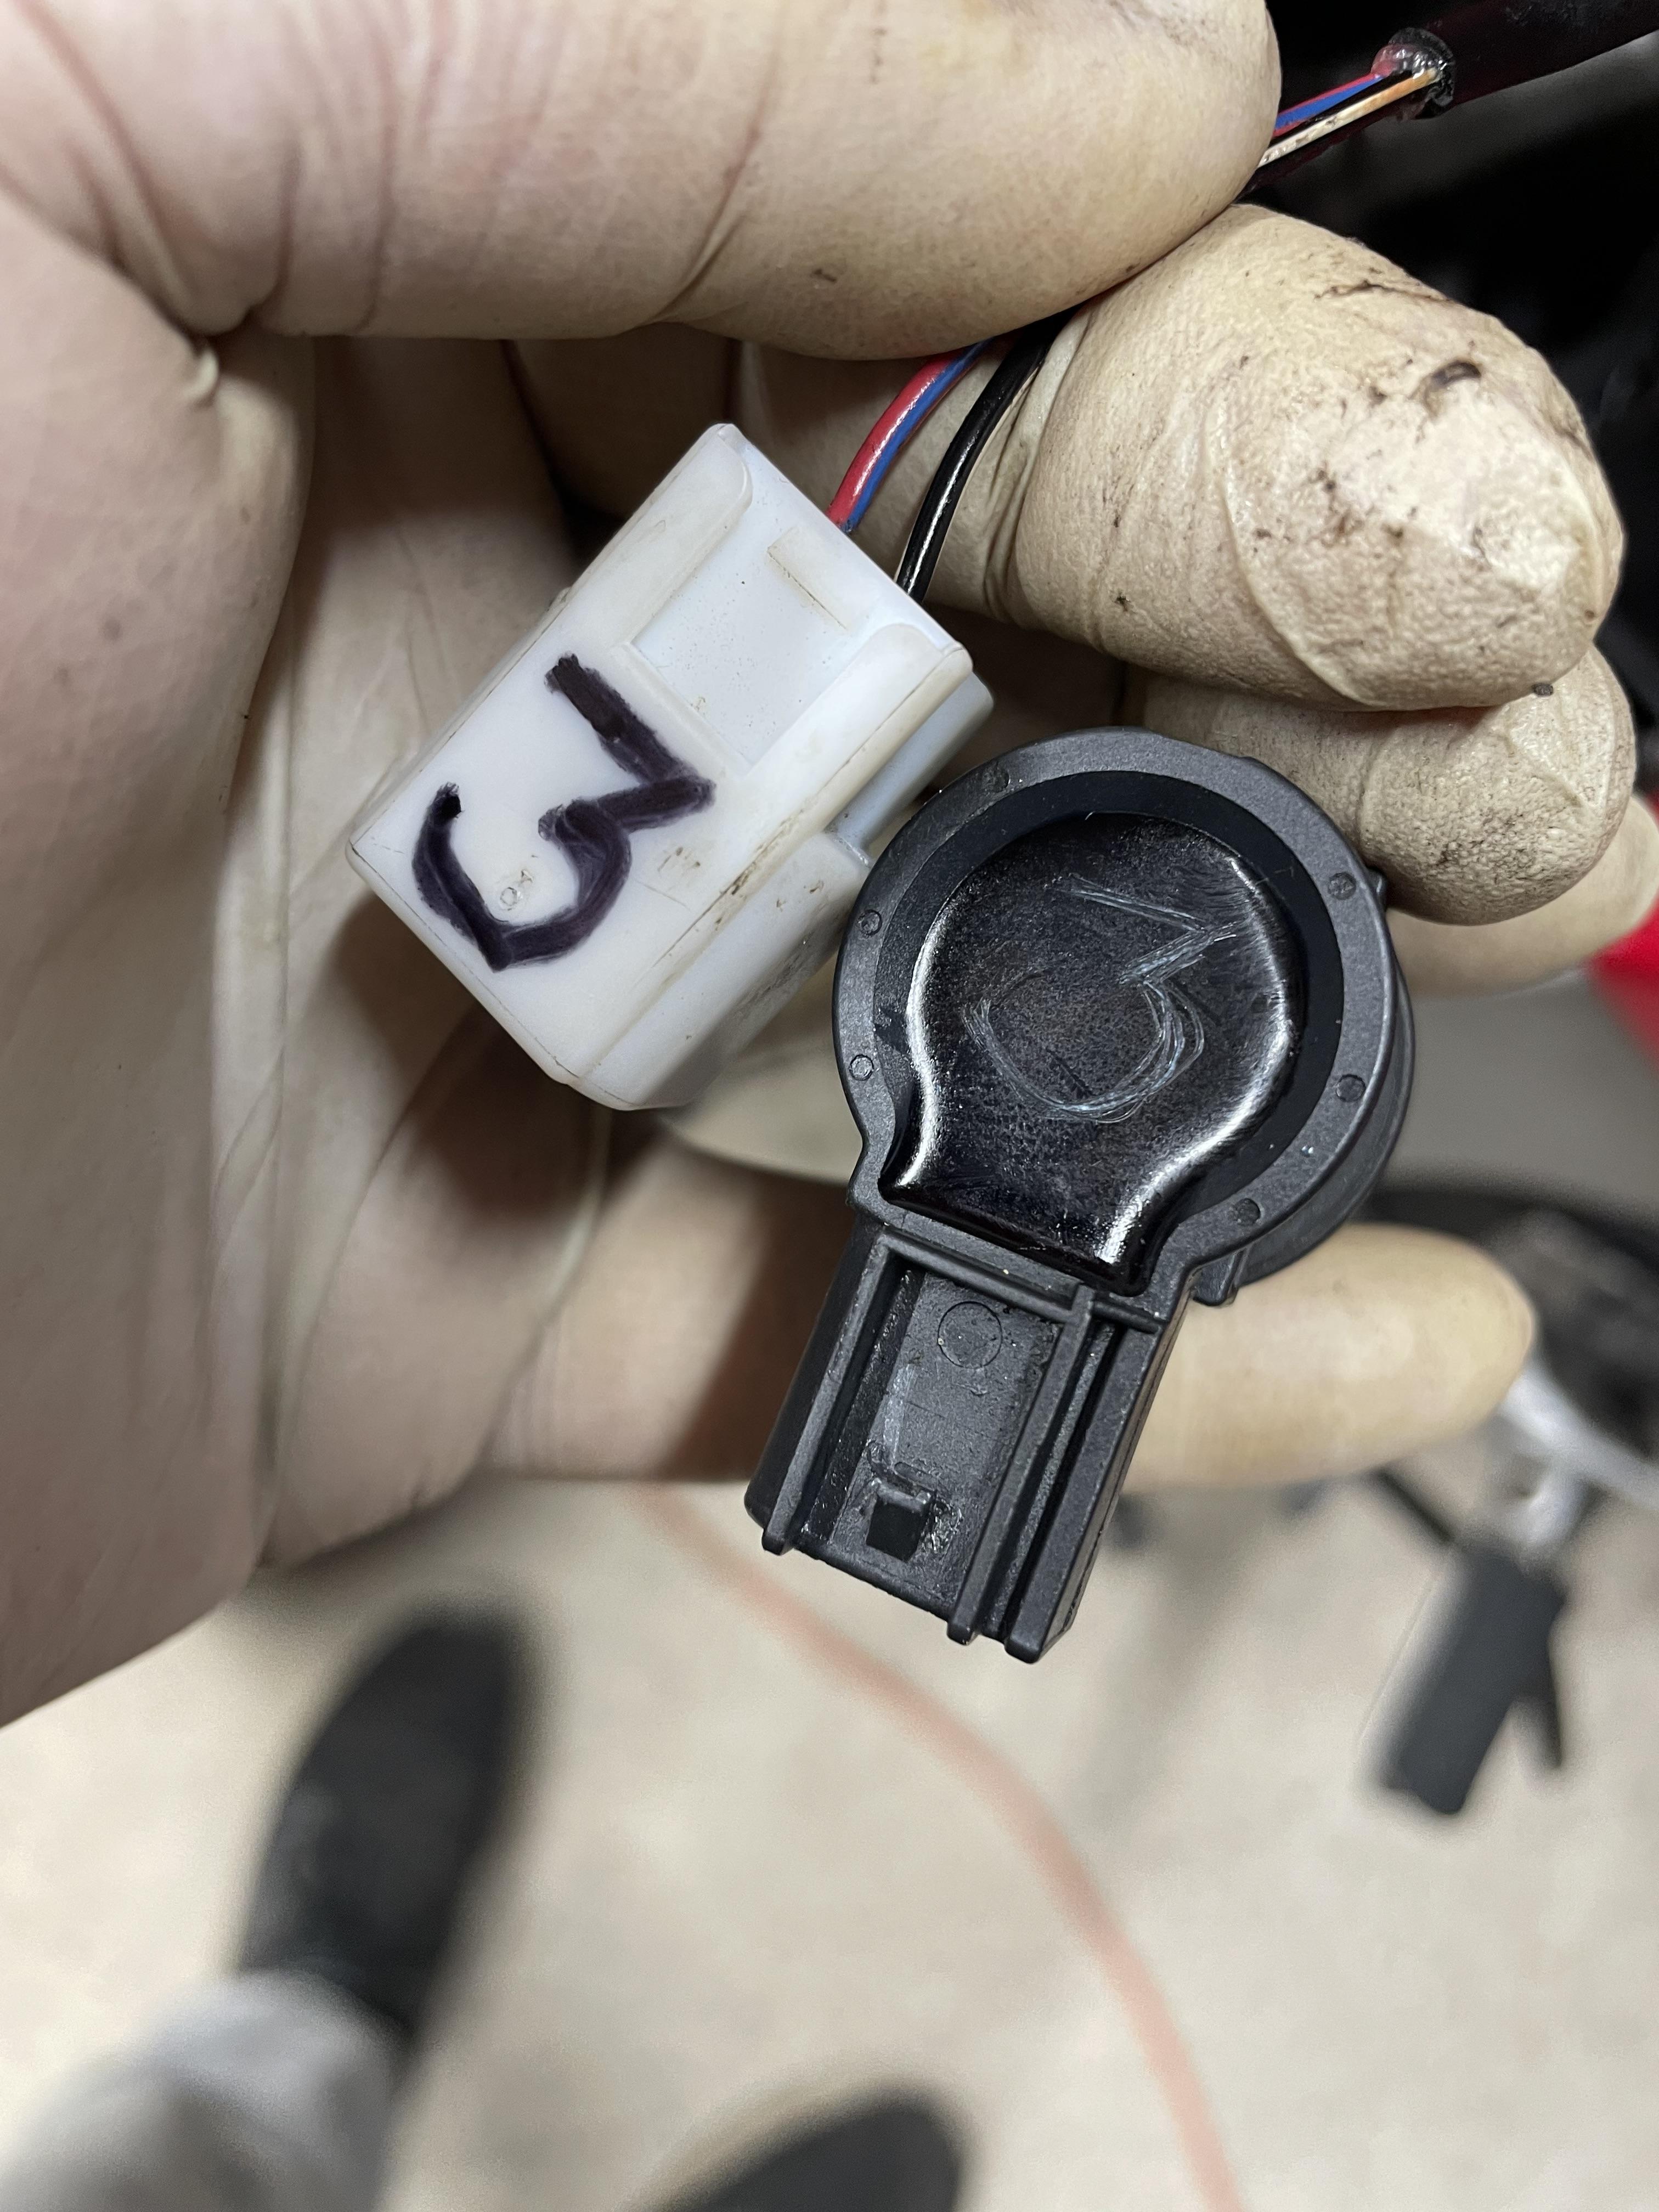
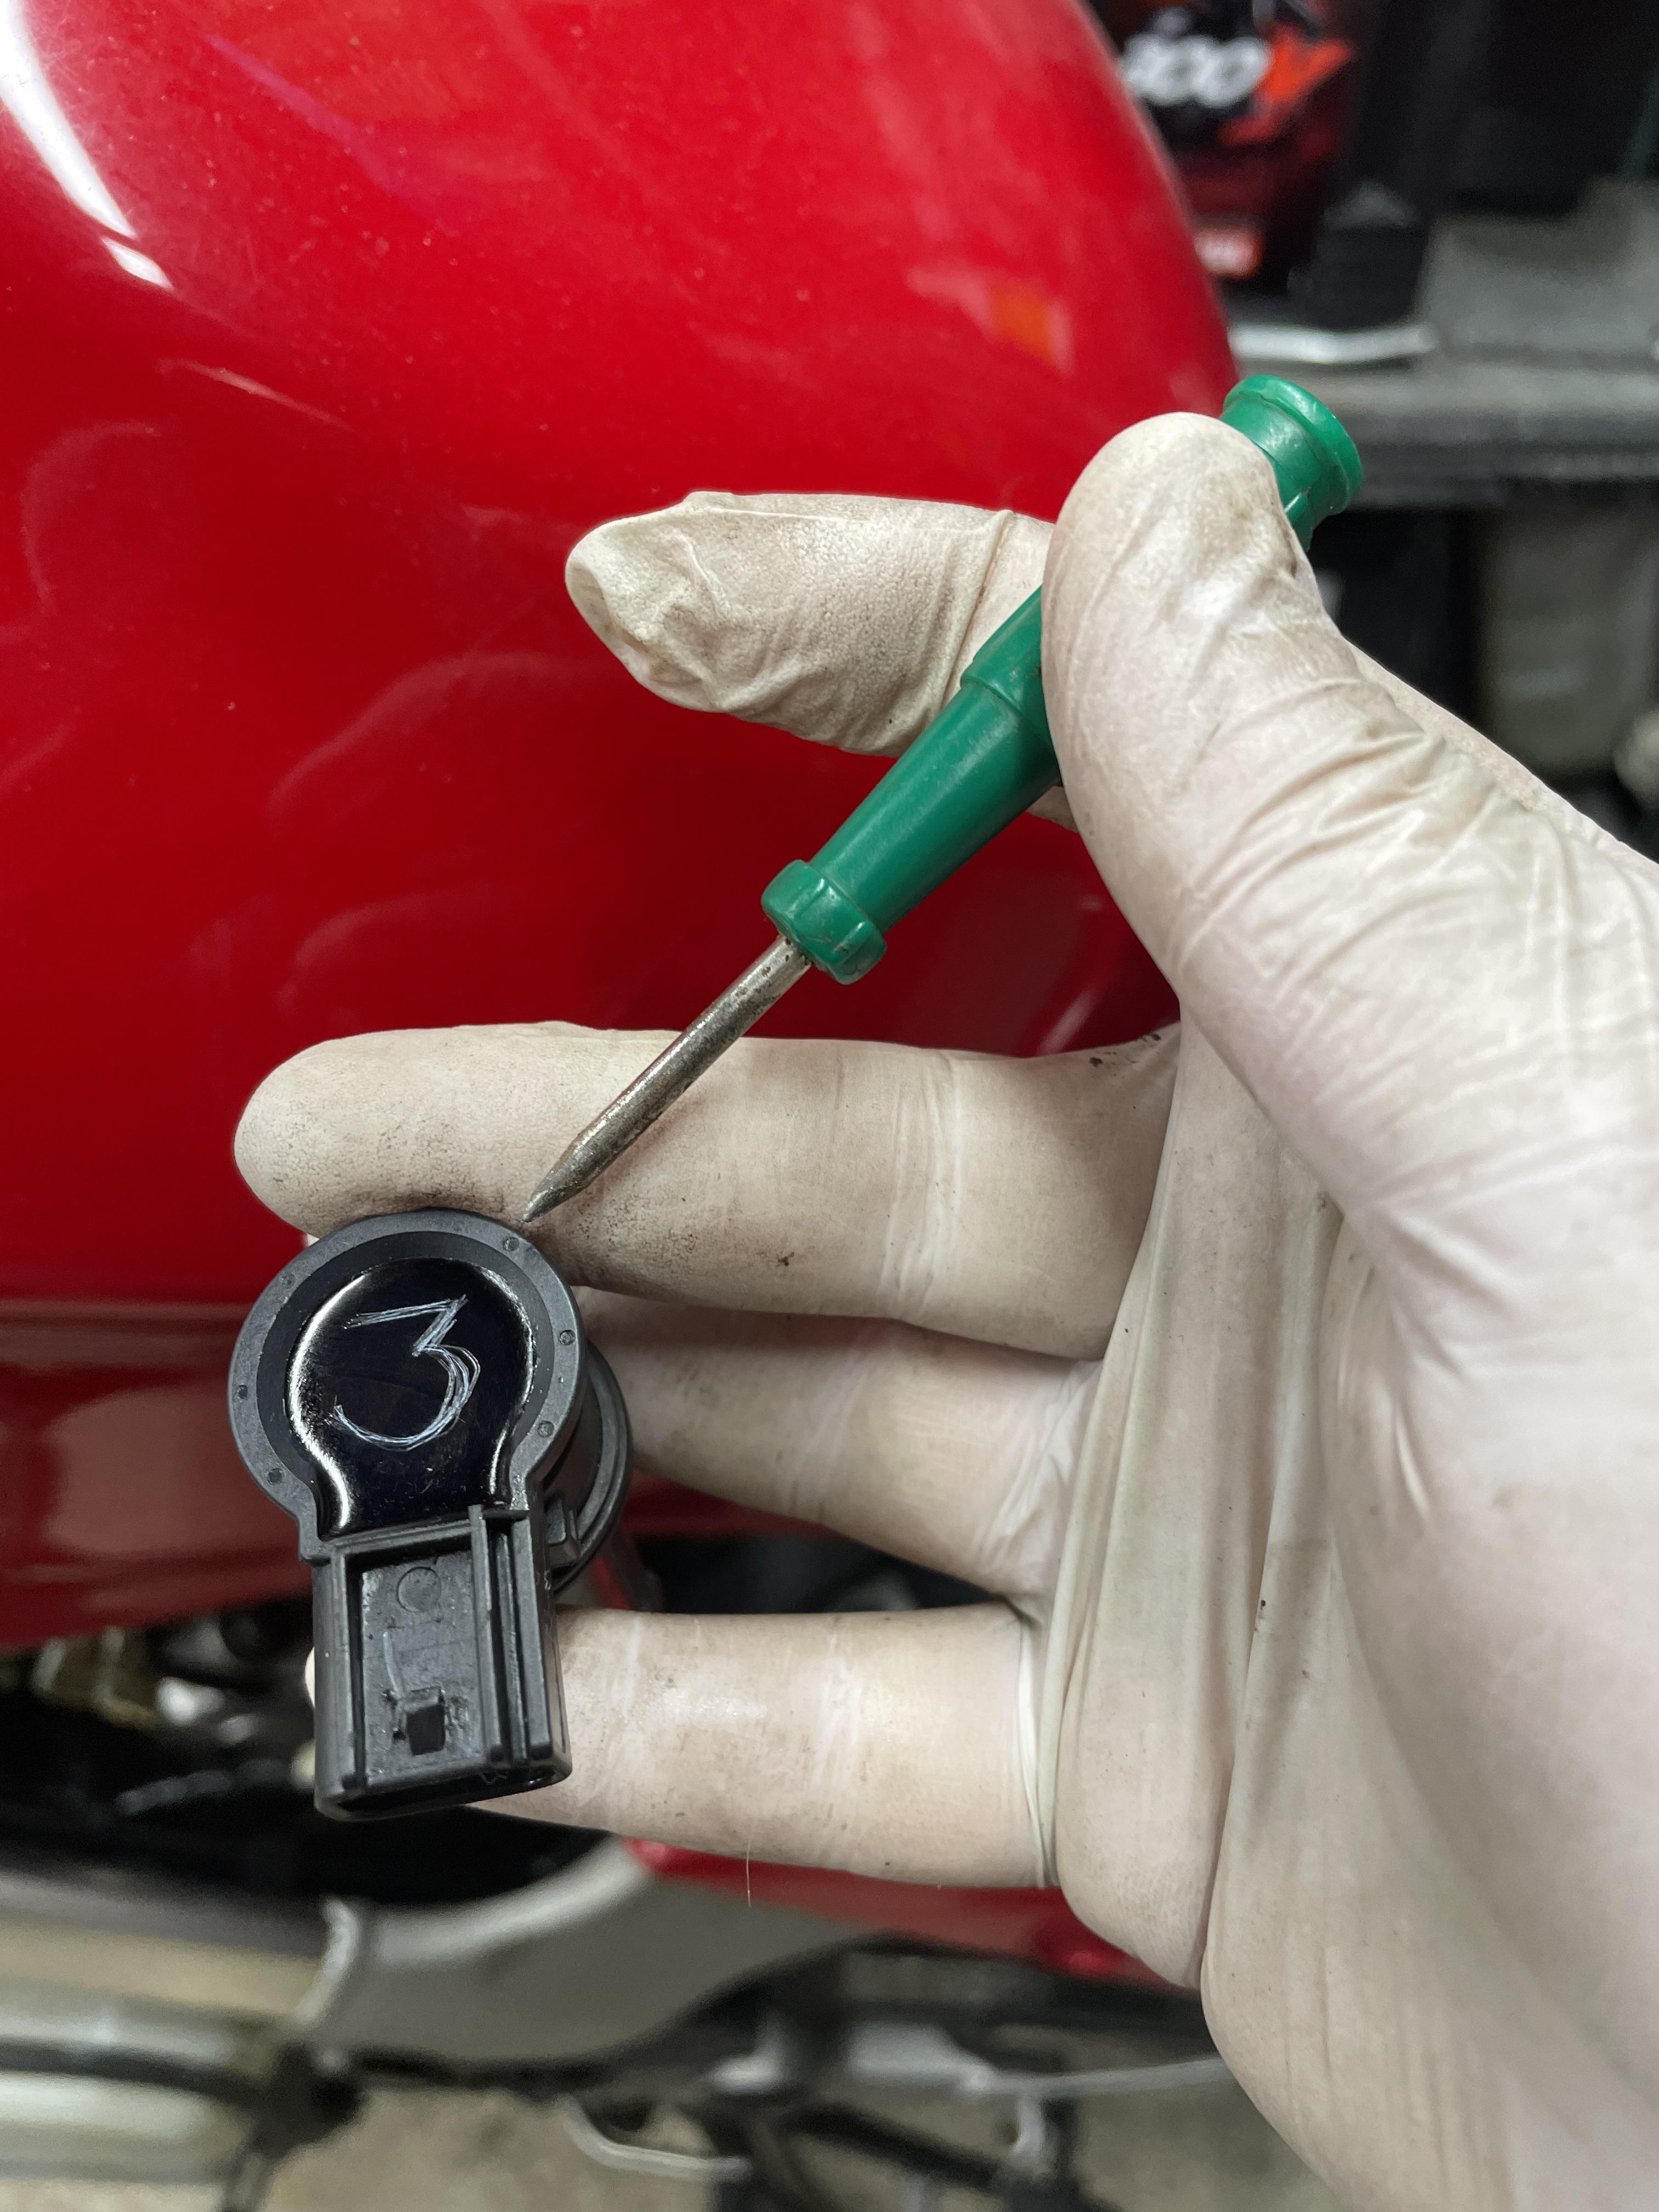
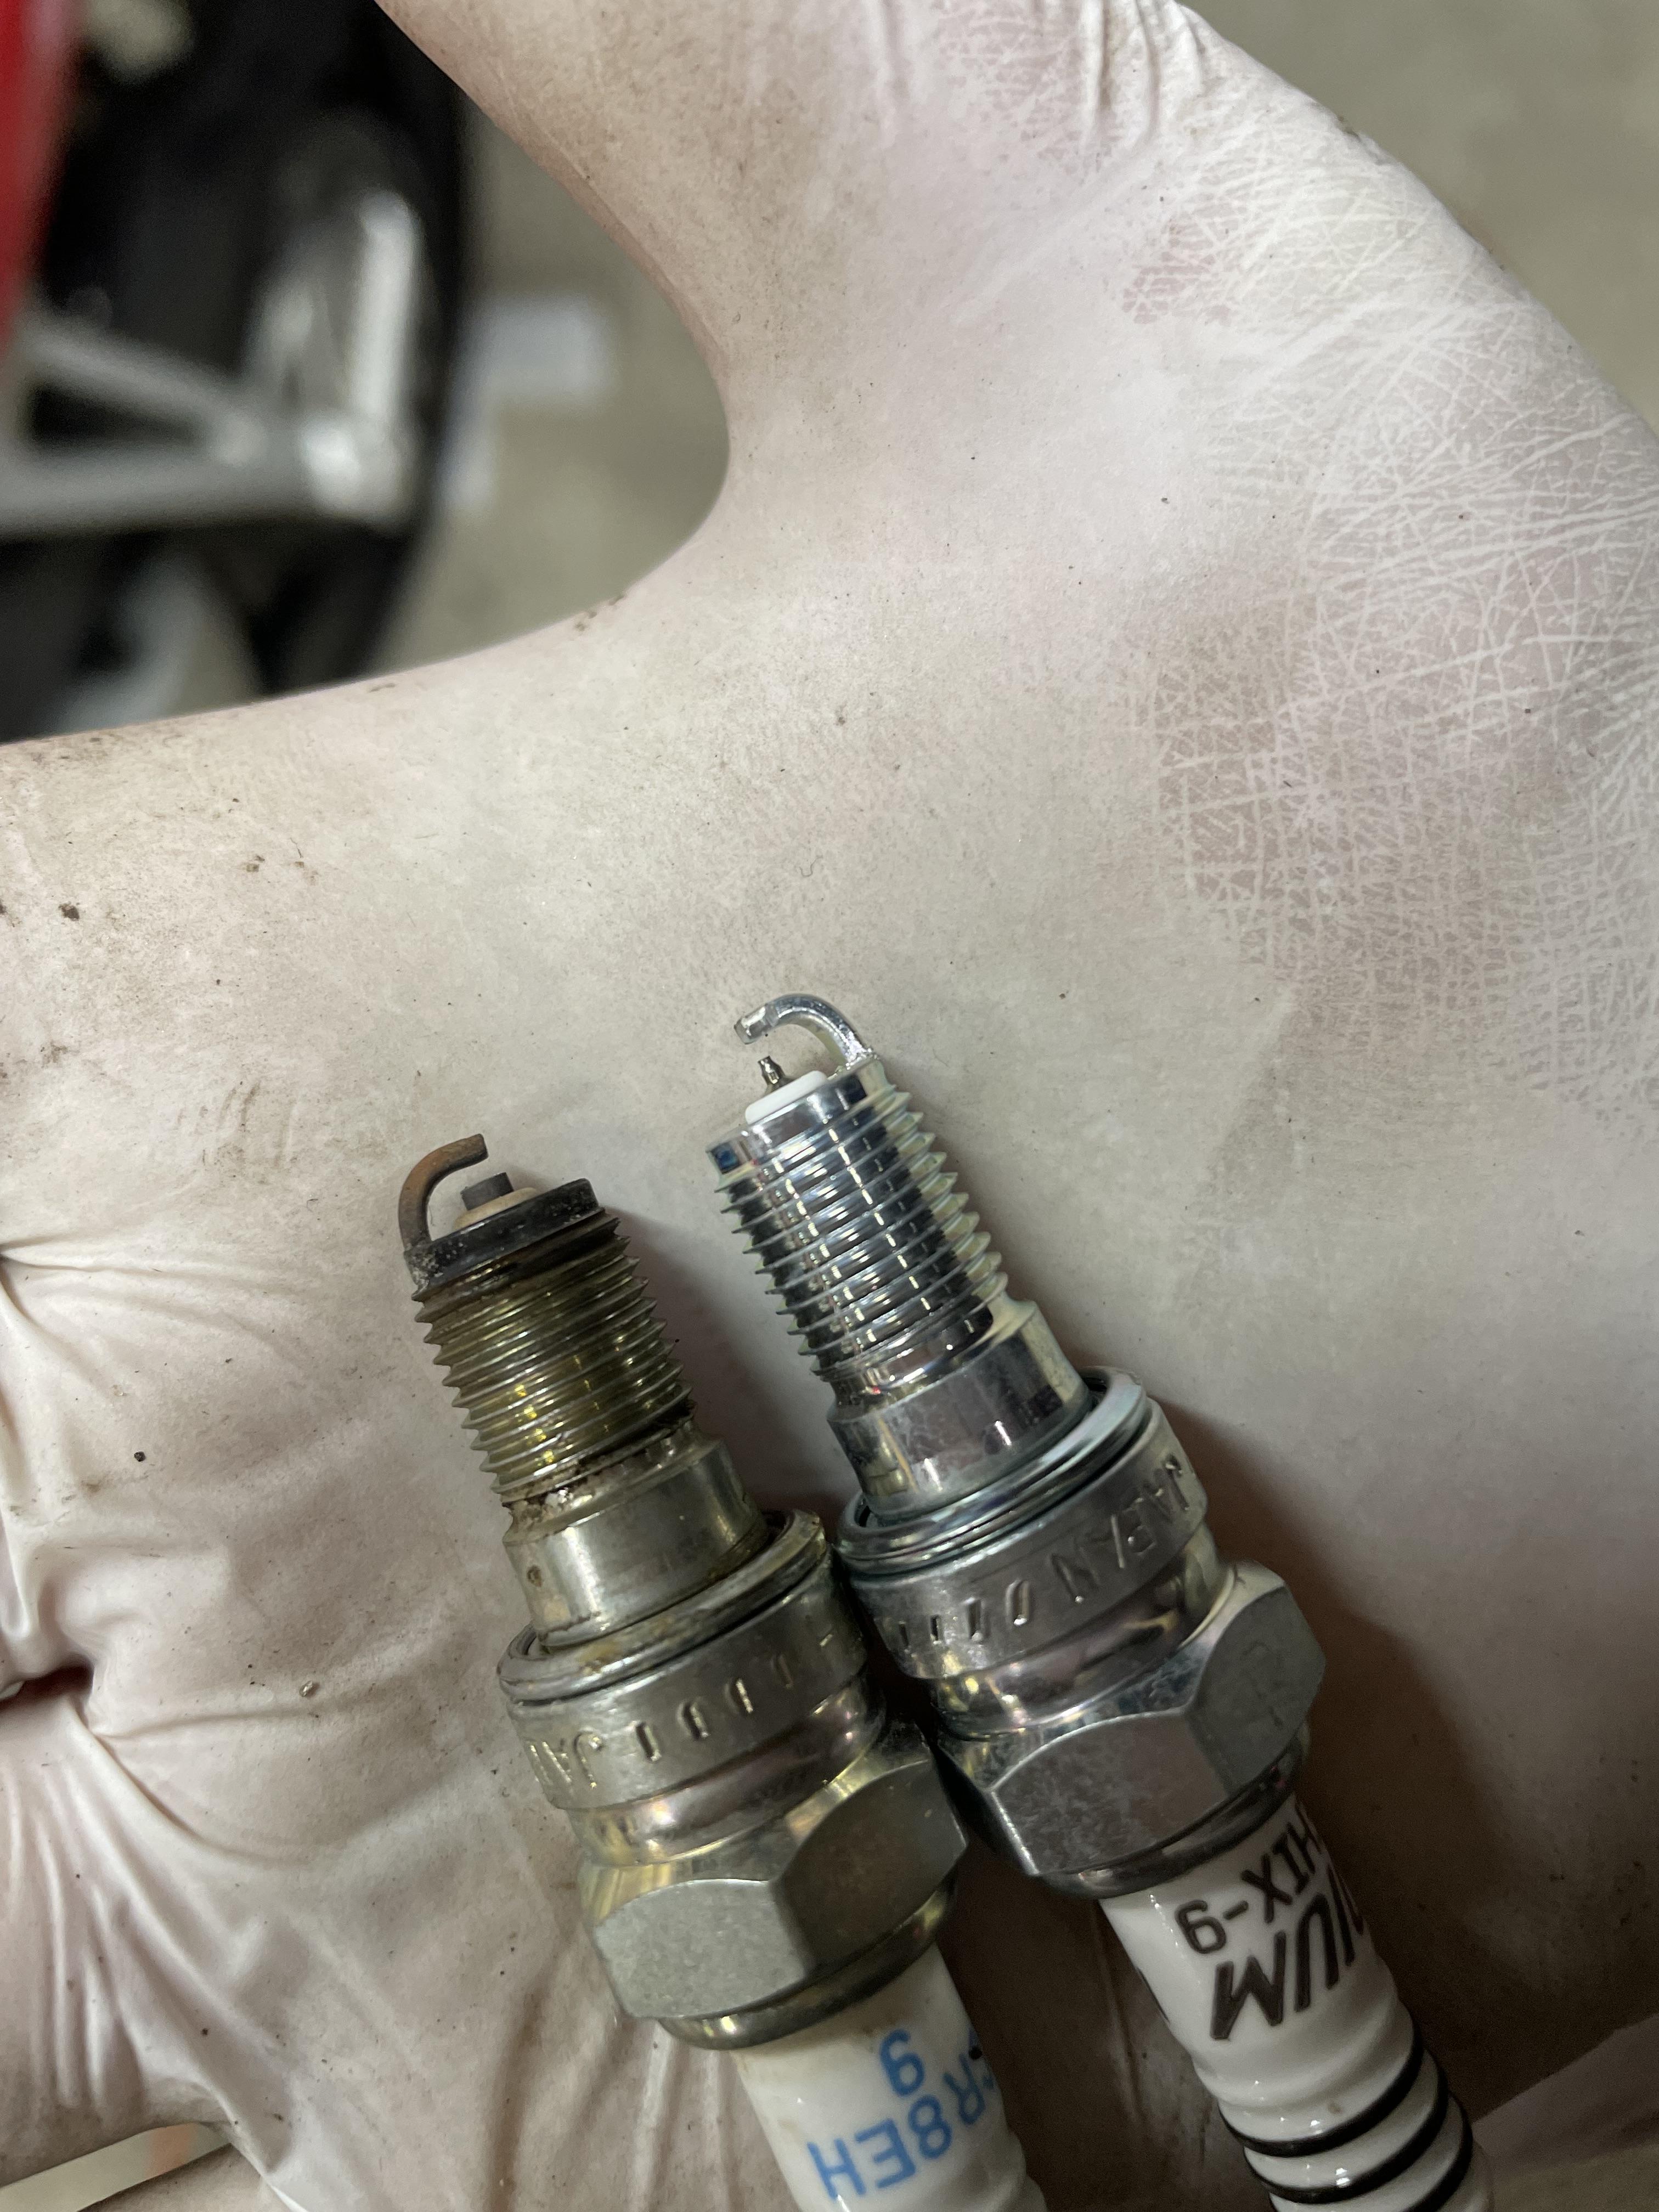
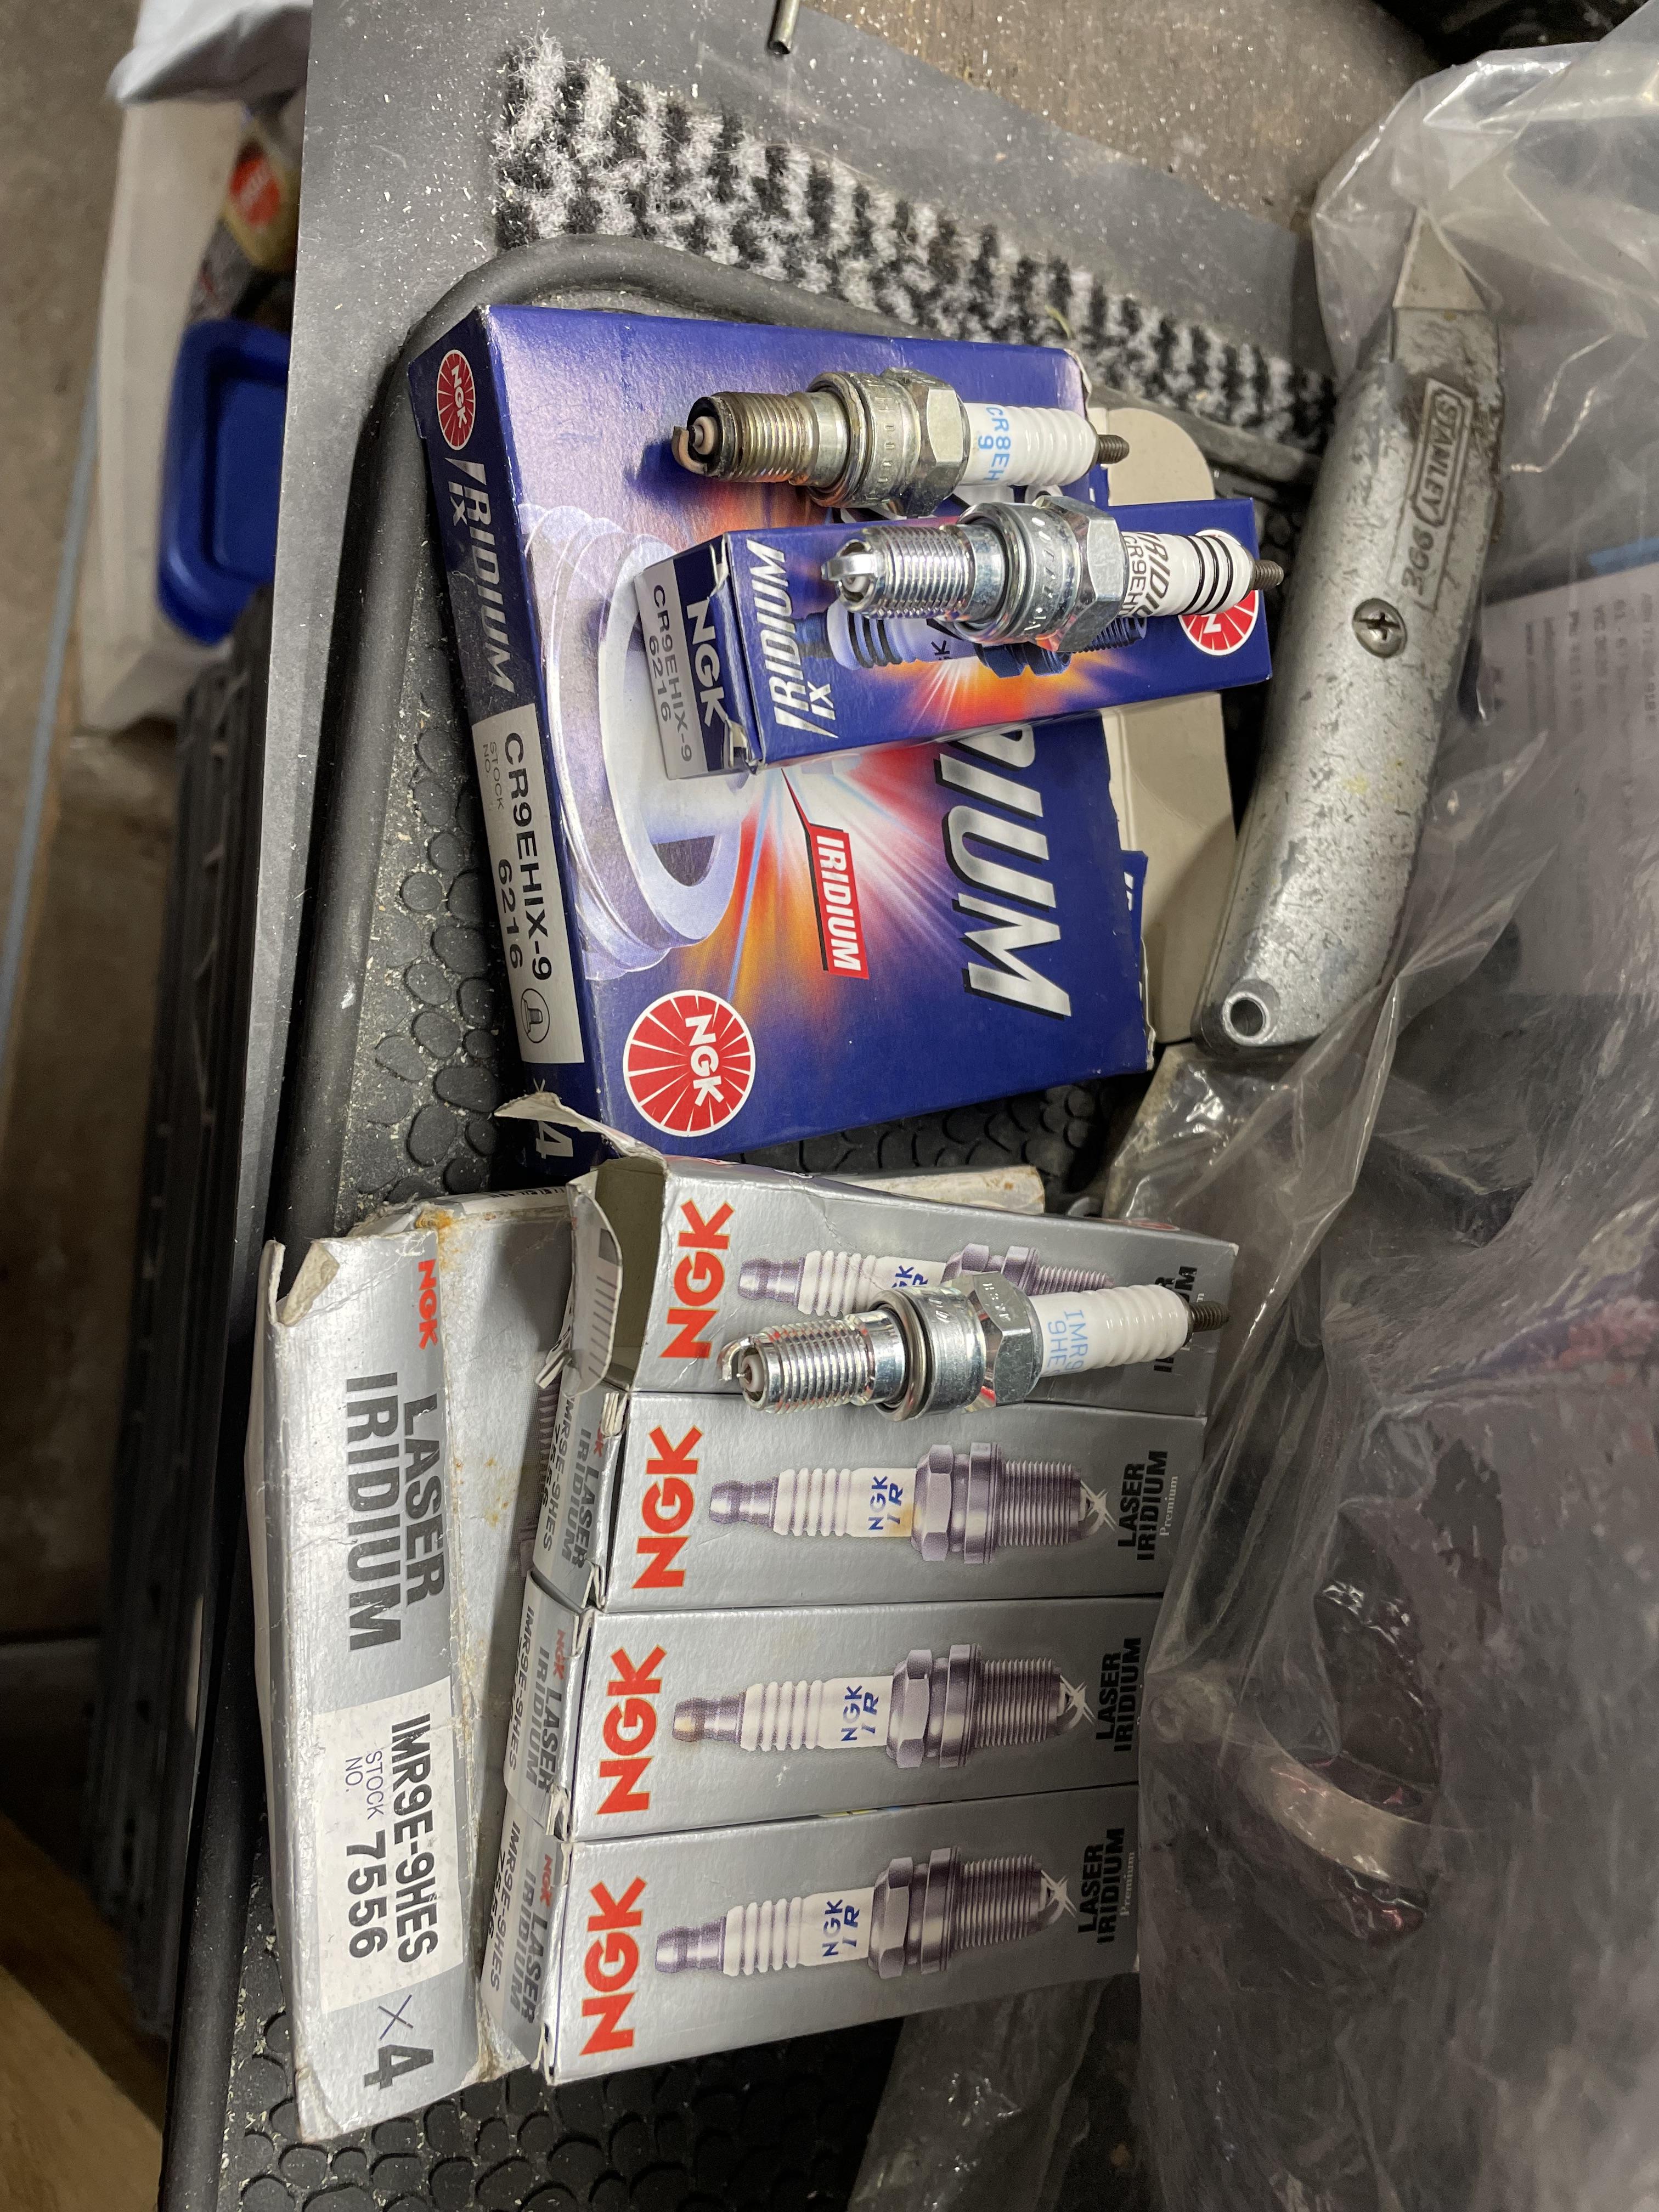
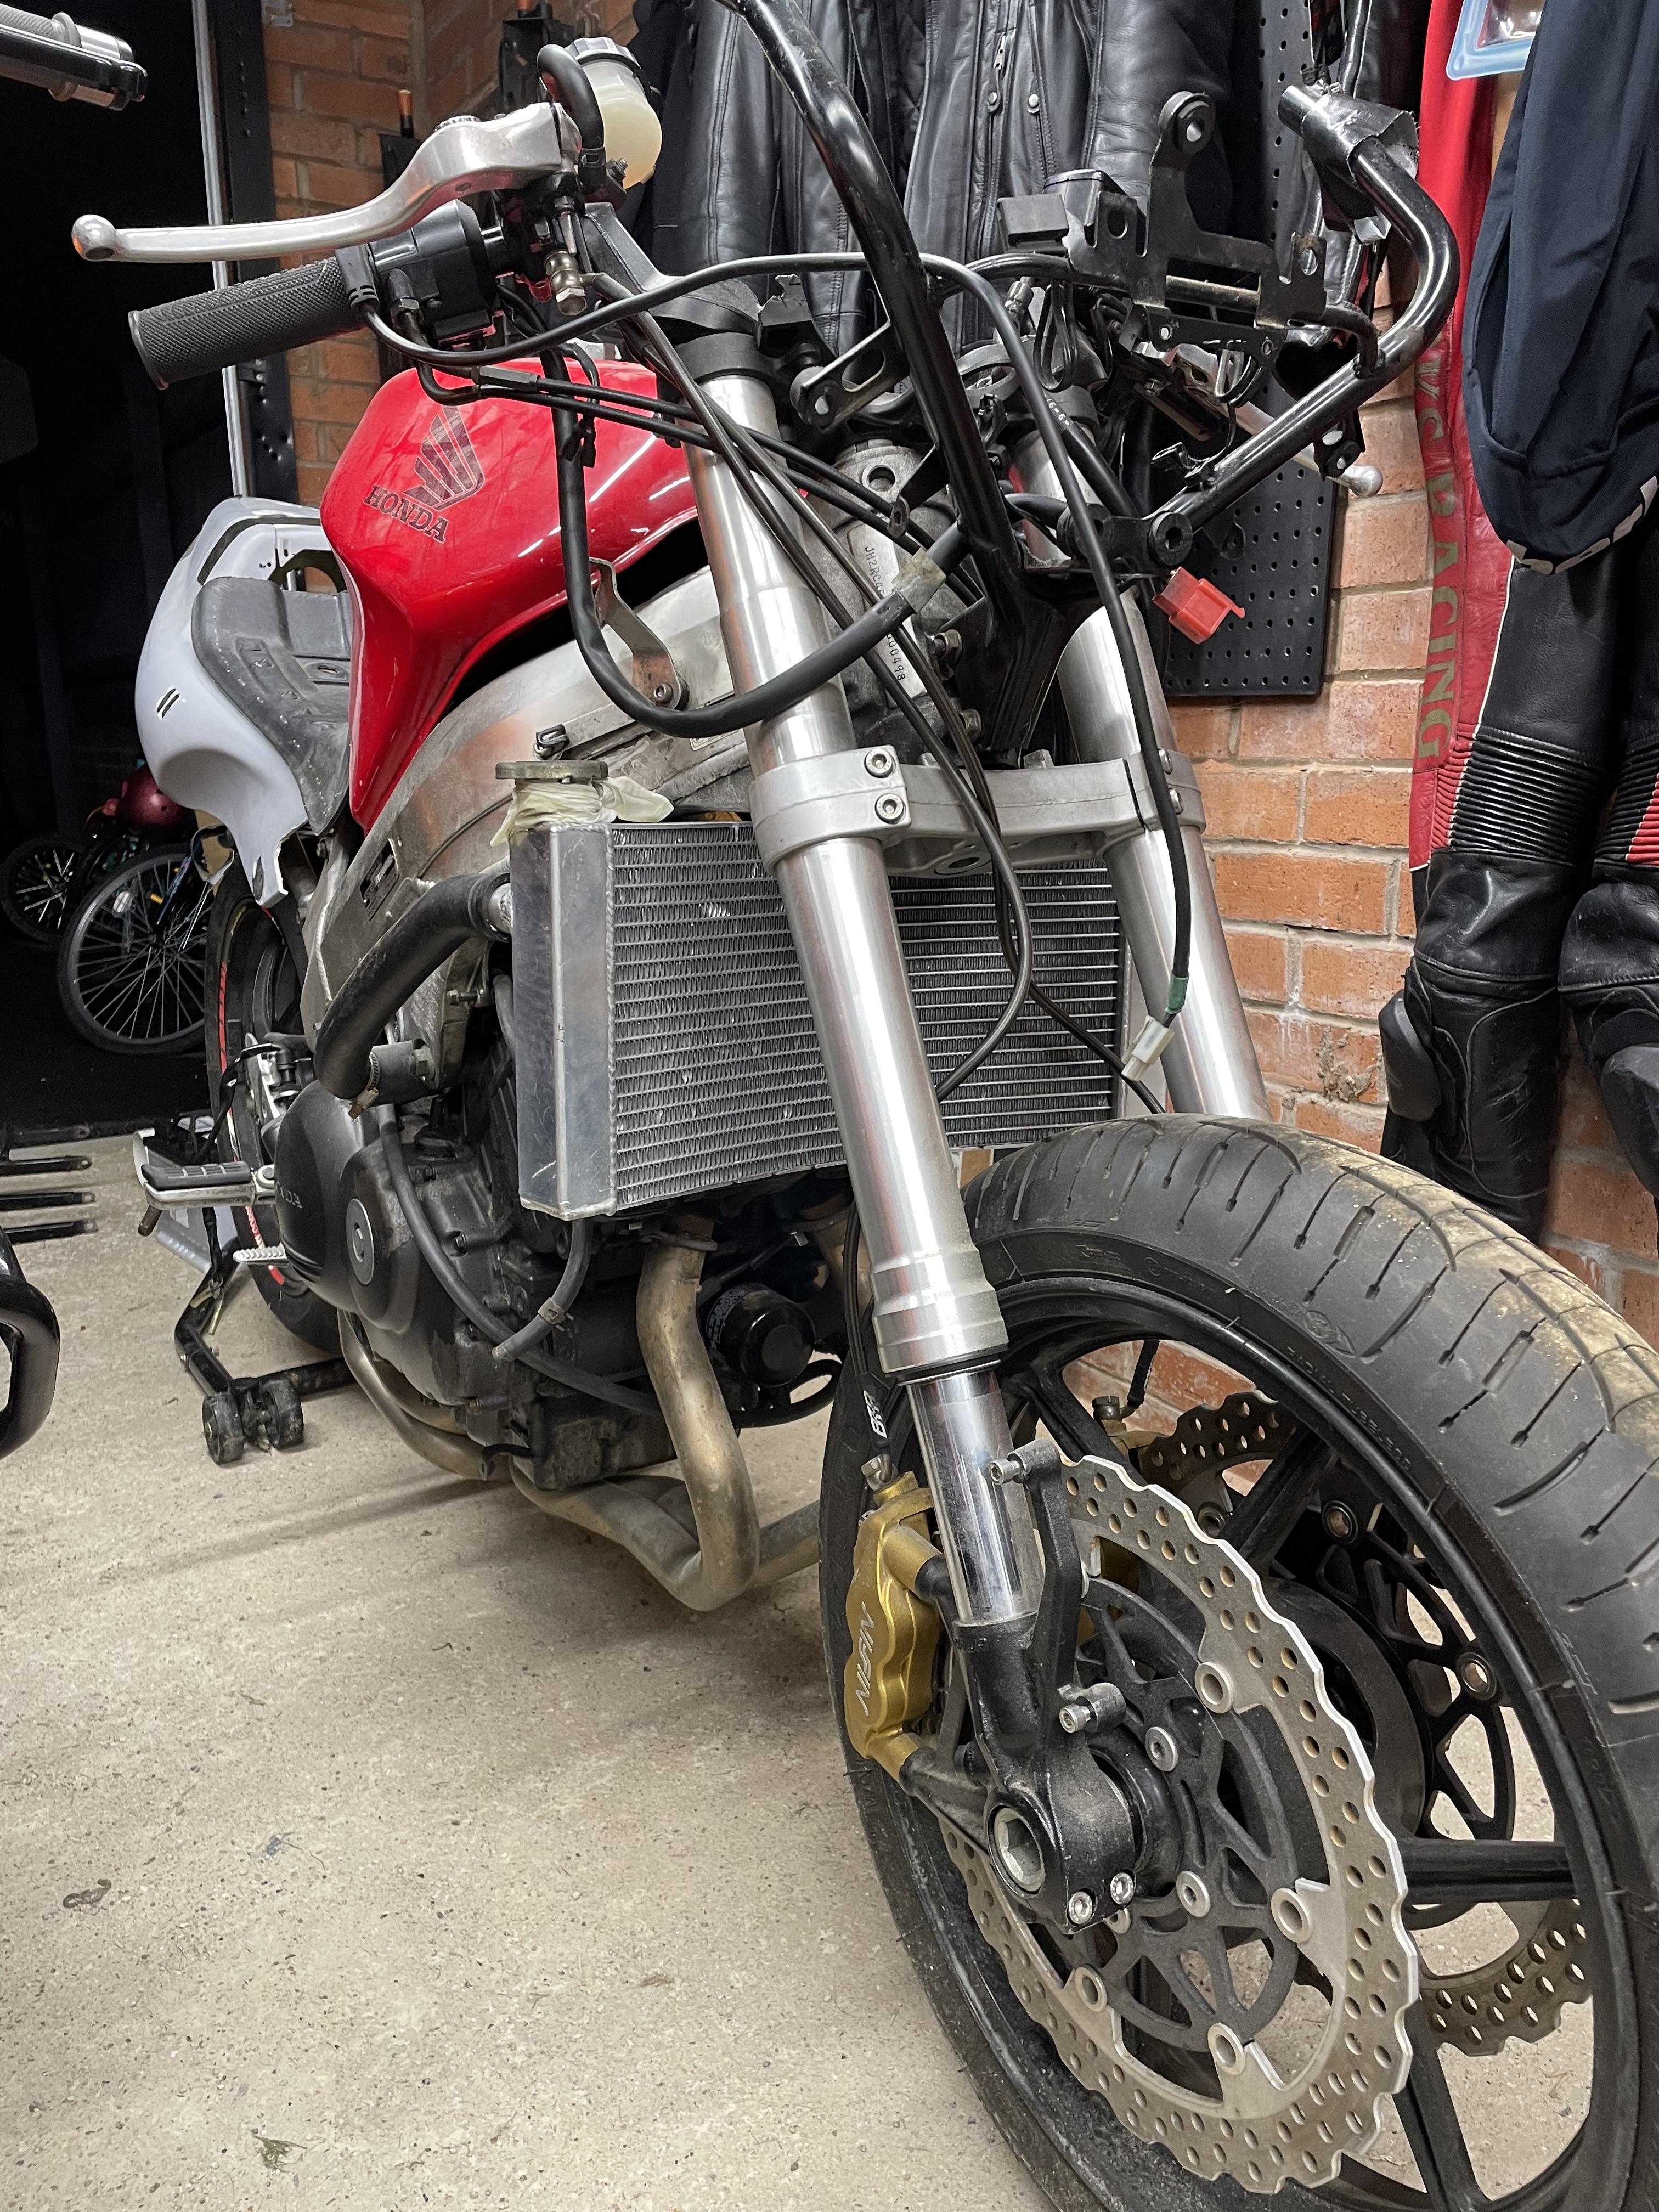
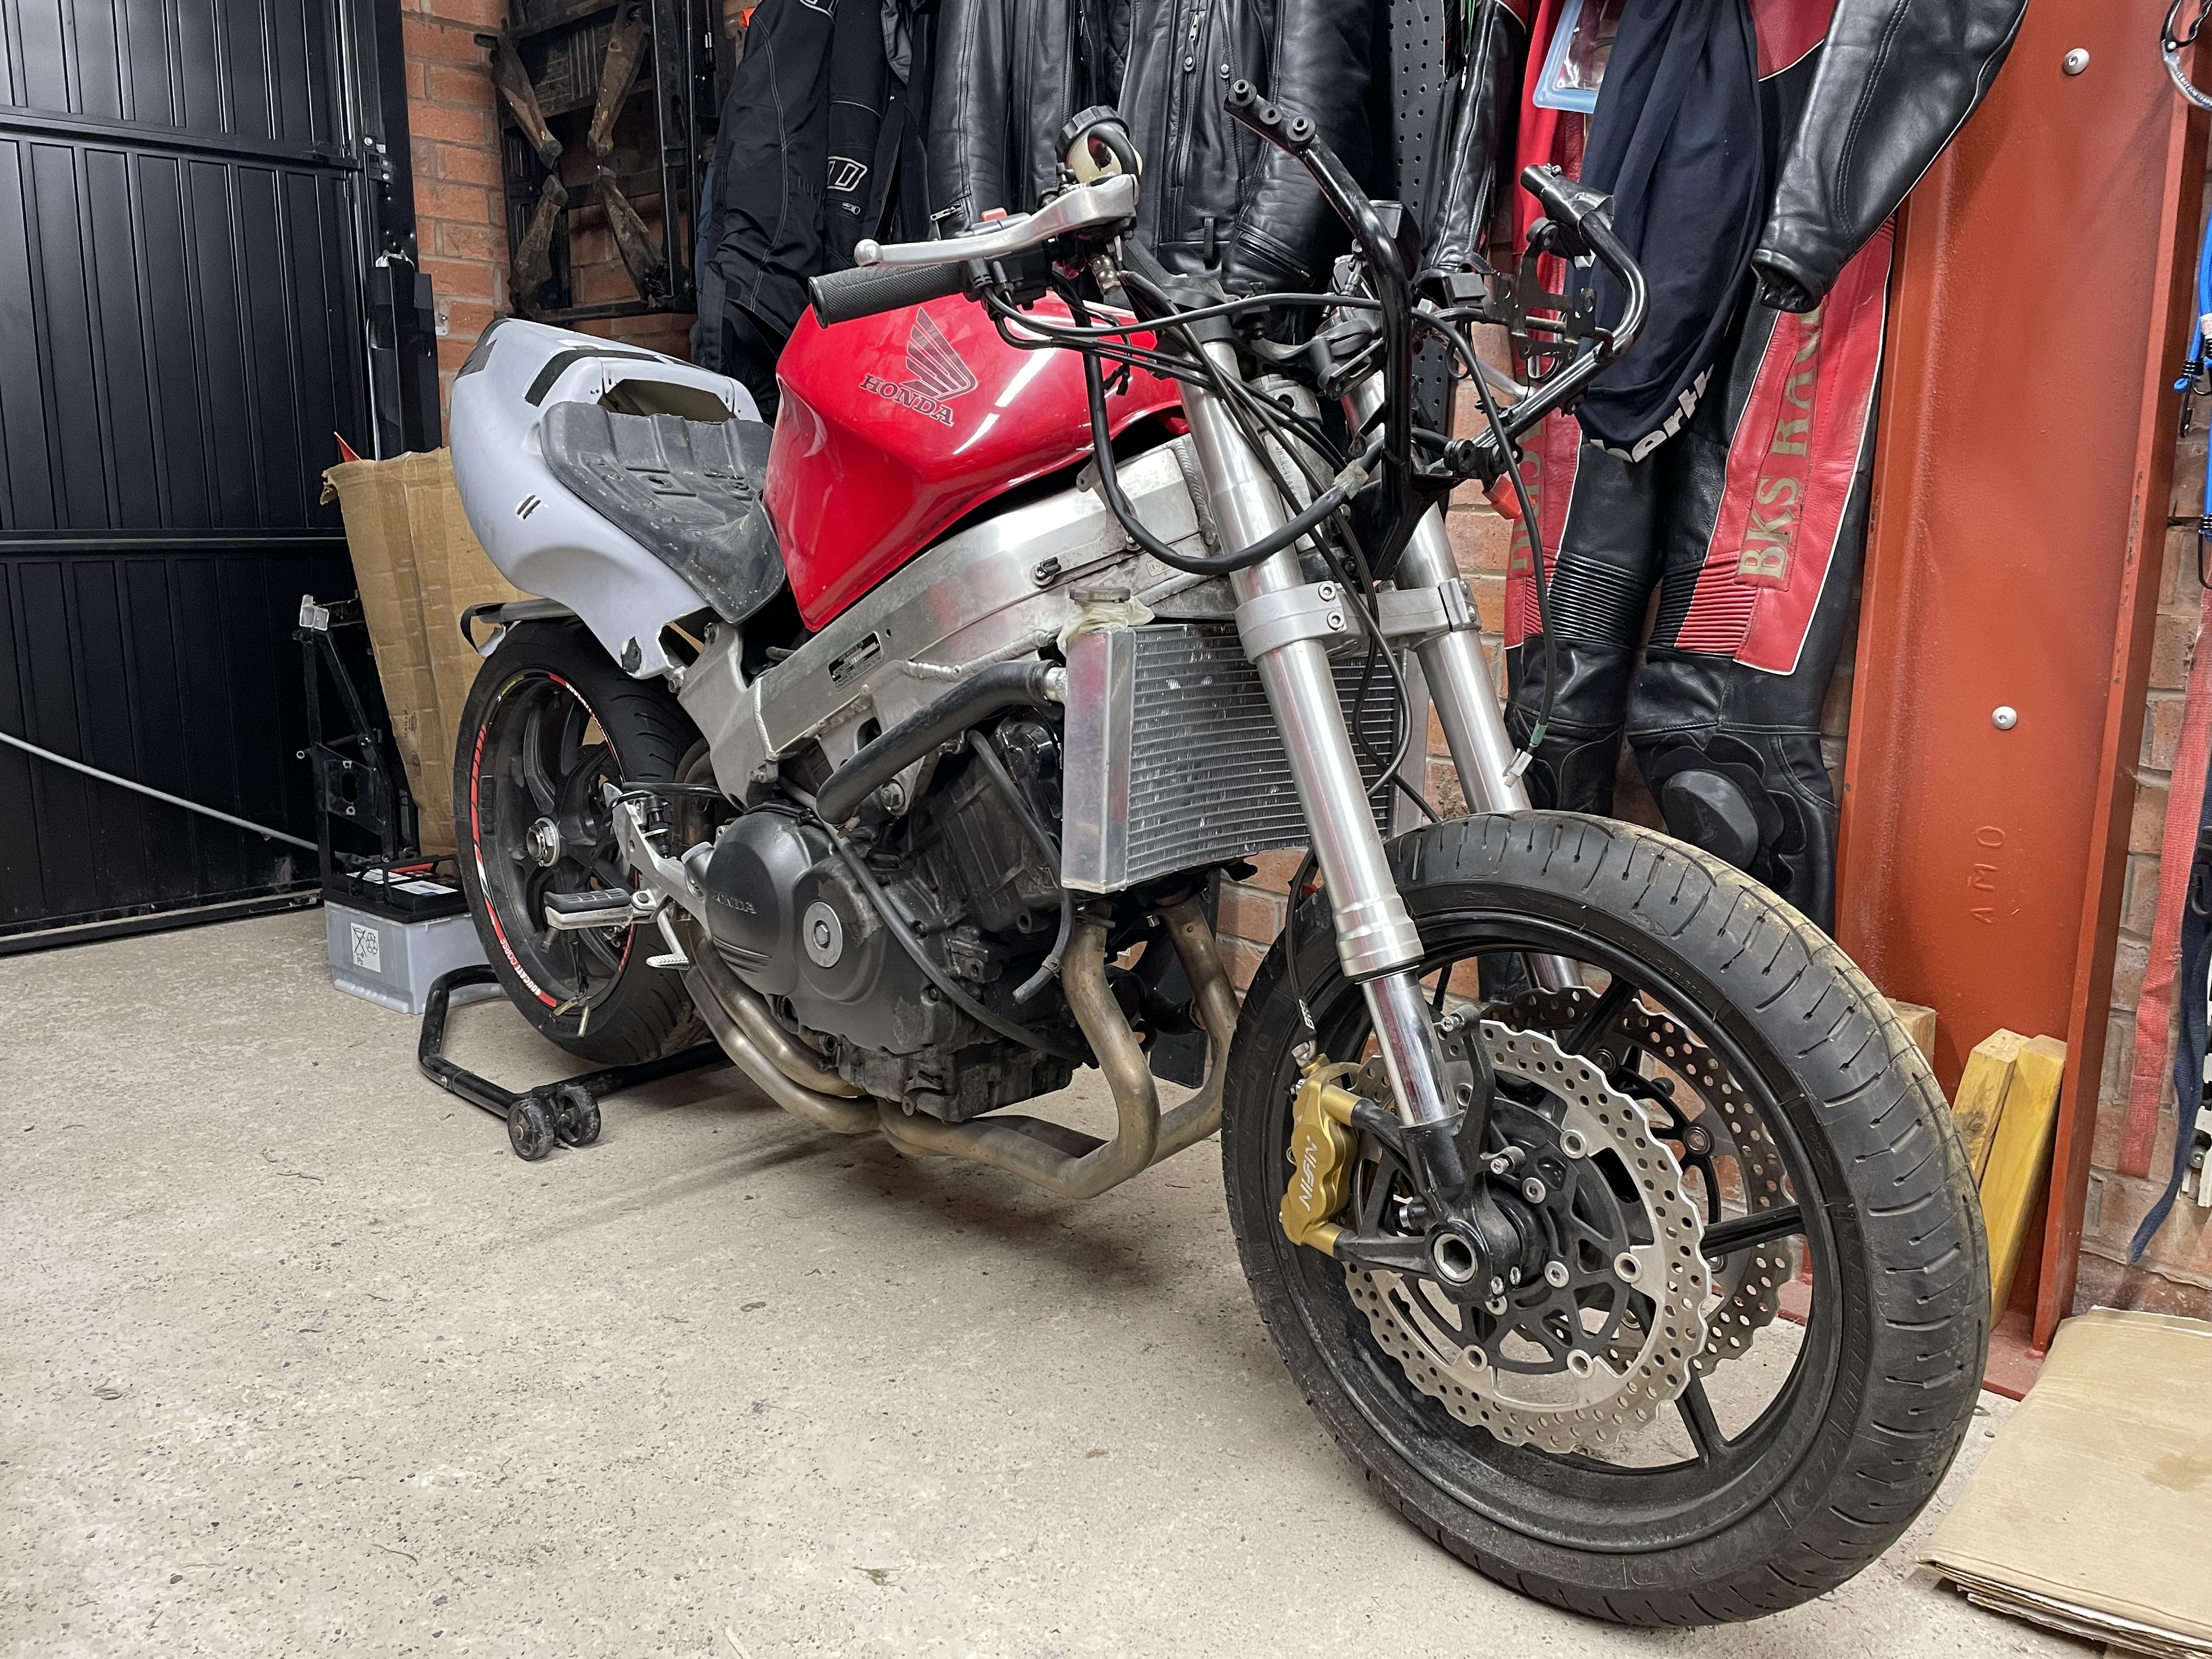
Still stuck on what fairings to fit on the race bike, so thought I’d give the poor old 5th gen “Donkey” some love instead. Hoping inspiration for the racer will strike soon! Had some GSXR 750 coils on the shelf so decided to treat the “Donkey” to them. What a daft idea - took a whole day of messing about and dismantling the bike to to reach the spark plugs, especially the front pair. Many choice words were used! Big thanks to Ranger and Mohawk for pioneering this mod. Followed your thread and cut off connectors from a CBR900 loom, even matching the wire colours. Below I cut out the metal tube from an insulated crimp for a cleaner install. Crimped with a proper tool and slipped adhesive heat shrink over each join, then another bigger tube over them both. Tried to stagger the joins by snipping the wires at different lengths so they’re not right next to each other. Bike has done 29k miles so I thought best to replace spark plugs whilst I’m in there. Wouldn’t want to have to rip the bike apart again so threw in some NGK Iridium ones. Below you’ll see the regular NGK plug (top), the NGK Iridium XI (aftermarket, middle in blue box)) and the Laser Iridium (OEM, bottom in silver box). I believe the Laser Iridium are fitted to the 7th and 8th gen bikes as standard? Apparently the Iridium IX are good for 40-50k miles, whereas the Laser are good for 80-100k. Closeup of the firing electrodes on a regular vs Iridium IX plug. See how fine the iridium one is? NGK Iridium IX going into the Donkey and Laser Iridium saved for the racer. Scratched each coil top with the cylinder it belongs to, and also marked the end of each connector with the same number. Should reduce confusion if I ever tear the bike down in future. The Donkey now fires up nicely, as it did before, but at least the coil clutter is gone so bike is easier to work on. Fresh plugs also a bonus. Next up is clutch master and slave upgrade on the Donkey…
-
Thanks for the input again, gentlemen. Mohawk, I think that’s a VTR1000 front fairing and CBR1000 rear. Does show that 1000cc fairings fit the VFR, though. And Captain 80’s is right about the high bars not fitting easily, although some VTR guys are trimming their fairings to fit Superbike bars. Anything’s possible. Here’s the perfect bubble fairing on a Firestorm but turns out it’s a one-off so can’t get it. https://www.bikebound.com/2021/07/20/fvtr/ Looks like a Ducati of some sort and can fit high bars, but it sits higher than Captain 80’s ideal of tank-to-headlight perfection. Would be much sexier a couple inches lower.
-
I like this. Will look to model the new fairing on this concept. Currently the existing fairing stay limits where I can trial-fit things. Should really pull it off for this.
-
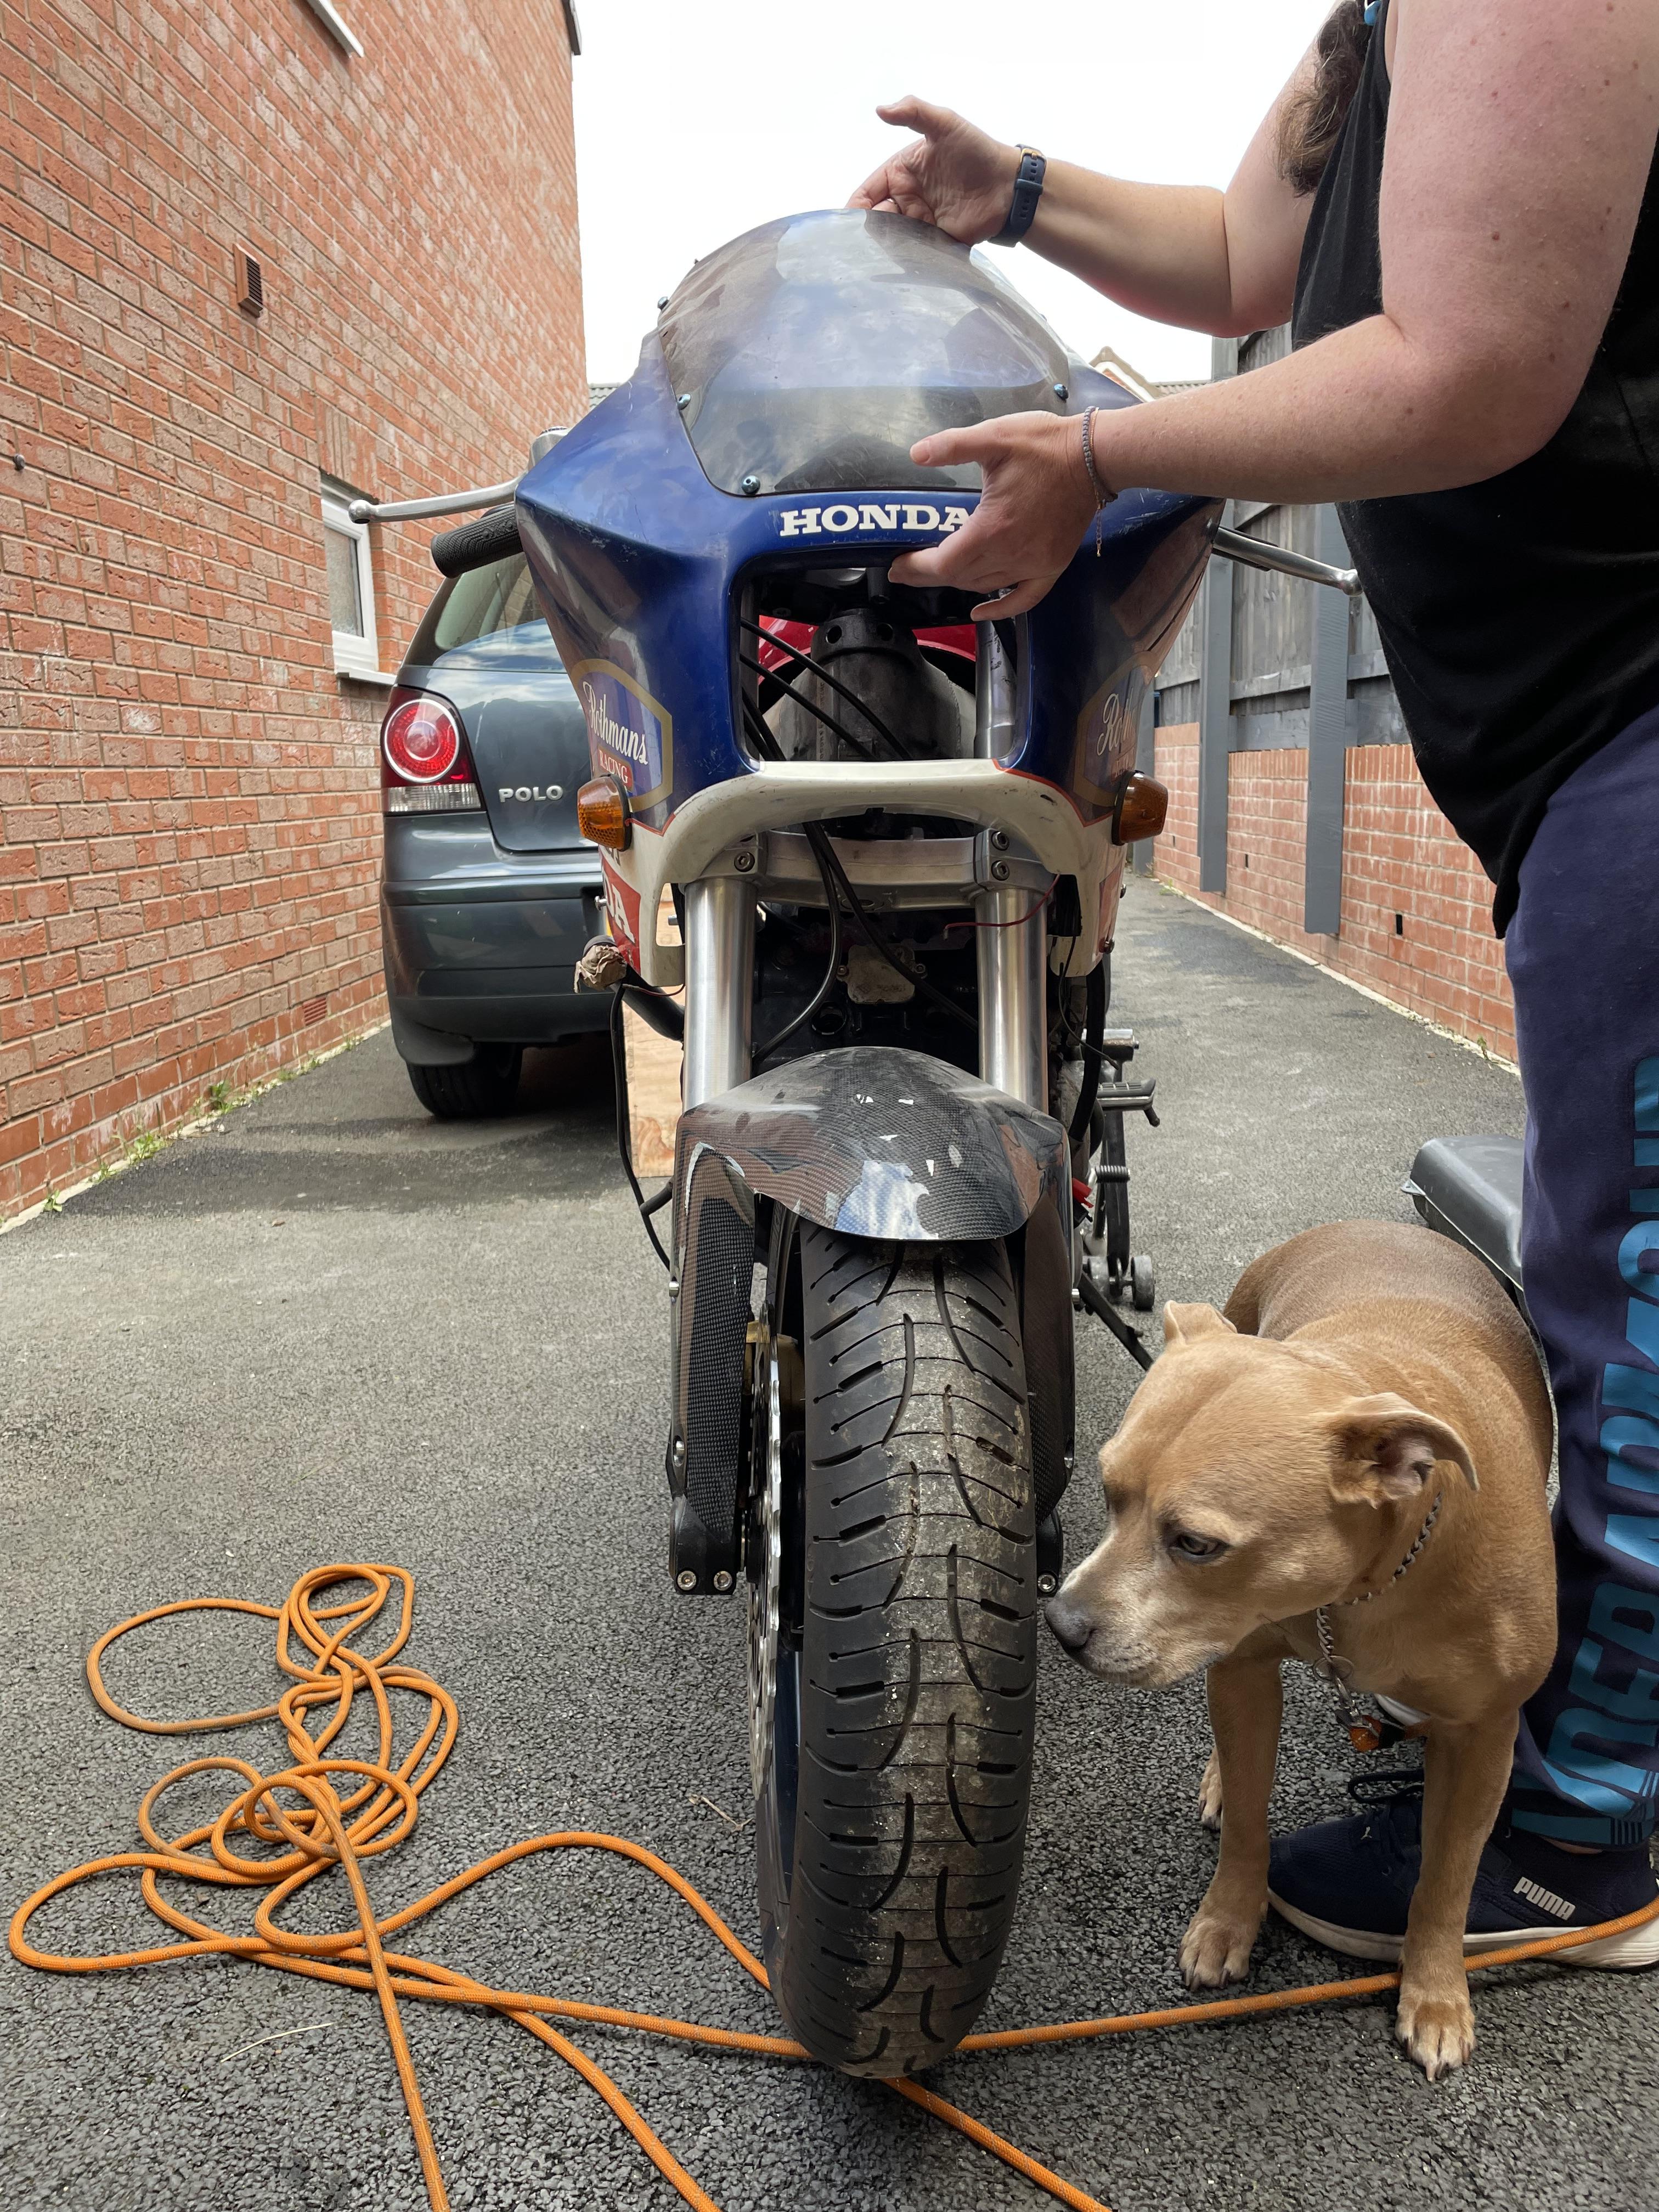
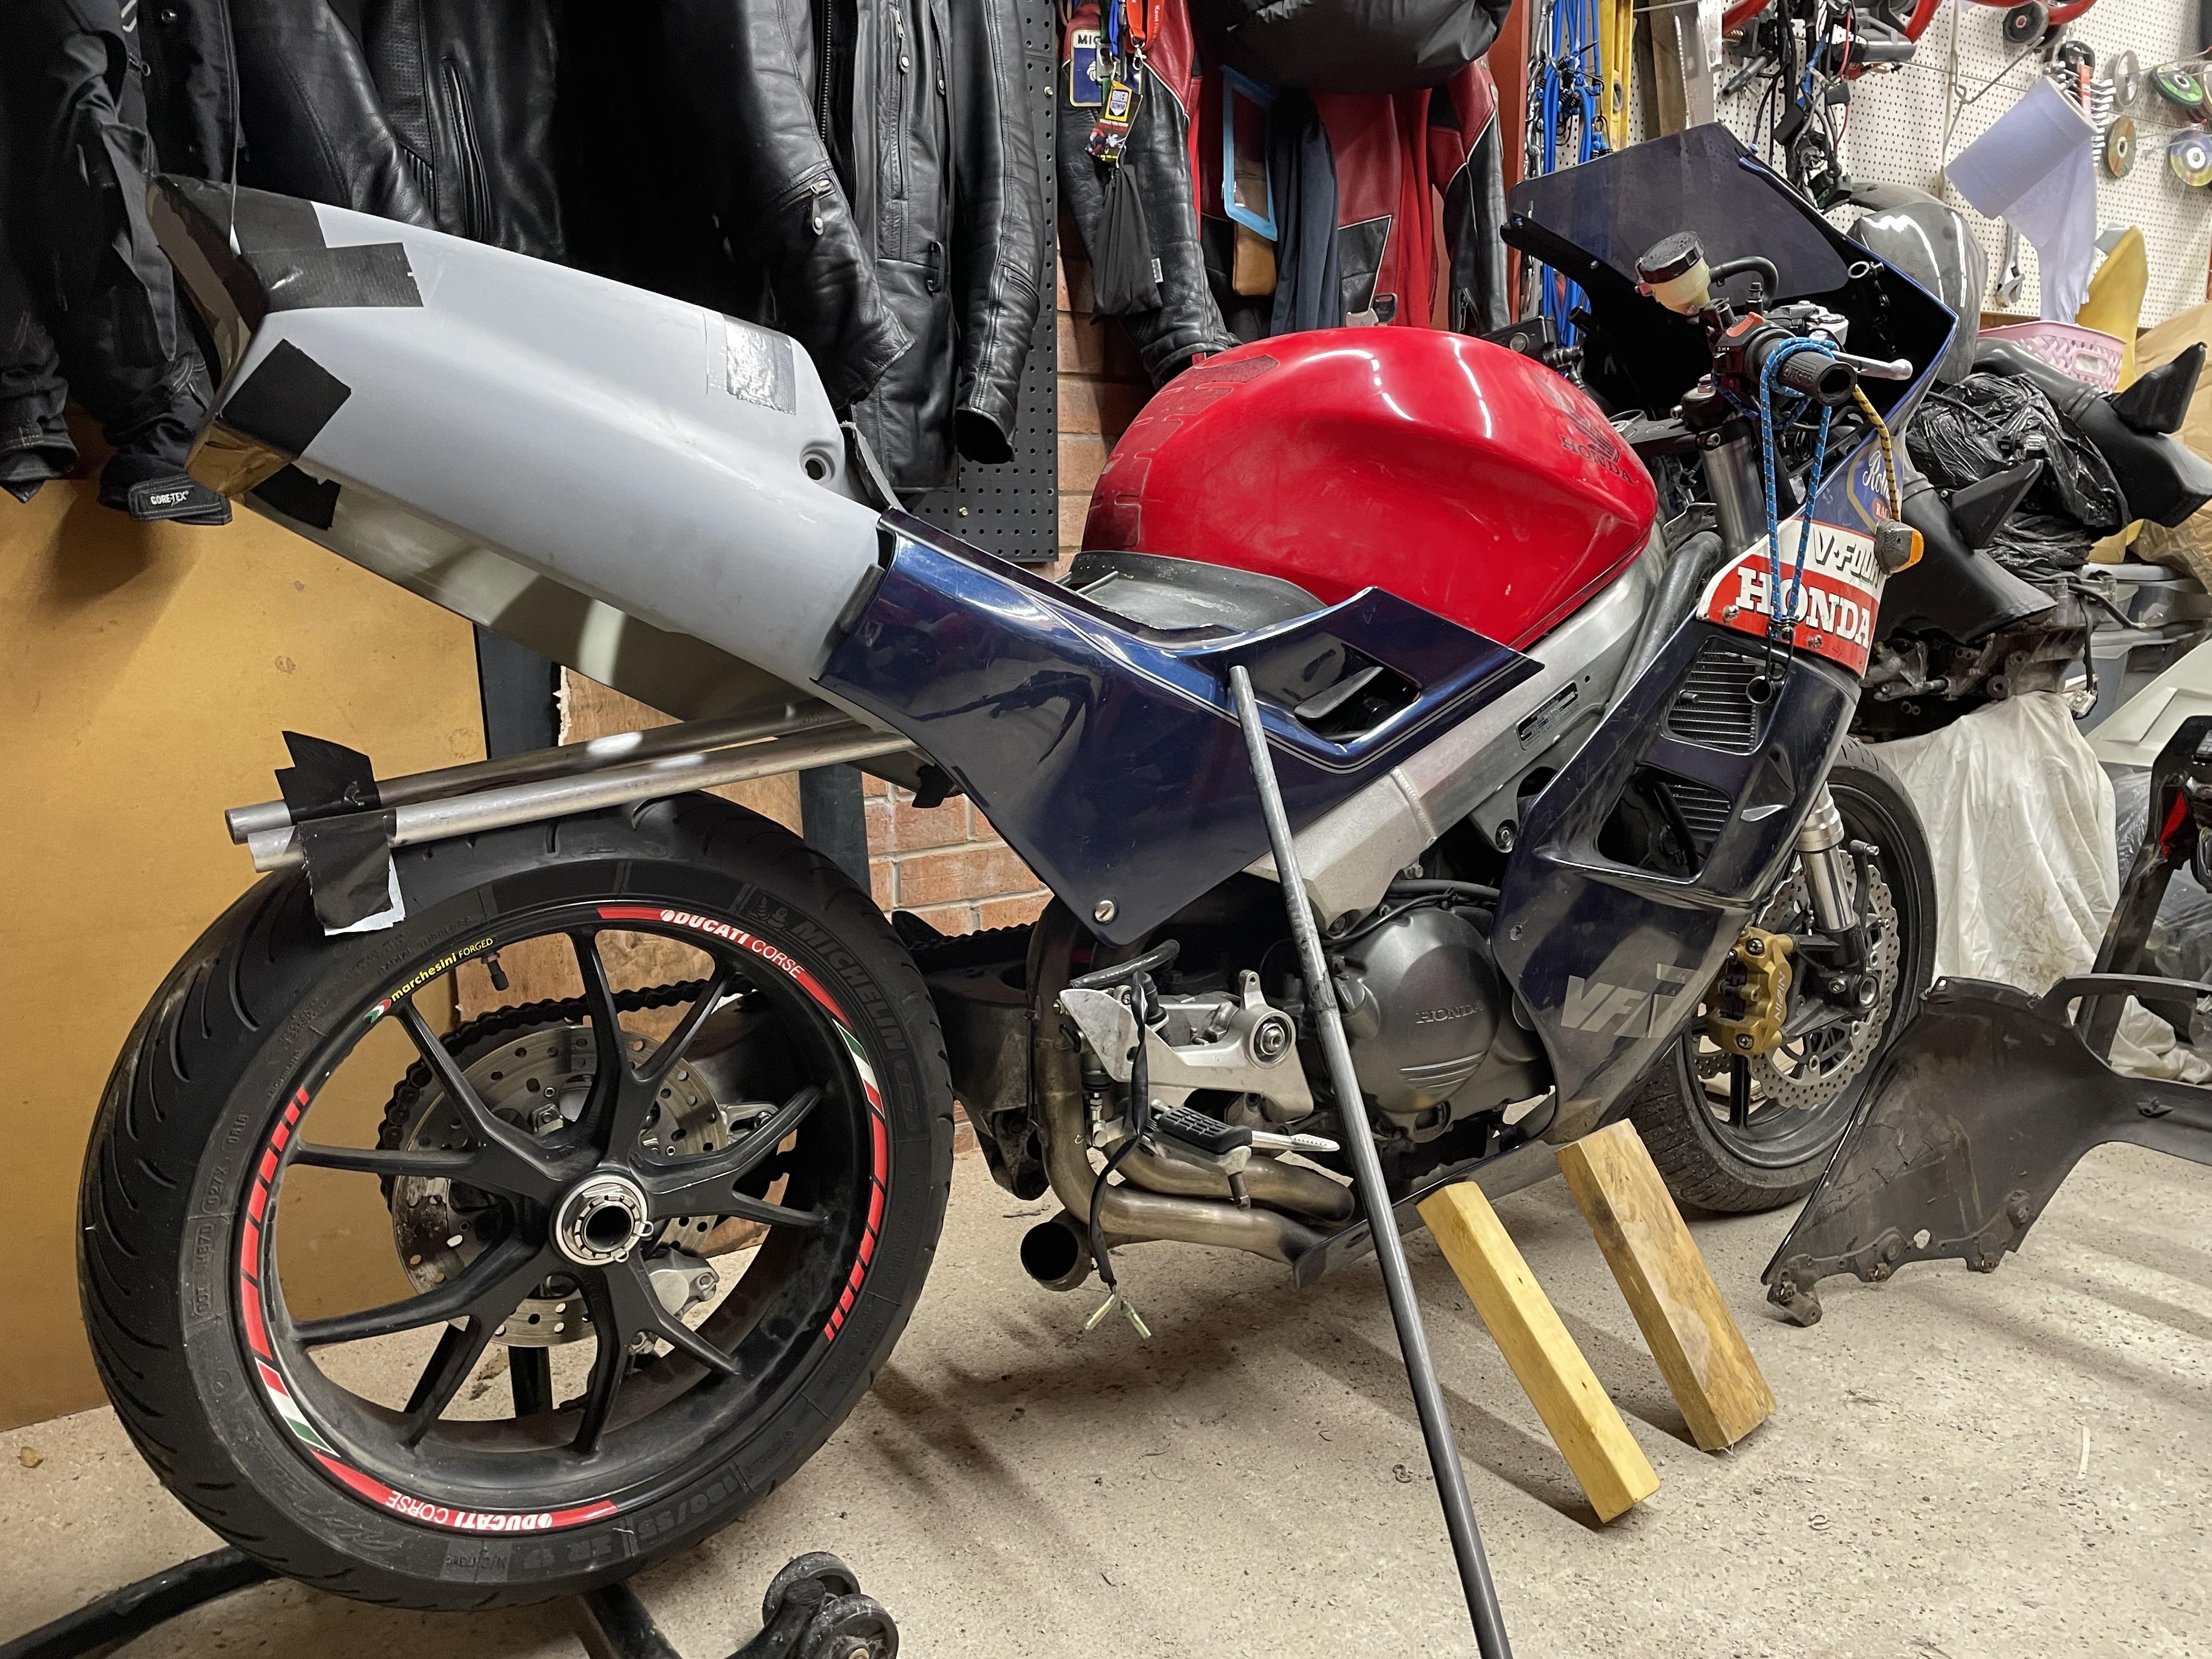
I like your thinking, Captain! In fact I’ve been lusting after that exact bike (rear has been chopped and that seat is lush). So much so I got some unobtainable fairings imported from Poland (couldn’t get any at digestible prices locally) and did a trial fit. Thing is, the VF is a much bigger bike than the VFR, so the fairing looks far too big. In fact with its narrow profile and compact wheelbase (comparatively) the VFR looks better with modern 600 fairings, instead of old 1000 ones. Have a look at these taken last summer: Hard to tell from the pics but the Bol d’Or cowl dwarfs the VFR considerably. It seems too big. But looking at it again now, it’s growing on me. Here’s an NSR400 (I think?), which I imported from China for a trial. Looks OK if you can imagine the screen in place. The screen on these is a nice classic bubble shape that allows high bars (all these have high bars). And here’s a VF400 fairing that I quite like but side panels will be a nightmare to match, as will the radiator scoops. Last one has CBR600 side fairings for trial and the previous two have 1st/2nd gen side fairings. And another with a 1st/2nd gen cowl for trial. Here’s a GSX1100 fairing for trial. Cafe racer style with high bars but I don’t think it works at all. Just to prove the point that our VFRs are quite small compared to old 1000’s, here’s a mockup of a 6th gen with CBR600 fairings. Not sure if the artist is using the correct scale but it looks about right. As always, your ideas are very welcome. No such thing as a limit - let your imaginations flow! Only thing I’ve not yet tried is the VF750, but my shed is really rammed with fairings and I can barely move in it, so loathe to buy any more “trial” bits. There will be an almighty purge when this is all done!
-
Love the look of that, Hondatech99! Have you figured out the exhausts yet? Will you need to reroute the link pipes with the new swingarm? Sorry for the late post - missed this somehow.
-
Thanks for your thoughts, chaps! Both those NR750s are based on VFR750s. Mines a 5th gen 800 so I’ve sent and email to Poly26 in France to ask if it’ll work. Three reservations: it’s a big-ass fairing (with a massive ass!); needs clipons under the top yoke to work; and what do I use for headlights? Still, I’ve asked the question. Hoping they’ll come back with a few other ideas too. Still looking at Ducati 888, 900SS and some of their cafe racer tackle. Or their ST2/4. Or VF750…or VF1000R (might be too big though)…or the Bol d’Or endurance racers…or TT racers if the ‘60’s… Why’s this part so bloody hard? Chassis is ready to go - it only needs plastics!
-
I like your thinking, Mohawk. Any other ideas? I was aiming for more classic than the ZX9R but it’s a cracking idea. Maybe even 1st gen VFR (or is that 2nd gen?). Or RC30 replica (but that means low clipons and a crippled back for this old man). Or CB1000 Bol d’Or… Or something Mike Halewood might have raced. Or…
-
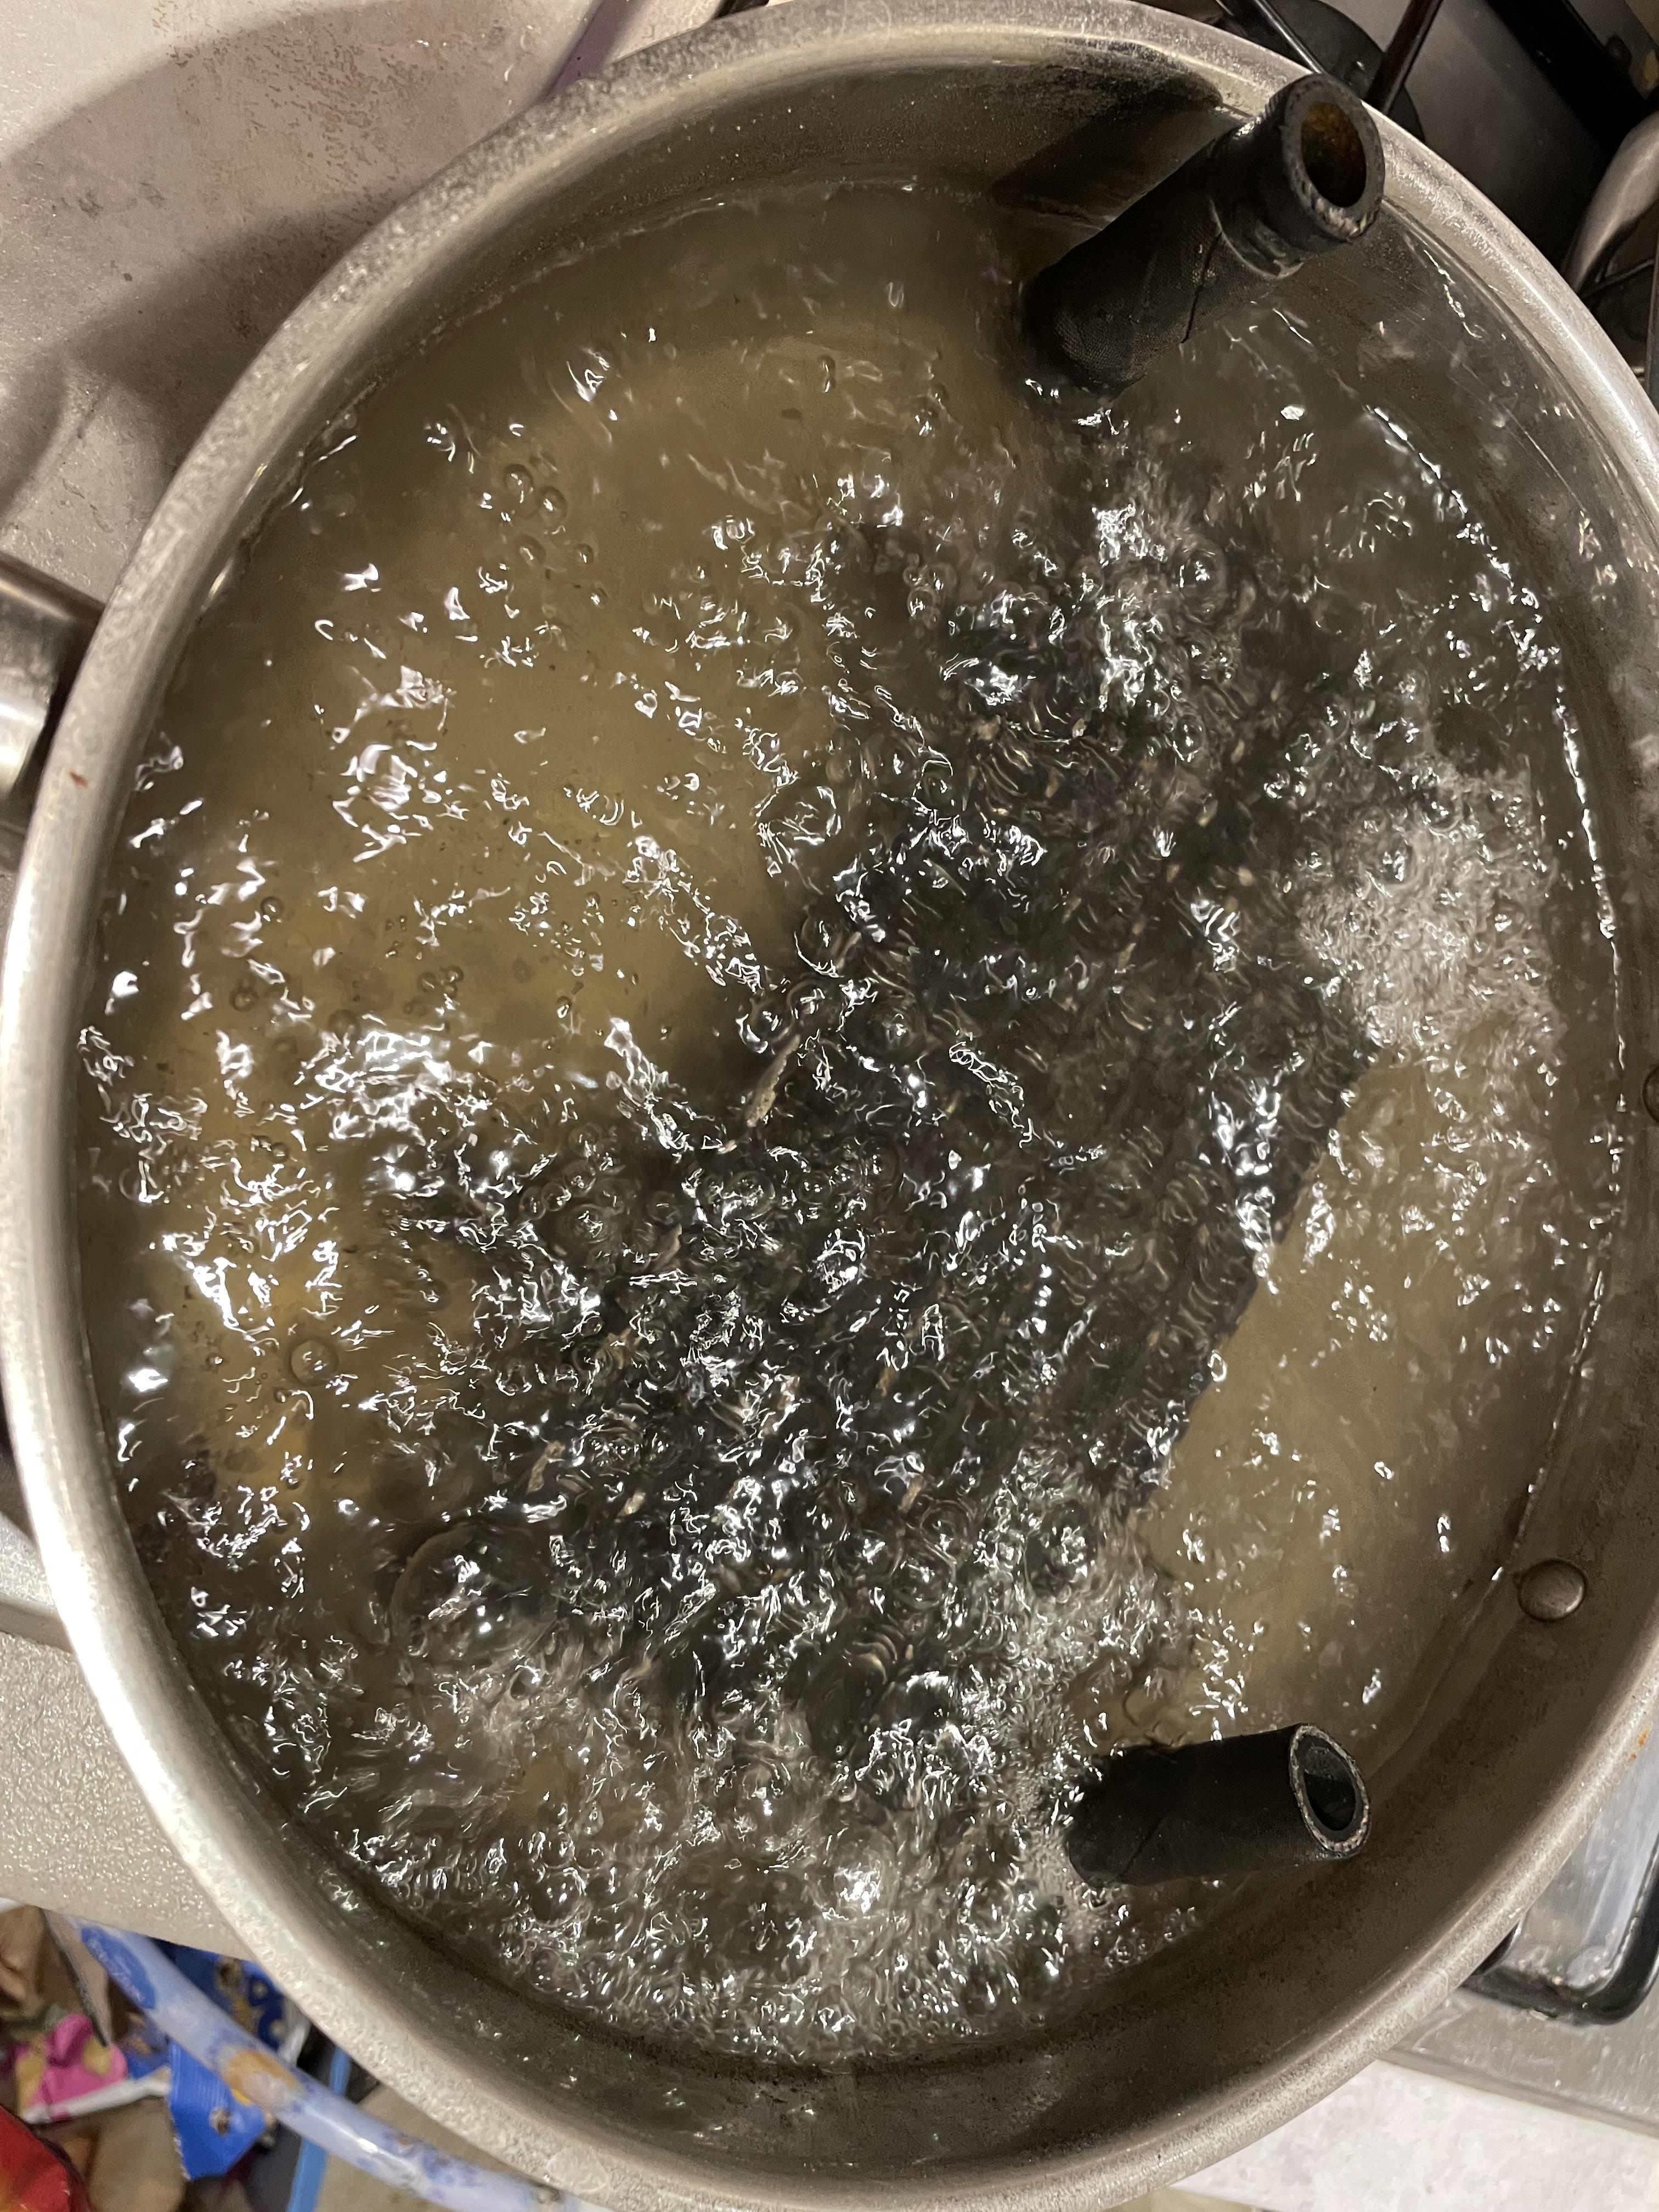
Got some time over Christmas break and fitted the front rad using horn mounting holes under the frame. It’s an F4i radiator with the lowest 3 rows (or maybe 4?) cut off to avoid front wheel contact at full suspension bottoming. I’ve got 125mm of fork travel on the ZX6R forks and the rad is 130mm away from the wheel and fender. Got hold of an oil cooler from an Aprilia Futura but it was grungy as hell (cheap!) so I boiled it for 20 mins to loosen the crud. Couldn’t believe how much there was. This is from the second round of boiling, after loosening it all up with a pick. Got to weld up a new exit takeoff as this one’s at the wrong angle, then find a suitable mounting position. The biggest challenge is finding a good front fairing solution for this bike. Got a garage full of experimental fairings and nothing seems to look right. I want a nice classic look with upright bars for comfort but can’t settle on a solution. All suggestions welcome!
-
Hilarious!
-
Nice scoot, Dutchy! Also, I’m a big fan of a good practical bodge when called for. If you’re ever in Hinckley (UK) I’ll weld it shut for you mate.
-
Damn Darryl, so sorry for your loss. Very sad to hear Lance has died. He was a cornerstone of this site but also a great man. I’ll remember how tireless the two of you were on the Wyld header project. And what a gentleman he was on the Factory Pro shifter group buy. And he was always keen to help us members with advice, even when his own life was hectic. He helped me figure out my Kawasaki front end swap - generous with his time and knowledge. Sorry for your loss, mate. I’ll miss him too.
-
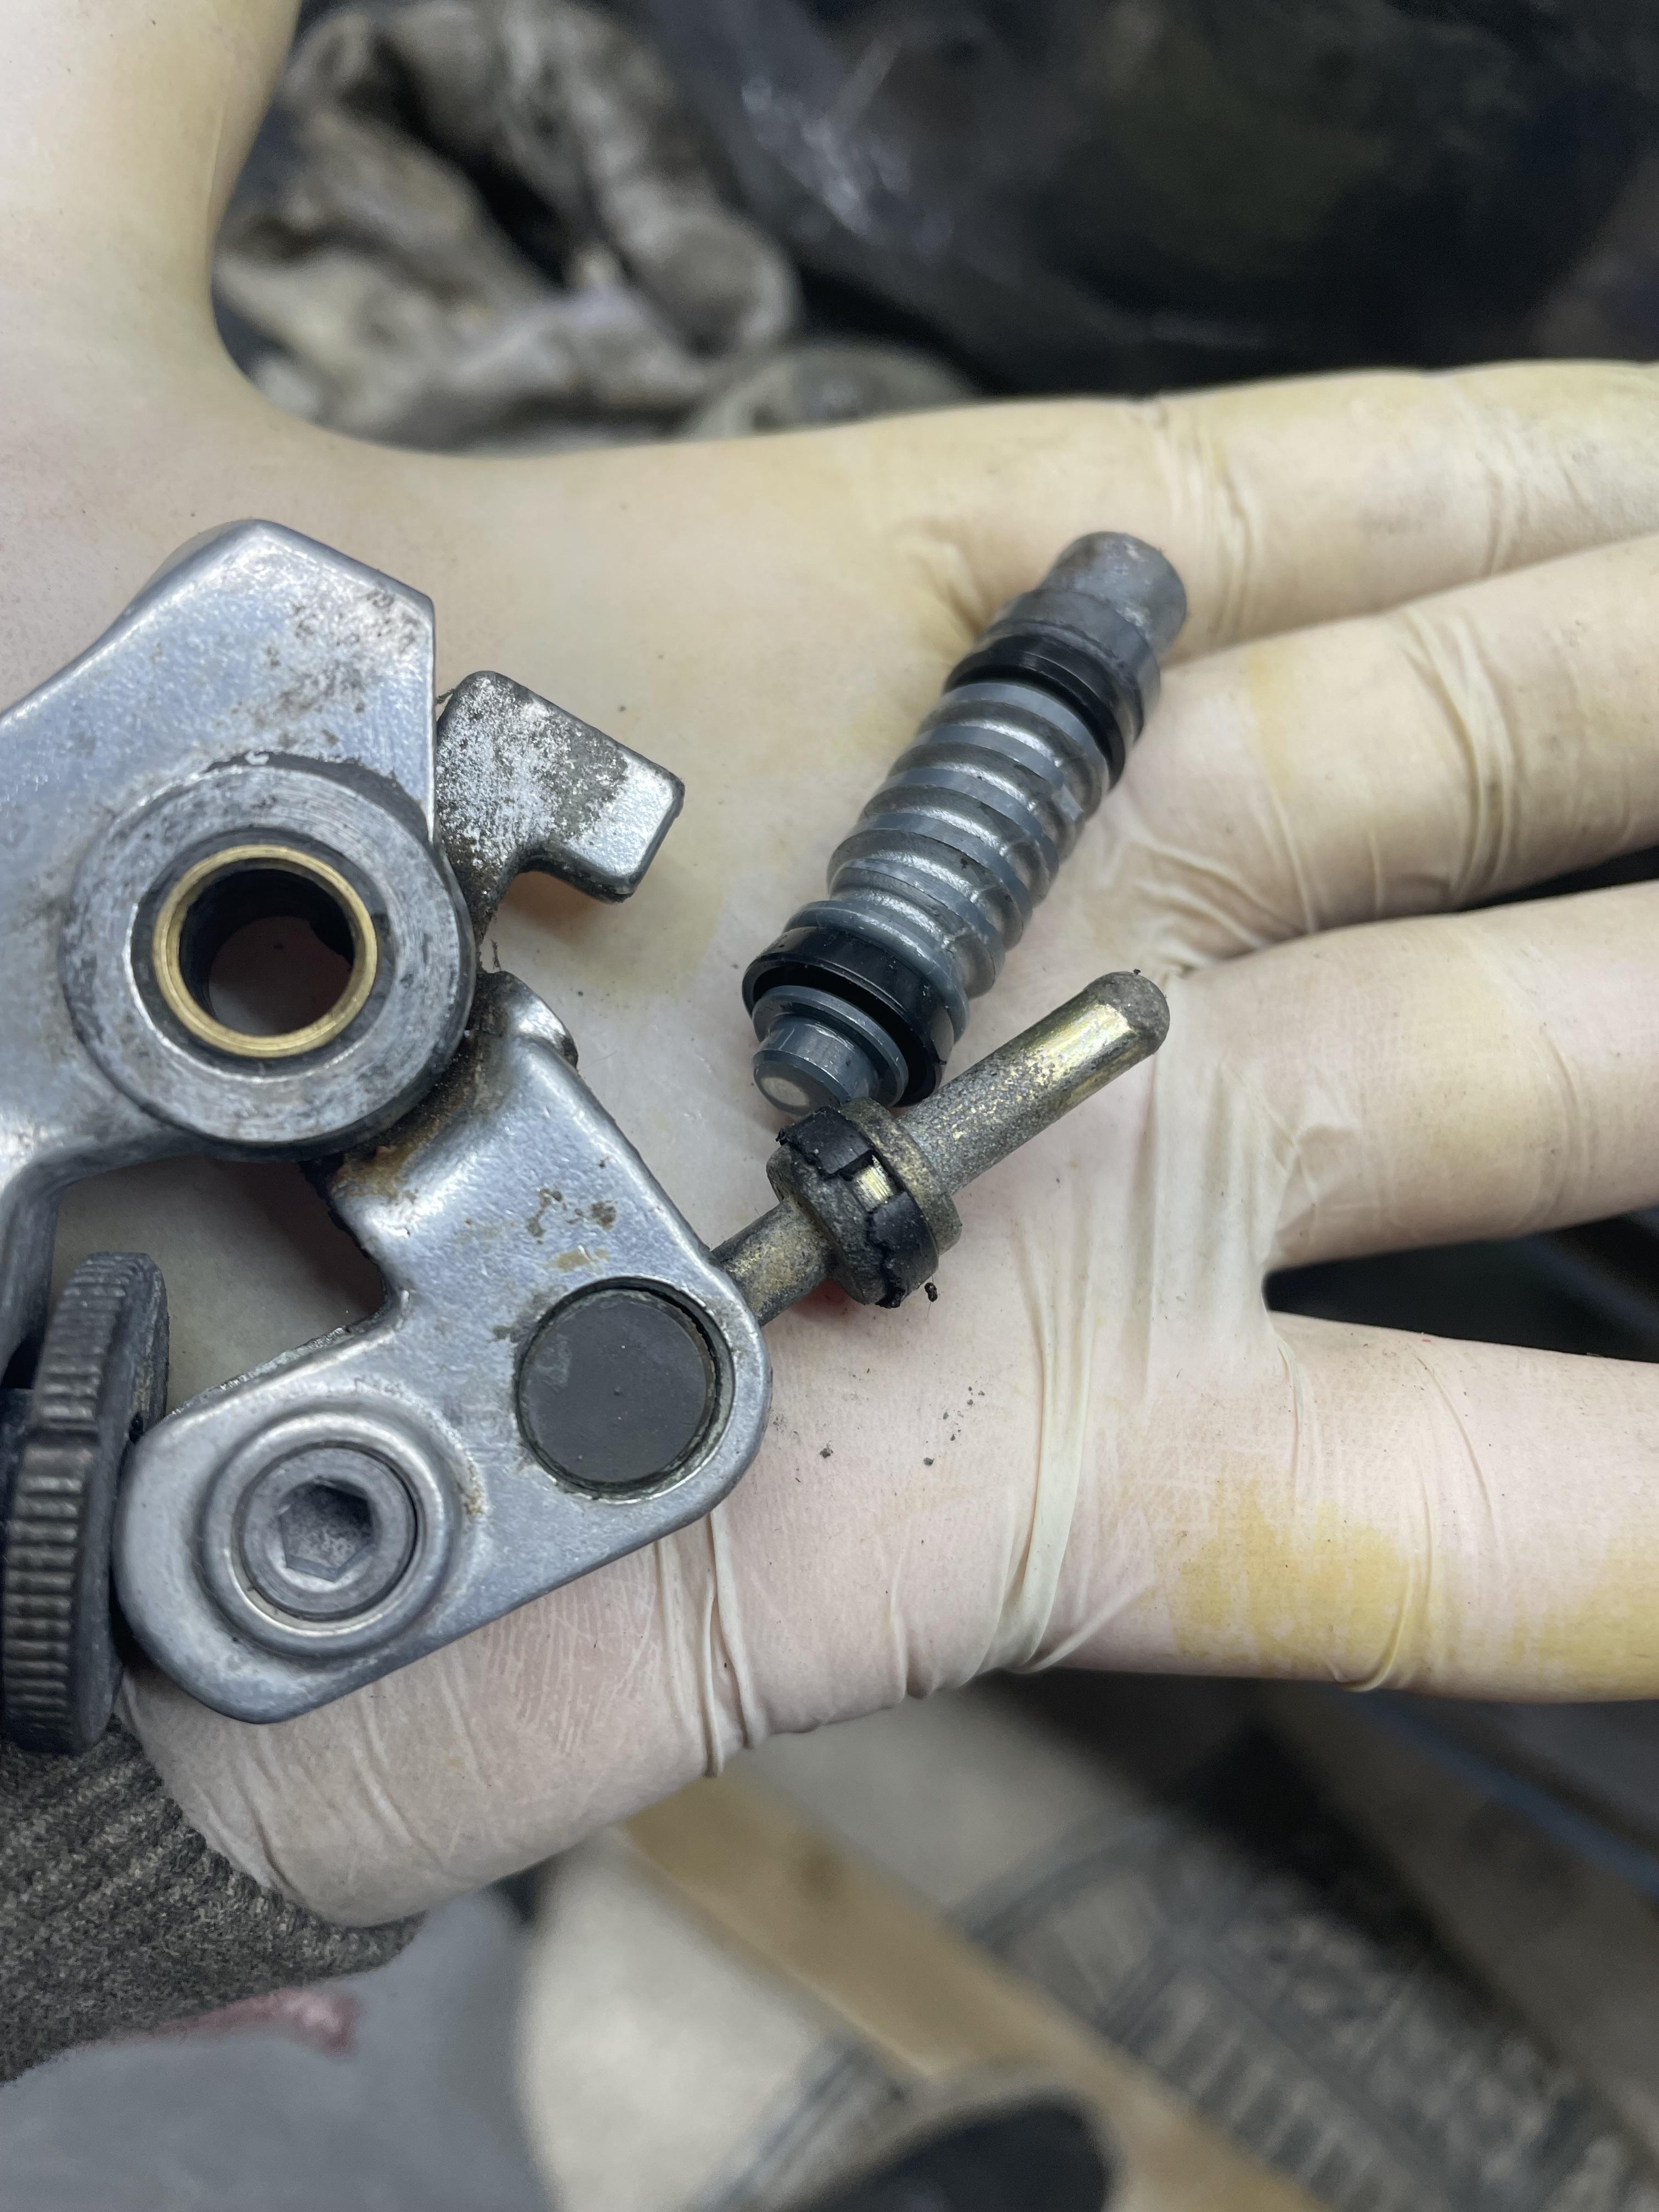
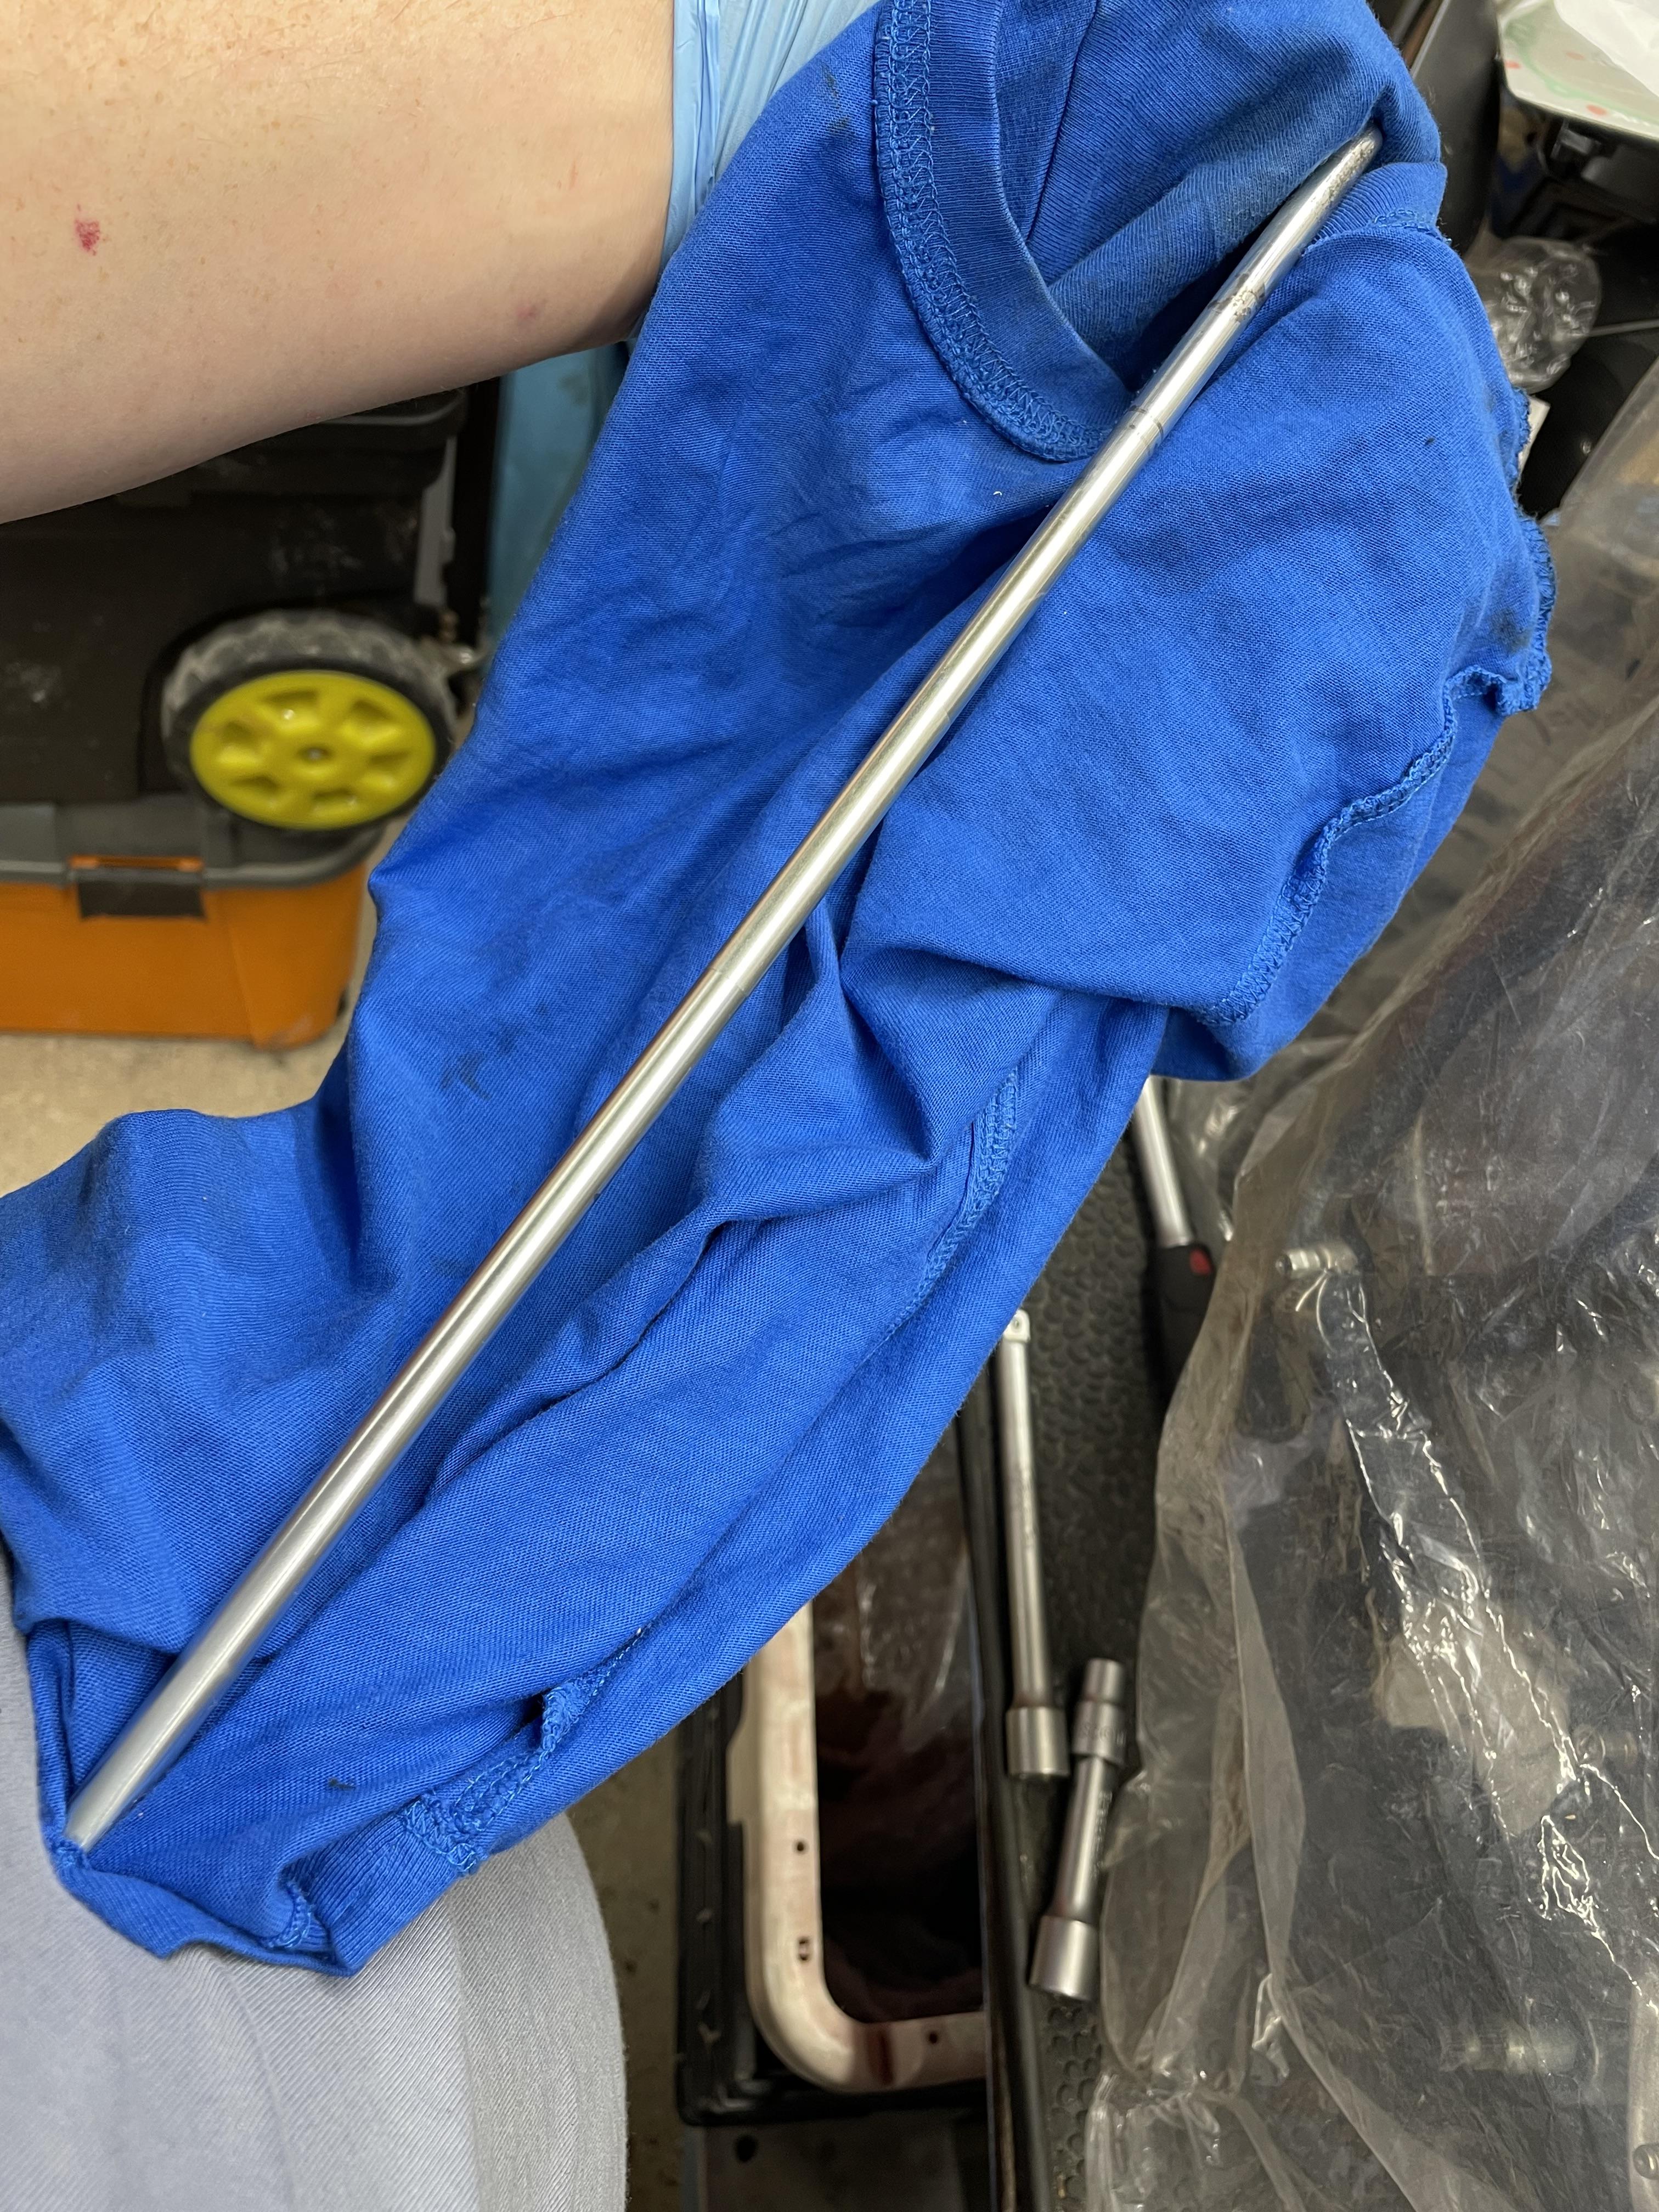
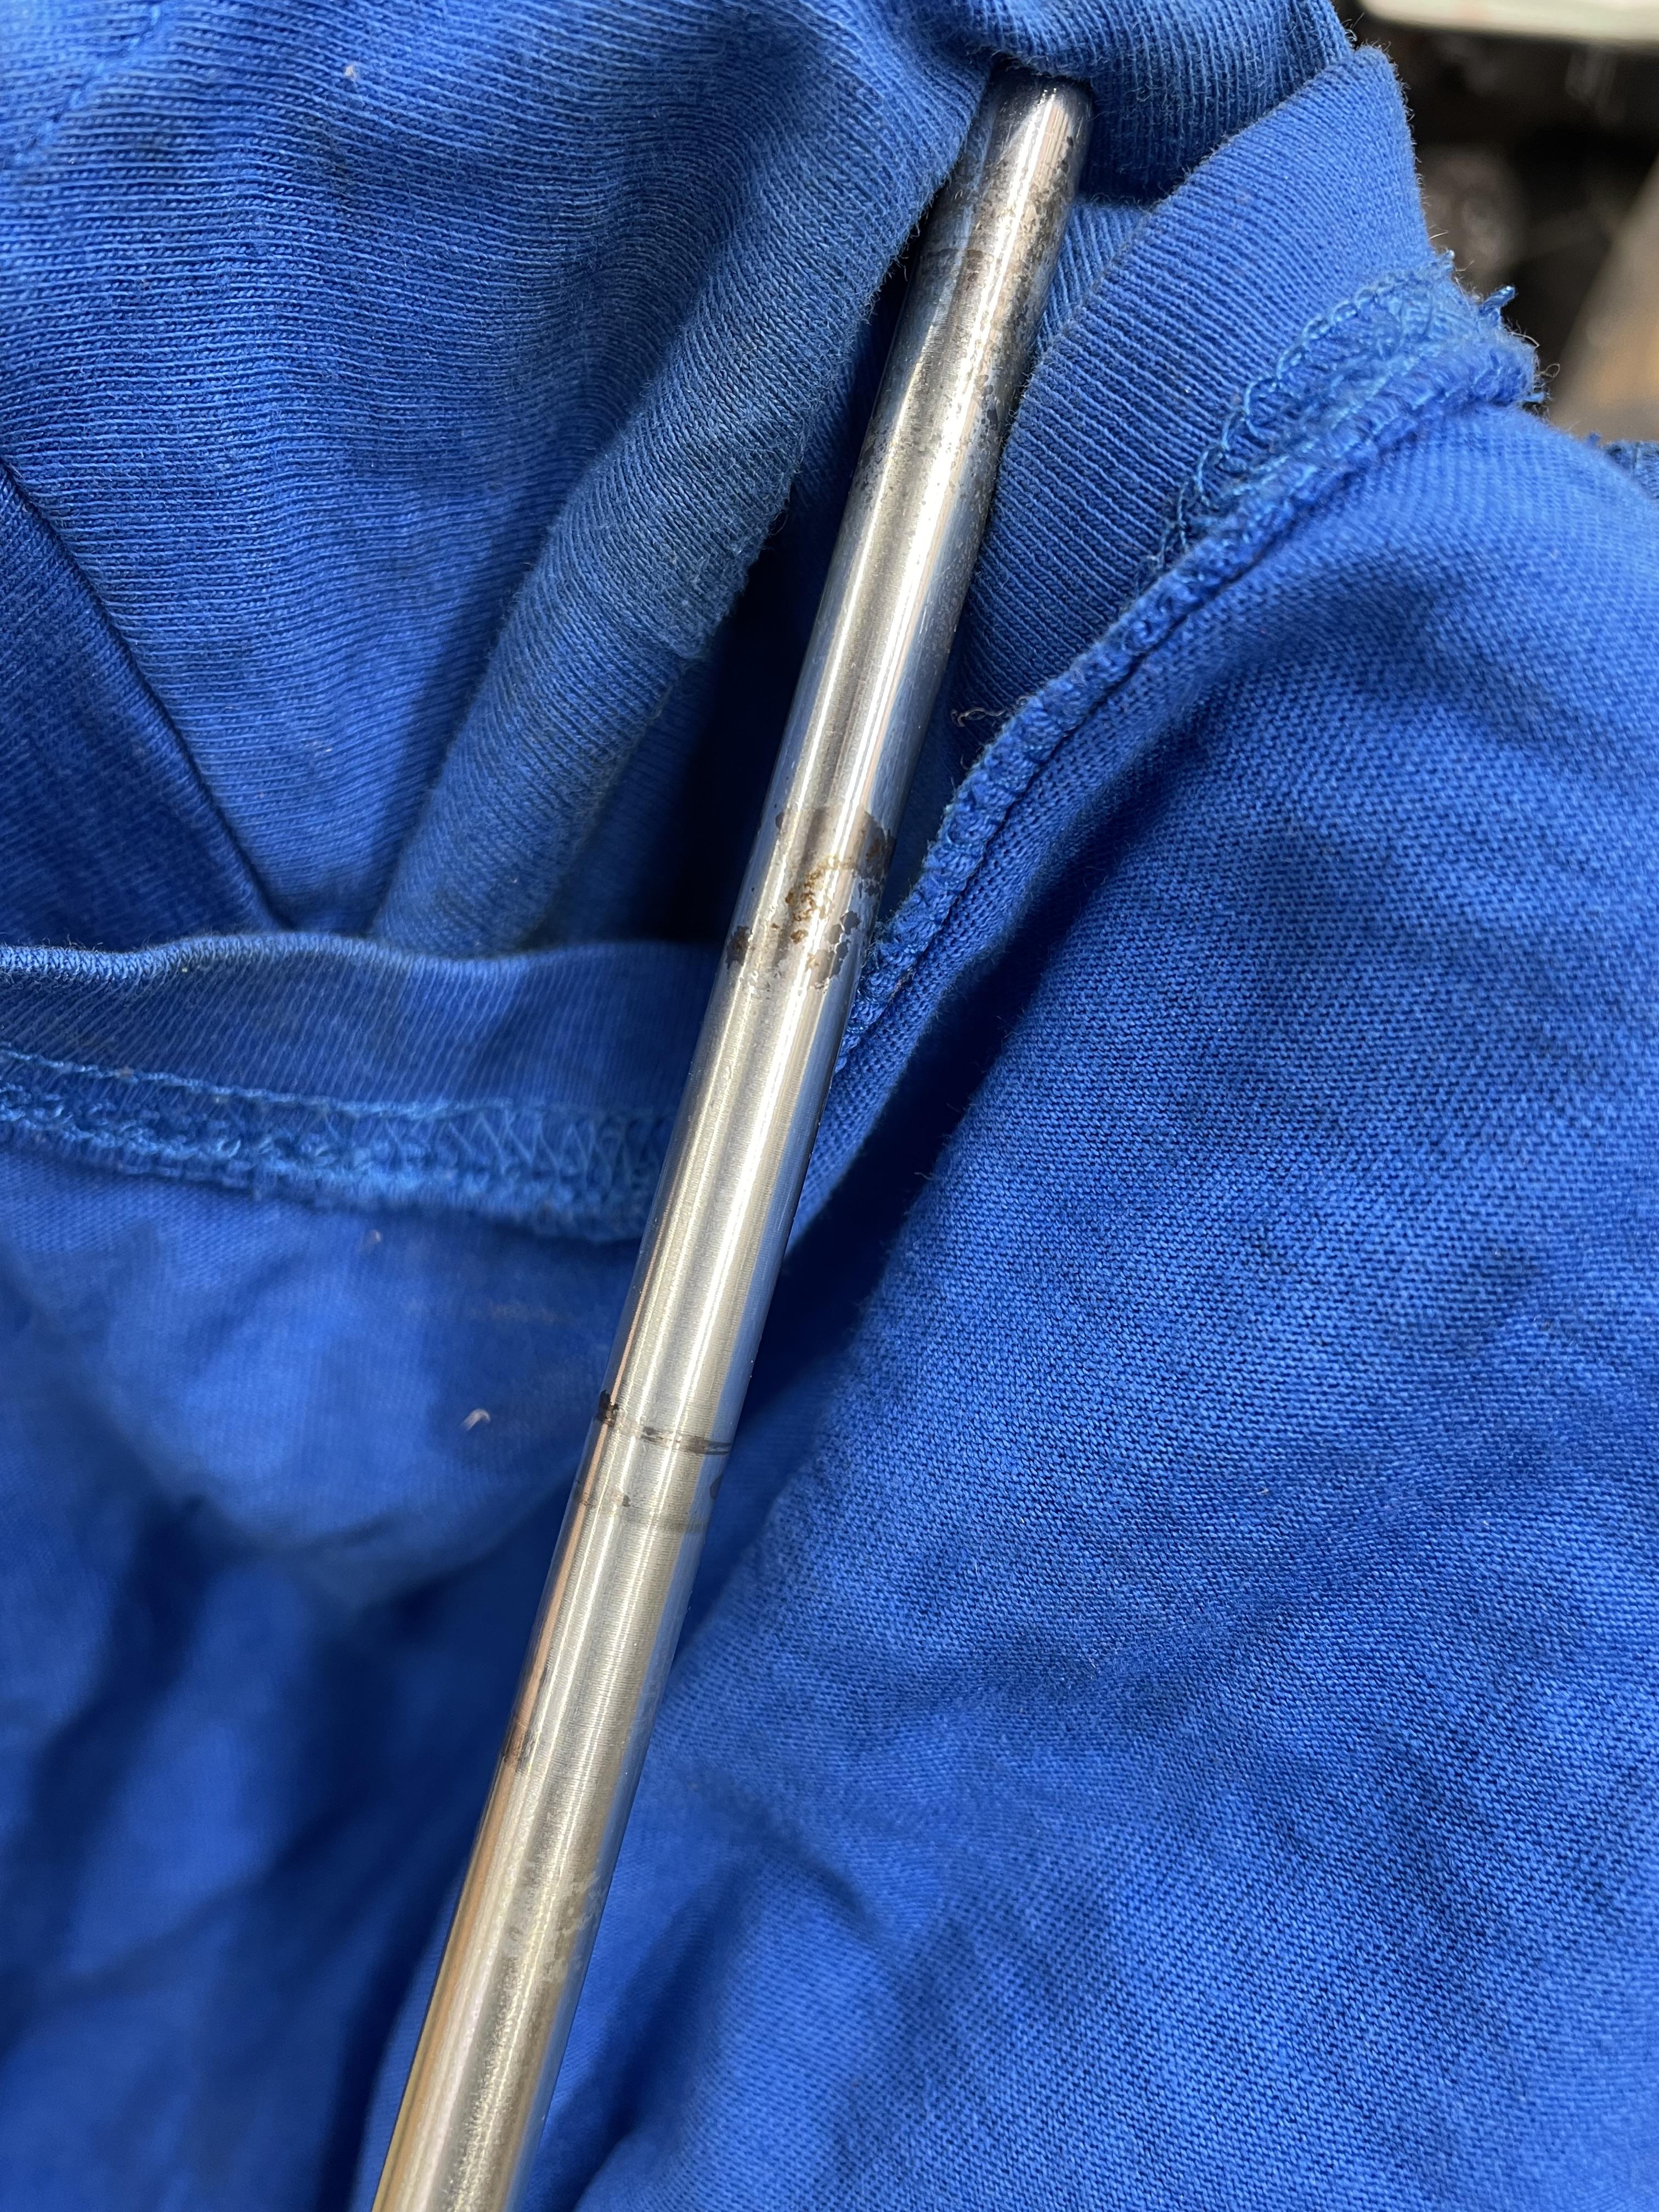
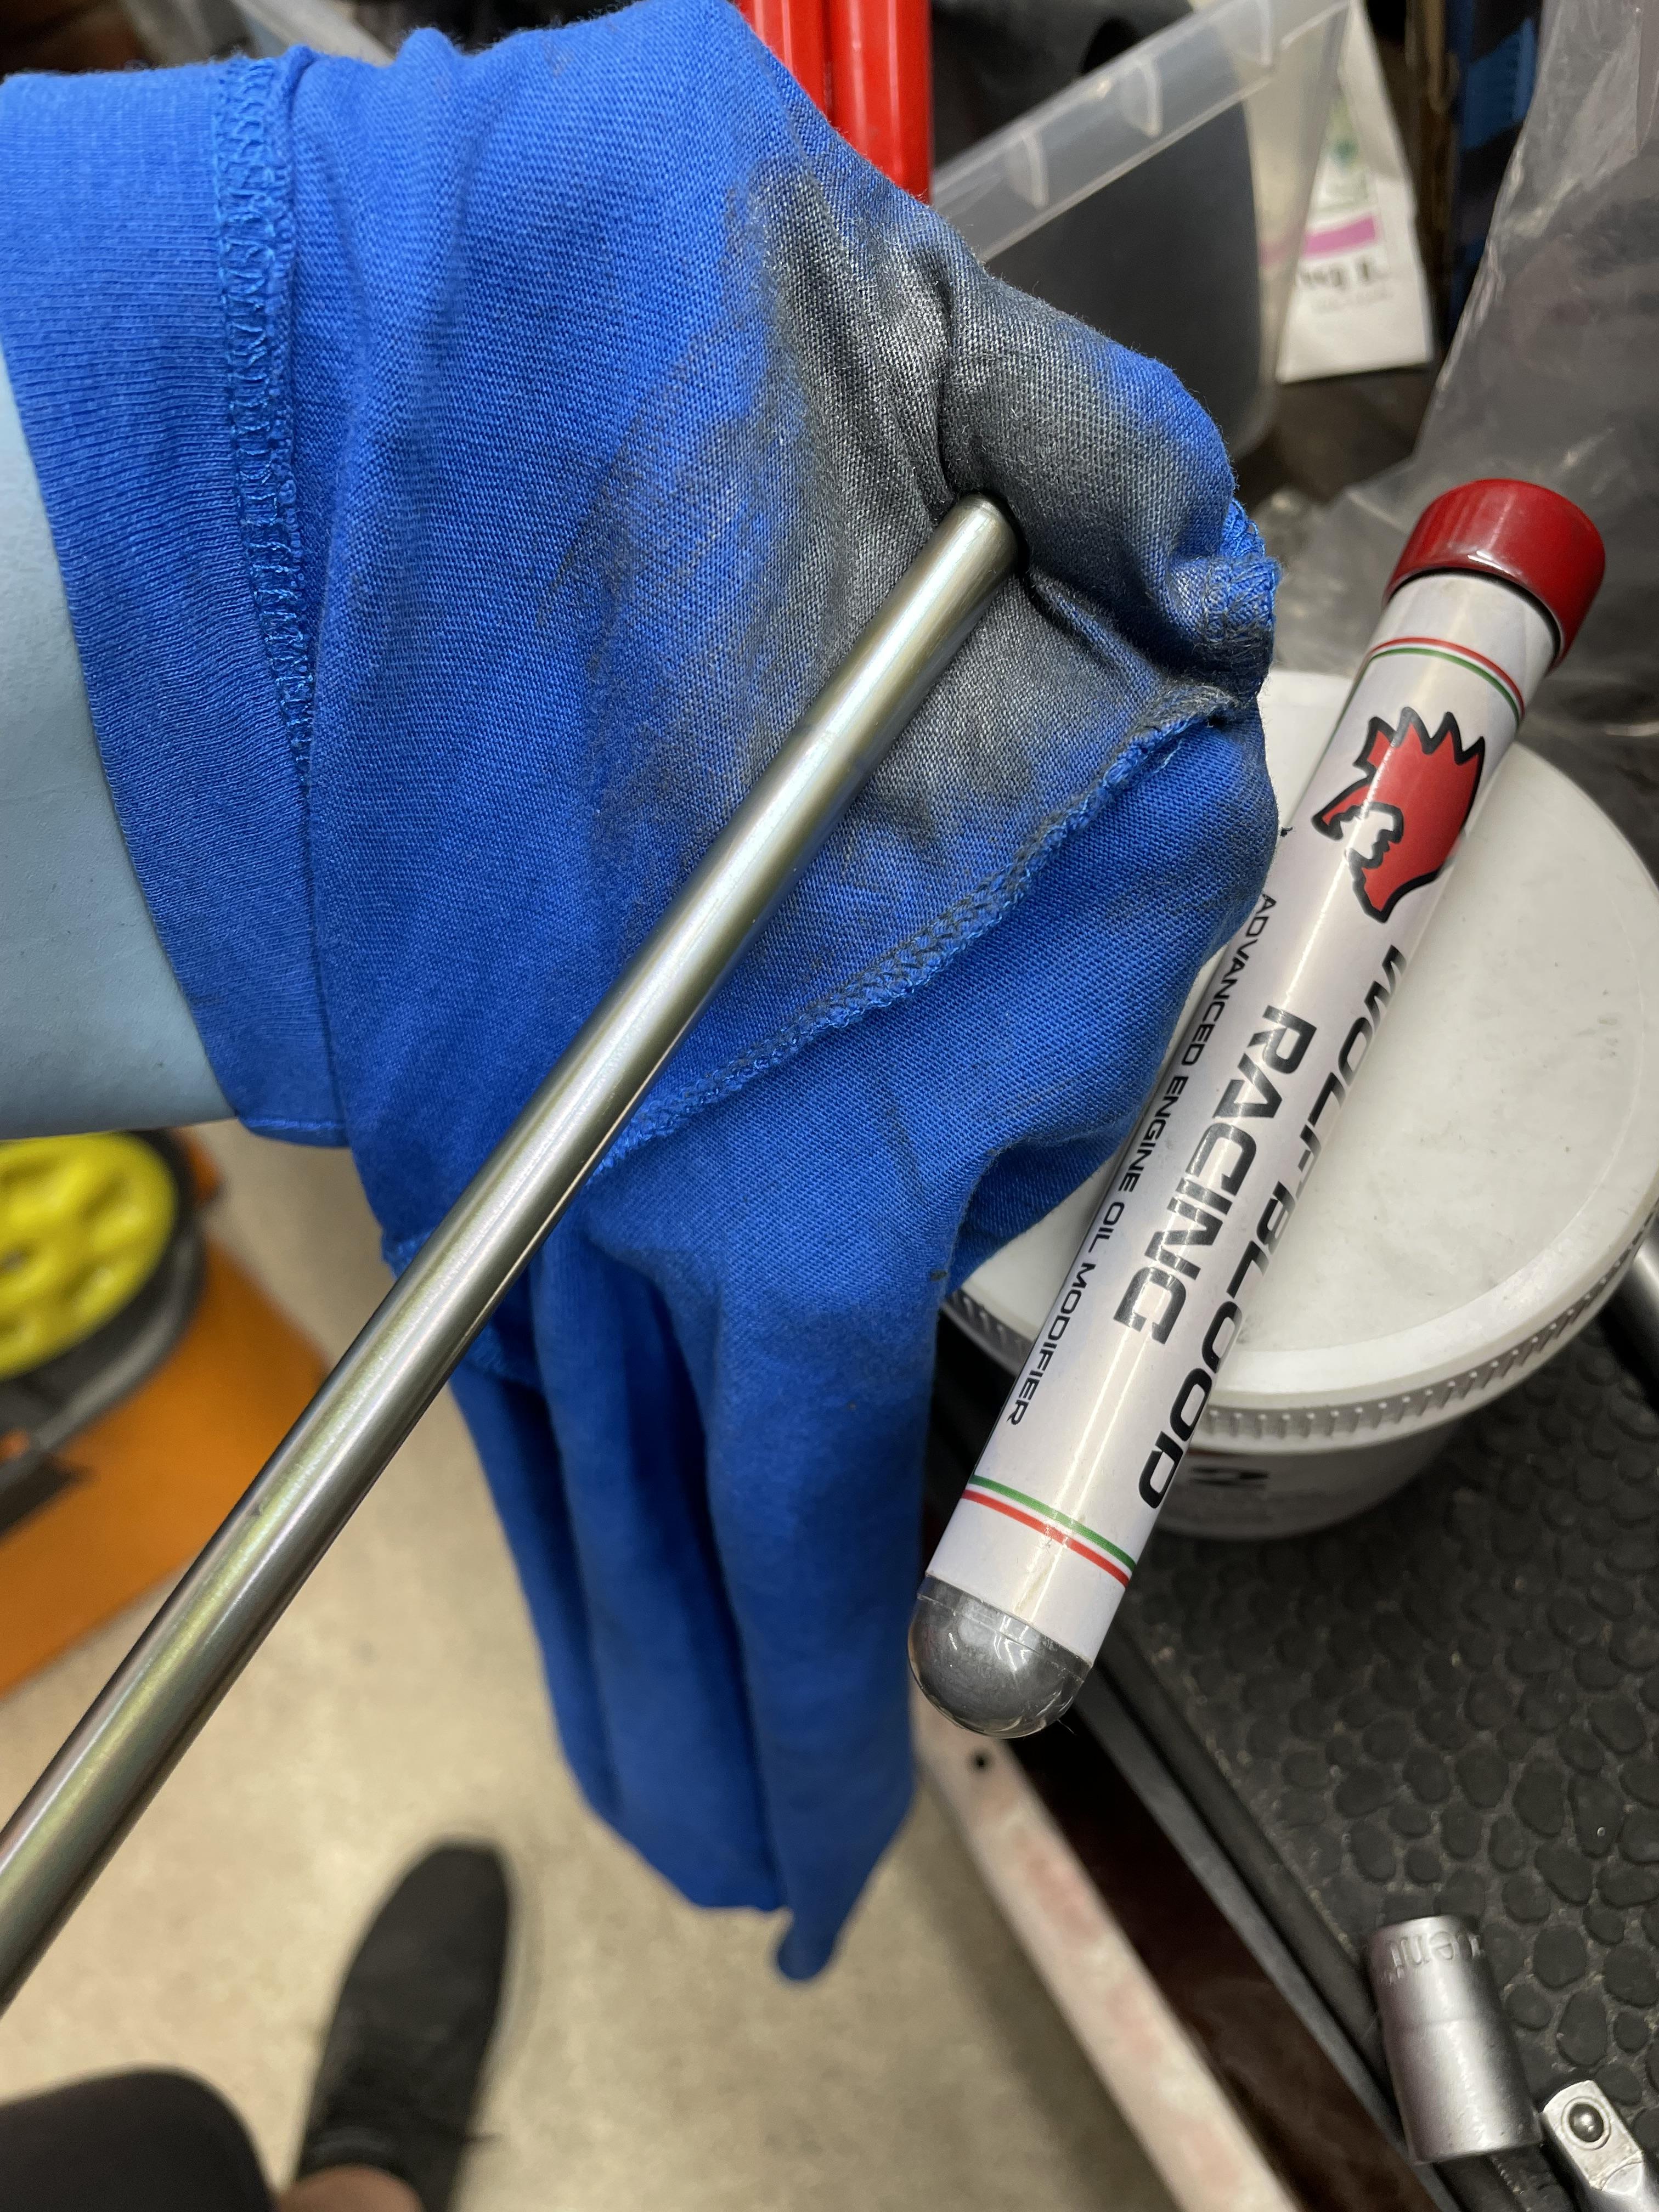
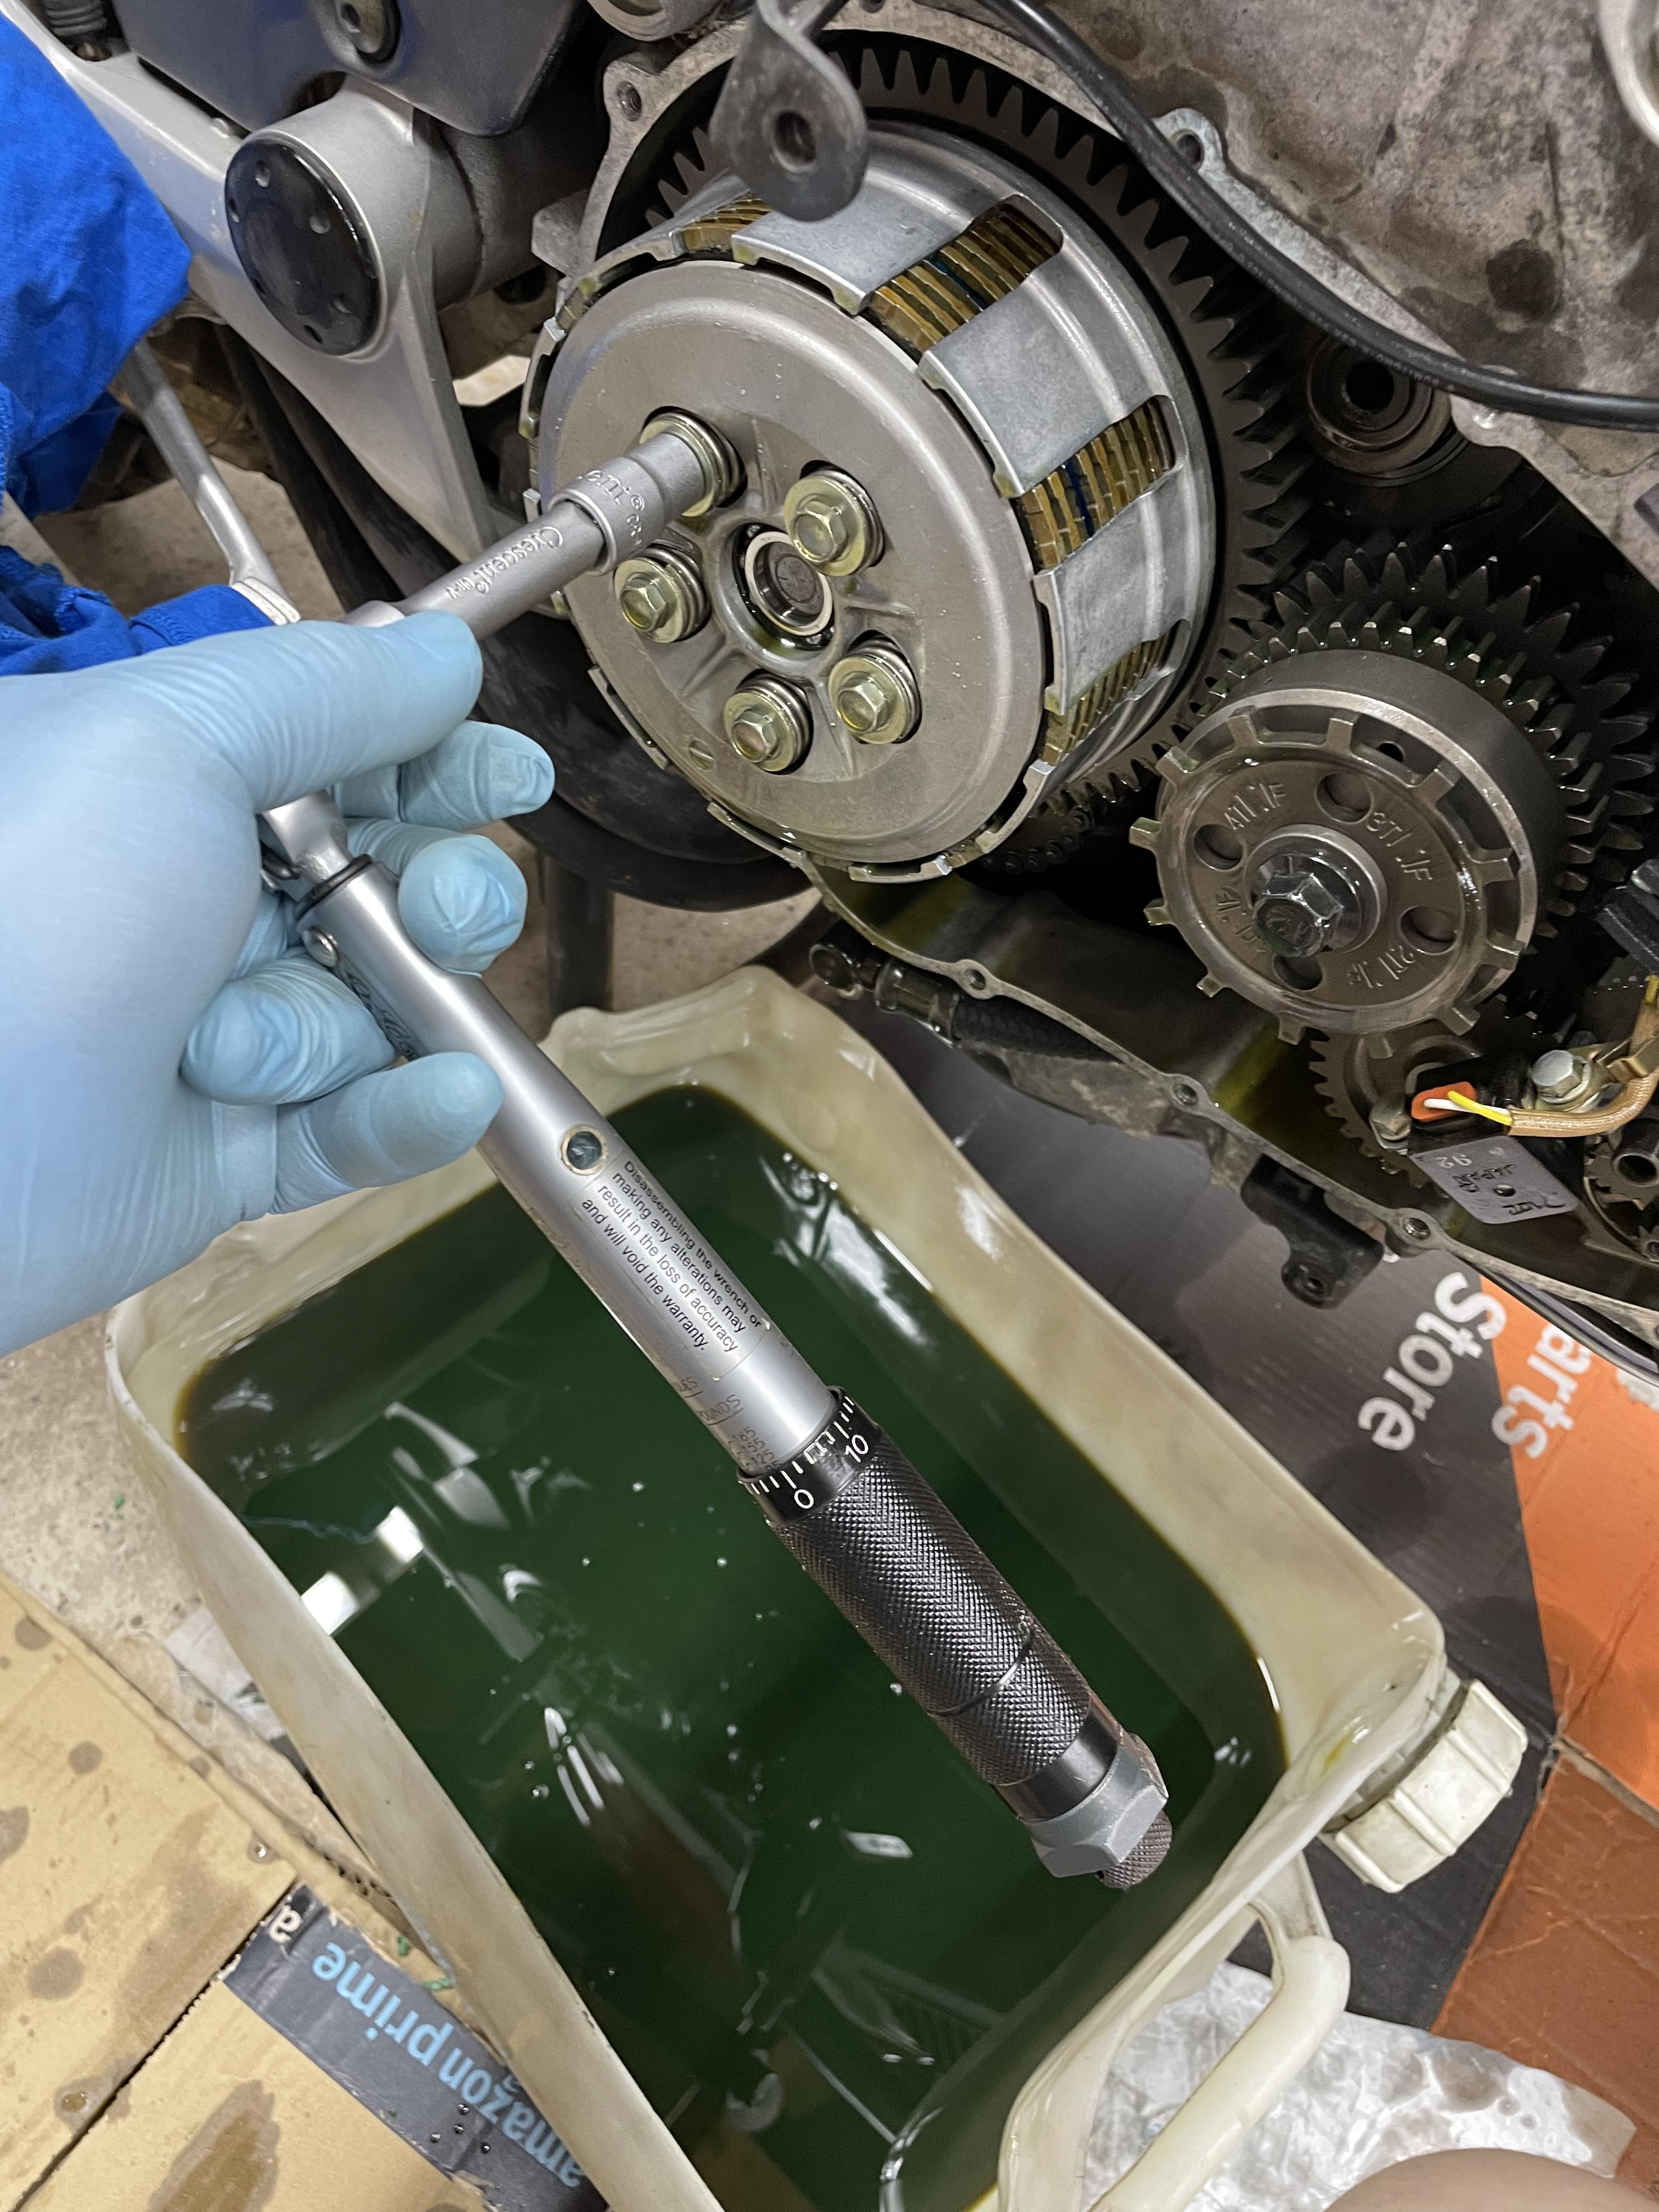
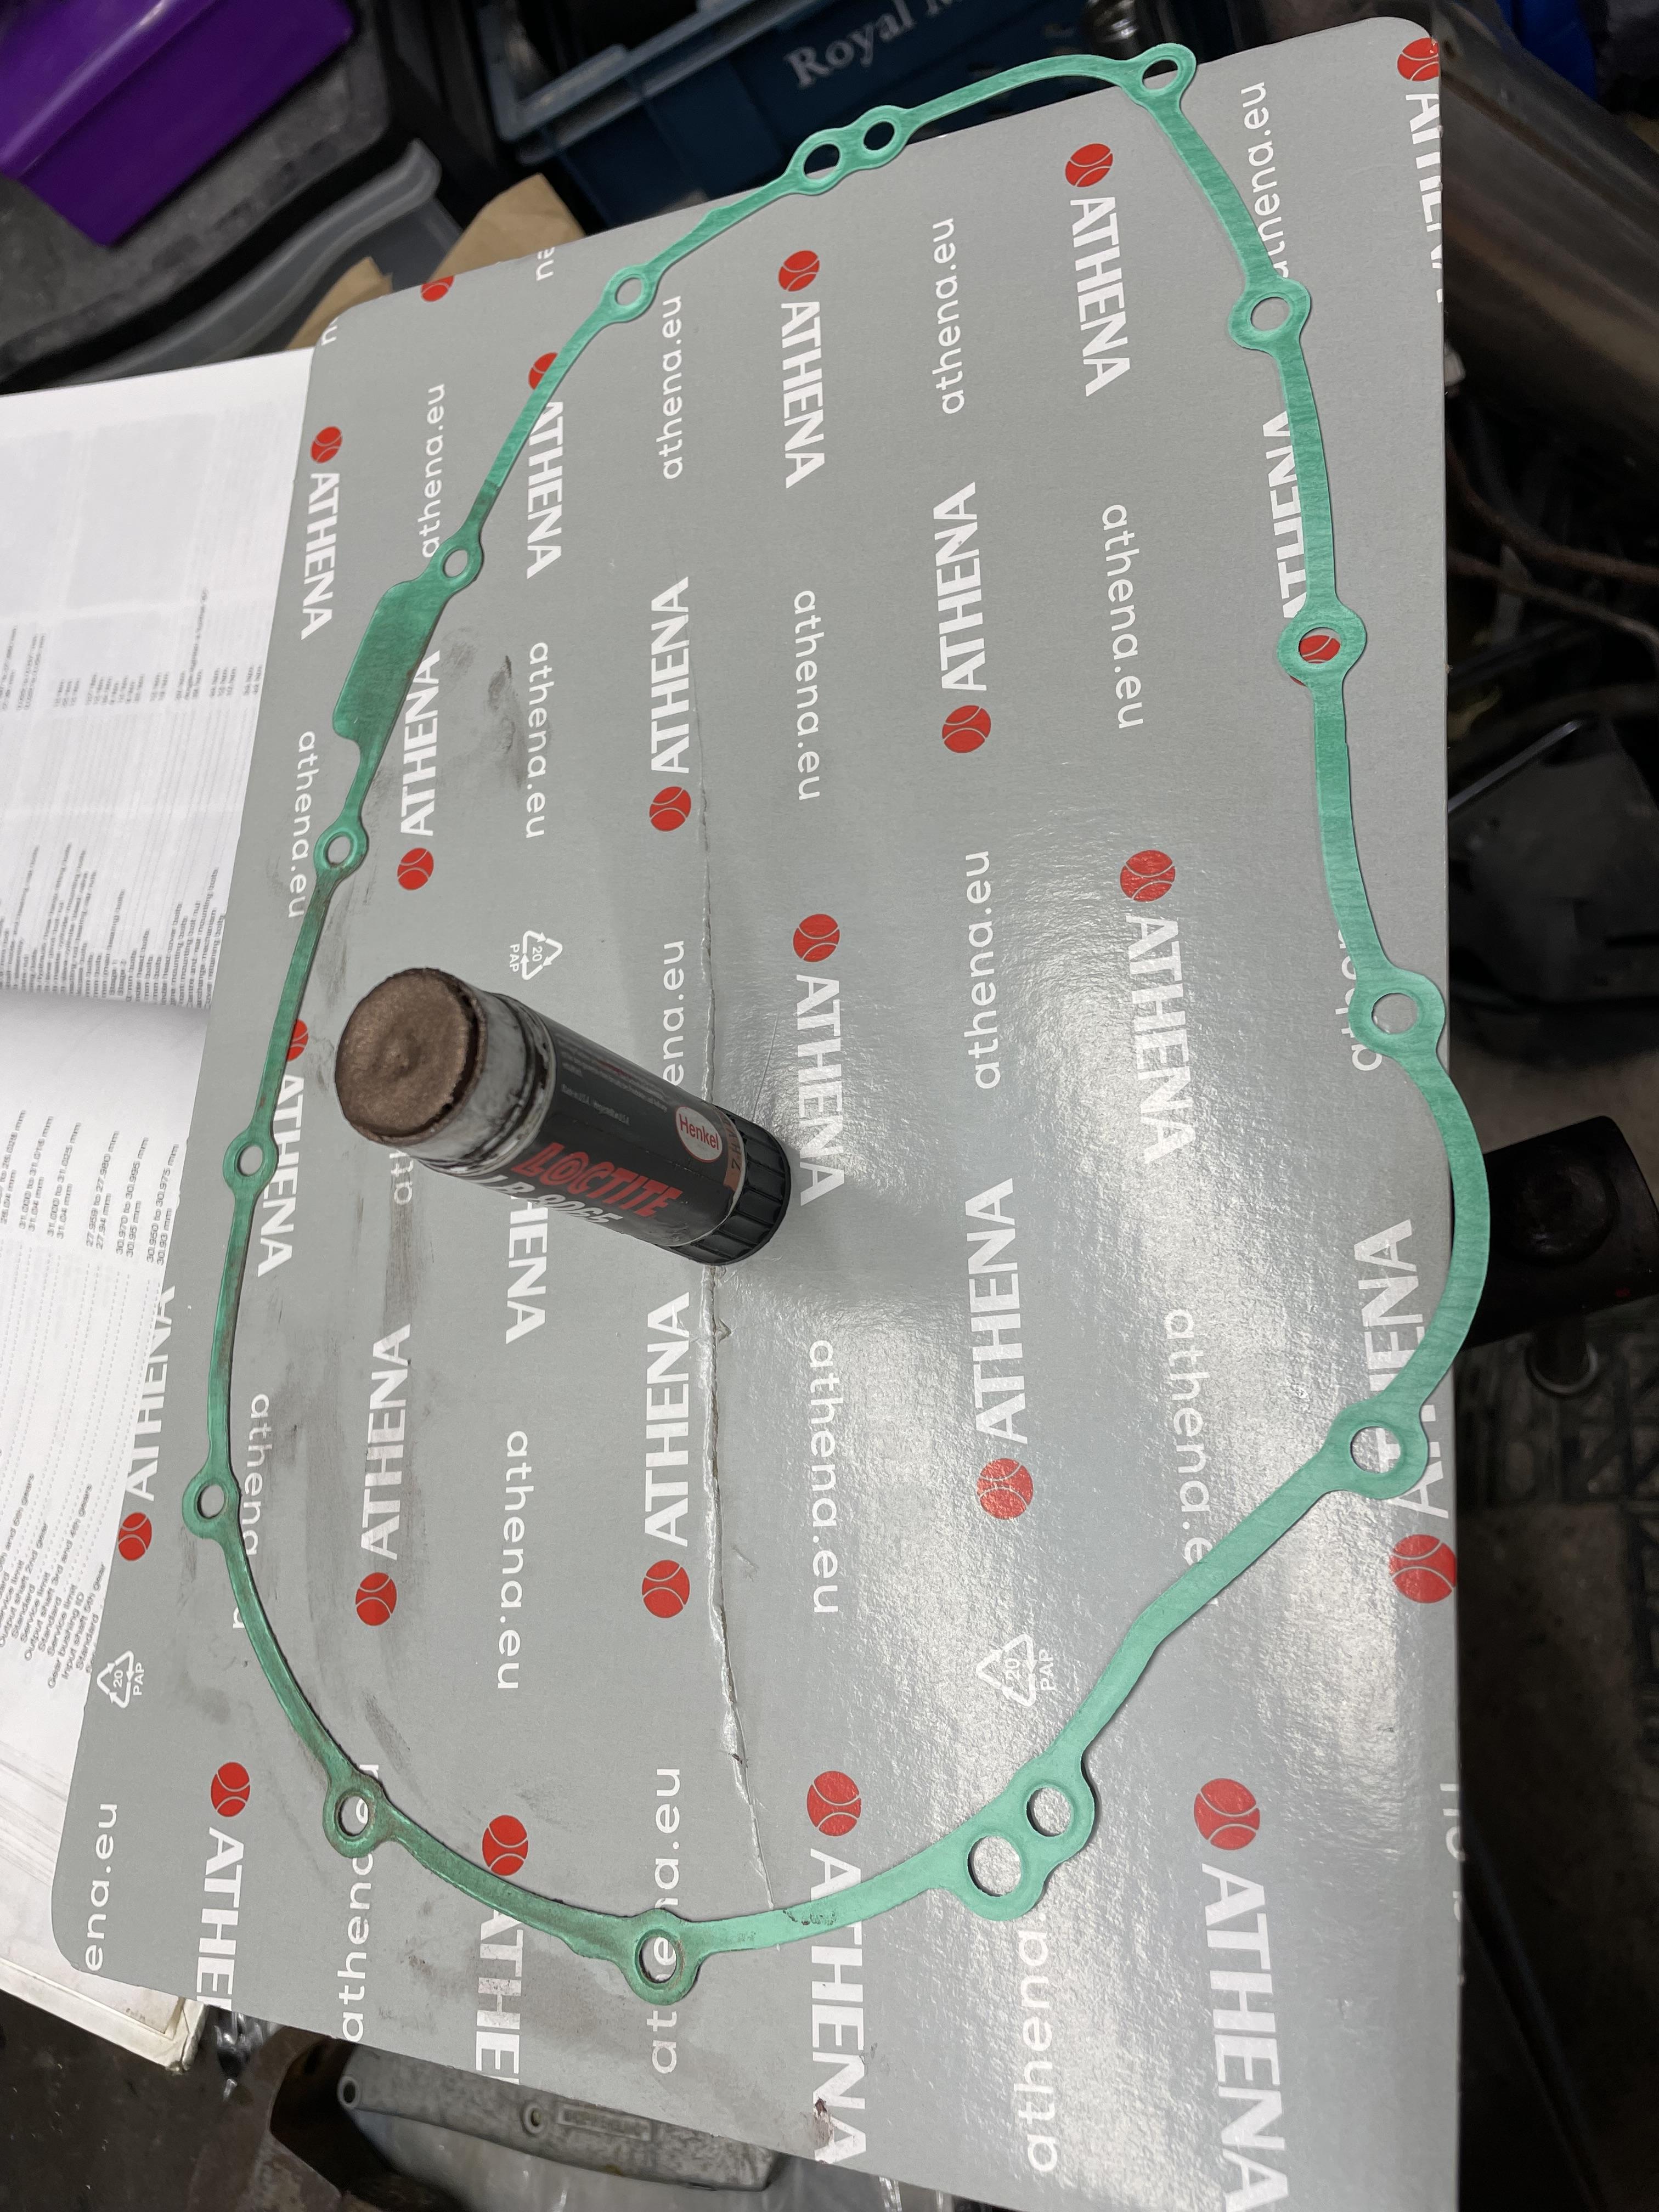
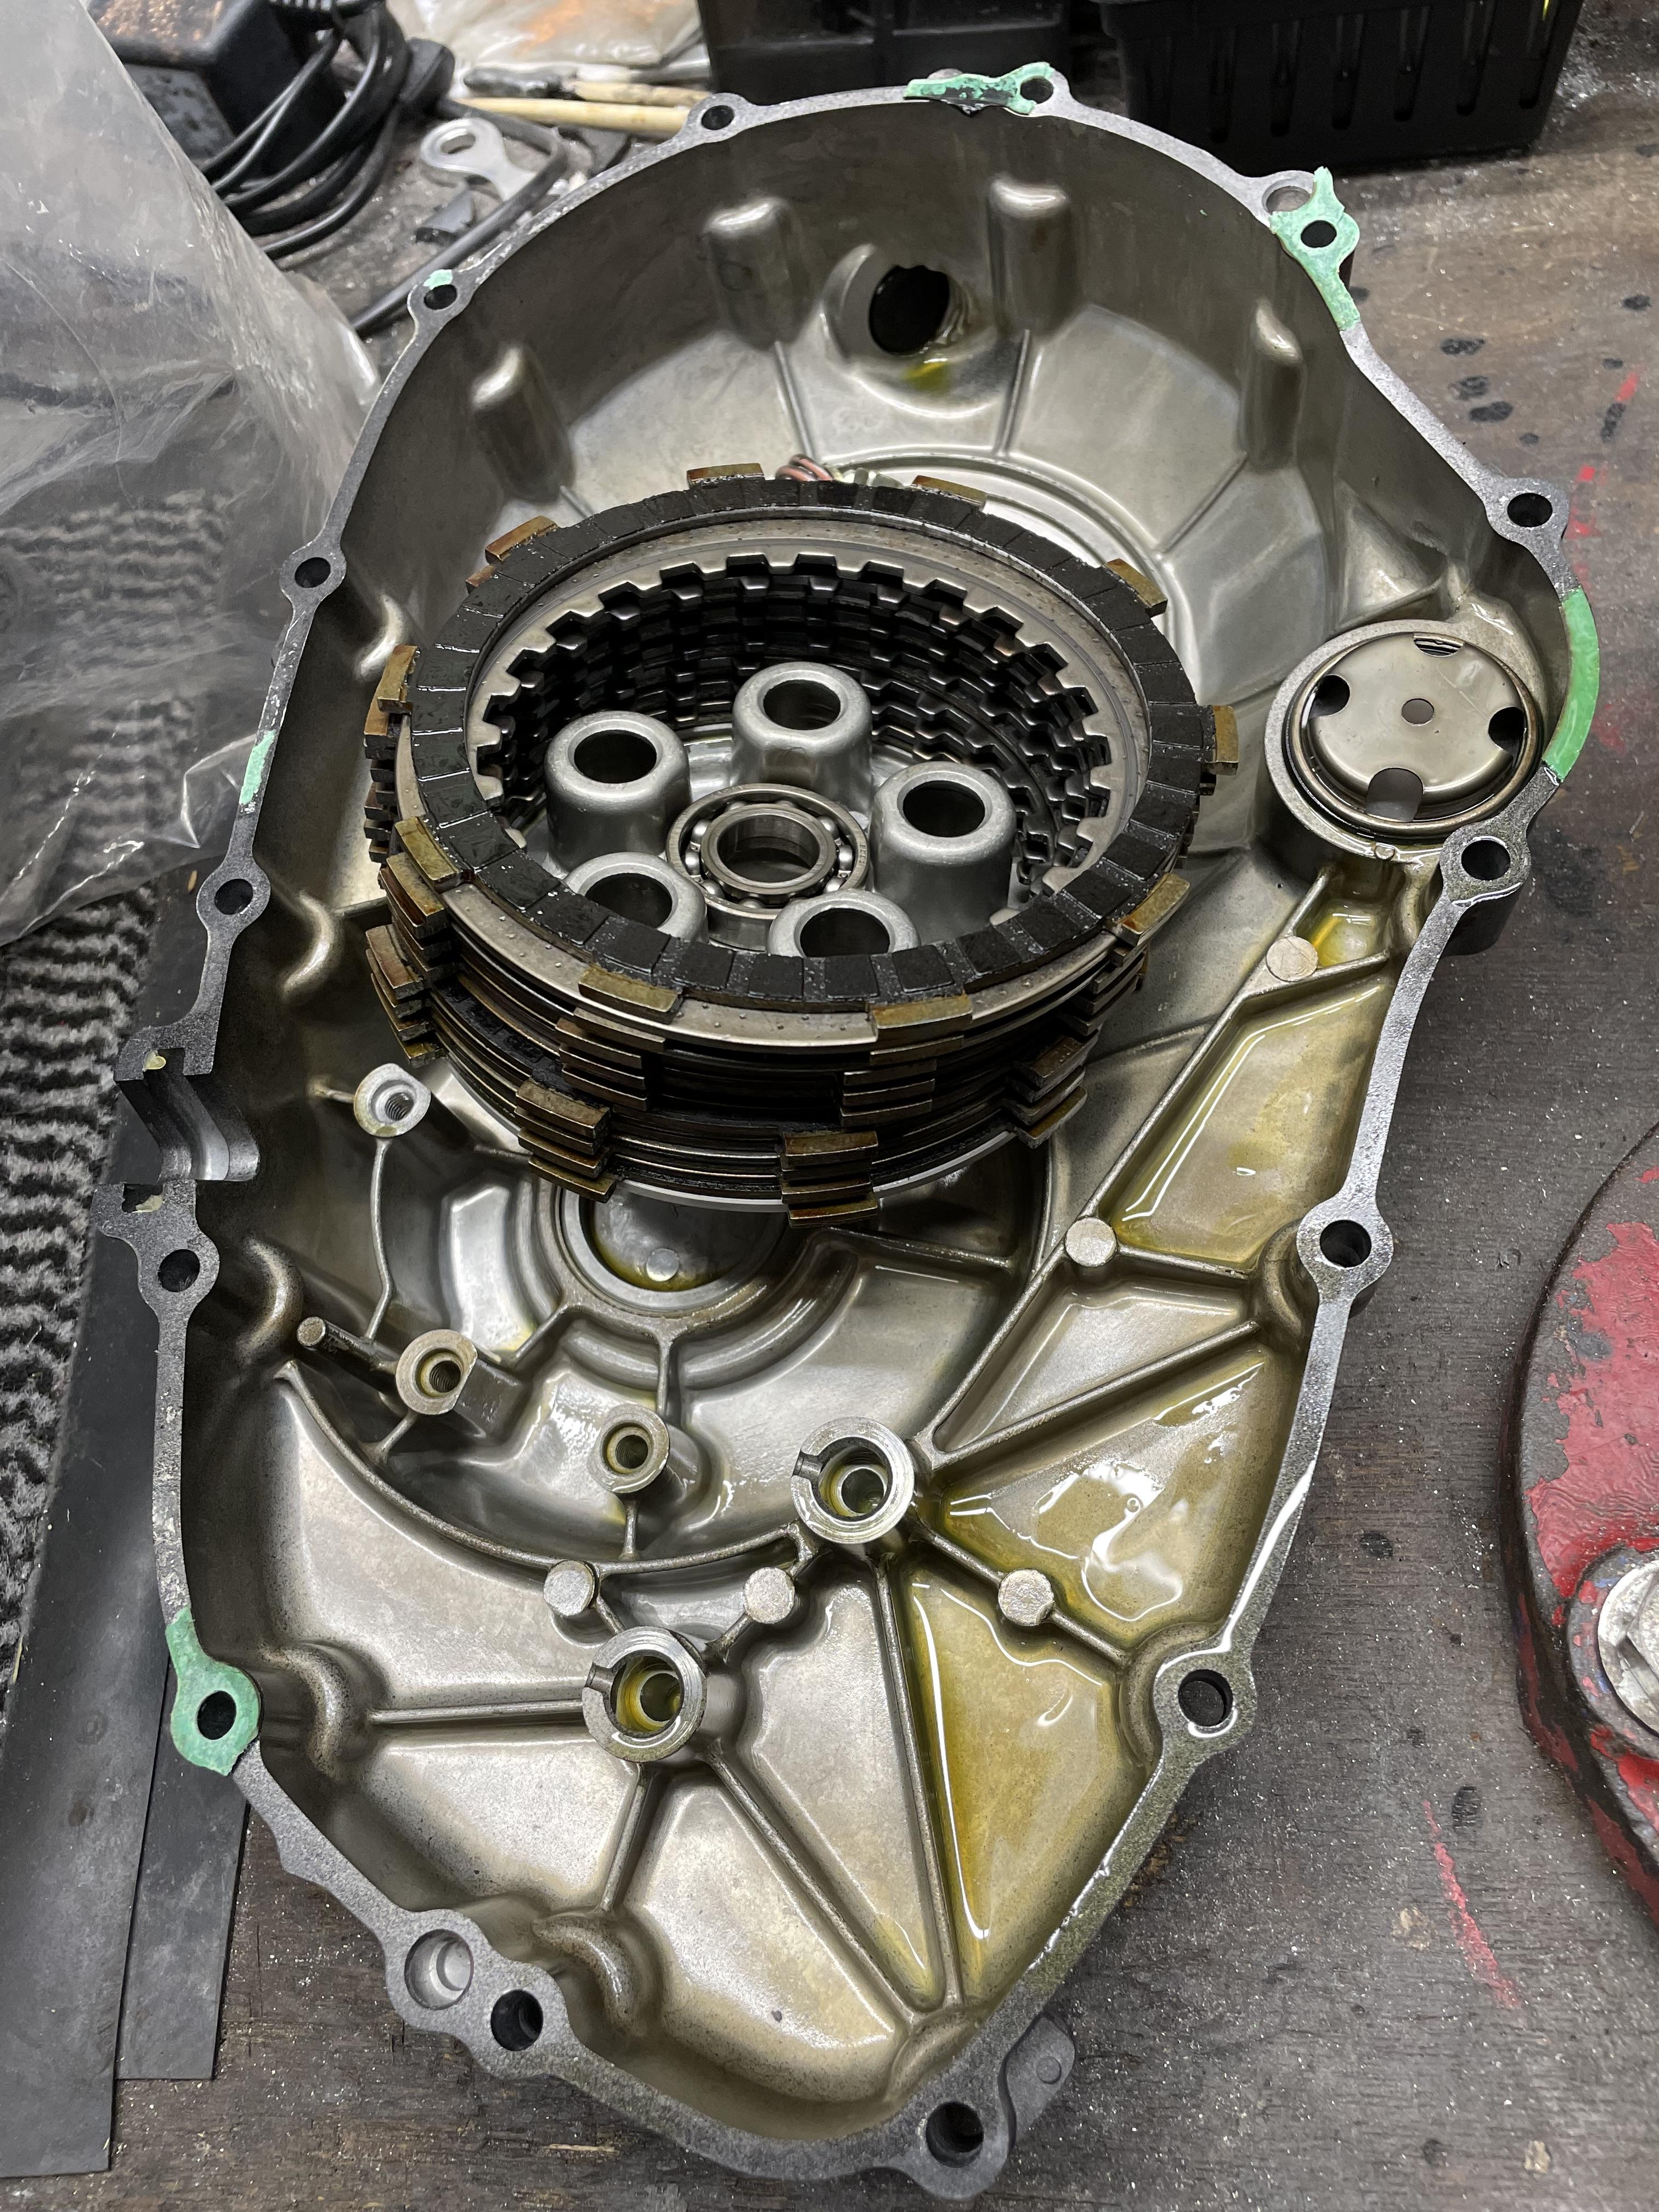
Finally got round to replacing the clutch parts in the 5th gen Donkey. Fist (and hardest) job was to remove the old gasket. Took over an hour with a blade! Dipped the new friction plates into the old engine oil I’d just drained in the pan. Left them for a couple days. Whilst waiting, I treated the pushrod to a 3-stage polish. Swapped it round so the pristine end was pushed back into the engine and put a dab of Redline grease on the end. Here’s what it started out looking like…grim corrosion on the slave cylinder end. After a 1st stage polish… After a 2nd stage polish. Closeup of the polished end shows scars from corrosion but couldn’t snag a fingernail on it…smooth. Now for a bit of flash and dazzle - buffed it with Tungsten Disulphide powder to make the surface slick and rust proof. Hoping it will make for smoother clutch action going forward. Had a new set of steel and friction discs on hand, but not the smaller friction plate that goes over the judder spring. The old one was within spec so I just scuffed the gloss off it with some 800, as per @BusyLittleShop advice: “Just enough to bust the glaze”. See how it’s glossy everywhere except where my thumb is. Then fitted all friction and steel discs as per manual. Followed by the slightly stiffer EBC clutch springs, progressively wound in a cross-cross pattern and torqued to spec. Final job was fitting the gasket, and to avoid breaking it in future I smeared a little copper slip on one face, and engine oil (from the drain pan!) on the other face. Should come off in one piece next time I open the cover. Once finished, I idled her for 5 mins to ensure there were no leaks (there were none, thank God!) and promptly took her for a 600 mile tour of Wales. What a ride. And not a hint of clutch slip either! Other than a slightly heavier clutch lever, she’s a dream to ride now. Power goes straight to the back wheel and rolling acceleration is fantastic. Big thanks to all those like @Captain 80s who kept me honest and didn’t let me cut corners. Costs a bit more but happy I did it properly in the end.
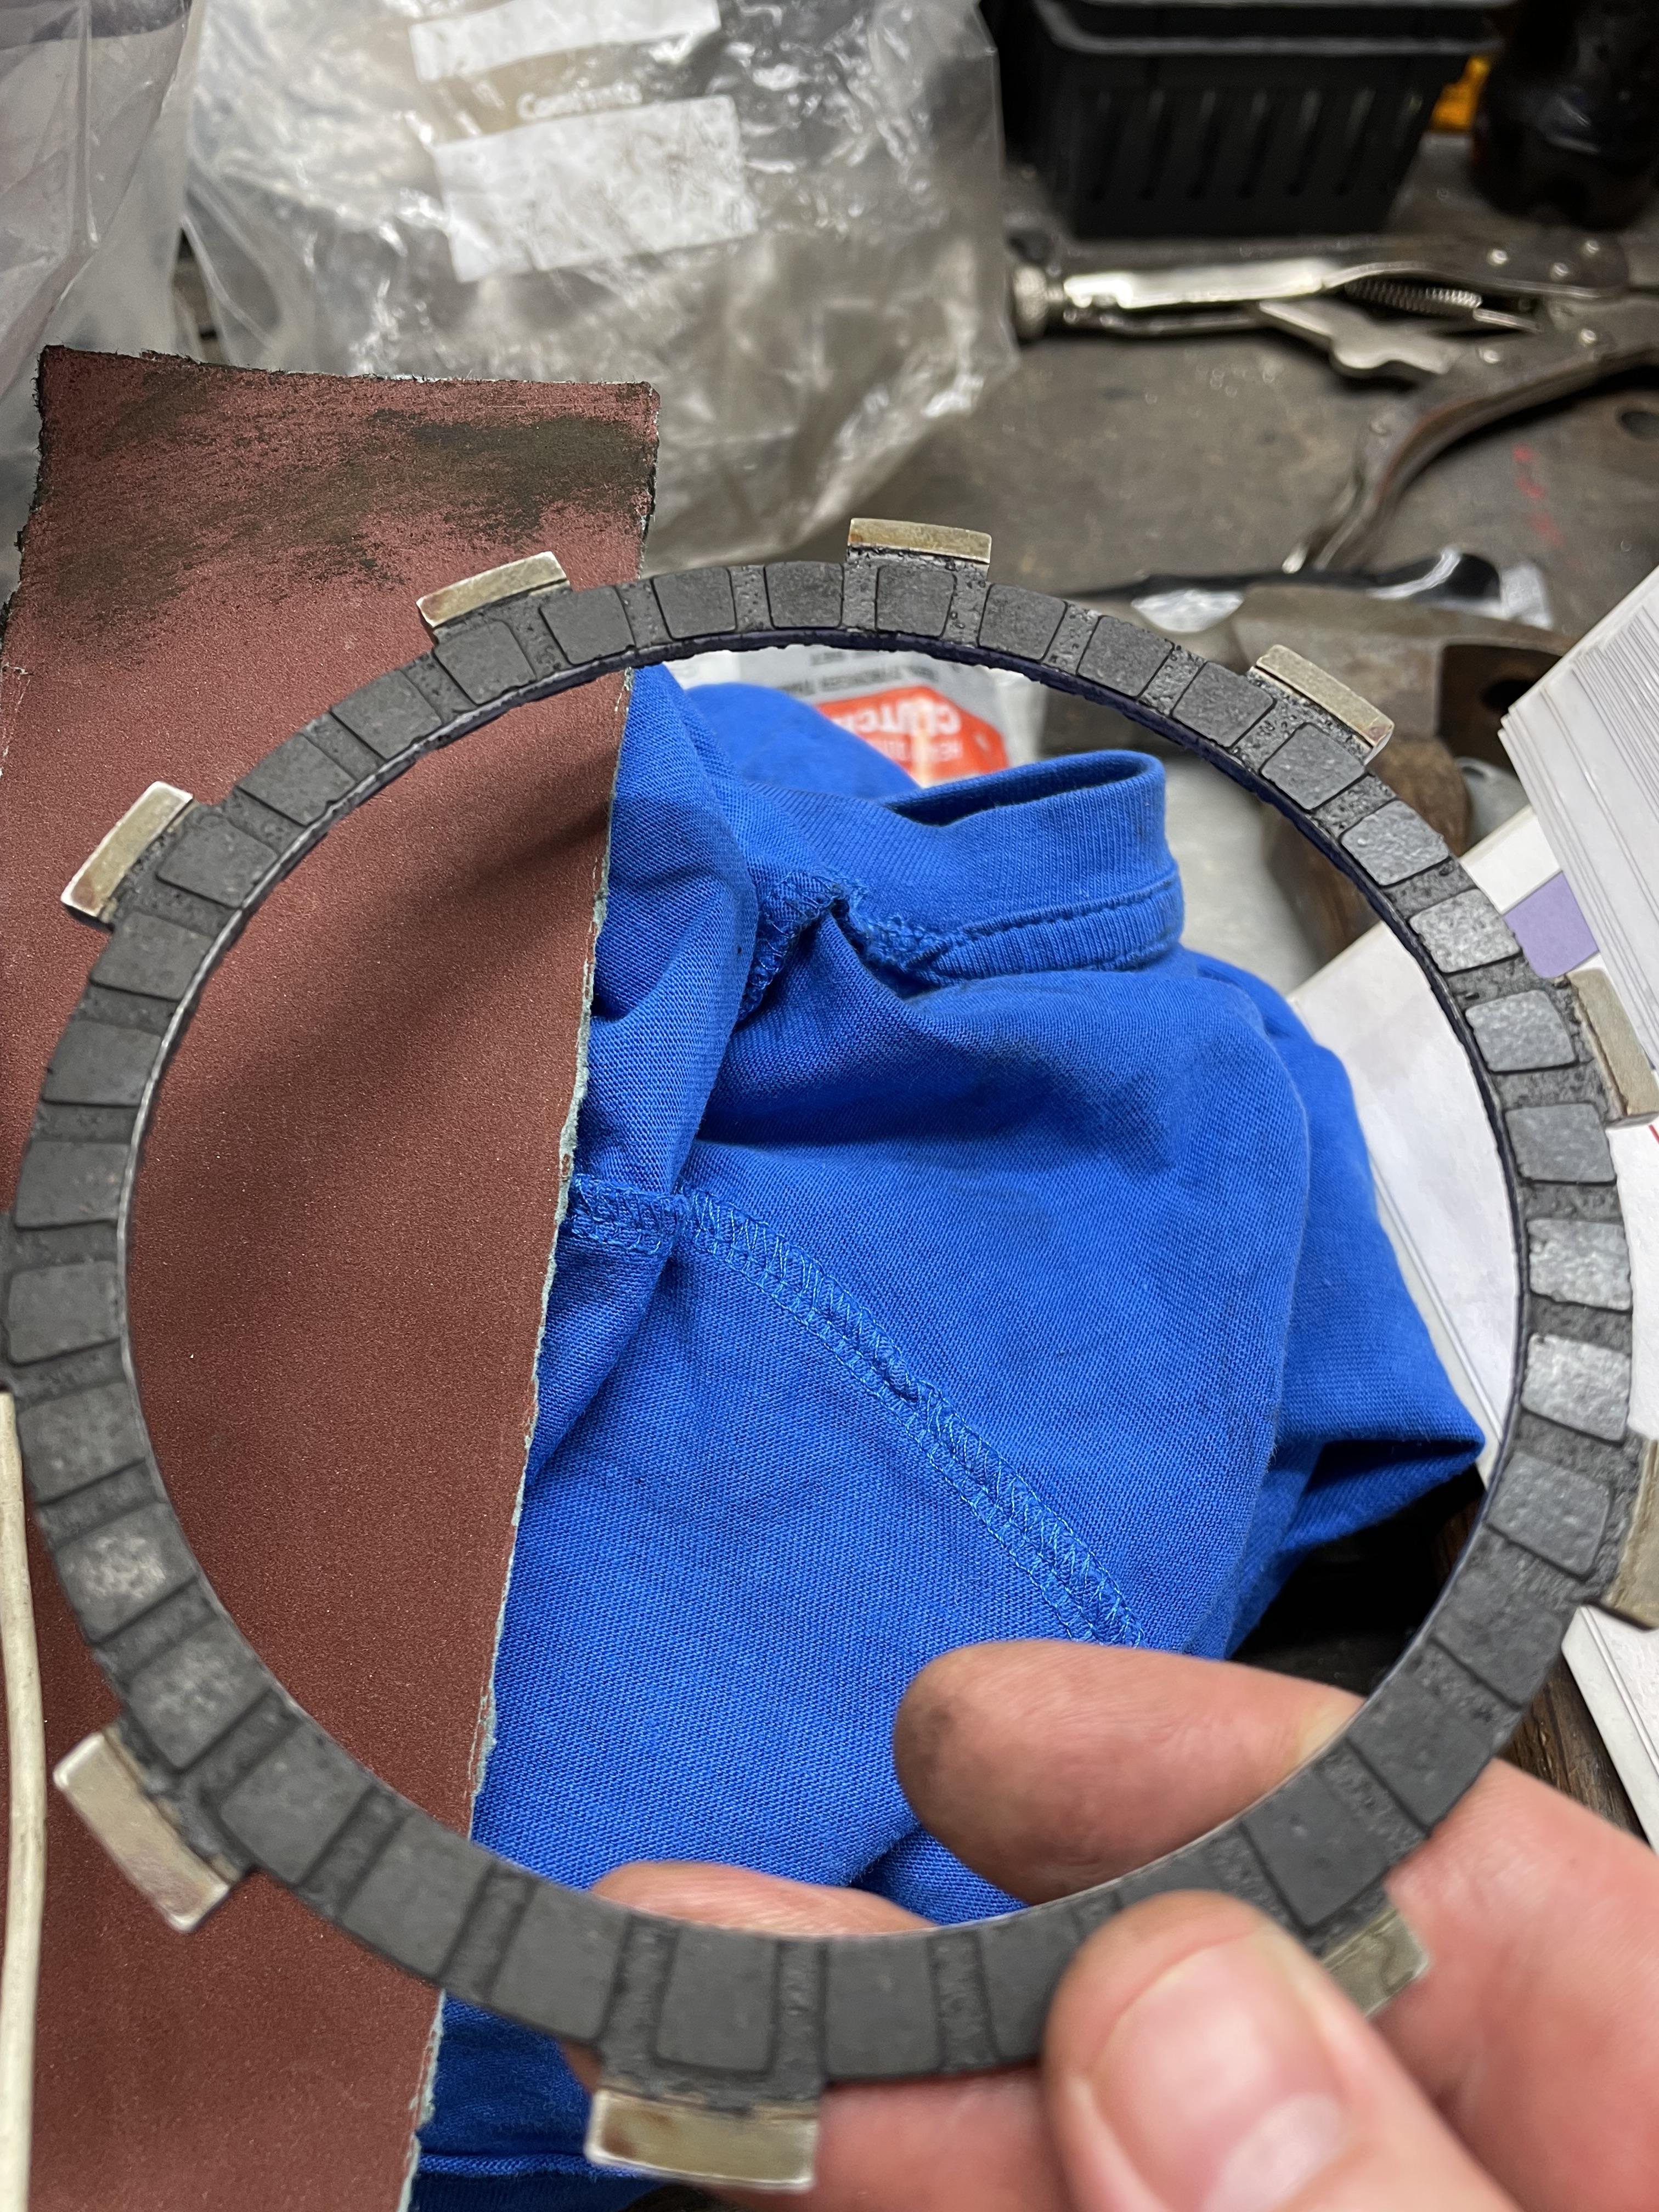
-
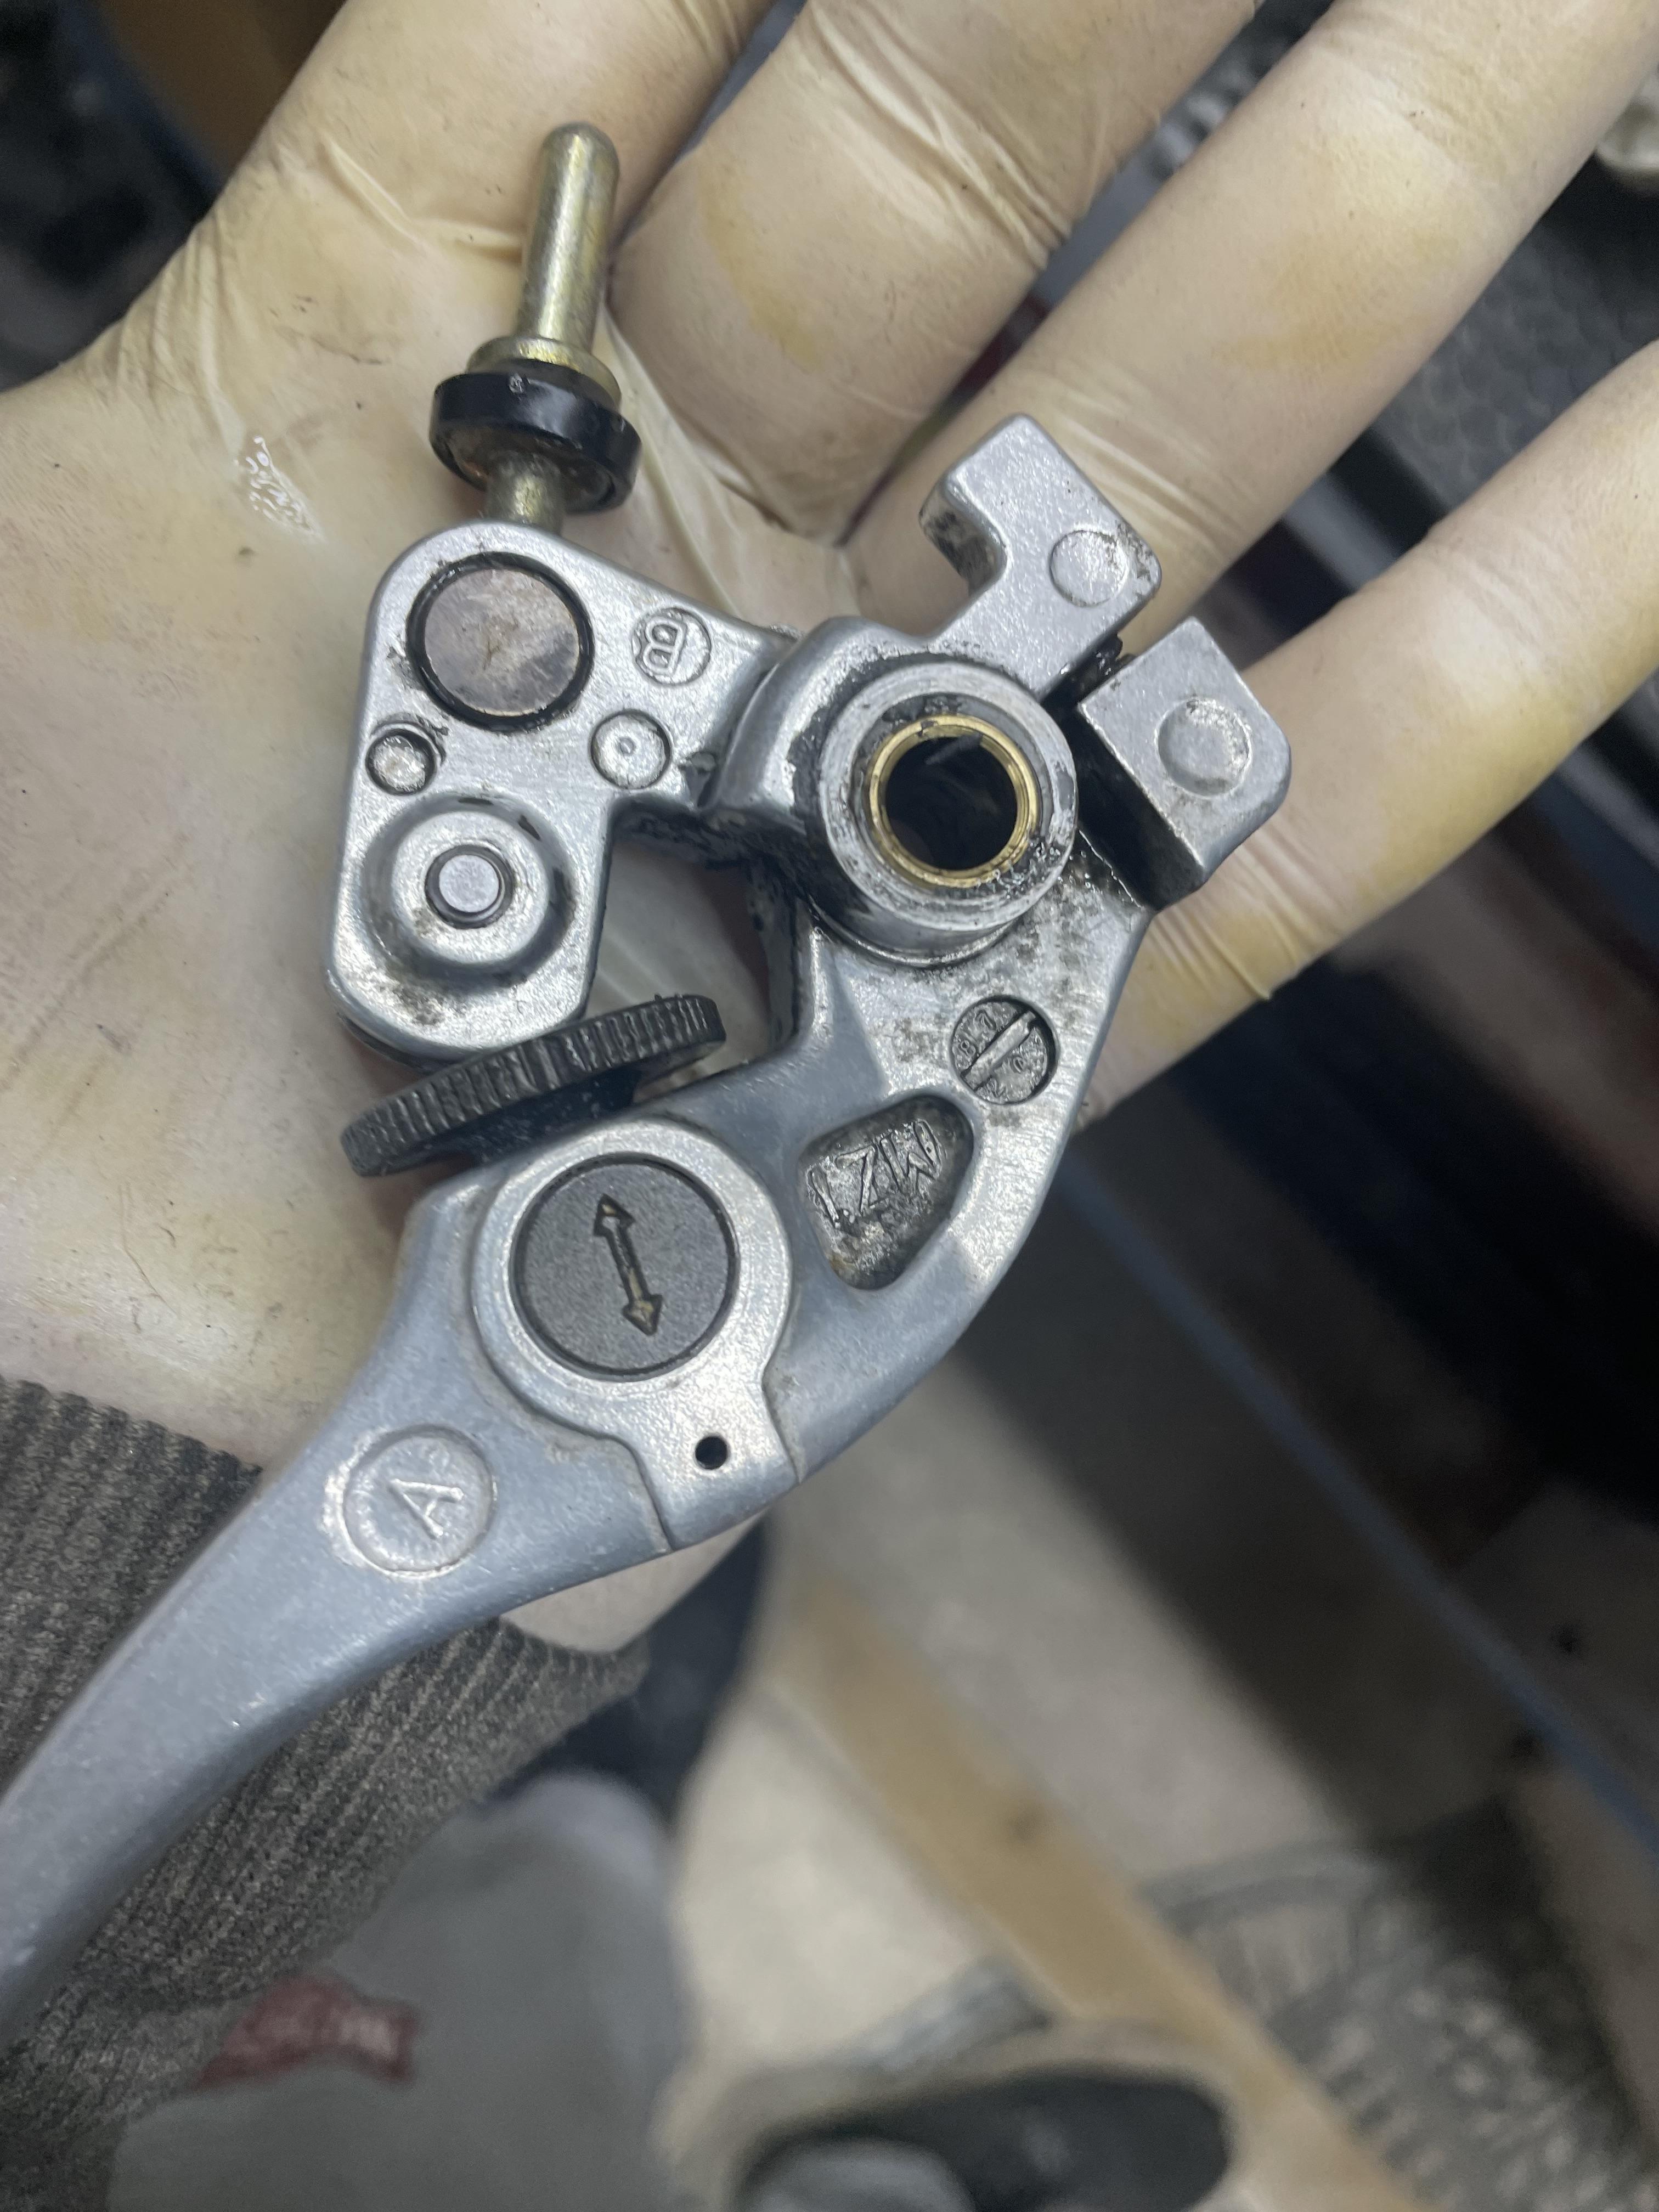
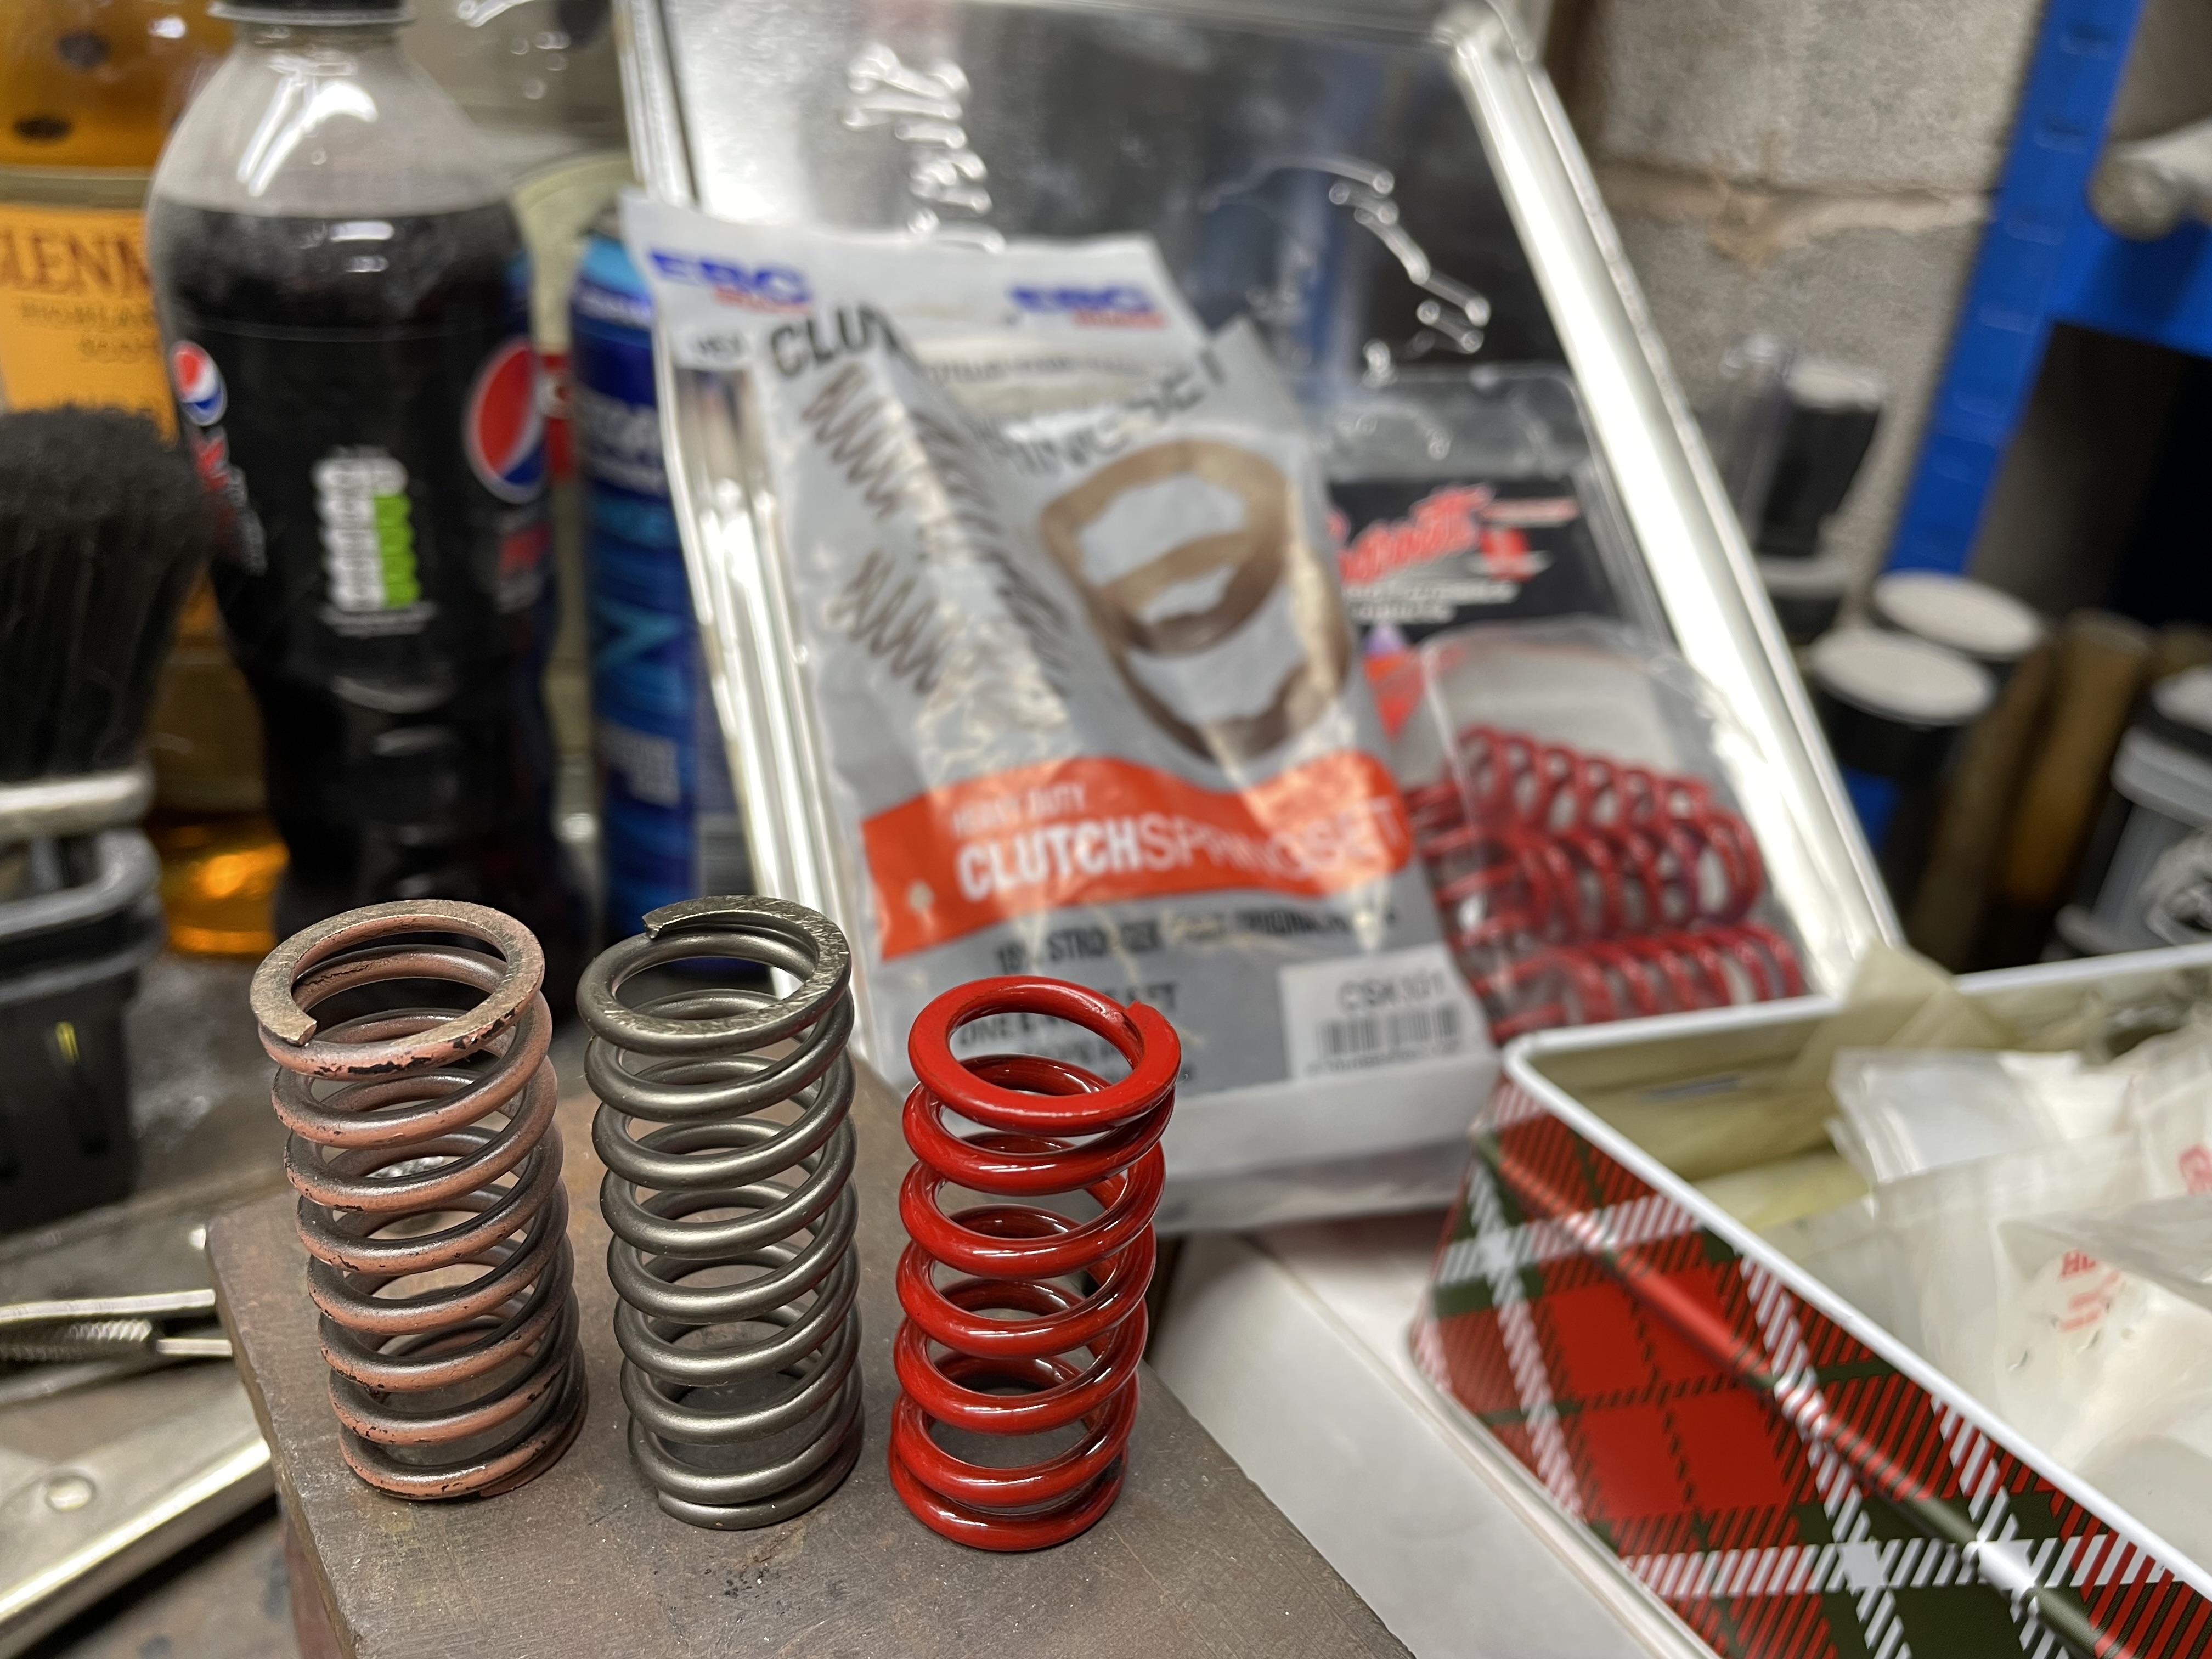
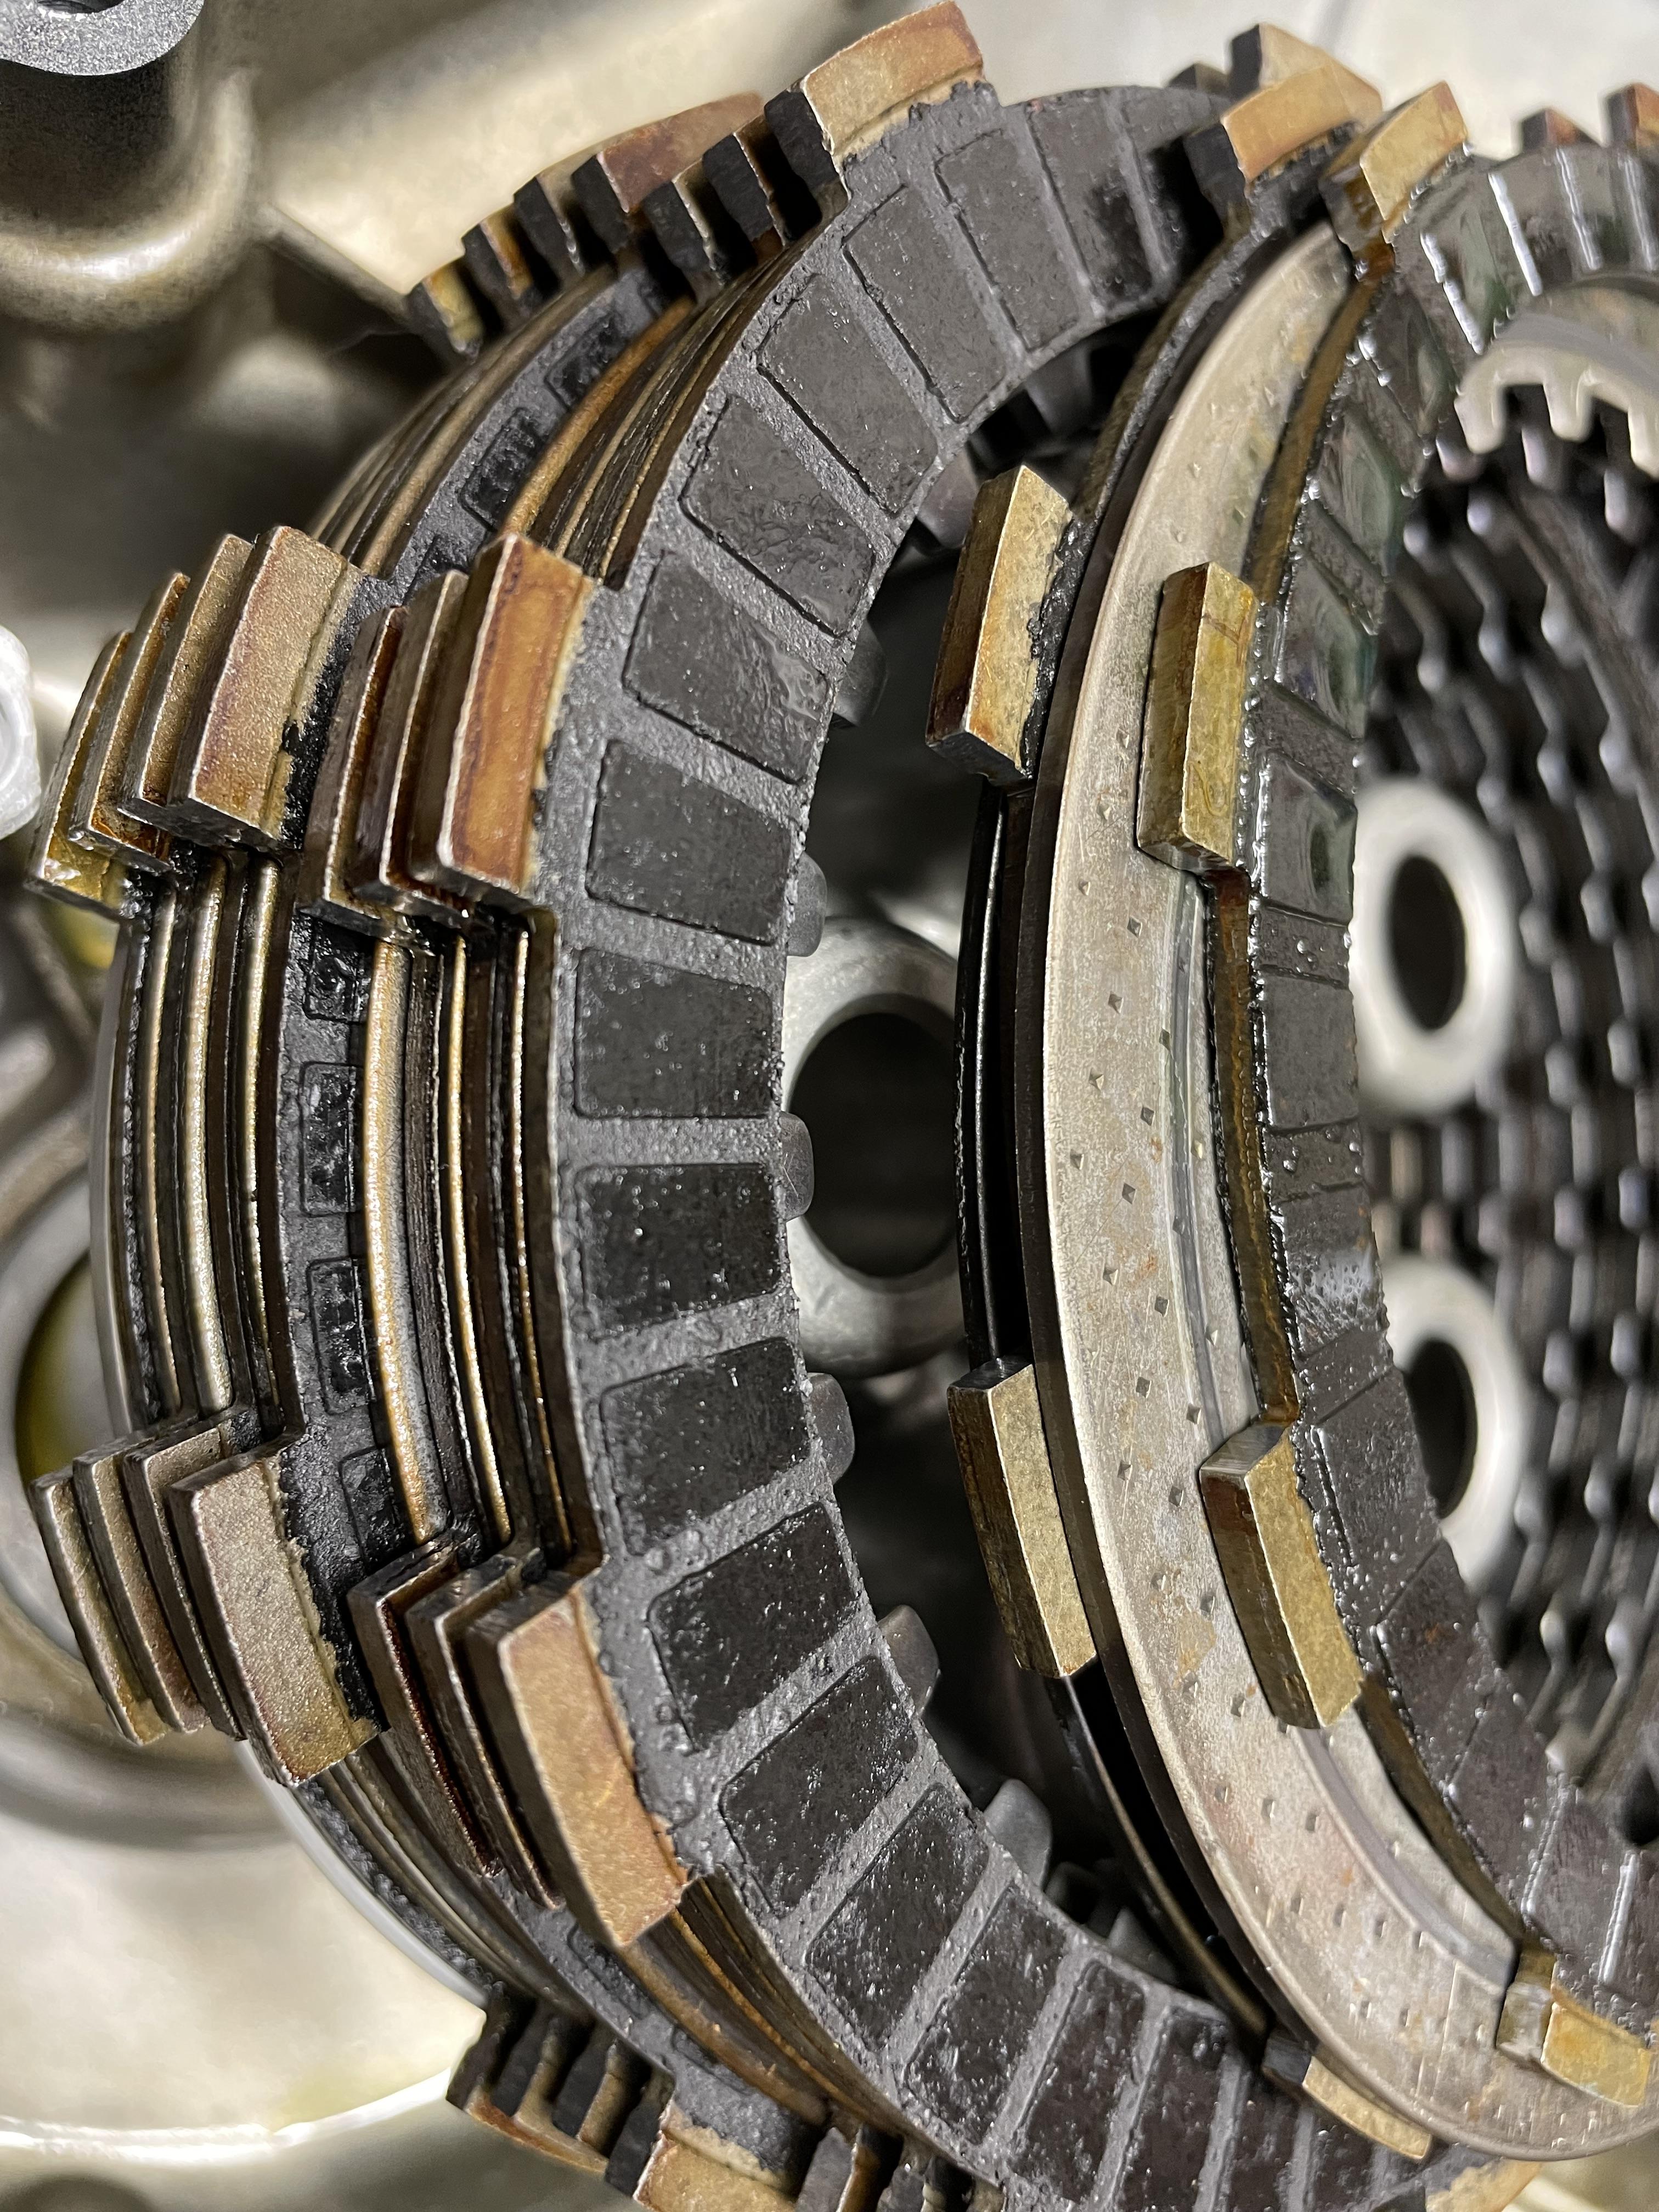
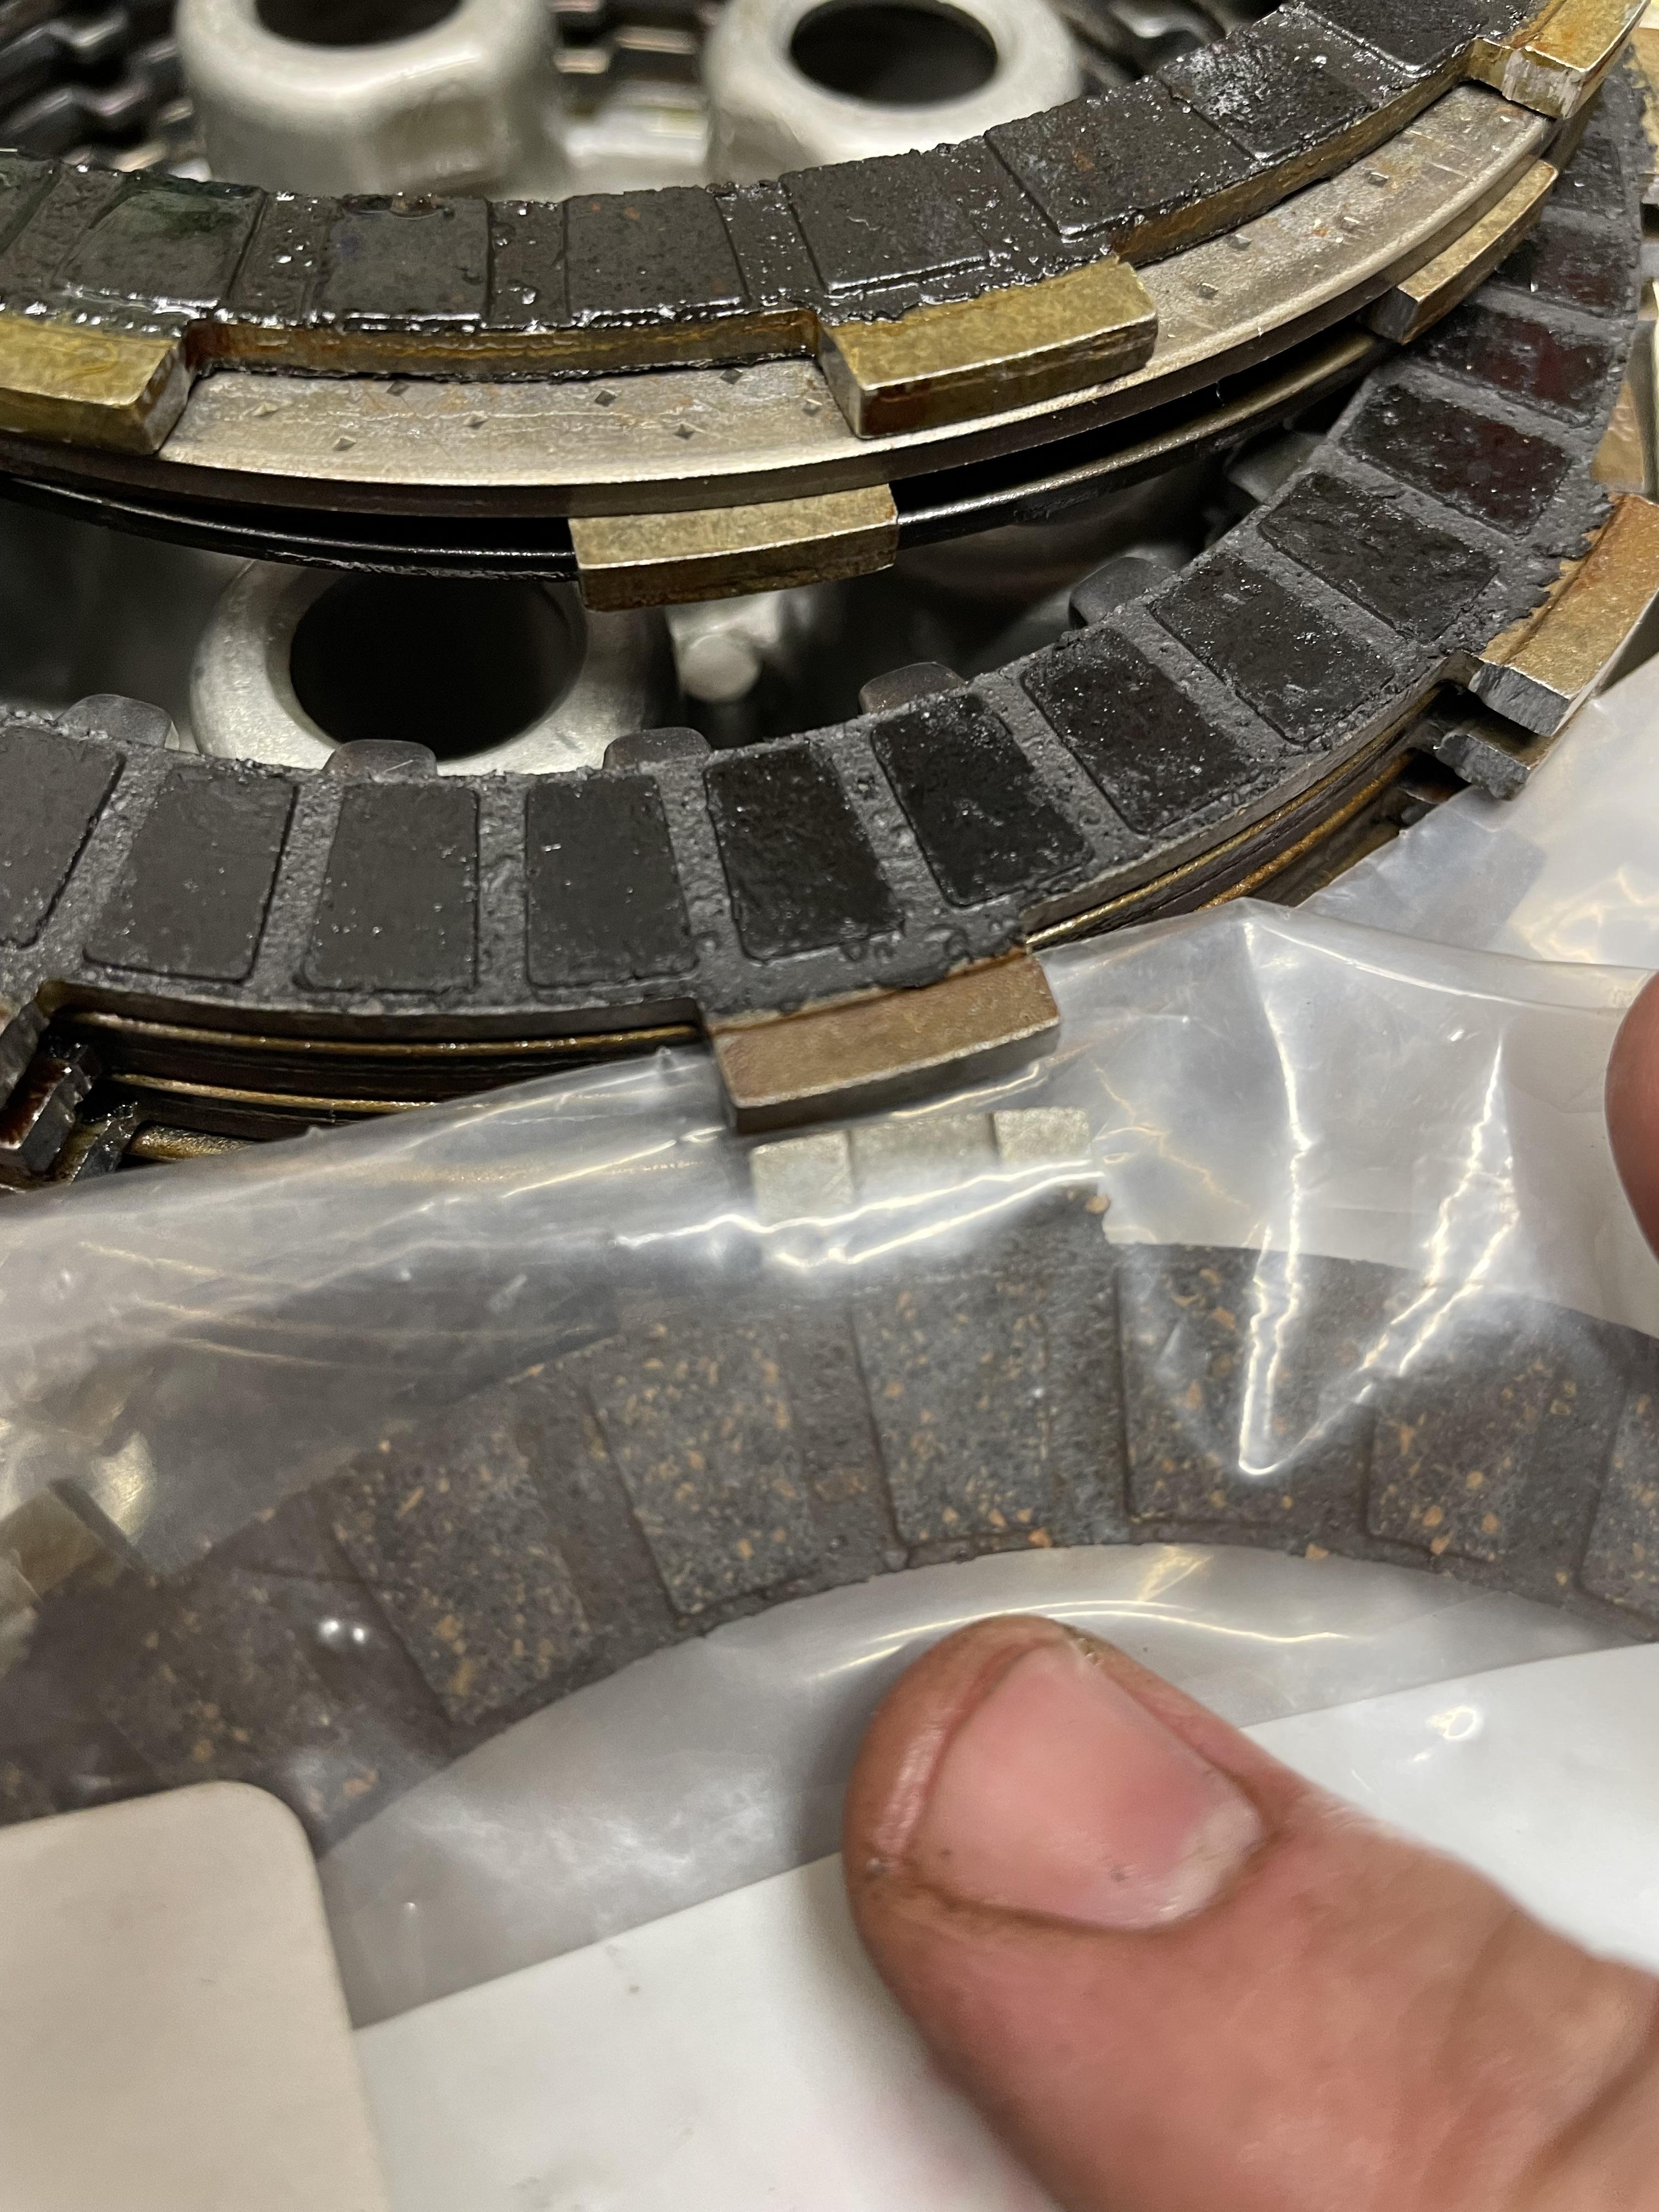
So I finally opened up the clutch cover (and broke the gasket of course), to investigate why the clutch is slipping. Swapped out the centre bearing as a blind stab at removing that squeak I hear when clutch is released. It just comes out with finger pressure - easy! Weird because everything works out within spec. The springs are slightly down on new but in the middle of spec. The fibre plates are almost up to new spec. Little glazing. Basket doesn’t have any pronounced notches. The steel plates are very slightly glazed, but not enough to explain the monumental slip (lasts a couple seconds) at 8,000rpm. Could this be an aftermarket clutch kit, maybe? The tabs on my new plates look different to the tabs on the old ones. Friction surface on the new ones looks more mottled than the old, but that could just be lack of oil. Steels look different too. New ones are smooth and old ones have dimples. Interesting aside: here are 3 x VFR 800 springs in order of firmness: 1. Old 5th gen springs slightly worn 2. New EBC 6th gen springs slightly longer and stiffer 3. New Barnett 100lb springs for a Harley racer. Stiffest of all and slightly shorter Going to deglaze the steel discs, install new fibre discs (although the old ones look great) and fit new EBC springs to see if they can stop the slip. What do you guys think of my discs, old and new?
-
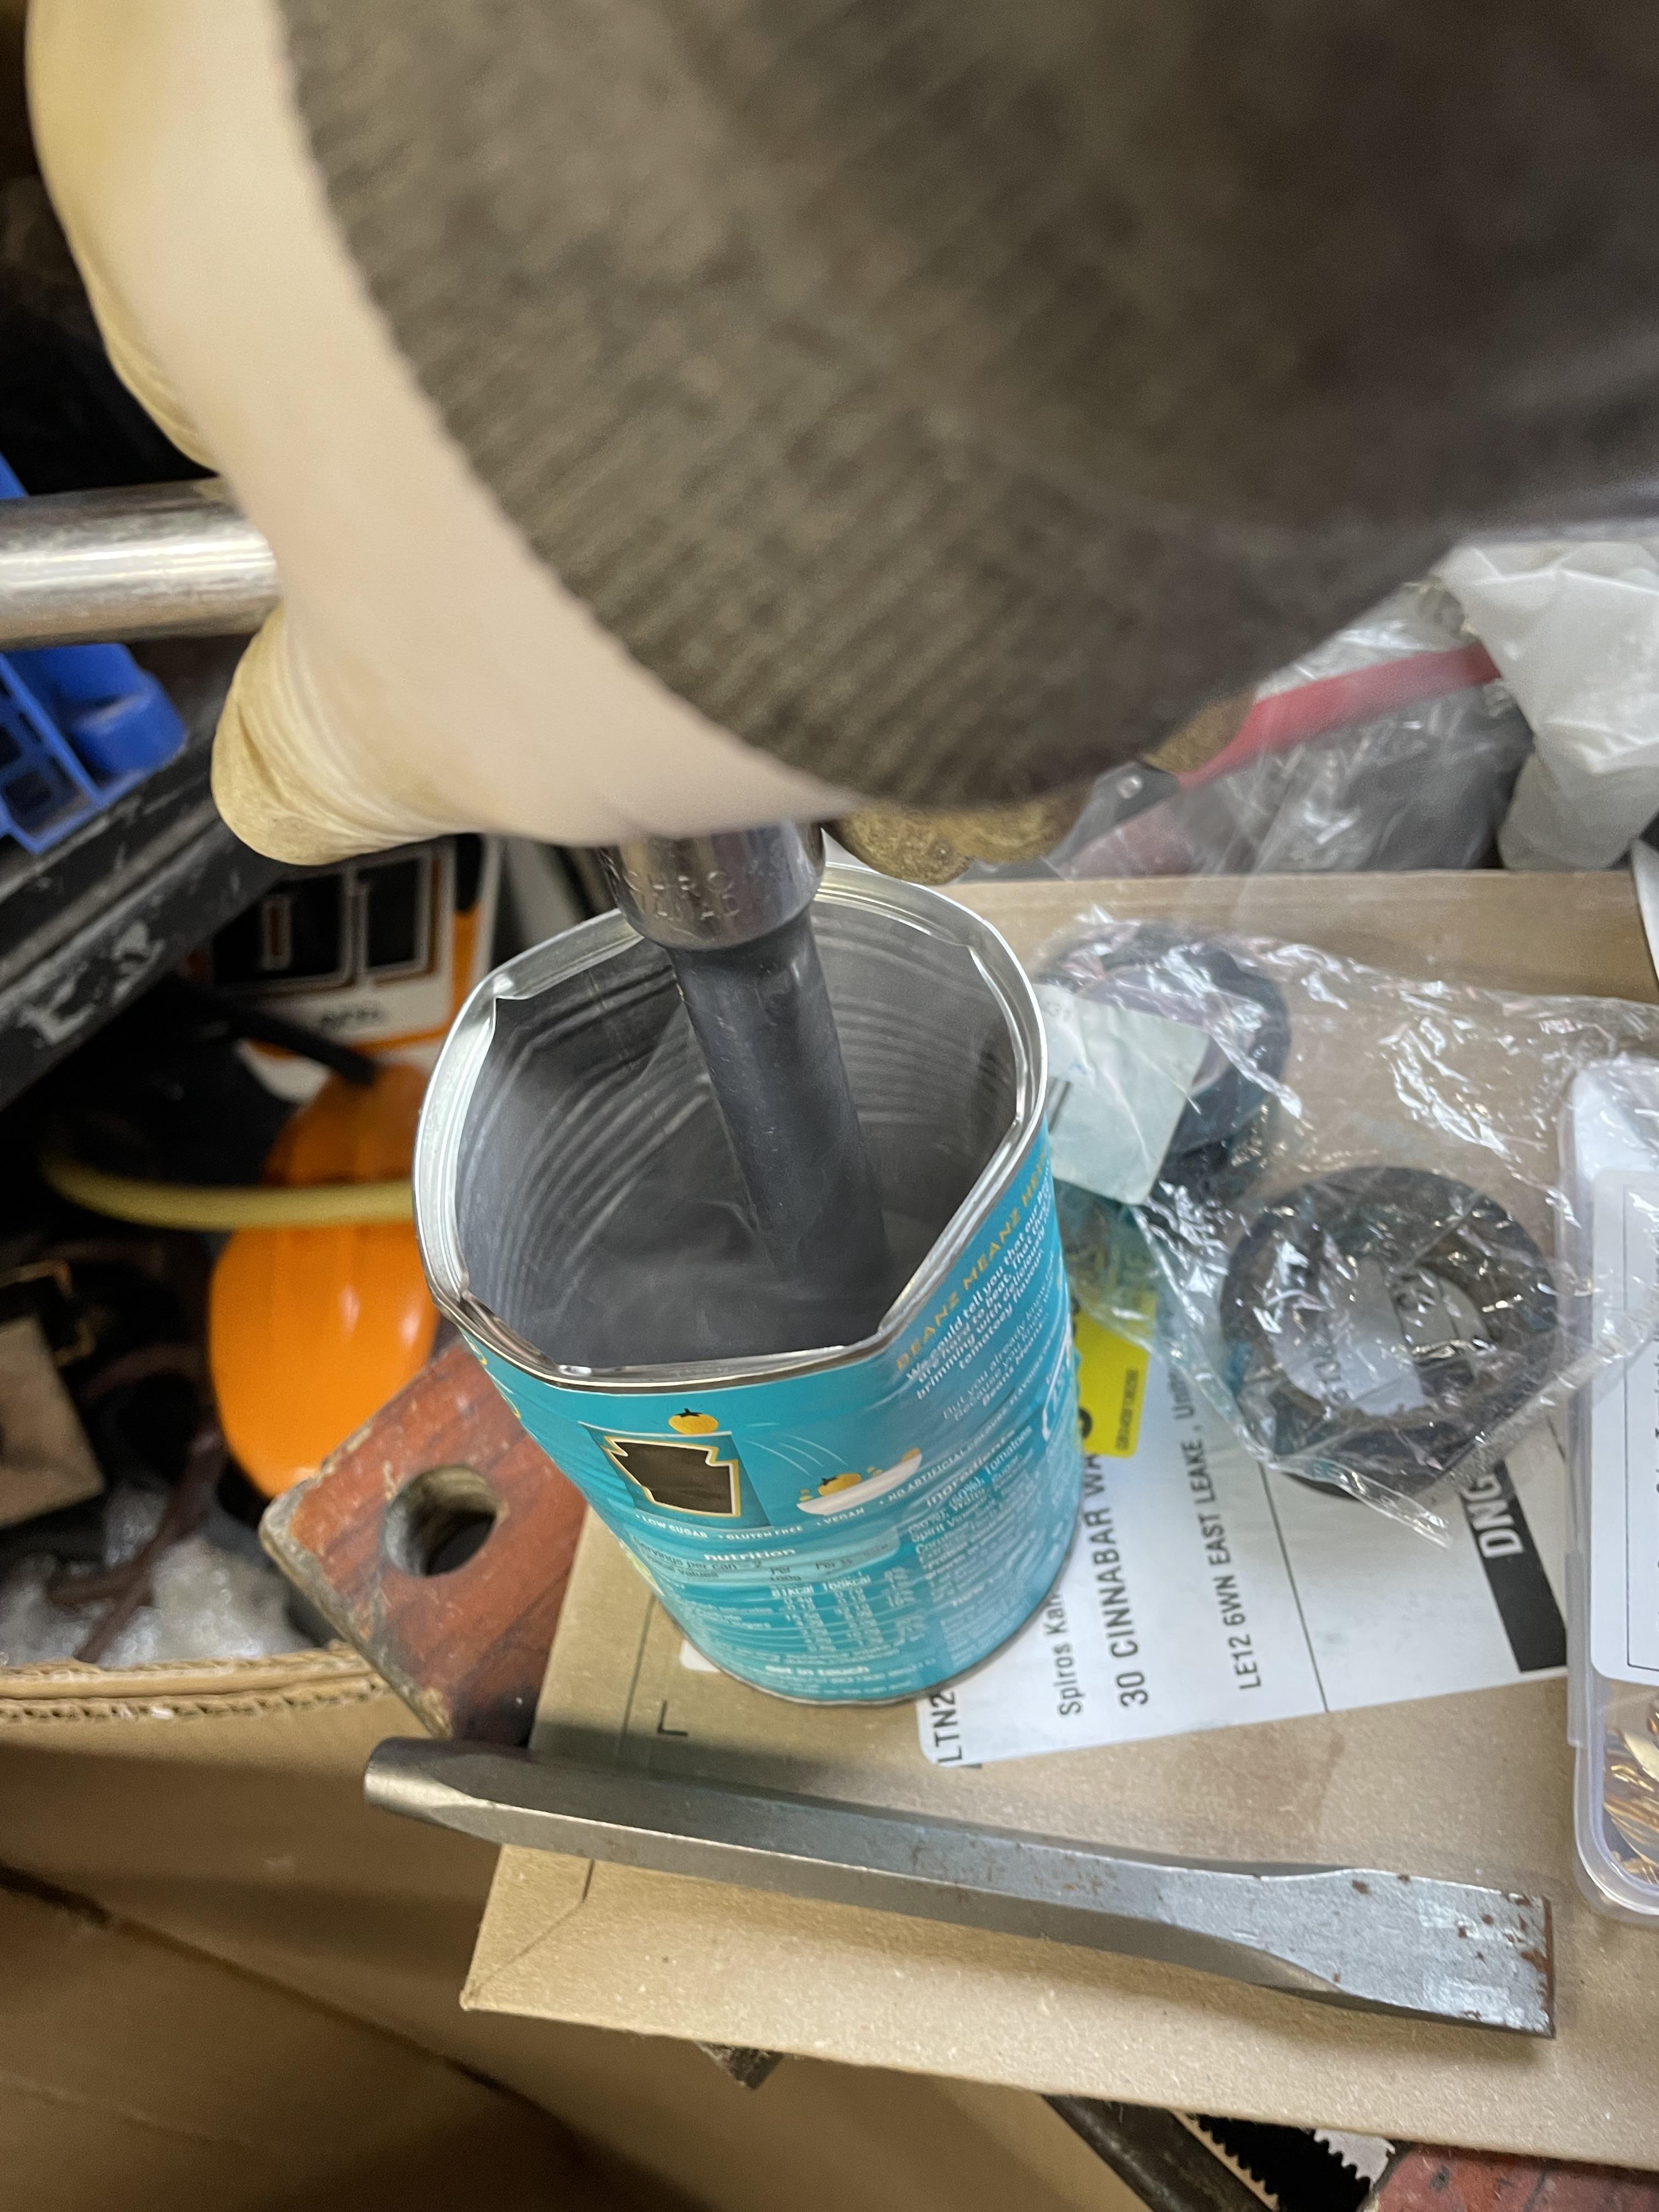
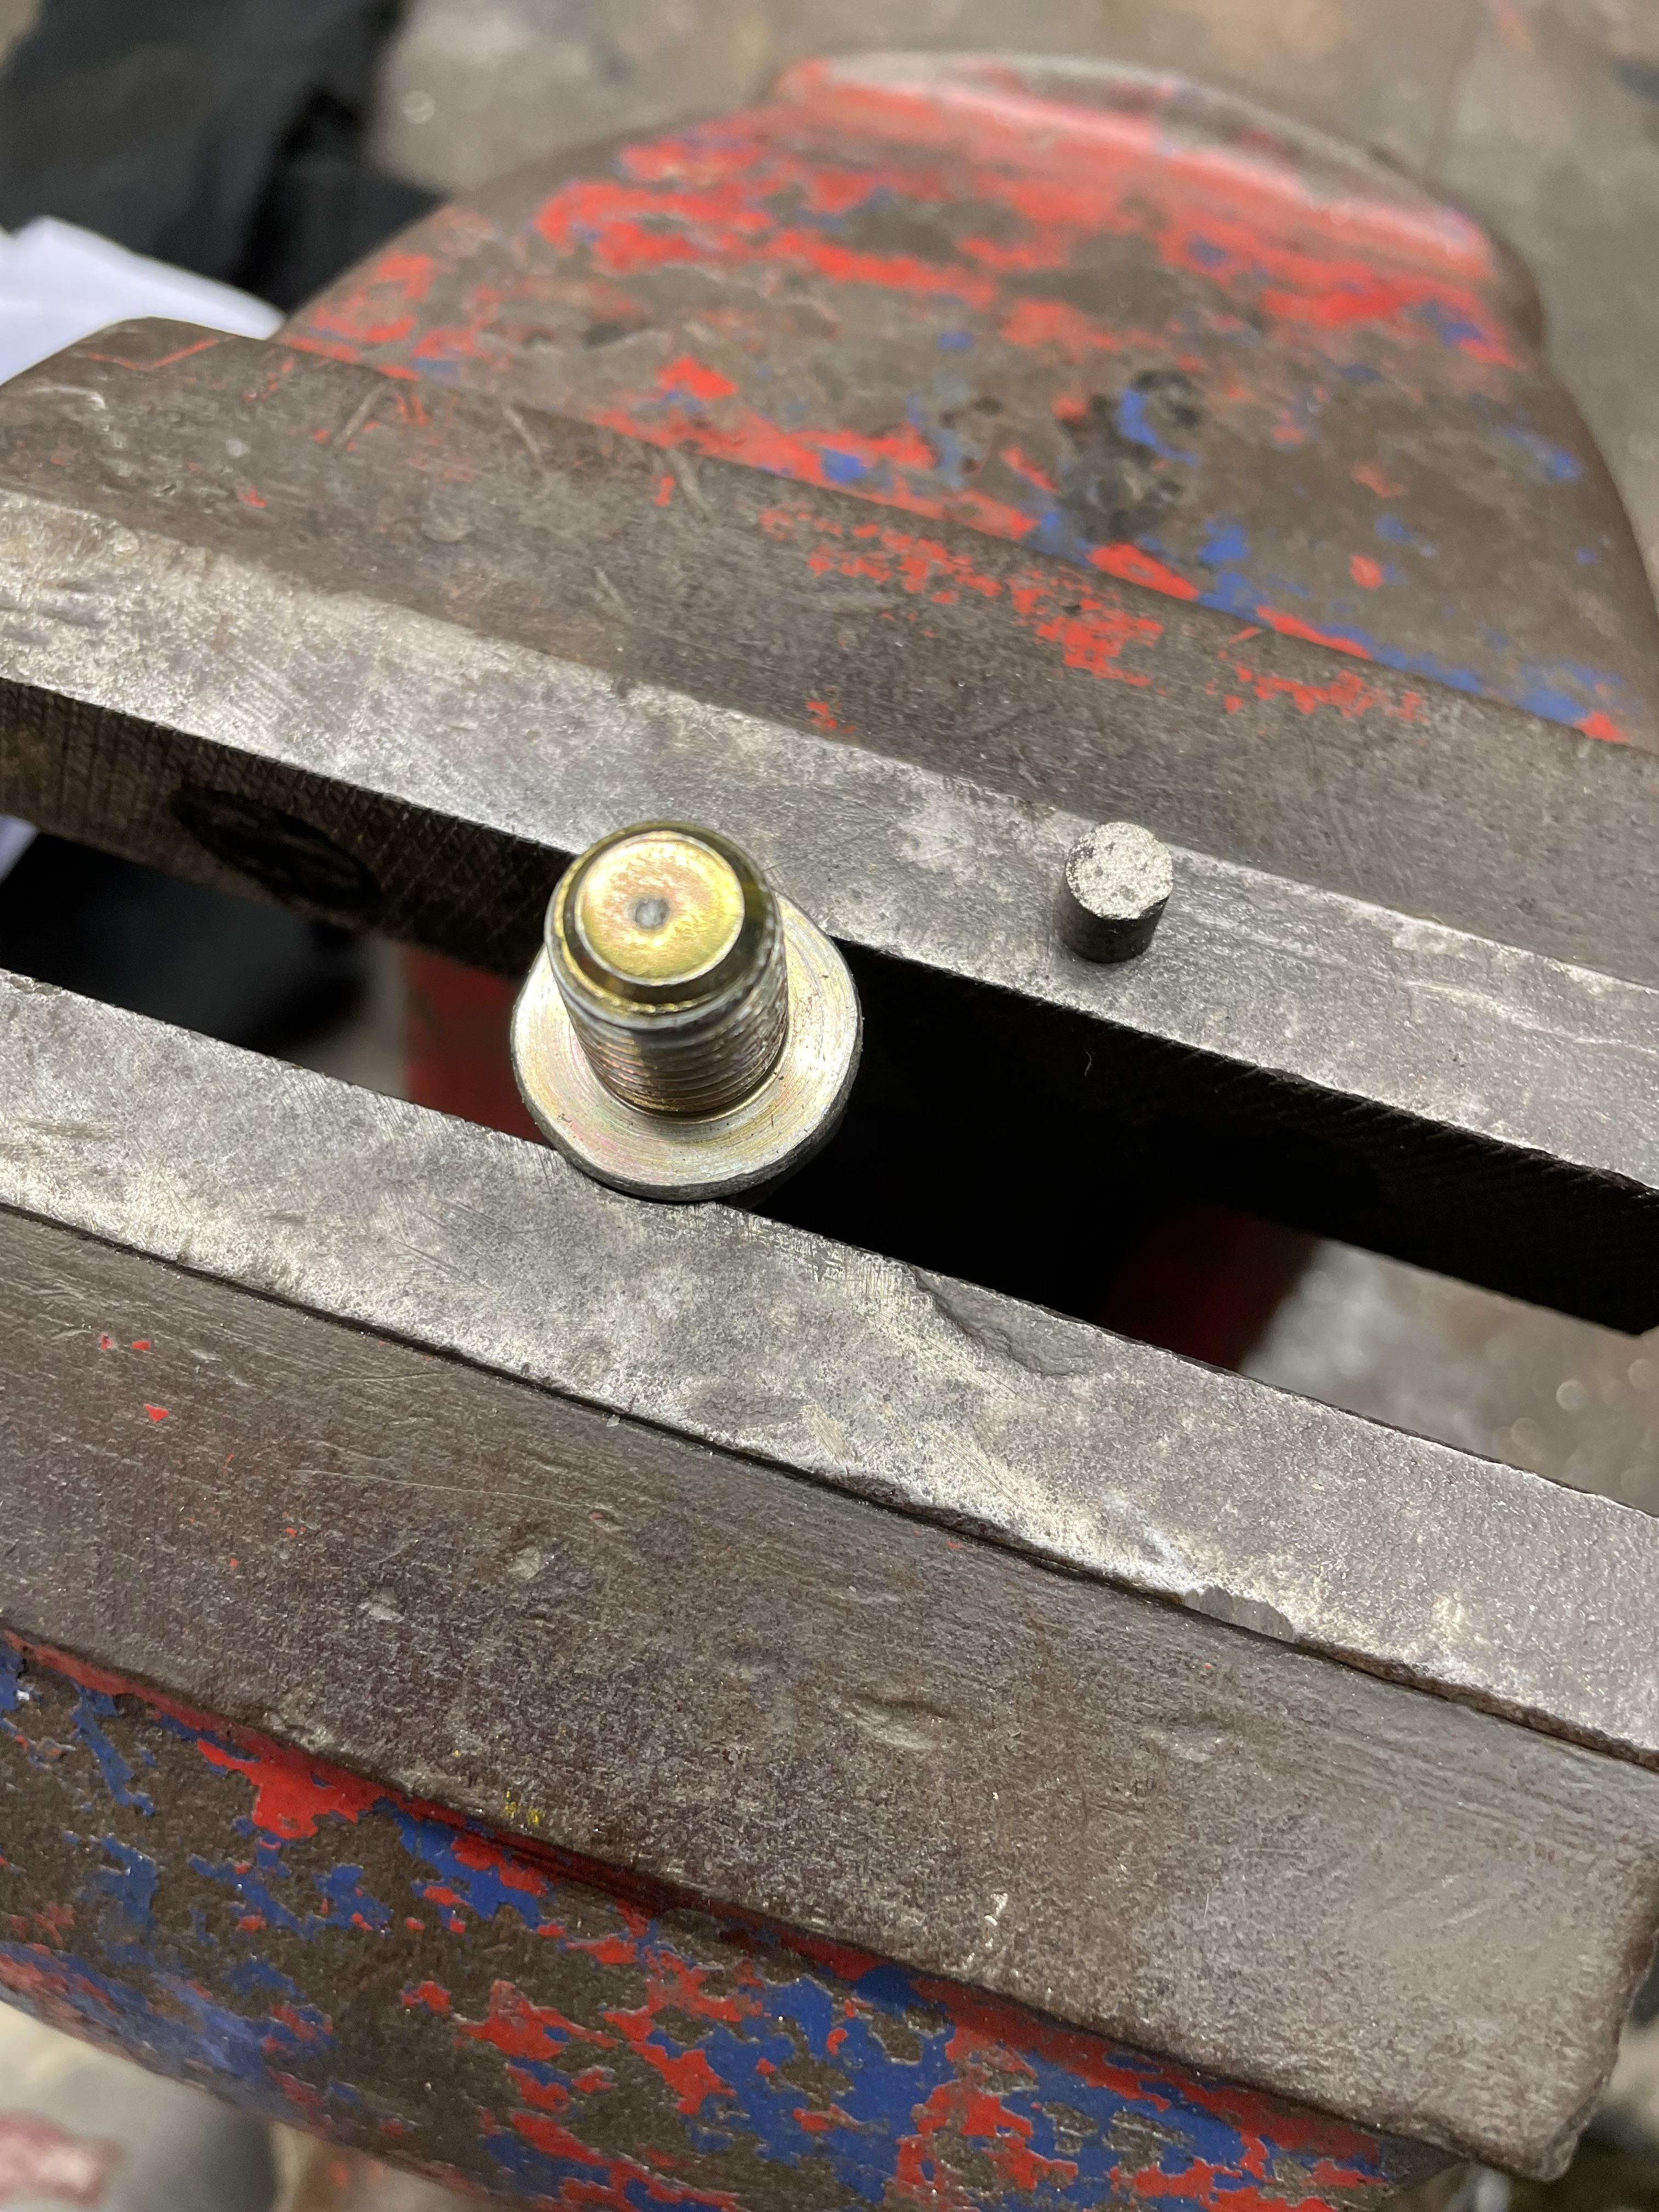
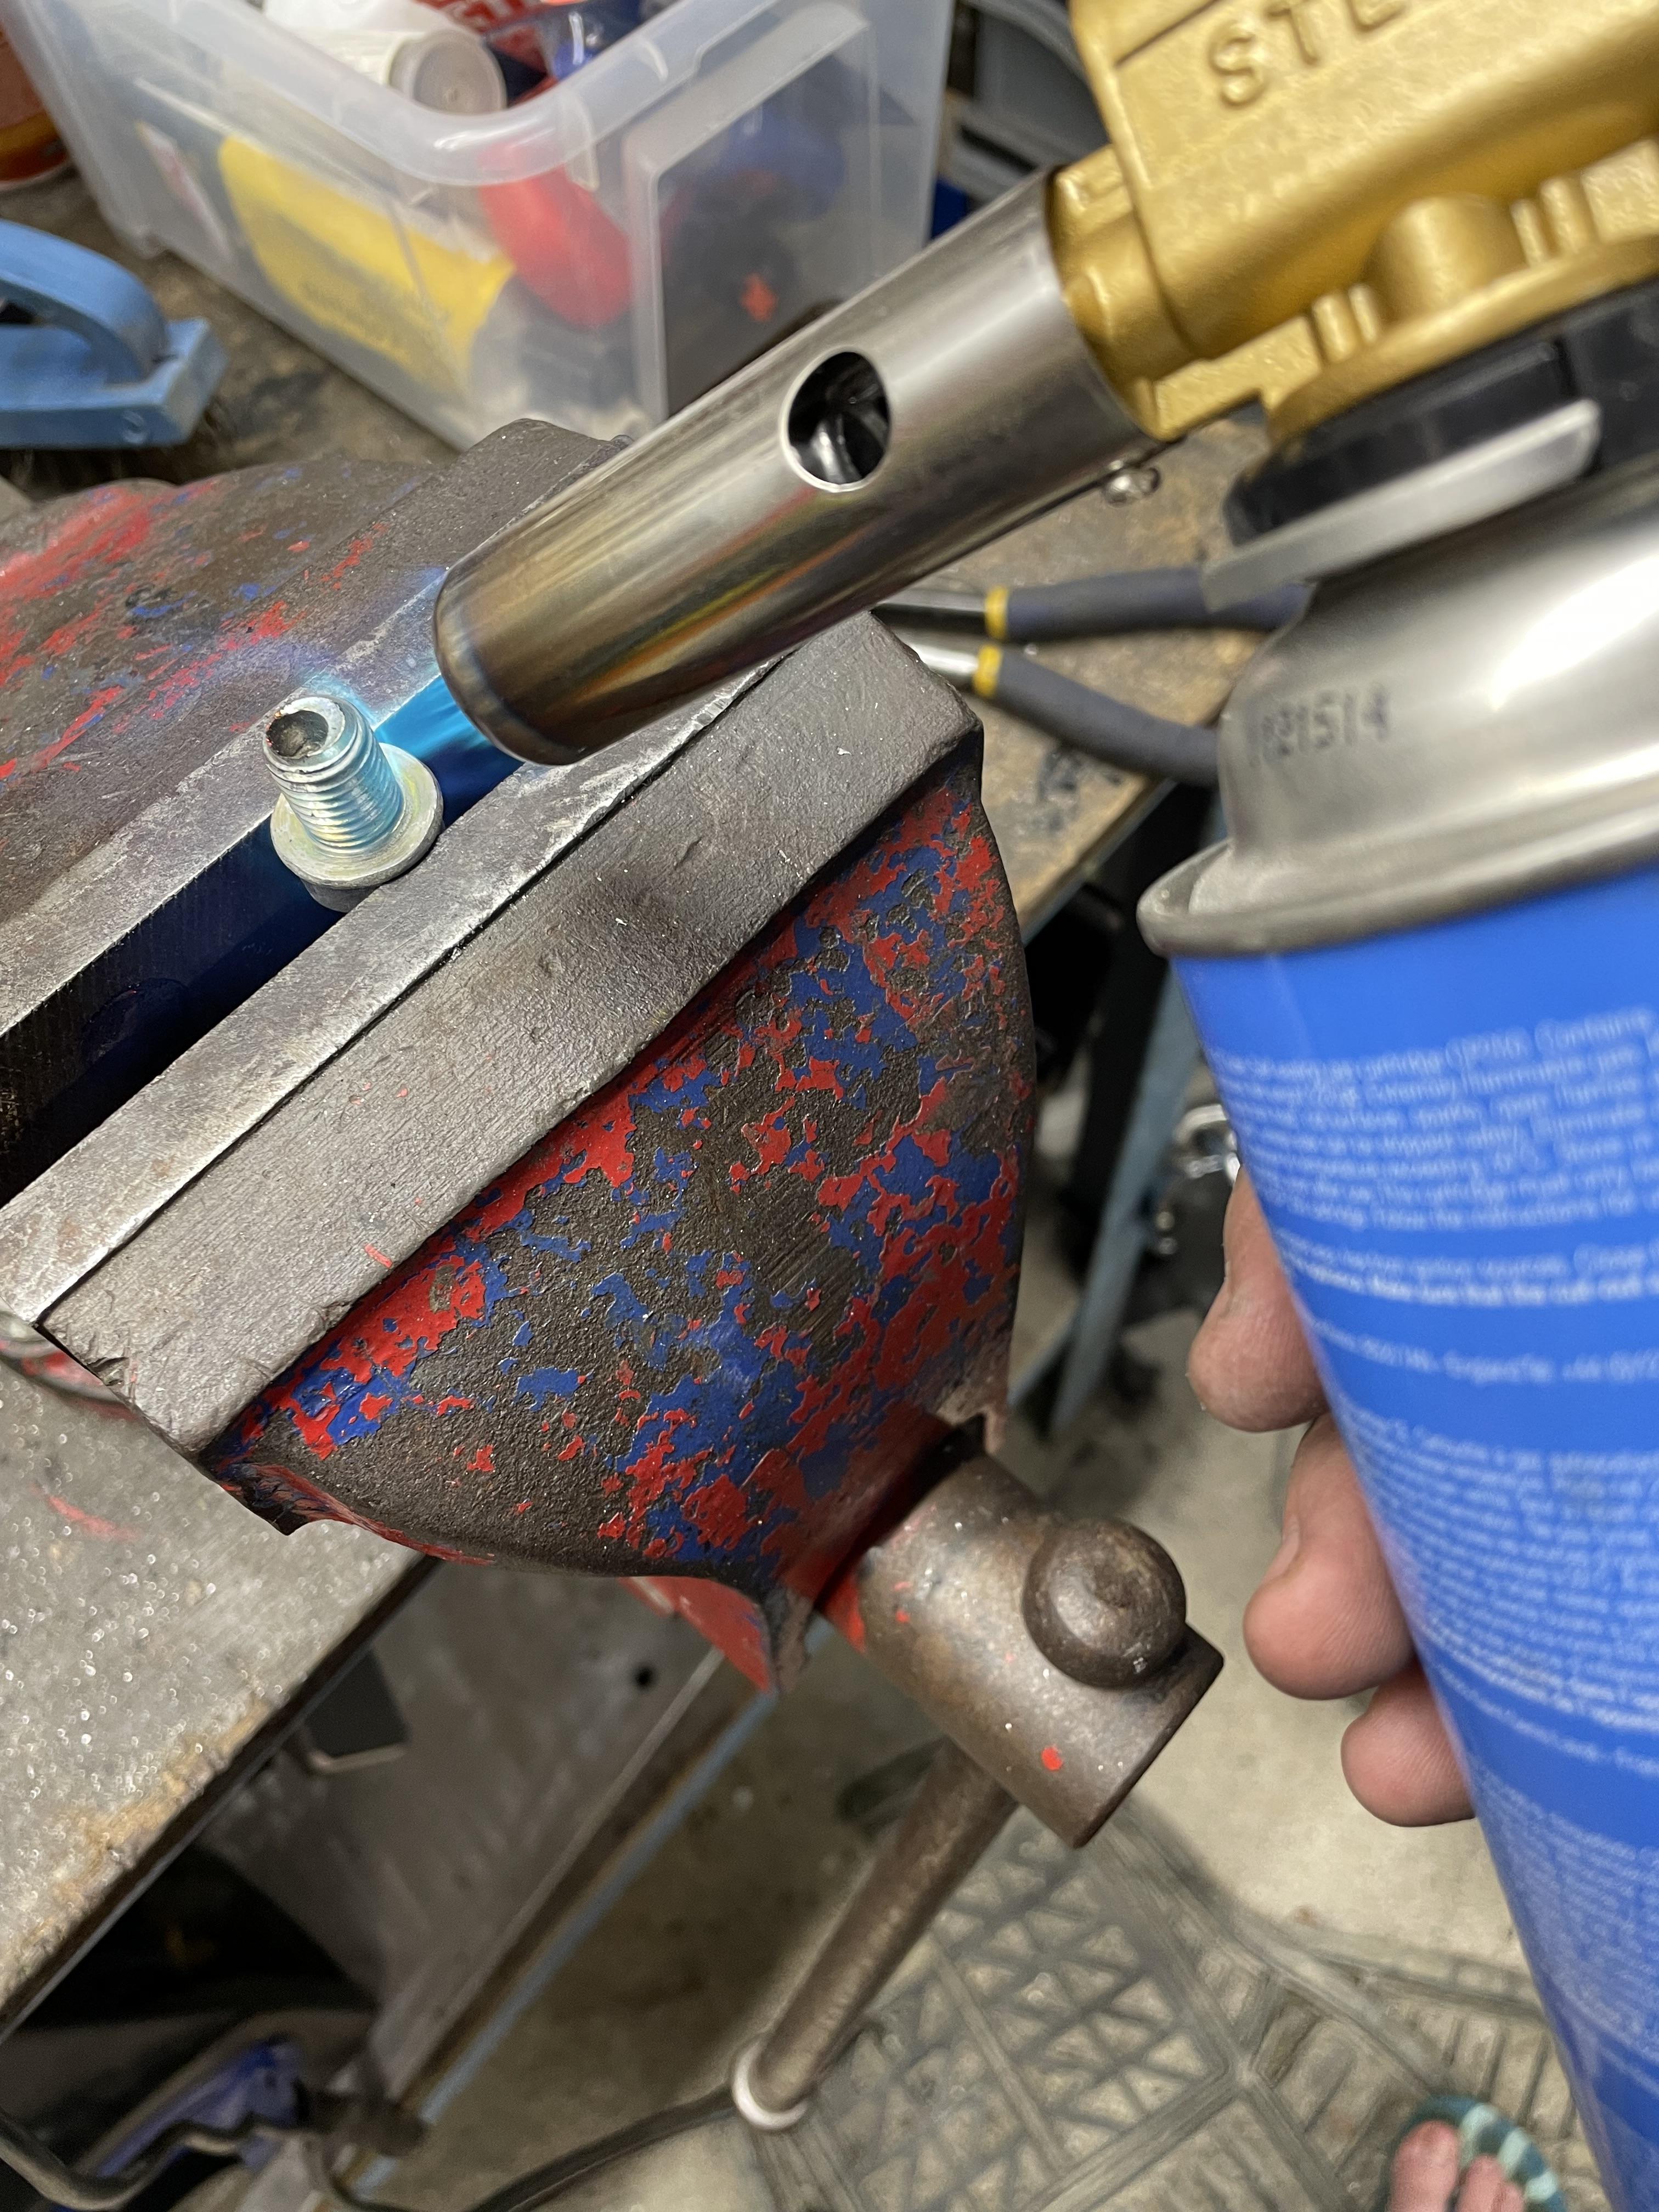
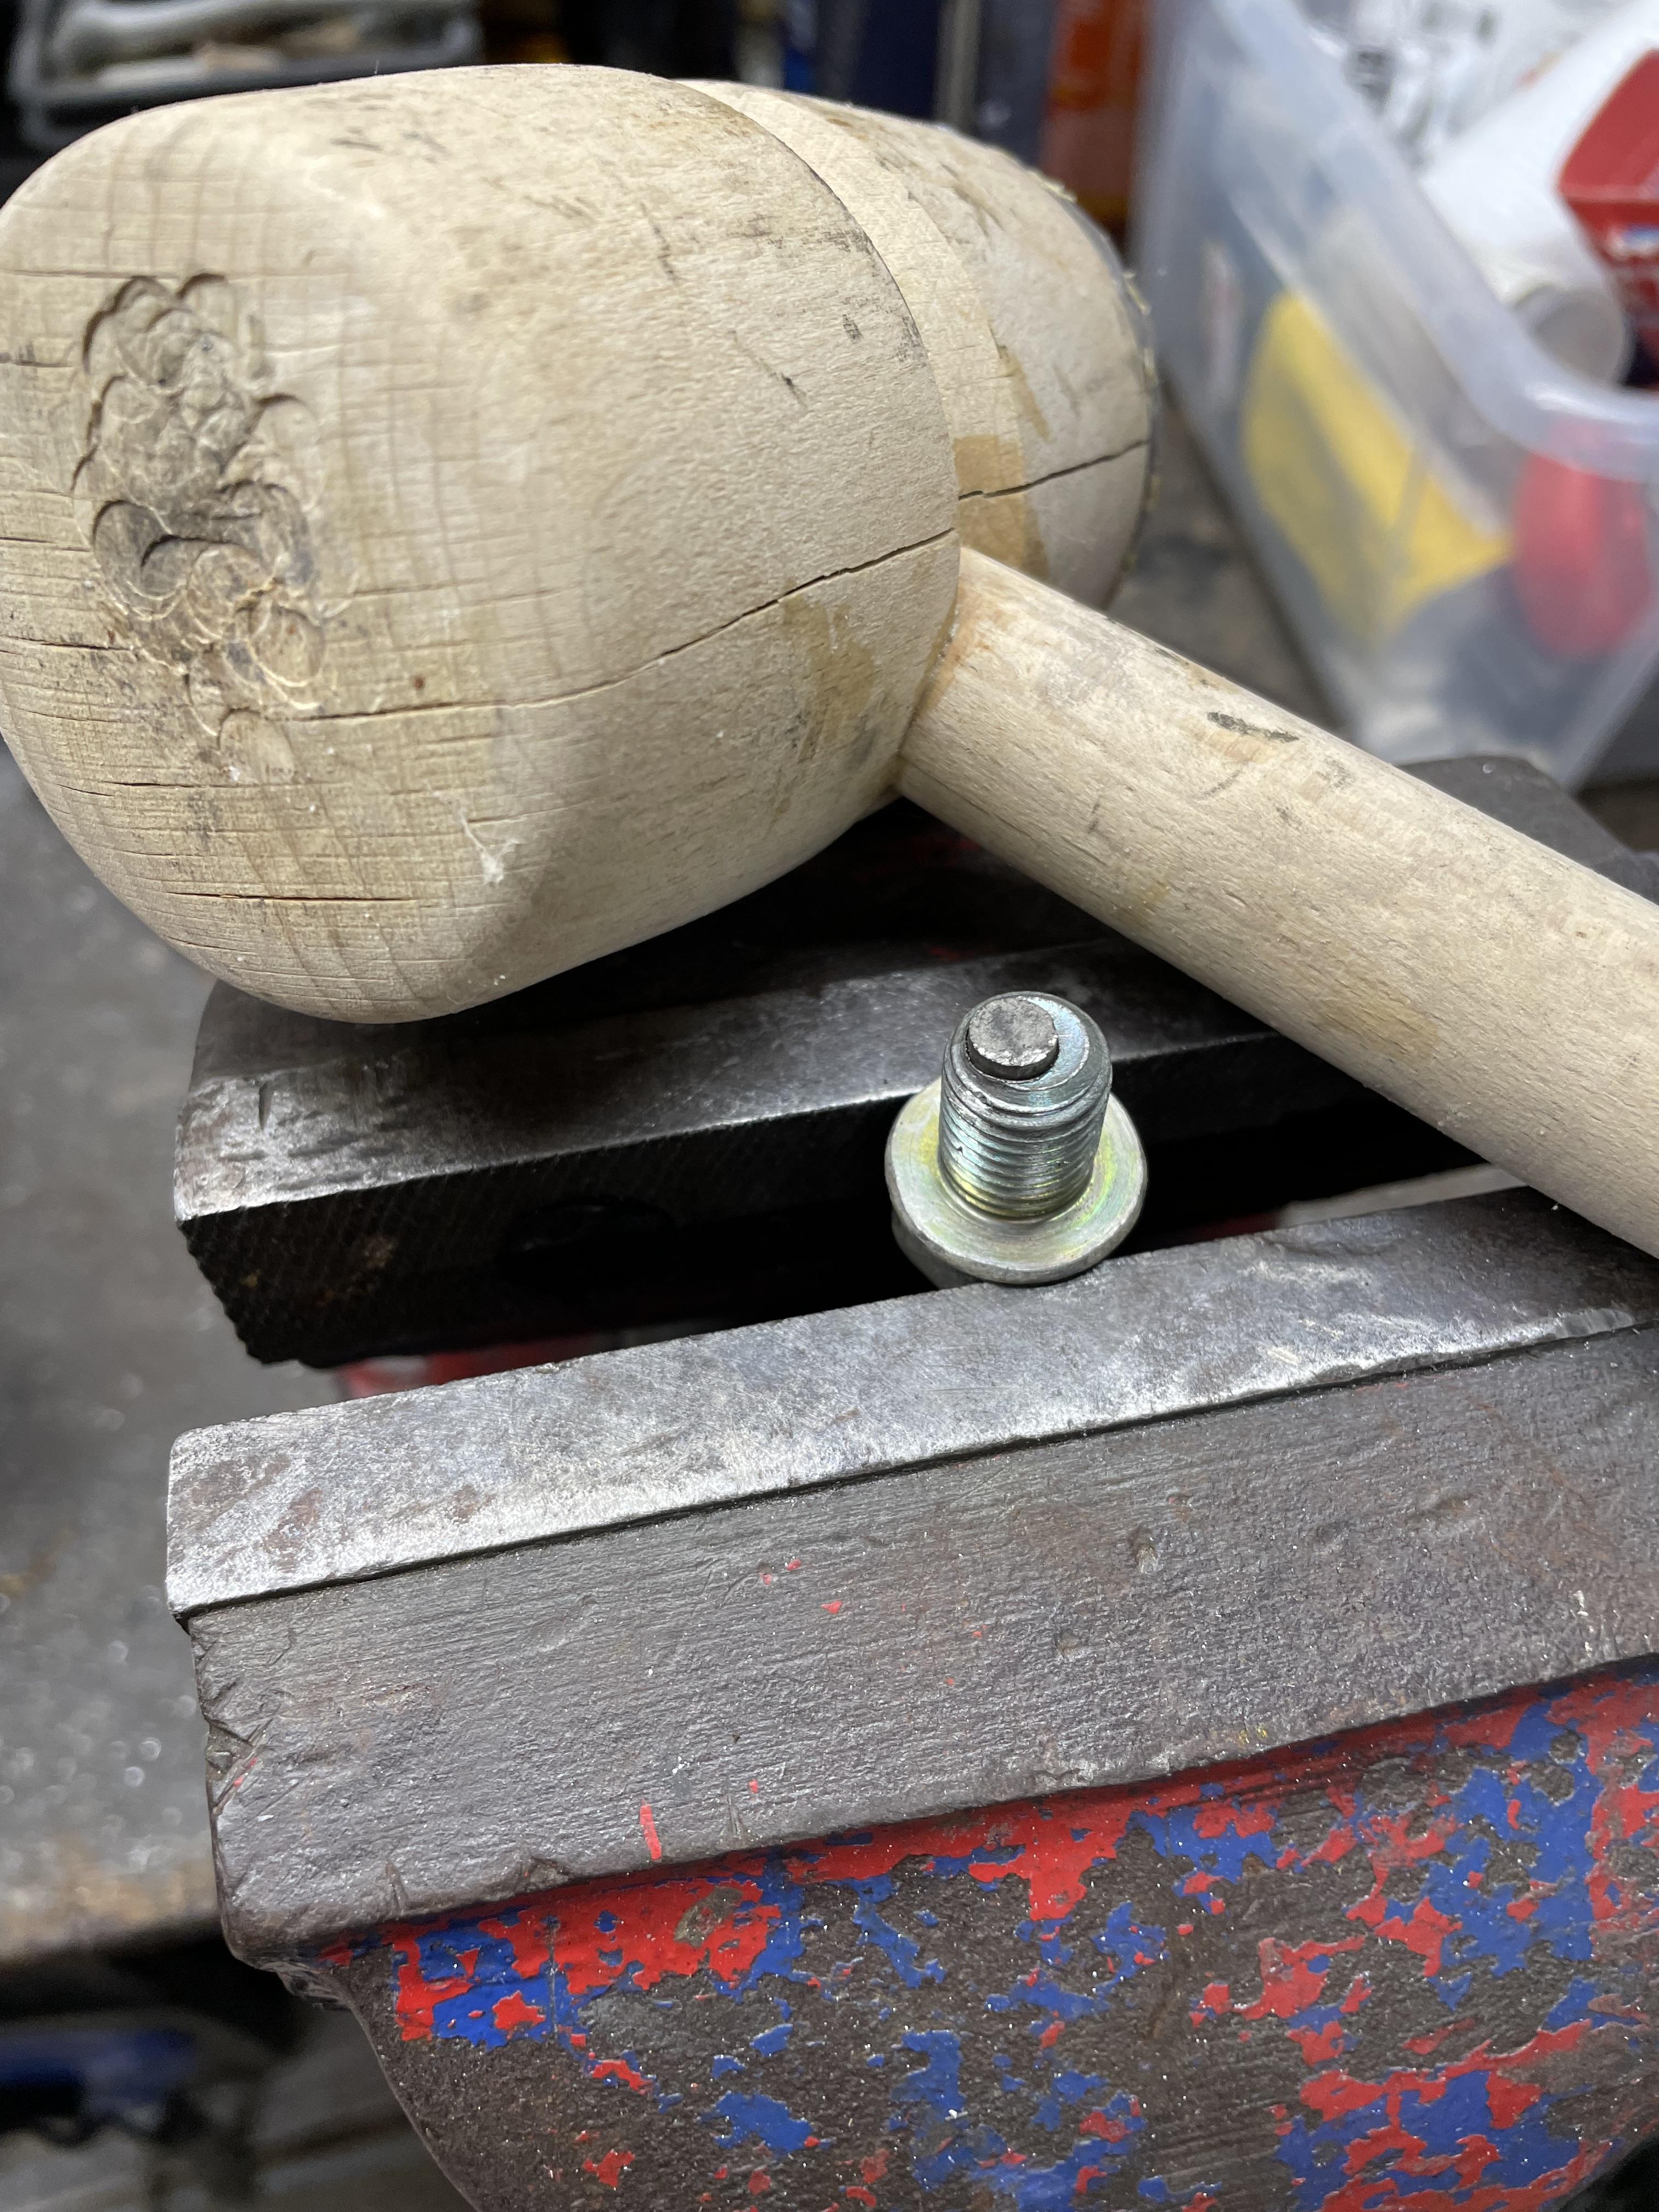
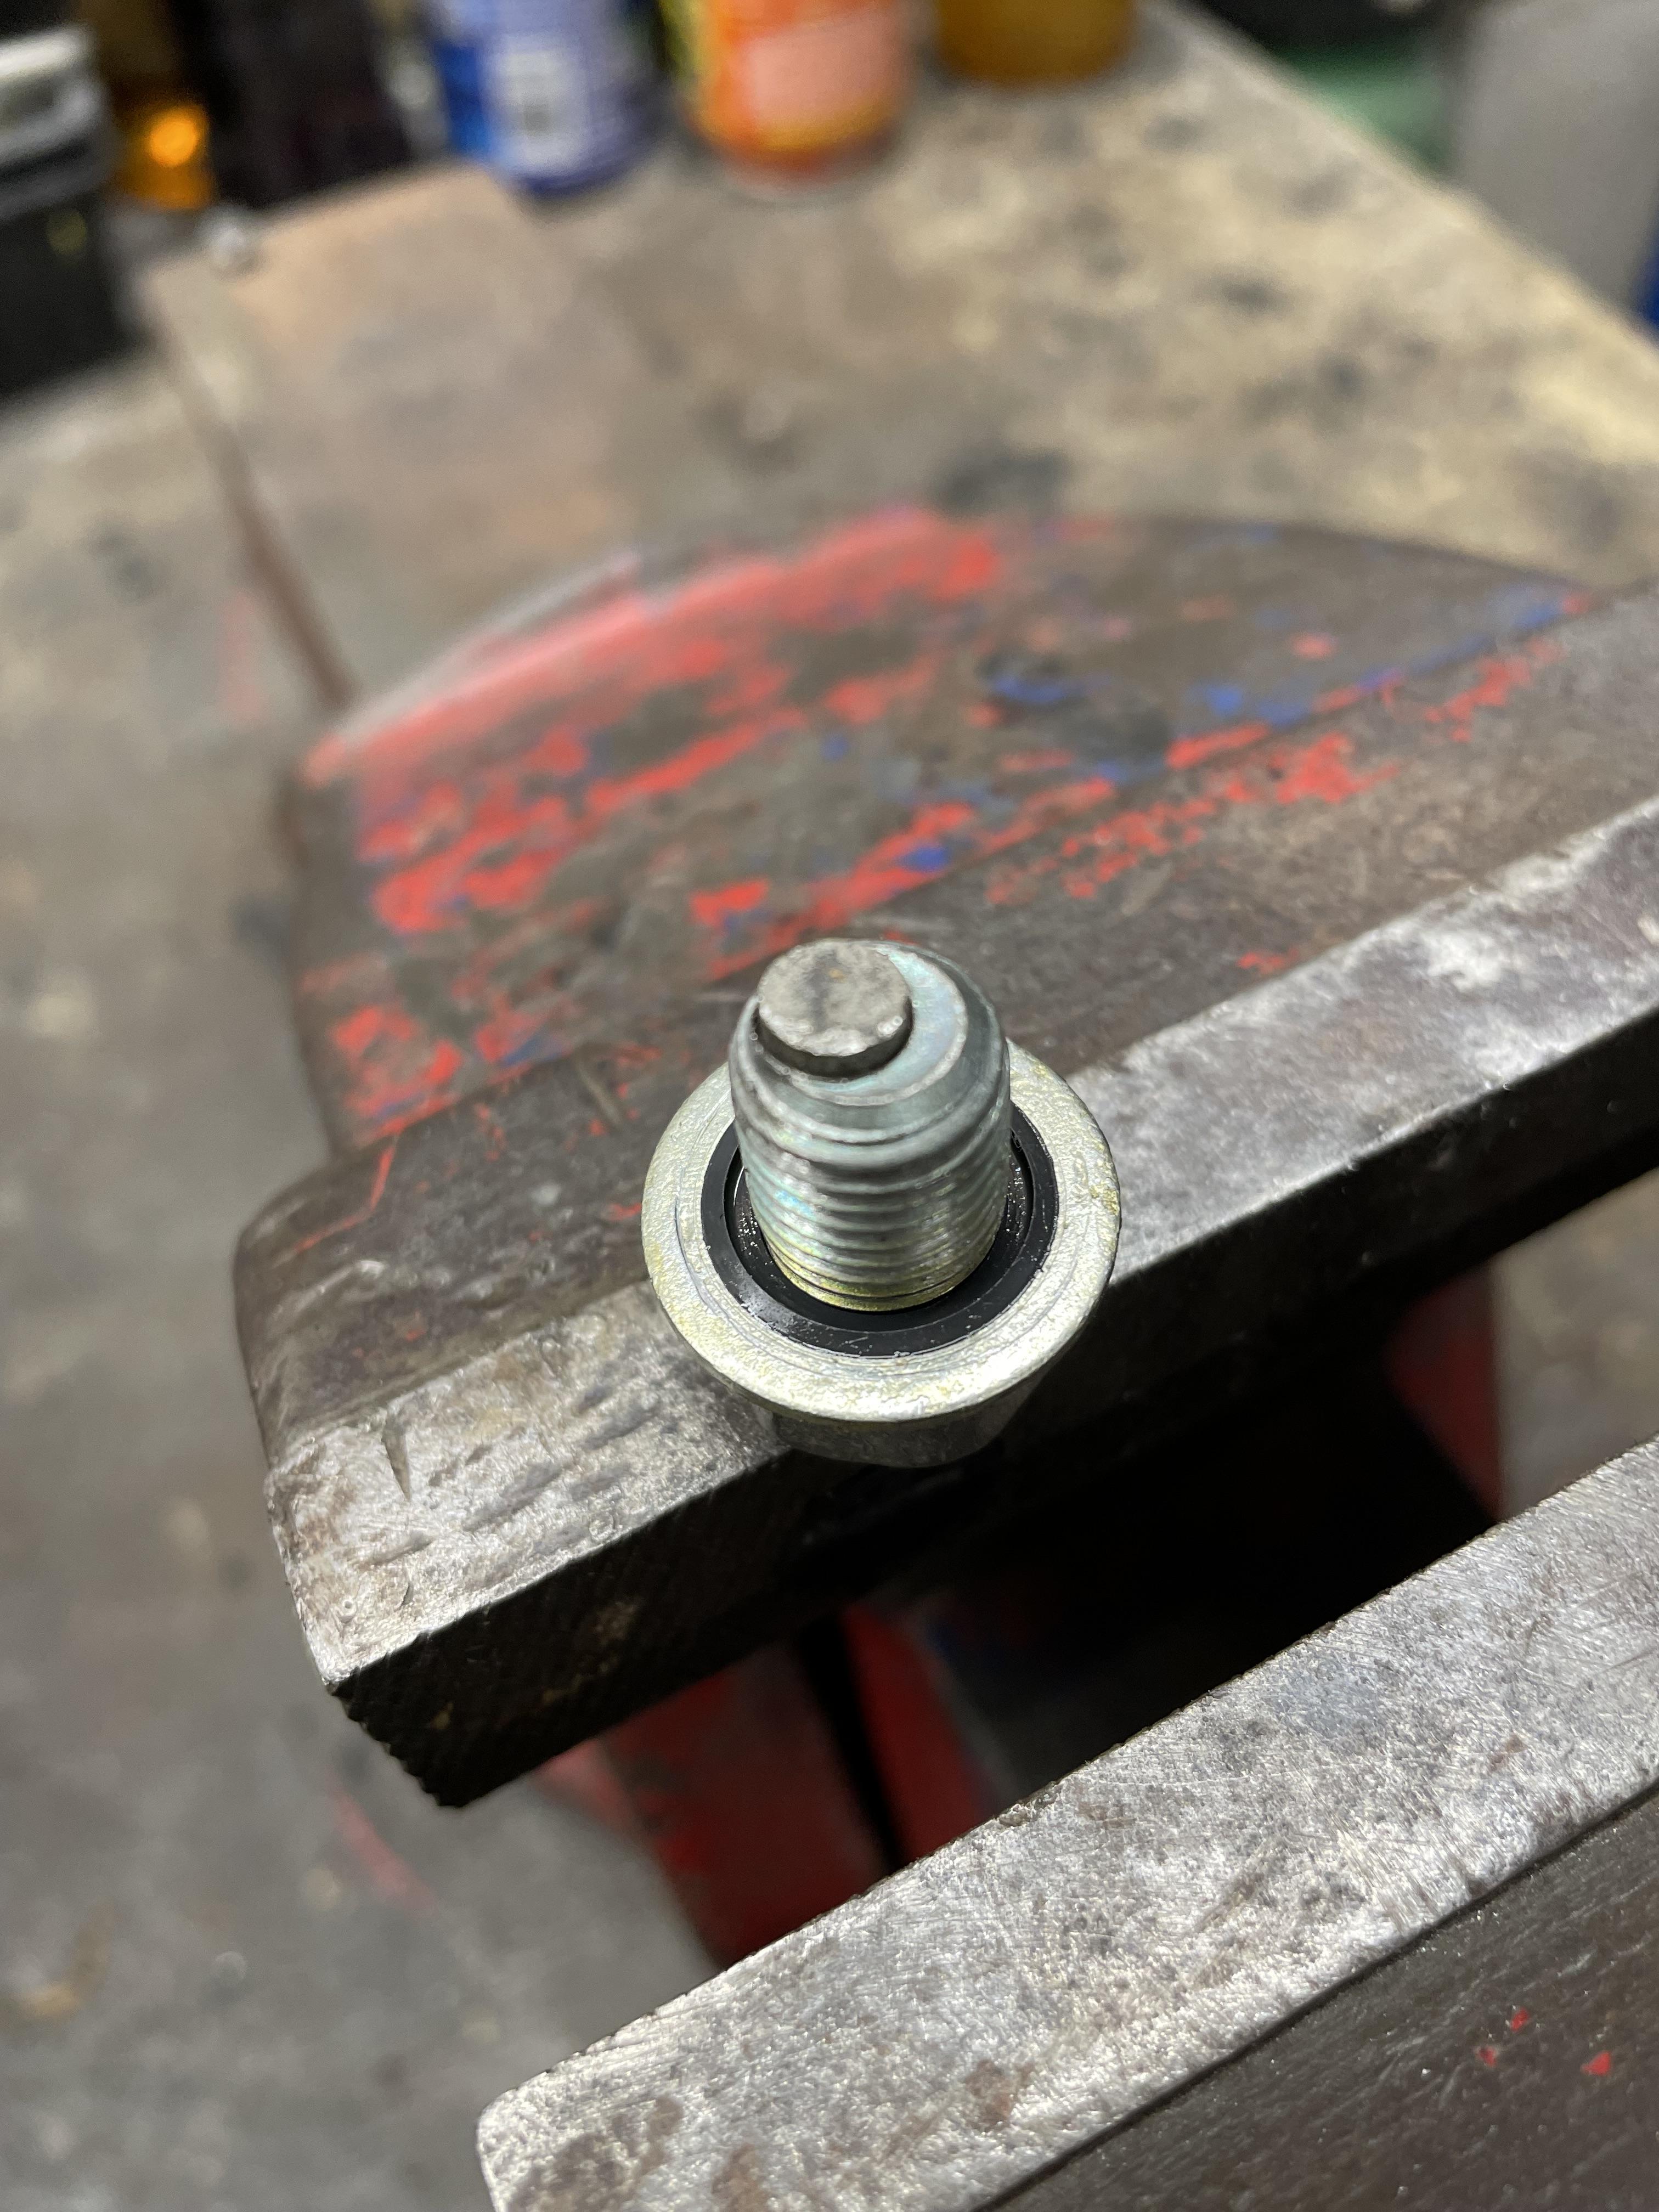
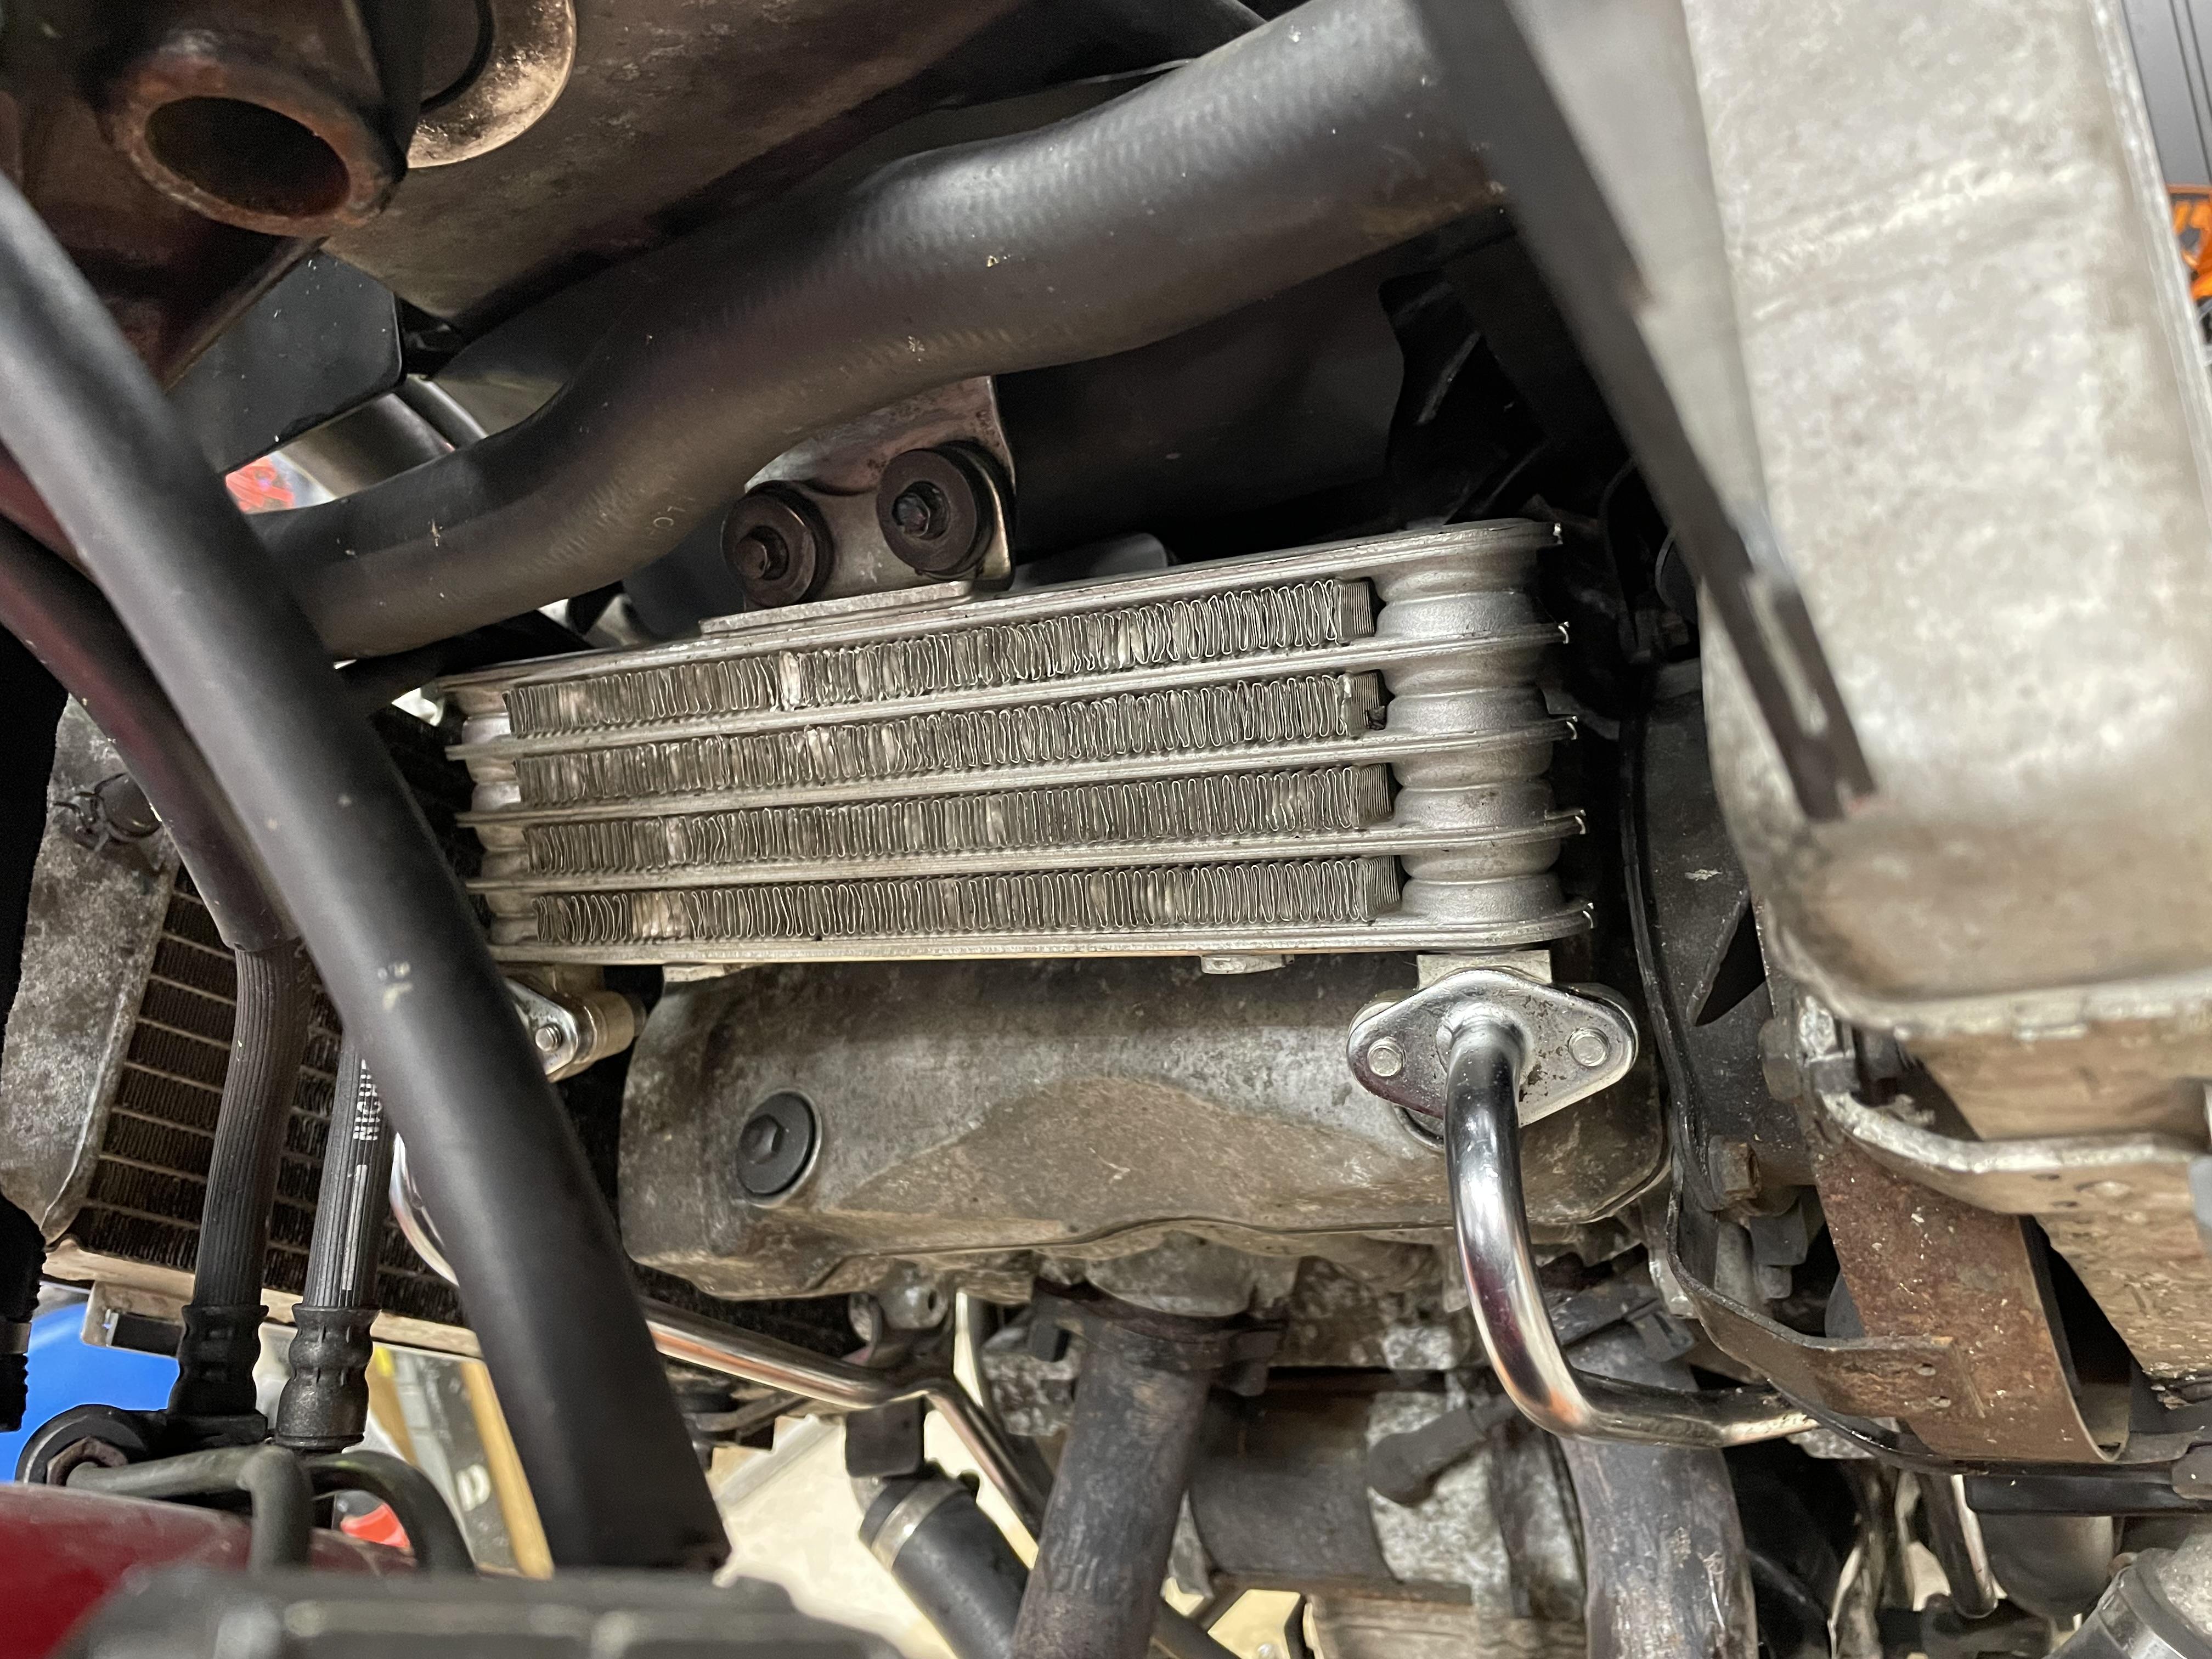
Quick update on the 5th gen Donkey: Dropped the oil after last month’s track day and to do three little jobs: - upgrade to VTR SP1 oil cooler (5 rows instead of 2) with slightly less corroded 5th gen tubes - investigate why the clutch is slipping - possibly fit a Factory Pro shift kit Cooler fitted with a new aluminium bracket I fabricated to move it a little more to the right (as you sit on the bike) and away from the fan. Hangs a bit skew but it seems to work so I’m calling it good. Couldn’t believe how corroded the lines on this 28k bike are. I swapped in the ones from my 70k bike because they were much better. Corroded one below. Then I decided to put a Samarium magnet on the sump plug to catch any swarf in the oil. Stupid - should have just bought one. But I did it anyway… It’s a 6mm magnet so I drilled a 6mm hole with no wiggle room. The magnet will attract strongly to the recess in the bolt, but for extra security, it’s an interference fit. Punched it in the centre but drill wandered. Never mind - the swarf doesn’t care where the magnet is. Break out the torch to heat up the bolt and expand the hole, just enough to squeeze the samarium magnet in so it hugs it tight when it cools. Once the magnet is placed, a few love taps with a wooden hammer (careful, magnets are very brittle) to drive it home. And now the magnet snugly ensconced in the bolt - done!
-
Thank you gentlemen for your input. Gives some comfort and shows I should have just listened to Captain in the first place. Having said that, I've never noticed this on any of my other bikes (including another 5th gen a few years ago). Maybe I just missed it but does make me wonder... Will be changing the pressure plate bearing just in case anyway as it's only about £11 ($15). Let see...