-
Featured Gallery Photo
All Activity
- Past hour
-
Regarding the fuel return line, this is part of the way fuel pressure is regulated to the injectors. The pump generates excess pressure, and the fuel pressure regulator allows excess pressure to drain back to the tank. I think this circulation also helps to cool the pump when the level is low. The FPR also takes a vacuum signal from an intake tract and this is used to adjust pressure up and down so the fuel pressure remains constant relative to the intake vacuum. I've only ever disconnected the return line when the tank was flipped over on its back (safe to do by the way, the cap will seal tight). I doubt it has any kind of check valve in the tank so my guess is fuel will flow out when the hose is removed.
-
pra joined the community
-
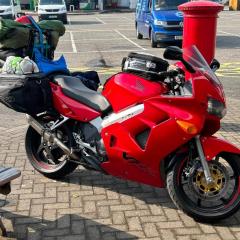
1997 streetfighter conversion
Whirrygears replied to Whirrygears's topic in Third and Fourth Generation VFR's
Thanks guys, i’ve come across that bike previously on fb. Great looking though 👍 - Yesterday
-
I believe you are being way too concerned over a non-issue. Dri-gas is fine, use it according to directions. Water in the fuel will not blow up your engine...jeesh! Some water drops MAY have entered the fuel tank when the filler cap was opened, but certainly not much. Rod out that over fill drain, Compressed air may blow the tube off the fitting, but it is not difficult to replace. If you are using pump gas, the alcohol will help with clearing any water. Now if you have a LOT of water in the tank, Just syphon it all out ang start fresh!
-
I forgot to mention that I refurbished those calipers, and replaced the pads with new ones. I placed the caliper parts in the sonic cleaner, made sure to run a green scotchbrite on the pins and backing plate. I added some brake grease on those items and on the sides of the new pads that touches those parts.
-

Camchain Tensioner Replacement on an 8th Gen VFR800DLX
Lorne replied to SgtMarbles's topic in Maintenance Questions
Take a listen to what my VFR sounded like before & after replacing both ccts. -
Yes, thank you Burger, very helpful advice indeed. So I've added a short video to make sure that I'm targeting the right hose to remove in order to catch the fuel (the fuel return line).Your instructions were quite clear I'm sure, though for the sake of posterity and potential usefulness to other novice mechanics such as myself, I thought I'd chuck it in here anyway. https://youtube.com/shorts/KjknScI3G8w?feature=share Also, I was wondering, since it is the fuel return line, does this mean that fuel that I will collect using this method will have came into contact with the fuel injectors in anyway? The fuel is obviously not being used for combustion, so I'm guessing that it would be unlikely. It's interesting to me to find that there is such a channel, so to speak, as a fuel return line; previously I had just imagined that fuel leaving a motorcycle tank would be destined for a one way journey of sorts before being ignited. There's no danger of fuel coming out from the point where I will disconnect the fuel return line? This is very interesting, I'm enjoying learning more about the bike, and thank you for you help. Ah yes Terry. The overflow is indeed blocked, I did indentify it, and tried what some have suggested... putting some strimmer wire down into the hole in order to unblock it. The thing is, the two gauges of strimmer wire that I tried seemed to be a bit stiff, and I didn't want to damage the overflow at all. The sales assistant at my local motorcycle store recommended using guitar string, which I will give a go. I'll report back on what I found to work best. The old school methylated spirits trick... I was reading that some alcohols are better than others for the purpose of helping dispell water in a tank. The common ones (ChatGPT): Meths (methylated spirits / ethanol + additives) → old-school hack, works, but leaves a bit of residue, and the purple dye/denaturants aren’t doing your injectors/carb jets any favours. Isopropyl alcohol (IPA) → technically does the same job, miscible with water and petrol, but it’s not as efficient at binding water as methanol/ethanol. Methanol (what’s in HEET yellow bottle) → the most effective at water absorption, which is why HEET and similar products are basically just methanol. Isopropyl + petrol → some commercial products use a blend, but it’s not usually sold pure for that use. Guys, thanks very much for the responses. I hope to be on the road again very soon, like I mentioned, the bike needs a good bit of TLC before she's 100%... and I'm aiming to address issues as they come to my attention. Many thanks again.
-

Camchain Tensioner Replacement on an 8th Gen VFR800DLX
Terry replied to SgtMarbles's topic in Maintenance Questions
Clattery when warmed (when the idle speed drops back) is probably the CCTs but could also just be clutch rattle, which might be fixed with a starter valve balance. The clutch rattle will go away with the lever pulled in a little. CCT noise is usually worst below about 3k rpm and then not noticeable above that. -
An old trick for dealing with water in petrol was to add a small quantity of methylated spirits to the tank; this allows a small amount of water to be absorbed back into the fuel. If you are already using an ethanol blended fuel, it should be doing this already. Burger's advice above is sound regarding the smaller fuel return hose; you can also just apply 12v power direct to the brown wire terminal to continually run the pump if you want to drain the fuel. This line comes from the fuel pressure regulator that also feeds the fuel rails; as long as the engine is not running none of this fuel will make it into the already-full rails/injectors. Water should not be sitting around the tank unless the water drain/overflow is clogged. When you have the tank lifted, the water drain is the larger hose of the two plugged in near the front underside of the tank, that connects to a pipe that runs right through the tank from the filler area. The hose should just terminate under the bike left side.
-
If you can get a firm lever feel with extra pumps, I'd suggest that you have something other than a hydraulics issue. If I read your post correctly, you can pump up the pressure, tie the lever back overnight, and still have pressure in the morning, until you release the lever for the first time. I would start by pulling the callipers off and double checking that the pads are installed properly and not catching on a pad spring. Your symptoms sound like something physical is pushing a pad off the disc so you have to pump in extra fluid to move it back before you get some brake pressure. I did that myself on a rear brake calliper once and it took an hour or two to solve.
-
No there is no dedicated relay on a gen 4 the relay is shared with the lights indicator relay as far as I can make out
-
SteveP joined the community
-
Thanks, I'll give that a try.
-
I'm used to it but it is annoying that I have to brake twice specially in an emergency. I tried regular bleeding technique, pump the levers still it's stiff, loosen the bleeding bolt and retighten. I even tried reverse bleeding. I maybe refilled the master cylinder like 10 times. I did hold the lever under pressure using velcro overnight just to check if there are any leaks and there were none. When I removed the velcro, after 10 seconds, the pressure was gone and I have to pump twice again.
-
Camchain Tensioner Replacement on an 8th Gen VFR800DLX
SgtMarbles replied to SgtMarbles's topic in Maintenance Questions
I was just curious, the bike has been acting a little odd… I went to start it the other day and heard a metallic “slap” which has never happened before. It still started no problem, but im noticing it sounds awe-fully clattery once it’s fully warmed up. I think it’s a cam-chain and tensioner issue, but I don’t want to fire the parts cannon at it hoping it’ll eventually fix the issue… -
It will remain firm for about 10 seconds. No plays in the bearings, I just flipped my tire so I checked all of that.
-
welcome. yes, chatgpt unfortunately lied to you; our bikes use banjo fittings for the fuel feed rather than a quick-disconnect. you could unbolt either end to get a fuel sample, but that'd probably get messy and would also necessitate replacing crush washers. here's an easier option: -find the smaller rubber hose clamped to a barb next to the fuel feed line. this is the fuel return line. -unclamp and disconnect, put hose in collection receptacle. -killswitch off, key on, and cycle killswitch once or twice. this will run the fuel pump for a second or so at a time and should cause fuel to come out the fuel return. as far as fuel dryer, i have no experience with it so i can't say. best of luck at any rate, hope the sample comes back with a clean bill of health.
-
I did try the reverse bleed method, did not fair any better. I pressurized the brake lines overnight to see if there's any leakage, no leaks and the pressure remained until I released the velcro. Then when I pulled the lever again, no pressure till the 2nd pull lol
-
bodyshk joined the community
-

1997 streetfighter conversion
vfrcapn replied to Whirrygears's topic in Third and Fourth Generation VFR's
Here's a couple of Sebspeed's builds. https://iconicmotorbikeauctions.com/auction/1999-honda-vfr800-custom/ https://iconicmotorbikeauctions.com/auction/1996-honda-vfr750-custom/ -
Front I did bleed the brakes, refilled the master cylinder about 15 times now. I even rebuilt the rear caliper and bled it.
-
jamesgall90 joined the community
-
Hello all, first post here. I've recently bought myself a 5th gen. I'm loving it, but there's a bit of work ahead in order to get 'er into the condition I want, so hopefully will be getting to know people over the coming years, it seems like the place to be. Anyway, on with my post... TLDR: Finding it difficult to take a fuel sample from a 1998 VFR800fi-w, and unsure about using fuel dryer. Thanks. I'd really appreciate some advice from those with experience of using "Fuel Dryer", and/or taking samples of fuel from the tank on a 1998 VFR800fi-w My situation is this: About 2 months ago I bought a 1998 5th Gen VFR800fi-w (I'm pretty sure it's a UK model if that counts). And so, I've taken a few rides out on the bike since owning it. Although I had never gotten the bike wet until last week. And when I say wet I mean around 20 minutes in absolutely torrential rain... quite a lot of intense water exposure for a short time. I got home after my ride, myself soaked, and parked the bike in the garage, dried it down, and called it a night. The next day the weather was fine and I thought I'd take another ride, I started the bike up and let it warm for about a minute, then put it in first gear and rode about 20 meters around to the front of the house. Now, one issue with the bike is that the petrol gauge does not indicate how much petrol I have in the bike at any time, it's always stuck flashing at one bar, even when the tank is topped up... and so, I switched the engine off and opened the cap to have a look to get an idea of how much fuel I had left, and when I looked I saw that around about 3 to 5 teaspoons worth of water had settled in the little moat under the cap. It appears that the overflow outlet hole is blocked under the cap, and so the water is unable to escape. My first reaction was to panic, and immediately assume that water had gotten into the tank along with the fuel. I have not turned the key in the ignition since, and pushed the bike back into the garage. I've spoken to a friend who has a fair amount of experience in general, and he seemed confident enough in believing that there would be no water in with my fuel, after asking about the condition of the rubber seal under my petrol cap. I told him that the rubber was fine, which it is. He told me that if any water had gotten into the engine, that I would have known about it already... and that there would have been a noticeable amount of objection in the form of spluttering from the engine. But I wanted to be 100% sure before starting up my long awaited VFR and potentially destroying the engine, and in researching I arrived at a few plans of action. 1 - Siphon and drain all fuel from the engine and refill with fresh clean petrol. 2 - Take a sample of the fuel to determine if action plan 1 is necessary. 3 - Add fuel dryer and top up with fresh fuel. So I thought that action plan 2 would be the best place to start... I'd see if I could determine if there was any water in the tank at all. This is where I ran into issues caused by my lack of experience. Through a conversation with ChatGPT I was informed that I should lift up the tank (no need to fully disconnect), and that there would be hose running from the fuel pump at the underside of the tank towards the throttle body, and that this hose would have a quick disconnect coupler. All I would have to do, would be to disconnect the hose at the coupler and switch the "reds" on, and collect the small amount of fuel that would be ejected from the hose that is intended to prime the fuel injectors before the bike is started. My problem is that there is no such coupler on this hose that runs from the fuel pump, and with this it seems like it will be more difficult to collect a sample. I believe I can't just take a sample directly from the tank because if any water has indeed entered the tank it will have sunk to the bottom of the tank, water being heavier than petrol. So basically where I'm at is wanting to take a sample from the tank, and any guidance or advice of a good way to do so would be greatly appreciated. I'm also a bit unsure of whether I should use fuel dryer. My thinking here was that if any water has gotten in, it may have just been a small amount, and I could run fuel dryer to deal with such a small amount. My VFR is a 1998 bike, and so I'm concerned that the fuel dryer could cause issues with older injectors possible. At the moment, I'm not eager to do anything until I know more about what is best. Has anyone had experience, good or bad, in using fuel dryer on older fuel injected bikes? Thanks for any help in advance. I'm real keen to get out again for a ride, but I don't want to hurt my bike in anyway. Best wishes all.
-
ChrisophViffer joined the community
-
1997 streetfighter conversion
slo1 replied to Whirrygears's topic in Third and Fourth Generation VFR's
A couple examples. The Blue one has a huge build thread in here. Also, SebSpeed did a few really nice ones. -
You need to take the left hand caliper off and bleed it with it elevated to get rid of the air in the pipe that wraps over the mudguard. Find a piece of wood or something for the pads to grip so you don't pop the pistons out. For braided line setup see this https://www.vfrdiscussion.com/index.php?/forums/topic/112621-braided-lines/&do=findComment&comment=1155648
-
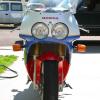
Hi all i am just starting a streetfighter conversion on my 97 36/2. Bike is currently stripped down, engine out etc. i am trying to find information on what builds people have done but there doesn’t seem to be much about! I have an vision in my head of how i want it to look. Frame is being powder coated graphite black and i am currently prepping engine to also paint the same colour. my plan is something along the lines of a 929/954 front end with a flat bar conversion, though i have read that early R1 and Gixxer front end can be done. Rear end is causing me the biggest headache. I really like the early Yam R6 style but cannot seem to find much info about it, things like subframe dimensions, difficulty in getting it to fit and so on. i’m pretty competent but don’t have welding and fabrication ability, though i can get the work done locally. if anyone can give me advice, links, hints and tips i would be very grateful. I am UK based. Cheers all
-
What position is the lever in ?
-
kiwimacchi joined the community
-
The tying back the lever works by compressing the air bubbles into micro bubbles which will then naturally migrate upwards. It helps if you make sure the master cylinder is the highest point of the system & remember to release the lever slowly so the bubbles expand gently in front of the master cylinder at which point they combine & burp into the reservoir. Once the lever is fully out pull it gently until you hear the brake light switch activate then release, repeat this a good number of times as it helps break the fluid tension & allows the air to escape into the reservoir. If you do this with the reservoir cap off you will see it bubbling out. Have fun.
-
JosephySoata joined the community
-
All of the above
-
VFRD Mission Statement
For owners of the Honda Interceptor and related Honda V4 motorcycles, for the purpose of mutual help concerning safe riding, maintenance, and performance of their motorcycles.
Rules of the ride - No one goes to jail, and No one goes to the Hospital.
Contributions - VFRD is a member supported website with no commercial advertising.

-
Forum Statistics
-
Total Topics26.5k
-
Total Posts362.1k
-
-
Who's Online (See full list)
-
Member Statistics
-
Upcoming Events
No upcoming events found -
Latest Classifieds
-
Top Downloads
-
-
Popular Contributors
-
Blog Statistics
-
Total Blogs116
-
Total Entries345
-
-
Gallery Statistics
-
Blog Entries
-
Blog Comments
-
By vfrpilot28 · Posted
I enjoyed reading this and seeing your story. For the love of motorcycling! -
By interceptor69 · Posted
Oops. I do believe I know how to post YT videos or they wouldn't be on YT. However I may have screwed up copying the link to the playlist. Thanks for the helpful comment. -
I think that you might not know how to post videos. You're in your YT studio in these links. You need the link to the actual video.
-
-
Most Contributions


