Leaderboard


Popular Content
Showing content with the highest reputation since 07/13/2024 in all areas
-
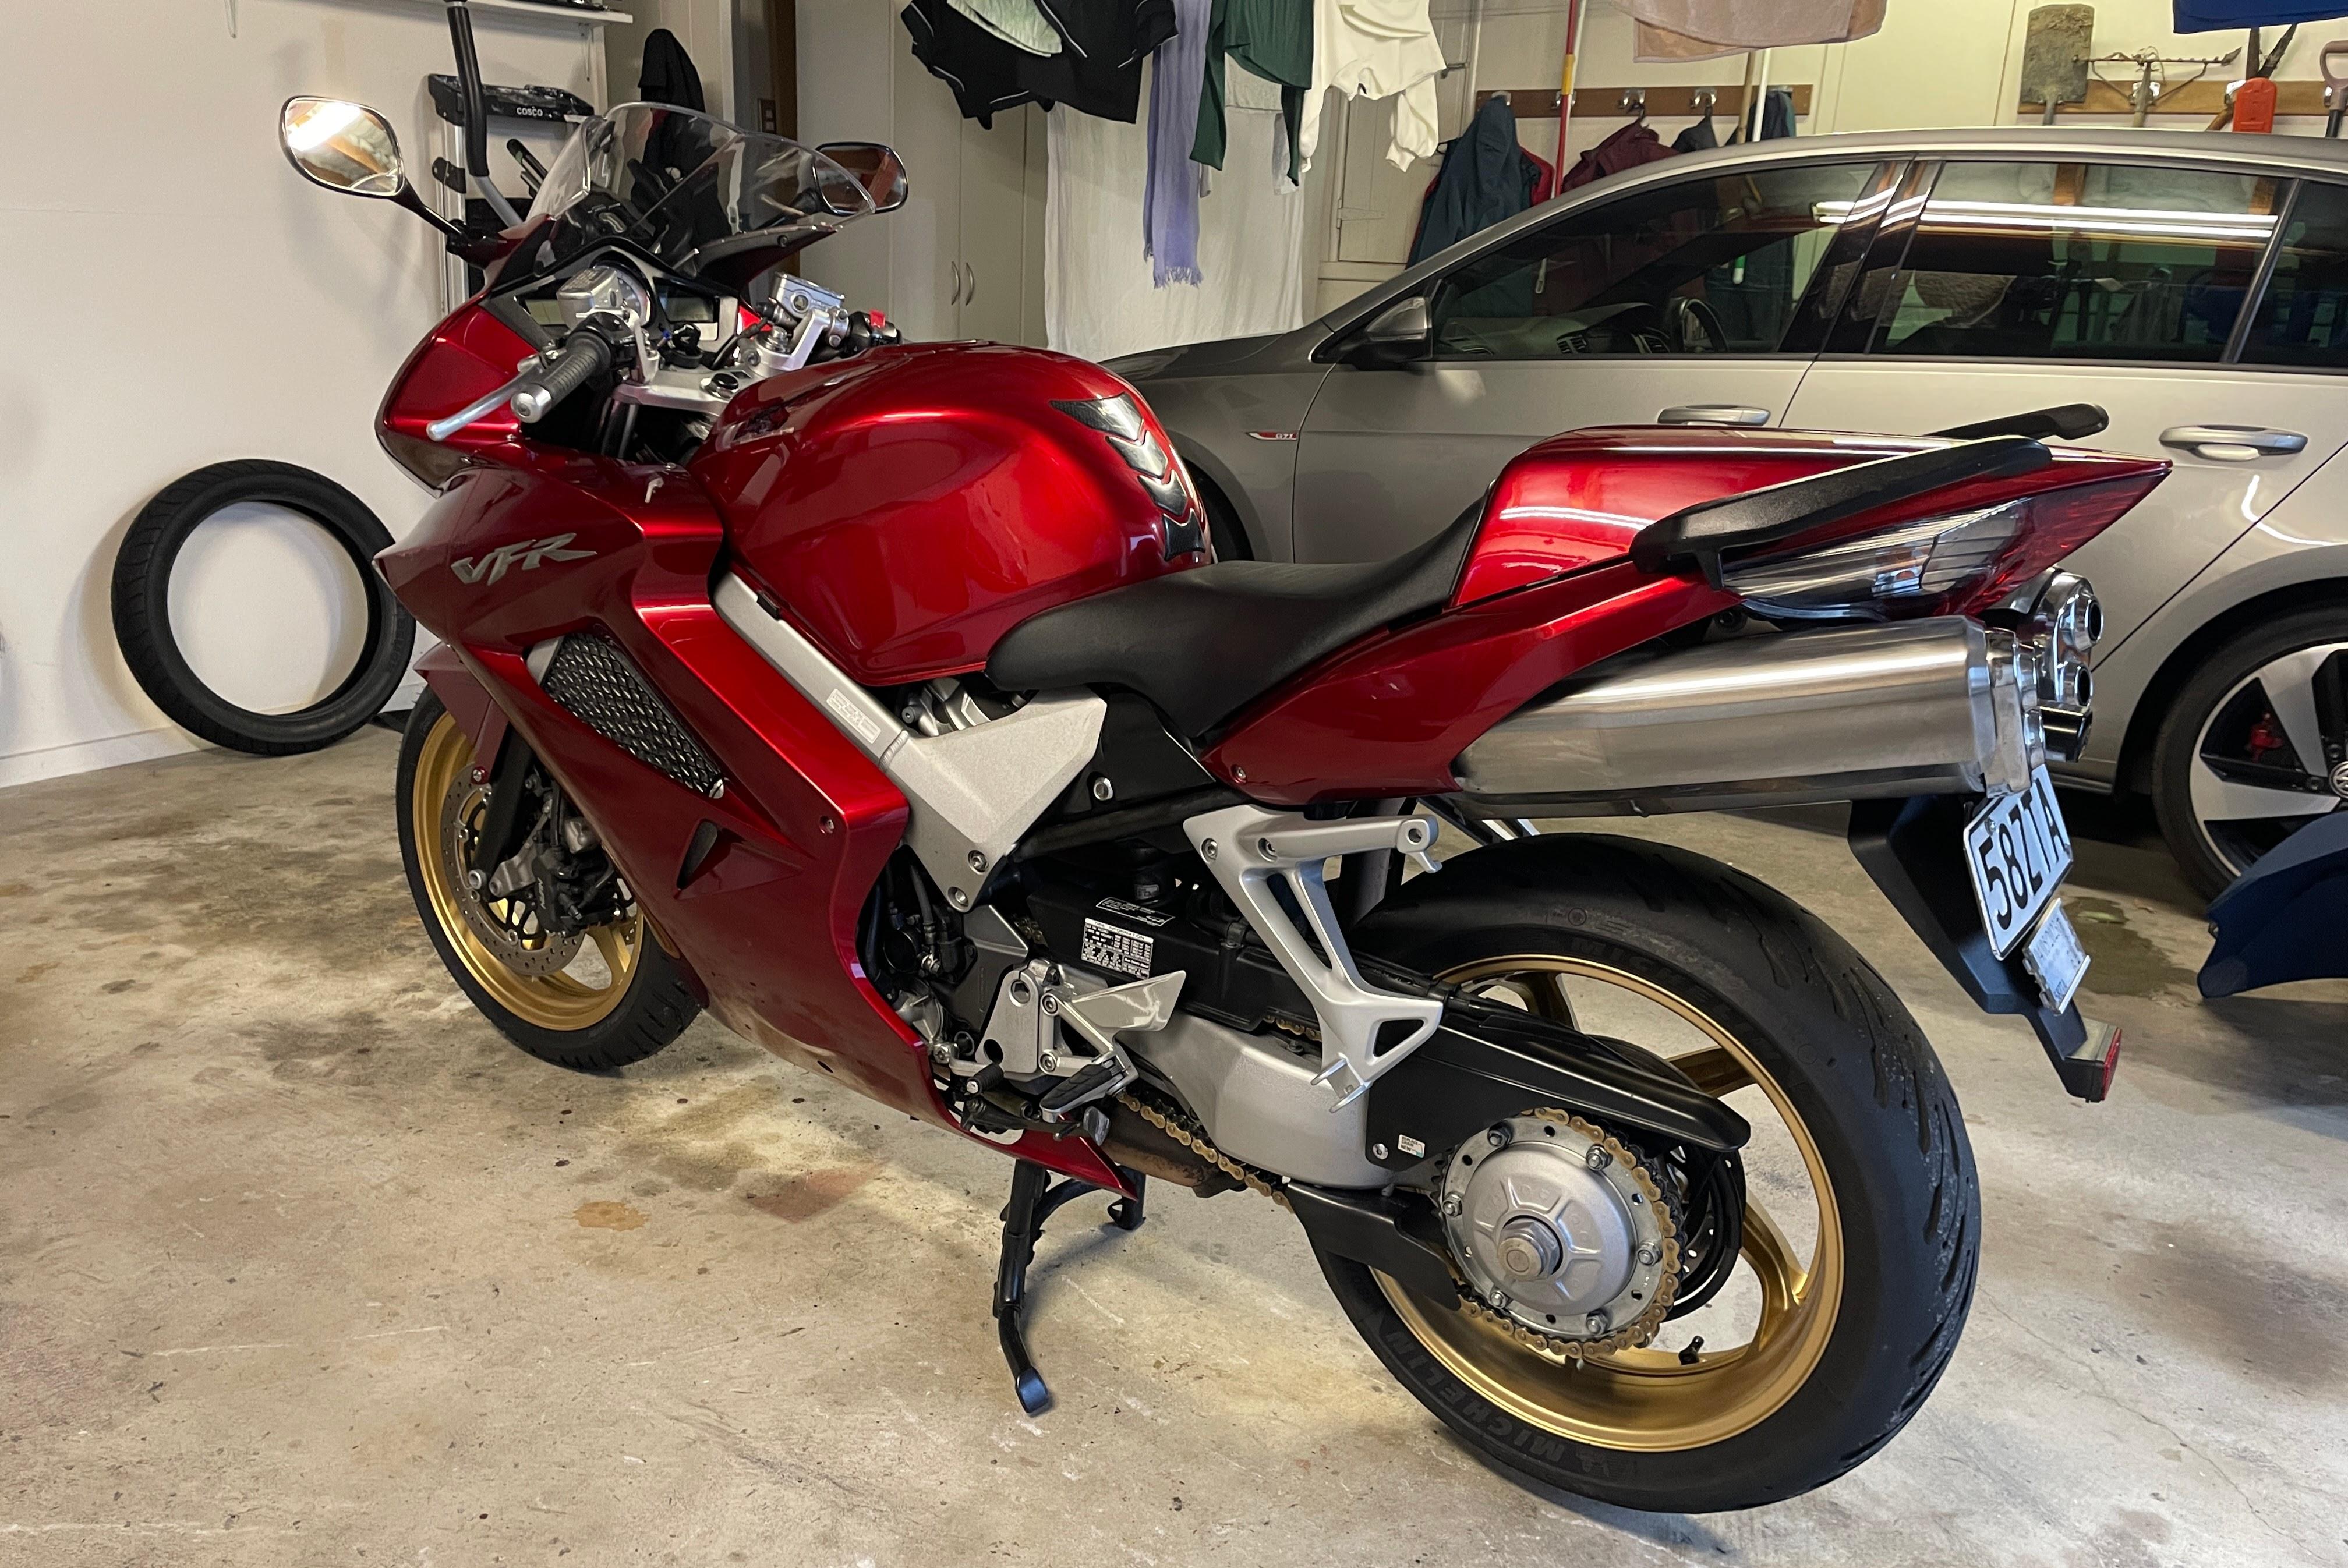
As most might know, I and fellow member sfdownhill were great friends and were a couple of key members in bringing the high performance headers the VFR community. After his untimely passing, I volunteered to help his family with all of the motorcycle related items Lance left behind. One of which was his prized 5 Gen. After a long battle with DMV hassles, the title was finally transferred to his father’s name and that bike is now up for auction at IconicMotorcycles. Seeing the pics of his bike on the auction site brings back some tears, knowing that his beloved VFR is a step away from finding a new home and me having one less shared physical connection with my friend. (It hit a little deeper than I thought it would). He and I talked a lot about the mods he planned and did and I even helped install some of the parts it still carries. I originally planned on being the one to sell it but after a lot of thought, I felt it would easier for it to be handled by a shop like Iconic. As just seeing the bike being loaded on their van when they picked it up was hard to take, imagine me dealing with someone coming to me to buy it? I’d probably be like the over protective father who feels no man is good enough to take his daughter on date :] Seriously though, it took a lot out of me handling the three bikes I took in, amongst the other moto bits I helped handle. After discussing with Lance’s father we both felt good about letting Iconic handle it. On that end, they were really great to work with, especially knowing that I as the middle man in this process. Anyway, thanks for reading and hopefully whoever does buy Lance’s VFR will get the same enjoyment as Lance did and will appreciate all that went into this special bike. Cheers, D https://iconicmotorbikeauctions.com/auction/2001-honda-vfr800-interceptor-3/14 points
-
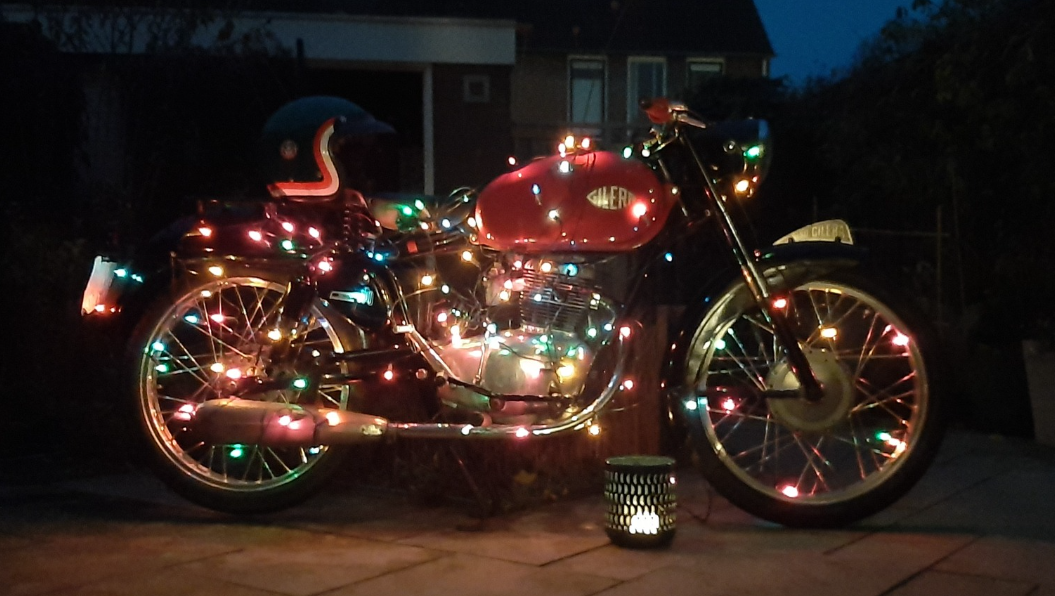
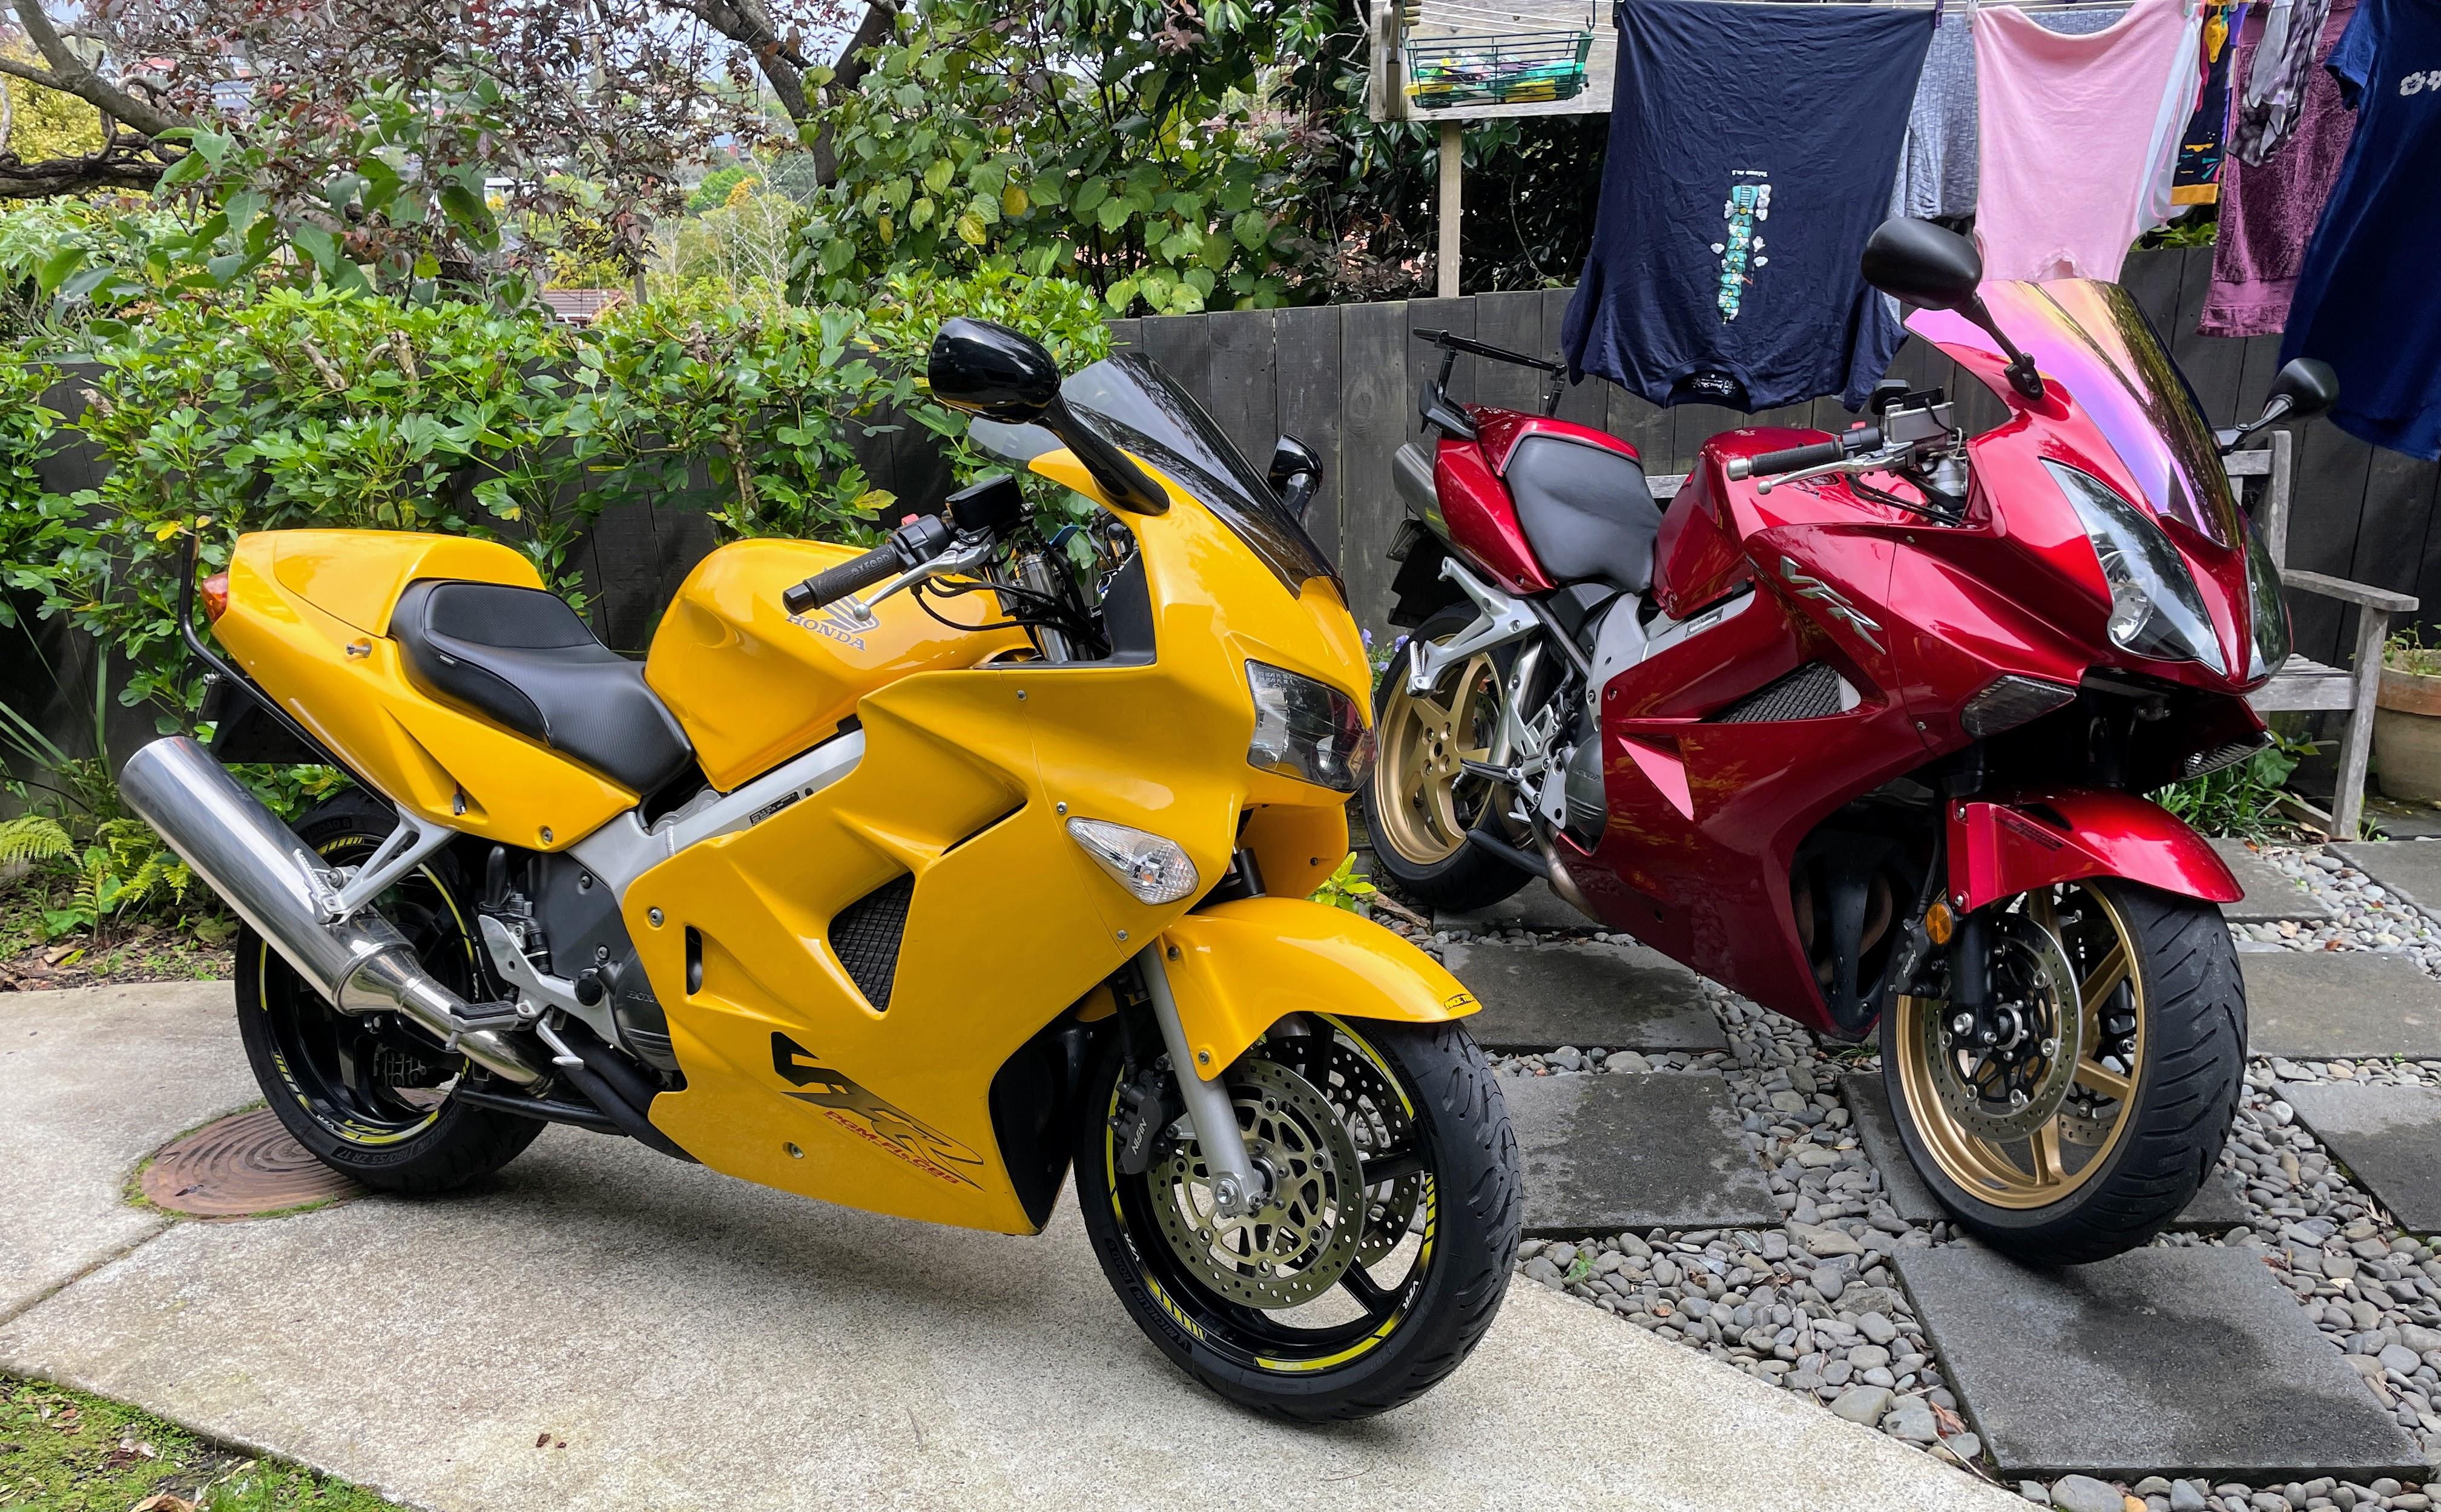
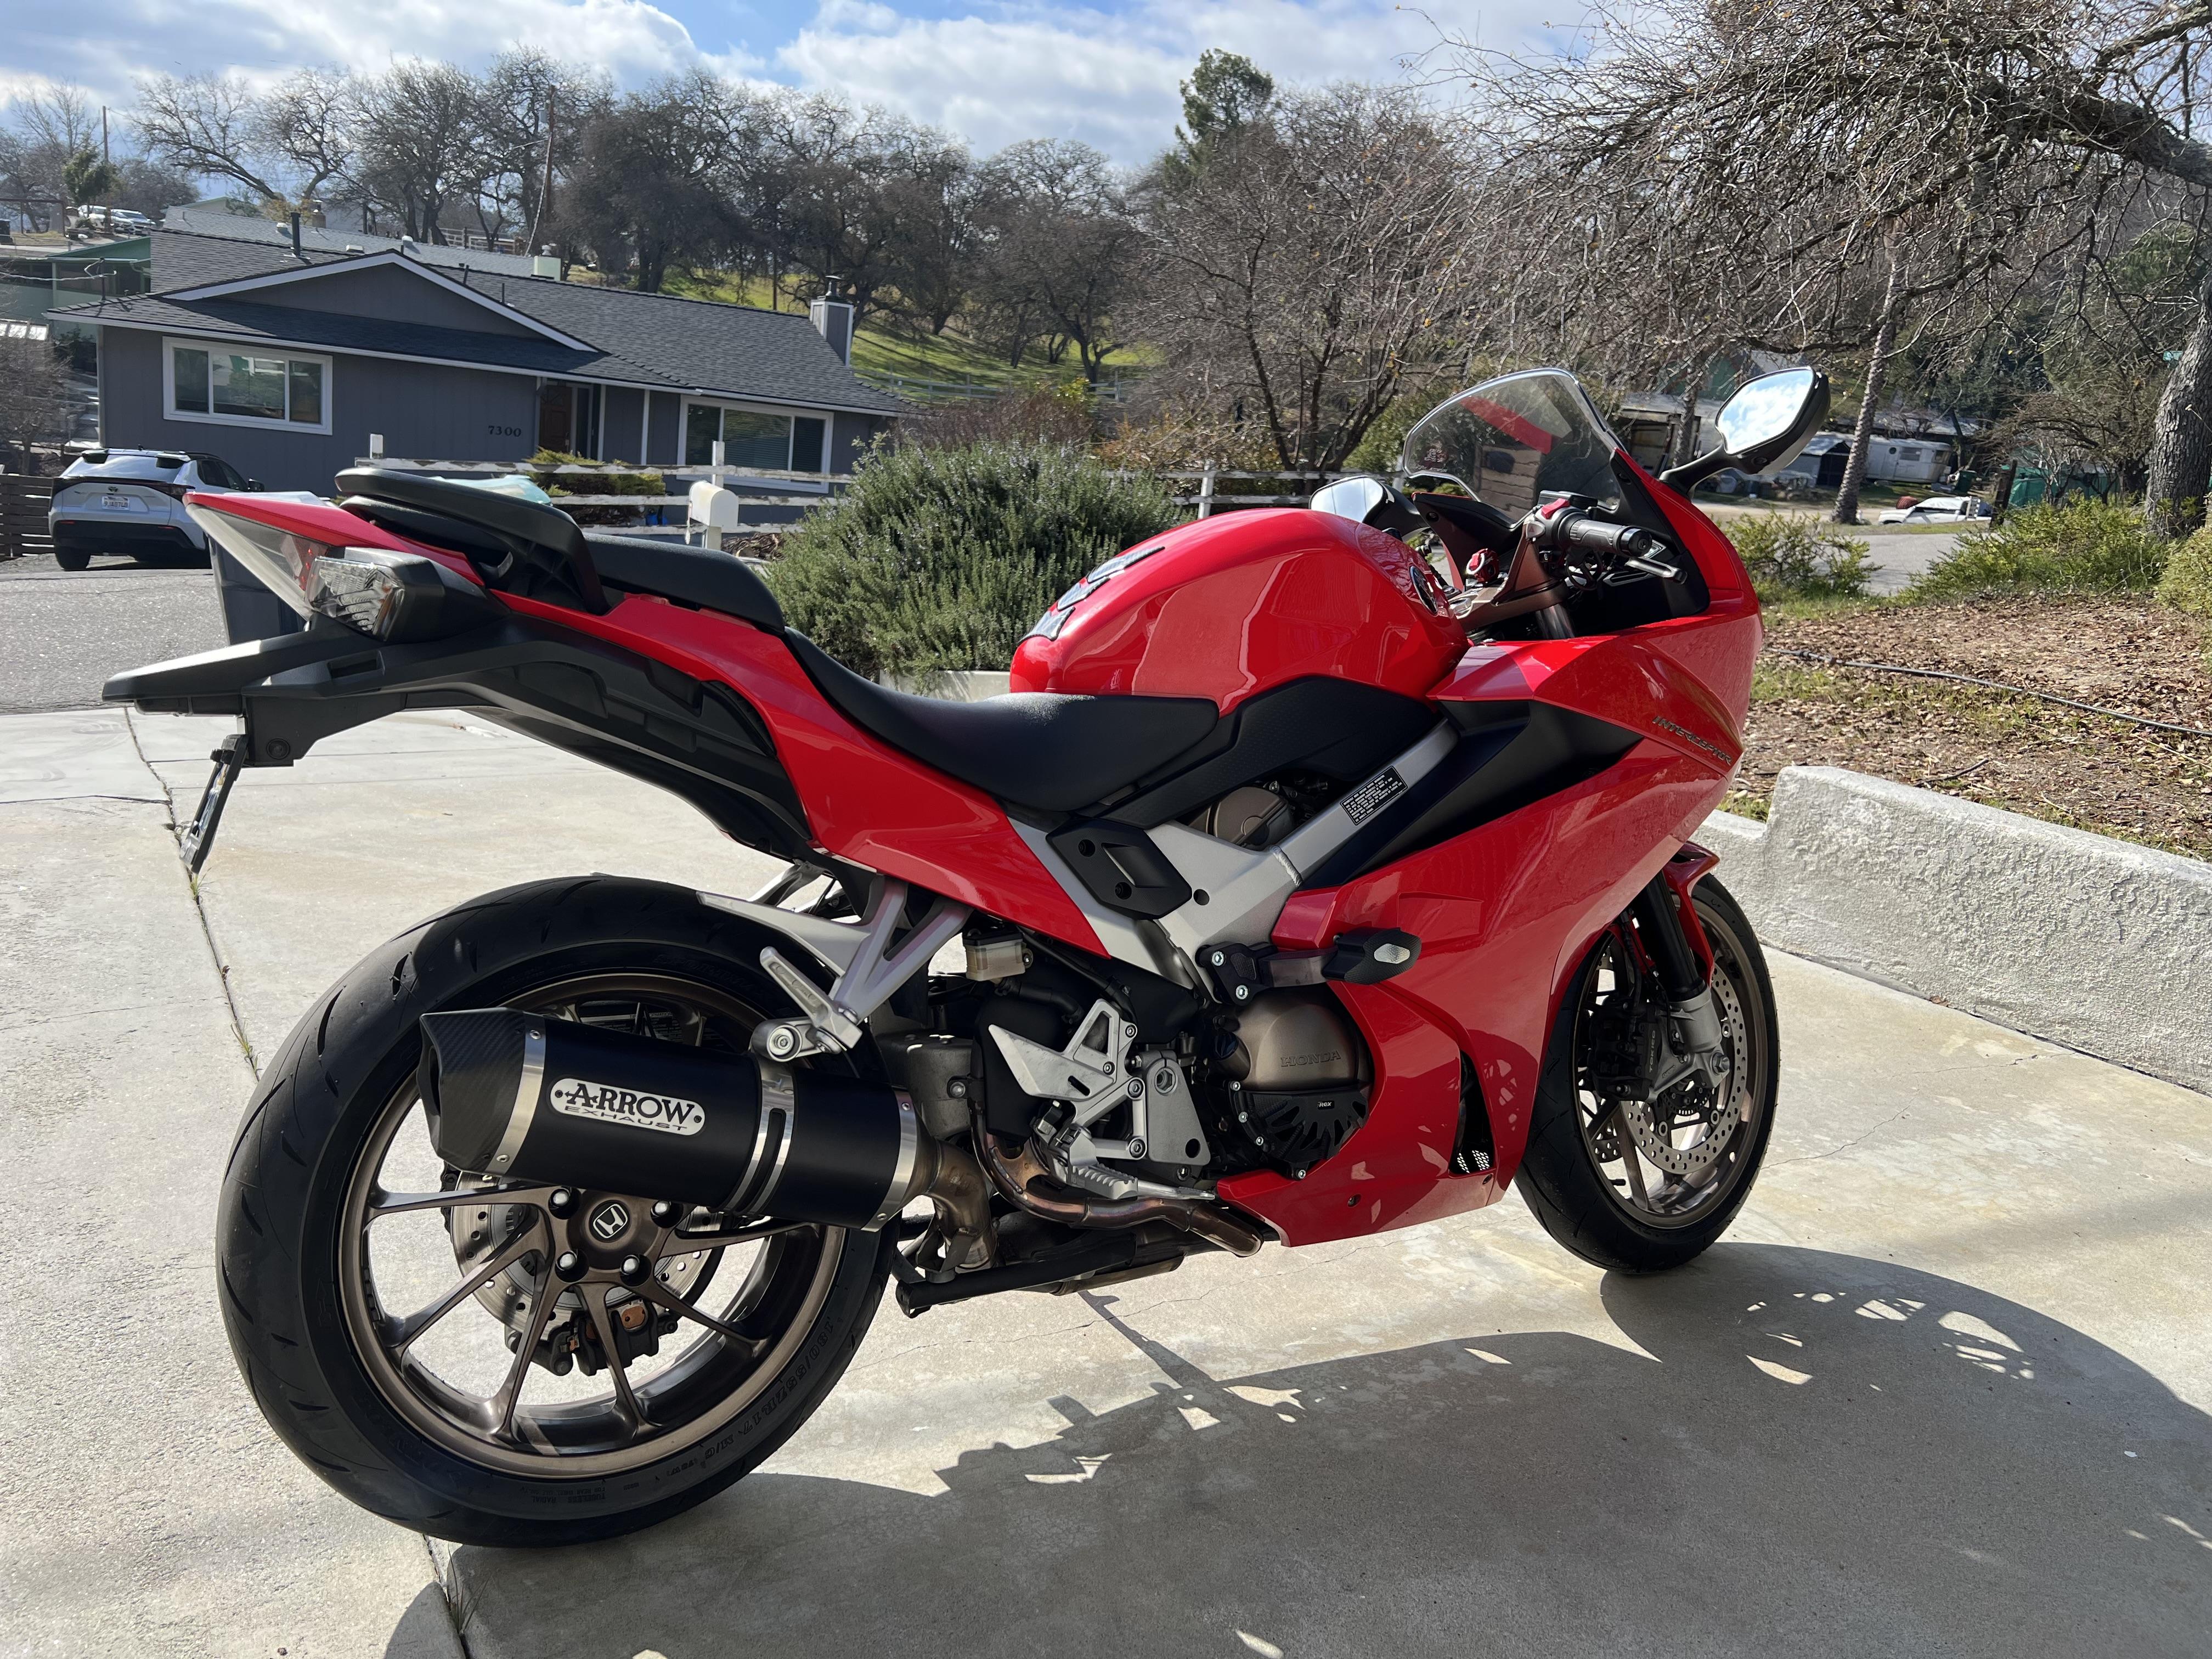
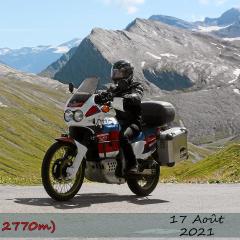
While looking through my old pics - not for anything VFR related, I came across this shot from late-2019. Probably washed it in preparation for a long winter's nap and decided to record the moment. I think the 6th gen looks pretty good from this angle.13 points
-
I created a PDF of the microfiche for the 1999 model for my own reference. Thought others might find it useful. 1999 VFR800 - Microfiche.pdf13 points
-
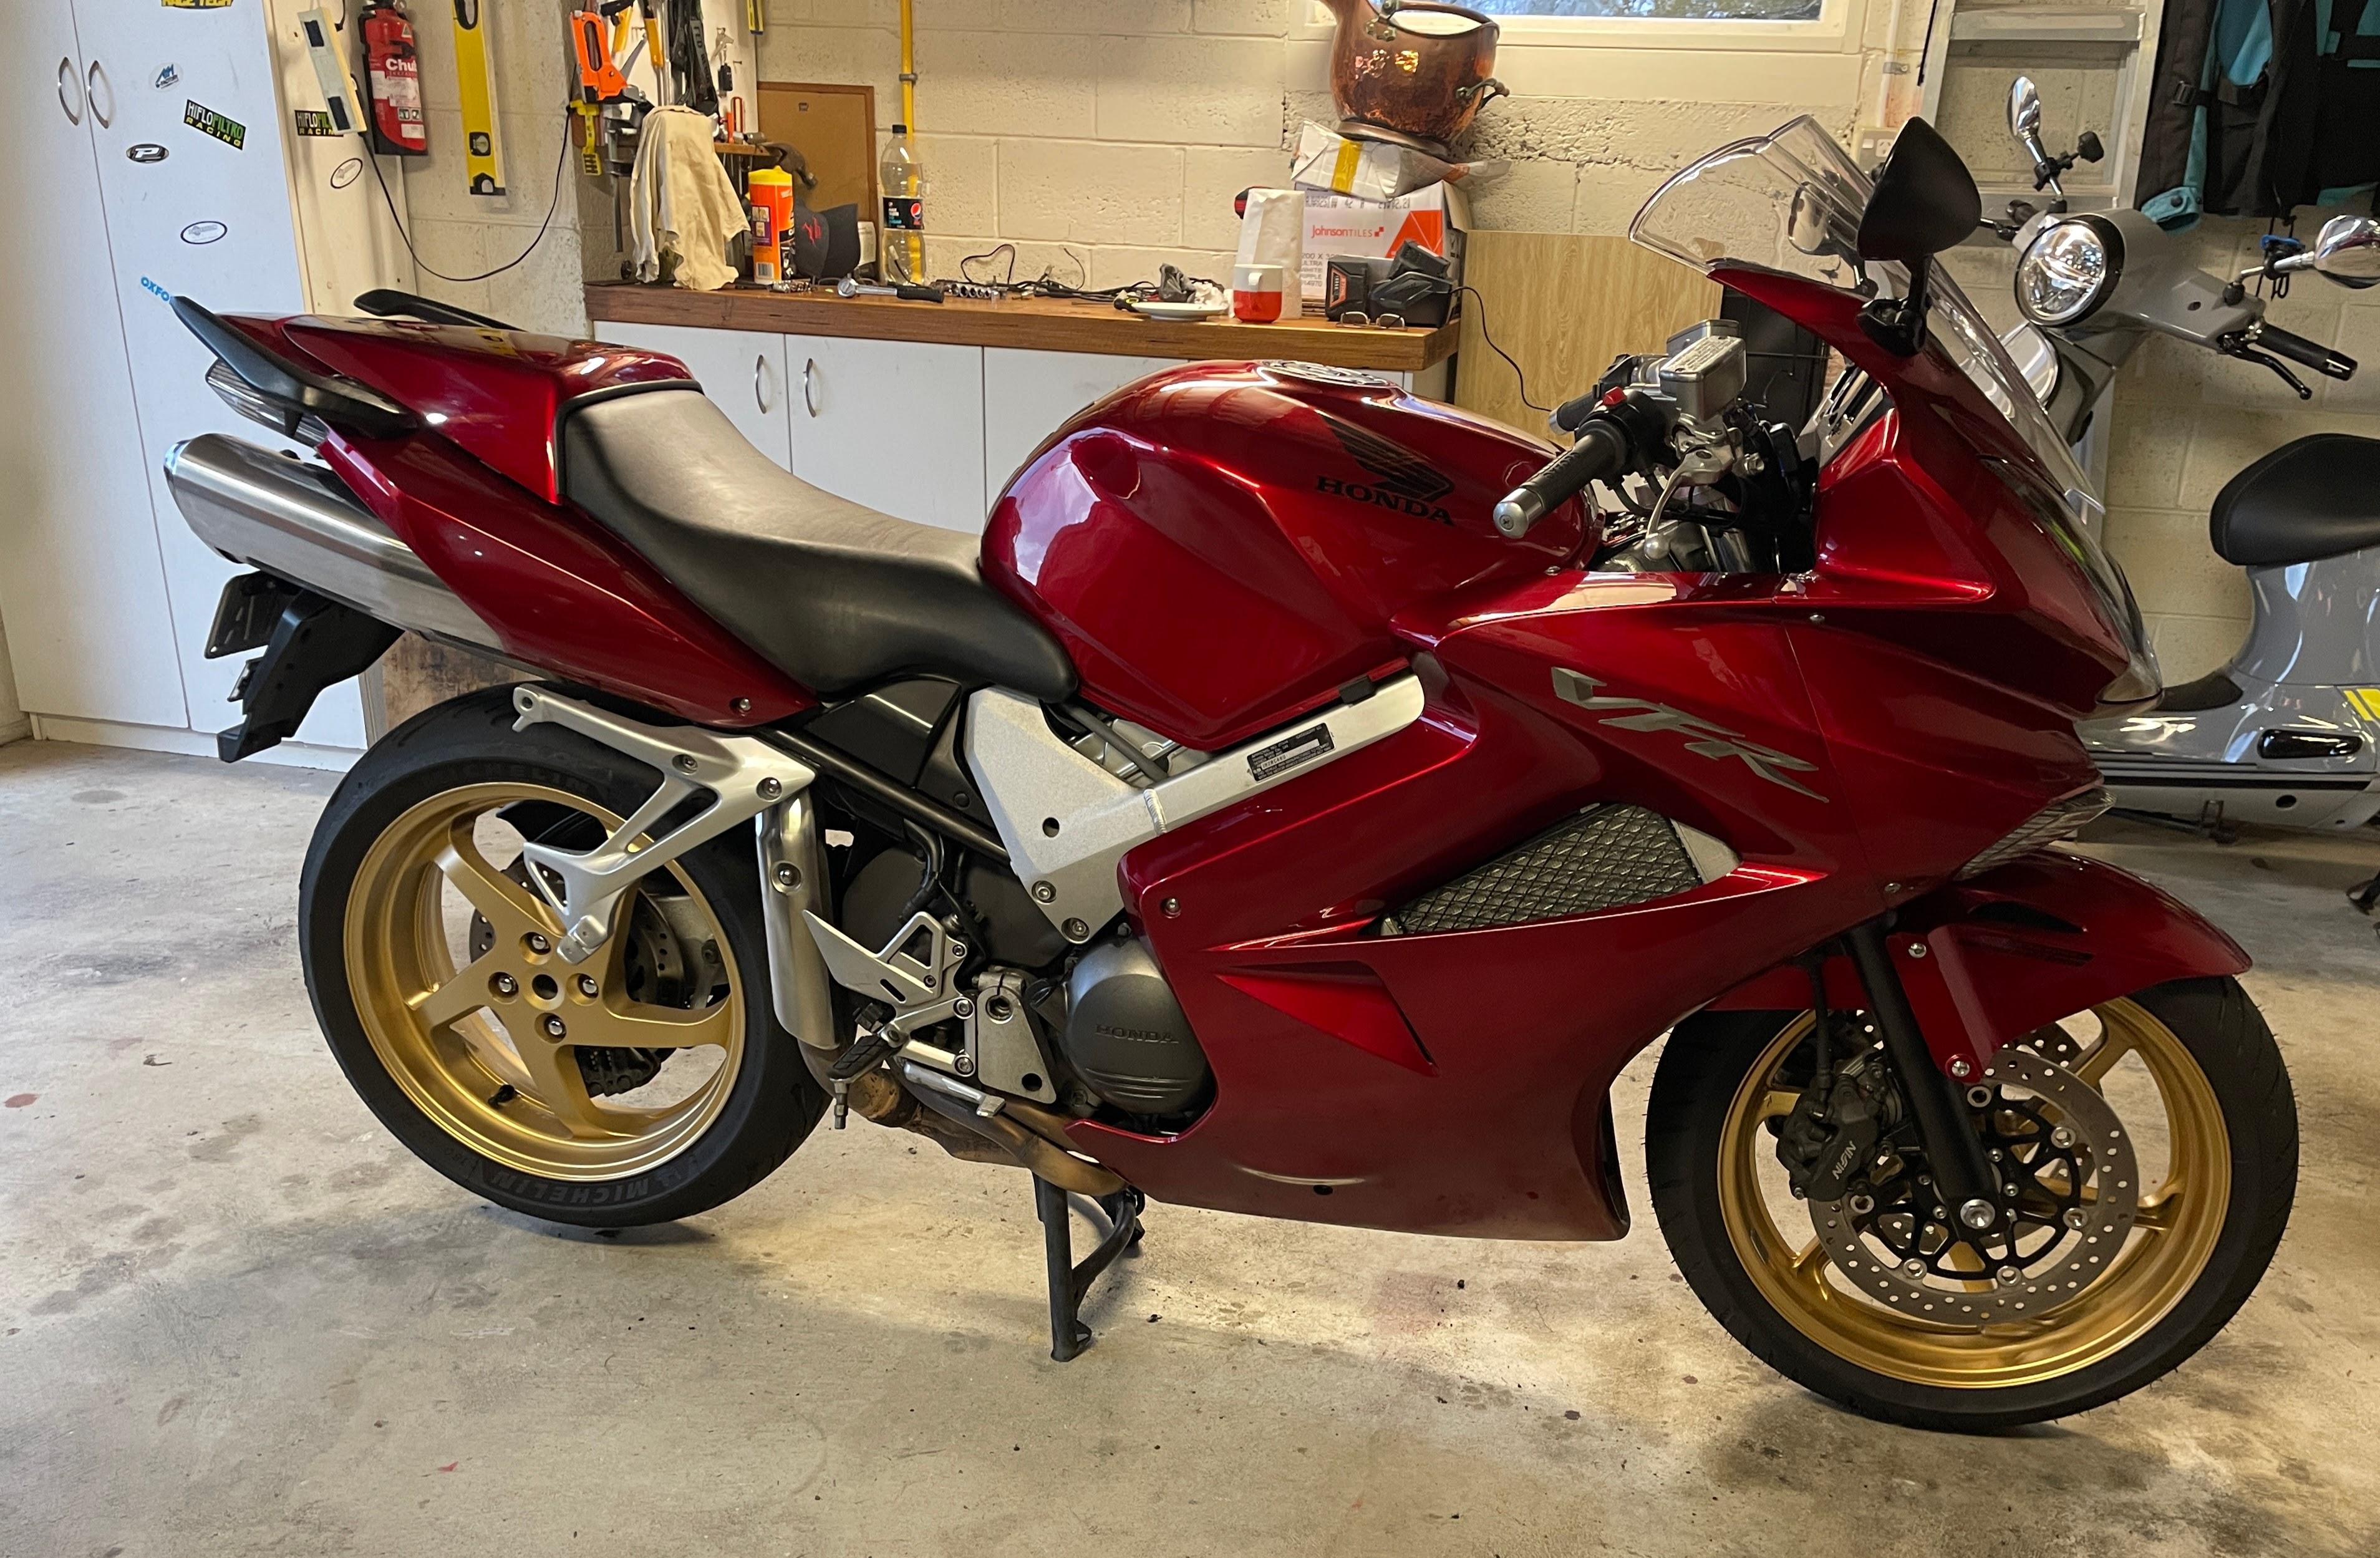
Hi. if you have not seen Steve's wrapped VFR I've attached a pic of both his bikes. Both look amazing. Not sure if he still owns it. Enjoy the pic they booth look stunning.
 12 points
 -
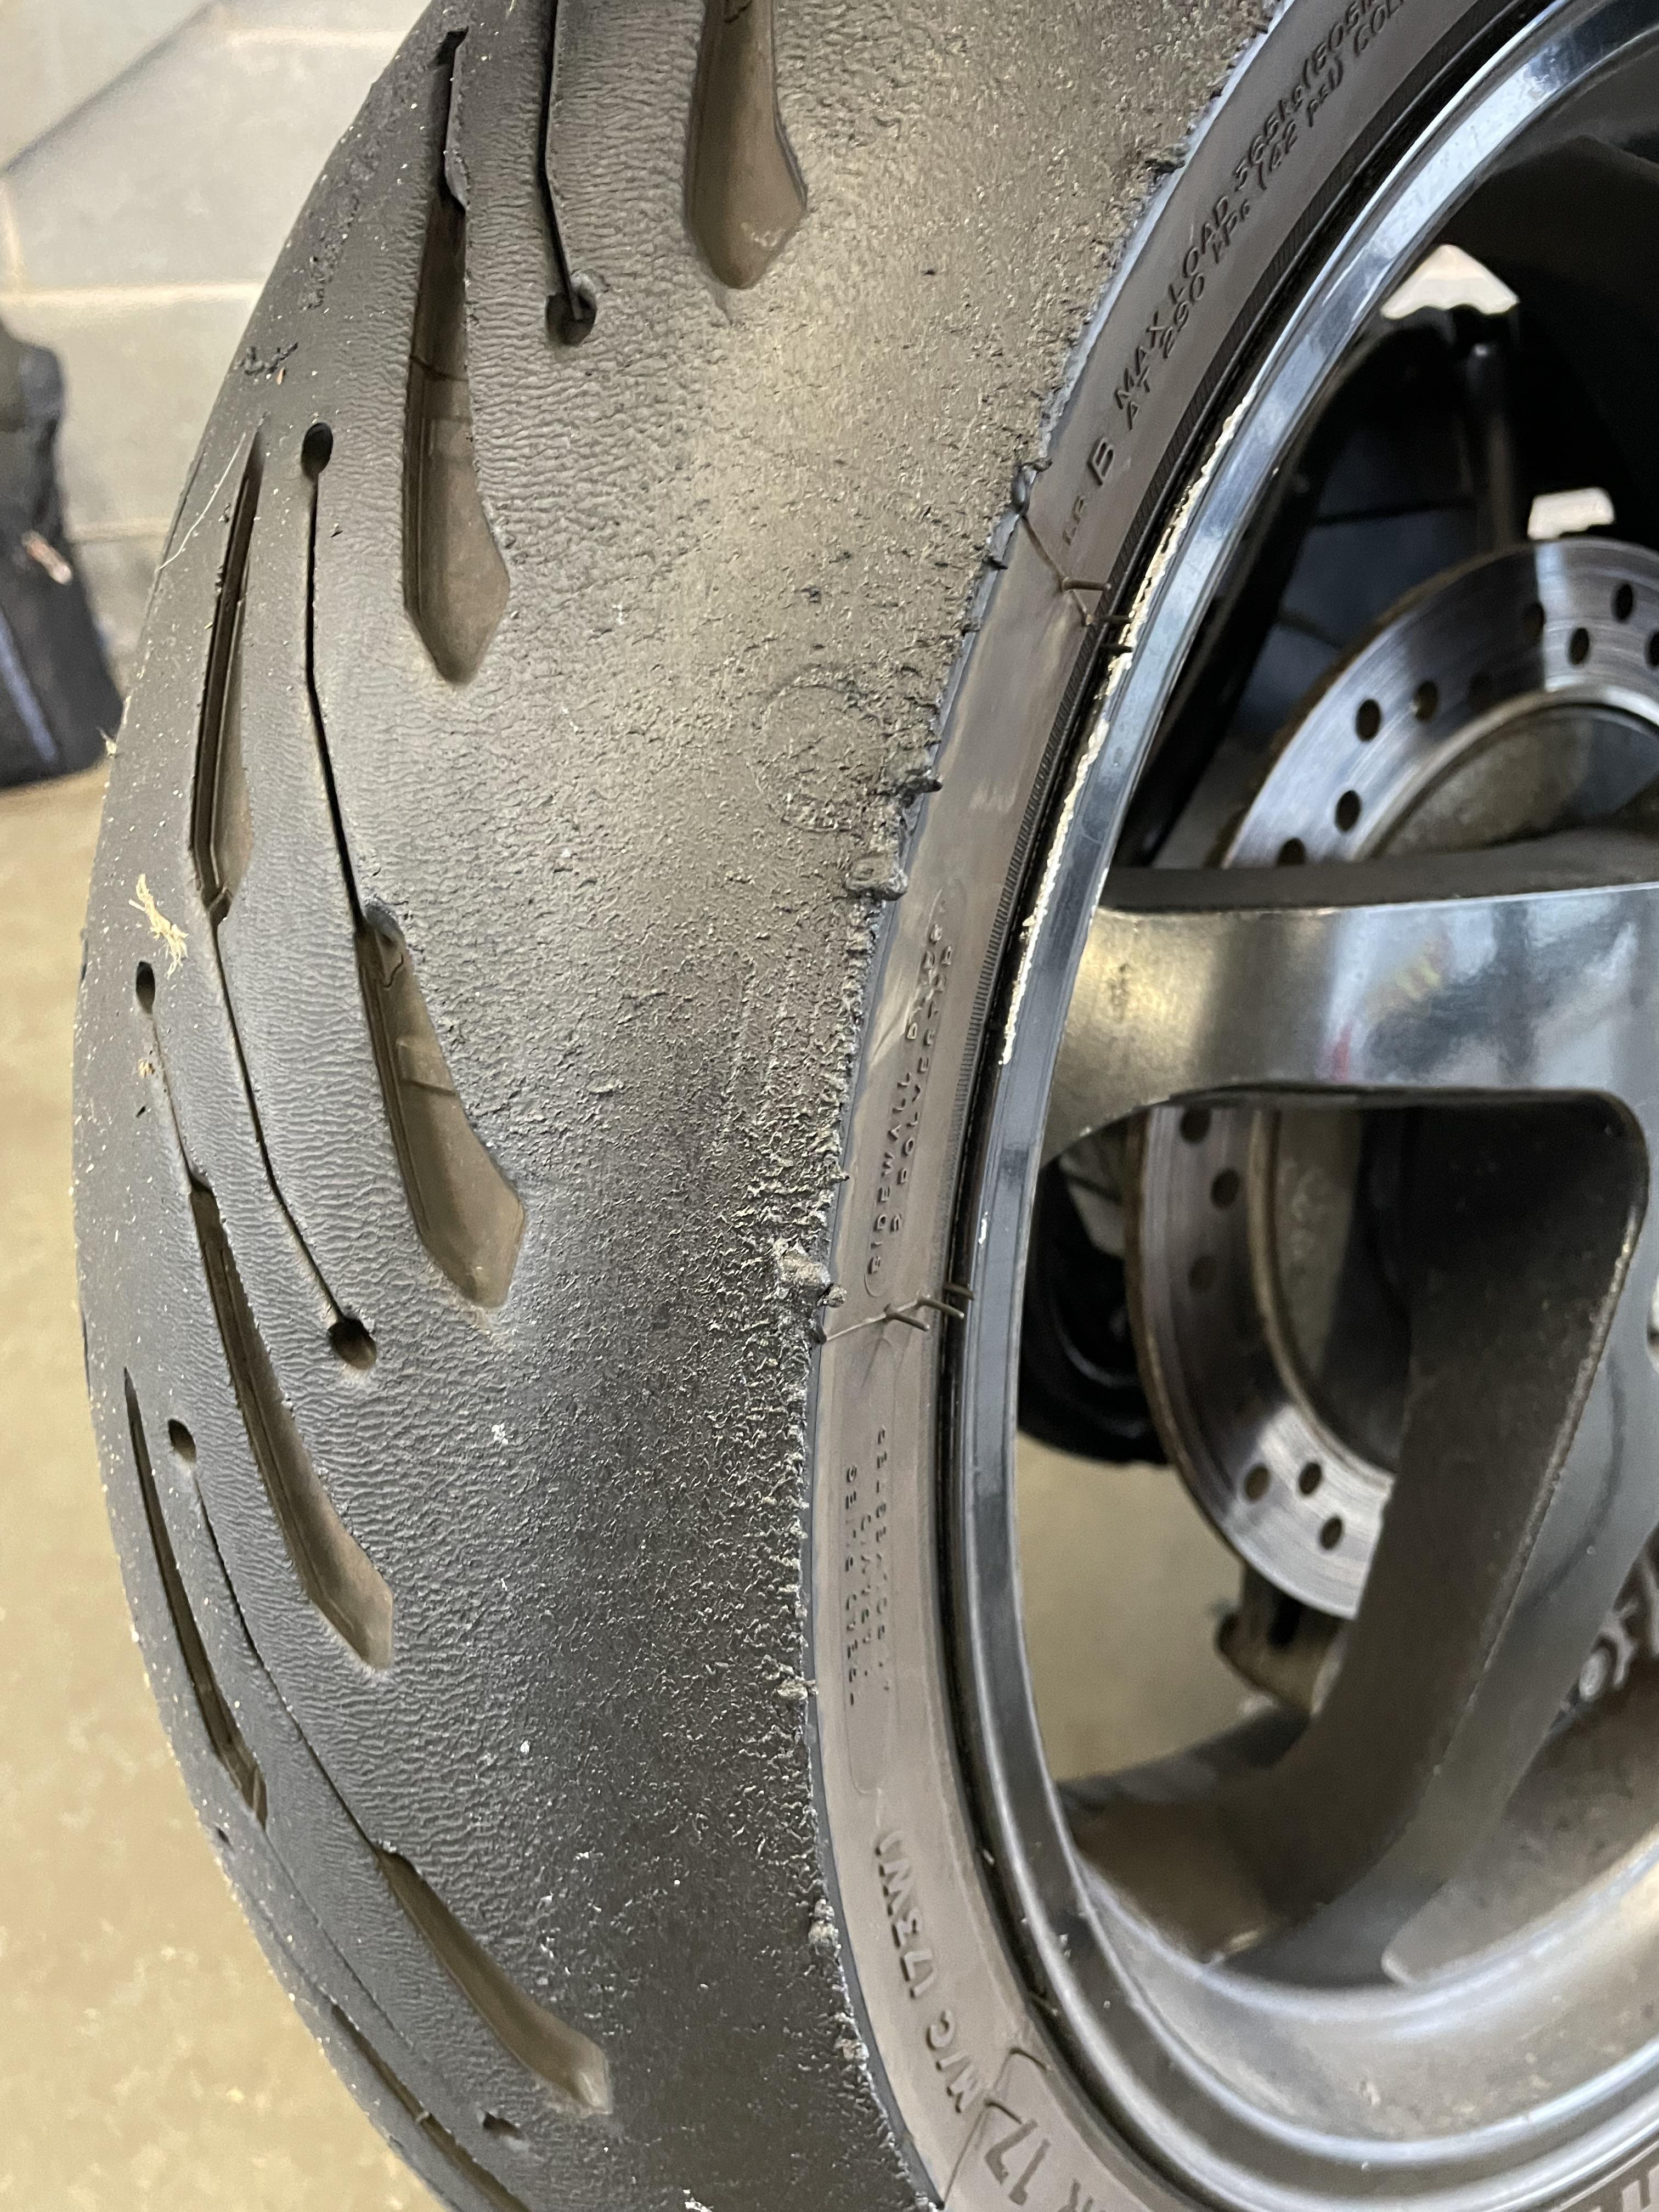
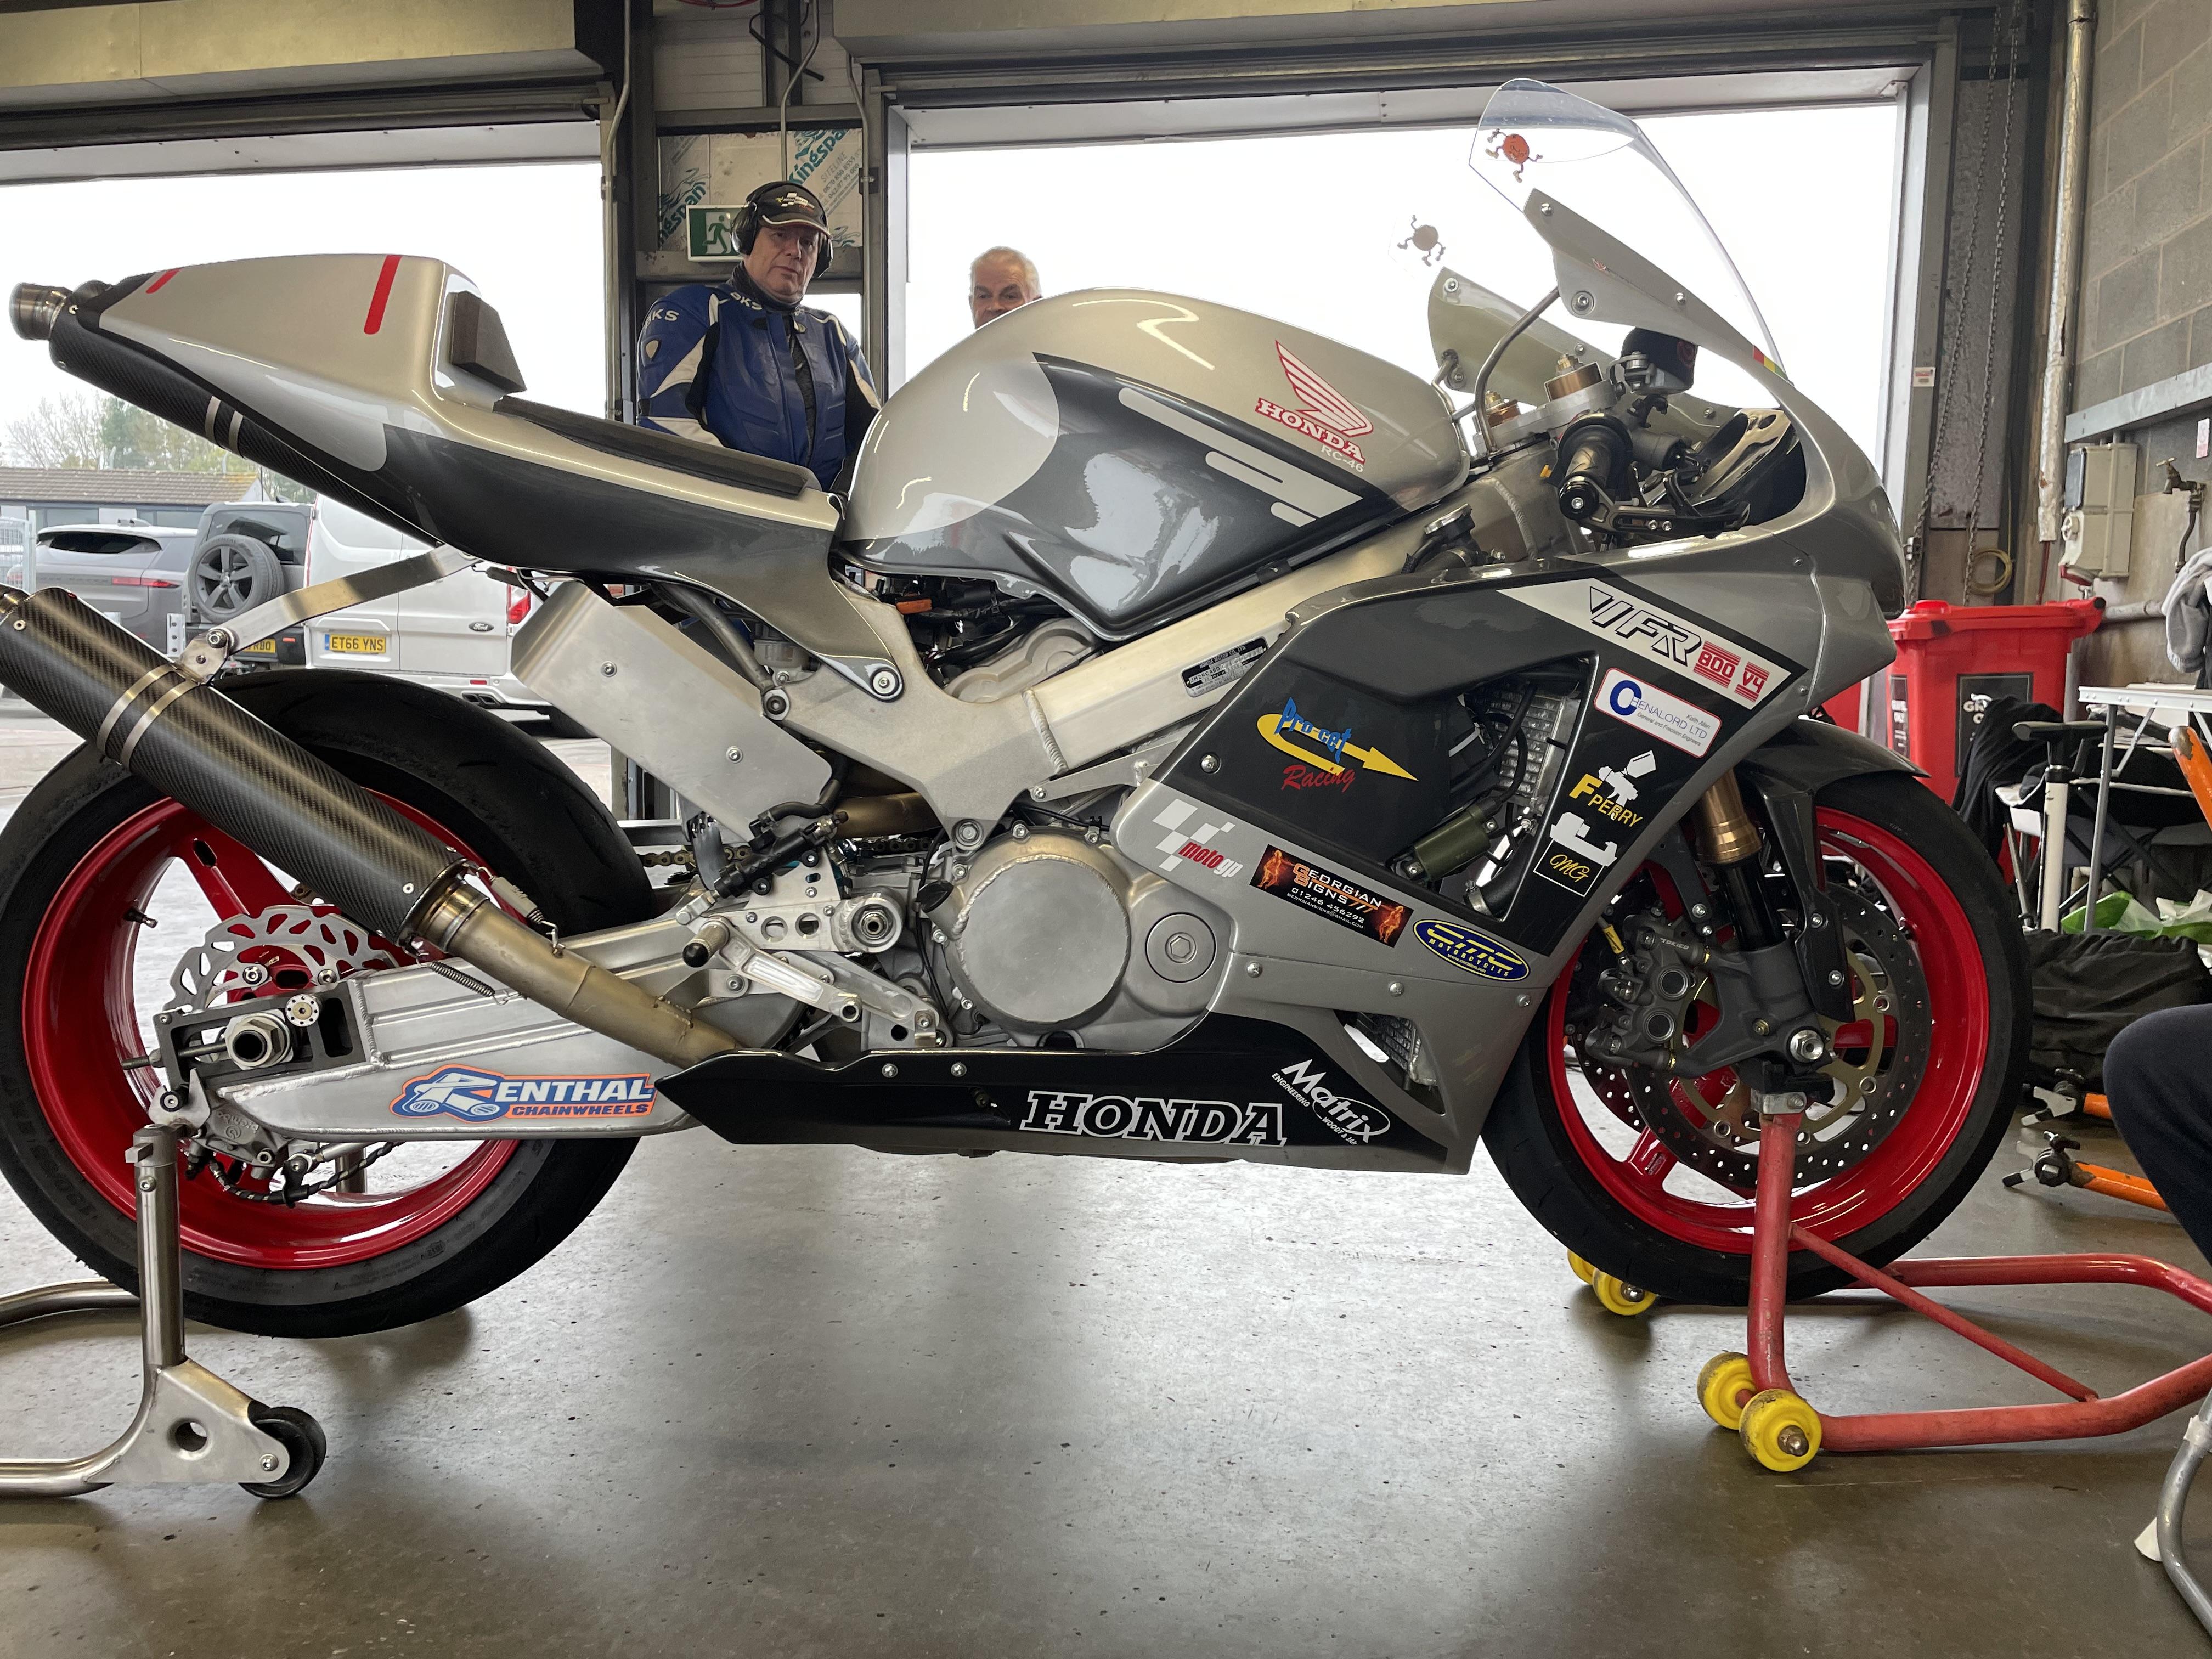
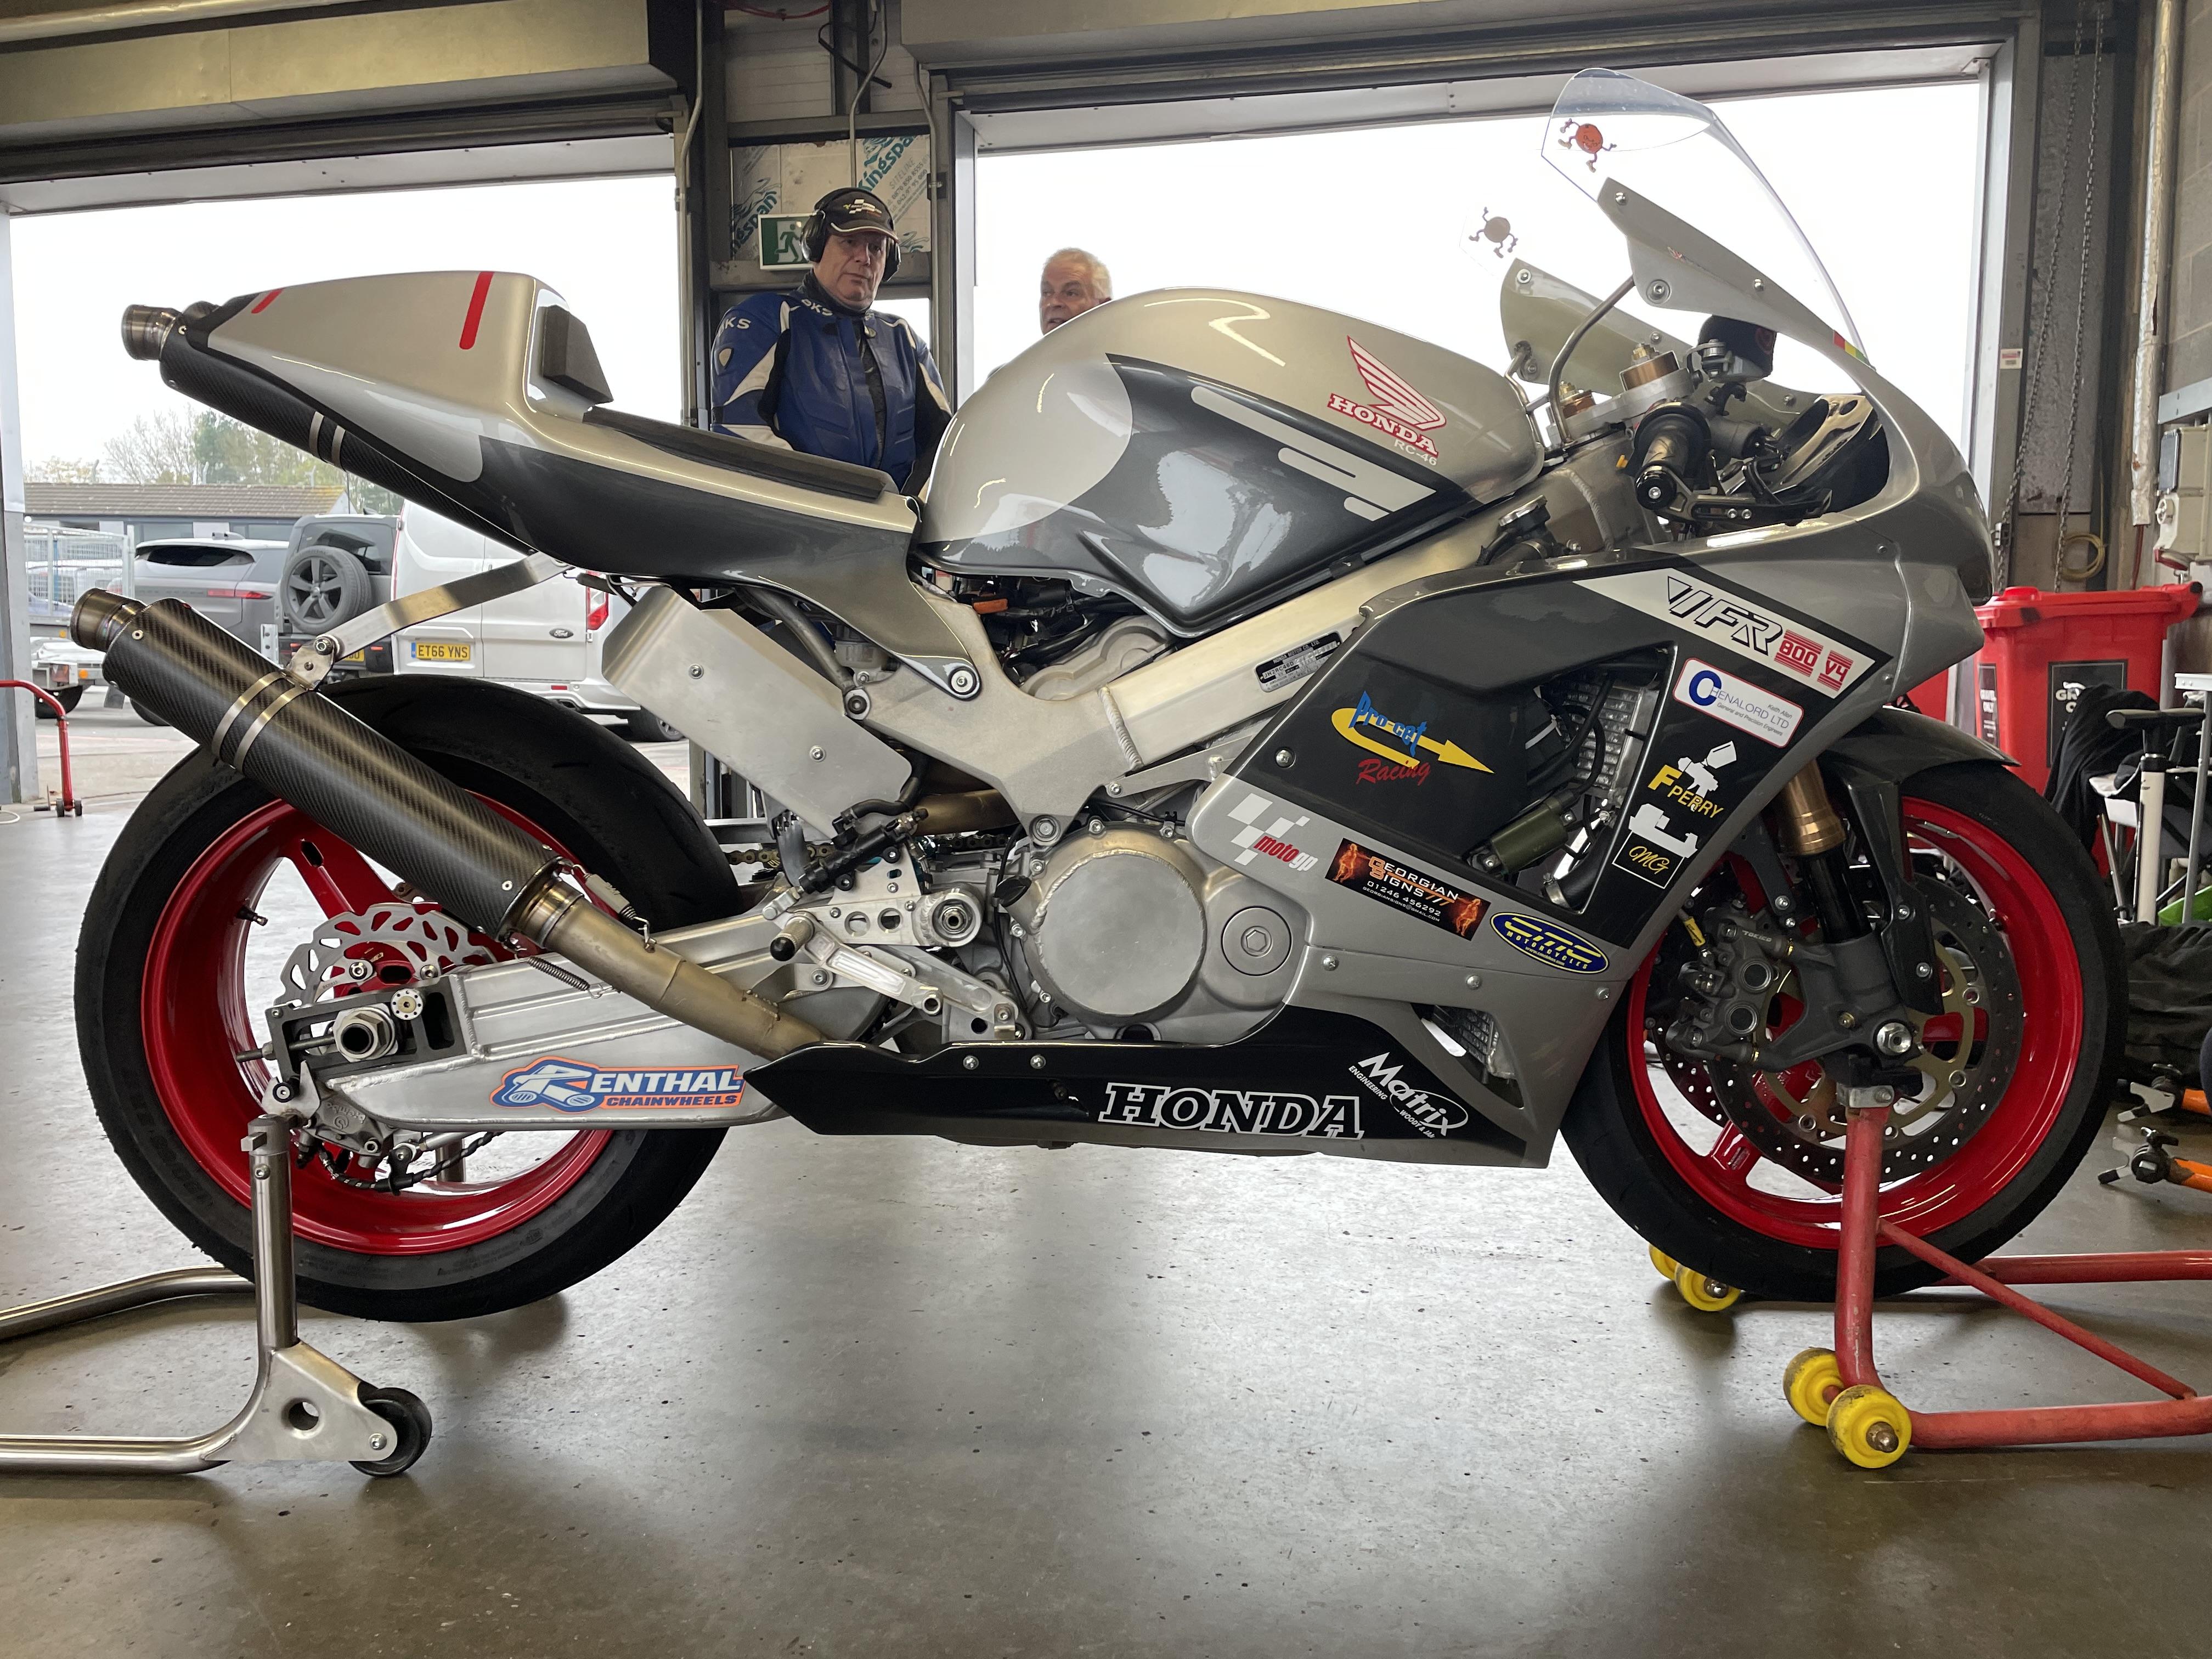
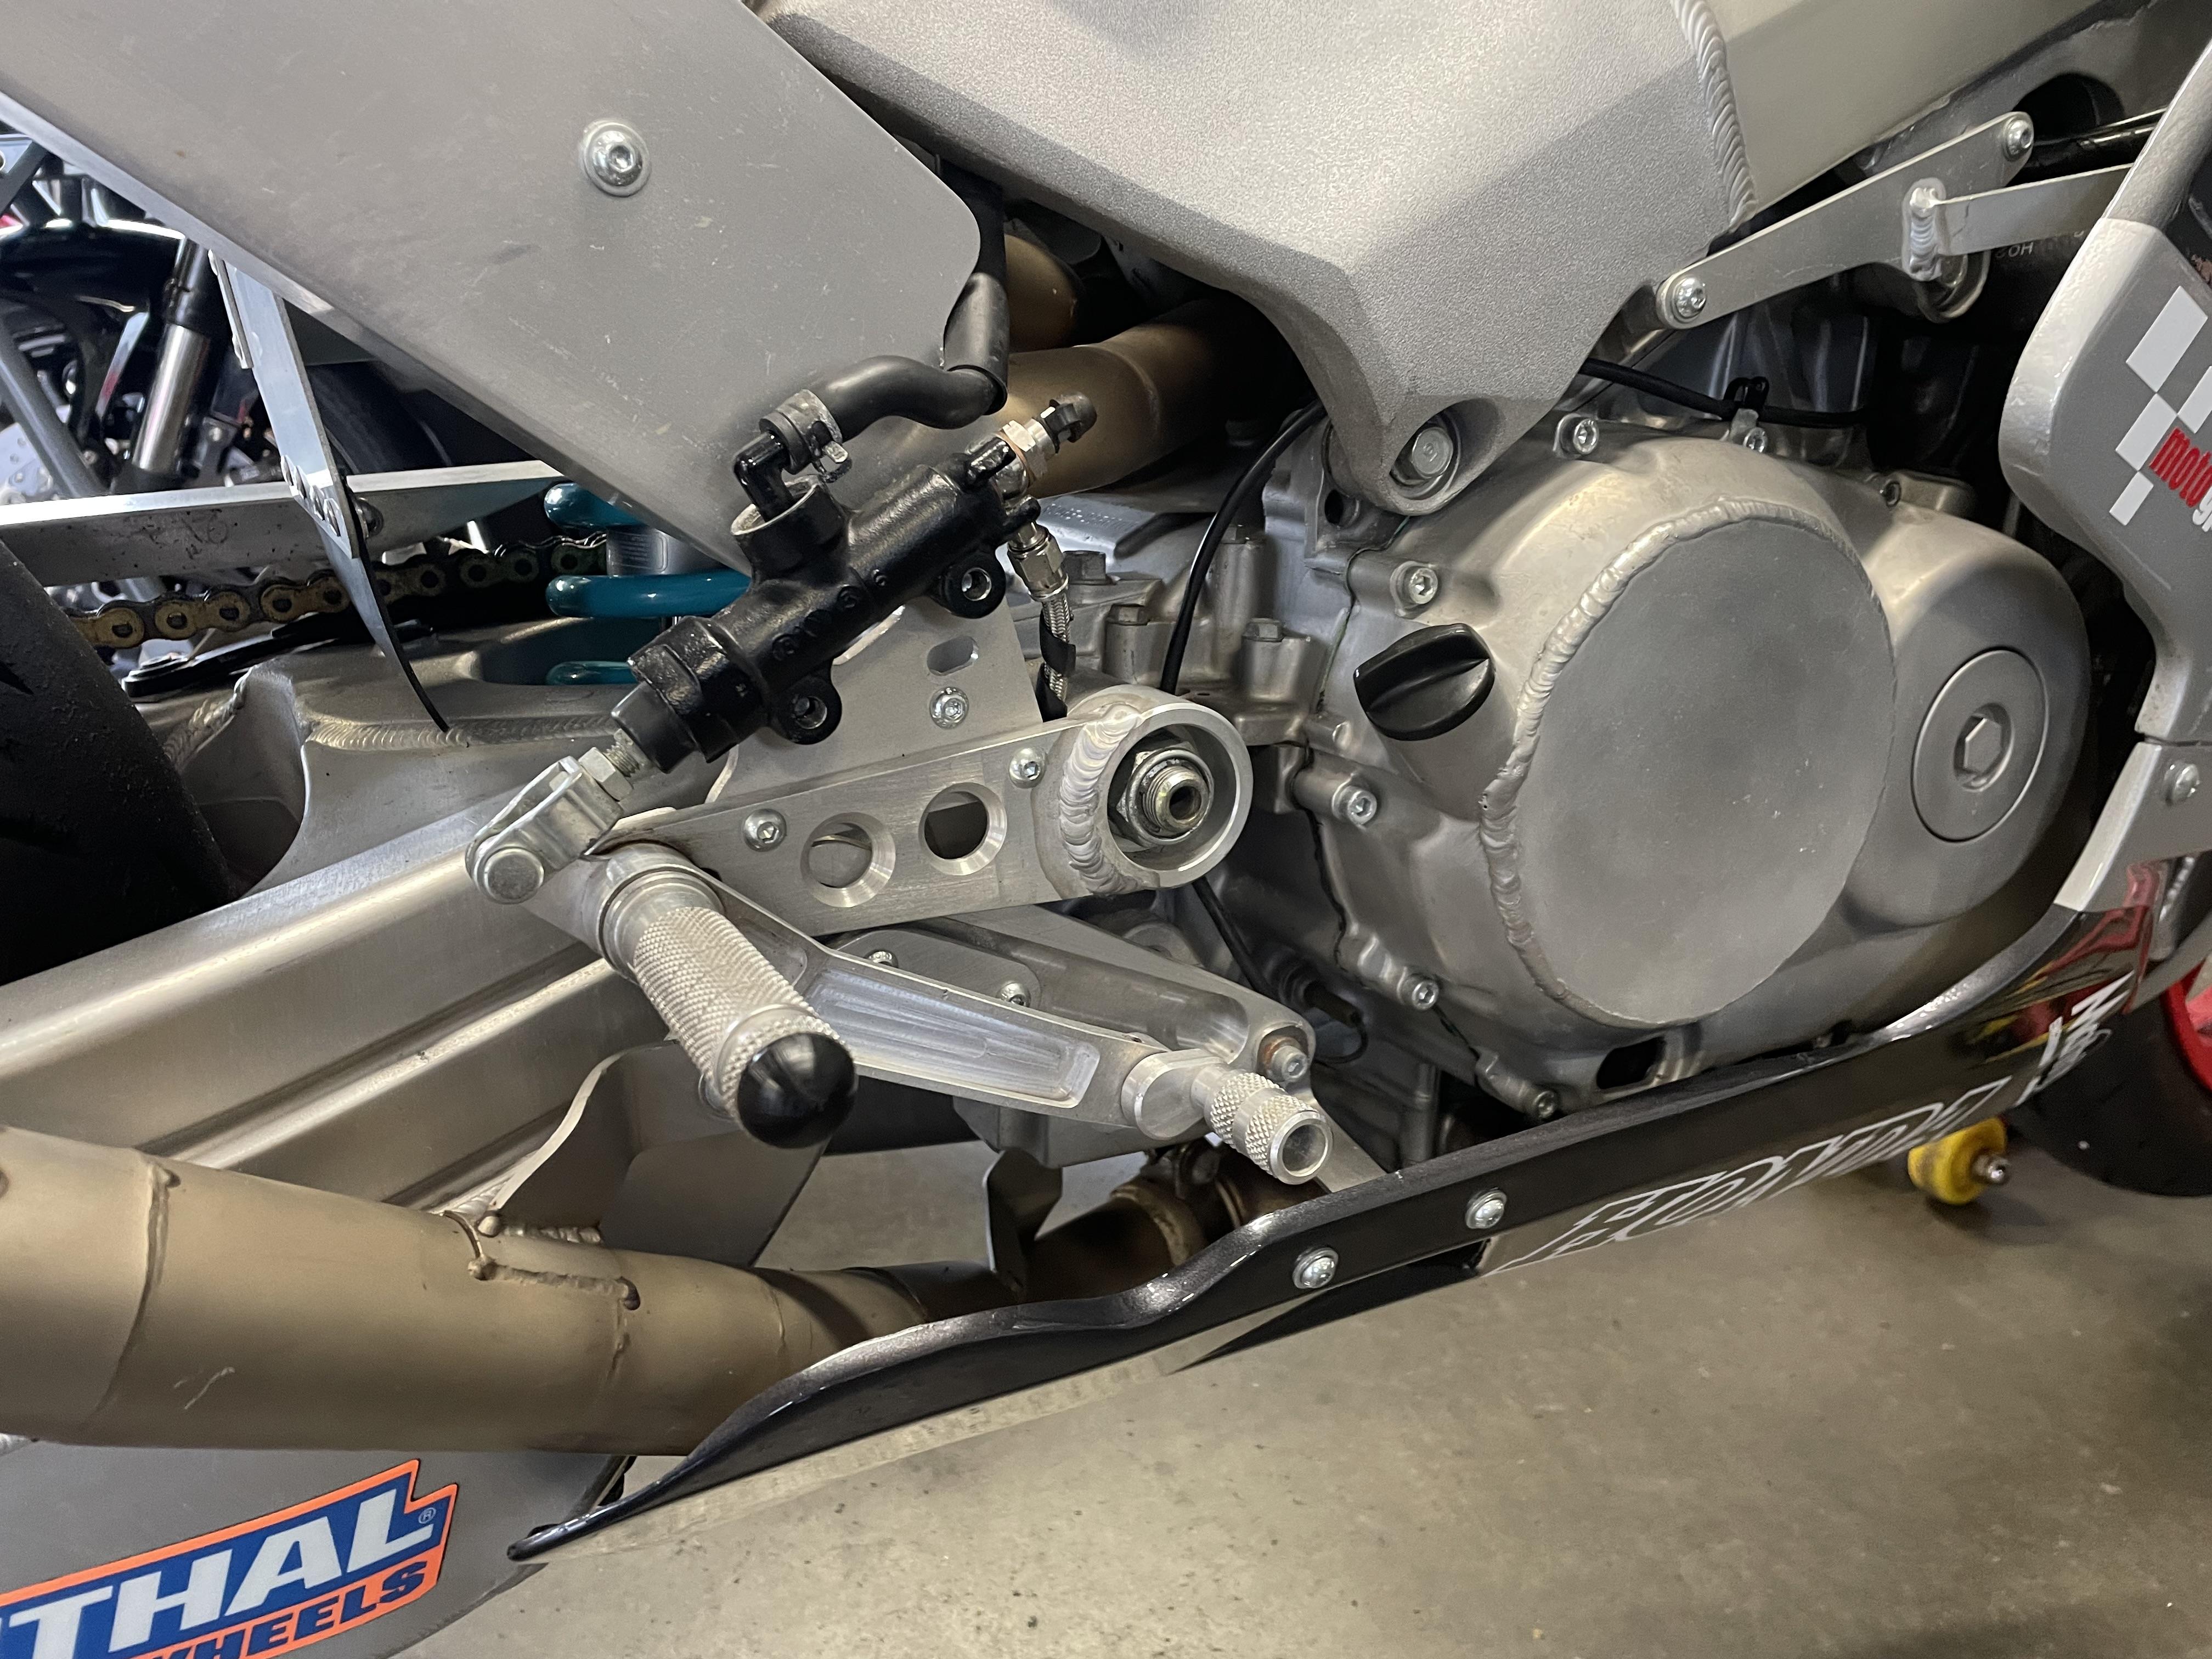
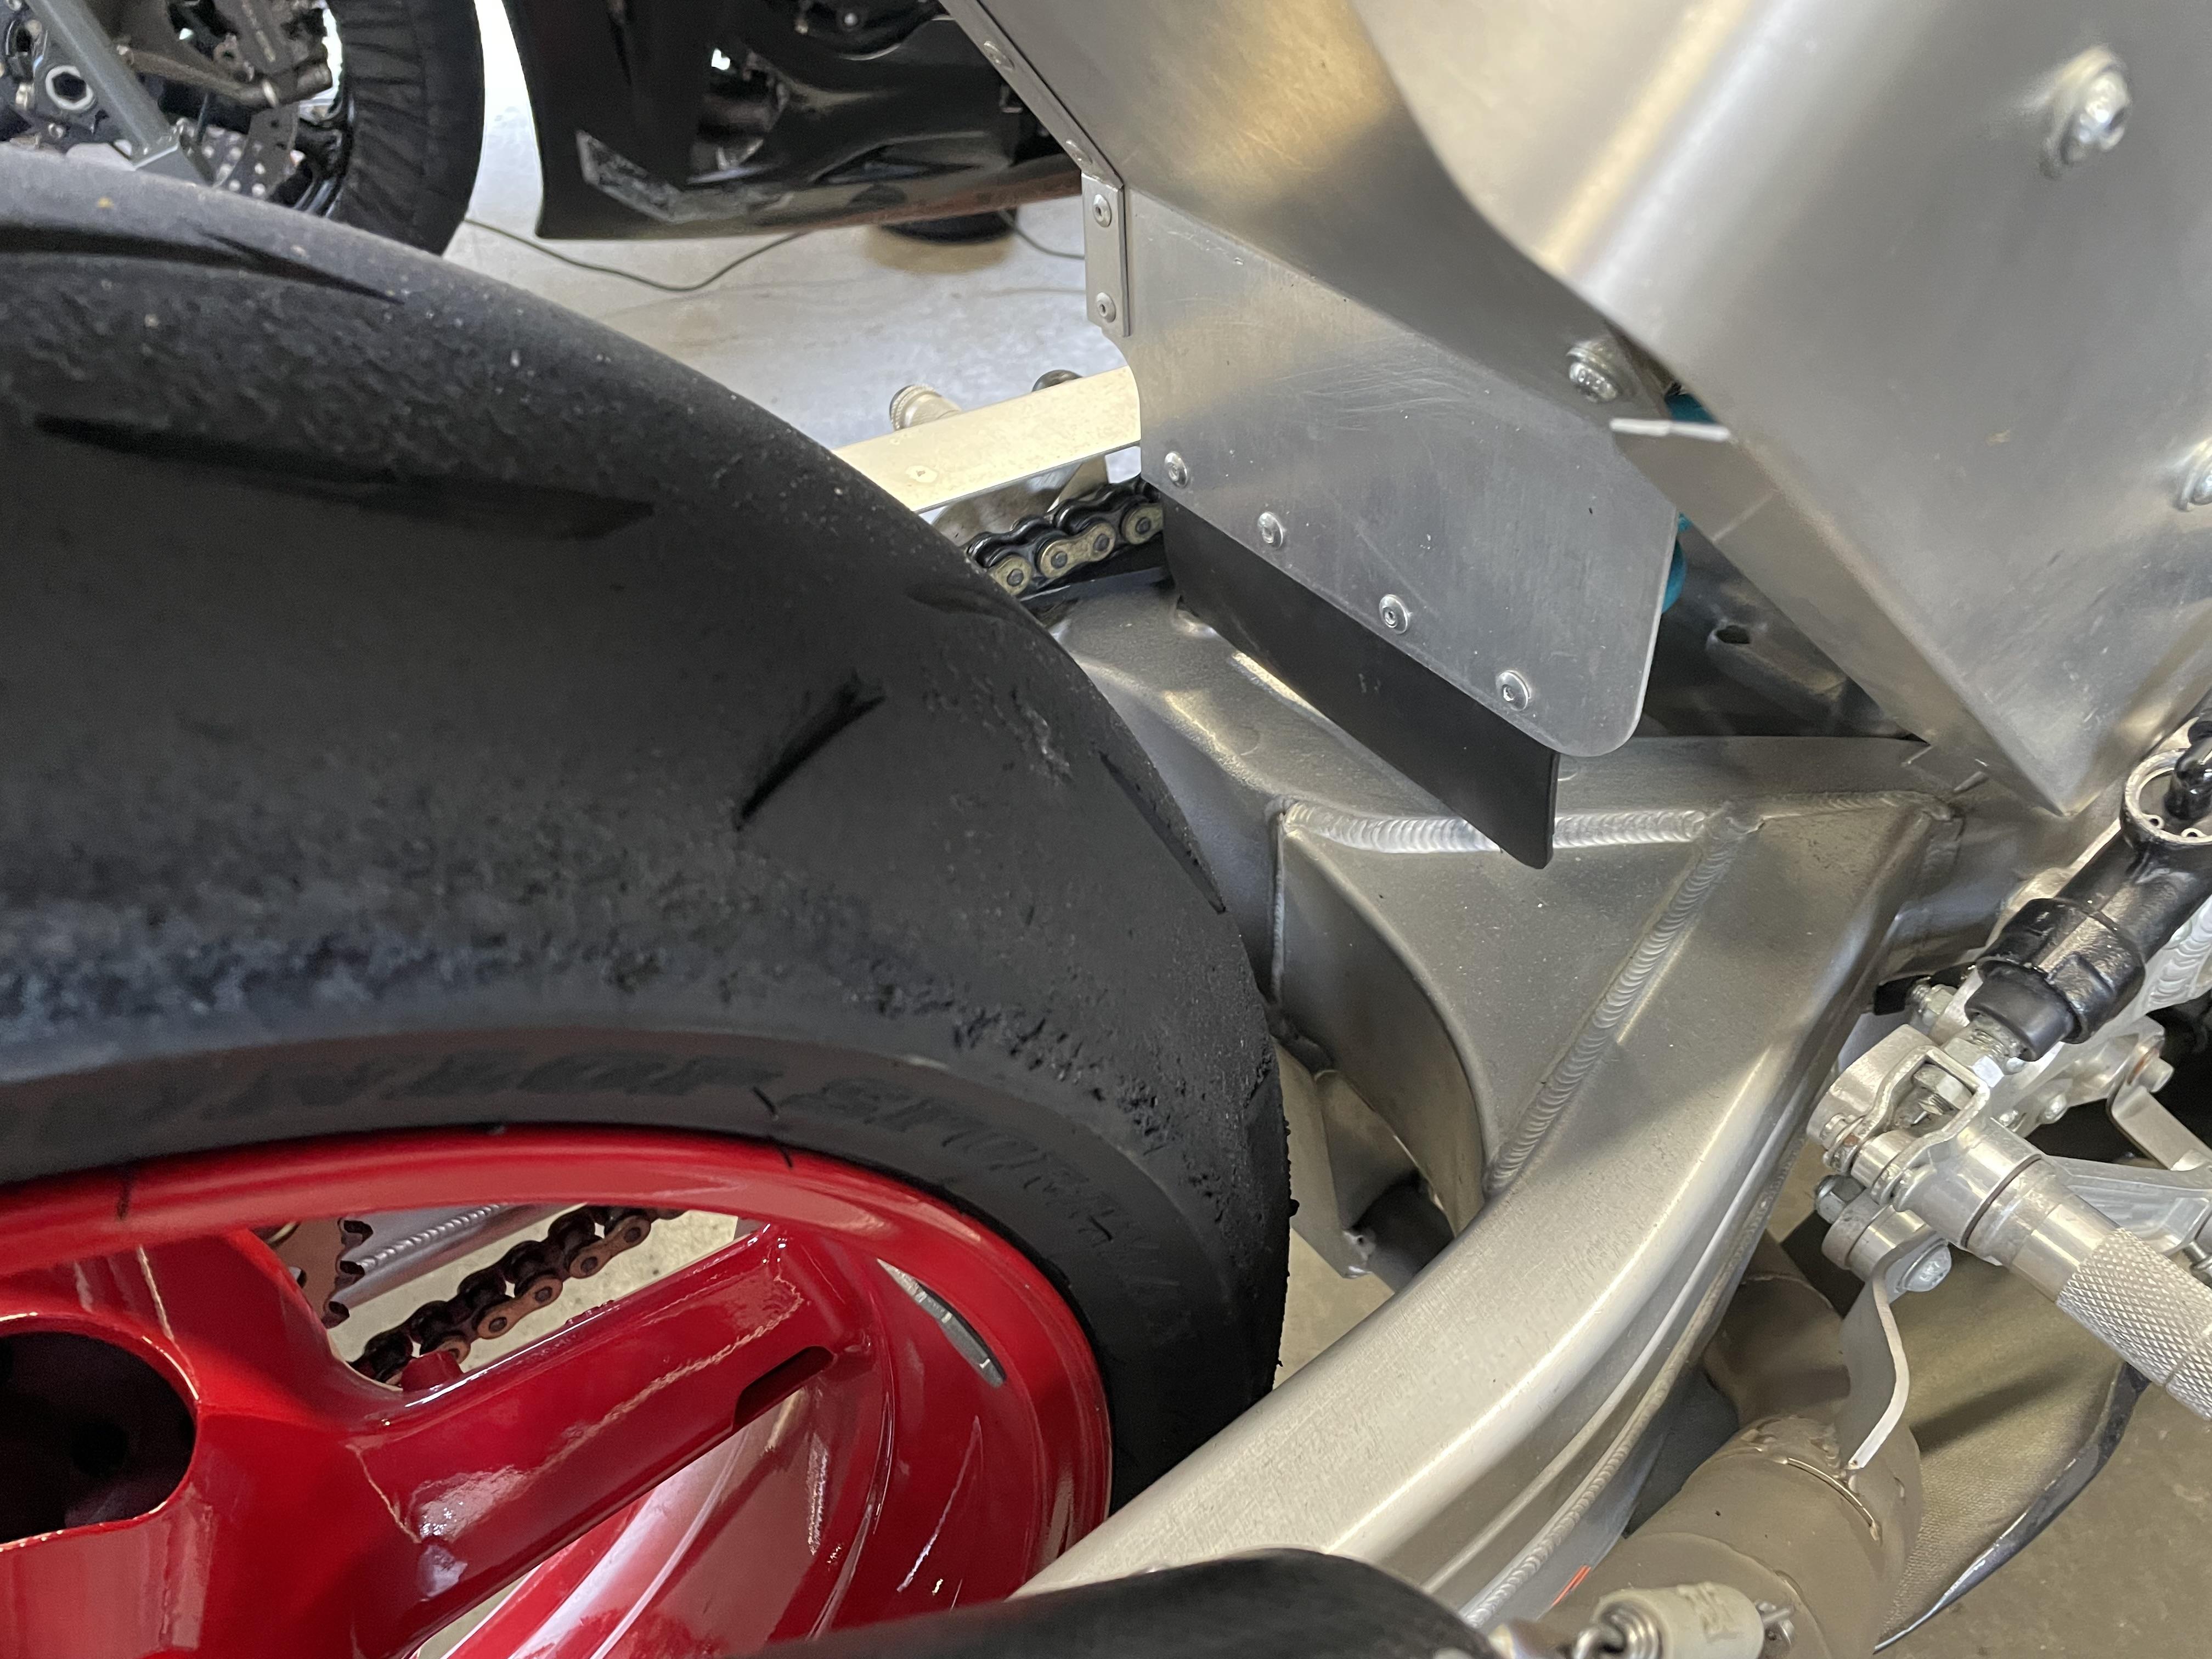
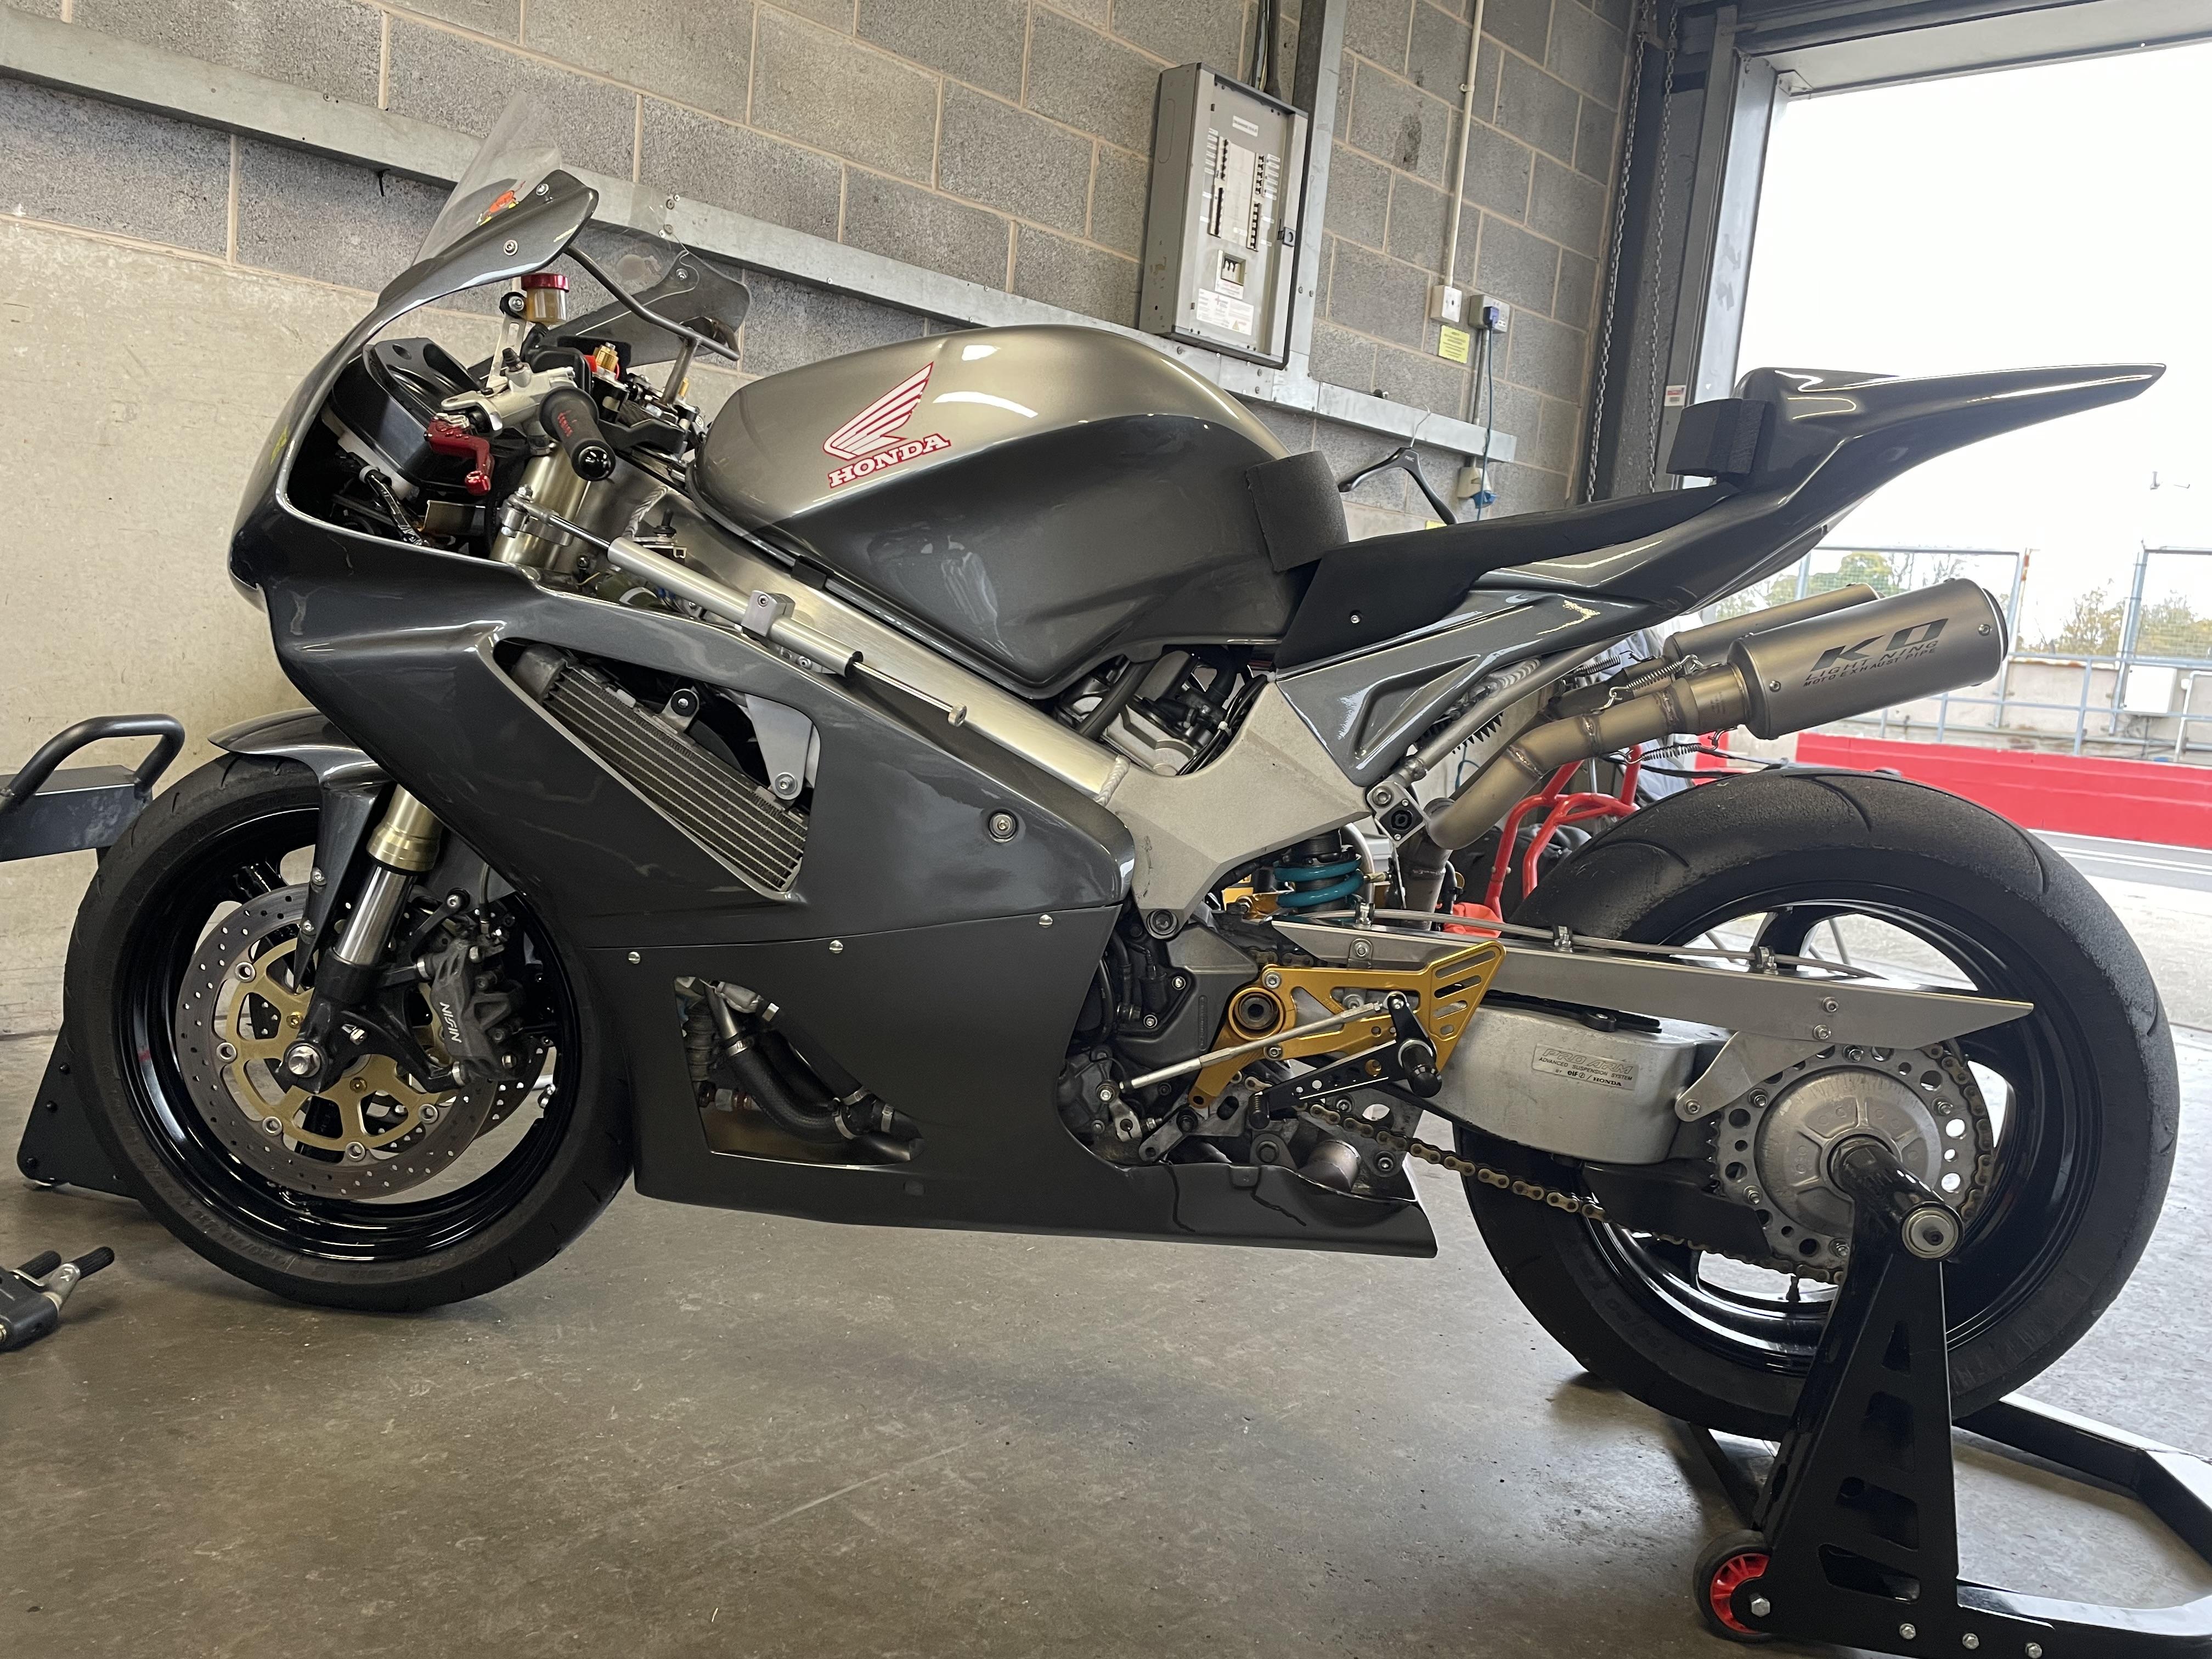
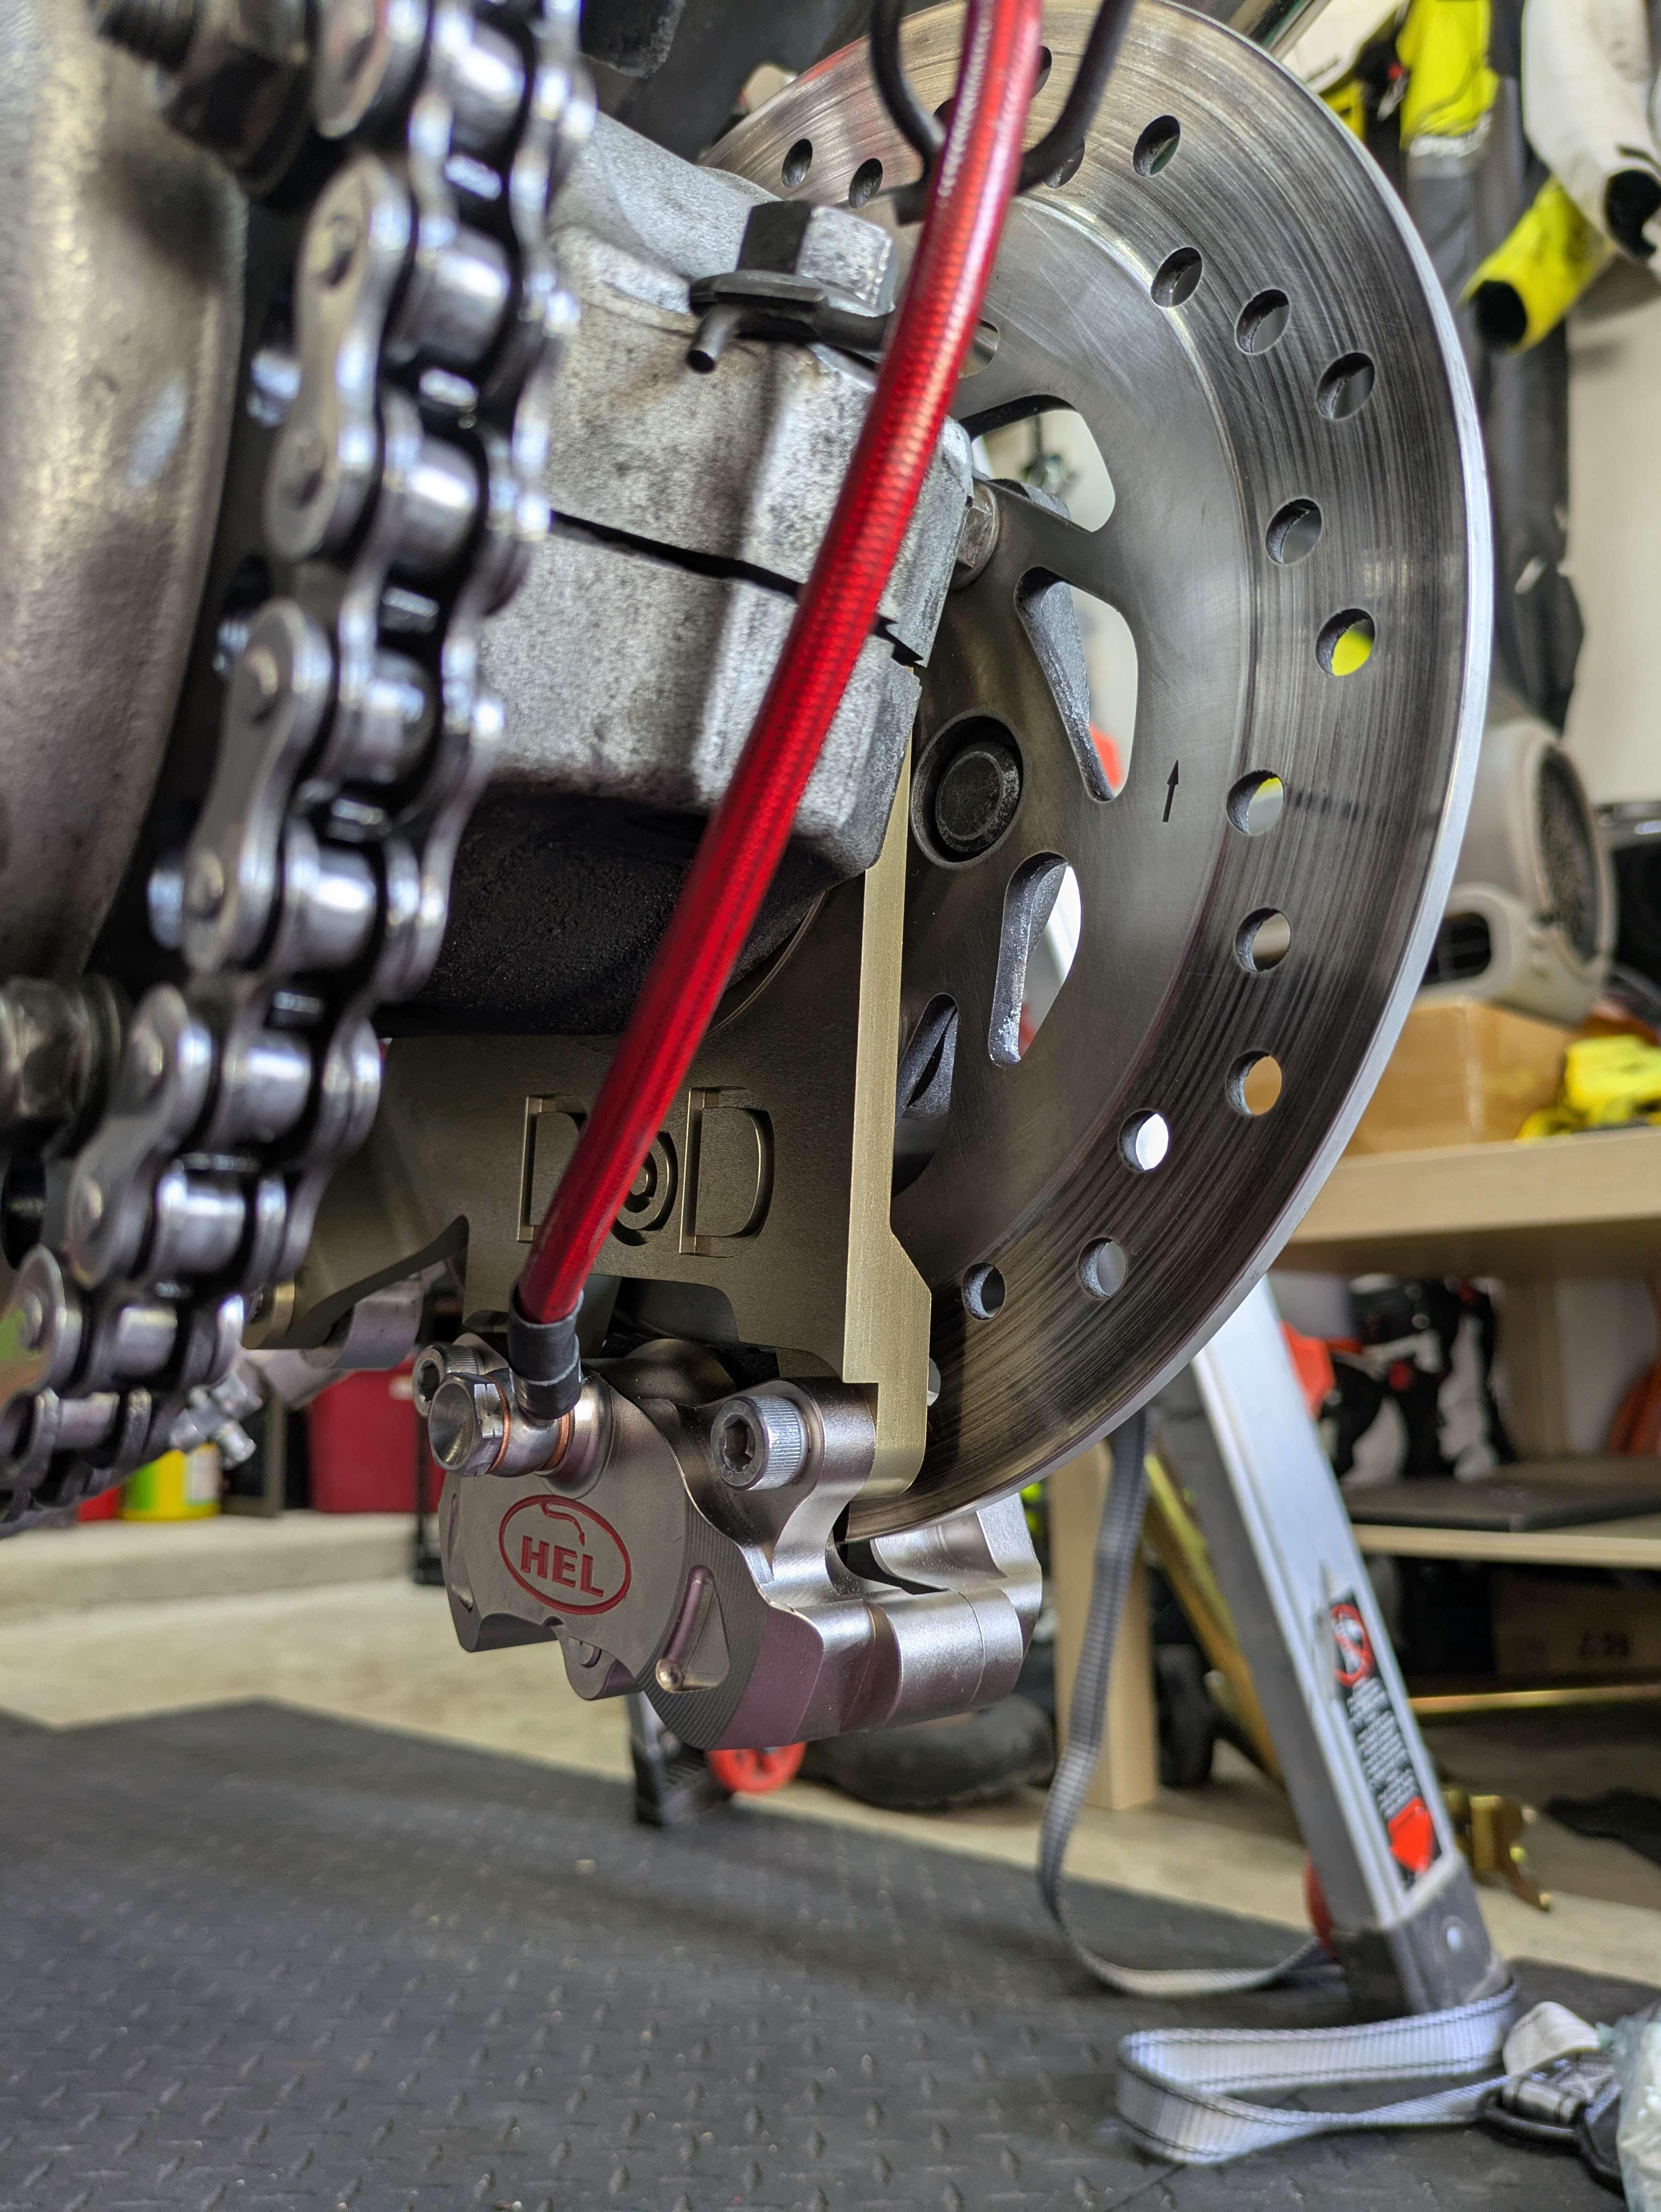
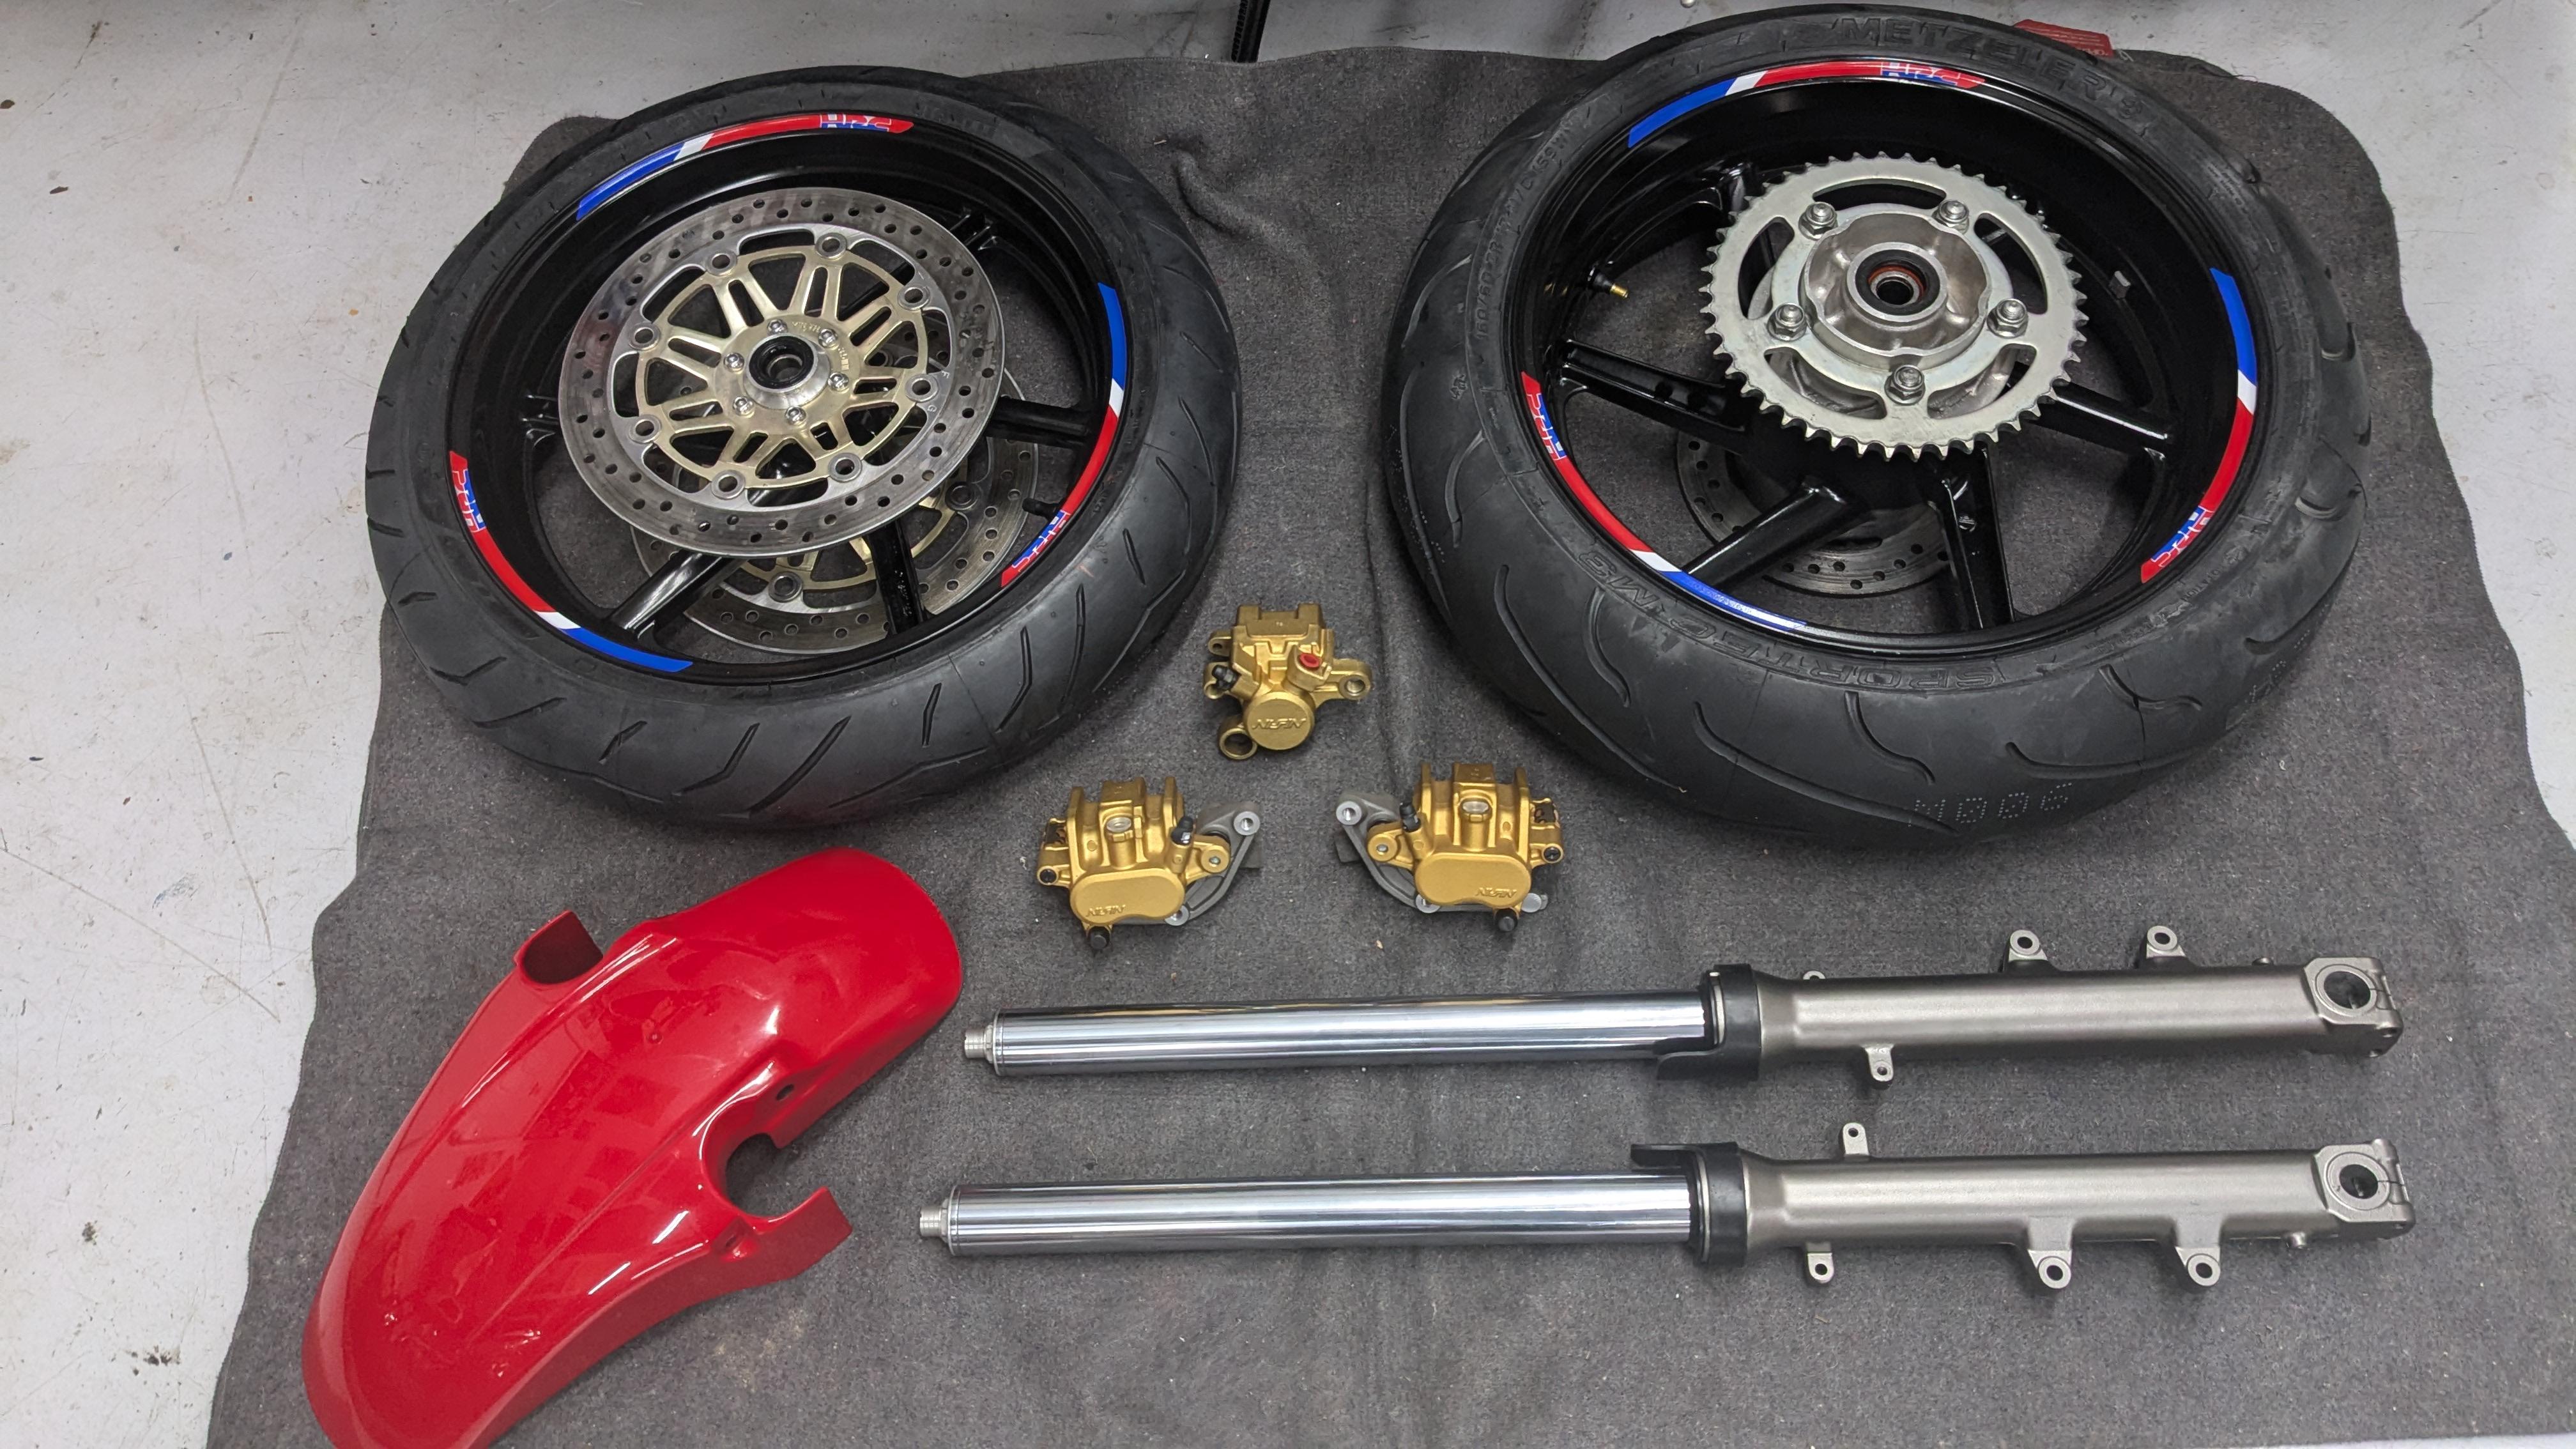
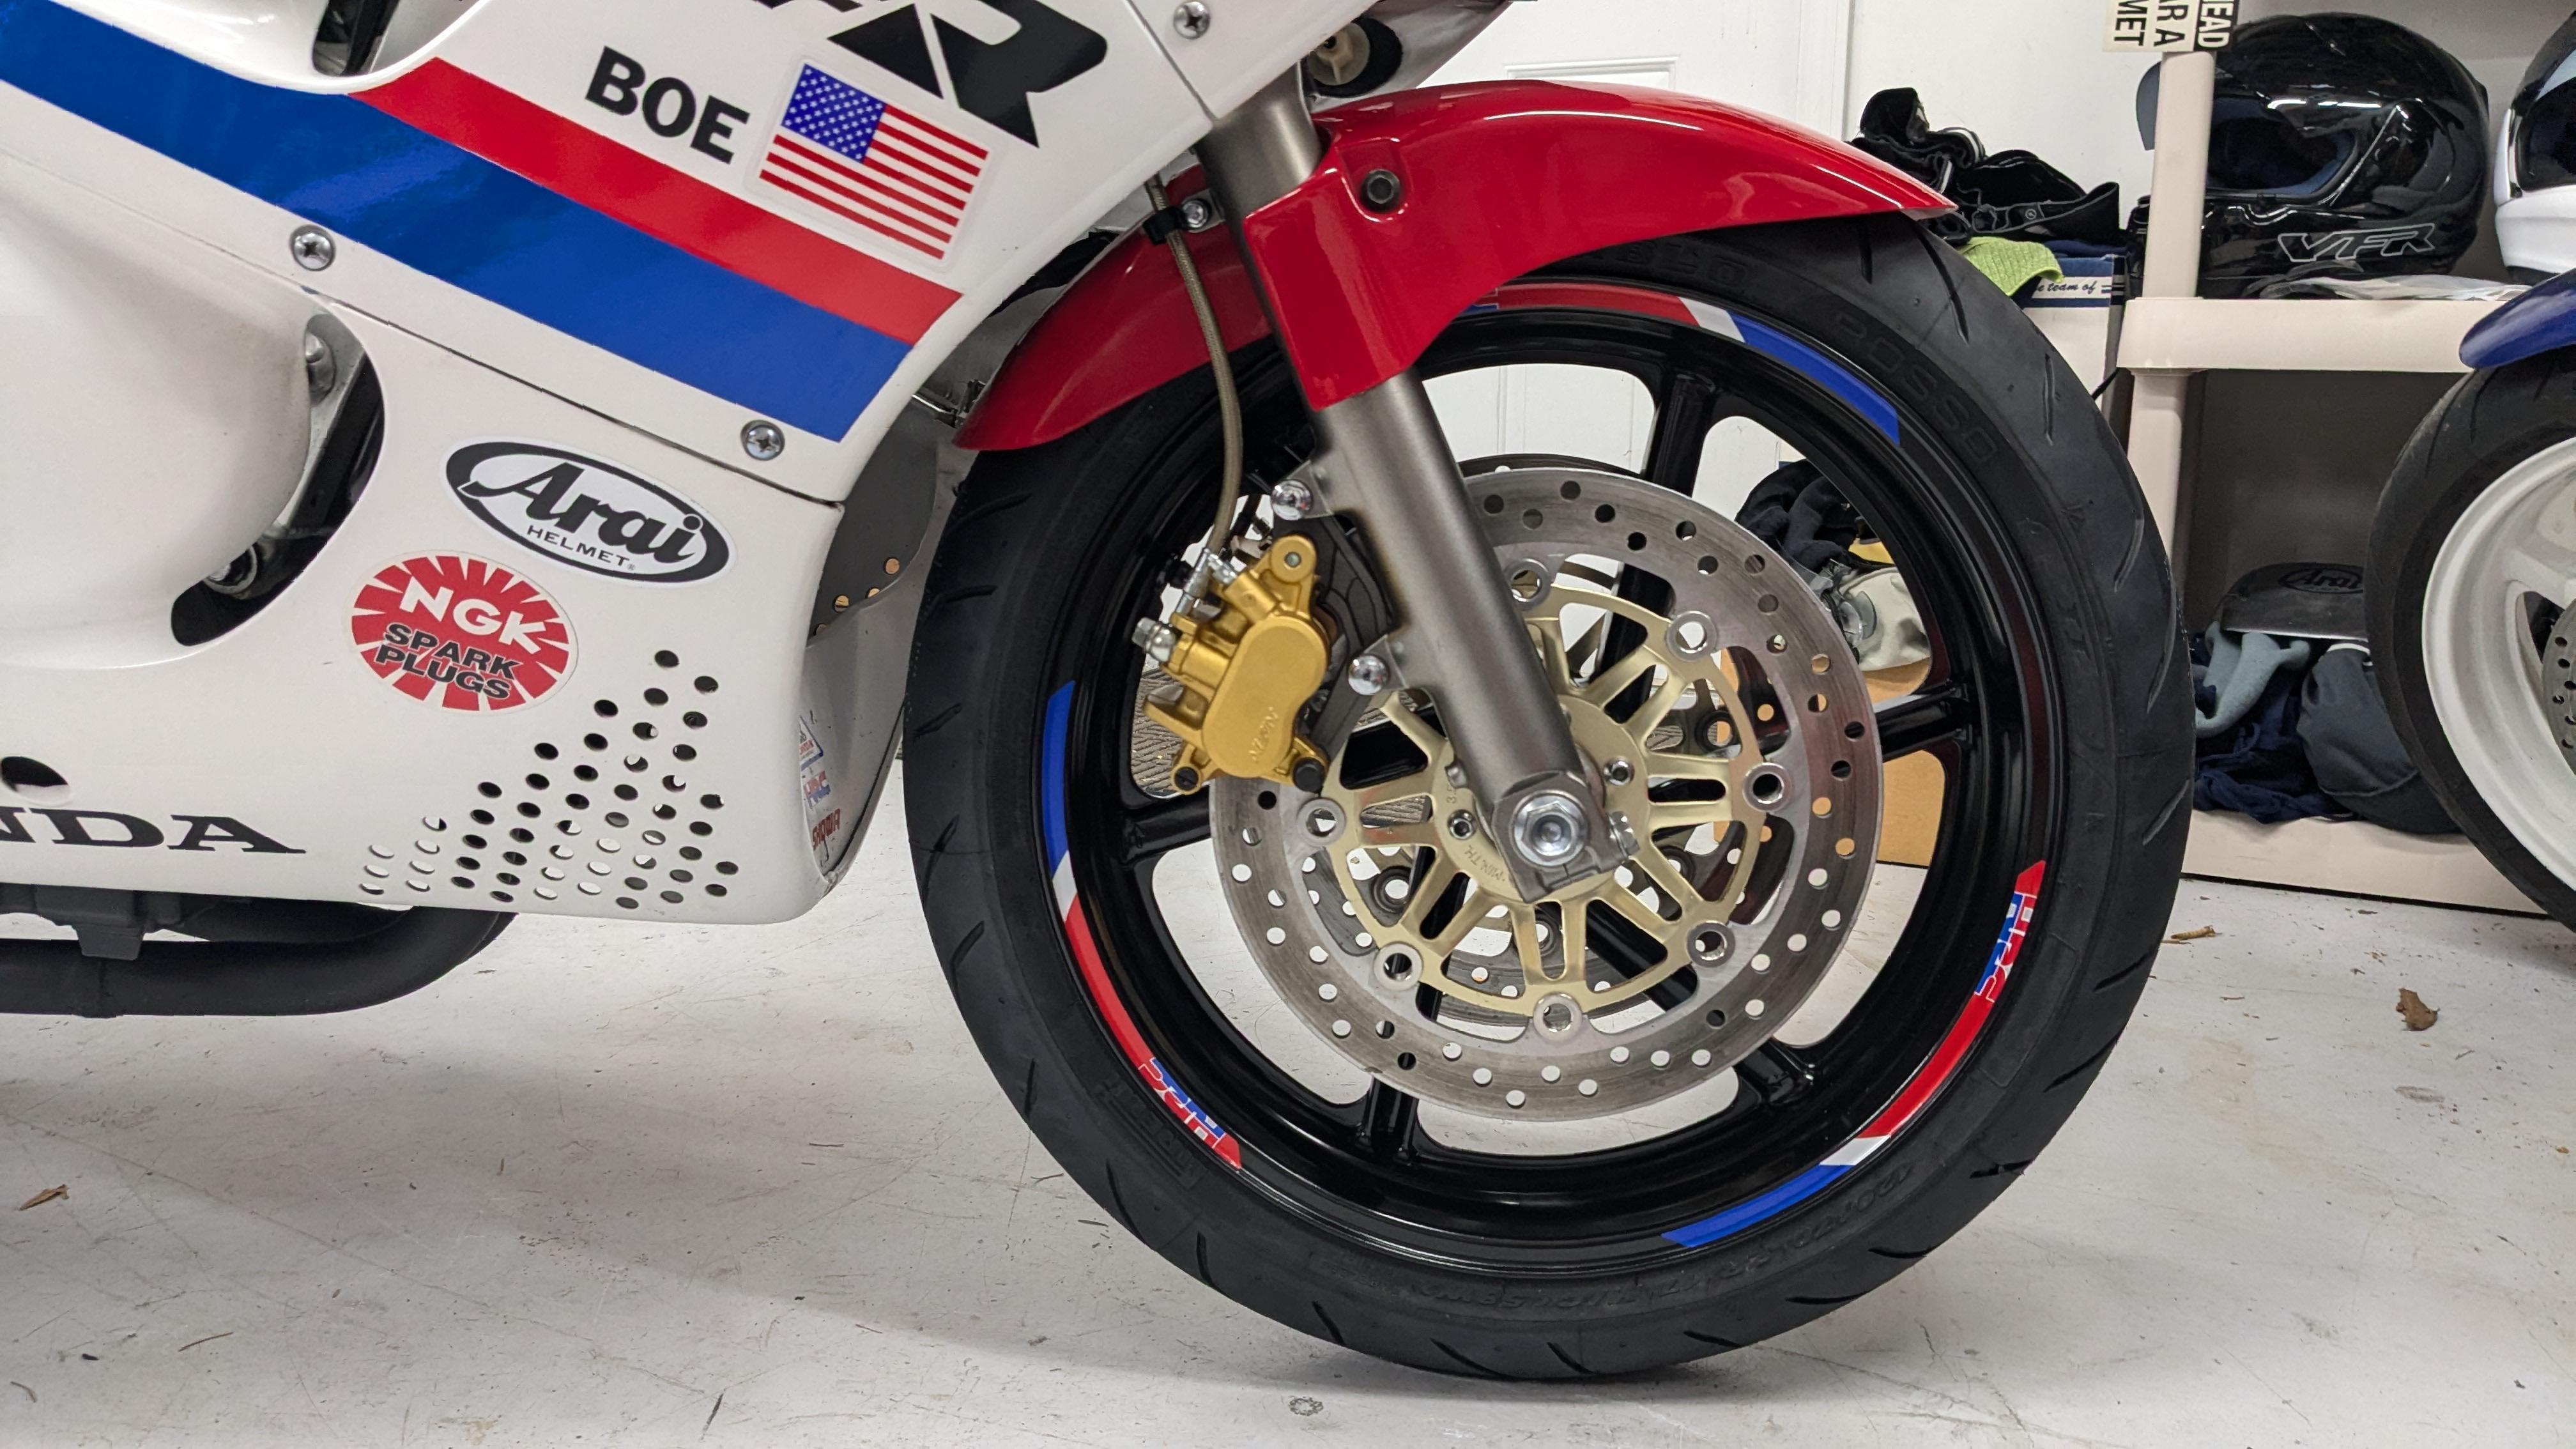
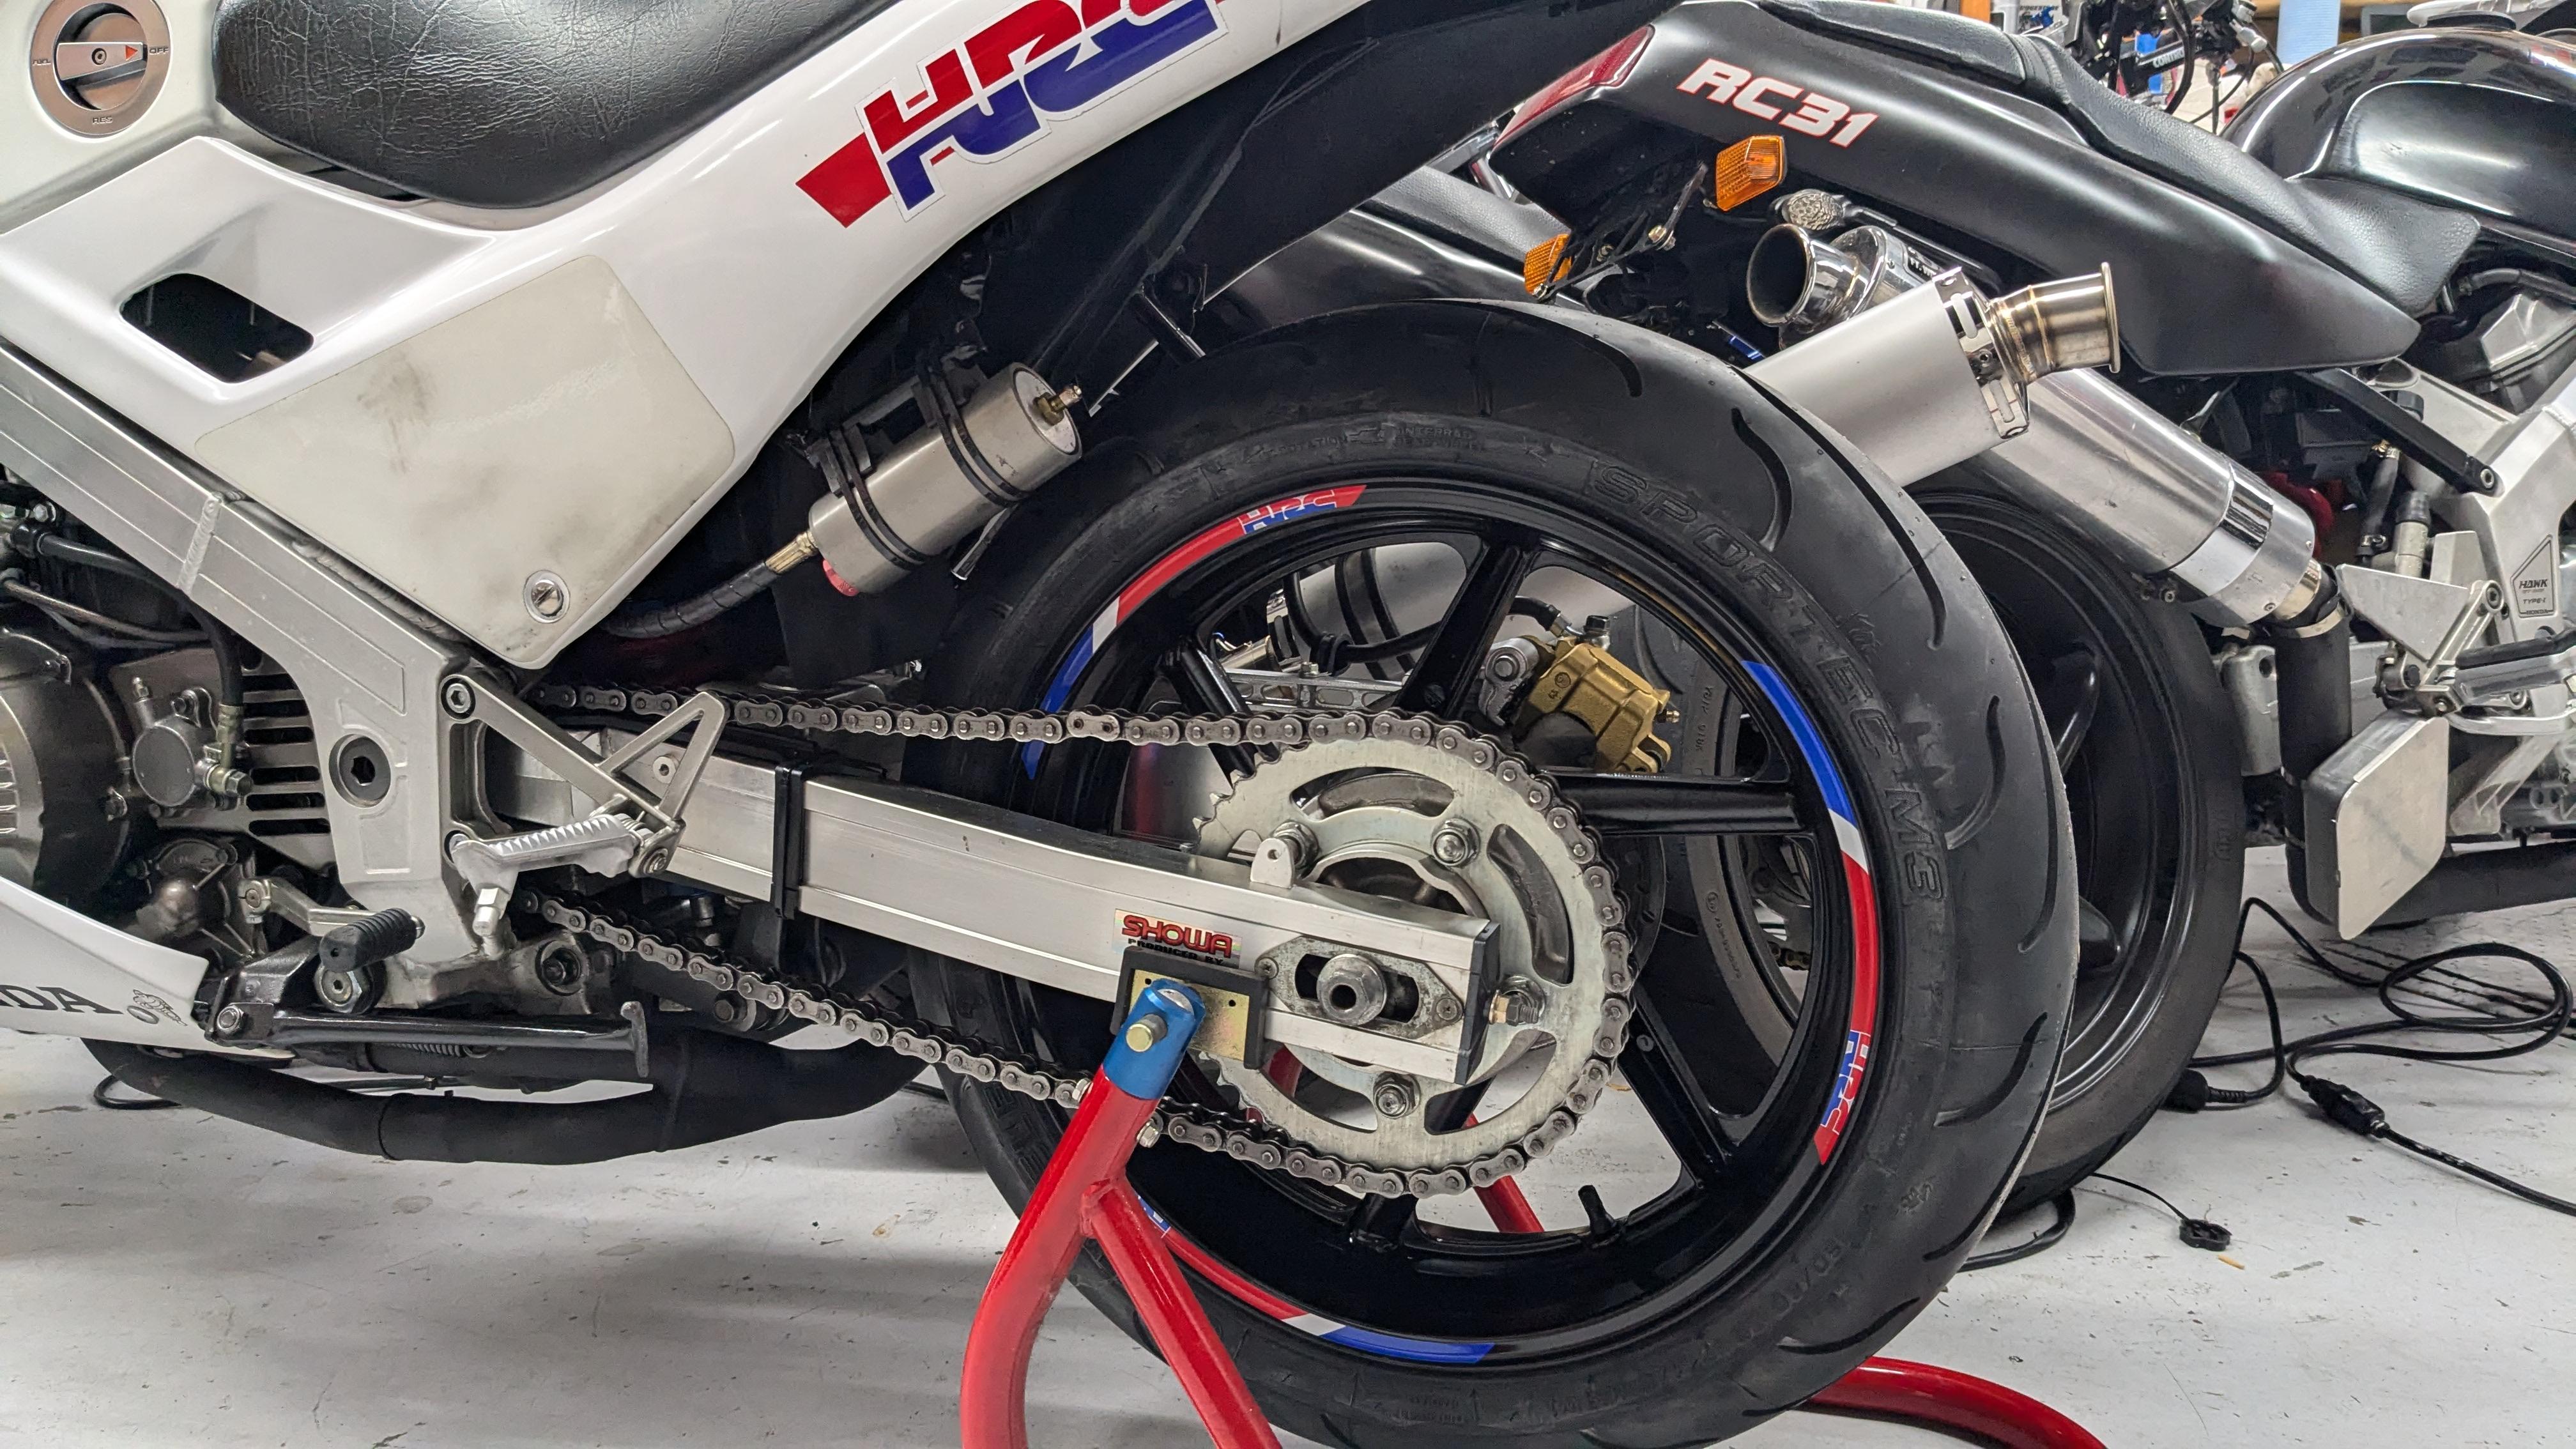
Been a few years of trouble free goodness. The bike continues to be very capable and fun. The need for new tires inspired me to put together a "RC26-II" Upgrade Kit. Restored F3 forks with RT Springs. F3 front wheel. Brand new front Nissin calipers and pads. F3 5.0" rear wheel with a matching rear caliper. New rear brake arm solution. Real clean and simple.
12 points
-
We renamed the UK...
12 points
-
Look what the cat dragged in... Was in the middle of rebuilding this Canadian '98 when things took a left turn....
12 points
-
I've finally completed my personal 1993 project. Rescued from a certain death sentence, I've brought it back to be my personal everyday bike. If interested, here's a short post on her story: http://v4dreams.com/shop-blog/my-v4-dream
12 points
-
Twenty years ago I flew to Nashville, borrowed a 5th gen, and rode to Charlotte NC on all the best roads. Went home and bought one soon after. Last week I flew to Nashville, borrowed the same bike (only 22k miles now) and spent 4 days riding some of the same roads. I now understand why VFRD meets in Franklin. We stayed in Townsend, and just rode everything we could in the area. It was epic, and I will not wait another 20 years to head east again.
11 points
-
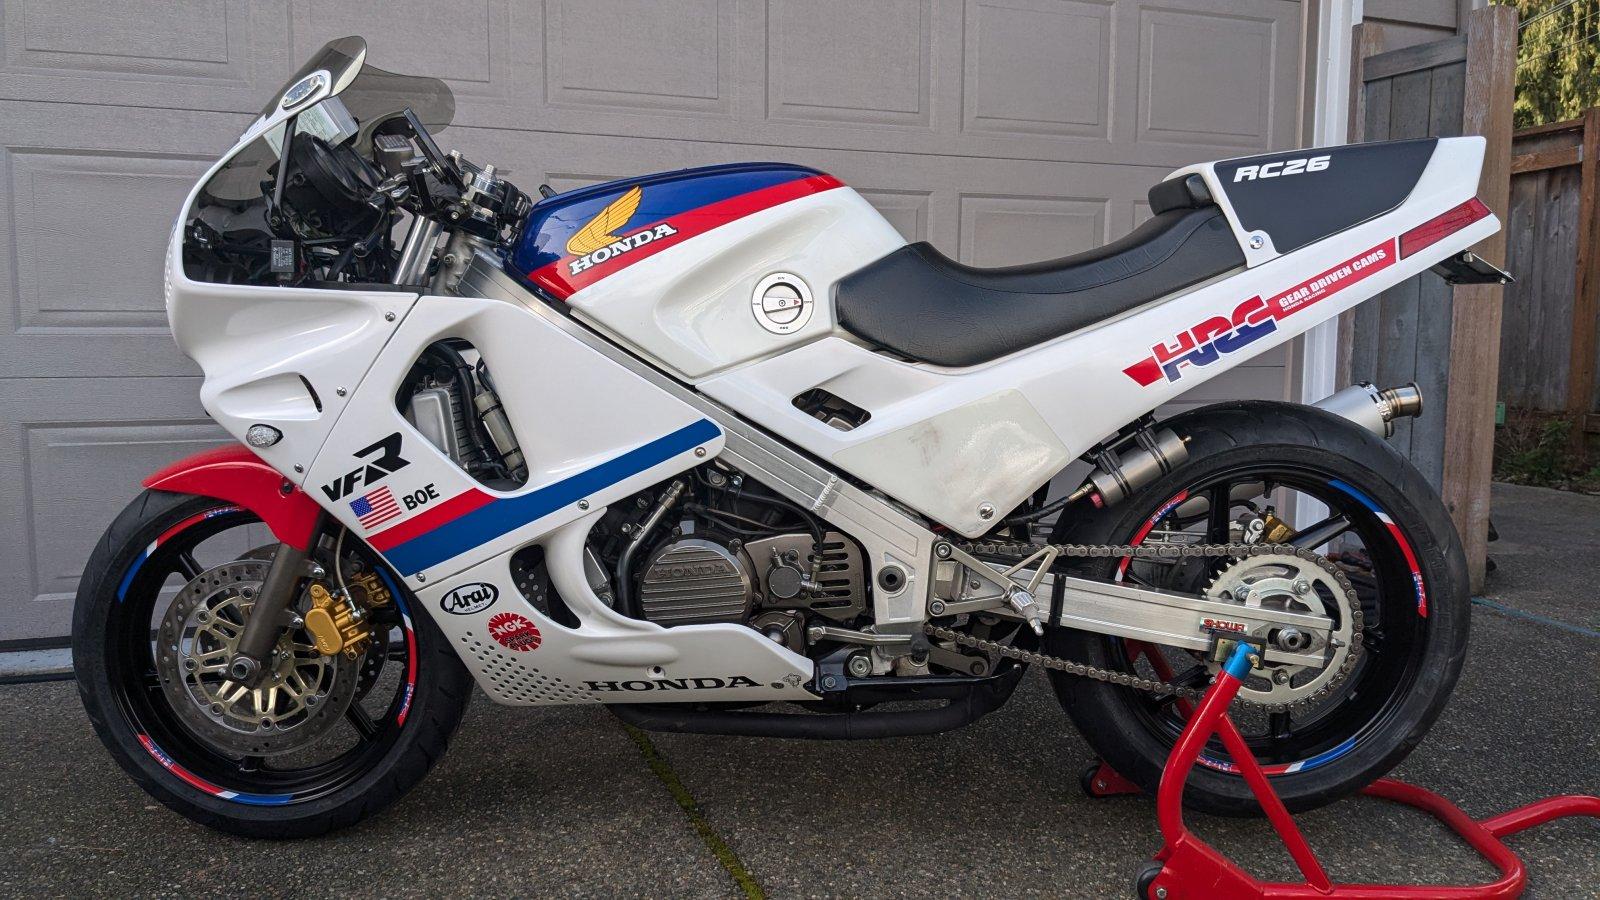
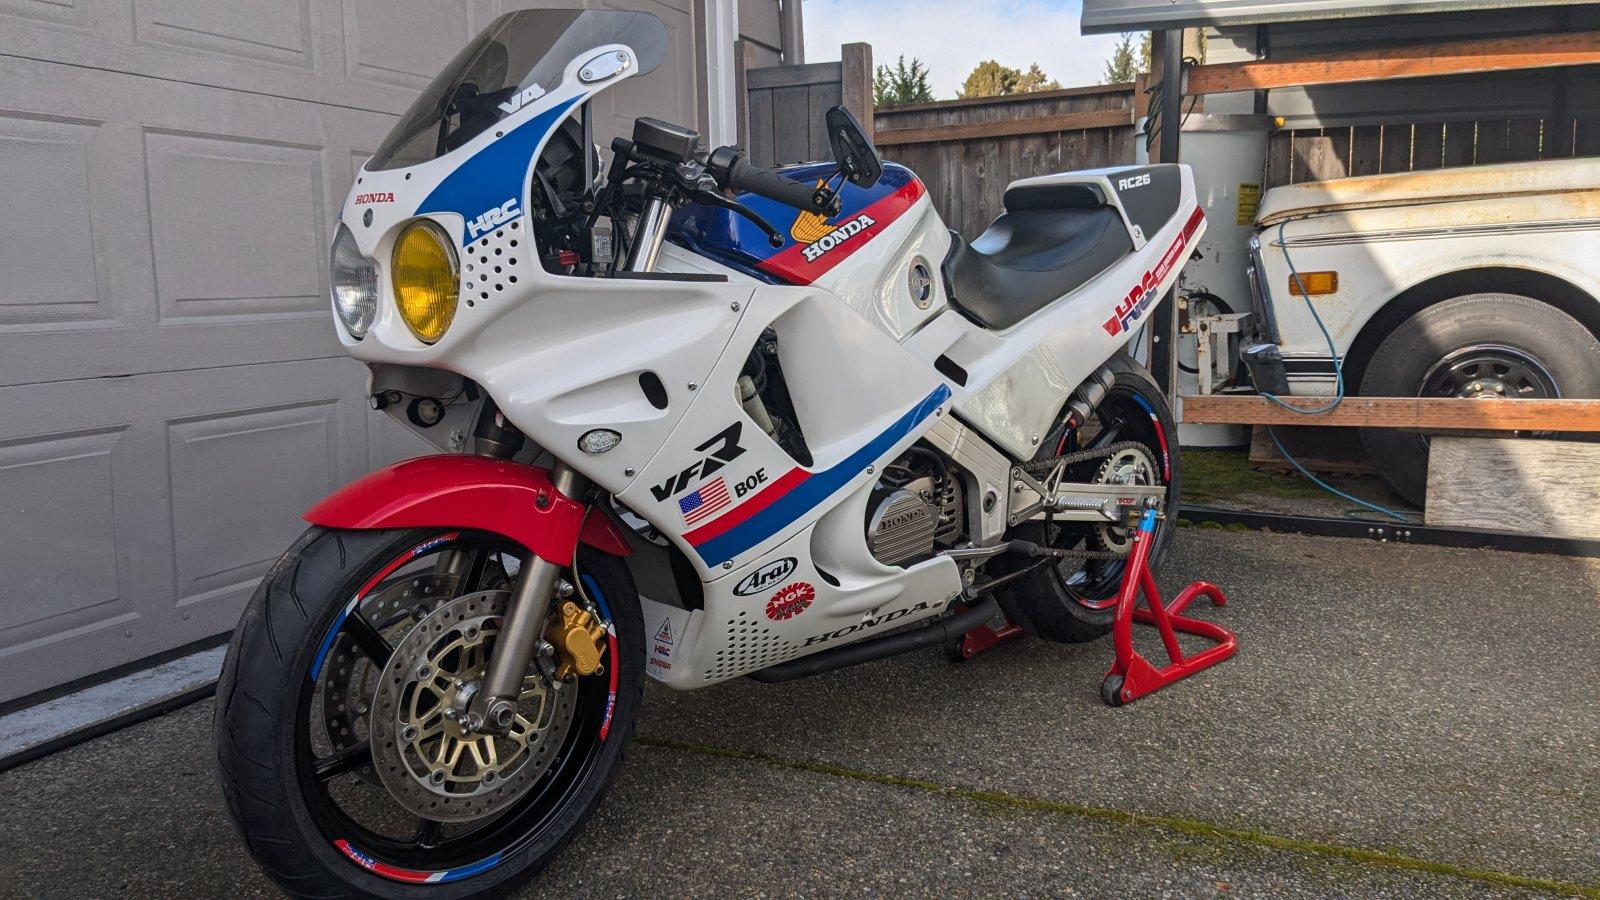
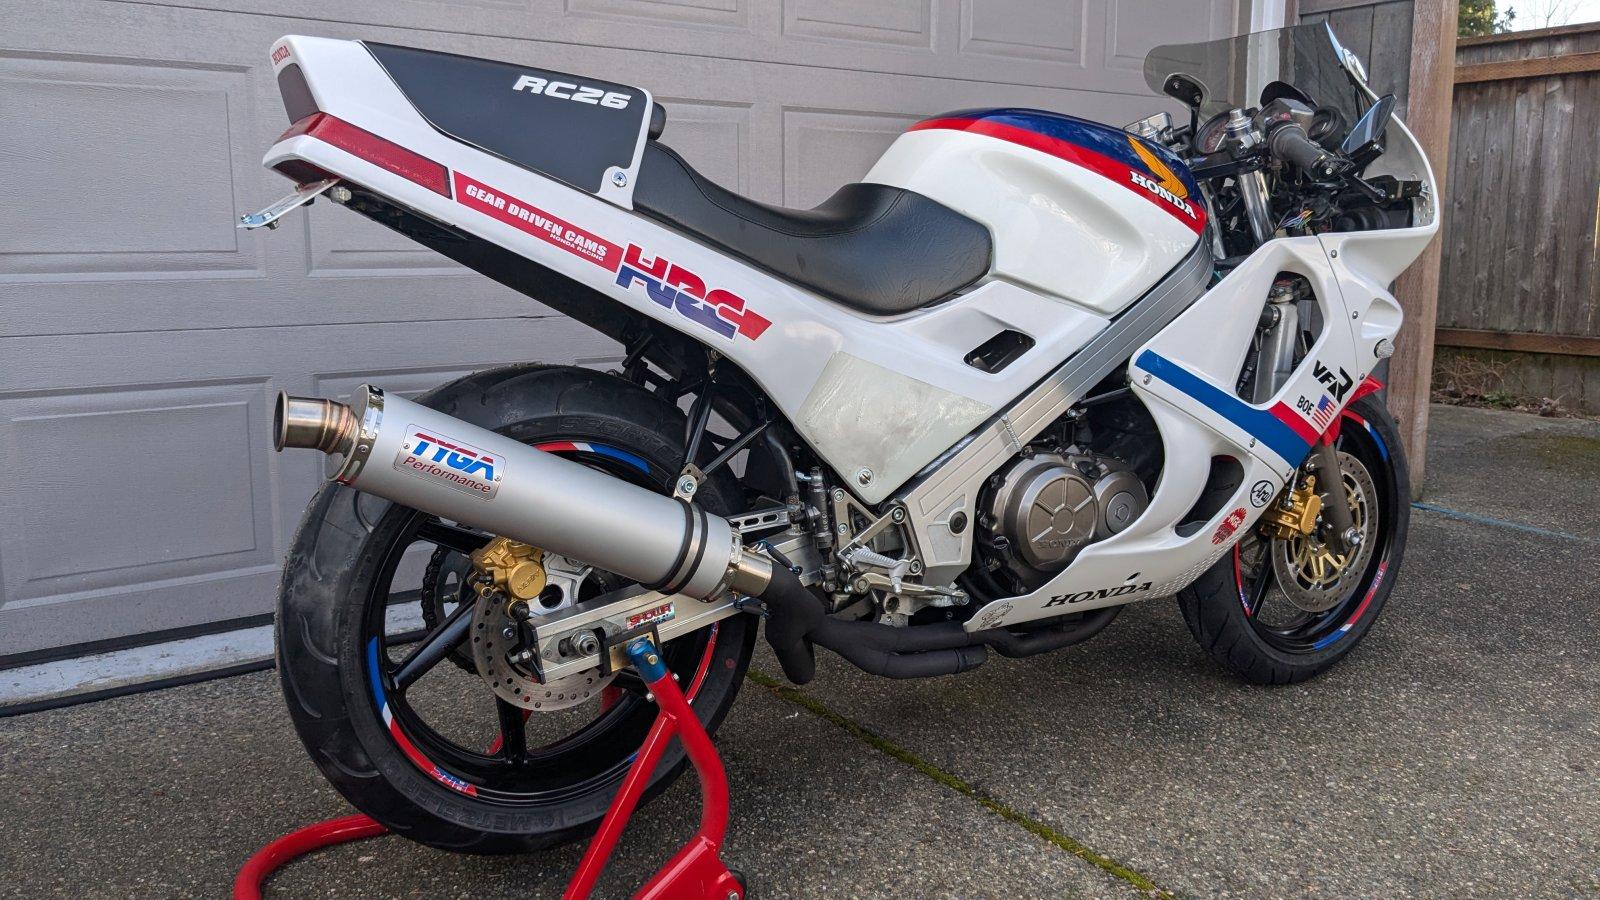
@LukeV4 Not going to lie, meeting you and your dad was the most excited I’ve been in a long time. Your VFR’s blew me away!!! Few pics of your bikes showing your craftsmanship and good taste. This one’s wearing a Tyga fairing for an NC30. Love the asymmetrical twin exhausts! And 954 swingarm welded to a 5th gen swIngram…seriously!!! Custom rearset adapters and engine covers welded flat for better ground clearance. Second bike wearing SP1 bodywork, Fireblade seat and S1000 subframe (modified). And a beautiful pair of exhausts in Ducati style! Rearsets from Harris and GSXR front end. If ever there was a pair of race-ready 5th gens, this is it! Meeting you guys was a real highlight. Thanks for coming and thanks for joining the forum!
11 points
-
It's been 4 years since the 5th gen took me on a tour. 2 years on a Tracer GT, and 2 years on the Multistrada. Loaned the Multi to a friend who flew in from Oklahoma, so it was 5th gen time again. We bonded immediately, but I missed having cruise control. 600 miles in and the battery was shot, but not the R/R or stator. And it was awesome to hit the thousand of curves on the old girl. Still love this bike.
11 points
-
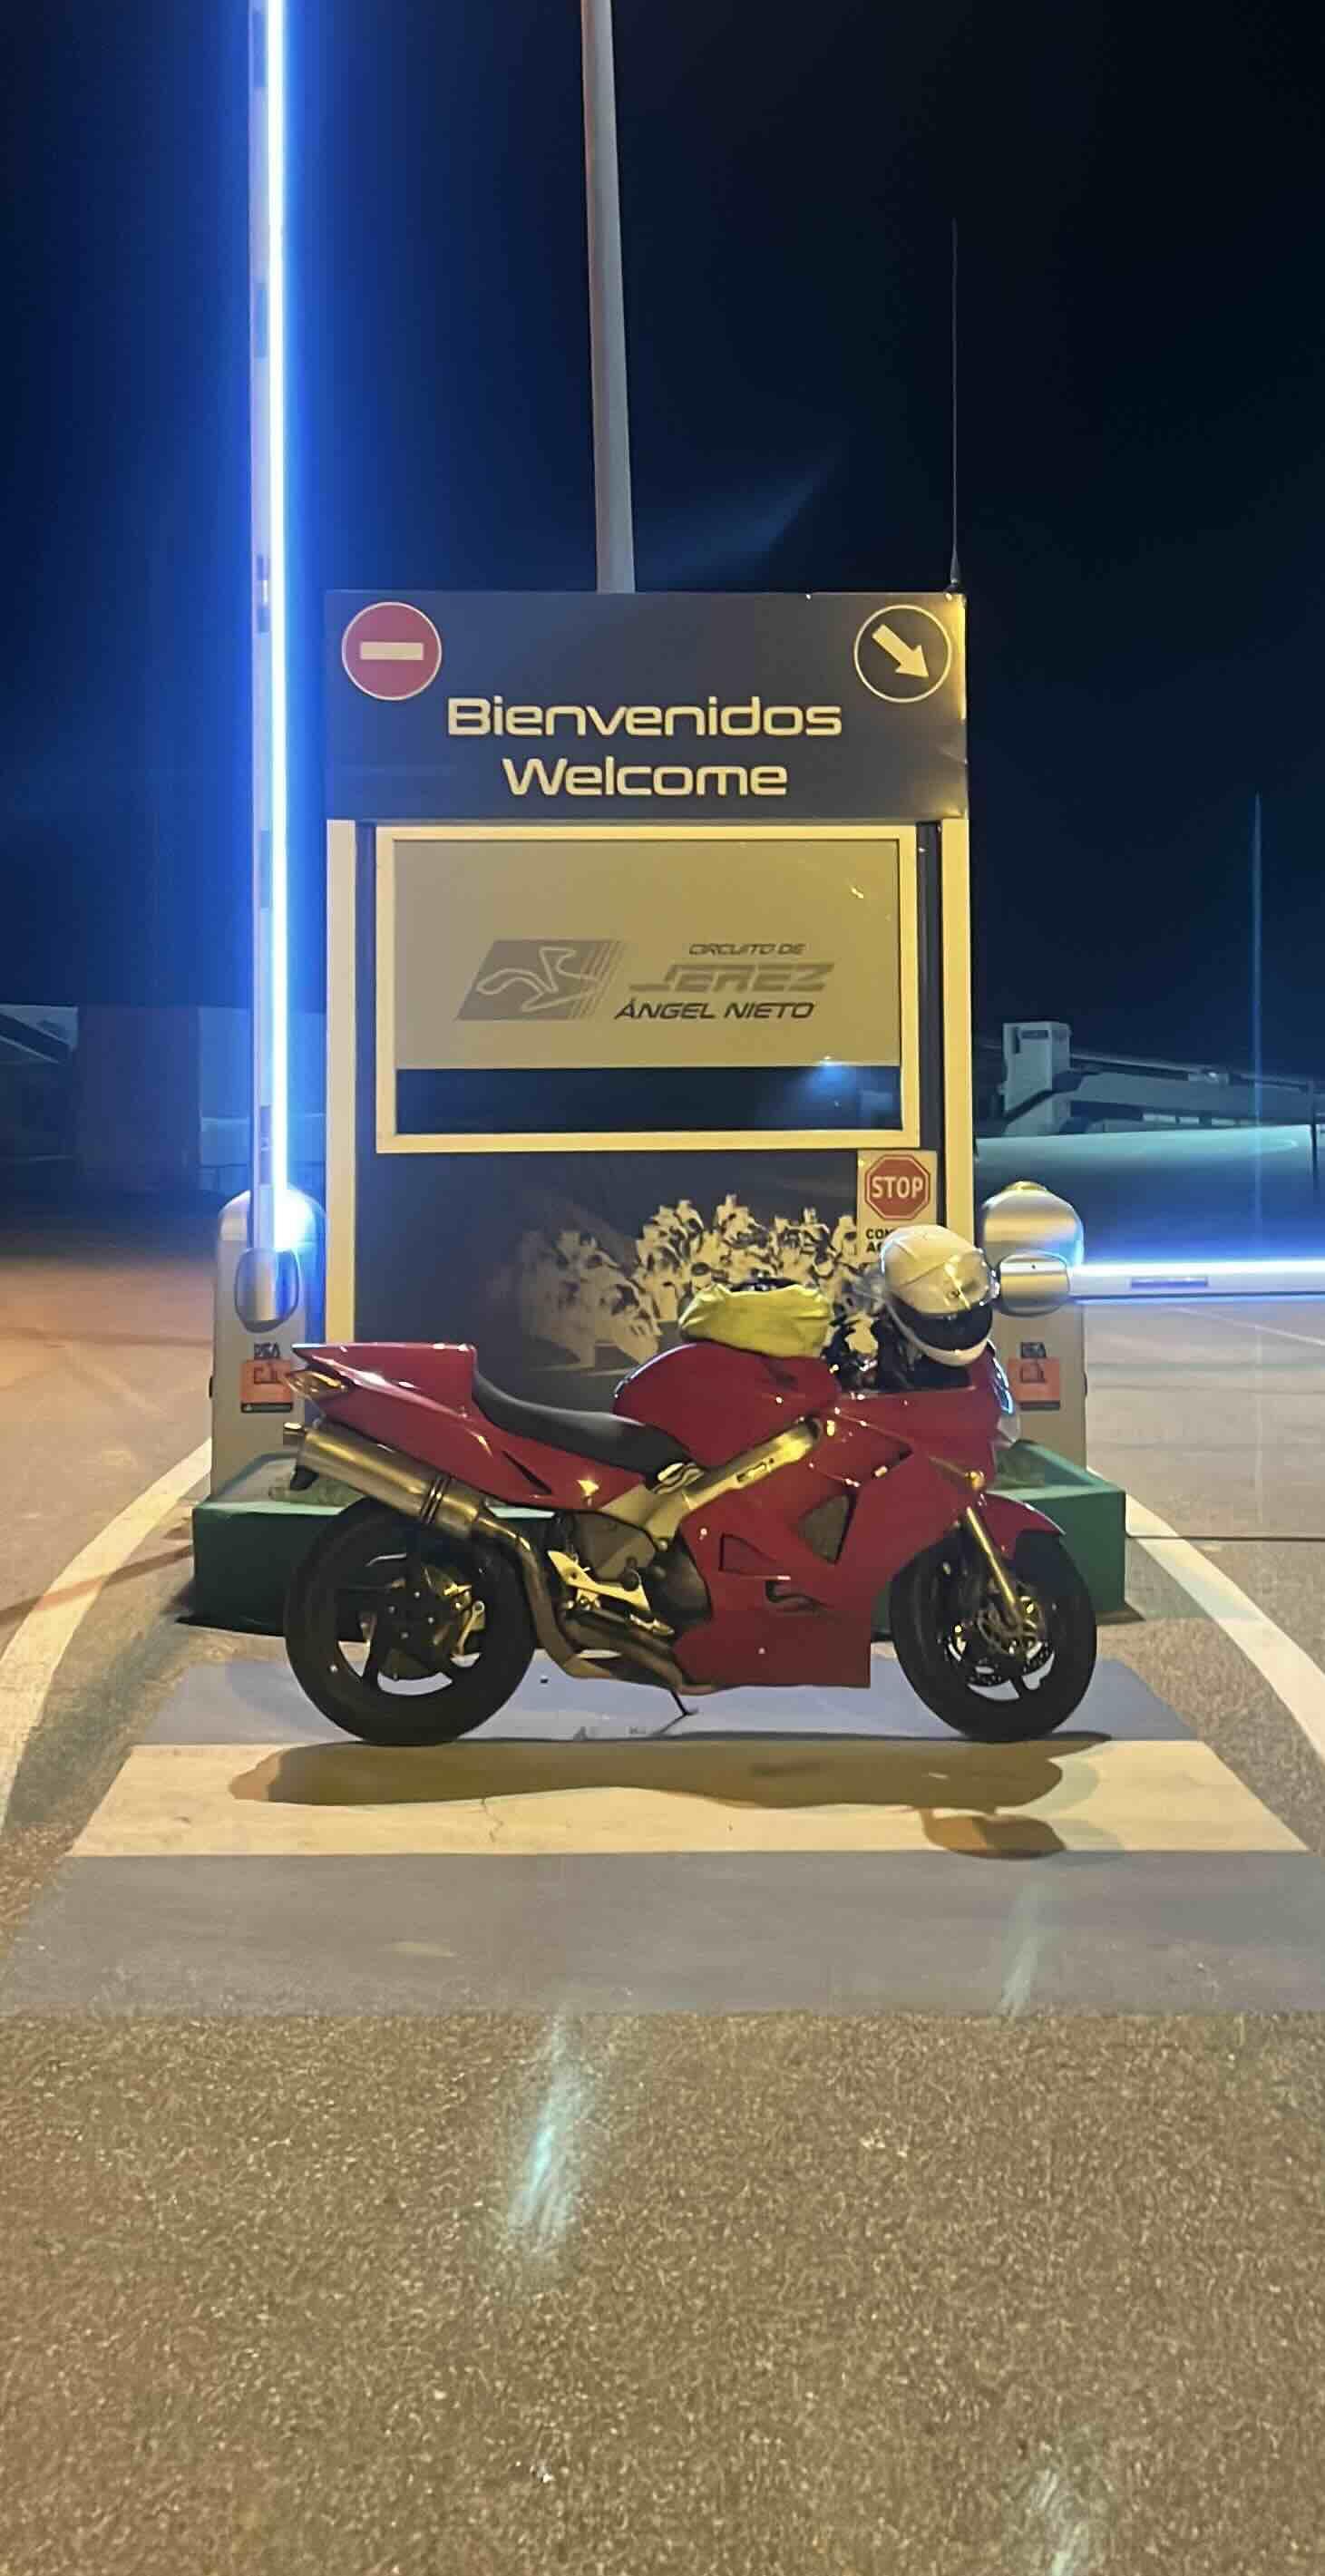
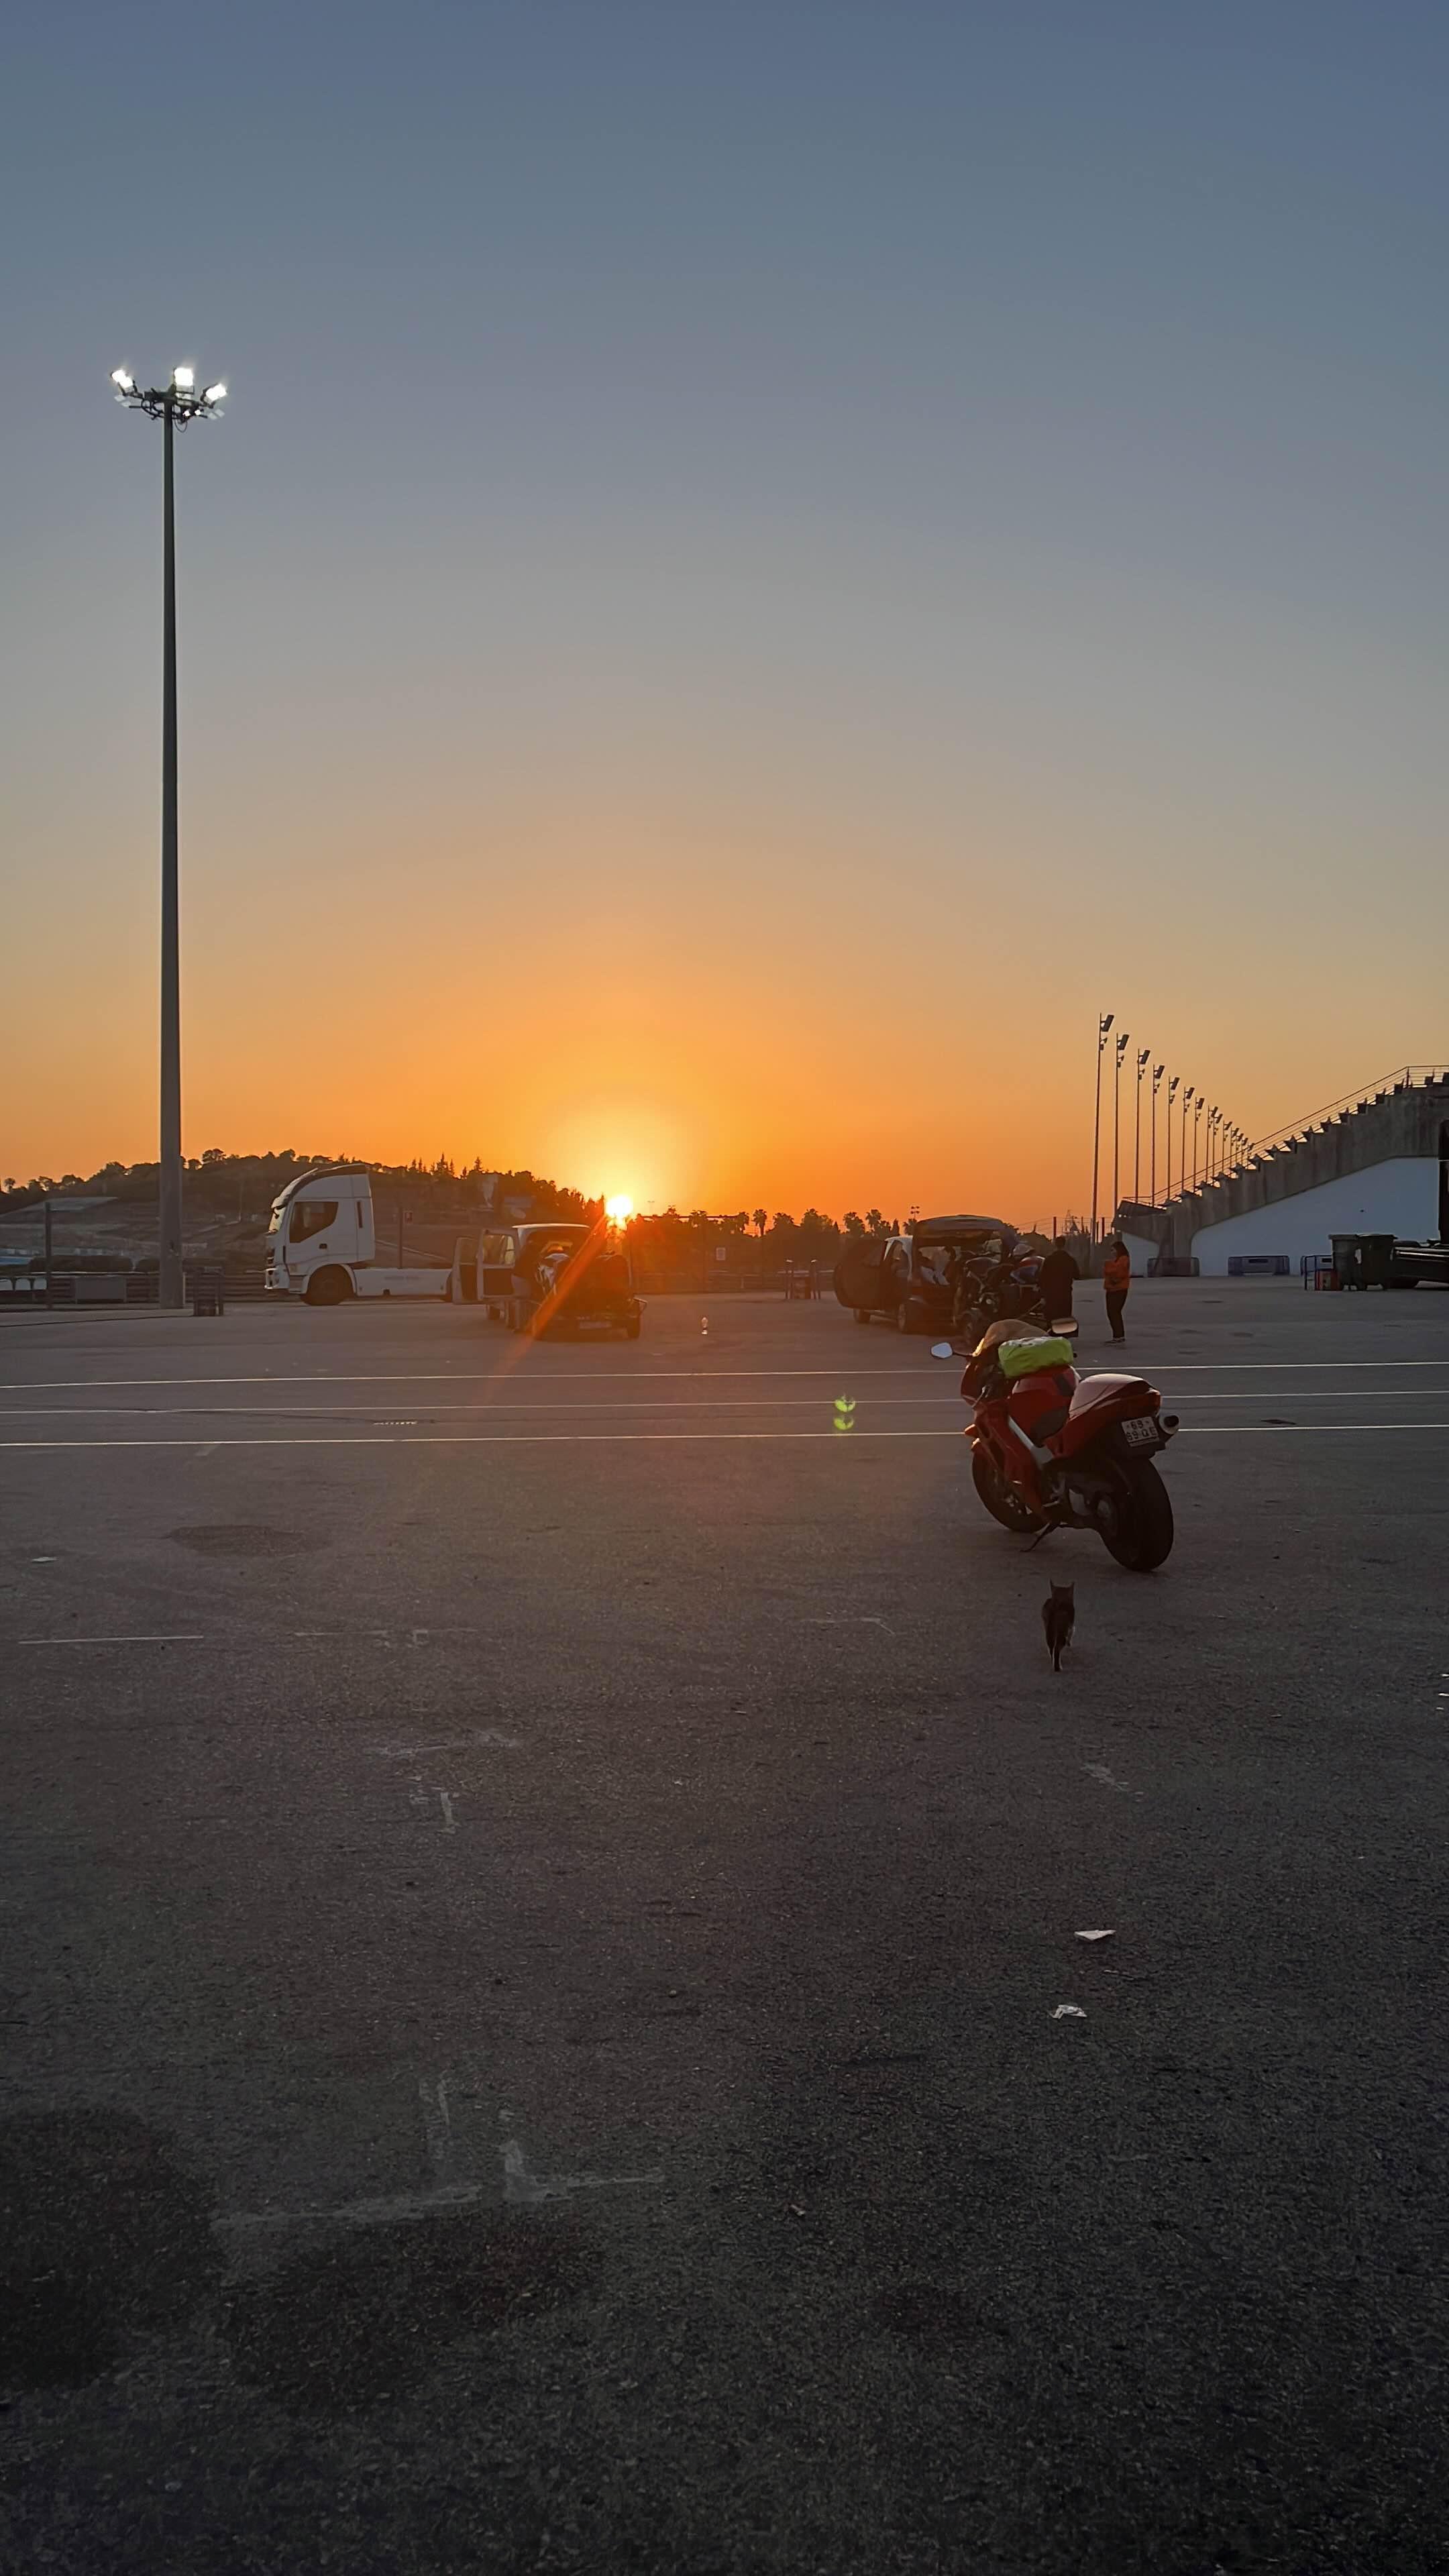
Last Saturday I had the pleasure to drive to Jerez de la Frontera circuit (Spain) from my home Sintra (Portugal). A beautiful ride with a mix of highway and interior twisties roads. Highway until Beja exit on A2, than interior roads going from Beja through Rosal de la Frontera until Sevilla, can't miss it, it's nearly just keeping following straight. Just a bit before reaching Sevilla, a bit of highway and a Stop for a long waited dinner, I do recommend Mesones del Serranito, for bocadillo (swandich) and huevos rotos (eggs). After another bit of highway until reaching the Circuit. This time I just went to see my friend on a track day with his S1000RR tranning for Portuguese S1000 RR cup. One day I will ride there with our wonderfull VFR Happy Monday 😃
10 points
-
Here's the Inner Wing with some of them... 😉
10 points
-
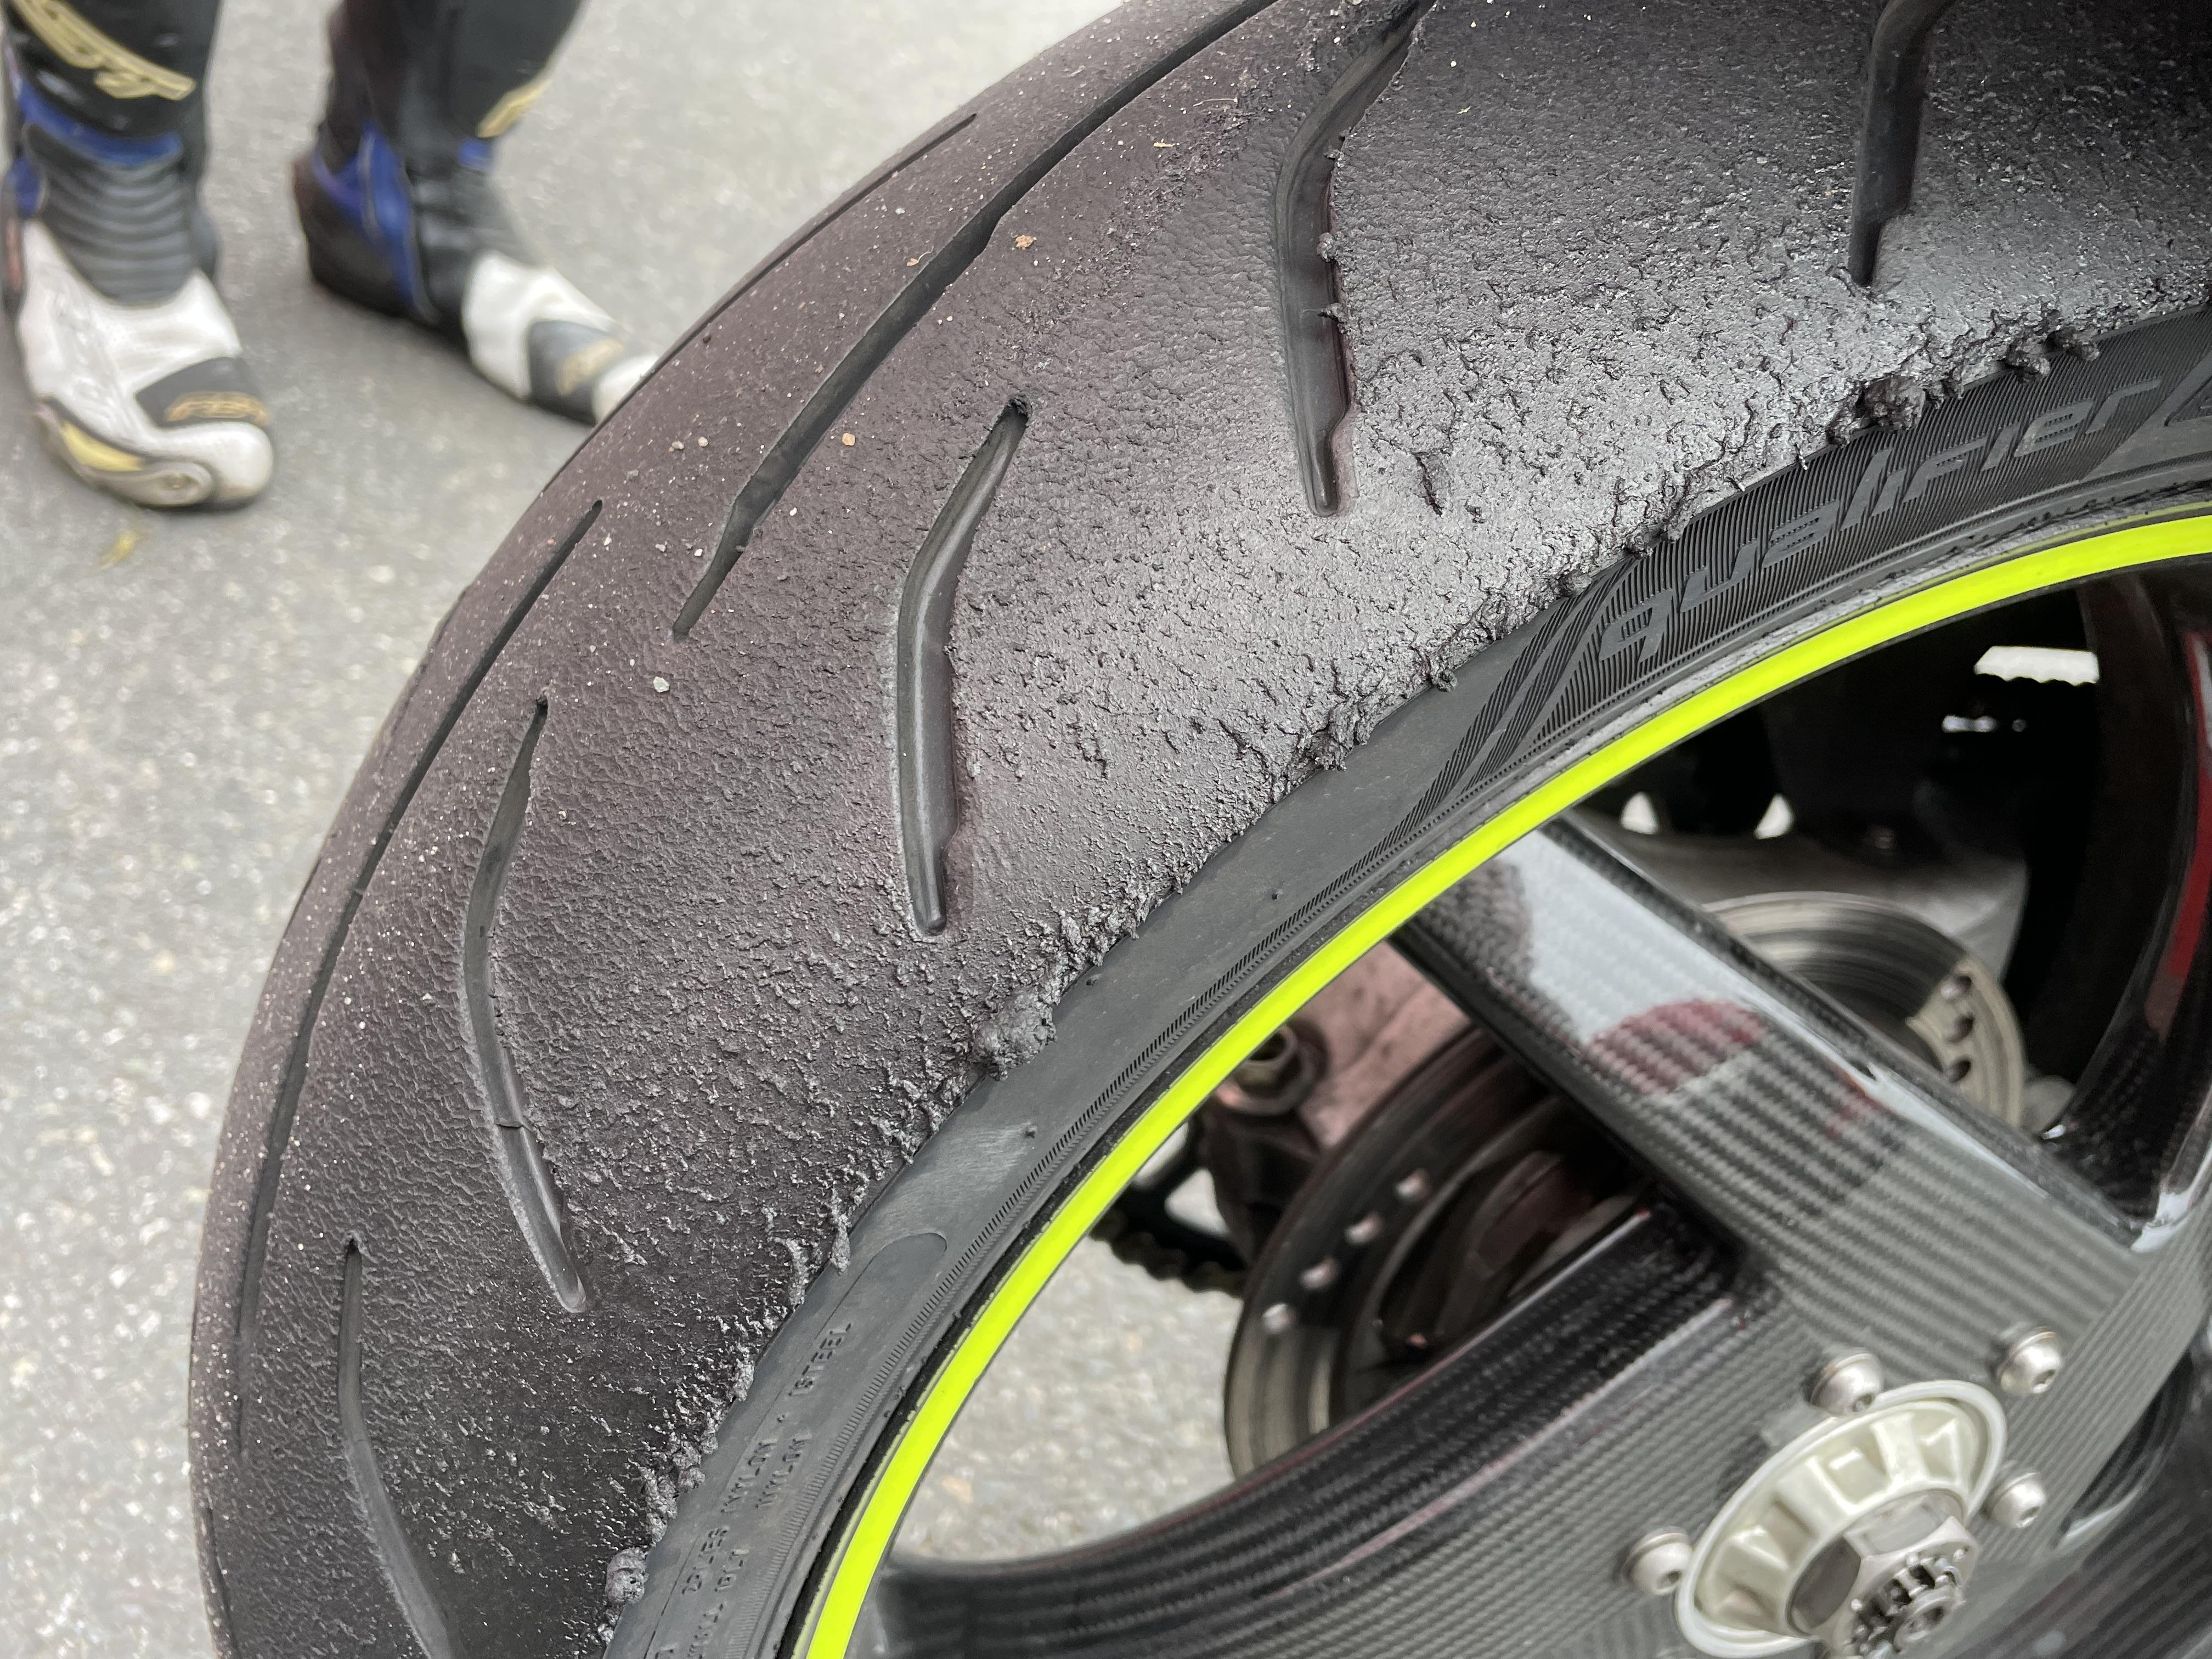
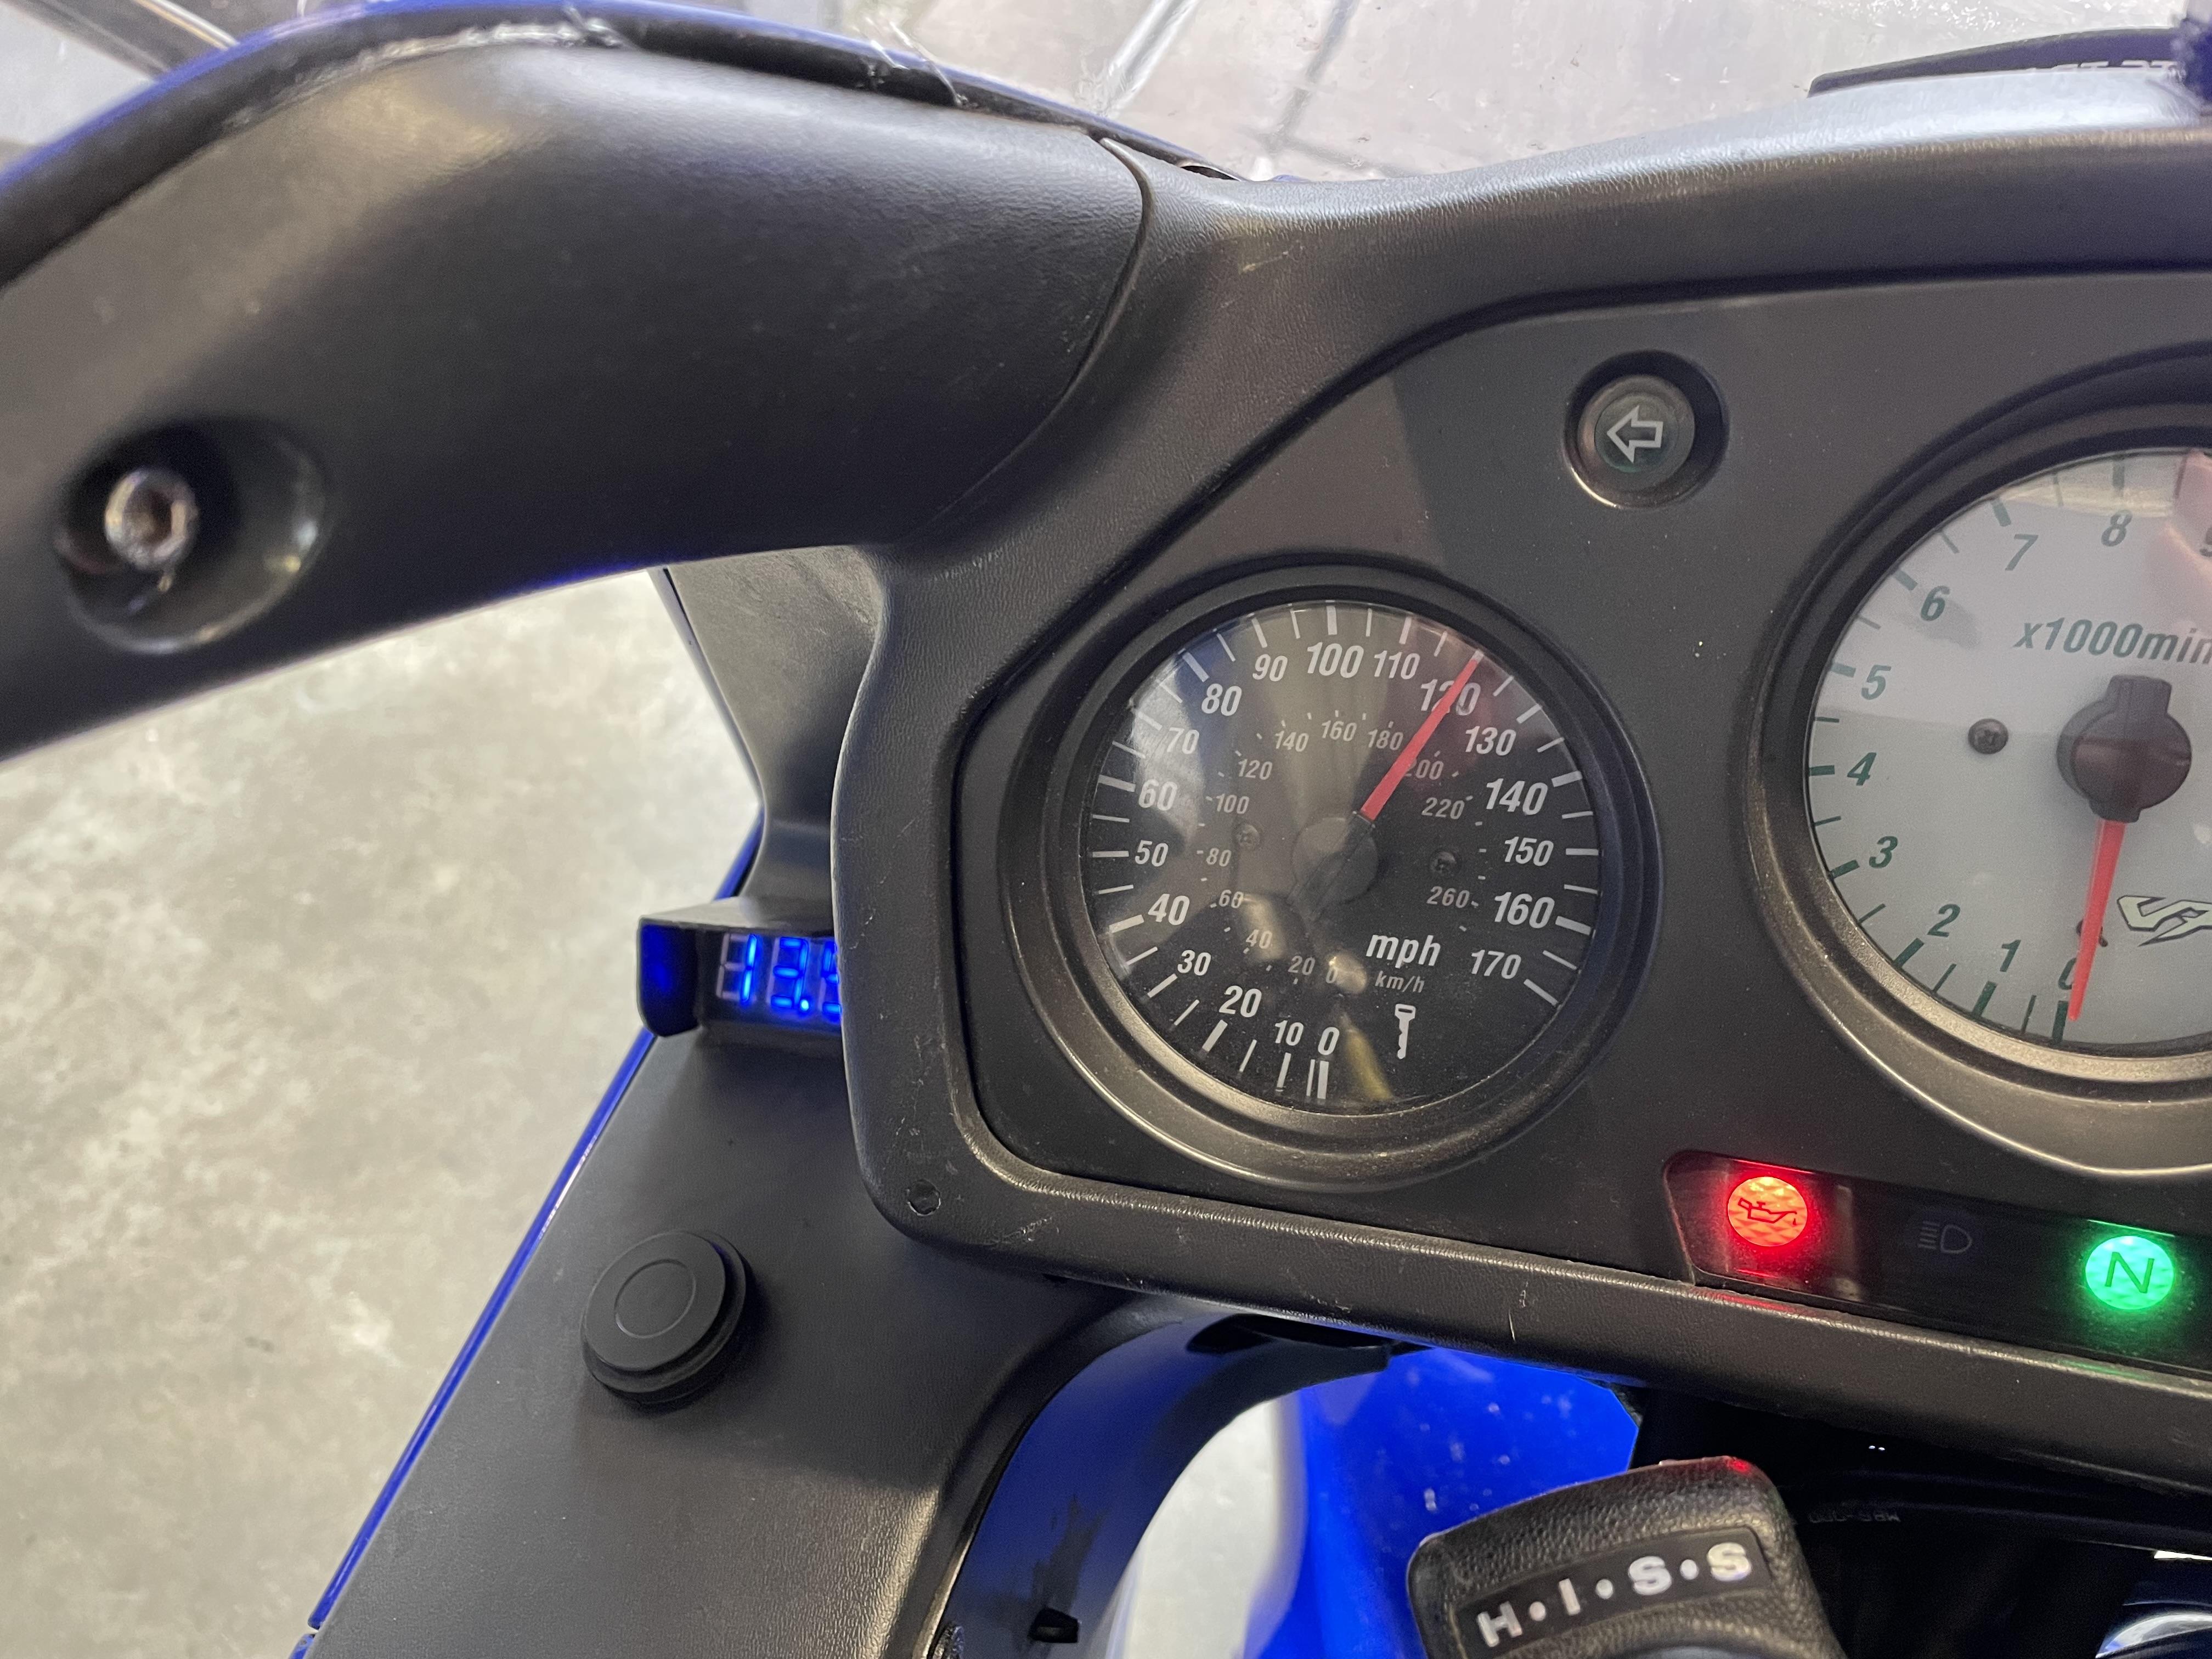
It was a mad rush to get the bike ready for the Donington Park track day with Mohawk but we got there in the end!!! Didn't have time to fit side fairings or centre stand but did get the quickshifter installed. I was lucky enough to get to see Mohawk’s famous blue 5th gen in all its glory from every angle…especially the rear as he blew past me twice on track!!! We shared a garage on the pits. And found the VFR can lean and burn. Check how tortured Mohawk’s tear looks! Mine looking respectable. Not bad for touring rubber! Mohawk has a gadget that replays his fastest speed on the clocks…that in MPH. Followed, of course, by some heavy braking before that tricky double-apex right hander after the home straight. It was a noisy track day at Donington, which tends to bring out all the likely lads and MotoGP hopefuls. There were a lot of exotica and prototype bikes there. Thousands of £’s worth of the latest tackle. So we were surprised (and VERY excited to see these familiar looking things. Can you make them out? Not going to lie, I was giddy as a school girl when I met these guys. The level of engineering and all the little modifications required blew my mind!!! They were very interested in some of Mohawk’s mods, like stick coils, single nut rear wheel and ram air, among other things. Hoping they join the forum.
10 points
-
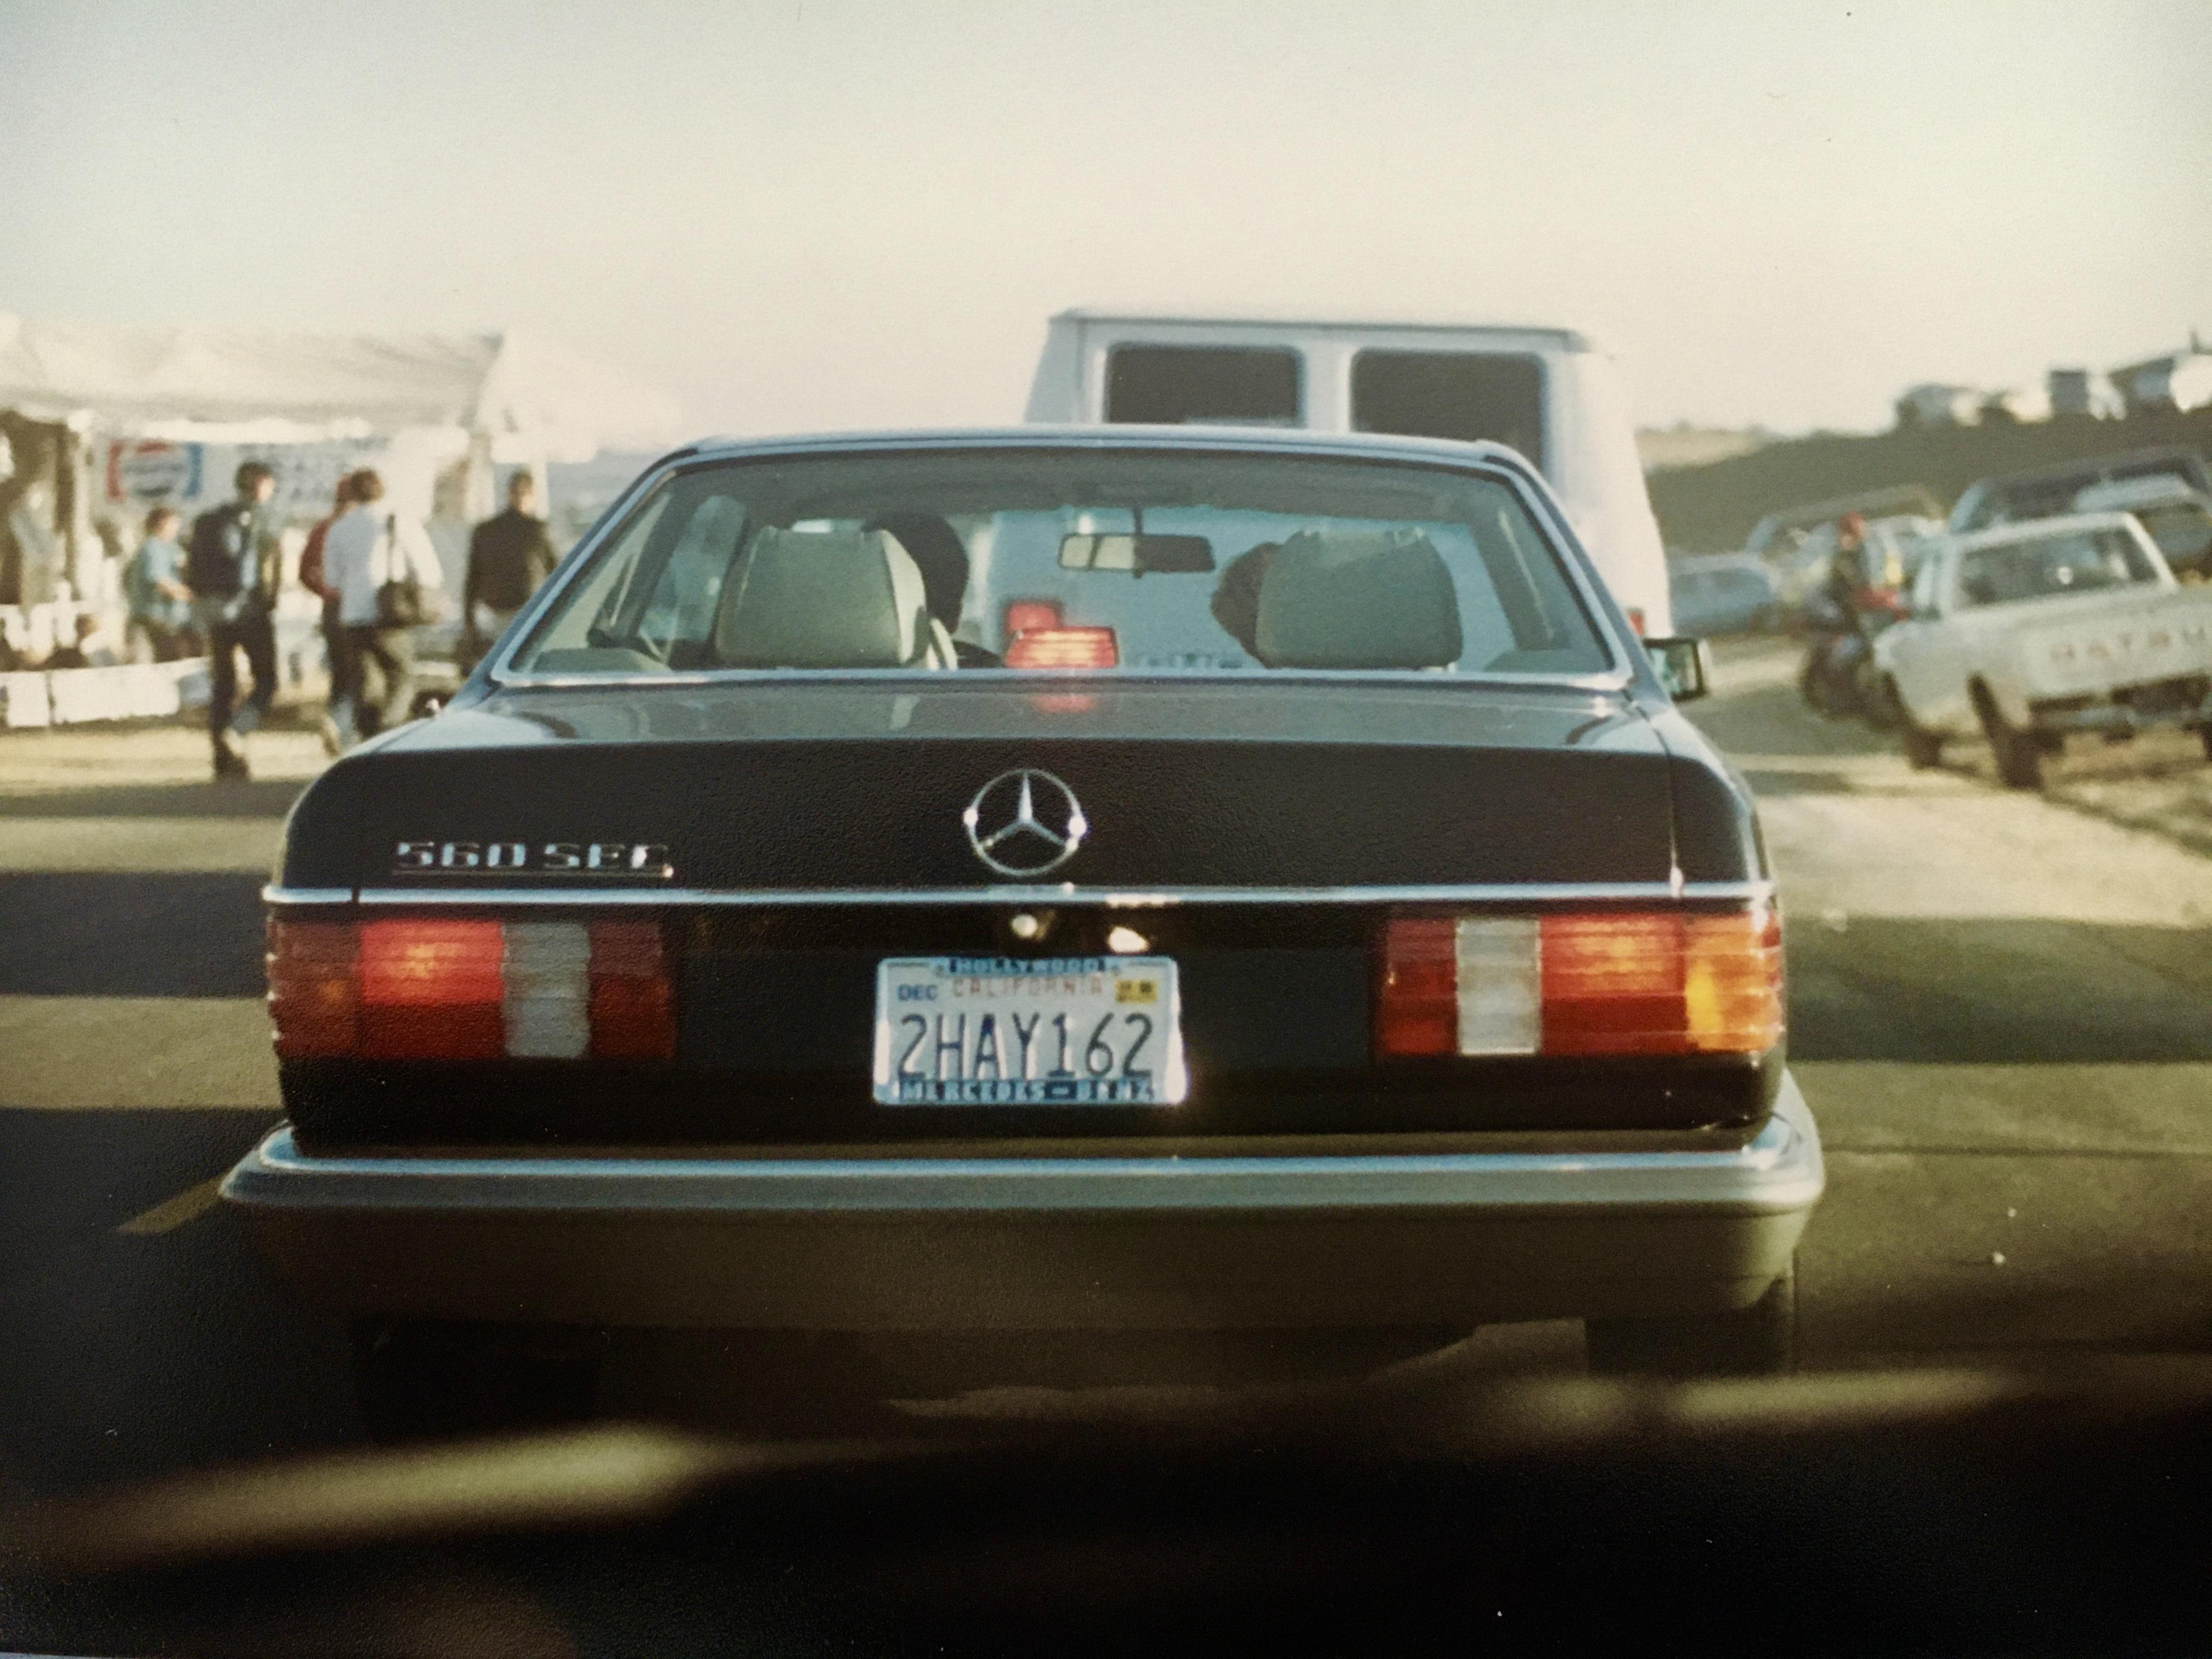
Lorne, this is your fault… I convinced my spouse to move to Princeton NJ area for my job. Had a new kid. Took on debilitating adjustable mortgage. Saw that gp was coming to U.S. for the first time in forever at Laguna Seca. “Oh, most important woman in my life,” I said, “doesn’t your sister live in Marin?” (aka bay area) Yes, she said (knowing full well where this was going), "you know my sister and hub live there…" So we flew across the country. I found the cheapest rental car in the world, and drove the econobox south through SF, and arrived on a Saturday in April with another 100,000 fans who all just heard that we would hit 100F that weekend. Yeah, I was with my tribe! Never been to Laguna Seca before. End up in an endless car snake going over the bridge above T5-ish. Coming from the east coast I was blown away at how friendly the CA crowd was. Everyone was waving! The Mercedes ahead of me was crawling too, but the crowds were just so positive, waving and yelling. Finally the Mercedes driver pulled off to the VIP parking, and as he turned I saw through the driver’s side window I was behind Eddie Lawson! So yeah, I can always say I was on Lawson’s tail at Laguna Seca.
10 points
-

Version 1.0
105,301 downloads
This is the same manual that is already available here on VFRD. I have been using this so much lately that I went ahead and made it a little more useful for myself. I assumed that some other members might like to have it as well. Combined both files into one. Optimized the file size so that it is only 60 MB. Ran OCR text recognition to enable text searches on the entire book. Rotated pages that had landscape page diagram for ease of viewing. Created bookmarks for each chapter & sub-chapters. I figured this was the least I could do to contribute since I am getting so much help from this forum.10 points -
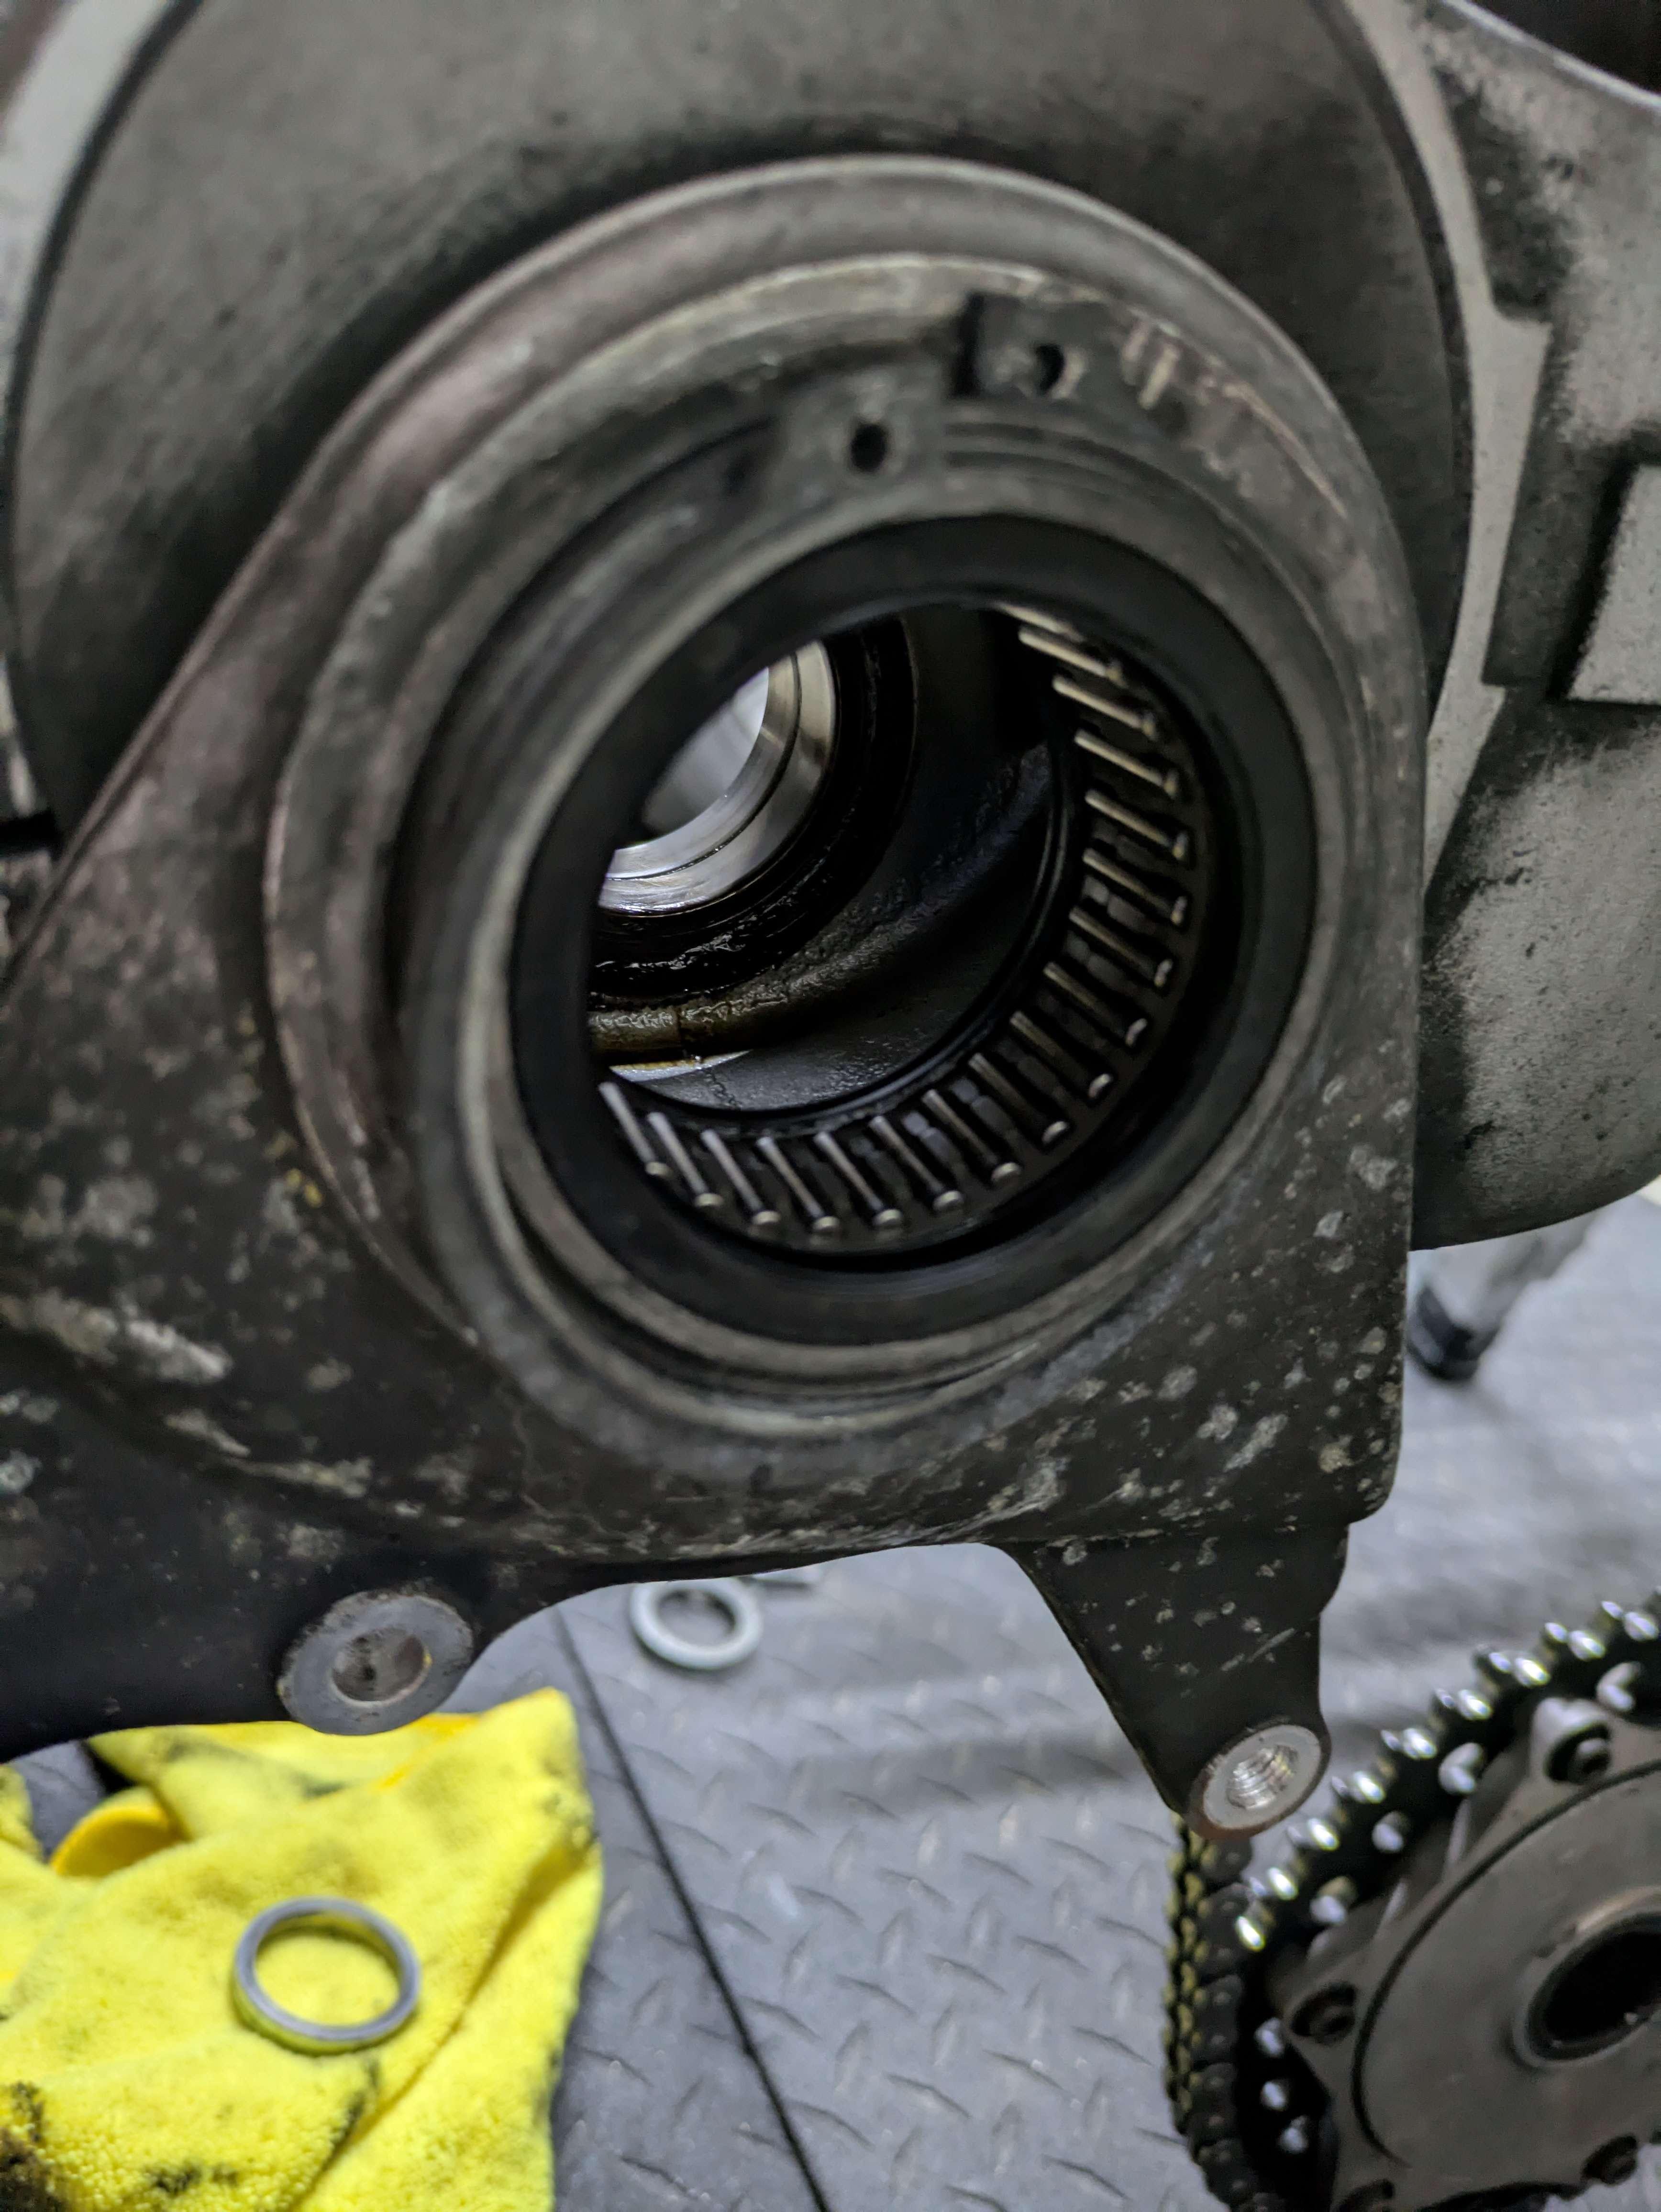
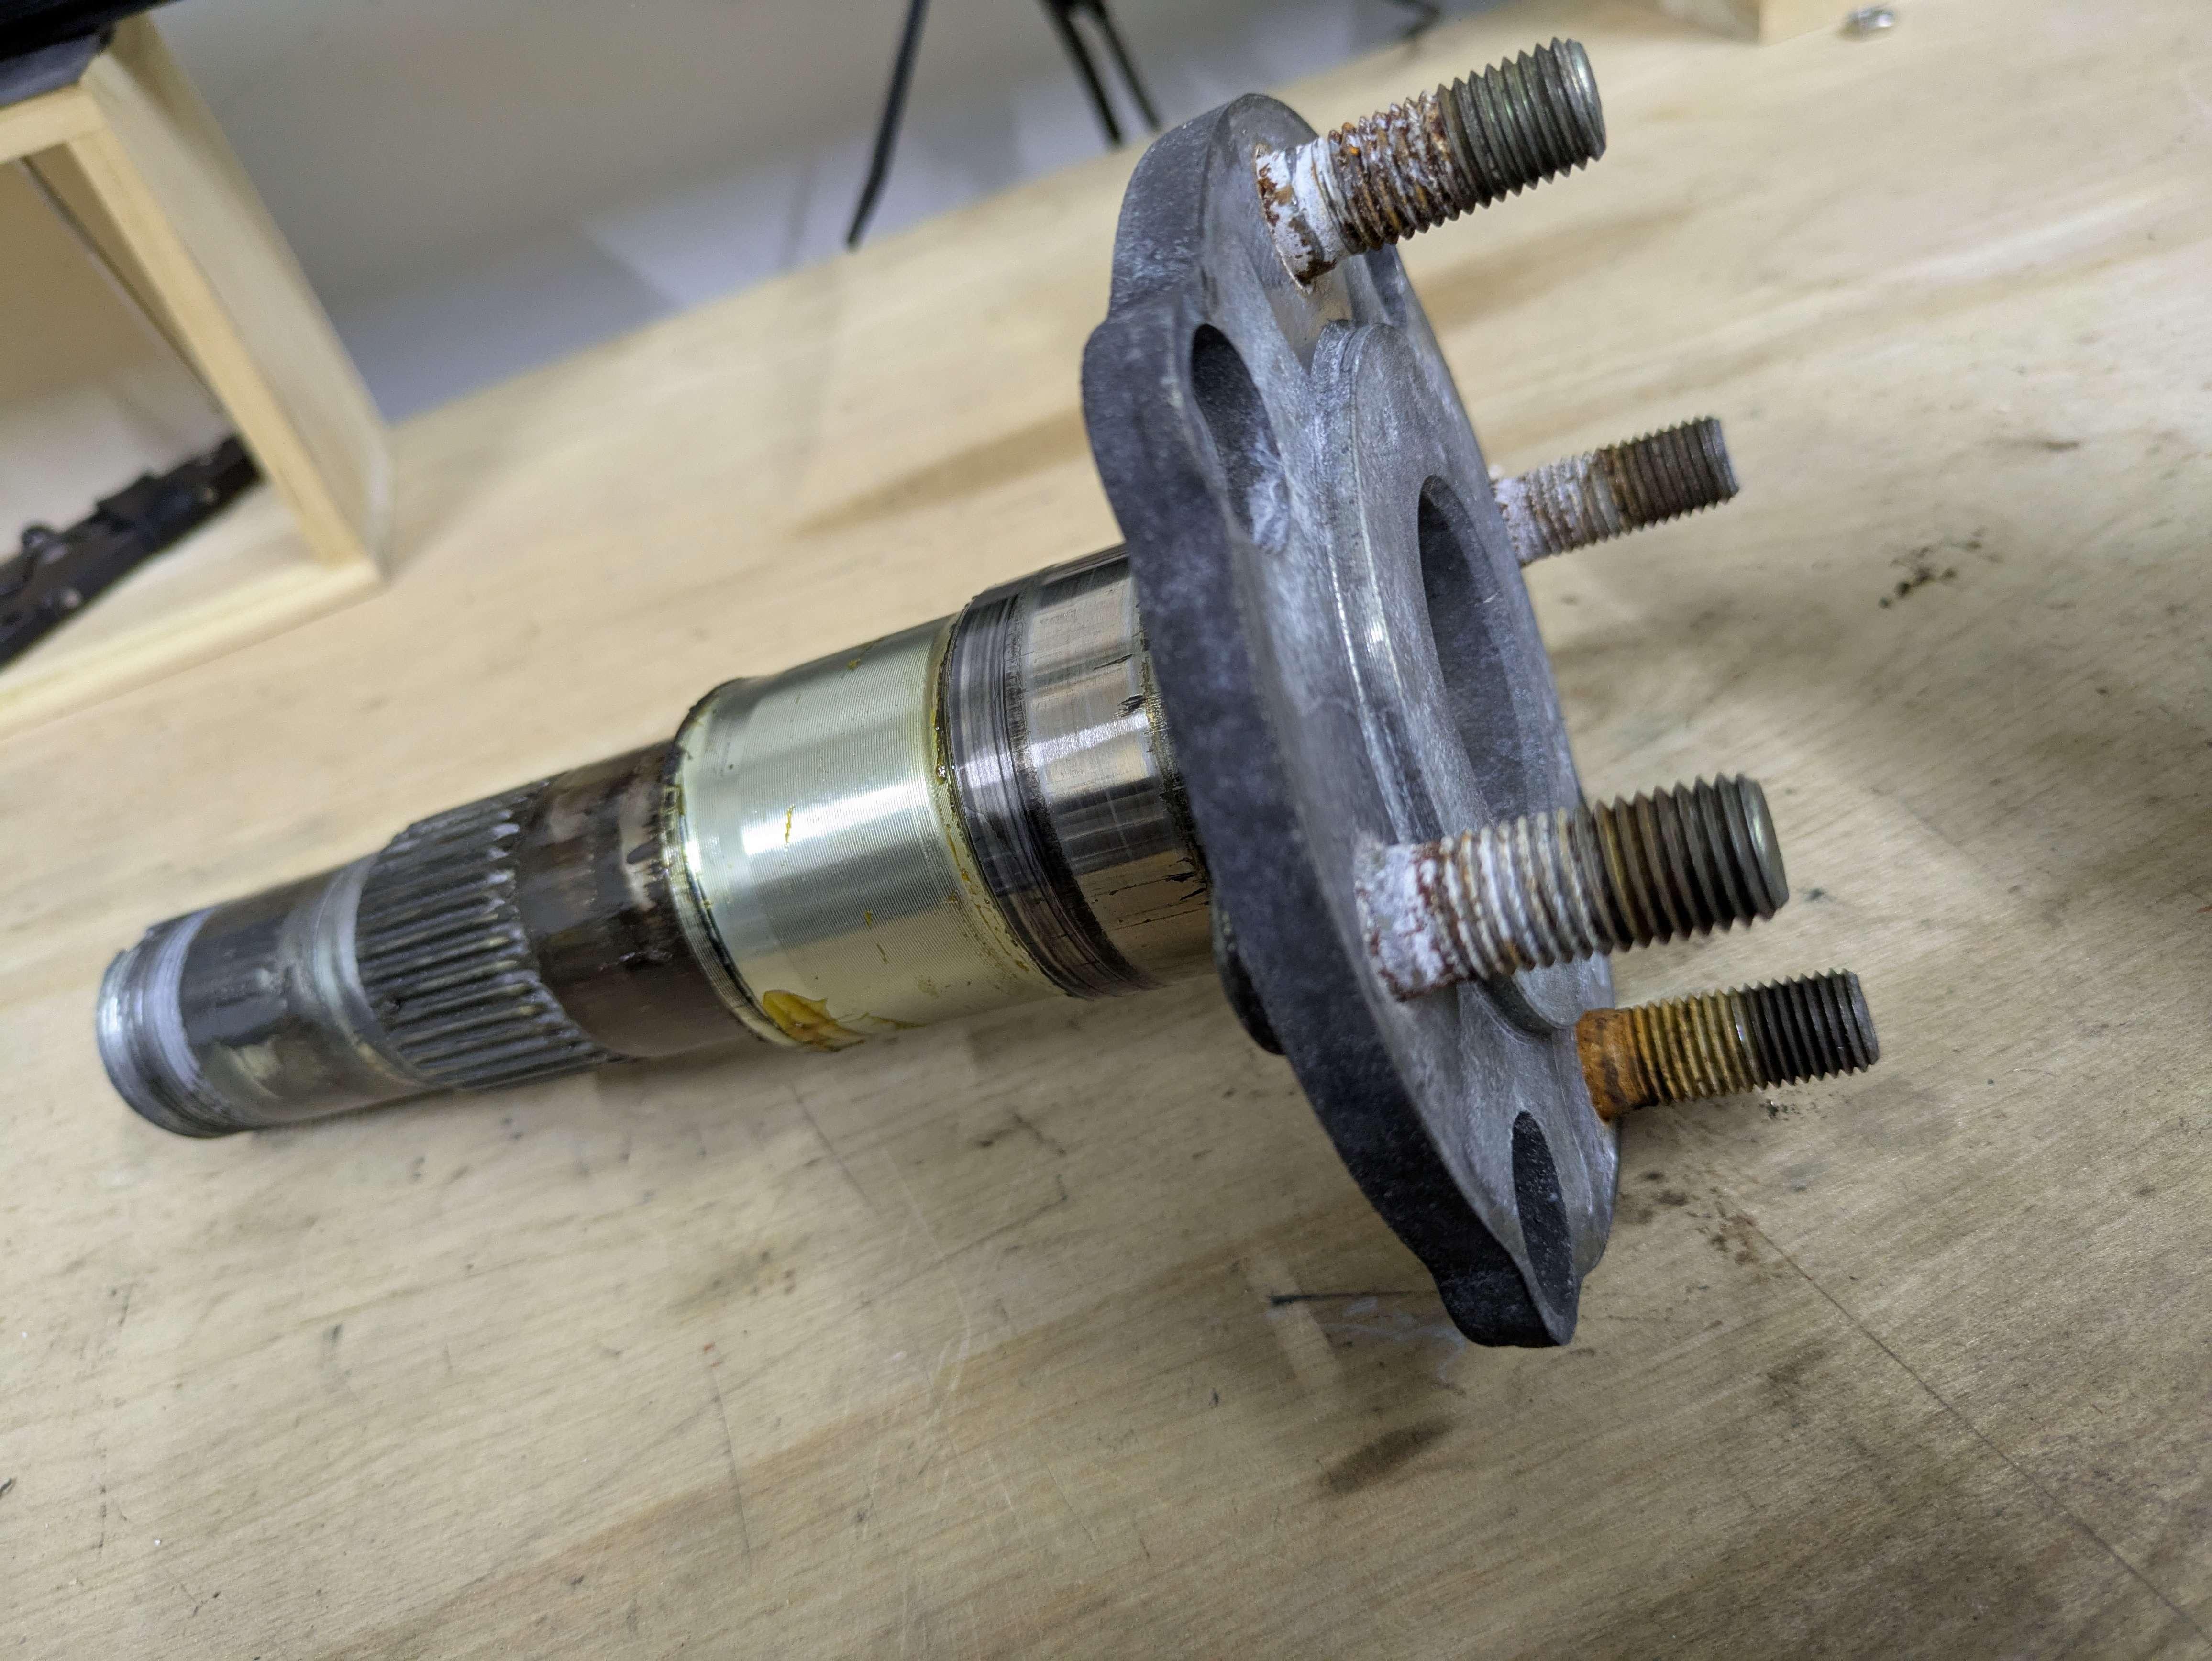
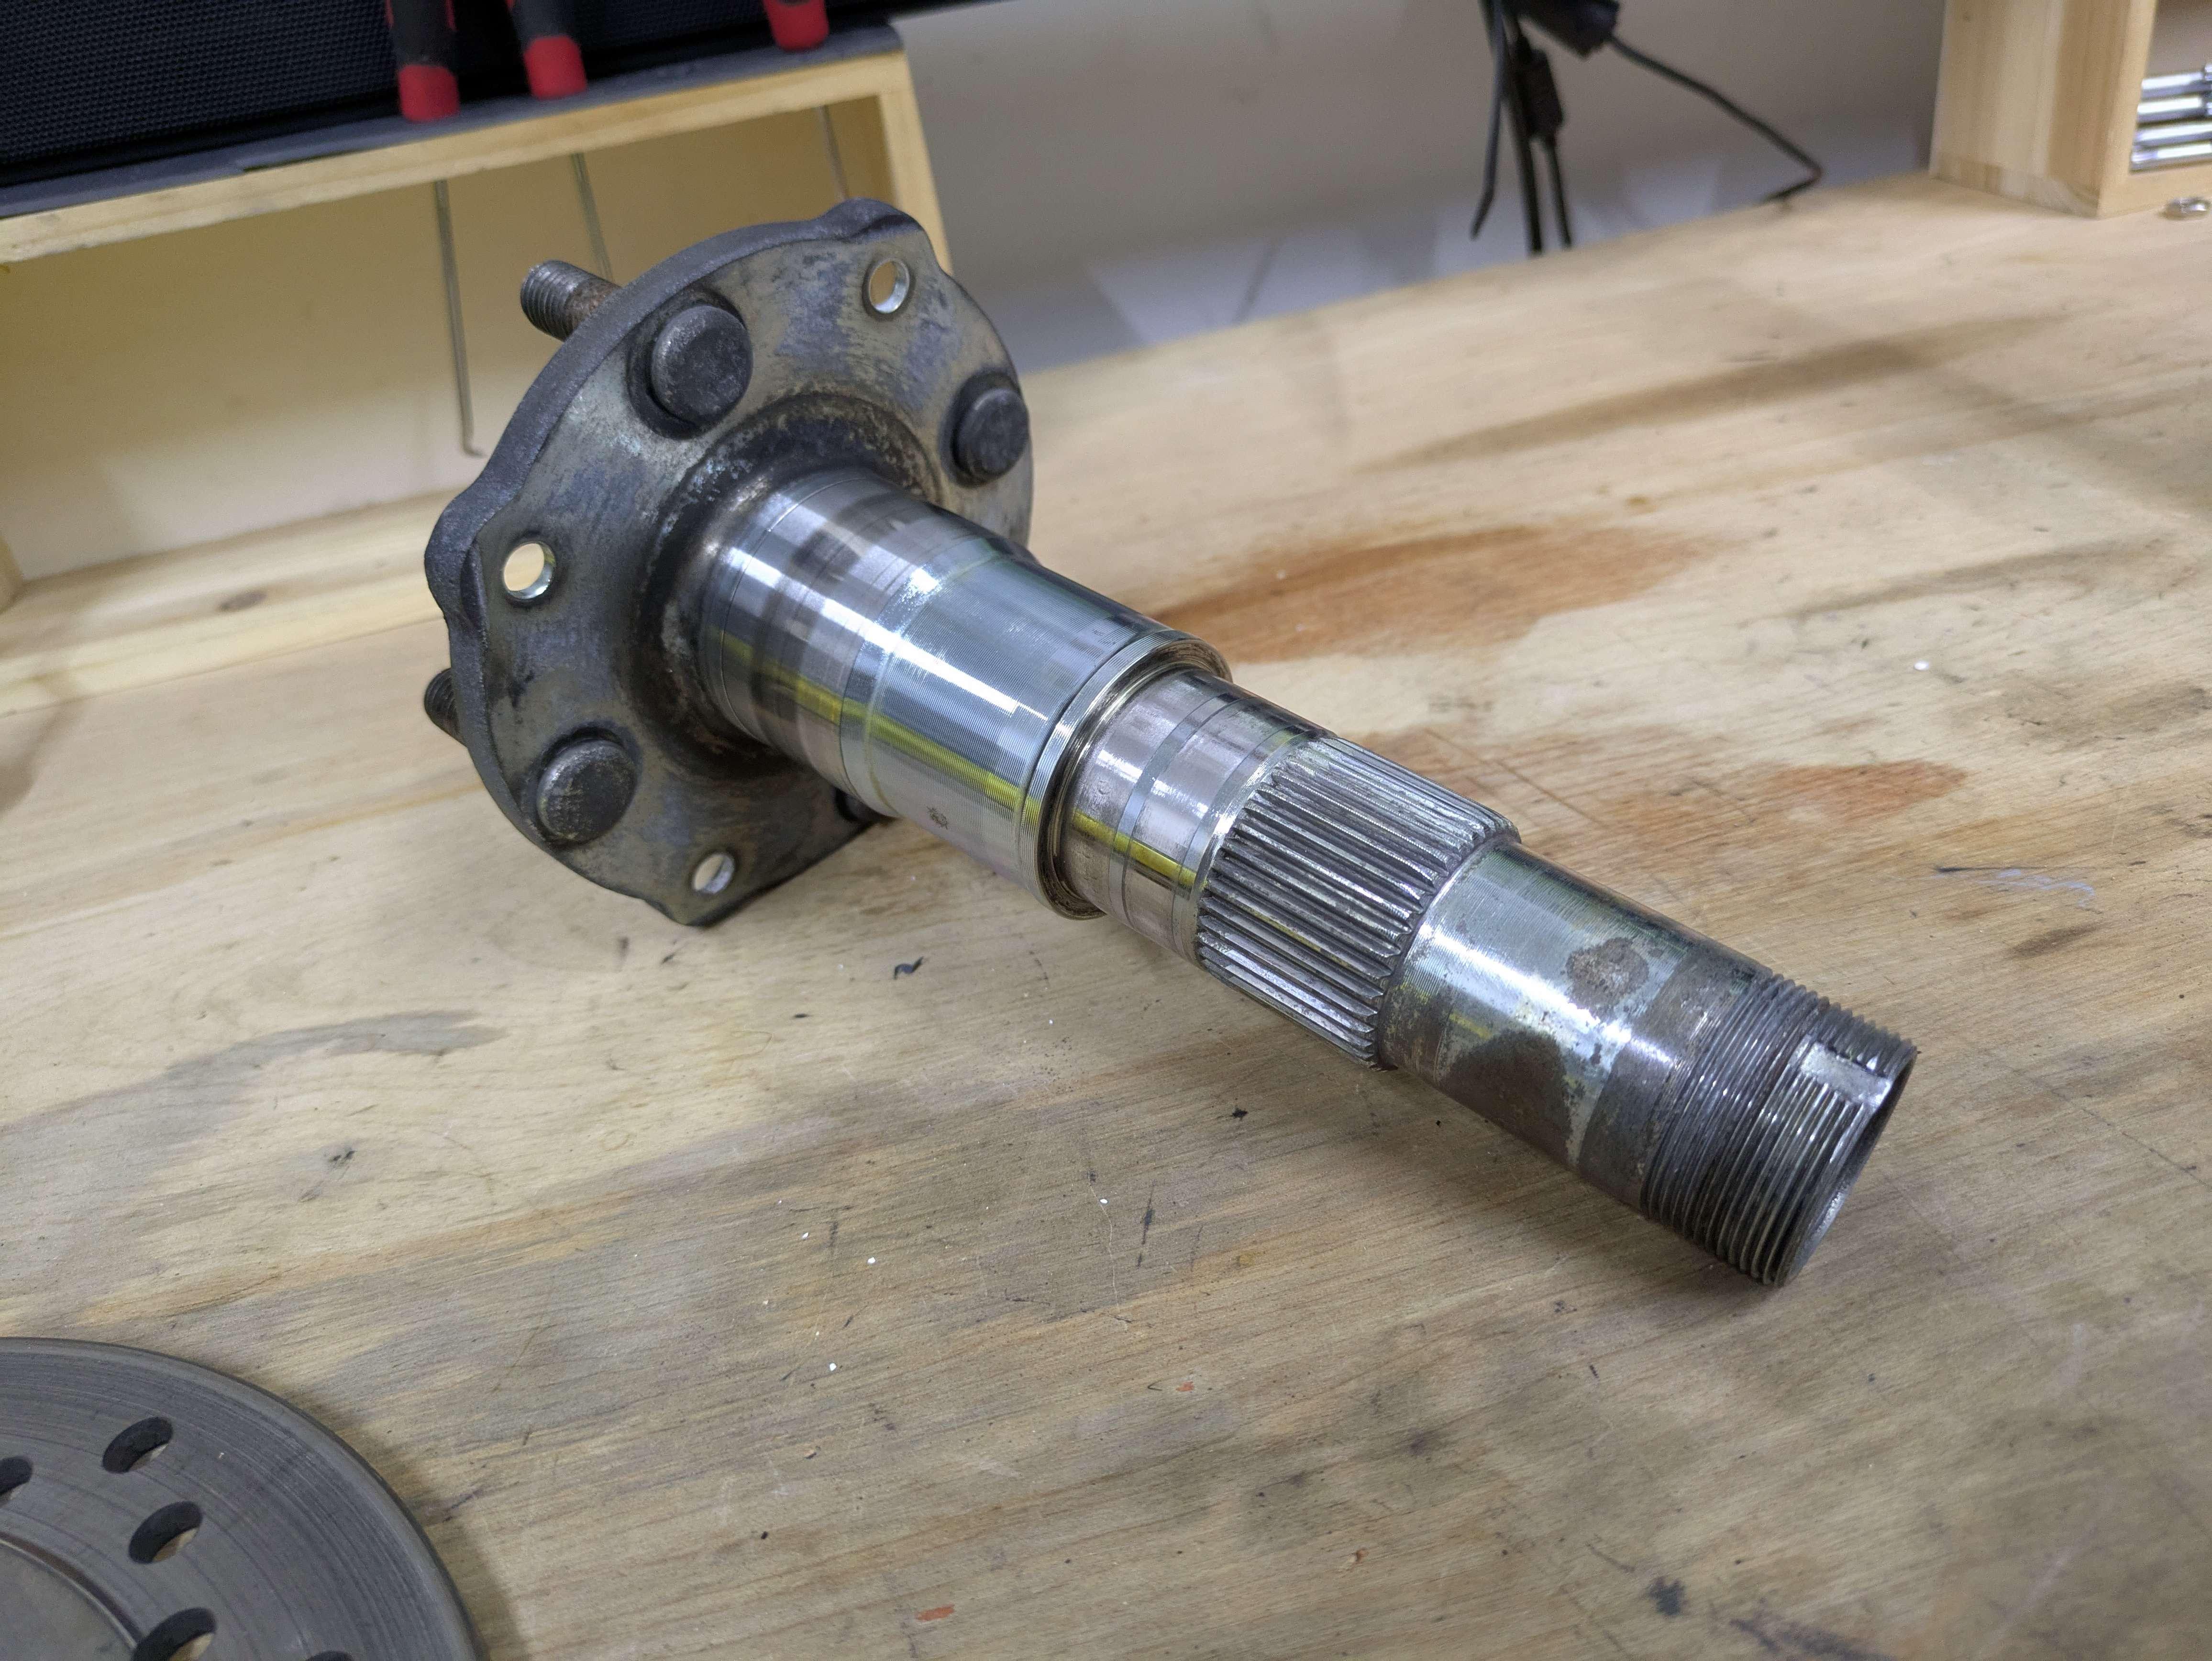
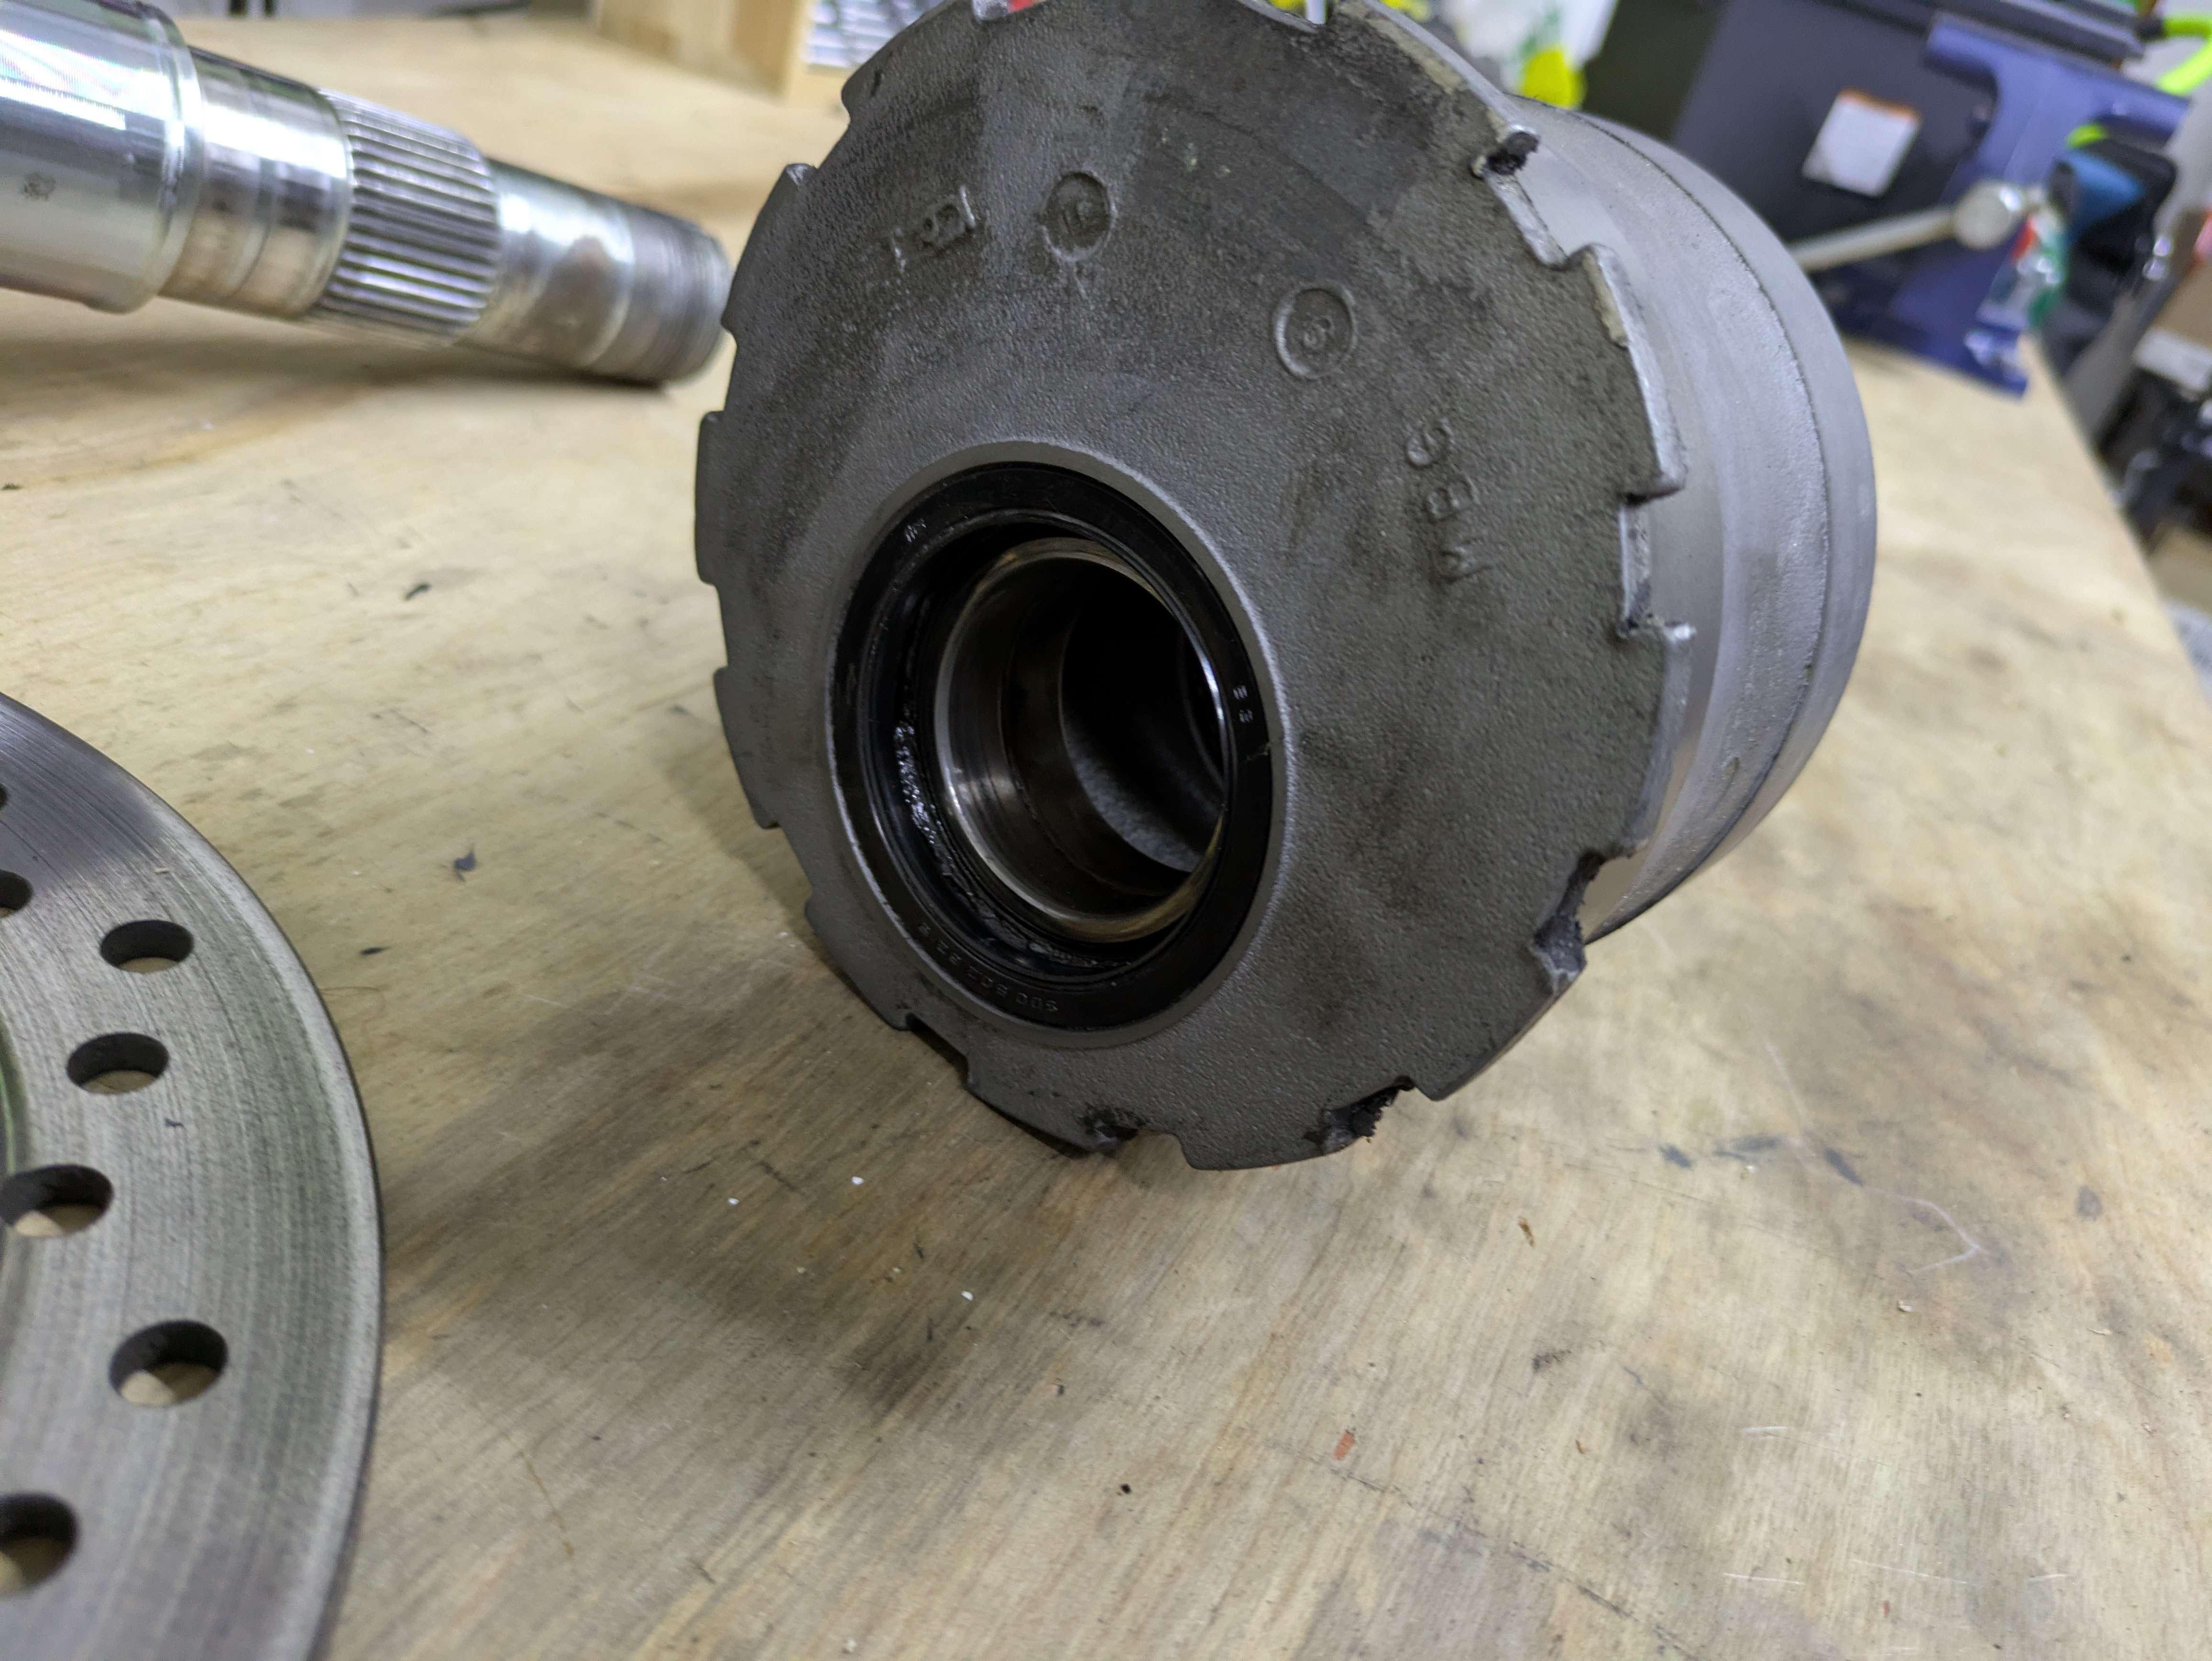
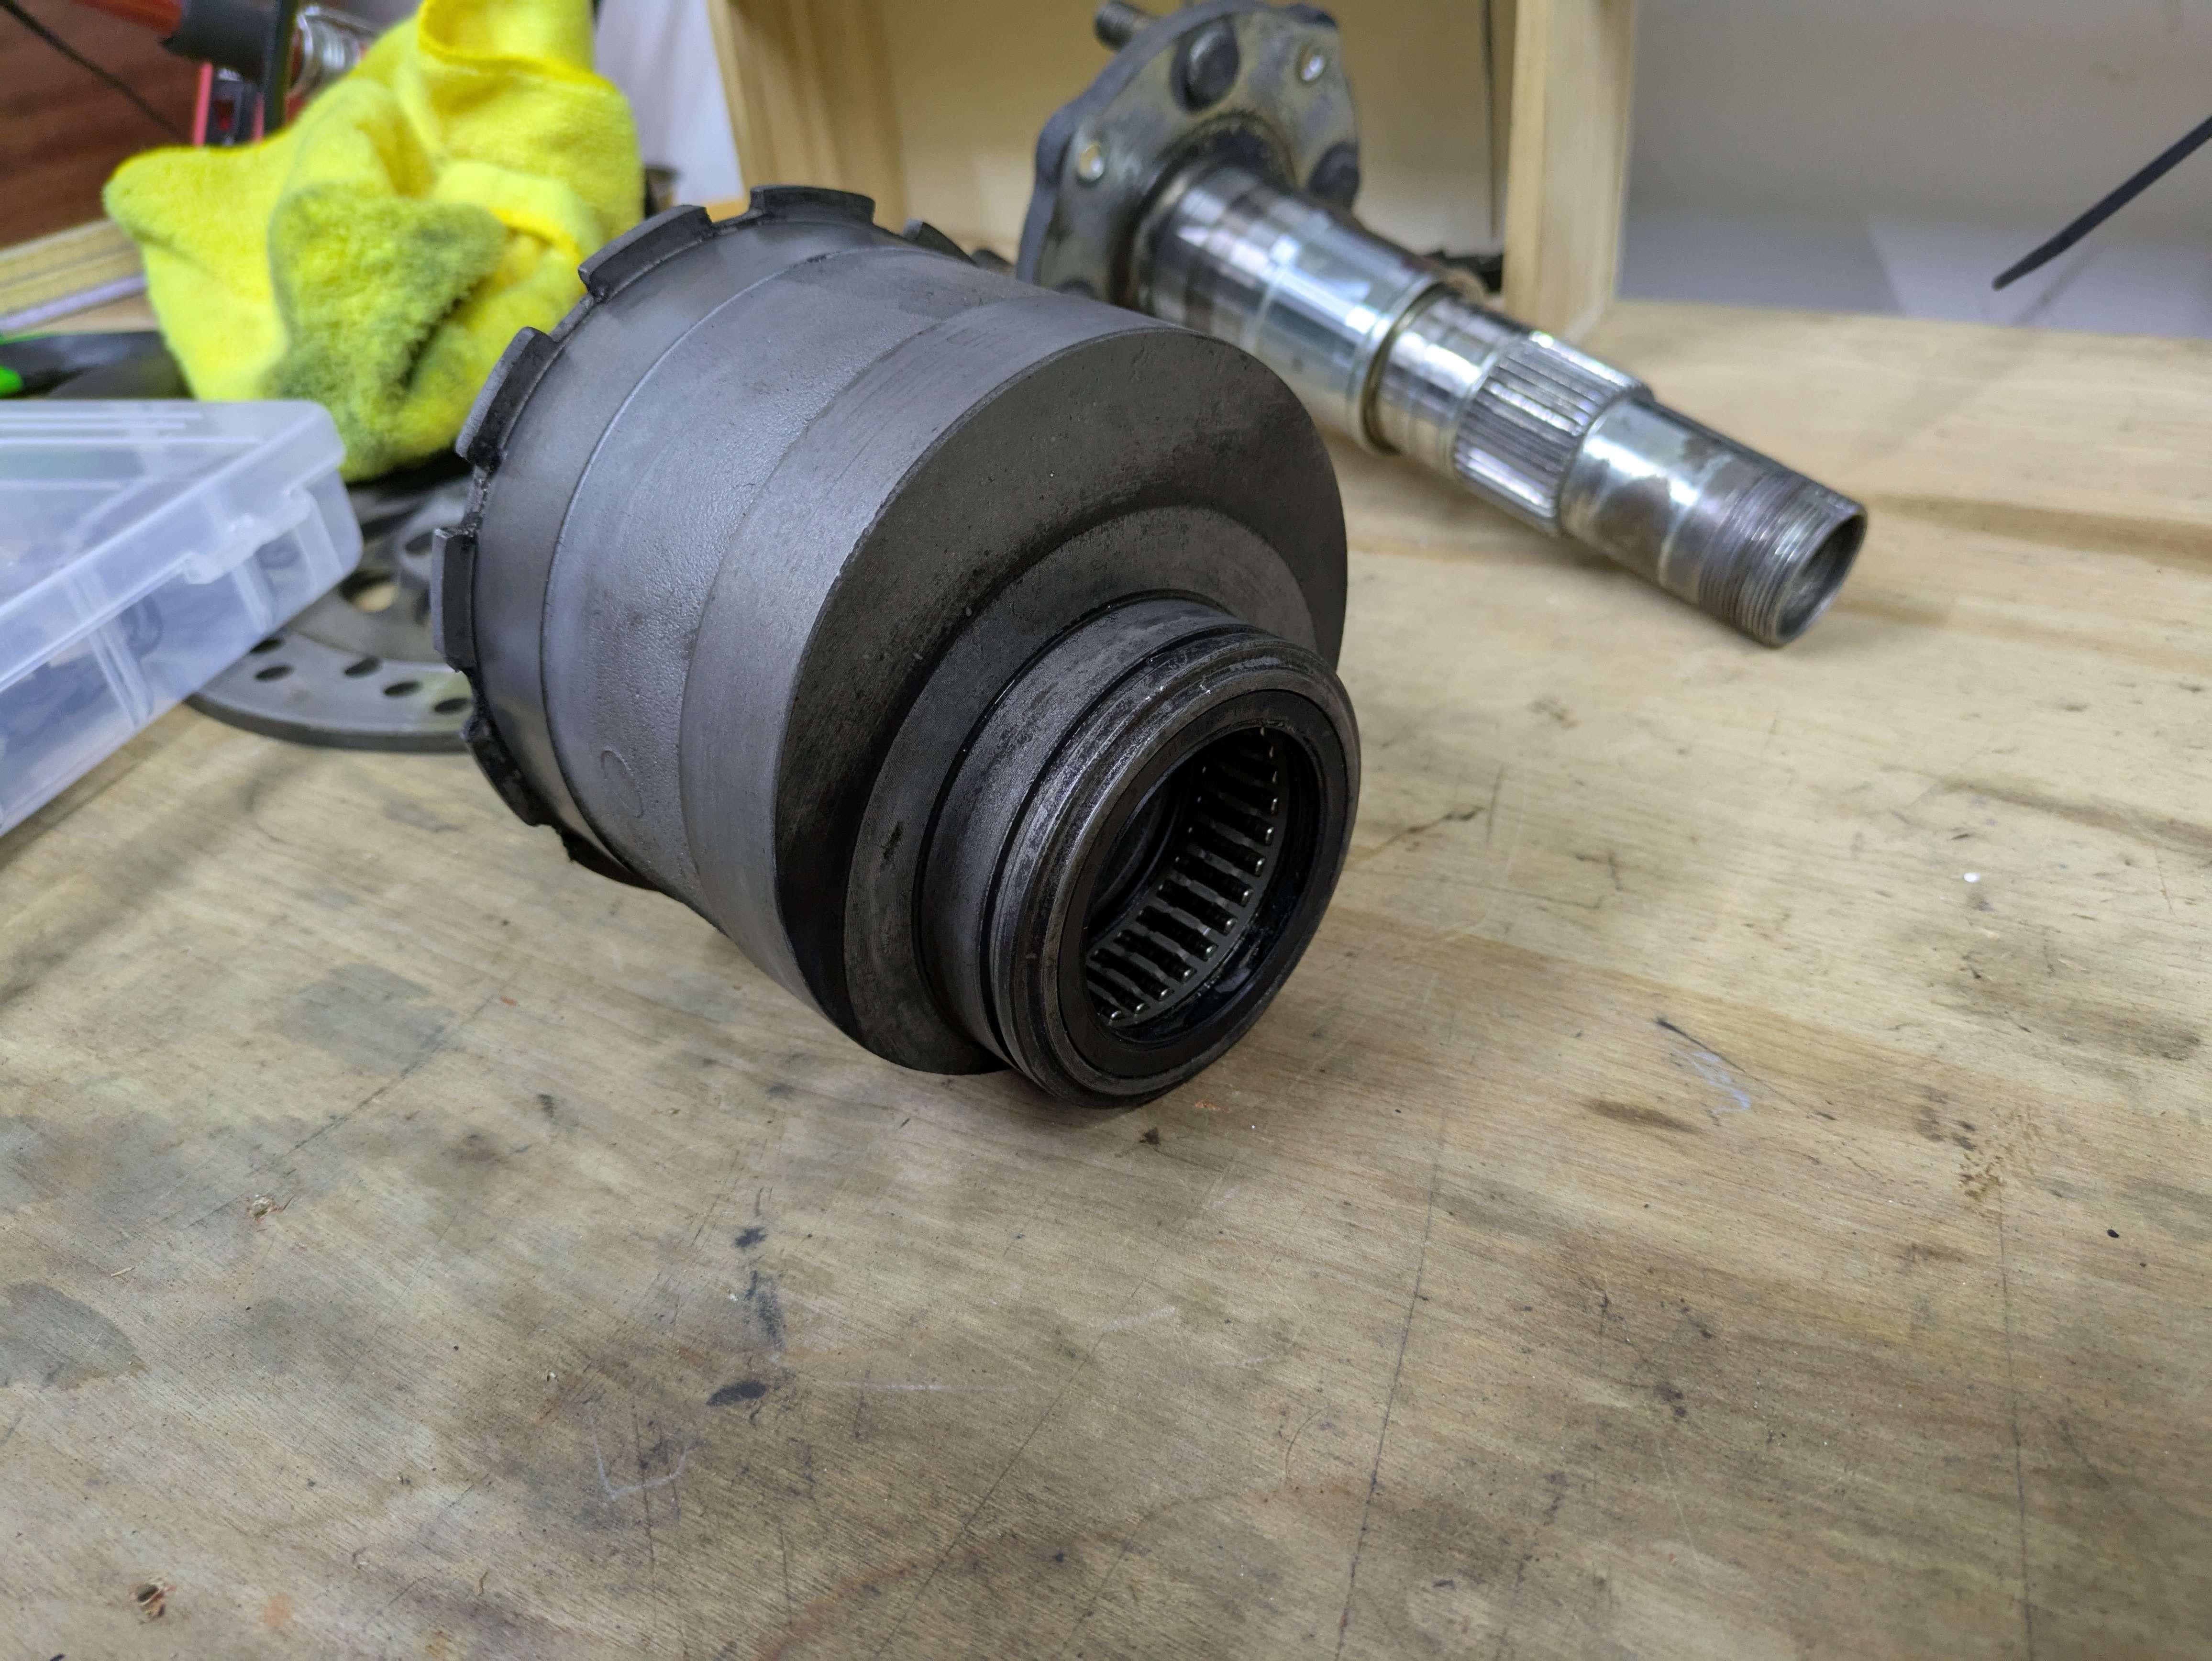
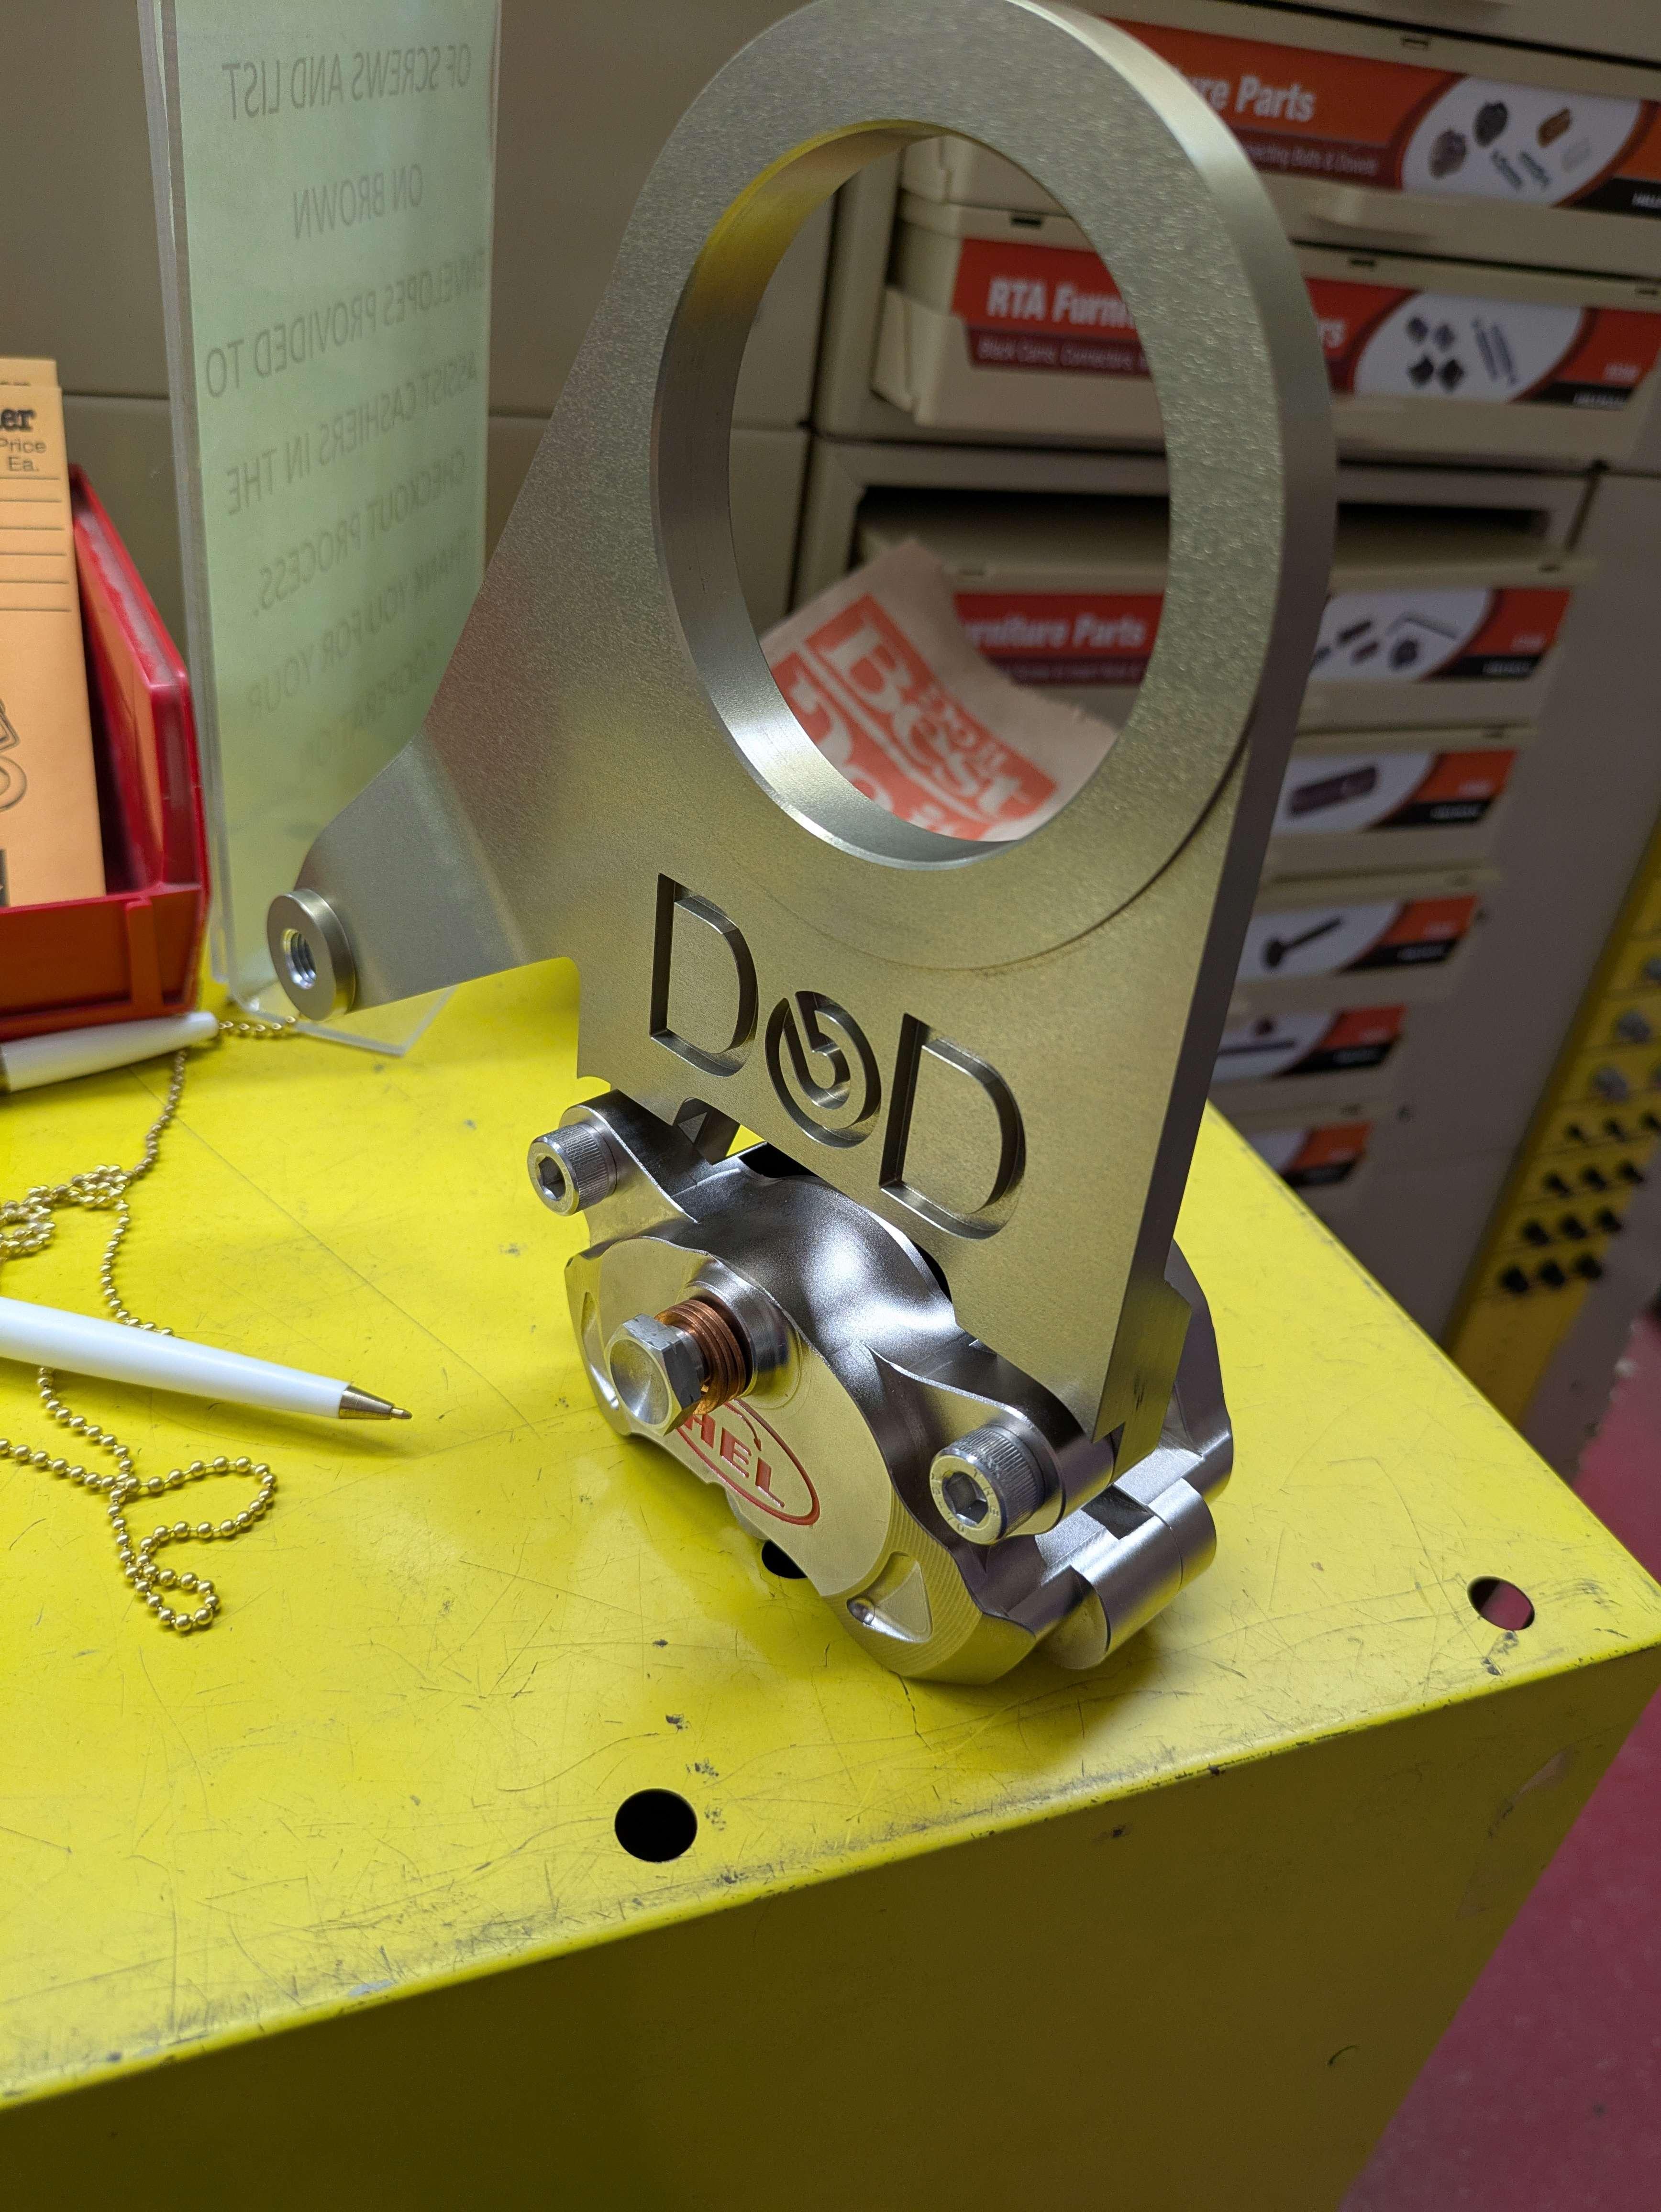
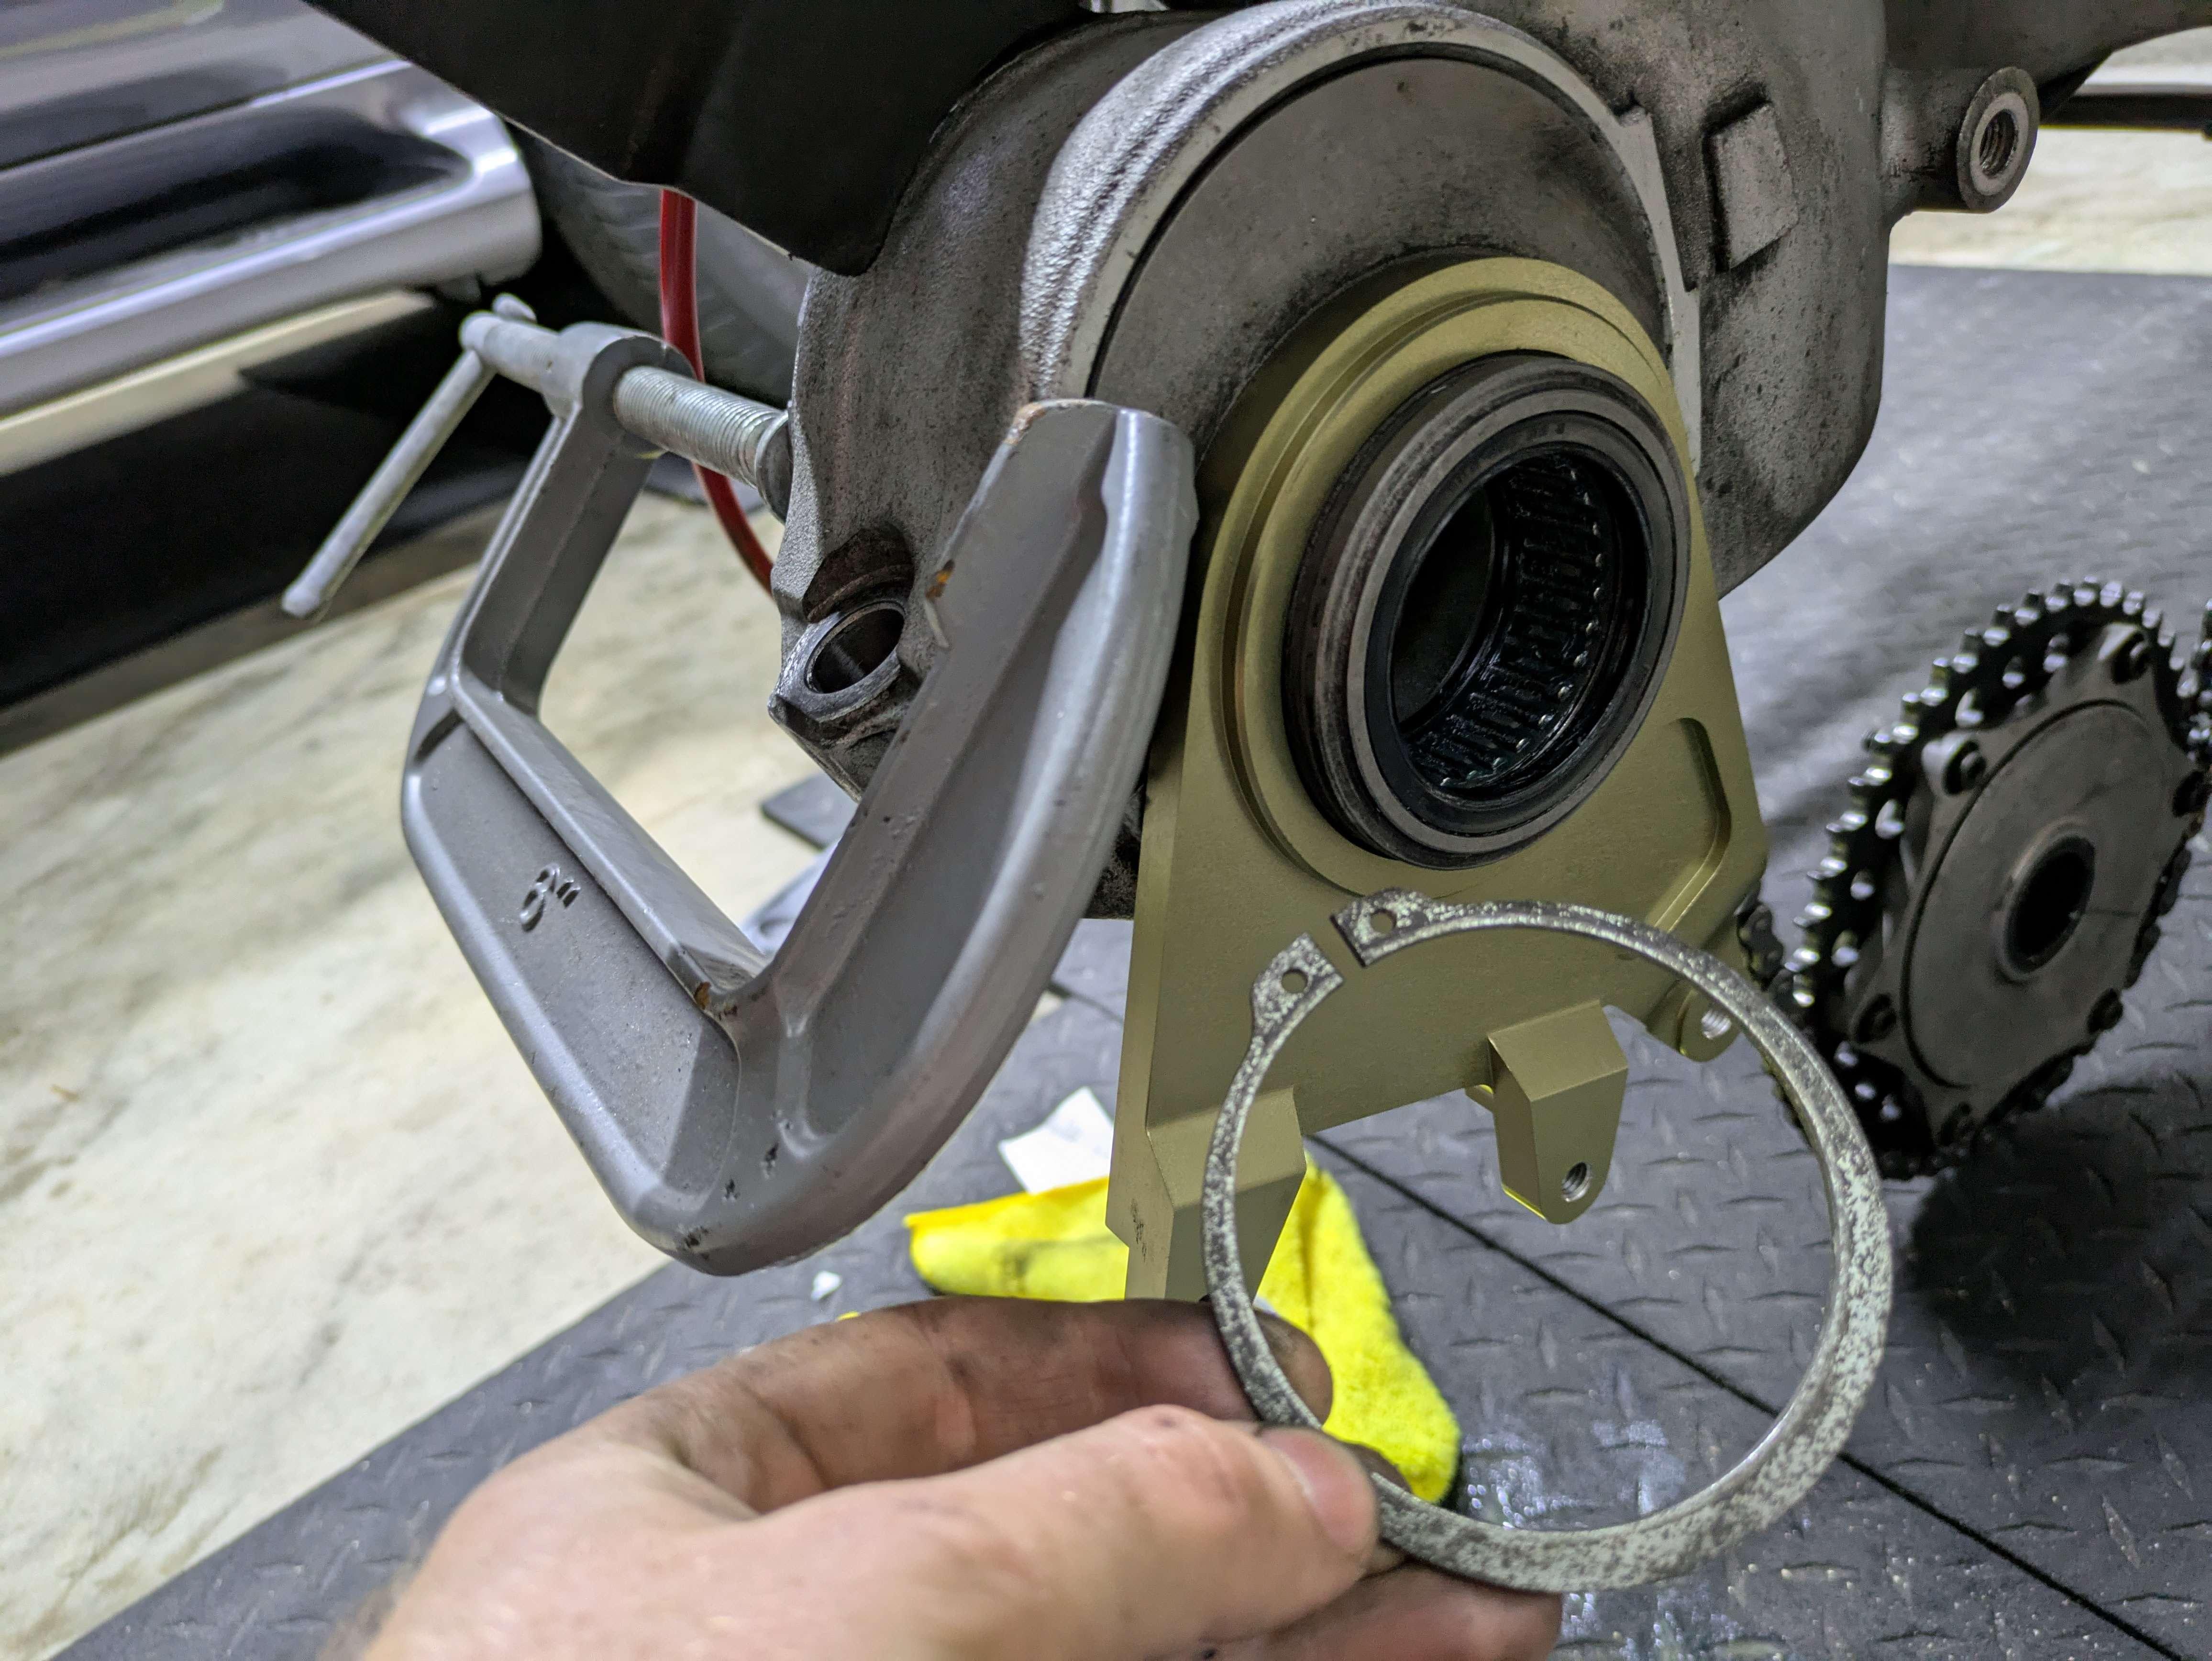
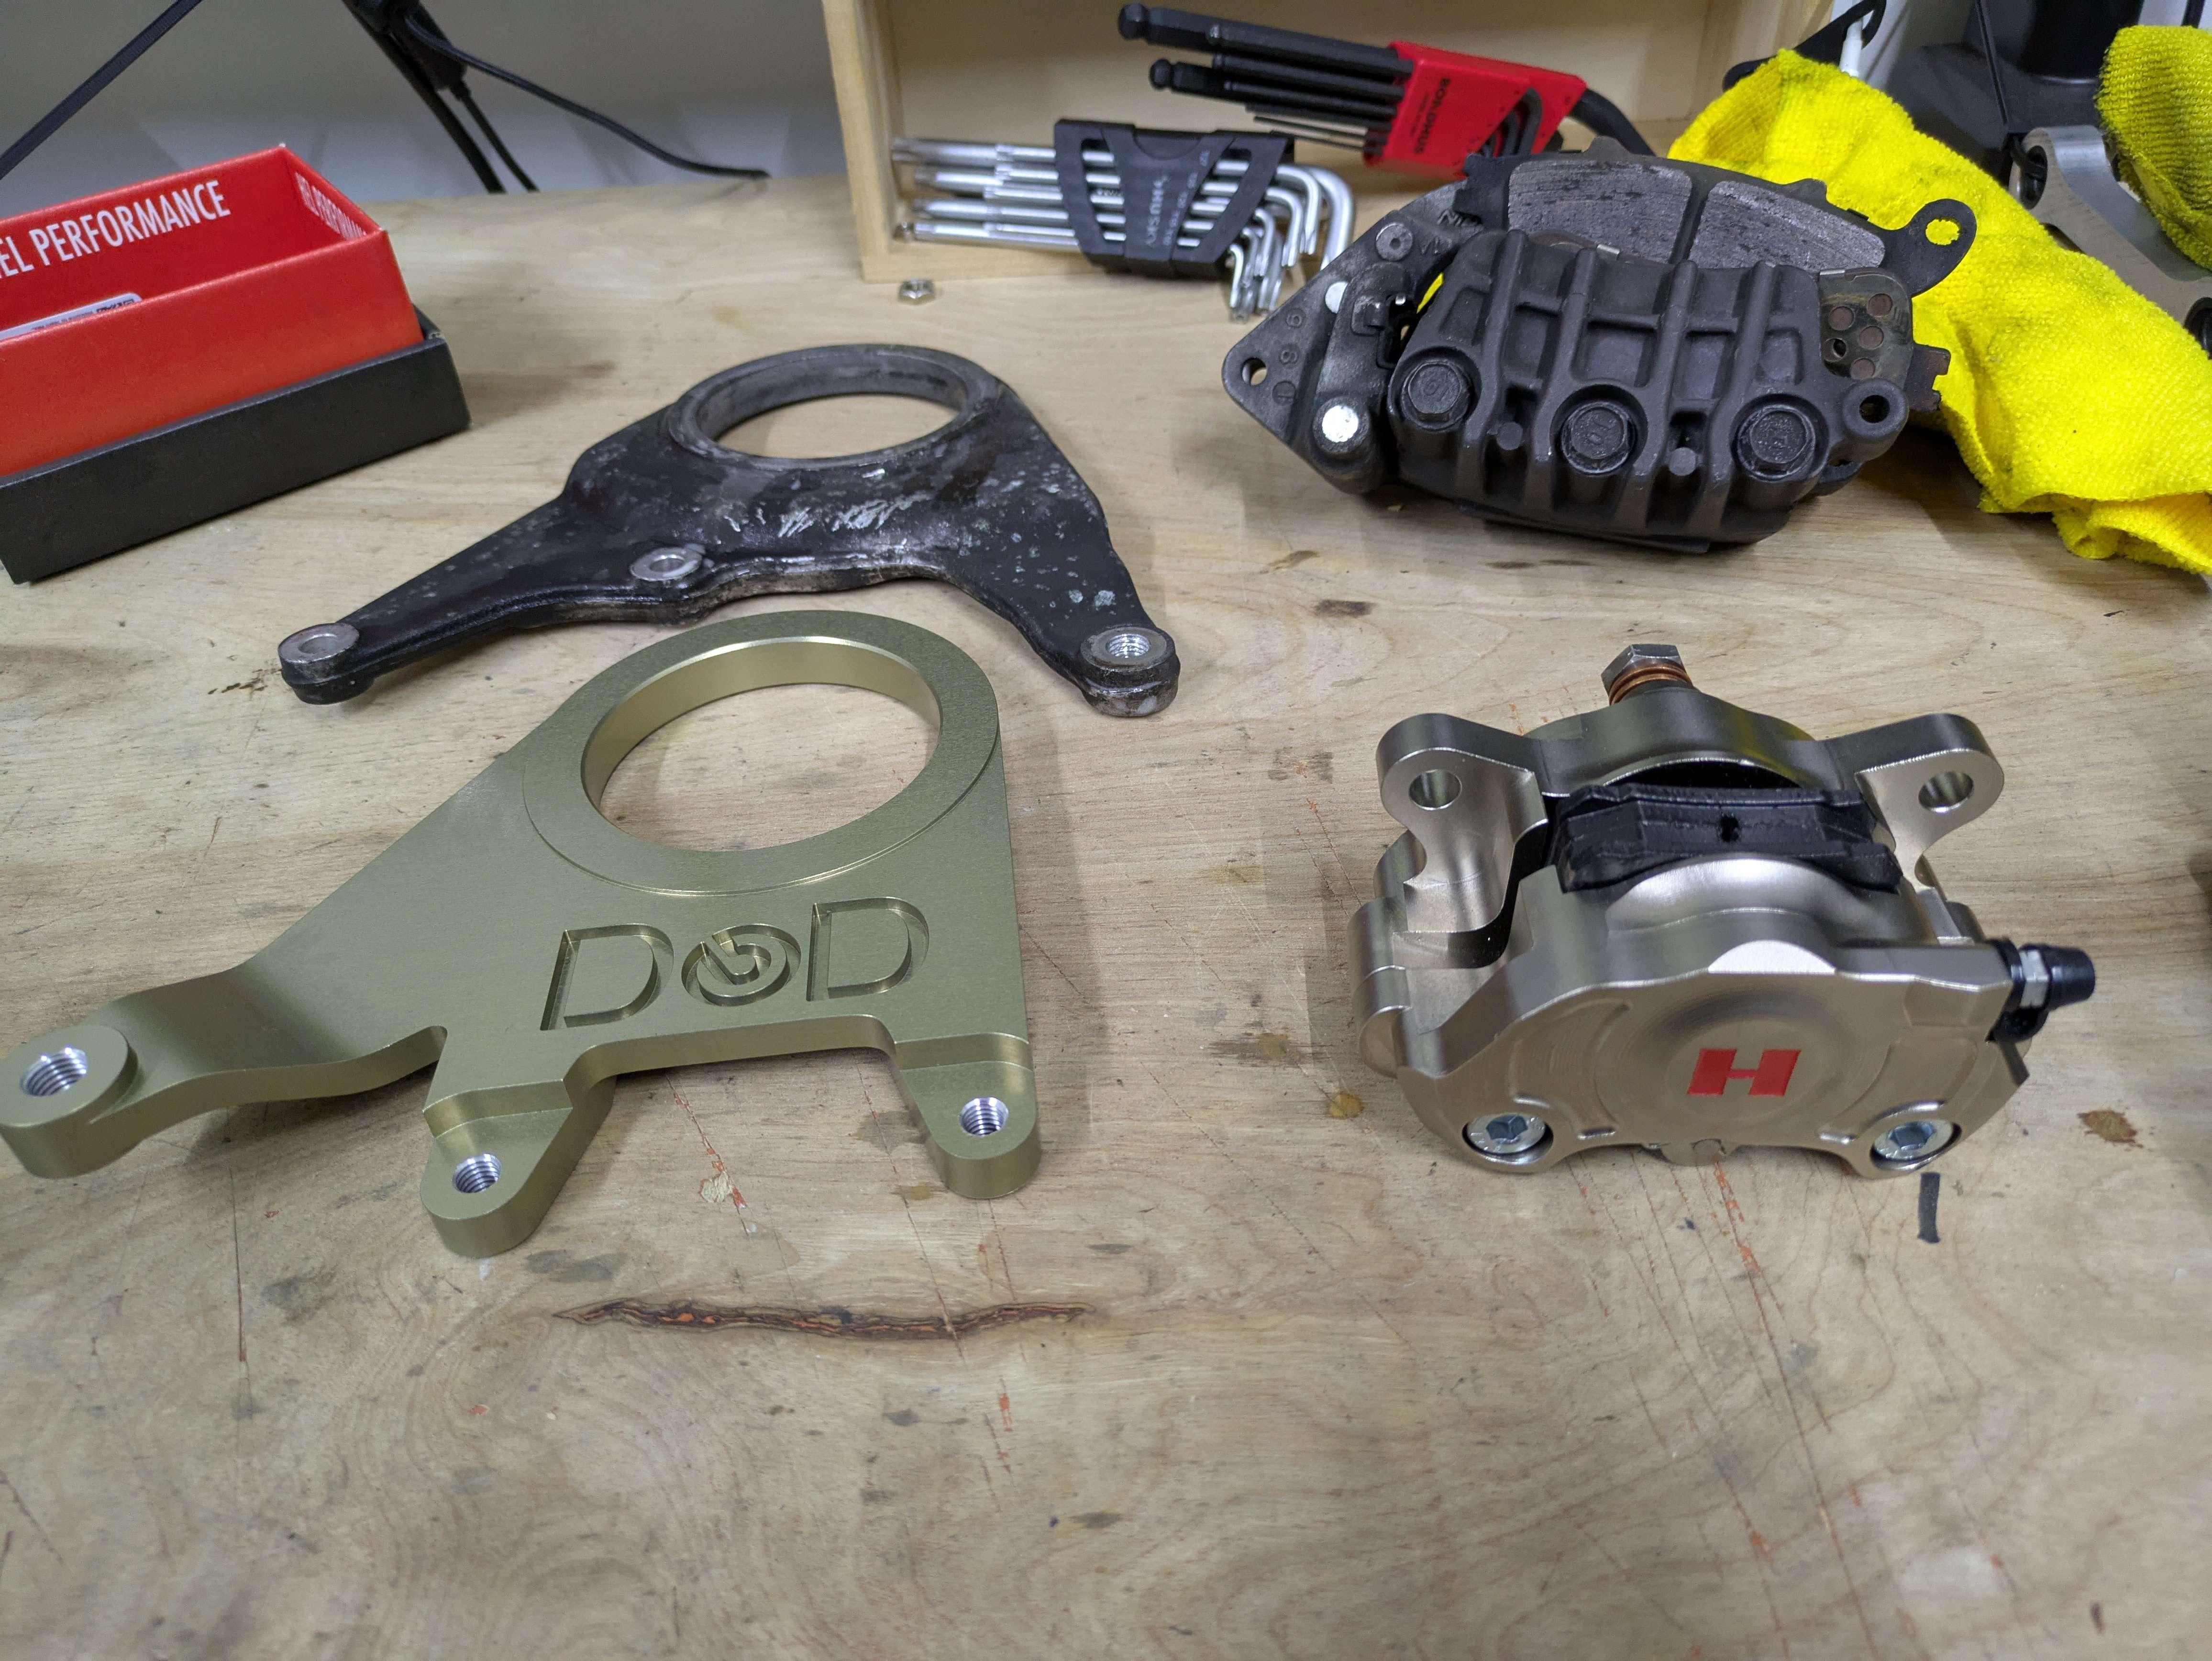
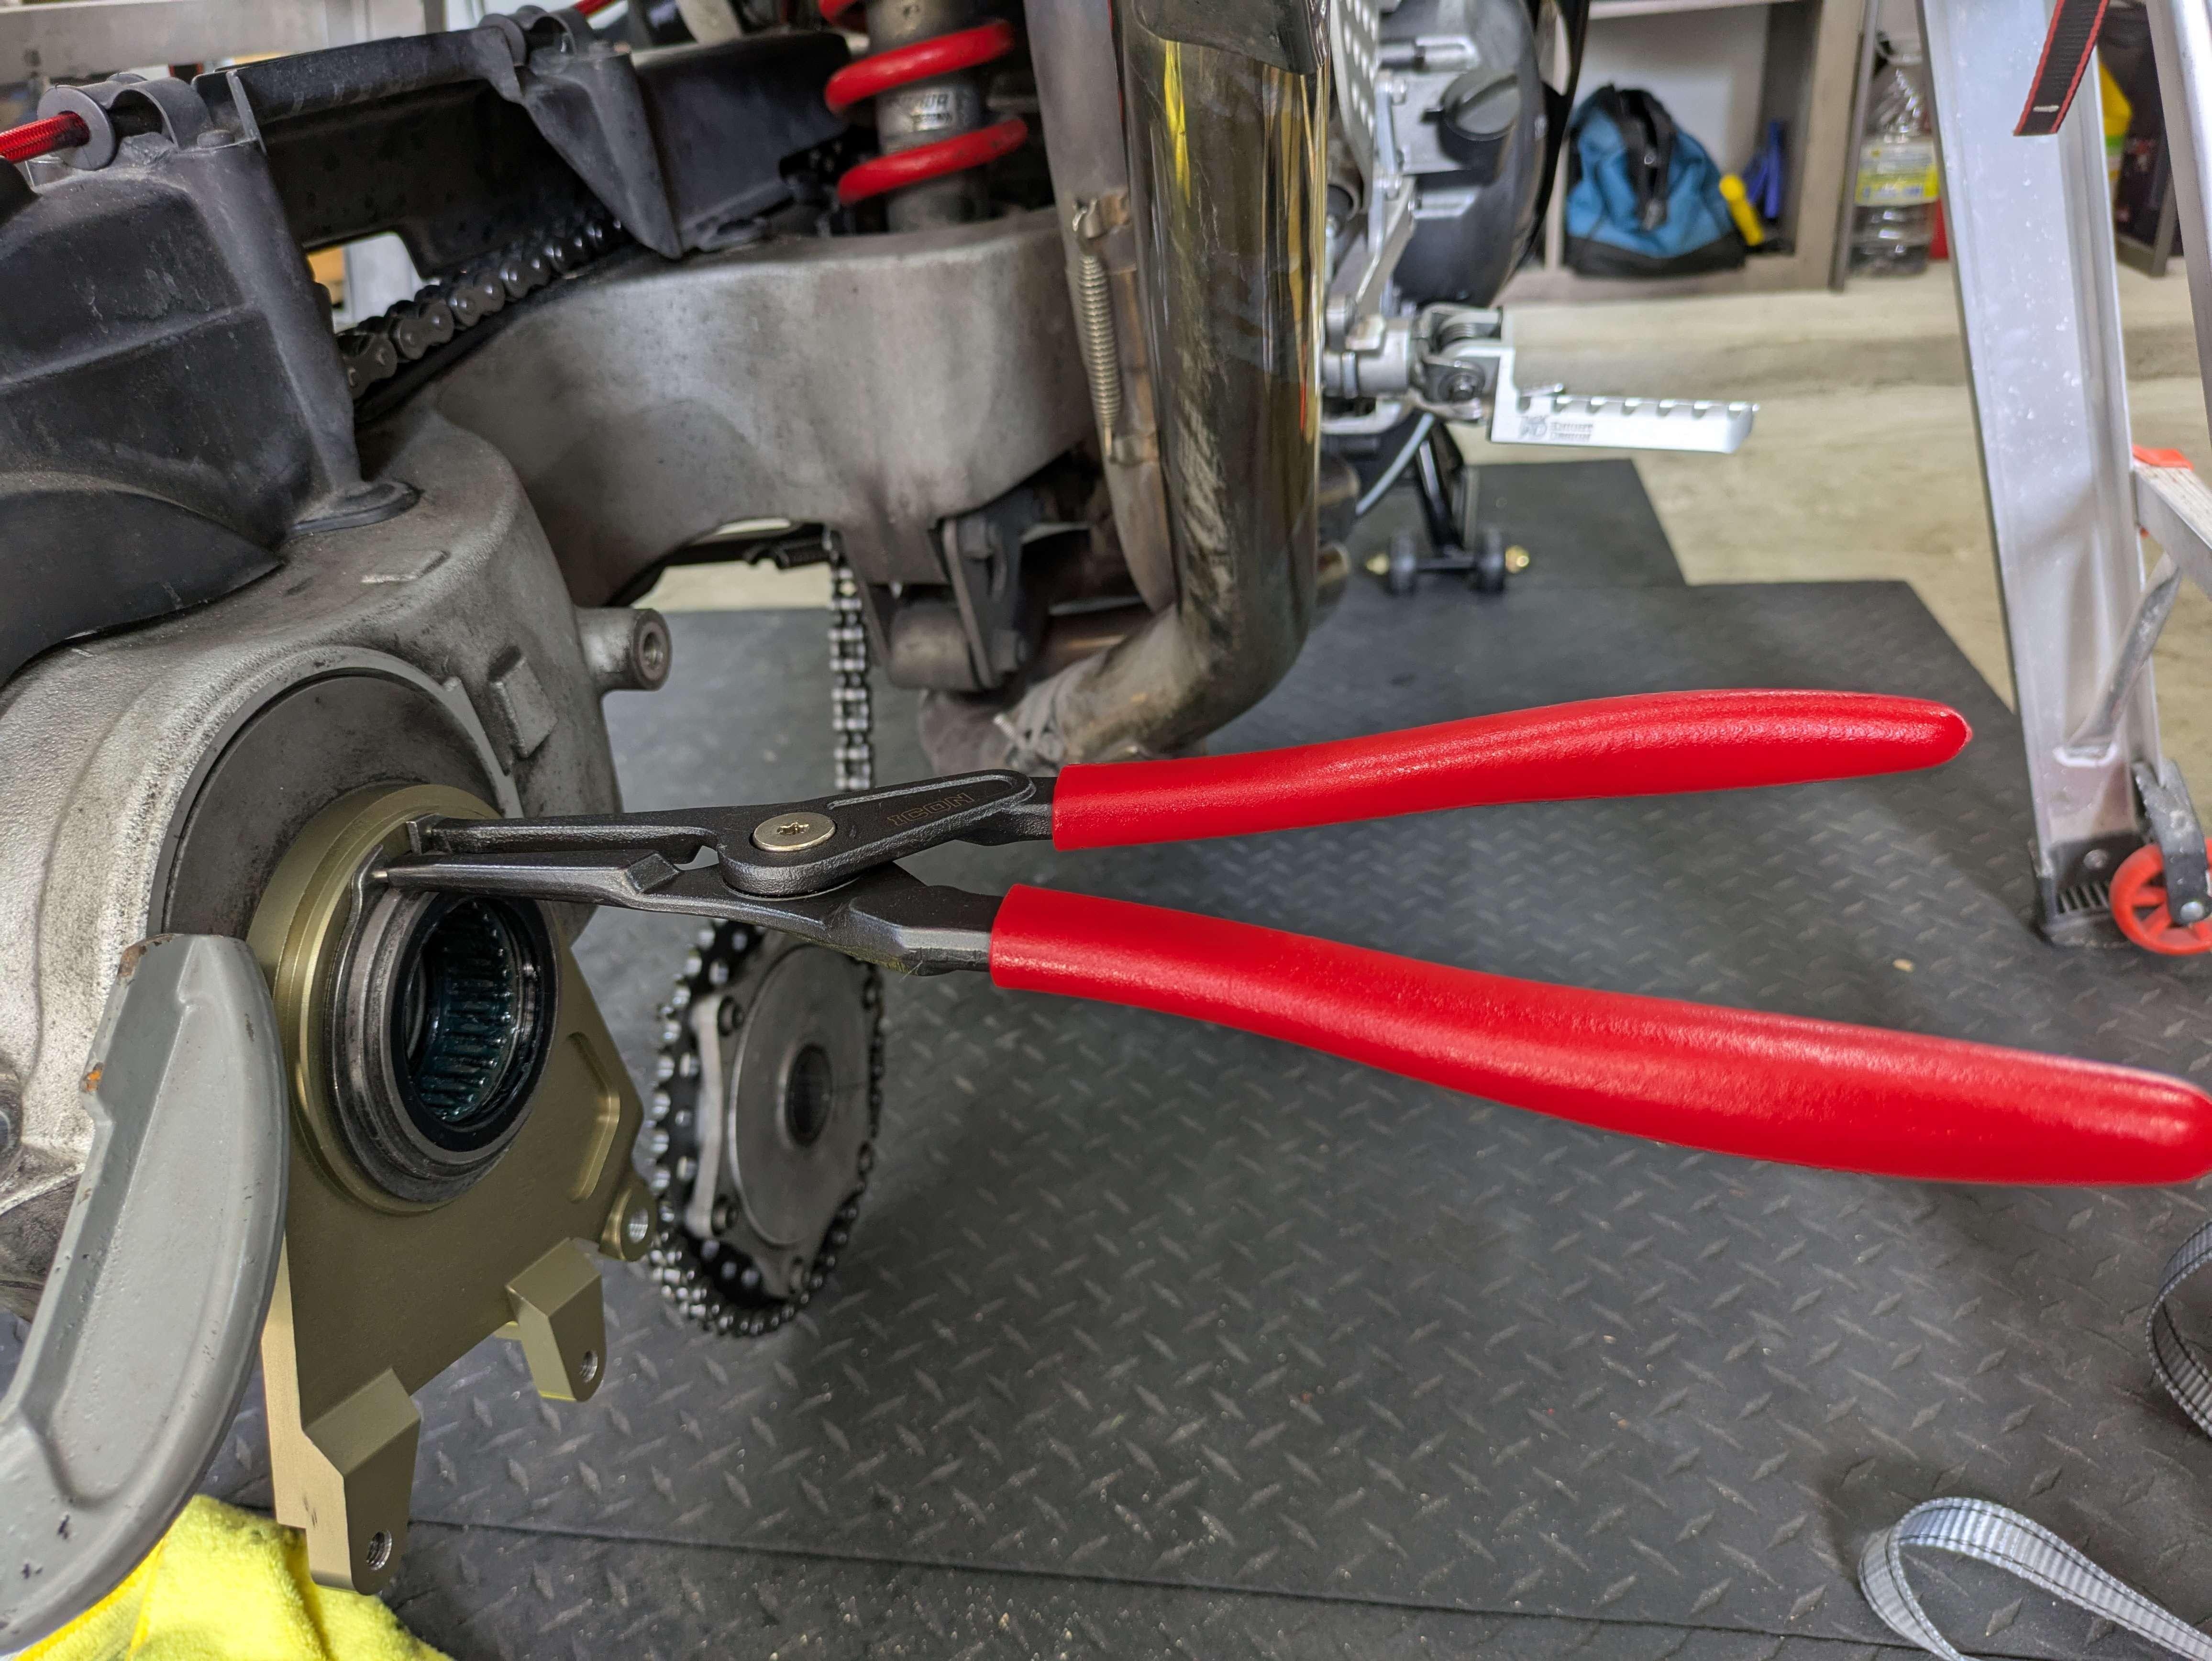
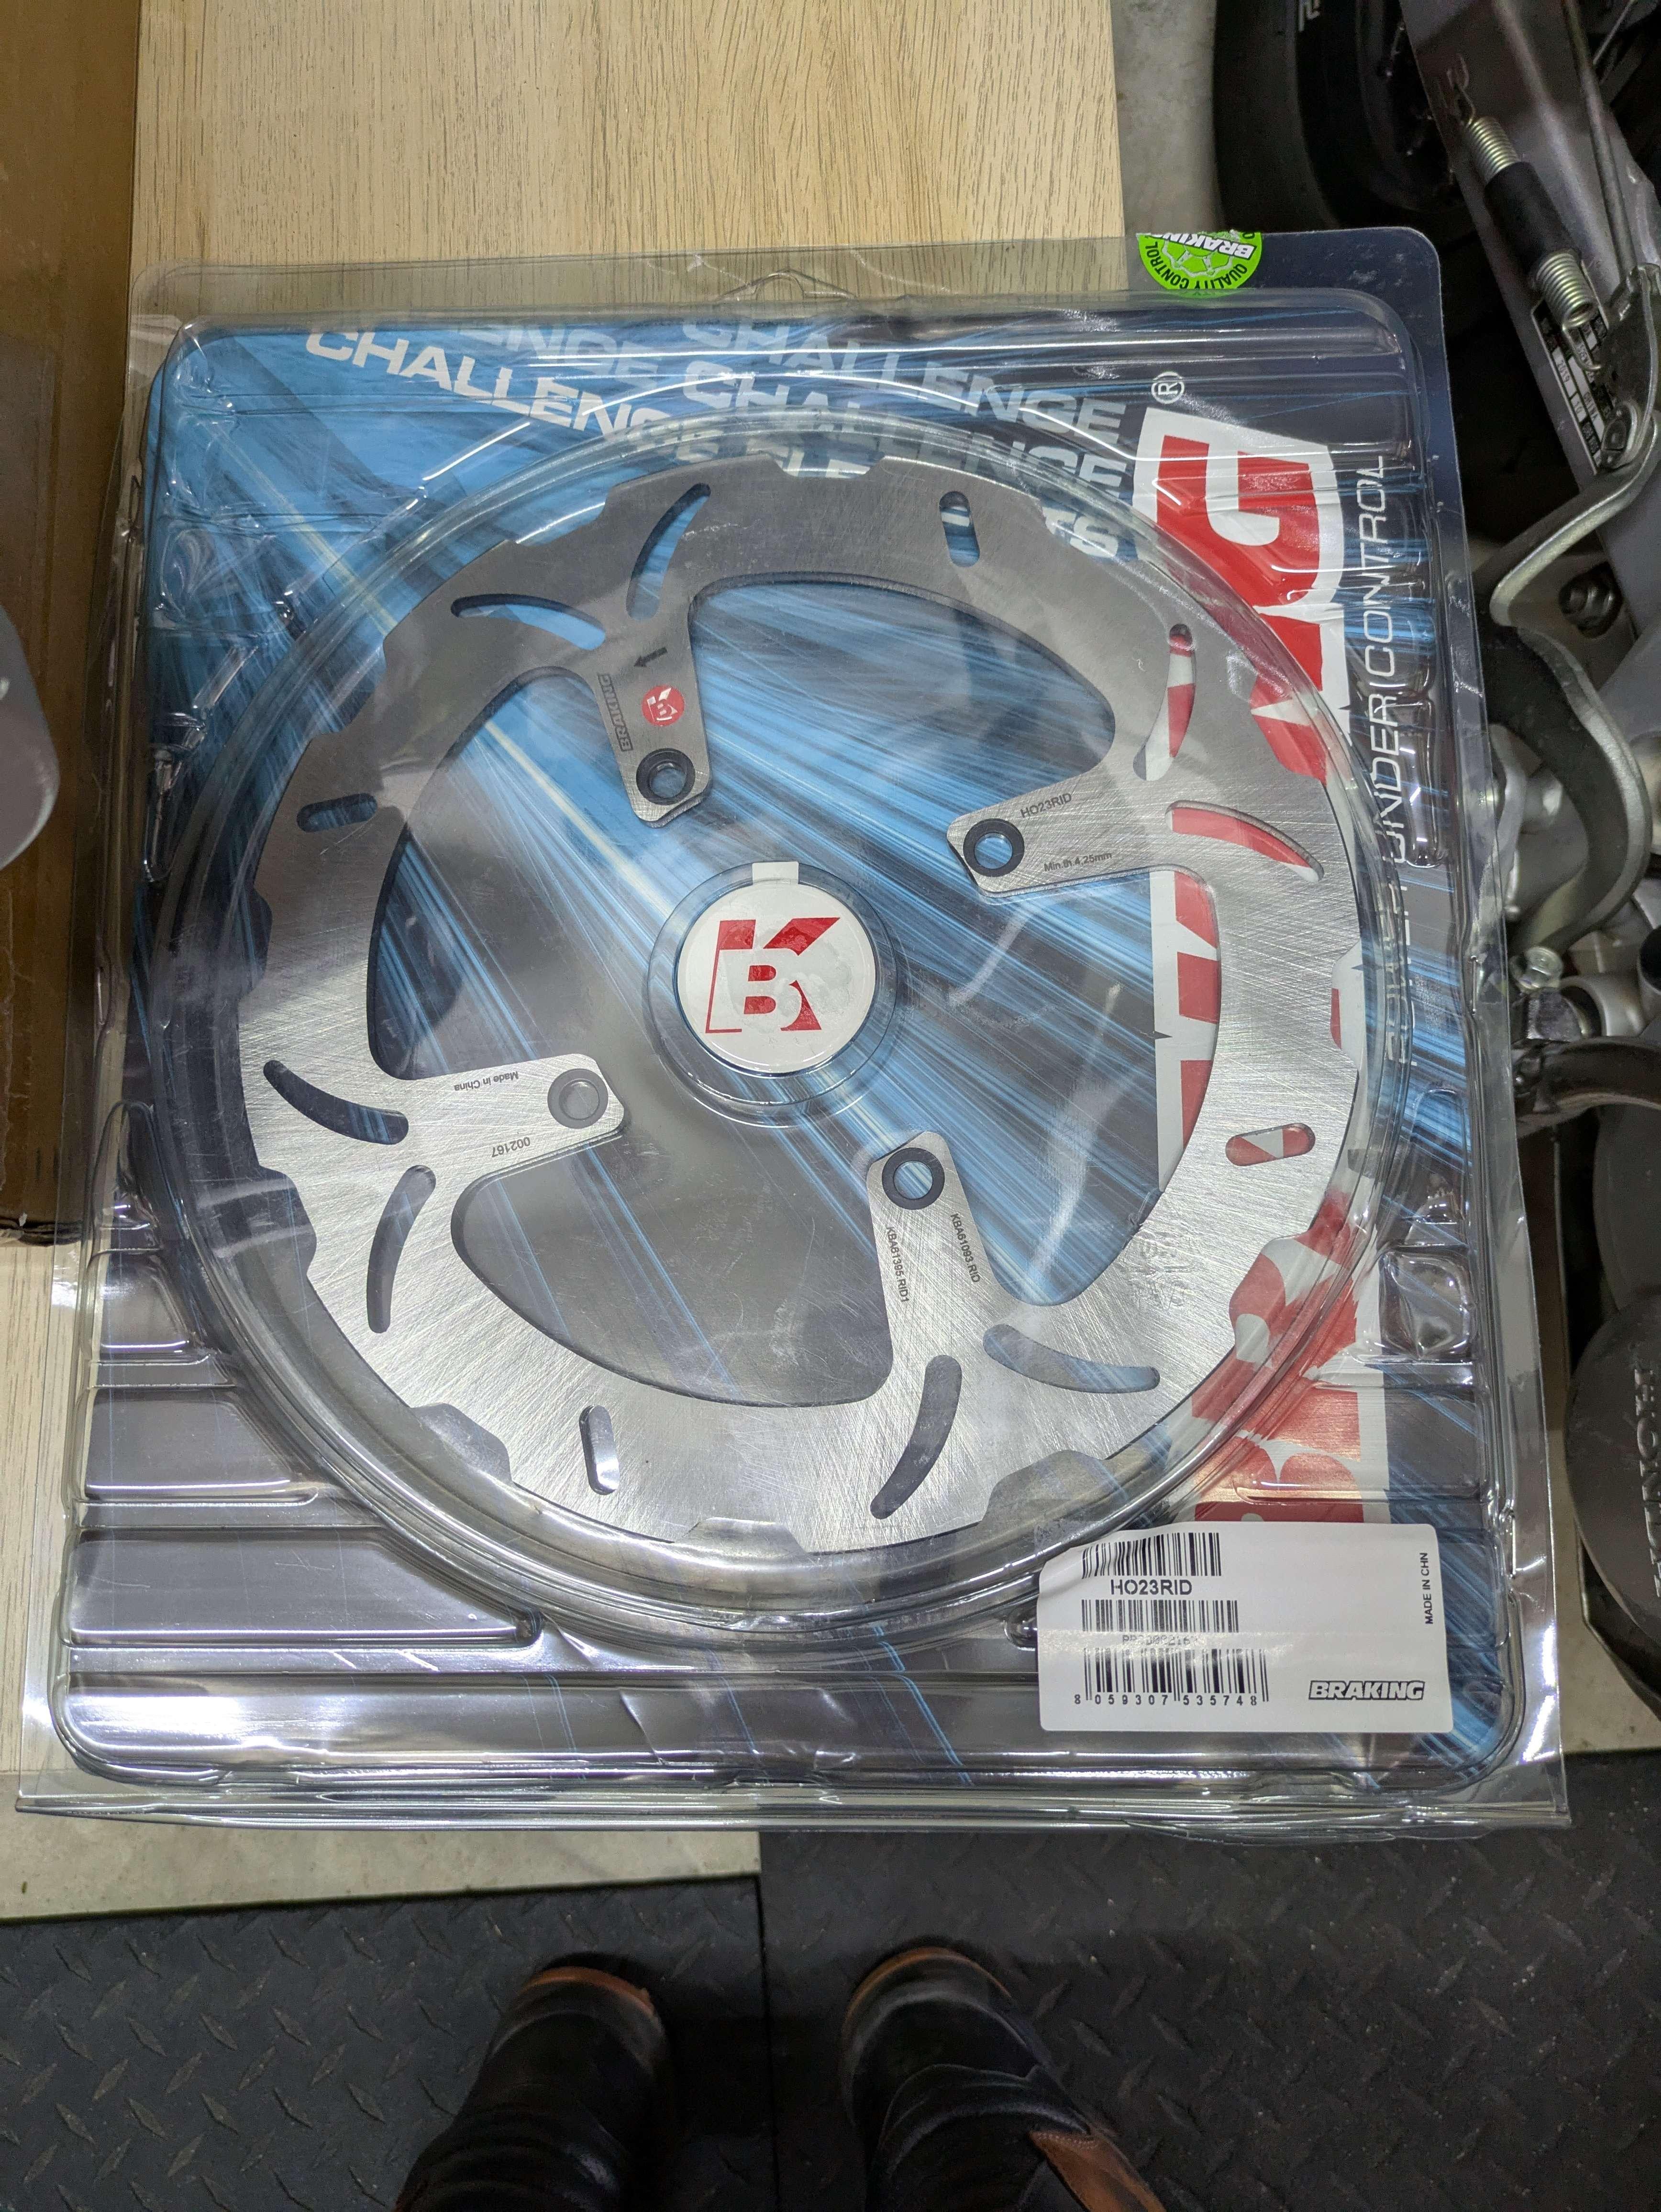
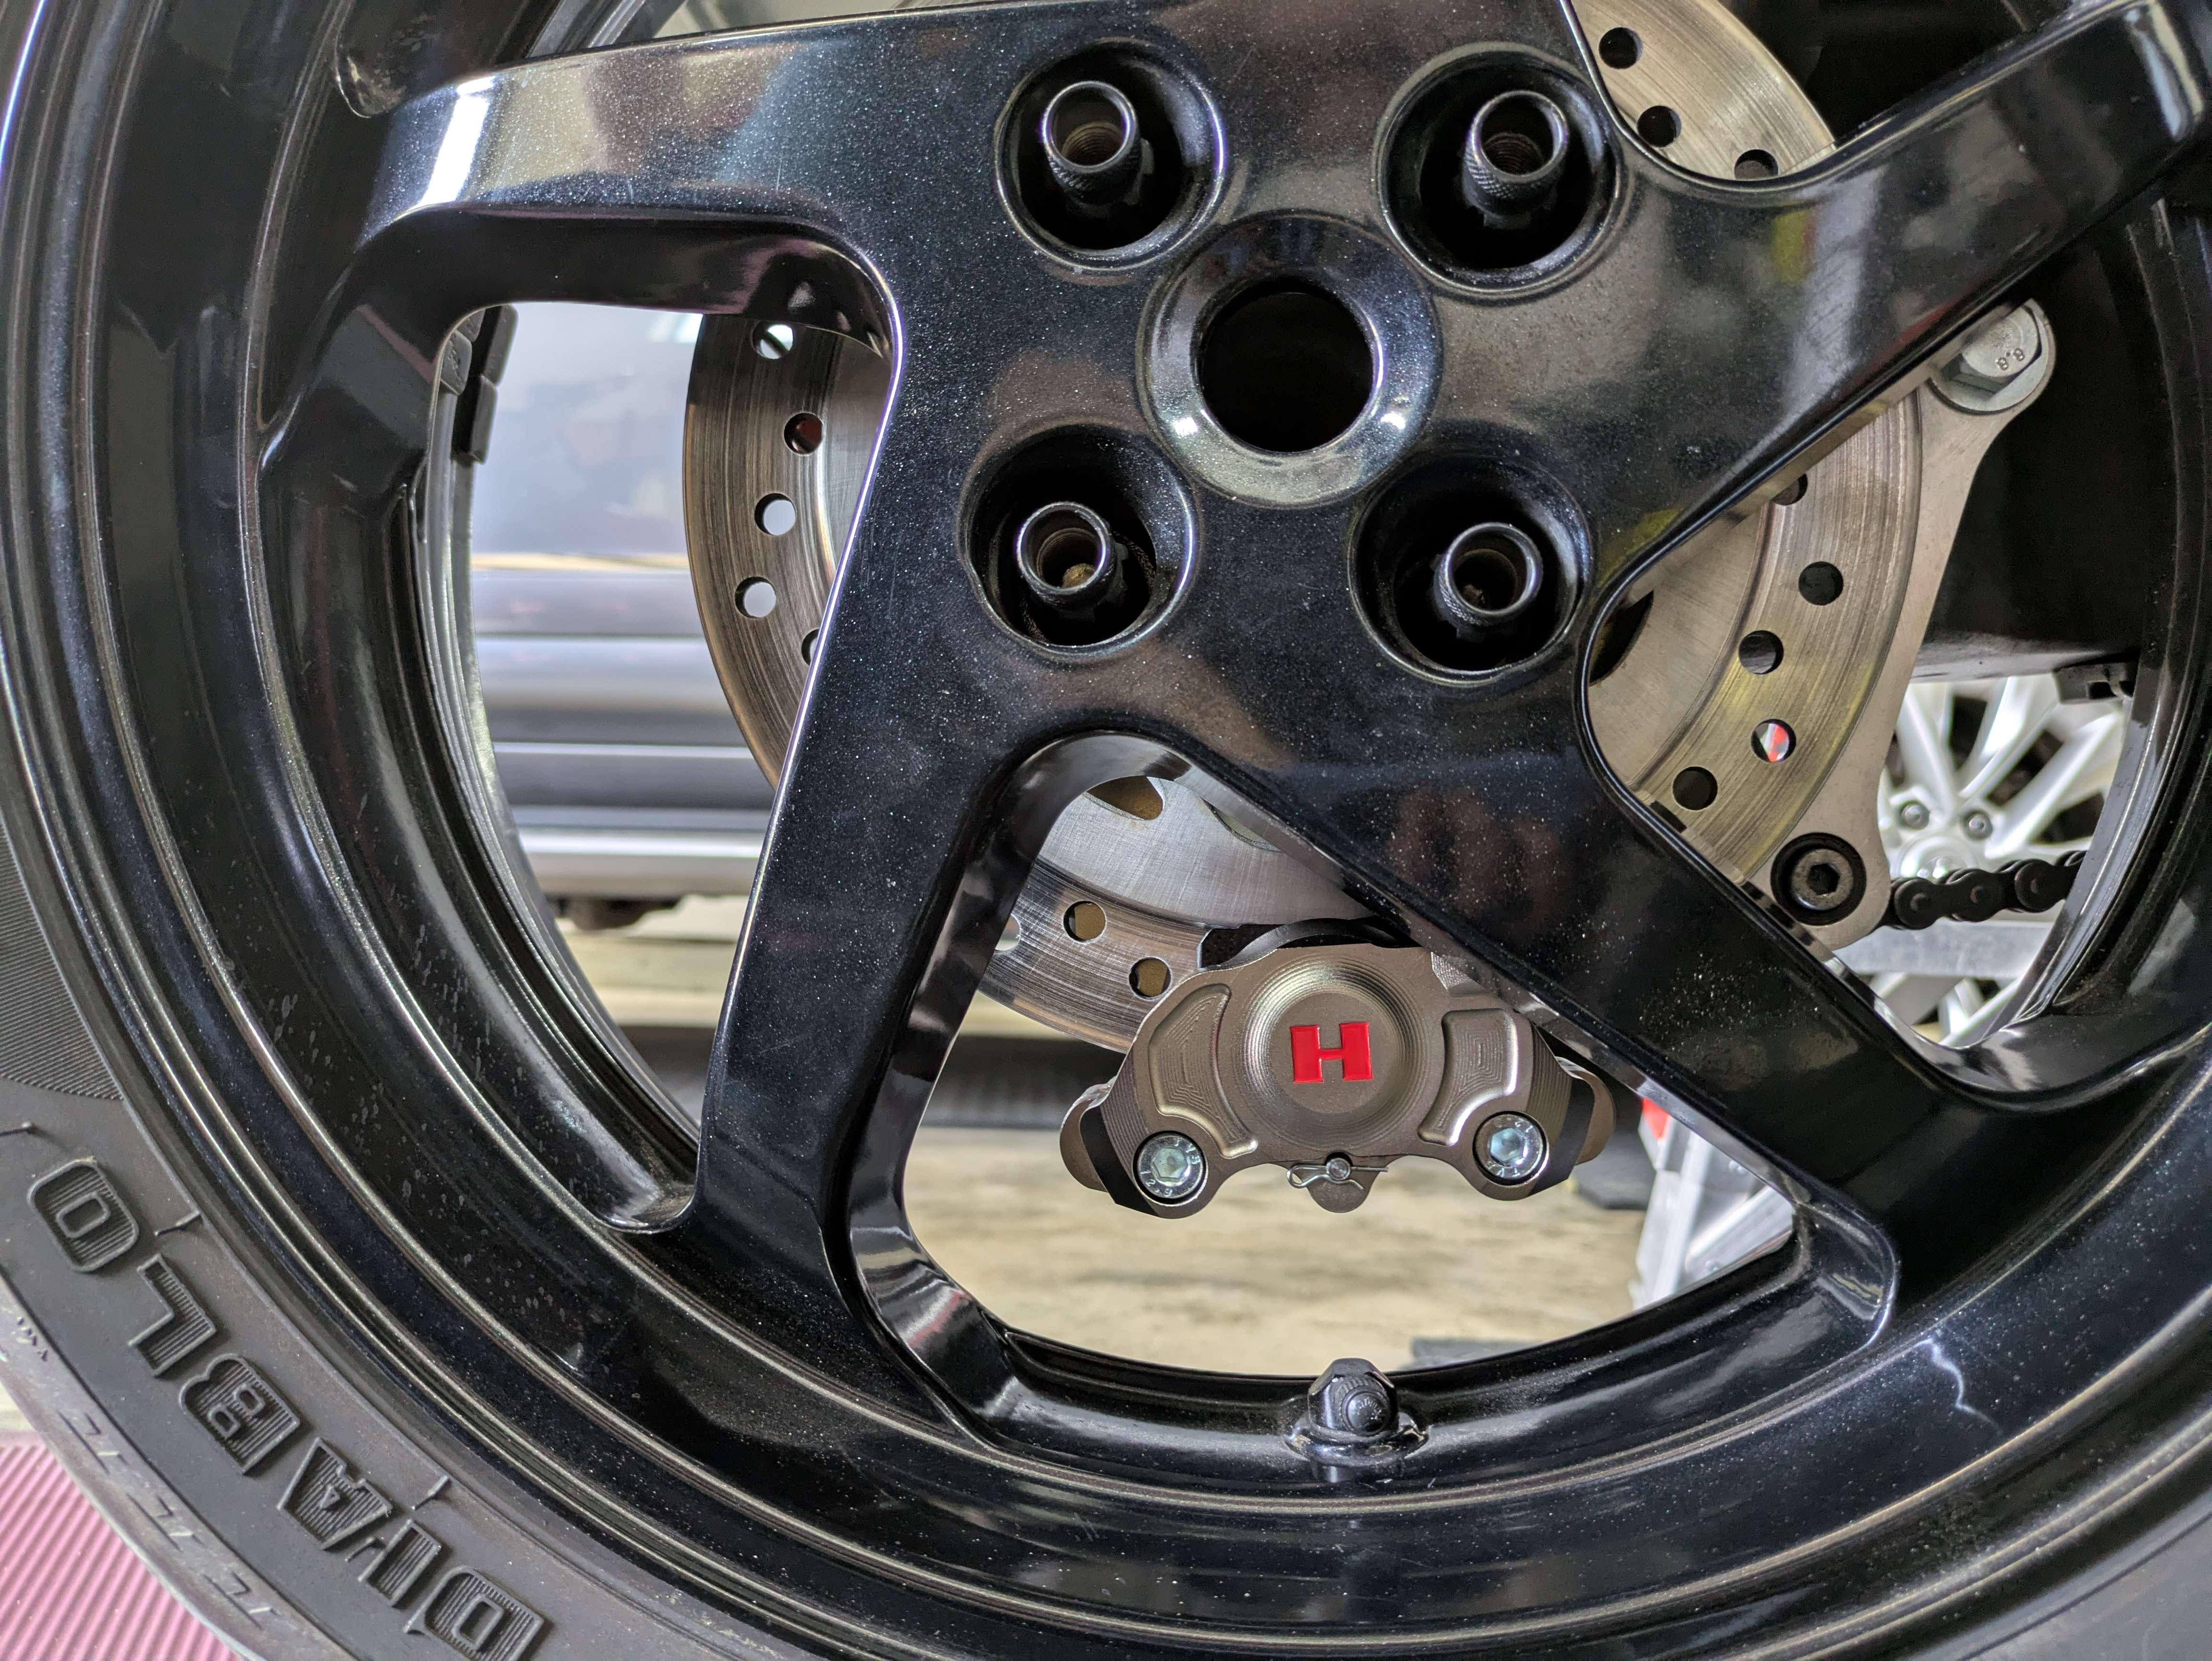
Well well well... the mad scientist strikes again. the ladder trick really did the work! It was VERY sketchy, but after distributing the load with a block of wood up top and securing transversely with easy-straps, I was able to confidently say the magic words "She aint goin nowhere" Next was to punch out the axle... and that was interesting! Quite easy to do, to be honest, and by some accounts on this forum, I consider myself lucky it were so simple. She's a little sour on the "left" (from rider position), but a good clean and grease & I'd wager she's good for another 60,000 miles 😁 Would love to poll advise from the viffer collective consciousness on this one. LMK how bad she is Now for the big battle of the job... Never have I ever struggled with a circlip like this before... I really had to muscle that bad boy off, and even then... I walked it off around its inner radius. (foreshadowing...) But we got there! Yee haw! a very scary job made simple. For years I was timid about taking the rear end apart, but it really is as simple as it could be! (challenging? Yes. Simple? yes. Such things are not mutually exclusive in my mind) Pics of the eccentric/bearings: And now for the whole point of this exercise... enjoy the eye candy, folks: Billet Hel rear brake caliper. And as pretty as she looks on the table... it was time to bring it all back together (and calm my nerves by getting this machine back on the earth!!) --- Reassembly --- So here we went... Step 1: Cir-clip ... well crap... this didn't go my way the first time, barely getting it removed. So what makes me think I can get it back ON.... After rummaging around town getting other bits I may need (across three hardware stores...), Ol Faithful Harbor Freight came to the rescue with the largest cir-clip pliers I have ever laid eyes on... That's right, folks. This Is how I got it back on. 🤣 After dying of maniacal laughter from my successes (and at my struggles from earlier), I press on to button everything up. All goes smoothly, and here's the end results... 🤤 Now... this job isn't complete, as I'll be back in there one more time to be sure that rear brake is clamping onto some kit as premium as itself... Stay tuned!
9 points
-
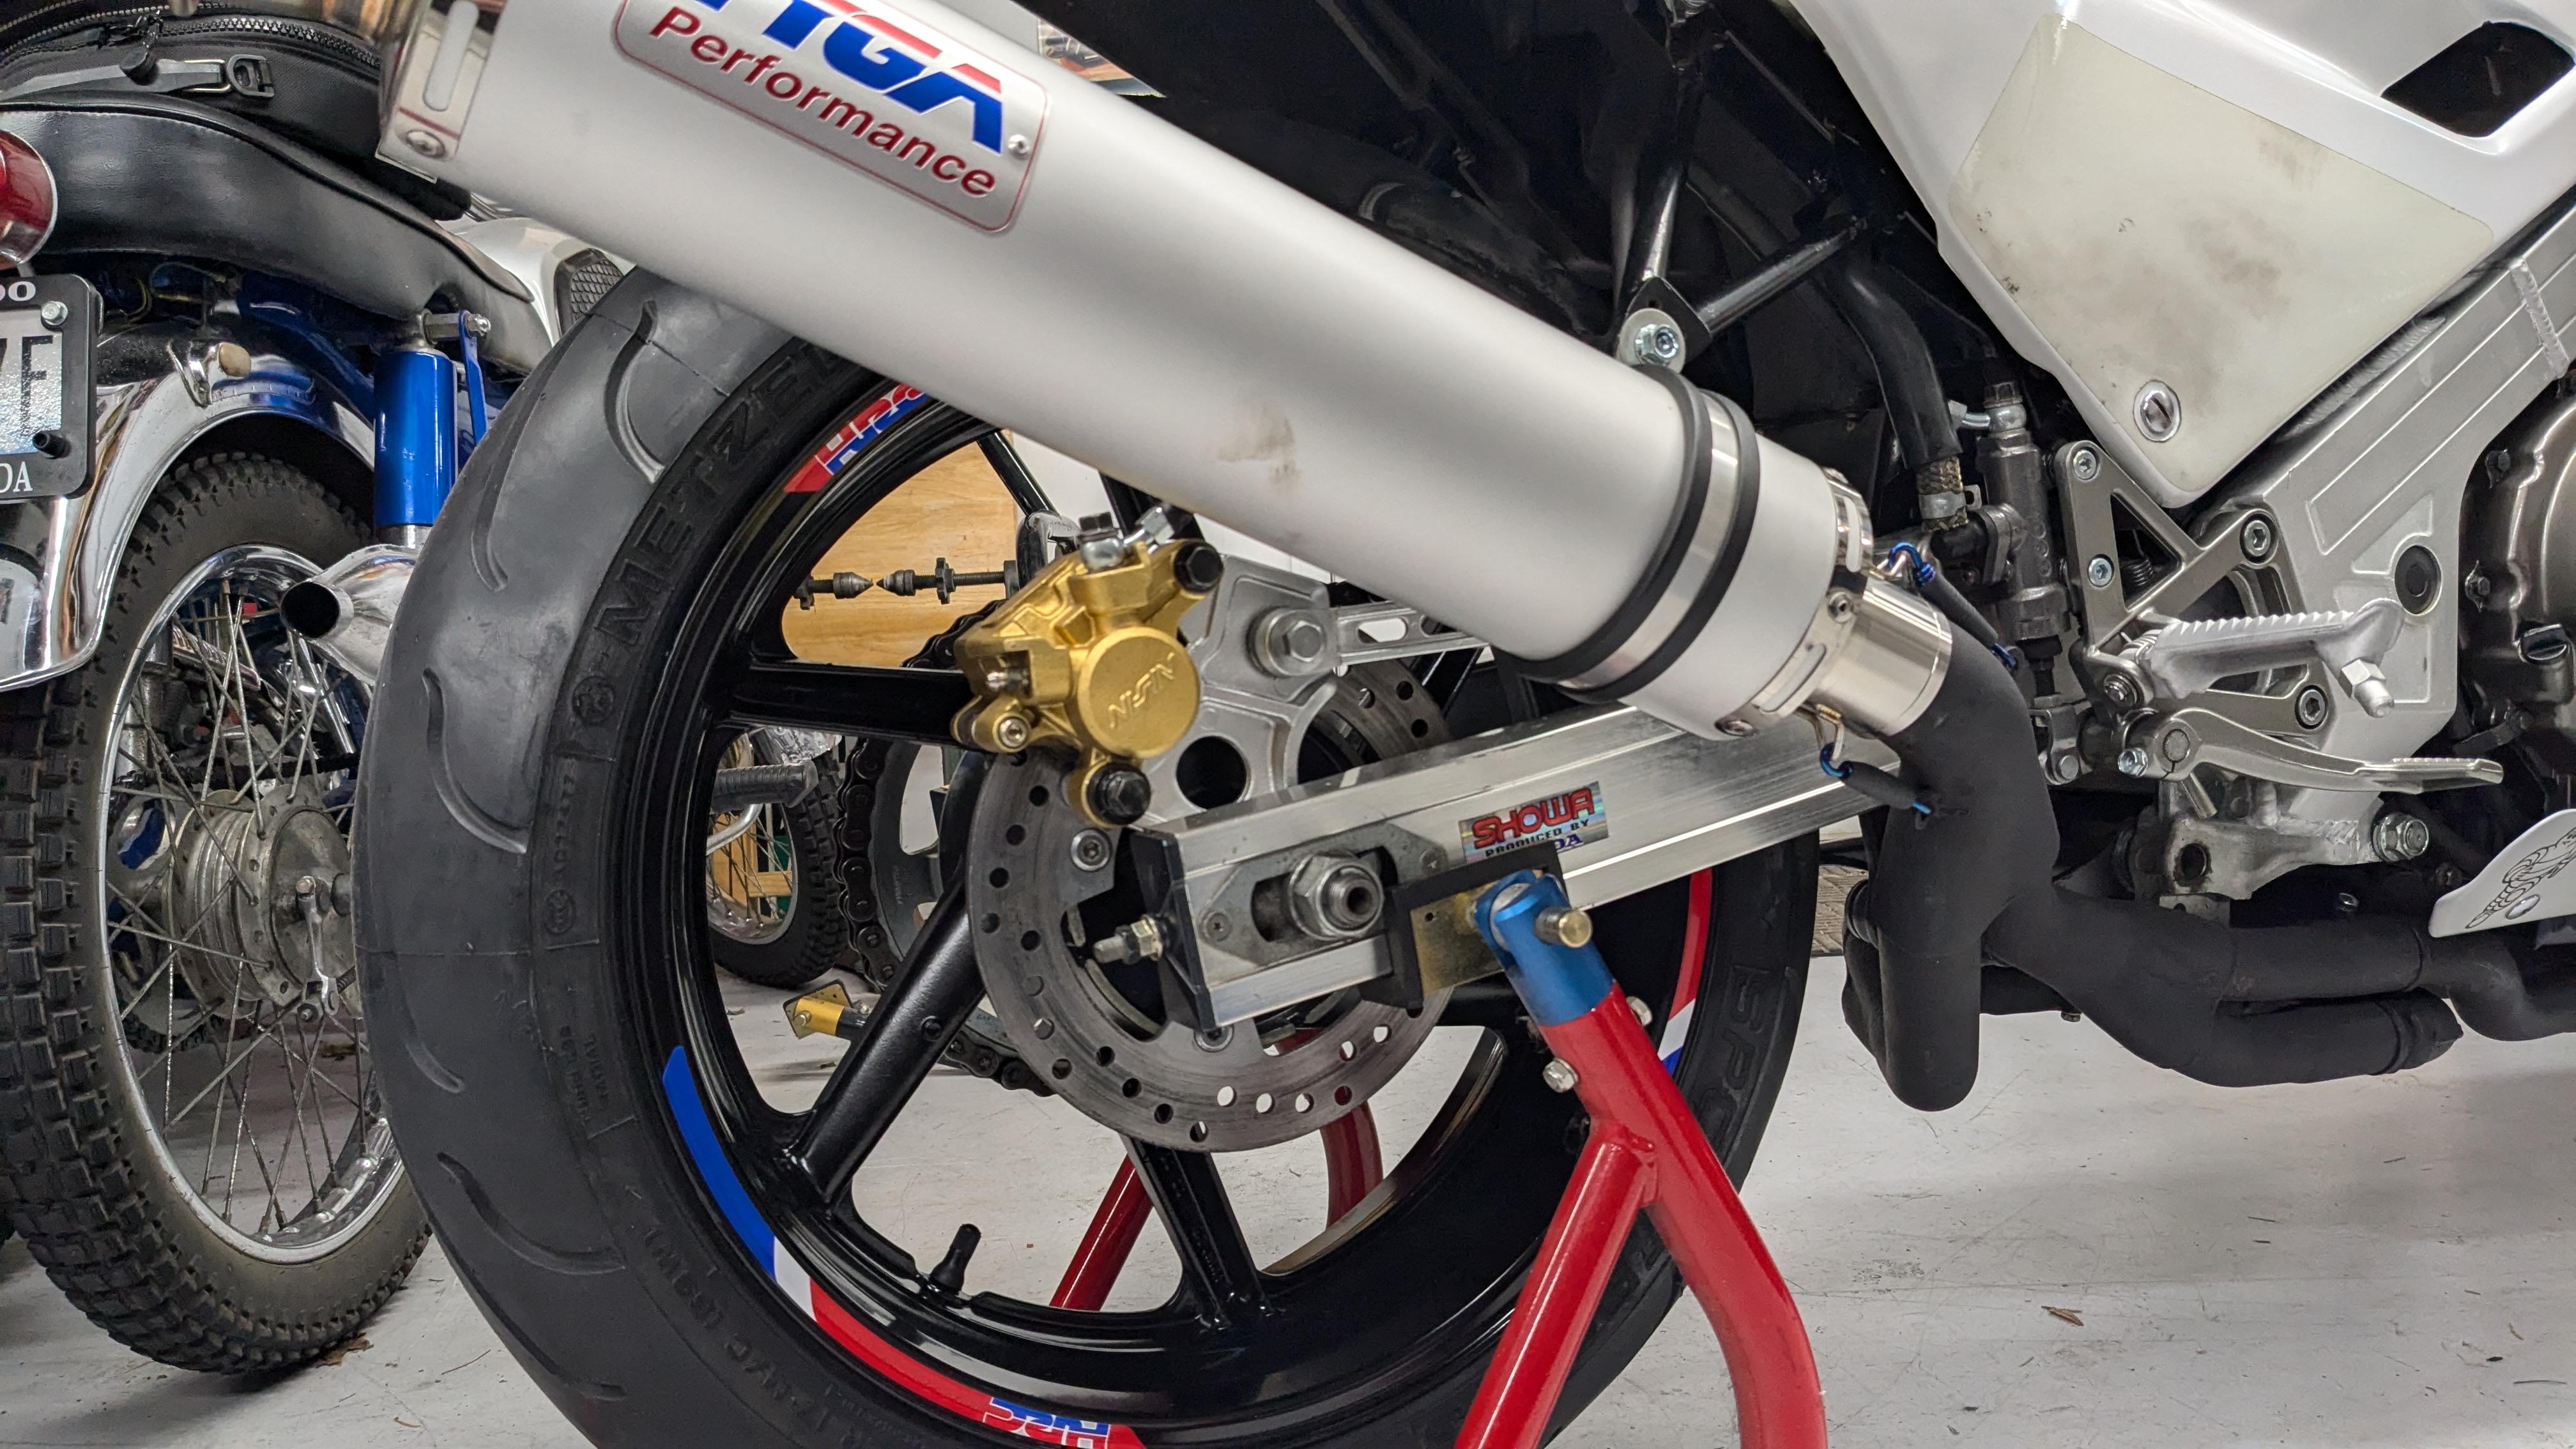
New tires presented an opportunity to finish a "RC26-II" Upgrade Kit. Restored F3 front end with RT springs, new Nissin calipers and pads. F3 5.0" rear wheel with a new rear brake set-up.
9 points
-
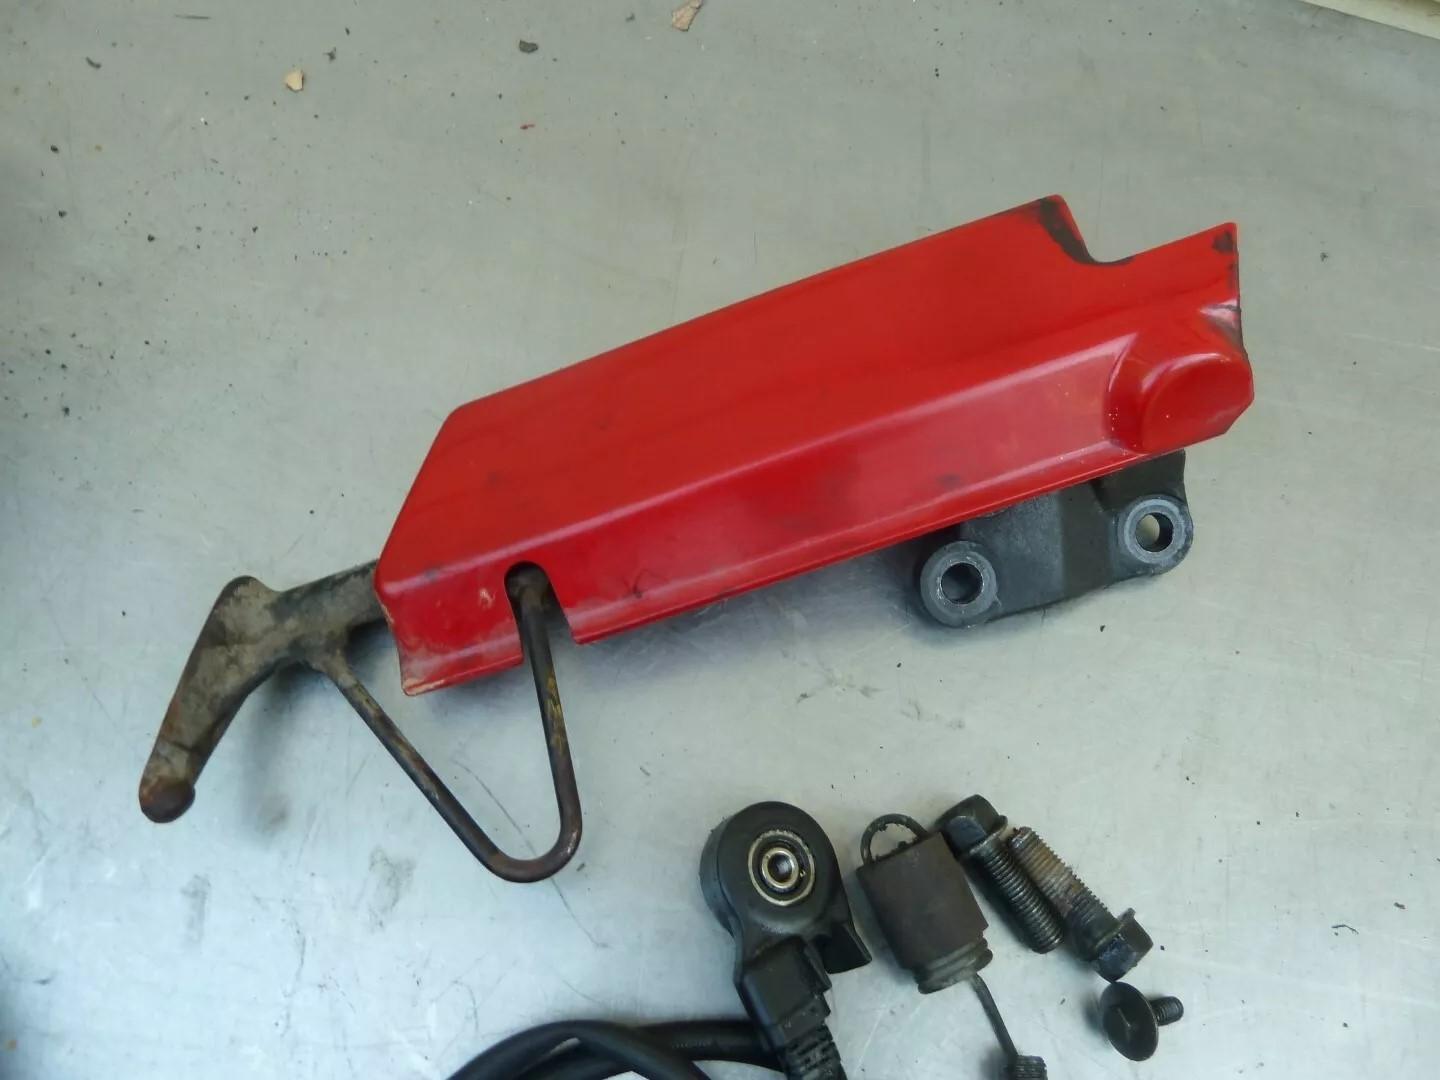
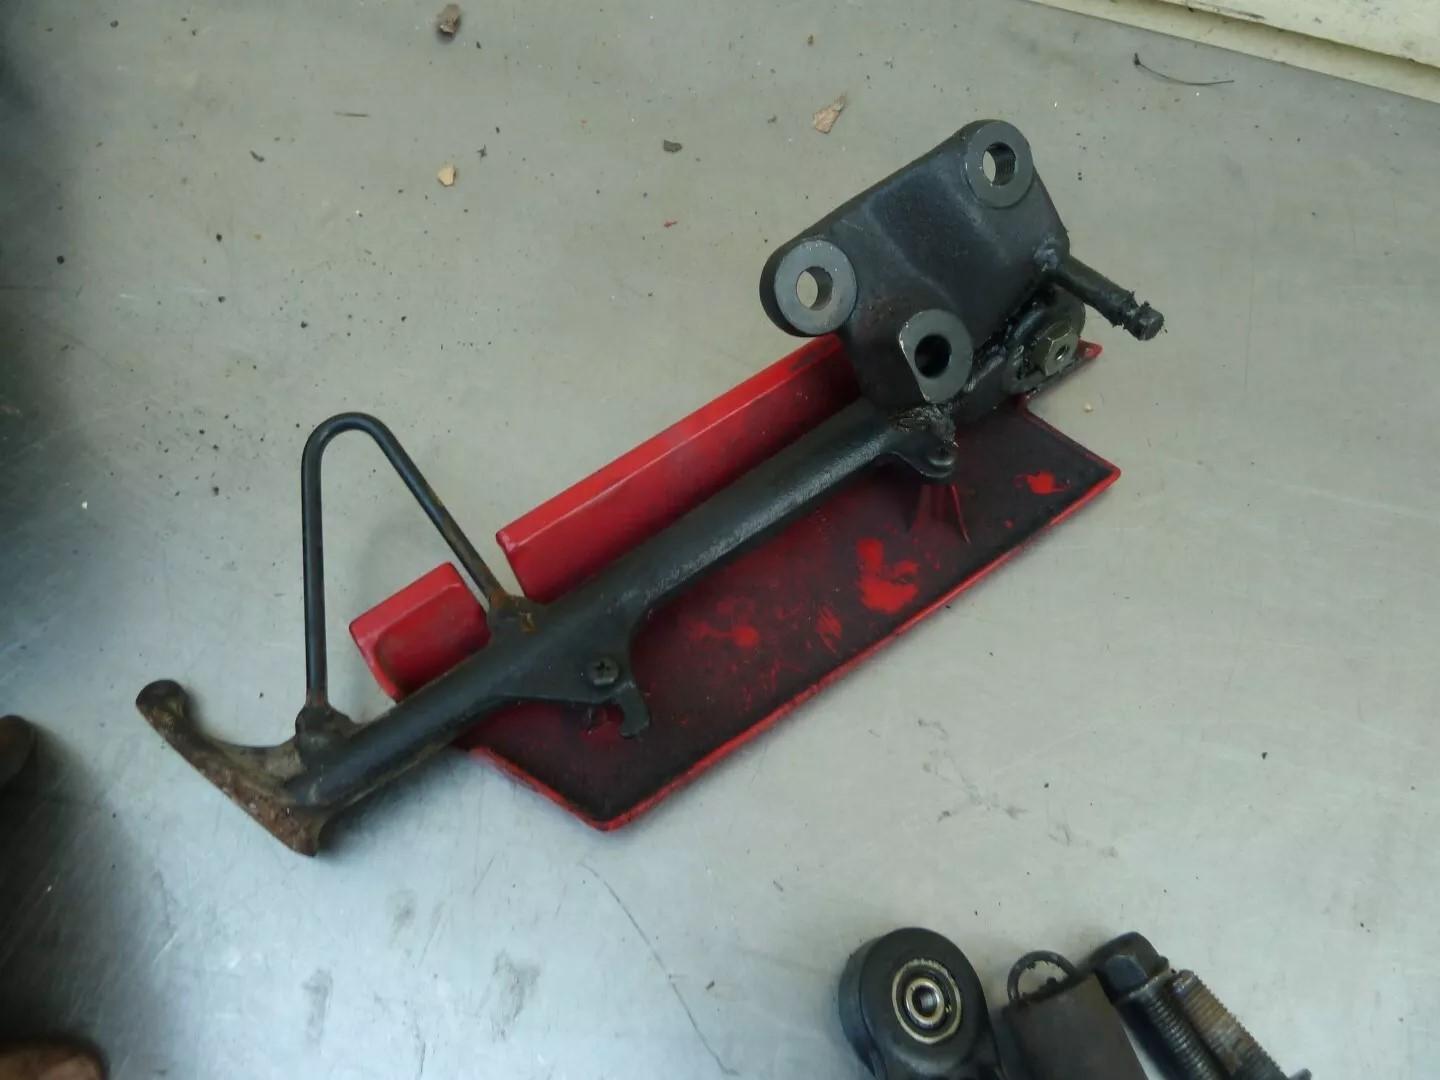
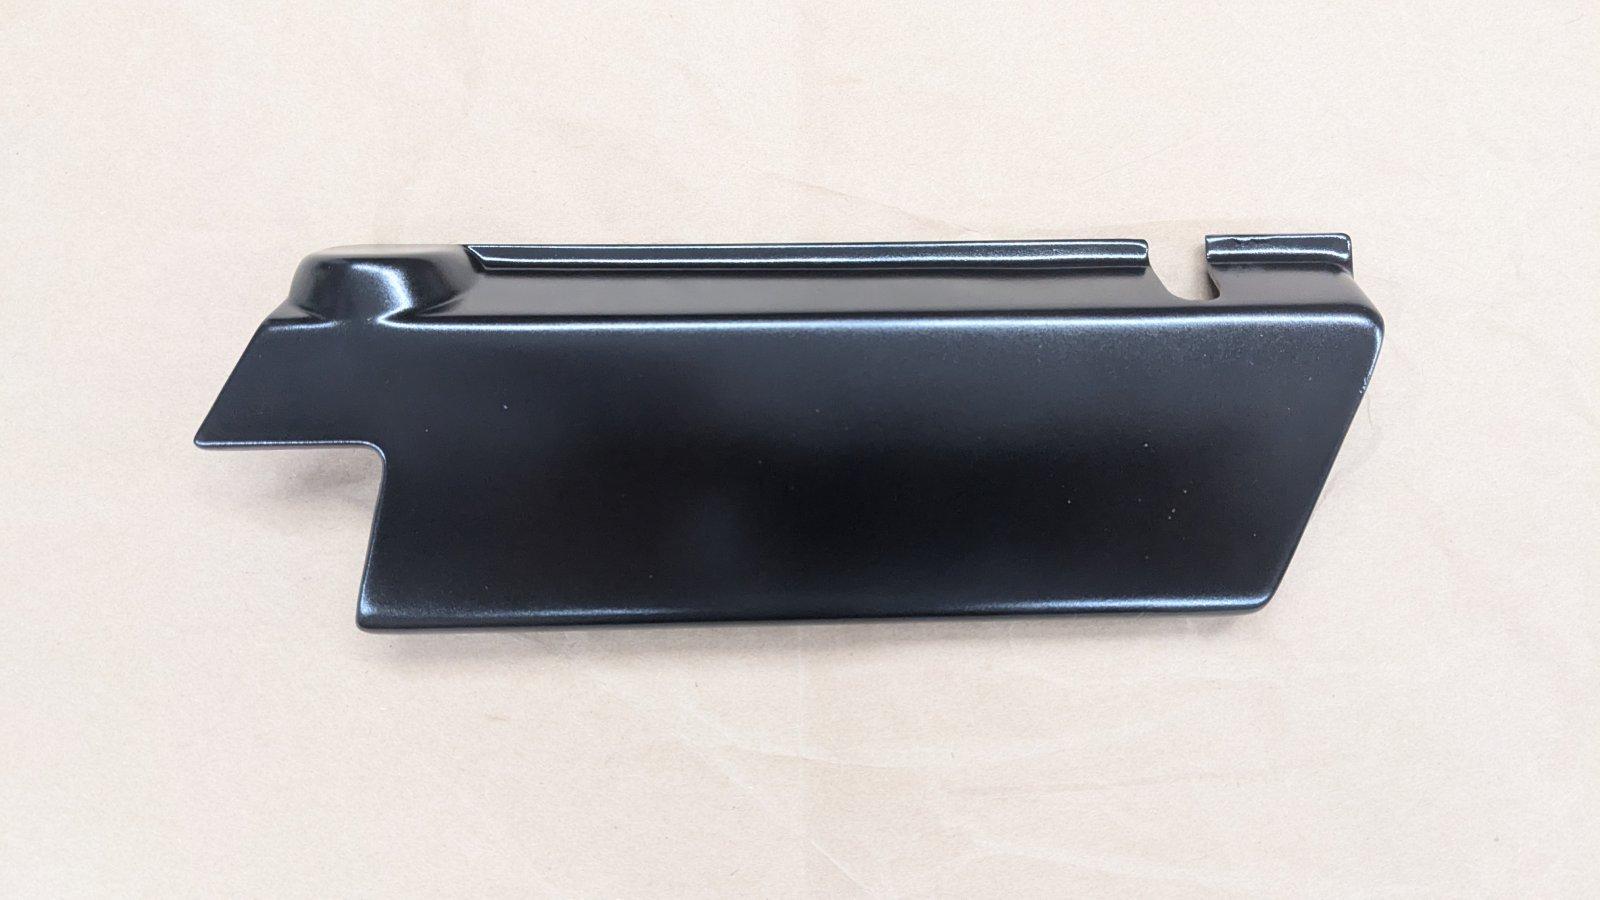
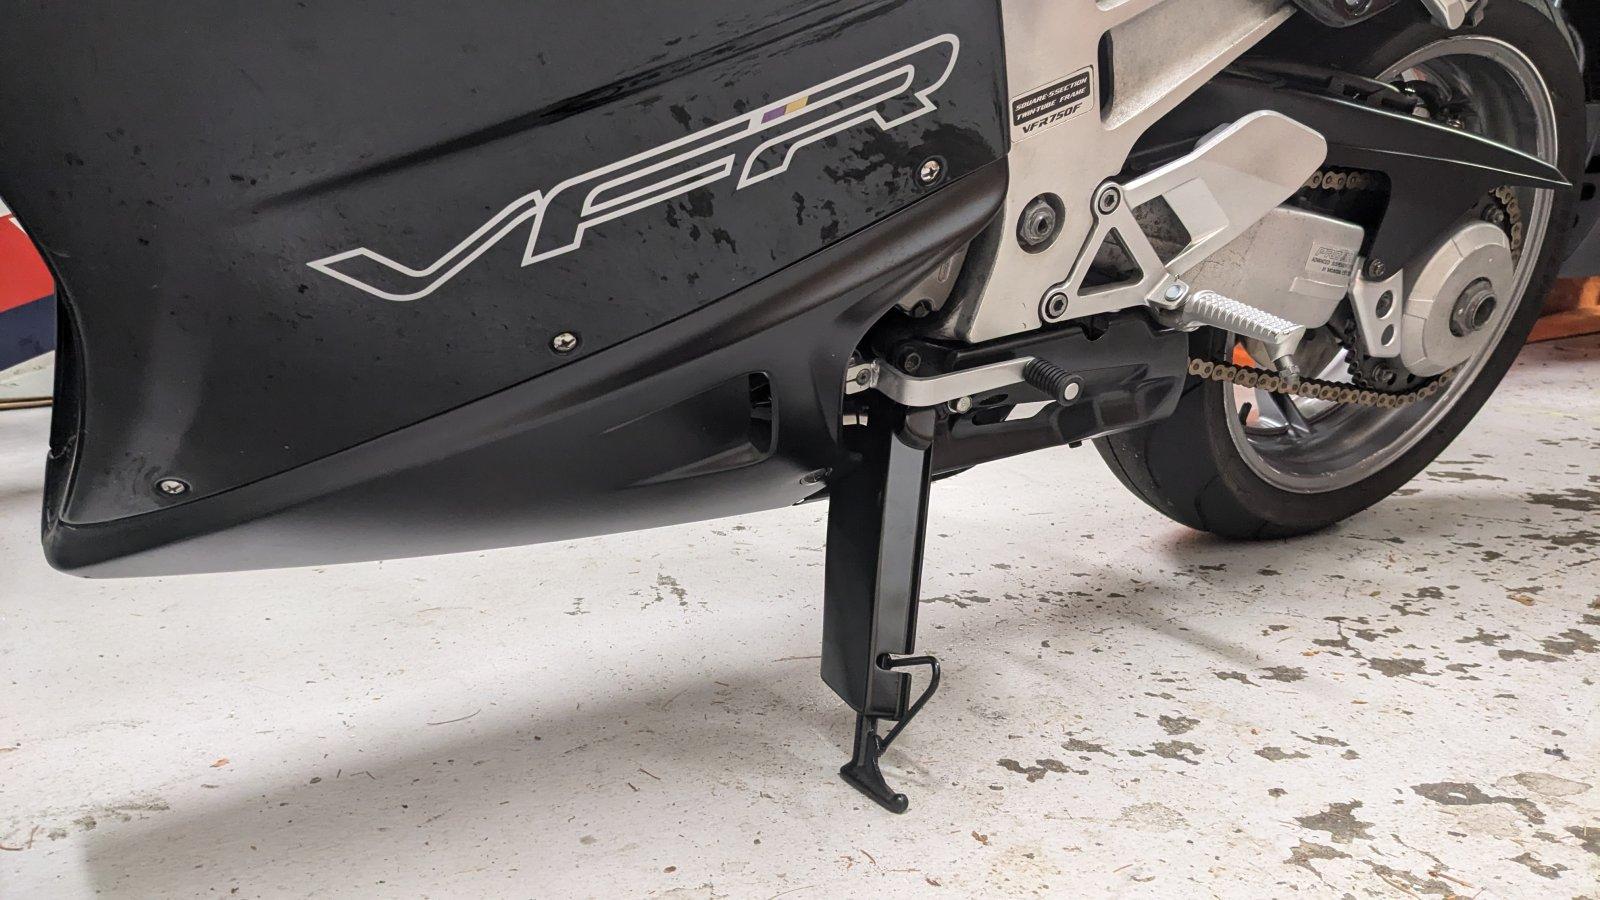
And I FINALLY found a Side Stand Cowl. Even had both mounts intact. Couple small cracks, that did not go all the way thru, repaired (v-grooved, epoxy filled, re-enforced on the back, ABS body filler, sanded). Couple coats of primer, sanded, couple coats satin black (which is what the whole lower third of the bike is). Gonna be good for 10 mph on top and 10 extra mpg. Because science.
9 points
-
Ho Ho Ho!!!! Best Season Wishes To You All!!!! And "may the road rise up to meet you" in 2025 as well....
9 points
-
I wiped them out, looking at 2 point authorization for logging in.9 points
-
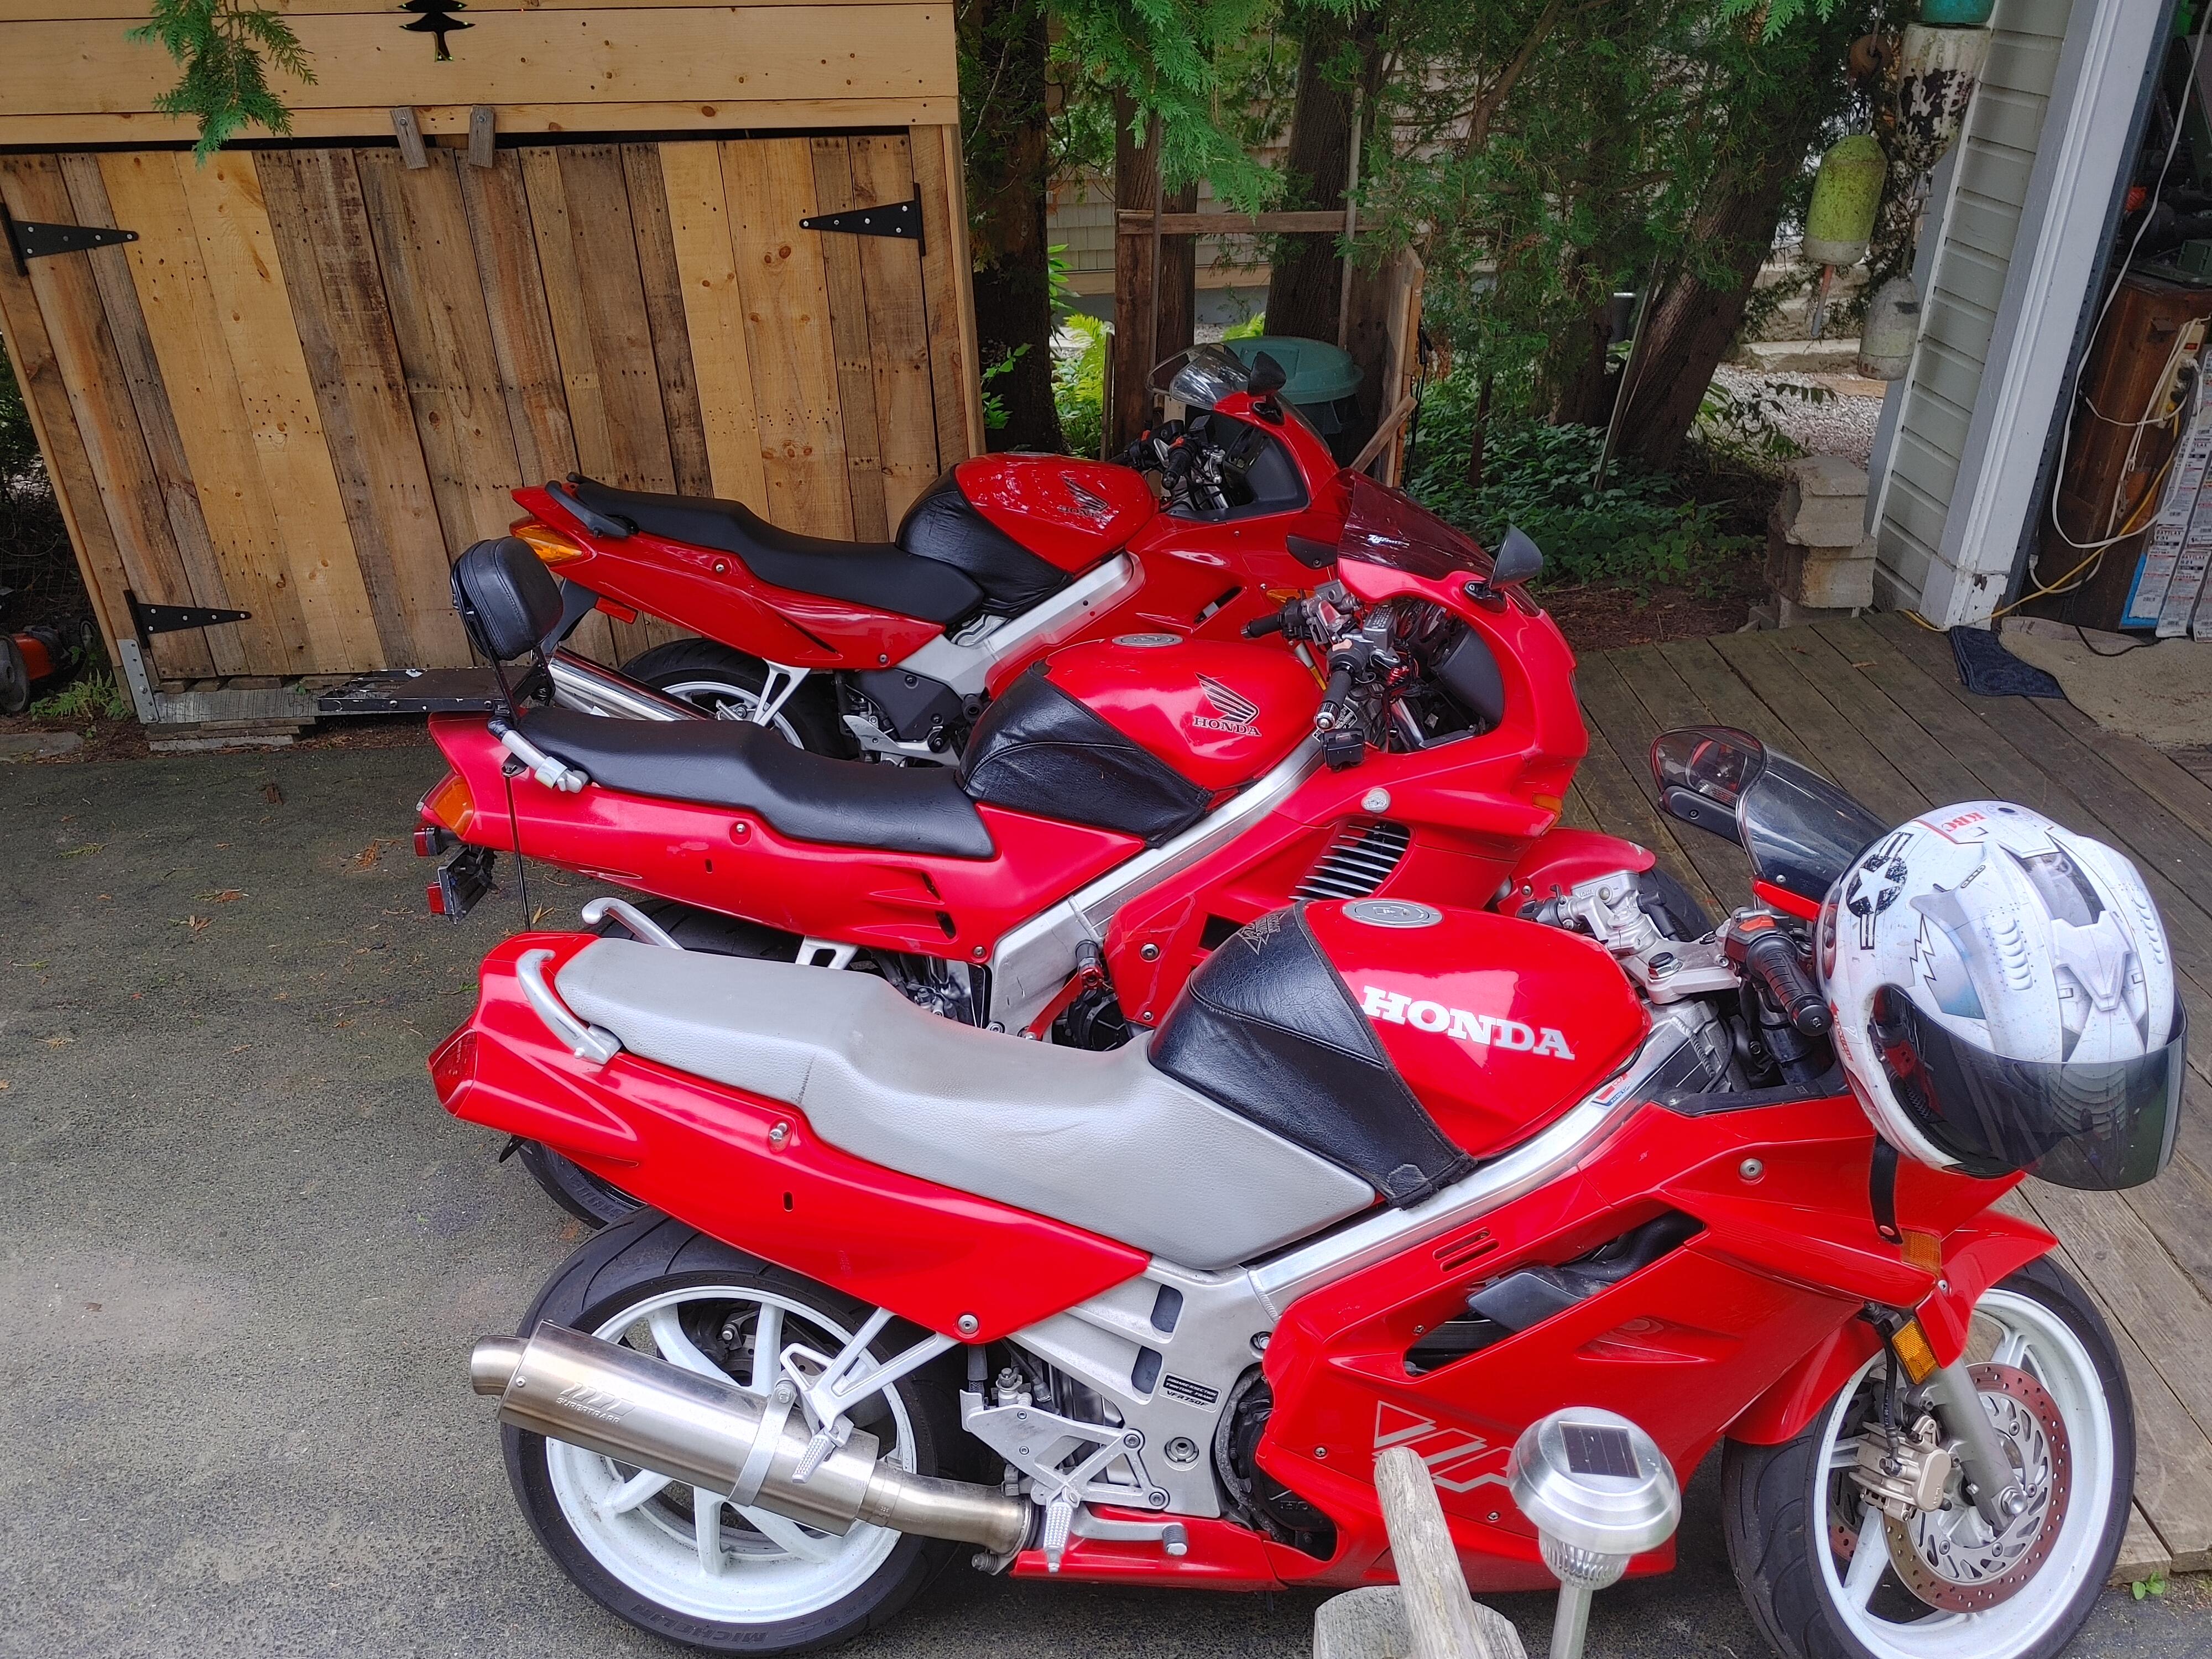
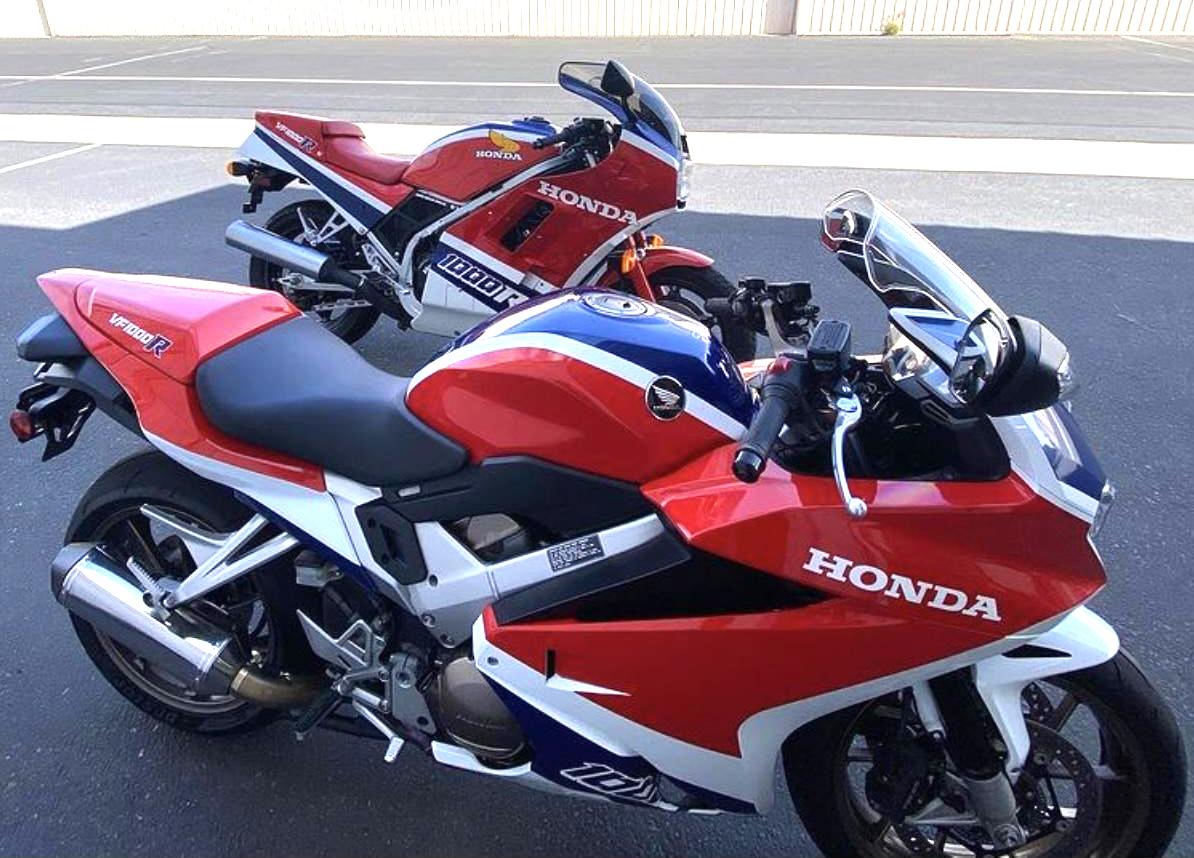
Bought this at the end of July. I knew it had issues as it sat for 13 years. Rusted tank 19 year old tires Original R/R Etc But it only had 11.5K on the clock So I spent a month cleaning the tank repeatedly, then treating it with Phosphoric Acid 3 times. This took awhile so in addition I built sliders/tip over protectors, went completely through the brakes, swapped my 8 spoke on to the rear and a new set of T32's, bobbins on the front axle just because I had them lying around, riding lights up front for Moose spotting, built some saddle bag frames and installed some longer heavier bar ends. Its odd but the bar ends on the VFR are exactly the same as on my VF1000R's After a couple of tests rides I took it on a 2800 trip down to VA,WV,PA upstate NY, VT NH then back to Maine I did encounter some engine surging about 1200 miles into the trip, but I made it back north so I'll address that in a separate post. Love the bike, a bit less sporty than my 3rd or 4th, but I bought it for touring, as my 4th has 114K and is showing it. My only complaint, and its not really a complaint is the braking system looks like it was designed by a bunch of French plumbers on their croissant break. First pic is off the trailer Next, the tank. Midway through the process. Tank clean My 3 red VFR's just because. Slider/tip over protectors Moose lights. Bobbins. Midway through building saddlebag frames. Bike at the top of rt 250 near the VA/WV line.
9 points
-
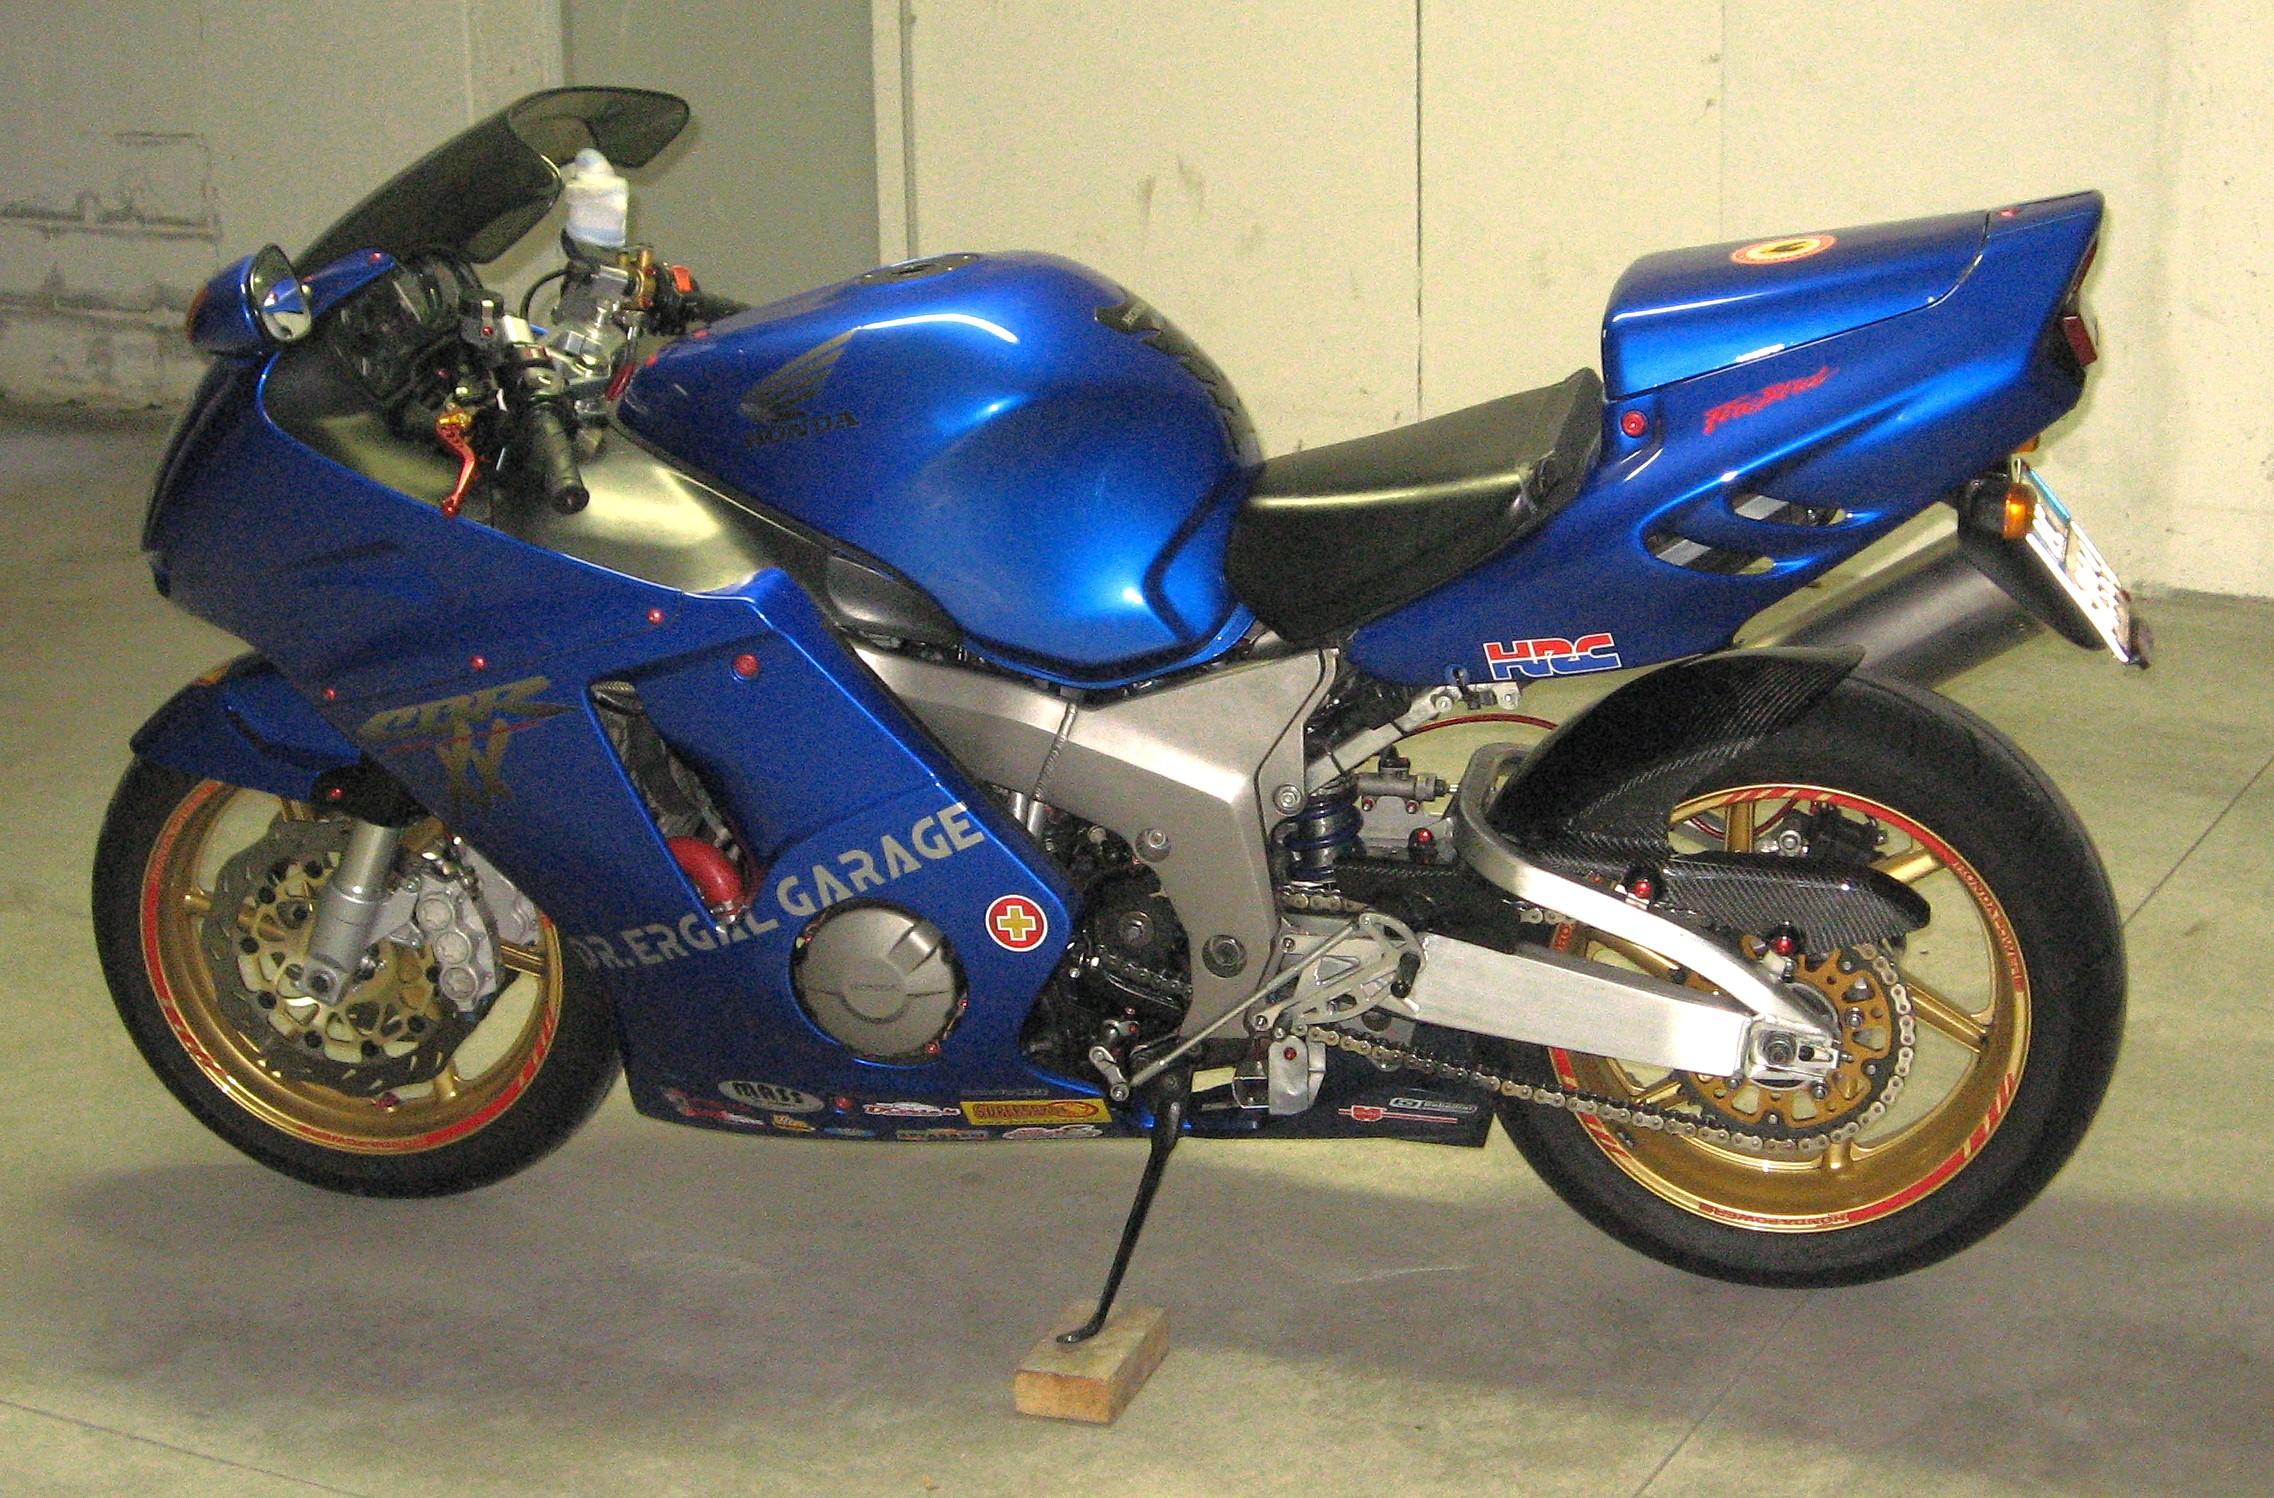
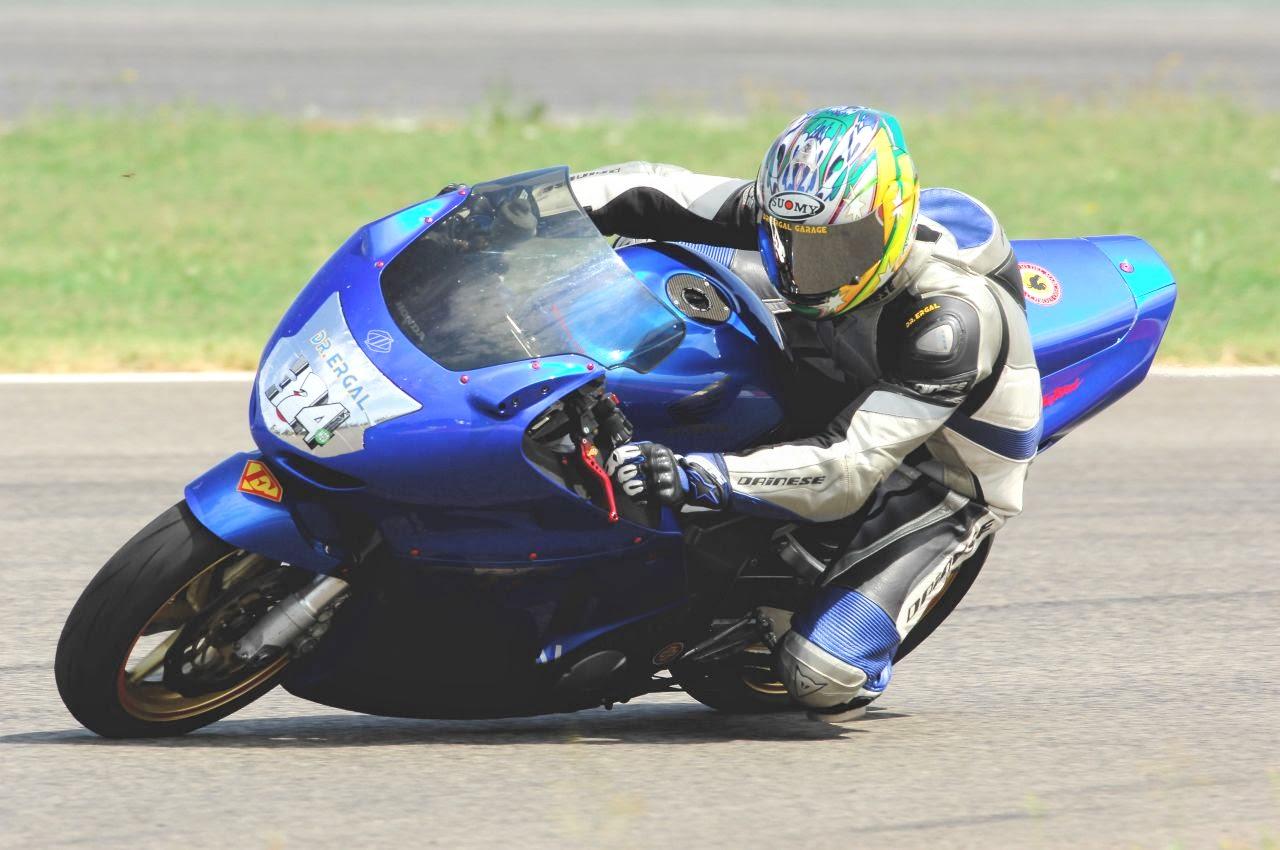
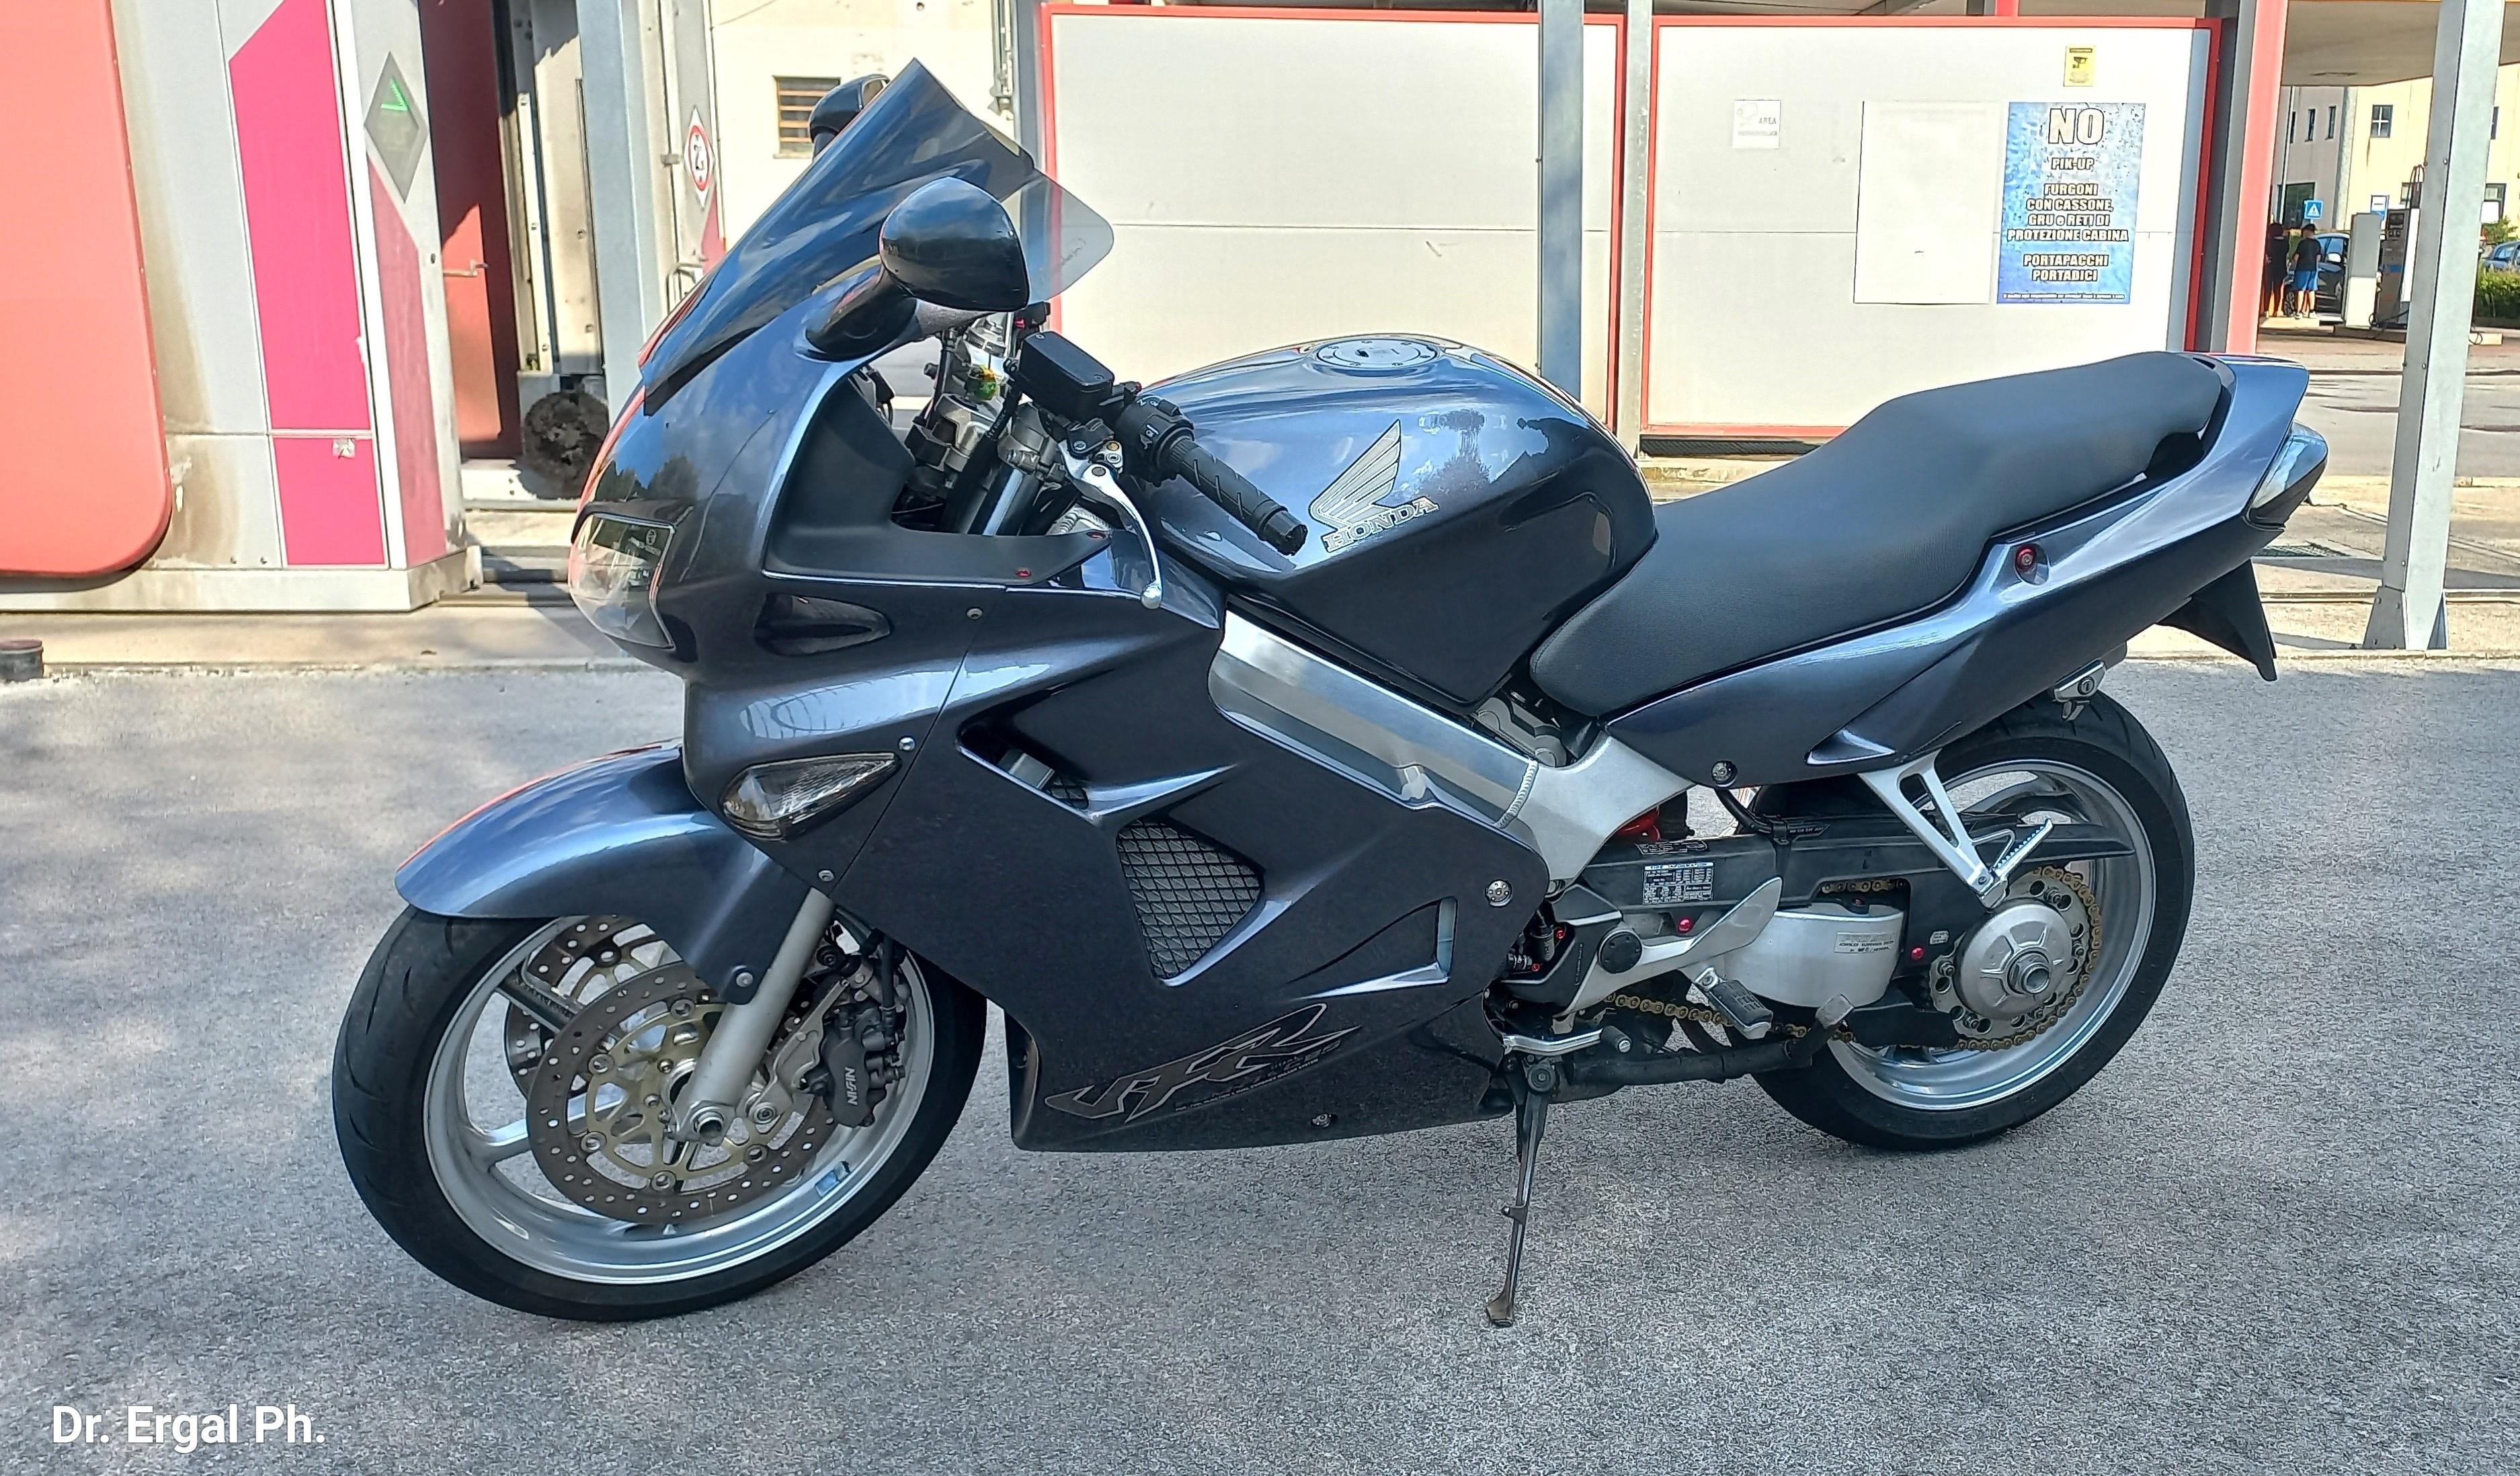
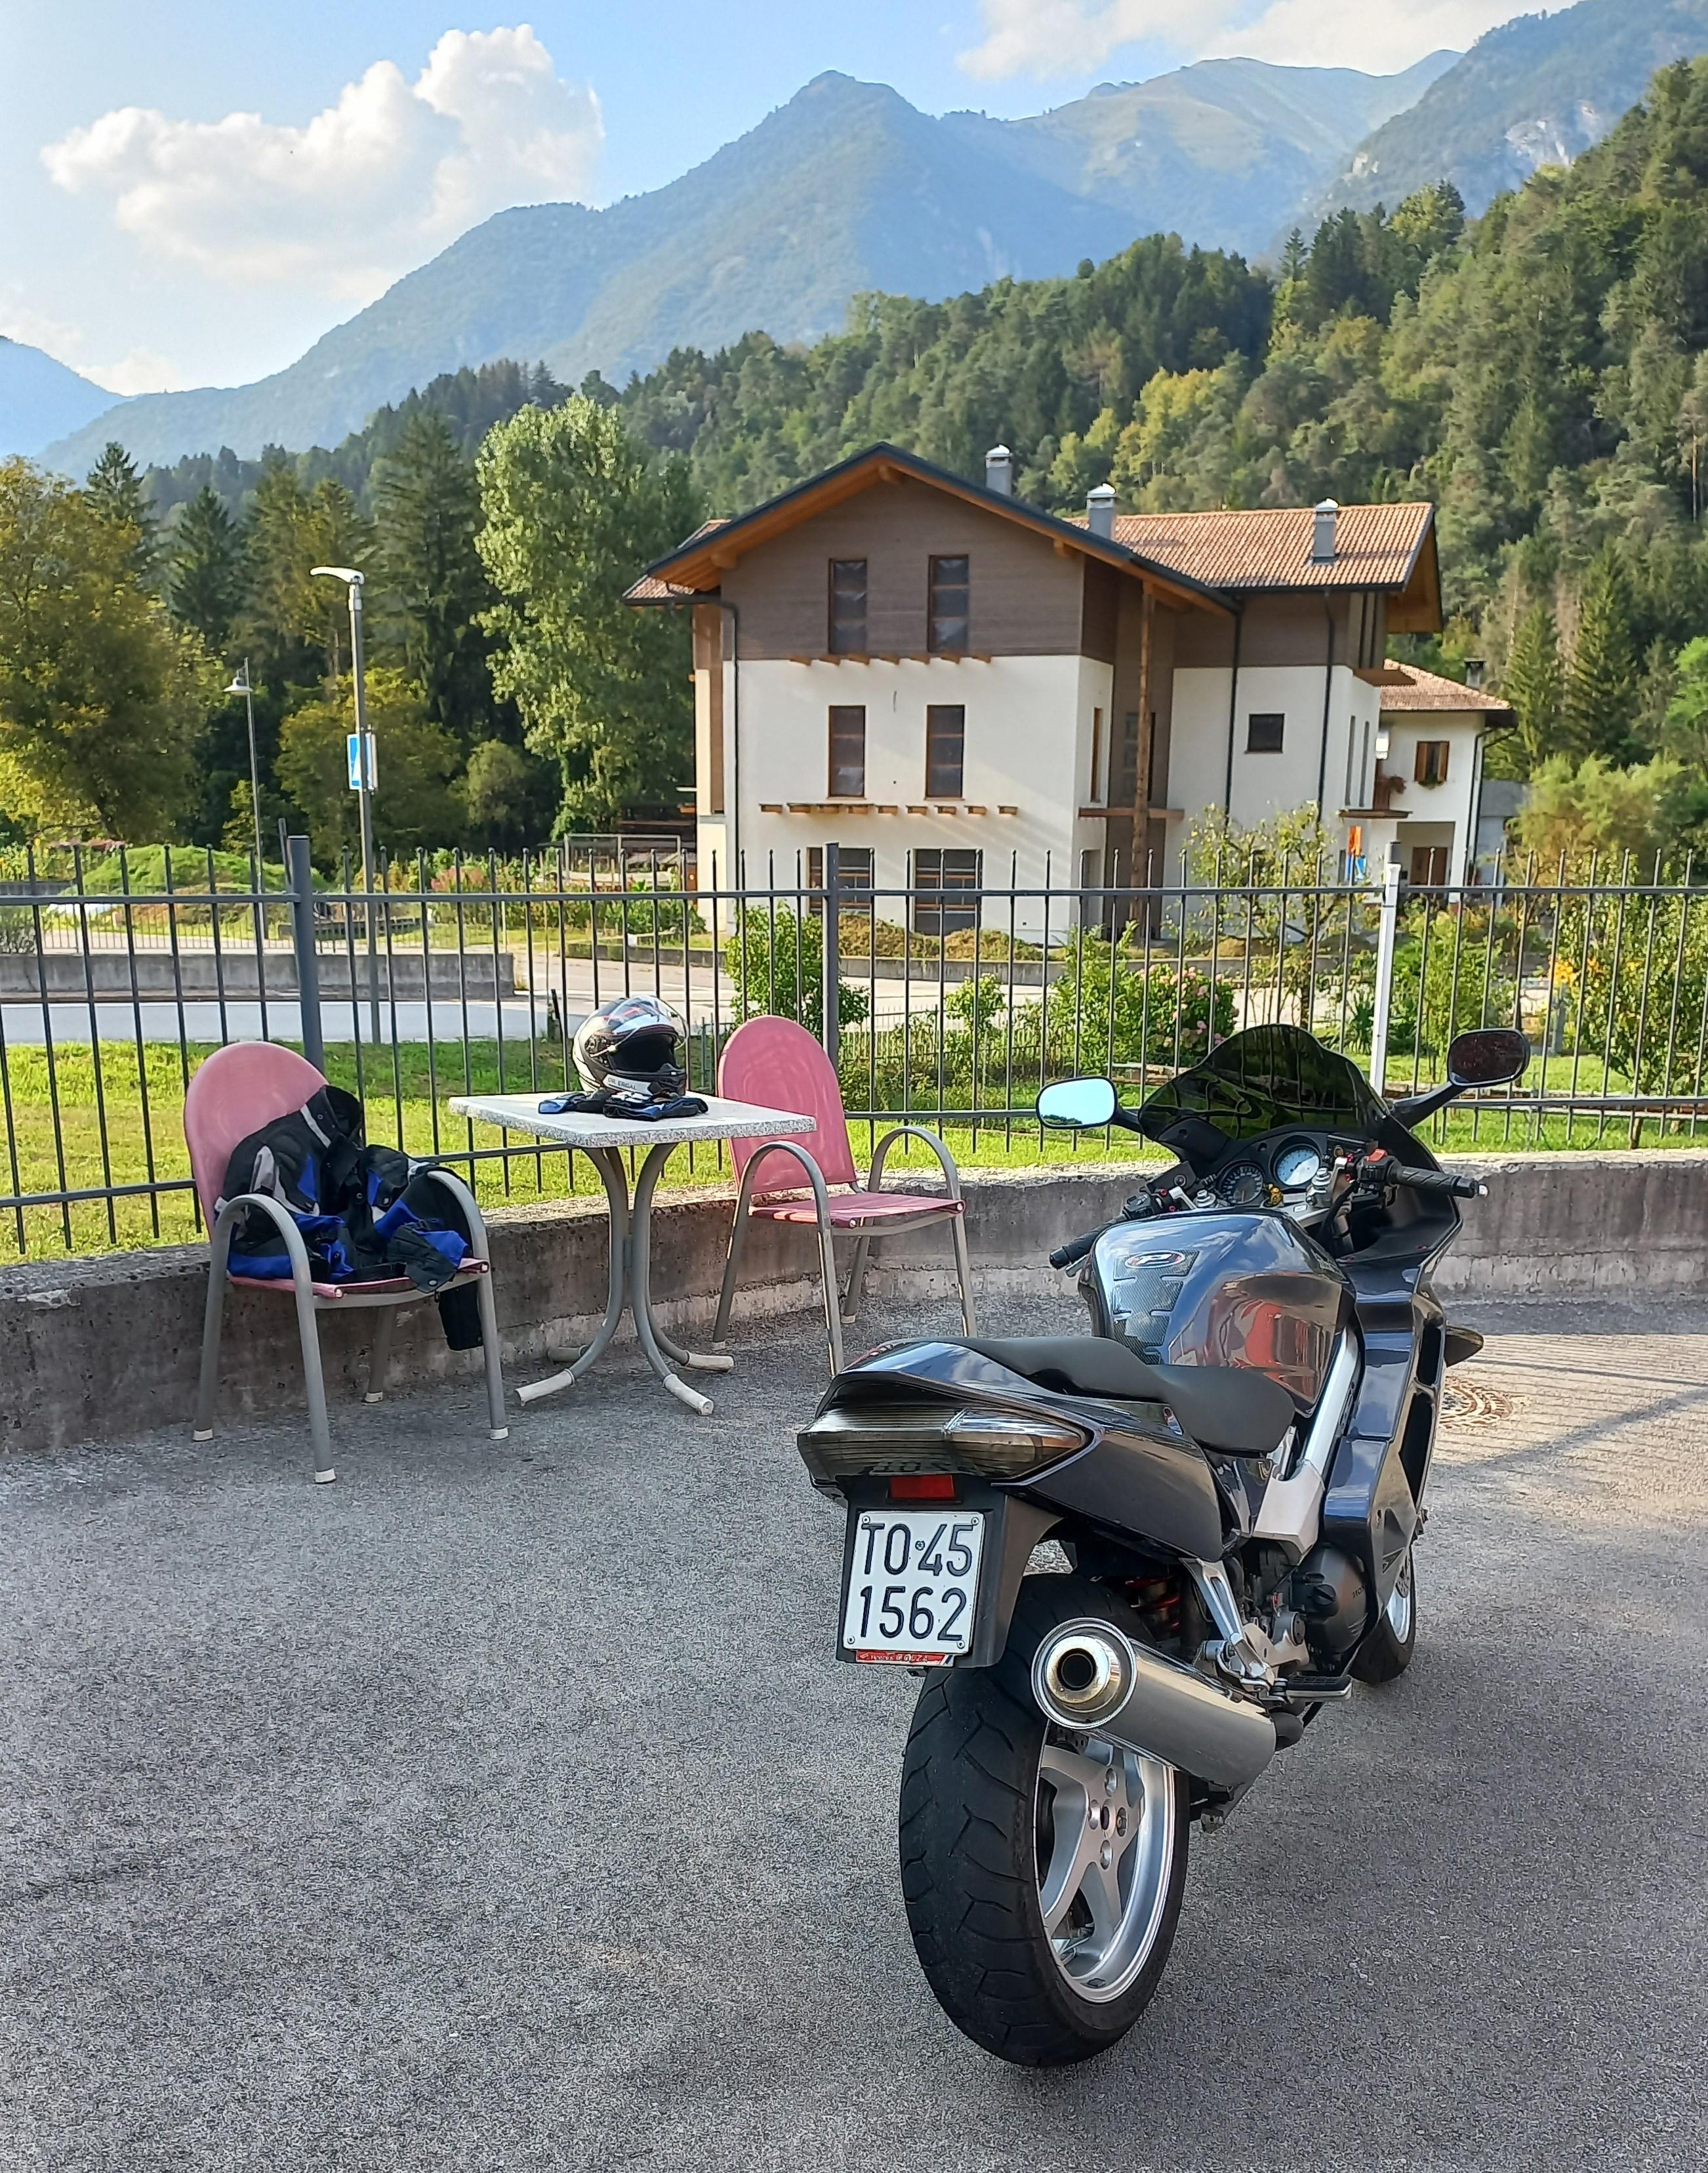
Hi everybody I'd like to say hello to this group: I just came back in the saddle of a VFR after having ridden a 95 model a quarter of century ago. I've been riding since late 80's, and I spent approx. 25 years running (or trying to, that's more corrrect 😁) in racetrack: I'm lucky enough to live 30km far from Mugello circuit. As written above, I've been riding a '95 carb VFR many years ago (DELICIOUS bike), but after this experience I've been bewitched for many years by the brutal force of the CBR1100 XX. I owned two of them, the first of which I've been tuned it a lot, transforming it into a sporty bike to have fun with in circuit: Now, after having passed 50's, I decided to embrace the old gear-driven cam V4 again. I found a '98 (Gen5) in good aesthetic conditions but needing a mechanical restoration. I paid it a few, spent some days in my workshop to restore it and now it's on the road again Engine and gearshaft are excellent, now, as well as (crossing fingers) the recharge system. Suspensions and brakes are awful. Just risen the tail by shimming the shock connection bracket, and lowered the front by shifting up the forks by 5mm. It's not enough, so something more drastic will come up this winter; I'll keep you updated Bye! Dr. Ergal
9 points
-
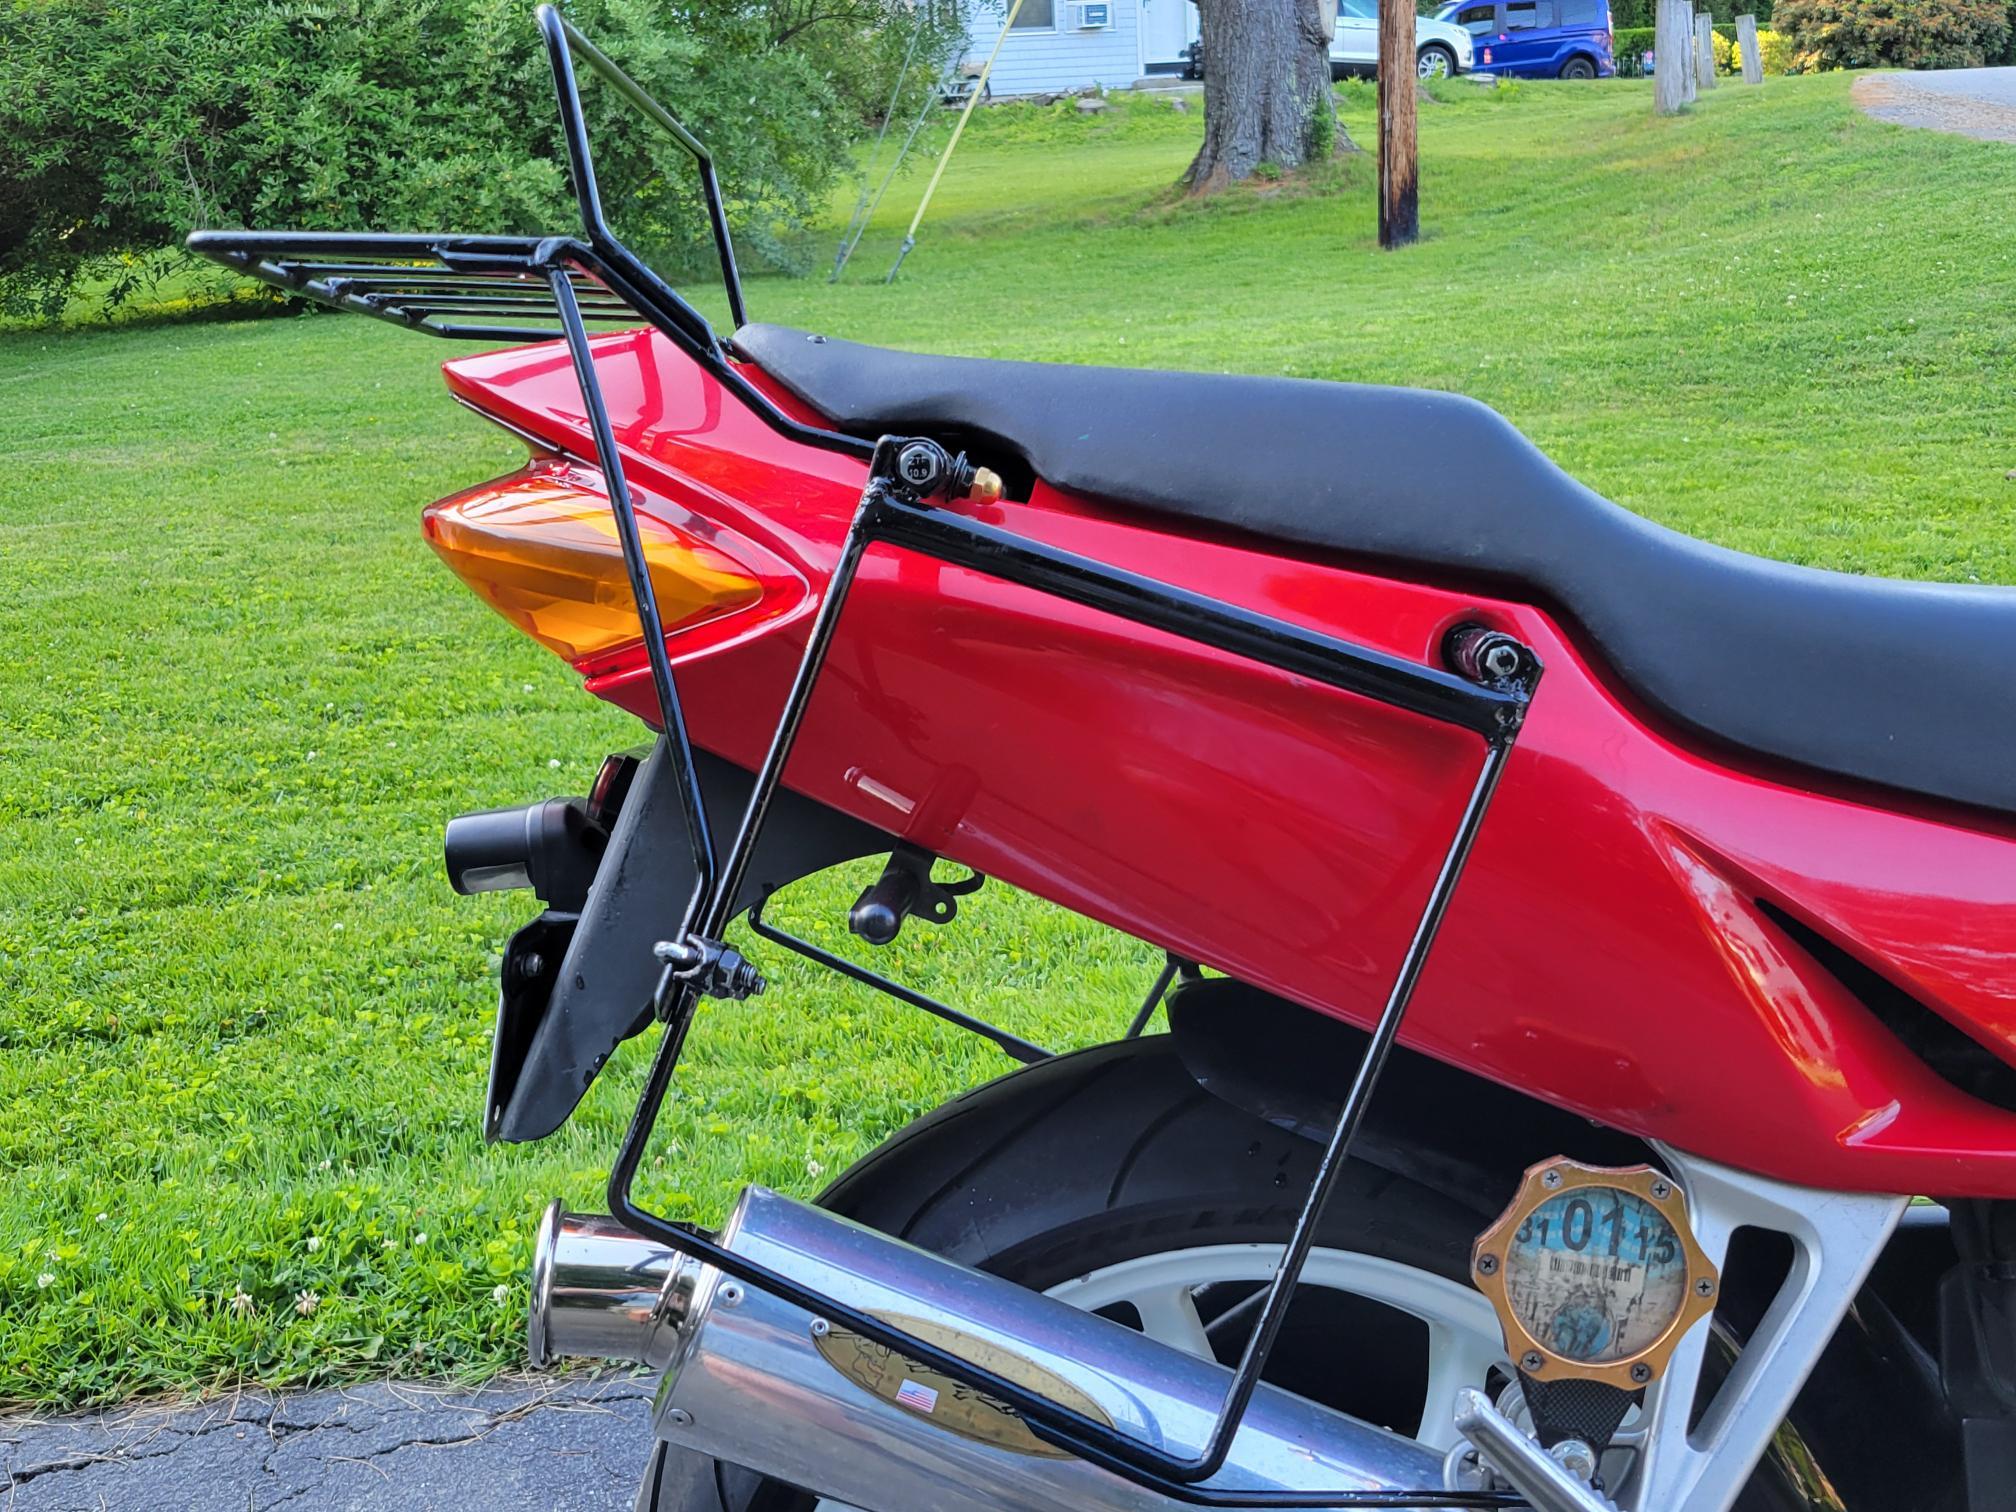
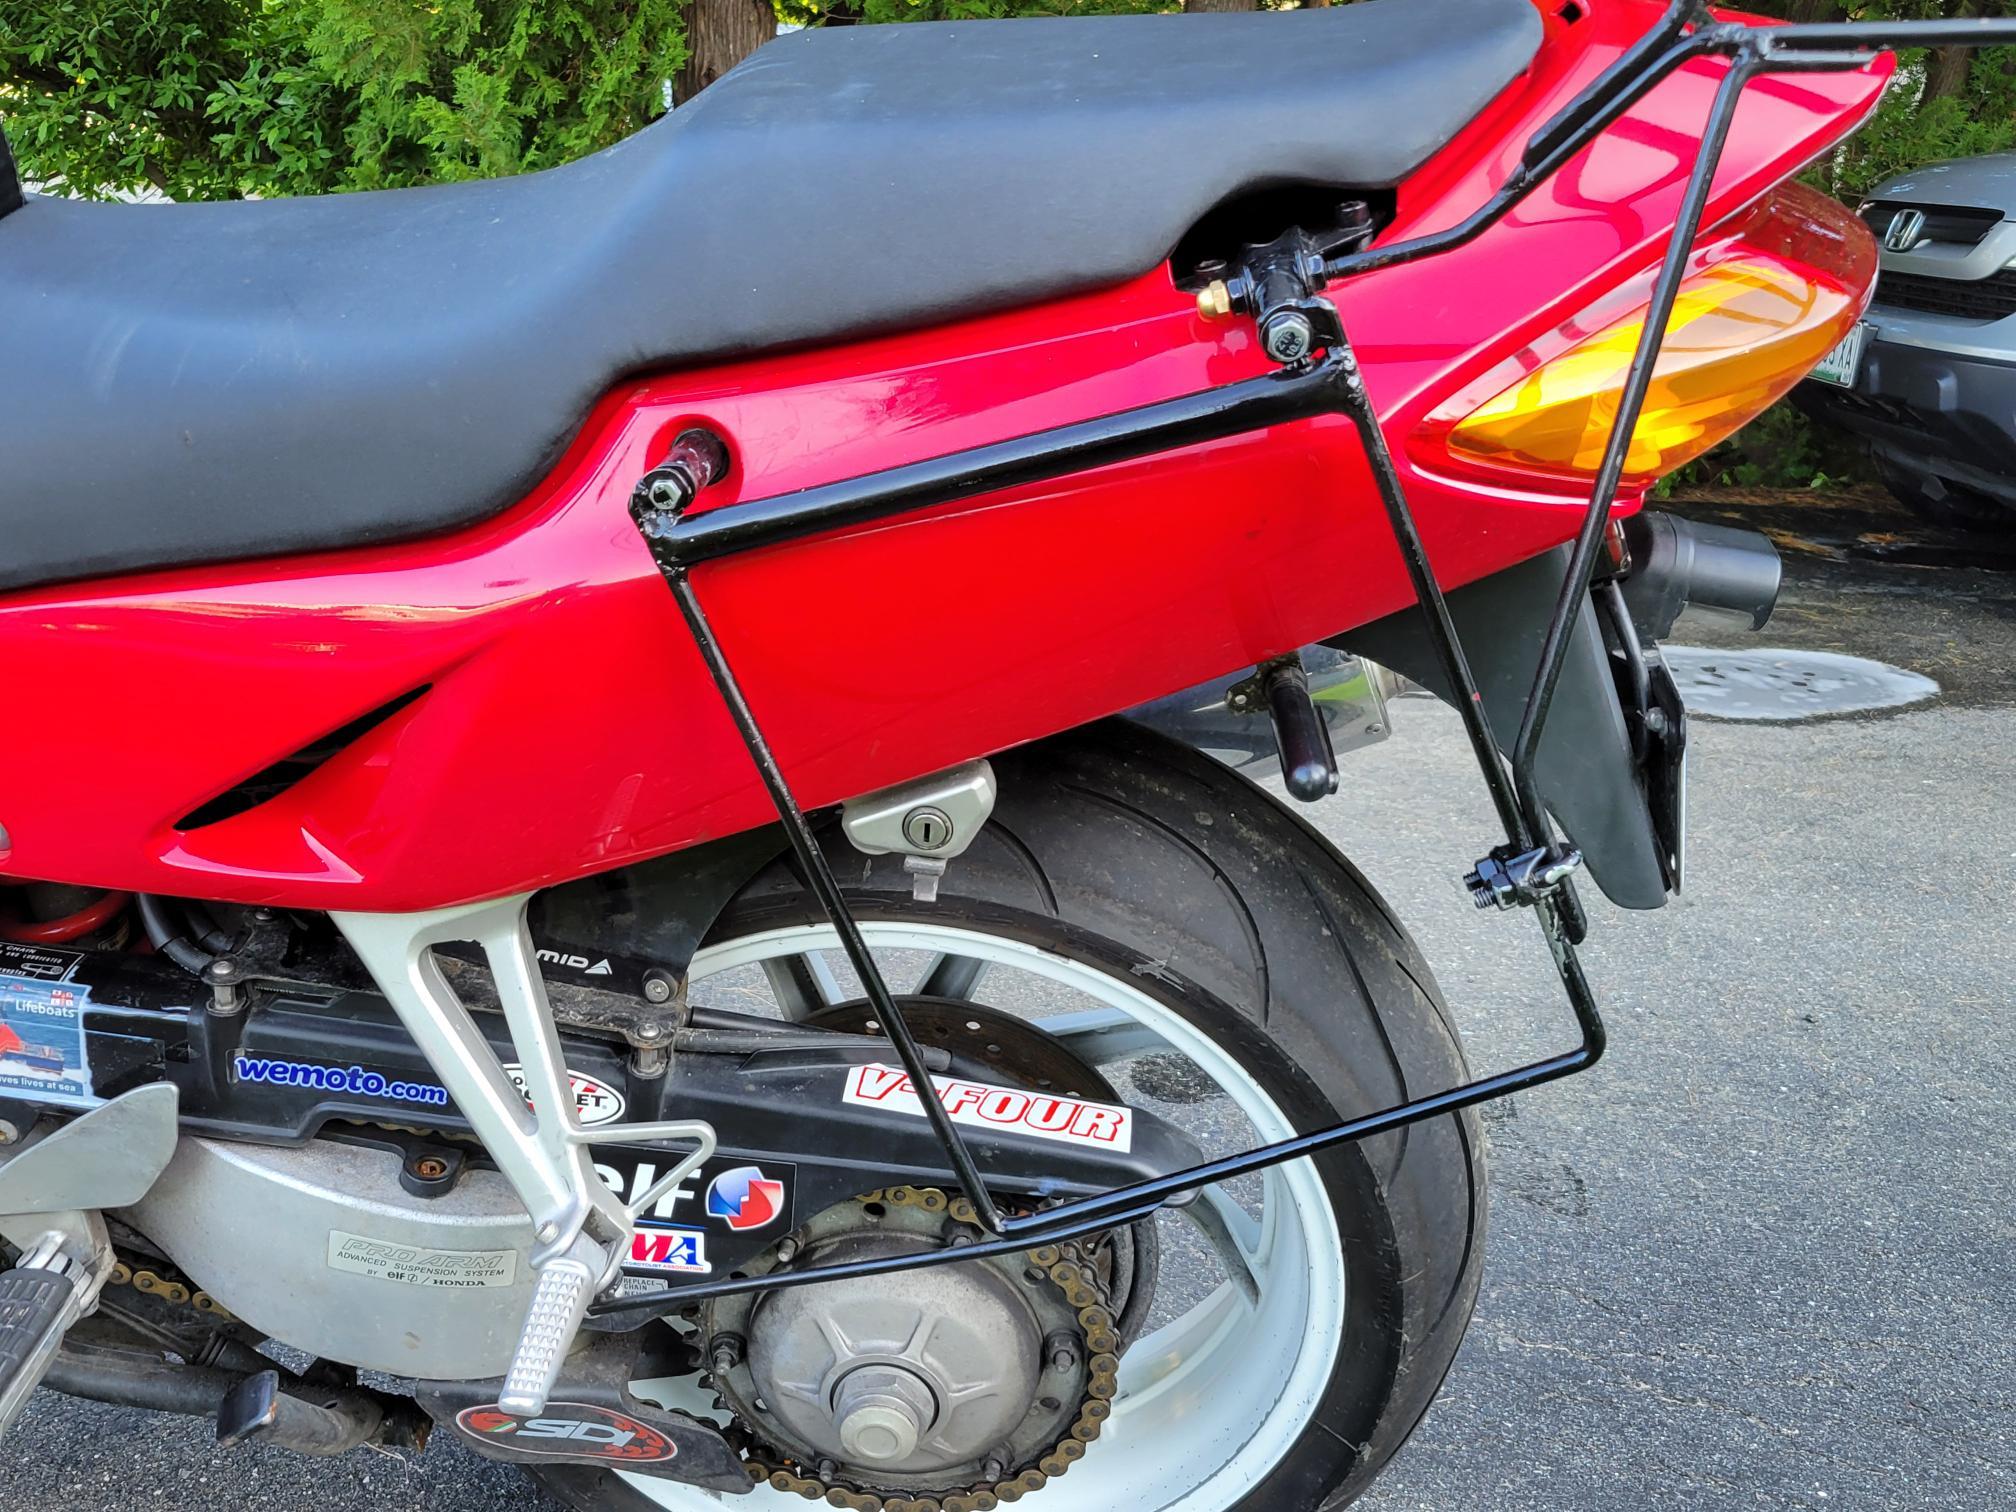
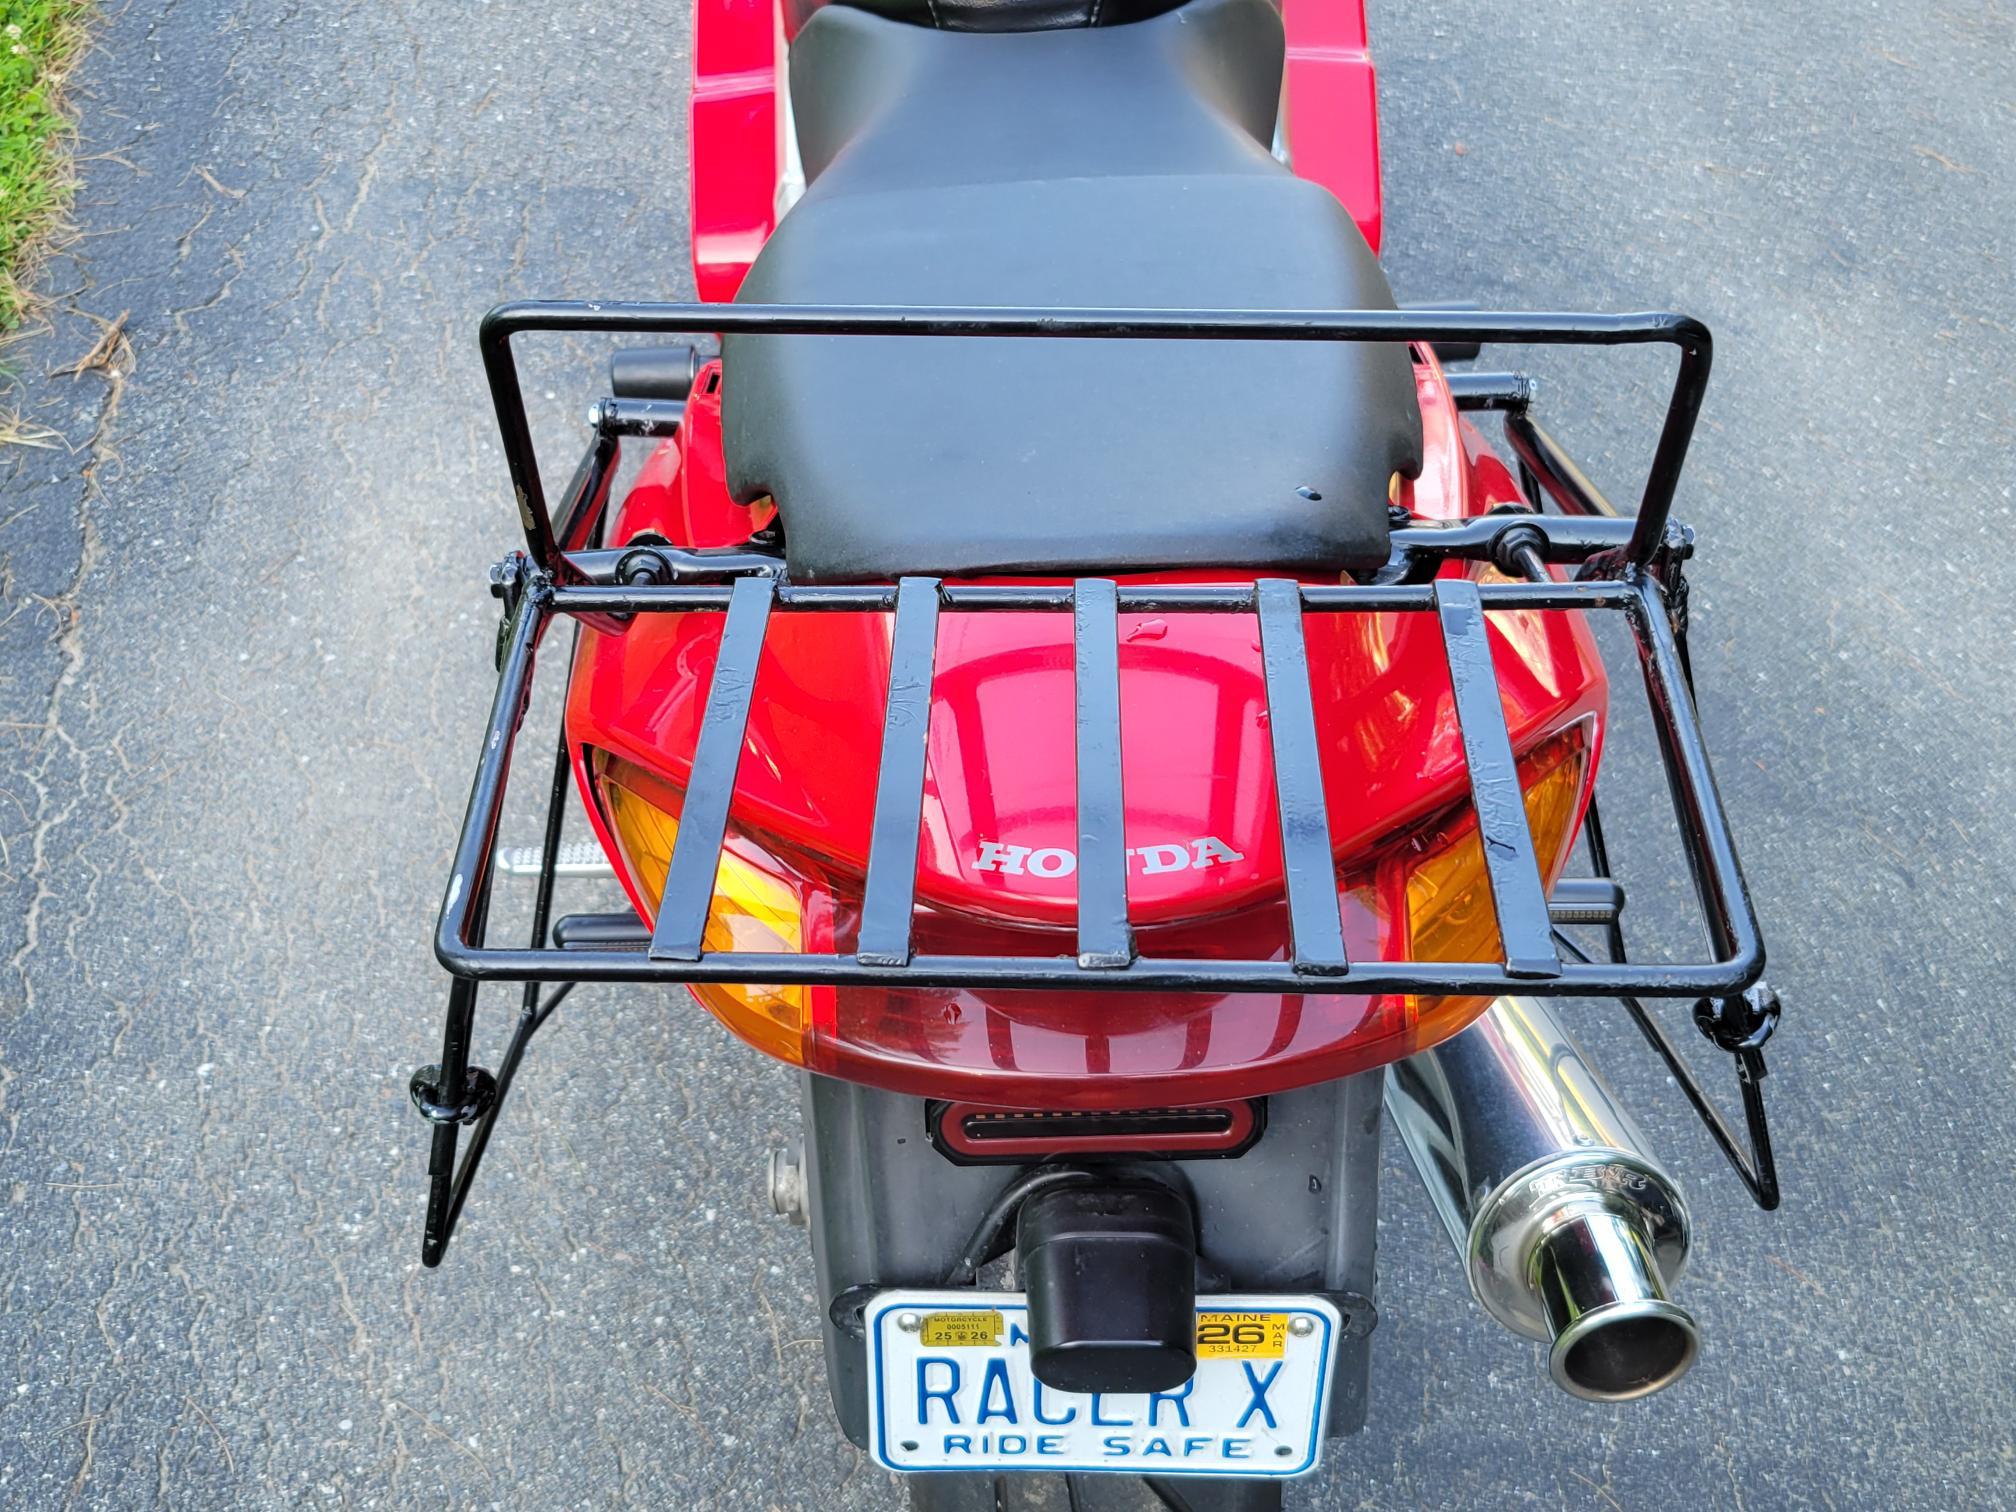
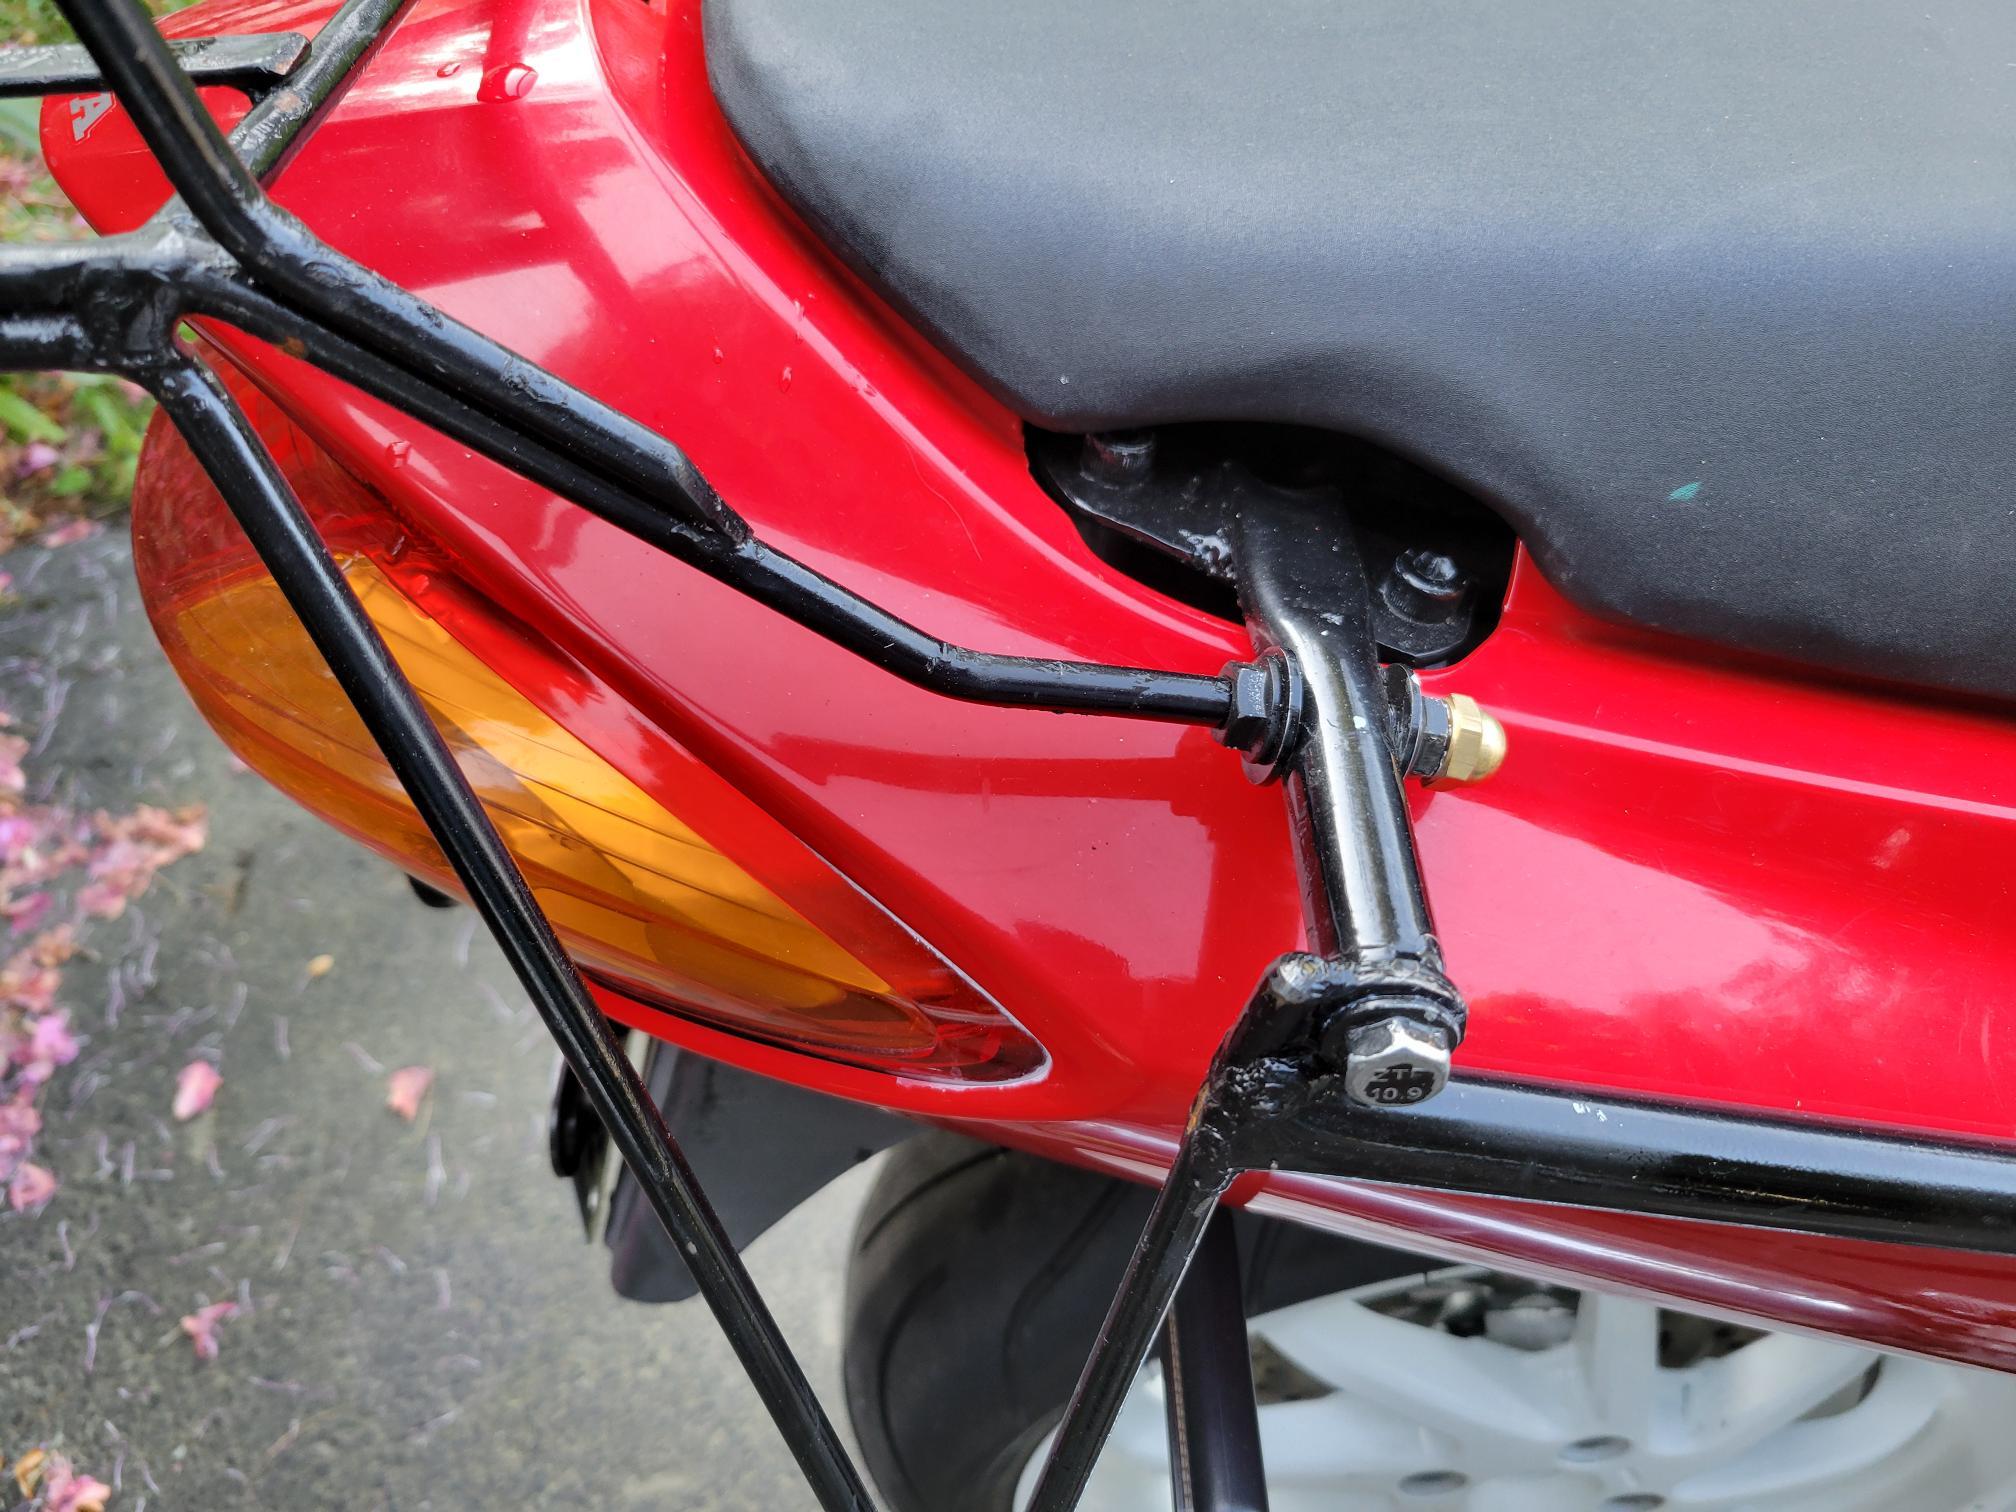
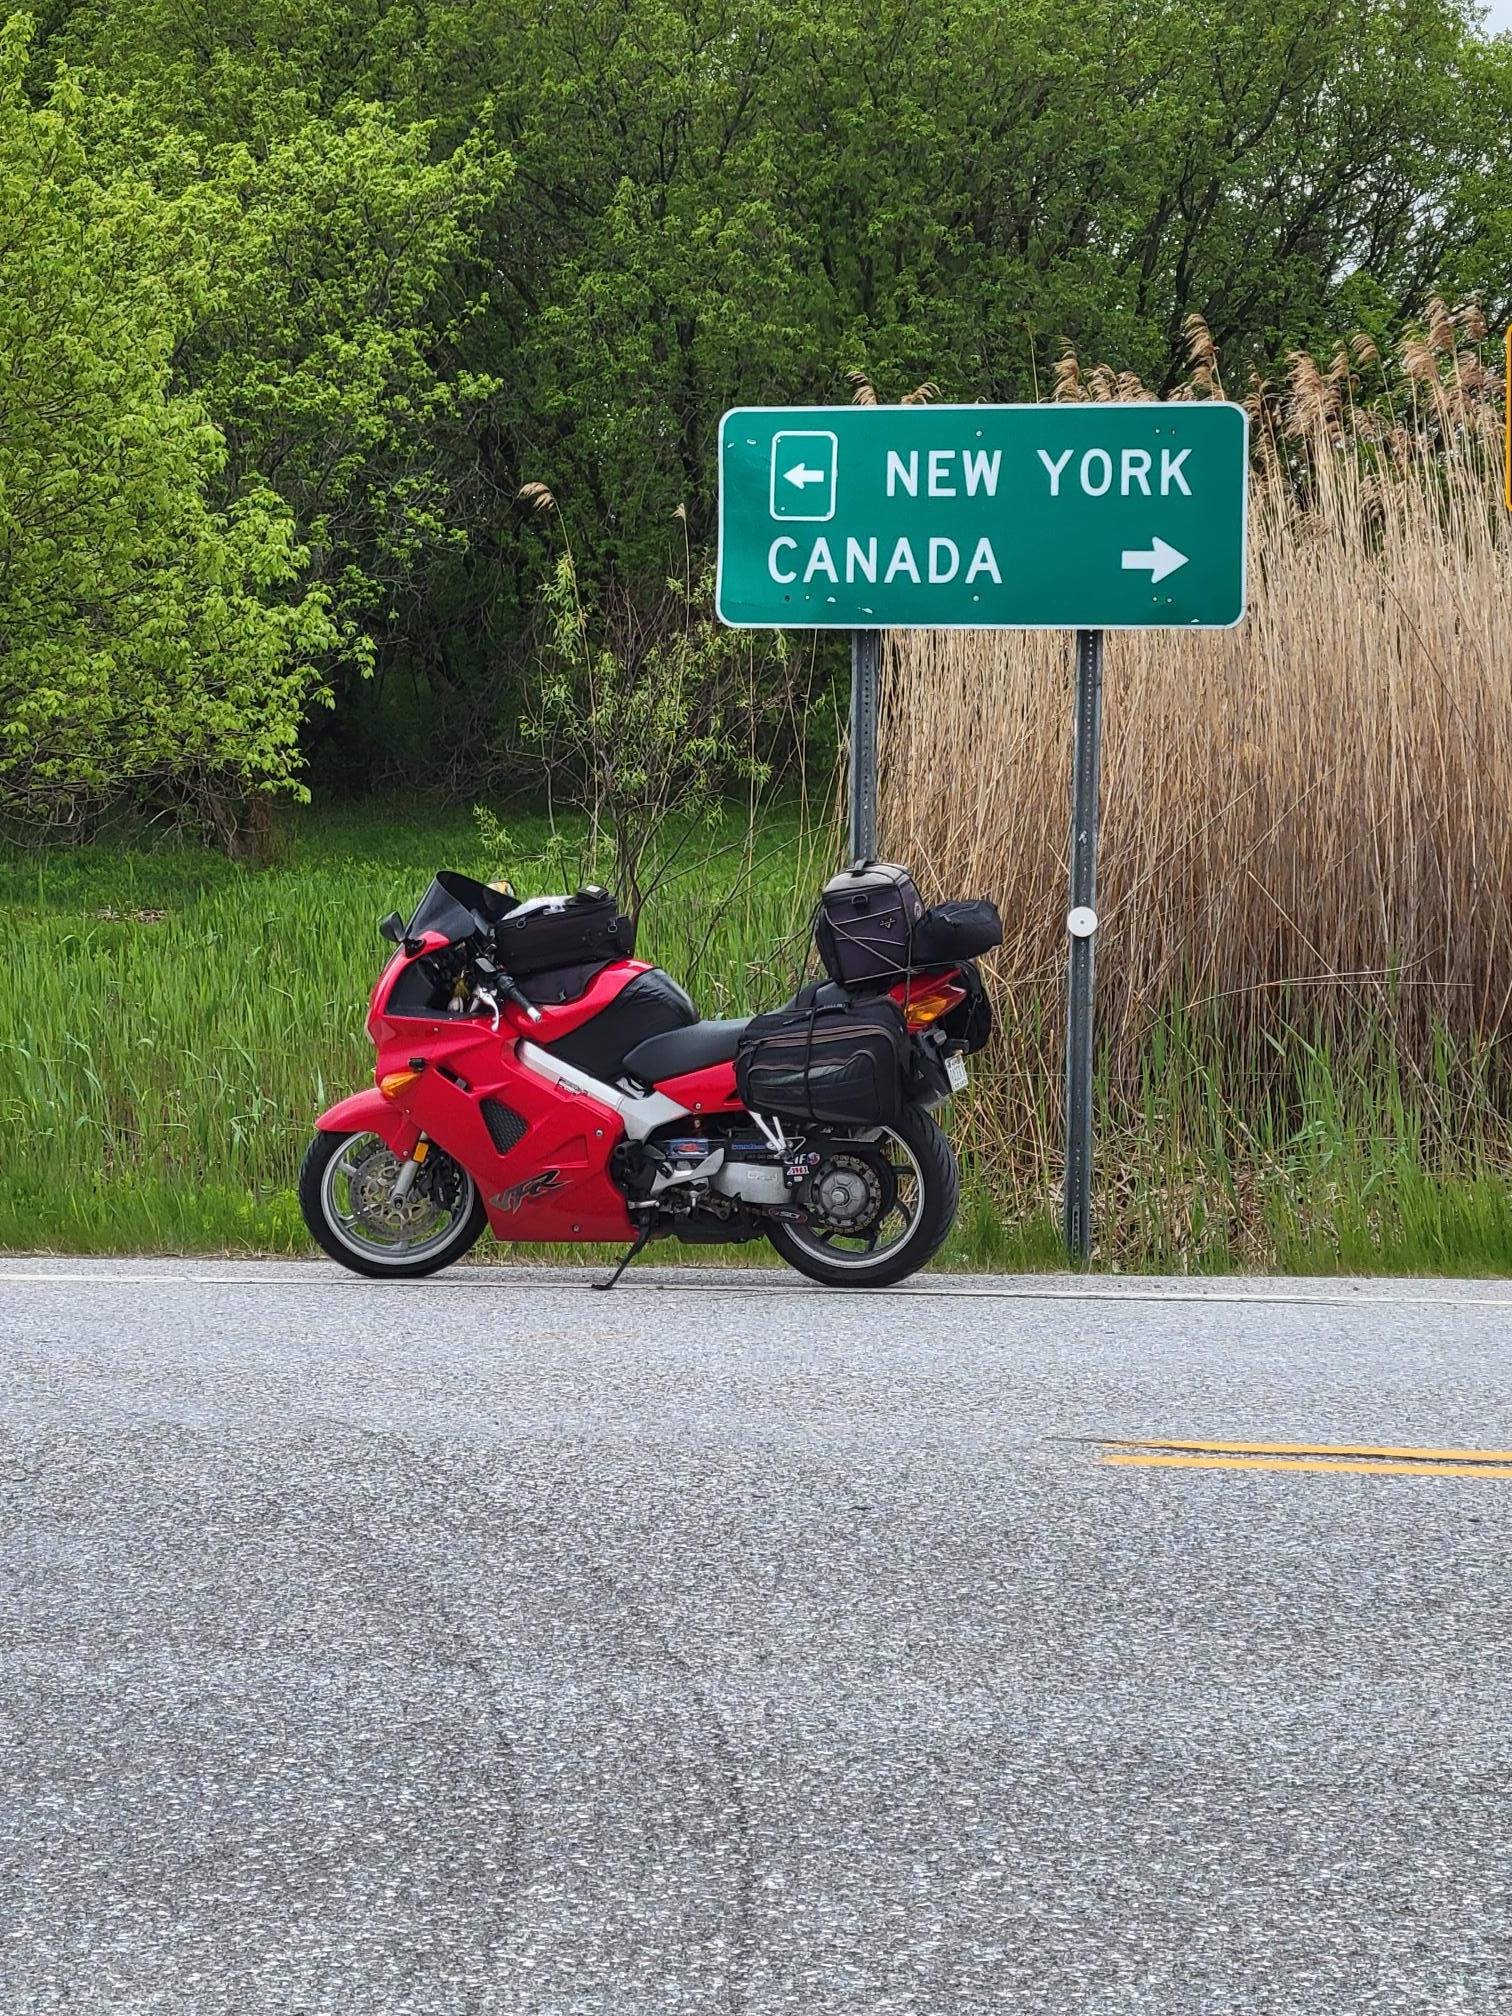
Last Sept. I finally got my new to me 5th Gen in running order. Unable to find any hard bags for it I ended up building a pair if saddle bag supports for my soft bags. I used 5/16" - 8mm weldable rod for most of it, with some 1/4" - 6mm for the forward stays. Everything was cold bent on my 6" vise with a 3lb ball peen, then welded. They are easily removable with 4 fastenings per side. I used them on a 3,000 mile trip that Fall and worked well. I did think though that a six pack rack would be helpful. Not finding anything available for the 5th Gen, and having trips to VA, TN, NC, then 4 days after that up to New Brunswick and the Cabot Trail in Nova Scotia in May, I figured I'd have a go at making a serviceable six pack rack a shot. Again I used 5/16" - 8mm rod for the frame and some 5/8' - 16mm X 1mm flat for the slats. I piggybacked off the Saddlebag supports to make it easier to mount, and threaded the rod at the forward end to adjust the rack, but also make it removable. The cable clamps on the aft lower are for the same reason. I can remove the rack in less than 2 minutes, but it is strong enough that a buddy and I lifted the back of the bike off the ground with it. 2 trips and just under 5,000 miles this May, and it has indeed proved useful. I'm a form follows function guy, so I'm not bothered if its less than elegant. Besides, there's so little in the way of luggage options for the 5th Gen that I had to figure out something if I wanted to go touring The last pic was taken around the 20th of May at Rouses Point NY as I was returning from NC etc. I generally will go up to the Quebec Border and turn right to get back home. This eliminates going through CT and MA, a far more relaxing way to enter Maine.
8 points
-
Hi All here some pics from my rides in north part of Italy, close to Austrian border Gavia (behind me with my beloved XX, my wife with her SV 650) Pordoi with my glorious Africa Twin Getting Stelvio Pass on my XX Alway on my XX, riding close to Garda lake Africa Twin again, playing with the snow... My second XX, admiring a nice small lake in the so-called "lakes valley" My Z750 over the astonishing TENNO LAKE, with its distinctive color between blue and green Hope you may enkoy the pics as well as I enjoined the rides 😊8 points
-
To be honest, I never would have known, or attempted this without the knowledge and feedback by the members here. I'm certainly grateful, and never take it for granted when someone on this forum takes time to answer my questions or offer information. Happy Trails guys.8 points
-
And so it commences... Needs some graft, but will get there... Move over Giacomo!!!
8 points
-
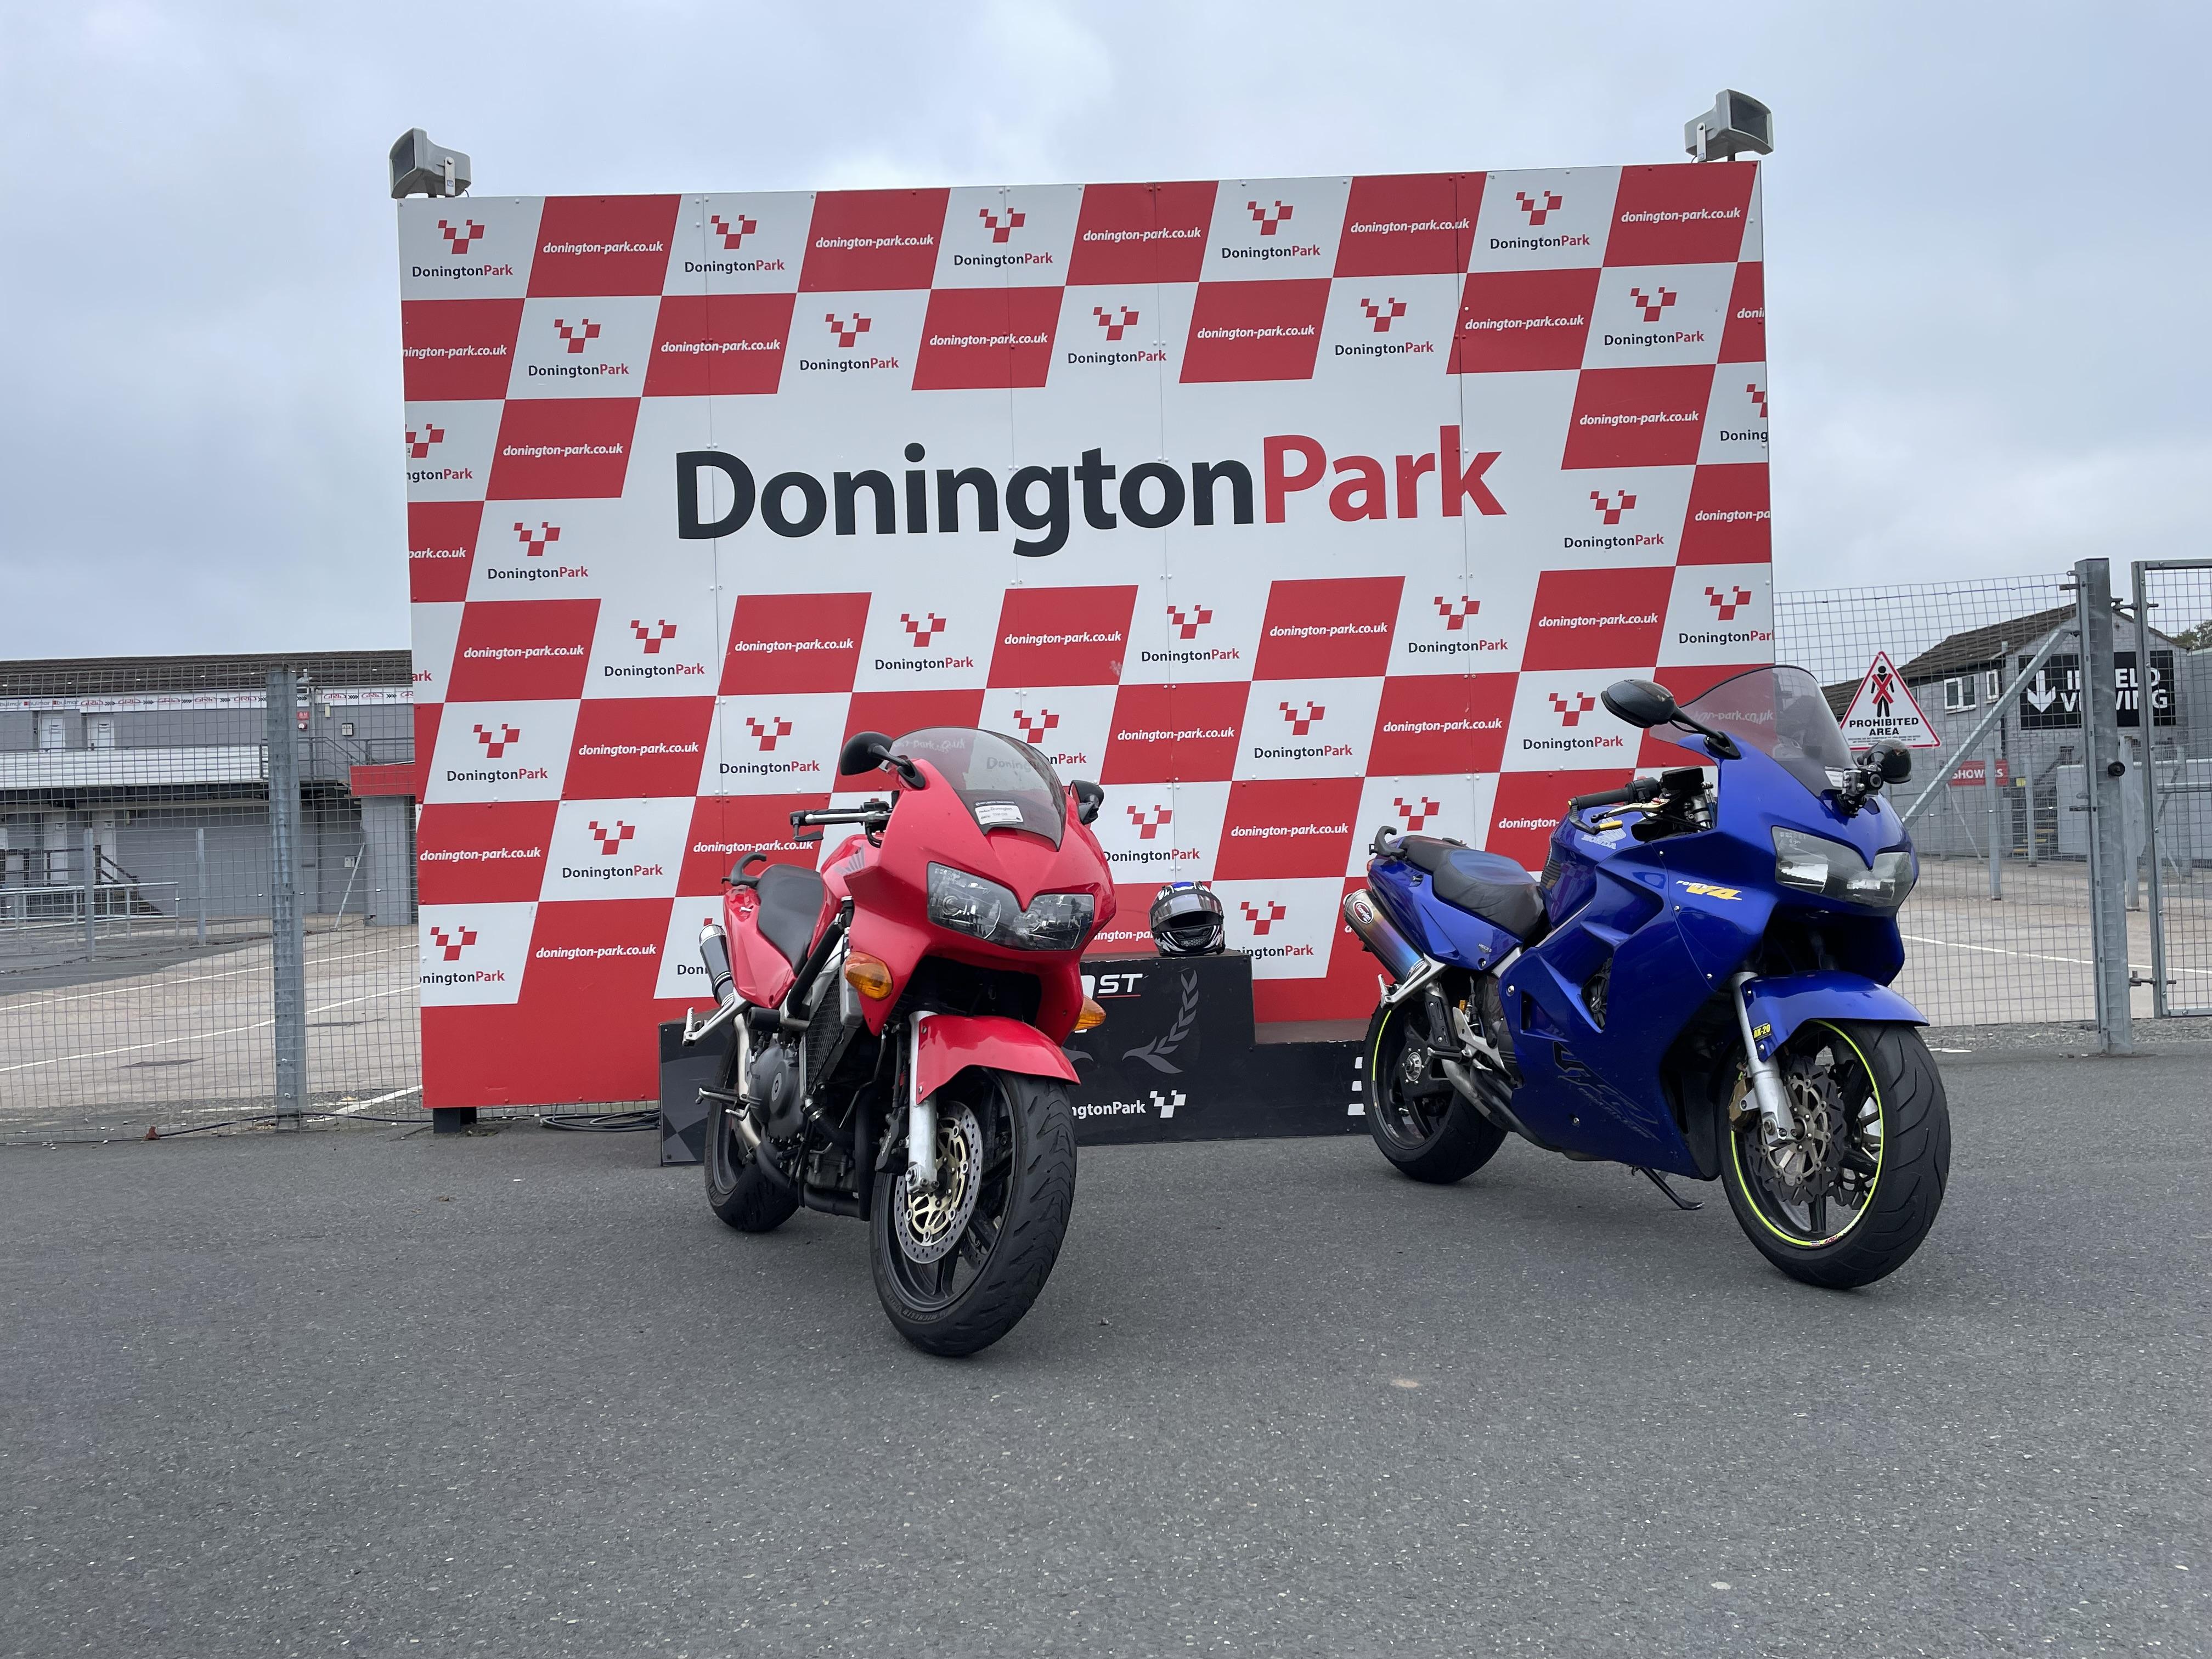
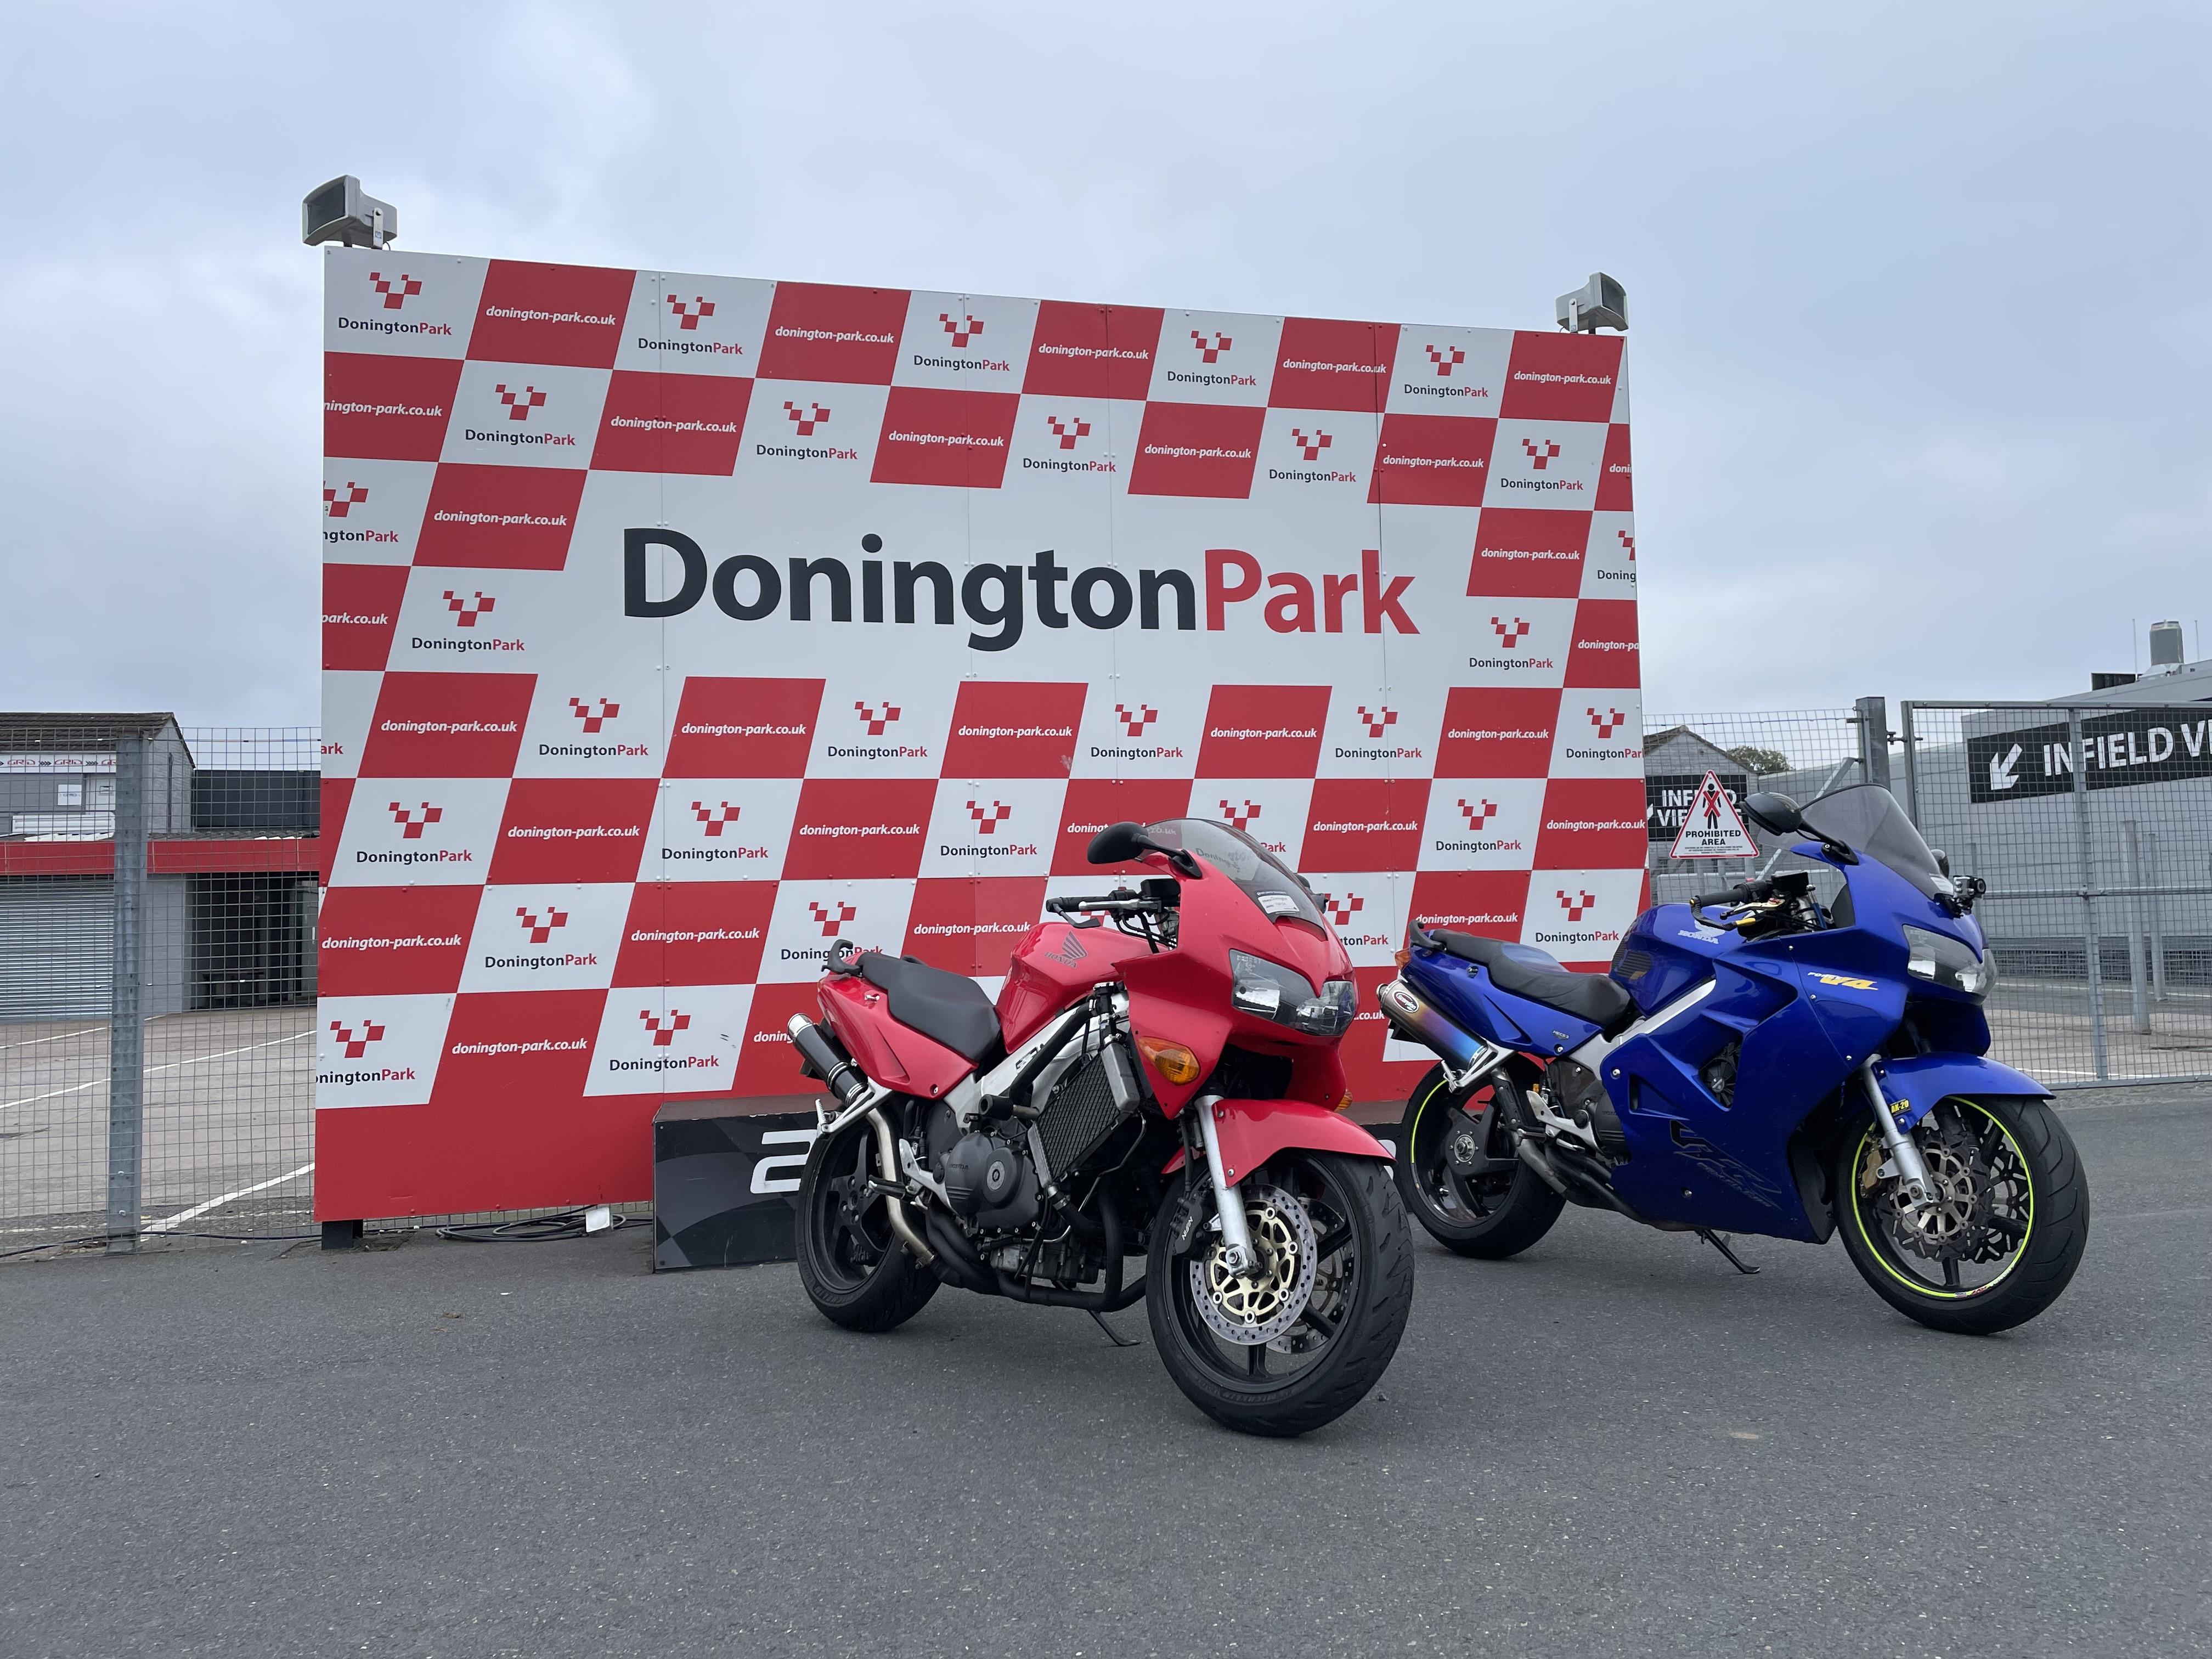
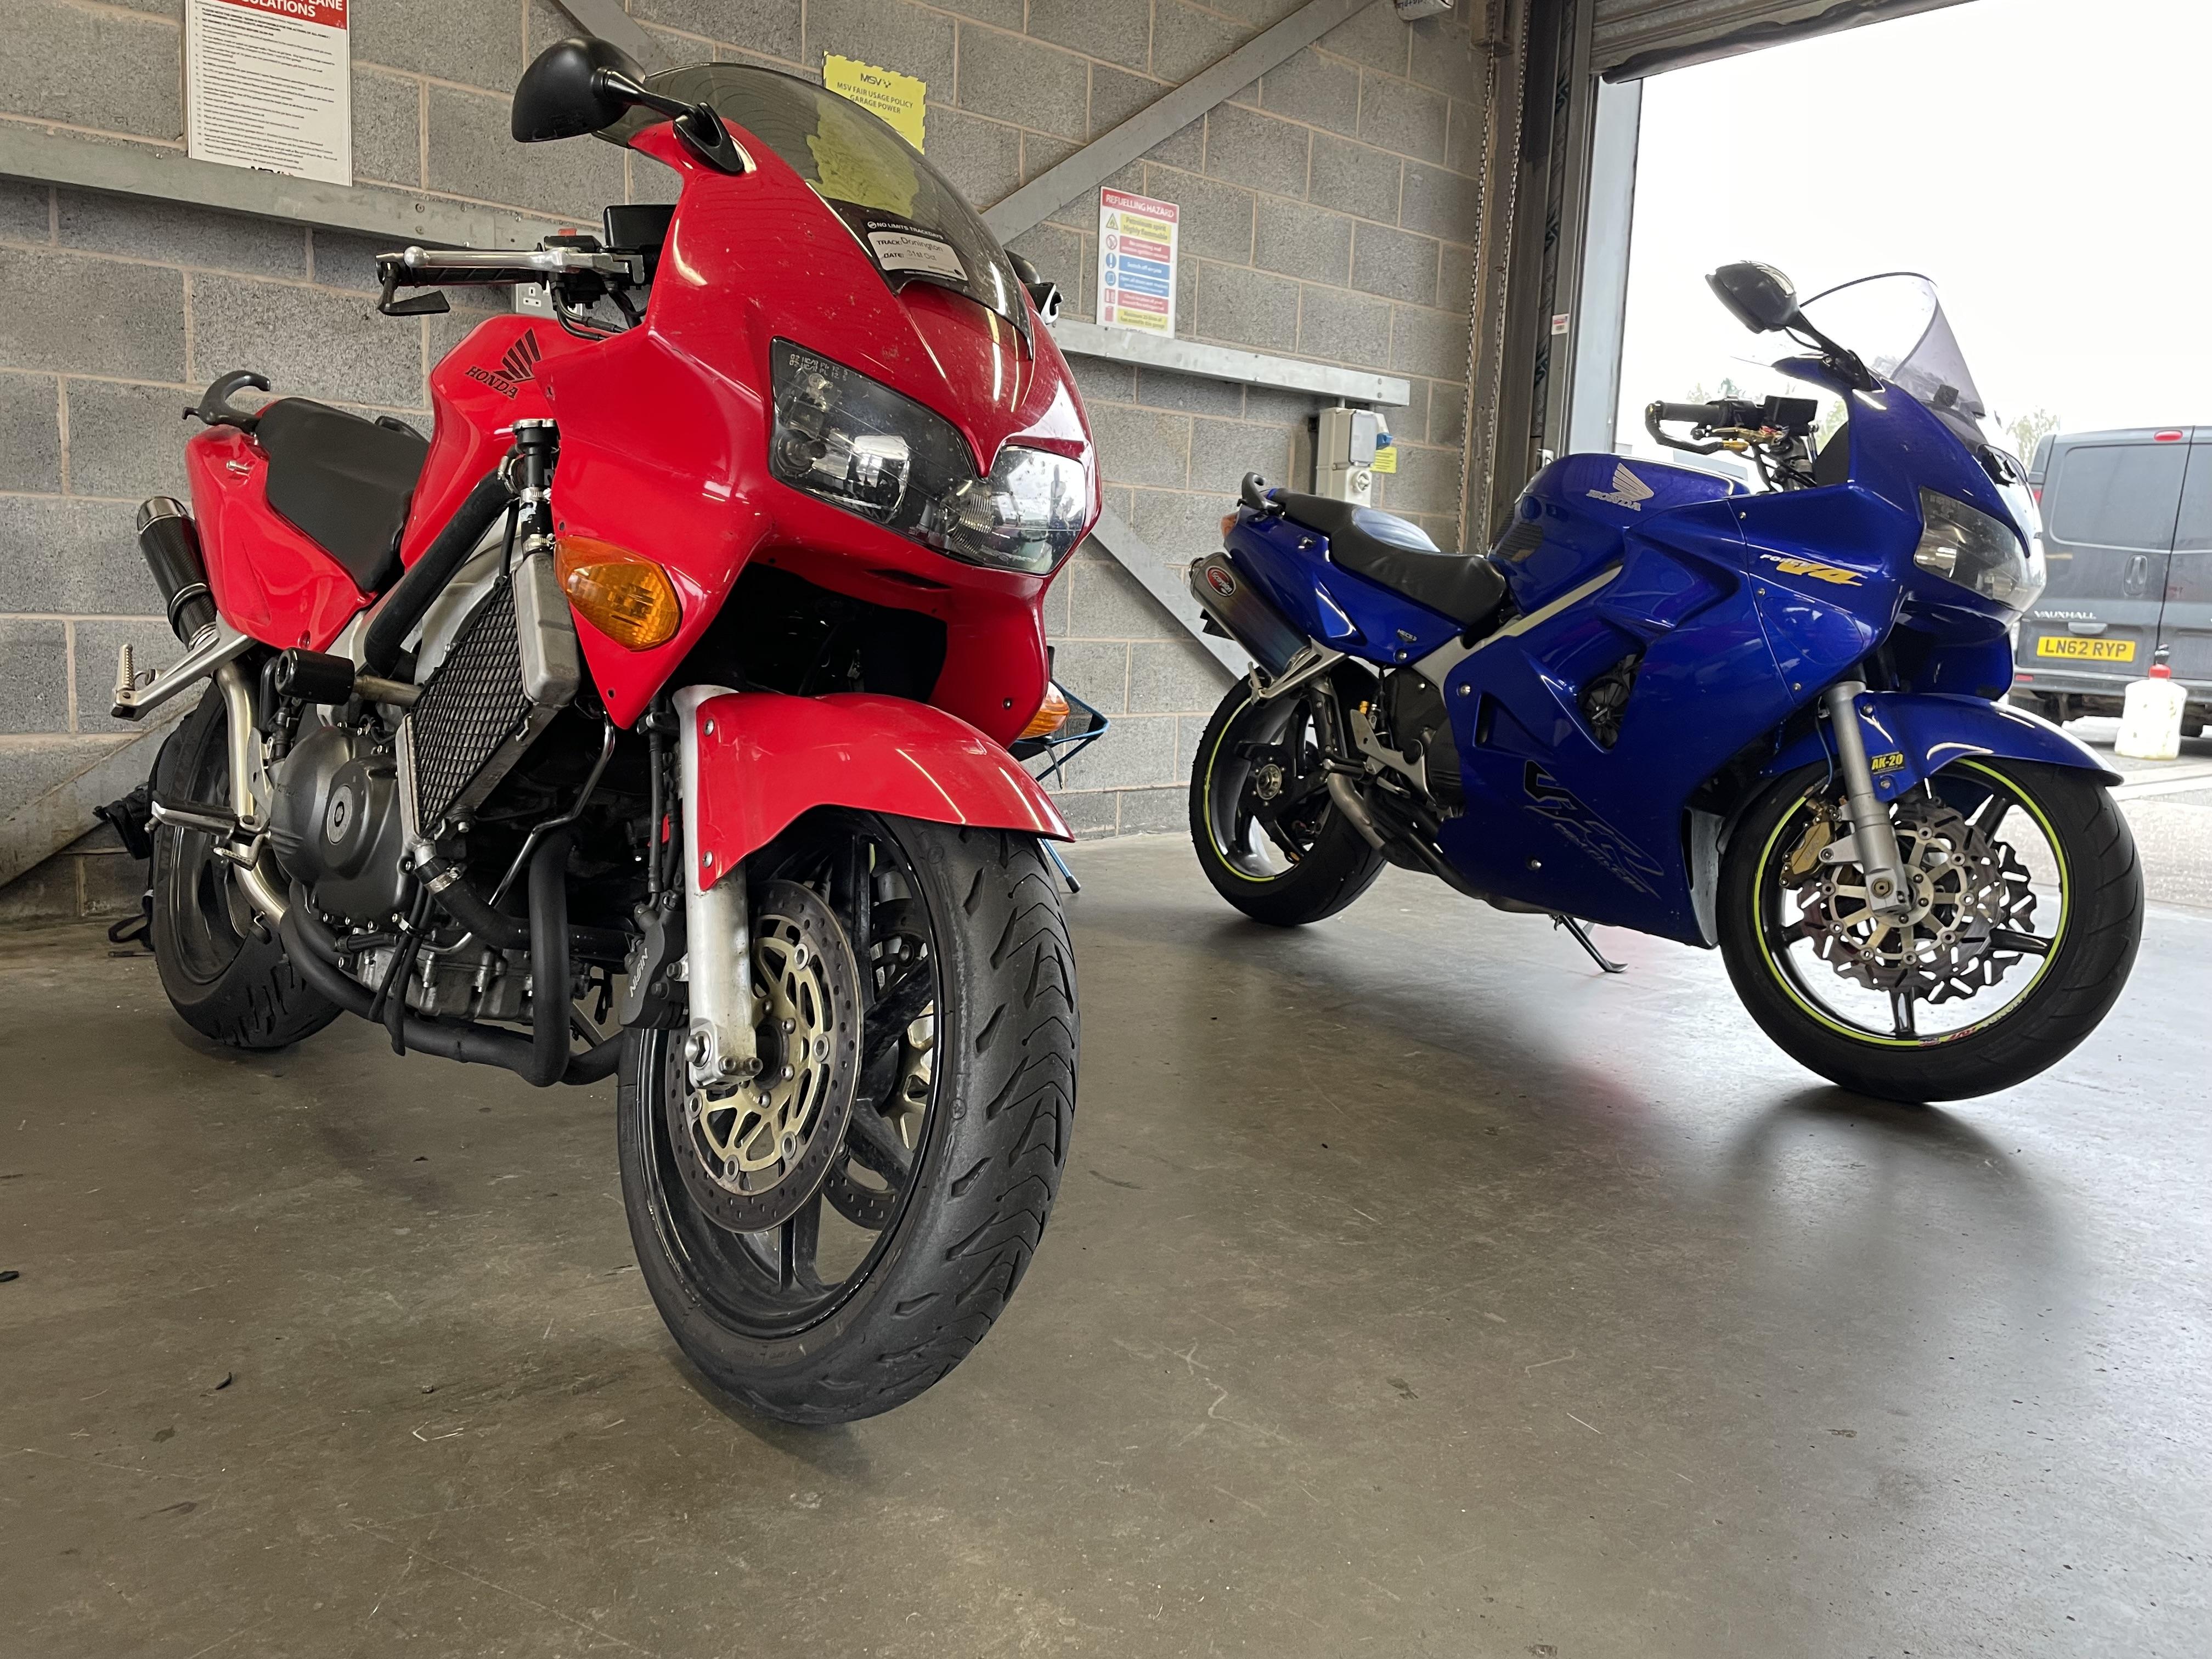
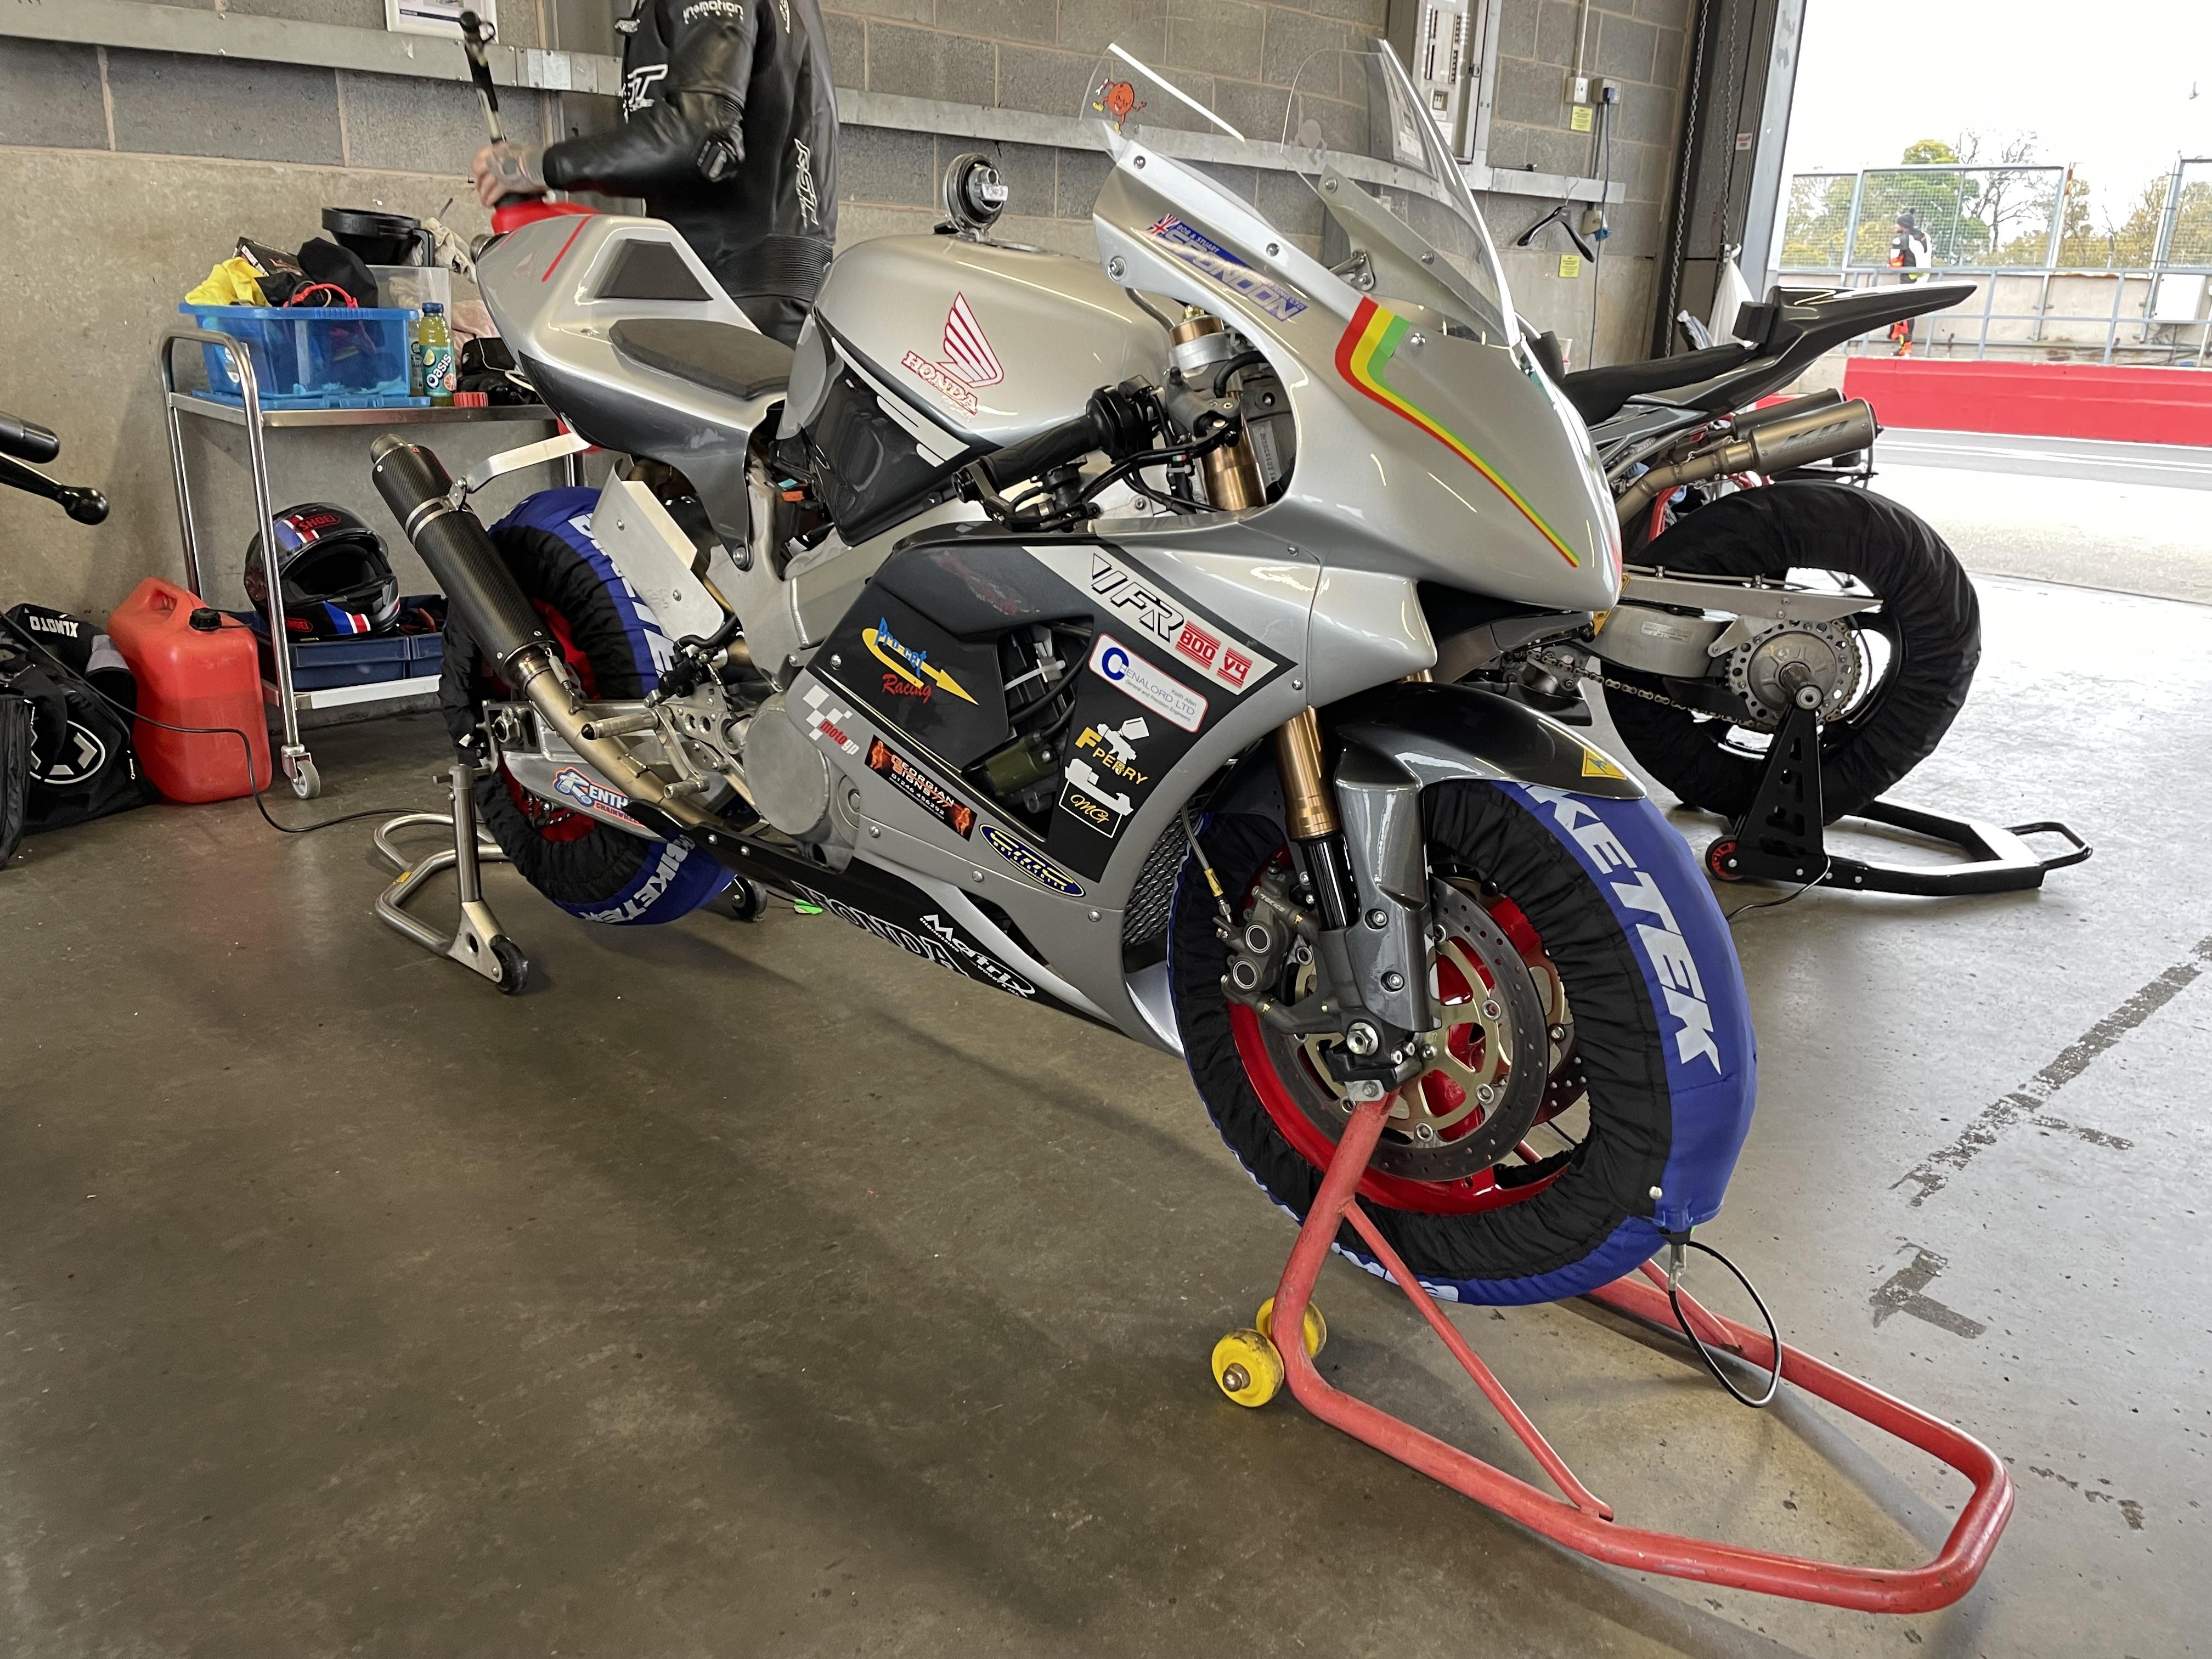
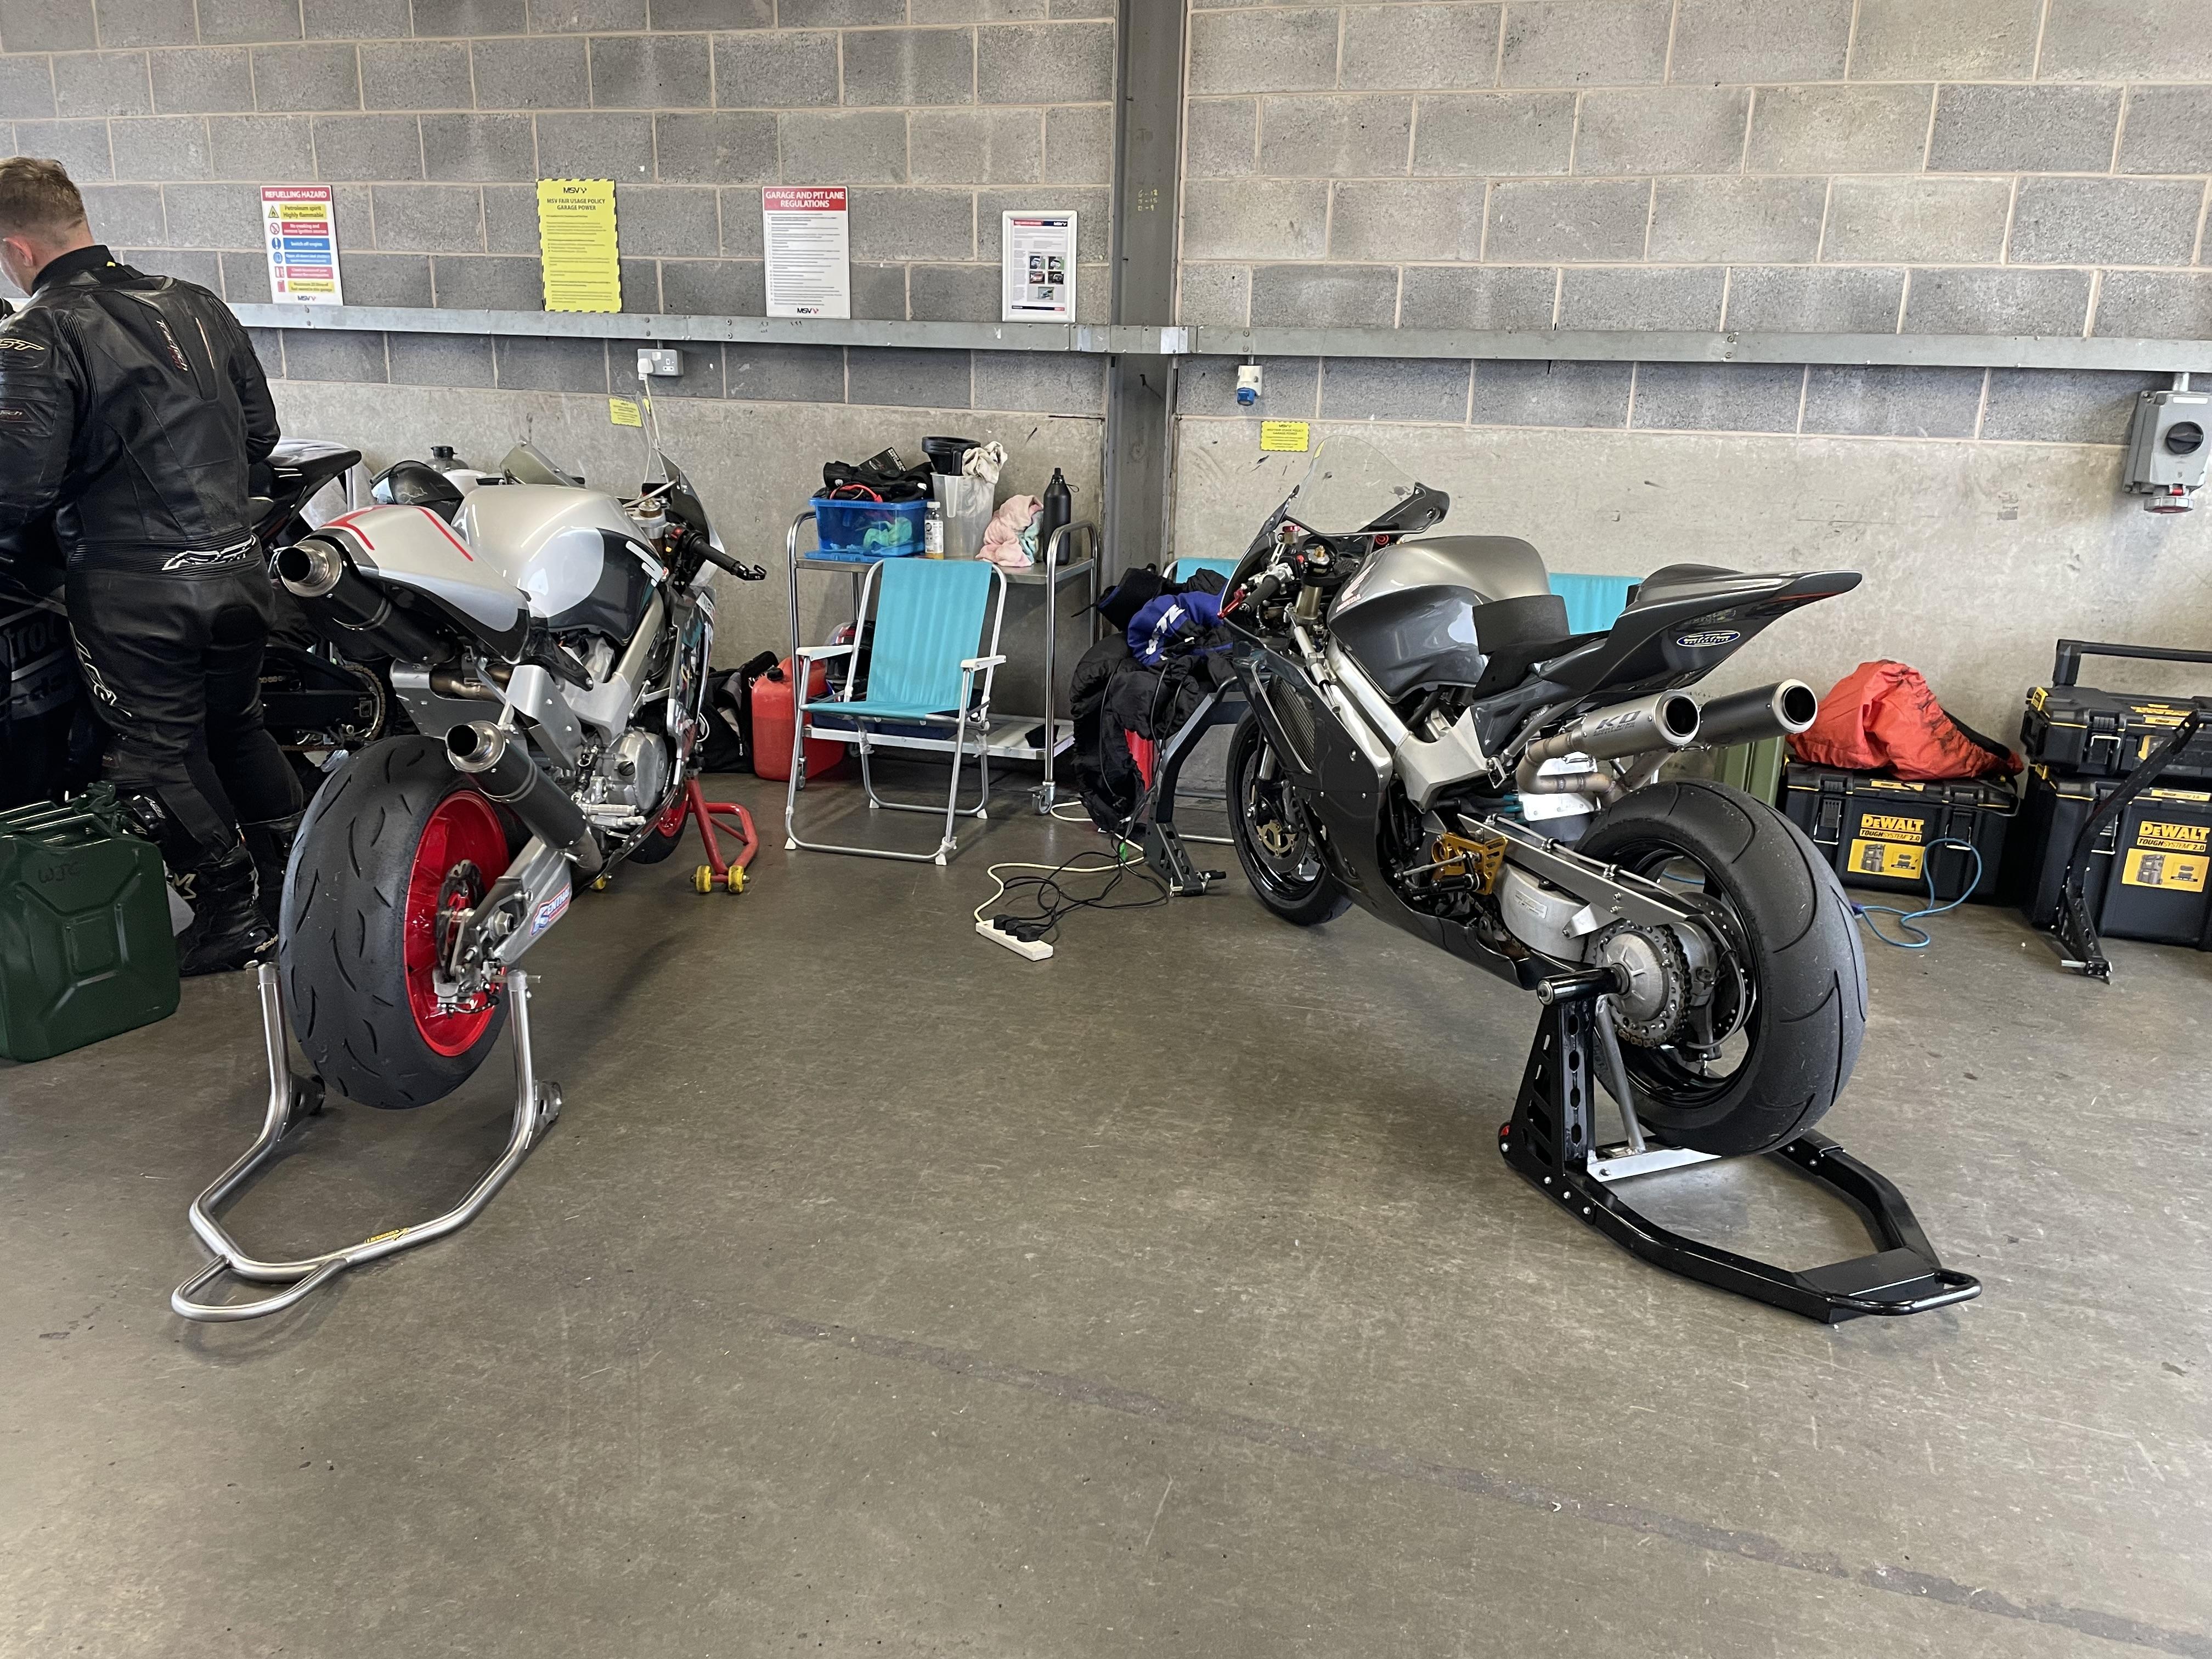
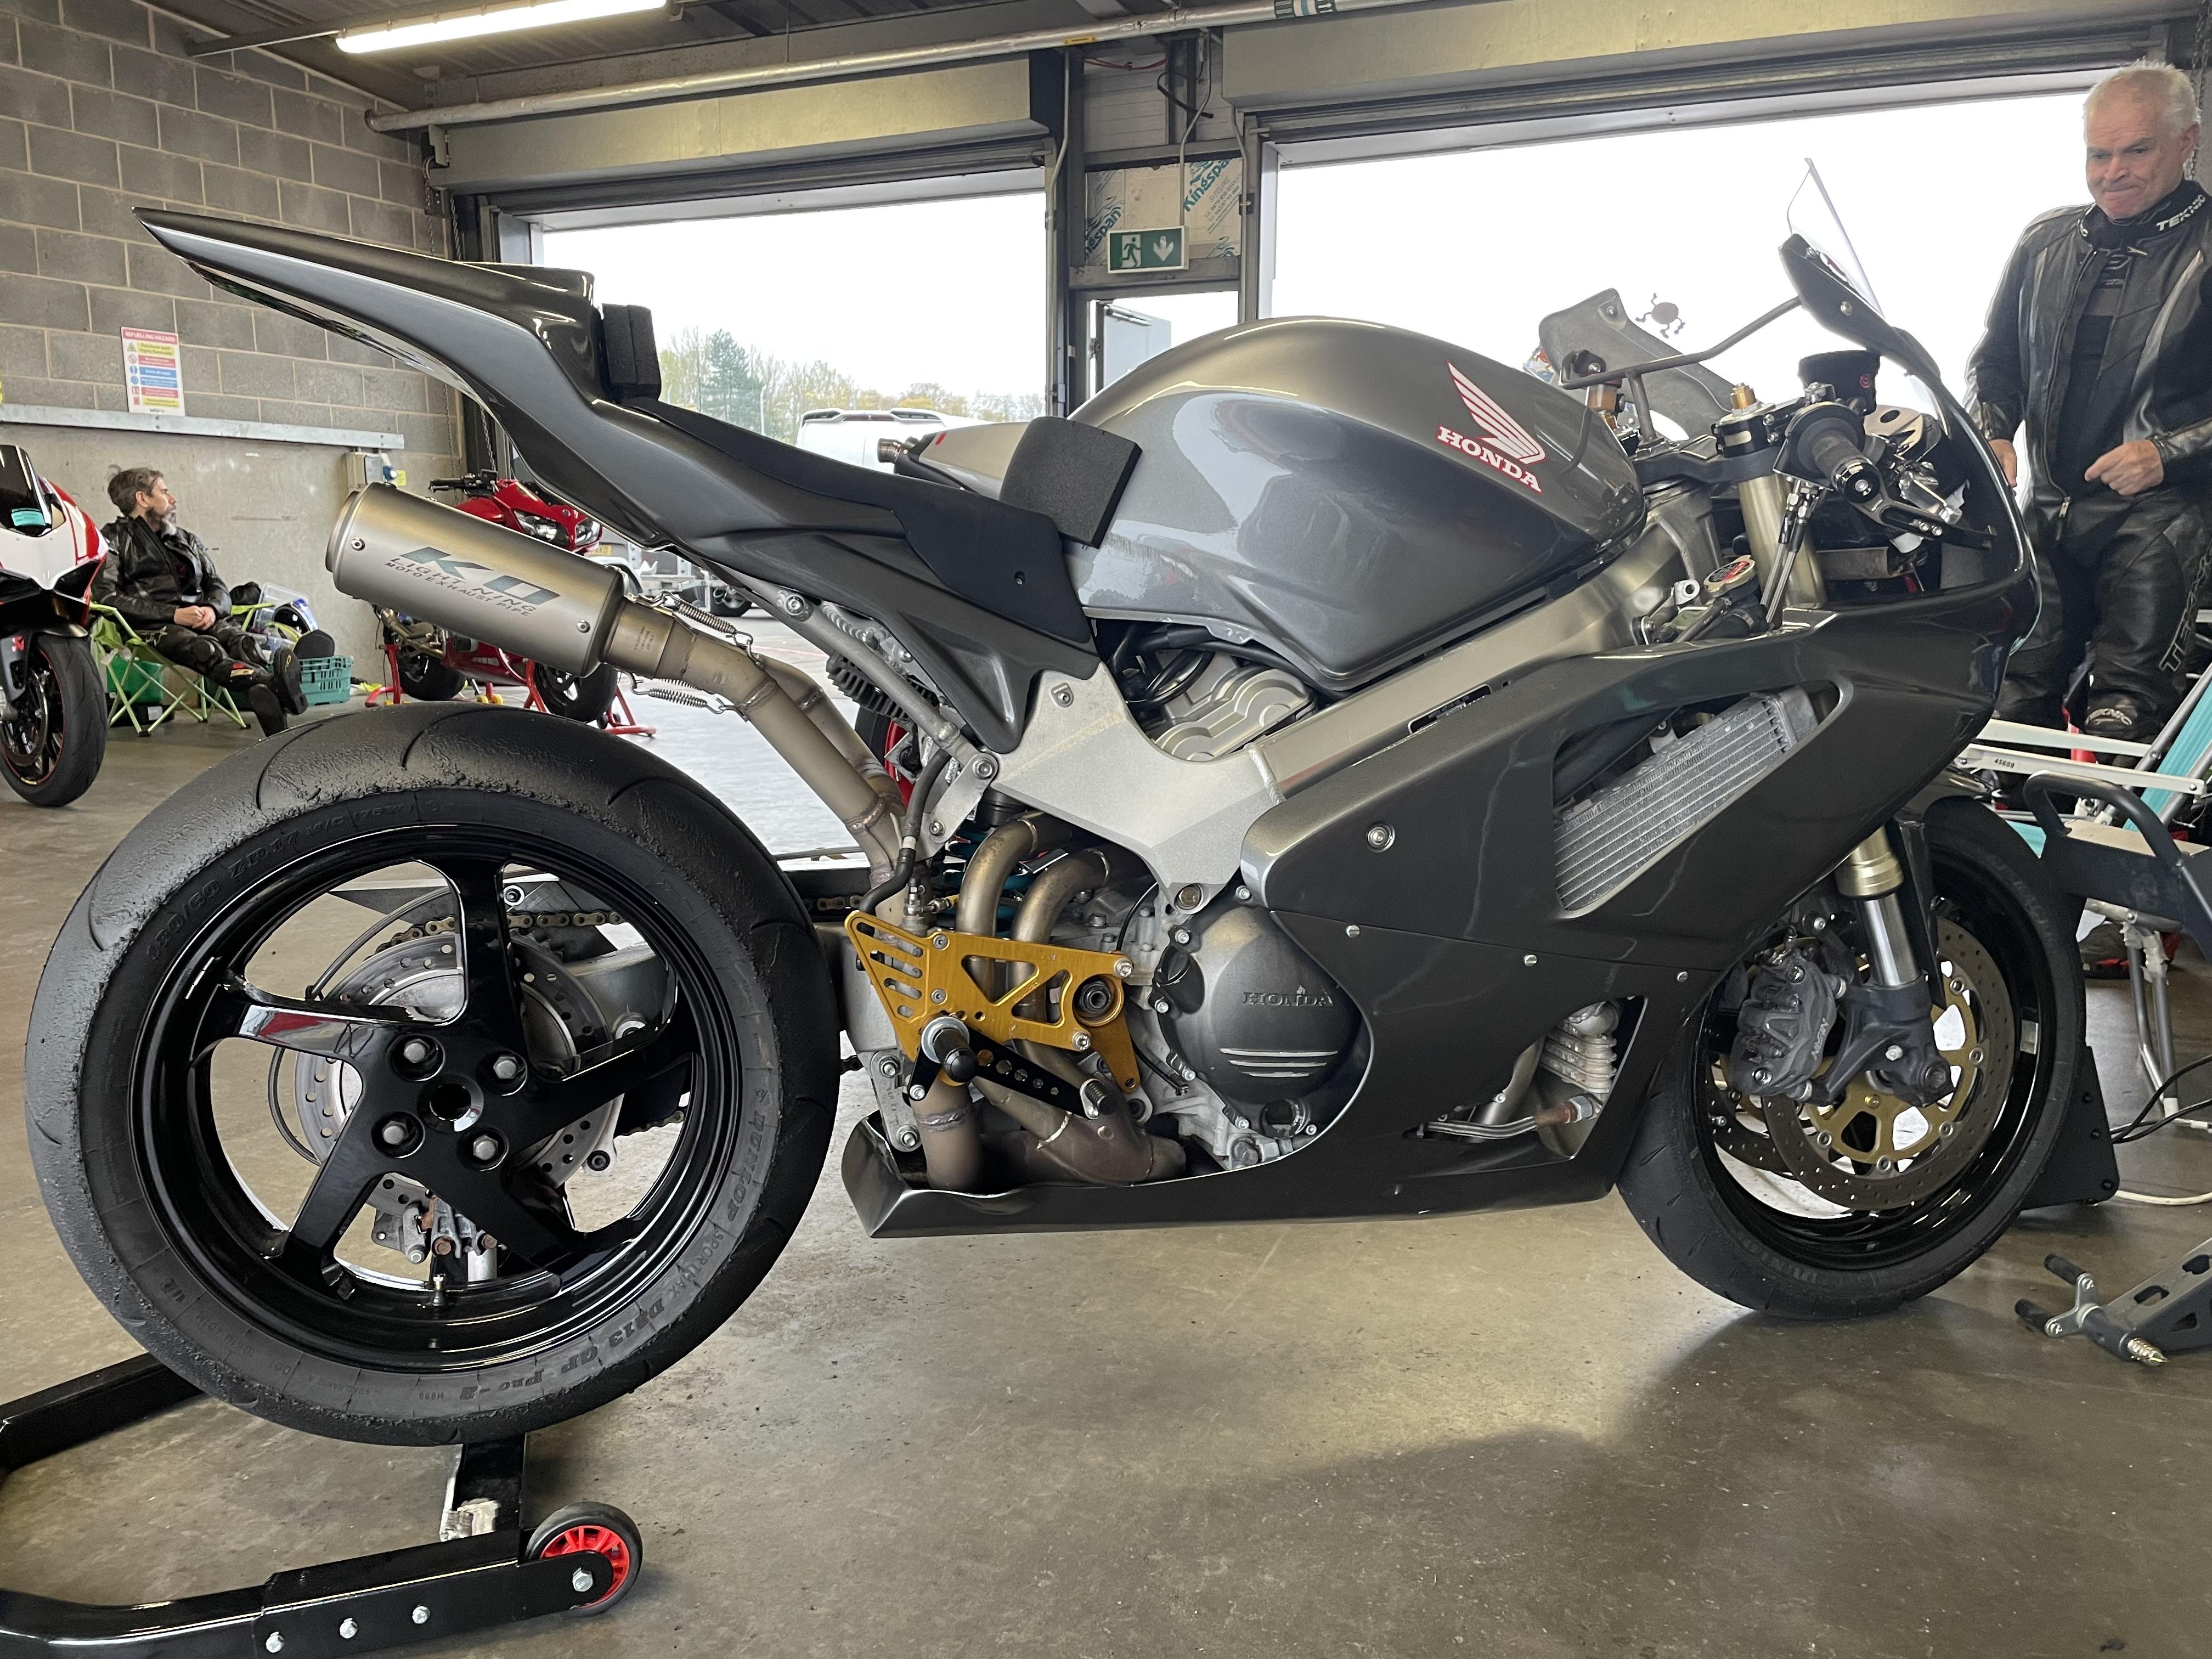
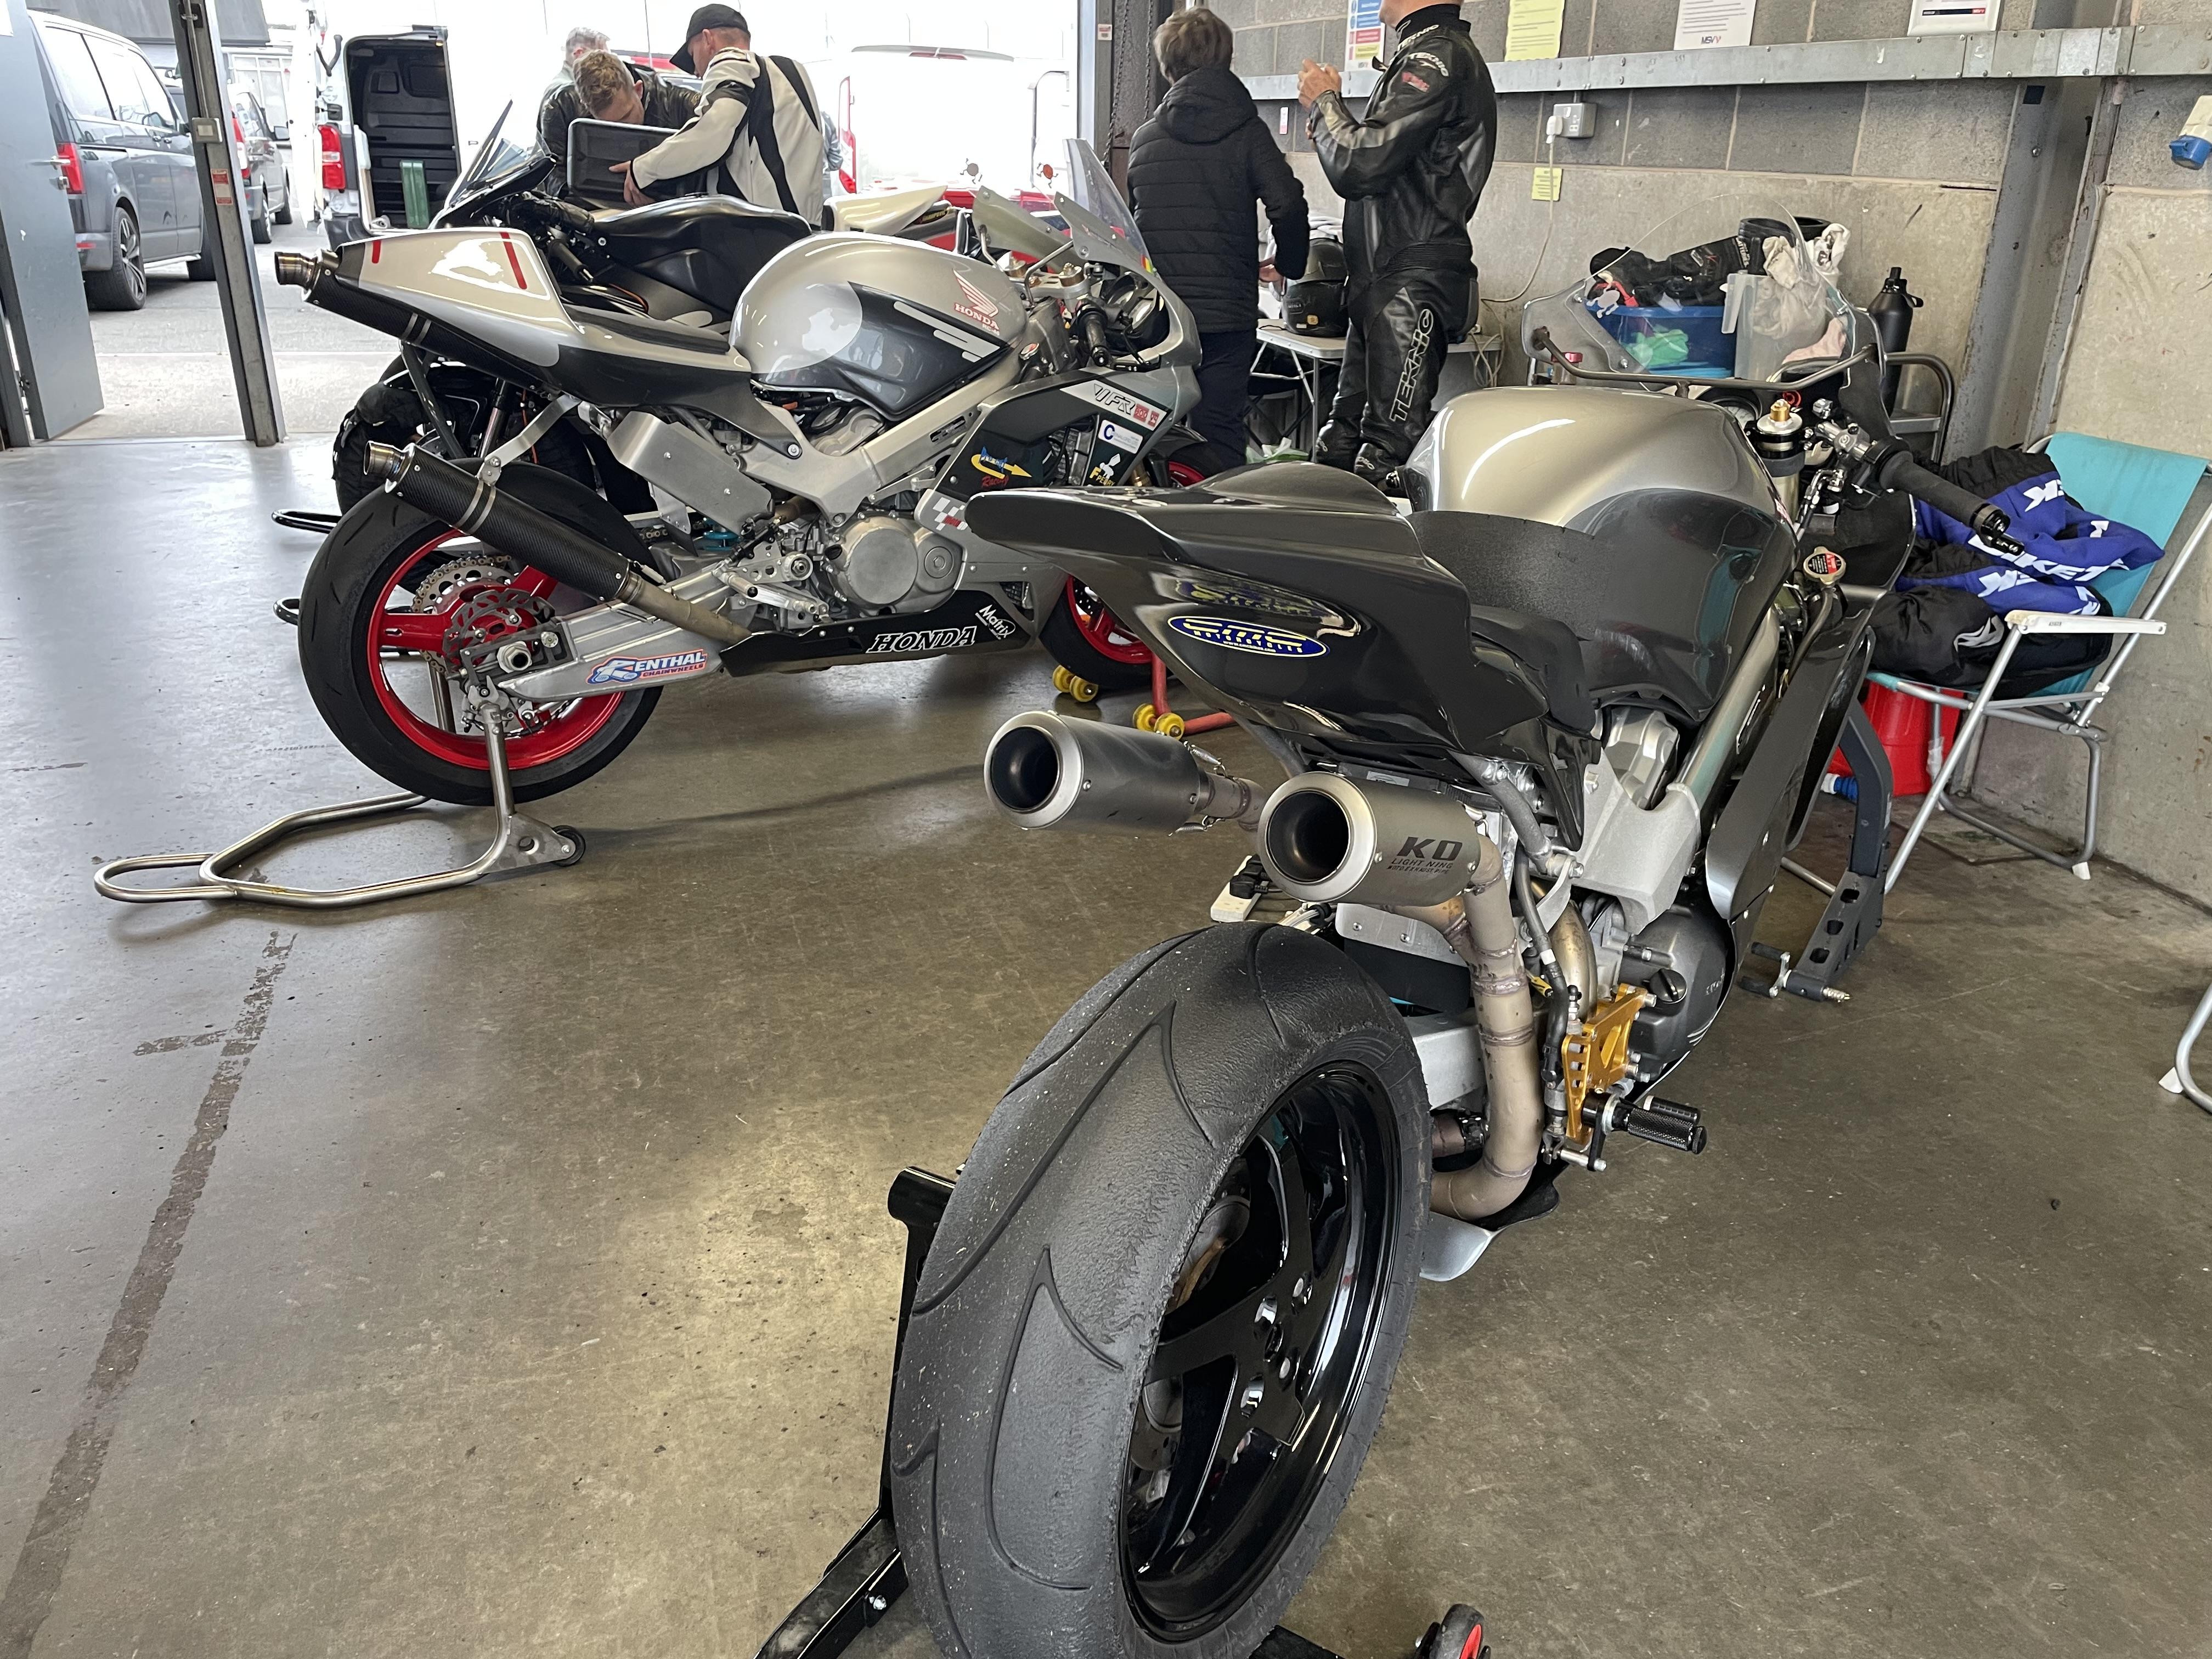
So the Red bike & the Blue Bike had a race, well a track day at least. Then they met some like minded people 👍 Fun was had by all, even the 3hr 20minute ride home was not bad. Saw a certain Leon Haslam there, was stood next to me during the briefing. I'm fat, I'm old, and this was my first track day since 2019, so a sub 2:12 lap on a 24year old road bike (time taken from only video run), was the best I could manage, baring in mind I rode to the circuit & had to ride home. Quite a few people took excursions throughout the day, including someone in the fast group that decided to leave all his oil down the bottom of Craner Curves, where you'd like to be for taking the old hair pin. Video was a bust as the camera mount broke, so is very bouncy, not in the link below. All in 400mile trip including 92miles & 16L of fuel (approx 27 Imperial MPG) around Donington Park racing circuit in middle England 😁 https://share.icloud.com/photos/0c9BGwbb-UM-ypZI00Dol98dA8 points
-
Decisions, decisions... I have been enjoying the 6th gen, but then I pulled out my 5th gen for a little run and realised a) I don't really need two 800s and b) the 5th gen is actually quite a bit better. Before all the 6th gen owners get cross at me, I should explain that my 5th gen has the same mileage and is similarly pretty condition, but has been treated to some tasty upgrades with touring bars, double bubble screen, heated grips and a Sargent seat; it also has a Nitron shock and has had a full Racetech rebuild in the forks. As a result it is a more planted ride and more comfy to boot. Back to back, the 5th feels freer revving and better in the low and especially midrange, and has none of the 6k surge and 6800 VTEC step; it also feels less top-heavy, presumably due to the lack of the high pipes. The 6th is certainly much quieter (no gear whine) and is also smoother; my 5th has a bit of seat vibes around 7000 which the 6th does not. I still really like the 6th gen styling, but I will be keeping my 5th gen and selling the 6th, which will free up funds for another project... To celebrate my decision I took a fun 320km run today on Bumblebee and he told me very clearly that we were meant to be together.
8 points
-
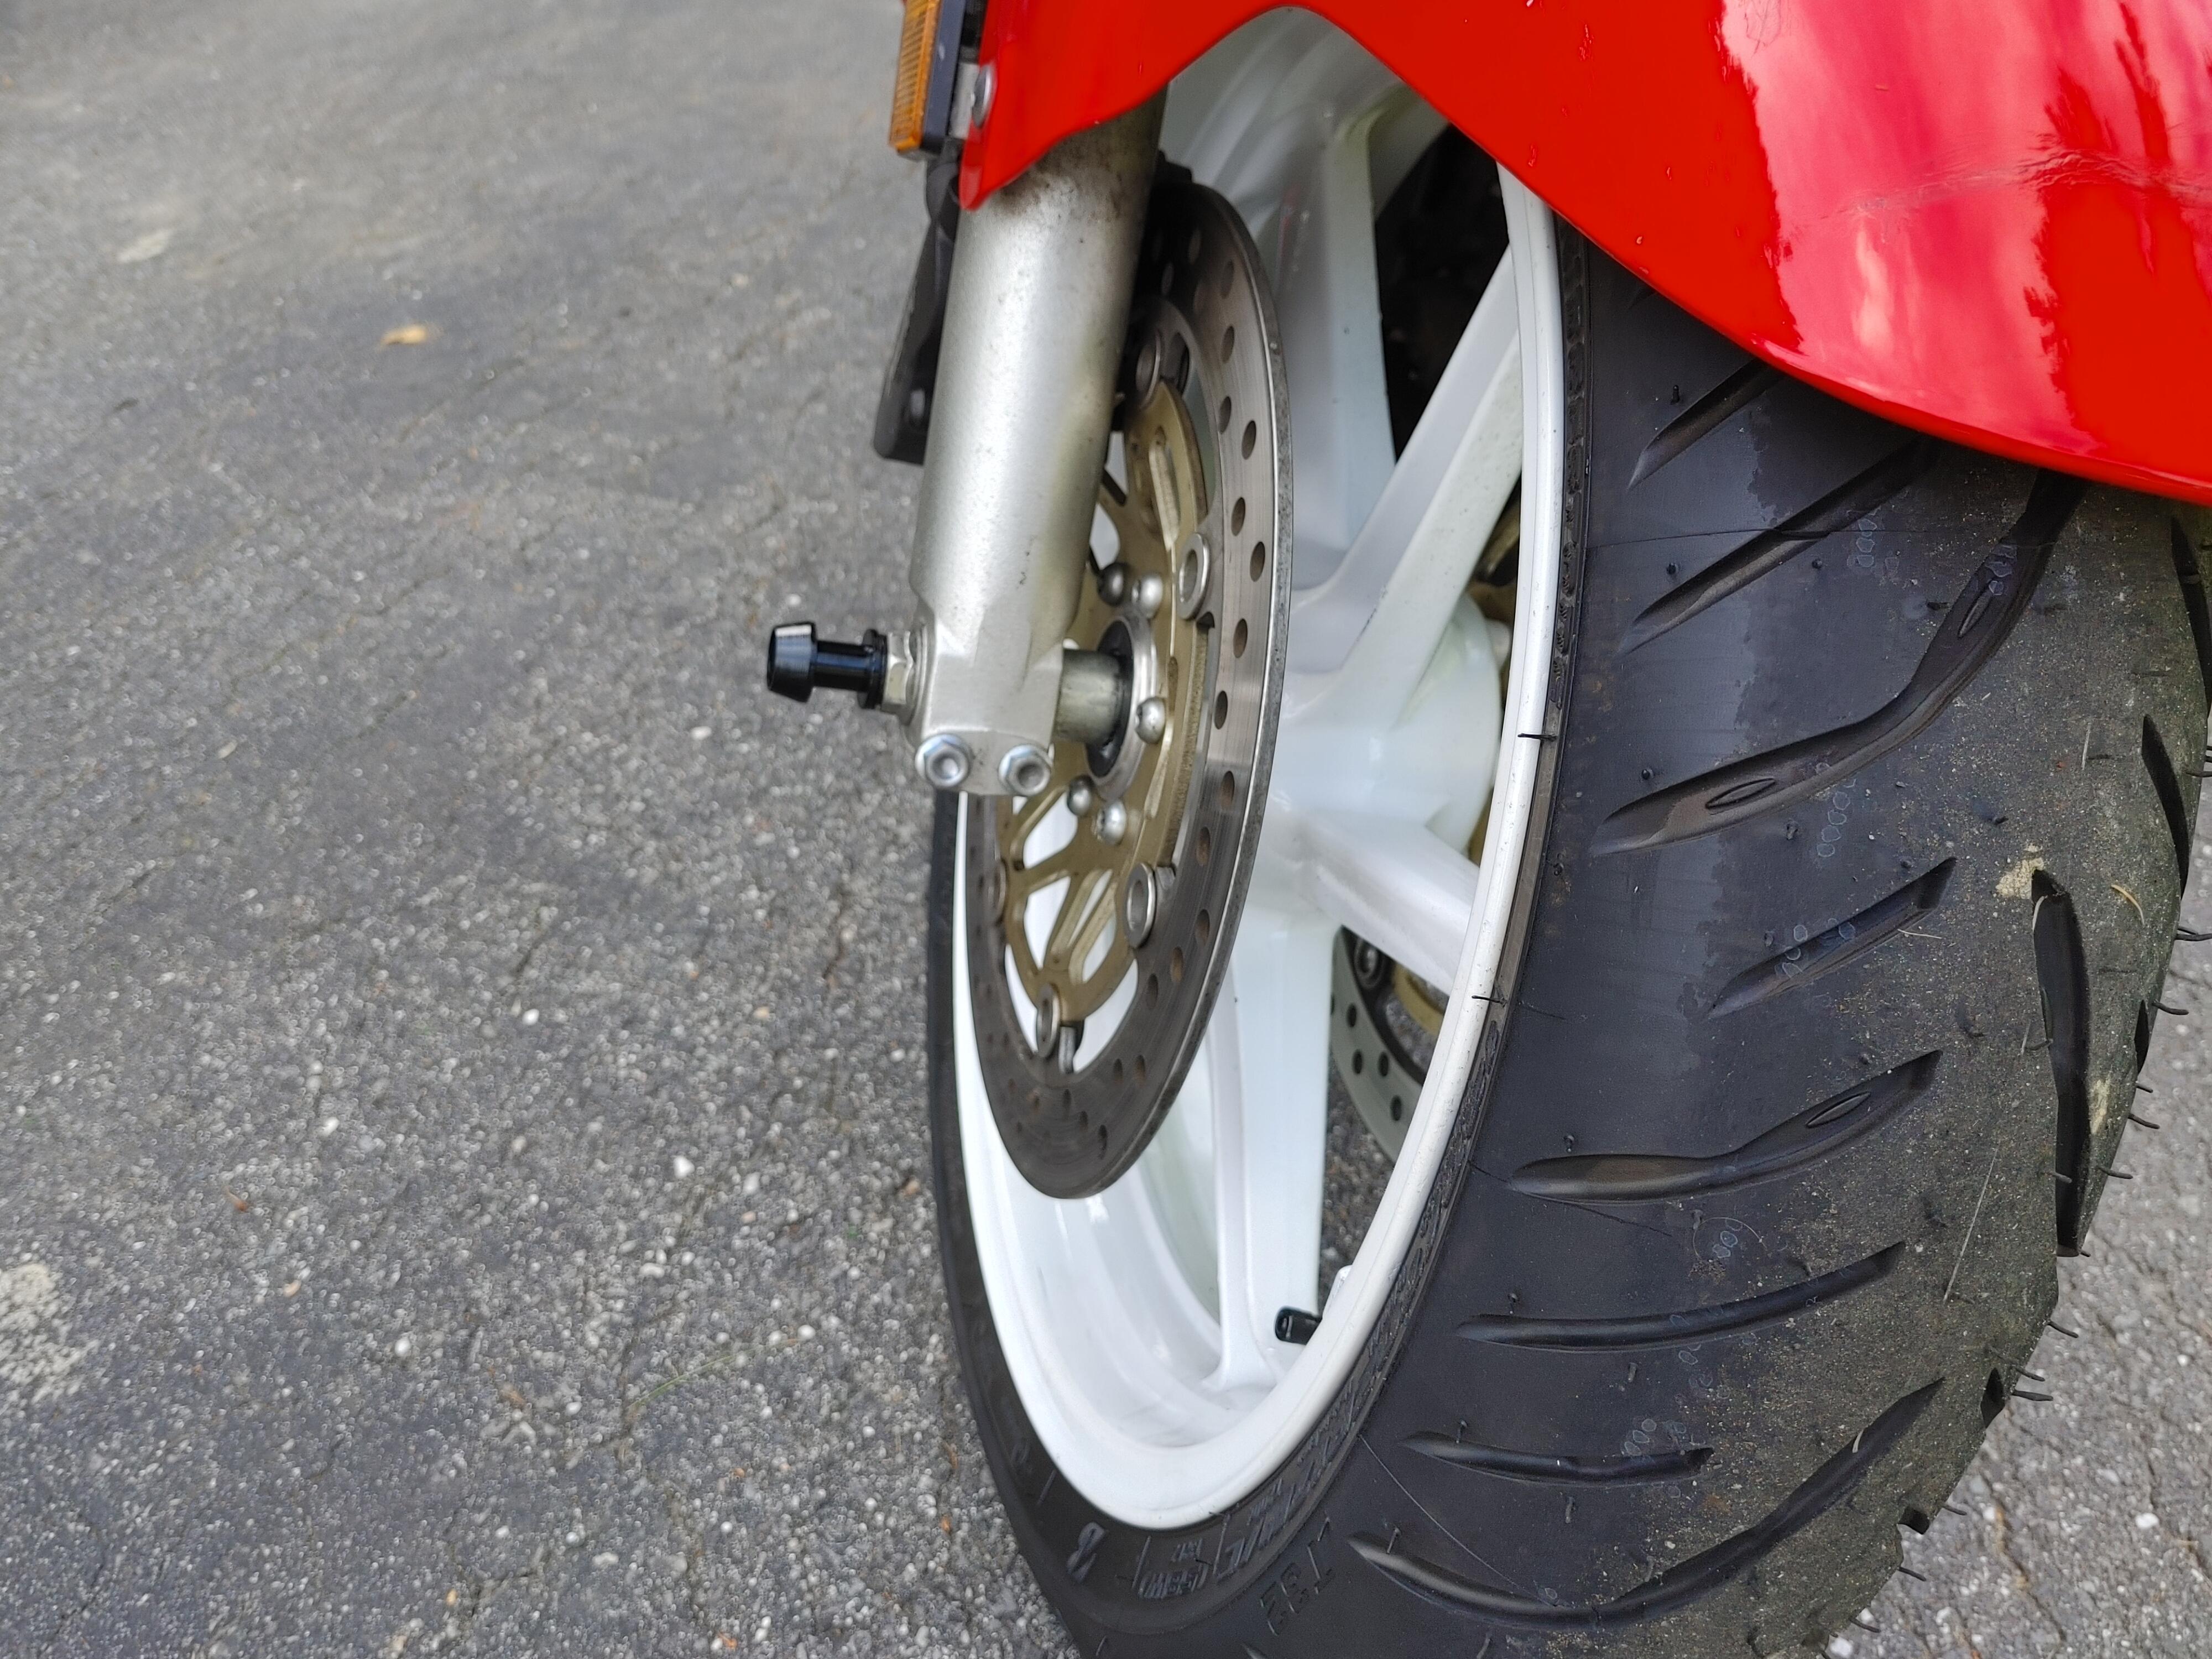
VTR1000F front wheel (to match the rear) with EBC rotors and a fresh tire. Replaced the valve cover gaskets (they were leaking) and re-set the valve lash, most were pretty loose. Had been planning to get in there sooner after rebuilding the bike and making sure it ran good and had all the gears. Fresh coolant since I had to drop the lower rad and did an oil/filter change. New brakes, wheel and tire feel great and the engine definitely feels crisper. Oh and I removed and restored the exhaust system collector, it was the last real crusty thing on the bike.
8 points
-
Ride safe everyone.
8 points
-
You are making a HUGE assumption here that none of us have disco lights or fuzzy dice on our VFRs mate. What happened to inclusivity and diversity? I may need to speak to a moderator about this breach.8 points
-
Hi All, here's a brief report of the first ride after the mods on my VFR. Mods here: Well, as well as reported in the post, I didn't do extravagant or exotic modifications; it's something that most of you have already experienced. Thus, forgive the repetition. Well, I come out for the first ride of the year, yesterday. Nothing special; I was just curios to see the impact of the work. Of course,, winter conditions (low temperatures, slightly over zero, dirty roads) and worn tires are not the best preconditions for pushing hard, so I've been extremely cautious and prudent. However, despite of it, the differences were more than evident: Brakes are ready, robust, and finally I can manage them as it's supposed to be. I was afraid of some chattering, to be honest: I confess that I was afraid that the washers to shim the calipers should have made system vibrate, but it's not the case; everything is smooth and linear. The new frontend works fine; the forkbrace makes it stiffer, and you can see it in entering the corner, while you get in your hands a good and "faithful" reading of the road ahead The engine also runs very well; I didn't get big variations from the new coils; the sensation was just like when I was young, running a 2 stroke engine with a leaner carburetion. It's slighty rapid in revving and "cleaner" to the throttle response. Nothing huge or striking: it's just a pleasant sensation of improved readiness In conclusion, very happy of the work. It's not a revolution, but the bike is now closer to my idea of a VFR. No useless and fancy stuff aboard (no PAIR, flaps, D-CBS), no ugly and old coils bolted on the frame below my hands. Just a sublime engine into a good chassis. A VFR as it's meant to be7 points
-
Hello all. Marcus here. Just wanted to say hi. This is my VFR.
7 points
-
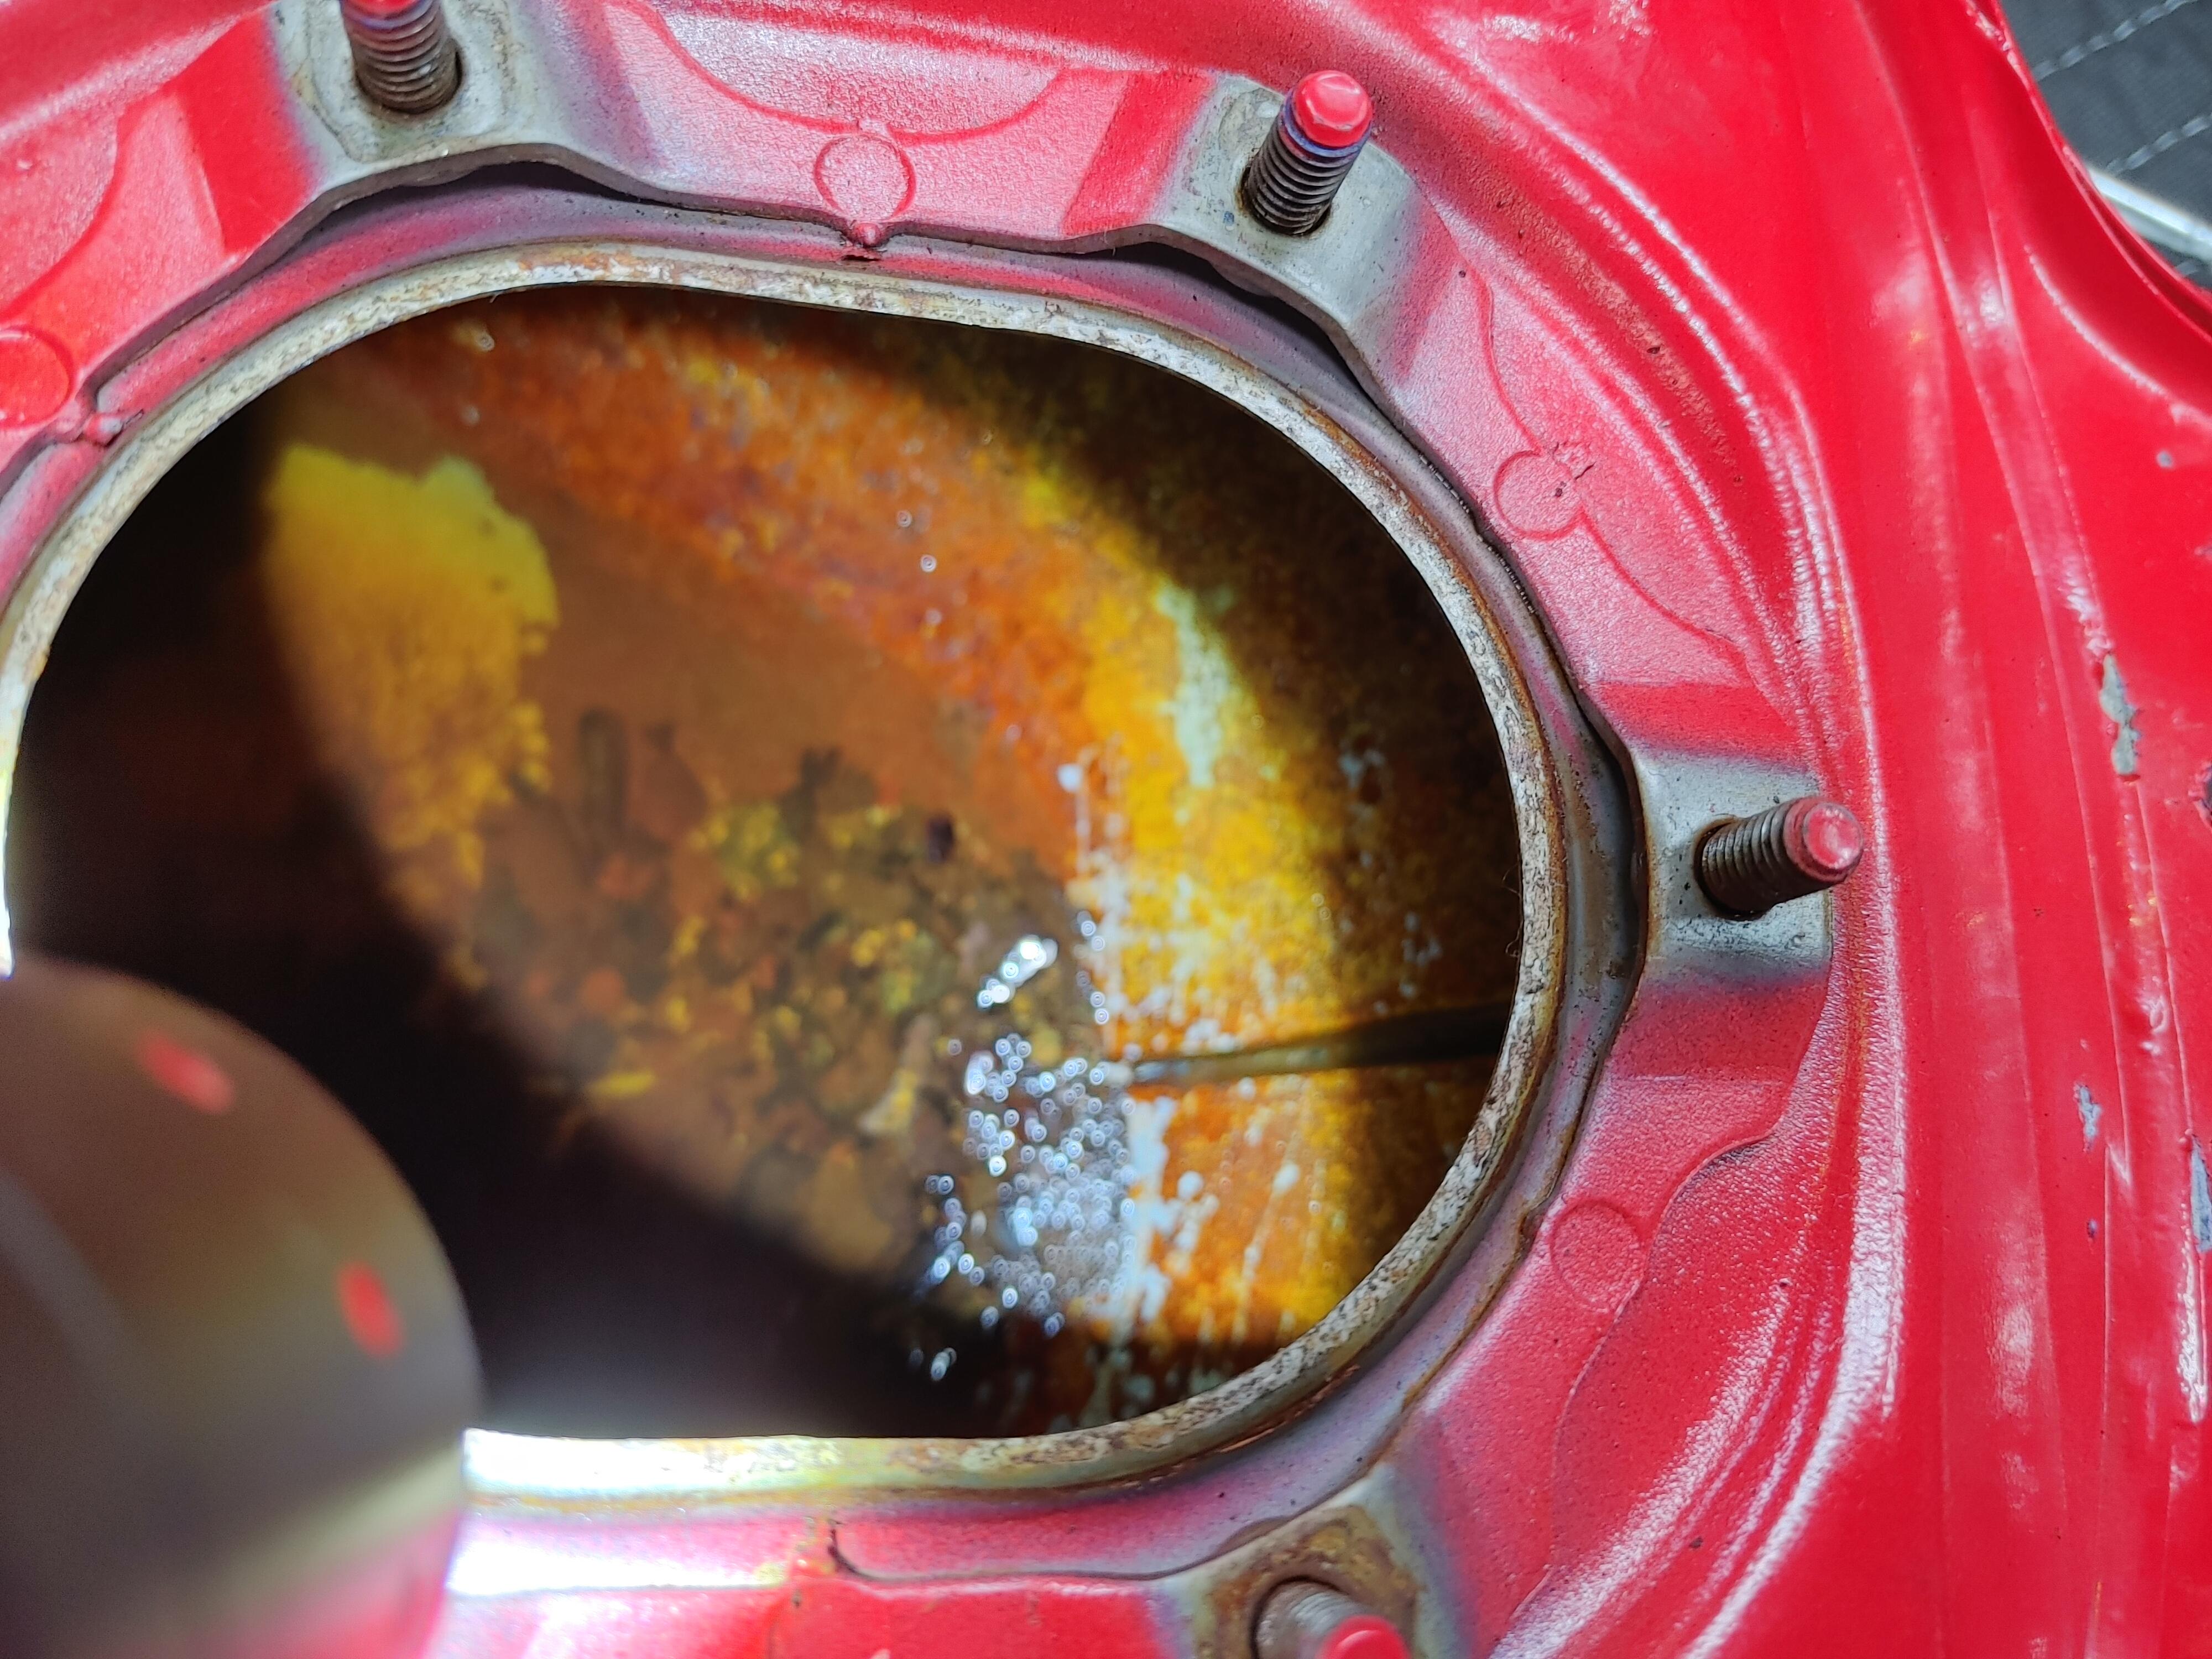
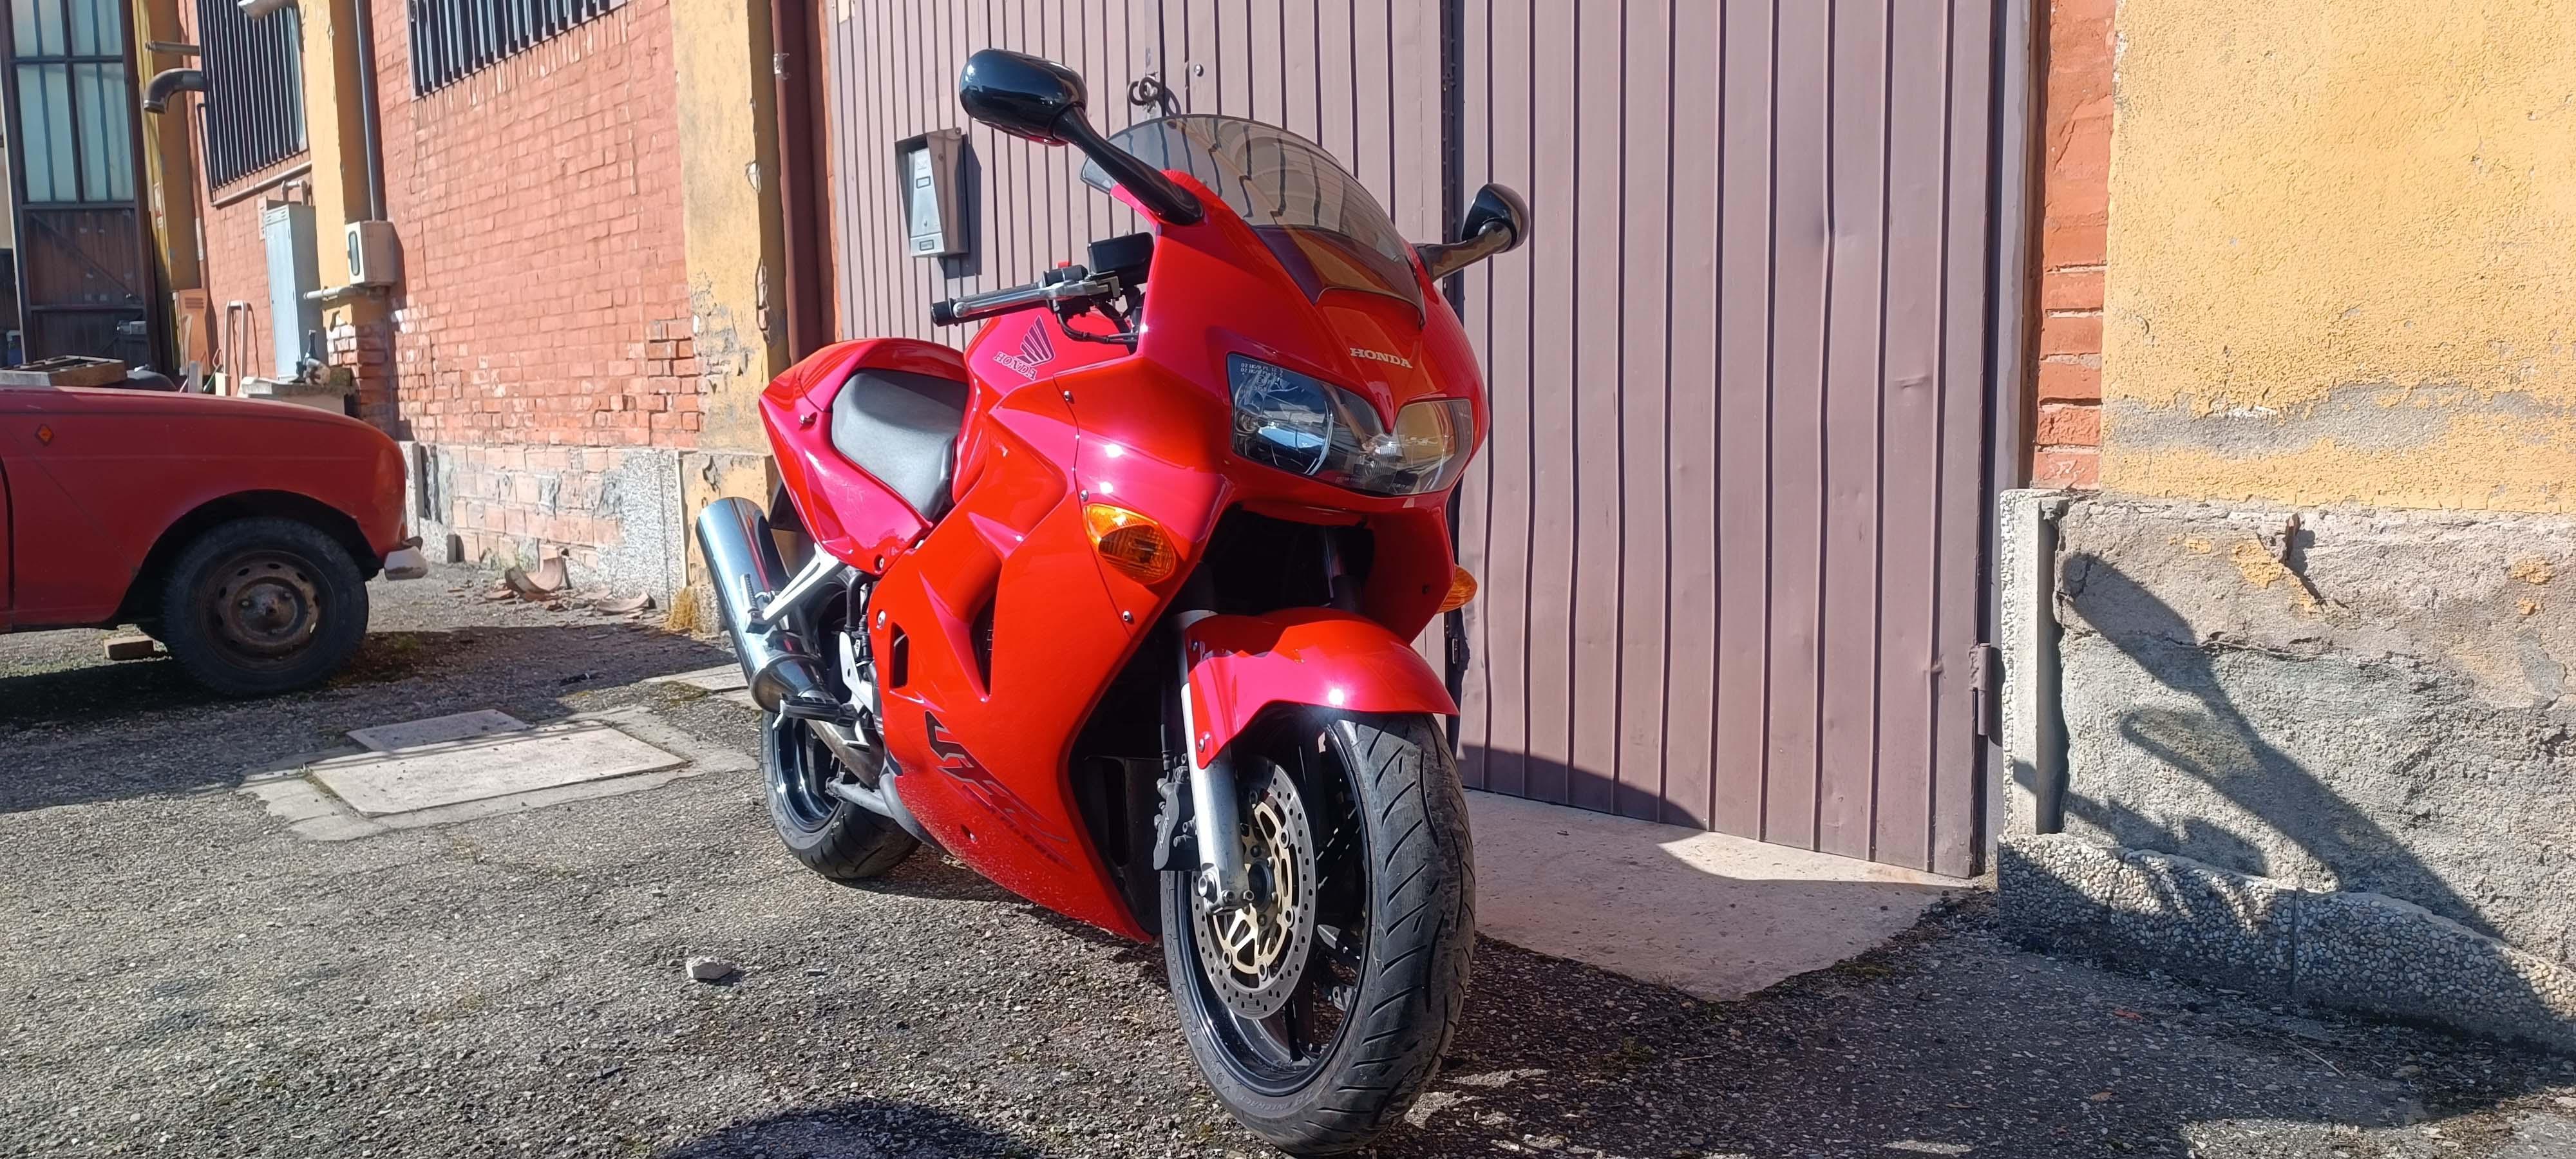
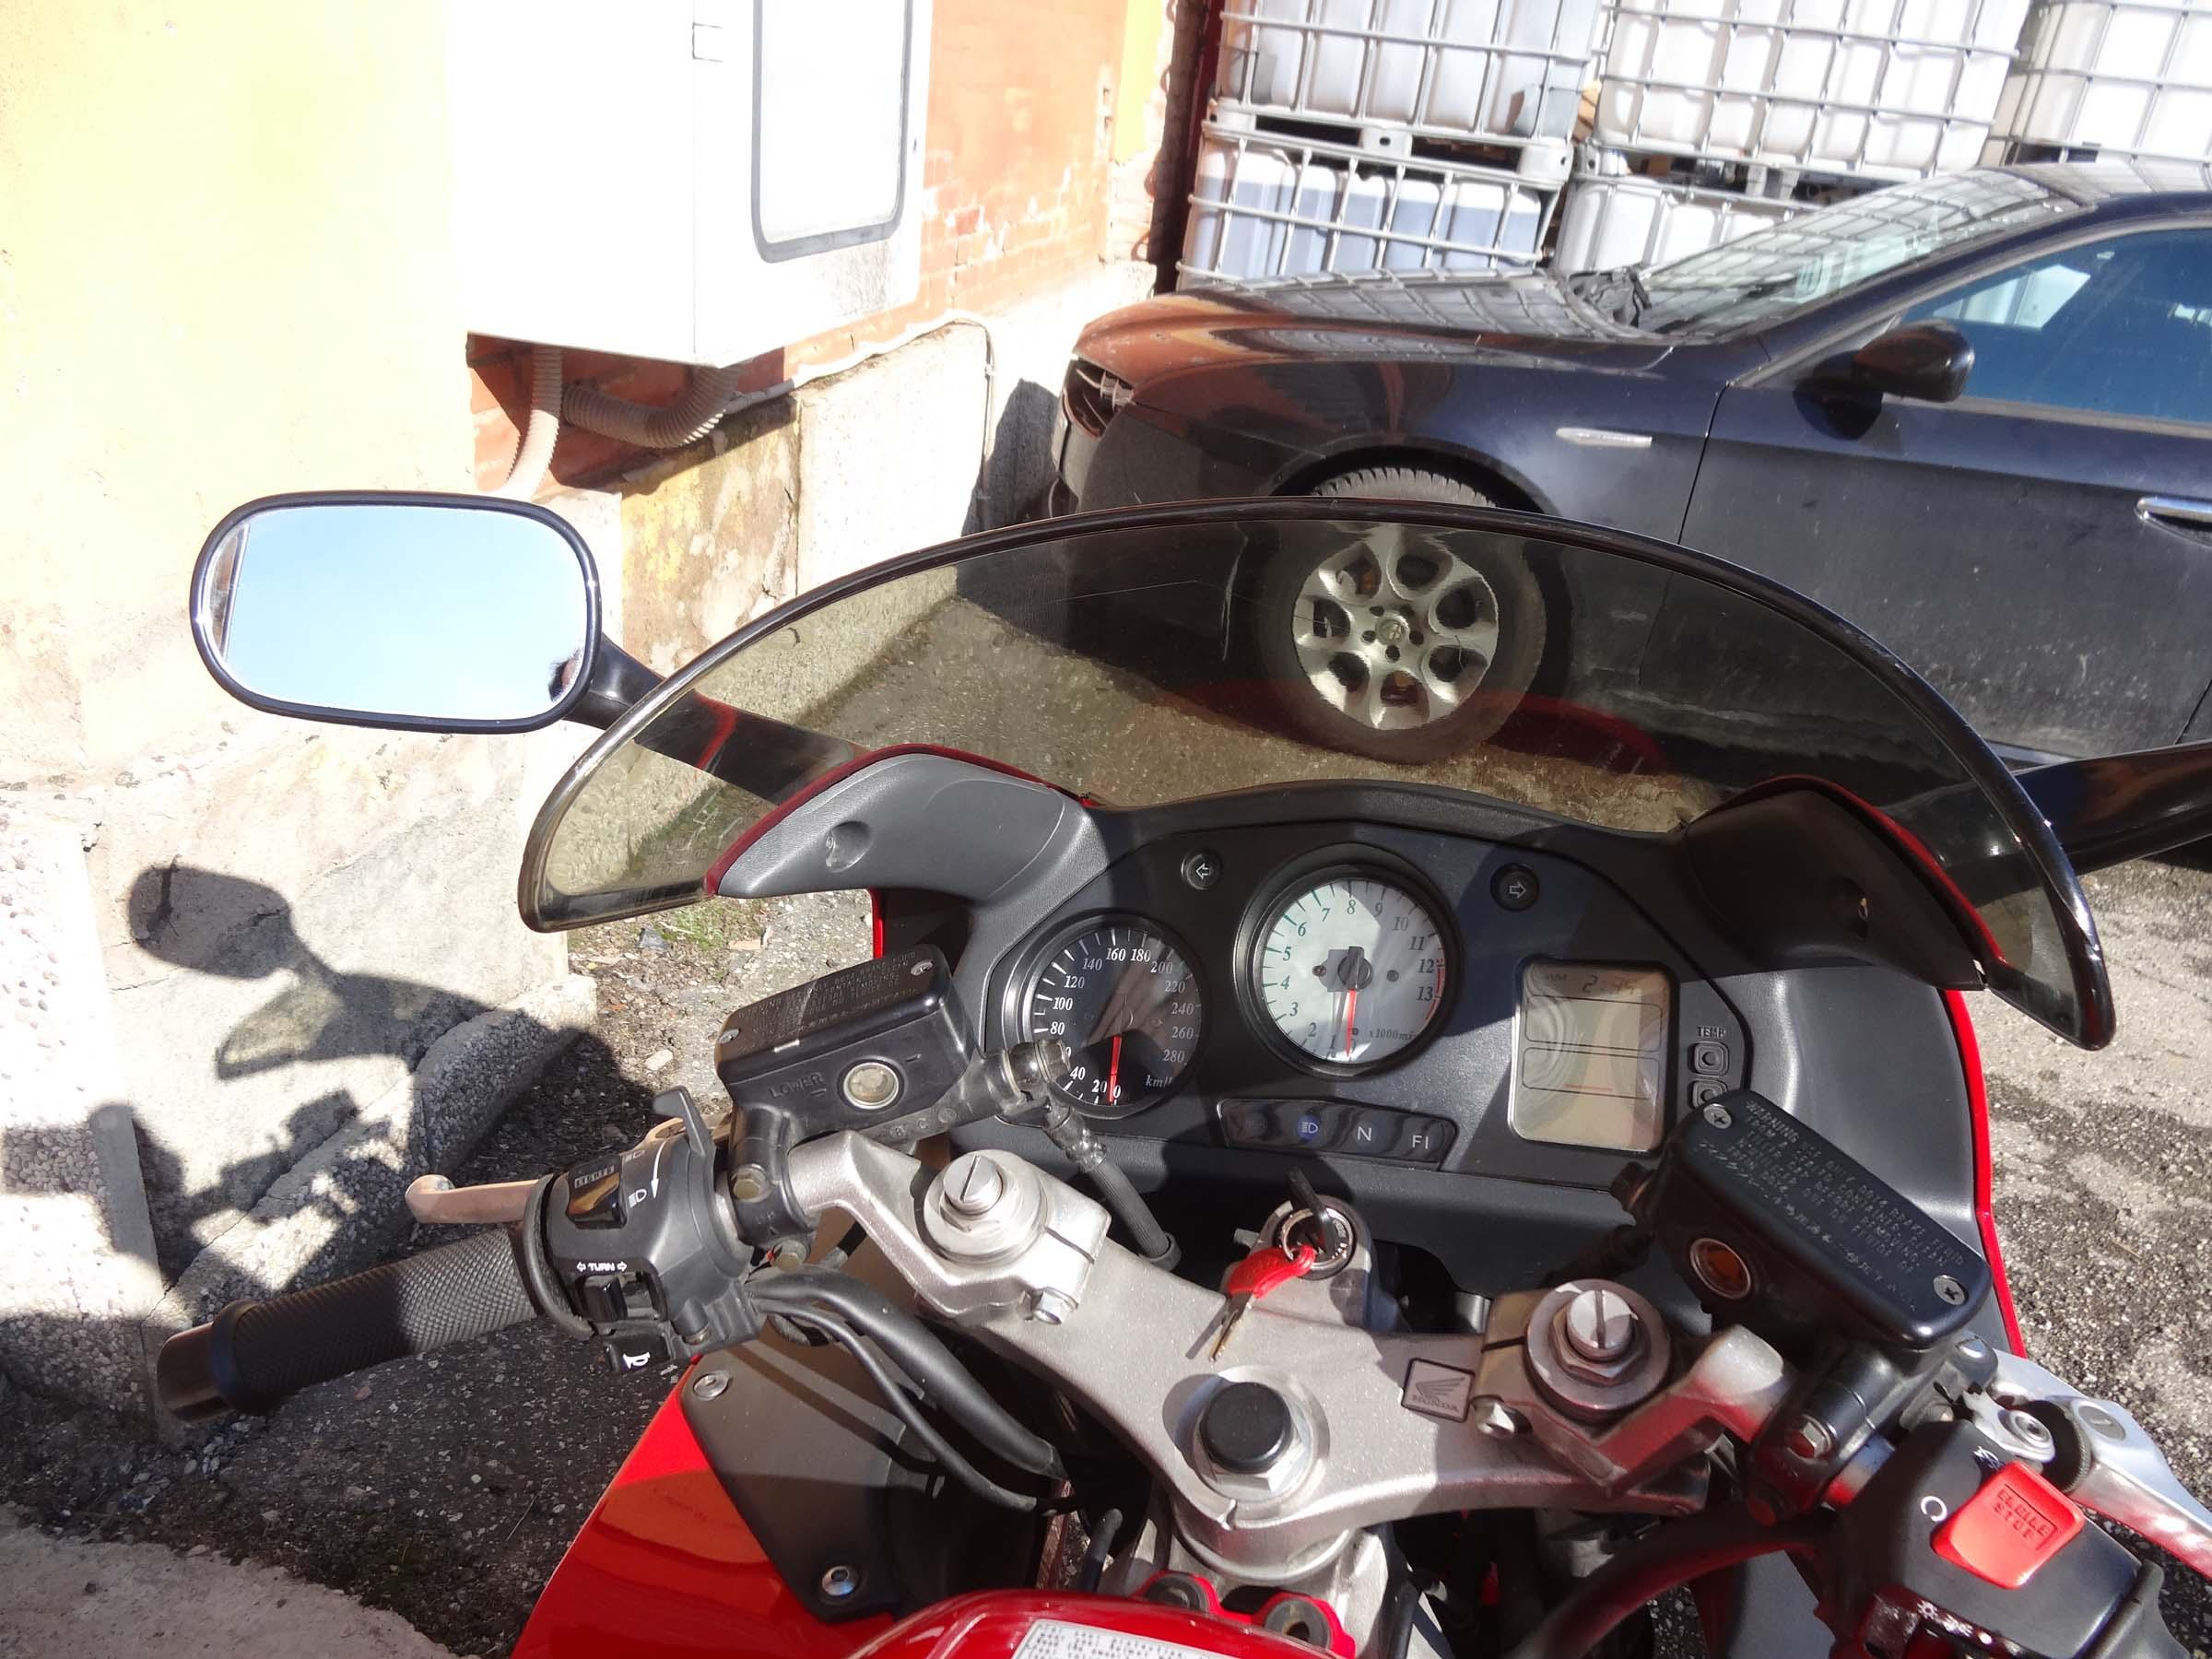
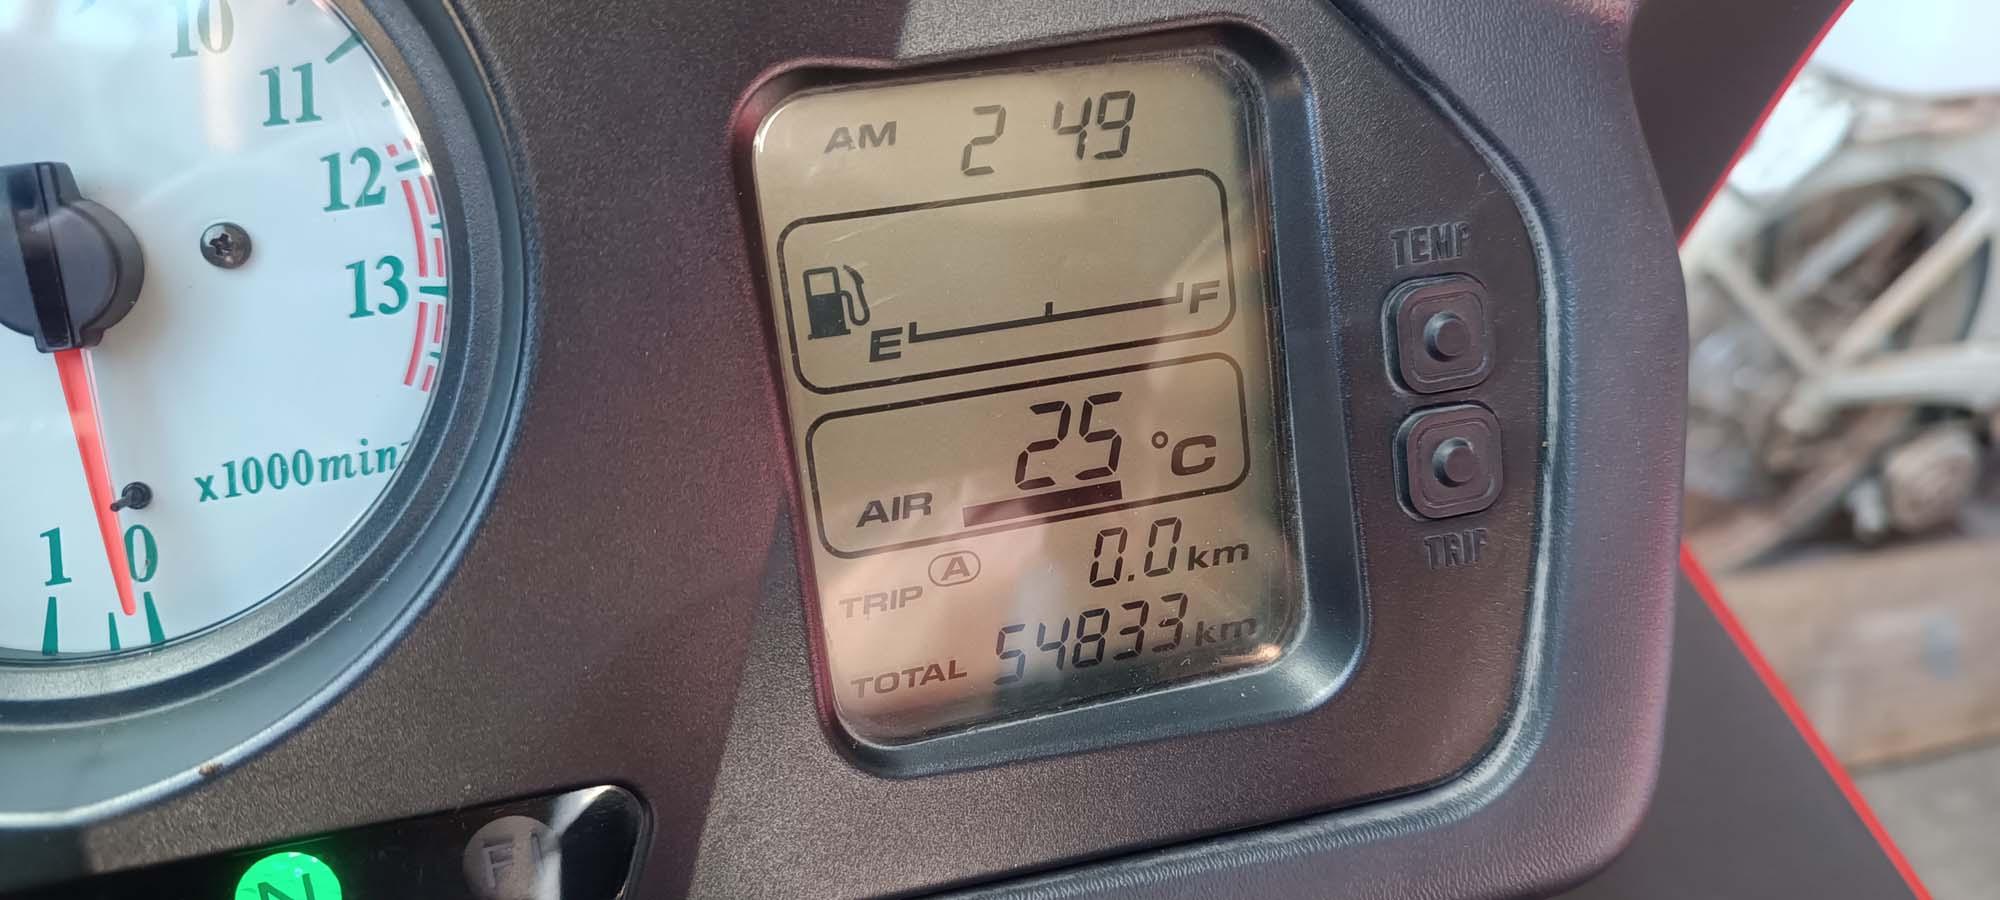
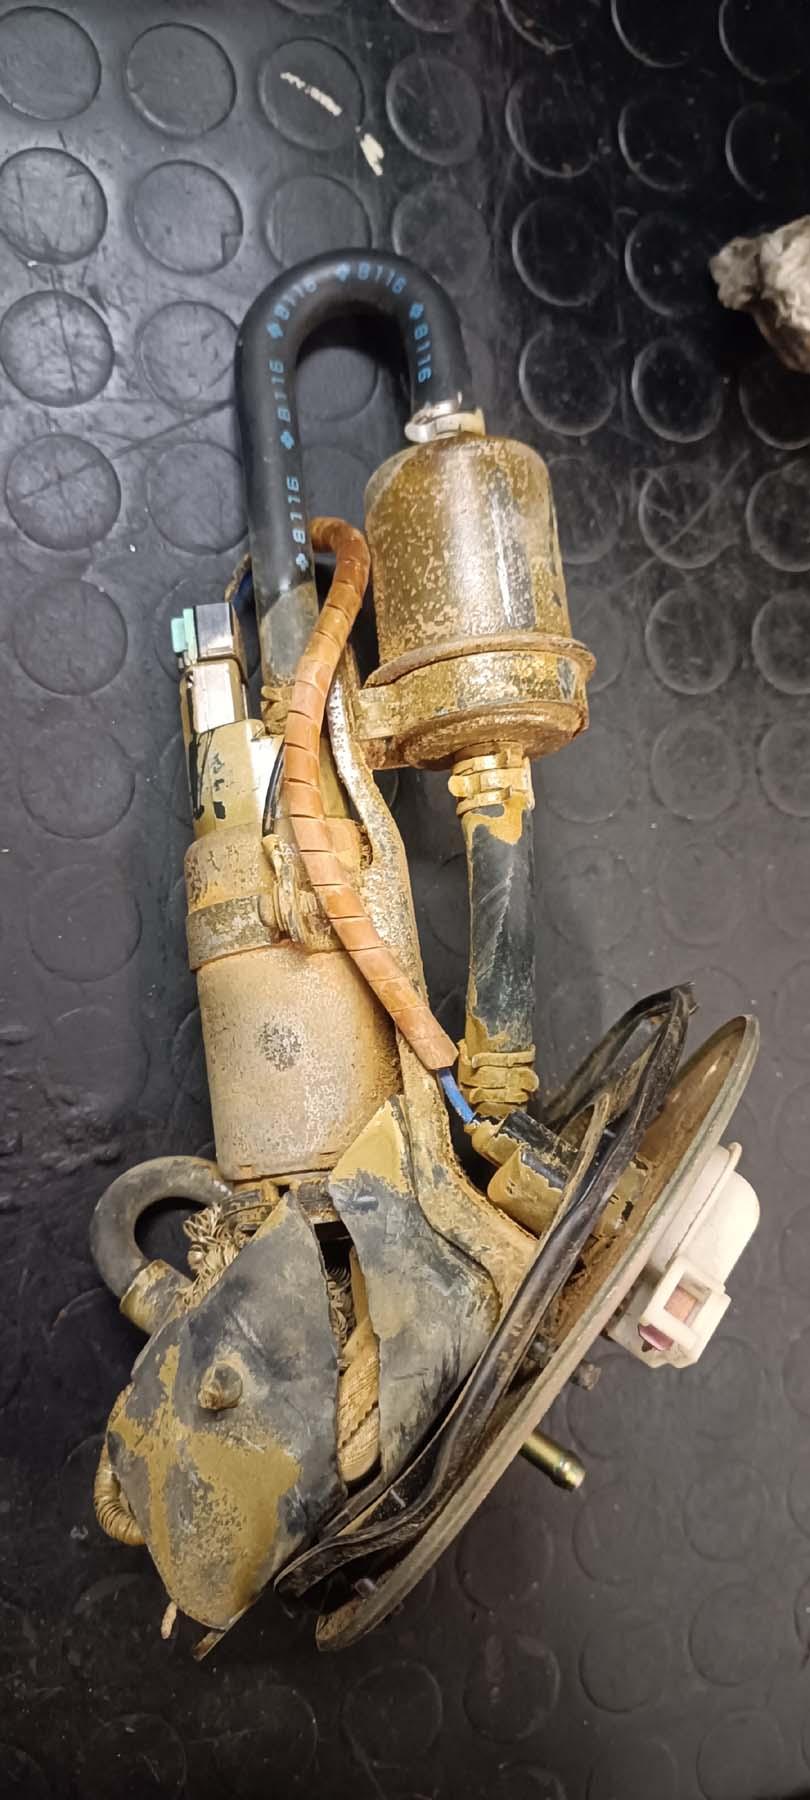
It's been a few months since I bought it, but I can only write now. I've always liked the VFR, I wasn't looking for one, but I had an opportunity (for me) and I bought it. I'm Italian and I live in Italy, and the bike is a 1998 VFR 800FI, single owner with just over 54,800km (34,000 miles), I paid 1,200 euros ($1,350) for the bike. It was sold as non-functioning, because it had been standing still for several years, the owner had vision problems, he hoped to solve them and so he kept the bike, then not being able to recover he decided to sell it. The bike had no problems when it was stopped, the problems are all inside the tank, the rotten petrol has caused disasters. In my spare time I will start to fix it, do a good service and all the necessary checks. I will share with you the progress of my work and I will undoubtedly need your help. I show you some photos of the bike and the disaster in the tank. I'd love to hear your opinions on the bike (and the disaster...)
7 points
-
Howdy folks. Finally I had the chance to replace the old worn tires of my VFR. After the renovation made this winter, I was really curious to test the bike with good tires, since the worn and mismatched tires set (Mitas SporcForce on front, Pirelli Diablo Rosso Corsa on rear) was been working really badly: rigid and sharpen carcass on front, soft and flat on rear... A MESS 😅 Shortly, I mounted a set of Mitas SportForce+ front and rear. When I purchased my first CBR1100XX I moved from fluffy tires (Pirelli) to rigid tires (Dunlop), and since that moment I fell in love with rigid, precise and "directional" tires, although a finest suspension setup was required. Well, MItas SportForce follows the line of this breed of tires, with rigid carcass and sharpen design. Since the first corner, I found the VFR much nimble and fast to lean down. I like that 😎 Moreover, the second part of leaning down, when you feel the bike like to FALL down, is very reassuring, giving you the feeling of a robust solidity. This invites you to dare with leaning, forcing your action, and the result is that the bike is always composed and firm, following an unbelievably narrow line. I had to reset my parameters because I got slow at any corner, so I forced me to release the bakes and enter the corner 5-10 kmh faster than usual, then more, and more... The final verdict is that you can drag your knees even on strict hairpins, with the bike solid and firm also at low speed. I expect these tire to last A FEW, but I run 2-3000 km per year. I think they can last a couple of year, that's more than enough for me Here some pictures from the yesterday ride For those who're wondering... I took a set of tiler's kneepads, sewed with velcro to mount my sliders 😆7 points
-
7 points
-
Hi Bumpers and Bumperettes! I am fine, thanks for asking guys. My health is still getting worse by the year and that was kinda what happened last year. Combine it with the let down of first block not being tunable by me and the fact that i had to start weekly purchases of LSU`s to keep up i just said fuck it. There is no Dyno close who will do RapidBike so the math stoped making sense with all i have to redoo to get shit proper and reliable. Some will say this project never made sense - i DO NOT AGGRE! All one can ask for in life is the ability to do something you love, and have the money to do it nomatter what it is and in a perfect world everything else should be shown the door! 298 days since my last post there is at least some news. I have ordered 2 more MyTuningBikes and enough sensors to sniff all 4 cylinders. I will have to strip her again, remove the headers and weld in 4 bungs. But first i will have to dyno my aprilia sxv and get her ready for a new owner and complete the FJ1100 restauration also going out the door! Getting rid of all the "noise" aka bikes i do not intend to use any longer will be necessary for me at this point in life. well, selling two and added one - cagiva Mito sp525 in very good shape, nothing major and a bike that is so rare i could not help myself, but the VFR will take presedence! To be continued - until completed!7 points
-
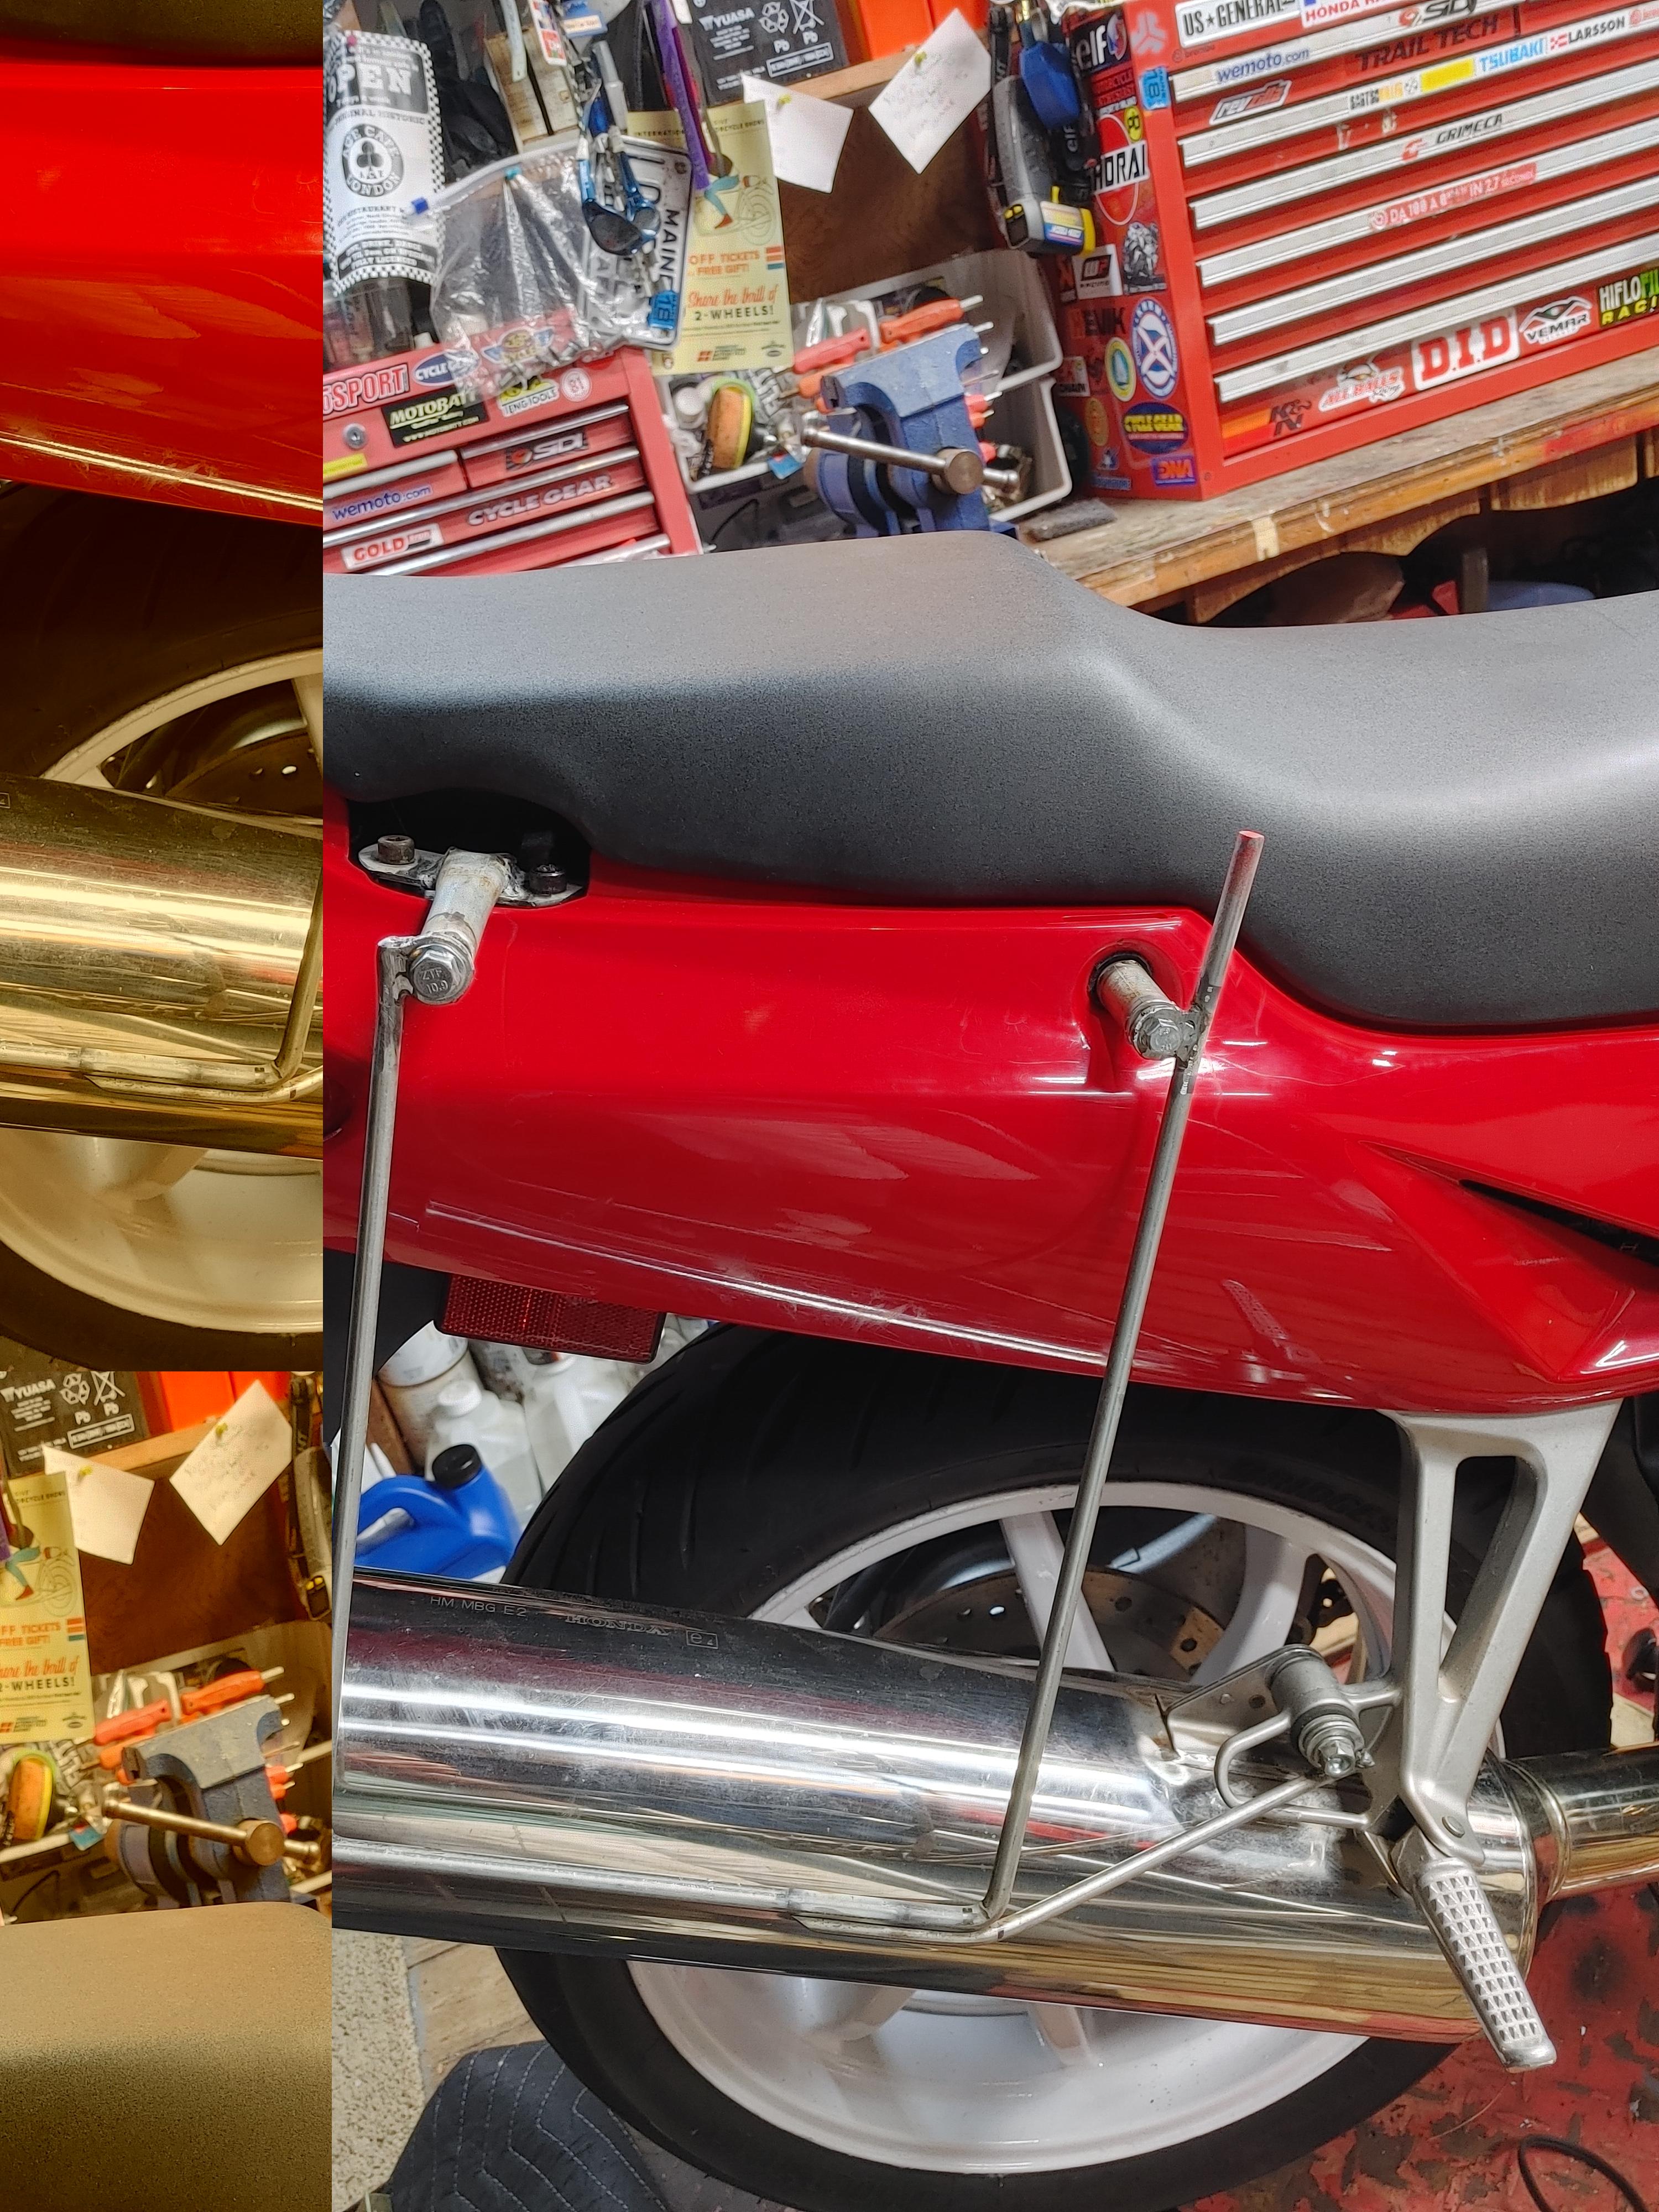
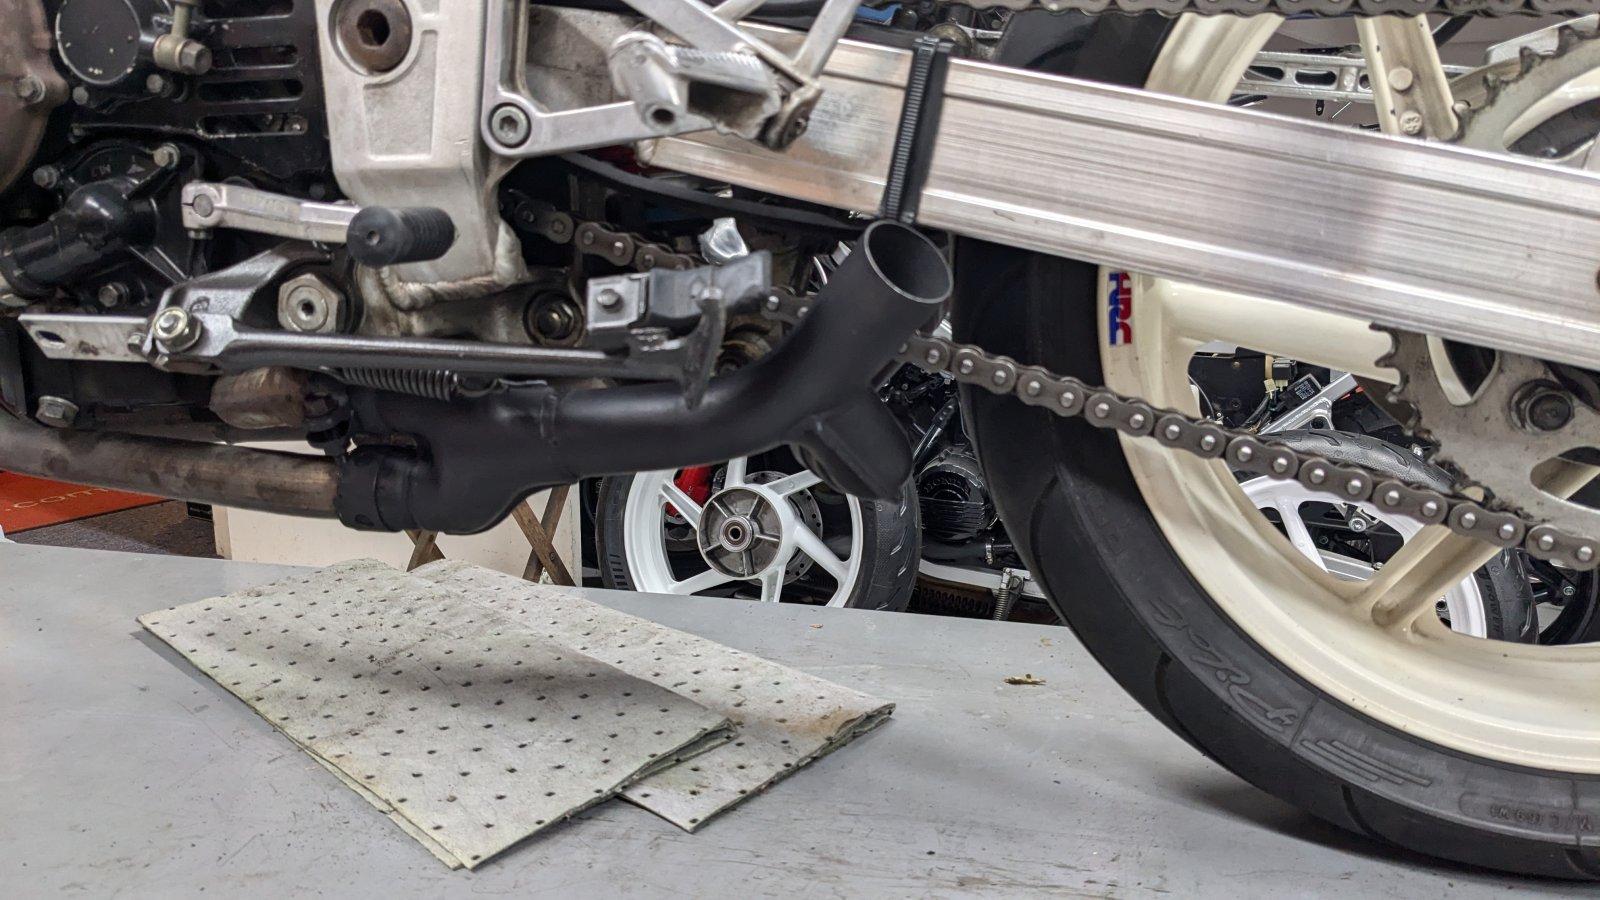
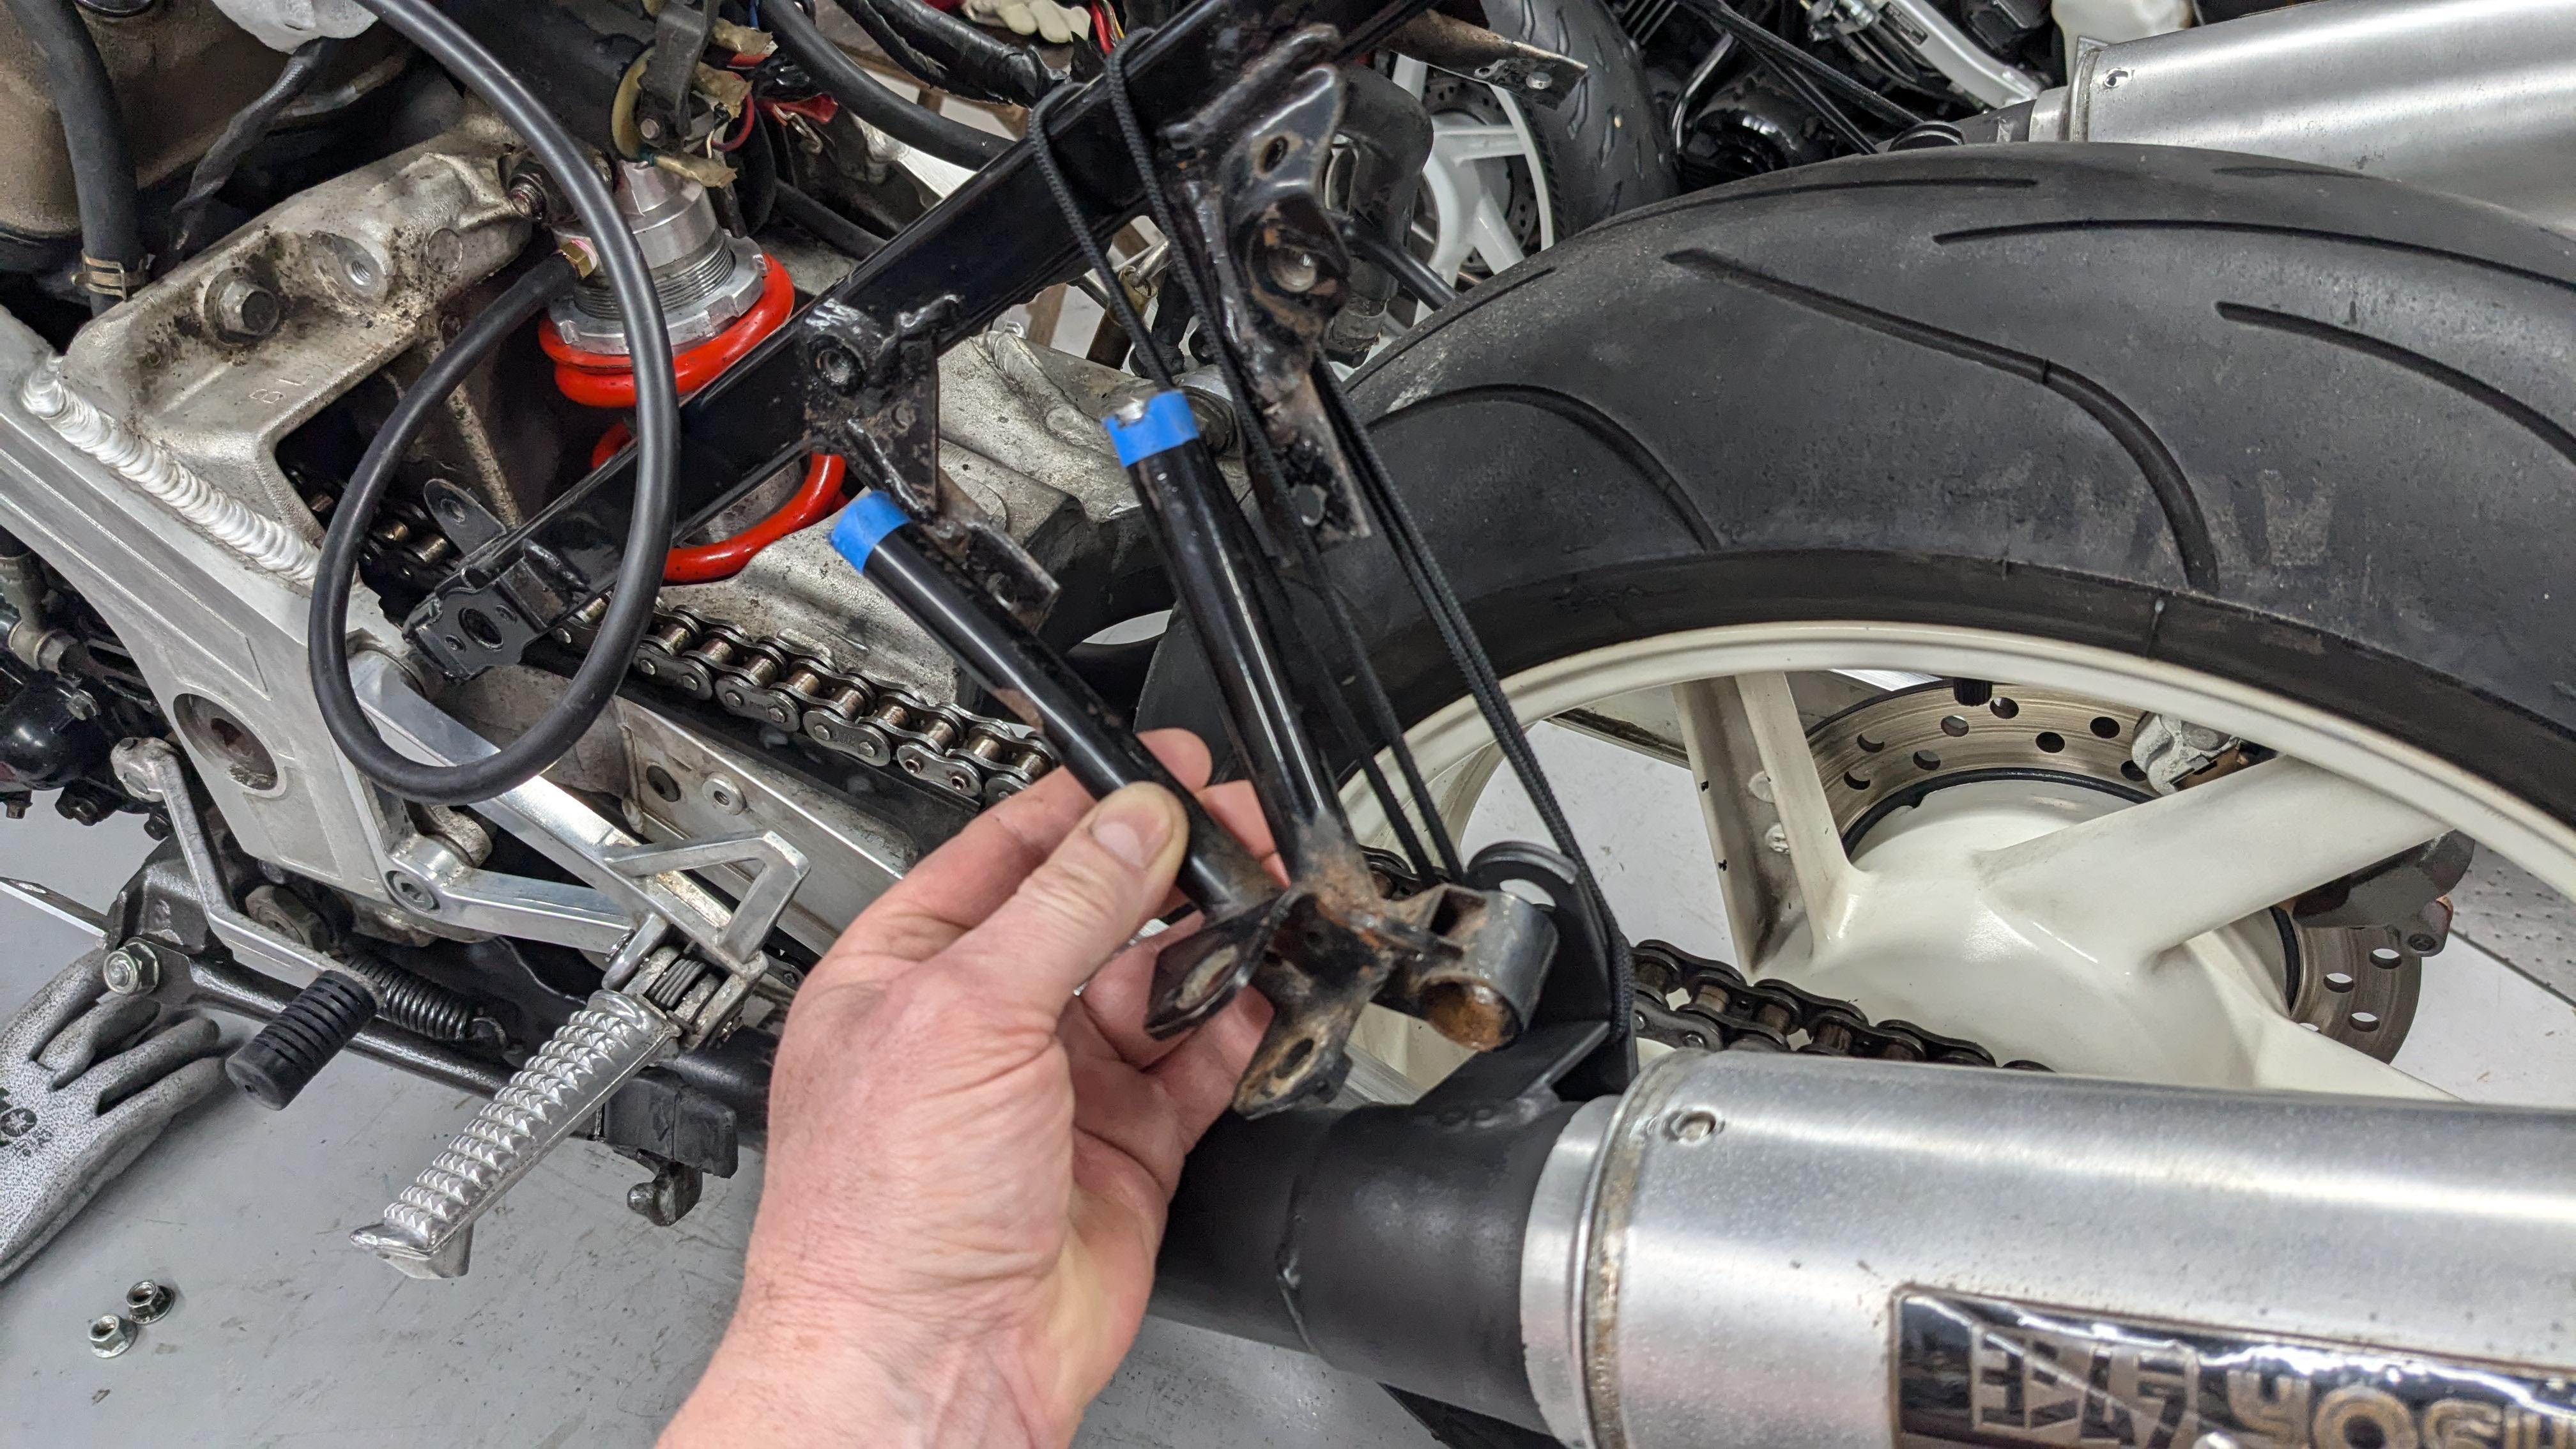
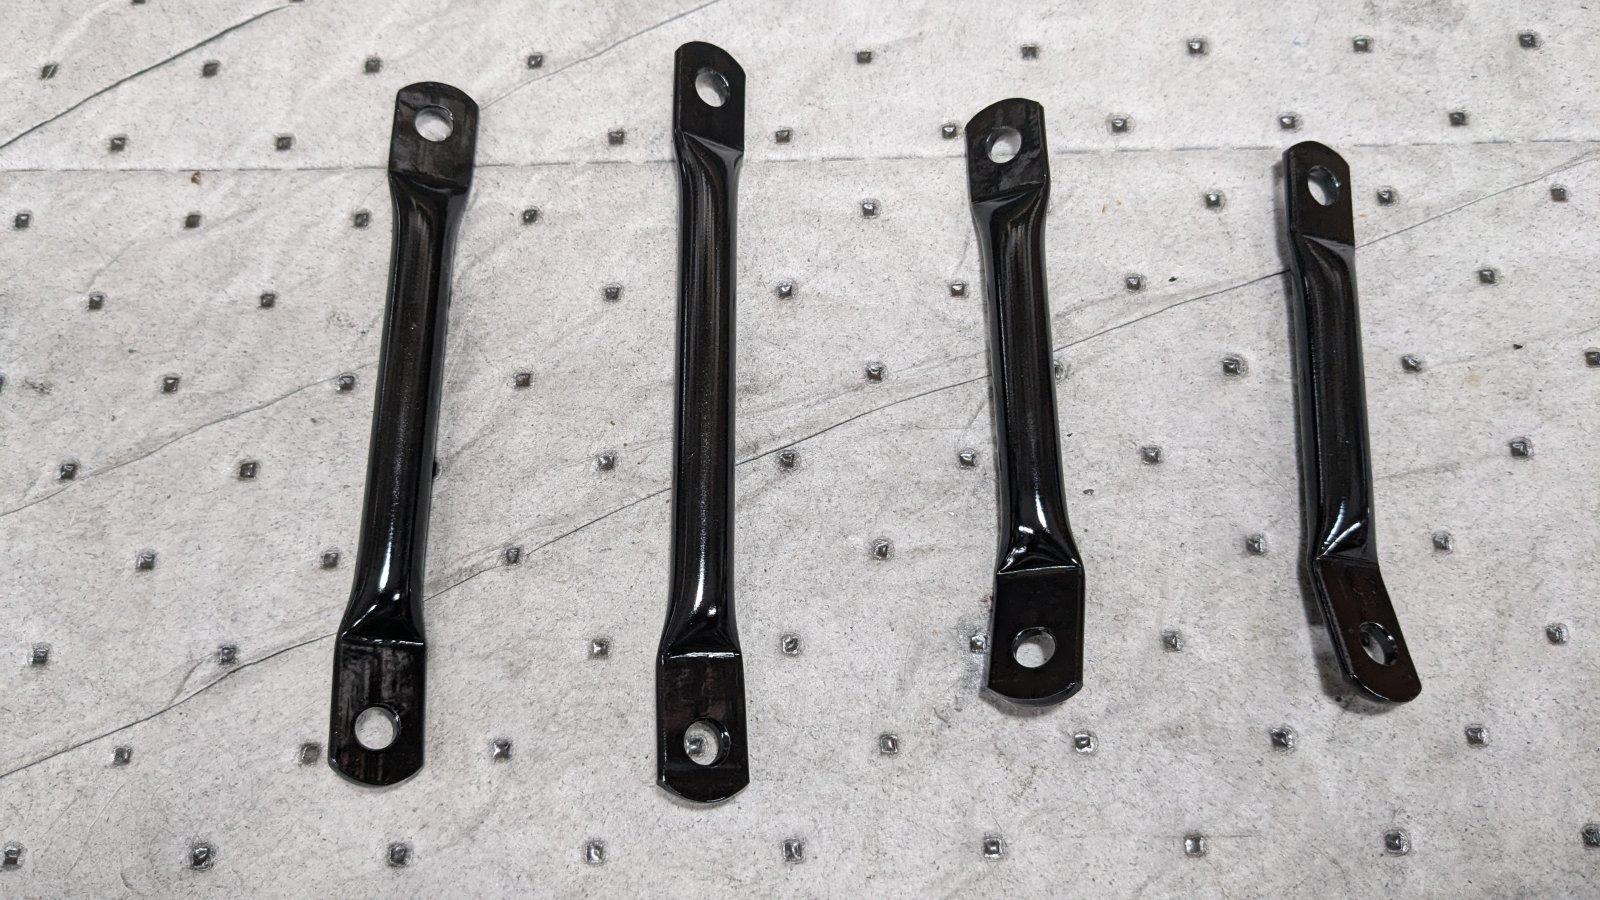
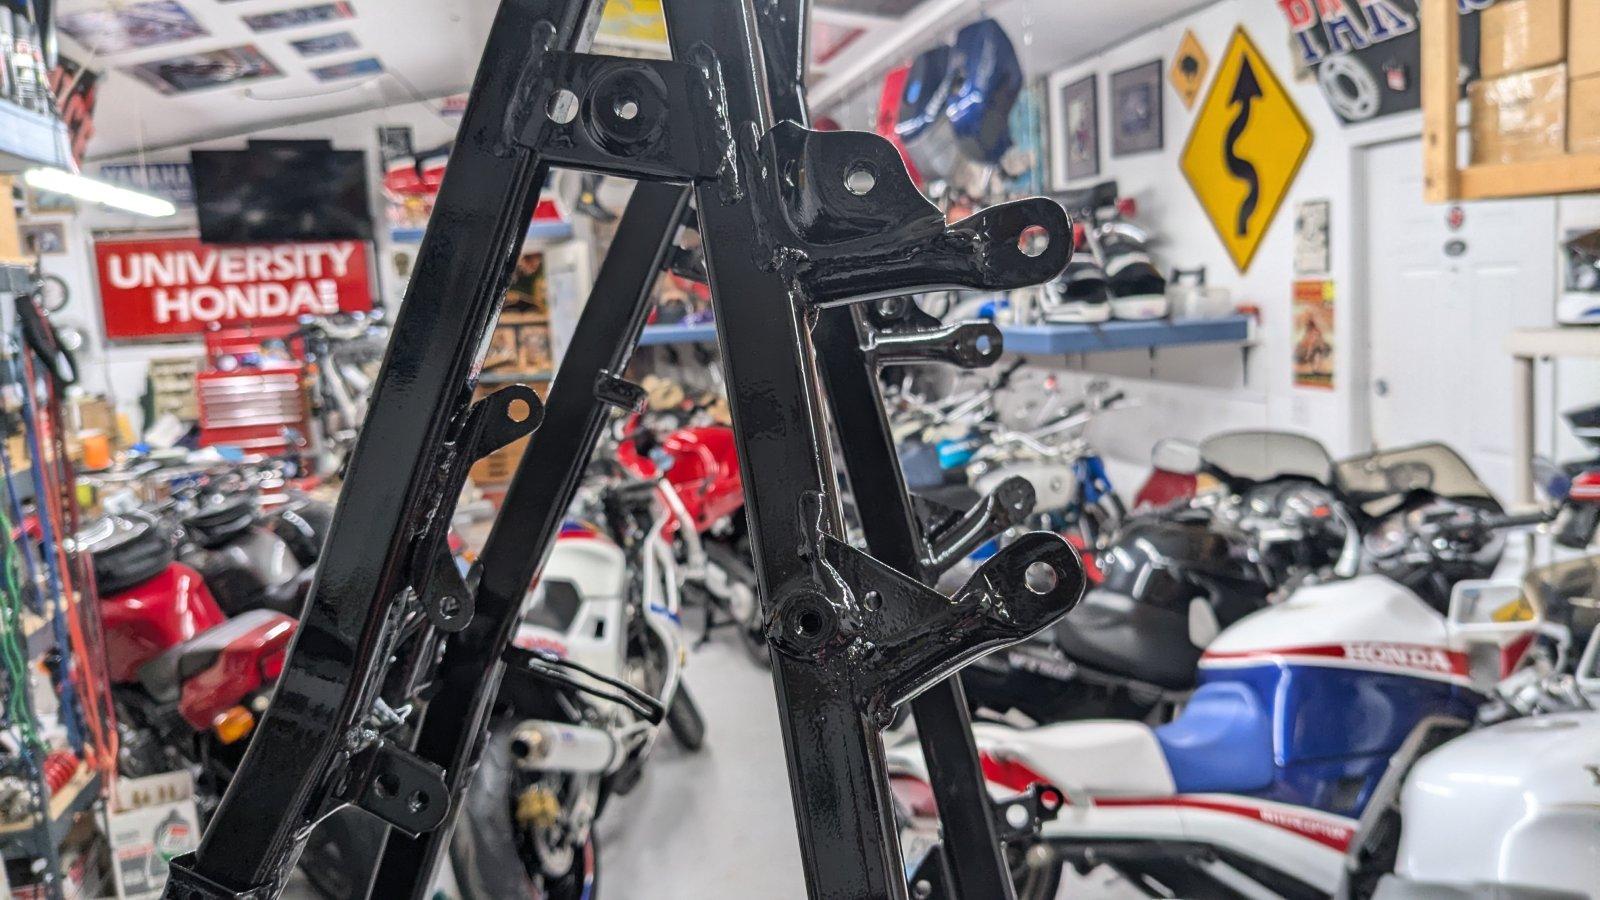
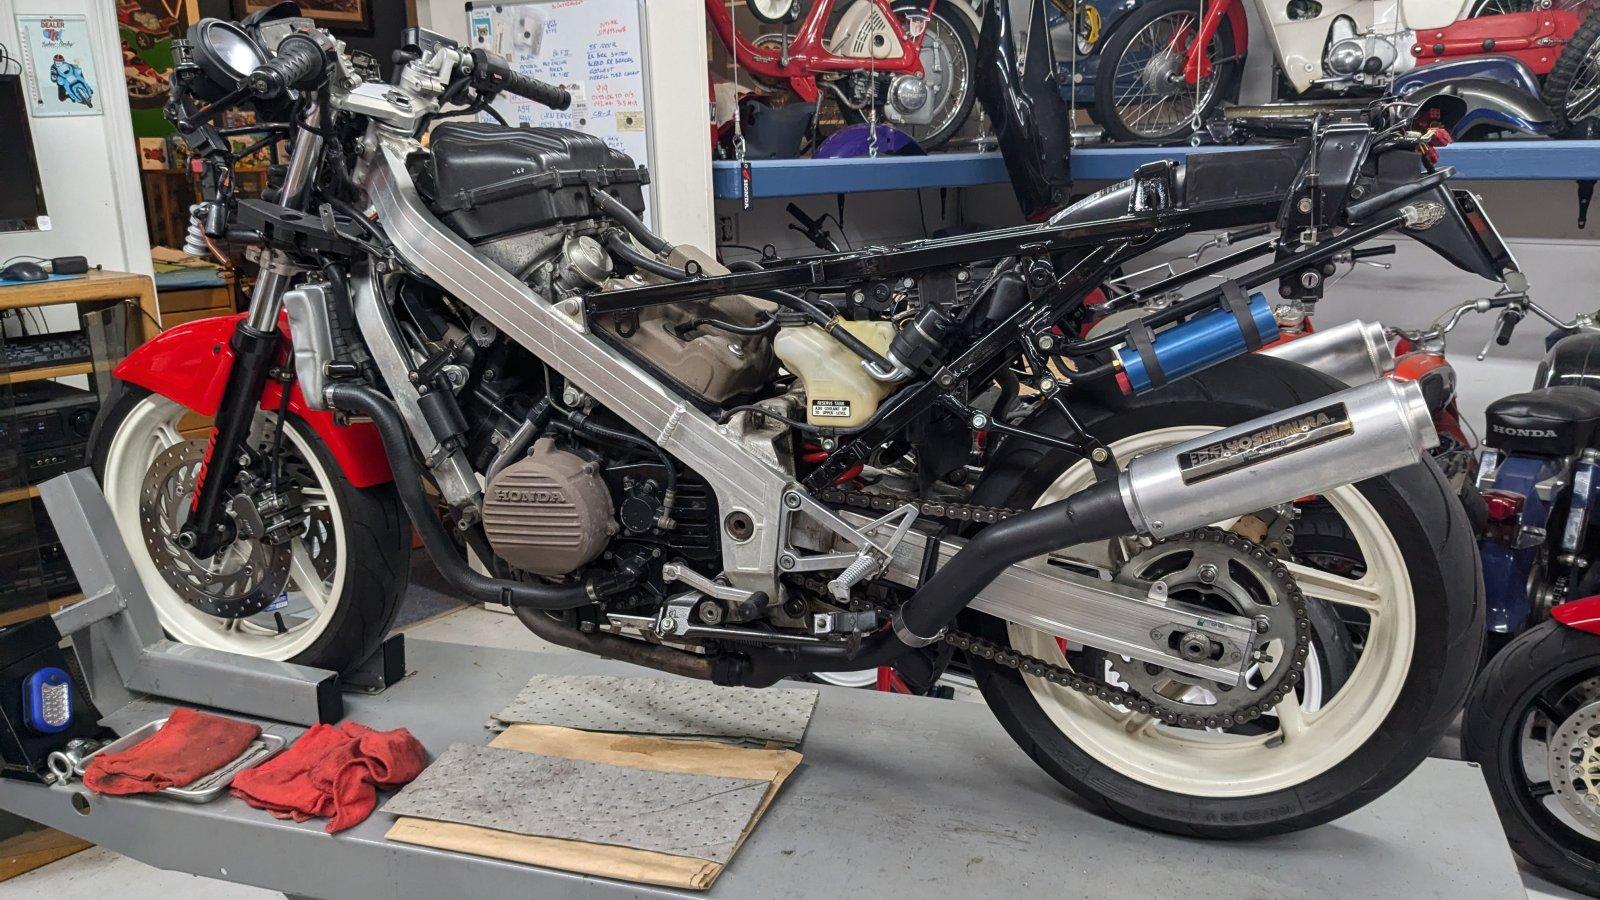
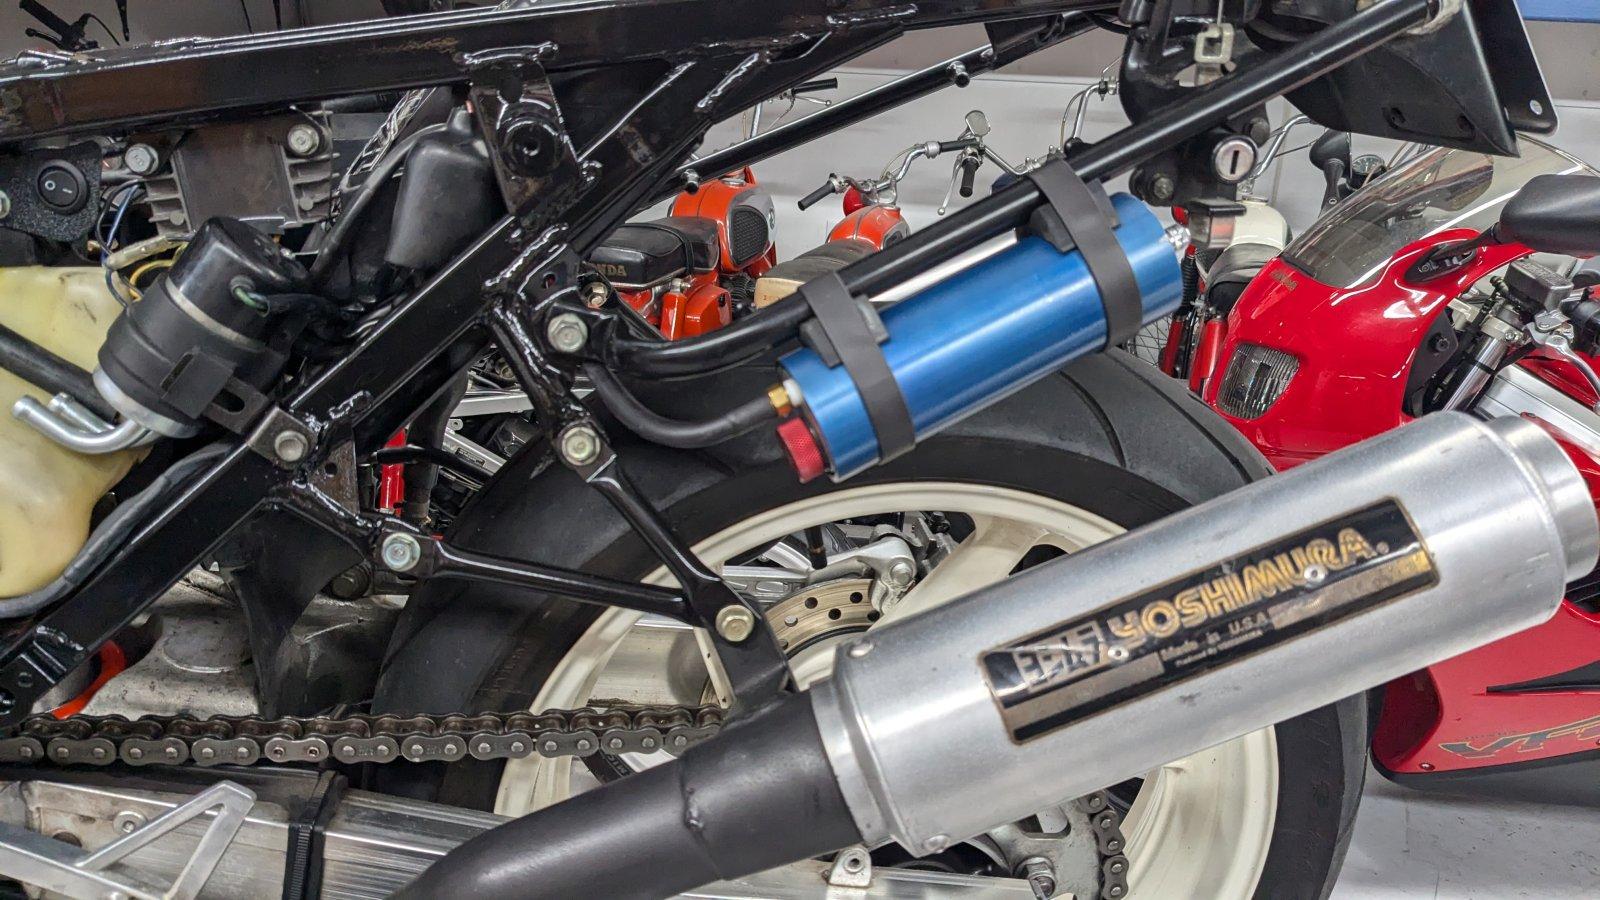
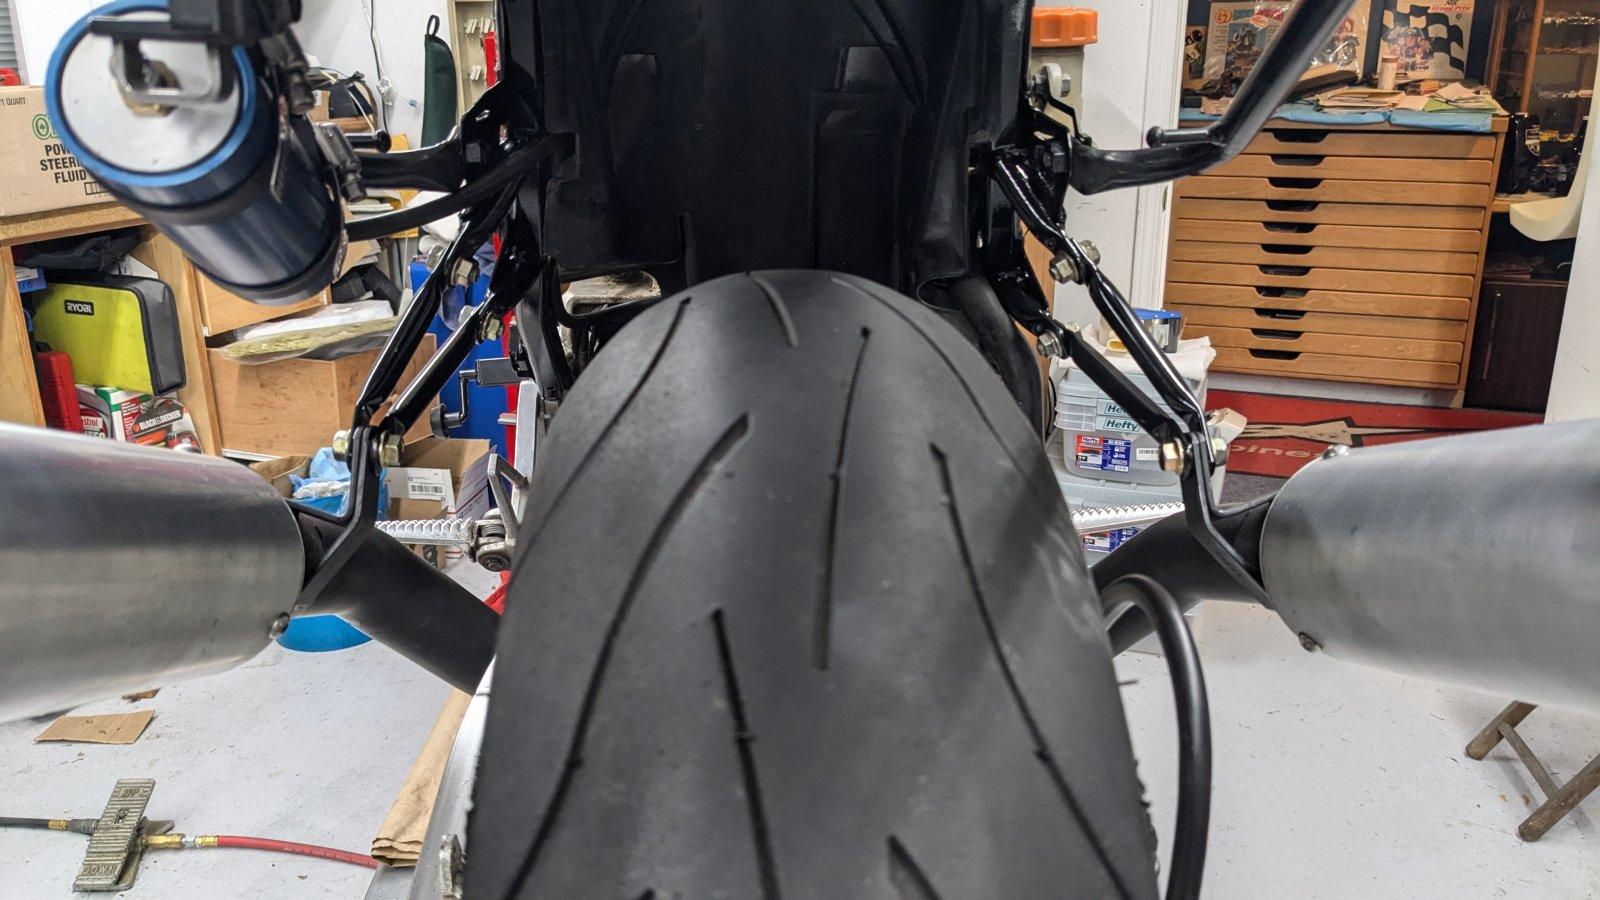
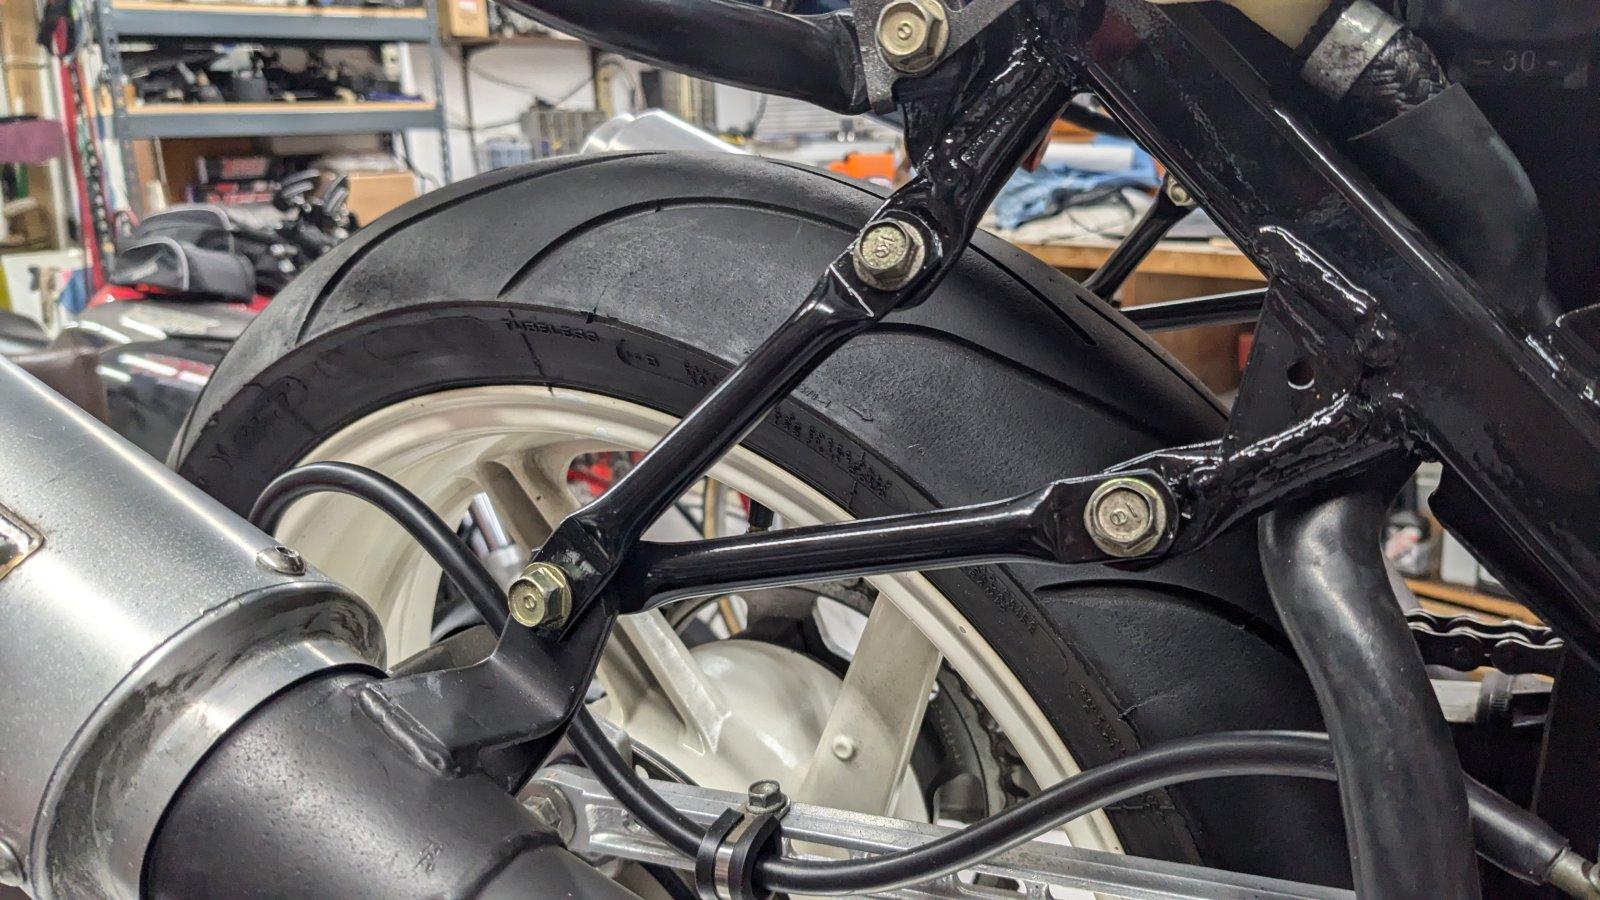
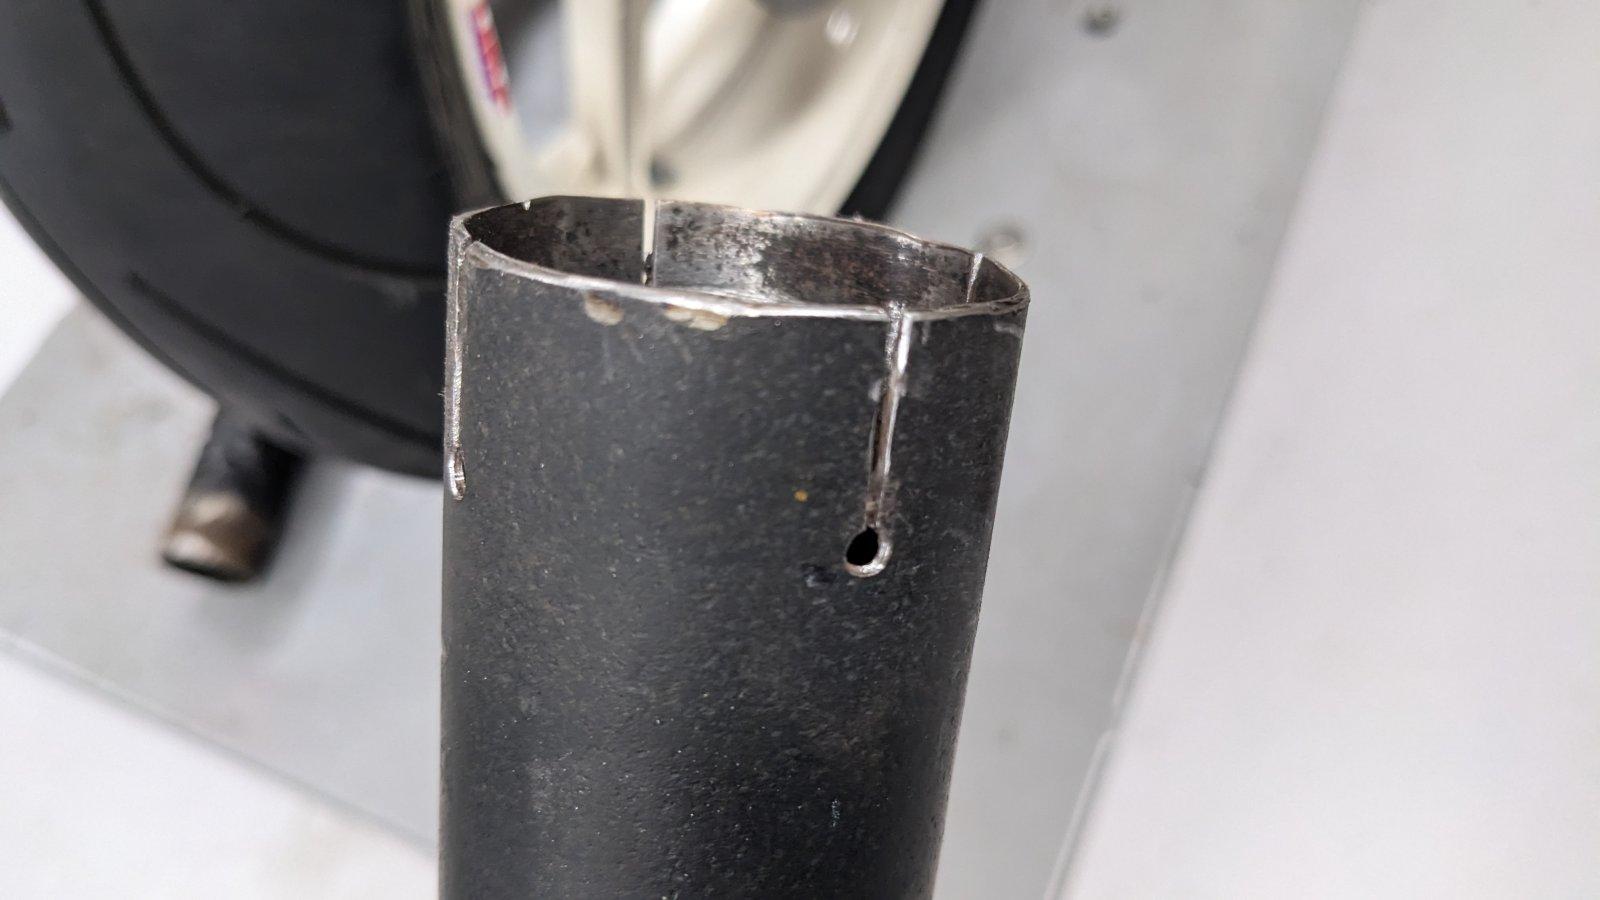
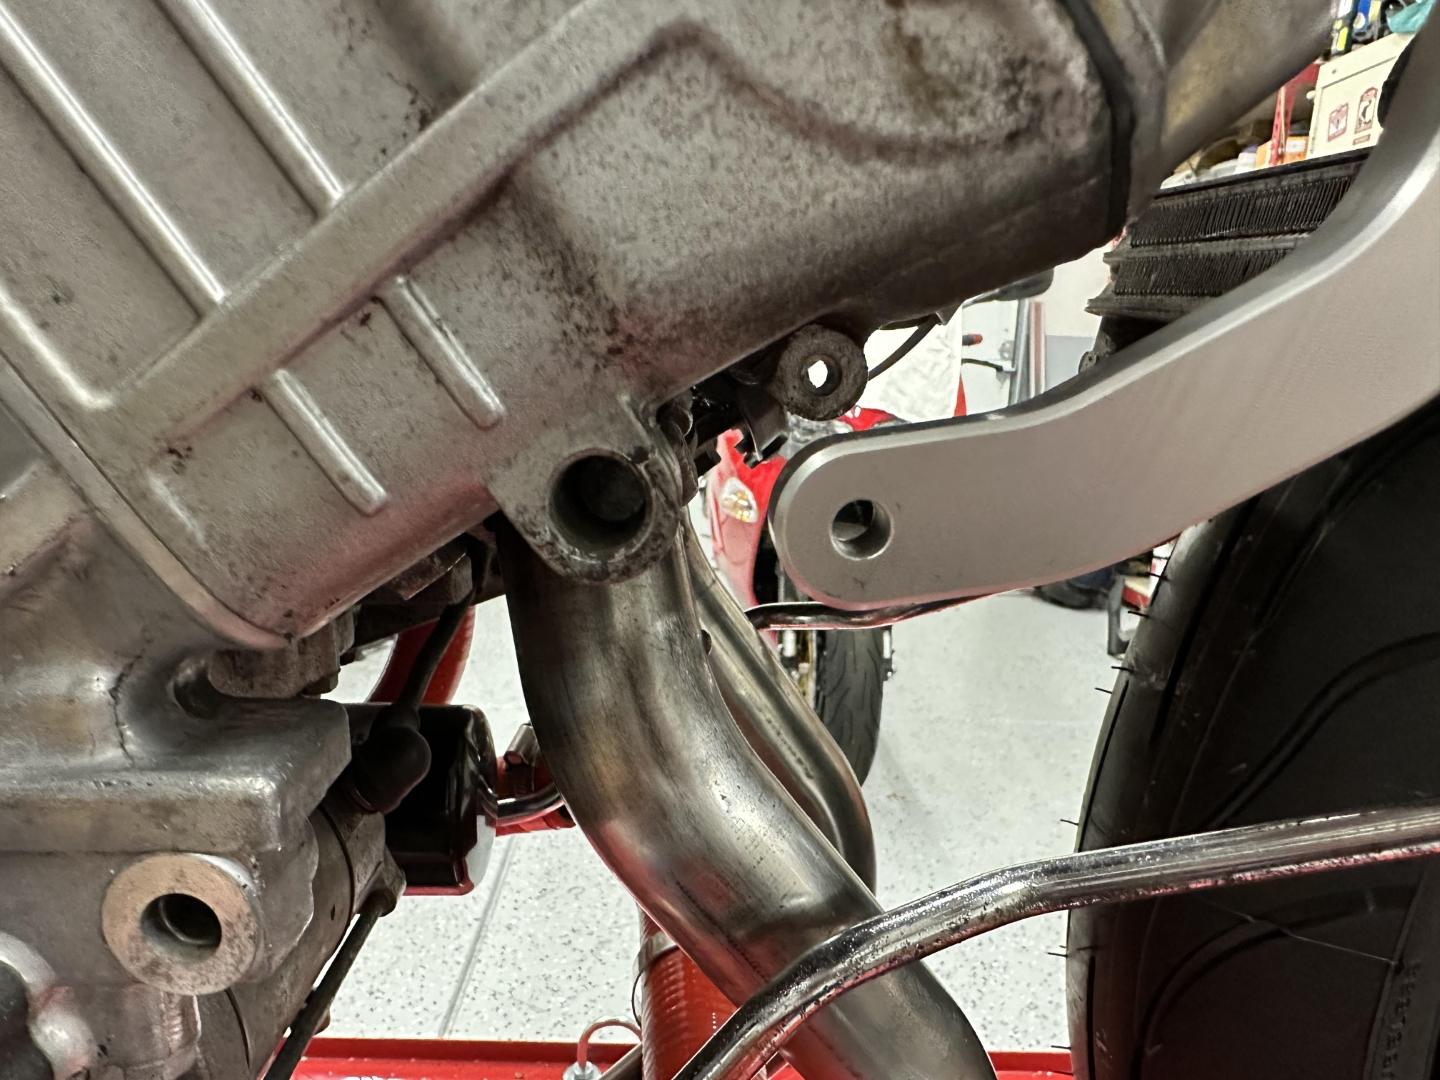
New exhaust is a mash up of stock muffler connectors and cross-over with the rear sections of a Yoshimura 4 into 2 system. Found some gaskets that had the correct ID / OD for the job. The Yosh pieces were complete, but I wanted the cross over pipe and the secure, clamped fitment of the stock connectors. Plus I wanted to re-position the mufflers a bit. New ends of Yosh pipes got gasket compression slots with drilled ends. Had a subframe with a damaged left passenger footpeg mount, so I cut them off and smushed the stubs for mounts. Here's how much higher the new mount location will be compared to "stock". Cleaned up and radiused sub frame mounts and new custom struts for the mufflers. Real nice angle now and super solid.
7 points
-
Shorter update: I bought it! I will be putting it on my blue 5th gen, so I will need to make a new mounting bracket and some other parts. Ciao, JZH7 points
-
Progressing. Slowly.7 points
-
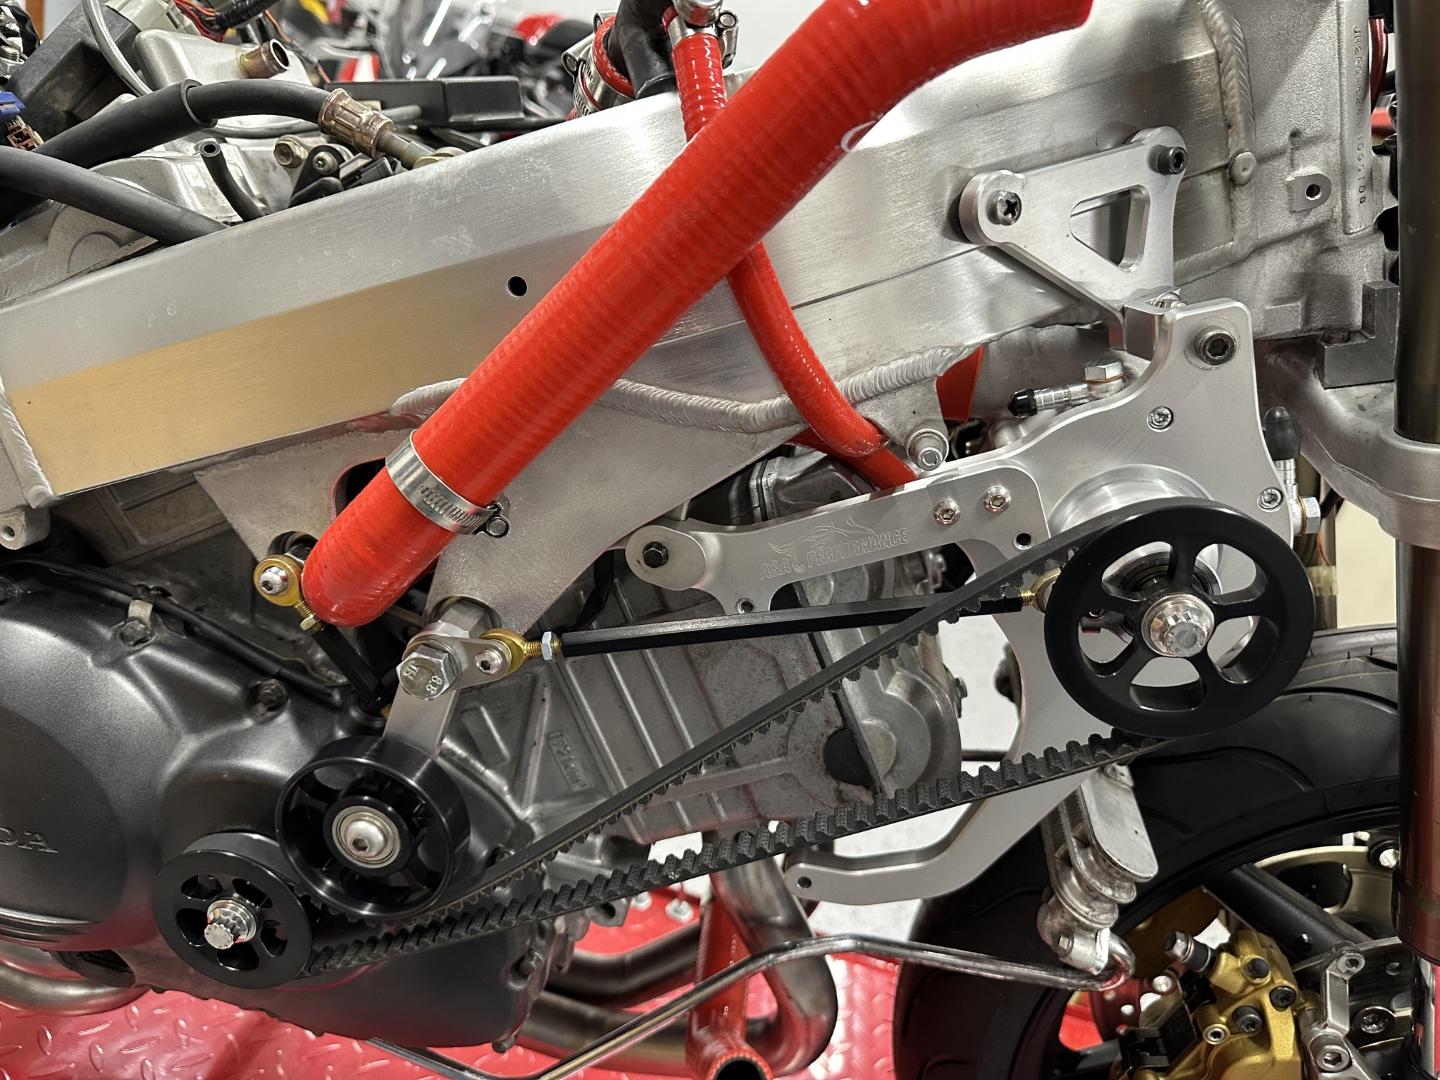
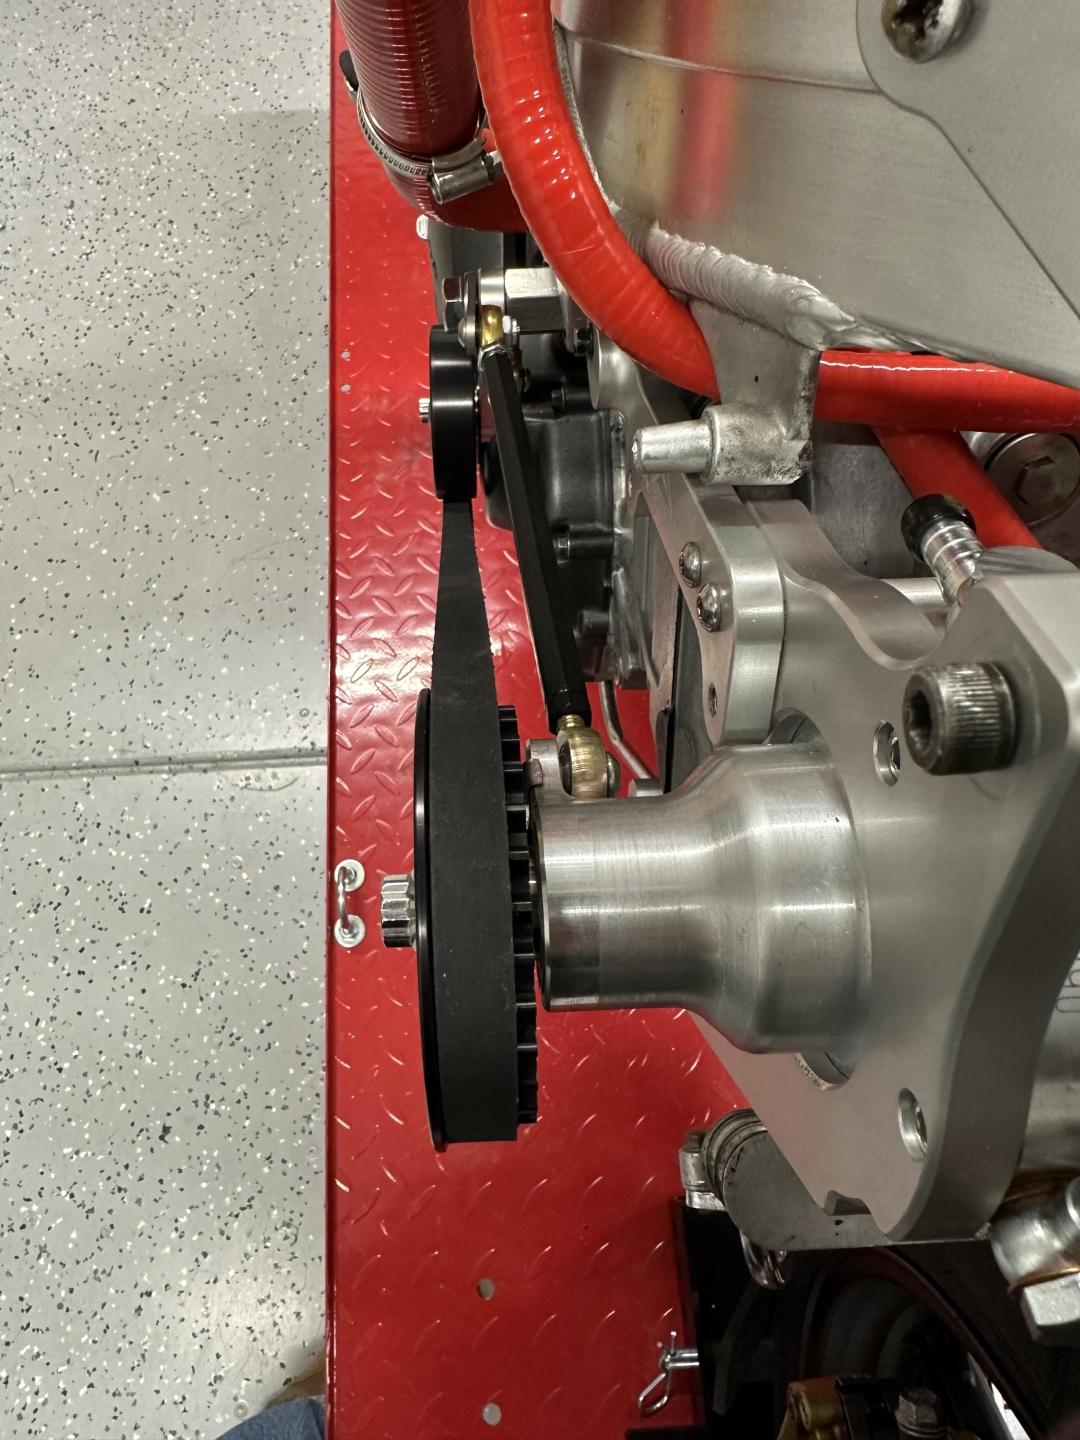
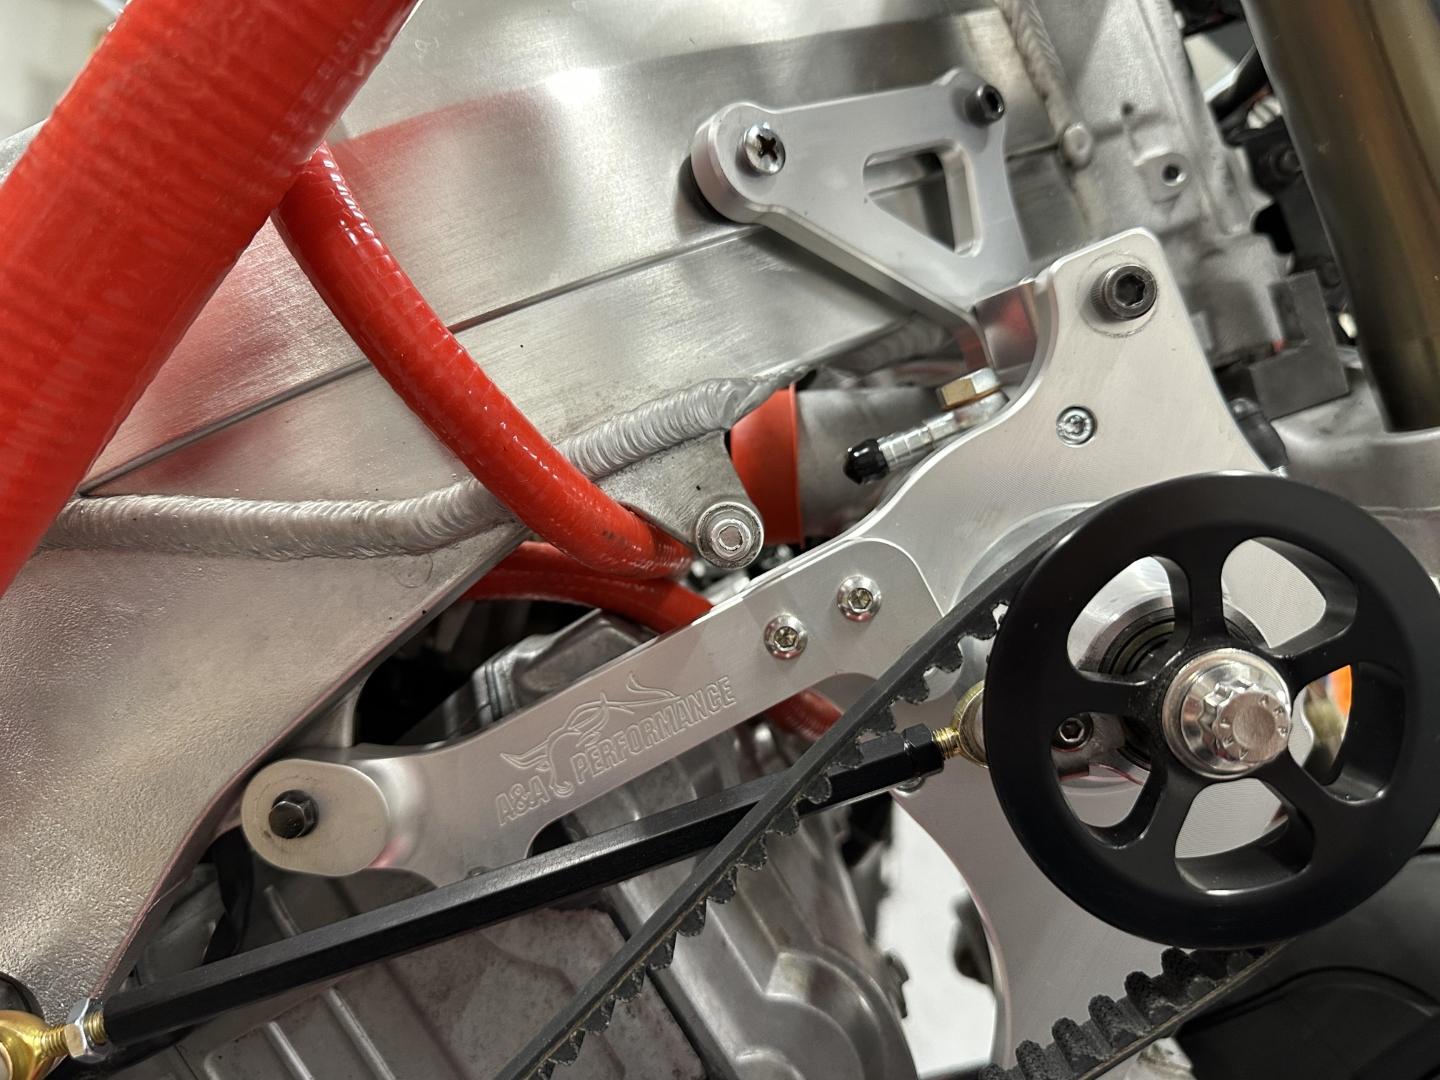
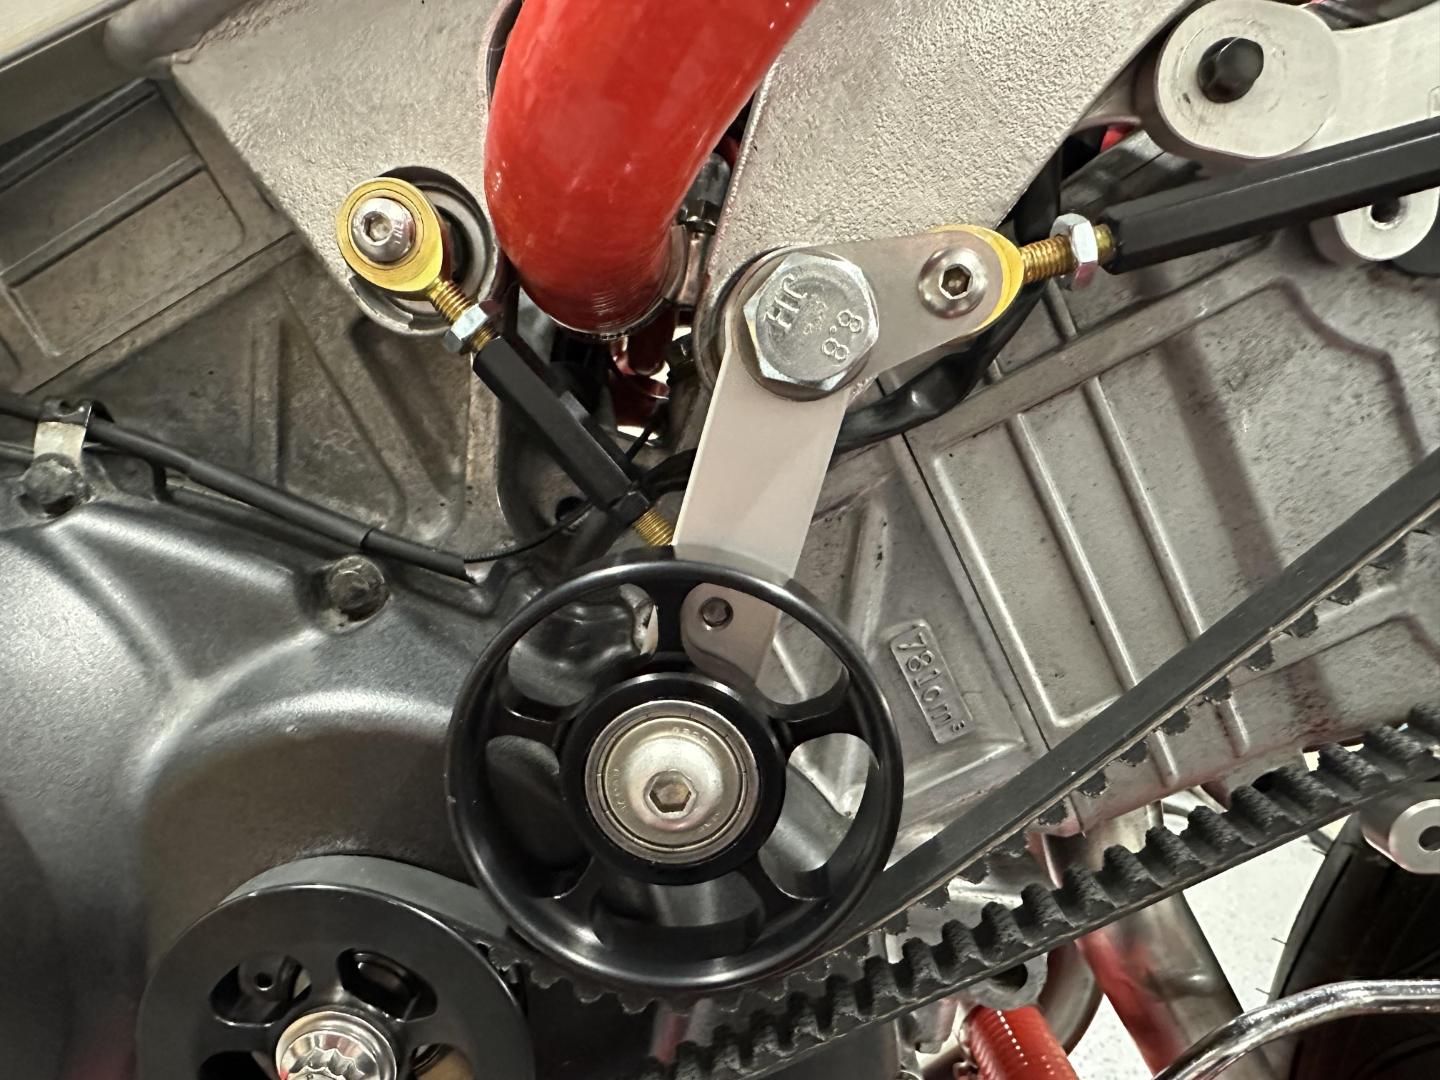
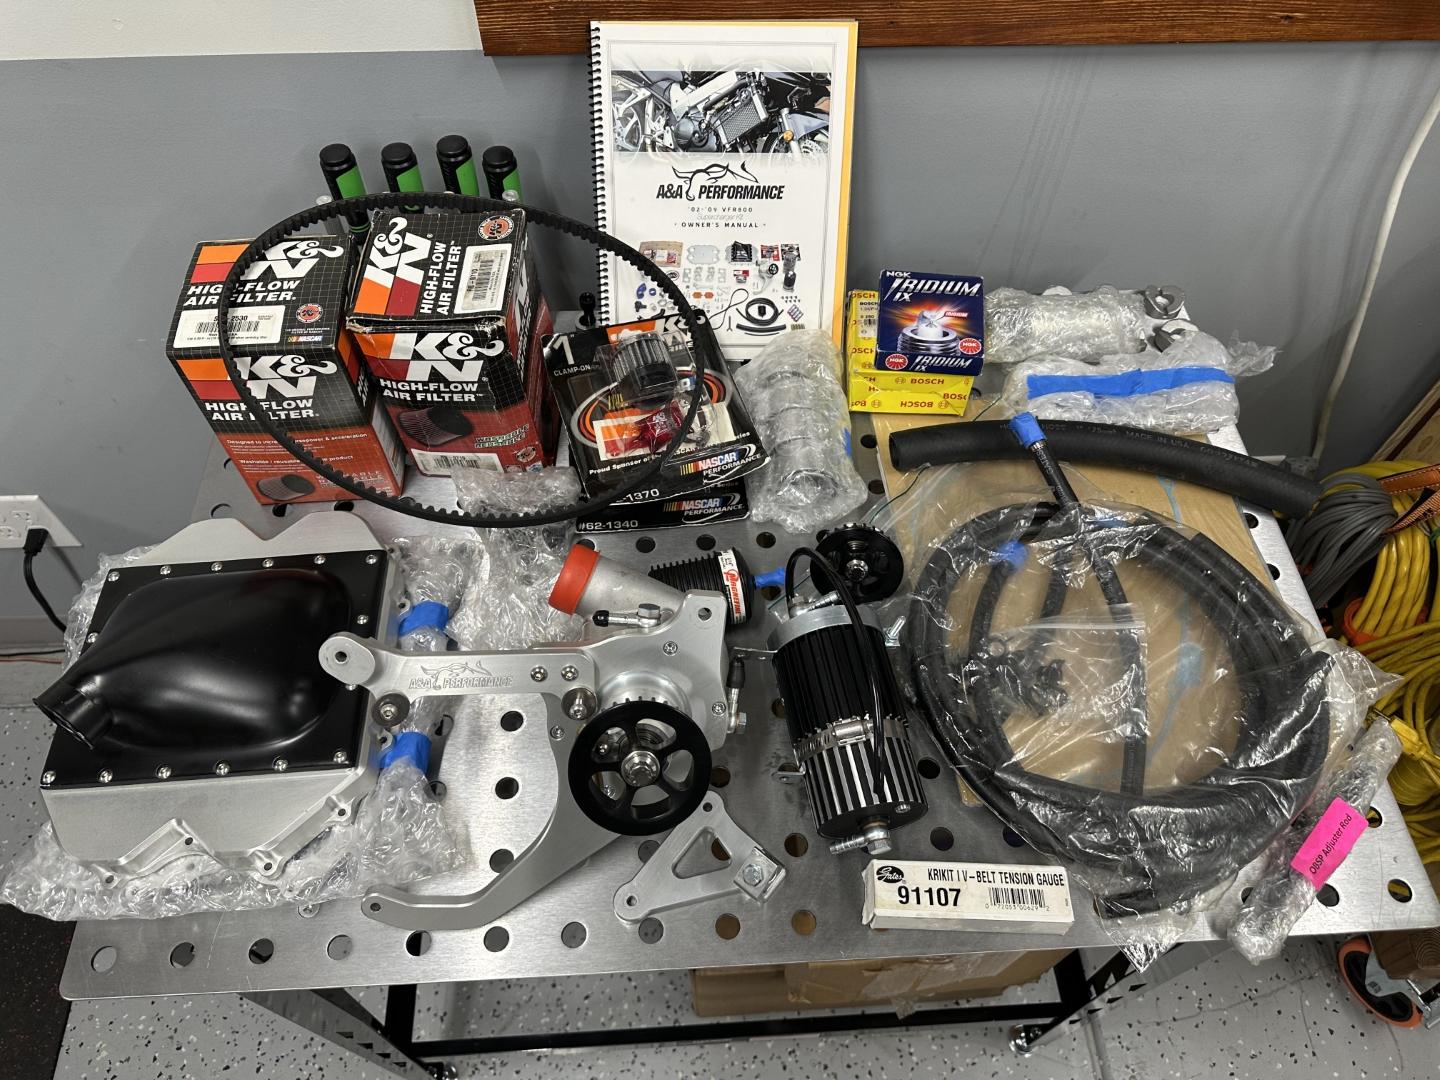
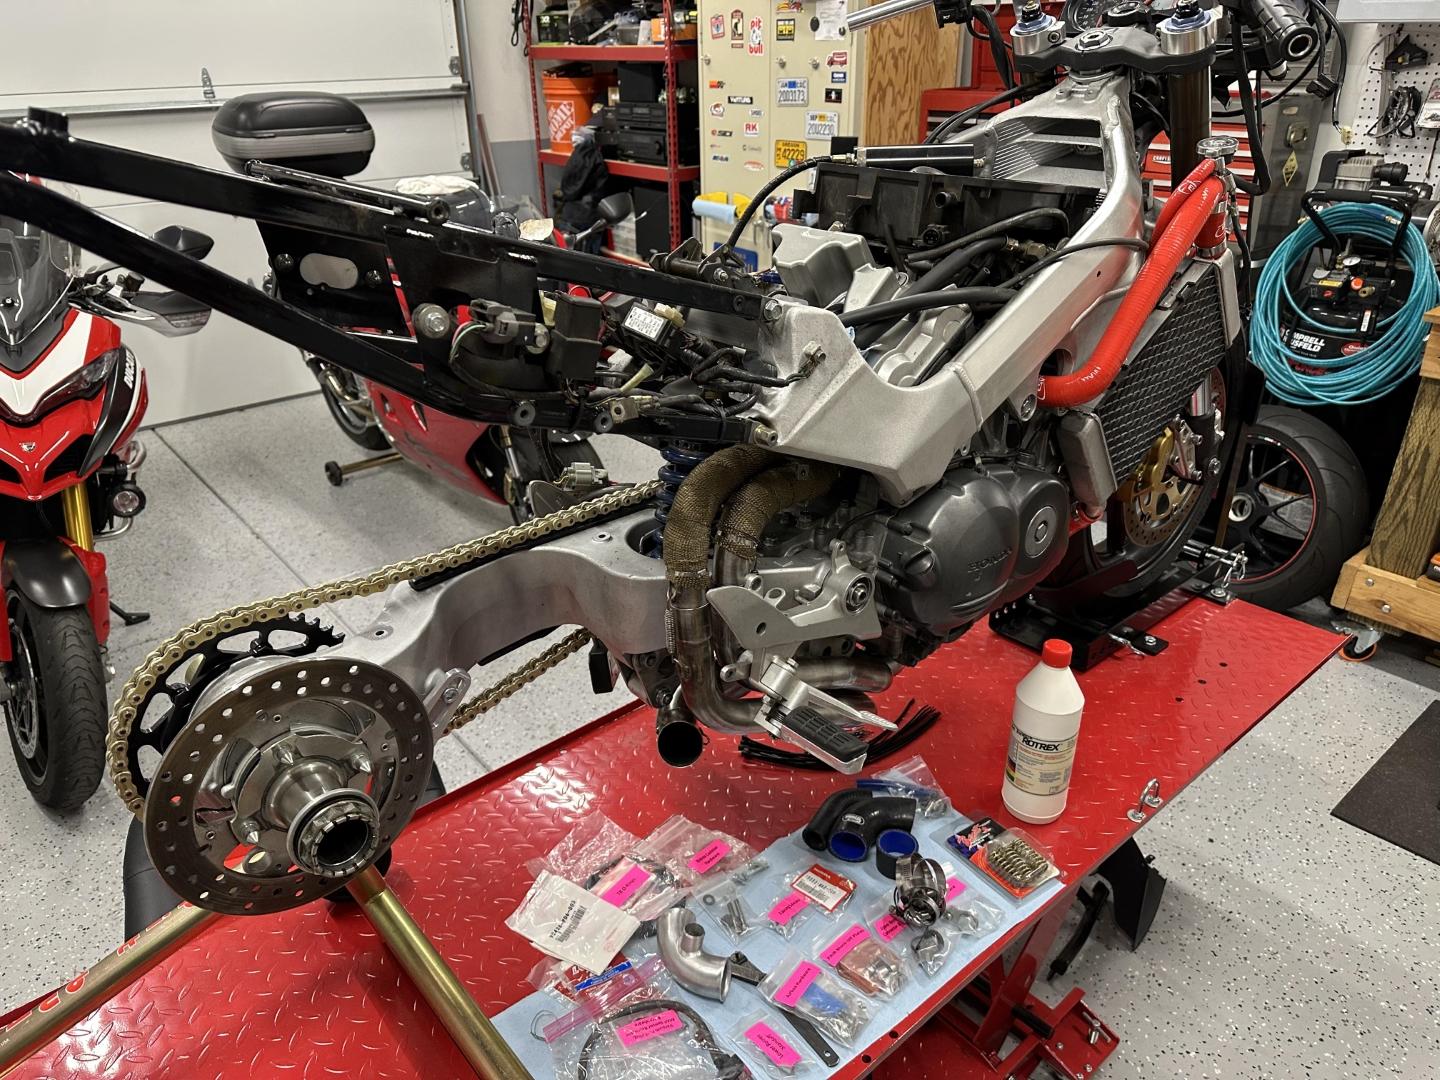
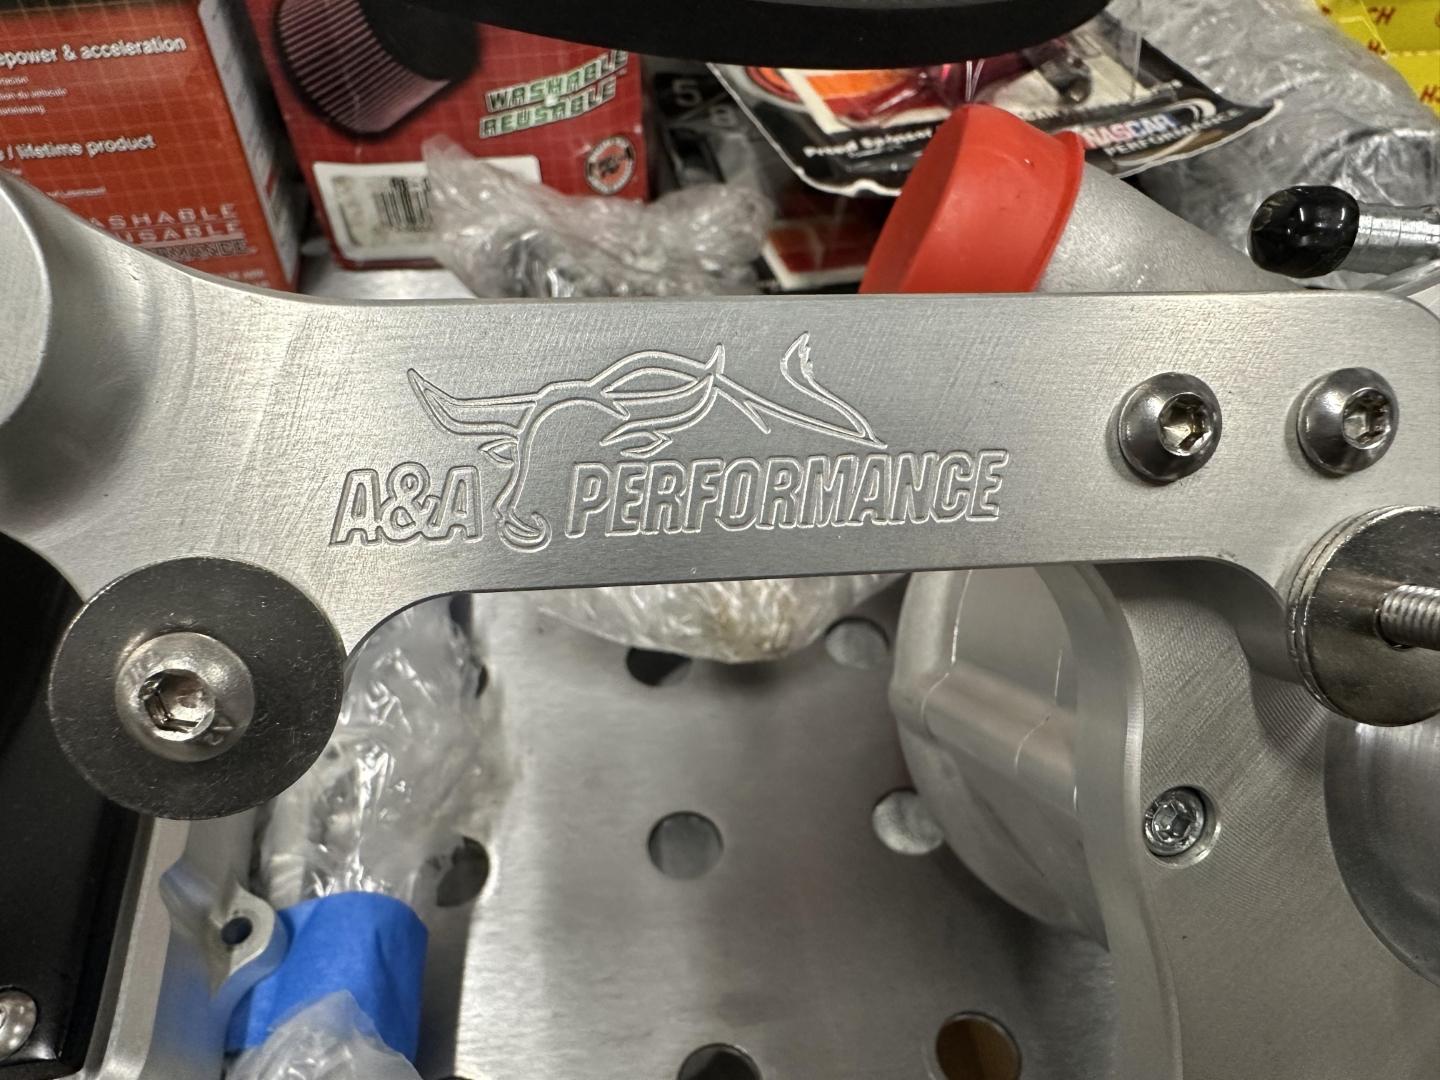
Thanks JZH. Here's where I got to in a few hours this past weekend. The 6g kit seems to just mount up to my '98, I was excited for a minute that it may just bolt on. The upper bracket lines up with the frame coil mount holes and looking at pics they seem to be in the same spot as the R/R mount on the 6G frame. The horizontal A&A bracket lines up perfectly with the frame tab. The idler pulley and tie rods all line up with where they would go on the 6G install. Only the bottom mount is slightly off but a new spacer would be easy to make up. The belt looks to be lined up perfectly, 2-3mm off. Issues so far: 1) The belt is too long for this installation? I can't get tension before the top and bottom are touching. The belt in this kit is a Gates Powergrip GT2 1040-8MGT-12, so 1040mm length. I noticed Wacken's 5G belt is a Gates ePowerGripGT 5MR900-15, so 900mm length. I may just need a shorter belt. But not sure why? Visually dimensions look the same as 6G. Also 3mm difference in width? I still need to measure and calculate what belt length this set up needs. - If anyone with a 6G can confirm the belt # they have? 2) RC51 lower triple is hitting the SC, I only get about 1/2 turn before interference. Larger fork tubes, less fork offset may be the main issue. Intake looks to bolt right up, the 6G adapter plates aren't used. The risers sit direct on the TB and the rest goes together. That's about as far as I've gone so far, any input appreciated. And happy to start a new thread on this.
7 points
-
Exhaust on fairing on, sort of I’m going to mount the rear brake reservoir here: Fired it up this afternoon too7 points
-
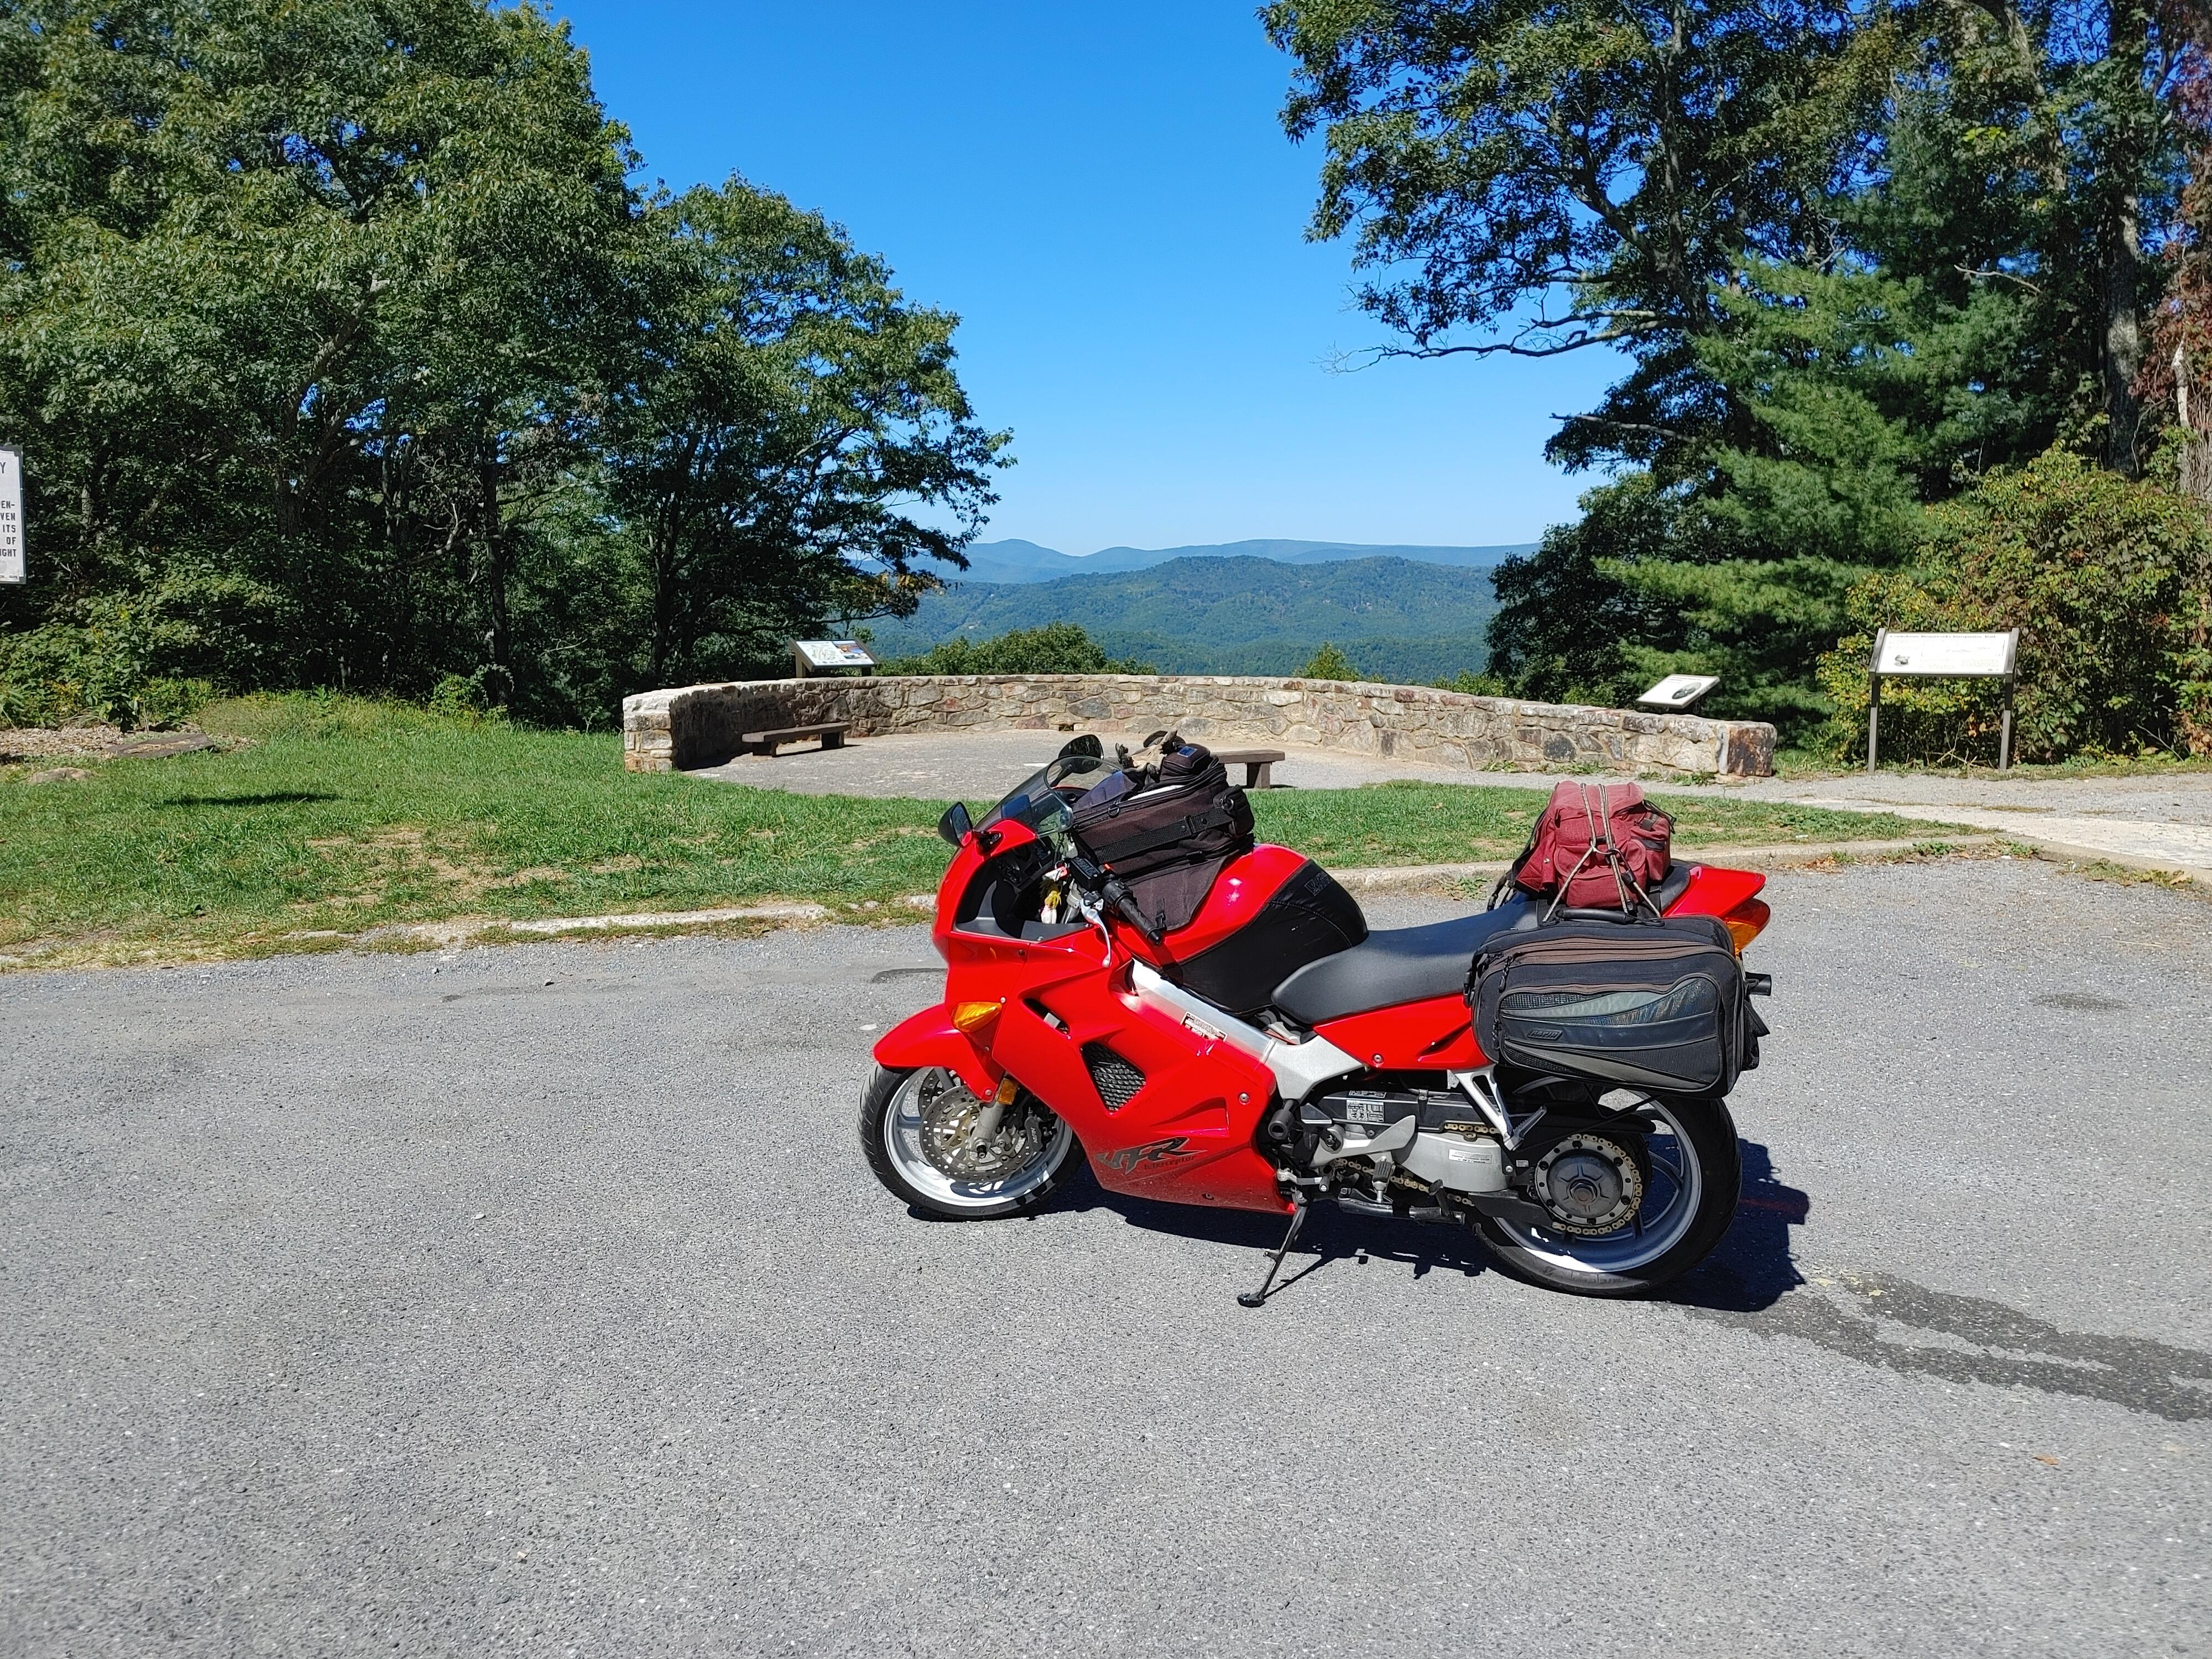
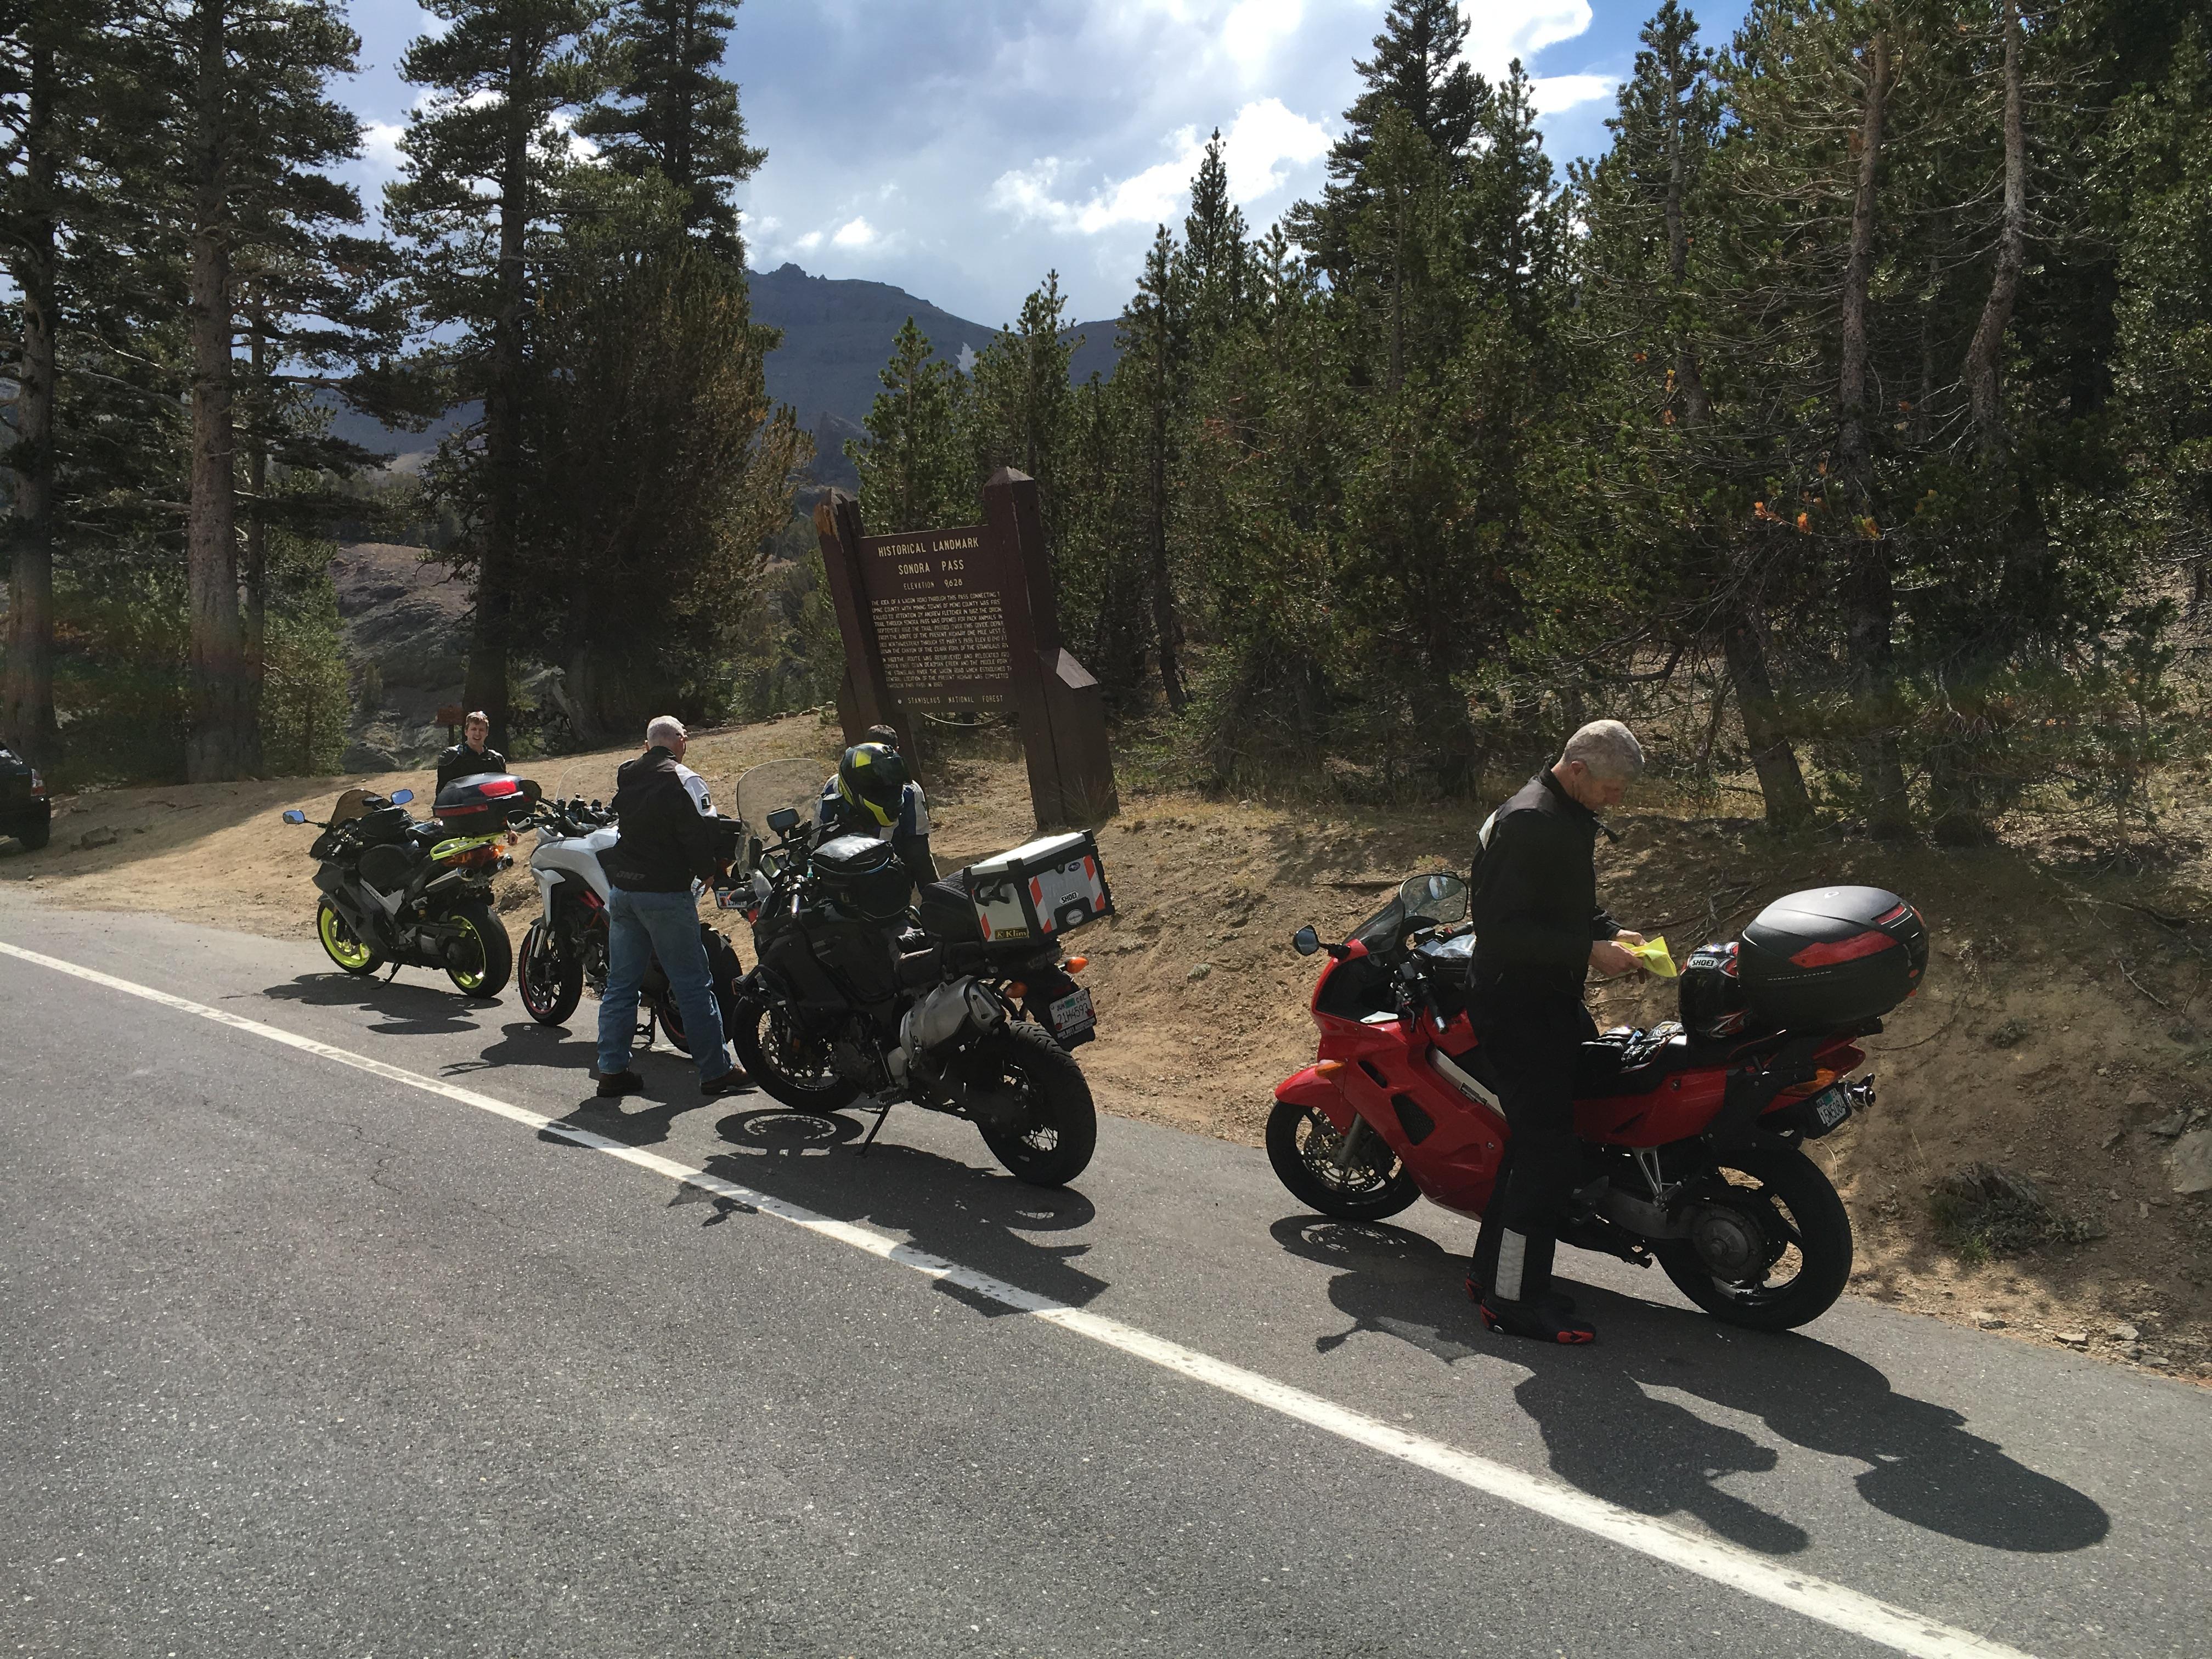
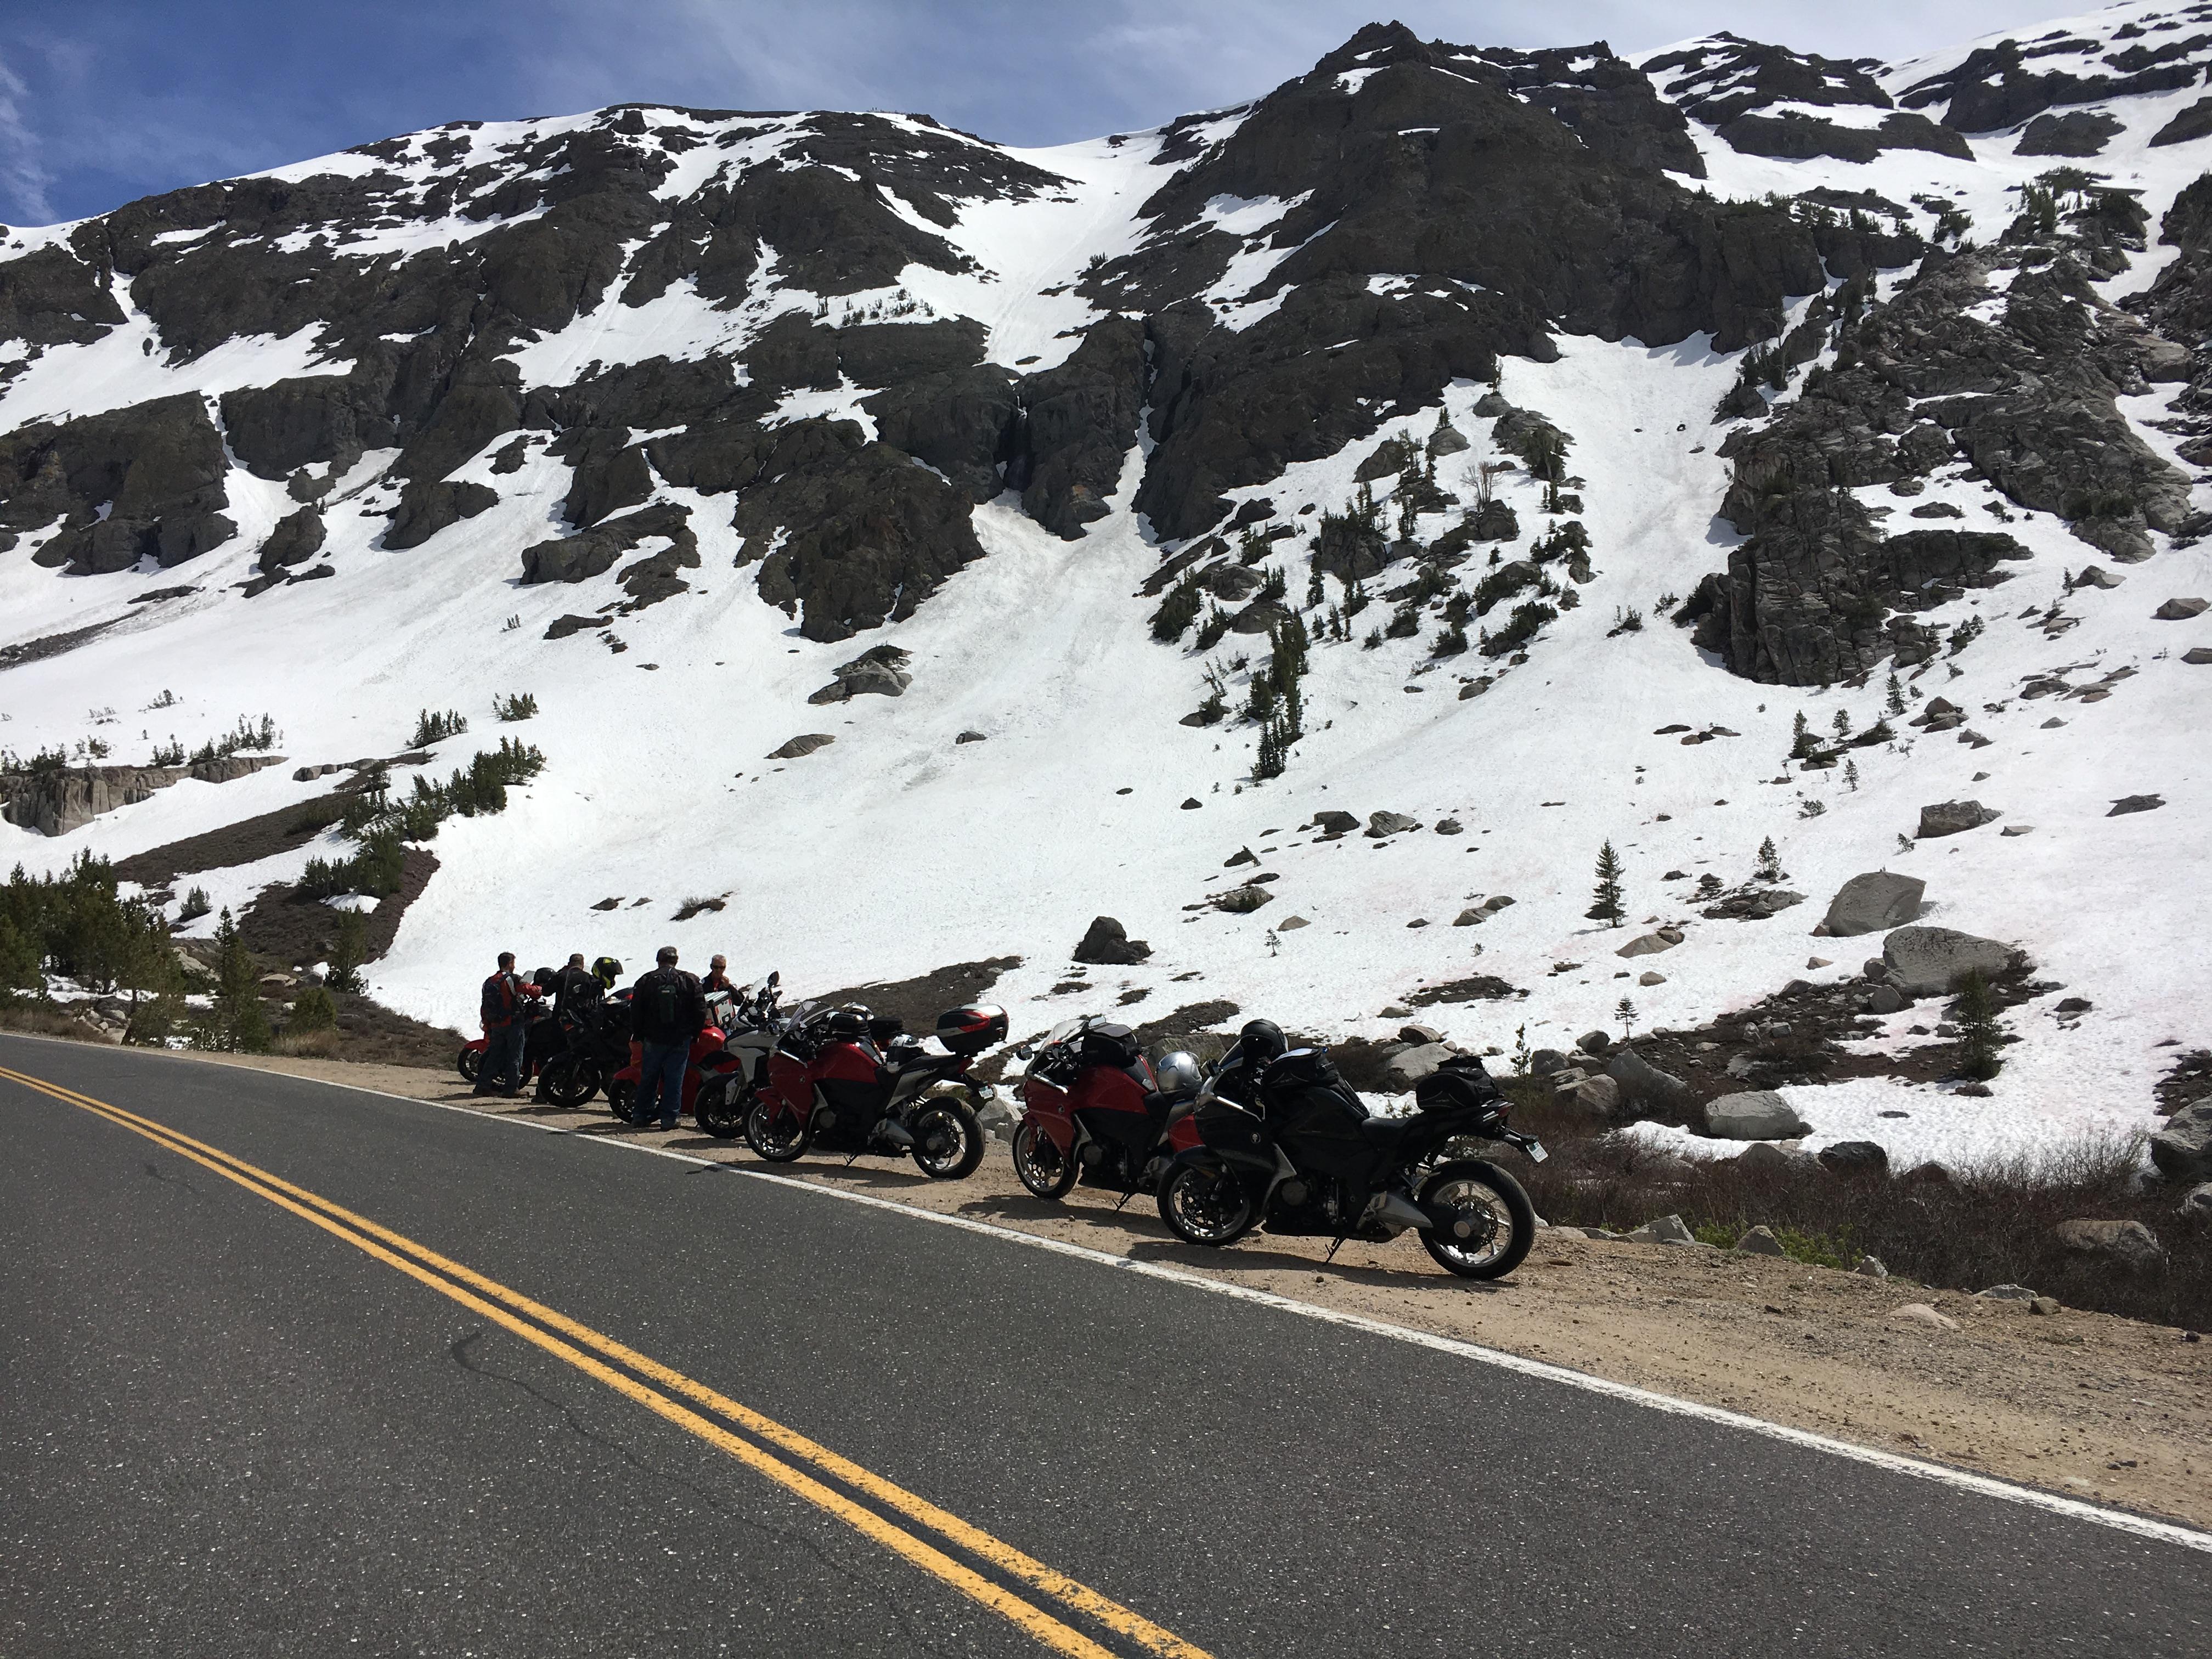
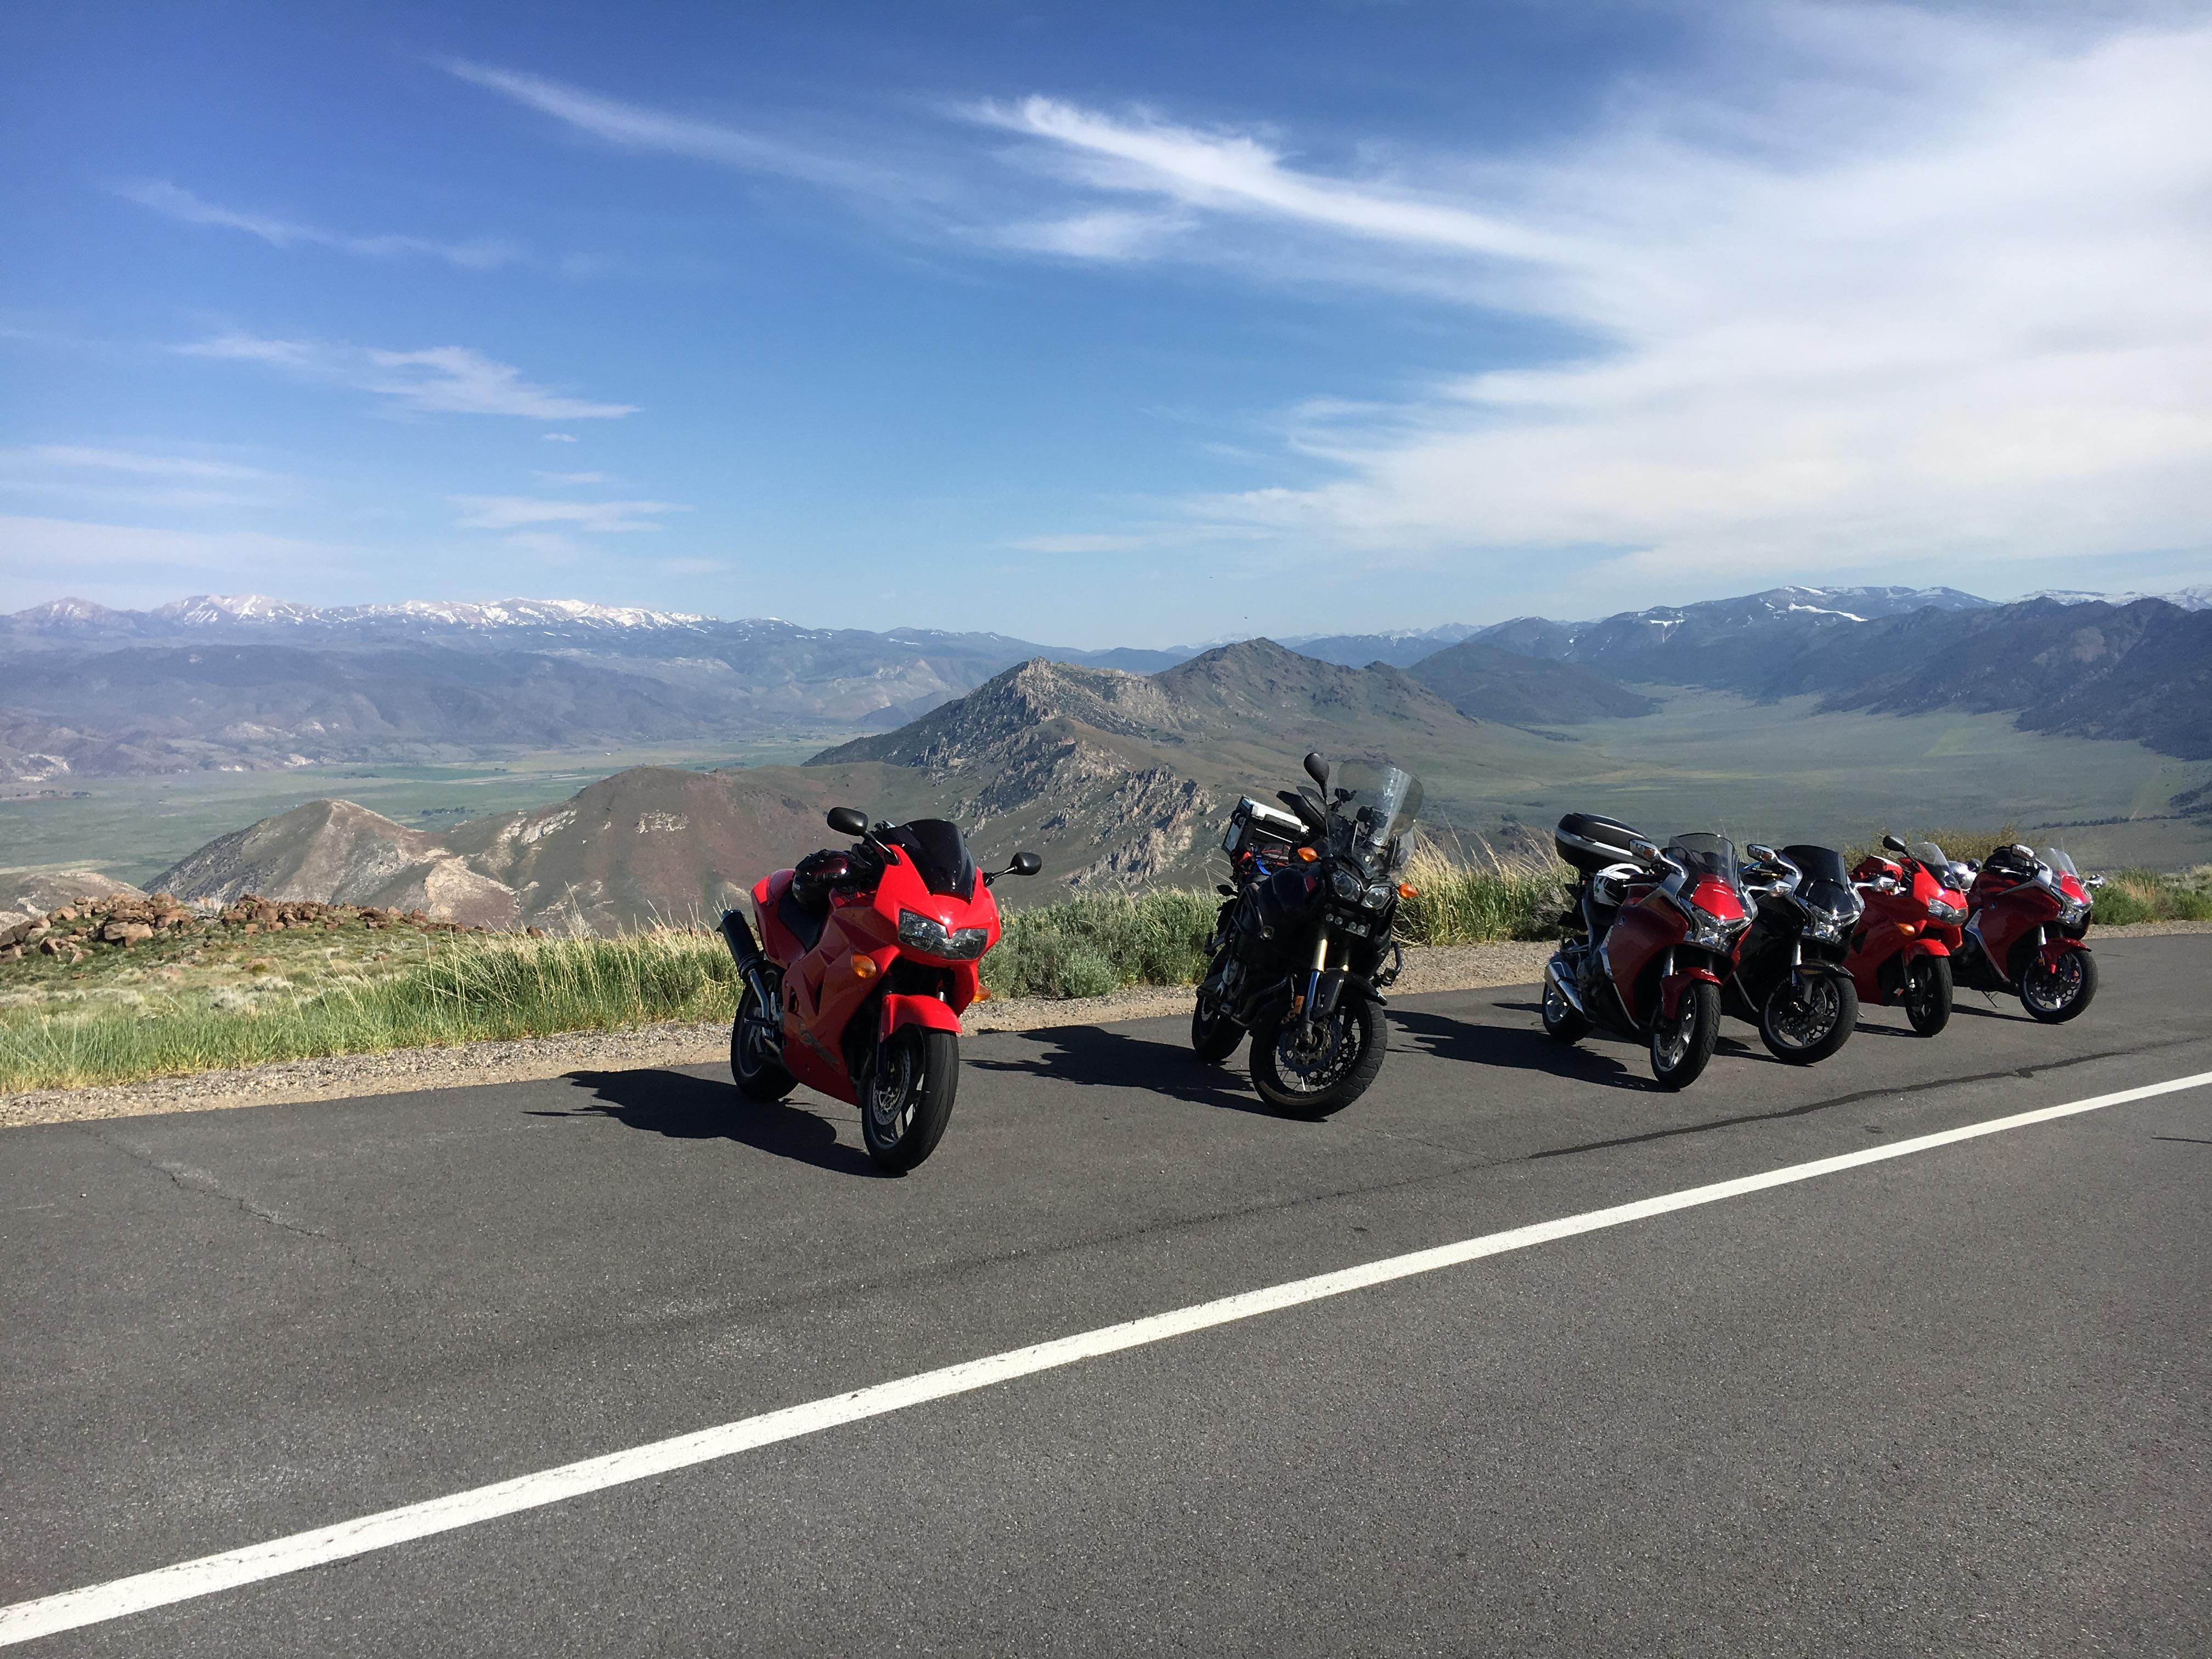
My favourite across California's Sierra Nevada mountains is over Sonora Pass, aka Hwy 108. The best stretch is 25 miles between the US Marines mountain training base at the eastern end to Kennedy Meadows, just past the west winter gate. Great views, decent pavement, loads of lovely, well engineered curves, and the summit is more than 9600 feet/2900 metres. Like most of California's best motorcycling roads, Sonora Pass is lightly travelled. From US-395 to Sonora/Jamestown is about 80 miles. In 14 crossings I've only ridden eastward twice. I think it flows better westbound - ymmv. But I highly recommend fitting it into anytime your trip takes you nearby. Or better yet, cross the mountains back and forth over the other passes nearby. This video is from our trip to Monterey for the 2011 MotoGP races. I apologize for the Dutch angle, but now I double check to level the camera when the bike is vertical.7 points
-
Great video Lorne. I agree, it is my favorite Sierra pass, but not by a whole lot! On weekend VFRD rides over the last decade we have generally traveled west to east--the long climb followed by the quick steep drop down to 395 after the summit. Then some barbecue for lunch and back over Monitor pass (last picture). Funny how the VFR's all stayed away from TC's Tenere:
7 points
-
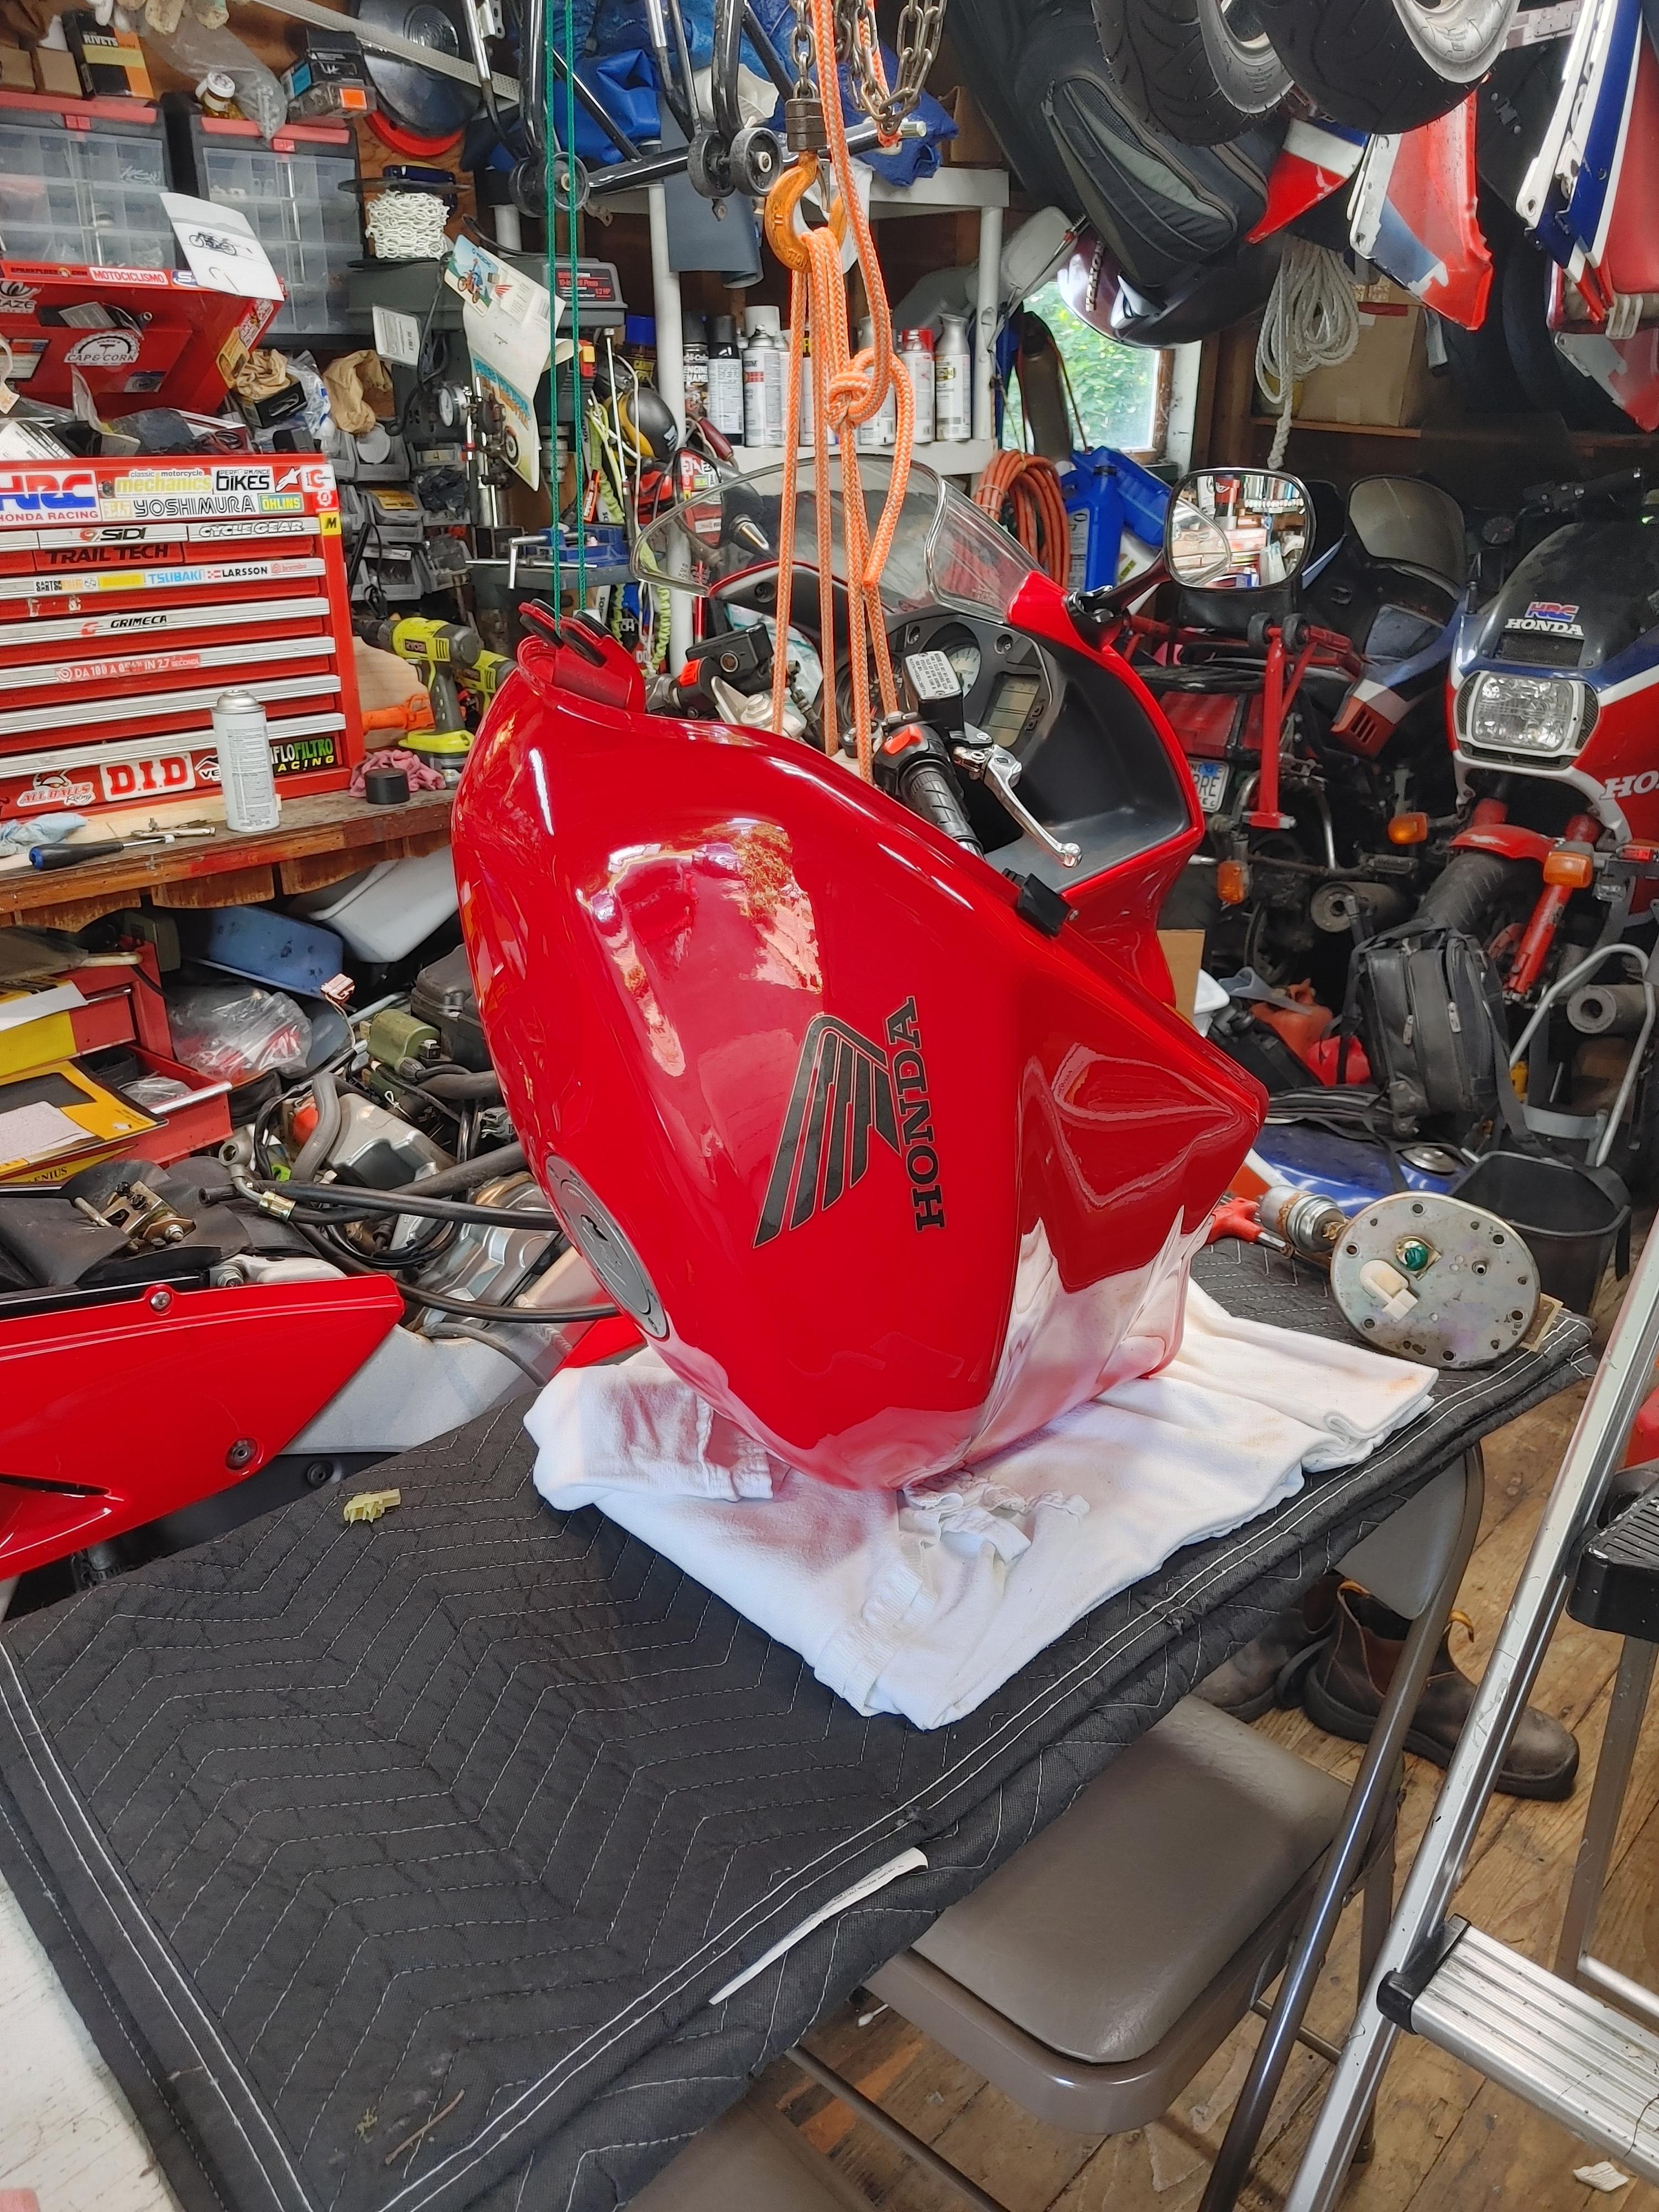
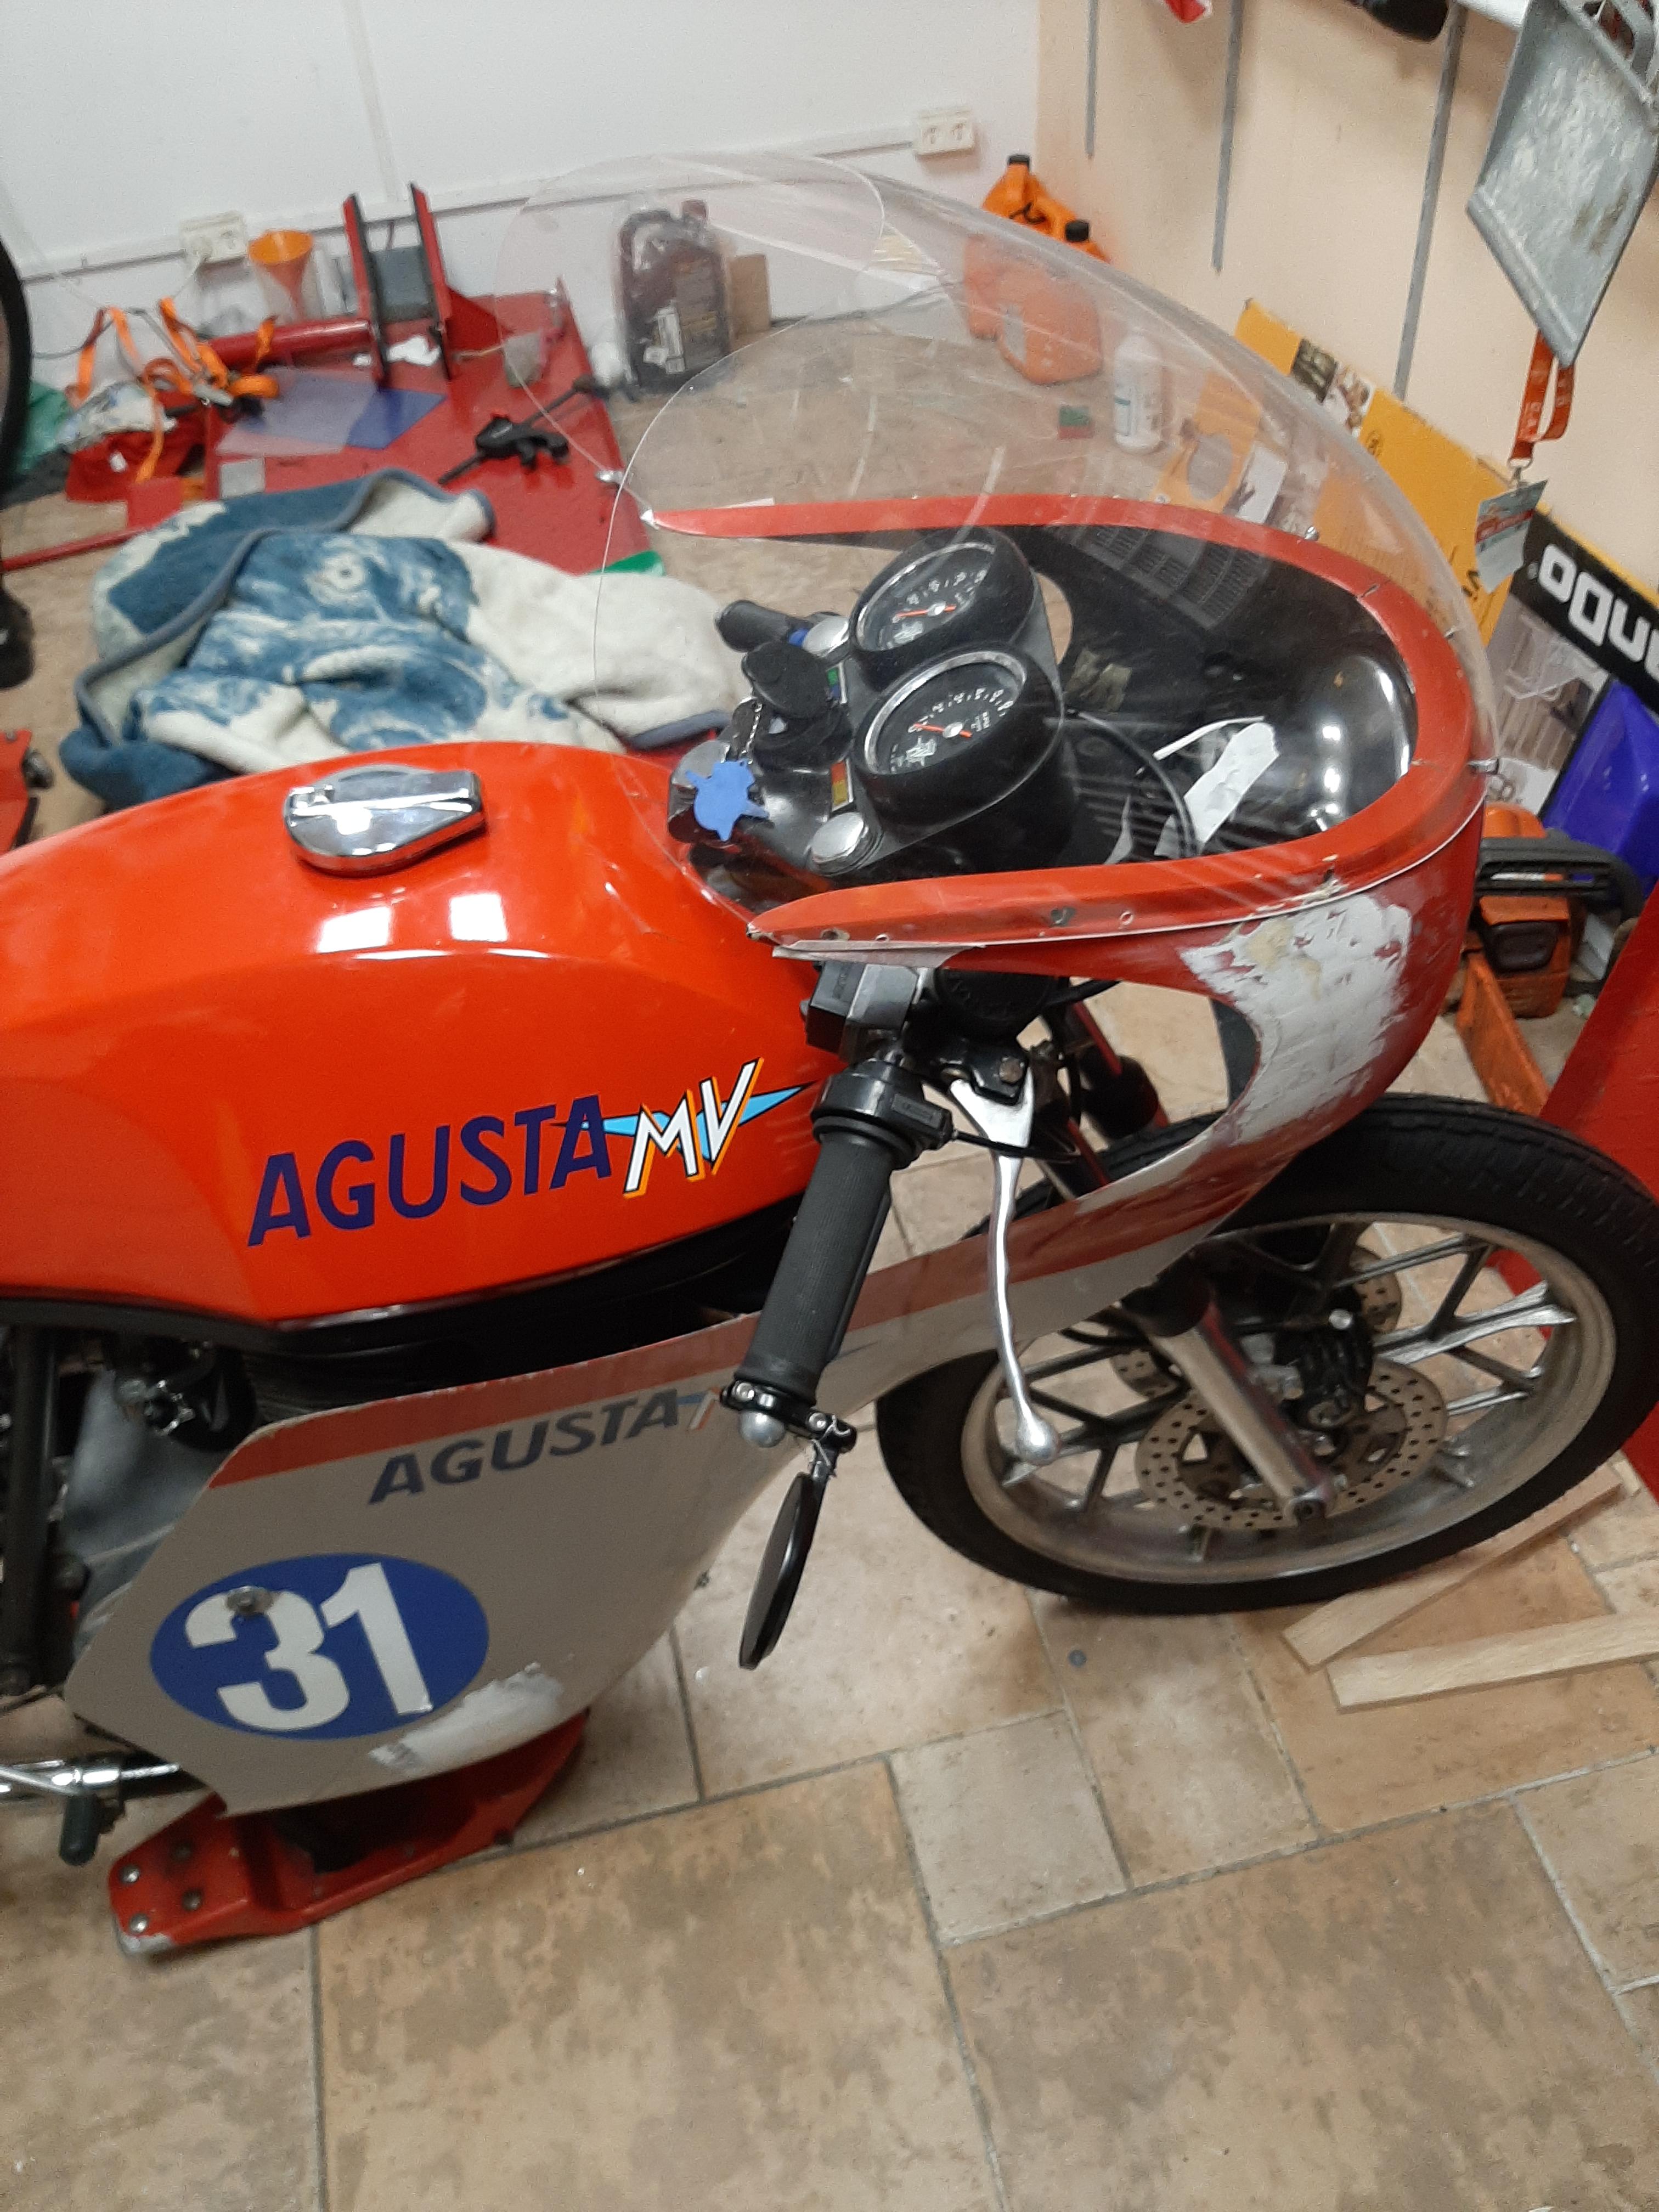
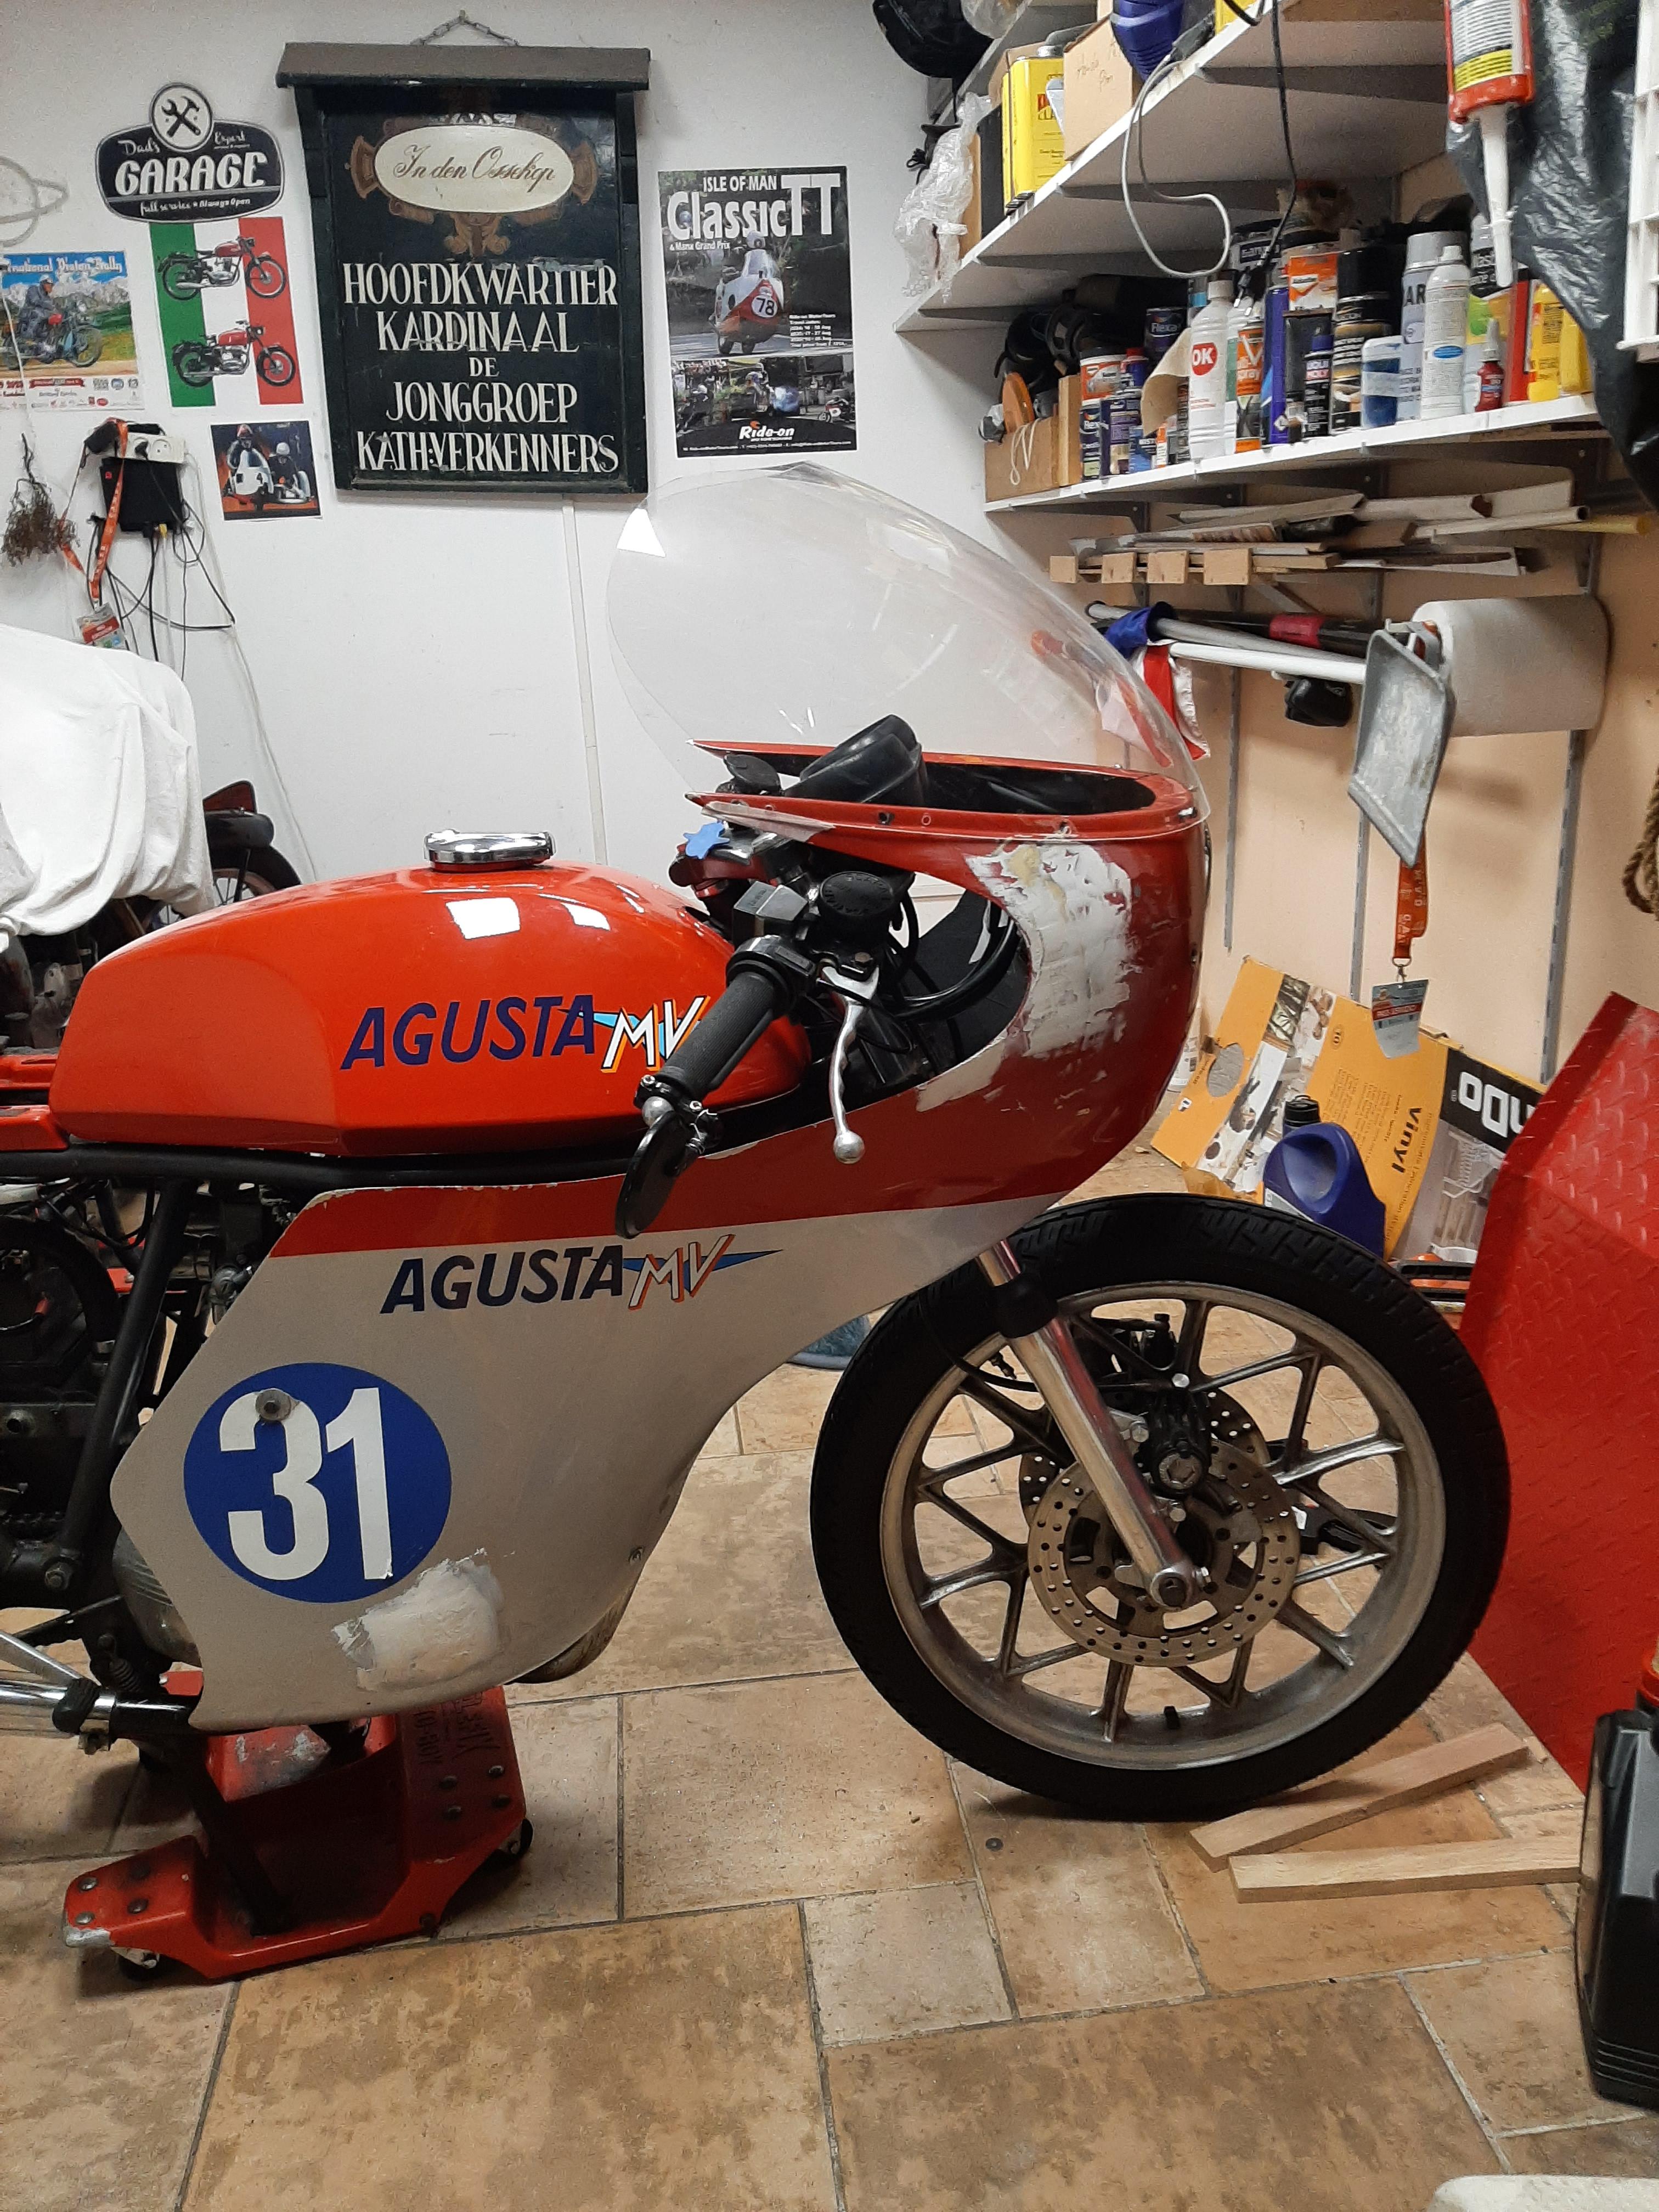
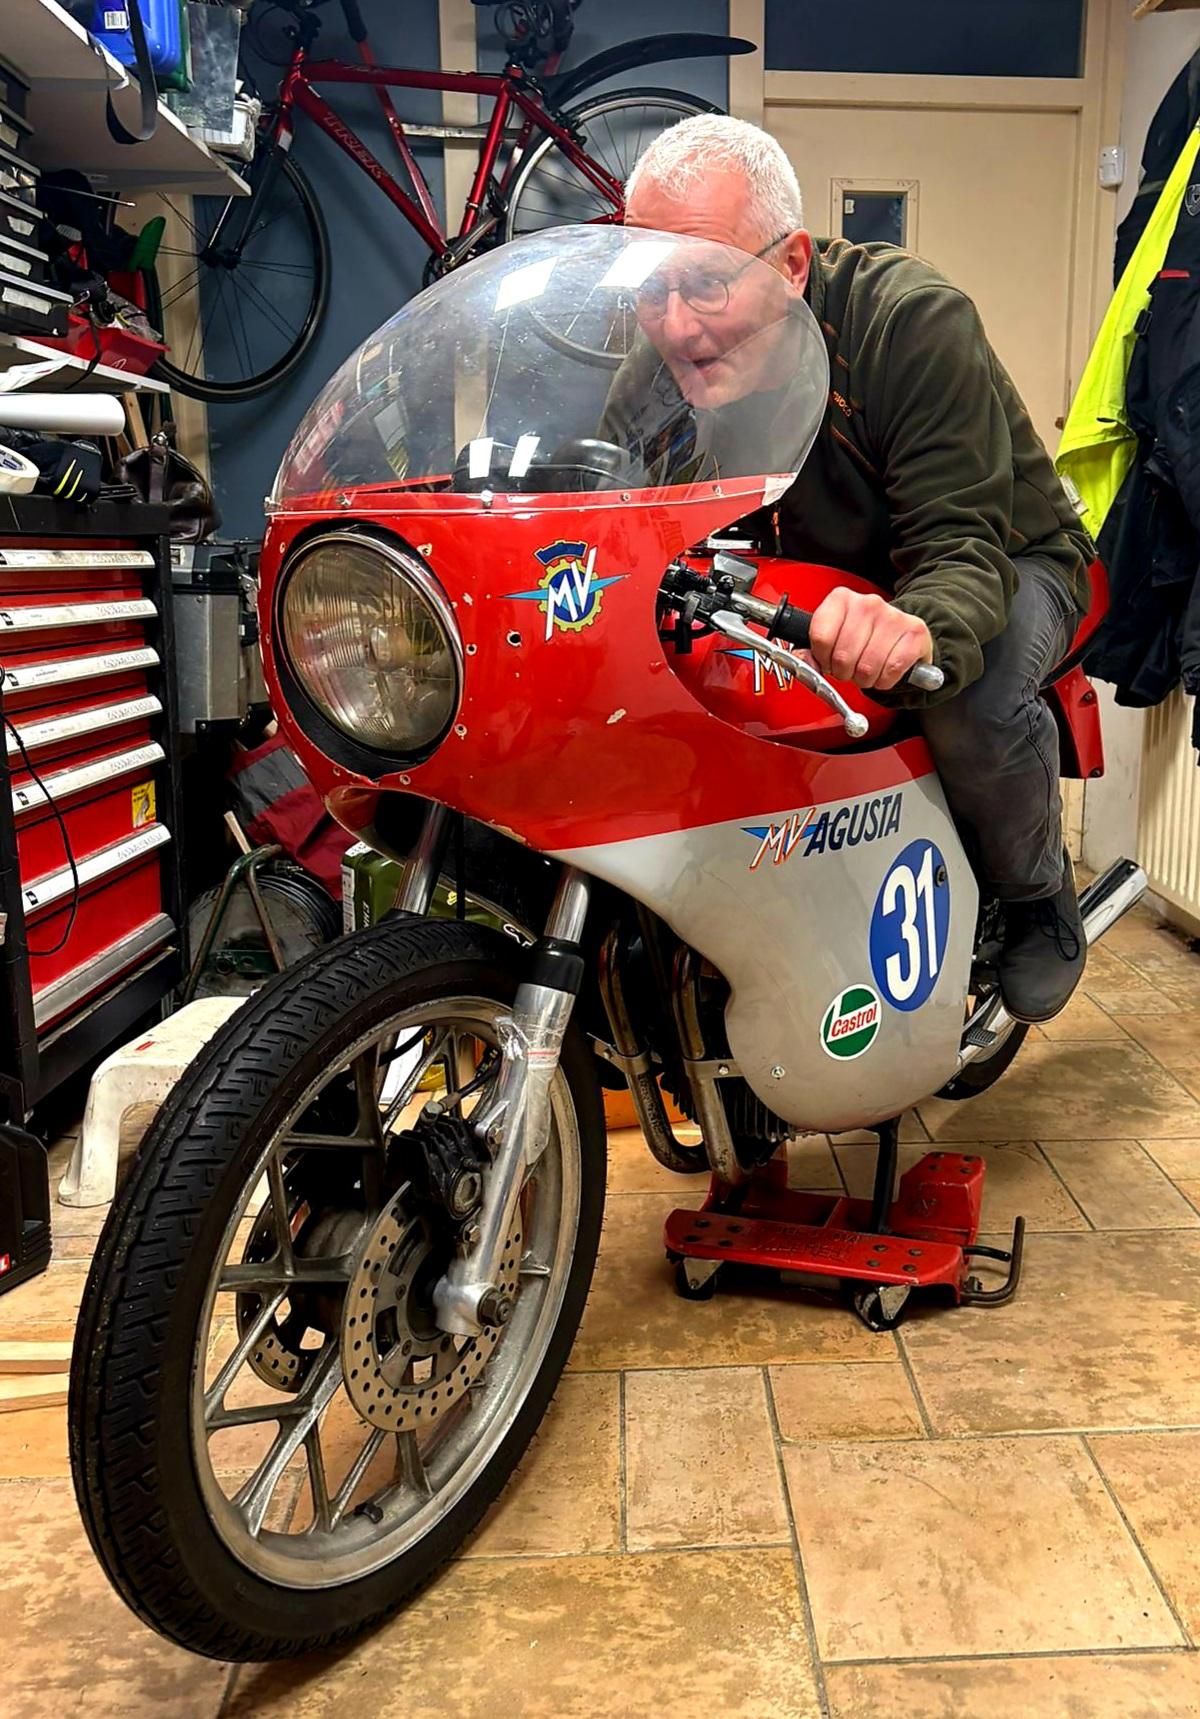
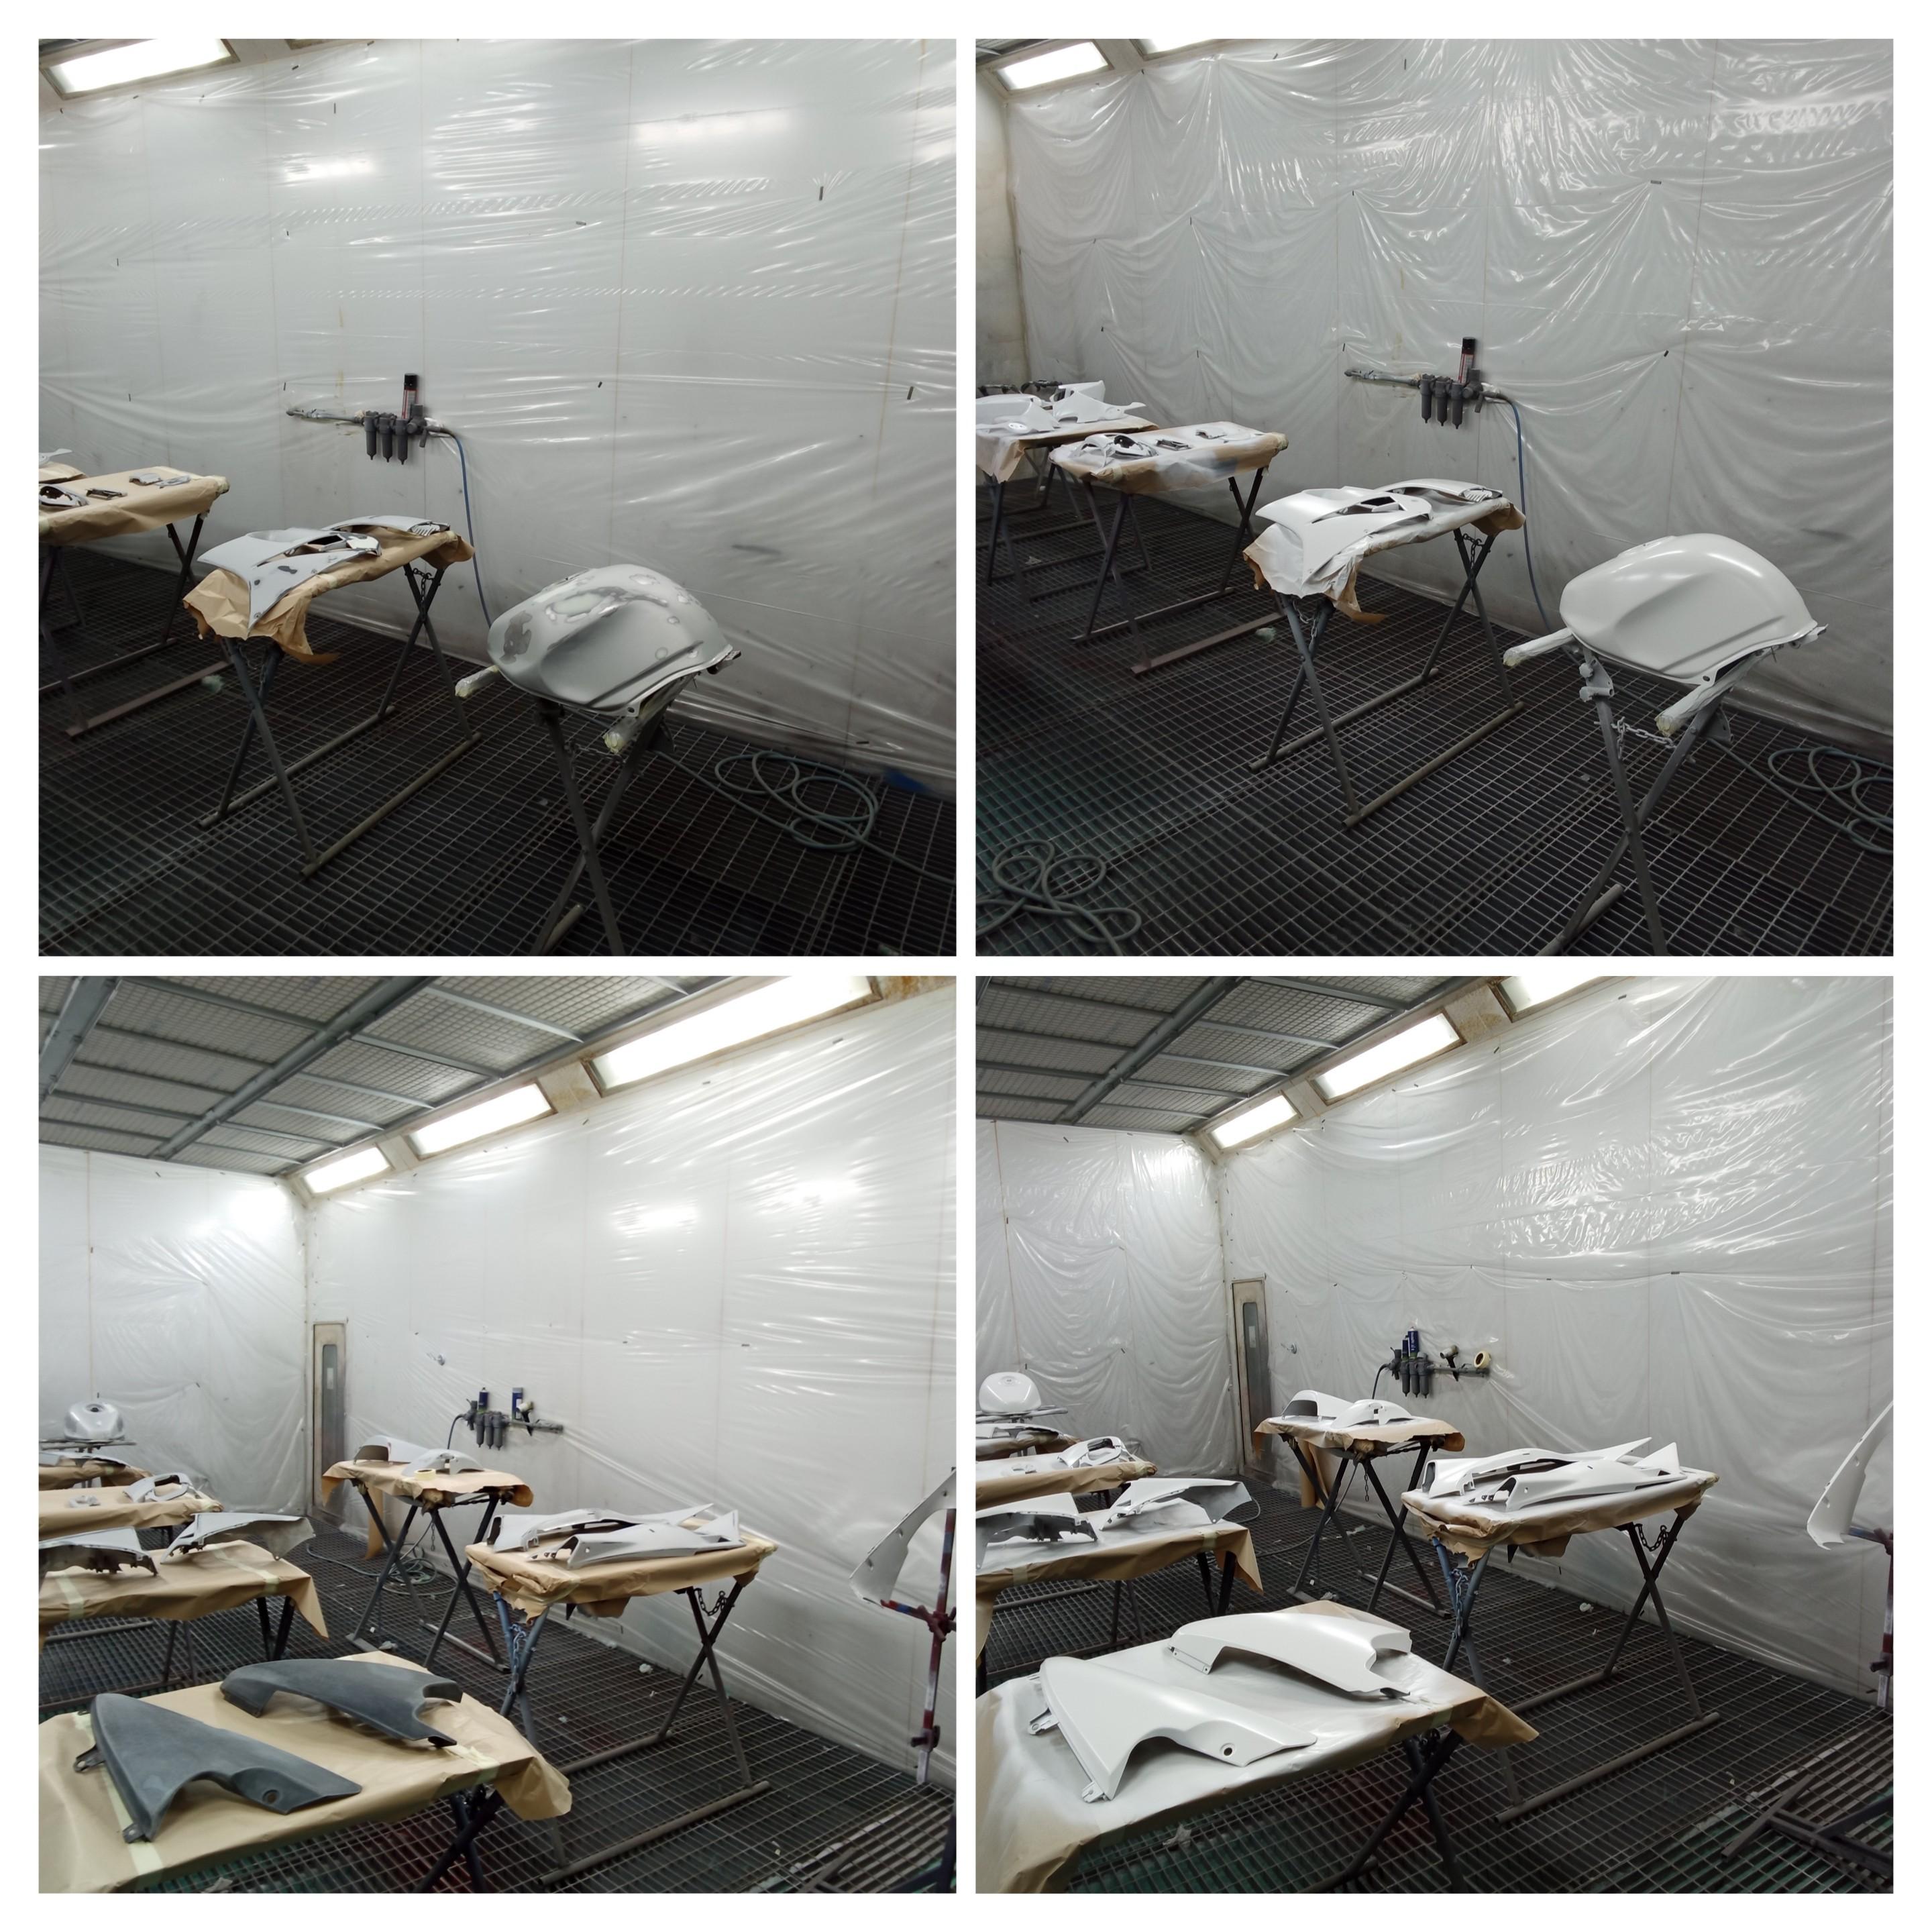
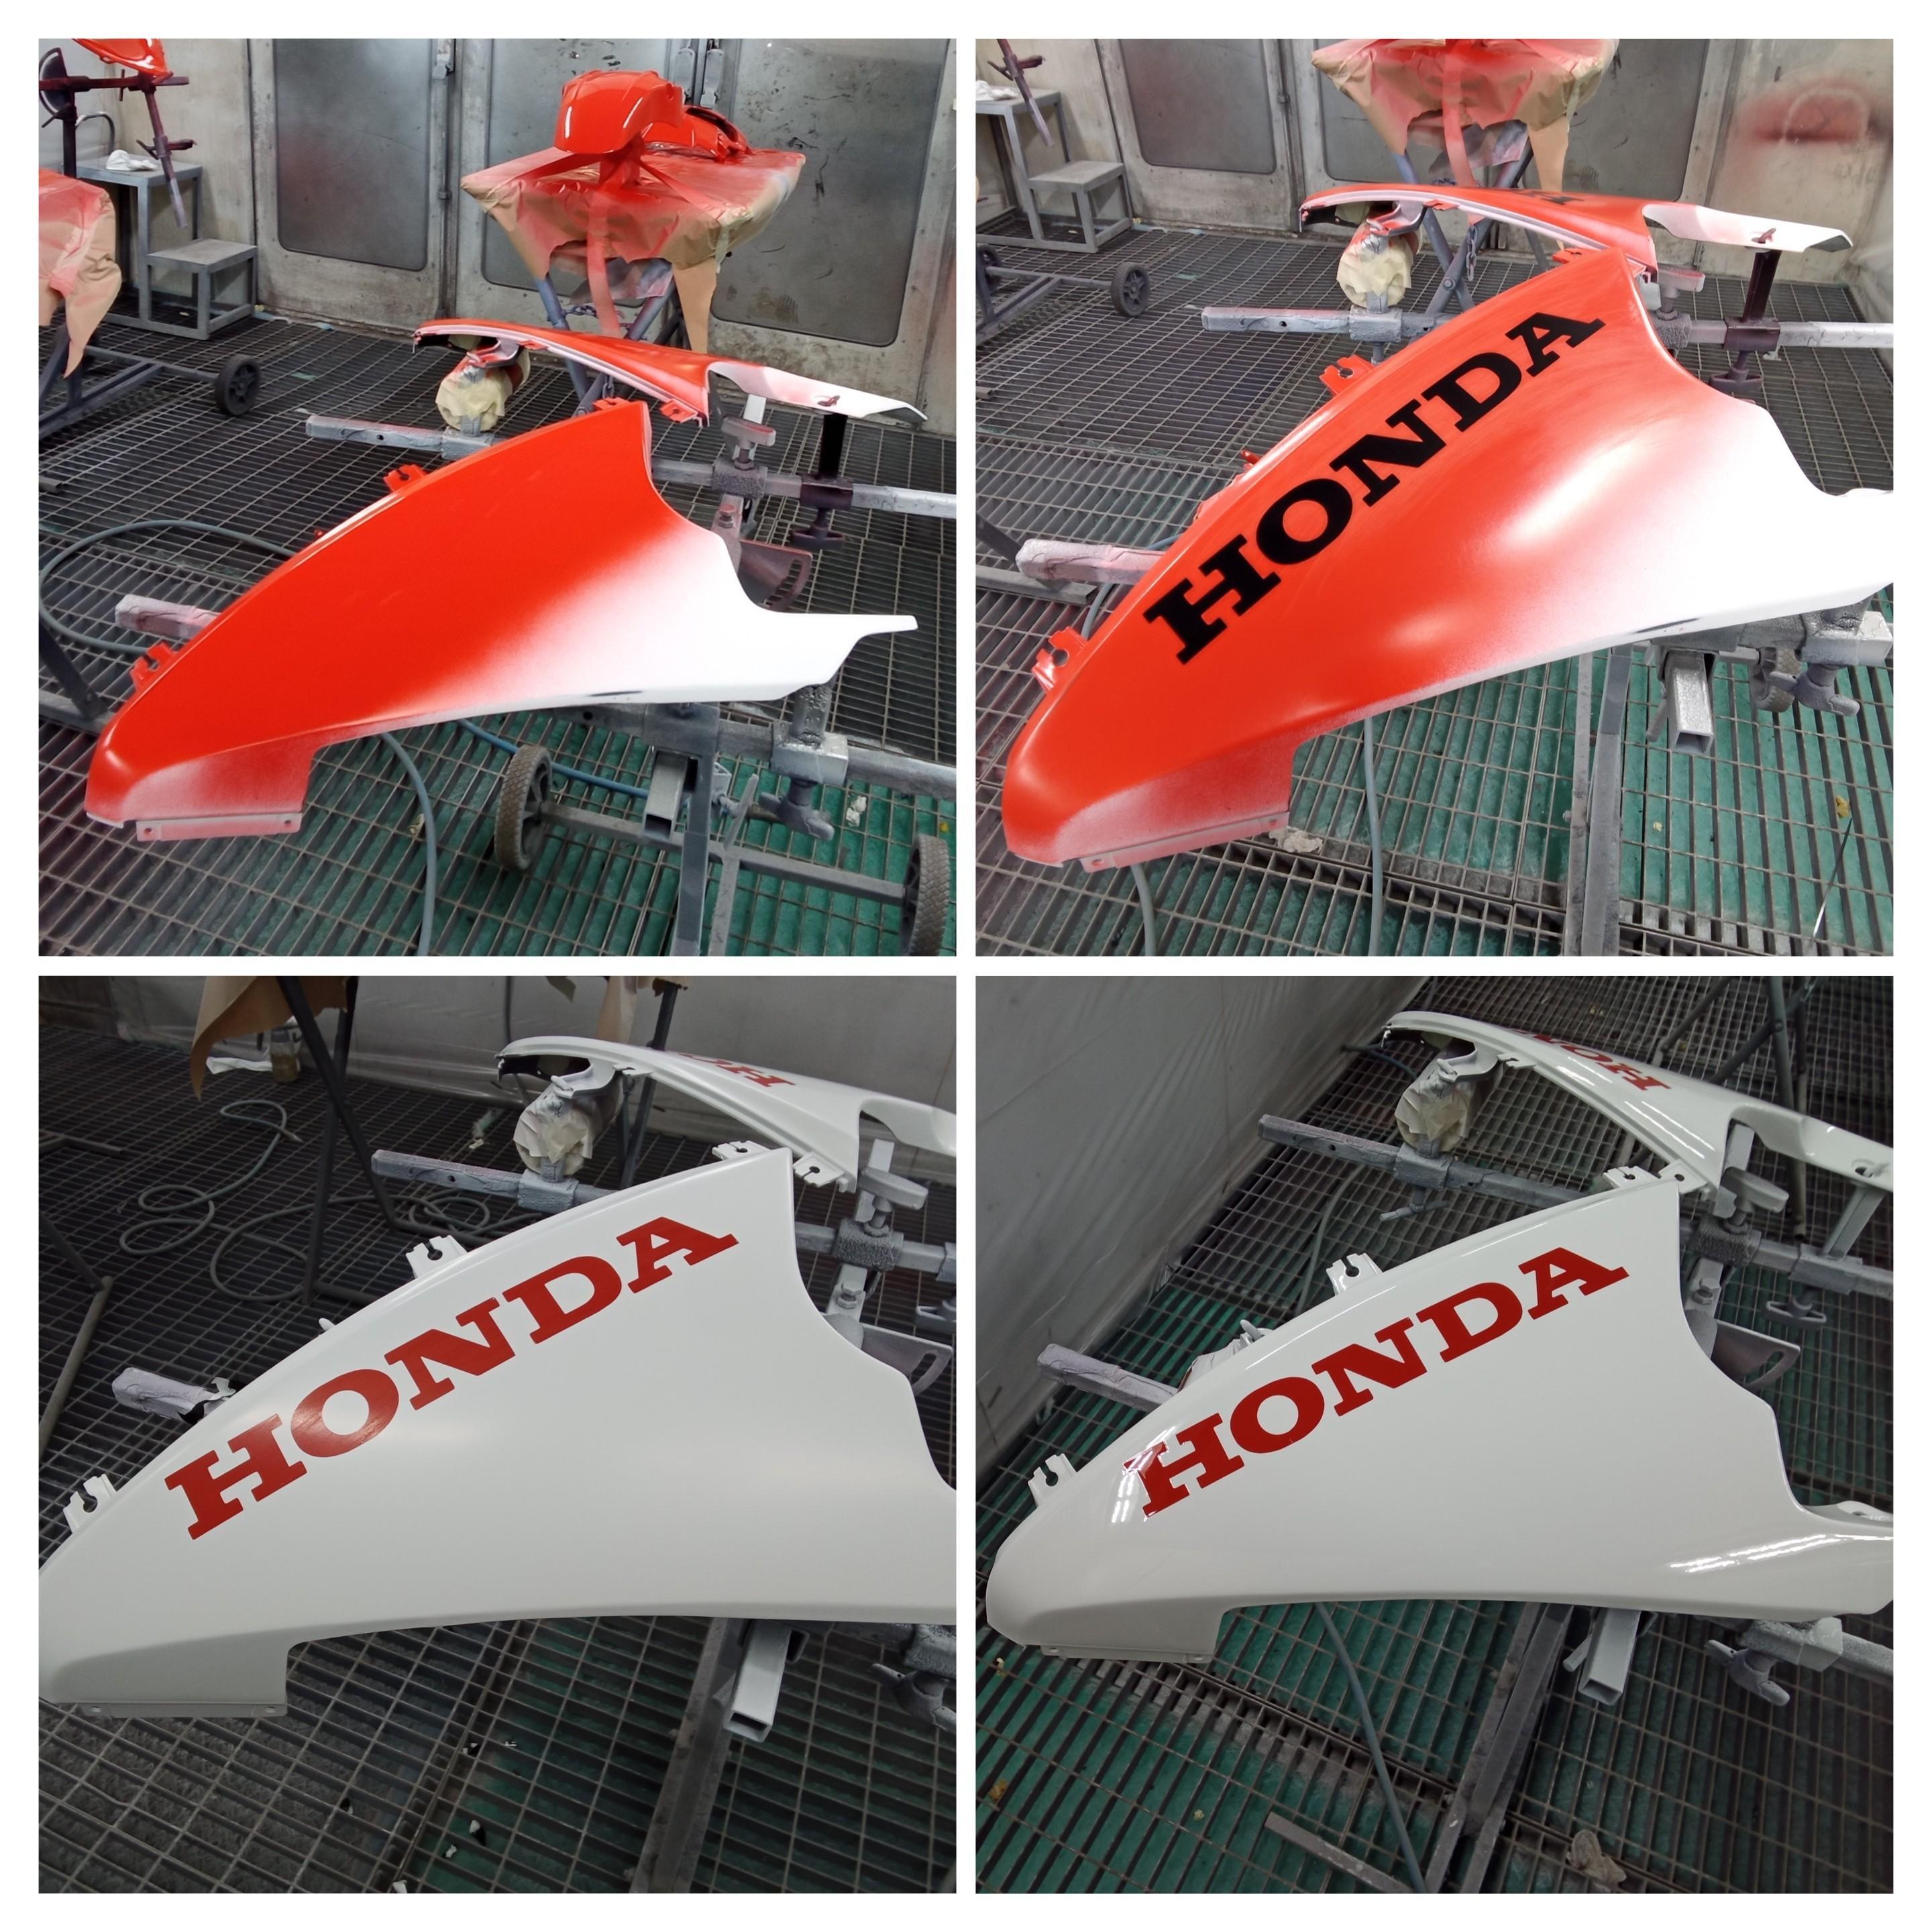
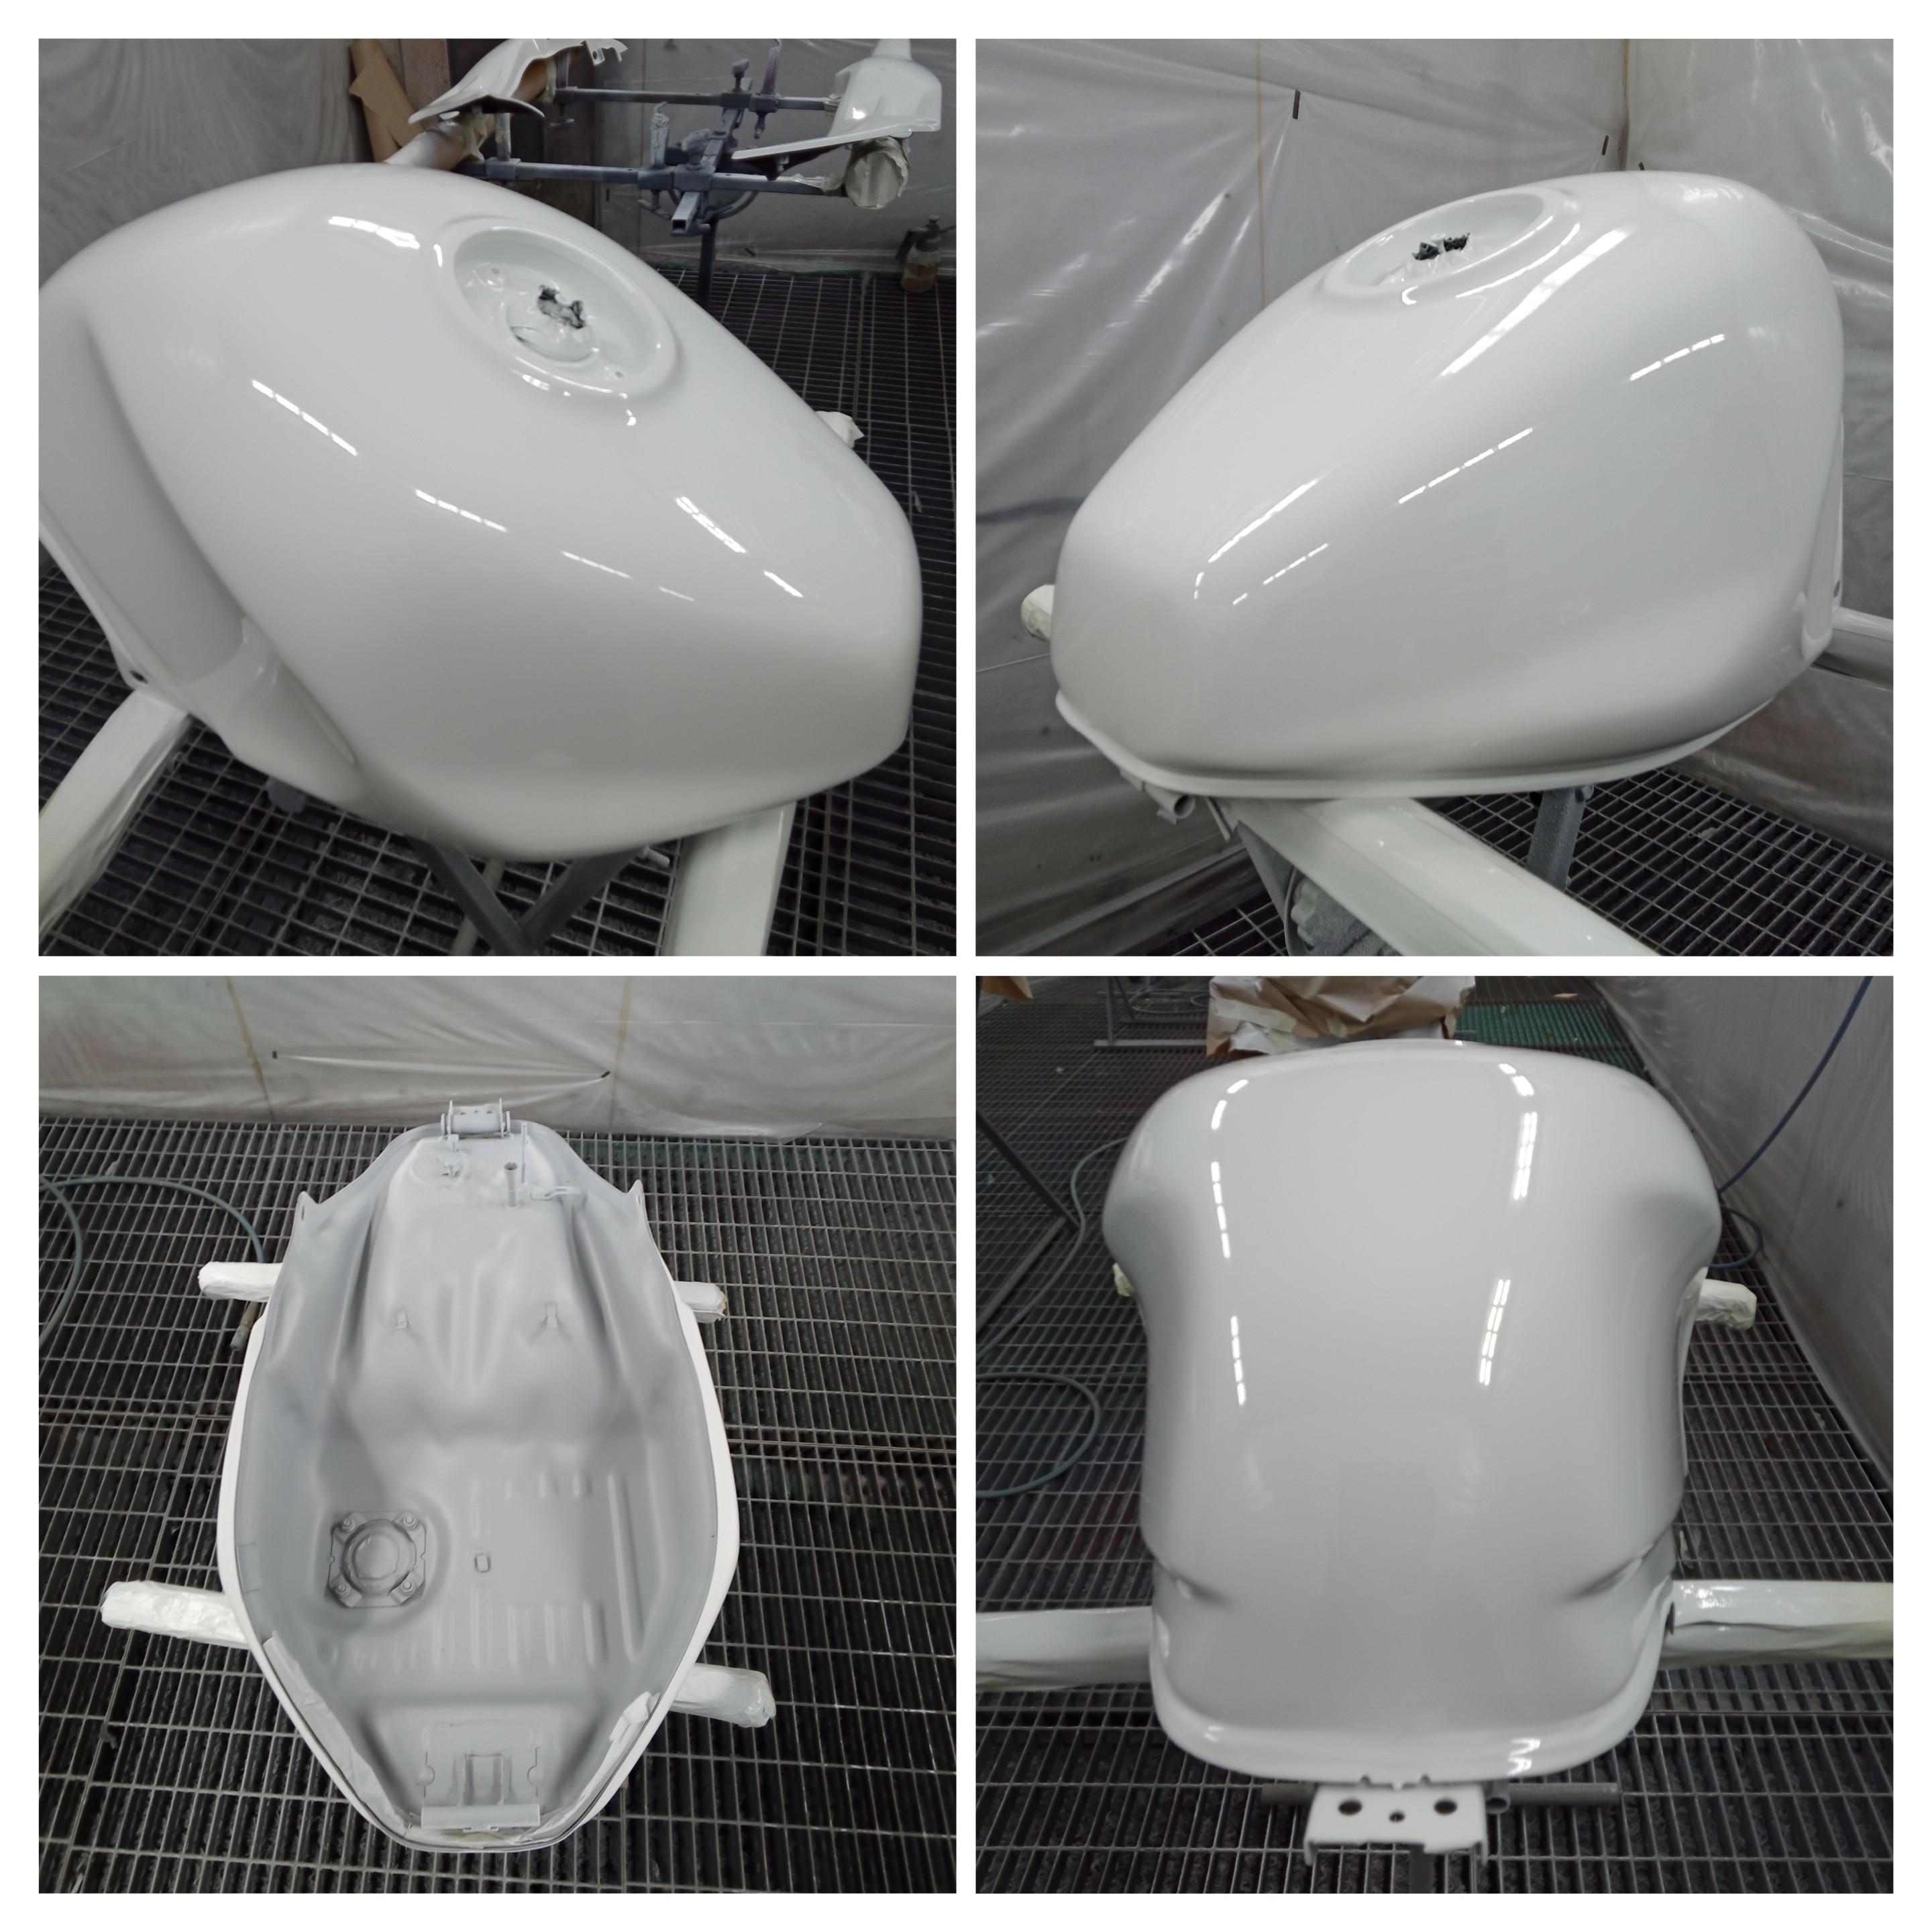
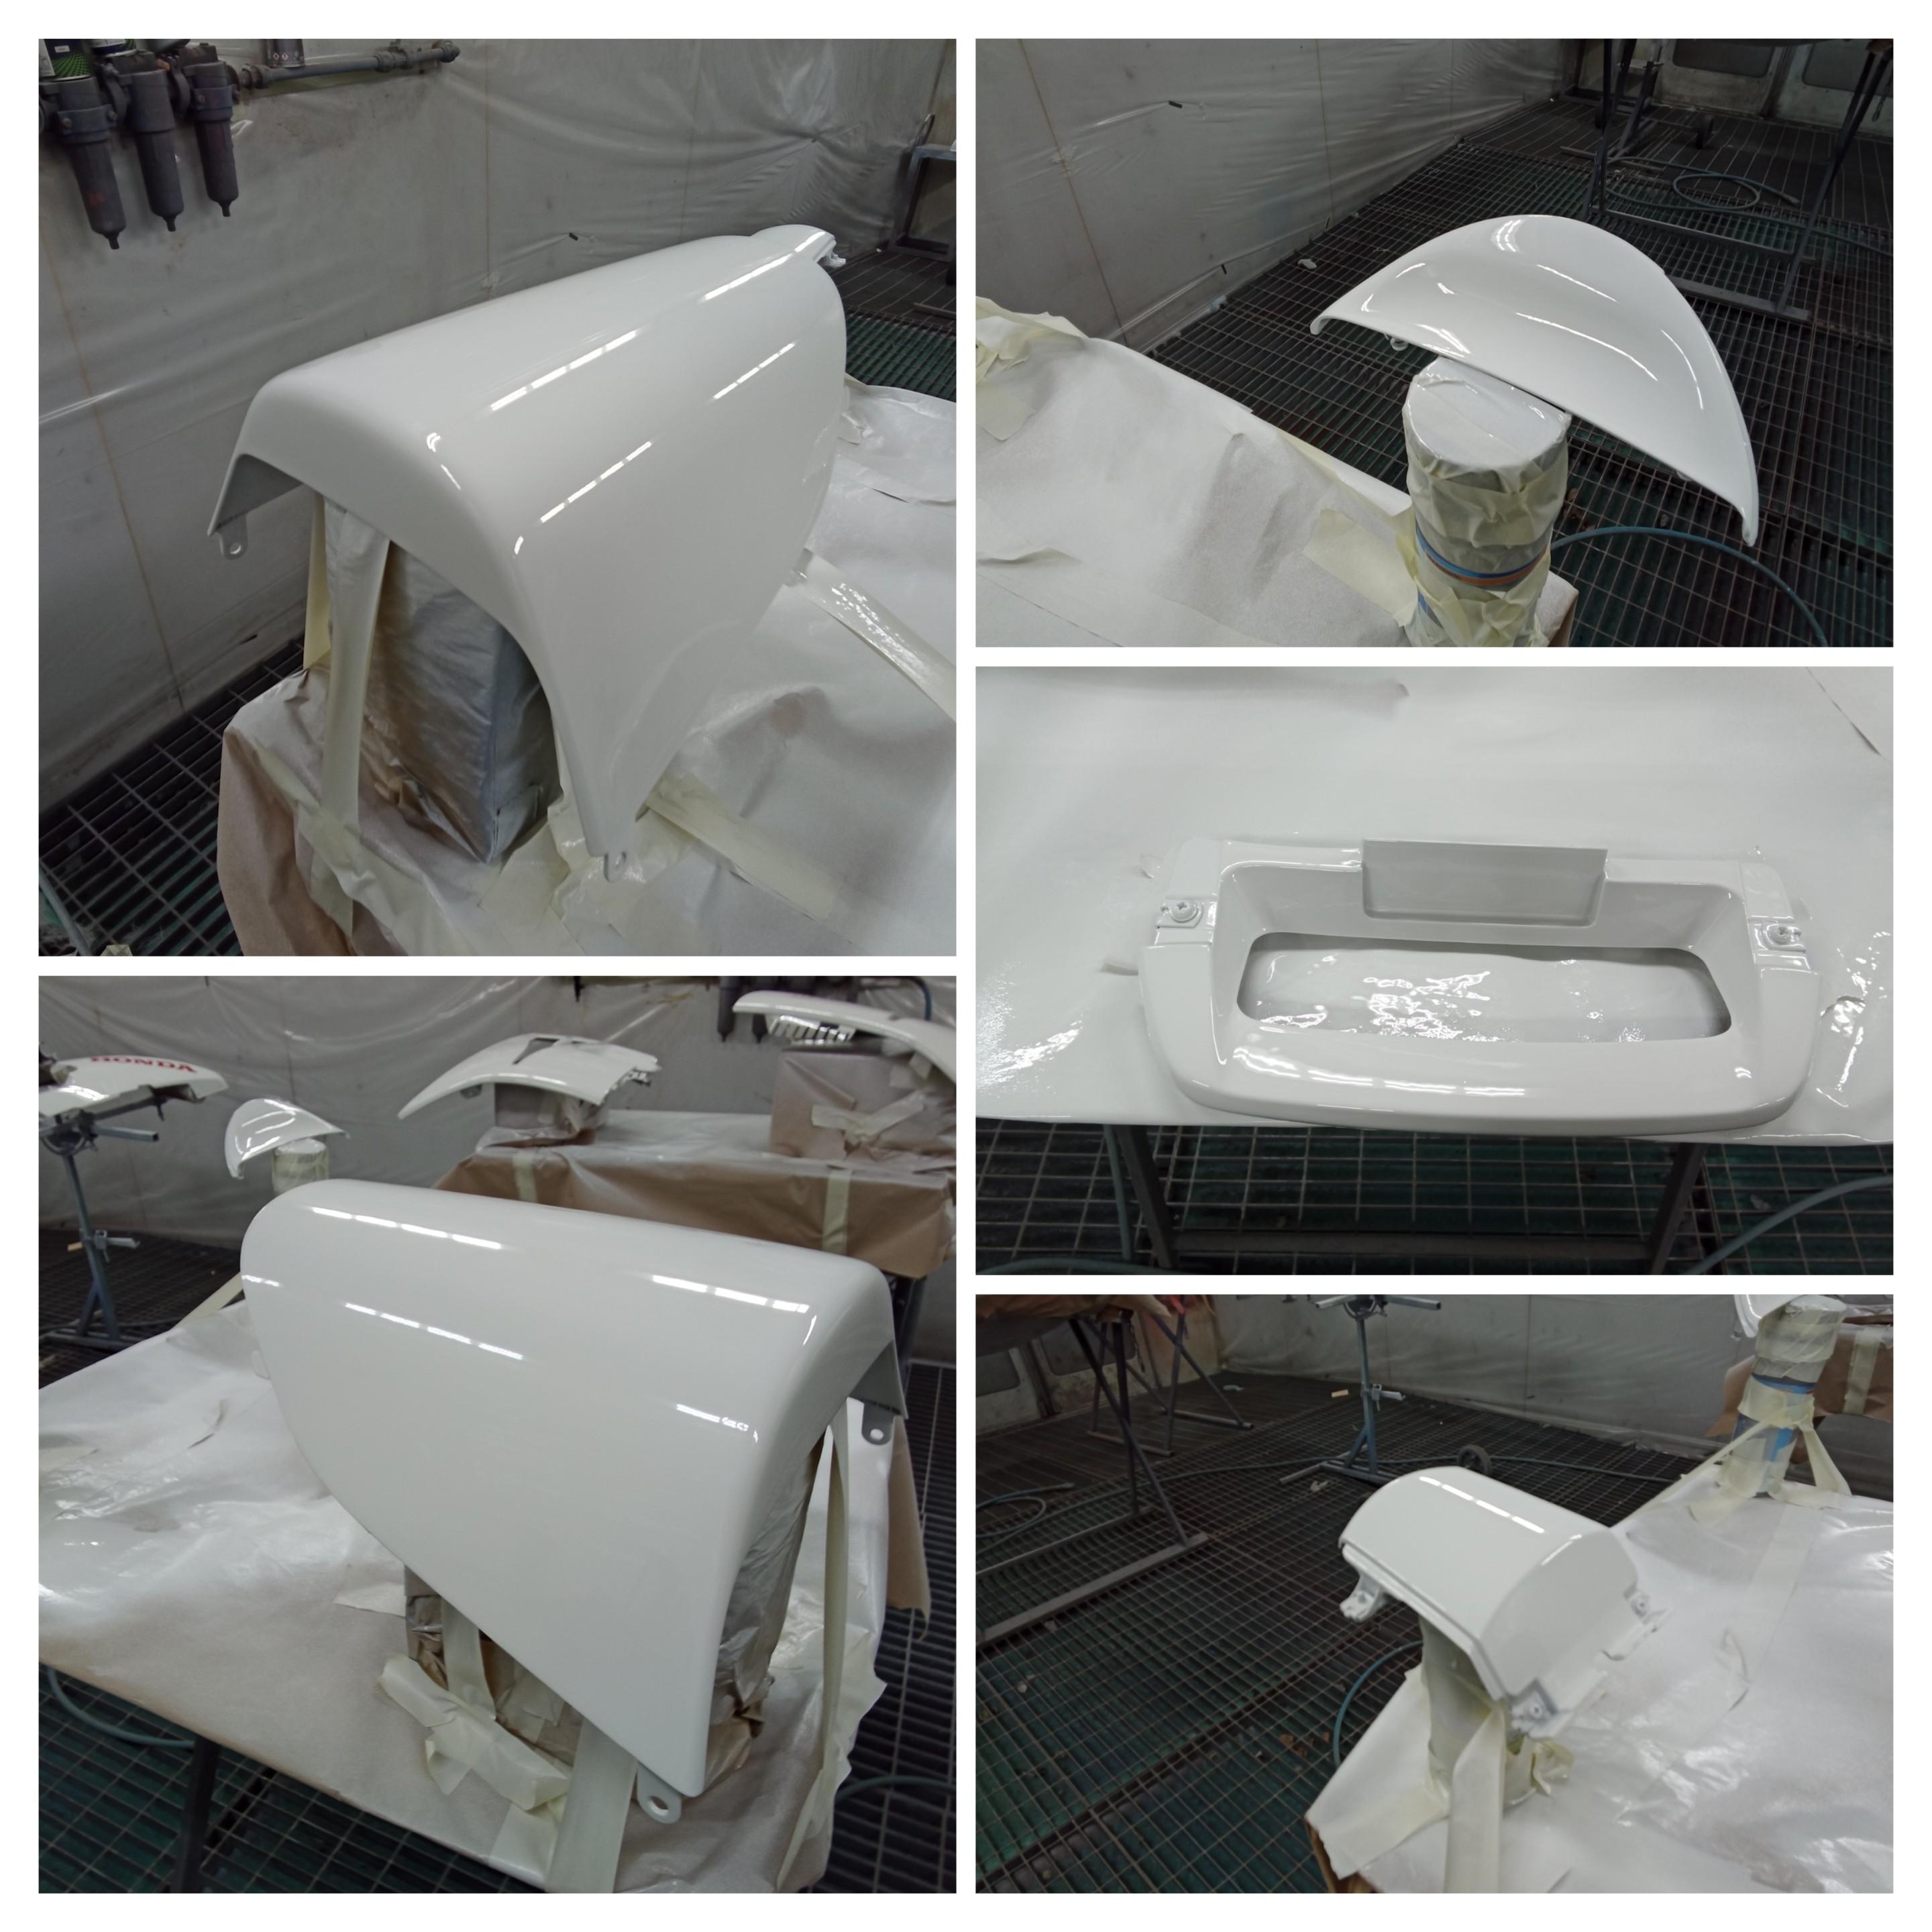
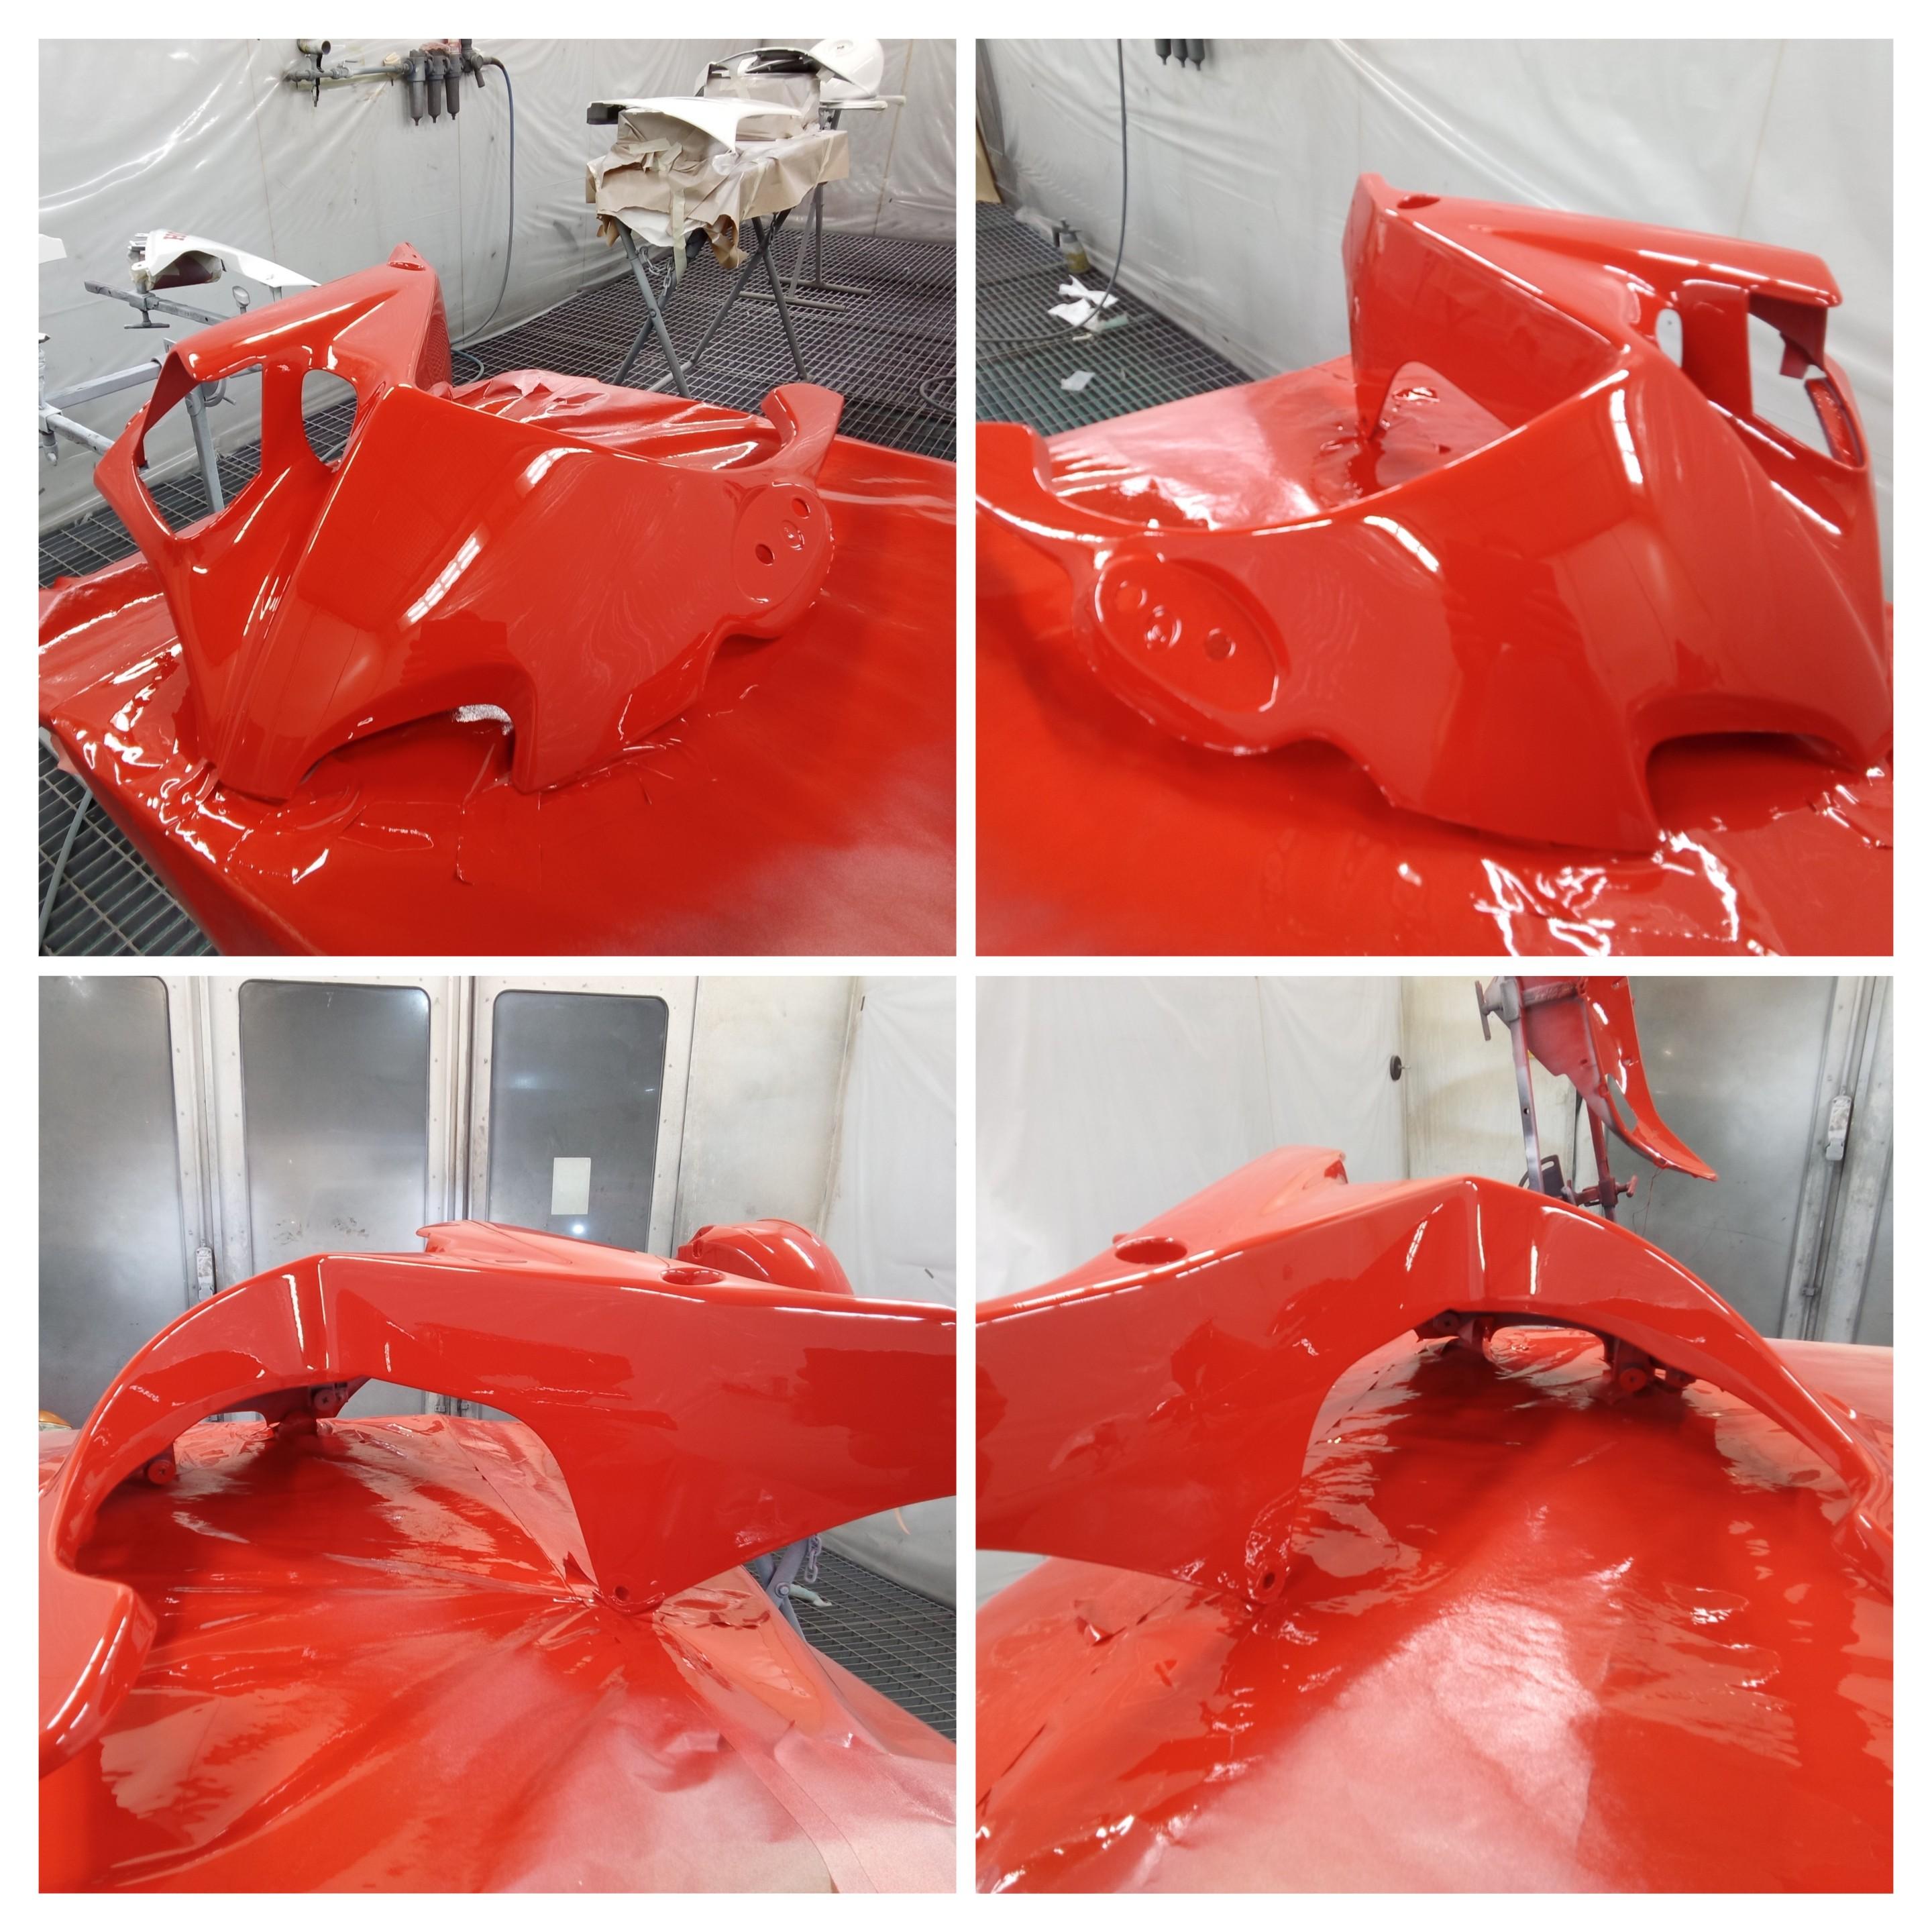
Good (chilly 🥶) evening to you all ! Another step achieved today. The first stage of the painting job is done. Nearly all white is there and a good bit of red has been sprayed. For the record, the tank has been etch-primed prior to high building. All plastic parts were first sprayed with a plastic promoter for safety, then a high build primer has been applied on all parts. After that a wet-on-wet primer has been sprayed before the final basecoat and lacquer. The primer phase Underbelly decal Final look The poor indicator who has seen the road a tiny bit too close 👀
7 points
-
Hi all i`m new to the forum, i`d like to introduce my self. I'm Darek i have a 96 VFR RC36 in red with 25000 km. I'm seasoned hobby mechanic, and looking to share rep methods and opinions on how to. I also own Kawasaki motorcycles which i repair-restore my self. I'm currently working on my VFR, its firs Honda bike i own.
7 points
-
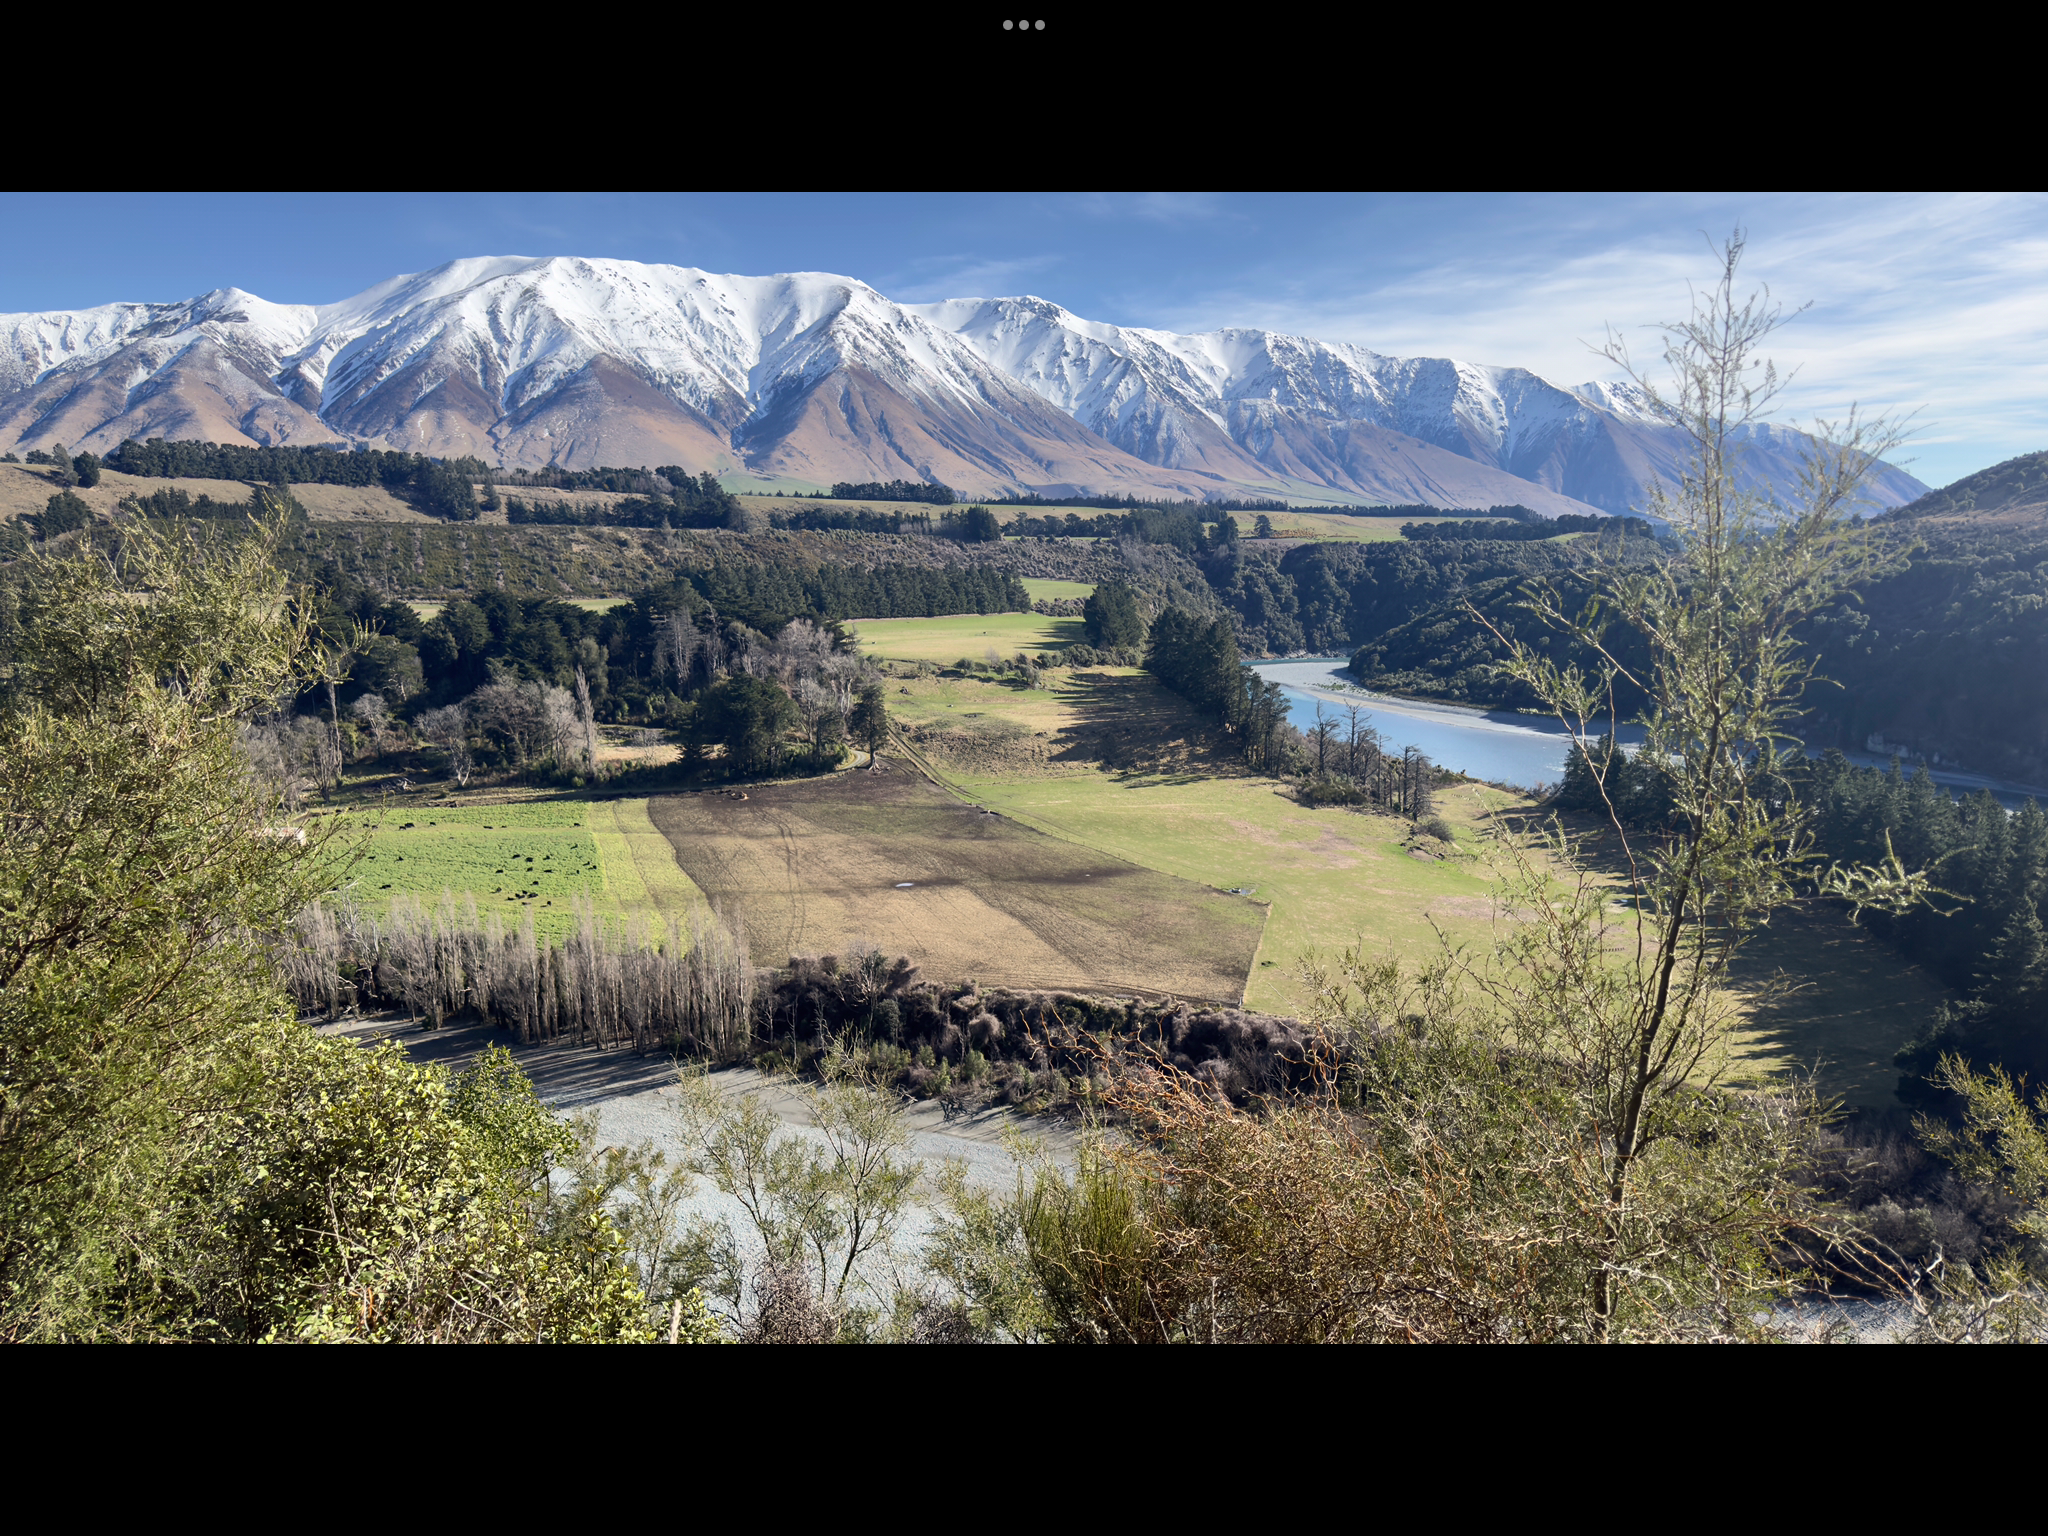
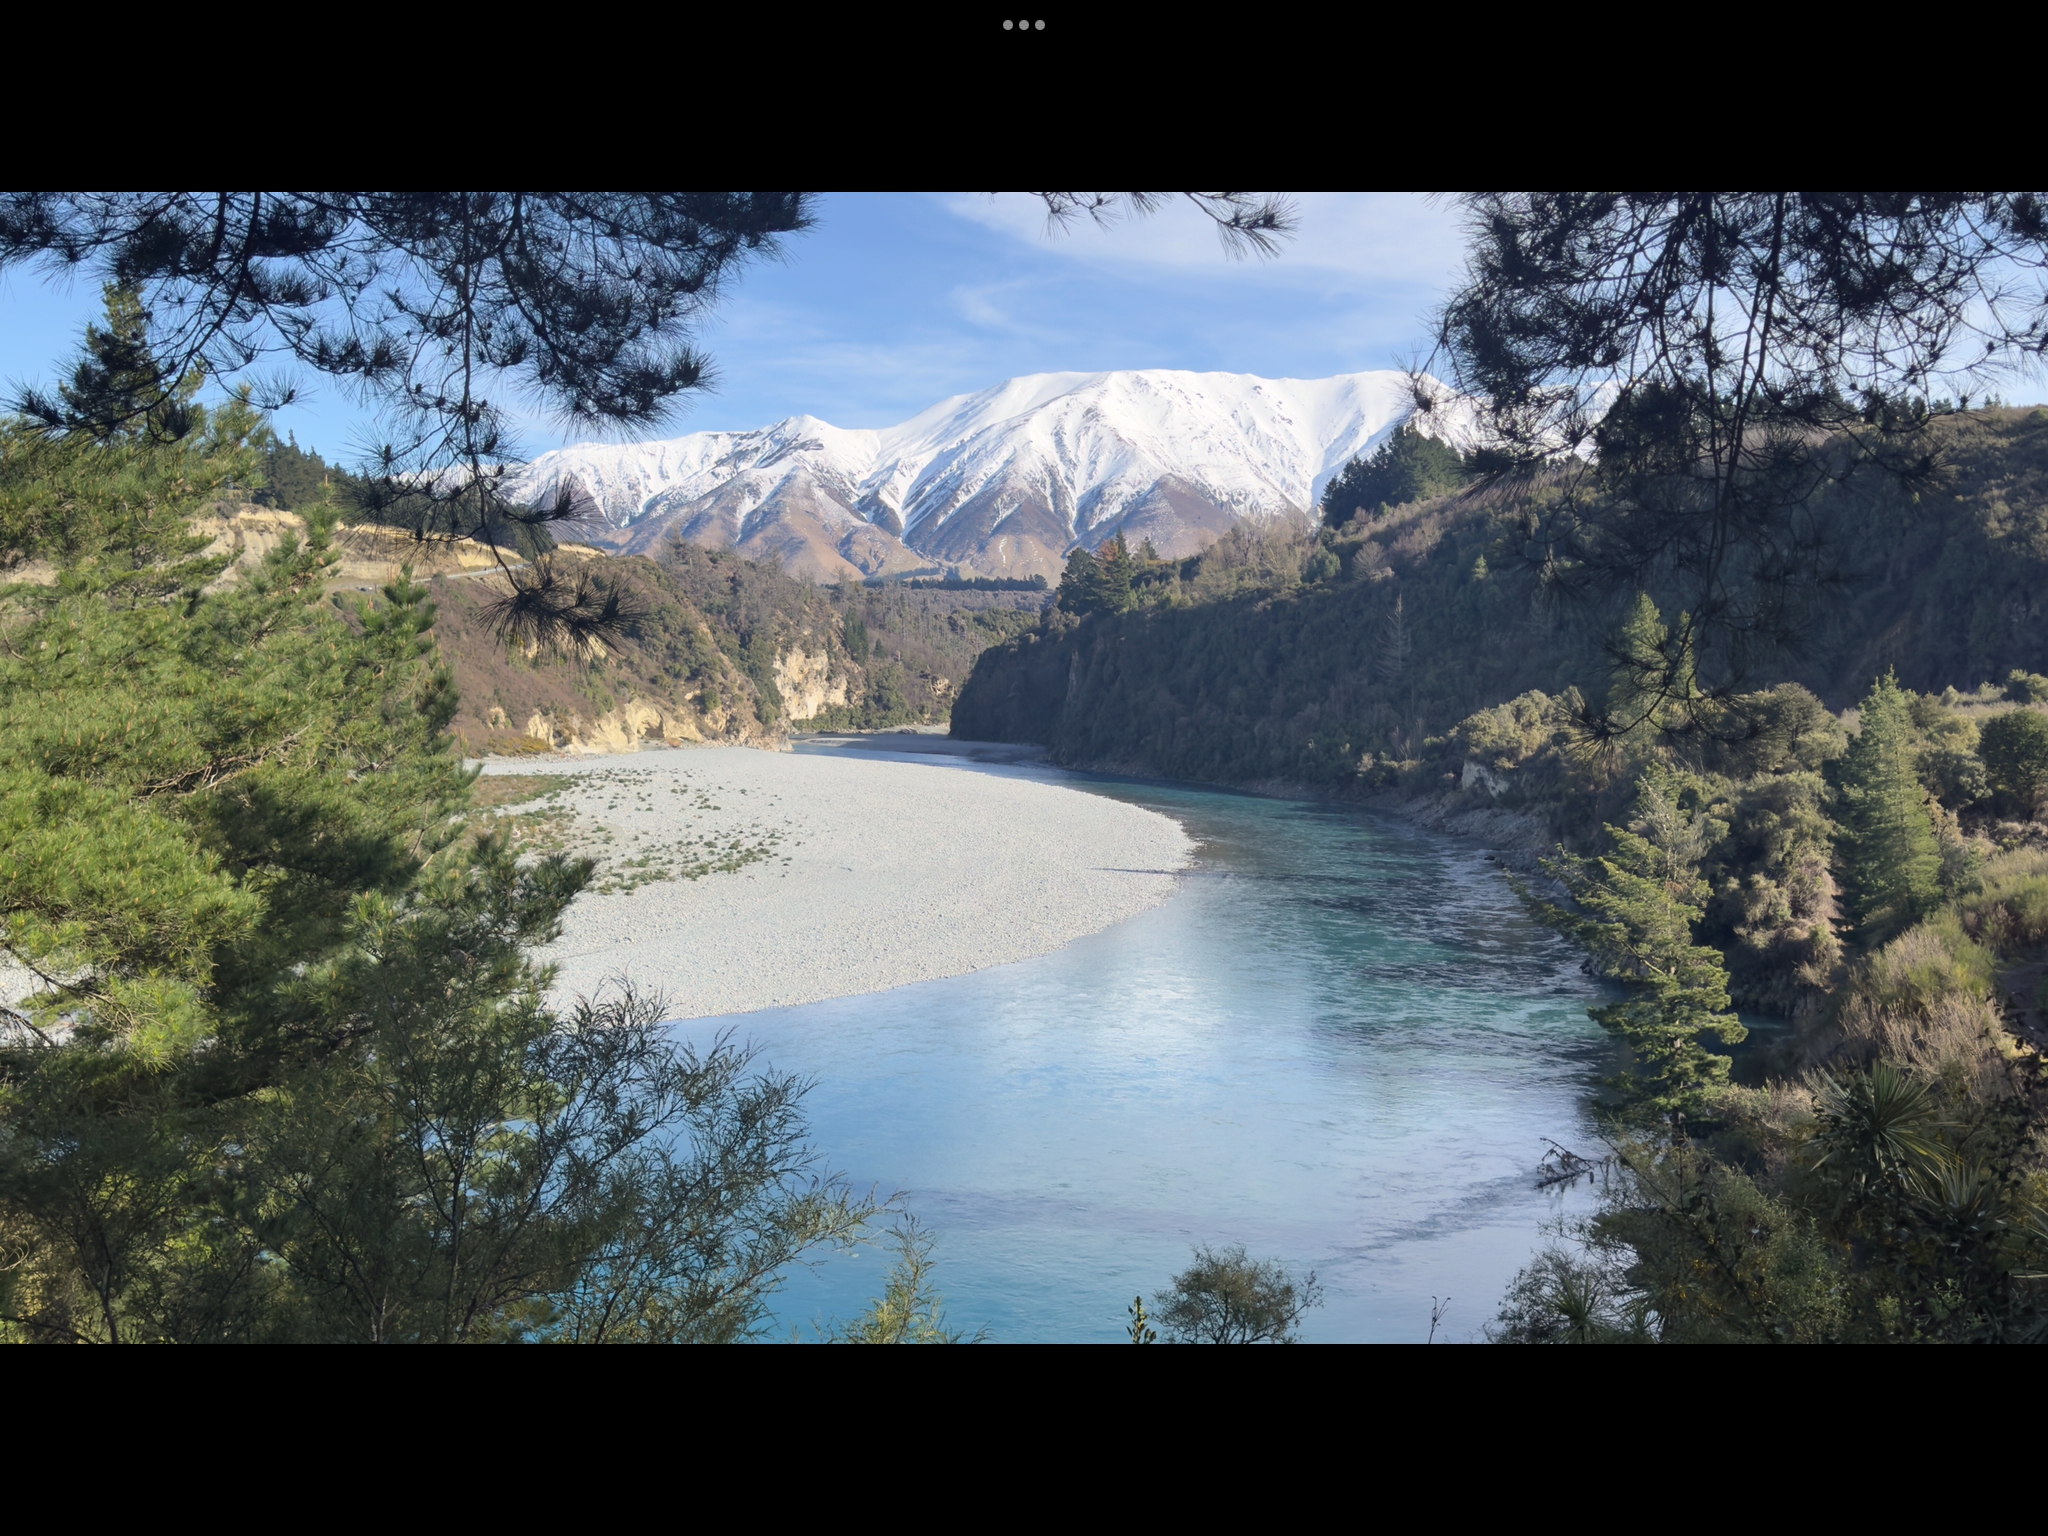
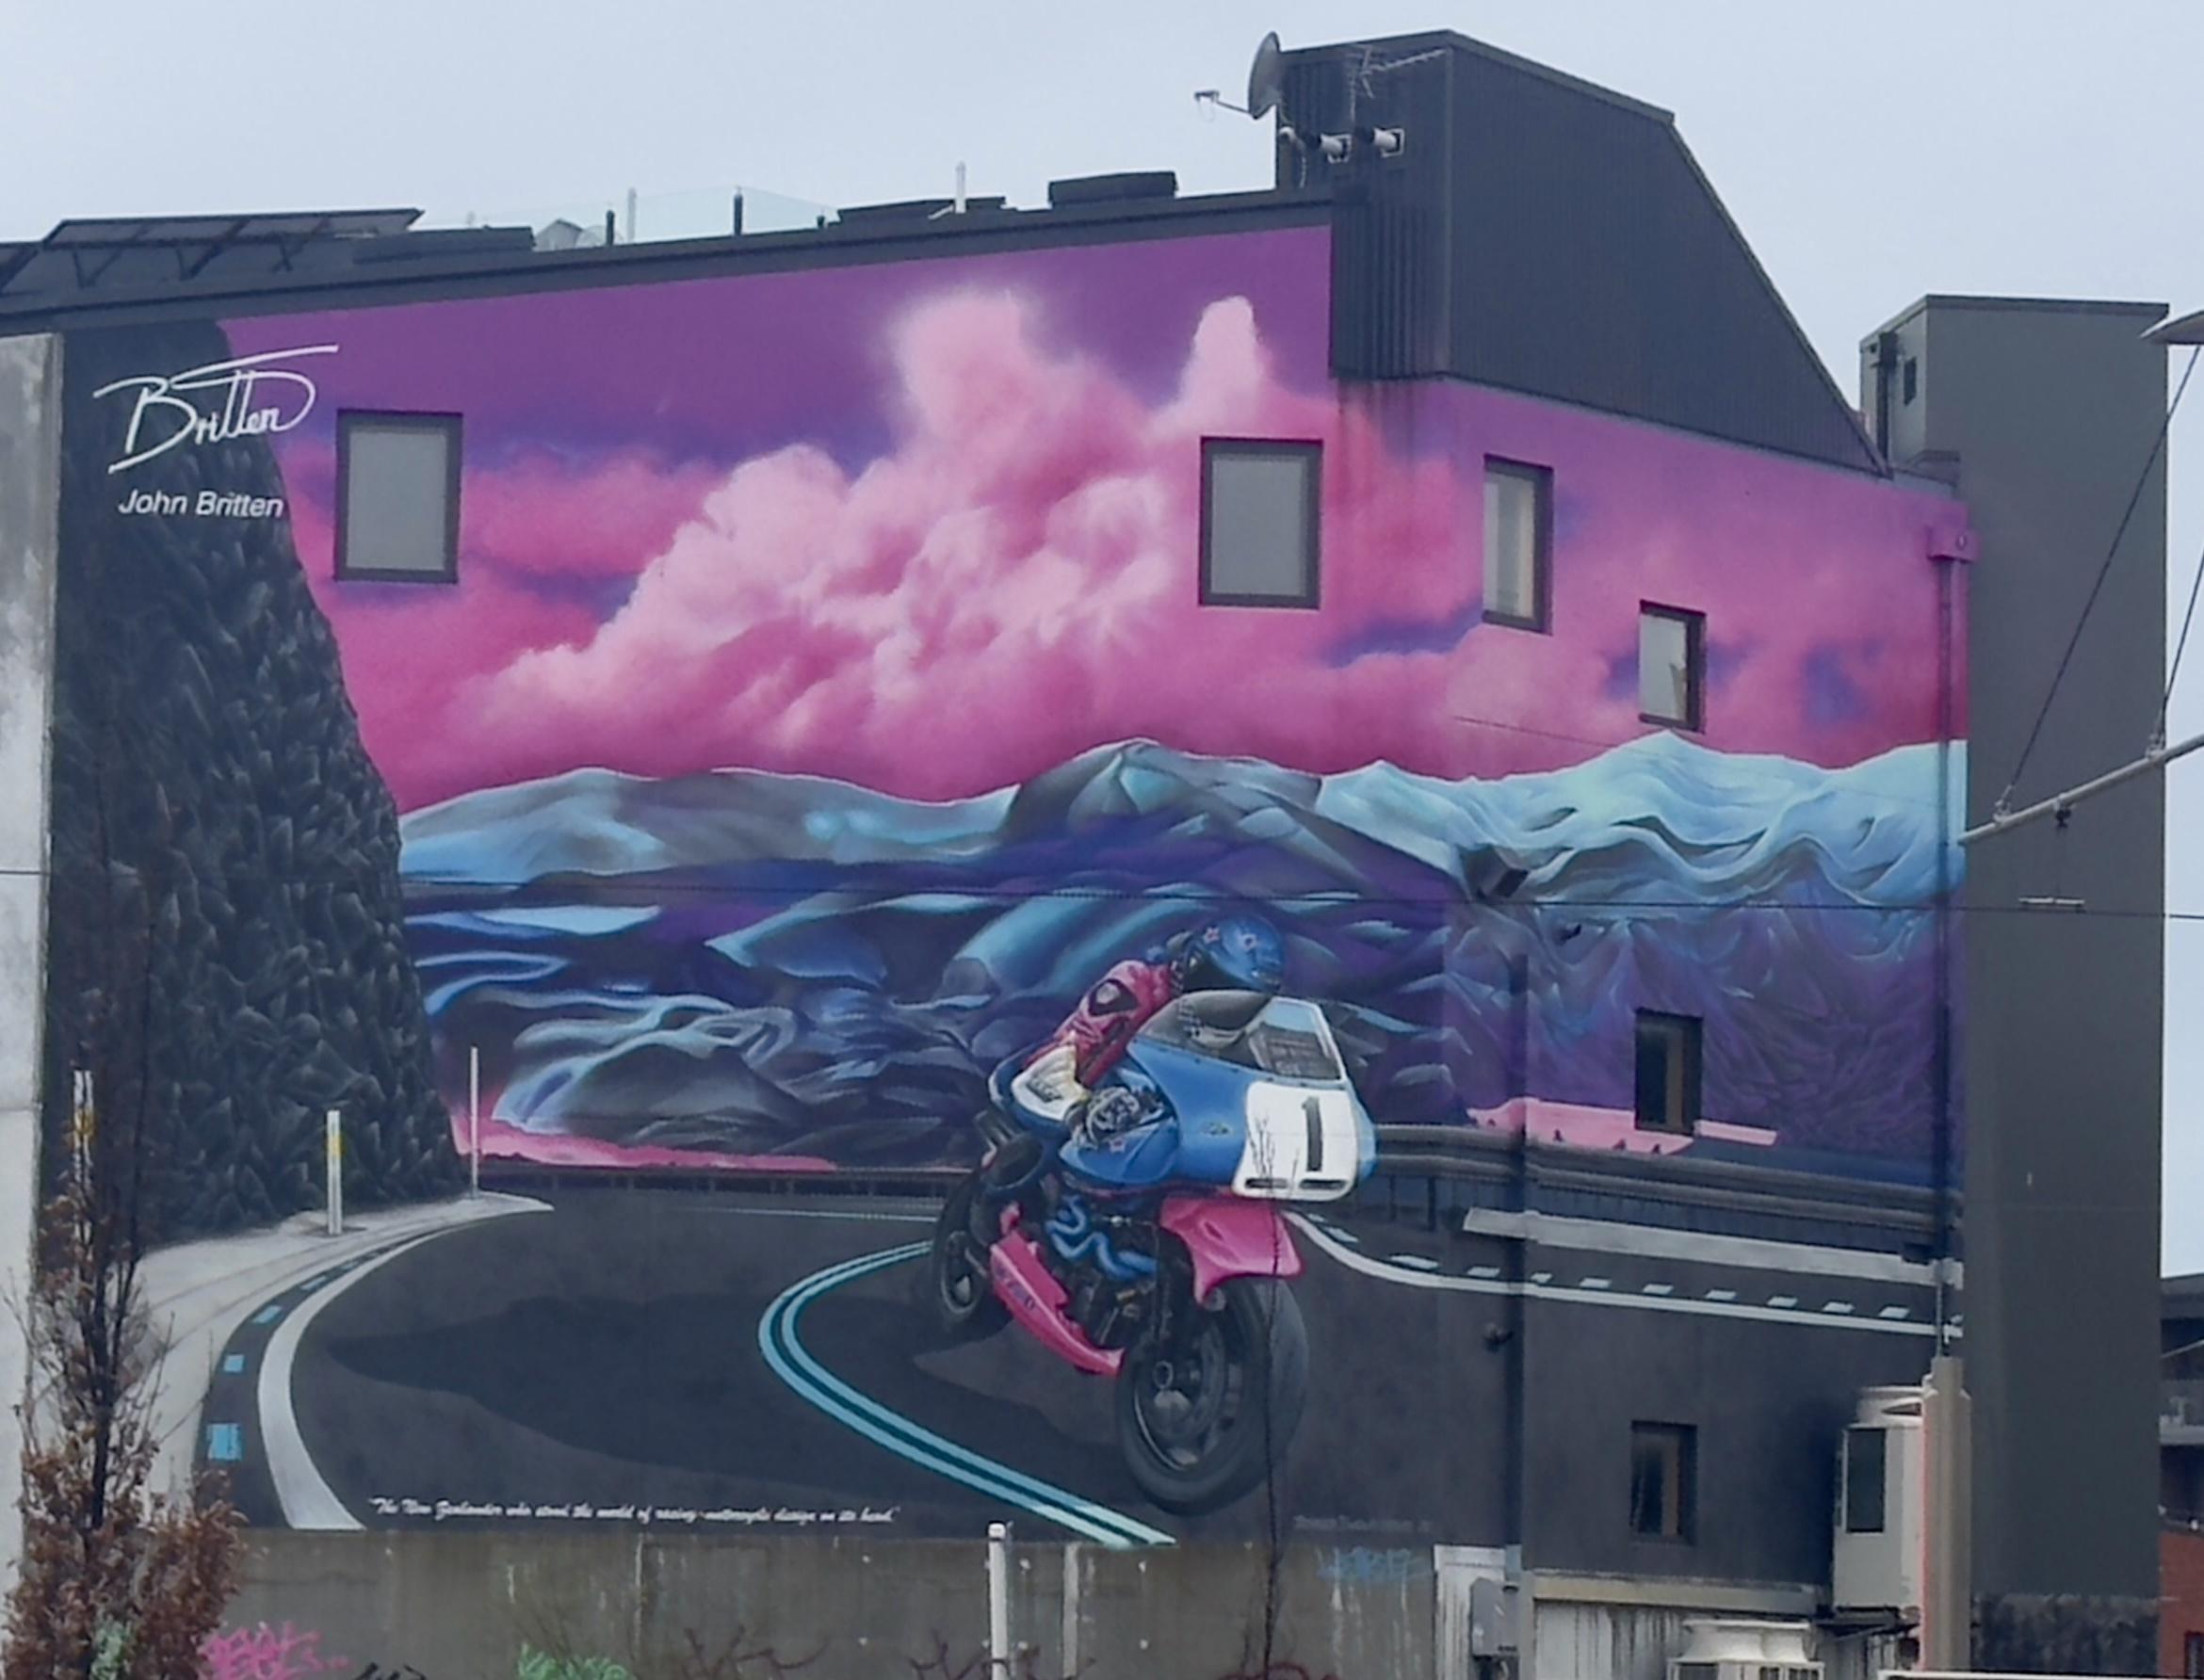
The weather in Townsville is not very good at the moment Grum, raining apparently. We are currently on another NZ holiday, can’t get enough of the place. Weather was cold and wet when we arrived but Sunday was glorious so we went for a “tramp” in the Rakaia gorge. Booked in to some hot pools today to recover. Came across this mural while in Christchurch.
7 points
-
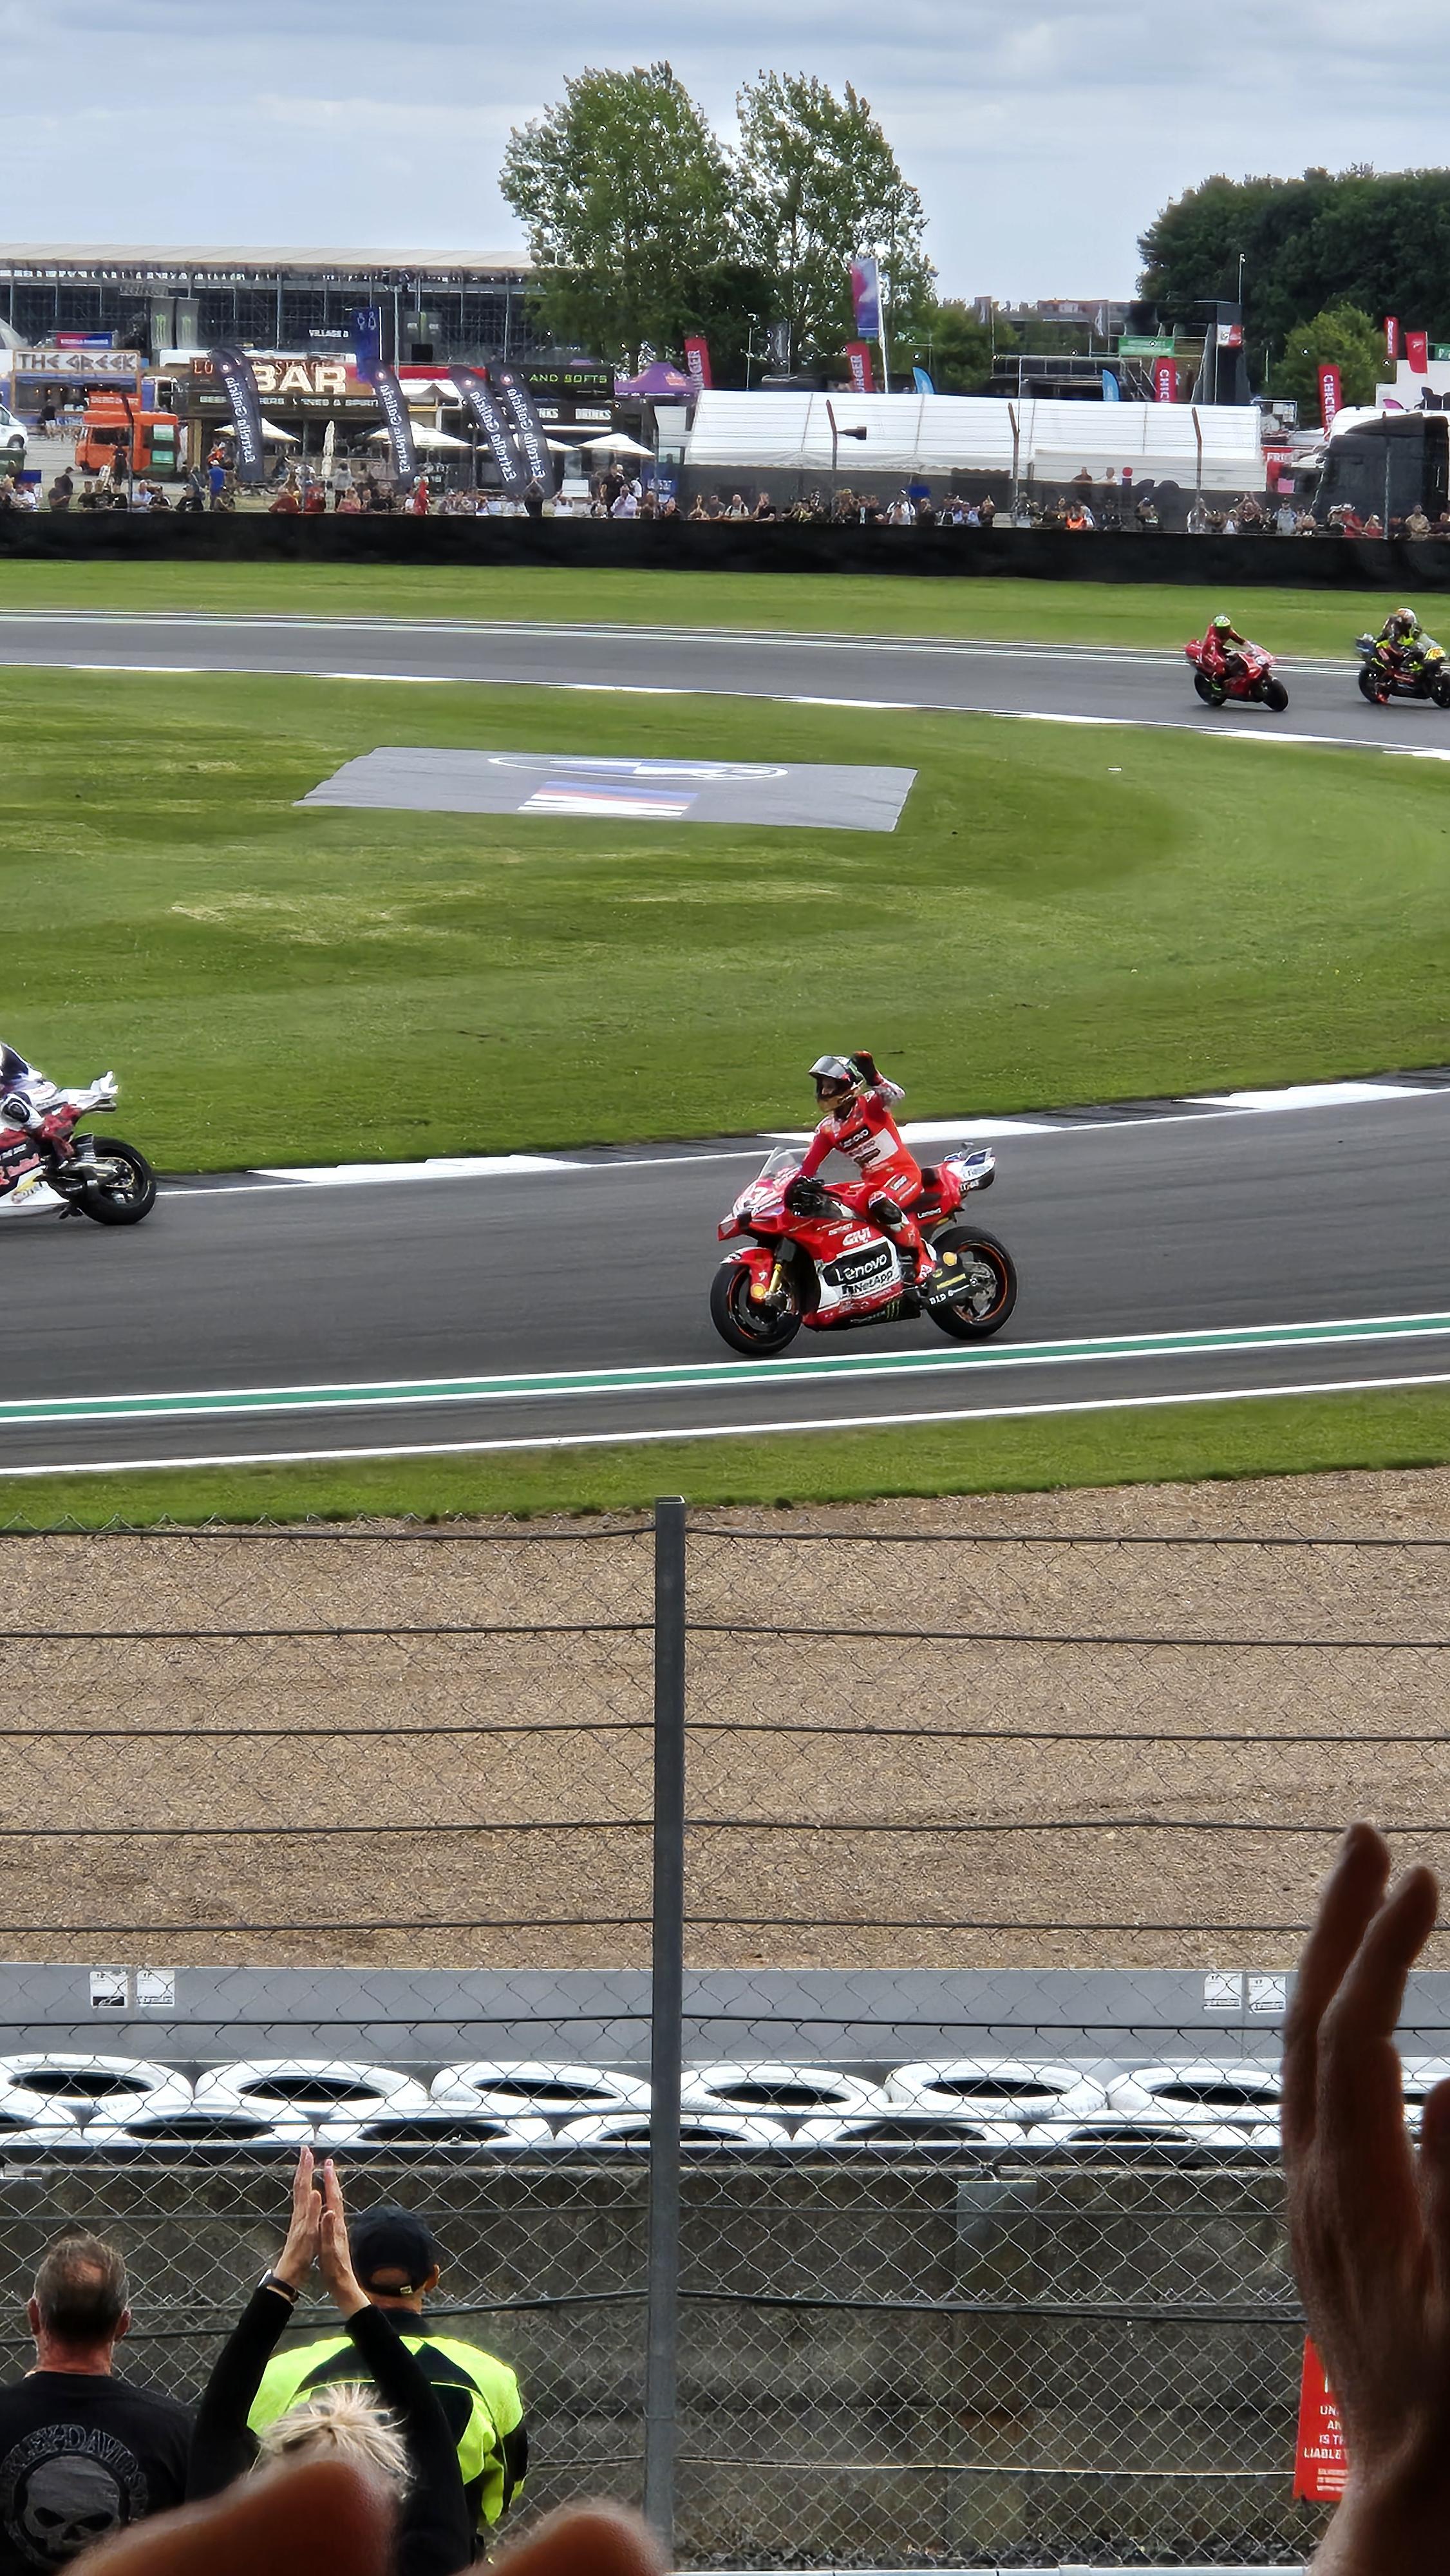
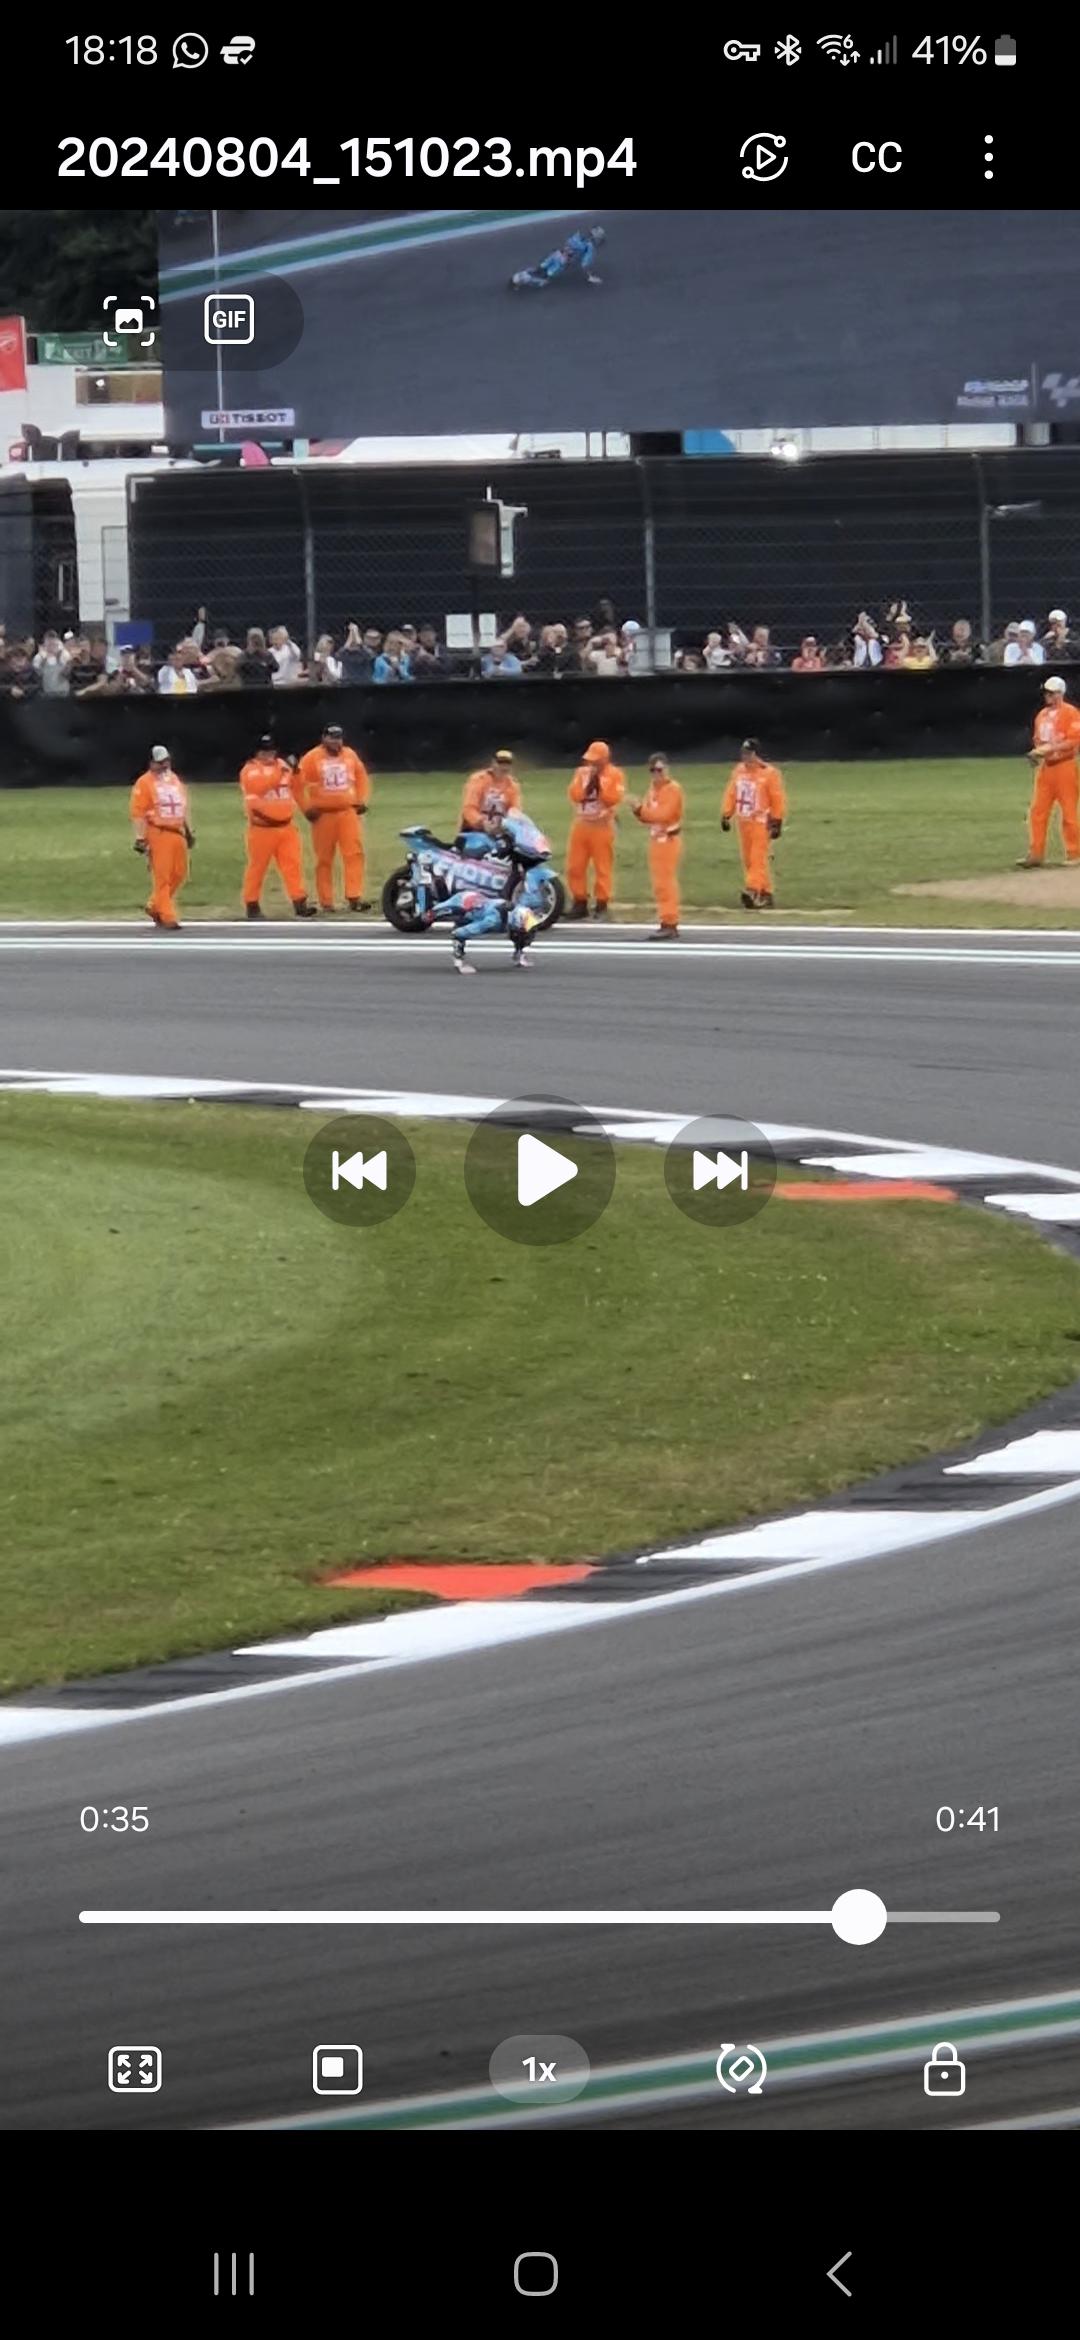
Thanks to my wonderful family, I was given 2 tickets to Silverstone for today's races, rode over with my son on his CB1000. Perfect day for it and some great racing with the best result possible in the Moto 2.
7 points
-
I thought I would have a go at the camchain tensioner pre-loading. I gave both tensioners two additional turns, as expected the back one was easy, the front was a little challenging as I left the tank in place and just pushed the hoses aside. A little nerve wracking as it took a little manoevering to get it clear of the hoses, but we got there. And guess what...it is about 95% better. I'm wondering if a decent starter valve synch might get rid of the last bit of clatter? I think that the front tensioner spring end had come out of its slot in the end of the tensioner. Did a bit more polishing on bolt heads polished the heat shield and repainted the passenger peg brackets. Not sure the PO would recognise this bike now. Don't tell the missus, but the Mancave is looking a little crowded now...
7 points


.jpg.626a52e5c41b0b450a13bed7311223bd.jpg)
b.jpg.62d00799d49817d15d880137d76e97d9.jpg)
b.jpg.d2d0d4b0adac8db159639cf6db93a31d.jpg)
.jpg.814de0b0fc1efb2c82ec310523854014.jpg)
b.jpg.d9371ab88186ede3b8a6931f02bb24a4.jpg)
b.jpg.f45d97241d5677d90b2678da71c9af32.jpg)


.jpg.d00c2fad62fc7395f6ec7b63c5f8d5b1.jpg)
.jpg.0f81a8e855ec007a0d7ce426d81a5cec.jpg)
.jpg.9e150109c1e2d1aef1bc1a1757223ede.jpg)
.jpg.de818d0ac2d67c7e6210818ac23cd0e4.jpg)
.jpg.448a82cbbcc79187dd605d82e6b5053a.jpg)