Leaderboard


Popular Content
Showing content with the highest reputation since 07/05/2025 in all areas
-
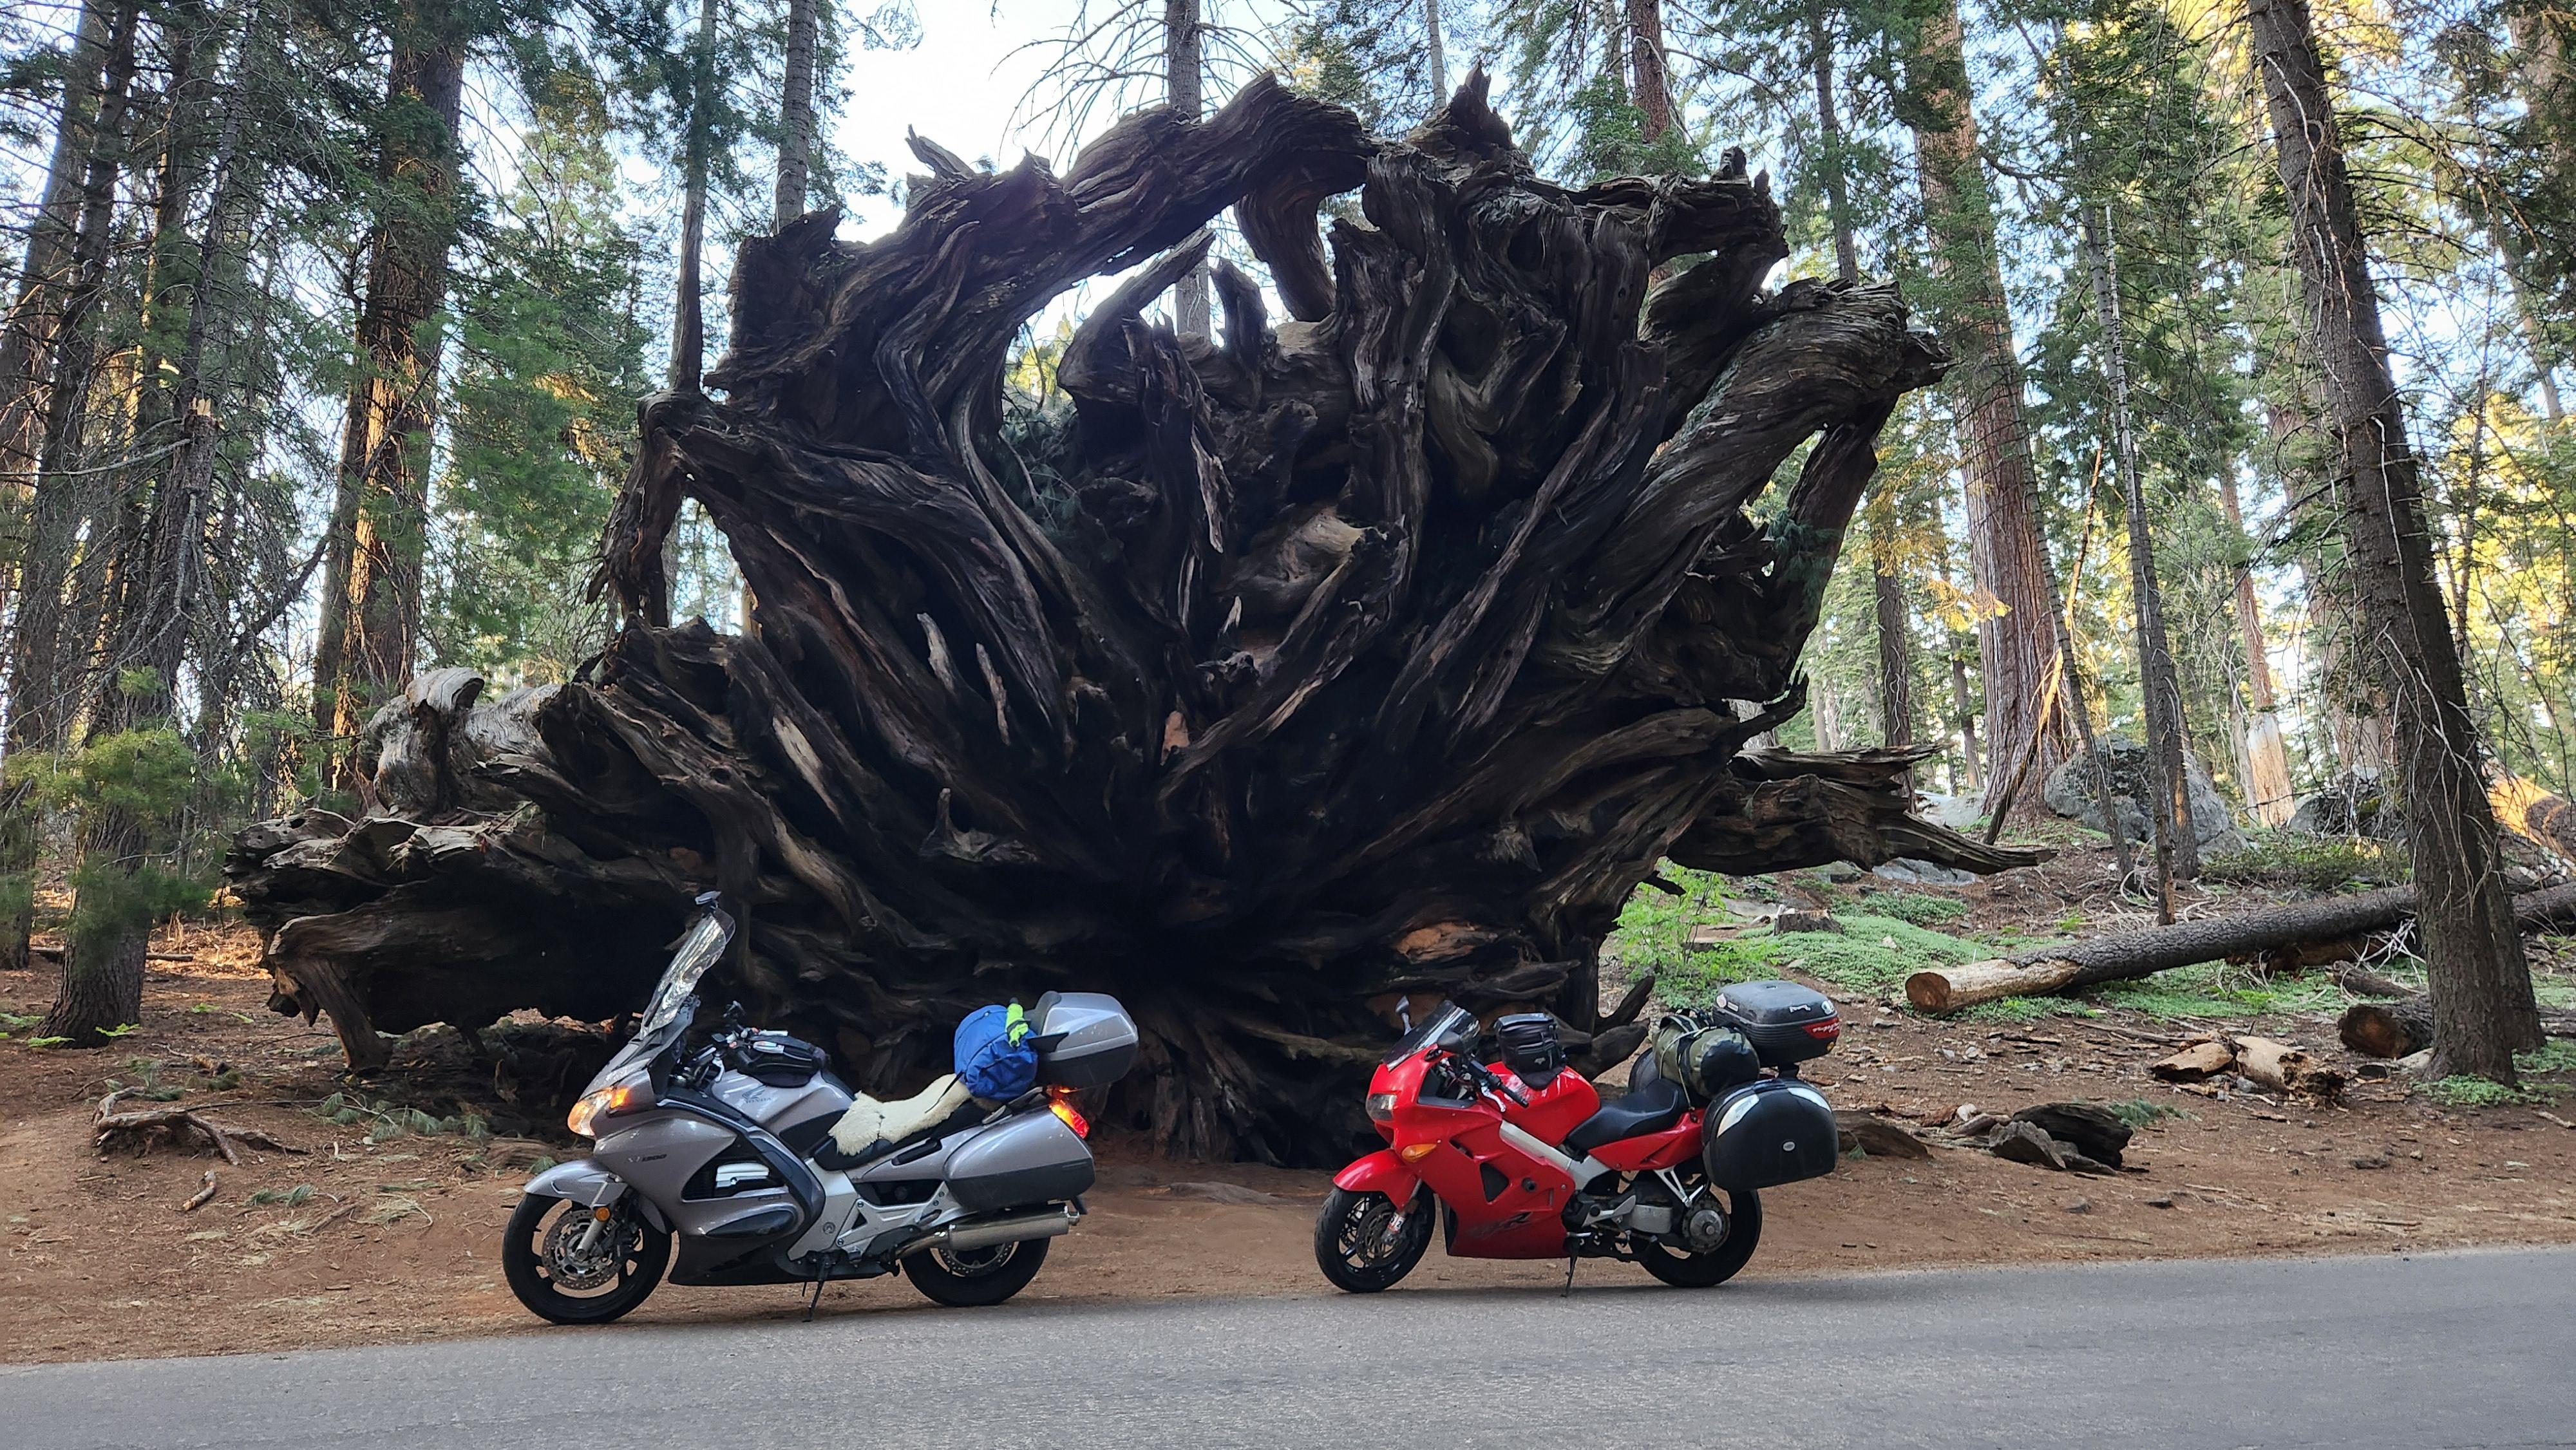
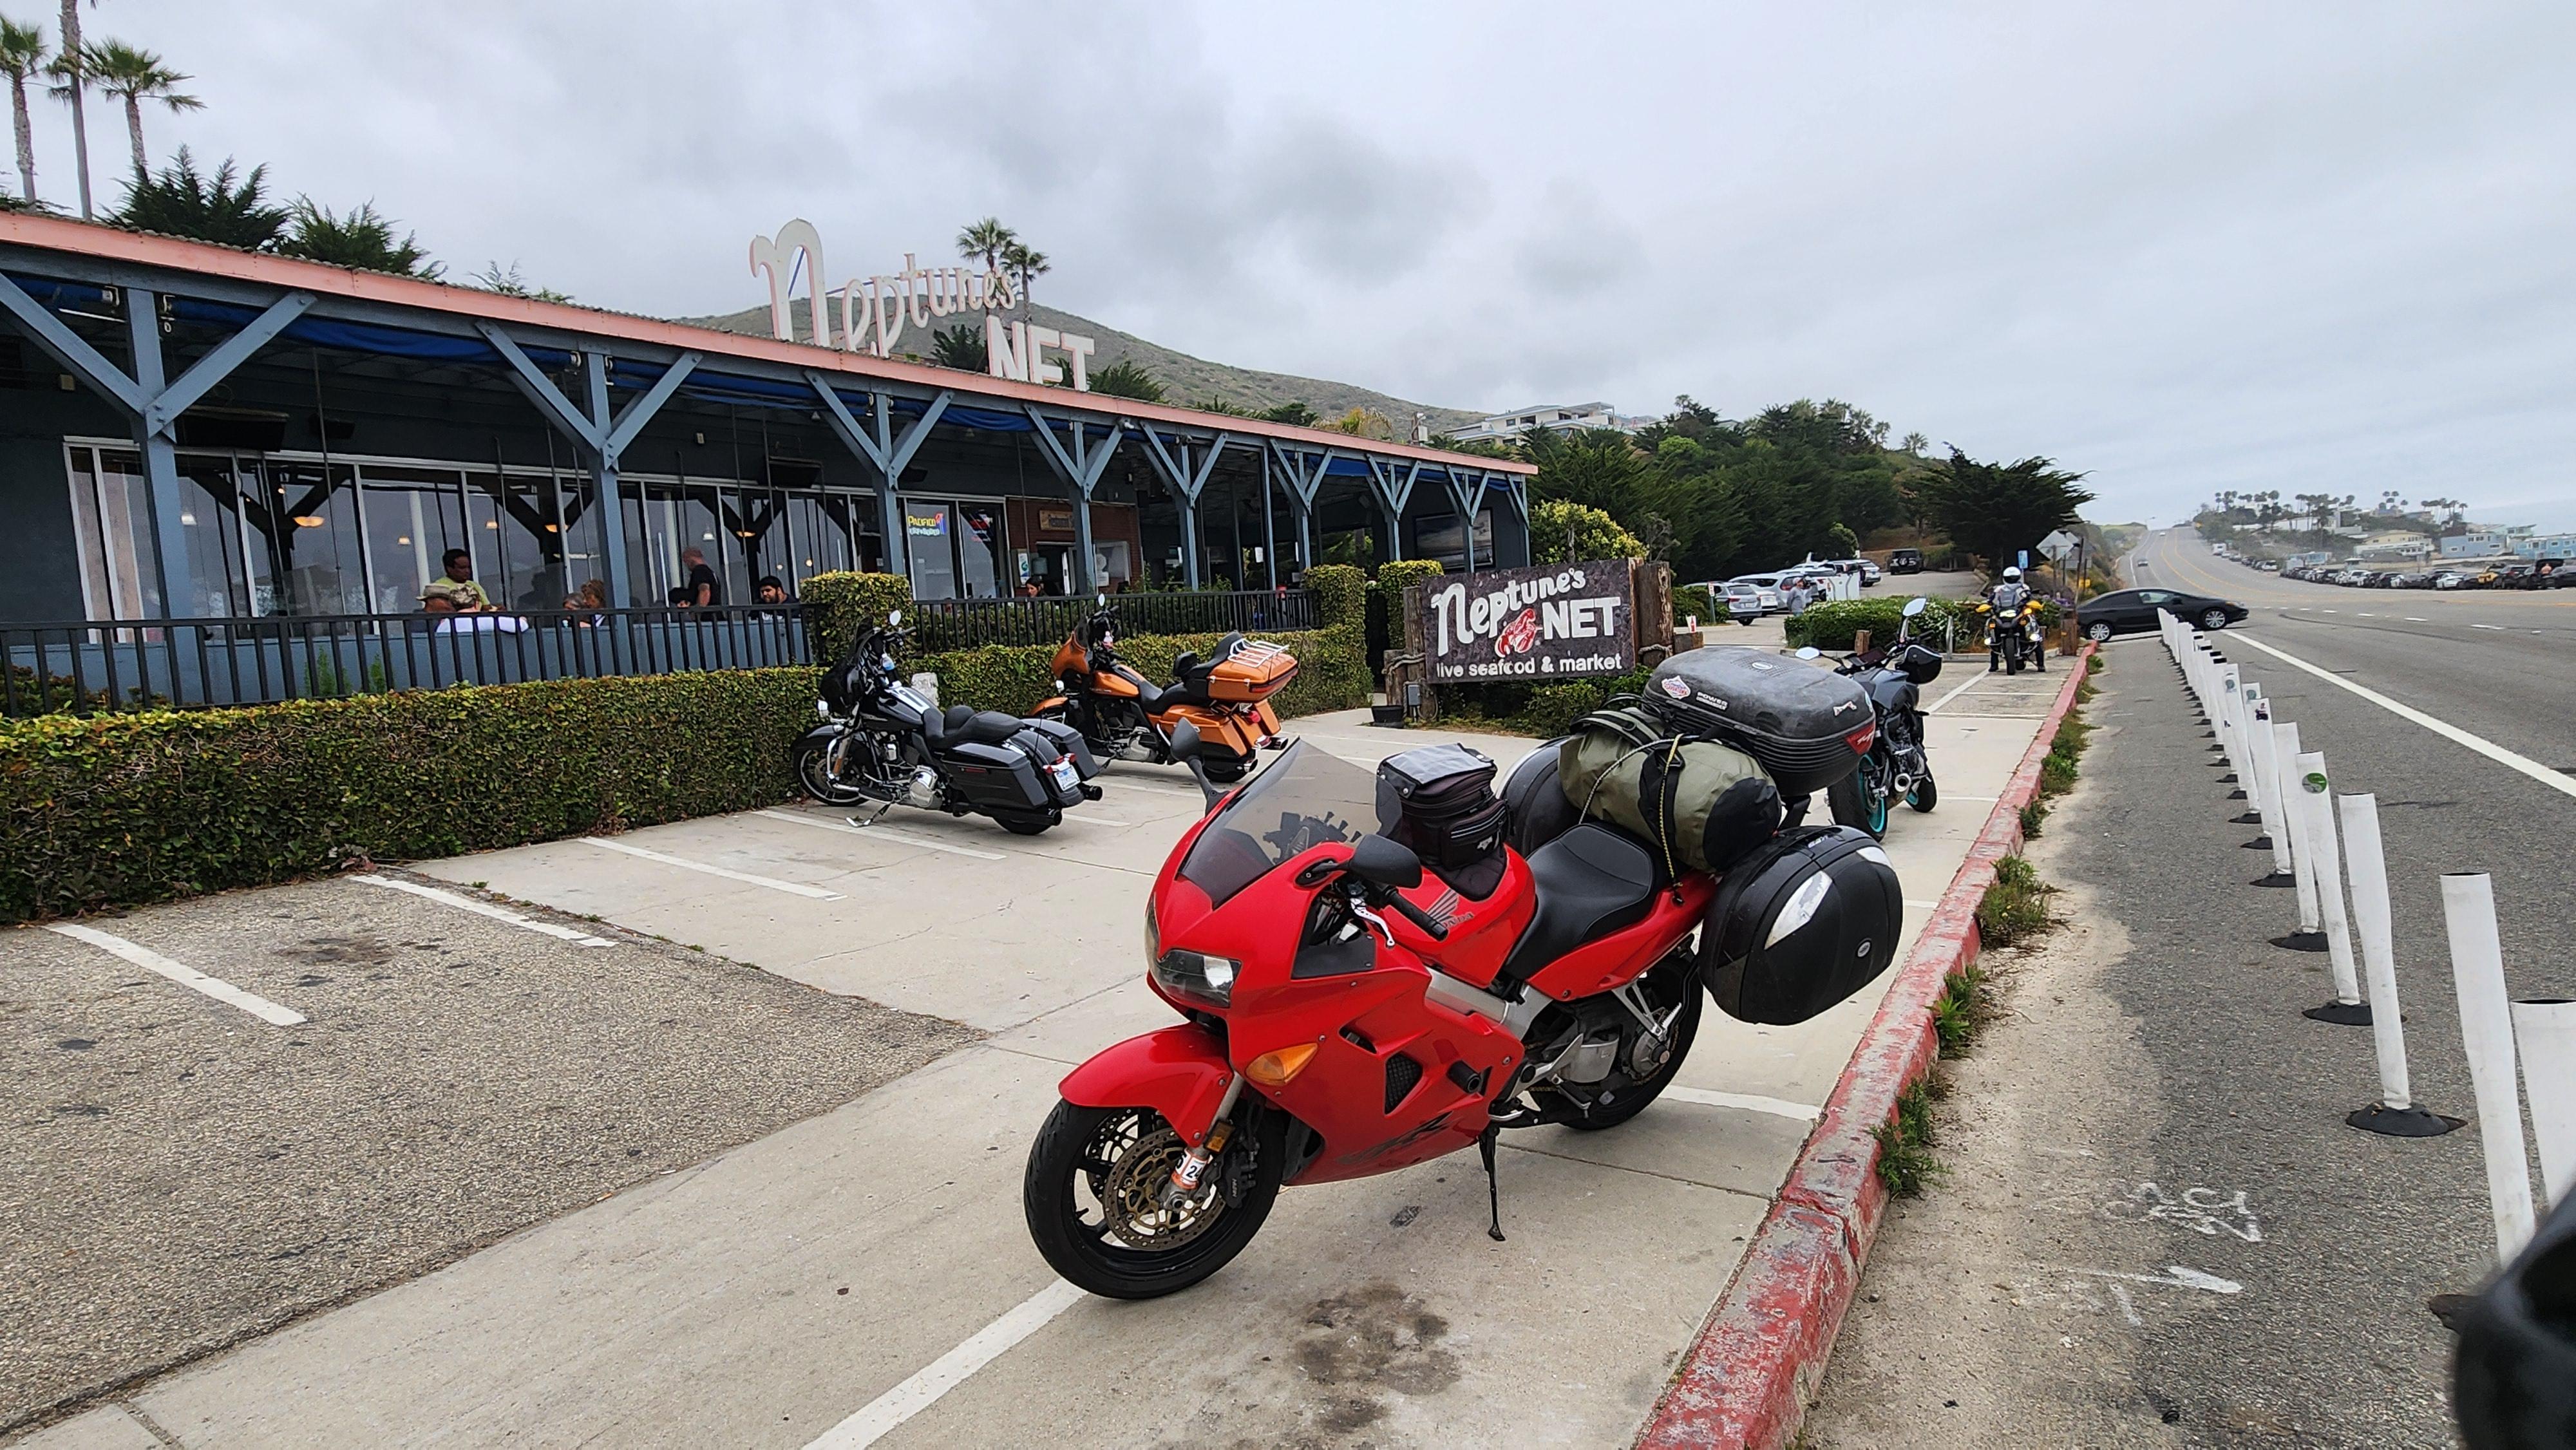
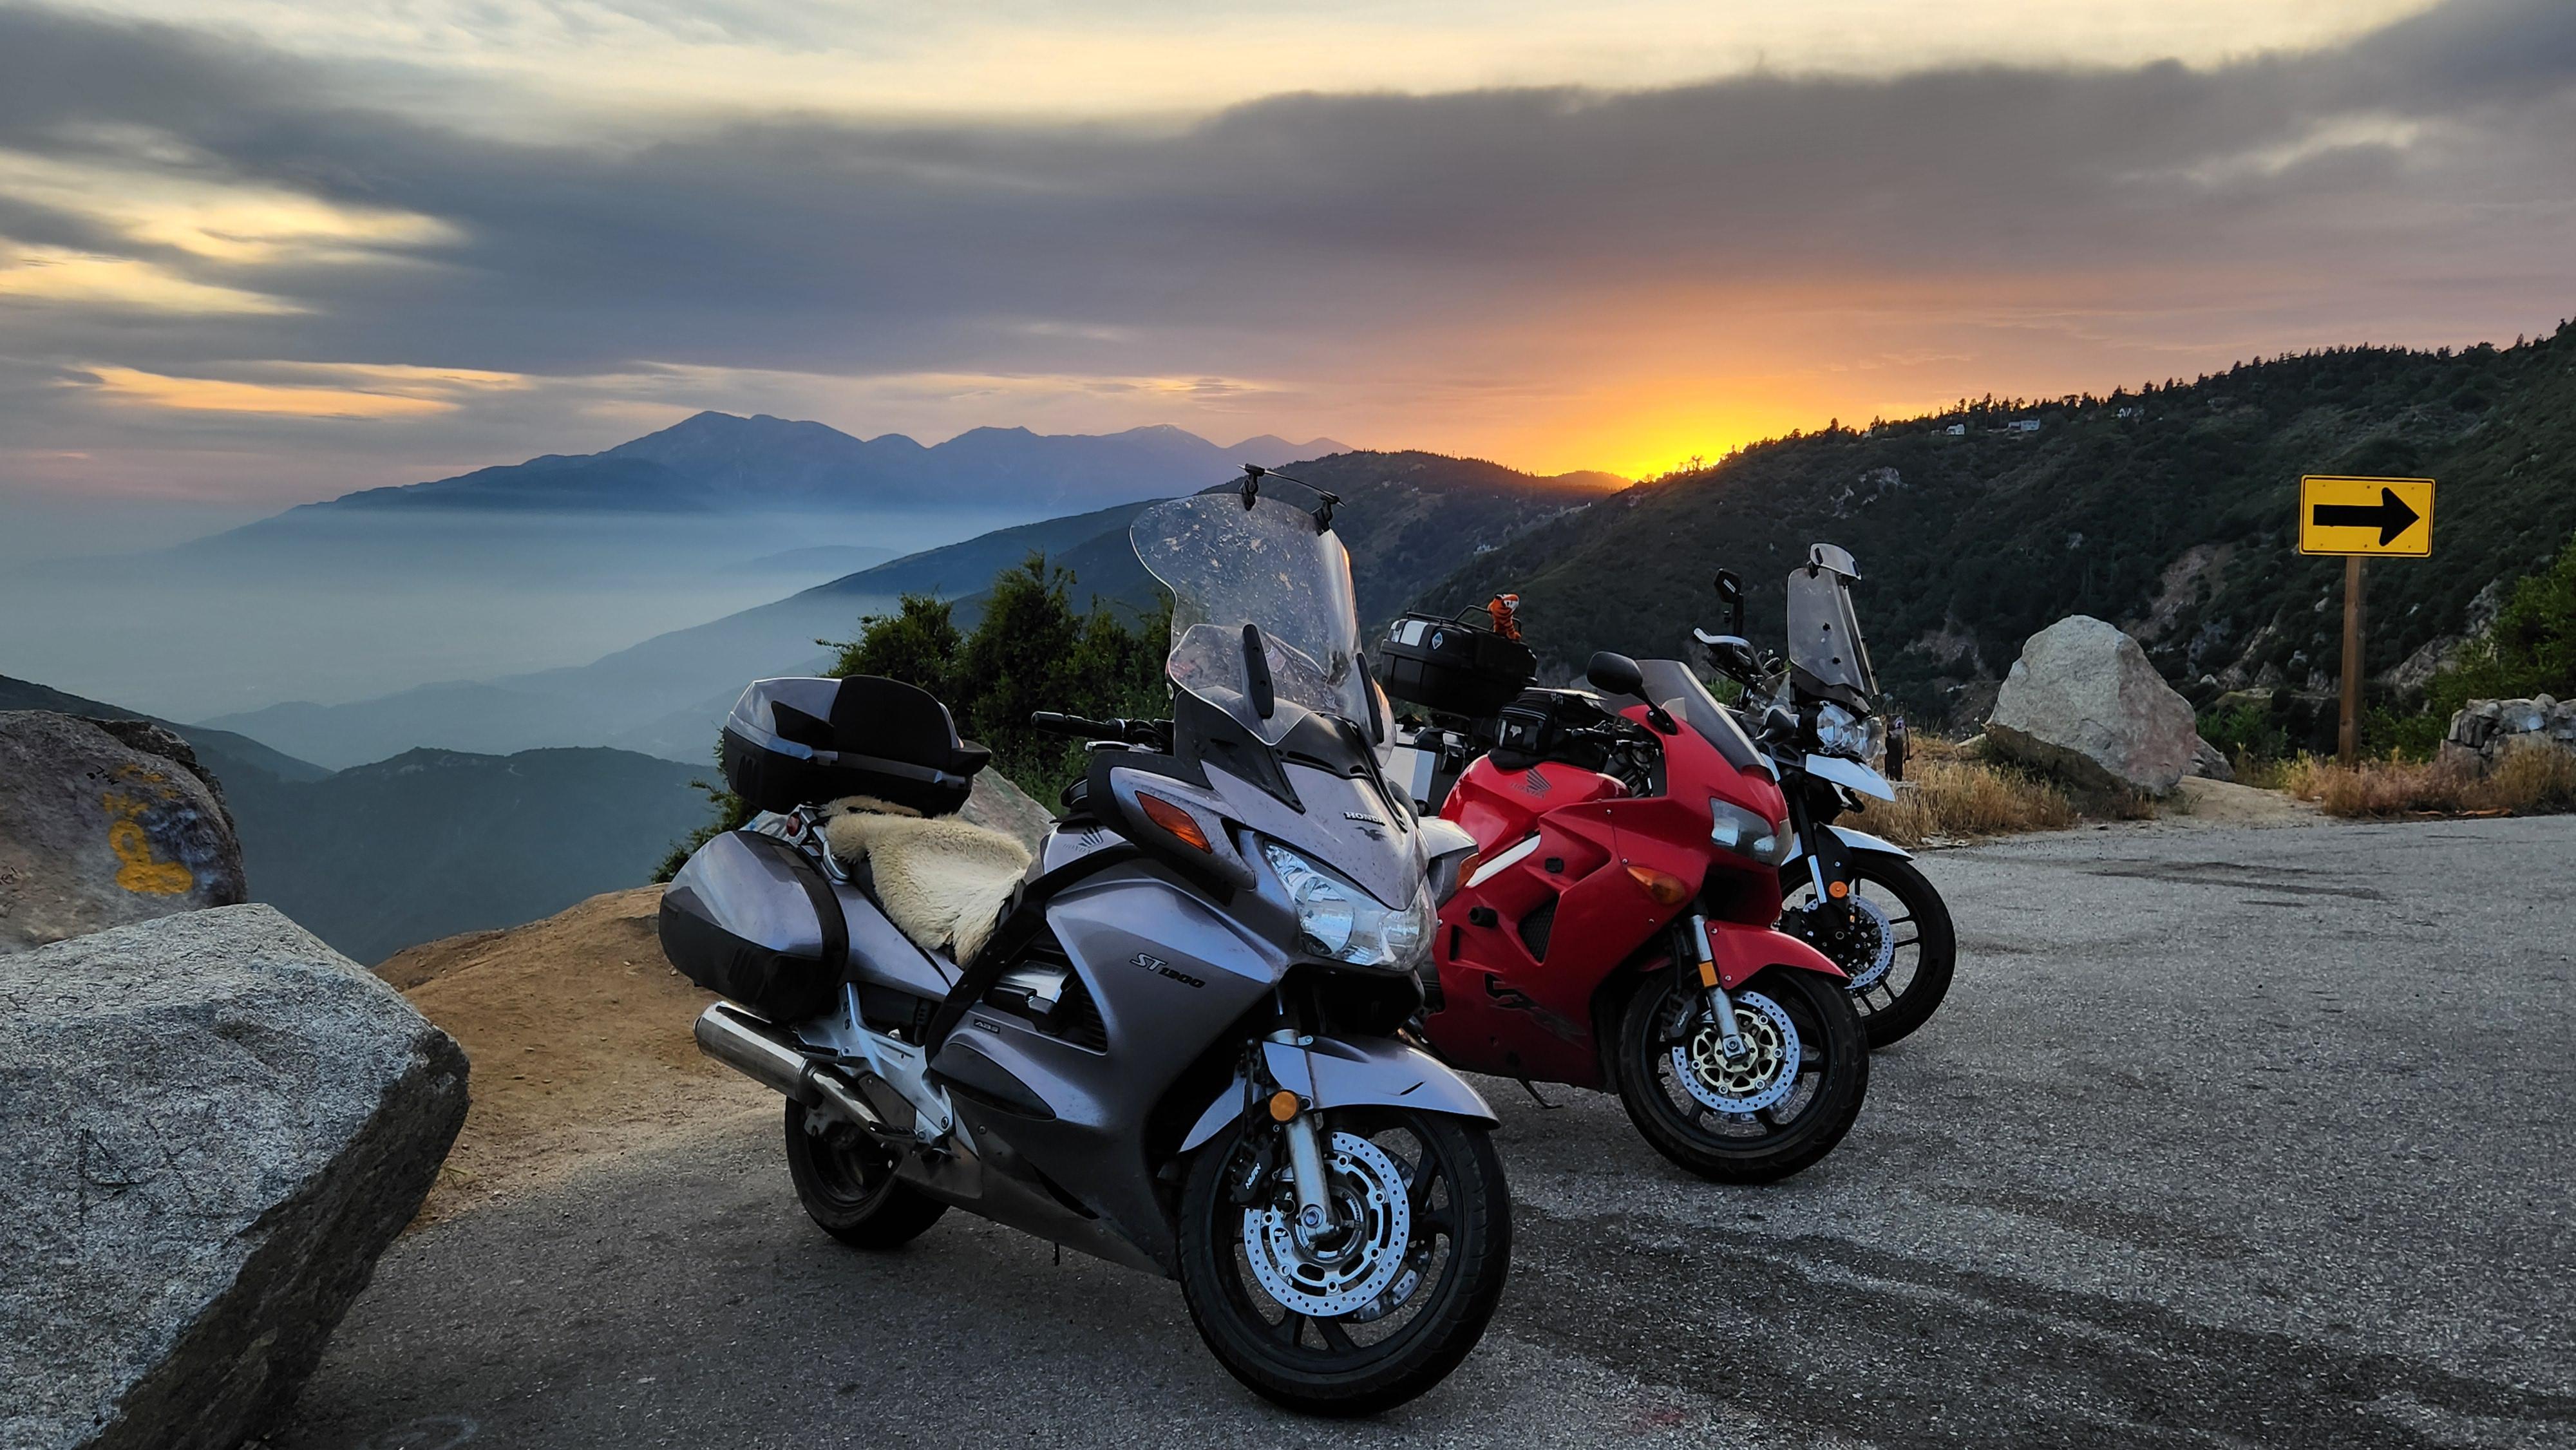
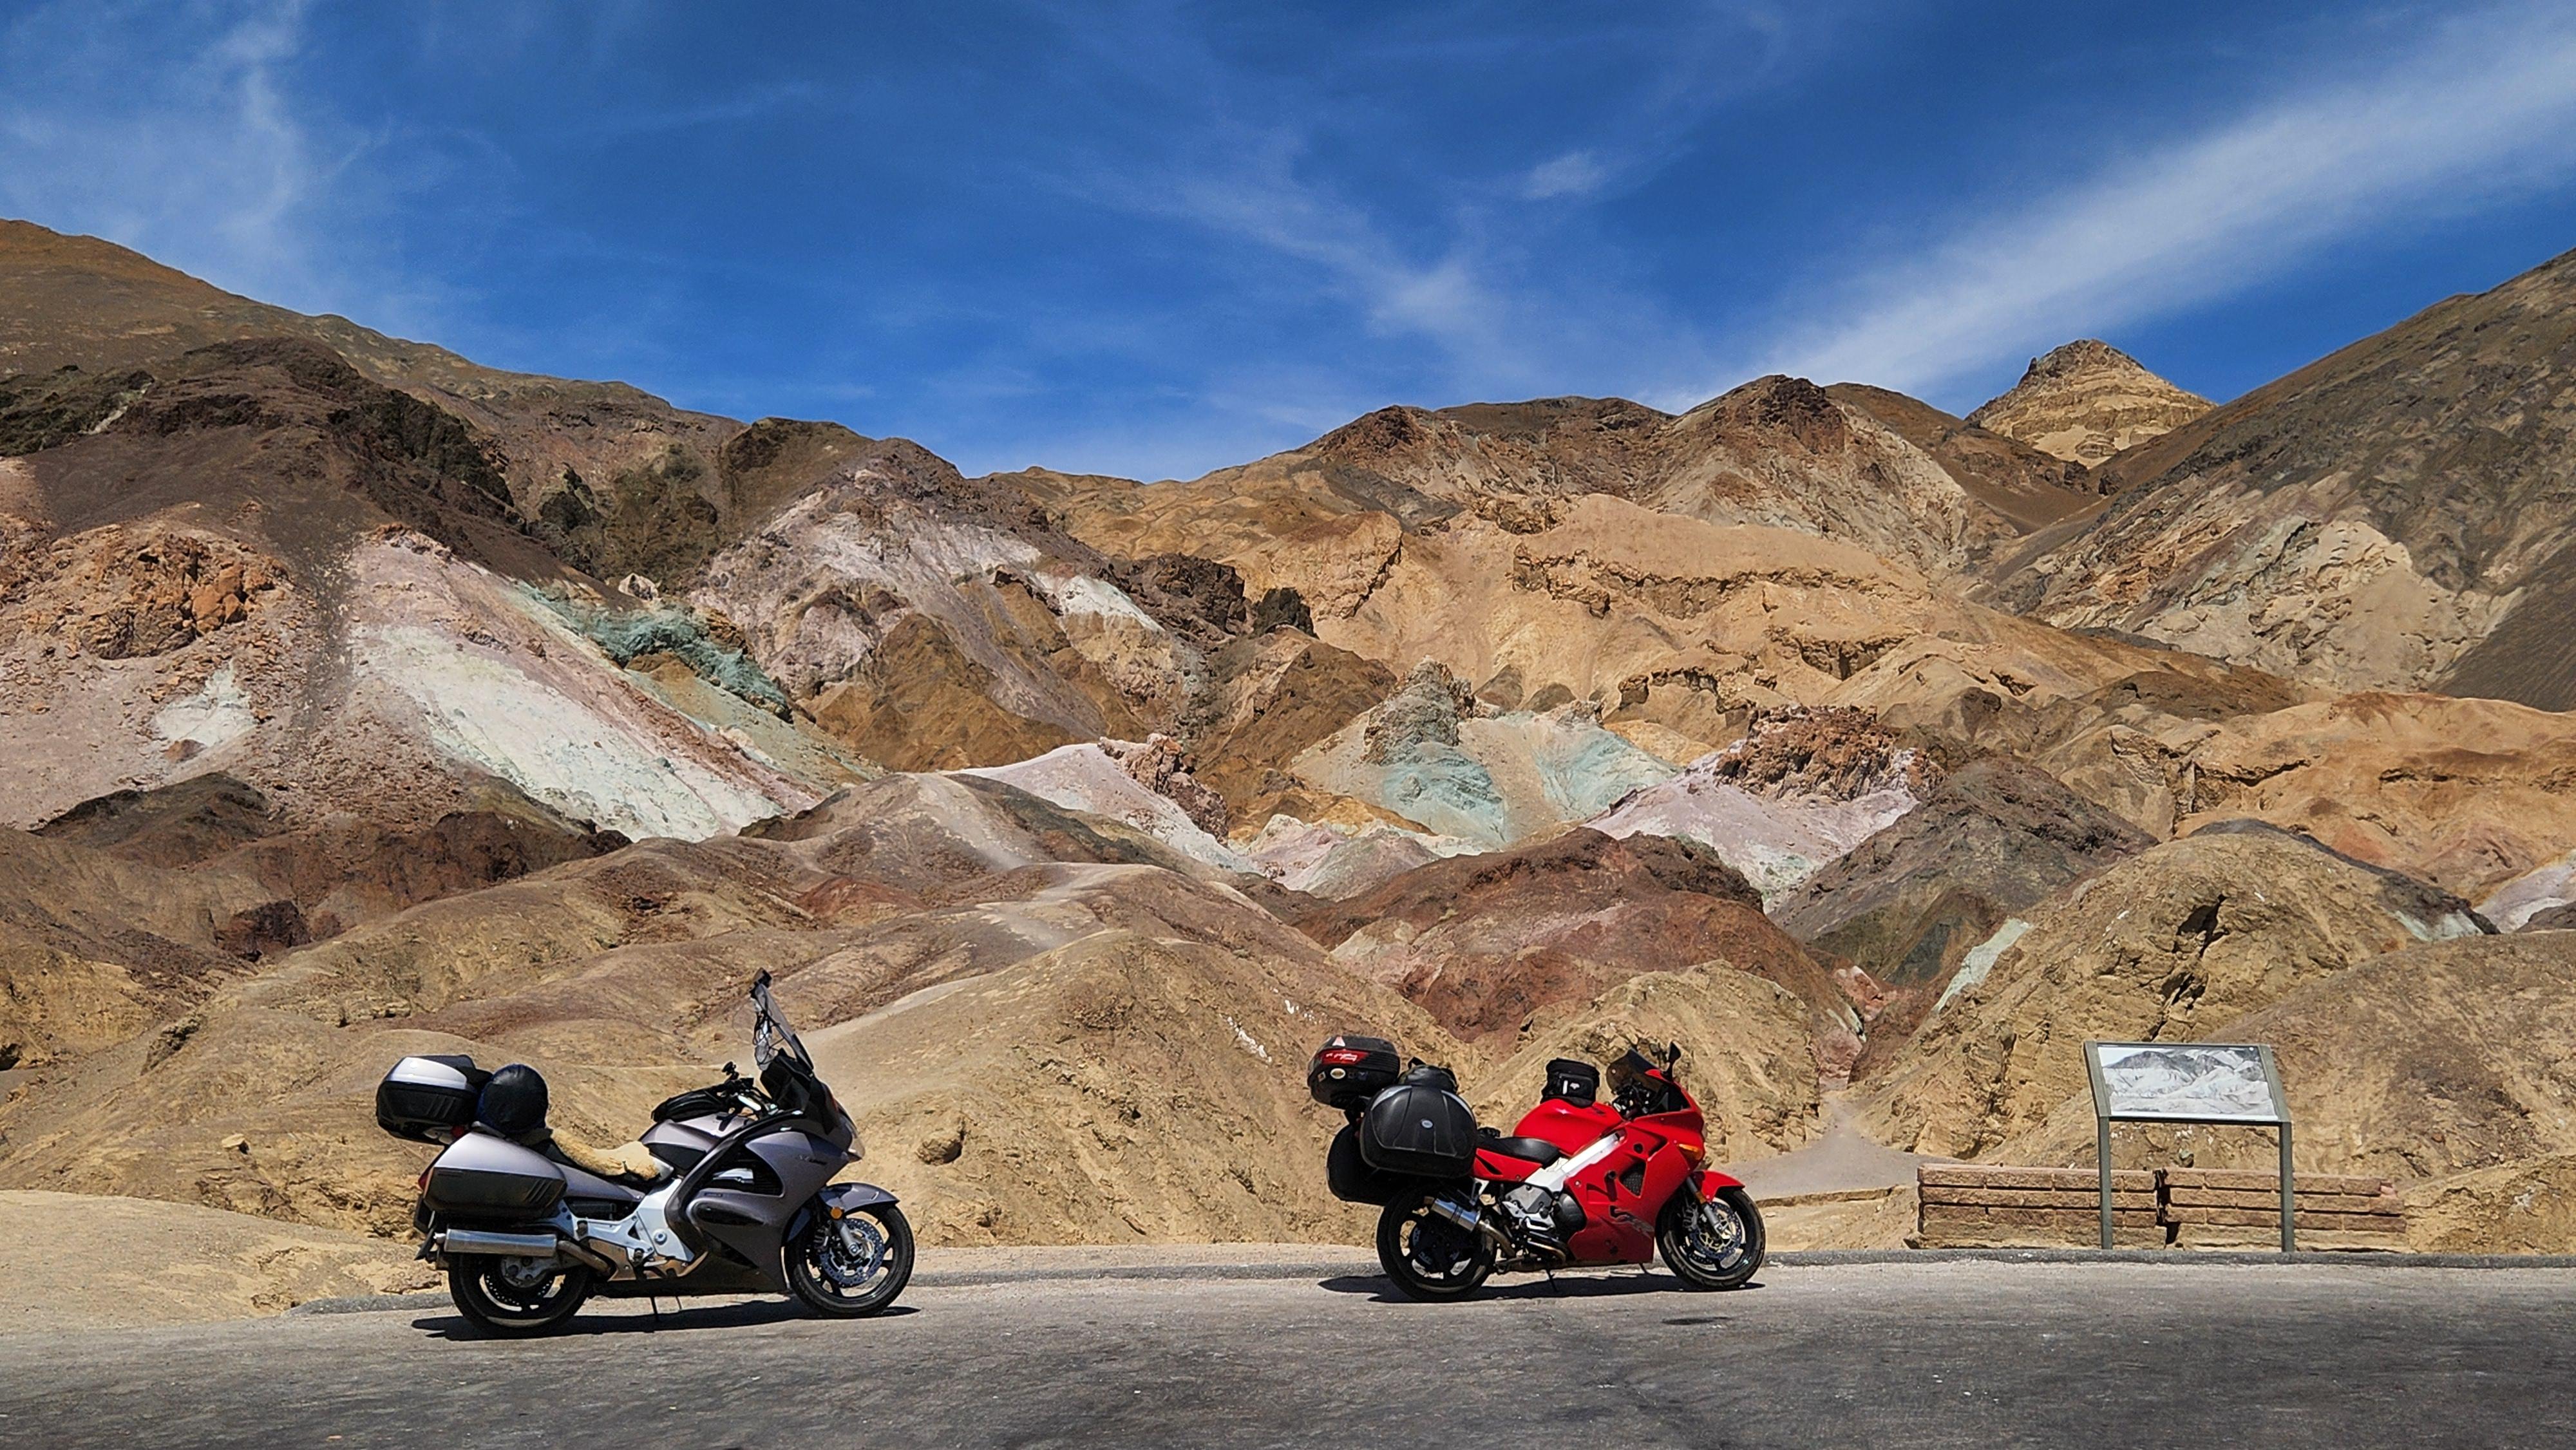
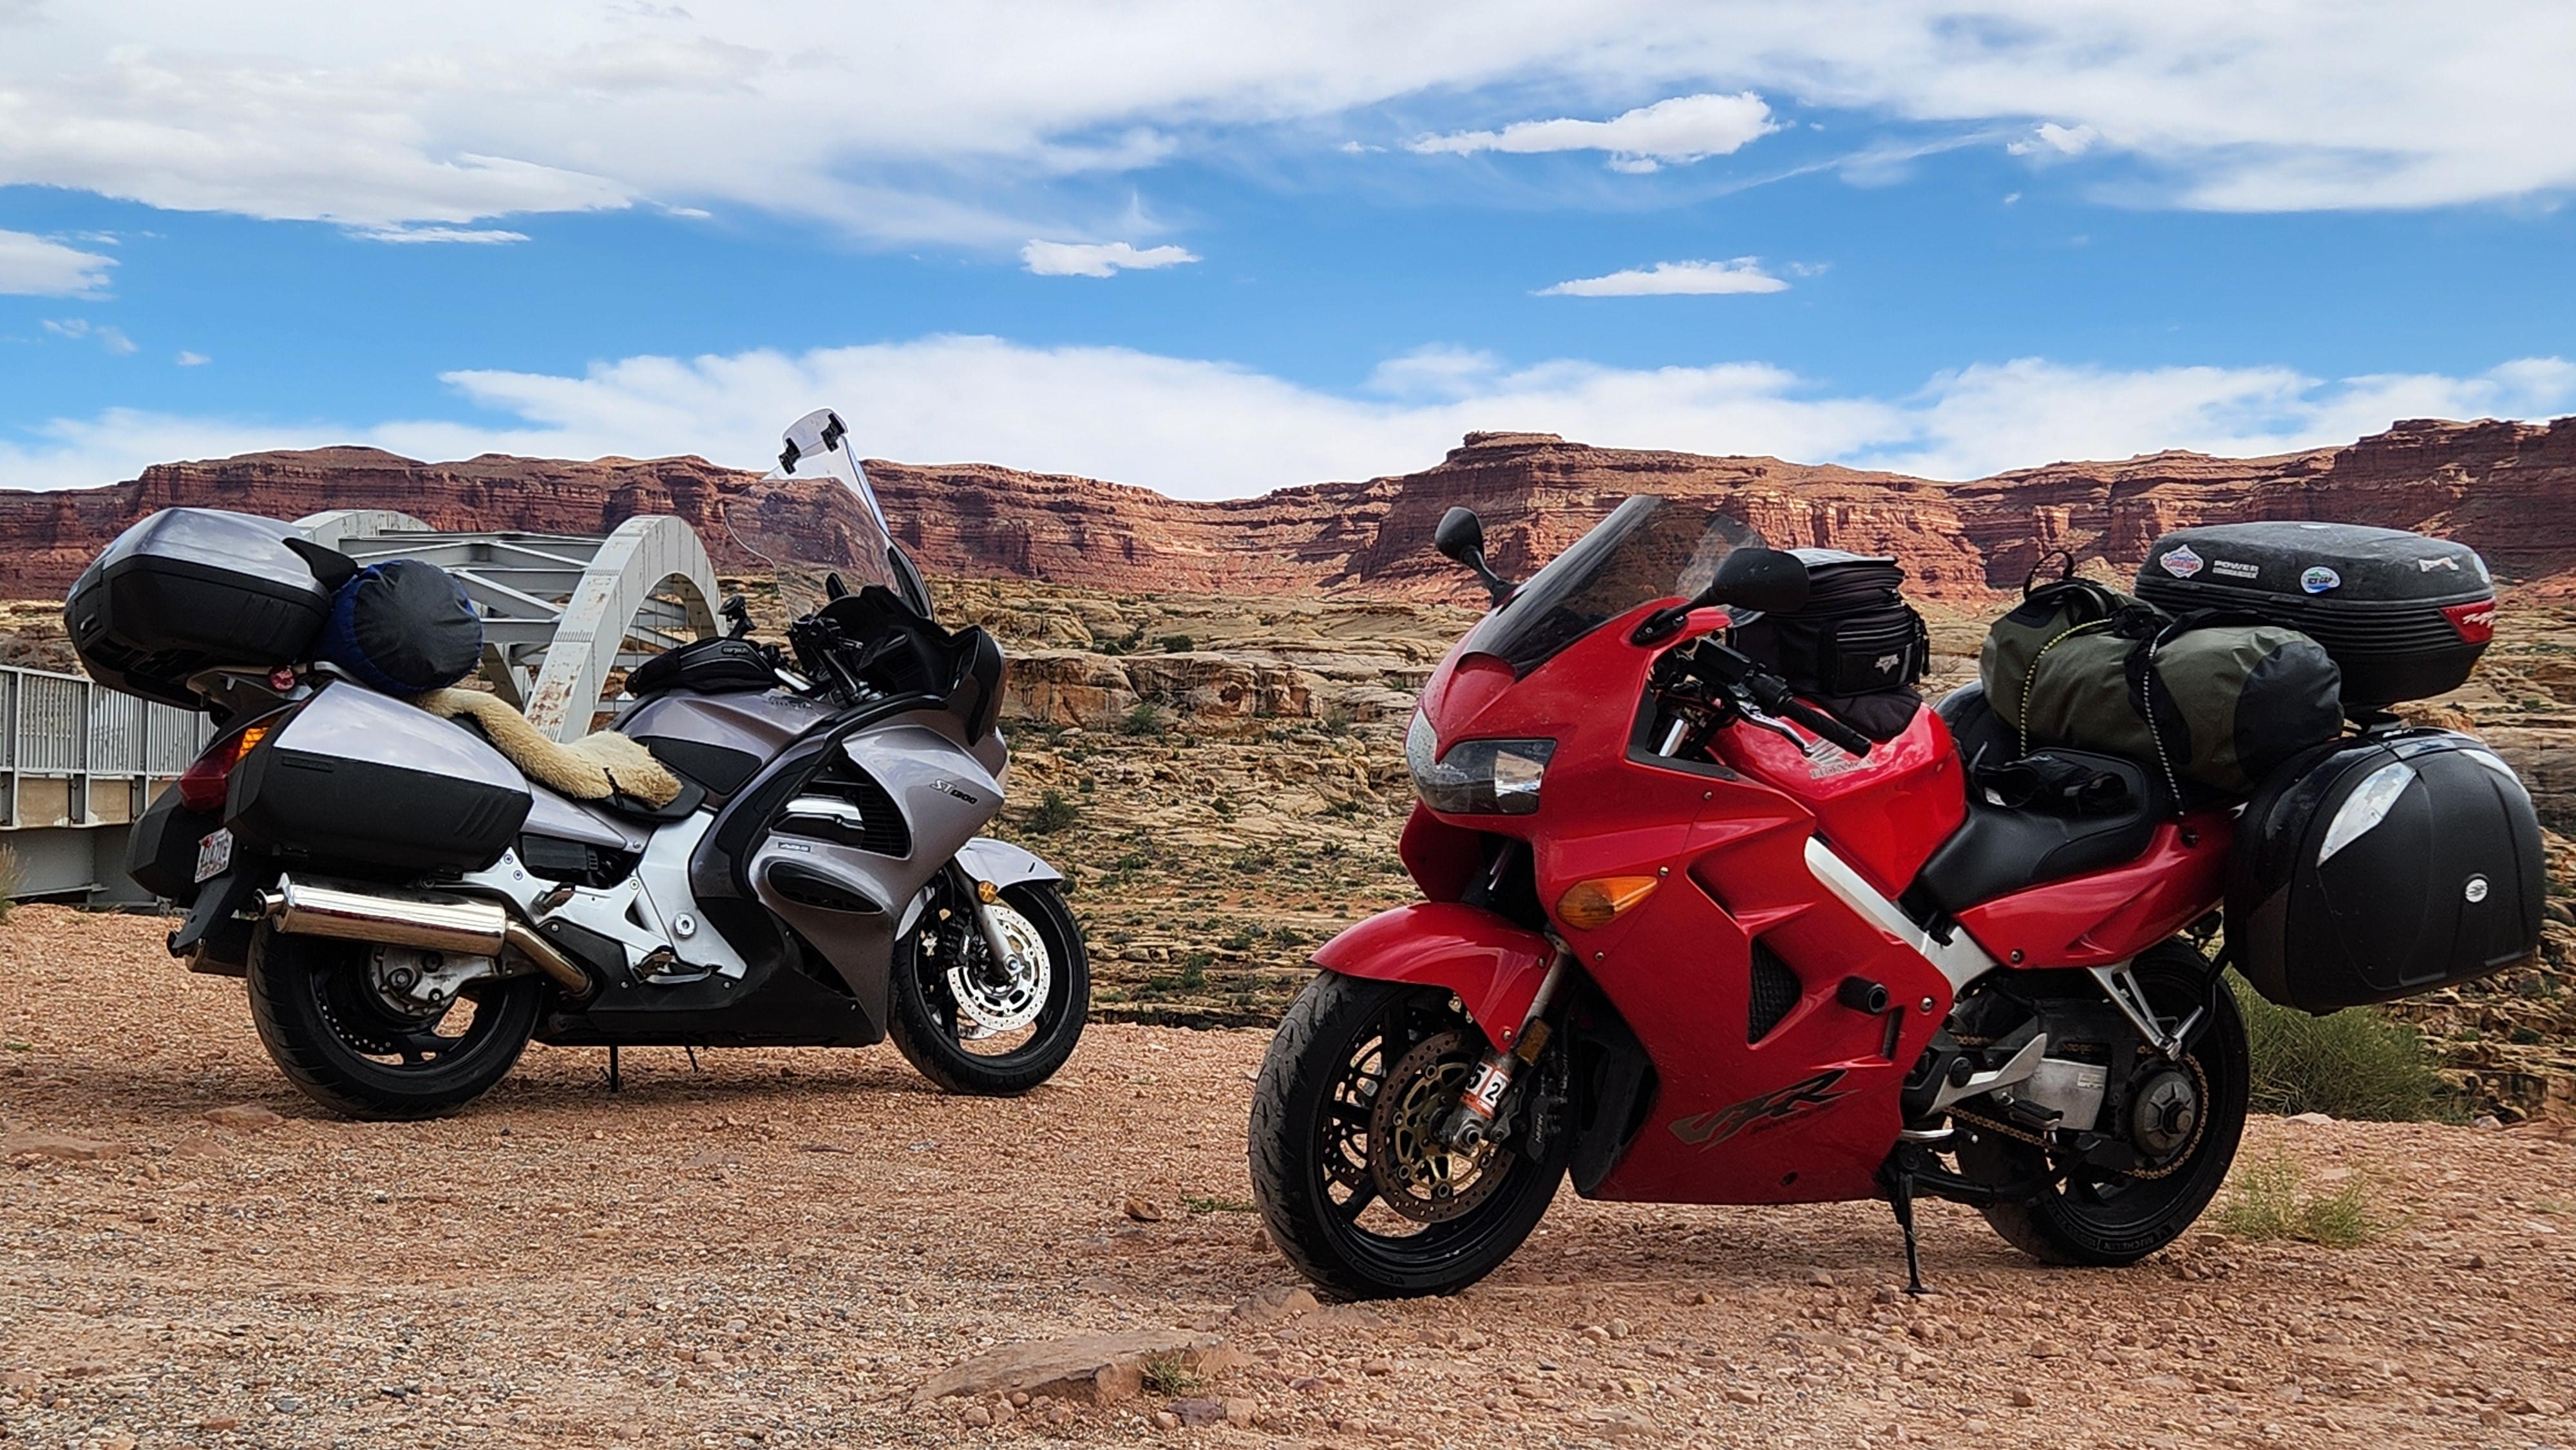
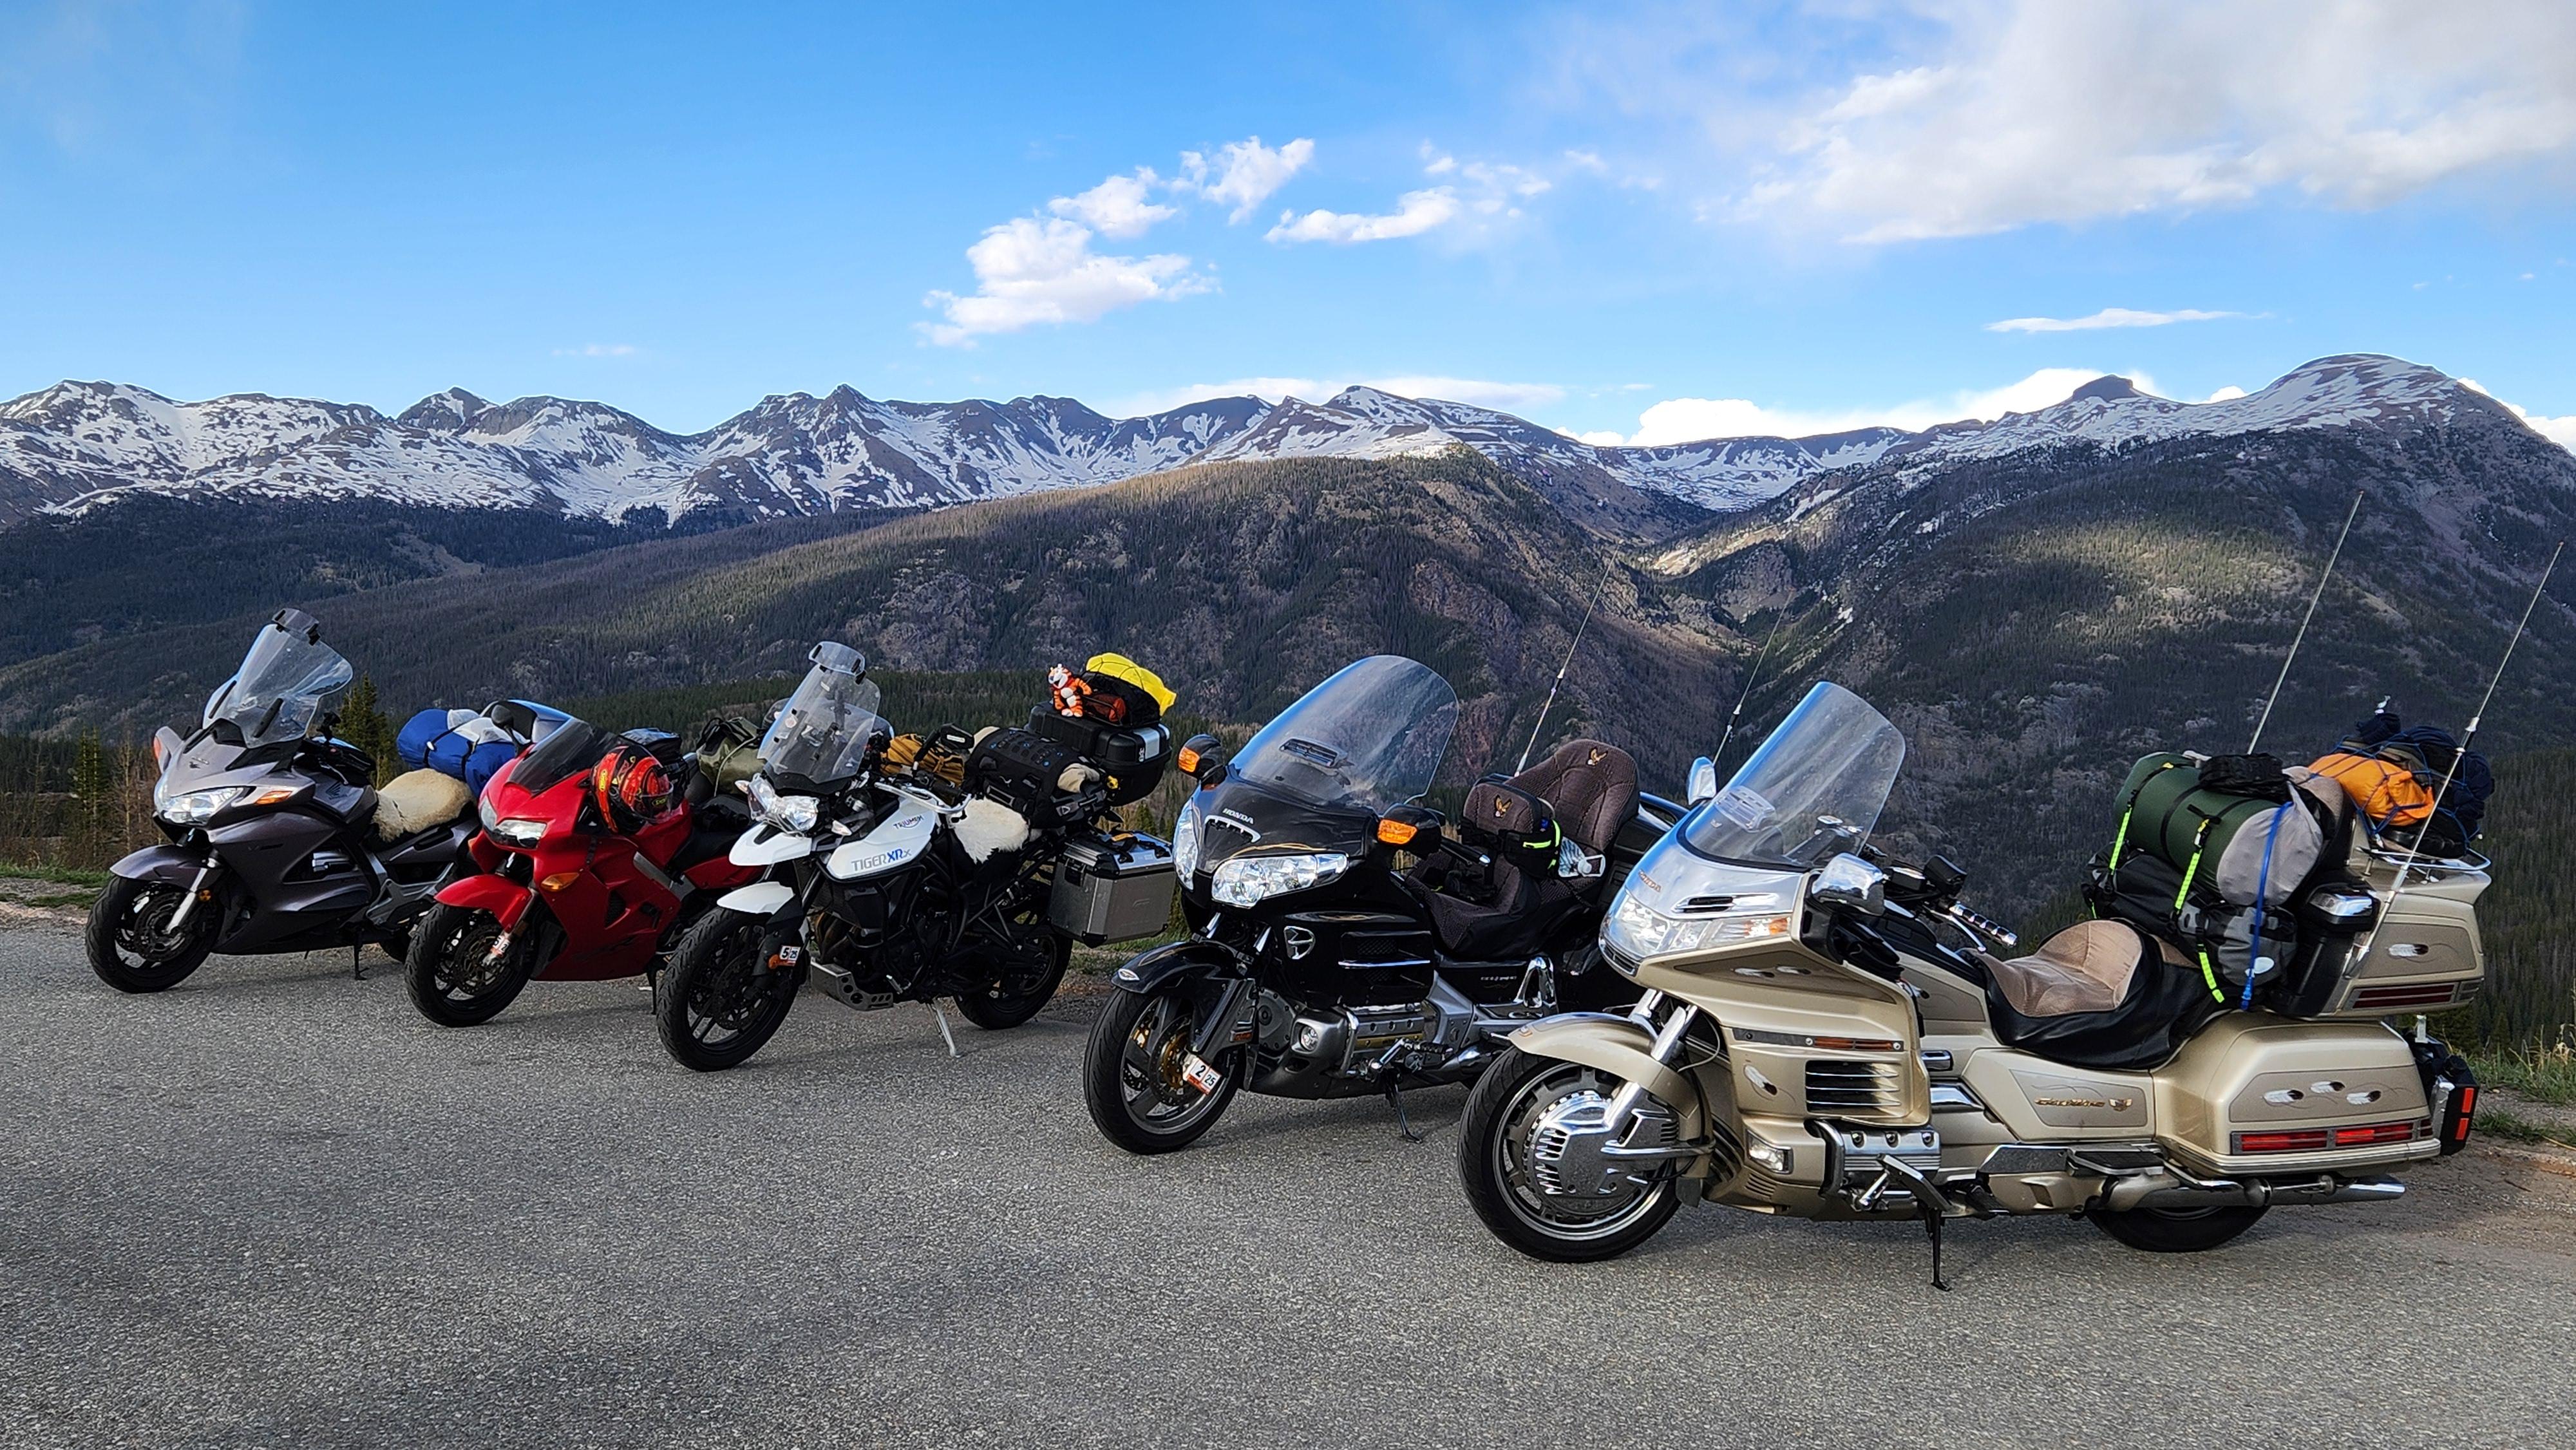
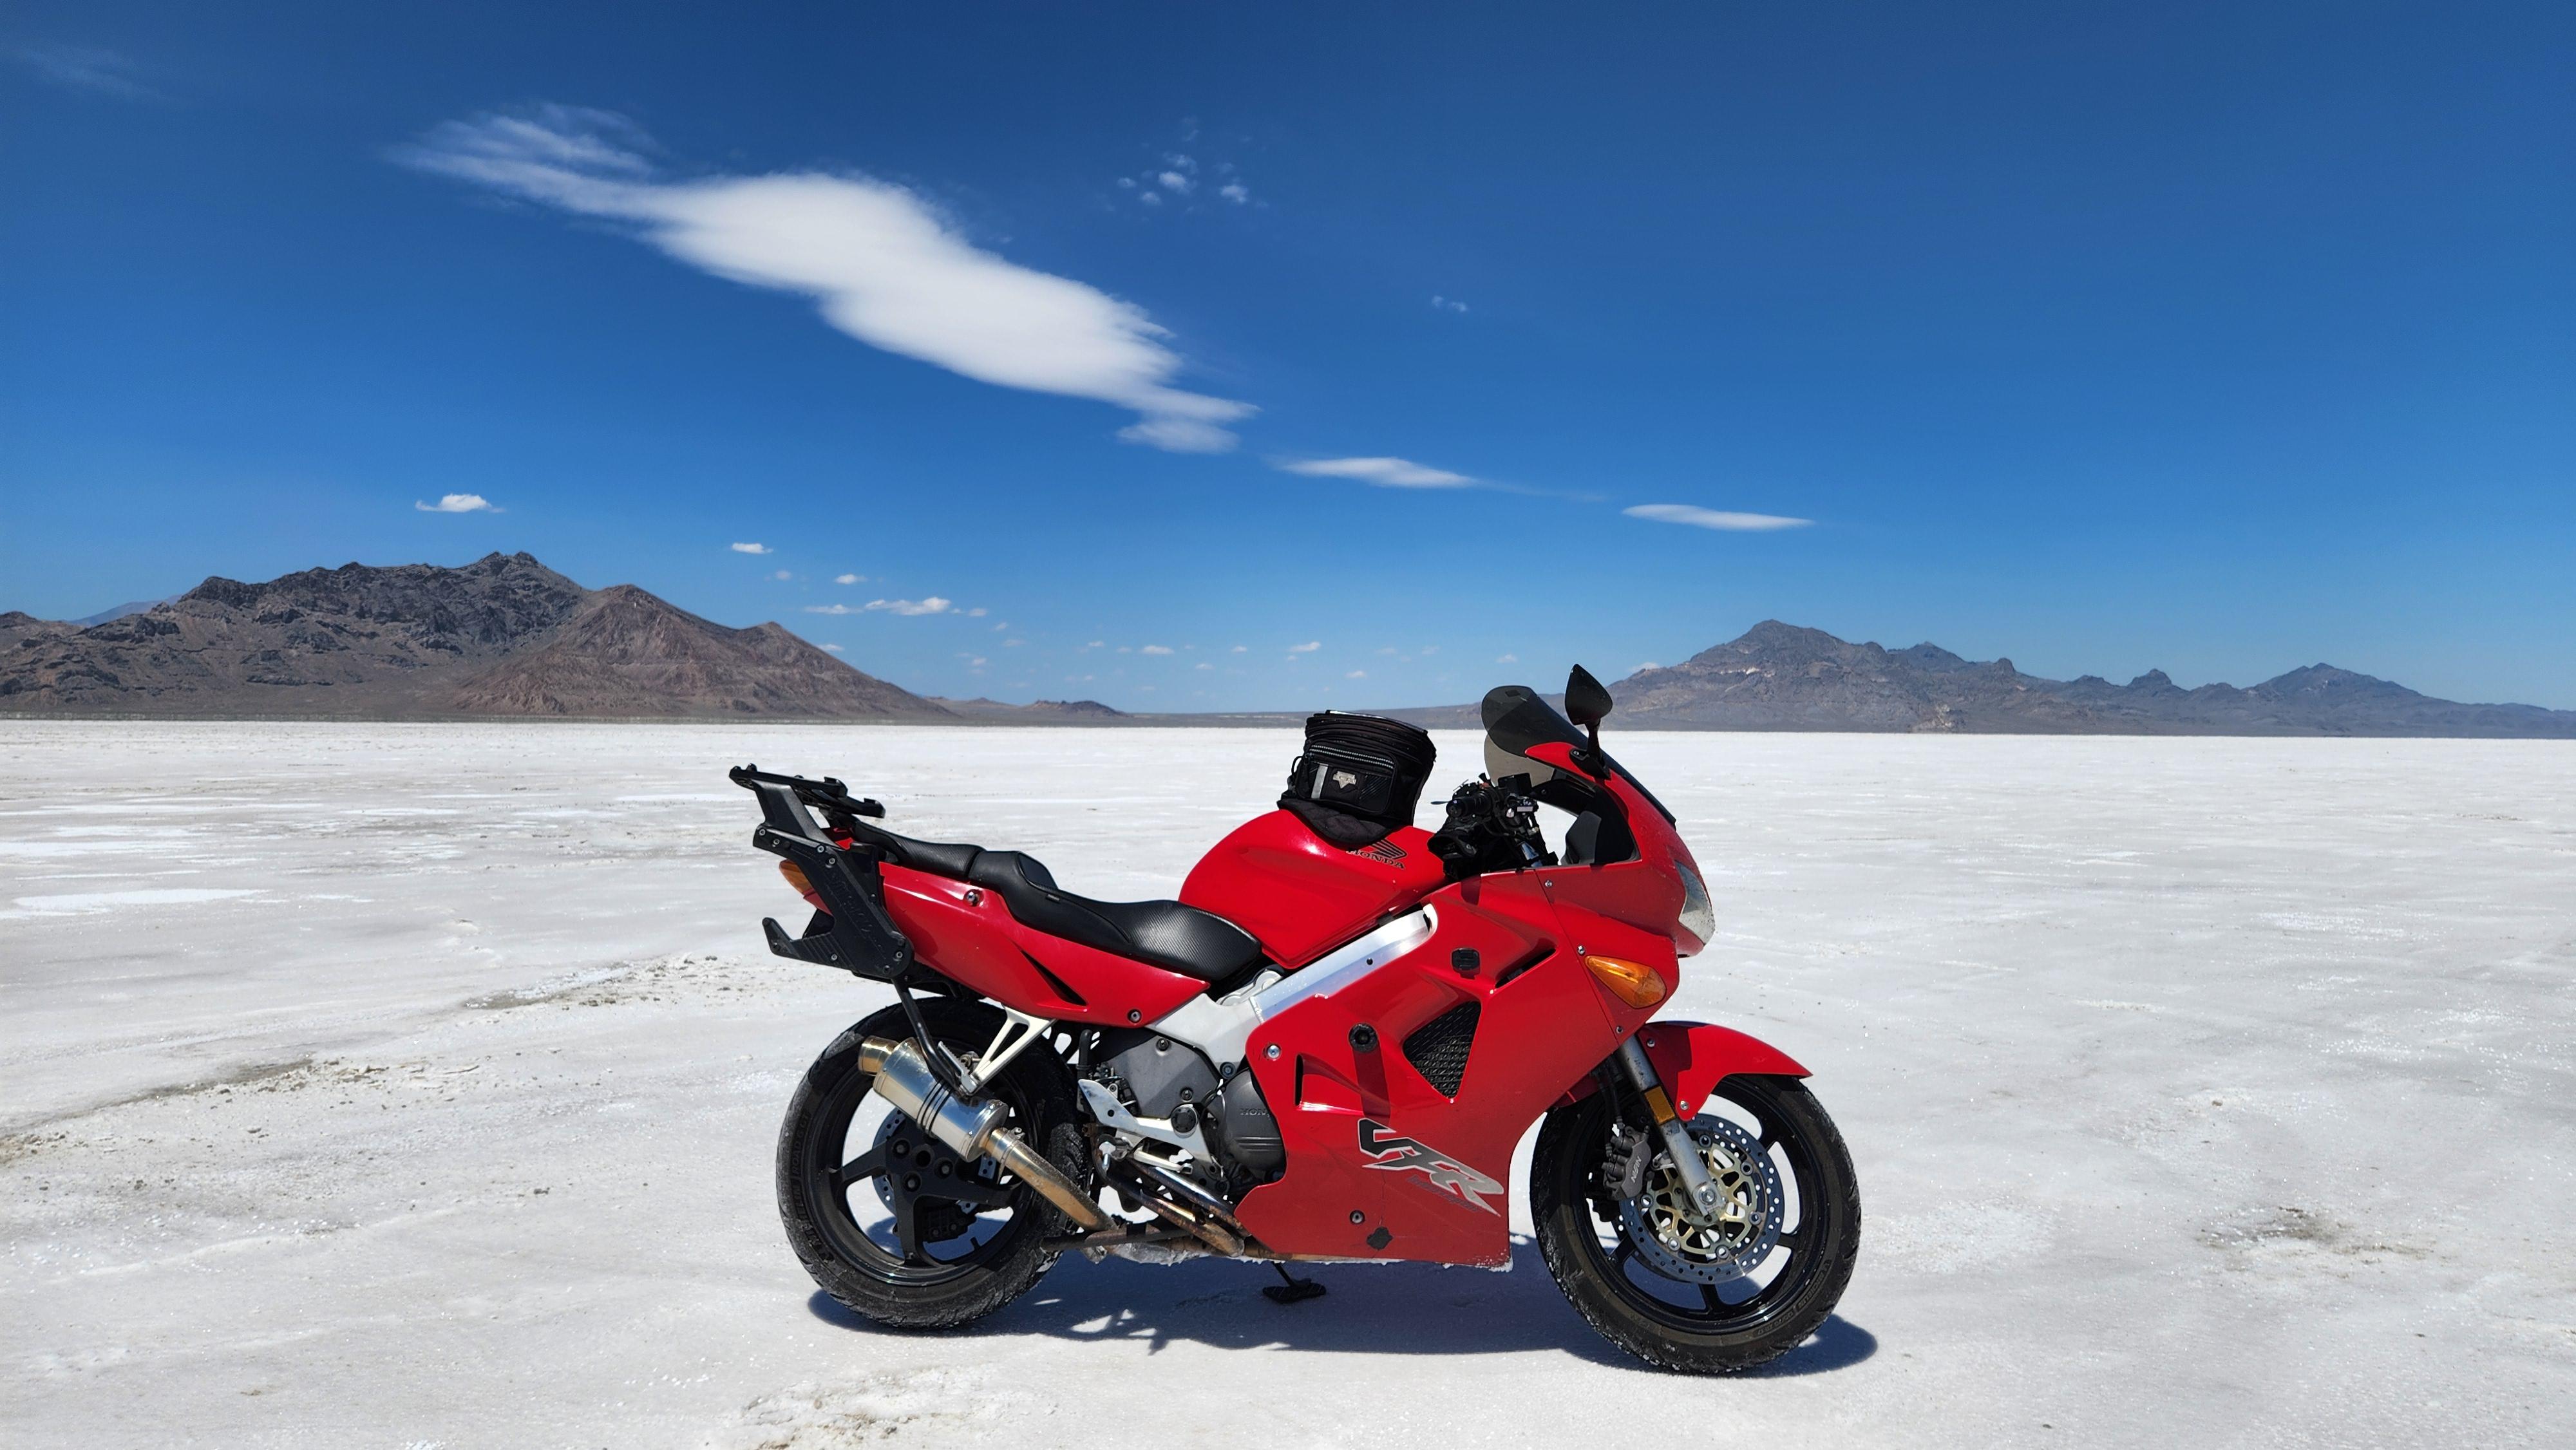
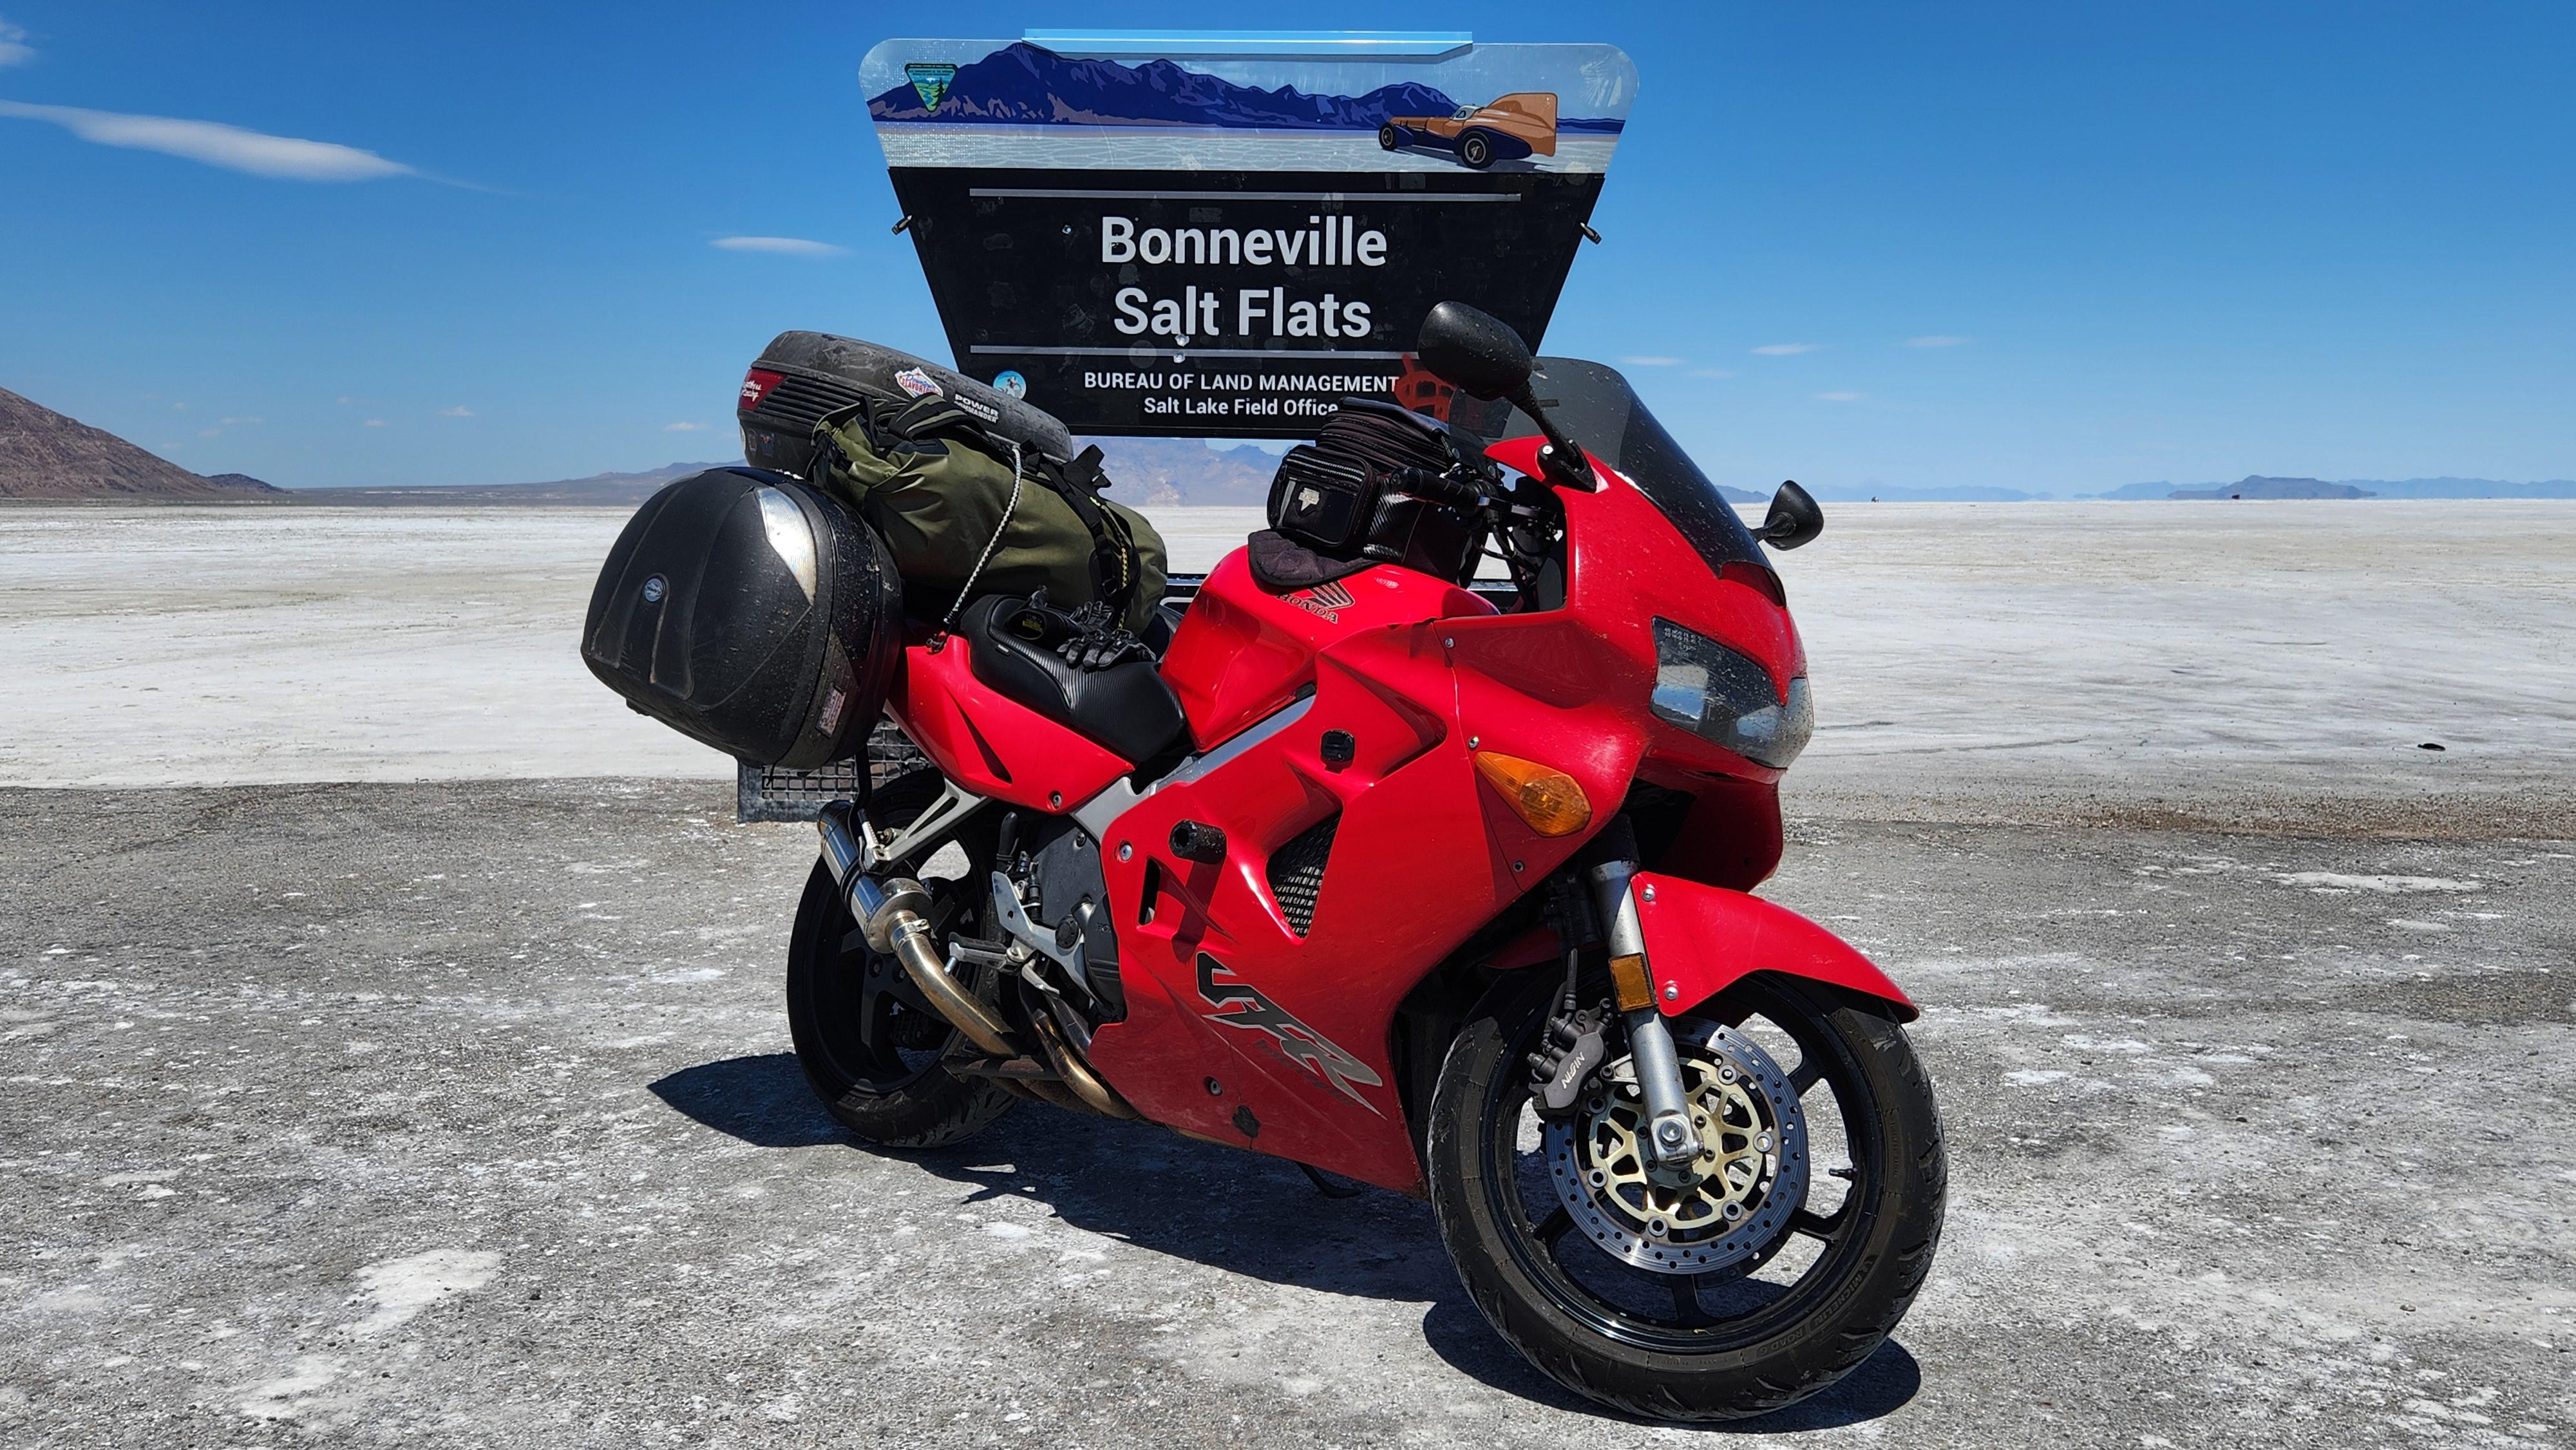
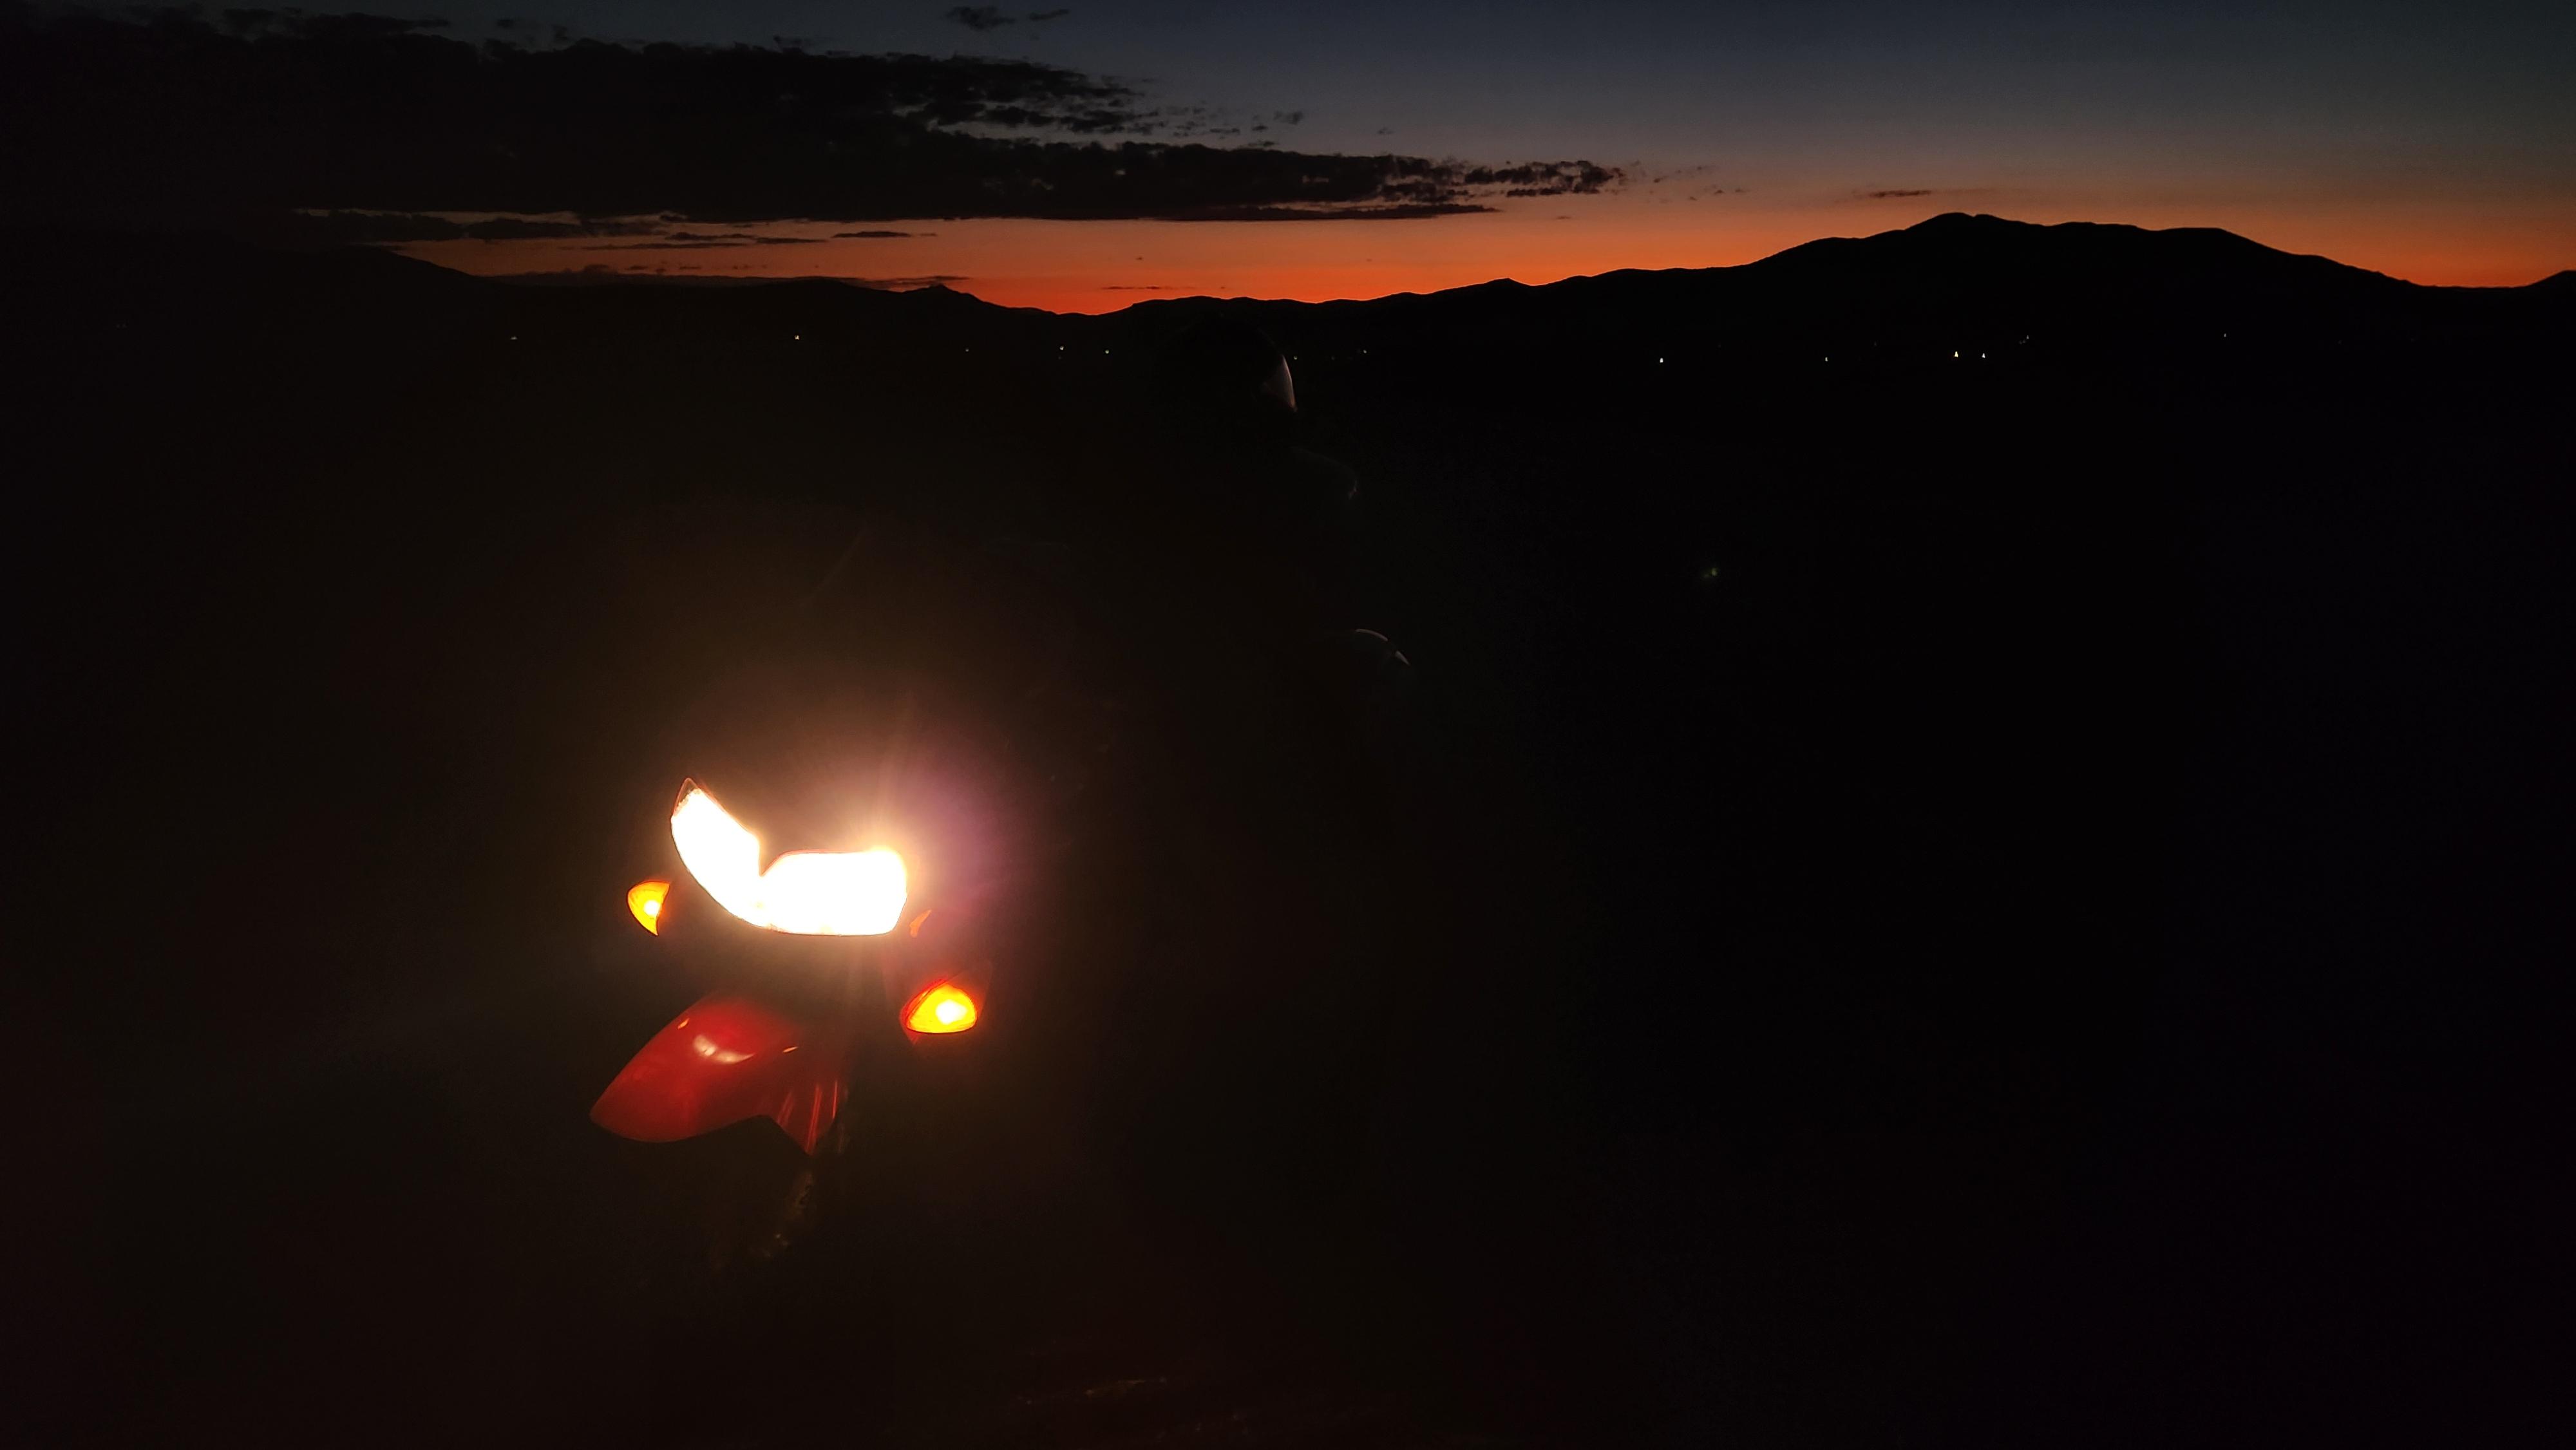
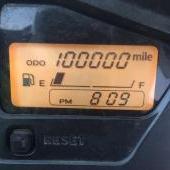
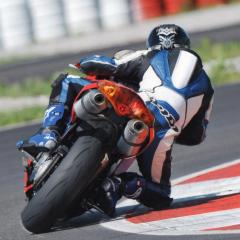
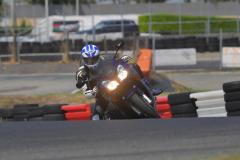
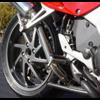
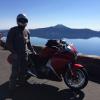
Hey All, I rode across the country on my fifth gen (which just hit 100,000 miles) in the summer of 2024, it was a wild trip full of adventure, highlights included doing high speed runs on the Bonneville Salt Flats, some questionable off road riding, tons of amazing National Parks and technical winding roads, and capping it off with completion of my first Iron Butt Association challenges. I had an unplanned chain replacement and tire issues, but the bike itself was rock solid on the 10,000 mile journey, even at 26 years old with ~87k miles on it at the start - gotta love VFRs. I posted a full recap of the trip with photos/videos on ADVRider (link below) if you're interested in reading more about it: https://advrider.com/f/threads/balt...-back-on-a-1998-vfr800-may-june-2024.1785705/ I also put all my gopro videos from the trip in this youtube playlist: https://youtube.com/playlist?list=PL9DvxzVIwTSC5lZQXAICLcjH6-gFGpymF&si=yMuUjMQZ-fQx25qh Here's a few pictures of the journey:
 5 points
 -
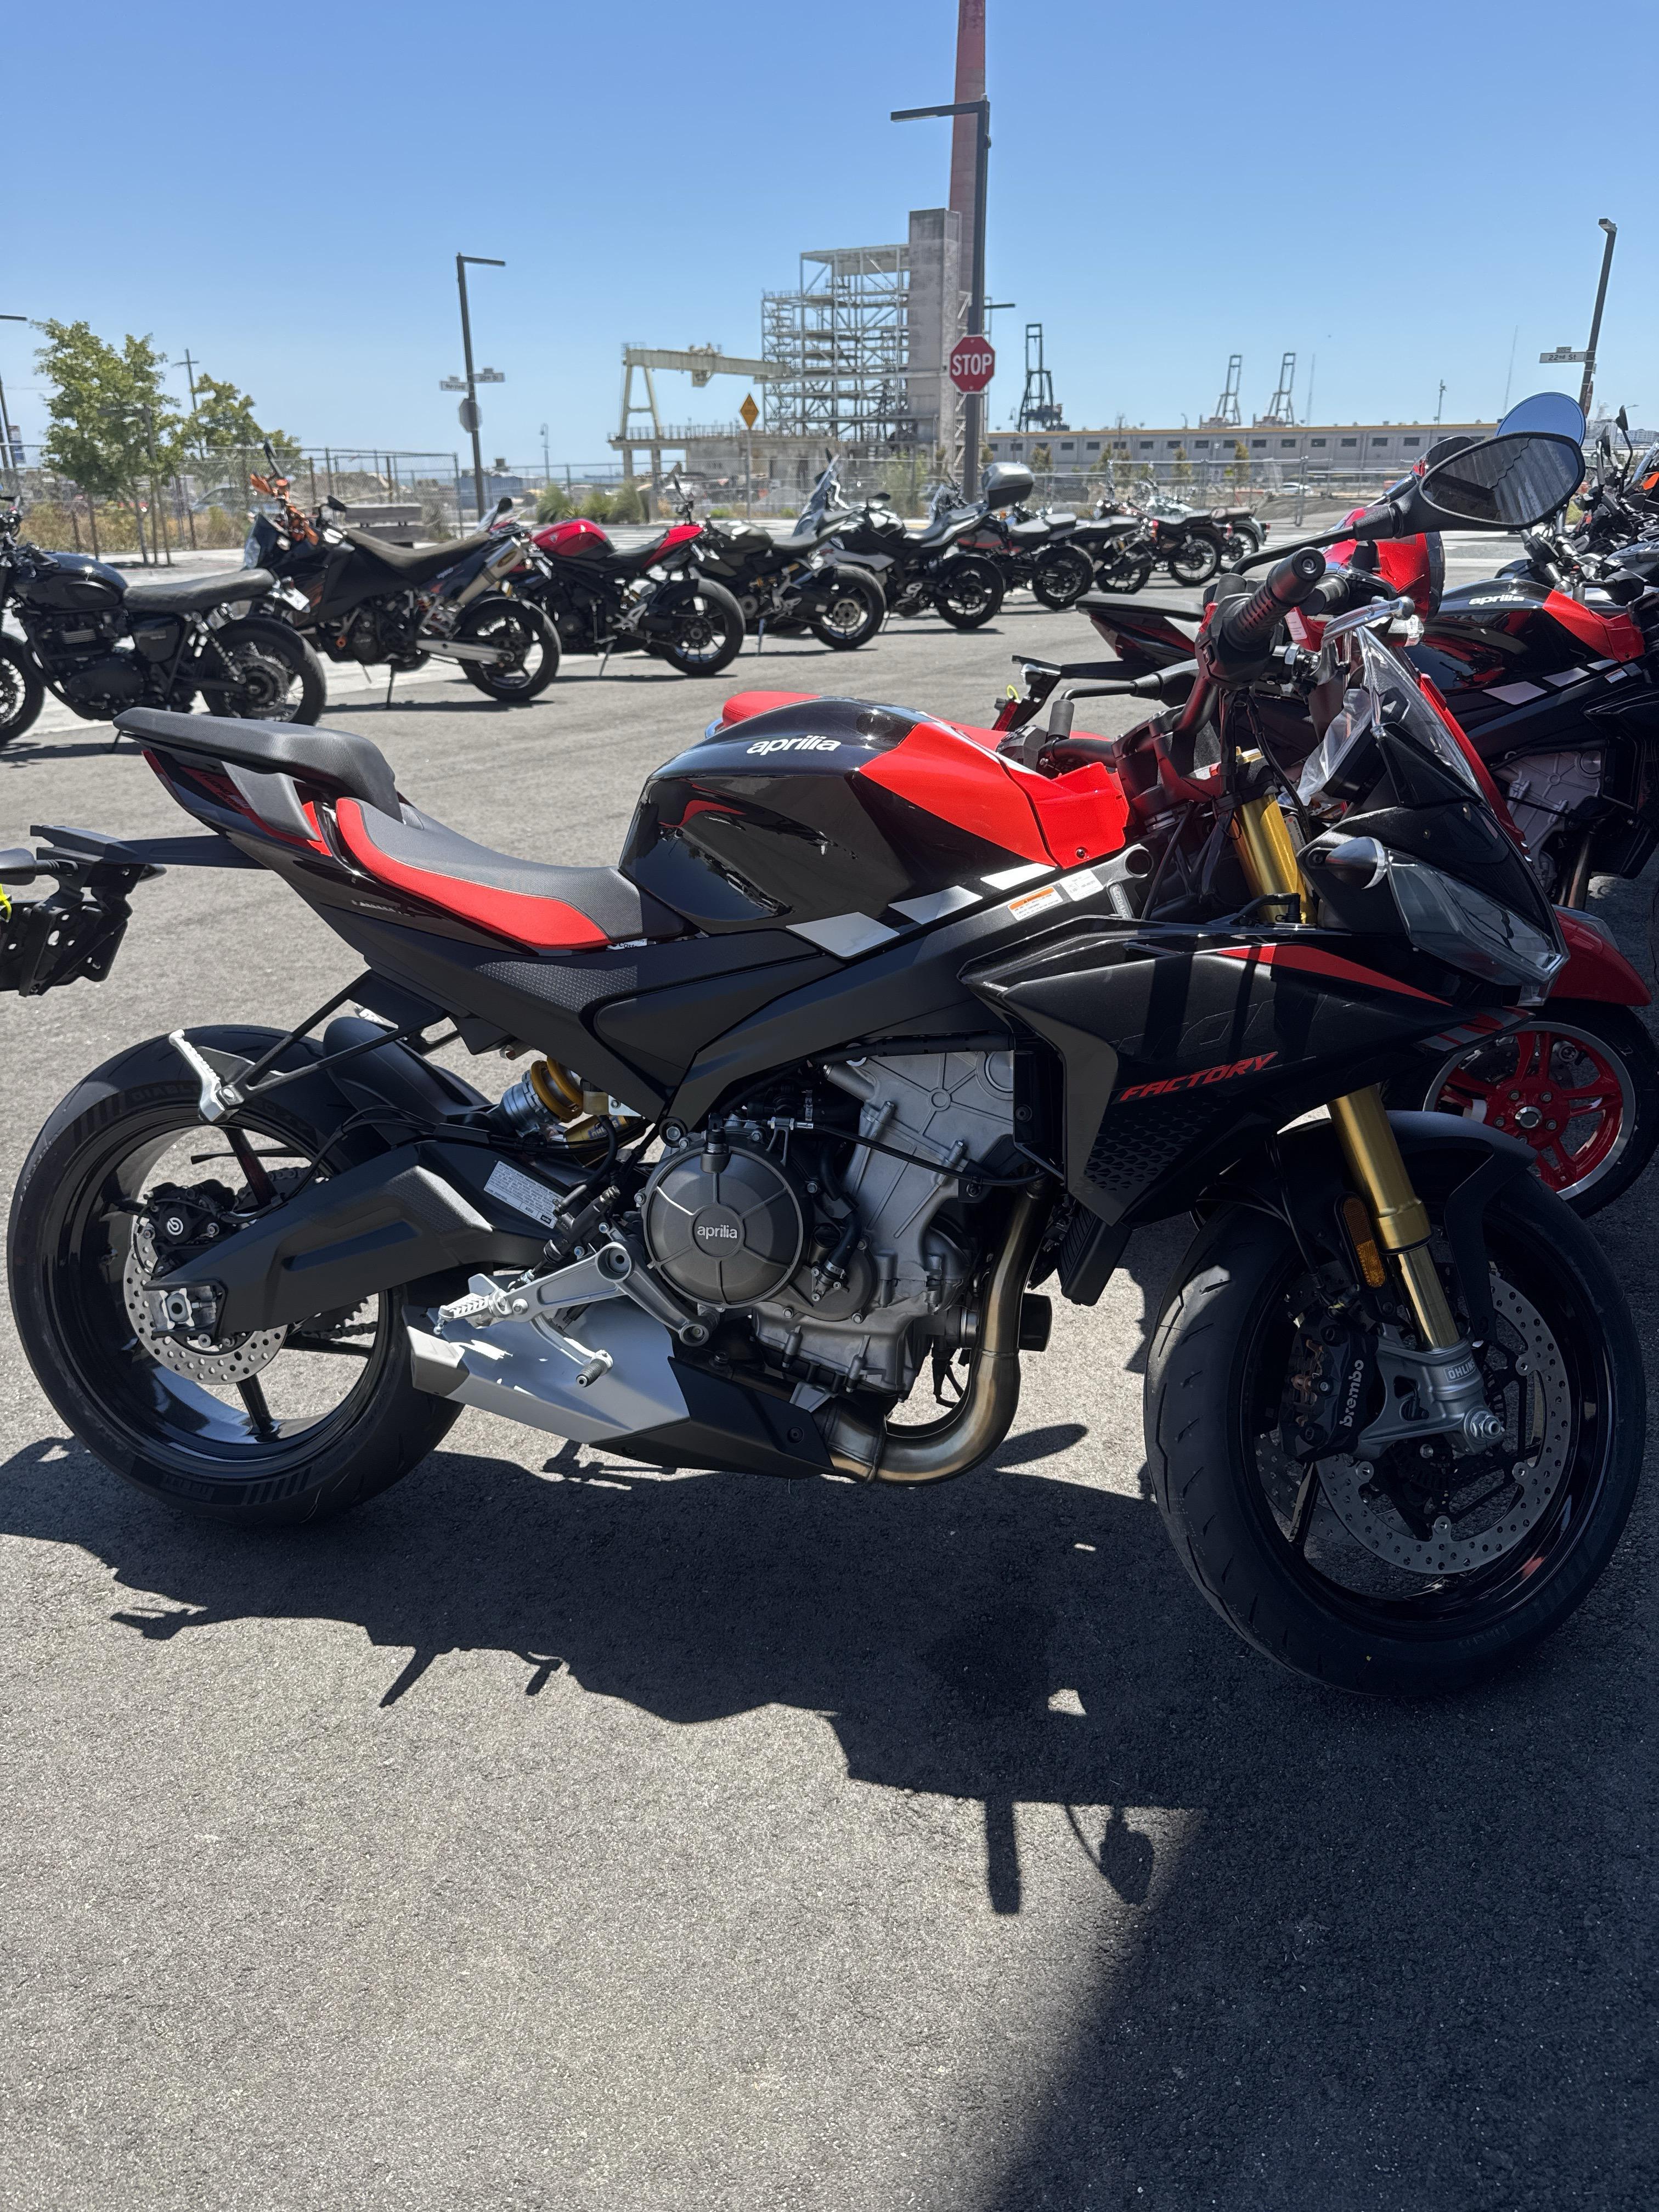
Lucked into a crazy deal on a one-owner 1998/5th Gen yesterday and want to keep up with tech stuff. The gent (77) bought it new in 99 and has cared for it beyond what most people would, tons of documented preventive maintenance over the years and only 1k miles added to the clock since Covid. New to VFRs but not bikes in general, I've owned many brands since 2006 (drank the HD koolaid up until then). I can already tell that the factory seat and I will not play nicely together, otherwise I'm digging it!5 points
-
Ride the new bike home Saturday!
4 points
-
You want to be able ride them easily. If not, look what our (deceased) club president did to his livingroom. https://www.motor.nl/video/motormuseum-in-je-huiskamer/4 points
-
Hi Ughandi, Thank you for your donation of 25.00 USD. We look forward to improving the forums with your donation. Thanks VFRDiscussion3 points
-
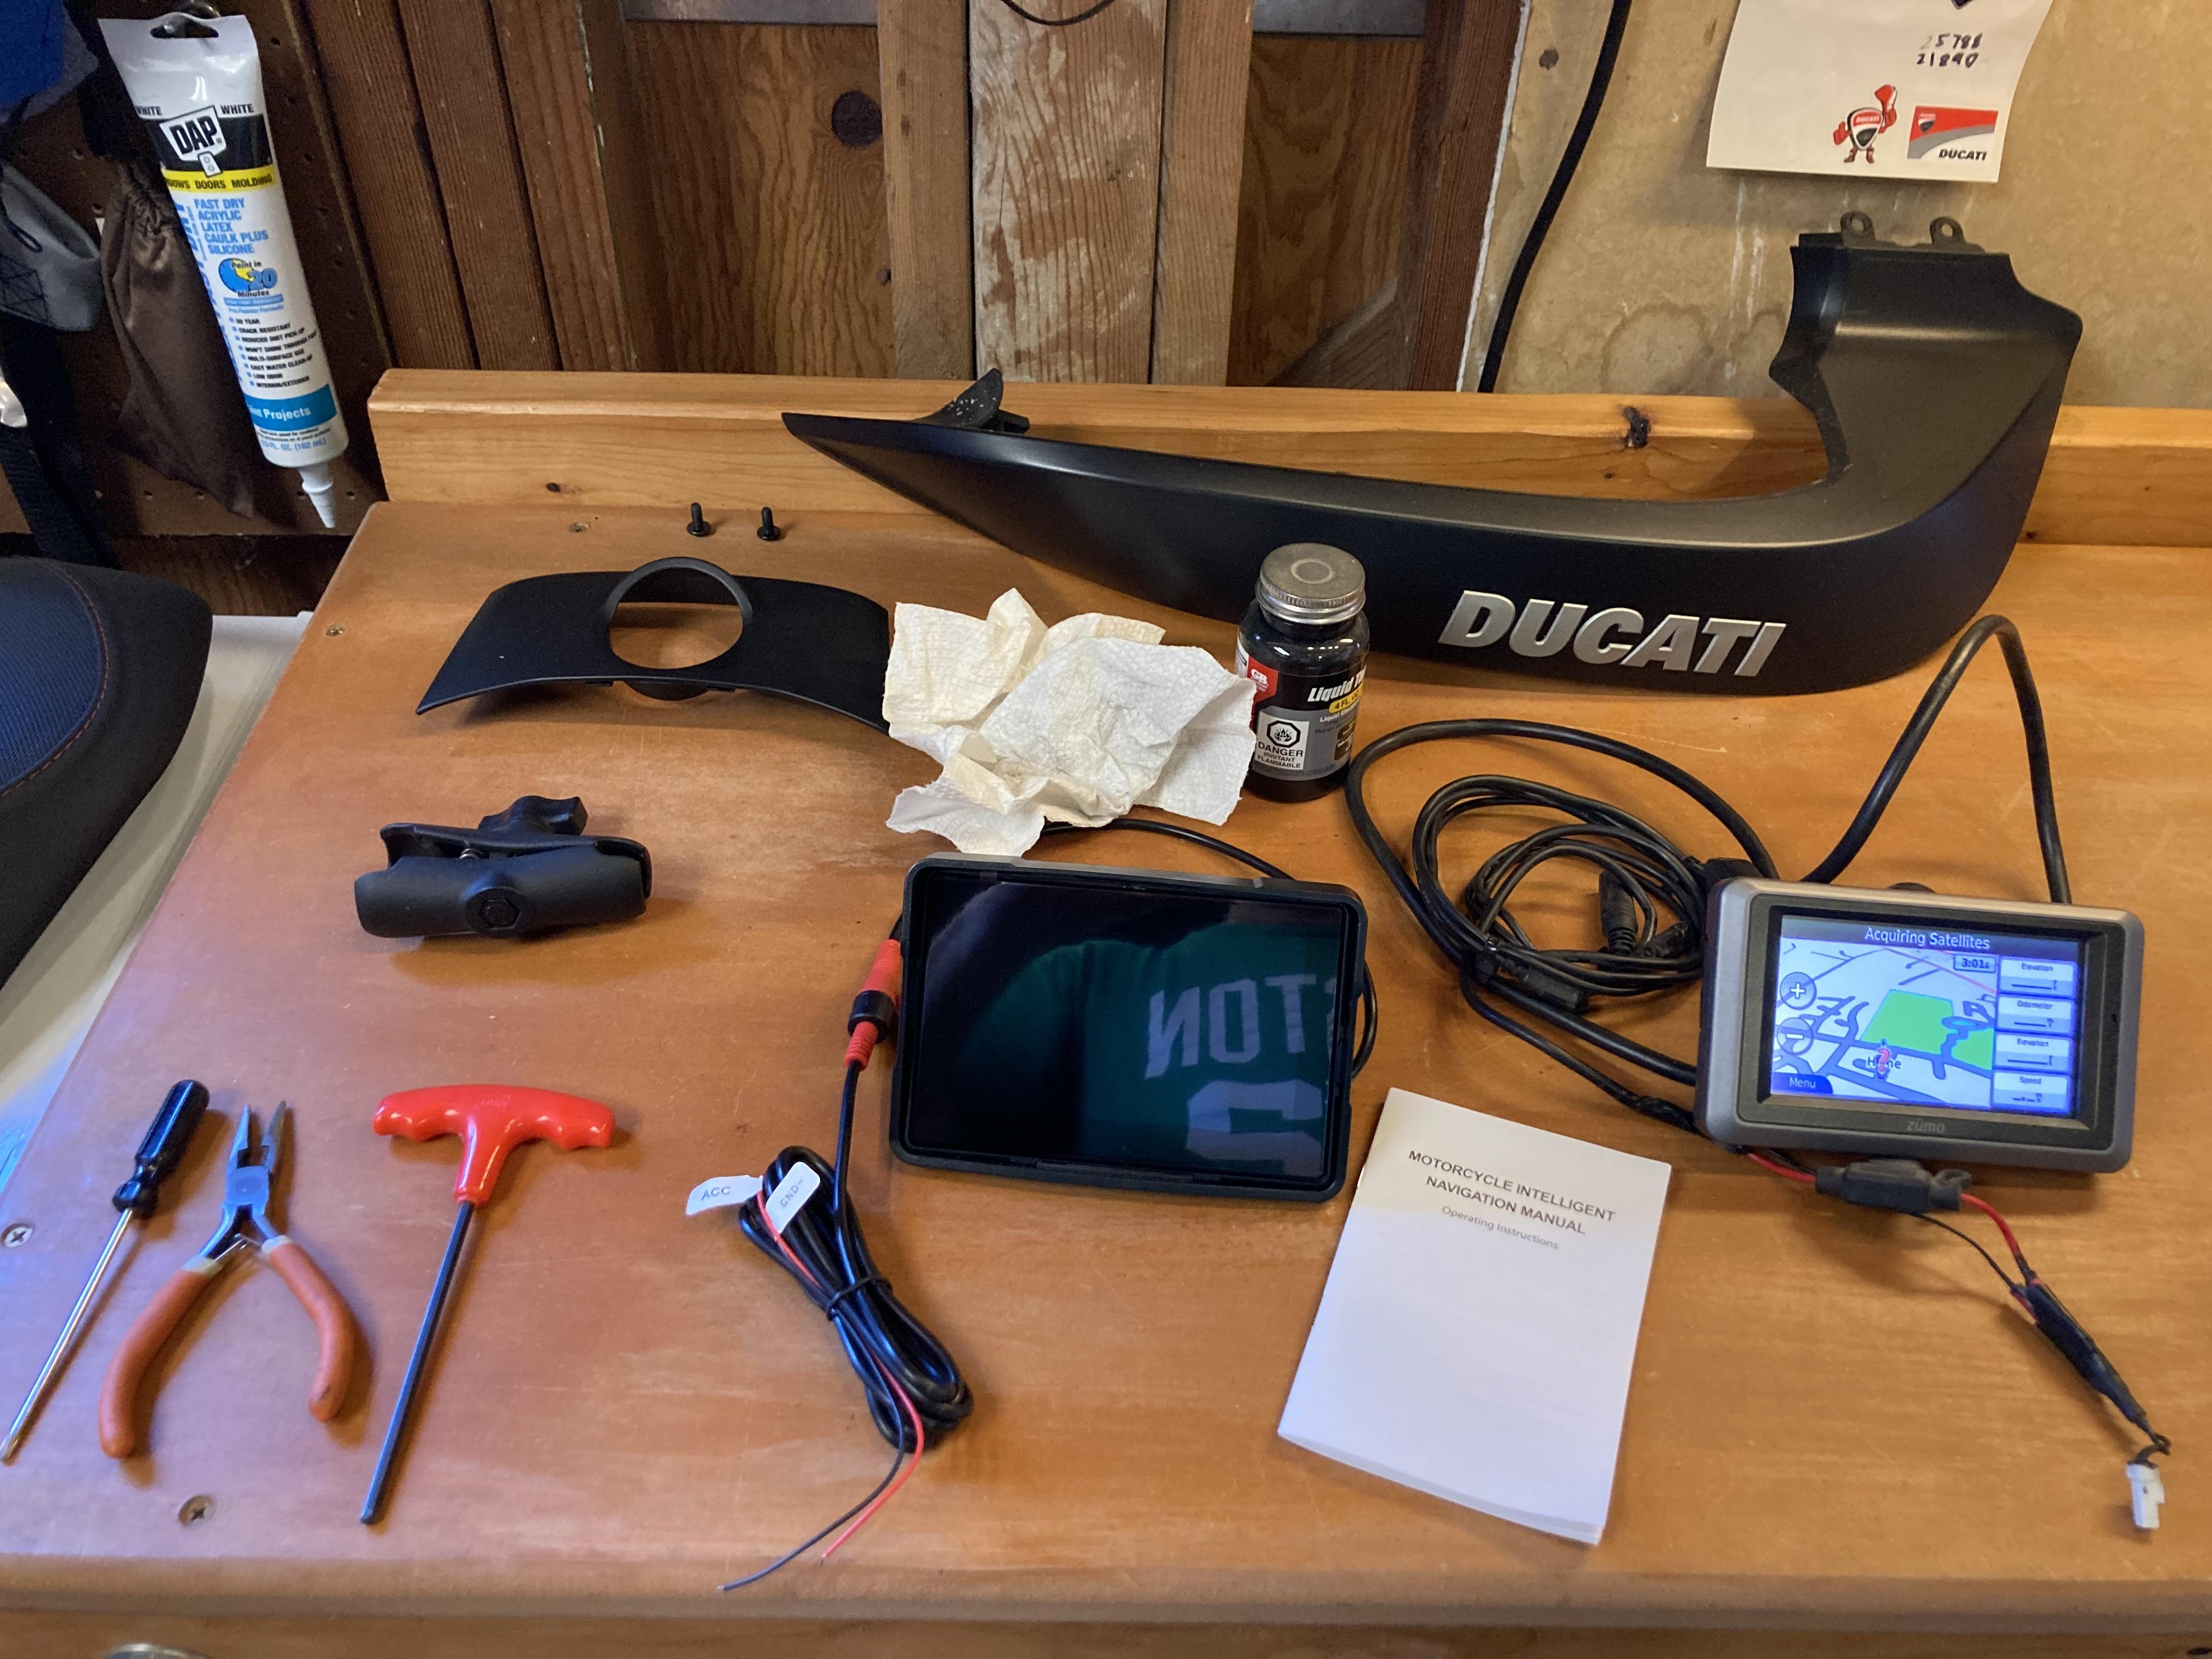
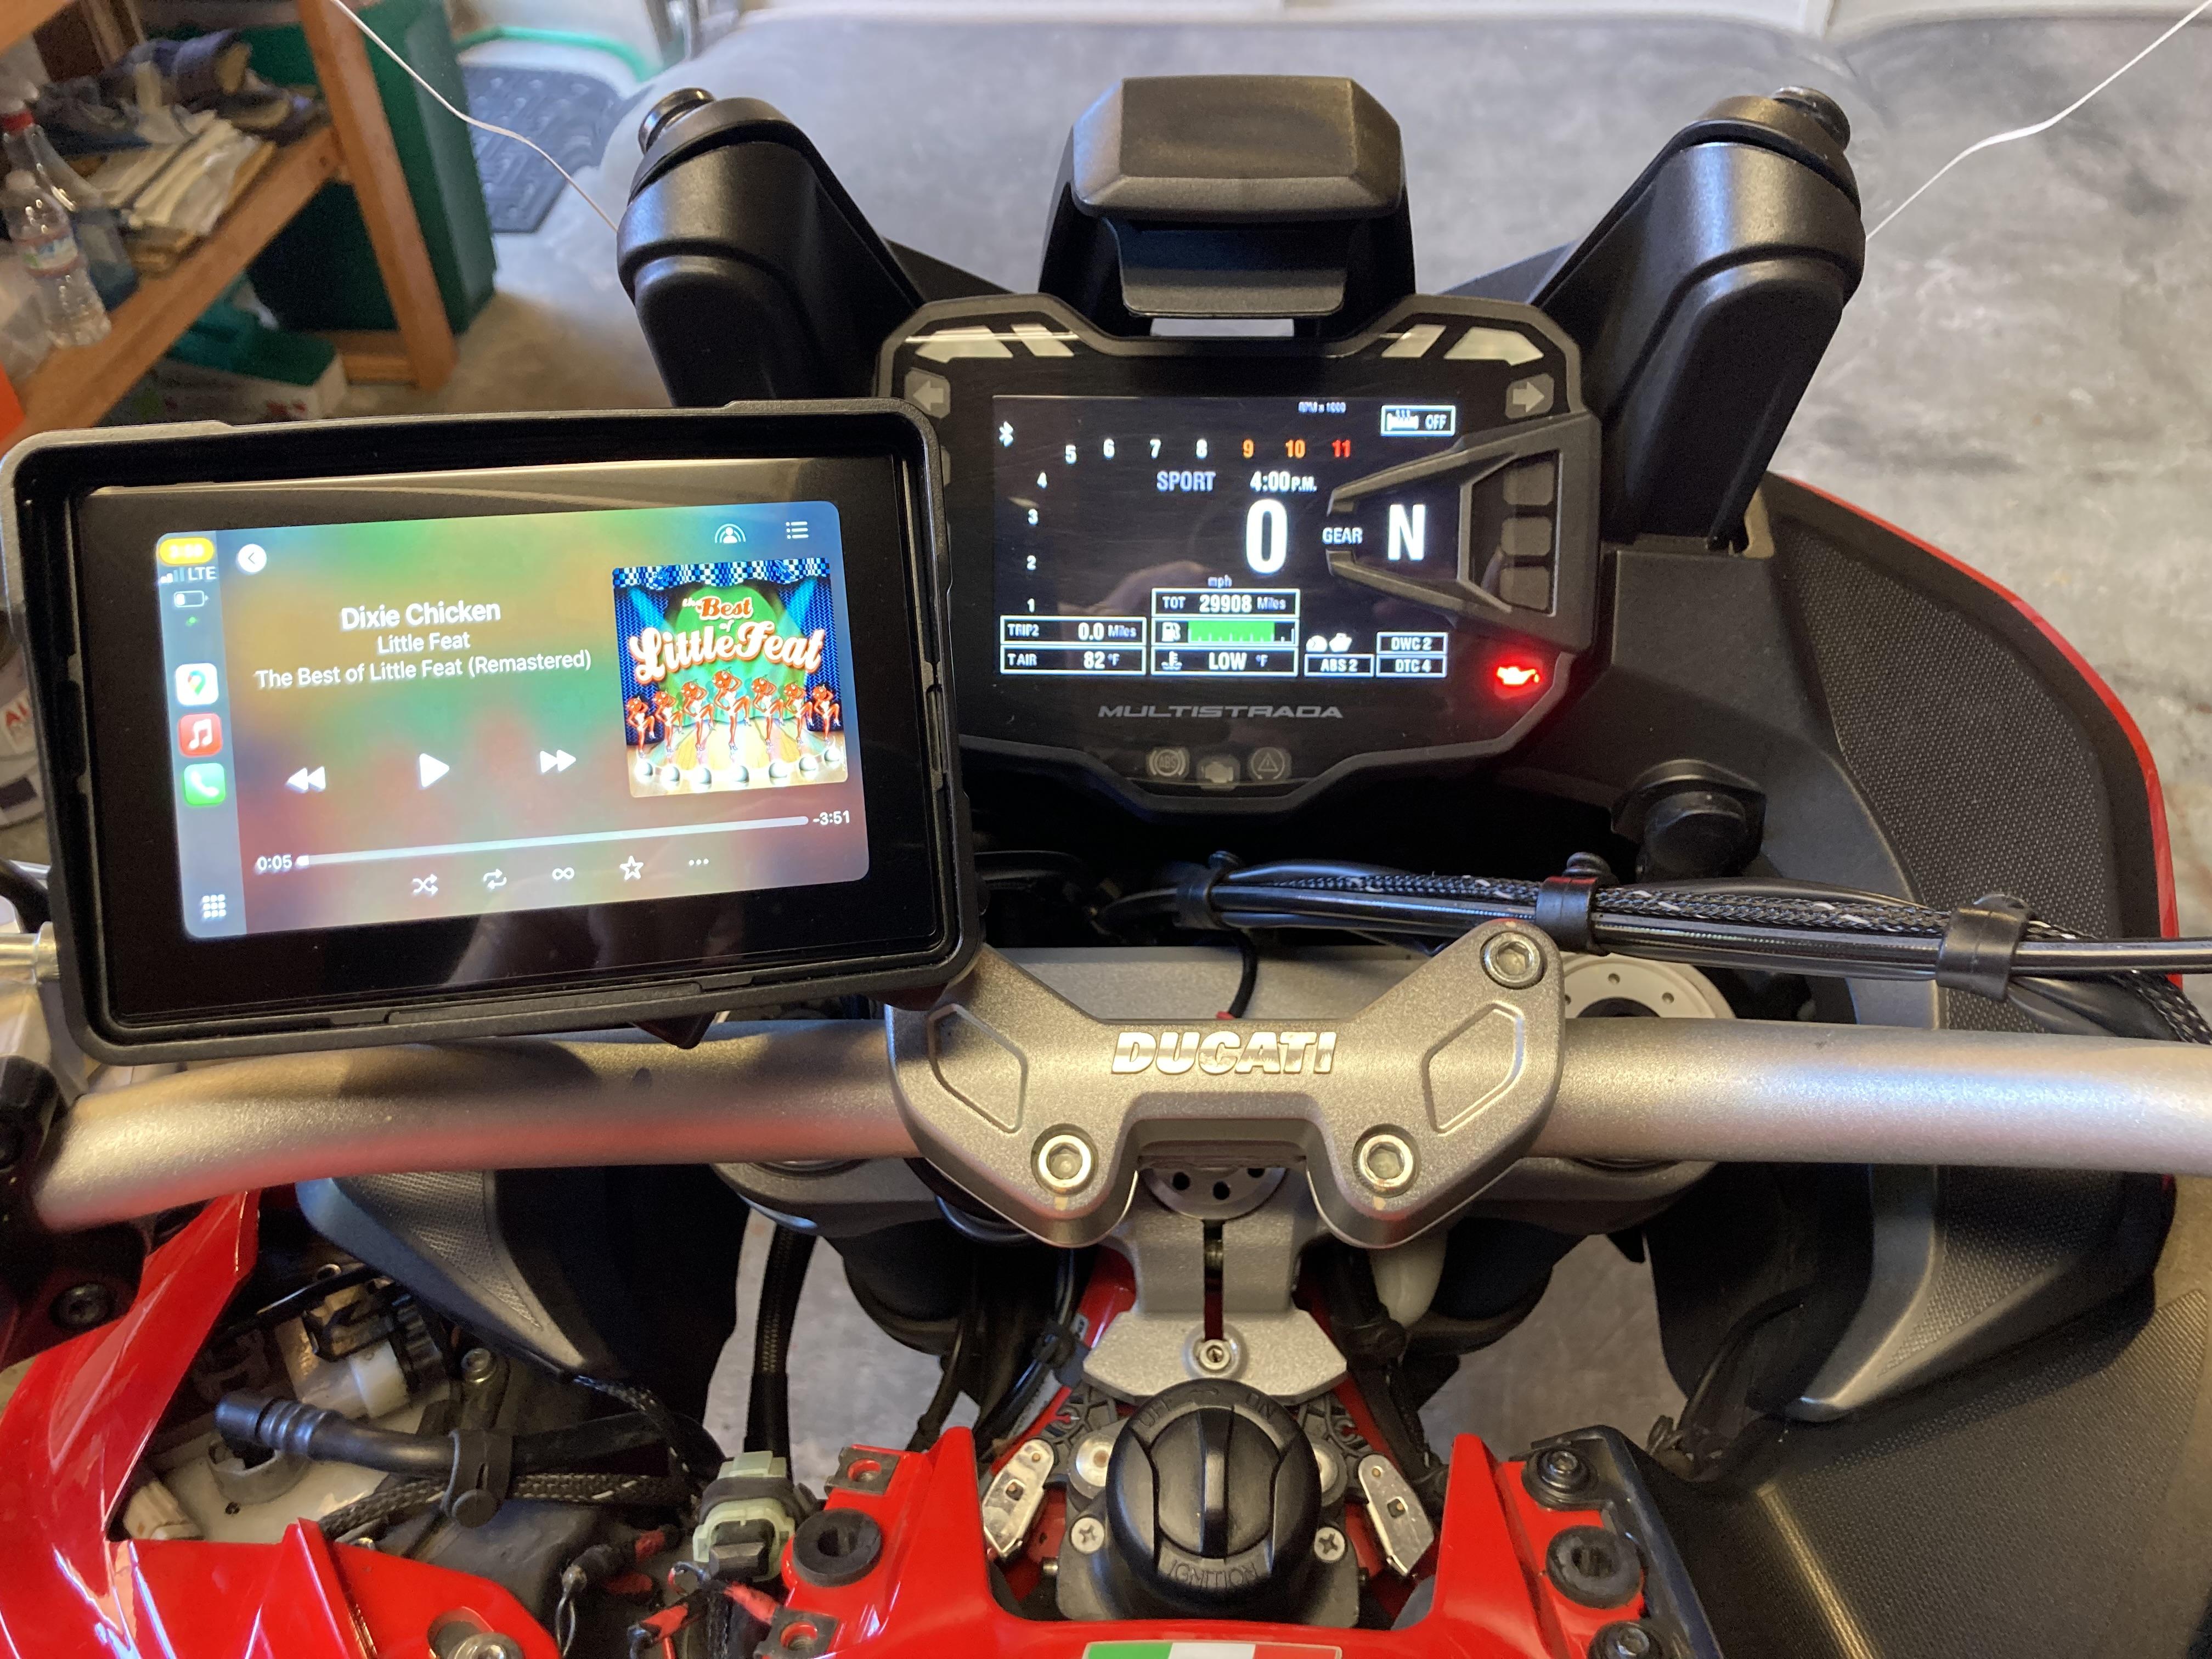
Well thanks to this thread, and Frogger and TT, I absolutely broke the bank last week and ordered a $63 CarPlay unit made in China by Camecho. Just finished the install so haven't ridden it yet but I have to say it all works quite nicely. Here's the (few) Cons, then the Pros, mostly as compared to my new doorstop, the 15 year-old Garmin Zumo: Cons: -The Zumo showed elevation, which was kind nice, but I'm sure I can find an app... -The Zumo was a quick (one second) disconnect. On this unit you have to unscrew the waterproof connection, which is on about a foot of cable attached to the unit. And when you screw it back on the inner piece must be aligned rotationally perfectly, probably not easy in the dark. But then again, it only costs $63, maybe I'll never remove it... Pros: -Well, it's CarPlay. I'm iOS, but even if you're Android you'll know that it does pretty much everything CarPlay does in your car. Pretty sweet. -Screen is excellent, great definition. I'll post more after a ride. -I hooked it up to the GPS power source Ducati provided but hid behind the bodywork, just as I had for the Zumo. I left a 2 amp fuse in the line just in case, probably overkill since it's fused anyway. I spent most of my install time just getting the wiring how I wanted, making sure the wires didn't foul movement at full lock, or get rubbed by any other part. -It paired w my phone in maybe 10 seconds. Paired and works seamlessly. -I'm not really a listen-to-music-while-riding guy, but maybe I'll install the Scala unit from my old Arai. We'll see. Hey, can't beat it for the price, 10% of the cost of my Zumo, not adjusted for inflation.
3 points
-
If you only had a little more height... What about going 2x3 high (3x2?) on one side to leave the full wall open on the other side?3 points
-
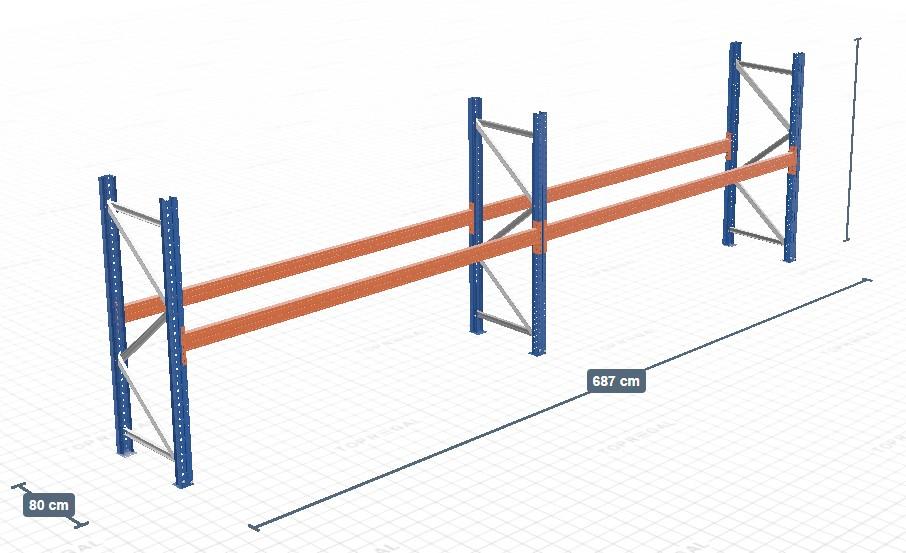
'No' is not really what I wanted to hear, but reading on it sounds more like a 'maybe' to me! One option I have considered (but hoped to avoid) was to convert the cantilevered shelves into a 4-post rack. Unistrut is also available in deeper channels (61mm and 81mm), but that gets expensive real quick. 'Back-to-back' 41mm channels are also available. But using any of them for the verticals forces the workbenches away from the wall--and I don't know if just using those struts would solve the 'moment' issue in any case. A 4-post rack may be the least-worst solution. I'd still have to work out the number of posts-per-bike, but that should be a fairly straightforward load (4x) calculation--and that could still allow me to position large equipment underneath (such as a lathe) if it were located "between bikes", so to speak. * * * Okay, so I've now looked at commercial pallet racks and I think that may actually be the way to go. They are available here in a number of configurations, but most critically in 800mm deep versions with spans up to 3.6m! I have 7m of wall, so I could fit a six-post pallet rack with two 3.3m spans, each of which is designed to support 1,100kg. A fully laden VFR800 (the largest bike I would be racking) weighs less than 300kg, so I could store three of them with no issue--and only have one vertical post "in the way" down below. Something like this, but with the horizontal carriers moved all the way to the top. (I've read that the loading and stability of "one-level" pallet racks are much reduced, so I'd have to brace it to the walls, at least.) I'd also have to think about the shelf covering (if any)... Thanks for your insight--critical comments are in many ways more valuable than encouraging ones! Ciao, JZH
3 points
-
Here's a YouTube video. De-Link Drill2 points
-
What a terrific journey! Thanks for sharing the story, photos, and links here! 🙂2 points
-
Well this is interesting. Strangely enough I was only last night working out how my new shed (ground up build) needed to be laid out, and what I wanted to do in it. While sitting on the lounge, brainstorming with a glass of red wine, I came across this video. Bike wall storage at 5.25: SO MANY GREAT SHED IDEAS - OUR MATE BRENTONS SHED TOUR Not quite what you have in mind, but food for thought. This shed also has a sliding gantry with electric hoist, which is shown later in the video (used to get things up into the mezzanine areas).2 points
-
Update. Went for a 160 mile ride today. Limited access highway (101) and twisty roads (128). Pretty happy with the device so far: -The screen is great. Excellent definition, clarity, and absolutely no glare no matter where the sun was. (sometimes I couldn't see the Zumo at all if the sun was behind me) -I went for the 5" screen, not the 7" which I felt would be overkill, would block the bike's main screen, and be blocked by my tank bag. It's great. Small fonts, but my face is only about a foot from the screen when riding so all good. -I installed my Cardo comm (Q-Solo) on my helmet and quickly realized that yeah, I still don't want to listen to music while riding. Or take that call that popped up. But it worked. -All the usual CarPlay stuff worked fine: traffic, route planning, time to arrival, speed limits, etc. I did find that if you twist the throttle it takes the device a few seconds to catch up to reporting your actual speed. So, obviously, never twist the throttle while using this device. -The major flaw (today) was that my gloves don't work on the touch screen, but that's easily solved. Lot's of touch screen friendly gloves available.2 points
-
Have you tried Givi? They're right here in Charlotte, NC. Also one in U.K. https://www.givi.co.uk/2 points
-
I tend to worry about him if no new bike appears for say 3 months....2 points
-
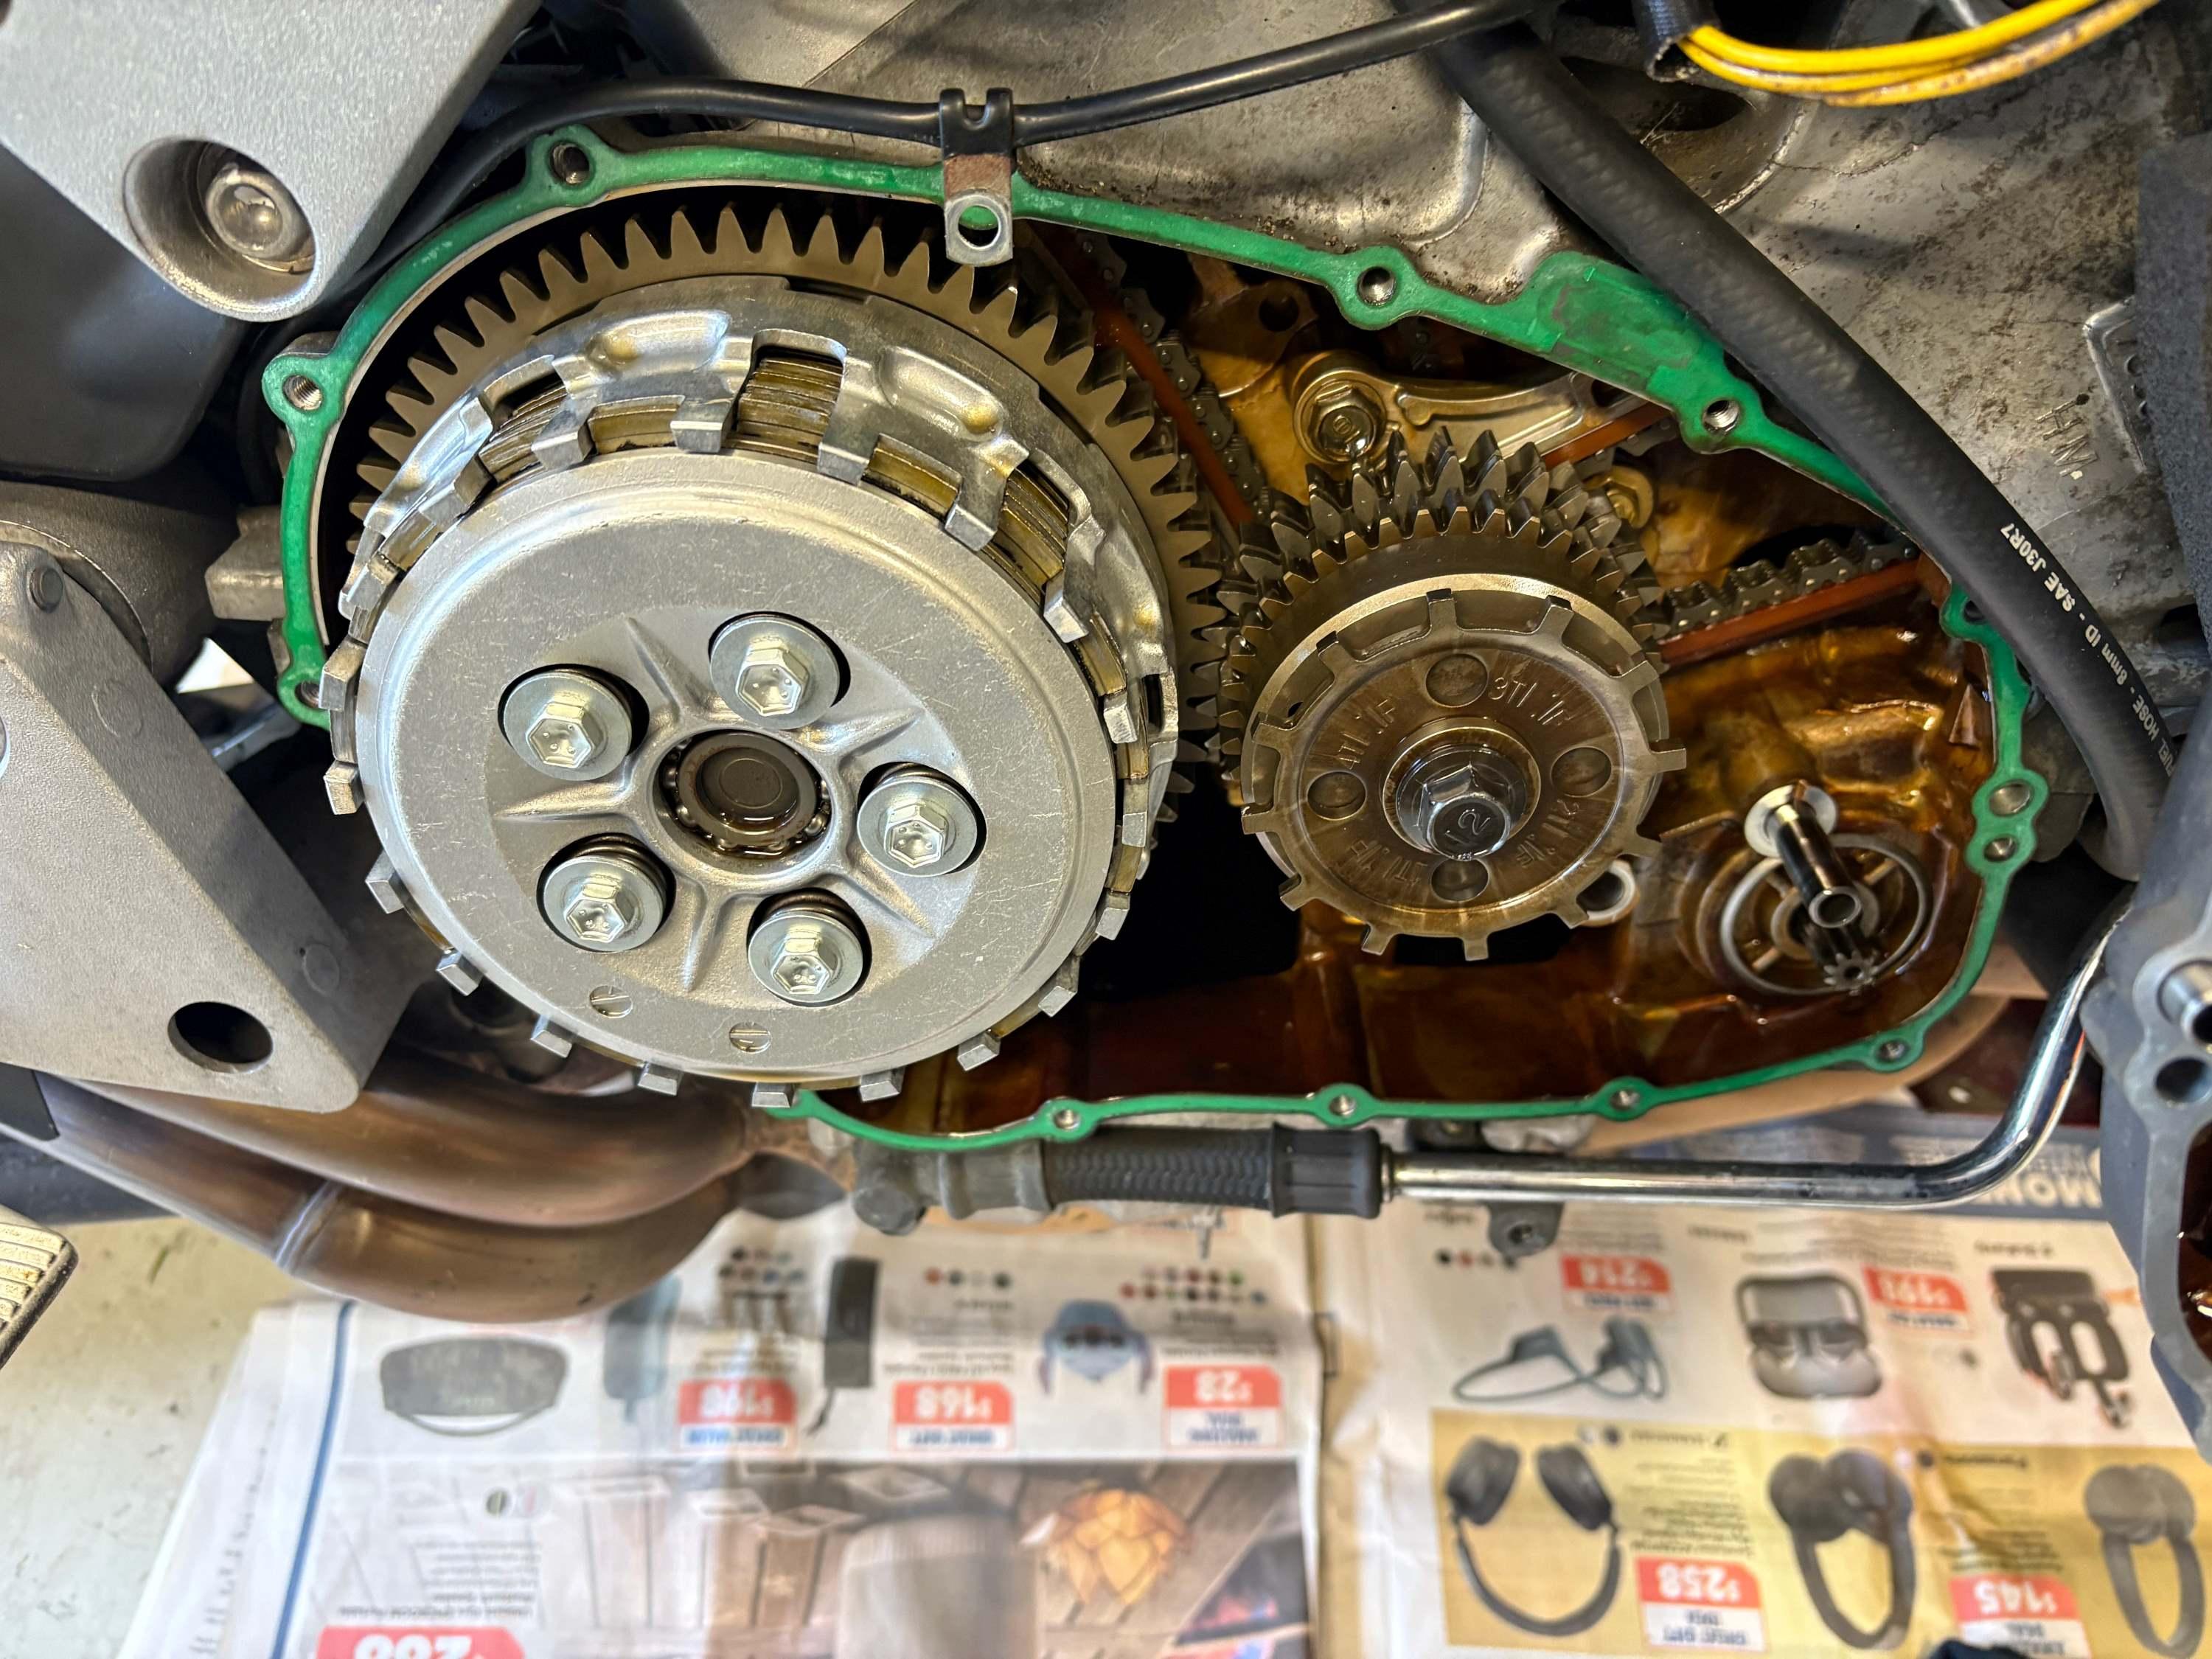
The only thing that sticks clutch plates together is cold oil and viscosity. My bikes never suffer from that, probably because they never sits still long enough. The clutch has an inner and an outer, where the fibre discs engage with the outer, driven from the crankshaft, and the steel discs engage with the inner and drive the gearbox input. When the engine is in neutral, the clutch spins as one unit, but when you drop into 1st gear with the clutch lever pulled, the inner will quickly stop and the outer carries on spinning, which is why there is often a bit of a clonk. I'd suggest letting the engine get up to a good operating temperature as that will give the clutch a chance to be bathed in nice hot oil. At that point I would shut off the engine and put the bike in gear with the clutch pulled, and then try rocking the bike back and forth to free up the sticky plates. If you need to get to it, clutch disassembly is no big deal but you will need a spare gasket and the patience to scrape off the old one without galling the mating surface. You can do it without dropping the oil, on the sidestand. Just don't drop foreign objects into the open sump...I just swing the case to the side and hang it up so I don't need to do anything with the ignition pulser wires. My 6th gen is below but the 5th is basically identical. Remove the 5 bolts and the clutch can be easily pulled apart, but use a torque wrench and go softly when rebuilding it.
2 points
-
Hey y’all, I recently picked up a 2005 VFR800 with 40k miles. It has some wiring issues and I don’t have the time to sort it out myself. Anyone know of any good techs in Houston we can trust? Quick notes: I just ordered the front wiring harness recall from Honda and they will replace it for free in a few weeks. I’m assuming I’m still going to have issues after that so I’d like to line someone up now, if possible. My dealer already said due to the age all they can do is the recall, nothing else. Previous owner recently installed the VFRness, new R/R and Stator. Thanks in advance!2 points
-
Is your reg/rec flat on top of the fins, or curved? The original OEM ones were flat--as in pancake, like your battery will be if you rely on one! But, Honda upgraded its reg/recs at some point to the curved, or rounded fin version. I don't think they are MOSFET, but they may be less prone to failure than the original OEM reg/recs. Maybe you don't have a reason to panic! (FYI, I believe the SH847 Series-type reg/rec was OEM on Suzuki DL1000 Stroms). Ciao, JZH2 points
-
Well I must say luck was on my side No fuel pooring today, fuel has swollen the O-rings so no leak anymore, great! The oil leak at clutch cover was gasket that had slipped off So just to relocate as tight back. Then the fairings was mounted, you gotta love new bolt's for them Then only one thing left, switch the rear wheel between my RC24's after the plastic was on Then to get a insurance as take it in road use and ride to petrol station for fuel as check air pressure (forgot that at home) And then to nice road's As a nice cafe Really enjoy the bike, some things to sort like fork over damped and front brake feel not the best but otherwise running like a champ! Some pictures from ride home from Cafe Really love this motorcycle2 points
-
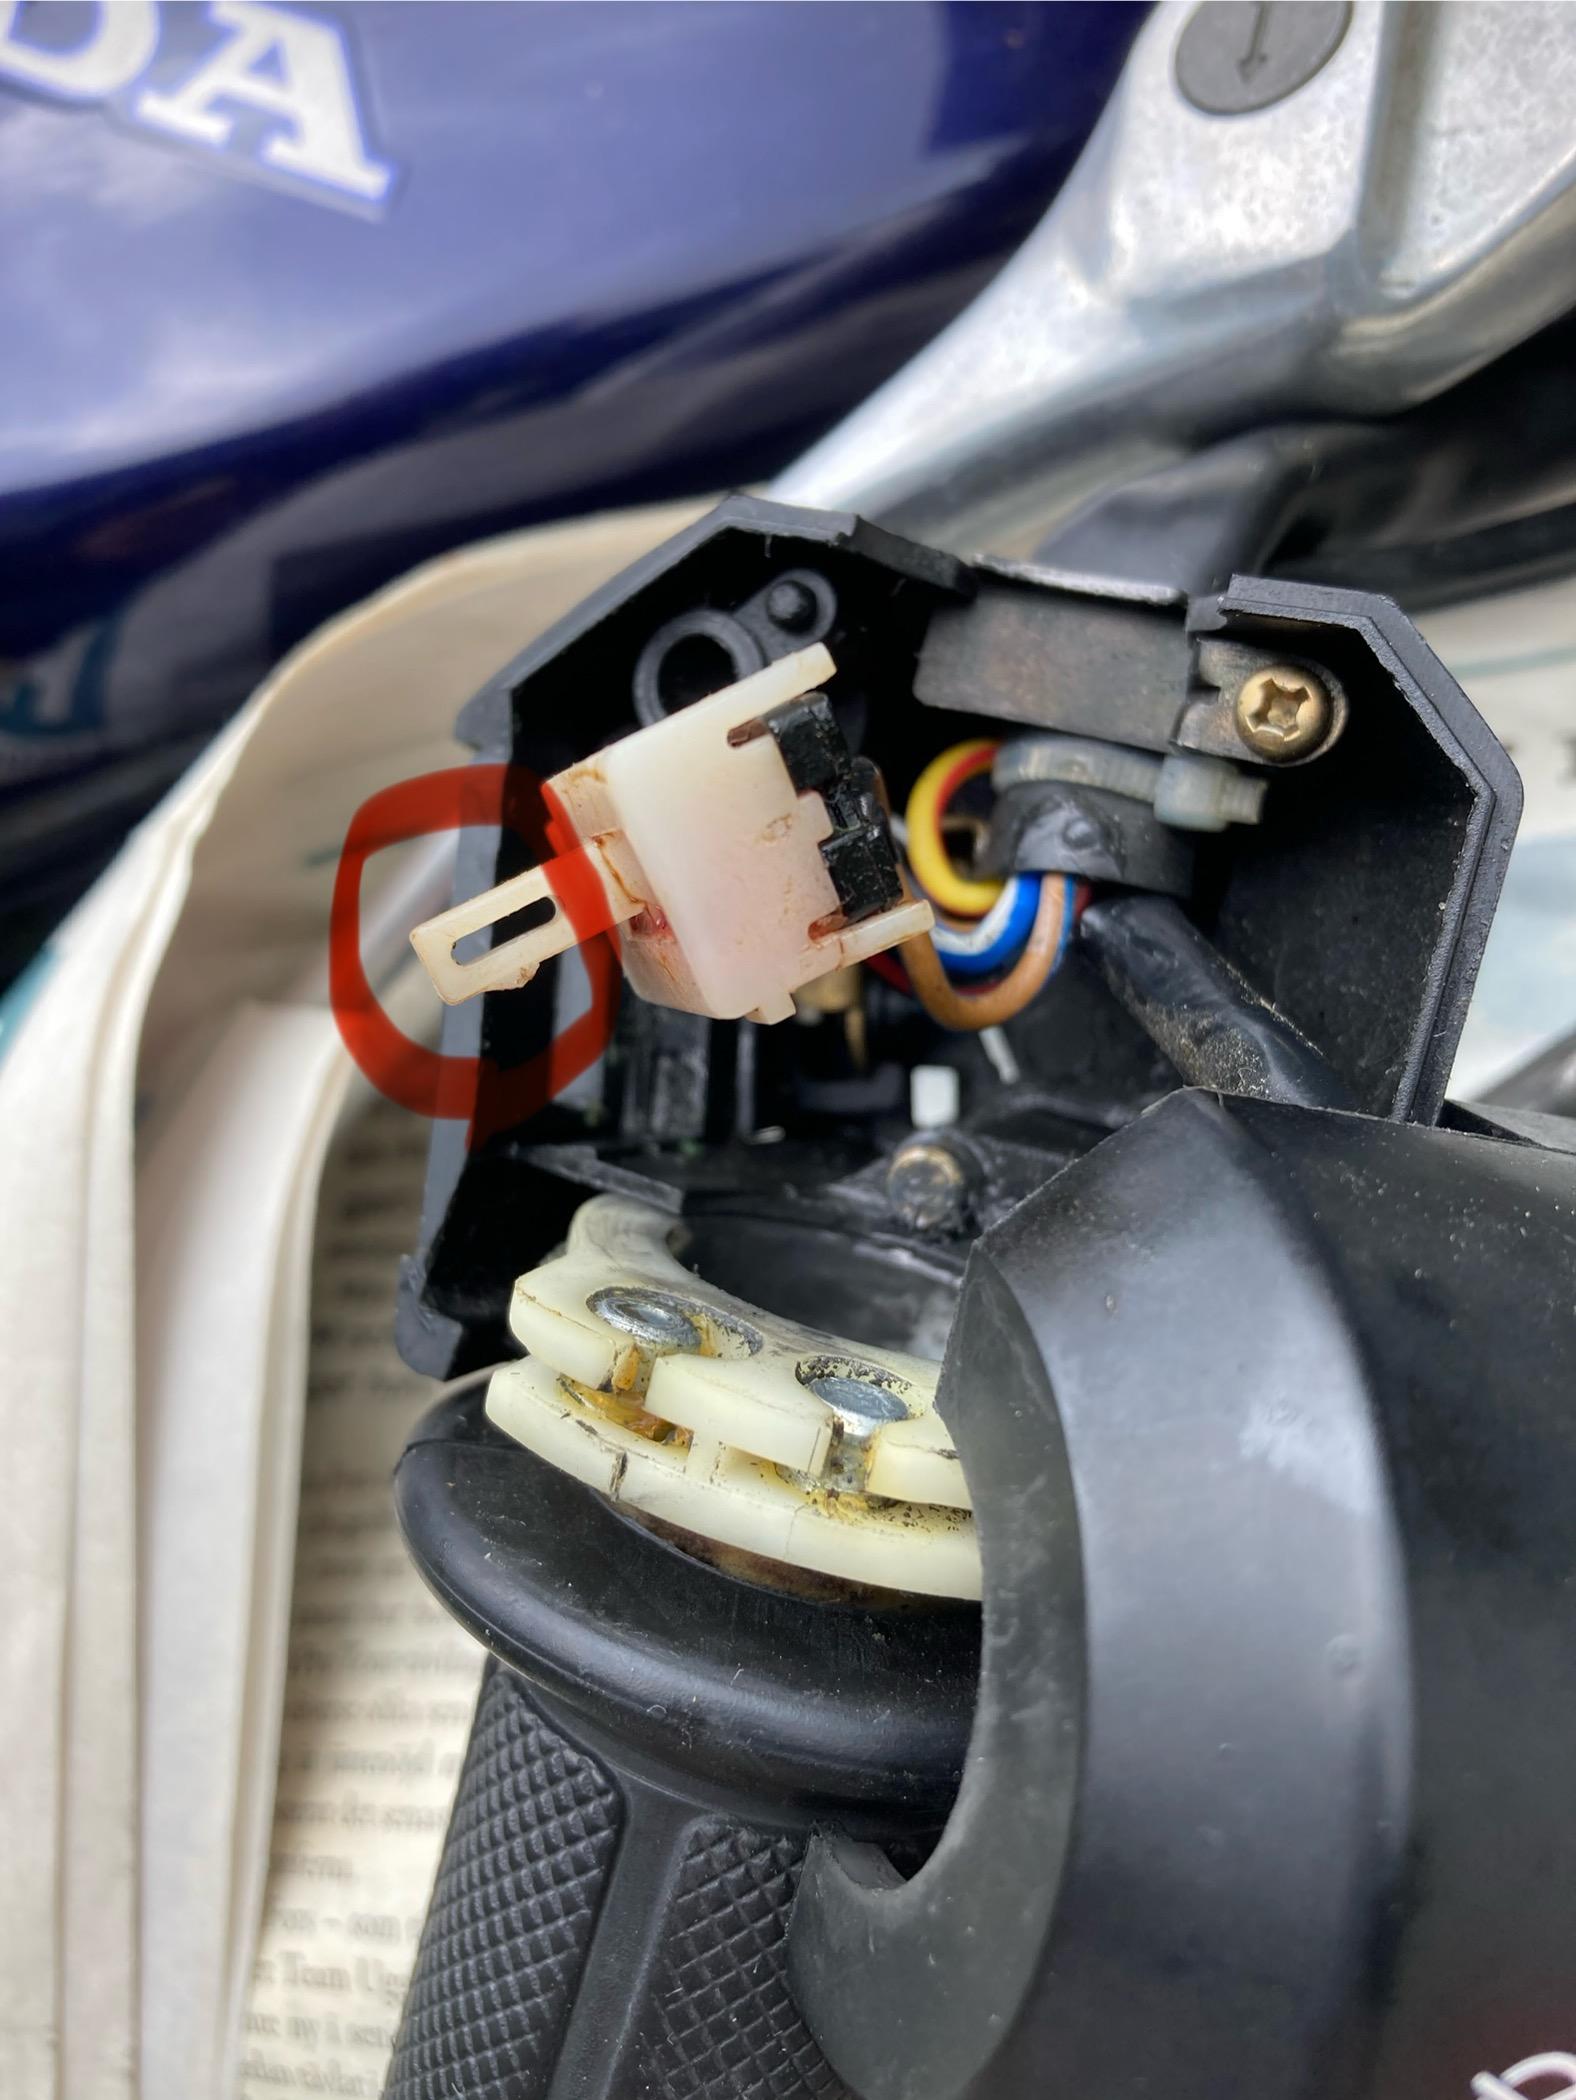
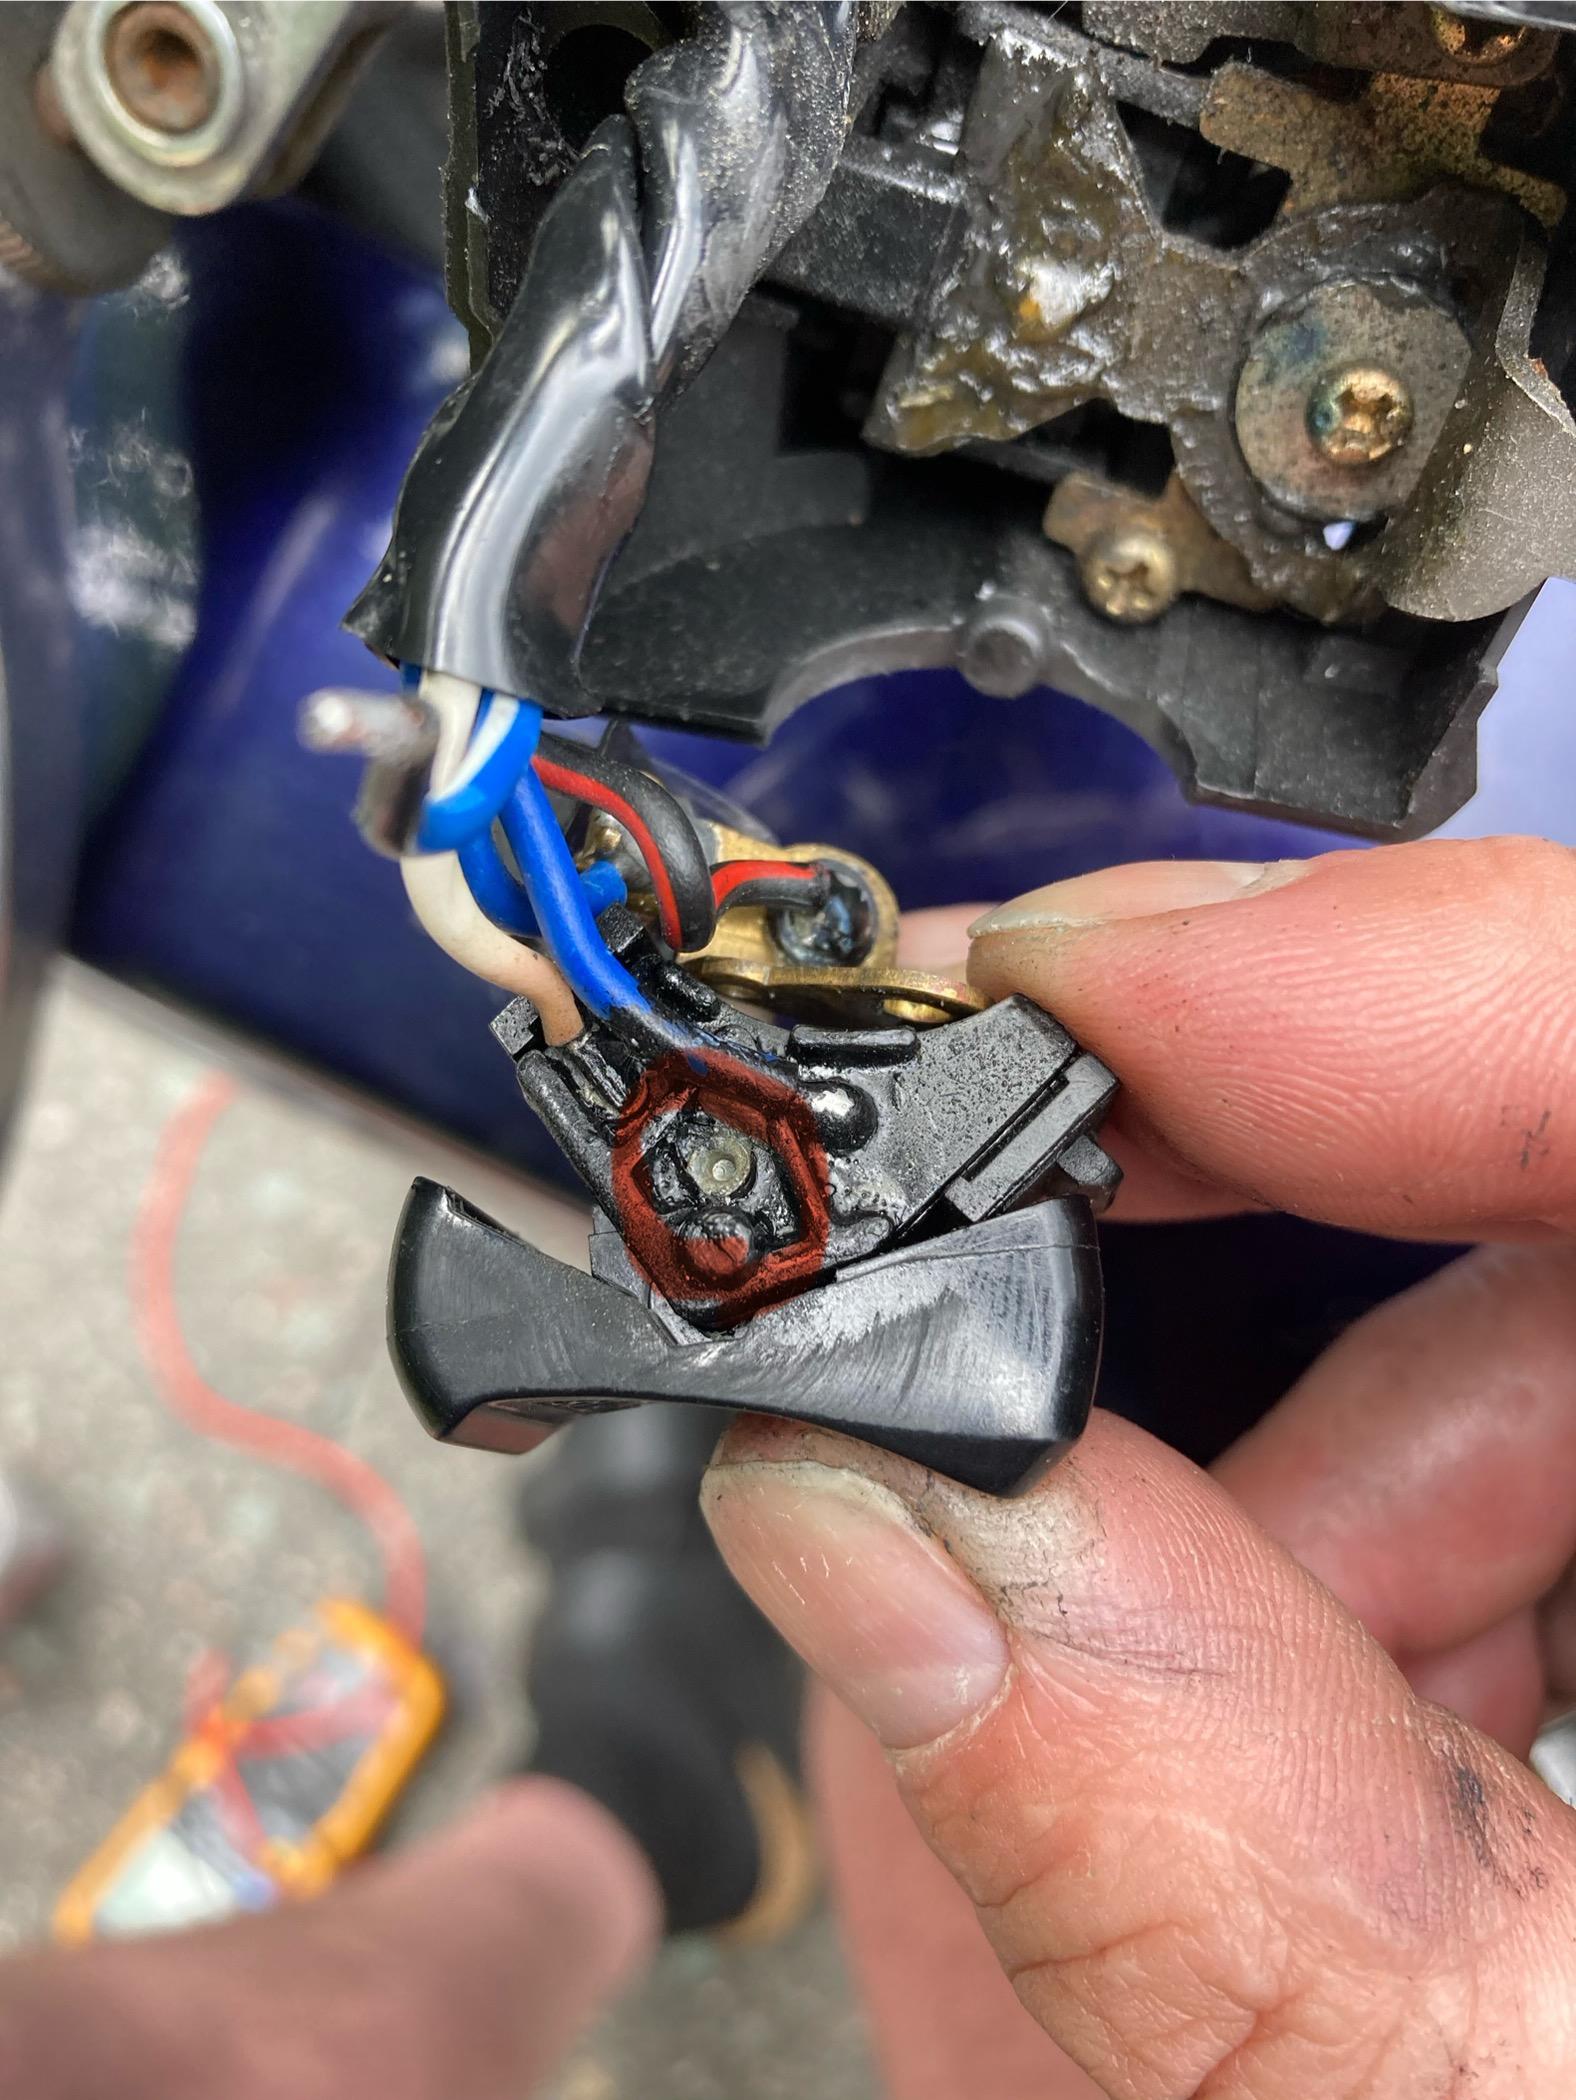
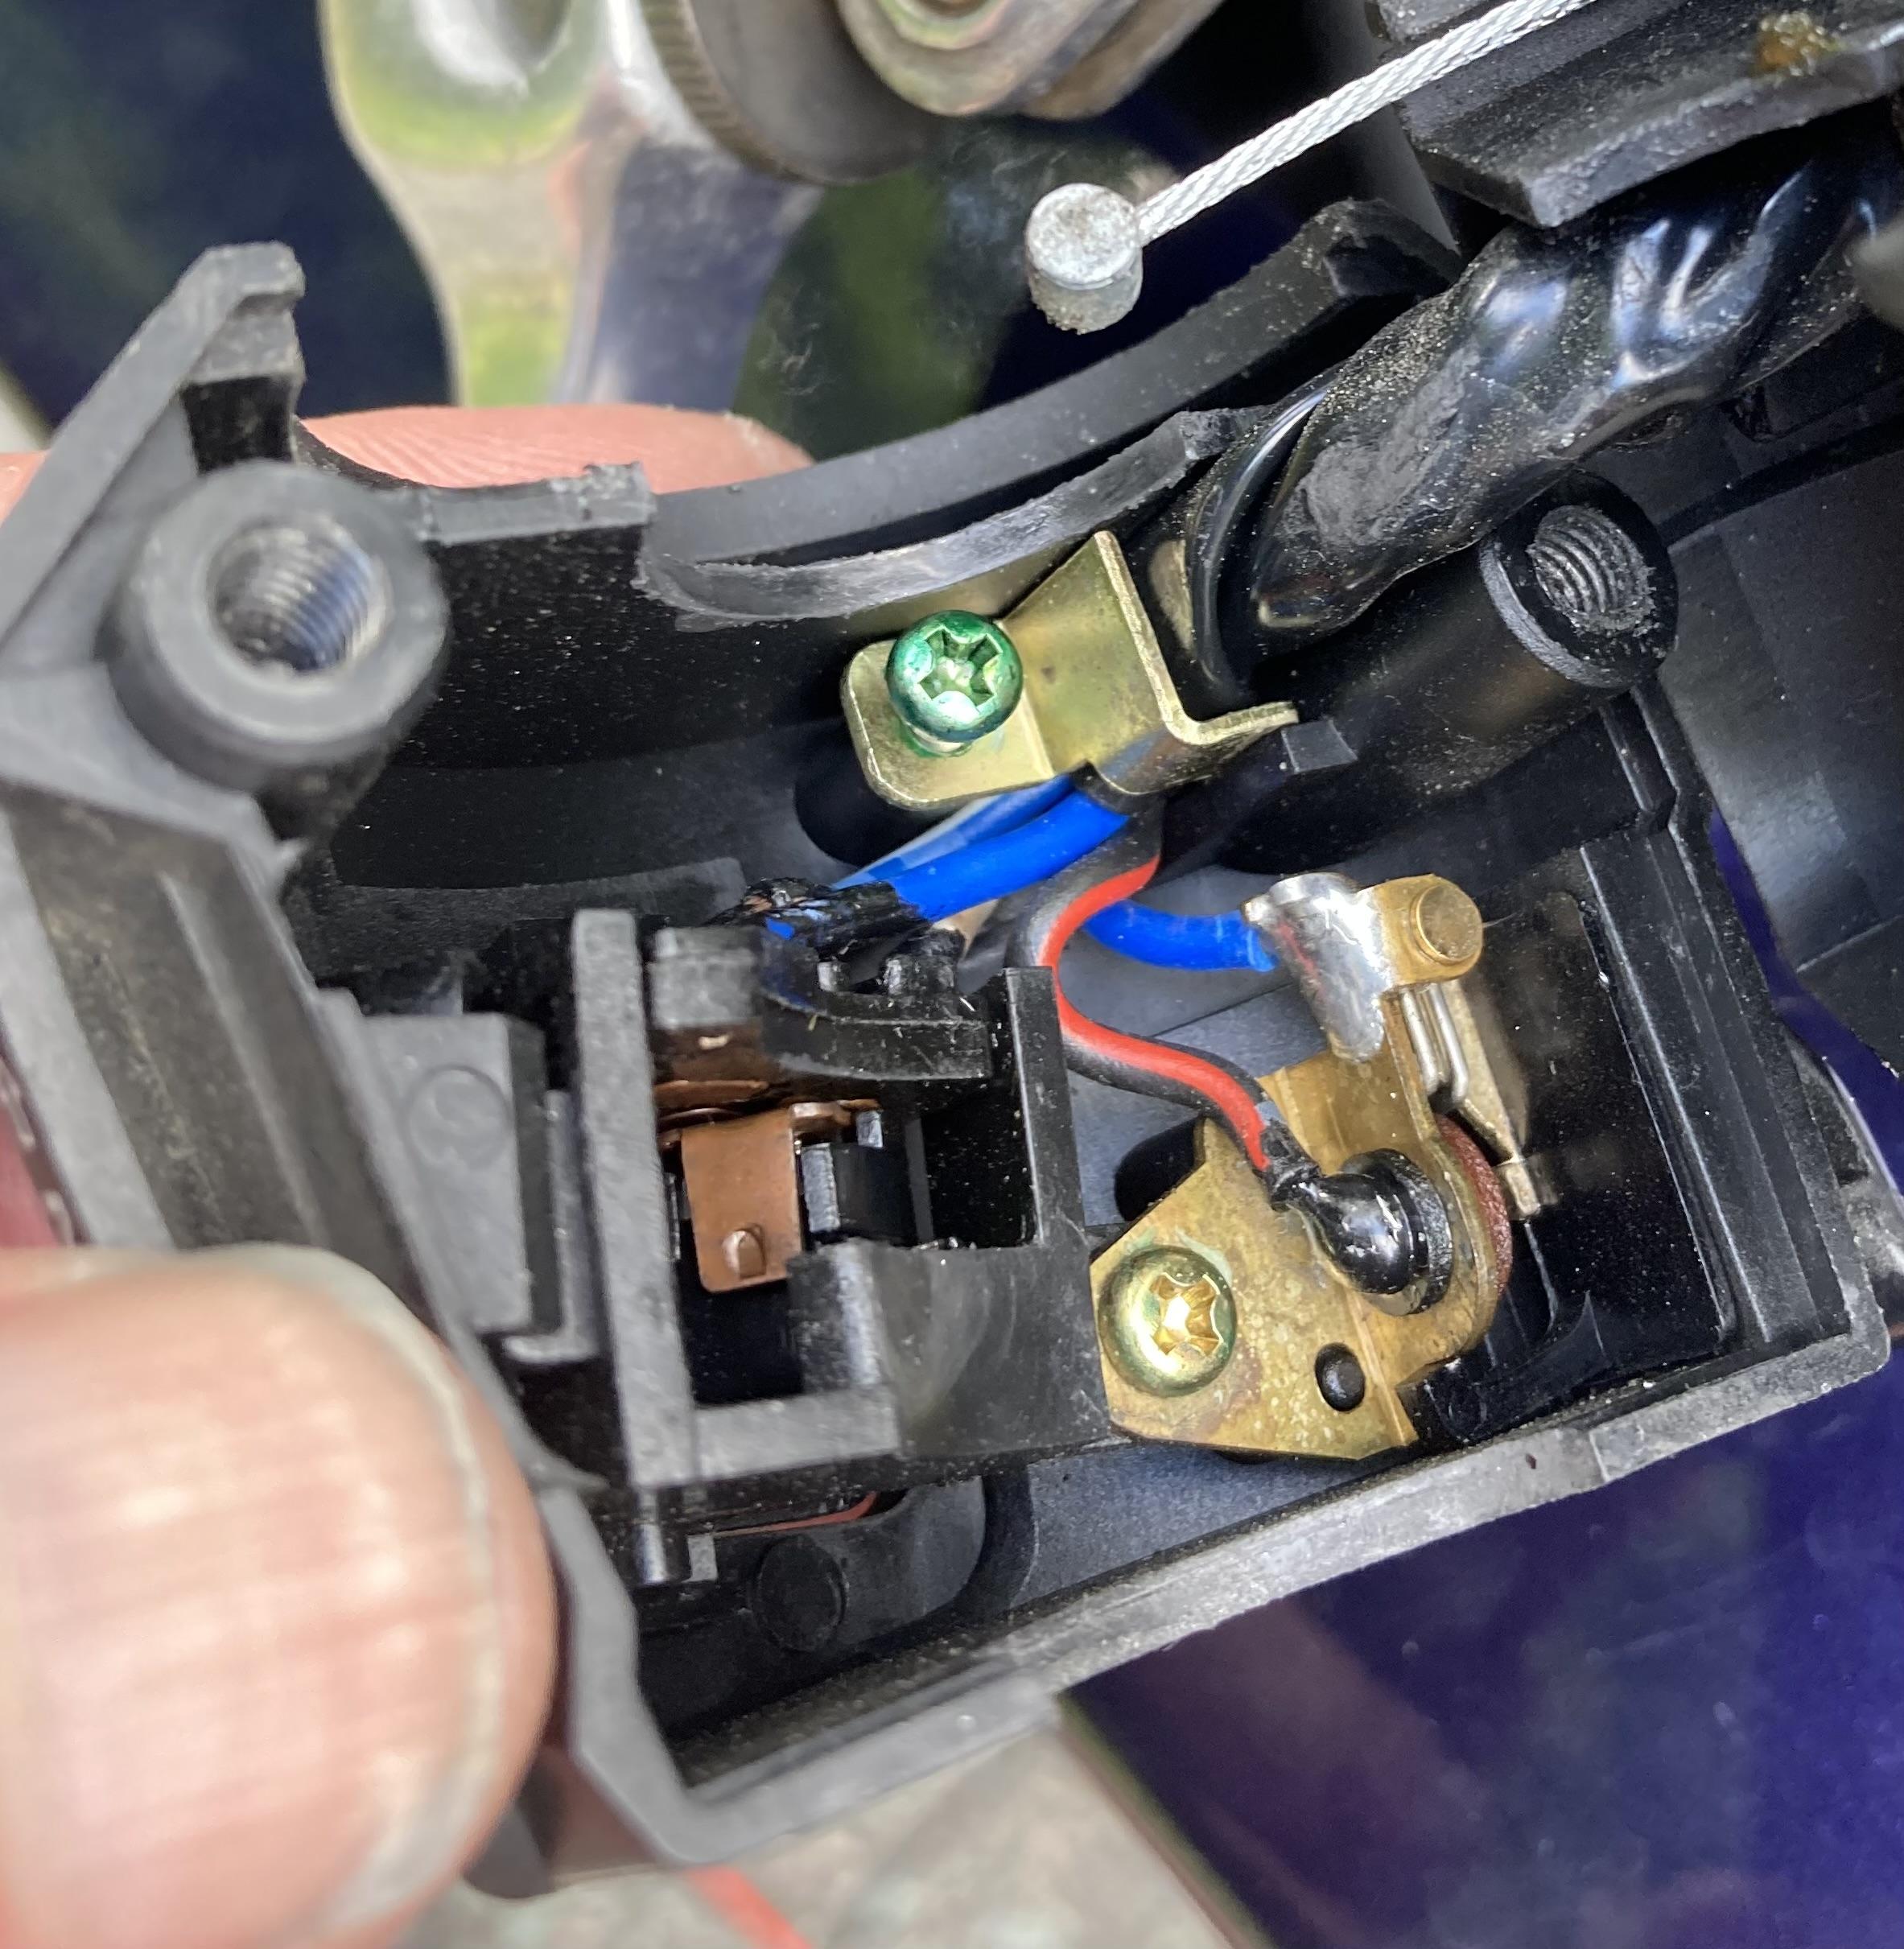
I found this video which describes the right hand switch disassembly and cleaning which could be needed if you have poor headlight connection. https://youtu.be/3_QMOKXJJmc?feature=shared I followed the video to be able to check the right switch assy. Some things weren't mentioned in the video: - to remove the switch assy from the bar i had to remove the brake lever. - i takes a large force to release the clipping feature that holds the right side light button on the switch body. You can see the why on the pic, snap feature is really stiff. Disassembly of the left side switch: Dimmer switch is just snapped in place and wasn't hard to get out after removing the cable strain relief and a fixation screw. you can see the soldering location for the blue/white feed wire which was broken off on my bike on below pic. This is what the left switch assy looked like before removing the dimmer switch: - i disassembled the passing button also to be able to remove the switch cover and gain better access for soldering. I struggled a bit during the removal so I am worried about getting it back together. Note: there's a spring and ball on the passing button for the tactile feel, this wants to escape and will be next to impossible to find if dropped. (Visible in lower right on pic)
2 points
-
2 points
-
Roll the bike up to 20-25 mph in first,shut it right off to compress the forks then gas it full up quickly and it will lift the front easily without clutching it1 point
-
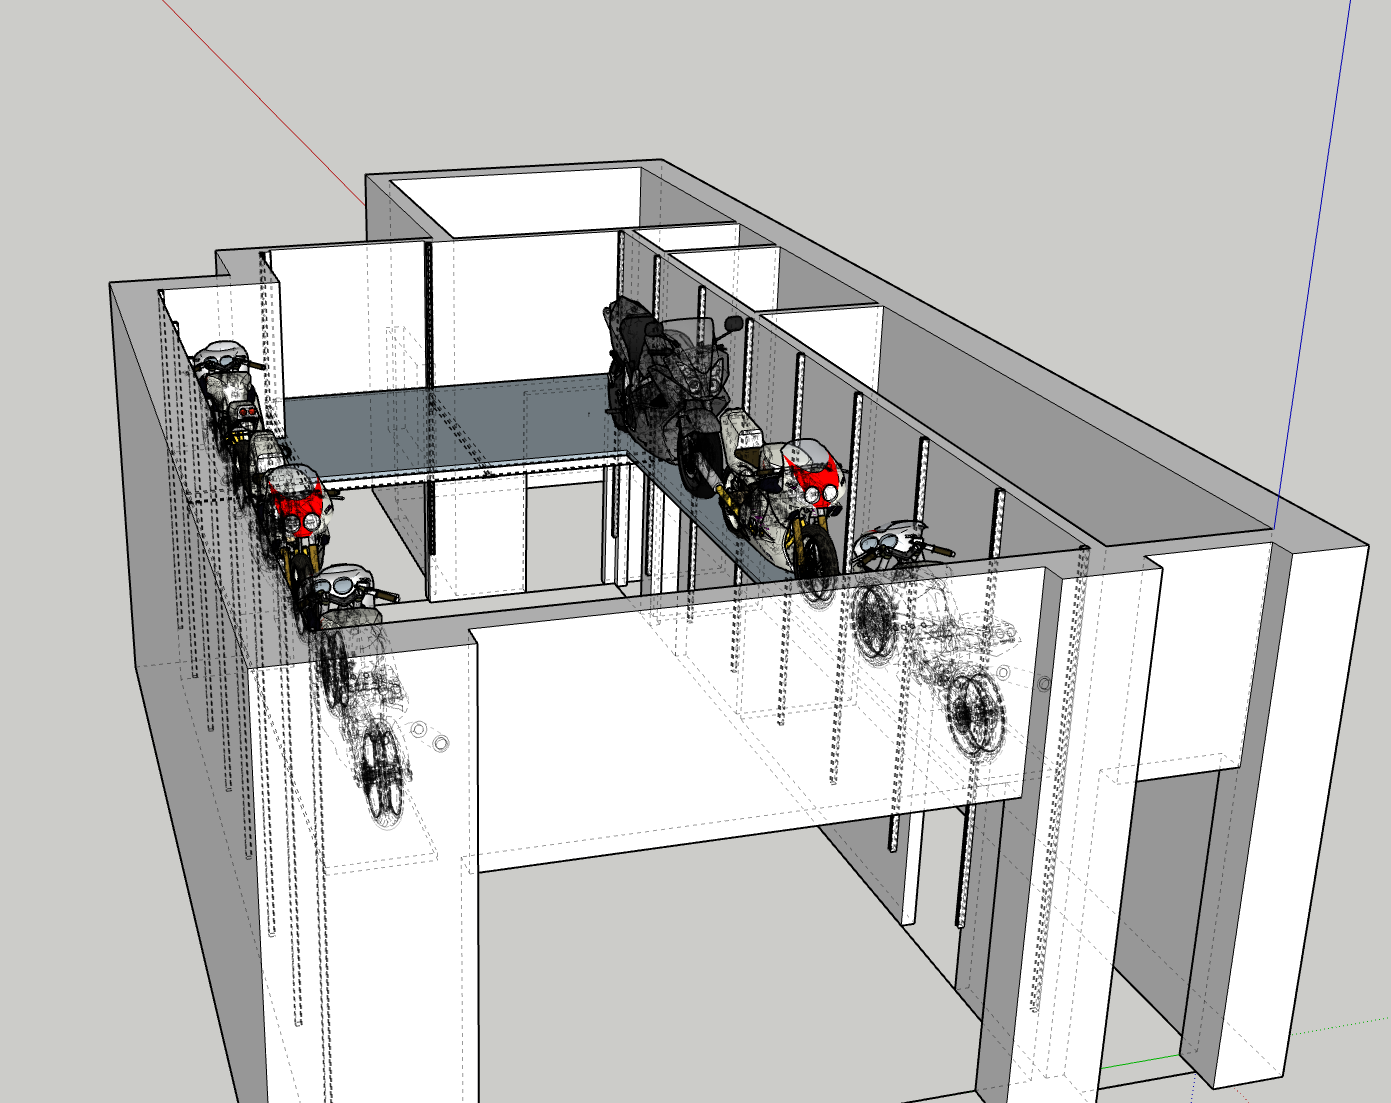
Coincidence, or what?!? So, I'm buying a ~275 year-old, three-story "canal house" in the Netherlands with a ground floor which is destined to be my new garage. Not an American-sized garage by any stretch of the imagination, but if I can manage the space well it should be big enough to meet my current needs. The total garage area is about 40m2--with 3.5m ceilings. The challenge is that if I want to be able to use the space as a workshop (and I do), I've got to find some place to store 9-10 motorcycles... (No, selling them is not an option!) My tentative solution is to use the garage's height in a creative way, such that I will build a heavy duty shelf 2m off the ground on the three side walls and lift the bikes up and down using an electric "pallet stacker". The shelves will be constructed from 41x41 Unistrut, with 1m-spaced verticals attaching at the floor and the ceiling (as well as to the walls). I'll use a 45-degree shelf support bracket made of welded rectangular tube attached to the horizontal and vertical struts. The bikes will sit on metal "sleds" I will design and build, which may be based on the Baxley-type wheel chocks I have 6 of now, or maybe on an ABBA stand-type design. The stacker can lift 1000kg 3.5m (it was either that or install some sort of winch/gantry system to the ceiling--this is simpler!) I'm not a structural engineer, but I've read a bit about the Unistrut system, which is quite versatile and very strong. I won't need to weld anything to the Unistrut (which is good, because it is galvanized steel...), but I can build the 45-degree brackets and the "sleds" from mild steel tubing and plate. I should have enough room for six bikes, even if I only use the side walls. I can only ride one at a time, so as long as they are accessible (and the floor area remains free of obstruction), I should be able to retrieve them whenever I want to worn on them or ride them. It should look something like this: The front wall will have 4x folding doors with windows above, plus there are french doors at the back and a small office. I should get plenty of light. Thoughts...? (Especially re the crazy shelf idea!) Cheers, JZH
1 point
-
That video is pretty much exactly how I did mine last year. Easy peasy, provided you're prepared to rebuild the caliper (and don't mind one-way mods). The only other caveat is that this requires a 14mm rear master cylinder to achieve a comparable hydraulic ratio. Ciao, JZH1 point
-
Clearance for the forks will be at a premium, my Vtec's ground clearance is only 125mm per the manual. Every time I think of an idea to try I end up looking was puzzled as Nathan Fillion. Good luck, John.1 point
-
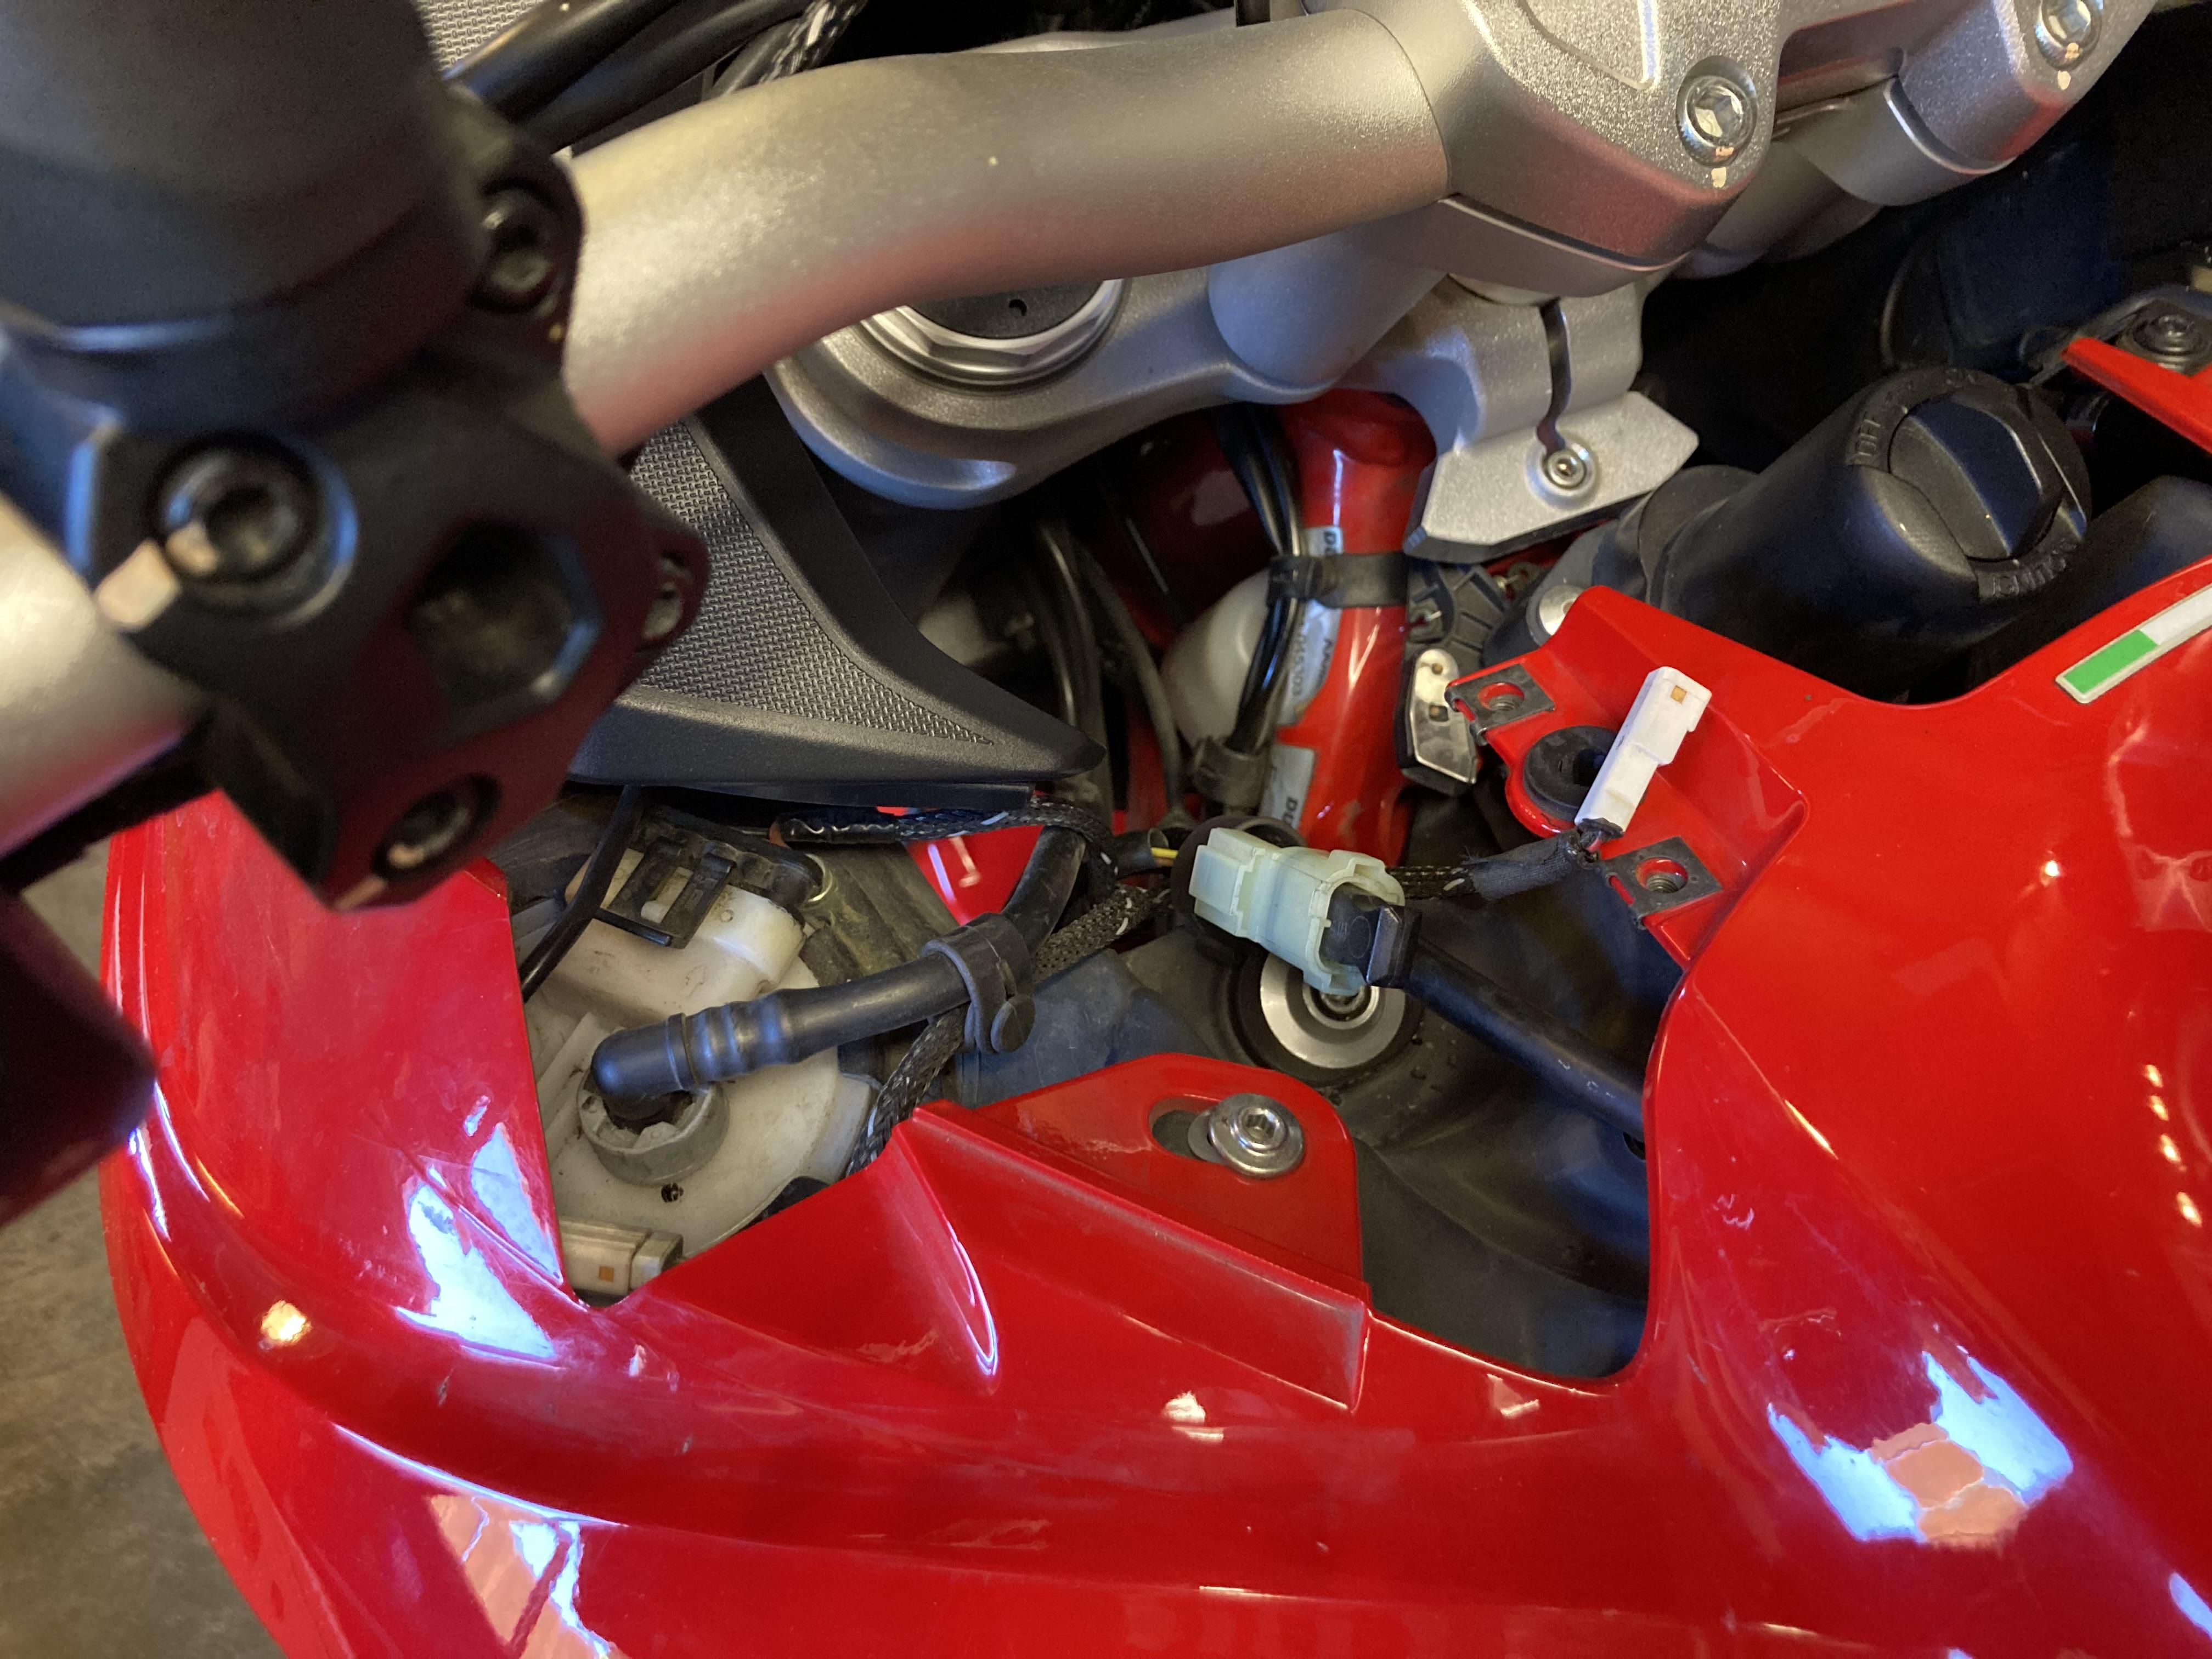
I took the easy way out; don't touch the rear calliper or hose connections. When you unbolt the linking hose from the PCV, you will find that the hose can now be rerouted smoothly and end up at the rear master just like it was designed to go there; the end fitting is even at the right angle. There is/was a double banjo bolt on the PCV as well, so I just bolted both hoses on to the new master and called it done. Not a great picture as it was zoomed in a long way, but gives you the idea.
1 point
-
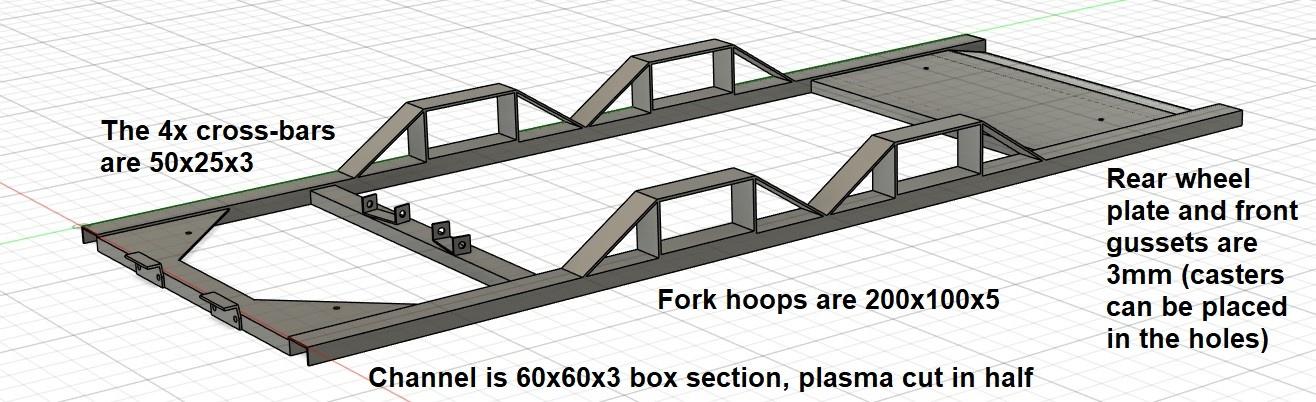
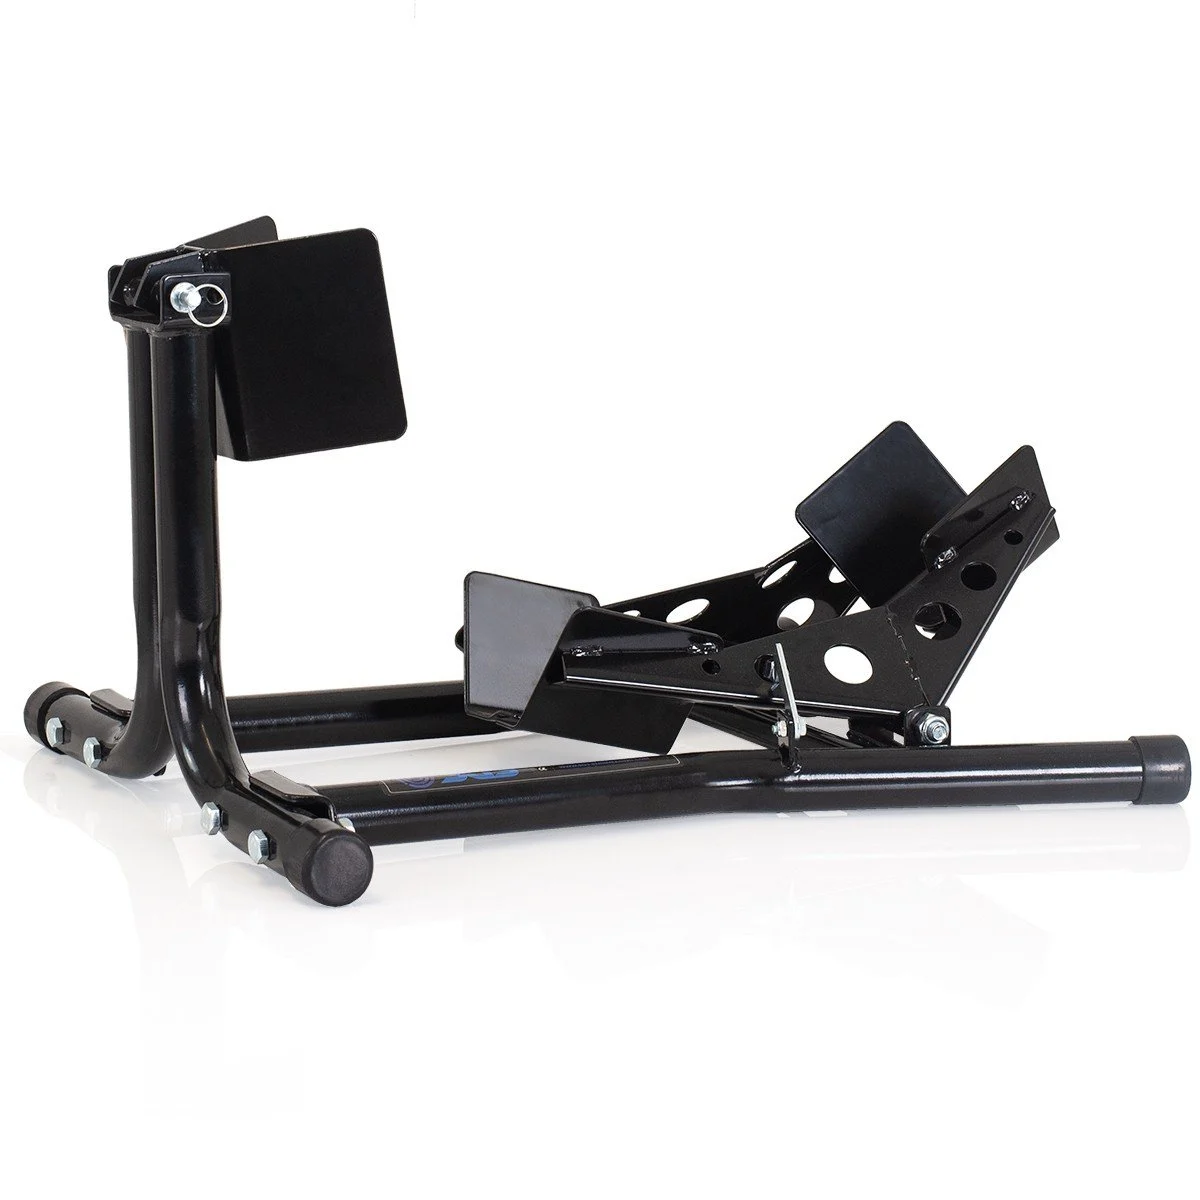
Nice "shed"... It's about twice the size of mine, but I saw some good ideas I think I might borrow! Regarding the racking, I think I will be able to use the lower beams on the back sides, as Yoshi suggested, as well as bolting the feet to the floor and bolting the tops of the frames to the walls. That should be that. As for what goes onto the racks, I think I've got a solution: I went through a couple of designs, trying to minimise the expense of the materials as well as the cutting and welding operations I will need to do. There's still a lot of steps to manufacture one of these, and I still have to do it 6-7 times... The wheel chock parts (not drawn, because I'm not making them) come from this kind of Baxley knock-off: In laying out my motorbike carriers, since I have 6-7 of these wheel chocks already, I've measured and duplicated the locations where the M10 and M12 bolts go. My bikes' wheelbases range from 1,440mm (the 5th gens) to 1,335mm (the NC35), and all the bikes' rear tyres sit basically in the middle of the steel plate at the back. It's pretty secure, but I will probably also strap each bike wheel to the front vertical to make sure it can't go anywhere. I was also thinking about welding some steel angle onto the plate at the rear, maybe 160mm apart, to help locate the rear tyres, but my bikes all have different sizes of tires, so one size won't fit all (in the same way). Not sure it is necessary, anyway. The fork hoops look huge, but the forks on the pallet stacker are quite large (ca. 170x70), and I don't really want a tight fit. I haven't actually measured the clearance between the bikes' bellypans/stands/exhausts and the forks that need to stick through, which I will do before I finalise this design. I decided to use the 60x60 c-channel, rather than the angle iron I had first used, mainly because of strength. I will have to plasma cut them, but I can set up a jig to make that do-able. This way, the channel just sits on top of the 50mm horizontal beams of the racks, and it will be very obvious when it has dropped into place. I've provided for the fitting of 100kg casters, which should make these carriers more useful when down on the ground. I wonder if I can make some sort of (removable) lifting device using the swing arm pivots, a la an ABBA Stand? That would make them even more useful for chain adjustment, etc. And I'd only need to make one, which I could pop into each carrier only when needed. Any thoughts on my bike carrier frame design? Cheers, JZH
1 point
-
Thanks, looks good. I just added one of these, https://www.amazon.com/dp/B09F2YH4NJ?ref=ppx_yo2ov_dt_b_fed_asin_title to use that power port on the dash and keep the phone powered in the tank bag, worked well on the last trip.1 point
-
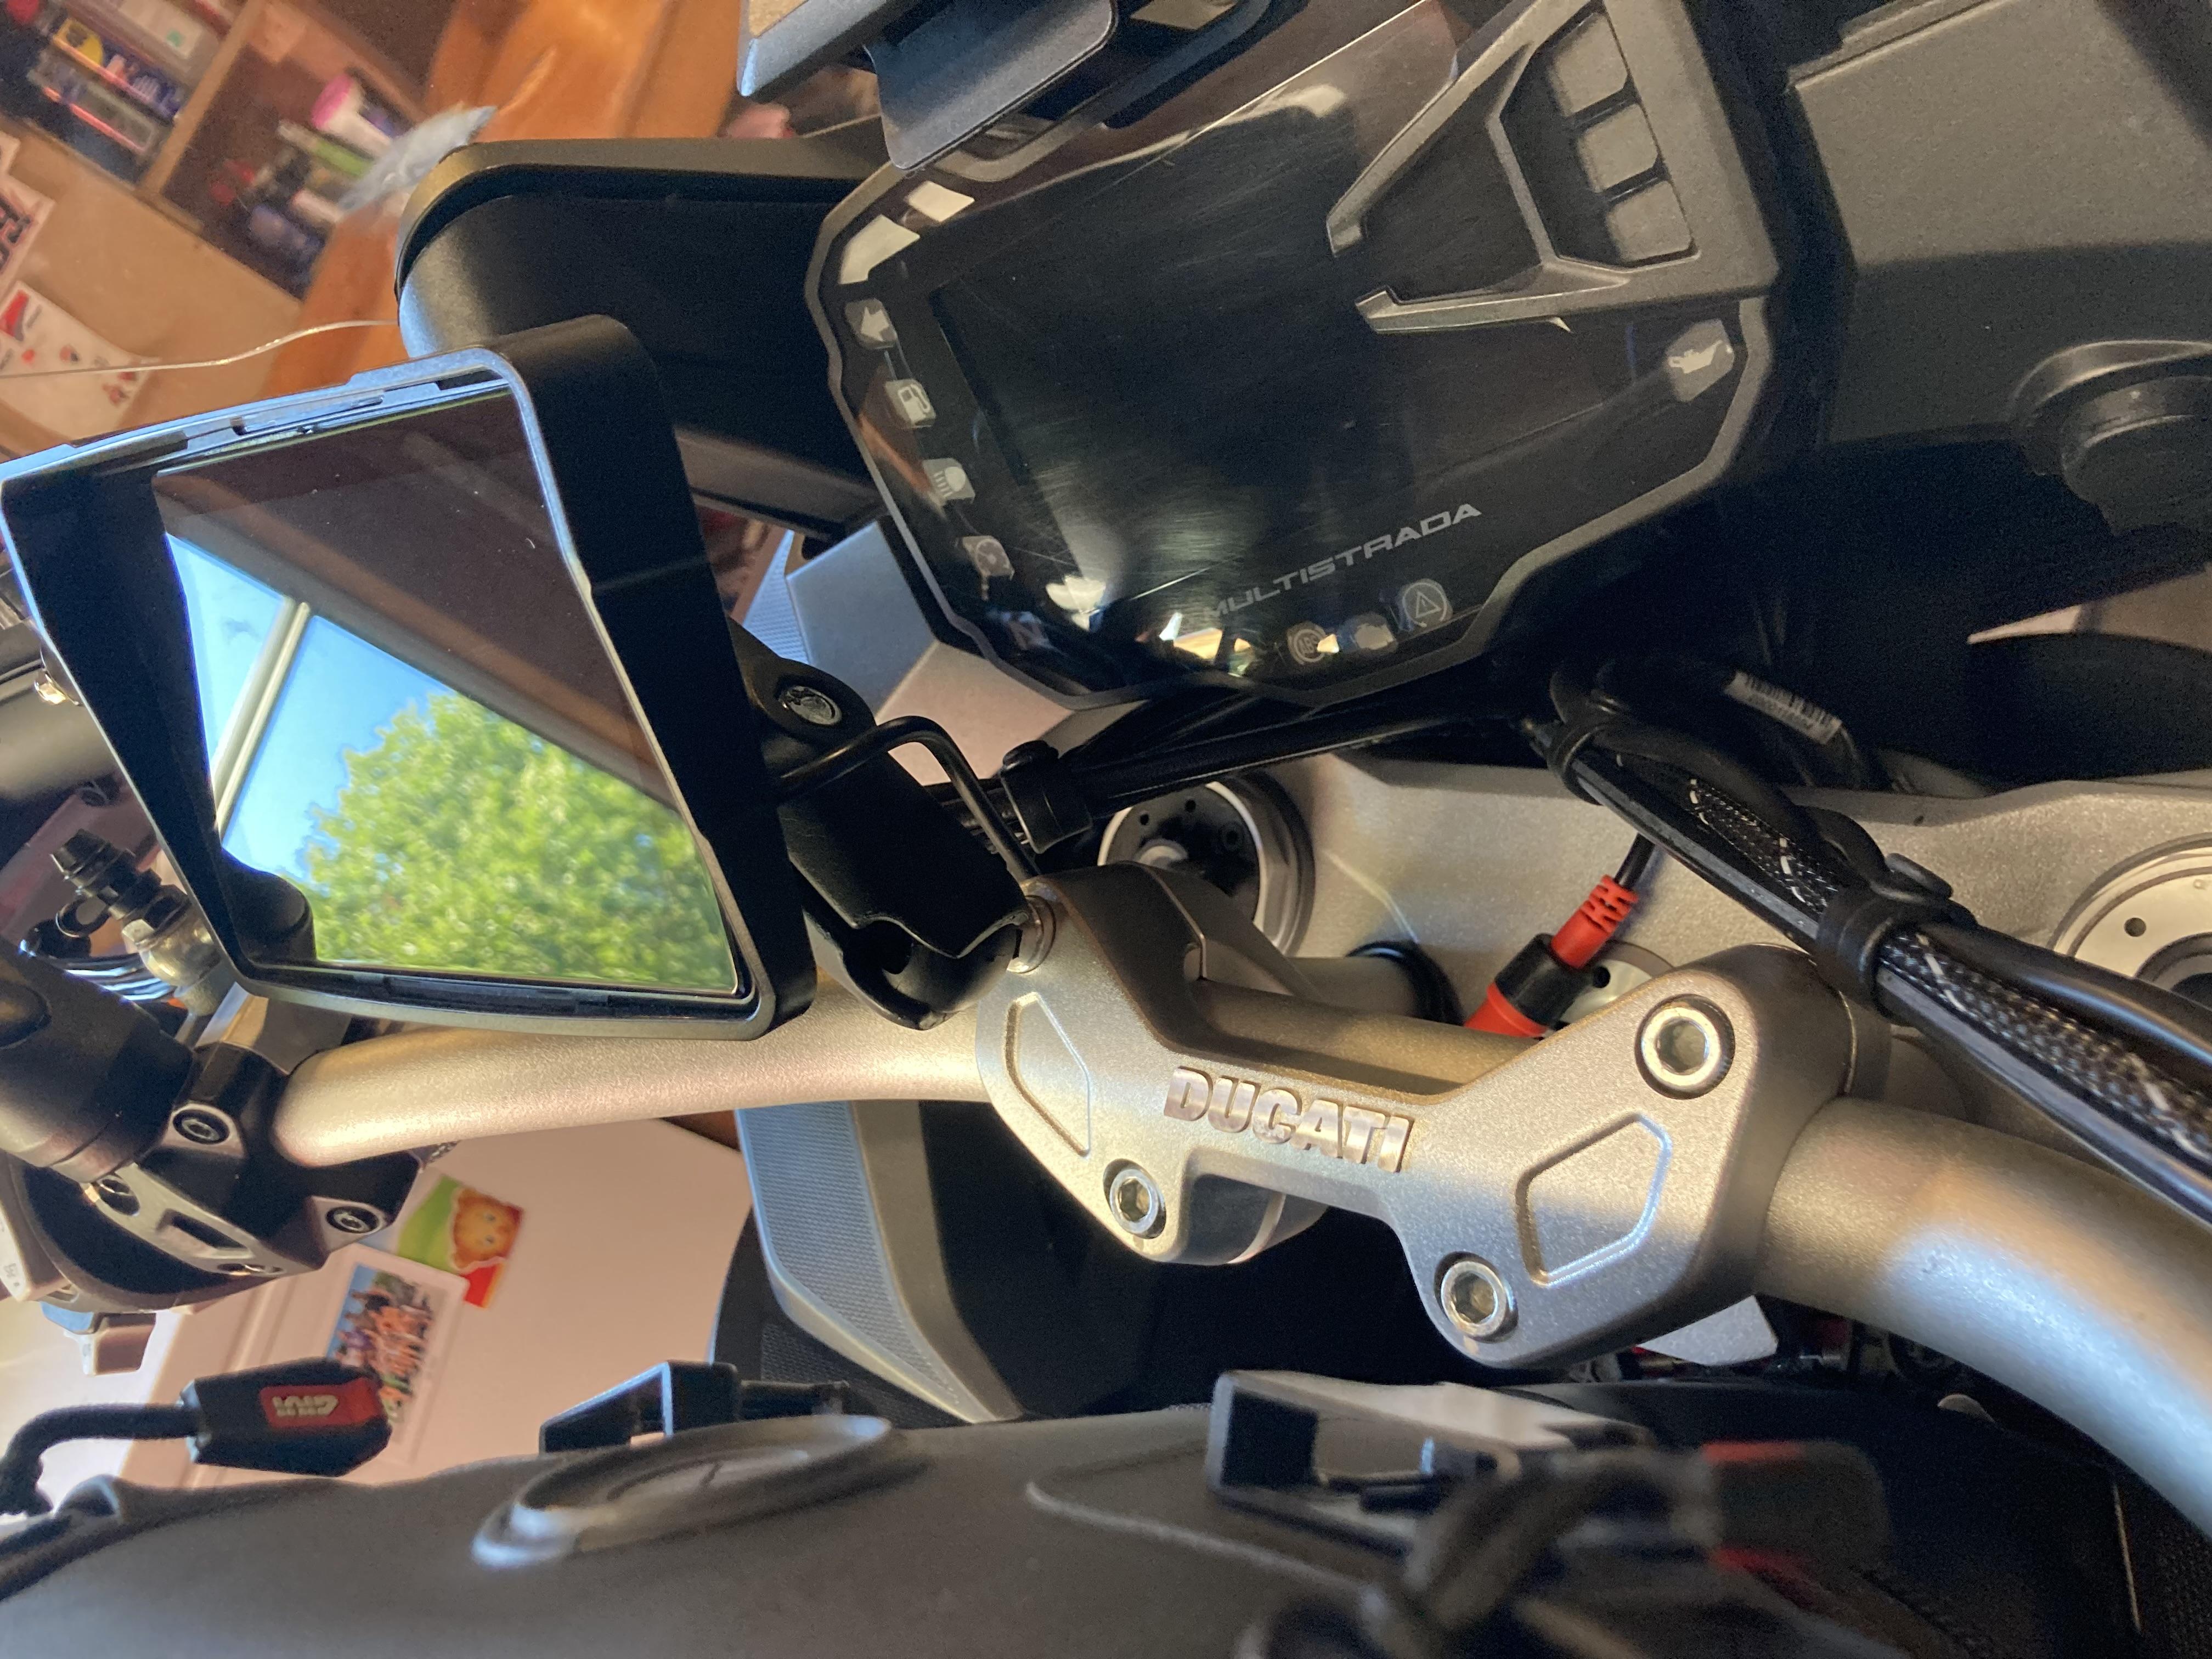
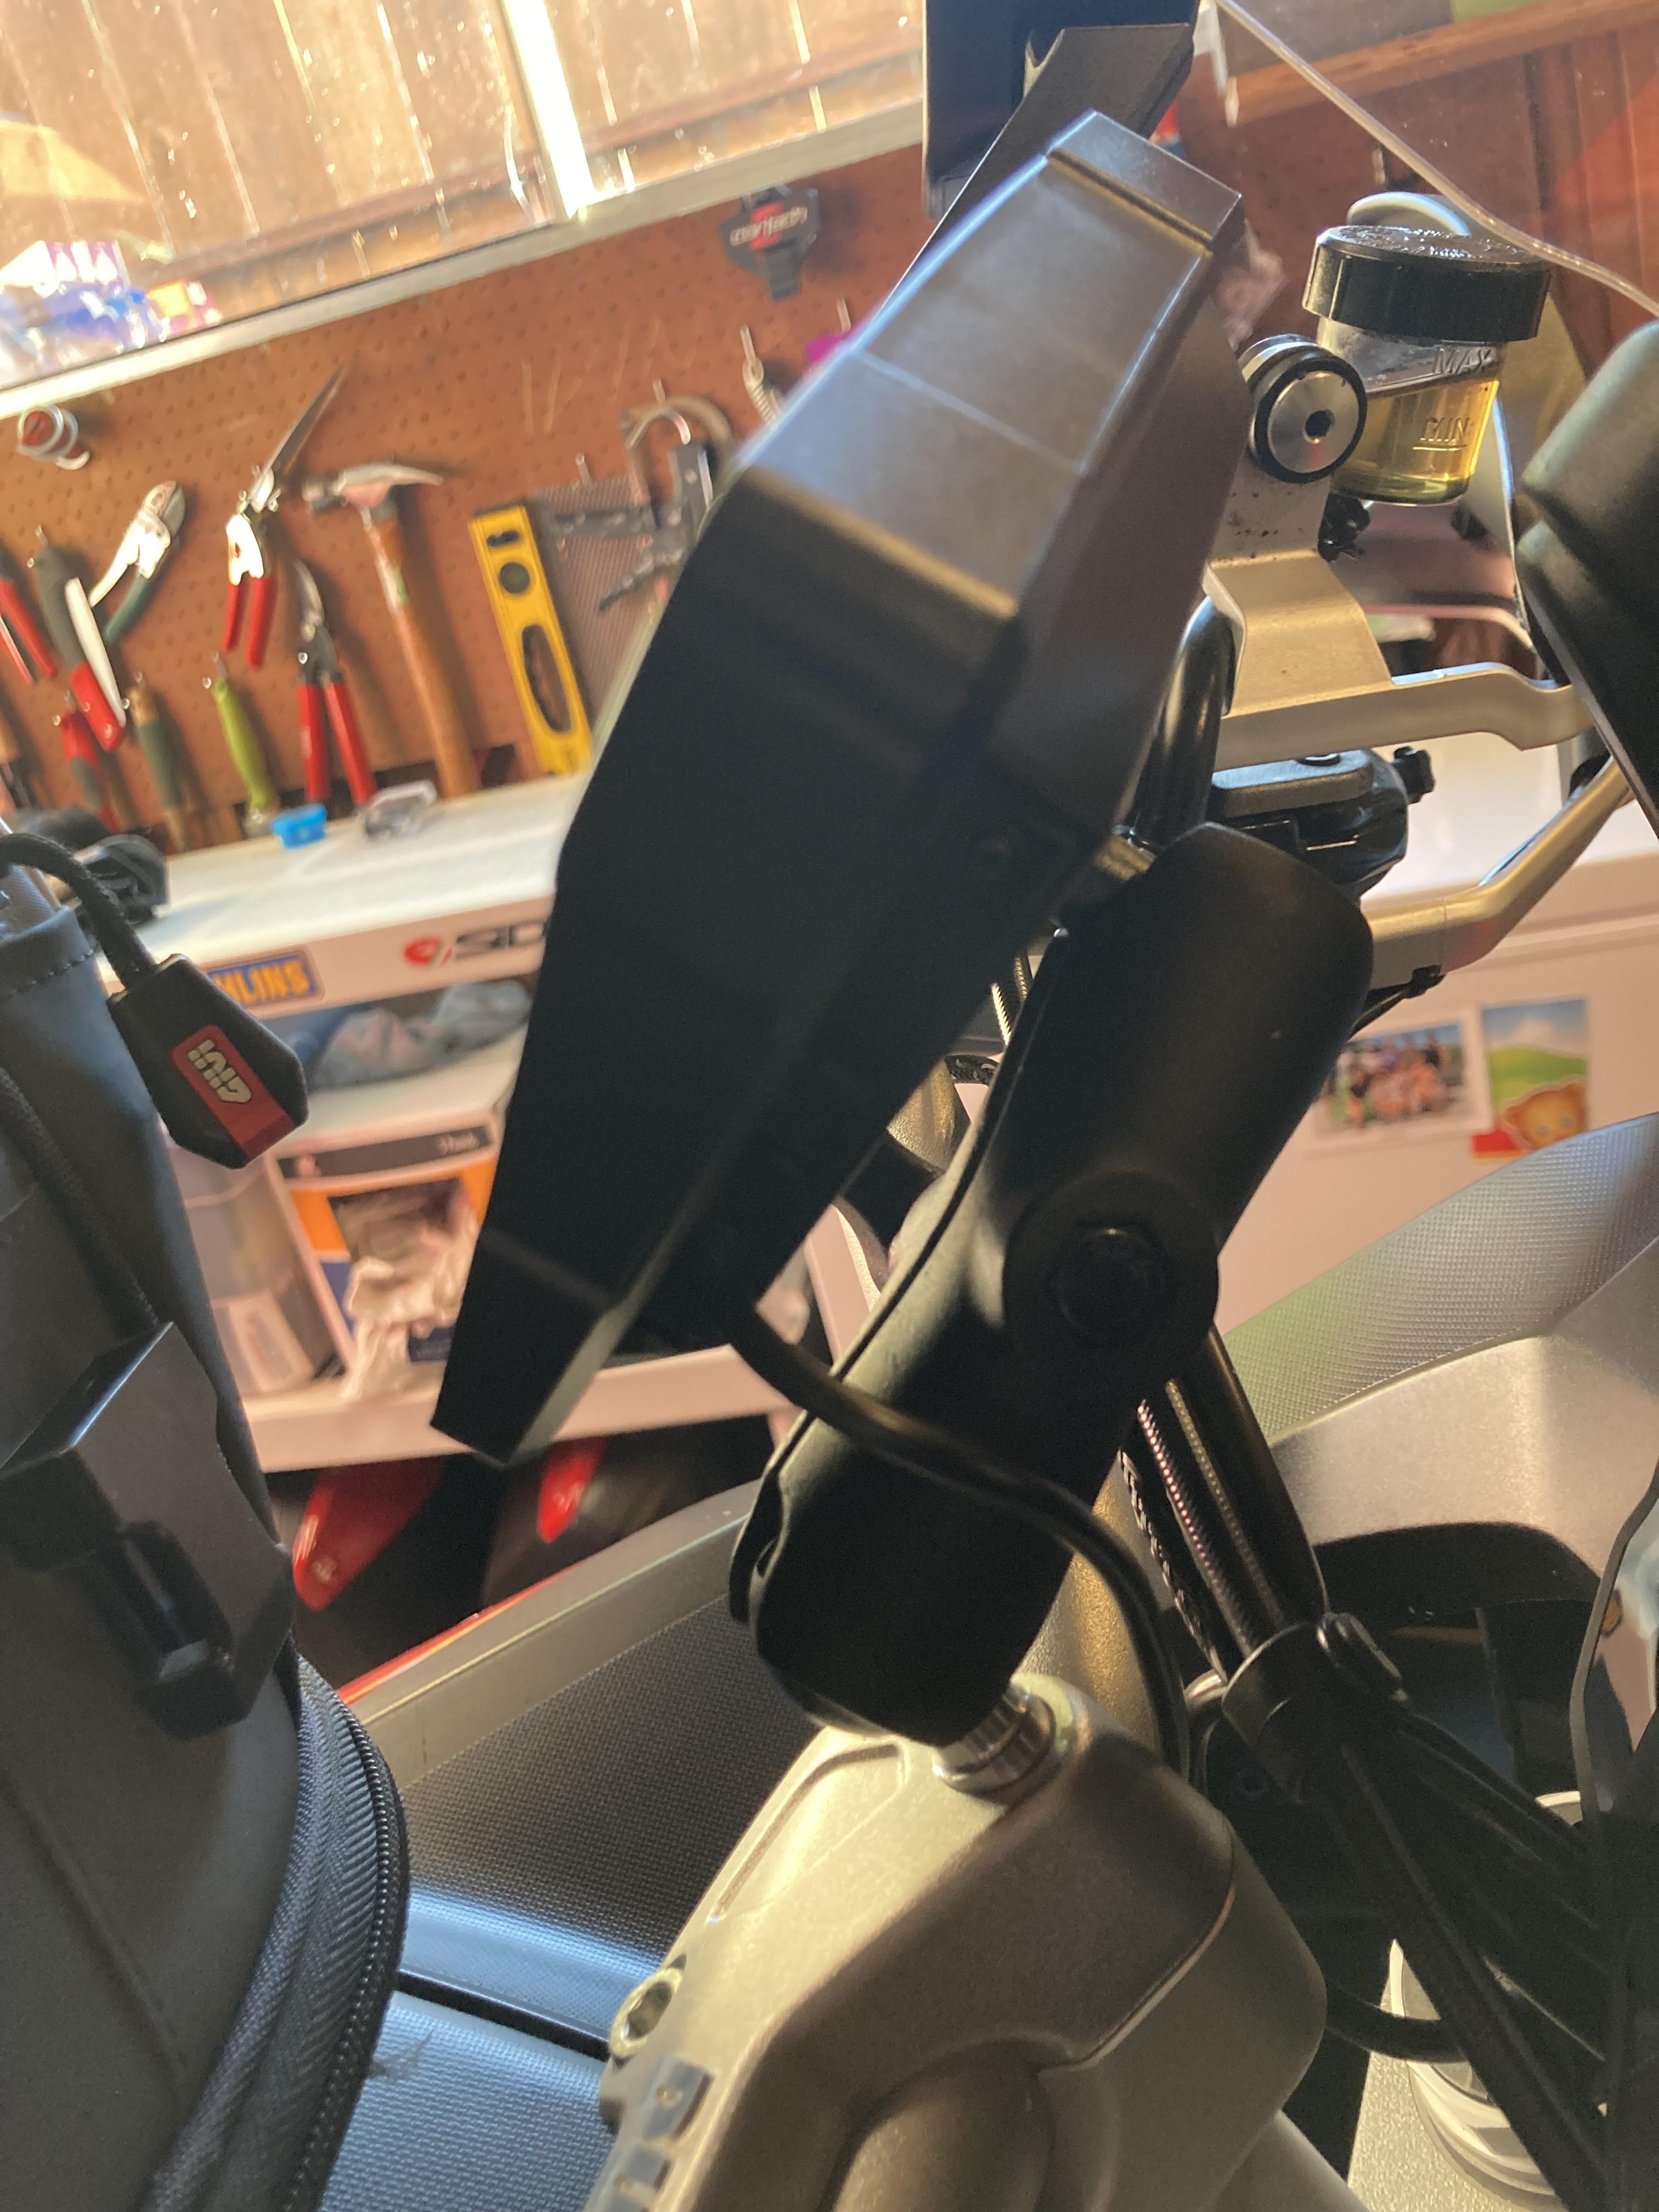
No, I didn't see a claim that gloves would work. I've never done the bar mount thing--it always seemed like it could rotate, just wasn't a clean solution in my mind. My 7th gen had a RAM ball attached into the steering stem, homemade by a former poster here on VFRD. When I bought the Multistrada I got a RAM ball with hole to insert a longer handlebar mount bolt, replacing the upper left bolt, photos below. Works great, rock solid: https://www.revzilla.com/motorcycle/ram-mounts-handlebar-bolt-ball-with-hole-base?sku_id=869087 I should add that, just like in your car, CarPlay uses a lot of phone battery, and the phone gets hot. I hooked up my phone to a lithium travel battery and left it in my tank bag.
1 point
-
Great first post!1 point
-
Also realize that with the relay in place, the only time the pump will operate is when it is being cranked or running (That ignition signal we talked about earlier). If the carbs are empty or need some filling, it will take a bit of cranking to get enough fuel in the carbs to start. Also I have found that if you are trying to prime a dry system (lines and pump) sometimes that fuel tank and petcock just won't "start" flowing even tho the pump is trying to pull some fuel. I sometimes have to put a rag around my air nozzle in the fuel filler opening and "pressurize" it just a little and then the fuel start flowing no problem. Good luck!1 point
-
Unplug the relay and jump the black and black/blue wires with a wire at the female connector. With the key on, and the relay bypassed, the pump should operate. The colors of the three wires change some across the models, but I should be close. You can hurt anything trying different combos. If there is a yellow/red wire present, it should be the other two. Basically, when the yellow/red wire (or whatever it is on yours) is getting a signal from the ignition, it energizes the relay to allow 12v to the pump by "connecting" the other 2. Those are the two wires you are trying to jump. Report back.1 point
-
I got Hepco and Becker. Can be done with or without top rack. I chose without. The racks, after initial installation, can be removed or installed in about 5 minutes or less.1 point
-
If you anchor the feet of the racks, and anchor to the wall, you should be fine with an extra beam on the wall side lower down. Another general principle is to not exceed beam deflection by (beam length)/180".1 point
-
+1. I kinda take Keny's posts for granted, but he is always buying, selling, riding, and improving bikes. Fun stuff.1 point
-
Great advice by the dude, BLS and gaz. Do not just start a bike up in the middle of winter storage, twist the throttle a few times, and turn it off for another month, for the reasons described above. And even if you get that rare winter day and take it out for a quick spin, a five or 10 minute ride will not help, even if the temp gauge settles in to normal operating temperature. As mentioned, you need at least 20-30 minutes until the cases are too hot to touch in order to burn off/evaporate all that bad moisture in the crankcase. Sticking clutch plates are above my pay grade however, plenty of experts here on VFRD to help. Cheers.1 point
-
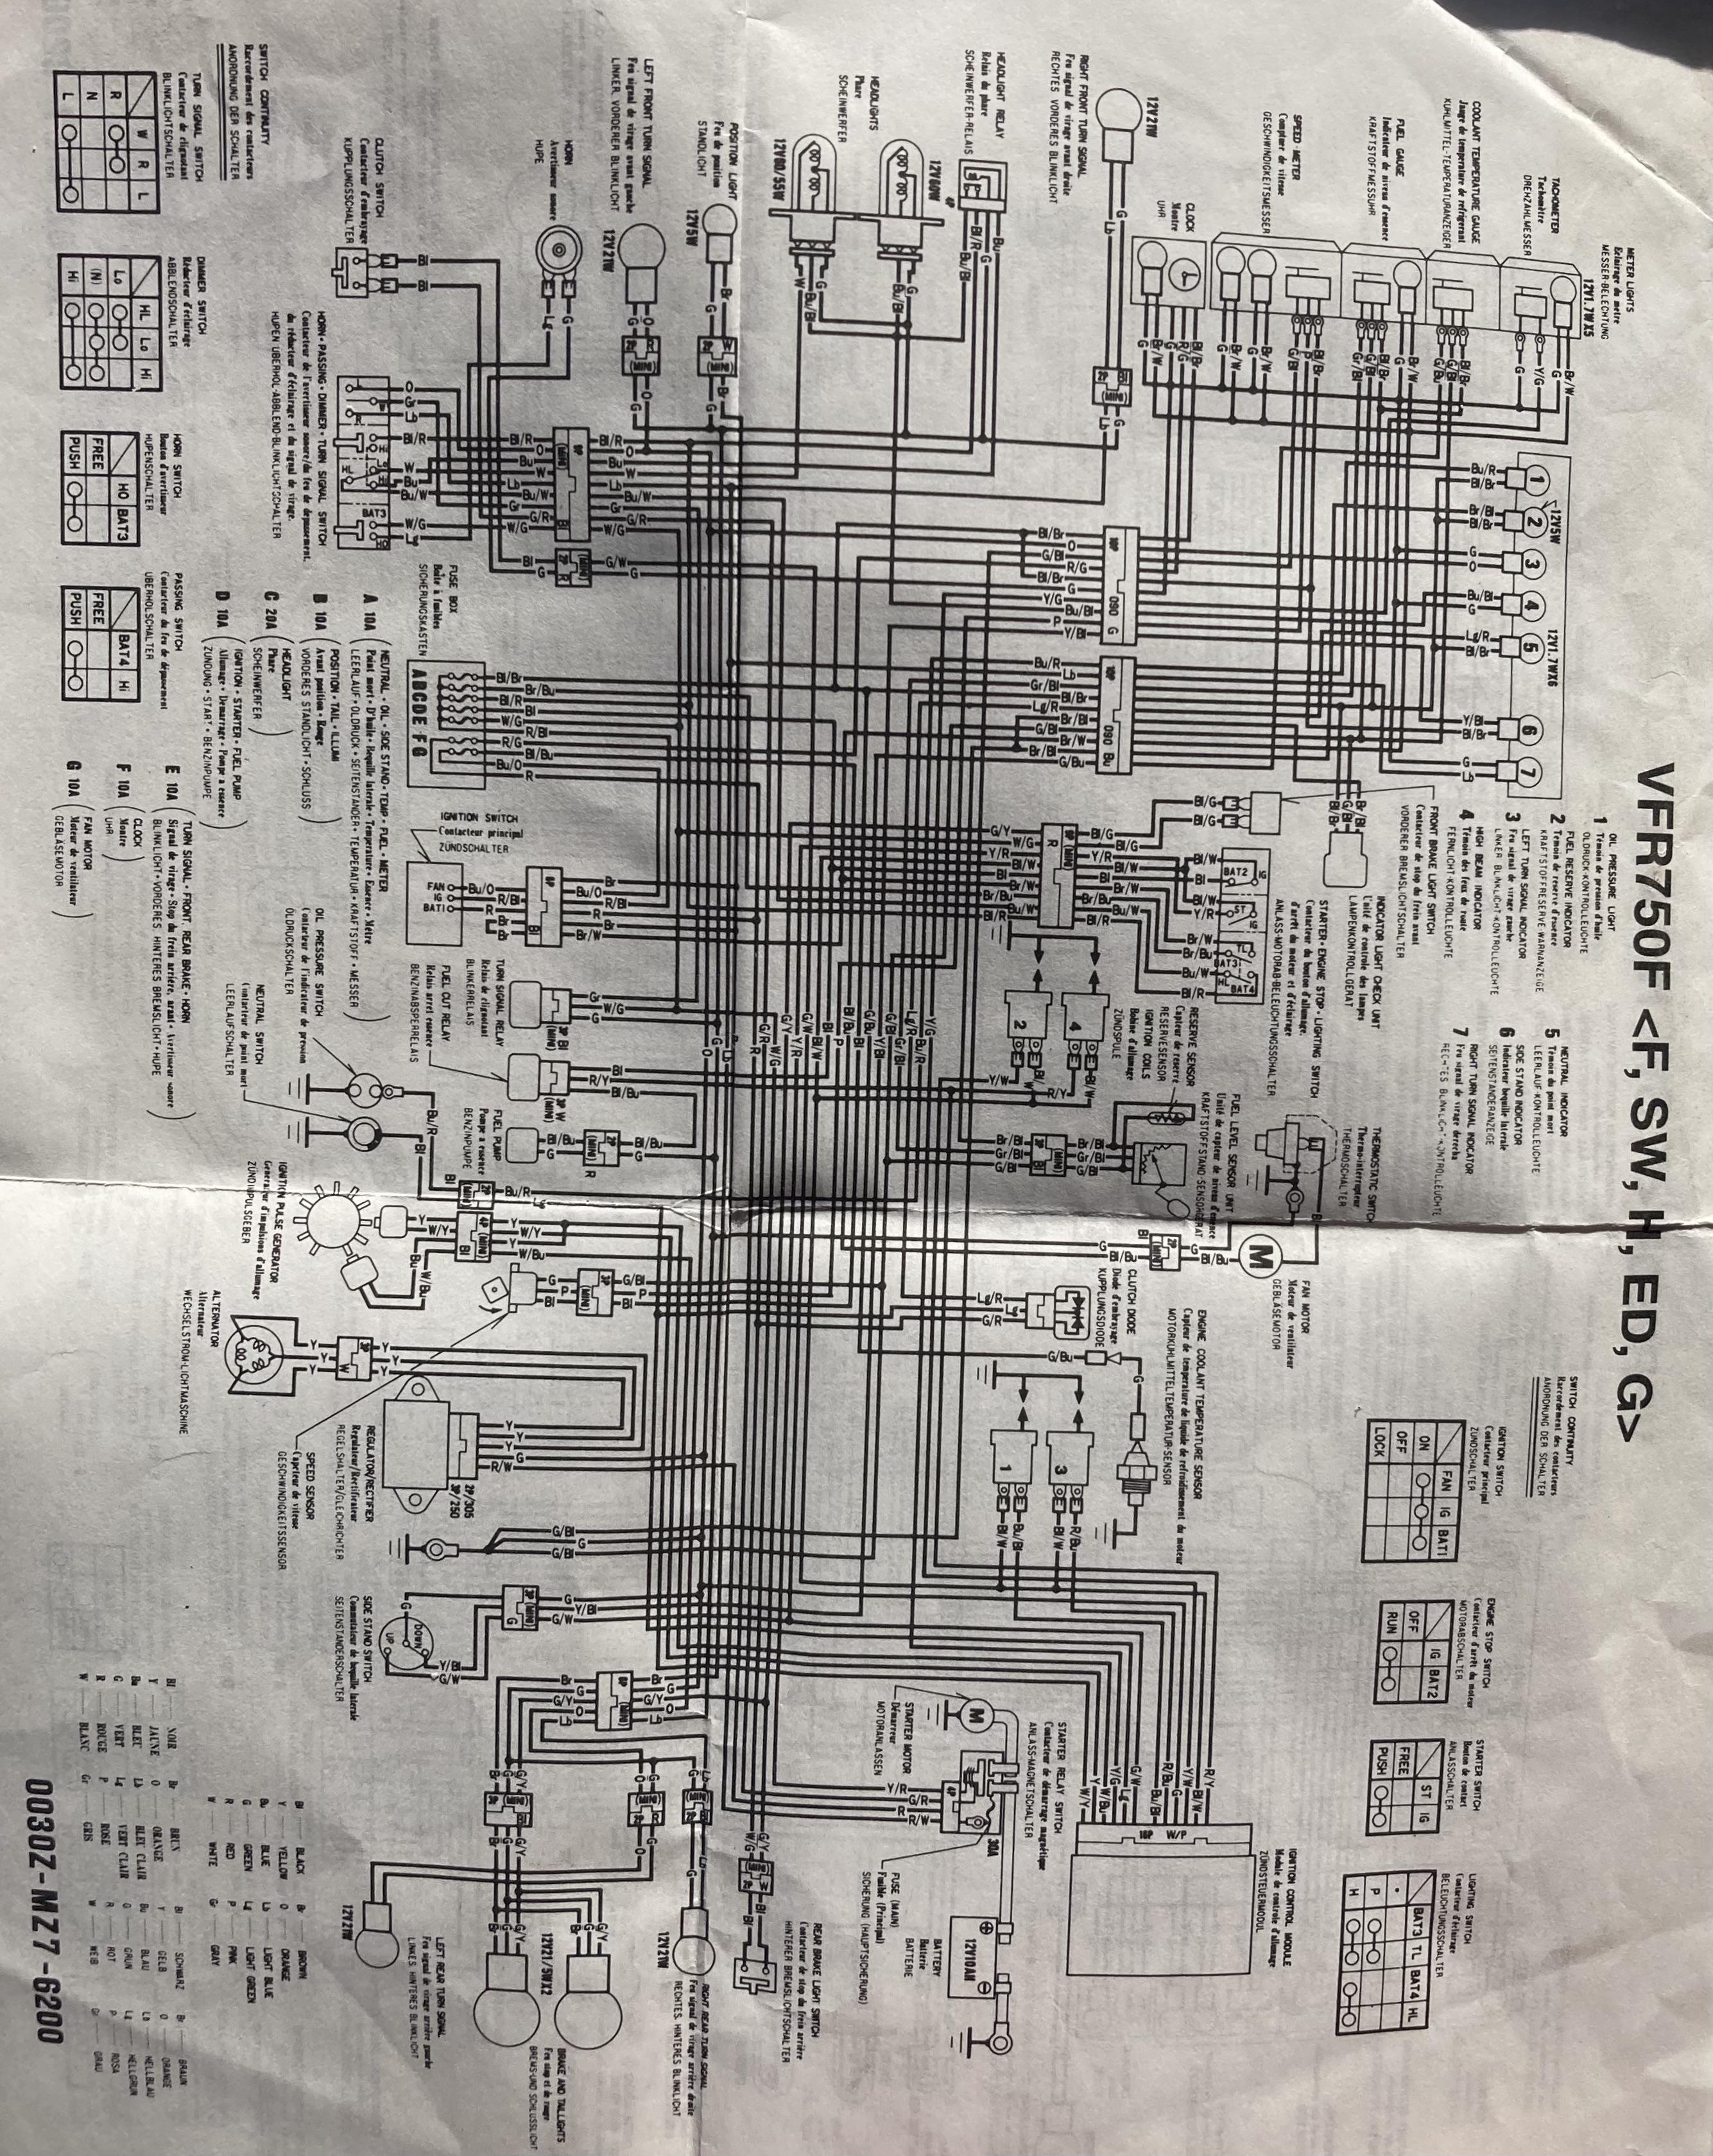
Hi, i just bought a -97 VFR750F, originally imported to Sweden from Germany. I got 4 circuit schemes with the bike so i had to figure out the correct one. The bike variant is VFR750FV - so the 'G' for Germany electrical scheme is valid. This means that there's only one light relay and no headlight circuit breaking on the start button on this bike. The problem with the bike is that headlight won't come on but passing button works so light relay and ground is probably OK. I checked wiring with the circuit scheme and a multimeter, started on the right switch assy since this is a known issue but all was good there. Then i opened the left switch assy and voila! The blue/white wire feeding the dimmer button switch has broken off. Seems to be a soldering hack job by one of the previous owners. I tried to see where it's supposed to be but it's cramped in there, hard to get access and solder it properly so i'll have to disassemble it.
1 point
-
I sent SW files and prints the other day. I use SolidWorks Maker at home, and Professional at work. The Maker version is only 49 bucks a year, and totally worth it, being an industrial standard. I make all of my 3D printed or machined parts at home using SW.1 point
-
You do realise this is a 15year old thread right !1 point
-
I got it back together after some trials, dimmer switch goes back first, then passing switch is threaded back into its' hole and both are secured by the same screw. It wasn't too bad even with my fat fingers 😄1 point
-
What a fun project. From an engineering perspective, the closer you sit the bike to the vertical supports, the lower the bending moment on the cantilever will be. I do occasionally drive a counterbalance fork lift (I have a licence and everything!) and I can tell you that putting 1 tonne loads onto the third level of pallet racking takes some hand-eye coordination and a little nerve. You shouldn't have too many problems with your nifty lift truck as I expect the visibility will be much better. You will need to make sure the floor under your shelves is really smooth as the wheels look quite small.1 point
-
It looks like there are good resources for "Beam Loads" and "Column Loads" for Unistrut at given spans online. The only worry I would have is it pulling out of the wall, or bending just below the 45 degree brace. If they are much taller than the bikes, you can run a piece of Unistrut or metal/wood beams across form side to side to prevent collapsing in on itself, and use those to hang your lighting. Although you are extremely thorough in everything I have ever seen you do, so you probably already have a way better plan than my quick brainstorm... Do post pics as you're building it, we need a good project here to keep us dreaming about our own work spaces! Is it too wet there for painted or epoxy floors?1 point
-
I'm enjoying this thread, looking forward to all the other things you will figure out, and the final result. Are the elevated motorcycle "shelves" really just for display, or do you intend to walk downstairs one morning, decide which bike is perfect for a ride that day, bring it down and zoom off?1 point
-
Hey everyone, I’m new here and recently picked up a 2005 Red VFR800. I’m located in Houston and would love to meet some folks in my area. Currently the bike is not running, I believe it’s a wiring issue so I’m in the middle of troubleshooting and plan to make a new post or two for help. I also have a 2011 HD Street Glide and 2014 Yamaha Stryker. I used to have a 2006 CBR1000rr and always wanted a VFR. Looking forward to connecting with a few of you soon.1 point
-
.jpg.ce681c66c3d4a2a7aac284f44fda764c.jpg)
From the album: 5th gen tour 2025
1 point -
I don't see a "non-machine shop" way of solving this problem, unfortunately. From the installation instructions and the picture on the Scotts website, it looks like the damper mounting bracket is supposed to sit flush on top of the top clamp, but your VFR's top clamp is not flat. Assuming the raised surface would be able to adequately support that bracket, yes, a machinist should be able to turn an extended nut (with the groove) which would allow the damper mounting bracket to sit flush on top of the top clamp. You might also need to raise the tank flange bracket to match the new position of the top clamp bracket, but that should only require some alloy spacers of the correct thickness. (You might also ask Scotts why they didn't make one for this model, considering they've had 10+ years to do so...) For the new custom steering stem nut, I would probably choose stainless as the material, but I'm not the one who has to work it! Good luck. Ciao, JZH1 point
-

Version 1.0
105,299 downloads
This is the same manual that is already available here on VFRD. I have been using this so much lately that I went ahead and made it a little more useful for myself. I assumed that some other members might like to have it as well. Combined both files into one. Optimized the file size so that it is only 60 MB. Ran OCR text recognition to enable text searches on the entire book. Rotated pages that had landscape page diagram for ease of viewing. Created bookmarks for each chapter & sub-chapters. I figured this was the least I could do to contribute since I am getting so much help from this forum.1 point -
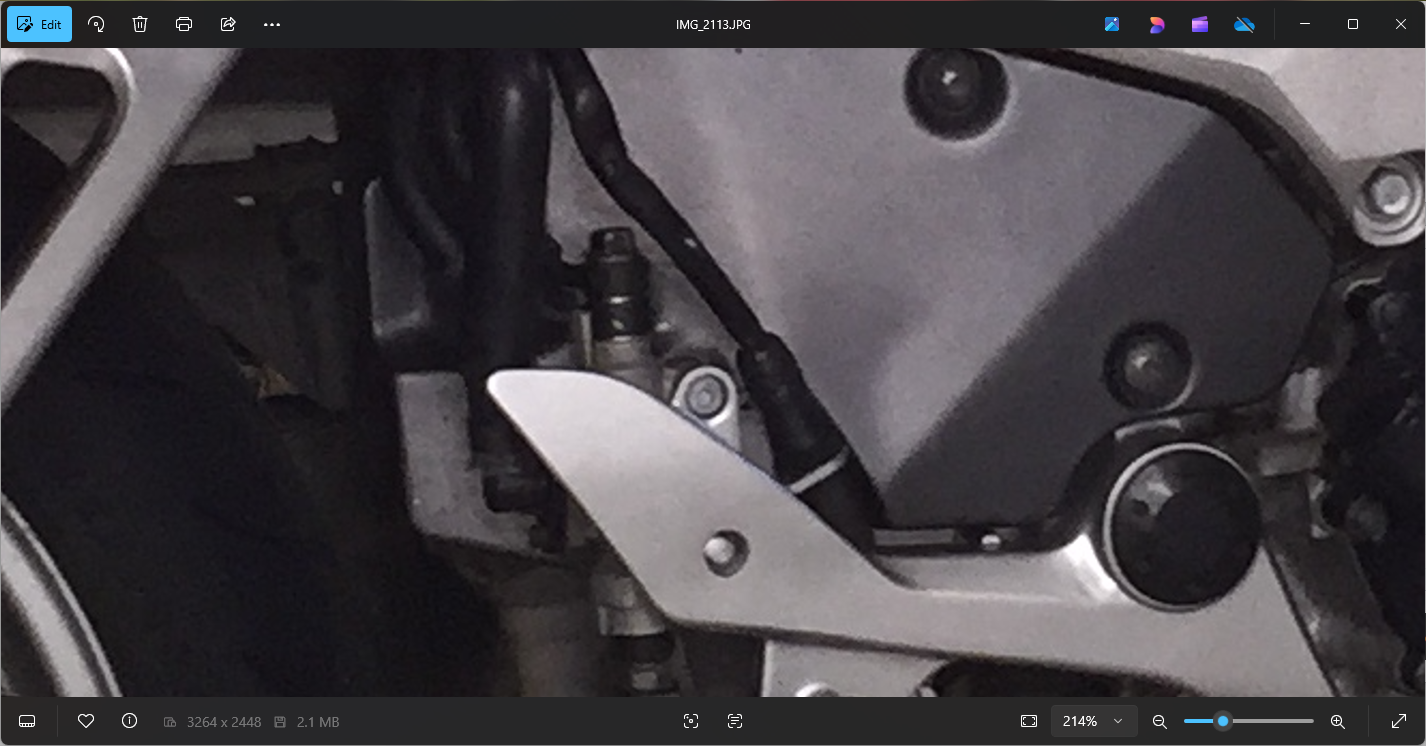
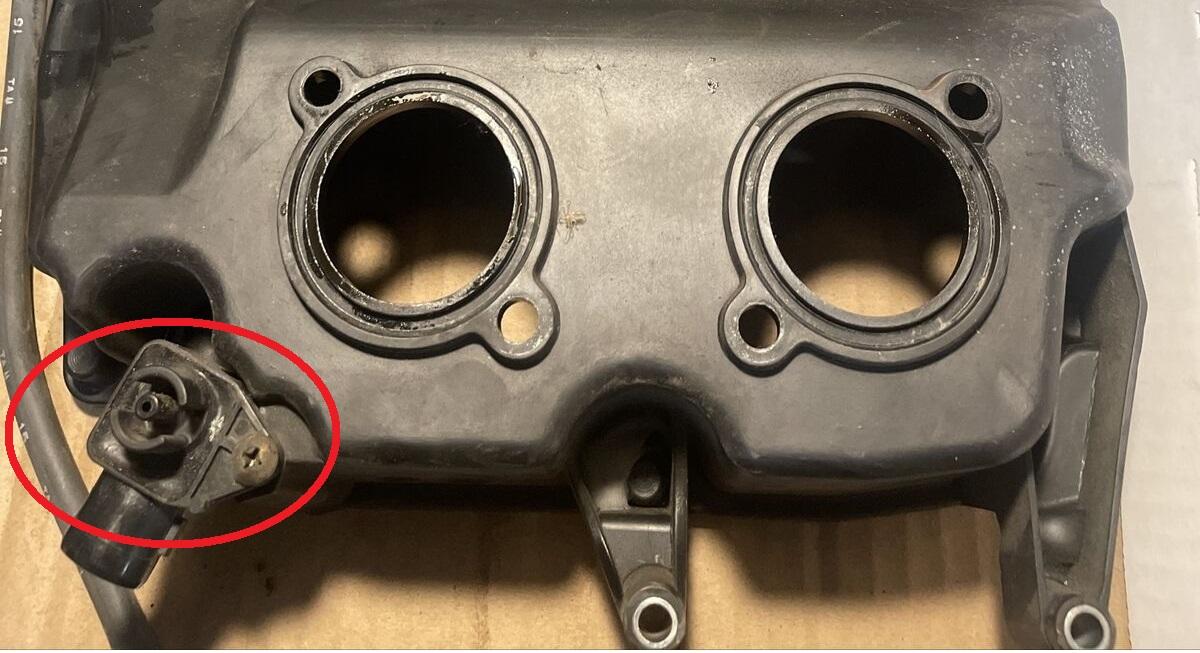
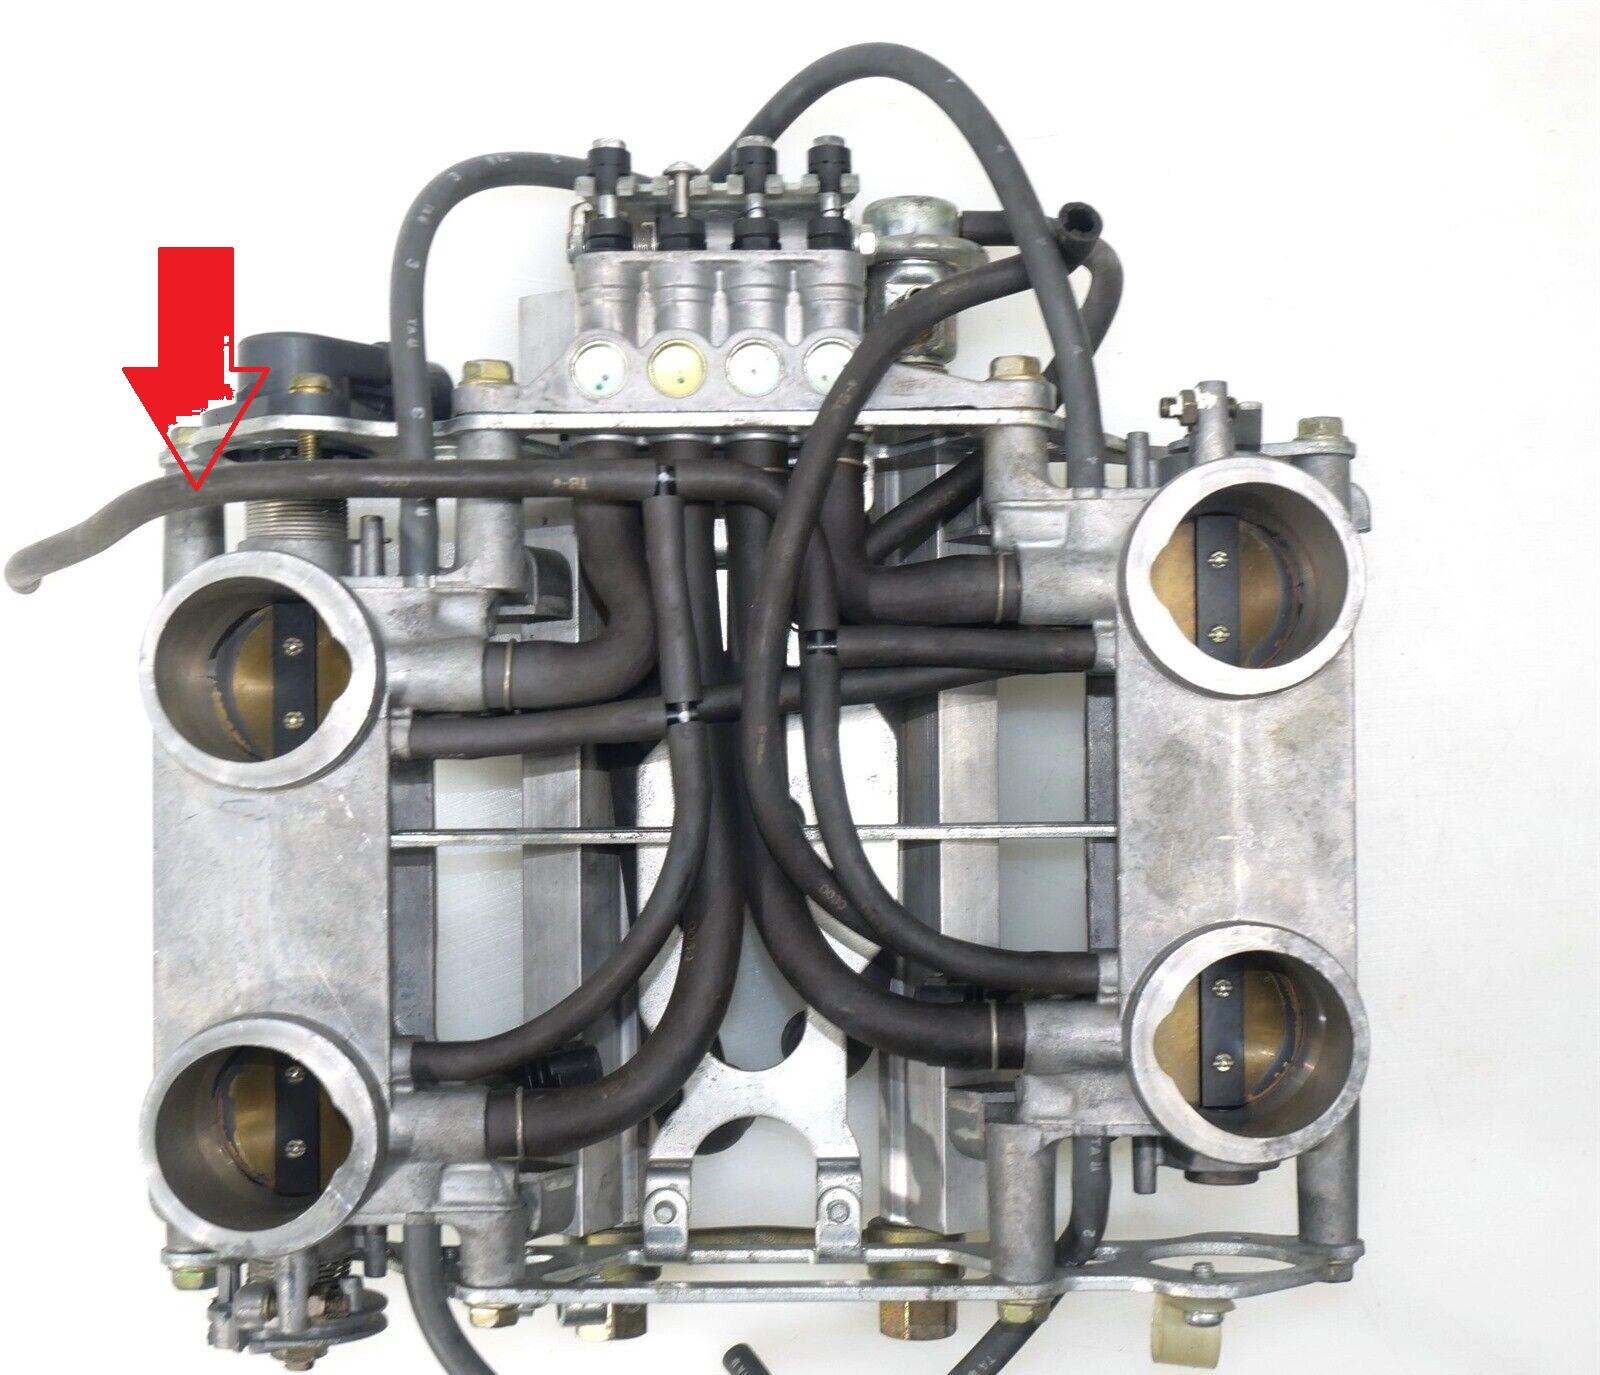
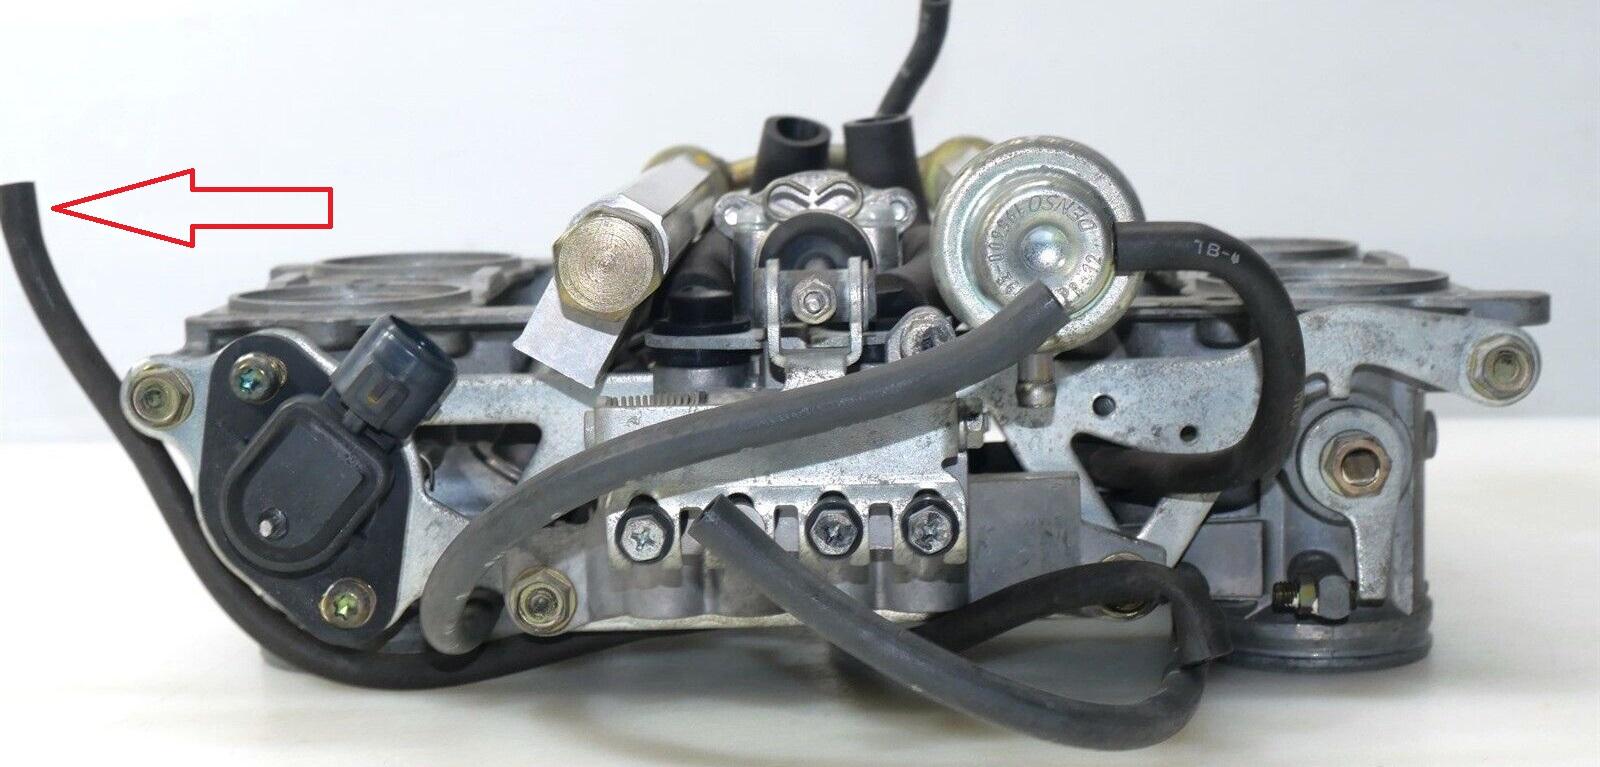
Not sure if you figured it out but I think this is what you are looking for ? Hose from bottom of throttle bodies attaches just below the electrical plug.
1 point
-
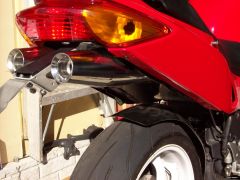
TL/DR: If you’re getting Shad luggage for your 6th gen VFR, you need to get a top case if want to build a tail rack, their soft side luggage system won’t work on the 6th gen VFR, and you’ll want the side opening hard cases if you’re running a top case too. Also, be prepared to add some extra signal lights. I recently bought a full set of Shad side case racks, top rack, and soft saddle bag supports. My initial intention was just to get the racks to make for better tie down points for soft luggage that I already had. Ultimately, due to the fit of the racks to the 6th gen VFR specifically, and after one frustration after another, I ended up getting hard side cases and a top case. Before I get into, I want to clarify that although I hit a number of frustrations with Shad’s products, I am ultimately very pleased at the final result. It still isn’t perfect, but life is full of compromises. I chose the Shad rack system largely because the previous owner of my VFR installed a fender eliminator, and the Shad system was the only system I could find that didn’t seem to use the stock fender as a mounting point. As a result of this design, I feel it’s one of the more inconspicuous rack designs, especially the side racks. I’m coming from a position of making my VFR a more capable commuter, and the occasional long-distance sport-touring. I run smaller saddlebags and a largeish, but far from massive sized sissy bar bag on my other bike, which has proven invaluable in general usability of the bike. I did run a large tail tunnel bag on the VFR for long time, but mounting and dismounting, although far from difficult, was kind of tedious. Additionally, I didn’t have any storage options other than a backpack and a tank bag if I ever took my wife for a ride on the VFR, since the tunnel bag mounts over the passenger seat. I also was leaning towards soft luggage in consideration of lane splitting. Soft saddle bags tend to be slimmer, and in the off event that I a bag rubs against a car (we are talking about CA drivers here), it less like to cause significant damage to the car, and the bags will most likely be unscathed. Unfortunately, with the way Shad’s racks fit the VFR, soft luggage isn’t really an option without some fabrication on your own. Top case/rack: Starting with the top case racks, they’re more like mounts… The top case mounts replace the grab handles beside the passenger seat, as two separate, larger, looped grab handles, with mounting points for a Shad top case. The mounts don’t connect at the rear to form a rack, and you’re pretty much required to buy one of Shad’s top cases, which come with their respective platforms. Shad cases utilize two different sized platforms, depending on which case you have. It is possible to order one of the platforms by themselves, to complete the whole rack assembly, but I went ahead and went full tilt and ordered their expandable 58X top case, which is excellent. Soft bag supports: I also ordered the soft bag supports, but what I didn’t realize when I ordered them (nor was it clearly shown by Shad), is that the supports mount to the TOP case racks, which run along side the seat, and over the turn signal light housings. It is IMPOSSIBLE to mount the soft bag supports on the 6th gen VFR. Further, the soft bag supports are cut to fit only on the top case racks, and do not fit on the side racks. So, ultimately, you’ll have to use Shad’s hard cases all the way around for the 6th gen VFR. Side Cases: I went with the Shad SH23 (top opening) side cases, trying to keep the overall profile of the bike as narrow as possible. I also prefer saddlebags that open at the top as opposed to the side for ease of loading/unloading. Unfortunately, the top opening cases are partially impeded by the top case (at least for the wider top cases). There’s enough flex in the plastic, where you can work the corner around the top case to open and close them, but it did make me scratch my head at the lack of polish. Brake Lighting: I did buy the additional LED brake light that mounts under the top case to compensate for the partial obstruction of my tail/brake lights. I also replaced my running/brake lights with LEDs. The Shad brake light is not a running light, and only comes on as a brake light. Also, it’s not really all that bright. It’s visible in daylight, but they’re more on par with the brightness of the stock incandescent running/brake light bulbs. I’m glad I bought the extra lights, but by simply changing the stock tail light bulbs with LEDs’ would probably be sufficient to compensate for the obstruction from the cases. Turn signal lighting: The side cases mount in such a way that they completely obstruct the turn signals from the sides of the back, and are really only visible if you are completely behind the bike. Admore lighting has some lighting solutions for some of Shad’s top cases and side cases, just not the cases I bought. Most likely I’m going to order a pair of LED strips to mount on the sides of the side cases, and splice them in with some sort of quick disconnect wiring rig. I’m also going to replace the both the front and rear turn signals with LED’s sooner rather than later. I planned to replace all the stock bulbs with LEDs as they burned out, but in the essence of safety, I definitely want to prioritize visibility since the cases significantly impair the turn signal light visibility. I plan on making an overview video in the near future, and will add it to the thread for reference.1 point
-
As another that owns both, my $.02 is that it's maybe more a question of "what are your preferences and priorities" vs "is one better than the other"? You have to weigh the differences between them based on what's most important to you. The main absolute differences are that if you want factory luggage and / or ABS, you'll need a 6th gen which can be a real value for a bike that you can pick up for about $4,000. If you want the GDC's, you have to go 5th. I can ride either just as readily and have ridden both long distances. Past that things become more subjective depending upon intended use and personal preferences and abilities. I like that my '99 does not have a wax unit to cause trouble, a cat or cam chain tensioners that can fail. In an ideal world I'd take the two and meld them together keeping what I like best about both. Several years ago there was a post from someone, I think in Ohio that did essentially that. Actually in my ideal world Honda would still be producing the 5th gen - ah well. As I think of the two, while I like my 6th gen and will probably sell it as the miles pile up, I love my 5th gen and do not intend to ever part with it. I plan to leave it on the center stand in my garage and let it remind me of all the fun rides I had on it. YMMV.1 point
-
From the album: 5th Gen Morph
1 point