VeeEffArah
-
Posts
155 -
Joined
-
Last visited
VeeEffArah's Achievements
")


-
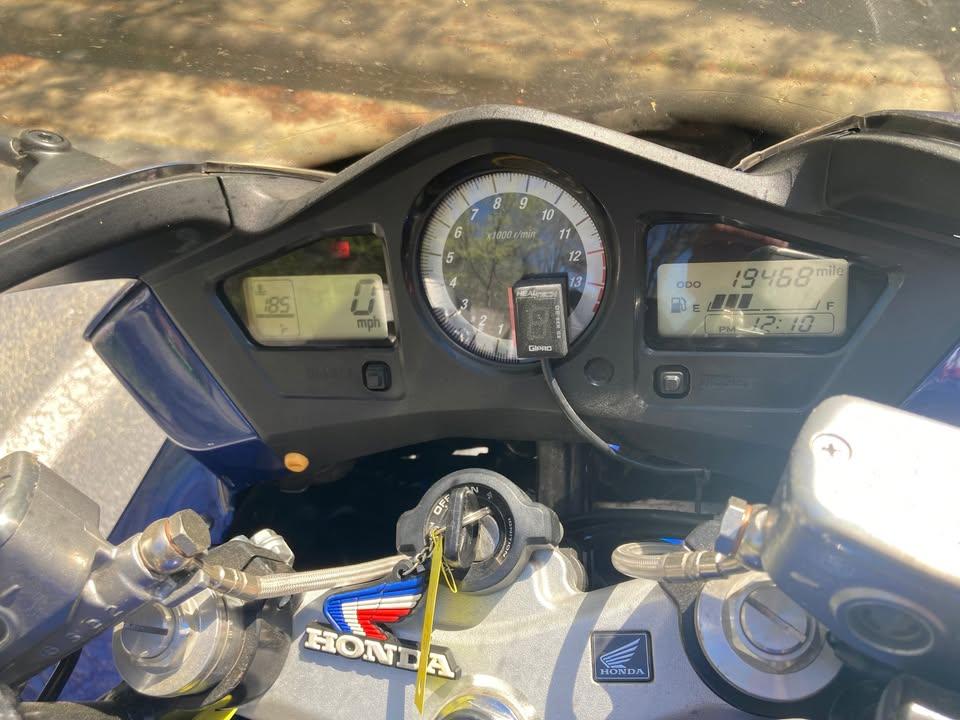
Not had an aftermarket one until this VFR. My FJR1300 has it stock. Will say that after riding the VFR with the gear indicator, I'll be adding to any bike that doesn't have one. Handy device for sure to keep me checking for 7th gear.

-
This popped up on FBMP.. https://www.facebook.com/share/1C3rnAUSUN/
-
IMO, the fuel gauge is accurate. Concerning the first bar, I've noticed mine will go away between 20-30 miles. Doesn't matter if I just fill it up or pack it full.I've learned not to obsess with that first fuel bar thing and just ride I commute 140 miles daily with about 85 / 15 split of highway and backroads. Usually at 75 mph on the highway and rpms are dead on 5,000 at that speed. Go consistently in the 200-210 mile range before the last bar is flashing and typically putting in 4.5-5 gallons.
-
Maybe as simple as pulling one from your bike to check against?
-
What I think is happening is folks Google this procedure and land on 8th Gen. But even in 8th Gen world there are conflicts in different manuals. Beit sidestand or center. Honda created that mess by offering the 2 models with 1 not having center stand. Agree with Terry though to check your specific manual.
-
Pretty sure I grabbed the bulb reference from a FJR forum actually.
-
I've ran both GT and standard on my FJR1300 and couldn't feel any difference except when mounting and removing the tyres. Same with my FZ1 Fazer. Ride more, worry less 😁
-
The H4 bulb base is a Honda thing and not just US spec H4 bulbs. Normal H4 bulbs use the P43T base. But Honda decided they wanted to be special and use PX43T 65 degree base. Hence the tab locations being different and requiring modification.
-
This ^^^^ I was working at Road America this past weekend and talking to a guy with a clean 5th Gen. He had a few typical tasty mods done and commented how he hated the yellow looking headlight? LED ? I asked. He said no way !!! LED headlights is what burns up all the electrics on these VFR's. So the bad / mis-info is far and wide.
-
Does it have stock looking silver colored triangle pieces? Otherwise could possibly have a lowering link / dog bone. Granted I use center stand on all my bikes and by no means is the VFR the easiest, but isn't what I call dificult either. Stock components as below
-
I think stock seat height was like 31.5" or there abouts. Start by checking the triangles at the lower shock / linkage area to see which way the small arrow is pointing. Stock, the arrow is pointing forward. Some folks lower the bike by rotating the triangles to have the arrow pointing upwards.
-
One of my FZ1 had similar couple years ago. Pulled the plates, separated and then soaked the fibers in oil overnight. Reassembled and all was sorted.
-
My error, read over that somehow. Perhaps a compound change is in order. Similar but different, I bead blasted the rotor surface area on my FZ1 rotors and they were hella loud until I got a layer of pad material back on them. And after thinking a bit, I recall some Ferodo race / track day pads that were overly loud on my previous 1000RR track bike. Performance was OK, just more noise than other pads before. Swapped them for another brand ( DP ) and were almost whisper quiet comparatively.
-
Could we get the OP to clarify if the "angle grinder" sound is all the time or just when the brakes are applied?
-
Make sure the holes on the backing plates are centered with brake pads holes also. As far off centered as they looked, that was the problem IMO.