Leaderboard


Popular Content
Showing content with the highest reputation on 04/10/2024 in all areas
-
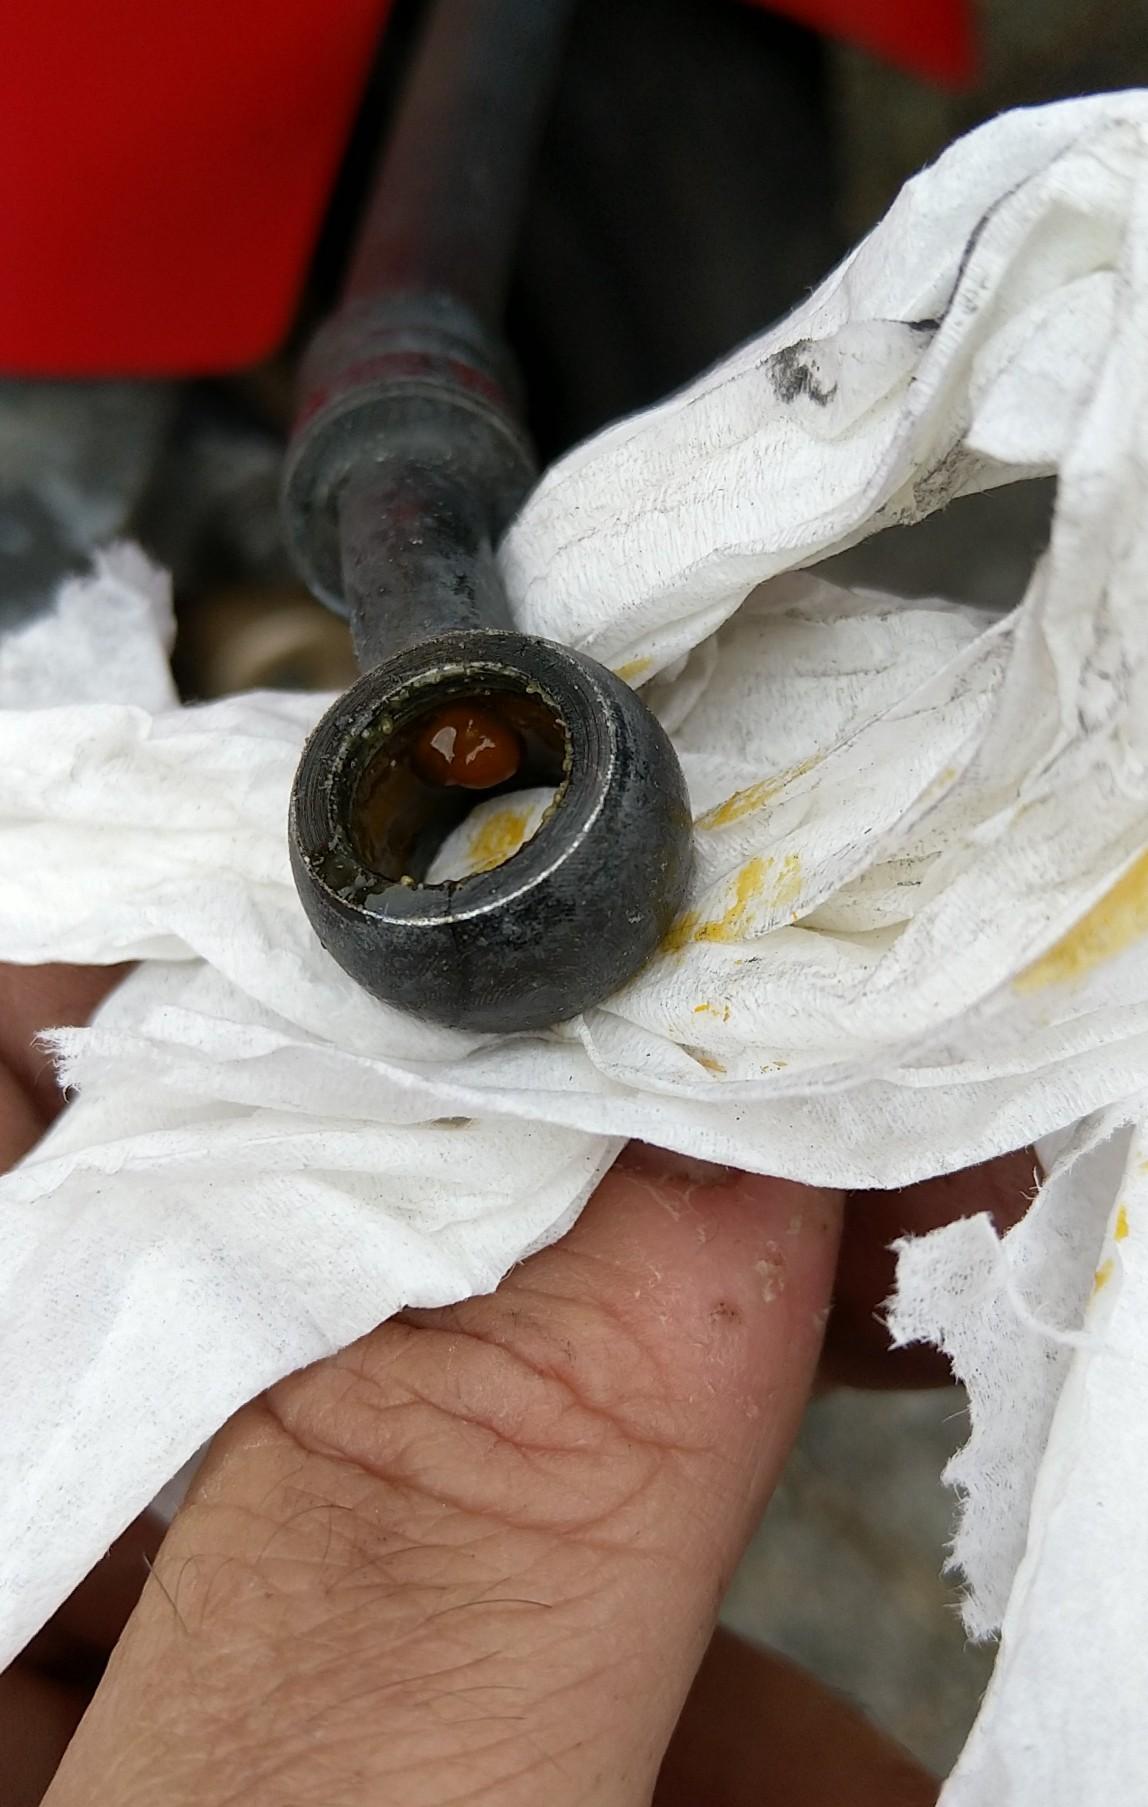
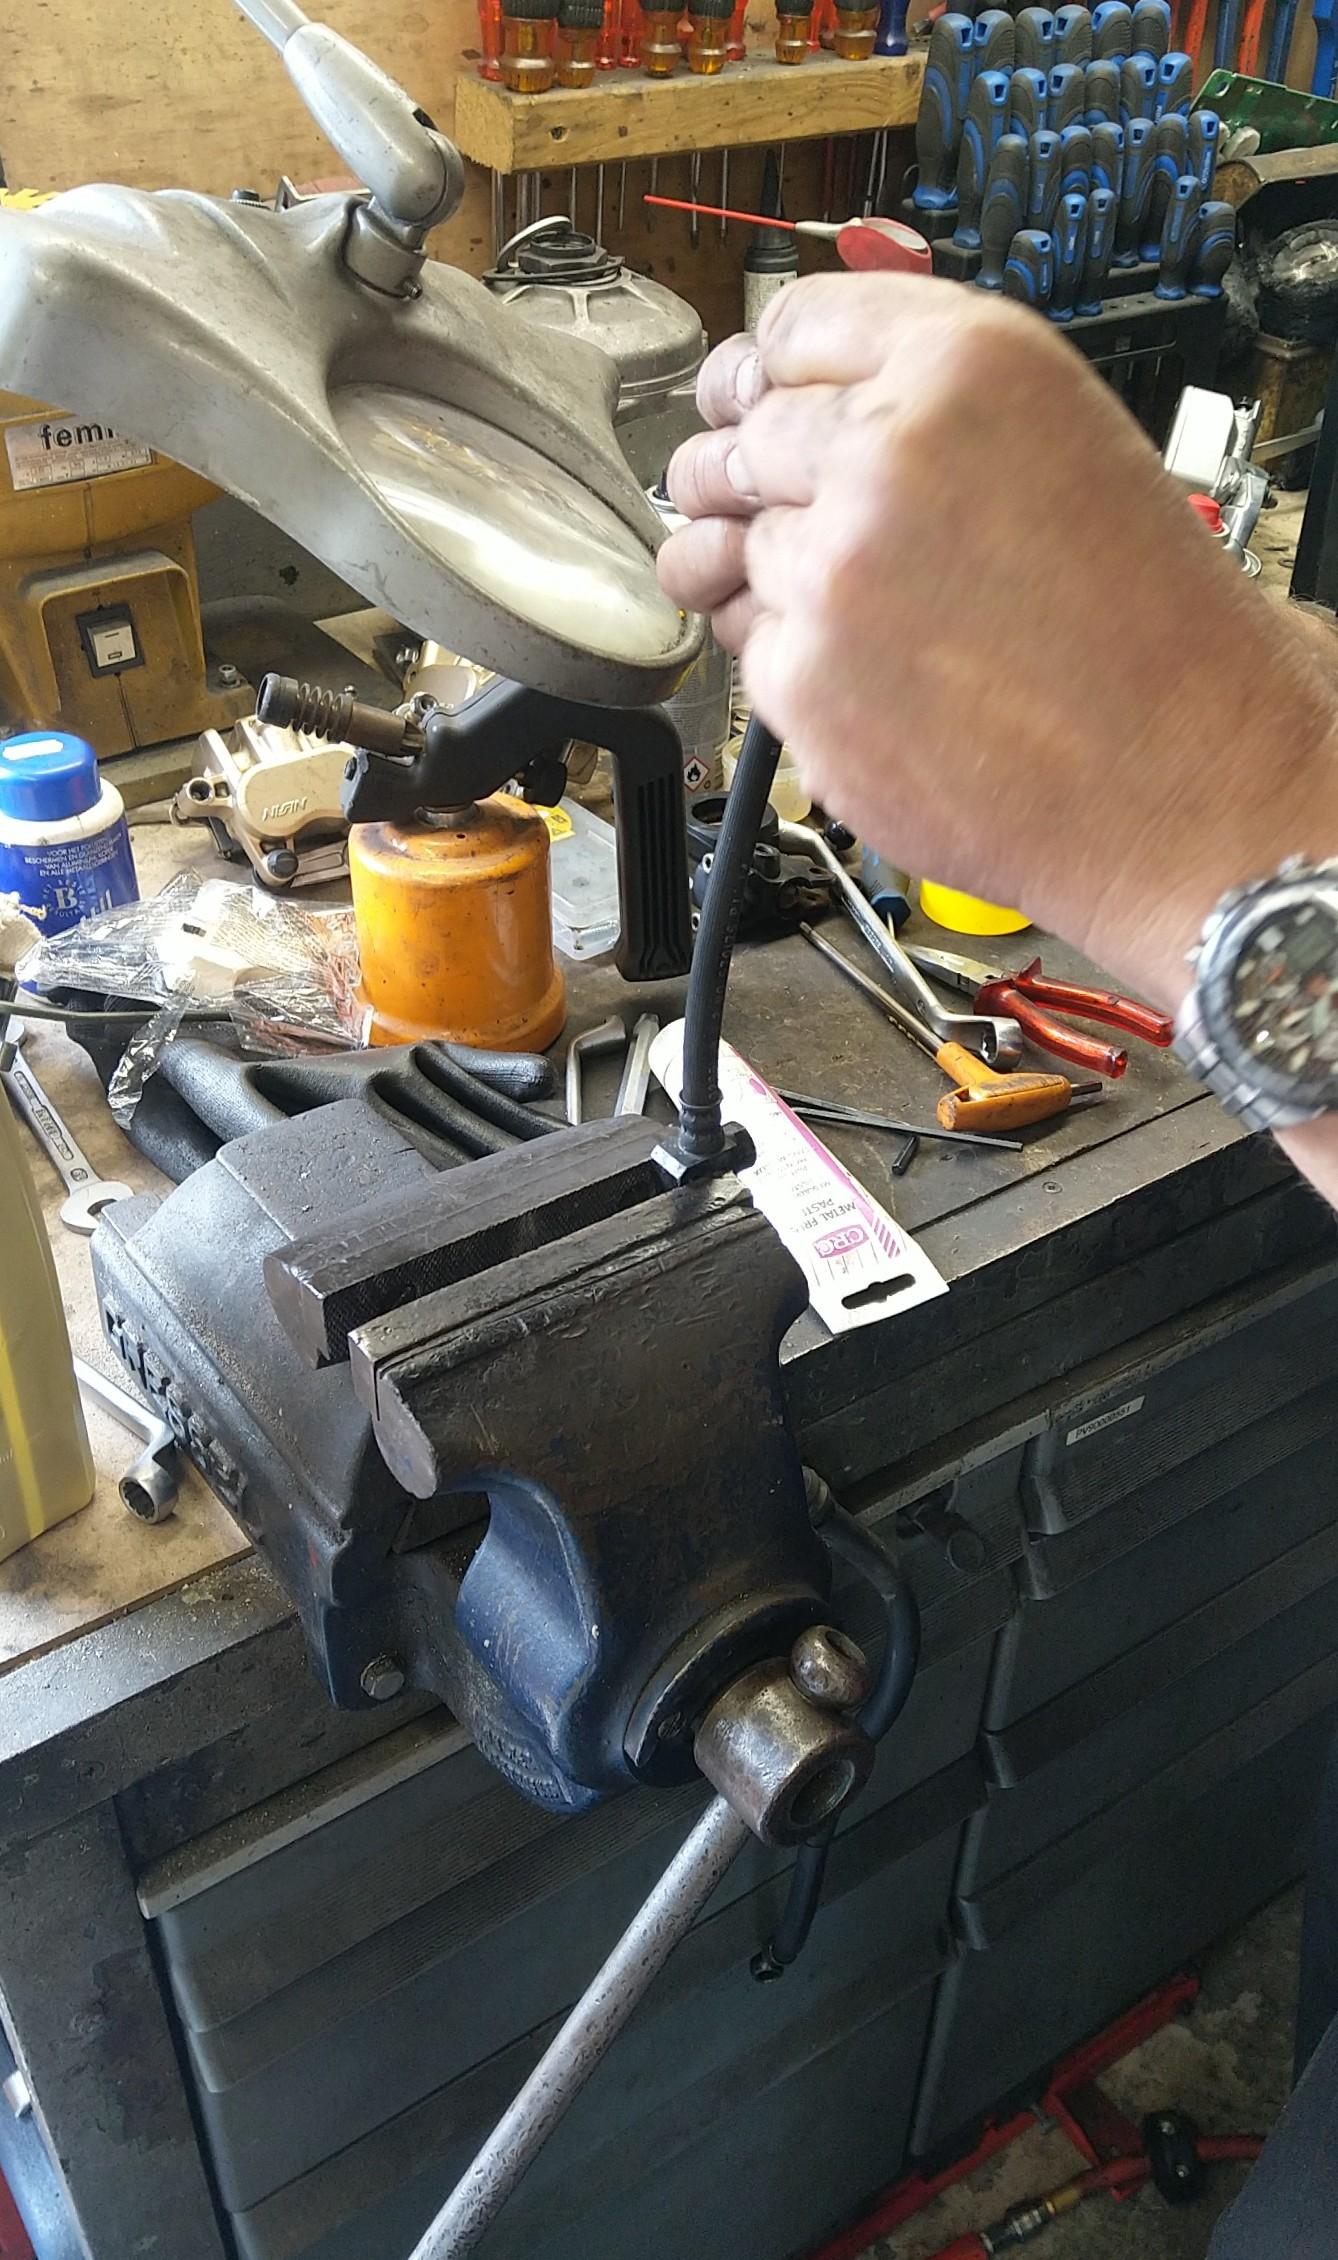
As for the original question, yes. On a RC36-2 that sat for years. @TheDutchy and I put silly pressure on to try and clear it to no avail. Mucked about with some wire, but abandonned that. As bmart wrote, that is sharp So the clever next step was The clutch slave was not much better
 2 points
 -
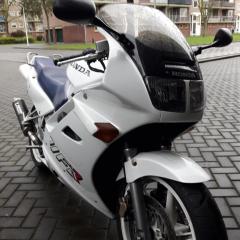
...I bought this lightly used 2 year old VFR750, and haven't been without a Honda since then; several VFRs and a handful of VTR1000F. I'd bought the bike late that afternoon, and being early March it was a dark, damp first ride to visit my folks. I'd love to have it back, and in that condition.1 point
-
Hi Styran. Good point you raise and I had exactly the same thought. The first thing I did was zoom in on his picture and noticed the BAS looked properly mounted and electrically connected. There could be a good chance the crash impact has internally damaged the BAS. He also stated - "All fuses are good and all connections have been checked as well." ! All will be revealed regards the BAS with the suggested voltage measurements.1 point
-
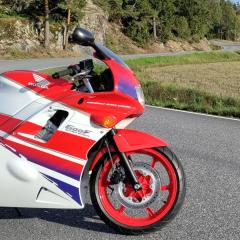
Ahhhhh, the lovely VFR color.1 point
-
When me and his buddy worked on his bike after a big accident we could not get the computer to fire up, we looked at the diagram and the bank angle sensor was missing. We jumped the outside pins of the bank angle sensor connector and the bike fired right up. Check the fuse first then this may be worth a shot.1 point
-
It's a Super Alce 5001 point
-
In the fall of 2023 I was at a bikes/parts market. It was strategically combined with a flea market. At the entrance you could see many couples arriving together but then to split up, one going for clothing and things for the home and the other going for parts for old bikes and cars.1 point
-
oh, and kind of promised to give my toughts on the Rotrex and the cause of my problems. Here is what i wrote during my diagnosis and repair. Id love some input on this! So here are my findings, thoughts and experience from running this kit for a decade. I don't know if there are some engineering guys in this thread but I'm not one but i will present my thoughts on what rotrex could have done better, also some ideas for improving the belt system. I would love if we could come up with something together on this part! Some prehistoric information: This is my second rotrex and the bike has a total of 30000km force fed, the second unit (this one) has around ⅔ of the mileage. The first one was changed due the pulley bolt coming loose within the first year. It was covered under warranty. What has happened is a total failure of the output shaft. My theory is that a traction drive supercharger is not very fond of the rapid changes in rpm it is put through being fitted to a motorcycle engine. I have no idea if there where changes made to better handle this in the c15-60 current production. My second newer unit has an aluminum nut to reduce rotating mass, also the balancing of the impeller is somewhat changed but is still cast. The output shaft is cross drilled for oiling purposes, and this is where it sheared. The radiusing of the transition between the driven face of the shaft and its thrust/support surfaces looks good but there is room for more here! There is almost no radiusing on the mating surface where the impeller seats. The shaft has broken in 3 pieces and its anyone's guess which part broke first but i suspect that the output shaft has gotten surface damage causing unbalance. There is a couple more things that can destroy a rotrex: # Overspeeding. Not possible with this ratio. # Lack of oil / maintenance. Never been low, dirty or run over the recommended km interval. At this rate it never will as there is oil included in the box when you buy a new unit 😅 however the oil have a couple more years than recommended… #Oil surface breakdown due to temperature. I'm sure this oil will be fine agewise after 3 years. There is no evidence of overheated parts as one normally think would be visible, however rotrex says a maximum of 80 degrees, so here comes the oil surface breakdown possibility. The output shaft is badly damaged but also have some areas that is good. The initial lockup happened after filling gas, idling for a couple of minutes and pulling somewhat inspired out on the road. Sudden high-pitch screaming and then lack of power. Could it be residual heat from the engine soaking the rotrex while filling causing a breakdown of the oil film? I will do temp surveillance this year in multiple spots to get an idea. However i have had a louder than usual unit for at least one season and i find no outboard bearings i can blame. The input shaft bearings are divided by an oil seal, the inner bearing (oil pump side) is a bit noisy while spinning it on my finger while assembled in it's housing. The outer one is perfect. This can be debris from the damage, but i suspect not. This takes me to a bit of history and what i think is the kits weakest part. I am on my 3 belt, the carbon belt where gone the first year (around 8000km) After about 20000km the outboard bearing startet making noise, and i changed it for a equal but not ZZ (double sealed) The pulleys are really small, this does not help belt life. A ribbed belt would help together with increasing the diameter. It will also quiet everything down, I'm sure some would appreciate that, i wouldn't. It would also help outboard bearing life by decreasing the tension the belt needs to run at. I'm not sure if a toothed belt is better at efficiency?1 point
-
Good chance the SMC (secondary master cylinder) at the front wheel is also blocked. Need to go through the whole system to make sure everything is clear. Great opportunity to ditch the linked braking system all together. Justin1 point
-
Save your money, the fronts are probably close to the same condition.1 point
-
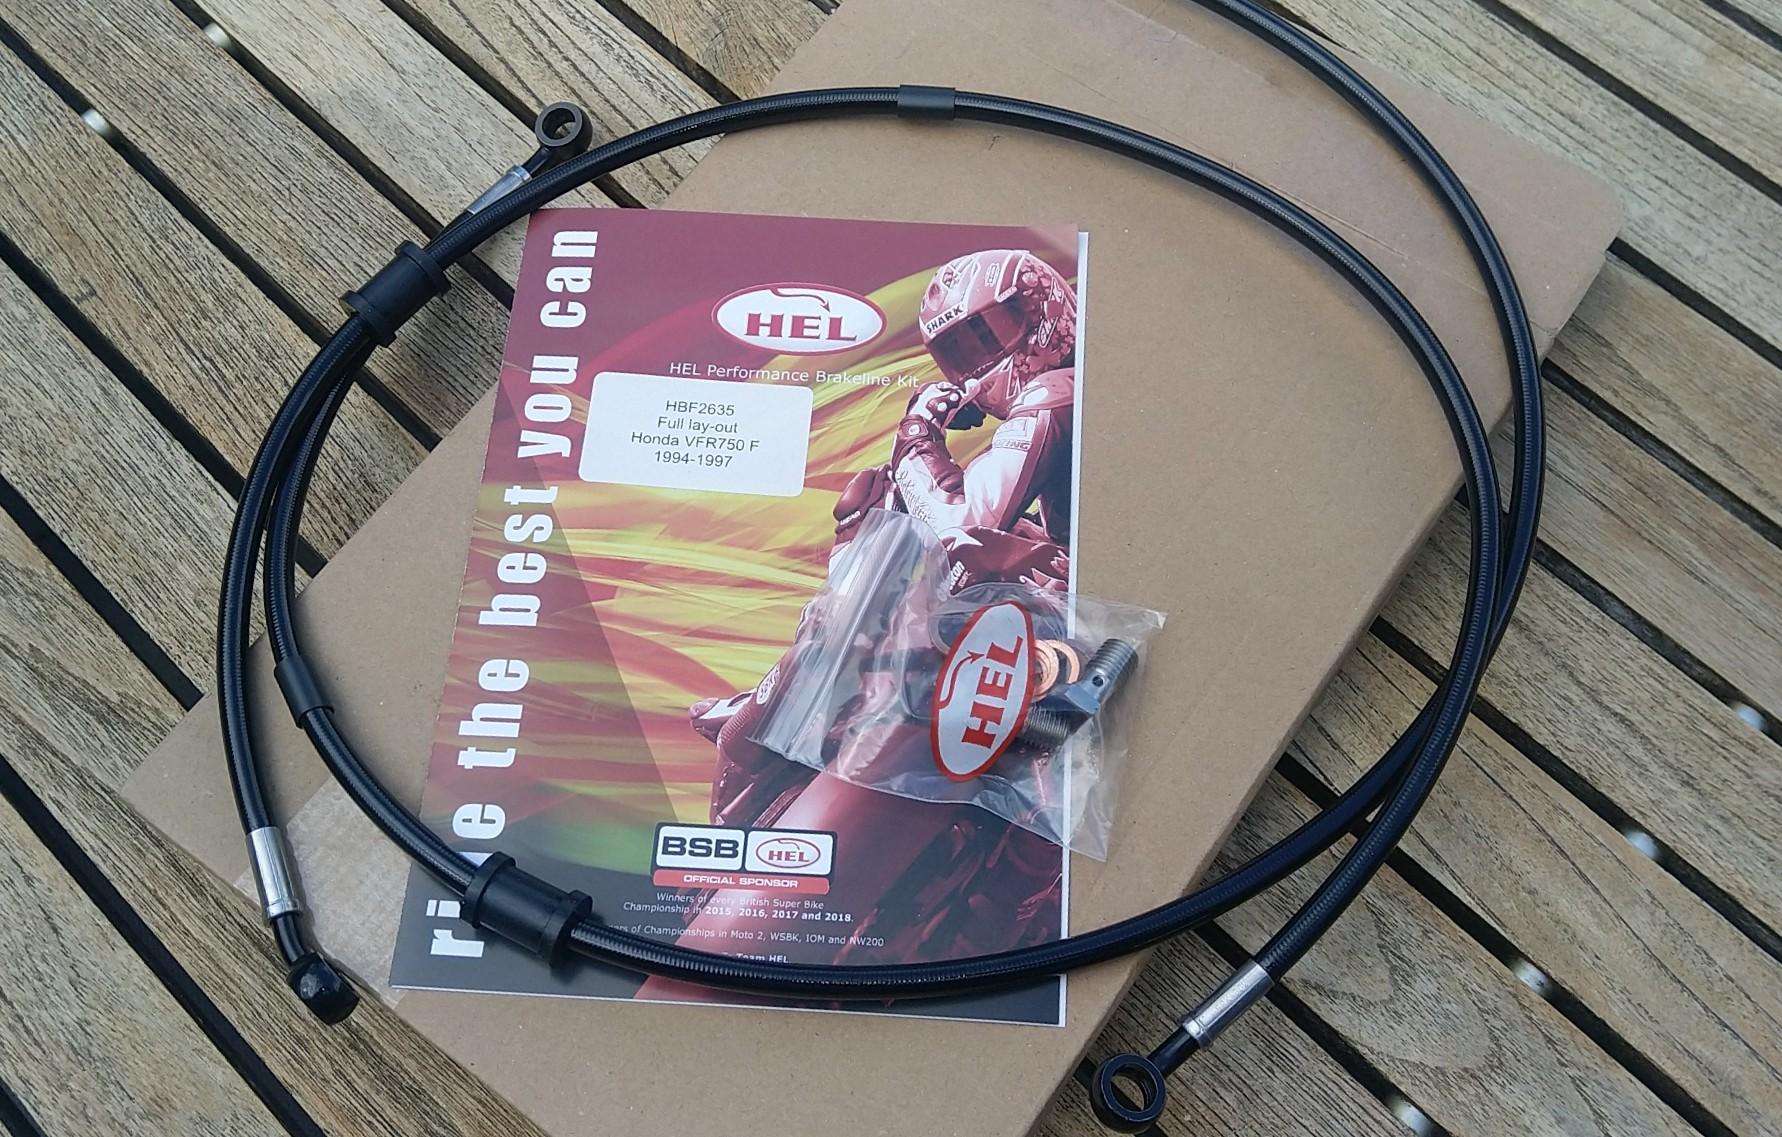
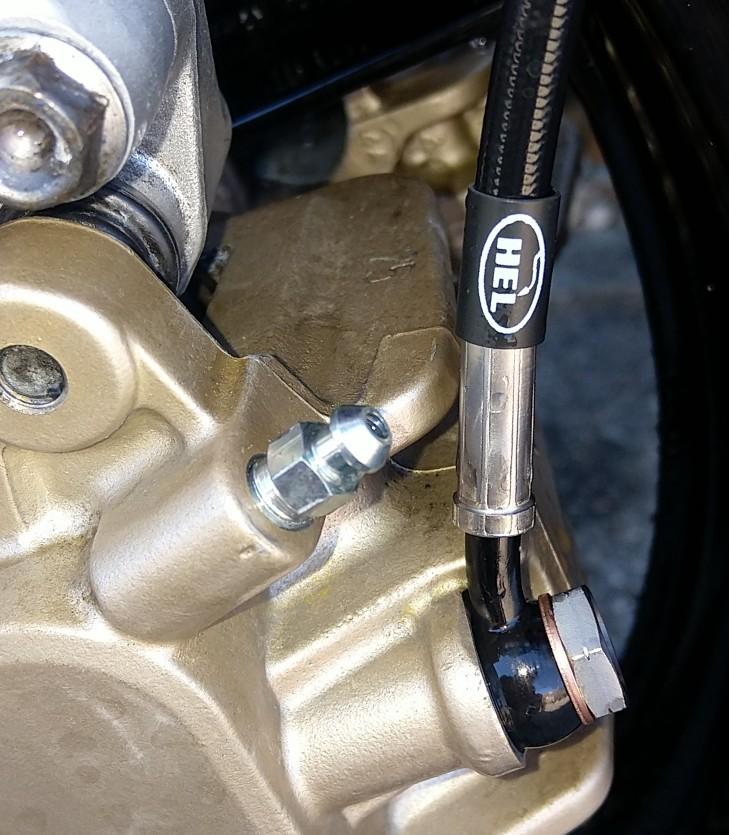
While you were at the rear brake line, you may as well have taken off the caliper, ejected the pistons, cleaned them up and reinstalled with new seals and rubber boots on the sliders (plus pads if necessary). Easy job and vastly improves the rear brake feel. Er, Dutchy, is it my eyes or is that last photo of yours missing a copper washer between the banjo and caliper body?1 point
-
The Bandit is finally together And alive VID_20240410_095848.mp4 Just need side covers as seat on, then first ride, but will not happen today, have a doctor's appointment in a other city that takes rest of day1 point
-
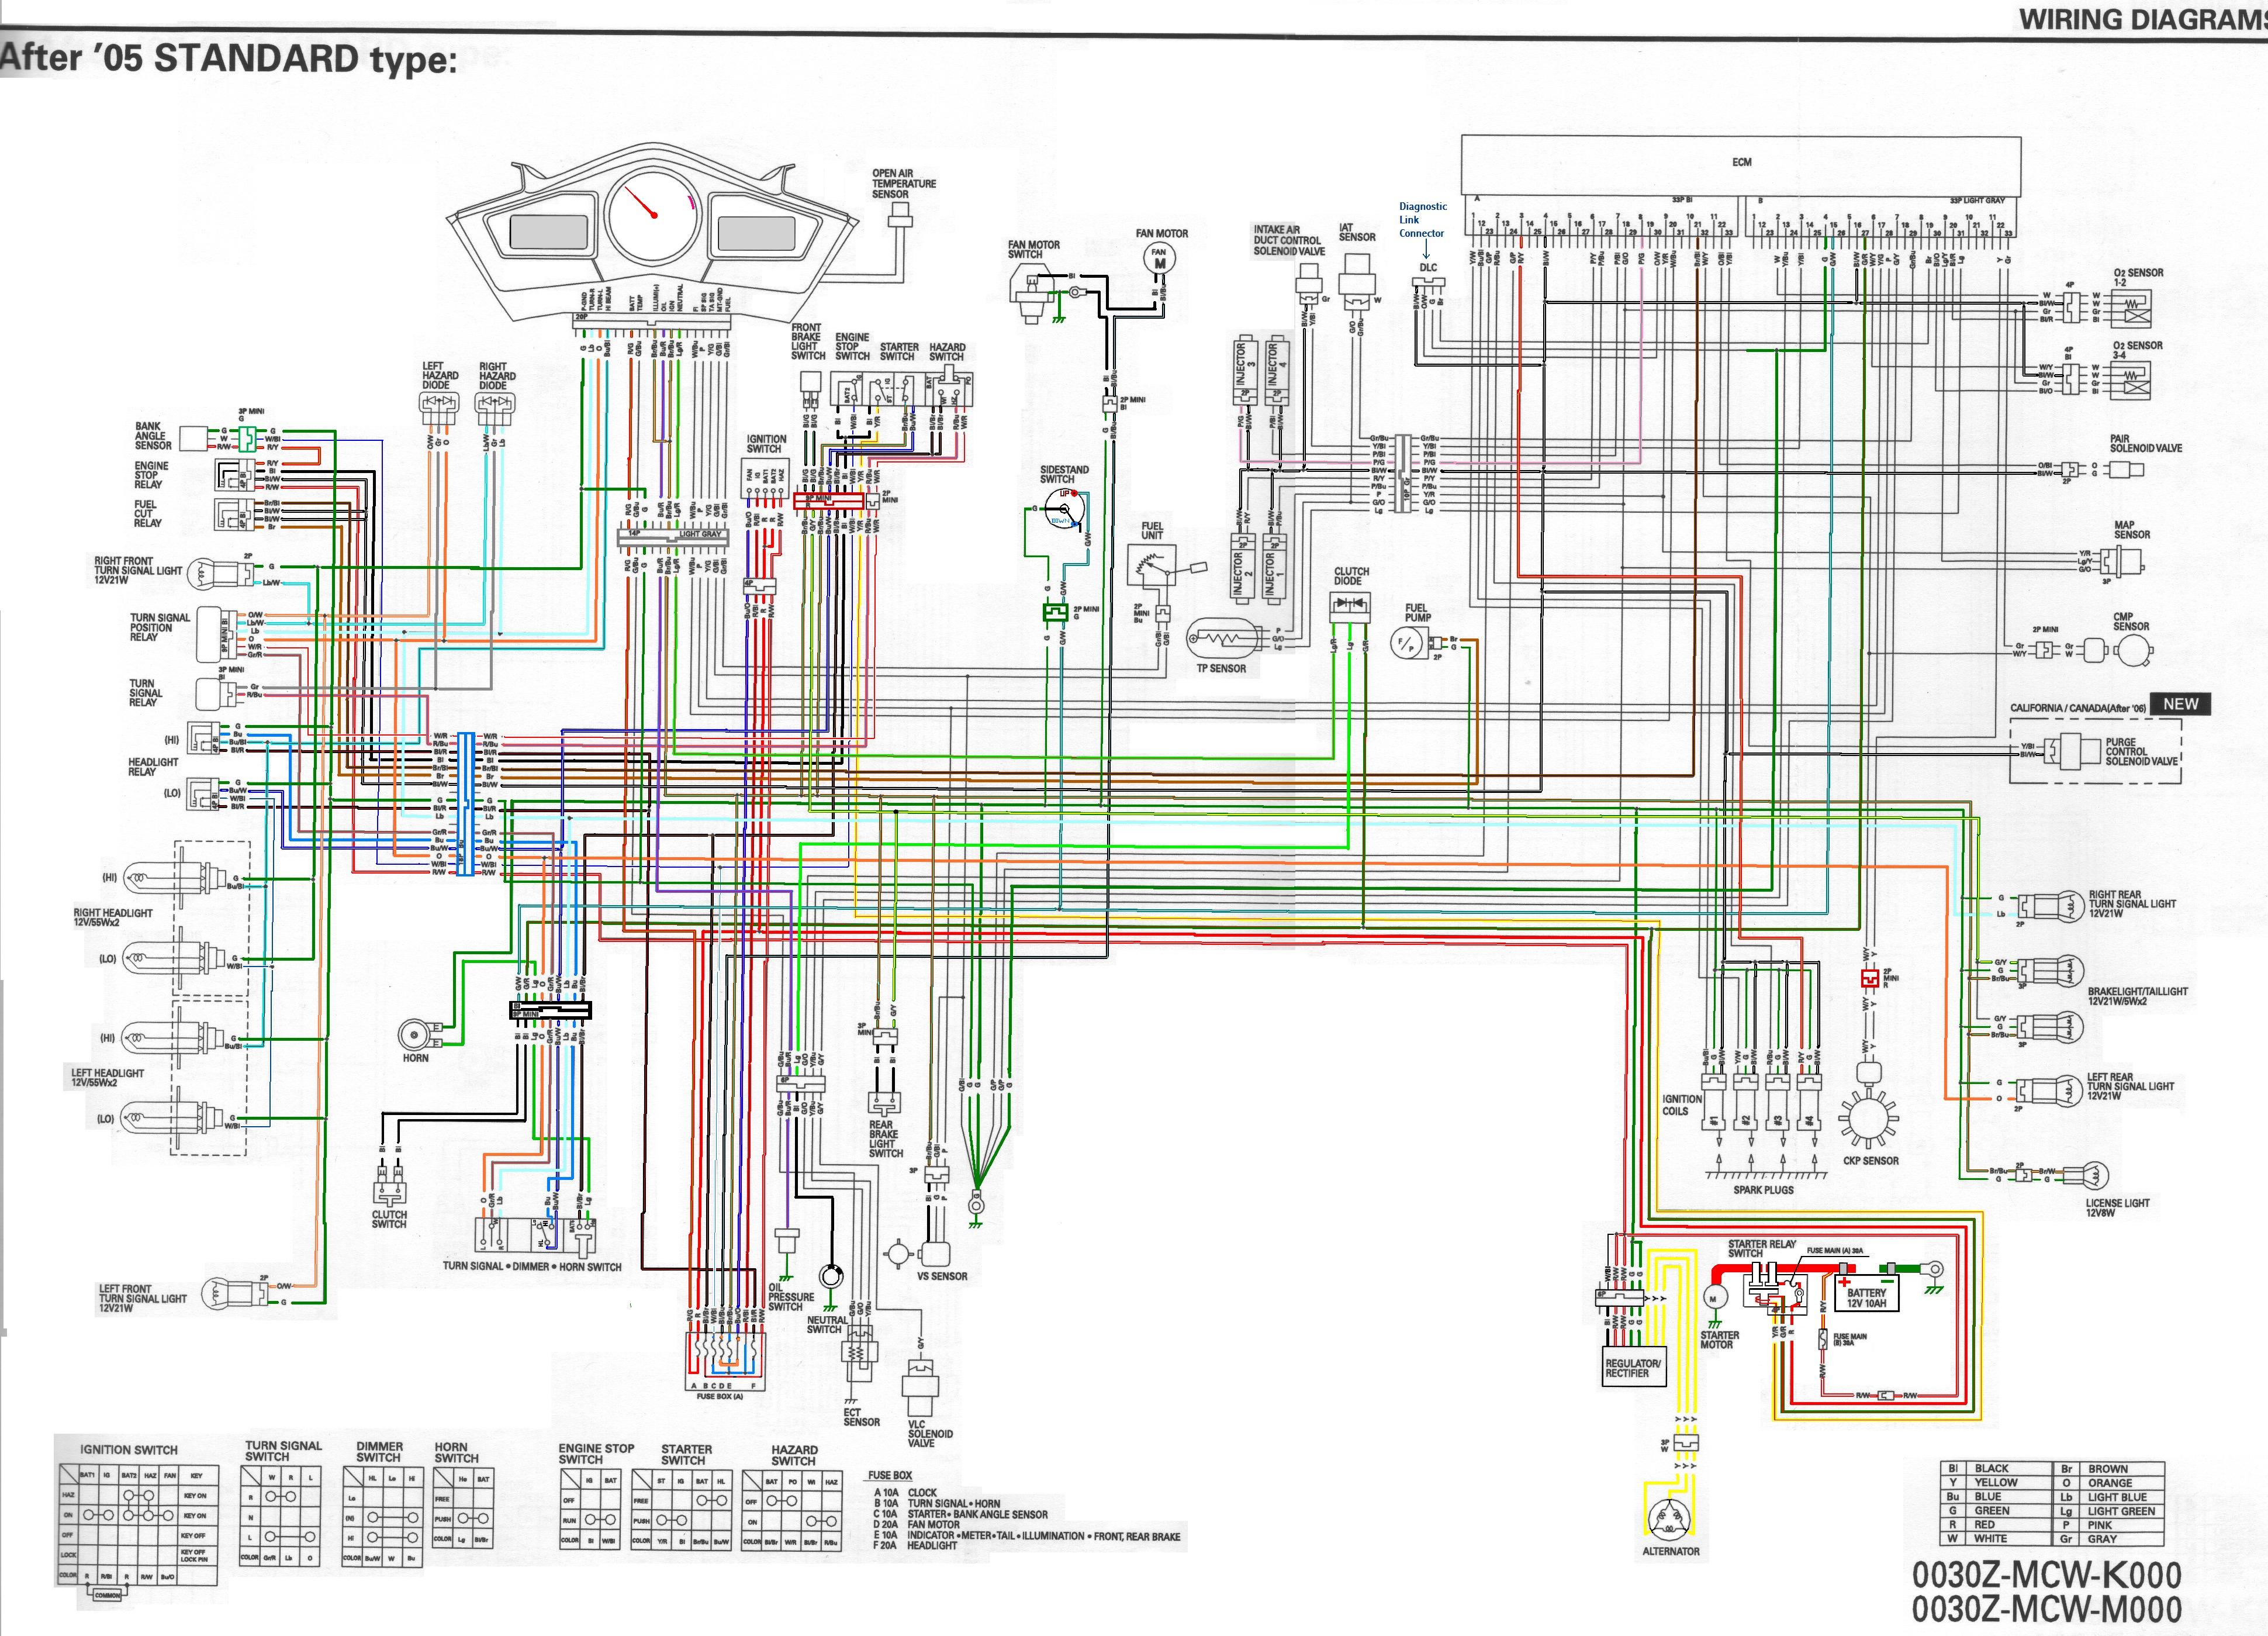
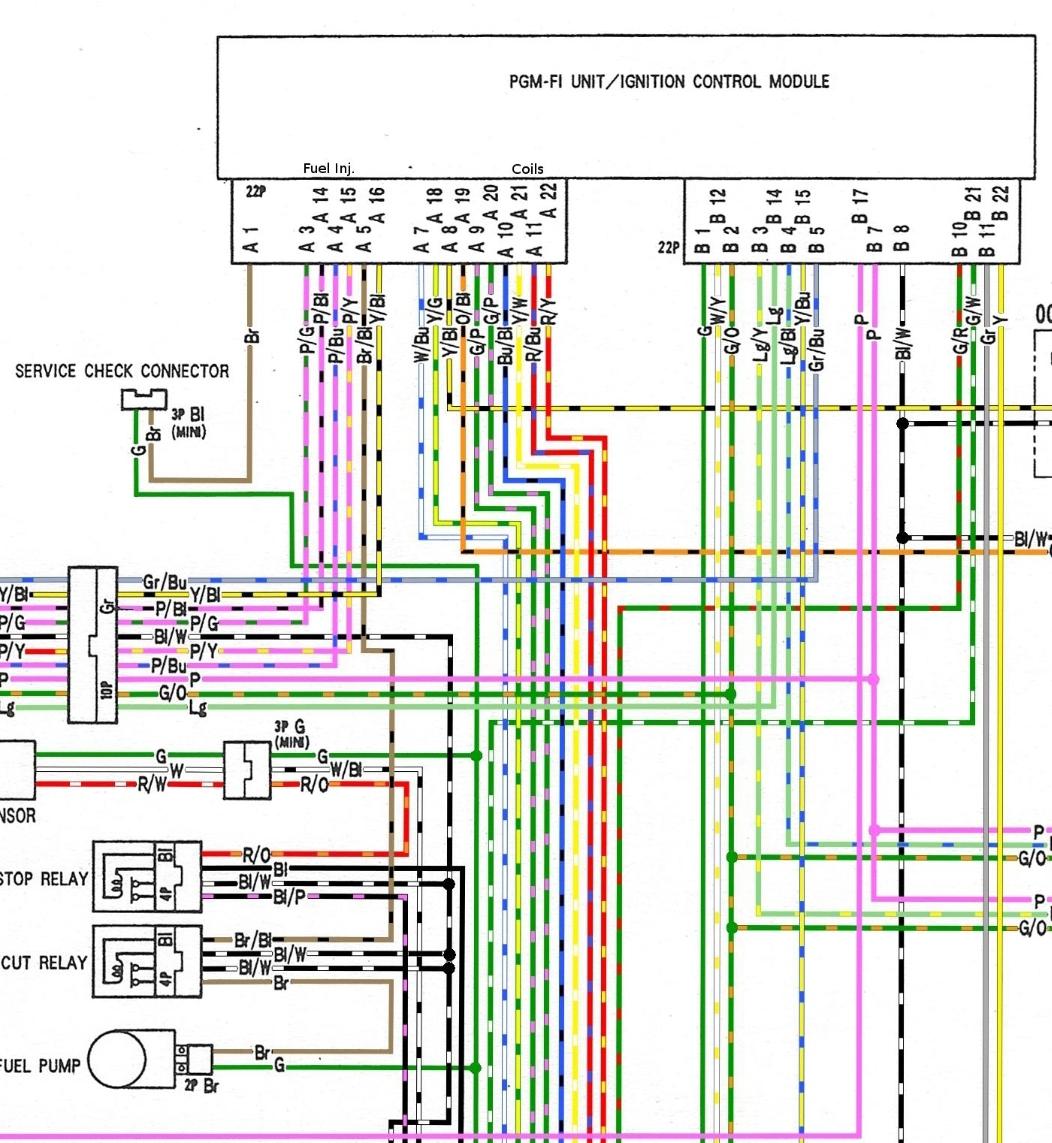
Hi Kyle. What a bloody mess! You could have all sorts of damaged wires and connector issues. OK. So the obvious thought is your ECM is completely unpowered, this could be either Power Or Ground wise. The other issue is your Fi Light Not coming On, it should be On if the ECM is unpowered. Is the Instrument Panel or it's wiring damaged? The fact your bike cranks over, means your Main Fuse A 30amp power is good. Do you have a wiring diagram And the Service Manual? Downloadable from this site? Hopefully the attached drawing will help. With the status of your bike you're going to need to measure voltages and do continuity checks, just visually looking ain't good enough. So for starters look at what's going on with Main Fuse B 30amp power. This fuse feeds all your EFI stuff including the Fuel Pump. Follow these steps trust you have a multimeter......... Clip your meter black lead to the battery Negative and start probing voltages with the other lead. Measure 12v on both sides of Main Fuse B the fuse has tiny metal test points on the top of the fuse probe these. Next measure 12v at the 18p Blue connector probe both sides where the Red/White wire enters and exits the connector. Now up to the ESR Engine Stop Relay measure the 12v at the Relay Base, Red/White wire. Now with Ignition to On Kill Switch to Run make sure you measure 12v on the Black wire for the ESR coil. Note - This Black wire is Positive 12v from the Kill Switch. Does the ESR energise? If it does you should now have 12v on the all important Black/White wire at the ESR and at the FCR Fuel Cut Relay. Get back to us regarding these first few checks.
1 point
-
Safety wire is super sharp. Do you know the inside wasn't damaged in any way? Brakes are...important.1 point
-
When was the last time the brake fluid was changed?1 point
-
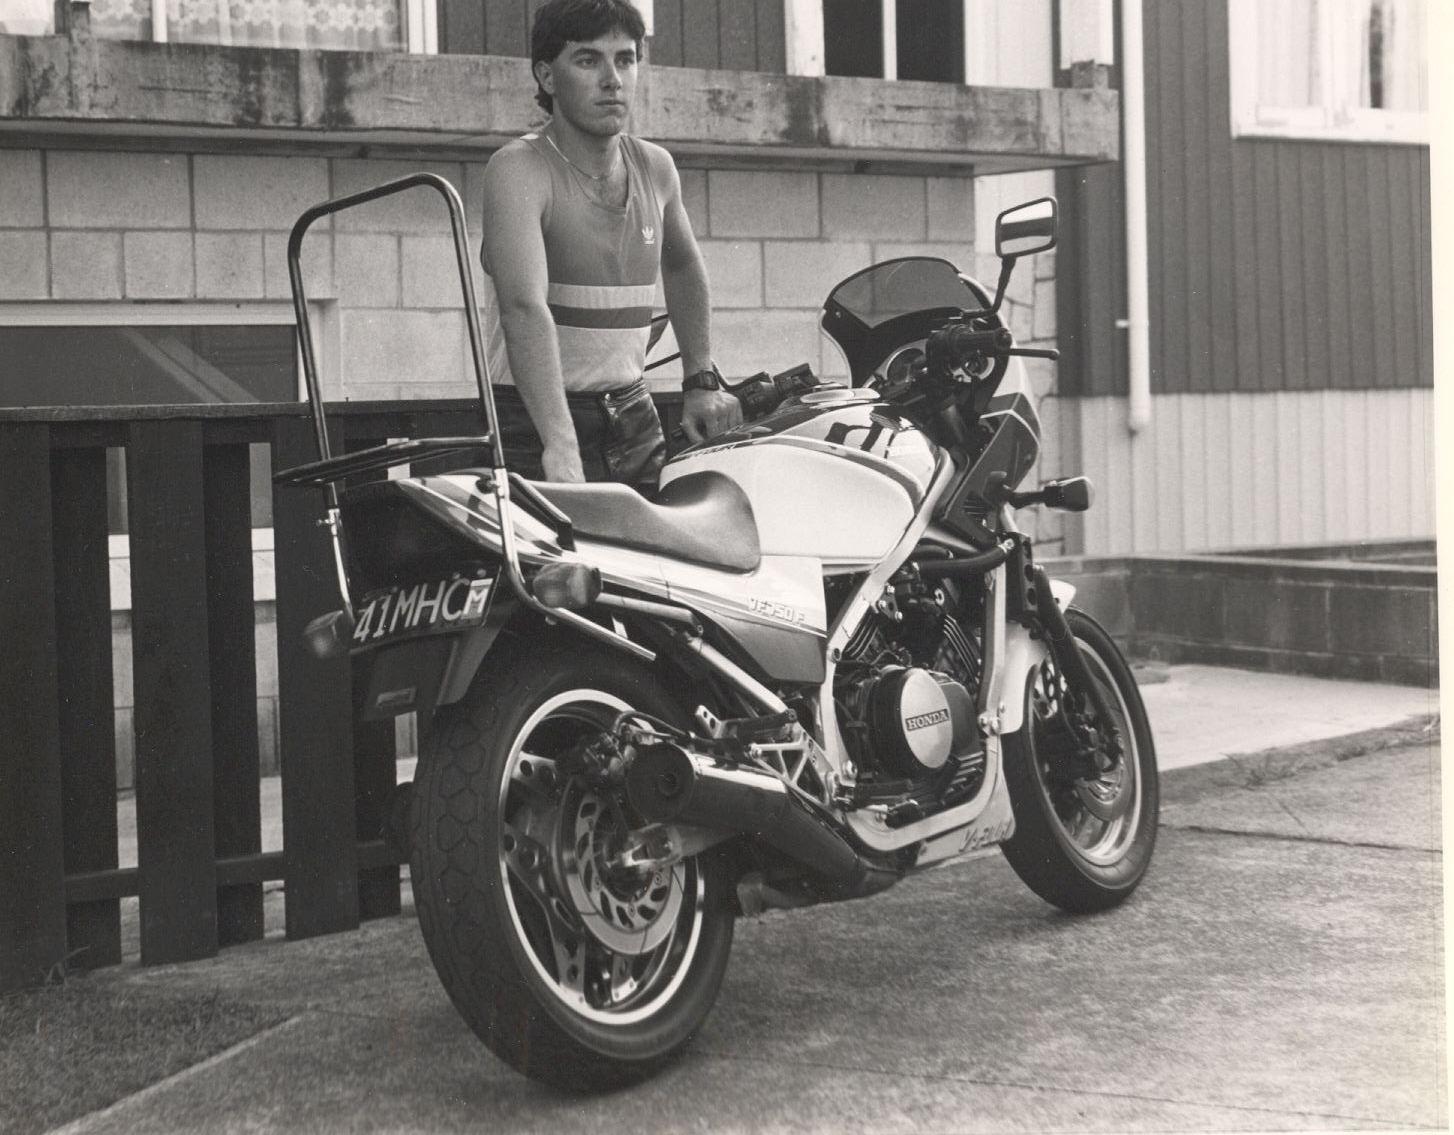
This is nearly 41 years ago...before the invention of colour! Not sure why I'm looking so stern...my girlfriend took the photo. It is easy to see why I never made it into the movies too. This was the bike that I borrowed for a test-ride from the dealership I worked part-time at, and dropped at over 100mph discovering just how powerful those front brakes were in a pre-ABS world...this is the "after" photo, after I purchased and repaired the thing. Maybe I was thinking about how stupid I was (and to be fair, still am).
1 point
-
Two days after buying the VFR I got caught out by loose sand on a highway exit and down I went. Skinned knee and separated A-C joint (collarbone) for me and some plastic damage to the VFR. Three weeks later we were both back on the road, definitely nervously on that first ride. A couple months later I took a longish day trip: ferry to the mainland, Hwy 1 to Hope, north on Hwy 5 over the Coquihalla to Merritt, Hwy 8 to Spences Bridge, then back on Hwy 1 to the ferry terminal at Tsawwassen, and back home. About 750 km/450 miles and 2 90-minute ferry rides. This photo is on the Coquihalla with Yak Peak in the background. Despite appearances, I am not praying but it's clear why I never had an acting career.
1 point
-
Do you think there is enough material left to run a thread die down to correct the threading? Or have you stripped the threads completely. If the latter, could you recut the bolt/ stud with the next size down ( for example if it was 6 mm cut a new 5.5mm or 5 mm thread) and use an appropriately sized nut? Others may have a better idea1 point
-
Looks like the wheel is not damaged & only has cosmetic outer lacquer damage. Waiting on a verdict from BST, but should be restorable to as new look 👍😁 Phew1 point
-
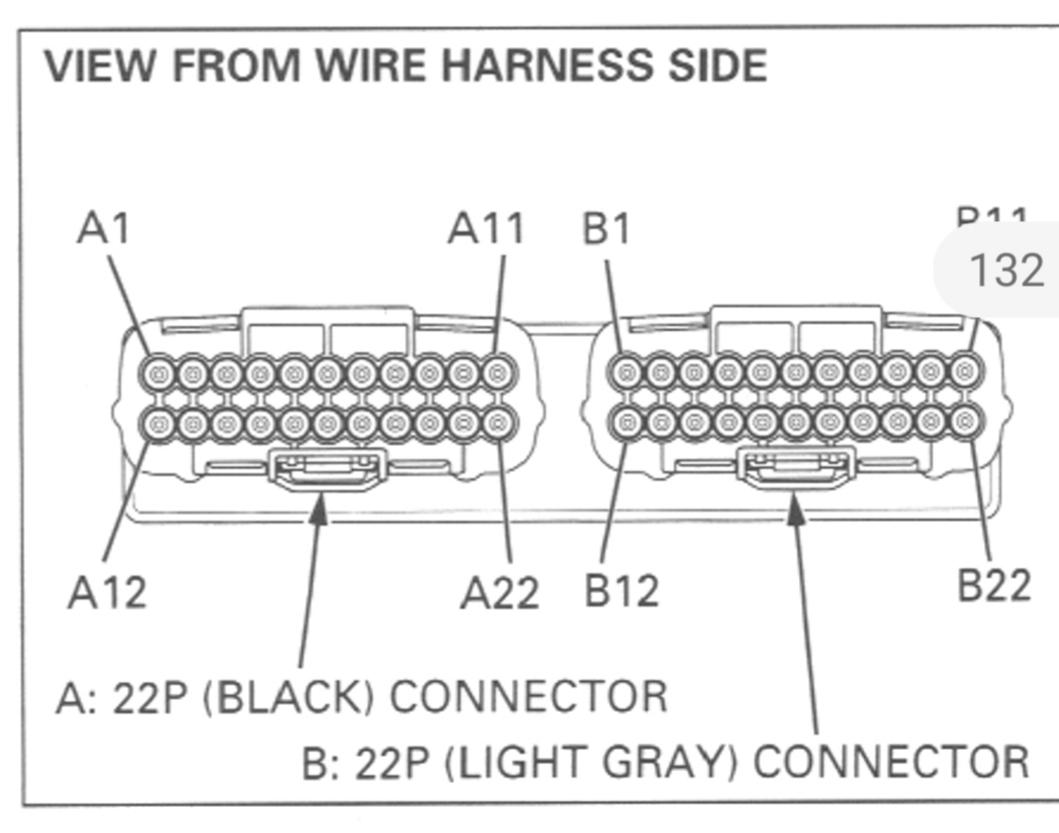
So the Ground block "looks good"! Did you happen to measure the two genuine Ground wires I mentioned within the block to ensure they are Properly Grounded? Have you checked the frame Grounds I mentioned? My last suggestions on your issue, I'm running out of ideas............. 1. MEASURE the ECM Grounds I've mentioned! A9 and A20 both Green/Pink wires AND B1 a Green wire. Unplug the ECM connectors, set you meter to the lowest Ohms range Black lead on the Battery Negative (Not Frame) probe these wires at the ECM connector. DO YOU READ ZERO OHMS?????? Refer to the attached partial wiring diagram and the ECM plug layout picture. 2. Verify you have Solid 12v at the Black/White wire at the ECM plug B8 Ignition to ON. 3. Check all ECM Pins and sockets for any sign of corrosion or oxidization due to moisture ingress. 4. Verify you have continuity/Zero Ohms on the FCR Ground wire Brown/Black from the ECM A5 to the FCR Relay Base. 5. Unplug one of the Sensors, be that the MAP, IAT, BARO or ECT. Turn on ignition, have the Sidestand DOWN. Does the ECM issue the appropriate Diagnostic Code for the sensor? If NOT this is further evidence your ECM could be toast. 6. If all Grounds, Power and wire continuity are tested as OK. Then there is a high probability your ECM is toast. INFO - As complex as the ECM is it is an incredibly reliable device. Generally it's Grounds, Power Supply, Sensors or wiring and connections that are at fault, rarely the ECM itself. Destroyed ECM's that I'm aware of have been caused by Overvoltage from a faulty R/R and the self induced incorrect jumpering of the FCR relay for Fuel Pump ops and Flow testing. Incorrectly placing 12v from the Black/White to the ECM grounding wire Brown/Black causing a dead short taking out the ECM. Good Luck and Happy Fault Finding!
1 point