Guest Posted October 11, 2009 Share Posted October 11, 2009 looking good, has a nice profile i will look again tomorrow, too late for me to get motivated now Link to comment Share on other sites More sharing options...
SEBSPEED Posted October 11, 2009 Share Posted October 11, 2009 Lookin good dude, I gotta say I like it better without the endcaps... bet it would be loud though! Link to comment Share on other sites More sharing options...
Member Contributer Kel Posted October 12, 2009 Author Member Contributer Share Posted October 12, 2009 I gotta say I like it better without the endcaps... Ditto! Link to comment Share on other sites More sharing options...
Member Contributer Old School Posted October 13, 2009 Member Contributer Share Posted October 13, 2009 Sweet, Sweet, Sweet. I do like the lines, the way the tank and tail flow together. :beer: Stephen Link to comment Share on other sites More sharing options...
Member Contributer Kel Posted October 25, 2009 Author Member Contributer Share Posted October 25, 2009 I got a little more body work done today. I trimmed the seat to follow the frame more. Before it hung down on the frame at the bottom and I just didn't like it. I was going to weld on a nut to the side of the frame to secure it but now it will get a small tab with a nut welded on the back. This is really how it should look. I stuck the headlight in for kicks. It will be a little more recessed than this. I also raised the rear and slid the forks up a little. I thought I was high up front before but after dropping an inch I'm still at 27" from the lower front fairing screw(which is stock height). I may go another .5 inch but that will wait. I'm starting to get a warm, fuzzy feeling seeing her dressed up. I only wish it were last April. Link to comment Share on other sites More sharing options...
Member Contributer unbalanced Posted October 25, 2009 Member Contributer Share Posted October 25, 2009 Awesome! I really like the tank, I agree with you that it fits much better than the original. This is just what I needed... Also like the front with the 'endurance' style! :fing02: Link to comment Share on other sites More sharing options...
Member Contributer VF1000RS Posted October 25, 2009 Member Contributer Share Posted October 25, 2009 Very cool. Love the single headlight. Radiators? Link to comment Share on other sites More sharing options...
SEBSPEED Posted October 25, 2009 Share Posted October 25, 2009 *applause* Link to comment Share on other sites More sharing options...
Member Contributer Kel Posted October 26, 2009 Author Member Contributer Share Posted October 26, 2009 Very cool. Love the single headlight. Radiators? Thanks Tom. It's going to be stock radiators for now. Not too concerned with air flow up top. The opening below the screen is adequate. There really wasn't that much air getting in under the dual headlight anyway. If things get hot, I'll throw on a 120mm PC fan, but I'm not anticipating any problem. A manual fan switch has always served me well. Link to comment Share on other sites More sharing options...
Member Contributer Old School Posted October 26, 2009 Member Contributer Share Posted October 26, 2009 :cool: :blink: :3: :wub: :biggrin: Thank you for the photos!!!! Link to comment Share on other sites More sharing options...
Guest Posted October 30, 2009 Share Posted October 30, 2009 Keep it going, I LOOVVVEEEEE it!! Link to comment Share on other sites More sharing options...
Member Contributer vfrcapn Posted October 31, 2009 Member Contributer Share Posted October 31, 2009 Looking good, can't wait to see it with full paint! :biggrin: Link to comment Share on other sites More sharing options...
SEBSPEED Posted December 2, 2009 Share Posted December 2, 2009 Is it done yet? :biggrin: Link to comment Share on other sites More sharing options...
Member Contributer Kel Posted December 2, 2009 Author Member Contributer Share Posted December 2, 2009 Is it done yet? :comp13: I'm afraid you'll need more popcorn. Link to comment Share on other sites More sharing options...
SEBSPEED Posted December 2, 2009 Share Posted December 2, 2009 I'm afraid you'll need more popcorn. A whole winter's worth? Link to comment Share on other sites More sharing options...
Member Contributer Kel Posted December 2, 2009 Author Member Contributer Share Posted December 2, 2009 I'm afraid you'll need more popcorn. A whole winter's worth? Yes, and you should see the drink size. Link to comment Share on other sites More sharing options...
SEBSPEED Posted December 3, 2009 Share Posted December 3, 2009 I'm afraid you'll need more popcorn. A whole winter's worth? Yes, and you should see the drink size. No big snags, I hope? :musik20: Link to comment Share on other sites More sharing options...
Member Contributer Kel Posted December 3, 2009 Author Member Contributer Share Posted December 3, 2009 No big snags, I hope? :blink: No big snags unless you consider time a snag. Time and money collided to push the project back a little. I'll get it in to the basement and start all the detail work. Probably wait till spring for the final paint. Link to comment Share on other sites More sharing options...
Member Contributer Kel Posted March 20, 2010 Author Member Contributer Share Posted March 20, 2010 Almost 5 month's to the day since my last update because...umm...there were no updates done. So back in the saddle today with a good blow down and a quick spray wash. I did do some minor fairing work to get ready for the projector beam install. Not sure if I'll attach it to the upper stay with a metal cage or make a carbon fiber block attached directly to the fairing. Proof... Link to comment Share on other sites More sharing options...
Member Contributer unbalanced Posted March 23, 2010 Member Contributer Share Posted March 23, 2010 I still think you're ahead of me :unsure: I like the lines, and the SSS... gives me something to look forward to. Originally I was going to use that model tank and noticed some clearance issues with the airbox, are you using the stock box? Looks good! Link to comment Share on other sites More sharing options...
Member Contributer Kel Posted April 7, 2010 Author Member Contributer Share Posted April 7, 2010 I did get some work done this week. Doesn't seem like much but it did take a lot of time. I came to a point in the build where I started thinking about a way to mount a license plate. I'm not a big fan of the sideways plate attached to the swingarm. Hell, I don't even know if it's legal. It had to be sturdy because it will hold a tail light, signals and the plate. I kicked around some aluminum brackets but didn't like what I was seeing. I decided to go with my trusty Carbon Fiber. I formed a plastic shape that I liked and tacked it to the tail with some resin mixed with some shredded fiberglass cloth. When that was mostly cured but still tacky, I wrapped the whole thing in CF. I ran it out on to the flat area on the outside and tucked up underneath. A couple of coats of resin and sanding in between and it's all done. Rock hard and super strong. I think I could stand on it and not break it off. This is it after the first coat of resin on the CF has dried and been sanded. This is when you say OH SH**, I ruined it. But it will look better with more coats. The key to the first sanding is not to chase after every bump because you don't want to break in to the fibers at all or it will look crappy. Side view. It's shorter than the plate which I wanted. It has a slight curve to and looks like it could be a stock fender which is cool. Here it is at a distance. Looks like it's always been there. I also needed to reinforce the duct on the top of the tail. I could have used fiberglass underneath but I had a small piece of CF left over so it went on top. It will get masked off and painted around it to let it show. It will also help to break up blue that will go there. Can't really see the weave but it looks nice. Stinkin' camera! This tail was REALLY rashed and wavy when I got it. 20 hours into this probably isn't far off. After... Before... Link to comment Share on other sites More sharing options...
Member Contributer unbalanced Posted April 8, 2010 Member Contributer Share Posted April 8, 2010 Really nice Kel... I like the endurance look of the tail - should look great with the 'new' front. Can't wait to see it in color, what paint schemeare you going with? :pinocchio: Link to comment Share on other sites More sharing options...
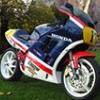
Member Contributer Kel Posted April 8, 2010 Author Member Contributer Share Posted April 8, 2010 Really nice Kel... I like the endurance look of the tail - should look great with the 'new' front. Can't wait to see it in color, what paint schemeare you going with? :lobby: I'm probably asked this more than any other question. I have some ideas kicking around. I don't want to say yet but there will be no mistaking it as a Honda. There will be red,white and blue along with a special model name. Just think 80's Factory race bike and you'll be close. I change my mind every 2 weeks so hard to say exactly what the final look will be. I can't wait myself! Link to comment Share on other sites More sharing options...
Member Contributer Kel Posted April 14, 2010 Author Member Contributer Share Posted April 14, 2010 I got the projector headlight in and all seems good. It looks flat in the front and the headlight looks flush all around... ...but as you can see from the below pics, the nose is now more rounded than the flatter stock headlight opening, both top to bottom and from side to side. Trying for a bulbous race nose from the 80's without it being like a basketball. The headlight is close to flush on the left side and recessed on the right, exactly what I wanted, kind of like the OKI RVF's. Had I just glassed the front flat it would have looked like an '86 GSXR750. (Great help from my five year old!) It sits a little close to the upper radiator but I think it will be fine. I made it so it will have some degree of fine adjustment for aiming. All stainless hardware. I made the tunnel out of fiberglass cloth and lots of resin. I used a piece of 1/2 inch MDF to act as a block to hold the bolt heads. It's light, sucks up resin nicely and I had a piece kicking around. I attached it with a thick epoxy resin paste and covered it with fiberglass cloth to secure it to the fairing. It's pretty strong. ...and it is bright. I couldn't take a picture directly in front, too bright for the camera. This is off to the side. I still need to do some body work on the upper to smooth things out but she's starting to look pretty tough. I think she's lost 50lbs visually. Wish it was actual lbs. Link to comment Share on other sites More sharing options...
Veefer800Canuck Posted April 14, 2010 Share Posted April 14, 2010 I like the battery location, that's poor-man's anti-wheelie control! :pissed: Link to comment Share on other sites More sharing options...

Recommended Posts
Archived
This topic is now archived and is closed to further replies.