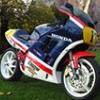
Member Contributer Kel Posted March 23, 2009 Member Contributer Share Posted March 23, 2009 Now that my winter kitchen projects are done, time to start my rebuild. Once a decade seems to be the trend. Pulled it out of the garage to blow off a layer of mahogany dust. Man there is a lot of stuff behind that upper fairing. Hope I don't have to go with a different upper or I've got some relocating to do. Try hiding that stuff, Seb! DSCN1842.JPG Link to comment Share on other sites More sharing options...
Guest Posted March 23, 2009 Share Posted March 23, 2009 Why not just put on a new seat and ride it like that? Great street fighter look.............but, ? Do all those tubes in the front route back to your flux capacitor? :cool: Good luck on the rebuild. 1000R parts are getting harder to find. Link to comment Share on other sites More sharing options...
SEBSPEED Posted March 23, 2009 Share Posted March 23, 2009 Boy, you're a glutton for punishment, aren'tcha? It's getting a little close to spring to be starting a big project now... :cool: & are you kidding me? Hiding all that stuff is so easy! Just give me an appropriately sized garbage can, and I'll make it ALL disappear!! :angry: Then replace the goofy Honda rad setup with a custom HRC style aluminum radiator, in the conventional position. That takes care of 90% of the mess - then start shortening wires, get an Acewell gauge, coupla foglights for headlights... yeah, that's the ticket! NOT! lol The rad thing would be a great improvement though... the R sure is top heavy! Link to comment Share on other sites More sharing options...
Member Contributer Kel Posted March 23, 2009 Author Member Contributer Share Posted March 23, 2009 Yea, it looks like the old bulldog from Tom and Jerry! Looks like it's going to tip over forward. First thing I've got to do is trace down a serious oil leak in the back of the motor. Leaves a sizable spot on the floor. Then paint frame and motor. Get the SS arm with the RC30 wheel on. Make an exhaust. Patch up my other panels. Reshape the upper and fit a single left side, endurance style round headlight. Paint all. And if I feel so inclined and it's not july by then, cut out the stock gas cap and weld in a newer style flush one. Believe me, I know this is a terrible time to start all this crap. Guys were out riding today...then it started to snow. Link to comment Share on other sites More sharing options...
SEBSPEED Posted March 23, 2009 Share Posted March 23, 2009 Well, good luck with it! And don't forget the pics... :cool: Link to comment Share on other sites More sharing options...
Member Contributer vfrcapn Posted March 23, 2009 Member Contributer Share Posted March 23, 2009 Sounds ambitious and pretty cool. Good luck, looking for pics. :angry: :blink: BTW, once every ten years is going to be my new schedule too. :cool: Link to comment Share on other sites More sharing options...
Member Contributer VF1000RS Posted March 24, 2009 Member Contributer Share Posted March 24, 2009 Fun fun fun Kel. I`m in the middle of a flush mount gas cap conversion for the big F project myself. Just need to find a good brazier to mount it so it doesn`t leak....and smooth out a couple dings... Link to comment Share on other sites More sharing options...
Member Contributer Kel Posted March 24, 2009 Author Member Contributer Share Posted March 24, 2009 Fun fun fun Kel. I`m in the middle of a flush mount gas cap conversion for the big F project myself. Just need to find a good brazier to mount it so it doesn`t leak....and smooth out a couple dings... Great bikes think alike! Link to comment Share on other sites More sharing options...
Member Contributer Kel Posted April 12, 2009 Author Member Contributer Share Posted April 12, 2009 Well the motor is out and the frame is bare. My gasket kit is on the way. My oil pan was leaking like a sieve so I'll freshen the easy ones up. All is cool until....time to remove the exhaust. Of course 2 studs had to snap. Lucky? for me they are both in front. There is enough left to grab but they aren't budging. I've hit them with a ton of heat and PB but no go. Tapped on them, talked sweet to them, bribed them, all to no avail. So the day wasn't a total loss, I mocked up the swingarm. I cut down the left side boss on the frame. The arm sits nice in there. I put the 400 wheel/tire in there to see how things are looking. I'm dead on with the 400, we'll see how the RC wheel/tire goes. I'm seeing now that there will be some creative thinking for the shock linkage. The VFR's linkage point is left of the R's. I really want to keep the stock upper shock mount location. Someday I may want to go back to stock setup so I don't want to cut too much that will be a pain to recover from in the future. Plugging away. Link to comment Share on other sites More sharing options...
SEBSPEED Posted April 12, 2009 Share Posted April 12, 2009 That's great and all, but where's the darn pics??? :fing02: Link to comment Share on other sites More sharing options...
Member Contributer Kel Posted April 13, 2009 Author Member Contributer Share Posted April 13, 2009 That's great and all, but where's the darn pics???:dry: Pics? PICS? Did you read my post....broken studs.....pain...suffering...loathing...despair. I'll post pics of my wrists when the stitches come out. Link to comment Share on other sites More sharing options...
Guest Posted April 13, 2009 Share Posted April 13, 2009 Schweet, that bike could probably assimilate the Borg in that livery! Link to comment Share on other sites More sharing options...
Member Contributer Kel Posted April 18, 2009 Author Member Contributer Share Posted April 18, 2009 My gasket kit is here so I decided that I would put in the oil pan gasket now so I can wash and paint the motor. It's pretty complete. I won't put in the valve seals or base gaskets but most of the rest will go in. gasket kit.jpg The pan hasn't been off in 20+ years so of course a bolt had to break. Fun.jpg I want a t-shirt made with this picture! The good news is the cam lobes look brand new. All of them! I was surprised with everyone jumping to get an oil mod done. They looked good 10 years ago when I last had the covers off but I thought maybe by now there would be some wear. 60+k miles on those cams and they look like I just put them in. I can't see the rockers so there is no saying they're just as good but I"m happy for now. Mod will wait. Bigger fish to fry. lobe1.jpg Link to comment Share on other sites More sharing options...
SEBSPEED Posted April 18, 2009 Share Posted April 18, 2009 The R's had a better oiling setup than the F's did. Good on ya for getting some work done! :fing02: Link to comment Share on other sites More sharing options...
Member Contributer VF1000RS Posted April 19, 2009 Member Contributer Share Posted April 19, 2009 Nice cams Kel! Know how you feel in the broken bolt dept. Just snapped the head of one of the cylinder coolant drain bolts off....that was fun...especially after snapping the end of the "Easy-out" off in there too... Link to comment Share on other sites More sharing options...
Member Contributer Kel Posted April 19, 2009 Author Member Contributer Share Posted April 19, 2009 Nice cams Kel! Know how you feel in the broken bolt dept. Just snapped the head of one of the cylinder coolant drain bolts off....that was fun...especially after snapping the end of the "Easy-out" off in there too... I feel for ya. I had most of the bolt drilled out when I loaded up the extractor. Started to crank on it when I said to myself, "You know this is going to break, right?" I backed it out and just drilled the rest out with a larger bit. Tapped it and all is well. I have NEVER heard of anyone having a good experience with those cursed things. They always seem to break at the slightest pressure. I'm going to have to try and cut some threads on whats left of the exhaust stud. I know it will go south if I try to drill it out. I just might have enough room if I cut down the exhaust collar. Trying to get stuff done and the sound of bikes going by is making me crazy. Waiting on an RC30 wheel collar and a water trap for my compressor. Then I can start sandblasting some stuff and check my wheel alignments. The Dunlops 207's are supposedly wider than most tires but options are short in the 180/55/18 world. May try an Avon Viper? I've got an '83 VF tank on the way. Not sure if I will use it or not. I was thinking I need the knee scoops that the 750 has to get the look I'm after, plus it's pretty flat on top, again, something I think might work for me. We'll see when it gets here. Link to comment Share on other sites More sharing options...
enzed_viffer Posted April 19, 2009 Share Posted April 19, 2009 Good work, Kel! Nice cams Kel! Know how you feel in the broken bolt dept. Just snapped the head of one of the cylinder coolant drain bolts off....that was fun...especially after snapping the end of the "Easy-out" off in there too... I feel for ya. I had most of the bolt drilled out when I loaded up the extractor. Started to crank on it when I said to myself, "You know this is going to break, right?" I backed it out and just drilled the rest out with a larger bit. Tapped it and all is well. I have NEVER heard of anyone having a good experience with those cursed things. They always seem to break at the slightest pressure. I've broken only one, IIRC, but they sure are brittle bastids. When I had the VTR1000, the first time I went to change the oil I found the previous owner had rounded the sump plug head off. :491: I tried all kinds of things to get it out, but it was seemingly welded in there, plus it was located in a recessed corner of the sump, so access was problematic. In the end, I decided there was no alternative but to drill and Ezy-out it. So off I go. Get the Ezy-out in with a small wrench, lean on it, nothing doing. So I get a 12" bar on it, lean, lean LEan! CRACK!!! Uh-oh... To my great and hilarious relief, it was just the plug letting go its grip on the sump hole. I guess the PO must've buggered up the plug, and decided since he couldn't guarantee he had it tight enough, he'd use some loctite or glue on it. But it's never nice when things break, huh? Link to comment Share on other sites More sharing options...
SEBSPEED Posted April 19, 2009 Share Posted April 19, 2009 Nice cams Kel! Know how you feel in the broken bolt dept. Just snapped the head of one of the cylinder coolant drain bolts off....that was fun...especially after snapping the end of the "Easy-out" off in there too... I feel for ya. I had most of the bolt drilled out when I loaded up the extractor. Started to crank on it when I said to myself, "You know this is going to break, right?" I backed it out and just drilled the rest out with a larger bit. Tapped it and all is well. I have NEVER heard of anyone having a good experience with those cursed things. They always seem to break at the slightest pressure. I'm going to have to try and cut some threads on whats left of the exhaust stud. I know it will go south if I try to drill it out. I just might have enough room if I cut down the exhaust collar. Trying to get stuff done and the sound of bikes going by is making me crazy. Waiting on an RC30 wheel collar and a water trap for my compressor. Then I can start sandblasting some stuff and check my wheel alignments. The Dunlops 207's are supposedly wider than most tires but options are short in the 180/55/18 world. May try an Avon Viper? I've got an '83 VF tank on the way. Not sure if I will use it or not. I was thinking I need the knee scoops that the 750 has to get the look I'm after, plus it's pretty flat on top, again, something I think might work for me. We'll see when it gets here. I'm in this club too. Took a lot of time and patience on my part to get a broken ez out (and bolt) out of my 750F block. Glad you passed on that... heh! Oh and - I told you so... 71 degrees and sunny next Saturday, better get crackin!! :491: Link to comment Share on other sites More sharing options...
Member Contributer JamieDaugherty Posted April 20, 2009 Member Contributer Share Posted April 20, 2009 The R's had a better oiling setup than the F's did. Good on ya for getting some work done! :fing02: Where did you get that info? The oiling was the same between the two based on the F and R engines that I have built. The only possible difference could be the pressure of the relief but I think those are the same too. The pumps and relief valves are different part numbers but I think functionally they are the same. Again, my assumption has palways been that the part number chage was because the R had a deeper oil pan. Link to comment Share on other sites More sharing options...
Member Contributer Kel Posted April 26, 2009 Author Member Contributer Share Posted April 26, 2009 I've got the arm in and I think it's where it's supposed to go. I still need to make a collar for the spindle to make up the difference in the RCwheel and the GT spindle. The wheel is dead center and with the modded cush drive, I think the chain should be close but I won't know till my tire comes in and the motor is back in. I'm still not sure what to expect from the linkage. It's a point of mystery now. FSCN2006.JPG The shock is off set to the left but the hole in the rear sub frame is center(I hope). You can see the wheel is central to that. FSCN2004.JPG Link to comment Share on other sites More sharing options...
Veefer800Canuck Posted April 26, 2009 Share Posted April 26, 2009 Cool, did you check with VF1000RS to see how exactly he did his? Link to comment Share on other sites More sharing options...
Member Contributer Kel Posted April 27, 2009 Author Member Contributer Share Posted April 27, 2009 Cool, did you check with VF1000RS to see how exactly he did his? Tom and I have different approaches. I'm trying to design everything with the idea of being able to go back to stock if need be. Probably harder than if you cut and welded things specifically for a custom job. Keeping the stock shock mounting points as well as frame bosses somewhat intact etc, is really challenging. That said, Tom is always on PM "speed dial" if questions arise. Link to comment Share on other sites More sharing options...
Member Contributer vfrcapn Posted April 27, 2009 Member Contributer Share Posted April 27, 2009 Cool, did you check with VF1000RS to see how exactly he did his? Tom and I have different approaches. I'm trying to design everything with the idea of being able to go back to stock if need be. Probably harder than if you cut and welded things specifically for a custom job. Keeping the stock shock mounting points as well as frame bosses somewhat intact etc, is really challenging. That said, Tom is always on PM "speed dial" if questions arise. So how are you doing that? When I mocked mine up with the sss, the only way I saw to fit it was to cut out the frame brackets for the original swingarm pivots? Have some pics? (I just tossed a spare R frame a few months ago, wish I had held on to it for this exact exercise.) Link to comment Share on other sites More sharing options...
Member Contributer Kel Posted April 27, 2009 Author Member Contributer Share Posted April 27, 2009 Cool, did you check with VF1000RS to see how exactly he did his? Tom and I have different approaches. I'm trying to design everything with the idea of being able to go back to stock if need be. Probably harder than if you cut and welded things specifically for a custom job. Keeping the stock shock mounting points as well as frame bosses somewhat intact etc, is really challenging. That said, Tom is always on PM "speed dial" if questions arise. So how are you doing that? When I mocked mine up with the sss, the only way I saw to fit it was to cut out the frame brackets for the original swingarm pivots? Have some pics? (I just tossed a spare R frame a few months ago, wish I had held on to it for this exact exercise.) You definitely have to grind down the left inside boss flush with the frame. But to return to stock, you only need to weld on a spacer of equal length. I then drilled out the stock leftside swingarm bolt to 20mm and the head ground flat. It then gets cut with just a bit of the shoulder sticking out from the frame on the swingarm side. On the right side of the frame, the stock mount is stepped from 20mm down to ?. I drilled the narrower step out to 20mm. I ground off the welds on the "box" that holds the nut and removed it intact. To return to stock requires a small collar for the stock bolt and simply reweld the "box" to the frame. Easy. The arm needs collars cut for left and right sides. To mount it, I'm using an axle I had which is 20mm. It goes through the arm and the drilled left side bolt gets snugged into the stock threads in the frame, it's shoulder tightening down on the bearing. Then the axle nut and presto. Sounds good in theory. We'll see in practice. Link to comment Share on other sites More sharing options...
Member Contributer Kel Posted May 3, 2009 Author Member Contributer Share Posted May 3, 2009 Test fitting the Vf tank and RC45 tail. As you can see, there is a lot of glass work to fix. The tank looks better than I had expected. It's larger than I thought as well. I think not having the seat ride up on the back of it helps. I'm really digging the knee cutouts. The Euro kR tank is flat like this and has the cutouts, looks great, I had a bead on one from AUS but it was crazy money to ship it so this will do nicely. Don't know why the States got the one it did? With the Aztec pyramid of a gas cap gone, this one should look racy. side.jpg I have to fill in where someone had cut in for a taillight( the exhaust will exit out from there) and make a rear mounting frame. The stock subframe gets to stay intact. reartail.jpg Link to comment Share on other sites More sharing options...

Recommended Posts
Archived
This topic is now archived and is closed to further replies.