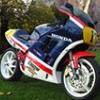
SEBSPEED Posted August 9, 2010 Share Posted August 9, 2010 Kel - would you always go through Tapeworks for stock (style) stickers? Those look like a selection that was well planned. I am probably painting Ole Yeller this winter... dont worry, it will always be yellow... my buddy said he could do a pearl yellow .... reminding me of the 700F white pearl ones. They look good man! Good luck I used Tapeworks for the numbers and the others I picked up here and there. Tapeworks doesn't really deal with stock Honda stuff anymore, some copyright BS from Honda. There are other places to get VFR stickers. Let me look into it. Pearl sounds nice. Crispy's looked good. Make sure that all those decals are safe to be painted over, if you plan to put them under the clearcoat. Some are not compatible and will bubble up or leak their colors. Link to comment Share on other sites More sharing options...
Member Contributer VFRDYLAN Posted August 9, 2010 Member Contributer Share Posted August 9, 2010 Me either. Video or it never happened!! :fing02: what!! speak up....cant hear you over sound of imaginary engine running............................... OK, OK, I have to get a firewire card for my PC this week. It should be here before the ceramic fiber packing so...I'll get a vid of it running. It's got a serious bark without the gutted V4 rattle/coughing. It is closer to GP than slip-on!! :huh: Can't wait to see it in the flesh! Do you have a target for the first ride date? Just got my engine back in the frame last weekend and I'm just hoping I remember where all those wires, cables and tubes go :cool: Link to comment Share on other sites More sharing options...
Member Contributer Kel Posted August 9, 2010 Author Member Contributer Share Posted August 9, 2010 Just got my engine back in the frame last weekend and I'm just hoping I remember where all those wires, cables and tubes go :blink: That's great Dylan. Oil lines cleared the frame? It's not too bad wiring it up. Most things are totally obvious. What's up with the wheels? Did you get them done? Where's the damn rebuild thread? First ride for you is when? Link to comment Share on other sites More sharing options...
Member Contributer Kel Posted August 9, 2010 Author Member Contributer Share Posted August 9, 2010 Make sure that all those decals are safe to be painted over, if you plan to put them under the clearcoat. Some are not compatible and will bubble up or leak their colors. Some decals can have problems. It's best to give them a light wipe down with some rubbing alcohol. Get one coat of clear on. Let it dry. Decals, then a couple of light mists with the clear then the full monty. Link to comment Share on other sites More sharing options...
Member Contributer VFRDYLAN Posted August 9, 2010 Member Contributer Share Posted August 9, 2010 Just got my engine back in the frame last weekend and I'm just hoping I remember where all those wires, cables and tubes go :blink: That's great Dylan. Oil lines cleared the frame? It's not too bad wiring it up. Most things are totally obvious. What's up with the wheels? Did you get them done? Where's the damn rebuild thread? First ride for you is when? I've been real buy with work and have yet to get the wheels blasted...but it is on the list. I plan on getting the bike together with the stock rims and then doing the next mod.... My goal is to have it done the last week on the month (I have a week vaction planned) and then be riding in September. Link to comment Share on other sites More sharing options...
Member Contributer Kel Posted August 22, 2010 Author Member Contributer Share Posted August 22, 2010 Got some needed garage time in. Had to be creative with the rear brake line with the pipes in the way so I ordered some line and a few fittings. The line is plastic coated, braided stainless with a Teflon core. The plastic coating is smoked and gives the braided weave a nice carbon look. Two, 30 degree banjo's and some new crush washers. Time to line up the hose. I didn't want to drill straight in and have the line make a bend towards the front so I drilled at an angle that was easy on the hose. This looks like a good spot. I wanted the smallest hole possible while still allowing some room for an abrasion buffer. The hole was only slightly larger than the hose. I filed the top and bottom opening with a small curved file till it was very smooth and rounded. I then filled the hole with black silicone and trimmed a rubber grommet to fit in at an angle. I tucked it all in and when it set up it was solid and with the silicone, rubber grommet, plastic coating and stainless braiding, I'm very confident there will be no rubbing issues at this spot. I found a grommet from something else in the garage that worked perfectly to hold the line in the caliper arm. The hose will exit out the left side opening in the pivot area. Just for extra security, I slid a piece of clear tubing over the hose to protect it inside the arm, To keep the end of the hose steady in the opening, I simply sprayed in some expanding foam. All goobed up. Trimmed off flush. I'll probably seal the foam with something to keep it from crumbling. Maybe over kill but... Now I just need to run it up and over to the rear master and all is good. Link to comment Share on other sites More sharing options...
SEBSPEED Posted August 23, 2010 Share Posted August 23, 2010 Awesome. Where'd you get the smoked line in bulk? Link to comment Share on other sites More sharing options...
Member Contributer Kel Posted August 24, 2010 Author Member Contributer Share Posted August 24, 2010 Awesome. Where'd you get the smoked line in bulk? Earl's. Link to comment Share on other sites More sharing options...
SEBSPEED Posted August 24, 2010 Share Posted August 24, 2010 Awesome. Where'd you get the smoked line in bulk? Earl's. From the link I gave you earlier? Just looked there, and found it. Might have to order some! Link to comment Share on other sites More sharing options...
Bartlecon Posted August 26, 2010 Share Posted August 26, 2010 That is a great use of the urethane foam Kel, I never would have guessed that you found the exact sized rubber grommet in your sparse garage :-) looking great man, I hope that you dont have to thread your way down the street in the tracks that cars make (in the snow) when you get it running like that time over to my house in Rye... I wonder if the tool handle coating would work to seal up the open cells of the urethane? Link to comment Share on other sites More sharing options...
Member Contributer Kel Posted August 28, 2010 Author Member Contributer Share Posted August 28, 2010 I wonder if the tool handle coating would work to seal up the open cells of the urethane? Funny you should mention that. I tried some of the silver caliper paint on a piece of the foam...it ate right through it like Alien spit. I went to the "PO" and bought some of that dipping rubber. It did have a very slight reaction so I axed it. There is a product that is meant for gluing up foam insulation panels to concrete. It won't burn foam so it's an idea. I hope that you dont have to thread your way down the street in the tracks that cars make (in the snow) when you get it running like that time over to my house in Rye How about that BC. I remember sitting at the lights at Yoken's with it snowing like a bastard(I'm talking, can't see the pavement, scraping it off the shield, snowing) and the damn light would not change to let me turn left. After sitting through 3 light changes, and the snow piing up on my tank, I just ran the red. Let me tell you, a 16" front wheel and snowy roads is a horrible combination. Can't believe I made it home. (kinda like when I had to drive home from your place with only 4th gear in my Saab) Link to comment Share on other sites More sharing options...
Member Contributer Joshvfr Posted August 28, 2010 Member Contributer Share Posted August 28, 2010 This is an awesome project, keep the posts coming. Its going to be a beauty. Link to comment Share on other sites More sharing options...
Member Contributer Kel Posted September 8, 2010 Author Member Contributer Share Posted September 8, 2010 My custom brake light LED's came in. Made by Radiantz. A 4.5" (30 LEDs) for the bottom and a 3.25" (20 LEDs) stacked on top. 120 Degree viewing angle. They need a dual element circut for them to work as running and brake. I was surprised at how bright they are. I can see why LED's are the future. Link to comment Share on other sites More sharing options...
SEBSPEED Posted September 8, 2010 Share Posted September 8, 2010 Are those the flexible strips? Link to comment Share on other sites More sharing options...
Member Contributer Kel Posted September 9, 2010 Author Member Contributer Share Posted September 9, 2010 Are those the flexible strips? Yes they are. The shorter you go the less flexible they are. You can get these in 12" strips and cut them into any length's you want, just add the ends. Link to comment Share on other sites More sharing options...
Member Contributer VF1000RS Posted September 9, 2010 Member Contributer Share Posted September 9, 2010 Are you going to french them in a touch? Link to comment Share on other sites More sharing options...
Member Contributer Kel Posted September 9, 2010 Author Member Contributer Share Posted September 9, 2010 Are you going to french them in a touch? I thought about it Tom but if you don't get the opening just right, it looks like crap so...I'll just put them on the surface and not worry about how to mount them from the back. Link to comment Share on other sites More sharing options...
SEBSPEED Posted September 9, 2010 Share Posted September 9, 2010 Are you going to french them in a touch? I thought about it Tom but if you don't get the opening just right, it looks like crap so...I'll just put them on the surface and not worry about how to mount them from the back. Cut a piece of wood the same size as the strip, sand the ends round to match, glue it to a flat surface, cover with aluminum foil + wax, lay up fiberglass over it. Cure, trim the flat area 1/4" all 'round the channel, then glue/fiberglass to the inside of your tail. Drill a little hole for the wire and set the strip in there. You can doo eet! Link to comment Share on other sites More sharing options...
Member Contributer Kel Posted September 9, 2010 Author Member Contributer Share Posted September 9, 2010 Are you going to french them in a touch? I thought about it Tom but if you don't get the opening just right, it looks like crap so...I'll just put them on the surface and not worry about how to mount them from the back. Cut a piece of wood the same size as the strip, sand the ends round to match, glue it to a flat surface, cover with aluminum foil + wax, lay up fiberglass over it. Cure, trim the flat area 1/4" all 'round the channel, then glue/fiberglass to the inside of your tail. Drill a little hole for the wire and set the strip in there. You can doo eet! Just remembered...I can't....I'm not French. Link to comment Share on other sites More sharing options...
SEBSPEED Posted September 9, 2010 Share Posted September 9, 2010 Just remembered...I can't....I'm not French. Frenching would mean flushing/smoothing it in. I'm talking about a recession... which seems to be very American lately :ph34r: It's your bike, I'll leave you to do your thing now... :blush: :goofy: Link to comment Share on other sites More sharing options...
Member Contributer Kel Posted October 19, 2010 Author Member Contributer Share Posted October 19, 2010 Now that the test fitting of the panels is done, it's time to start putting on the pretty parts. The CBR gas cap looks good on the V45 tank. Hard to believe it looked like this after the welding. BEFORE AFTER A little carbon look for the petcock. Link to comment Share on other sites More sharing options...
SEBSPEED Posted October 19, 2010 Share Posted October 19, 2010 OOoohhhh shiiiiinyyyy.... Very nice, but, (please don't shoot me!) I just realized the gas cap is backwards from how Honda installs it. That was on purpose, right? :biggrin: Link to comment Share on other sites More sharing options...
Member Contributer Kel Posted October 19, 2010 Author Member Contributer Share Posted October 19, 2010 OOoohhhh shiiiiinyyyy.... Very nice, but, (please don't shoot me!) I just realized the gas cap is backwards from how Honda installs it. That was on purpose, right? :biggrin: Your answer is in post #108, oh forgetful one. :goofy: Link to comment Share on other sites More sharing options...
SEBSPEED Posted October 19, 2010 Share Posted October 19, 2010 OOoohhhh shiiiiinyyyy.... Very nice, but, (please don't shoot me!) I just realized the gas cap is backwards from how Honda installs it. That was on purpose, right? :biggrin: Your answer is in post #108, oh forgetful one. :goofy: Man, that was over a year ago! I have trouble remembering stuff from last week!! :goofy: Link to comment Share on other sites More sharing options...
Member Contributer Kel Posted October 24, 2010 Author Member Contributer Share Posted October 24, 2010 More items installed. The headlight is in as is the upper rad grill. I put in some new mirror grommets that I got at the Po. Pretty good match. Link to comment Share on other sites More sharing options...

Recommended Posts
Archived
This topic is now archived and is closed to further replies.