Leaderboard


Popular Content
Showing content with the highest reputation on 04/19/2024 in all areas
-
Never been an issue with all 4 VFR800's I've owned with after market exhausts fitted, 1200 shouldn't be any different. O2 sensors means ECU runs in closed loop, so air to fuel ratio is continuously optimized. Think you're worrying about nothing. I'd probably go back to the OEM type airfilter if it was mine! Good Luck with the bike, take it for a good test ride. Check it's maintenance history. Coolant change, brake and clutch fluid replacement - should have had a few of those! Oil and filter, etc. P.s. I'm sure there was a rear wheel drive unit issue recall for the early 1200's. Make sure this has been done.3 points
-
Errrrr......thanks. Everyone is entitled to their opinion and I'm not going to challenge yours 😆2 points
-
I treasure mine! Like many on the list, there's still nothing to replace it with that is better. Certainly not $10k better! 🙂1 point
-
Shit loads to anyone who knows their motorcycles1 point
-
Yes, and... After changing the oil, you need to RIDE for a good 45 minutes at full operating temperature to remove any moisture from the crankcases (provided you do not have any issues). Running a bike in the driveway, even until the fans come on, typically introduces moisture. That's why short trips on vehicles is so bad for them and their exhaust systems.1 point
-
The issue of the centre piston on the rear caliper not relieving is now resolved. This would only happen when actuating from the rear brake (that cylinder feeds the rears outer two pistons directly, and feeds centre piston via the front second master cylinder, though the green check and relief valve you see above. I think what was happening is fluid was entering the system through the ball check valve, but could not escape though the tiny relief hole which had blocked after been stood 12 years. The brake initially stuck after cleaning it out as above, it wasn't jammed on, but it wasnt right which was very worrying, I again began the process of confirming and chasing the pressure lock from the caliper back towards the front second master cylinder, but after confirming the pressure released at the rear middle piston banjo, subsequently releasing the rear wheel, I moved on to the PCV under the back right of the fuel tank, only to find I couldn't get it to lock again!? Maybe I just had an air bubble right at the back of the system and I let it out? I did a quick manual bleed over all the points, pumping the front second cylinder by hand, no vacuum/power or check valve hoses, just an 8/10mm spanner and a bit of pipe on all the points, my favourite method to be honest! - The levers are nice and firm now, and after a good blast out, the front brakes are really keen even with light pressure, the back when actuated from the rear still drags for 1/2 second or so but its getting quicker and smoother at releasing, I dont notice it when pulling up at lights any more, the bike free wheels forward back when rocked. Happy, just been out for an hour, great bike, good find.1 point
-
Just so you know, the two posts above are from two of the more knowledgeable members of the forum. Welcome to VFRD.1 point
-
Previous owner left everything to dealers, I showed him some faults he was not aware of when viewing the bike so not much there Will remove the fairings this weekend and start measuring and tracing and checking for cables that aren't part of the loom. Will make some notes as I go as this will be my first time chasing a electrical issue and that wiring map is already making my eyes hurt1 point
-
I've got a simple "Sealey" manual tyre changer in the UK (probably the same as many others coming out of the same factory in China!) and it works absolutely okay. However, I bought a separate, nylon enhanced tyre bar off eBay which works better than the original all-metal one the Sealey came with. What made the unit work best for me was to bolt it to the driveway, using stainless steel button head bolts (slathered in anti-seize) threaded into Rawlbolts sunk into the drive. When I'm done I unbolt it and put the bolts back into the holes. So far, so good! Ciao, JZH1 point
-
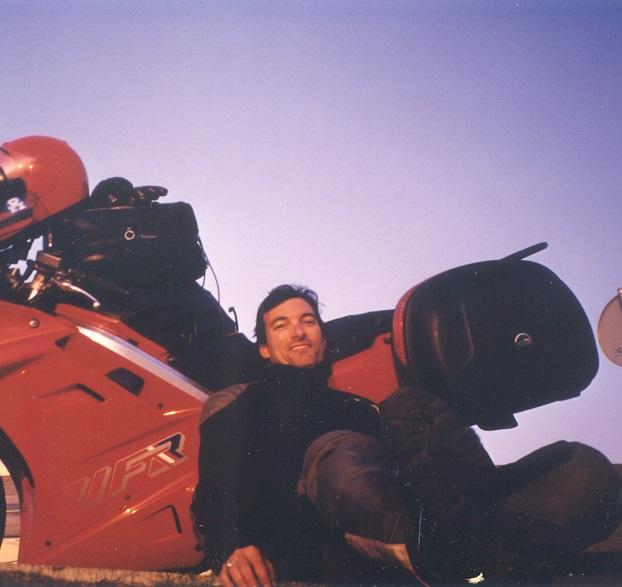
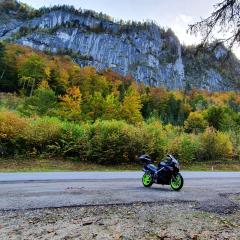
Also not from waaayyyy back, but still pretty far back. I was both exhausted and satisfied after completing a SaddleSore 1000 ride just outside Boulogne, France, in around 1998. I think the photo was originally a 35mm slide (which I was still using--and explains why I have several boxes full of slides and few digital photos from the early days!) The FL was my original 1990, bought new in California. Retired it after 60,000 mi or so, but it could have gone on and on (if I had replaced the cam shaft I broke whilst improperly tightening the cap bolts...). Ciao, JZH
 1 point
 -
What color are you looking for? The US colors of red, blue and black are still available. Blue is cheaper and black is the most expensive. Some of the overseas colors are still available. Fowlers in the UK has a very easy to navigate site. https://us.fowlersparts.co.uk/ The exchange rate is bad for us at the moment, so the prices at Fowlers are high. I have found that getting the parts numbers for fairings from Fowlers, and then ordering from Japan works well. The site in Japan I have used multiple times is https://japan.webike.net/ Webike's site is a bit harder to navigate when browsing for available parts. That's why I find the part number on Fowlers and then plug it into the Webike site. Webike ships super fast and you have to pay extra for that. However, the exchange rate between the US and Japan is so good for us that the total price is typically reasonable. I have even found the price on some parts that are available at Partzilla can be cheaper when ordered from Webike and shipped over the Pacific. DHL is by far the best shipper they use. They are even sometimes the cheapest.1 point
-
I'm coming buddy! If your bike is a low mileage garage queen that has never seen the rain this may be easier for you. So, first off ignore the HBoL where it says you need to remove the engine. You don't and with the age of these it's a risk. Particularly the rear lower bolt which has a far too small hex in it and runs through a U in the bottom of the engine so corrodes in place. I've had to cut two off in the past but you could get replacement bolts then! Next up, be utterly prepared to deal with snapping exhaust studs. They're piddly little M6 ones. If you plan on doing it this winter then start spraying them with penetrating now! 🤣 Ignoring the parts that are NLA, my personal minimum shopping list for this would be 18291-MN5-650 (exhaust gasket) x4 90304-438-000 (front nuts) x4 Unfortunately when I did mine I believed the HBoL so took the engine out...🤣 After the event I realised this wasn't needed. It's still a massive pig of a job though even without taking the engine out. So, here is how I would do it if I was to do it over again. -1) Get the bike properly hot and then spray all the exhaust bolts/nuts with proper penetrating fluid (ie not WD40) at least a week before. Keep spraying them every day until you're ready. The exhaust studs particularly the fronts where they get sprayed by water from the front wheel will snap for fun so everything you can do to prevent that helps. 0) Put the bike on the main stand on a 2x4 or similar (and the same under the front wheel) to give some extra height. 1) Remove seat, tank, side fairing panels, belly pan and all rear plastics (inc tail light), unbolt and remove the silencers and the collector. Undo the front to rear header clamps. 2) Remove battery, disconnect wiring from ECU, reg/rec, pickups, starter solenoid, fuel pump relay and rear coils (note which way they're connected)...but if you forgot then bottom connector on bottom coil is black/white, next one is red/blue, bottom connector on top coil is black/white then top is blue/black. Remove the rear coils. Remove the pipe to the rad from the coolant tank. Disconnect the hose from the carbs to the fuel pump. 3) Remove the loom from the subframe up until where it meets the frame, remove the top bolt for the rear brake master cylinder, remove the rearsets and remove the subframe. 4) Remove the rear wheel. 5) Unbolt the top shock mount, the remote adjuster, the linkage bolt (the one to the frame) and the two special bolts either side of the swingarm and remove the swingarm with the shock, move the chain over it so you don't need to remove that. 6) Remove the remains of the shock heat shield (it's inevitably a rusty hole by now). 7) Loosen (don't remove) the rear engine bolts (the ones that go into the back of the rear head) and then remove the heatshield plate they hold on. Spray all the exhaust nuts again with penetrating fluid. At this point it's time to actually tackle removing the exhausts. Now personally I would be very tempted to go straight for cutting the front nuts off. two slits either side with a Dremel or similar then split them. It massively de-risks the chances of snapping a stud. If you decide not to then I would go *straight* for lots of heat on them, get them hot and hope they either unscrew from the head or unscrew. If they don't and snap....well you're now going to have to drill out and re-tap the remains. Once you've got the fronts out then you can remove the front downpipes from the rears. Next up is the rears, you should be able to get an 10mm socket on to the end of the nuts using a massively long extension going through the back of the frame. Once they're undone you should be able to wiggle the rear exhausts out, it can be done but it can take some wiggling and having extra ground clearance helps (hence why starting off with the bike raised). Remove the exhaust gaskets (they're particularly hard to see in the rear ports), stick the new ones in the ports with a blob of grease to hold them in place, wrangle the newer ones in, fit the front downpipes and then tighten the nuts on them. Make sure you don't get the left and right front downpipes mixed up (DAMHIK!) In classic HBoL fashion, assembly is the reverse of disassembly... 1) Refit the heatshield plate between frame and engine, tighten the rear engine bolts (the ones that go into the back of the rear head) to sec. 2) Refit the heatshield plate between exhausts and shock. You may want to consider making a new one as it's nothing special but rusts away and does protect the shock from heat. 3) Refit the swing arm, don't forget to loop the chain through first! Bolt the linkage and shock in. 4) Refit the rear wheel 5) Refit the subframe (and rearsets) and fit the loom to it. 6) Refit the rear coils, connect everything you disconnected back up again. Refit the battery. 7) Refit the tank, connect up the fuel pump to the tank and to the carbs. 8 ) Refit the collector. 9) Refit the exhausts. 10) Refit bellypan, side fairings, seat plastics/tail light and seat. Start her up.
1 point
-
I would view the below as mileage items: Brake pads Chain and sprockets (keep lubed to ward off surface rust) Valve check - changes due to heat cycles and movement Time related: Oil Coolant Brake fluid Fork oil - 5 years? Clean electrical connectors - corrosion can still happen over time even without riding. Petrol tank - keep full to ward off rust and use fuel stabiliser. Injectors - can't hurt to use an injector cleaner to help keep them clean when riding. Tyres - after using 7 year old tyres I wouldn't again. Fit something sporty that will wear out before 5 years is reached. Get your moneys worth! Keep on stands to avoid flat spots. Battery - tender or swap in a battery from one of the others when you want to drive it, saves buying a battery that sits on a tender for most of its life. Mice protection - may not affect you, plug exhaust and airbox. Bodywork - keep covered with a soft cover even garaged. Detail and polish as the urge grabs you. ACF on metal fittings and fixings. Hoses - over time will get old and hard. Buy replacements now and hoard for later. Rear hub - may be prudent to strip and regrease and then move periodically to stop it seizing, grease gumming up (?) That's all I can think of right now but good advance thinking 👍1 point
-
Center stand installed and lifting the bike up These are the steps to installing an oem centerstand for a VFR1200F Part Number 08M50-MGE-100 This retails for around $200 delivered, I got mine from ServiceHonda.com. Before even attempting to do this MAKE SURE THE BIKE HAS COOLED OFF you will be working around the headers and you will burn yourself if its hot! Centerstand parts and instructions Inner and outter springs main spring and a safety spring that fits inside Should the main spring break the smaller saftey spring inside will keep the centerstand up so that the centerstand does not fall during riding causing an accident Bump pad wet with soapy water to install inside the hole in the stand Twist and push on the bump pad until the pad seats itself inside the hole Grease the post holes Grease the other post hole This is where you will install the center stand post goes inside that large hole and the spring hook in the upper smaller threaded hole I used Honda thread lock on the spring hook bolt I dont want it falling out The bolt is a 14mm bolt and the torque spec is 16 foot/lbs Dry fit This is the basic layout of the centerstand mechanism Here I am trying to install 1 of 2 washers on the right side washer 1 goes inside the right stand post hole 2 on the outside of same post hole I had difficulty holding the washer in place so I taped it in place with masking tape washer 1 taped into place I slid the post into the post holes fitting washer #2 was also a chore not much room with the headers there side the cotter pin into the hole in the post right side fingers or use a needle nose cotter pin goes here right side spreading out the cotter pin ends is difficult to reach a flat head screw driver did the job from the front on the right side of the bike installing the springs I used an old spring installer my Grandpa had for drum brakes - instructions call for two persons to install the springs The safety spring did not go on the first time needle nose pliers for that center stand.pdf1 point