Leaderboard


Popular Content
Showing content with the highest reputation on 04/12/2019 in all areas
-
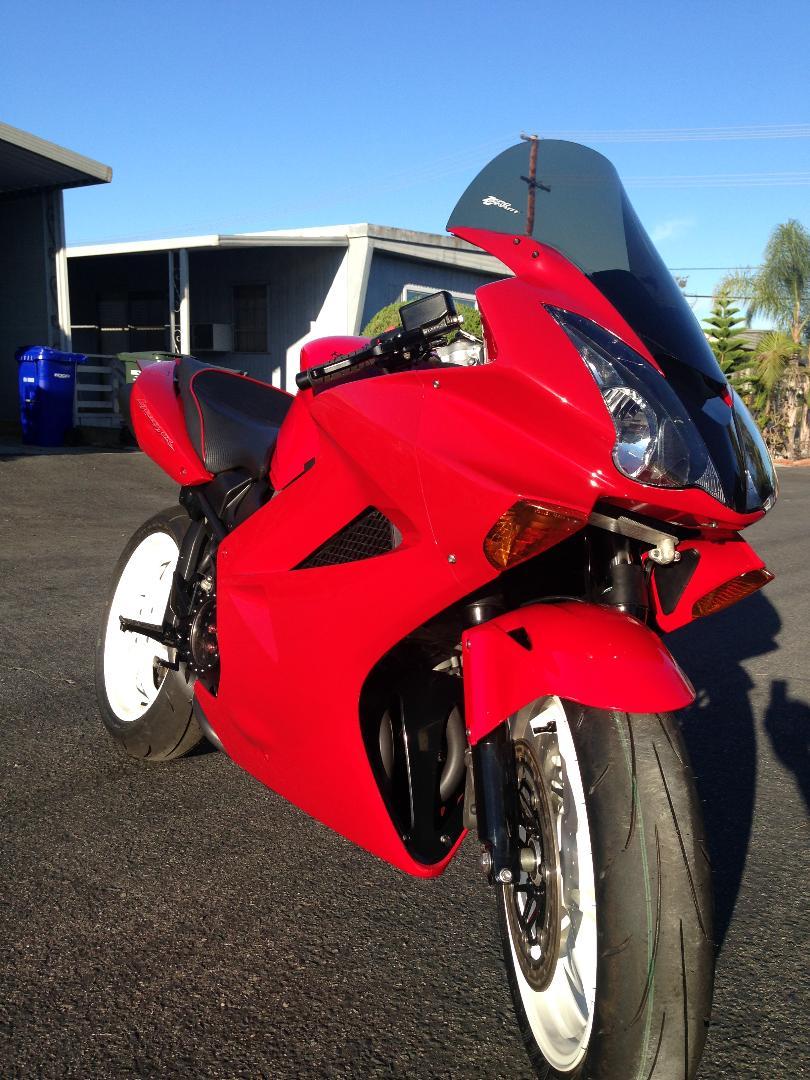
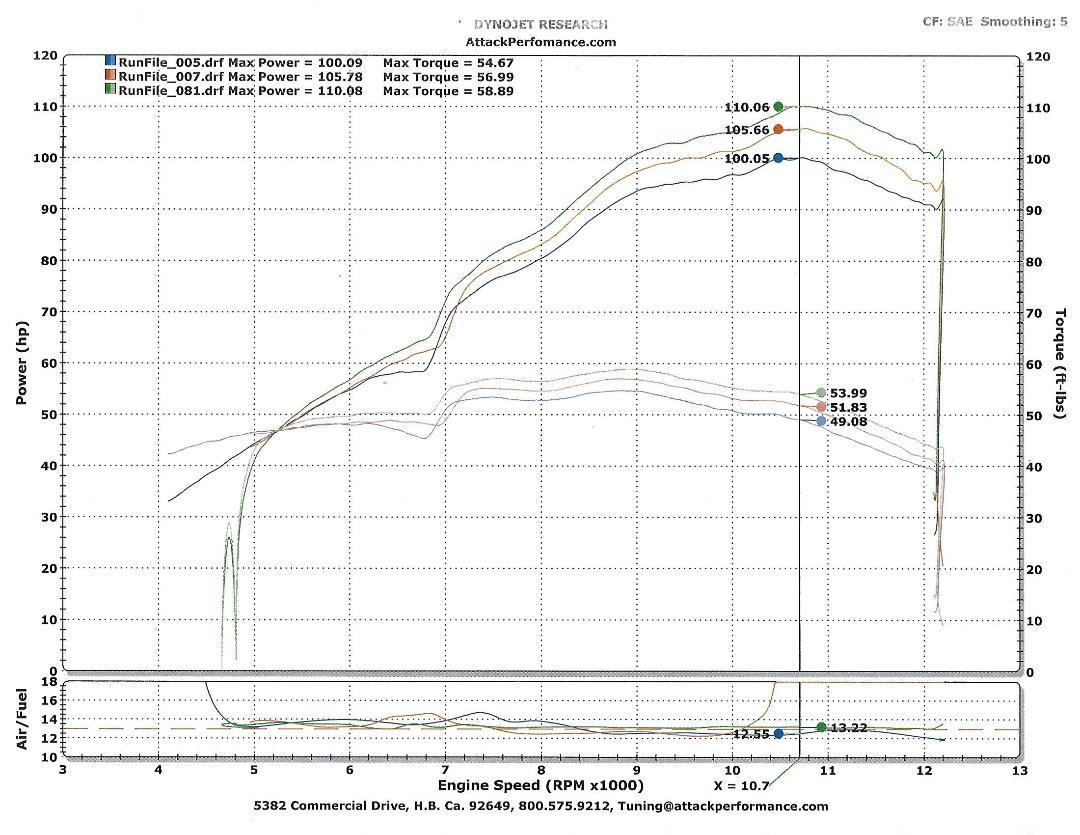
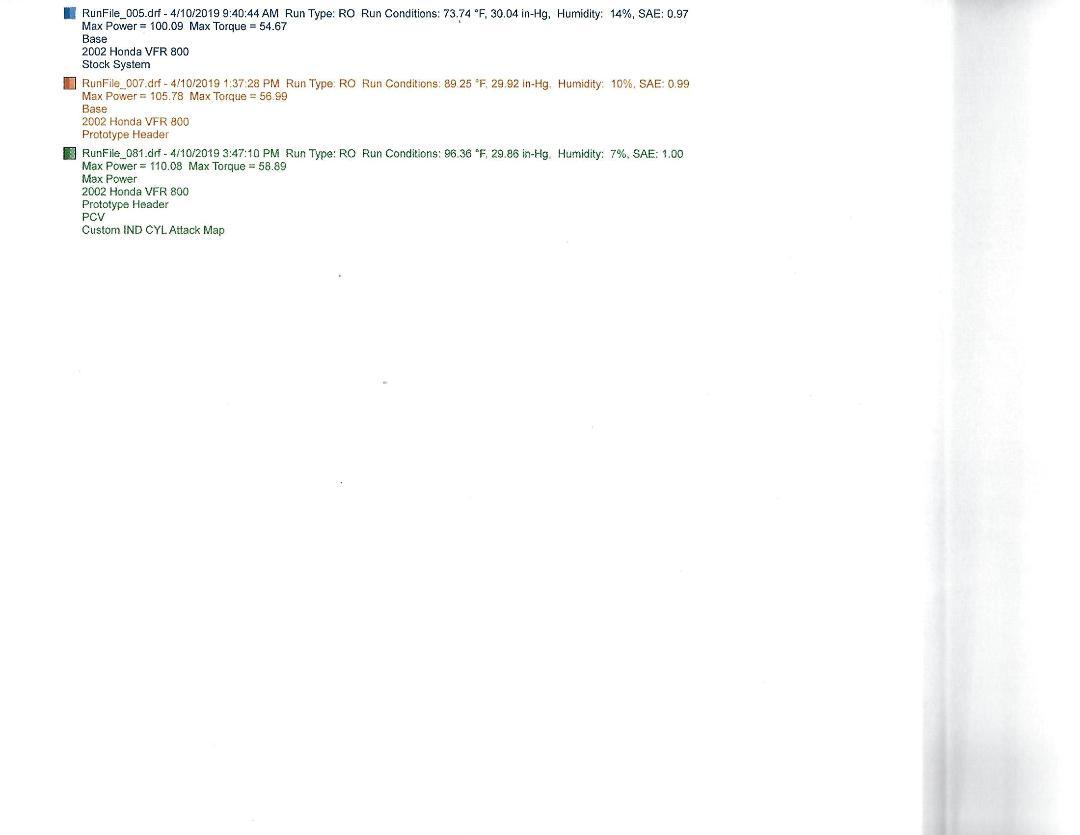
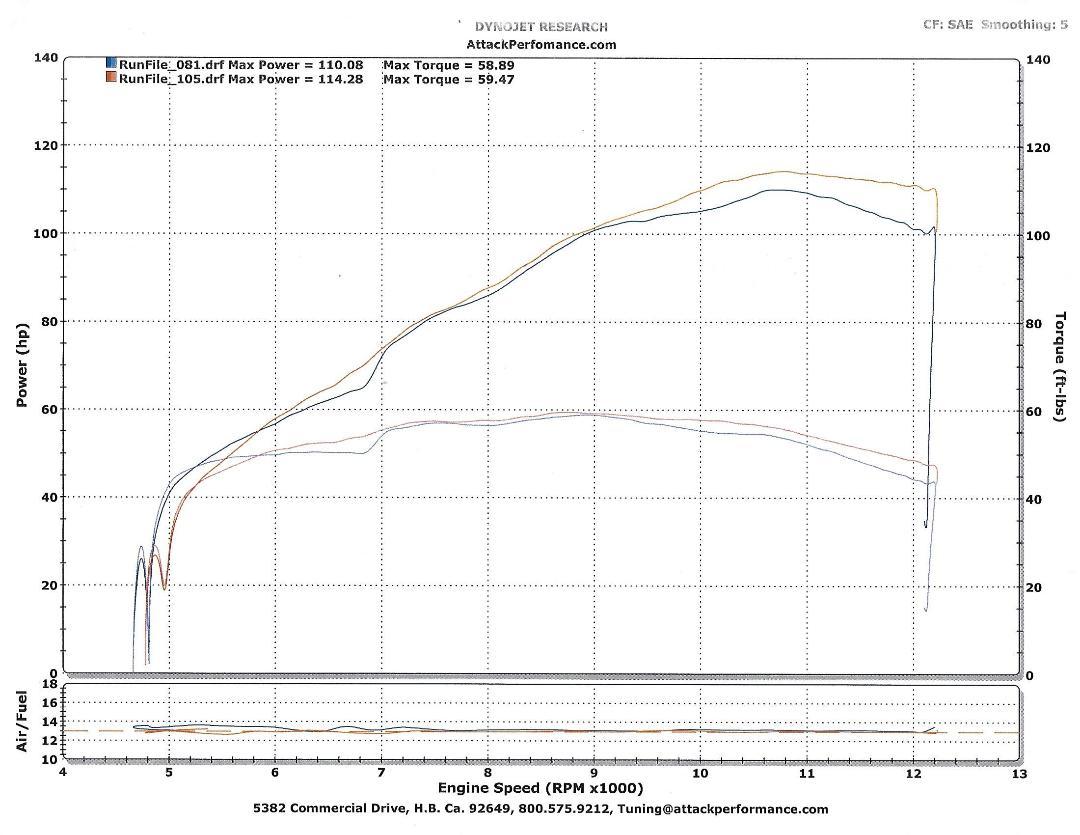
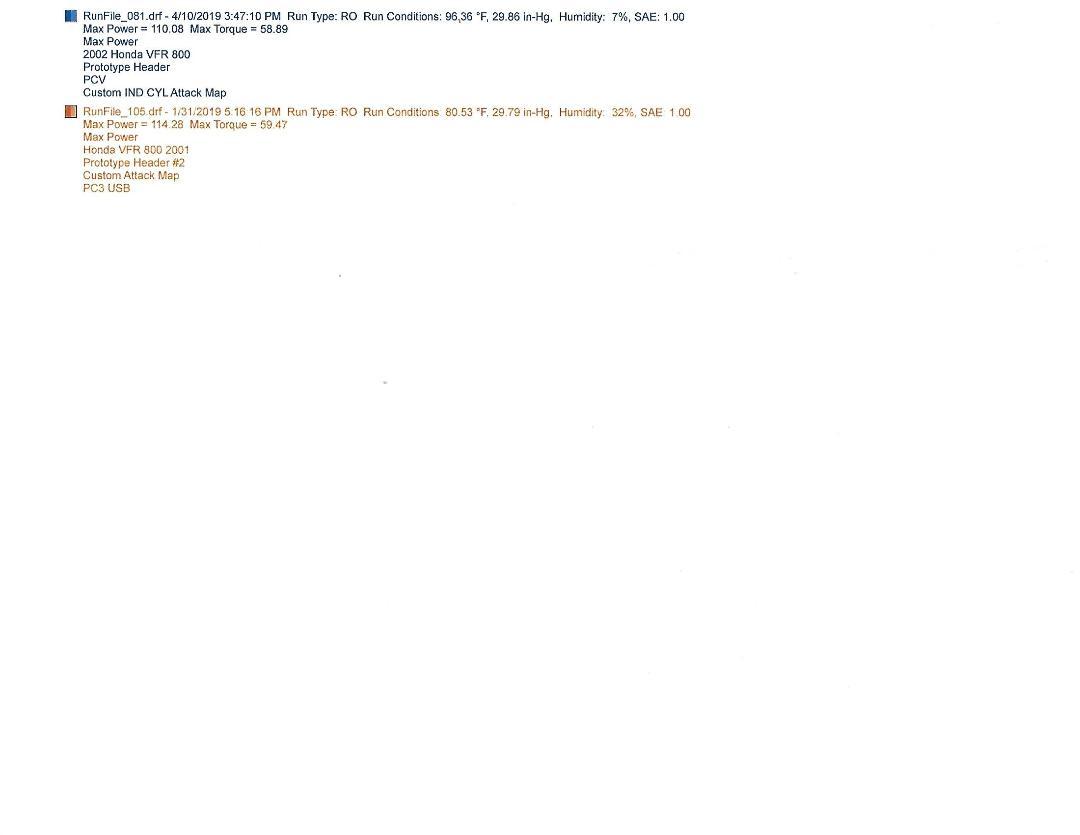
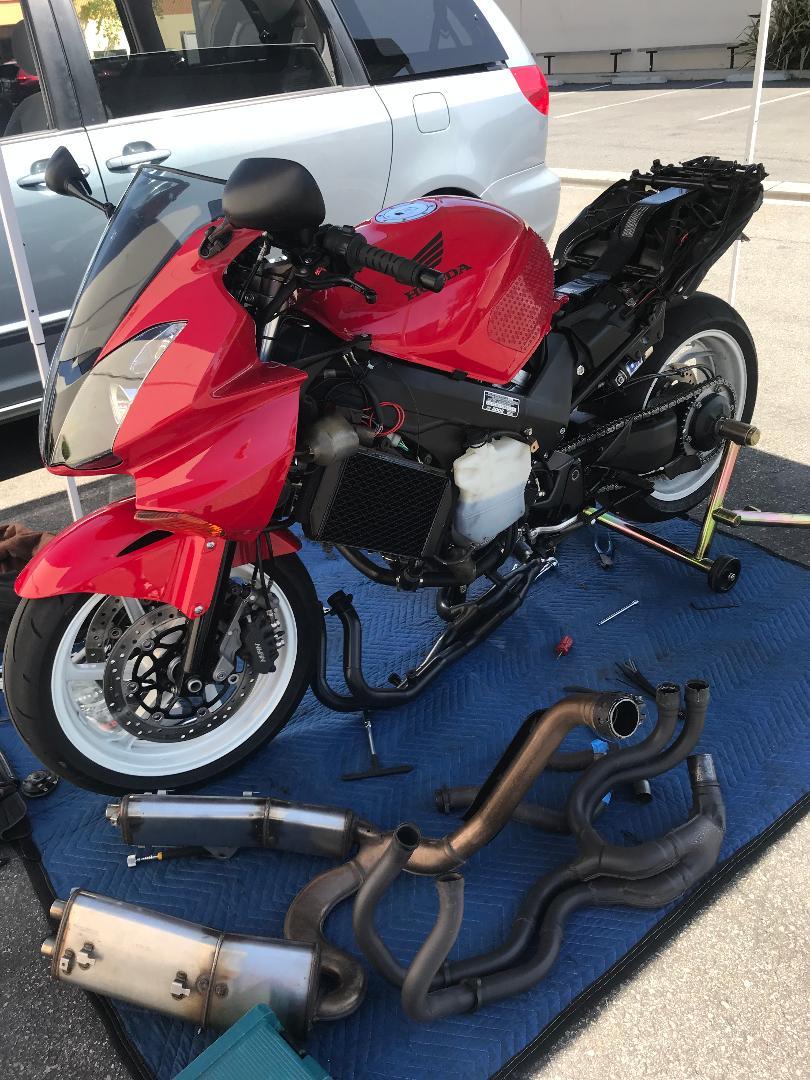
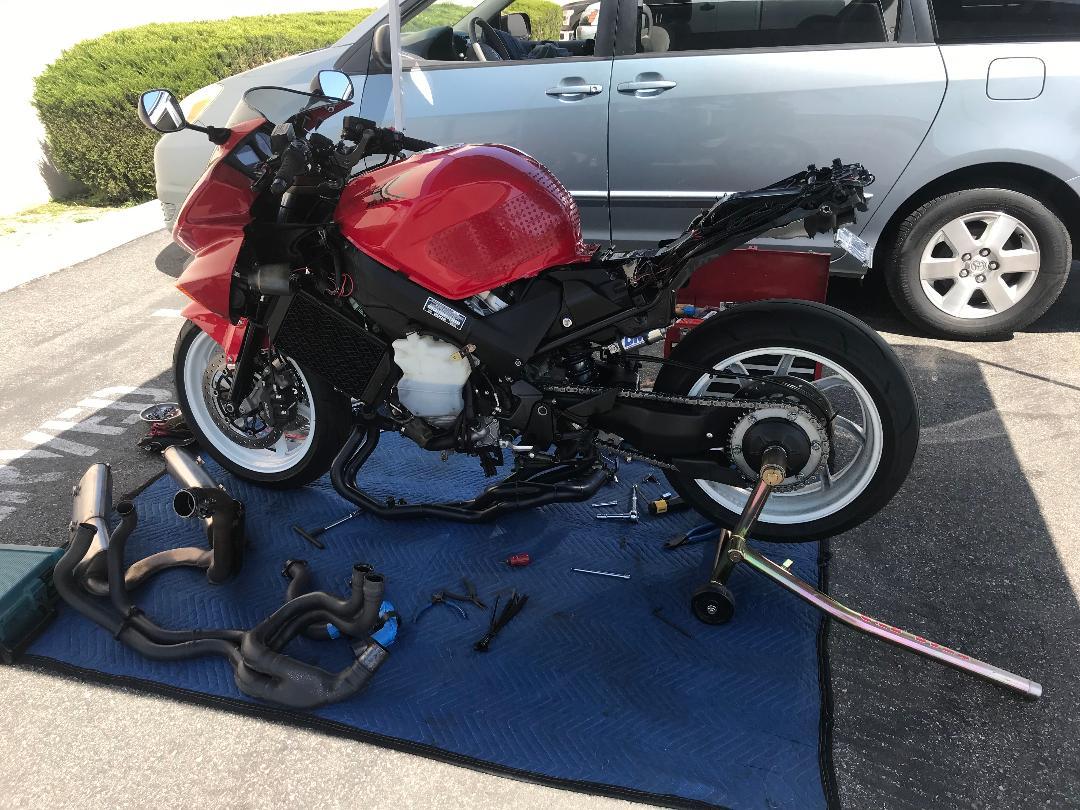
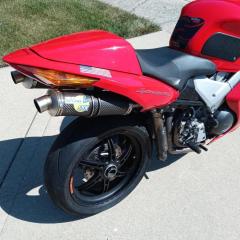
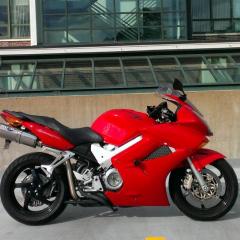
DYNODAY II : V4 GOES VTECH!! This is VFRD member Hammerdrill's 6 gen. It has all these components in black: forks, rotor carriers, frame, OEM mufflers, swingarm, drive hub, footpegs, radiators, etc. In the middle it has Sebspeed's clutch cover, up top it has an 8 gen cockpit [bars and triple clamps] and deeply red R157 bodywork. All this black and gold pops with contrasting with pearl white wheels. I can't get enough of this bike. And it's not just a pretty face, it runs and handles great, as it is suspended by a full DMr suspension that Jamie built for Hammerdrill's weight and riding style, and has a Power Commander V smoothing out the fueling. So raises the eternal question - what next mod would benefit this motorcycle and keep us out of trouble for at least a short while? Answer: Put it on the dyno! Get a baseline, then put new headers on it and tune the living heck out of it. So we did. Wednesday April 10, we showed up at Attack Performance prepared. We had test fit the headers two weeks prior, and brought all the accoutrements we'd need to put the bike in Jozef's capable hands for baseline and tune. I've made myself late here, so will slam up dyno charts and try to explain my way out of the ticket later. [Who can figure out the lean spike in AFR between 10k and 10.5k rpm?] 6 gen baseline with zero map in PCV compared to middle graph w new headers and zero map in PCV, compared to top graph after full tune: Here is the same comparison with a midrange reference line: Conditions on the day [All runs occurred same day]: Comparison of tuned 6 gen to tuned 5 gen, both tuned with the new headers: 6 gen vs 5 gen conditions:
 4 points
 -
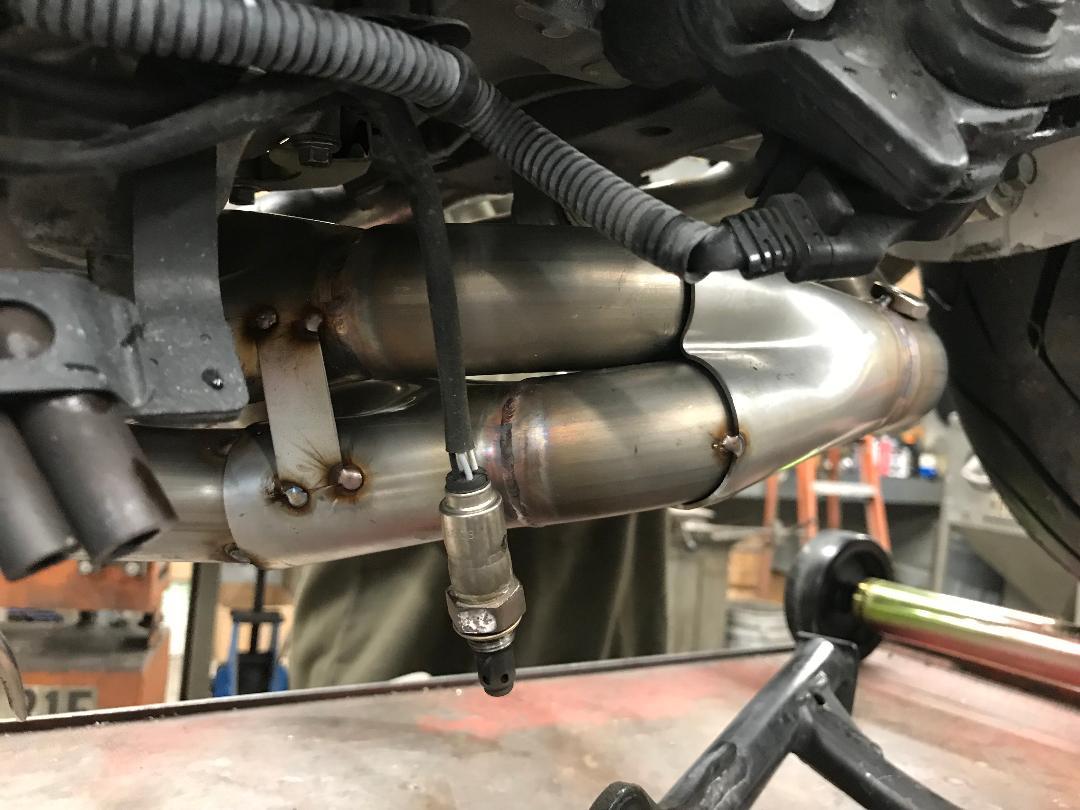
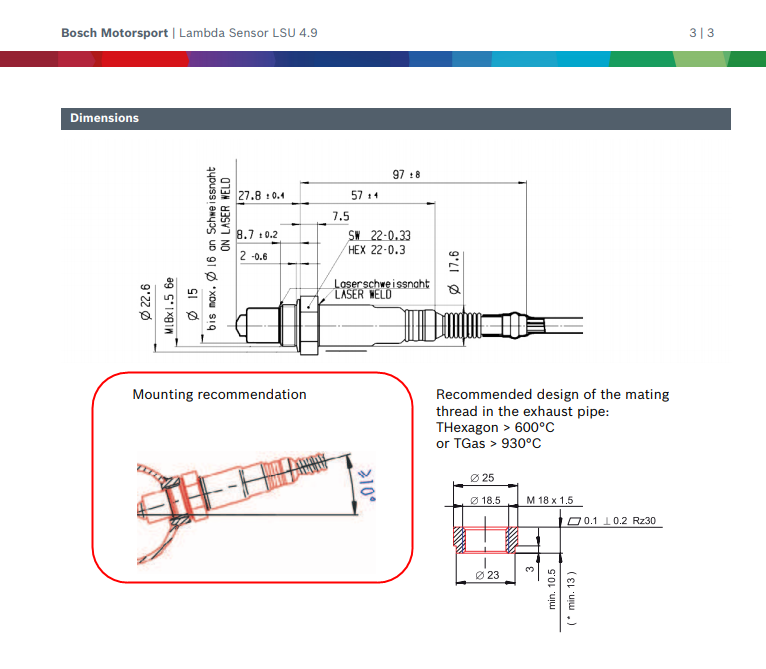
I'm probably wasting my time saying this but here we go anyway: I have about a decade of experience with motorcycle fuel injection systems that use Bosch wide band O2 sensors mounted at a level angle. On both of my do-it-yourself fuel injection motorcycles it turned out that I needed/wanted to mount the O2 sensor at a level angle. So 10 years ago when I was building up my first FI motorcycle I was asking/worrying about this exact issue. I ended up having the opportunity to have a back-and-forth email dialog with a couple of Bosch engineers from the division that produces these sensors. You wouldn't believe how unconcerned these two guys were about the effect of mounting one of their O2 sensors at a level angle. They basically said that the "mounting recommendation" drawing was produced because it had to be done, a requirement demanded by the management. Their opinion was that as long as you don't mount the sensor at a downward angle you won't have any problems. My experience with my FI project motorcycles bears this out, no problems at all. Every so often I remove the sensor from the bung to do a "free air" recalibration of the O2 system and the sensor always looks good, just light carbon coating that you would expect.4 points
-
PCV requires an ignition module. Not sure if it is even compatible with the VFR800 PCV either - doesn't show up as an additional purchase option.2 points
-
We barely got the mufflers done in time, but we’d already test fit them two weeks ago after gutting them, before working on their internals. They will be finished in black and have black OEM heatshields trimmed and bead rolled to wrap around the trailing edges of the mufflers. Muffler mod will be covered in a separate thread. B8259217-2C5C-442B-8128-55AEF70AC069.MOV C53ED7DF-A6CE-4028-A6C3-520CA98A26EC.MOV2 points
-
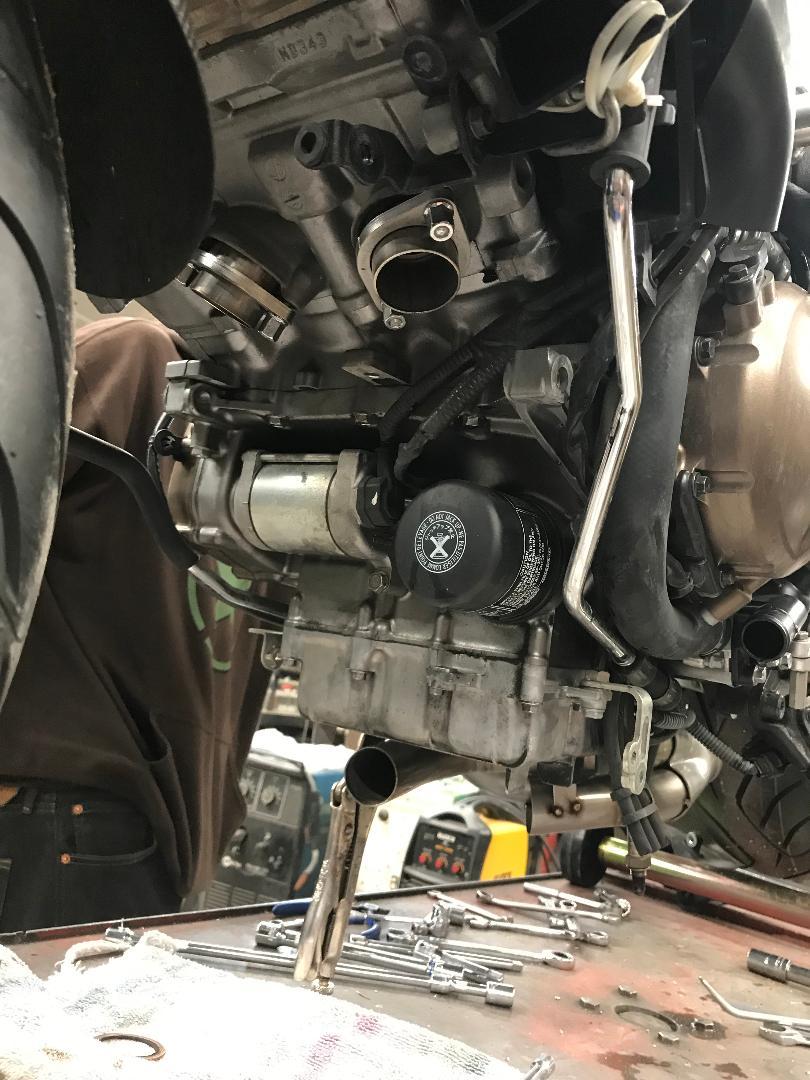
Delicious! Looks like the mock up is gonna work with some fenagling. might have to get creative with some pig-iron to semi-permanently scoot the brake lines out of the way. Have you guys tried a service? AKA being able to get the oil filter out with most of the fairings on? It's a pita with the baby header 😬 If it's at all possible maybe you could push the shifter-side primary a wee lil closer to the block for a bit so you can easily get the filter inbetween the inner-fairing stay and the primary. it'd make service life a HELLUVA lot easier than stock.2 points
-
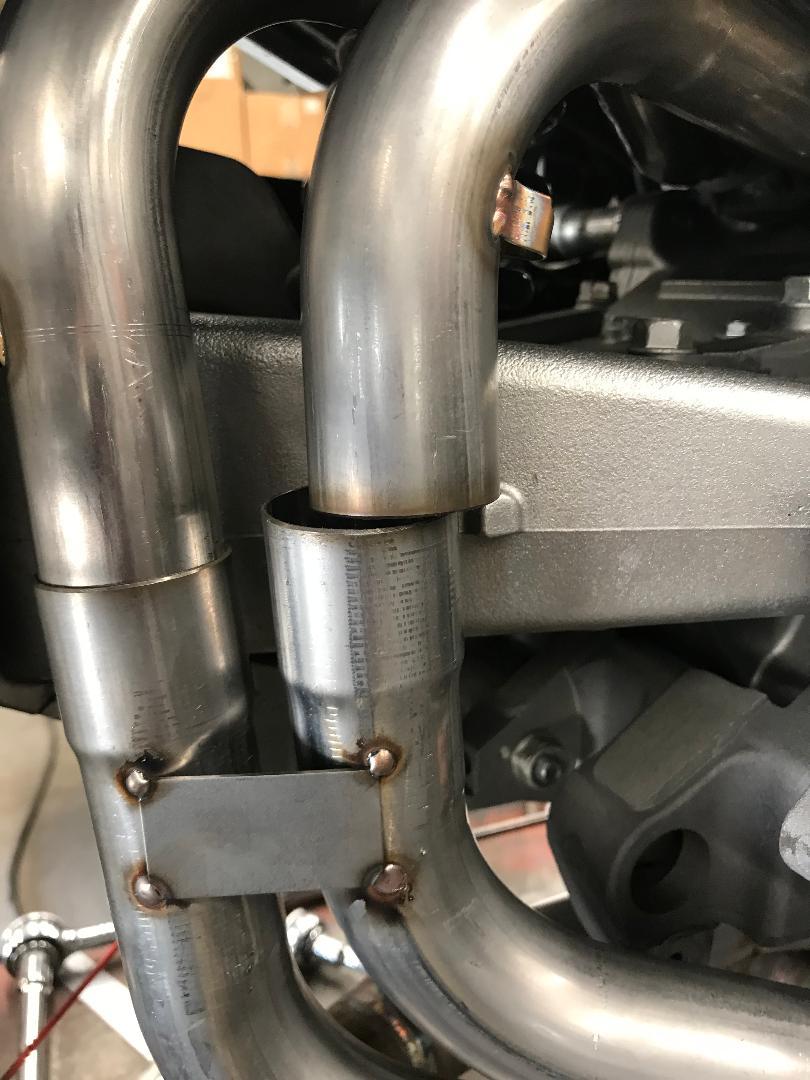
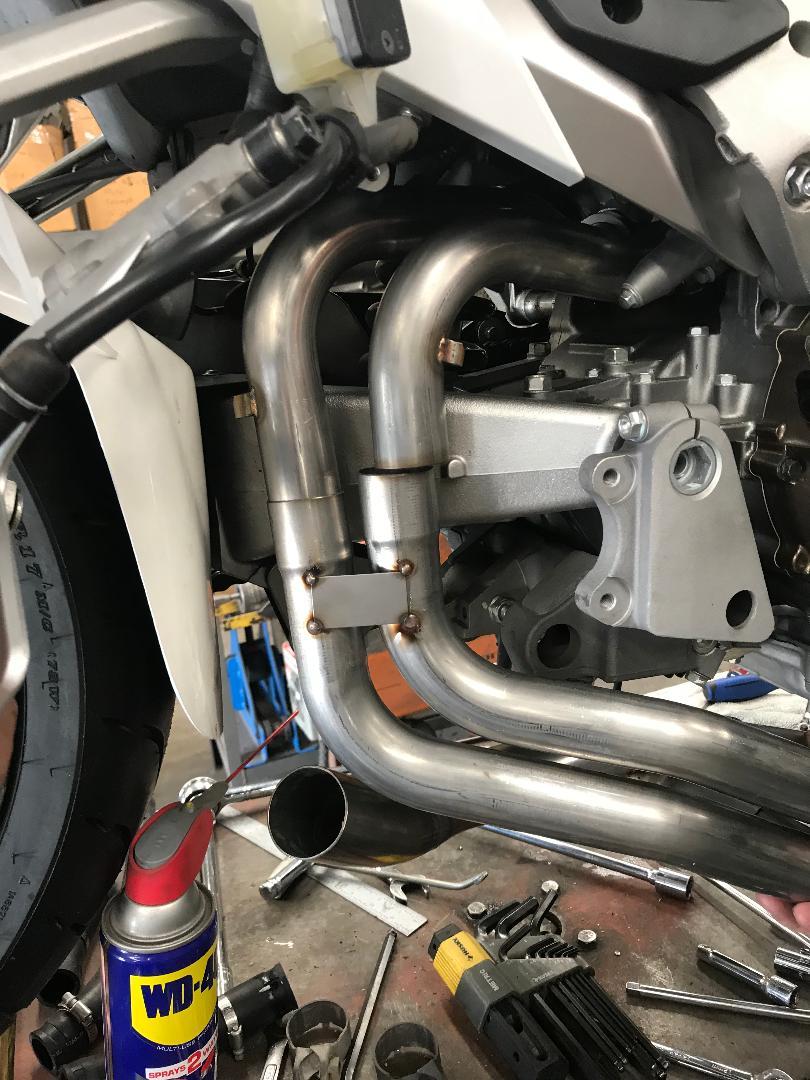
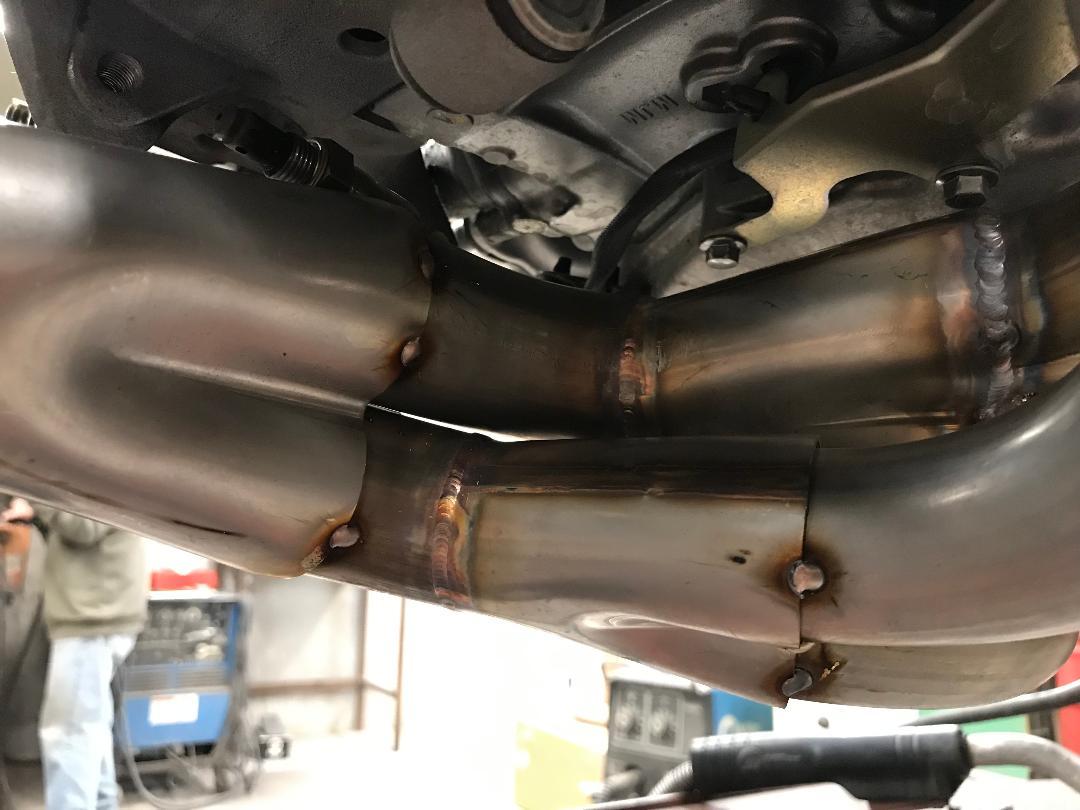
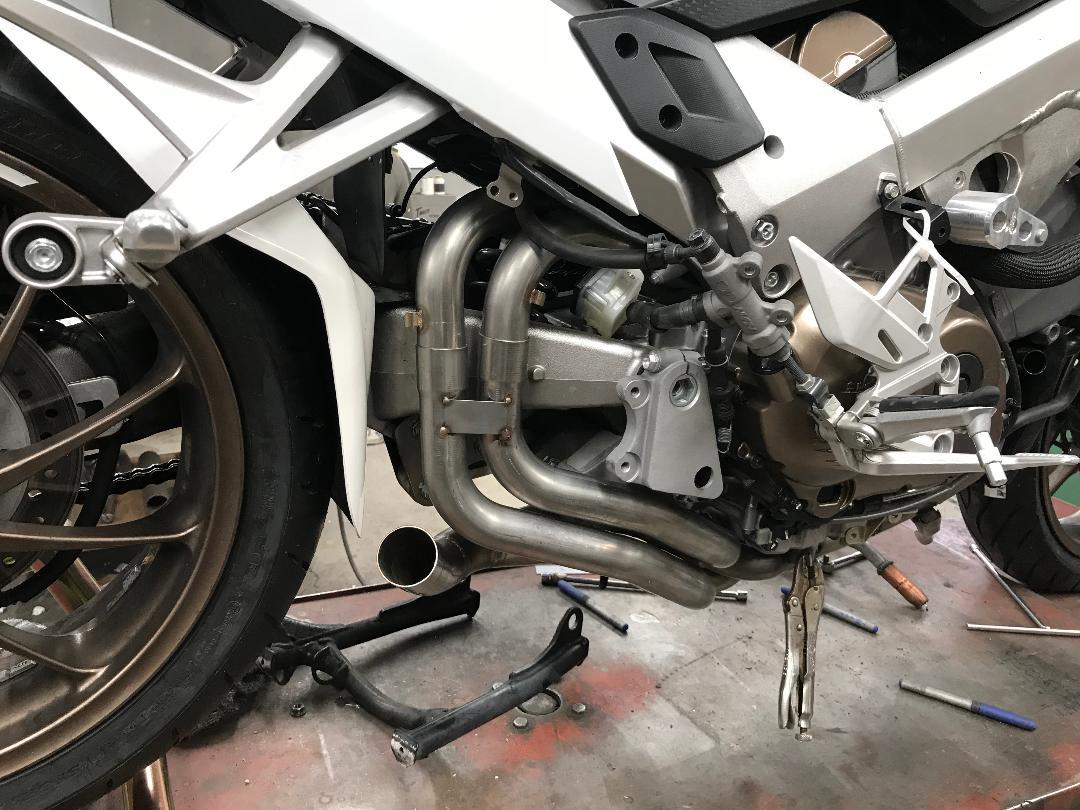
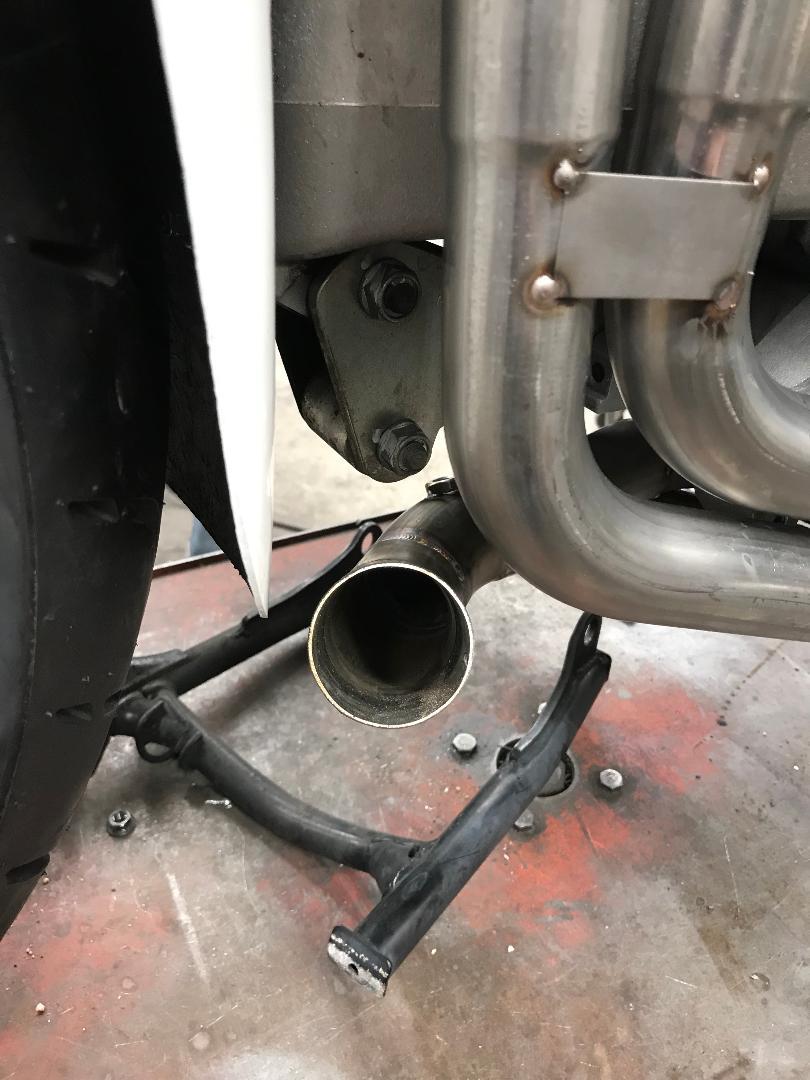
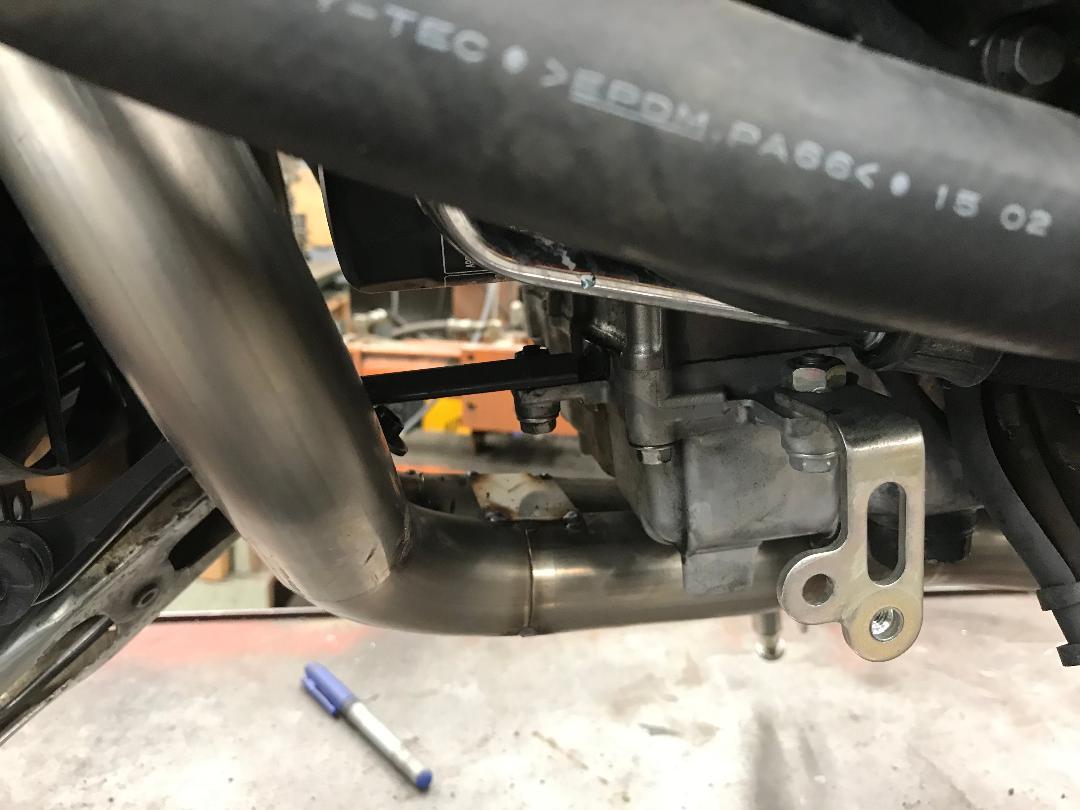
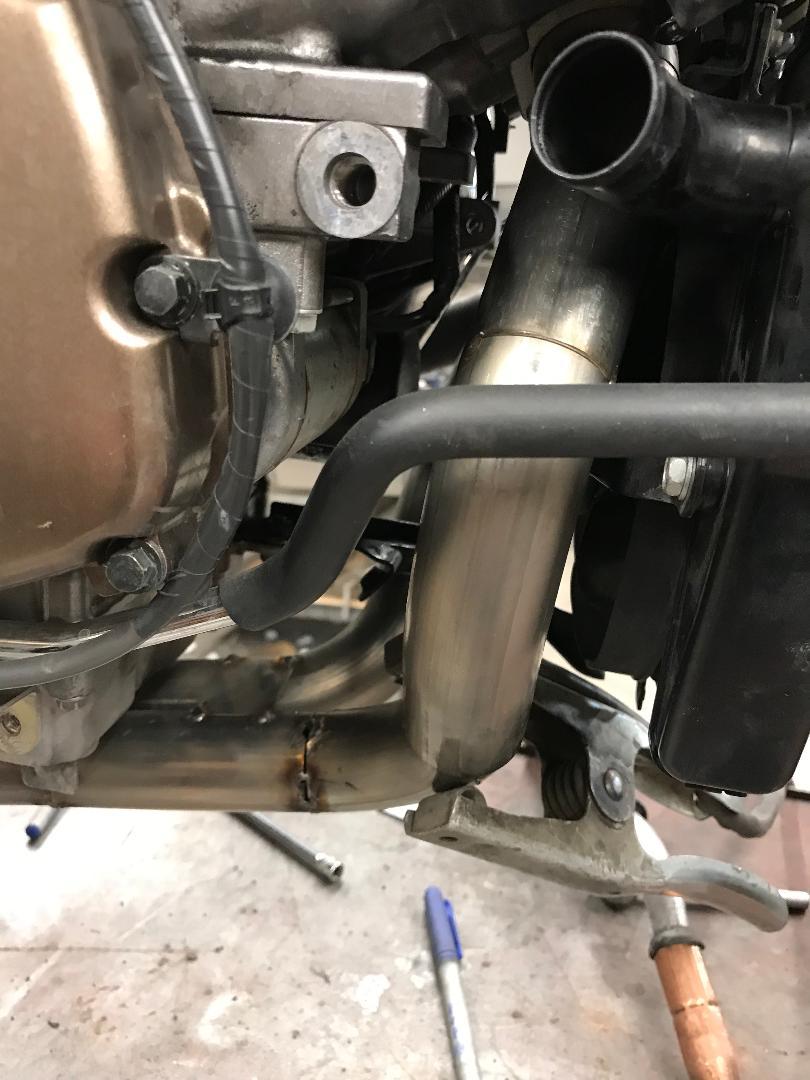
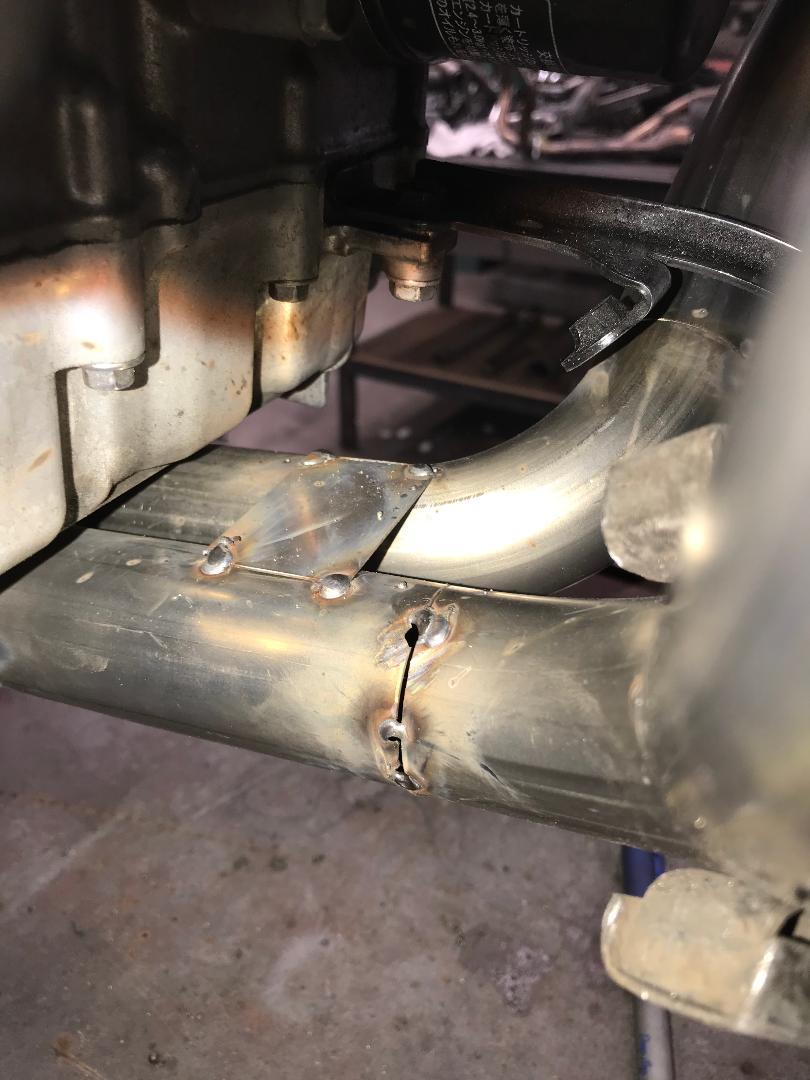
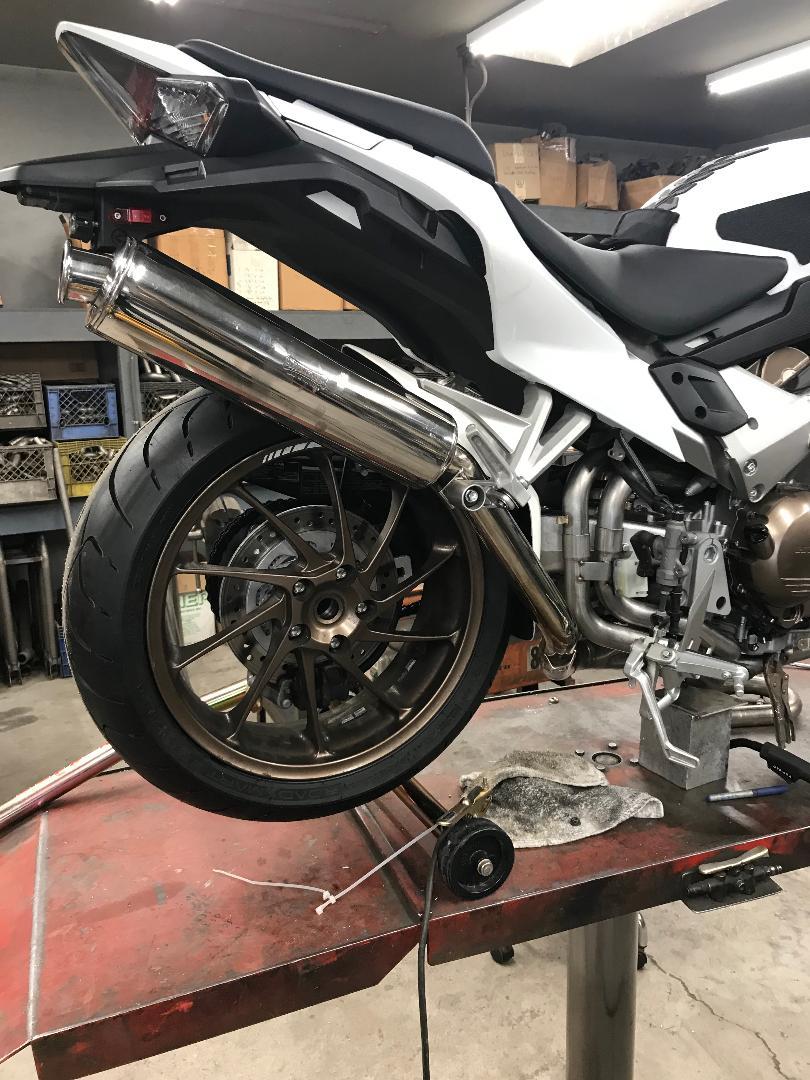
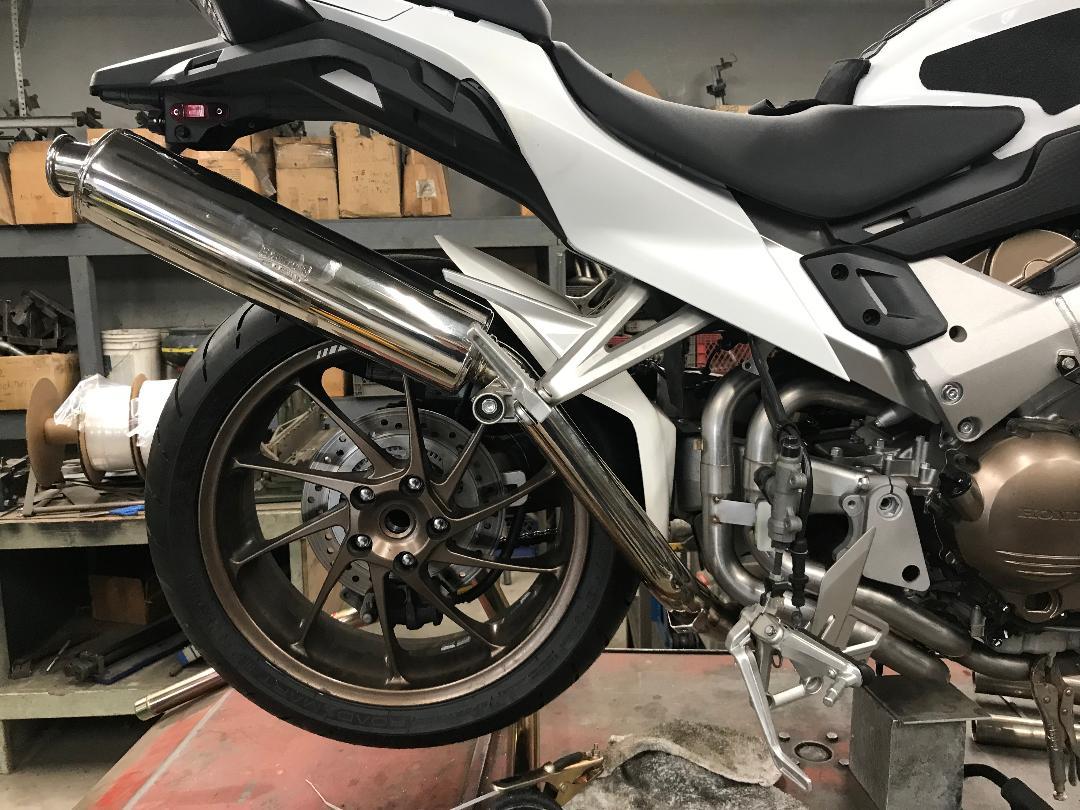
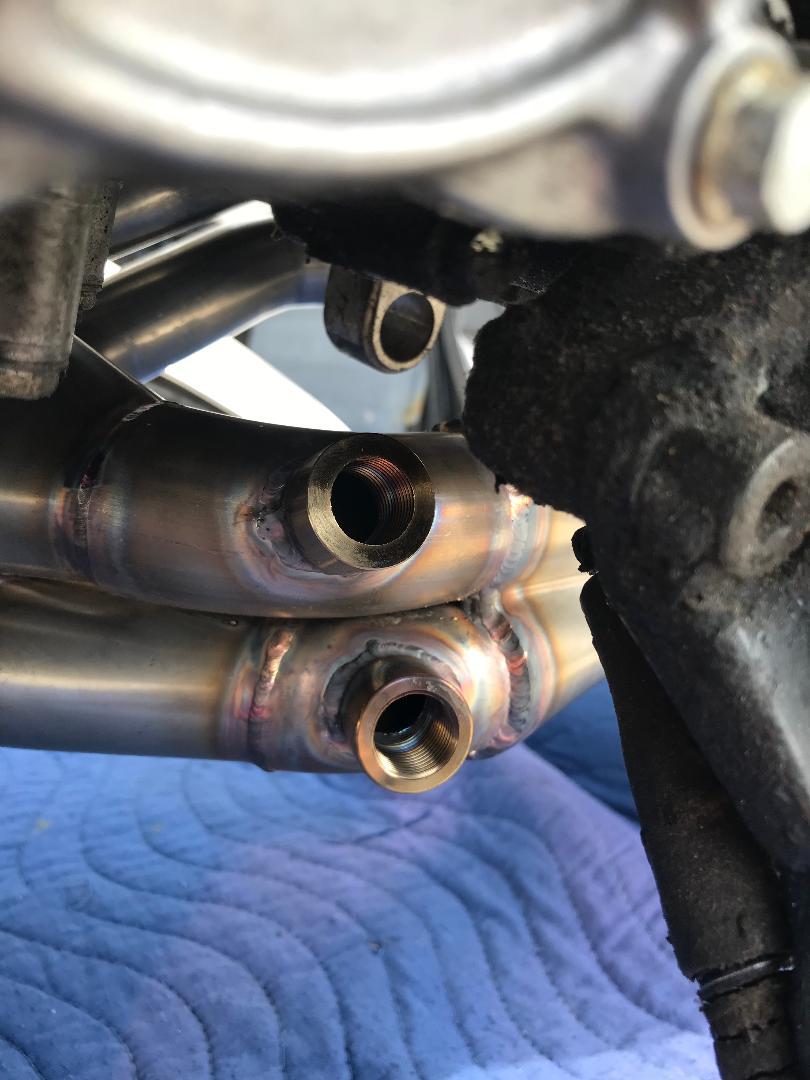
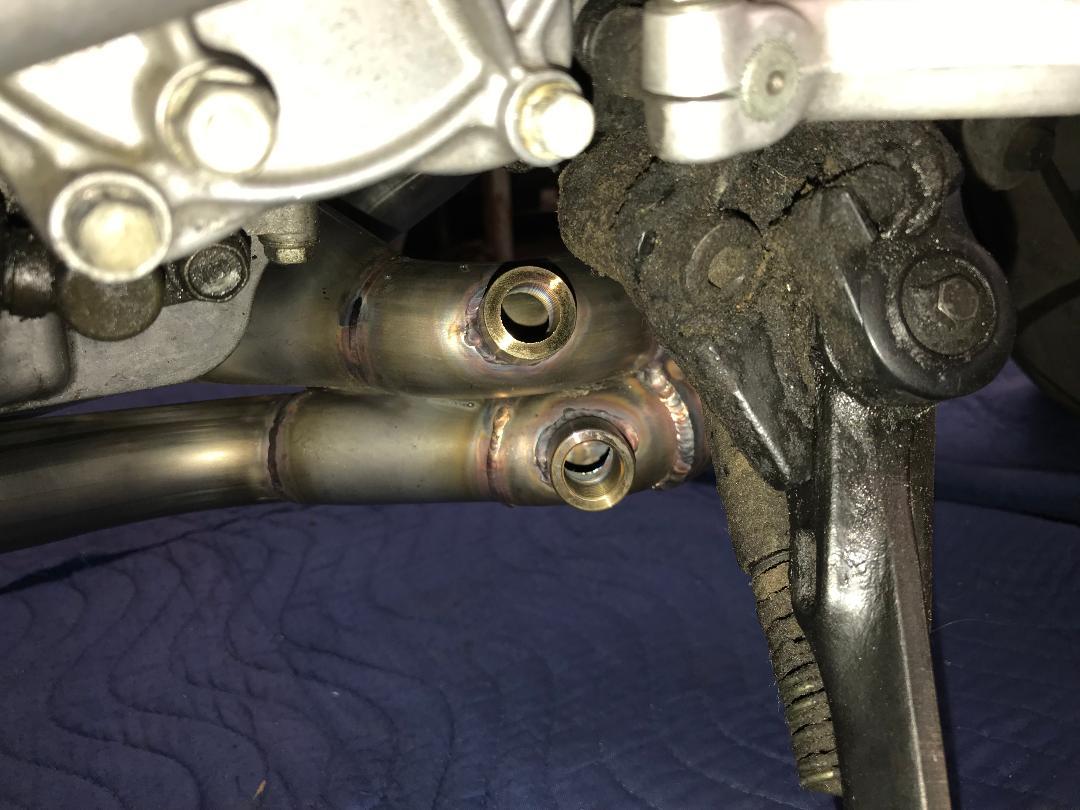
Last night's snoozefest continued: 5/6 gen production headers went to the passivators this week and will be ready to pick up end of next week. DucV4 and I have arranged to have a box-building and packing party as soon as we get the headers back, so shipping will take place April 22. 8 gen headers are under construction - Wade says we will have a working example ready for final fitment and the dyno at the end of next week. The first objective on the 8 gen headers was to build a mockup set of headers from which he will build a jig [fixture] like the one he built around the original Two Brothers headers. This process was easier on the 8 gen than it was with the TBR, because the TBR were rare and sacrosanct - under no circumstances were they to be damaged. To build this mockup, Wade was free to cut, tack weld, sew, test fit, stitch back together, add length, change bends, etc. At his shop last Friday, he was making lots of sparks, loud metallic screeching sounds, and generating the smell of very hot metal all day [After disassembling the 8 gen, I hung around and kept busy with test fitting 5/6 gen headers to confirm bung placements]. Item #1 on his list was installing the upper rear primaries, and right off the bat, spacing didn't look great; they were too far apart from each other, and they ran into hard parts of the 8 gen. Part of this turned out to be the thick OEM crush gaskets that I neglected to remove - the gaskets were pushing the new primaries out of alignment. Most of the problem was caused by two other fitment/engineering conflicts we ran into. First, the 8 gen rear primaries are of much smaller diameter tubing and cross over each other before turning downward to where they merge. The left rear primary of the new headers, with larger diameter tubing and no crossover, runs into the inner heat shield - this is the curved sheet metal piece that resides between the left rear primary and the shock absorber. On the 8 gen fitment bike, we temporarily removed this piece. Second, the brake hose from the ABS controller to the rear caliper comes into contact with the new headers. We temporarily removed a bolt that holds two hard brake line fittings together so we could scoot the hose over - without disconnecting - and install the new rear primaries. Refresher note: 8 gen OEM left and right rear primaries merge with each other, and 8 gen OEM left and right front primaries merge with each other. 5/6 gen OEM [and new performance headers] left front and left rear primaries merge with each other, 5/6 gen OEM [and new performance headers] right rear and right front primaries merge with each other. Note the gussets Wade added here [and other places visible in other photos] to maintain spacing during assembly. Radiators off to start on the interesting part: crafting the front primaries. Here you can see the 'starter tubes' Wade made and installed into the front exhaust ports. Note visegrips holding a spacer in place: The collector exit was somewhat less trouble. IMPORTANT NOTE: the 8 gen single OEM bung and O2 sensor are 12mm, not the 18mm fittings we've found with 5/6 gens and Bosch wideband sensors. Here is a nut tacked into the OEM bung location as placeholder: Everything was starting to look good, until we installed the fitment Staintune slipon and found it too far to the left, which meant the front end of the headers was misaligned. Think of the vertical sections of the rear primaries [at the slip joints] as the center of a pivot; if the rear of the the header assembly is too far to the left - and it was - the front section of the assembly needs to be cut and reformed to bring the rear into alignment. Wade doesn't get phased by adjustments like this, he just chops off the offending appendage and gets busy making his mockup correct. In this case, cutting off the front pirimaries and realigning them correctly pivoted the assembly around the rear primaries' slip joints and the whole assembly came into front-center-rear alignment. Somehow this pipe looks good on any bike. That's it for this update. I'll do 6 gen dyno day results in the next post.
2 points
-
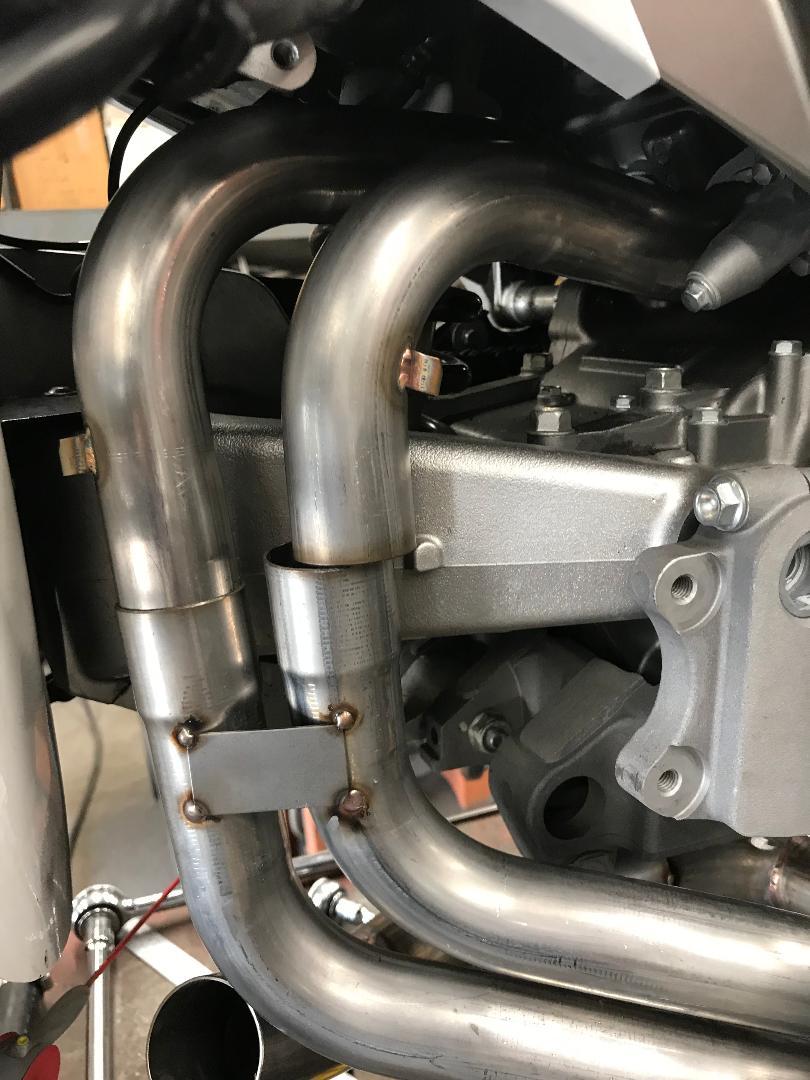
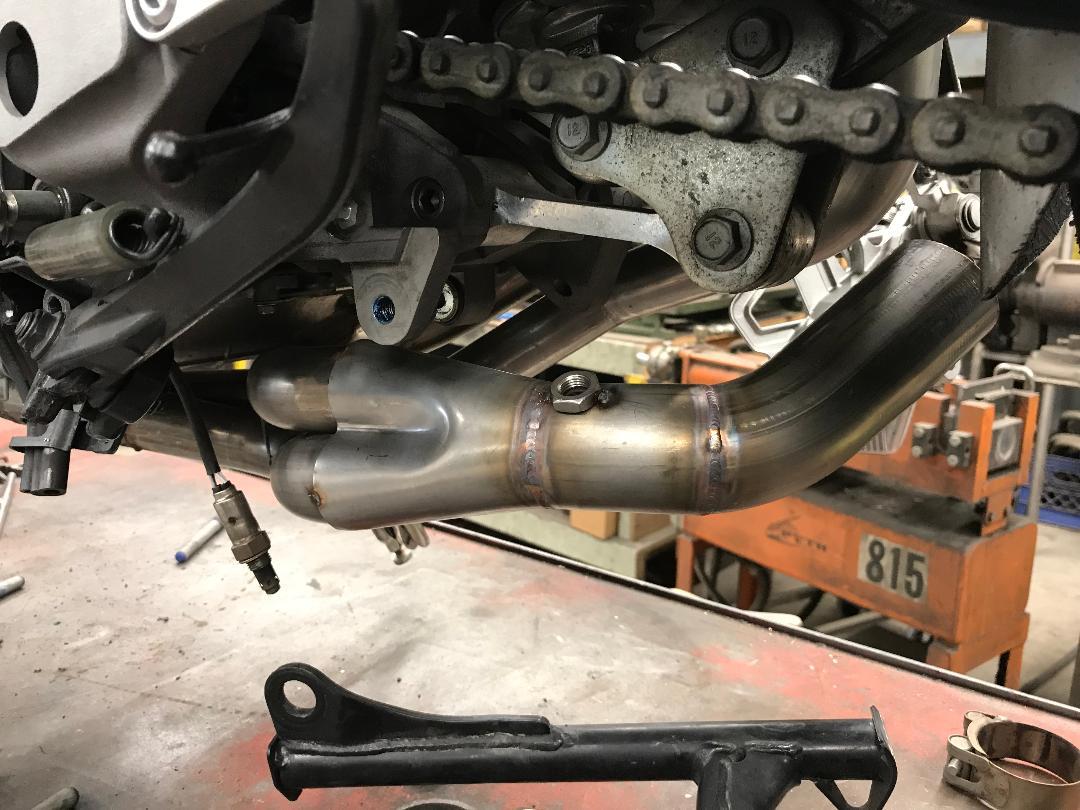
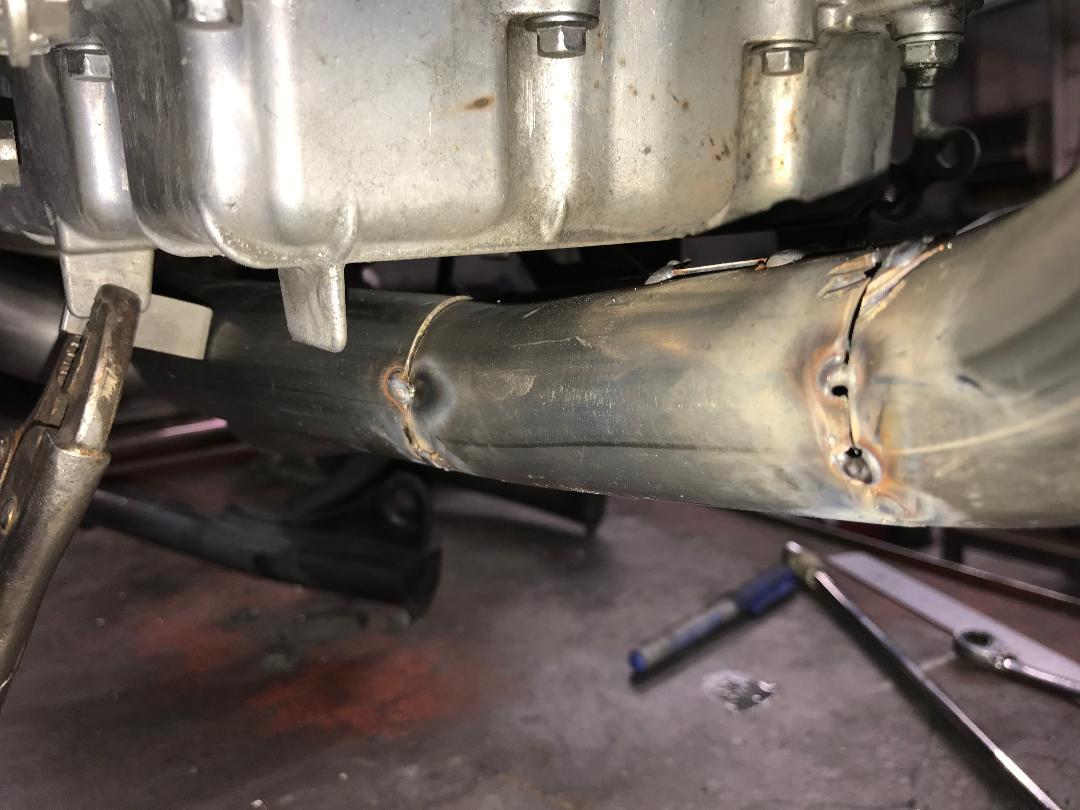
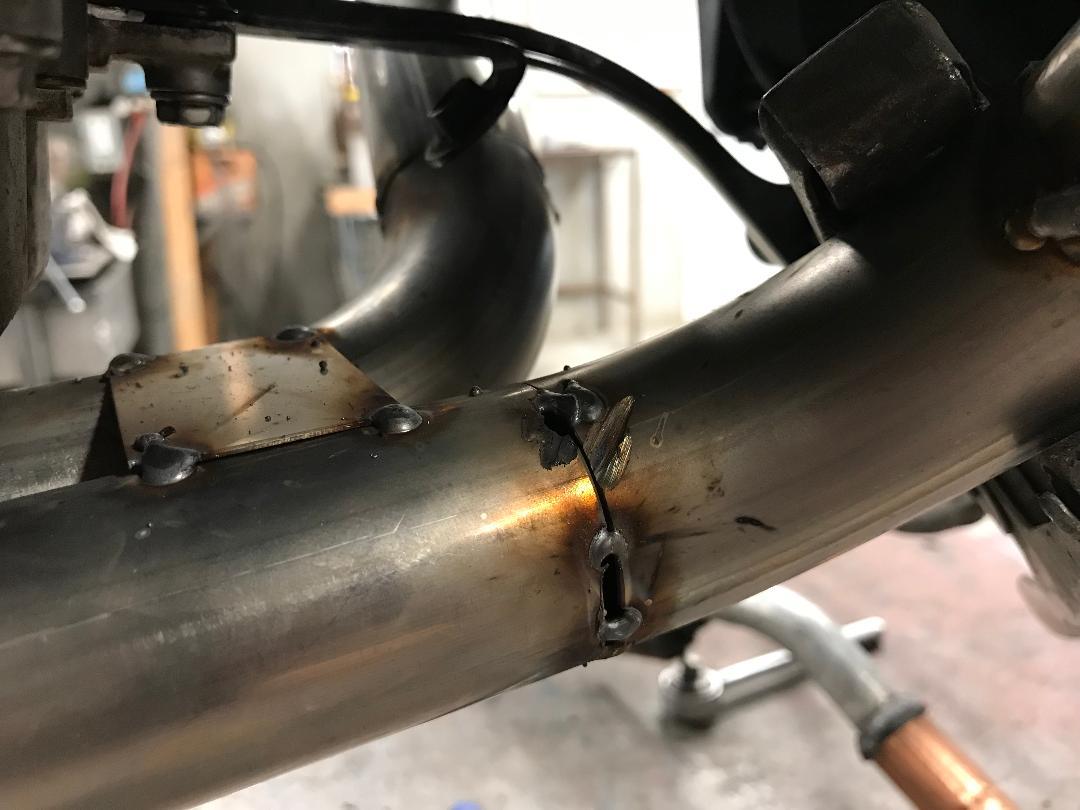
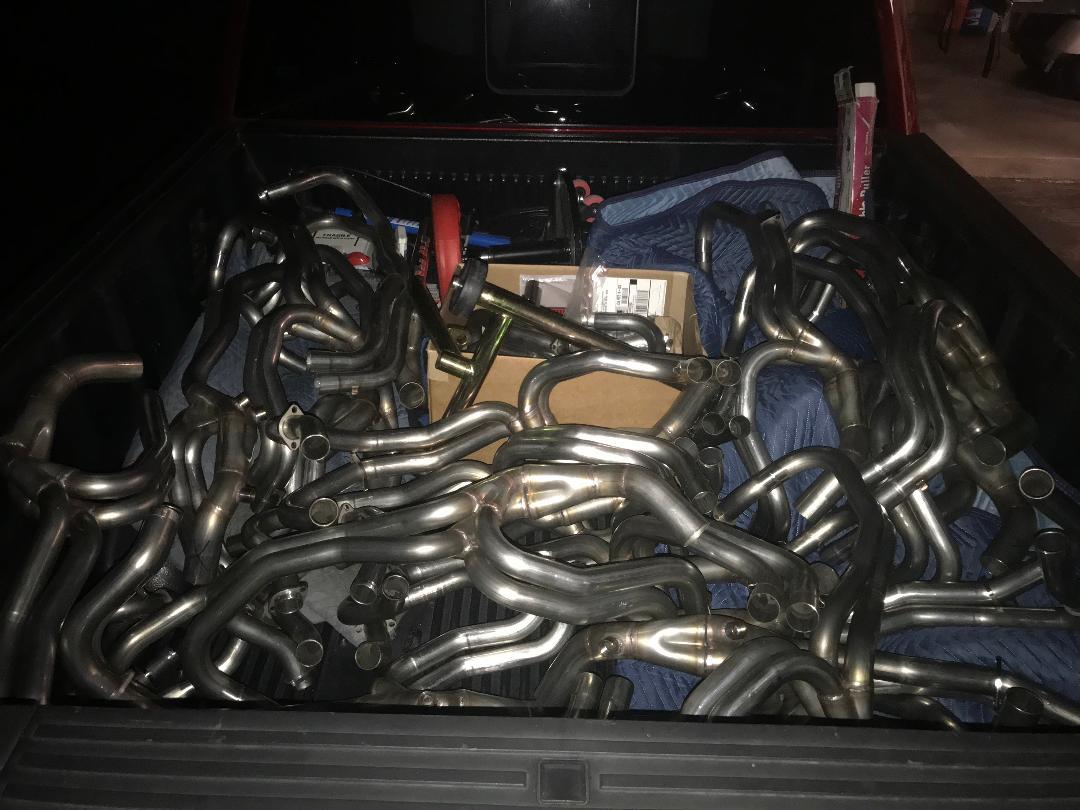
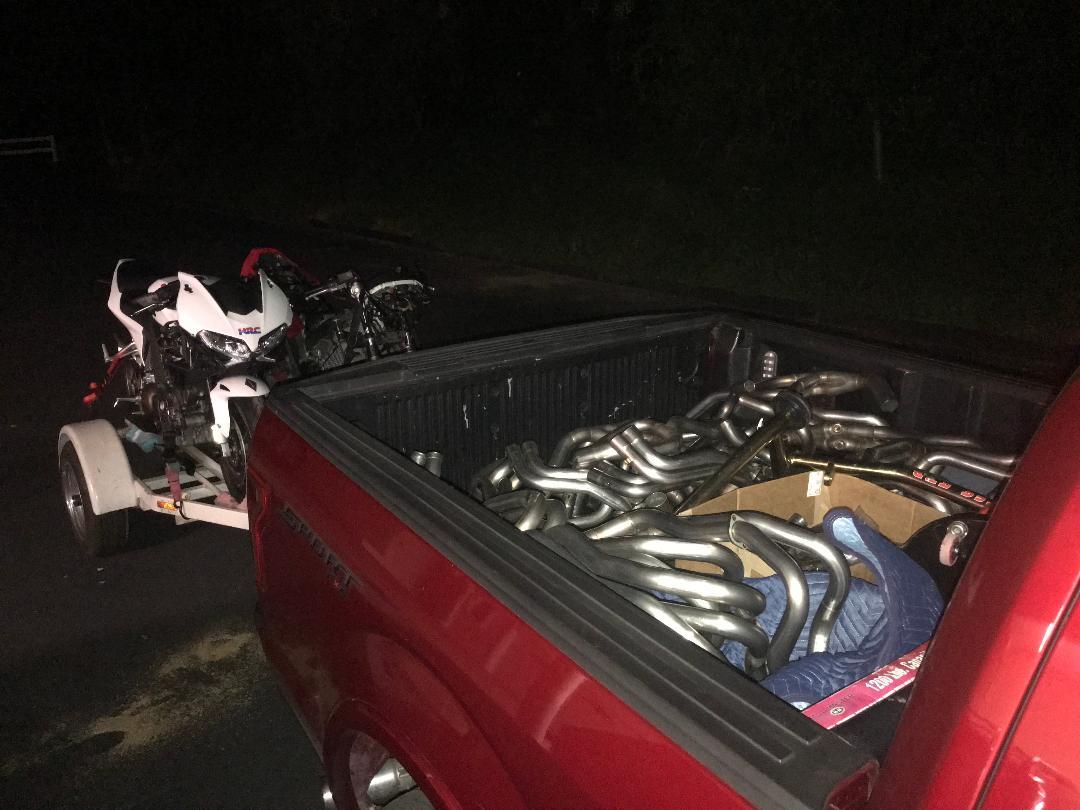
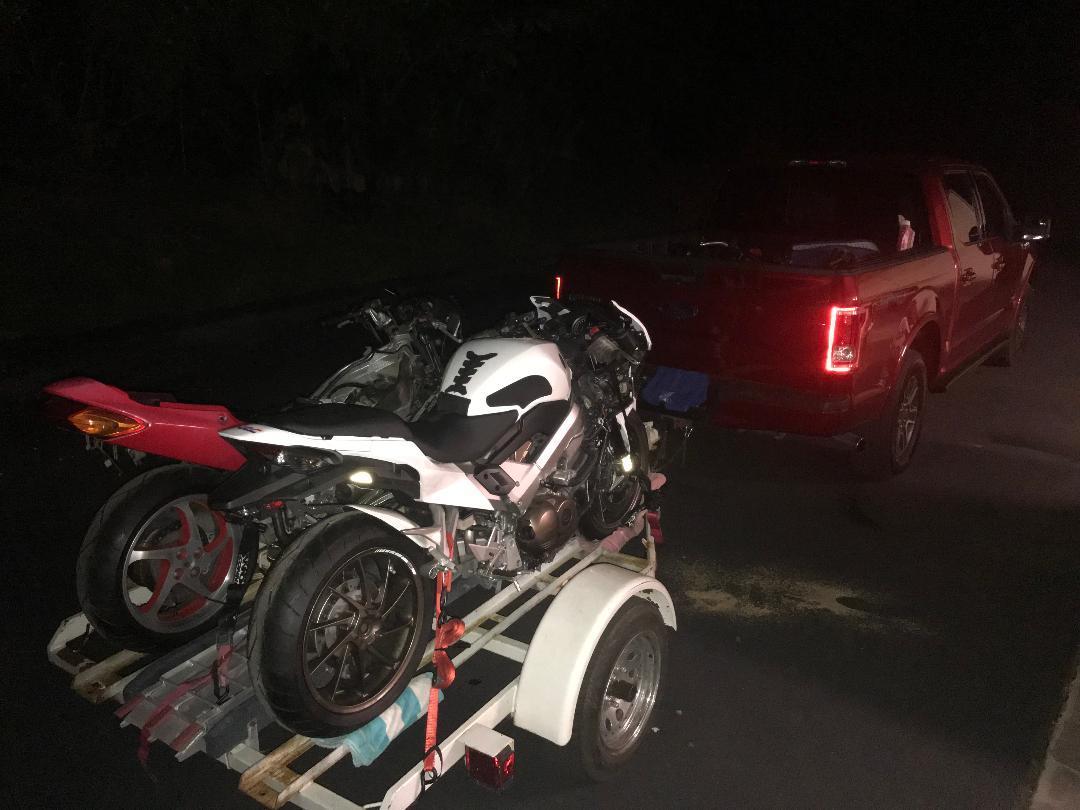
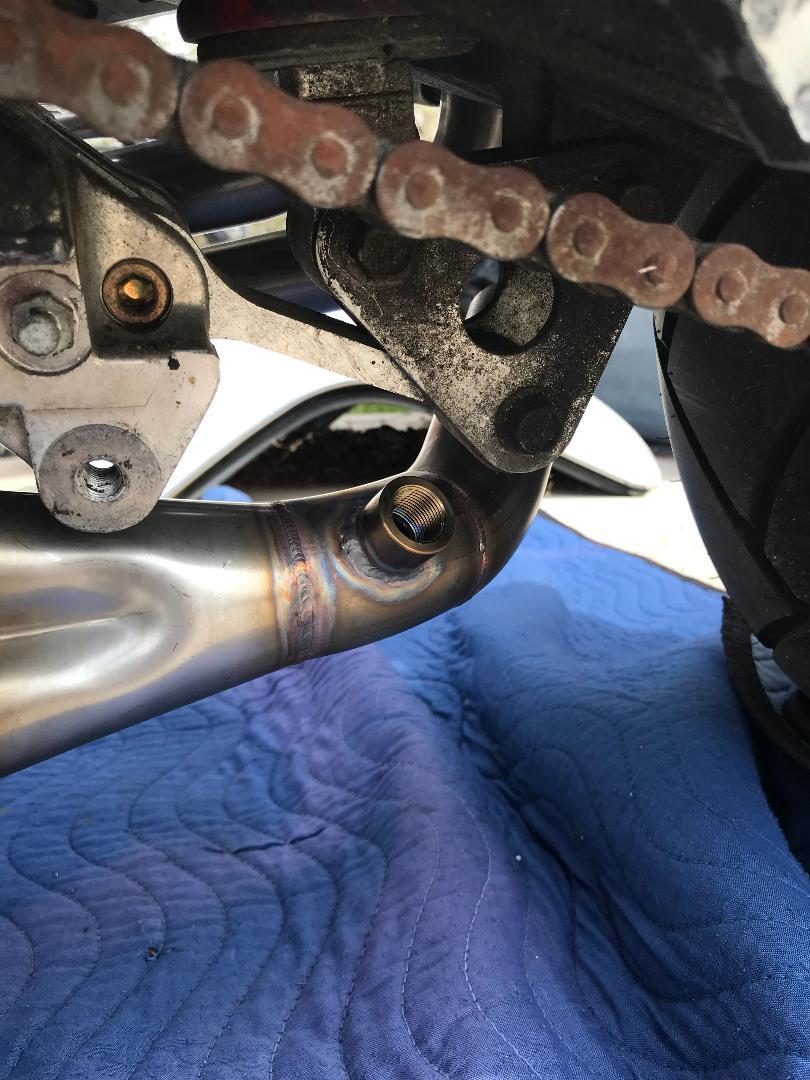
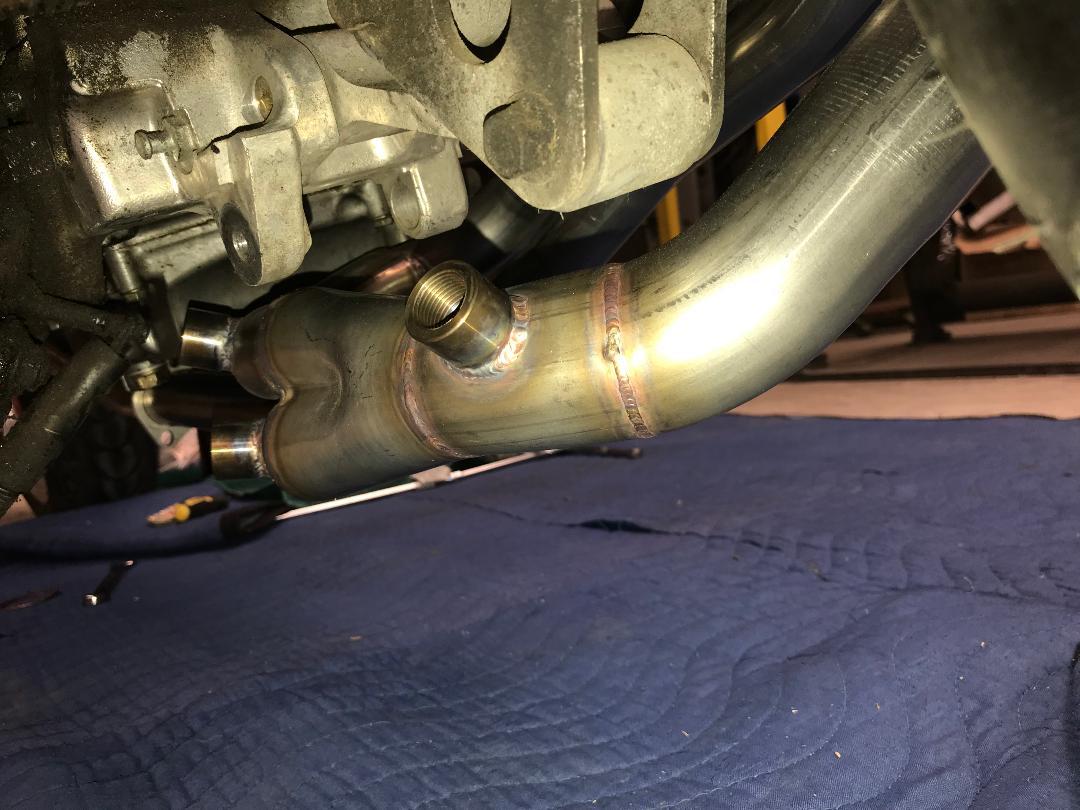
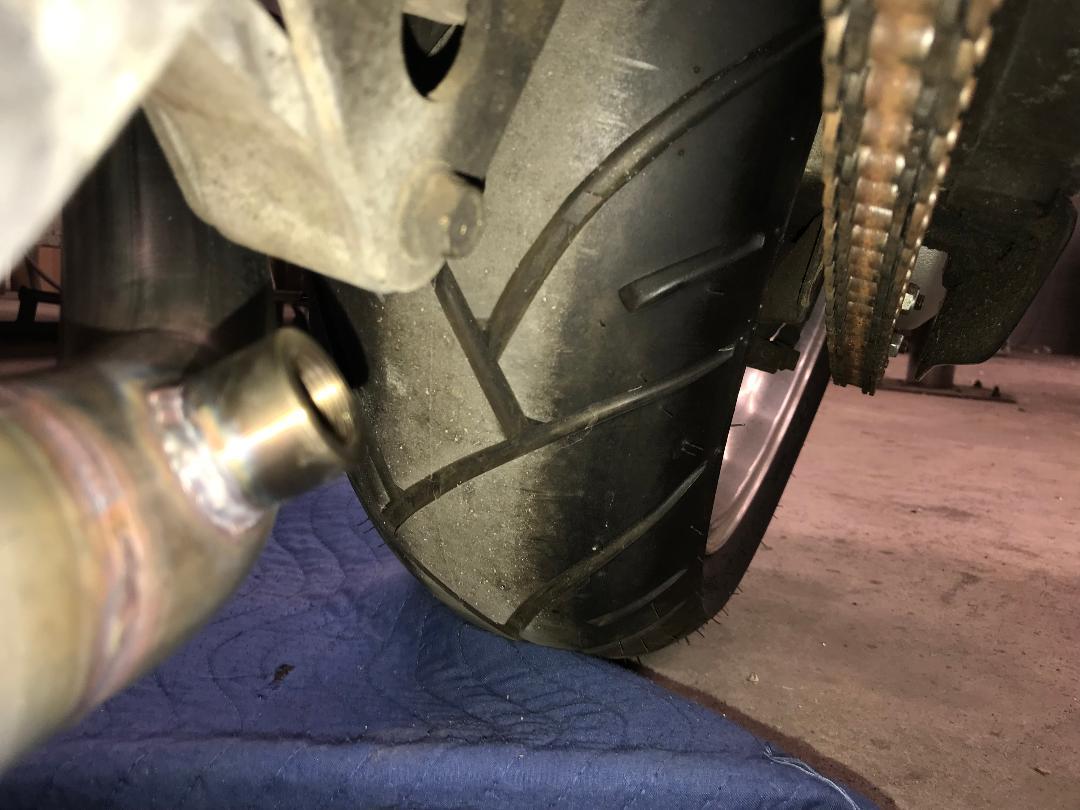
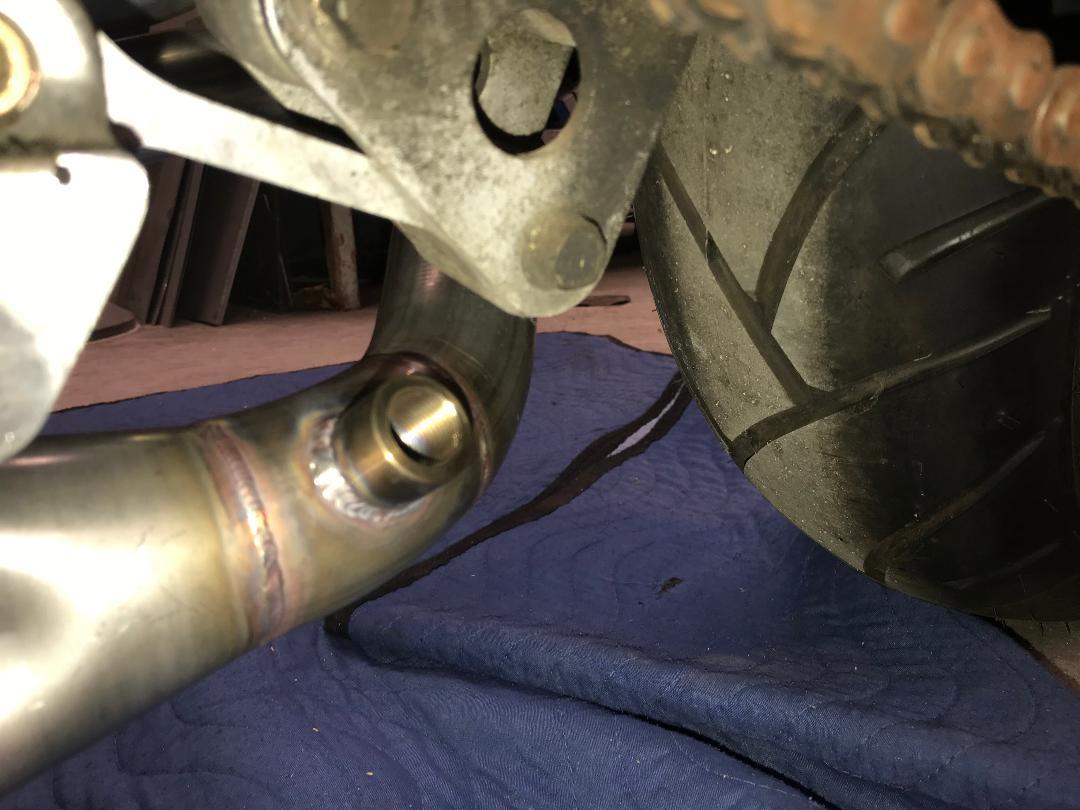
I apologize for the delay in posting updates - Duc2 V4 has been responsibly reminding me that header related things are happening and those who have purchased headers or placed deposits have a right to know. The photos and brief details in this post will be supplemented with further information once I get to a peaceful place with a slower pace - the airport tomorrow. Shipping - Duc2V4 and I discovered that the USPS Retail Ground shipping rates we quoted are only available in person in a US Post Office, after standing in line and filling out forms by hand. Luckily, Duc got busy with his corporate Fedex account and his careful cross-checking found that he can ship Fedex for about the same as the bargain basement price of USPS+insurance. With Fedex, specifying the package value establishes a coverage amount, so the headers shipped Fedex will be covered. First shipped headers received - VFRD member carlgustav received prototype 2 headers today and we traded texts on fitment to his 6 gen [Prototype 2 was constructed and tested in January] . His install is looking good, but will have to wait until after a family celebration this weekend. 8 gen dyno day rescheduled - I made a mistake in thinking that the objective of last Friday's visit to Wade's shop was to produce a working 8 gen prototype. I was wrong - the actual objective was to fabricate a tacked-together 8 gen header from which Wade could build a jig, as he did with the original Two Brothers headers. Temporary tack welds to hold assembly together: I am nodding off, so will pick this up again tomorrow. 5/6 gen production headers are paid for and have been picked up - we visited Wade last Friday, counted up the 22 headers with various bung configurations, paid for them, and loaded them up into the rig to bring then home: Second objective last Friday was check bung placement. Wade correctly observed that whether they were right or wrong, all the bungs were already done. Nevertheless, I test fit a 3-bung set of headers on our 5 gen fitment bike and all 3 bungs ended up their proper places. Here is the rear bung placement [Please pardon the accumulated rust and crud on the chain and center stand - this bike's rehab is off in the future a bit]: And here are the front two bungs:
2 points
-
Thanks for the update SF - have a great time in TX!!!1 point
-
Back to the 6th generation chart does anyone think the mufflers and the mid pipe had anything to do with the loss of power on top end.1 point
-
This is true, HighSide. and as Wade and I discovered, getting a fat, non-crossover cyl #1 primary tube (left rear) past all the 8 gen hardware that Honda nestled in around the stock headers has proven to be a bit of a rub - solveable, but not solved yet. Also to be noted is the difference in 02 sensor size - 12mm for stock 8 gen and 18mm for 5/6 gen and Bosch wideband sensors. We’ll have to get a plan together for 8 gen bung size. Wade is highly in favor of a single choice for 8 gen headers: get a single bung, single size, single placement or no bung at all.1 point
-
hah, Awesome! Exactly the but dyno results we'd expect from those charts. It's between 5 and 10% pretty much everywhere from midrange up. Very nice charts, at least as exciting as the 5th gen runs. I don't know for sure about PCV. Rapid Bike Racing does for sure, I think PCV can do it, too, but I don't have first hand experience. And rumor has it there is a lot of advance to play with on the 6th gens. It'll be fun to see a chart if anyone is willing to play with the advance after getting their headers.1 point
-
it would be a cheaper road to fab a turbokit from a GSXR600 to the VFR. and it would be a monster for quick spooling afterwards.1 point
-
So... looking at the charts it's the same. 5 easy horsepower. 10% HP possible, 7-8% torque. Good numbers I'm betting the bike feels great with that tune, and the bottom end looks good, too. Could probably grab another HP or two with some ignition mapping, too.1 point
-
Im thinking that a downward angle is needed so that if there is moisture on the sensor and the bike is hibernating, then the water can drip off.1 point
-
I'm with Seb on that.1 point
-
I understand that I might be asking a lot here... but is there a chance of doing a test fit of the new 8th gen header prototype on a 6th gen before they go into production?1 point
-
The normal positioning of O2 sensors, from the Bosch documentation, is that they should be a minimum of 10 degrees above the horizontal centreline. See below:
1 point
-
Increased wear/shorter lifespan. They can handle some water/moisture as is evident on cold morning start ups with drops of water coming out the exhaust. Ideally the sensor should be on the top but that's not possible or practical to get at. So if they can be clocked around a little, that's all good.1 point
-
More angle on the next batch?1 point
-
Italian overhaul. Hop on a freeway onramp and run it up to the rev limiter.1 point
-
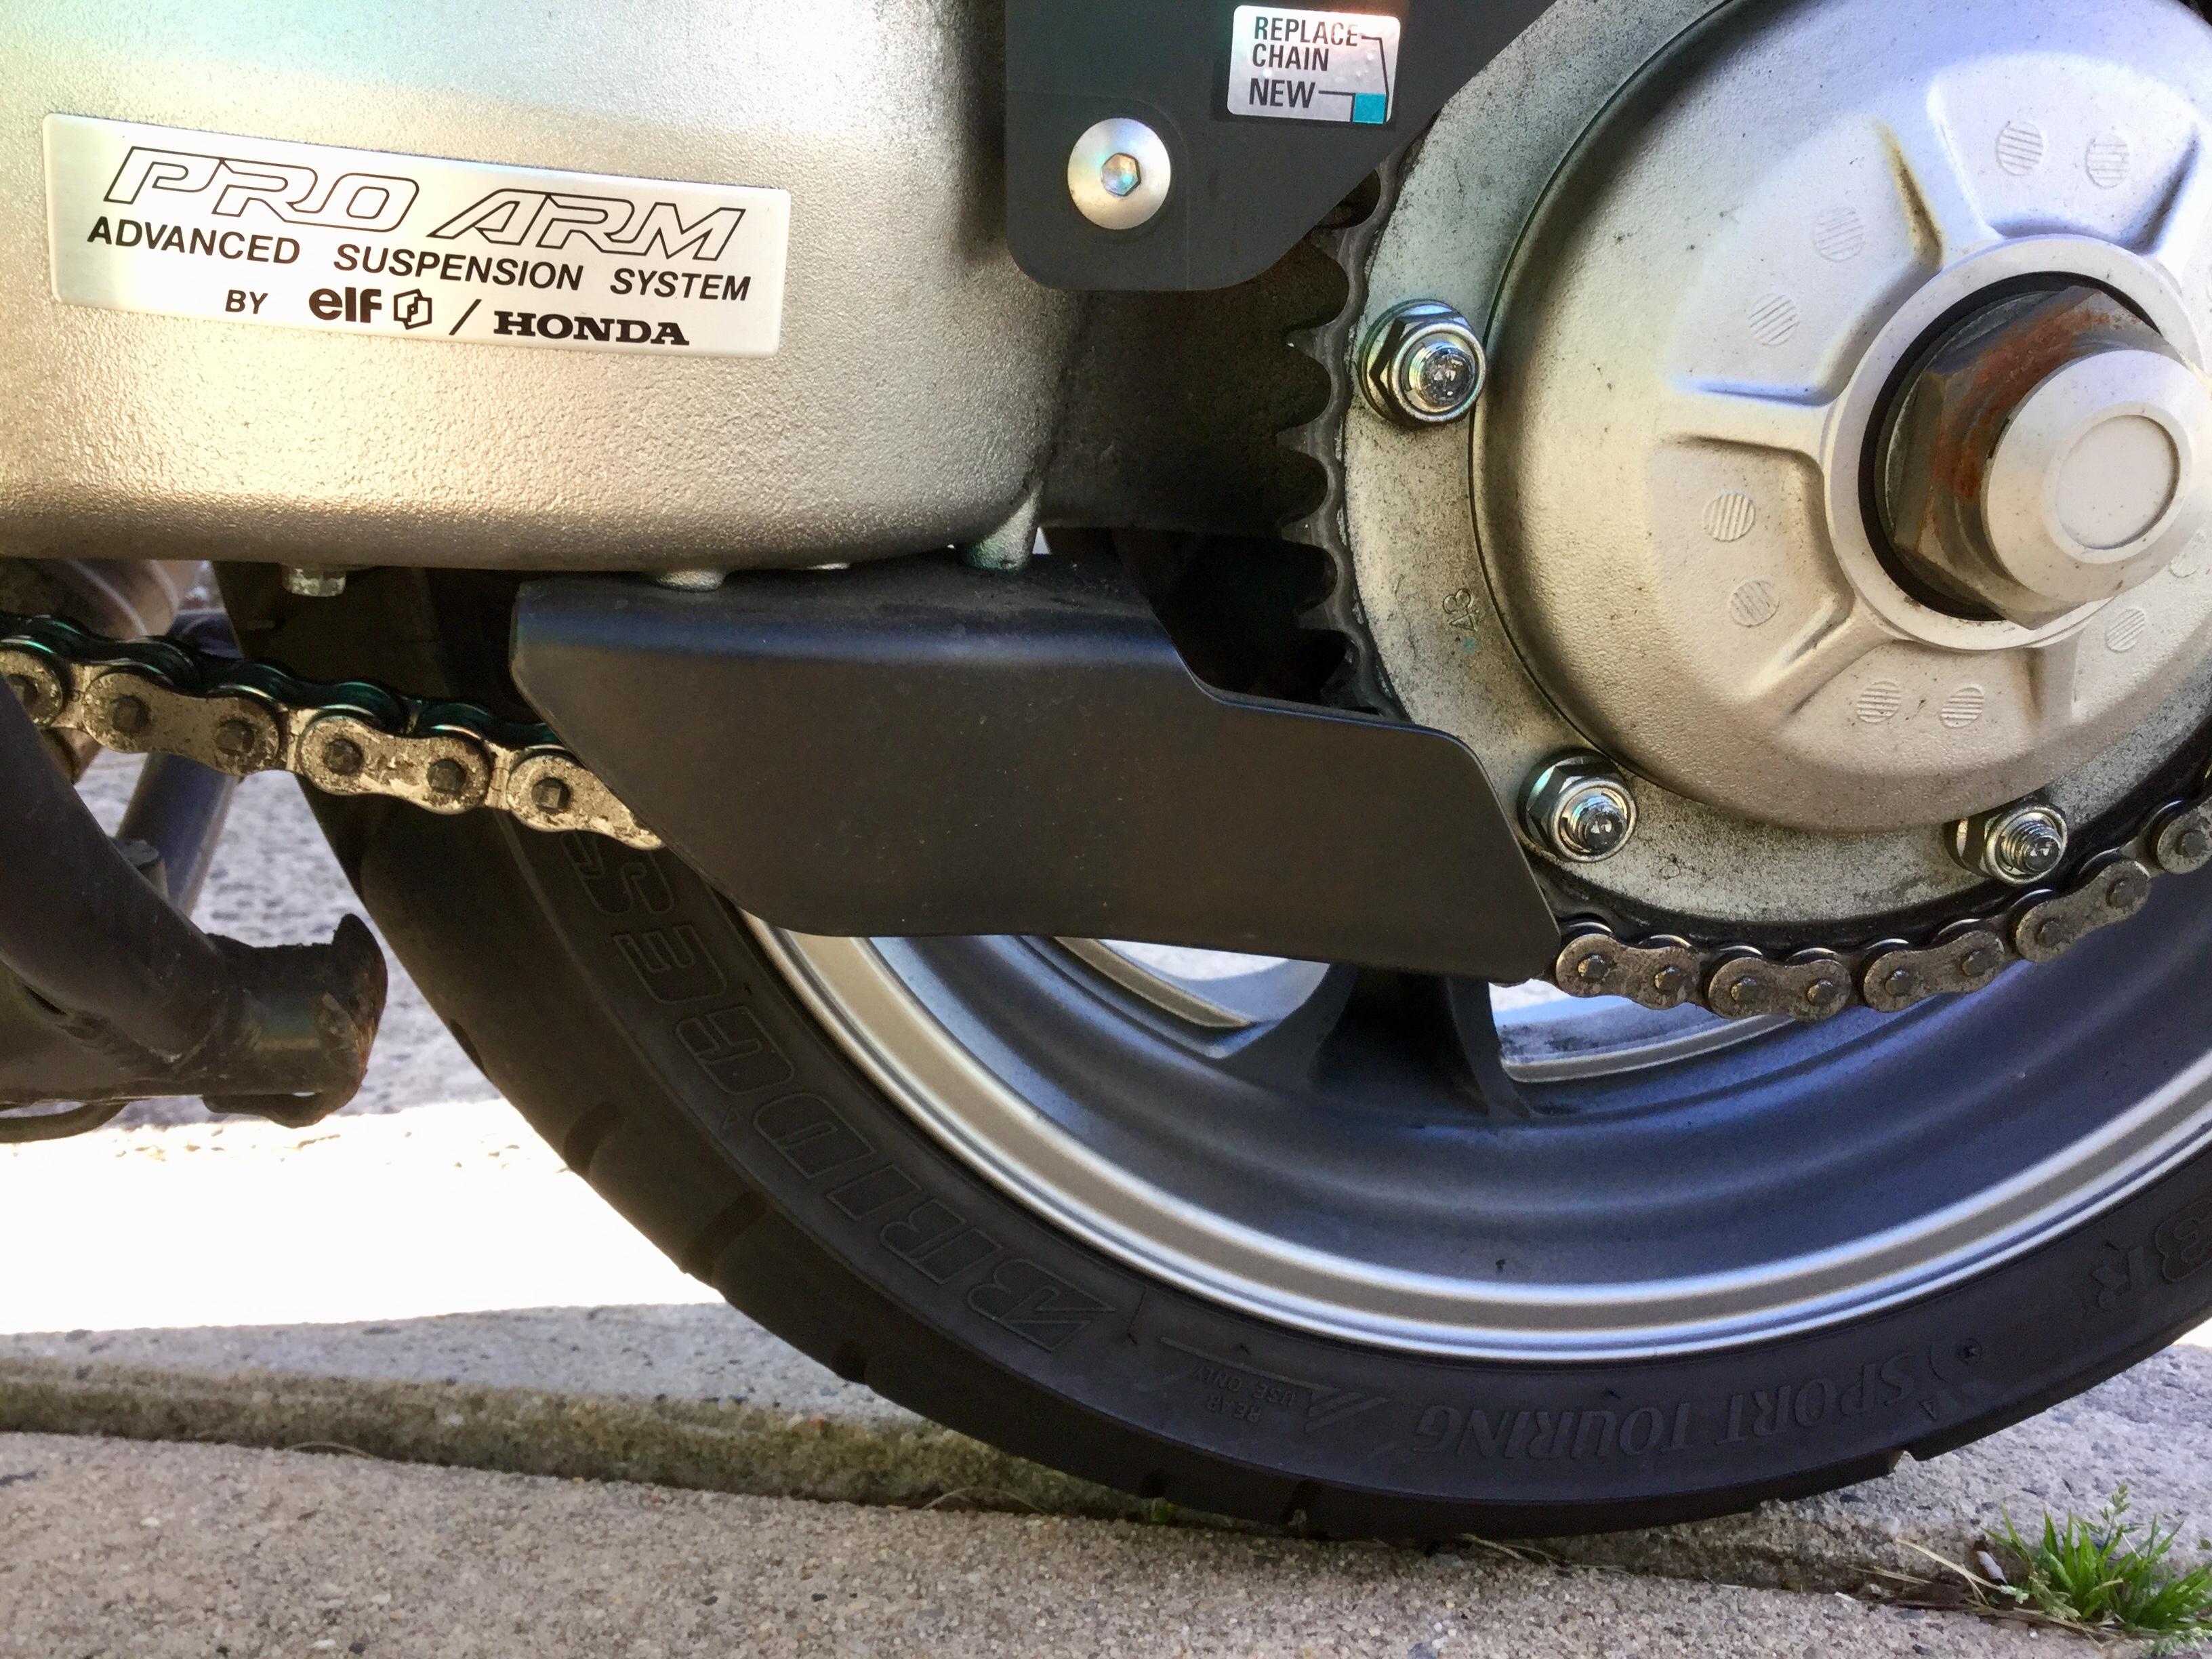
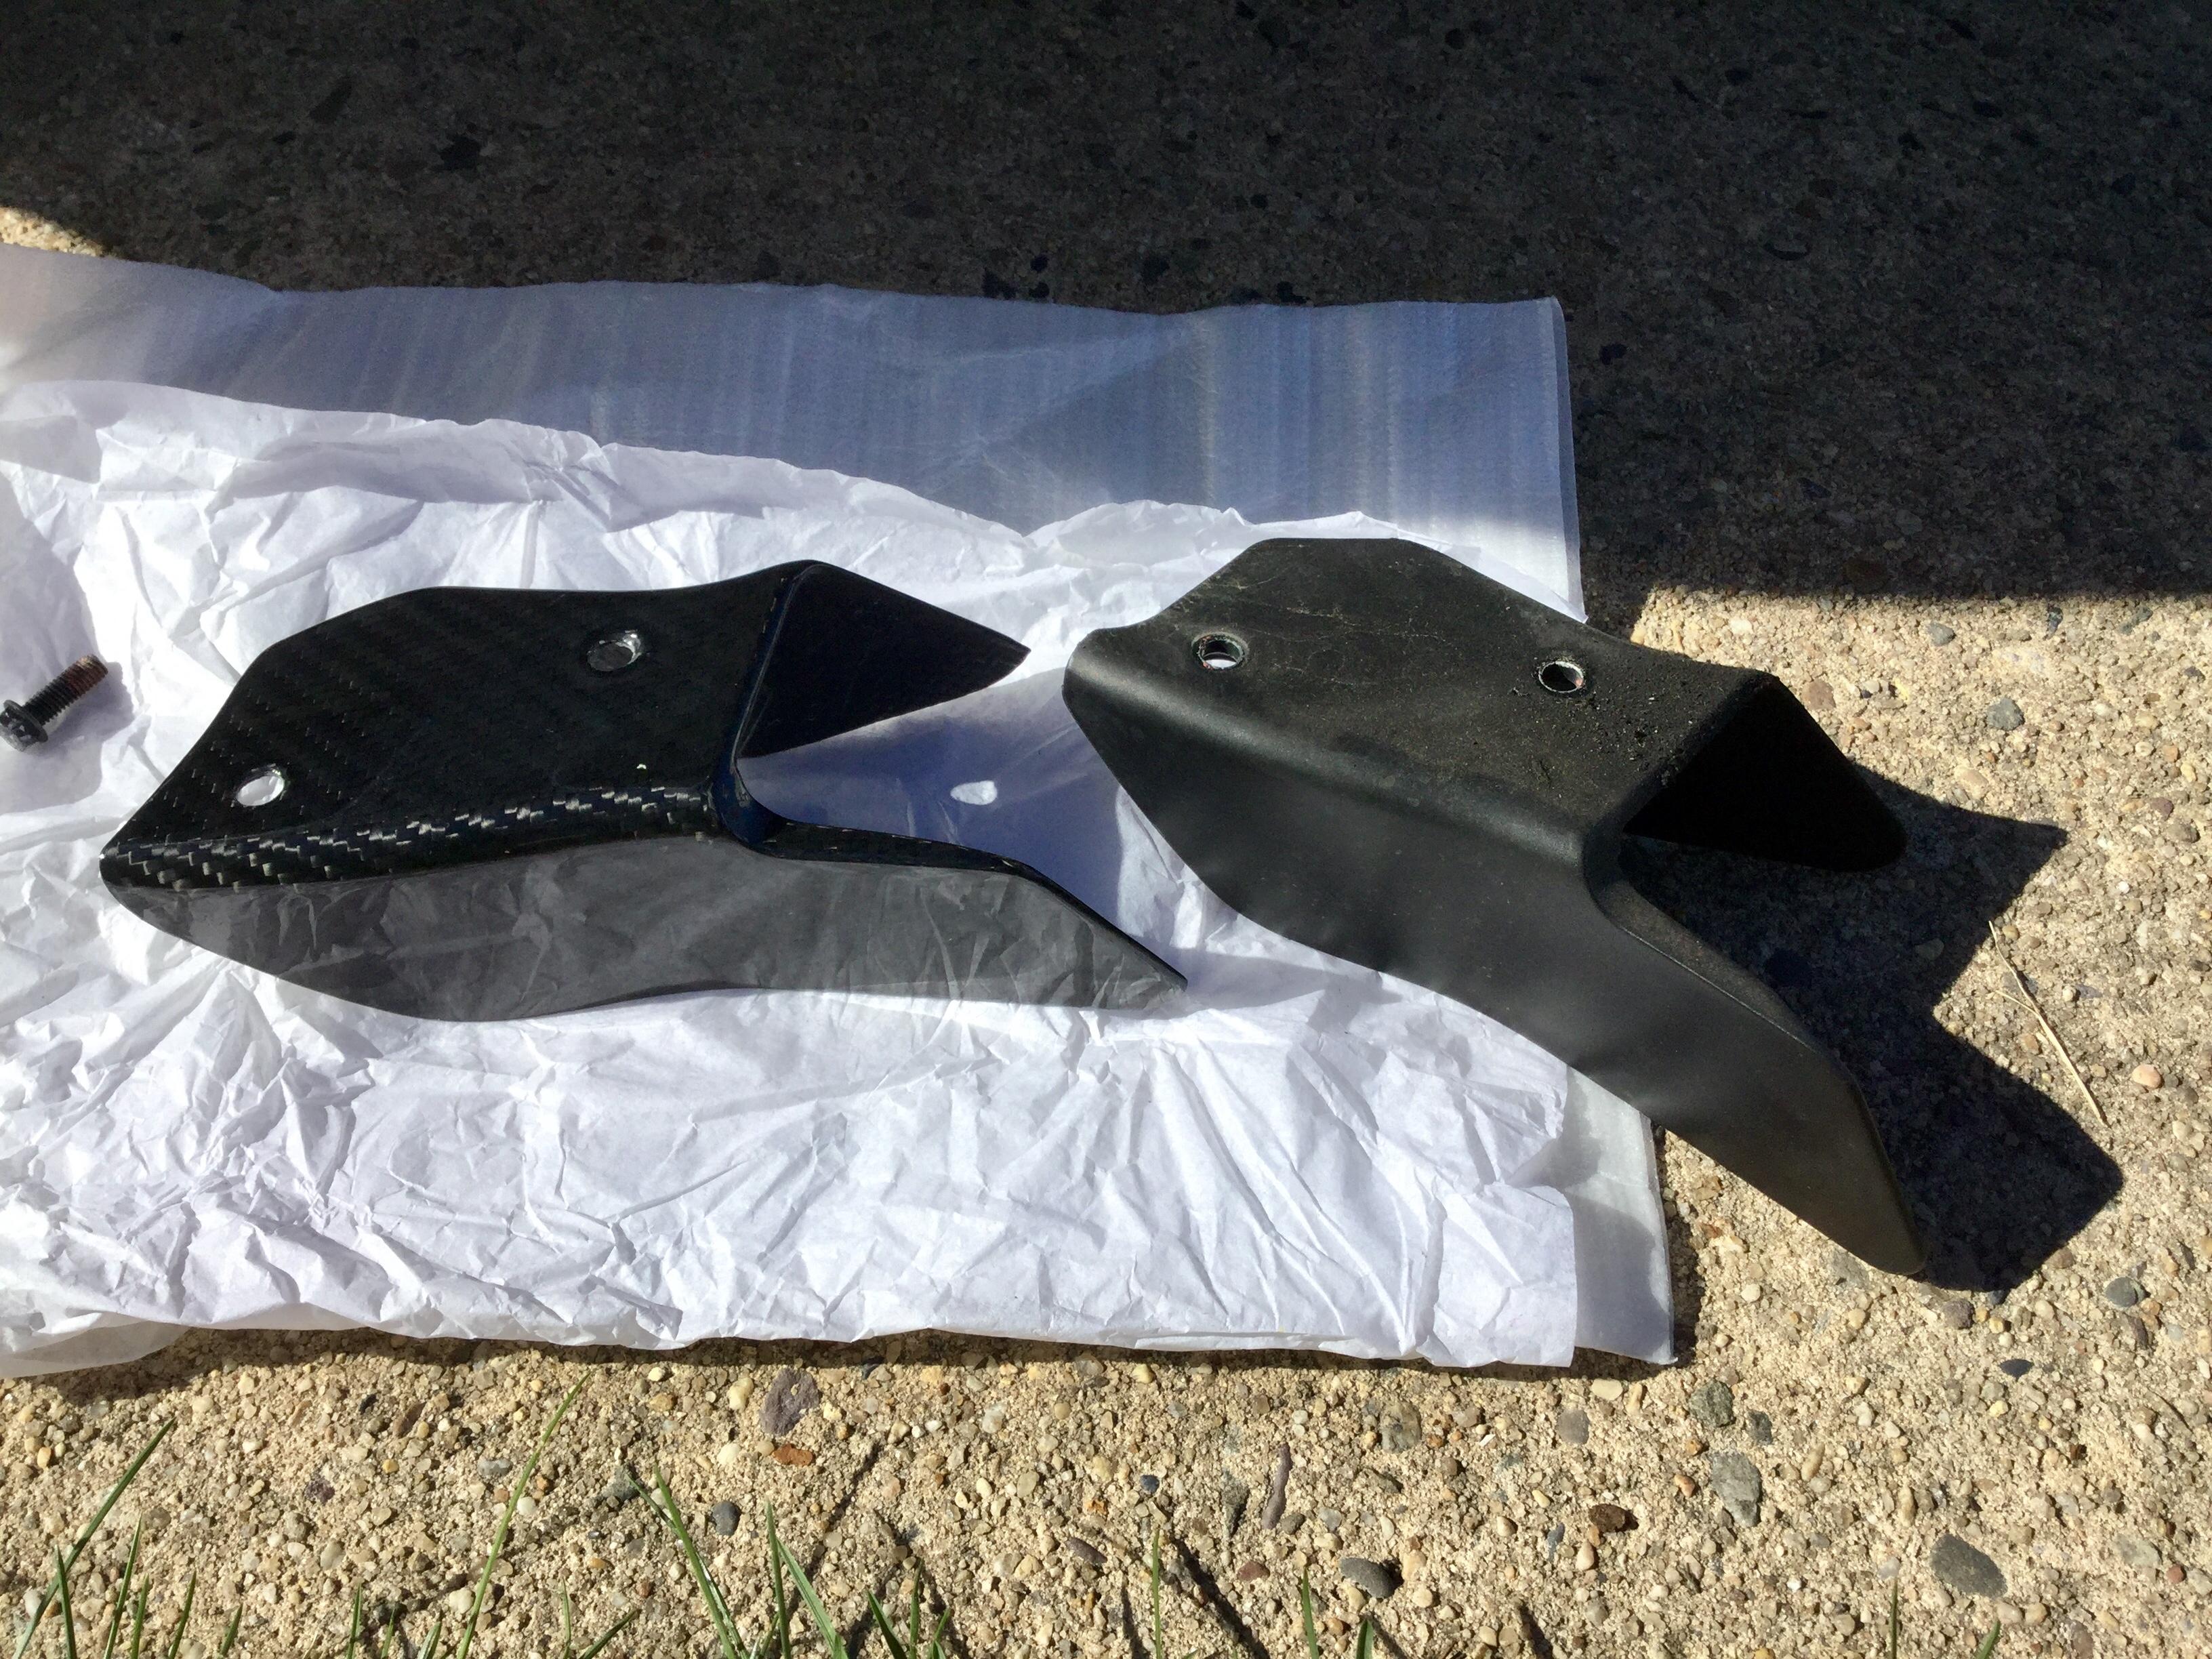
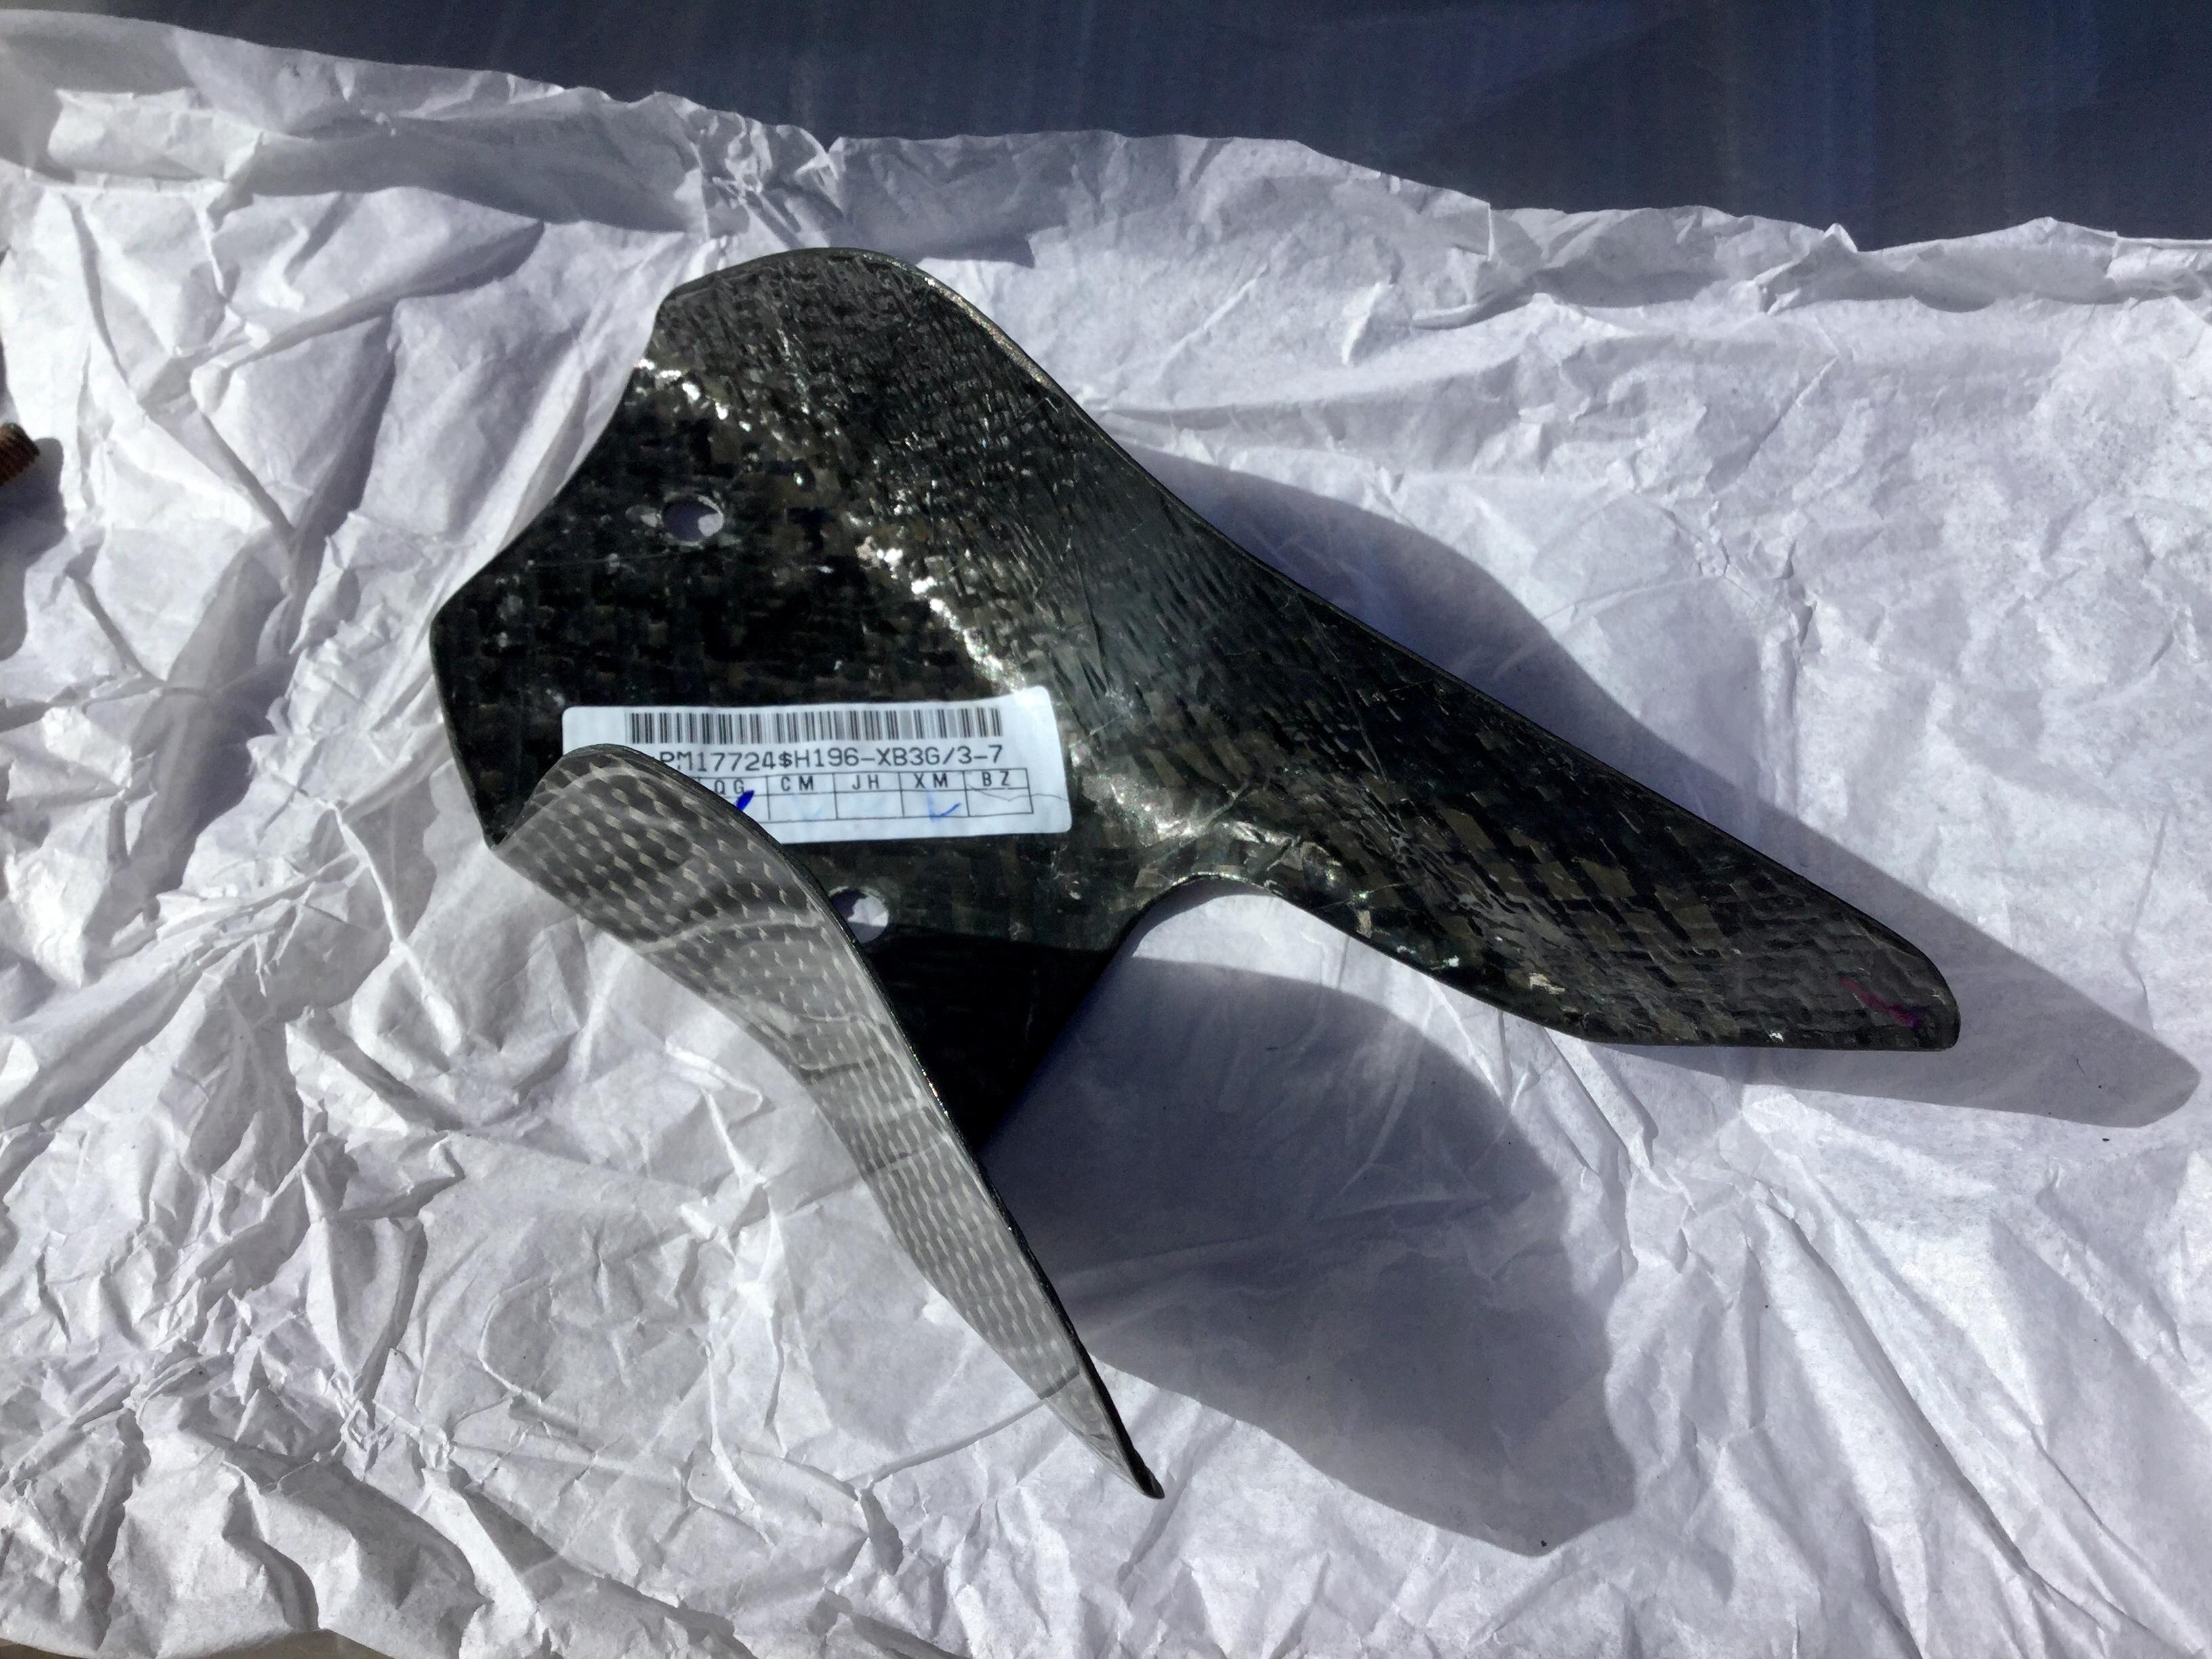
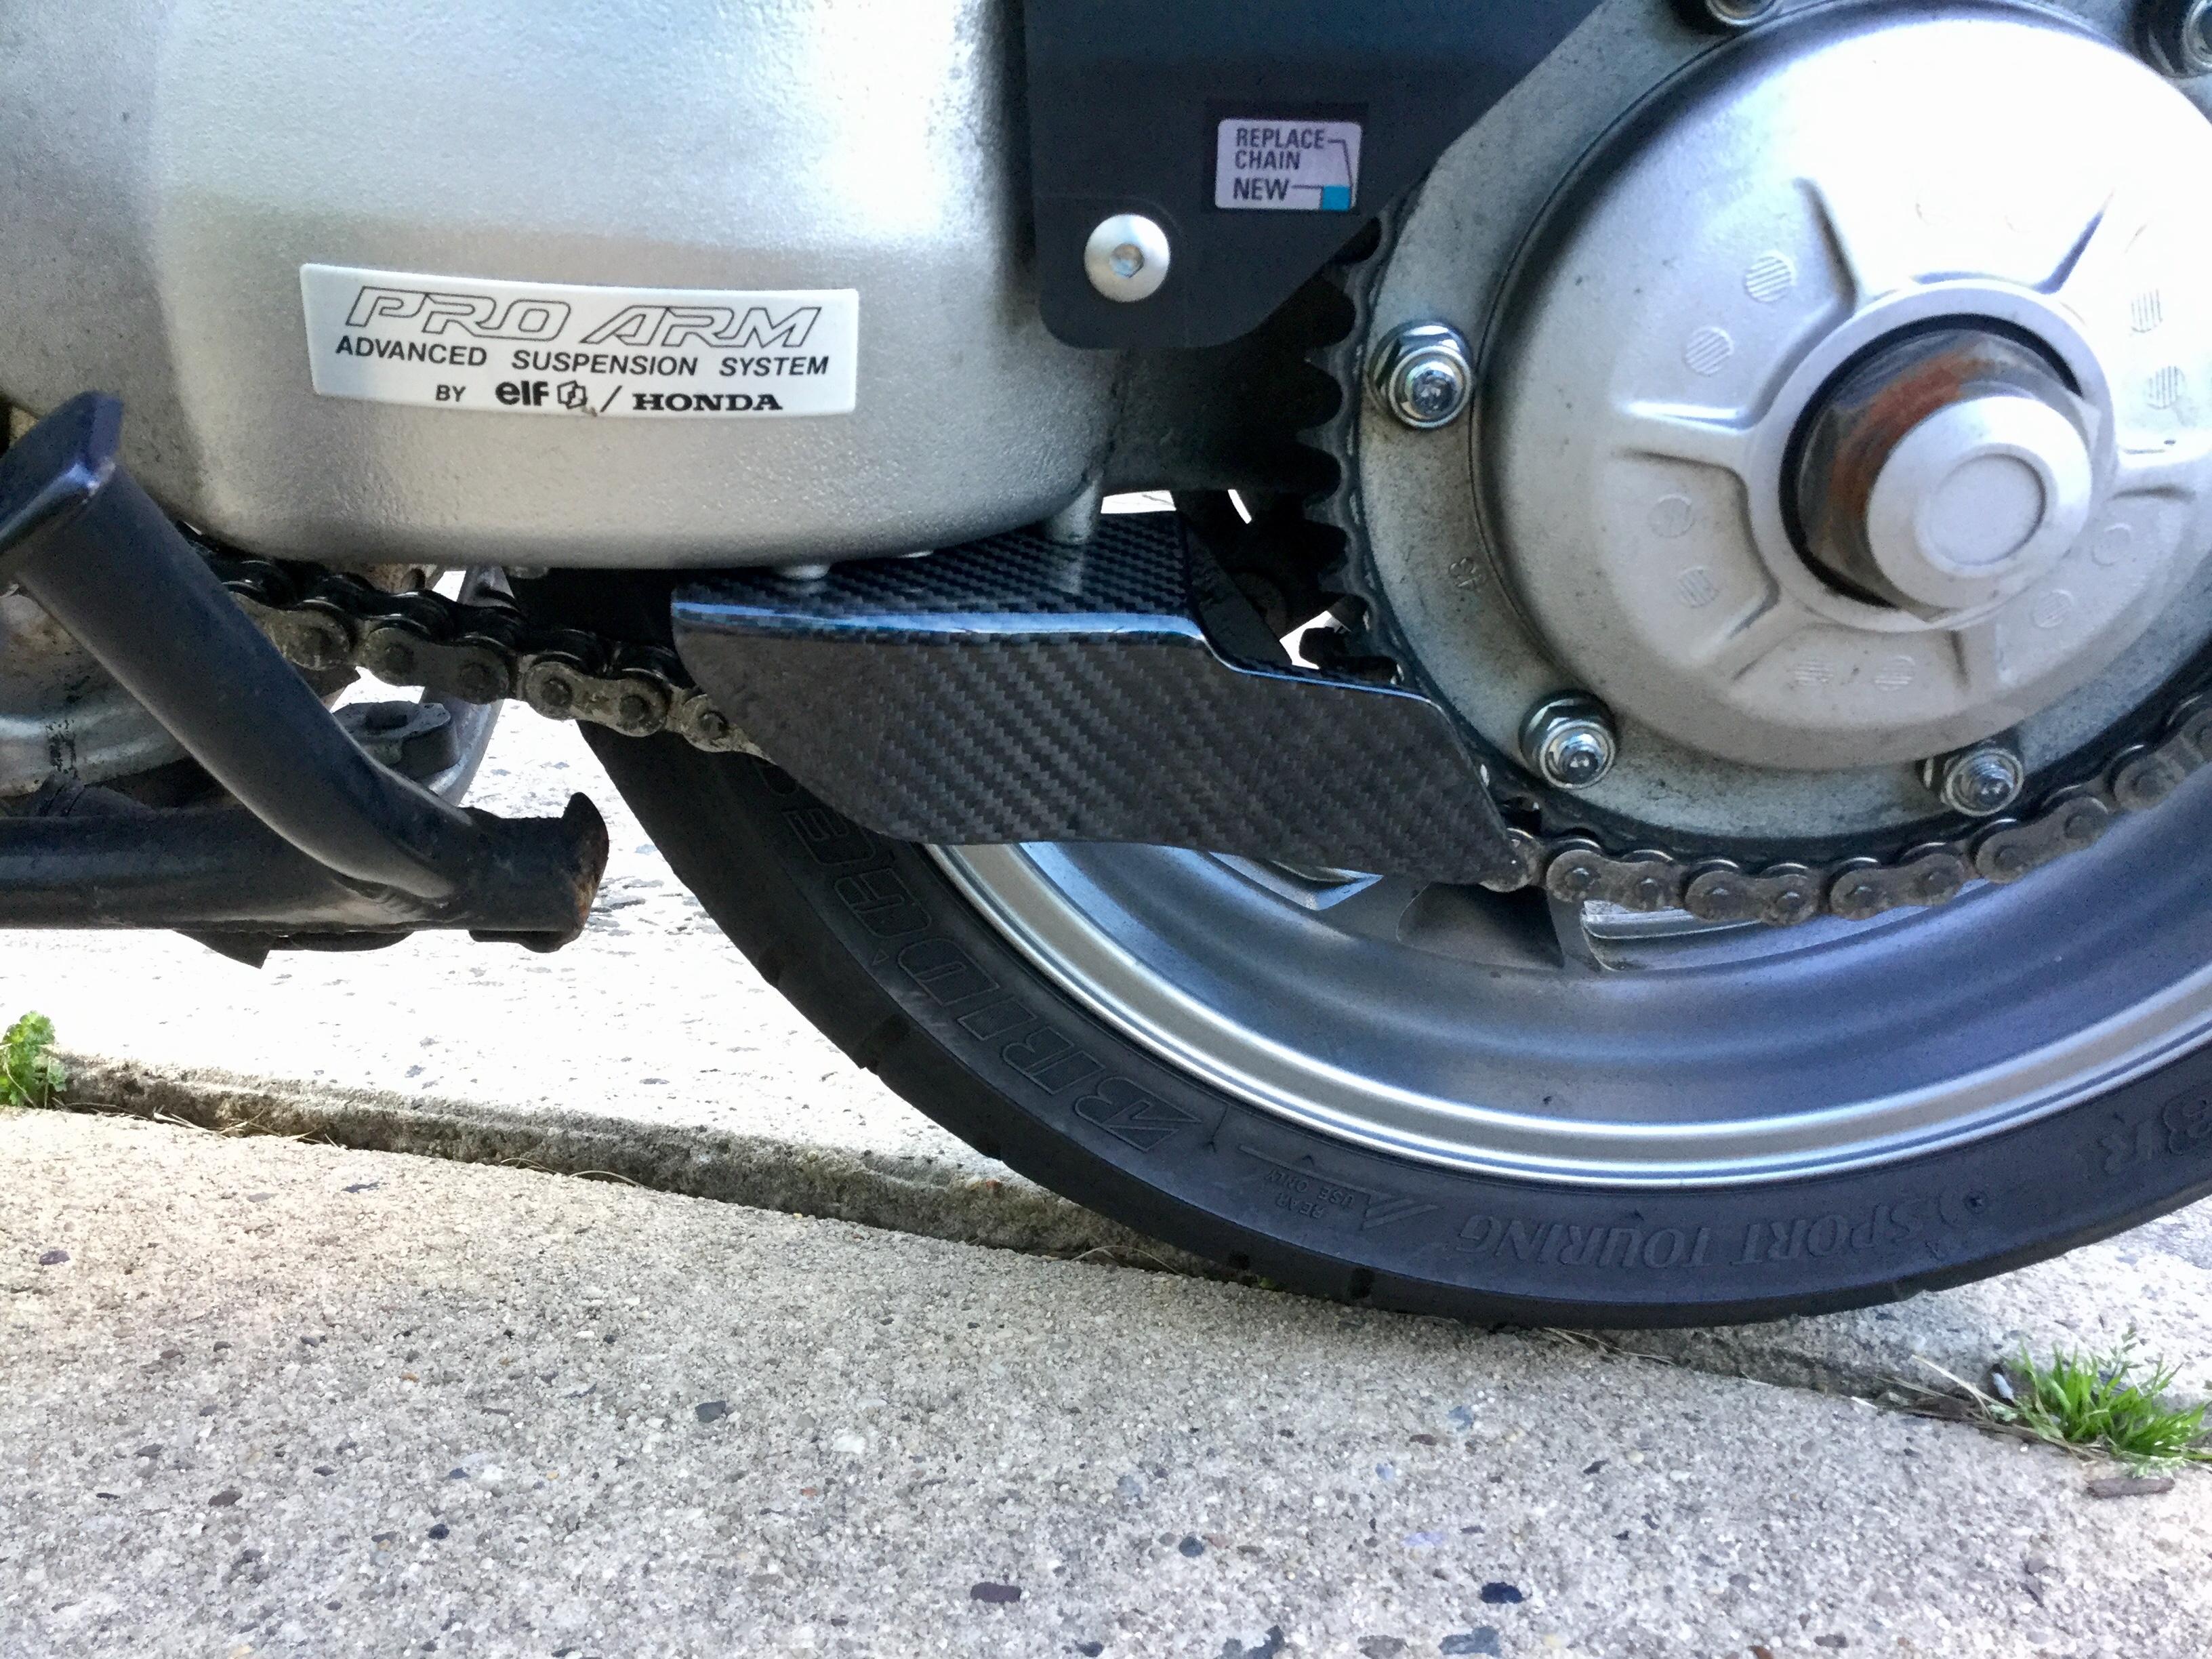
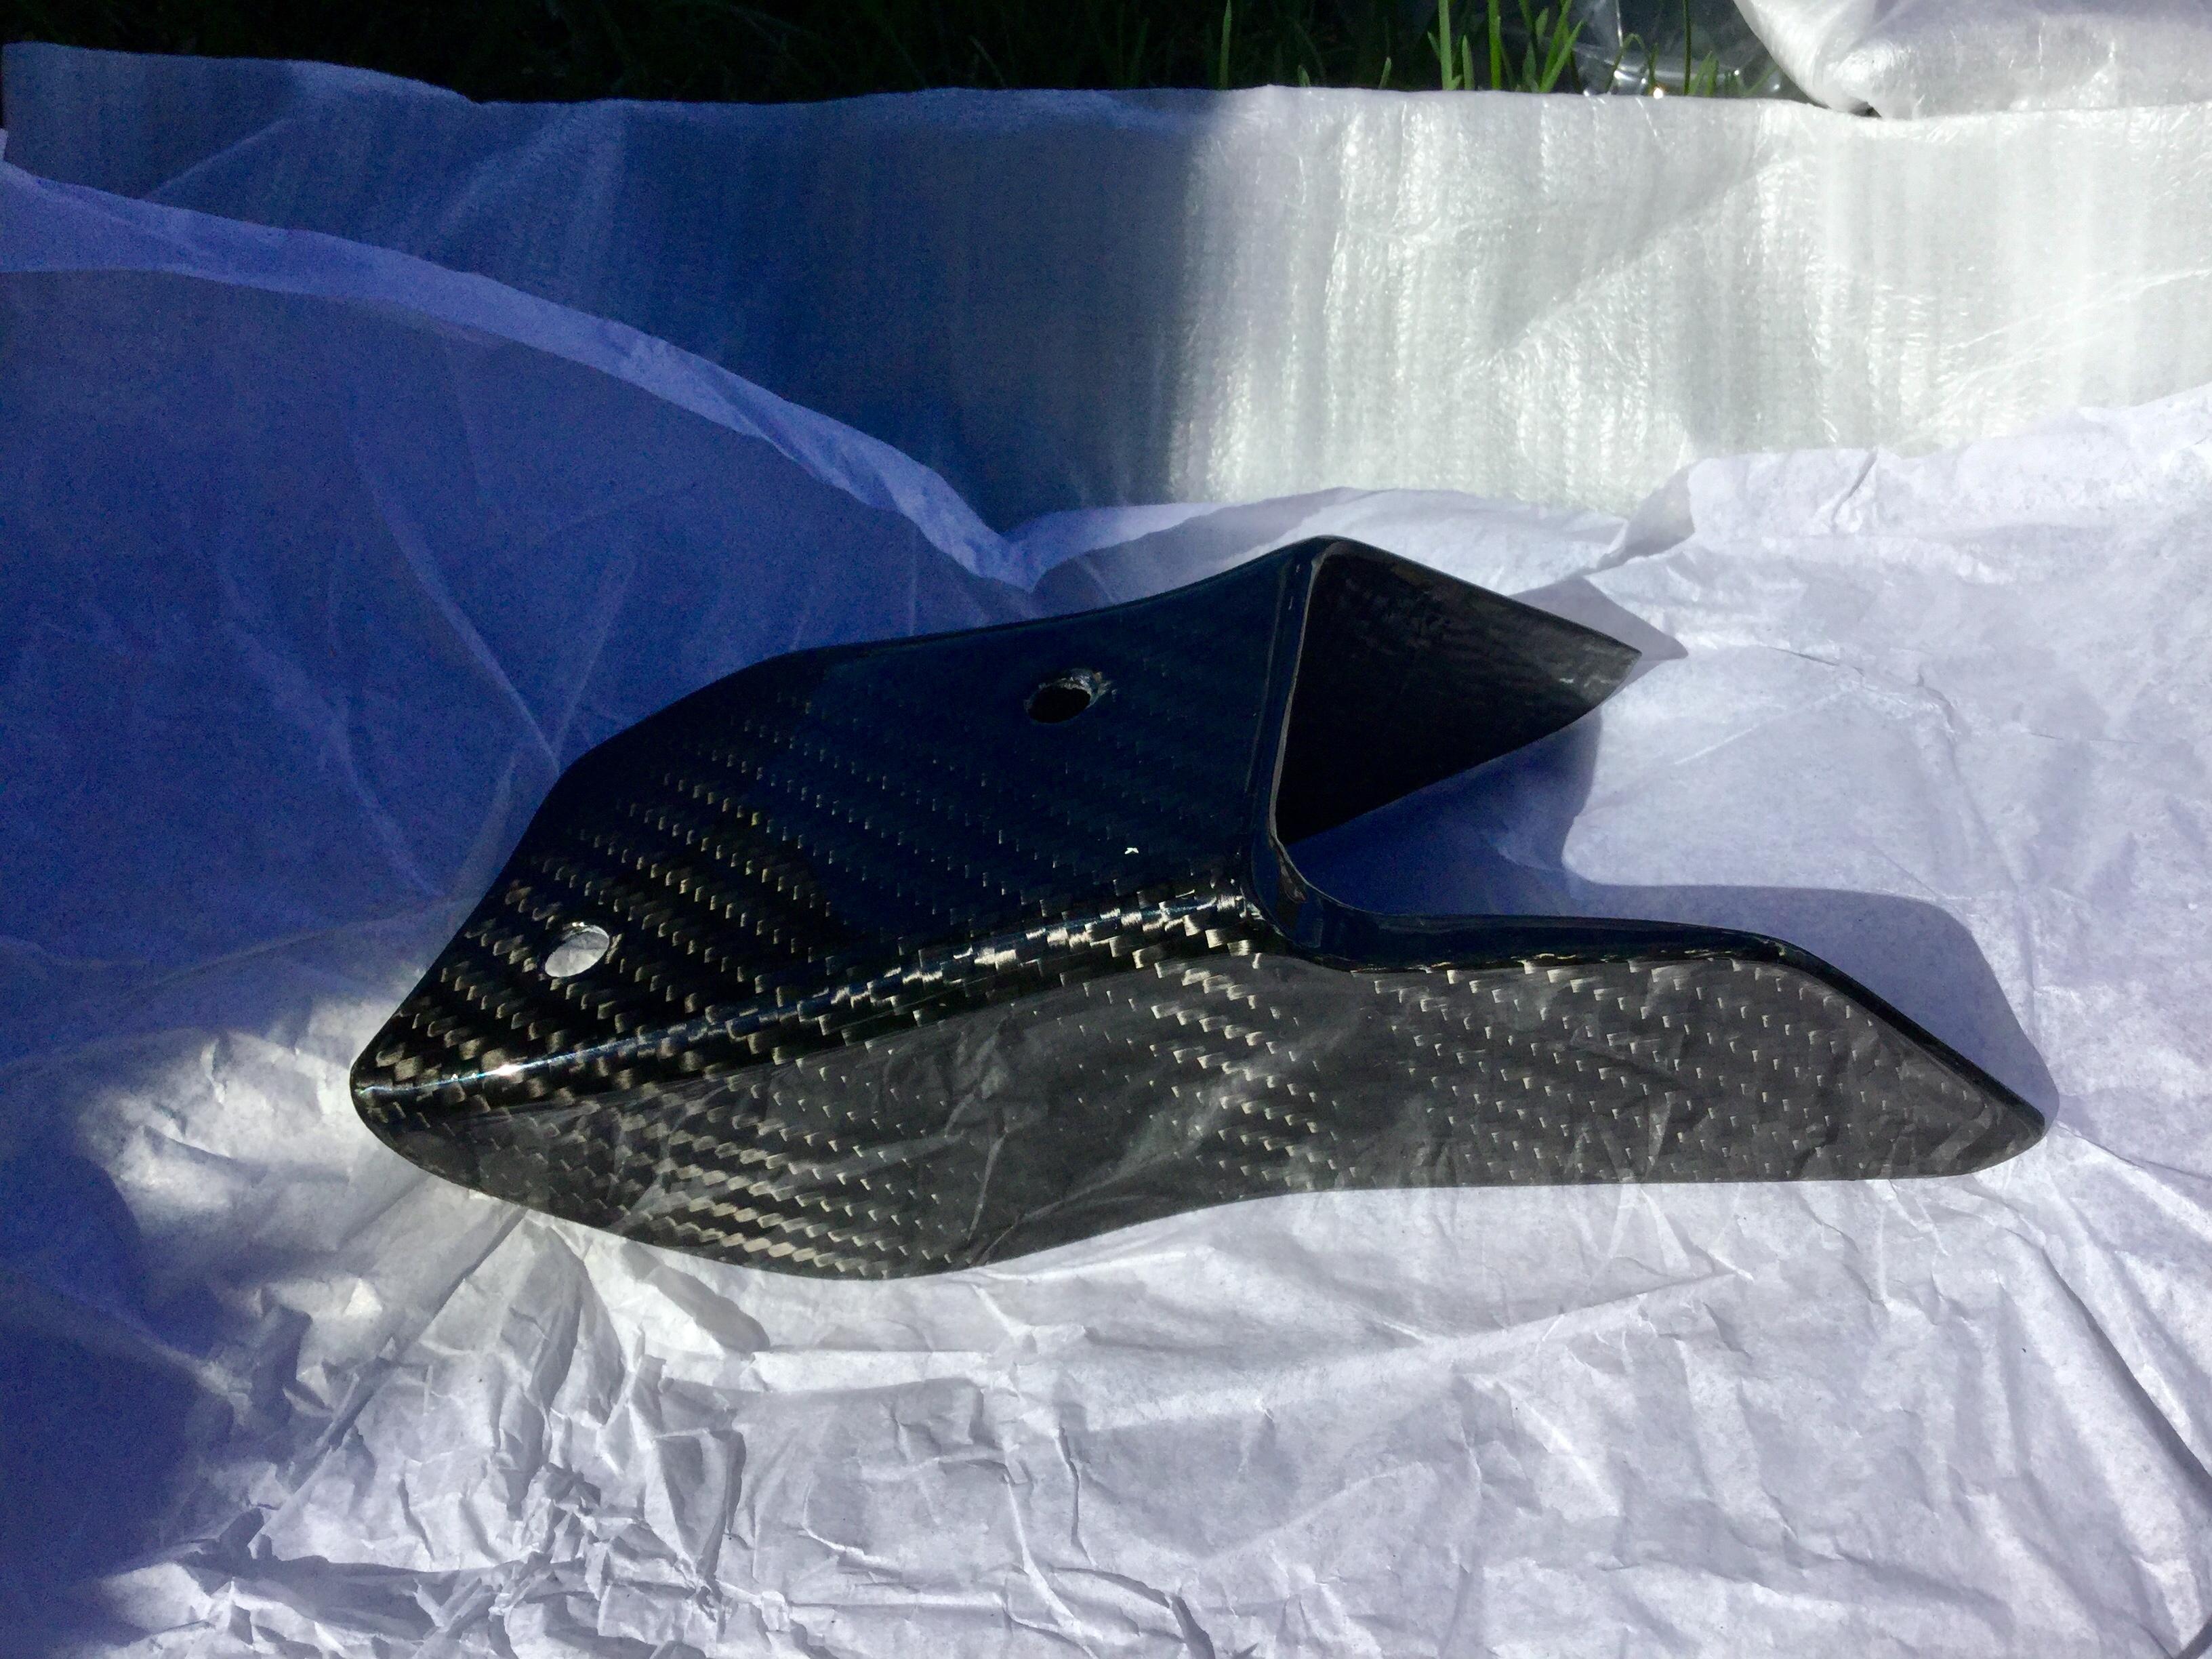
Carbon Fiber Racing https://www.carbonfiberracing.com/store/c75/VFR800_%2F_VFR1200.html Of course you cant purchase just the chain guide piece, you need to purchase a set that includes the under seat side covers as well. I’m not so keen on them, and may sell them off. I just wanted to add some panache not go over the top ‘full carbon build’ street fighter bs.1 point
-
Wanted to put some carbon fiber on here, thought the black plastic piece was a little unrefined looking.
1 point
-
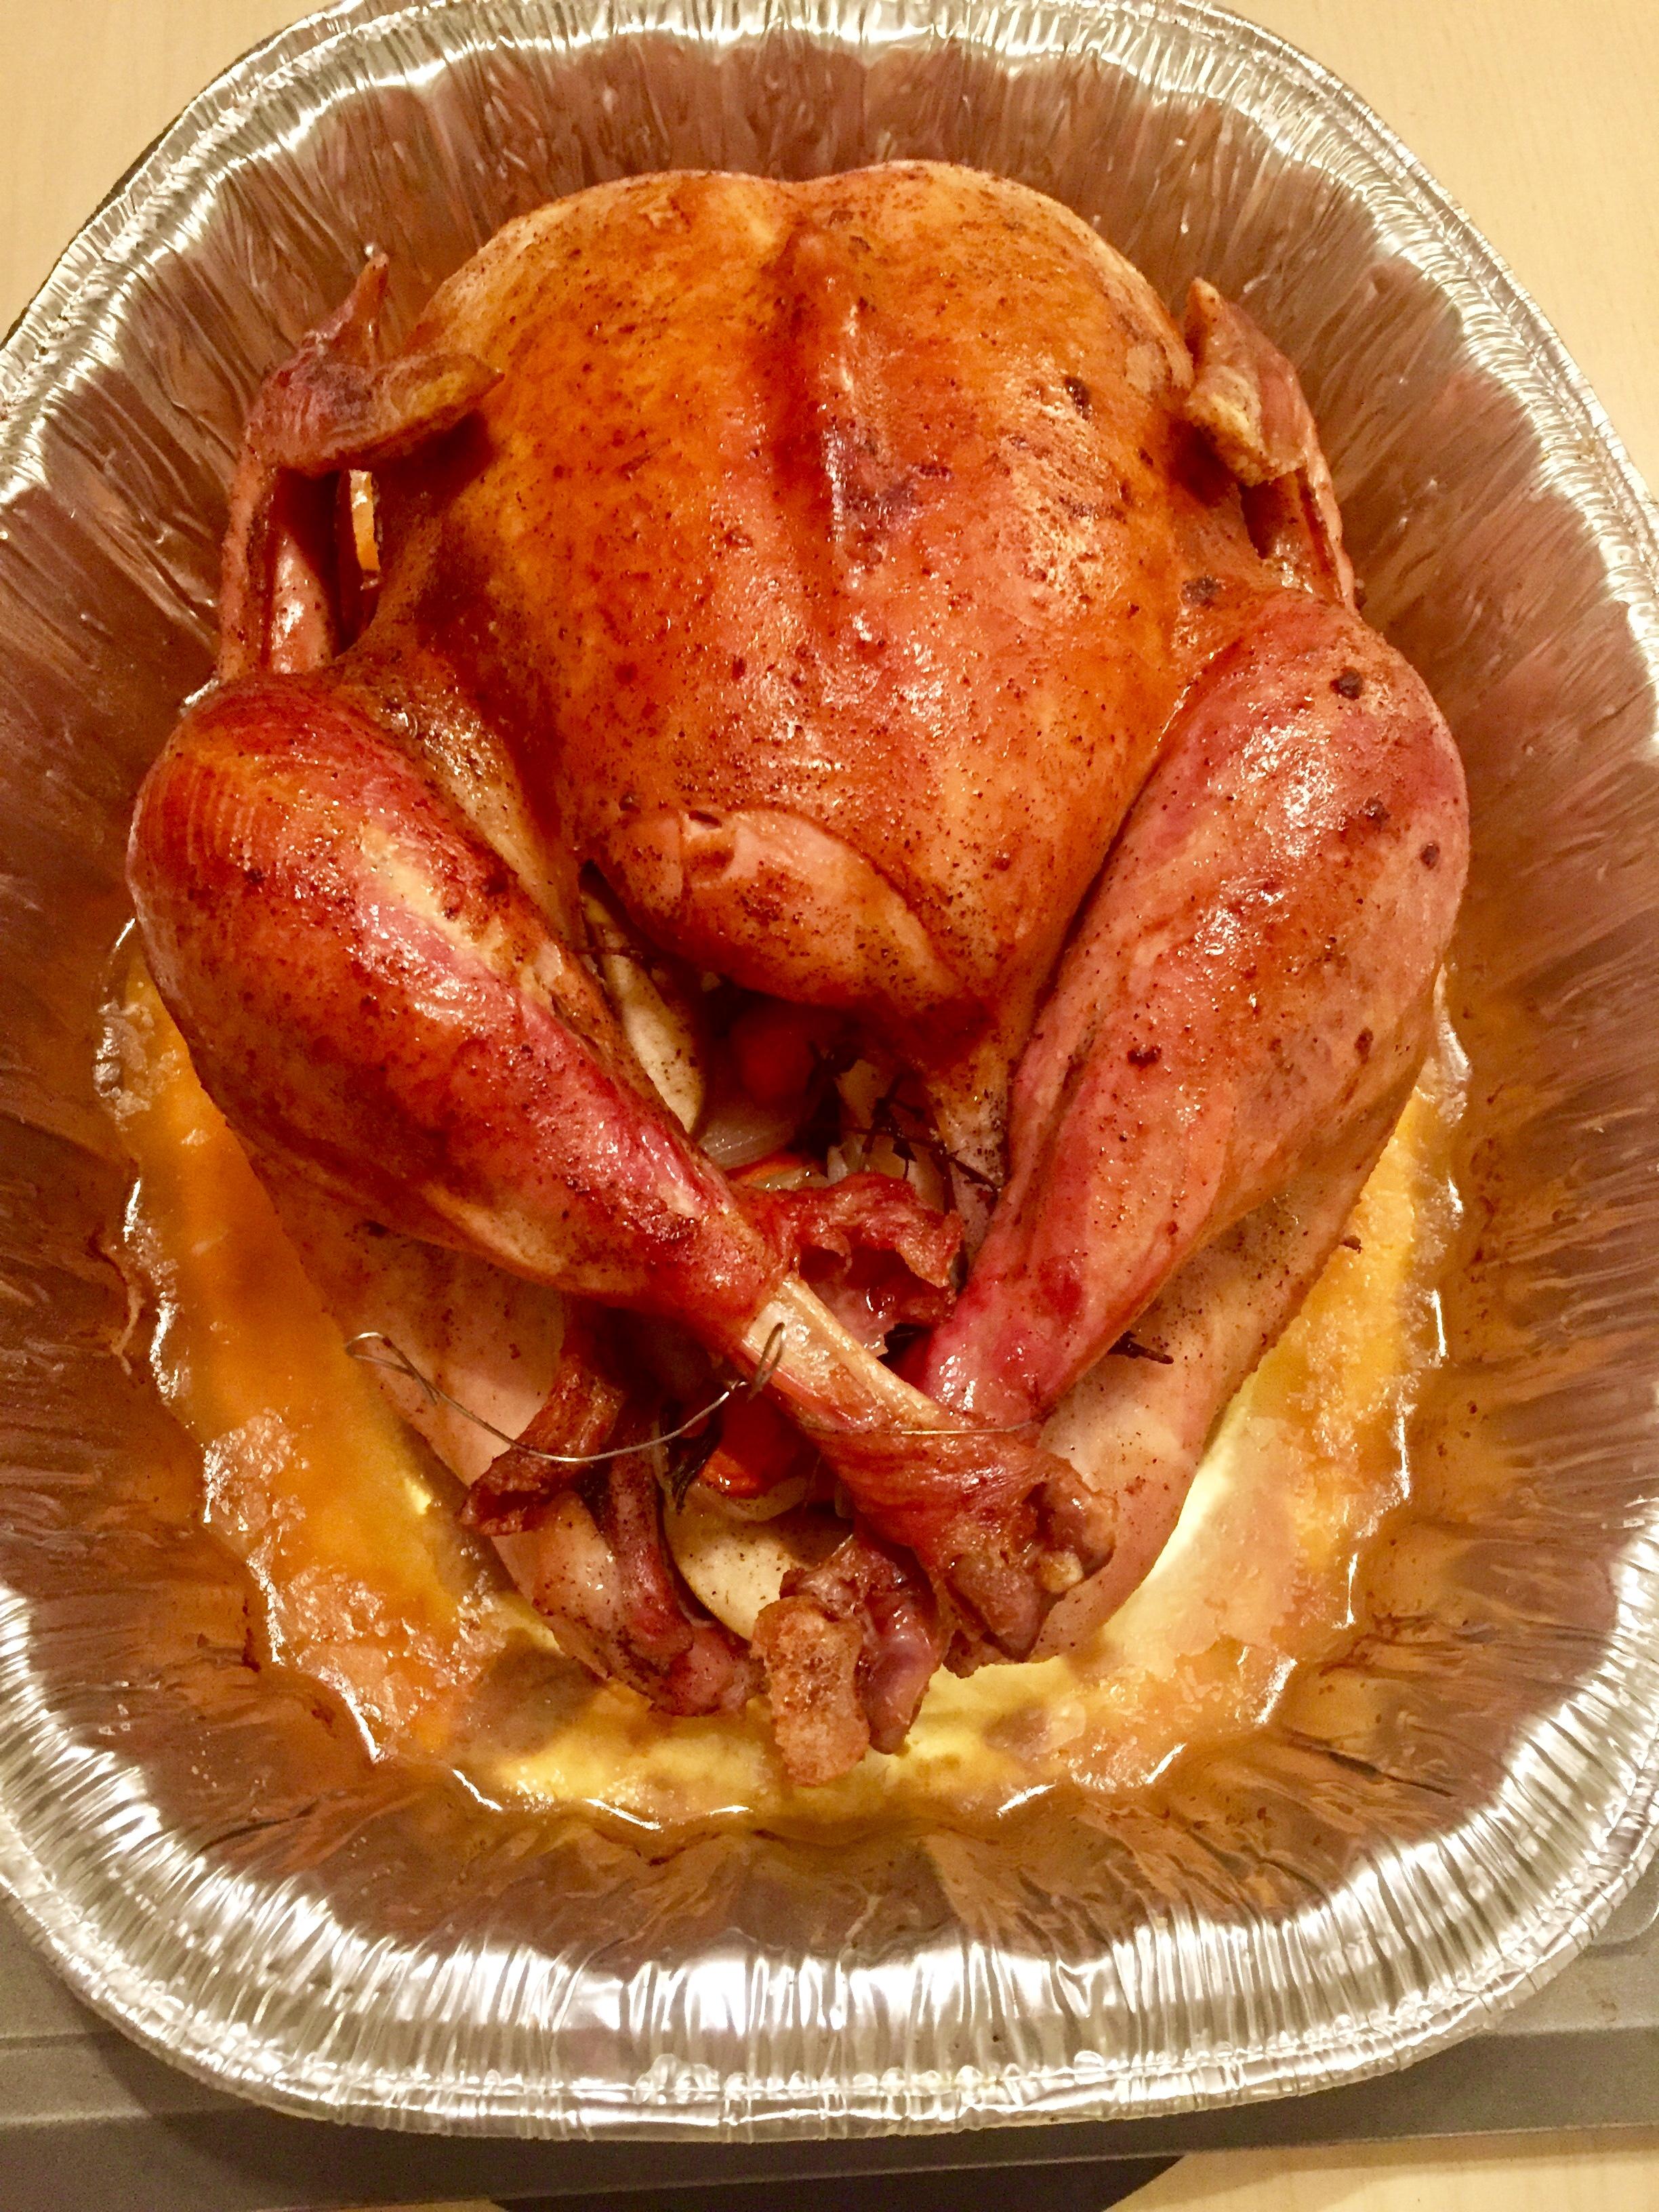
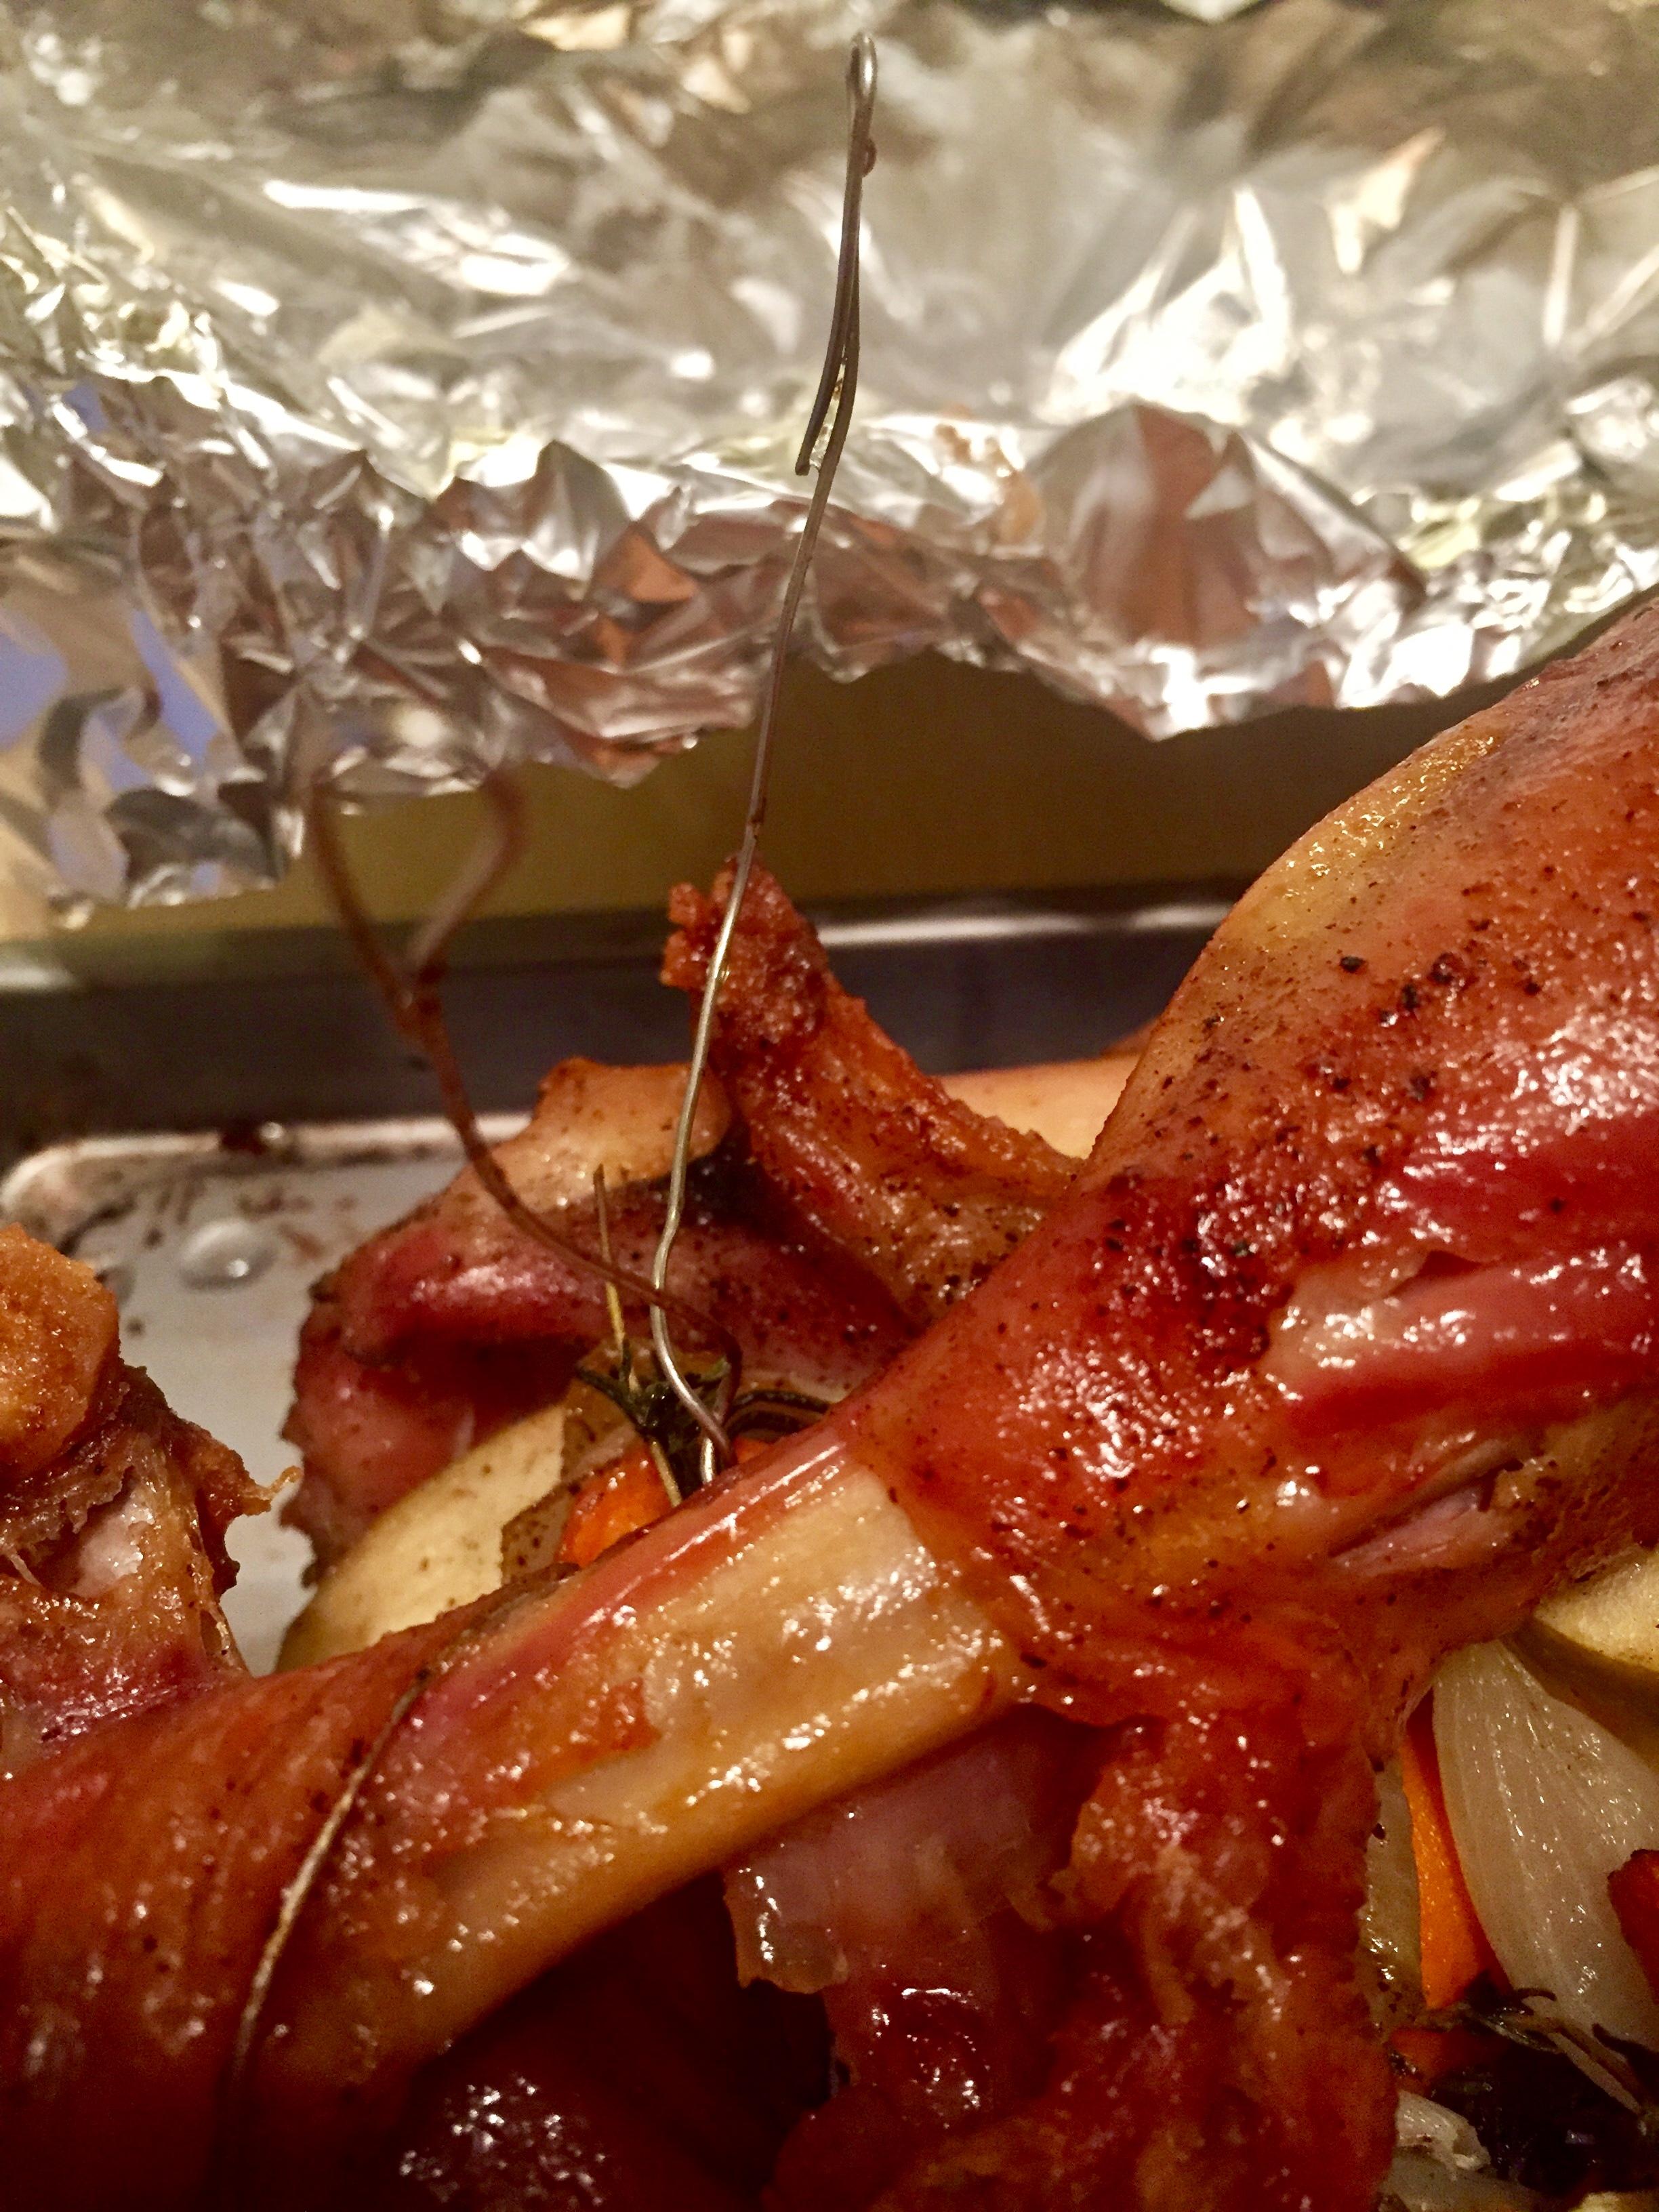
I recommend laying a few strips of bacon across the top of turkey - gives it more flavor and helps keep it moist. And, you know, bacon 🙂1 point
-
I’ve been focused on selling my last moto (SV650) for the past few months, to make room for the VFR to hibernate for winter. So this week saw the SV leave and the VFR finally get some indoor storage. It hurt me to keep it outdoors just under a cover for the past few months, it was just necessity. That said the most most moto related thing I did this week was safety wire my Thanksgiving turkey.
1 point