Duc2V4
-
Posts
3,486 -
Joined
-
Last visited
-
Days Won
66
Content Type
Forums
Profiles
Gallery
Blogs
Downloads
Events
Everything posted by Duc2V4
-
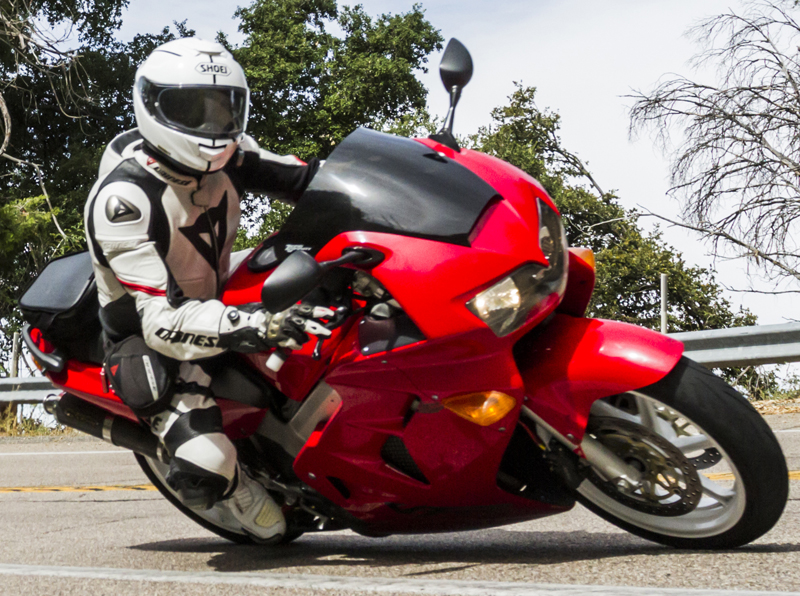
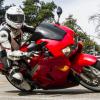
Welcome back! I do like the VFR in white. I also like the Stormtrooper helmet! Almost bought one for a spare but used the money to buy a new water pump and silicone coolant hoses instead!
-
TFI FUEL CONTROLLER BY DOBECK PERFORMANCE vs Power Commander
Duc2V4 replied to RossR's question in Modification Questions
Hmm, sounds interesting. Doing a cursory look at their site it appears that rather than having a computer to setup the tuning, they use "pots" to adjust the fueling. Just like their web site says, they make it work like a carburetor. Personally, I would do some google searching and see if you can find any customer reviews. ADJUSTING THE POTS Green Fuel Pot: (functions like a fuel mixture screw and pilot jets on a carburetor) Adjusts for the motorcycle's fuel requirements during light load operation, from idle through highway cruising speeds and steady throttle, at or below the rpm set by your rpm pot. We have found that manufacturers have generally leaned out the fuel mixtures for emissions to a specific rpm (see below). To set this pot, make sure the motorcycle is up to a full operating temperature, then while in neutral, pick a fast idle that is not easy to hold a steady rpm (V-twins 1800-2200 rpm and multiple cylinders 2500-3000 rpm), hold the throttle at that spot and then slowly and evenly turn the green pot clockwise from its minimum setting, while listening to the exhaust sound. You should hear the exhaust sound change form an irregular and uneven sound to an even and smooth one. You may also see an increase in rpm as you increase fuel, and if you continue to increase fuel past this point to where the revs start to fall back away, then you can stop and start returning the pot screw back to a point half way between where the exhaust sound first smoothed out and the point where the highest rpm starts to fall away. Yellow Fuel Pot: (functions like an accelerator pump - needle and slide on a carburetor) This fuel adjustment adds fuel into the fuel map whenever the throttle is opened rapidly. This pot needs to be adjusted from test riding, by performing brisk roll-ons in a specific gear, and by always starting at the exact same rpm. Try one clock position increases between roll-on tests until you can't feel any more improvement, and then go back to the last setting that improvement was noticed. Some models won't require as much fuel as others, so while increasing the yellow by one clock position increments if the motorcycle starts to decrease in throttle response, then turn the yellow back one and a half clock positions Red Fuel Pot: (functions like a main jet on a carburetor) This fuel adjustment adds fuel under large load conditions and is generally required when either air intake or quality exhaust system changes occur. This addition happens automatically using our unique load sensing technology, and similar to the road test procedure listed above in yellow fuel, test riding while increasing red fuel will find an optimum setting. RPM Switch Pot: All (except Harley/Metric V-twins) Sets the rpm that the green fuel turns off. This adjustment is achieved by setting the pot to 4:30 o'clock for 600cc and above multi cylinder sport bikes. Each clock position of this pot equates to about 1000 rpm's, so 4,500 rpm's would be half way between 4 and 5 o'clock. Verify this setting by revving the bike in neutral and watching for the green light to go out at the chosen rpm. -
Then go and check out www.gearbest.com I think you might find something there.
-
There is a company called Innovv that makes really good cameras and camera sets. I found them through another site gearbest.com and bought my first set of cameras through them. The current set I have on my 5 Gen I bought directly through Innovv as gearbest.com didn’t carry the latest version I own. When I get to my desktop computer I’ll see if I can look up some videos I made using the different cameras, the initial set and the current set. In the meantime, check out the gearbest website as they have a ton of options and they’re all in one place to browse through.
-
I took the one that feeds the license plate light. If that fuse blows, no big deal IMO. I think it’s close enough to the battery too.
-
You are correct sir.
-
The description sounds right but does seem to be over simplifying how many times it takes to clear the air out of a line. There are a few makers of these bleed nipples, Russell, Goodridge and Speed Bleeder to name a few. Regardless of which one you choose, essentially, yes, you open the bleeder, press the pedal or pull the lever and it allows fluid to flow out, no need to close the bleeder before releasing pedal/lever. You do need to be cautious and keep your eye on the reservoir, make sure it doesn’t go too low as to introduce air into the line from the start of the line.
-
If the traditional bleed method of, pump, hold, open, close, release is too tedious, try speed bleeder nipples or an in-line bleeder with a one-way check valve, makes for much easier bleeding. I believe Motion-Pro has two types of in-line bleeder tools. If I recall correctly, one tool has a hose on either end of the check valve and the other one has a socket built into to the tool, so you can open the nipple and leave the tool attached. Then again if your mechanic is willing to do it and isn’t going to charge you too much, that would be another route too.
-
BTW, the School does sell tires at the track and you can get a decent deal on them as well. I believe students get a discount, a set of Dunlop Q3+ was $225 OTD, well at least corner workers get them for that price. My friend bought a set some time mid-year. I believe they will even mount them for you but don't recall the fee.
-
If I'm not mistaken, OEM tires are not typically sold through normal retailers but only through dealers, which means you can't shop around as much as with other tire models. Meaning you'll probably pay more for a tire that is really just a middle of the road tire. (No pun intended) You can get much better rubber, for less and find them available in more places than OEM. My recollection of the OEM tires (Dunlops) that came on my 09, the rear squared off and the front cupped very badly and I had to change them at about 6k miles. Of course these were from a few years ago, so newer OEM tires might be a tad bit better but I look at them similar to ink cartridges that come with new printers, yes they work but they really aren't meant to last that long. YMMV (literally)
-
As of today (10/9/2018), ASV levers are still made in the USA, so no "also made in China" happening with their product...yet. Although I would suspect that there could be knock-offs being made and sold by unscrupulous resellers. Personally, I do not have an anti-Chinese product stance but can say the Chinese levers I had prior to getting authentic ASV levers, did suffer from color fading (right away) and the pivot holes getting out of round after a couples of years of use. Being that they are priced so cheaply, I guess one could toss them out an buy another set and still be below retail prices of authentic ASV or Pazzo levers. I prefer to just have a good quality product from the get go, so now have all three of my bikes with ASV levers installed. Even without an anti-Chinese point of view, I really do not like the typical Pazzo knock-offs, or even authentic Pazzo levers for that matter. I prefer the ASV style adjustment knobs (Even OEM have them) vice the preset index adjustment the former have. I like the ability to be able to fine tune the lever position versus having a predetermined position. I also like the quality of the ASV levers, even after a couple of tip overs (all three bikes) and even a low side crash on two different bikes with ASV levers, the levers never broke, they came out a bit scratched, but they never broke. Since I have no experience with the Chinese levers in similar fore mentioned incidents, I cannot comment as to how they would fare in these similar instances. In all fairness, I actually still have my Chinese levers, I keep them in a travel bag when I go touring, just in case me or someone else in my group suffers a crash and loses a lever, so far so good with my ASVs in the past two cases. To me, the knock-offs are still good enough to use but just not my cup of tea. I even have a set of Chinese made rear sets on my 5 Gen, so again, no worries about Chinese products, as long as the quality meets my expectations.
-
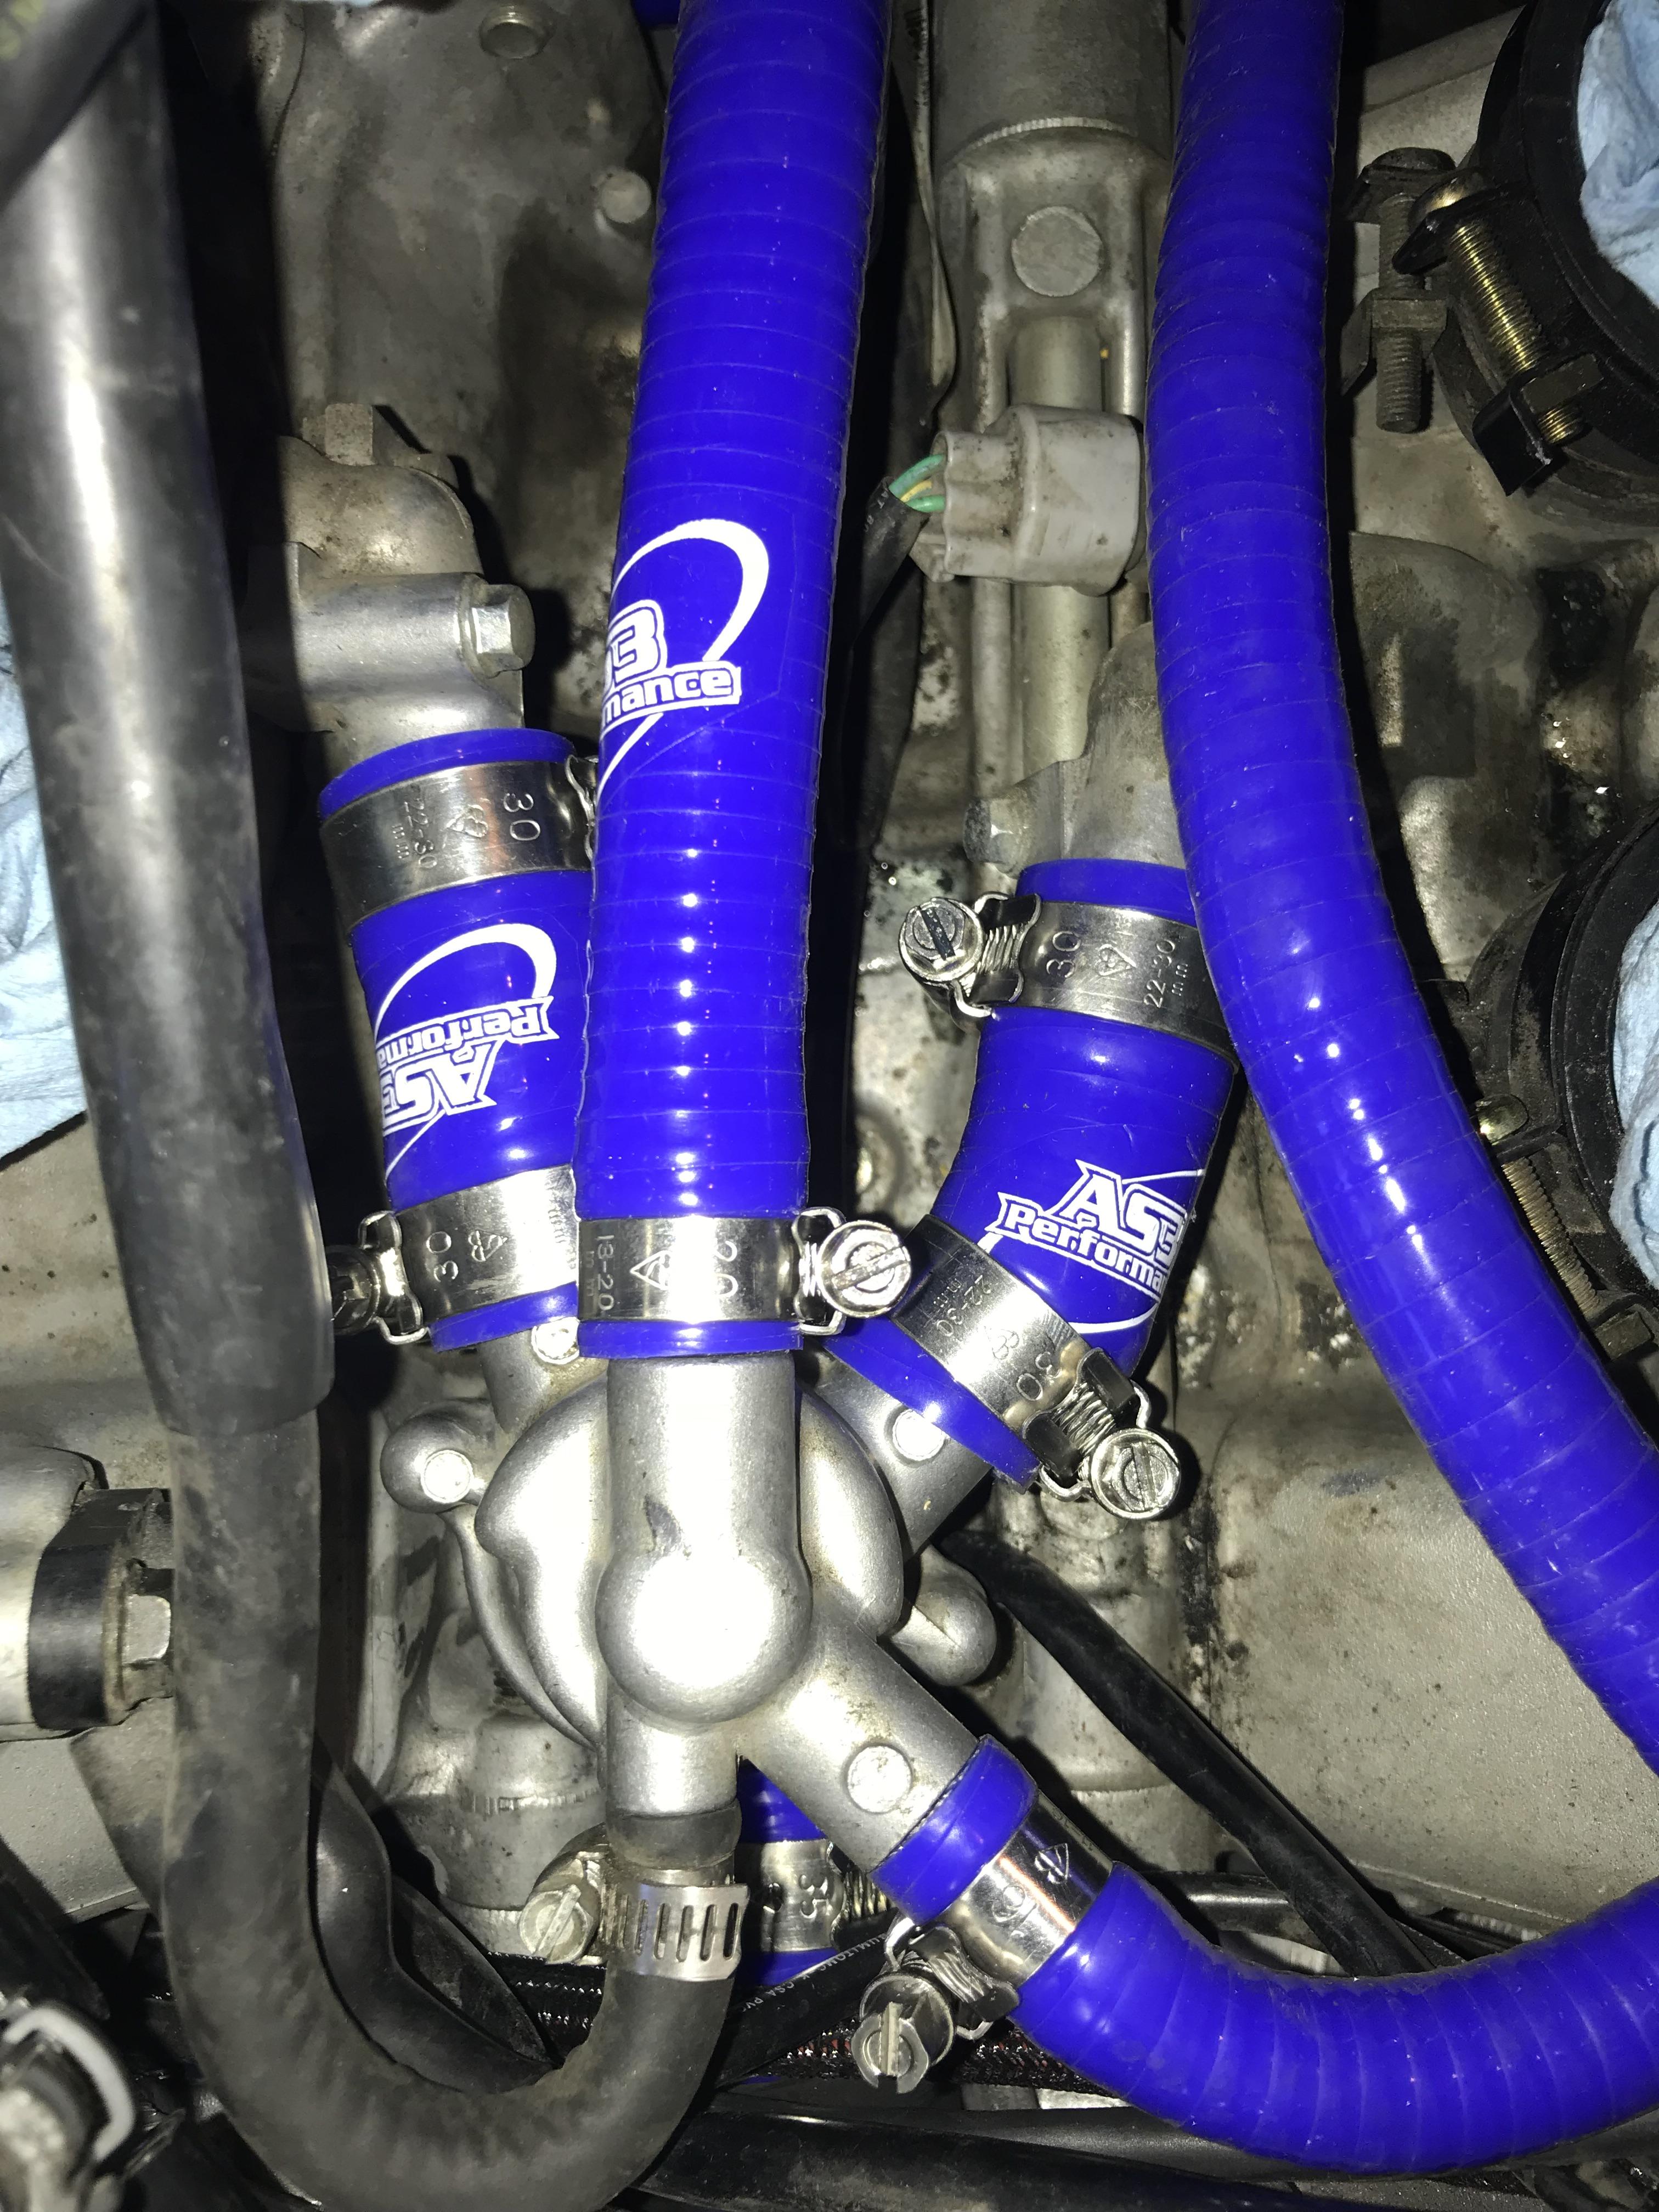
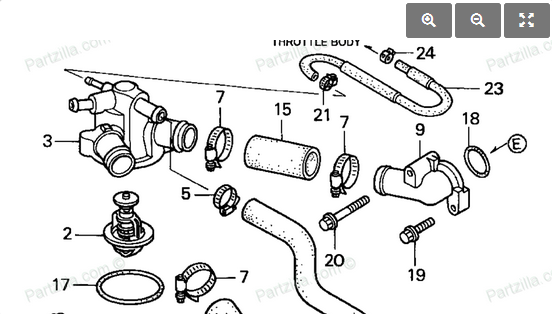
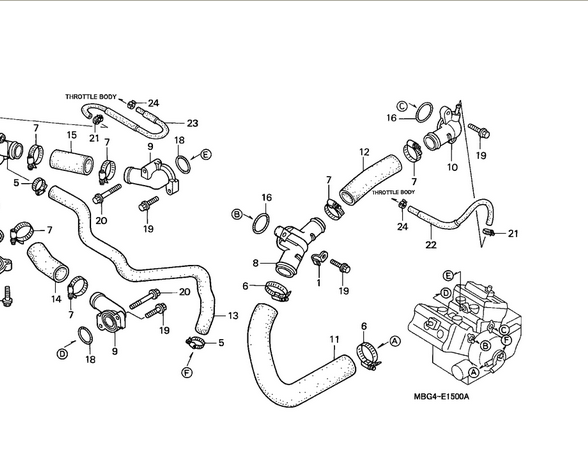
I thought I had a couple of pics that would help but it appears that Only have one that would show one of the hoses that goes to the wax idle unit. However, I do have screen shots of the exploded view of the Honda parts list, Hopefully this will help.

-
Delinking Left front brake, vfr800 2001,anybody tried this?
Duc2V4 replied to falken's question in Modification Questions
Although your idea looks good on paper, it will not work on execution. The left fork slider has a larger opening for the axle, which is also part spacer if you will. So using a right fork slider would mean you would need to provide a new axle or modify the one you have. If I am not mistaken, I believe that the de-link can be done with stock hardware but does require some modification to the left caliper/SMC. This would be creating a link between the main front hose and the hose that feeds from the rear system on the caliper, essentially a short jumper hose. Then disabling the SMC plunger but retaining its mounting points. I say this how to do it because I recall seeing this method posted before but cannot remember if it was someone on VFRD or VFRW. Maybe it was on both sites, can’t remember for sure though. Maybe someone who has done what you’re looking to do or has seen or done the method I described above will chime in. Hang tight I’m sure other suggestions will roll in soon. -
Daugherty Motorsports Suspension Upgrade
Duc2V4 replied to RC79NC001's topic in Eighth Generation VFR's
Had the same result with all three of my bikes serviced by DMr. The first was my 6 Gen and this being my commuter/tourer, I immediately felt the highway get smoother. The 5 Gen got similar treatment but was setup for track and sport riding, very happy with the results there too. That left my ‘95 Ducati Super Sport needing an update, as it had been several years since it’s suspension had been touched, again a welcomed transformation was received. I will always recommend suspension update as the first VFR mod anyone looking to improve their stock bike, as this for me, has been the best ROI I did to any of my bikes, that includes exhaust and engine modifications I.e. Power Commander, RapidBike, etc. -
Good report and yeah, sometimes things aren’t quite what we think they are. Better to find it near home than miles away on a mountain road somewhere.
-
What % of Gen 6.5 VFRs have had no RR or Stator fail?
Duc2V4 replied to VFR80025th's topic in Sixth Generation VFR's
I have a 2009 and I suffered from the Stator/RR issue at ~45k miles. I was almost stranded in a canyon but was lucky enough to naot stop until I came out of the canyon, that is when I went to start the bike and found my battery DEAD! I was able to reach out to a friend and we were able to get a battery from a Honda dealer only a few miles away. Once I got home, i found the Stator/RR connector was melted and when I took the Stator out, found it to be a bit crispy! Although I was very diligent in inspecting and cleaning/applying a corrosion preventative on the connectors, I did ignore a few signs that happened between my typical inspection and that ended up biting me in the behind. Along with my standard practice above, I also added a volt meter and will constantly check it when I travel. So far I have had trouble free mileage since the replacement of Stator/RR and battery. (knock on wood). That being said, I am rounding up to another 40k miles since the replacement so I have been really monitoring the volt meter and paying more attention to any little sign that I might have ignored the last time. What were the signs you may ask? Little things like harder starts, drops in light brightness when starting, changes in MPG. A mile or two is probably nothing to be alarmed about but when it became 4-5 miles on the average and even more on a coupe of occasions, I think I should have stopped and looked into things more. The price of being "too busy" with work and not paying attention to things that I should have. -
Your 2015 is an 8 gen, I was referring to the 5&6 Gens, as they don't have quick shifter as a bolt on option. So not sure if having a Power Commander installed on 5&6 gens allows for bolt on QS using the stock shift lever or is more like the Rabid Bike requiring a link type shift mechanism.
-
I have one currently installed on my 09 and have one that will be going on my 01, once I get off my tush and back to working on it. As for my 09, I agree, the bike runs really good and feels to have even better mid range now that I have the 98-99 catless headers on. Since the headers didn’t have O2 bungs, I had some put on so I could utilize the “auto-tuning” capability of the RB module. So far I’m happy with it but haven’t really played with the software yet. Figured I’d leave well enough alone for now. Most likely I’ll be digging into it once I get the 01 fitted though,
-
Ironically I have BeIN sports channel but hardly ever watch it. I mostly stream my racing. Yes, I have to pay for subscriptions to MotoGP and WSBK but not for Moto America, as they post their races on their website and you can watch for free. I believe it was when MotoGP was on the Speed channel and it was interrupted for NASCAR updates, not a race, not an even but just an update! I was livid and it was at that point I went to the MotoGP website and subscribed. I’m not one for wasting money (yeah right, you have three motorcycles) but I will spend money if I feel it’s worth it. Because I often travel, I can sometimes find myself in a hotel during a race weekend and since most hotels have somewhat decent Wi-Fi, I will typically bring my iPad and stream the race live or sometime later in the day, depending on time zone. You also get access to years of previous races and other little tidbits and info so I’m happy with my subscriptions but would have to say, it does suck if you HAVE to pay in order to watch certain programs but if you chose to, then that’s a different story. Not interested in many other sports so not sure what else BeIN shows that would have my interest but hopefully you can find whatever programming you’re looking for on some other outlet. Good luck.
-
I’m with you, kind of why I posted, so simple on the 8 Gen, not so much on the earlier Gens. Also not sure how the Power Commander handles QS and whether one needs a similar setup to the Rapid Bike. That being said, since I use the 5 Gen predominantly at the track now, I felt it was worth giving it a go but to add insult to injury, I’m still not 100% done yet. Too many weekend interruptions! Enjoy the quick shifter.
-
I have the Rapid Bike tuning module on both my VFRs now and it comes with a quick shift option BUT it also requires a gear shift lever that has a link arm to engage the gear shaft, versus the standard issue shifter on the 98-09 models, where the lever attaches straight to the shaft. Basically, in order to use a quick shifter with the RB module, you have change out the rear sets to aftermarket ones that have the shift link arm. Since the modification level is more than just adding a QS module, I am only going to do this to the 5 Gen, I really don't think my commuter/tourer needs a QS, especially after having done the amount of work it took on the 5 Gen to get that ready for one. Having ridden two different bikes at the track that had quick shifters, I can see how they make track riding a bit better but can't see the cost/benefit return being worth it to also do the 6 Gen. Perhaps if it was as simple as the new 8 Gen, I might have considered it but don't find it necessary on a mostly public road ridden motorcycle. Here's how I ended up after buying Sebspeed's 5 Gen to CBR929 rear set adapters and some aftermarket rear sets. This was the test fit for the shifter side. This is how the brake side ended up. Yes, I could have de-linked the brakes but quicker, easier and cheaper to just do what I did here.
-
What kind of Oil/Filter do y'all use?
Duc2V4 replied to Katastrophe18's topic in Eighth Generation VFR's
22. 5W30 Motul 300V Ester Core 4T Racing Oil, synthetic = 112,464 psi This Motorcycle Road Racing oil is from France and comes in liter bottles (slightly more than a quart). At the time this oil was tested in spring 2014, it cost $24.25 per bottle. And with the shipping cost added to that, the final cost was about $33.00 per bottle (shipping was all inside the U.S.), making it THE most expensive motor oil I’ve ever tested. zinc = 1724 ppm phosphorus = 1547 ppm moly = 481 ppm calcium = 3141 ppm TBN = 7.4 This oil contains sufficient amounts of the components required (detergent, acid neutralizer, etc) for normal change intervals in street driven vehicles. But, it has way too much zinc/phos for use in cat equipped vehicles. However, it is well suited for Race Cars, Street Hotrods and Classic cars. -
When I bought my tire changer, it was a full kit, it had the changer, the balancer, plus a couple of spoons, the little “yellow thing” (as it’s called), the xtra hand tire clamp and the mount/dismount tool. I recall the large cone adapter being a bit less when I bought it ~$90 but I’d have to dig up receipt to know for sure, not that it changes the cost of it now. I don’t remember the exact date I bought my kit but the whole deal was about $650 (shipped) and has paid for itself and then some. Now a lot of my friends and a few forum members, who I’ve only met when I changed their tires, come over and either get their tires changed and balance by me. Or in some cases, my friends come by and use the machine, usually for the price of a six pack of IPA (Lagunitas if you’re wondering). If you have multiple bikes, the changer is almost mandatory, unless you know someone who has one, but if you’re the weekend type of rider who’s tires last more than a couple of years, probably not a worthwhile investment. Well, unless you start a tire changing service, then I’d say you should probably charge money, rather than IPA...then again if you drink a lot, it could pay for your habit!
-
No Mar has one as well. It works with their balancing stand. https://www.nomartirechanger.com/Large_Cones_for_Motorcycle_Wheel_Balancer_p/bl-largecones.htm
-
You can also look into Plasti-dip. Spray it on and peel it off.