Guest Posted October 1, 2013 Share Posted October 1, 2013 If the front axle was hammered through-- didn't that destroy the bottom fork leg ( maybe need a machinist to make up a sleeve? GL, Jeff Link to comment Share on other sites More sharing options...
mcrwt644 Posted October 2, 2013 Author Share Posted October 2, 2013 Three pins? That "orphan" connector is probably for the optional digital clock (optional on US-spec bikes), so don't worry about it. Temp sensor wired backwards? Sounds like the bike has had a hard life, but you're getting it sorted. Ciao, Makes sense, I just saw that in the service manual The temp sensor I believe is bad. 'Thermosensor' as Honda calls it. The manual states that if it does this during their 'test' it's the thermosensor. I suppose my choice of words wasn't too good. The axle wasn't pushed through, just hit hard enough to actually mushroom the end on the left hand side of the bike as you sit on it. I'm getting block off plates, I hate this PAIR system. I never knew it was so in the way until I didn't take this one off. I very well may go looking for a set of calipers since these could be just too far gone. Does anyone have any other tricks for getting them unstuck? I tried the air compressor, but not for long at about 120 psi, but I was nearing the end of my 'shift' and getting too tired. What were stock main jets in the third gens? This one has 124's in it, but it certainly has adjustable needles in it too. While the carbs were off, I polished the vacuum slide sleeves ('in' the carbs themselves) and the velocity stacks. With regard to all of the plastic shielding, are most just overkill from Honda, and which ones, if any, are necessary? I'll be searching ebay for tank rubbers, block off plates, calipers etc...Until the next update (maybe pics) adios Link to comment Share on other sites More sharing options...
mcrwt644 Posted October 2, 2013 Author Share Posted October 2, 2013 front two cylinders apparently do not have exhaust gaskets. Missing a exhaust bolt on the right rear cylinder...might as well go ahead and do that when I drop the subframe to do the pair. Right fork seal is leaking. Brake calipers will not come unglued...a set on ebay for $35 usd. Didn't do much on her today. Rinsed the overflow and put it at the right level, took some oil out of the crank case to make the level perfect, put the carb shield back in, dilectric greased all the electronic couplings, and cleaned up a bit. Prioritizing the purchases. Brake calipers come first and then a slew of other things. Link to comment Share on other sites More sharing options...
Member Contributer gll429 Posted October 2, 2013 Member Contributer Share Posted October 2, 2013 front two cylinders apparently do not have exhaust gaskets. Missing a exhaust bolt on the right rear cylinder...might as well go ahead and do that when I drop the subframe to do the pair. Right fork seal is leaking. Brake calipers will not come unglued...a set on ebay for $35 usd. Didn't do much on her today. Rinsed the overflow and put it at the right level, took some oil out of the crank case to make the level perfect, put the carb shield back in, dilectric greased all the electronic couplings, and cleaned up a bit. Prioritizing the purchases. Brake calipers come first and then a slew of other things. Brake calipers ?? unglued?? all you have to do.. remove the pads.. pump until the pistons come out if that doesnt work.. take off the caliper. and use an air compressor to push the piston out... 100 psi does wonders.. just make sure the pistons are facing down on a block of wood or something. Link to comment Share on other sites More sharing options...
Member Contributer Dutchy Posted October 2, 2013 Member Contributer Share Posted October 2, 2013 well...... he wrote he did try to 120psi...... Sometimes things really are FUBAR Link to comment Share on other sites More sharing options...
Member Contributer gll429 Posted October 2, 2013 Member Contributer Share Posted October 2, 2013 well...... he wrote he did try to 120psi...... Sometimes things really are FUBAR whoops i missed that.. deaf AND blind today!! too bad he didnt contact me.. i have all the stuff he needs Link to comment Share on other sites More sharing options...
Member Contributer YoshiHNS Posted October 2, 2013 Member Contributer Share Posted October 2, 2013 I still want to know how he's riding and stopping if the front calipers are that stuck Link to comment Share on other sites More sharing options...
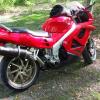
Beck Posted October 2, 2013 Share Posted October 2, 2013 Dang, that last owner was pretty hard on that bike!..... I hope you did not get her too late..... Good luck on the re-build! Link to comment Share on other sites More sharing options...
mcrwt644 Posted October 2, 2013 Author Share Posted October 2, 2013 yeah, brakes I couldn't even squeeze them shut. now they won't come out, at all. set on ebay for $35. PO hadn't ridden it in some time...yes, it's a work in progress for sure and she was neglected big time. I'll post some pics soon, but like I said, it's just a sad looking naked 3rd gen. Brakes are FREE! rebuild of calipers in progress. missing 'spring' plates too! Clutch is bled...time for bed :) Link to comment Share on other sites More sharing options...
Member Contributer JZH Posted October 3, 2013 Member Contributer Share Posted October 3, 2013 front two cylinders apparently do not have exhaust gaskets. The OEM exhaust gasket is a collapsible copper "donut", which can get flat as a pancake if re-used and the headers are torqued down hard enough. The gasket might be there; you just cannot see it. Feel around the exhaust port with a steel pick; there should be no "lip". Ciao, Link to comment Share on other sites More sharing options...
mcrwt644 Posted October 3, 2013 Author Share Posted October 3, 2013 if they are there, they are flatter than any exhaust gasket I've seen and I've seen a ton. I can't even discern a color difference when scratching where they should be with a pick...can't even catch any sort of lip with a pick Found a good fork seal I believe, so I won't have to buy them, just yet...budget, budget and yes, budget build. Link to comment Share on other sites More sharing options...
Member Contributer JZH Posted October 3, 2013 Member Contributer Share Posted October 3, 2013 if they are there, they are flatter than any exhaust gasket I've seen and I've seen a ton. I can't even discern a color difference when scratching where they should be with a pick...can't even catch any sort of lip with a pick Found a good fork seal I believe, so I won't have to buy them, just yet...budget, budget and yes, budget build. If you've already investigated and not found any, then that's conclusive. I was just pointing out that if you had expected to see asbestos gasket material, or didn't closely examine the exhaust flange, that the copper gaskets could still be there. Ciao, Link to comment Share on other sites More sharing options...
mcrwt644 Posted October 4, 2013 Author Share Posted October 4, 2013 sooo, I went by the local Honda shop today...CLOSED indefinitely...say what?? I was going to get two exhaust gaskets and a fork seal. Wow, building isn't even five years old yet. I got some 6 mm ID bolts for the exhaust today...easier than dealing with the studs from Honda. Put her up on a rear 'stand' and cleaned the chain and sprocket and putzd around a bit. I think I may take the wheels off tomorrow for the new sneakers. I placed an order today that totaled a hundred bucks for all the parts I need to this point in time to include block off plates. I should have everything by Tues next week. I still have plenty to keep me busy until then. The wiring for the fuel sensor under the tank needs attention. I took some pics, nothing great. The D and D pic is after about 30 seconds of polishing.... Link to comment Share on other sites More sharing options...
Member Contributer JZH Posted October 4, 2013 Member Contributer Share Posted October 4, 2013 Wish I could remember why nearly all exhaust headers use studs, but there is definitely a reason... Ciao, Link to comment Share on other sites More sharing options...
mcrwt644 Posted October 5, 2013 Author Share Posted October 5, 2013 when I worked at a shop in San Diego, we replaced Honda's studs with the same thread pitched hex bolts. It is convenient to be able to hang an exhaust on the stud, but we found it easier and neater to just replace them. That said, I got the calipers completely 're built' using the same seals etc considering the ones I needed were 'unavailable for shipping' and the Honda shop closed nearest me. The calipers themselves are considerably cleaner, the pistons look like pistons and I used caliper lube on them and they go in and out quite nicely. The wheels are in for their sneakers and come back in tomorrow, the front axle and spacers are all prettied up. I think tomorrow I'll break into pulling the PAIR system off. Link to comment Share on other sites More sharing options...
The Phantom Posted October 6, 2013 Share Posted October 6, 2013 Wish I could remember why nearly all exhaust headers use studs, but there is definitely a reason... Ciao, My guess is that it's better to snap a stud at the point where a nut has rusted on, than to have to ezi-out a broken bolt. You can still get something onto what remains of the stud to remove it. Link to comment Share on other sites More sharing options...
mcrwt644 Posted October 7, 2013 Author Share Posted October 7, 2013 More progress to include; rebuilt calipers cleaning, windscreen revival PAIR removal front end detail new sneakers (q2's) just waiting on parts Link to comment Share on other sites More sharing options...
mcrwt644 Posted October 11, 2013 Author Share Posted October 11, 2013 finally got the parts in. New exhaust gasket on no. 2, sub air cleaner, tank rubbers, brake calipers back together and brakes bled. I have an exhaust leak I believe on no 1, but IDK if I can get on the one stud to tighten it. It's so subtle that I'm not sure if it's worth messing with. I have to do the right side fork seal. If it wasn't raining and I had brand new sneakers, I'd take her for a spin. I'll post more pics here soon. I located a 90 for an absolute song, and the bike runs, so we'll see how this goes. Link to comment Share on other sites More sharing options...
Member Contributer JZH Posted October 11, 2013 Member Contributer Share Posted October 11, 2013 when I worked at a shop in San Diego, we replaced Honda's studs with the same thread pitched hex bolts. It is convenient to be able to hang an exhaust on the stud, but we found it easier and neater to just replace them. FYI: why do we use studs at all? why do we not just use bolts with heads? A bolt is under both tension and torsion as the components are assembled, while a stud (at least the part in the head) is under tension alone, a subtle but important difference. The torsion in the bolt has the effect of changing the pitch of the bolt thread leading to a massive concentration of forces on the first part of the thread. By eliminating the torsion a stud does not suffer distortion of the thread pitch which then give better distribution of forces within the head. The better distribution of forces allows, either a more economic design resulting in reduced weight, or the use of softer materials. So where does the torsion go to when you use a stud (I hear you say). Yup there sure is a torsion applied to a stud as you tighten it up but this is transferred from the shoulder of the stud to a seat in the head before the threaded section enters the head so the threads in the stud see only tension. To get the system to work efficiently: • The thread cut the head is (usually) machined to a special (very close) tolerance. • The machining in the head includes a seat for the shoulder of the stud to sit in. • During assembly the studs need to be inserted into the head finger tight only so the shoulder is seated snug ready and waiting to work as intended. If a stud unwinds during dismantling, don’t worry, but its best to use new studs rather than salvaging the old, as any old fashion "persuasion" could distort the shoulder of the stud. If the nuts are solidly seized to the stud it is a very bad idea to re-use these studs without removing the nut as the stud could act like a bolt which increases the danger of stripping the threads (in the head), even if you use the correct torque ! If you break a stud and cannot get a grip on it, try and use a stud extractor as a drill and tap is likely to ruin the original machining. When installing the new studs, remember the short thread goes into the head and run the stud into the head until the shoulder snugs up (finger tight) against its seat. Source. Ciao, Link to comment Share on other sites More sharing options...
mcrwt644 Posted October 12, 2013 Author Share Posted October 12, 2013 I didn't go with the bolts after all. I figured why mess with it? the darn things are hard enough to get in and or out, so leave well enough alone. Bike is virtually done, just the fork seal to do and a good detailing is about all that remains. Link to comment Share on other sites More sharing options...
sereethai Posted October 12, 2013 Share Posted October 12, 2013 when I worked at a shop in San Diego, we replaced Honda's studs with the same thread pitched hex bolts. It is convenient to be able to hang an exhaust on the stud, but we found it easier and neater to just replace them. FYI: why do we use studs at all? why do we not just use bolts with heads? A bolt is under both tension and torsion as the components are assembled, while a stud (at least the part in the head) is under tension alone, a subtle but important difference. The torsion in the bolt has the effect of changing the pitch of the bolt thread leading to a massive concentration of forces on the first part of the thread. By eliminating the torsion a stud does not suffer distortion of the thread pitch which then give better distribution of forces within the head. The better distribution of forces allows, either a more economic design resulting in reduced weight, or the use of softer materials. So where does the torsion go to when you use a stud (I hear you say). Yup there sure is a torsion applied to a stud as you tighten it up but this is transferred from the shoulder of the stud to a seat in the head before the threaded section enters the head so the threads in the stud see only tension. To get the system to work efficiently: • The thread cut the head is (usually) machined to a special (very close) tolerance. • The machining in the head includes a seat for the shoulder of the stud to sit in. • During assembly the studs need to be inserted into the head finger tight only so the shoulder is seated snug ready and waiting to work as intended. If a stud unwinds during dismantling, don’t worry, but its best to use new studs rather than salvaging the old, as any old fashion "persuasion" could distort the shoulder of the stud. If the nuts are solidly seized to the stud it is a very bad idea to re-use these studs without removing the nut as the stud could act like a bolt which increases the danger of stripping the threads (in the head), even if you use the correct torque ! If you break a stud and cannot get a grip on it, try and use a stud extractor as a drill and tap is likely to ruin the original machining. When installing the new studs, remember the short thread goes into the head and run the stud into the head until the shoulder snugs up (finger tight) against its seat. Source. Ciao, hello try one of these well worth the money http://eshop.wurth.fr/-/0965%2013%20%20900.sku/fr/FR/EUR/;pgid=hK0gYrRJ3jox6xjMInhwb_cR0000hVDttOJO;sid=1UQ0b12xhSPibwyyYoQqslK7wre14ZQKLHUSdMai?CC= Link to comment Share on other sites More sharing options...
mcrwt644 Posted October 12, 2013 Author Share Posted October 12, 2013 Ok, 'Butch' as she has so aptly been named is virtually done. Fork seal and side stand spring is what is left. That said, I picked up another 90 today, running, beat up for a little bit of nothing. Have her torn down to the tank only now. I'll need to move some fairings or get lucky and find some. Link to comment Share on other sites More sharing options...
Member Contributer trjerm Posted October 13, 2013 Member Contributer Share Posted October 13, 2013 You'll be happy w/ your 3rd gens. you buy the 2nd one to fix up or for extra parts and cute kid. I have 2 4th gens, 1 heavily modified (VFR from hell) and 1 stock except for penske rear shock, speigler superbike bars, gold valves, braided brake lines, hh pads and corbin seat w/ backrest. love both of them. Link to comment Share on other sites More sharing options...
mcrwt644 Posted October 13, 2013 Author Share Posted October 13, 2013 the red vfr was just such a steal it wasn't funny, esp for a bike that was already running. If I could find a left upper for it, I could put her on the road. I have a fourth gen headlight left over that I have mounted in there already. I could probably sell the rear wheel off this bike for more than I paid for it :) Link to comment Share on other sites More sharing options...
mcrwt644 Posted October 15, 2013 Author Share Posted October 15, 2013 I got a mid pipe custom bent for a whopping $5, and after talking to the shop owner, got a lead on material for an exhaust hanger that I fabbed myself...Nothing fancy,but it works. Link to comment Share on other sites More sharing options...

Recommended Posts
Archived
This topic is now archived and is closed to further replies.