Leaderboard


Popular Content
Showing content with the highest reputation on 03/23/2024 in all areas
-
This was the "what have I done" moment, after the VTEC was lowered from the frame with the 8,000 mile 5th gen motor waiting on the pallet. The cam cover is removed b/c I had already been in there adjusting the VTEC valves and it also gave me the extra clearance needed to clear the frame once lowered on the jack. Once it was back together and running, going for its first short ride around the block left me barely believing it was actually working. I read where others that have done this sit the engine down on block(s) and then lift the frame off and roll it away like a wheel barrow, leaving the engine behind. On top of the 2 step ladders is a thick wooden beam and ratchet straps. Either way works, this is just mine. Clearly this is quite invasive surgery, but very doable for any determined DIYer. Like any project, bag & tag fasteners, label, stay organized and torque to spec and you'll be good.
 4 points
 -
Not sure that gives me a tonne of insight. Pretty sure John McGuinness could smoke me on a Grom!!!3 points
-
One last thing. I met Freddie Spencer in person at a motorcycle show before Covid. We had a great convo and he luved the fact i was riding a RWB VFR 800 25th. I told him I always pretended I was him when I attack the corners. We had a great laugh. When asked what do you ride on the street back home? He replied with a grin and a smile: RWB 25th like you. and thats how he signed his book (Freddie Spencer: FEEL) for me; Hey John, keep enjoying your VFR I have one too. Freddie Spencer. F'N Priceless.
3 points
-
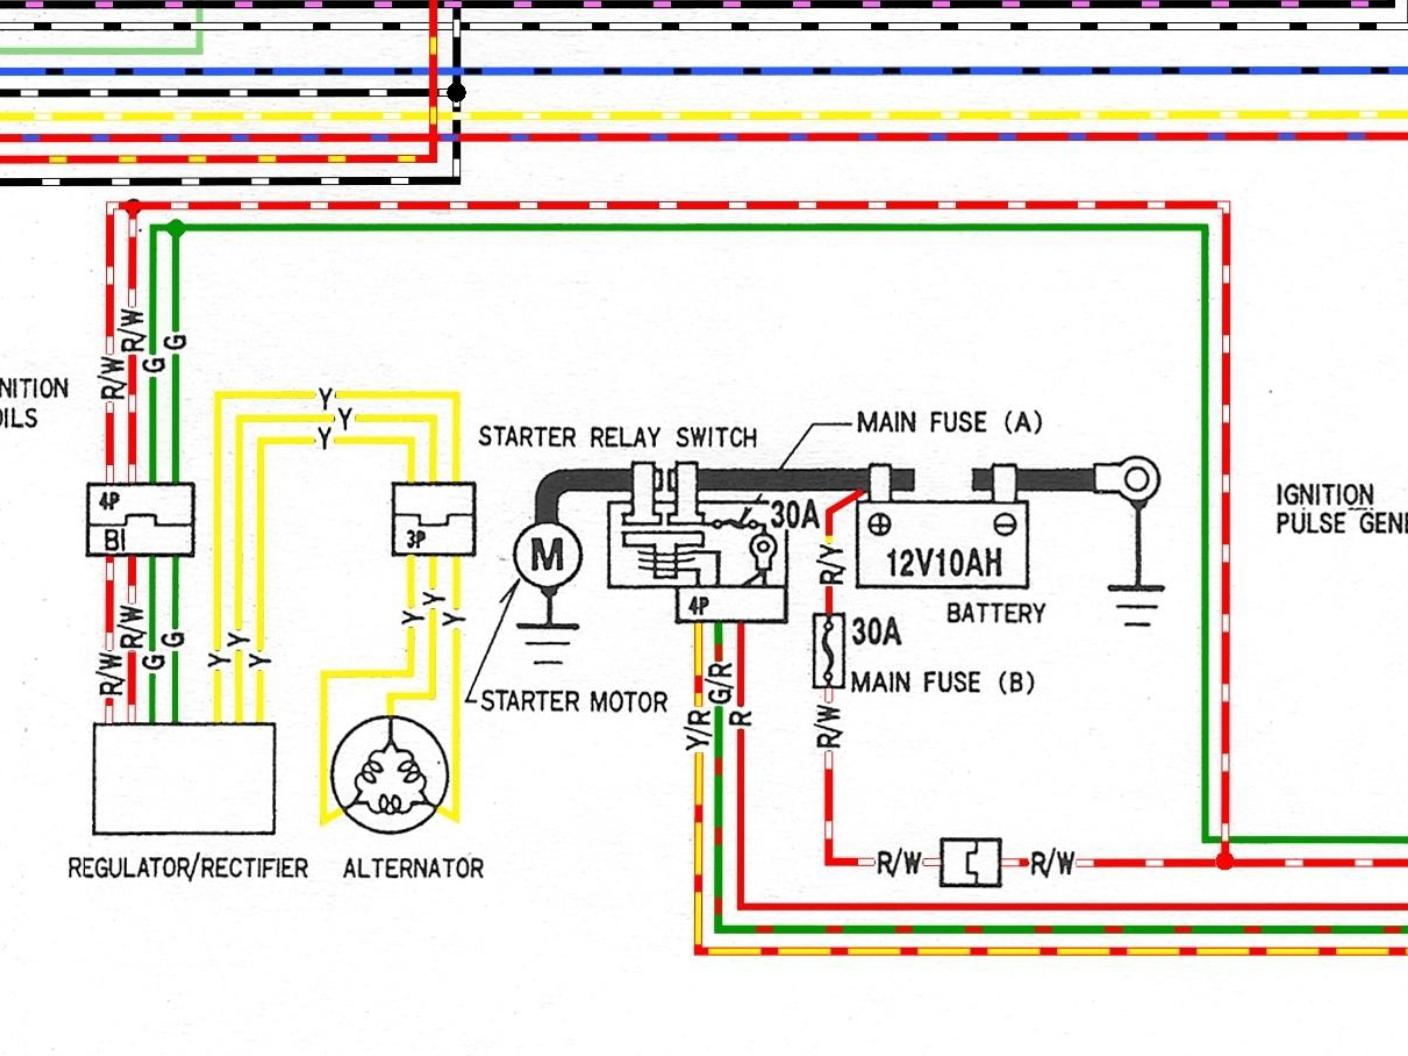
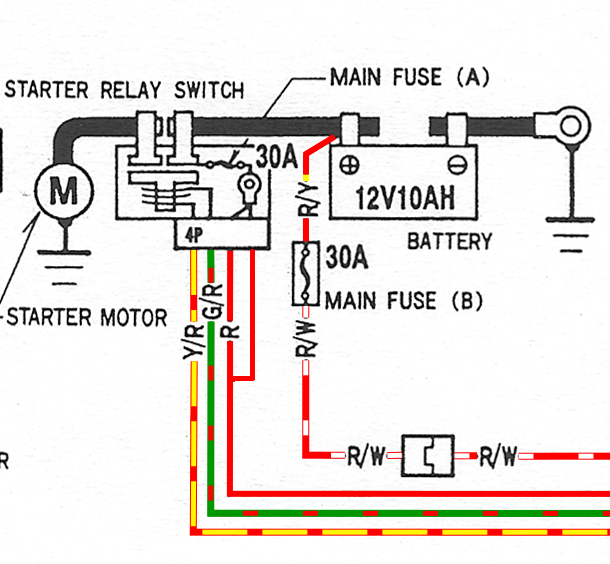
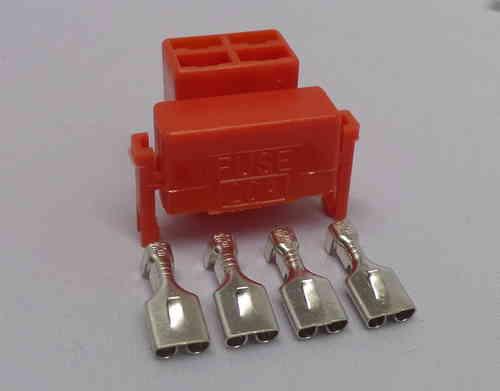
No Sir! Not when you look at the wiring diagram. The four wires become a normal two wire configuration beyond the 4P connector. The single 12v wire then goes to the battery, protected by the one fuse, Main Fuse B 30amp.
2 points
-
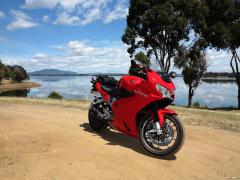
Knee down, toe about to drag, and the peg feeler still has a way to go before it touches. This one still has more in it re corning before it's at the limit. These bikes (as most modern motorcycles) are more capable than most of their riders (including me!).2 points
-
Lot's of people feel the same way. This is another forum member. The things the newer bikes are going to have though are the adjustable power modes, TC, WC, ABS, electronic cruise, etc. You don't sound like that is what you're after but may be a consideration.2 points
-
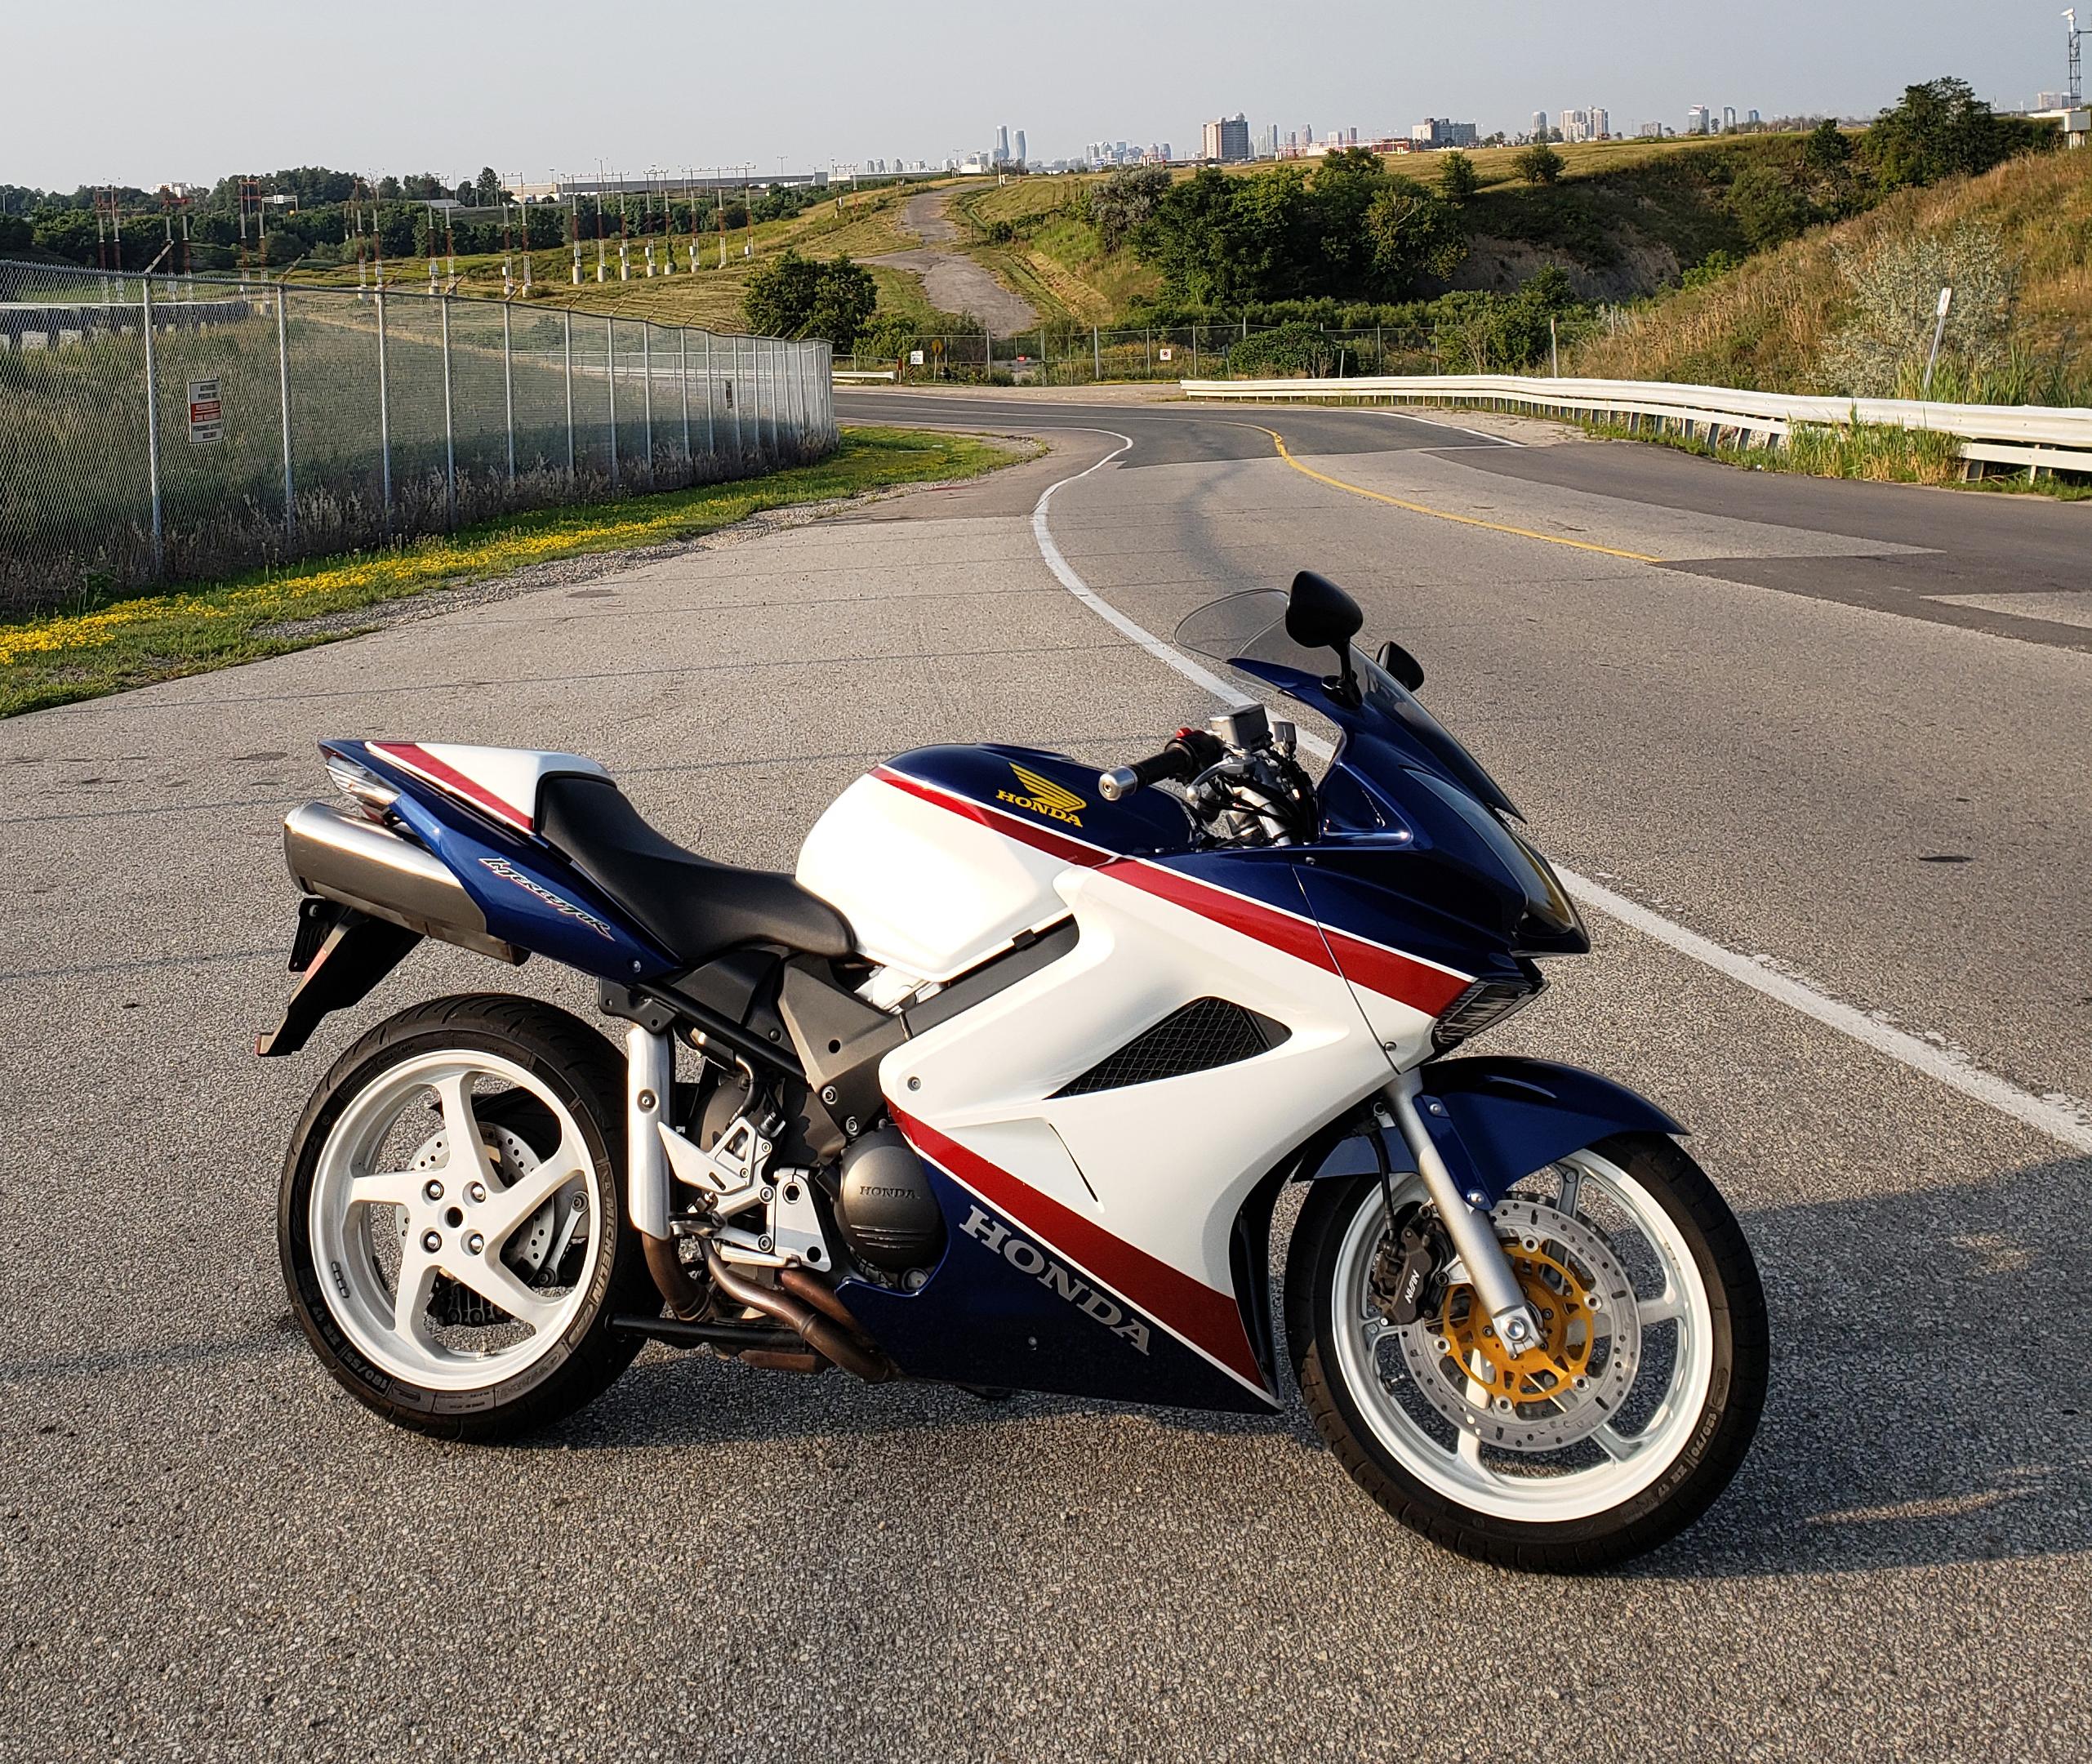
Arguably one of the best motorcycles ever made. I never thought an 11.3 sec quarter mile time was slow or 0-100 mph in 7.5 sec. (Cycle World Test) The engine is so refined and the quality of assembly is so above most bikes. Just riding it slow makes me Grin. Engine noise and smoothness and qaulity of controls and paint. Its not the lightest bike but I ride with Ducati V4s and V2 and Aprilia Tuonos and my buddies bikes are always having problems or waiting for parts. In the twisties on the street I'm there with them and if they want to lose me they are going to crash. LOL Its so stable at 140 mph. VTEC noise transition. Good luck, my VFR is my sportbike that I can ride for 4 hrs. And the looks , nuf said.
2 points
-
Assuming you had No fast idle issue Prior to your coolant flush, then it sounds to me like an air lock situation, adding to poor coolant circulation to the wax unit. Running the bike to high temps without the radiatior cap on will cause the volcanic eruption you had and especially if there is air trapped. Did you follow the fill and burping process in the Service Manual?1 point
-
Also at 4mph, something I really appreciate in slow traffic. There's no sense of needing to get a foot ready to put down until you properly stop.1 point
-
I know all my VFRs are way more capable than me and happy to keep it that way. 😆1 point
-
I know exactly what you're talking about. That epoxy job was a "oh shit, I need this done right now for tomorrow" job, always meant to be revisited and correctly redone. The epoxy was the right stuff, just no reinforcement plan in the moment. Was just trying to keep the pieces from literally falling apart. The fact that it lasted this long is pretty remarkable. That plastic and that epoxy are perfect mates. I think that "fabric" is a good application for those areas. I was even planning on making some plastic "donuts" to go around the mounts on the back side for additional strength.1 point
-
If you're interested in how one will do on the track, have a look at this video of John McGuinness riding a 5th gen at a track day. This one has 100,000 miles and a luggage rack. Note that he's passing many sportier, more powerful (probably liter) bikes. They likely pull away from him down the straights, but in the corners he makes it all back and more. https://www.youtube.com/watch?v=bMWXwsGUGM81 point
-
That is definitely heat stressed, the Red wire has turned brown and the red plug has melted, a hot and high resistance joint. Think you've found the fault! The Red wire will need cutting back to good unheated copper and new spade connector fitted. Its not essential to replace the relay coil spade connectors but if you can, then just do it. Replace the red plug with these high quality tin spade connectors, sorry can't remember the web site, just do a Google on Starter Relay Plug replacements should find them. Make sure the Red Wire male spade in the Relay isn't burnt or corroded. You could also try the wiring mod shown using the additional spare spade connector to the Main Fuse to share the electrical load, splicing an additional wire into the main Red wire. Some OxGard on these conections will also help. The coloured drawing is just a section from the 5gen Hi Res downloadable drawing from the forum. Starting circuit and wiring is the same as 6gen.
1 point
-
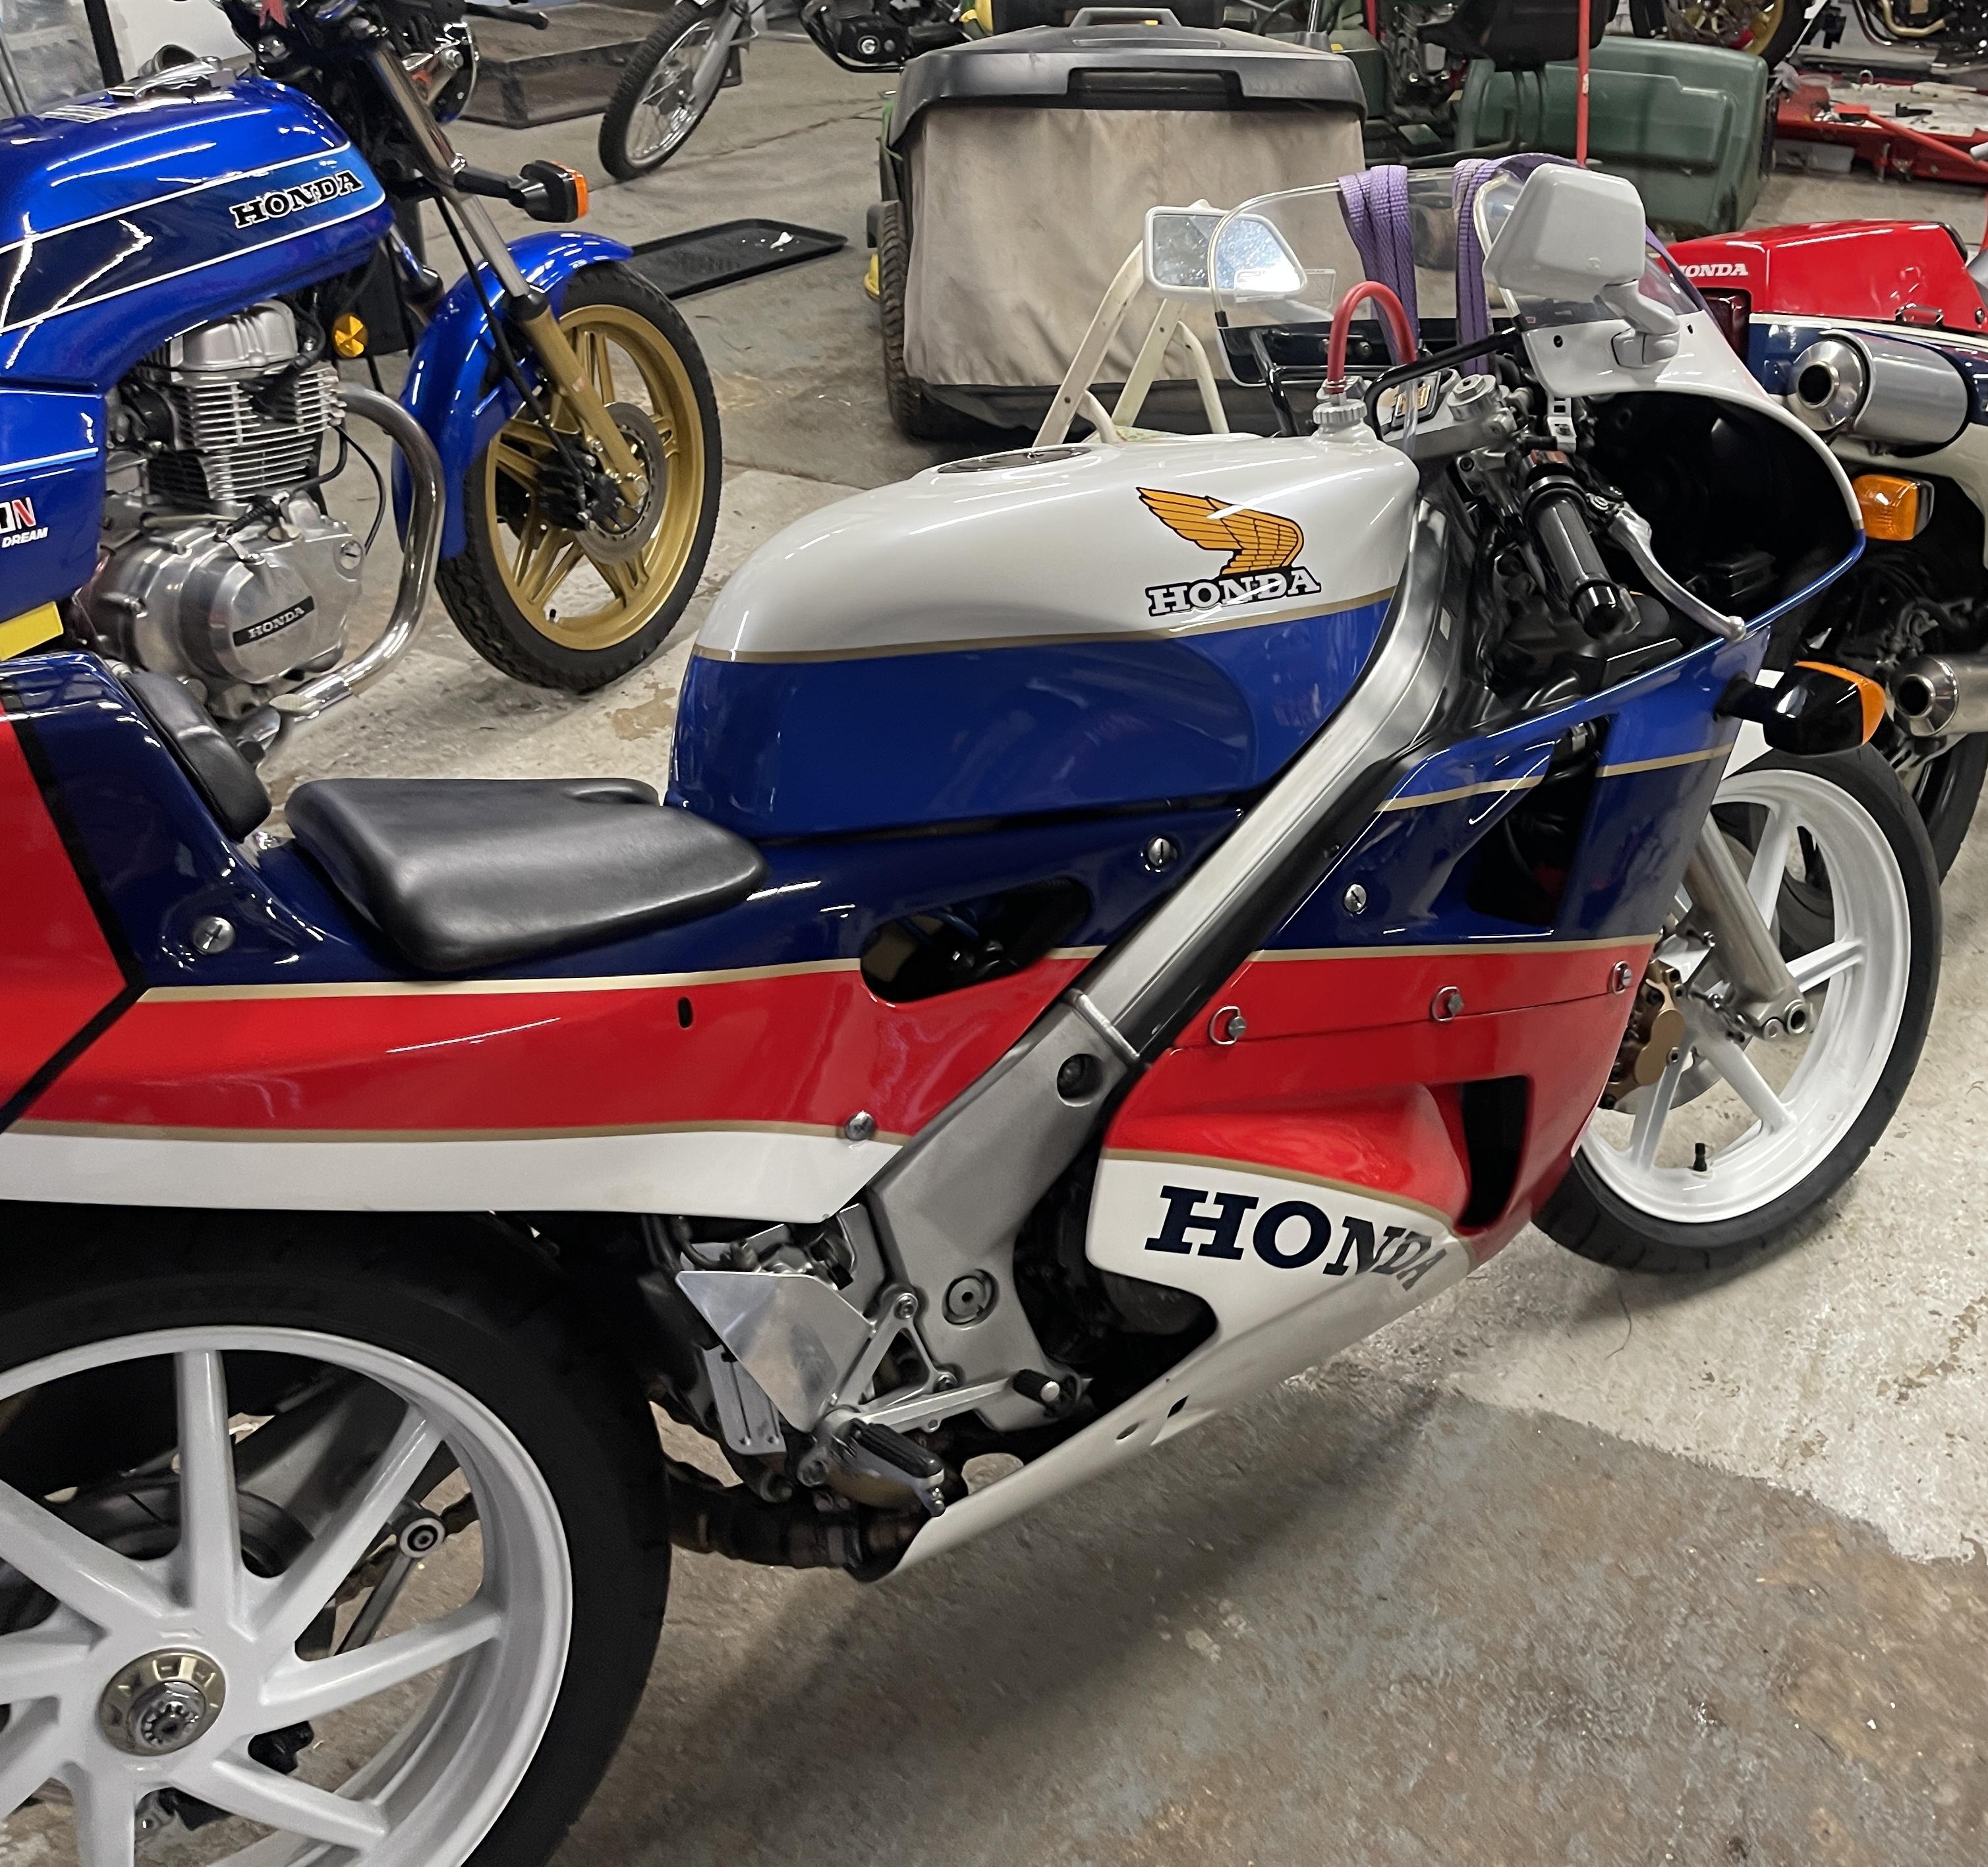
Long term Honda lover! Had a 30 new in 89 and forever regretted selling it! Managed to pick another up just before covid struck and have finally got her on the road (with two disks) 👍 1988 14,000 miles and had its first MOT last week (Ornament before). Great to be back on one, although at 61 don't think I'll be doing what I did on the first one, Northampton to Bol d'Or in a day. 968 miles and it nearly killed me 😜 Andy M
1 point
-
We had a bluebird 50f day here today, would have been rude not to wheel the bikes out and knock some dust off. First fire & neighborhood noise making of 2023... 😎1 point
-
Another little job done, this time with an assist from Mr.Burns and his 3d printer to knock out this little spacer that helps mount the Rotrex oil filter on the A&A bracket. And now for something completely different... a little electrickery fitting the new fuse box and RB Race in the tail. Yaman at Rapid Bike in Florida was pretty adamant that I would void the warranty if I did anything other than look at the box, so when the ground wire was too short to connect to the battery no matter how I routed it, I went ahead and extended it instead of asking... Installing the RB meant connecting the oem O2 sensors. No problem on a normal install... but the 8g downsized to 1 sensor, and although this VFRD header has that + 1 wideband sensor bung, neither were going to work for routing the wires of the stock sensors. So... I used a low temp silicon bronze wire to tig braze the bungs in, minimizing the chance of ruining the exhaust flow with burn-through. The wideband and 8g O2 bungs are plugged for now. I have a wideband AF sensor and gauge that will be installed in the future. The result of the harness recall back in the day was pretty much all of this excess wiring... all now deleted since it was a lot of clutter, and the new SH847 r/r simplifies much of the issue that plagued the stock system anyway. While installing the switch gear I noticed the turn signal switch was a bit sticky, so broke that down and refurbed it. I also lubed up the switch pods and left them soak in some grease to refresh them a bit before installing. And then... Just as I was getting excited about firing this bad boy up for the first time in years... Ethanol gas kicked my ass People, use e-free gas whenever possible. My bike has been living indoors in my air conditioned and heated garage/workshop and never outside. This is what ethanol does to metal when left to sit. Keith at MasonCity Honda set me up wit ha great price on a brand new tank. It was a bitter pill to swallow, but I was starting to hit a time crunch to make the '22 Spring ride and I felt it needed to be done. I sourced a very clean, low mile pump assembly from ebay. I installed a brand new oem fuel filter, gasket and mesh pickup on the ebay unit when I installed the Toro kit upgraded fuel pump and saved the other new parts t orebuild my unit in the future. For what it's worth, I took a quick stab at cleaning my old tank with CLR. Results were promising, but I didn't care to take the time risk. I can tackle that in the future to have a backup. Diluted with water... 1 overnight sit made a good improvement Freshly rebuilt new-ish pump vs CLR soaked rusty oem pump... Does carbon fiber make you horny? I pressure tested all the individual parts I worked on And then also the full system!1 point
-
Here's one a lot of you will appreciate. I had in the back of my mind a mod I had seen on a Euro or Spanish VFR forum. It was linked here years ago. Someone was taking 6g stator covers and modifying them to add an oil passage. I was trying to locate the info, and Miguel turned me on to looking at the 8g stator cover as Honda had apparently taken some measures to feed more oil to the stator on that model. Turns out he was right, and I ran with it. My brand new stator now has a fresh oil feed directly from the oil gallery! My 47,xxxmi stator was still working, but probably close to not, judging by the toasty condition This is the interior view of the 8g cover The red arrow indicates a port for a sensor that is unique to the 8g. It's not used on a 6g, so I turned up a plug and welded it in before I coated the cover. This is the location on the 6g block that needs to be drilled. I turned this drill bushing to allow me to drill the block perfectly You also have to drill a counterbore for the the orifice o-ring which will be installed I coated my drill with grease and pecked my way through, evacuating chips very frequently. When I broke through, I had a very tiny amount to clean up. The back side of the hole is not visible, but accessible, by removing the oil filter and threaded filter mount. I stuffed a rag past the new hole, and then used a vac and compressed air to ensure the were no chips left inside. Once done you can install the oem oil orifice and o-ring Here's the welded plug Cerakote color is Burnt Bronze The interior orifice size, in case anyone is curious: Job done: EDIT: I found out later there is one other mod needed to fit this cover... the 8g cover is TALLER/DEEPER than the 6g cover. It interferes with the coolant expansion tank. I taped over the cover and used a heat gun + hand pressure to form the tank to the new cover until it fit properly with the fairing. It didn't take a ton of effort, but it's worth noting for sure.1 point
-
Well my name is probably a clue. Just more bullshit on the same bike and nothing "improves" it. Give me Fuel Injection, that's fine. But I'll stick with just a analog high idle lever thank you. Keep your stupid "wax unit", I've been on the end of a "choke" lever my whole adult life. I think I can handle it. Sure the exhaust is just mild steel. That's fine, I don't ride in salt water, and I'll get it coated. But you can keep your catalytic converter (and associated hardware, software), even if it is made out of stainless. Besides the stupid Linked Brakes (yes, yes... I know the system works great, I've ridden plenty), the 98-99 is as close to a pure "modern" (re: FI) gear driven cam VFR you can get. Linked brakes, with secondary masters, proportioning valves and 2 miles of hose, belong on a fucking Gold Wing,1 point