Leaderboard

Popular Content
Showing content with the highest reputation on 02/14/2024 in all areas
-
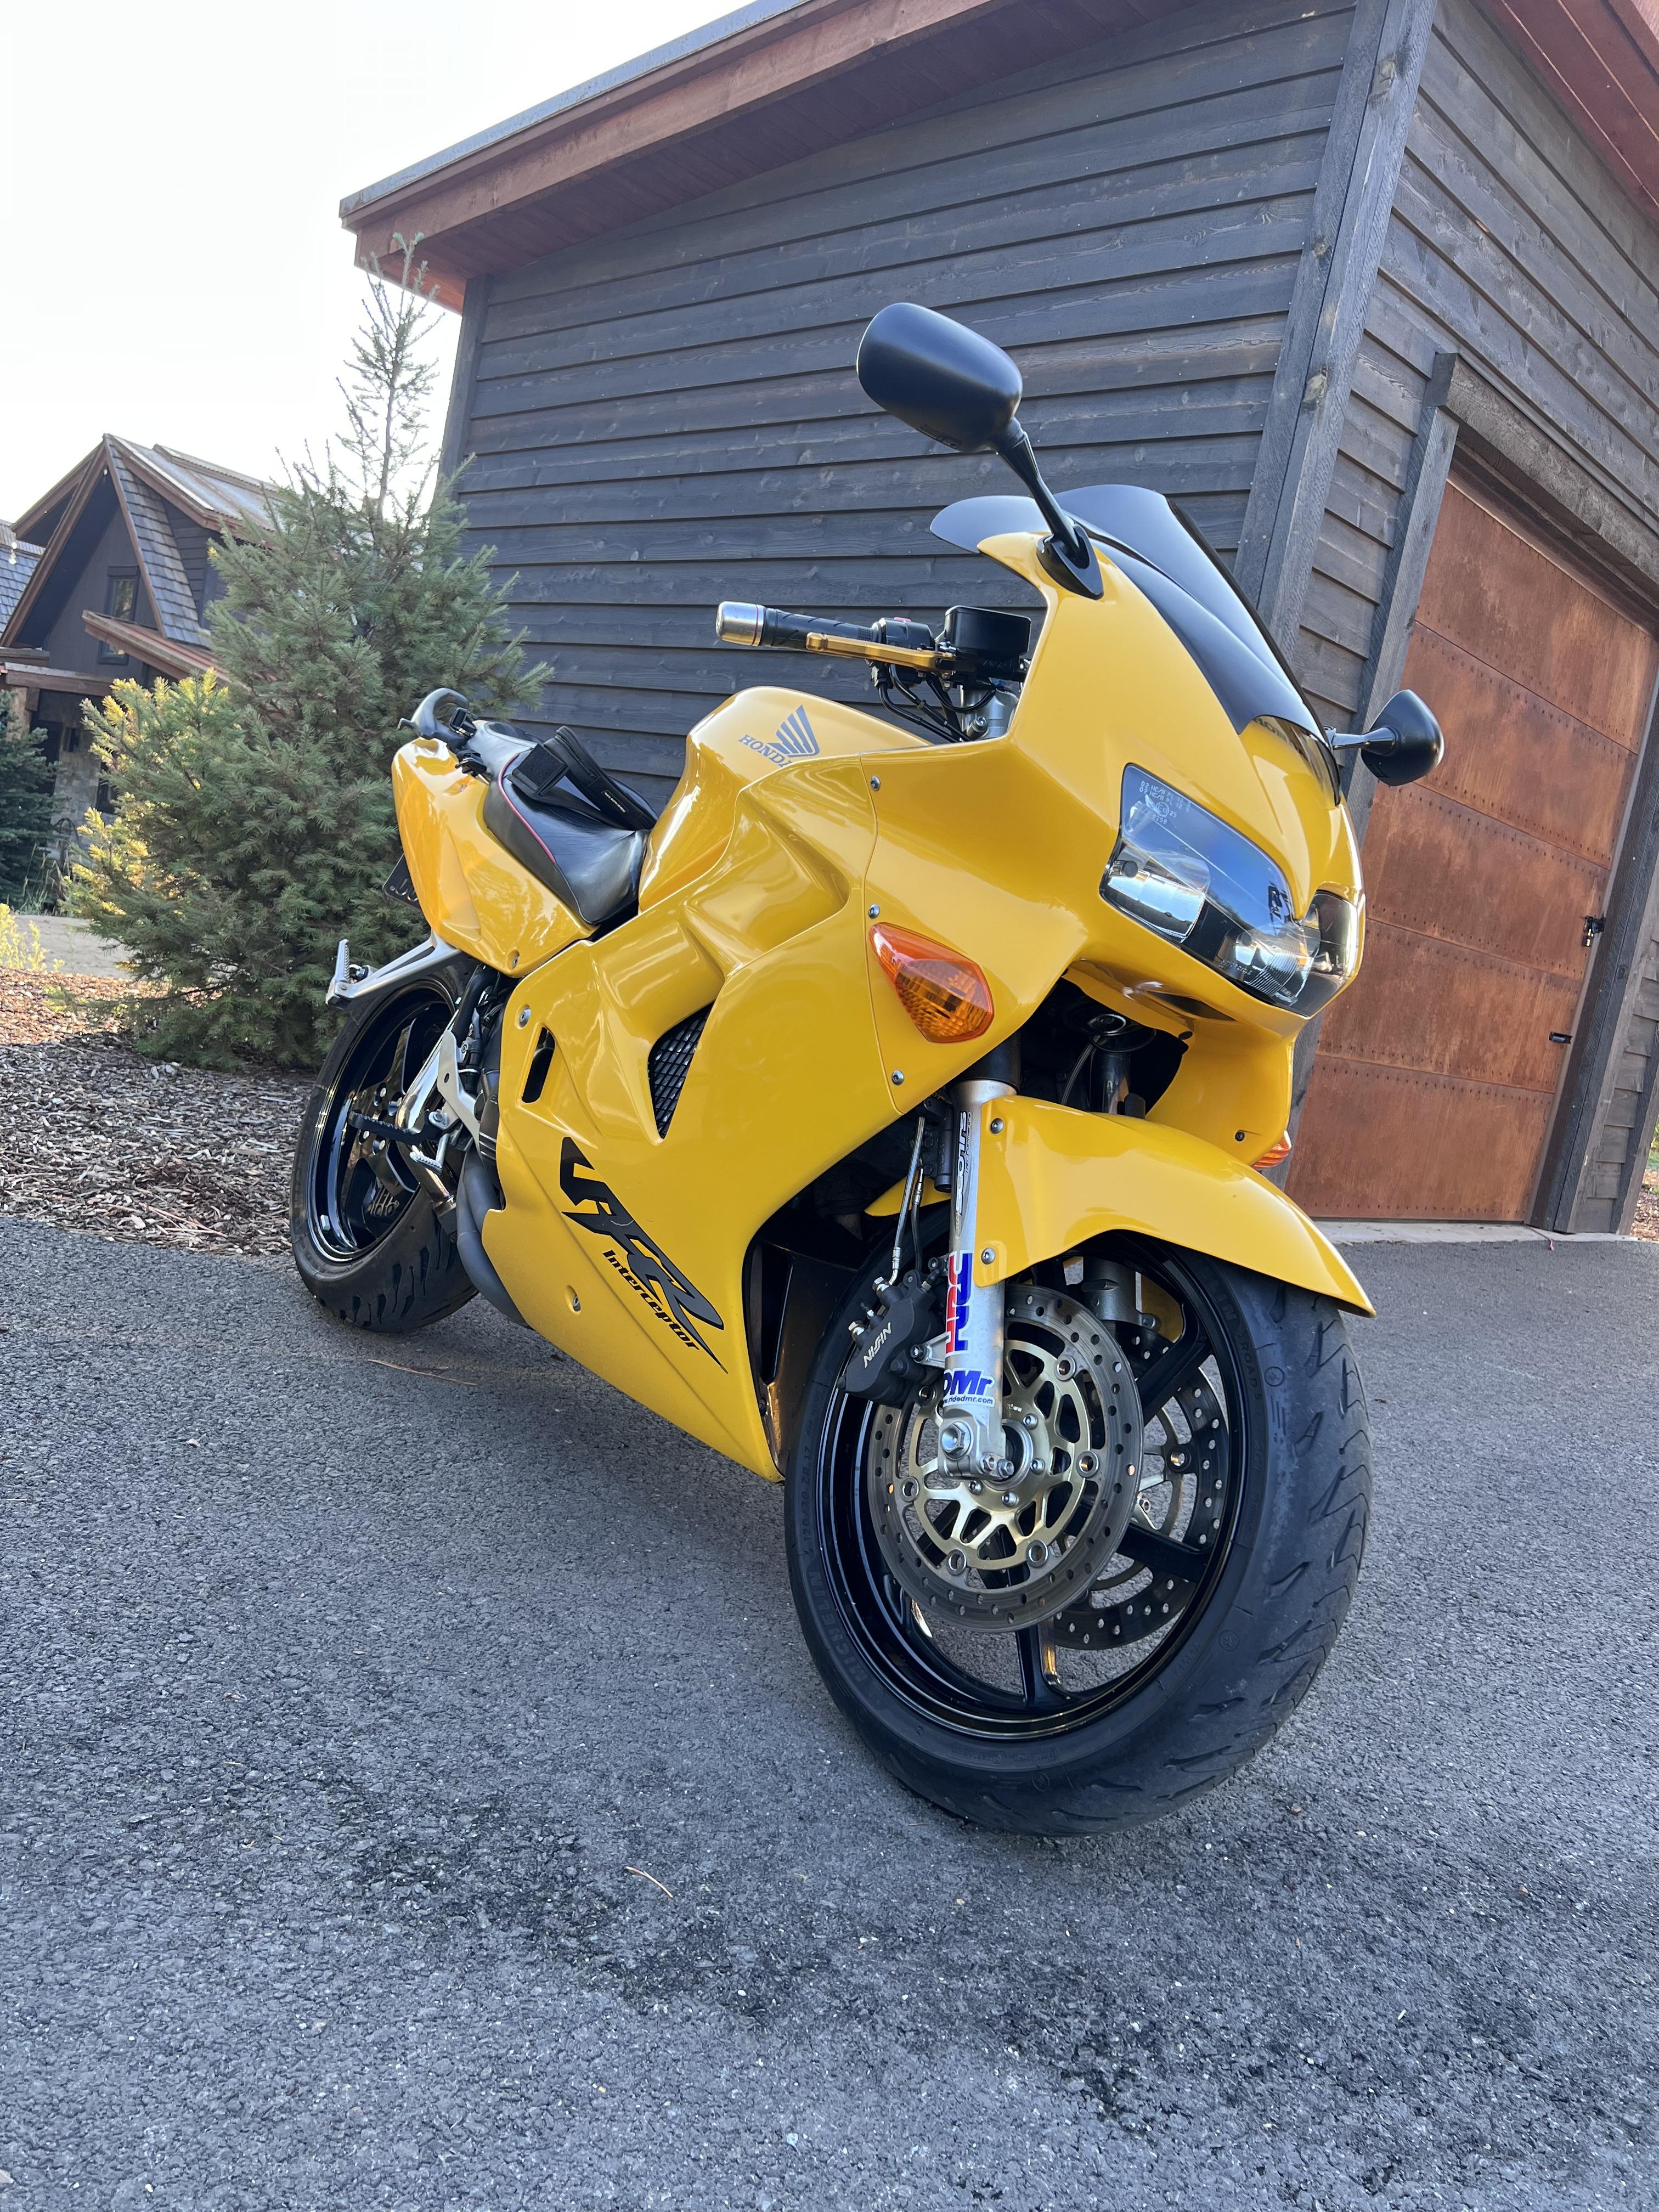
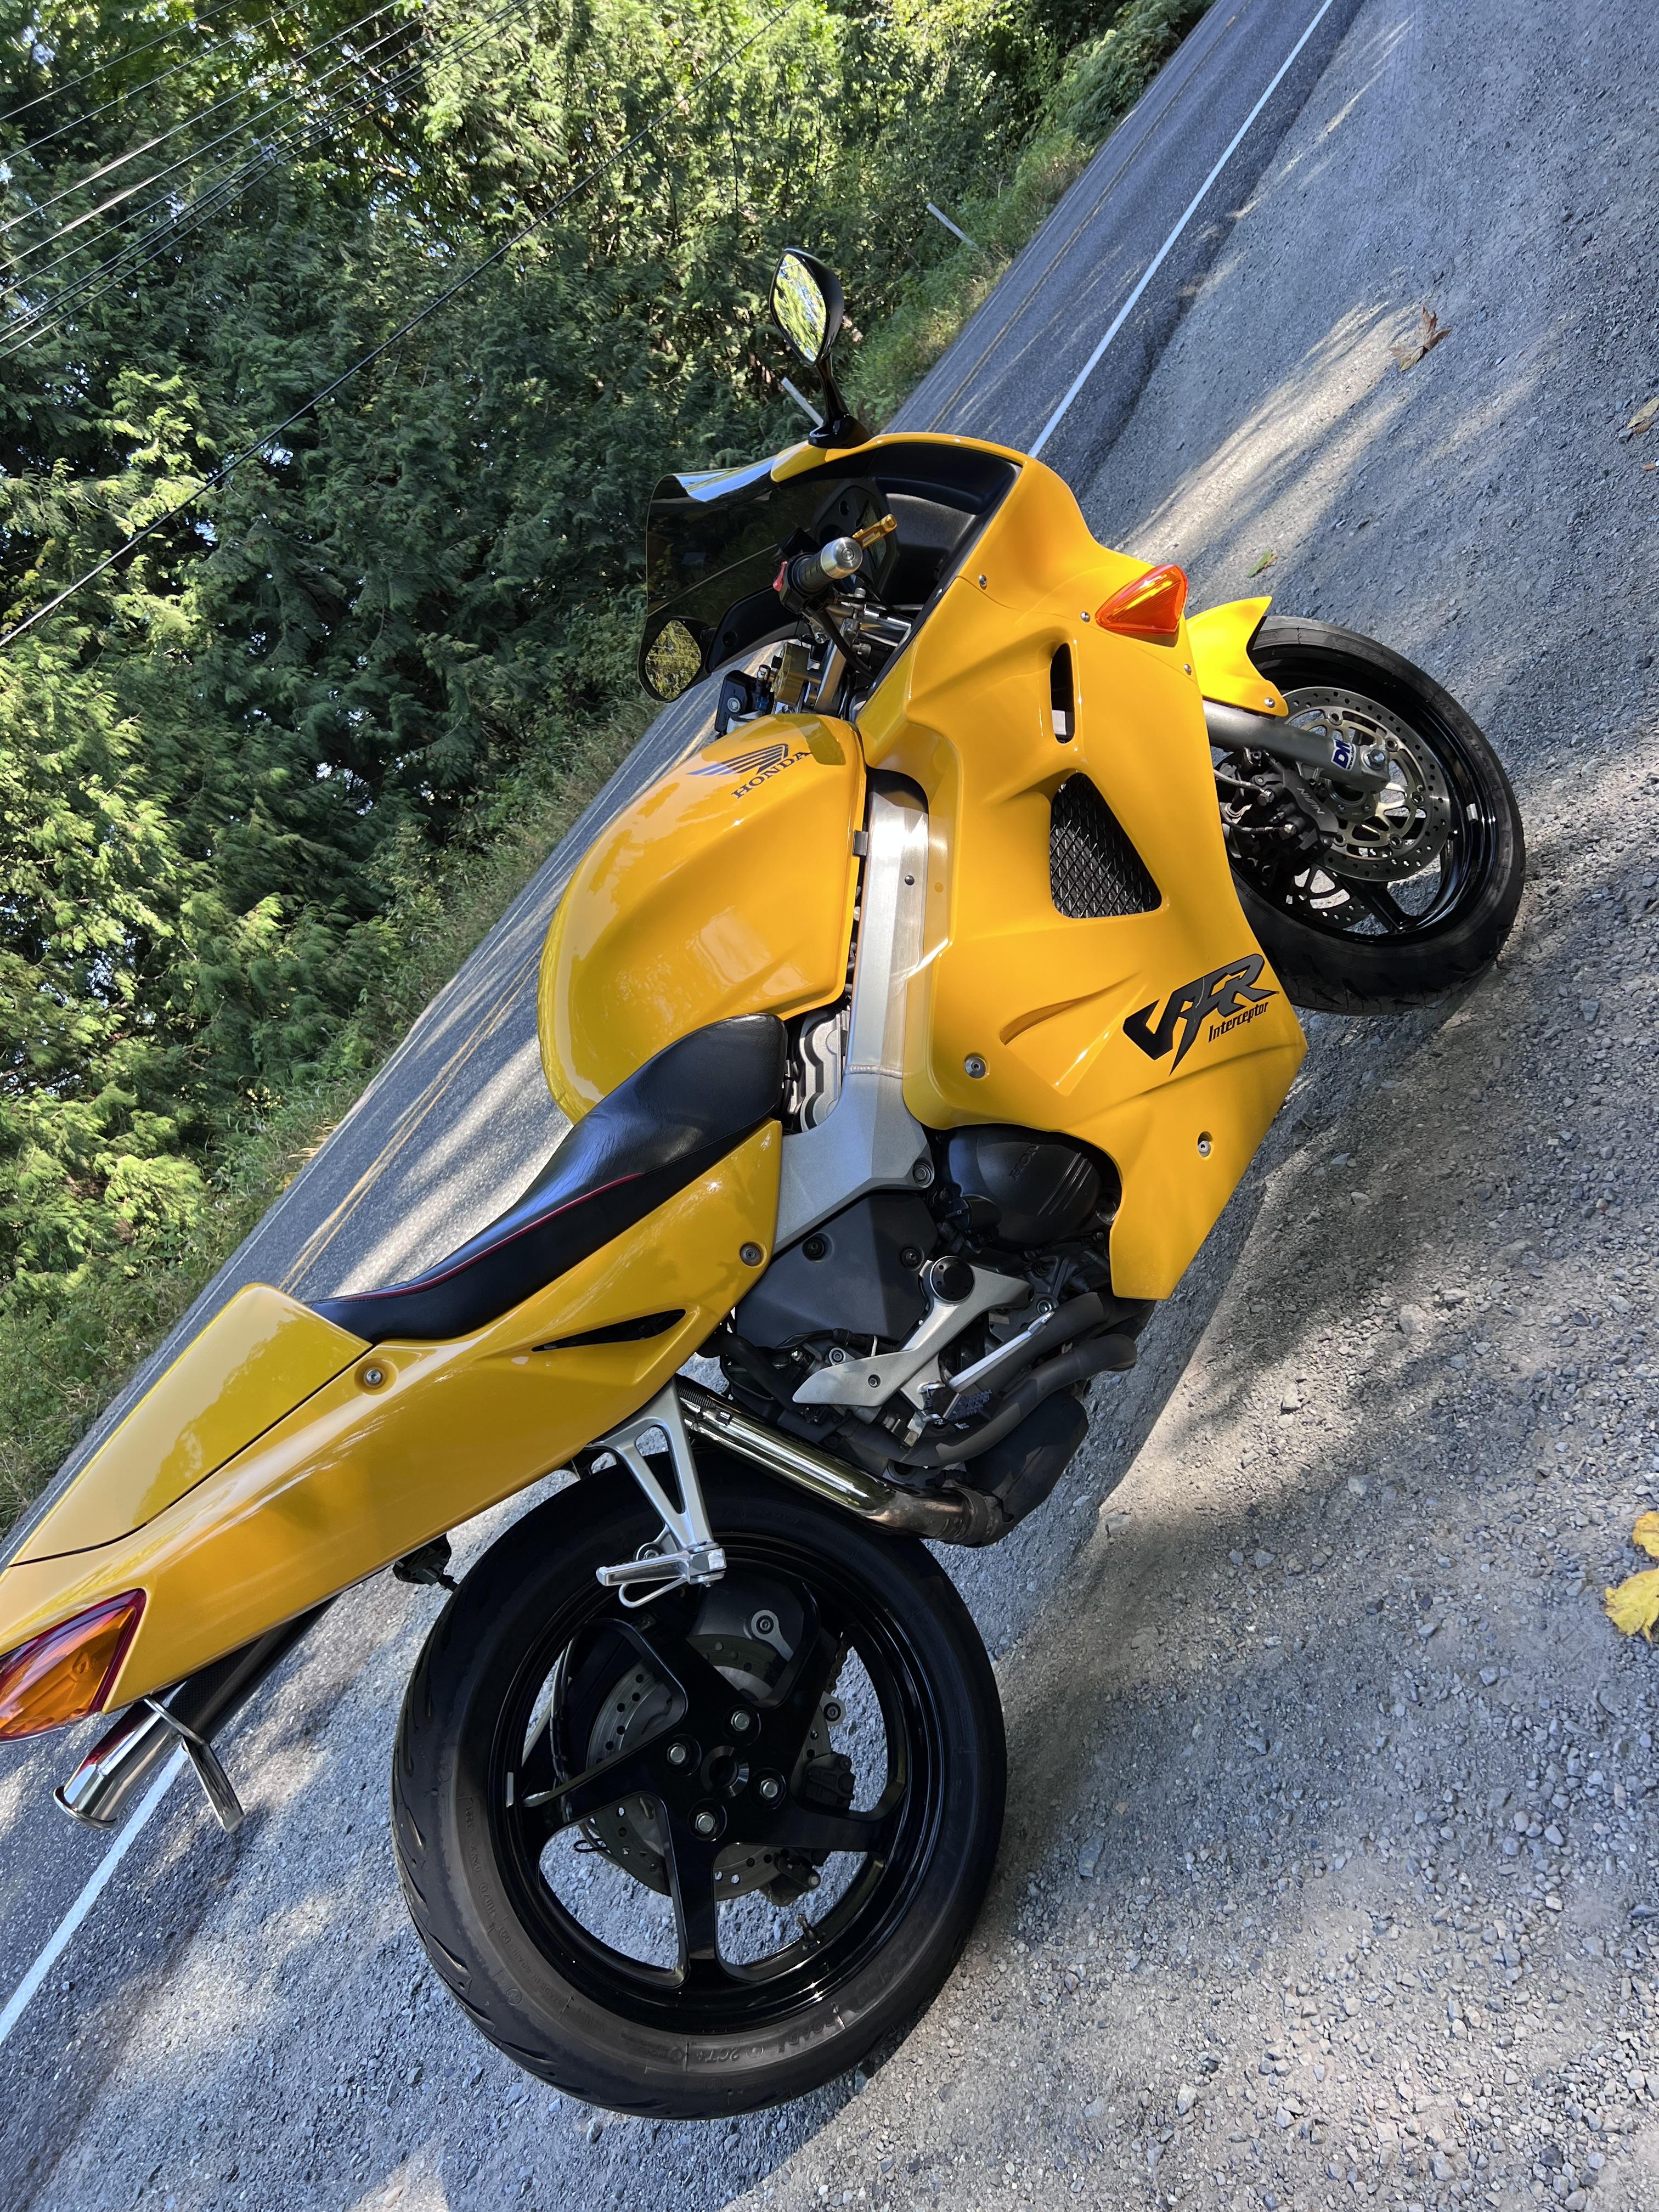
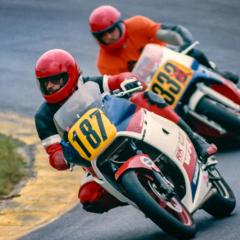
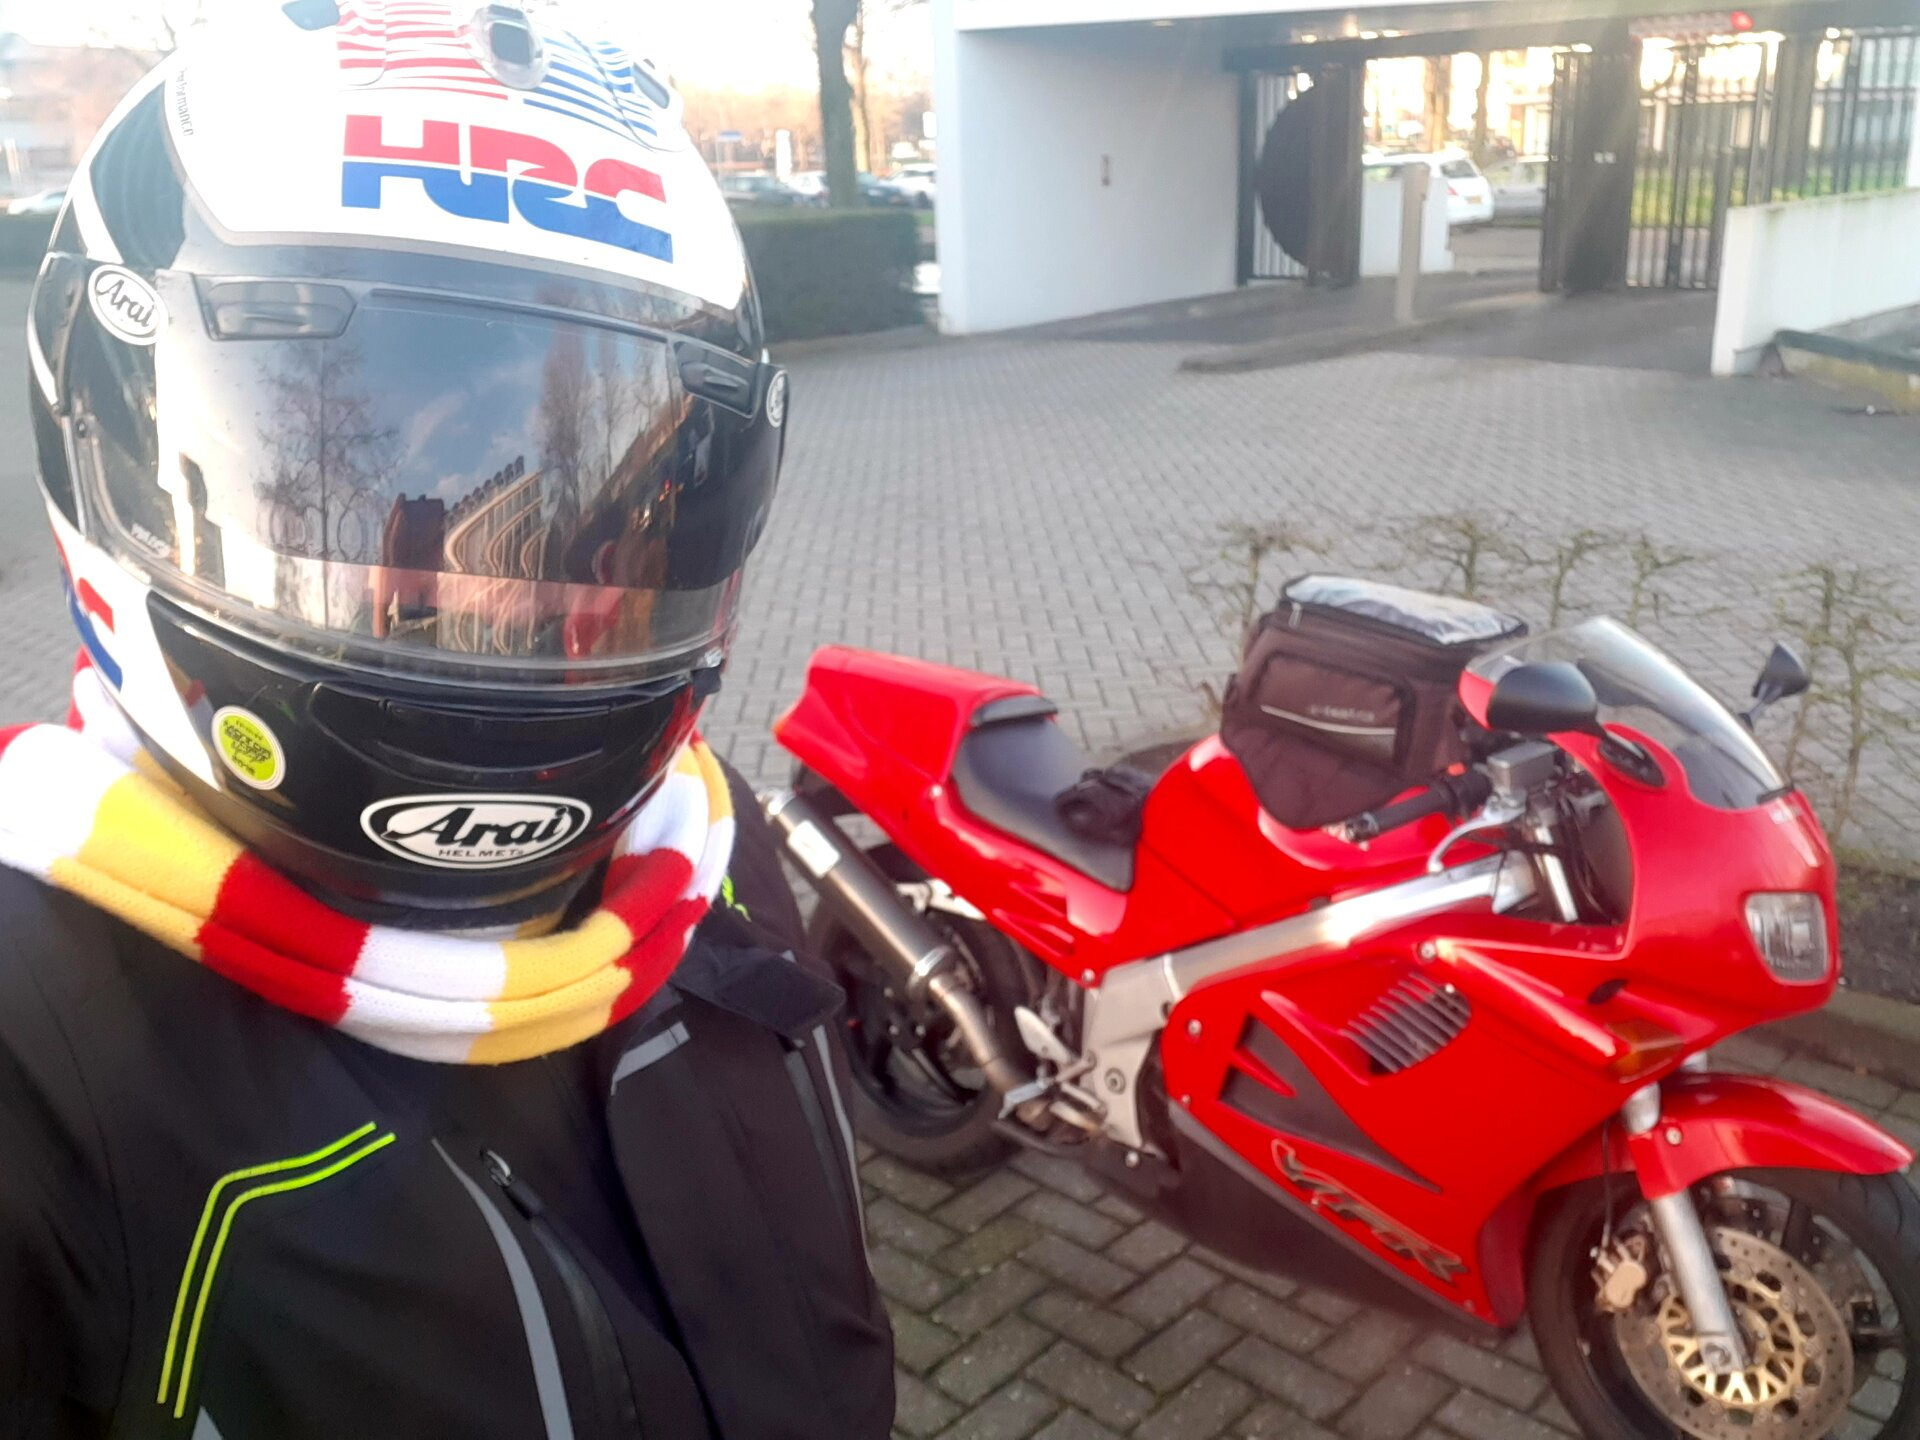
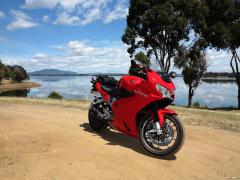
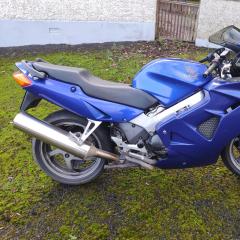
Here is my recently purchased vfr. Love this thing. Just found the forum, will be perusing for this upcoming seasons riding. Cheers.
 10 points
 -
3 points
-
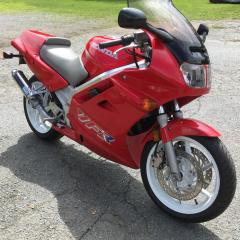
Nice comments Hingley. Yep, and I freely admit to have learned a lot from the collective experience of many long time members on this forum. As a last bit of info, and you can take it or leave it. If it was my bike, and it's service history is unknown, I wouldn't hesitate in baselining it's maintenance. I'd start afresh and shout it new sprockets and chain, along with all the normal maintenance items, fluids, plugs, air filter, oil and filter etc. I'd also dive into the electrics, solder up all the grounds in the dreaded orange earth block, solder the stator lead wires to the R/R and its output connector, upgrade the R/R if needed and make good the Main Fuse B 30amp fuse holder and wiring. Enjoy your ride. The Yellow 5gen looks GREAT and deserves all the TLC you can give it. Cheers2 points
-
Nice bike! I'm partial to yellow, had a bike affectionately named "Bumble Bitch" Welcome! These guys know their shit...1 point
-
Very nice!! I hope the very oddly placed HRC sticker on the forks came off, not on. Either way, sweet VFR. Enjoy.1 point
-
Congrats on that beautiful 5th gen. and welcome to the forum! 🙂1 point
-
Beautiful 5th gen you have there. Looks like its in great condition. Welcome to the forum.1 point
-
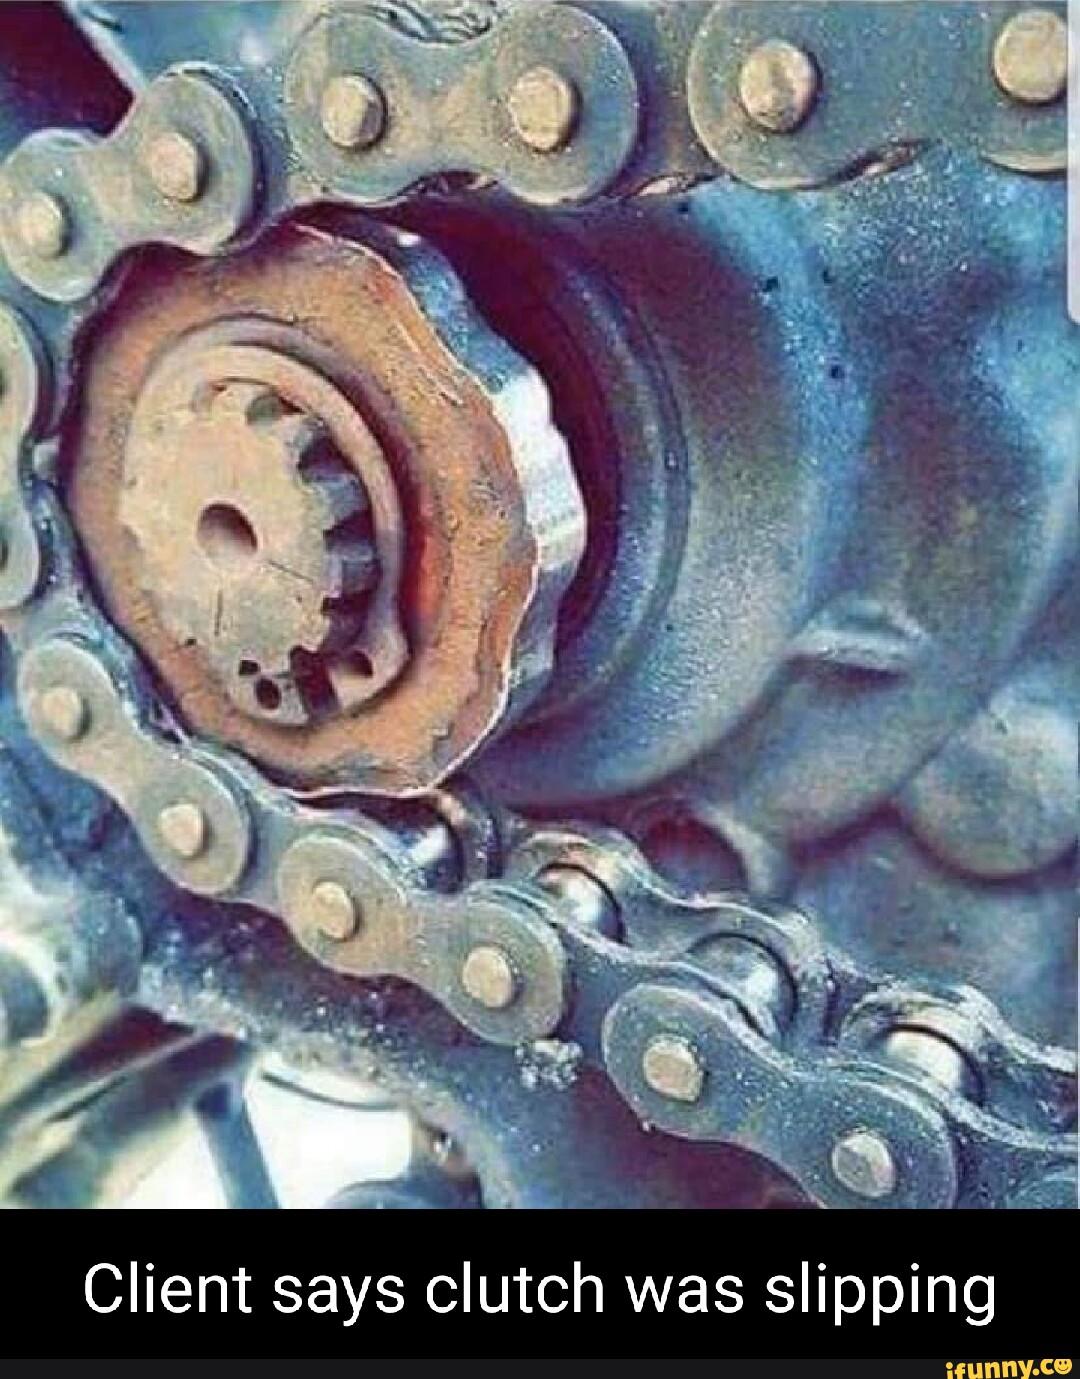
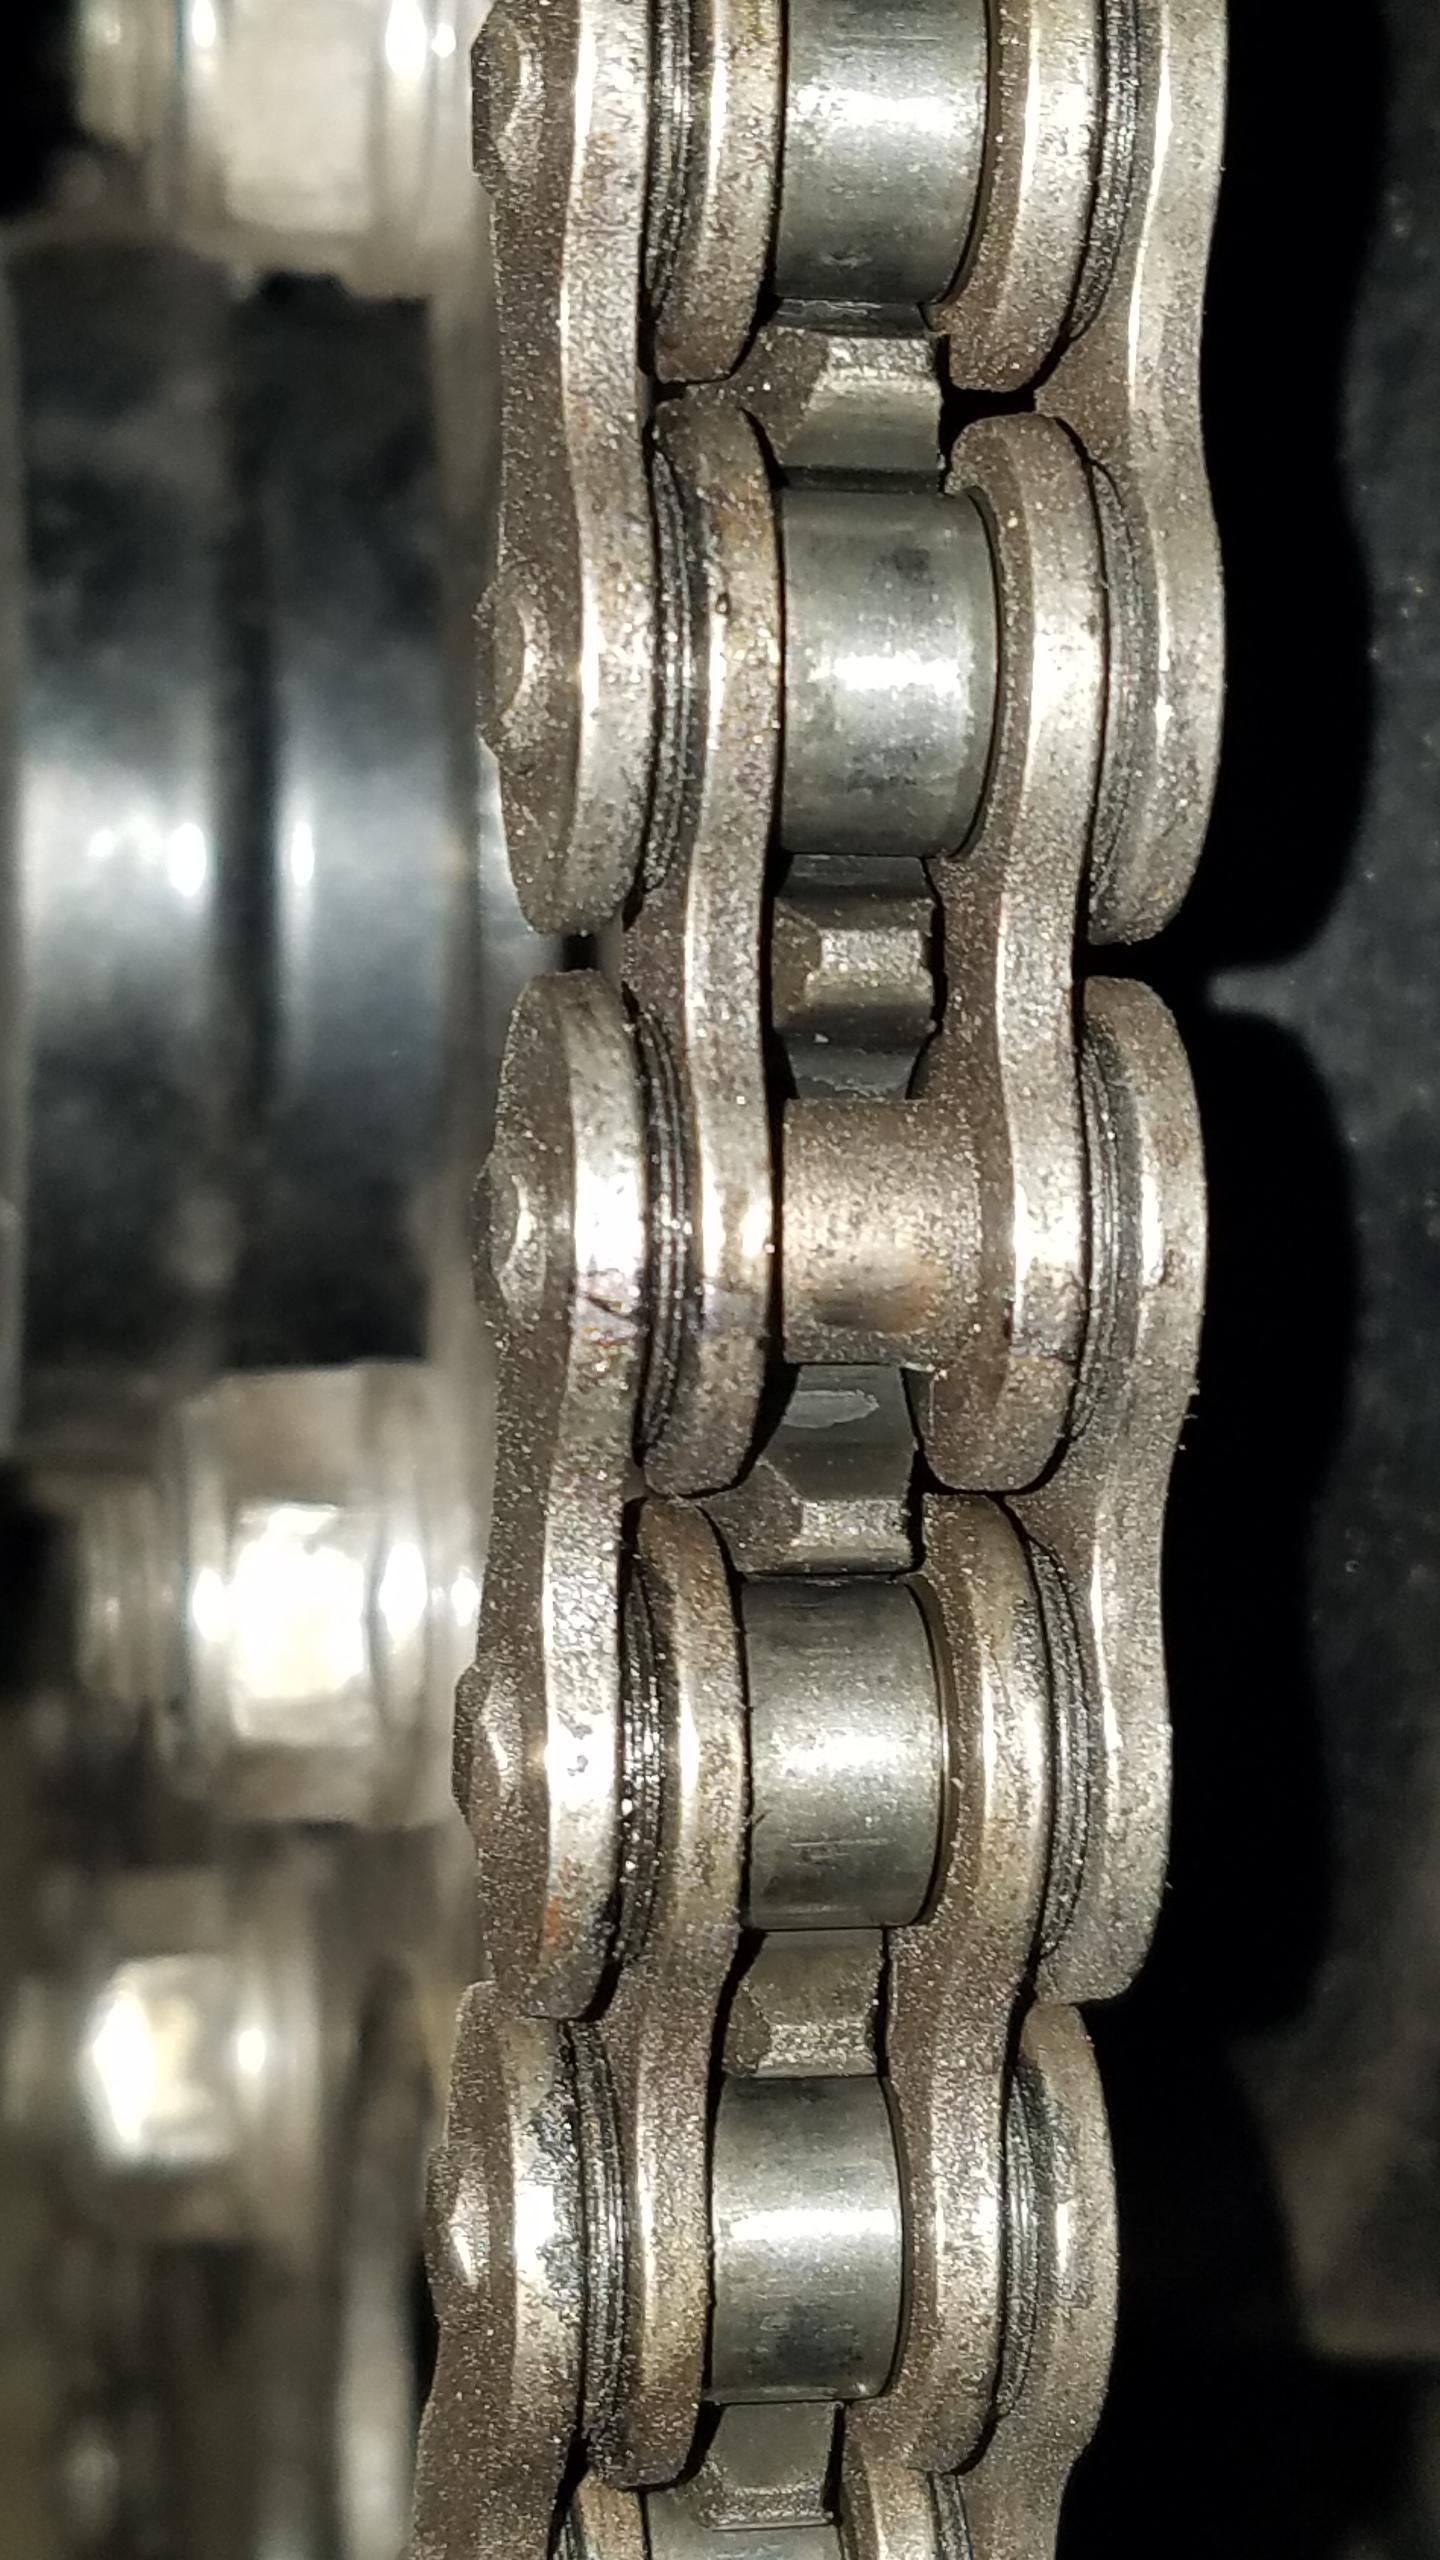
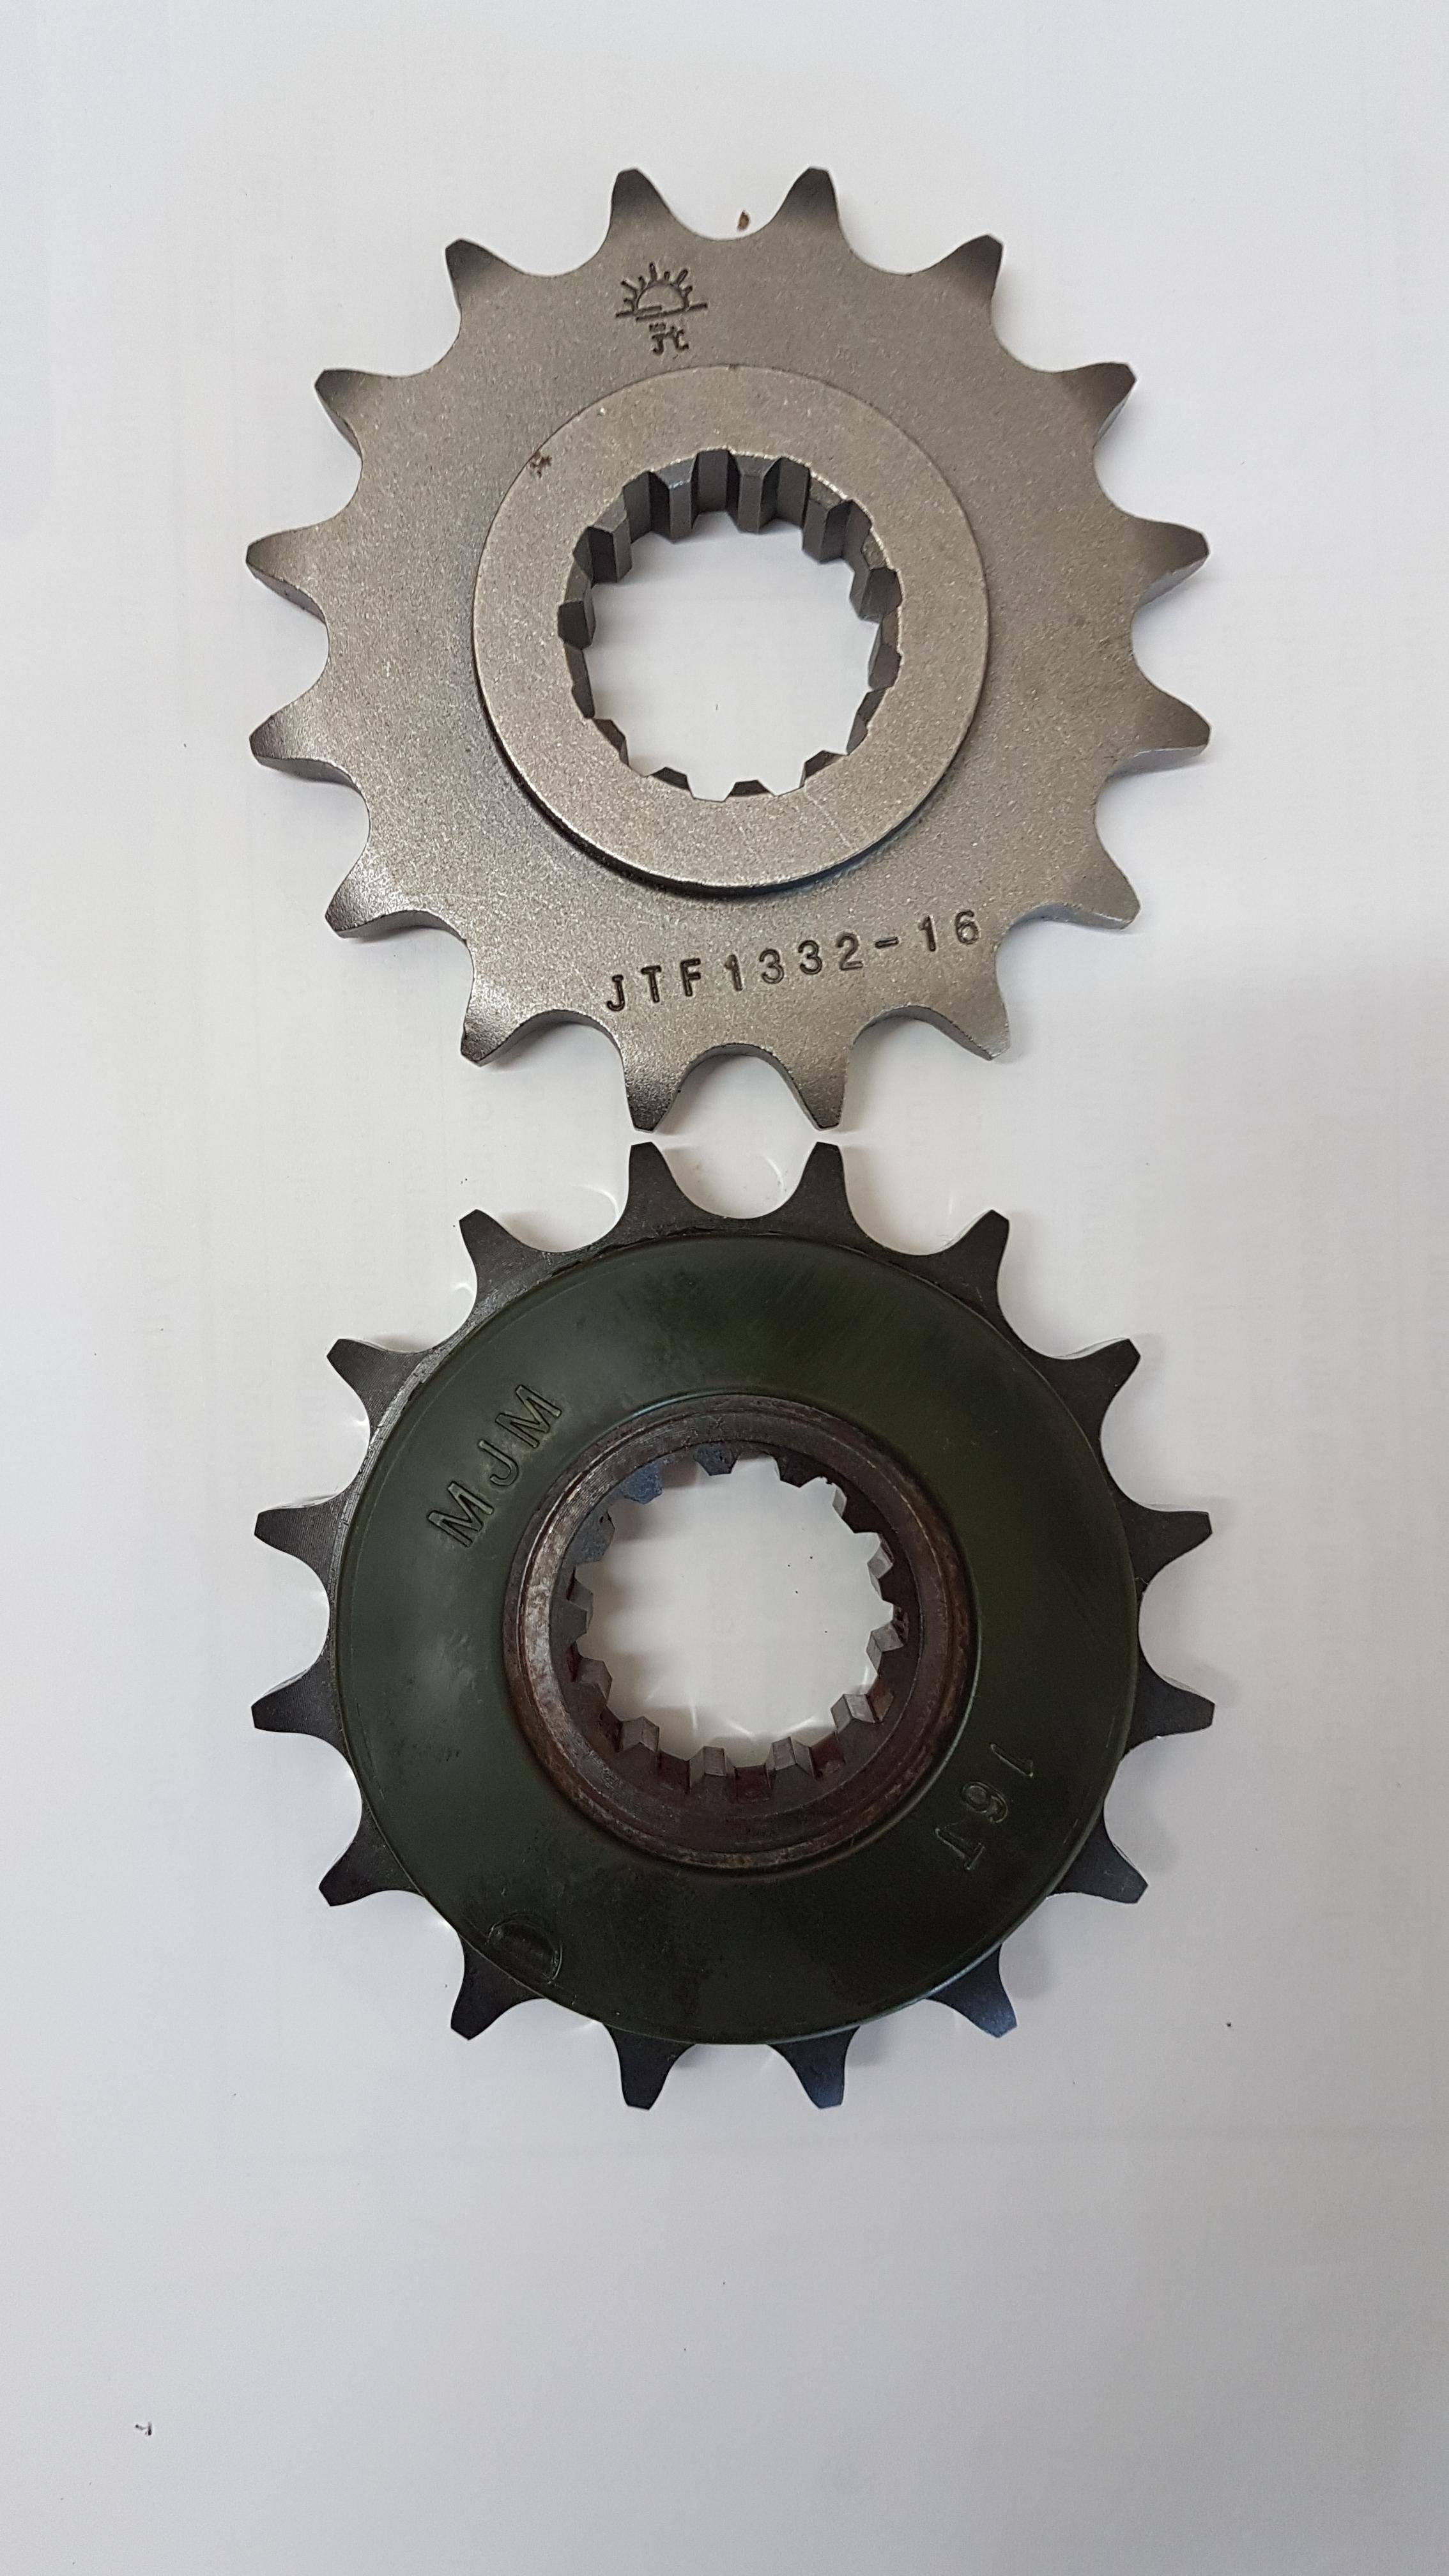
Amazing You guys have put together the best dam real life examples of chain and sprocket wear I have seen in a long time, laughable ones as well I looked for hours to find a picture of a front Honda sprocket and Grum flashes one up quicker than a knee dragging through corner 9, cool This 1999 VFR chain and sprockets do look good to my old eyes, but I have been out of the loop for years and it has 50,000km on it so I was hard pressed to think the previous owner installed Honda parts Keep it up1 point
-
That's magic. I don't think that even with proper care, they're made to go that long. O-rings break down. Lube comes out. Rollers break. My VFRs have been ~20k miles nearly like clockwork. The track bikes go ~5k-6k miles. If you've ever seen what a breaking chain does to a calf...
1 point
-
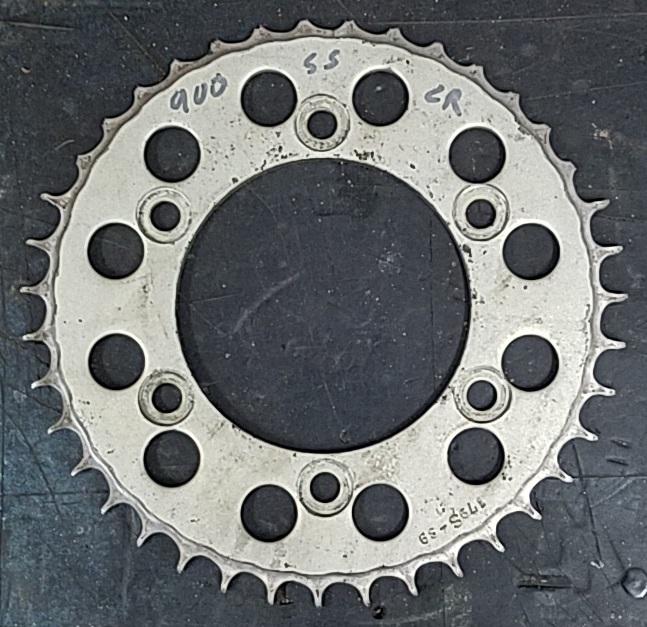
Just for info.... Here's my original 8gen drive sprocket after 74,000 km and the new replacement JT one fitted. (allow for a little Mobile Phone lens distortion, even the new sprocket looks a little non uniform in shape) My current original rear 43T Sprocket has done 96,000 km and has no visible sign of wear! I do have a replacement rear sprocket ready to go for the next chain replacement, but will it really need replacing???? The bottom line here is that always replacing sprockets and chains as a set is old school and a waste of money. Meticulous attention to chain tension and regular Chain/Sprocket lubrication will see good quality sprockets last for ages, particularly the OEM. And as Honda descibes in their Owners Manual, if there's no sign of visible wear, there's no need to replace them. I guess it's also fair to say that riding styles, riding conditions and weather, along with those who unfortunately have to ride on salt laden roads will have a big effect on both chain and sprocket mileage. BUT, As always YMMV.
1 point
-
For reference, this is nearly done. lol
1 point
-
JT sprockets also have the rubber. I picked this up recently - https://jkmoto.ie/product/jt-front-sprocket-jtf339-16rb-16-tooth-pitch-530-rubber-damper/ Its the 16T version, they also do the stock 17T version. I went with 16/43 on my 01 vfr, not a huge difference, but I do notice a little more grunt at low rpms.1 point
-
Carnaval ends tomorrow in the Netherlands, so I still wore "Oeteldonk" colors on my ride to work this morning 🙂
1 point
-
Welcome... good that you found the bleeding regulator... Dutchy knows what he talks about on the little volt gauge.1 point
-
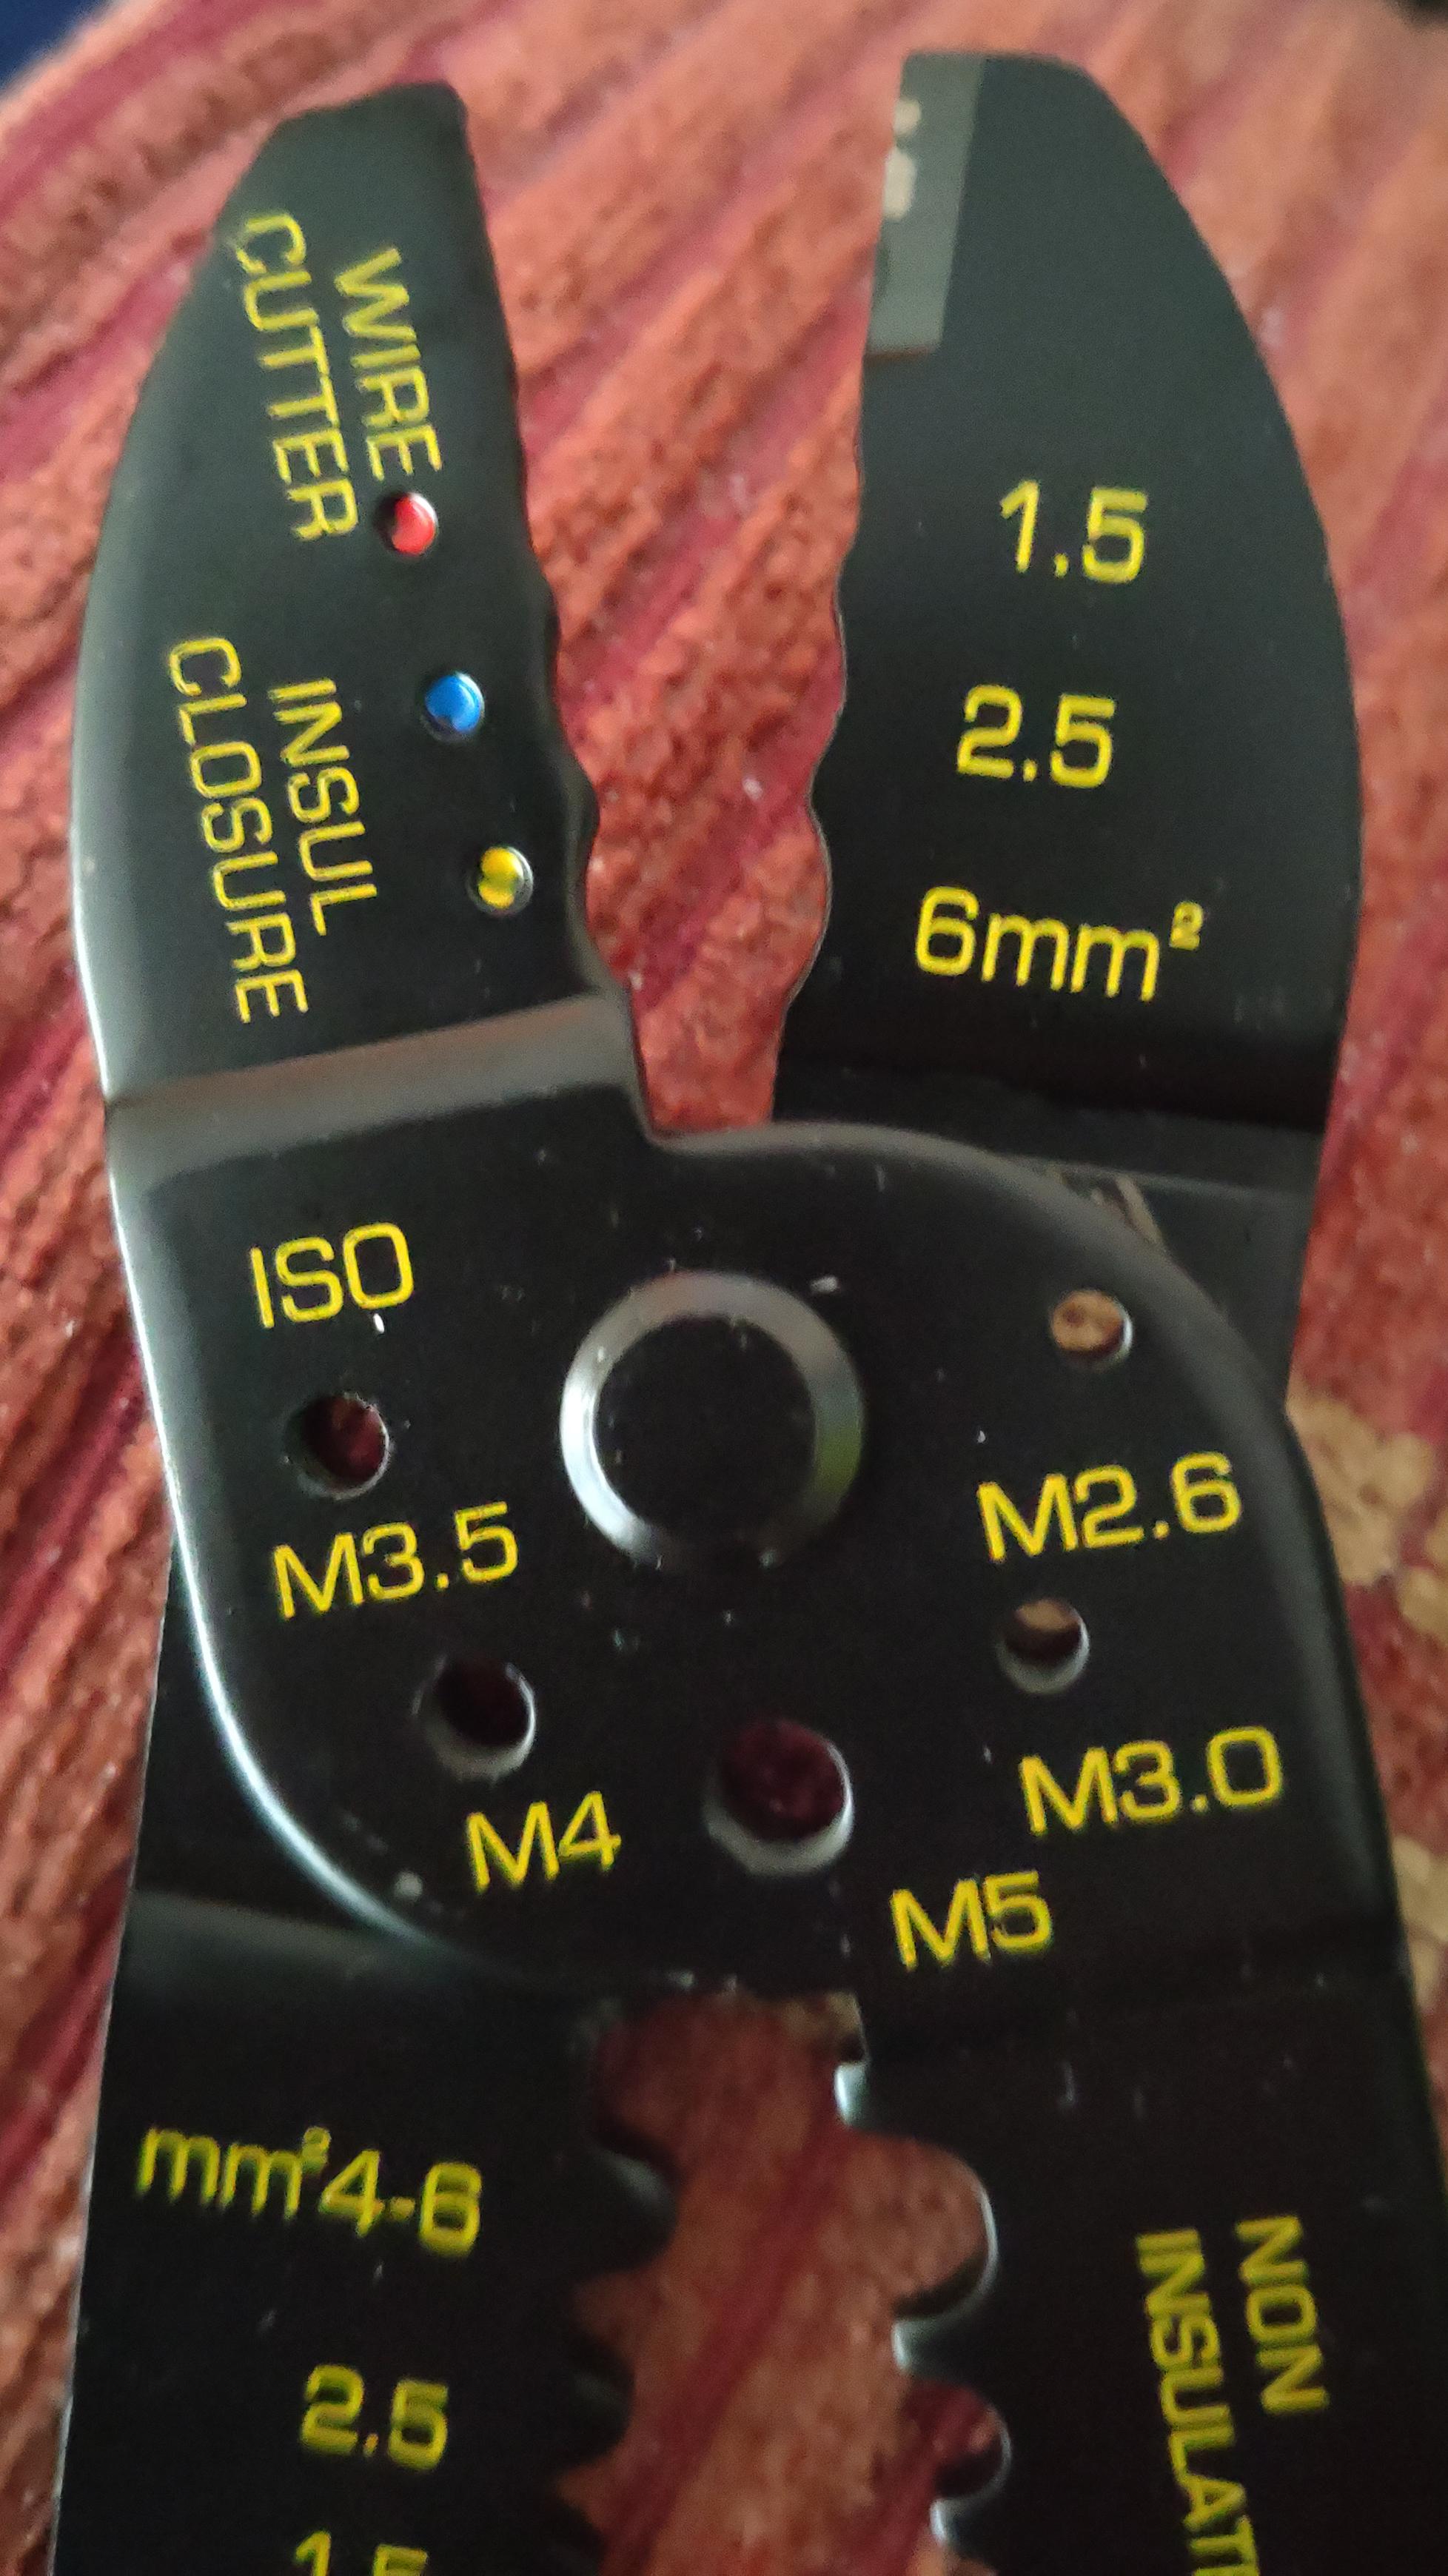
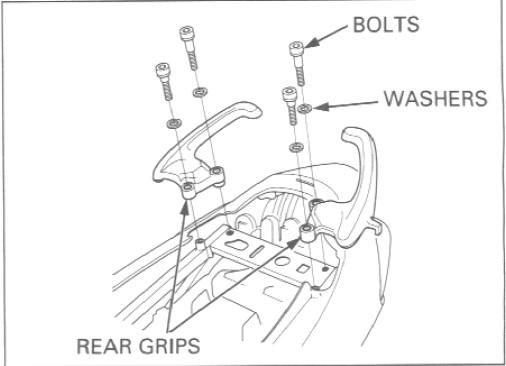
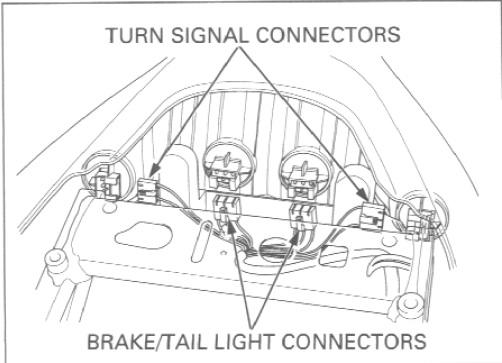
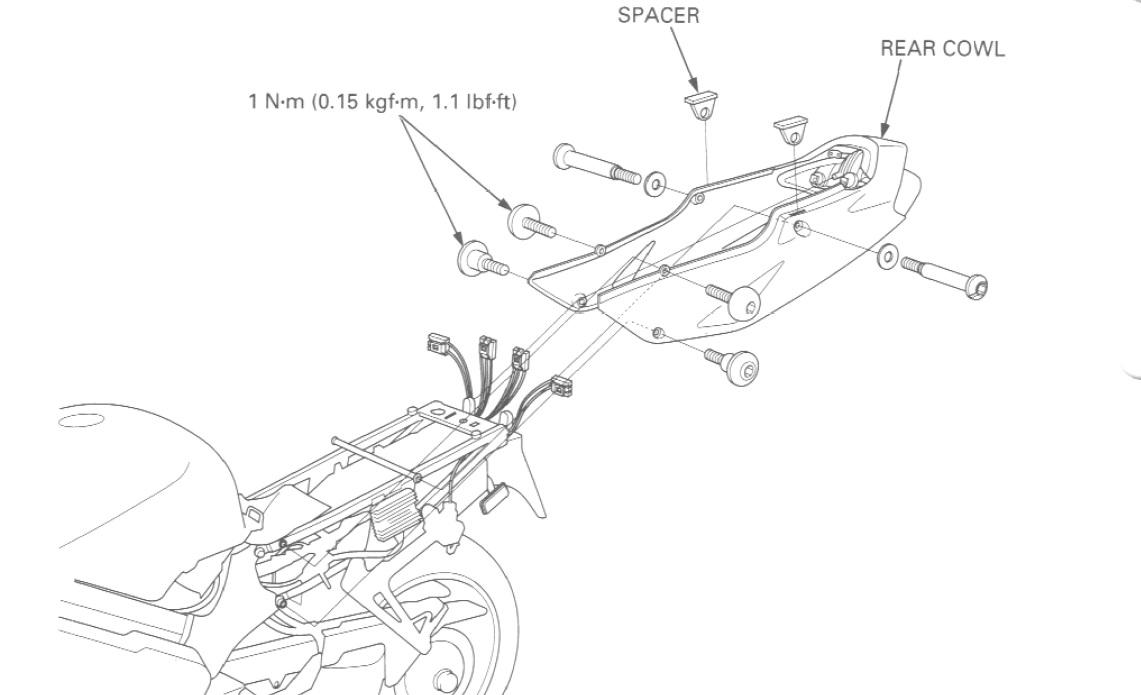
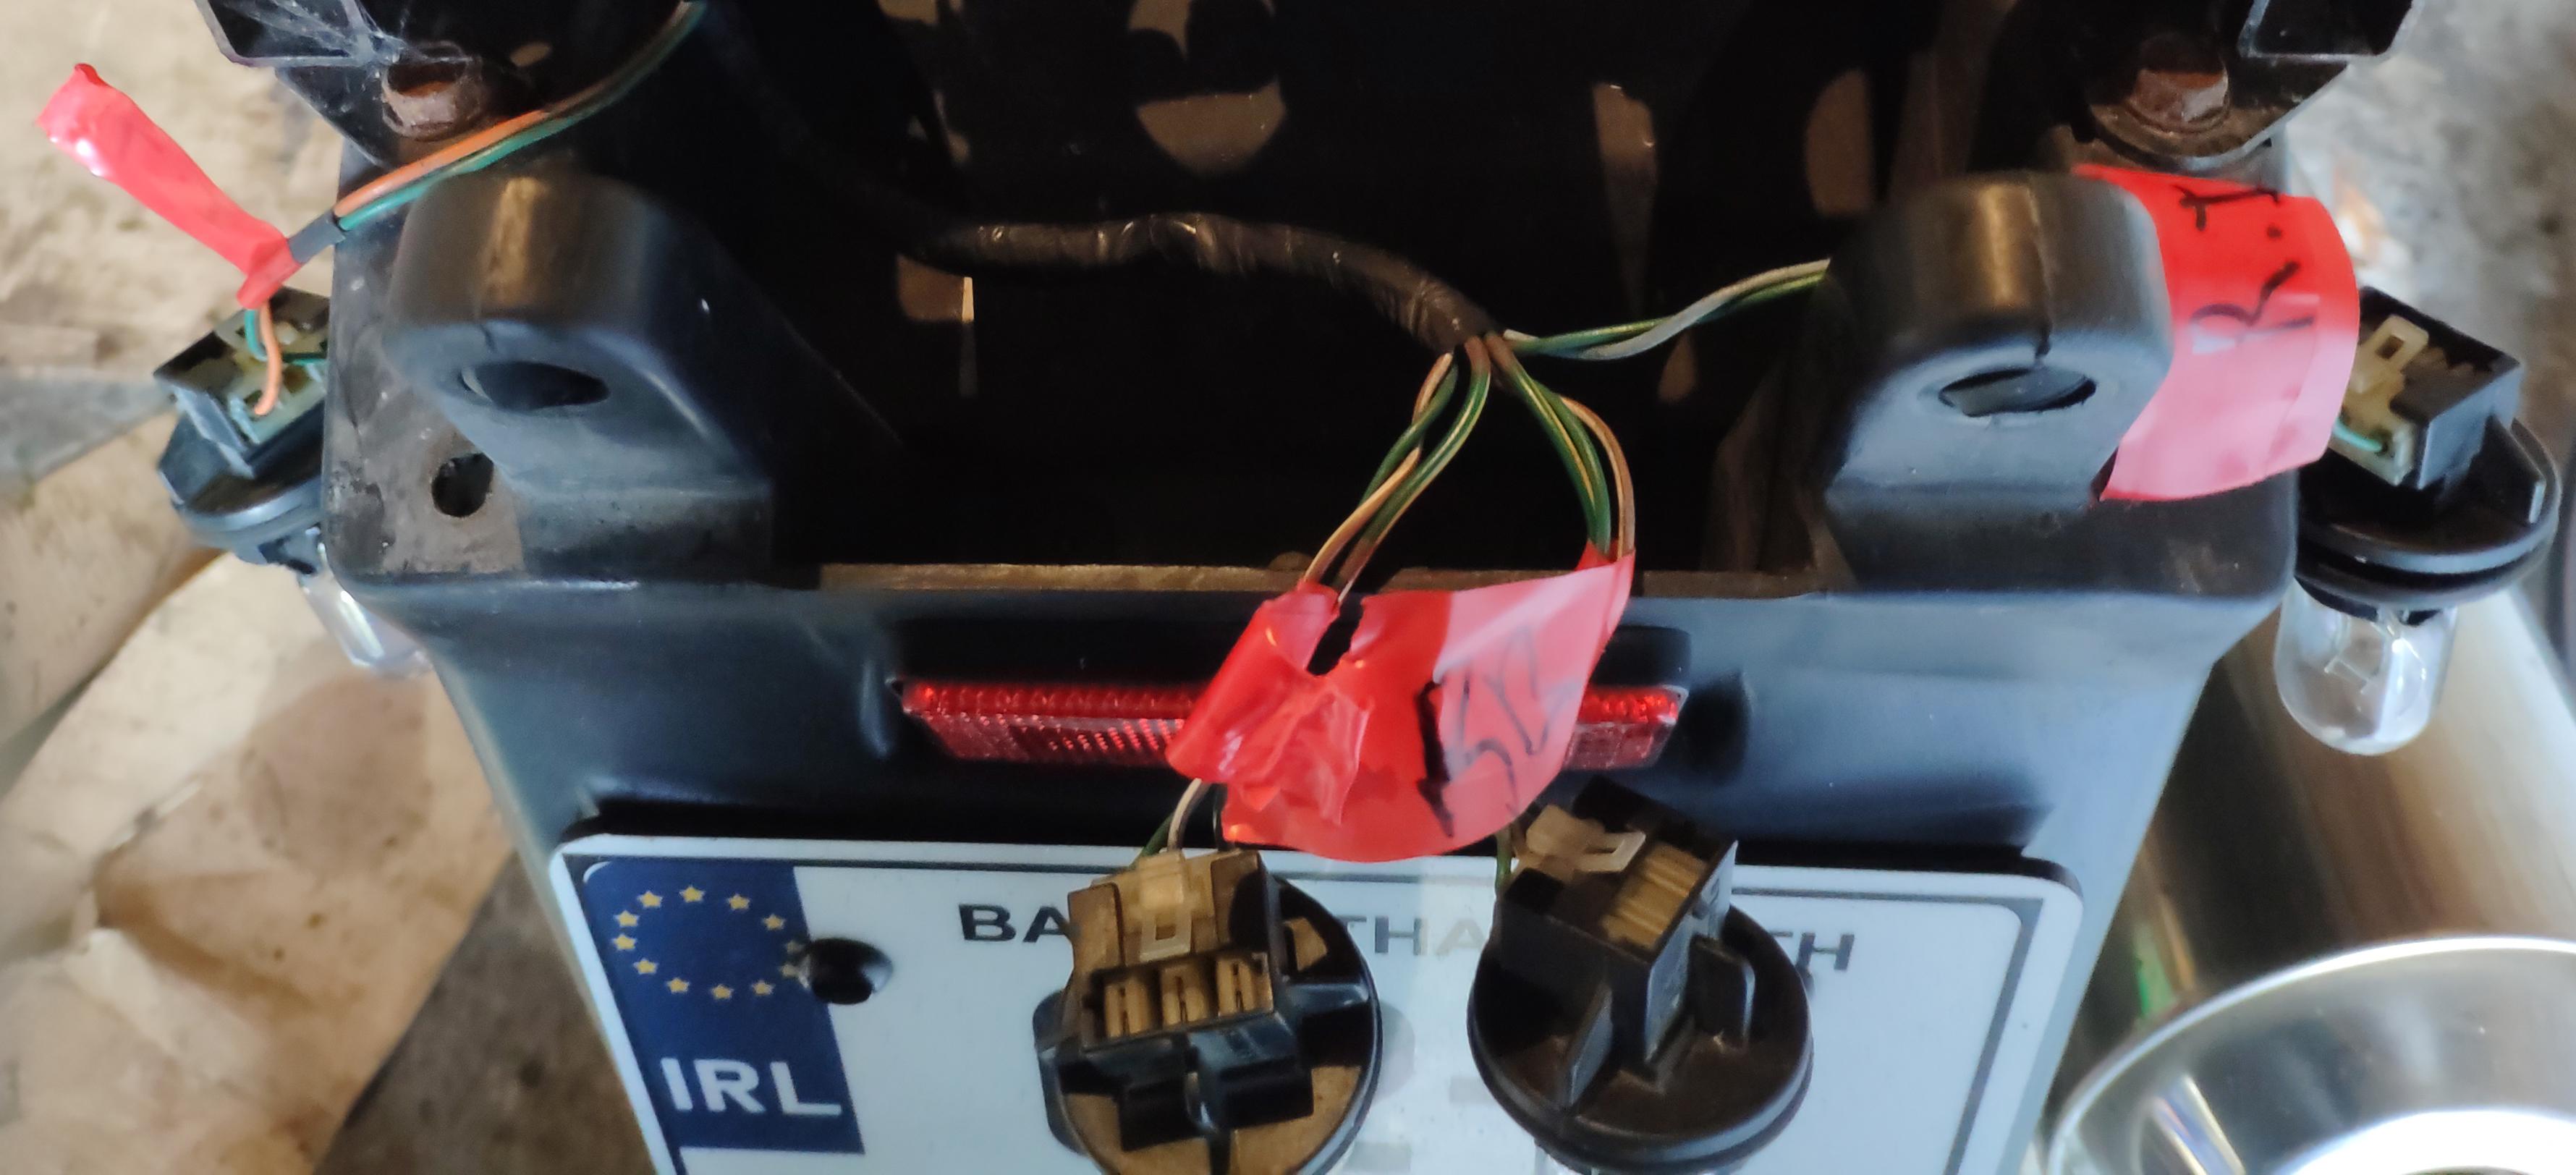
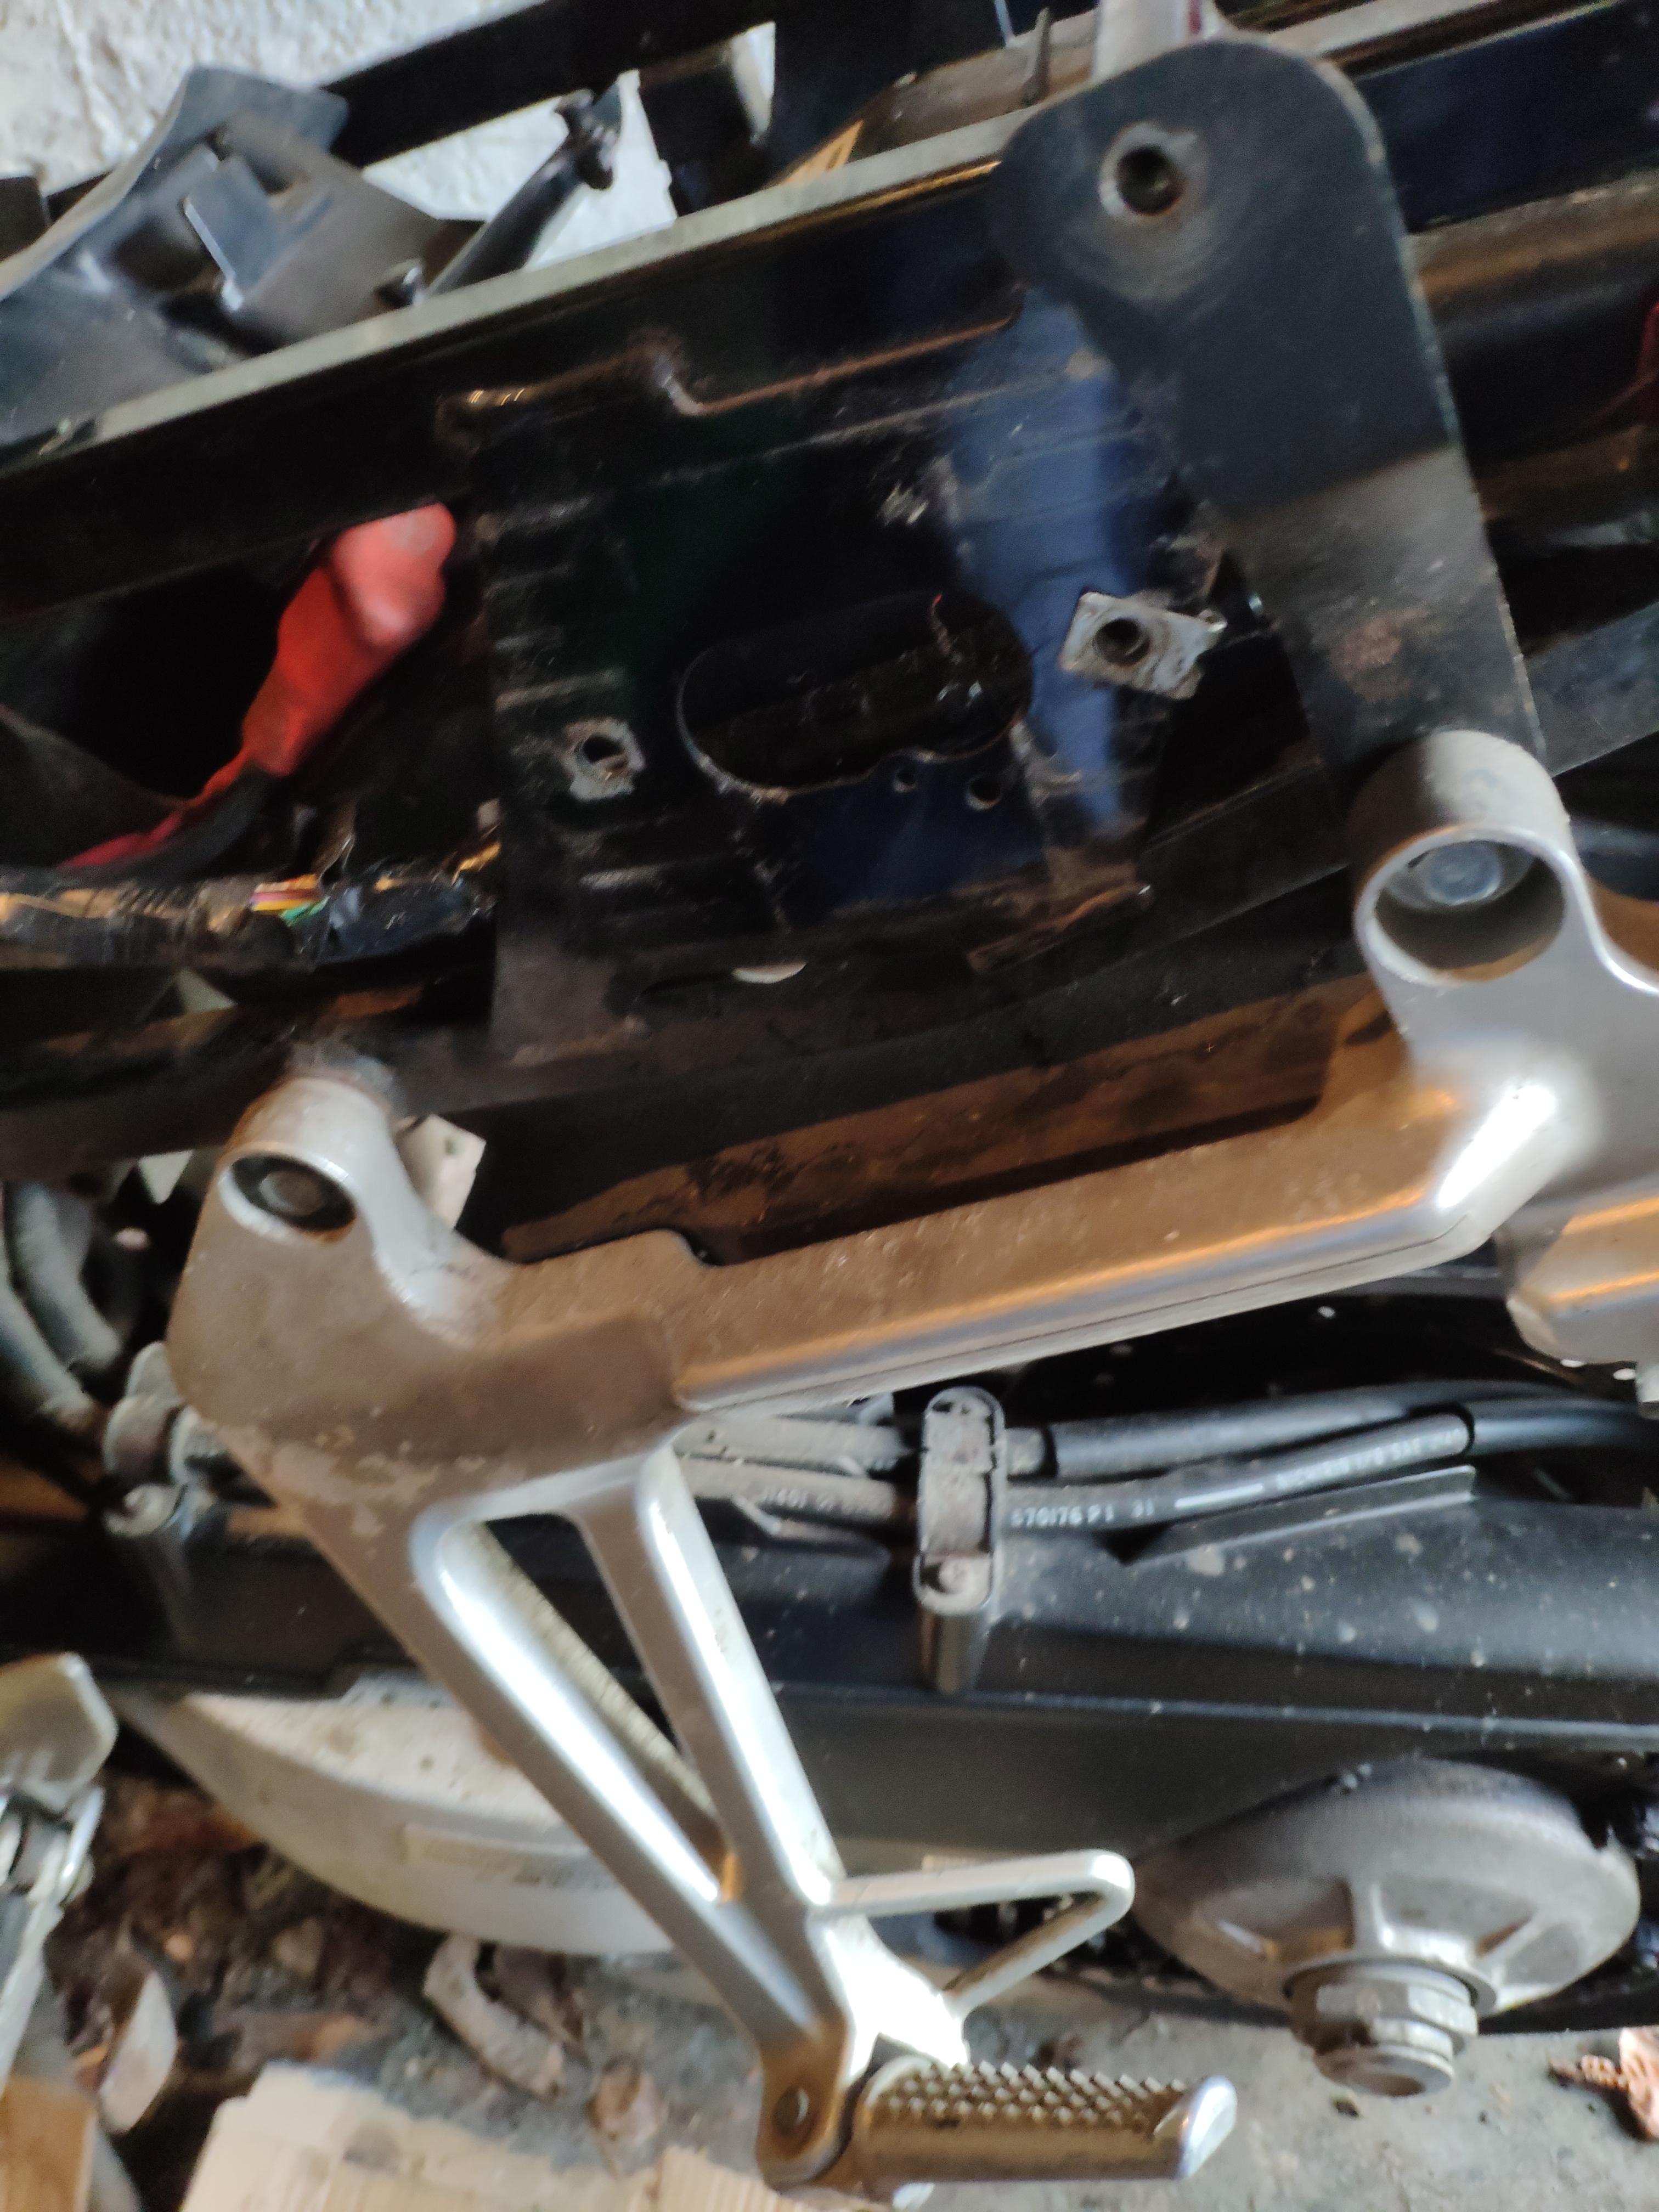
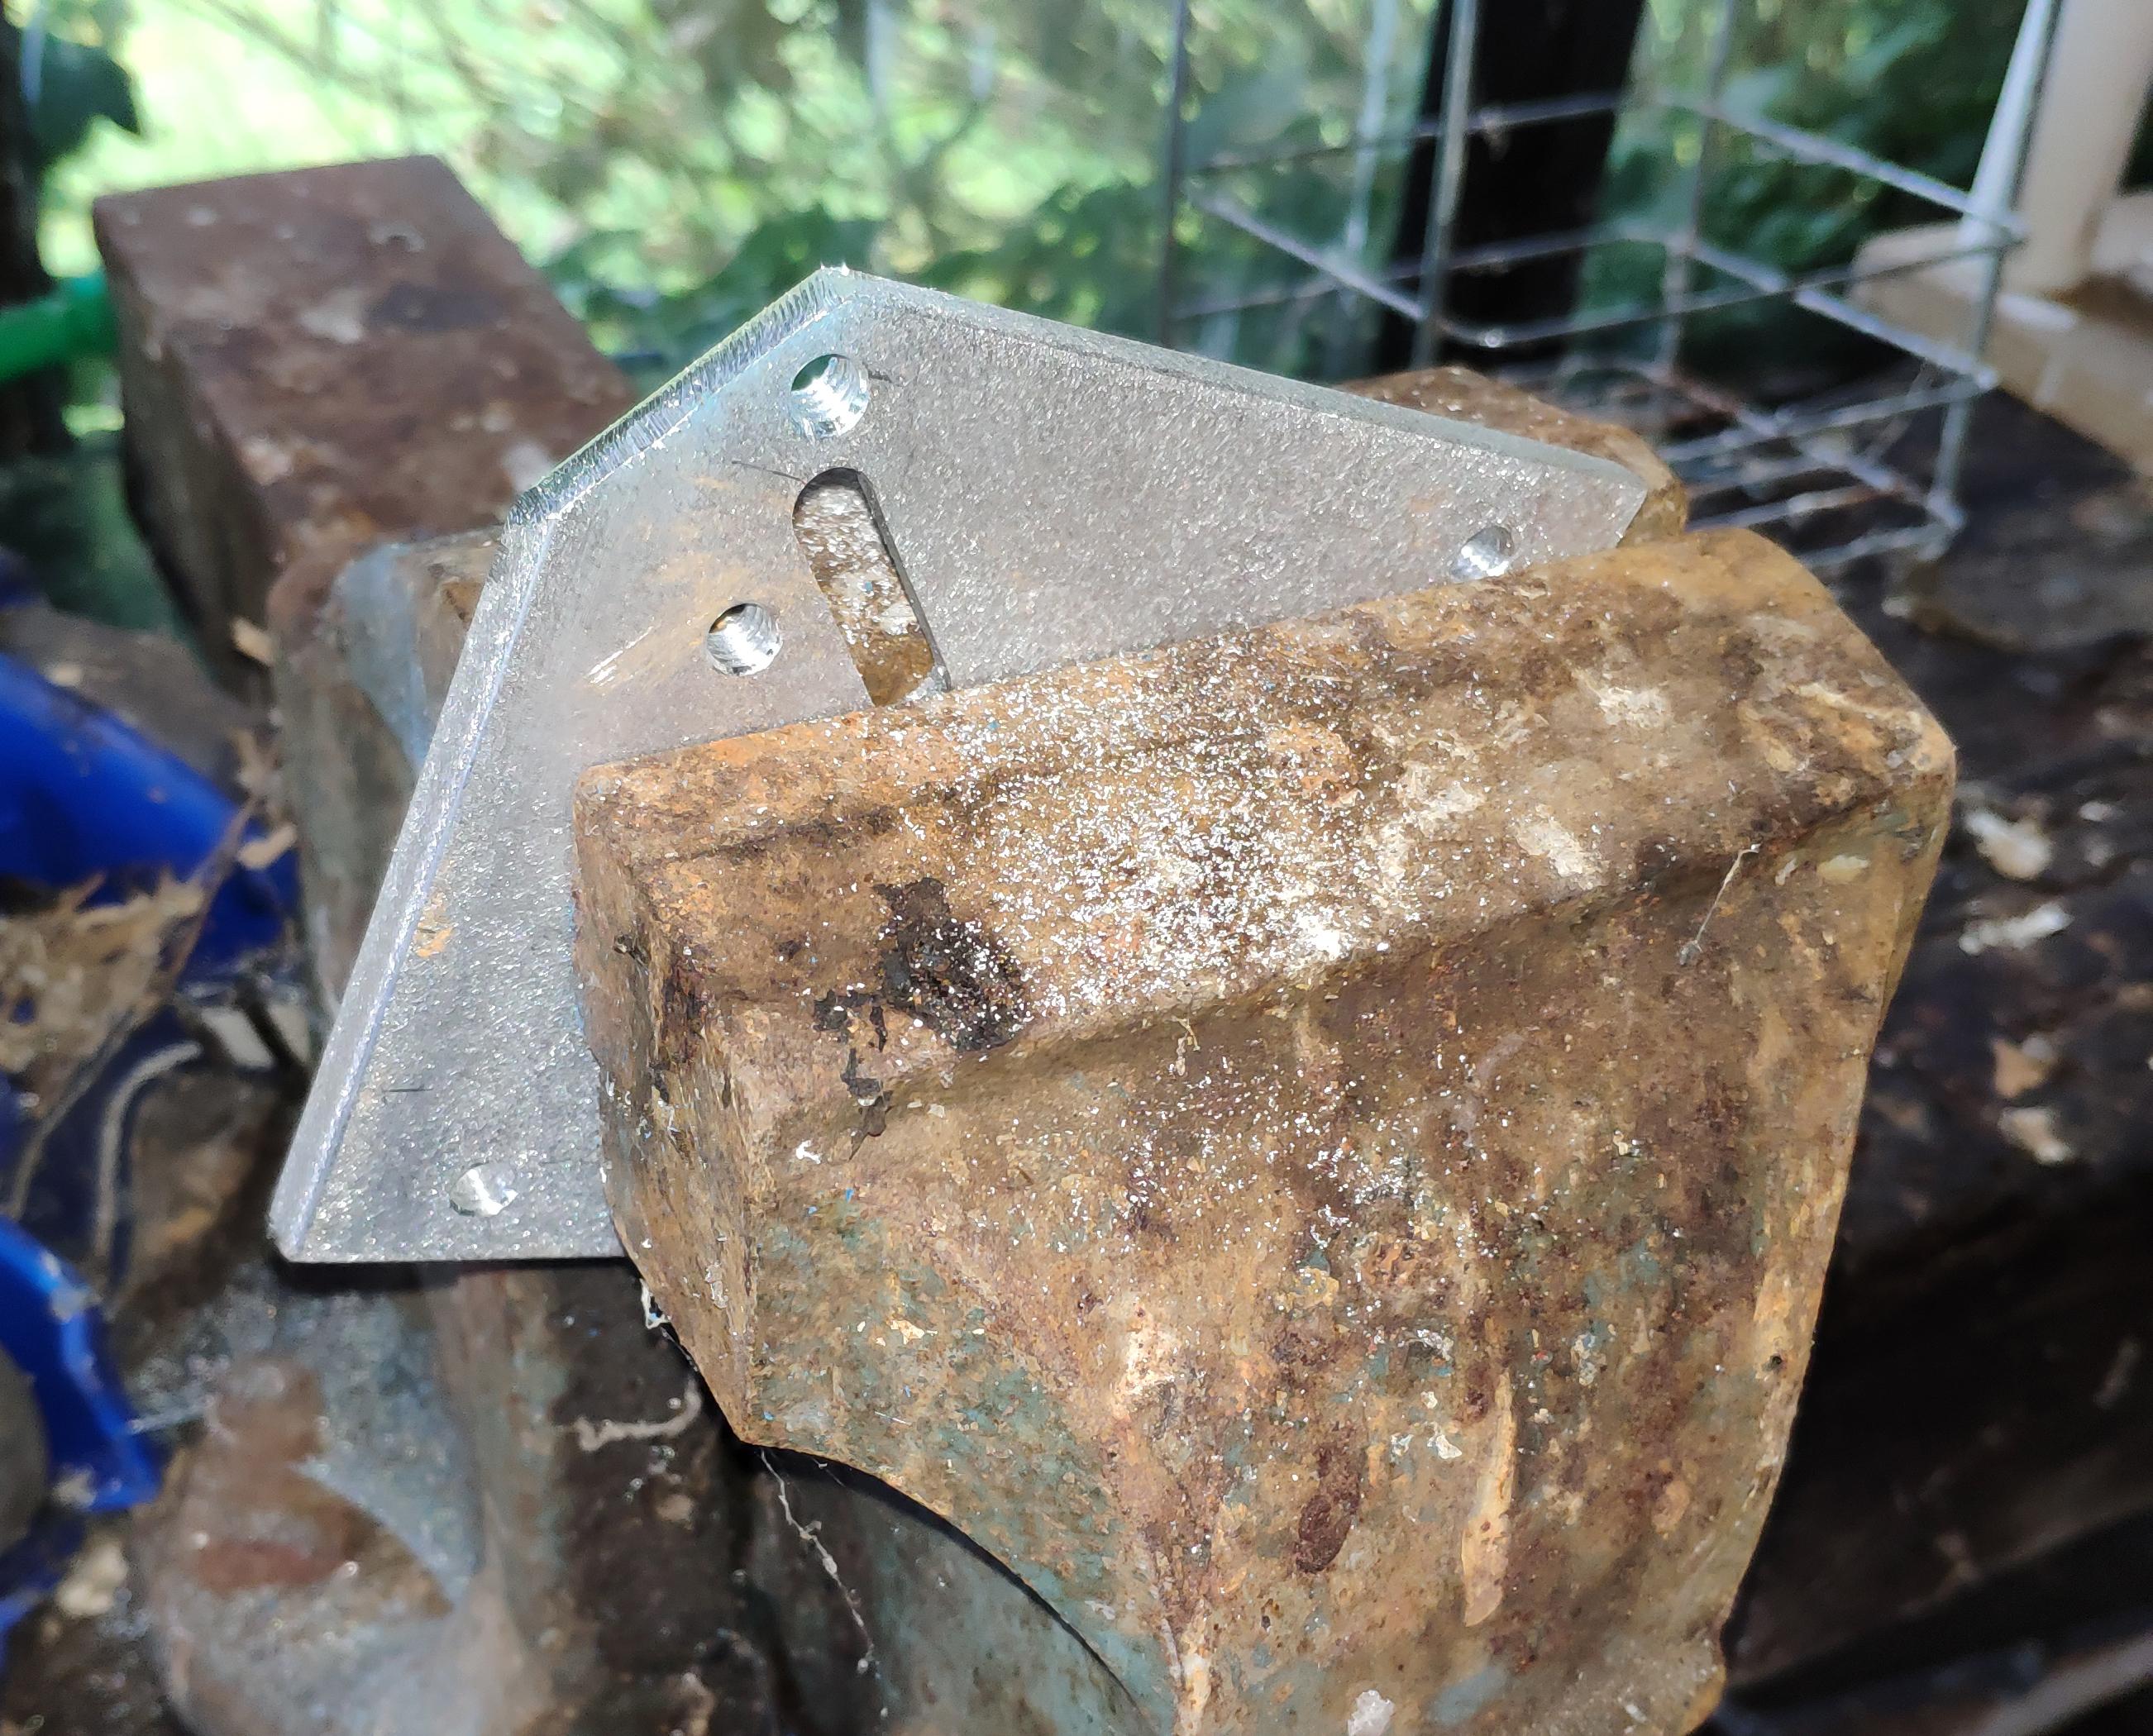
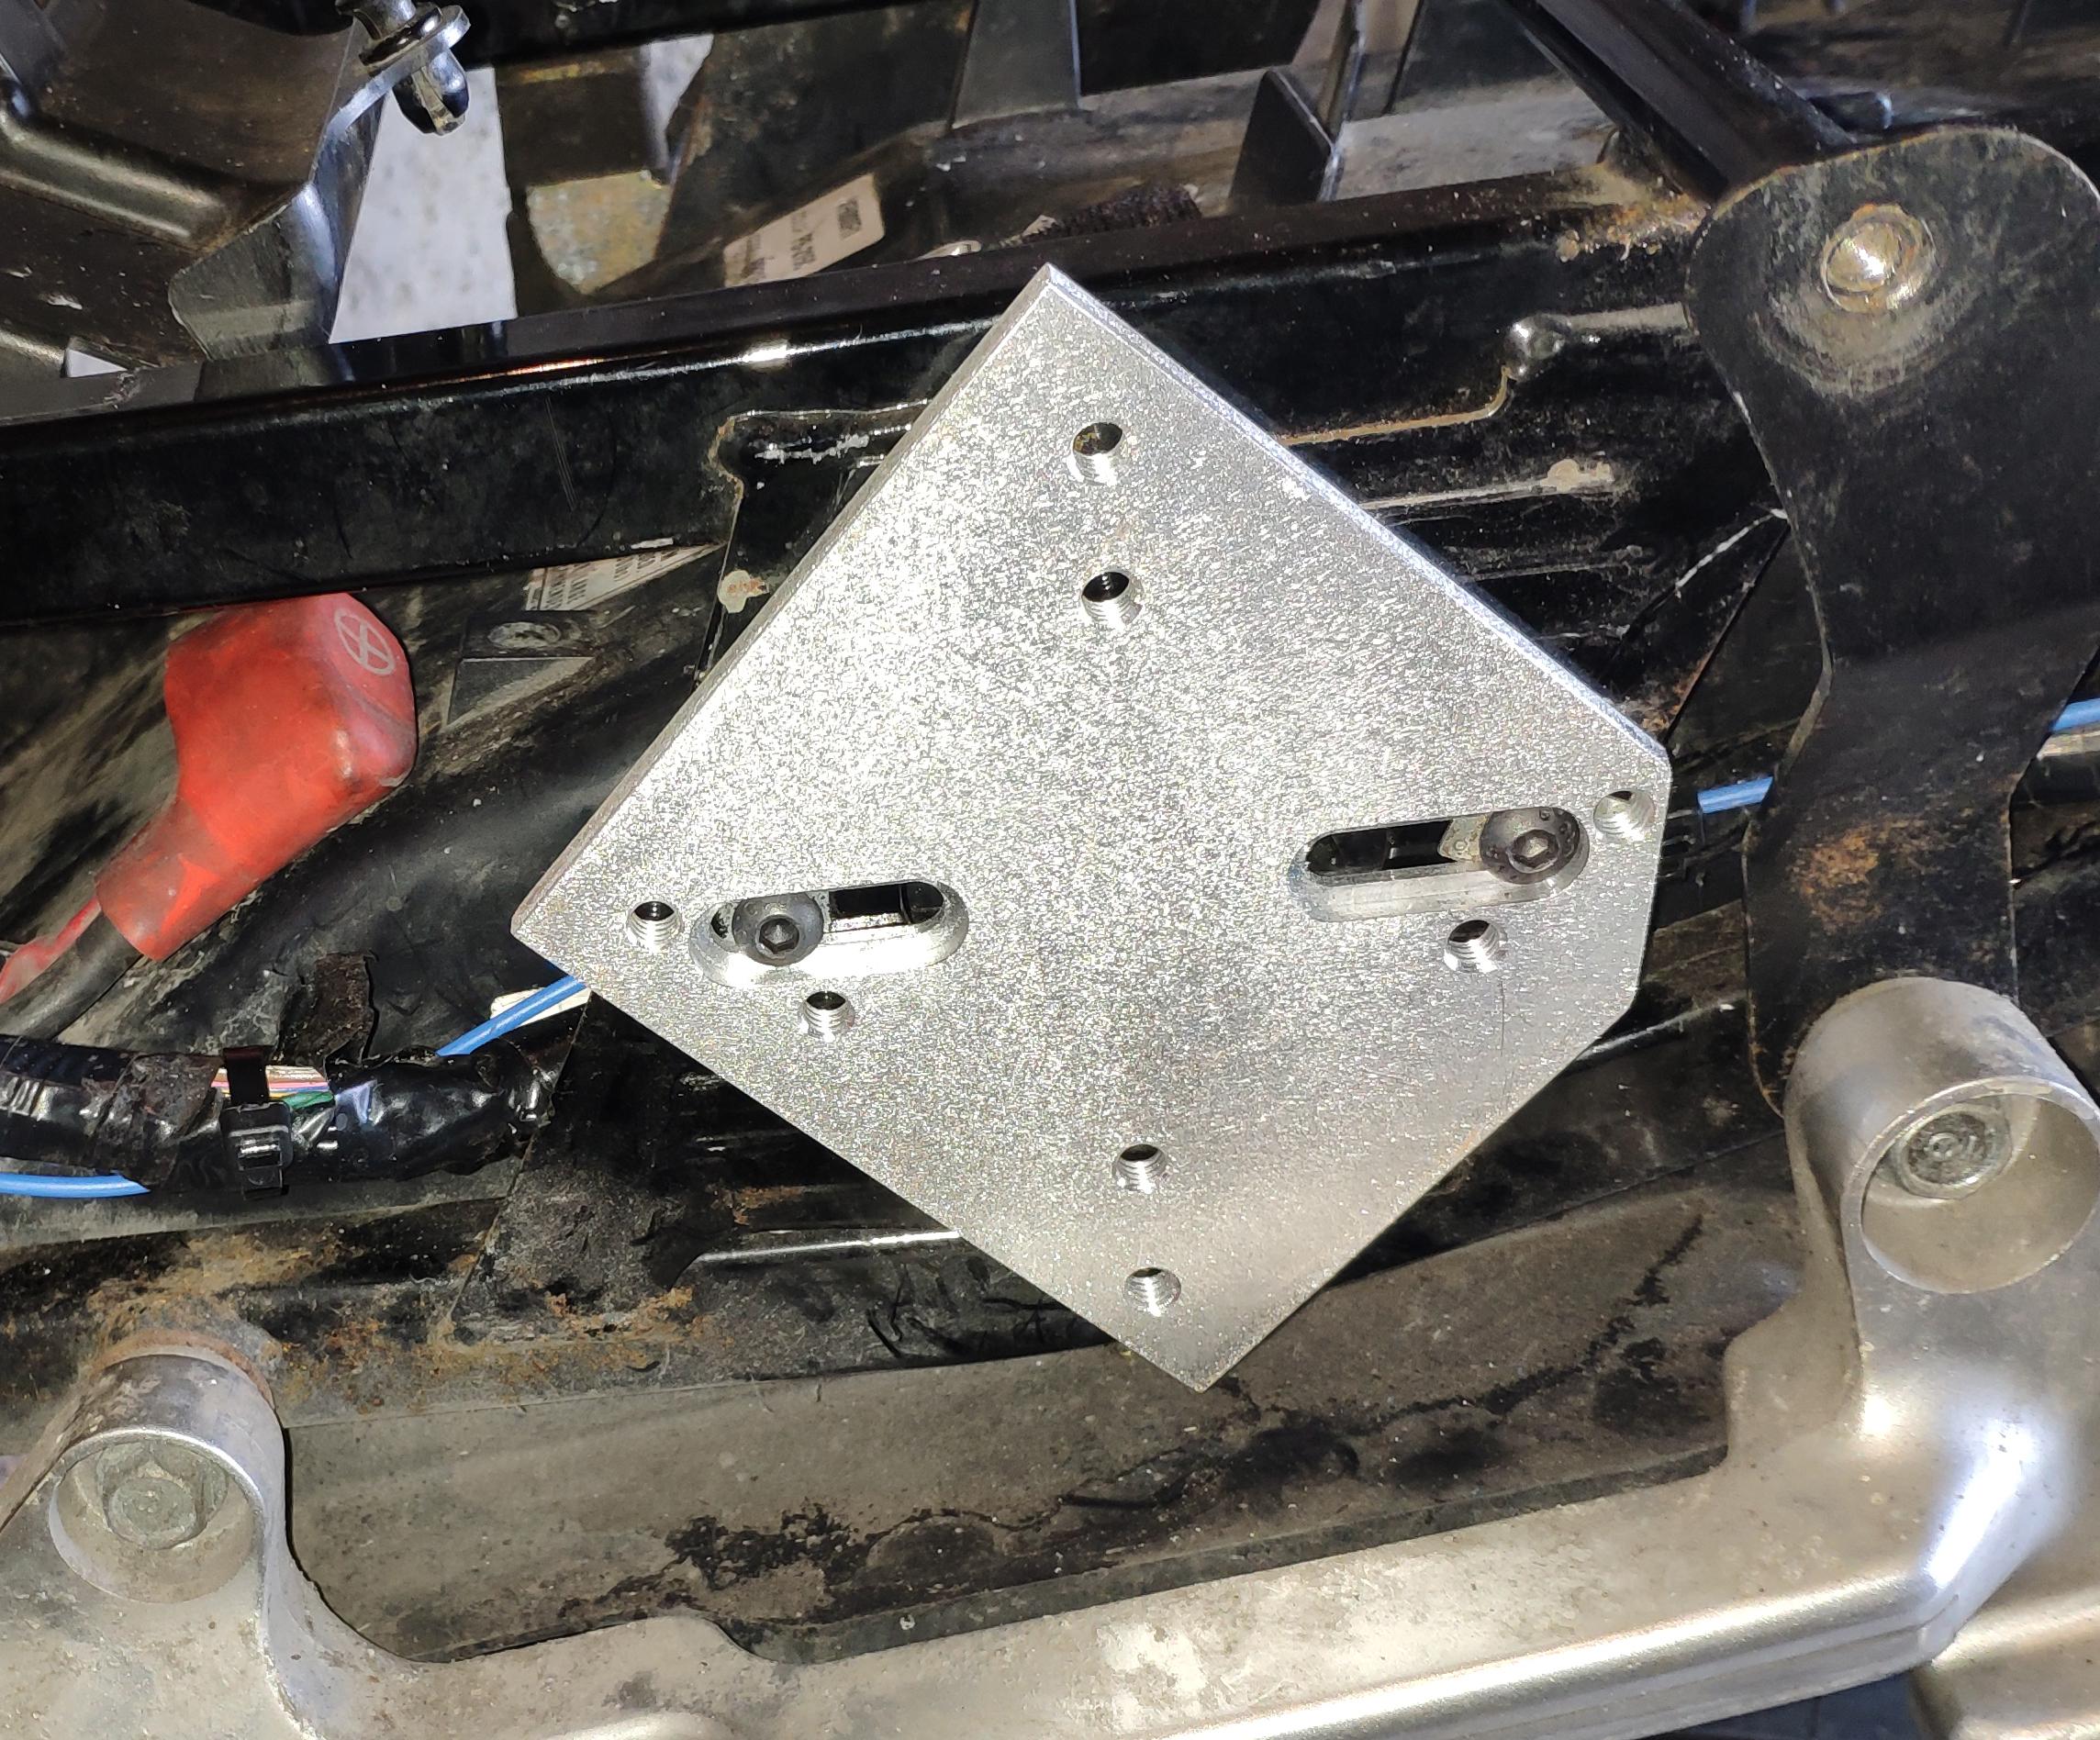
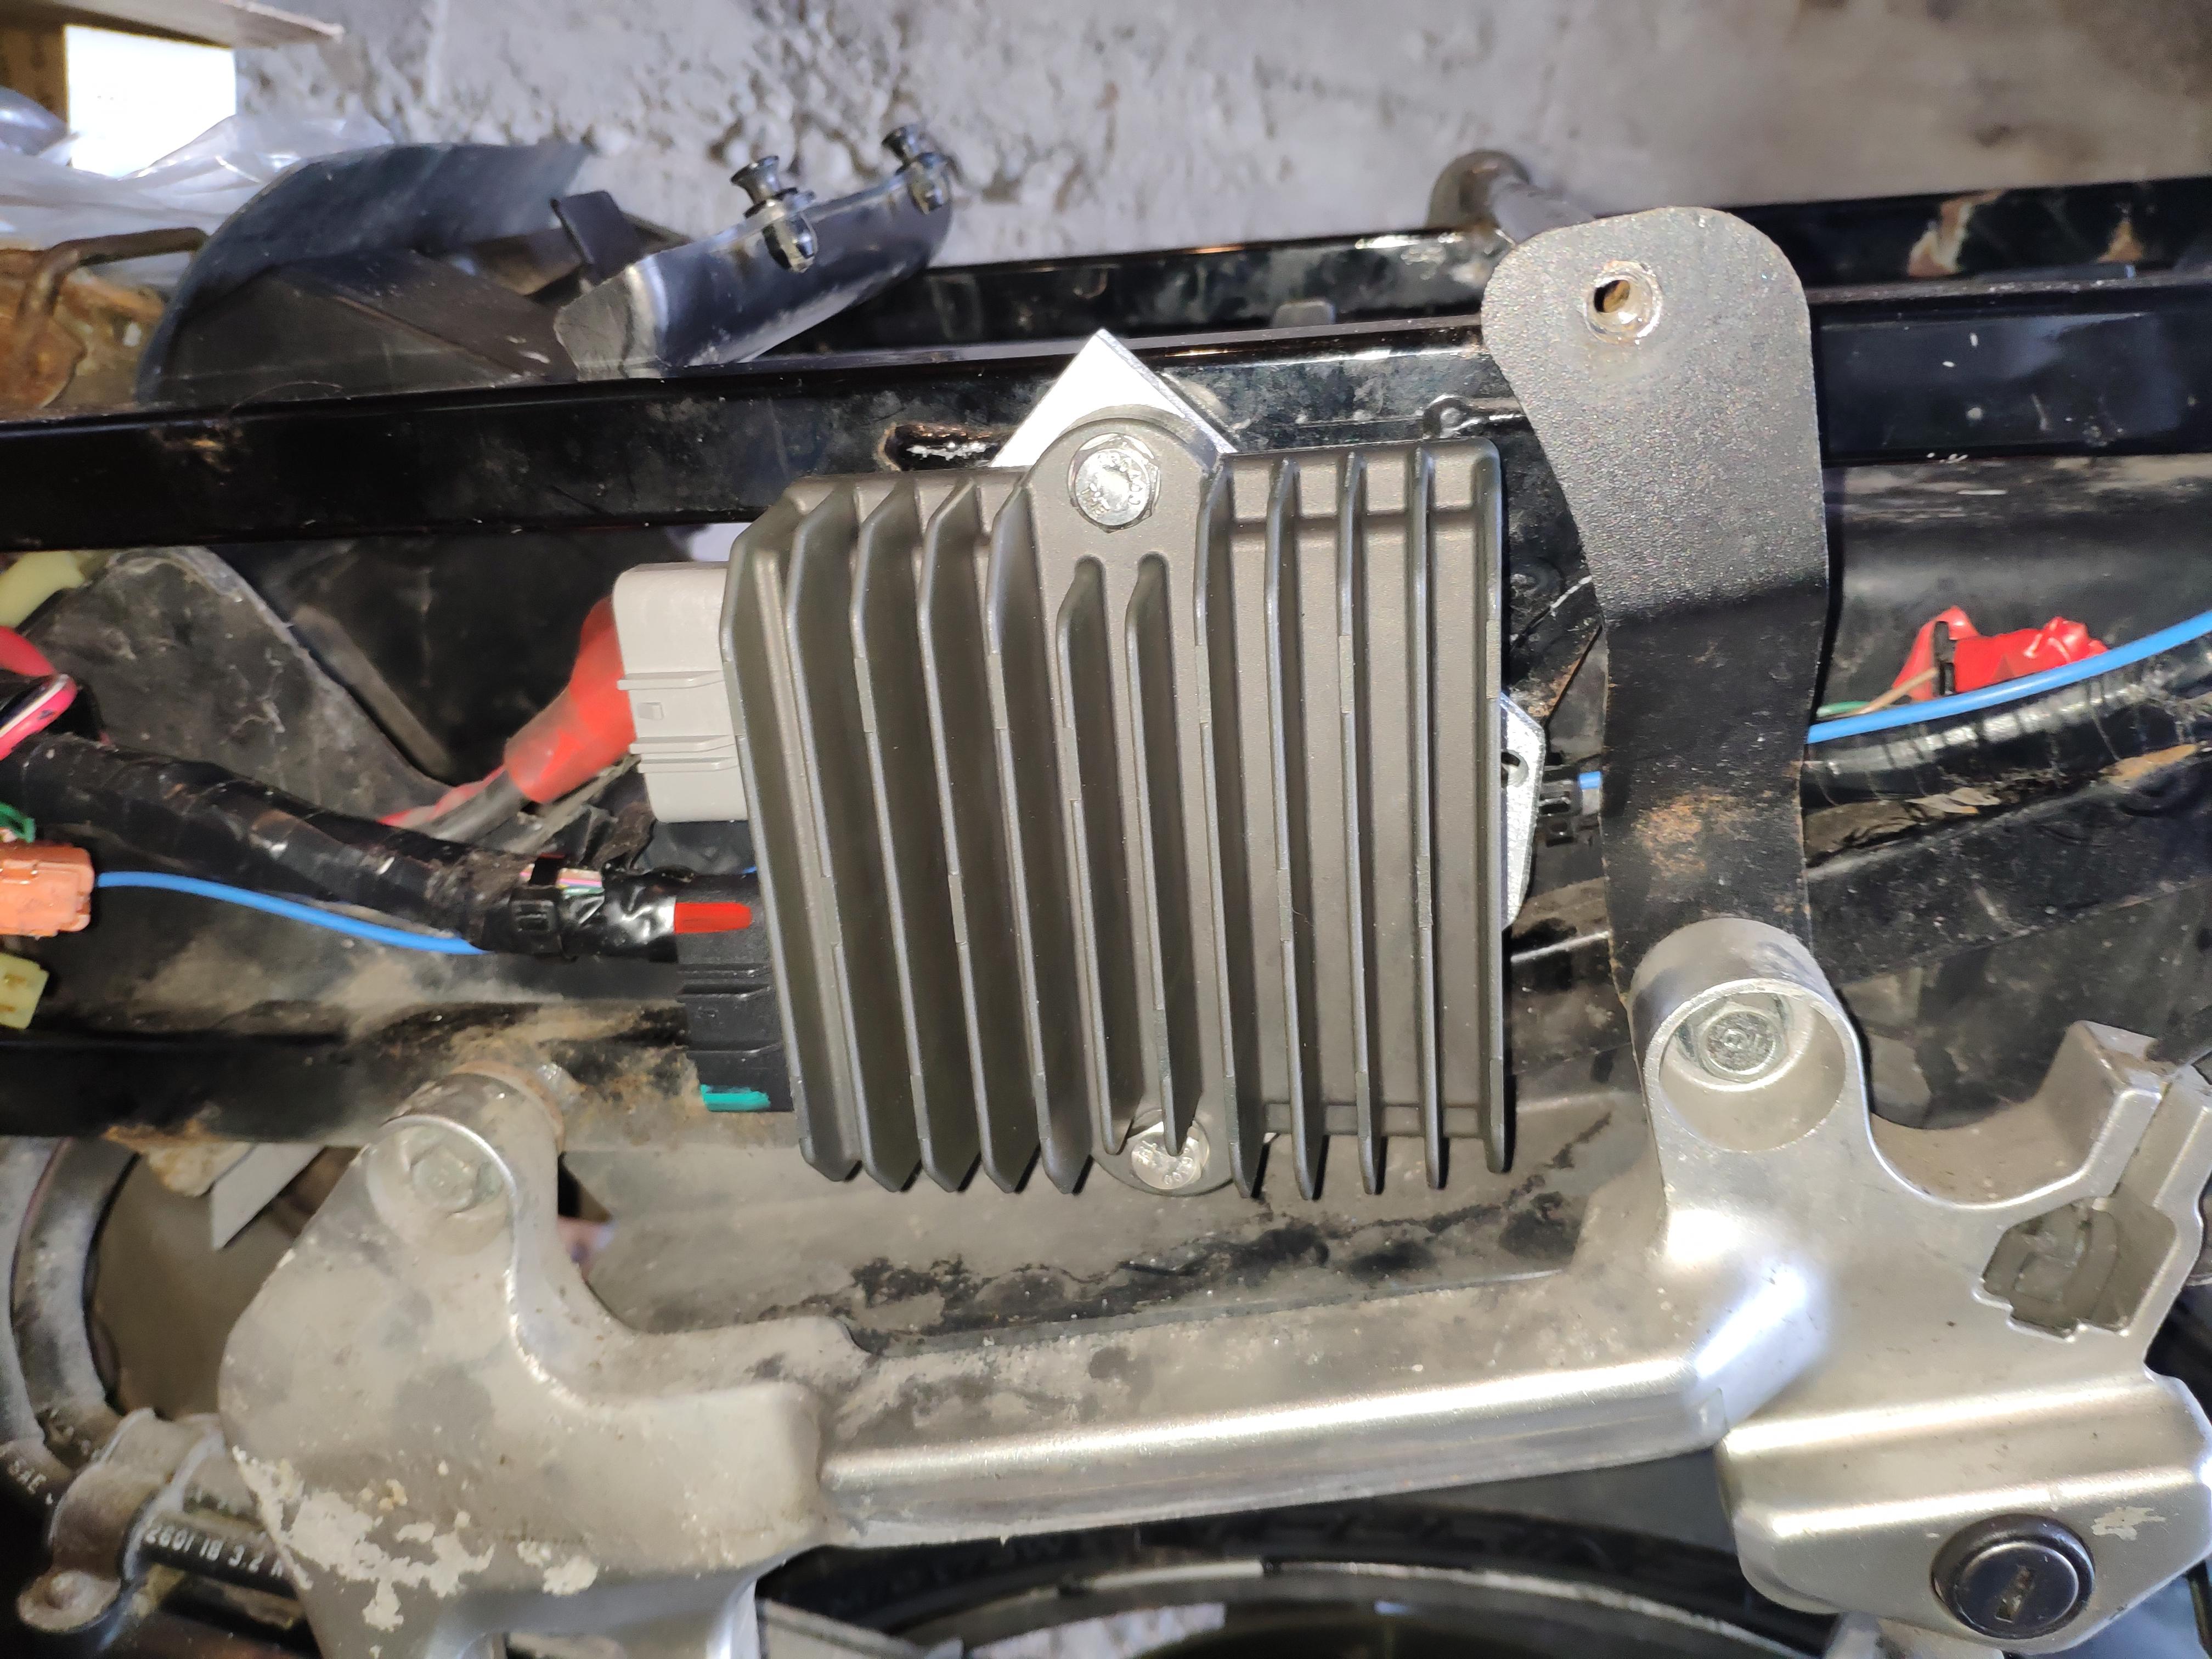
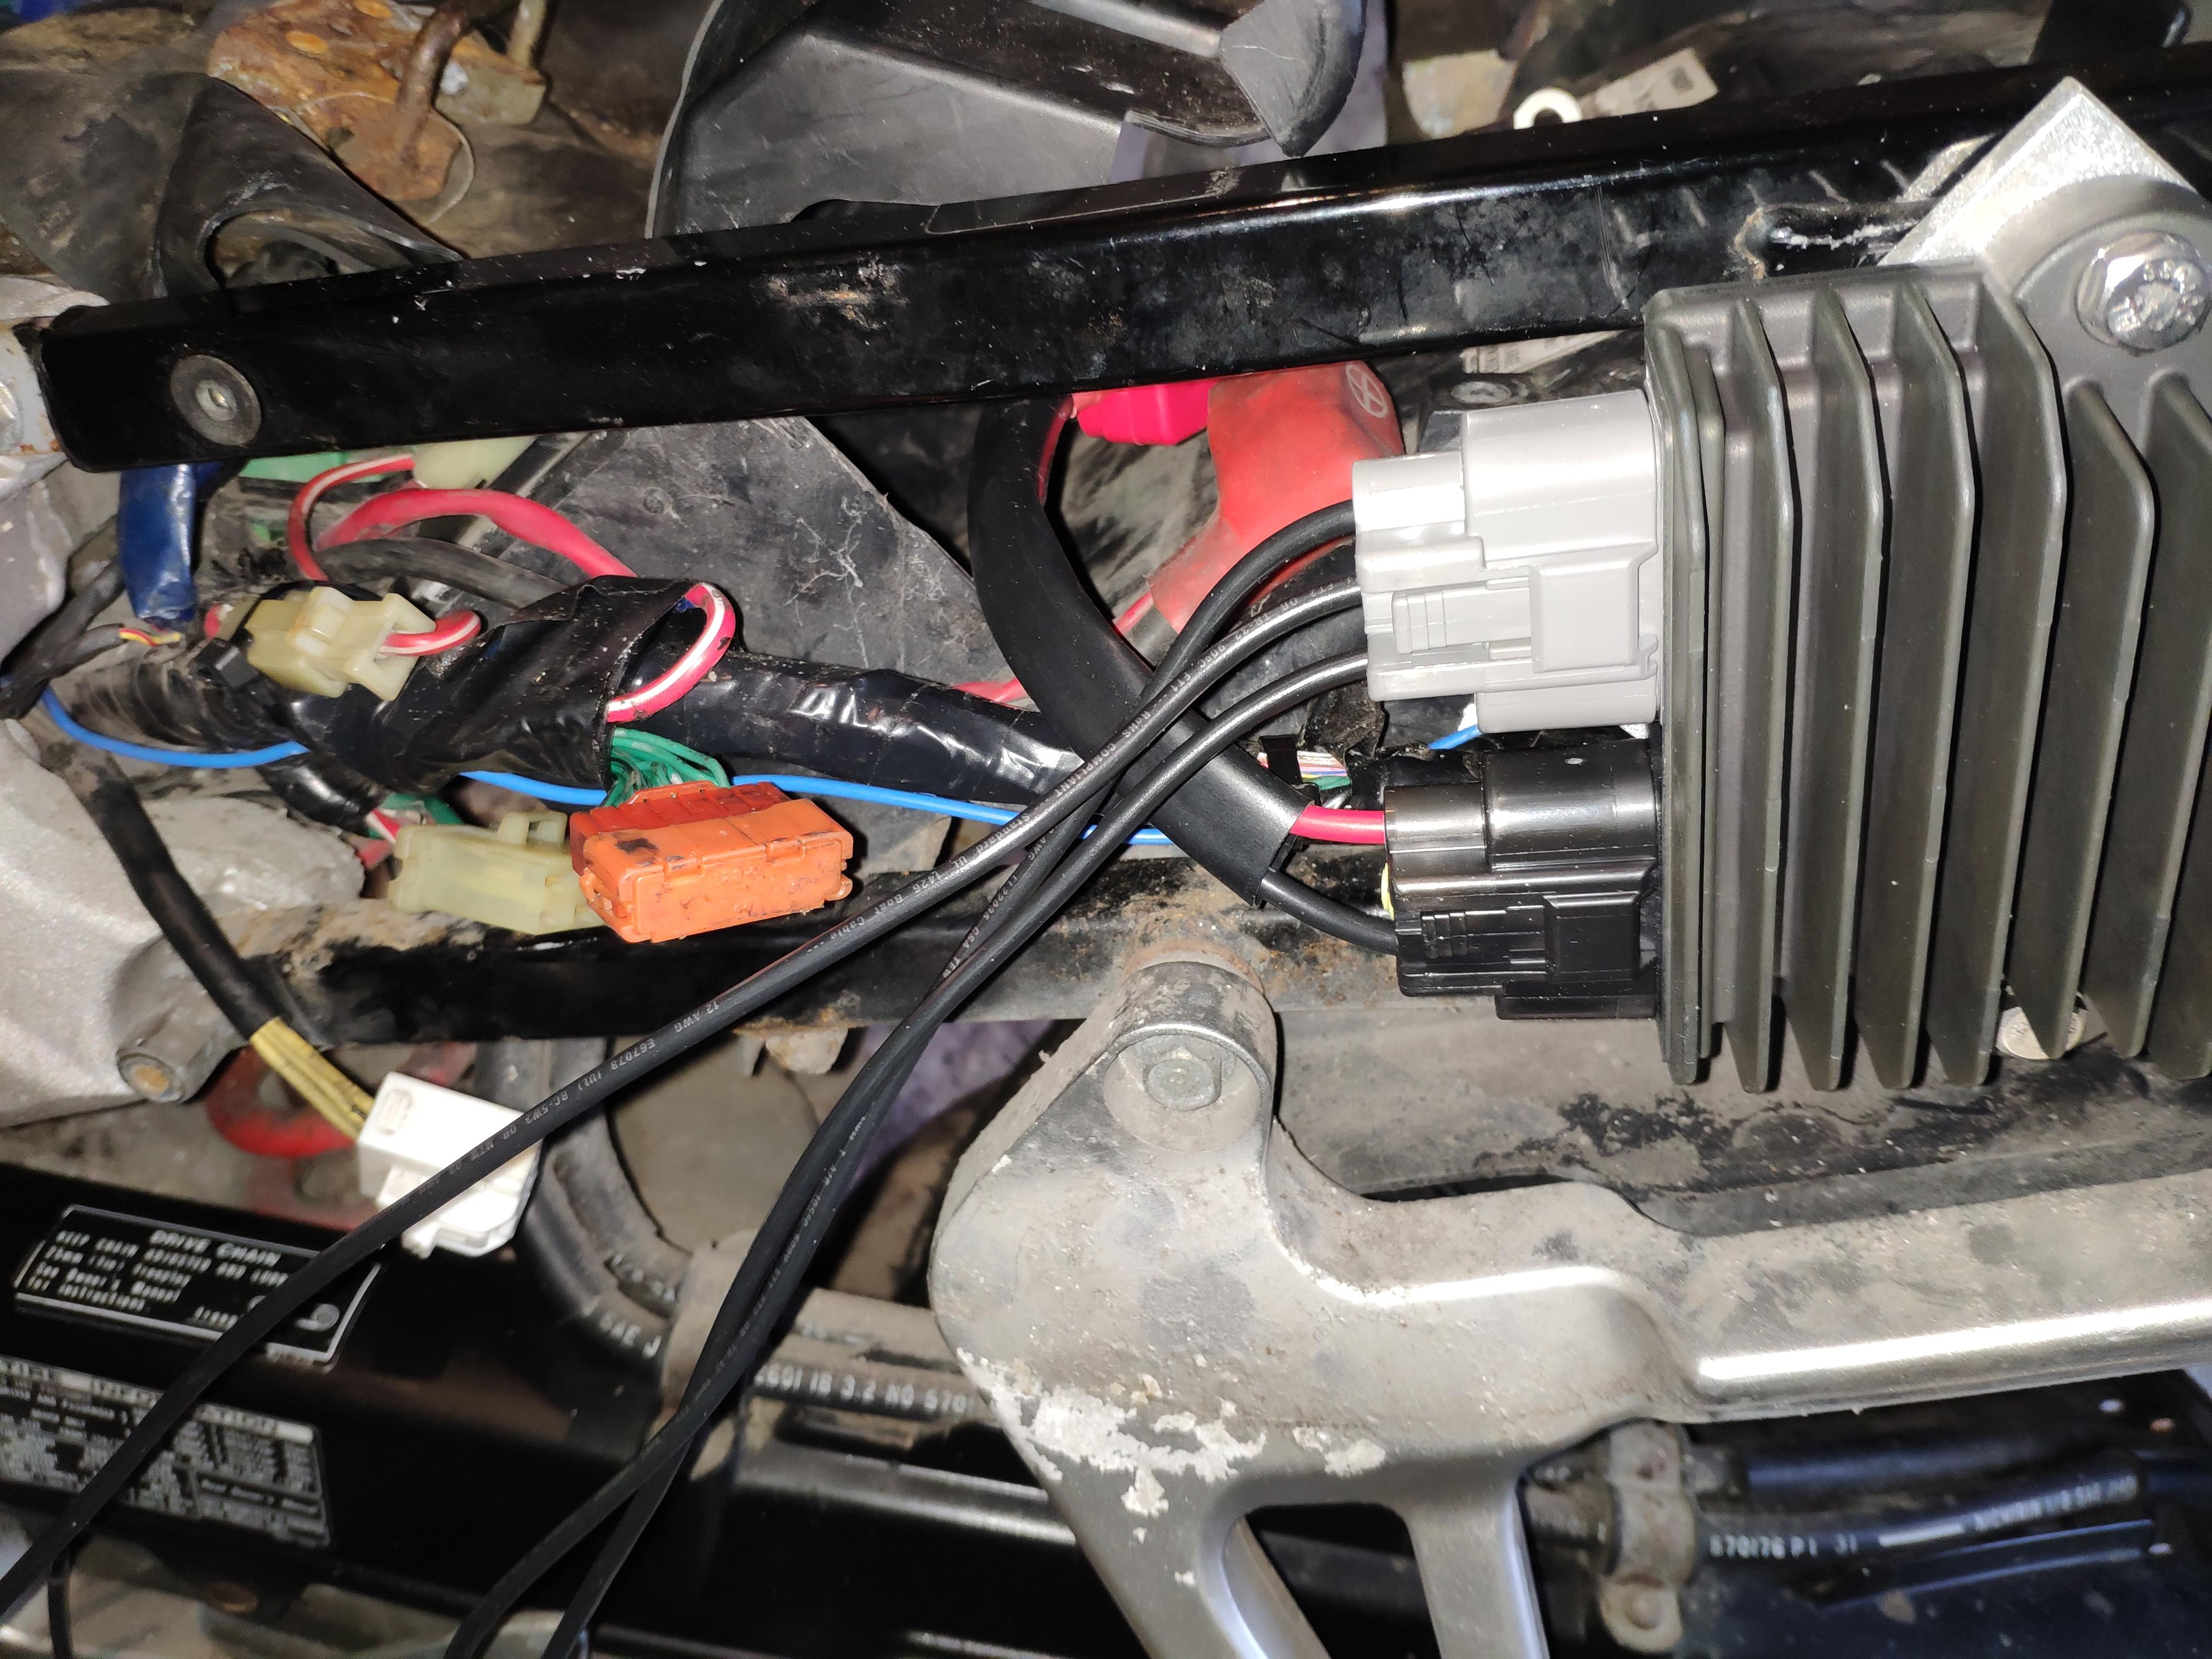
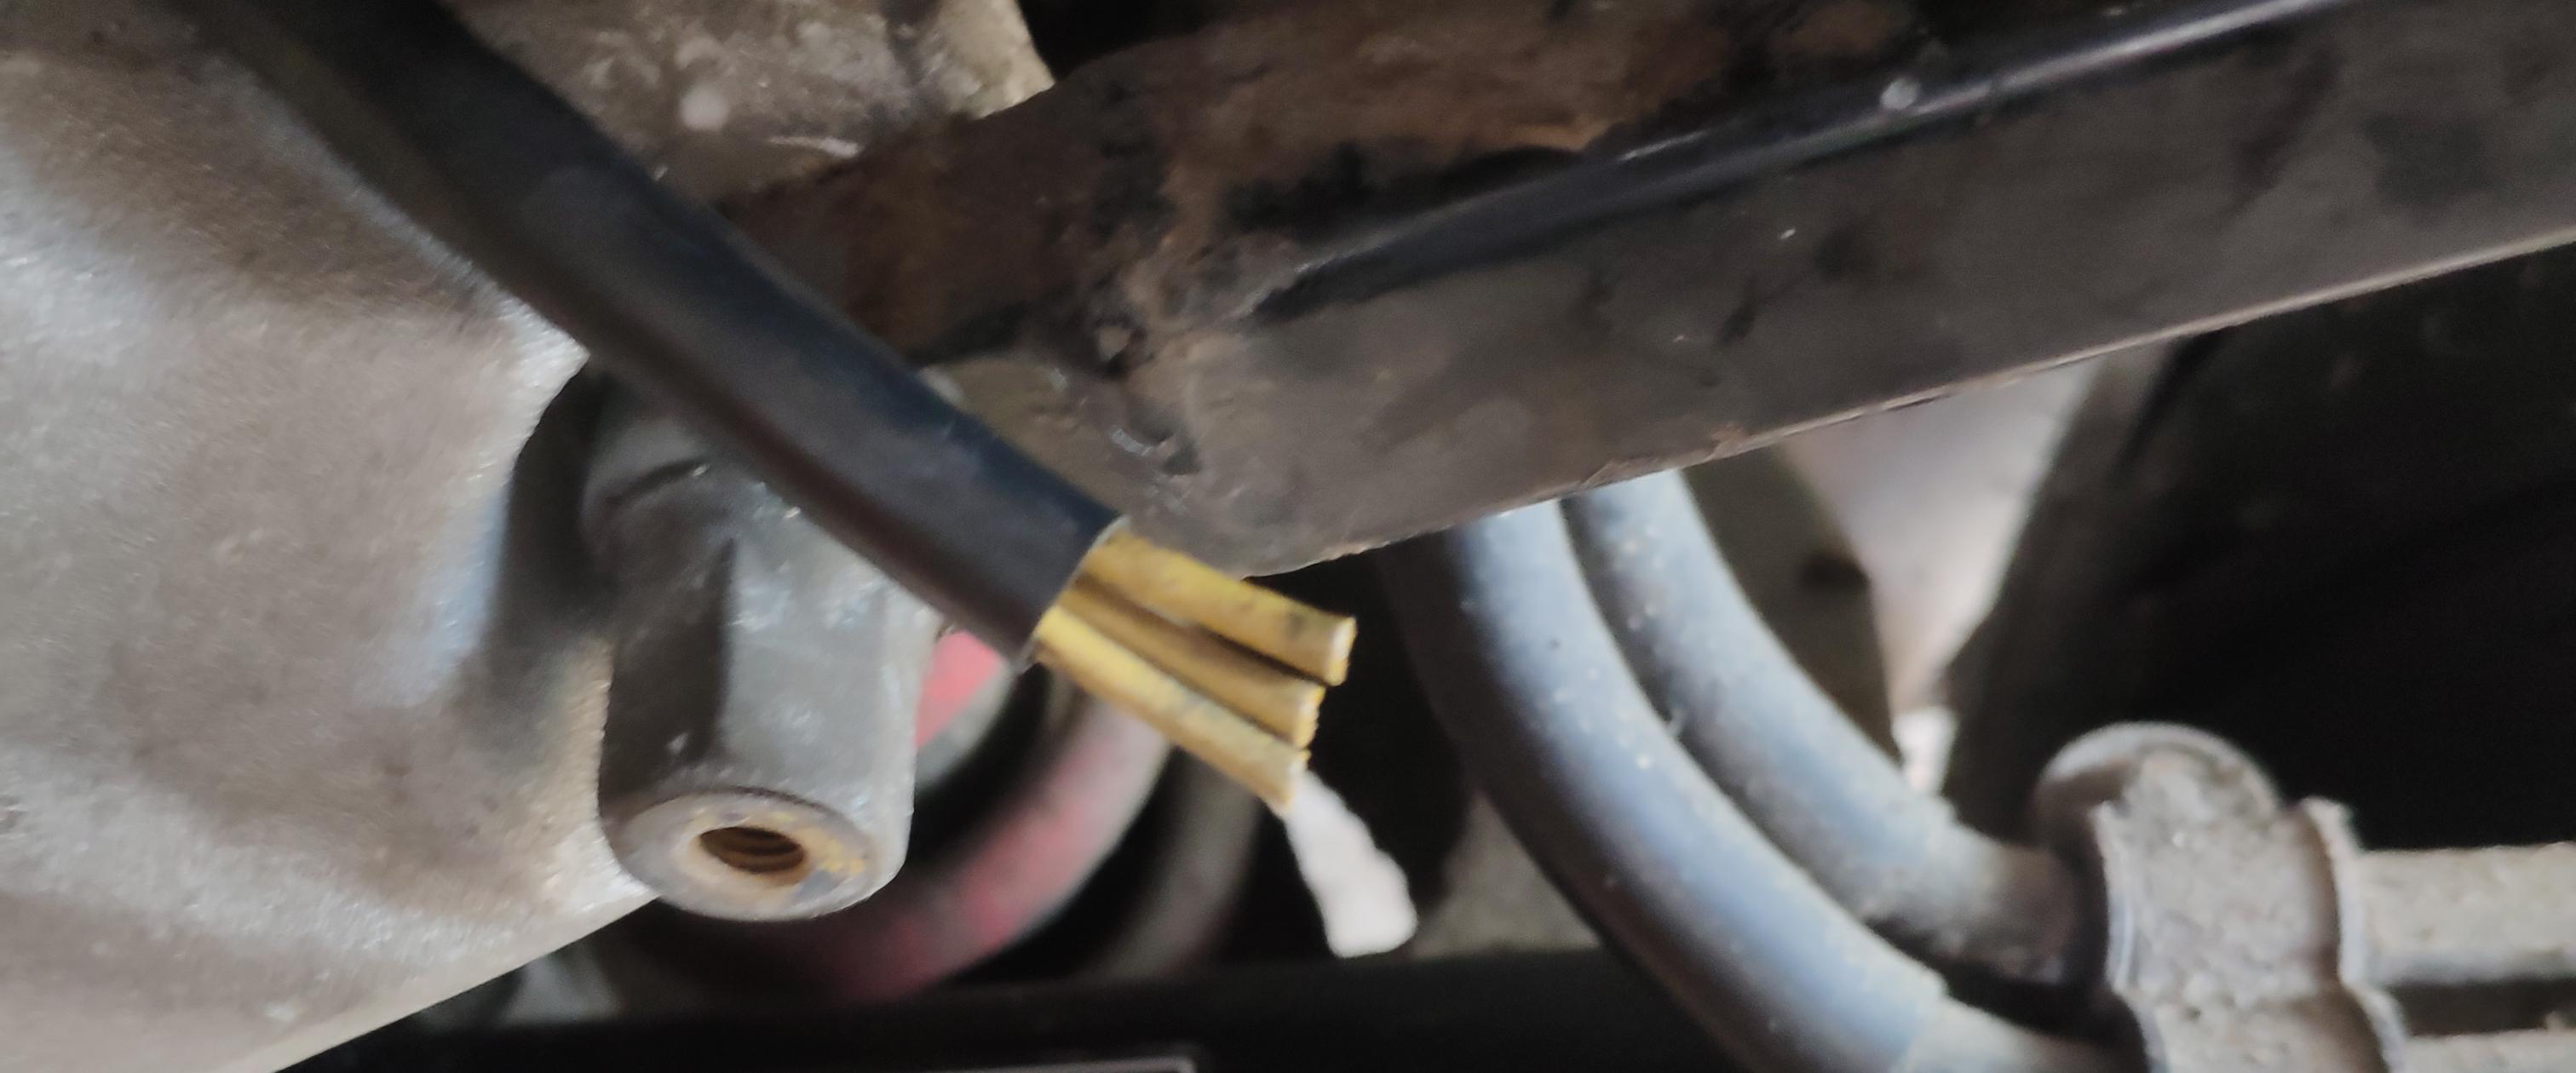
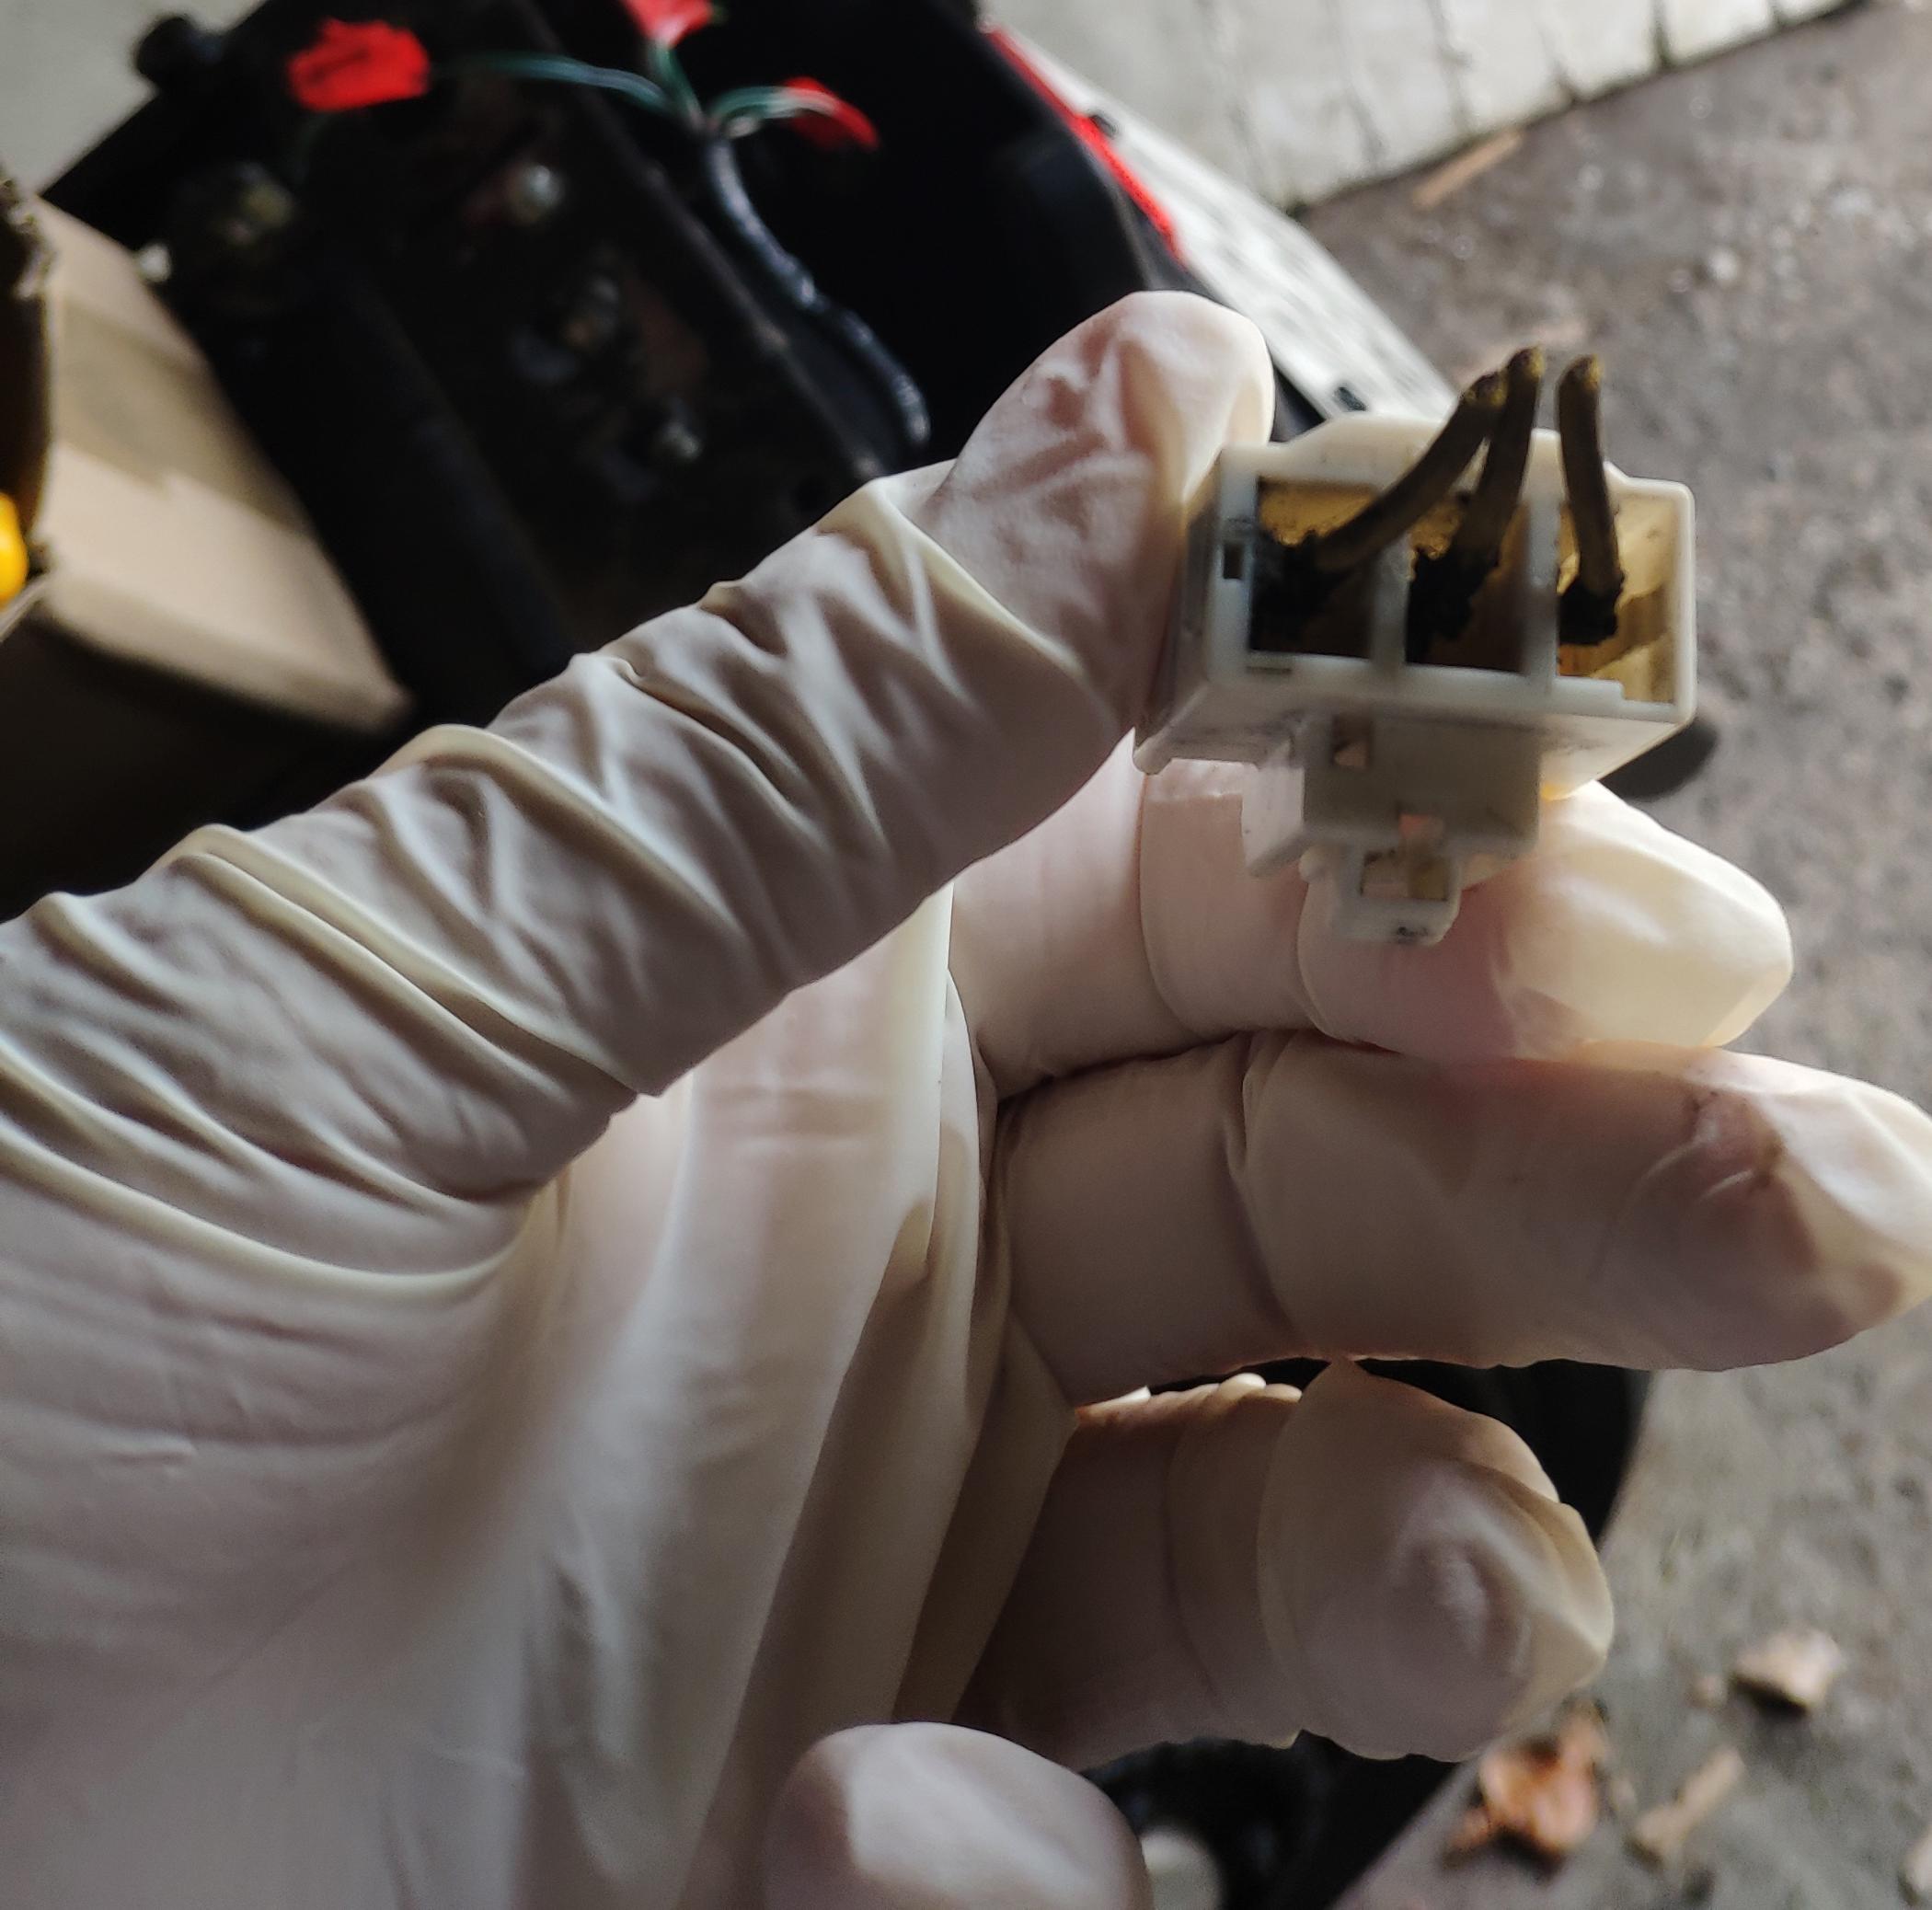
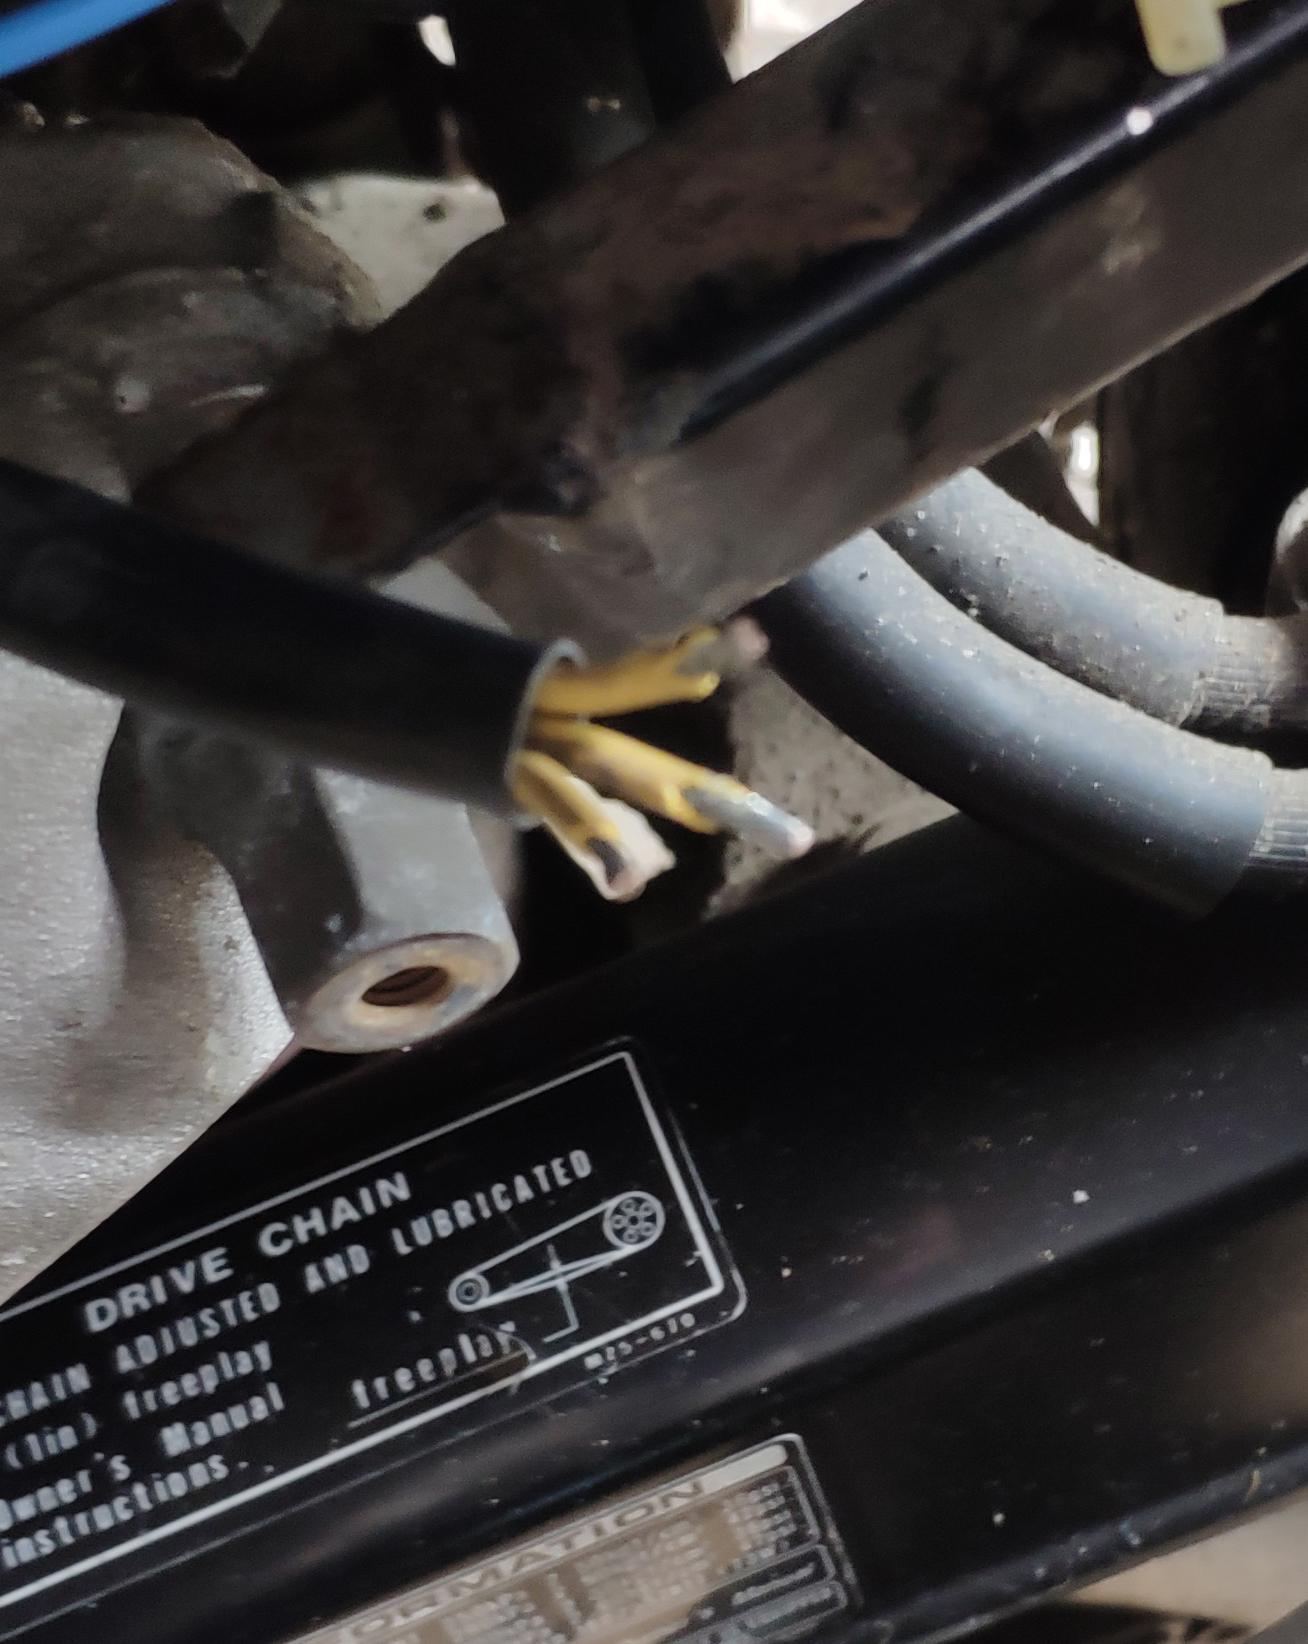
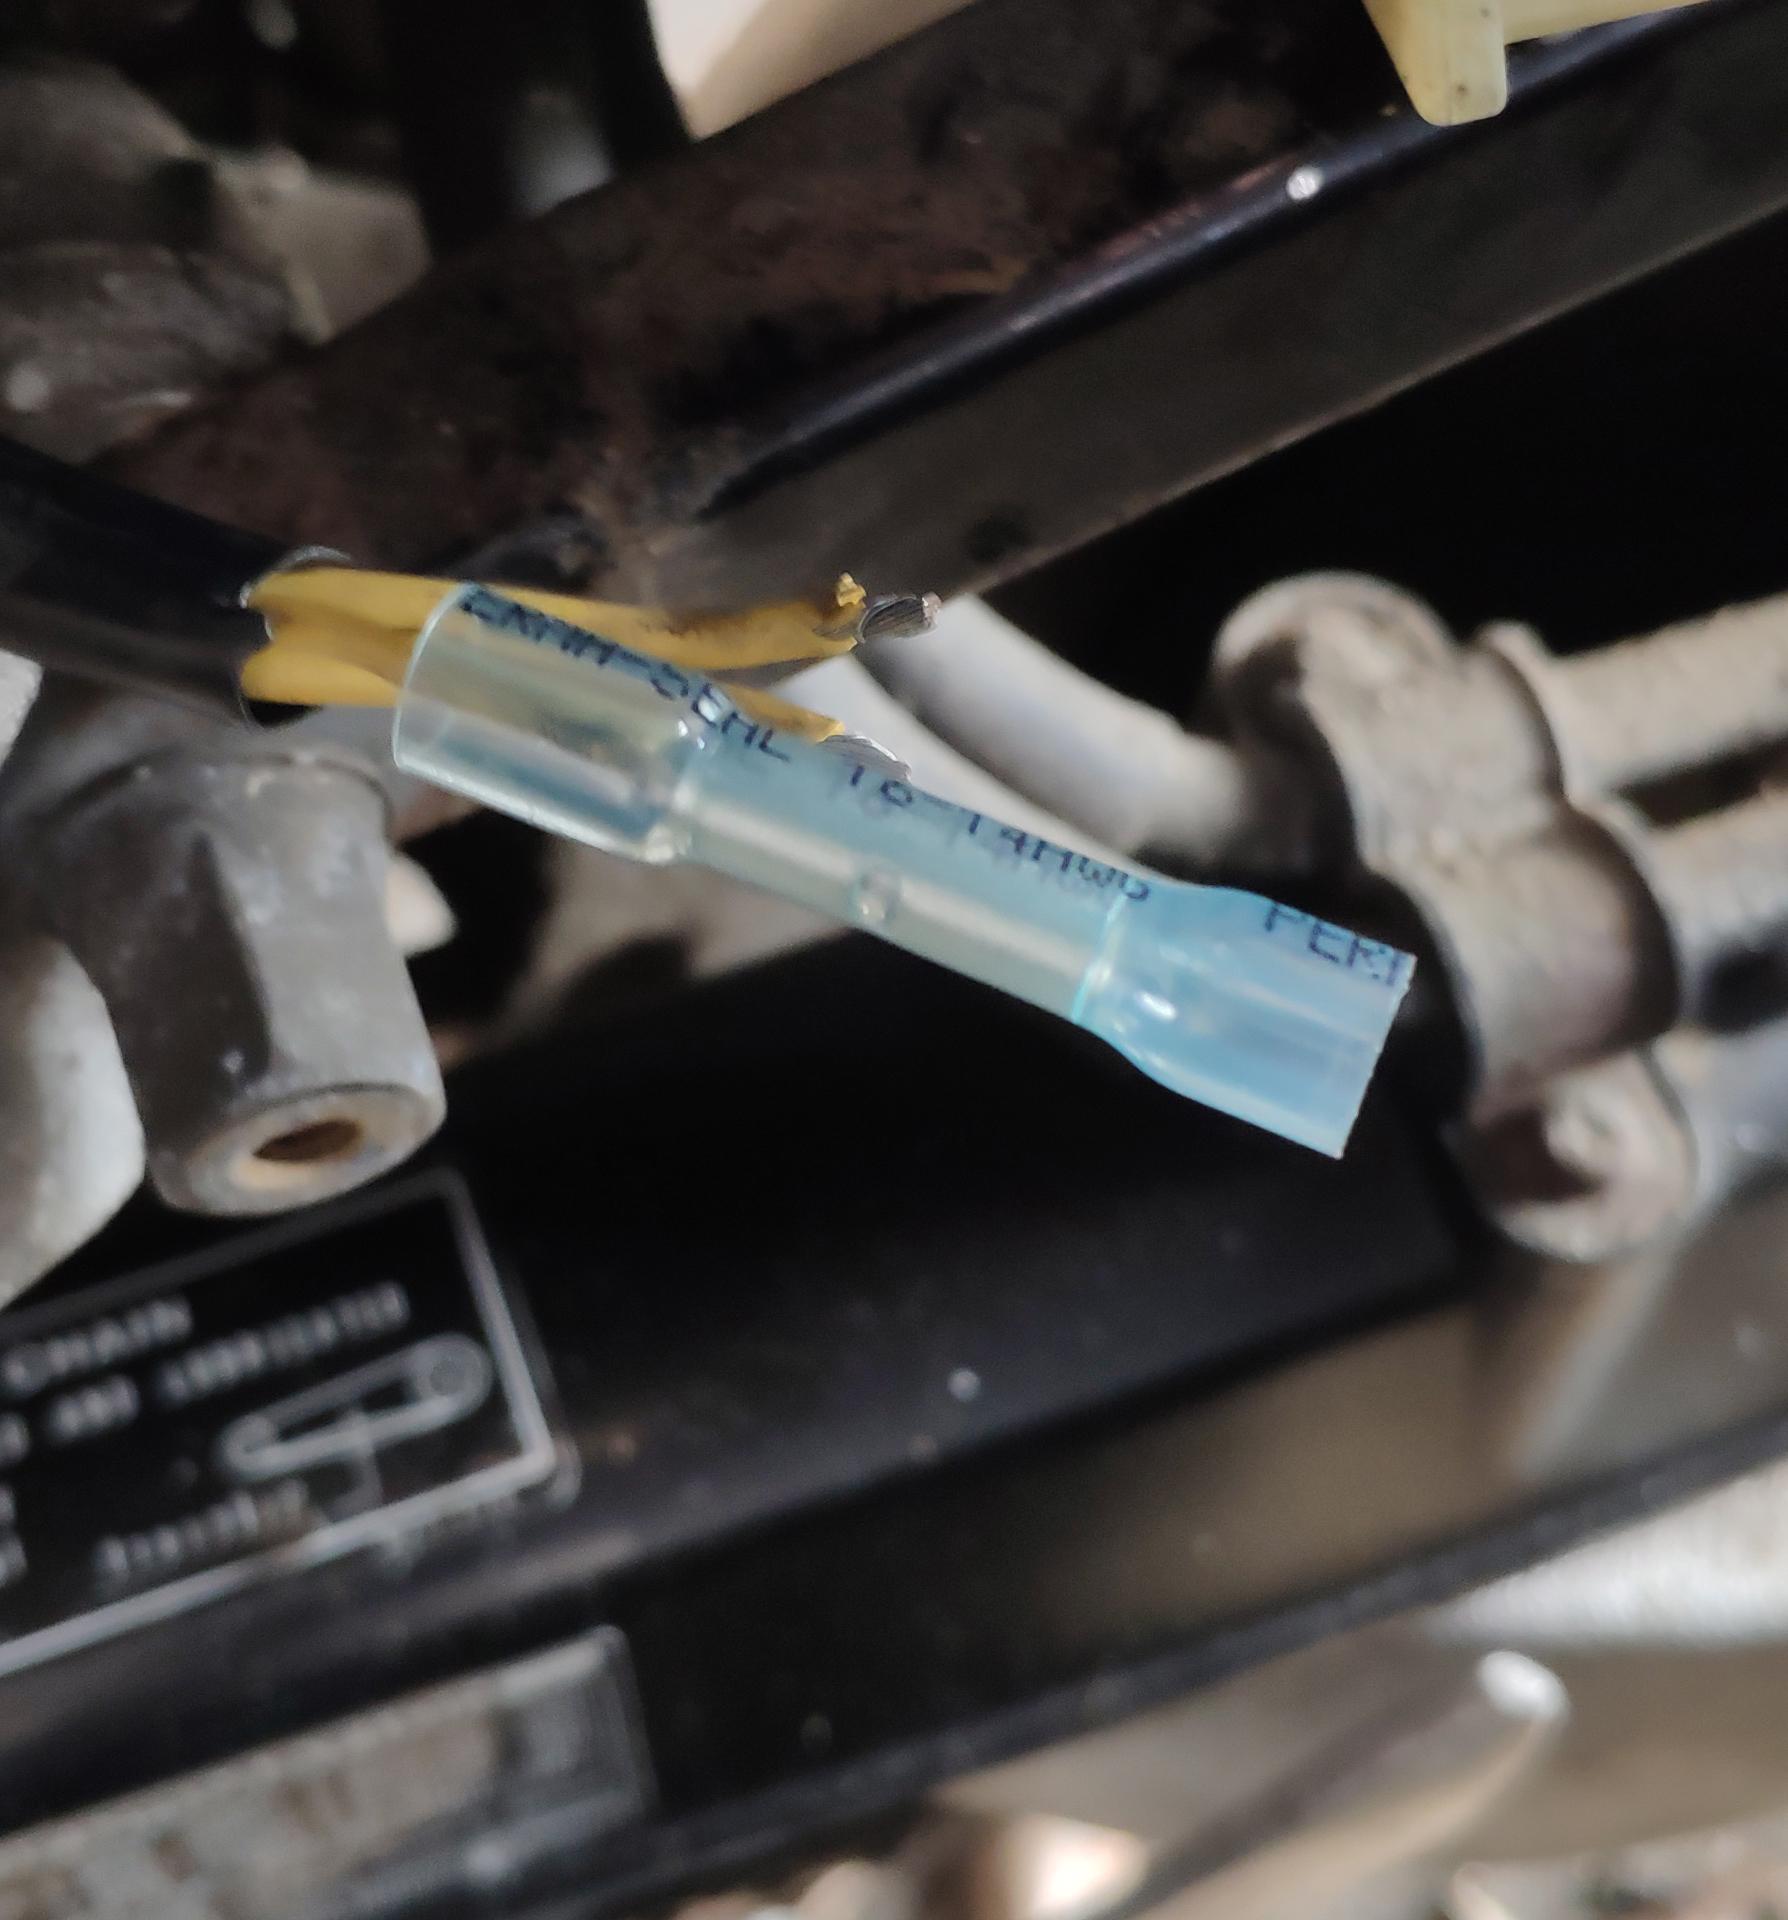
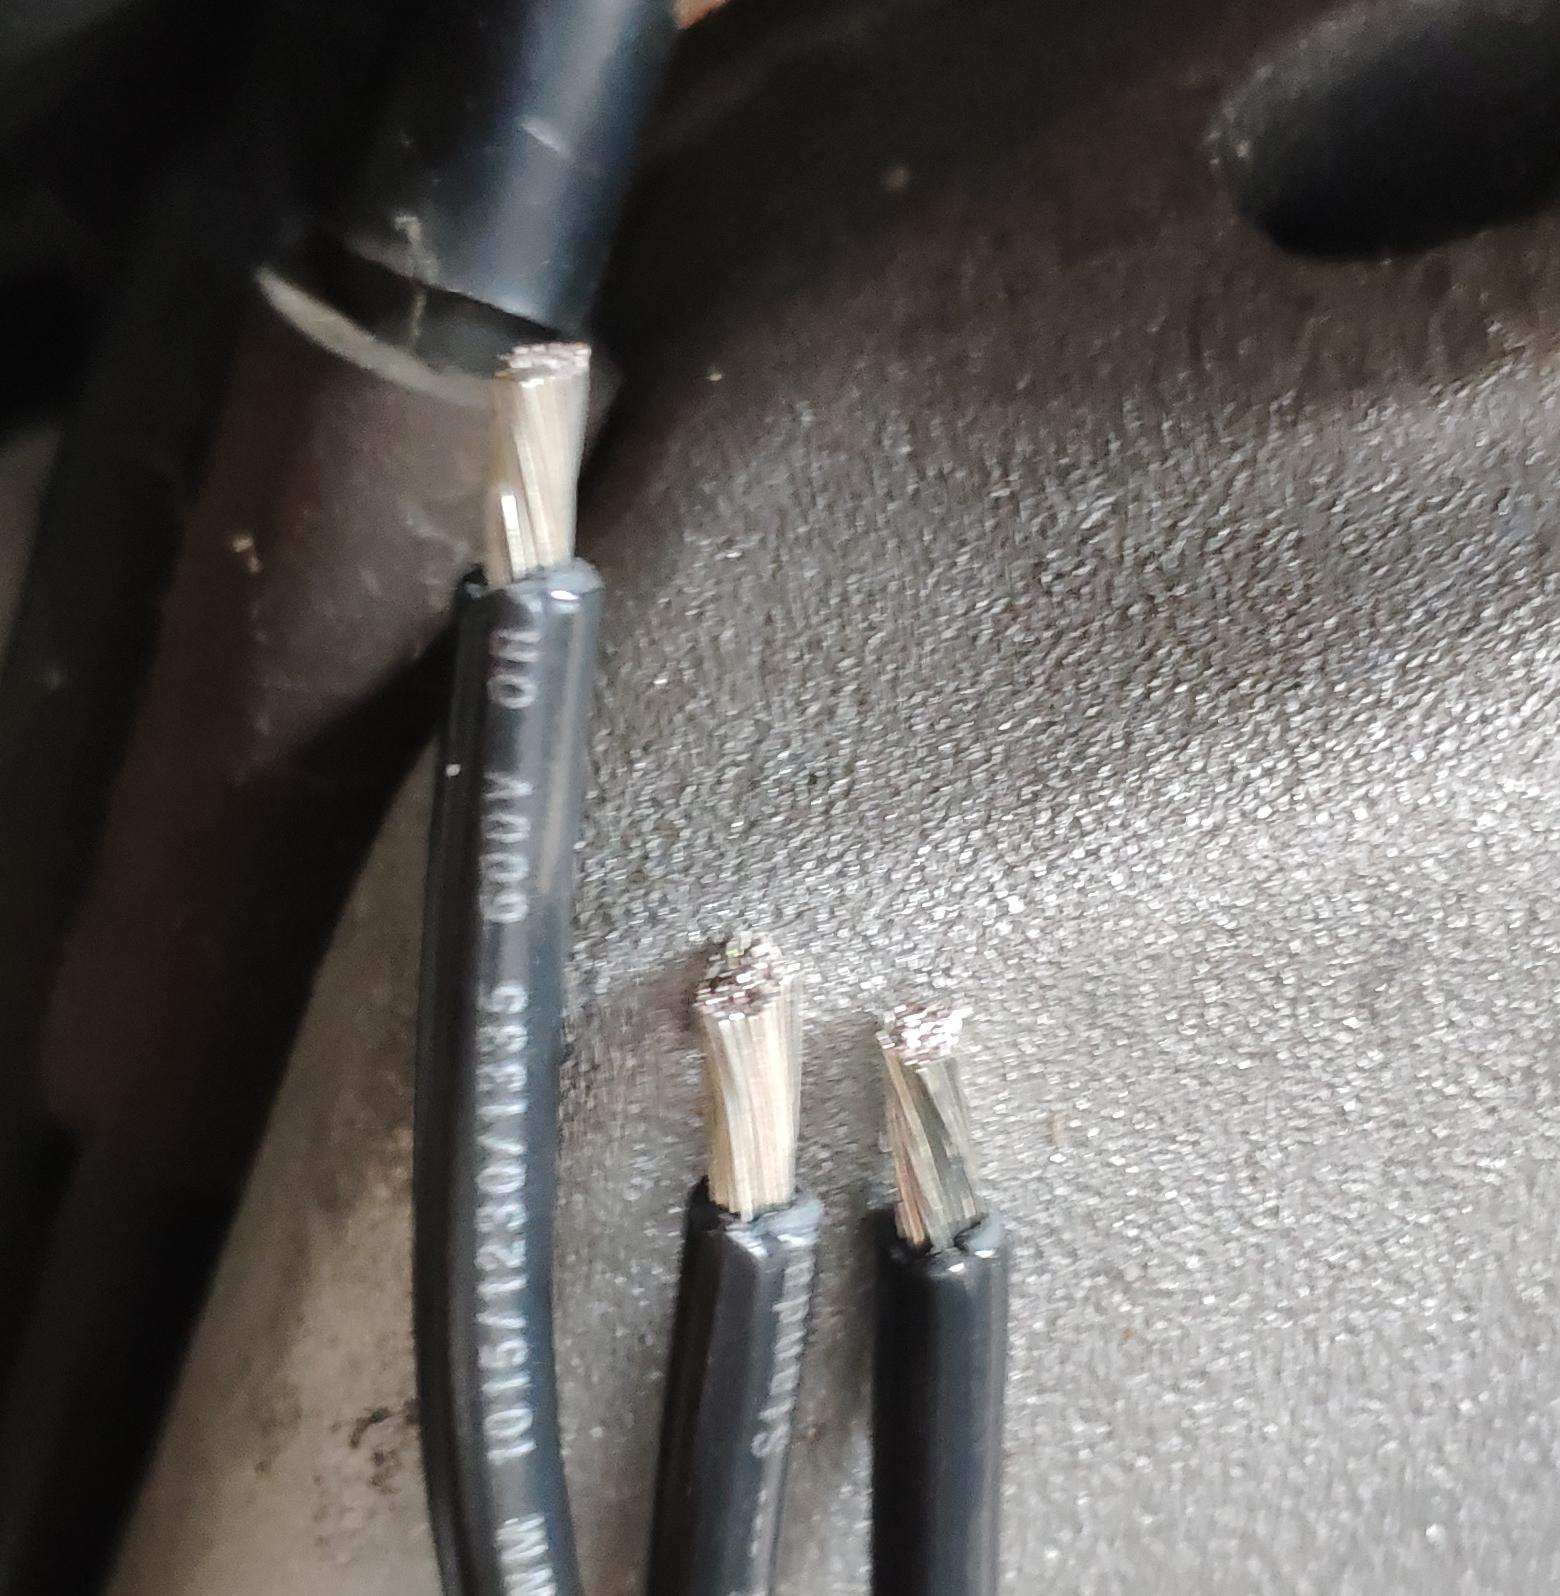
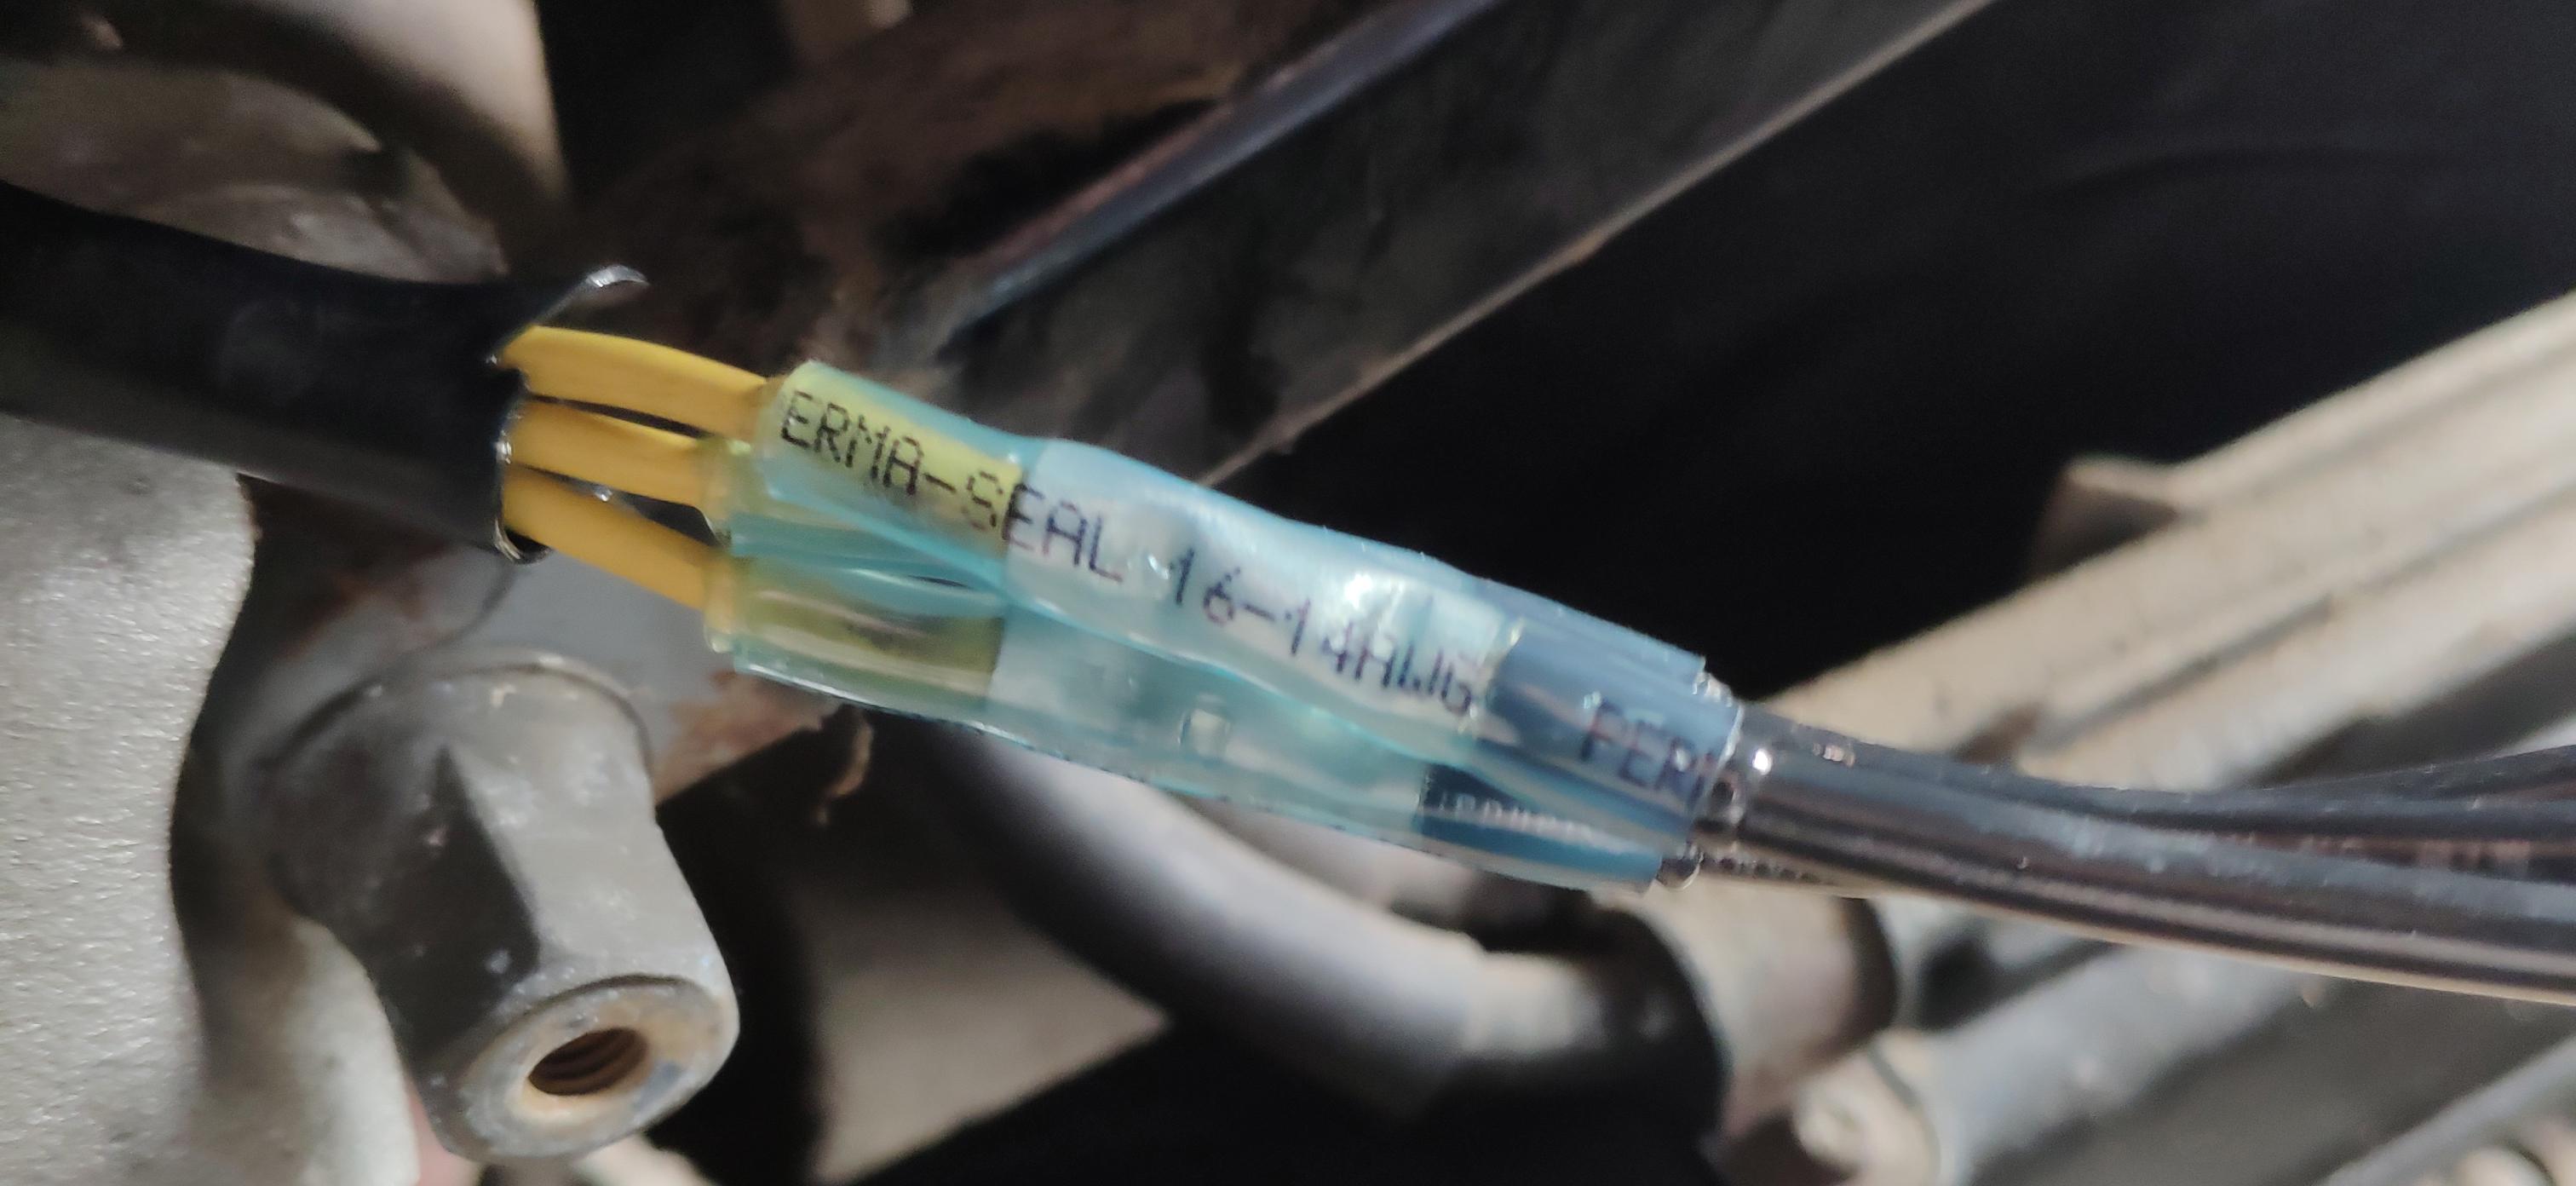
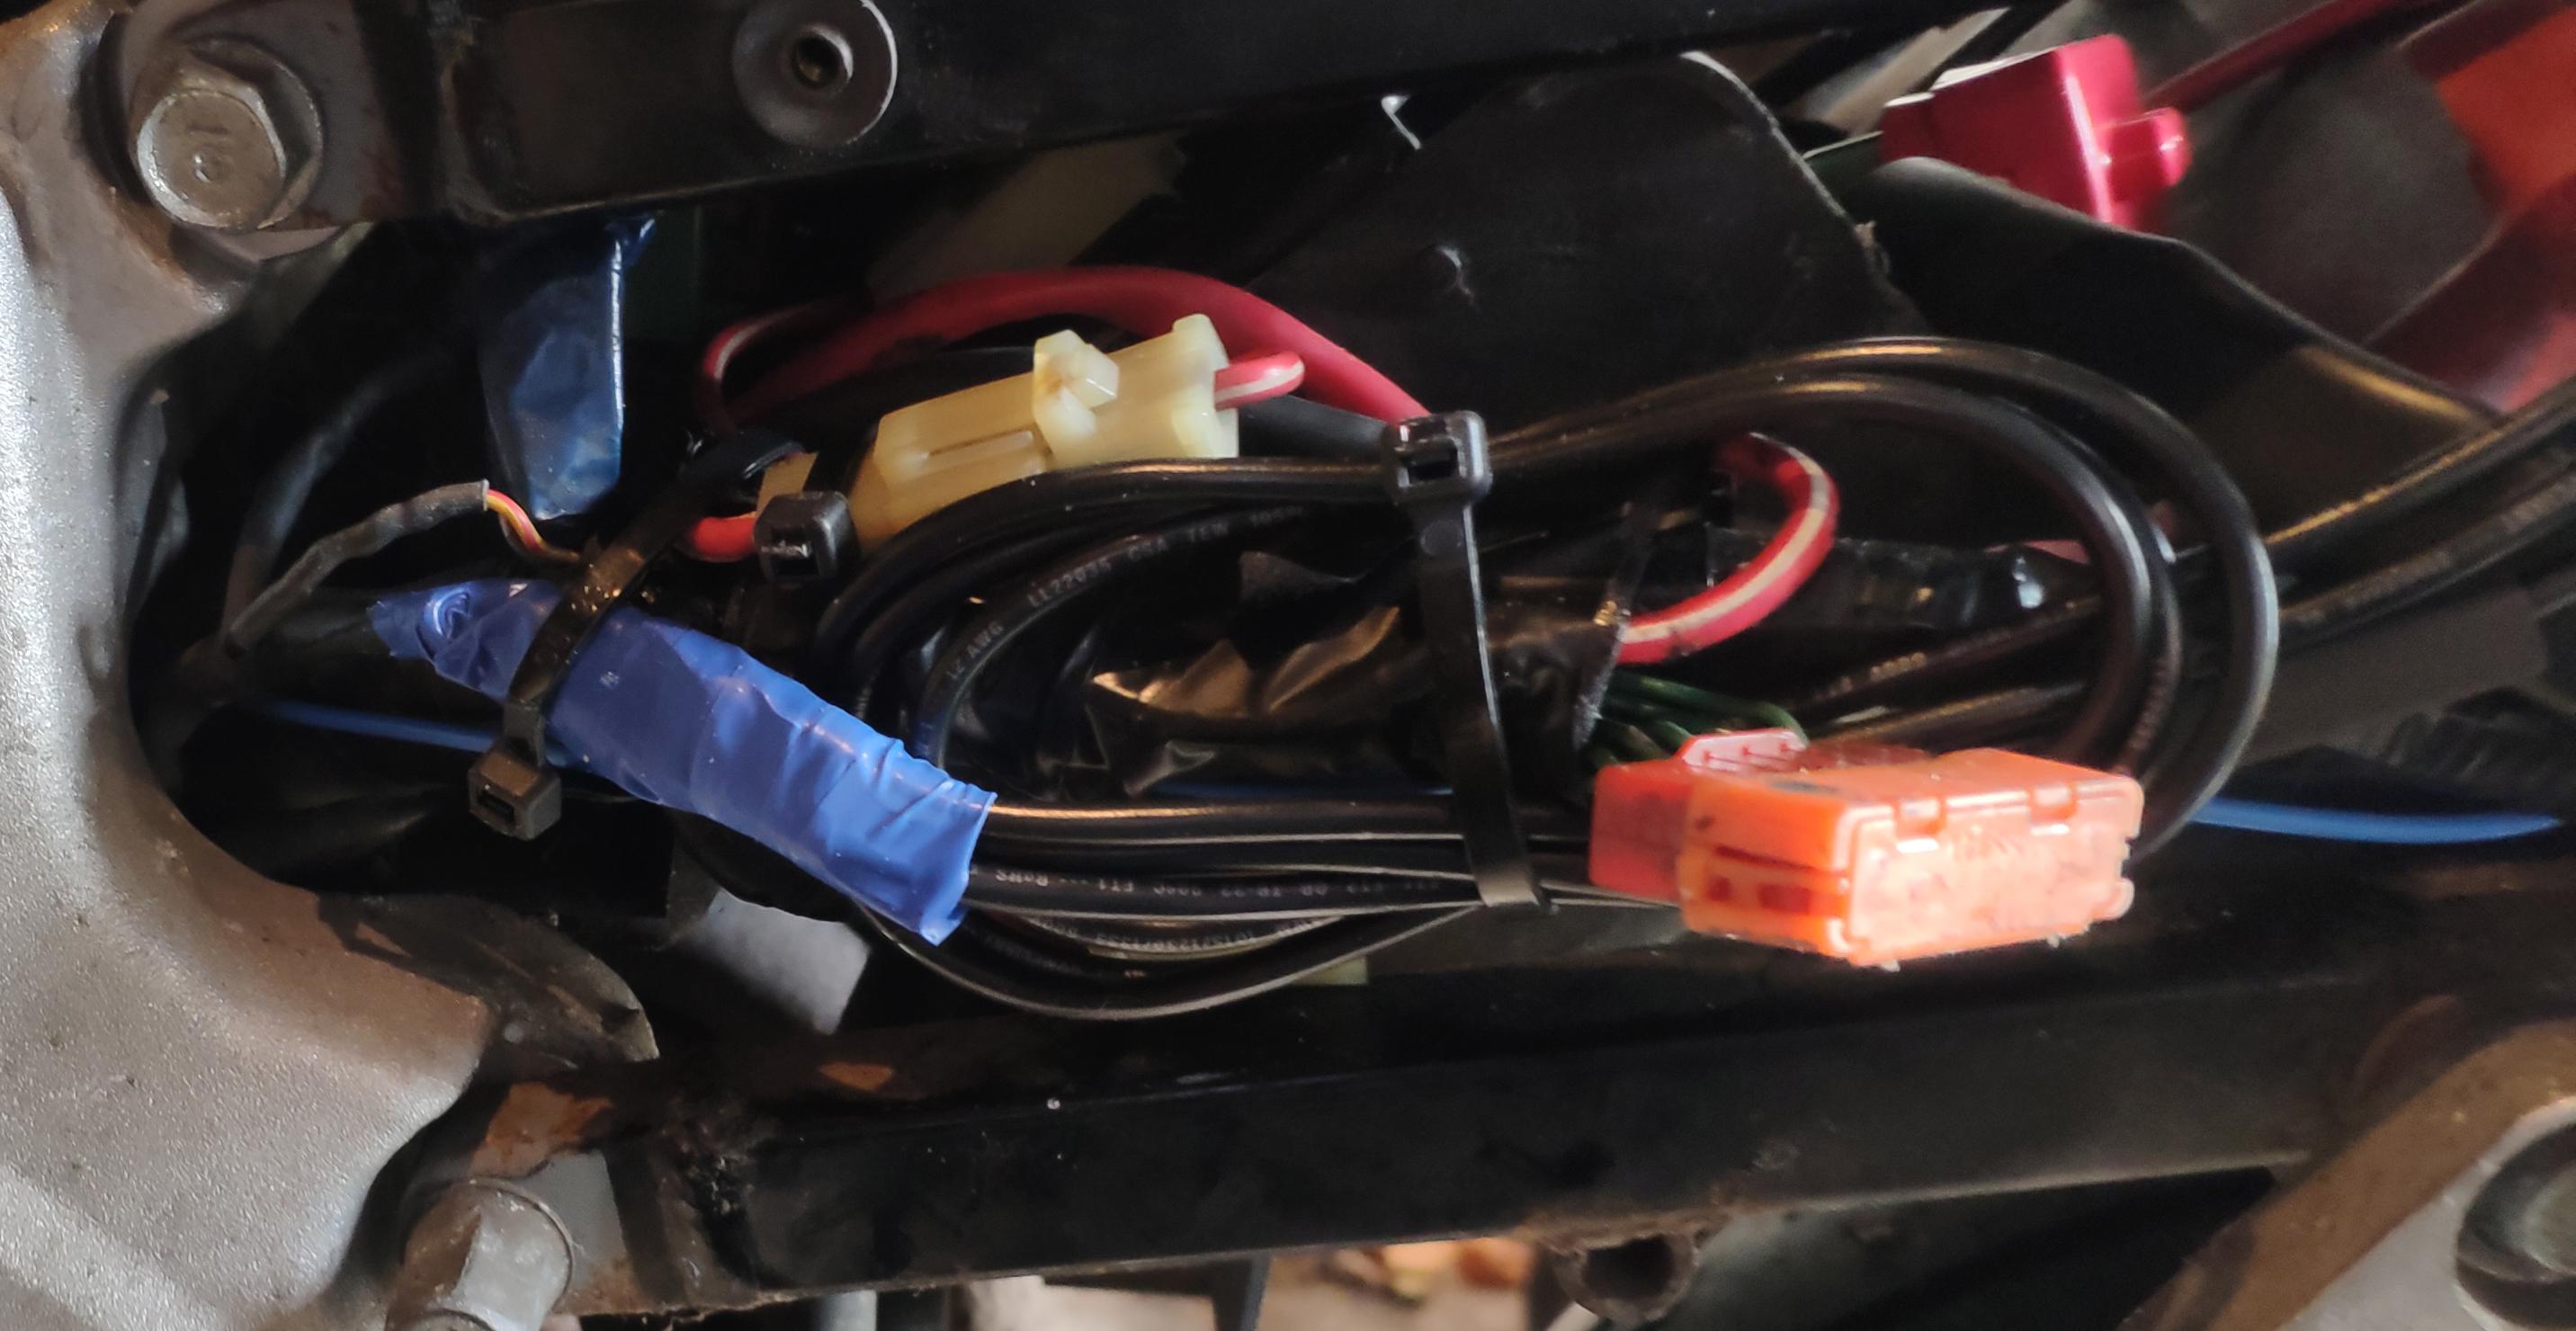
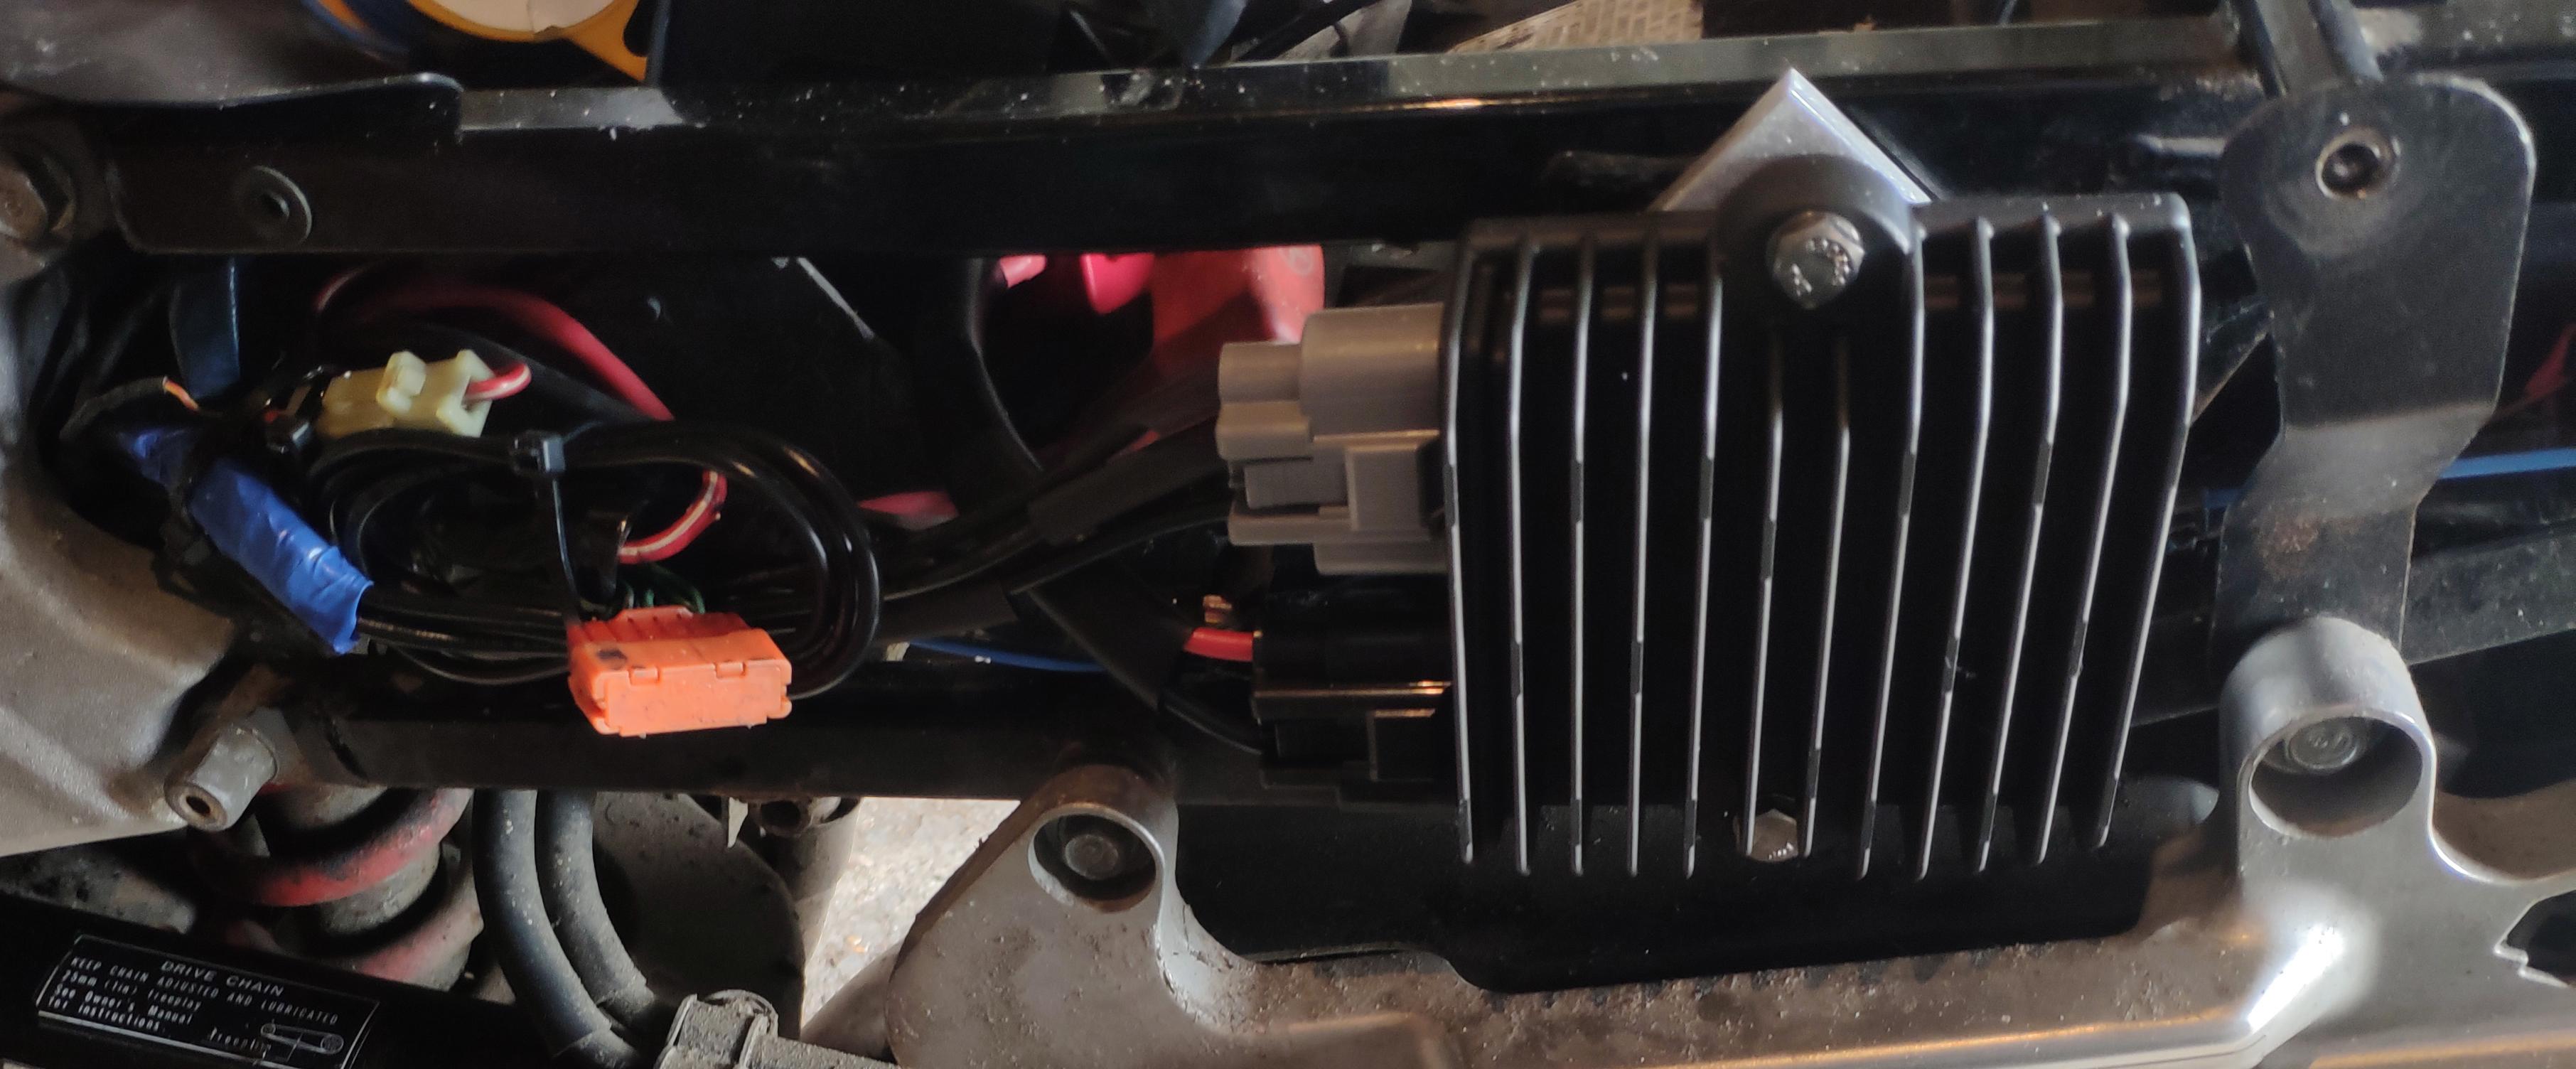
The Problem: The 5th gen VFR’s are known for having questionable Regulator Rectifiers (RR) that can suffer from overheating (other gen VFR's also suffer from the same issue). One preventative step that can be taken is to replace the RR with a mosfet (FH020AA) or series (SH847) RR. I went with the SH847 option as I want to run LED’s and I think this would be the best option for that. Not all bikes suffer from overheating, however I decided to do it as a preventative step on my 5th gen. Parts/Tools Required: Parts List: · Shindengen SH847 RR Kit from roadstercycle.com. It comes with crimp and solder type connections. Mine only came with the crimp style connectors, so I used them. For 5th Gen VFR’s you need 12” battery cables and the default stator cables are 24” and need to be cut to length. · 4 Way Mounting bracket from roadstercycle.com (Optional) Tools: · Crimping tool with insulated crimping capability like: Soldering iron (if you decide to use the solder connections) Hex tool for mounting the bracket (I can’t remember the exact size) Screwdriver + Spanner (10mm) + Socket. Heat gun or hairdryer Electrical Tape & Cable Ties (Optional) Tools required for removal of Rear Cowl Steps: 1. Remove the Seat. 2. Remove the rear Grips 3. Disconnect rear turn signals and brake lights. Turn them counter clockwise to loosen. It can be tricky to get a good grip, so take your time. 4. Remove the rear Cowl. 5. Label the lights as they are left dangling (Optional). Remember to remove when reinstalling 6. You can now see the old regulator Rectifier. Remove this by removing the 2 bolts. On my bike, 1 could be removed by the front bolt, the other had a nut that needs securing as you remove the bolt. Access is great though so you should have no problem. Tape up the old power connector, you wont need this. You will be left with the following: 7. I used the 4 way mounting bracket to mount in the stock location. You will be required to cut off one of the corners and file it smooth, like so: 8. Mount the bracket using the supplied hex screws. I had to use a bolt on the rear of one of them. 9. Mount the new RR onto the mounting bracket. The cooling fins do not have to be parallel to the airflow for this type of RR. 10. At this point you should check clearances by loosely reattaching the upper cowl. If it does not fit, move the mounting bracket as required, or relocate to a different location. 11. Plug in the new cables. 12. Cut the old stator plug. 13. Strip a small length off each stator cable 14. Slide the crimp connector onto one of the cables, if using the crimp style connectors. Otherwise use the solder type connectors. 15. Crimp between the midpoint and the end point. 16. Strip a small length off the new stator wires. They will need to be cut to length first. I left a little spare, just in case. 17. Slide this into the other end of the crimp connector and crimp between the midpoint and end point. 18. Do this for all 3 stator cables 19. Test by starting the bike and checking voltages, it should be 13V’s at idle and over 14V @ 5k rpm. If all is ok, continue. 20. Use the heat gun or hairdryer to heat the heat shrink around the crimp connectors. Use tape around them (Optional). 21. Cable tie the cables out of the way (optional) 22. Reinstall the upper Cowl in reverse order.
1 point