Leaderboard


Popular Content
Showing content with the highest reputation on 11/29/2020 in all areas
-
Good news. I'll be back after all. Cops found my bike in the bronx. Going to pick it up monday. Looks like some kids hot wired it and broke the gas tank lock so they could joy ride for a month. Cops said it still looks good. Just got an alarm to make it less likely to happen again.4 points
-
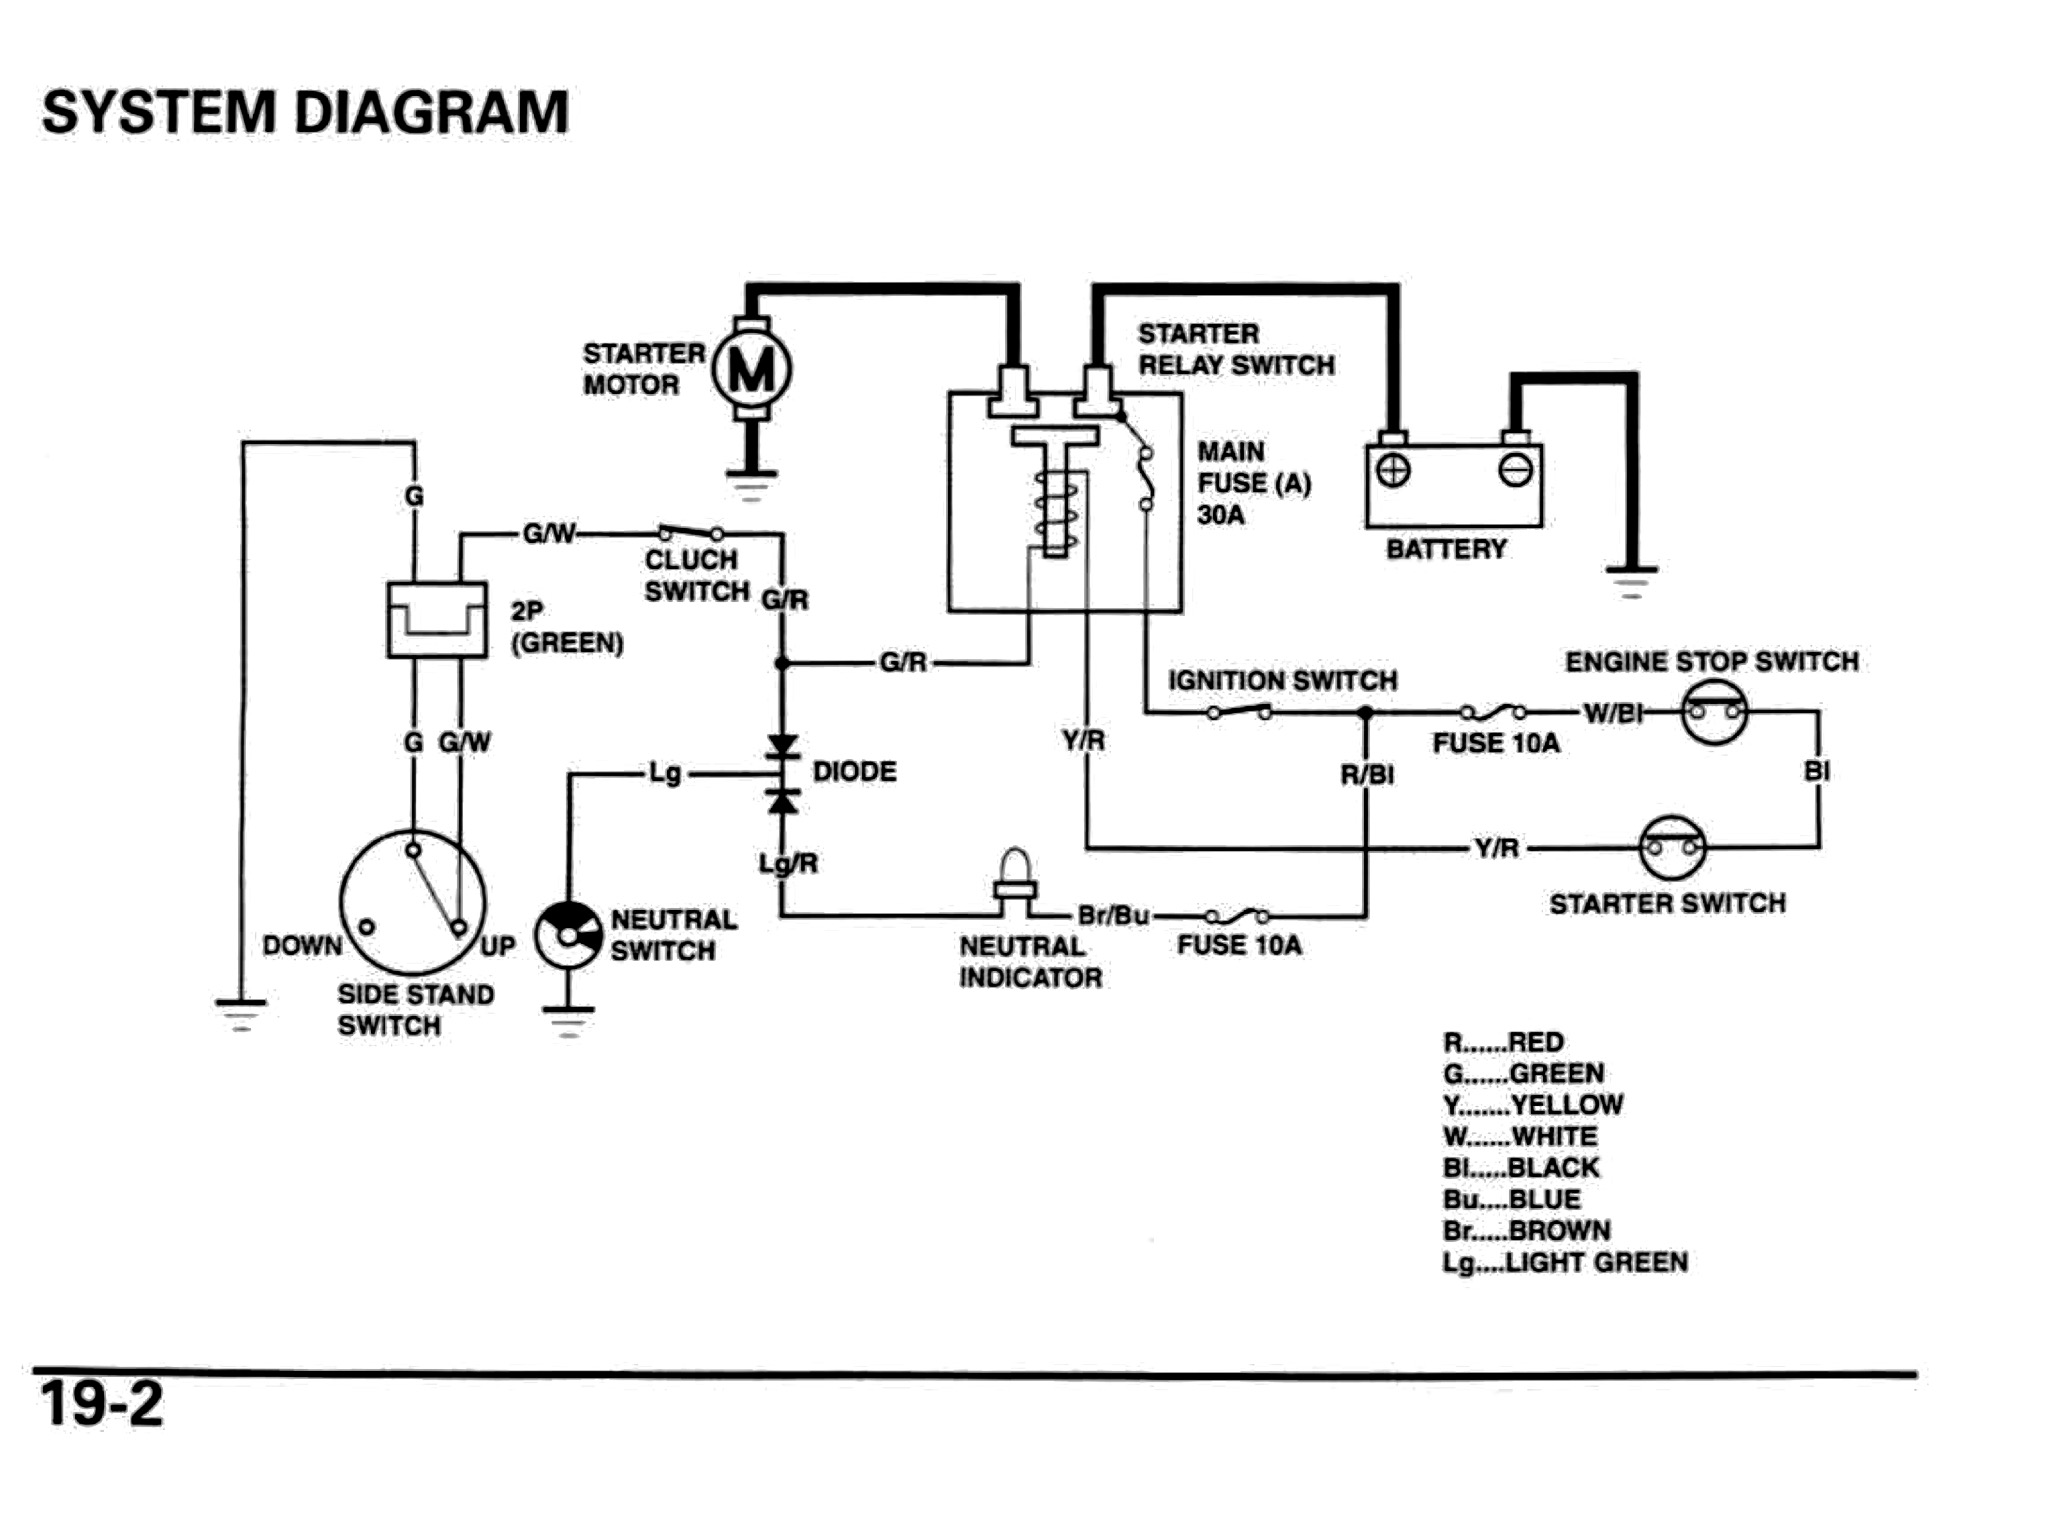
I have seen a similar situation with an aircraft heavy duty relay many years ago where the arcing of contacts with the high current caused the contacts to weld themselves together. Hitting the Kill Switch accidentally should not cause any issue as it's just the same effect as releasing the Starter Switch. The other thing you should check for is the starter relay wiring connector making sure you don't have some kind of short from your Main 30amp Fuse A to the Yellow/Red wire. This would have the same effect of a permanently energized relay. Either way I wouldn't hesitate in replacing the Starter Relay. Hope your Starter Motor survived the ordeal! You can run some operational checks of the Stater Relay on the bike by disconnecting the main heavy lead from the Relay that goes to the Starter Motor. Checking voltages, continuing and operation, it just won't be powering the Starter Motor in this state. If the Relay continues to remain in a closed state with the 30amp Main Fuse A removed then that would be a good sign of welded main contacts, or even a broken internal return spring. Keep us posted with what you discover ShipFixer as this is a rare situation you have.
 2 points
 -
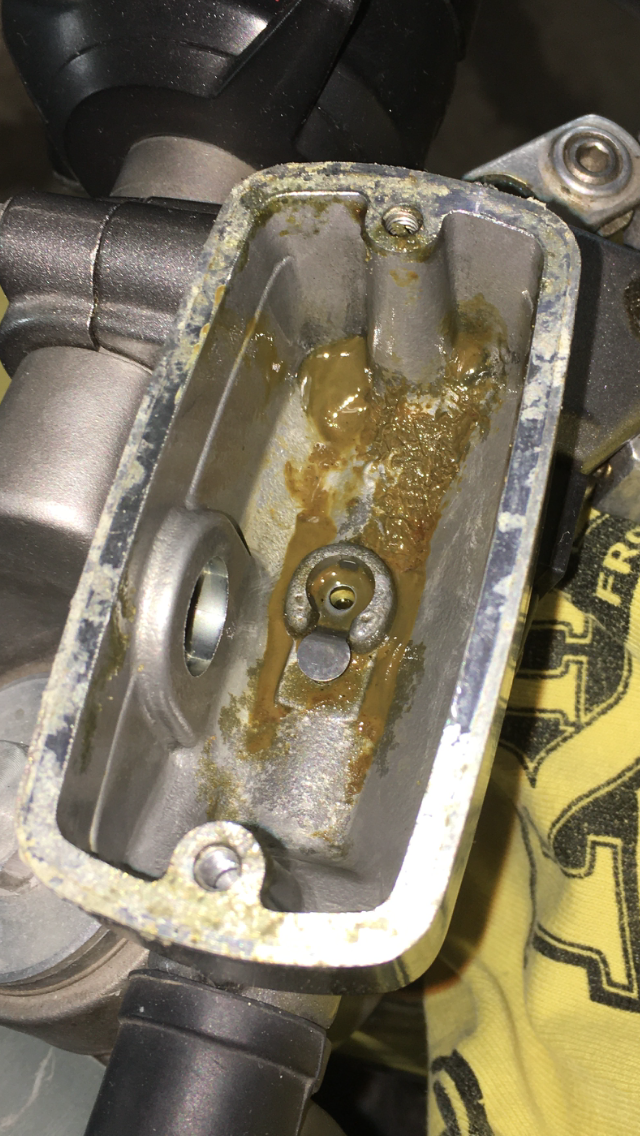
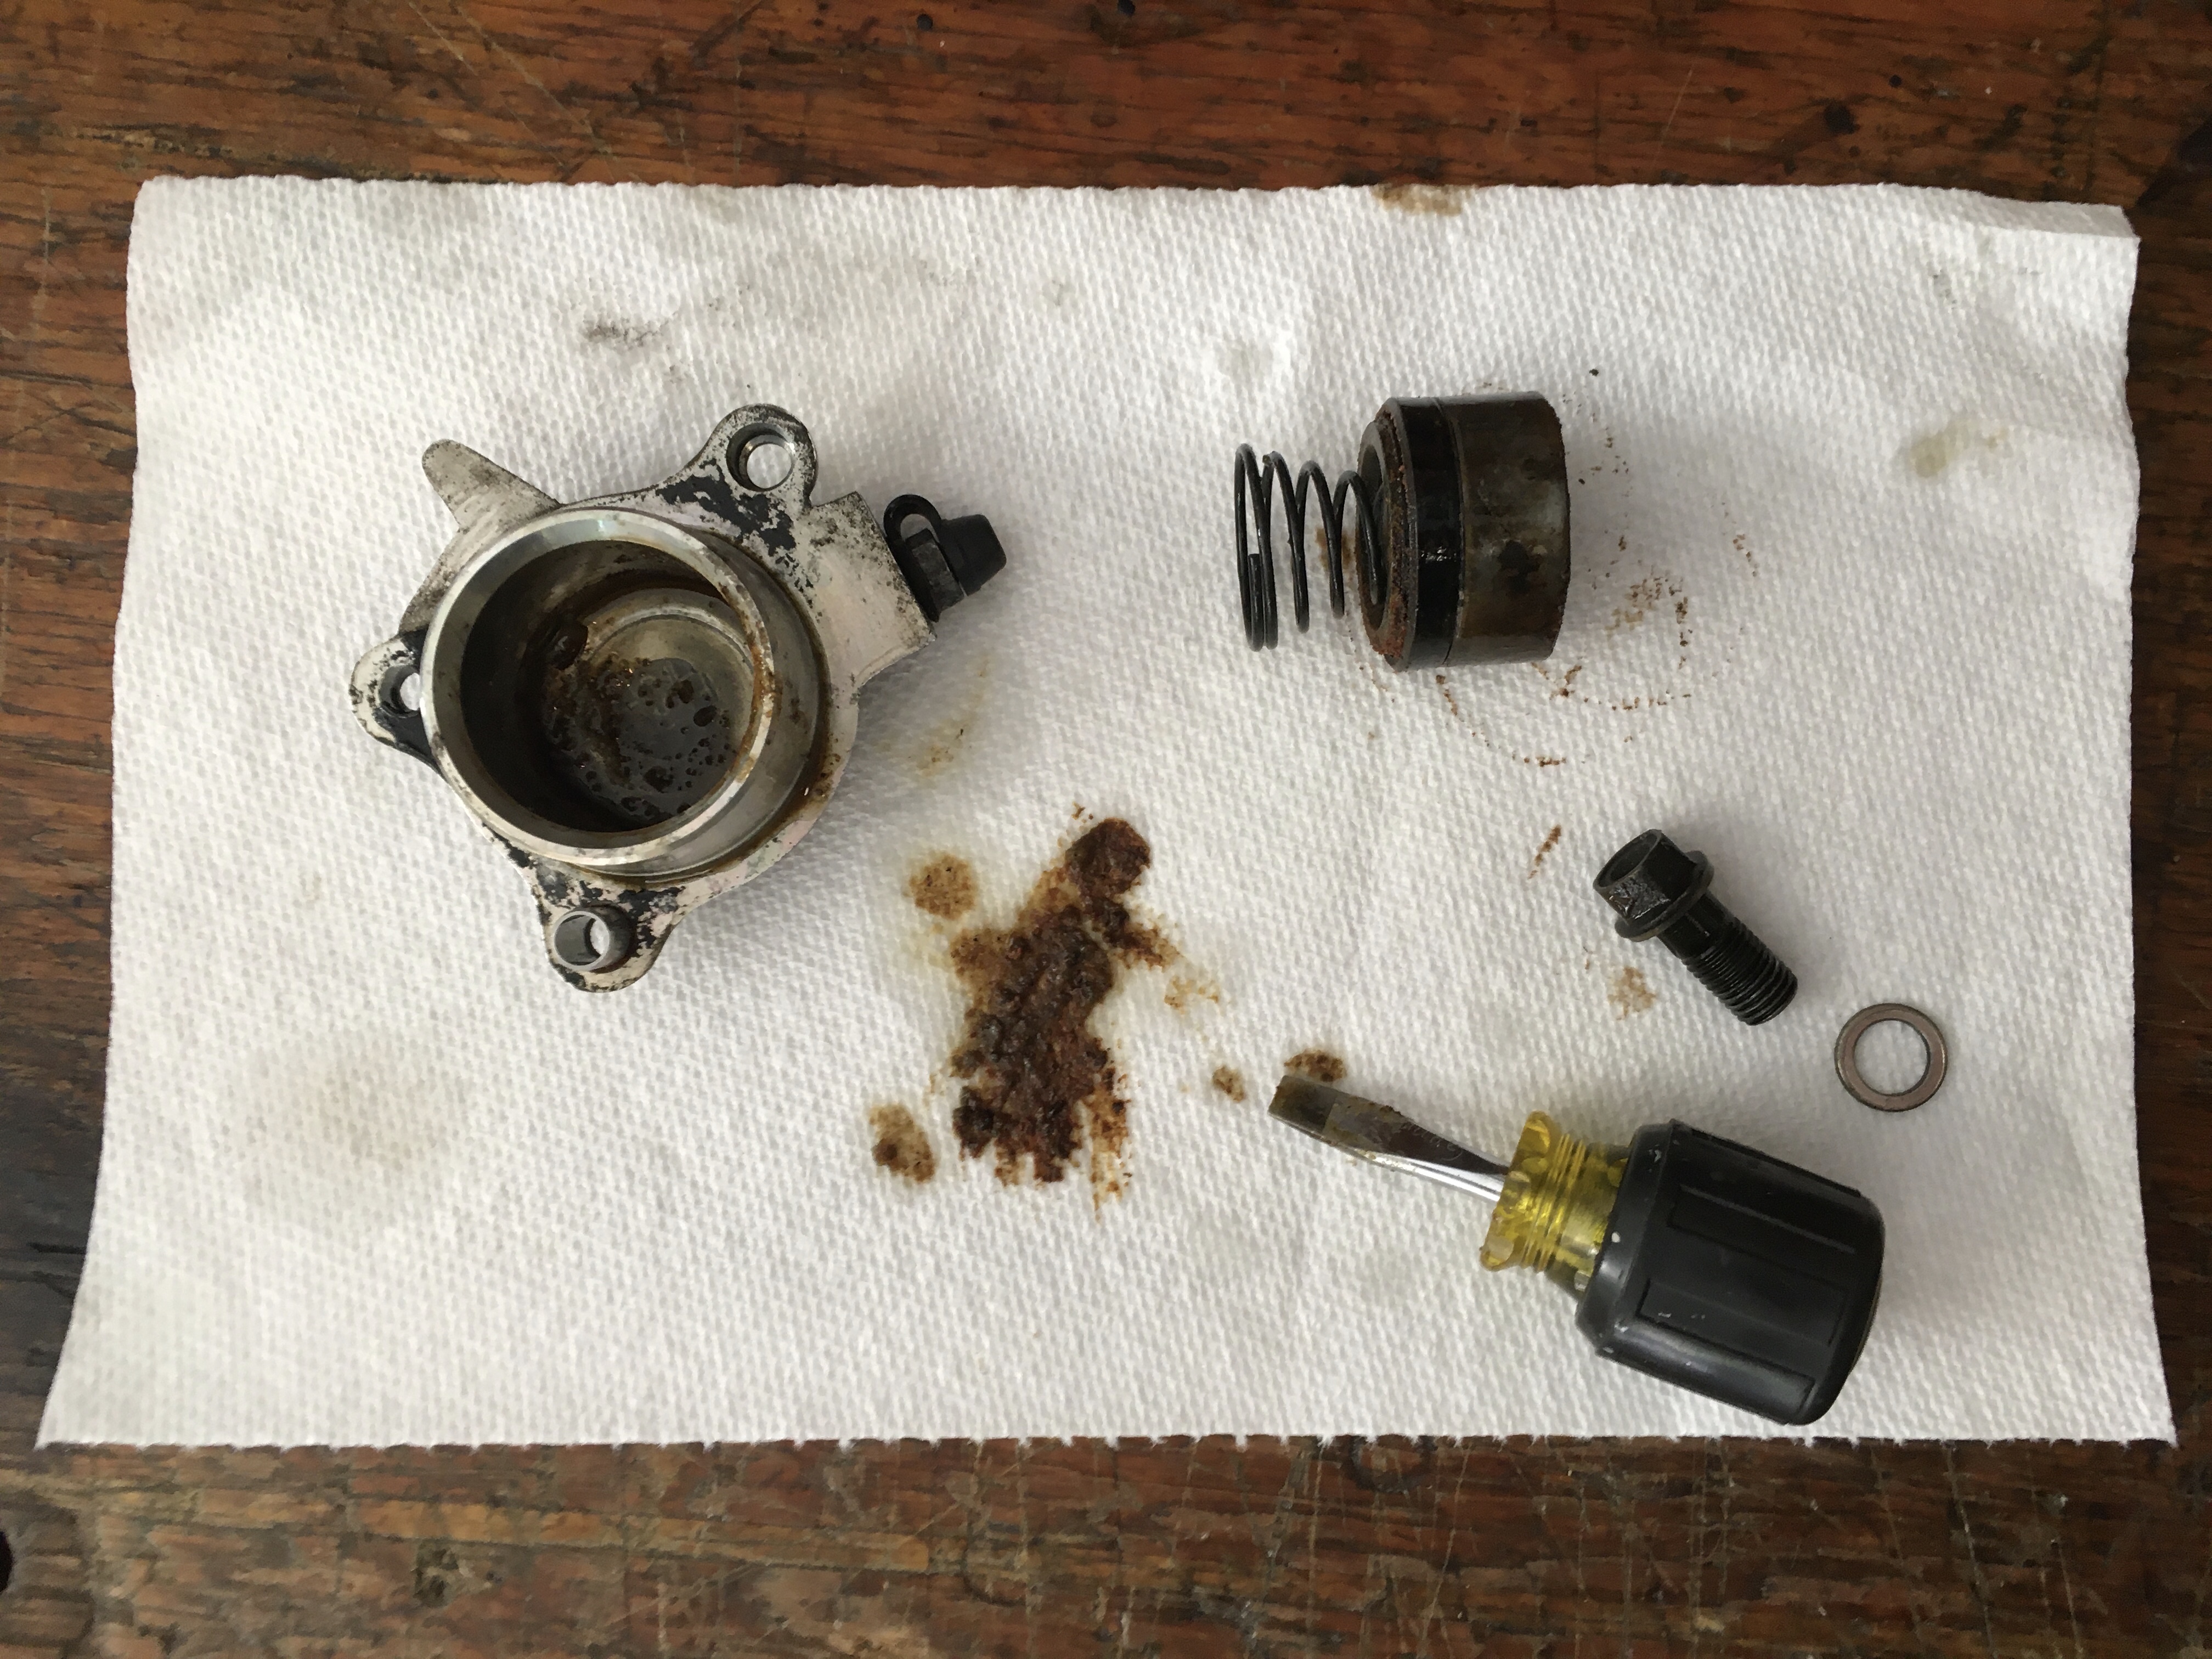
While replacing front sprocket I noticed the tell tale signs of a leaking clutch slave cylinder so decided to just go ahead and order rebuild parts. Here's what improper maintenance service intervals looks like. It's all fixed now, had to use some 600 grit paper and penetrating fluid to clean up the inside of the slave cylinder bore but it was salvageable. I bought a K&L slave piston and rebuild kit with all the rubber parts. Now onto inspecting the clutch plates because in the garage, not running, the bike has a pretty sticky clutch. From initial visible inspection with the side cover off it looks like it is disengaging correctly.
2 points
-
I haven't looked at it in awhile, but there's a video that shows putting a bolt/nut in each bobbin, and a dab o WD40 in the contact area, and then taking a socket wrench to tighten the bolts together and rotating each one to ensure that they can all move, not locked or corroded or whatever. Mbe try that?1 point
-
The EBay LEDs do seem to be a reasonable cheap upgrade. Some of the guys in here have tried several variations. Apparently you want the ones with the fans because those will run high and low emitters at the same time...for when you need high beams. You may also want shielded emitters so you don't blind oncoming traffic. Just a couple things to consider.1 point
-
Got them on ebay. They are cheap. I keep some regular bulbs in the car just in case they burn out. Chinese bulbs. I installed them in Oct. You will hear the little fans running when you turn off you ignition, but on cold days they do not run sometimes. Now my HID's in my Rc51 are super bright that also but that all depends on your headlight design. The RC51 and VFR800 have some big ass headlights with big reflectors inside. https://www.ebay.com/itm/9005-HB3-6000K-White-COB-LED-Headlight-Kit-High-Low-Beam-4side-Light-Bulb/363093965370?ssPageName=STRK%3AMEBIDX%3AIT&_trksid=p2057872.m2749.l26491 point
-
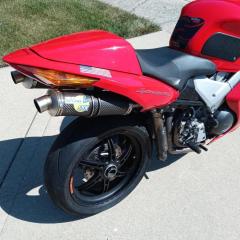
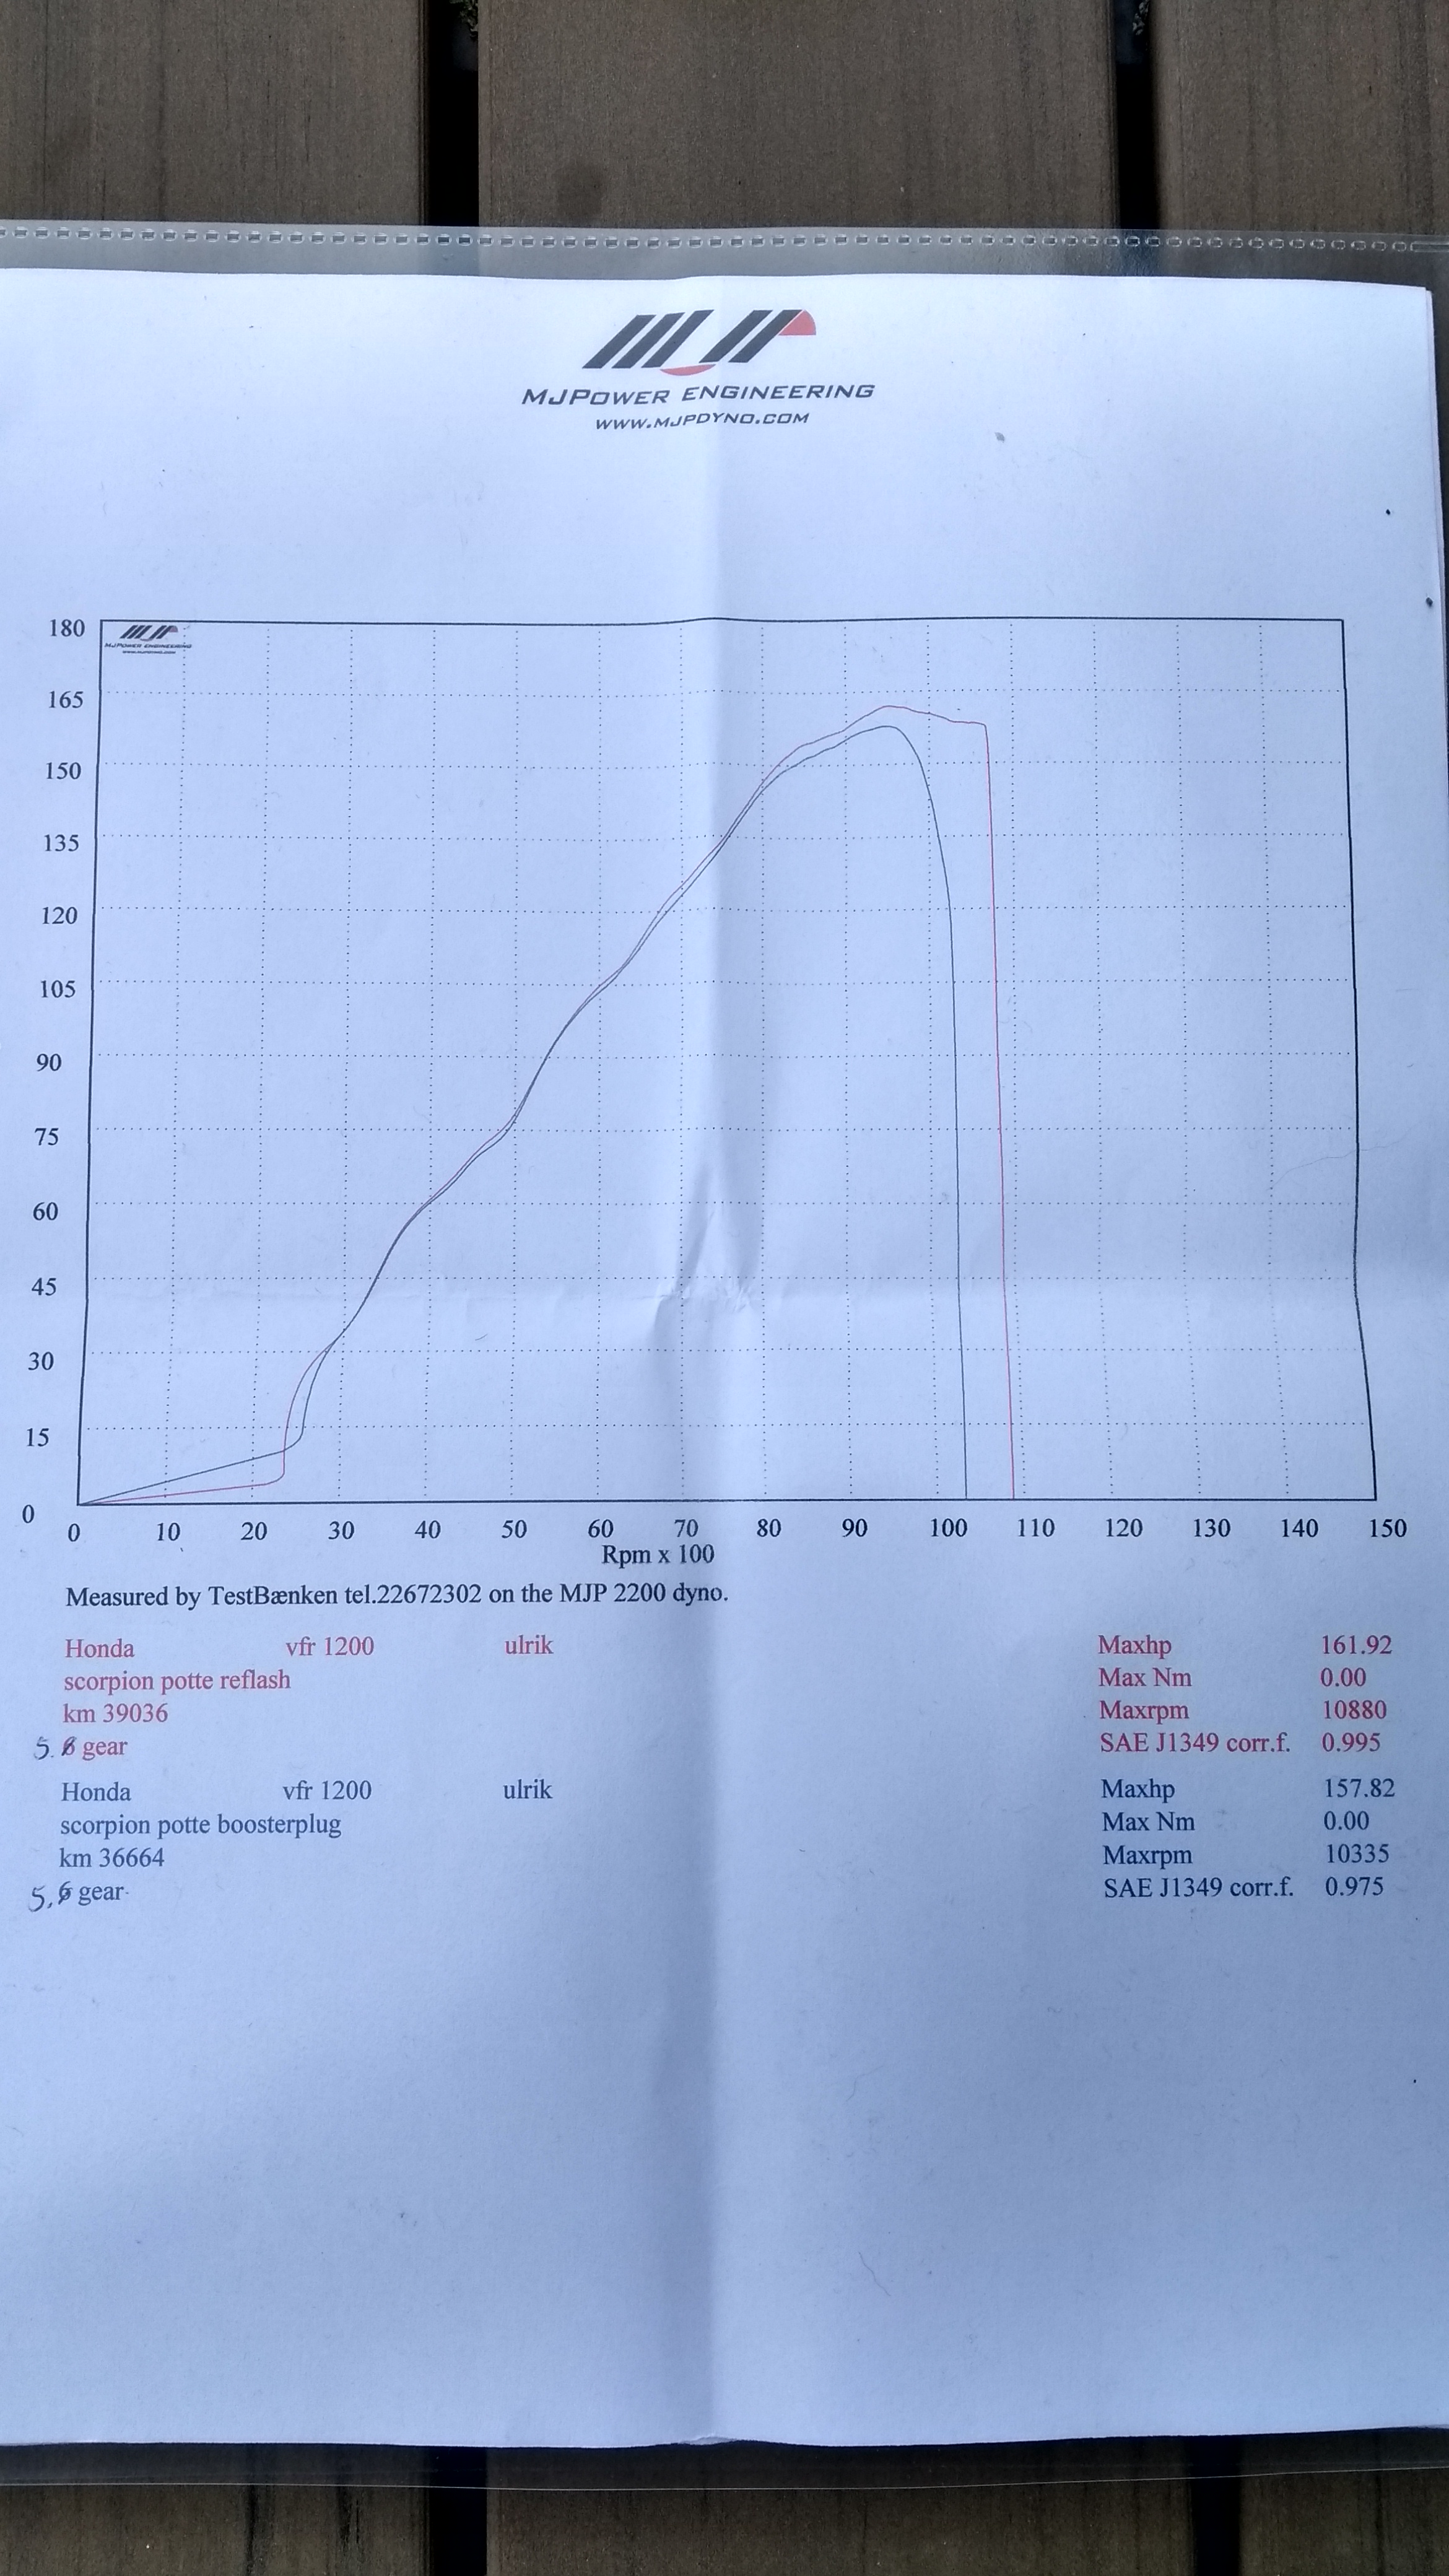
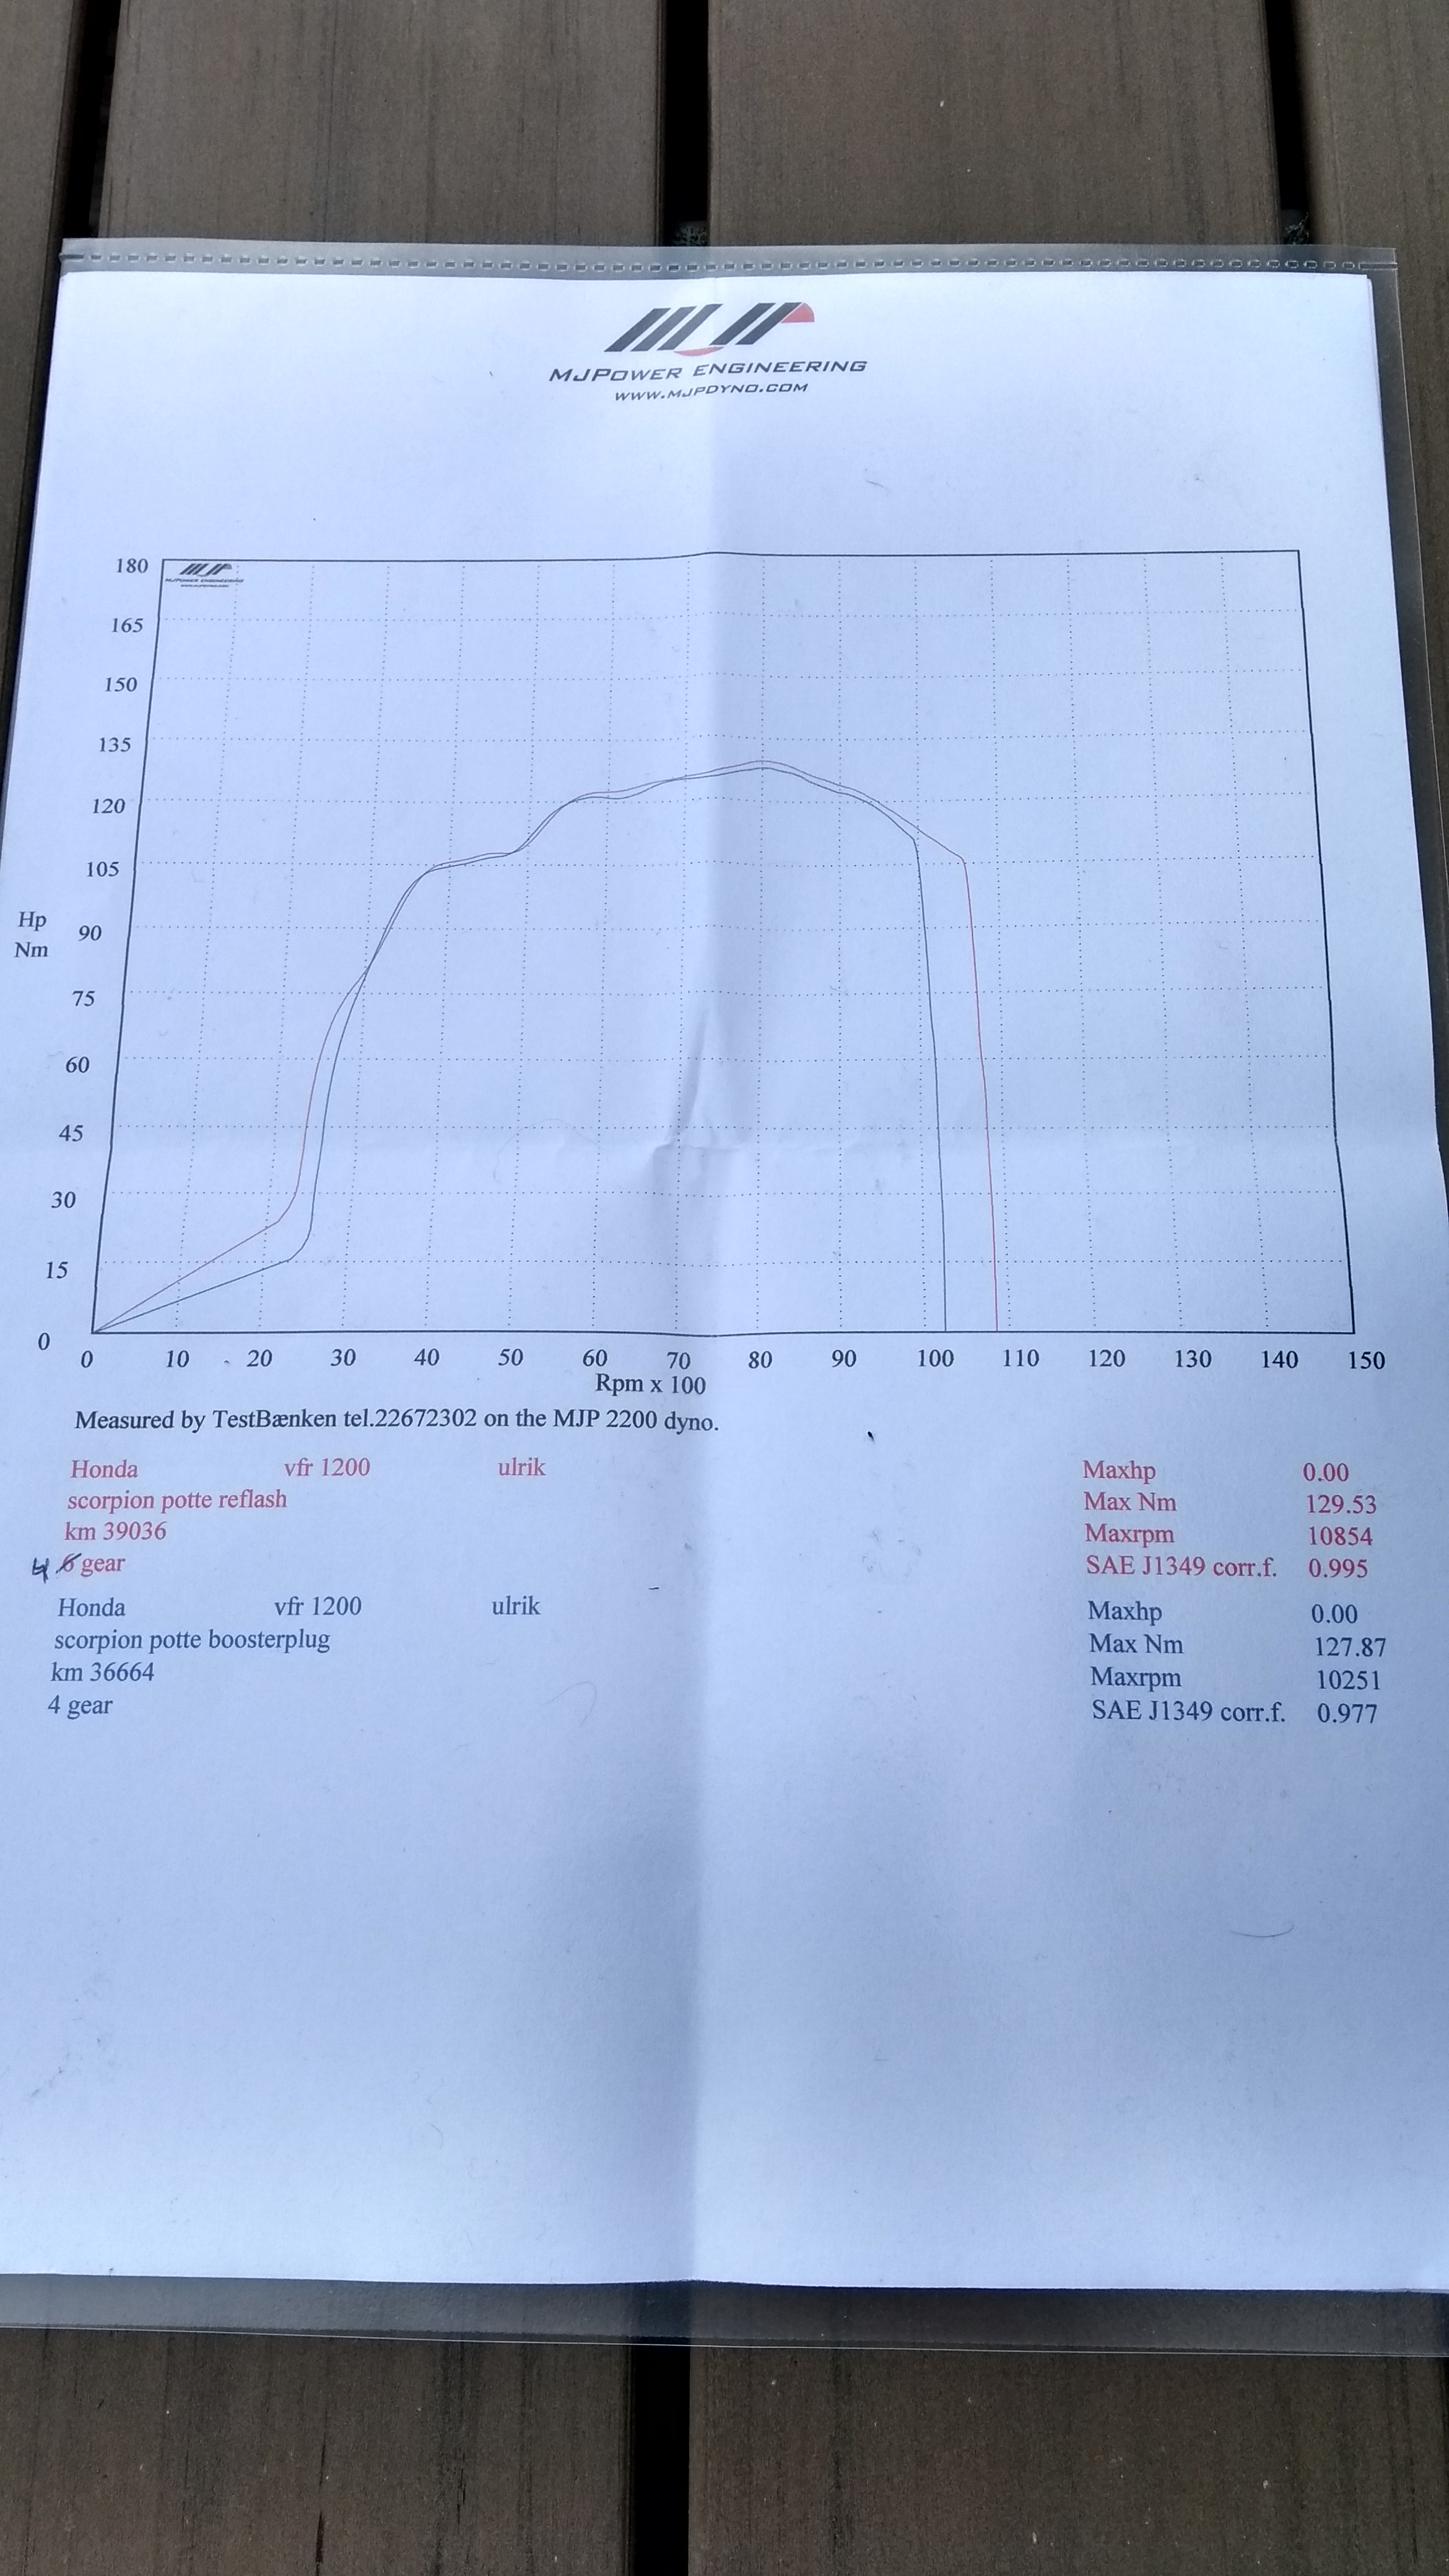
Good looking Bike👍 I did the Sabsteef remote Ecu flash and its very good...Before the ecu reflash i had the boosterplug installed.... Here is a dyno with boosterplug (No reflash) And without boosterplug after Sabsteef remote Ecu reflash... Info. Honda VFR 1200 F 2011. Scorpion factory slip-on..(Carbon) Helibars handlebar risers. 5 gear test 162 HP (wheel) 5 gear test 132 NM (wheel) No print🤯 Red line Sabsteef Ecu reflash. 39.000 km. Blue line Boosterplug installed. 36.600 km.
1 point
-
Congrats on the retrieval. Even if they caught the perps, likely they'll face nothing more than the cops taking their names and letting them go. Maybe it filters in to the crime stats. In the U.S. you have a vastly higher probability of seeing court for speeding or stopping in a crosswalk. Property crimes go virtually un-punished now. Sad reality, but that's the way it is in modern America.1 point
-
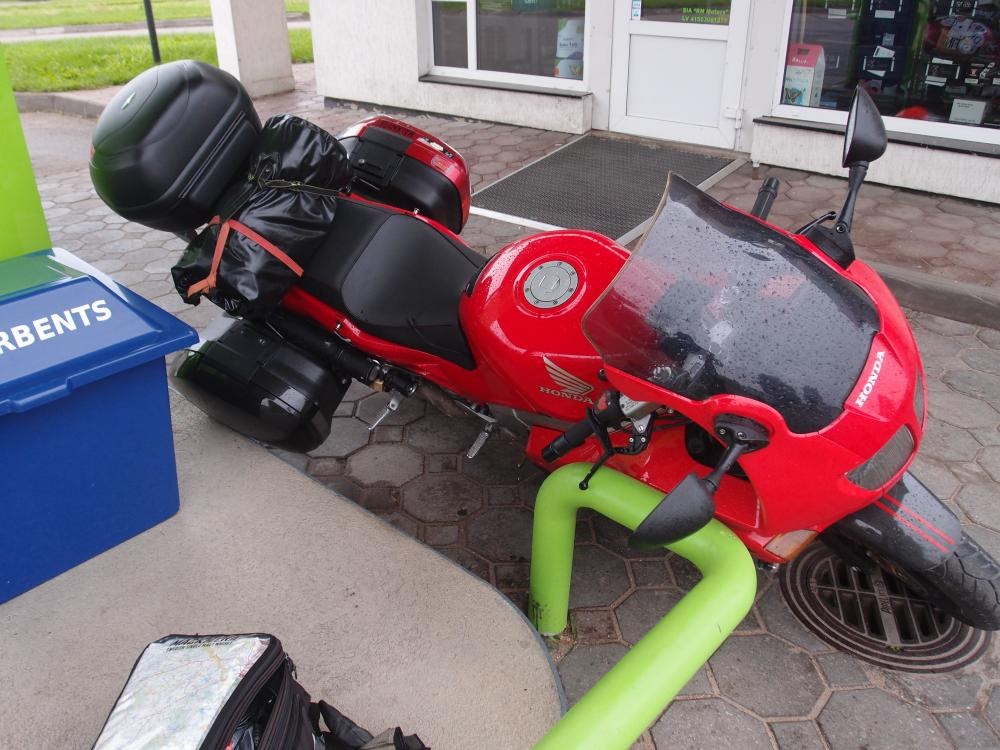
Great shots! For a moment (at the 1st picture) i thought "when did that lass join your trip?" Sorry to see the damage. I was lucky at the time (7AM) when my brain farted in Latvia...
1 point
-
Your average Dutch female could be a model...1 point
-
A lot of people are over-building their packs with higher-capacity than necessary due to comparing to outdated CCA-ratings of lead-acid batteries. First, some background on CCA: CCA - cold-cranking amps is rating of lead-acid batteries to deal with loss of power as temperatures decrease. At -10 degrees, a lead-acid battery will have only 25% of its CCA rating. So V8 needing 150-amps cranking current at low-temps, requires 4x150=600CCA battery. Just in case it's ever needed to be started in cold-weather. Since I lived in Santa Barbara for so many years, I never needed cold-weather starting. So I just used a motorcycle battery in my V8 5.0 Mustang convertible for ages (until I sold POS car). However, more accurate numbers would be to measure actual starting-current needed by engine: 130-150a = V8 +5.0L auto-engine 70-90a = typically I4 auto-engine 50-70a = V4 moto engine 30-40a = 250cc twin moto engine 20a = 125cc moto engine Note that starters "suck" power from battery when cranking, I=V/R. Starter circuit will only suck as much power as determined by windings in starter and load imposed by engine. Bigger batteries with higher CCA doesn't force more power through starting-circuit. It just gives more potential in colder weather. Or lets you crank engine for 30-minutes instead of 5. So single 4-series pack of 26650 cells with 120a 10-sec burst output is more than enough.1 point
-
Ok here we go...... - Better fuel economy. The 8gen has slightly smaller tank capacity and a nicer more streamlined shape the greater fuel economy far exceeds any loss of fuel quantity. - More improvements on vtec transition. - New cam profiles, engine compression slightly increased to 11.8 : 1. - Lighter weight (by almost 30lbs) and has a more nimble feel to handling and steering, gives you more confidence in the twisty stuff. - A nicer slimmer look due to the side radiators being moved to the front. - Rider seat has adjustable hi and low position. - Greater storage room under the pillion seat especially with the rear cowl in use. - Mirrors are better and are far less prone to being elbowed out of position by some peanut walking by your bike too closely. - Stronger more ridged new SS Swingarm. - Simple adjustment knob for rear suspension preload. Brakes. - Far better brakes with larger diameter 310mm front rotors. - Non linked with ABS, (Australian 6gens were never the ABS version) - Front brakes are dual radial mounted 4 piston fixed calipers. Instrumentation. - Whilst not essential but nice to have, gear position indication. - Fuel usage instantaneous, average etc. readout. - Traction control. - 5 stage heated grips. - Auto cancelling turn indicators...ok once you get used to them! - Turn Indicator and Horn switches have swapped positions! Will drive you crazy initially BUT once you get used to it it's great, your thumb is right next to the indicator switch where it should be. Electrics. - All the electrical issues that plagued the 5th and 6gens appear to have been resolved. - Stator is forced oil cooled. Have not heard of a single 8gen stator failure yet! - R/R is a greatly improved, efficient microprocessor controlled mosfet regulator. - Reduced electrical loads due to the LED headlights. - Gone is the radiator cooling fan thermatic switch now control by the ECM engine temp inputs. - Gone is the speed pickup that was coupled to the drive sprocket mounting bolt head. Rear ABS sensor is the speed sensor. - Gone is the diaphragm type fuel pressure regulator that had caused issues with 5 and 6gen. - Even the ignition switch and starter switch have been simplified to simple single pole switches, improving reliability. - Easier access to all fuses being under the rider seat. OEM Panniers. - Really nice, no ugly added brackets required, just discrete integrated mounting points for panniers. Very simple and fast pannier install and removal. Overall superb build quality, reliability, durability and bloody great fun! You also have the option of fitting a genuine Honda Quick Shifter for the 8gen. Cons. These are my only small gripes I have that may not be issues for other owners, but for me the 8gen is a fantastic all round great looking and sounding road bike. Wherever I take the VFR I'm always getting comments from people of what a nice looking bike it is.....I always agree! - Suspension a bit harsh no matter what the setting. - OEM exhaust is a bit ugly ...easily fixed! - Oh, yeah...Beware the Fuel Tank breather hose!!! - Oil filter is a little more awkward to get at due to it being behind the front cooling fan. - Minor issue in rear wheel removal, you now have to swing the exhaust aside, its a piece of cake, just a simple extra step you didn't have to do with a 6gen. Have I forgotten anything? "My Dream VFR". Taken this morning.
1 point
-
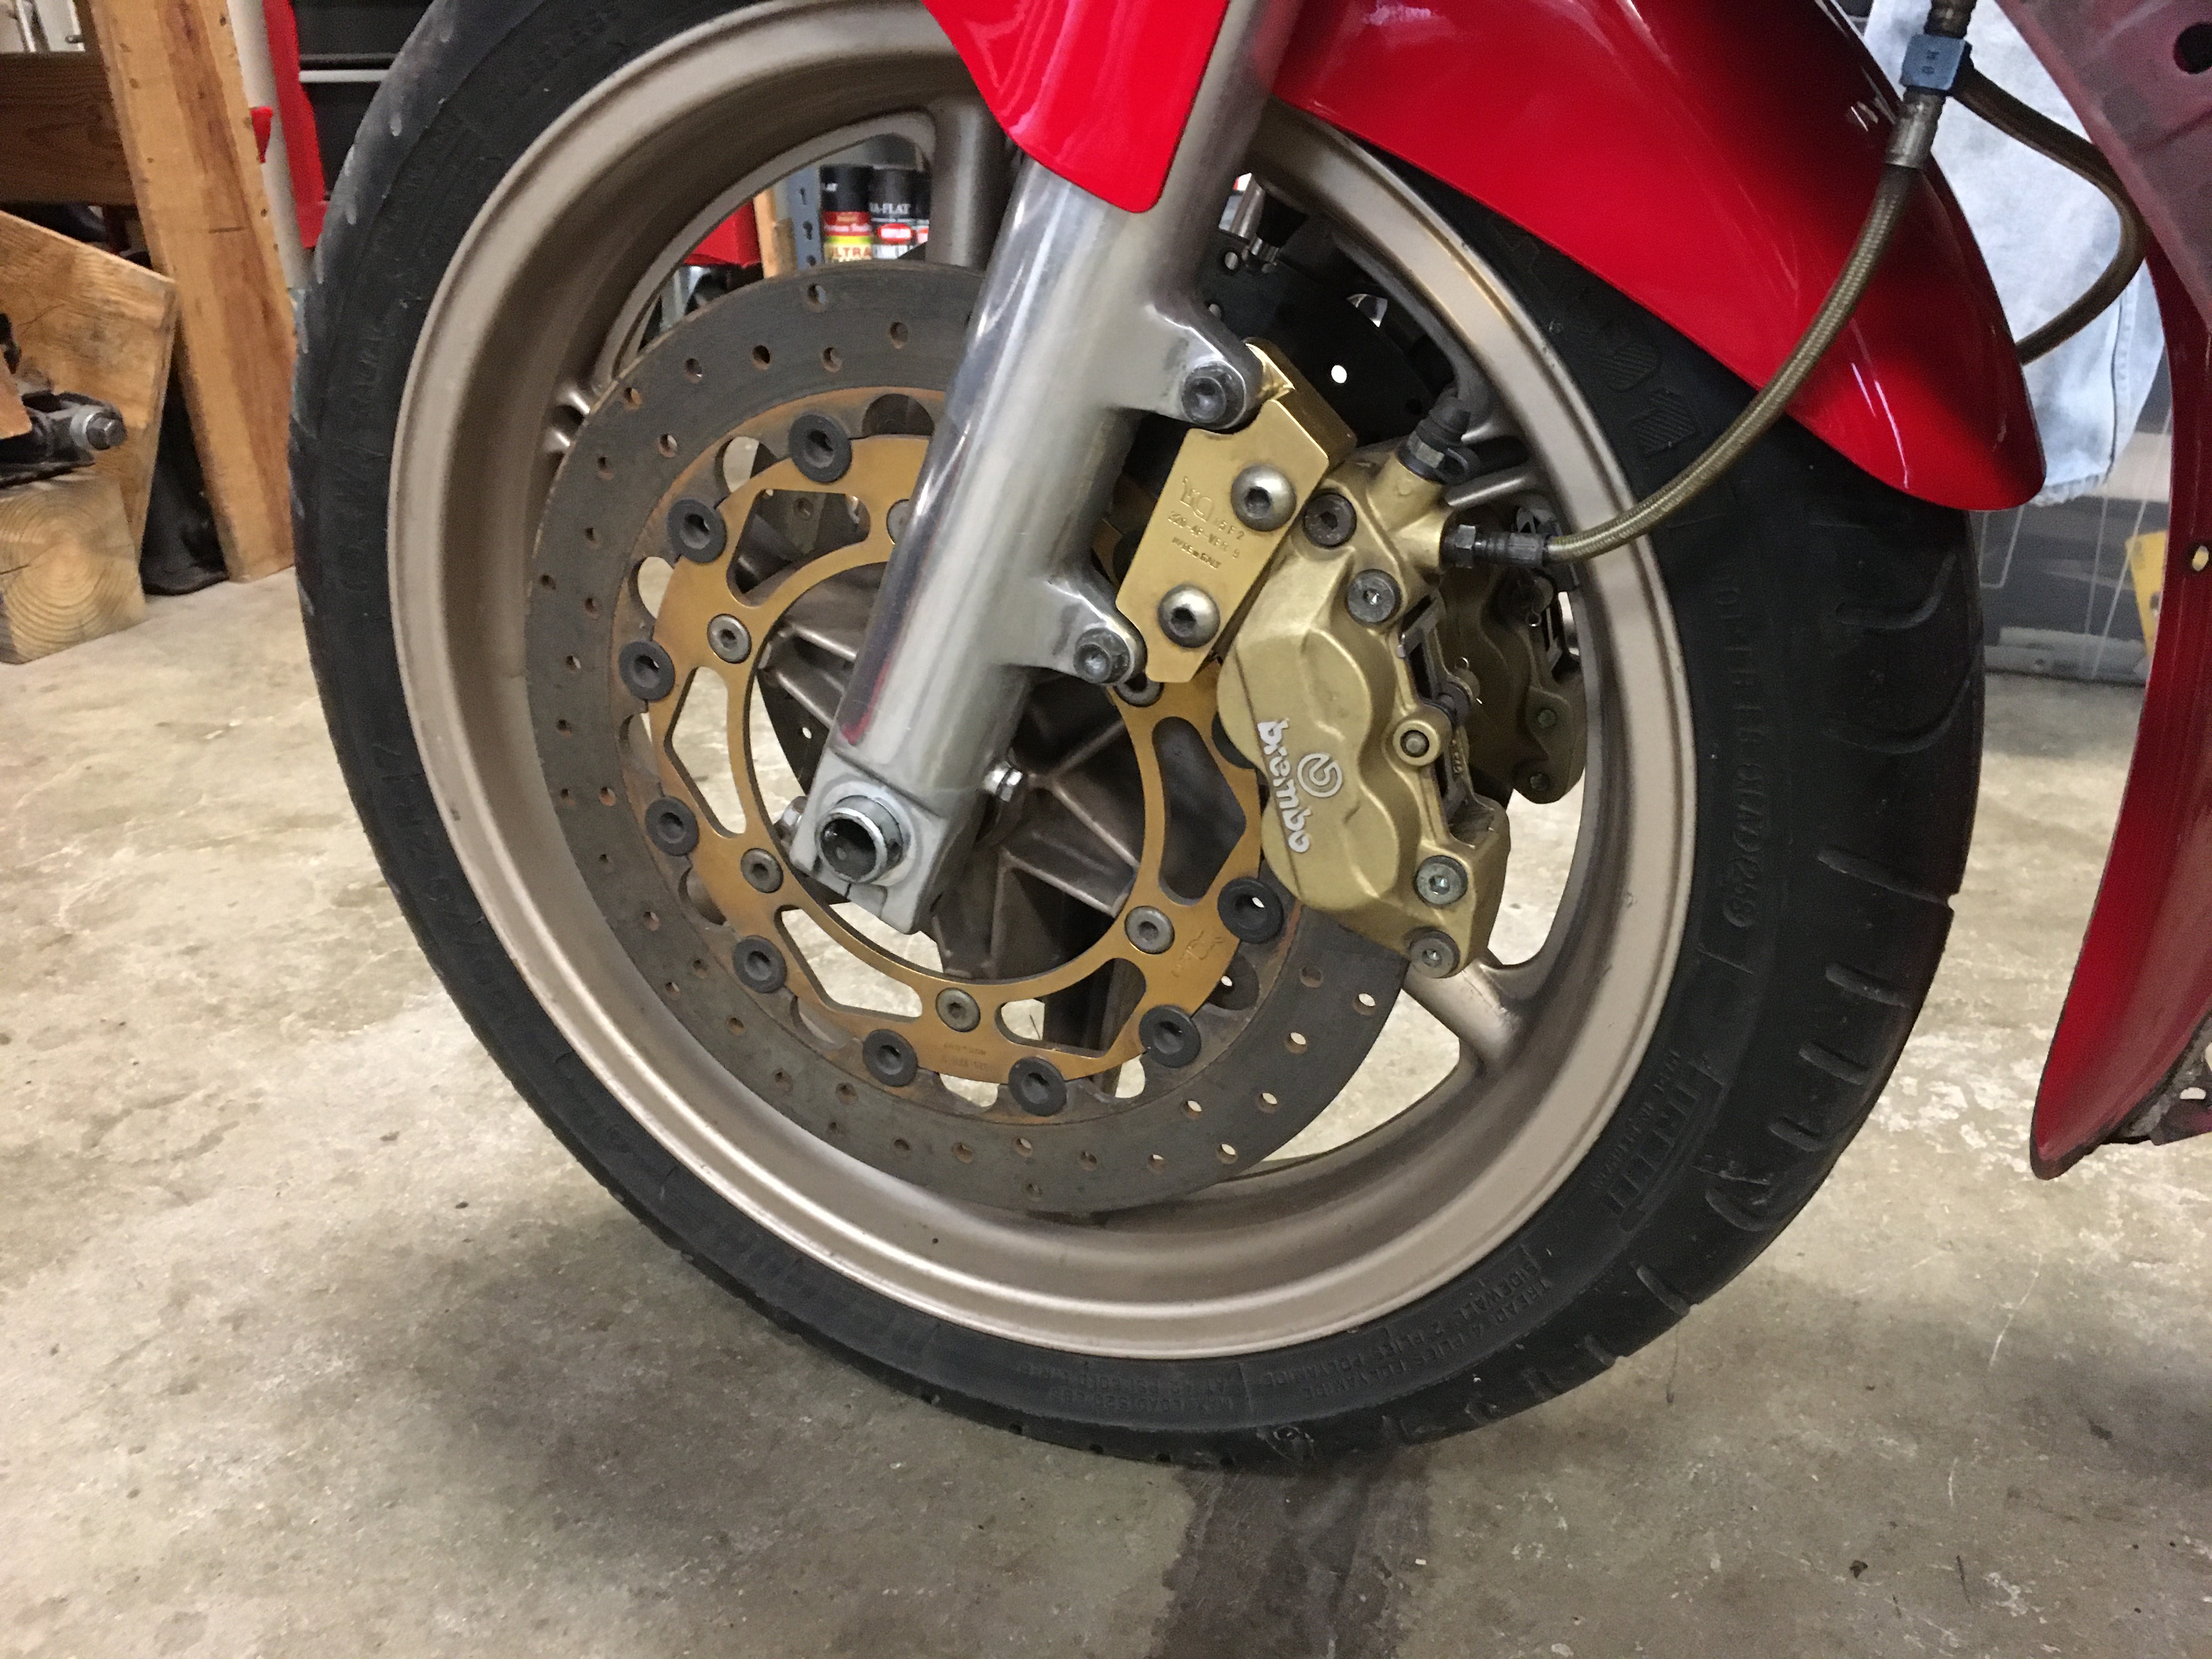
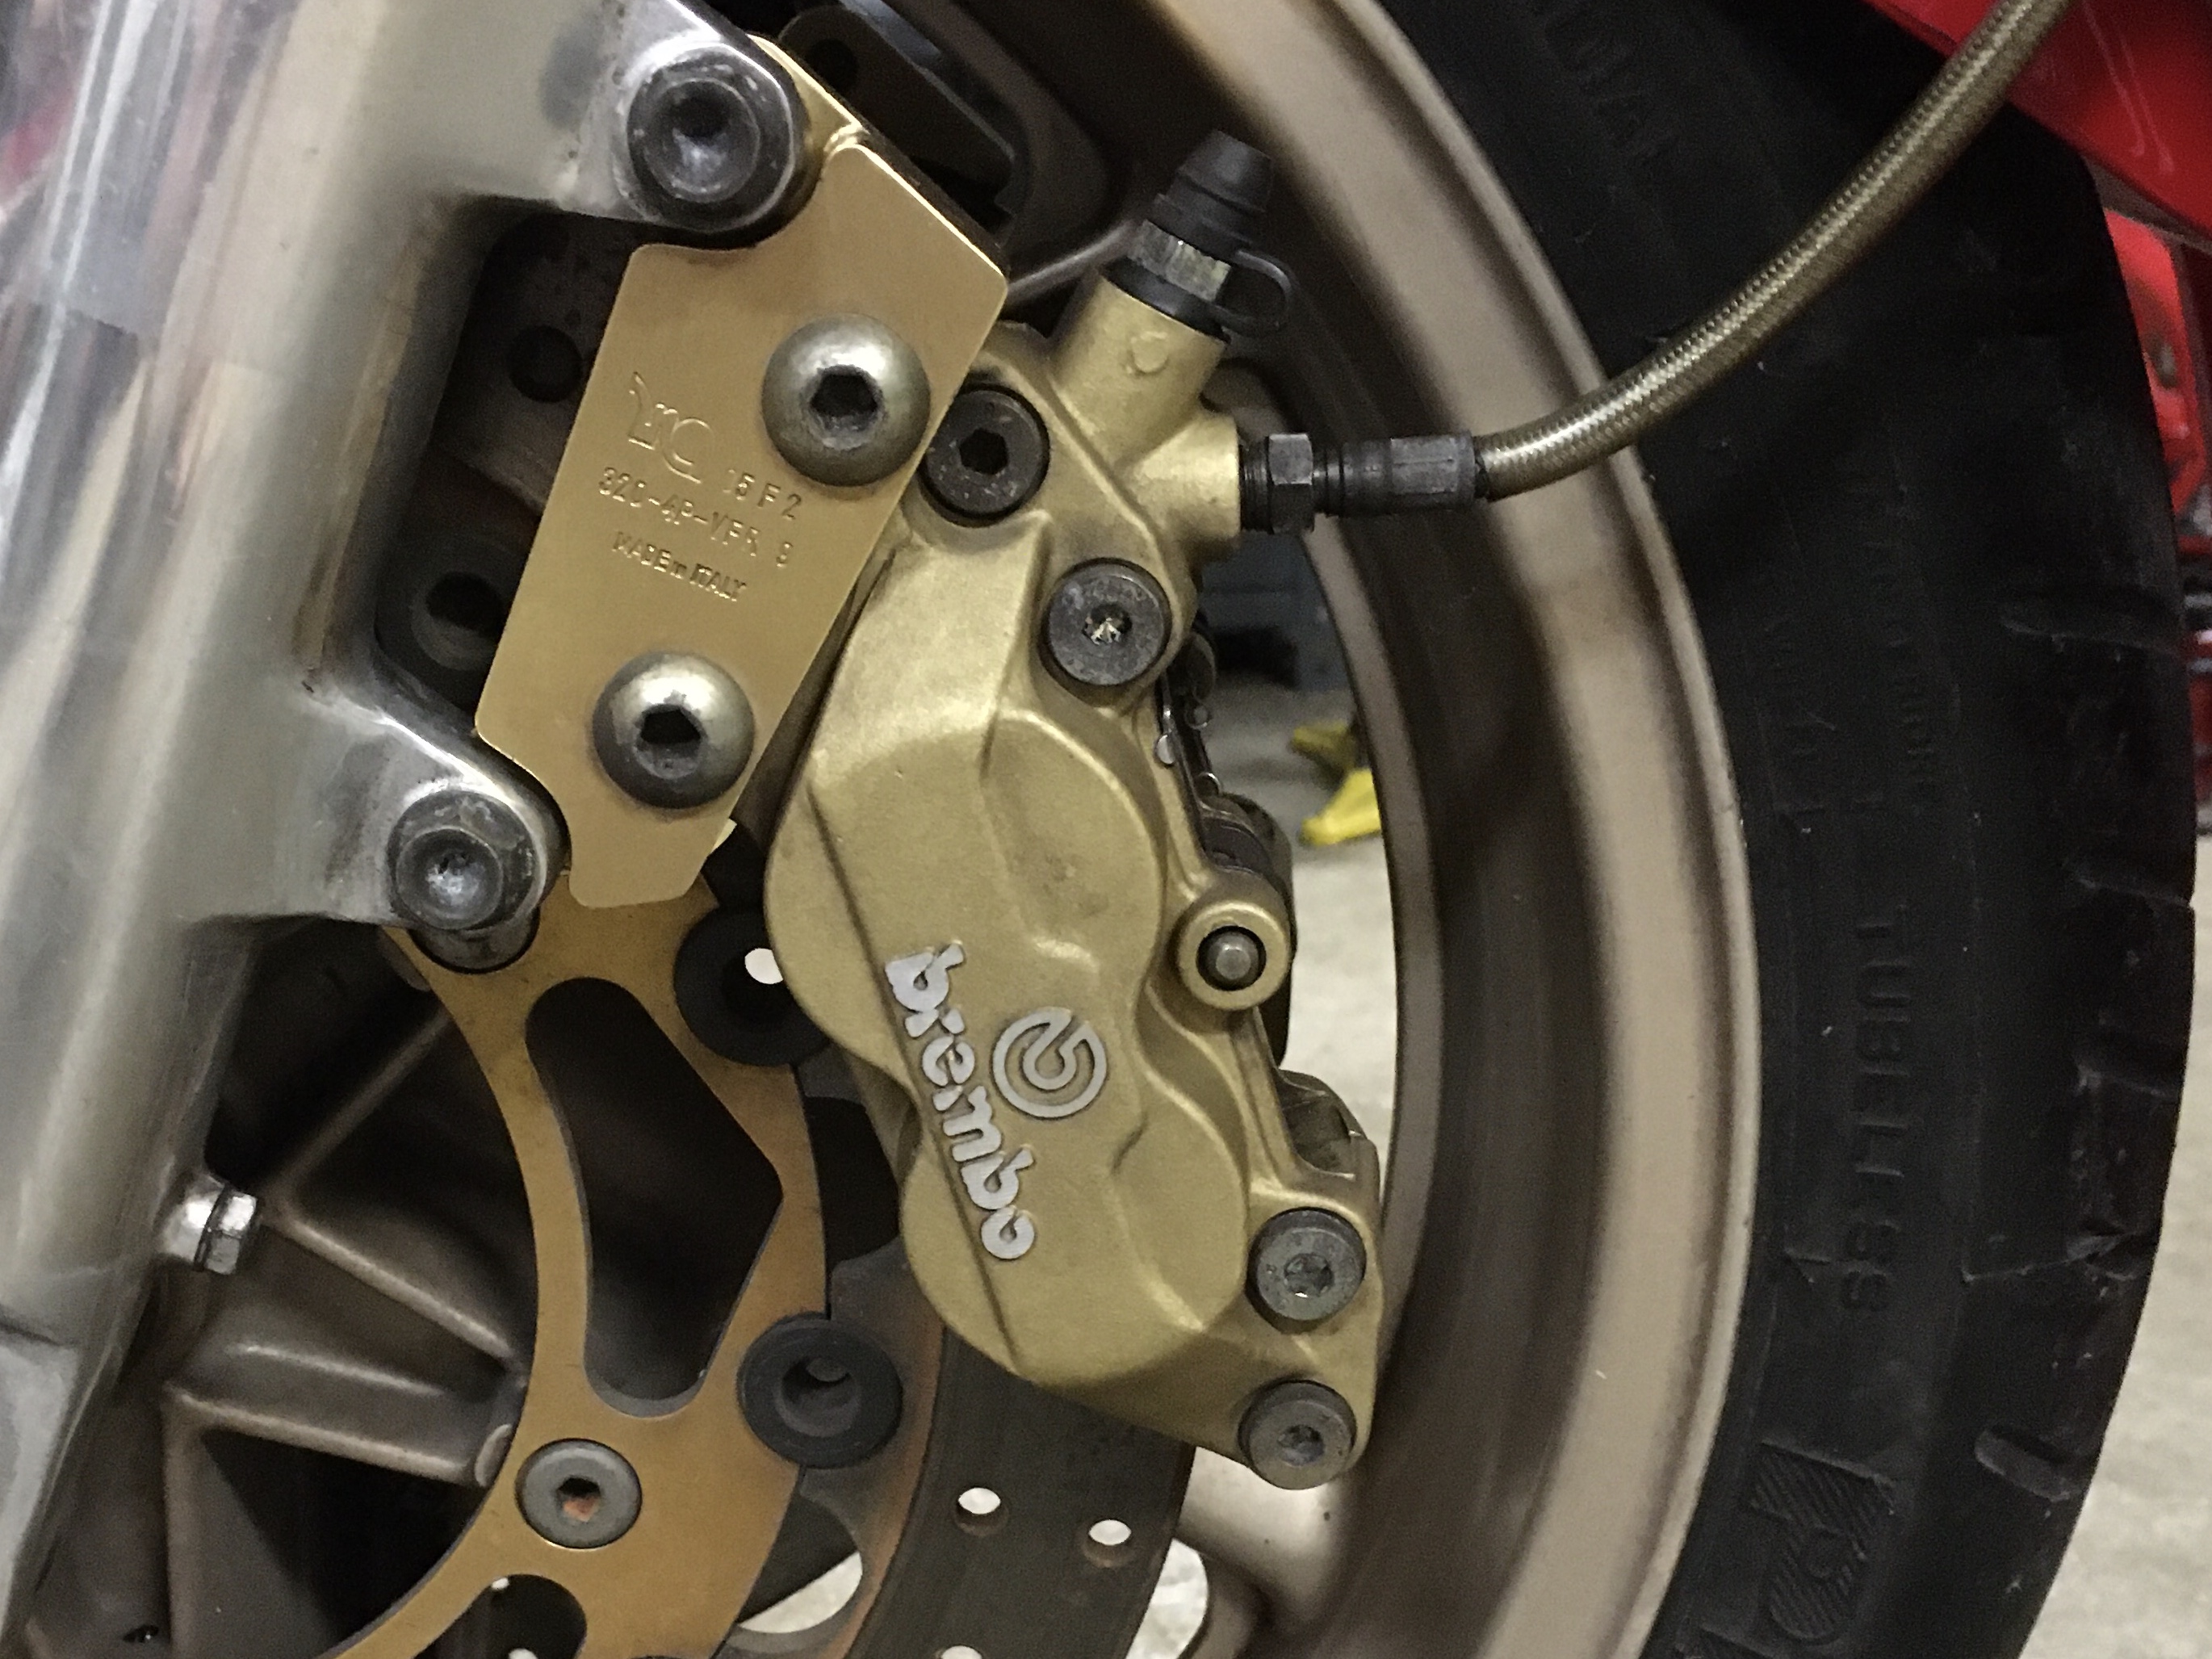
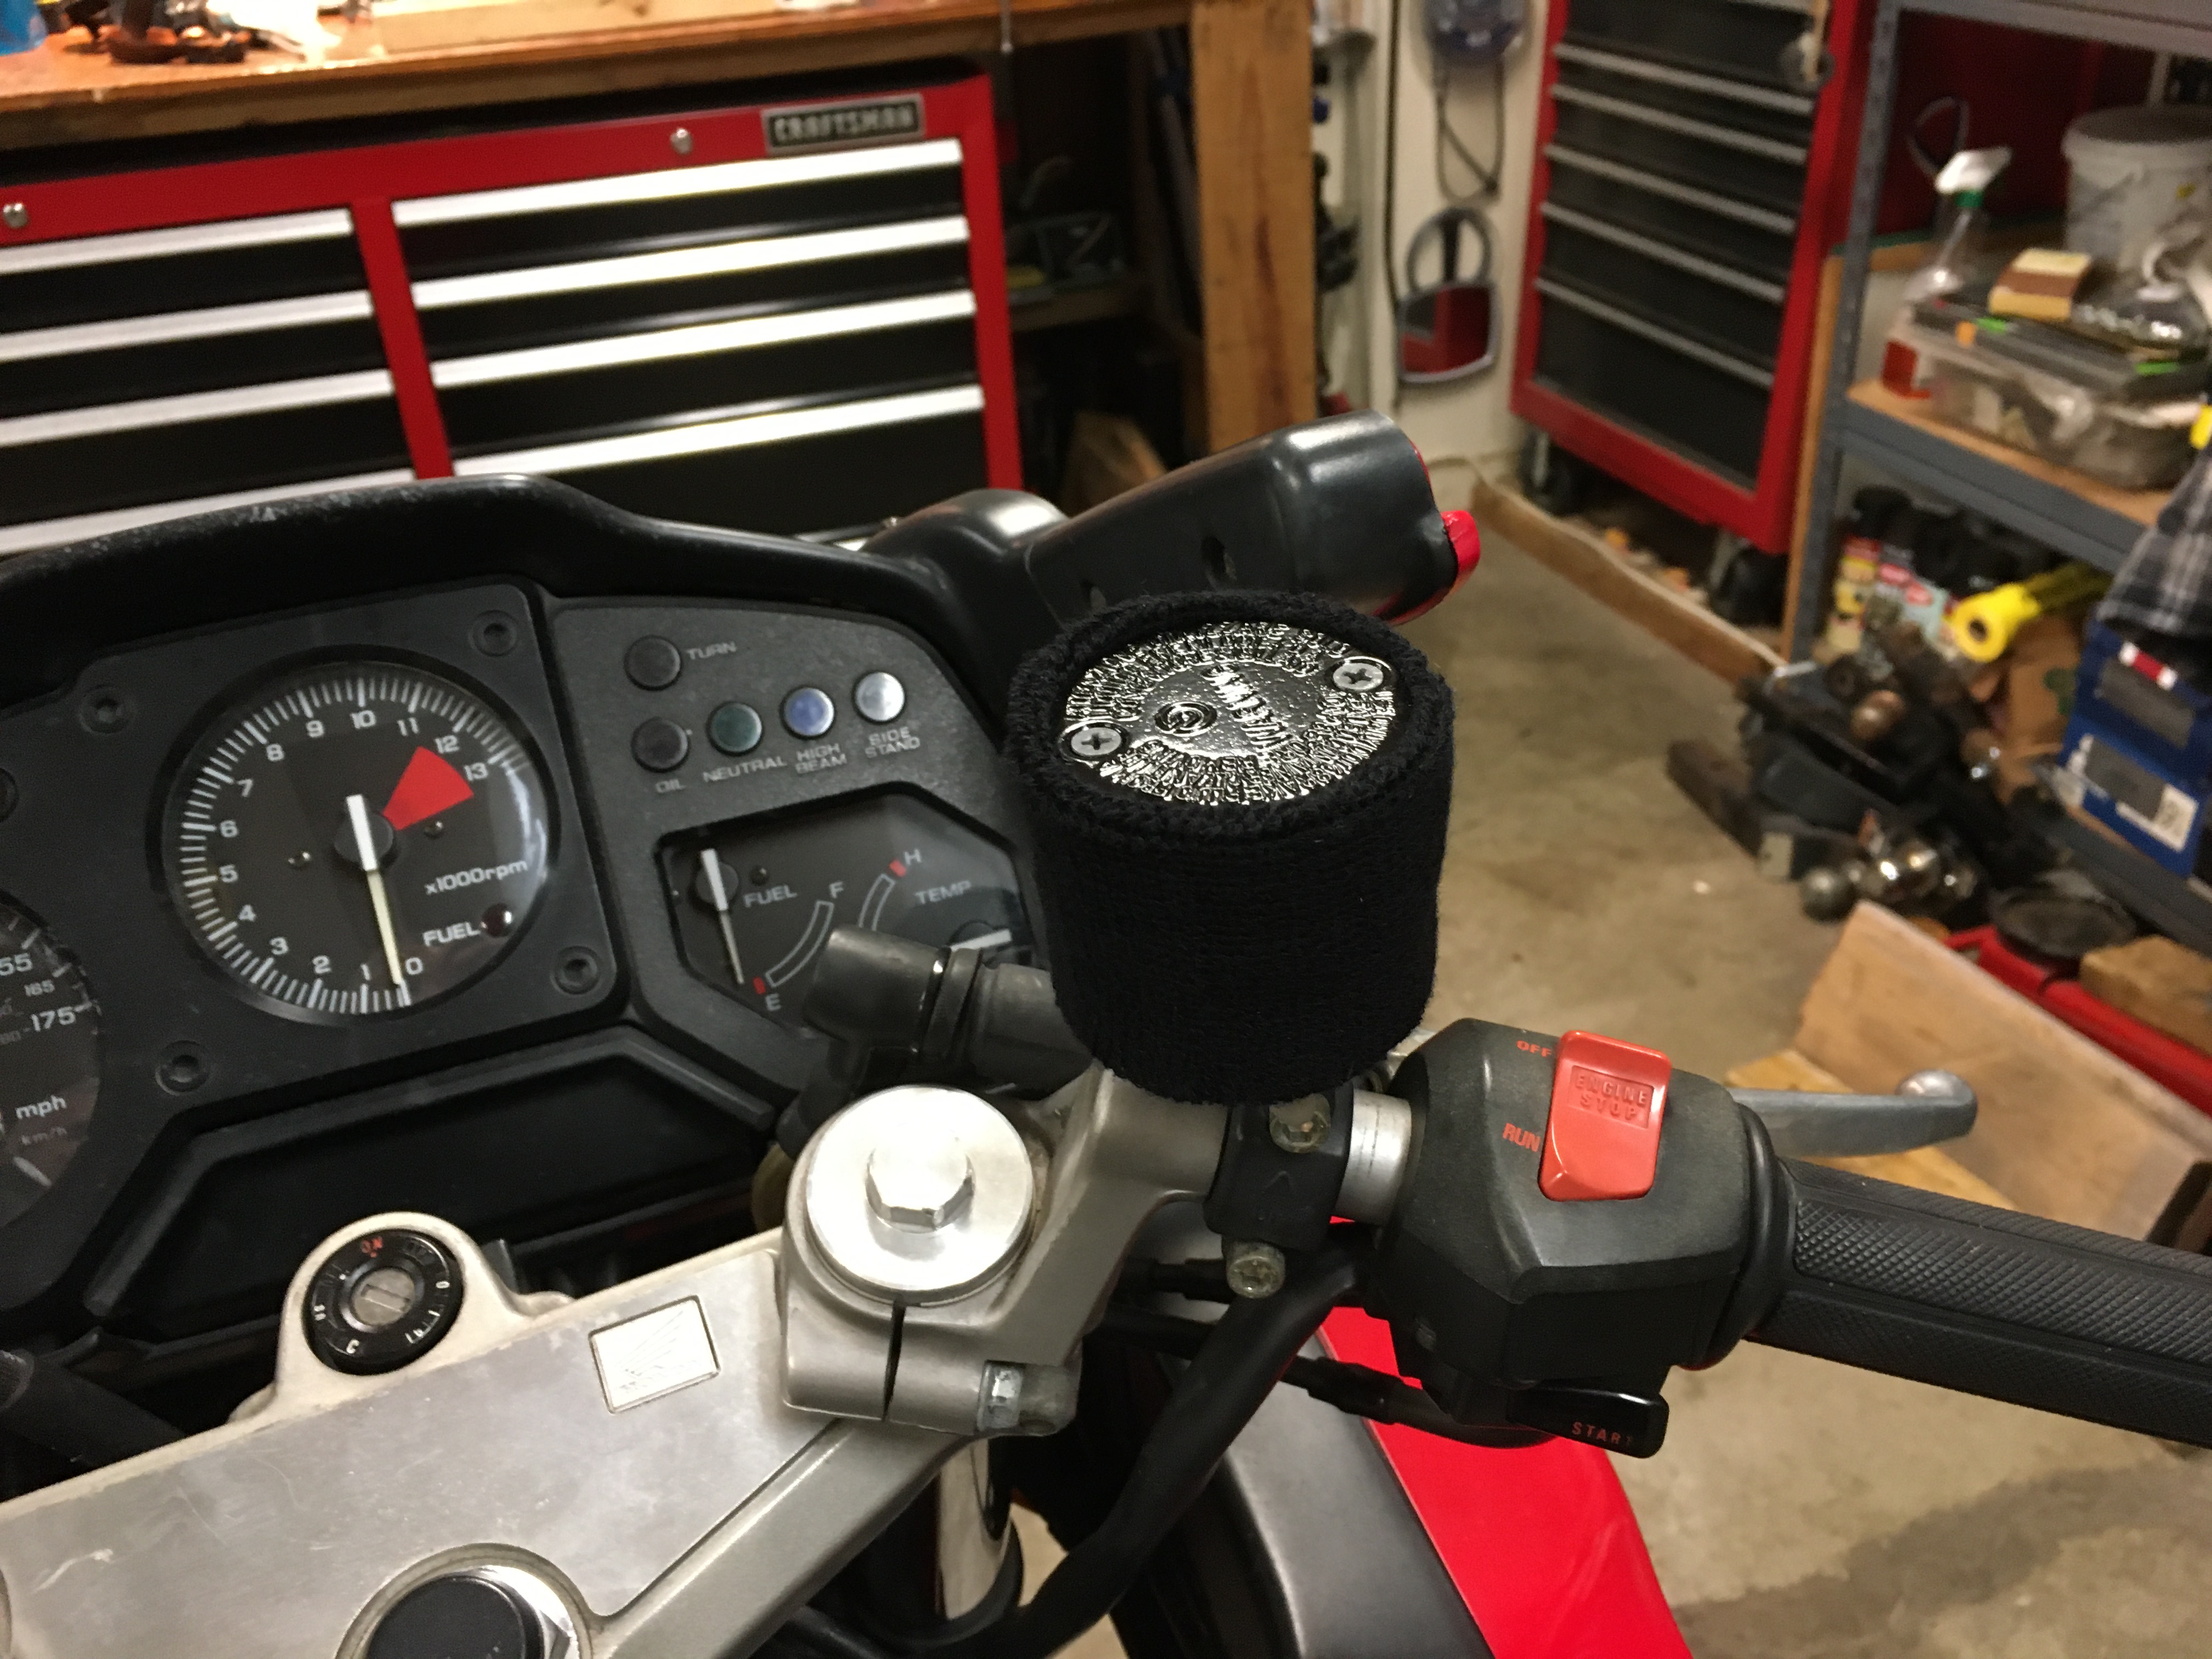
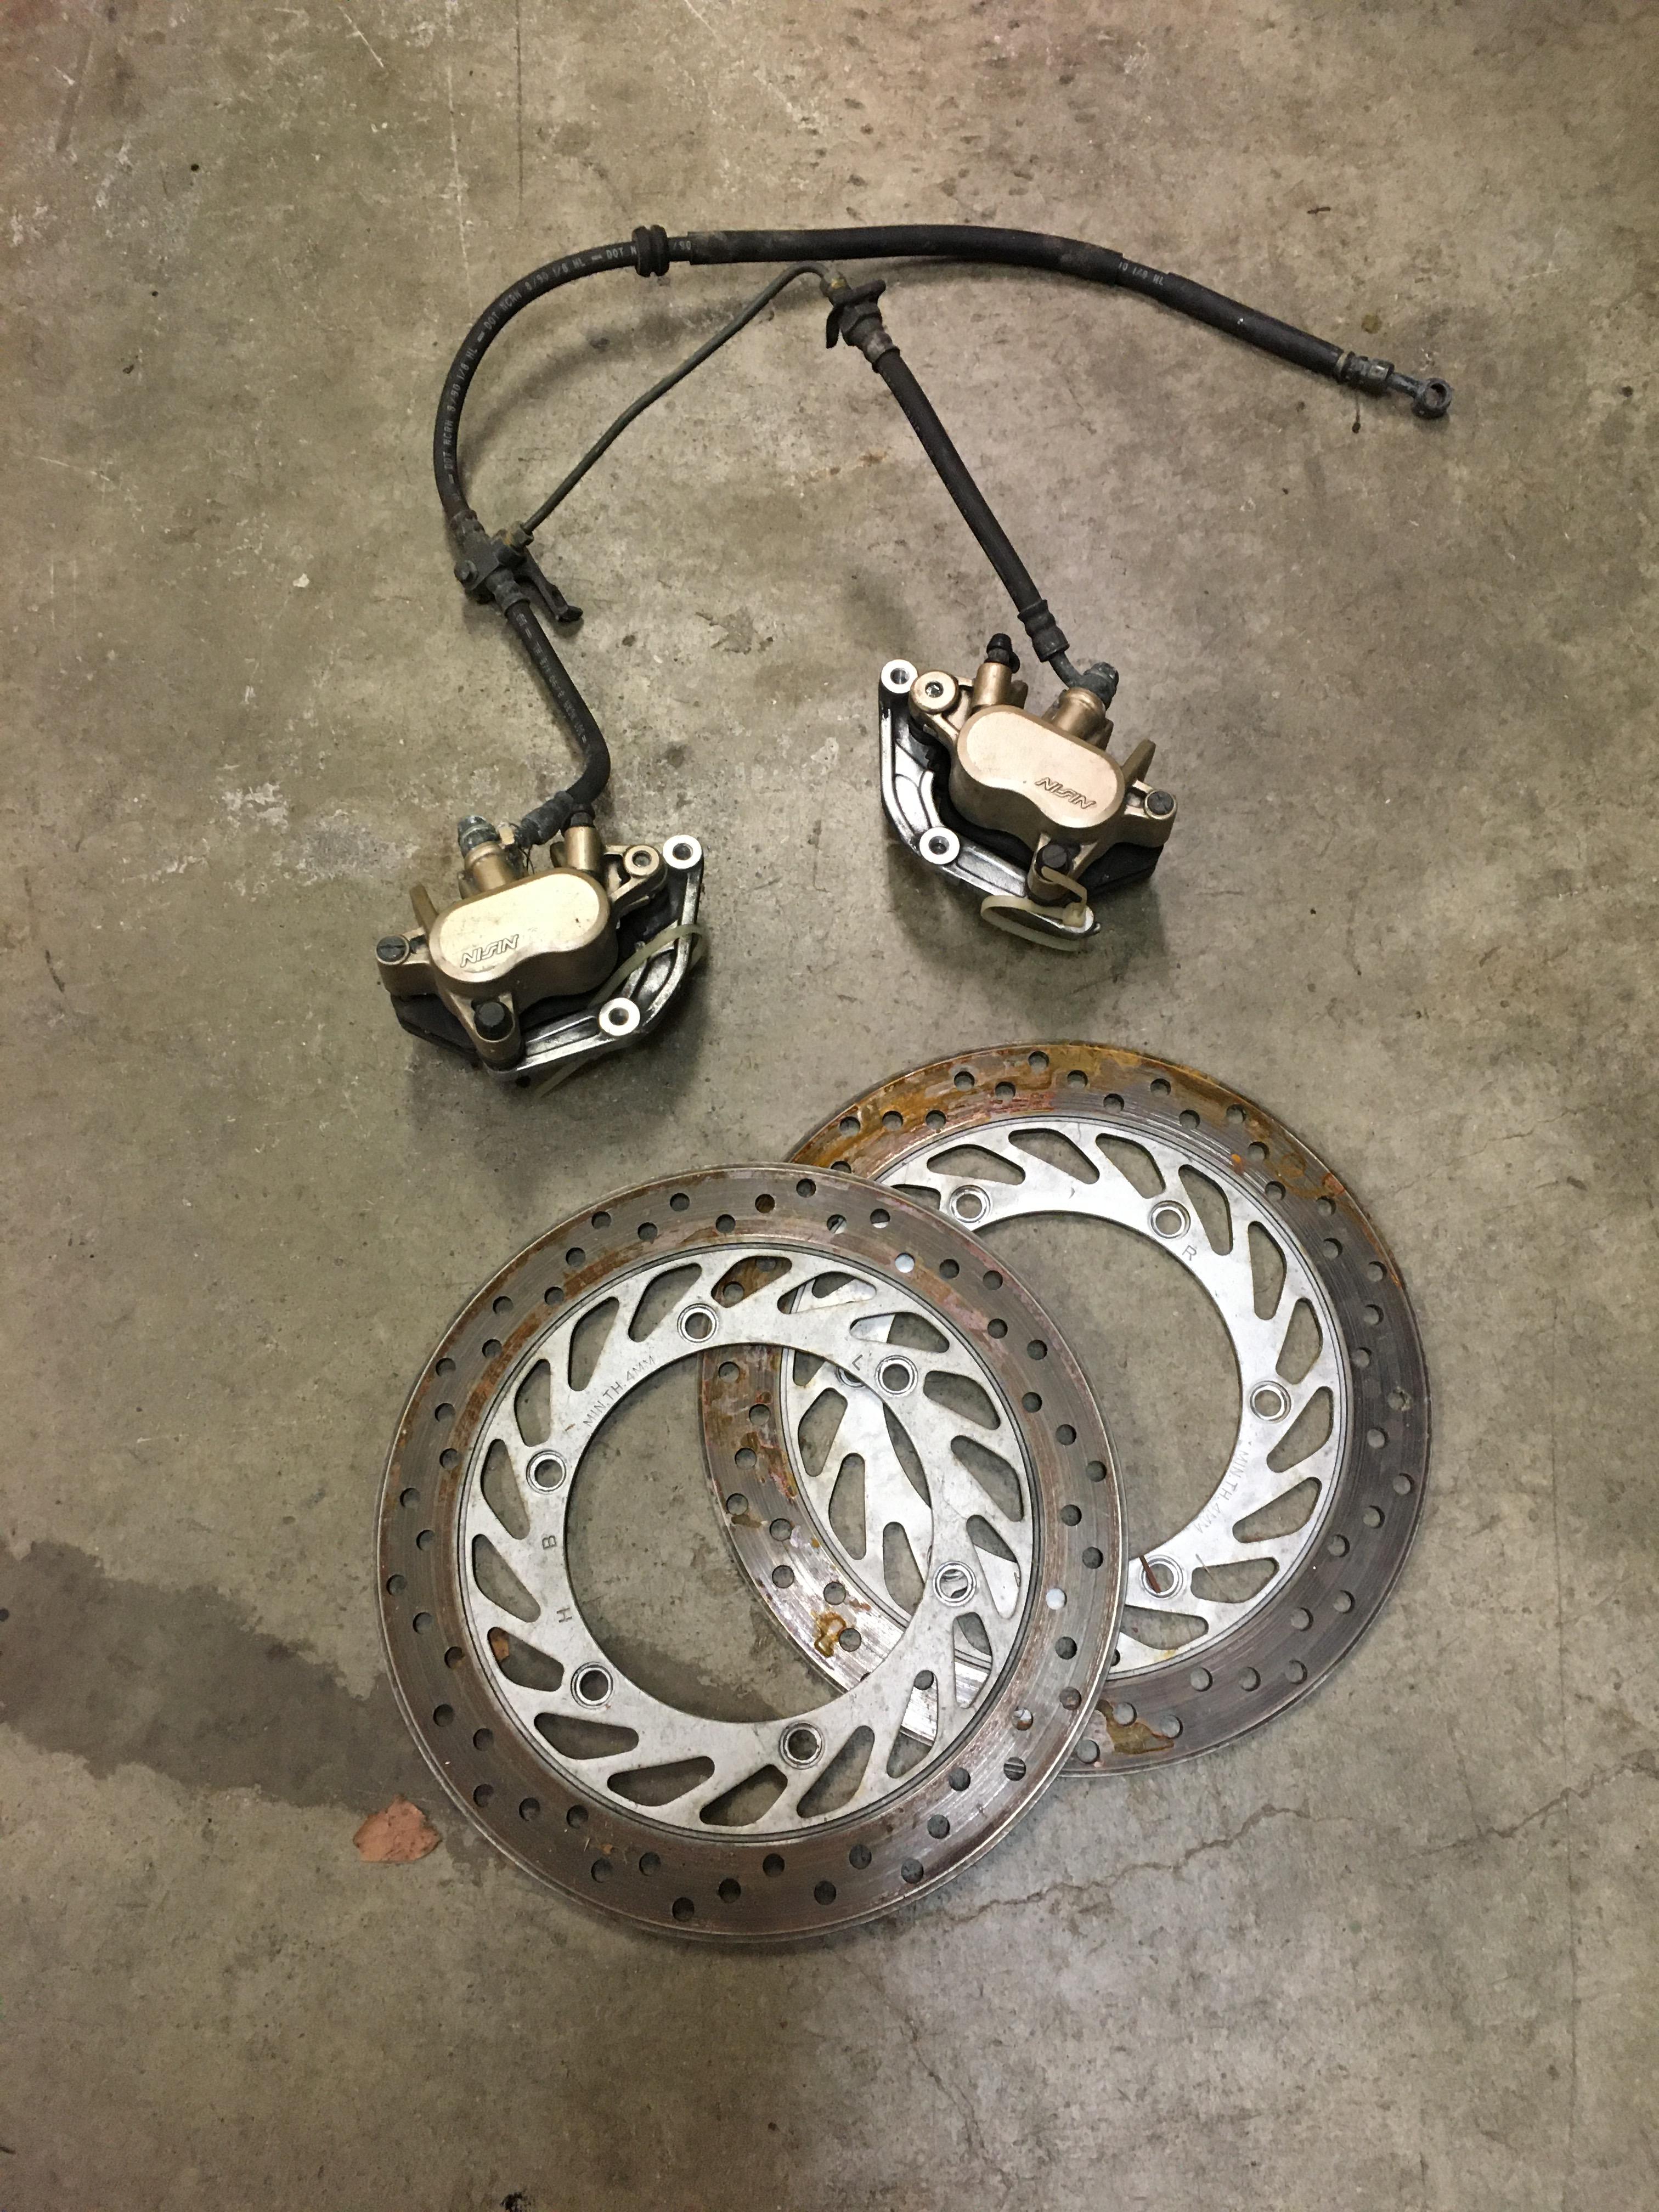
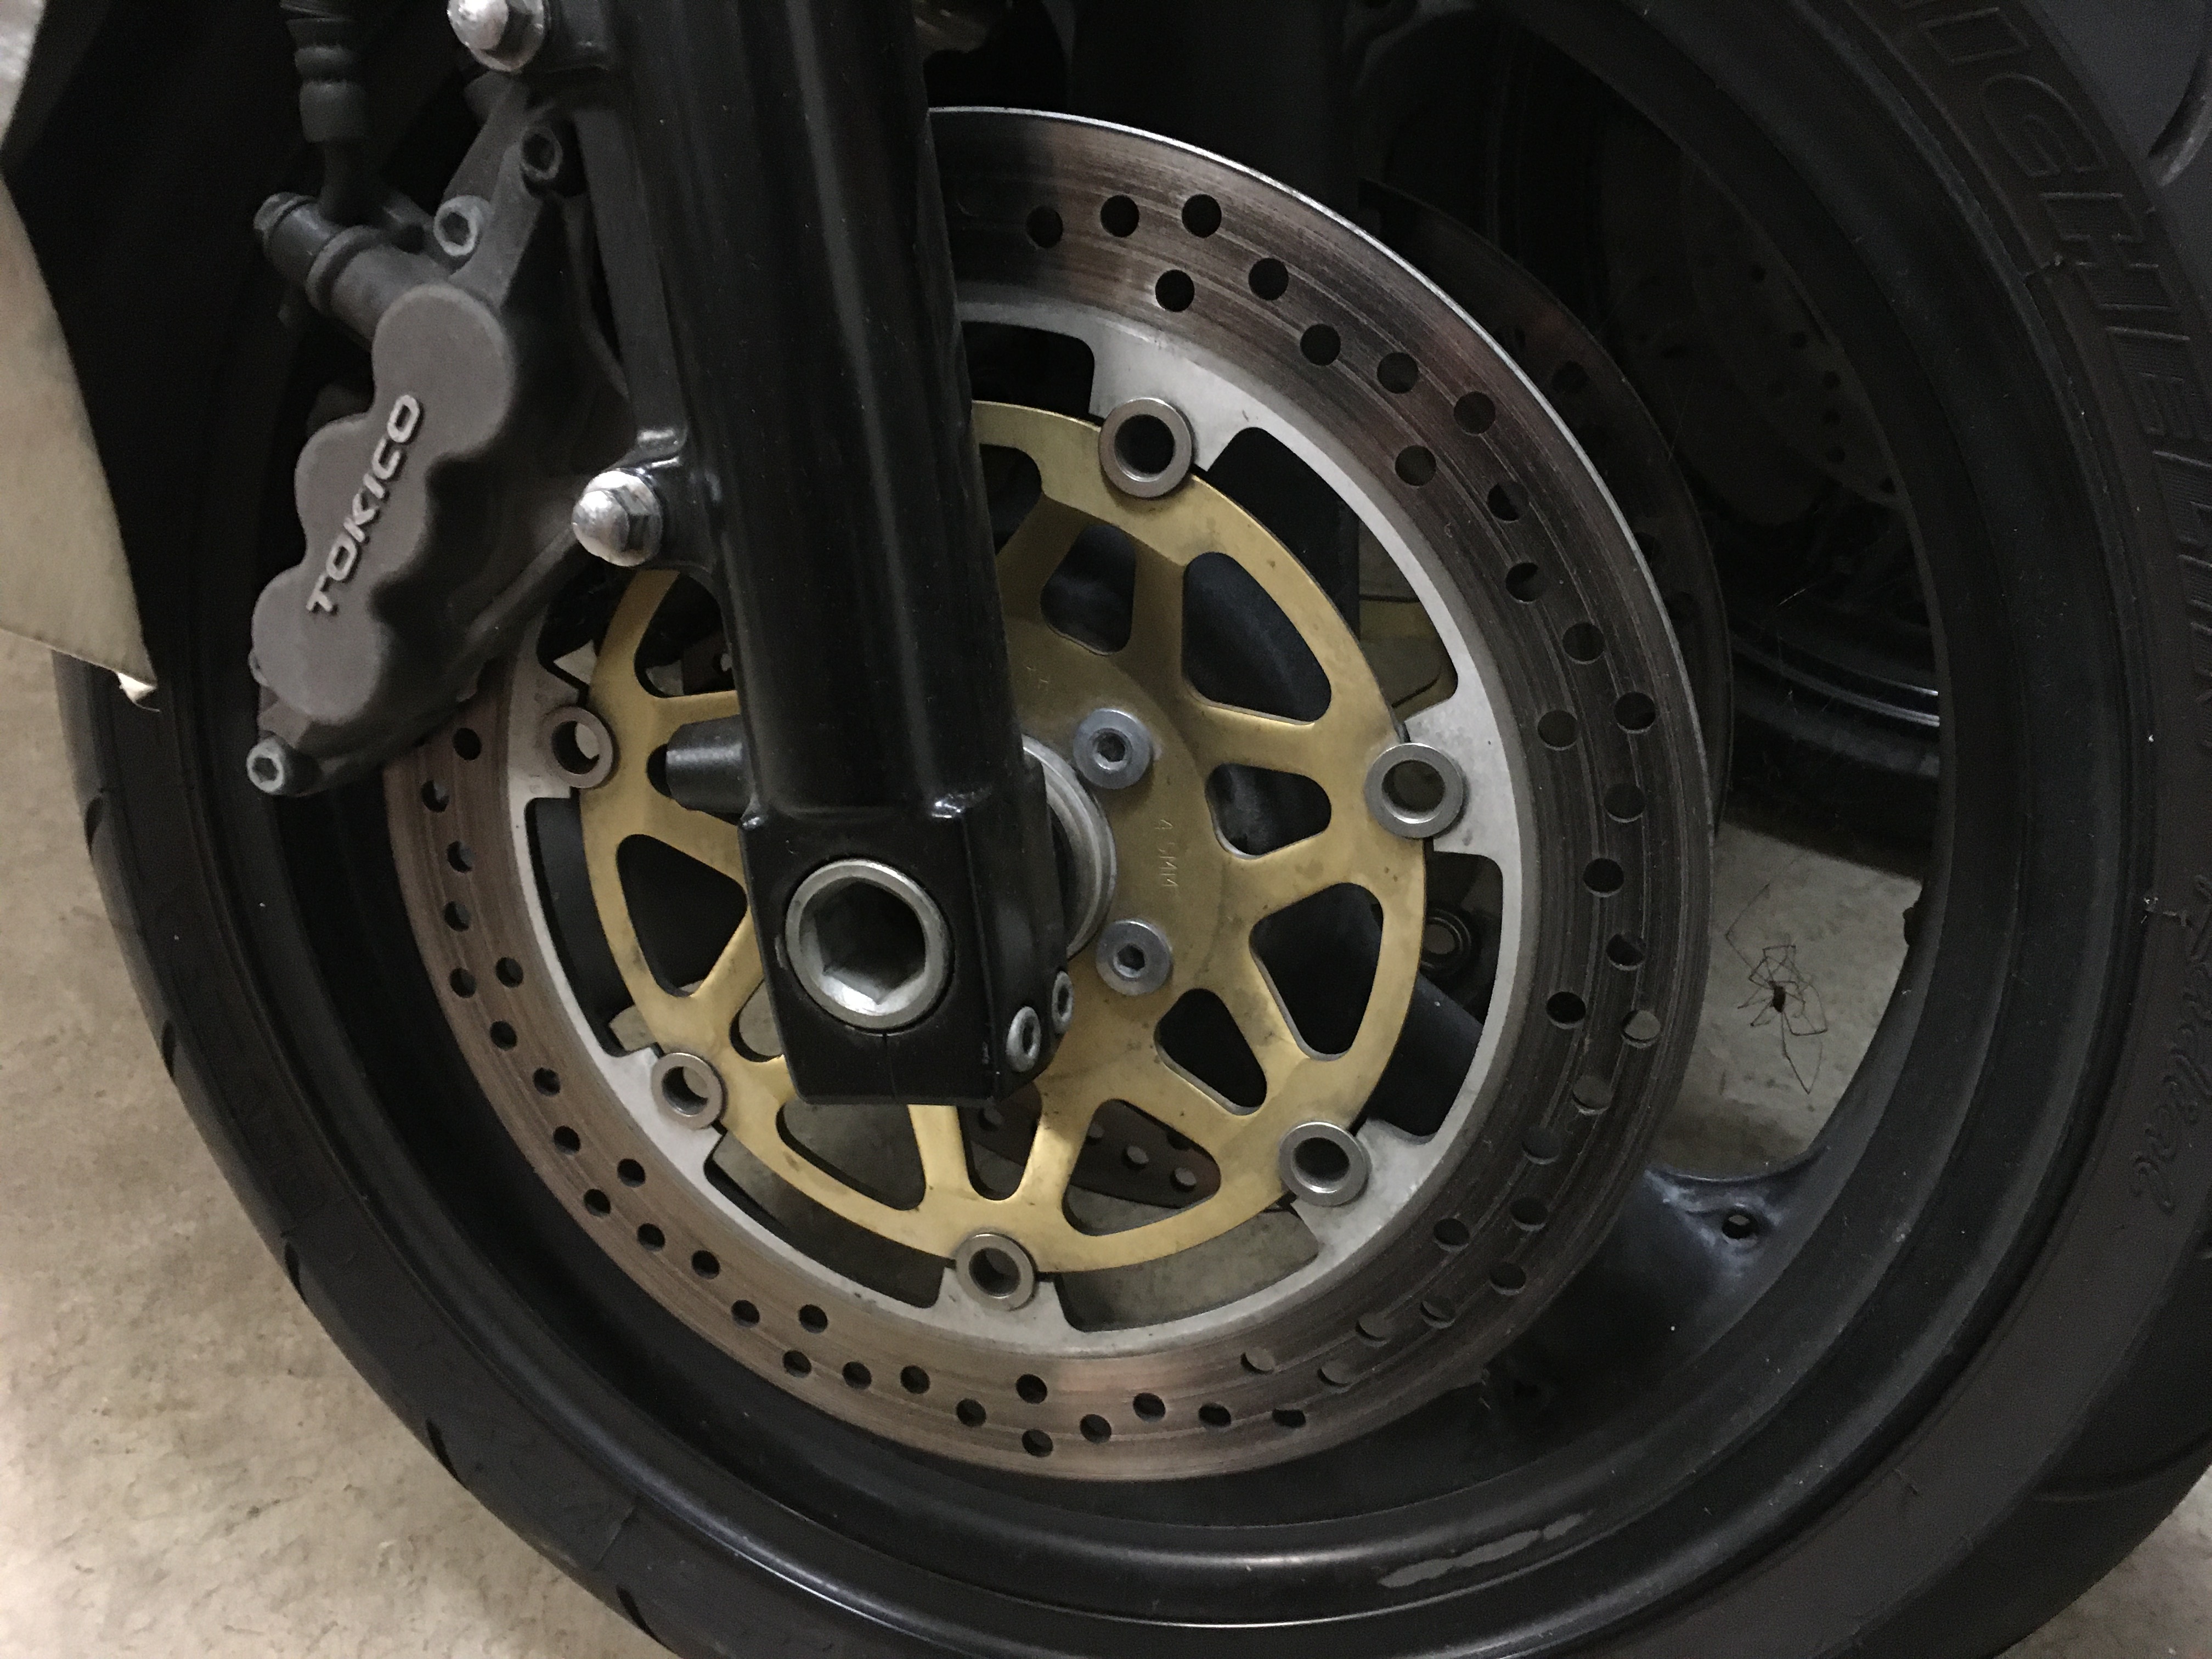
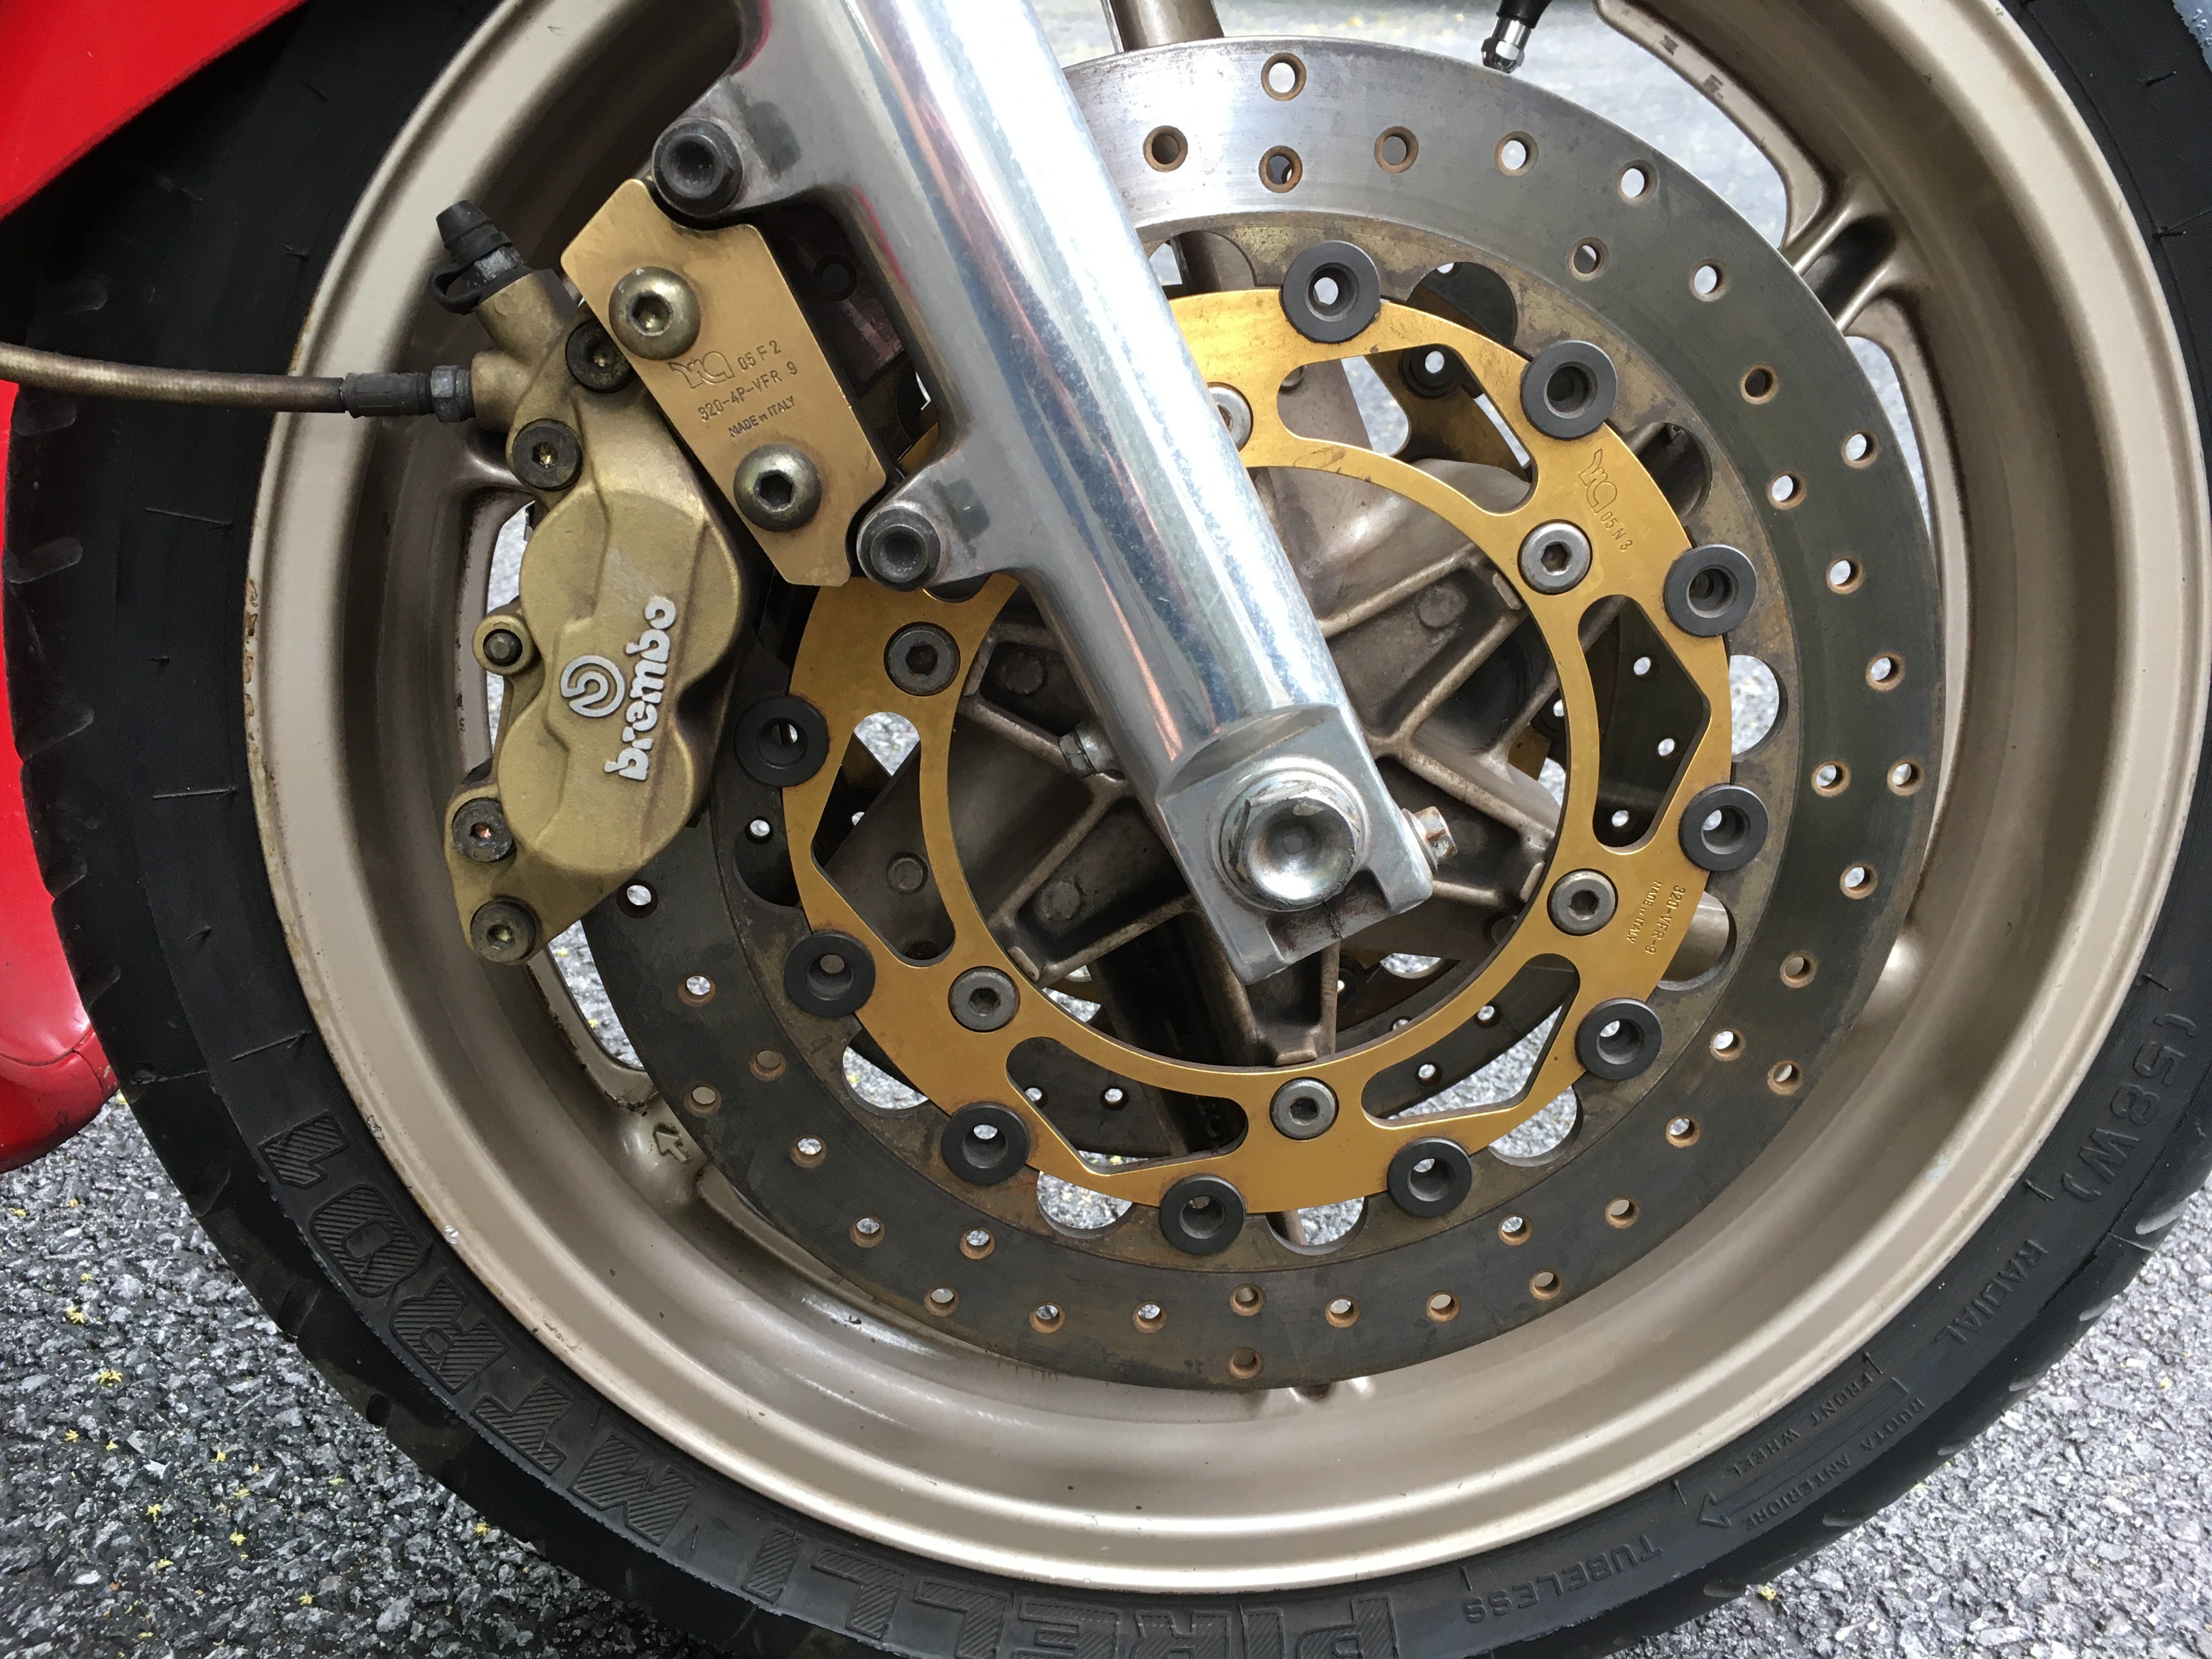
Brakes only slow you down! So this bike was bought at auction with no contact with the previous owner, so what you see is what you get. This bike came with the stock front brakes minus the master cylinder and lever assembly in a box. Instead it had a set of Brembo 320mm rotors and Goldline calipers with matching axial master cylinder installed. The lever feel when I got the bike was horrible, very short and firm, seemed like it would not provide good feel or modulation. Good thing I wasn't planning to just ride it. I flushed the system then removed the calipers from the fork to make it easier to inspect their condition and operation. Turns out other than a lot of brake dust they were in good shape. Pads were good, just needed grooves cleaned out, all the fastening hardware cleaned and everything put back together. I also gently pushed the pistons back in the calipers about 1/4" just to see if they would move freely and they did. Put everything back on the bike, flushed and bled system and now the lever feel is quite good! I like it. I also sanded and painted the brake fluid reservoir cup lid because it was in bad shape from fluid leakage. It does appear to seal correctly and is not leaking, I think it was just some lazy sloppy mechanic behavior. I will watch for any leaks when I ride the bike but I already bought one of those sweat band looking covers. One of the interesting parts of this bike for me is the full-floating rotors, this is new to me. These calipers are not floating so the rotors have to be. When I first pushed the bike around the driveway to load it on the trailer I thought there was something broken in the fork because when I would hit the front brake I could hear something loose, I thought it was a spring issue. Turns out it was the rotors and this is normal. The rotor design looks the same as my other bikes, the ZRX for example, but that bike has floating calipers and non-floating rotors, the same two piece connected with buttons design though. Here is the ZRX, non floating and 6 buttons: And the Brembo's, floating, 12 buttons: When you grab these rotors you can move them with your hand. Anyway, pretty cool I guess, supposed to be lower drag and full race. Here is good video showing the results of the two types of systems - The rear brakes are all stock and in good enough condition for a couple of test rides. I did go through them the same as the front, cleaned them, inspected condition and flushed and bled the fluid. I can see a new rear rotor and a set of pads in the future.
1 point
-
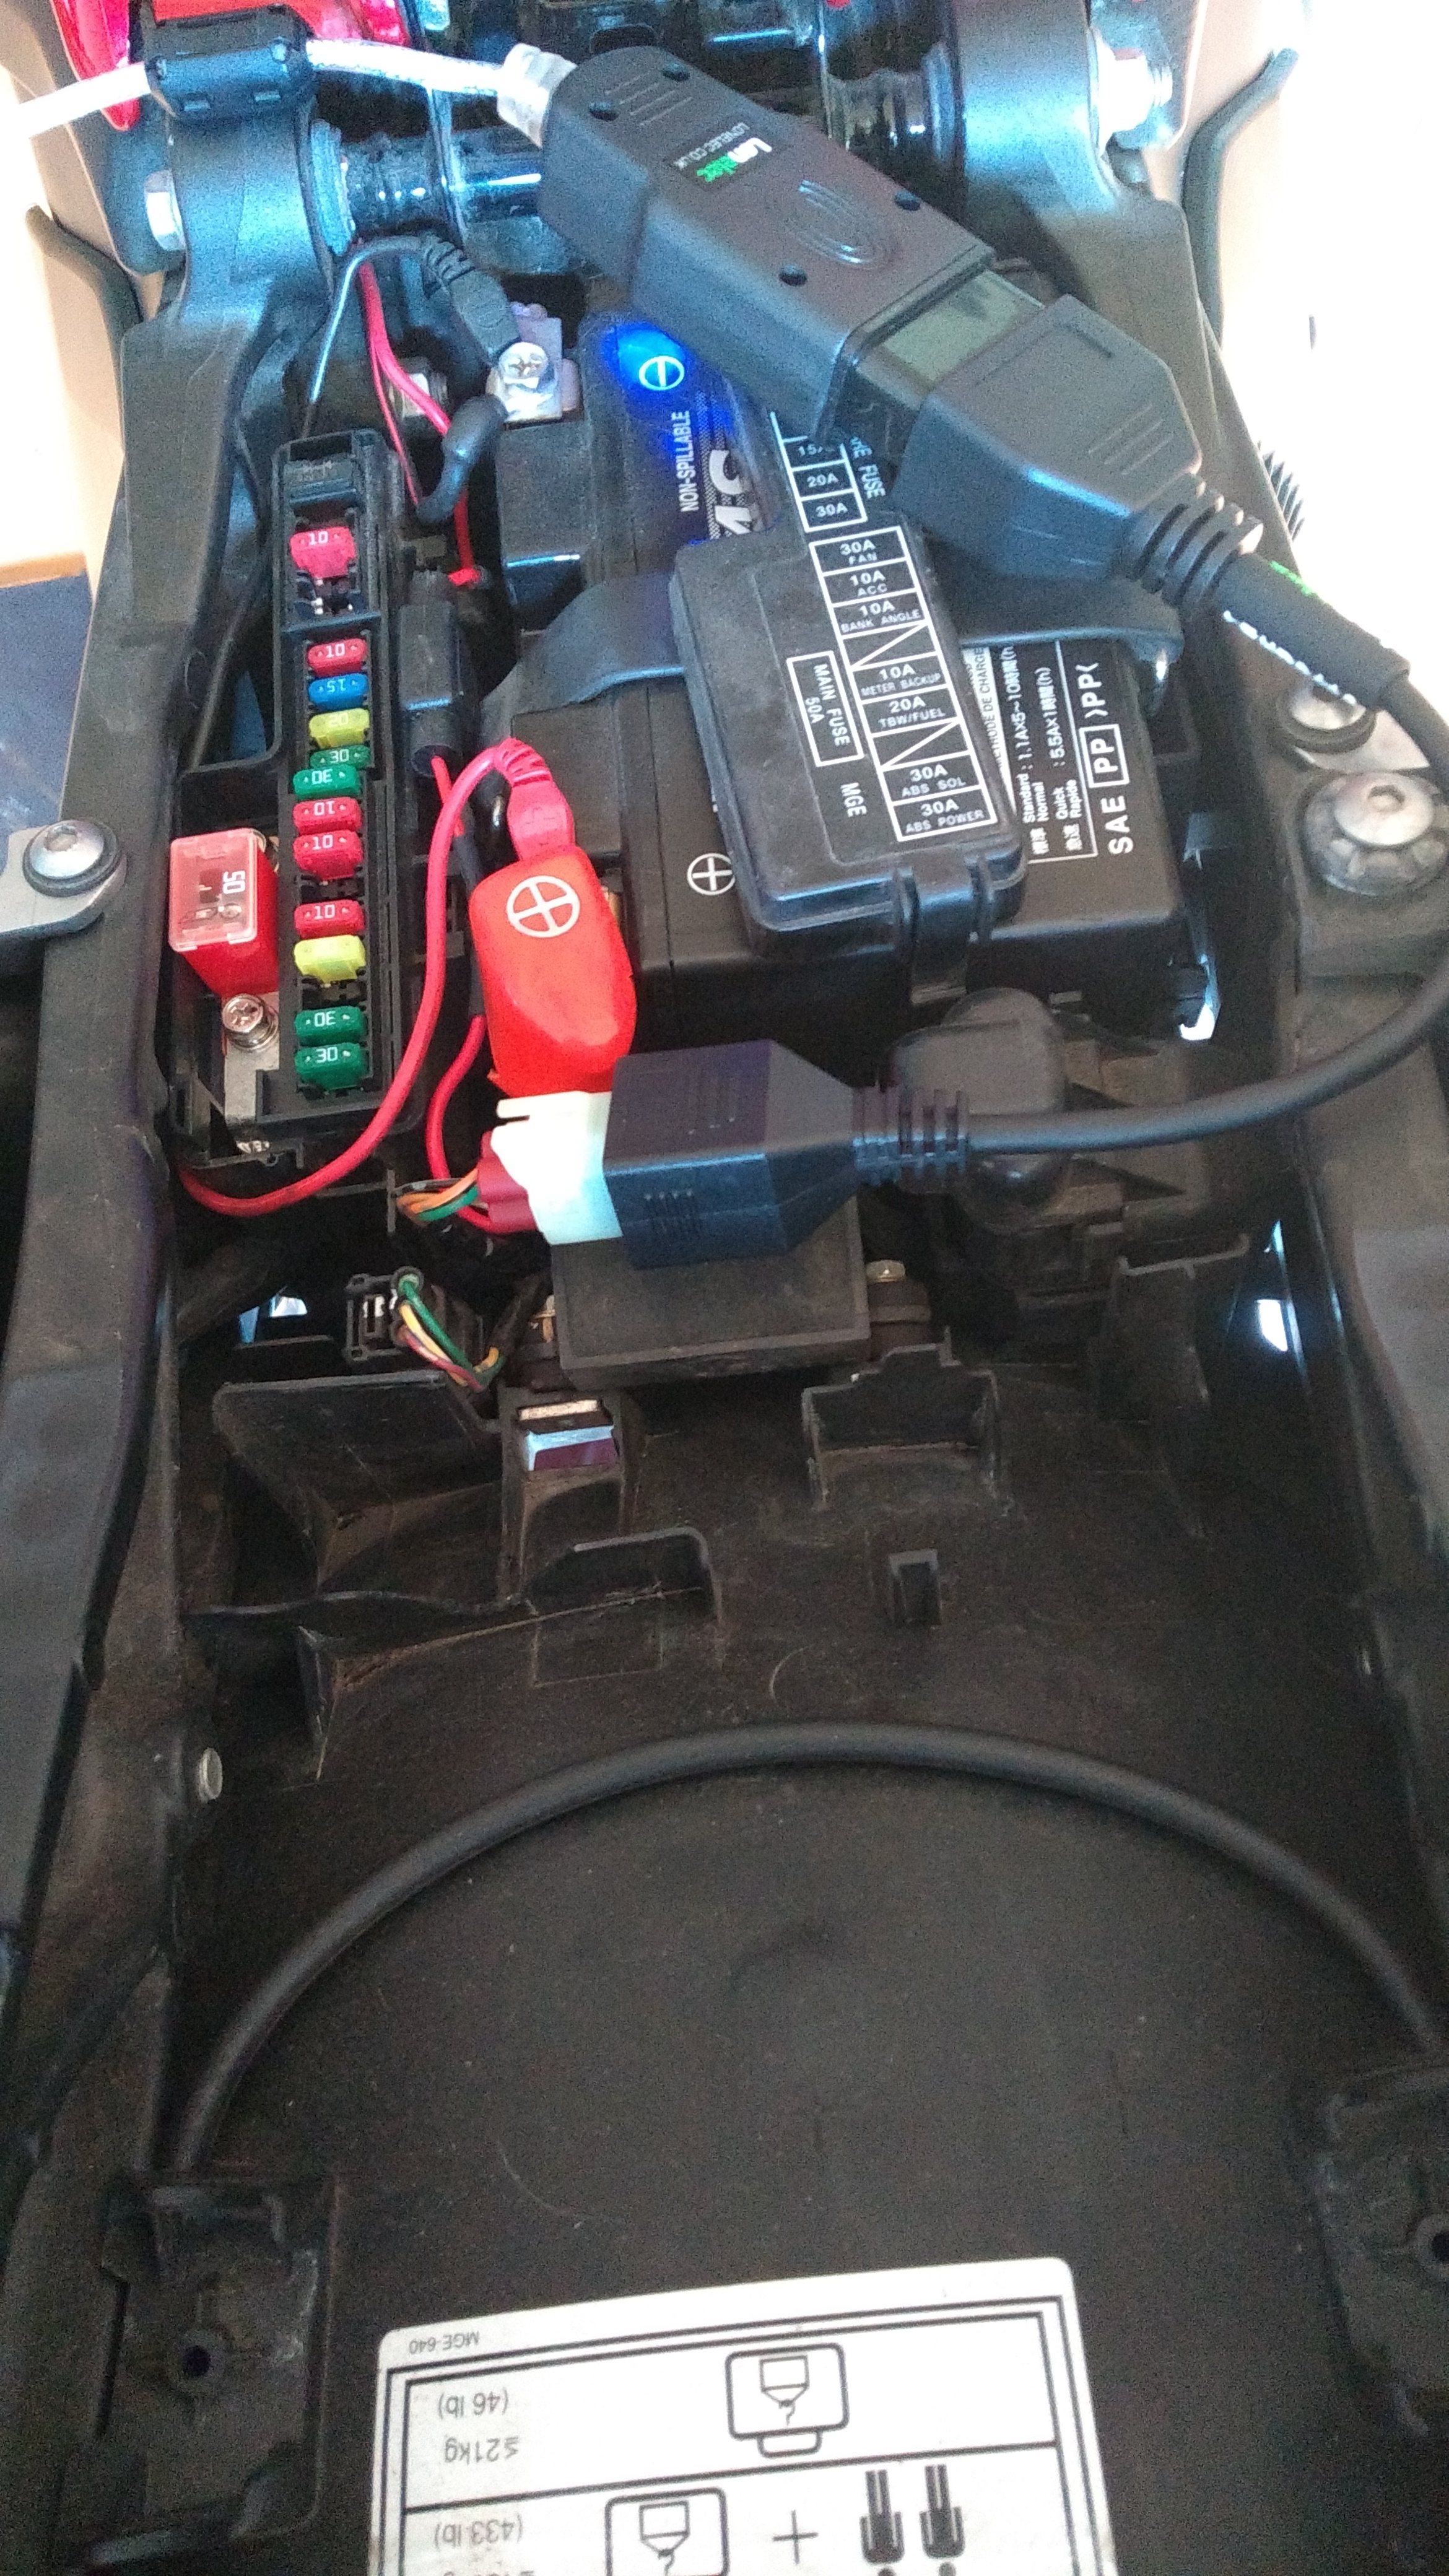
You actually haven't found the fault yet. So replacing perfectly-working parts with brand-new perfectly-working parts will change nothing. You can keep on replacing parts until you randomly get lucky and find the one specific component's that bad. That gets expensive and you end up with tonnes of spares you won't need for a long time, if ever. So simple way is to first identify drain amount, then identify specific circuit that has drain (where the drain is occurring): 1. disconnect battery-negative cable. 2. set meter to 10-amp range and put negative probe on battery's negative terminal 3. connect meter's positive probe to disconnected battery-cable. It will now form bridge to battery and measure all current flowing (the drain). 4. read meter-output and post here. How many amps are flowing? 5. then, unplug fuses one by one while looking at meter reading. 6. when meter-reading drops to zero, you've unplugged fuse going to faulty circuit. Which fuse is this? Sometimes, depending upon where short is, it might not be part of fused circuit and you'll have drain with all fuses removed. Then we test circuits directly to find short.1 point
-
Sign 'O The Times...................
1 point
-
Well, I could not right the bike by myself... The petrol station proved closed..... But luckily, a drunk (yes at 7am on a Sunday; I could hear Johny Cash starting to play in my head ) staggered past. Unable to communicate (my Latvian or Russian language skills are zero), he pointed at his chest and shouted "Popeye!!" I gave him a tenner (probably good for 10 bottles of vodka...) for his help... 4 hours later, an oncoming car took a left turn w/o seeing me. And that finished my 4th gen (and my trip) off....0 points