Search the Community
Showing results for tags 'fairings'.
Found 22 results
-
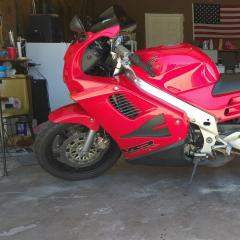
Hello all! A very unfortunate thing has happened. During a rainy ride home in NYC I rode over a manhole (for some reason also covered in oil) rear wheel spun out and I fell to my right side. My Gen 5 VFR has been through everything, I'd thought so. Engine swaps, electrical issues, cooling issues, forks, rotten pipes, etc. But I never thought I'd need fairings. Yet here we are... I am honestly heartbroken, since day 1 I've been trying to bring it back to it's former glory. And now this.. The right side fairing, the head cone and right side blinker have slid down the pavement and man..did it leave a mark. I'm in search of these 3 items. I can't even find a blinker! Anyone here doing a part out or have them for sale? I don't need pristine parts..but alteast better looking than what I have now. I'd greatly appreciate it. Thank you very much for reading and listening!
-
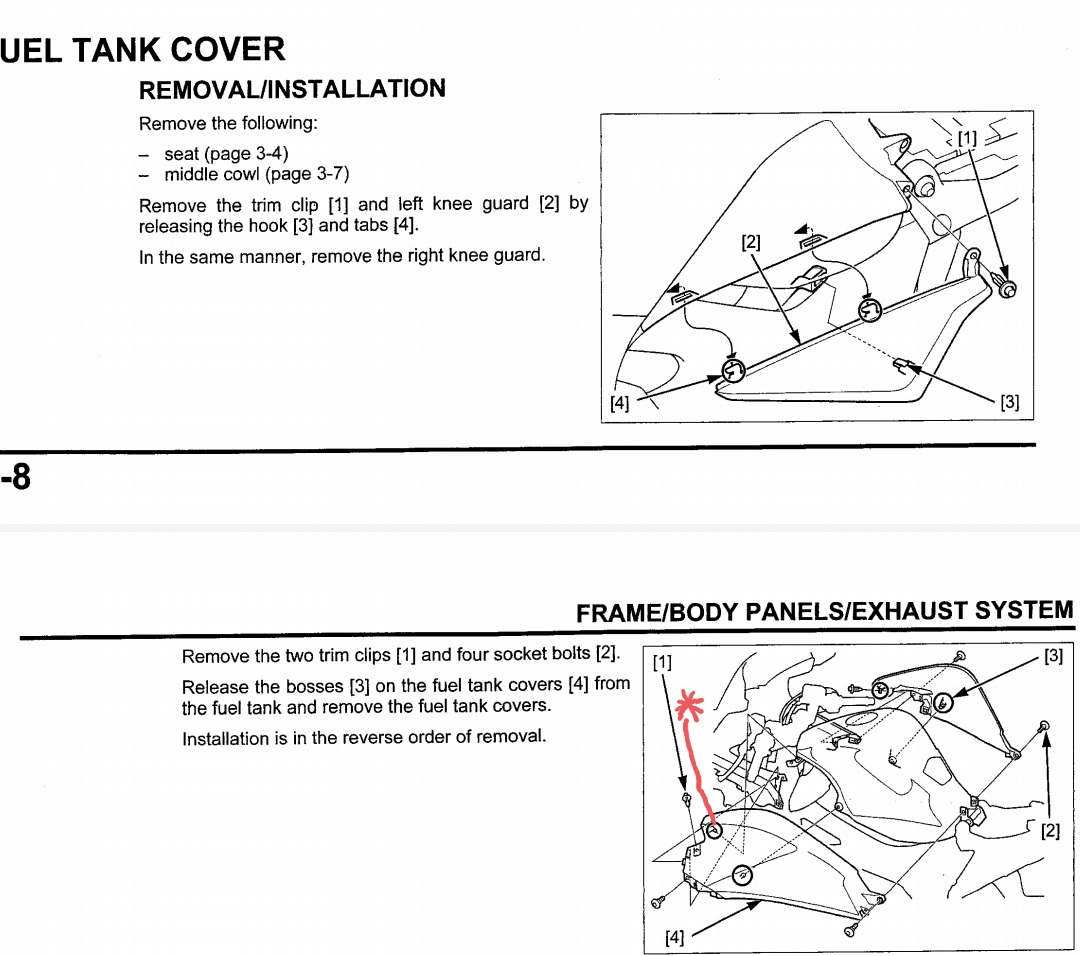
Need help to take off the fuel tank covers on my VFR. I have undone all the clips and screws on the tank cover. However, there's one piece left and want to be very sure how to undo it before attempting so as not to break anything. I have attached a picture to indicate the point. Appreciate the help.

-
 I've been a reaaaaallllyyyy long time infrequent lurker. I bought my 1996 in 2005(and joined VFRD), rode her for a while and had a few issues that I was going to get to. Well, I never got to it. Life always seemed to get in the way. Here I am now though, in need of some direction from you more experienced folks. There are a number of things that need replacement, most of which from sitting so long, and I'm curious as to the best place to get them. One of the main issues are the right side fairings, the lower black and red right above it. From what I remember, no one makes them anymore, OEM or aftermarket, and you have to find them used? Anyone have them here? The other bigger issue is the starter is toast. I see a huge price disparity between aftermarket and OEM. Aftermarket is about $100 vs $400 for Honda. Why such a big difference? Does anyone have experience with aftermarket starters? The list of stuff I need is probably fairly common, with maybe the exception of the throttle tube. I haven't found it on a parts breakdown. But any recommendations for the following items would be appreciated - Chain Fork Seals Brake pads front and rear Is there a caliper rebuild kit? Air Filter As is usually the case, budget is a bit of an issue, and I'd rather not spend so much on the starter, which I hadn't expected to have to replace with this project. Thanks for taking the time to read this!
 -
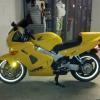
Hey everyone I’m new to the vfr world. I just purchased a 2002 interceptor with 19000 miles. And I noticed the left fairing is almost orange while all the others are red. The owner and only owner said he’s never changed anything on the bike other then the battery and regular maintenance so my question is. Is it possible this is a mistake from the factory or age? The owner never noticed it at all because the colors are so close you can’t tell unless your right on it.
-
 Feel free to check out my review/installation at the below link and let me know what you guys think in the comments. If you have any questions, don't hesitate to ask! https://imgur.com/a/s75od
- 3 replies
-
- 1
-

-
- aftermarket
- chinese
- (and 2 more)
-
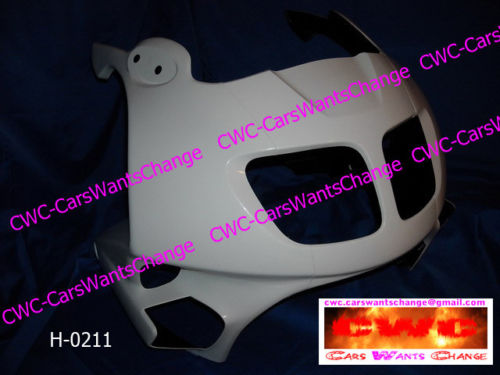
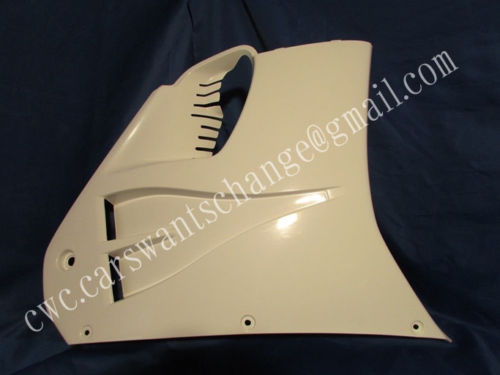
I recently bought a 1995 Honda VR750F and it was low sided at low speed. So naturally I am in need of a right upper and middle fairings. I got on ebay and came across fiberglass reinforced plastic fairings made by a company called CWC and sold by a person with the e-mail of cwc.carswantschange@gmail.com. They seem to be of good quality. The right middle fairing is $159 + $59 shipping. The upper right fairing is $219 + $59 shipping both coming from Poland. They are white gelcoated along with all the mounting holes drilled and tab work ready for mounting. Does anyone know if these are legitimate or not? Also since I want to paint the bike white I was curious if white gelcoat was durable enough to leave as is.
-
Hi folks, I wonder if anyone could point me in the direction of a single seat cowl for my 1988 VFR 750 RC24. Any colour will do as it is to be painted and put on a bike I am restoring. Thanks Paul
-
Hi All I was wondering if there is any difference, in regards to fitment, between the earlier series and latter series of 5th gens? I have a 01 model ans am looking at a set of replacement farings from a 99 model. I know the mirrors are different, but are the mounting points the same? Cheers!
-
Hi, I'm looking at getting some replacement fairings due to some damage on the left side of my bike. However the bike I have purchased is an American Interceptor model (2009). I have a friend who purchased a 2009 VFR800 here locally in Australia brand new through Honda. I noticed the other day that the fairings are a little different. It seems as though mine exposes more of the plastic under the fairing on the right hand side at the top, where as his is a narrower gap between the fairing and the tank / body of the bike. They appear to be from two different molds. Does anyone know if the VFR Interceptor (American model) uses different fairing types to the Australian version, and if they would be compatible or not? Otherwise - can anyone recommend a solution for me to replace my left hand side fairing. I'd be happy to consider ordering OEM from Honda, but if the Australian version is different to the American one I could be in a bit of trouble. Also - does anyone know if it's fine to order OEM for one fairing and if the colors should still match - or if I have to replace a fairing do I have to buy a whole new kit to ensure the colors match? Thanks Adam.
-
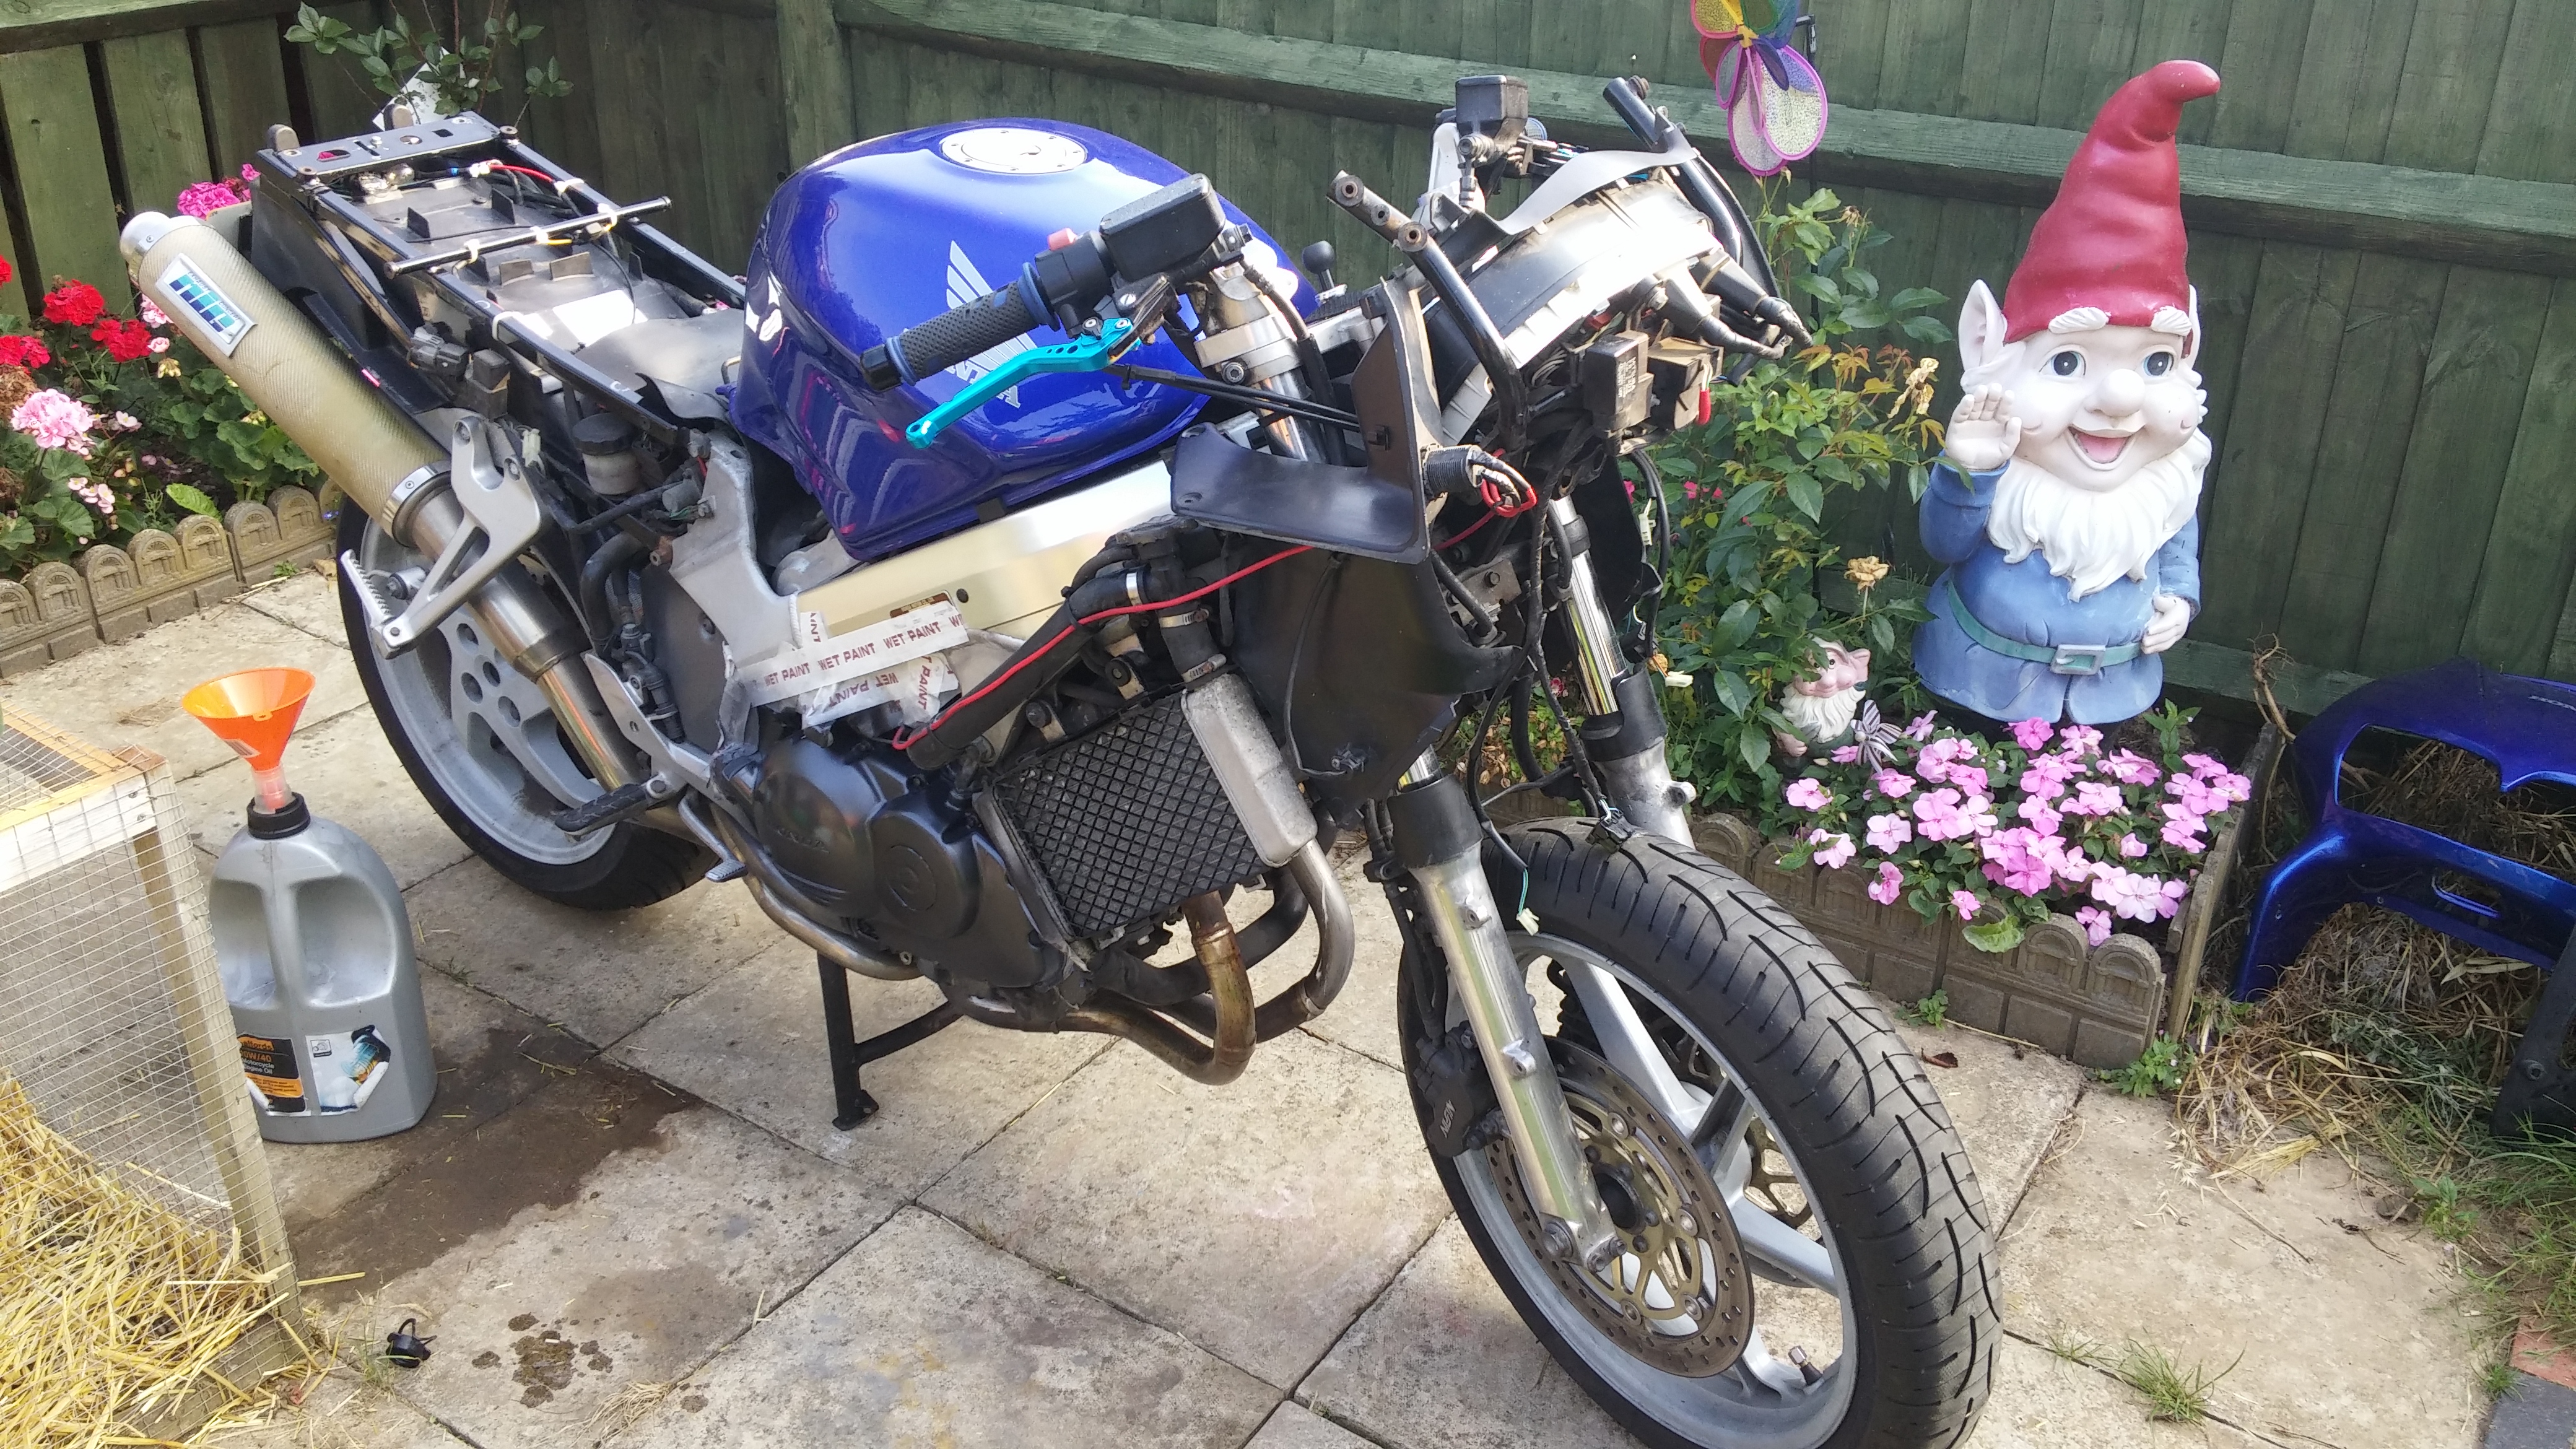
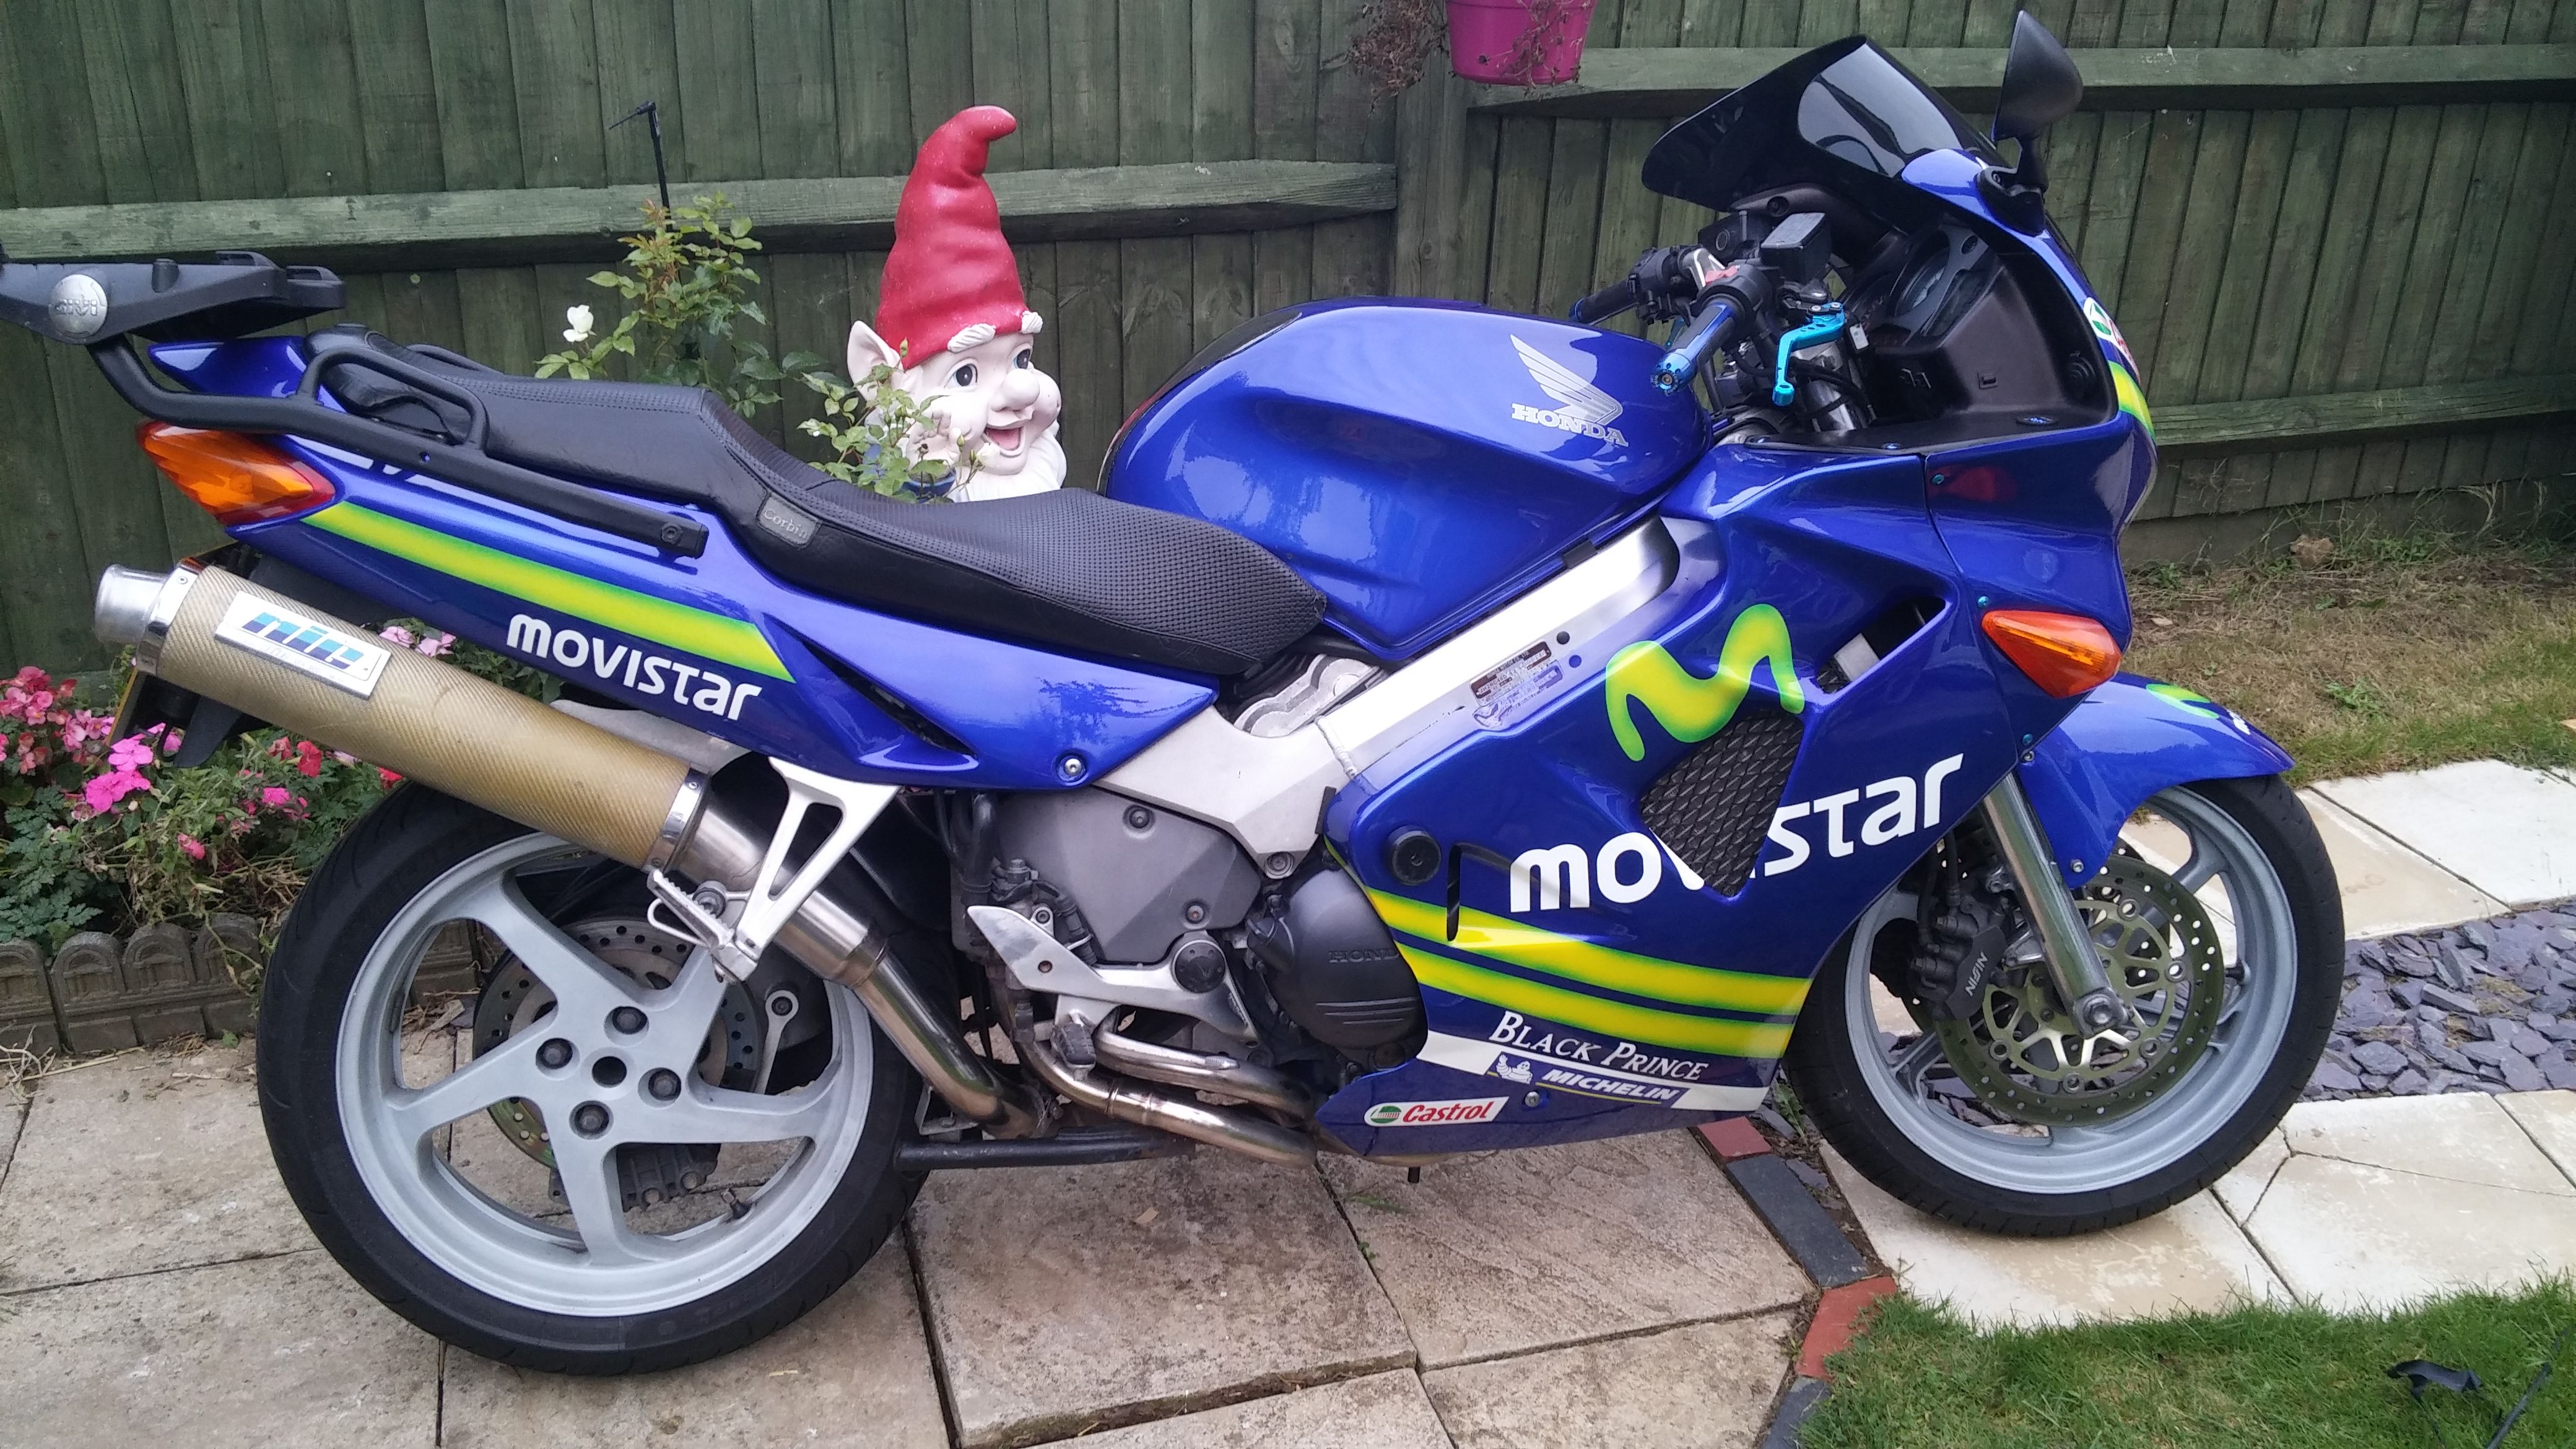
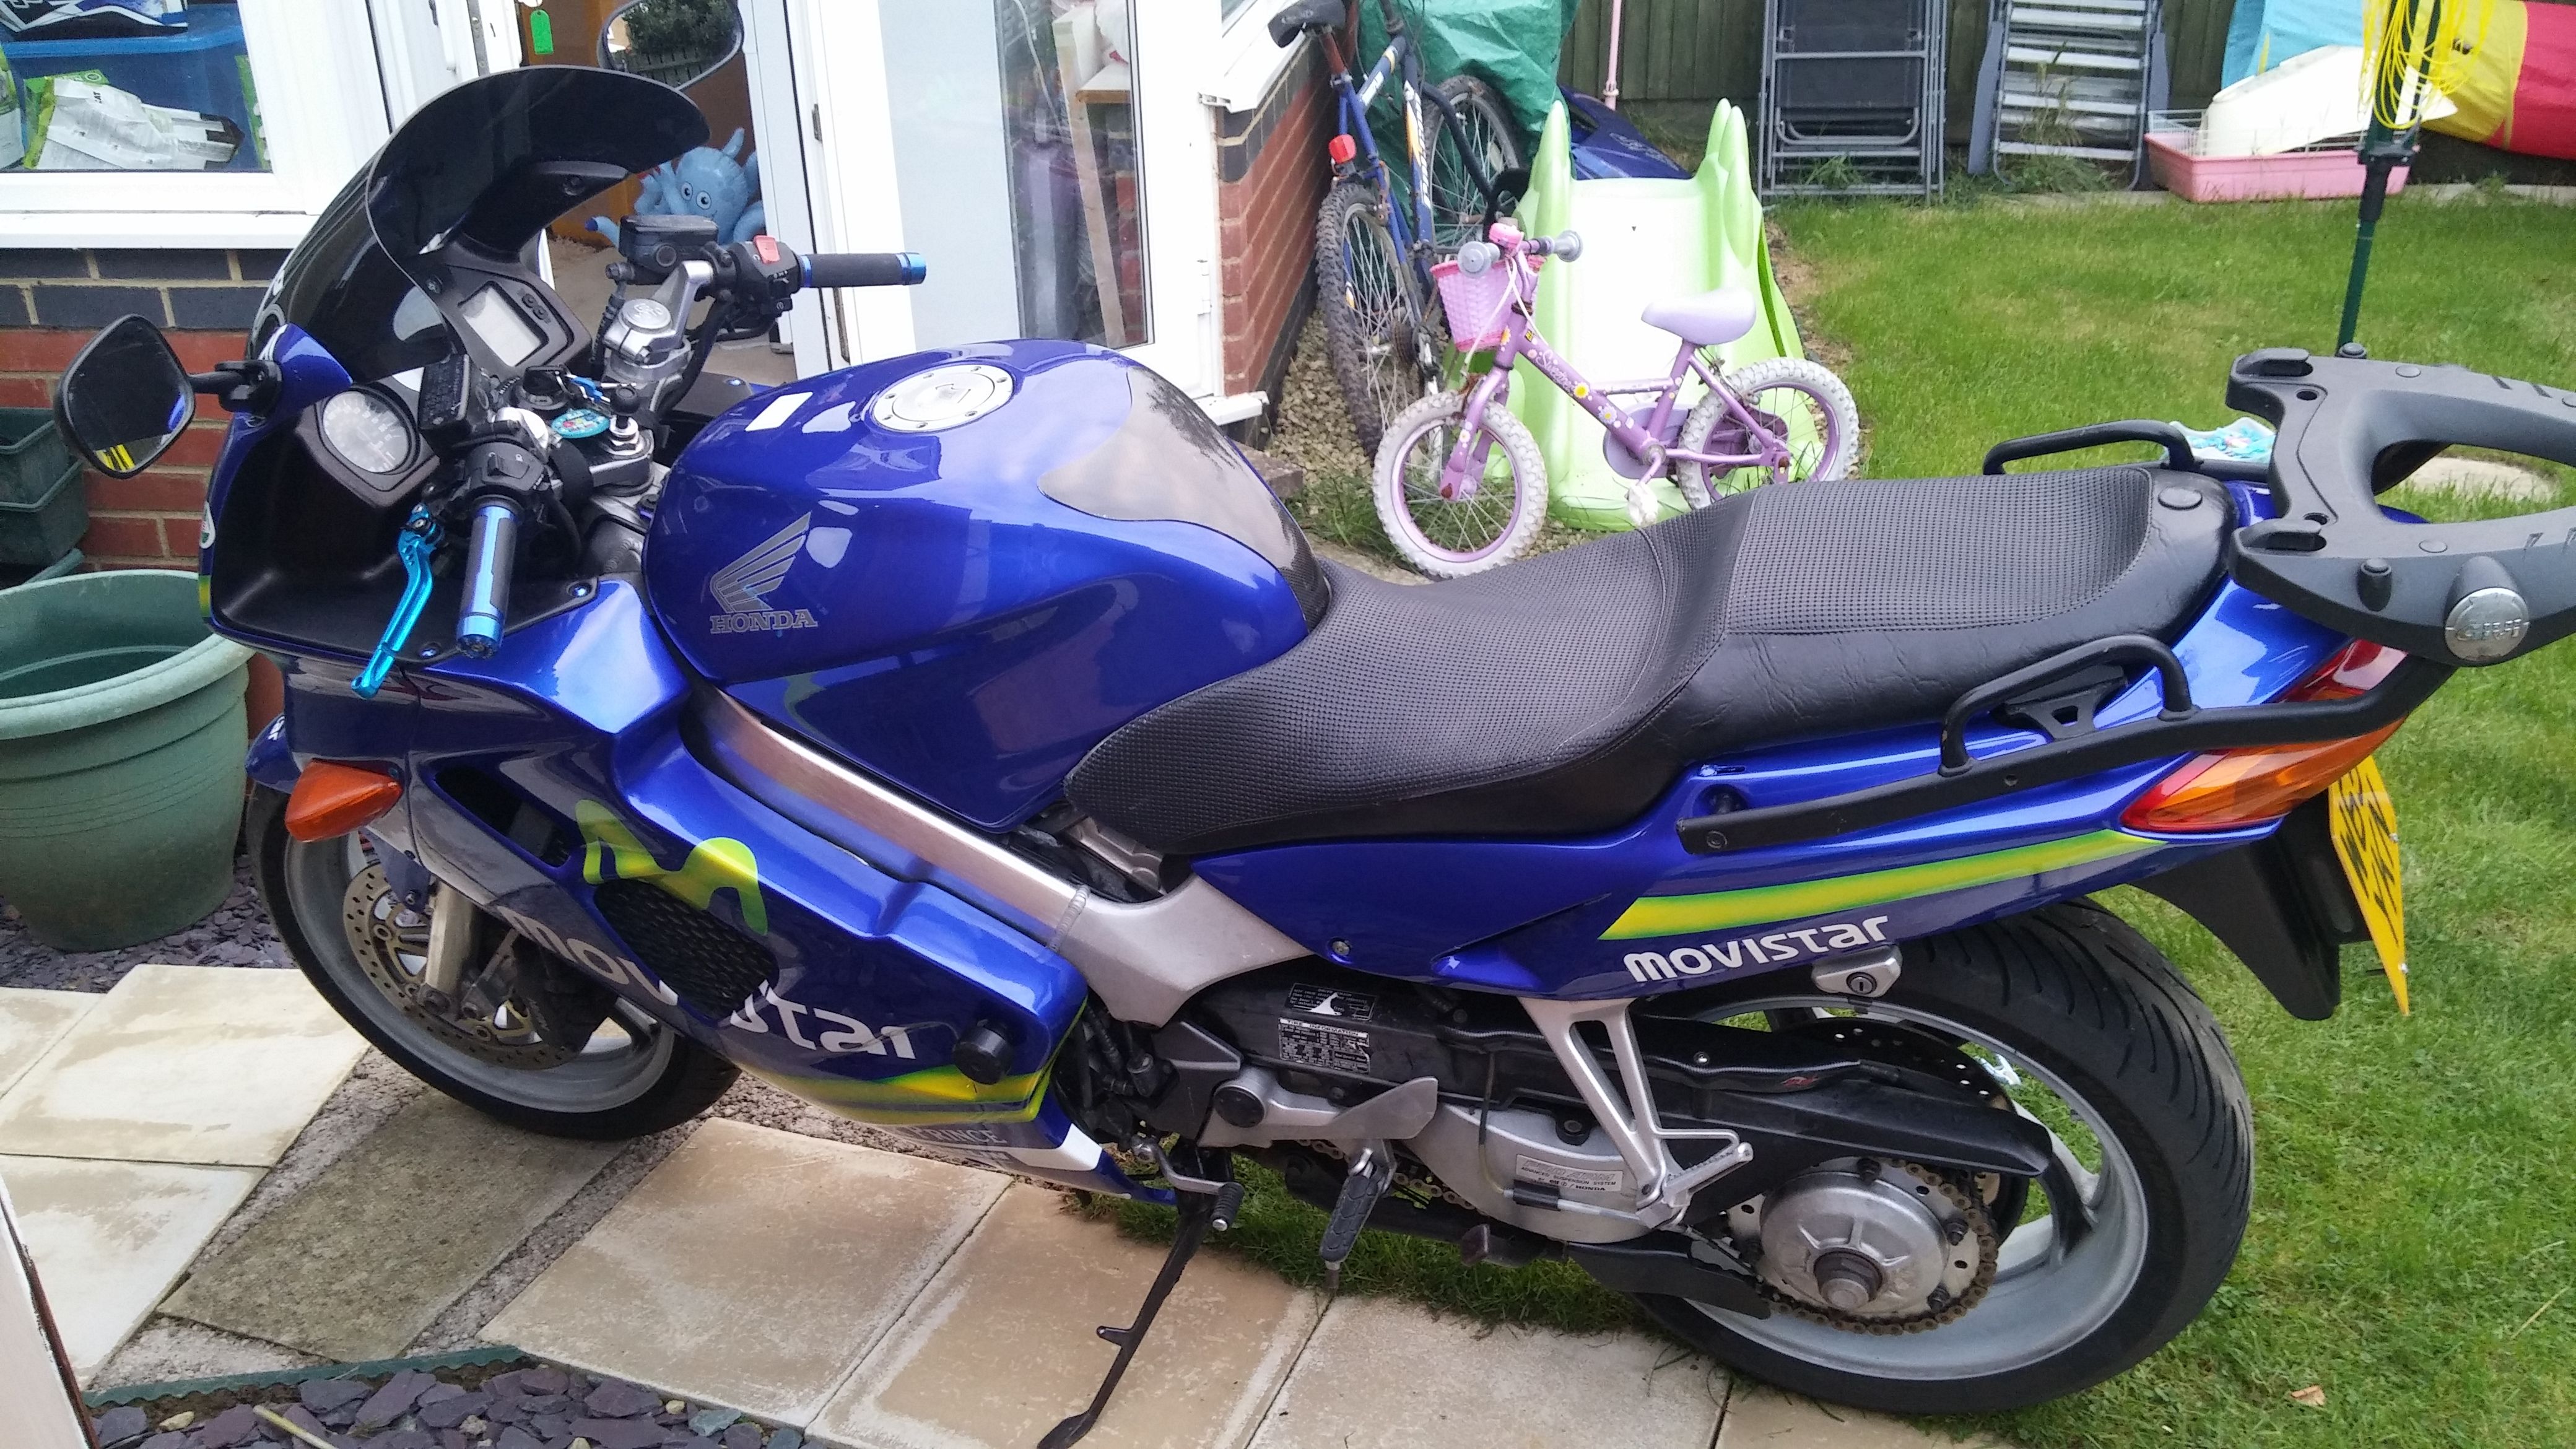
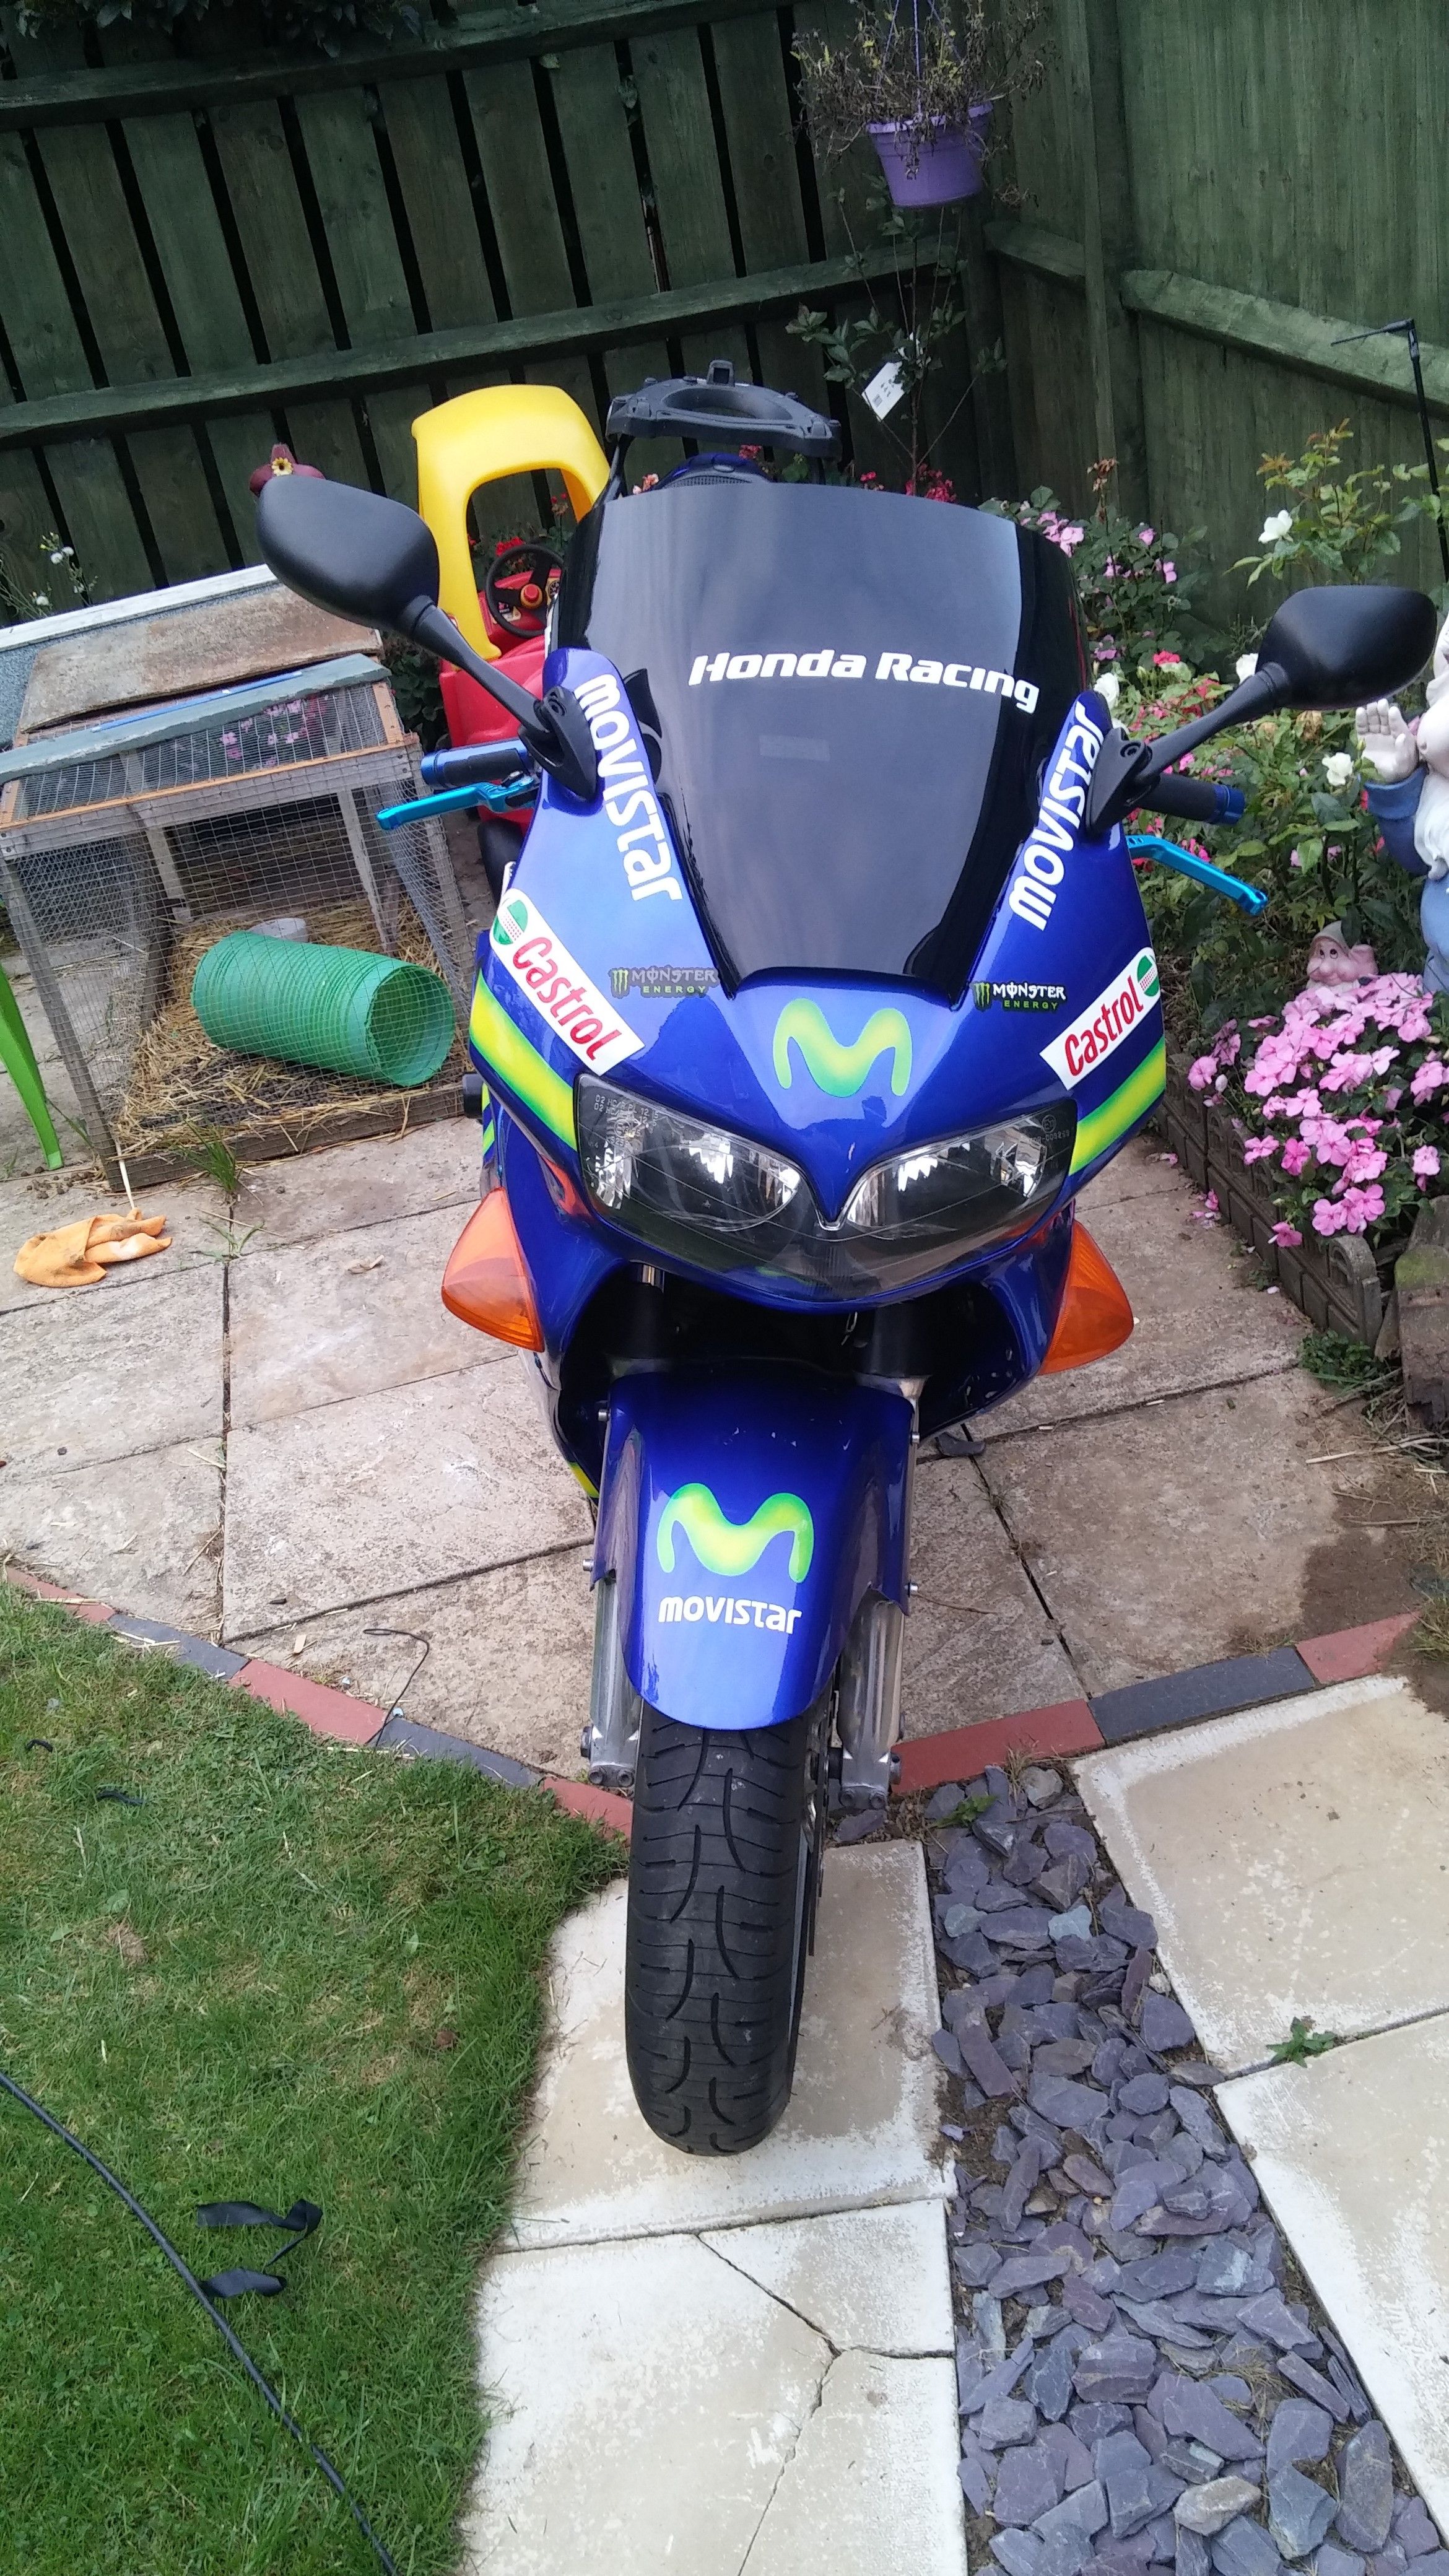
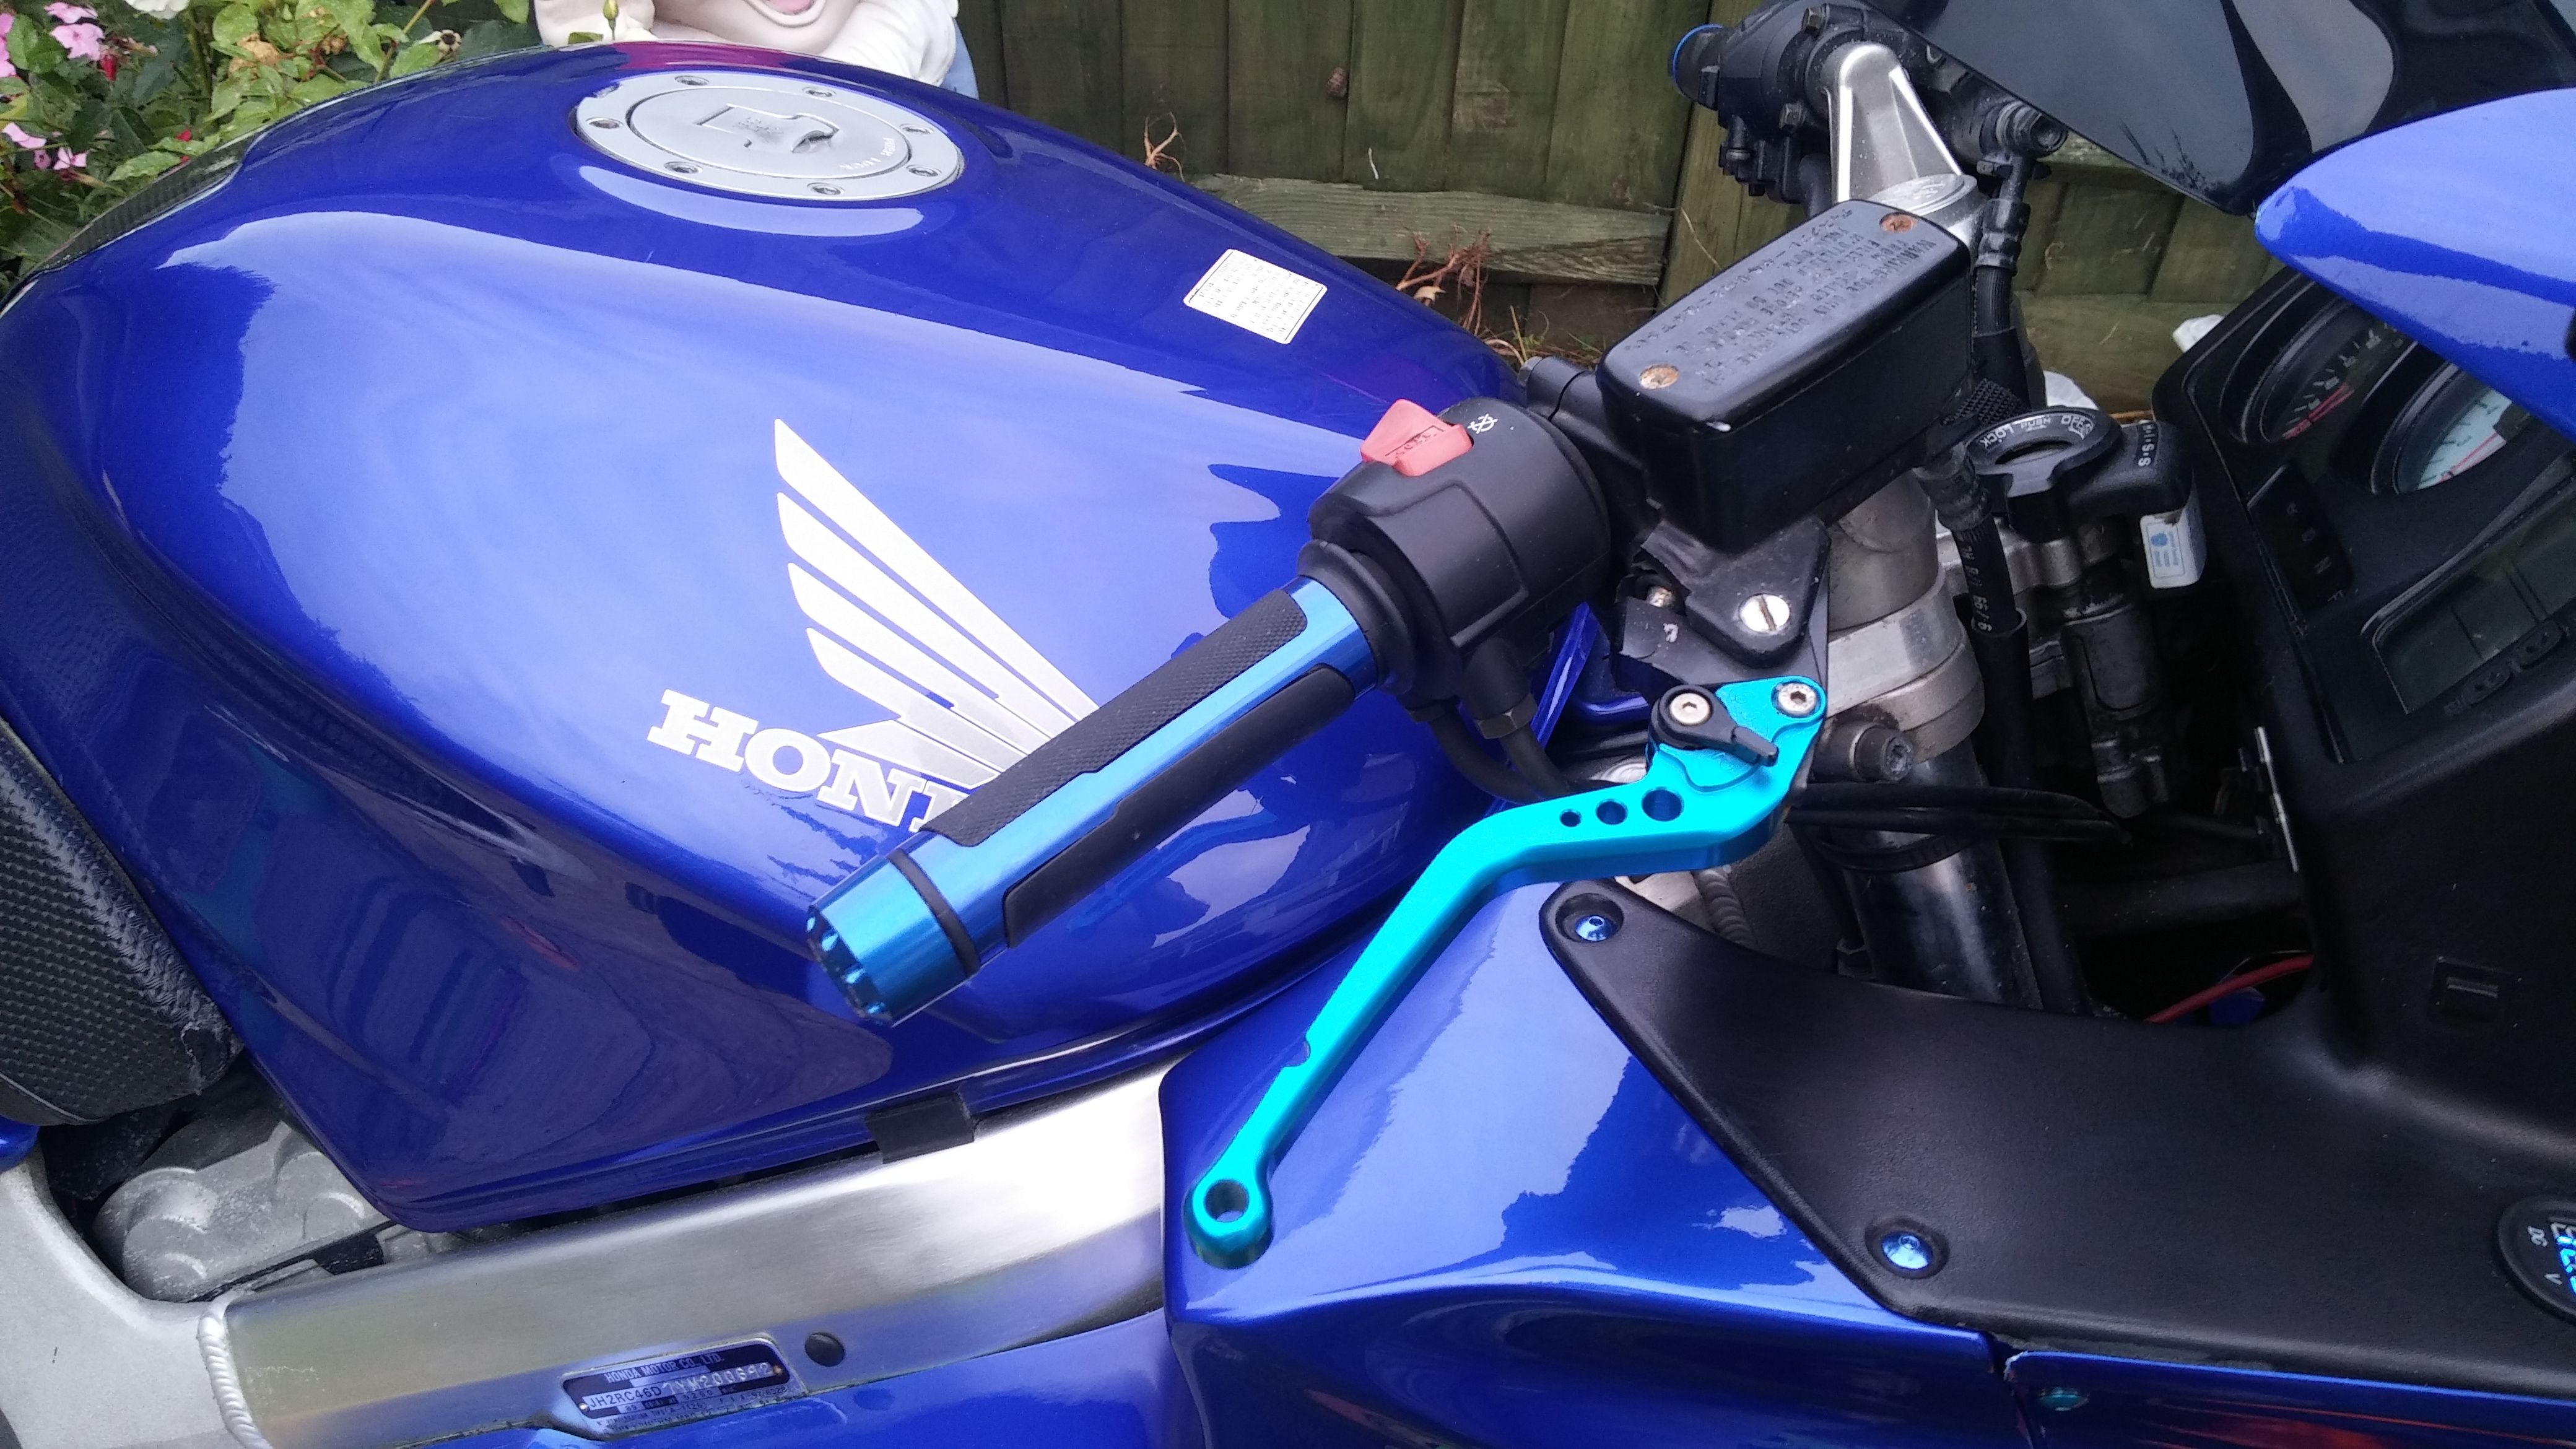
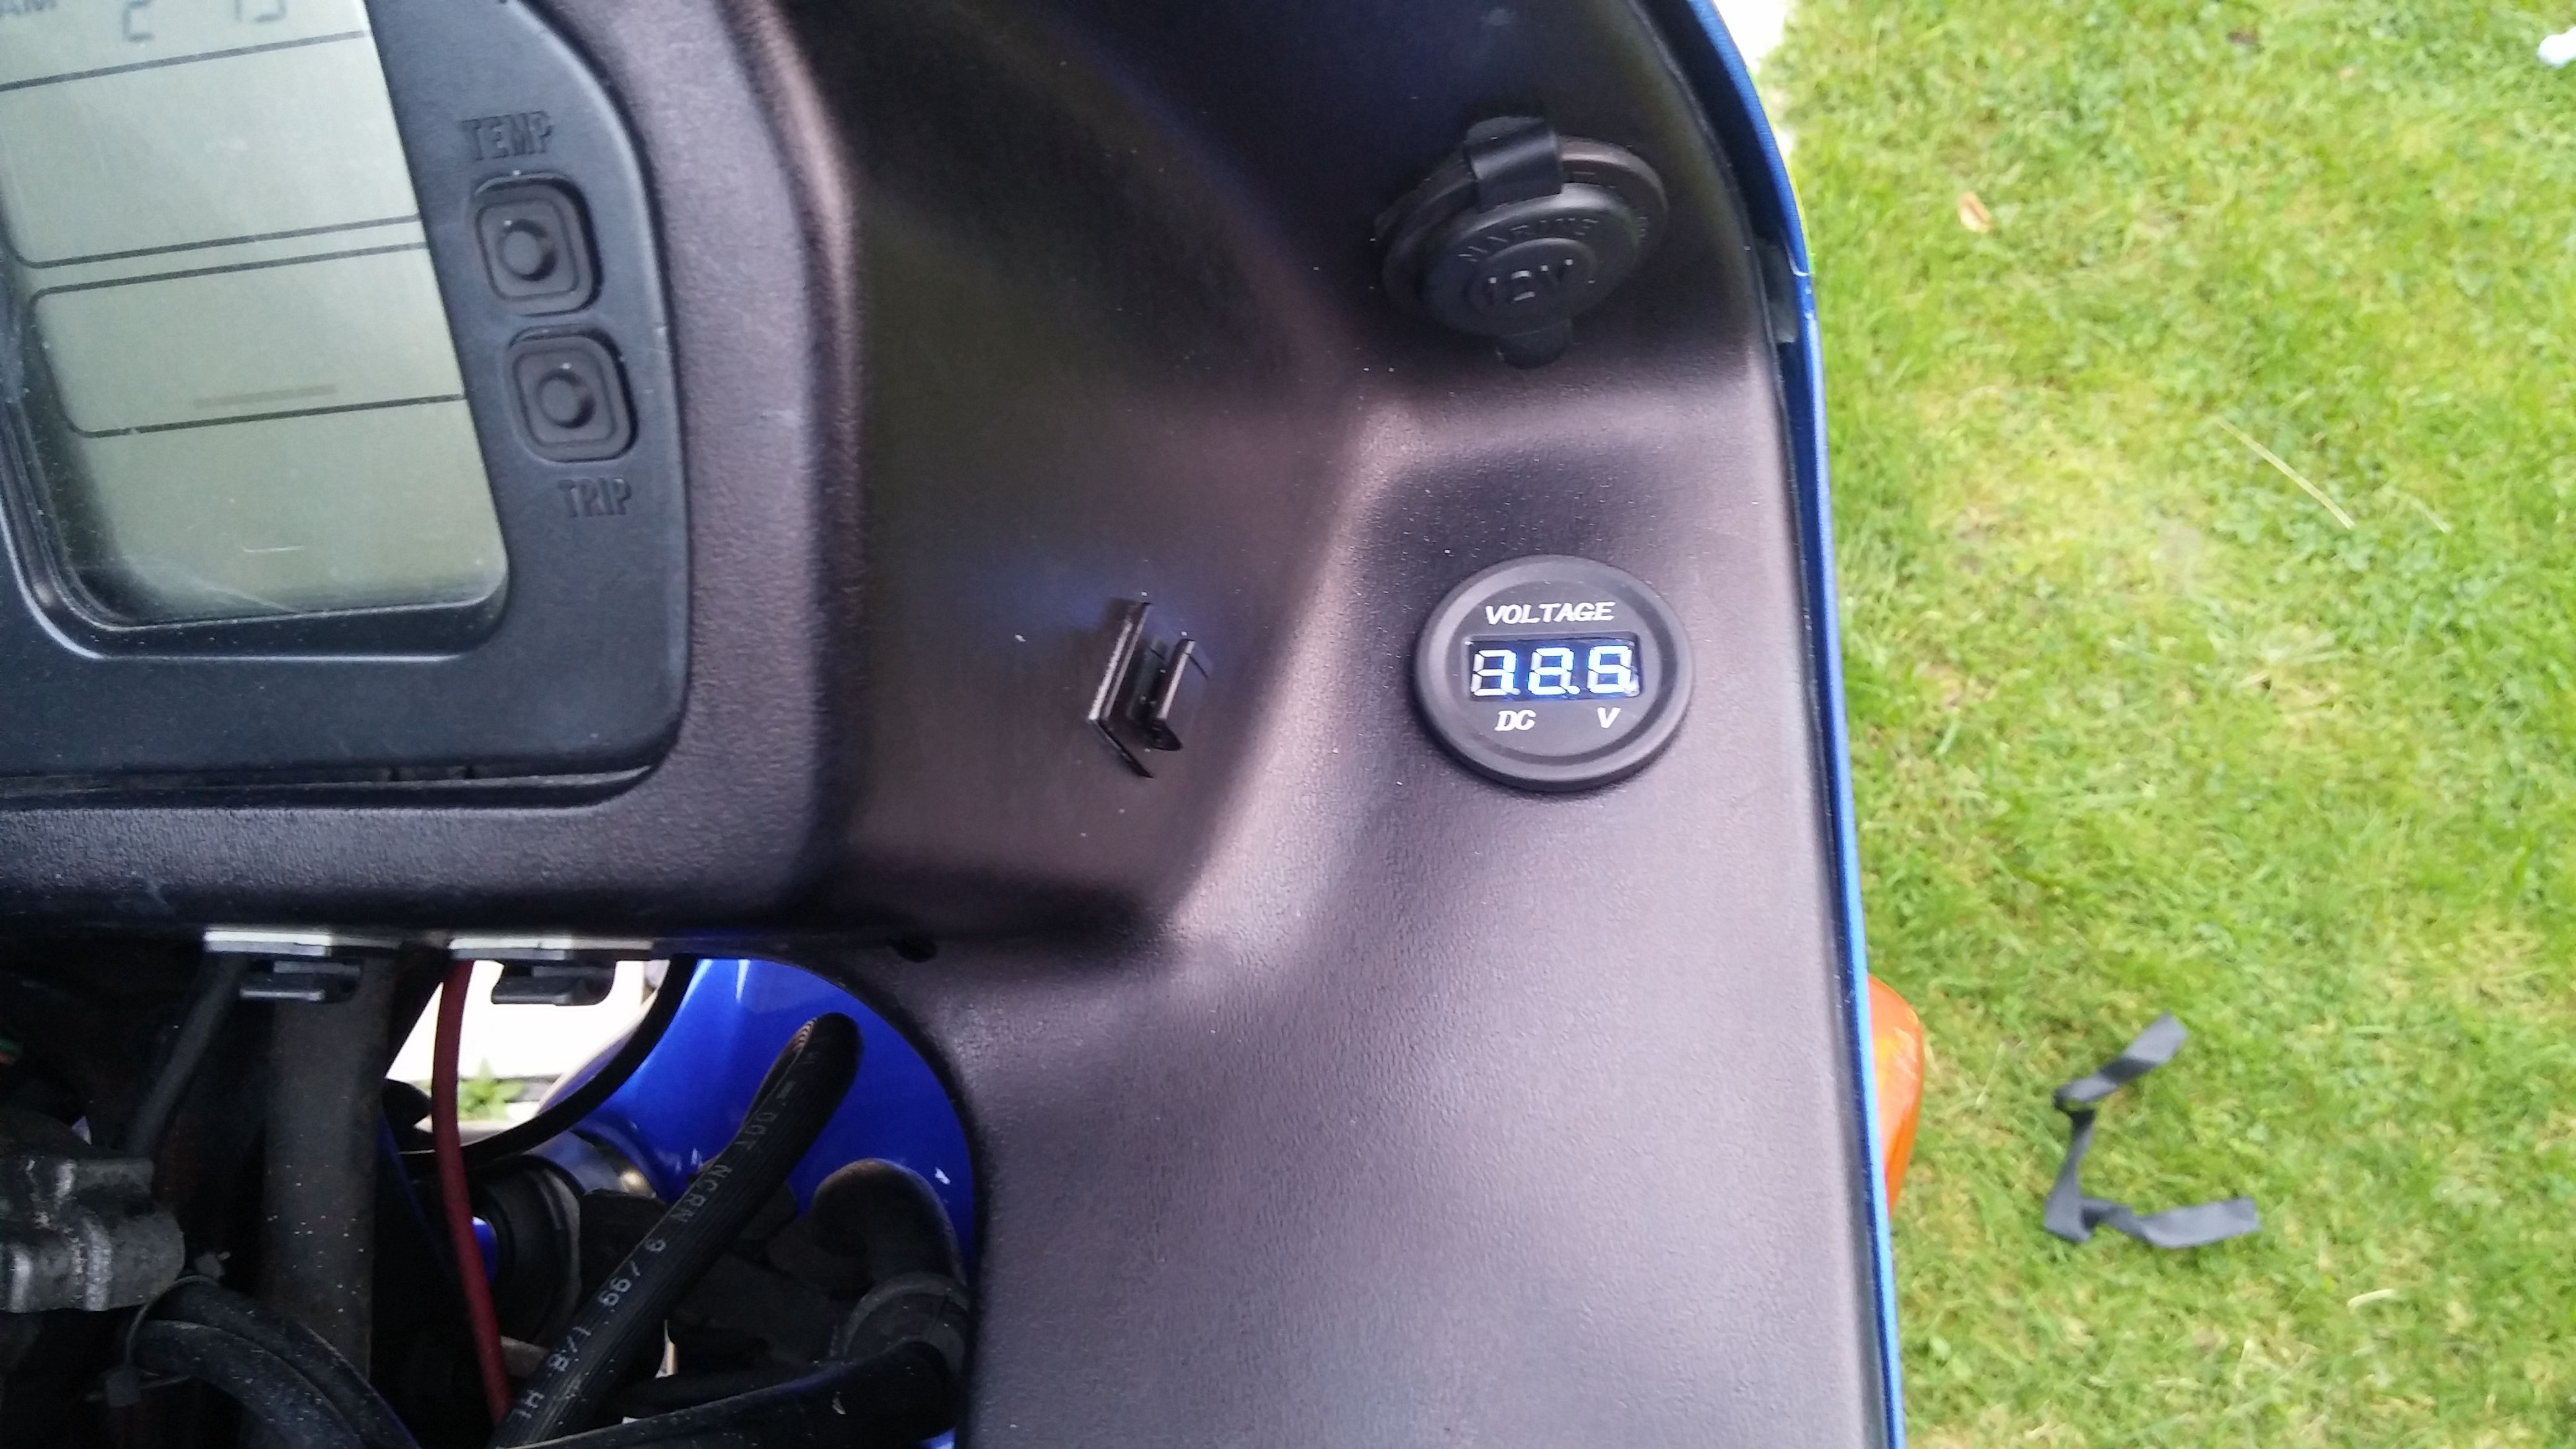
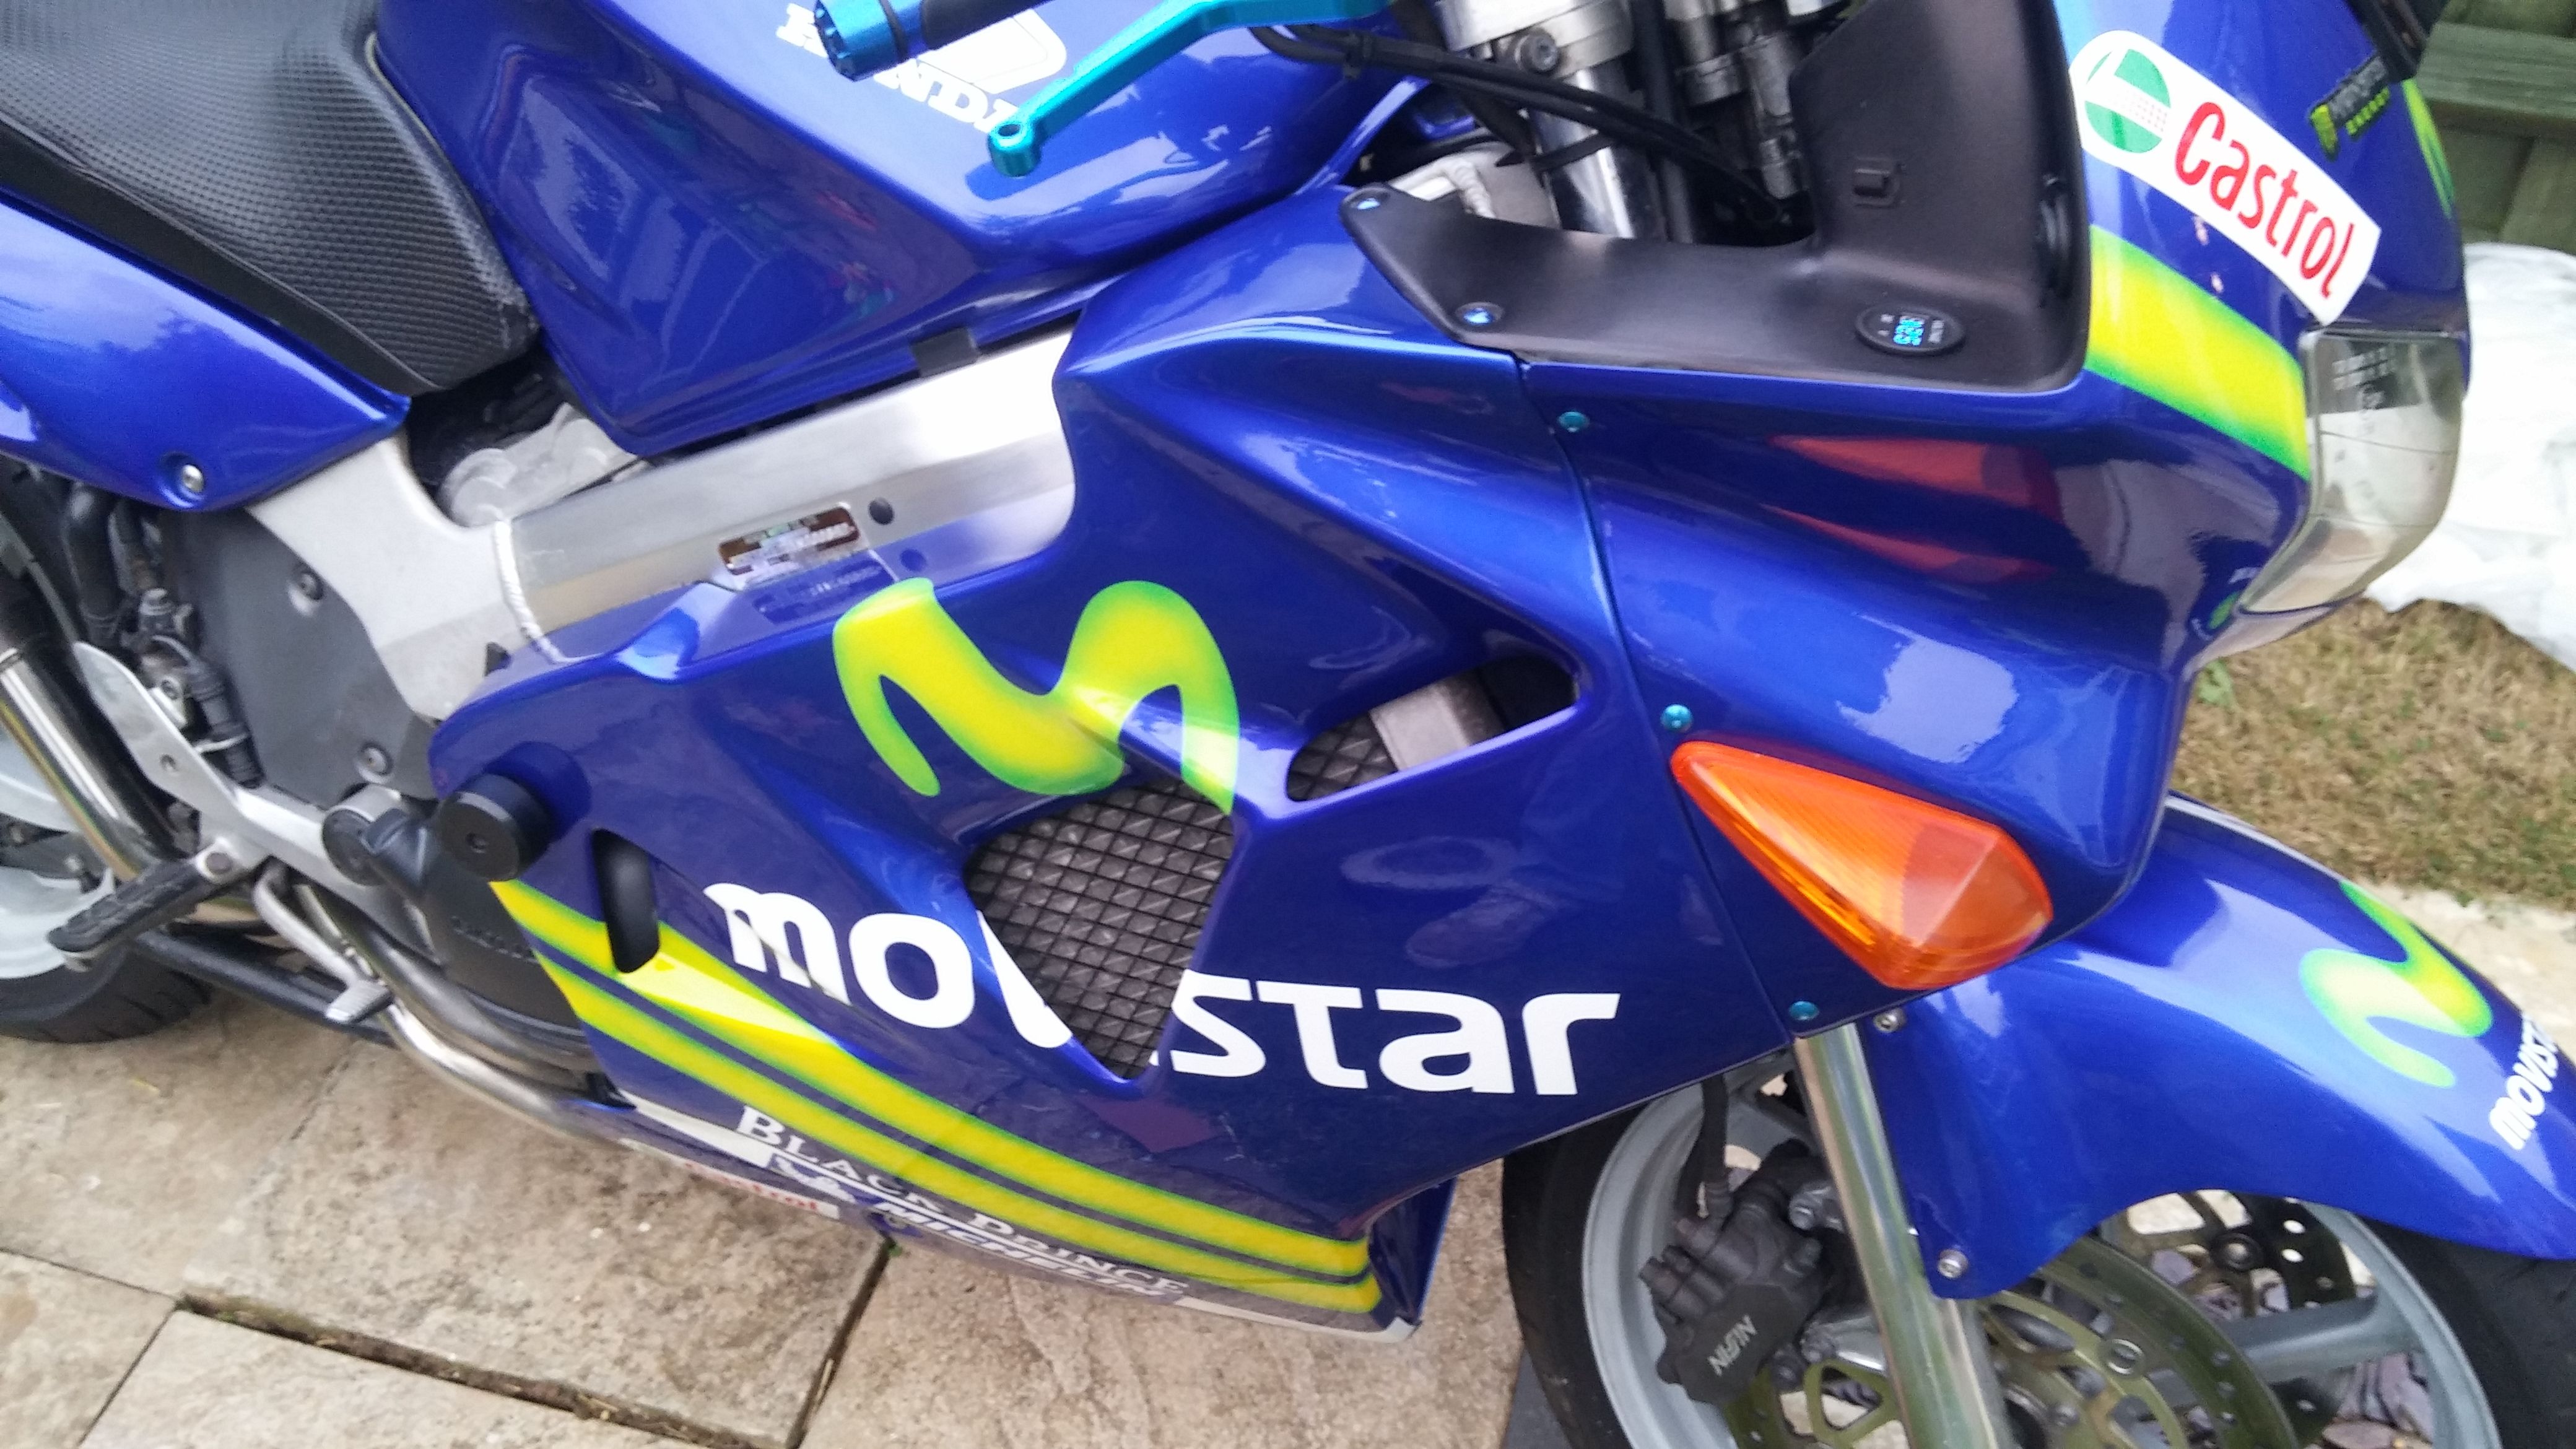
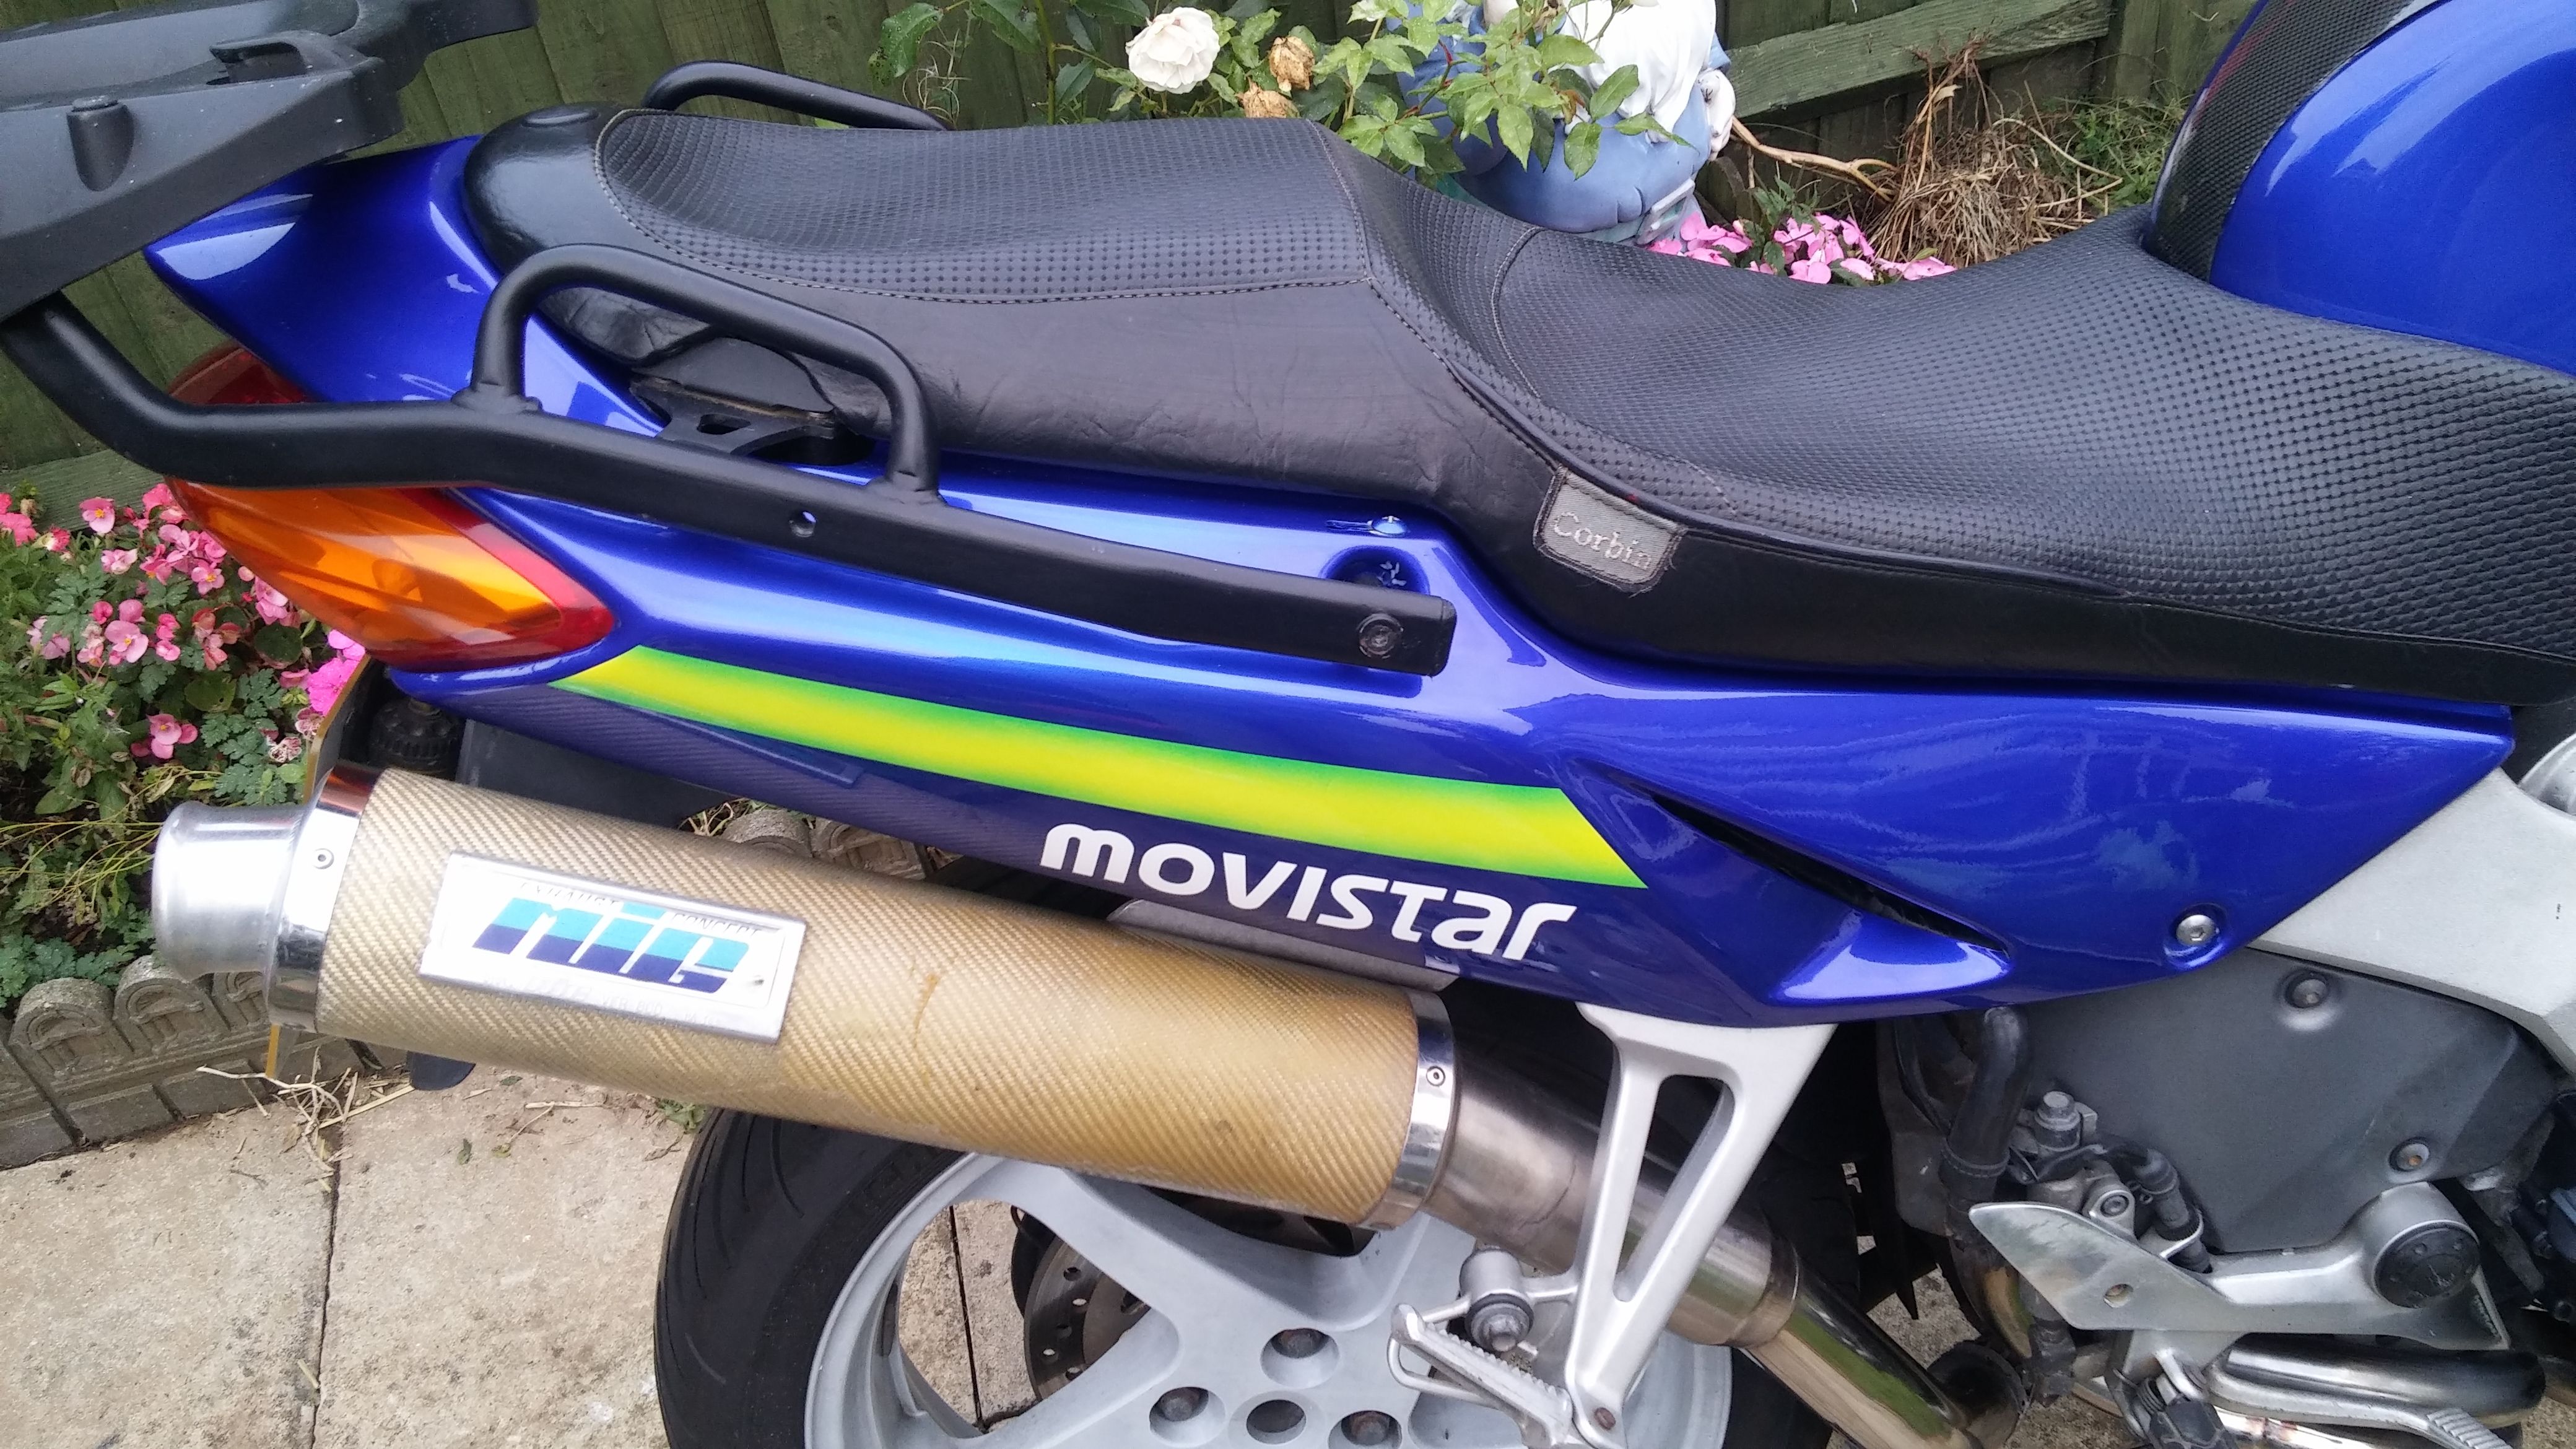
I have a 2000 Tahitan Candy Blue 5th Generation VFR800 I purchased this about 2 years ago when it had done 32,000 and was in pretty good nick. It did have some marks on the right hand fairing though which then got worse by me dropping it twice, while stationary might I add and no, please don't ask!!! It had also been my only form of transport to work for 9 months come wind or rain and lived outside. I had some quotes for re-spraying but most of them I either was not impressed at the persons work or they wanted a lot more than I was prepared to pay. Some other issues I had lately included over revving when cold and my oil cooler pipes were really rotten with virtually no chrome left on them. I had also on the last drop scratched the clutch cover even more than it was already. I did loads of research on Chinese fairings and will document this later in this post but decided while the fairing were off I would do some other bits and pieces. I probably need to make it clear at this point that I am by no means a mechanic and I have only had a bike for about 4 years, a Honda Varadero 125 whilst waiting for my test and a 600 Bandit for a couple of months after my test that got written off. I find the Haynes manual invaluable and managed to get one off of eBay for £10 I also found the Ron Ayers site great for getting part numbers as he actually lists the actual Honda Part Numbers. http://www.ronayers.com/oemparts/c/honda_motorcycle/parts Over-revving: When the bike was cold it would rev normally up to about 65-68 degrees at just over 2,000 R.P.M. Then it would just to 3,500 until the temp settled to around 79 degrees After a number of posts on various forums I considered the problem probably lay with the fast idle wax unit. Rather than replacing I thought I would try draining and flushing the cooling system first and the suspicion was it may just be an air bubble. So drained the system took off the coolant bottle and washed it and then used Wynn's coolant flush as directed on the tin. Topped back up with pink anti-freeze as directed. Problem now gone. Well that was an early success!! Oil Cooler: Drain the oil and get a new sum plug washer just in case!! In situ I could not remove the pipes from the cooler at all and I was replacing them anyway it is probably best to remove the front wheel off to remove the cooler with pipes attached but I could not be assed so just hack sawed each side to remove them. On getting to cooler out I took it to work (I work in a garage) and various people tried removing the bolts that connect the pipes to the cooler itself. Although they eventually succeeded they knackered the oil cooler in the process, Grrrr. I had already ordered some second hand pips for Ebay France which appeared to be in very good condition. EBay France seems to have loads more stuff for VFR's than the UK site does. The pipes cost me £16 and a tenner postage and when they arrived I was well chuffed they were in really good condition compared to my old ones. Then ordered an oil cooler from a breakers here for £20. After ordering all new bolts and O-rings from the Honda dealer at silly prices this all bolted back into place and so far no leaks. At the same time changed the oil filter and replaced the oil. Spark Plugs: Oh this will be easy, yes the back two are a piece of piss the front two however are a nightmare to get to. I used two 10 inch extension bars and a plug socket with the rubber bit in to grip the plugs. Cleaning: As the fairings were now off I decided to clean all those bits you do not normally see. Mostly this just took a warm soapy clothe making sure I dried with kitchen towel after. However as someone with two young children I have now found yet another use for baby wipes, they really do clean anything!!! The other shocker was I have a full stainless steel exhaust but most of it appears never to have been cleaned so was in fact slightly rusty and very very dirty. you read so many suggestions of what to clean things with and I am always a little dubious but had seen one item repeated a number of times. Harpic toilet cleaner. All I can say is OMFG!! Just use a kitchen scourer you know sponge one side green stuff the other. You need hardly any effort, I was totally gobsmacked. Word of warning though wear gloves and long sleeves ‘cos shit it burns!!! Clutch cover: This was just generally scratched and dinged form the two vistis the bike had to the floor. i taped all round it with masking tape (see picture1) then used a high build primer from Halfords. The I bought some Peugot engine Matallic Grey from the Range, mailny as it was half price and I did not need the huge tim Halfords was selling. It was £3.75. 3 coats of this then 3 coats of Halfords Satin Lacquer. Others: At the same time I fitted new Puig bar ends, this turned into a nightmare as the left hand screw was stuck in the inner handlebar and just kept twisting. In the end if was just cheaper and easier to buy a new handlebar, cost me £15. Also fitted new grips I always slide them on with hairspray has always worked so far. I also fitted a blue round LED voltmeter so I could keep an eye on the notorious R/R and Stator problems. This was about a tenner from a company called Istoz on Amazon. Have wired it straight to the battery with an inline fuse. I also took the opportunity to tidy up some things while the fairings were off. Much of the wiring is wrapped in normal electrical insulating tape. Understandably after 15 years some of this was not fairing well. Mostly the ends and joining pieces. This is where I discovered something called amalgamation tape. Great stiff it is like a rubber you pull off the amount you need peel off the backing tape and just pull it and stretch it and it sticks to itself, much better than ordinary adhesive tap Chinese Fairings: You can find them on Ebay, Amazon, Alibaba or DHGate or you can find supposed suppliers in other countries. My suspicion is that they all in fact come from the same place. I researched for nearly 6 months. I knew pretty much straight away it was a choice between two colour schemes. Either white and black or the same colour blue I have but with the Movistar decals. Some facts along the way. No matter where you read it if you interrogate the seller no-one and I repeat no-one sells injection moulded fairings for 5th generation VFR's. If you see them listed as Injection moulded when you question further they will say there is a mistake on the website. If you are looking for perfection these fairings are not going to be it. However if you are trying to give your bike a different look for a reasonable amount of cash then they are good value for money. Finally decided to go for the Movistar blue, the reason, again no matter how many adverts you see it on no-one does the tank covers anymore, they were just to prone to breaking apparently. Therefore it seemed pointless to have new fairing and then try to get someone here to match the paint for the tank. From ordering to delivery was 4 weeks. They arrived very well packed with lots of foam in a large box. I did however have to pay customs and vat on top of what I had already paid. So I paid £290 plus 46 customs and vat. They all seemed to be in good condition. I also seemed to have more bits than I had bargained for. This is because they have included the inner fairing that goes round the dials the side fairings that connect to the outer fairings and the bits you remove to take the mirrors off. However I did not use any of these as they are all in just really cheap shiny gloss black plastic. It was then I noticed there was no rear seat cowl which was clearly advertised on the picture. I emailed the seller and asked about this and was told actually they do not do the rear cowl for the 5th generation. Now not a huge worry to me as I always have the top box fitted but maybe to others. First thing to note None of the holes are big enough (I expected this), the paint is in places if you look closely a bit what I would call orange peely, but as you can see from the pictures it is barely distinguishable from the tank original. They were also very very shiny!! The front headlight fairing is the worst, on this it seemed everything was in the wrong place and the hole on the left is not quite wide enough for the headlight to slip into. The four stanchions that you connect the headlight to were also badly positioned. If i did it again I would probably attach open brackets to those stanchions so that I did not have to force it so. In doing so I have opened a hairline crack which I have had to plastic weld. The tail fairing fitted pretty much straight off apart from making the holes bigger for the bolts. You may have to as well use slightly smaller head bolts than those big flat ones that are on the original fairing as the spaces are just not there to take them. This is easily rectified by sourcing from eBay. I also ordered blue anodised fairing bolts and well nuts and a pack of 30 well nuts on thier own. I also ordered some of those plastic screw connectors where you push the plastic bit through the holes and then screw in the plastic screw. I actually had two of these missing on the upper inner fairings and had not even realised. Then the main fairings, this is of course done in conjunction with that funny v shaped thing behind the front wheel. The nice thing about this part over the original is that it is sprayed the same colour as the panels as opposed to matt black. Personally I think it looks miles better. this and the bottom of the fairing was in fact a better fit than my originals going together really easy and for the first time ever my fairing line up underneath the bike and have two fixings in them which are now removable. Lastly was the front fender which fits perfectly. Polishing: The bike is 15 years old as is the tank and quite frankly the new fairings were putting that tank to shame, it was covered in small surface scratches and swirls. Eventually found a product called G3 scratch remover this was applied with a dual action electric buffer and god the results are amazing. I have come to love the Meguiar's produnts so after the G3 i applied polish and then caranuba wax. I have to say I am stunned by the appearance compared to how it was. So there you have it, overall fitting the fairings was nowhere ther the nightmare I imagined and I personally am very happy with the way they look. Polishing:
-
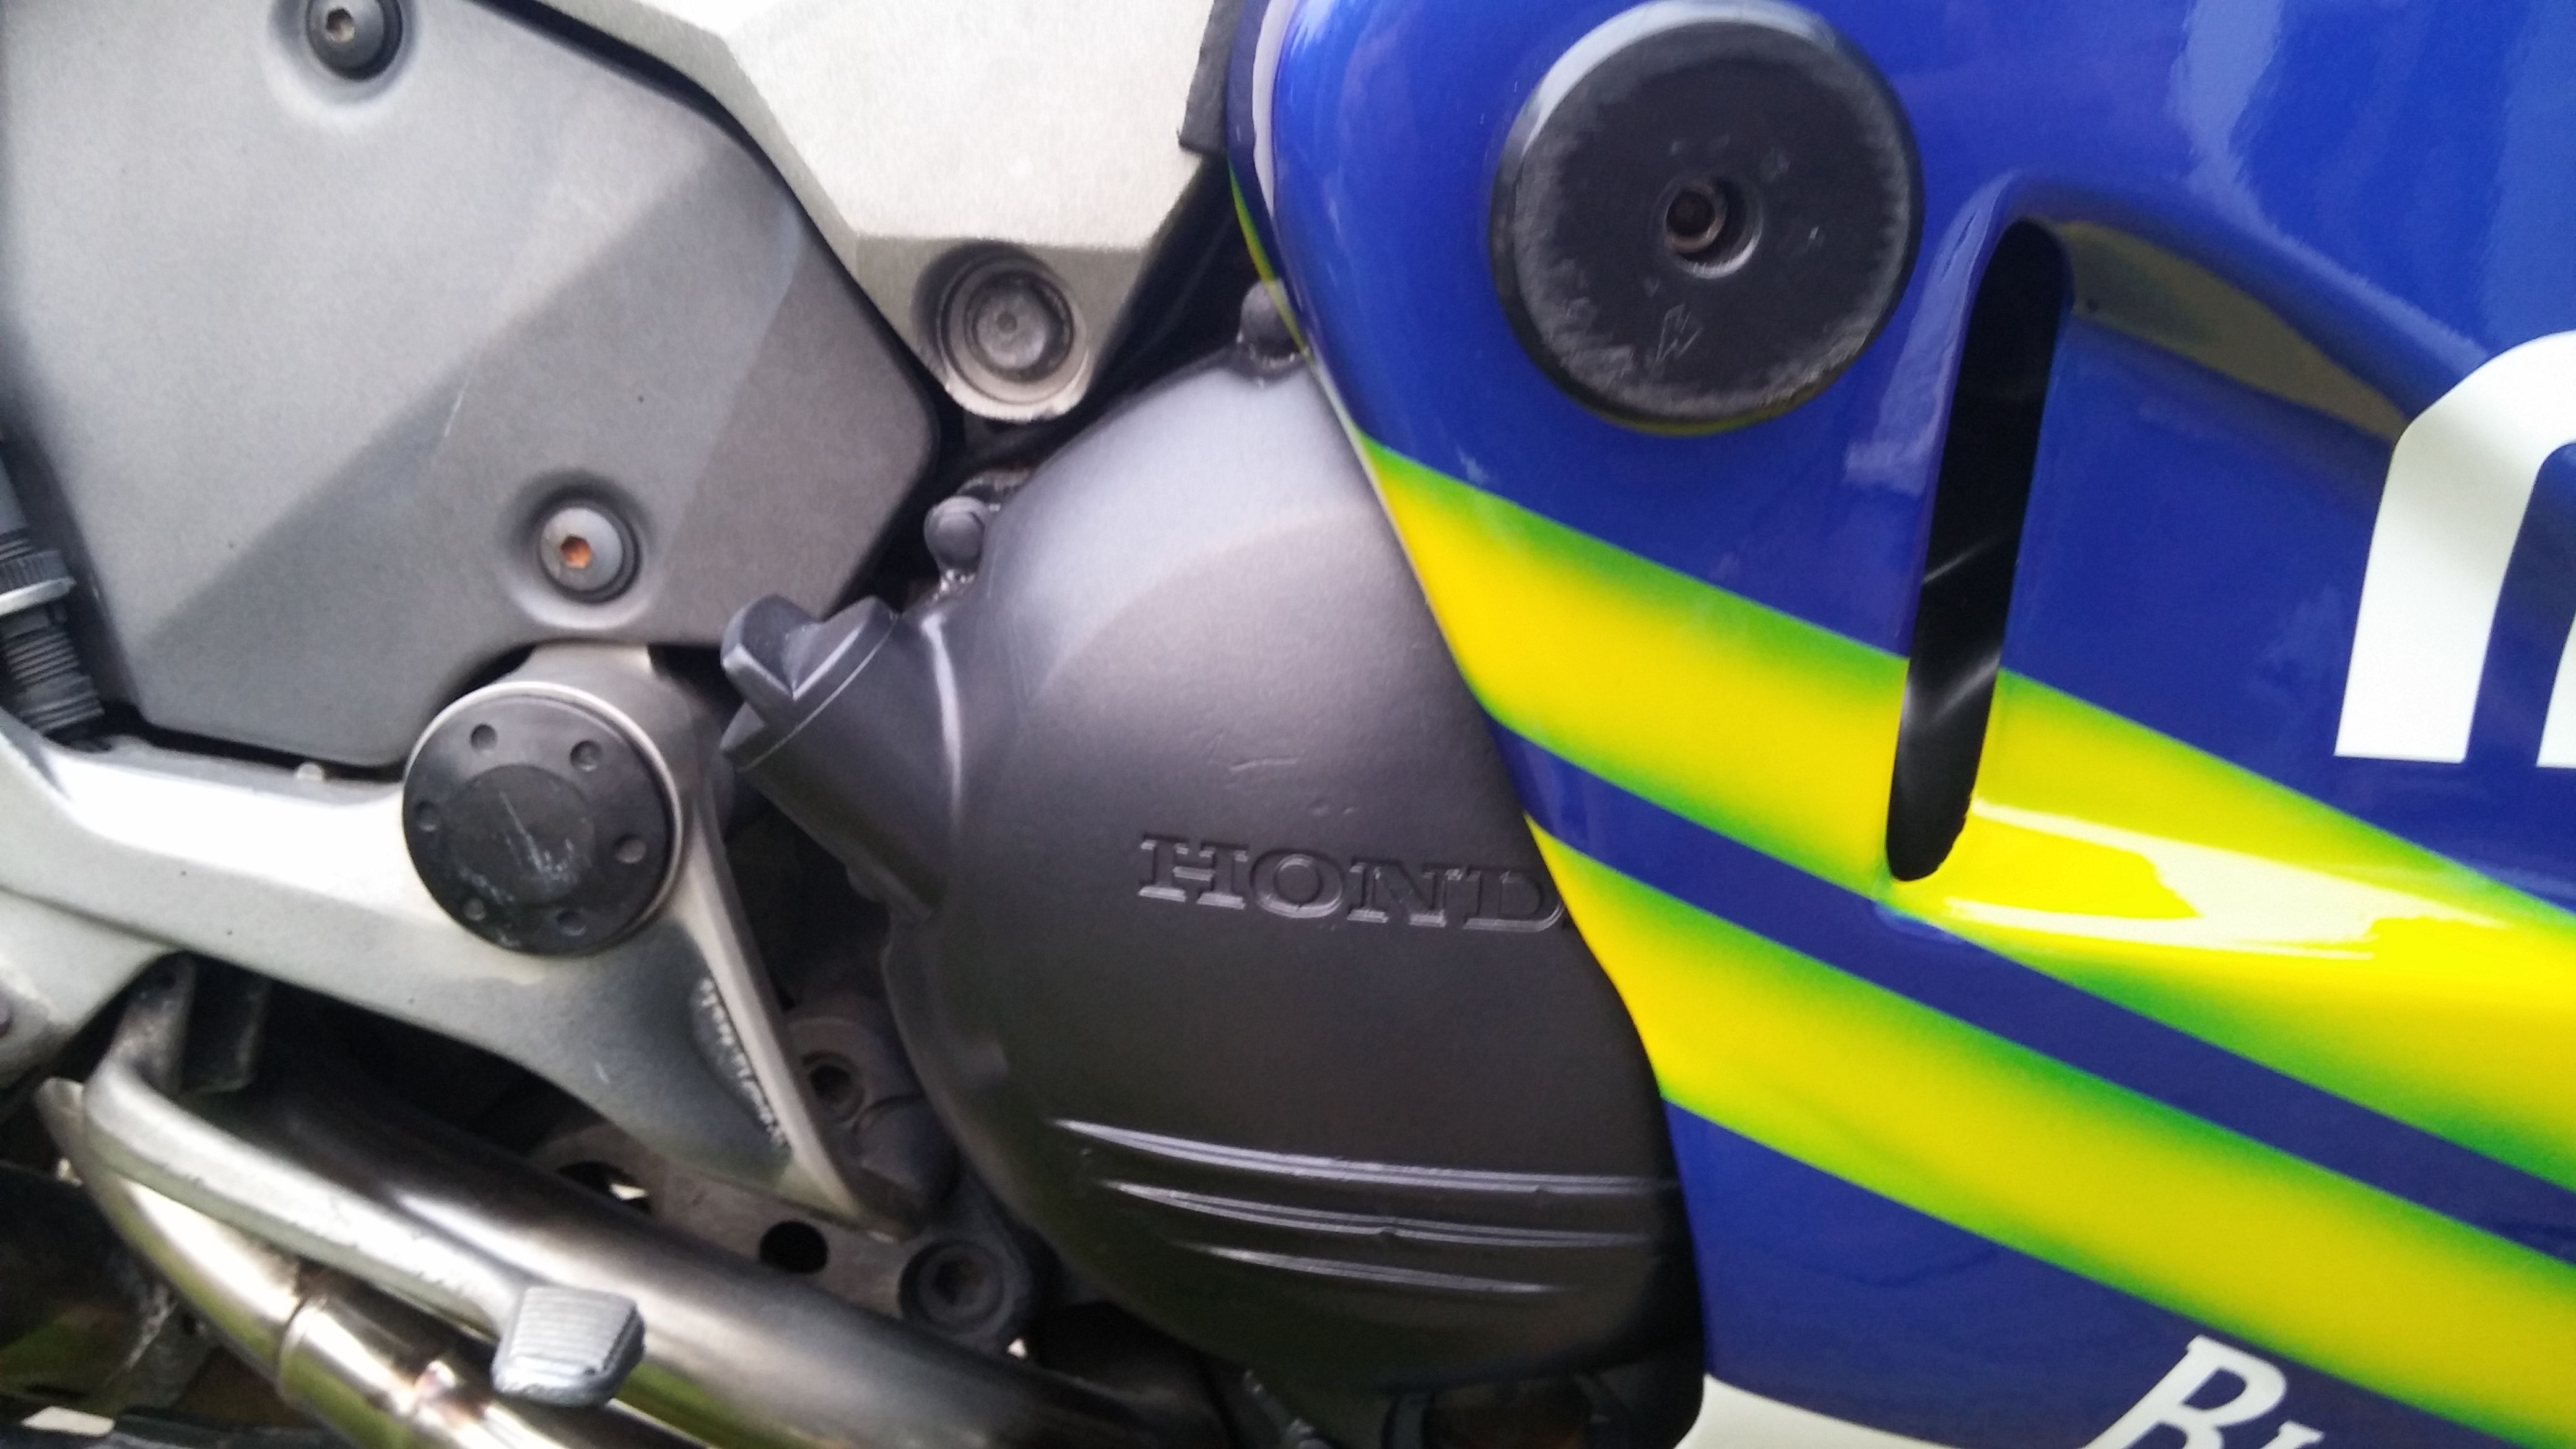
My Sebspeed Custom Clear Clutch Cover Experience
VifferCrab posted a topic in Sixth Generation VFR's
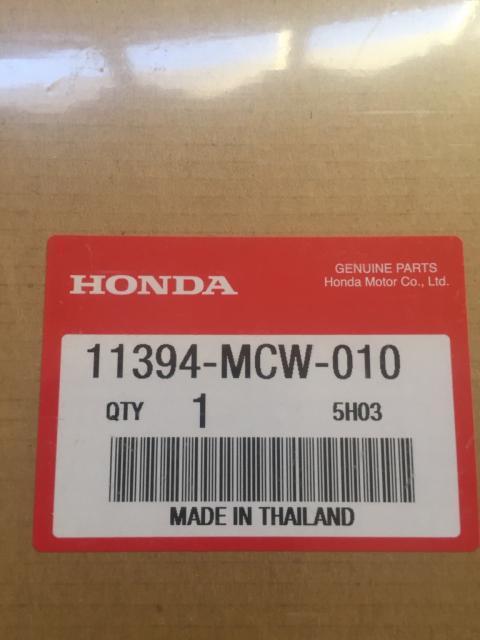
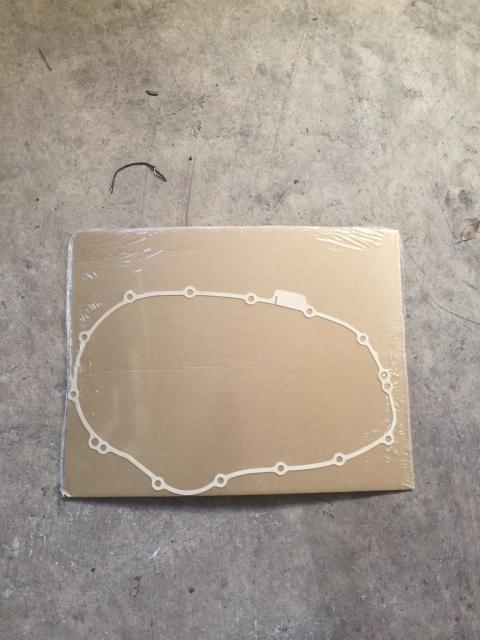
Many have been following my Chinese fairings build thread found here: http://www.vfrdiscussion.com/forum/index.php/topic/81765-viffercrabs-chinese-fairings-build-thread/ But, that thread is a bit lengthy, and I've taken it off topic at times, but there's one part of it that I feel deserves it's own thread, just because of the awesome sauce of it. And that's this SebSpeed clear clutch window. Many of you are familiar with him, and his work, but I, being new to the VFR world was not. I'd actually never heard of such of a thing before in my life, but I've been out of the bike world for a few years now, focusing mainly on cars and family, so it's no wonder I was a bit out of touch on the cool things going on in the bike world. During my hunt for ideas for my custom job on the fairings, somehow I fell upon a thread or two that showed the SebSpeed clear clutch cover. The very first one I saw, I knew I had to have it. It's so just damn cool, I don't care who you are, the cool factor is off the charts. My VFR was originally purchased as something to just get me back in the game, and had a little curb appeal to it. At no point, did I think it was going to morph into a full-on rebuild, but alas, he were are. I sent Seb a PM on here, and he got back to me immediately with price, timeline and the confidence that he'd help me through uninstall and reinstall of the cover. I'm a confident wrench on a car, but I'd never as much have even take a fairing off on a bike before in my entire life. After doing the full faring swap, adding exhaust, and a couple other low skill mods, I felt like with his help, we could do this. He literally gave me a play by play on how to take the cover off, take the pressure plate off, and reinstall when I get it back. I can't tell you how many messages we've exchanged. Let's just say it's a lot. I know he's getting sick of me, but to his credit, he's never let on to that, and has been nothing but helpful. More than helpful if I'm being honest. He's been holding my hand through this whole thing. Means a lot to someone like me... The day (night) came where I was going to attempt to take the cover off. Not really having the exact tool needed for the final step (a rubber mallet), I was ready to give up for the evening. He took the time away from his family to exchange how-to pics, and exact instructions on how to get it off, using less than optimal tools. He taught me a trick on how to use a 2.5 sledge and a Playboy magazine. Well, it ended up being a kids Skylanders magazine, but let's just say Playboy to make it interesting. Sure enough, did exactly what he said and BOOM, cover is off. Pressure plate is a piece of cake, not much instruction needed there. So, in a box it went, and he was even nice enough to offer to have it and my pressure plate sent of to powder for me, instead of me having to do it on my time. Again, means a lot to someone like me... Some of these pics are in my build thread, but let's put em here too, for when that thread slows down and is relegated to page 15 from the home page, never to be seen again: And here's the replacement gasket you need for the cover... And a few short days later, he sends me this picture.... Look at that work! He's a skilled dude, for sure. So now, it's off to powder coat, and then back to me. Can't stress enough how awesome he's been from start to this point. A true pro, very patient with me, and even offering his personal opinion when asked, about color and finish. Will update...
-
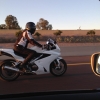
In the 'I can't leave well enough alone' department, I'm pulling the trigger on a set of the newer ABS injected Chinese fairings. I've decided on using the seller named Auctmarts, which from what I can tell, is the lesser of all of evils when you read anything about these aftermarket kits. Seems all of the horrible experiences with Chinese fairings, are from years ago before the industry started using more modern methods of plastic molding. So, with the relatively low entrance fee, I'm gonna give it a shot. My 2002 only has ~9000 miles on it, but I'm the third owner and somewhere along it's history, things have toppled into it. So, I can either roll my eyes at it, when the nicks and scratches catch my eye every time I ride it, or do something about it. I'm going with a total color change, from red, to a white/black theme incorporating a little bit of the red back into it. Wifey doesn't know it yet, but my inspiration is the colors of the flag of her home country. I figure when she yells at me for spending more money on this thing, I throw that little tidbit at her, and BOOM. That'll shut her up... :) Here's a before picture, which I've posted recently. Will keep updating throughout the process. I'm working with the seller now, to finalize paint details before I send money. Timeline and review to follow... And because I know someone is gonna ask, here's a pic of wifey with the Viffer Extra credit goes to anyone that can tell me her home country. :)
-
Just a question to anyone who has attempted a total fairing color change on the VFR 1200? Found some really decent websites selling every color produced for VFR and contemplating making the swap from red to black. Any thoughts or experiences from persons who have tried it? $829 doesn't seem too bad for a reversible paint job. Here is on of the links for the aftermarket suppliers http://www.nicecycle.com/VFR-1200-Fairing-s/5941.htm.
-
I know some will consider this too fussy, but I do wash and wax my VFR a few times each season--particularly after a long tour, a ride with lots of insects, a rainstorm, before and after storage, etc. On my recent 3,500 mile (5,700 km) ride to SumSum3 and back, I used the Revpack Tourpack that I've had for many years. It's a u-pack that fits over the pillion seat. I like it because it keeps the weight low and is easily transferred between the VFR and my dual sport. It secures to the bike with two straps that go under the seat and buckle to the bag. I always criss-cross two additional straps over the top so it is very secure. When doing day rides from a 'base,' like the motel in Montrose, I usually remove the side cases and tourpack and just use a tank bag. I've done this now for all of the five summers I've owned my VFR without any issues. I have always left the under seat straps in place, though they're not difficult to remove. I did the same thing this year at SumSum, but on each ride we encountered construction, and by the end of the third day the bike was covered in a fine coating of Colorado dust. That's when I noticed that the excess strap that had been flapping around in the wind during the day rides had sanded a neatly triangular dull spot into my tail fairing beside the seat (Doh!). I could have easily removed the strap or put some 3M protection film on the area (I have squares of it to keep the buckles from rubbing), but it never occurred to me that the excess strap would sand off the finish. (Of course, when the pack is on the straps are held away from the paint.) Here's the offending strap--3/4-inch nylon, about six inches of excess: And here's what it did to the paint--not that easy to capture in a picture: So, the question: Will this buff out? If so, how? I know there are buffing wheels, cutting paste, various polishes and so forth--will some combination of same restore the shine or is this just another bit of evidence that my bike is a 'rider'? If so, I won't lose too much sleep over it. While on the subject of cleaning and finishes, I had a key fob with a black plastic piece on it that left some marks on the upper triple tree. I'm always careful to keep any key fob light and soft, with only the ignition key on it, but this one fooled me and left marks anyway. I've tried several cleaners in an attempt to get the marks off, but the surface is not smooth and so far I haven't been successful: Any ideas? Thanks in advance.
-
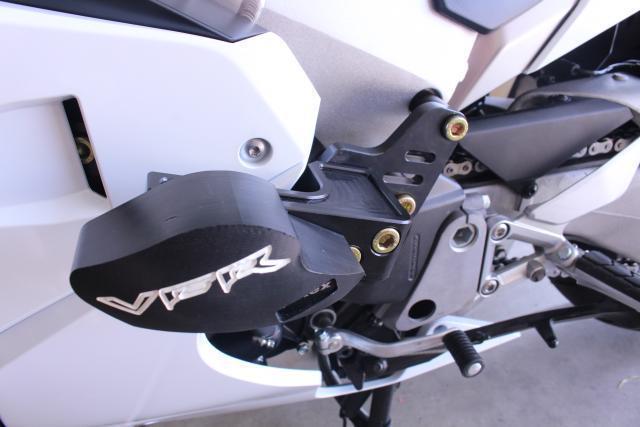
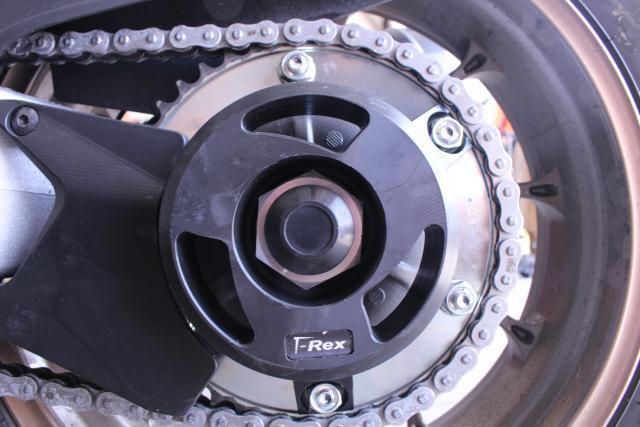
I recently installed the T-Rex frame slider kit on my VFR. As far as I know T-Rex is the only company making frame sliders for the 8th gen. Overall I'm very happy with the kit, and the installation couldn't have been easier. T-Rex says the upper fairings don't need to be fully removed, but I found it easier to pull the full fairing rather than risk damaging them during the install. If there's one negative it's that the pucks need to be removed to pull the lower fairings, so oil changes will require an extra step. The full kit was $290 shipped which is a bit much for frame sliders, but then again these are of the highest quality and far cheaper than a new set of fairings. Edit: Here is the link to the kit: http://t-rex-racing.com/catalog.php?item=559 The primary sliders are beefy (2lbs each) and mount with three bolts. Also, the pucks are easily replaceable in the event of a slow speed crash. When installing put the fairings back on before installing the pucks. The rear slider easily attaches to the sprocket, just be sure to put the factory washers on the outside of the slider. The front axle sliders are super easy to install. No need to remove the wheel, just remove the front axle bolt and bolt the slider into place.
-
From the album: 97 VFCBR
VFCBR VFR 600RR Body Swap -
Before I start my little experiment, I am trying to do some presearch. I got a 3rd gen minus fairings (see avatar), and since 4th gen lower fairings are cheaper and more plentiful, it might be fun to try some on and see how they fit. Anyone know if the mounting holes are anywhere close? The mid fairings will likely stay off, so they aren't much of a concern for me.
-
I need new fairings for my bike and OEM is just too dang expensive for this era of bike. I was wondering if anyone has any experience with this company? http://www.nicecycle.com/Honda-VFR-800-Fairings-p/1129.htm Also any pics of this particular color scheme on a bike? Thanks in advance!!!
-

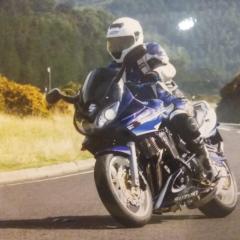
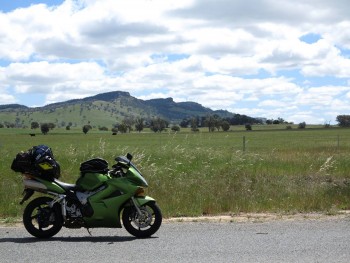
the bike on the way back from philip island, in the old colours.
Guest posted a gallery image in Member's Gallery
From the album: Jon's Konica Minolta fairings
-
Hey all. I have one of the thinner Chinese replacement body panels for my VFR. (To be specific, tail section for 5th gen from another user on here (and I totally like it man!).) Anyway, it does already have a small crack in it just from shipping, and I don't want it to crack while on the bike. What can I do to reinforce the plastic? Can I spread some sort of material along the backside of the fairing in strategic locations? Should I go ghetto and duct tape the hell out of it? Suggestions would be much appreciated (pictures too, if you've done this yourself). Thanks!
-
I tried to search for an answer, but I'm stumped. Looking for specs on the bolts used to secure fairing on a 2000 VFR. The Honda part number is 90103-MBG-000 and from what I can tell is a 5mm diameter 20mm length bolt. That's great, but I want to replace with a torx bolt, so I need to know the thread. Does anyone know the thread density on this part? I know it's in Honda's interest to keep such stuff a mystery, but I was hoping there was a resource for this type of stuff. Had a similar issue with the Frankenbolts to secure the cowl. Got that resolved --> http://www.vfrdiscussion.com/forum/index.php/topic/70461-a-part-is-a-part-is-a-part-right/
-
A bit expensive me thinks. http://www.ebay.at/i...b1#ht_668wt_905