KevCarver
-
Posts
2,462 -
Joined
-
Days Won
26
Content Type
Forums
Profiles
Gallery
Blogs
Downloads
Events
Everything posted by KevCarver
-
Thanks for the update! My main concern was not seeing it on the fiche, but then I found this thread and got the part#, so I know they are still available.
-
So, what's the verdict on these? I was just thinking about seeing if @SEBSPEED would be able to machine some, but at $16.79 (2020 price) shipped from Hong Kong I'm wondering what kind of volume it would take to compete. I couldn't find it anywhere in the parts fiche, but the part# (44808-MR&-013) still calls up the correct plastic part for under $6 (US).
-
Nice work, vey cool with the return spring on the rear master!
-
How do you guys deal with the packing grease on brand new a brand new chain?
-
Under $30 Fuel Pump Repair/ CBR/VFR HYBRID BUILD
KevCarver replied to MOTOPILOT's topic in Fifth Generation VFR's
I was more concerned with what looked like cheap crimp on butt connectors at the plug for the pump. (I thought they were wire nuts at first glance) Anyone else see that on the harness side of the connector? Could have been a bad connection there all along and the movement of the plug in and out may have reconnected the wires. I'm personally not familiar with OE pumps failing on any fuel injected generation... -
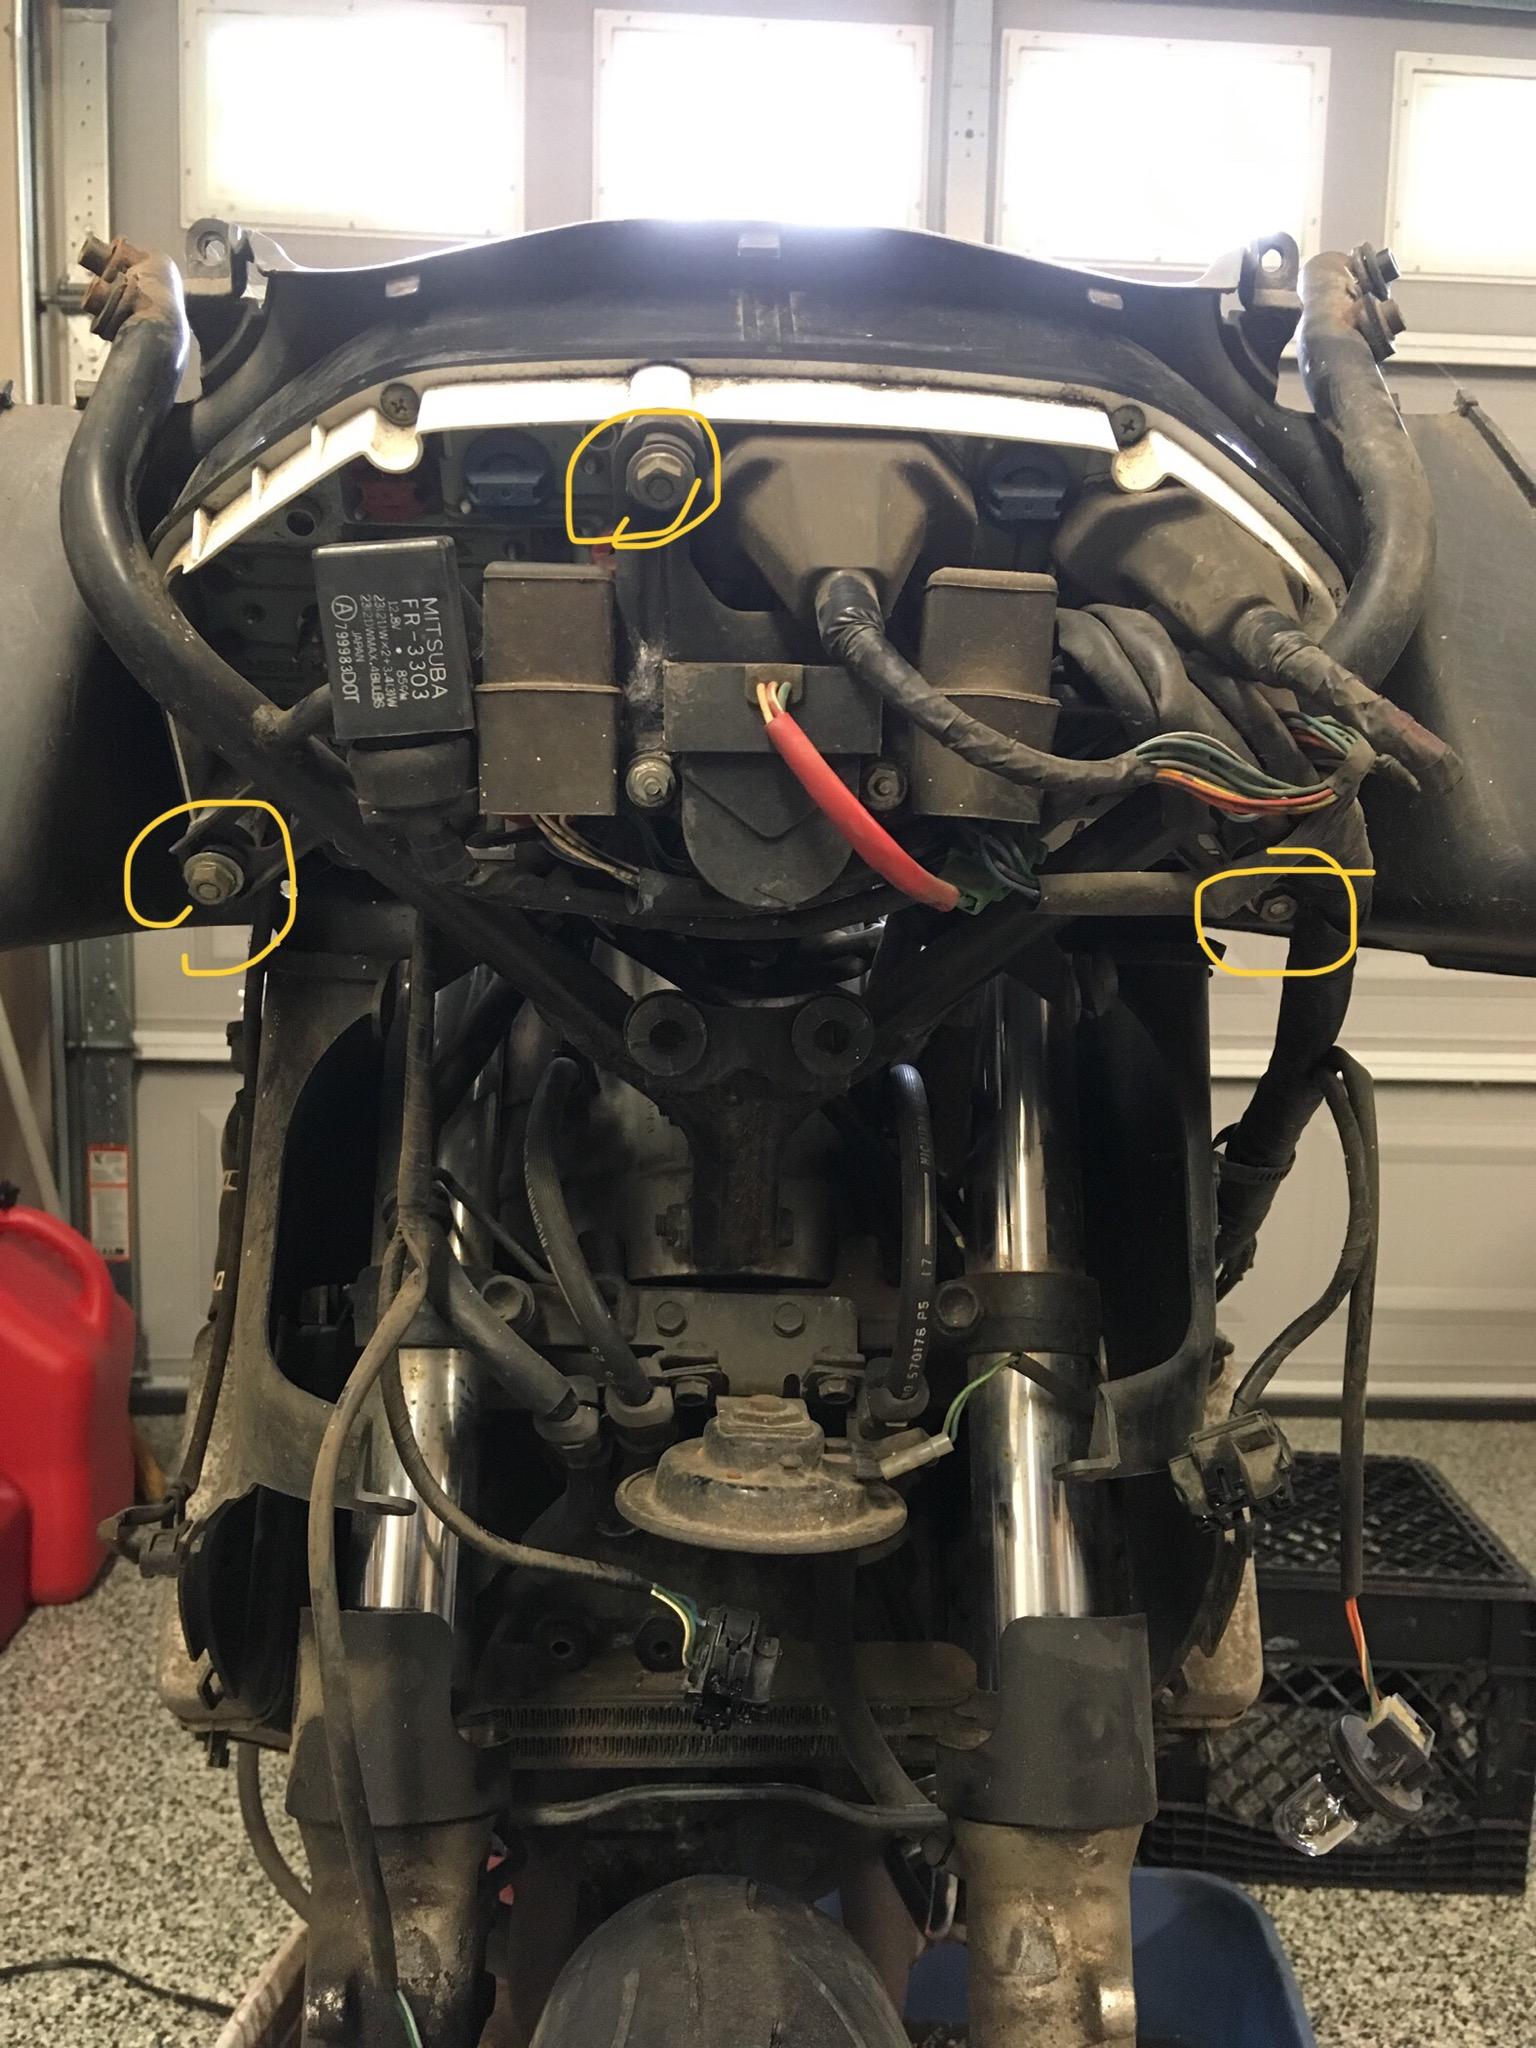
Do yourselves a favor and invest in Dzus fasteners for all the well nut screws on the front! You'll love it! Just get the clip on backings and the type of fastener your prefer. Mine are black D-Ring except for the very top inner (the ones in question that fasten to the metal bracket), and those are 4mm allen button head because they are slightly recessed and the D-Rings won't go flat. Those 10 (Five each side) are the easiest to do with nearly no modifications required. I only had to slightly enlarge each outer hole to get the Dzus to fit and the clip backing fits over the inner panel. I don't bother with the capture washer, I just pull them completely out. I think it's easier to fit the panel back on without the fastener sticking out of it.
-
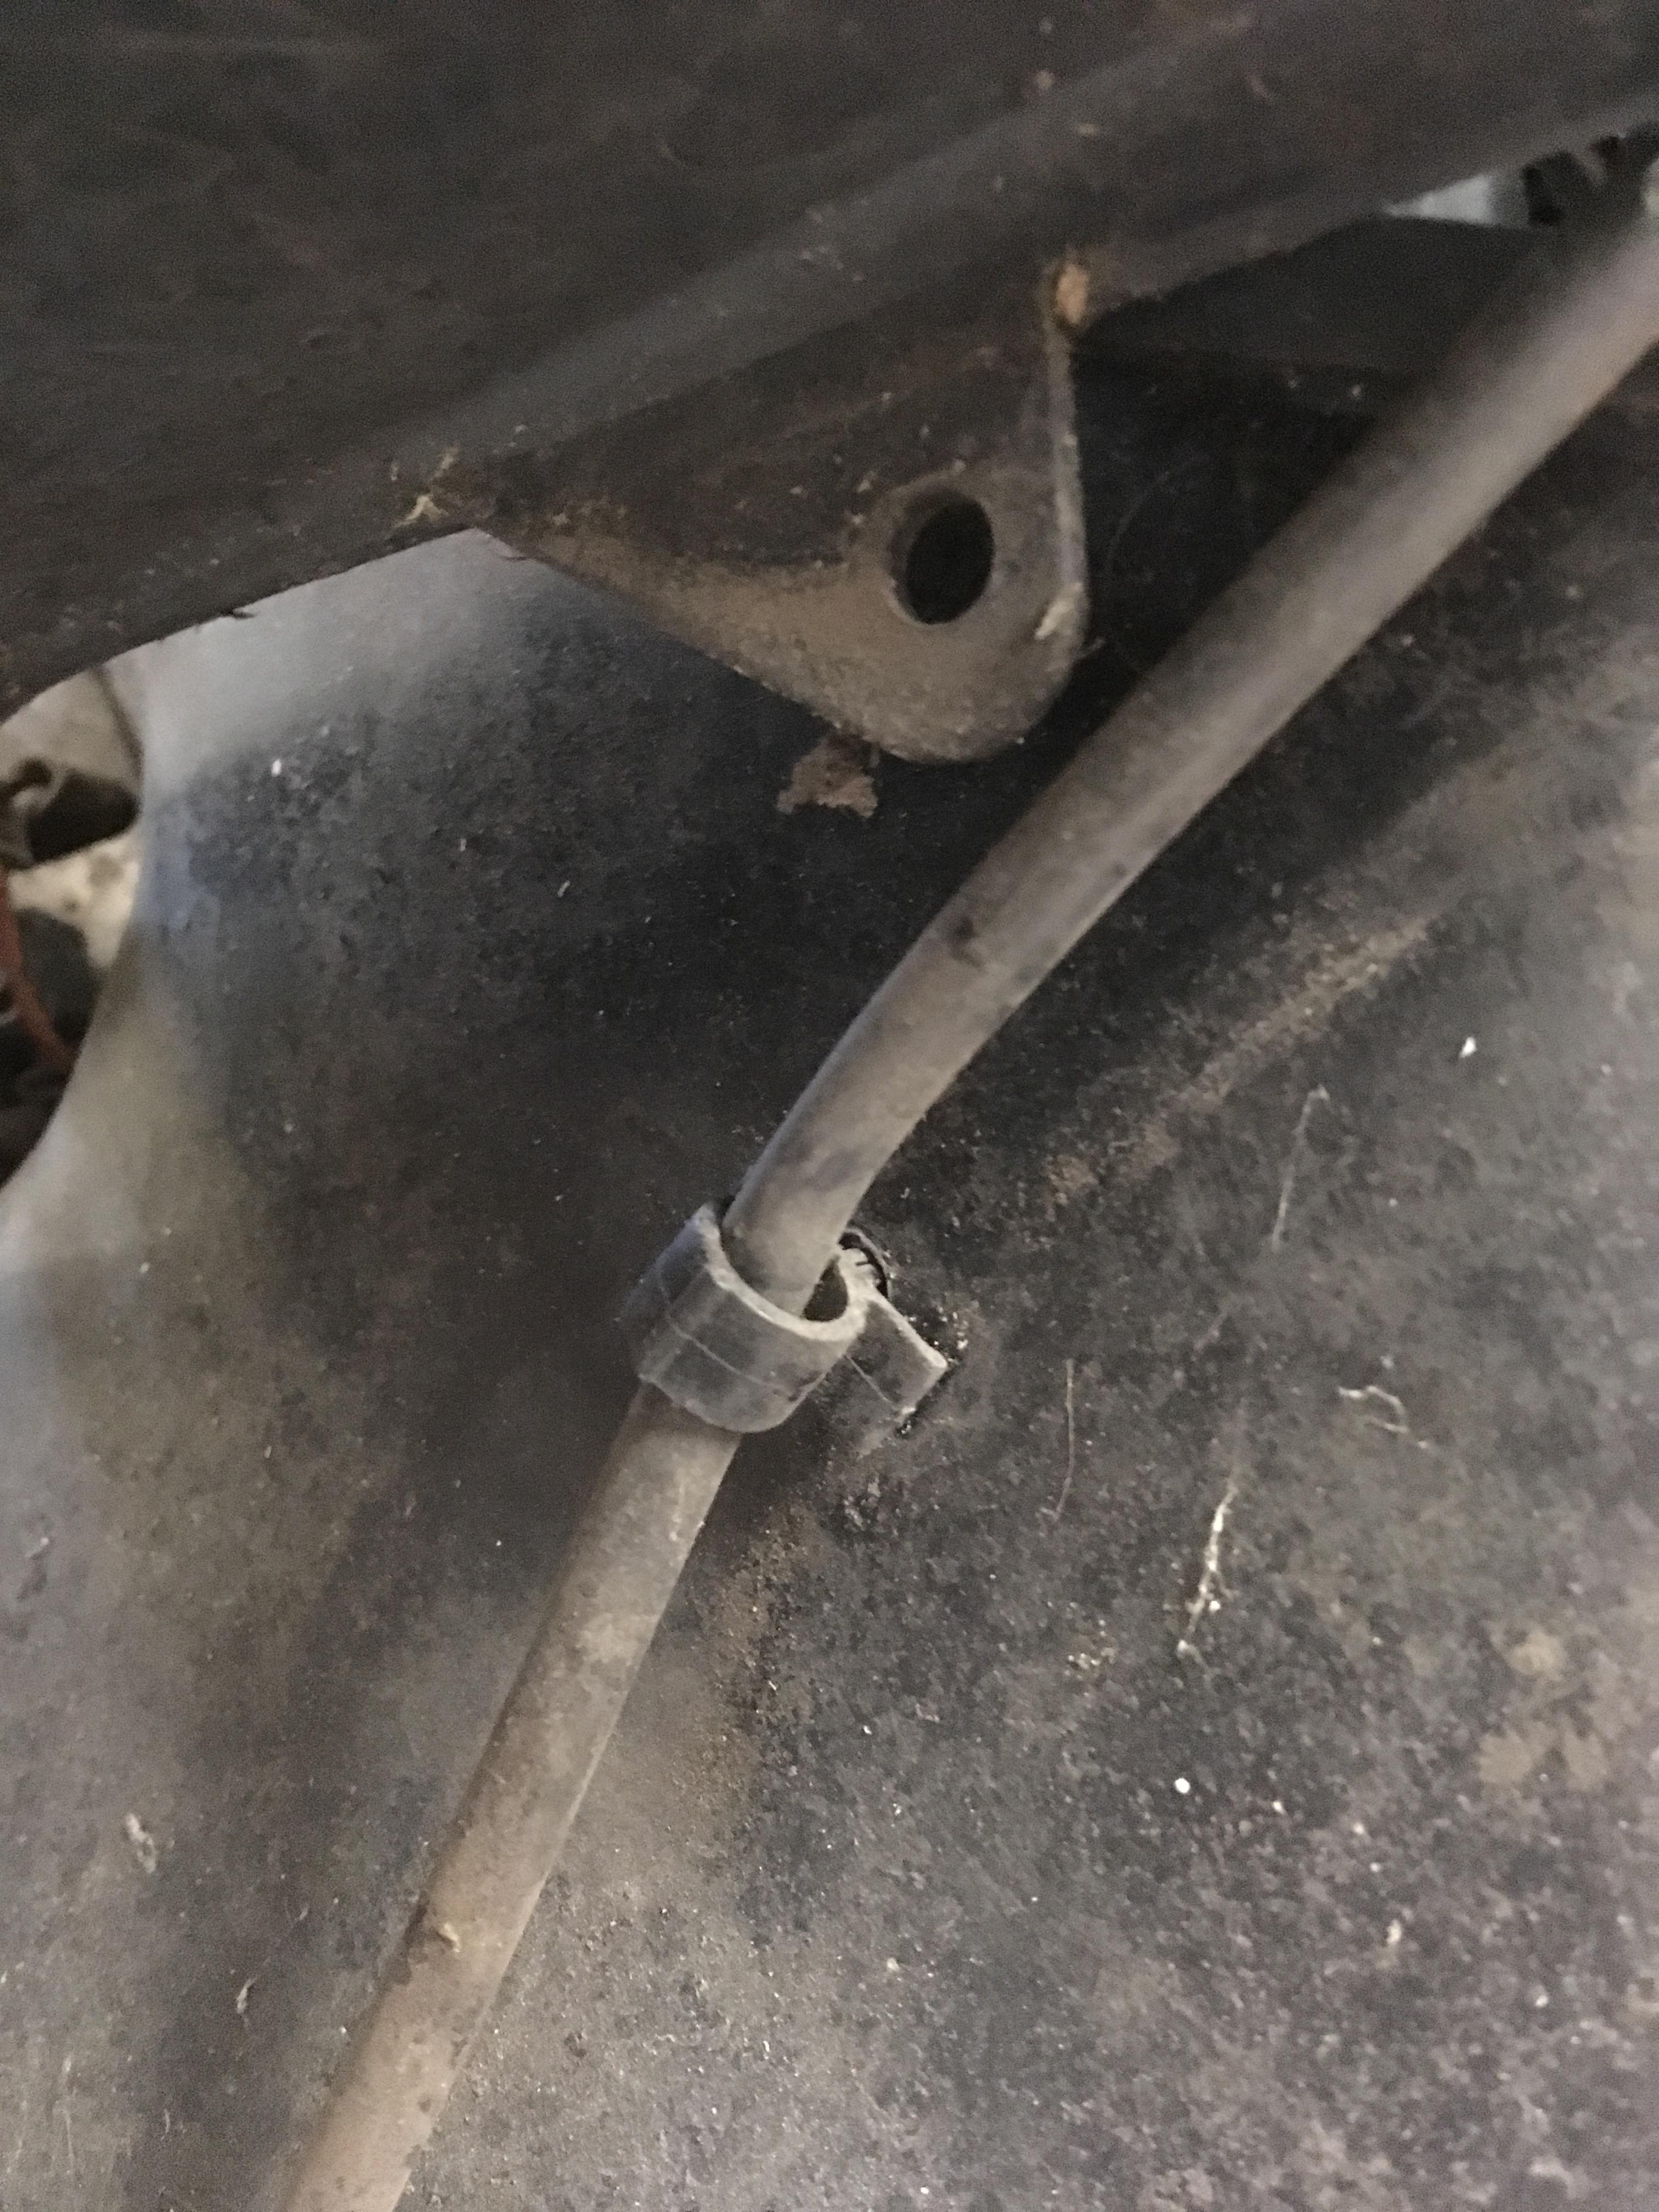
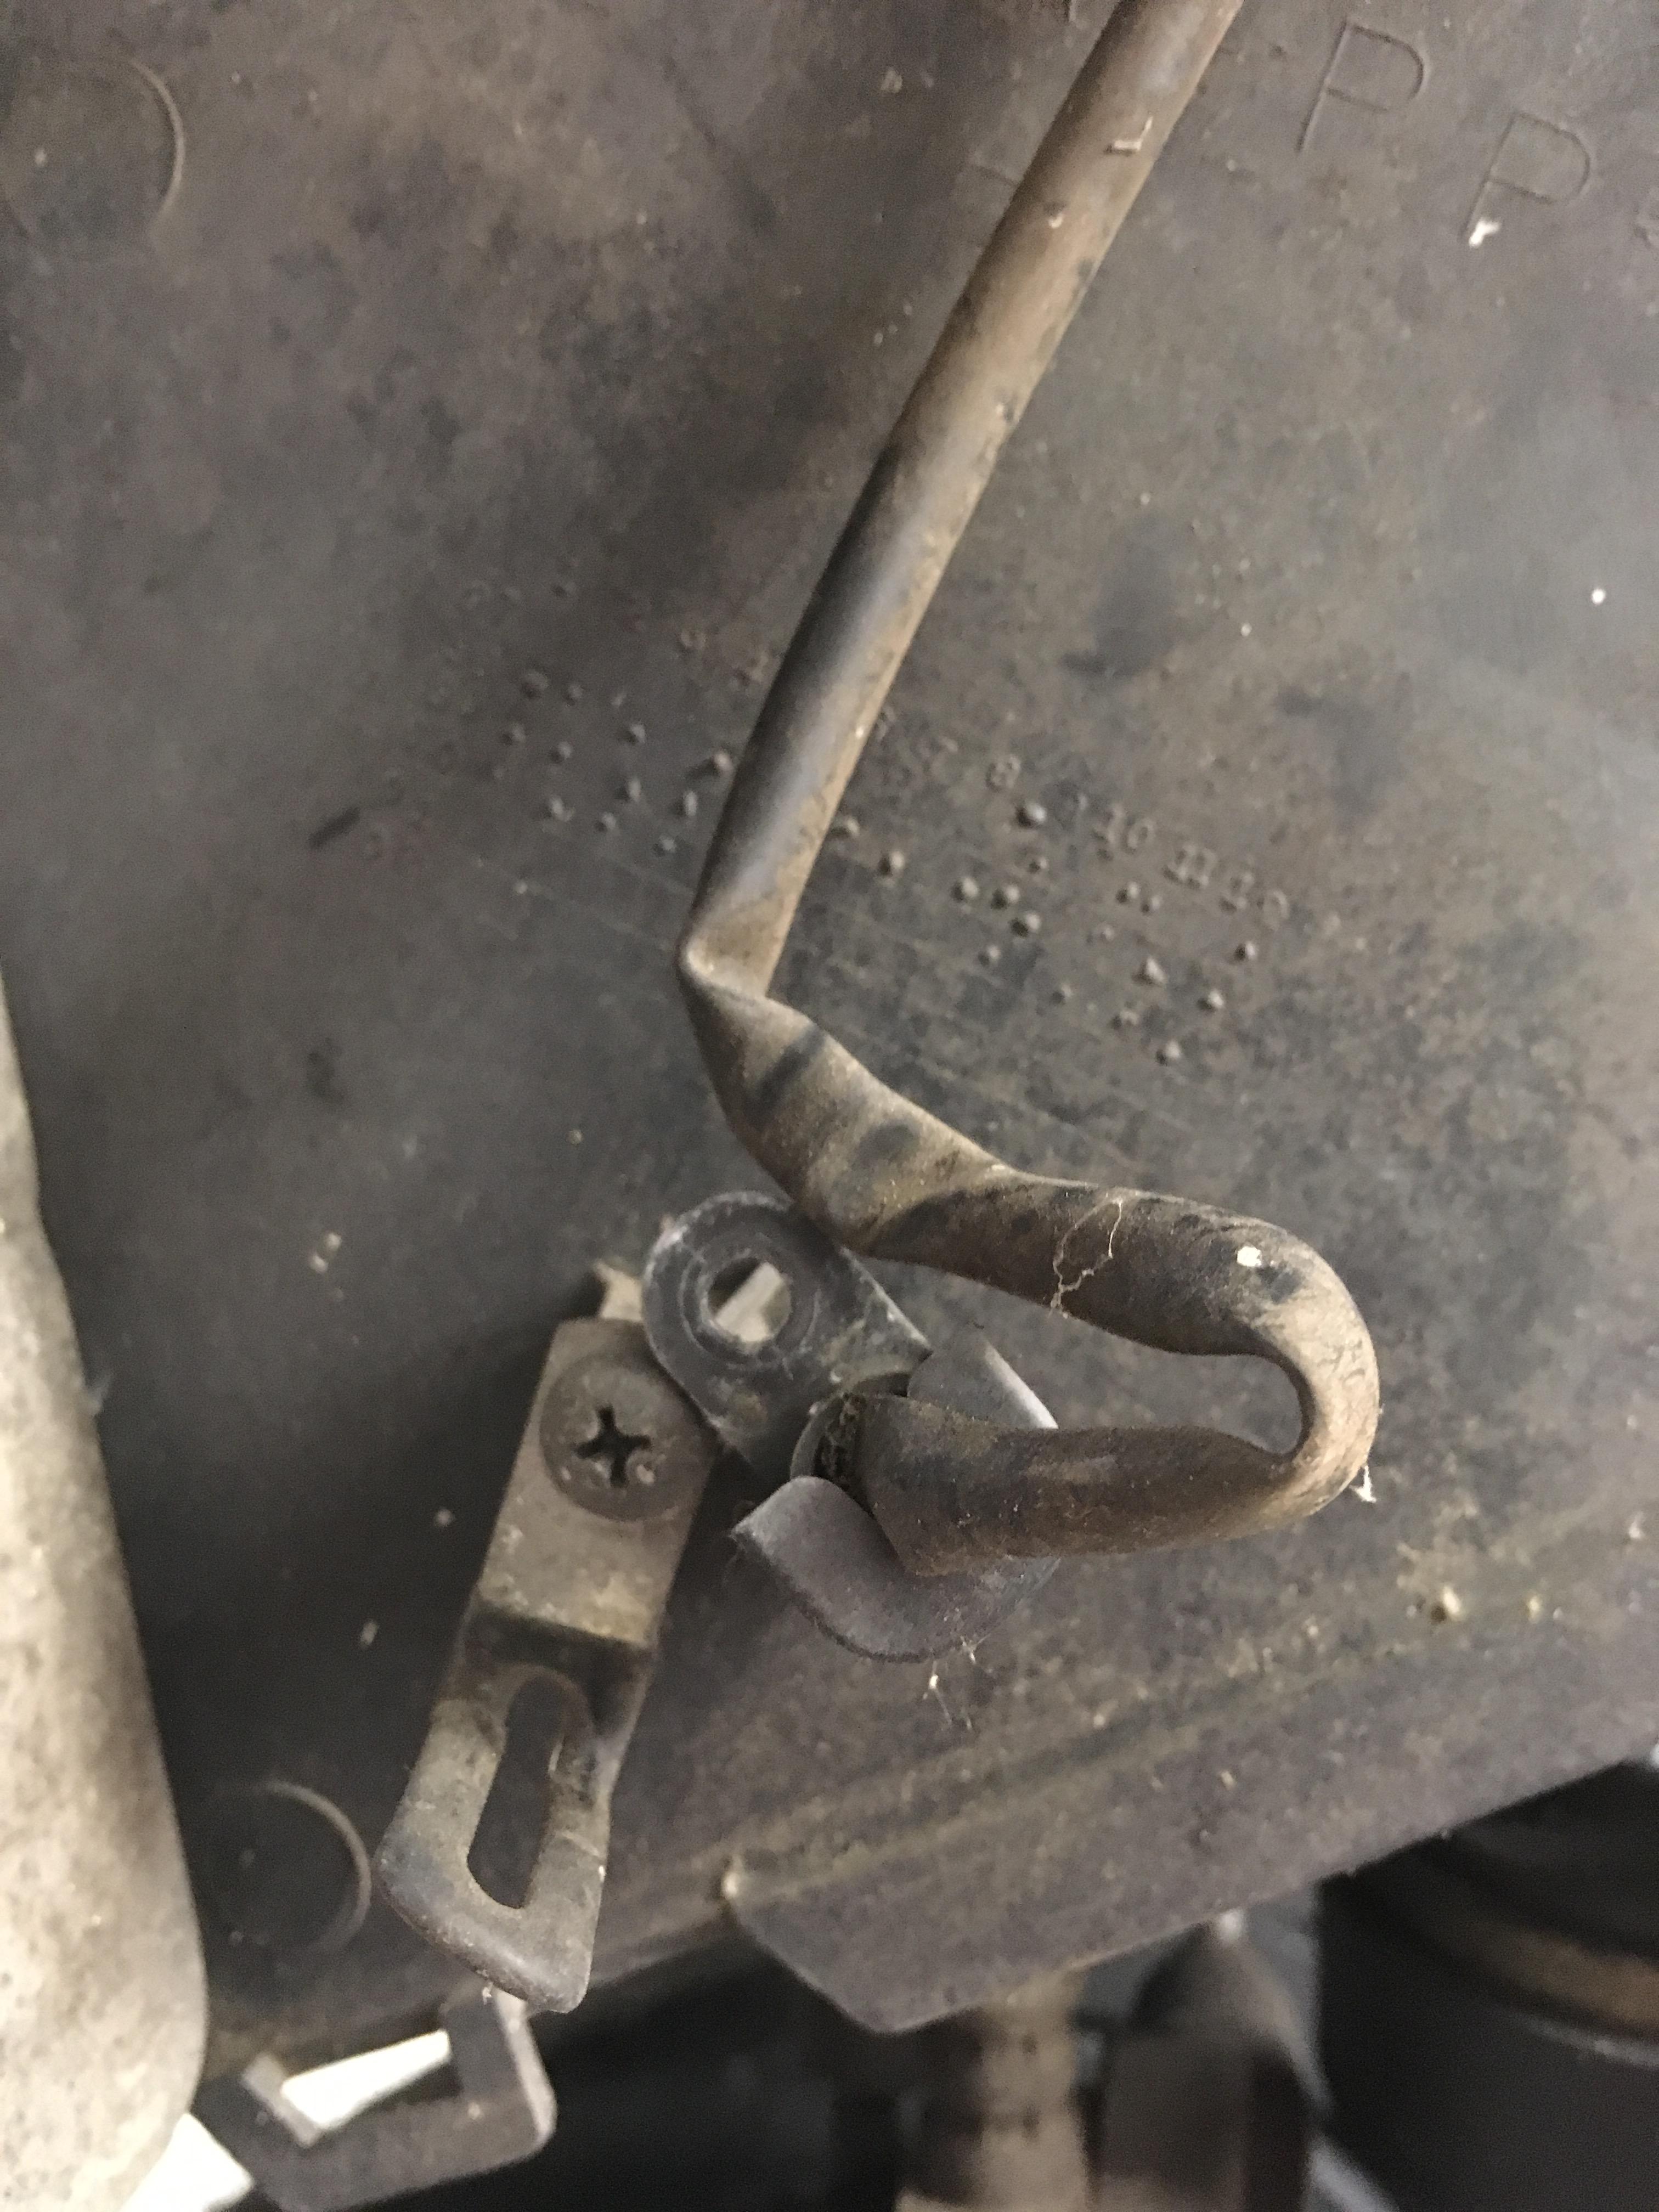
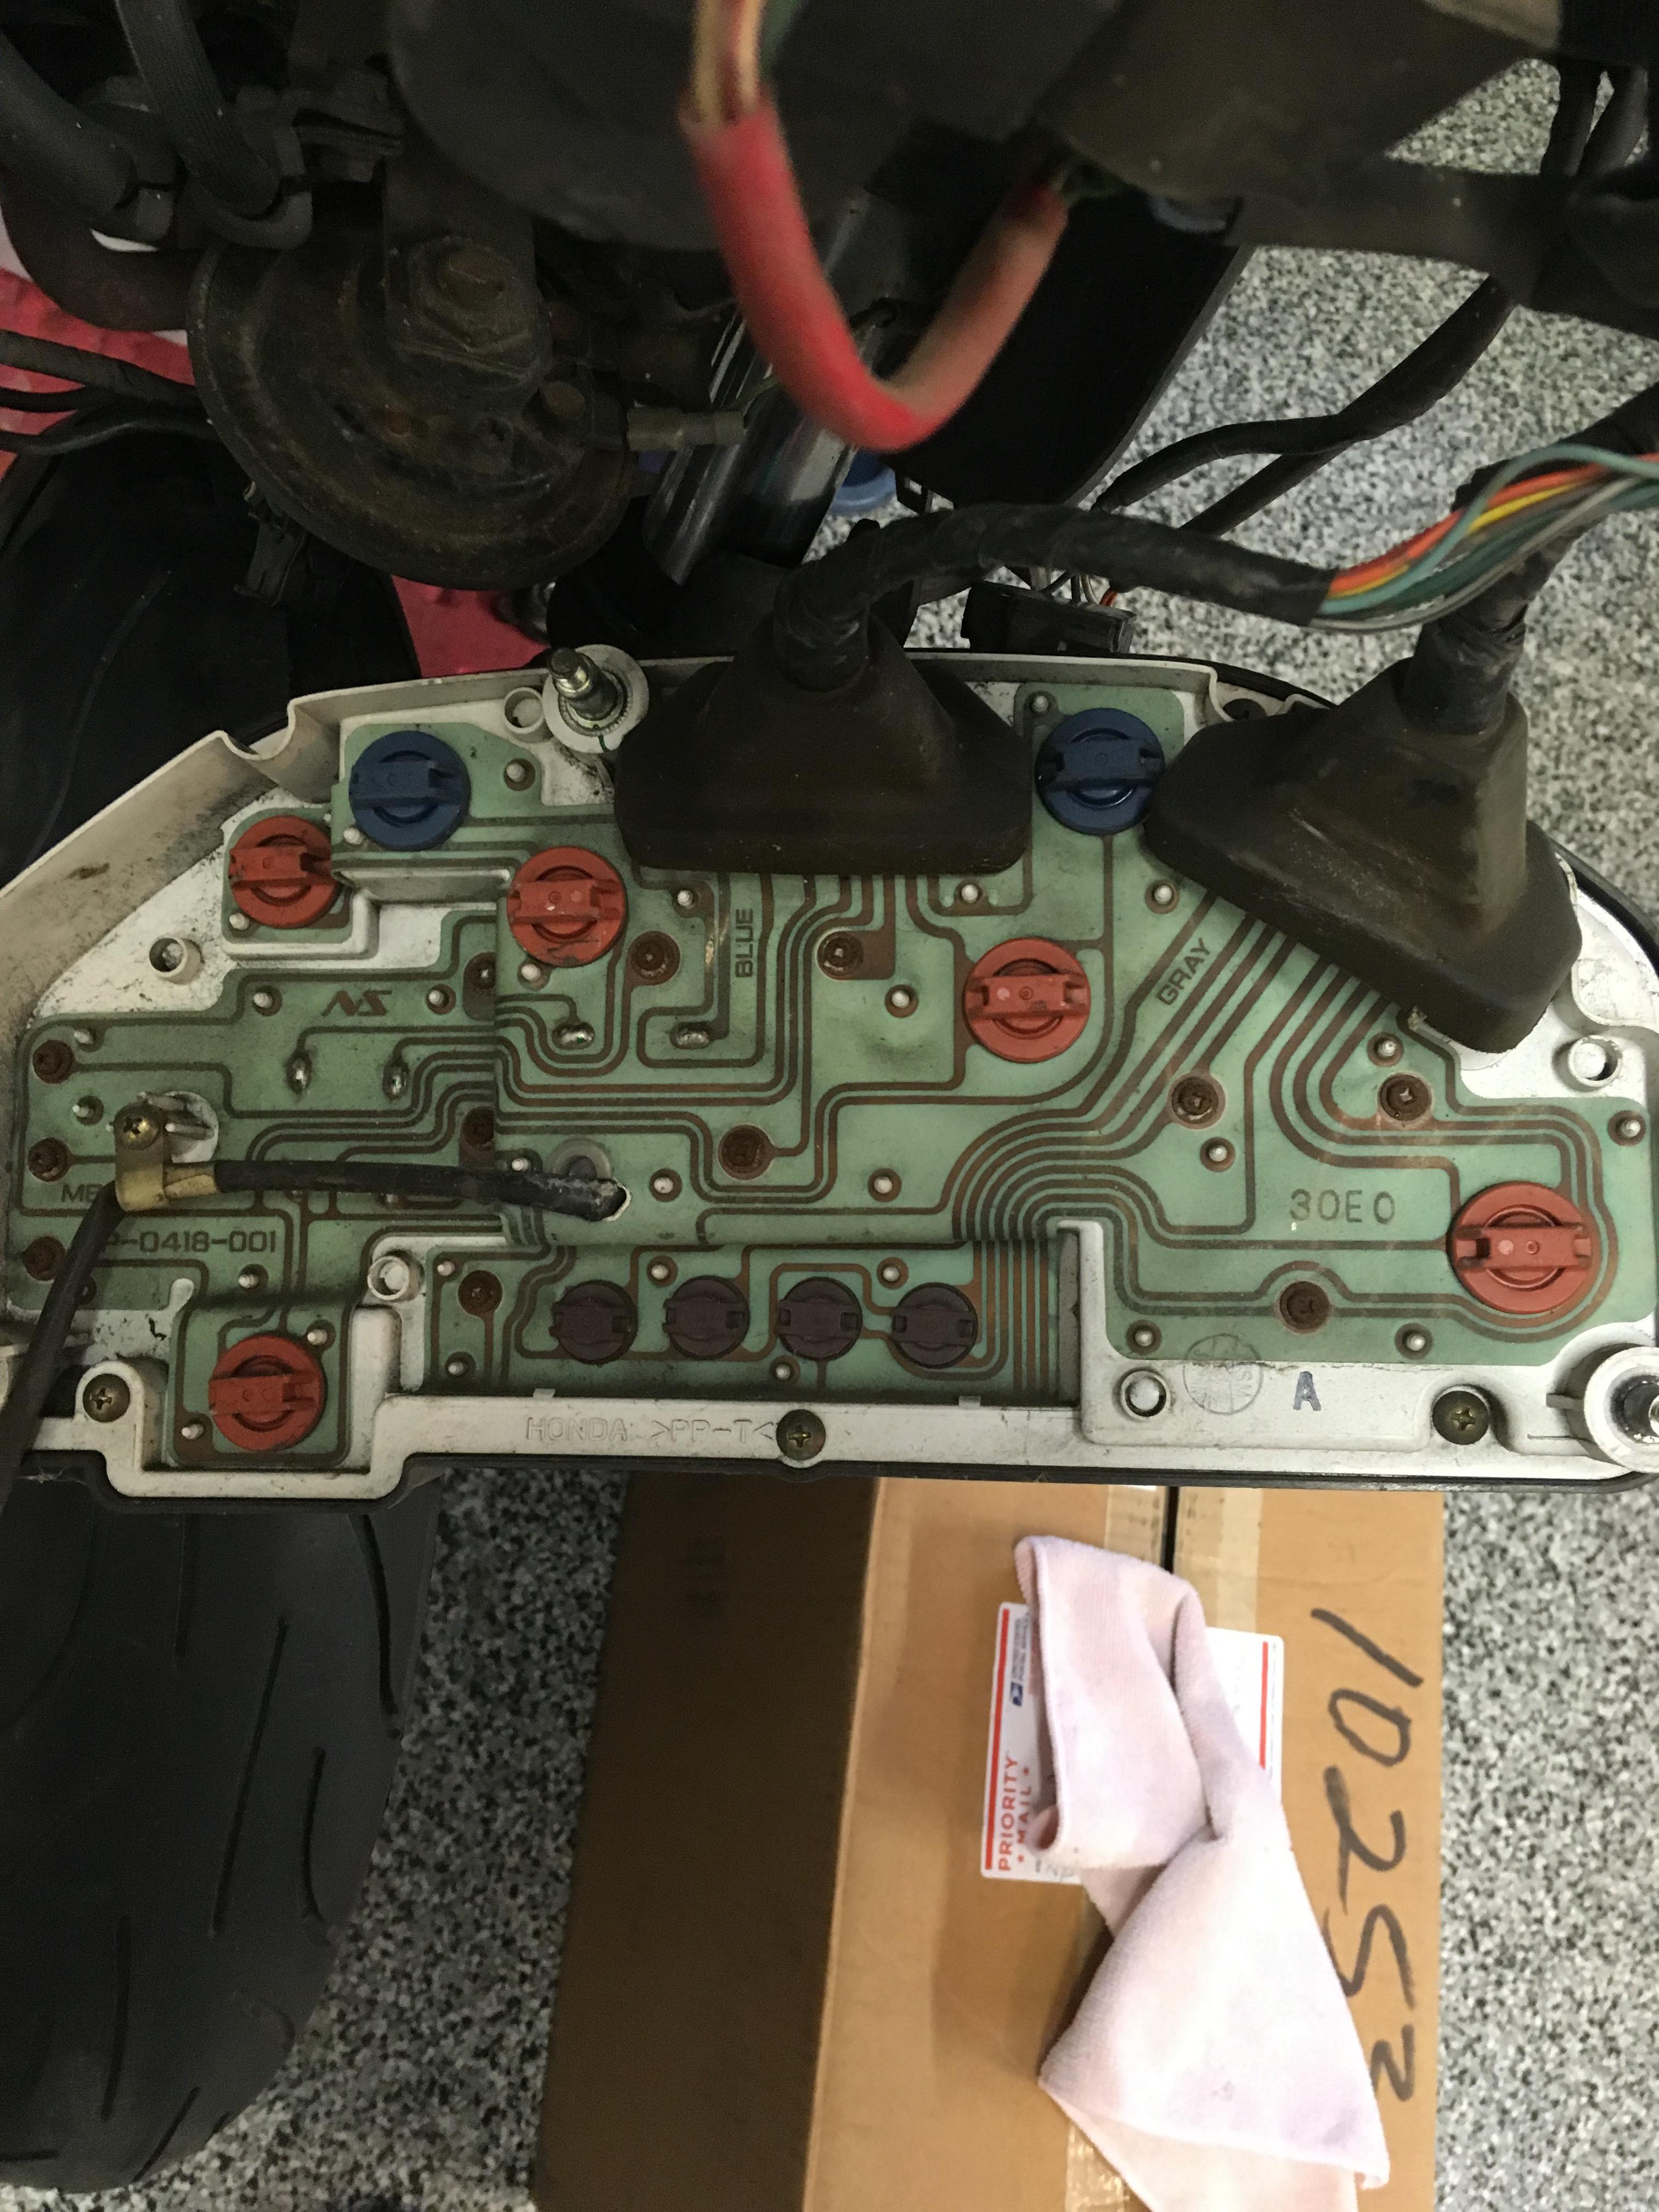
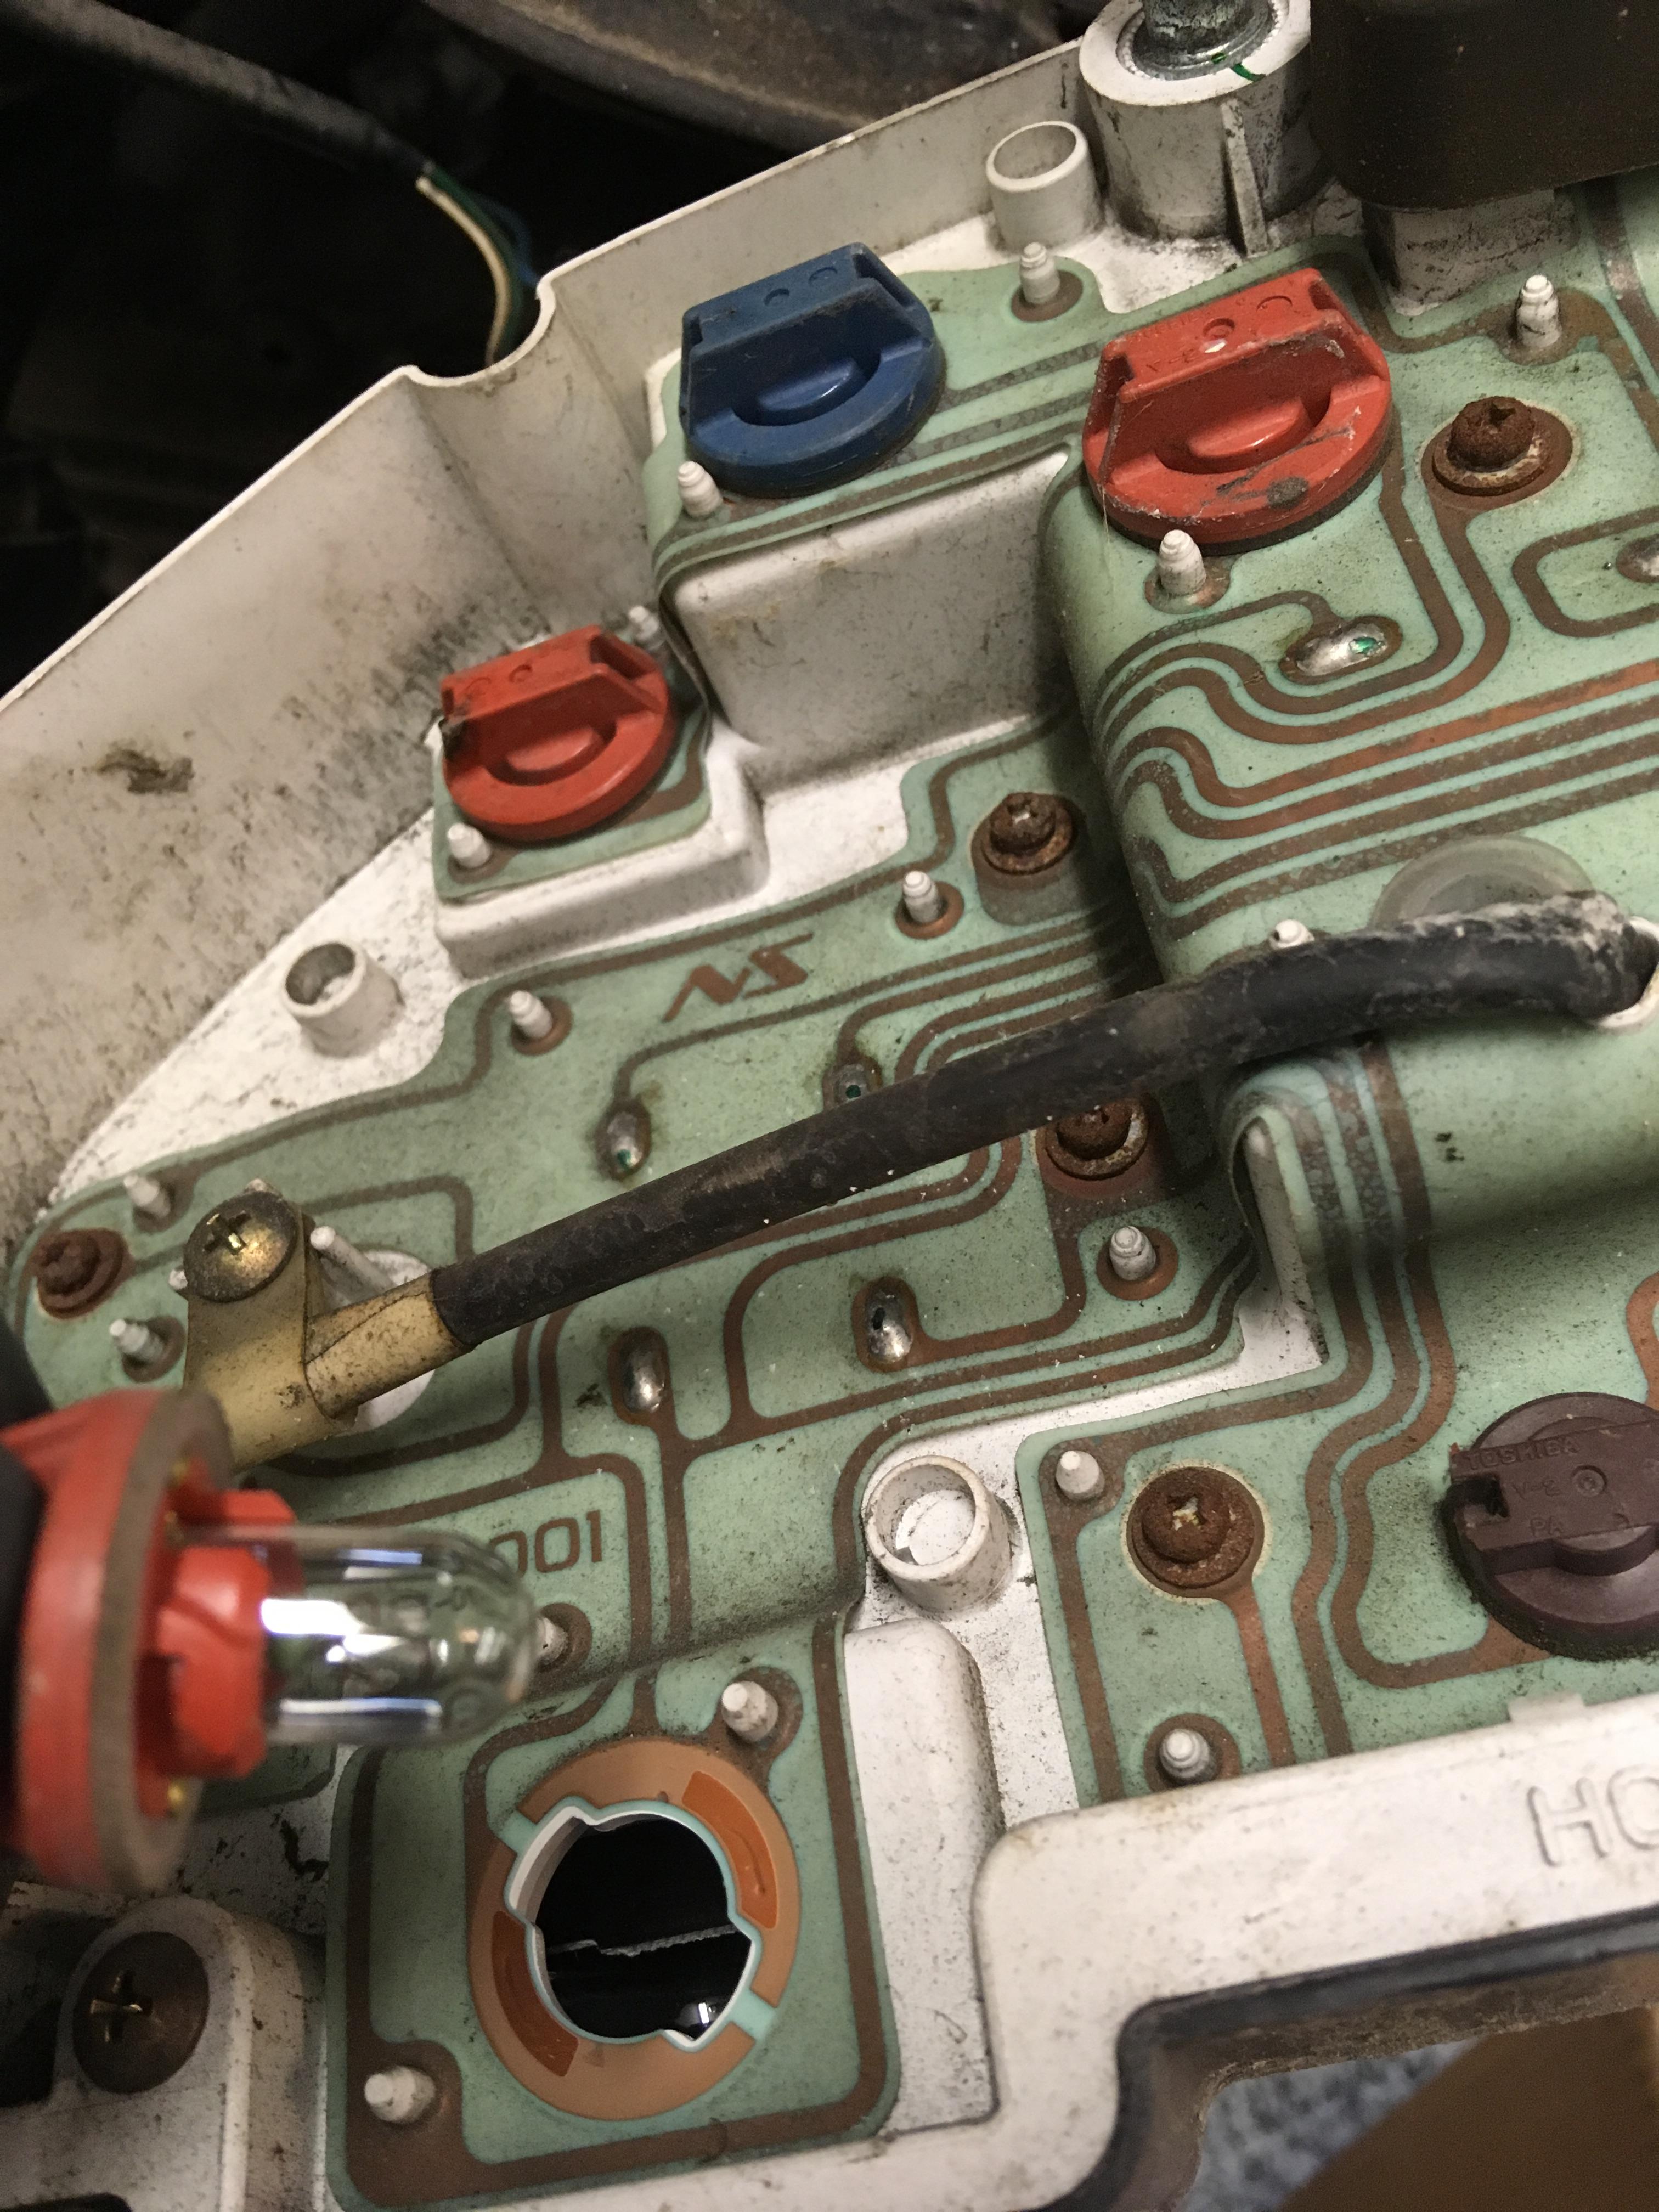
LED swap out: Remove the upper fairing and headlight, and gauge surround (or move out of the way), then remove 3 10mm nuts holding the cluster to the fairing stay. Bottom right also has a wire tab: Pop the air temp sensor wire holder out: Remove the screw holding the air temp sensor and remove sensor for slack to move the cluster: Two blue are turn signal indicators, 2 red left side top and bottom are the LCD screen, 3 red in a diagonal are the dials, and the 4 small black are the "idiot" lights: Quarter turn twist and they pull out: Replace with appropriate color LED and replace the bulb holder. Most LEDs are polarity specific, so test each one before moving on. If you reinstall and it doesn't light up turn the bulb 180 degrees and retry. No need to remove the LED bulb from the holder, just spin the entire thing 180: Put it all back together and make sure there aren't any dark spots.

-
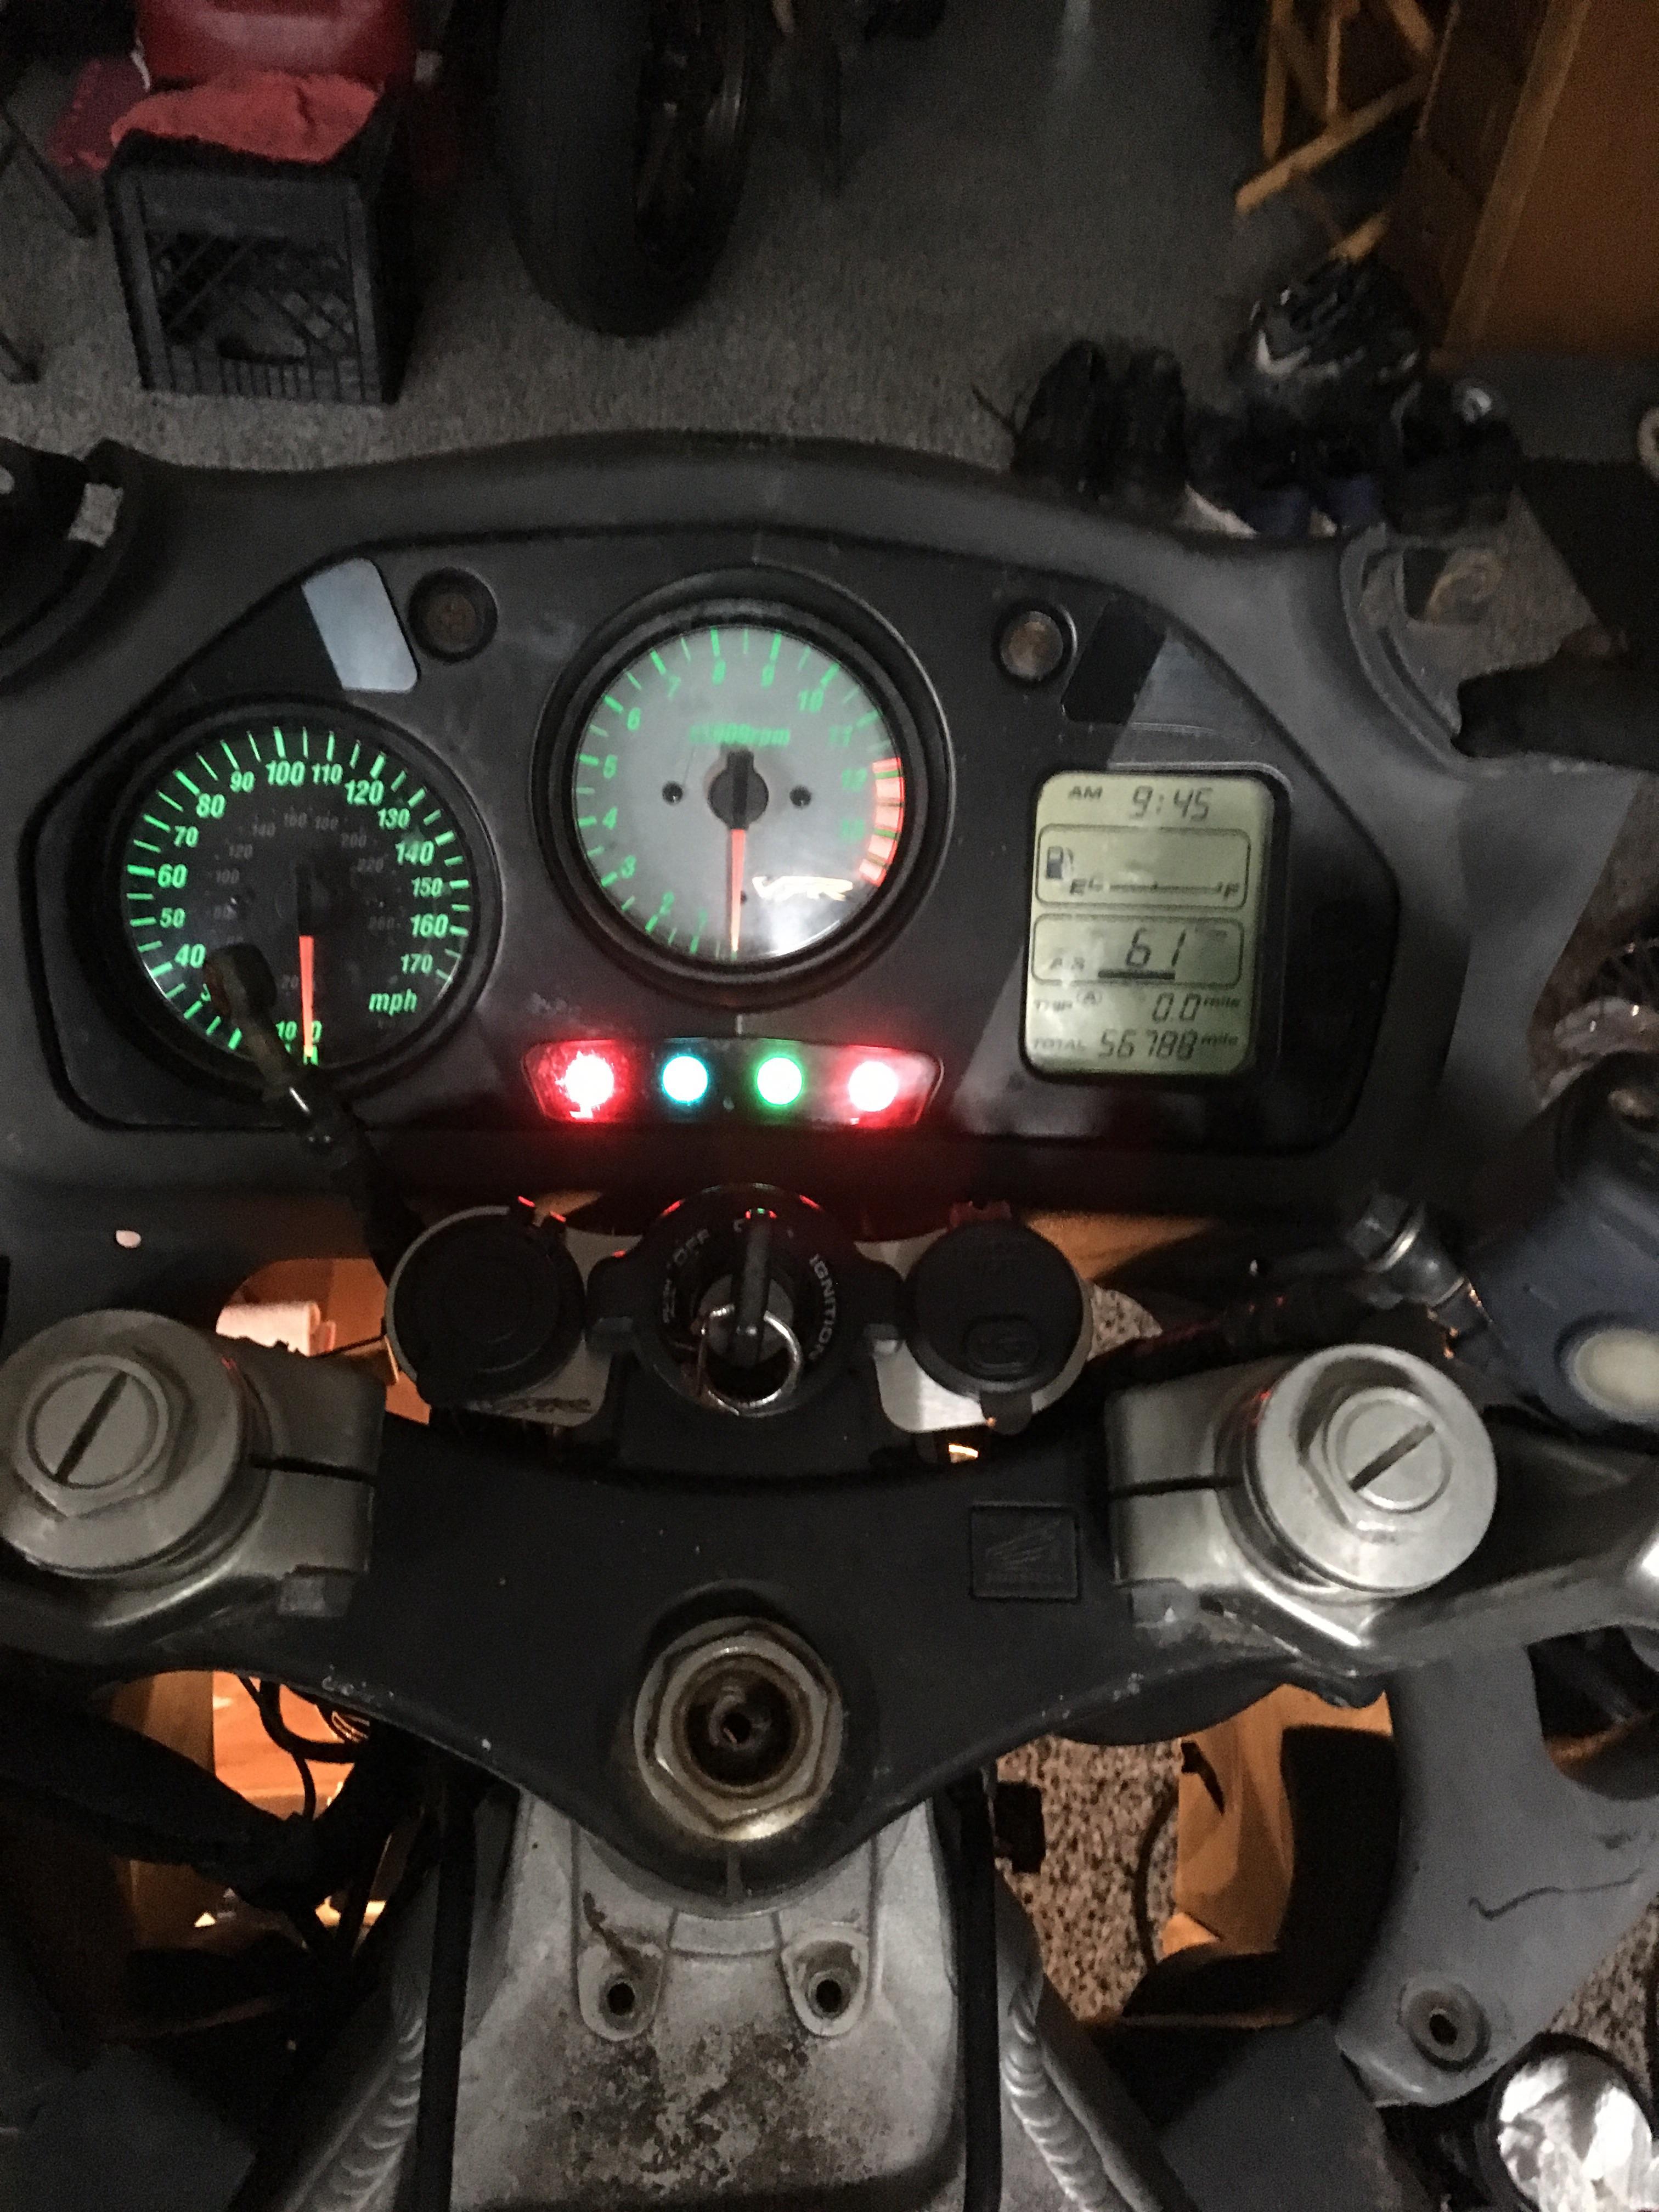
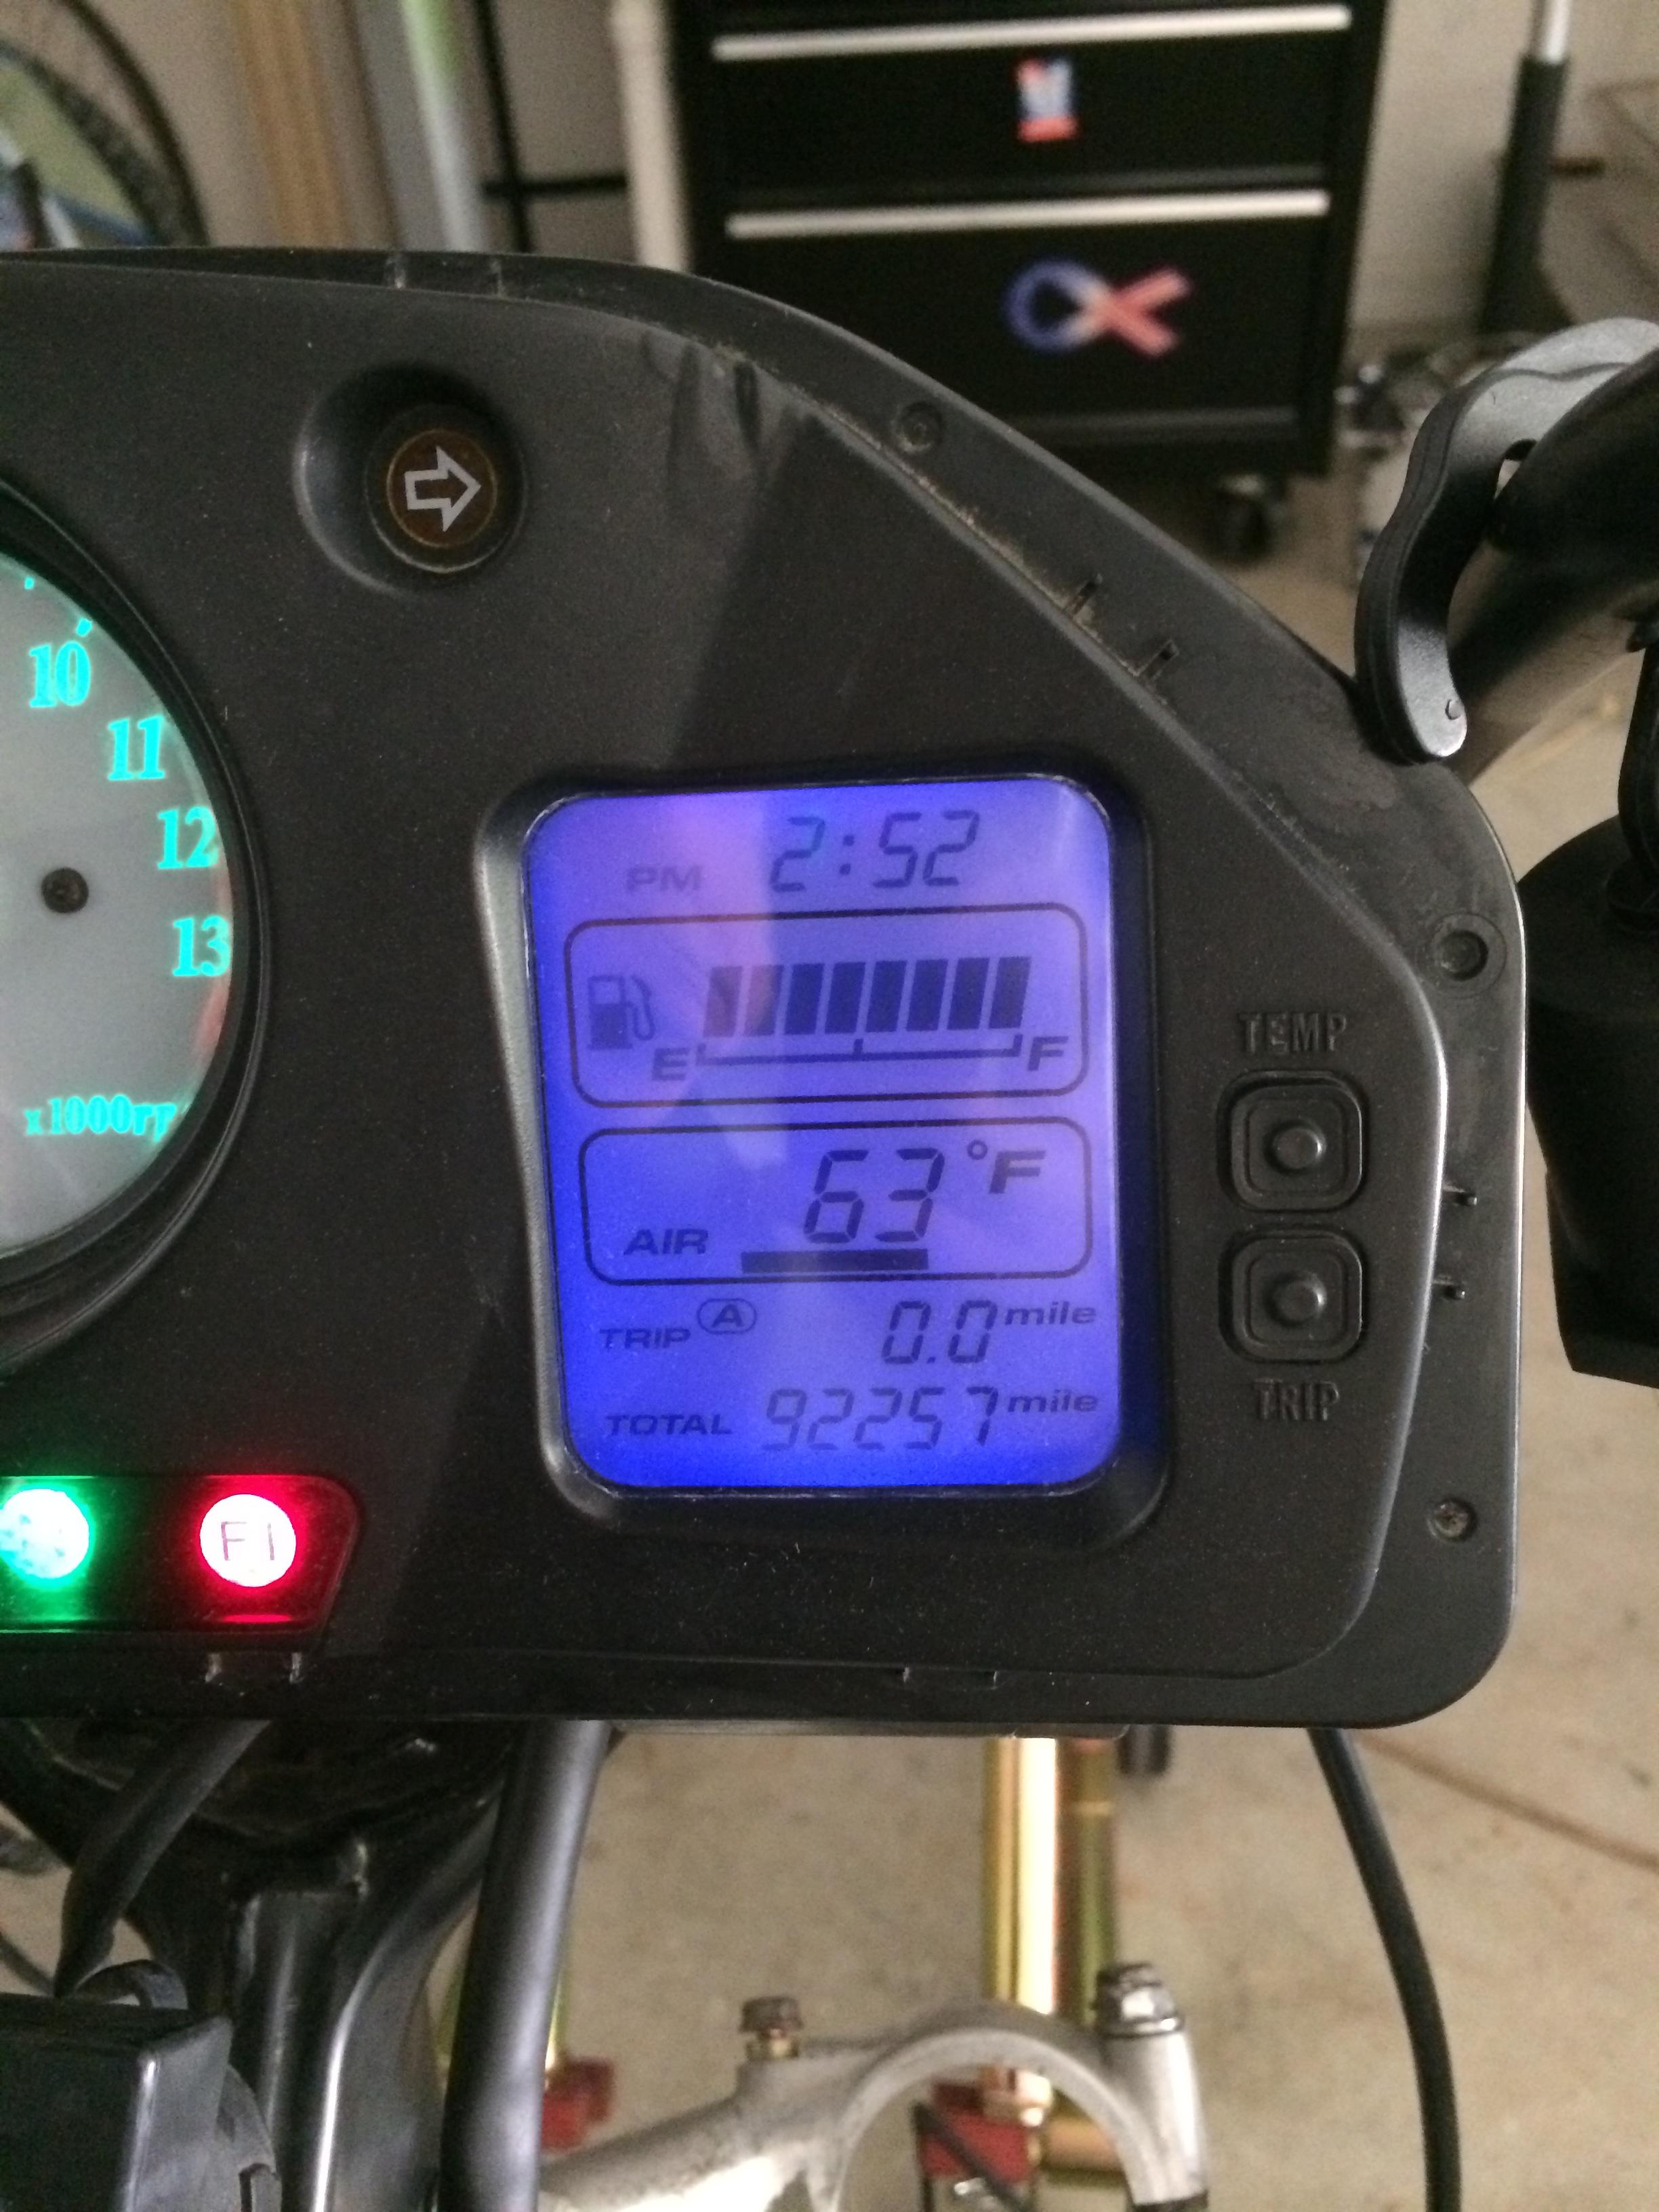
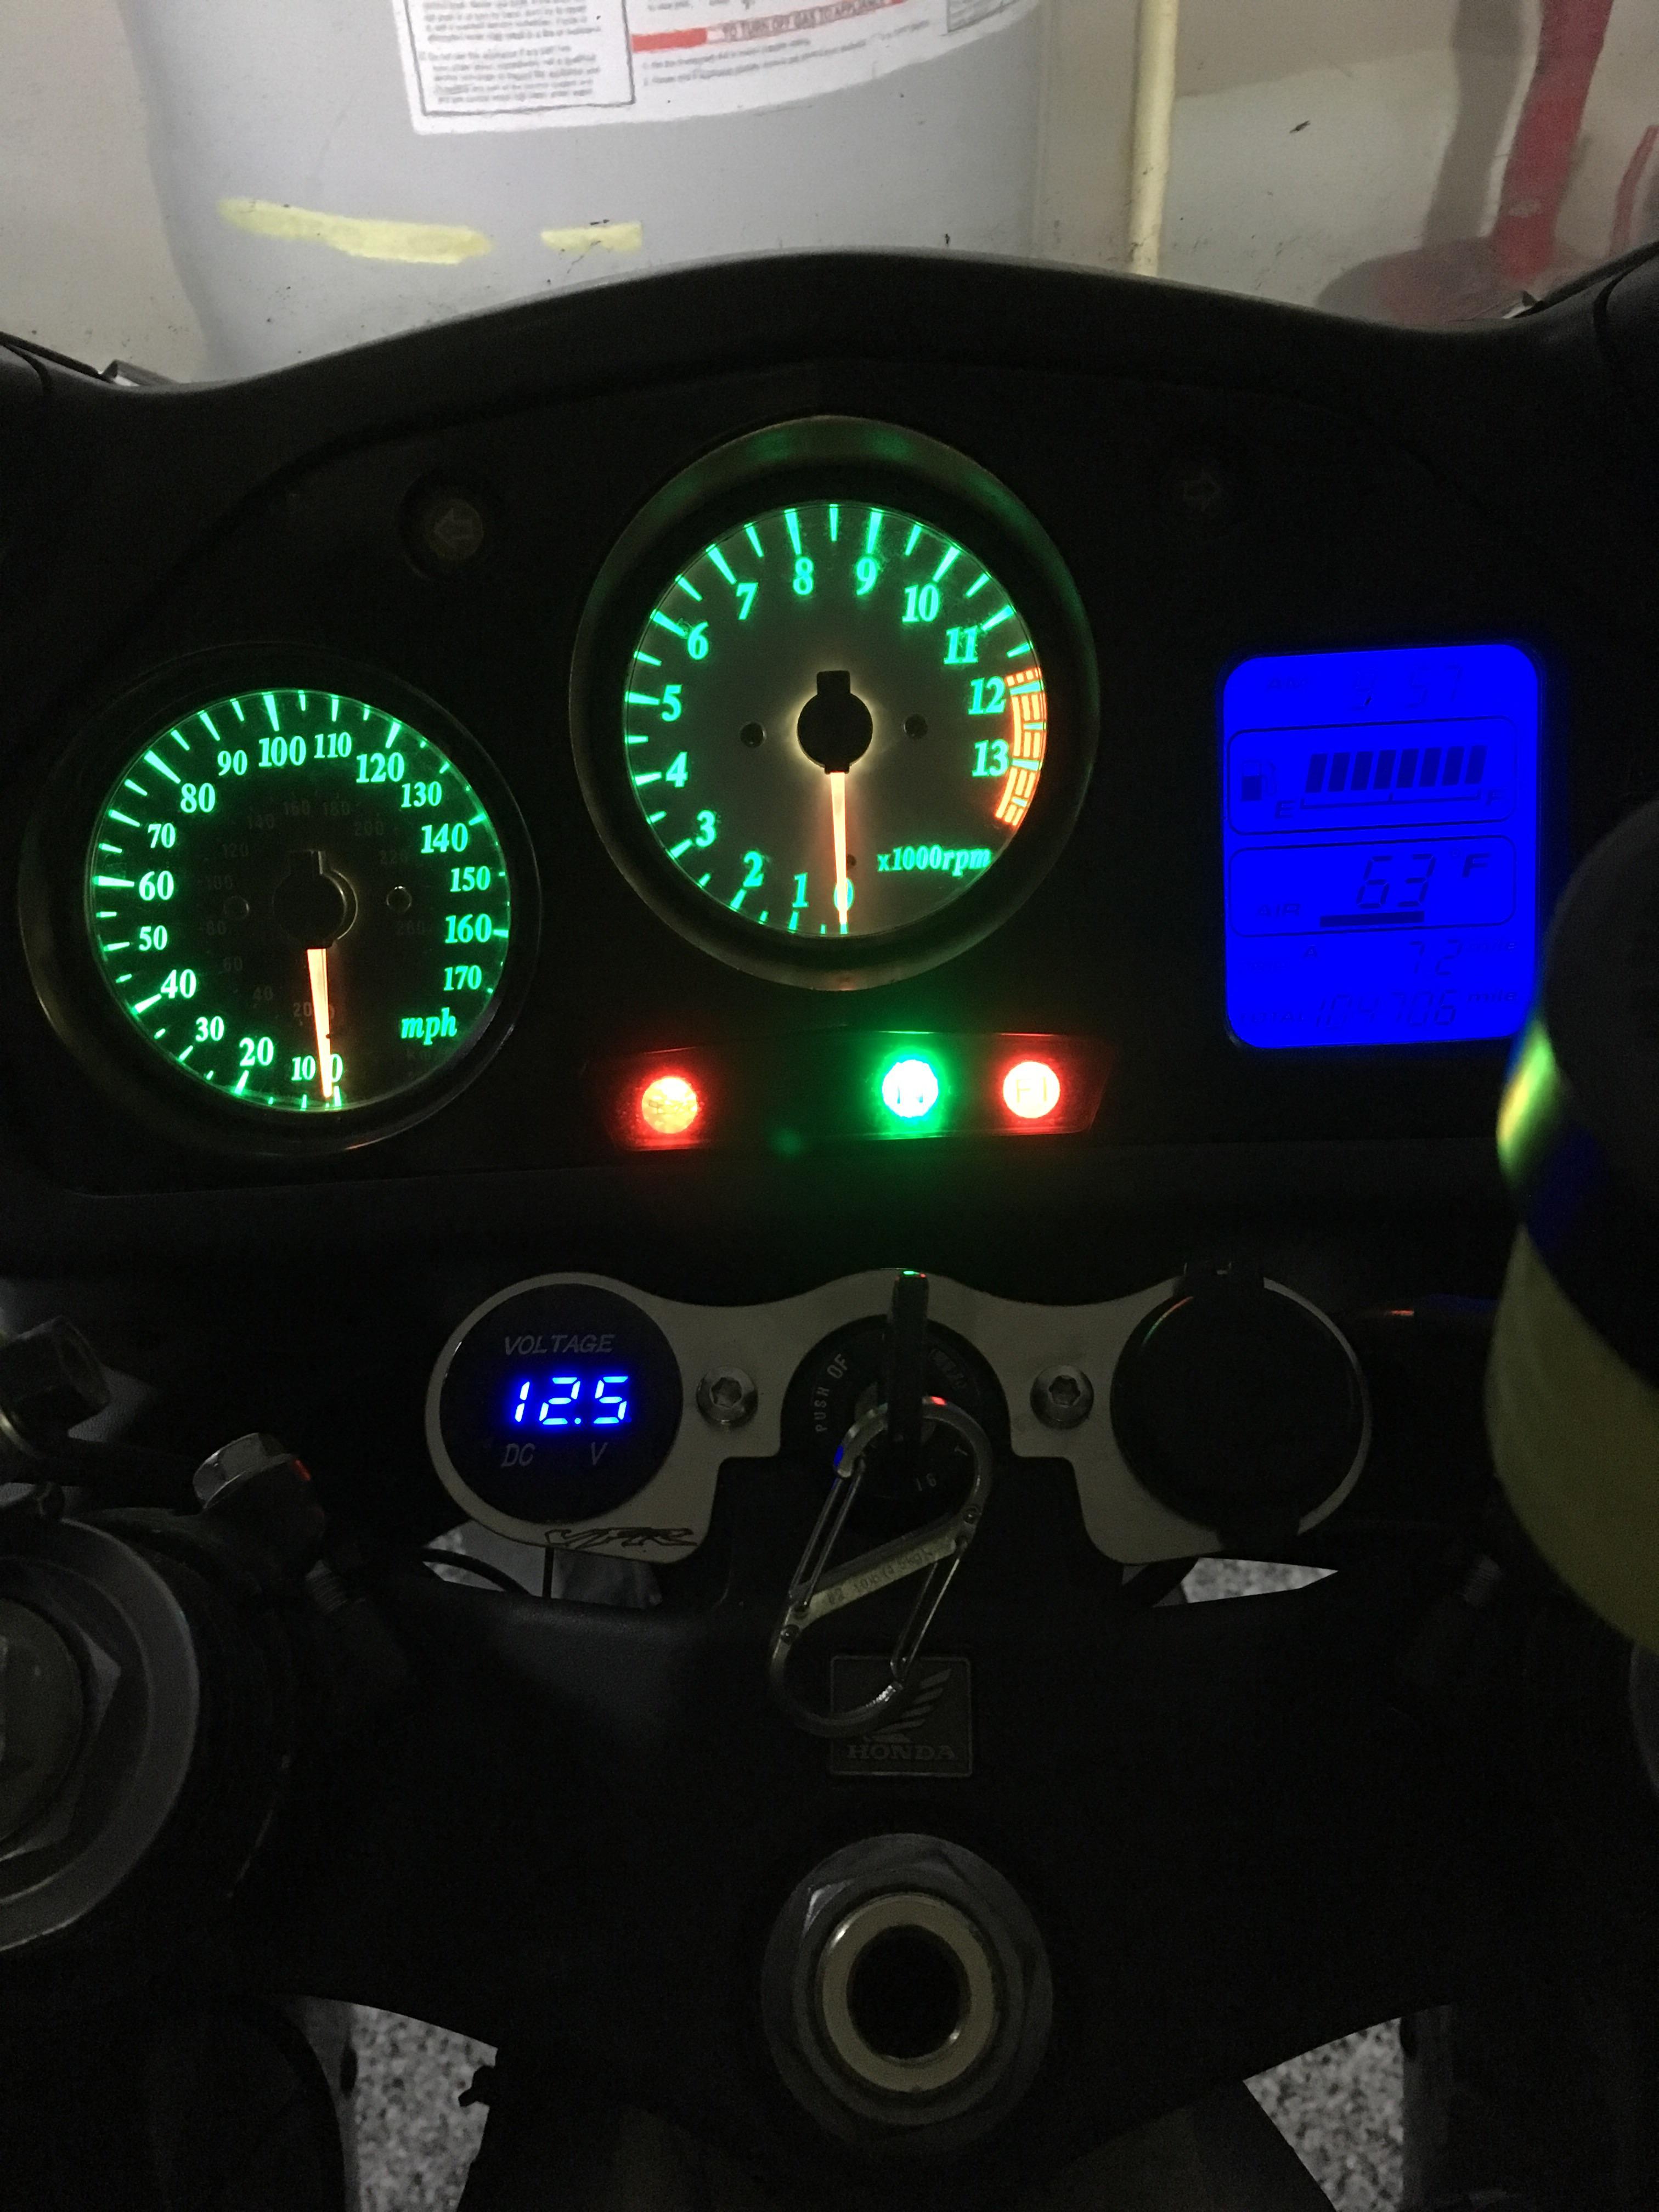
It's really simple to swap out the incandescent bulbs for LEDs. Here is the list that you need (Fifth Gen Only): Bulb Size Color How Many Where it Goes: 194 Amber X2 Turn Signal Indicators 194 Blue X2 LCD Screen 194 White X3 Dials 74 Red X1 Oil Light 74 Blue X1 High Beams 74 Green X1 Neutral From What I've read LEDs work most effectively behind the same colored lens as the bulb. That's why I matched each lens with the like colored LED. The LCD screen actually has a blue filter behind it, that's why blue bulbs. I had a spare cluster a few years ago and experimented with taking that filter out. While I was able to remove it, I wasn't able to reassemble the LCD and have it work again. I know at least one other VFRD'er was able to do it, and put red LEDs behind it. I think others have used red LEDs with the blue filter in place, but I think it's pretty washed out (and I'm not really into red anyway). I think there might be LEDs out there that will work in the Fi Light, but I'm not sure. I guess it needs some sort of resistor (I'm not great with electrickery) because standard LED bulbs will be on at half power when the light should be off, and full power when it should be on. So I left the incandescent bulb in there. Literally the only incandescent bulb on my entire bike. (Not my) 2000 taken today with standard incandescent: My '99 taken in 2014 (Post Crash Rebuild) with LEDs: Super Blue LCD Screen: My ‘99 today, same garage, same lighting as 1st pic. (High beam indicator works, I just didn't have it on in either pic)
-
Or screw-drive...LOL
-
How I upgraded my rectifier to a Sh847
KevCarver replied to wiremanjon's topic in Sixth Generation VFR's
Nice work! I like those breakers better than fuse holders. -
I dug out my leftover silicone hose yesterday and measured. The OD of the 3.5 is 12mm! Yeah, it's pretty thick. Maybe you can find thinner, or maybe it has to be that thick to not collapse? I have (sorry for not converting) just under 4' remaining, I think about 44". Using about 19.5" for the radiator overflow means I used just over 4.5' for only the throttle bodies. The two 8mm hoses are between 7" - 8", and if I hadn't cut the 2 small bends out of the remainder I could do another 2 long hoses. It was probably 3' to start out. A meter is longer than a yard, so 50cm would do you on that.
-
How many KMs, Just curious? When I did all that under the airbox stuff I was at around 166,550 (103,490 miles).
-
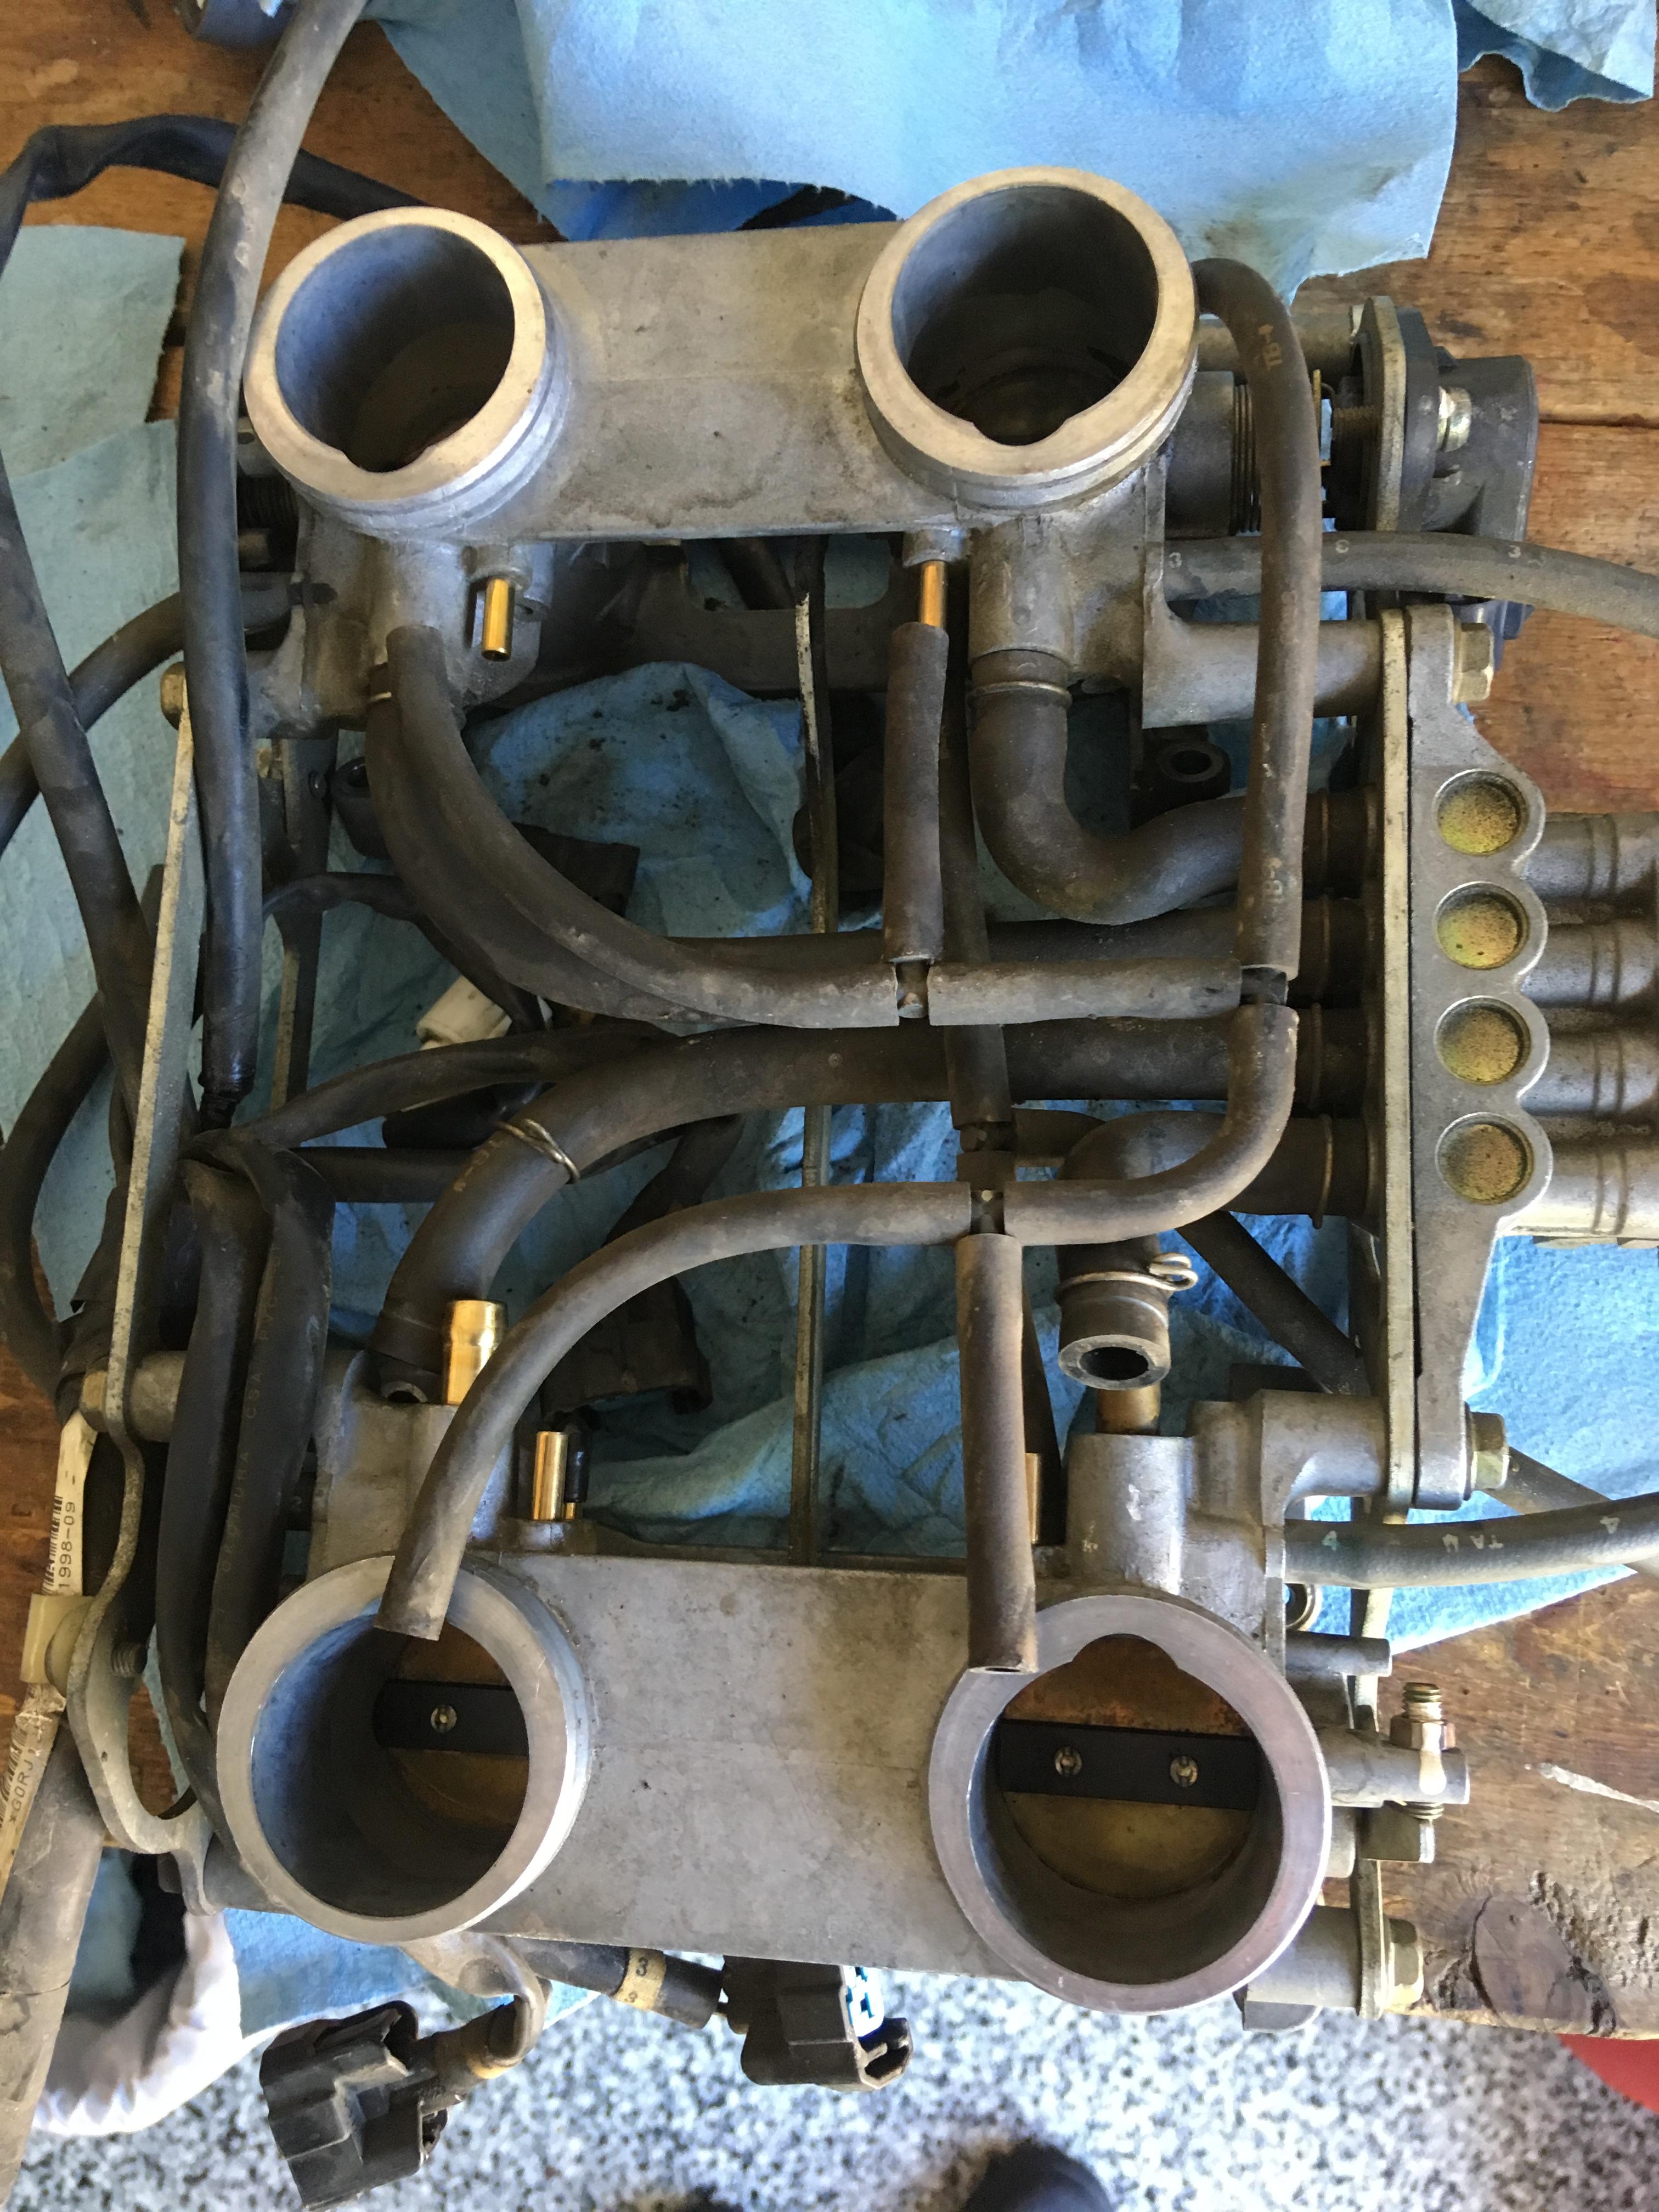
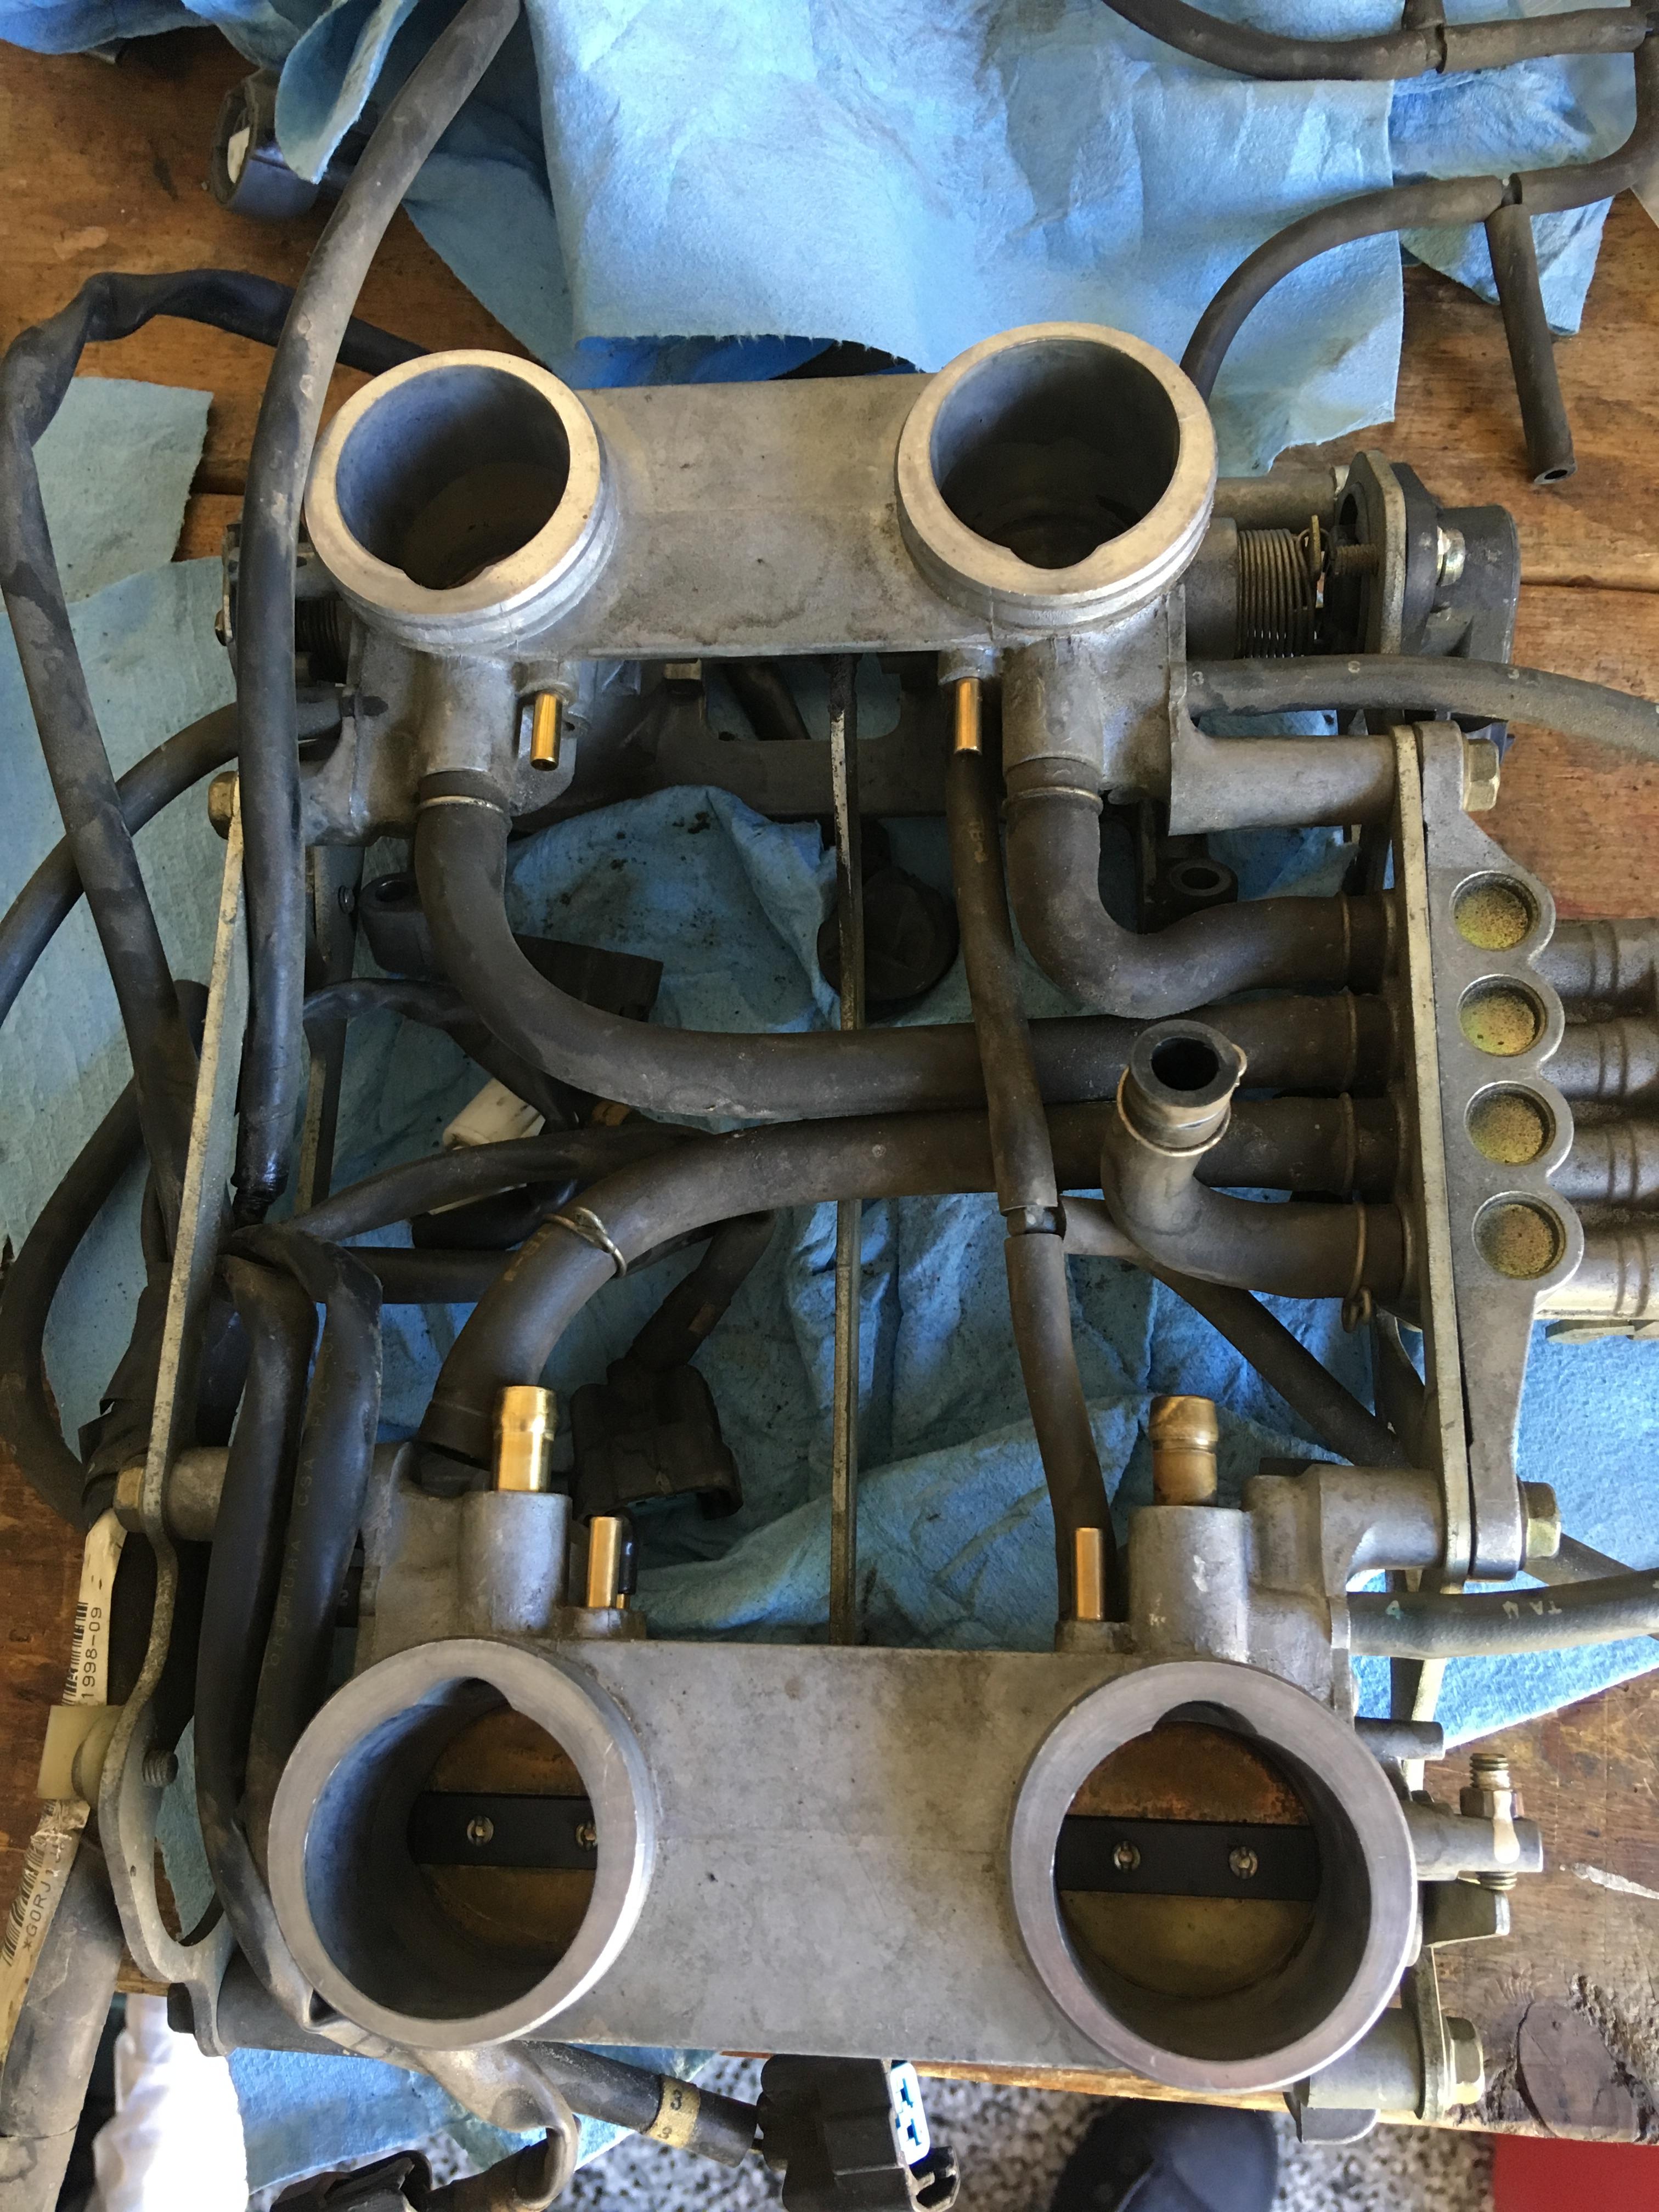
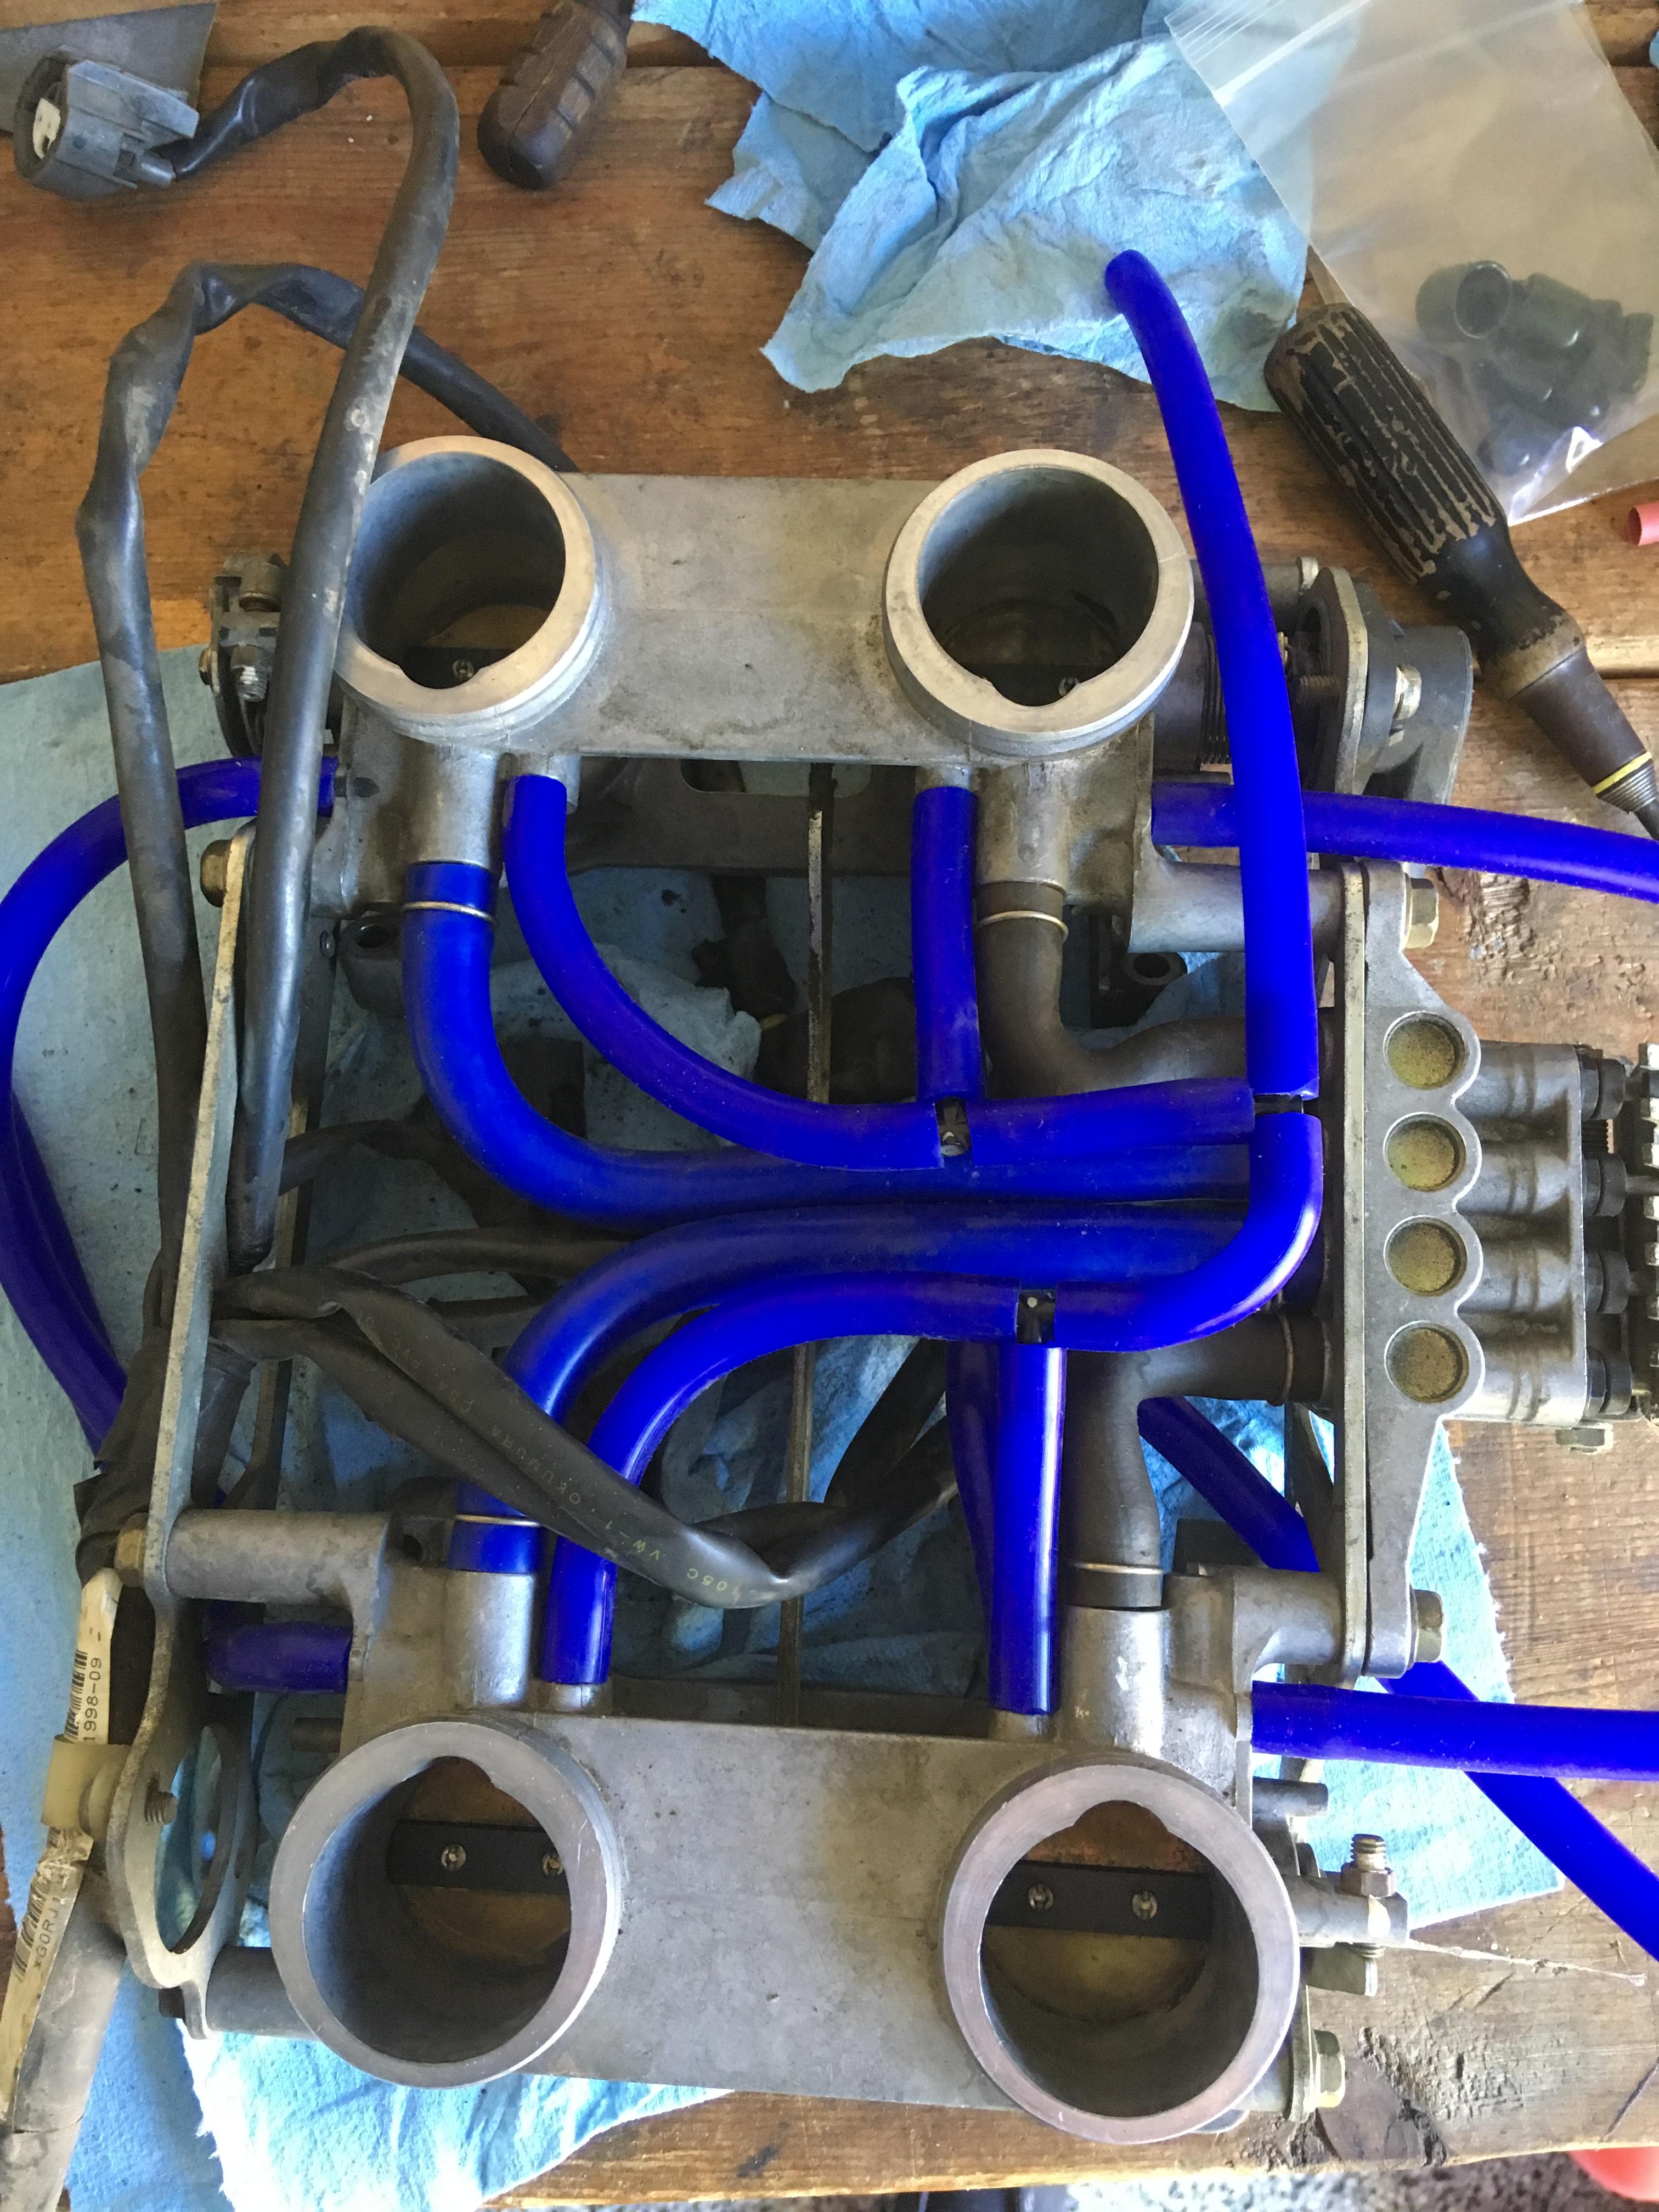
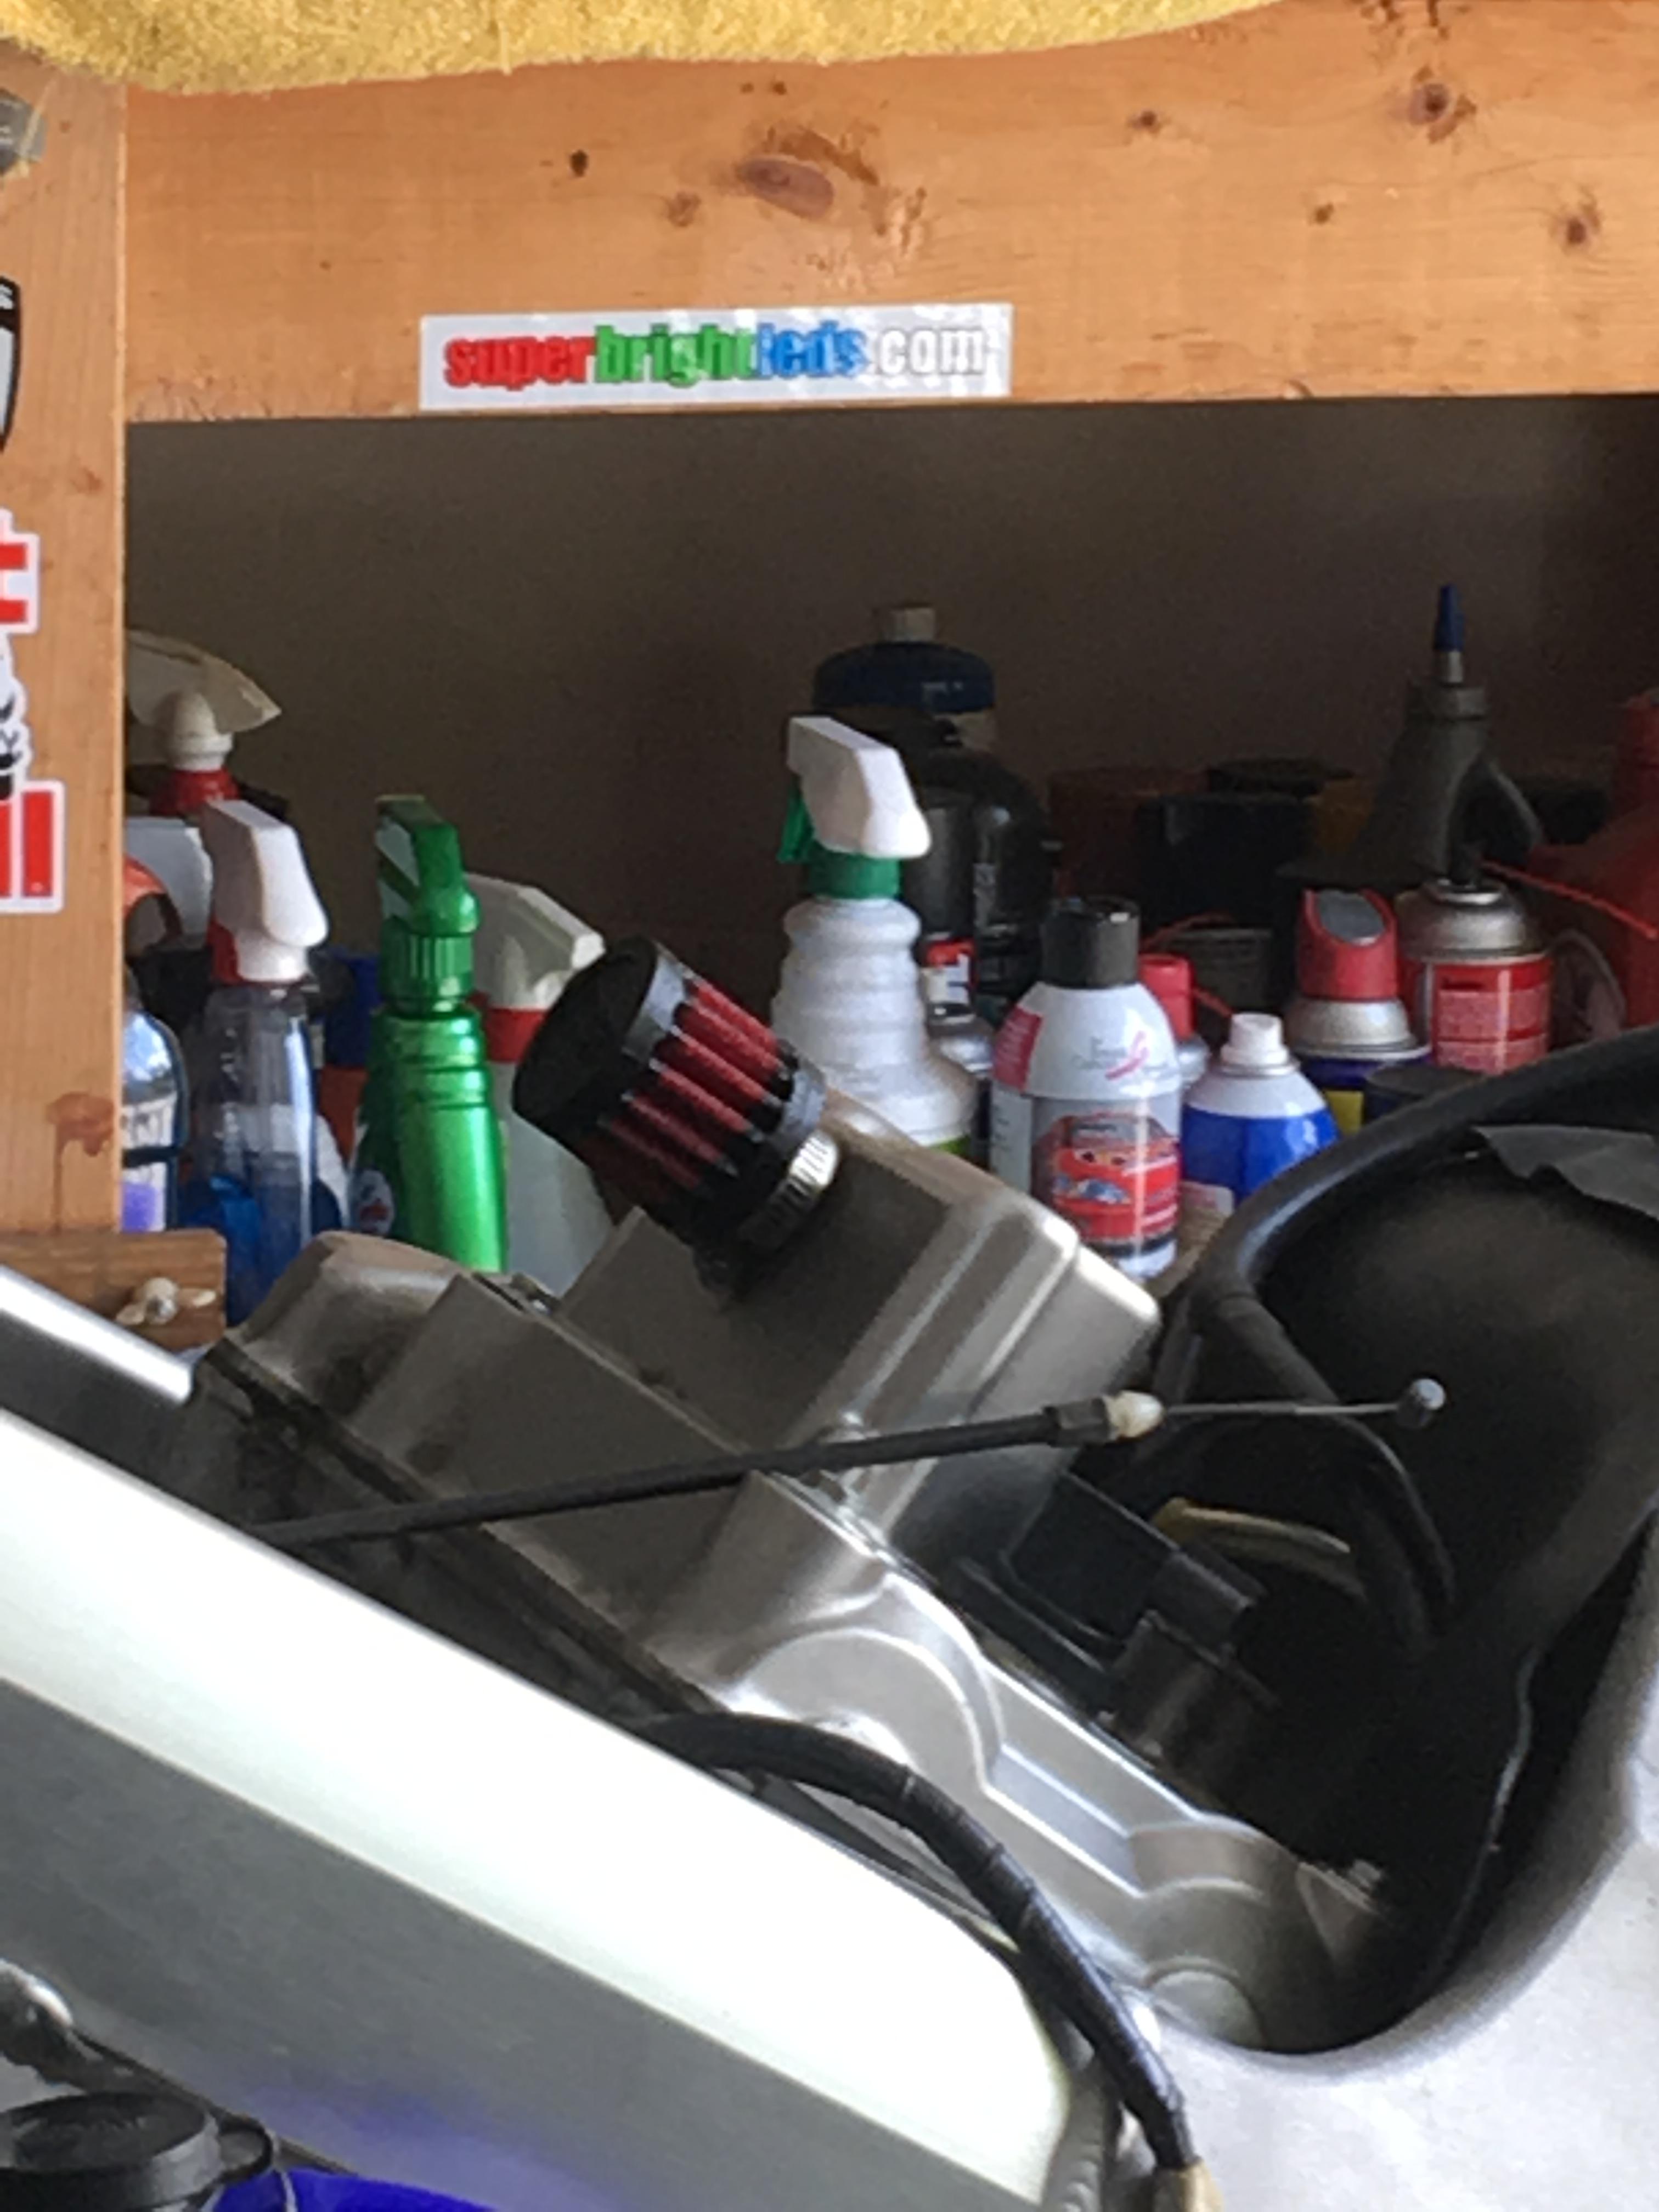
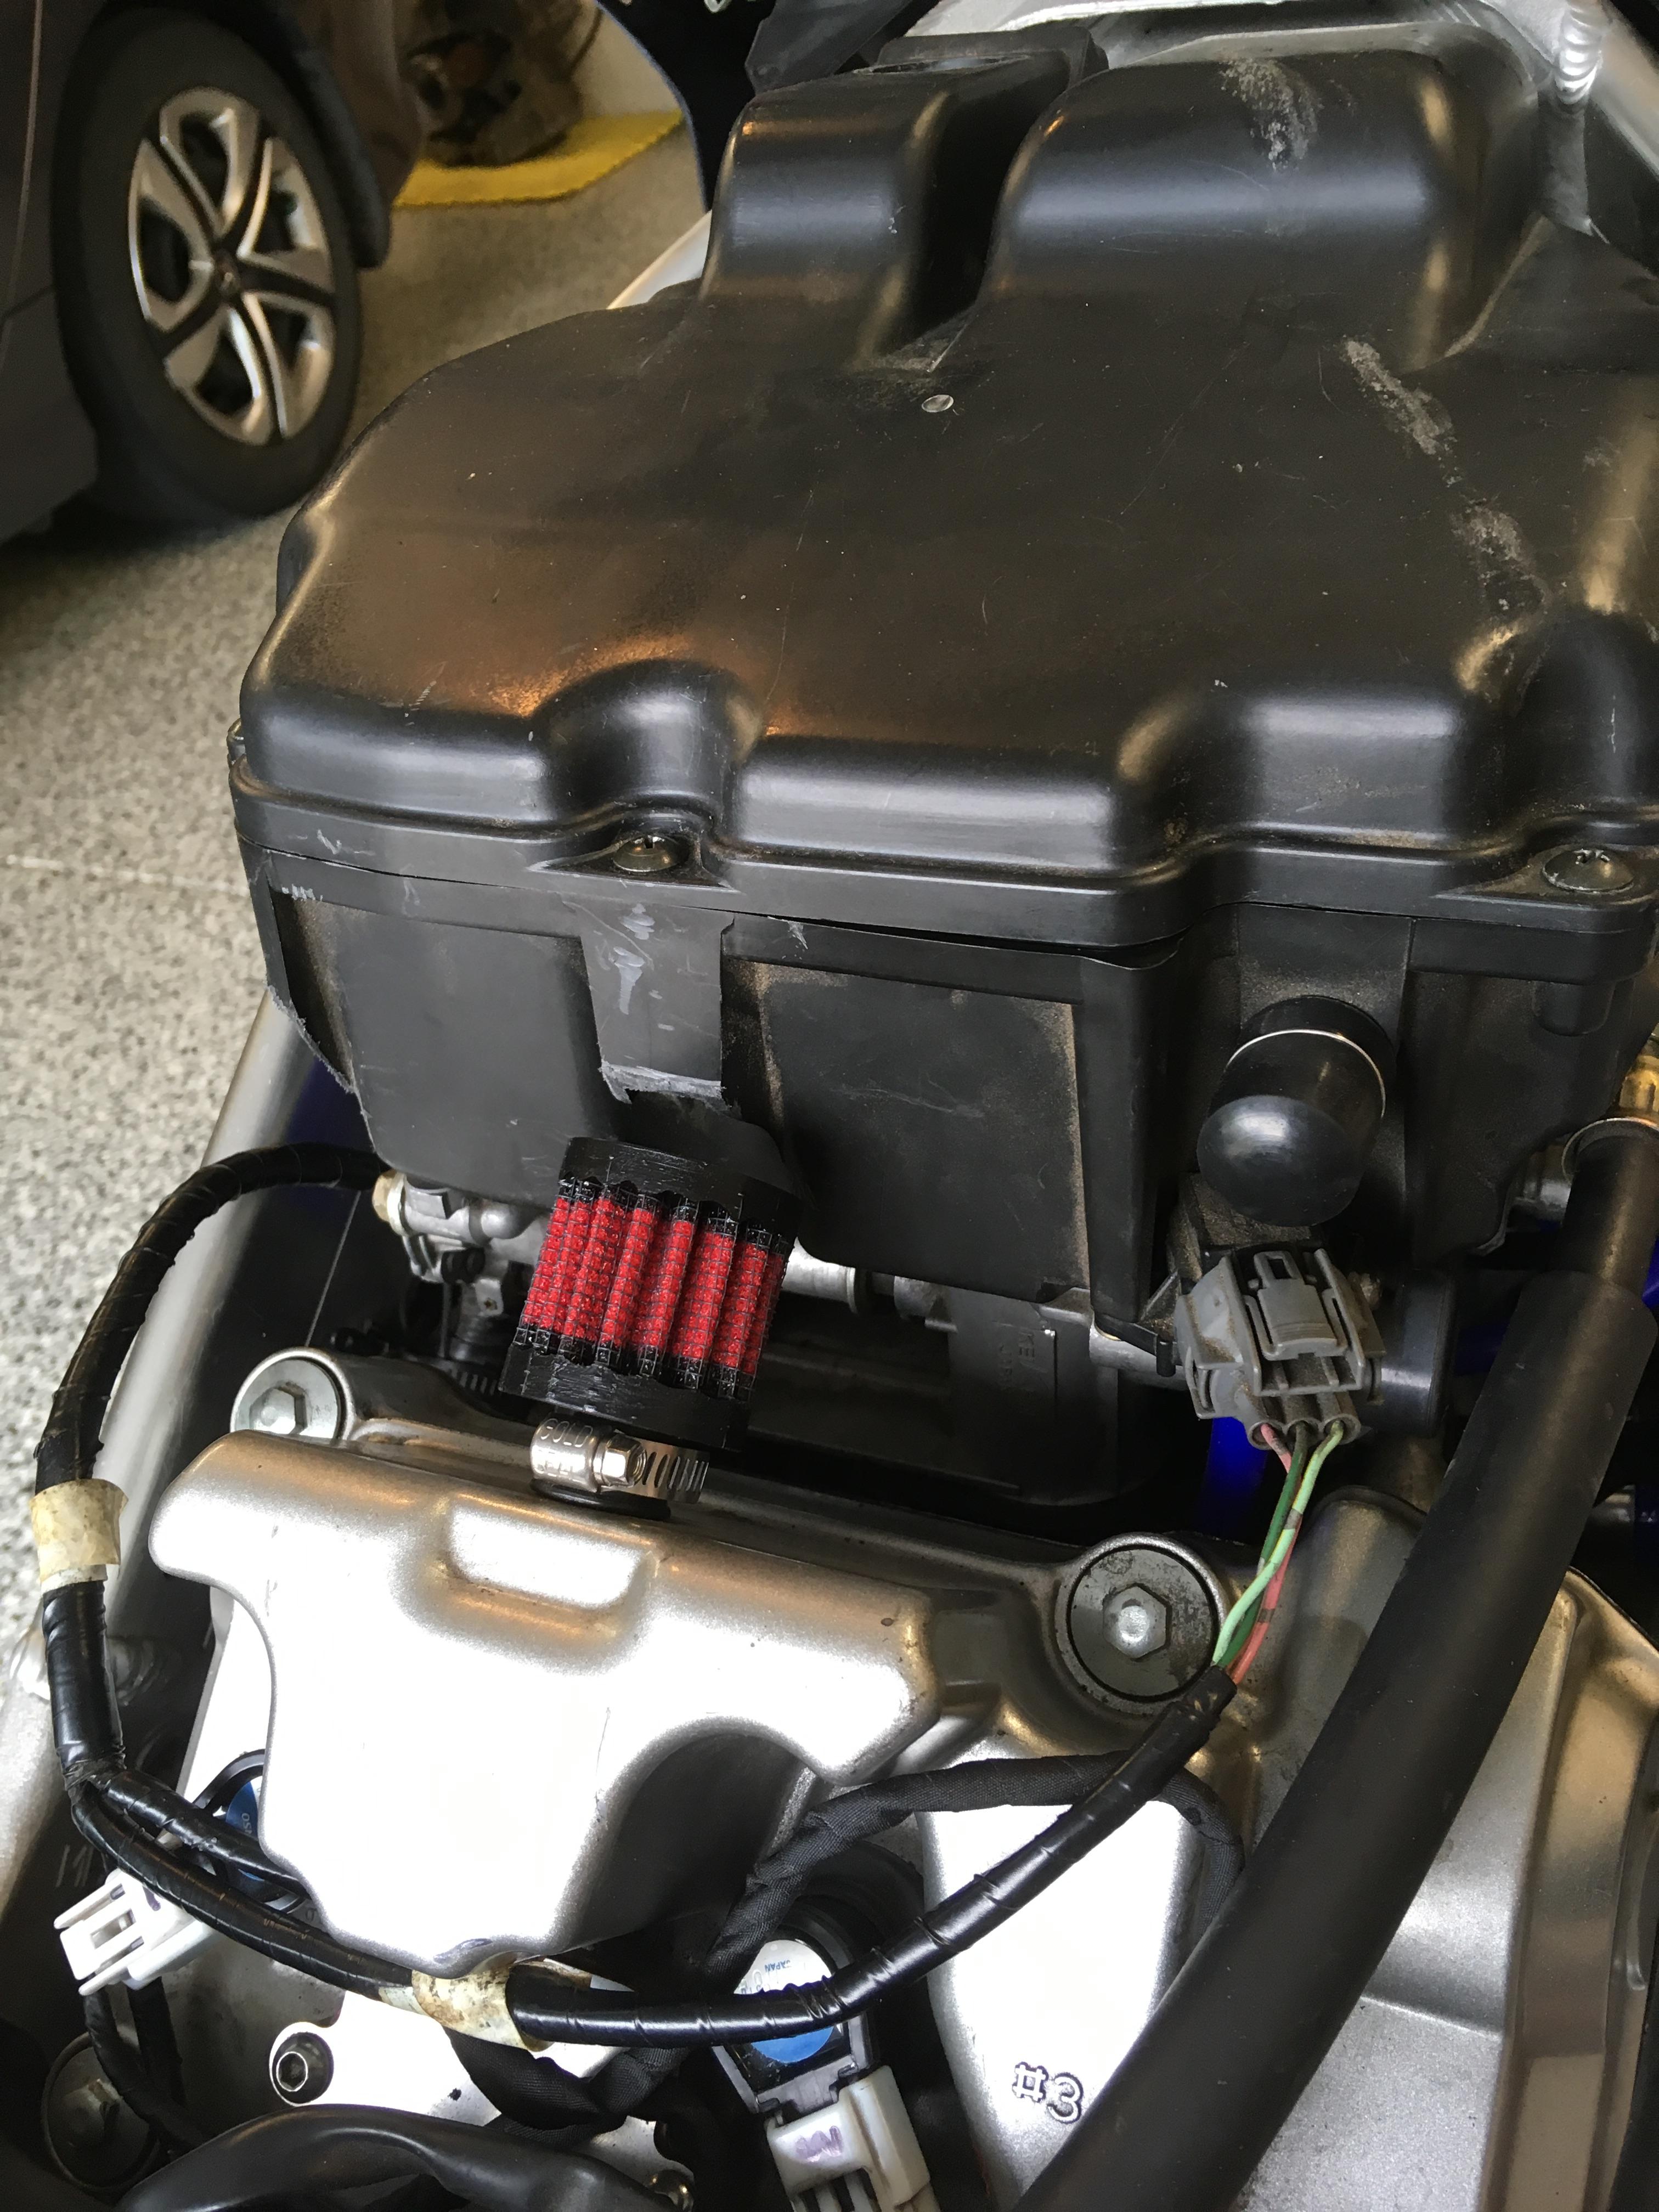
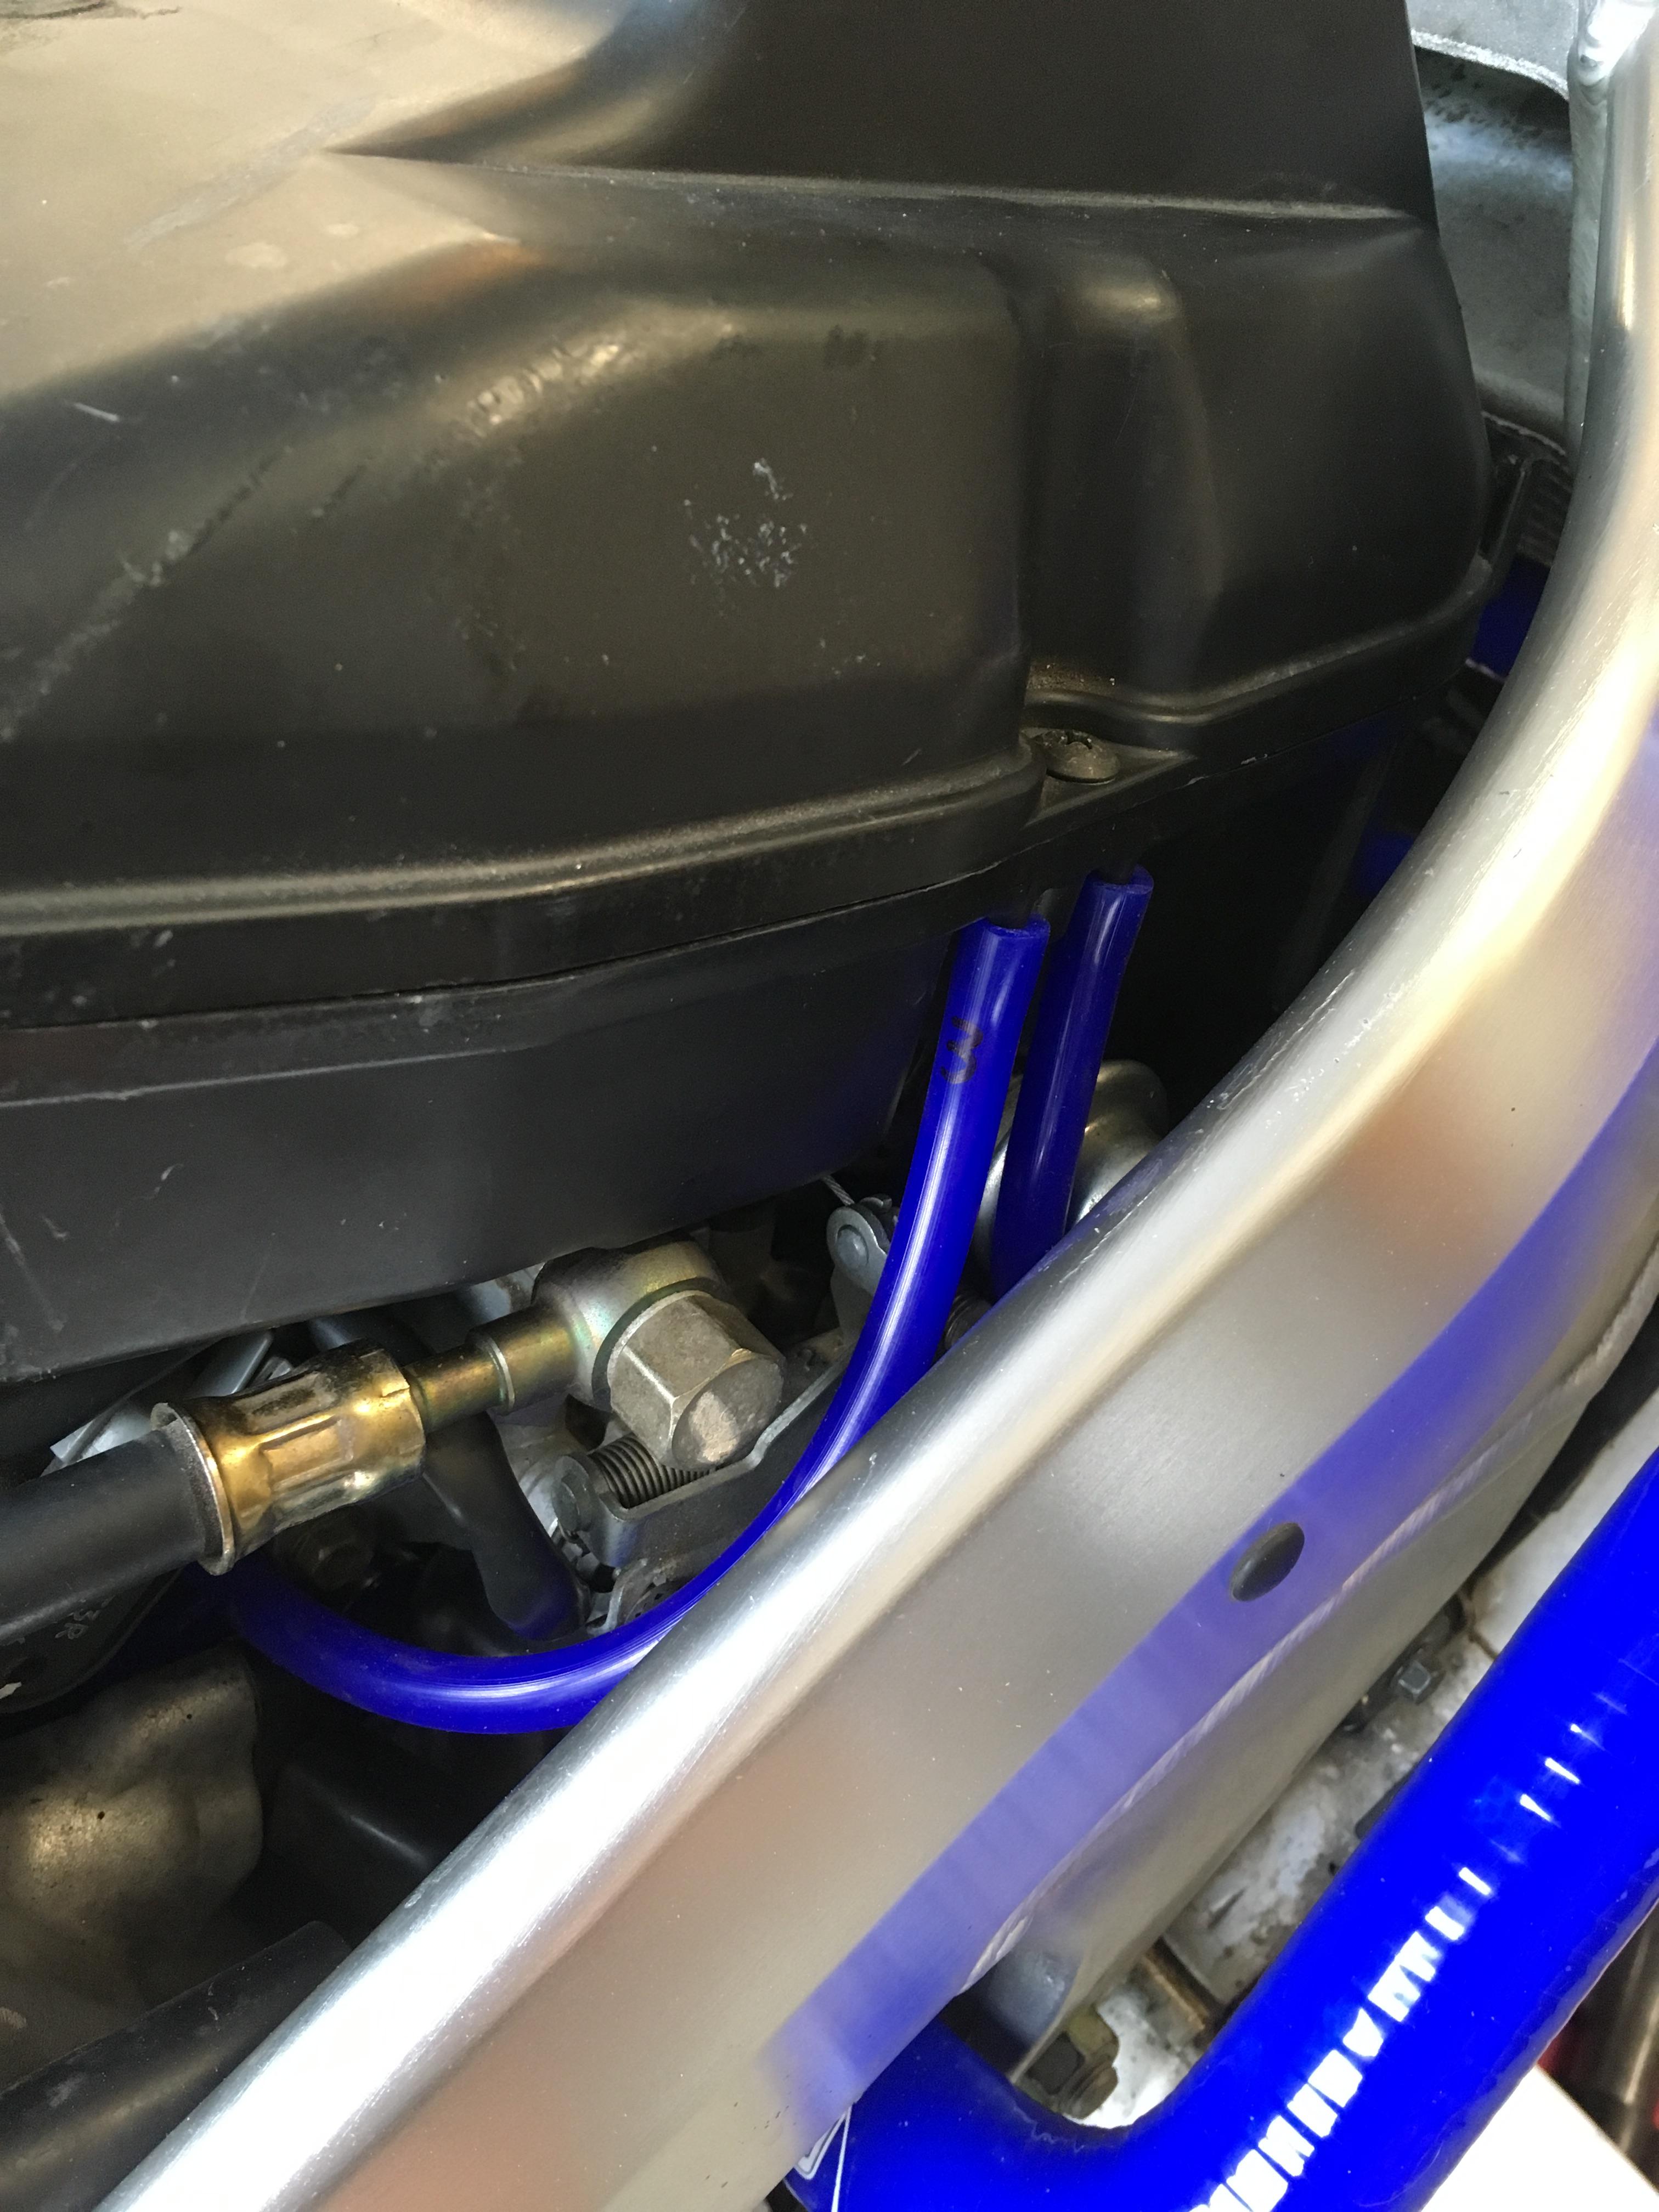
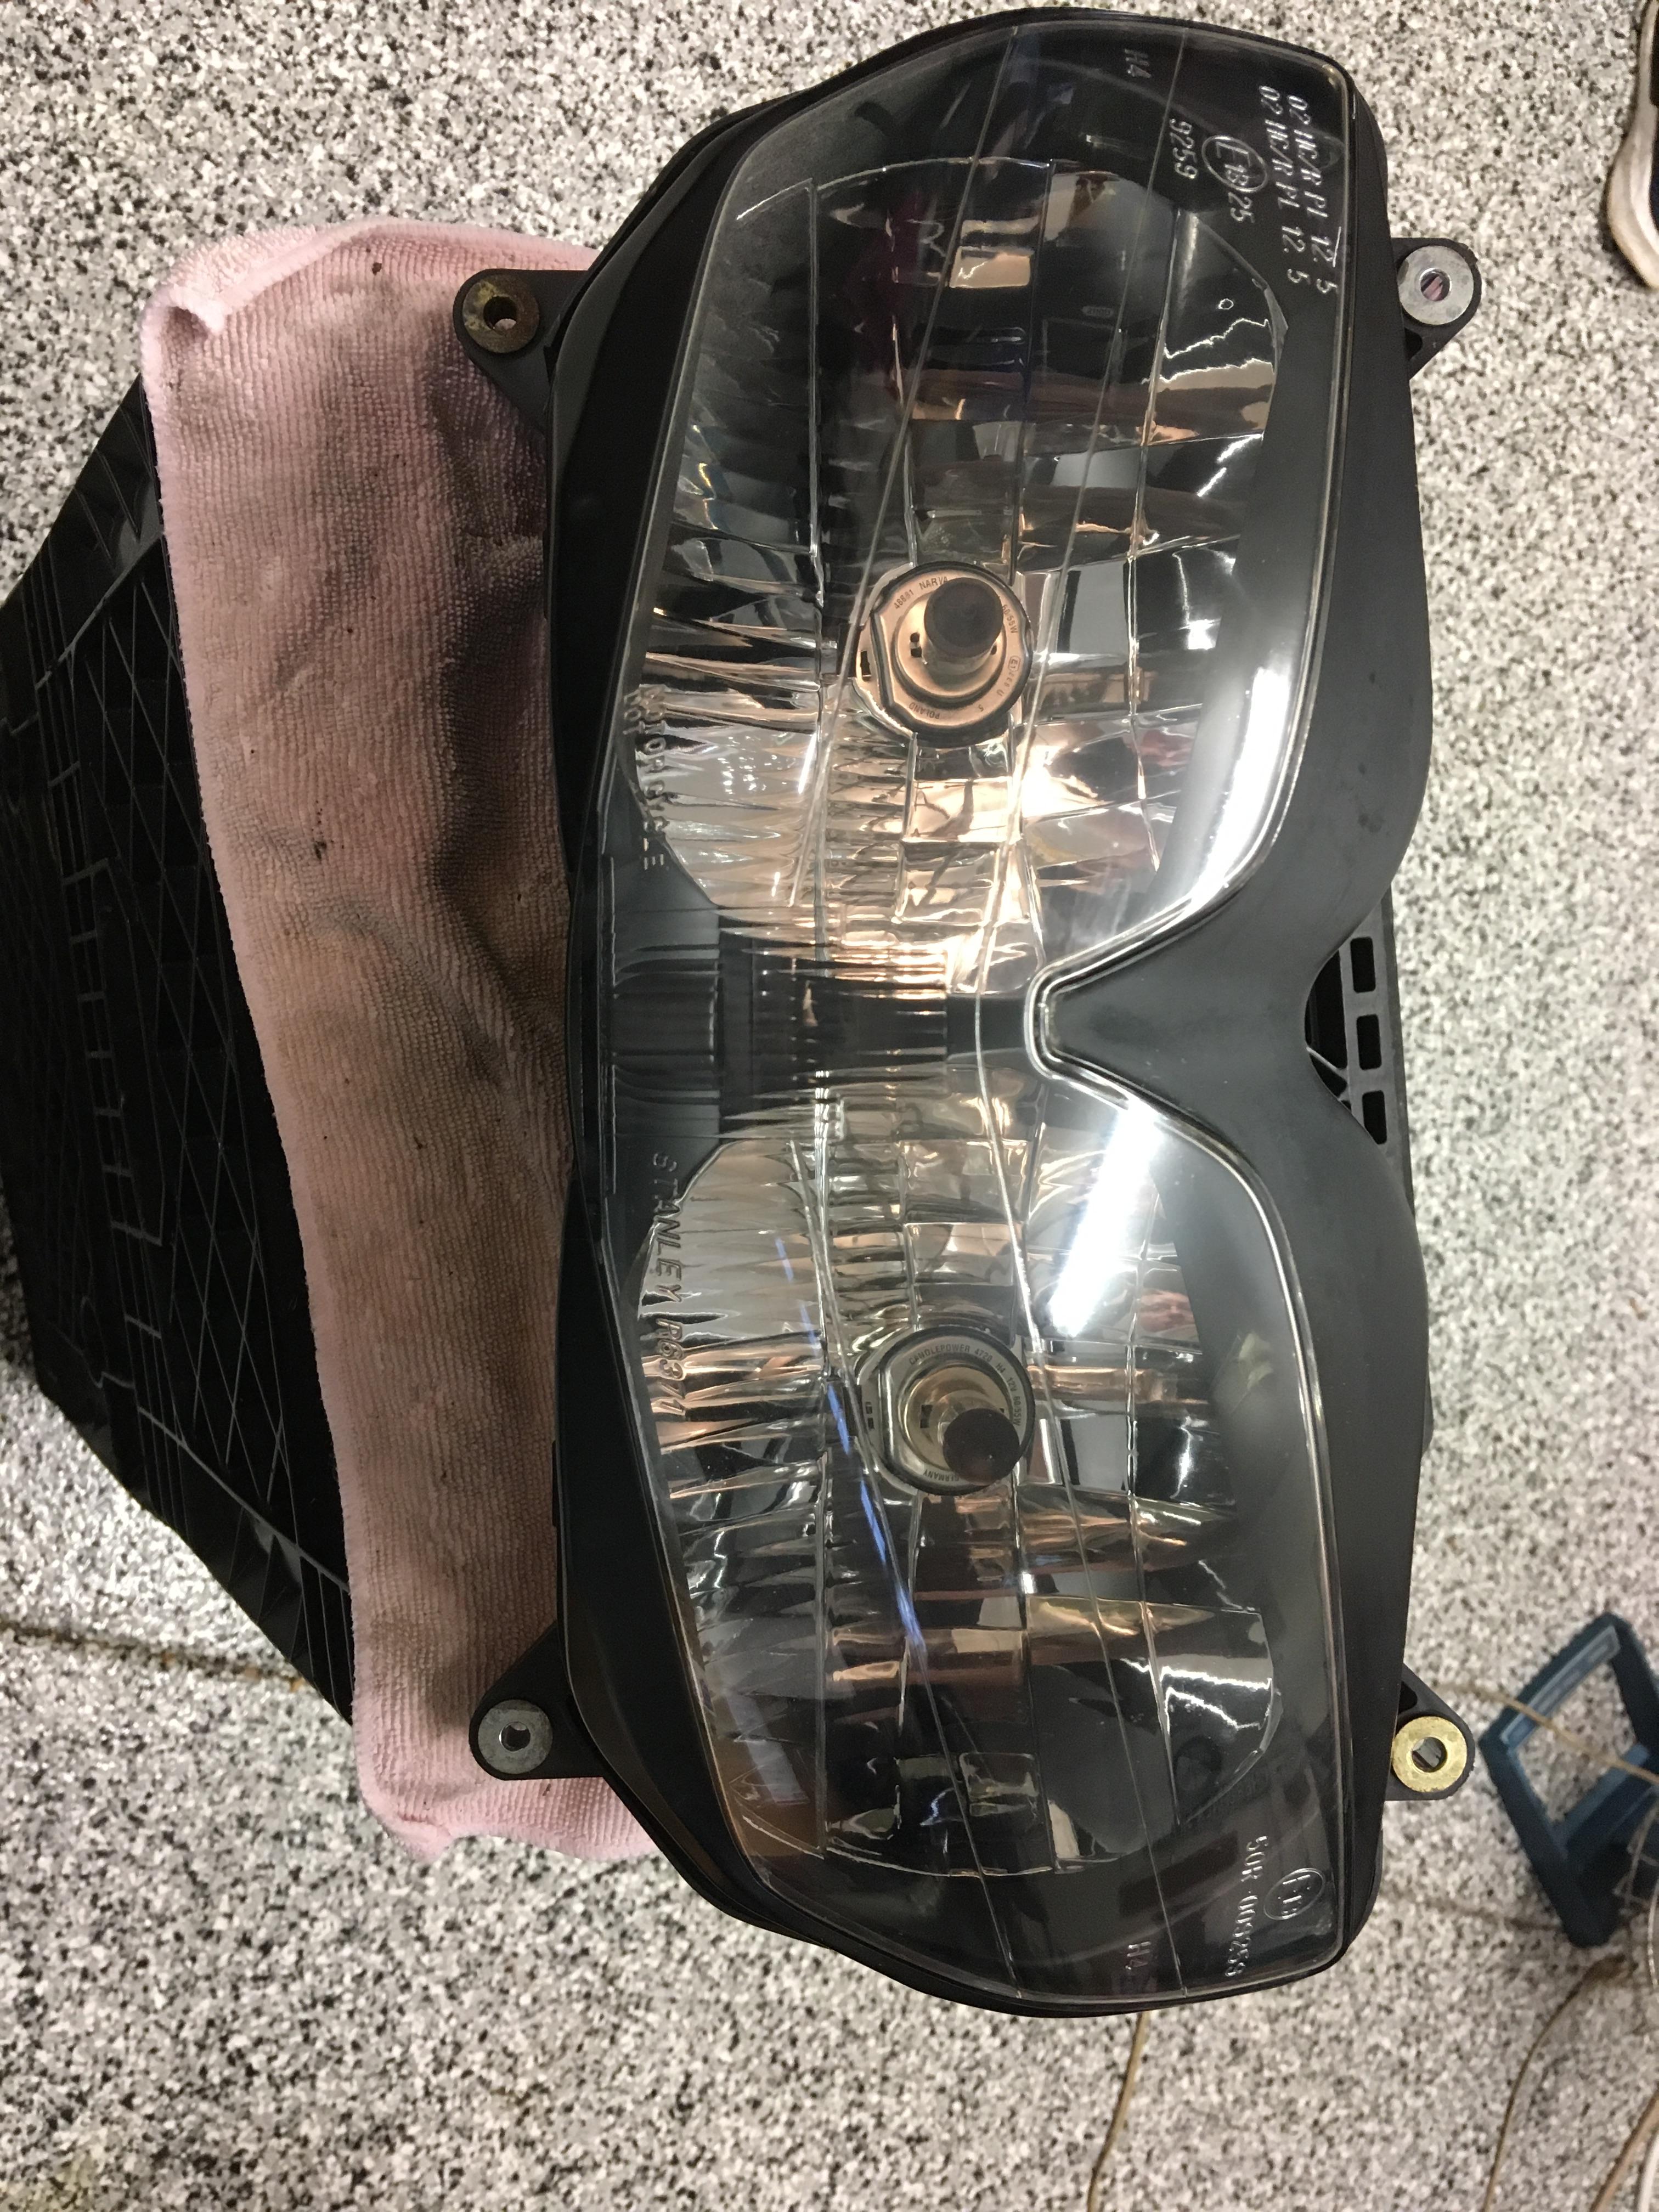
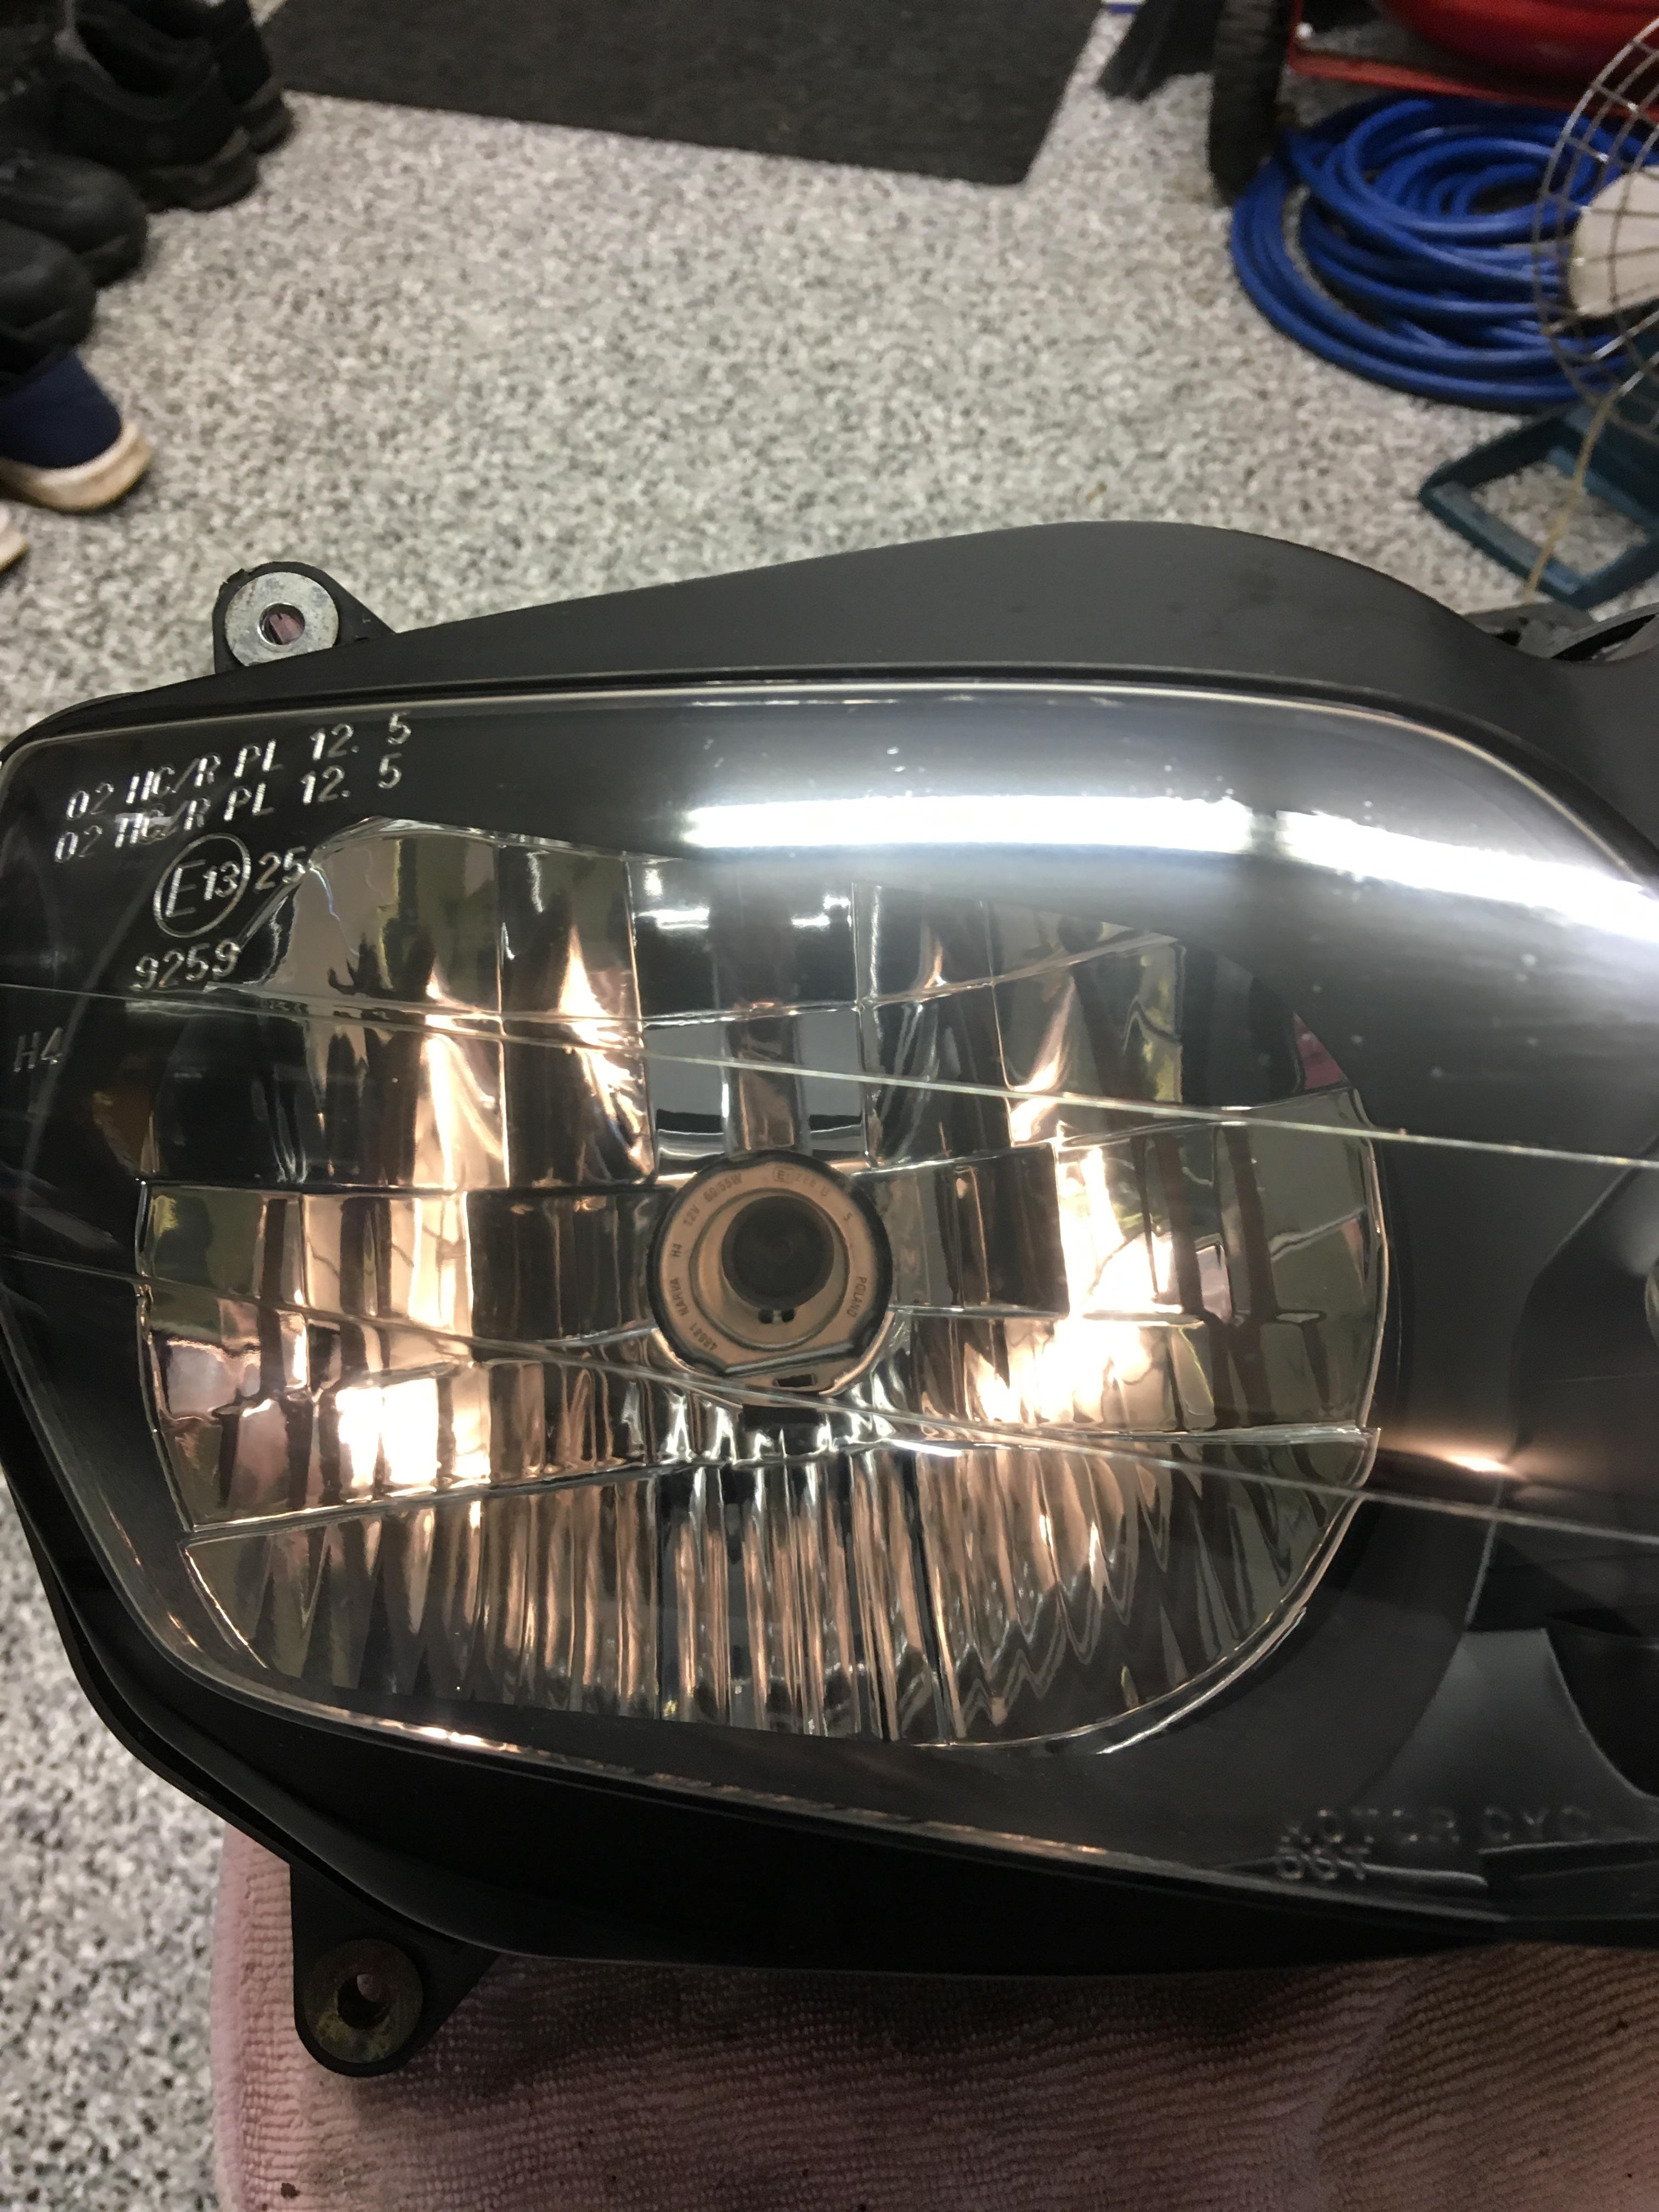
You didn't mention it, but I'm assuming you already know to get a new t-stat housing O-ring. If you need or want new throttle body boots, they are discontinued. I took a look at a set of 6th gen boots, and the only difference is that they have MCW molded onto them instead of MBG on the 5th. Valve Clearance Check? Throttle body hoses; I did all but 2 in silicone. There were only 2 that the bends were too tight and I was afraid they would kink. The OD was very slightly too big in a couple places, but with patience I worked them on. Just ordered 3.5mm ID in 10' and 8mm ID in (I think) 1' from Amazon. Also, I used some leftover 3.5mm for the radiator reservoir drain hose that wasn't included with the AS3 kit. It was a tight fit, parts fiche lists that one as 5.5mm, but I got in on. Perhaps in actual overflow it won't flow enough coolant, but I hope I don't find out. Headlight polish? I did start a thread on that. I thought mine looked really good until I polished a much worse one and it came out better than mine by far! Headlight Polish LED Instrument Cluster Lights? I have a list of sizes and colors required, if you want. I replaced my fuel filter, cut open the old one, found it pristine clean, opened the replacement box and realized I didn't have a '99 fuel pump anymore and they had changed out the filter design somewhere along the line (presumably '00). So I have no idea how many miles were on the one I cut open due to it coming with some tank or other I had got along the way to replace various damaged ones...🤷♂️ I'd say you probably don't want to bother unless you know you've got into some dodgy fuel or a rusty tank. Tank rust is what would be my main concern. The four 3.5 nipples shown here are the ones that are tough to install due to the silicone OD being slightly larger, but as you see in the next pic they are seated. Also, there is a cap in there somewhere for the line to the flapper actuator. The two 8mm hoses I couldn't make the bends work. Stock spring clips fit the silicone 8mm. YMMV on this one. I didn't like seeing the oil residue in my airbox, so I capped the AB and stuck this filter on the valve cover. (Unintended product placement in the background) Long ago de-paired/de-flappered. Swapped the coils for COPs and cleaned up all the now redundant mounting points on the airbox exterior.
-
Thermostat replacement - hope to never do this again
KevCarver replied to 8200rpm's topic in Fifth Generation VFR's
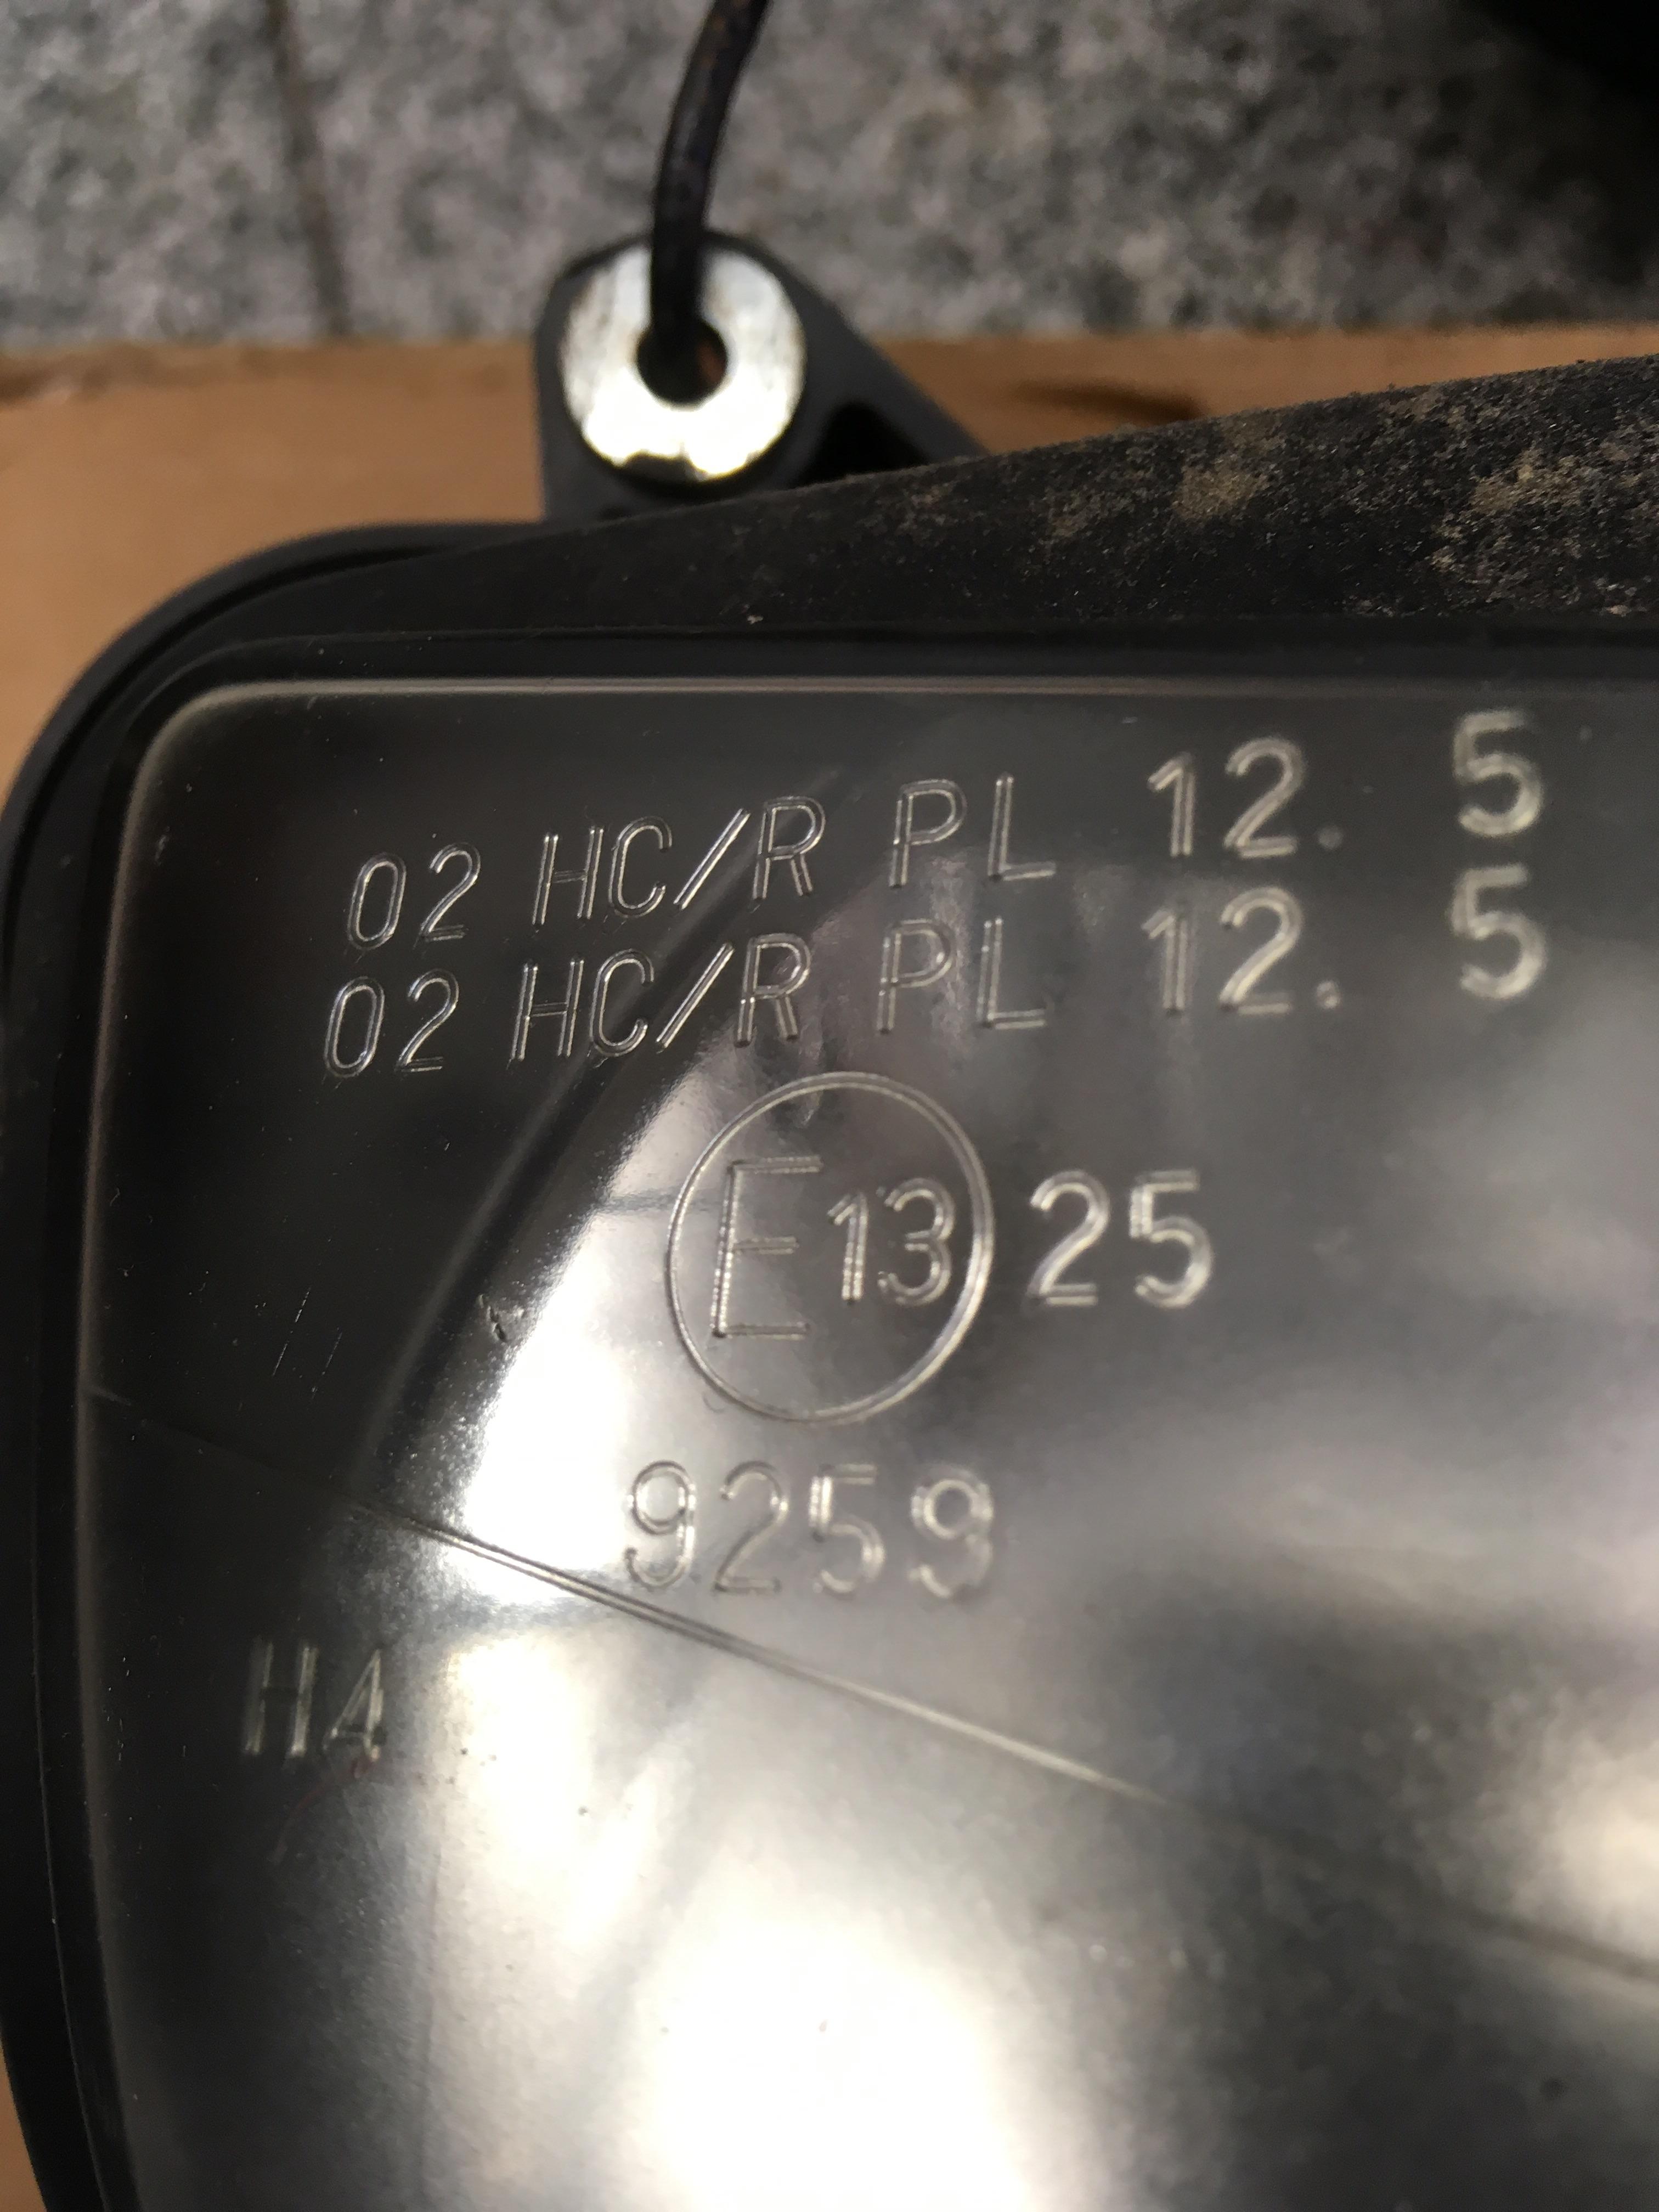
I have a set of 6th Gen boots on hand (Loaned from MiniCarver, Thanks!) to see what, if any, differences there are. Best I can tell is that the 5Th Gen boots have MBG molded into the top, and 6th have MCW. Fit nice and snug to a 2000 TB, interior contours match up from TB to boot. MiniCarver is running 6th Gen TB on 5Th Gen engine, with a new set of MCW boots (which is why he has a used set spare). Ron Ayes shows MCW at $10.11 each, MBG has no listed price. -
Electrical Problem (Lights Off and High Beam Indicator On)
KevCarver replied to Headhunter's topic in Fifth Generation VFR's
I don't know if I solved anything, but after reading your post I went and fished out the offending right side connector. It's an LED and has a pigtail on the bulb housing, so there is more slack to work with. Messing with it seemed to solve it, at least for now. -
Awesome build so far!
-
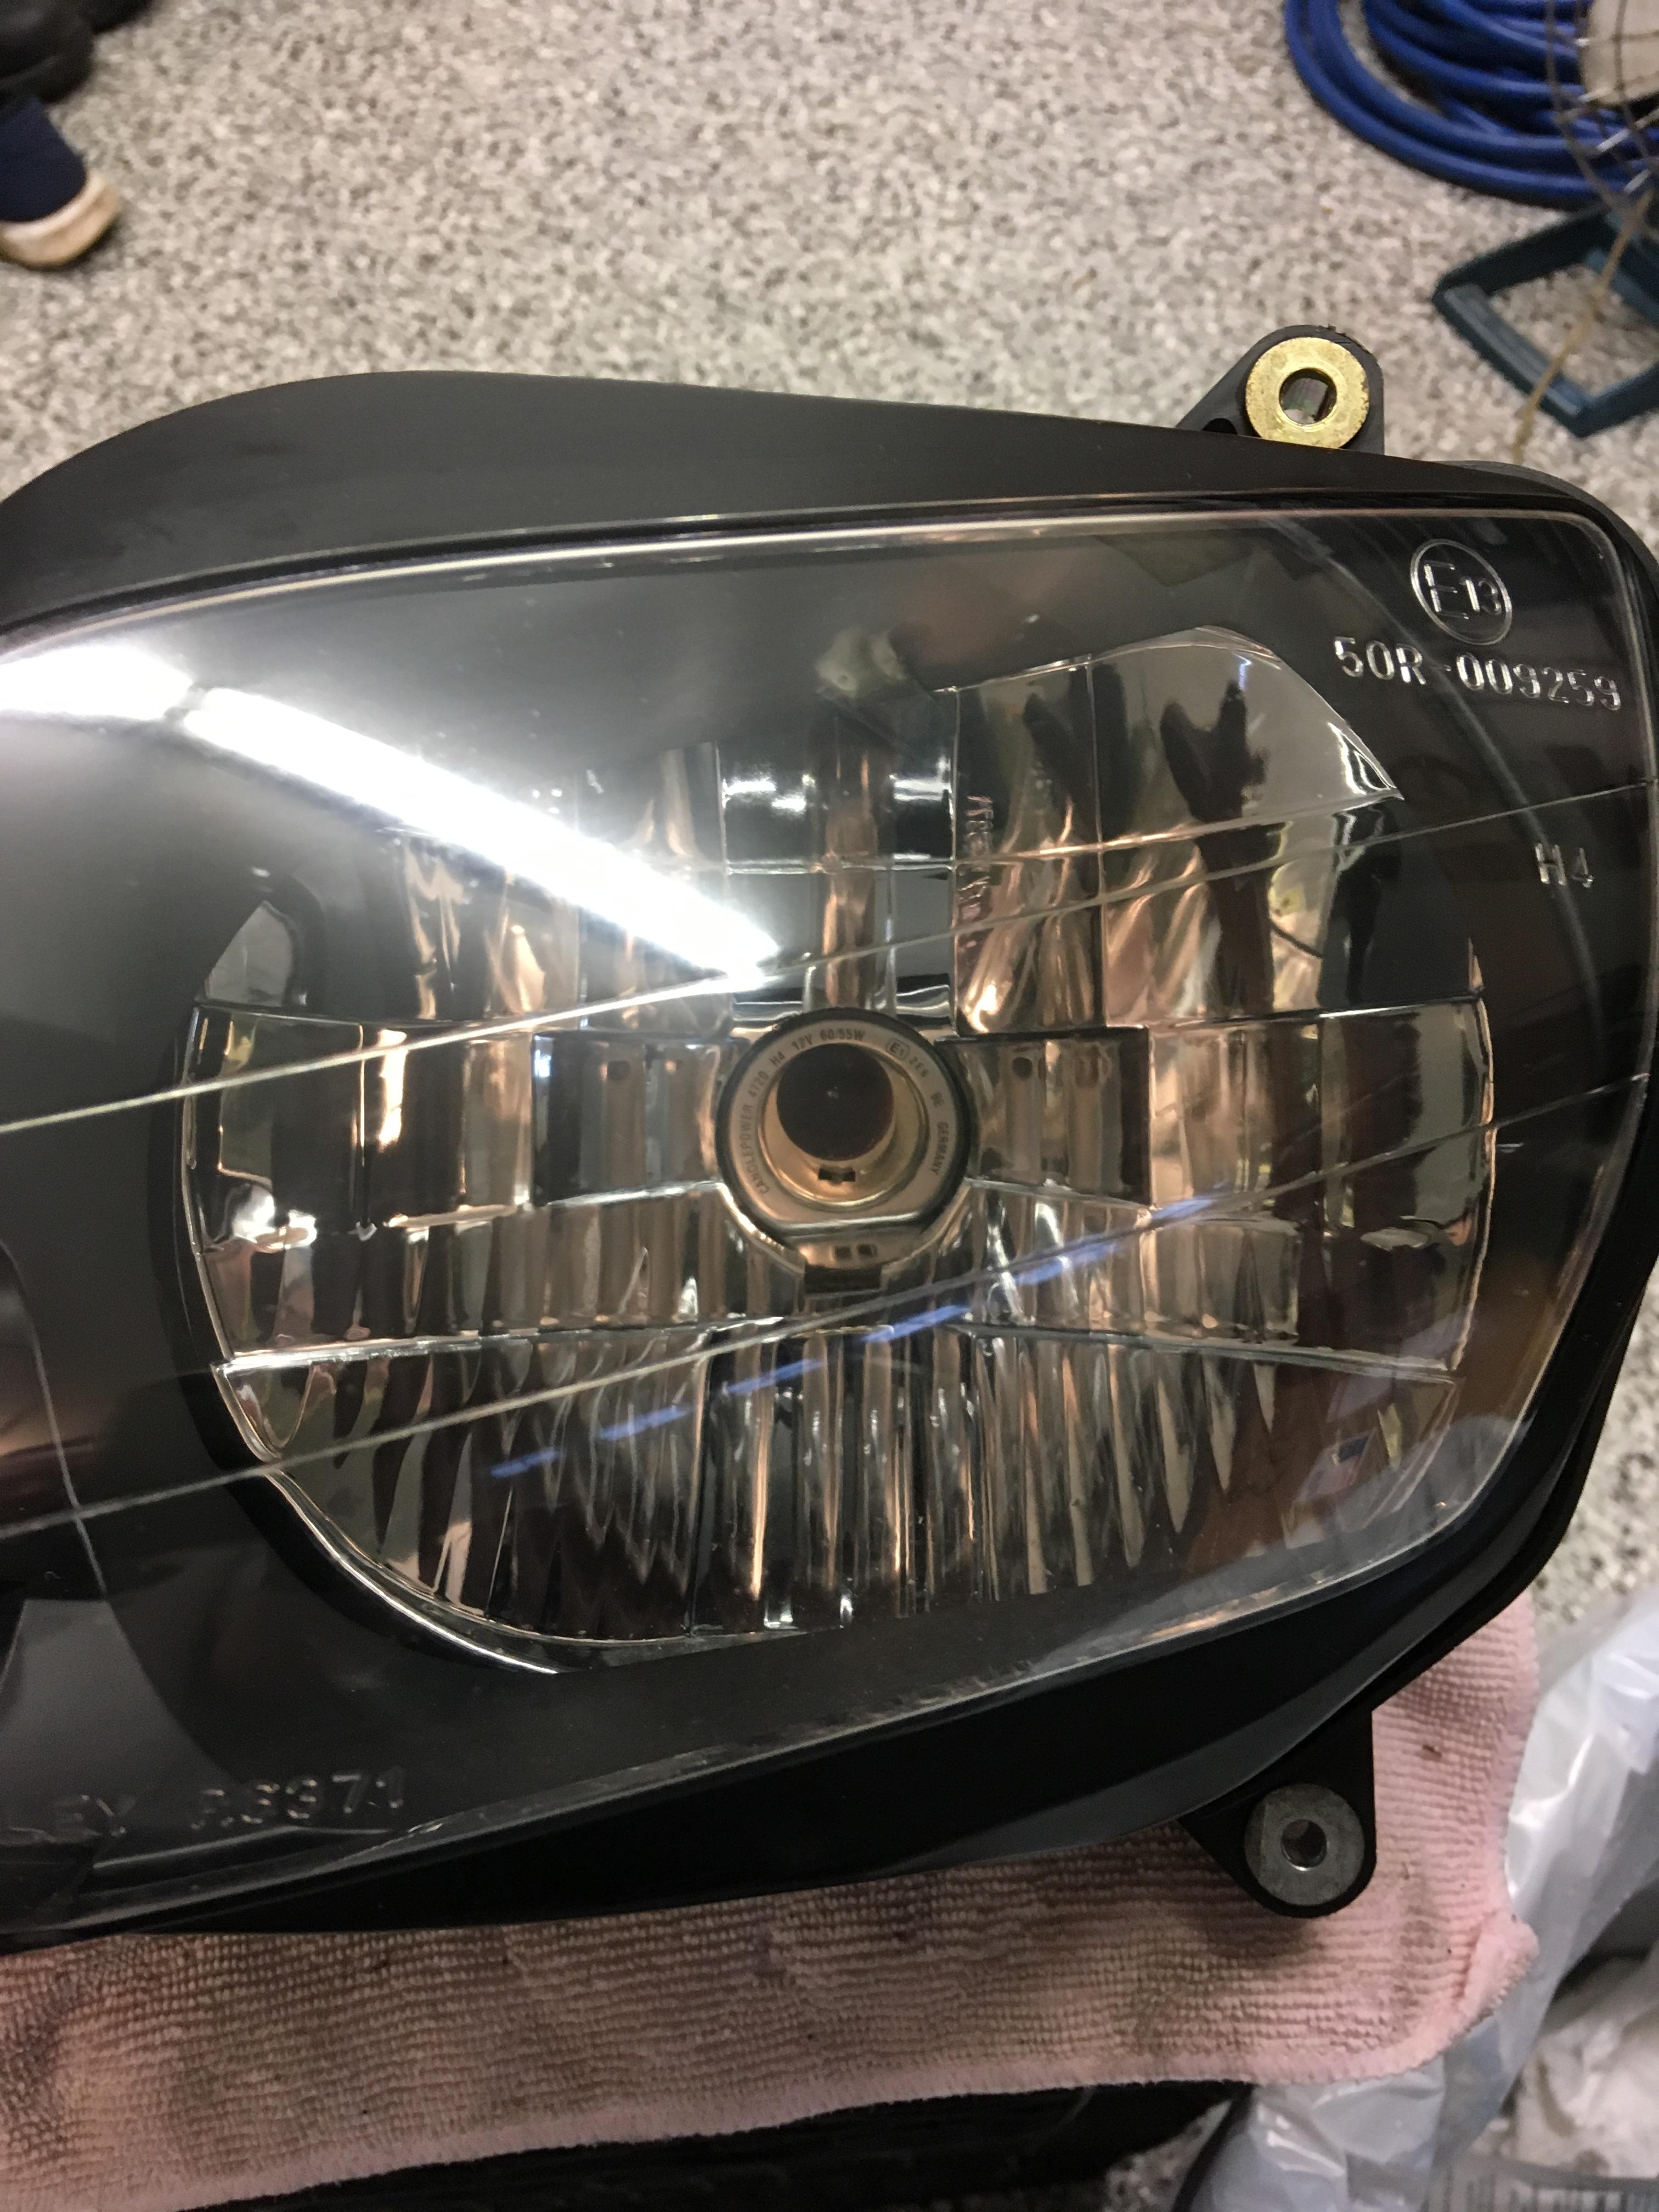
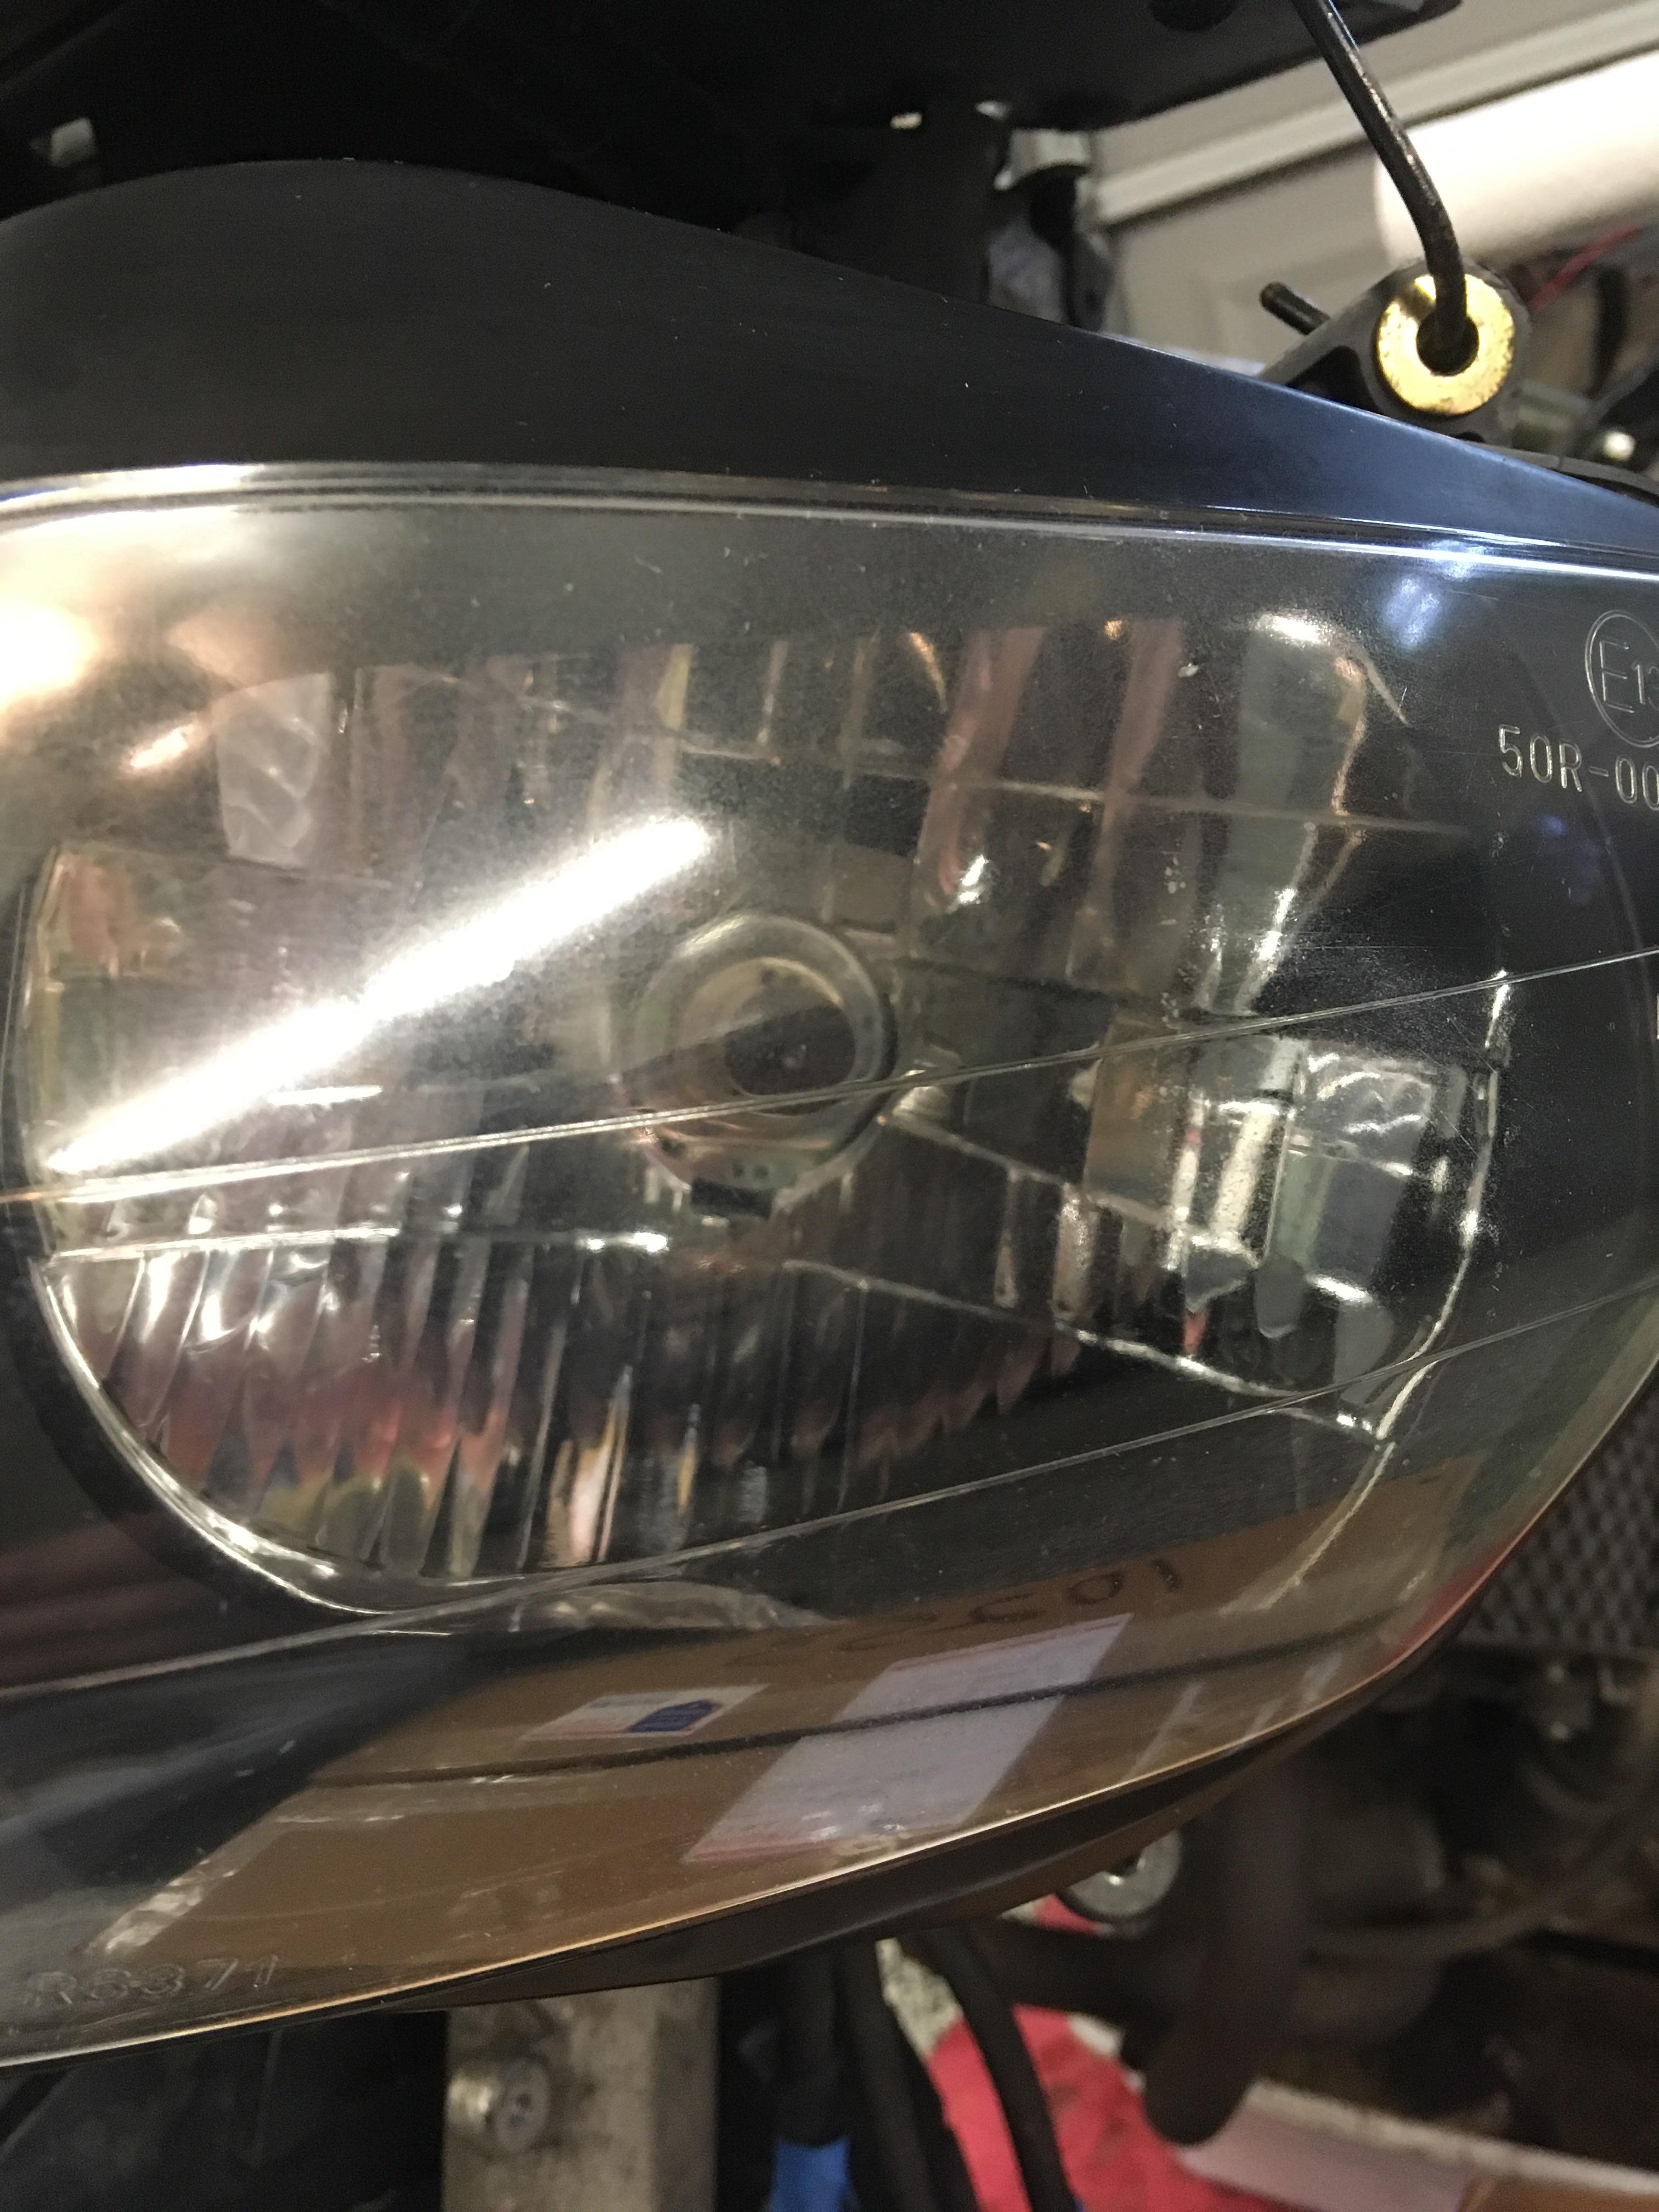
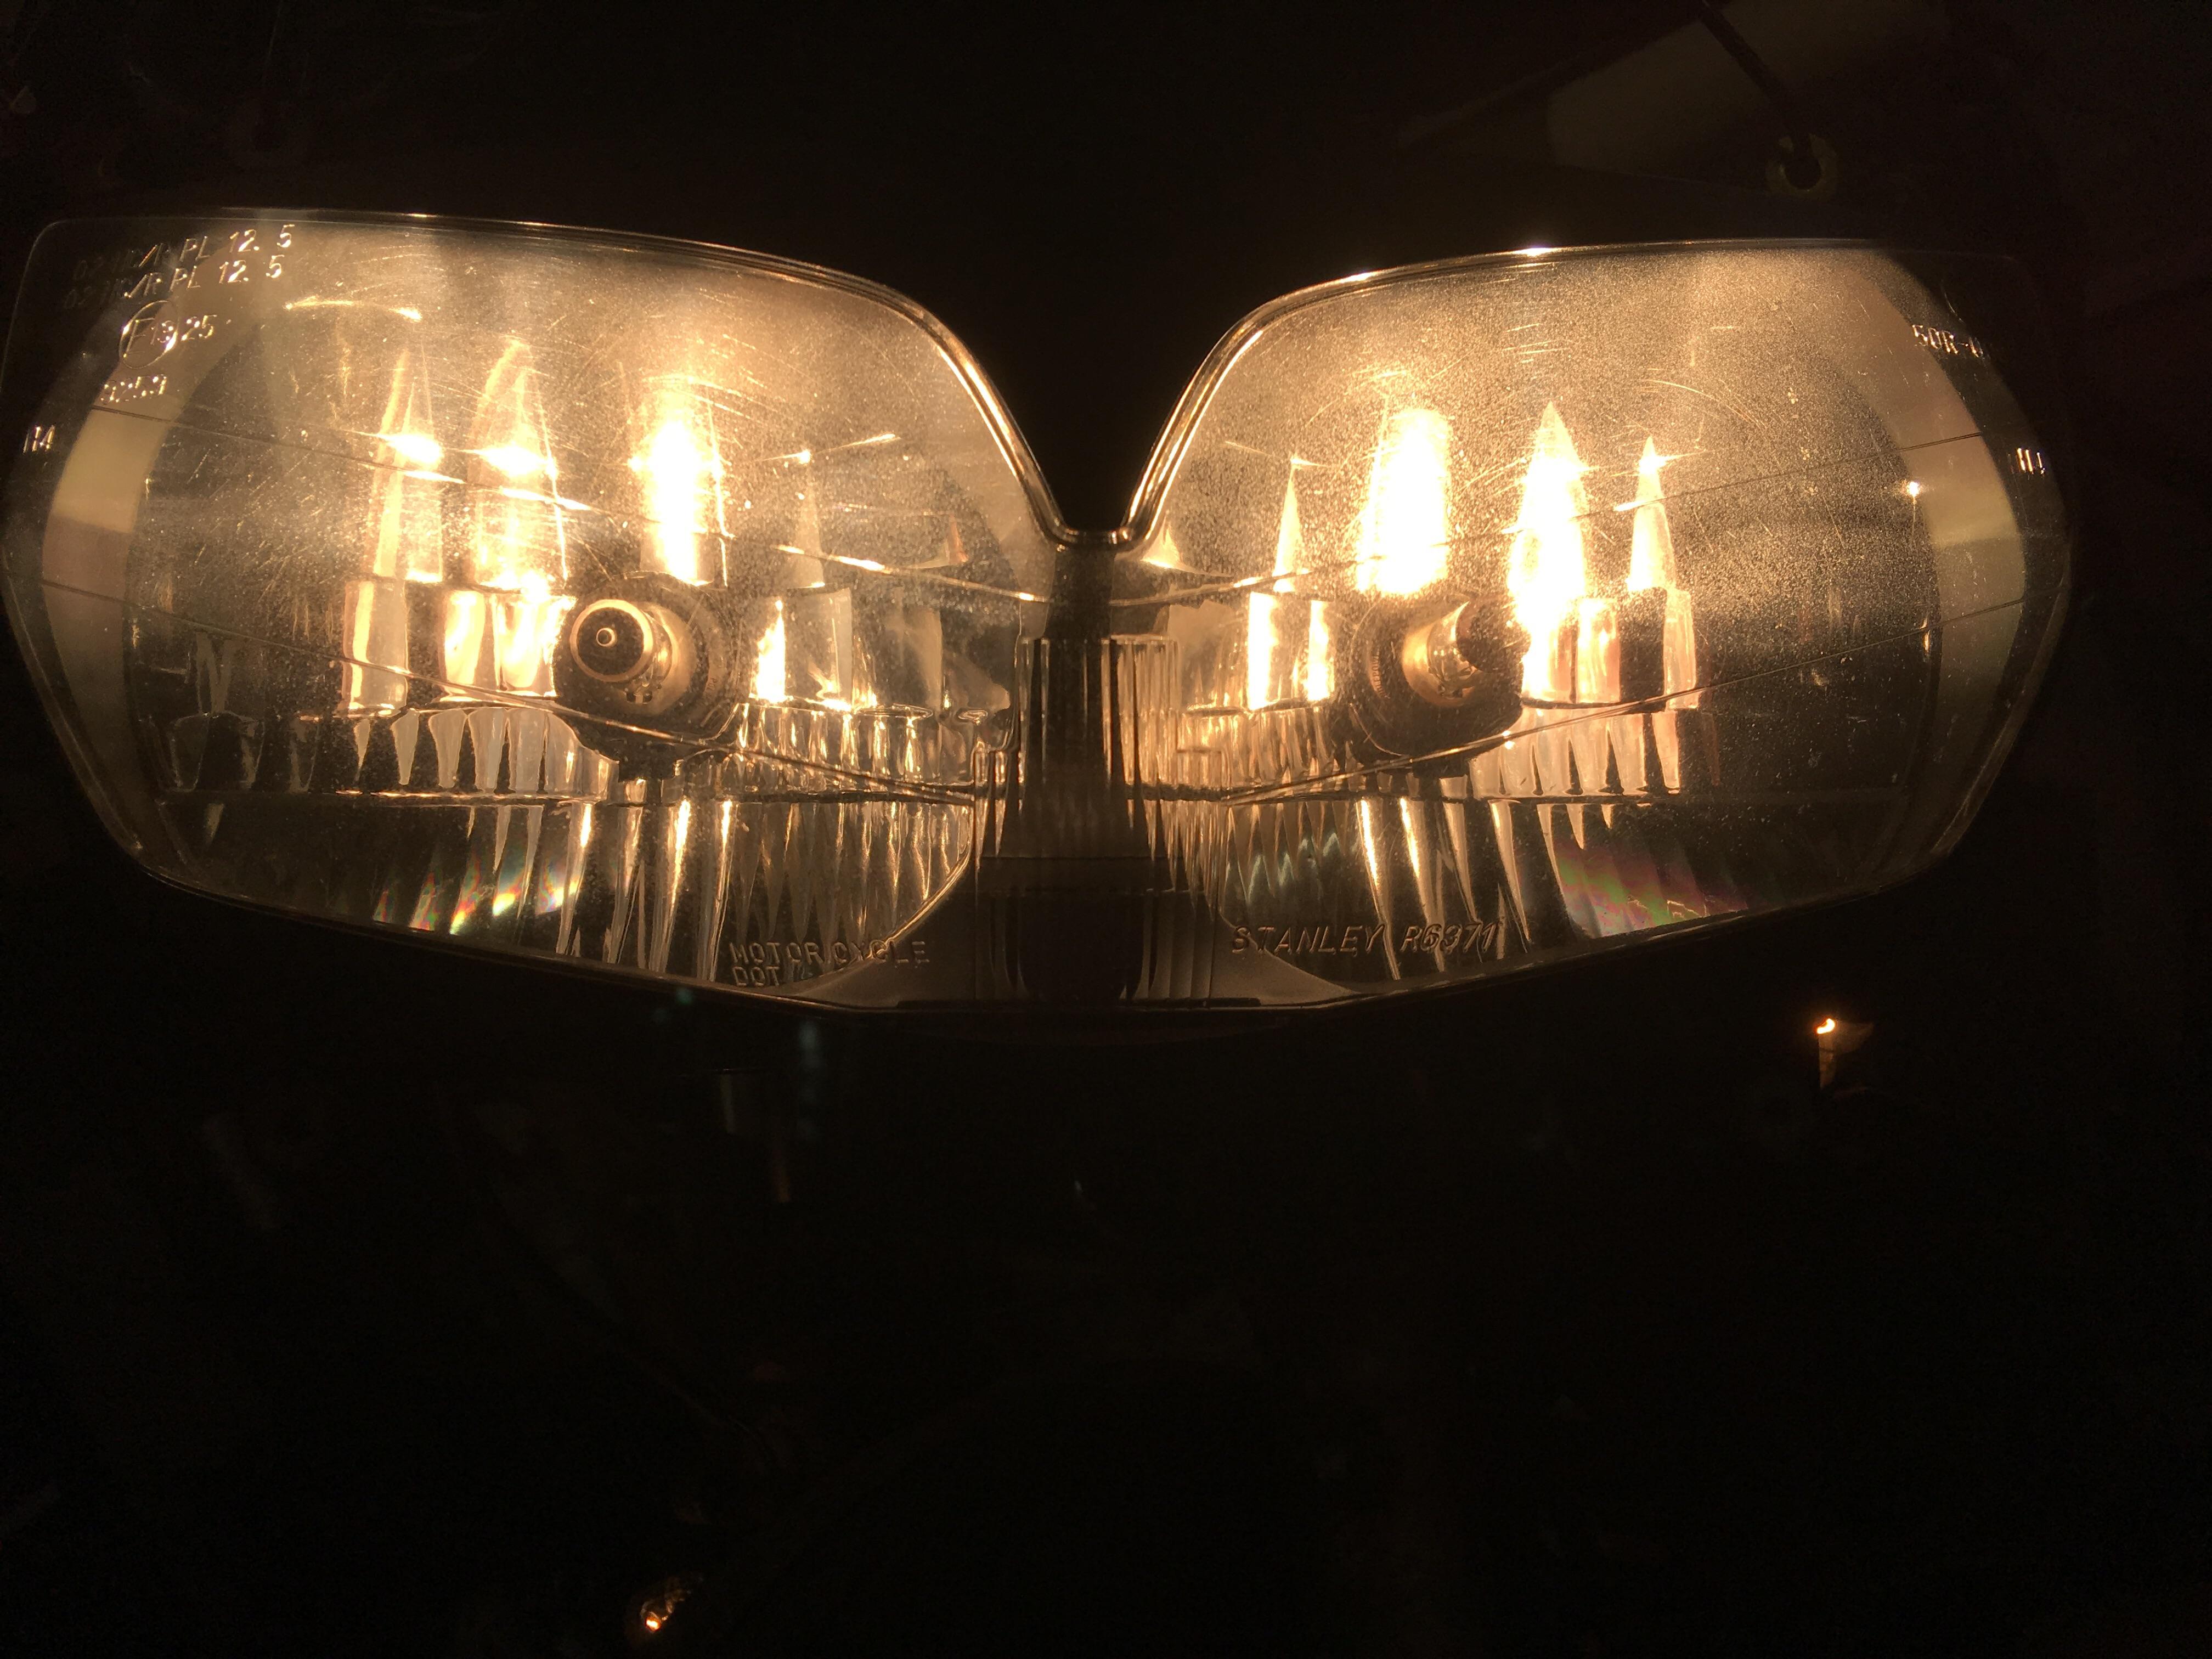
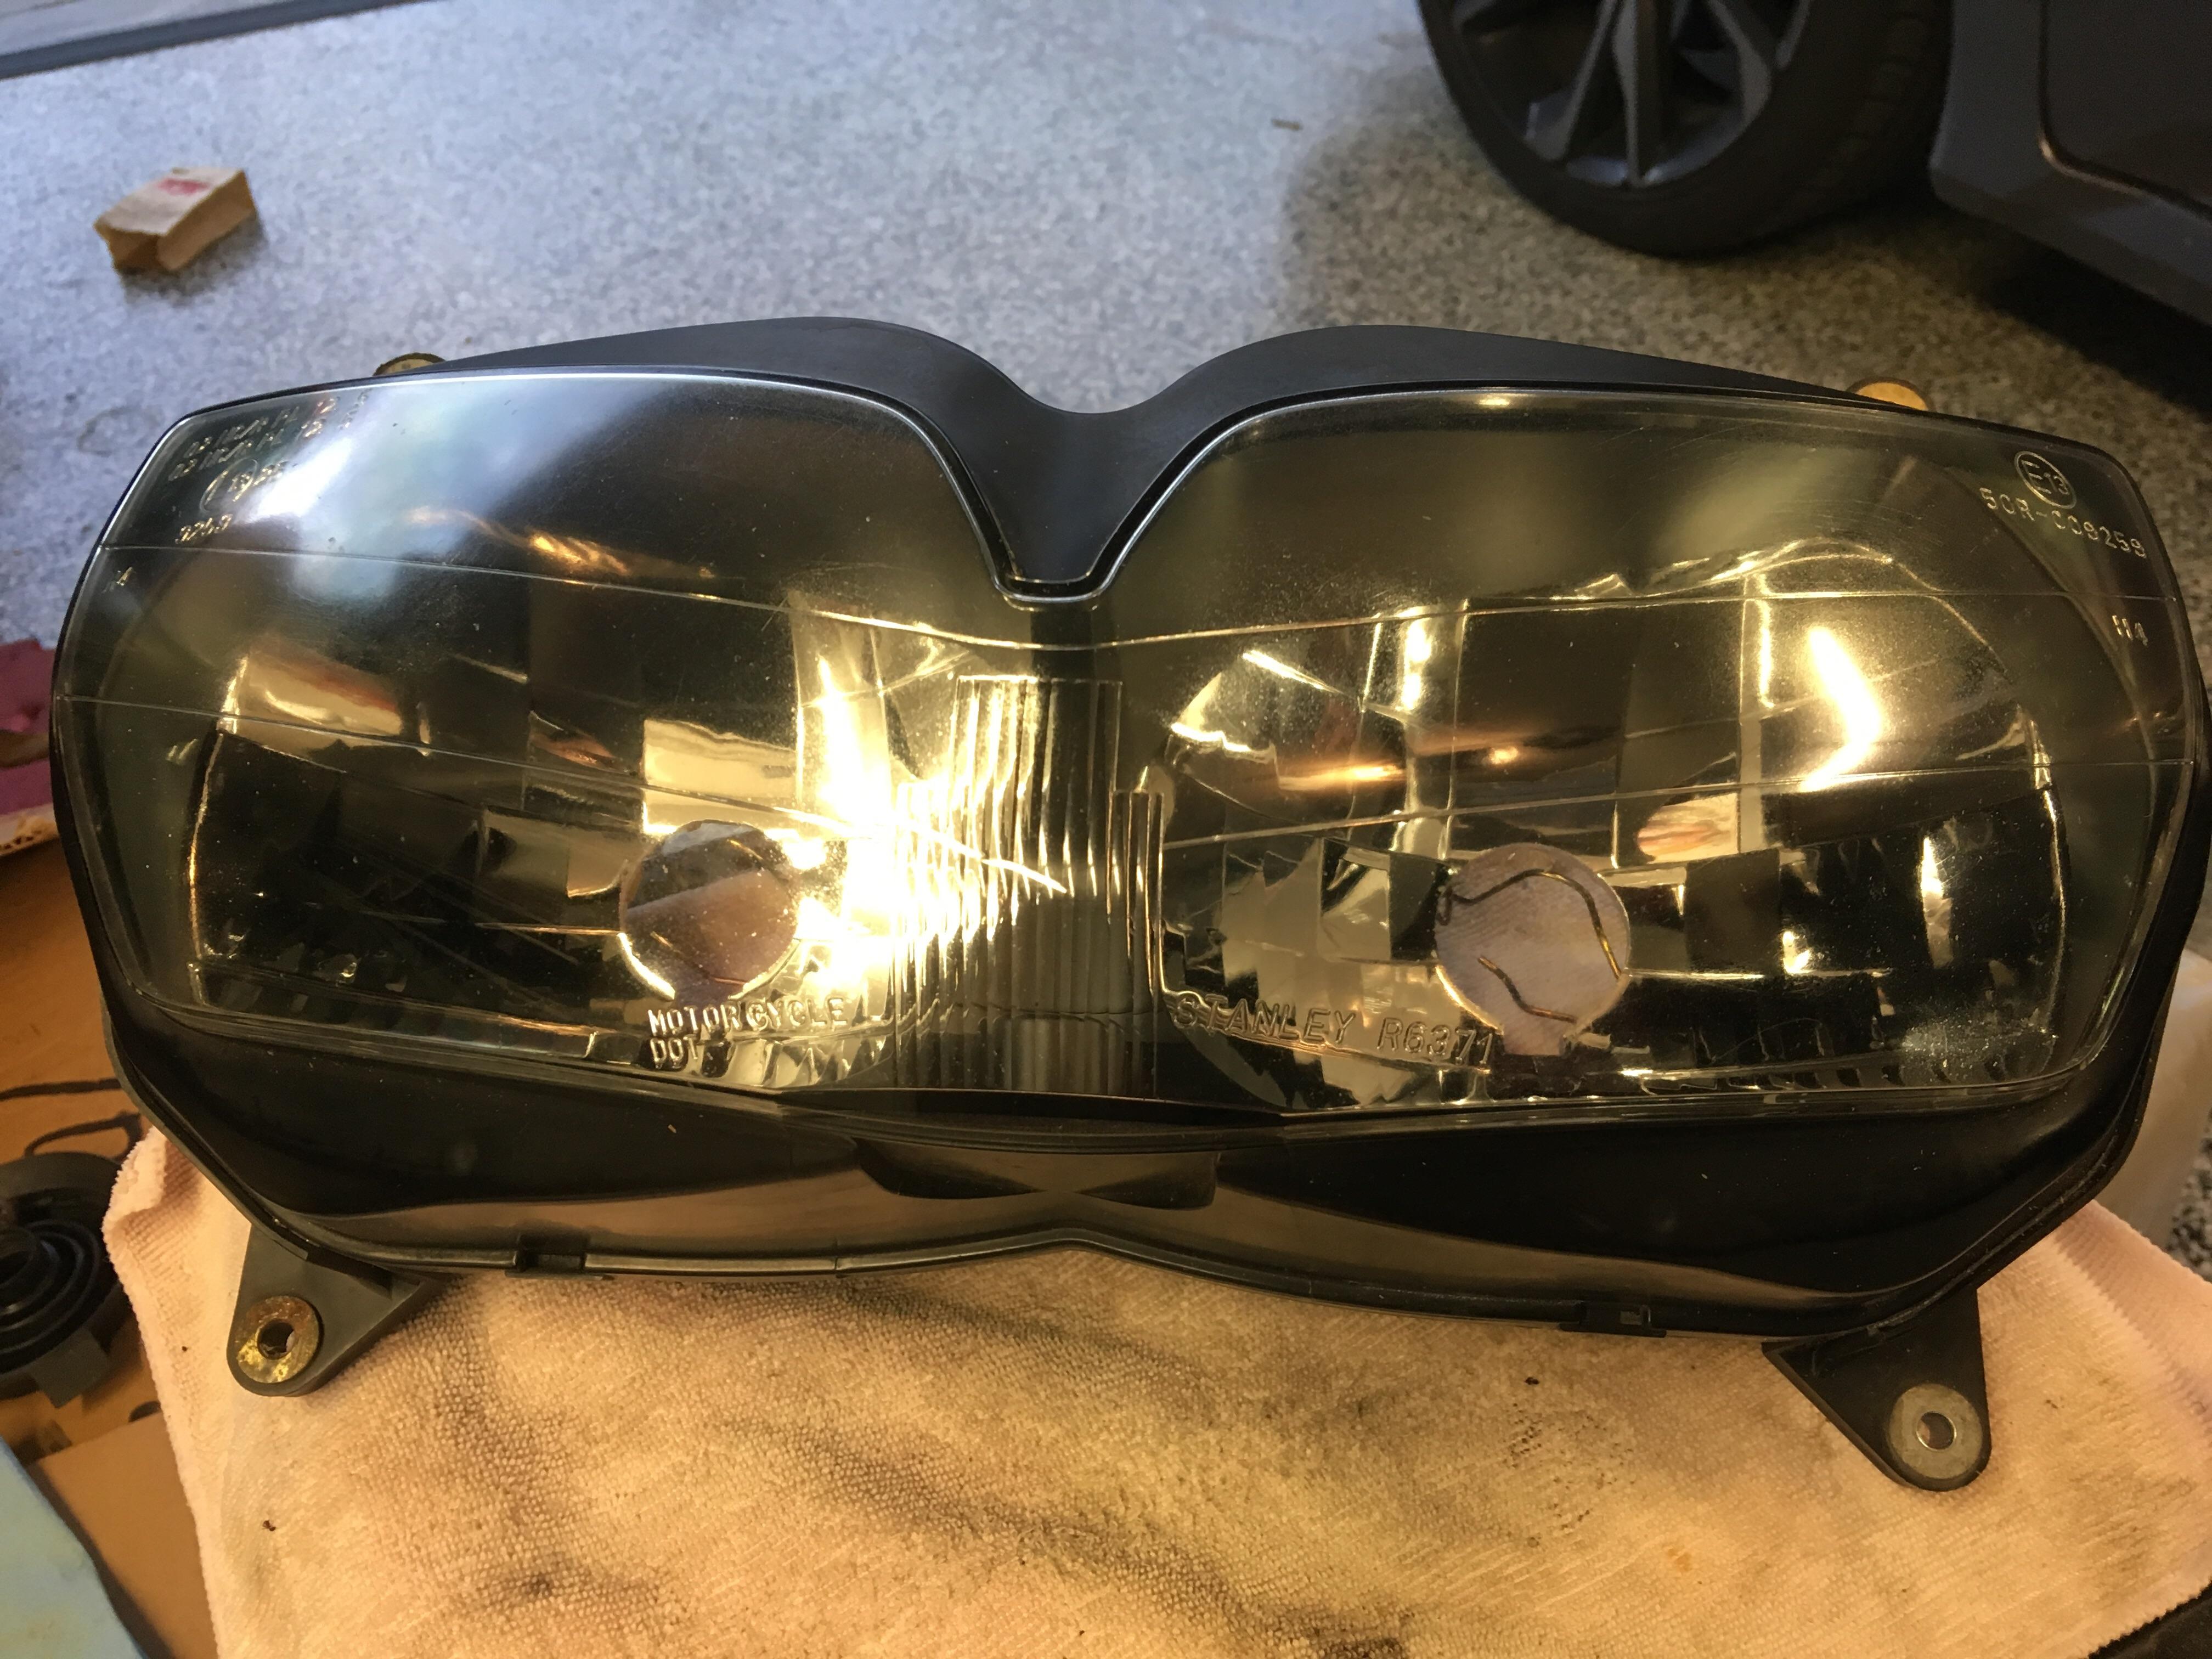
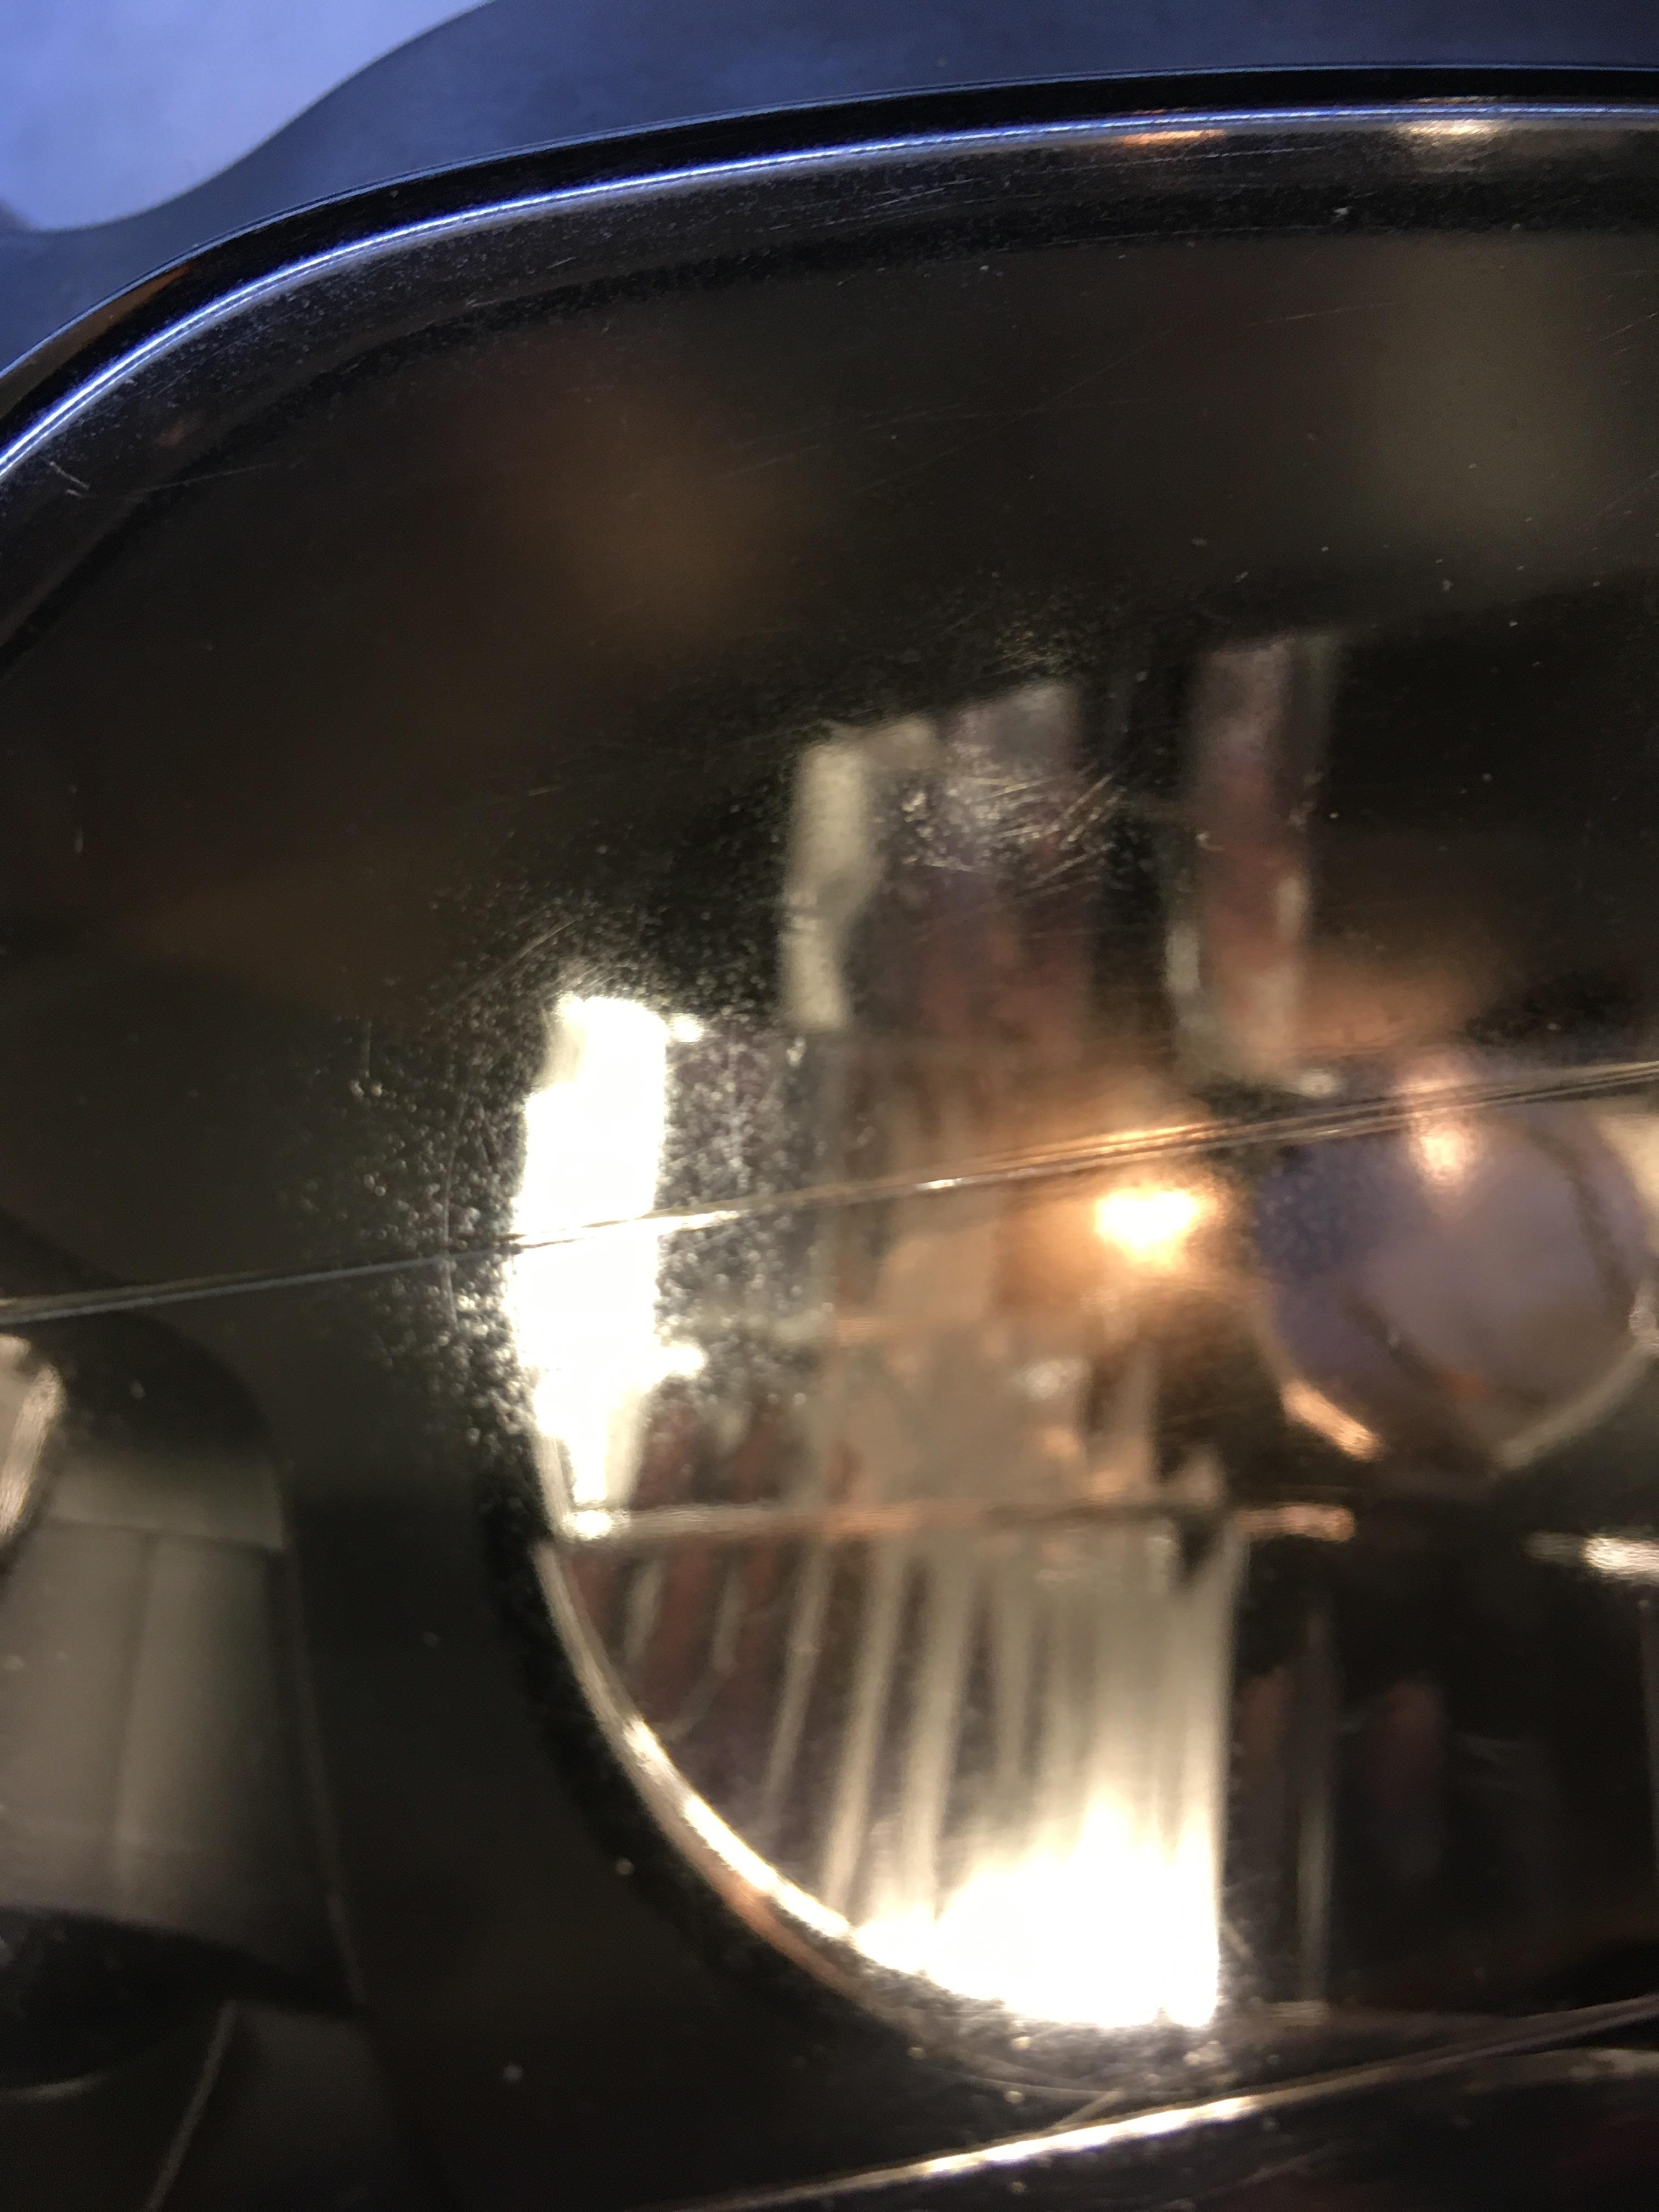
Here are the pics I took yesterday afternoon and I just checked this morning after fully drying, and then some. They look the same now. The sealer/clear coat fills in all the sanding cloudiness and dries clear. The same thing happens with water or alcohol, but of course dries cloudy again, so I was skeptical. Of course you can tell it’s not brand new, but really you’d have to look closely. Considering where it started, I’m beyond thrilled!
-
Job done! I'll reserve final judgement until the morning when it is completely dry, but it looks great at the moment! I did a combination of most of the above; Mainly polishing with light plastic polish, and some sanding with 1500 grit, finally finishing off with the 3M sealer/clear coat after the included 3000 grit pad. I guess the biggest thing I didn't understand was that I didn't need to finish it completely clear and polished before clear coating. The Chris Fix video from MaxSwell and also the 3M instructions both left it clouded over. So that was not my original intent. I'm leaving it alone until tomorrow, so I'll see what it looks like then.
-
I could try sanding again, but I’d hesitate to go more coarse than 1500. I read an Amazon review on that 3M sealer that said on his car lights he started with 800, then 1000, then 1500, 2000 and finally the 3000 that came with the sealer. 800 seems harsh to me, but I don’t know much anyway😄 I tried some more pics today after More polishing. Don’t know if they turn out well enough. So much better than they were, but I’ curious to see how good I can get it. What’s better than someone else’s stuff to experiment?😆
-
Thanks, I just ordered this. Sounds like it is 2 wipes designed for two car headlights. Maybe I'll hit my personal headlight with the 3000 grit and the second wipe. It's actually in really good shape, but maybe it will help it last even longer.
-
How about Bon Ami? (Going with stuff on hand) Likely not as aggressive as the plastic polish, but was recommended a few years ago to get car windscreens smooth for quieter wiper operation...
-
Getting there! Did the starboard side with polish only, and started on the port with 1500 wet. I got scared seeing it turn all swirled, so I switched to polish. Not sure if I should have sanded through that, then polish. You can see (I think) in the second pic some of the slightly still hazy areas.
-
Thanks for the detail adkfinn! Here’s what we’ve got: Top left corner is where I tried the polish
-
How about that 3M Paint Defender spray on clear protector? I found an old bottle of Novus plastic polish in the garage and on a small test area it looks better with about 2 minutes of effort.
-
Have any of you tried any of the available headlight polishing kits on the market? Working on a friend's '00 and the headlight is extremely hazy and needs to get cleared up.