Leaderboard


Popular Content
Showing content with the highest reputation on 08/22/2020 in all areas
-

Version 1.0
104,757 downloads
This is the same manual that is already available here on VFRD. I have been using this so much lately that I went ahead and made it a little more useful for myself. I assumed that some other members might like to have it as well. Combined both files into one. Optimized the file size so that it is only 60 MB. Ran OCR text recognition to enable text searches on the entire book. Rotated pages that had landscape page diagram for ease of viewing. Created bookmarks for each chapter & sub-chapters. I figured this was the least I could do to contribute since I am getting so much help from this forum.2 points -
Don't know how I missed this site all these years, but he's got a bunch of great articles on maintenance and lots of gorgeous restorations he's done. Great V4 resource especially for the older bikes. http://v4dreams.com/index.html2 points
-
Yep. And, Joe’s a nice guy who’d help anyone.1 point
-
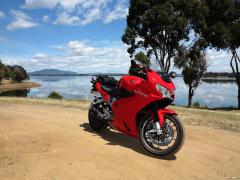
So when last I left you, I had just finished up the valves (with the help of my buddy Tony) and needed to get some additional wiring taken care or while waiting for my exhaust to get back from Jet-Hot. ...well, Father's Day weekend was as good a time as any to wrap up my project! :fing02: It started Friday with a call from my girlfriend that I had "missed" a delivery from FedEx. "Crap! ...that's my exhaust!" After a couple calls to FedEx (the first being a very rude lady telling me I would have to wait until Monday for their next delivery attempt) I found I could drive the 30 miles to the Ventura, CA sort facility and pick up my package as long as I made it before 8pm! ...that's more like it! So while, chronologically I saw the exhaust before I did any new wiring on the VFR, you're going to get things in the order work was done, so let's flash to the bike. It needed some new wiring for both the heated grips as well as the Datel voltmeter in the dash. I decided to just run 2 pairs of 14g wire from the fuse box forward. With both pairs run and labeled I wrapped the whole mess in wiring tape and ran it along the main wiring loom to the back of the bike; overall it gives it a cleaner look, protects the wires, and makes future repairs a bit easier (since you can reuse the wiring tape). Here is the wiring where the two pairs split up; the toggle is for the heated grips, the other pair goes further forward to where the previous owner mounted the volt meter in the dash (a location I hate as it's unreadable, but I'm not ready to buy a new dash panel yet). The next issue involves the fuse box itself. It's a quality, marine grade, fuse box, but it was wired directly to the battery (bad if you leave your heated grips on over night in the middle of South Dakota, for instance). :mad: I don't have pics of my relay install (so sue me) but I wired in a relay at the rear of the bike, operated off the license plate light as a switch. ...hardly a critical light should something go wonky with the relay etc.. Knowing that I finally had the exhaust, I took a moment to work over the back of the engine case with my Dremel and a small brass wheel; with my DMV inspection coming, I wanted to be sure the engine serial number was clearly visible. ...it's a far cry from the corroded and caked in pounds of dirt, oil, grease and tar that it was a few weeks ago! ...so just to annoy you, I'm going to flash backwards slightly to the work week prior to getting the exhaust. There were a couple things I needed to take care of, and luckily, we have an old lathe at work. If you remember the beginning of this thread, there is a broken cross bar on my subframe, so I wanted to turn a steel bar that would fit in there vs. trying to weld the broken bit back into place. Also, I was missing one of the steel bushings in my left passenger grab-handle. Rather than spend $80 buying a new handle from Mother Honda, I decided to spend a whopping $5 at the Do It Center on a 3' length of "weldable steel" rod; this would be PLENTY for both projects. Here's my newly turned bushing (left) next to the OEM one from the right handle. And pressed into the grab handle. ...fits like a glove!!! Next would be the insert for the cross bar. I needed to tap it (kinda useless if I can't bolt into it). ...that should do it. It fit's just a little snug into the existing cross bar. And the length looks good. ...a little JB Weld and she'll be good to go!!! :cool: Ok, fine. Back to the exhaust. You remember this mess: ...well, how do you like me now? Thank you Jet-Hot! ...I even had them coat the heat shield since it was all marred up. I also got my 1300# Hyperco spring in the mail from HRP World. :smile: Installation went pretty good until I actually had to connect the main header pipe to the pair of connector pipes from the #1 & #3 cylinders. I just didn't have enough muscle to compress them down over the new gaskets. ...luckily, I DO have ratcheting tie down straps in the garage! :thumbsup: Yeah, that's what I'm talking about! They look pretty damned good to me! NOTE: If you're doing your exhaust, don't forget to slip the clamps over the pipe and up out of the way before compressing them down onto the gasket! ...no I didn't forget, but forgetting would suck, so I bring it up as a little reminder! :wink: Then I cleaned up all the shock linkage, and flipped the dog bone so if it continued to rub, it would at least rub on a a new spot giving me a little more life from the current dog bone. ...I have no doubt I'll have to replace this piece some day. Penske is installed, along with a new chain slider. ...time to stake the new chain! Chain Staking Slip the new chain around the drive sprocket and rest both halves on the rear sprocket with the bike in gear to prevent anything from moving. ...this makes life a lot easier! Here are the two halves with the master link in place and the "X-Rings" on and packed in the supplied grease (I love DID). I also love my Motion Pro chain staking kit (it's also really handy to have a 14mm deep well socket and largish socket wrench). Place the master link cover plate where it belongs (the grease should hold it in place just fine). Line up the chain tool so it lines up with both posts and slowly add pressure using your wrench until you feel it start to really press into place. The key to staking a chain is to go slow, and recheck your alignment with the chain tool over and over. As you add a lot of pressure (it takes quite a bit to force the plate over the posts) it will often slip slightly out of alignment. Once it finally seats over the posts it will suddenly feel much easier to press; be careful not to over press the plate, you only want it flush with the surrounding plates, you don't want to crush the O (or X) rings. To stake the chain, you need to change out to a pin and anvil in your tool (you stake one pin at a time). You don't need to destroy the pin, just slightly deform the ends. Remember how hard it was to press the plate on? There are no heavy forces acting on the plates to push them out, so the slightest deformation in the pin will keep the plate in place forever. Here's the completed master link. At this point, all that remains is to button up the bike. I have a box full of new hardware to replace all the either rusty / corroded, broken, missing, or just plain wrong hardware that was on the bike. I got lazy on pics at this point because I just wanted to get her put together. So here she is, done at last! ...ok, bike porn time, here's the VFR with her garage mates: So with her all together it was time for a little test run before cleaning up the garage and putting all the girls back to bed for the night. :cool: A romp into the Santa Monica Mountains (my back yard) gives me a good chance to shake her down. ...first note, the suspension is bOuNcY BoUnCy, especially in the rear. I brought some basic tools along to help make any needed adjusttments, and after dialing in a little preload into the front, it settles down a lot. I added some preload to the rear, and it helps, but I really need to reduce the compression damping a little and add some rebound damping. A run down Mulholland to PCH and back up gets the rear more in line, but still not quite enough rebound damping. I suspect a day of tweaking the suspension while running the same sections of mountain over and over and over will be in order. ...damn, that's tough work!!! :biggrin: Here's the old girl parked in front of the Rock Store in Malibu while I cool off in the shade after a hard days work! I hope this little thread helps someone out down the road! Cheers, Dale1 point