Leaderboard
.thumb.jpg.e25635faf3d19c5c806399bf7f087432.jpg)


Popular Content
Showing content with the highest reputation on 10/23/2019 in all areas
-
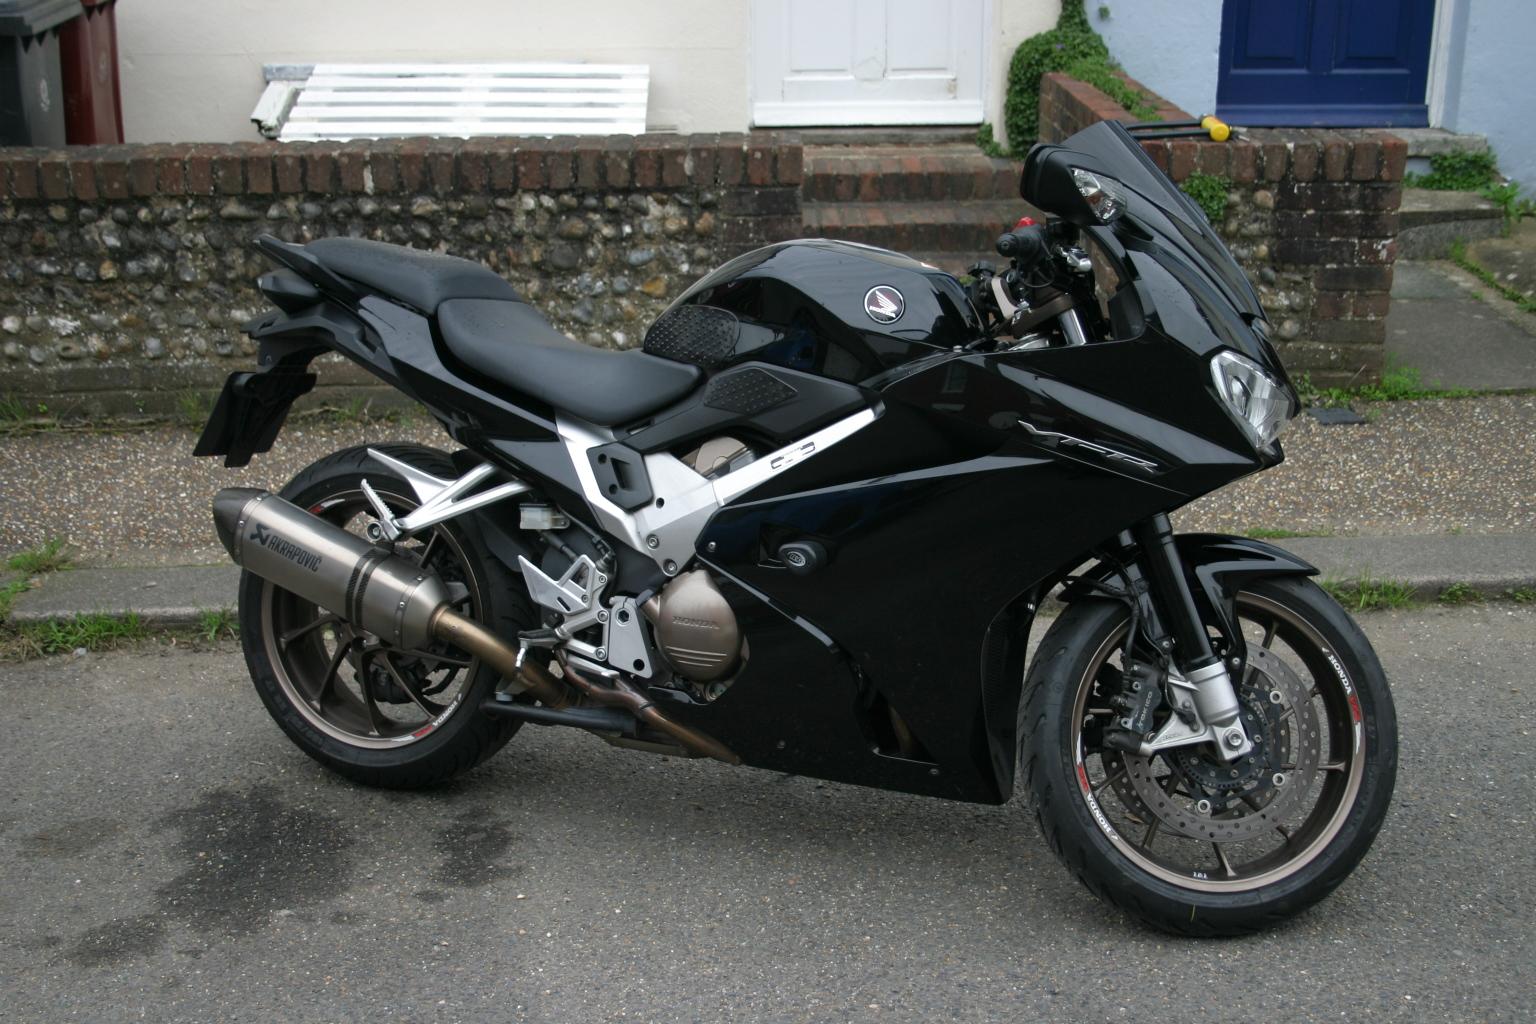
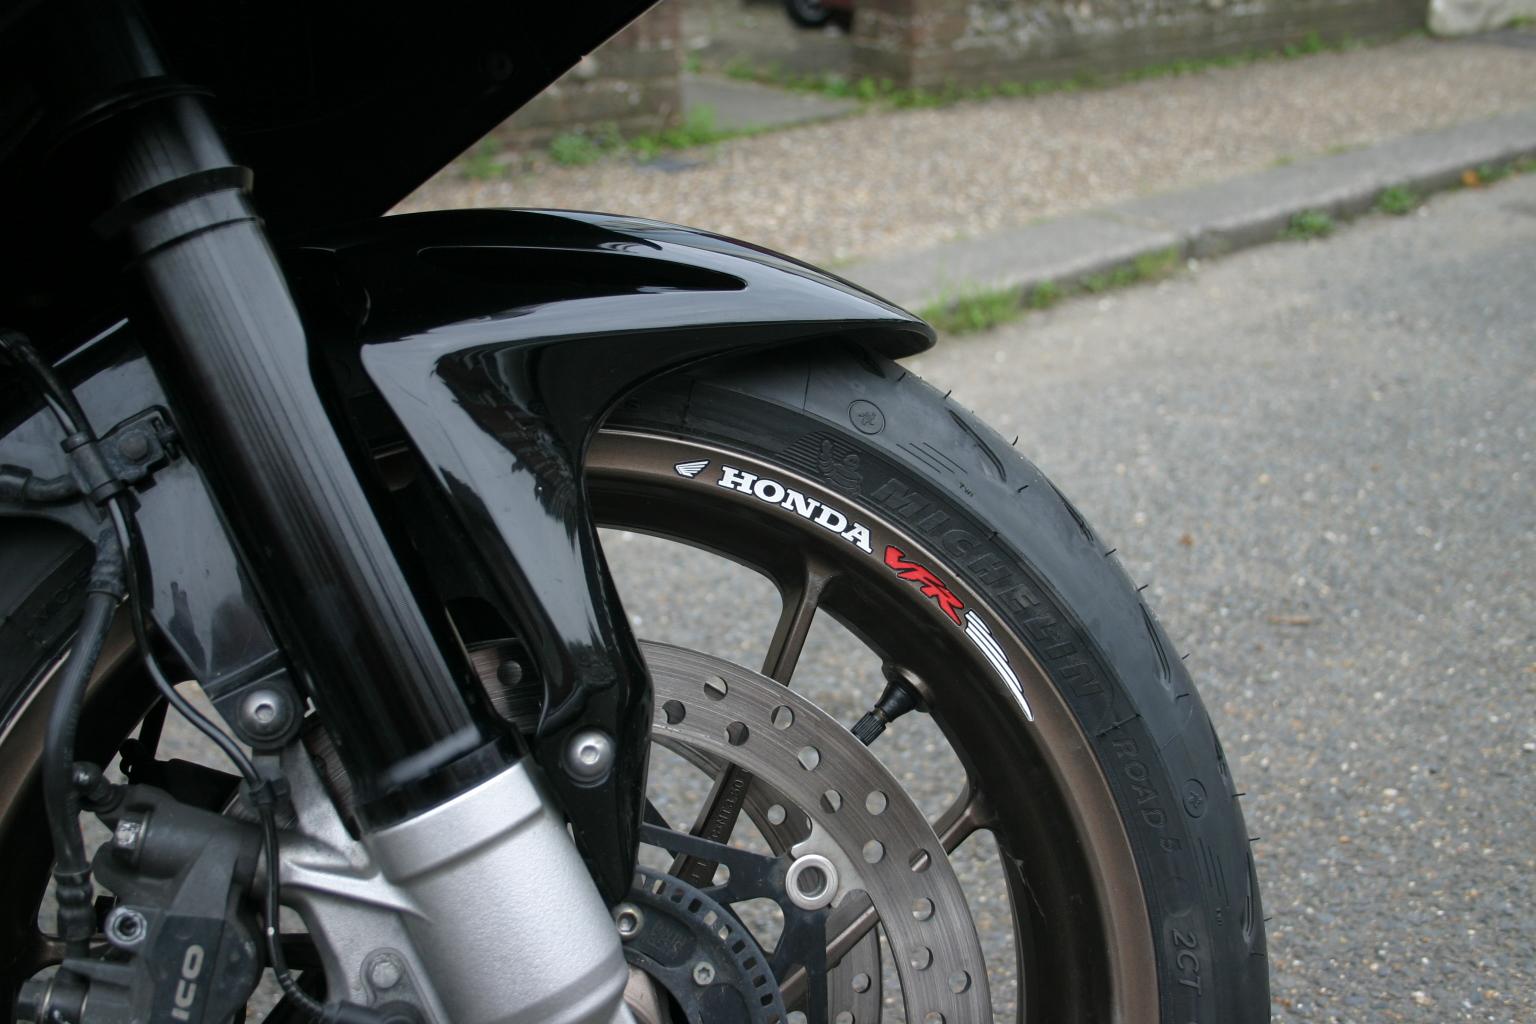
I picked up my new ride yesterday, to replace the 2014 in white that was nicked a couple of months back. This is 2014 too, and has another 6k miles on it, but is in better condition. Plus it has the Akro exhaust, which really does seem to smooth power transfer at low revs. A few points of interest: 1. It's gorgeous. I thought white was the best colour, but I now realise how wrong I was. I caught my reflection in a shop window this morning and looked a real badass. Given that I'm the least badass person going otherwise, that pleased me. 2. It came with the seat cowl and side blanking plates. I consider this a minor miracle. 3. The heated grips switch light is green rather than red, even though like my previous bike it's a 2014 UK model. Any ideas? 4. These stickers on the wheels. I've never seen them before. Are they a genuine "part"?
 2 points
 -
.JPG.b0d8a68c229474d01c03d3a40ecdec47.JPG)
From the album: 4th gen Fall
Fall rides are the best :)1 point -
This was in the first post of the thread. I had probably read through this whole thing 3 times before I noticed it - lots of info to digest. *Some dimensions, features, and specifications of the header will be taken from the TBR. The new header will incorporate the following specifications from the original TBR header design: -header construction will be from 18 gauge 304 stainless steel tubing, [0.049"/1.24mm wall thickness] -header will have 38mm od primary tubes [1.5" od] -header will have 41.5mm od secondary tubes [1 5/8" od] -header will have 51mm od collector tubing [2" od] -header's rear primary tube junctions will be fastened by spring tension fittings -header's left front and left rear primary tubes will merge -header's right front and right rear primary tubes will merge -header will have no crossover of front or rear primary tubes -header's collector exit tube will have a 51mm od [See Note c below] -header's tubing will be mandrel bent1 point
-
You have terrible luck with animals, Max. Trees too? I don't think I have ever hit any critter bigger than a gopher. Knock wood.1 point
-
Reinstalled the hard bag brackets, cleaned & lubed chain, replaced front brake pad pins - old were corroded. This gives me an excuse to show yet another trip photo. Here's one from Spring 2014, on California's Pacific Coast Highway near Ragged Point. From Cambria to Monterey, PCH is a fantastic ride on a bright sunny morning.1 point
-
@duccmann I'll look around. I probably still have the template somewhere... I could scan it into a pdf for you to use as a pattern. I think you can get the Hydro Turf with 3M double stick backing... If I weren't a DIY kinda guy, I might call around to some smaller body shops and see if someone is interested. It really isn't any different than how they attach emblems.1 point
-
100% custom. I didn't like any of the pre-cut options: I wanted something that followed the body lines, and I really prefer to make my own stuff whenever I can. I worked a little in a body shop back in the day and I picked up a lot of little tricks for this kind of stuff. The foam is actually Hydro Turf (mostly marketed to jet-skiers). I sketched out a template on posterboard, cut two mirror image pieces and smoothed up the edges with sandpaper. To attach them, I used 3M headliner adhesive - designed to make foam stick to metal. If works excellent if you follow the directions... clean everything beforehand with alcohol, do it on a hot day, or use a little forced air heater to preheat the metal like I did... I bought a bunch of cheap magnets from Harbor Freight, pre-placed the pads how I wanted them with the magnets and then went around the perimeter with masking tape and masked off all around. Sprayed the tank and the back of the pads with the 3M, and then used the masking tape perimeter to line them up just how I had them. The down side to the headliner adhesive is that it's a contact cement, so you get one shot at getting it right or you're basically just going to have to clean it all up and start from scratch. I used the magnets to hold them tight and give the adhesive time to cure. After that, cleanup was mostly just a matter of peeling the masking tape. I'm really happy with how they look and how they work.1 point