

Auspanglish
-
Posts
2,307 -
Joined
-
Last visited
-
Days Won
28
Content Type
Forums
Profiles
Gallery
Blogs
Downloads
Events
Everything posted by Auspanglish
-

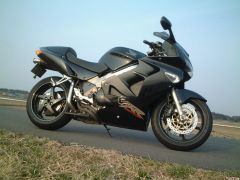
Taking a break in Central Washington.
Auspanglish commented on elevation's gallery image in Member's Gallery
 Why none other than the VFRD annual calendar... there's a post on it somewhere's abouts...
 -
Taking a break in Central Washington.
Auspanglish commented on elevation's gallery image in Member's Gallery
There's something about the white dames that makes them so photogenic... and the dark stone and earth and the crisp blue sky... and the simplicity... it's a real contender for next year's calendar.... -
Emmm, just think of Mad Max overtaking the main part in El Zorro... :cool:
-
Don't tell me, you also invented th ElCheapo GPS system right???
-
Ok, i'll give you that but I was comparing to my 51 (SP2), now theres a bike thats really known to run hot and in my case in summer always above 230f, my polarity/blade switch defineately helped. I hear ya though brother, Viffers can get toasty :fing02: Correction: my highly esteemed compatriot AussieinUSA... :fing02:
-
Well I would beg to differ with my compatriot AussieinUSA, and would dare to state that the VFR is a known hot-running bike. Everyone I know over here who has one, or knows someone who has one, says they boil your eggs in no time... I find that if I'm not circulating above 80 km/h both my 5th and 6th gen will heat up to the max and enter into the cycle of tripping the fan at around 106ºC, cooling her down to 96ºC and heating back up.... and so on ad libitum I agree, the design of the fan is flawed... to pull or suck air inward through the rad toward the motor is based on the idea that the air entering would be cooler than the air around the motor if the fan were to blow air through the radiator from the inside out... BUT, this is only valid if the bike is stationary and the ambient temp is relatively low. Here in the sunny 40ºC south-of-Spain summers this does not apply so much. Also, I don't tend to spend much stationary time on a running bike... only when stopped at the lights. If I do venture into city traffic, I am usually moving at some speed, albeit low... so if the fan kicks in, it's fighting against the natural air flow due to the movement of the bike and it's effect is probably neutralized to a high degree... or at least not taken advantage of to it's maximum potential. Also... heat is the arch-enemy of our electrical systems and the number of R/R which die in the arse over here in summer is mind-boggling. Some spare parts outlets have realized this and stock up on more R/Rs over summer than usual... my dying R/R experience occurred after a stifflingly hot afternoon running around town on the 5th gen... I have many a time wanted to reverse the polarity on the fans of both my bikes... but am unsure as to whether this would be agreeable for the motor, the fan's motor I mean... not the bike's. Using blades that run in the opposite direction sounds like a winner... it can't be all that bad the short periods you're stopped and it's blowing hotter air off the engine than ambient through the rad... and when you're at anything over 0km/h it must enhance the natural airflow in through the front of the bike... being able to manually switch the fan on could be a great plus in combination with the reversed helix... hmmmm, I reckon I'll have to try that for this summer... just have to keep in mind to turn the fan off when it's not needed and always before turning off the bike so it's not on when I want to start up the bike... although you'd hear it-... noisy bugger. So the part number in the photo is for the reversed helix right?? Off the VTR?? I'd also live to whack another fan on the RHS rad, but the engine's eccentrically placed and there's no room for one the same size... a couple of PC fans fit on the outside in the gap in the fairing but I doubt they have enough pull... guy I know stuck two on there, claims it makes a difference... but he has the OEM fan switched and so it's hard to say where the blame lies... there's just enough room for a PC fan on the inside front-bottom corner of the RHS rad, but same difference I reckon.
-
Reno-Fernley Track Day June 2, 2007 - 20.jpg
Auspanglish commented on PorradaVFR's gallery image in Member's Gallery
 Stealthy.... mmmmm
 -
 Looks great!! Just an observation... that elastic strap that goes round the bottom of your boot (wet weather pants I suppose)... try taking your boots off and have that on the inside next time... if it gets hooked up on the footpeg or brake lever... you're "ef-you-see-kayed"!!!!
 -
Veeery interesting indeed... a closer up shot would be good to be able to appreciate the new shape. Just a quicky: how tall are you?? are you all legs or long in the torso? I'm 6'4" and have "issues" with buffeting...
-
Gen. 6th Vfr: The Brake Lines Are Now Runnging Through The Swingarm!
Auspanglish replied to 2FAST4U's topic in Modifications
Sacrebleu!! very trick indeed... hope it never snags on anything but quite a clever idea there sir... -
Gen. 6th Vfr: The Brake Lines Are Now Runnging Through The Swingarm!
Auspanglish replied to 2FAST4U's topic in Modifications
Ok, I've got a few questions for you: 640603 is female? Are you sure? The block is female, so this fitting would have to be male, no? 2- My bike is de-linked, so I wouldn't need the "return line". Could you tell me which fittings I would need? 3- Since I only need one line, do I still need to drill holes? Thanks, SG If you onl ave one line you would only need to widen the existing holes from what I understood. But, if you've only one line... does that mean your rear calliper is only running two pistons? I thought the second line wasn't a "return" line, but a "sending" line from the PCV valve... running the third piston when you apply the front brakes... -
Gen. 6th Vfr: The Brake Lines Are Now Runnging Through The Swingarm!
Auspanglish replied to 2FAST4U's topic in Modifications
Seb, and anyone else thinking to do this... just get an industrial strength vacuum cleaner and jam the hose opening up against the hole, should do the trick. You'll hear the flakes going up the hose. Here's a suggestion... when you open out the diameter on the existing holes and fully drill the new one.. why no do it so the holes go at an angle... I know it's thick stuff but, if the holes angled forward (bottom to top) the lines wouldn't have to negotiate such a sharp bend and wouldn't run the risk of kinking (braided lines btter than OEM for this reason too), and also wouldn't rub on a 90º angled edge!!! Just my 0.02 cents' worth... the thickness may be an impediment to this idea, I'm sure Seb can confirm whether it's possible. -
 ¡¡¡Guapísima!!!
 -
Oh man... I just realized what's been putting me off... we see the black wire on the lower side (left in the pictures) and that "appears" to be the side away from the R/R. But what I forgot, and can't appreciate in the photos is that the wires coming out of the R/R double back and after the connector head back towards the R/R... so at first I was thinking... "but that's not going TO the R/R but AWAY from it... my bad...
-
Did you buy the VFRness? If so that does the Monitor wire fix. Your 98 wouldn't have a monitor wire. Yes I did (you've forgotten the biz with customs already?). But I still have that doubt in my head about the connection to the black wire and not the B&W one... in case people ask me over here in Spain. They're always asking me to translate stuff from here as it's well known you Americans get stuck into the DIY stuff a lot more... especially on this site.
-
I don't reckon it would hurt, but keep in mind the 5th gen doesn't have the black feedback wire leaving the R/R. Beefing up the red and green wires would probably be an advantage... also the R/R is located on the left hand rear part of the bike, under the seat cowl attatched to the subframeabove where the helmet lock is... I've been asking about that black wire out of interest's sake 'cause I can't get my head around which way it runs, to what device it provides feedback, as it's black in some parts and B&W in others... but haven't yet had a reply. I took the easy path for my 6th gen and bought Tightwad's VFRness. Now I see I probably could have done it myself... but I'm sure Tightwad has done a much finer and sturdy job than I would have... Thanks again Josh... I know Tightwad does a harness for the 5th gen as well...
-
Maybe it's a stupid question... it's not that I don't trust Kanadians, nor Kanadian Ken for that matter... the thought just came into my head... it's a feedback wire... does it give feedback to the R/R or some other device?? Hmmm... somebody... please tell me I've missed something... :fing02:
-
-
And shouldn't the cable you made up be connected to the blck and white cable from the R/R?? The way it's done here it looks like you create a loop and the information (in the form of a more accurate voltage from the battery) neveer reaches the R/R... or have I got my cables back to front??
-
How do you relay it?? Please explain for idiots!!!
-
Could someone PLEASE condense all of this into an easy to follow how-to for 5th gens with pictures ¡¡POR FAVORRRRR!! After reading the whole thing I can longer think straight!! :fing02: 98 and older (ehem). In then end tightwad, as you can see, I smashed up my Vtecker and was forced to keep the 5th gen for I have no car... should have gon through with the 5th gen harness too, plug and play... almost... drool drool...
-
 Hooooooowl!!! That is the schmickest looking thig on two wheels I've seen in a long while!!!! I've gotta know... what is your exhaust and fender elminator set-up on there??? Dude, all she needs are the Y2K condomless mirrors and Toro1's blackened out frame and she would be the masterpiece!!! 2009 VFRD calendar material right there for ya!!! Oh yeah... and the clear indicator lenses??? Where?? How much???
 -
To all those wising to do this alone... NO WORRIES. I've just performed this mod myself, all by my lonesome. It is easier than changing the oil filter. For those of you who are either: - LAZY - FRIENDLESS (...I mean doing it alone :S) - IN A HURRY There are a couple of shortcuts over the original write-up. I did loosen my handlebars but DID NOT REMOVE THEM (There's a metal clip or ring towards the fork cap which obliges one to prise the handlebar coupling apart, which can easily result in scratching or deforming and besides, there's no need to remove them altogether, unless you're going to be installing helibars and such... because the forks just need to slide up through the two triple trees and the handlebars. So I just loosened off the bolts. I DID NOT REMOVE THE WHEEL. I figure it's easier to keep everything in alignment if you do not remove the wheel. Plus it serves as a great point of support when using the car-jack-under-the-headers method. I used a car jack (not the scissor type Dutchy used but a mini-hydraulic one, like the ones car mechanics use but smaller in size), below the headers. THERE IS VERY LITTLE RISK OF YOU BREAKING SOMETHING, unless you actually rest the keel of the fairings on the jack while the headers are still hot, as in this case you will melt the fairing where those little plastic clips go in on the underbelly and you will curse yourself. I have used this method to change umpteenth front tyres. Now I jacked the front up just a smidgin, the front wheel didn't leave the ground altogether. I loosened off the six bolts, 2x handlebars 12mm @ 12 NM (I call them handlebars because I am lead to believe that Helibars is a brand of bar-risers), 2x lower tree 14mm @ 36 NM (fairly high torque ), 2x upper trees @ 17 NM (allen head bolt, same size as the large fairing bolts). Then I let the hydraulic jack lower roughly the distance I wanted to lower the front. Some 8 mm. My calipers have the feelers for inner and outer diameters and the handlebars did not get in the way at all. The fork tubes were quite unwilling to slide up in the trees on their own. So I had to coax them. But so the bike wouldn't drop onto the jack (with the headers taking the brunt, even though I wasn't overly concerned about an 8 mm drop), firstly I jacked the front up and had the tubes slide down in the trees to see if that would overcome the friction of 10 years of never having been touched (I'm pretty sure the previous owner(s) never touched this part of the bike). That worked, so I proceeded to lower the jack and got things moving easier. It did need a little egging on. My fuel tank was half empty, perhaps if it were full the front would have dropped by itself. I wasn't on perfectly level ground (I used a spirit level on several points of the bike, so I know it wasn't perfect). I found that one side was perfect and the other side wasn't, but with the friction between the trees and the fork tubes, I tightened up the upper tree bolt on the one that was spot on, and coaxed the other one to where it needed to be and tightened off the upper bolt on that one too. Then all I had to do was measure everything again to be sure and tighten up the remaining bolts. So, summarizing: 1. Jack under headers. 2. Lossen off the 6 bolts. 3. Lower the jack the desired amount. 4. Measure them. 5 Tighten up all 6 bolts. 6. Measure them again. 7.Take it for a ride, starting off slow and based on handling, increase your speeds. At about 60 km7h, remove your hands from the bars, but keep tem ready to grab again, in case you get wobbles... Mine was more solid than ever, which I would put down to more weight distributed forwards. 8 Have a beer, it was a tough job and you desereve it!!! Actually, my 5th gen is now on rails. After having set sag and performing this mod, she is now so much more stable, and corners like a dream. I had regularly complained about an unusual instability in the past, and now I know what it was... too much trail!!! I notice that now all I have to do is look where I want to go and she's there. Before I had to really guide her, really MAKE her take the corner. She would always take the corners, but now she does so with ease and aplomb!!! DO THIS MOD!!!
-
If it is your first time its probably be easier for you to remove the wheel and do one fork at a time .... Be careful not to pull, twist, yank or pound to hard while its on the jack I beg to disagree. If it's his first time he is more prone to error. Leaving the wheel on means everything will stay in alinement better. Don't be afraid people. The headers will support your bike fine. But like Dutchy says, doing it with an almost empty tank is common sense. It weighs much less that way. You can use the car jack to slowly drop the whole assembly in a perfectly parallel manner and once you've dropped the front by the desired distance, you will most likely find that the distance is the same on both sides, unless you've got the bike on uneven ground or haven't placed the jack centrally. Although the scissor jack that Duthy uses can be a bugger to adjust, there are smoother operating jacks around for like 15 bucks. I use one under the headers to do the fork oil change or change the front tyre... works a treat!! I'll be doing this mod over the next couple of days as I've got this odd instability in straight line trajectories... and I'm starting to suspect that the rear shockie I swapped out on my 5th gen is a 6th gen model and apparently a few mm shorter... I will document the procedure.
-
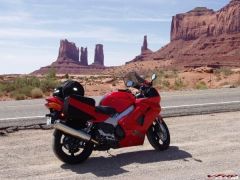 Amazing photos. Such a hotile yet eye-pleasing landscape. Looks like one would be better off doing early morning stints and taking the afternoons off...