Search the Community
Showing results for tags 'diy'.
Found 11 results
-


Version 1.0
105,273 downloads
This is the same manual that is already available here on VFRD. I have been using this so much lately that I went ahead and made it a little more useful for myself. I assumed that some other members might like to have it as well. Combined both files into one. Optimized the file size so that it is only 60 MB. Ran OCR text recognition to enable text searches on the entire book. Rotated pages that had landscape page diagram for ease of viewing. Created bookmarks for each chapter & sub-chapters. I figured this was the least I could do to contribute since I am getting so much help from this forum. -
Hi Guys and Gals, So spoke to my nearest Honda motorcycle dealer Rick Gills Motorcycles and Paul from their parts and service was very helpful. Turns out my bike hasn't had the recall work carried out as shown by a lack of punch/stamp below the J on the head stock VIN stamp. As shown below. There should be a dot punched/stamped there below the J if the recall work has been carried out. So if any of the Aussie 6th geners are reading that's what to check if you have a bike with a VIN between JH2RC46U*2M400005 to JH2RC46U*5M700241. (Don't know if the mark is standard across the world/regions). So the part(s) have been ordered and I'll get a call in a week or 2 to book it in for the work. On the exhaust front I got some great feedback (for once ) with Gumtree. A couple of interstate riders willing to help out but shipping would have defeated the purpose of keeping the cost down. Ended up getting a pair off of a great bloke named Simon locally on Monday for a 100 buckaroos. Local exhaust shop said $25 a side to weld the ends back on so I got to it last night as shown. I marked approximately 6mm in from the centre of the weld to cut with the hack saw. Sorry about the photo quality. A bit of persuasion and BFI and I got it out.. Got the other side done and called it a night. In total it took about 1 hour and a half and a few beers. I dropped the cans off at the exhaust shop this morning, as they are flat out and my job is no worth much to them it could take a day or 2. I'll be annoyed if I can't try them by the weekend. I'll try to get some audio recording as well to put up. Thanks for taking the time to check it out. Cheers.
-
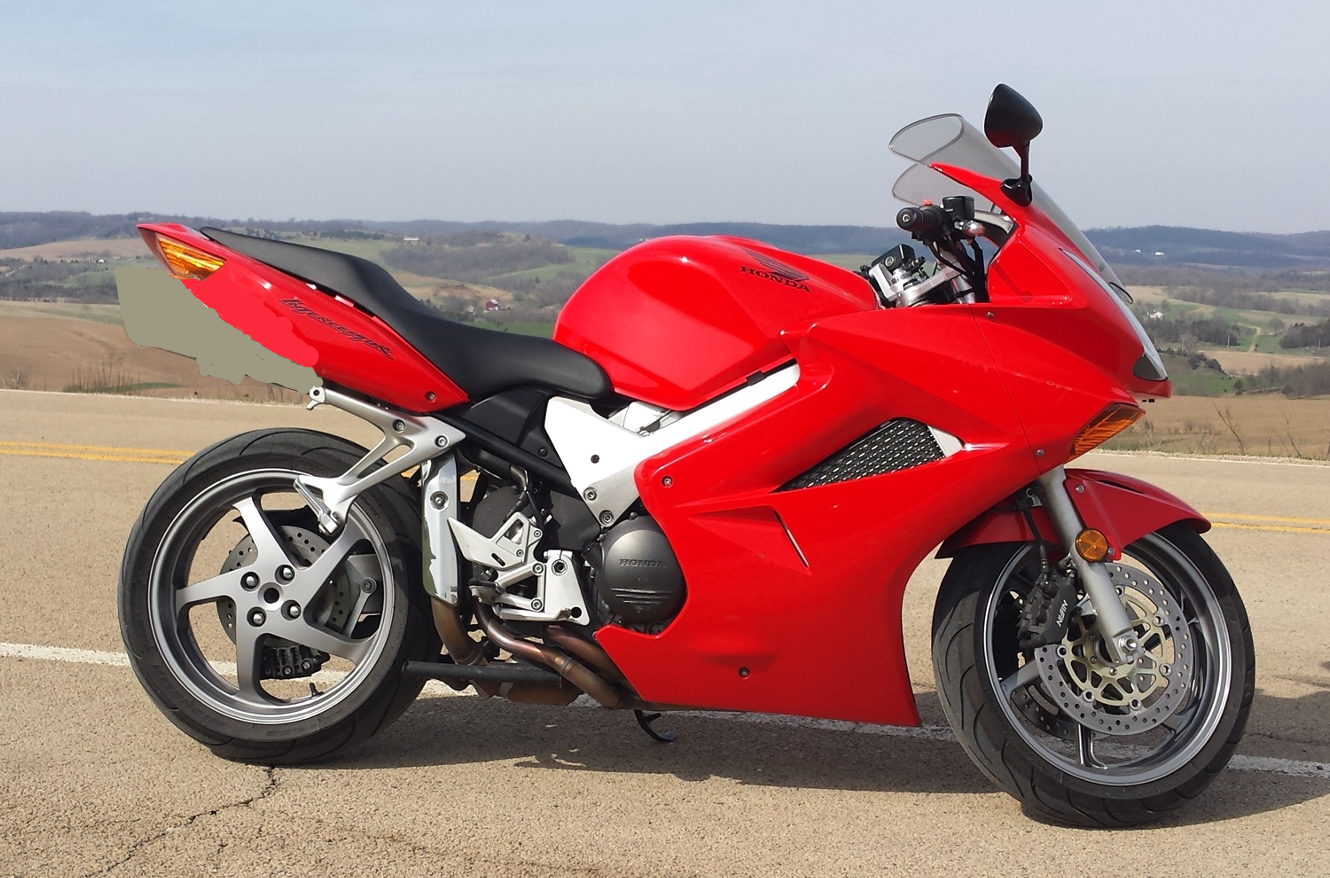
 I recently purchased a red 2002 VFR800 and I am absolutely loving it! It hides its age extremely well except for one thing (which tends to be an eye sore for me); the big outdated under tail exhausts. Another issue I have with my motorcycle is it is just no loud enough. I run with a Stain-tune cat back exhaust (without the baffles) and also have the stock exhaust. Now I know I can have a custom exhaust fabricated or use a more modern style rear exhaust setup (like repurposing a R1 or Ducati TOCE setup for the VFR) and this would fix both of my issues (make it louder and get rid of the dated look, but I am a university student on a pretty tight budget when it comes to throwing money on a bike. The alternative to this is running with a cheap slip on exhaust which comes out the side. The issue with this would be the gaping hole under the tail where the old cans used to be; this just makes the motorcycle look like something is off about it. What I am proposing is to get an affordable slip on and put that on the side, and fabricate a piece to go under the tail. I would fabricate this by first making a mold around the empty tail with cardboard, filling it with expanding foam, shaving it down to fit the bike, going over the foam with fibreglass, and finally paint matching with the Italian Red Honda paint. I could also have the fibreglass part painted at a shop if it would be cheaper. I have listed the rough price estimate and a getto mock of the final product (slip on not included in the mock up). I would love to get your guys opinion on this, the level of difficulty this would be, and if this is a pipe dream or something that is actually realistic and a good idea. Thanks. Cost Estimate: - Shorty Slip On Exhaust - $100 CAD - Expanding Foam - $10 CAD - Cardboard - Free - Sandpaper and Files - Free - Fibreglass Repair Kit - $40 CAD - Primer - $10 CAD - Honda Paint - $35 CAD - Clear Coat - $15 CAD - Total - $210 Motorcycle Mockup:
-
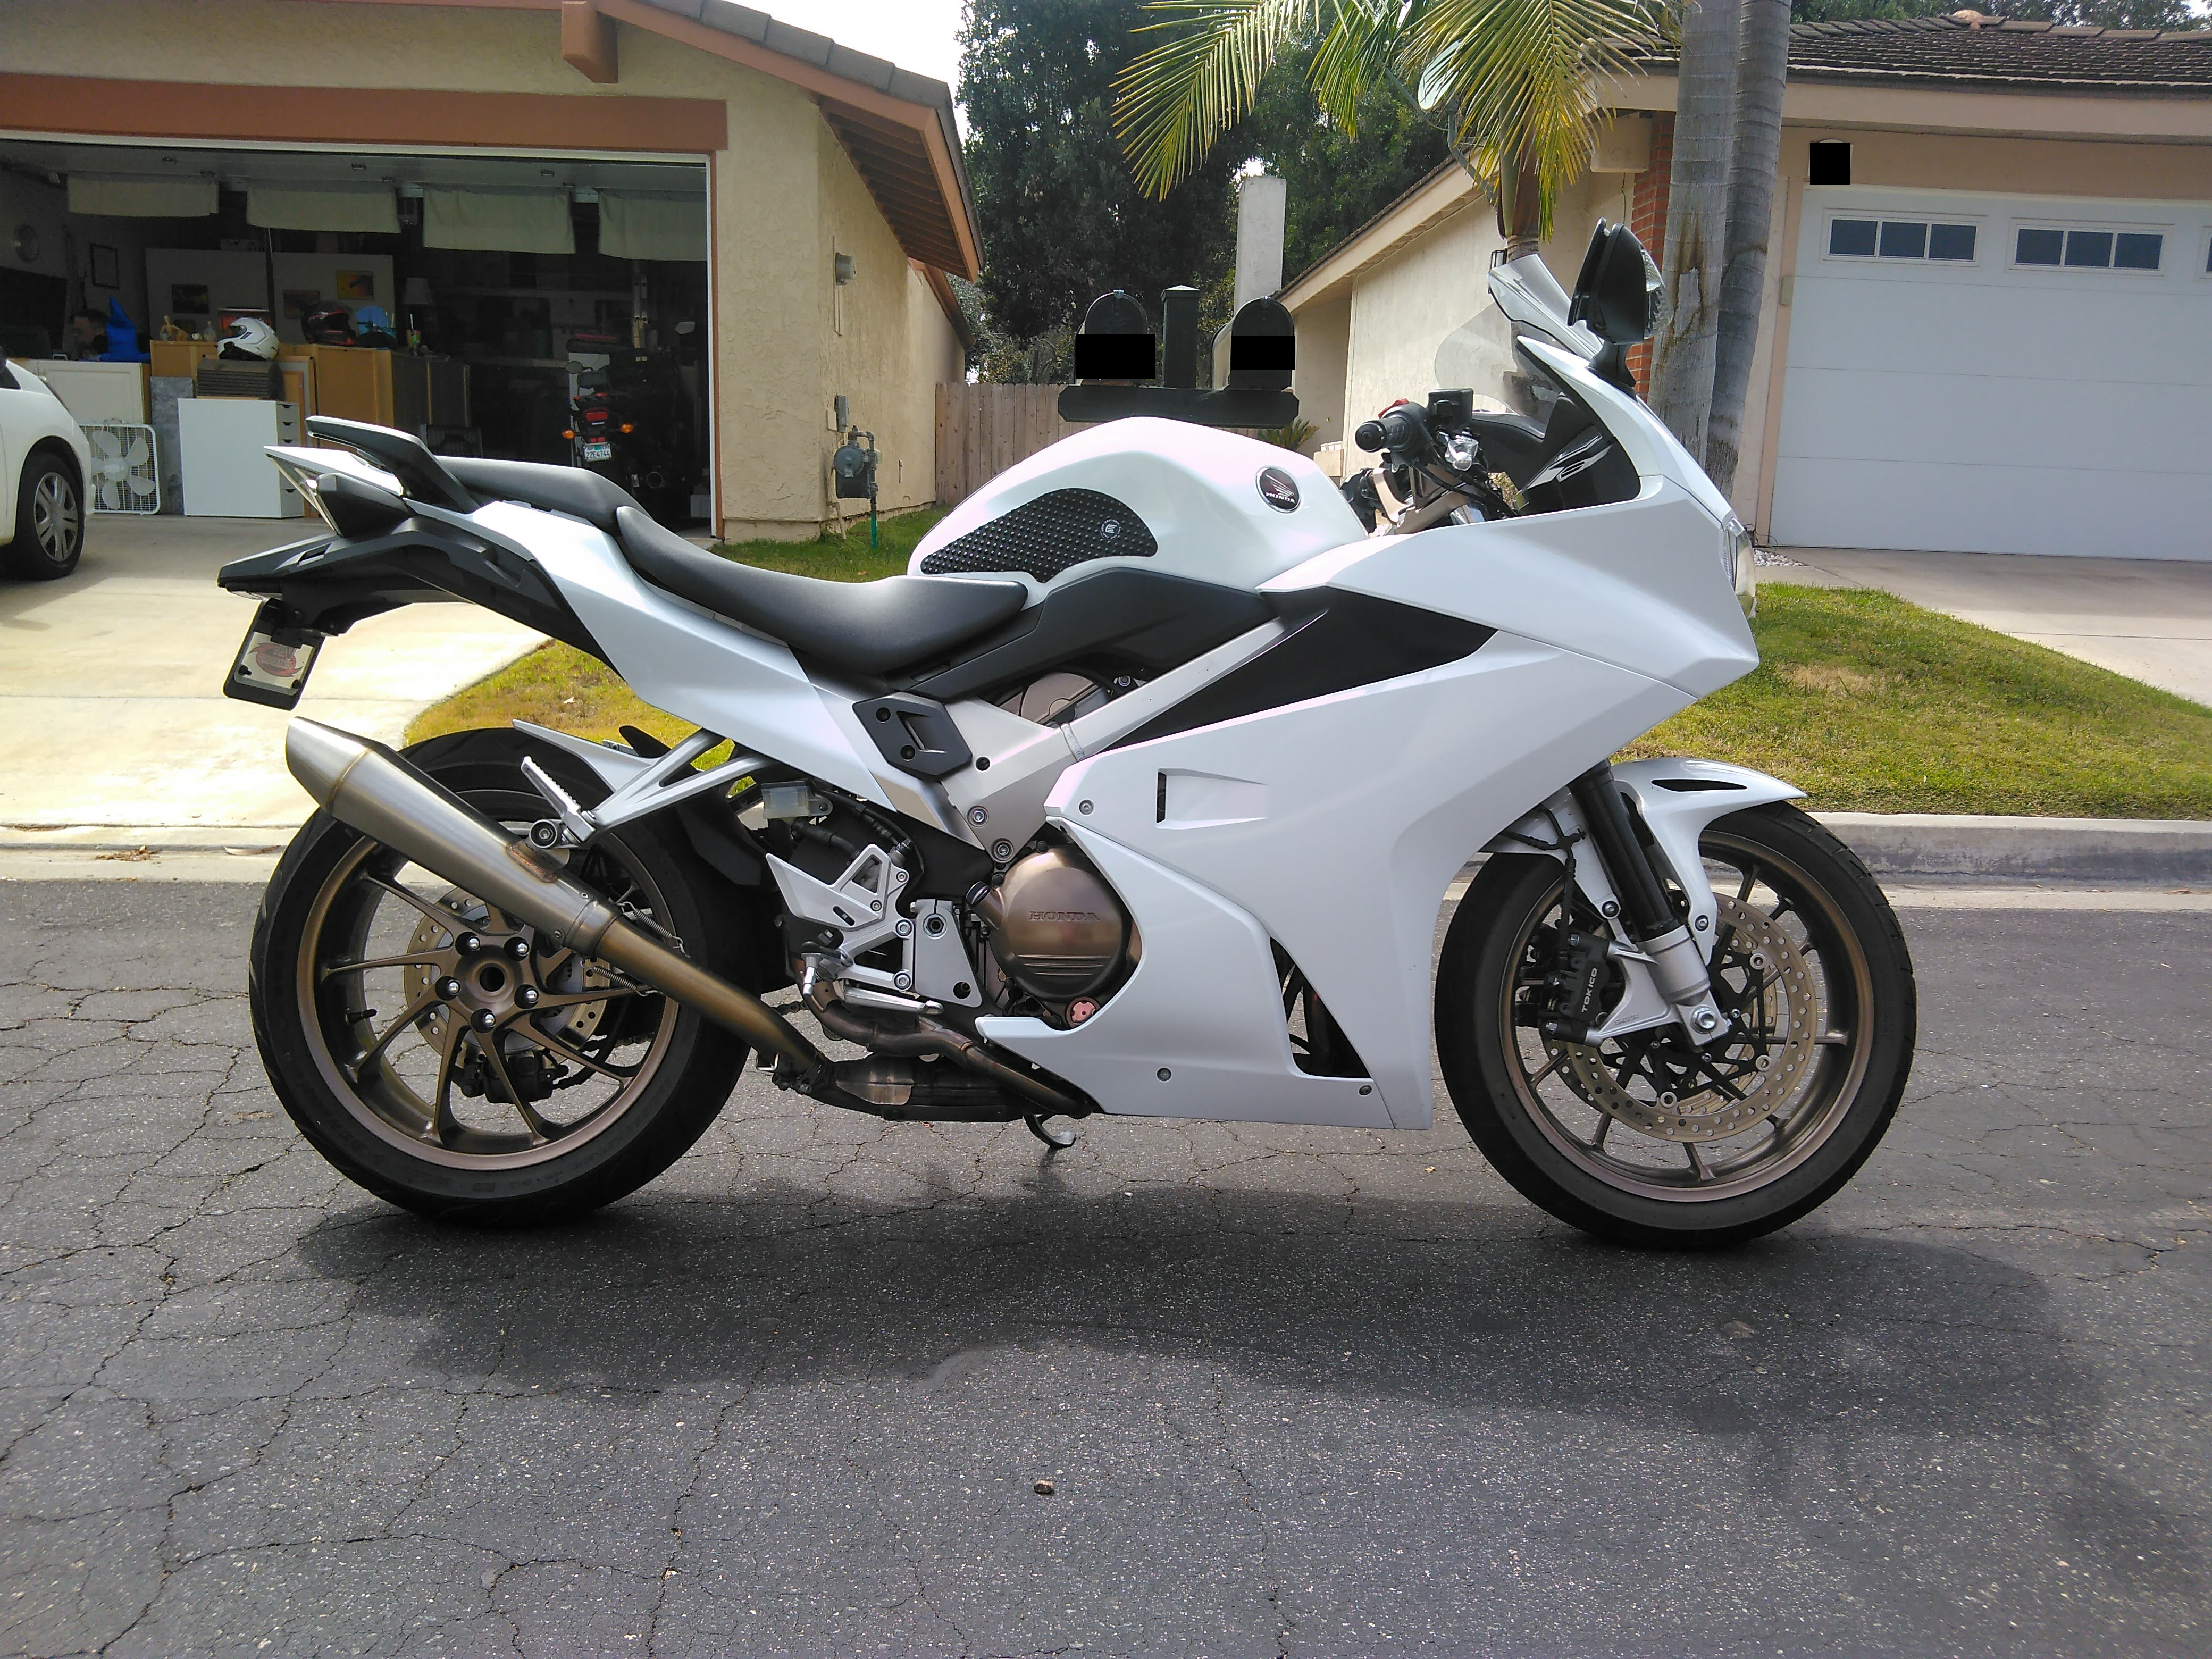
Some of you may have seen this on Facebook already but I had a few minutes and thought I would share it here. I acquired this very nice 2006 / ABS model a few years ago and decided pretty quickly that I did not like the graphics or the overall look that much. I began thinking about what I wanted to do. I changed out the rear wheel with a nice 8 spoke that I found on Ebay early on. This helped but still not what I wanted. Then I looked at a lot of paint schemes to see how I wanted to go. I wanted this to be a little understated but "sporty". I am lucky that I have a friend who is a painter who agreed to help me out. I did all of the prep work. I scuffed the existing plastics and the tank with 1000 grit paper to give the new paint something to grip. It's really pretty scary to see what you've done to a pristine finish the first time you try this. Trust that when the clear goes back on it really is like magic. Next I laid out the design and let my friend shoot it. I used two additional colors. This one is a Lexus/Toyota color called "Storm Gray". The second color is from Jaguar and matches the wings on the tank. I finished by adding a pinstripe that we put under the clear. Once the paint and clear was on, I did the final buffing and leveling. Here is the final result...
-
View File 98-01 Honda VFR Service Manual | Optimized & Bookmarked This is the same manual that is already available here on VFRD. I have been using this so much lately that I went ahead and made it a little more useful for myself. I assumed that some other members might like to have it as well. Combined both files into one. Optimized the file size so that it is only 60 MB. Ran OCR text recognition to enable text searches on the entire book. Rotated pages that had landscape page diagram for ease of viewing. Created bookmarks for each chapter & sub-chapters. I figured this was the least I could do to contribute since I am getting so much help from this forum. Submitter marriedman Submitted 07/20/2012 Category Owners Manuals and other
-
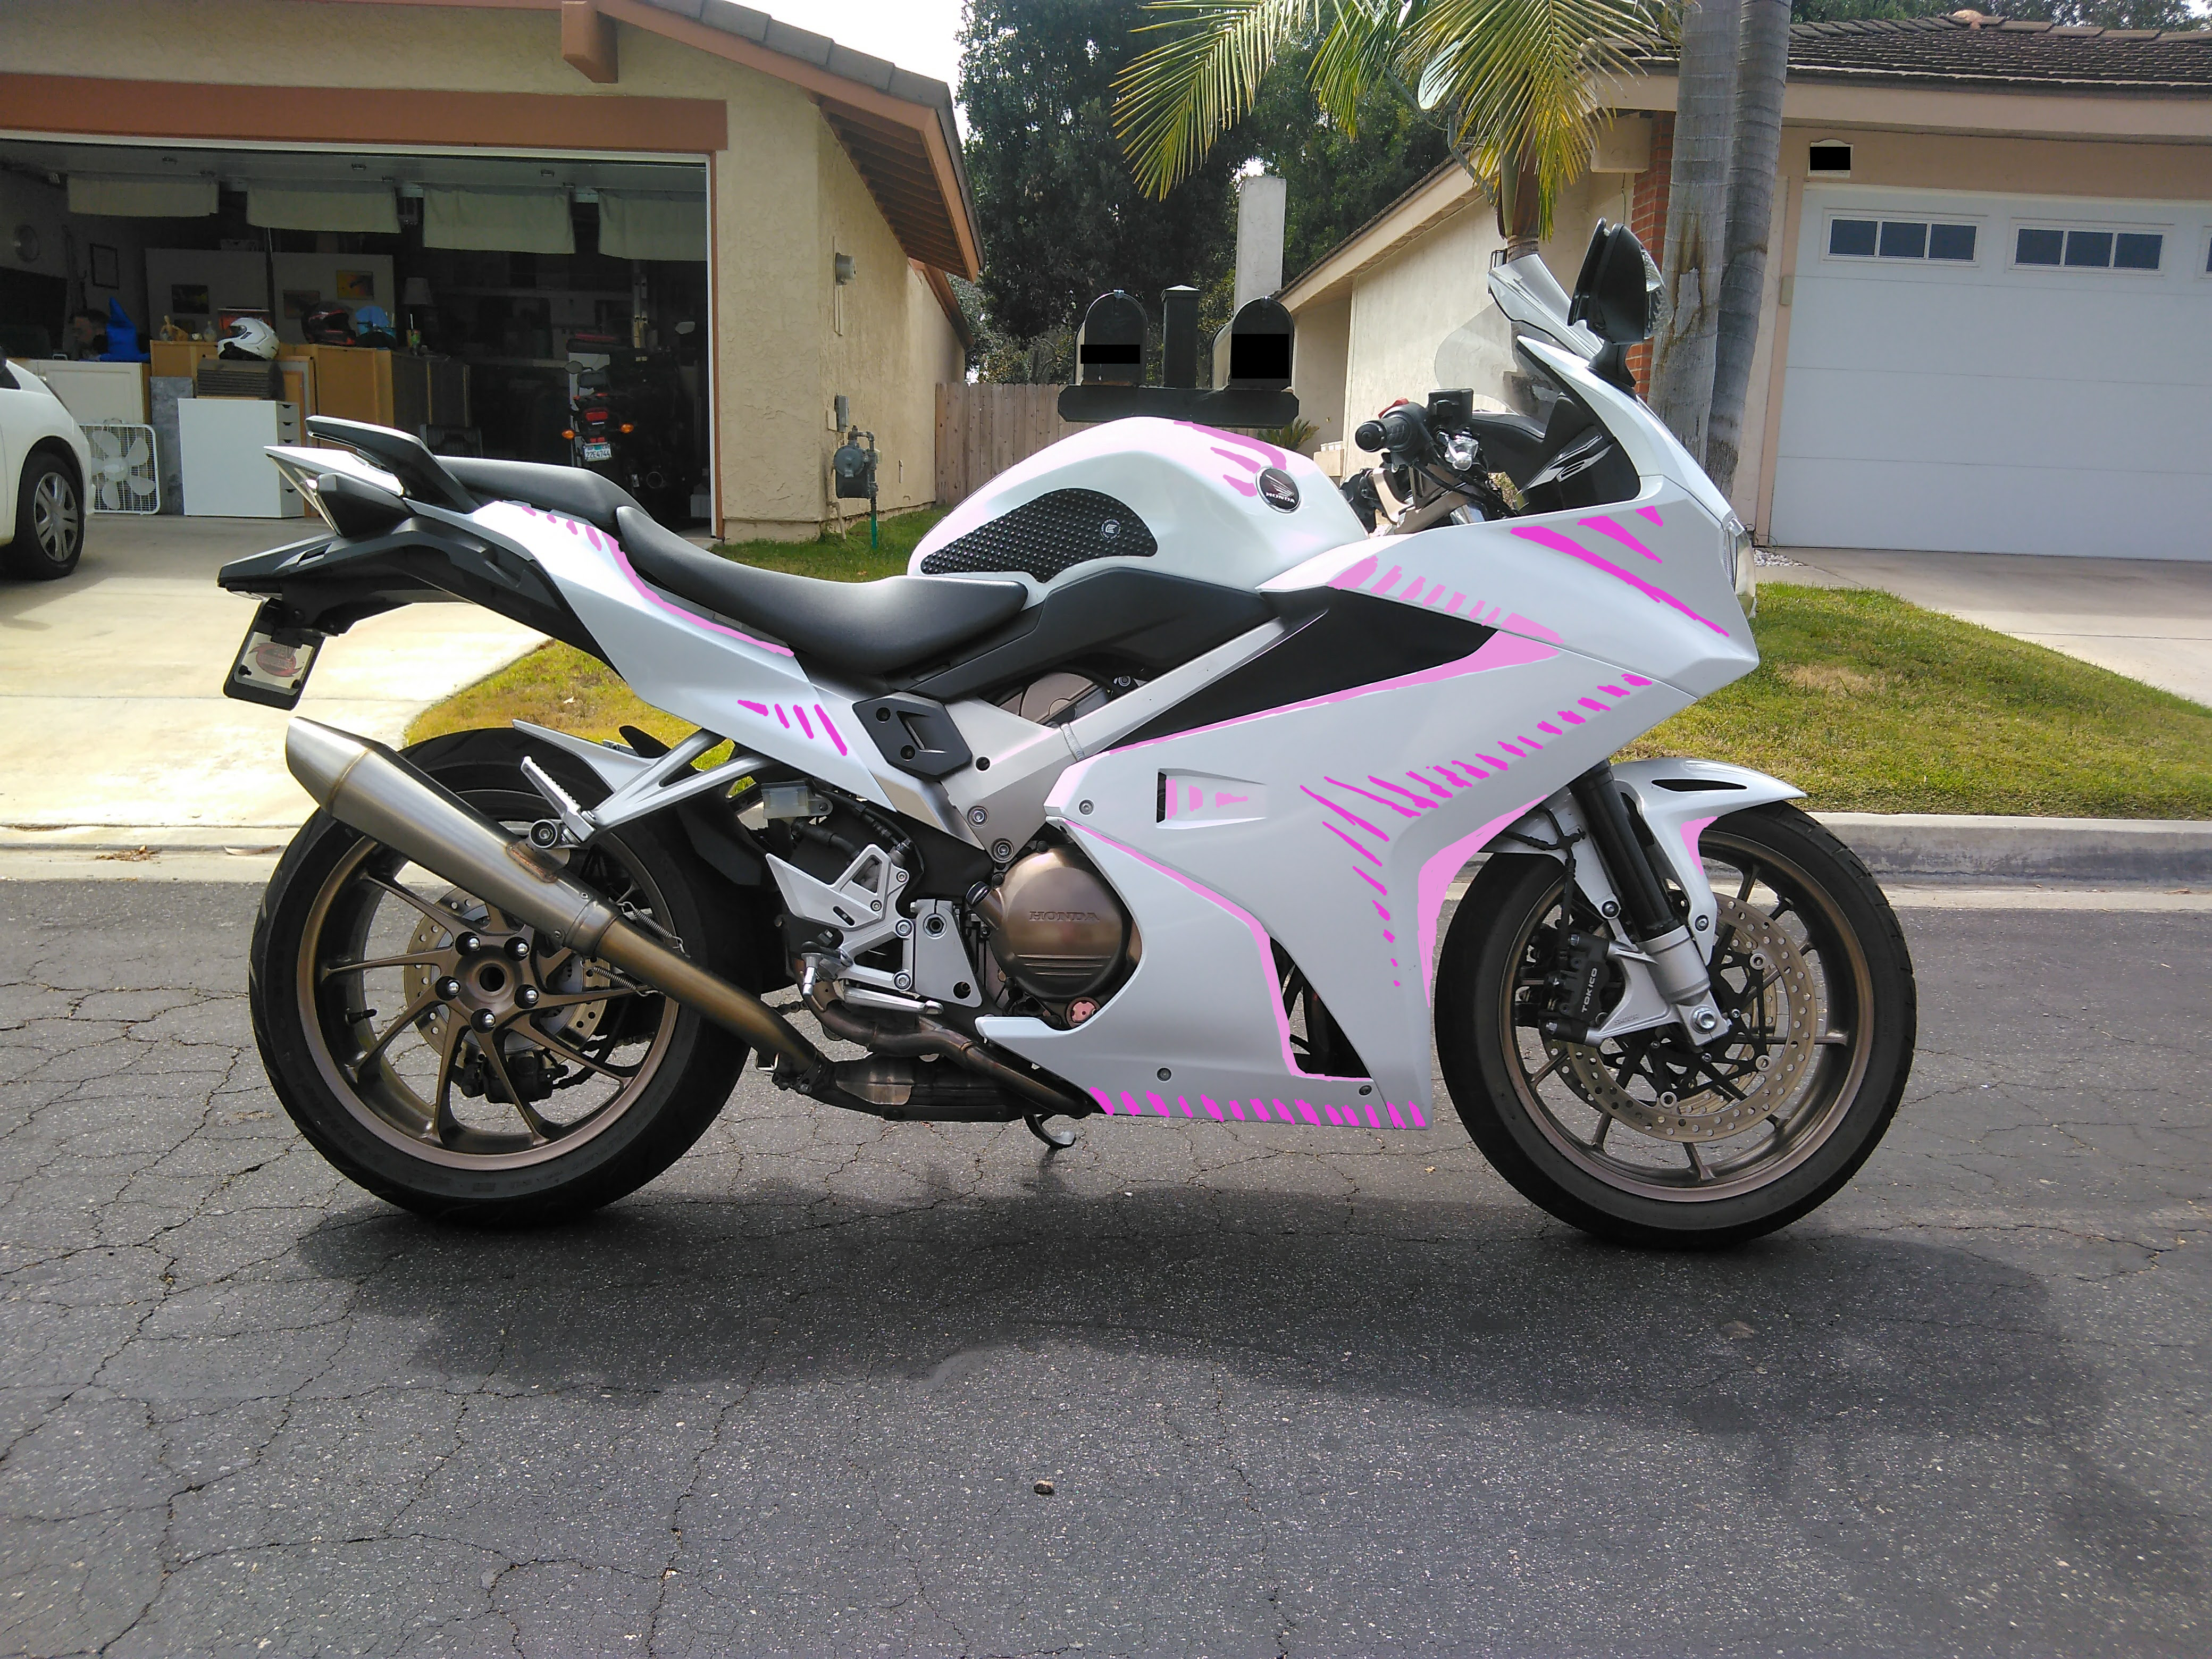
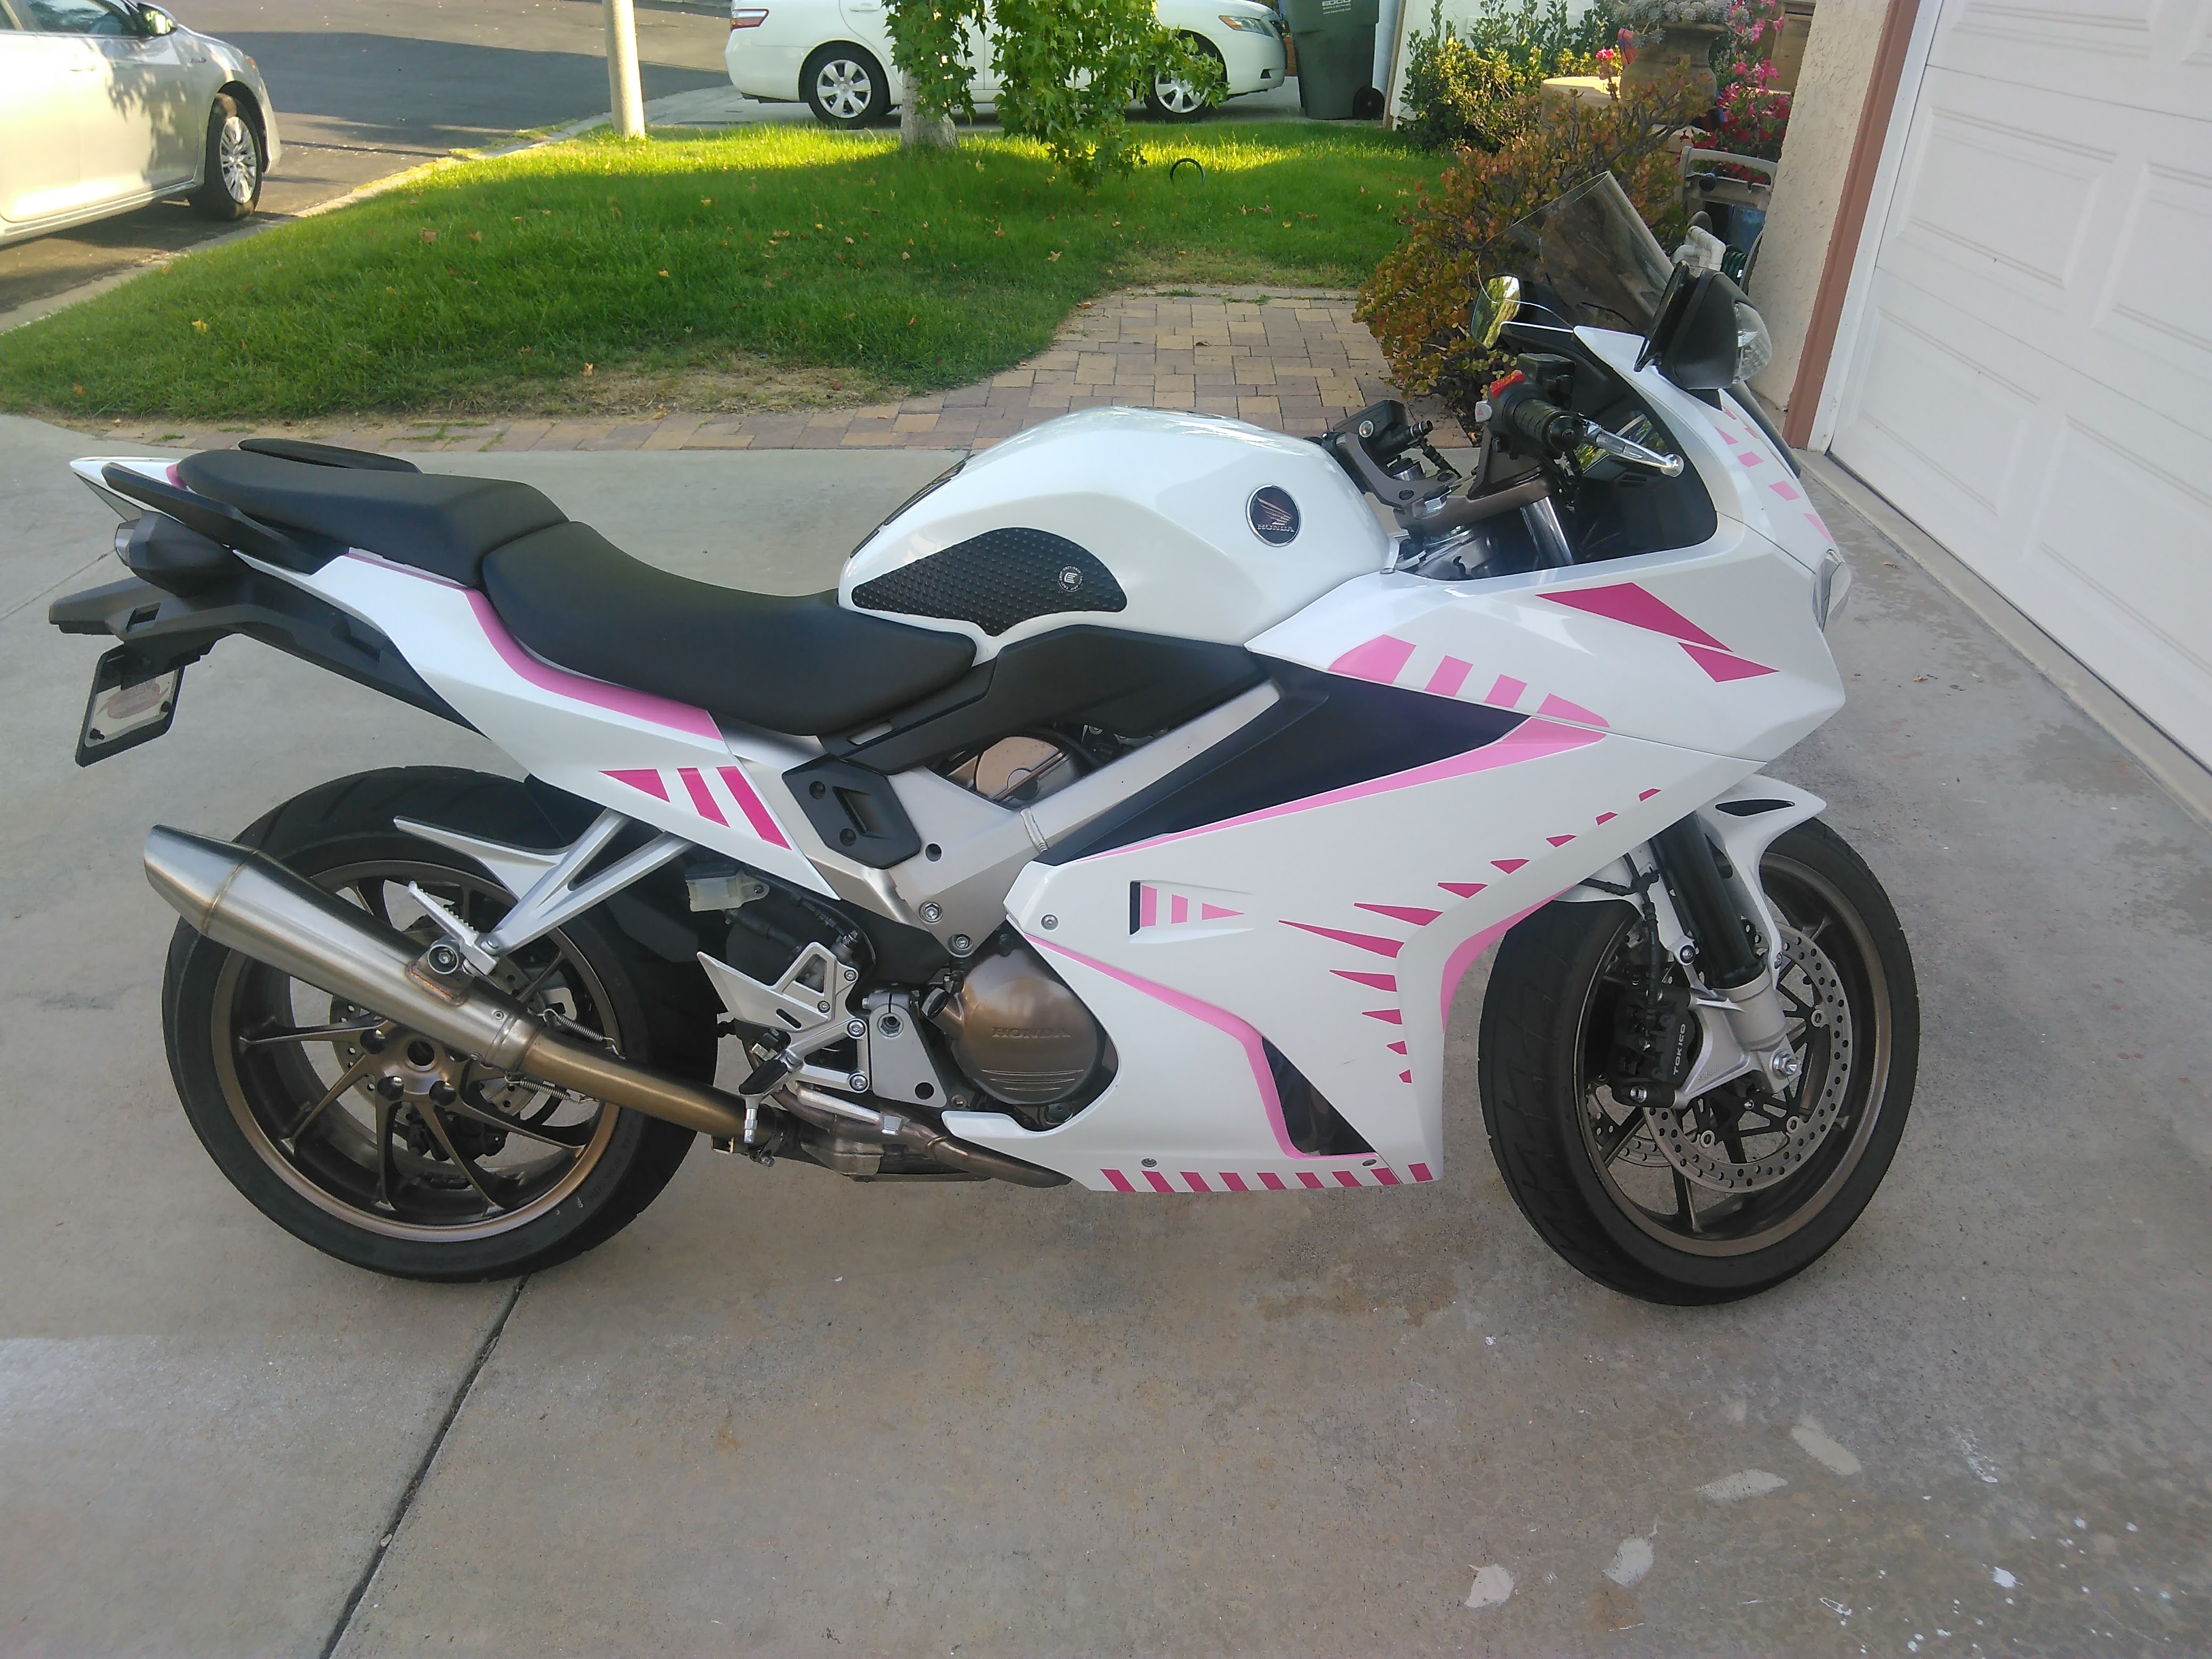
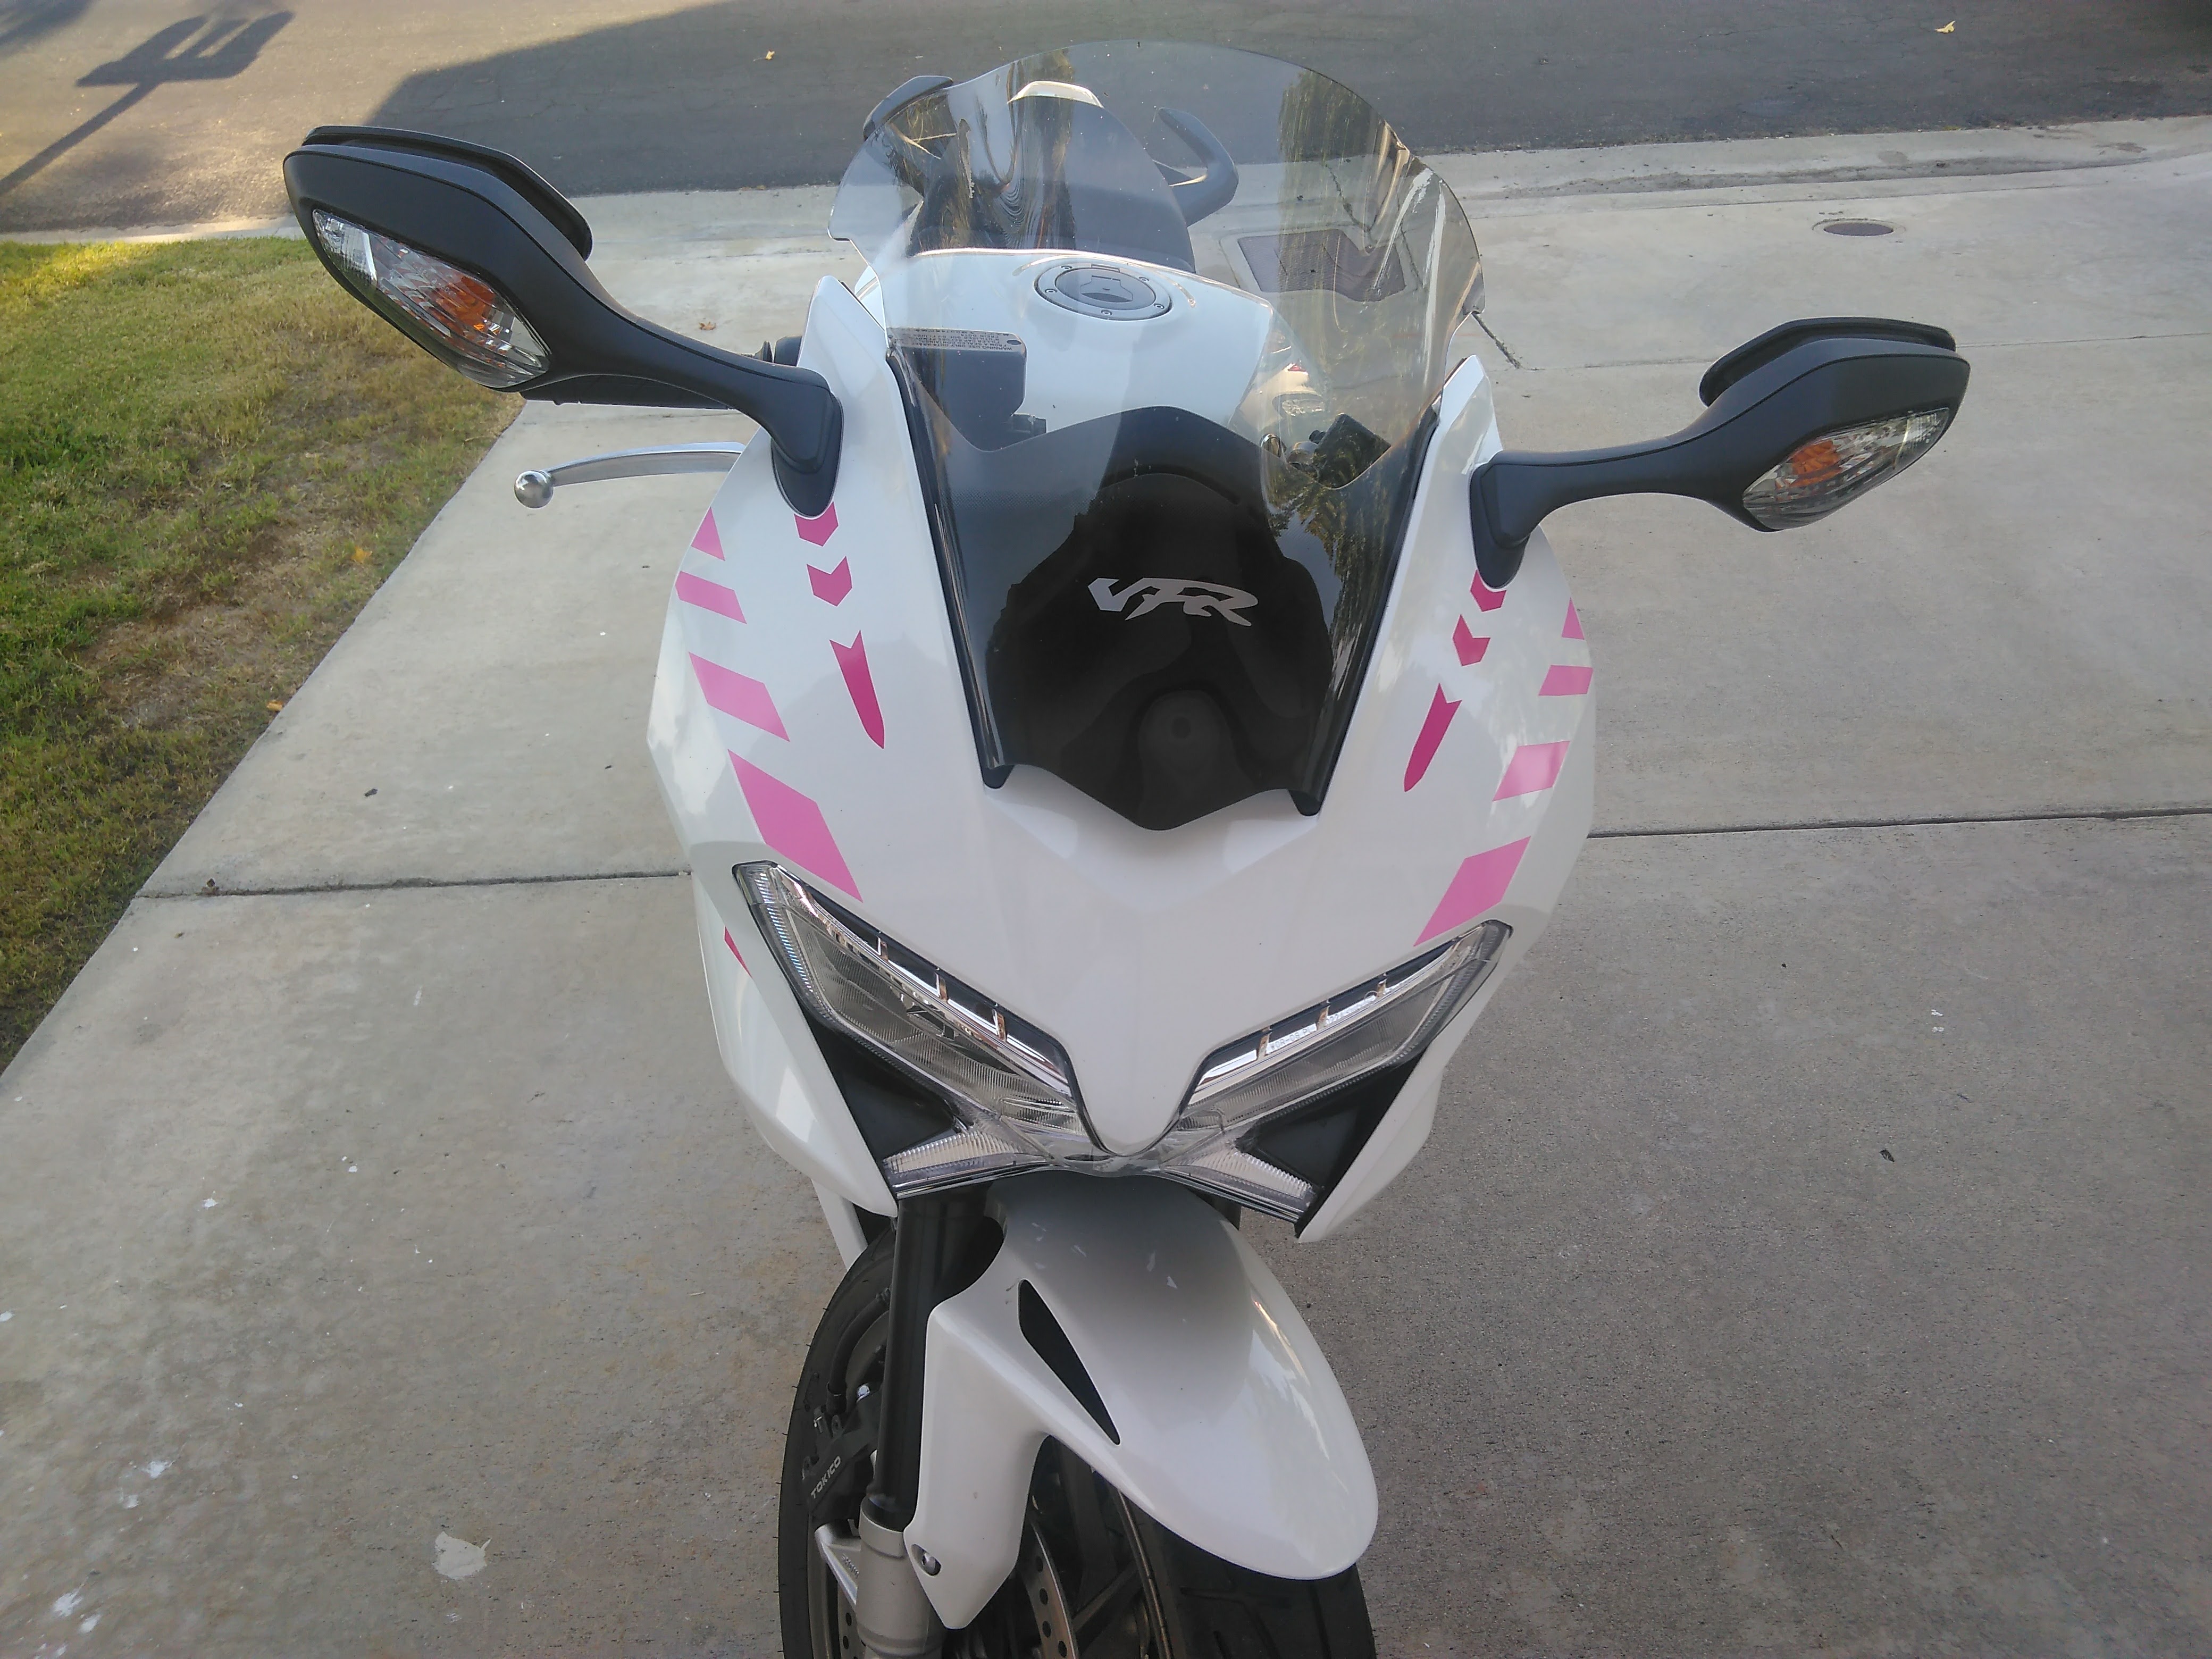
Hello VFR Discussion, glad to finally have a reason to join your ranks. in the last couple weeks i got my grubby mitts on a nice '14 VFR that only had 16k miles from the previous owner (excellent condition too). guy put a GPR slip on on it and a PCV, which was a bit of a nice bonus. the VFR has basically been my dream bike since the redesign and i'm so happy i managed to snag one, but it just wasn't quite... pink enough. Enter me, twenty bucks, and two rolls of permanent adhesive outdoor vinyl. I realize the color's probably a miss with most people but I think it turned out great. we've got the before, the plan, and the after. all in all, maybe about 8 or 10 hours' work? those fiddly contoured bits are the very devil to stick stuff to. The Before. Can't believe reviewers called this bike "too plain." it's beautiful as it is but we're going to have it looking perfect. Something like this needs a plan. fifteen minutes' fooling around in photoshop and i got my rough idea all hashed out. getting the correct scale in a photo like this is super f*$&ing hard; the shapes ended up bigger on the finished product. The glorious finished product. Imagine, if you will: you're a reasonably confident man's man out for a day of manning on your Harley manmobile™. You're getting pretty into it on the curves; your black leather apparel creaks with almost--but not quite--sexual charge against the gentle pressures of Mistress Tarmac. Your chrome glints masculine appeal onto the scenery around you, and your exhaust leaves a faint musk of testosterone hovering above the pavement. all of a sudden, you hear it. a banshee wail from the depths of depravity sounds out behind you. a glint of headlights in your rear mirror. It's coming. the high scream of a v4 in full thrust counterpoints the rumbling of your cruiser in weird and arcane beats and harmonies. you try to outrun it, you try to push your way down into the lean, but the monster pounces on you, like a Puma, or a Jaguar on a wounded doe. a flash of plastic, a blur of pink, and an eldritch horror from the Barbie aisle surpasses you--you!--like you're standing still. in embarrassment, you limp your way home and vow never to speak of this moment, lest your masculinity, machismo, your very raison d'être shatter and fall around you from the titanic blow it has received. You will wait. you will recover. and you will hope the pink monster never finds you again...
-
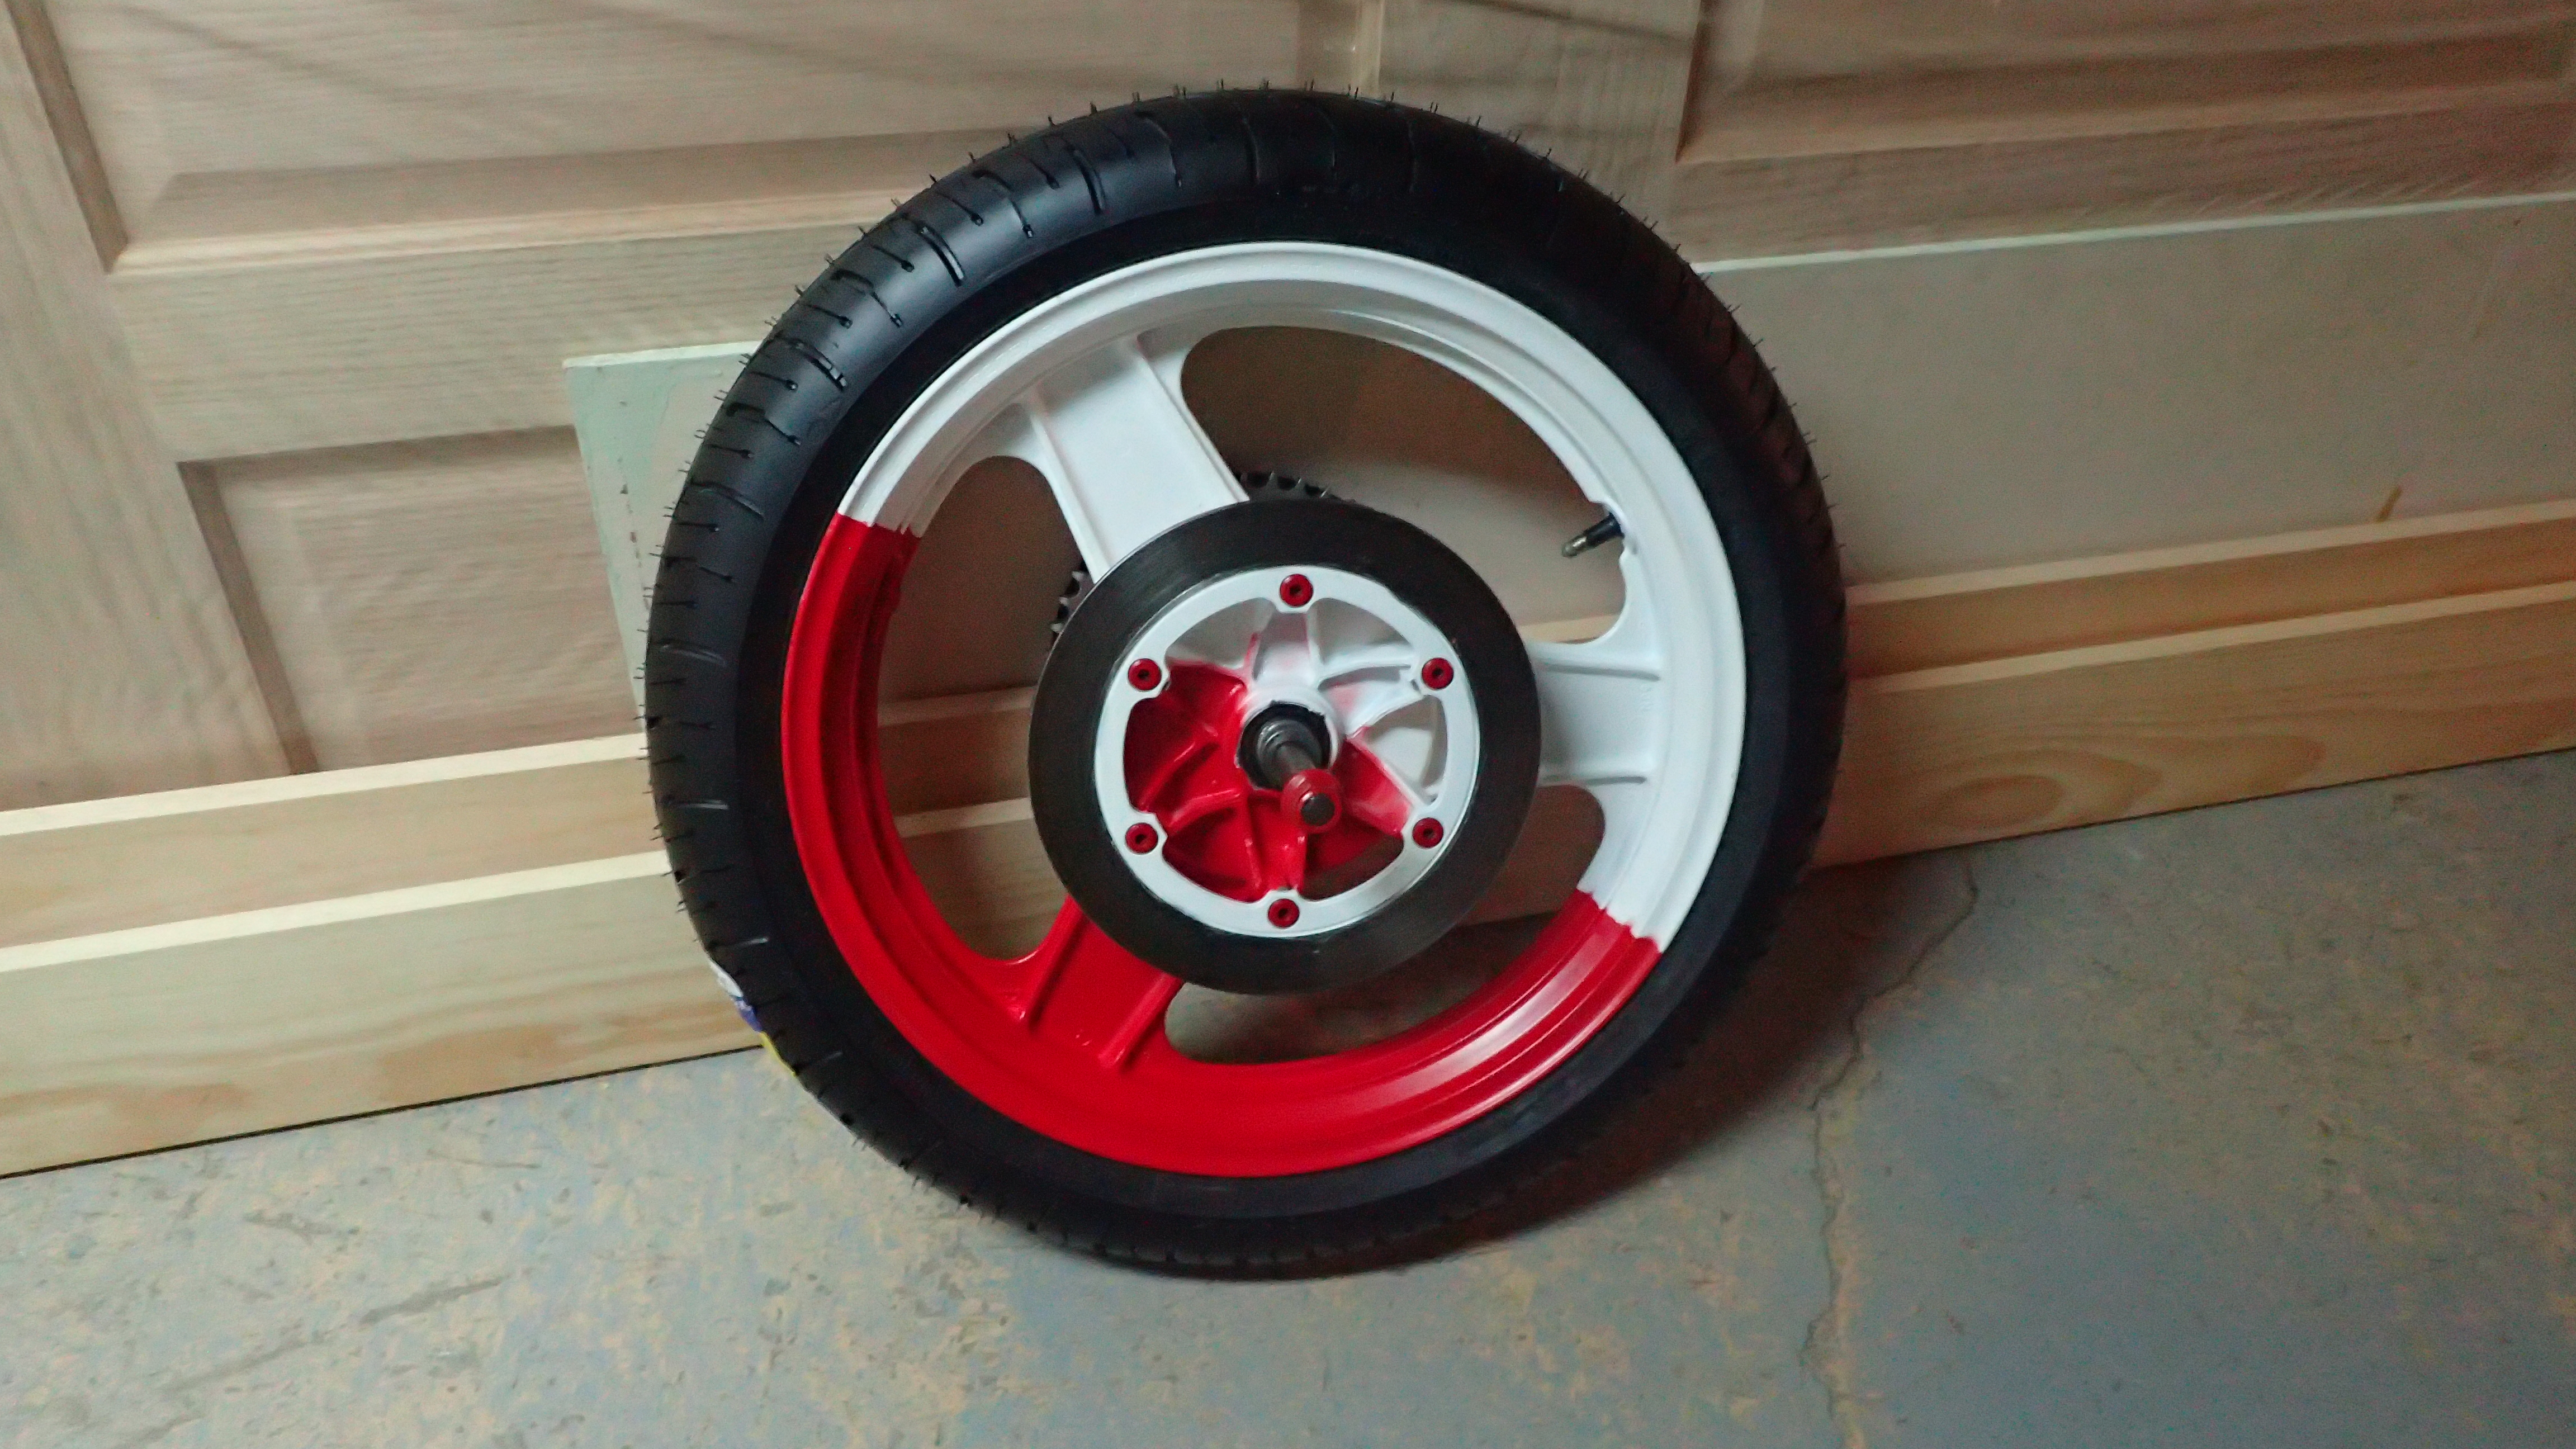
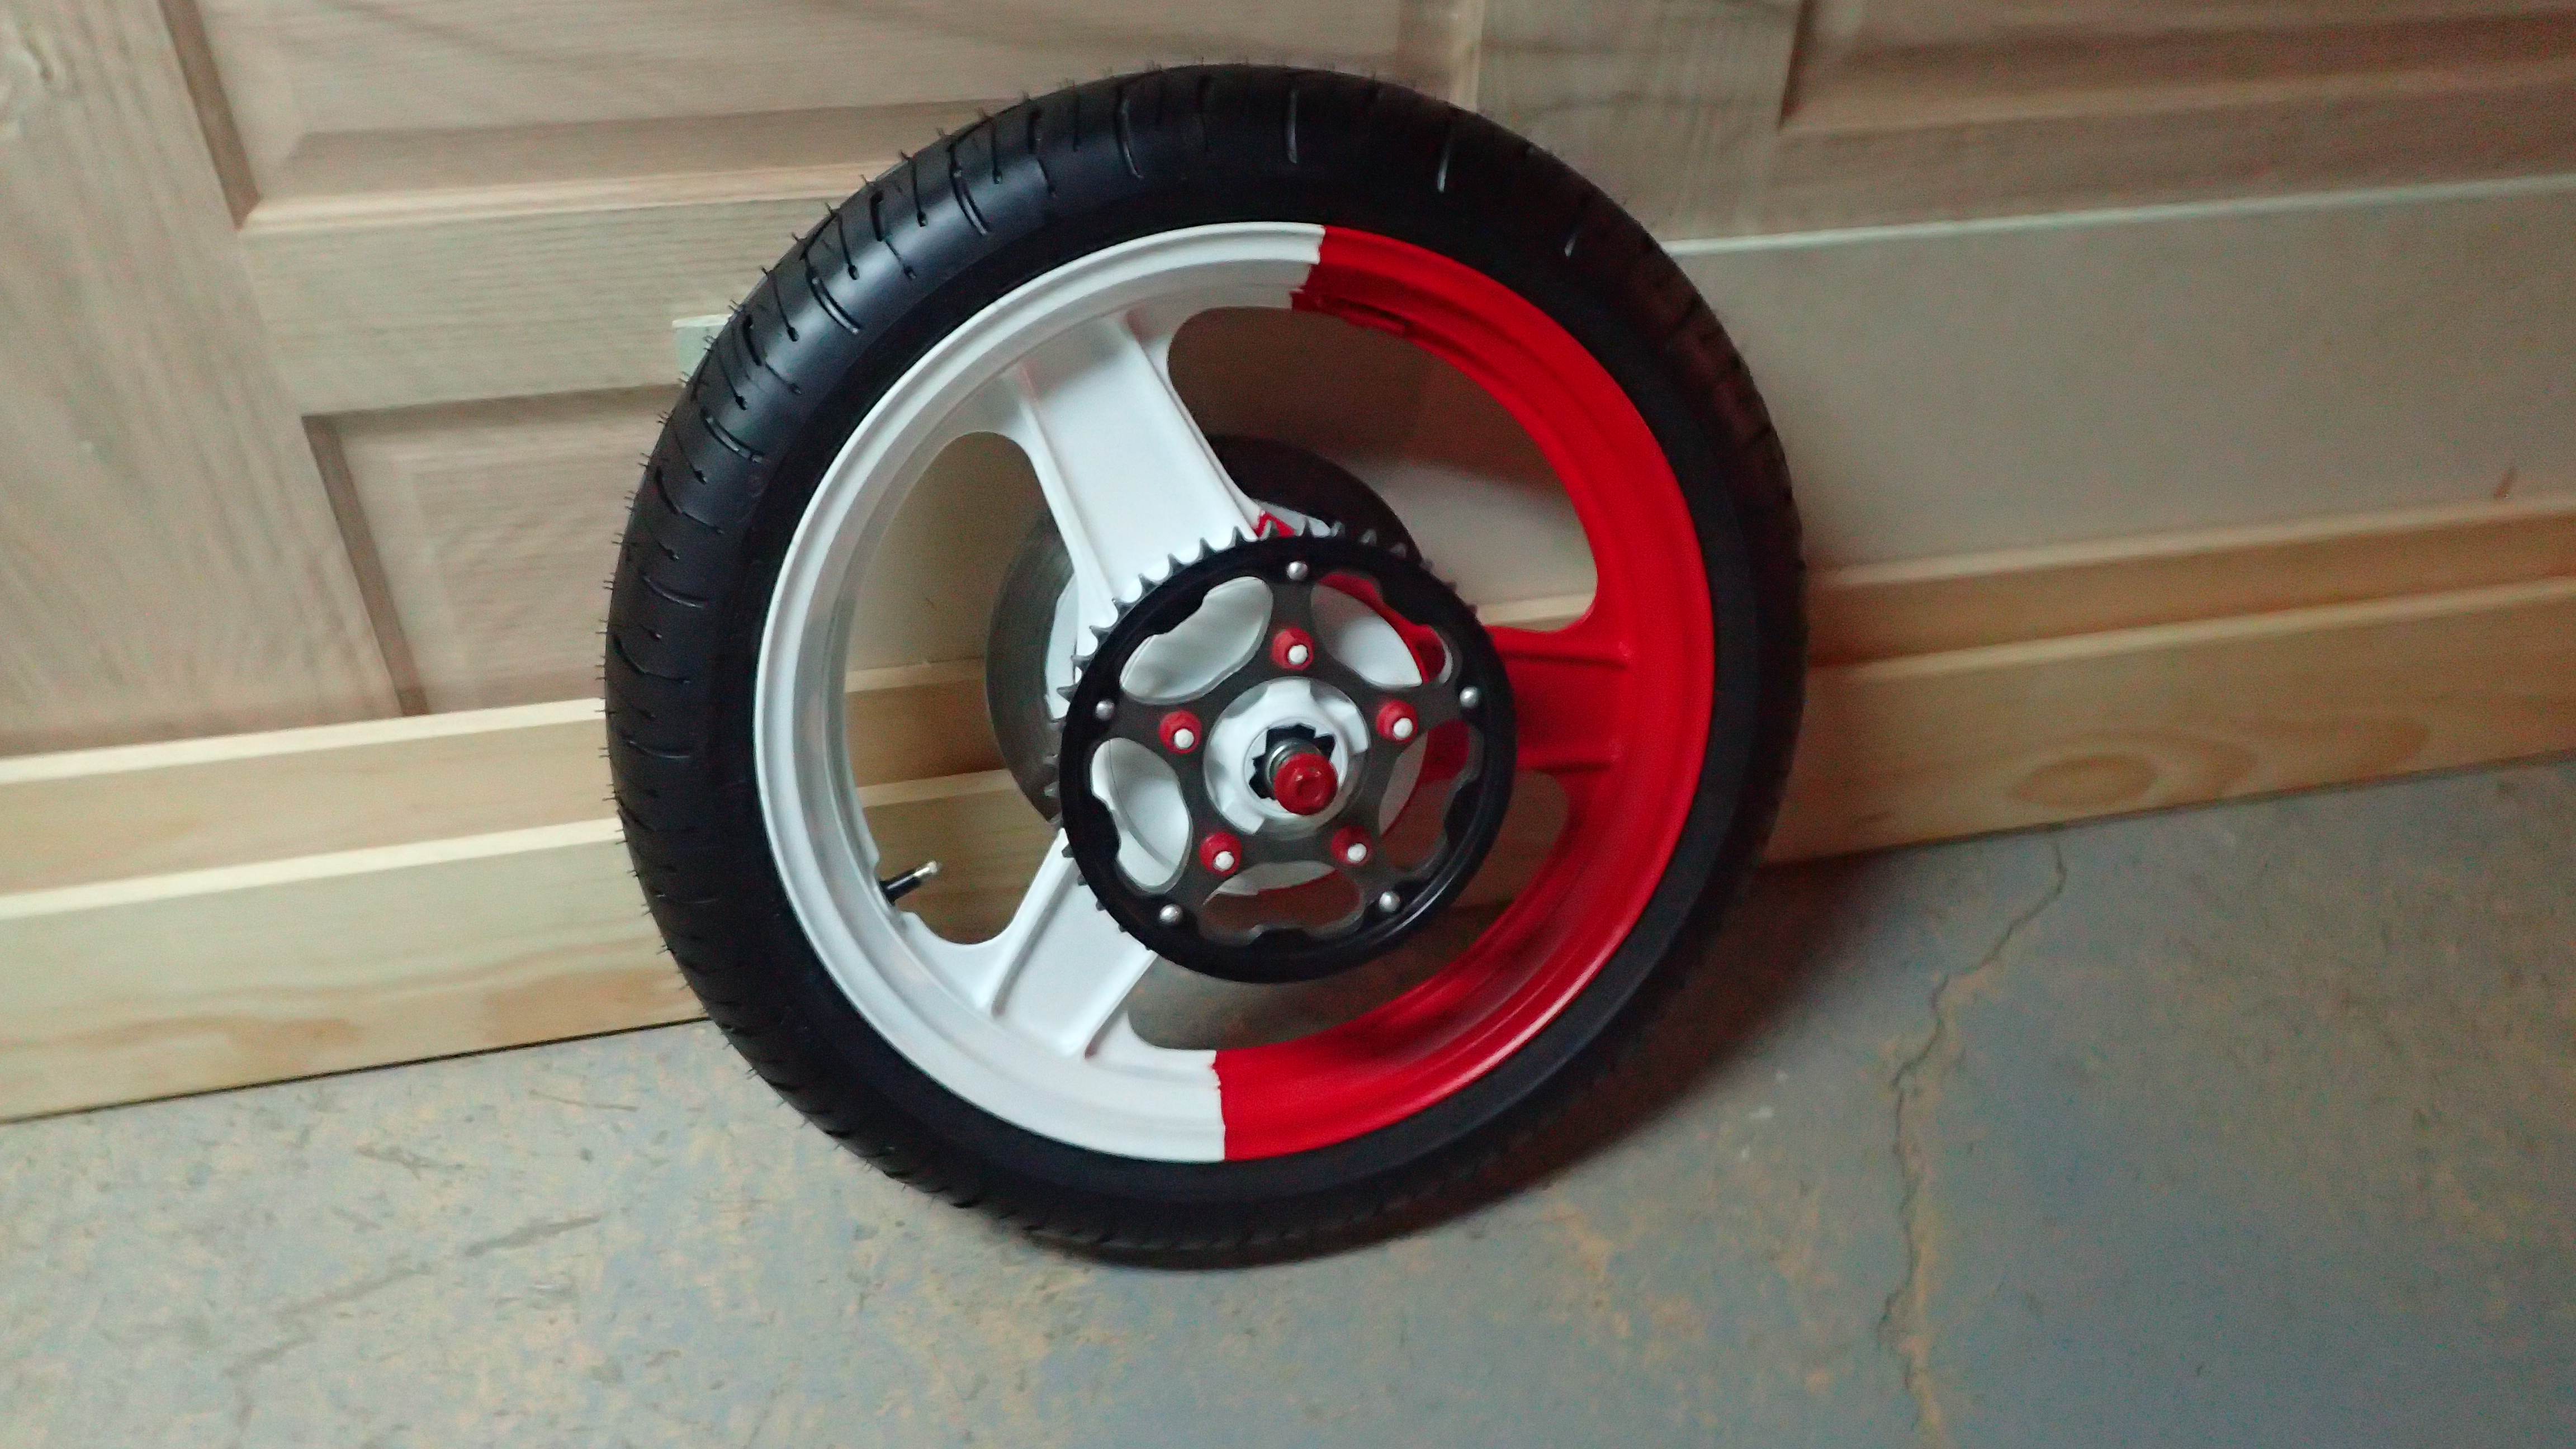
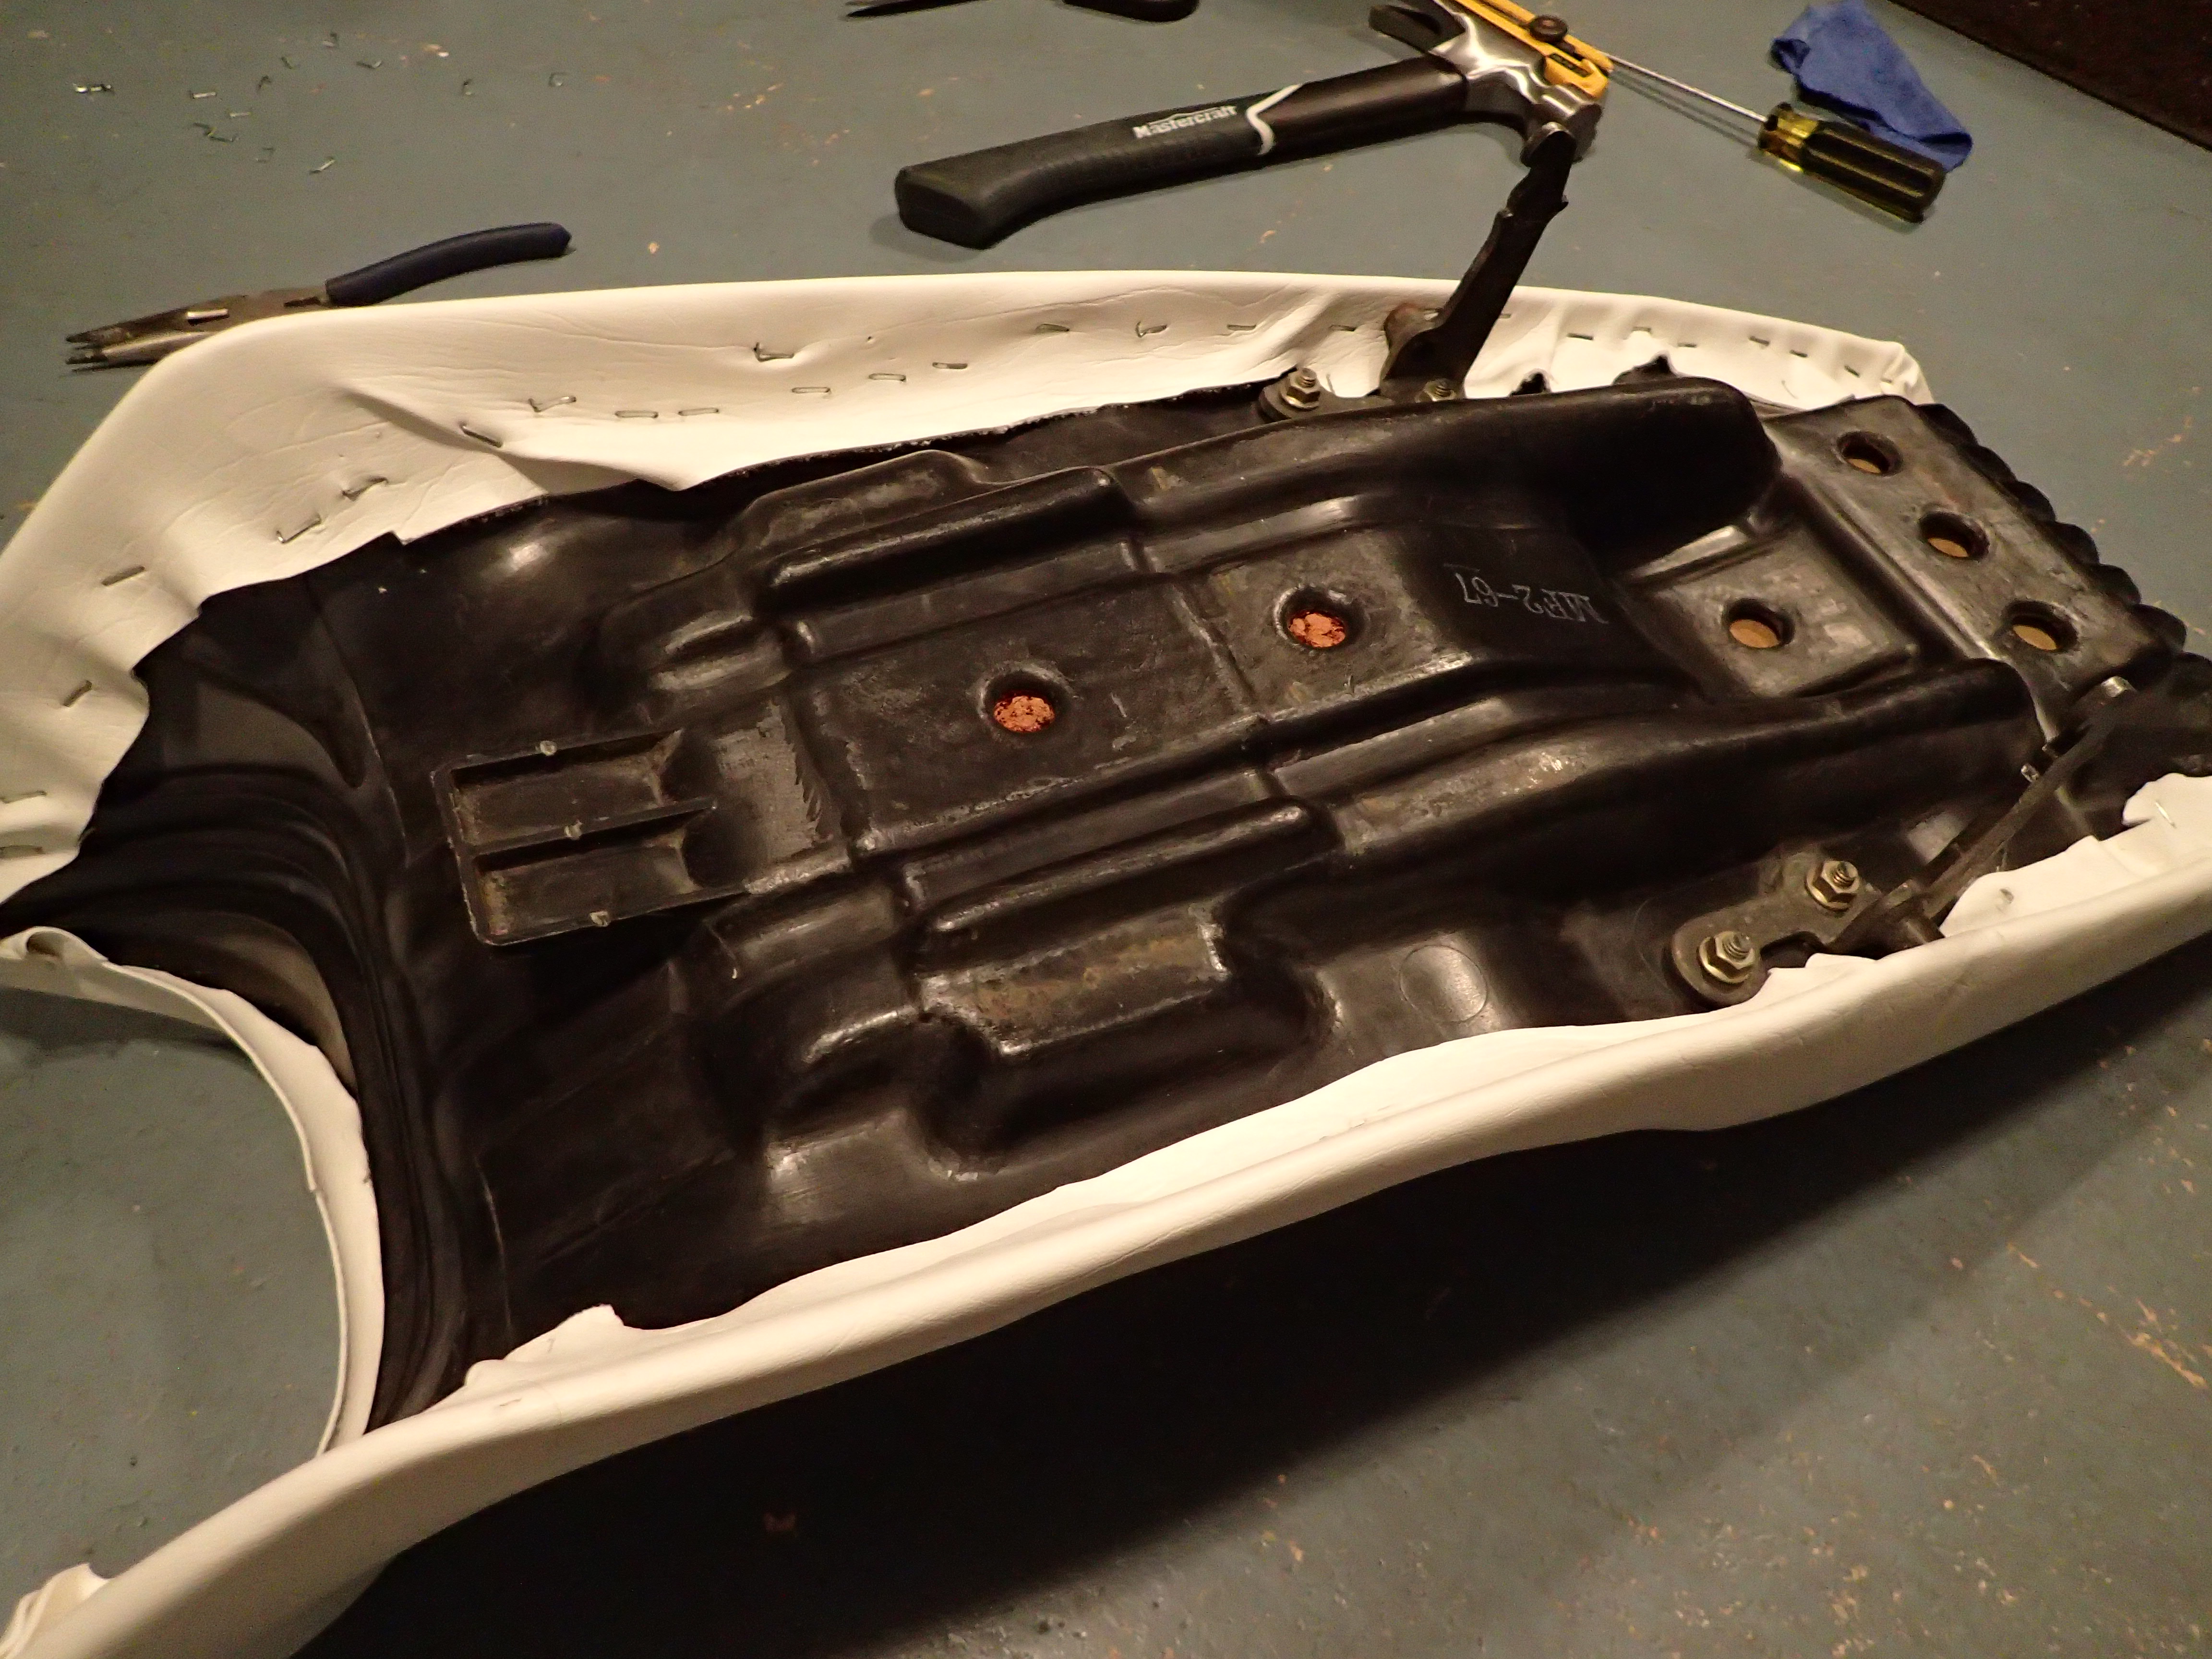
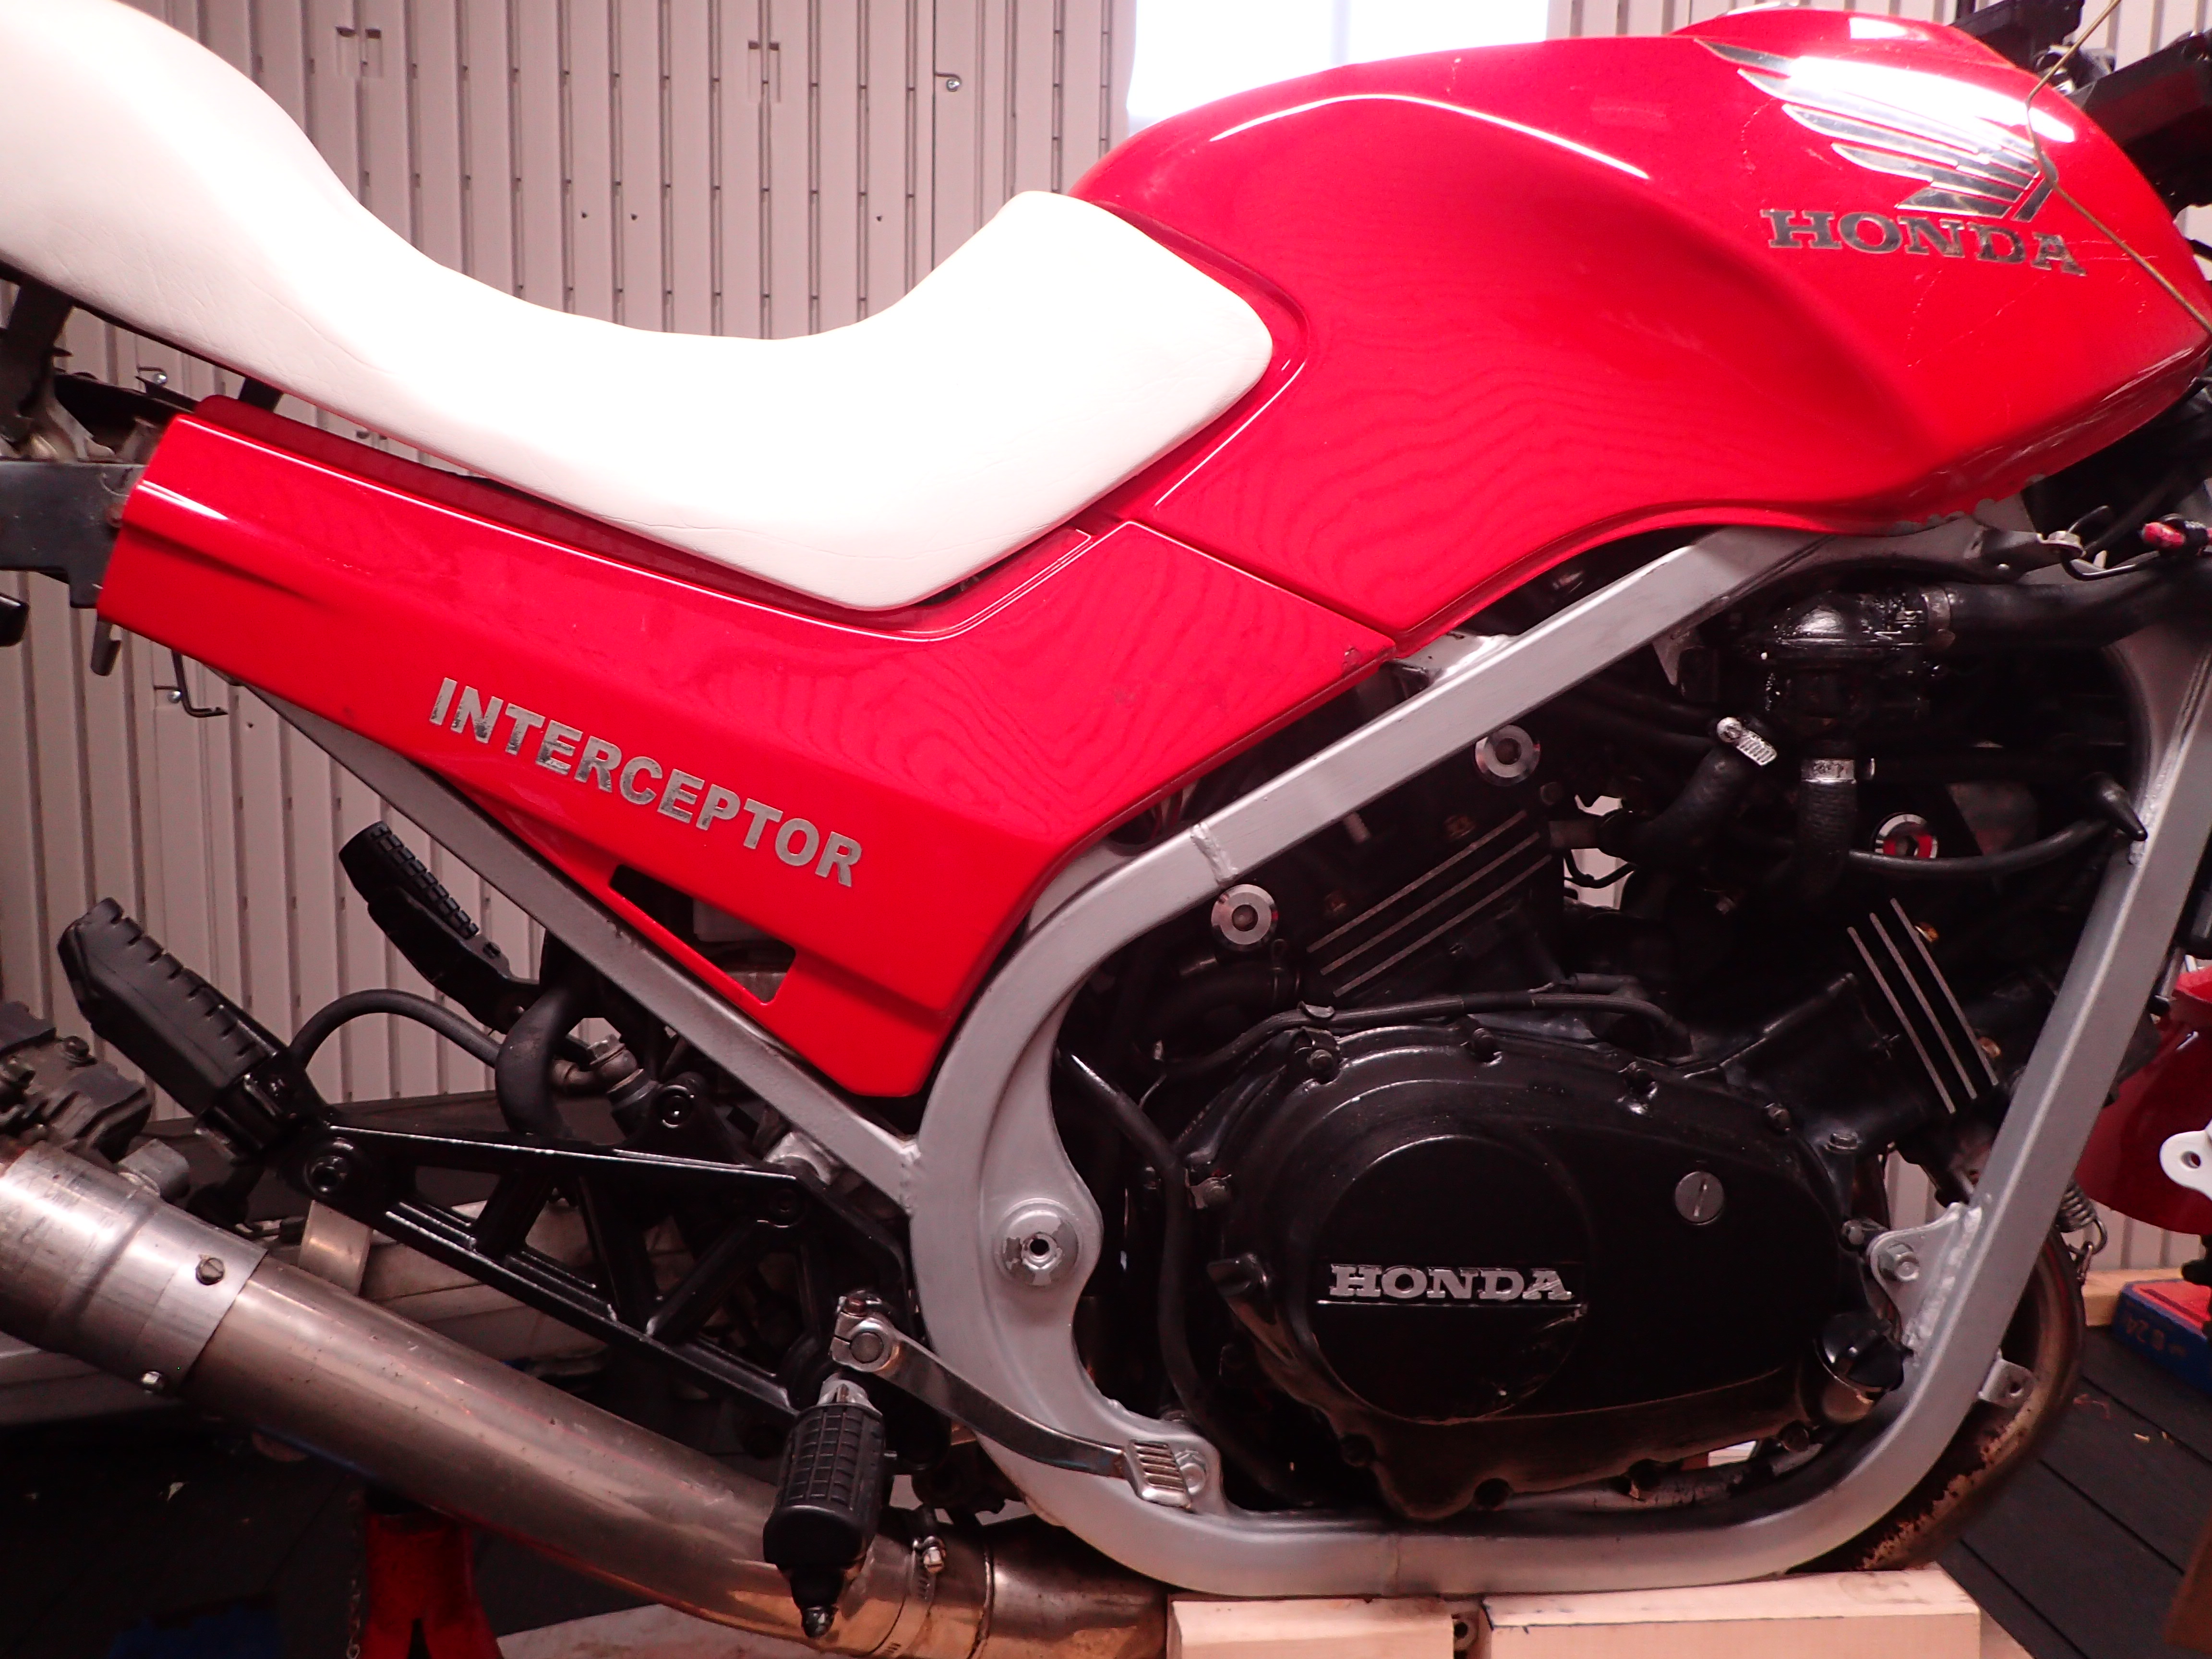
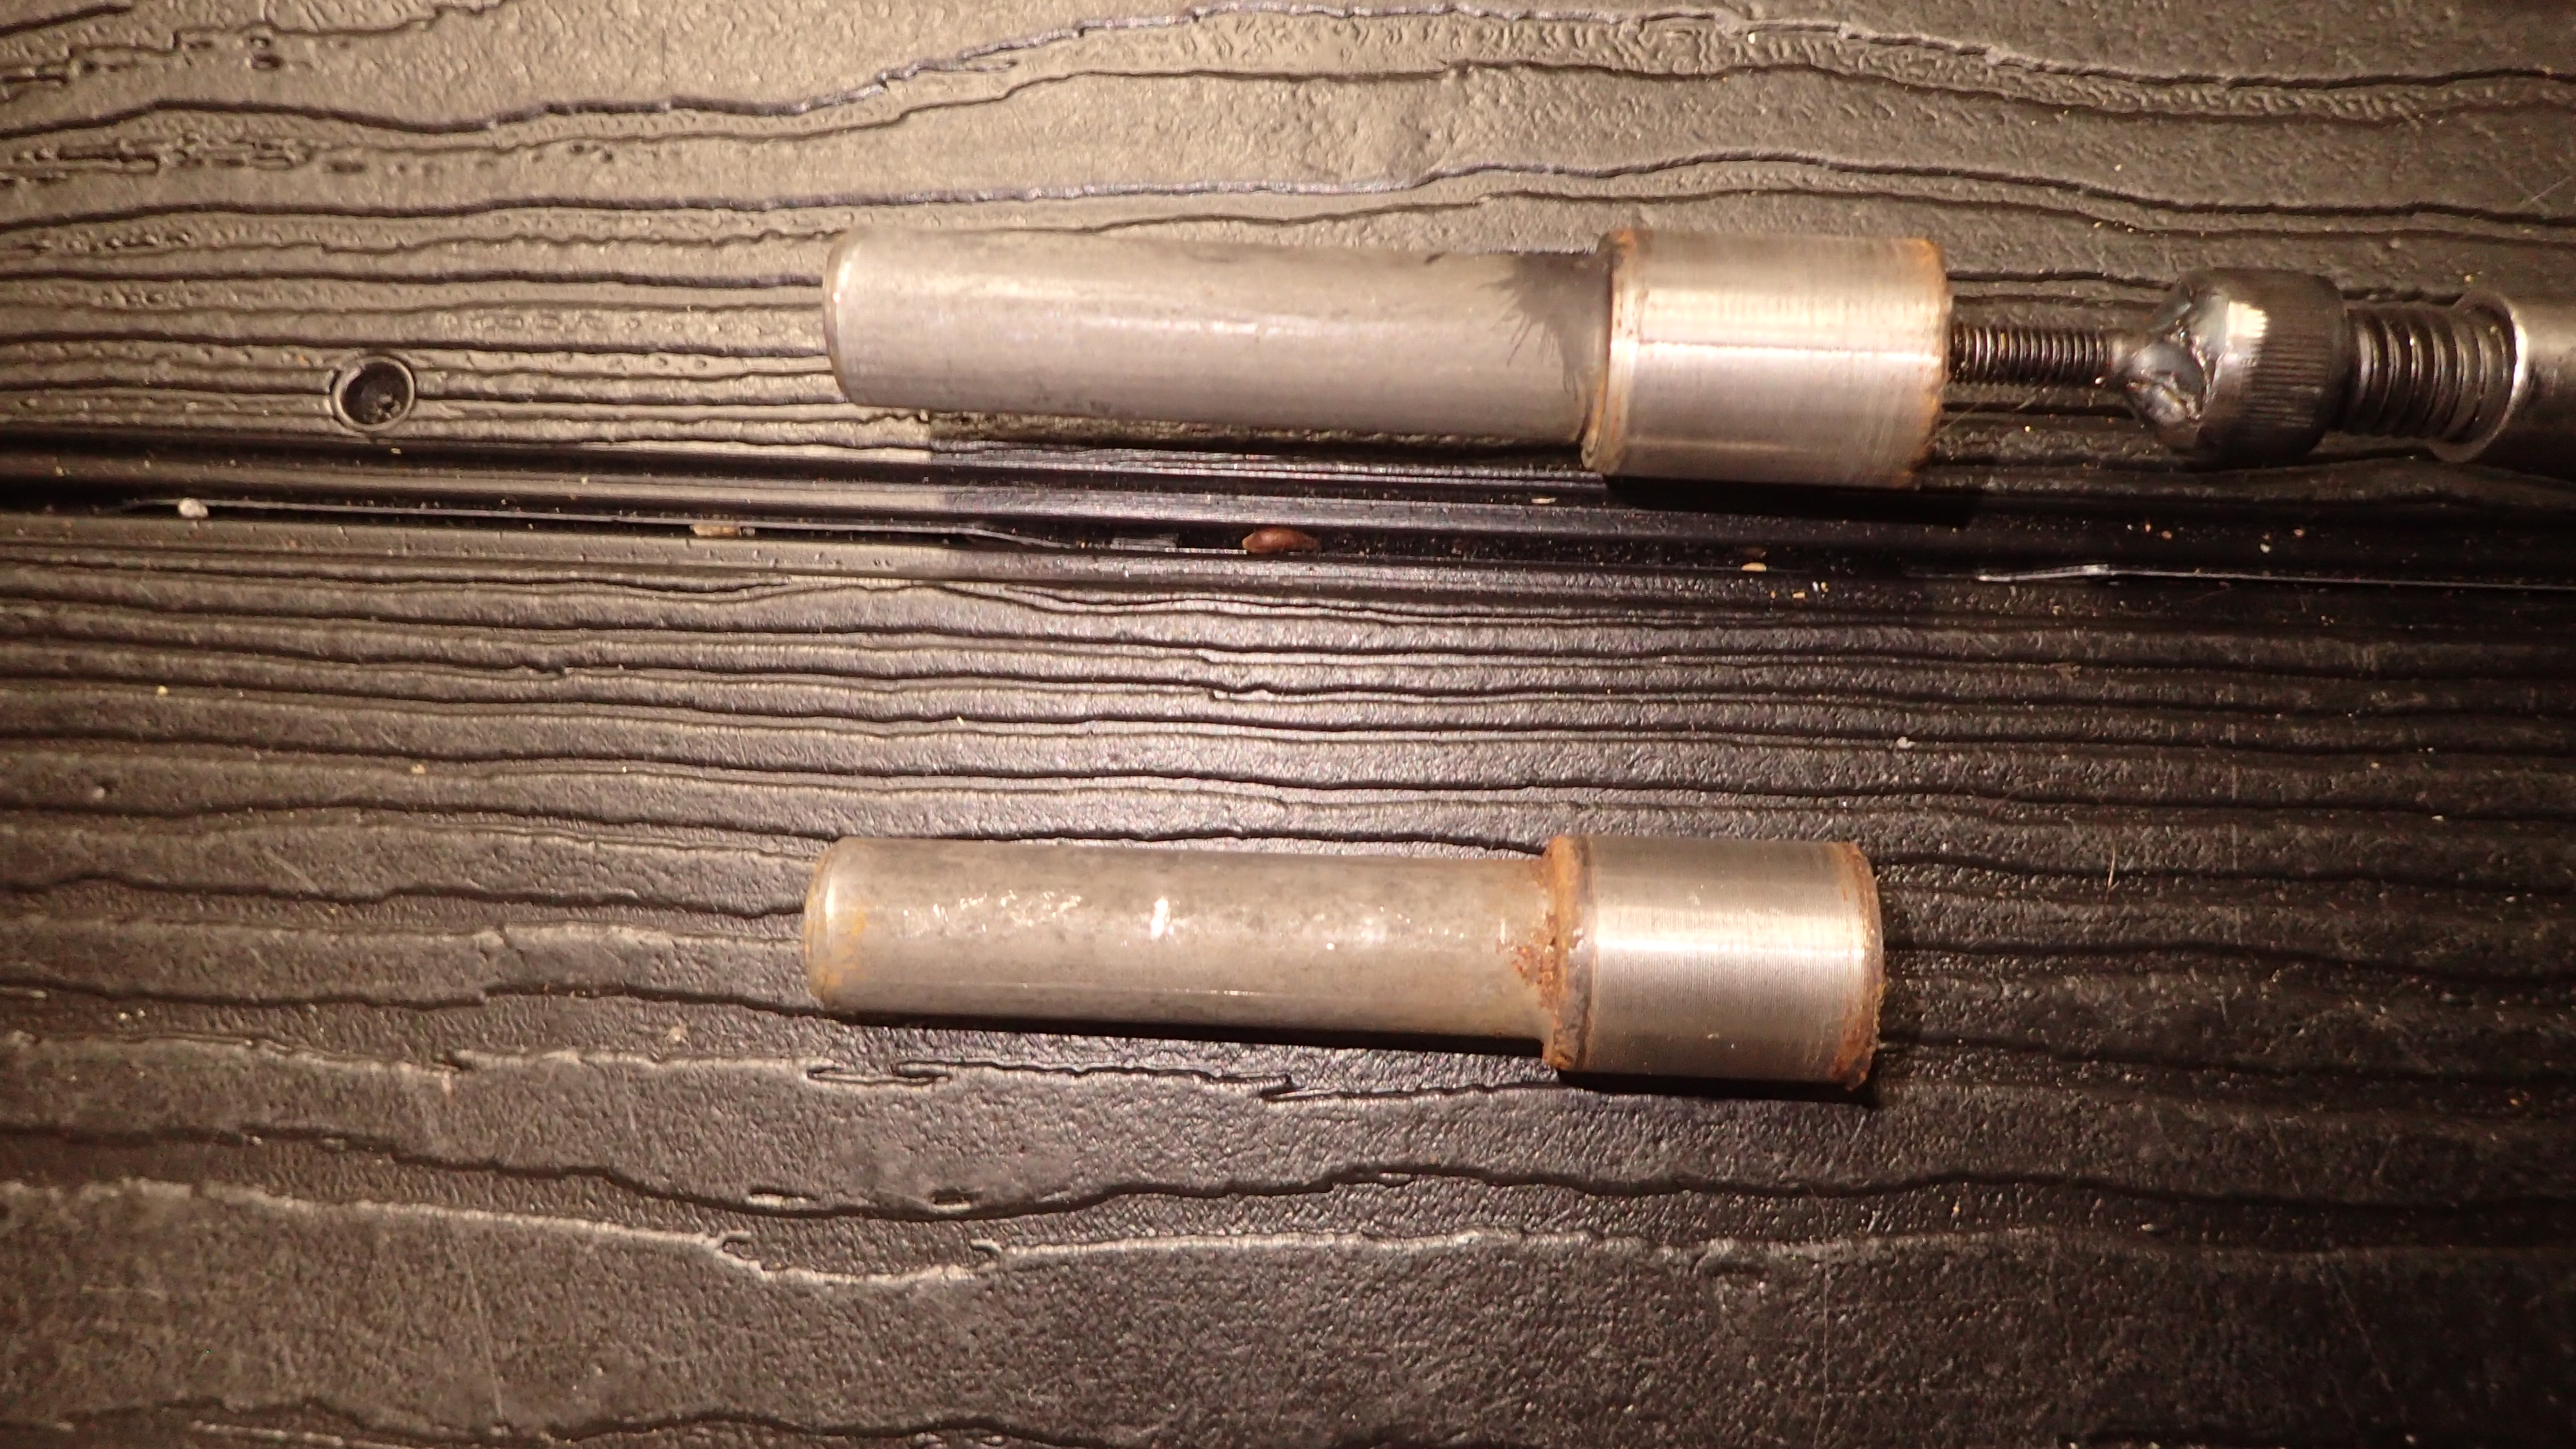
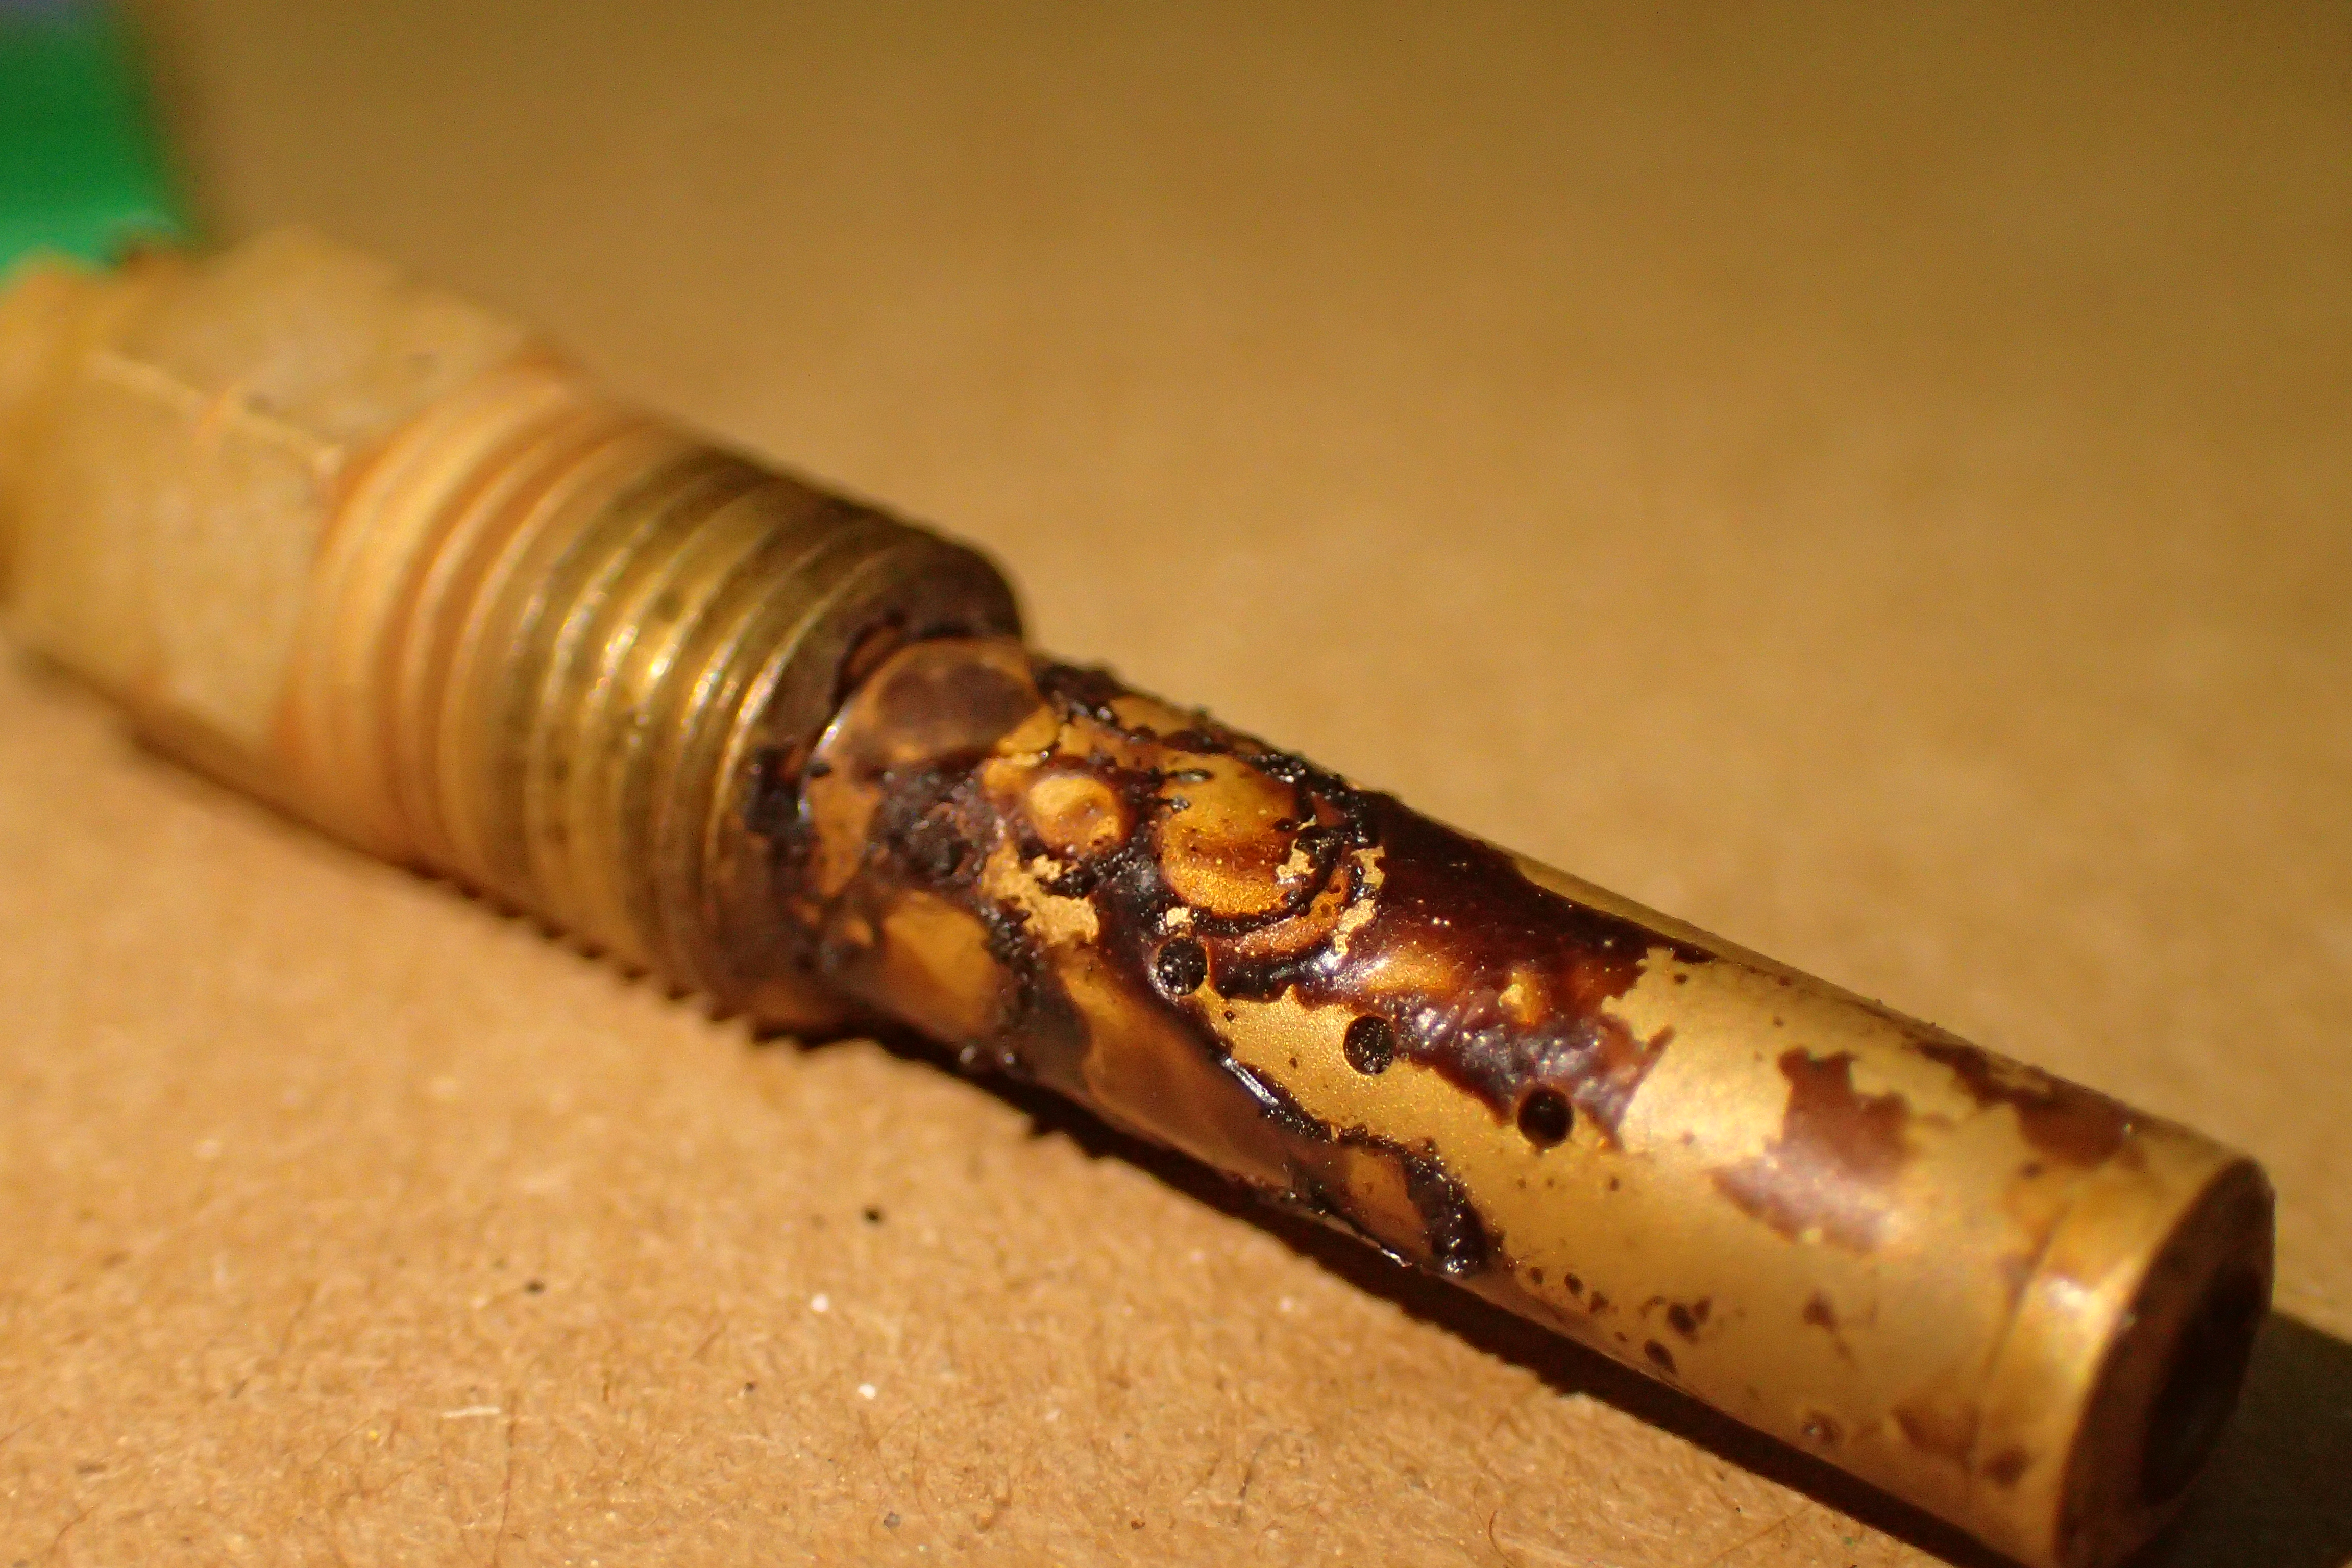
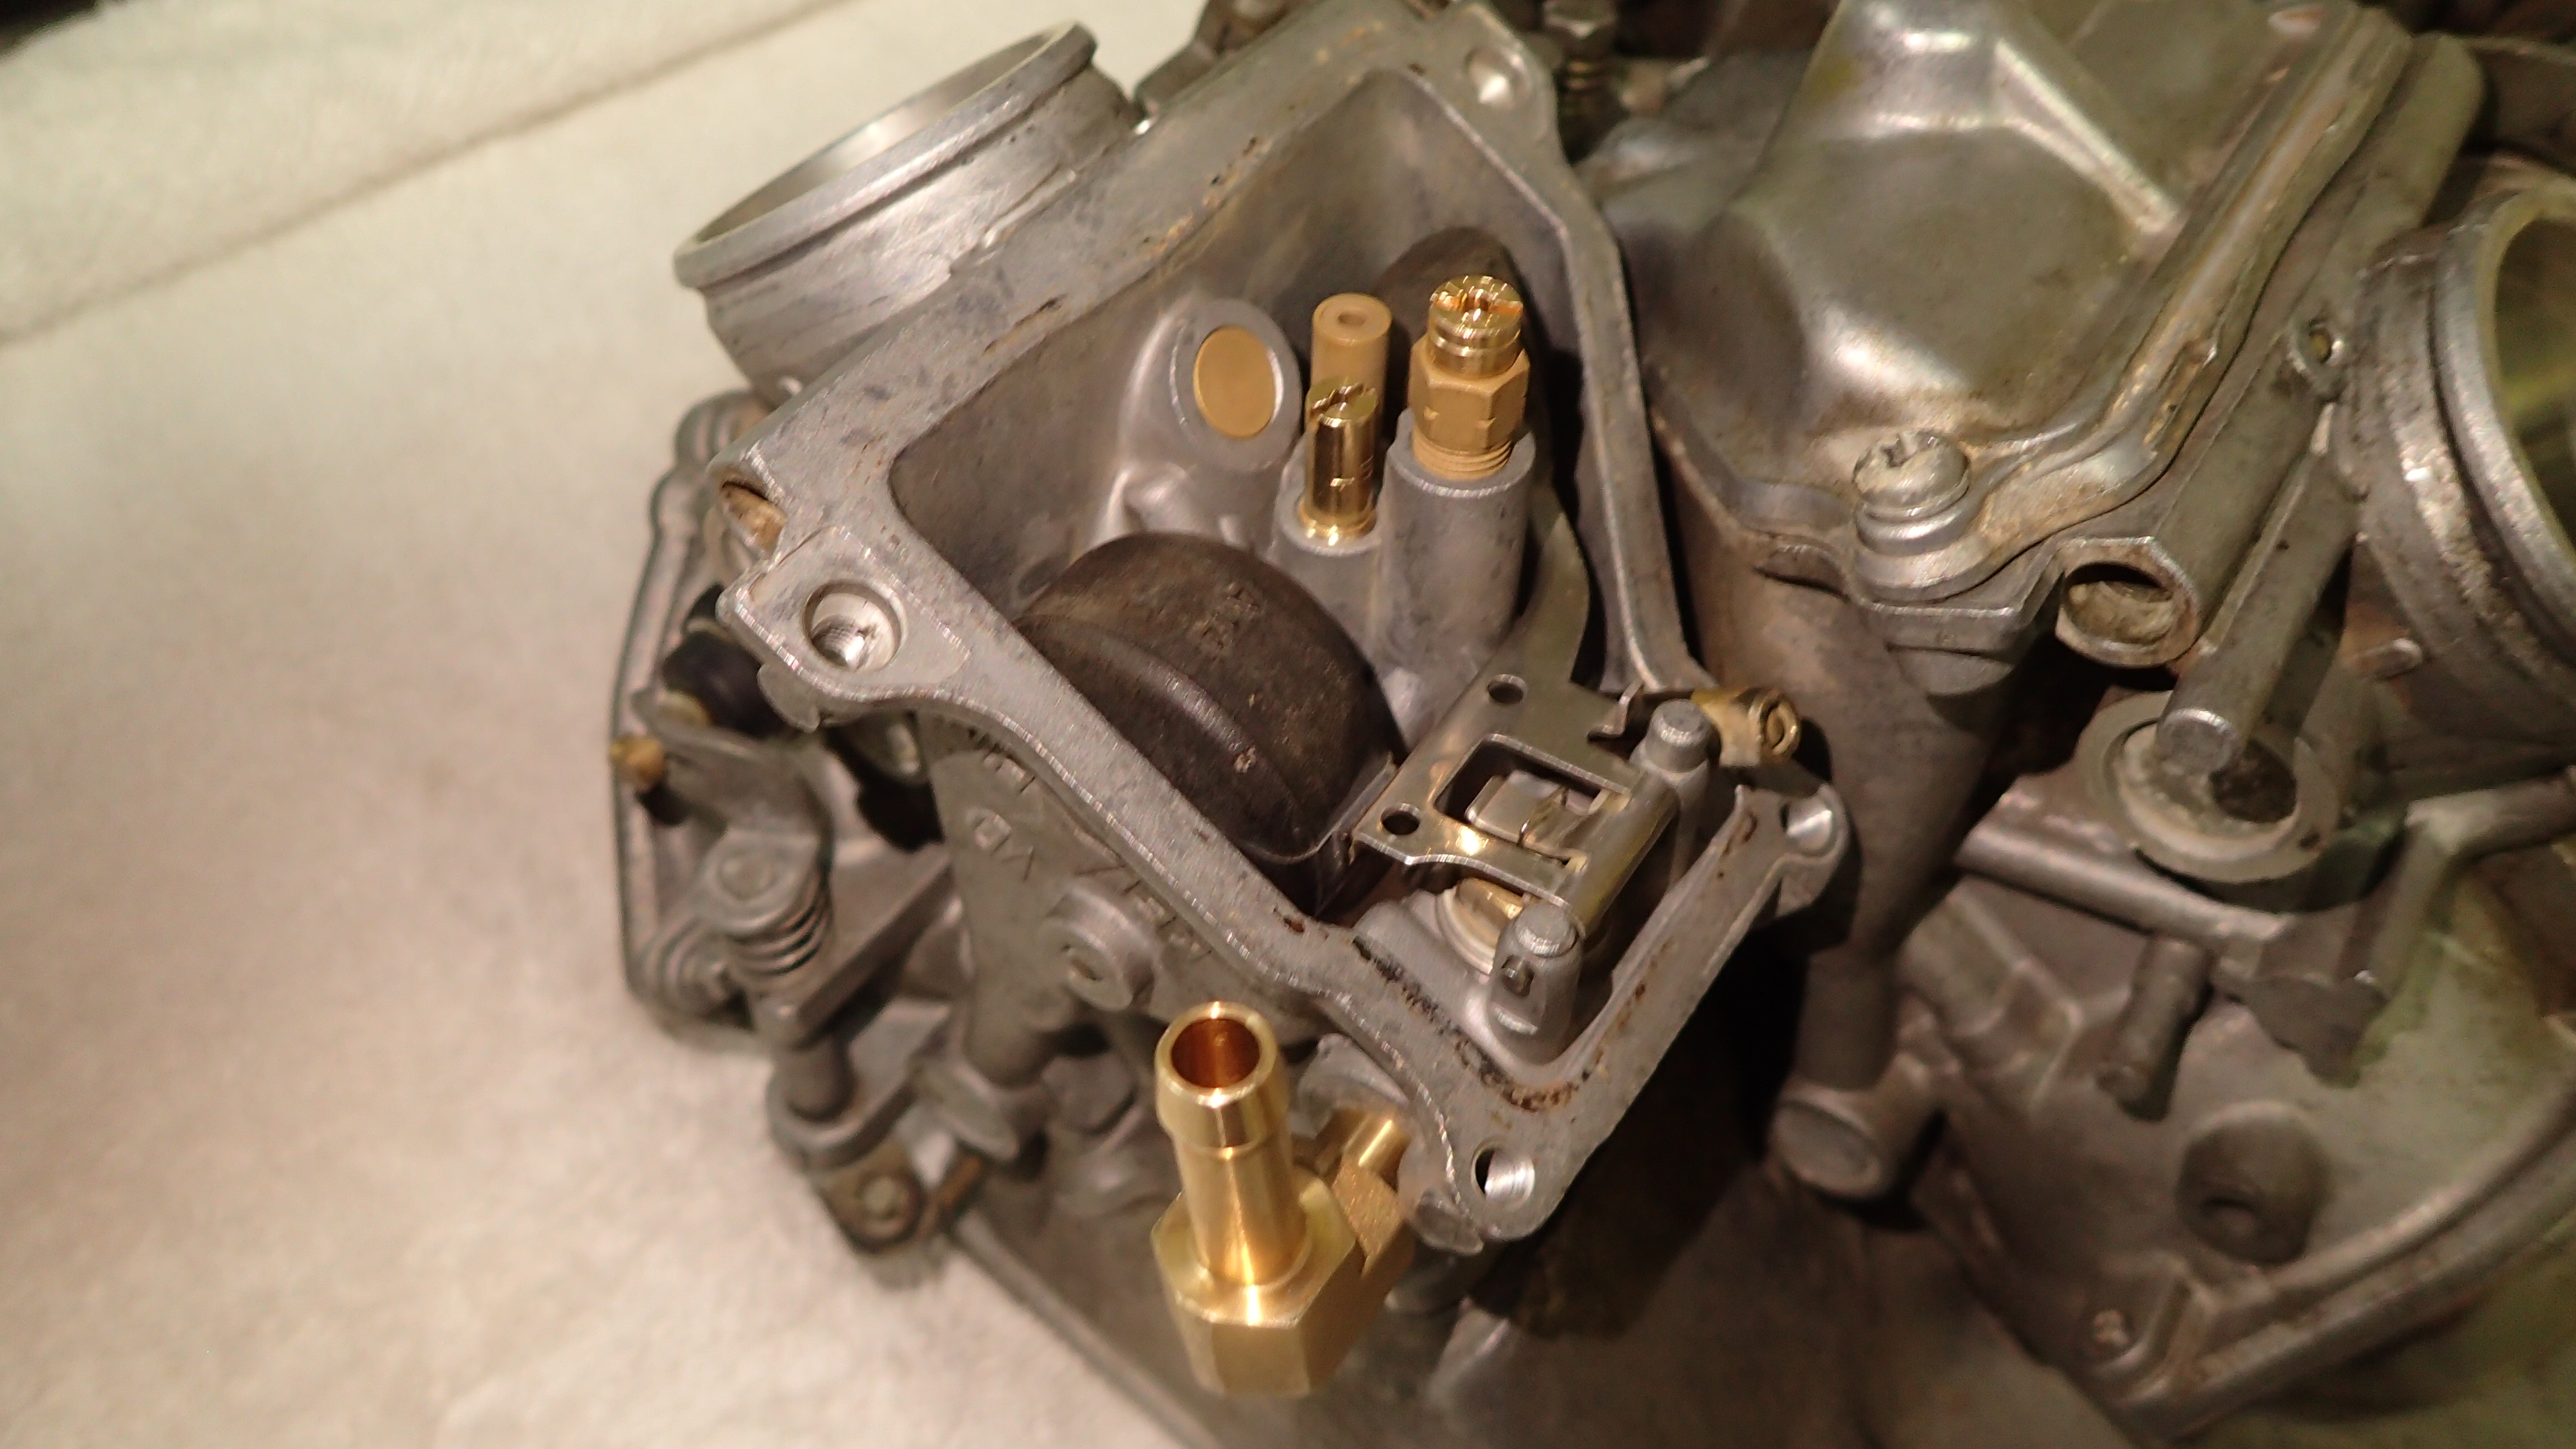
Welcome! This will be a thread where I show off the finished product(s) of my VF500 Resto-mod. I will only be featuring work I have done or modified myself. I will not be including specifics on how I did things here, but I will answer smaller questions. If you too are working on a VF500 you may want to see my other thread where I've been back and forth asking questions to the forum on how to solve problems with my build. My motorcycle is a 1984 VF500F. I picked it up with 56,000km on it. I have been restoring it inside and out. I am replacing parts that I think are outdated, for the purpose of either making it look better or preform better. Besides bolstering the performance I am changing the look of the bike from it's boxy-retro look, and into a bit of a streetfighter or cafe-racer. One thing you will notice about this build is that it is not going to be a perfect show-bike finish. The simple answer to this is the fact that I can not afford the tools or materials, nor do I have the expertise to do it anyways. This bike is ultra-low budget. Wheels I sanded down the old paint and metal. I fitted modern radial tires that give it a lower profile (and in my opinion a cleaner look). Then I painted the red and white using Duplicolor wheel spray paint. Seat Being vertically challenged, I reshaped the foam of the seat while I was recovering it with new vinyl. Handlebars/Mirrors I pulled the cores out of the stock handlebars so that I can fit bar-end mirrors. Used a drill, tap and a slide hammer. Mirrors are in the mail. Carburetors After cleaning the carbs I put bigger jets in to accommodate a straight pipe and K&N air filter. I also did a mod that Dutchy taught me about where you drill an additional fuel line, to prevent a lean mixture on the fourth and third carb. Fourth carb with jets and extra fuel-in^
-
I wanted to add some additional storage to my bike for an upcoming motocamping trip. While the factory top case looks nice, I really didn't want to pay over a grand for it and came up with this instead. While I do sacrifice my pillon seat, for the intended trip I won't need it. The case itself is a nice Pelican knockoff from Monoprice. Shipped it was about $60 and included pick and pluck foam, perfect for carrying my DSLR. Interior volume is 19L. Monoprice weatherproof case The case is attached using four 120mm M8x1.25 studs. The studs are threaded into the holes for the passenger grab bars and secured in place with nuts. After that I simply threaded some nuts and fender washers onto the studs and drilled holes in the case. Finally the case is secured on the other side with more washers and nuts. The whole setup is rock solid and the size matches the opening where the pillon seat goes perfectly. In the future I'd like to make the case removable using the seat latch/key to enable fast changing from cowl, to seat, to case. My buddy did this on his ZX6R, but copying that design on the VFR will be more challenging given the difference in mounting hardware.
-
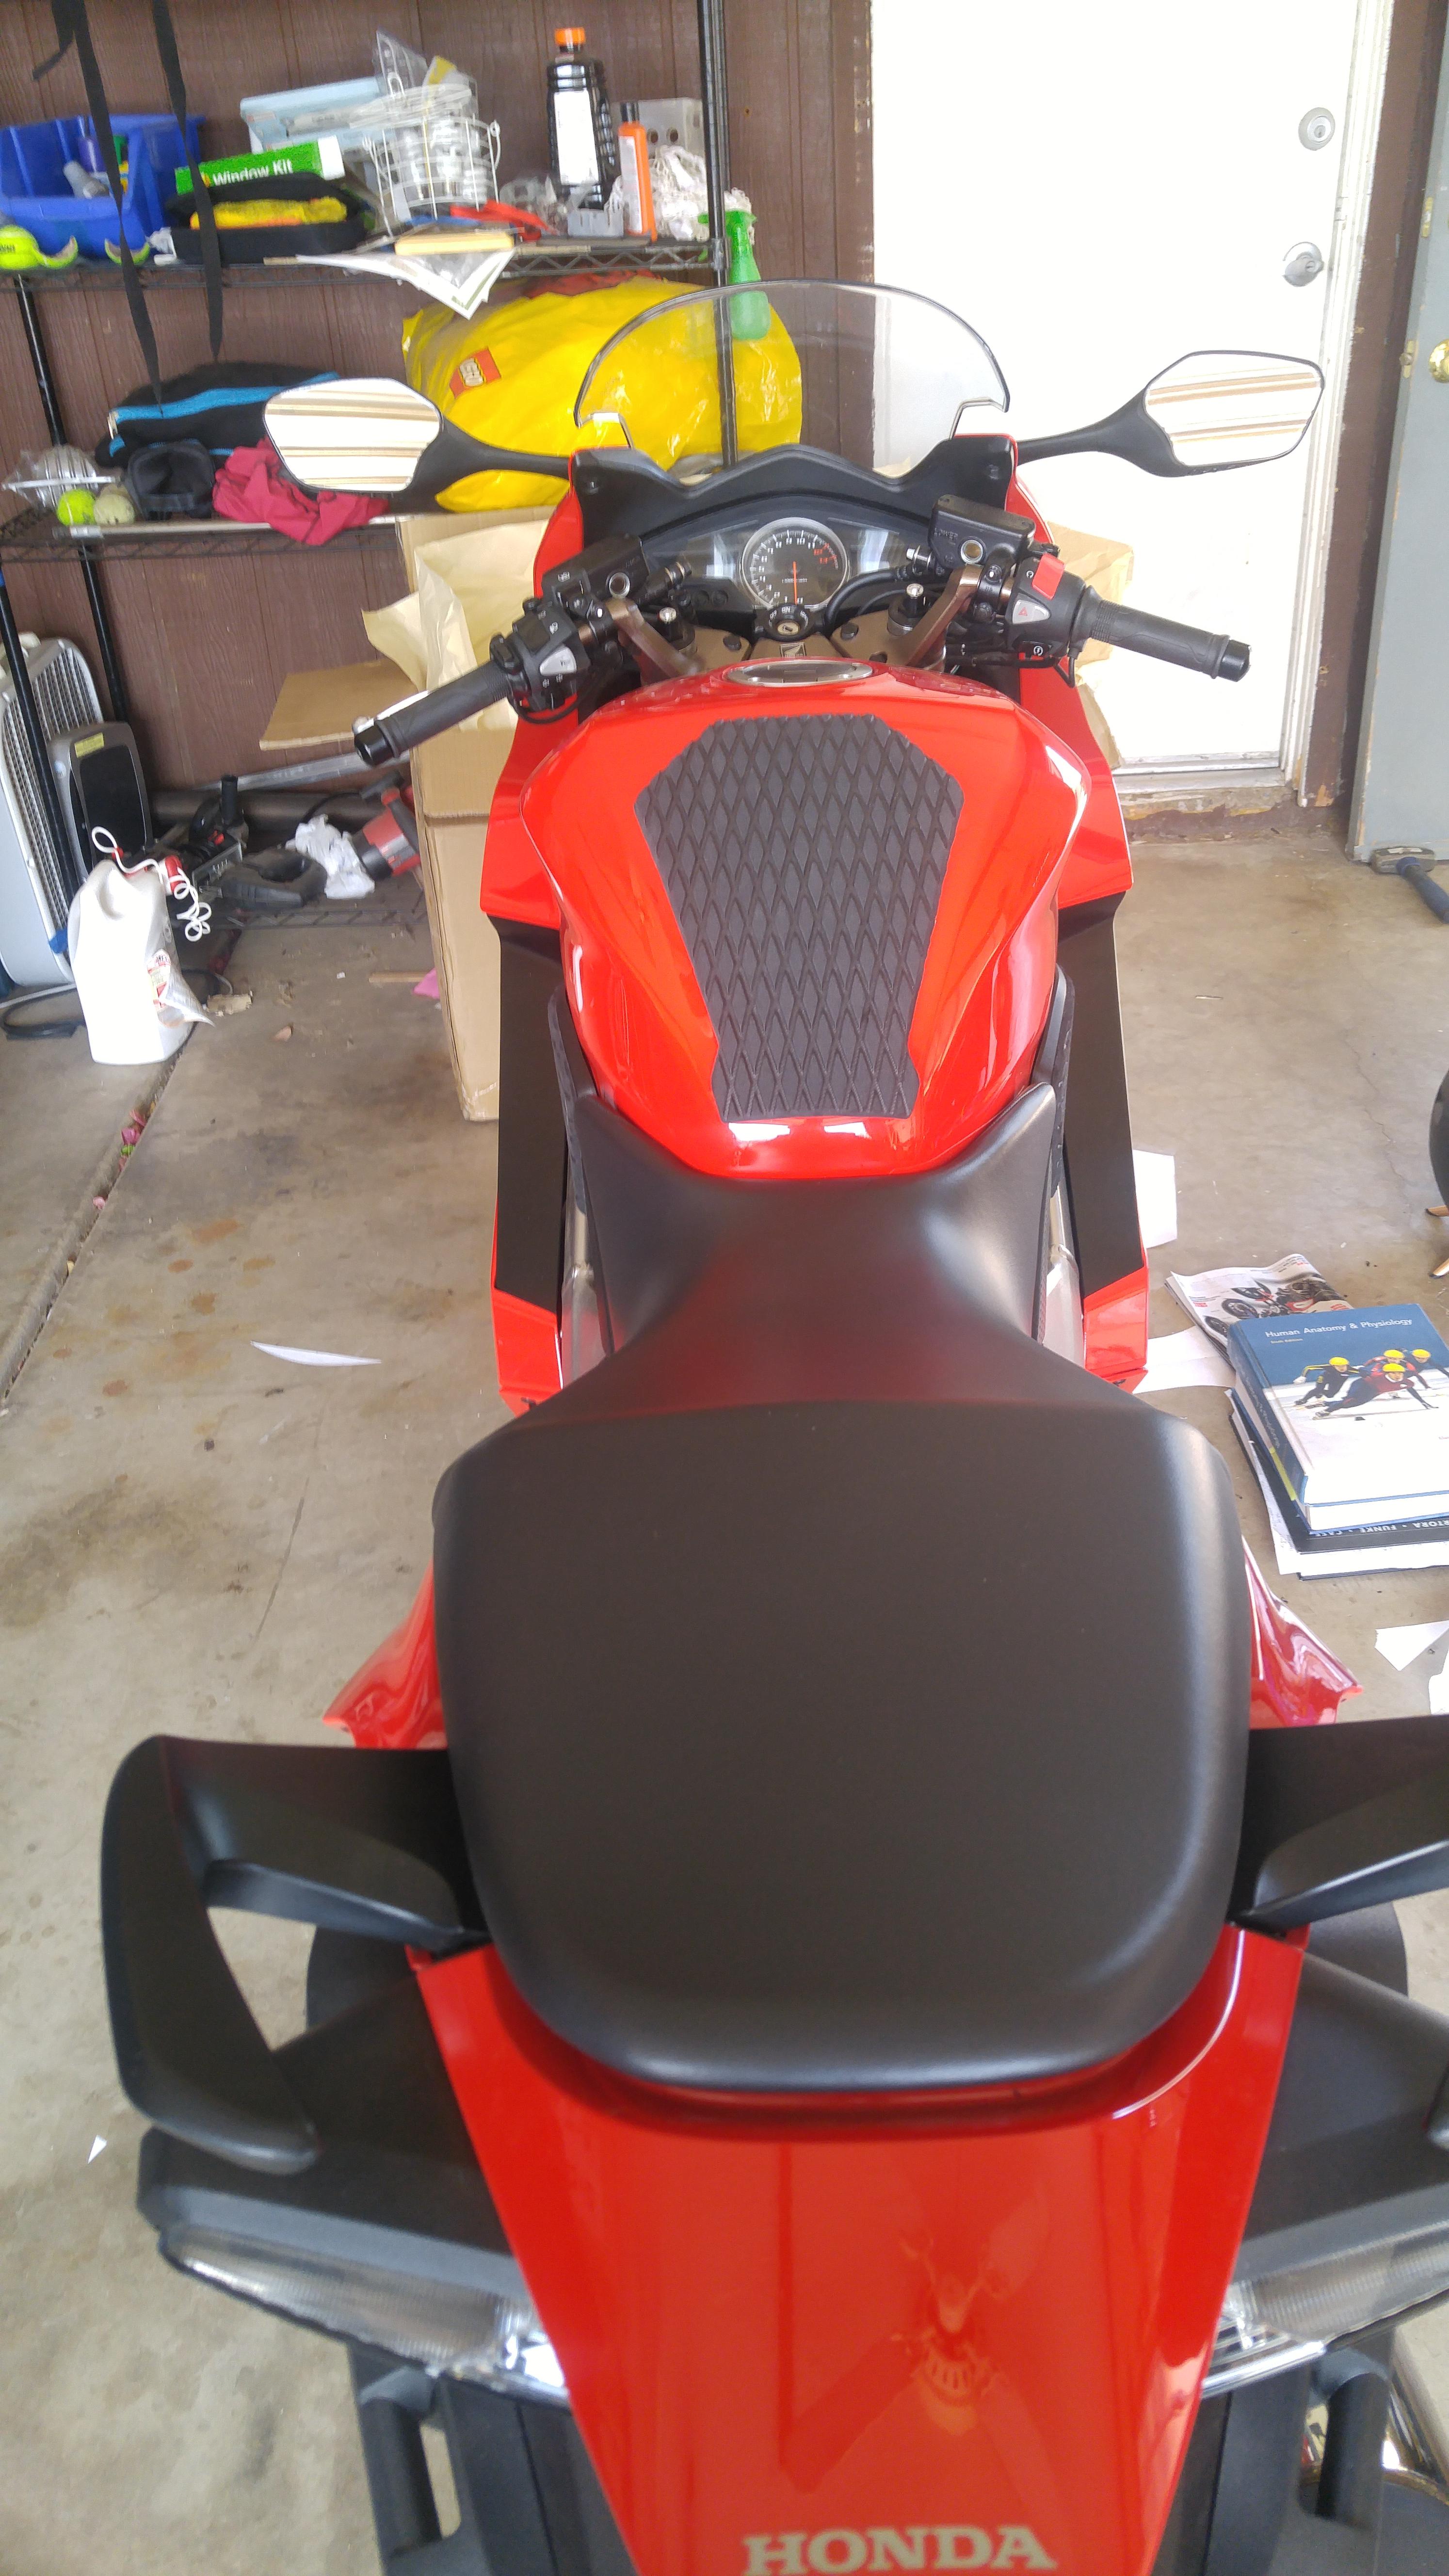
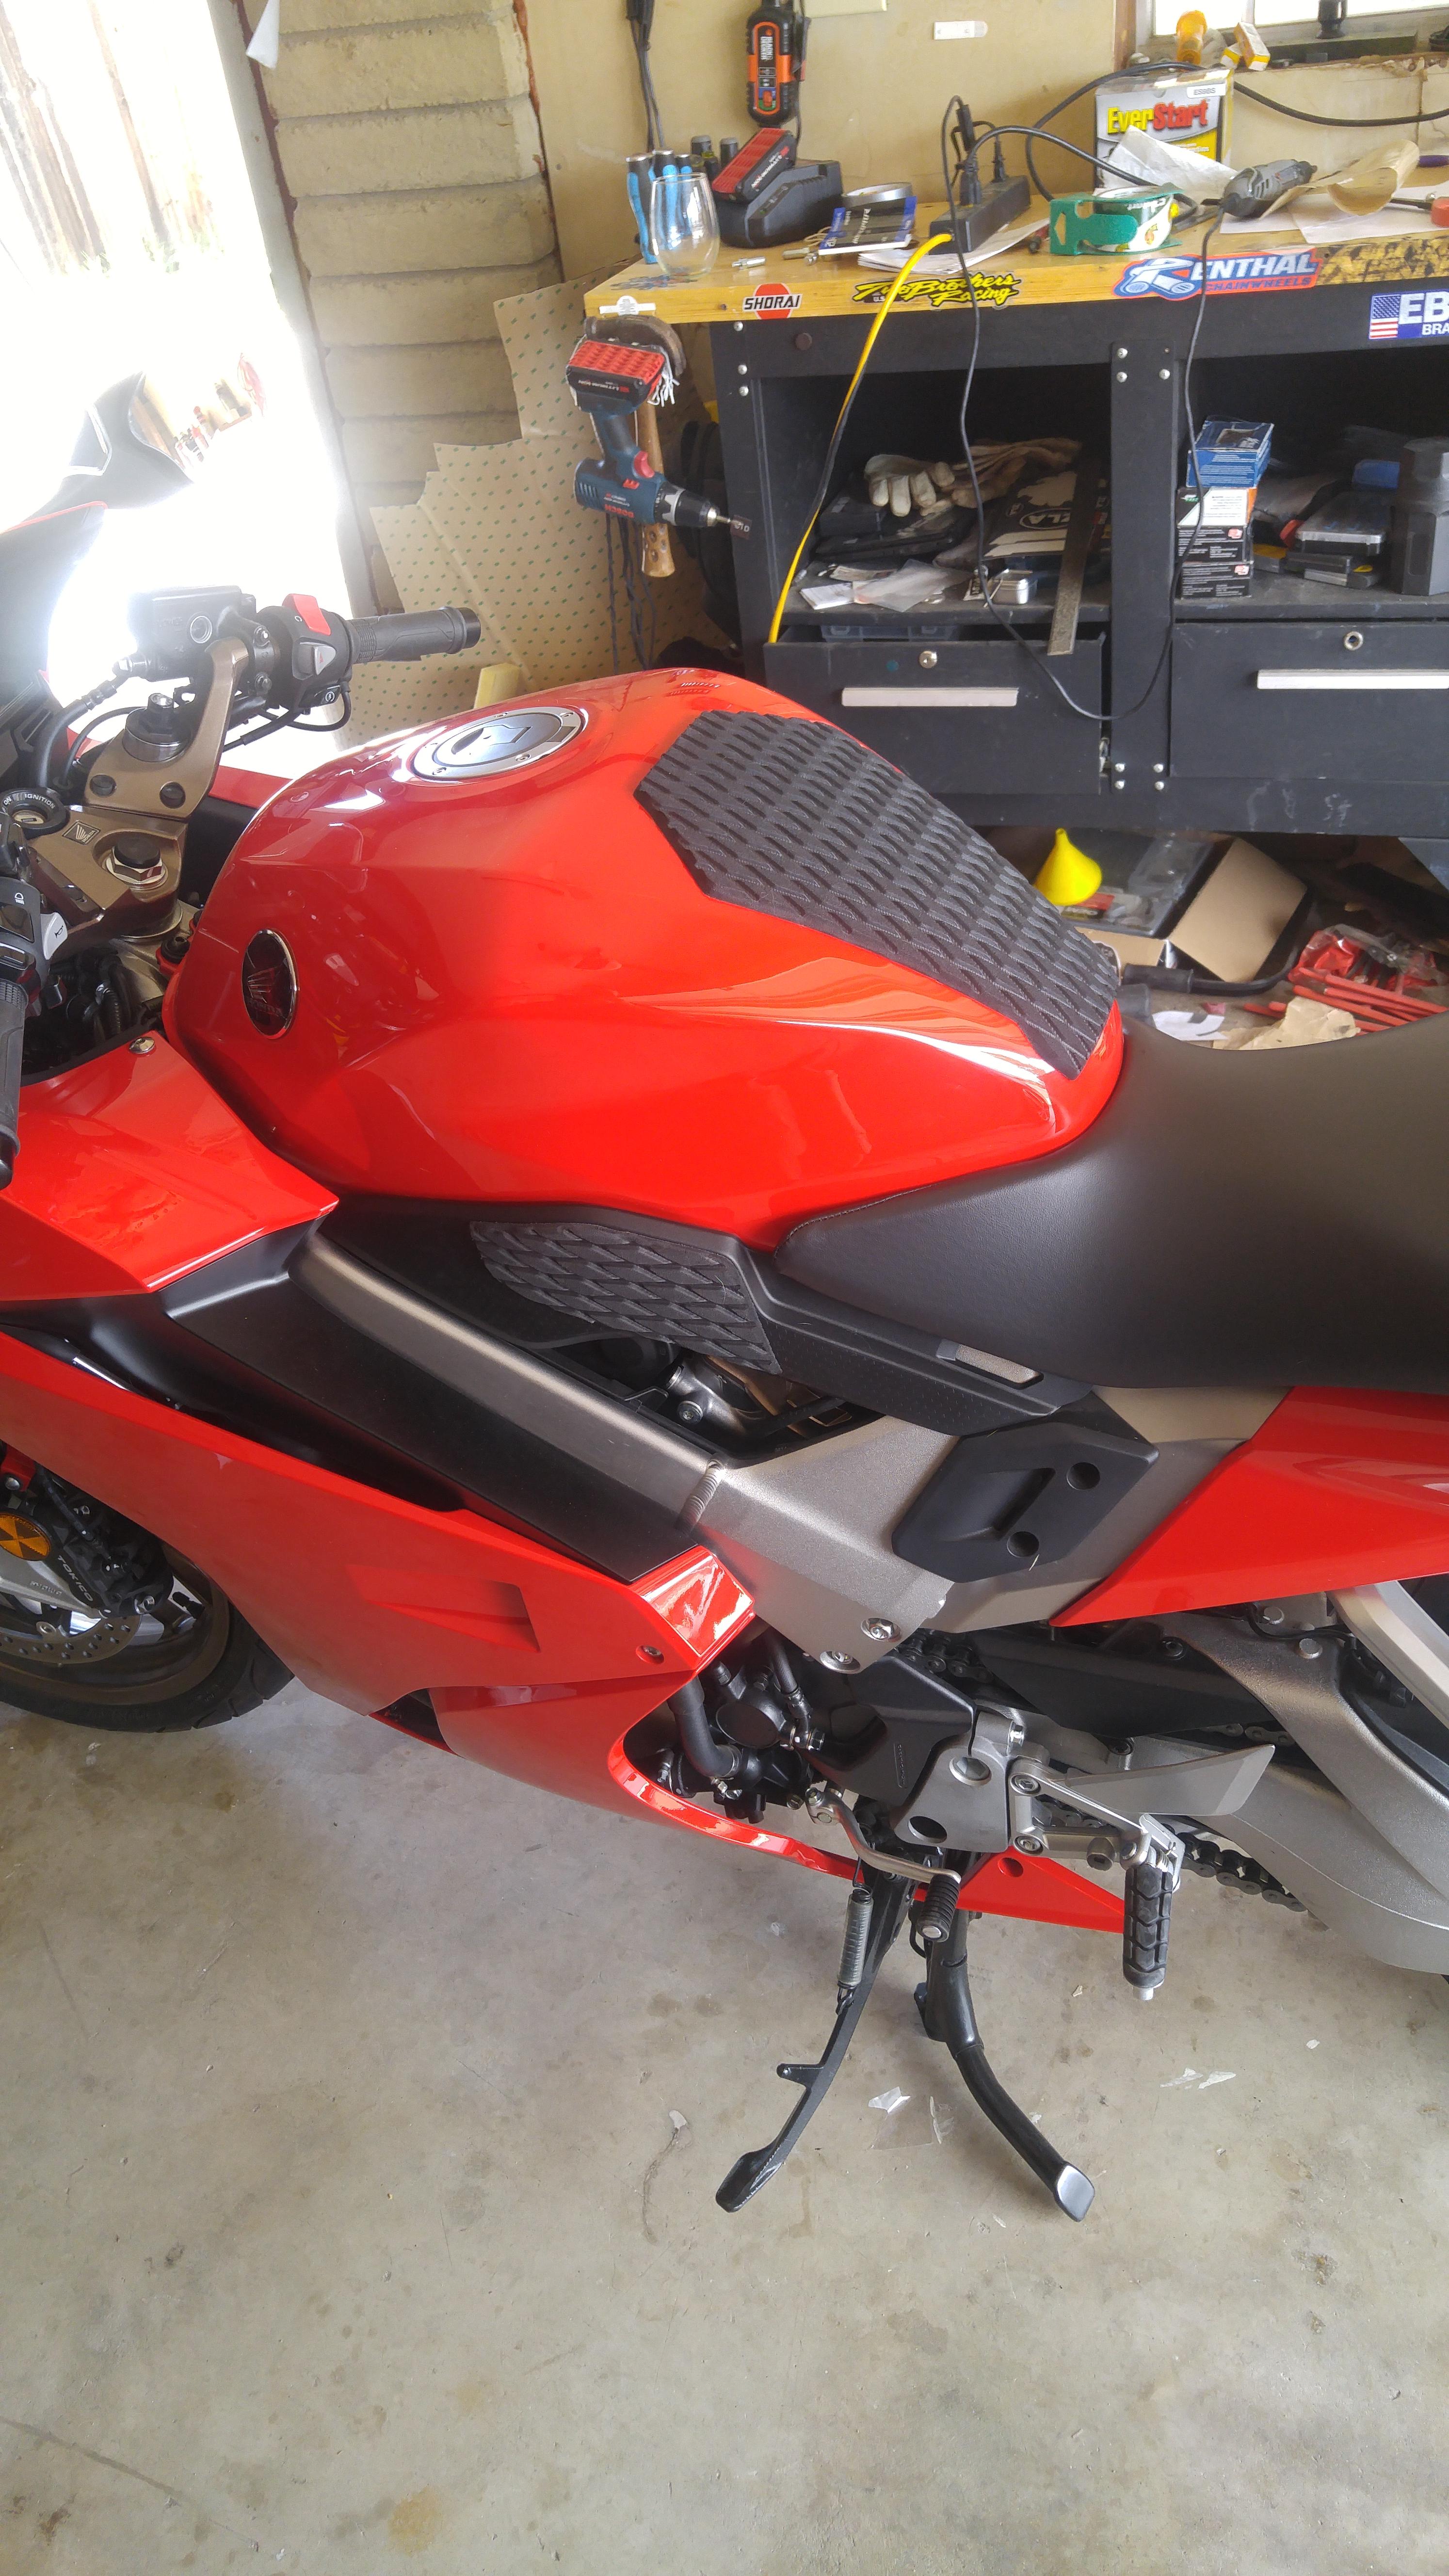
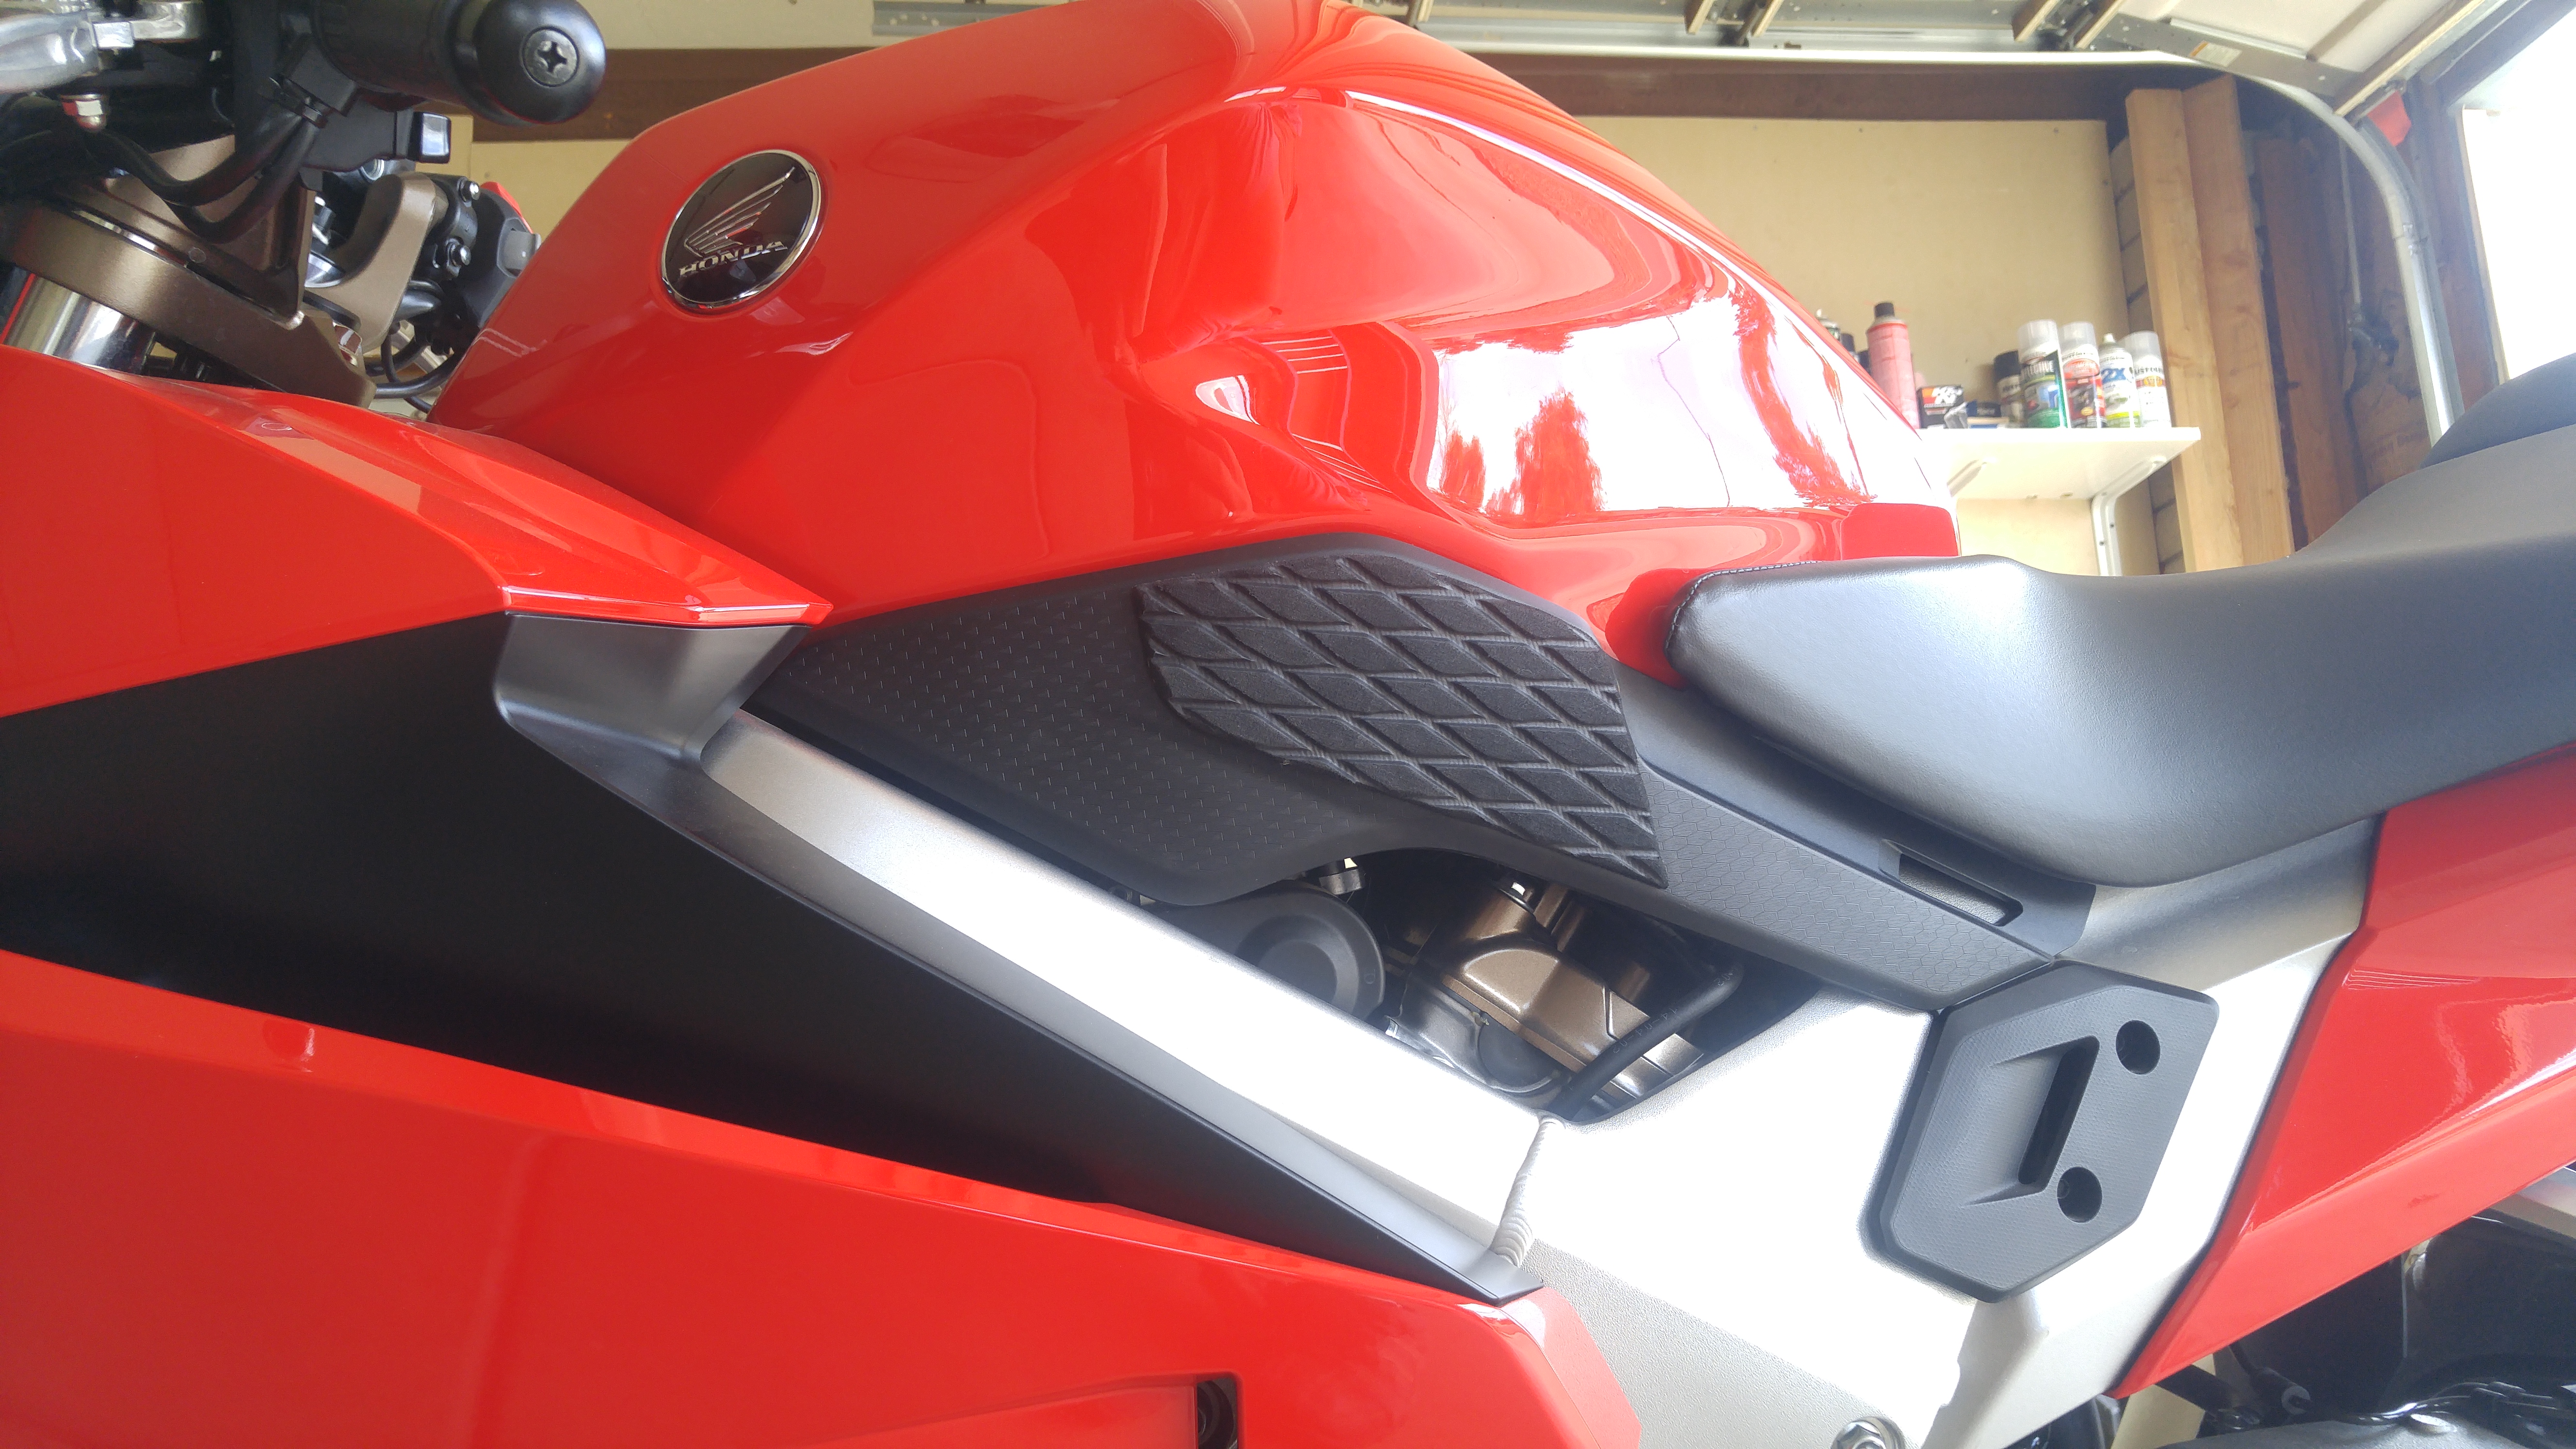
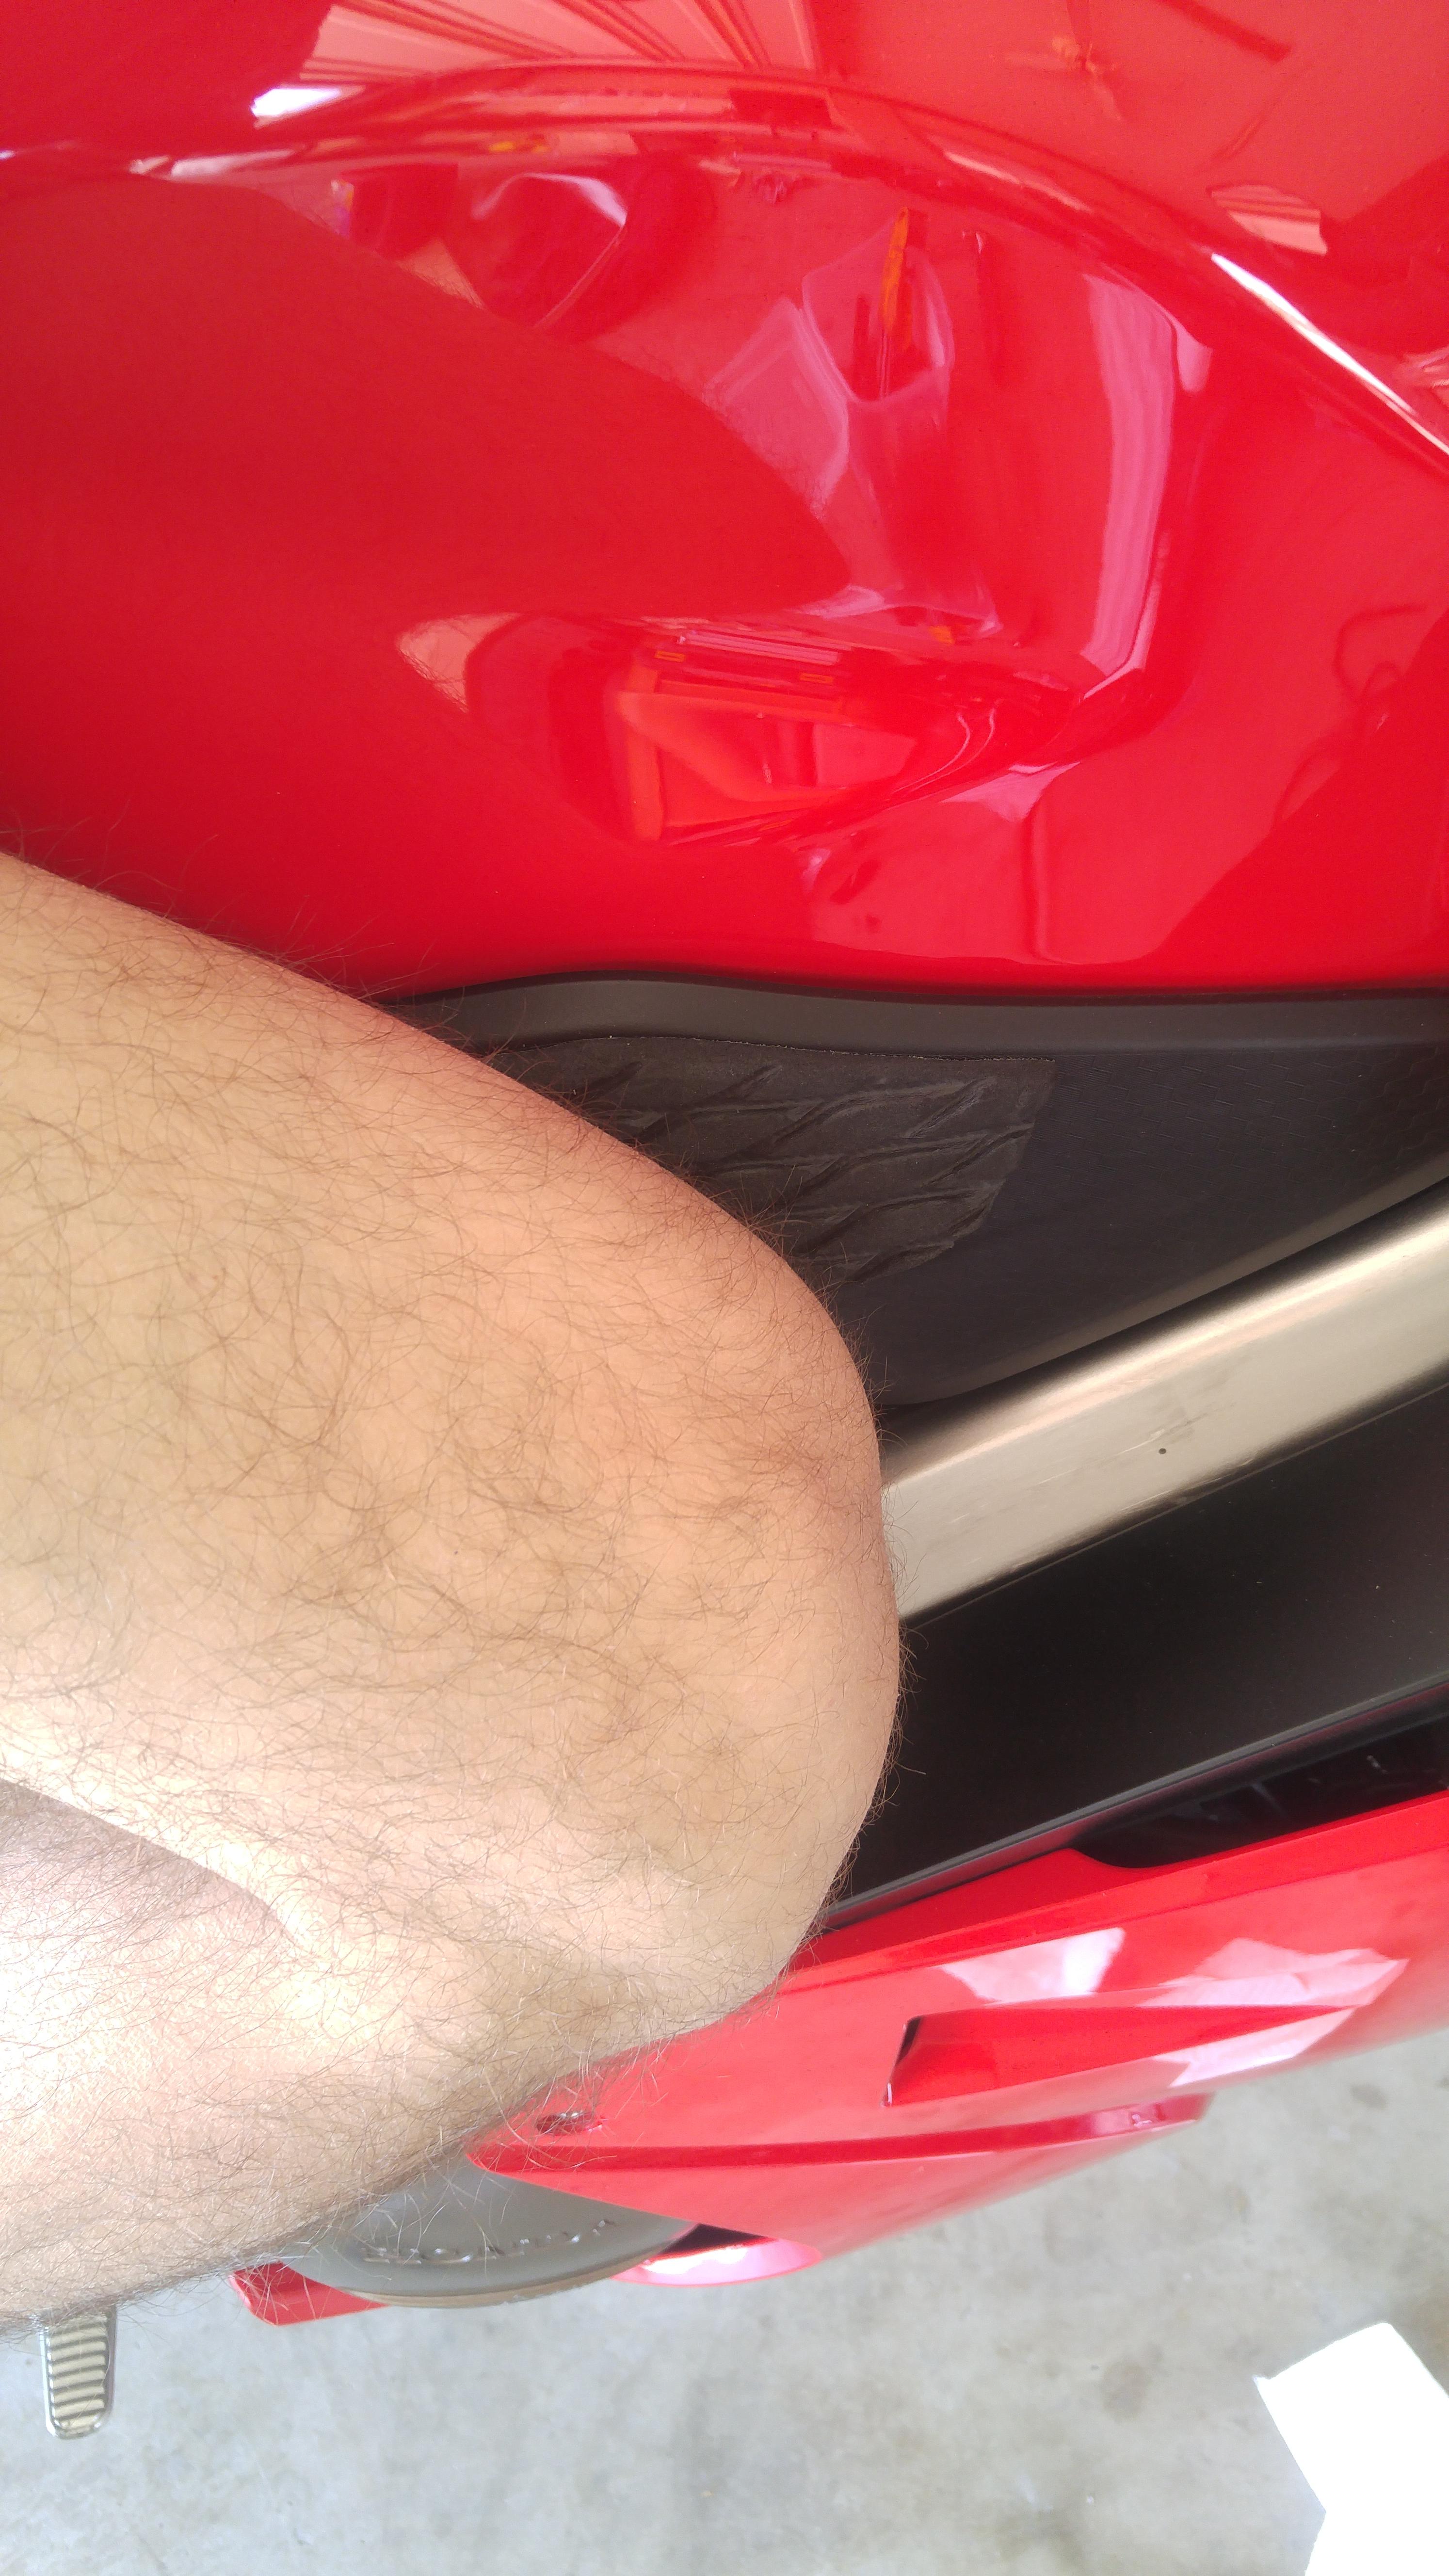
Still new here, and browsing the archives. I don't see much love for hydro turf. To me, it's the cat's meow. I bought a roll a while ago and made a bunch for daytonas, as that was my bike of choice at the time. Moving up into the world of comfortable bikes, I still risk scratching the tank, and enjoy squeezing with my knees. So, these aren't perfect, but they'll do. If I can ever get my hands on a decently priced seat, I'll most likely chop off the useless front wings and add a little bit o grip.
-
Hey guys, I posted about my cct failure about 4 weeks ago on this site. I didn't know what was wrong with it and had to ask you guys. I have had the bike at a mechanic for some time now and he came to the conclusion that the CCTs that I replaced were over tightened. Thats what caused the chain to break. So any of you out there thinking about buying either manual or auto adjusters for CCTs, Please buy auto adjustable ones!!! Its very easy to over tighten those by feel and I blew up my engine because of that.
-
I got inspired by this thread by HispanicSlammer on changing tires, having tired of both the dealer mark ups and often ridiculous amount of money they want to install them. http://www.vfrdiscus.../page__hl__mojo So I bought a Mojo lever and a Marc Parnes balancer. Still, I didn't want a tire changer taking up space in my garage. After studying the post I came up with a low cost alternative, and having tried it found it works well for me. Maybe this will help someone that does not want to shell out the cash for a tire changer or also has limited space. I started with a workbench I already have, and underneath the top in the corner I placed a 4X4 block of wood and attached it to the underside of the bench securing it with 4 countersunk screws. Next I drilled a 1/2 inch hole through the top and in to the 4X4. I placed a small metal plate on the bottom of the hole to prevent the upright from falling through. Then at the home center I obtained a 1/2" steel rod contractors use - it was in the isle where they have concrete and supplies for making forms - $2.50. The wood underneath the benchtop makes the upright very stable - it moves some, but not much, providing a solid base for the Mojo lever to work from. The small plug to the left fills the hole when not in use. At a wrecking yard I bought a used car wheel, 14" - this one was from a Volvo, but anything in a 14" size would do. I took some 3/4" heater hose I had laying around and split it lengthwise along the inside of the curl it was in and wrapped it around the perimeter of the wheel to prevent scratches during the tire changes process. The wheel cost me $5. Then to change the tire, I placed the bike's wheel on the car wheel and use the Mojo lever to remove the tire. The bar clamp helps keep the bead of the tire in the drop center of the wheel making removal much easier. I kept it near where the Mojo lever was starting out working away from the clamp. I also used some Ru-glyde from NAPA to lube the bead of the tire, but soapy water works just as well. Both the front and rear tires came off surprisingly easily. I held the tire with my left hand so it would not rotate and worked the Mojo lever with my right. Everything stayed in place well. For a bead breaker, I attached a sattelite dish mount I had left over to a stud on the garage wall, then used a 4 foot 2X4 attached to the mount with a 1/4" bolt and a short piece of 2X2. Placing the car wheel on the floor for support protects the rotors from any contact. I don't have to worry about the wheel slipping off of blocks or spacers during the process. Since the 2 pieces of wood are not attached, angling the 2X2 slightly toward the center of the wheel insured that it pressed on the bead and not the sidewall of the tire. Pressing on the sidewall will not remove the bead from the rim. That was it. Other than this I followed the process in Slammer's thread. My total investment in this was $7.50 (granted I had the bar clamp and a few other things already) - this all stores away in a cabinet and takes up no floor space. The finished product. Best part of all, no scratches whatsoever on my rims! The Mojo lever works really great. (sorry for the fuzzy pics). Total time was about 3 hours. I also changed the valve stems, and this little tool makes it very easy - pull on the "T" handle and push on the back of the stem while rotating it slightly and they go right in. I got the .453 diameter 1" stems at the auto parts store for $3. On the PR 3's, found this on the sidewall. Sign of the times . . . Finally, took this shot of the PR2 rear - I had never noticed this previously, but appears that the harder compound going down the center of the tire is visible. These tires aren't done - they'll see some additonal use later (one of the benefits of changing your own). These have been amazing tires - they have more than double the mileage of the original Dunlops they replaced and are still in better condition. I hope the 3's are as good.