Trace
-
Posts
545 -
Joined
-
Last visited
-
Days Won
4
Content Type
Forums
Profiles
Gallery
Blogs
Downloads
Events
Everything posted by Trace
-
Yep. Got 'em. Hyperlites. http://www.hyperlites.com/ Five years later, they're still working "brilliantly". Hehehe.. :happy:
-
Make that "soooper DUPER geeeeeeniusssses...es...esssss"! :laughing6-hehe:
-
Instead of circuitry....how about fiber optic cable(s) from the taillight housing up to a "jewel lense" somewhere on the dash area, as the 68-71 Corvettes did to the center console? :idea3: Wait...it didn't work very good on the Vettes, and prolly wouldn't work so good in sunlight on a bike. Never mind...but it was worth thinking about for a few seconds. :biggrin: I'll be damned! Beck and I came up with the same idea at the same time. Geniuseseseses! :fing02:

-
 That's a great photo, and it's so fun for us Americans to see a "funny colored" 5th-Gen like the blue and green ones. Nice! What is that white stuff all over the ground and road?
 -
Dimitry, I can't quite follow the relevance of your point regarding payment, but I'll use your concept of "pay" to make my point. Using VFRD, JES started a thread where he preached the viability of HHO and haughtily boasted about 80mpg; and one of his supporters actually said "The Laws of Thermodynamics are dated", as if there's a statute of limitations on physics; and others accused Big Business/Big Oil of suppressing "green" research for various nefarious reasons. And last May we got daily updates of his installation and progress, but now.....nothing. So, back to payments. Instead of VFRD having to PAY JES for the results of his experiment....I believe he OWES this community (both the supporters and the naysayers) a few minutes of his heavily prioritized time to give us an update. In fact, I'm betting that JES is just finishing up a big report on the results of his research and he'll be sending us the weblink to it any day now! :fing02: Even Galileo and Columbus were told to "put up or shut up" when it came to their radical ideas, and those two guys eventually justified their beliefs. And on May 12th, you yourself said "Can't wait for the results!". So...how much time is enough time for him to give us some results?
-
Yes, exactly right. I don't think anyone said he should stop, but six months have passed and there was a lot of interest and discussion by both supporters and naysayers, along with an ongoing heated argument that ventured into politics and big business and conspiracy theories. So, what I'm thinkin' is that after tossing this experiment smack-dab into the middle of VFRD-land, it's about time "for letting us know about your efforts". Isn't that fair? Just sayin'....
-
Hey....alcohol works! HHO doesn't.... :laughing6-hehe:
-
OKAY!!! Last May this post came out about hydroxy or HHO or whatever. Much interest was generated, the tree huggers and Big Oil Conspiracy Theorists proclaimed JES_VFR a saint and visionary. Most other members adopted a wait-and-see attitude hoping for the best, and several others (including Mad Scientist and myself) immediately waved the BULLSHIT flag. My position was that you can't get something for nothing, no matter how many black helicopters with Exxon emblems you think might be following you; or no matter how many pseudo-science bullshit websites you subscribe to. The assorted wackos out there might not like pure science, but just because your politics make you think that there is a conspiracy doesn't necessarily mean there is one. [And I don't exactly mean your politics, JES, I'm using the general "you" and "your", here]. You (actually it was mostly your followers) resorted to name-calling when the logical and scientifically-educated members questioned your HHO investigations. I KNOW that you're a good guy, a good member here and that you mean well, but I can't let pseudo-science and left-wing theory run amok without a challenge. What say you now? How about that 80 MPG that you referred to? Frankly, I'd love for you to tell us it's working and making lots of power and giving big mileage improvements, so I can eat a bunch of humble pie.
-
Yeah HS, that's a very cool plate for you....and for all of us, too! :fing02:
-
Craig Hennigee's The Whooppee Car, a 1948 Anglia A/Gas, steel body running a 466 inch Chevy using Crower injection. We campaigned it all over at Divisional meets (known as Winston Championship Series meets back then), and I "think" we won the Gasser/Modified Production class at the Gators in 1980 or 81, but I missed that event due to engineering school demands. I forget the details. Anyway, we eventually turned to bracket racing (ugh!) because that was the only thing going on a consistent basis. Somewhere in there (October, 1979), SuperStock magazine did a feature article on us, and that was a HUGE deal for non-professionals like ourselves. I still have a copy of that magazine, sealed in a ziplock bag.... Because of our regional popularity in the mid-Atlantic area, we started doing mostly match racing because it was more fun and the tracks always paid us good money to race their "local hero" for best 2-out-of-three. Since we were running 8.80s in the mid 1980s (pretty fast for a true doorslammer at the time). Once we got into the match racing deal, we removed the complex Crower stuff and went with a Dominator and made the engine much bigger.....and we began to learn about blue bottles. Yaknow? We then got into the beginnings of the "outlaw style" and "Quick Eight" racing that eventually became today's Pro Mod cars, but we weren't near that level of sophistication at that time. The car was destroyed in a finish line crash at Cecil County Dragway in Rising Sun, MD in 1989 when the other guy lost control of his Hemi Arrow and took us out. Craig took a good beating in that deathtrap Anglia, the rollcage knocked him silly and the asphalt ground away his helmet down to the foam.....and he never really (successfully) raced again. He started a busy DJ business (oldies and car tunes, of course!) and we went our separate ways and that ended my drag racing life for the most part. We sure did have a lot of fun with that car and a whole host of characters and women who we hung around with back then. I heard that Craig died this summer of a sudden heart attack, but I hadn't talked to him in 20 years. Apparently he built an identical looking "tribute" copy of the old car as modern funny car some time in 2009, but I know nothing about it. Craig had his alky funny car license since the early 80's, so maybe he was thinking of making a comeback in an alky funny but I just don't know. There are a few pictures and a short vid of it on the web. Here's the only digital picture that I have. And I just found this forum link with someone asking about the old, original car. Kinda strange to hear someone asking about it after all these years: http://66.154.44.164/forum/showthread.php?t=392355 Oh...and I just found this memoriam for him: http://www.capitalcruisin.com/whooppee.html This was a really neat car. The crowds loved it, kids loved it, and women thought it was "cute". :wub: Oh....did I mention the HUGE wheelstands it pulled all the way through 2nd gear? Those wheelie bars really got a workout....and so much for "cute". :biggrin: And for the sharp-eyed drag racer out there who notices both the Hays (clutches) and the ATI (automatic transmission builder) decals on the door.......we used a very strange thing called a "clutch-Turbo". Think of it as a dinosaur version of Honda's DCT!!! It was fairly common back then for fast, high powered cars to use them before the Lenco planetary clutchless transmissions were introduced in the late 70's. We launched with a true clutch, and then shifted up through a 3-speed TurboHydraMatic tranny's gearbox that had the torque converter removed (with the clutch in it's place, basically.). Click, click, click, just like a (highly modified!) normal automatic once the clutch was released. Very slick, but we broke a LOT of stuff with that violent driveline shock! :pissed:
-
Haha...yeah, they're pretty damn straight. Maybe THAT'S why I moved to Florida after a lifetime in the DC area, which has plenty of good roads west of the city and into the foothill areas...I was so used to dragstrips that I thought Florida roads were NORMAL!
-
Two good tracks, two hours away each. But frankly, I just don't give a fack about going around tracks, lap after lap. I'm well aware that it's great for training and skill improvement, but for me it's just no fun. I've done my share of car tracks and a few bike trackdays, but it's just a pain in the ass to go there, put up with their rules, remove glass stuff, get inspected and annoyed......to hell with it for anything other than a very occasional basis. It's NOT a substitue for Dragon area roads and their vistas and discoveries...not by a long shot. Again, I spent 12 years as an NHRA crewchief traveling all over the east coast, so I know a little about tracks, in general. For enjoyable motorcycle riding, it's not for me.
-
Hahahaa! No, prolly shouldn't repeat that one. I doubt anyone would quite get the intended joke via the written word. :pinocchio: Good pics! Those were some crazy rat-junkyard-bikes that you took pictures of. Very stange creations around an old Harley motor, basically.
-
 Come to think if it, I was there on my RC from the 21st-24th....and rode home on Saturday to leave the roads the weekend crowds. Didn't even bother with the Dragon myself, but my K-bike buddies wanted to do it once so they could legally put a Dragon sticker on their bikes! :biggrin: I hung out at the Gap store and talked to friendly Wingers! There are soooo many other great roads in the area that I don't need to fight for space on the ultra-tight & technical Dragon with a floorboard-dragging Harley or a local Rocket Man ninja.
 -
Excellent report and photos. Since I'm very familiar with all those places (but I've never seen dragons!), I can attest to the fact that this is an amazing area to ride a motorcycle. As BR always advises us flatlanders prior to TMAC: bring your best game and be in reasonable riding condition to avoid exhaustion (and crashes), have good tires.....and don't think you're going to be a knee-down hero because the locals will make you humble. And yes, the HD folks are often a little hostile (wouldn't you be if you were on a piece of junk and getting passed by pesky little "ninjas" all the time?) and the Winger guys are always fun and friendly (wouldn't you be if you were retired and touring on a comfy, capable bike for weeks at a time? :fing02: ) A world of warning--Local pickup truck drivers are the WORST regarding hostilities and downright potential manslaughter. Since they know the roads and are safe in their big cages, they go like hell to avoid being passed or to stay on your tail. They won't let you by, and once you do squeek around them they then chase you for the whole remaining road. The locals in cars and the tourists (I always look at the plate when I come up on a 4-wheel vehicle) usually try to find a place to pull over or otherwise don't maike life difficult for you. I always give a little wave when I pass someone, hoping to keep some other rider from getting cage rage.
-
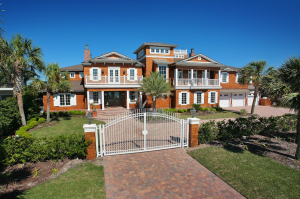
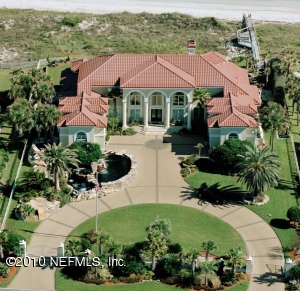
That stretch of A1A south of Daytona beach is actually in a neighborhood of oceanfront megahomes sporting gated driveways. So....35 mph is fair right there. Places like these:
-
What do you mean "another kind of V-Twin [cruiser]"?? I've ridden that thing 480 miles to Franklin several times. Of course it only goes 120 miles on a tank, so thankfully I get 3 breaks during the trips up or back down to Ponte Vedra Beach! :491:
-
I've lived it... :laughing6-hehe: That's pretty funny! :biggrin:
-
I do: I know it's easy to pick on Florida and our lack (!!) of twisties, but when you think about it.....not many places have the intense roads of the few mountain states like TN, NC, KY and CO. But here in Ponte Vedra at least I'm 500 yards from the ocean and a beautiful beach lined with palm trees.. And the weather to go with it, so I ain't complaining. :fing02:
-
OctoberFest is a little smaller based on vendor attendance and other activities, but otherwise is pretty much a carbon copy of the BikeWeek decadence along Main Street. Zillions of Harleys of every imaginable year and description. There are no races at the Speedway in October. The nearest corners (curves) to Daytona and Jax are at the Jennings GP motorcycle track on the Georiga/Florida border along I-75, about 150 miles away. Next closest curves are at the Georgia/NC border, 480 miles away. In the huge pine forests of central and northen Florida we have very high speed sweepers for "curves", with zero elevation change. But you gotta be willing to run 110+ for these sweepers to be any fun, and they're linked by roads that look ike this:
-
Any photos that have anyone in them who might resemble me are definitely unapproved photoshops...... But the Flat Jax Crew really does exist! :fing02:
-
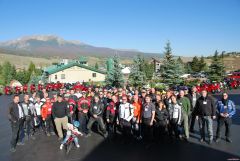 That has to be one of the best group shots in the history of VFRD! Congrats, guys. :fing02:
 -
Remove front wheel, look up and notice hole at bottom of steering stem, get a long metal rod of the appropriate diameter and tap the GPS mount thingy out from below. Oh...replace front wheel before riding!
-
Gotta love "Veefalo". It's a perfect name for that bike! Nice report HS, and as ususal your pictures have us all reaching for maps and planning our across-the-USA dream ride that we all want to take "someday"....
-
Hahahahahaaaa! Good one! :dry: