Nifty7Fifty Posted November 24, 2015 Author Share Posted November 24, 2015 Thanks Bill. So, how did it feel to you with the new settings? Are they final? It did look good. There seemed to be less suspension travel used than in the first video you did (bearing in mind the different test route). That's down to the extra pre-load and compression, I'd say. Do you still advocate trying the stock dogbone hole with these settings after this test ride? Cheers, Glenn Great questions Glenn. . . To me, the first settings felt the best, and would be most appropriate for comfortable cruising/touring. The extra available stroke and slightly softer compression really transformed the bike into a whole new beautiful experience. I tested the complete range of motion multiple times during the install (I'm a stickler about things like that), and from what I've observed, it's my conclusion that not only does the rear suspension design support the extra stroke, but I believe it was likely engineered from the beginning to accommodate a much broader range of travel. Anyway, with that in mind, the newest adjustment (as specified in the vid) is much better suited for aggressive sport riding, so I will probably keep it that way because I typically have a difficult time keeping the counter under triple digits As for the dogbone. . . "To drill or not to drill, that is the question" I think it's gonna be a very subjective decision based on personal riding style, height, weight, etc., and I would really like to hear the input of those who try it as I can only speculate right now. But, from what it looks like to me, I'd say you can use the original hole with a minimum Preload of 80% or greater, and some may find it necessary to lower the front a little. If I used the original hole, I reckon I'd need to lower my front (i.e. raise the fork tubes) approx 1 inch. Not sure though, It really needs to be tested. I'm excited for you and everybody to get going! Looking forward to new Ninja Viffers posting in here soon, I'm ready to kick back and let someone else drive this bus into the next country .. ..... Canada, maybe ? Link to comment Share on other sites More sharing options...
Nifty7Fifty Posted December 2, 2015 Author Share Posted December 2, 2015 Here's some of my notes for you self-motivated chaps who wanna have a little fun this winter. . . New shock chart .bmp . . . Enjoy ! . Link to comment Share on other sites More sharing options...
slovcan Posted December 2, 2015 Share Posted December 2, 2015 Thanks Bill! That's a great reference document. Link to comment Share on other sites More sharing options...
Nifty7Fifty Posted December 2, 2015 Author Share Posted December 2, 2015 Thanks Bill! That's a great reference document. No problem Glenn! I've put some time into that thing. You would think that here in 2015, all of that info would be readily accessible somewhere online, but you really have to dig deep to find those values for all of the years and models listed. Then you need to cross-reference everything to prove the values because some places show incorrect specs. Let me know if you have any questions about anything on the chart. I also have additional bike models and years in my home database, so if you need info on something not listed I probably have it. Cheers! . Link to comment Share on other sites More sharing options...
Member Contributer Rush2112 Posted December 3, 2015 Member Contributer Share Posted December 3, 2015 Here's some of my notes for you self-motivated chaps who wanna have a little fun this winter. . . New shock chart .bmp . . . Enjoy ! . Are these shock lengths measured at the eyes center to center? Link to comment Share on other sites More sharing options...
Nifty7Fifty Posted December 3, 2015 Author Share Posted December 3, 2015 Yes, thanks, I should've noted that. All of the numbers in the "shock length" column depict eye-to-eye measurements. Eventually, I'll make a revision with more makes/models/years and I'll be sure to clarify this in the updated doc. . Link to comment Share on other sites More sharing options...
CandyRedRC46 Posted December 3, 2015 Share Posted December 3, 2015 Interesting read. Apparently I showed up way late to the party, thinking this was a question of it this shock was possible and not an actual build thread lol. Anyways, I am wondering why you went with modifying the dog bone length, which alters the suspension rate, as opposed to shimming the top shock mount, (especially as you changed your opinion that maybe the dog bone should not be modified at all and also seeing as the modifying the dog bone actually increases the progressive nature of the suspension rate). After reading through this, it seems as though for best performance (not necessarily best bang for the buck) would be, picking up a clean/used zx14 shock, respringing it (to get the desired sag and ride height, with the least additional preload and not altering the linkage geometry) and revalving it according to your weight/spring and riding style and then shimming the top mount/fabbing up a longer top mount to reach your desired ride height. Link to comment Share on other sites More sharing options...
750 Posted December 3, 2015 Share Posted December 3, 2015 Interesting read. Apparently I showed up way late to the party, thinking this was a question of it this shock was possible and not an actual build thread lol. Anyways, I am wondering why you went with modifying the dog bone length, which alters the suspension rate, as opposed to shimming the top shock mount, (especially as you changed your opinion that maybe the dog bone should not be modified at all and also seeing as the modifying the dog bone actually increases the progressive nature of the suspension rate). After reading through this, it seems as though for best performance (not necessarily best bang for the buck) would be, picking up a clean/used zx14 shock, respringing it (to get the desired sag and ride height, with the least additional preload and not altering the linkage geometry) and revalving it according to your weight/spring and riding style and then shimming the top mount/fabbing up a longer top mount to reach your desired ride height. Wouldn't the whole buying a new spring, revalving and getting brackets/extensions made up just turn it from a budget mod into a money pit? Link to comment Share on other sites More sharing options...
slovcan Posted December 3, 2015 Share Posted December 3, 2015 I consider this as realistic alternative to the $1000 aftermarket options for replacing a 25 year old and tired shock. For some, re-springing will be worth it. Anything more just defeats the original purpose of the project. I will try it as is and see what I think. Cheers, Glenn Link to comment Share on other sites More sharing options...
CandyRedRC46 Posted December 3, 2015 Share Posted December 3, 2015 I thought the purpose of this shock wasn't necessarily to be a budget shock, but that you guys had no aftermarket options. If companies are still selling drop in fully adjustable shocks for the third gens, then yes this would just be a budget alternative and I wouldn't bother having it rebuilt to vfr and rider specs, but if you third genners have no aftermarket support any more (which I thought was the case) I would totally get one of these shocks and build it to spec (about $400 including the ninja shock is still a great deal for custom built full adjustable shock). I am really waiting for Jaimie Daugherty to show up and shed some light on this mod, but my guess is he wants nothing to do with the bro science arguments. Edit: after checking in at DMr. They are still selling custom built cbr929 shock conversions for the vfr750, so there are still aftermarket solutions for you guys. Okay I get it, budget shock only, my bad lol. http://www.daughertymotorsports.com/vfr750.html Link to comment Share on other sites More sharing options...
Nifty7Fifty Posted December 4, 2015 Author Share Posted December 4, 2015 . . . and then shimming the top mount. . Can't shim the top mount on a gen3. I would say this is not only a good budget mod, but I'd put the bare shock's performance right up there with the popular $300 - $500 options. Another deciding factor for me was finding a replacement that would fit without an adapter. I kicked around going with a shorter shock, like the 929, but the 929's are outdated now and I don't see the point in making the adapter plus revalve & respring, when you can just find a modern shock that fits without using an adapter. That might have been a decent option 10 years ago, but imo there's better choices now. I get it though, when members say they "built" their bike, most actually mean they simply "assembled" components that other folks built for them. It's all good, not everyone has the time or ability to explore. I'm properly tooled and fully capable of revalving, respringing and making any adapter I need right here in my garage. My personal reason for this swap was not only for it to be budget friendly and easily duplicatable for others, but also a neat and clean install (i.e. no adapters & such). Of course, performance was also a big consideration and that's exactly why I chose the ZX-14r shock, as there are others that would physically fit better, but I believe this one is one of the better performance matches for the 3rd Gen. . Link to comment Share on other sites More sharing options...
CandyRedRC46 Posted December 4, 2015 Share Posted December 4, 2015 Look at that assembly fork kit that I just picked up from the fork swap store and that bolt on fifth / sixth gen hybrid full exhaust that I totally didn't have to custom pie cut and weld together. One day hopefully I'll figure out how this build a bike thing works and stop just assembling them. But jokes aside, that's good that you're trying new things out. I wish I could actually contribute to your thread, but I don't know too much about the 3rd/4th gen so I can only state arm chair engineering opinions. I'm glad the shock is working out for you. I'm not going to try and lecture you on revalving and respringing, as I know it will fall on deaf ears, but I do hope you keep tinkering and experimenting with this set up and eventually try a stock suspension geometry and higher rate spring combo. Link to comment Share on other sites More sharing options...
Nifty7Fifty Posted December 4, 2015 Author Share Posted December 4, 2015 Look at that assembly fork kit that I just picked up from the fork swap store and that bolt on fifth / sixth gen hybrid full exhaust that I totally didn't have to custom pie cut and weld together. One day hopefully I'll figure out how this build a bike thing works and stop just assembling them. LOL NICE !! Wasn't referring to anyone in particular, but for those who the shoe fits, and in my brief tour around here I do see a lot more parroting than working ;) The bike looks great, if you have a build thread on it, post up a link I wanna see! Link to comment Share on other sites More sharing options...
CandyRedRC46 Posted December 4, 2015 Share Posted December 4, 2015 Thanks nifty. I've been working on it since Jan 2009, so there isn't once specific organized build thread, but a few projects here and there, just trying out different things. Lot of weight reduction and electronics. Lot of suspension and brake modding. Lots of tunning and a little more power. I still need to do a light weight subframe, maybe from a Daytona 675, it looks to be a close match. Then a ducati 1098 rear hub/brake/wheel with some custom hardware. After that it will be time to pull the engine out and apart, massage the heads, cam regrind and 929 pistons. Maybe I'll get it done with in the next seven years lol. Sent from my A0001 using Tapatalk Link to comment Share on other sites More sharing options...
Nifty7Fifty Posted December 4, 2015 Author Share Posted December 4, 2015 Yeah I hear ya, big part of the time goes to figuring out what you wanna do and how you wanna do it. I'm kickin around some ideas for my rear sub-frame now too, tighten up the rear fender. Curious, why switching to the Duc rear hub, better brakes? I'm running a 4th gen motor with 3rd gen exhaust (more power with this setup), gravity gas feed, motor worked over a little ;) 15/44 sprockets, some bolt on performance bits here & there. Shed some weight, Geared, lifted and tucked !! . Link to comment Share on other sites More sharing options...
CandyRedRC46 Posted December 4, 2015 Share Posted December 4, 2015 One thing I dont hear much people talk about, I believe that the 3rd gen has 36mm carbs and the 4th gen has 34mm carbs. So if youre running a 4th gen motor, I would consider putting the 3rd gen carbs on it and jetting accordingly. That could possibly free up a couple hp when complimenting some exhaust and airbox mods. As far as the ducati rear hub conversion, it would be strictly for weight reduction. The 1098s rear wheel is forged and significantly lighter than the vfr wheel. The axle/hub/cush drive/brake/ etc is also significantly lighter and less complex that the vfr components. The wheel itself is relatively common and affordable. The 5th and 6th gen brakes are linked from the factory. There is a huge mess of over complicated lines, proportioning valves and secondary master cylinders etc. I delinked the brakes when I went with the R1 front end, so I shed some weight there and got phenomenal front brakes and forks in the process, but I still have the massive 3 piston sliding rear caliper. I dont need anymore stopping power, but I am sure switching to a fixed brembo 2 piston caliper and matching master cylinder would drop some weight/complexity and offer much better feel. Link to comment Share on other sites More sharing options...
Nifty7Fifty Posted December 4, 2015 Author Share Posted December 4, 2015 . . . the ducati rear hub conversion, it would be strictly for weight reduction. . . Dig it, that's prob the first thing I would do to a 6th gen - separate the brakes. R1 front end, smart move, looks great on there too! One thing I dont hear much people talk about, I believe that the 3rd gen has 36mm carbs and the 4th gen has 34mm carbs. So if youre running a 4th gen motor, I would consider putting the 3rd gen carbs on it and jetting accordingly. That could possibly free up a couple hp when complimenting some exhaust and airbox mods. This is a common misconception that I see folks mention alot... It actually might work better the other way around (i.e. you might get a little more torque out of a gen3 motor by running gen4 carbs). The RC36-2 motor is HO than the RC36-1, and the carbs were upgraded accordingly. The slightly smaller throat makes a better fuel delivery curve, which these lean systems desperately need. In addition to delivering more fuel across the range at a higher velocity, the 1994 - 1997 carbs atomize the fuel/air mix more efficiently, creating extra power. They changed the fuel bowl as well. Basically, the 4th gen carbs are a higher-output design. . Link to comment Share on other sites More sharing options...
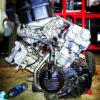
downic71 Posted December 13, 2015 Share Posted December 13, 2015 It's been a really mild December in Toronto - so I ventured out into the garage to get started on my "Nifty" mod. I was able to get the old shock out without too much trouble and had followed Nifty's instructions to to prepare the ZX14 mounts. I did notice how much heavier the original spring is when compared to the ZX spring. I cranked down the pre-load. So far, it seems to fit pretty well. Haven't tightened it up yet but it does seem to fit nicely. So I'm going to ask what is probably a fairly dumb question - go easy on any responses. When I eye-ball it, the ZX spring appears to be a little bit longer than the VFR spring but the diameter seems about the same. If the ZX spring does turn-out to be too soft, is it conceivable that I could simply switch springs? My VFR shock is toast so I have no need for it. Link to comment Share on other sites More sharing options...
slovcan Posted December 13, 2015 Share Posted December 13, 2015 I wouldn't have thought you could use the VFR spring, but you would have to do measurements every which way to see. The Honda shock is straight and I don't think it is at all progressive. The ZX spring is tapered and progressive - smaller diameter on one end than the other. I don't know if it would be possible to move the spring seats around between the shocks to accommodate the different spring. Why don't you take the ZX shock back out while everything's apart and measure and analyze it on the bench and let us know? You'd need to know the diameter of the shock itself, too, too see it the spring seats could be moved from one to the other. Cheers, Glenn Link to comment Share on other sites More sharing options...
Member Contributer RC36Rider Posted December 13, 2015 Member Contributer Share Posted December 13, 2015 Looking at your pic, the eye-to-eye lengths seem very close. I thought the ZX shock was +/- 330 mm and the stock one was 345 mm. Link to comment Share on other sites More sharing options...
downic71 Posted December 13, 2015 Share Posted December 13, 2015 I've pulled the shock and have taken measurements. The ZX-14 spring is progressive - the top is about 4mm narrower than the bottom. I think it would depend on the internal diameter of the VFR spring - if it were in the 56mm range - then it would likely fit. Does anyone have the internal VFR spring measurement? Alternatively - how hard is it to pull apart the VFR shock - any special tools required - or significant risk of death? Link to comment Share on other sites More sharing options...
slovcan Posted December 13, 2015 Share Posted December 13, 2015 Nice work, downic71. For the VFR spring ID, measure the OD, then measure the spring wire thickness, x 2 and subtract from the OD. That's easier than taking it apart to then find that the size won't work. Having said that, progressive springs are nice and give a nicely controlled ride. The Kawi package does seem to work well with the adjustments Bill is using. Feedback from using that shock with a stiffer, linear spring will be interesting. Cheers, Glenn Link to comment Share on other sites More sharing options...
downic71 Posted December 13, 2015 Share Posted December 13, 2015 Finished the installation with full preload applied. Sad to say this mod won't work - the ZX spring is far too soft. As you can see in the video below, the rear tire hits the plastic mud guard without too much effort. The bike feels considerably lower - even the side-stand grazes the floor when any weight is on the bike. I'm a bit heavier than Nifty at 225lbs - and I'm using the stock dogbone hole. I suspect the revised dogbone hole position might help with the height issue but I'd still be concerned that the spring is too soft. https://youtu.be/JsM4IXT9wEU Link to comment Share on other sites More sharing options...
Member Contributer RC36Rider Posted December 13, 2015 Member Contributer Share Posted December 13, 2015 How much preload in mm do you have if I may ask? According to the Service Manual,the stock spring has about 13 mm of preload with the hydraulic adjuster in the standard position. At your weight, I'd think you need quite a bit more and that's on a 16 kg spring. Link to comment Share on other sites More sharing options...
Nifty7Fifty Posted December 13, 2015 Author Share Posted December 13, 2015 downic71 - Nice job ! Thanks for posting your work in detail. I wasn't sure how it would work in the original bone hole, now we have some insight. Couple thoughts. . .It actually didn't look too bad, I'd say a lighter rider (prob up to 180 pounds, no heavier) could run it the way you set it up, if they also lowered the front end a bit. I mentioned before that I would raise the forks about an inch to lower the front, if I did use the original hole. That would also increase the rake angle, which might be enough to eliminate the contact your getting on the undertail. But again, that would be a remedy for a lighter rider. I believe you and I are close enough in size, that you should indeed achieve the same results as I did by drilling the new bone hole, and you could probably get by with the original spring. Although, at your size a new spring might be the best bet to get the most out of this mod. From my tests, I'd say the shock should work well with up to a 12kg/mm spring, without needing a re-valve. But try the new bone hole first, that might be enough to get you going. ** I wouldn't use the VFR spring, an Ohlins or similar won't set you back that much and would be well worth it imo. ZX shock + new spring = $150 - $200 total. Still less than half the price of the next alternative. . Link to comment Share on other sites More sharing options...

Recommended Posts
Archived
This topic is now archived and is closed to further replies.