Search the Community
Showing results for tags 'custom'.
Found 19 results
-
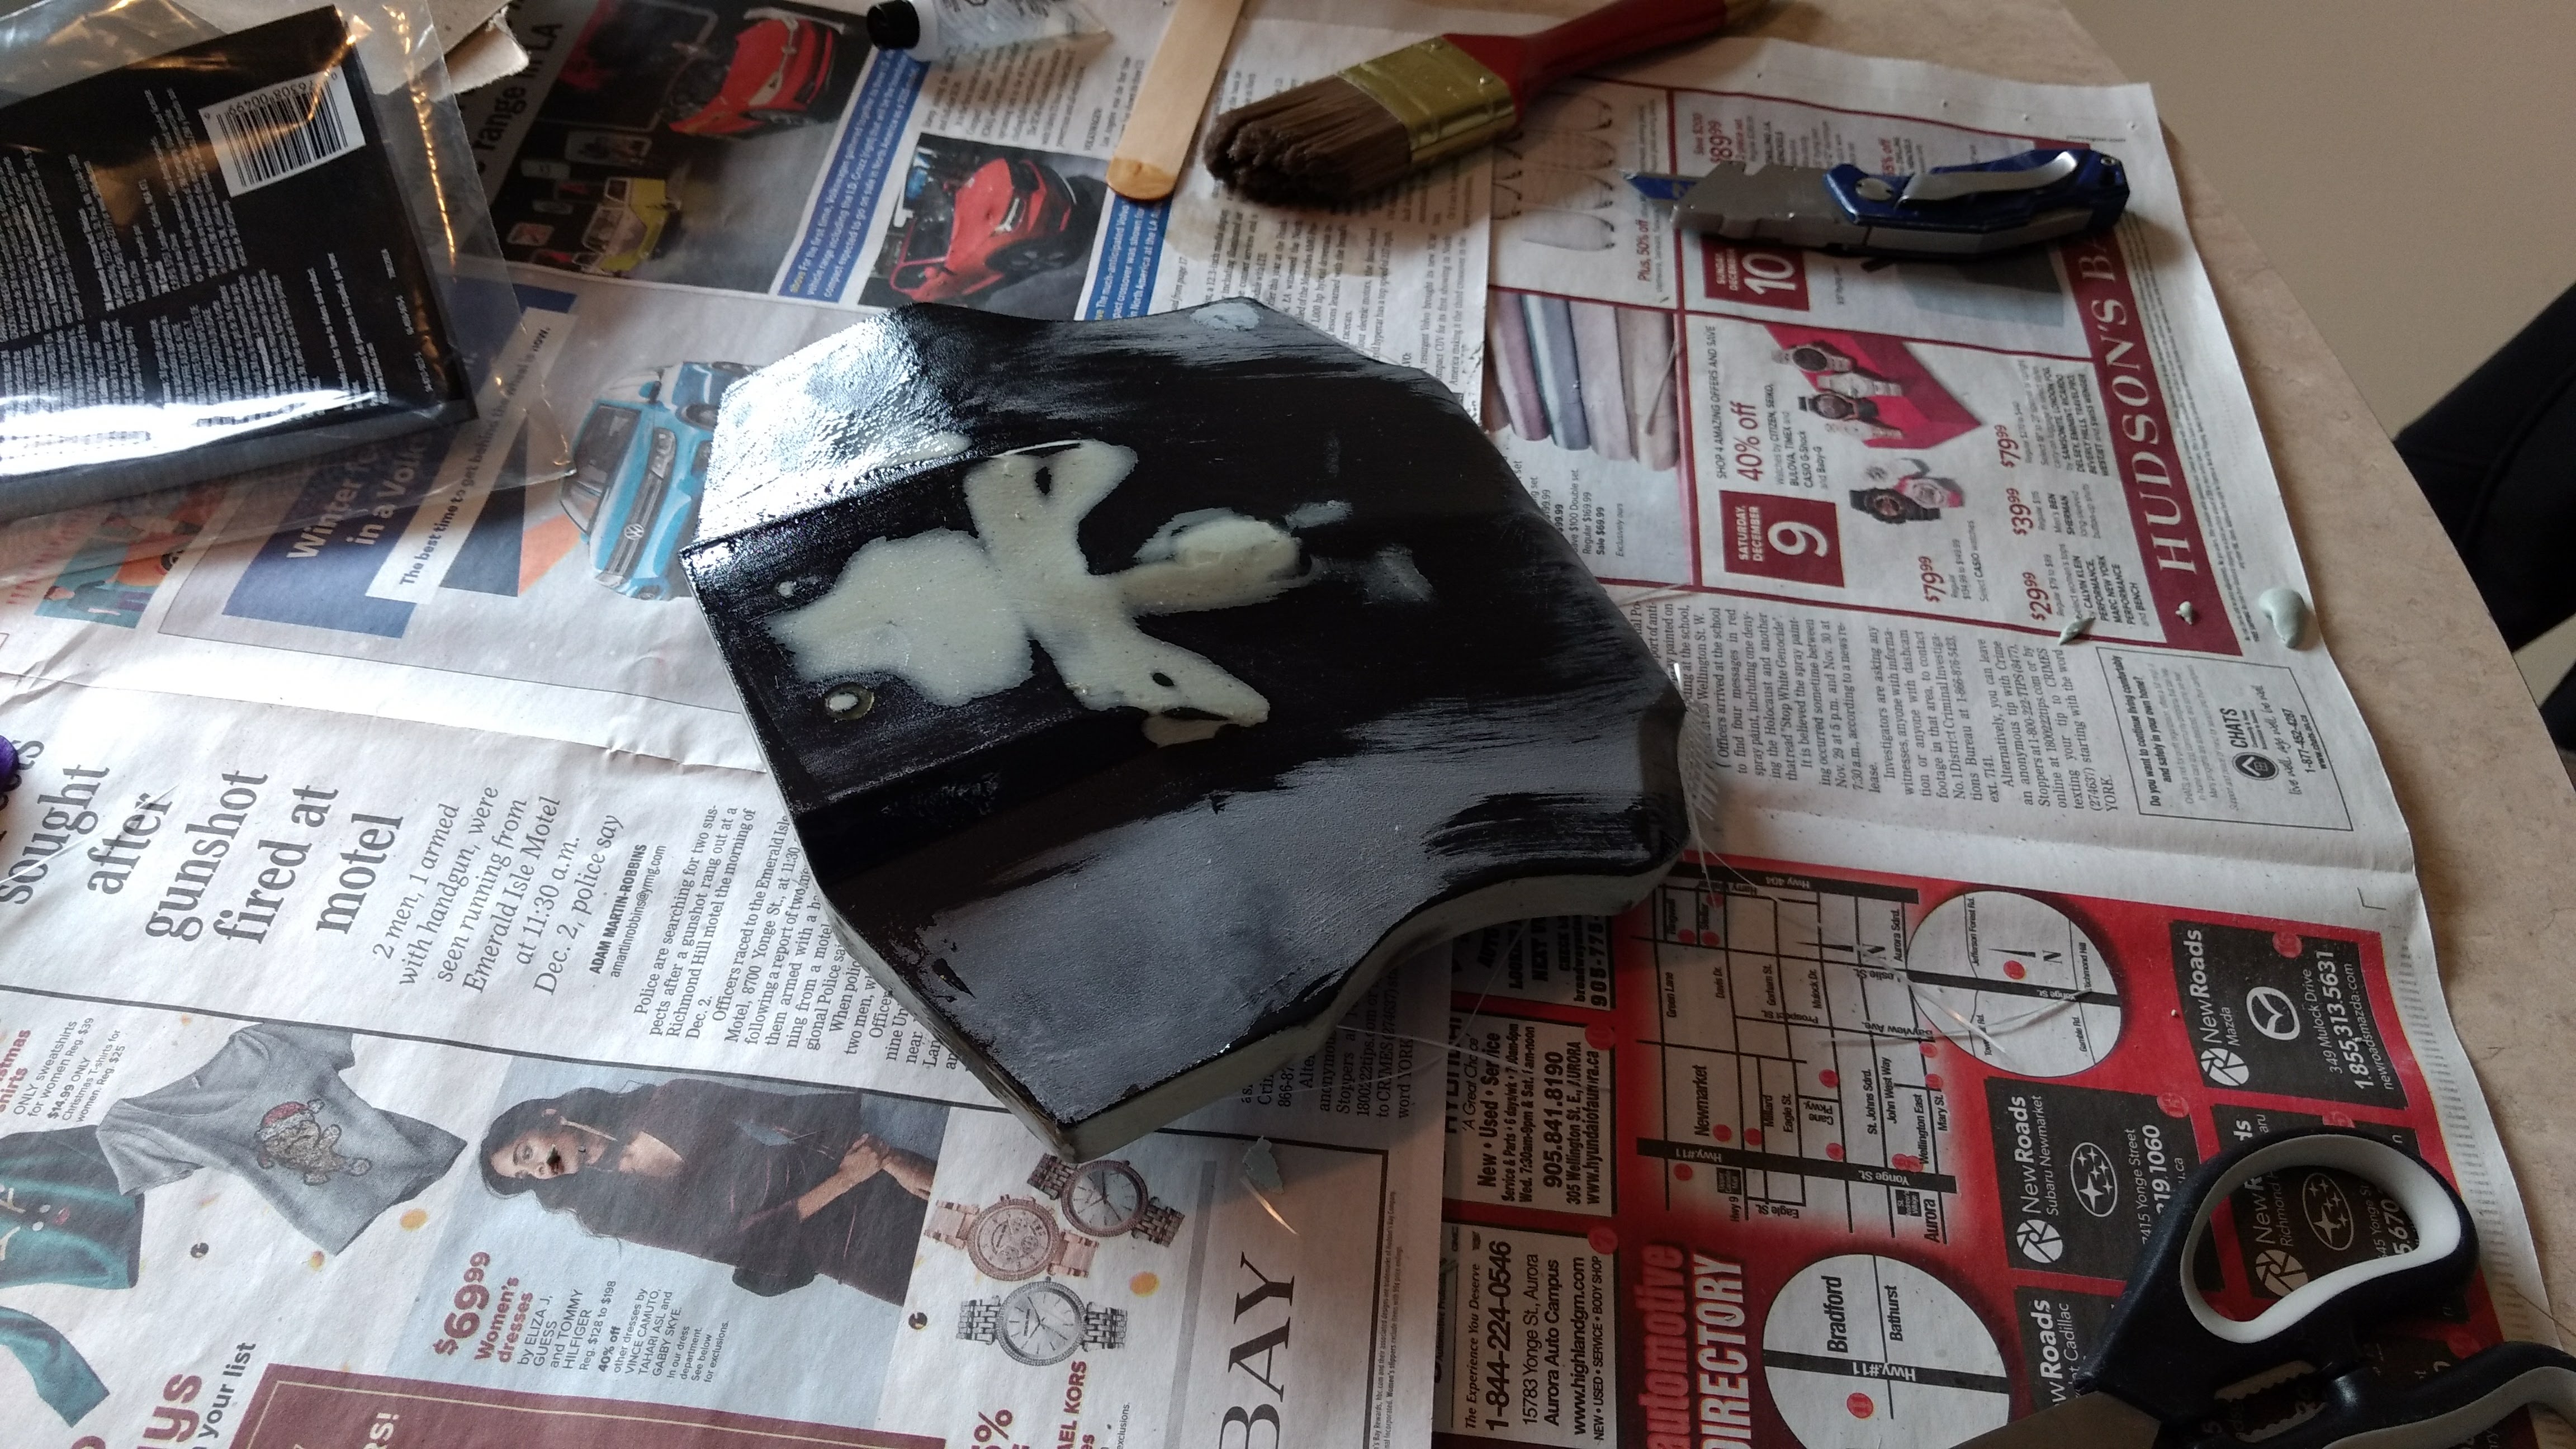
 I recently purchased a red 2002 VFR800 and I am absolutely loving it! It hides its age extremely well except for one thing (which tends to be an eye sore for me); the big outdated under tail exhausts. Another issue I have with my motorcycle is it is just no loud enough. I run with a Stain-tune cat back exhaust (without the baffles) and also have the stock exhaust. Now I know I can have a custom exhaust fabricated or use a more modern style rear exhaust setup (like repurposing a R1 or Ducati TOCE setup for the VFR) and this would fix both of my issues (make it louder and get rid of the dated look, but I am a university student on a pretty tight budget when it comes to throwing money on a bike. The alternative to this is running with a cheap slip on exhaust which comes out the side. The issue with this would be the gaping hole under the tail where the old cans used to be; this just makes the motorcycle look like something is off about it. What I am proposing is to get an affordable slip on and put that on the side, and fabricate a piece to go under the tail. I would fabricate this by first making a mold around the empty tail with cardboard, filling it with expanding foam, shaving it down to fit the bike, going over the foam with fibreglass, and finally paint matching with the Italian Red Honda paint. I could also have the fibreglass part painted at a shop if it would be cheaper. I have listed the rough price estimate and a getto mock of the final product (slip on not included in the mock up). I would love to get your guys opinion on this, the level of difficulty this would be, and if this is a pipe dream or something that is actually realistic and a good idea. Thanks. Cost Estimate: - Shorty Slip On Exhaust - $100 CAD - Expanding Foam - $10 CAD - Cardboard - Free - Sandpaper and Files - Free - Fibreglass Repair Kit - $40 CAD - Primer - $10 CAD - Honda Paint - $35 CAD - Clear Coat - $15 CAD - Total - $210 Motorcycle Mockup:
-
 Hello everyone, Im new to this forum, and i had a question regarding the ignition system. I would really like to know how the ignition system works because i want to instal a custom iggnition/efi system(for now i want the ignition only) with vw coil on plugs. Now for this to work I was told that these system needs a cam trigger input in order to use it on a odd firing engine. Now is my question how does original ICM know when to fire in the correct sequence when the triggerwheel rotates twice when both cams rotate once, if i know how they managed to do this I might be able to imply this on the custom ICM greeting Connor
 -
Help request for VFR 750F RC36II ignition system and workings
Connorhvb posted a question in Modification Questions
Hello everyone, Im new to this forum, and i had a question regarding the ignition system. I would really like to know how the ignition system works because i want to instal a custom EFI with vw coil on plugs. Now for this to work I was told that these system needs a camshaft input in order to use it on a odd firing engine. Now is my question how does original ICM know where the camshaft will be if the tooth wheel that provides input for sensor wil rotate twice when the camshaft is rotating once. Or does the ignition run in a wasted spark. And perhaps how i would be able to imply this into the EFI. I hope someone can help me figure this one out. Greetings Connor -
Some of you may have seen this on Facebook already but I had a few minutes and thought I would share it here. I acquired this very nice 2006 / ABS model a few years ago and decided pretty quickly that I did not like the graphics or the overall look that much. I began thinking about what I wanted to do. I changed out the rear wheel with a nice 8 spoke that I found on Ebay early on. This helped but still not what I wanted. Then I looked at a lot of paint schemes to see how I wanted to go. I wanted this to be a little understated but "sporty". I am lucky that I have a friend who is a painter who agreed to help me out. I did all of the prep work. I scuffed the existing plastics and the tank with 1000 grit paper to give the new paint something to grip. It's really pretty scary to see what you've done to a pristine finish the first time you try this. Trust that when the clear goes back on it really is like magic. Next I laid out the design and let my friend shoot it. I used two additional colors. This one is a Lexus/Toyota color called "Storm Gray". The second color is from Jaguar and matches the wings on the tank. I finished by adding a pinstripe that we put under the clear. Once the paint and clear was on, I did the final buffing and leveling. Here is the final result...
-
I recently modded my stock vfr800 exhaust! Check out this viseo to see how I did it! Let me know if you have any questions!
-
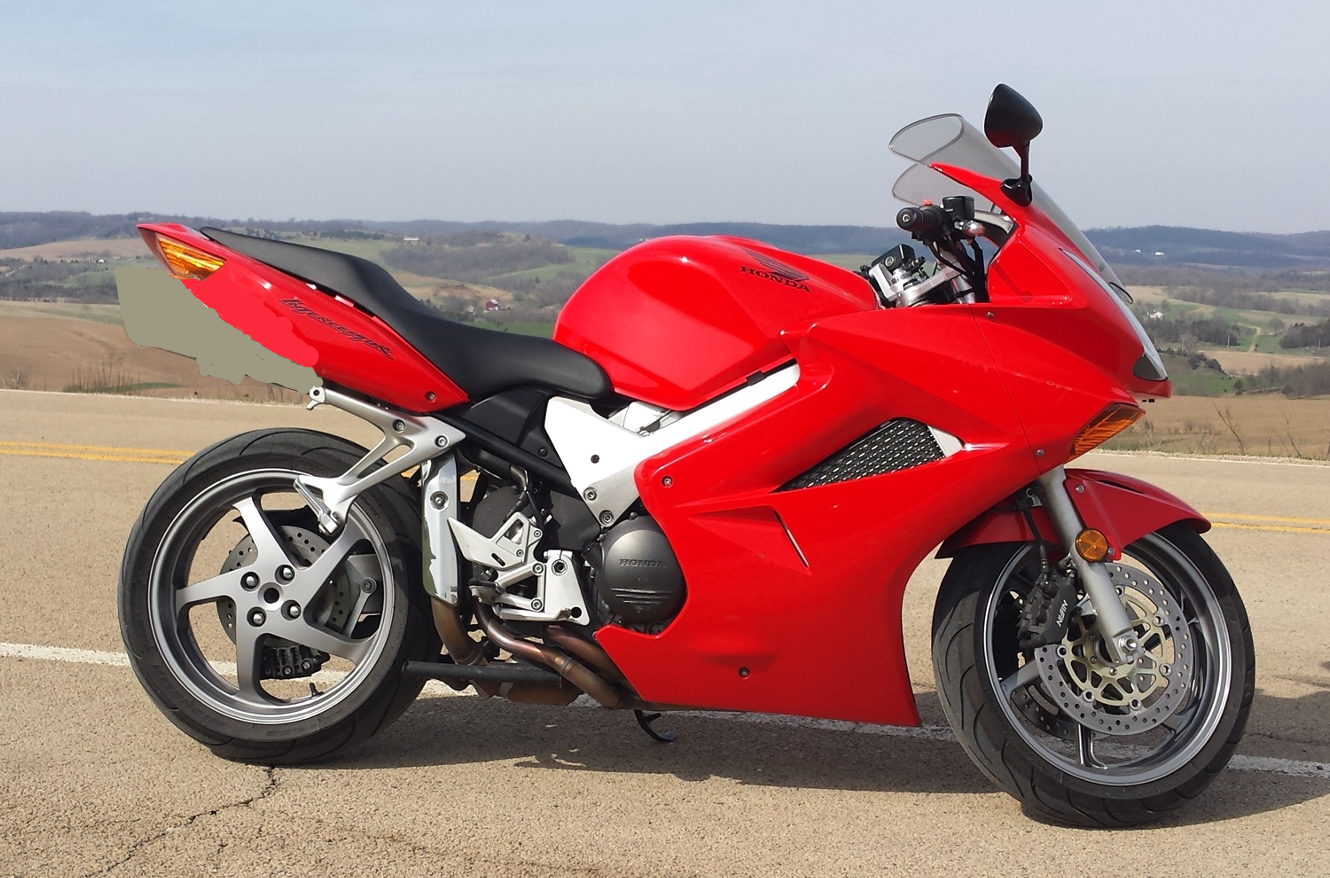
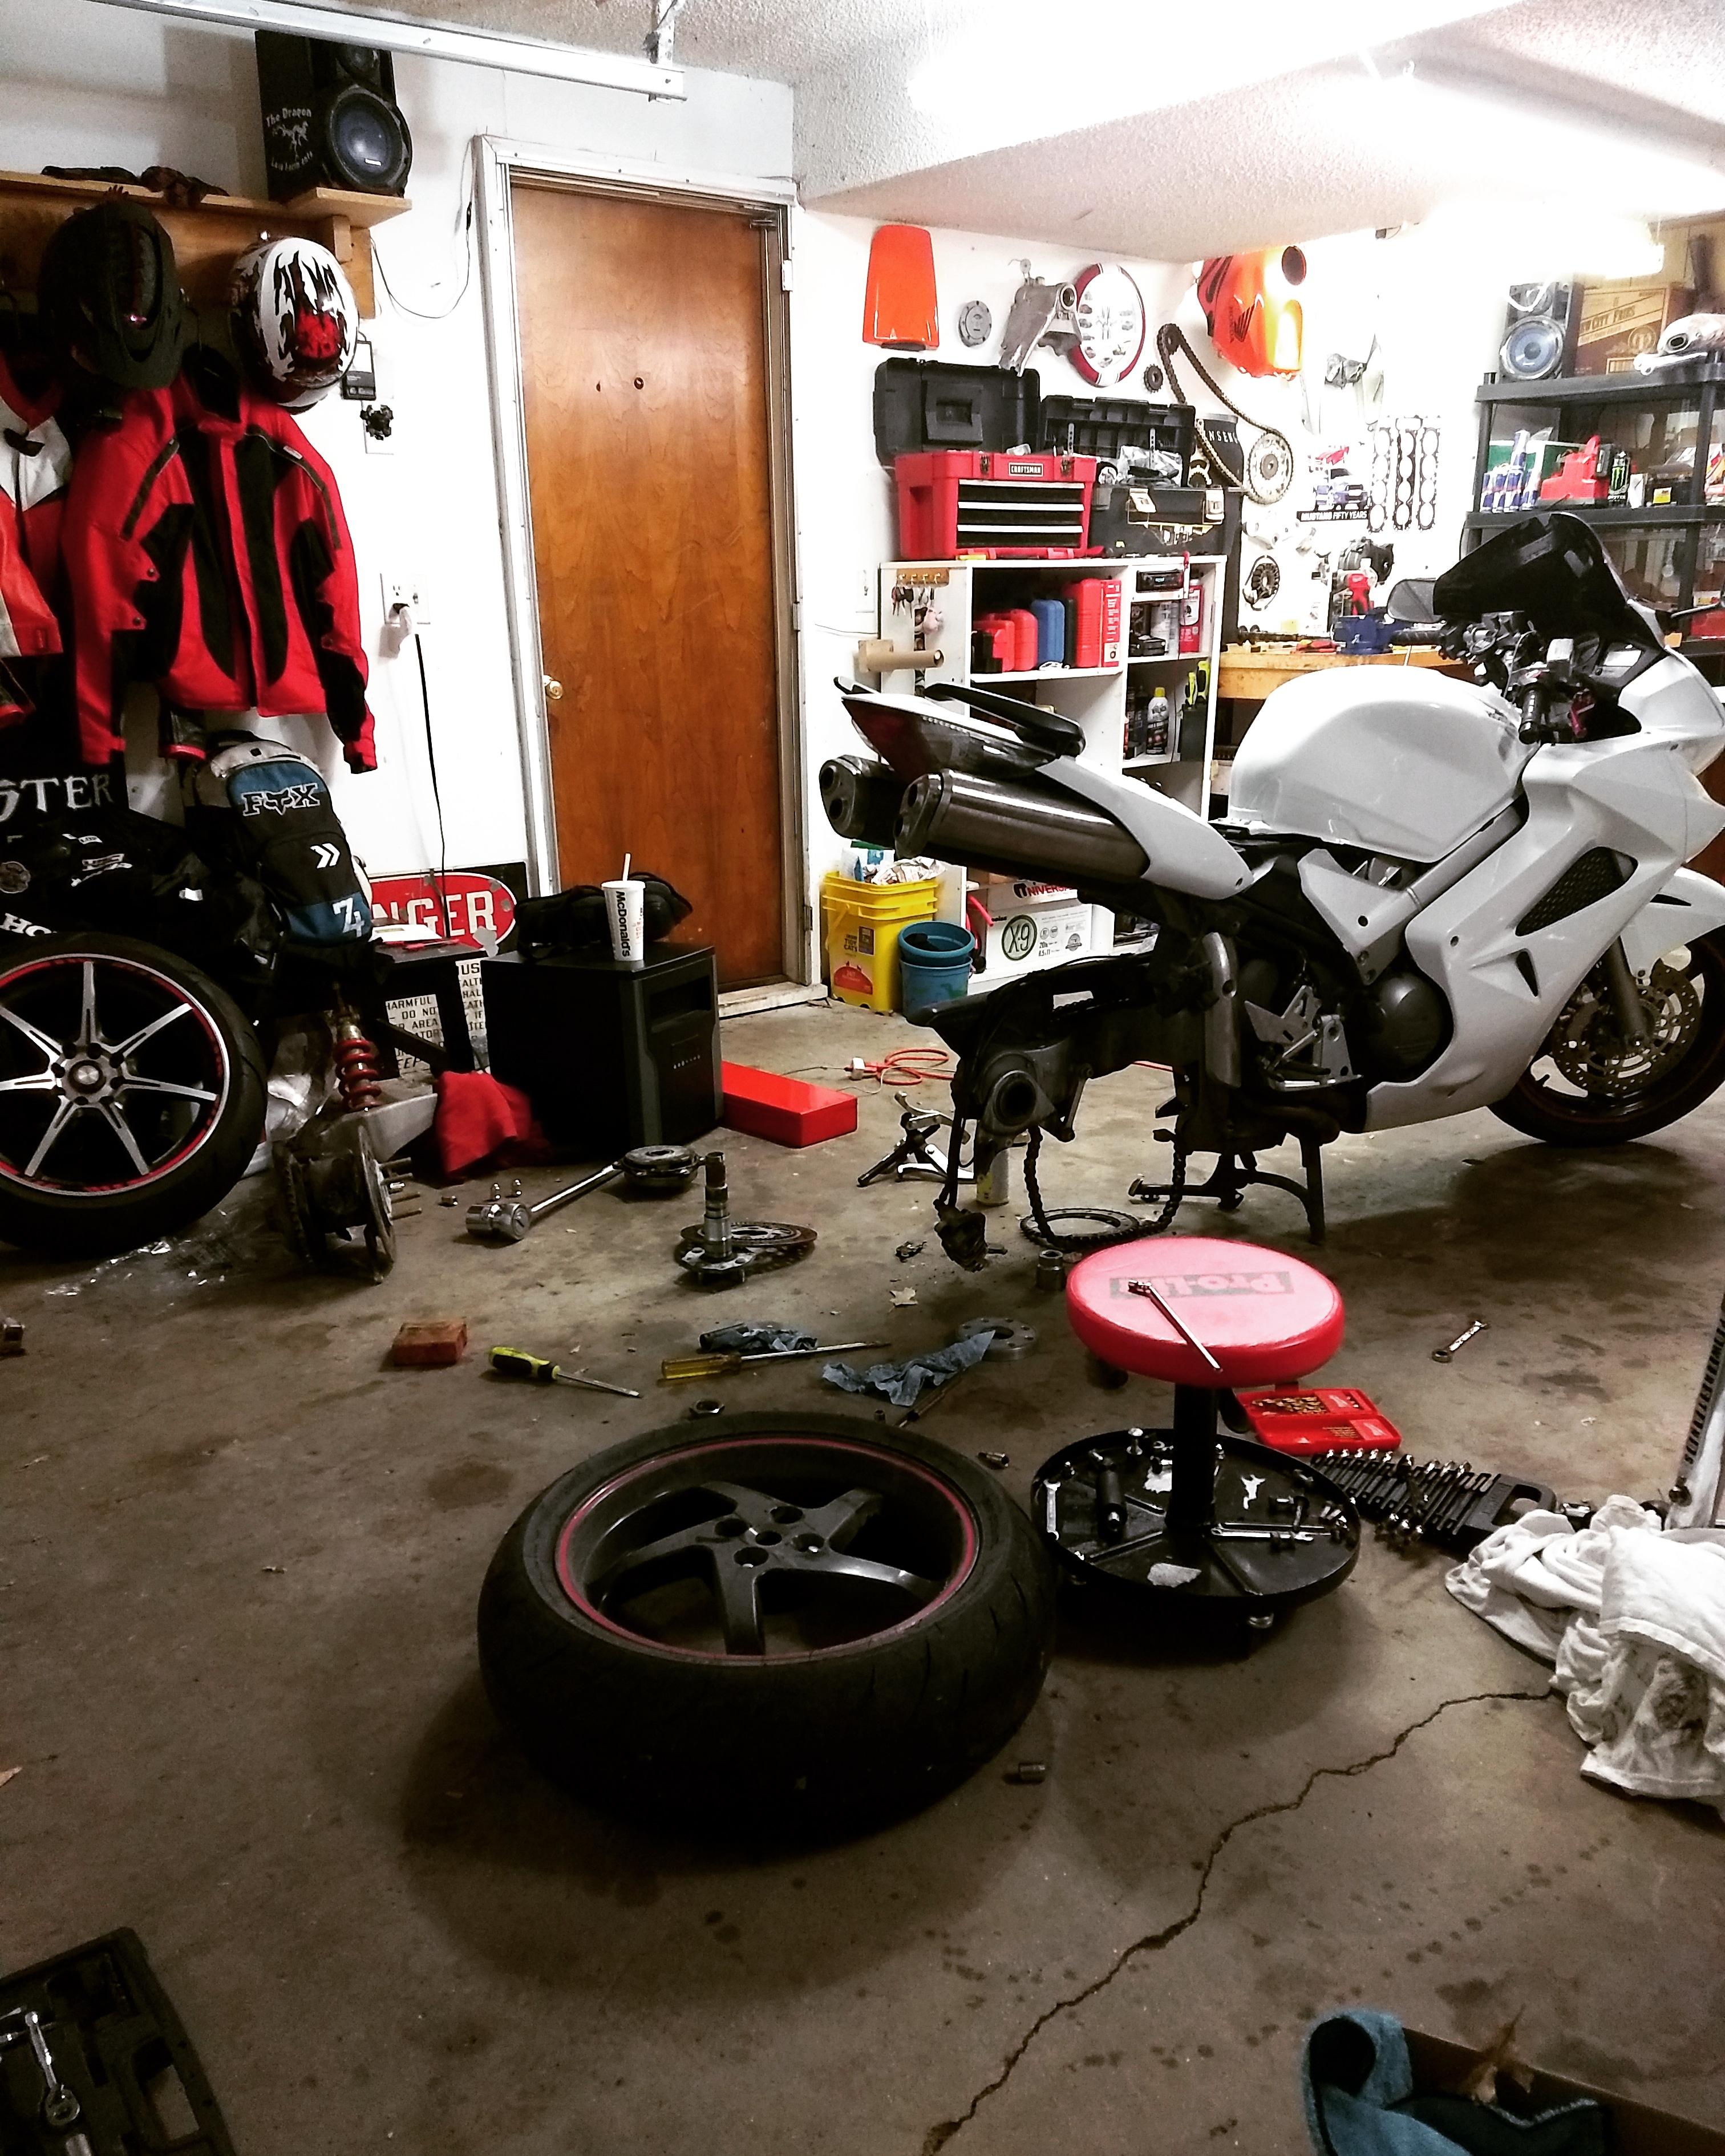
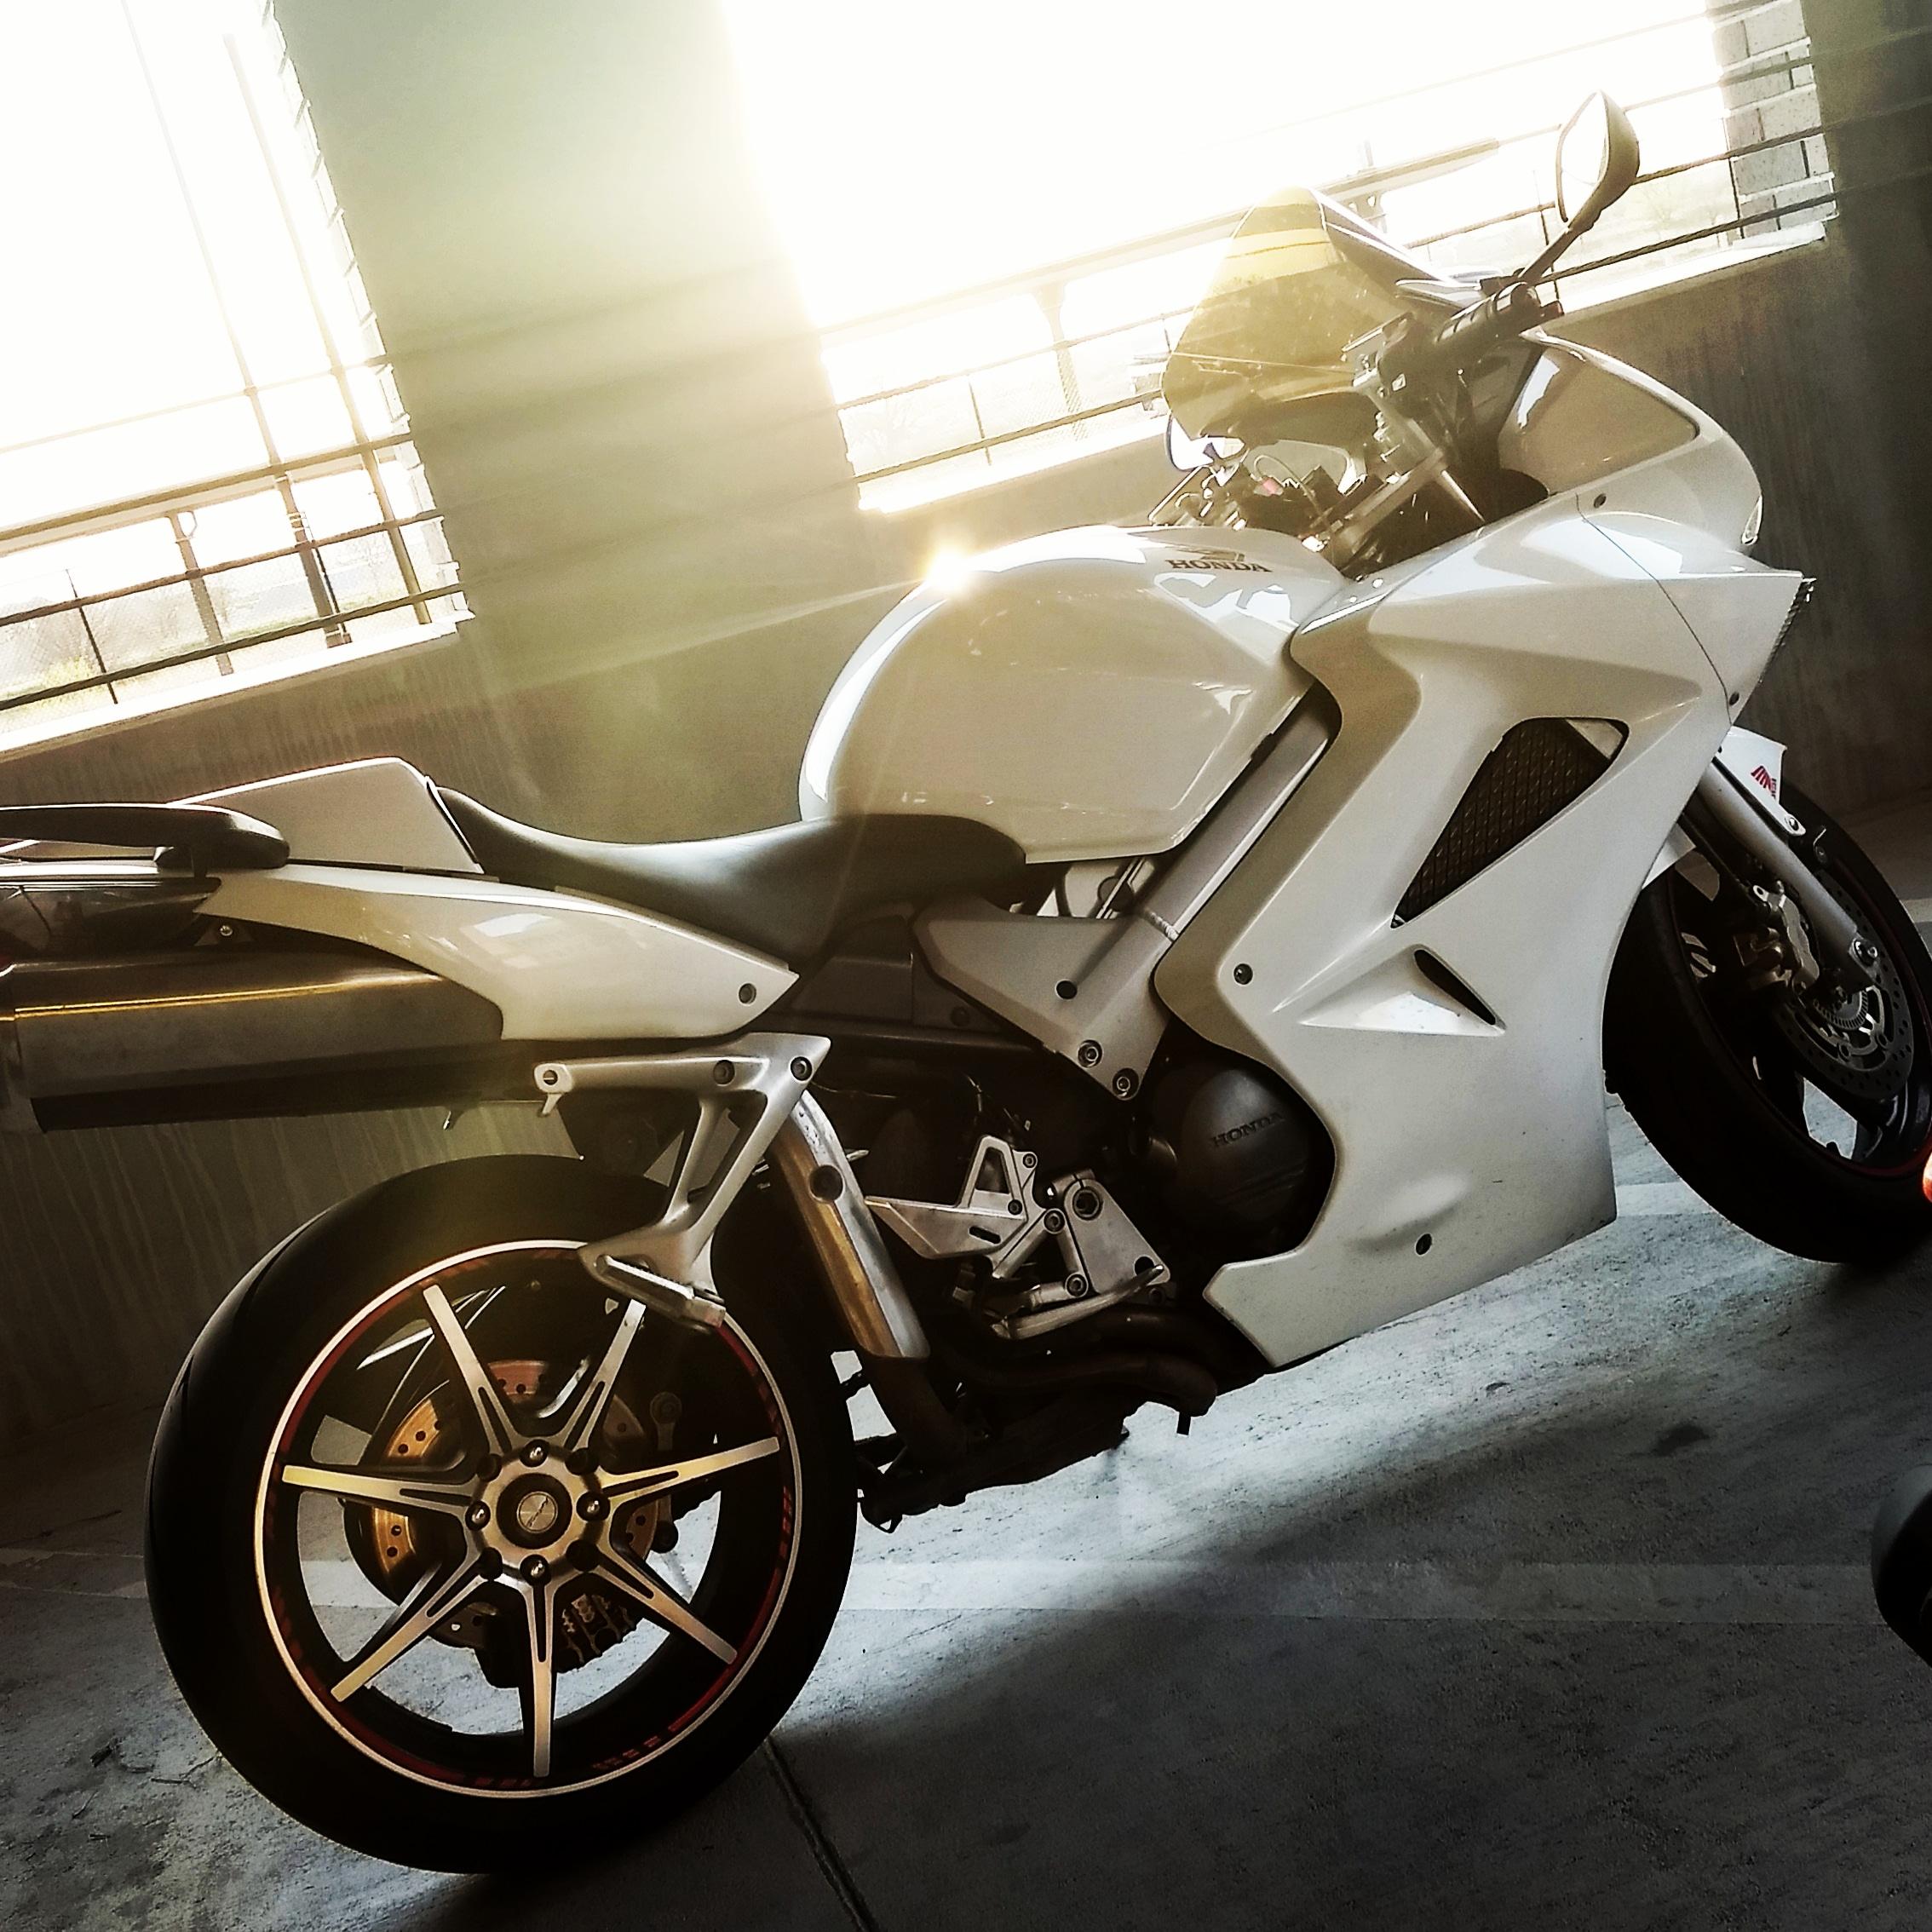
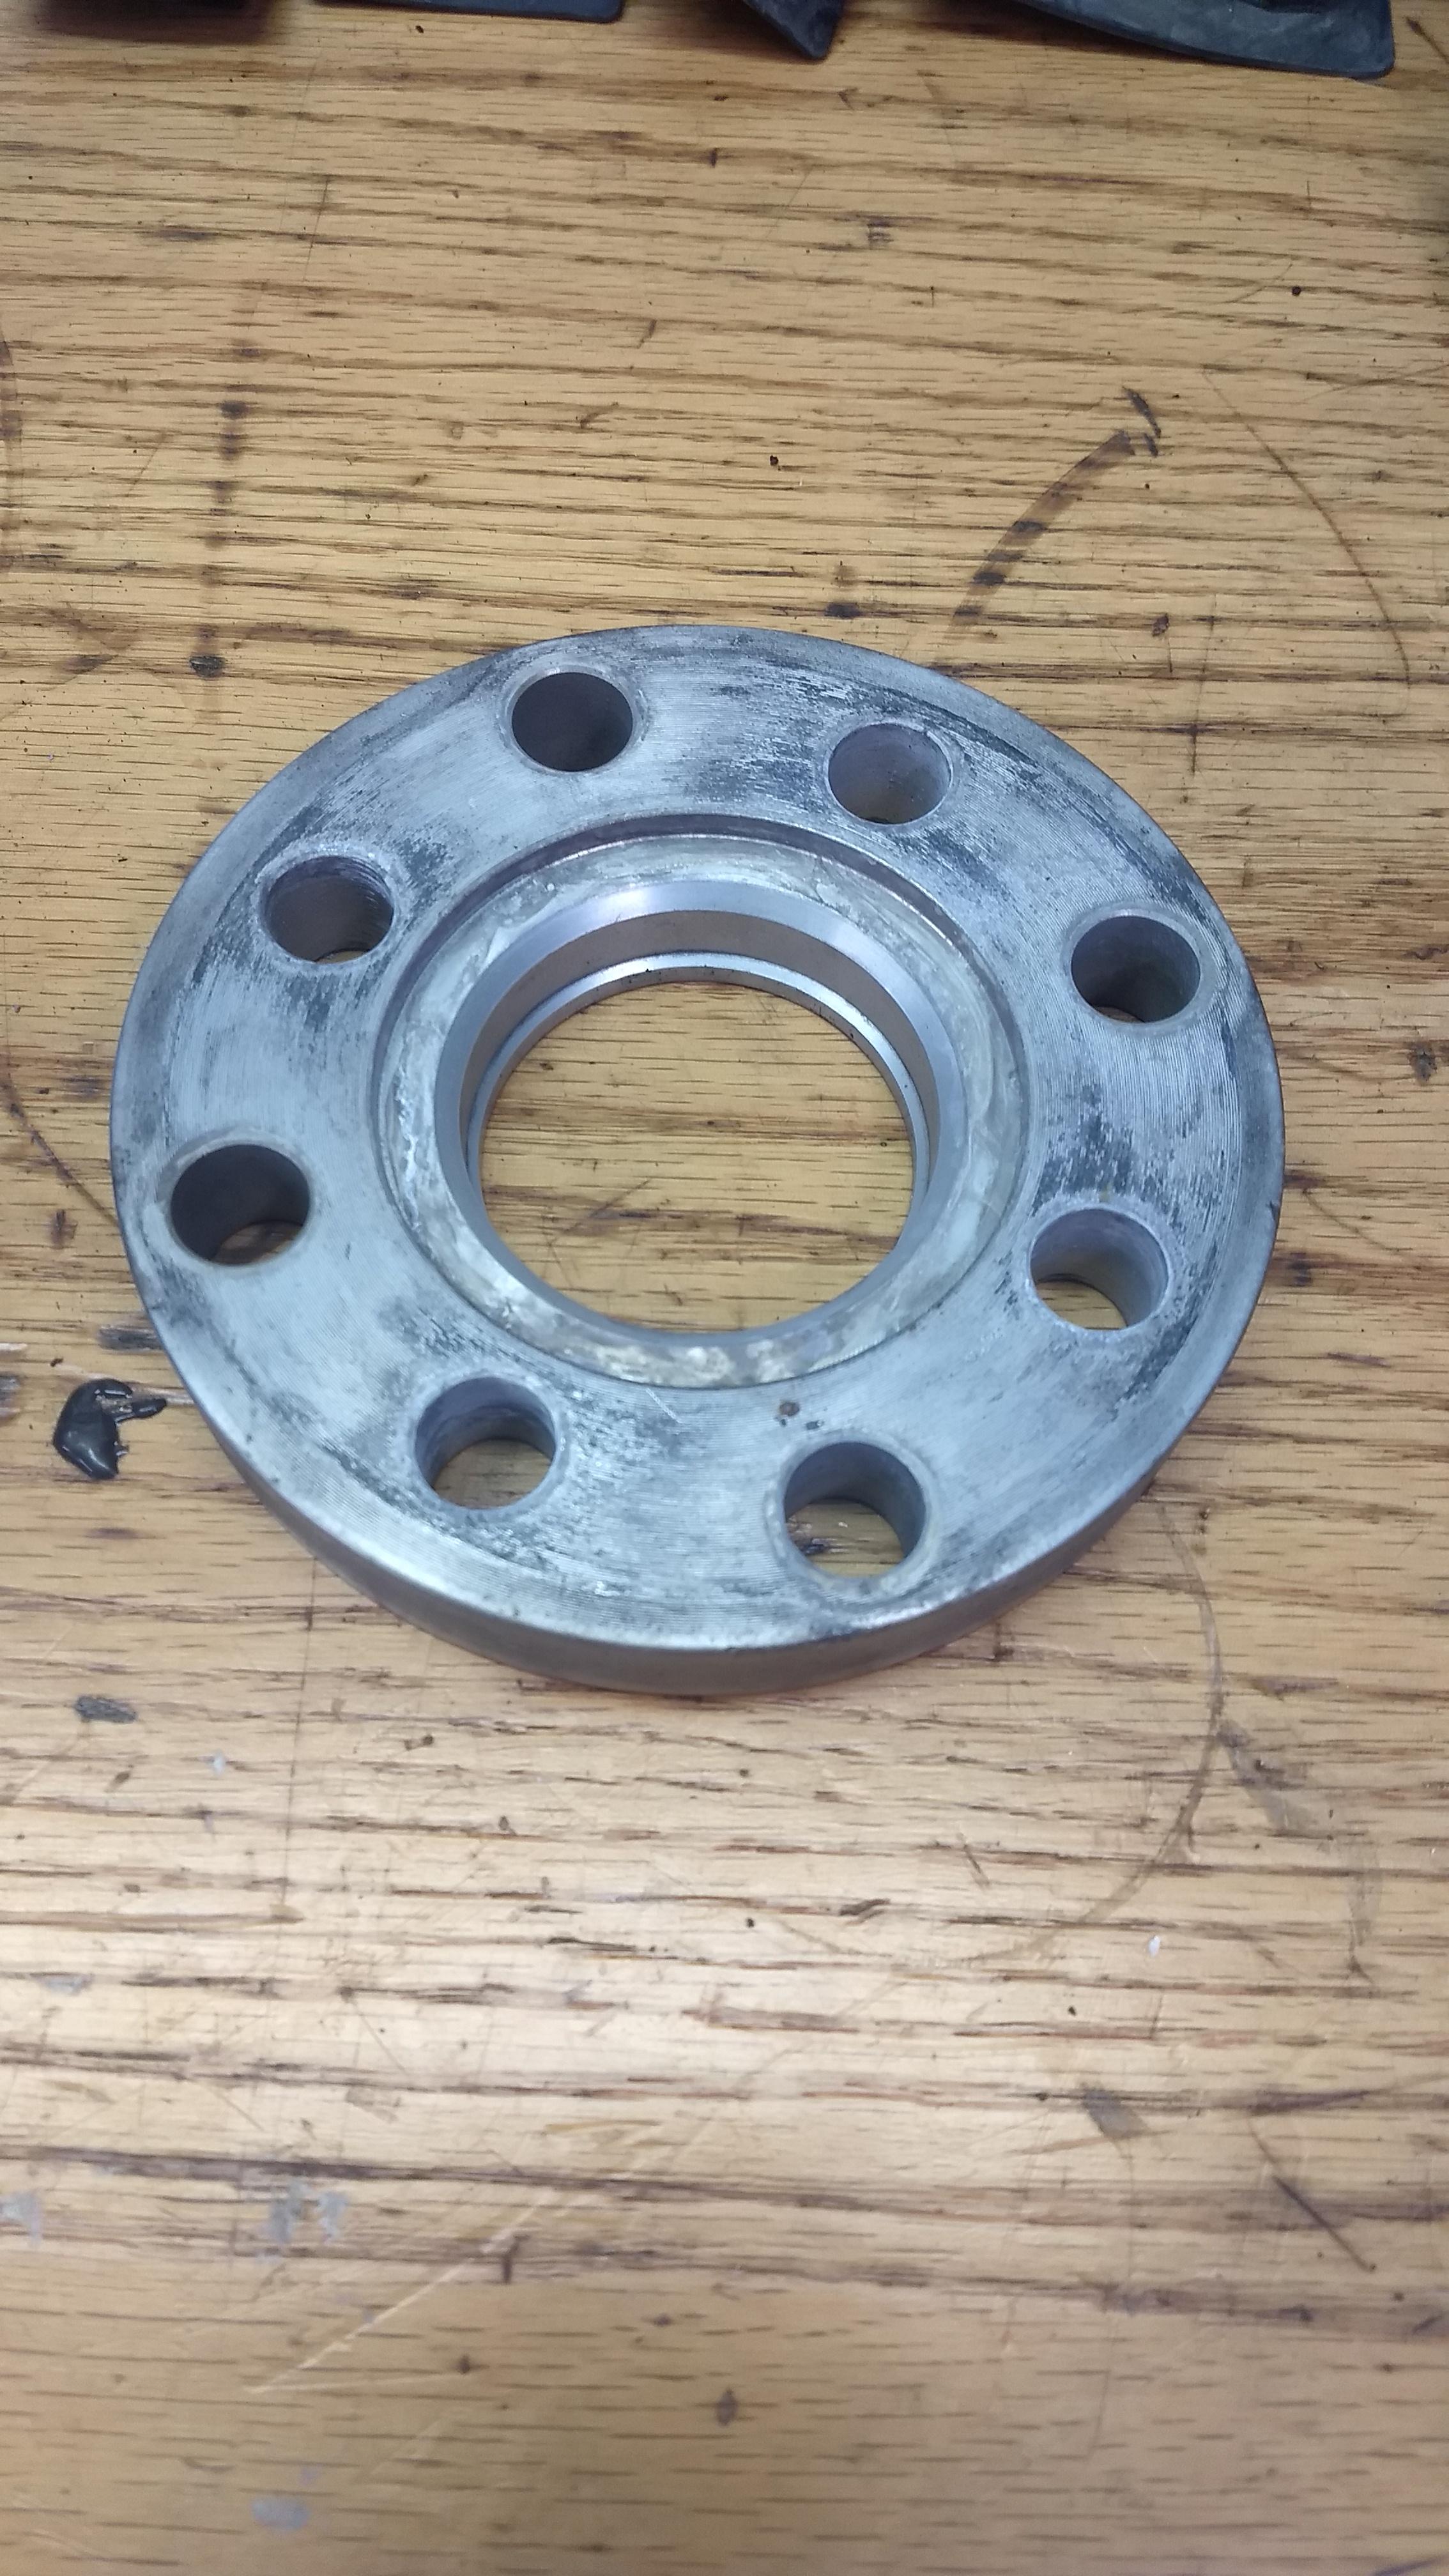
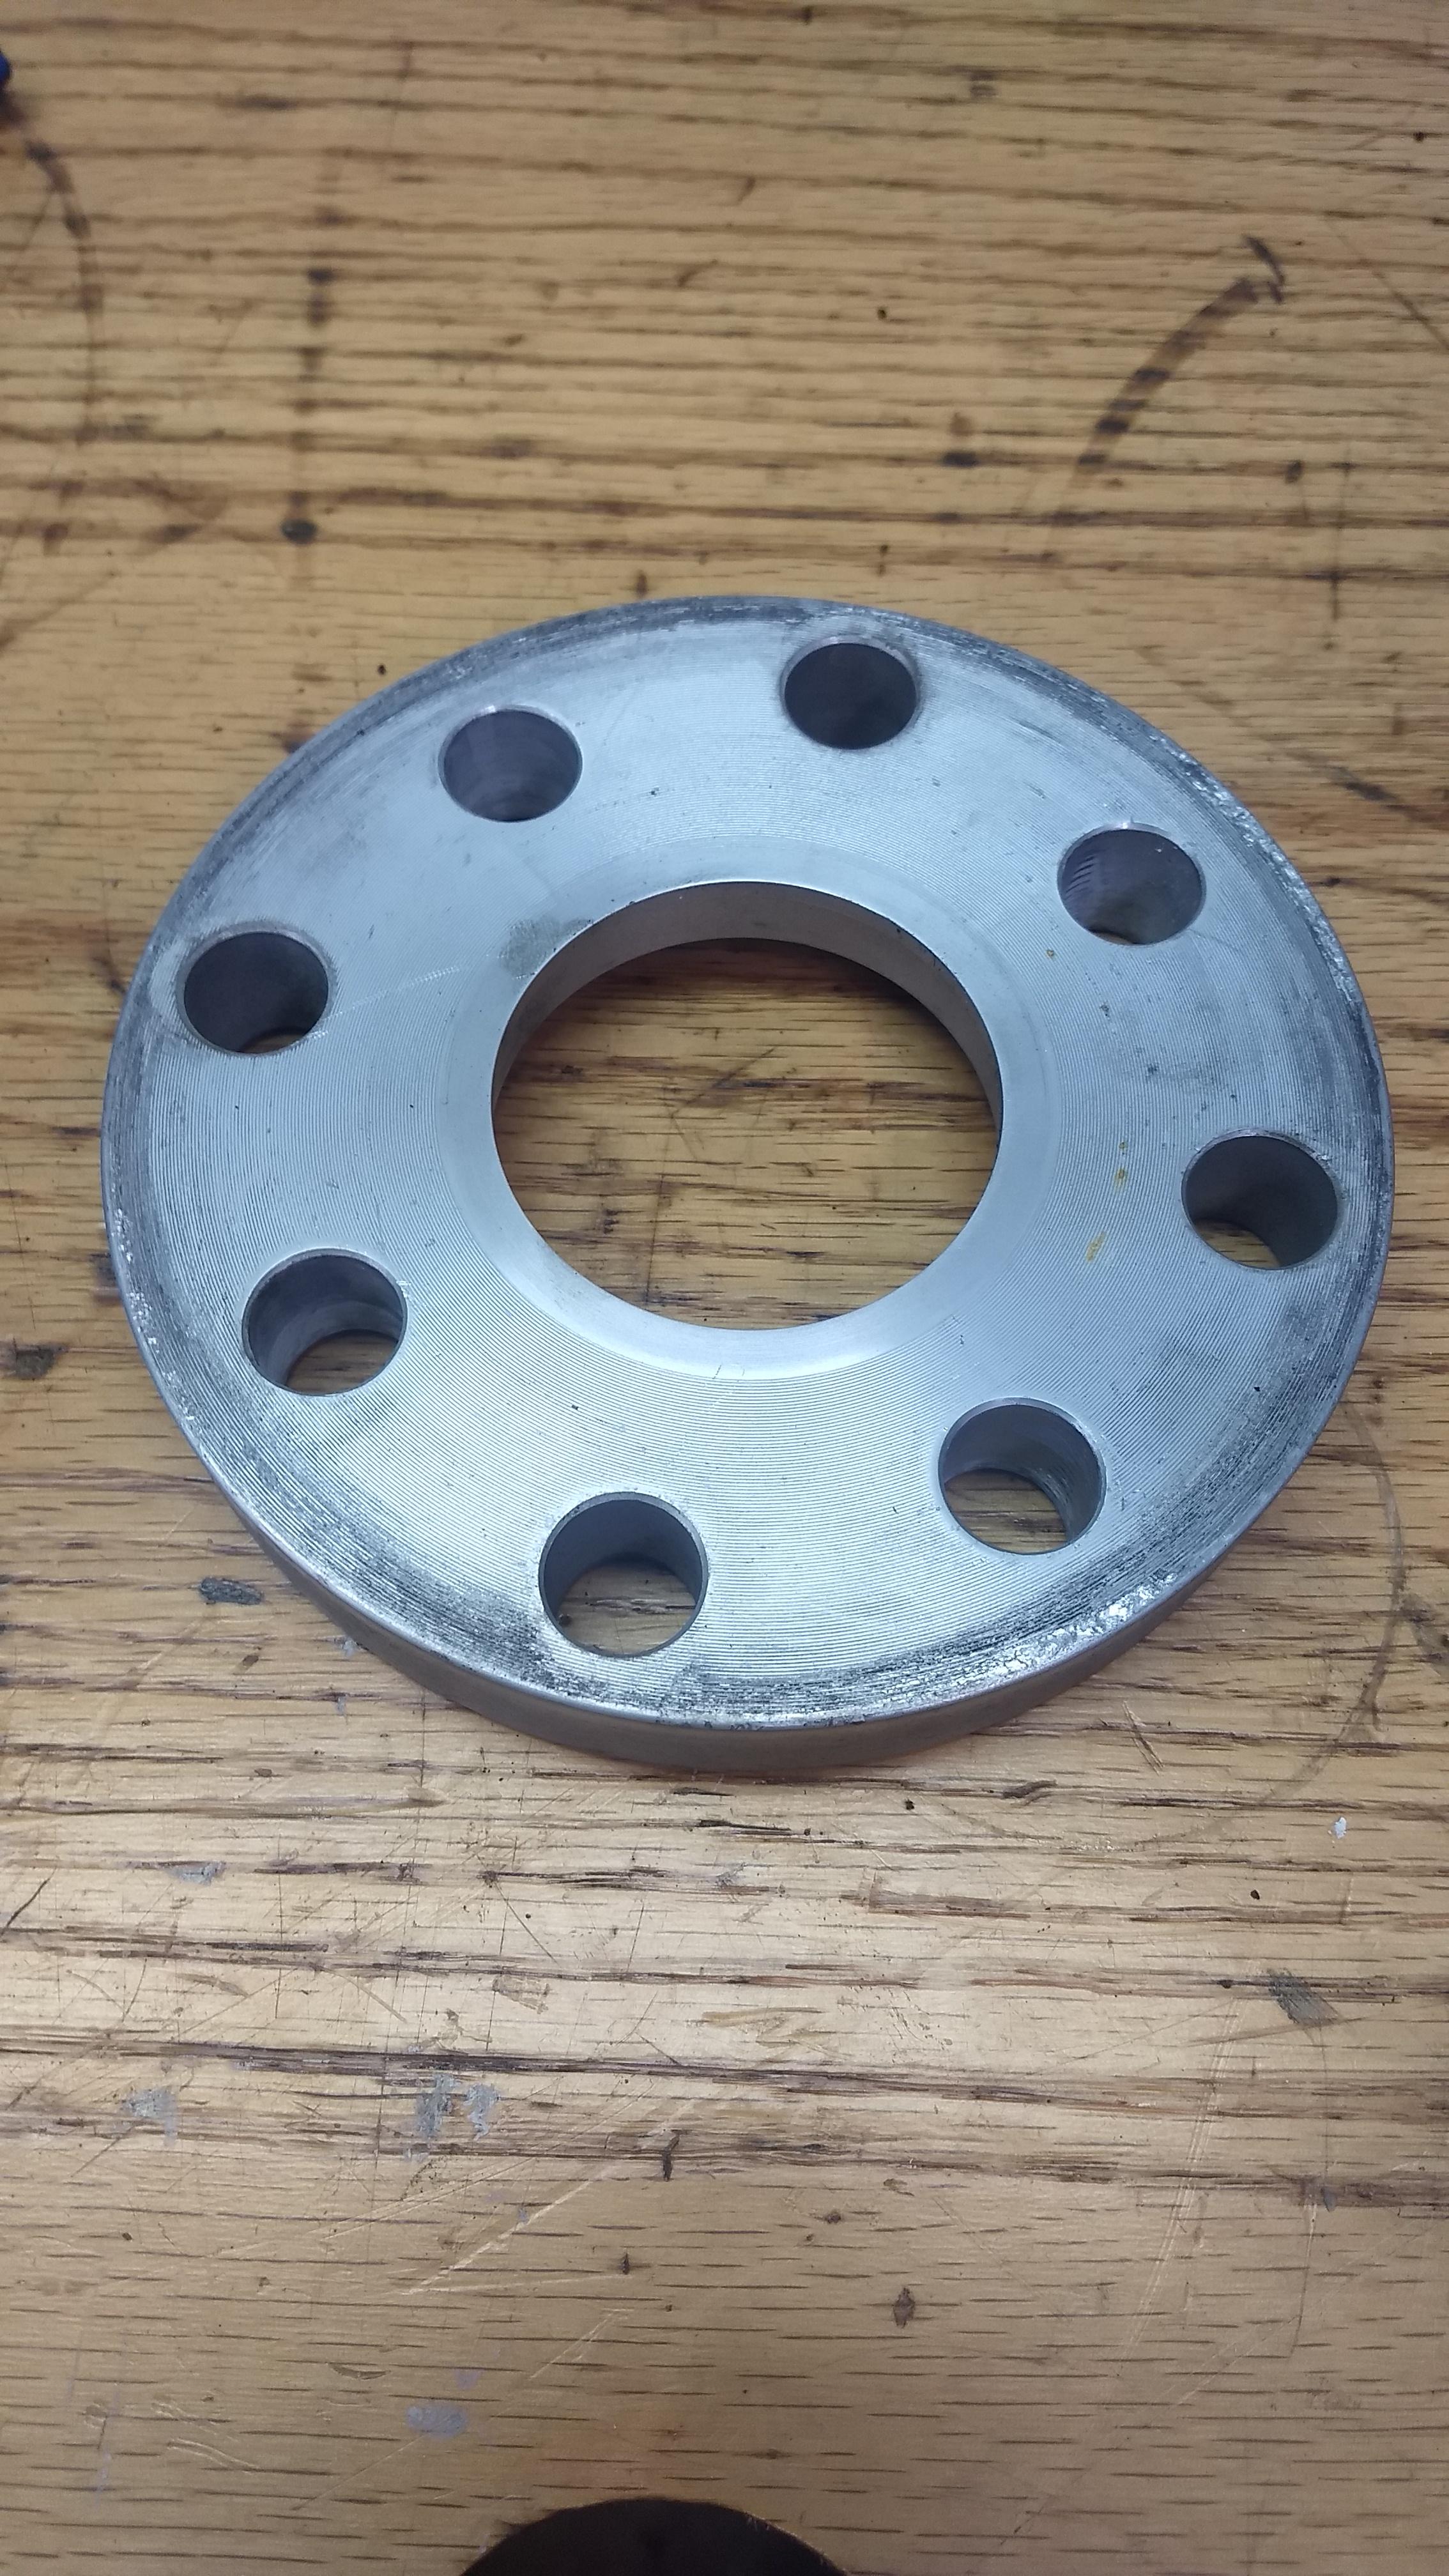
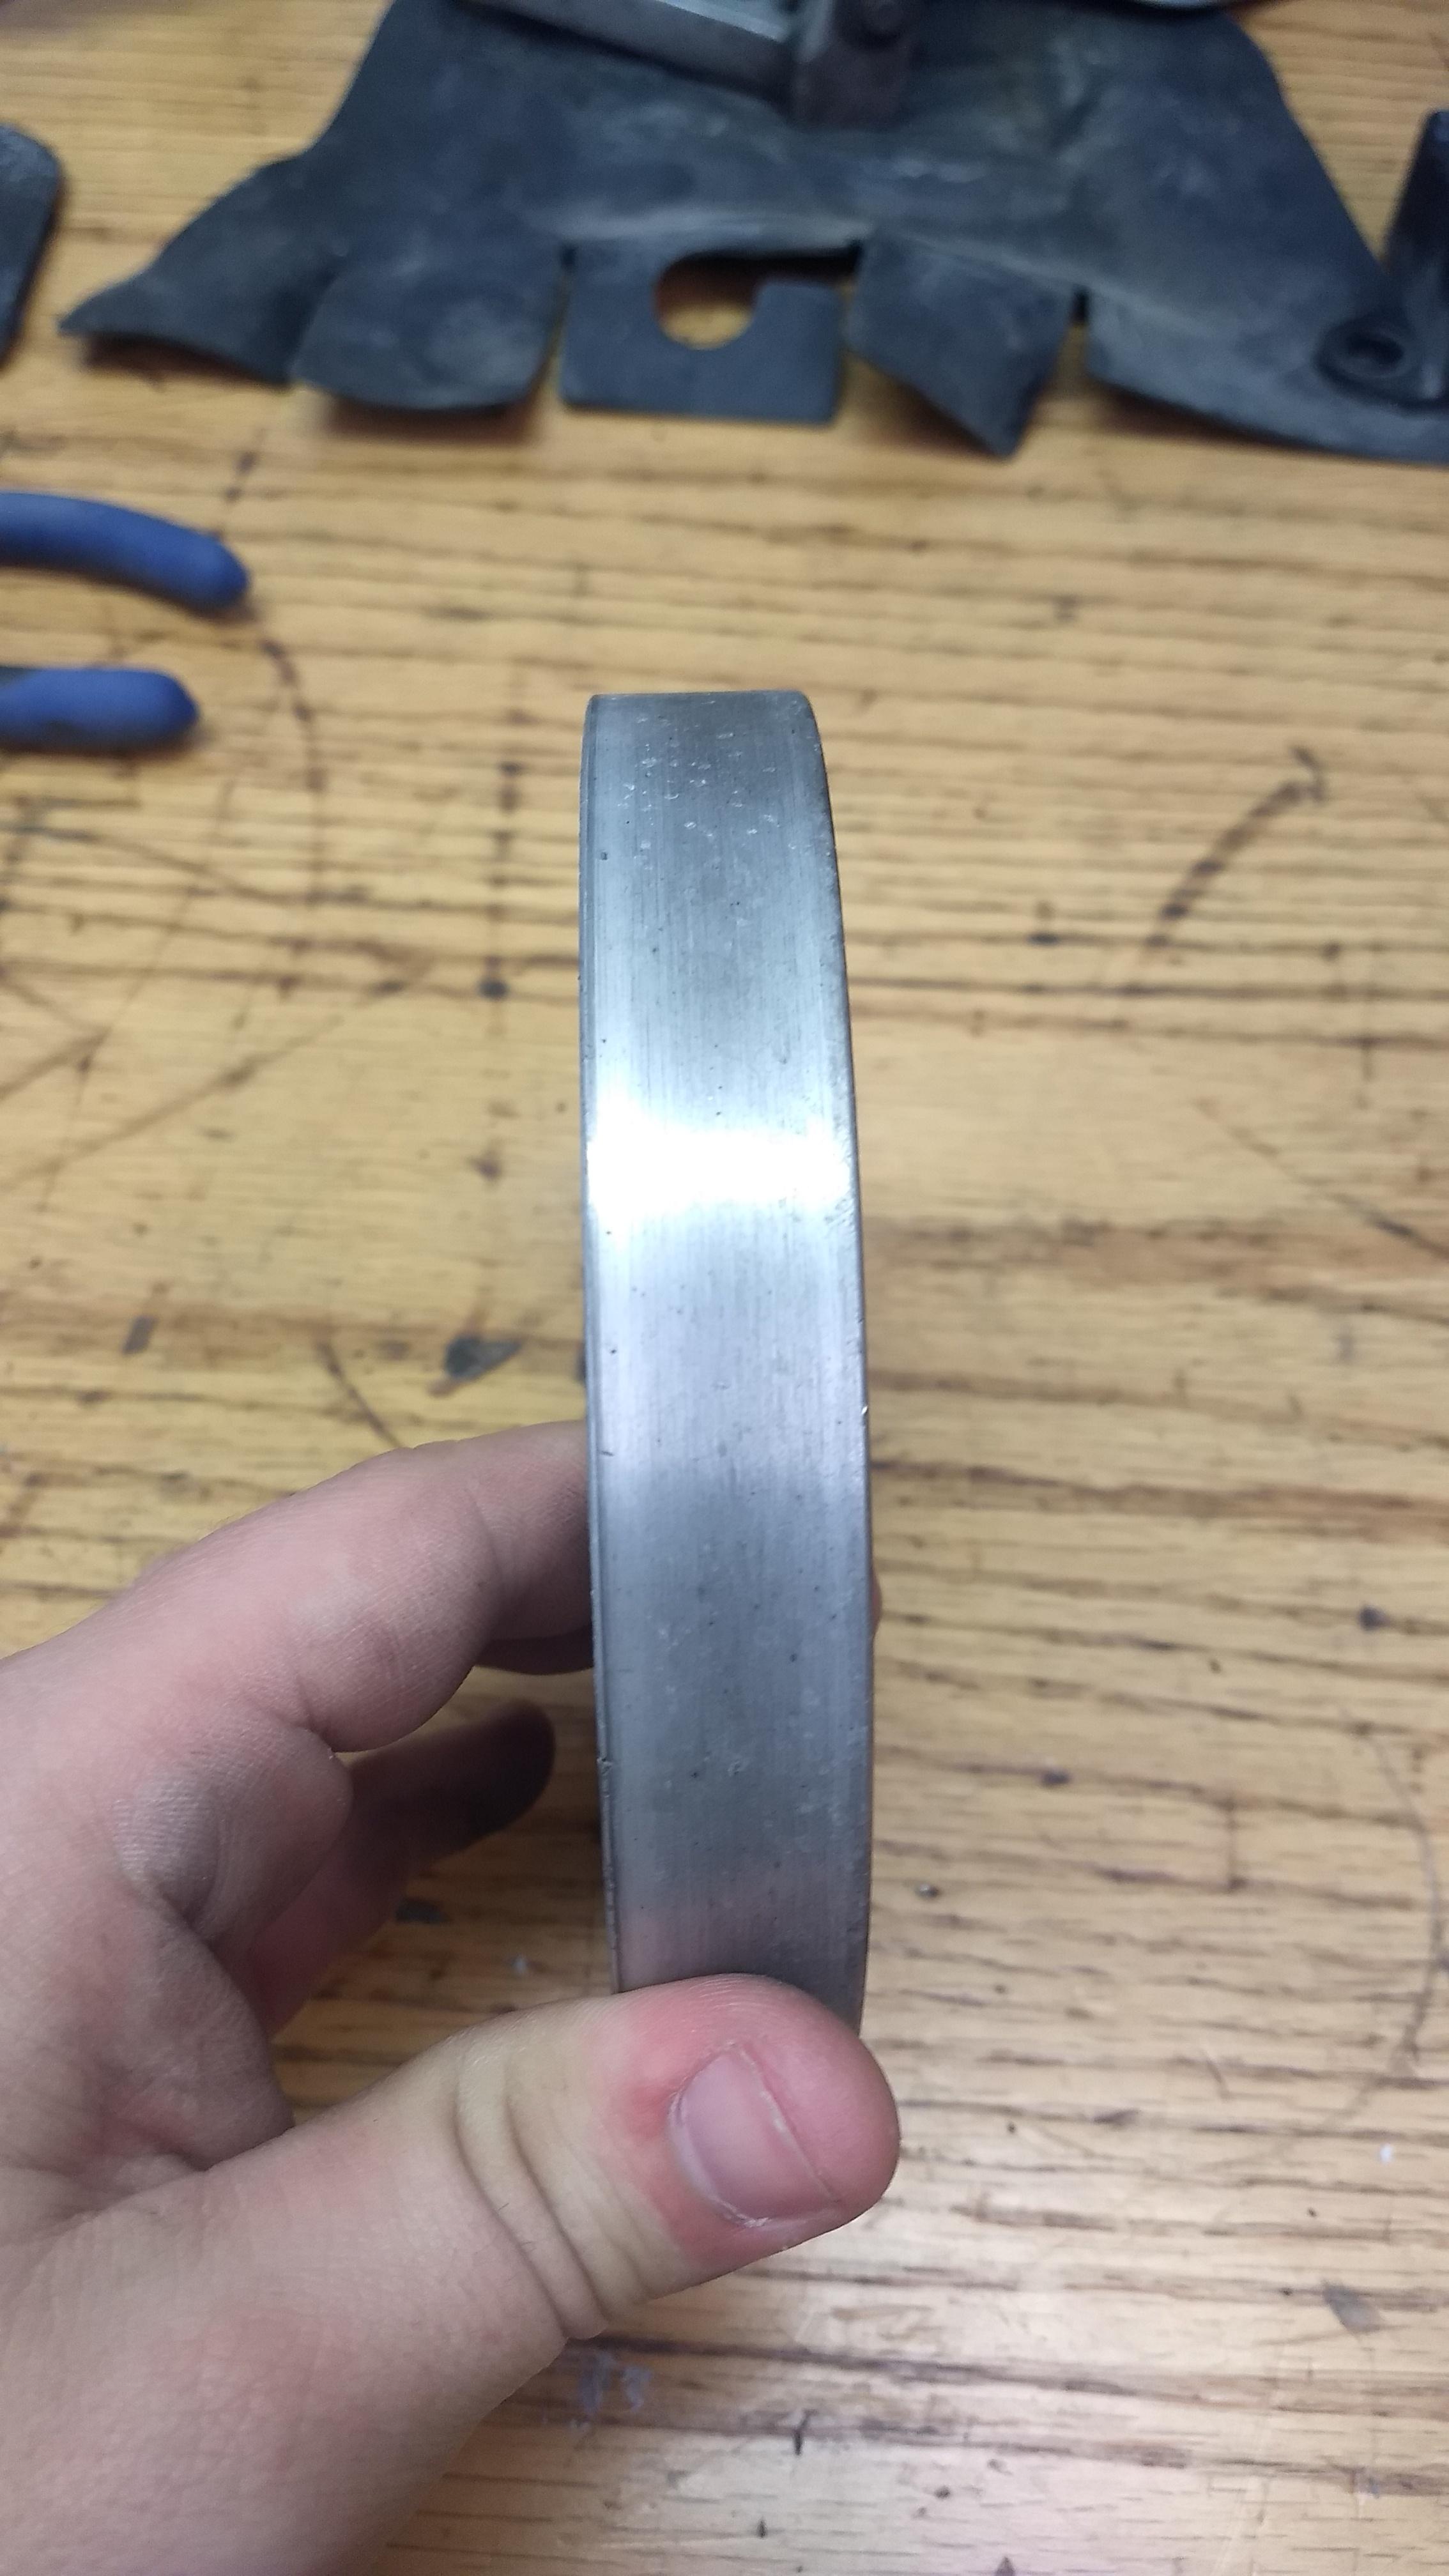
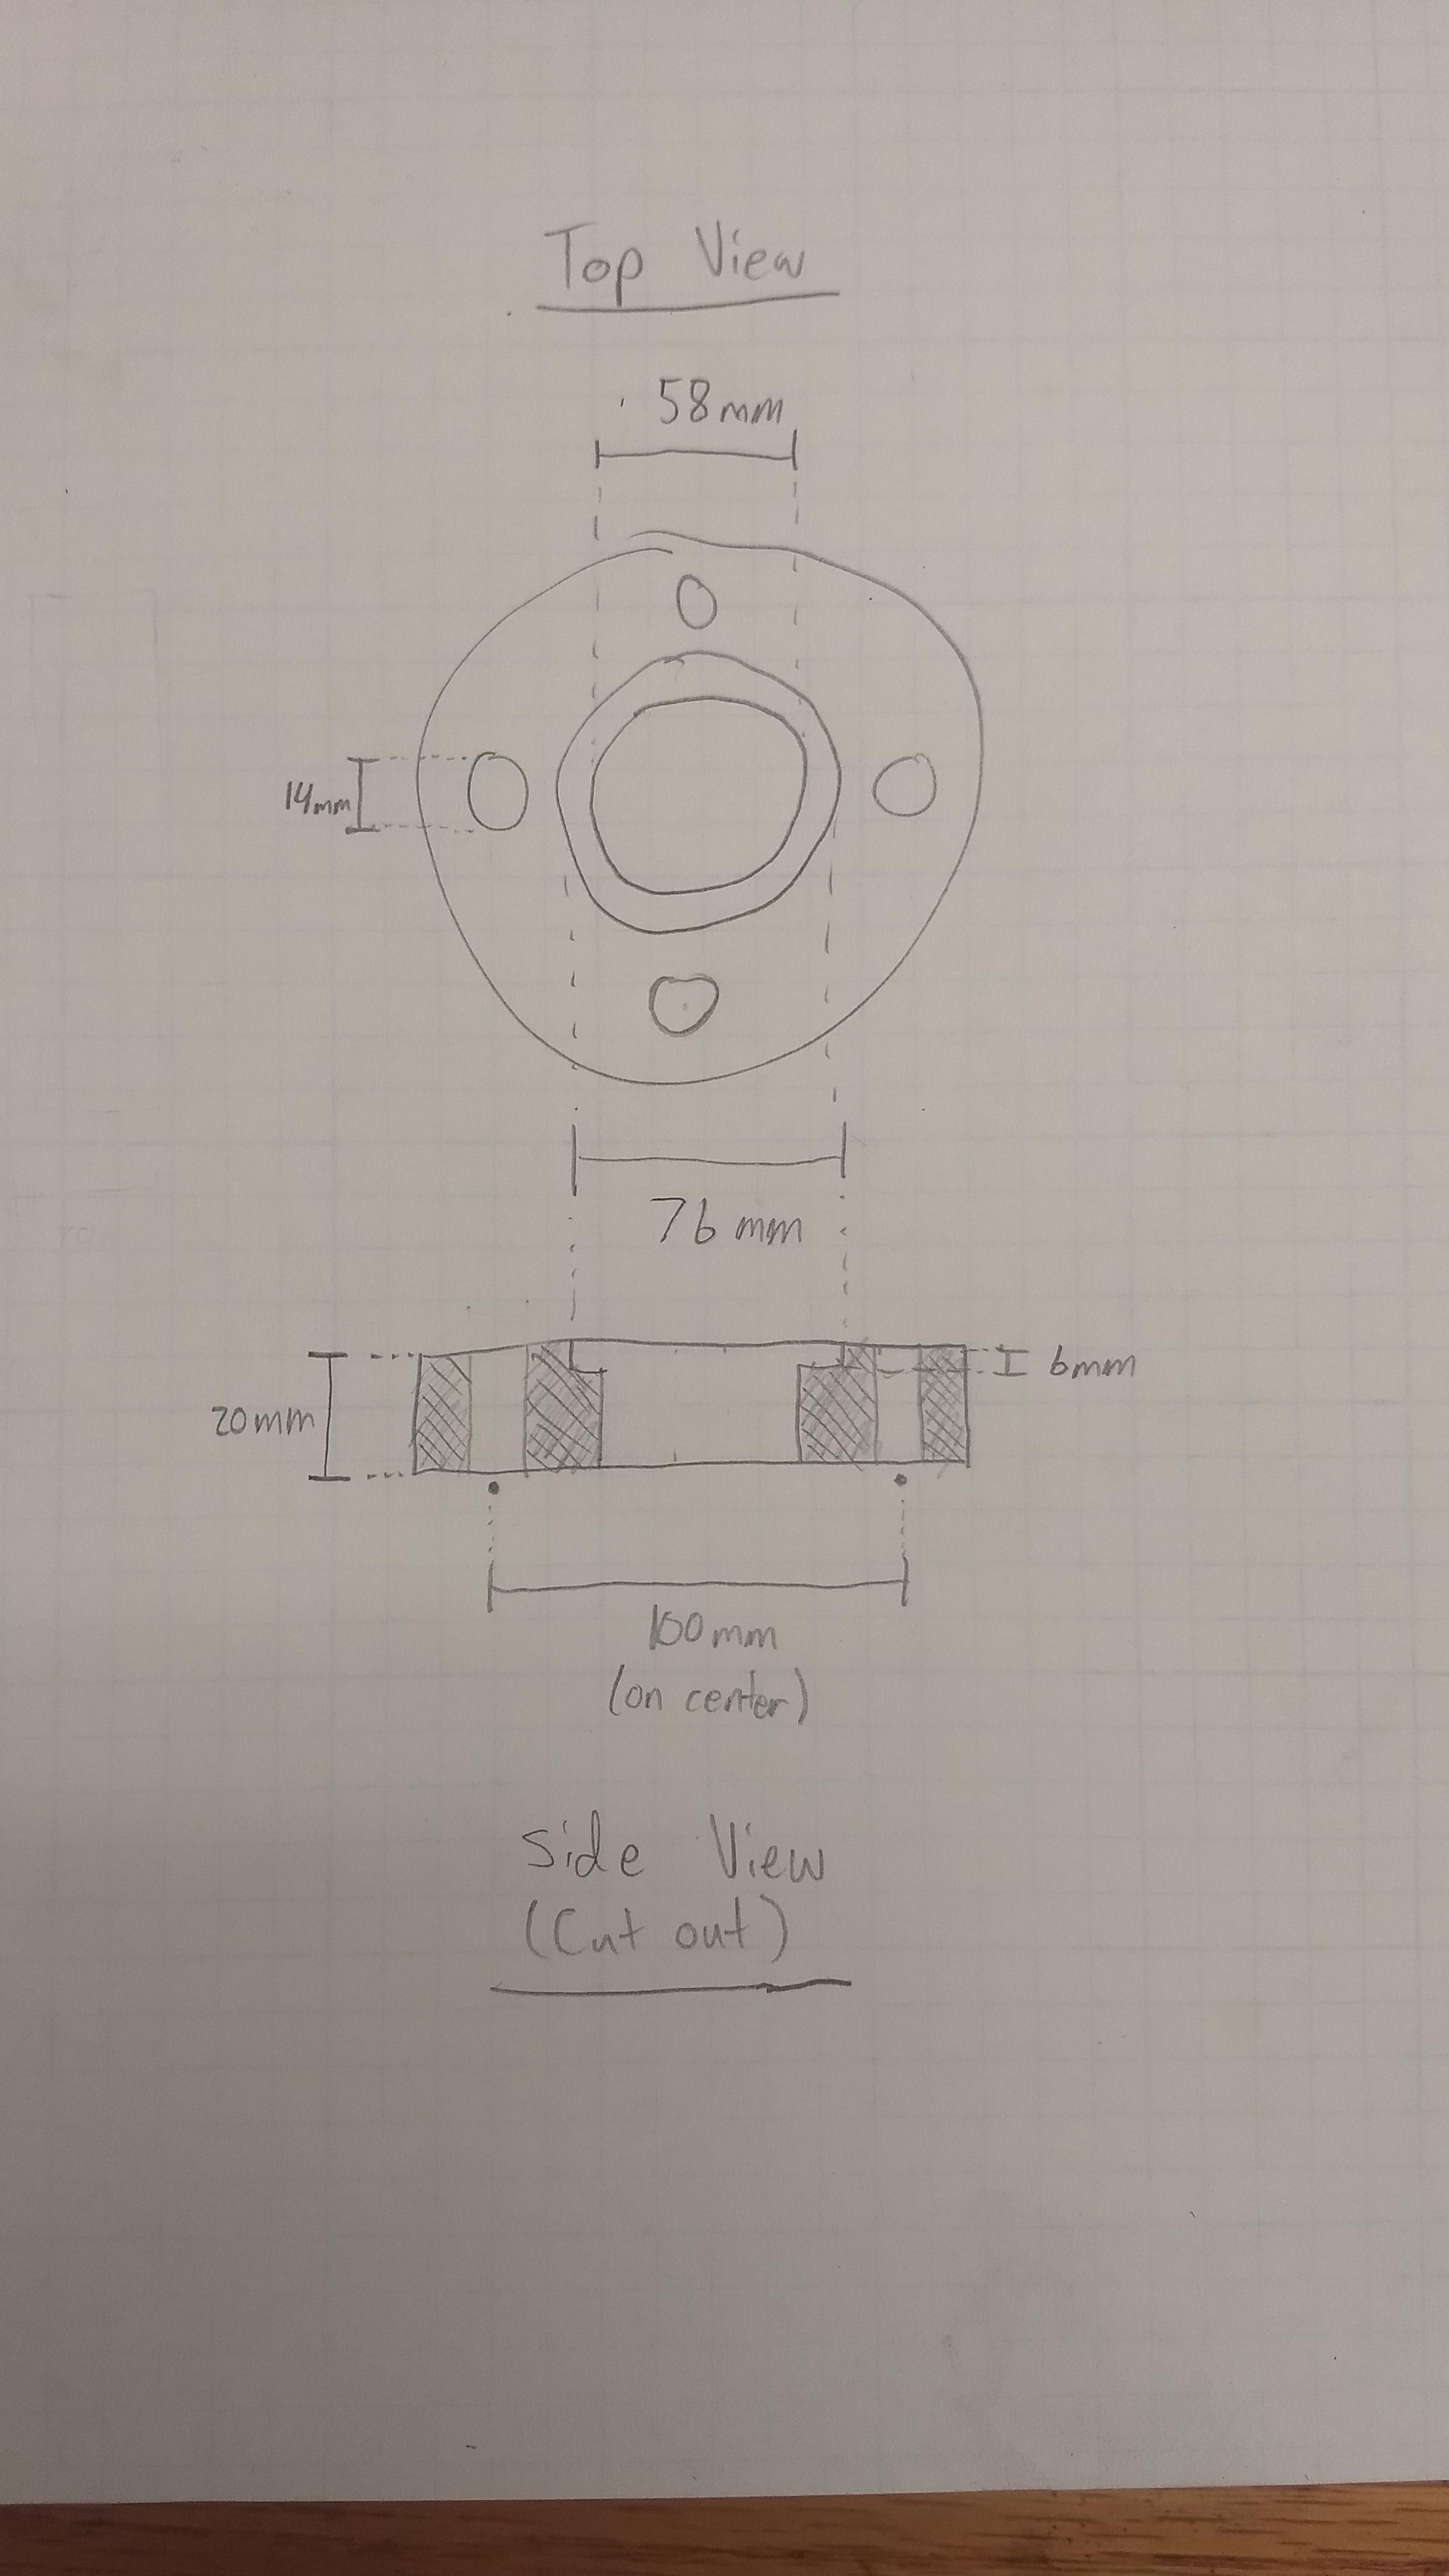
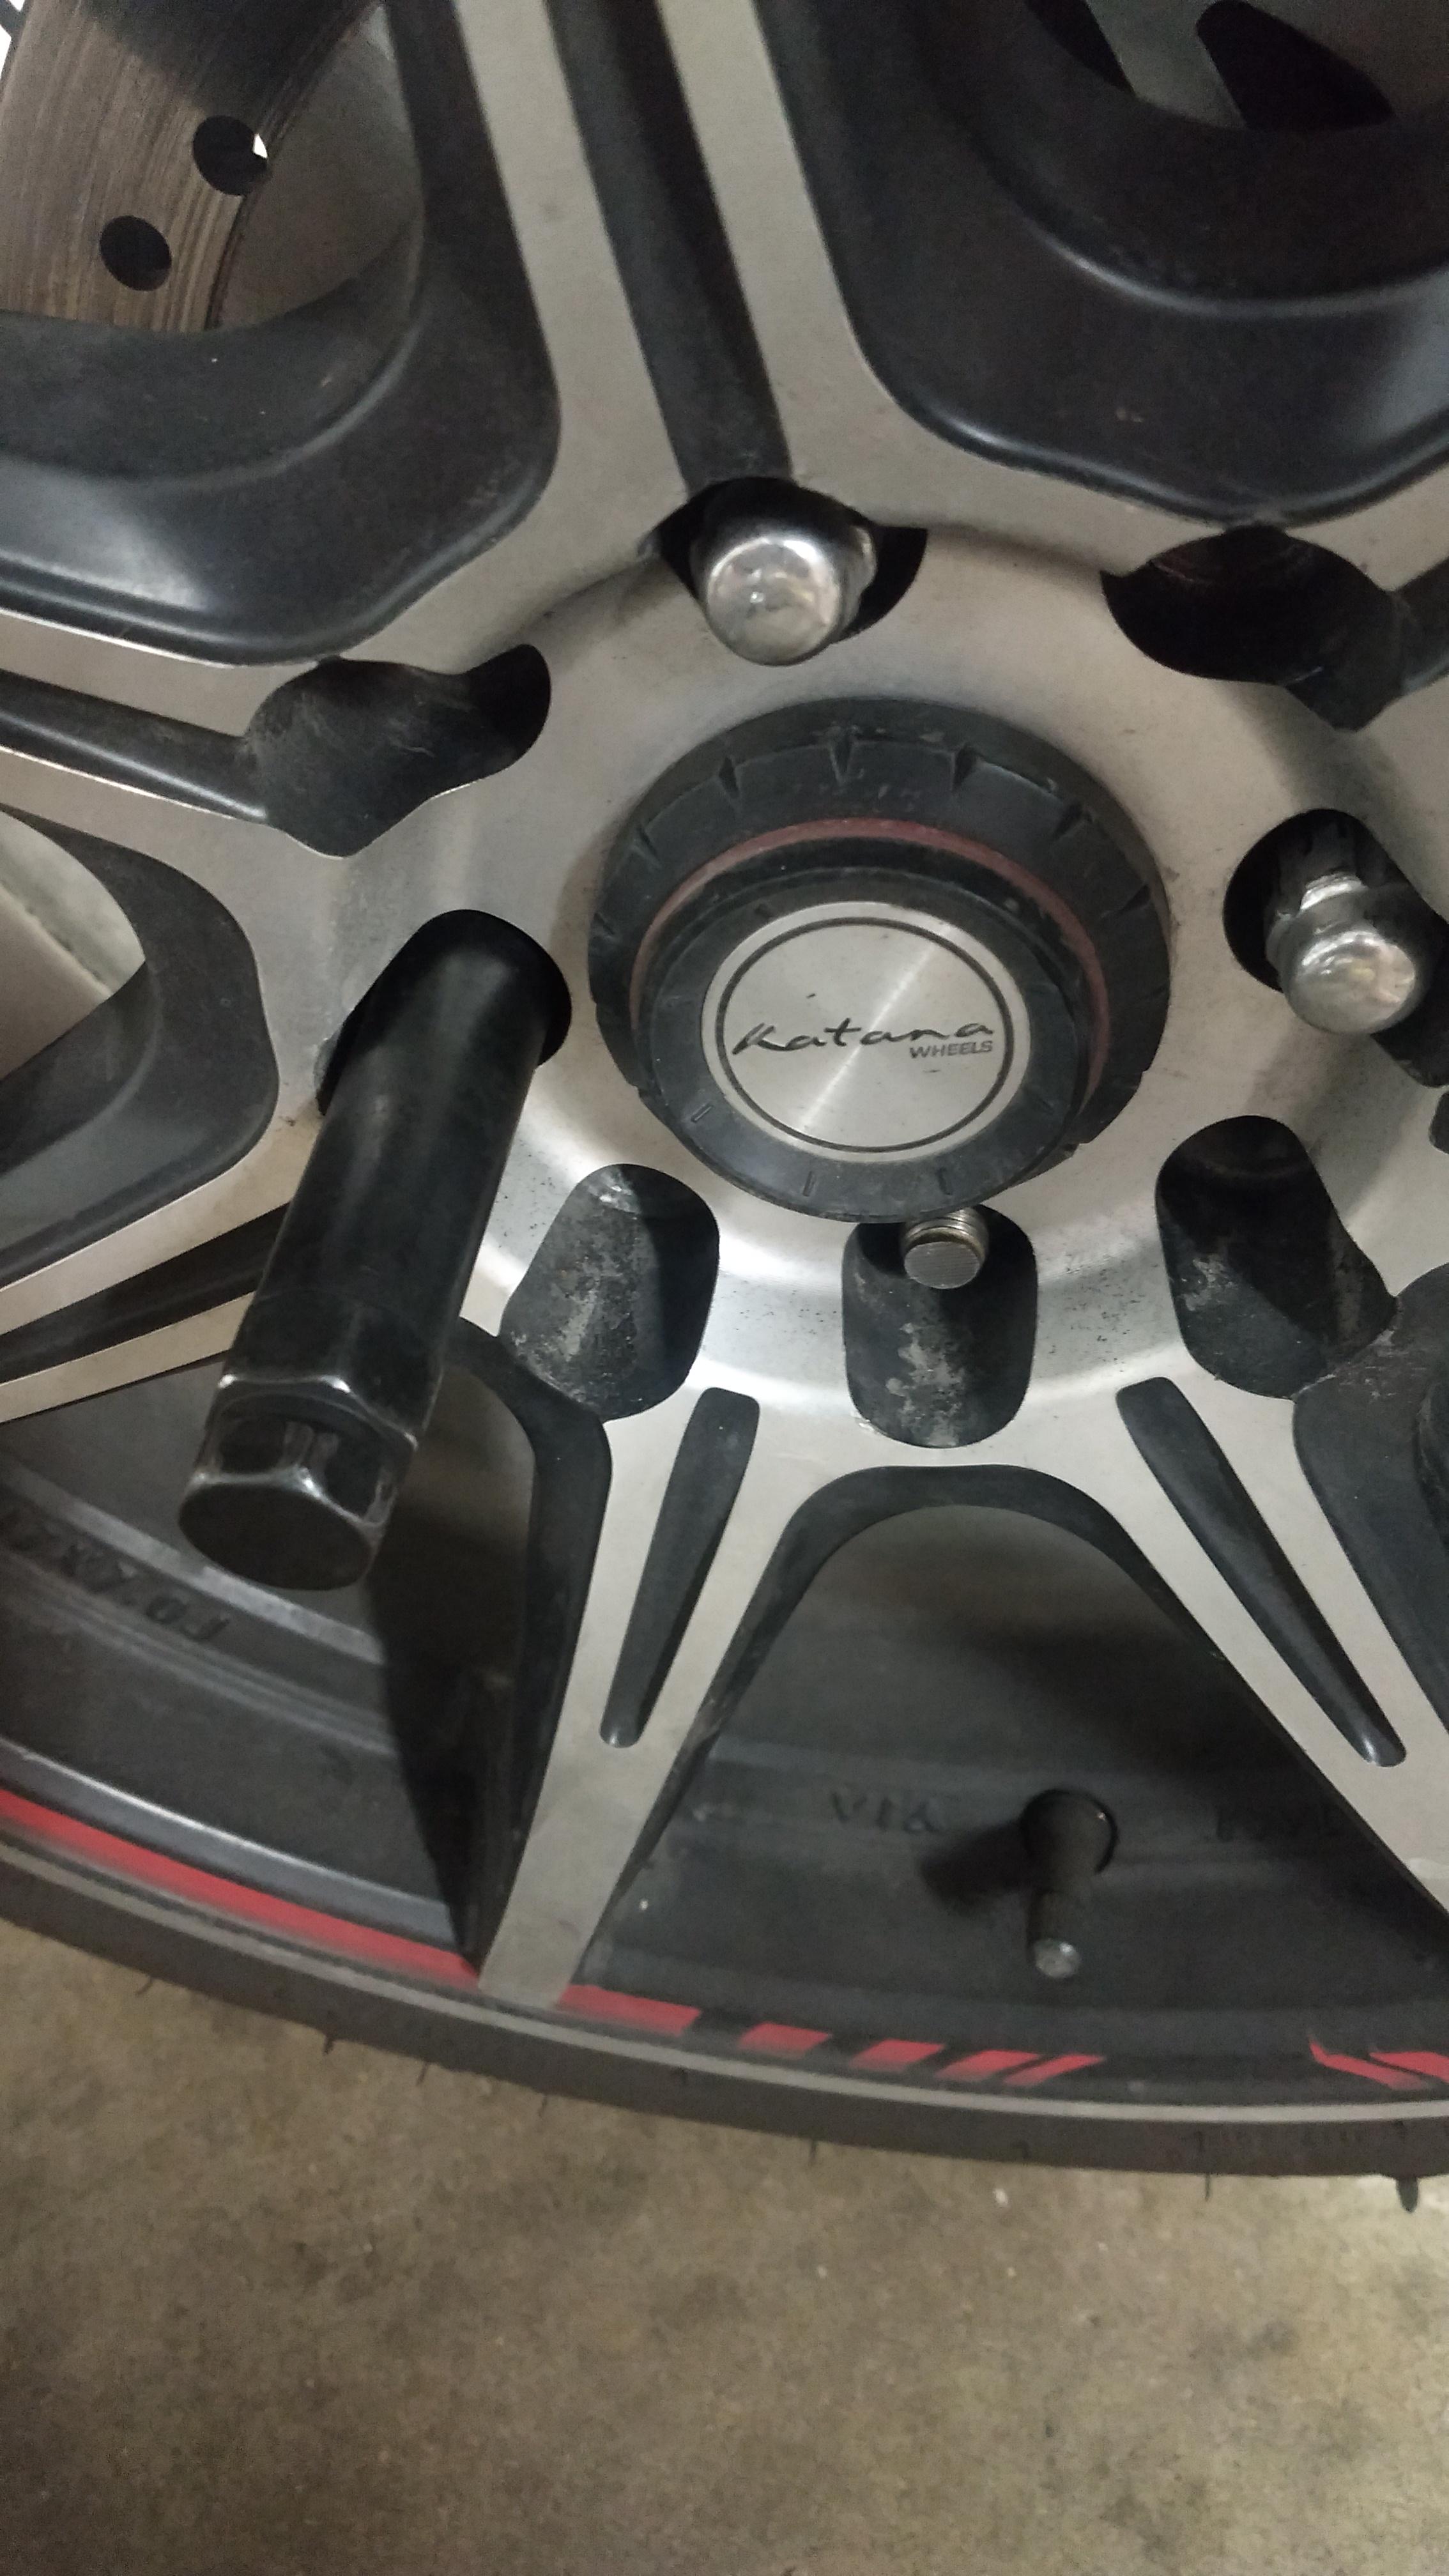
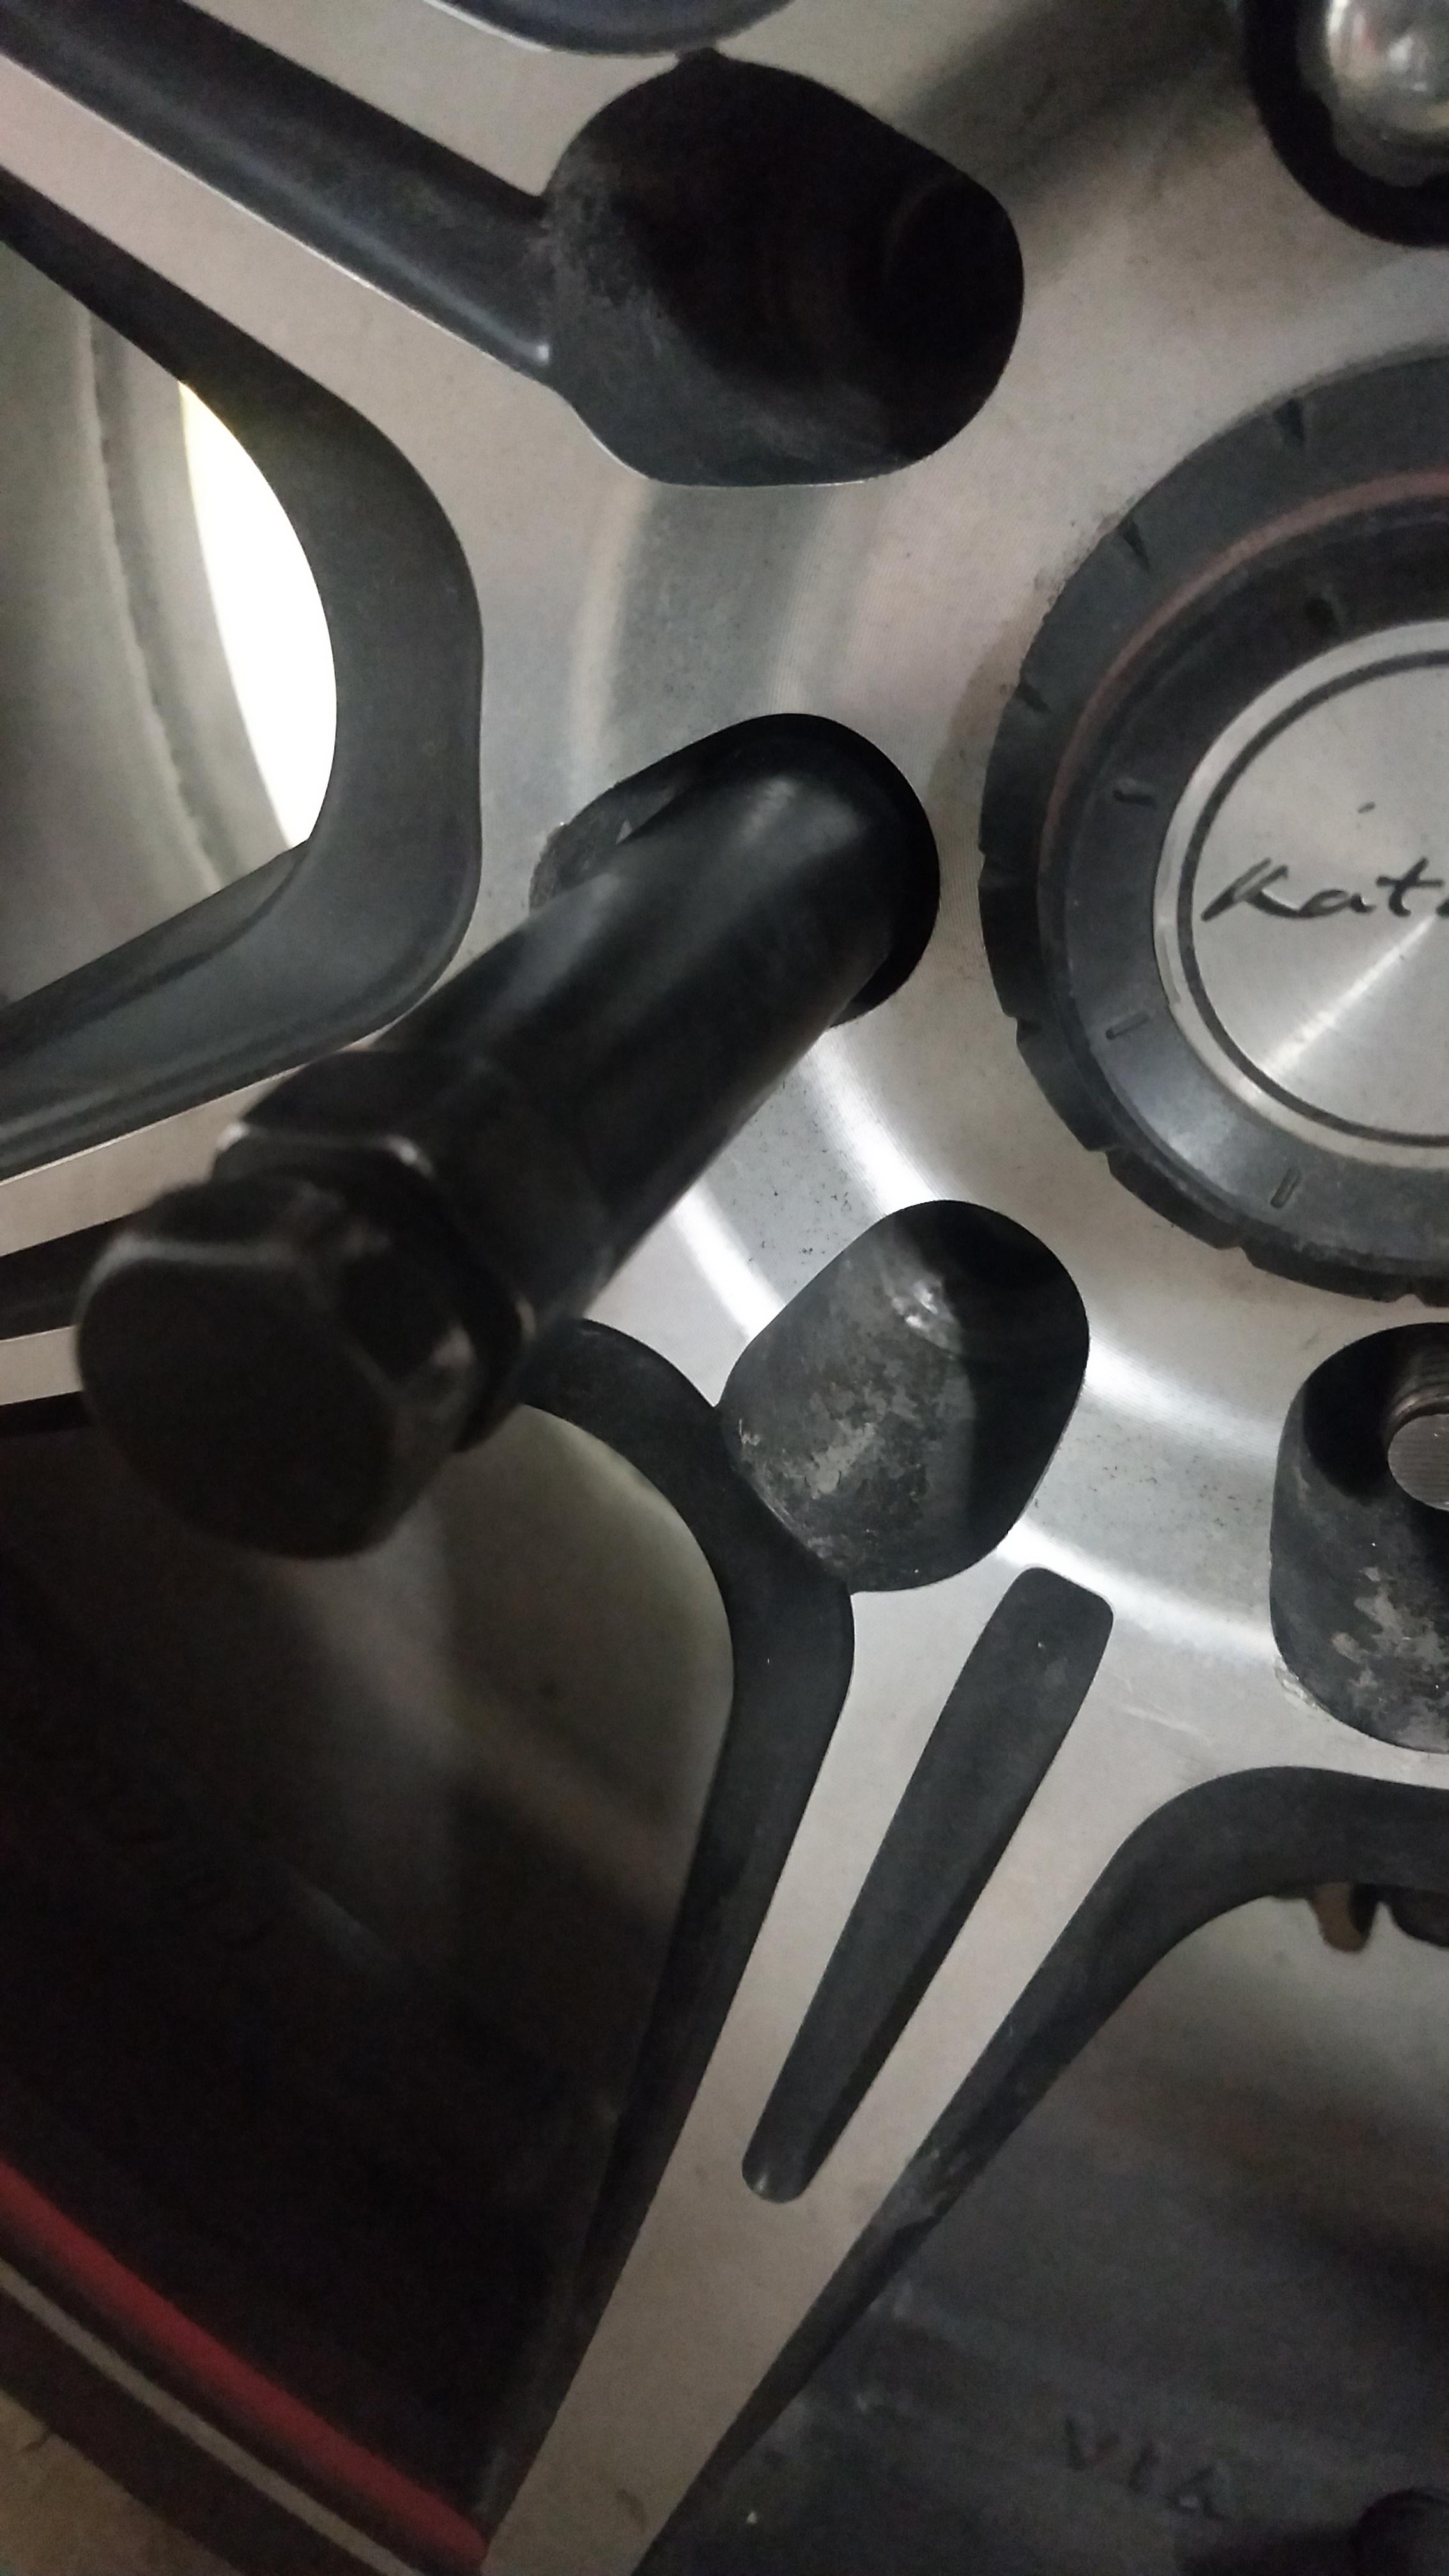
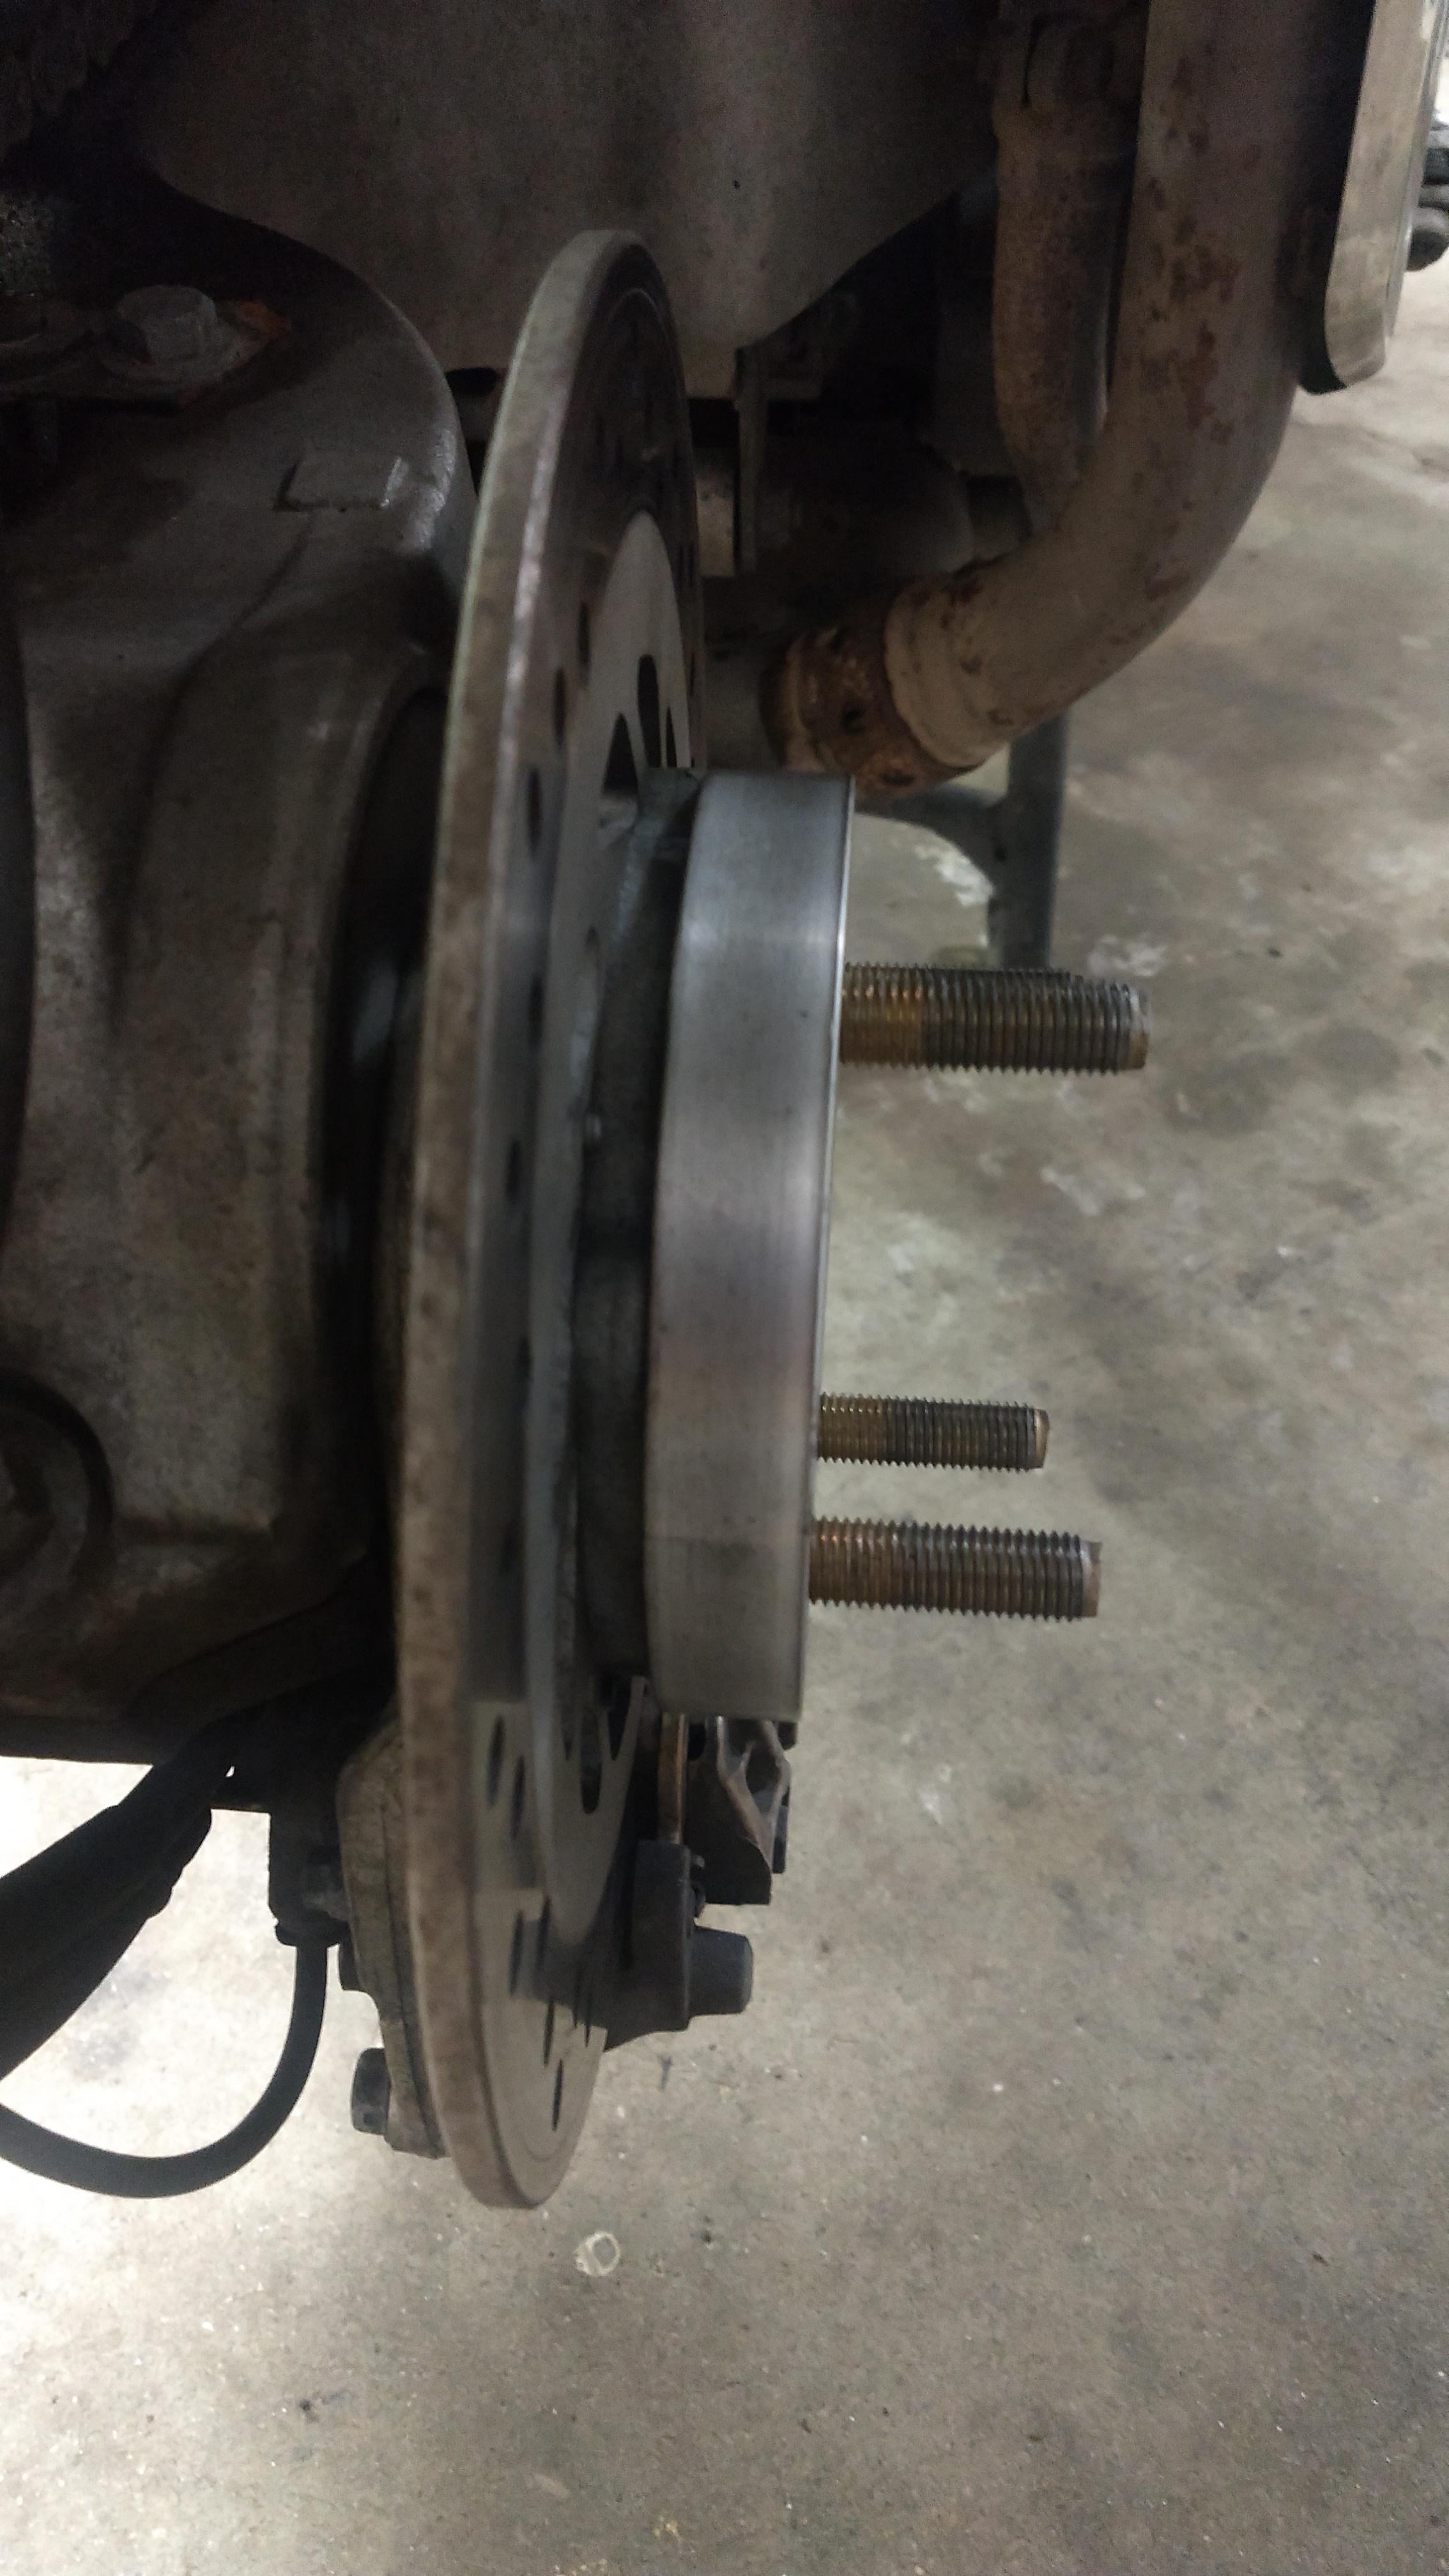
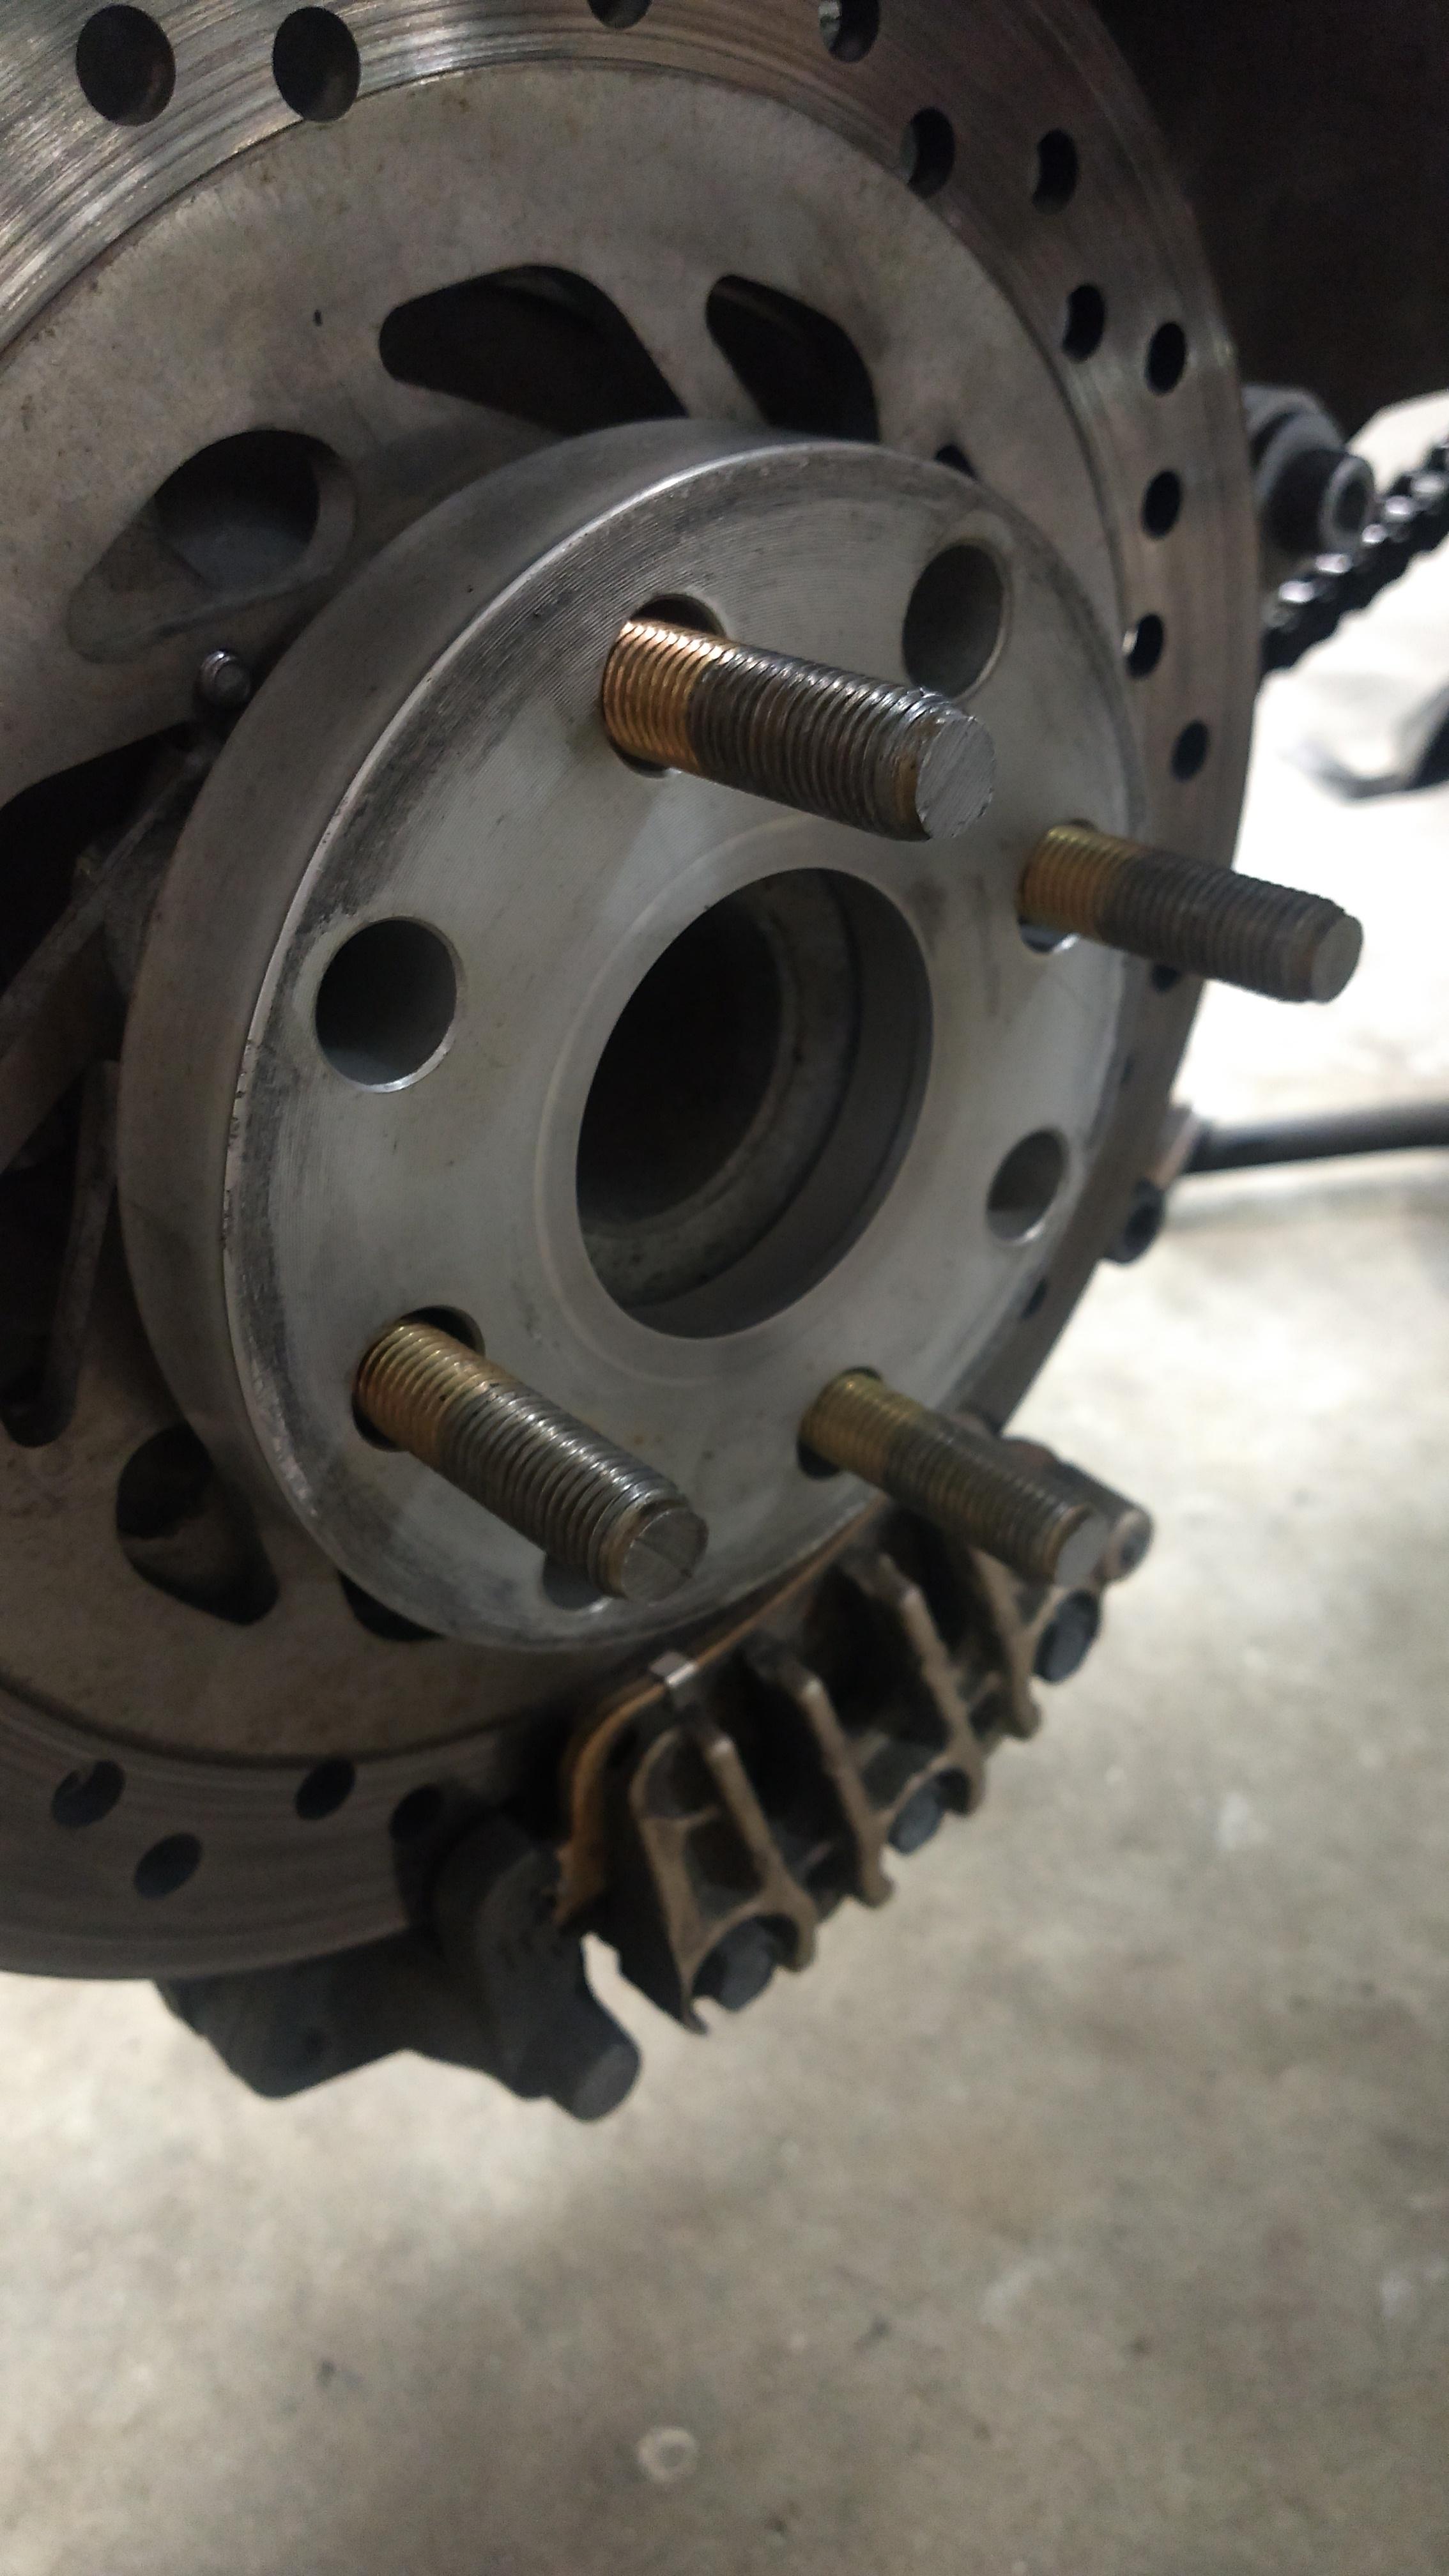
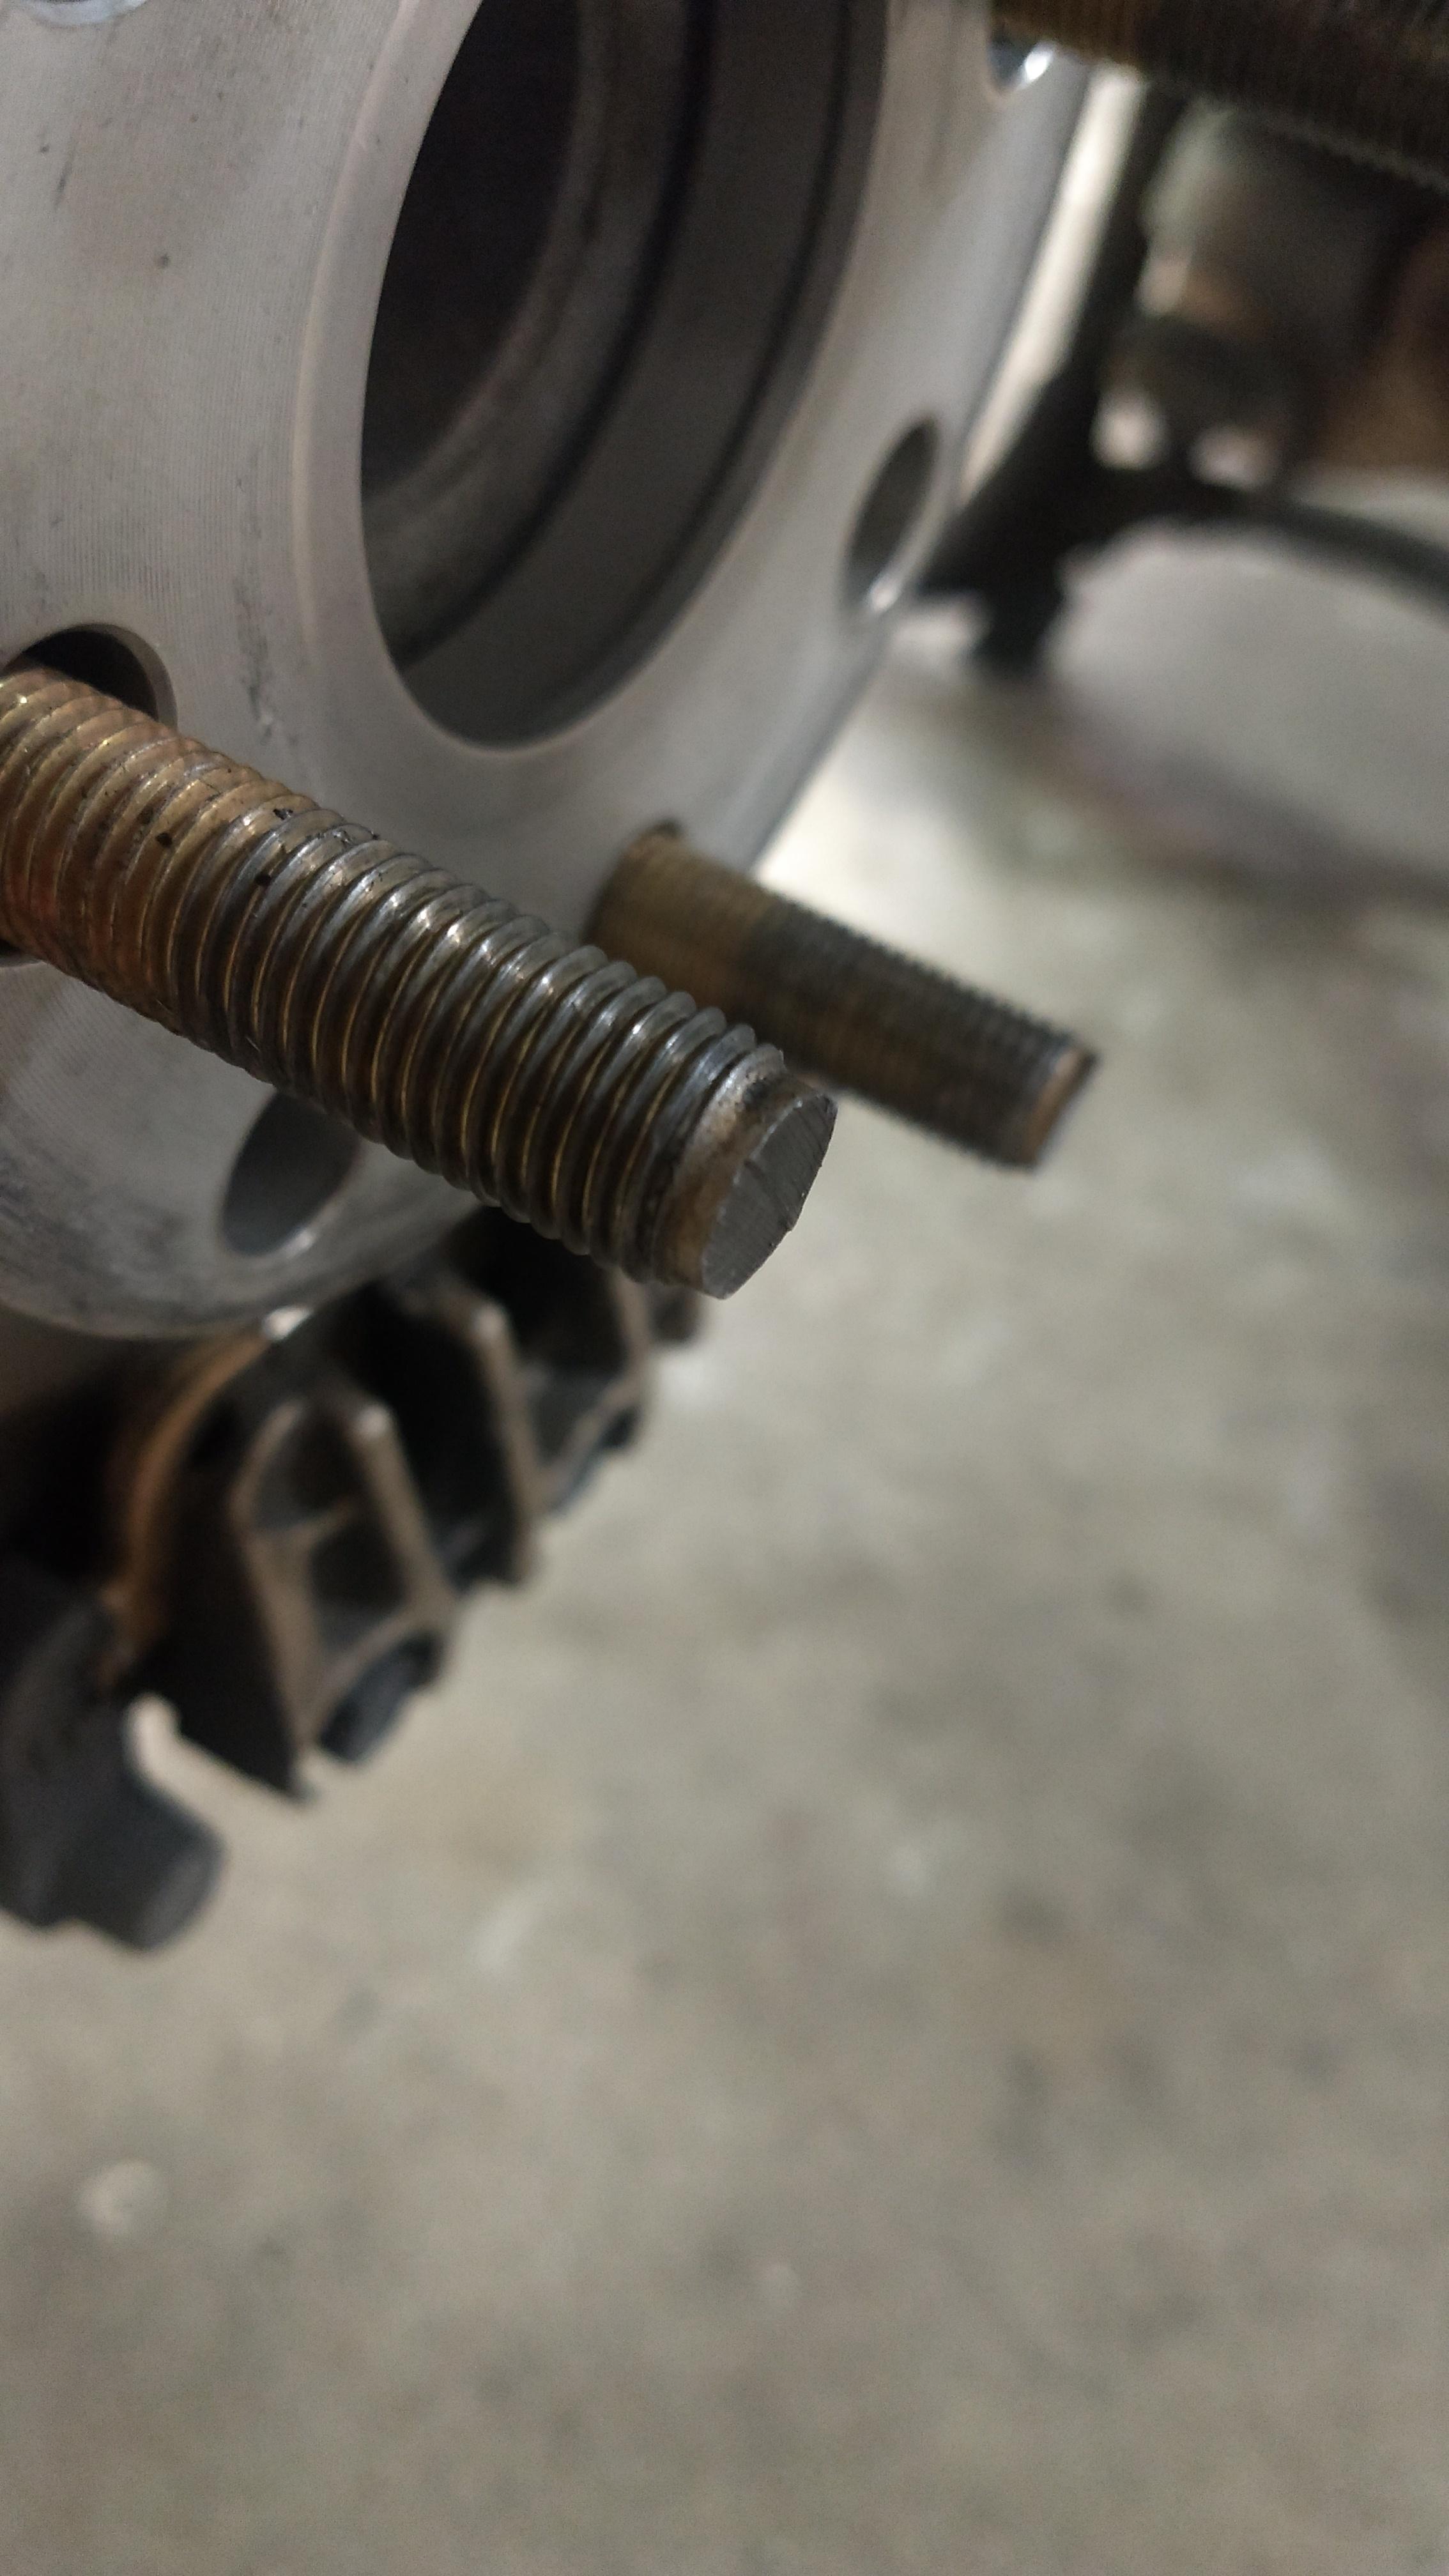
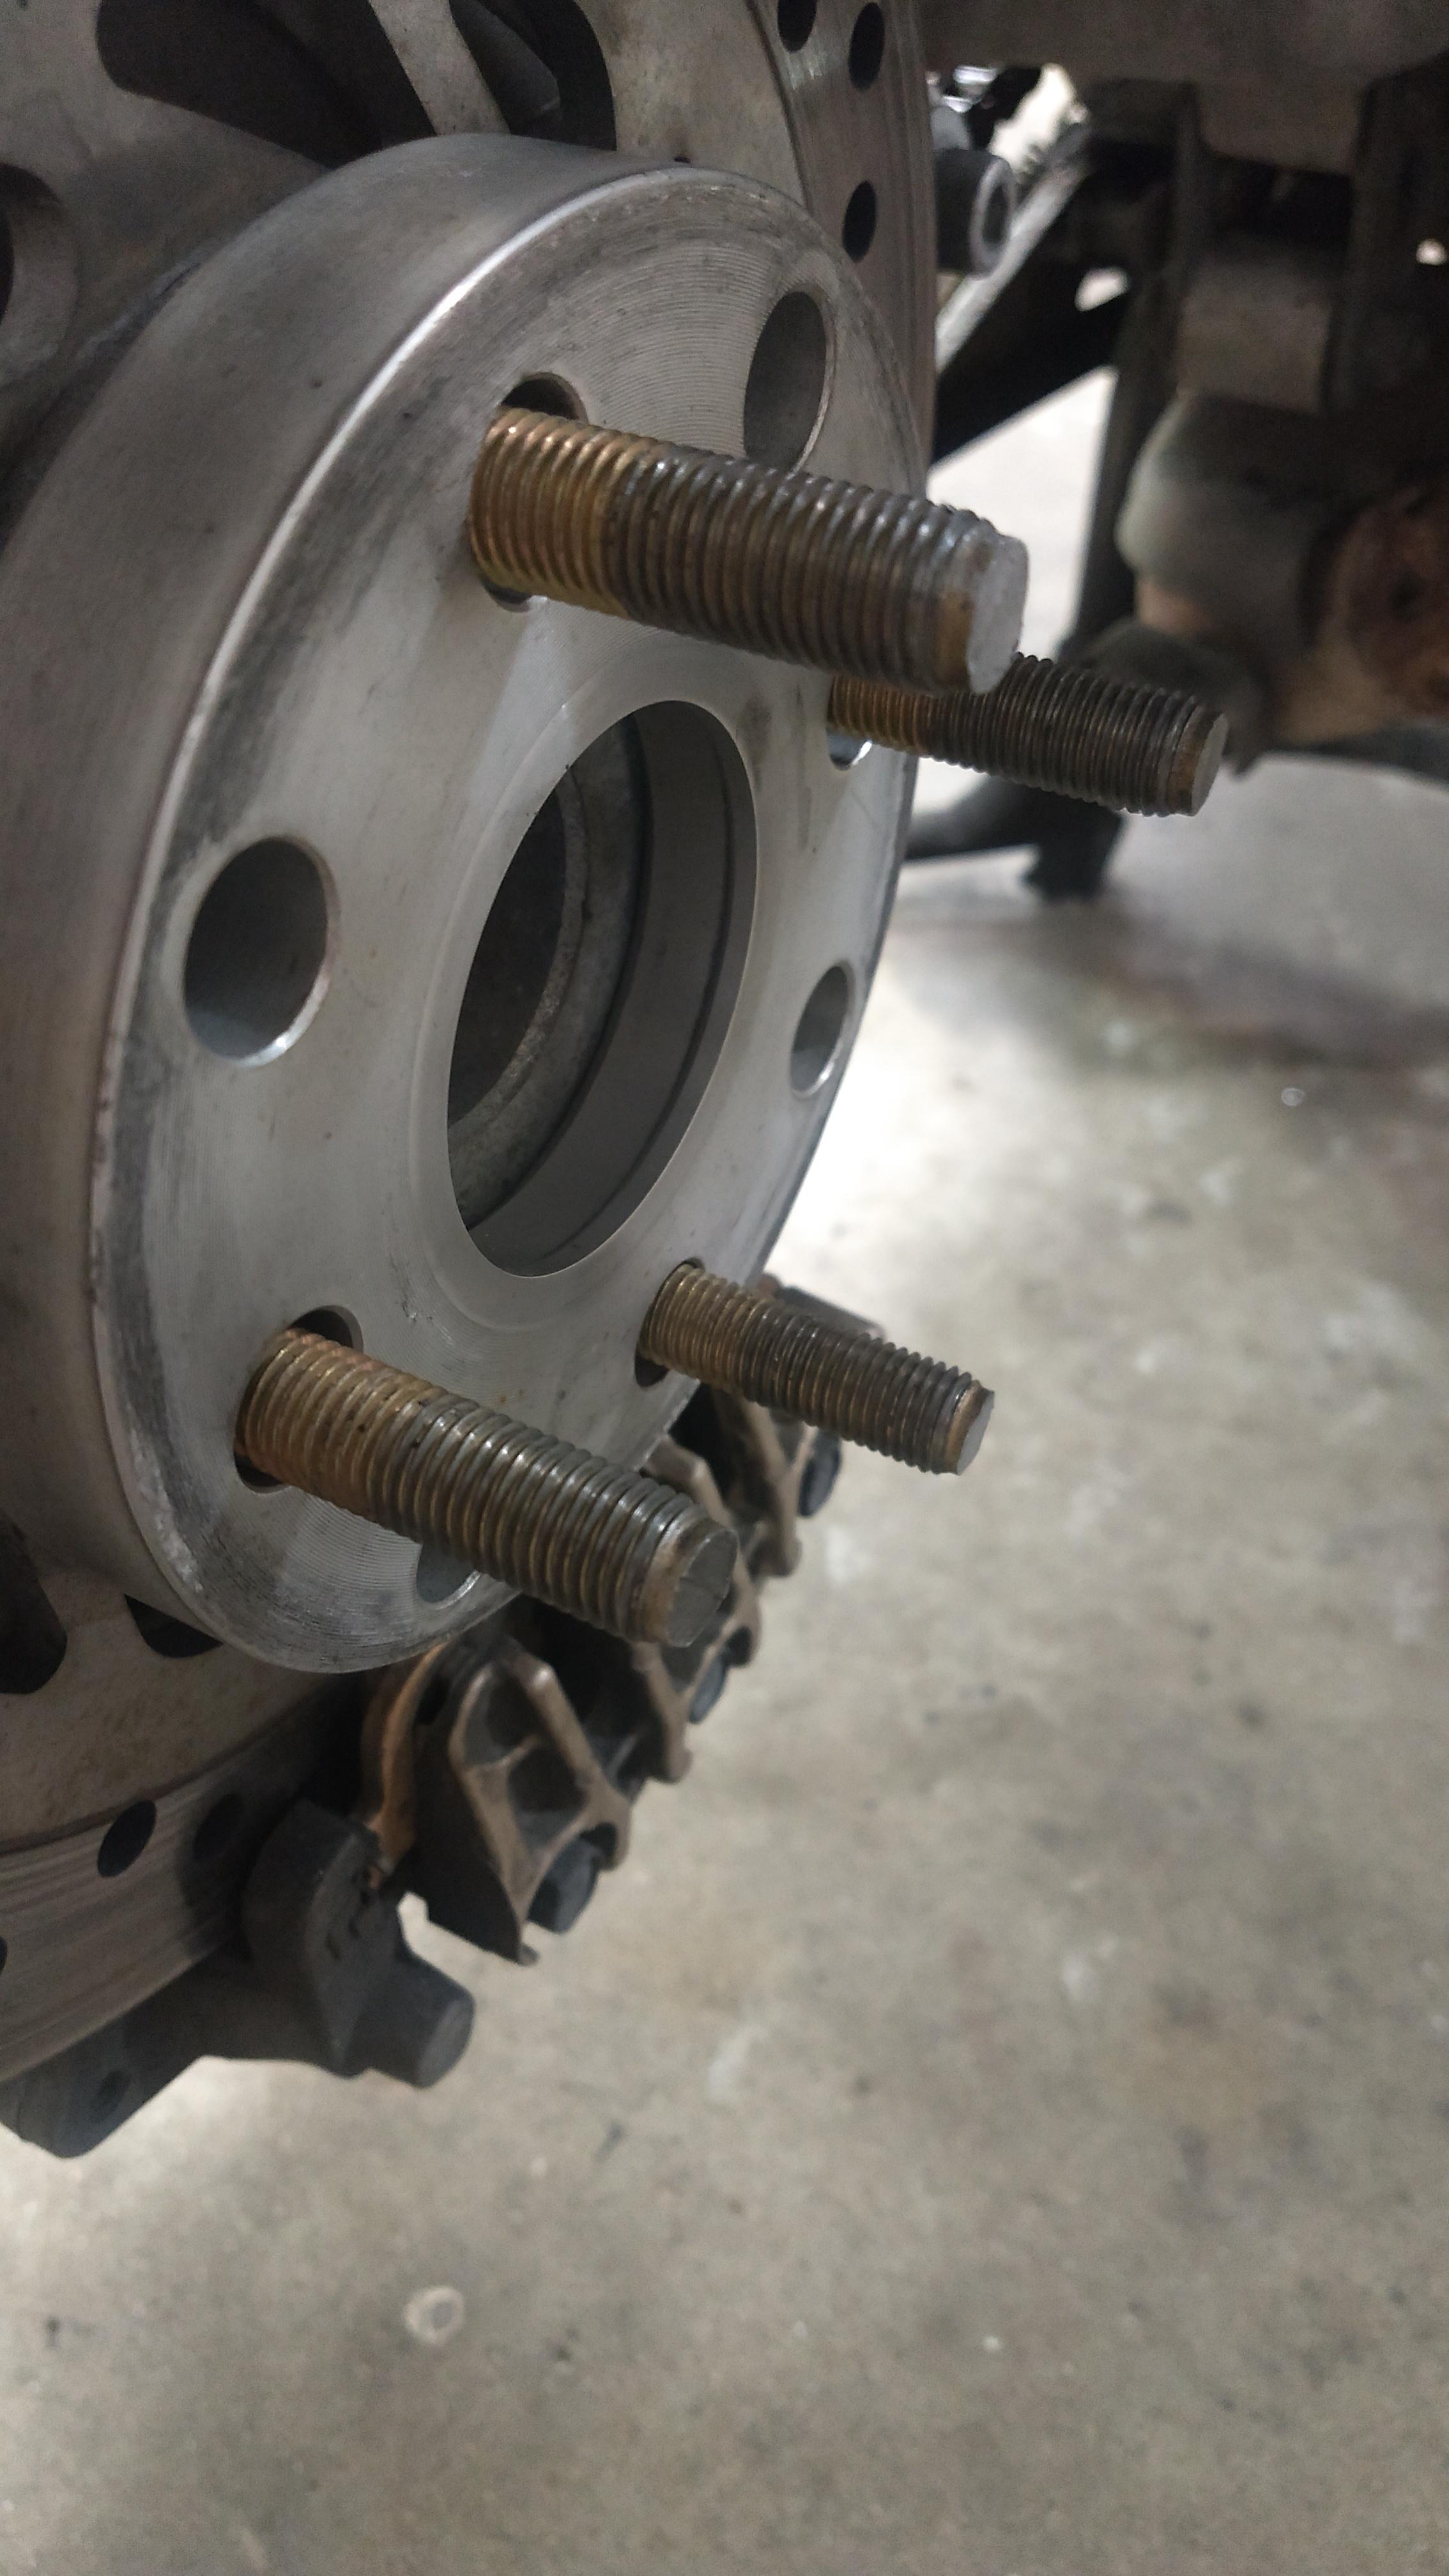
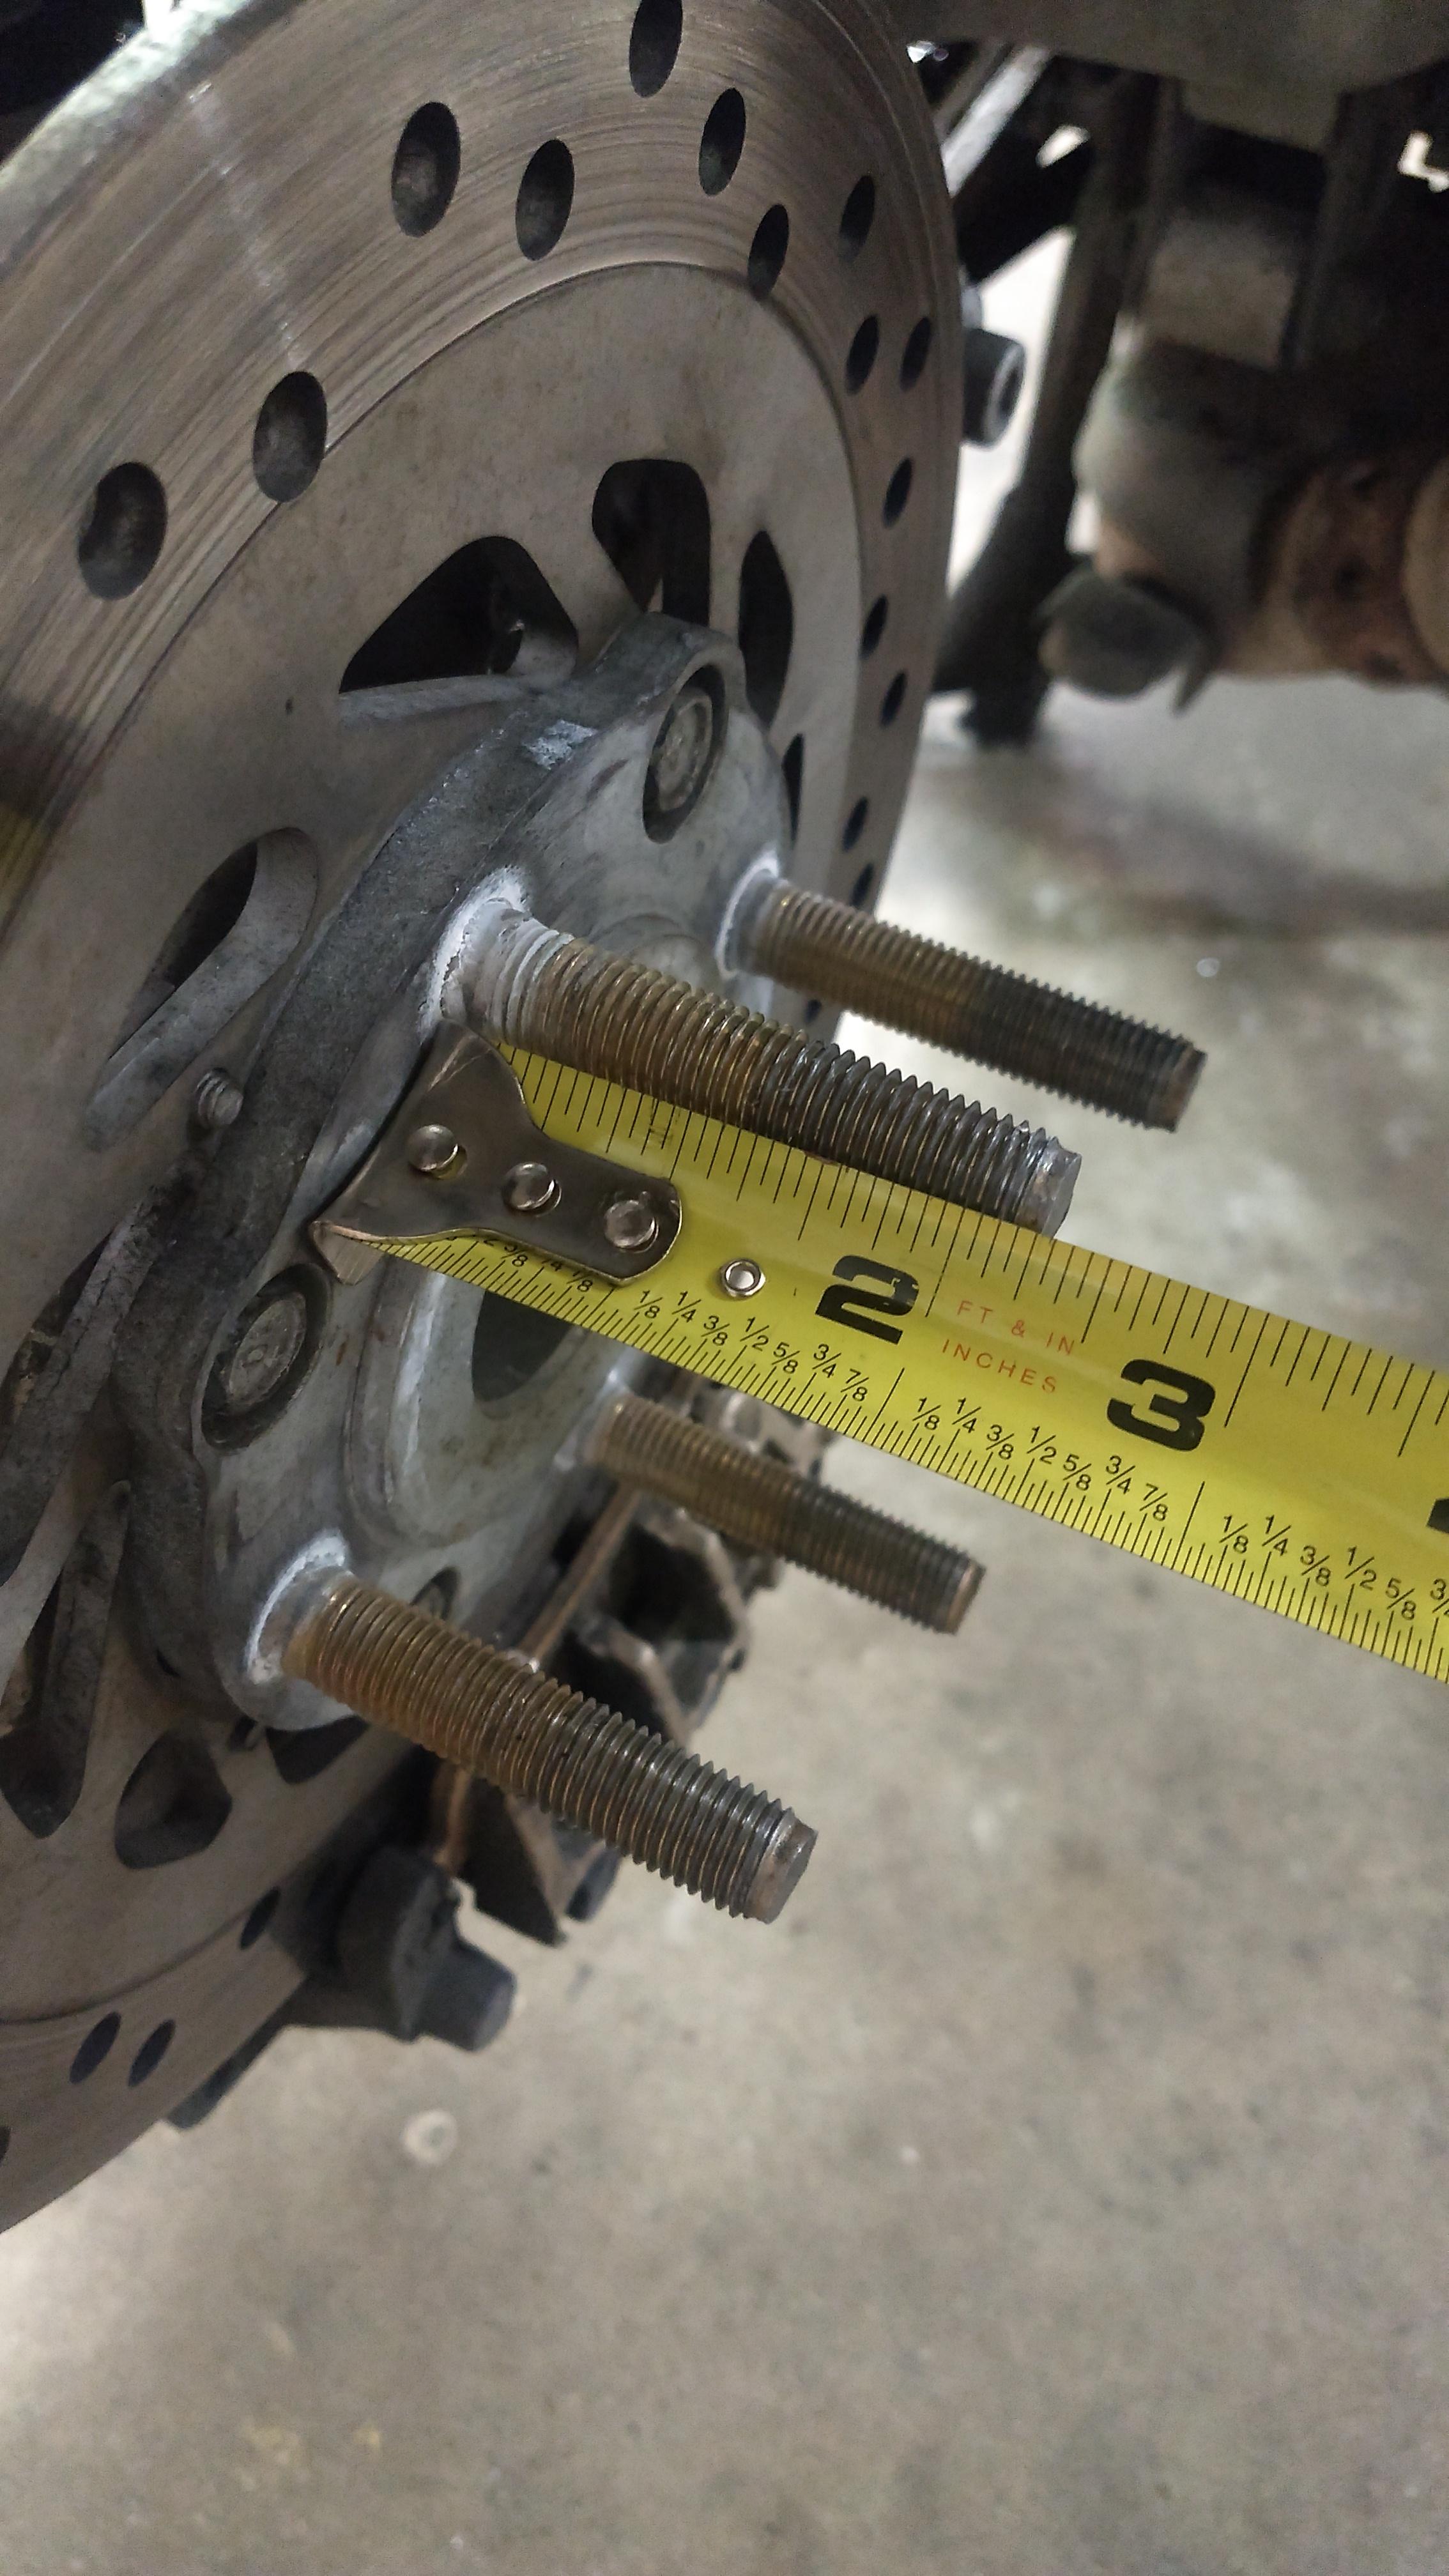
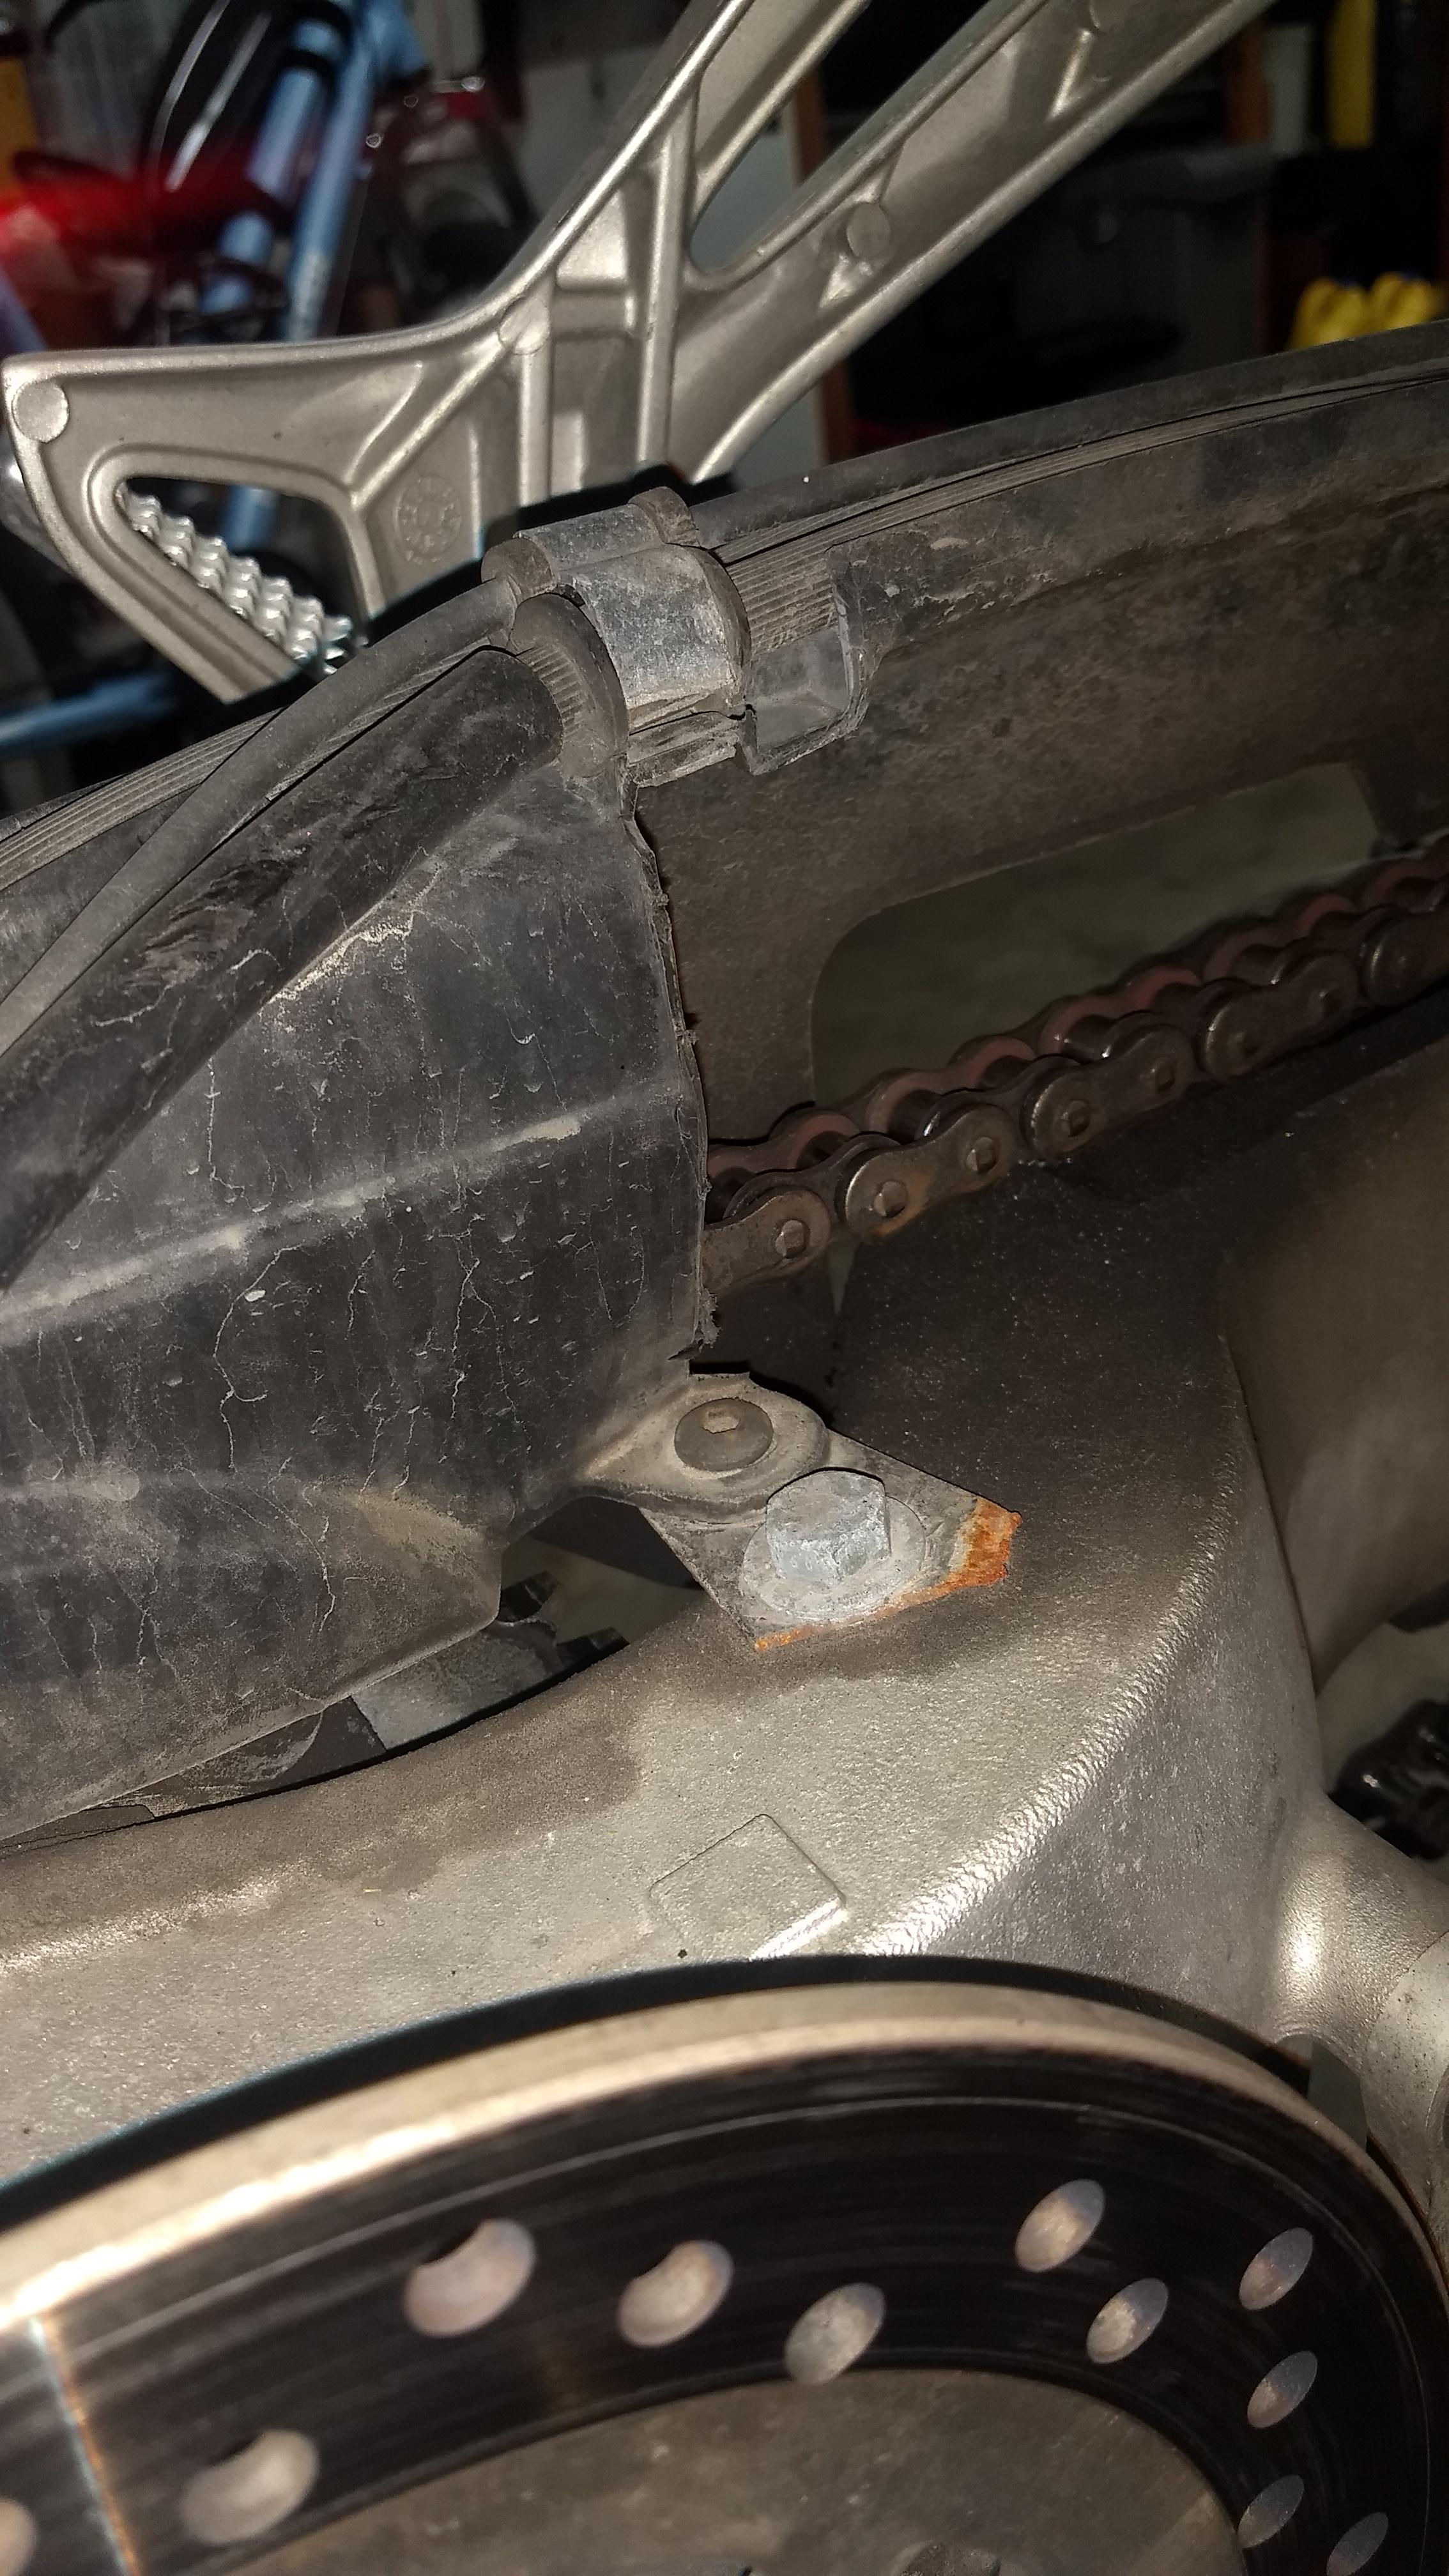
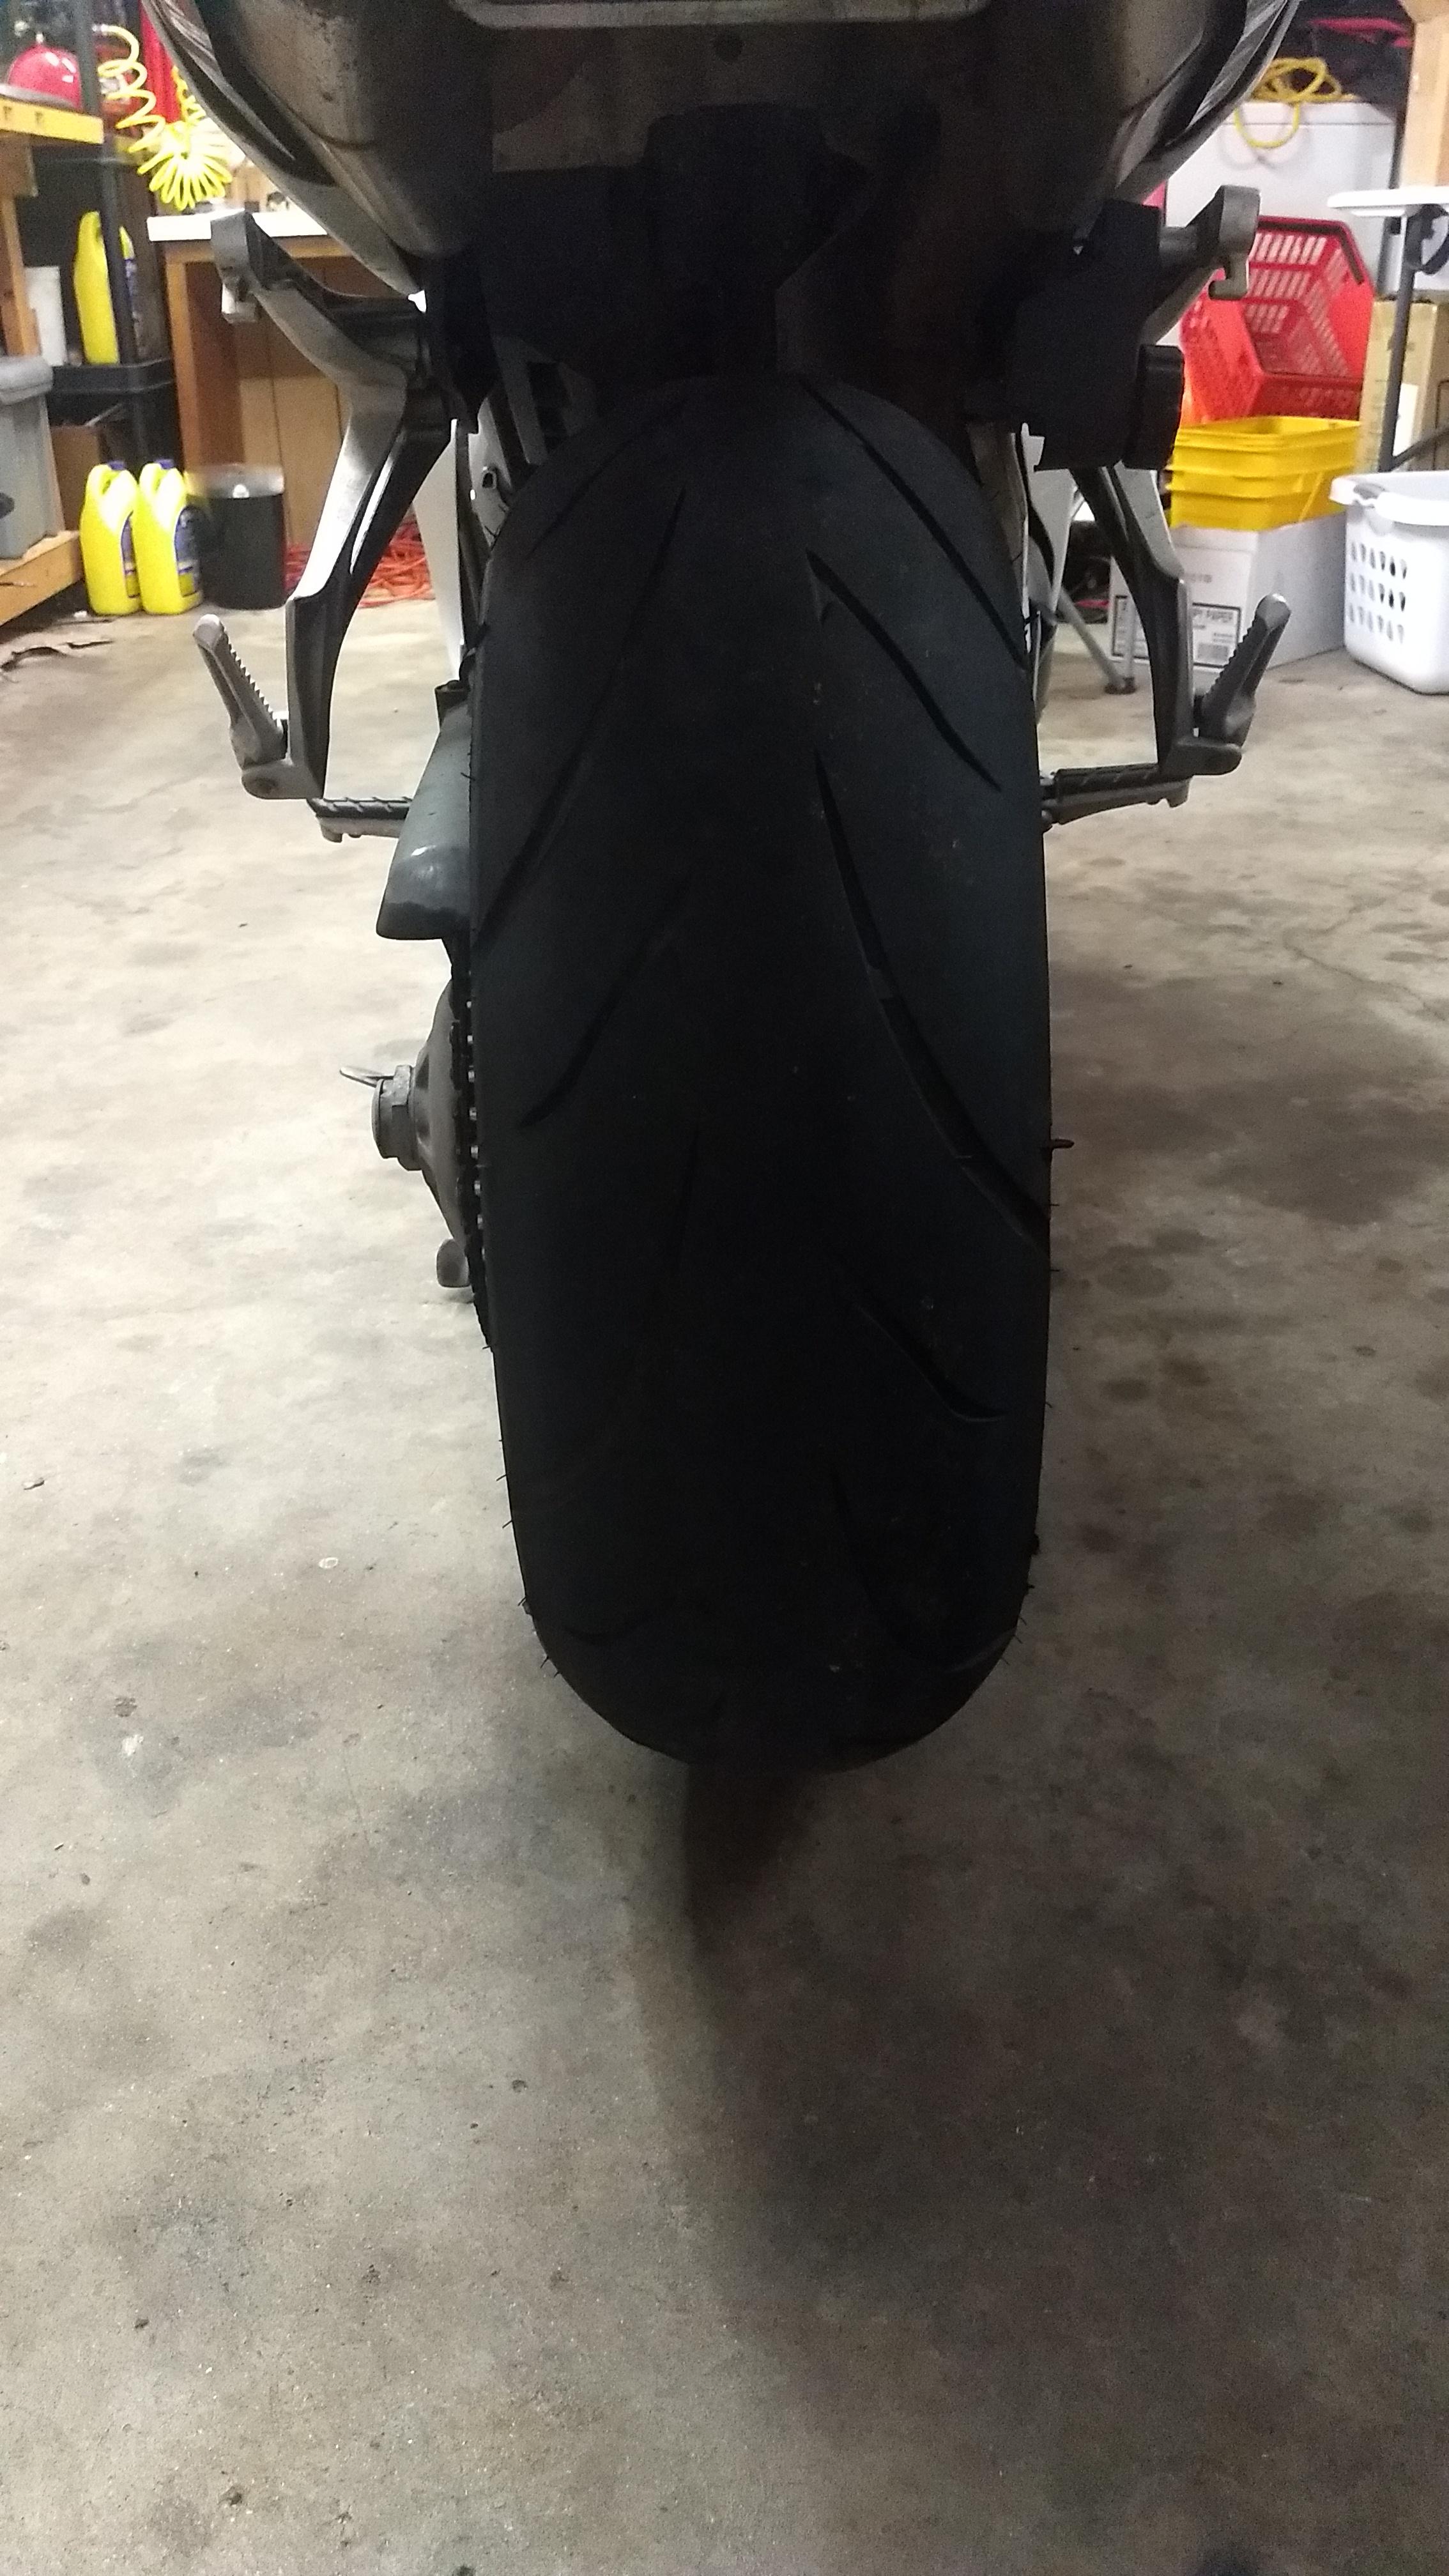
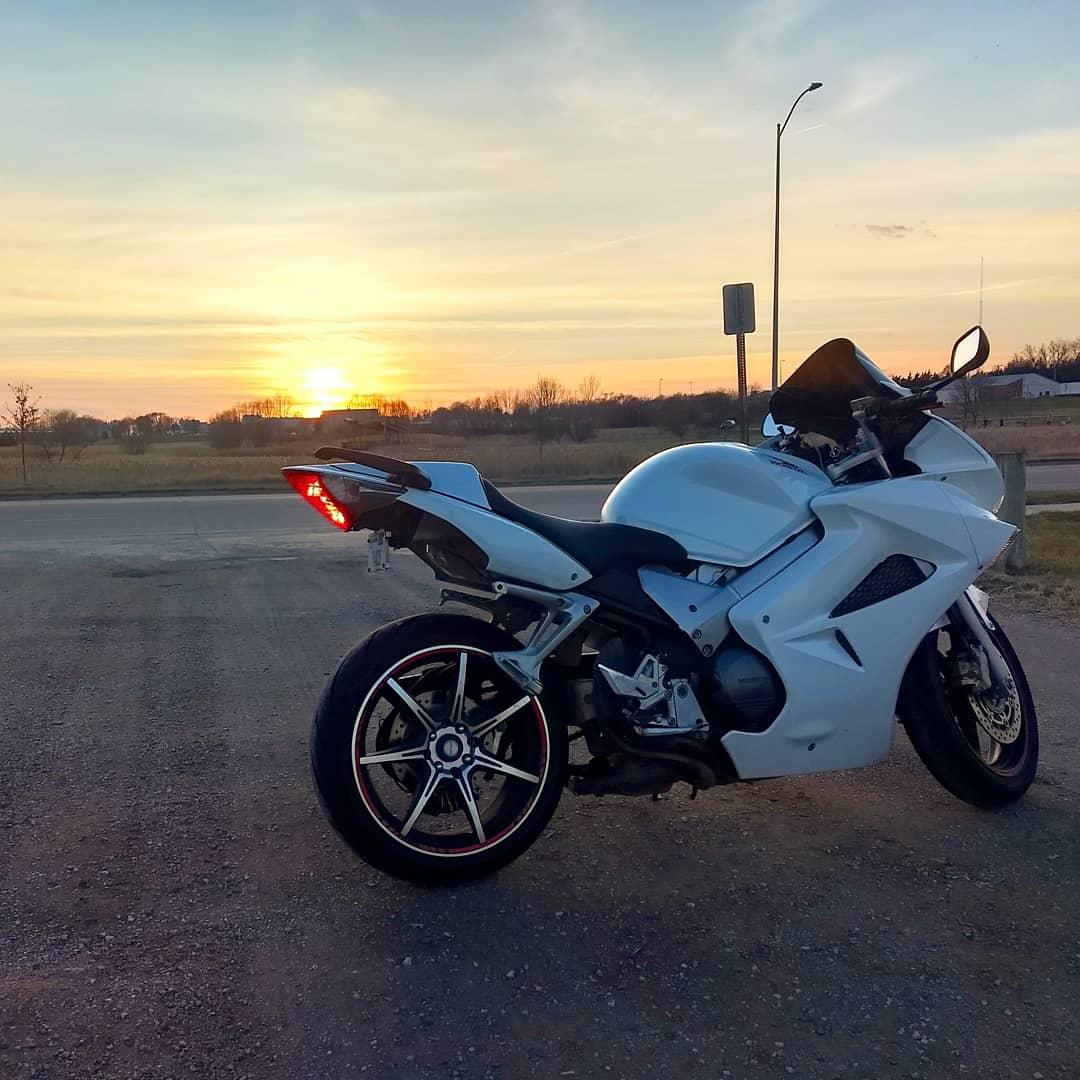
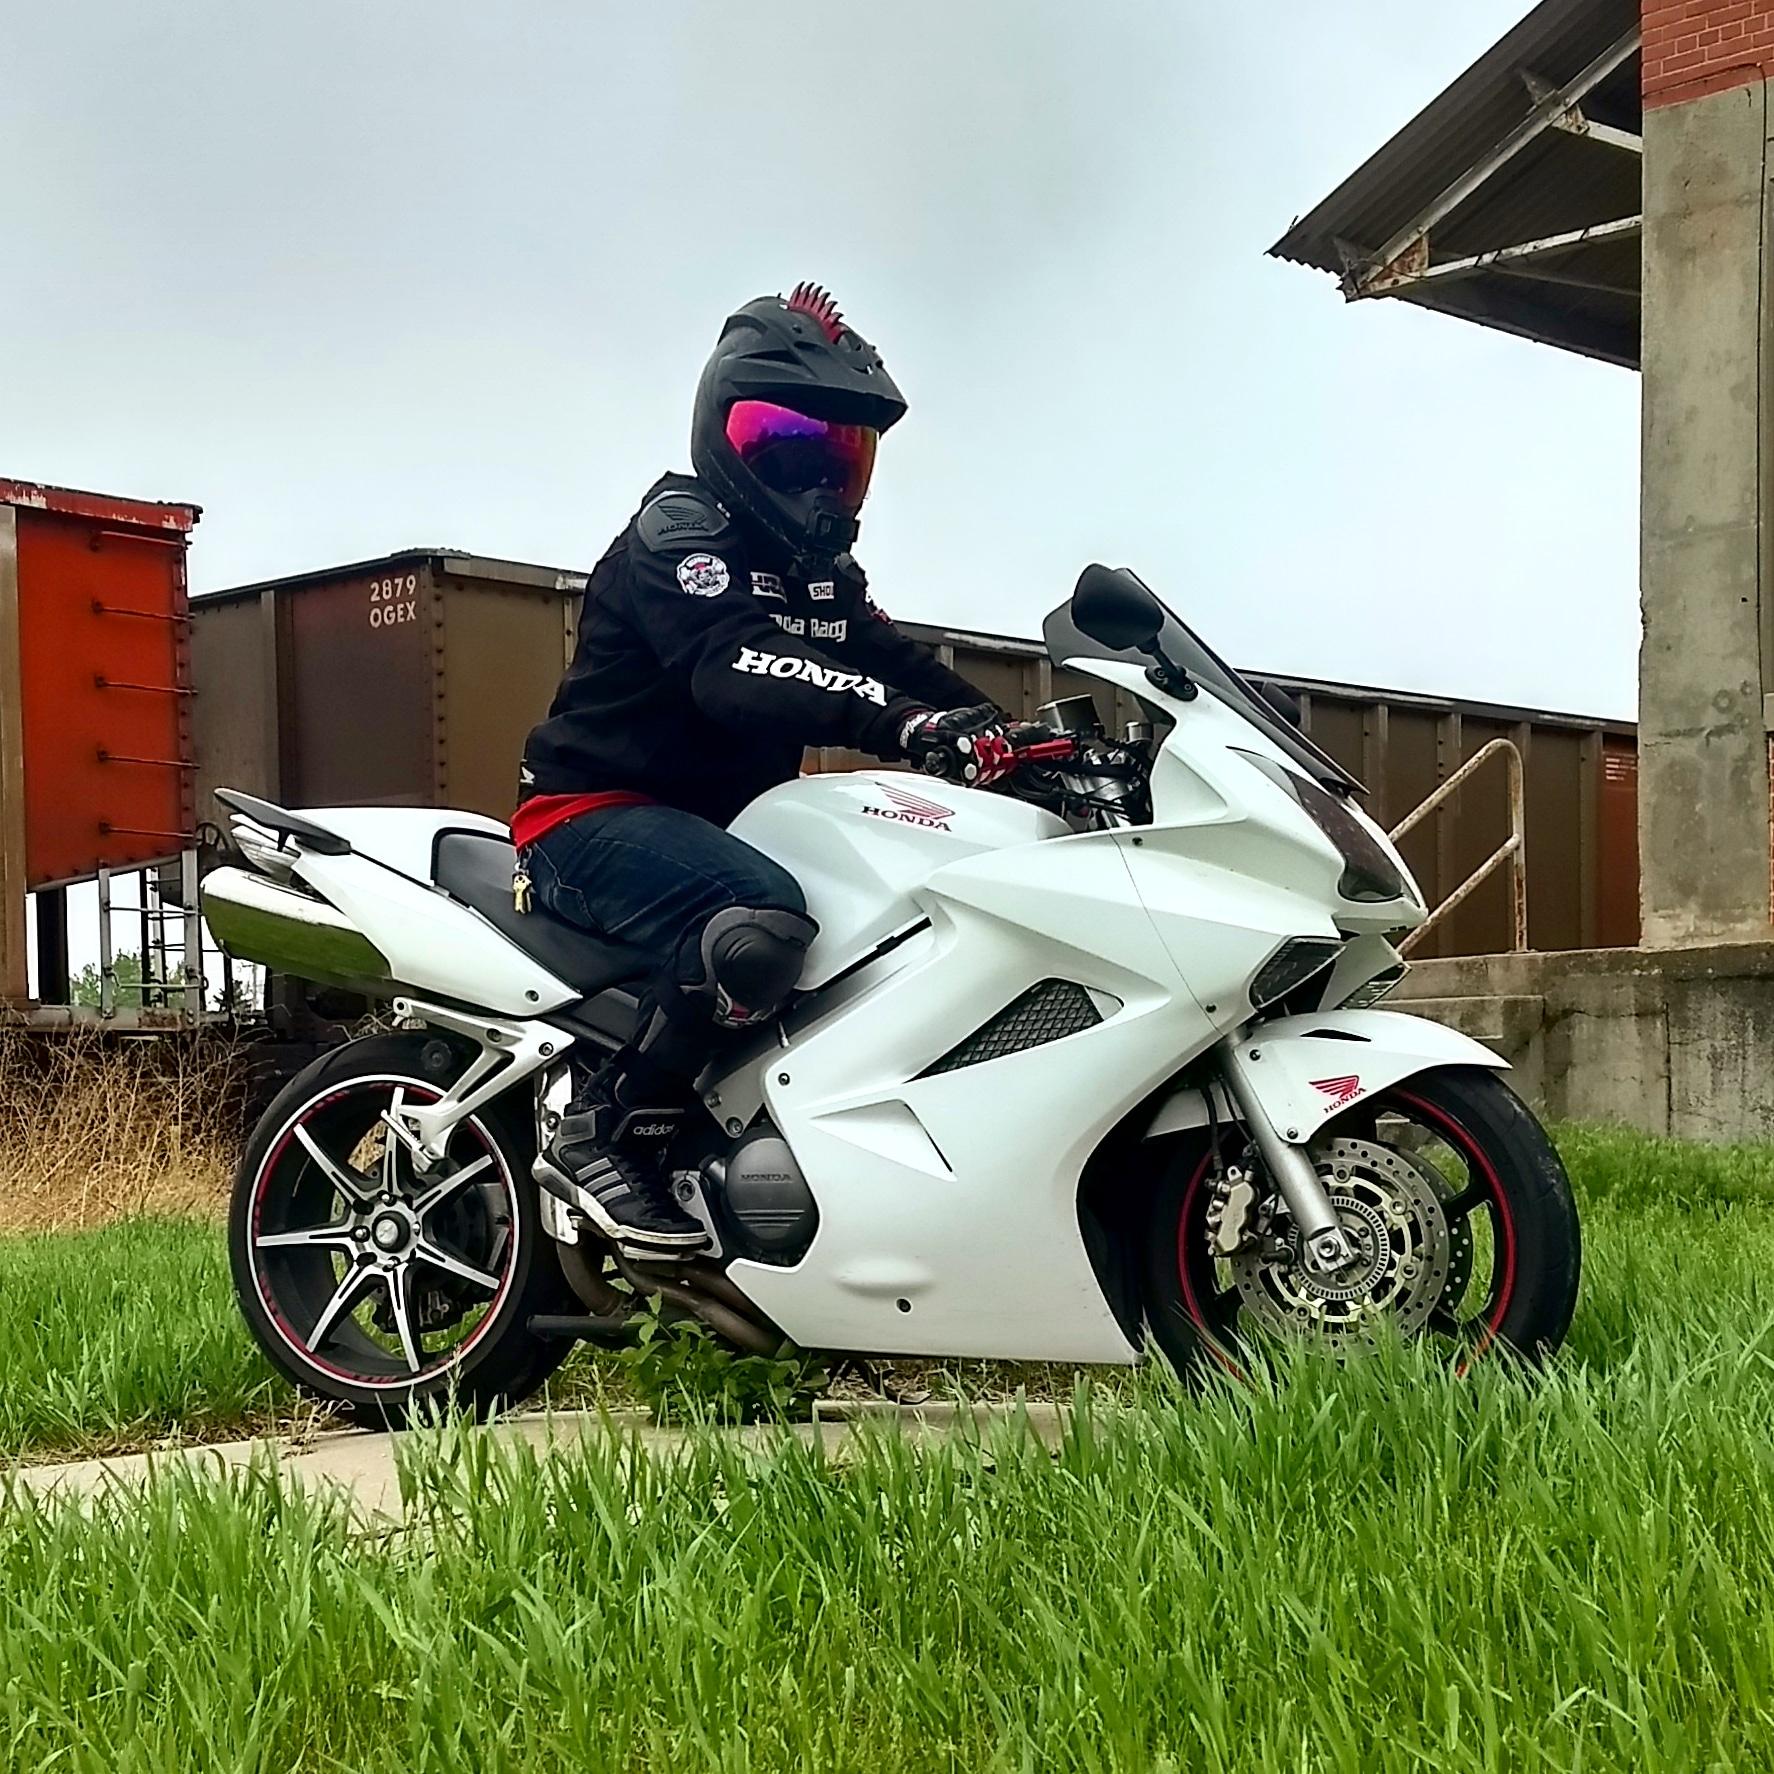
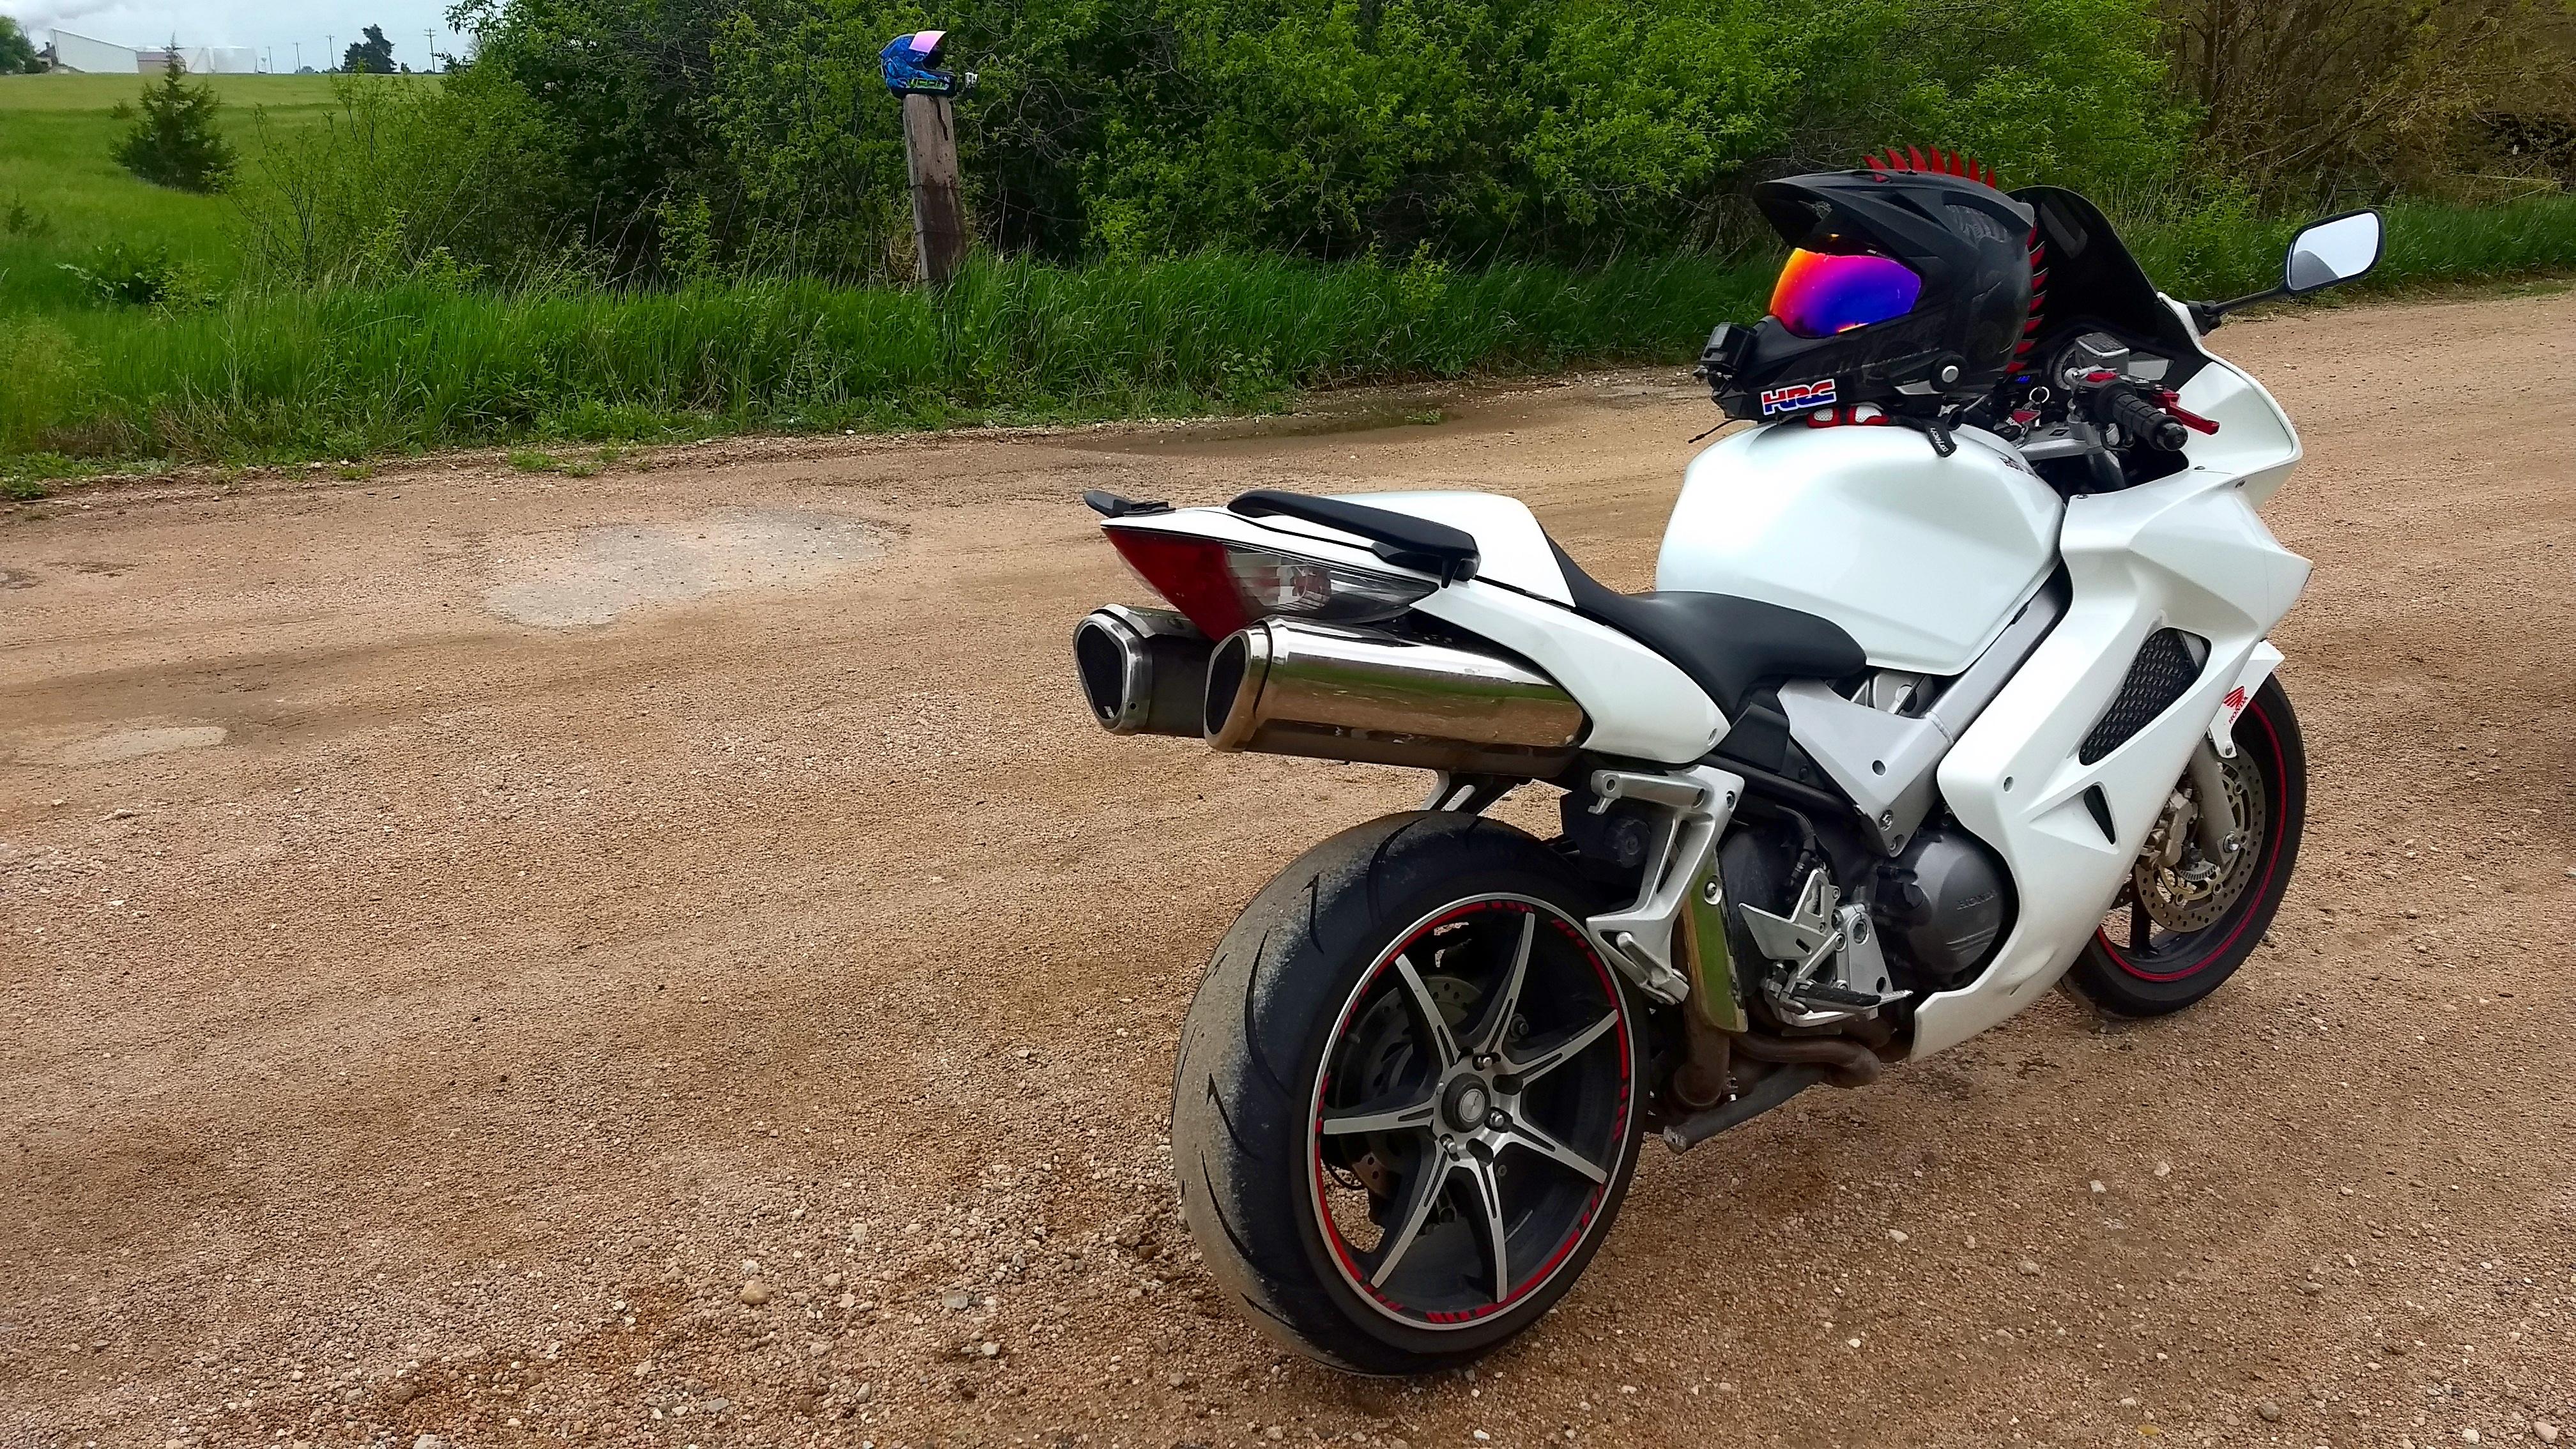
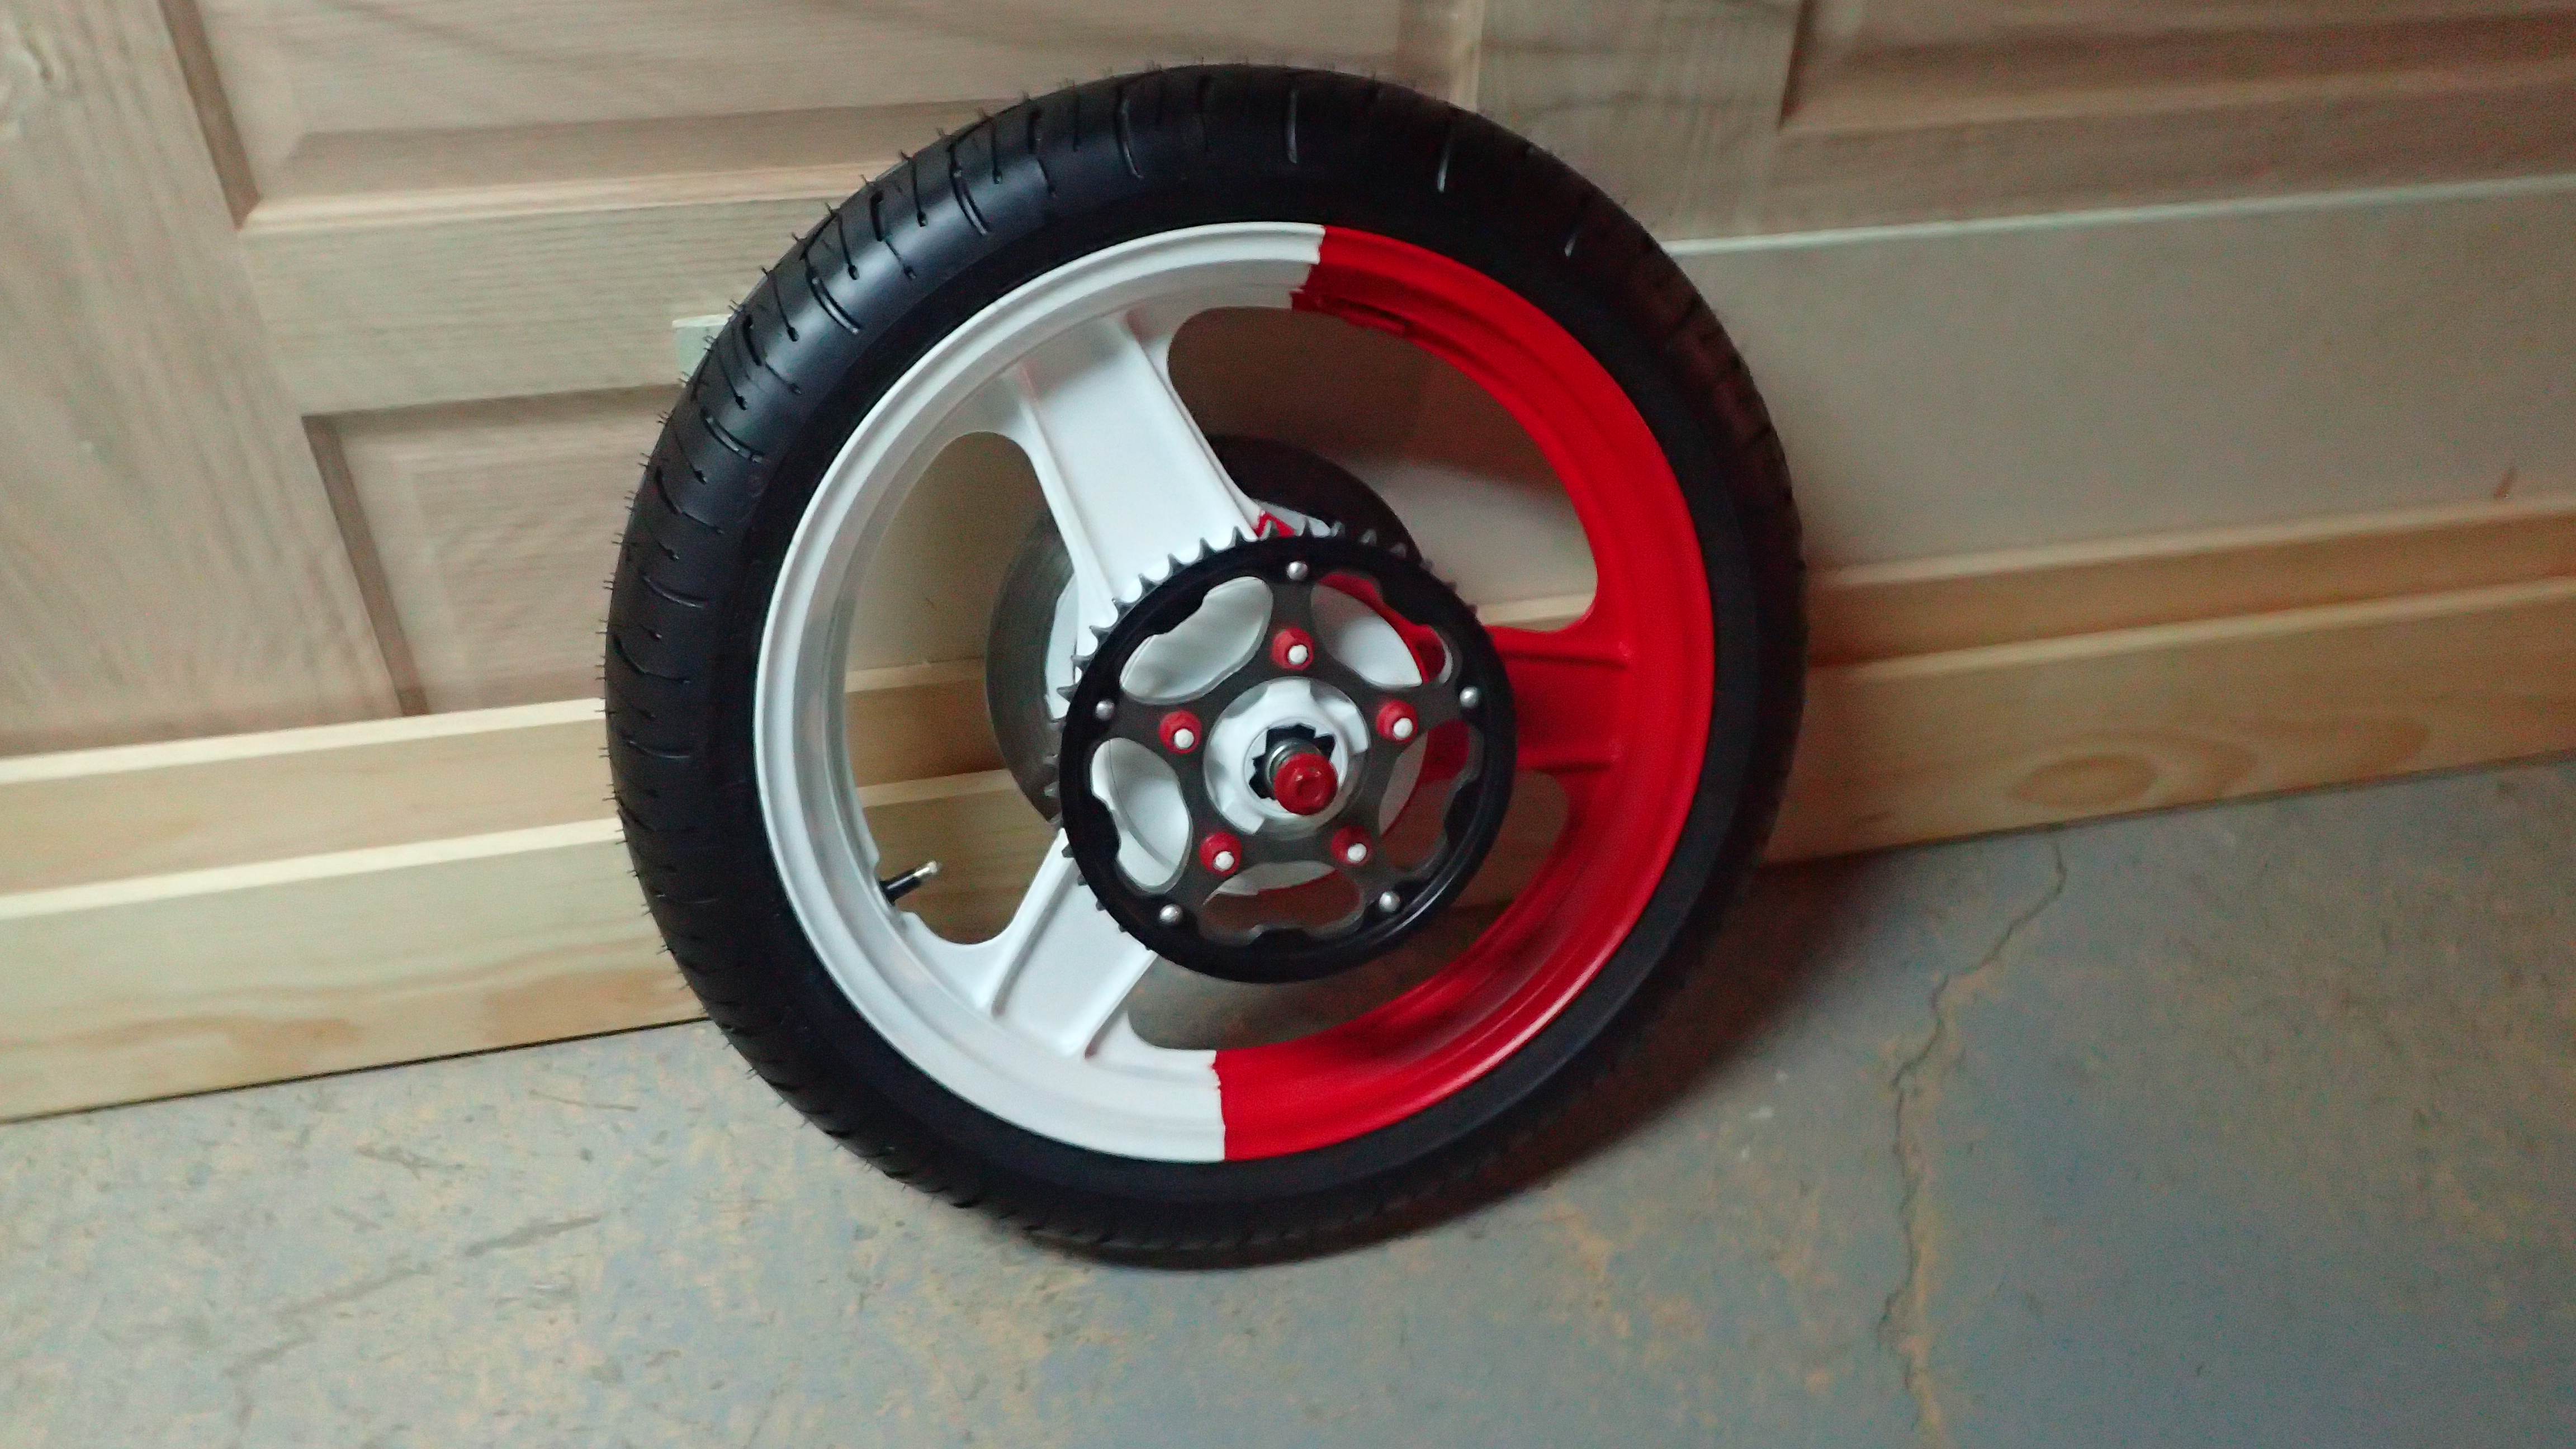
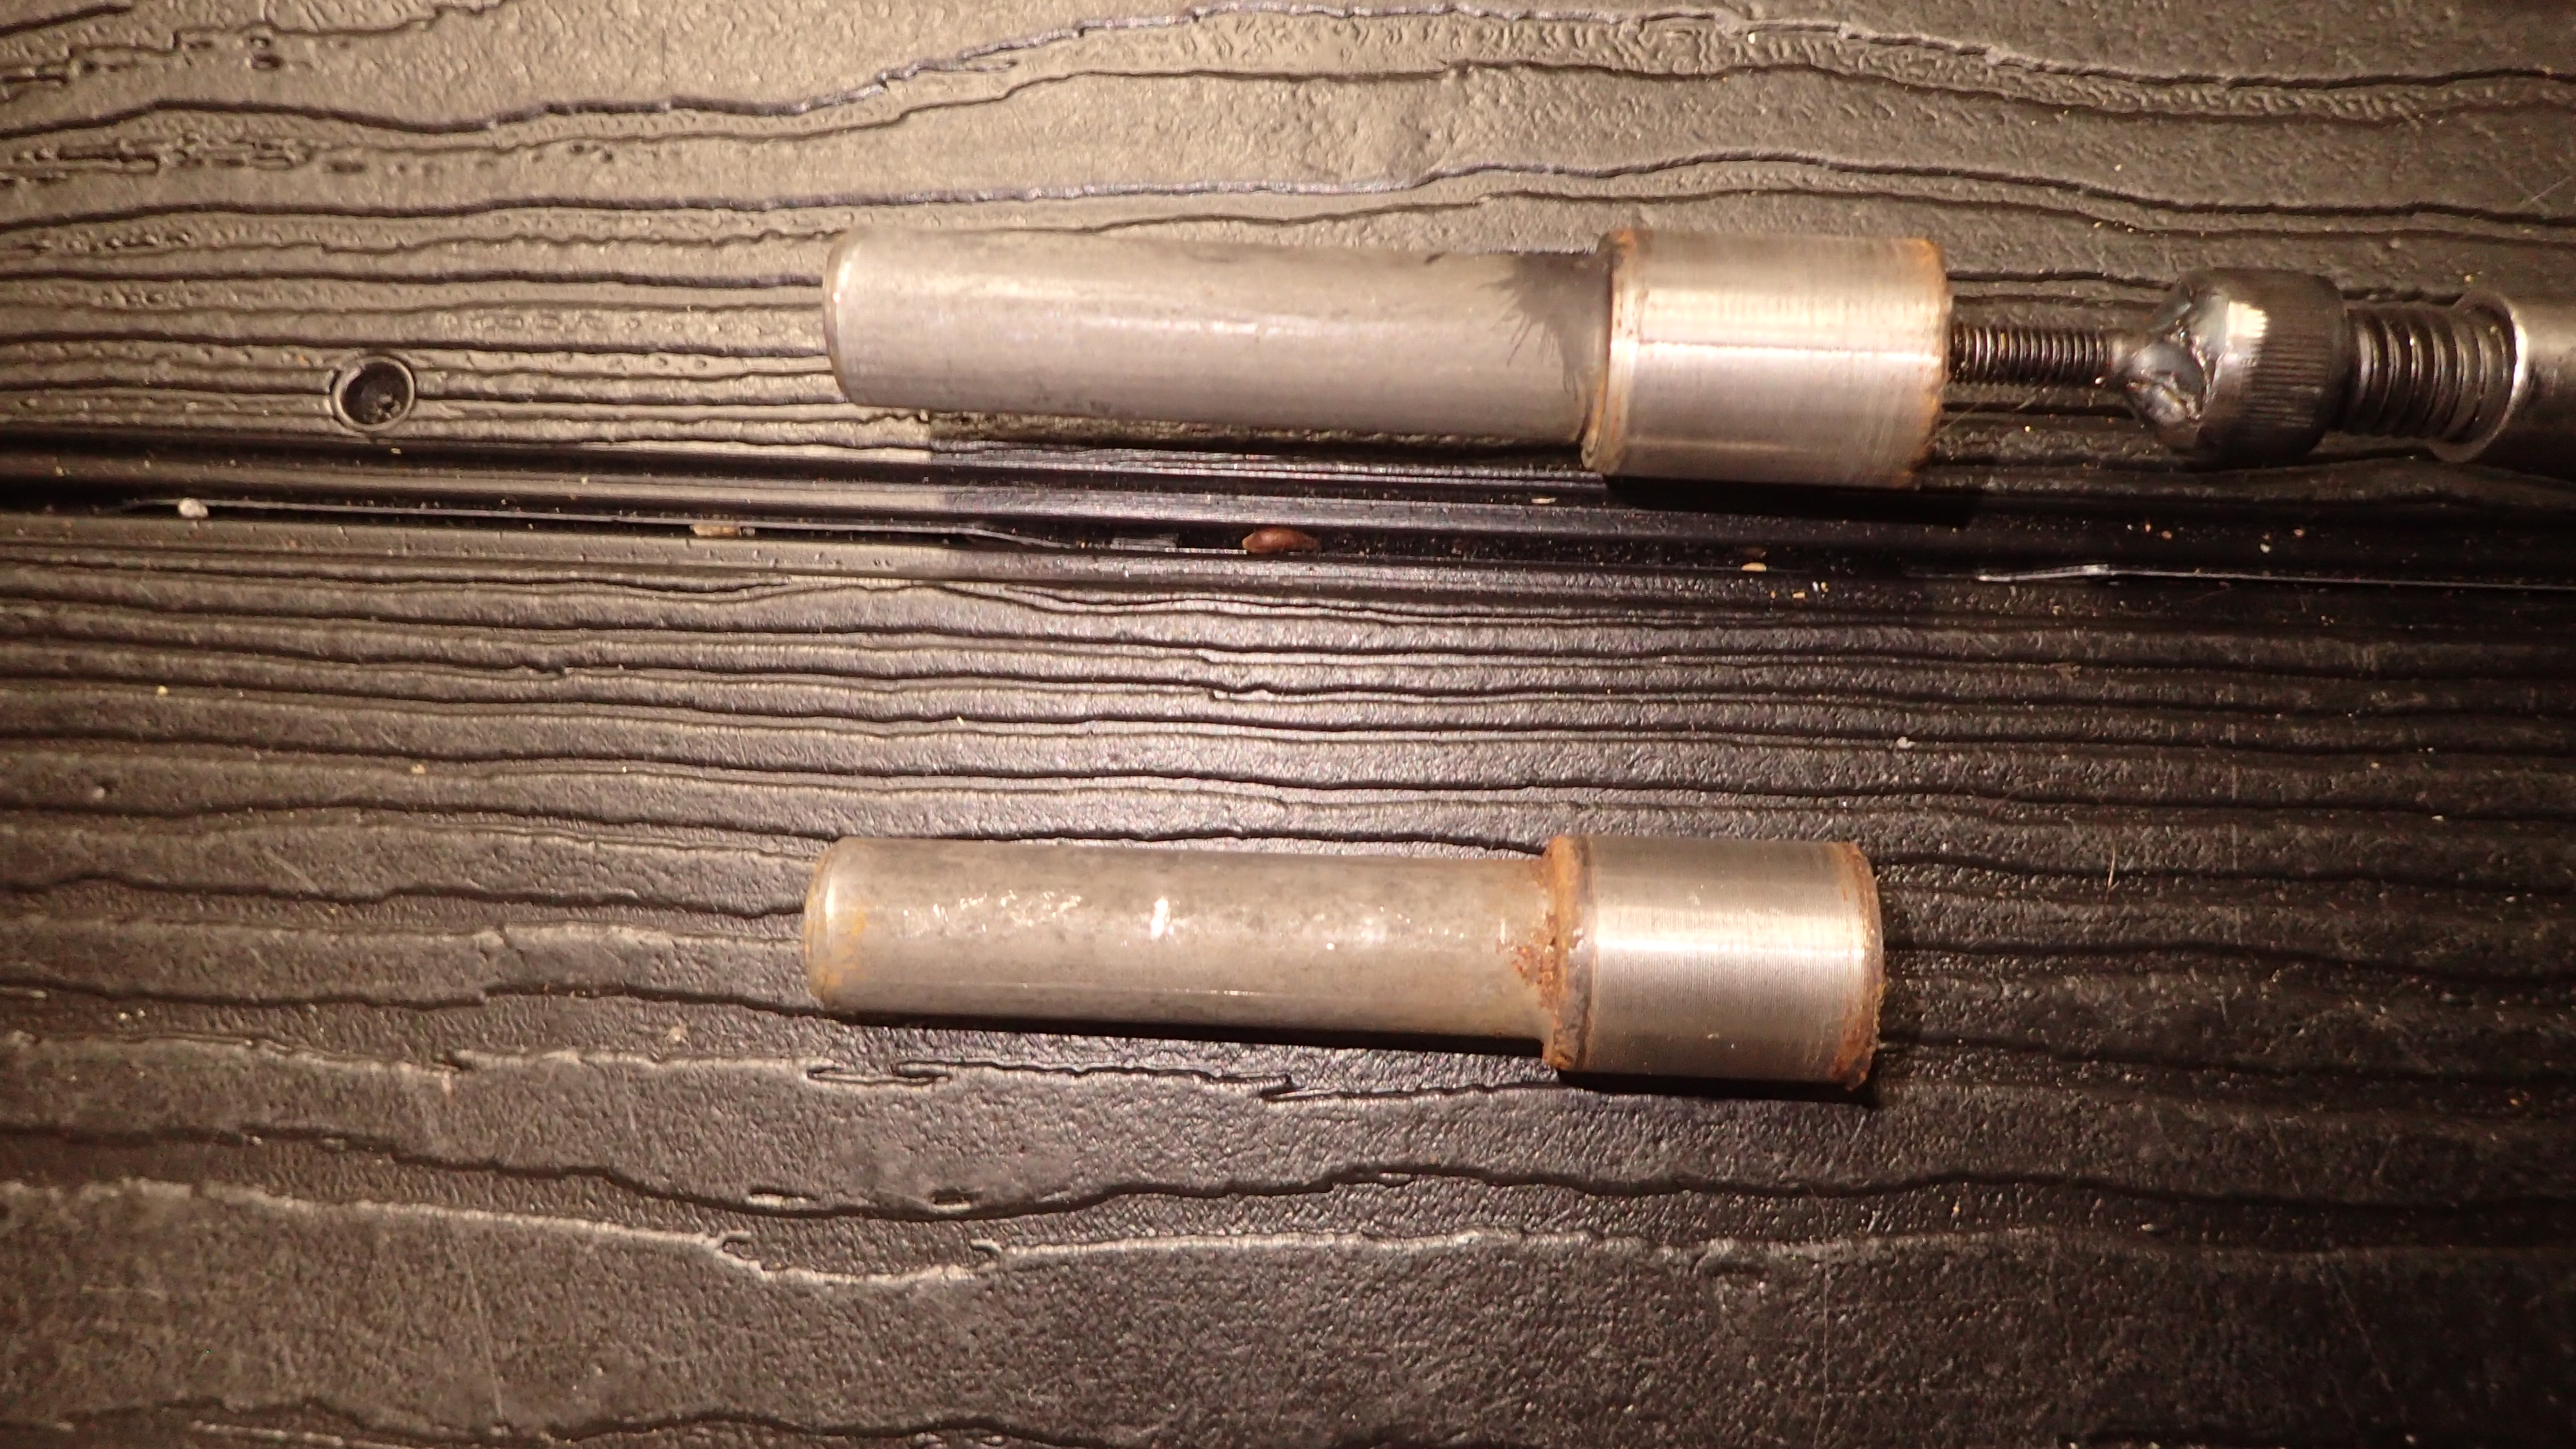
Hello all! So I did this mod a couple years ago and I've absolutely loved it! I originally did it to my first vfr800 which was a silver 2003 non-abs model. I put about 17,000 miles on that bike with about 8,000 - 10,000 of those miles after I did this mod. Unfortunately I was in an accident and the bike got totaled. I skipped between a couple other bikes but eventually bought myself another vfr! My lovely white 2006 abs viffer I currently ride. I swapped the aftermarket rear wheel from my old bike onto the new one right away and I've put 3,000 miles on it since then! If done right this mod works amazingly! I trust my bike any distance on any road, from the city to highway, and even the mountains to the canyons! Rain or shine! When it comes down to performance, I've never noticed any less after the mod was done as compared to stock. With the new rim I went with and the wider tire, the rear wheel for me weighs about 3 pounds or so more than the stock one did, sure That may make an incremental difference to a very experienced track rider but these bikes aren't designed for track only use and they are far from the fastest bikes out there, so to me, the extra weight is well worth the look! And again all that being said I've never noticed any kind of performance loss, I've burned trough my chicken strips with easy and the bike seems to have all of the get up and go that it did before. So I definitely recommend this mod! Before doing this mod I referred to many of the other forums where people have discussed this. And I took a little bit from each of them to get it done. I still recommend reading through all of those as well as this one to get as much of an understanding of it as possible. The biggest problem for most people was finding a good rim that worked well with a motorcycle tire. I don't remember exactly what brands, but there are some brands that you definitely want to avoid and others that are very safe to use. I found that out from reading those other forums and hearing how some people struggled while others did not. This issue comes from the fact that you are using a car rim with a motorcycle tire and they aren't exactly designed for one another. That being said each rim manufacturer varies somewhat from one another so some rim work great while other not at all to mount the tire to. The rim brand I went with is NinjaWheels, and the exact rim I bought was the Ninja NJ11. My tire guy had to use a little extra elbow grease to get that tire on there but it went on without any problems and hasn't caused me a single issue since! Now the rim I bought was a 17"x7" rim with a 40mm offset. This offset was too large to fit center when mounted to the hub. So in order to correct the offset, a spacer was necessary. I took a spacer I already had and had it machined to fit my application. I drew up some specs for it in the picture below. Its a 20mm spacer with the 4x100mm holes drilled for the studs to go through and the center cut out in a way to maintain strength and cut weight. (This particular spacer also had 4x114.3mm holes drilled in it that are unnecessary). It may be worth noting that this 20mm spacer was required since the rim used was a 40mm offset. If you choose a different rim with a different offset, the spacer and stud length will need to be adjusted accordingly. With the VFR, I wanted a good sport touring tire, and with the rim being a 7 inch wide rim, my options were limited. That being said I found an amazing tire (that I've bought again for the rear and the front) which is surprisingly, the Shinko Verge 011. Now yes, you dont got to tell me twice about the general perception of shinko's, I know that alot of them are just trash, BUT NOT THE 011 VERGE!!! Haha Since I was searching for a 200/50r17 tire, the Verge kept popping up as one of the few sport touring tires offered in this size, and after reading countless reviews almost entirely 5 star rating, I was sold enough to give it a shot. Now I've used dunlop Q3's and Pilot Road 4's before and they are both amazing tires, but the Verge is honestly just as good! It's a dual compound tire so it's center offers incredible longevity while the sides are very soft and sticky allowing for excellent cornering in the twisties! Plus it does absolutely amazing in the rain! And on top of all that, you just cannot beat its price point of ~$140! Lastly, since you are using a spacer for the rear rim you will need longer wheel studs to account for that. I went with ARP Extended Wheel Studs. Now I used 12.5*1.5 wheel studs that were 2.5 inches long but I ended up having the cut just a little bit off of the tips so that my lug nuts could secure all the way tight. If you can find 2 inch long wheel studs those would probably work, but for the peace of mind that you have as much threads in there making contact with the lug nuts, you can do what I did and just remove any extra as necessary with a hack saw. Also, With this specific rim, there was not enough space for normal lug nuts to fit so i bought a 4 pack of splined lug nuts with the special splined socket that came with it. These are slimmer in profile and fit into the lugnut holes into the rim perfectly. This may or may not be a problem for you depending if you bought the same brand rim as me. One thing worth noting here is that the rear wheel studs are pressed in and will require you to take the hub (once its removed from the bike) to a shop where they can then use a hydraulic press to press out the old studs and press in the new ones. There are ways to do this at home but with this sort of thing I didn't want to risk messing up anything or damaging my hub, so I had a friend at a shop do it for me. After all of that the final thing you need is to slightly modify you chain guard by cutting off on small part of it so it will not rub on your rear wheel. The wheel will have about 1/4 inch of clearance between it and your swing arm when its all done and tight. The slight modification done to the chain guard can be seen in the picture below. Summary List of Parts Used: Ninja NJ11 Rim, 17"x7" size, 40mm Offset, 4*100mm bolt pattern 200/50r17 rear tire, Shinko Verge 011 Custom made, 20mm thick, aluminum wheel spacer (as seen in pictures above) Extend ARP Wheel Studs, 12.5*1.5, 2.5 inches long (with some of the tip of the bolts removed for secure fit) Slight modification to the chain guard (to eliminate any wheel rubbing) The exact process of doing this mod consists of: 1) With the bike on its center stand and in first gear (and possibly with the help of a friend holding the rear brake) brake loose the large hub nut on the left hand side of the swing arm 2) Remove the rear wheel and real break caliper 3) Remove the large hub nut on the left hand side of the bike 4) Loosen the chain bolt and then put all of the slack in the chain 5) Pull the chain off of the rear sprocket and let it hang down onto the ground 6) Pull off the left hand side of the rear hub assembly (the big bowl like piece the sprocket is bolted to) 7) Slide out the rear axle/hub out the right side of the swing arm 😎 Replace the wheel studs as described above 9) Reassemble in reverse order of the steps described above with the new wheel And here's Just a bunch of pics of the bike with the wheel! Please wheel free to ask any questions or comment below!
- 15 replies
-
- 1
-

-
- aftermarket
- custom
- (and 8 more)
-
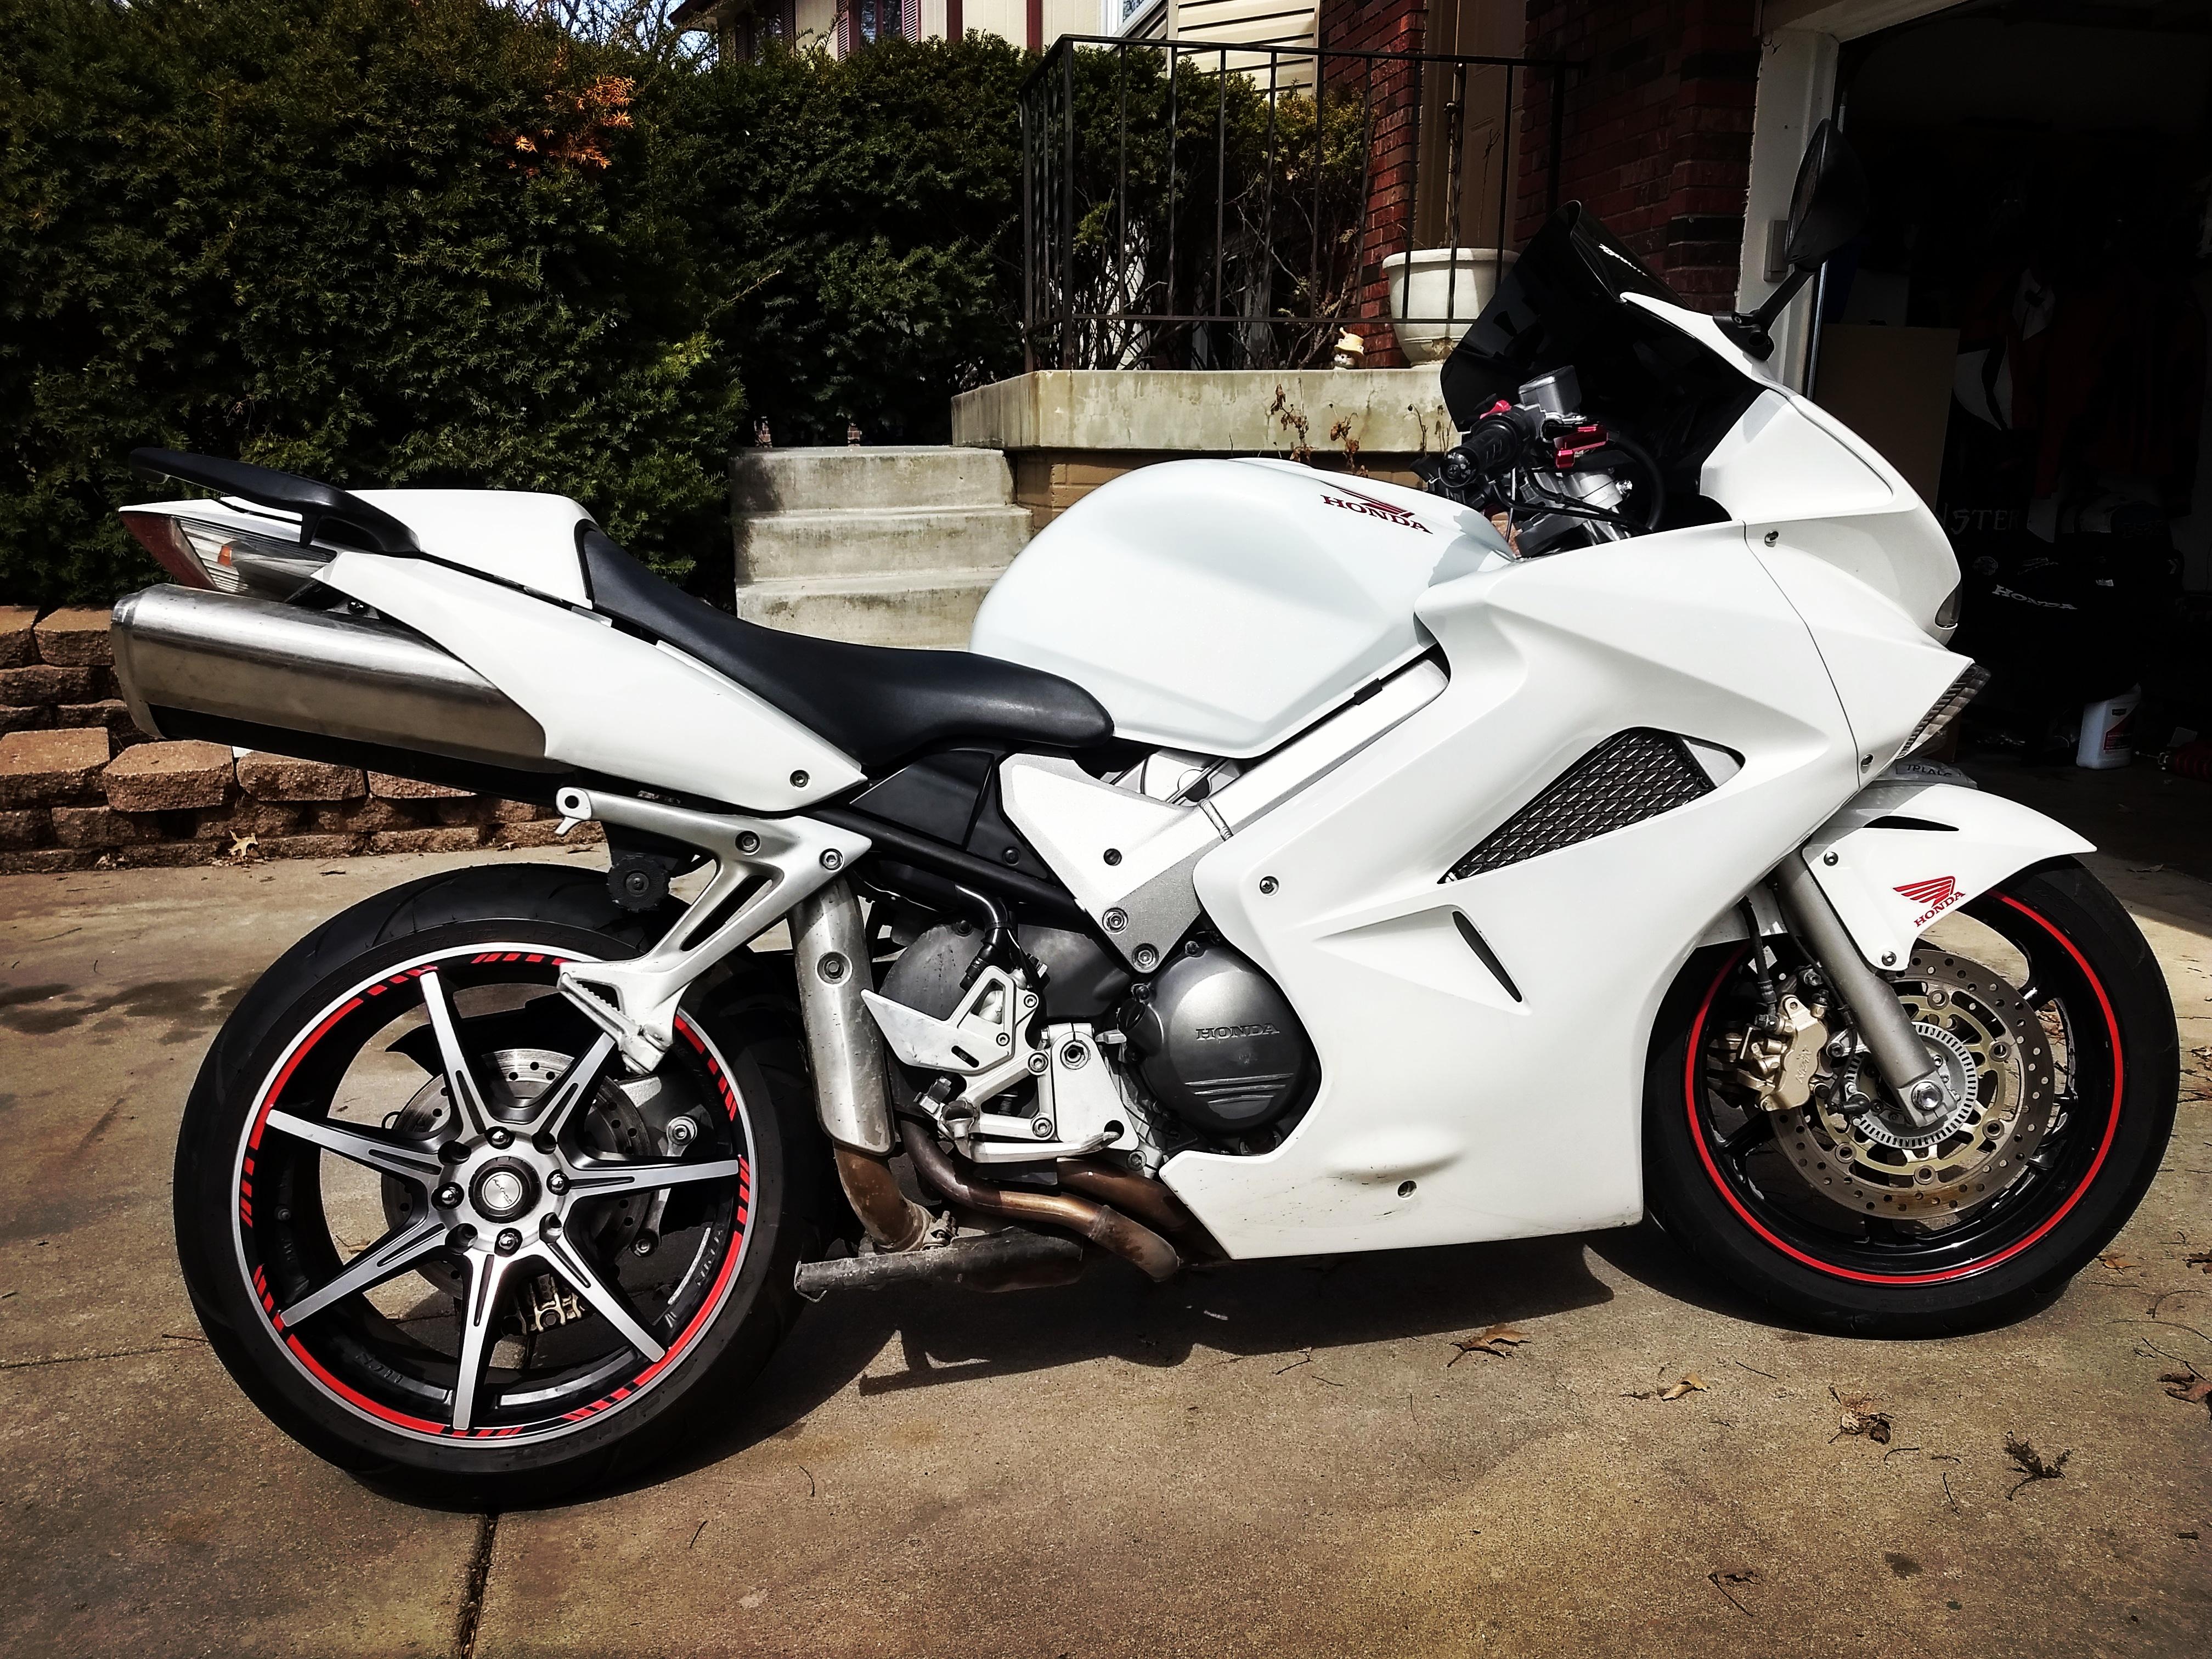
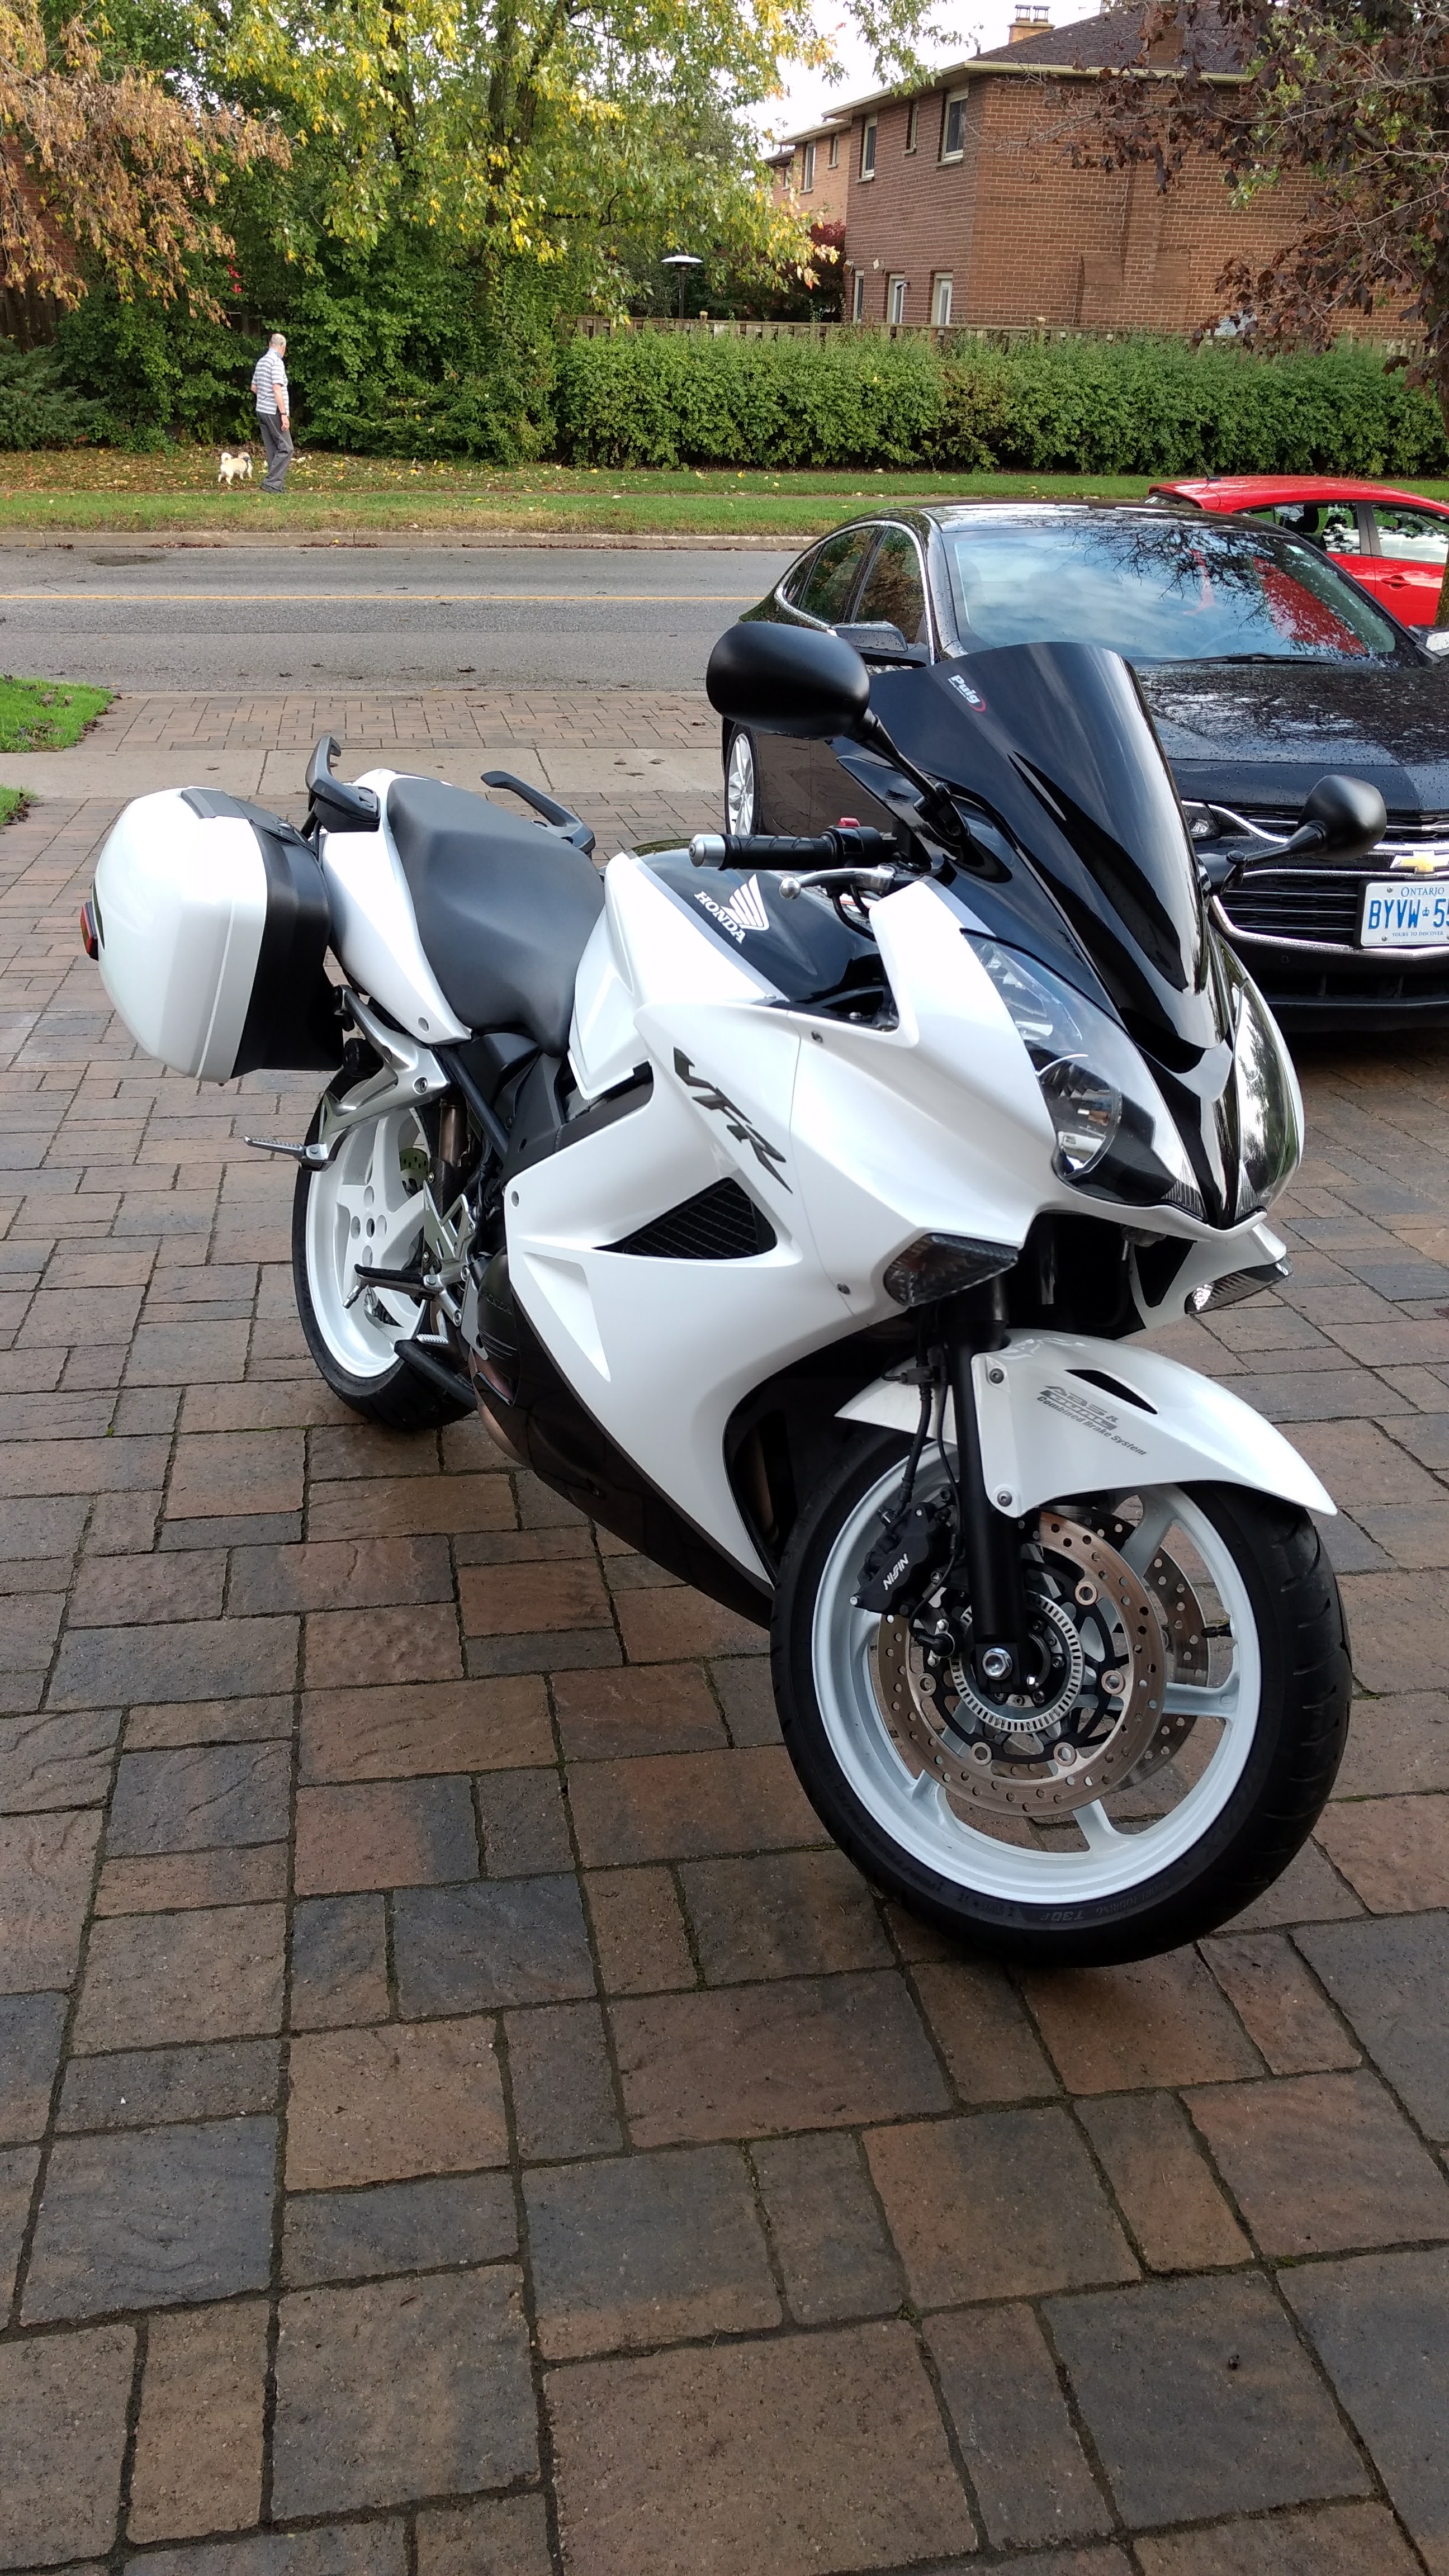
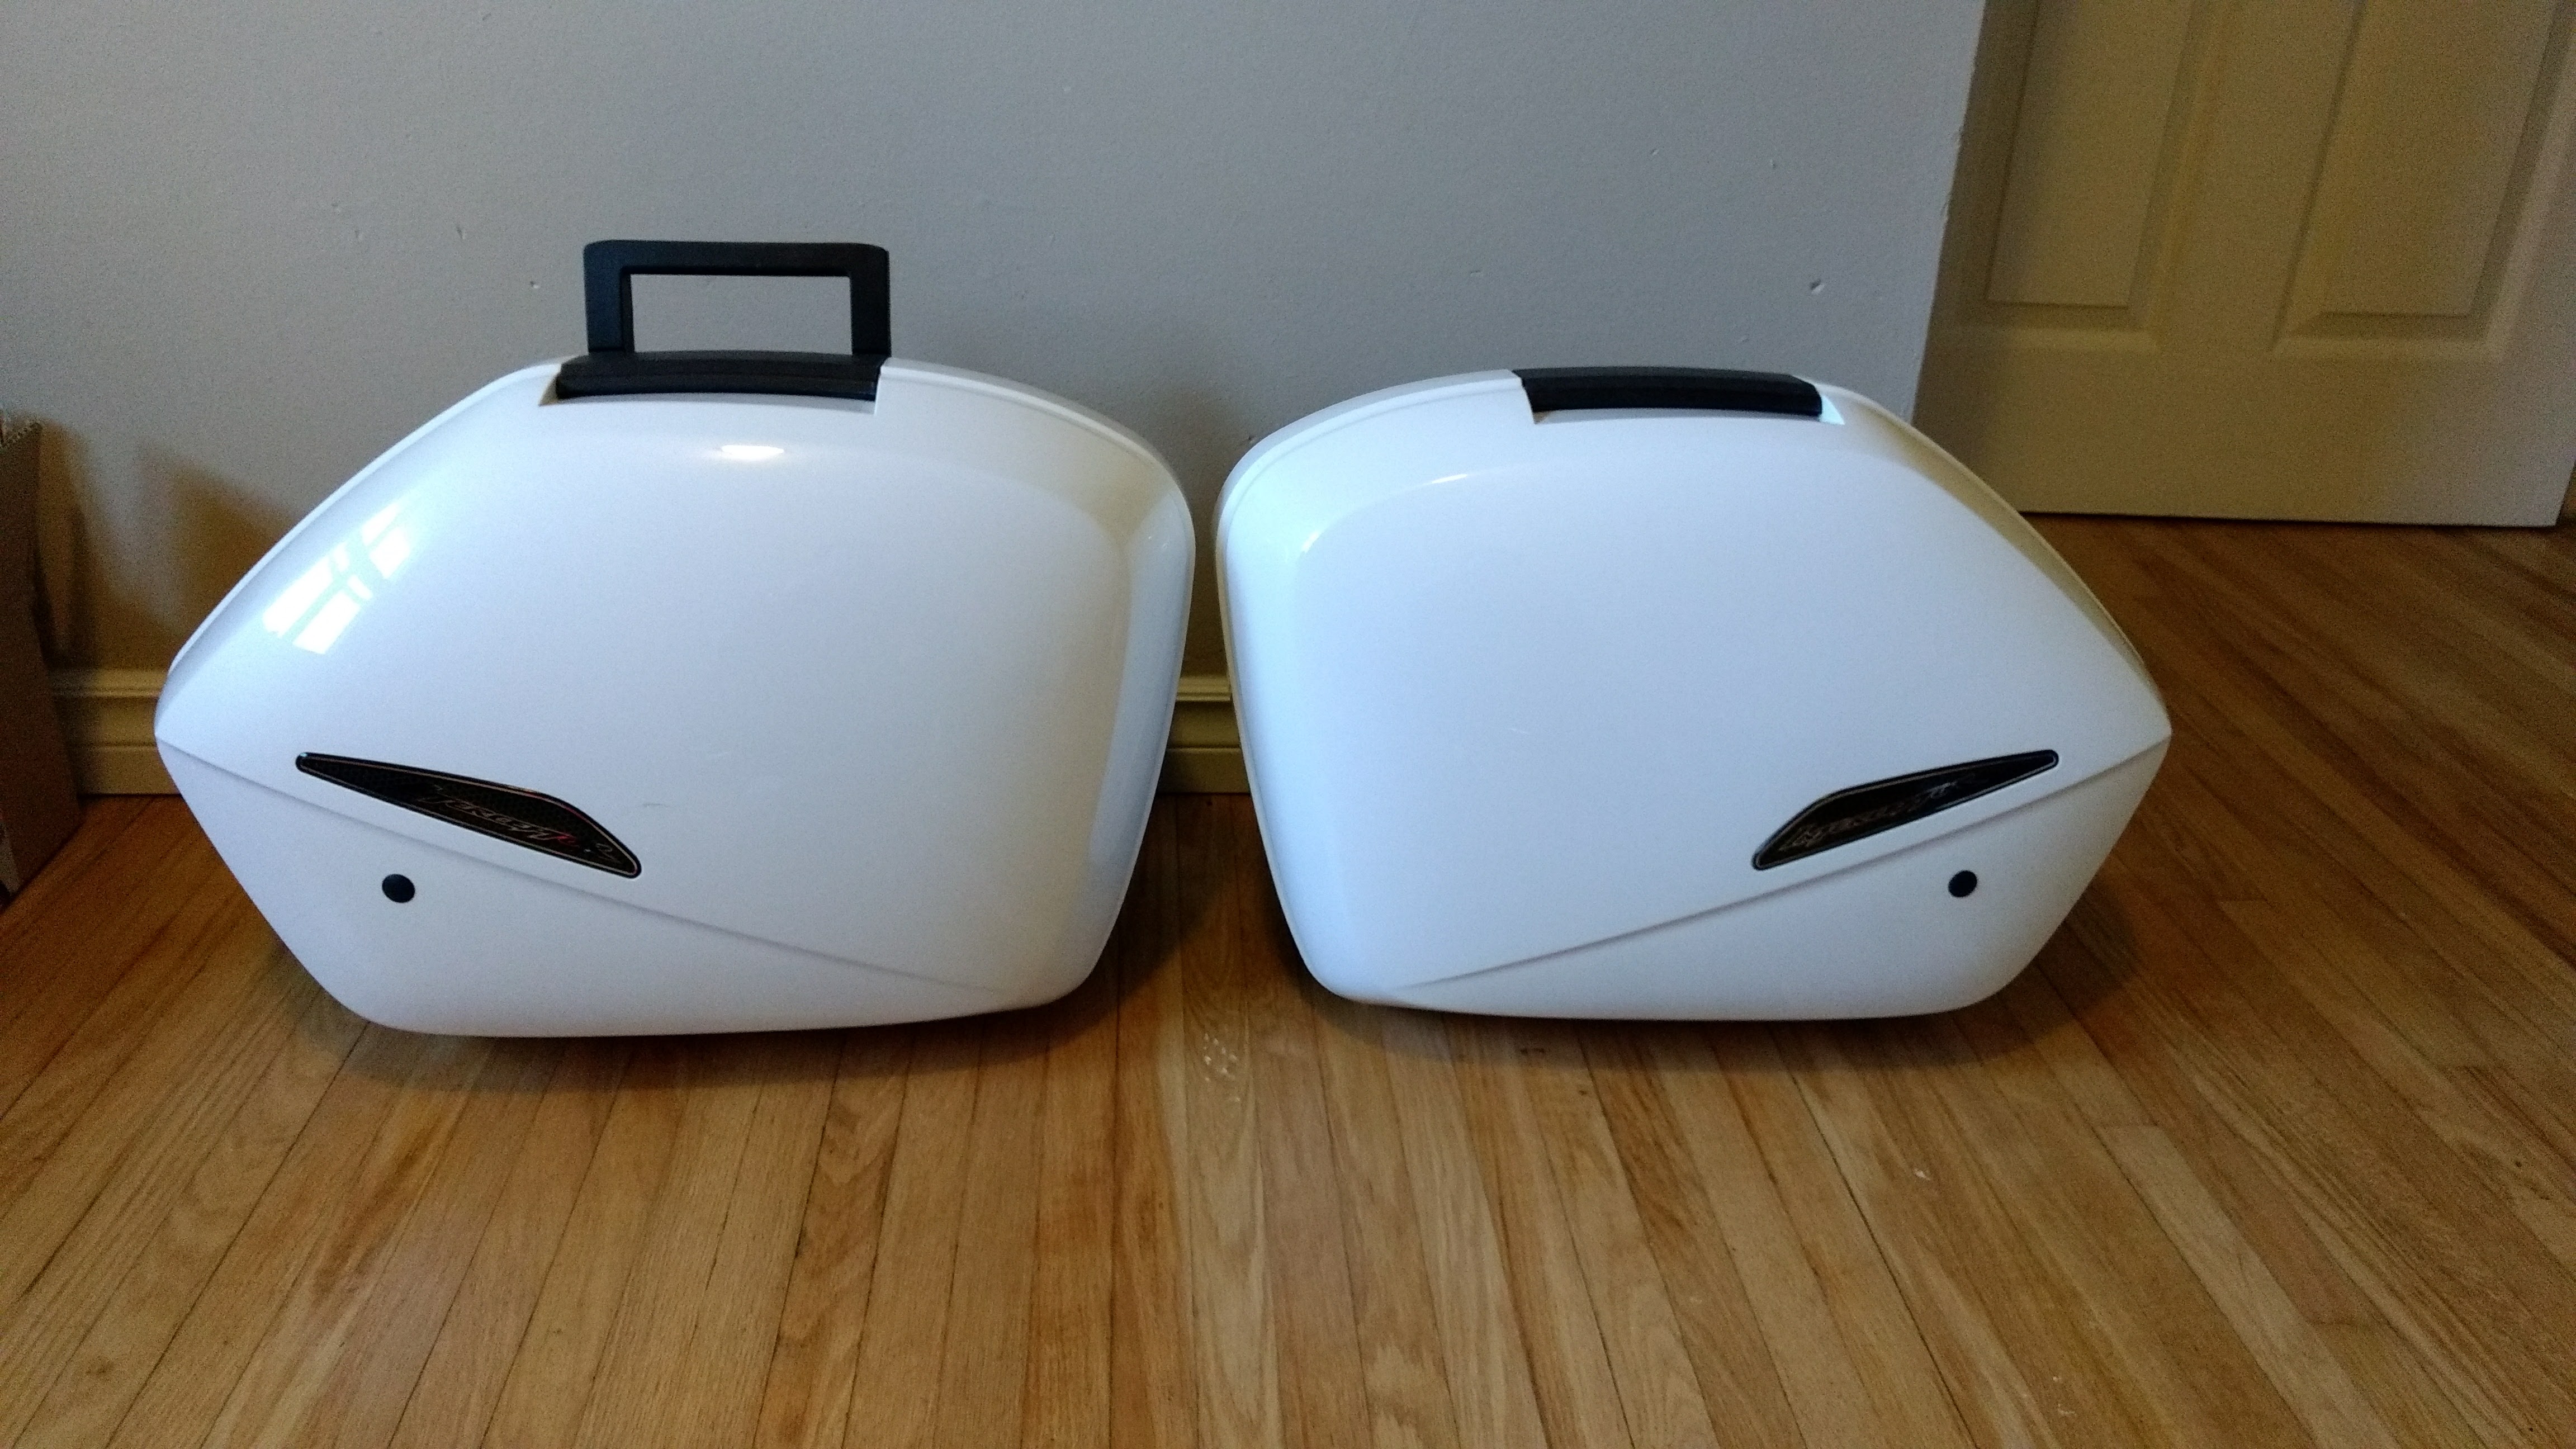
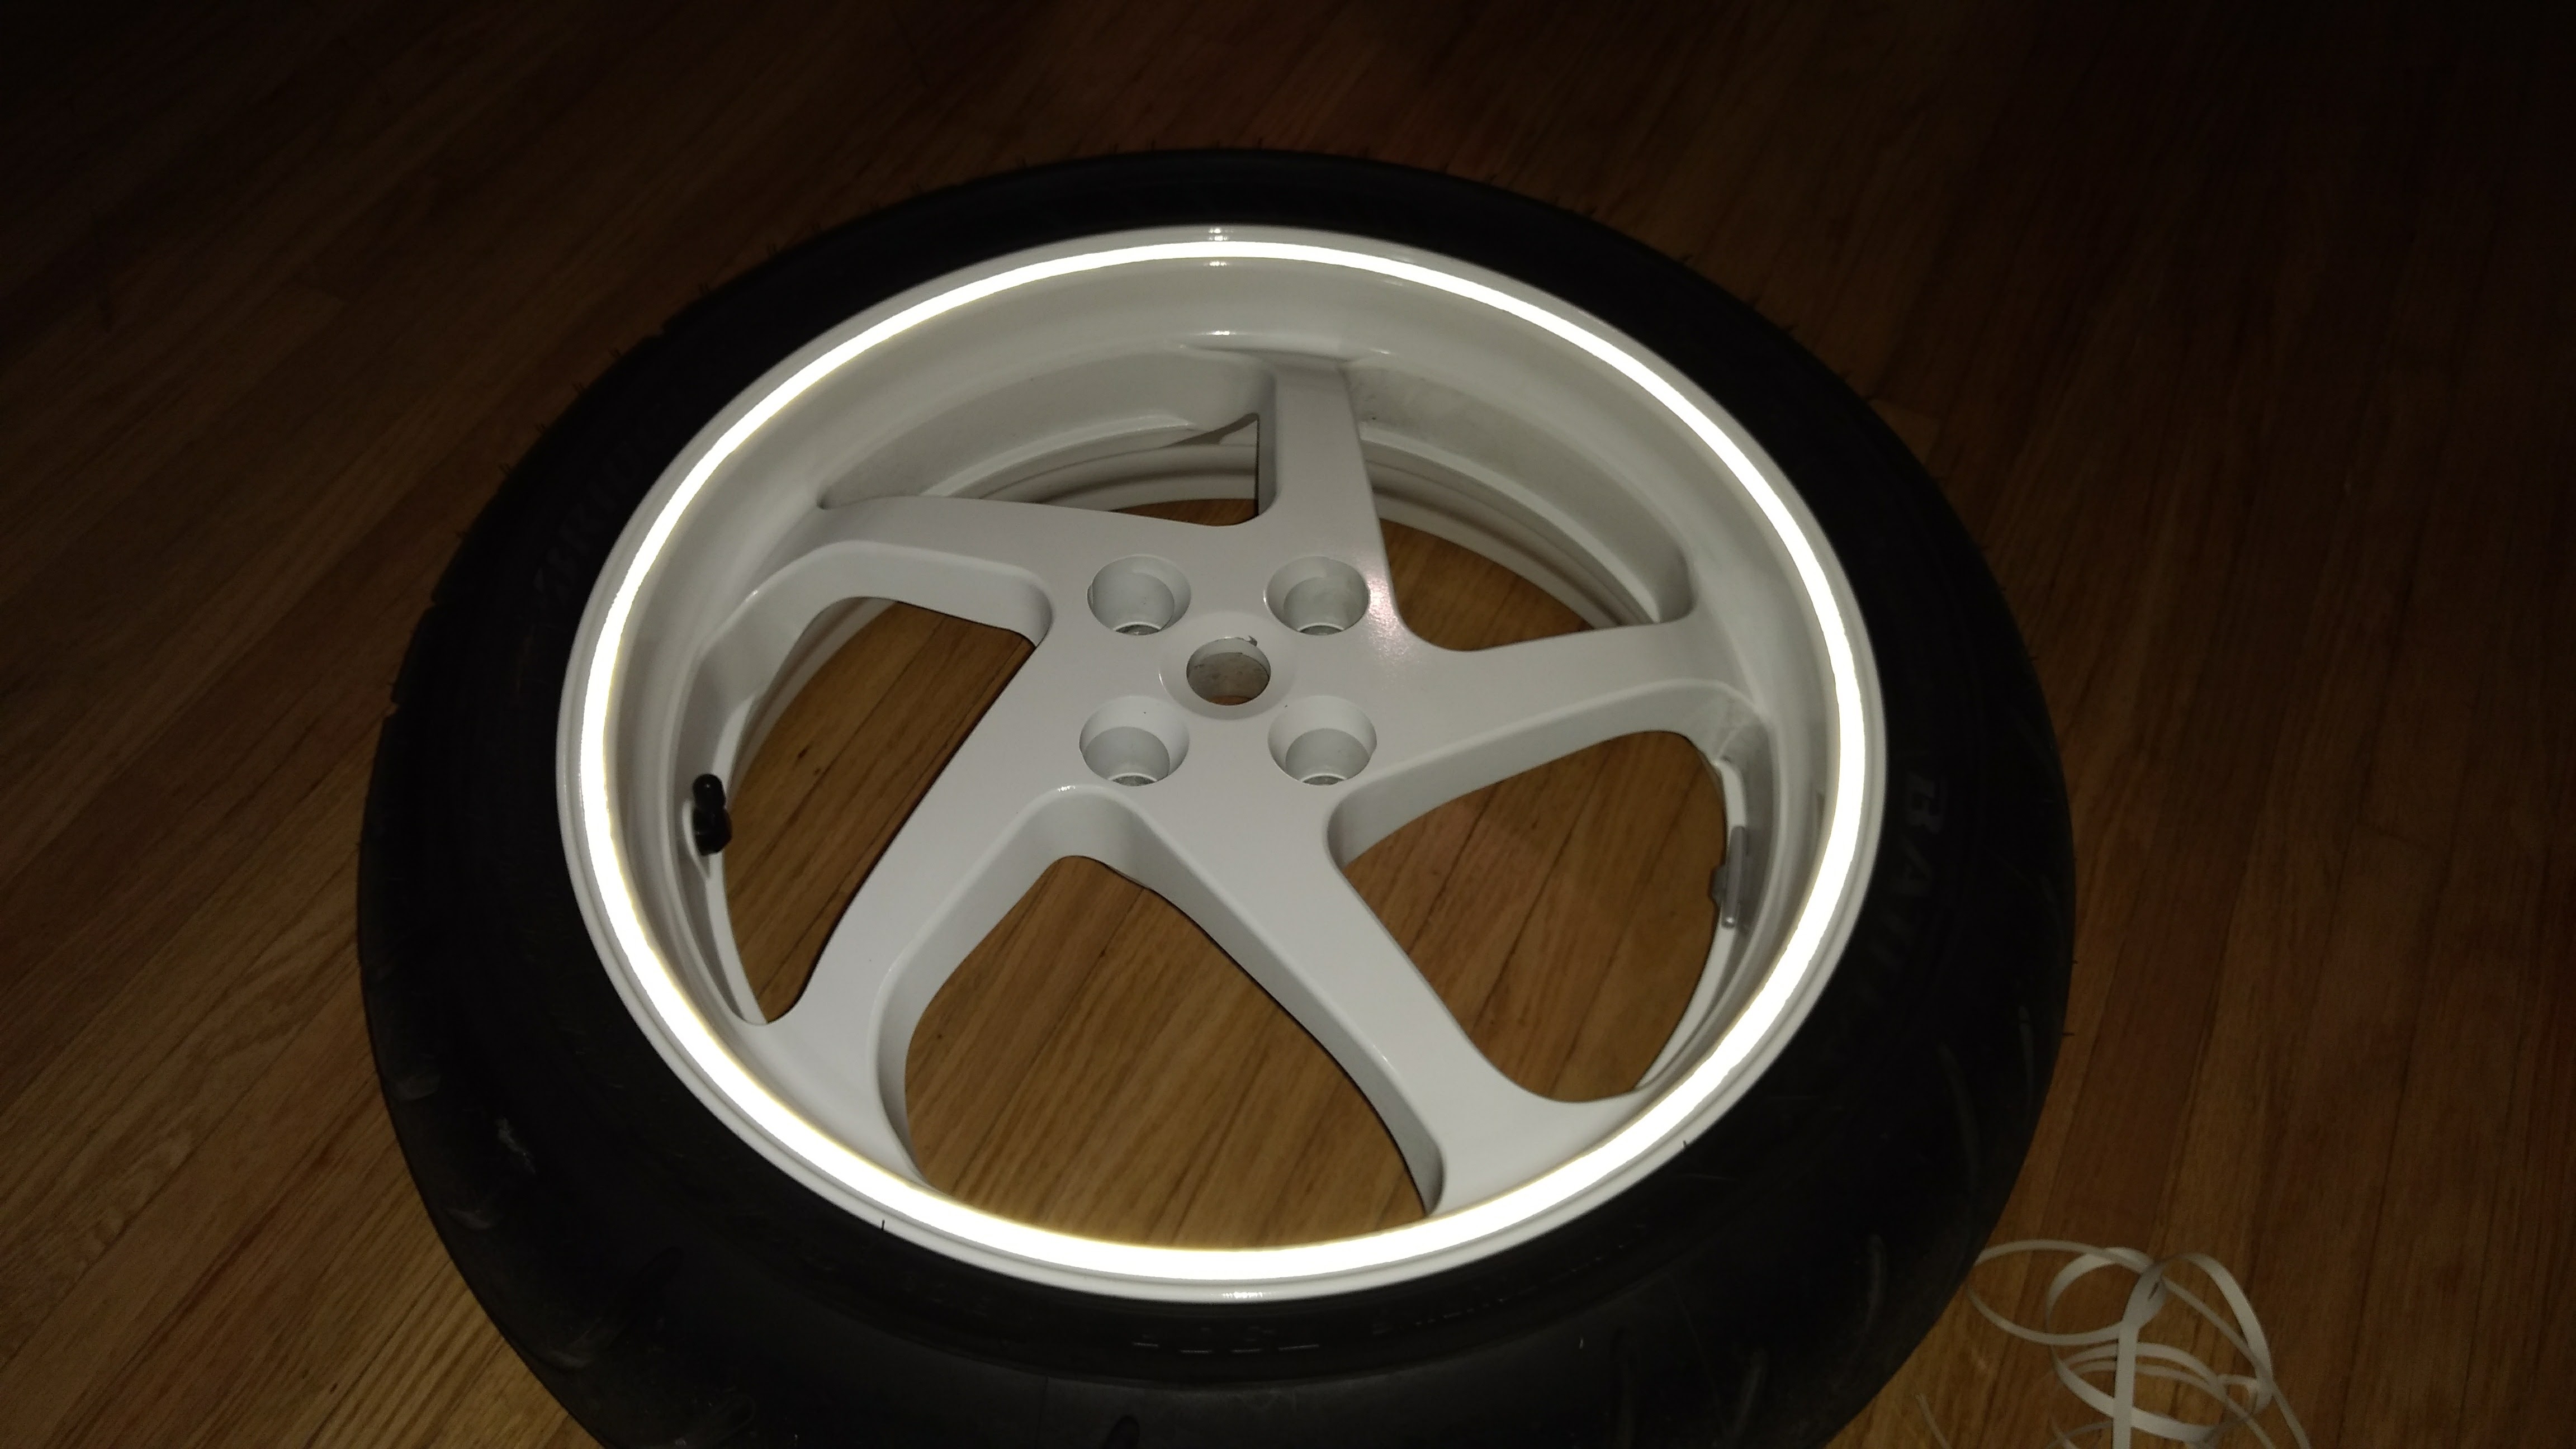
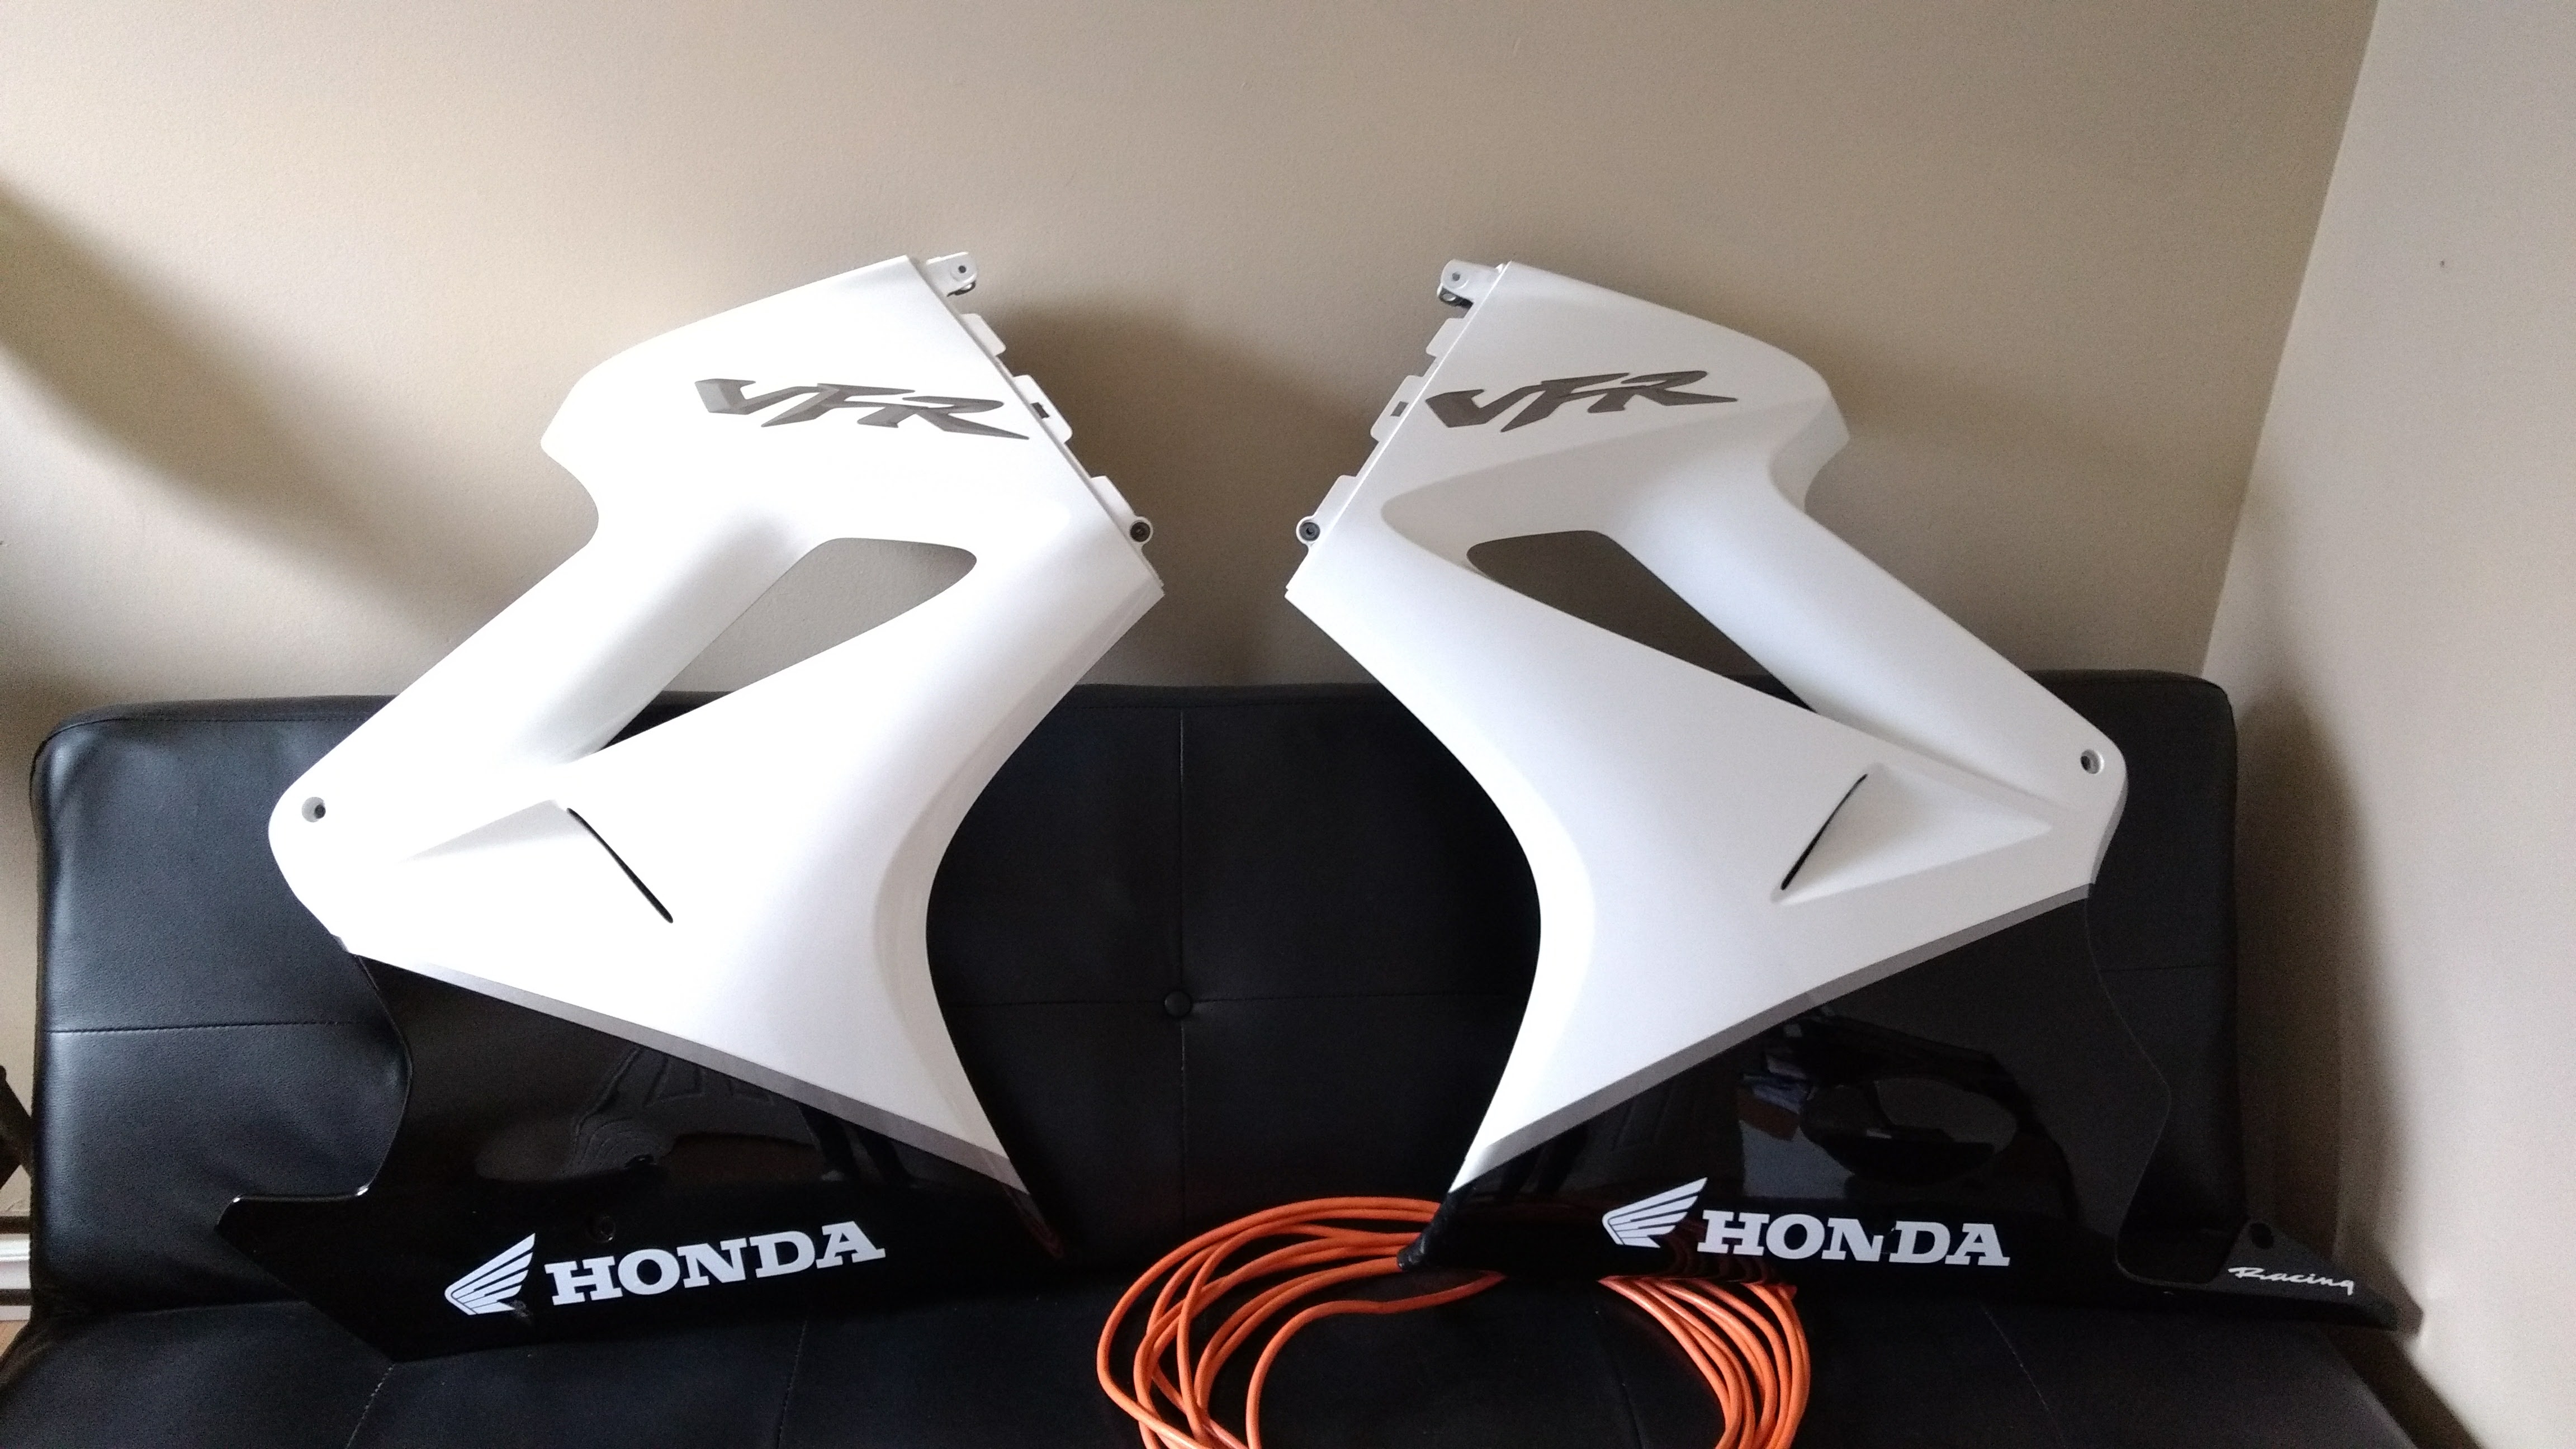
Hey All, First time VFR owner and first time poster. I've been a Triumph thoroughbred for a while now - owning both a Street Triple and Thunderbird - I decided I wanted something a bit more sport touring. A few family friends own VFR's from various generations and I have heard nothing but good things about them. So I decided to buy a 2009 VFR800 to add to my stable. The previous owner did some tasteful mods to it such as Honda hard bags, leovince exhaust, tail tidy and a double bubble windshield. To add my own touch to it I'm adding a few mods to it myself - honda logos on lower portion of the fairing, reflective rim stripes and a rear tire hugger from red fox (waiting for it in the mail). In addition I wanted to create a new tail tidy as I noticed without any form of mud guard, the tail lights get coated in road grime and dirt and muck which reduces their effectiveness (plus they are getting sandblasted.) I am making a new inner rear fender to cover up the gap in between the exhaust behind the tail tidy. My ultimate goal is to cast my prototype in carbon fiber. Take a look and let me know your thoughts or if you have any suggestions.
-
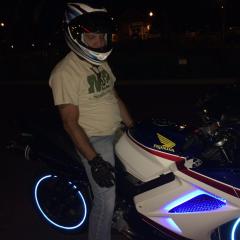
It’s actually dark blue on the sidedsides , numberd are white inplace of red... Guyes, something to ponder for a very Reasonable price ... bluegauges.com
-
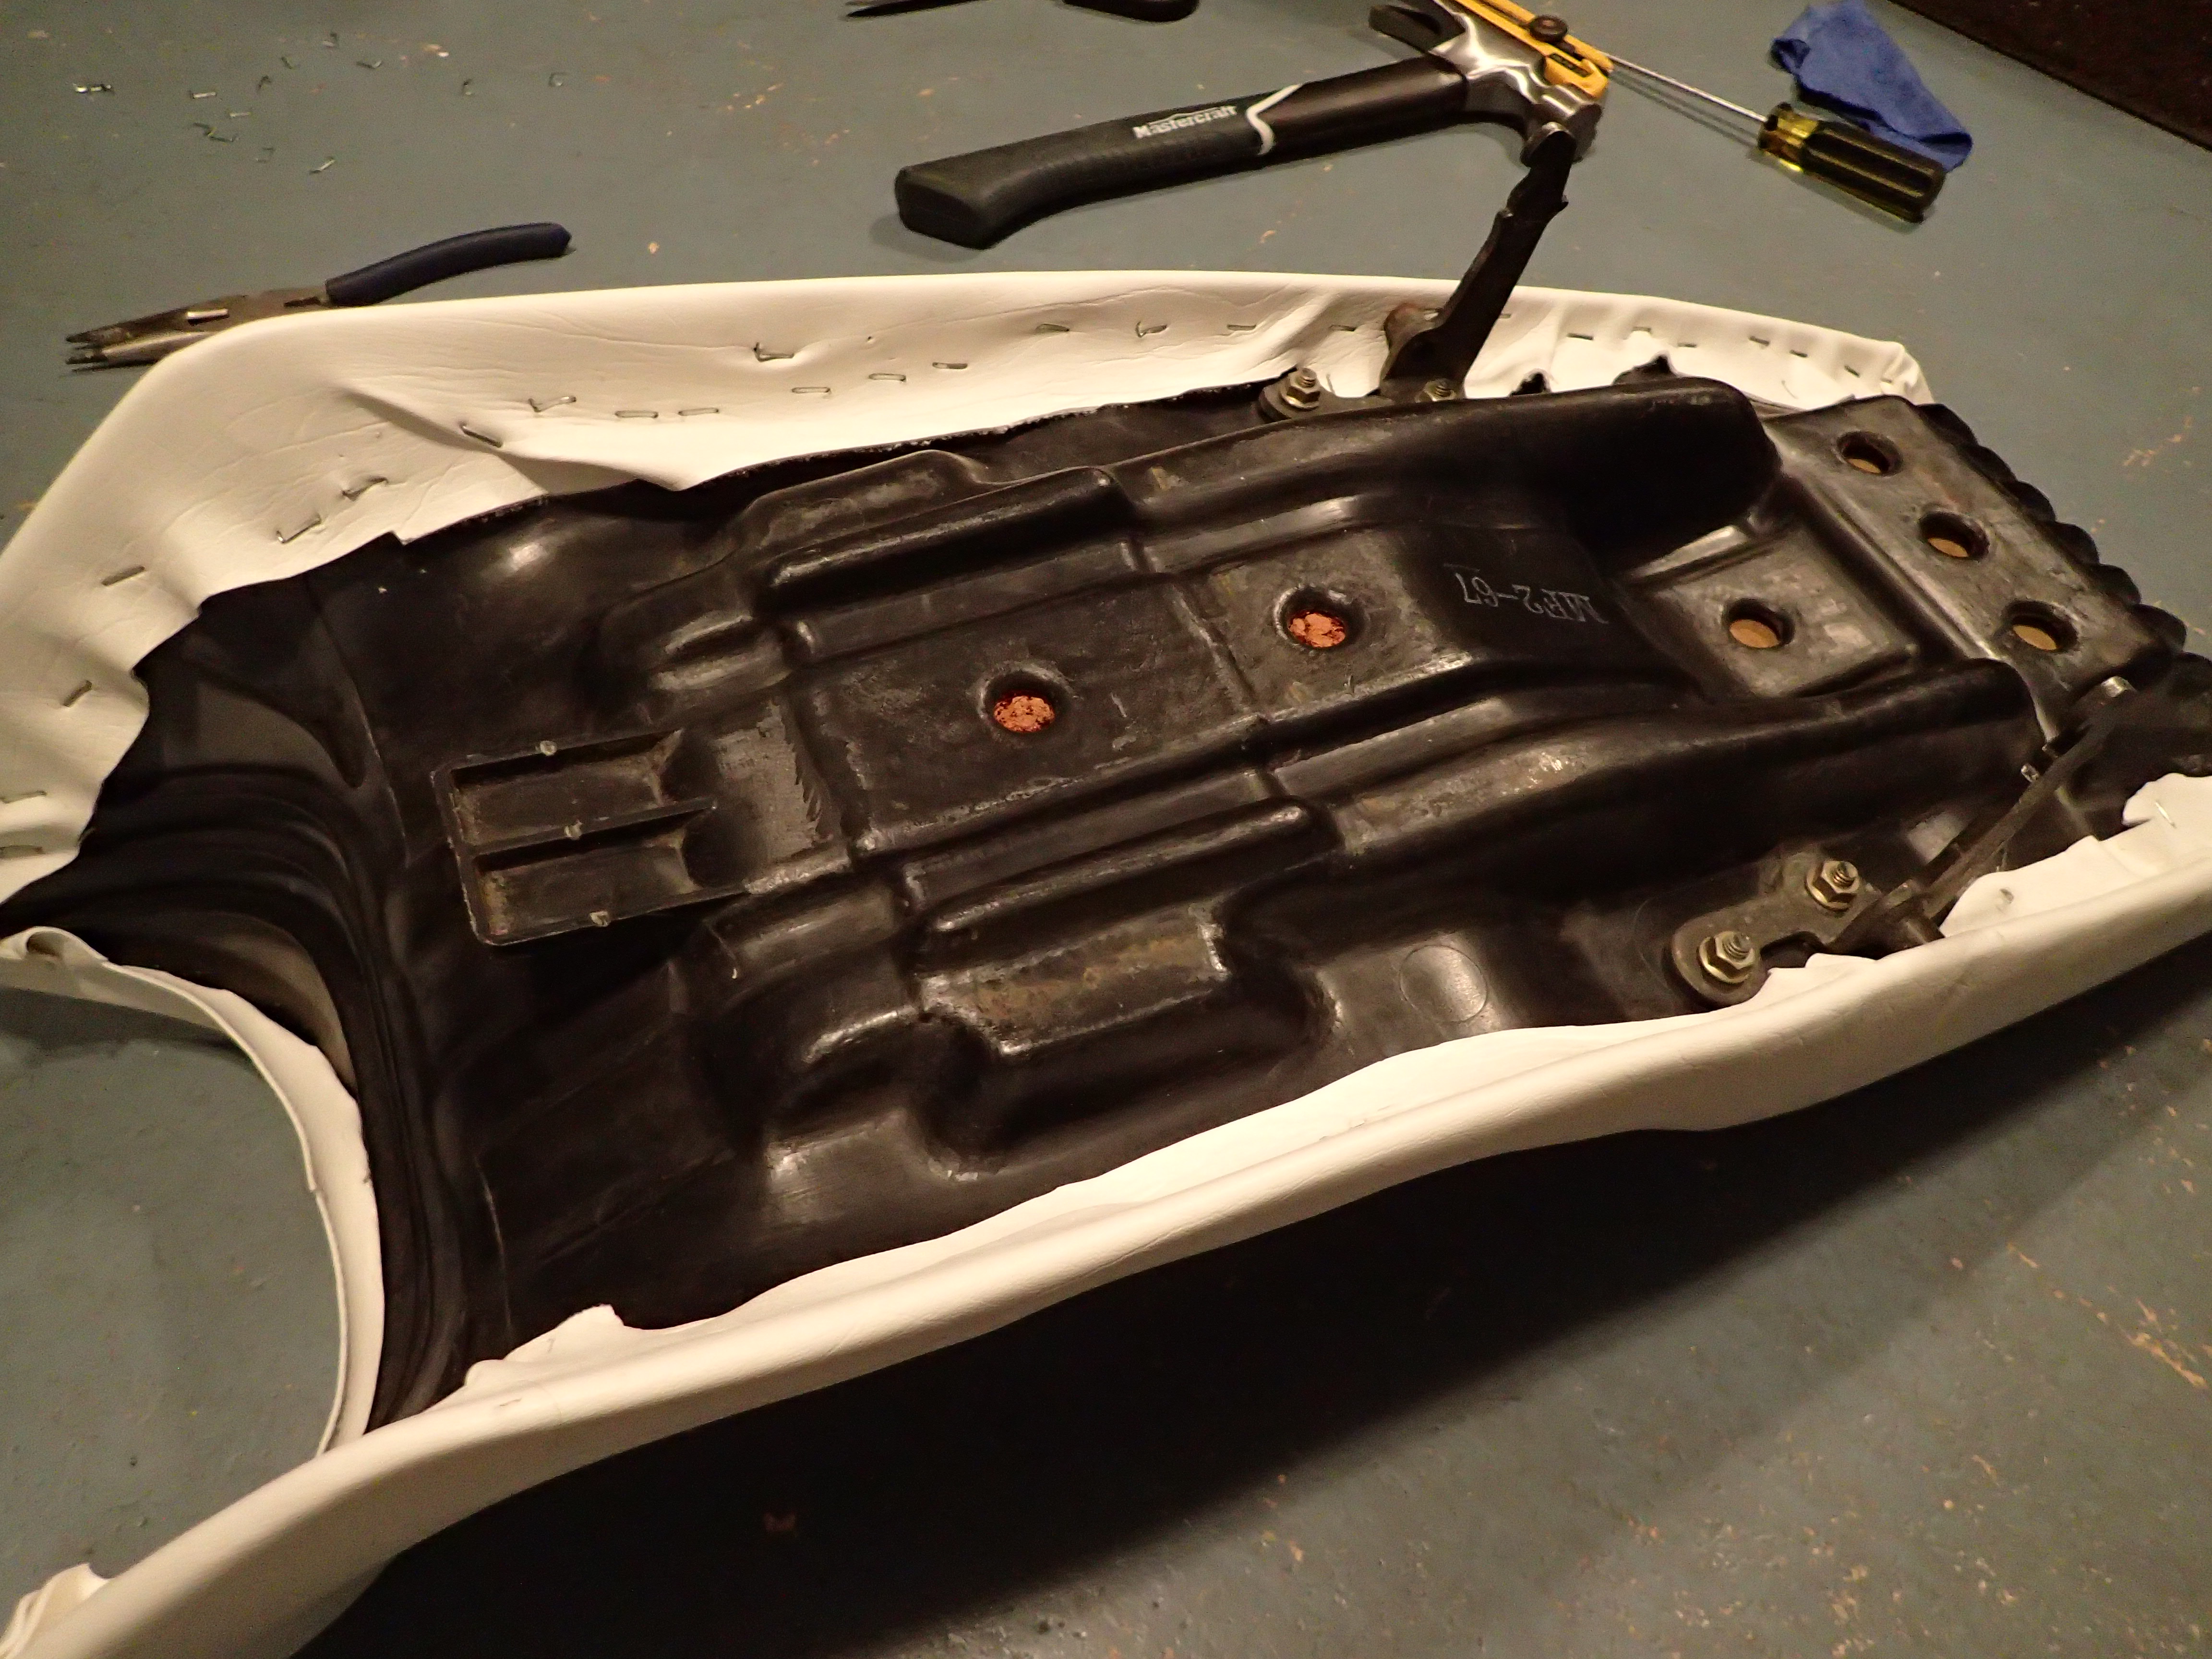
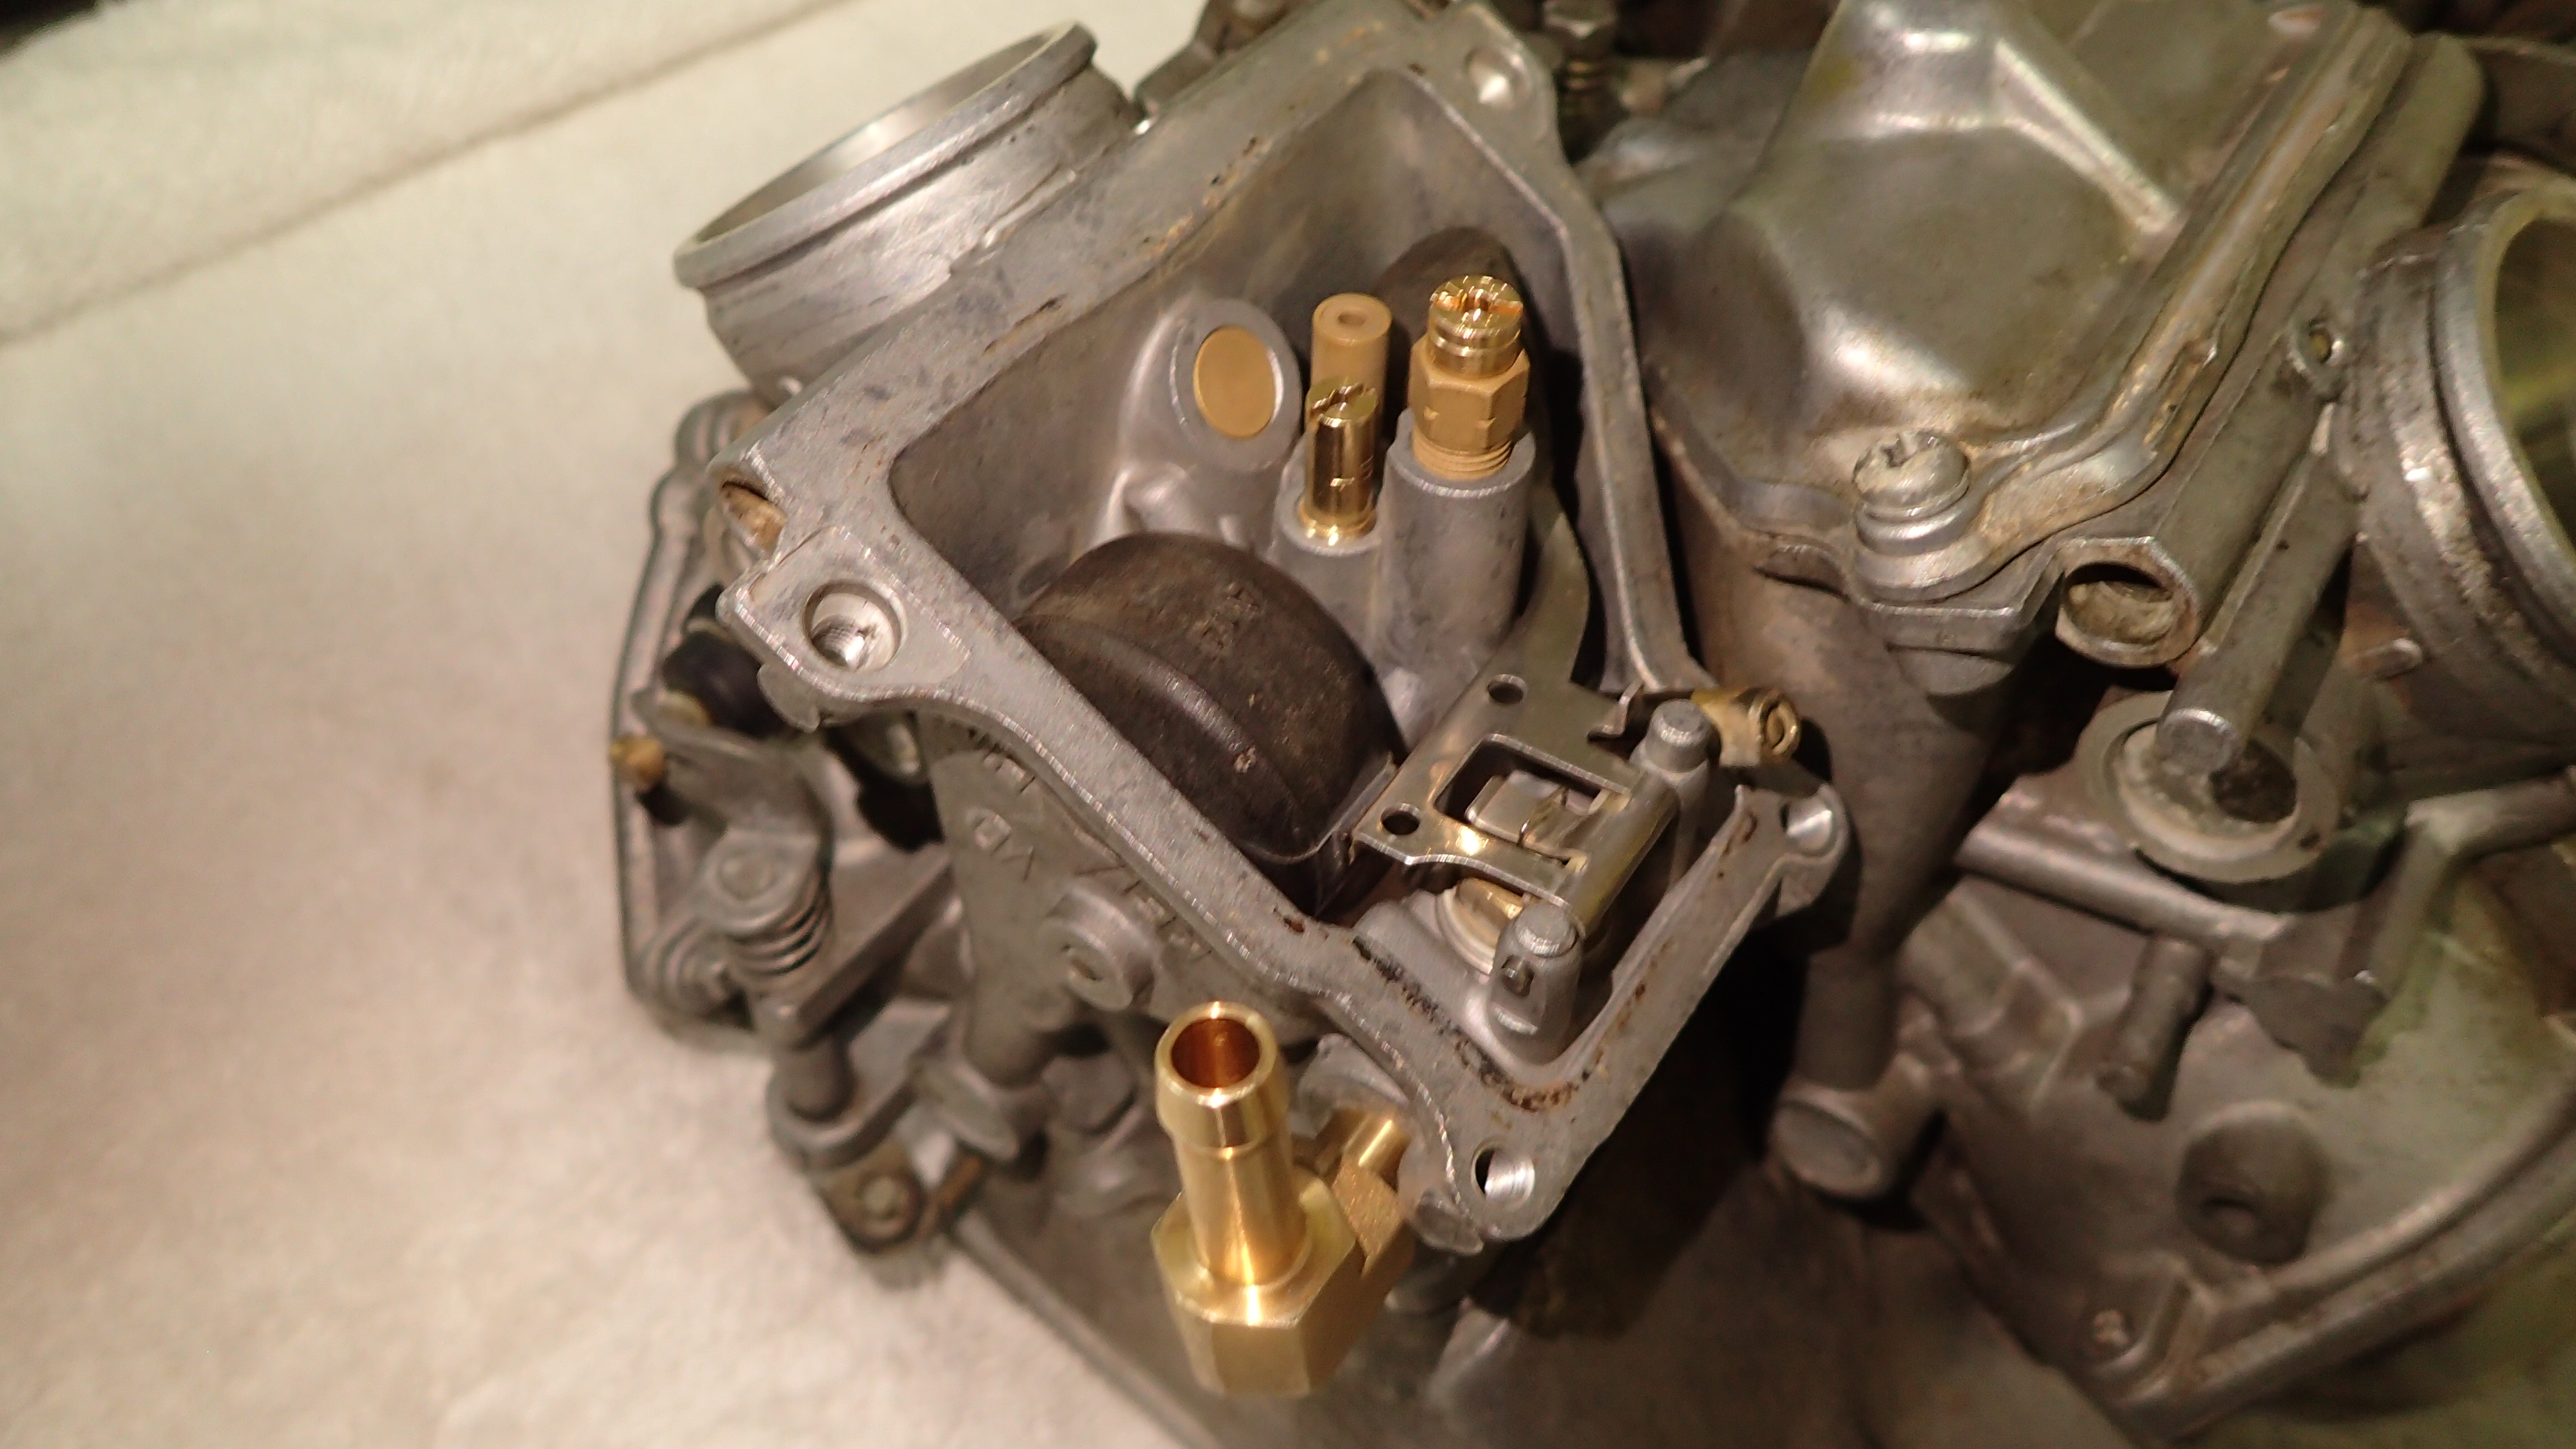
Welcome! This will be a thread where I show off the finished product(s) of my VF500 Resto-mod. I will only be featuring work I have done or modified myself. I will not be including specifics on how I did things here, but I will answer smaller questions. If you too are working on a VF500 you may want to see my other thread where I've been back and forth asking questions to the forum on how to solve problems with my build. My motorcycle is a 1984 VF500F. I picked it up with 56,000km on it. I have been restoring it inside and out. I am replacing parts that I think are outdated, for the purpose of either making it look better or preform better. Besides bolstering the performance I am changing the look of the bike from it's boxy-retro look, and into a bit of a streetfighter or cafe-racer. One thing you will notice about this build is that it is not going to be a perfect show-bike finish. The simple answer to this is the fact that I can not afford the tools or materials, nor do I have the expertise to do it anyways. This bike is ultra-low budget. Wheels I sanded down the old paint and metal. I fitted modern radial tires that give it a lower profile (and in my opinion a cleaner look). Then I painted the red and white using Duplicolor wheel spray paint. Seat Being vertically challenged, I reshaped the foam of the seat while I was recovering it with new vinyl. Handlebars/Mirrors I pulled the cores out of the stock handlebars so that I can fit bar-end mirrors. Used a drill, tap and a slide hammer. Mirrors are in the mail. Carburetors After cleaning the carbs I put bigger jets in to accommodate a straight pipe and K&N air filter. I also did a mod that Dutchy taught me about where you drill an additional fuel line, to prevent a lean mixture on the fourth and third carb. Fourth carb with jets and extra fuel-in^
-
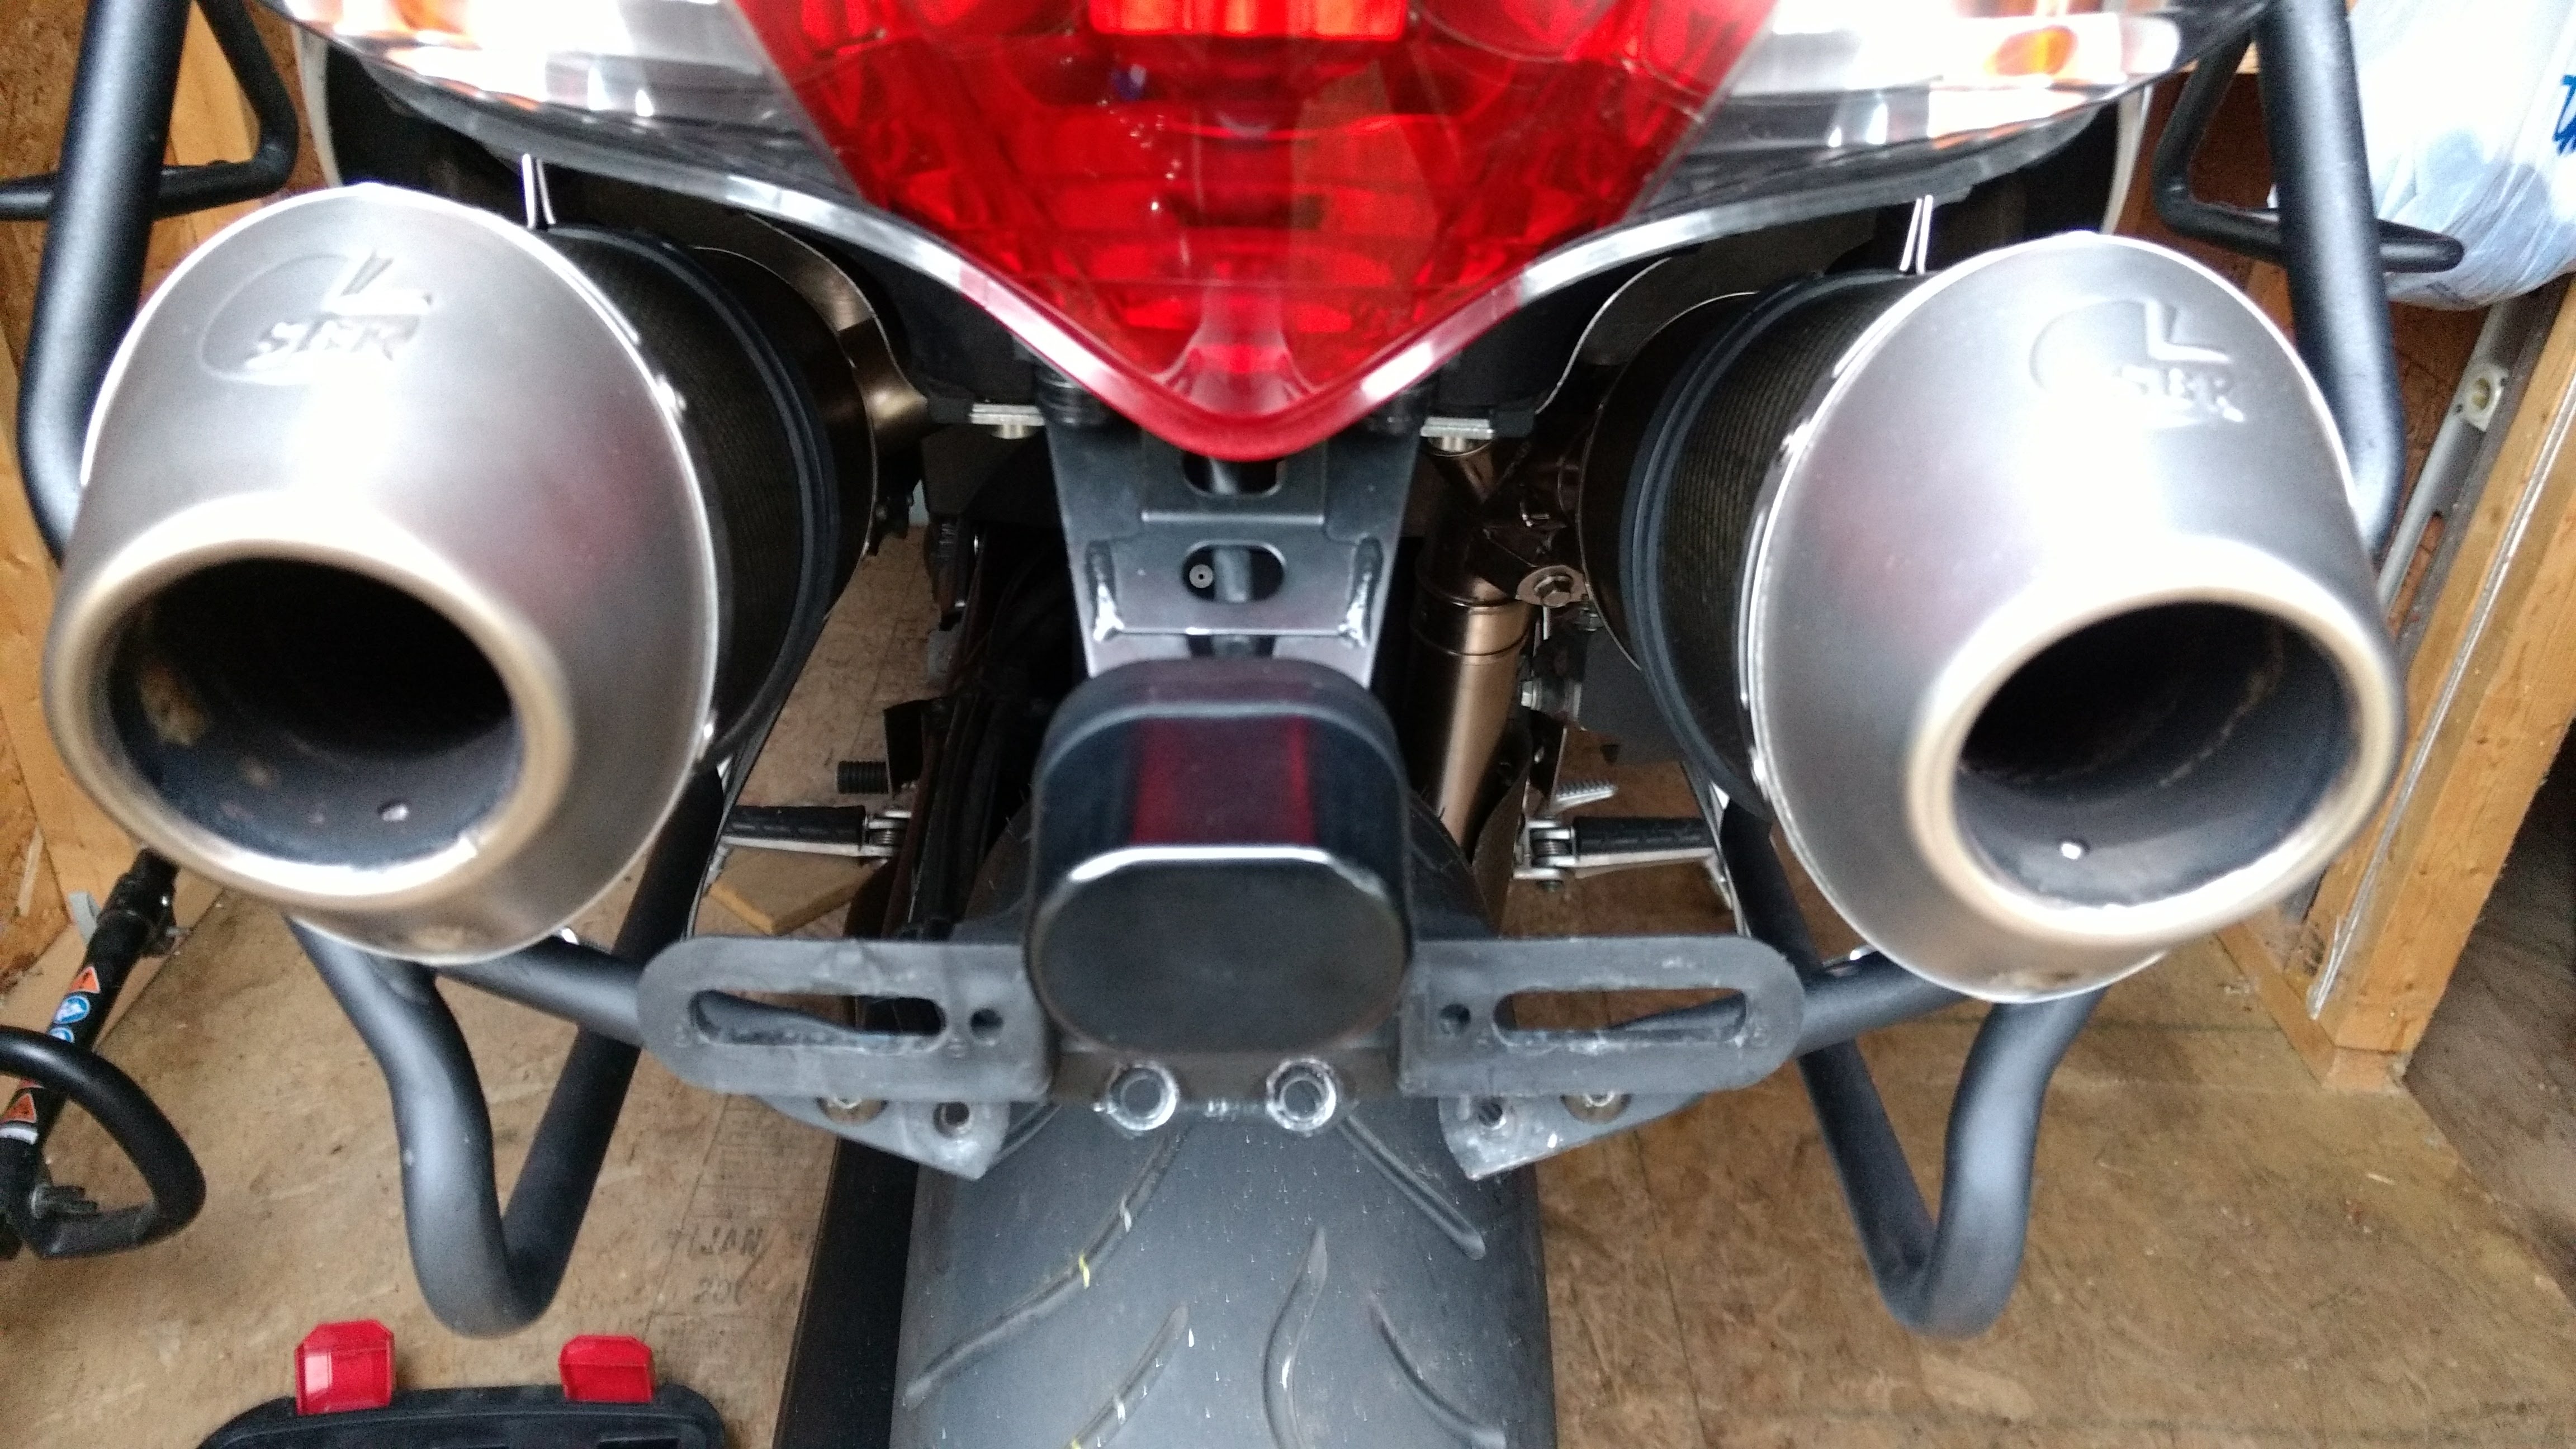
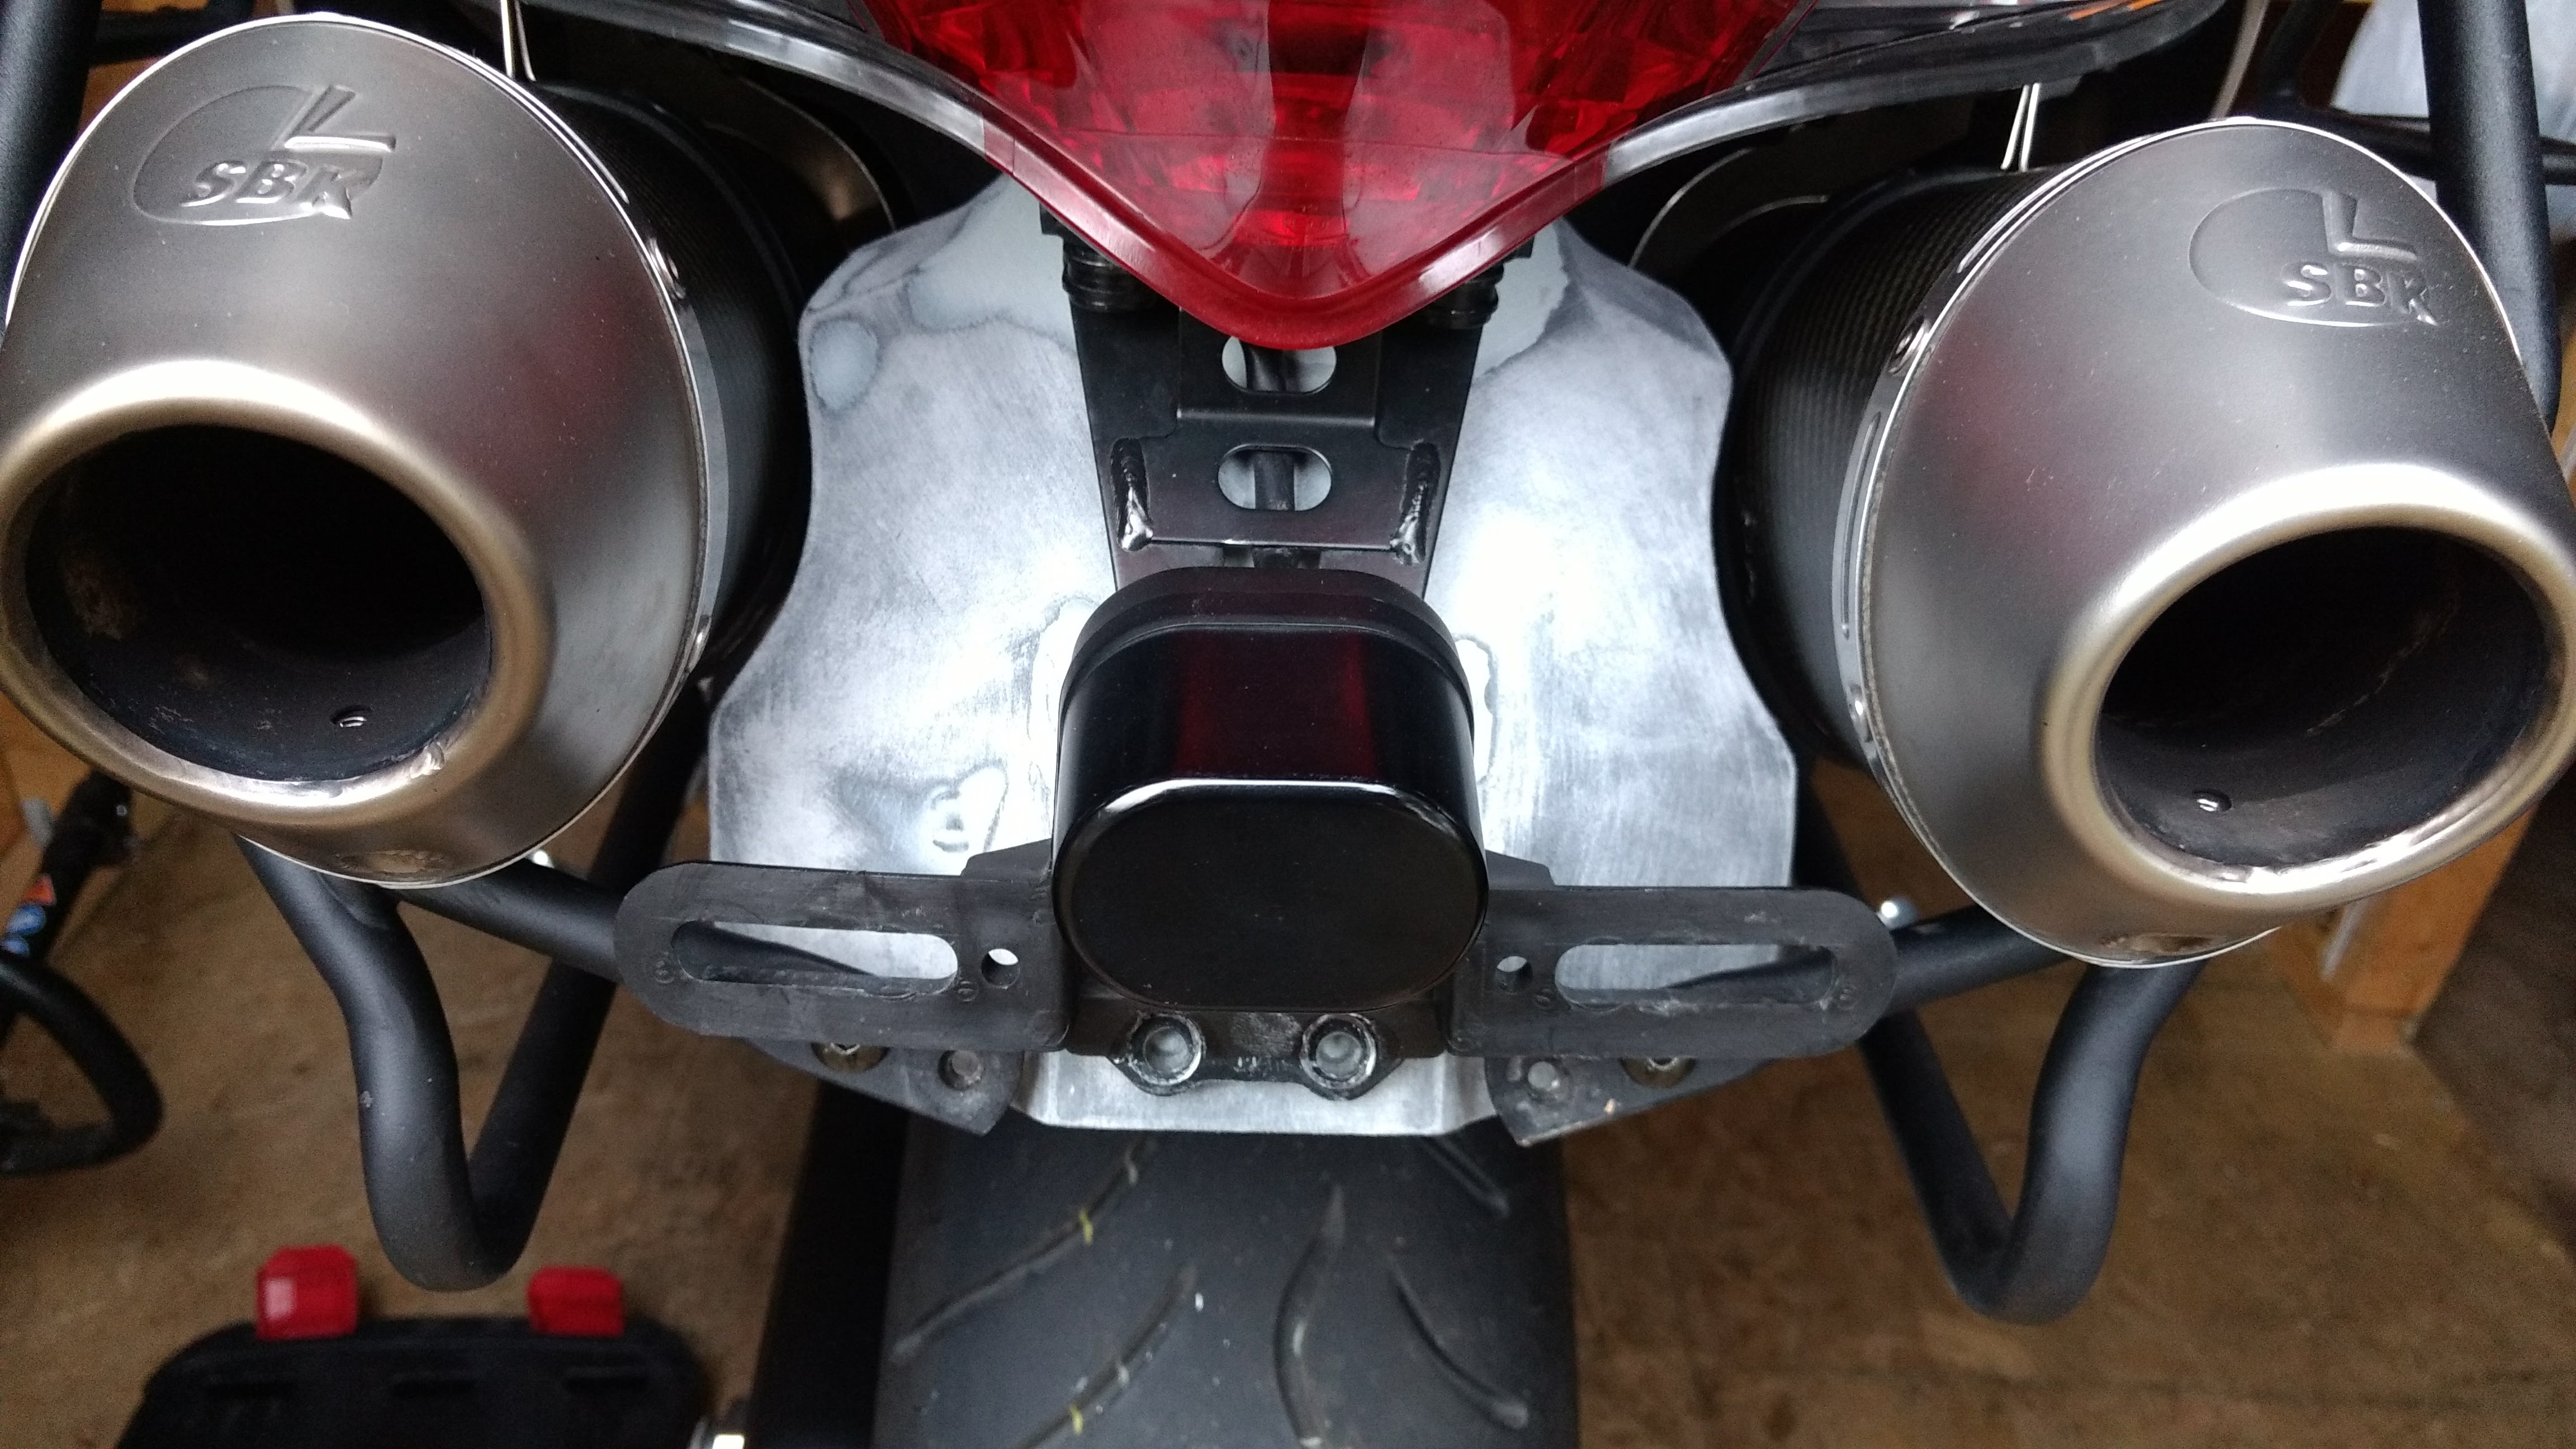
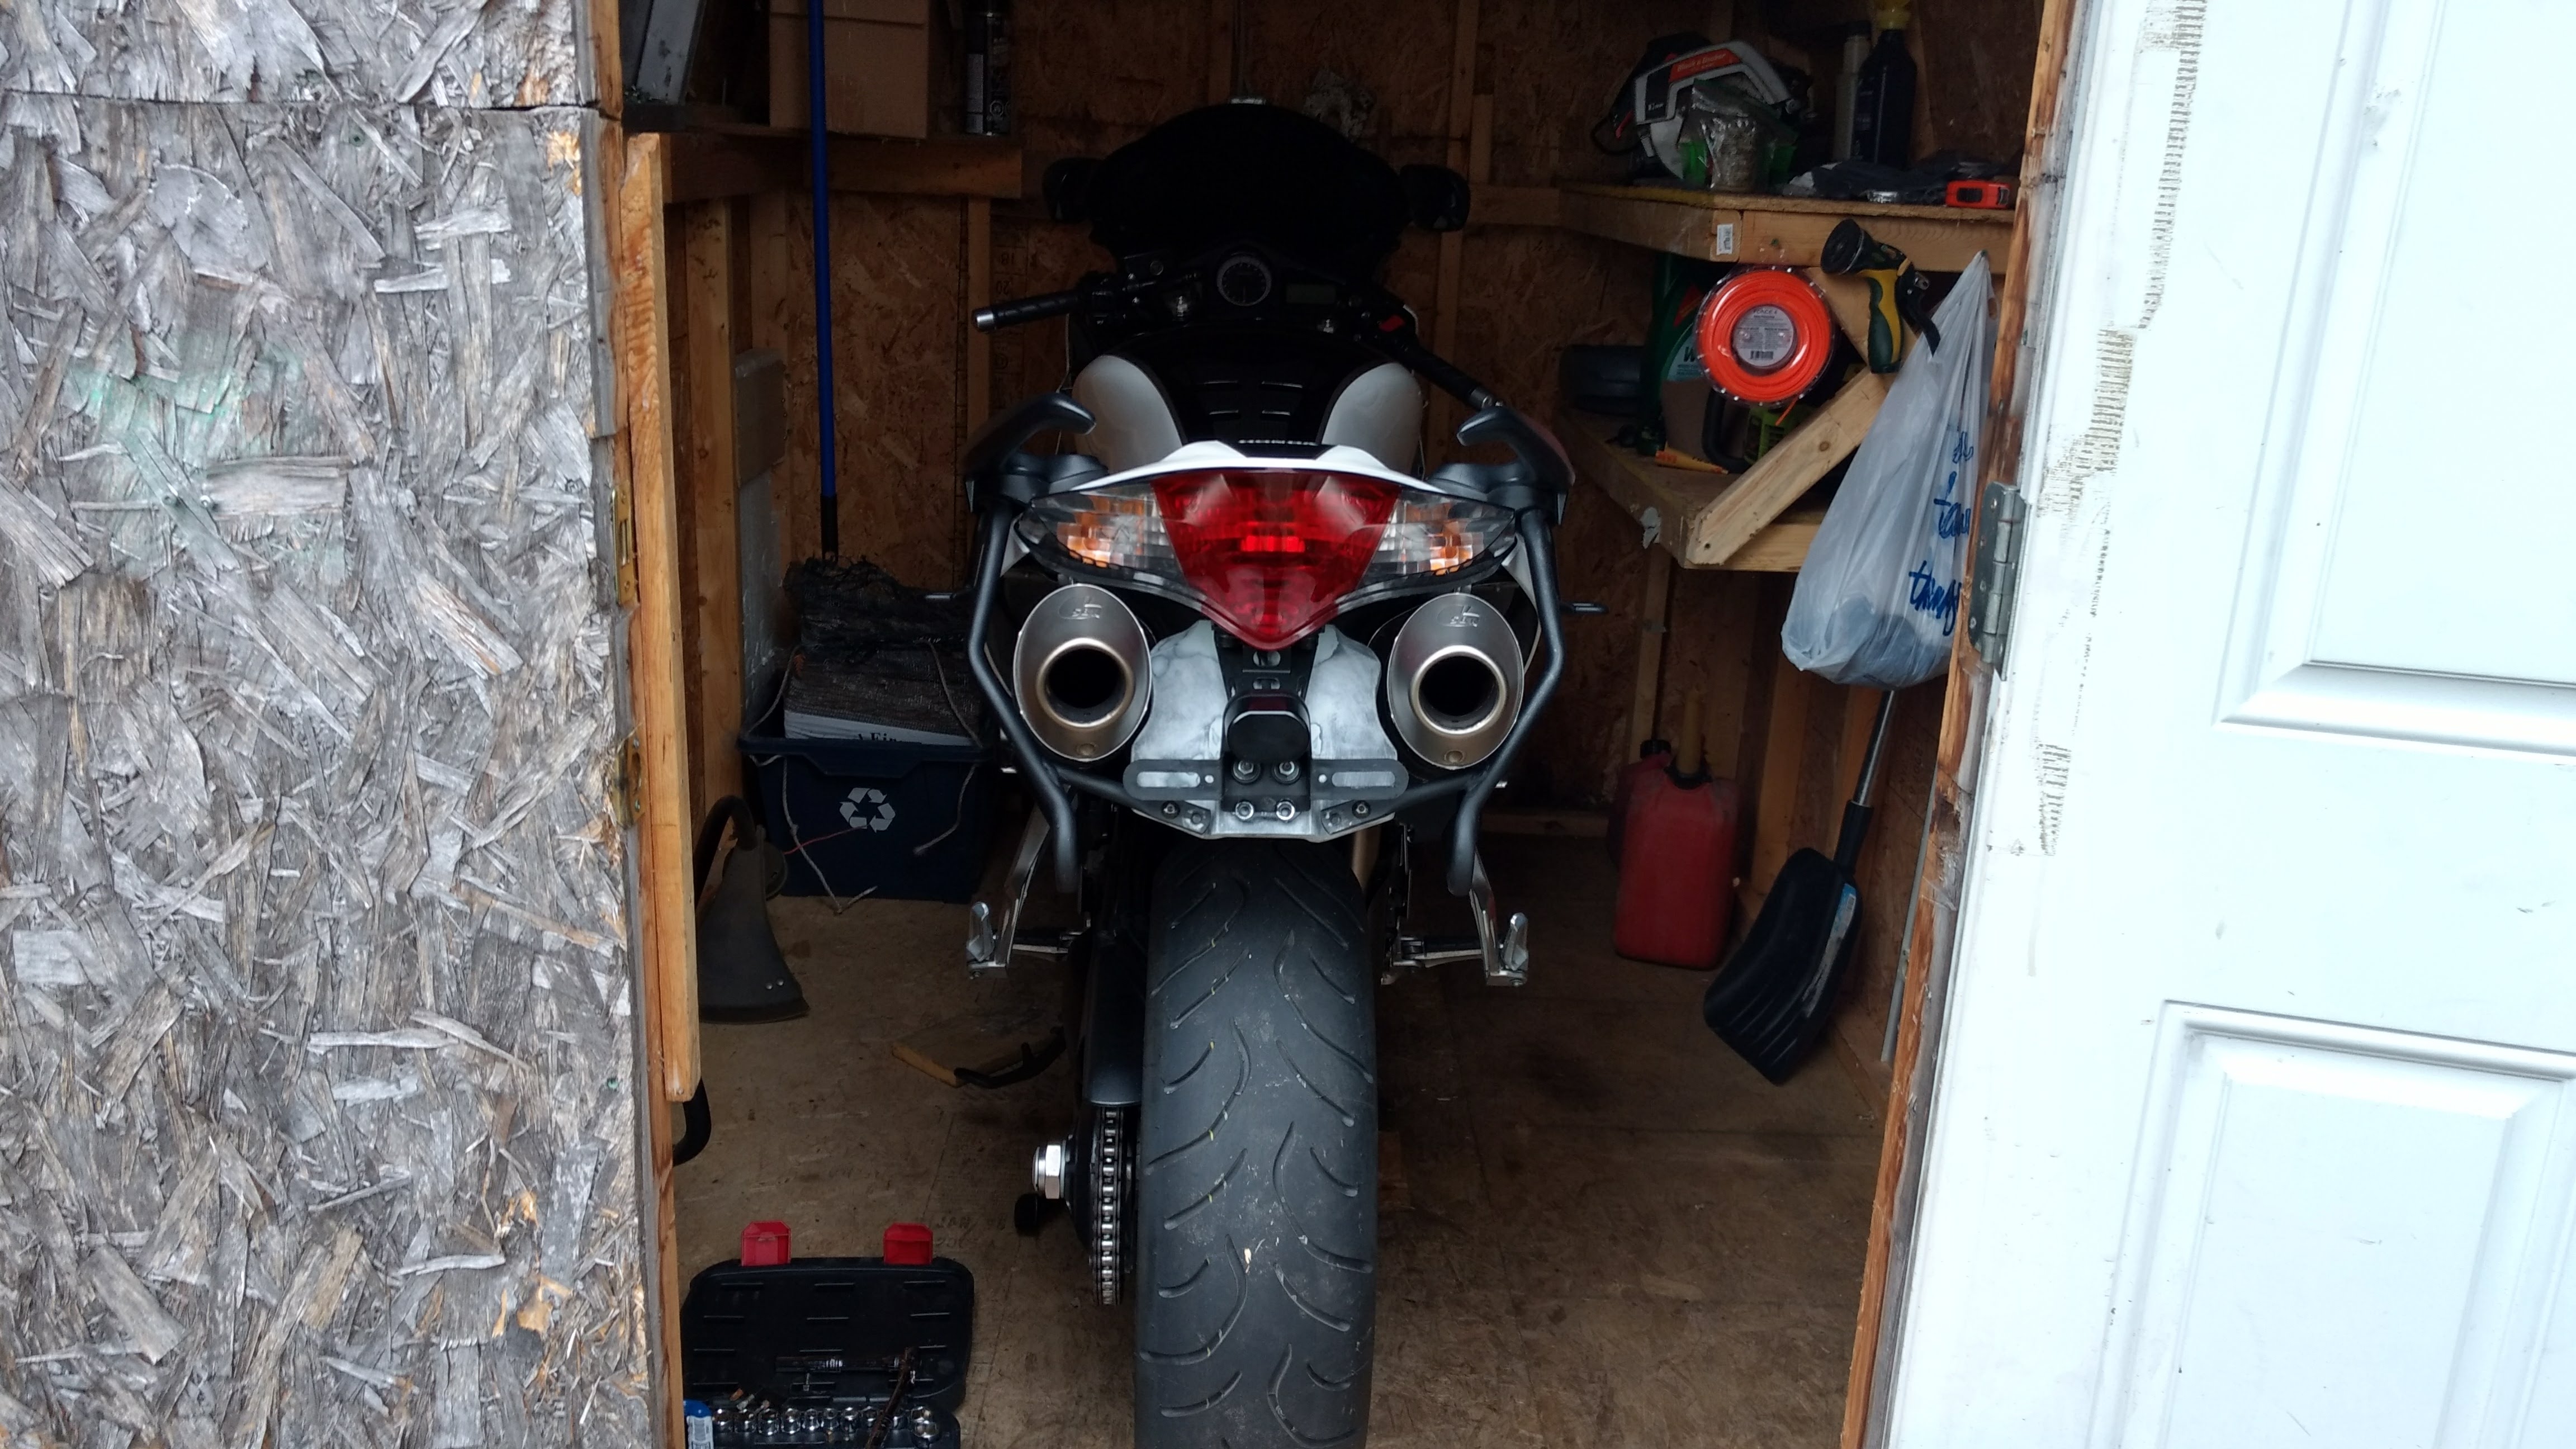
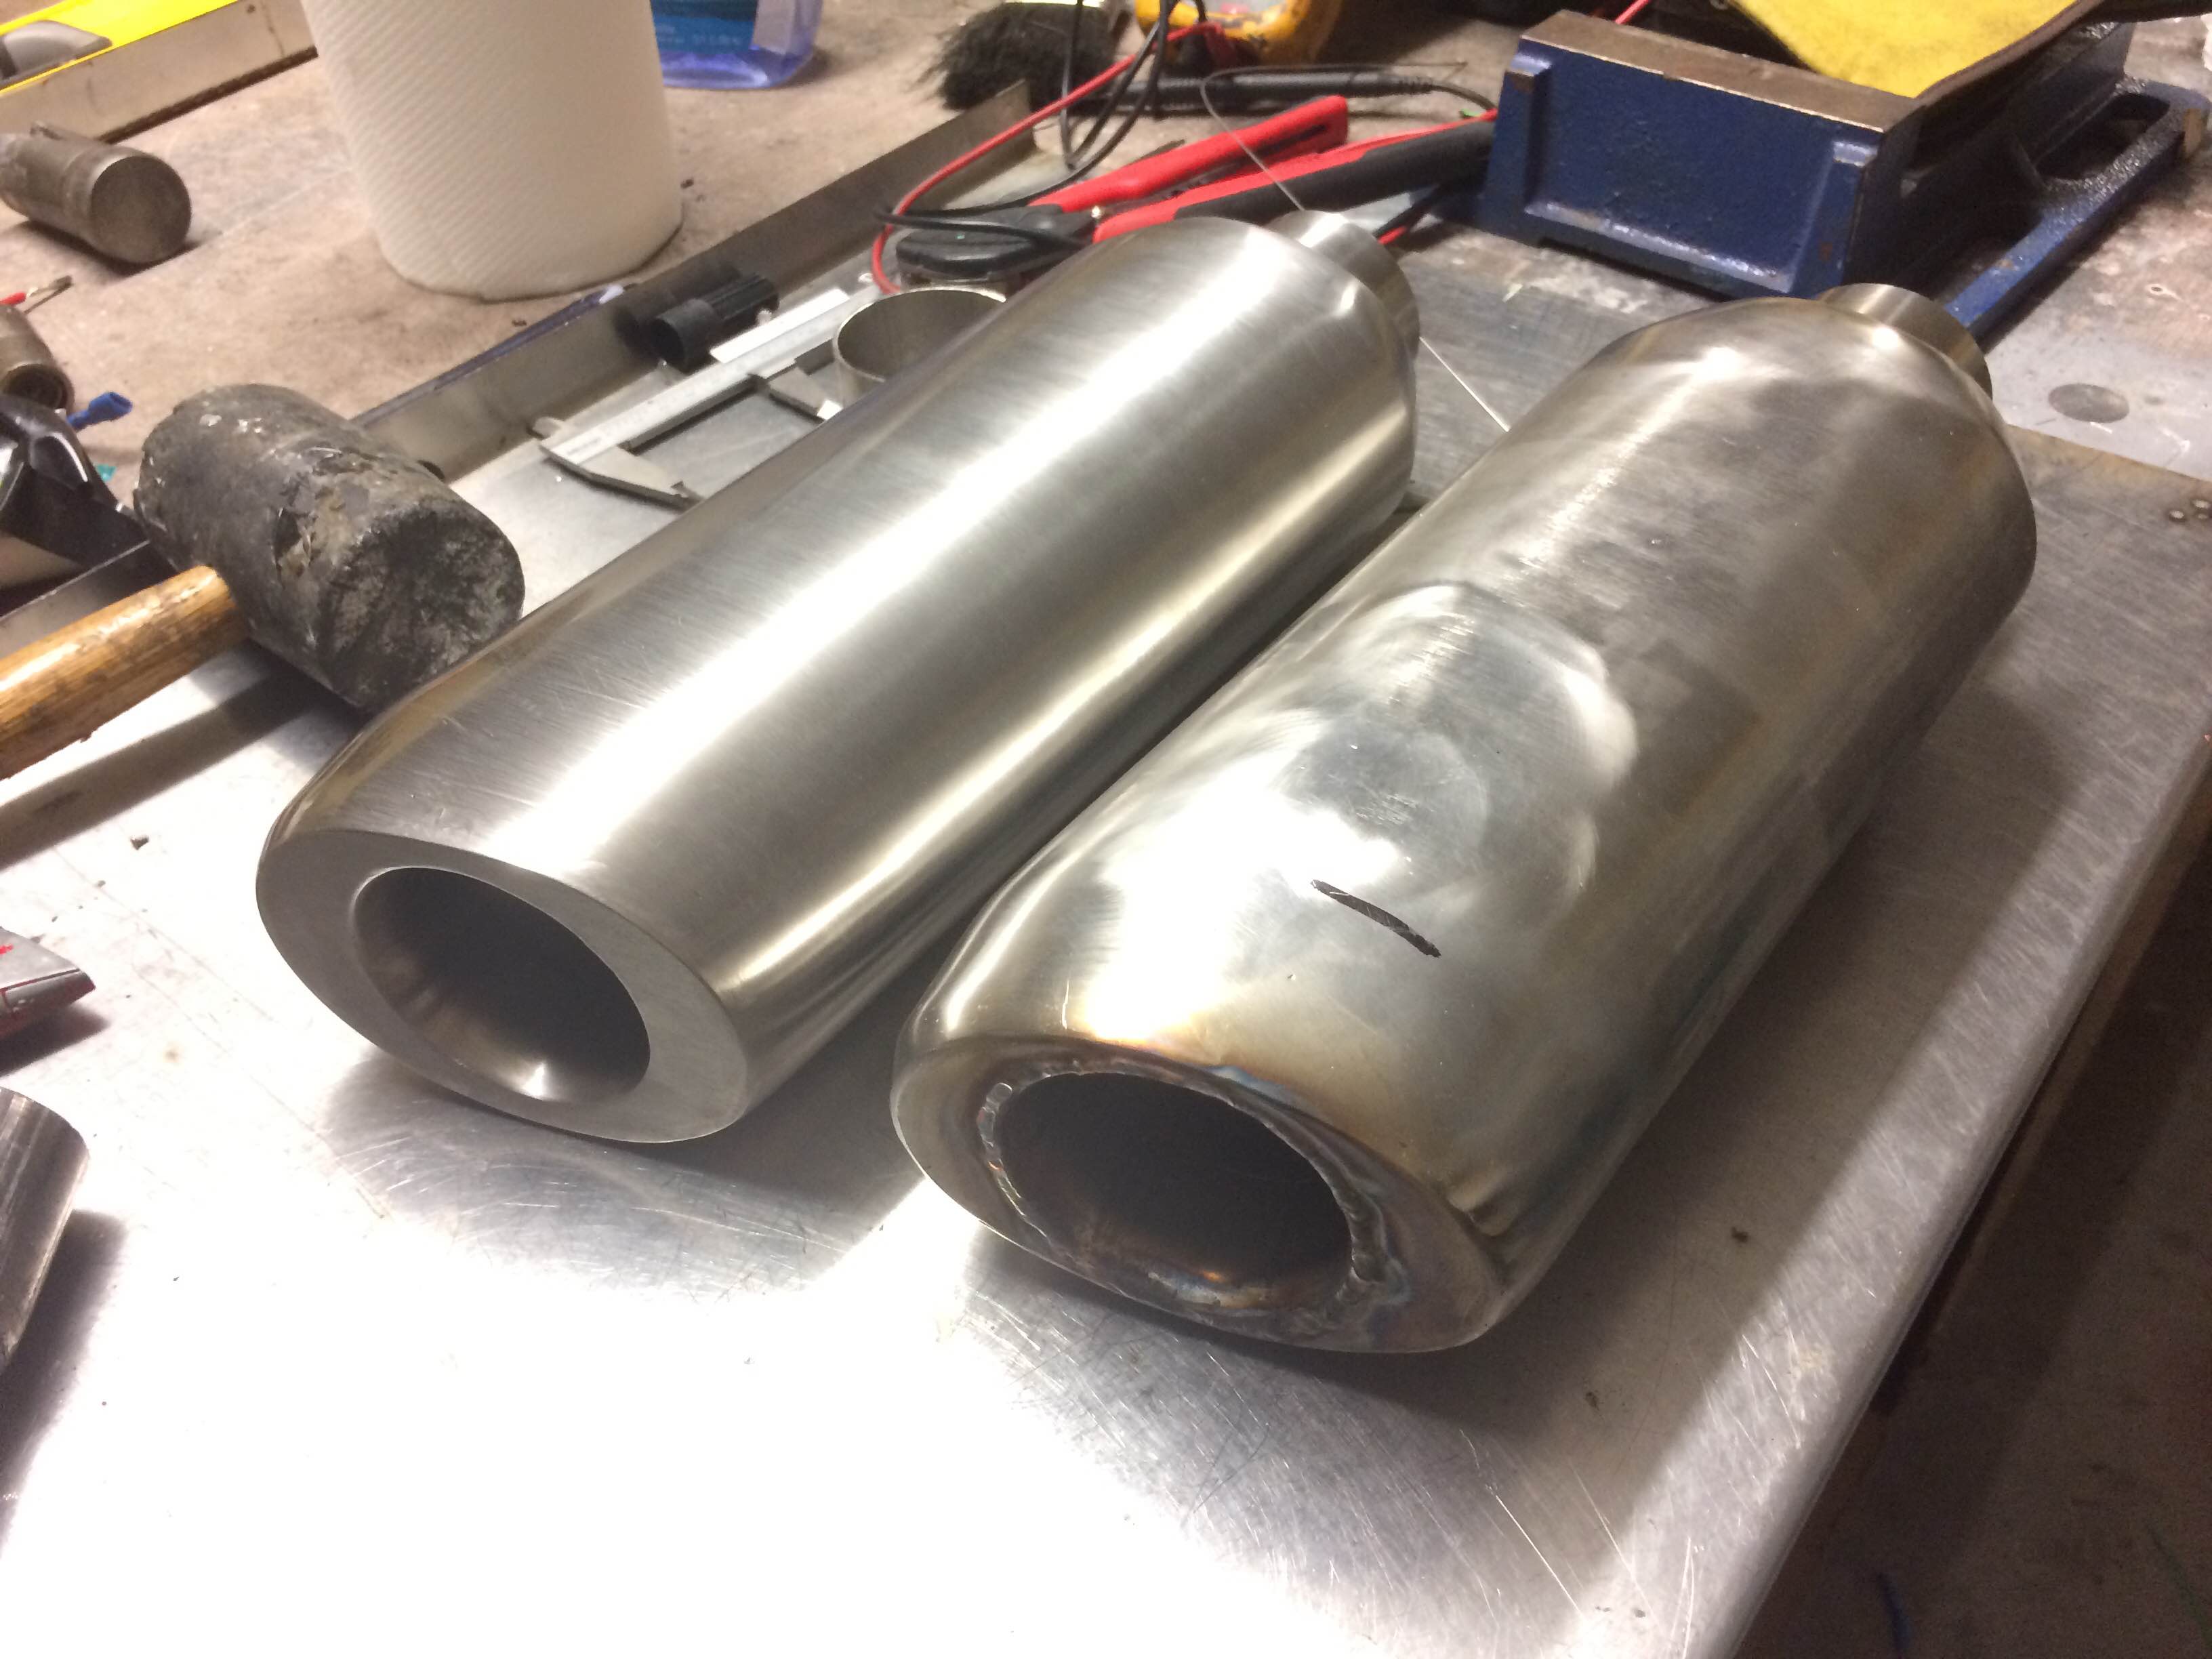
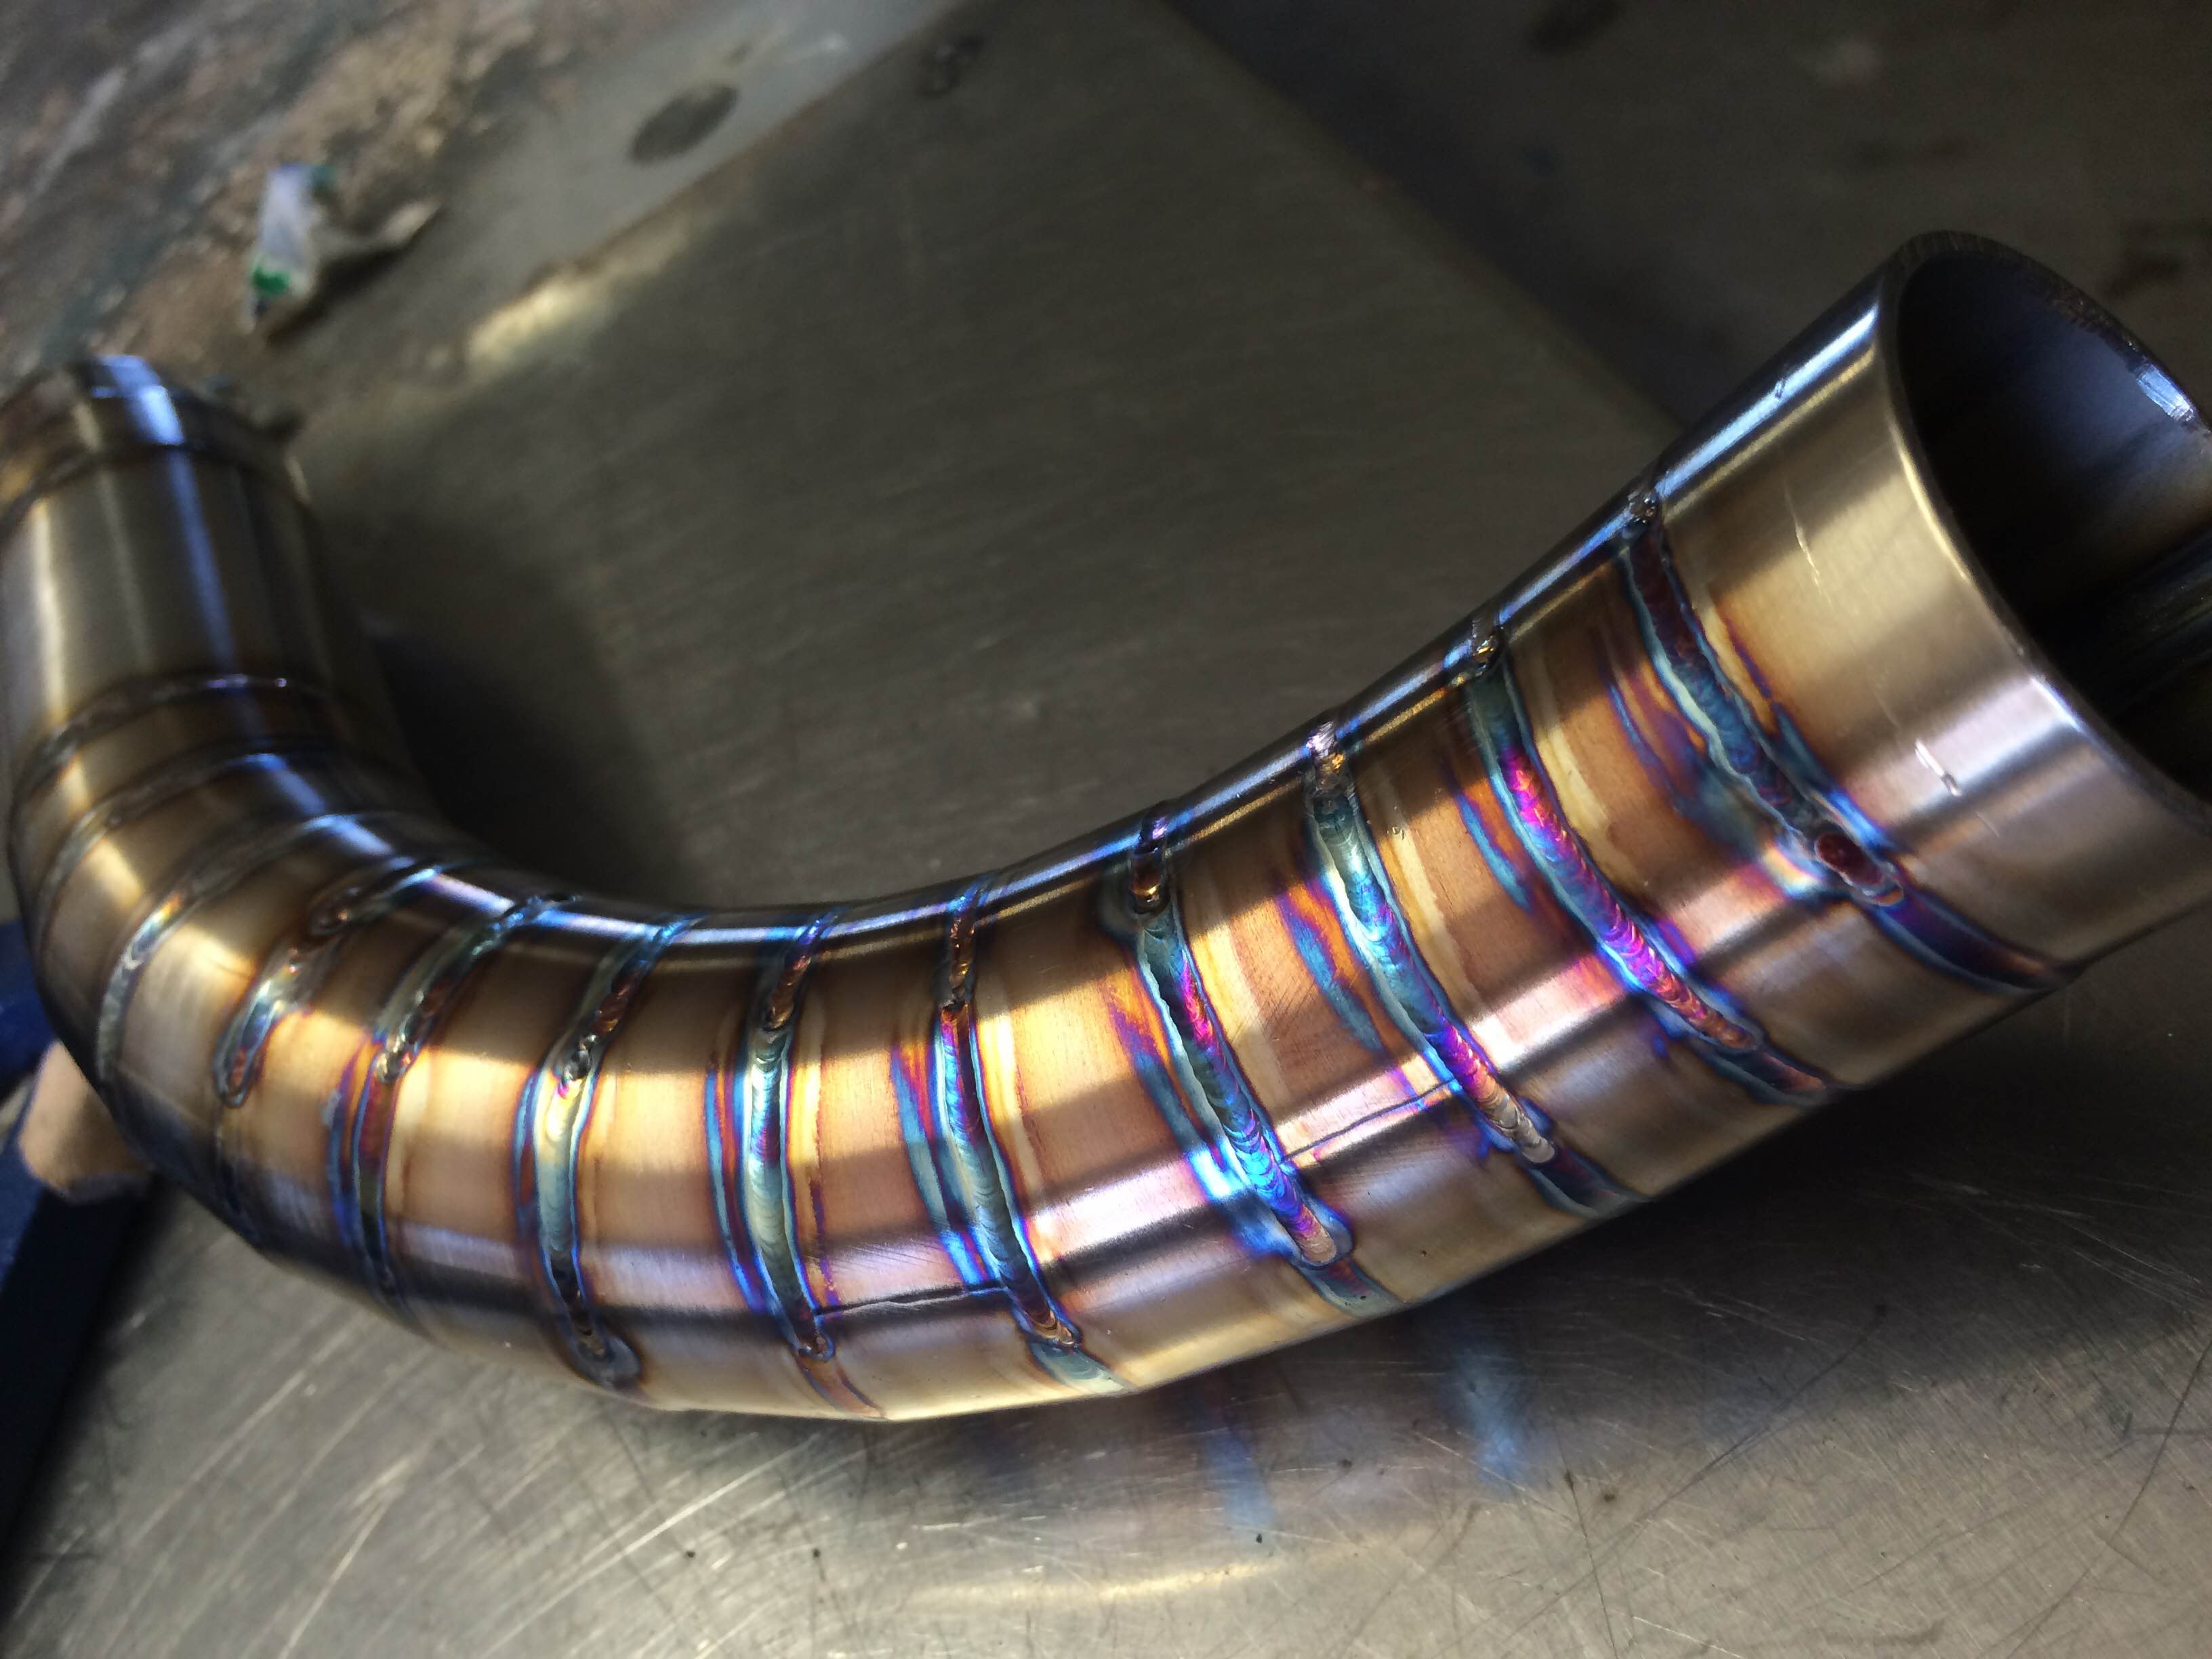
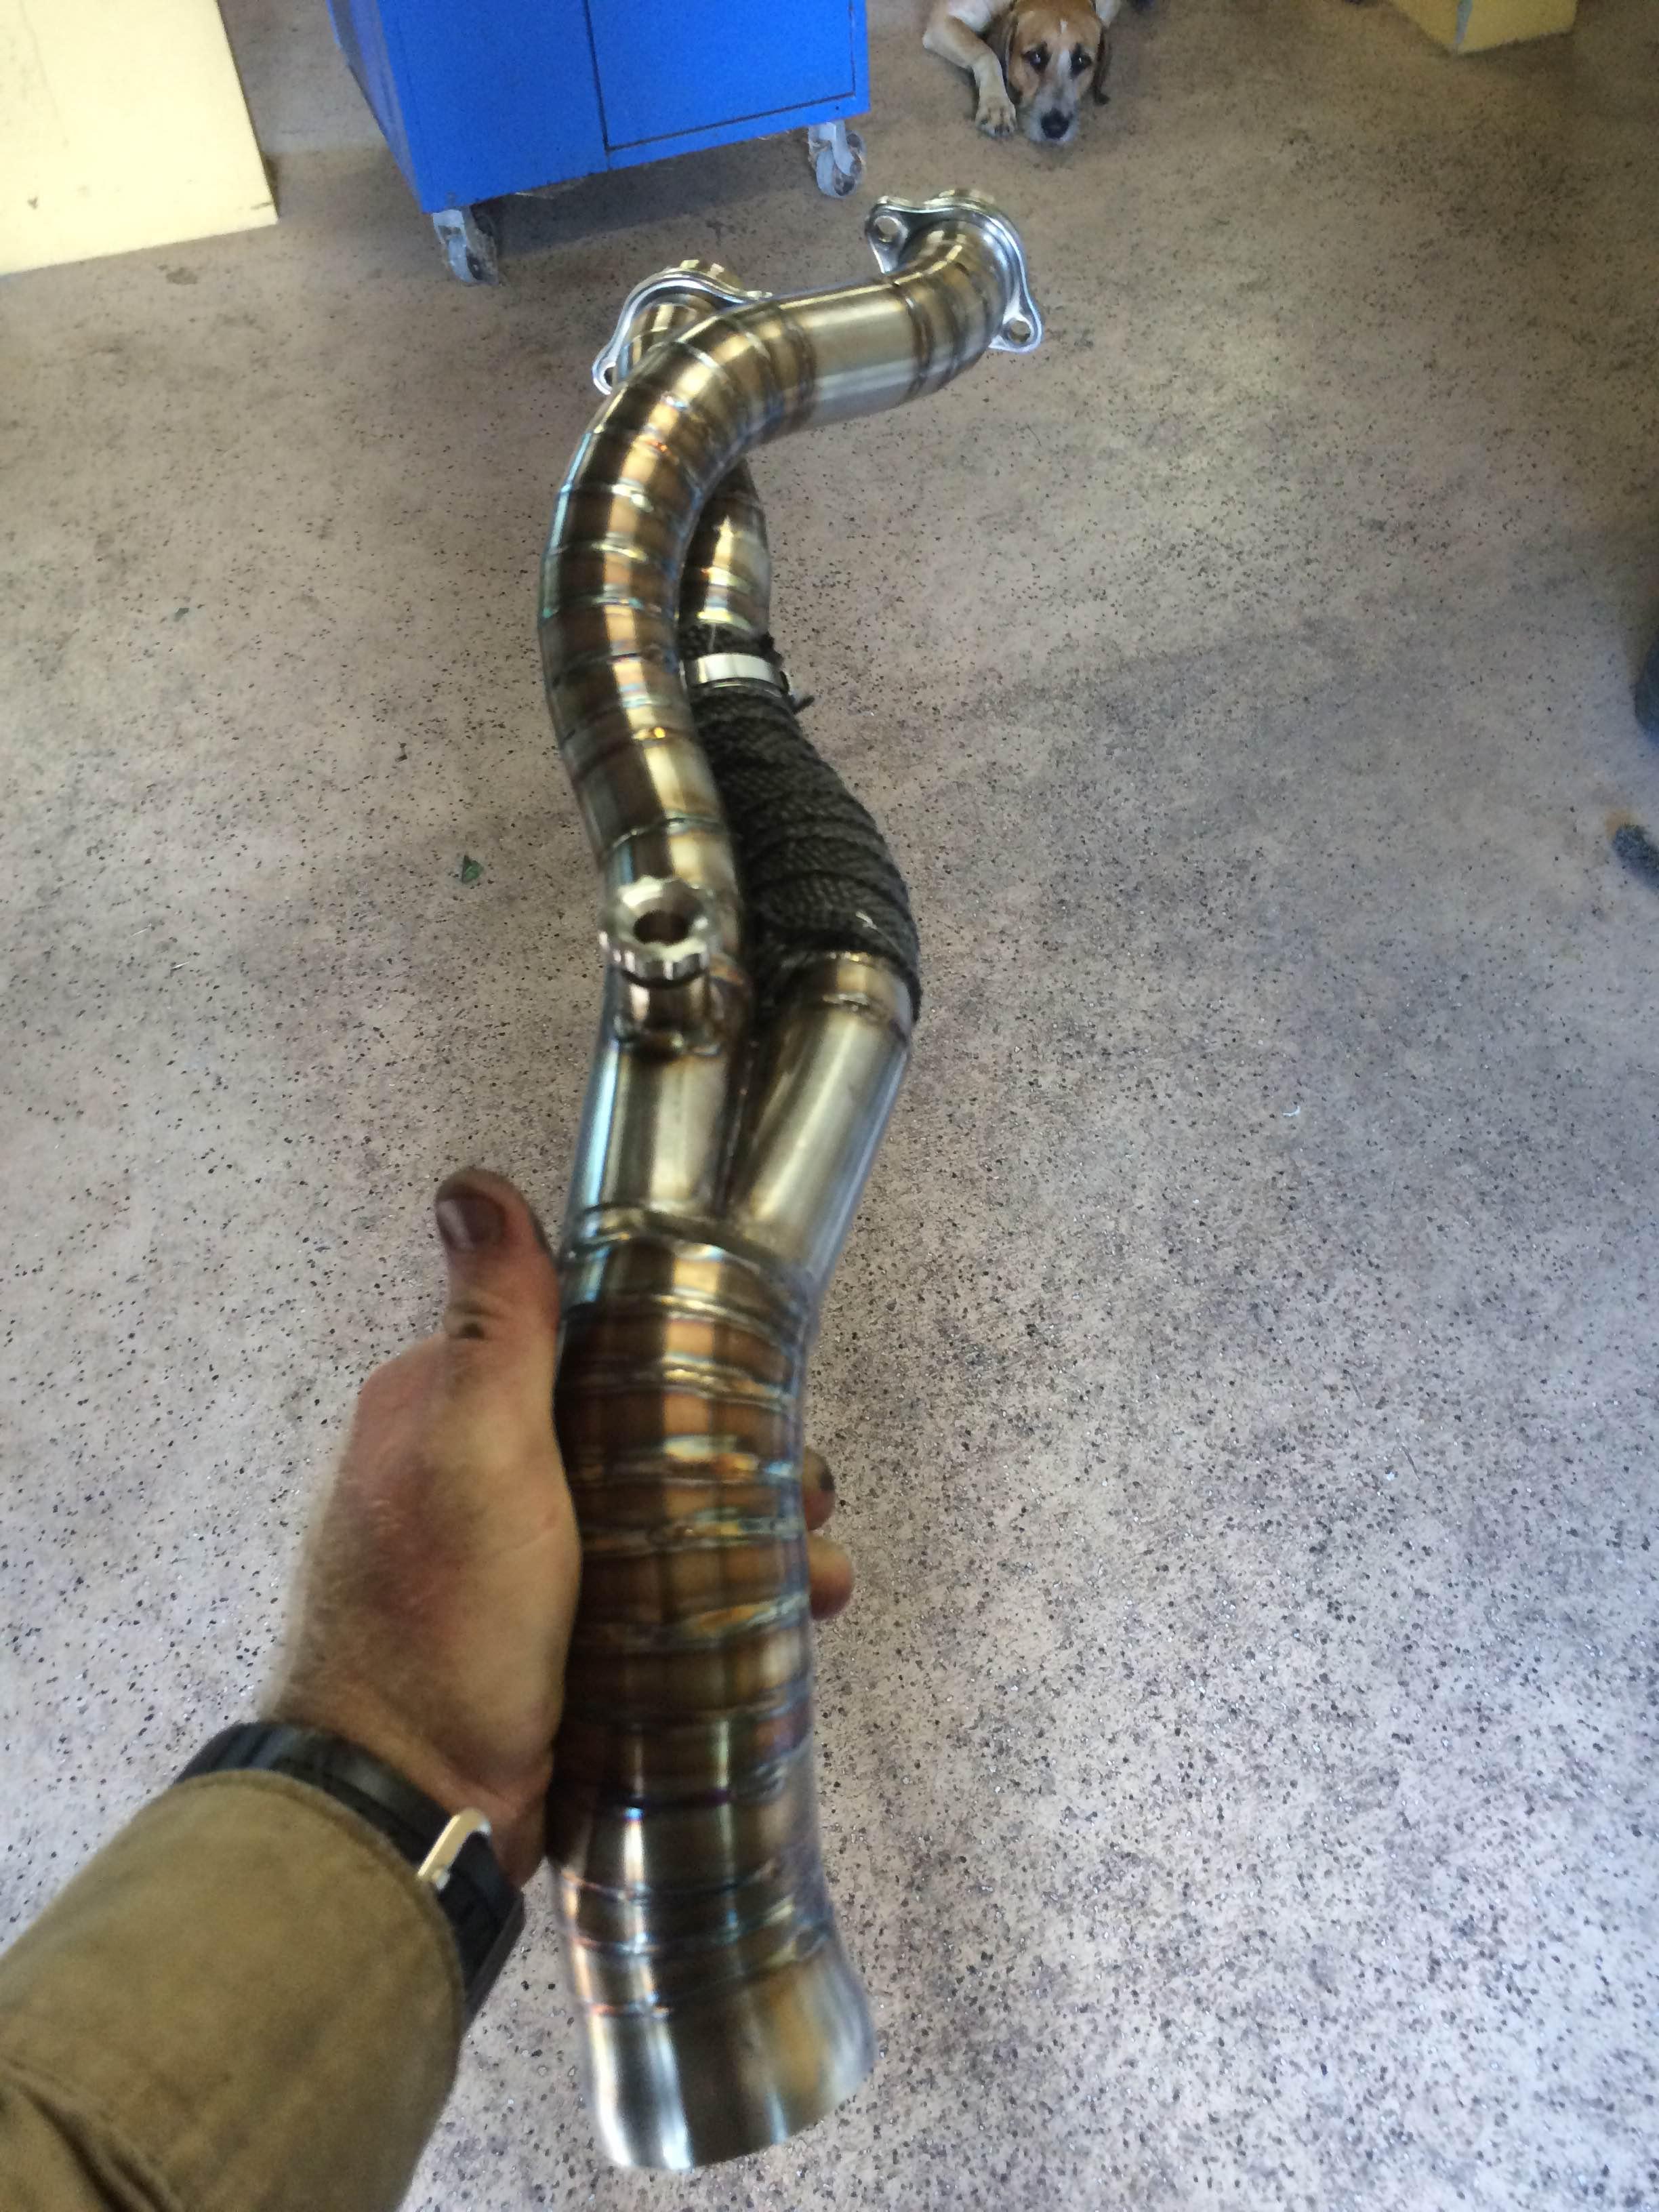
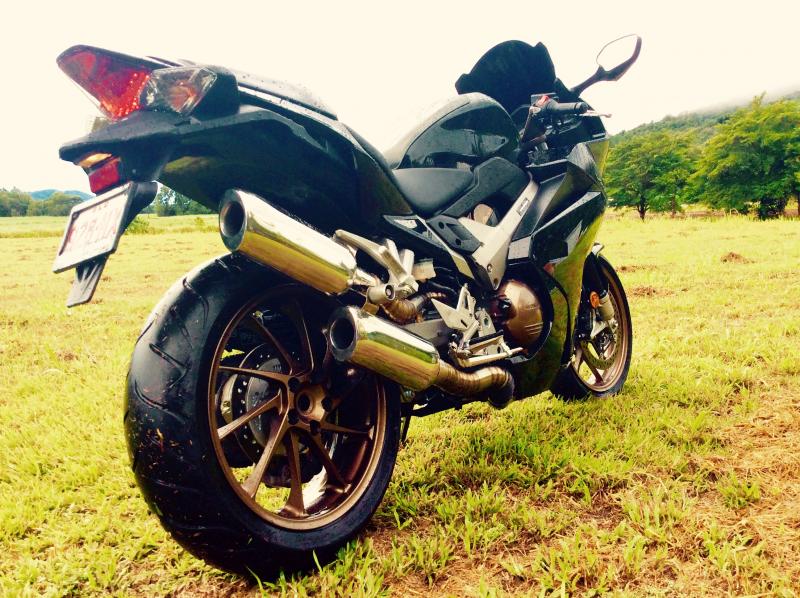
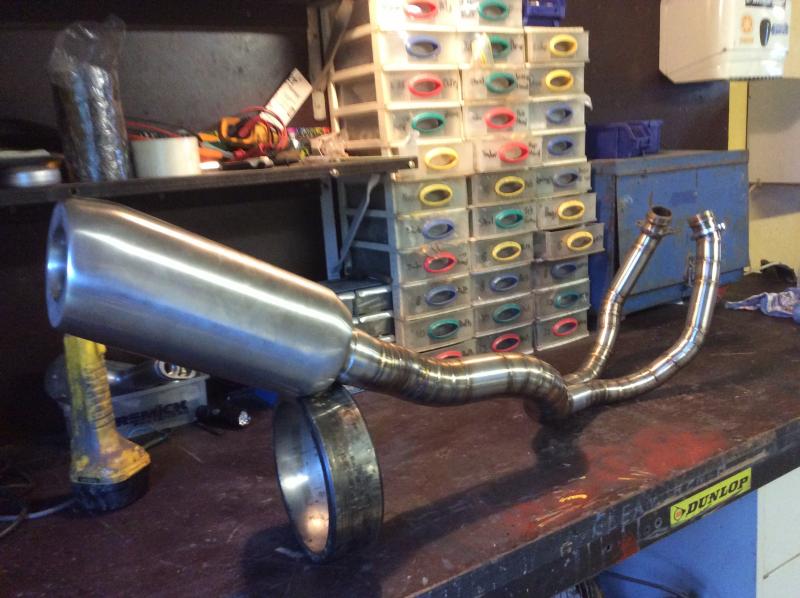
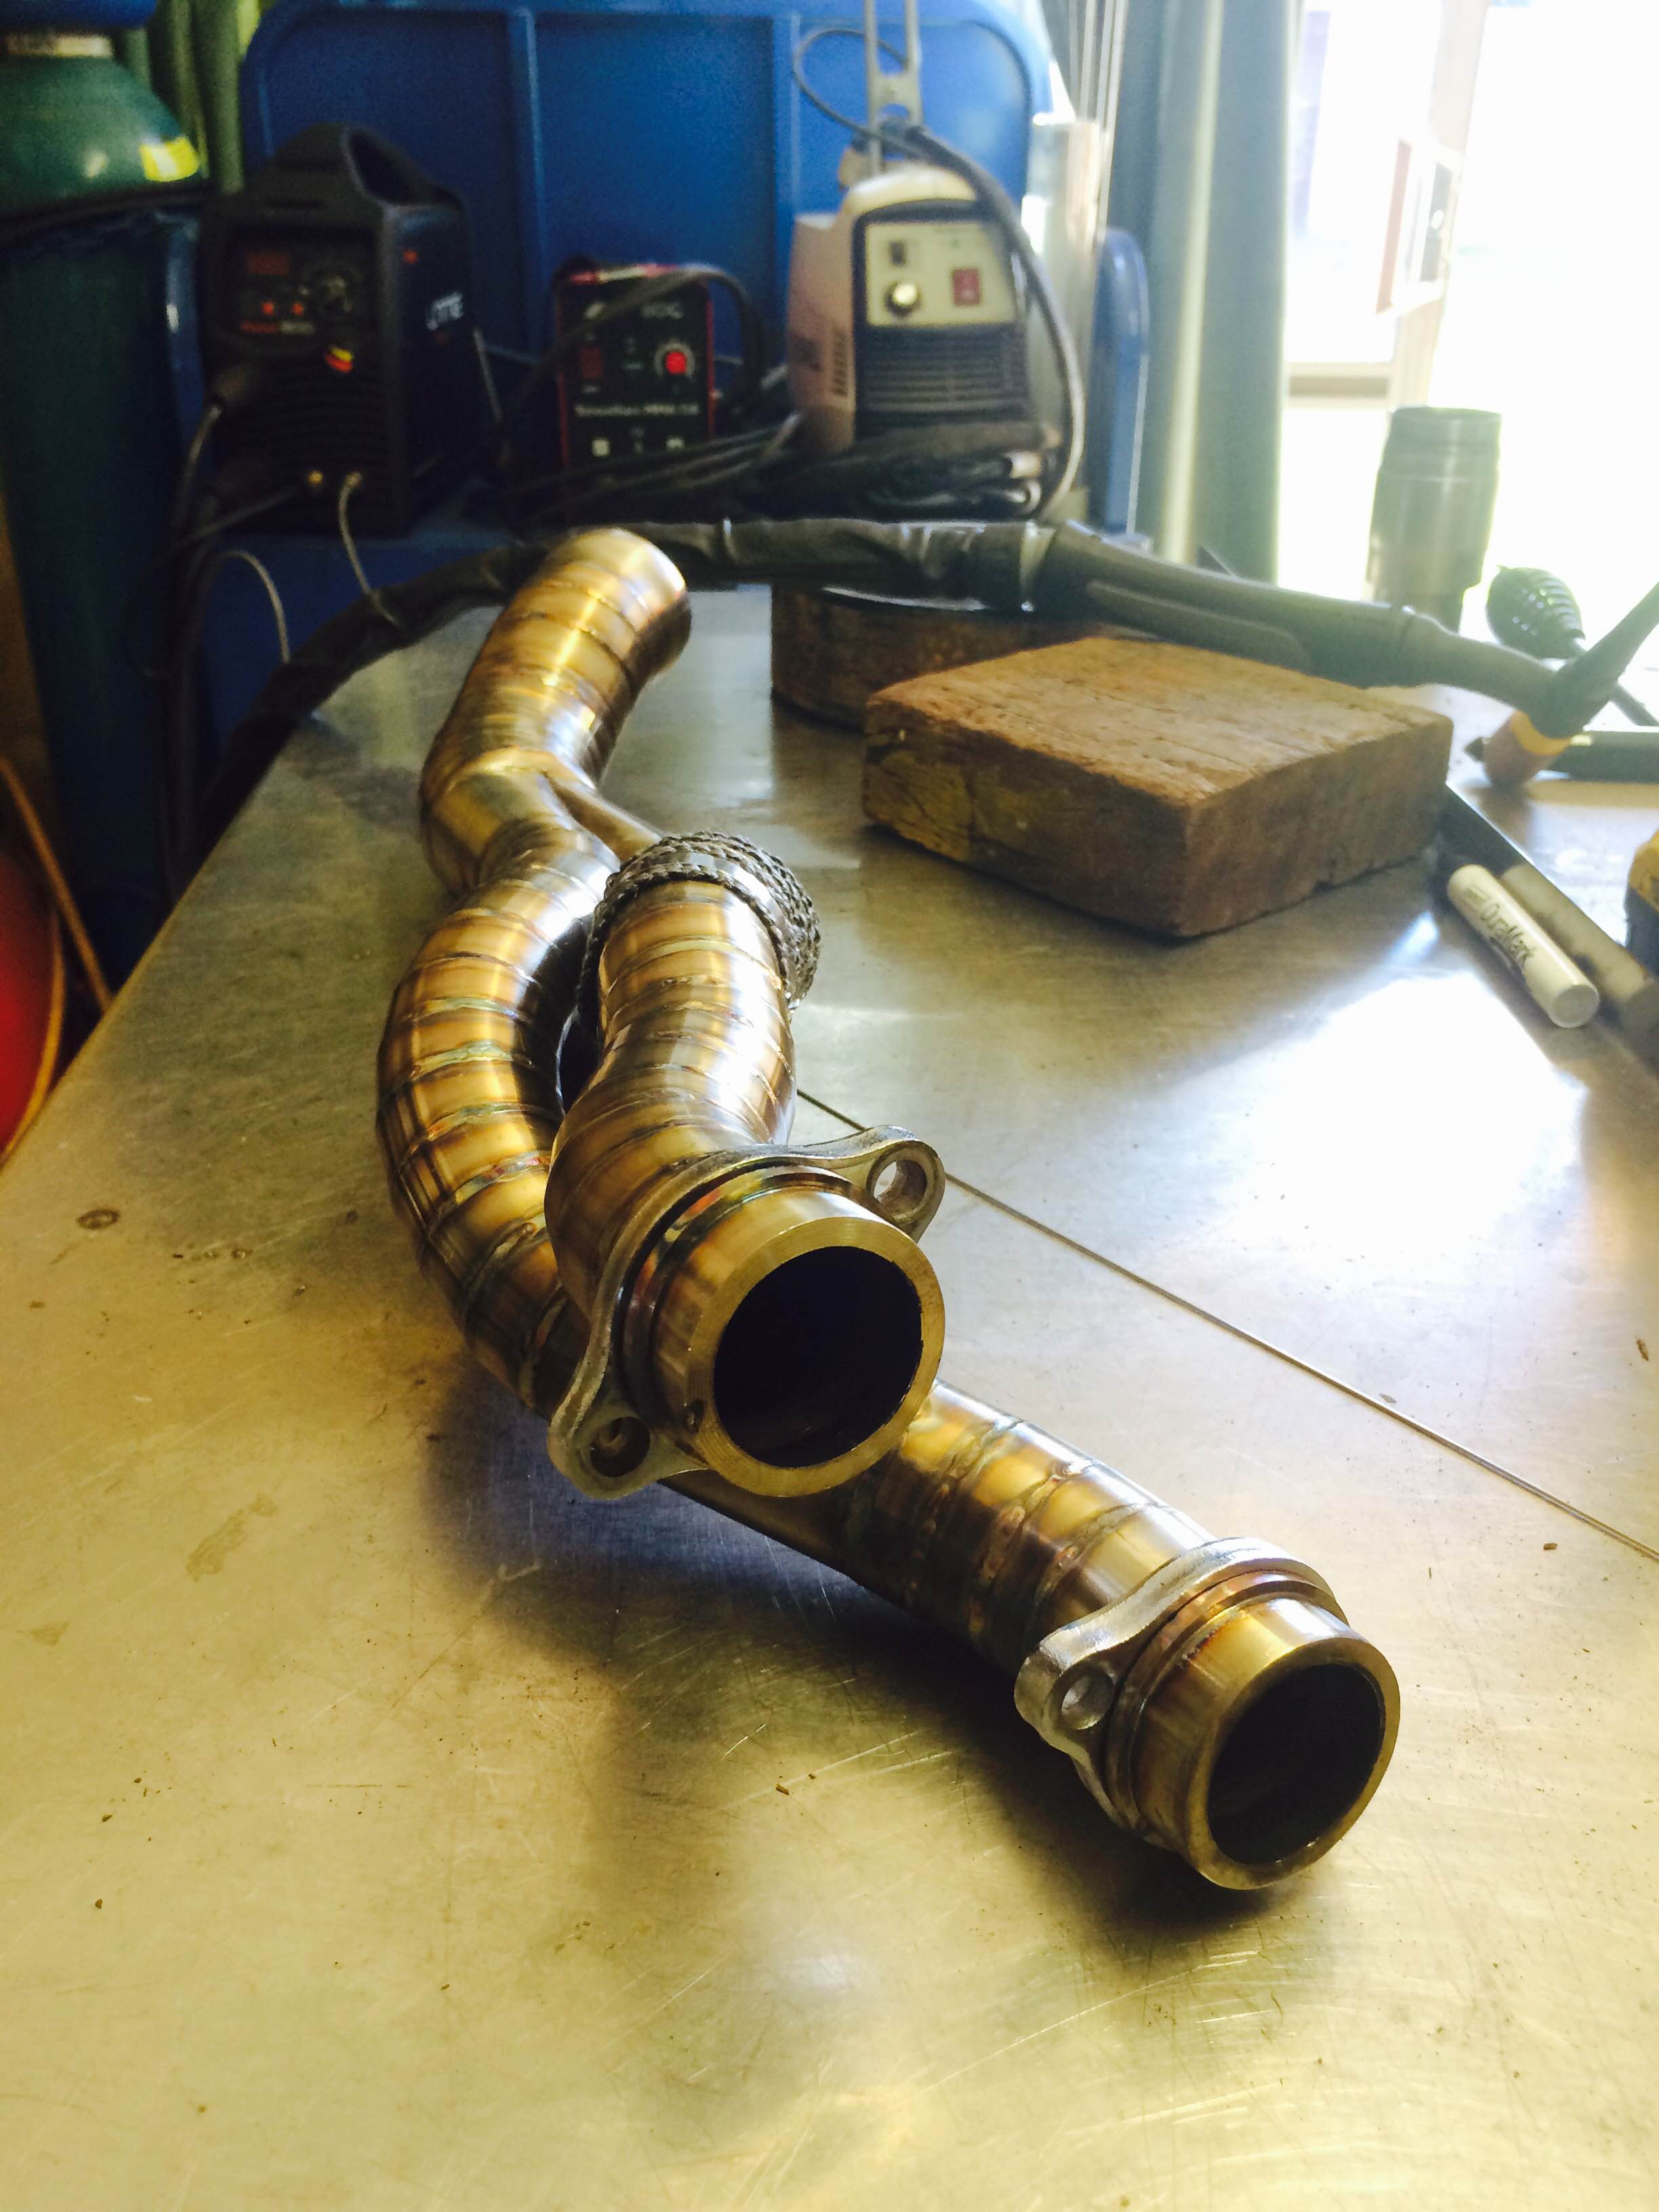
hi Guys, new to the vfr forums, thought I would show you the exhaust system I made for my '14 vfr. its a 4 into 2, so the front two cylinders and rear two are independant. the mufflers I made from 100mm pipe I flattened in the press to form an oval shape. primaries are 35mm ID going into 55mm ID, so she is , um, pretty big lol. results so far are very pleasing, nice note and no melted bits. has anyone got a map for PCV that they are happy with sharing with me ? the base map on the power commander site is for a pretty stock bike, figured there must be something else out there. Im running the usual airbox mods, BMC filter and autotune. cheers.
-
I did a few searches and didn't come up with anything. Google wasn't much help either. I found a leather jacket I'm interested in, but it doesn't have any ventilation. Does anyone have any experience adding zipped vents to a leather jacket? I figured I would ask here and also see if I can get ahold of any local leather shops to see if they could help me out. Thanks.
-
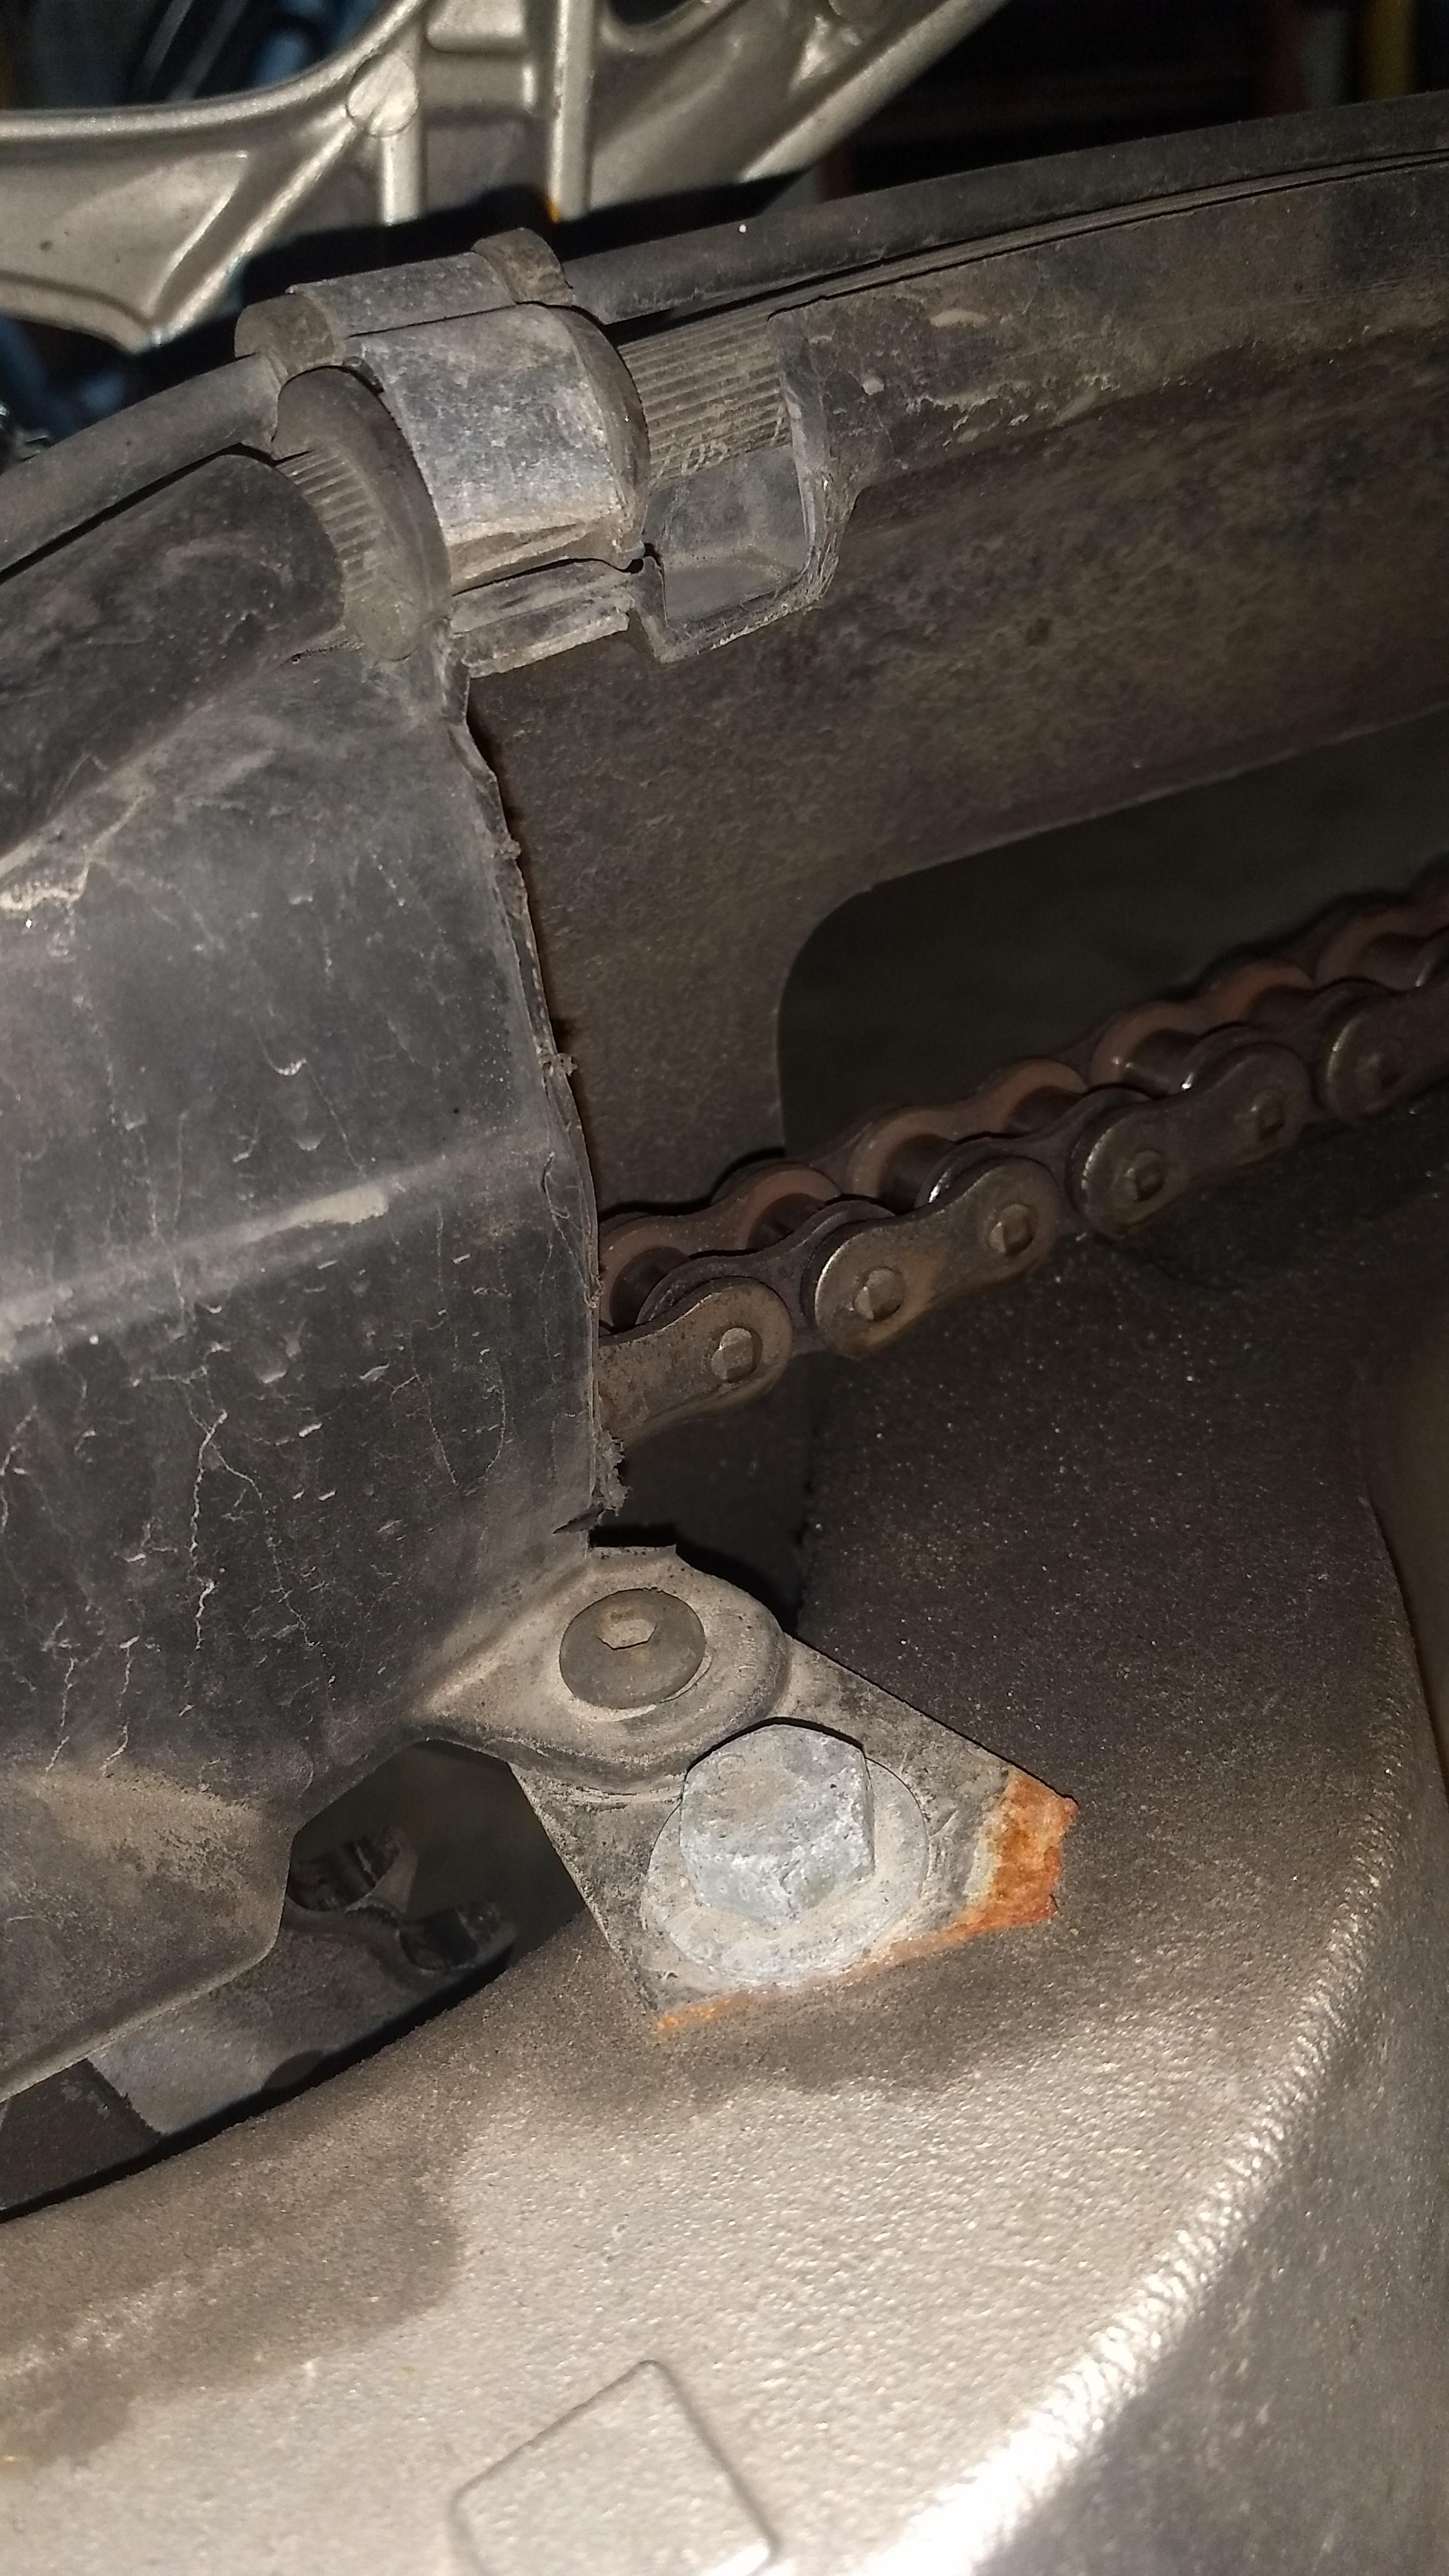
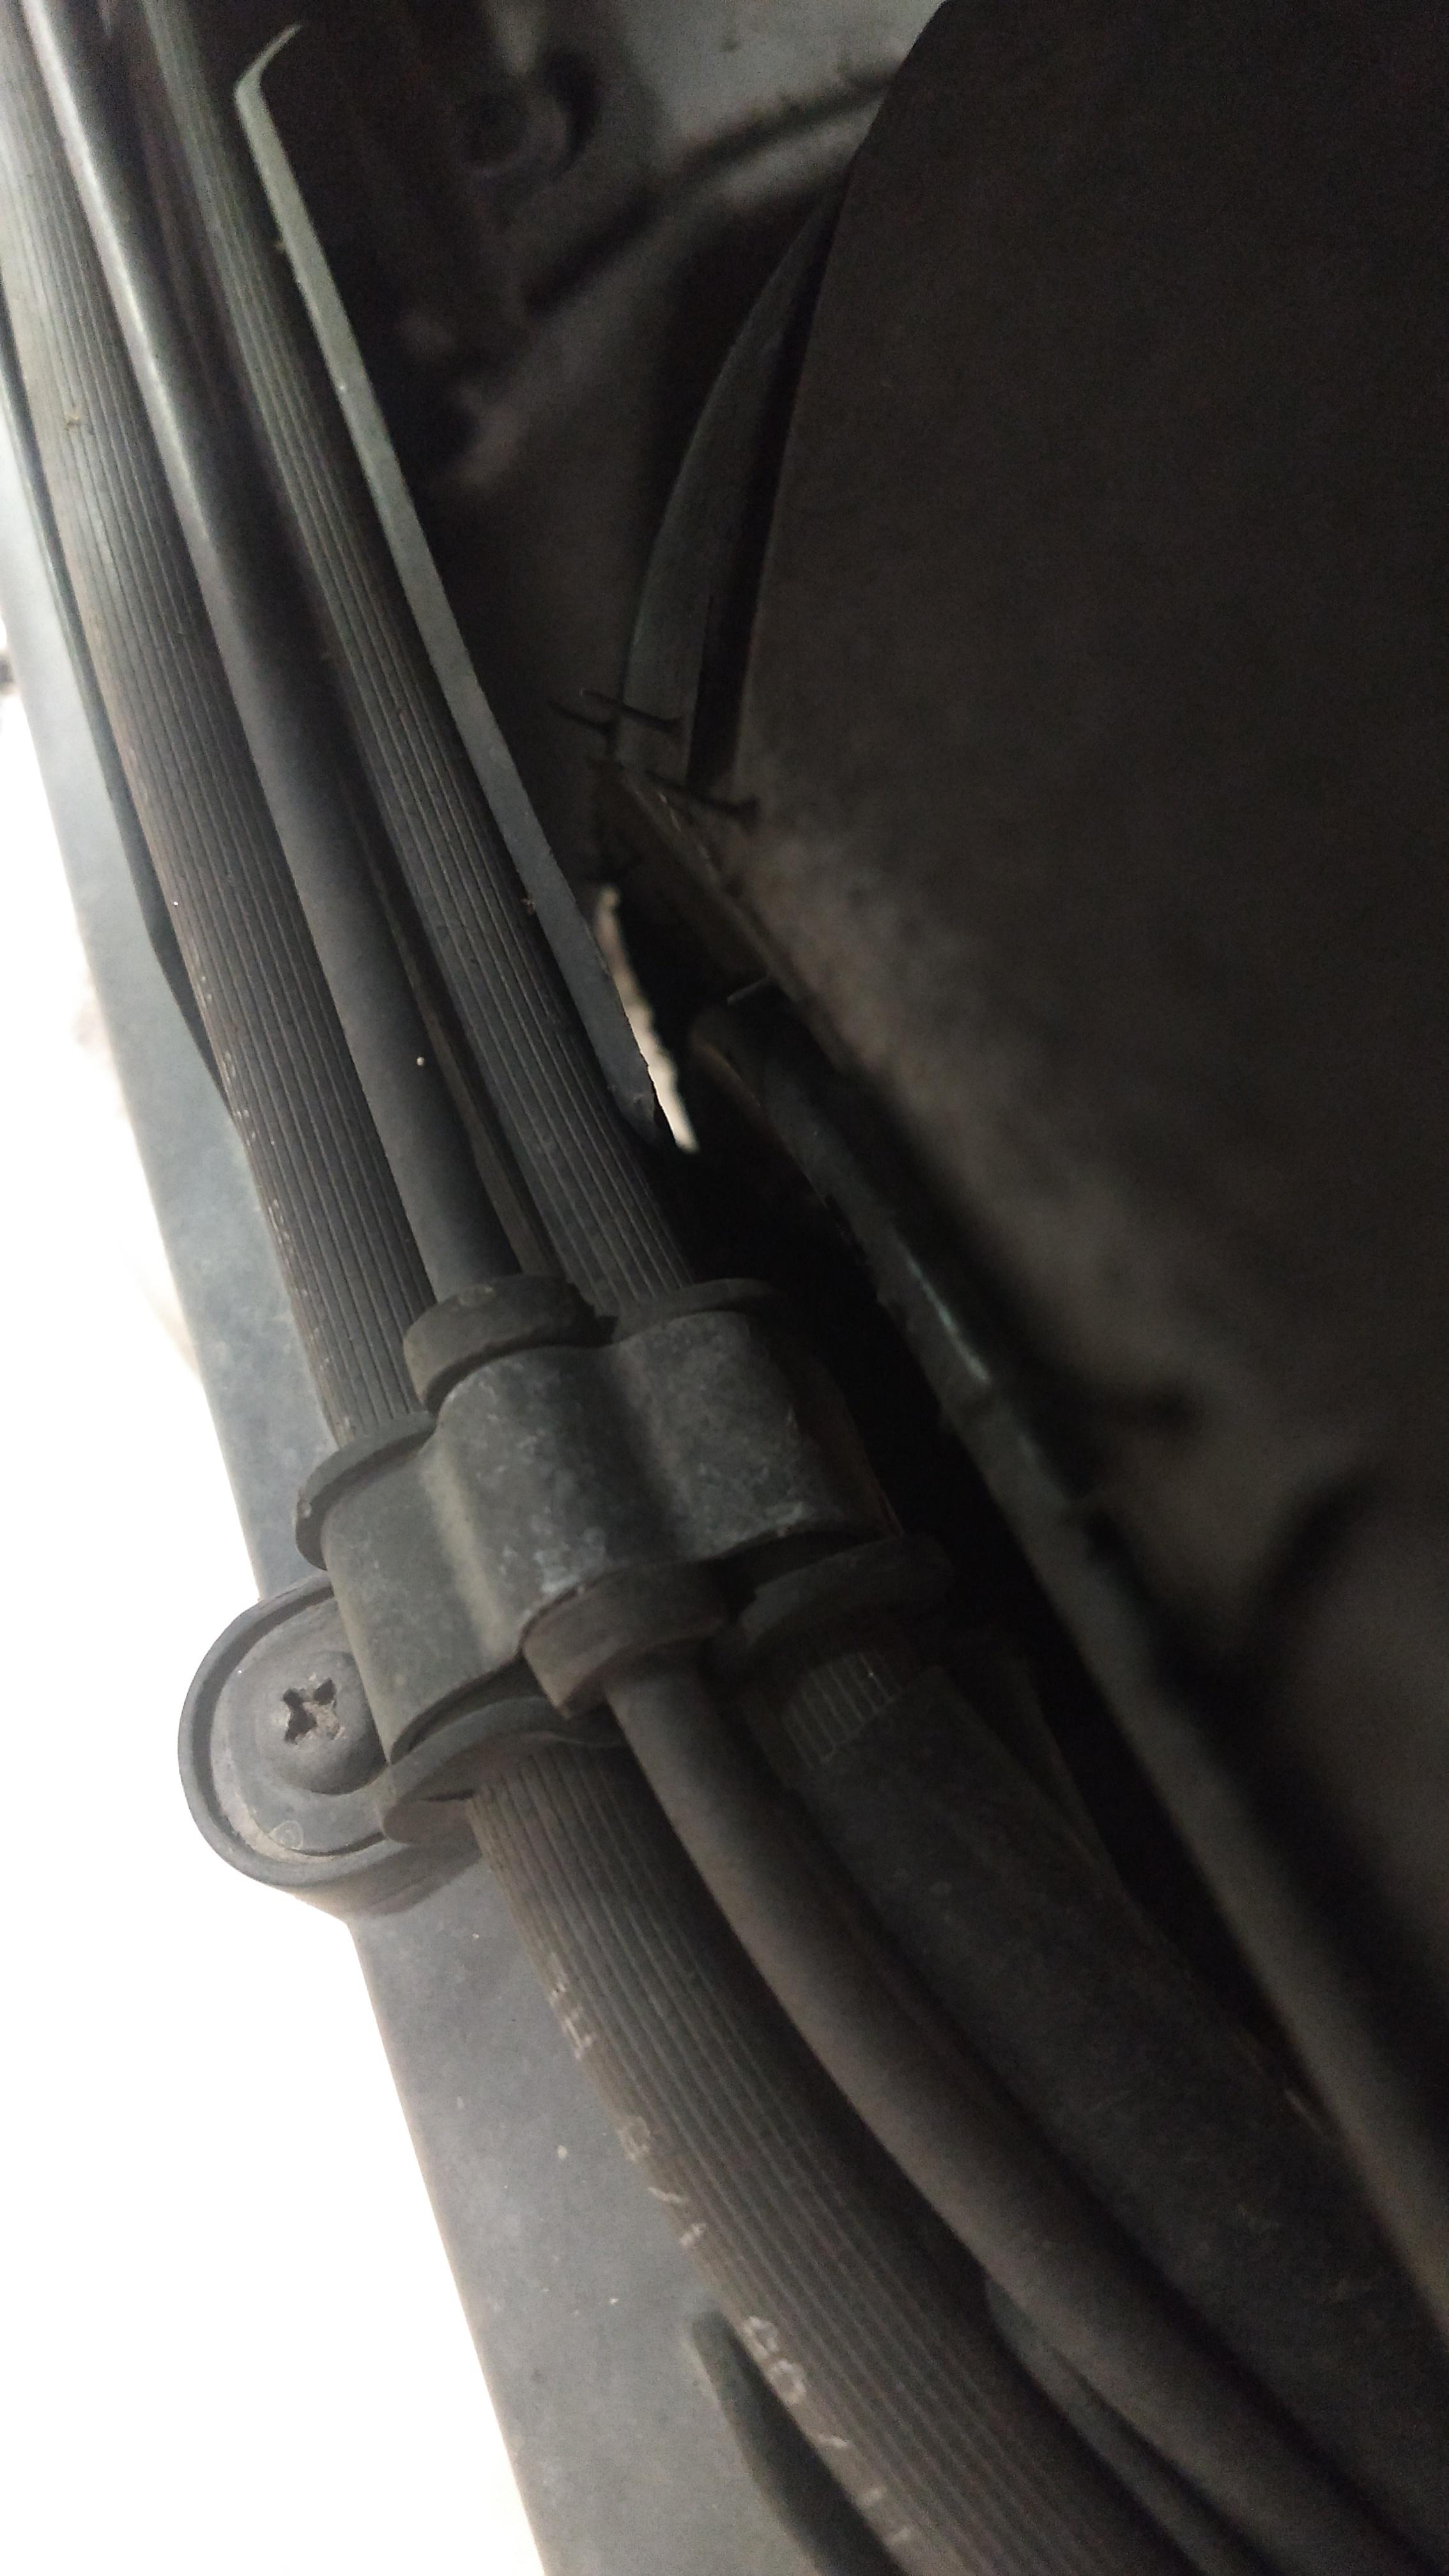
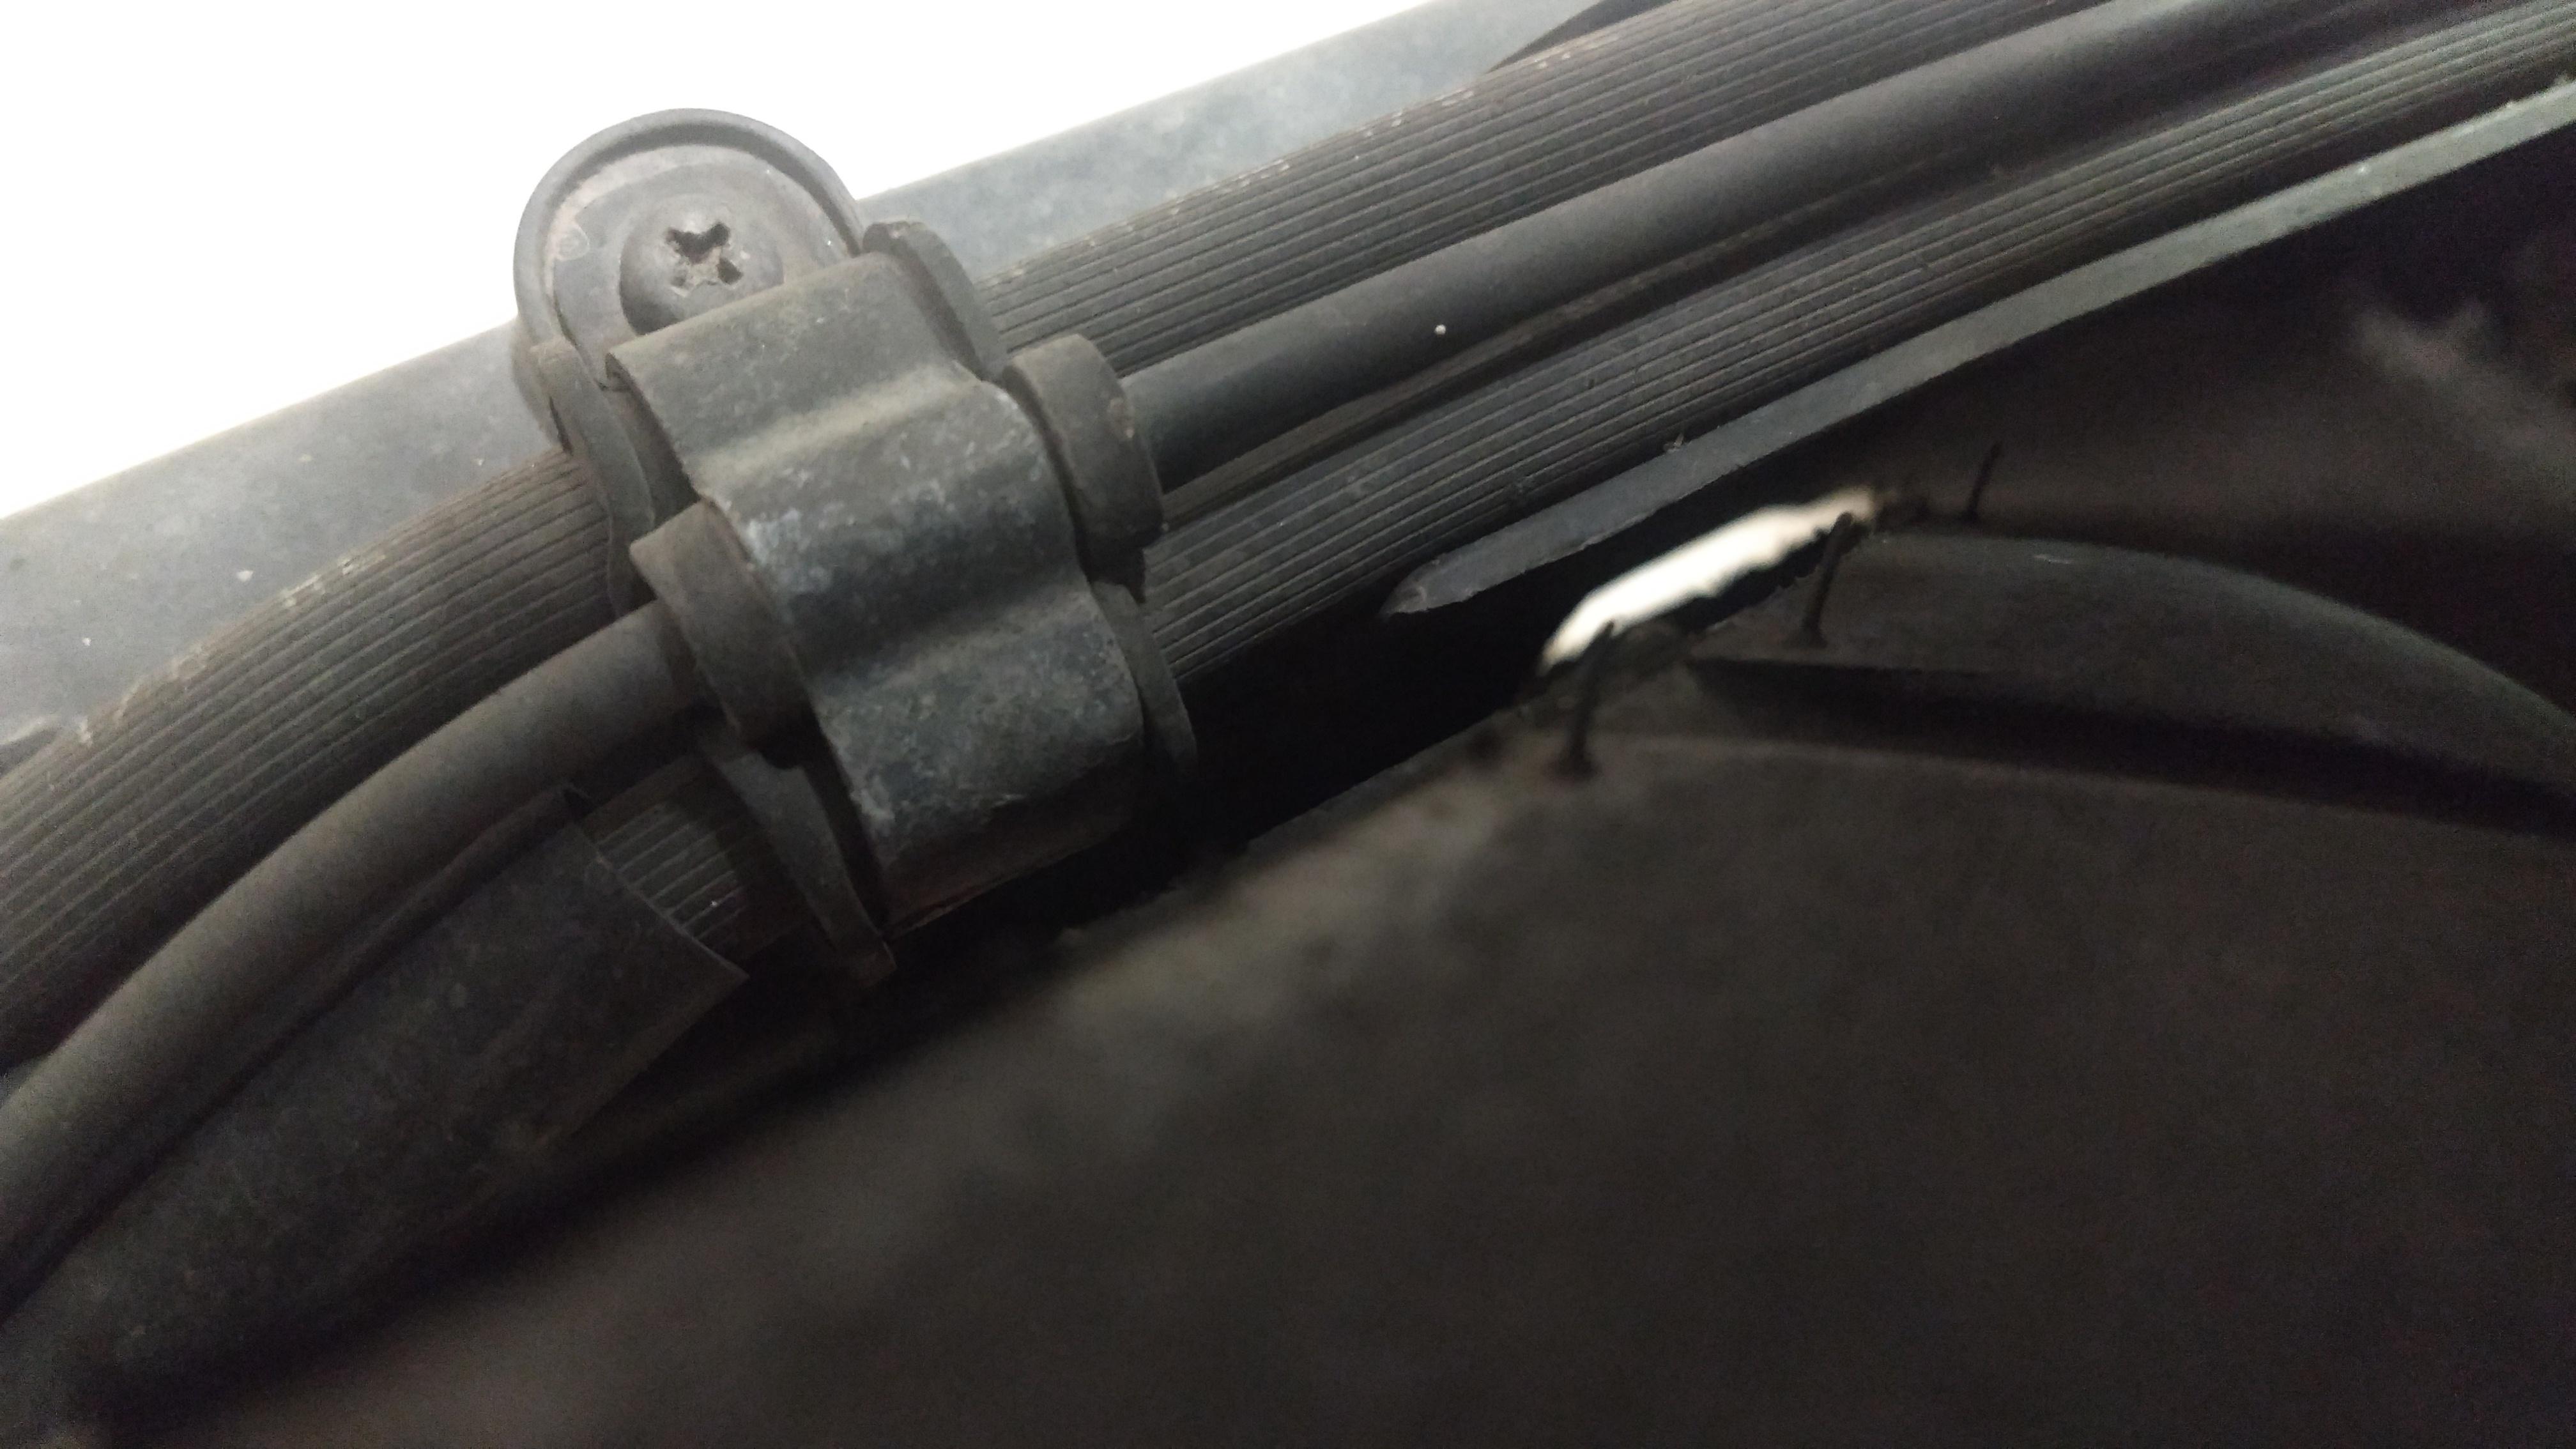
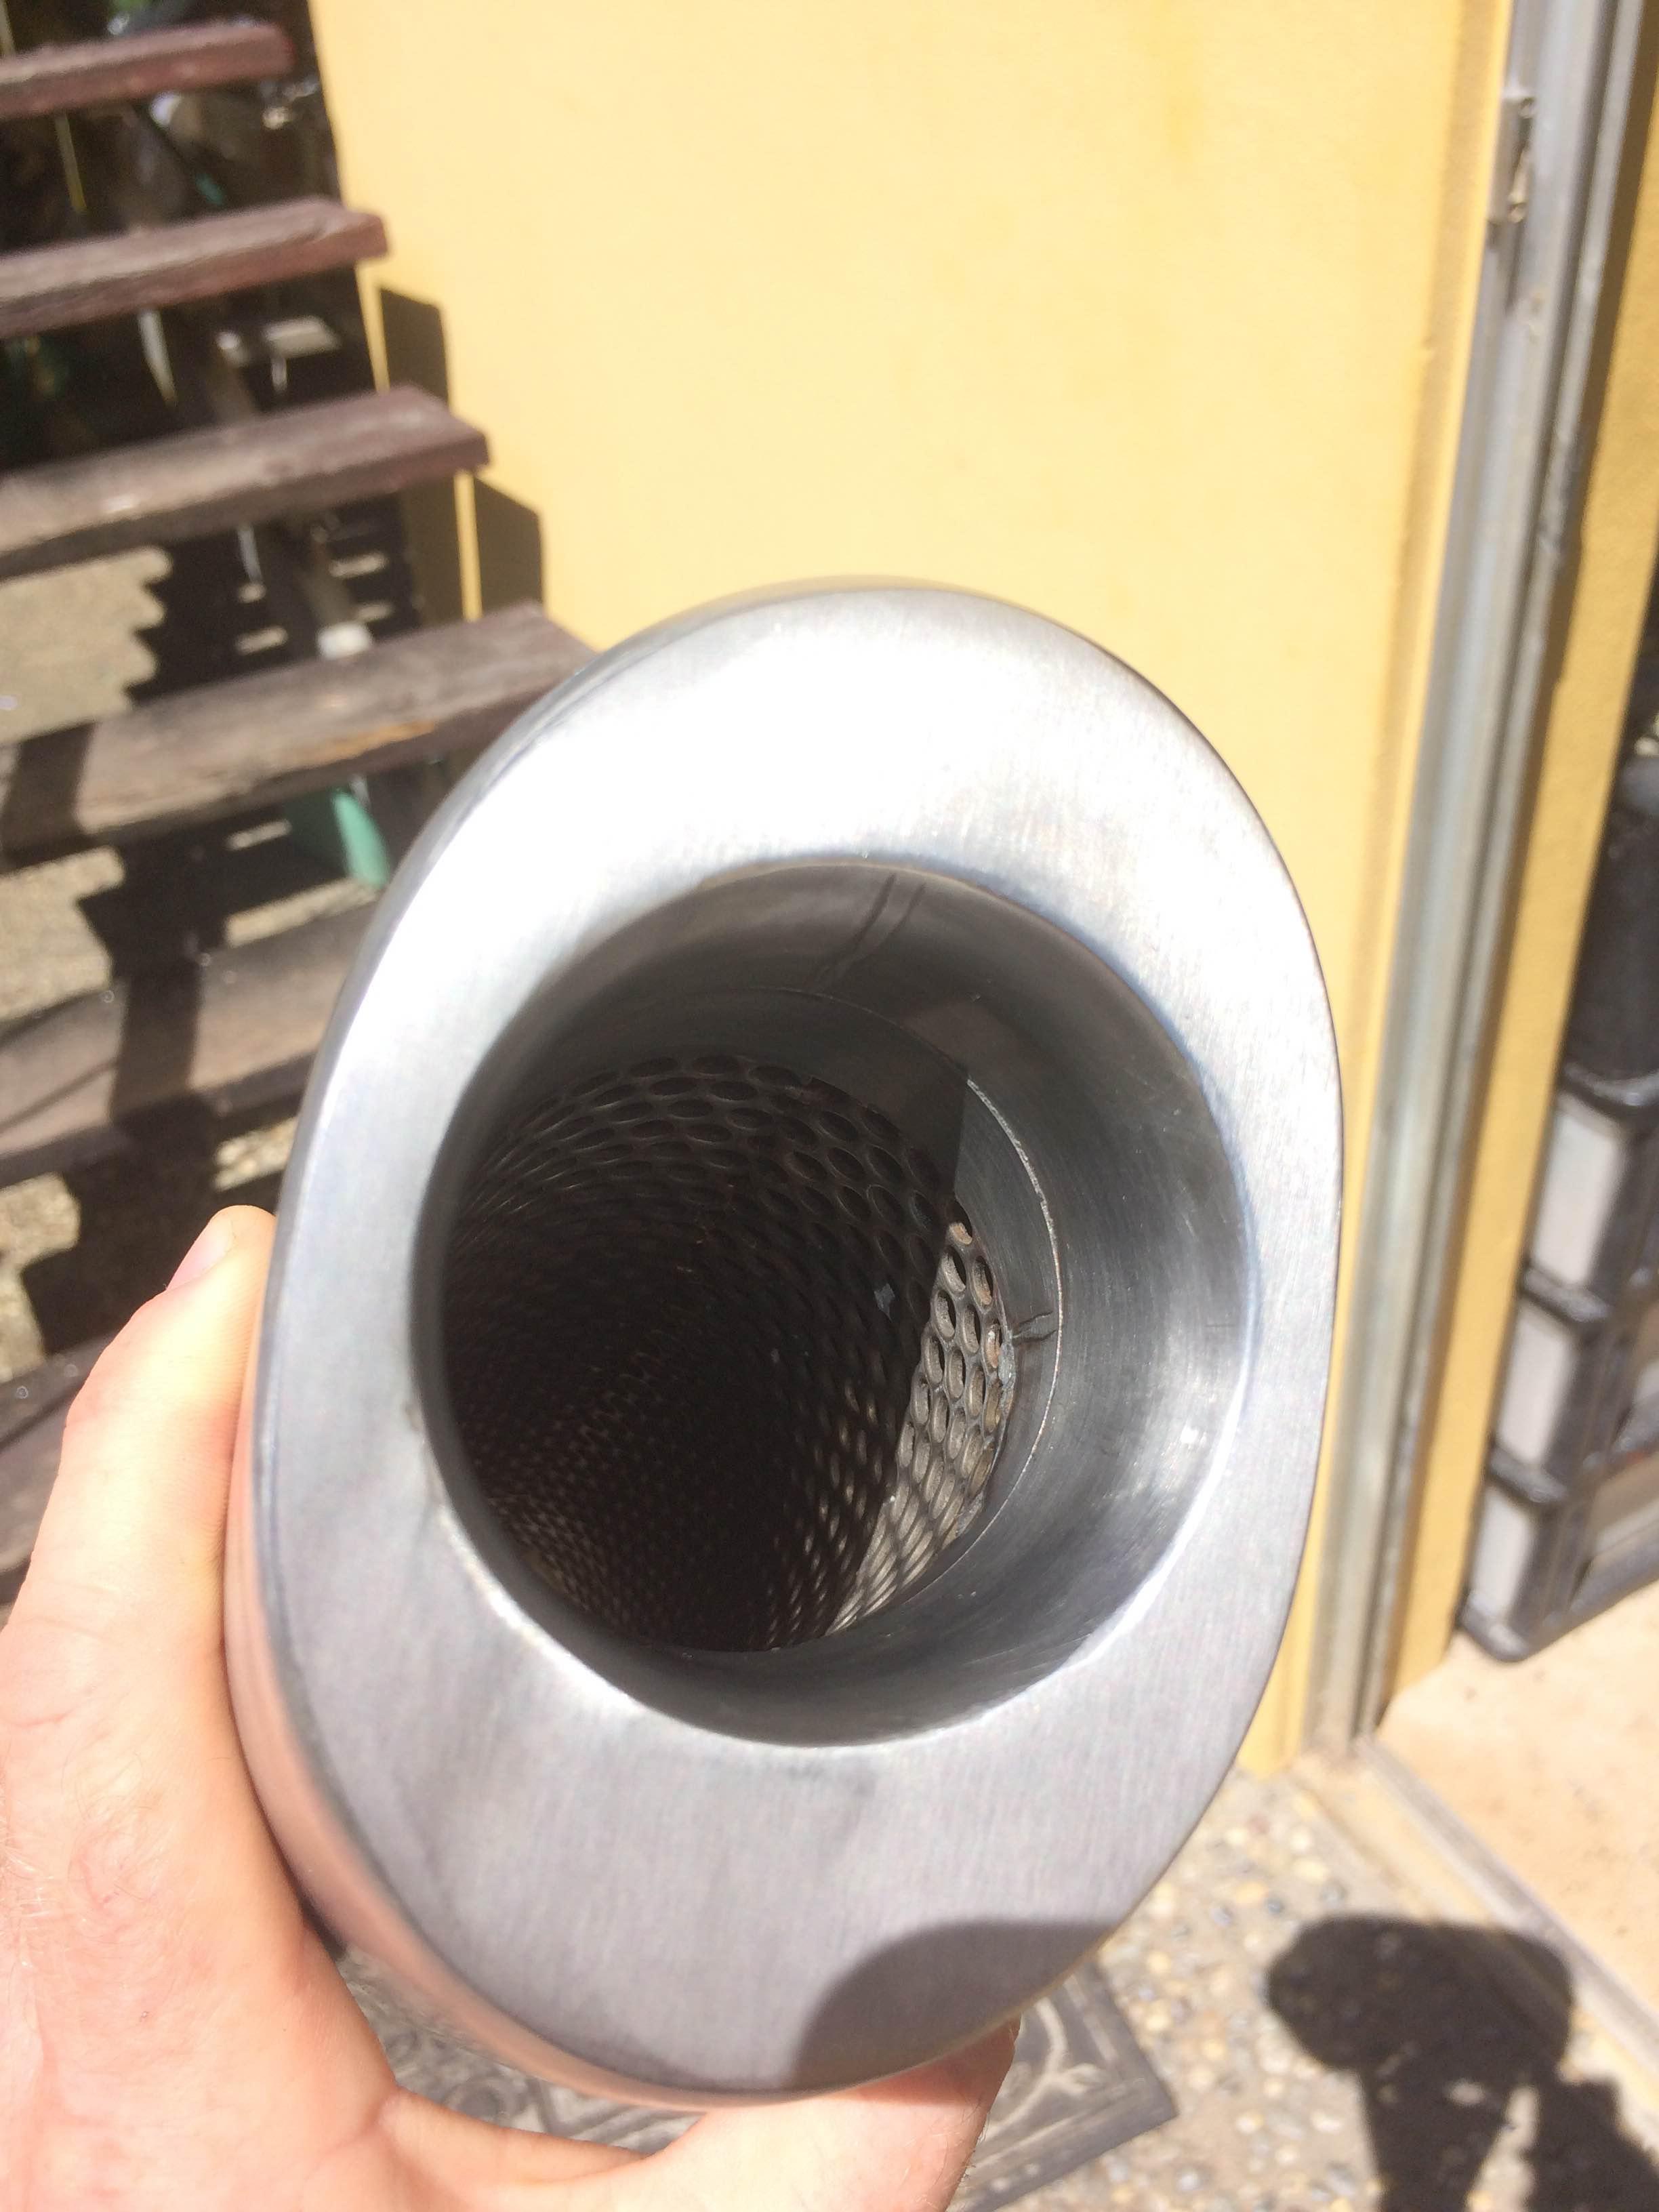
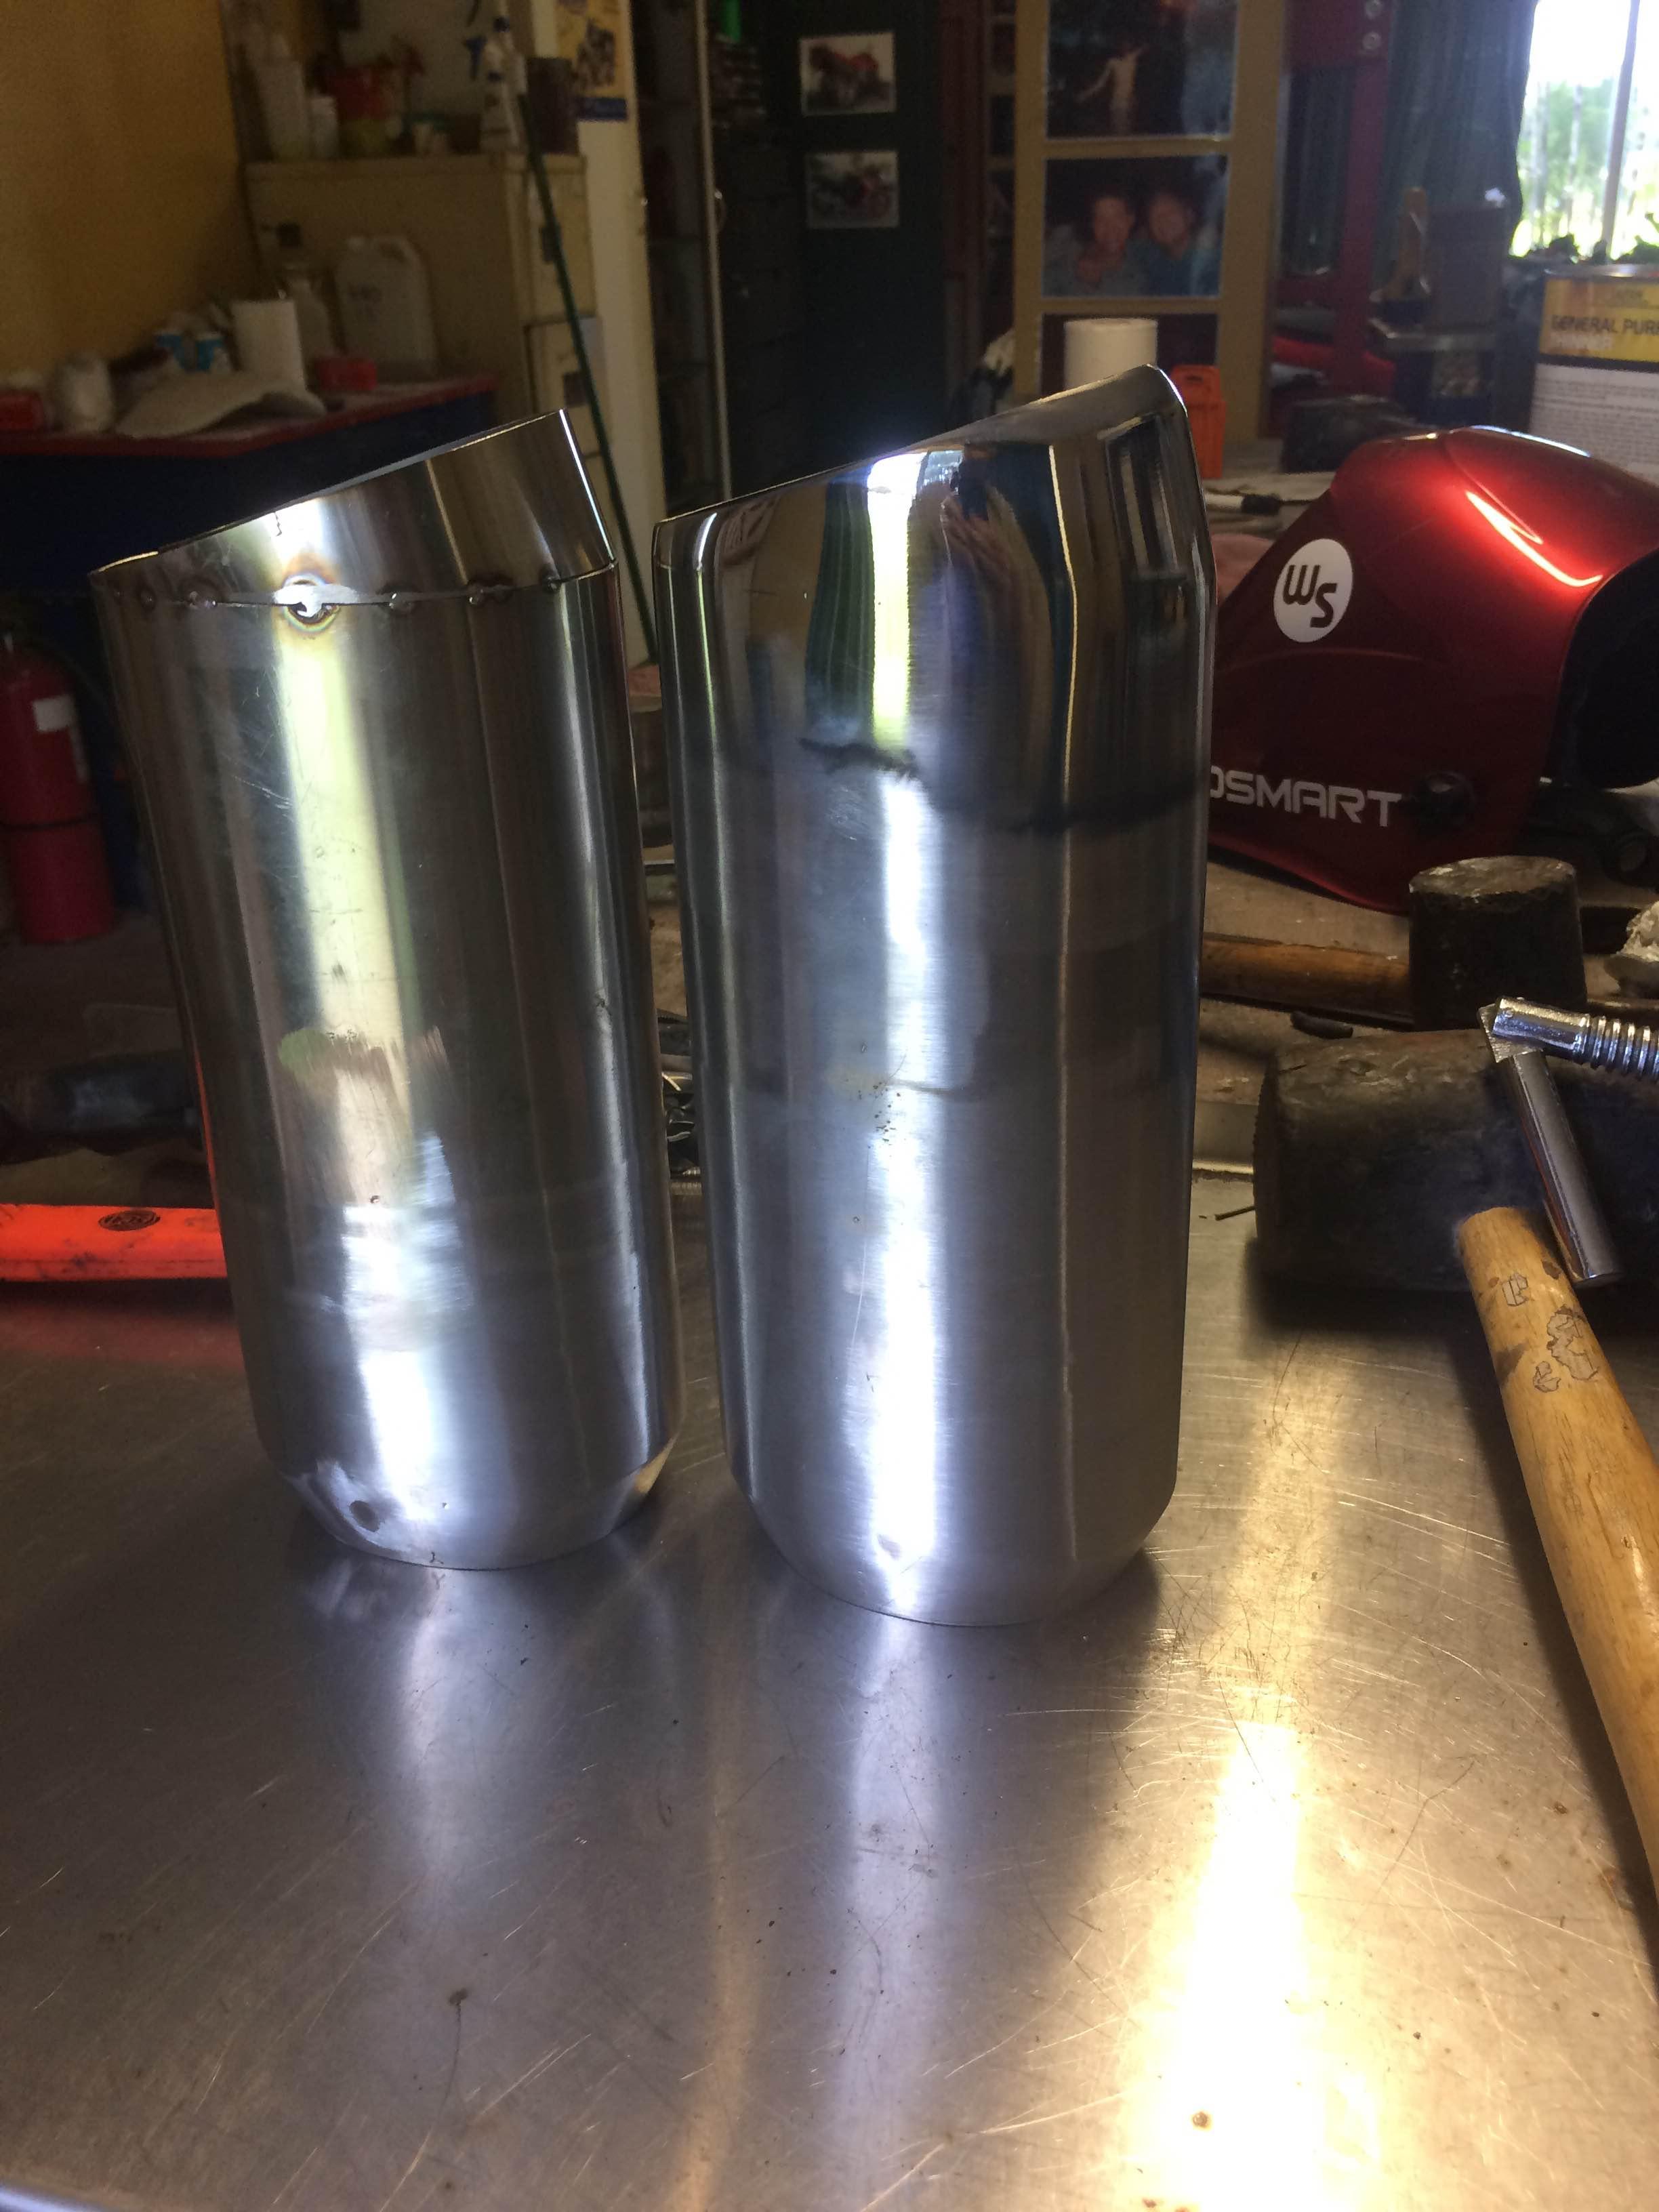
 I've posted about this in the past, but I finally sourced the parts I needed and had some time off school and work to go tinker in the garage. I did some research into the stock system vs an aftermarket system and they all said the same thing. The stock exhaust is heavy, restrictive, and muffles the sound off the V4 engine a little too much using a 3 baffle system. Aftermarket exhausts were lighter, way louder because of a straight through design, but didn't look right compared to the stock cans. Many people also run into bag fitment issues when using aftermarket cans. So my problem was how to take the best of both worlds, looks and proper fitment of the stock can, and mesh it with the performance and sound of an aftermarket can? What I came up with was a design to remove the stock baffles and replace it with a single baffle that would flow better, sound better, lose a bit of weight, and last a long time. The final design changed from my poorly done sketch, but I think it'll work better This will be a photo heavy post, sorry to those with slower connections, but my hope is that others will be able to do the same if they choose to. So here's what I did: I ordered up a used gen 6 exhaust system off ebay to hack apart so I could keep the stock one if I ever wanted to go back. Removed the heat shields and other bits and bobs. I cut off the tips of each can right beside the weld using a dremel. It took 12 cutting wheels and a dull hacksaw blade (ran out of cutting wheels) to remove both sides. That metal is tough! I used vice grips to pull out the stock baffles, it took a fair bit of wiggling and pulling but they eventually slipped out. Wear gloves when you do this, as the cut metal is quite sharp and the fibreglass packing around the baffles is super itchy. I then removed the fibreglass sheet from the baffles and broke out the cutting wheels again. After cutting off both ends of the baffle, cutting through the inlet and outlet pipes as well, I discarded the center section as it would be unneeded in the final design. At this point I picked up a 48" length of 1.25" perforated stainless steel pipe to be cut into 4 smaller sections (12" each). I used a 1.25" bi-metal hole saw to cut two holes on the inlet side of the stock baffle to fit the perforated pipe through. I laid everything out and riveted the stainless pipes to the outlet pipes to keep them in place. I'll take everything to be welded at a later date. I then slipped the inlet pipe of the stock baffle over the two new pipes and placed rivets on each side to hold it in place. After some pushing and a few cuts later, I was able to slip the new set up into the stock can no problem. I still have to finish the other can before re-installing everything on the bike and firing it up. Hopefully I'll have that done later this week. Exams and work keep interfering with play time Total costs: Muffler: 250$ Pipe: 40$ Rivets: 7$ total: ~250$ for a perfectly fitting gen 6 slip on!
 -
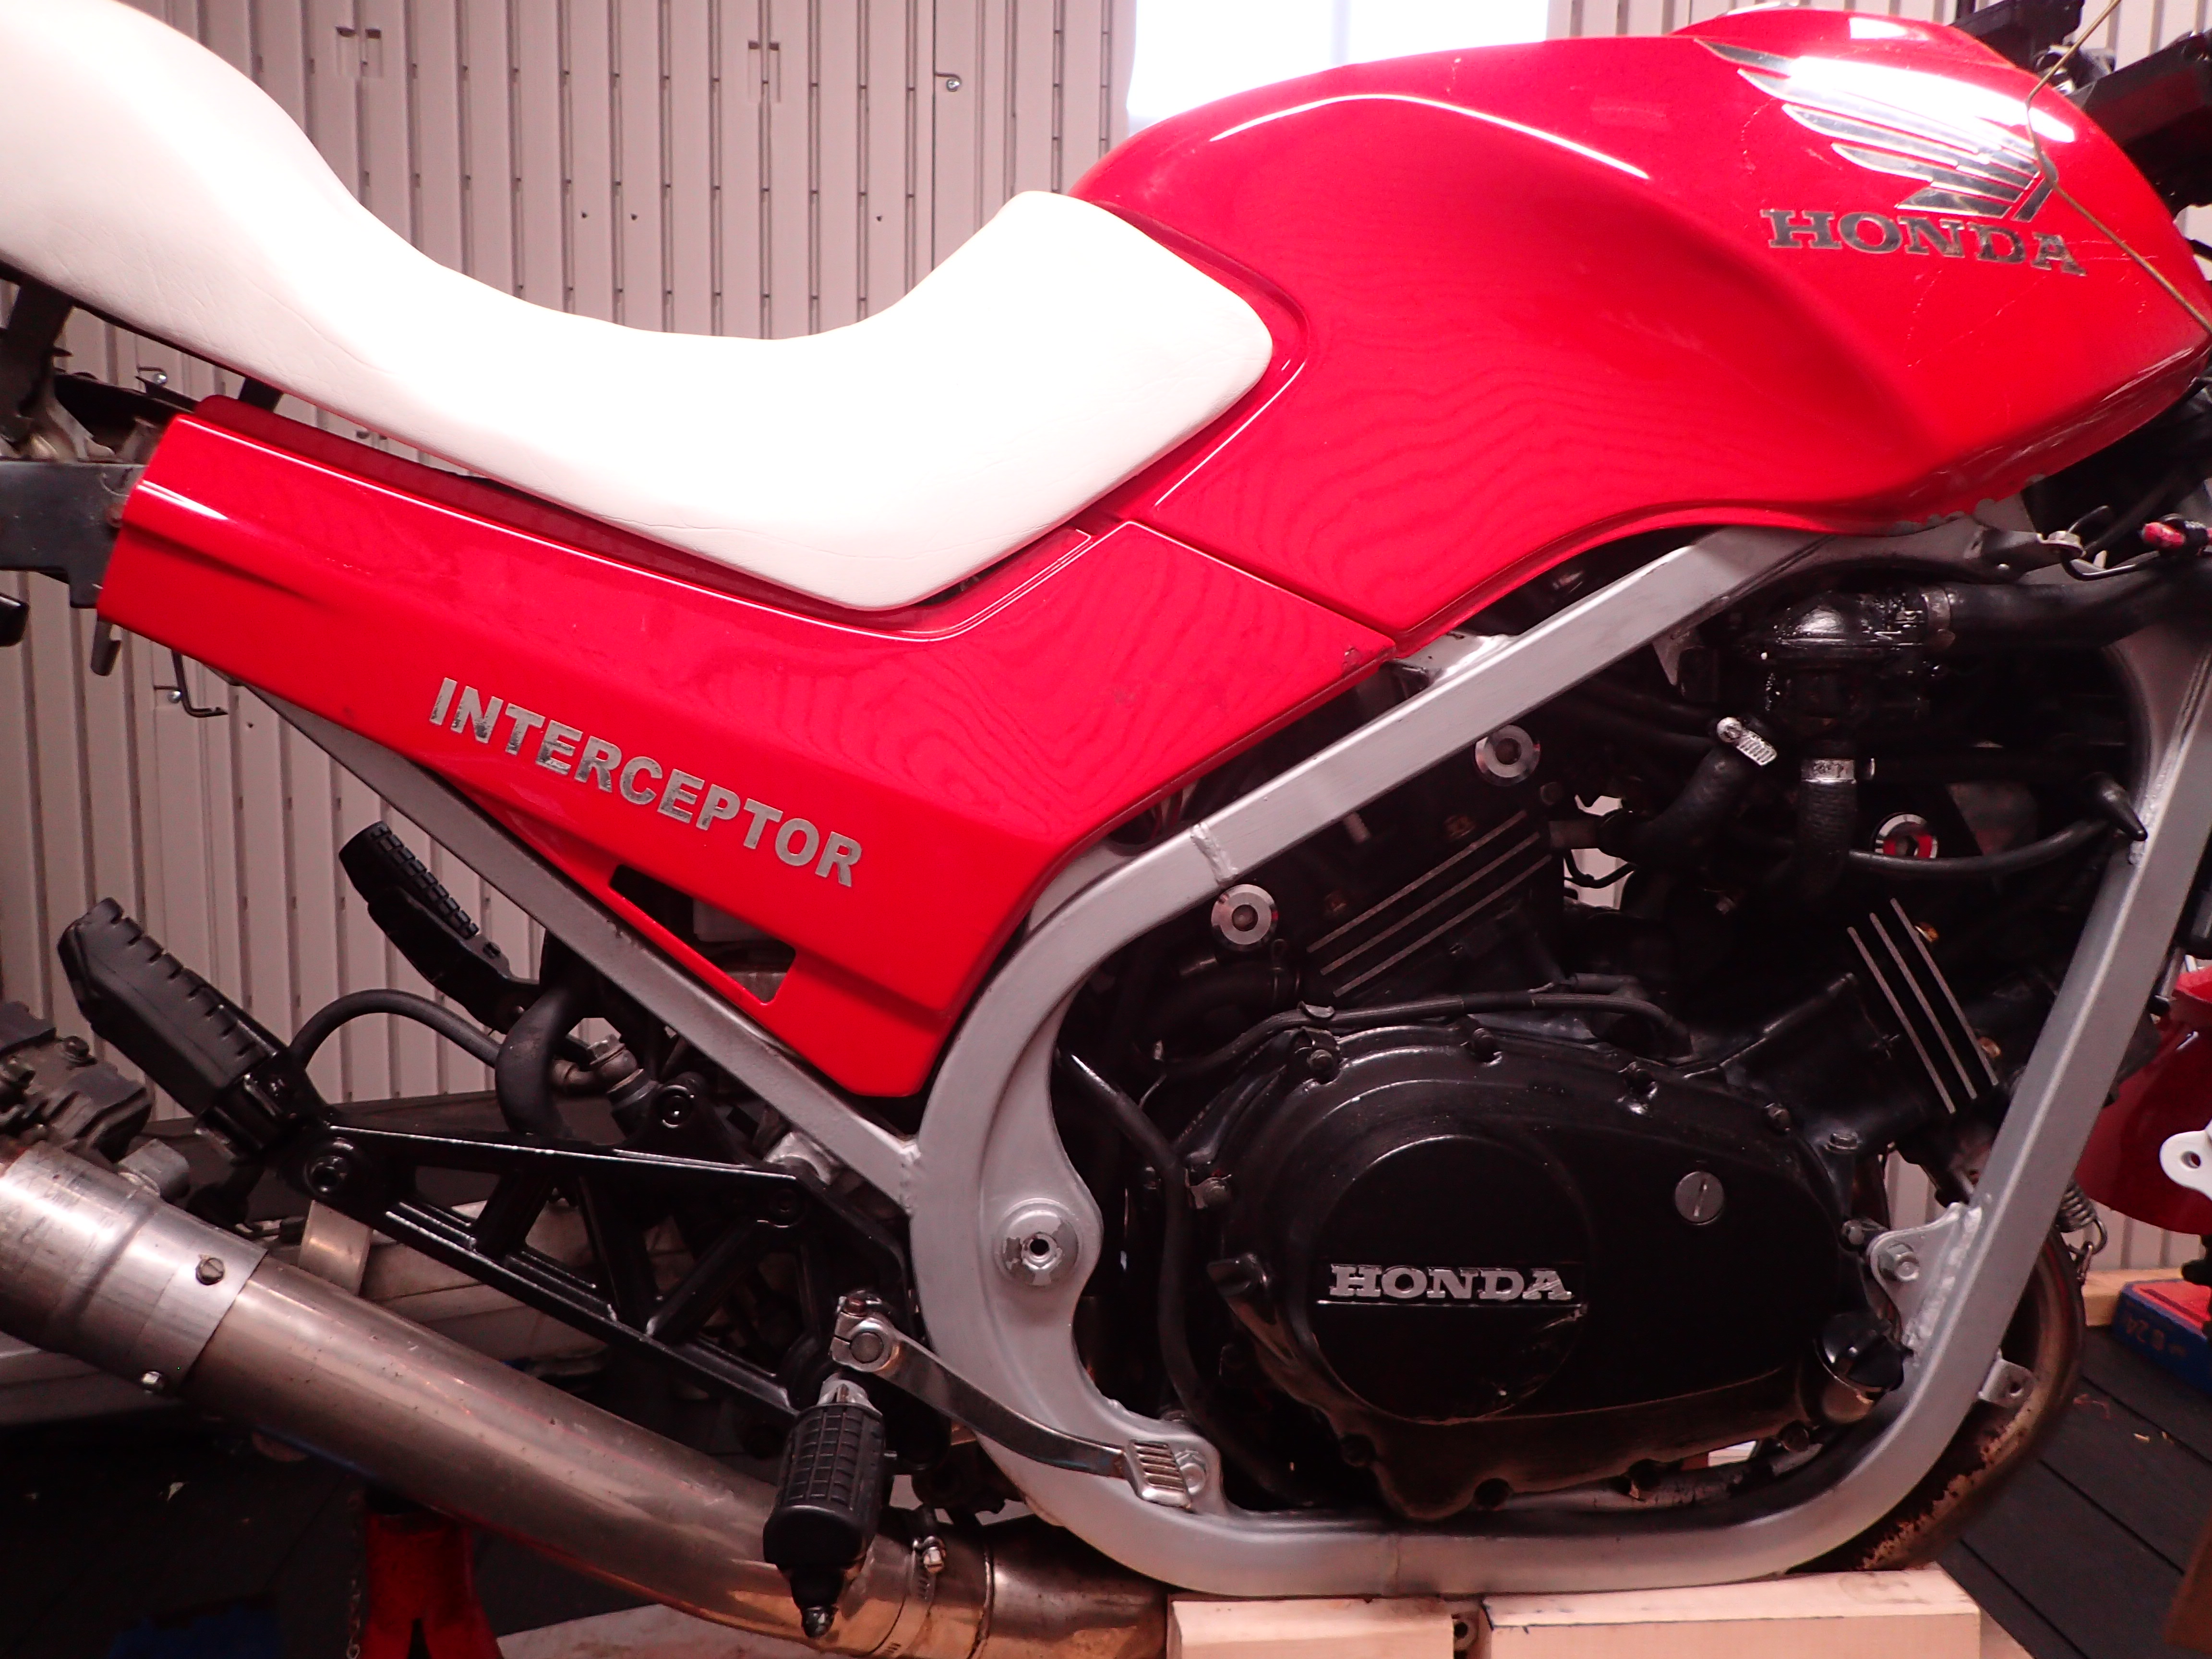
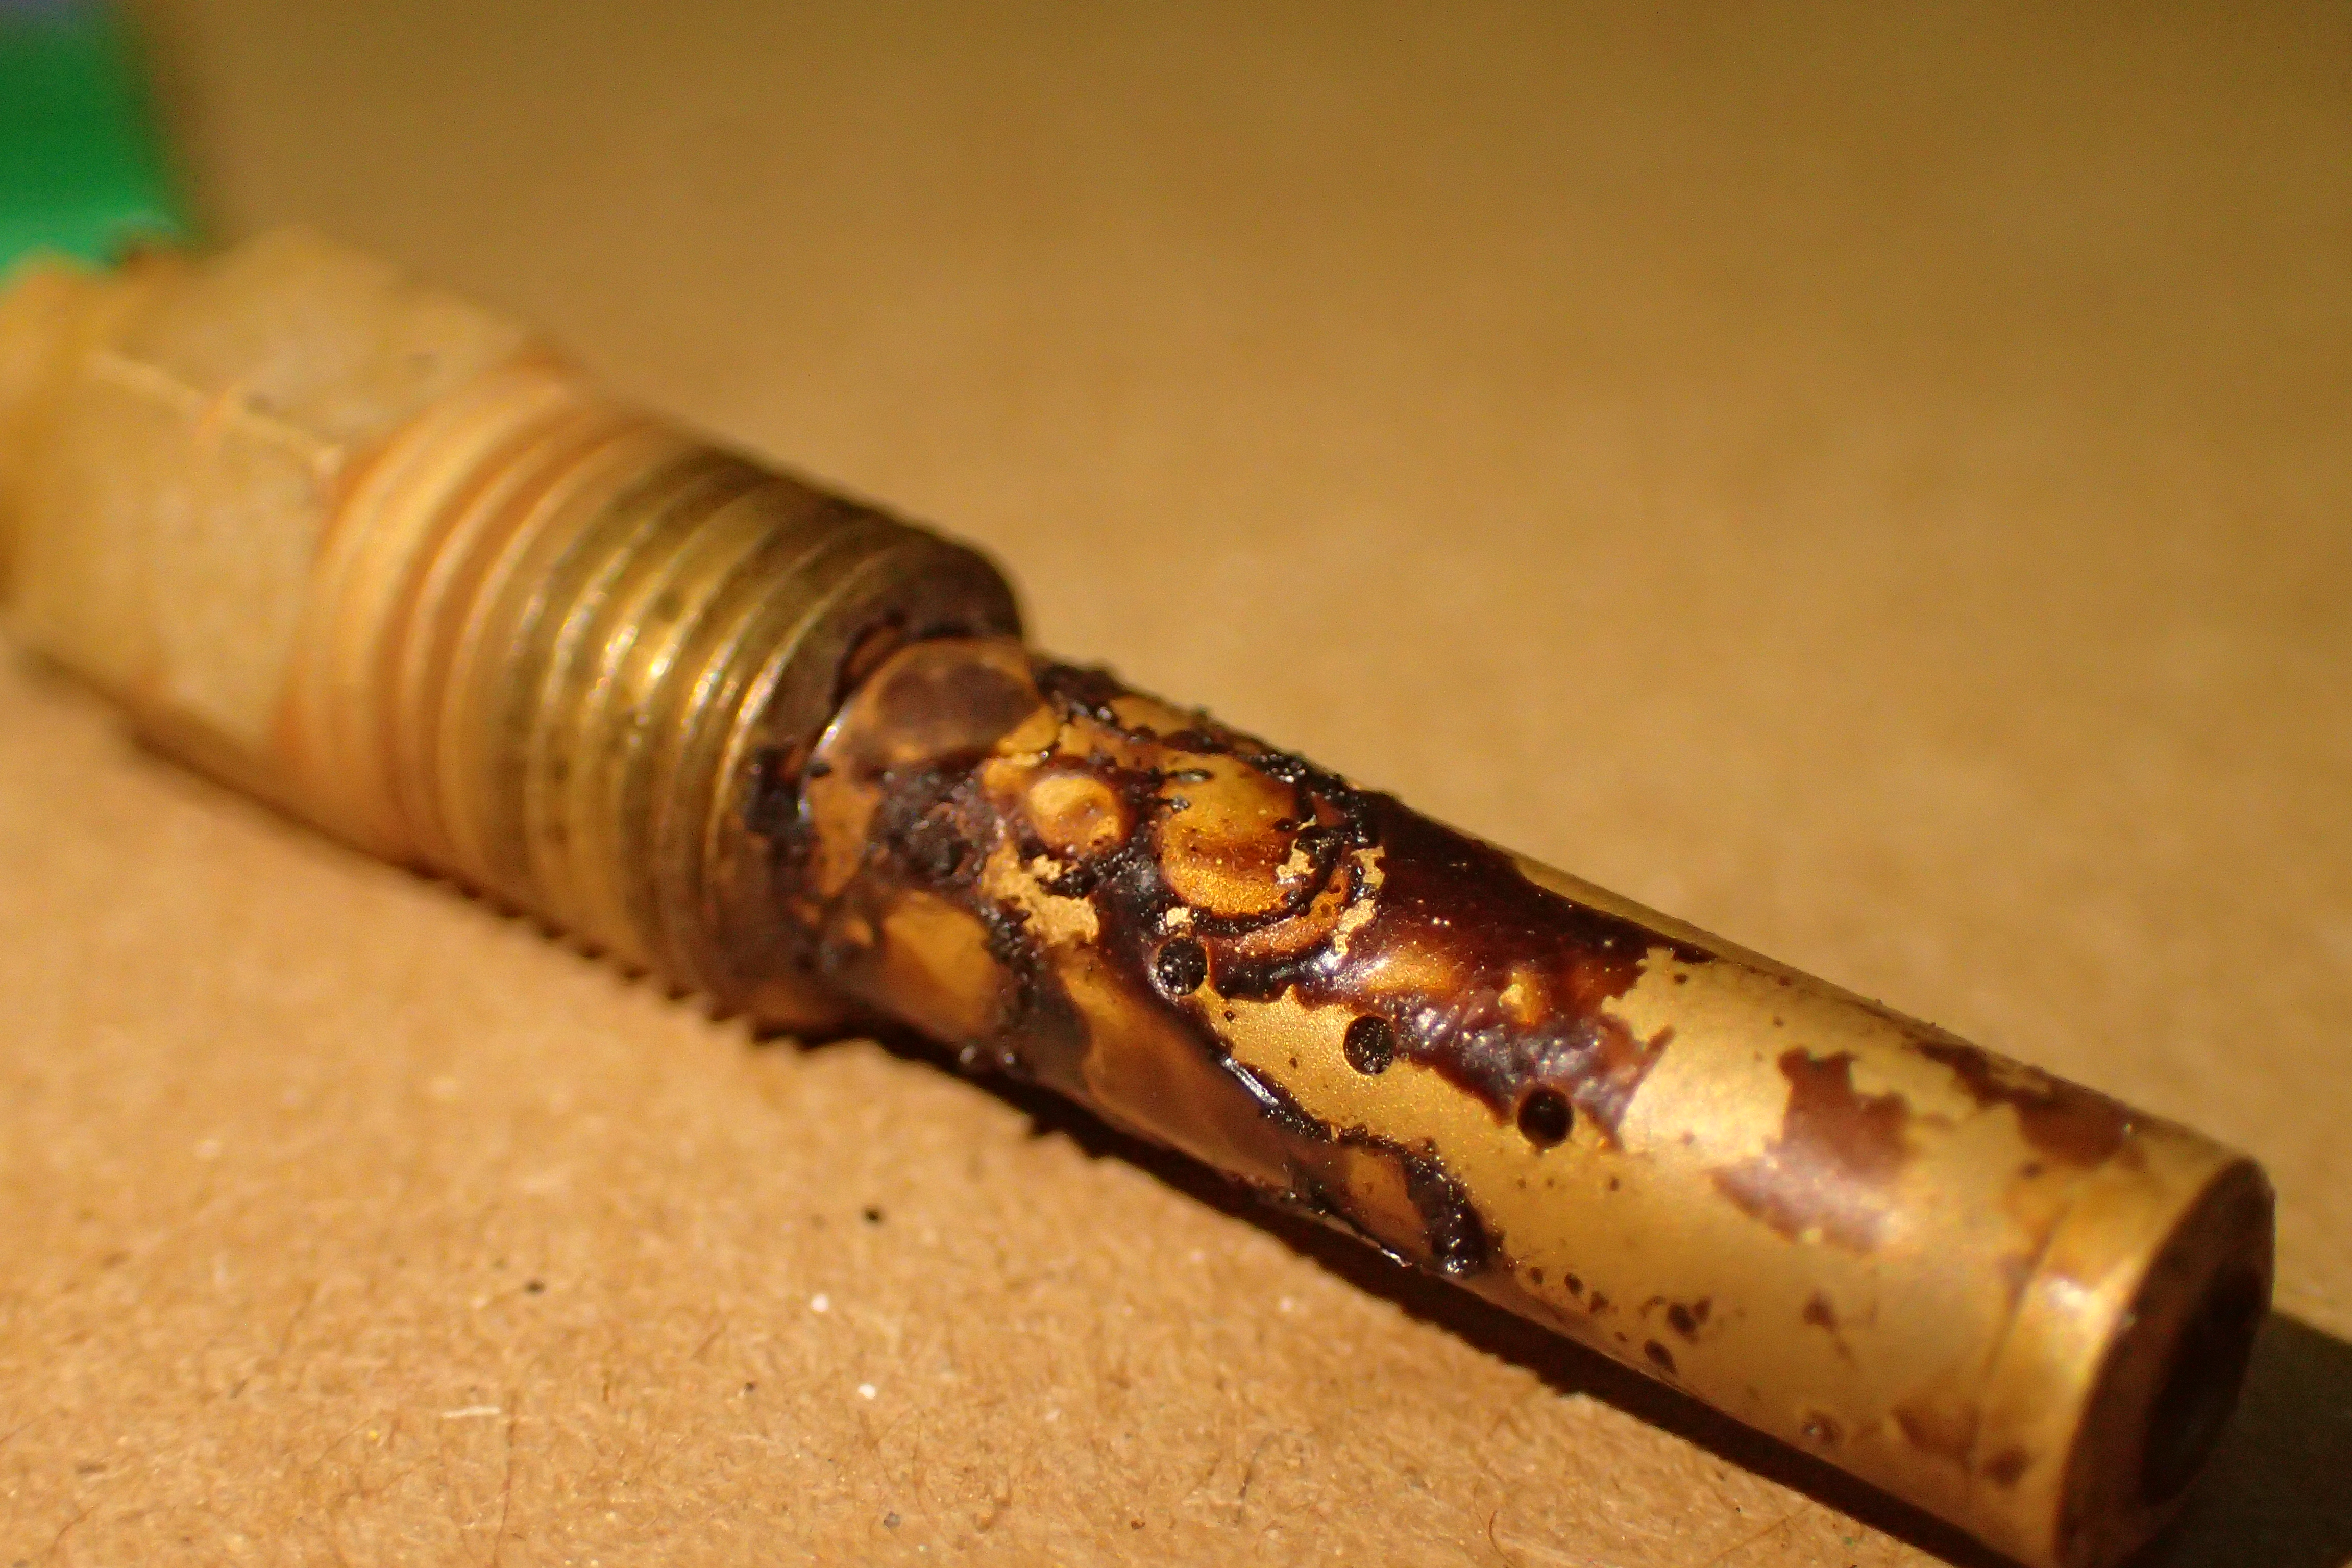
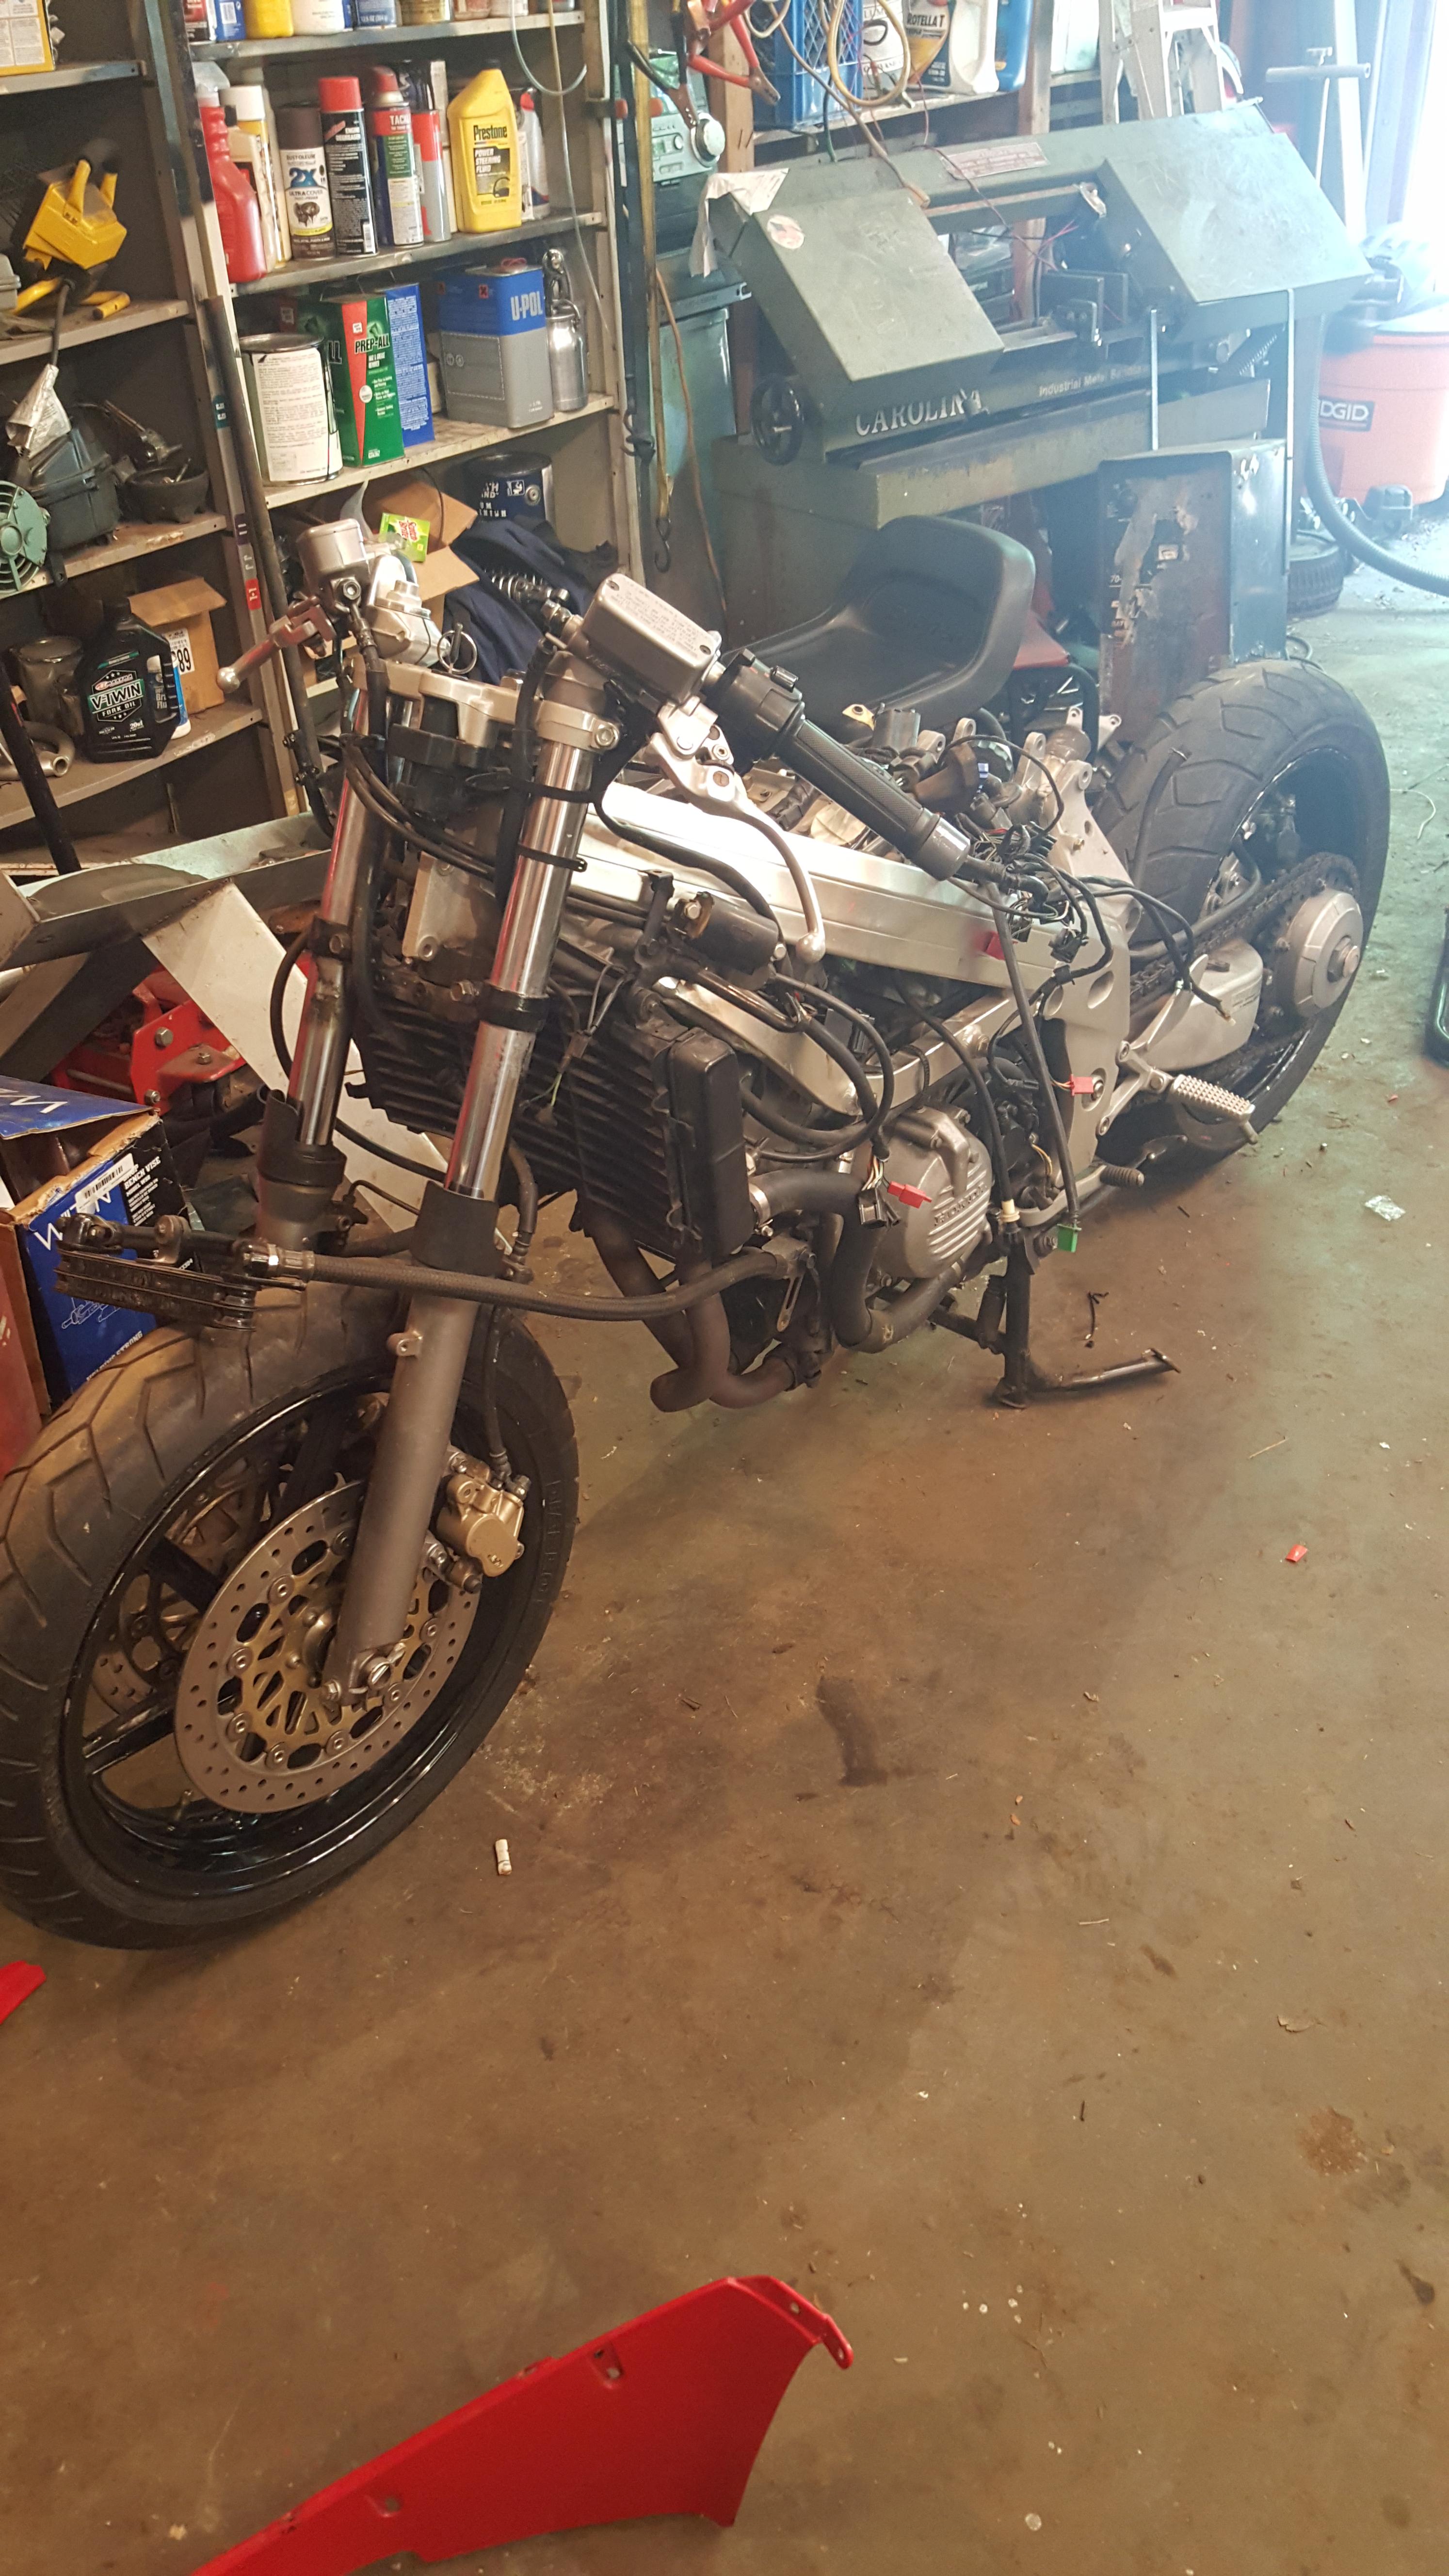
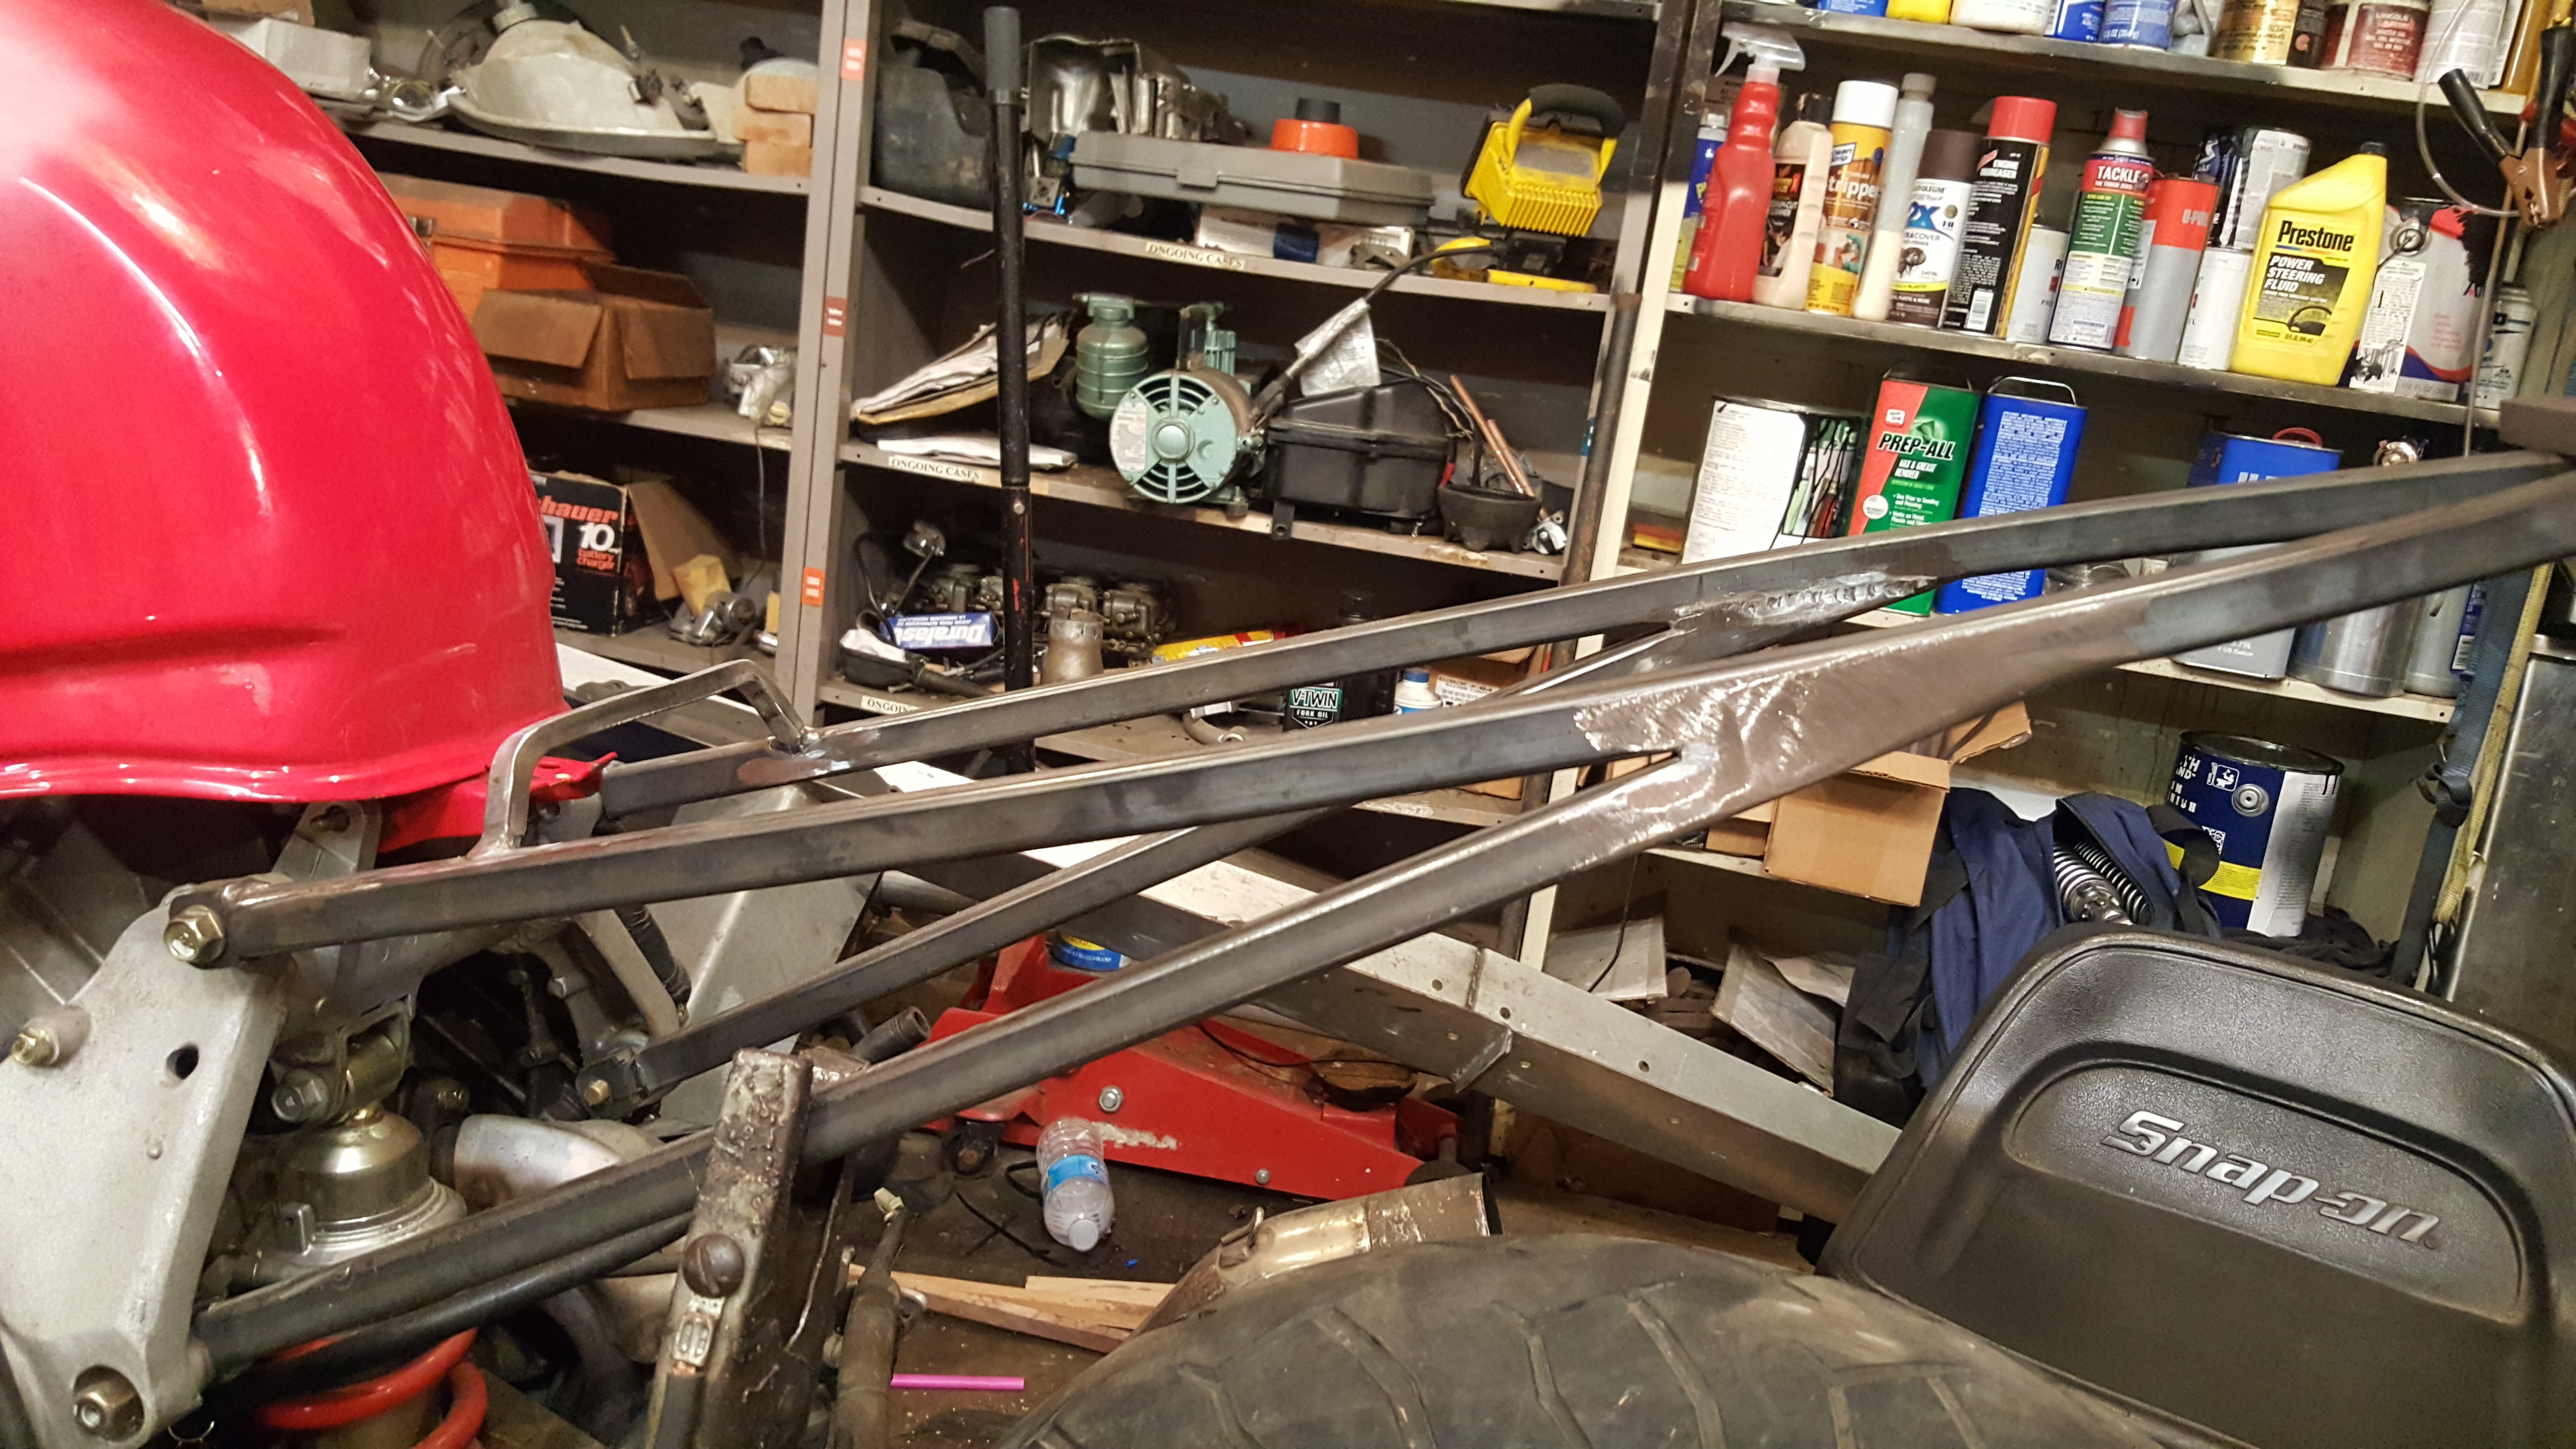
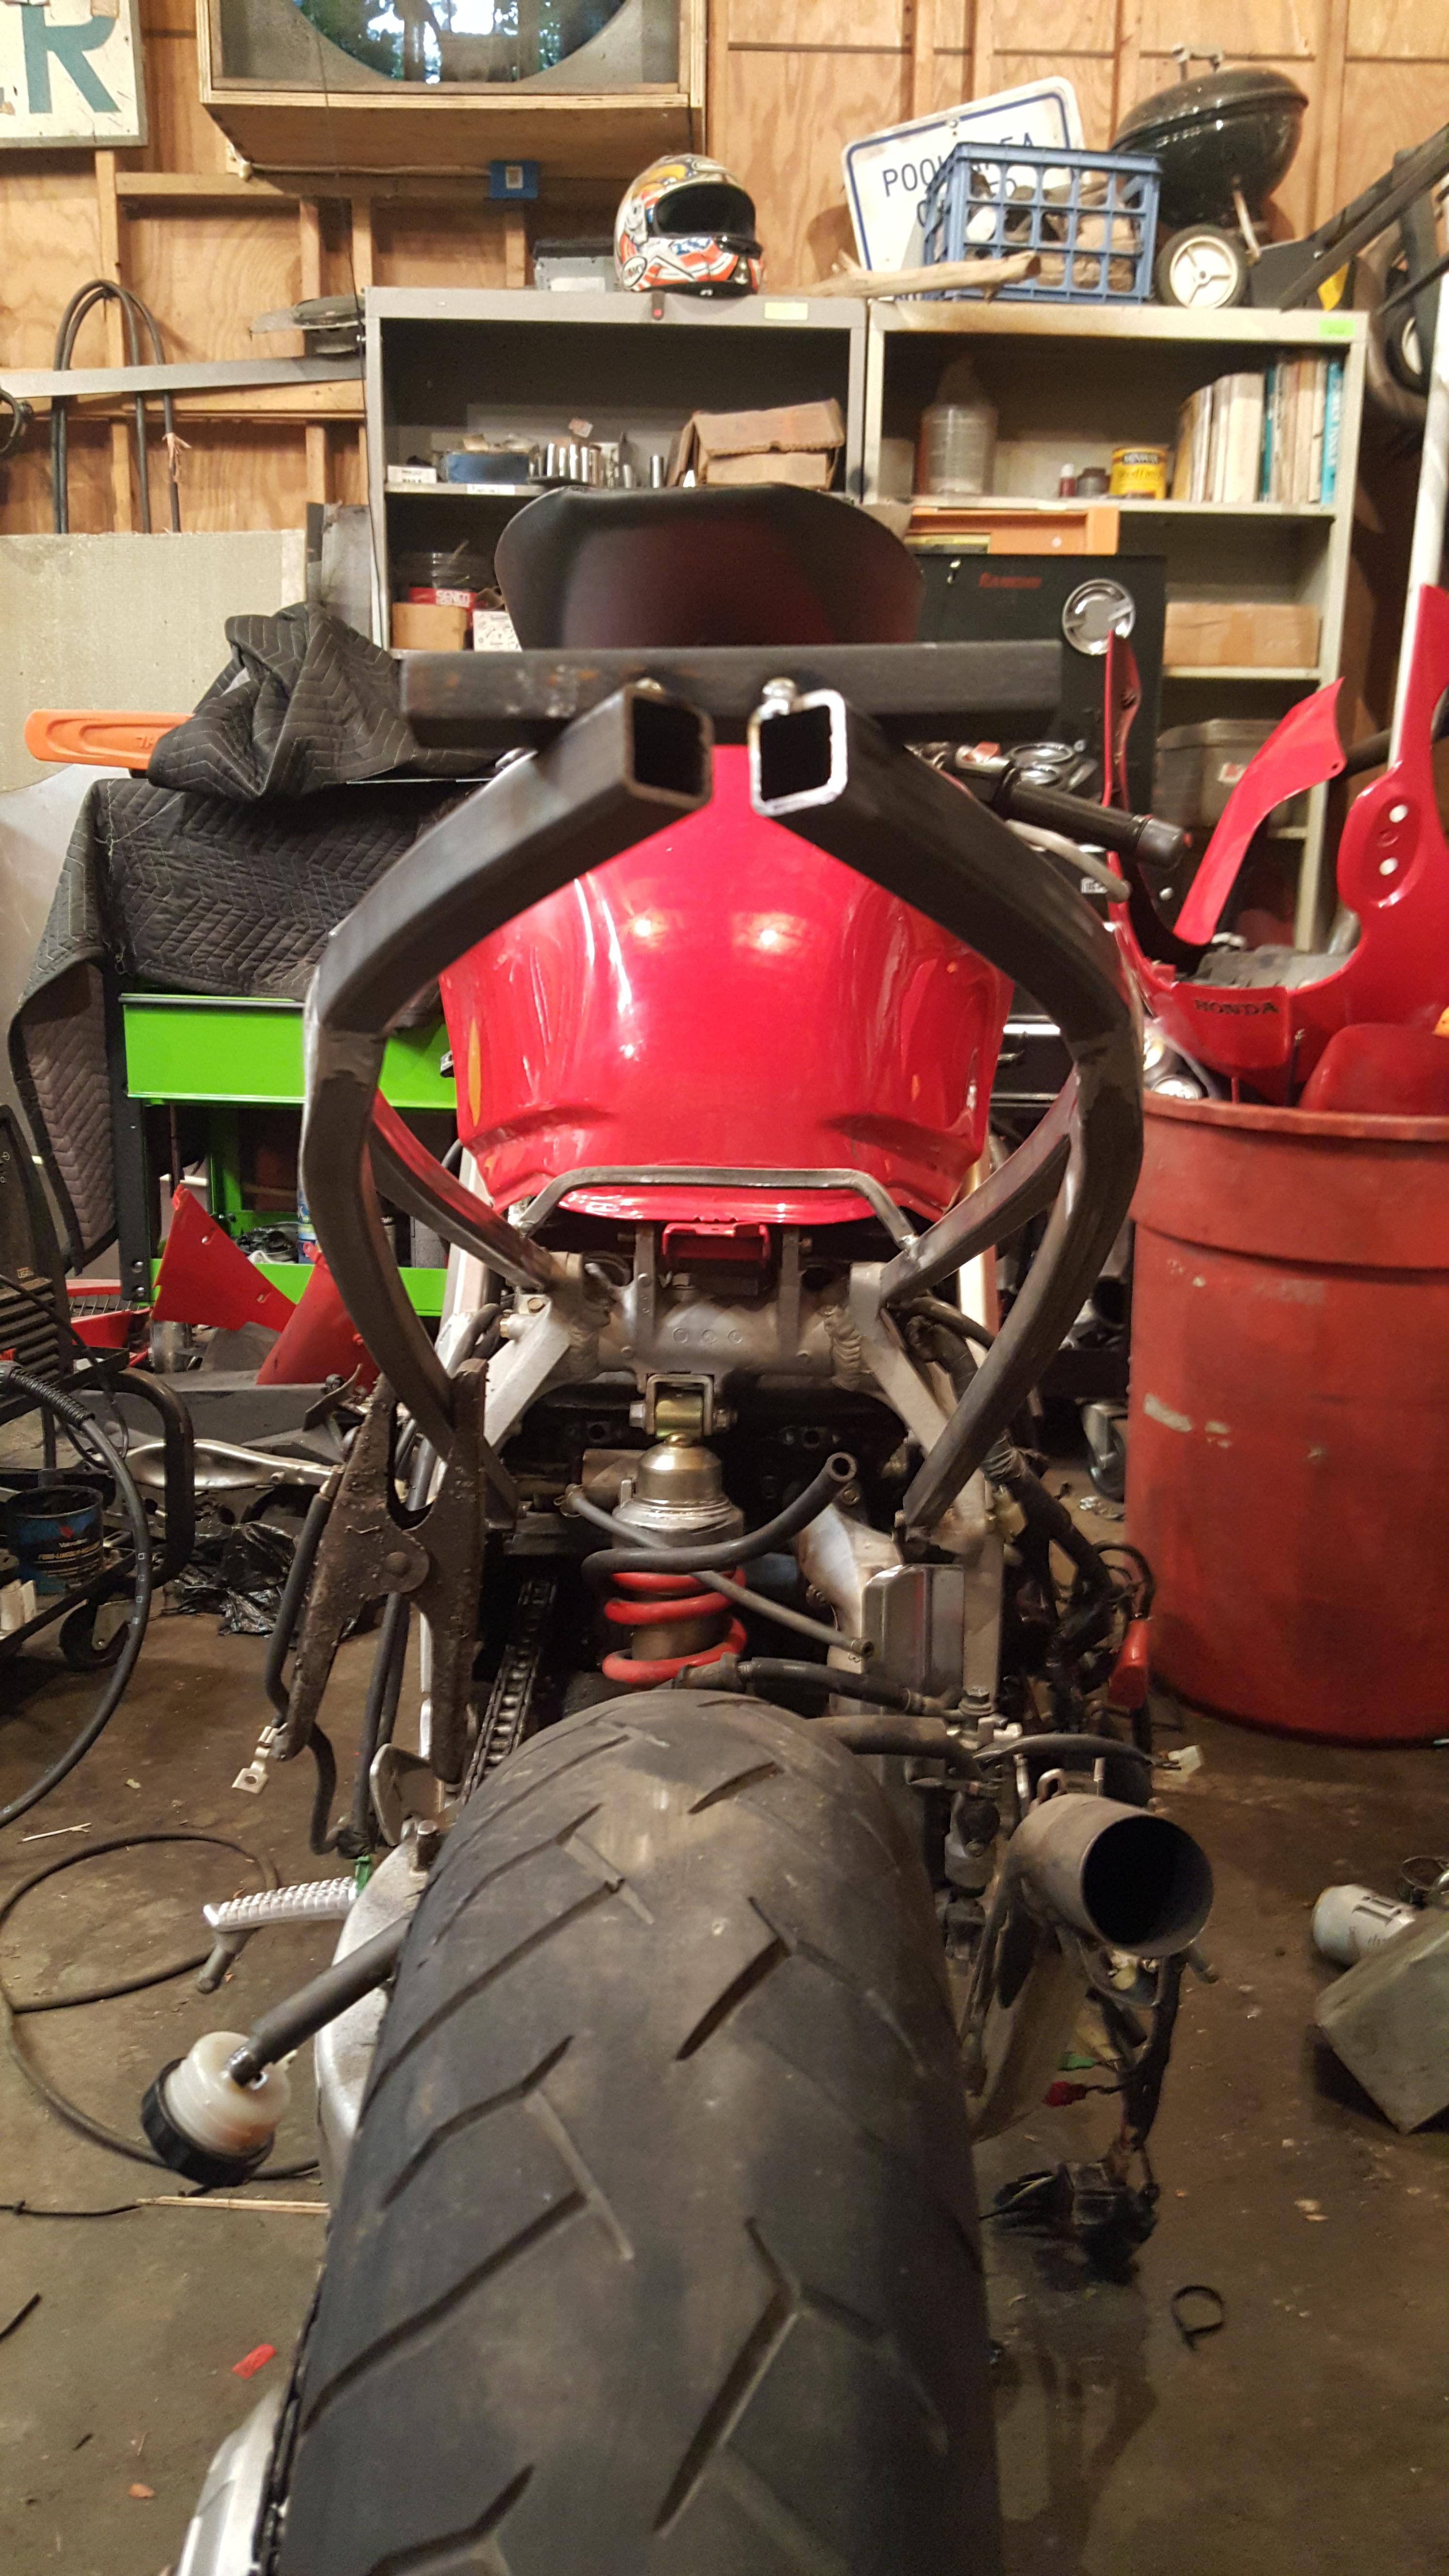
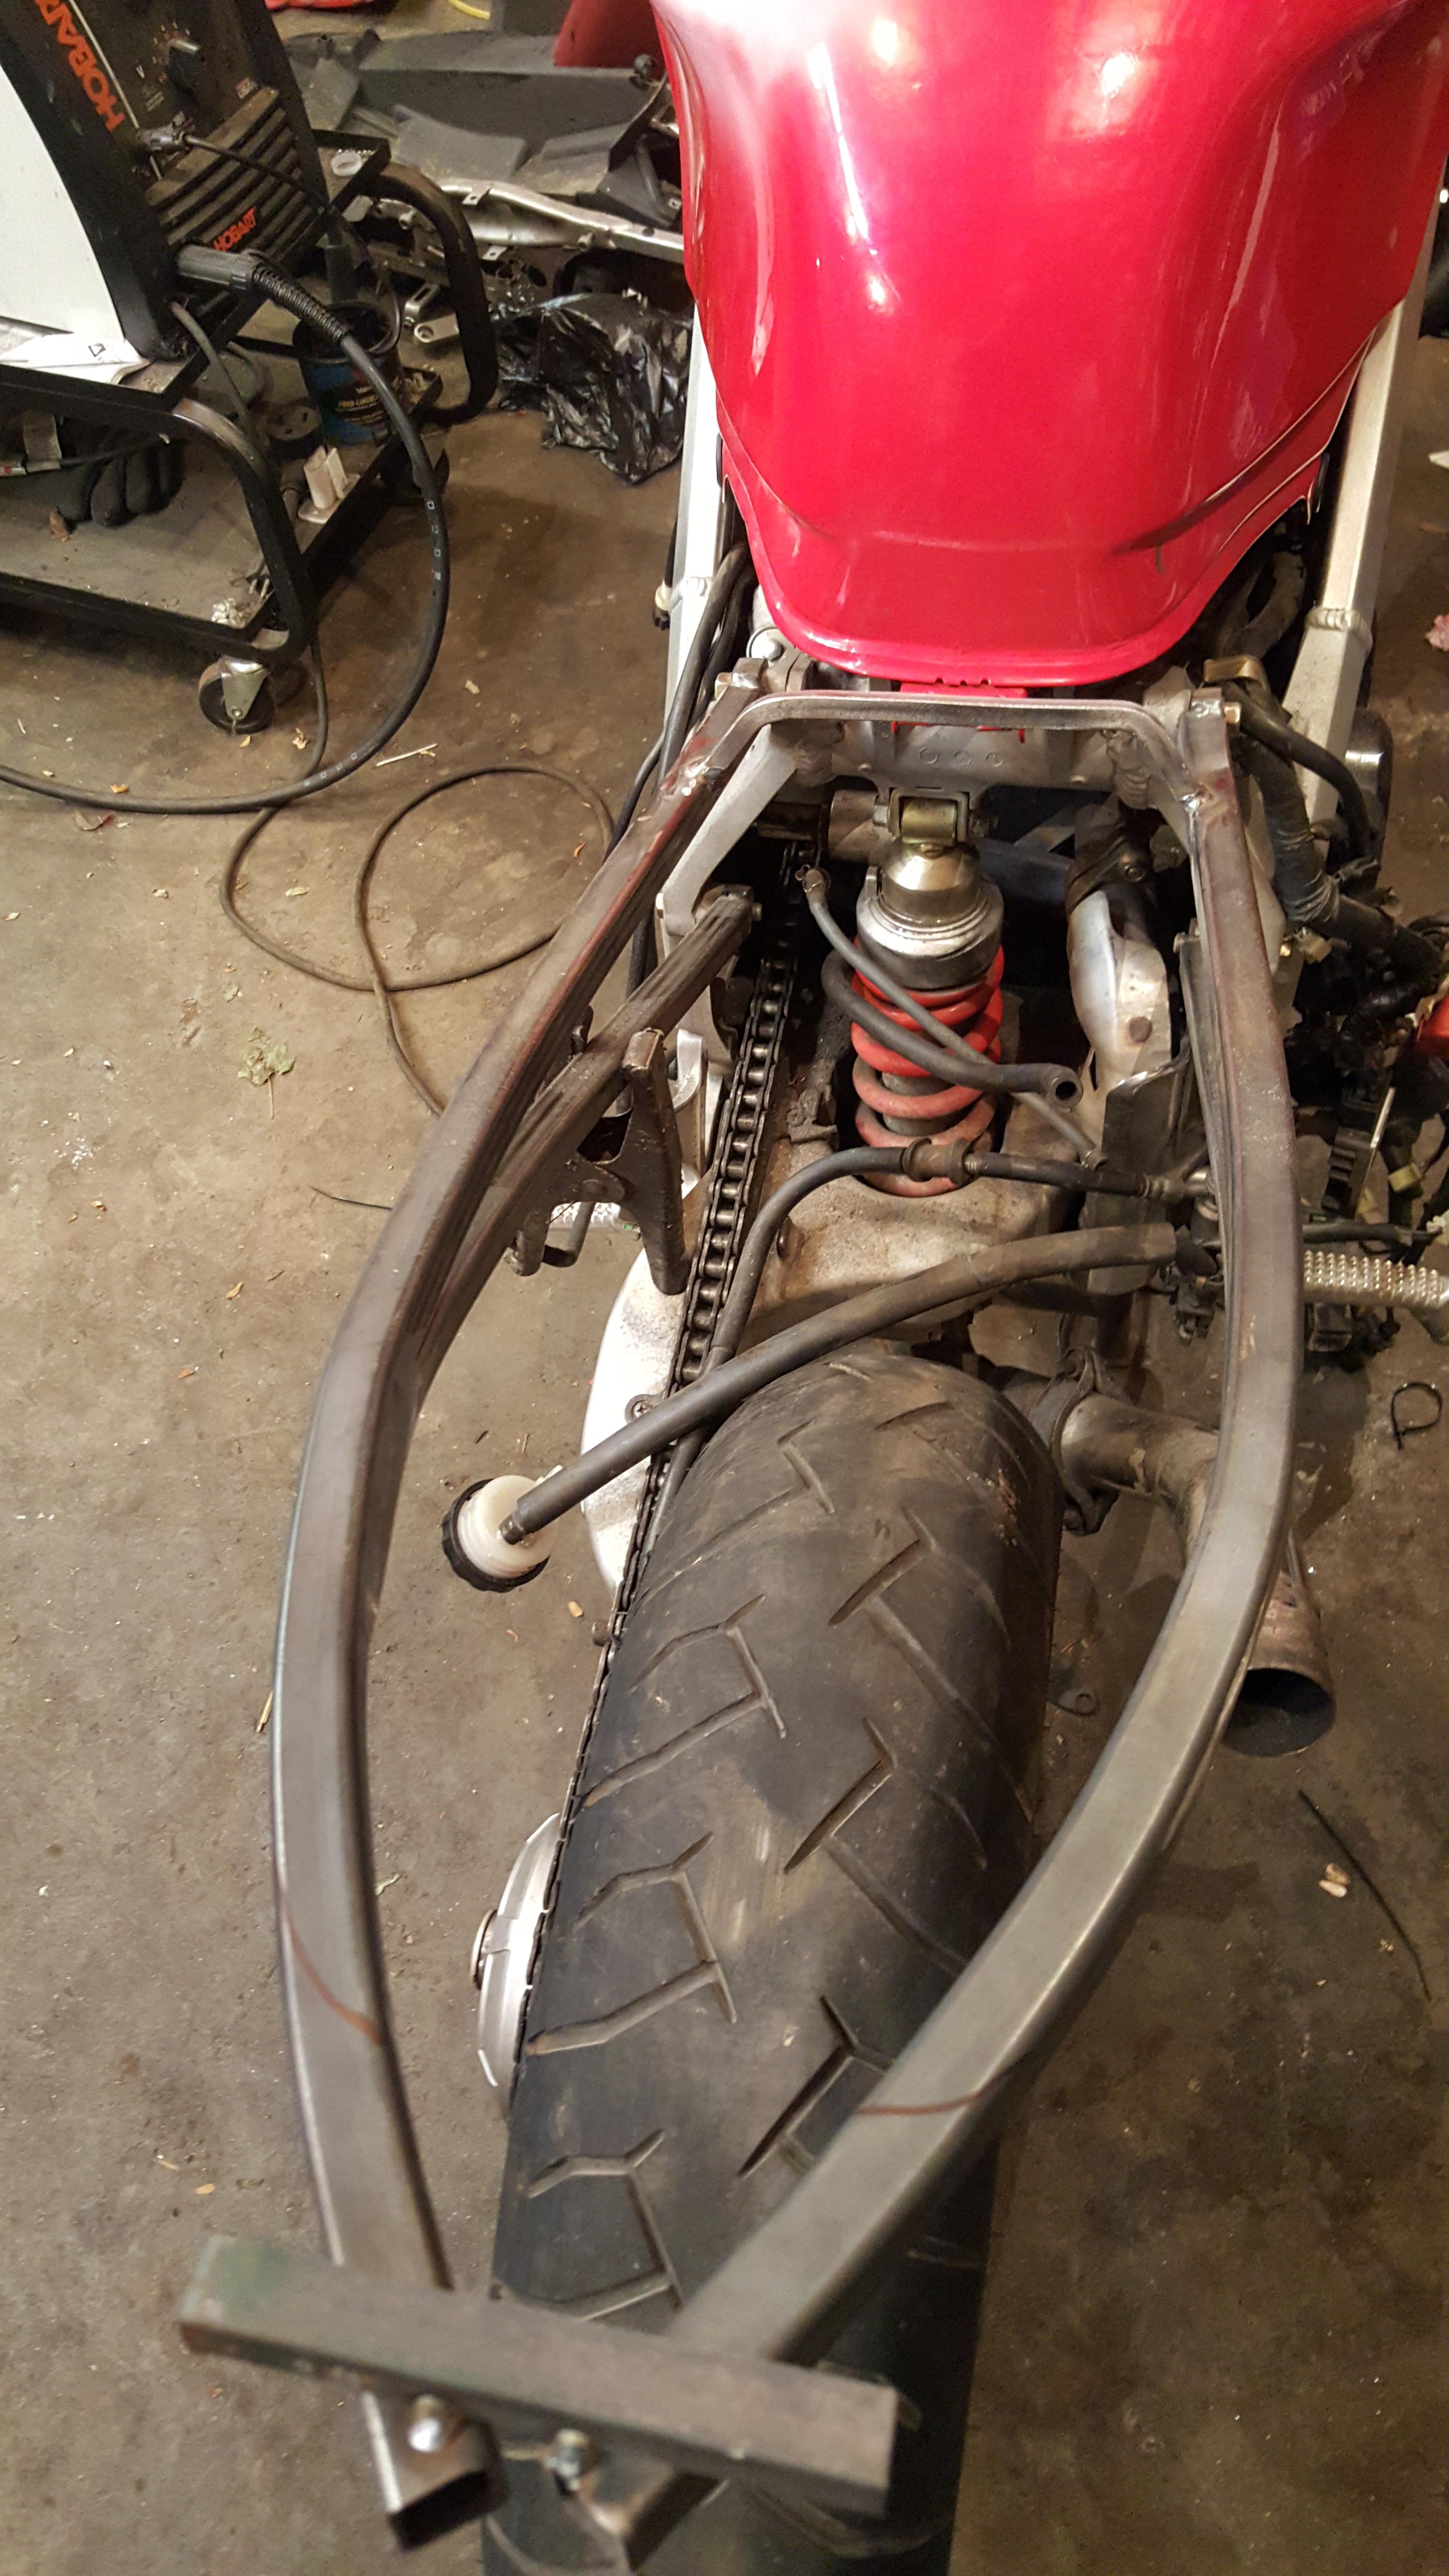
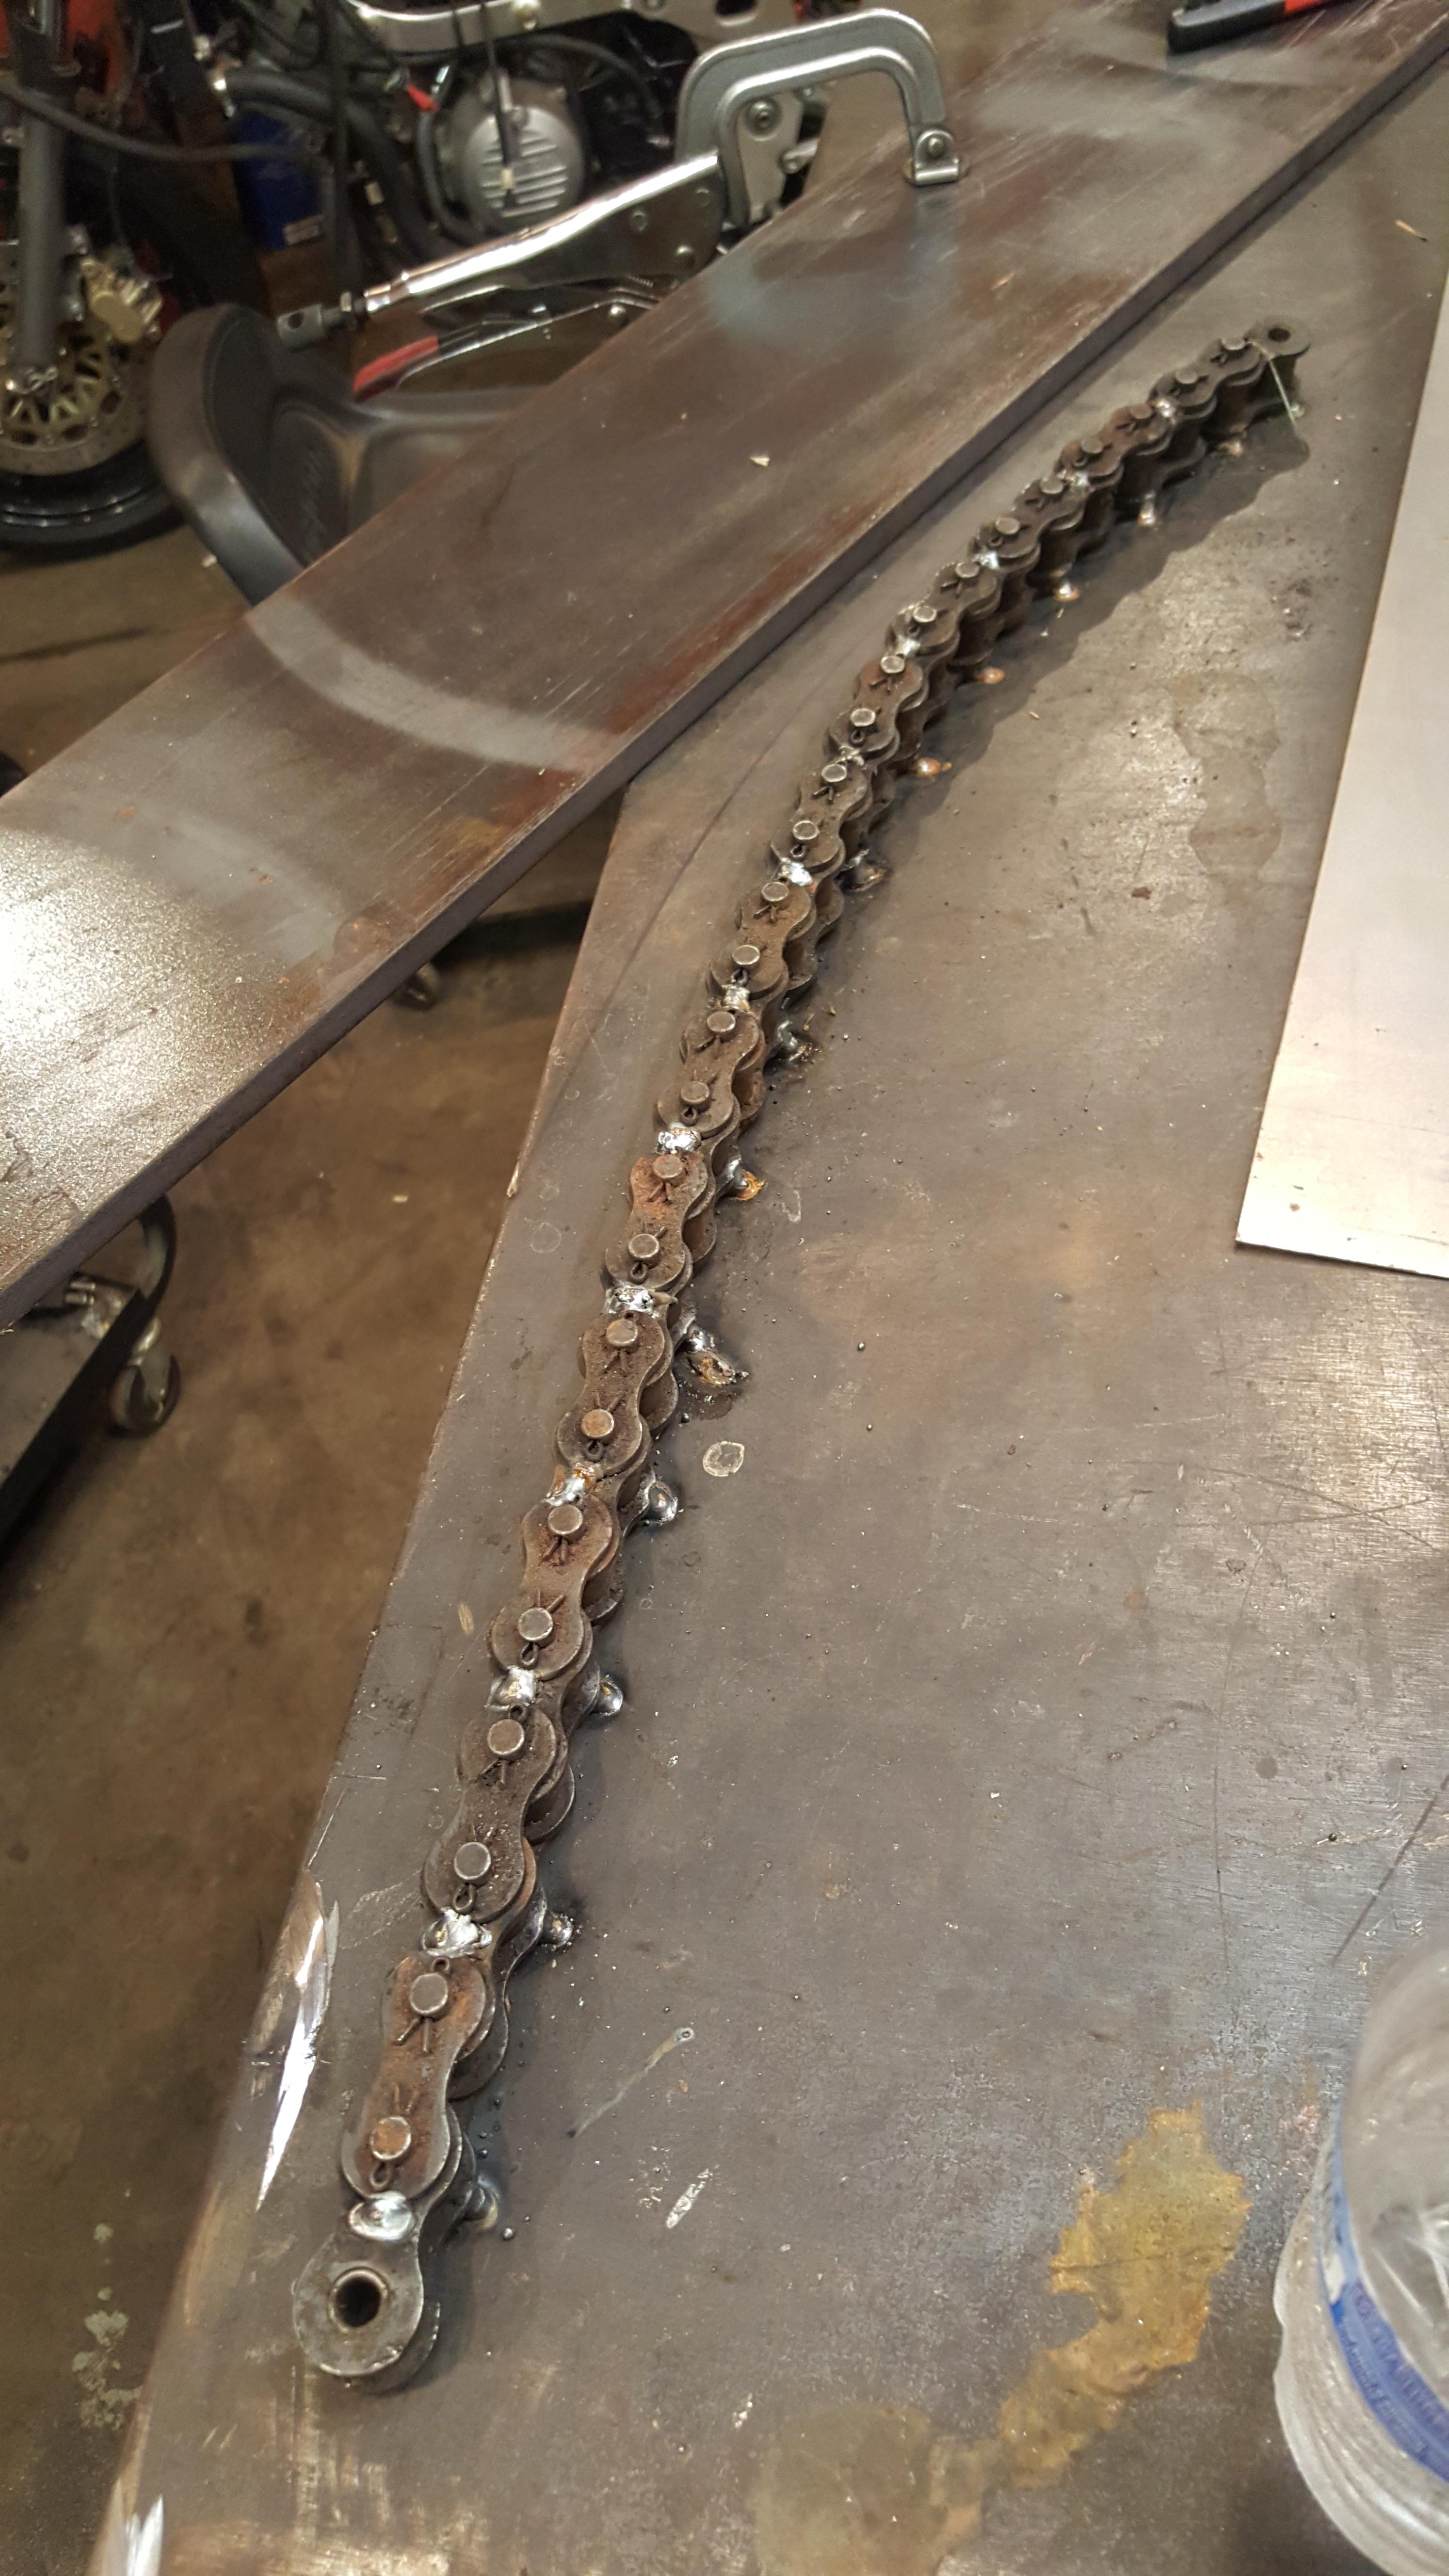
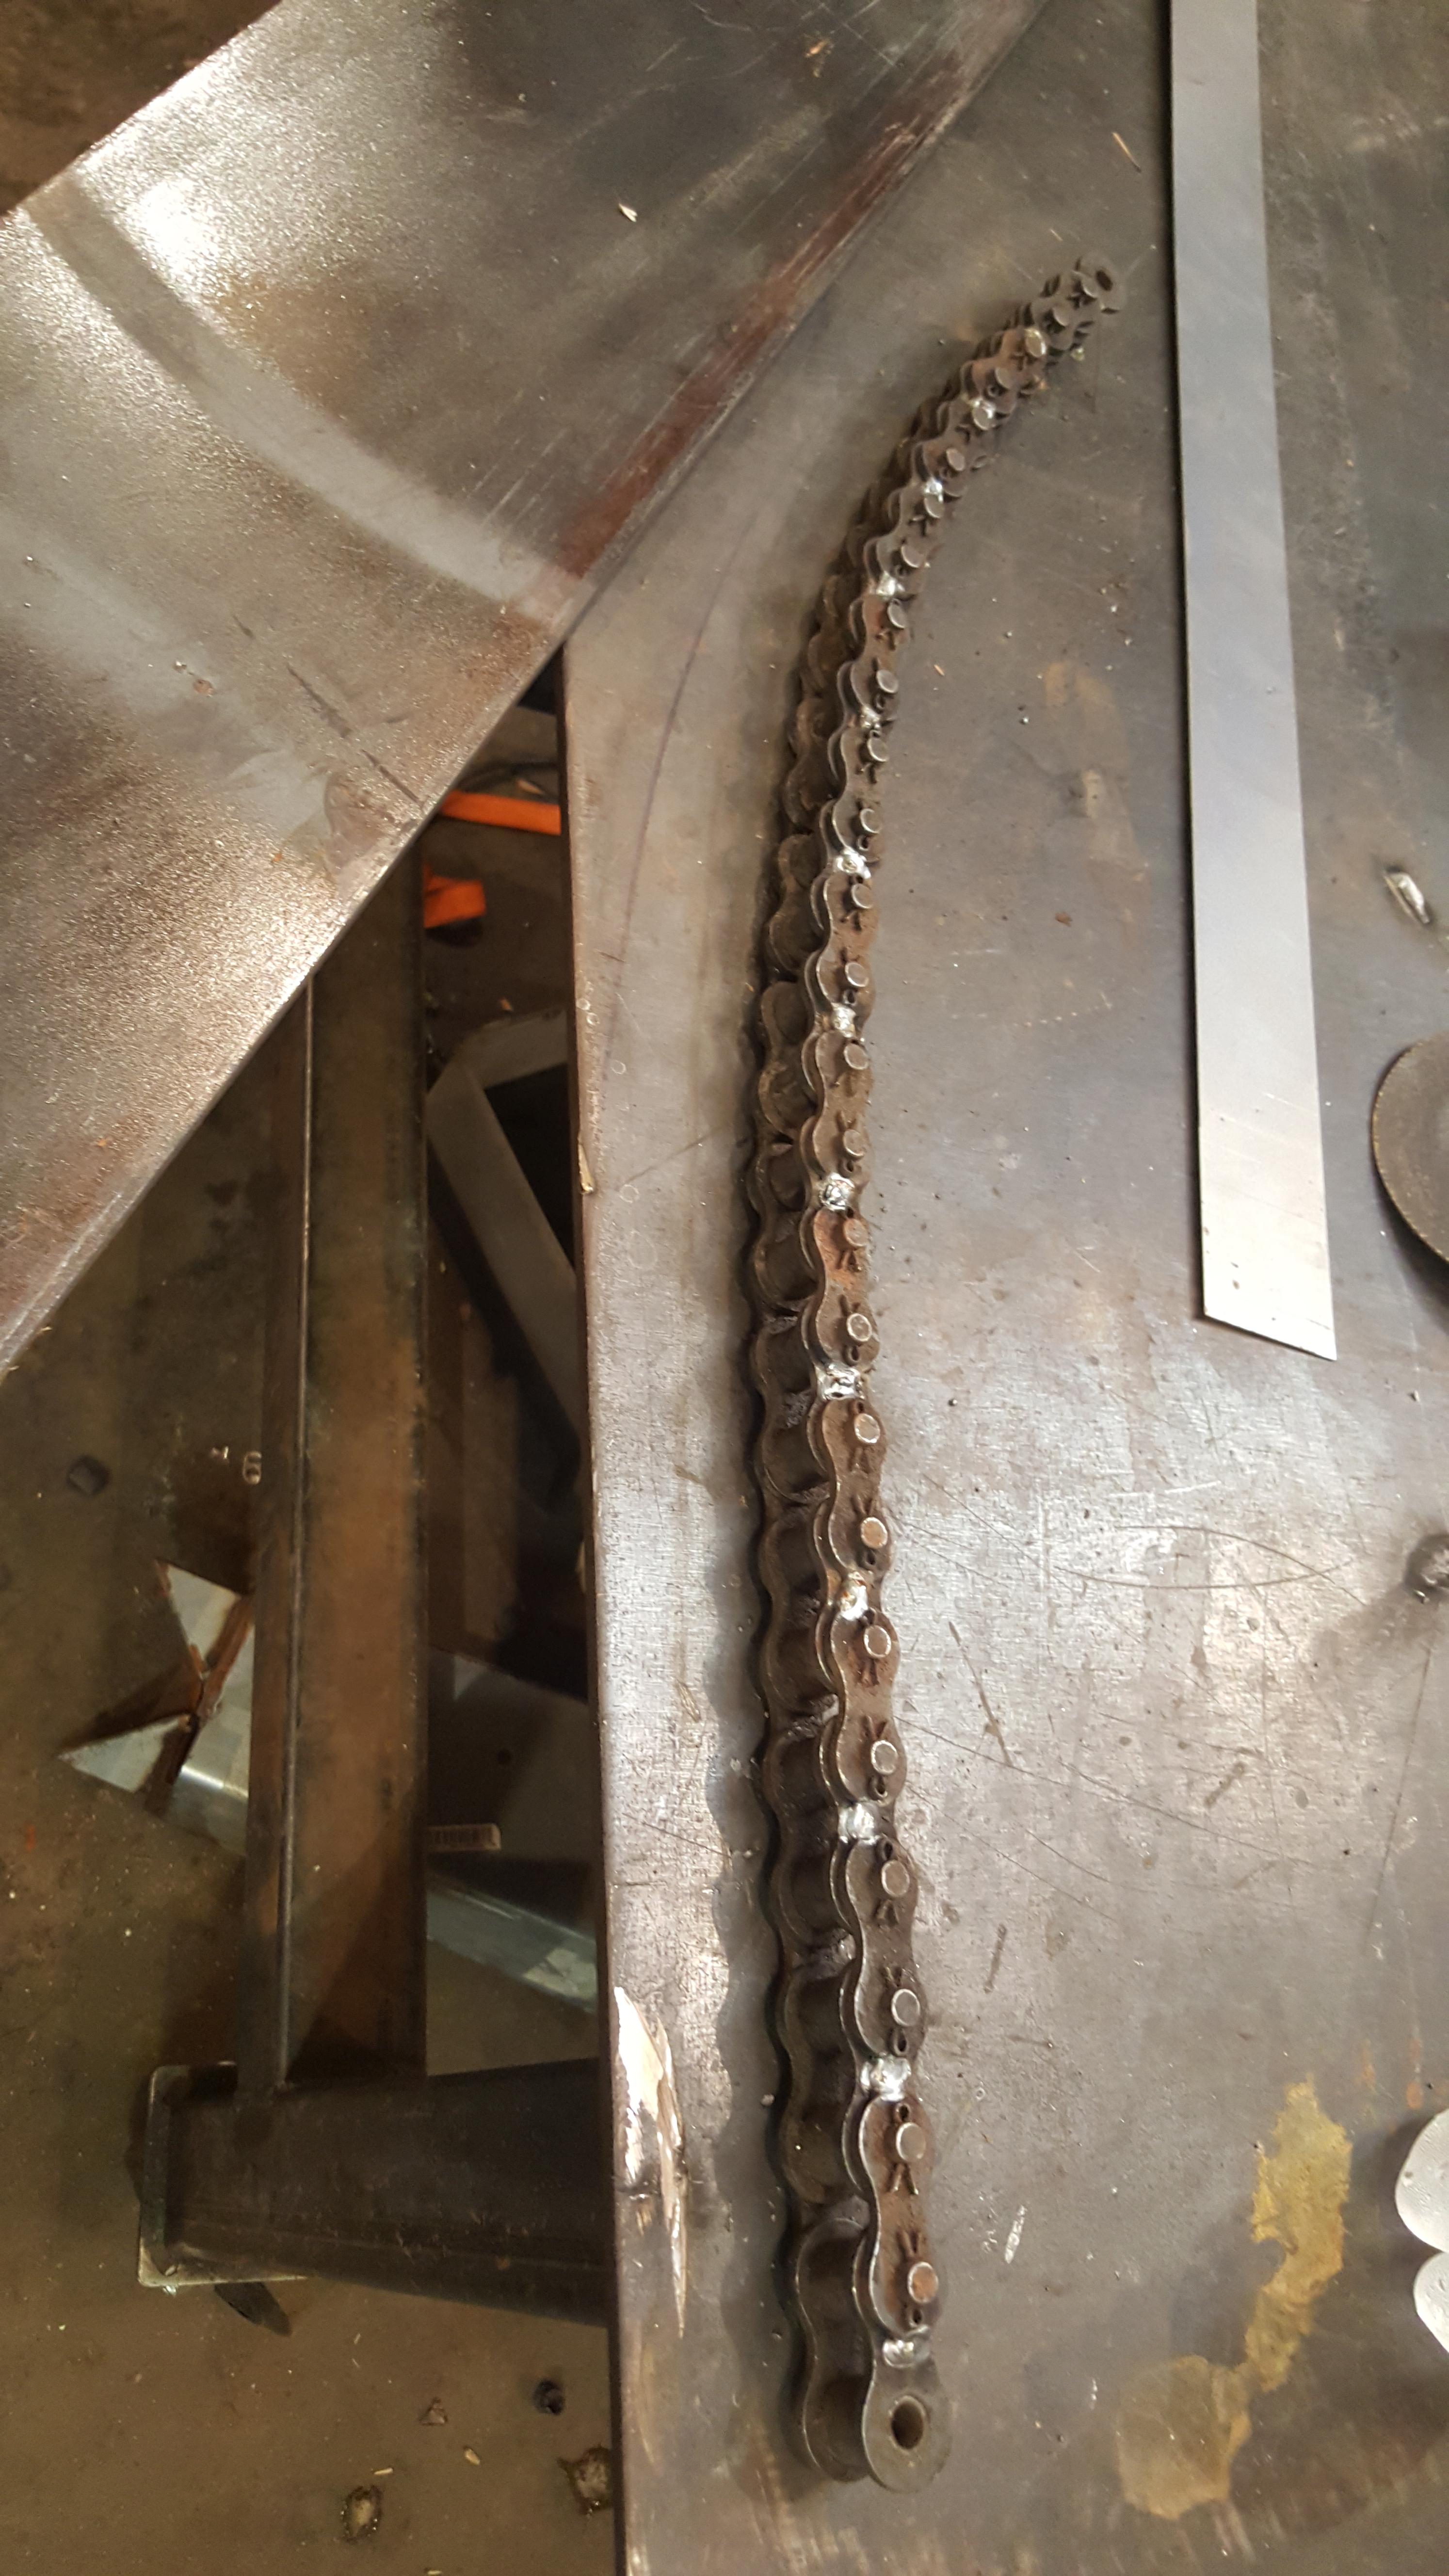
hello! im new here and actually new to posting on forms completely for that matter! i search and read thru them allot. and have gotten some good info from here so i figured i would give it a shot and see if i can get some extra direction or info! i bought a 1997 vfr 750 from a friend that owns a local bike shop. it was dropped off a U-Haul truck while trying to load it and bent the tail pretty bad so it was a perfect start for what i wanted to do, i already planned on building a custom tail. im a welder fabricator for work and went to technical collage for motorcycle technology and have owned many bikes and still own all types of bike so im not new to any of this but can always use advice from people who have more knowledge on a specific bike. so some info on the bike... when i got it home first thing i did was charge the battery fresh fuel and fired it up ran great! good start, then i striped it of all of its outdated ugly plastics! haha went over the whole bike completely i mean EVERYTHING! found the forks are bent son they came off one of the clipons was cracked so i ordered risers and dirtbike bars and went that rout because that was the plan anyways. did the pair blockoff and got fid of all of that crap. and started on the tail. i started with a ducati monster seat. had to get a little creative on bending the square tubing for the tail ;) but it came out great. i then made the undertail skin and box. im now in the middle of thinning out wiring and figuring all of that out. taht brings me here. right now im planning the dash. i wanna do a minimalistic dash few led lighsts thats it. dont think im going to do any gauges. all i want is a low fuel light signal light high beam light side stand maybe... i cant figure out the low fuel light.. so this is where im stuck. i have SOOOOO many more pictures i will probably add in the morning just wanted to start it up and see if i get any responses. THANKS!!!!
-
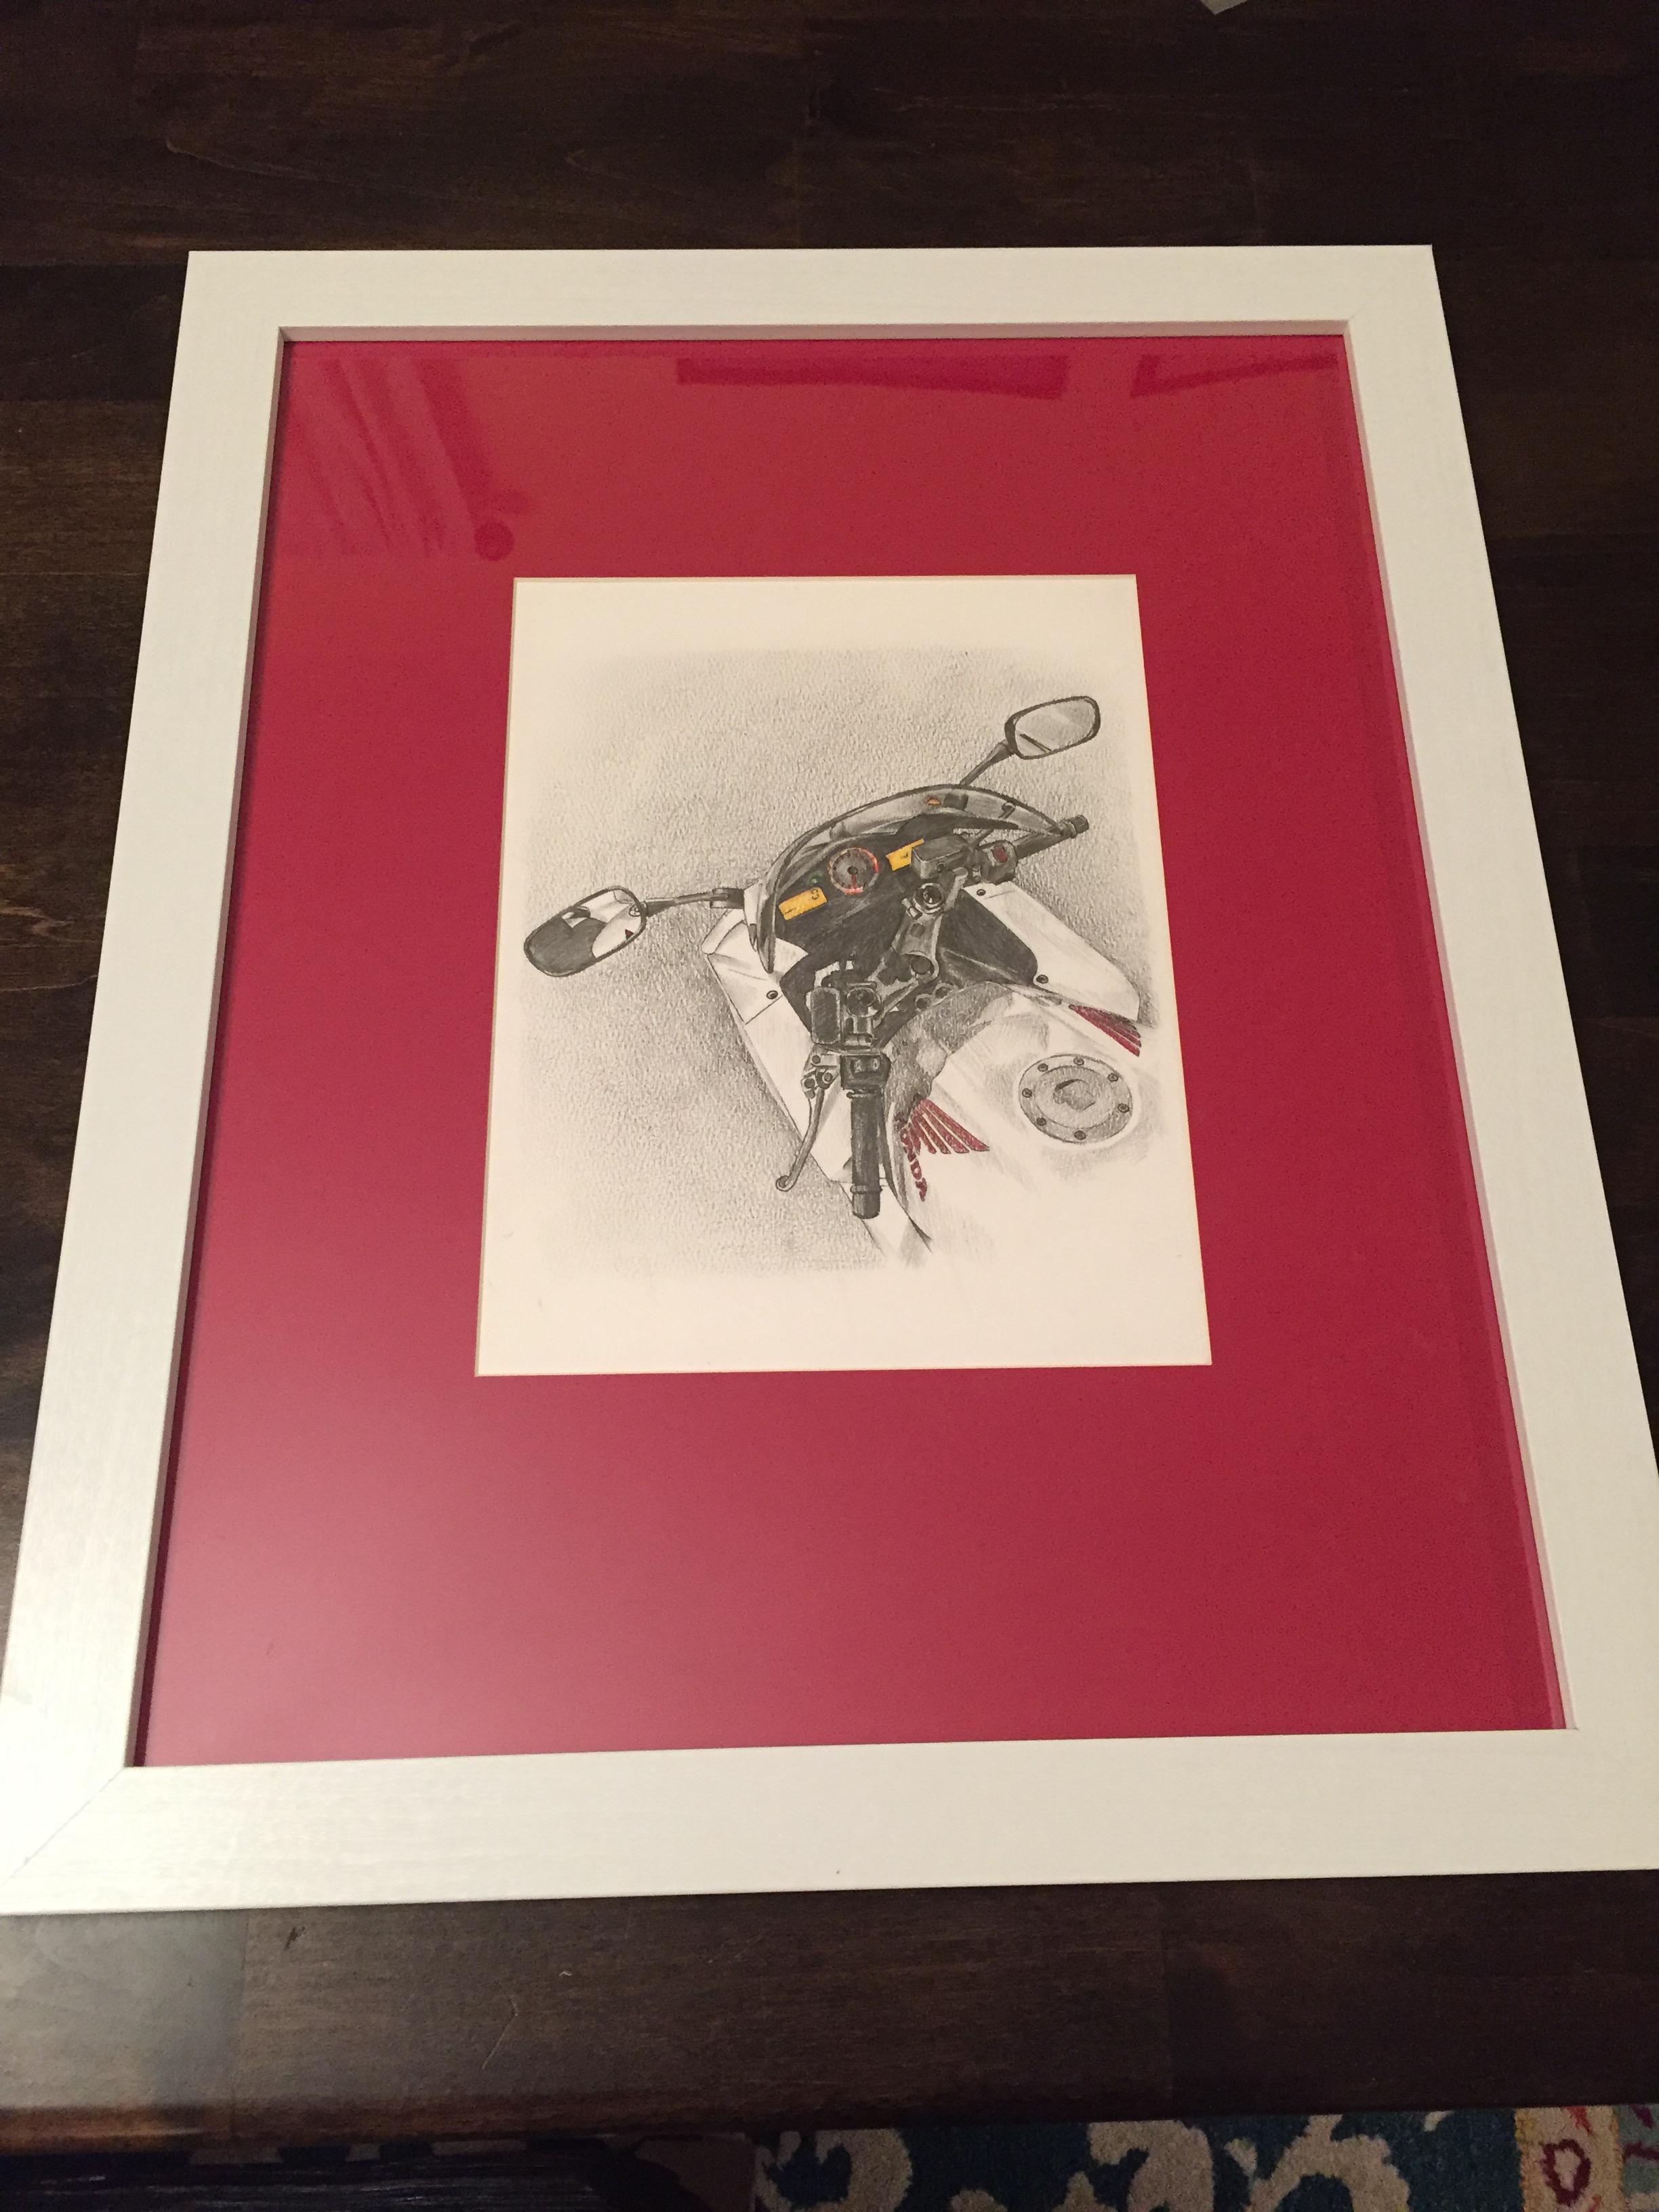
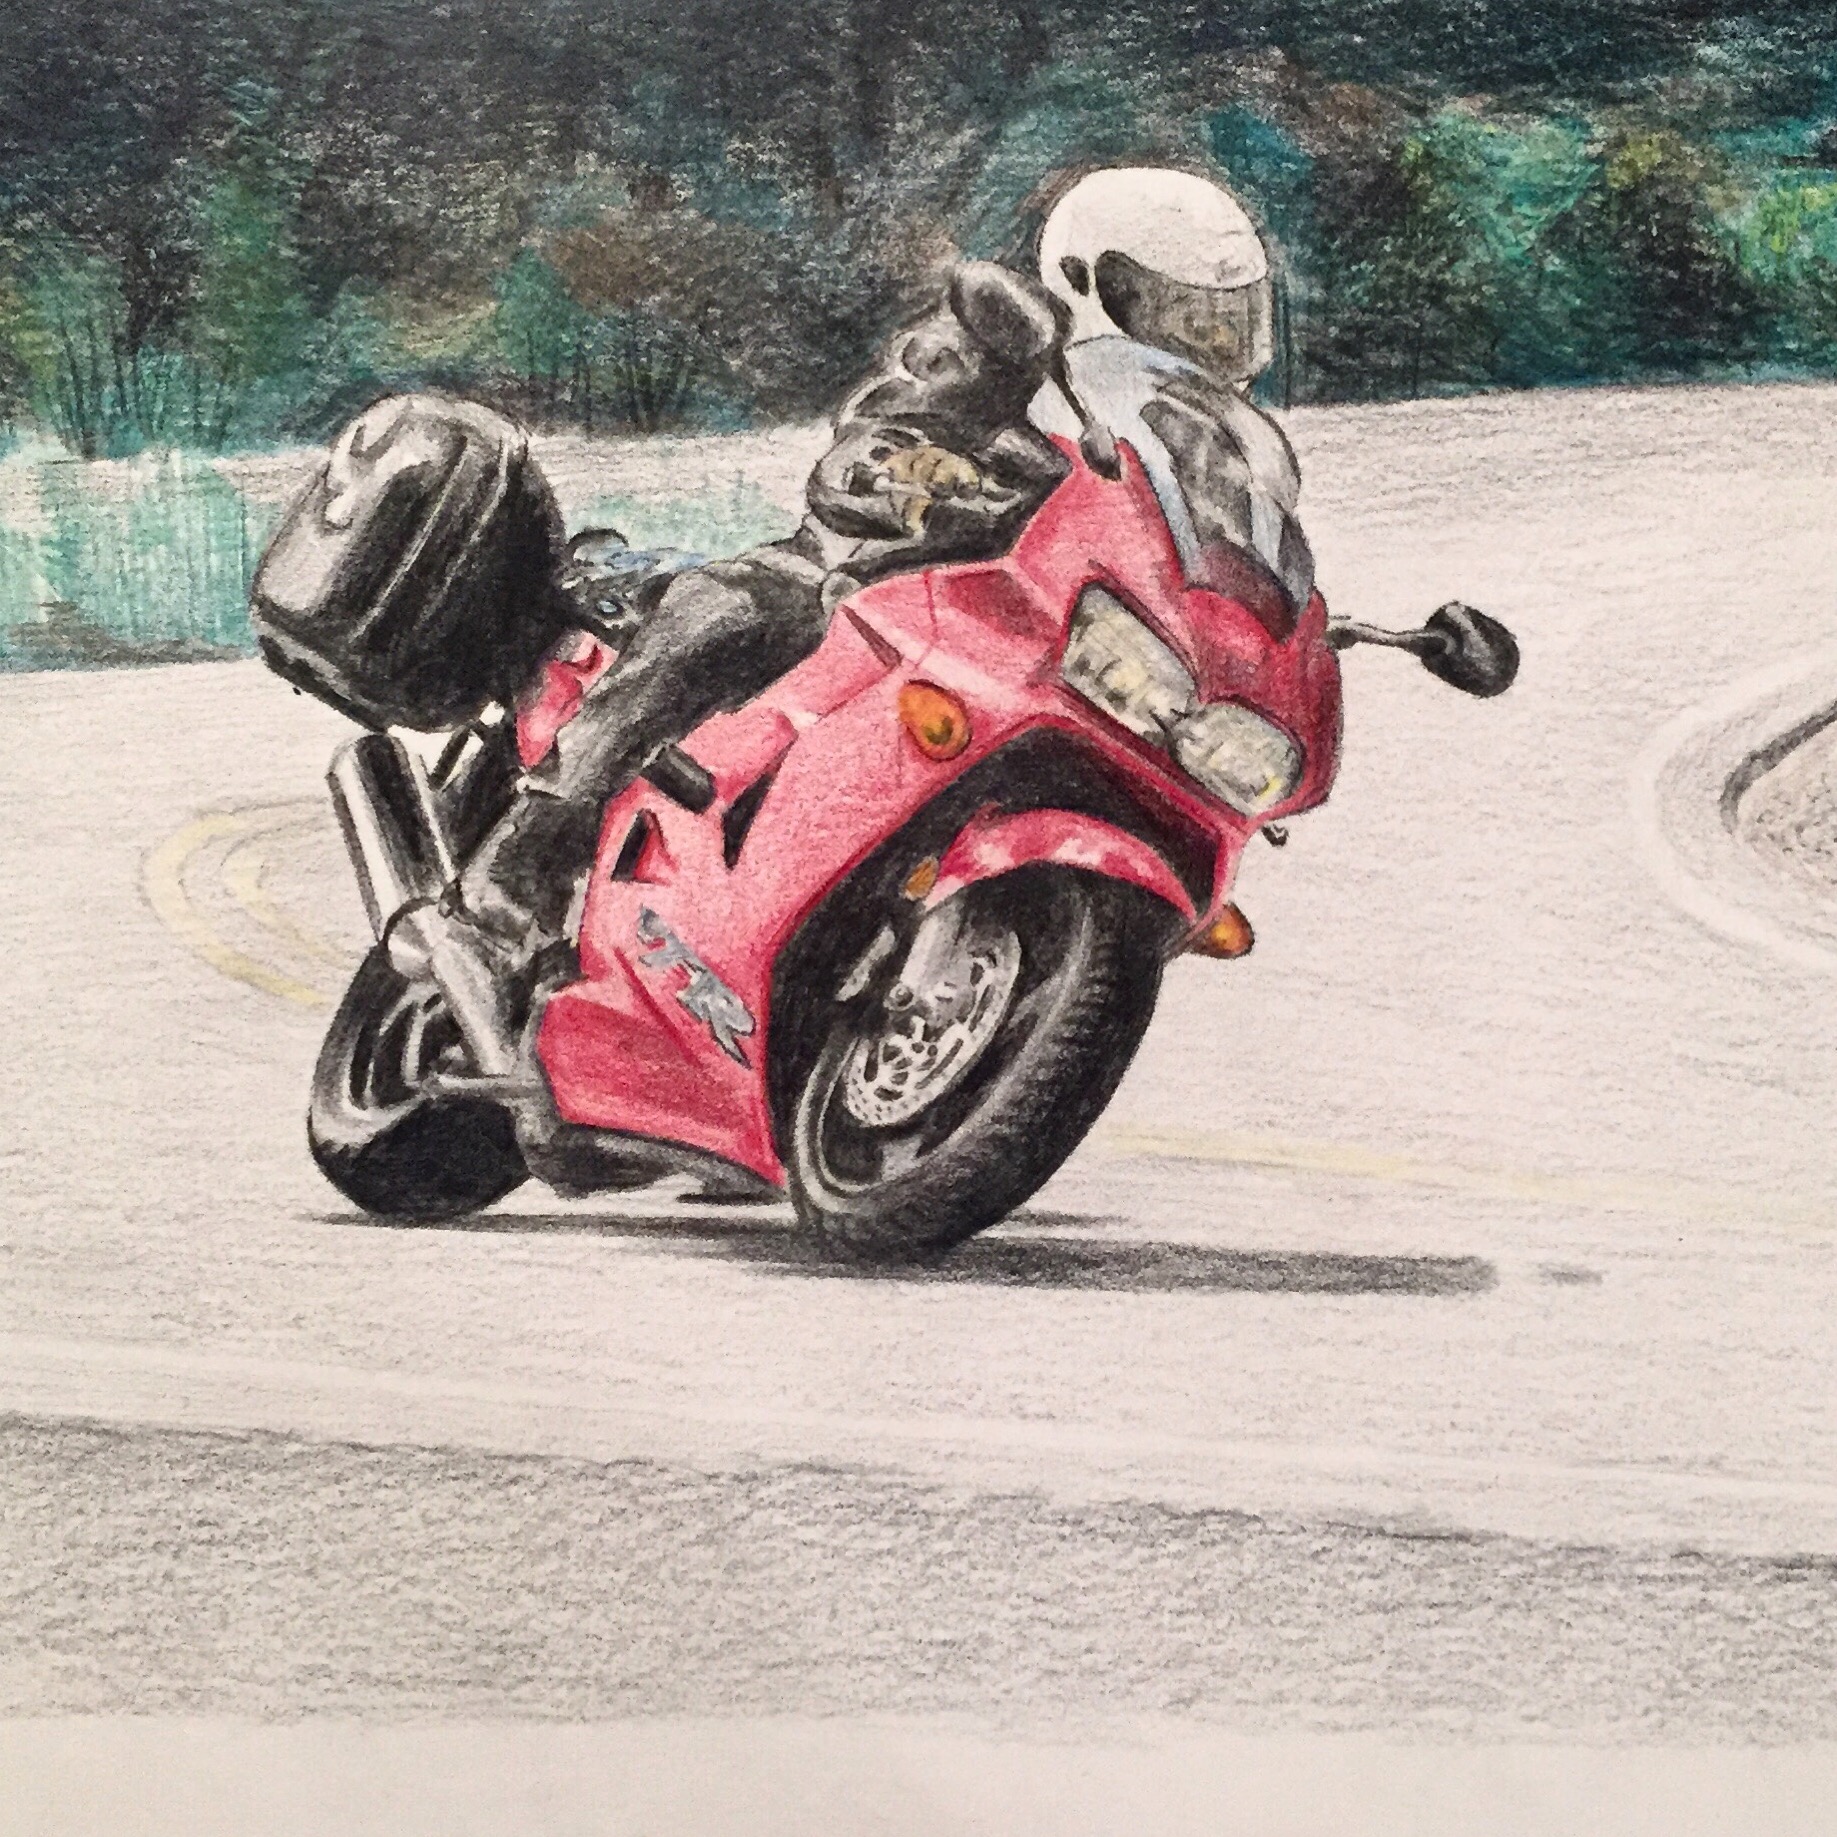
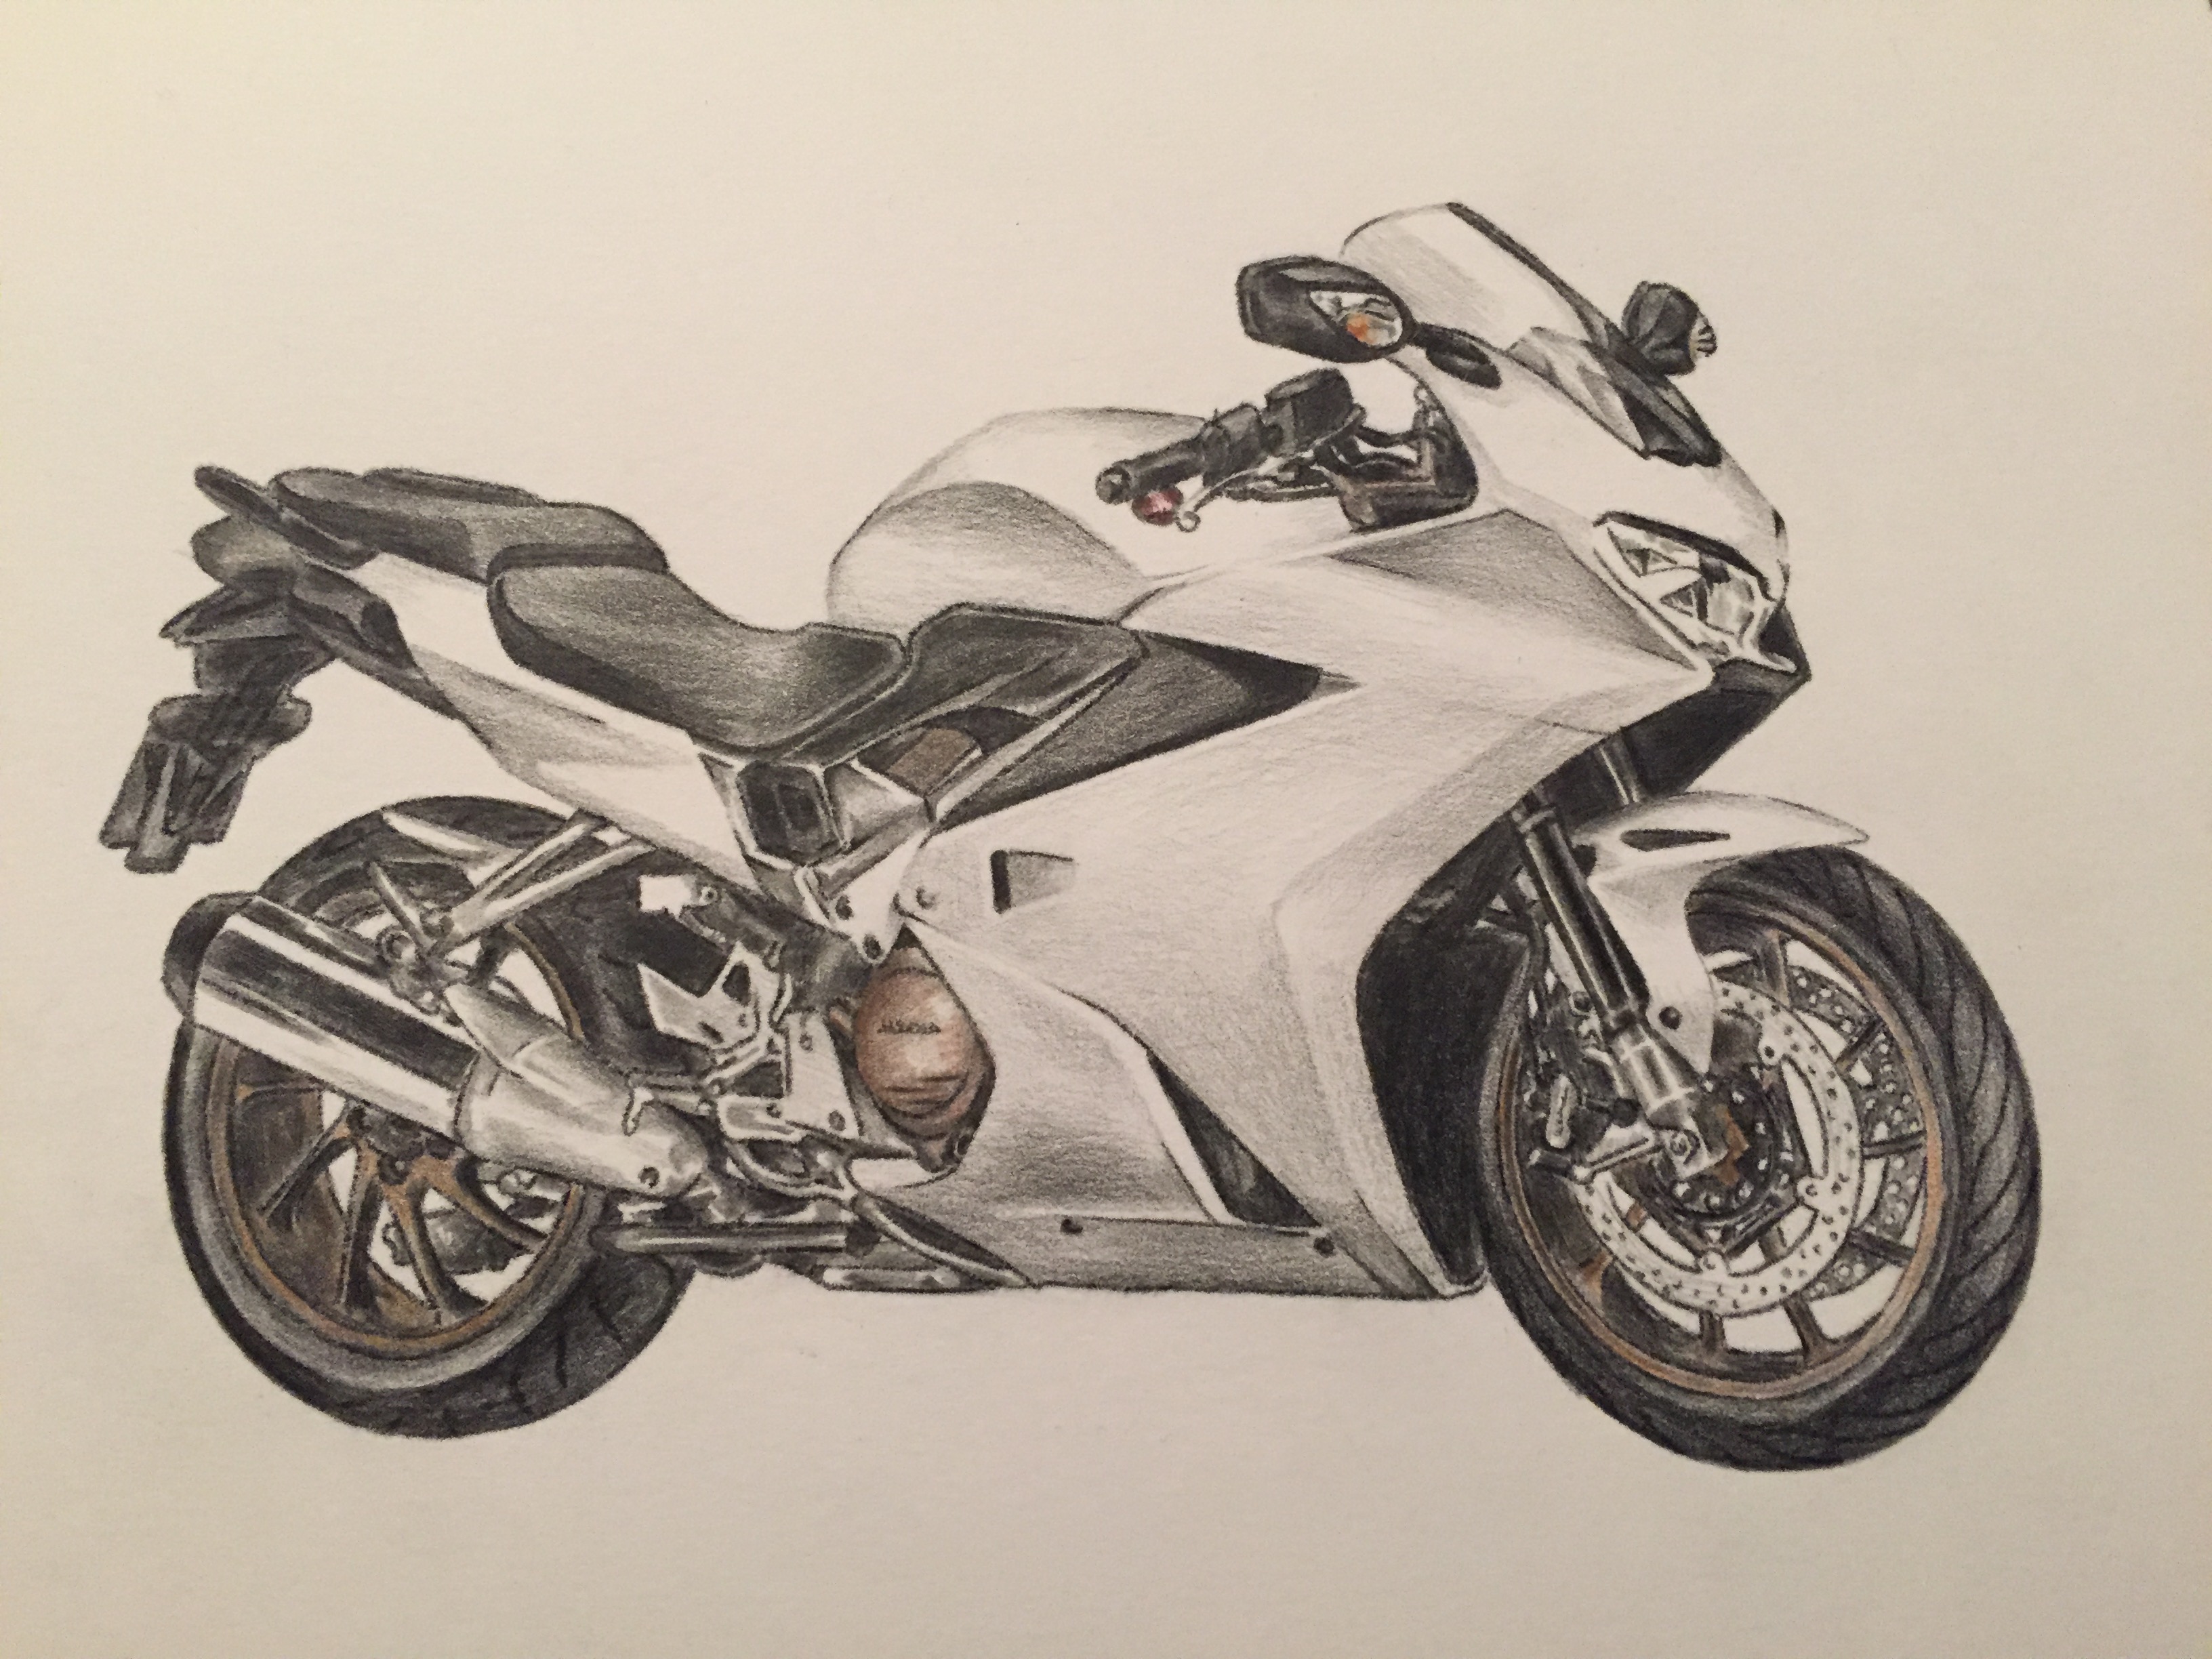
Just throwing this out here for anyone interested... I've been drawing/painting since I was a kid and started drawing people's bikes lately. I had a guy on VFRD ask me to do a custom photo for him and shipped it out from Cincinnati to Minneapolis. He (Maxswell) was pretty happy and I got paid, so everybody wins. Shoot me a message and your favorite photo of your bikes and we can probably work something out!
-
I'm going to be welding up my own exhaust for the VFR, and am trying to make it work as well as possible. My idea is to have each cylinder bank have it's own system, but the unusual firing sequence is throwing me off. I'm trying to mimic the looks of the Honda MotoGP system. It makes sense to me to have the exhaust pulses spaced evenly to provide the best flow, but the setup doesn't allow that. How should I arrange my headers to optimize this? It looks to me like this engine runs like a pair of 270 degree parallel twins. Looking around at the new FZ-07 has unequal length headers. Is this the solution to this issue? Does it really even matter? EDIT: I think I've misled you guys with what my goal is to do. I do not want a single exhaust exit. I do not want the two cylinder banks to ever merge if they don't have to. I want my rear cylinders to exit through the tail, and the fronts to exit behind the footpegs.
-
I am keeping a collection of all custom paints/photochops. Currently, they are not organized by any means. VFRD Paint jobs and Chops Last update: 30/3/13 11/22/10 - Moved from Flickr To Photobucket - added pictures since last update 4/1/09 - Sorted by generations 5/12/09 - Added more pictures If there are any pics you would like added or removed, just send a PM.
-
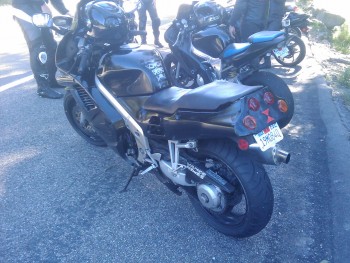
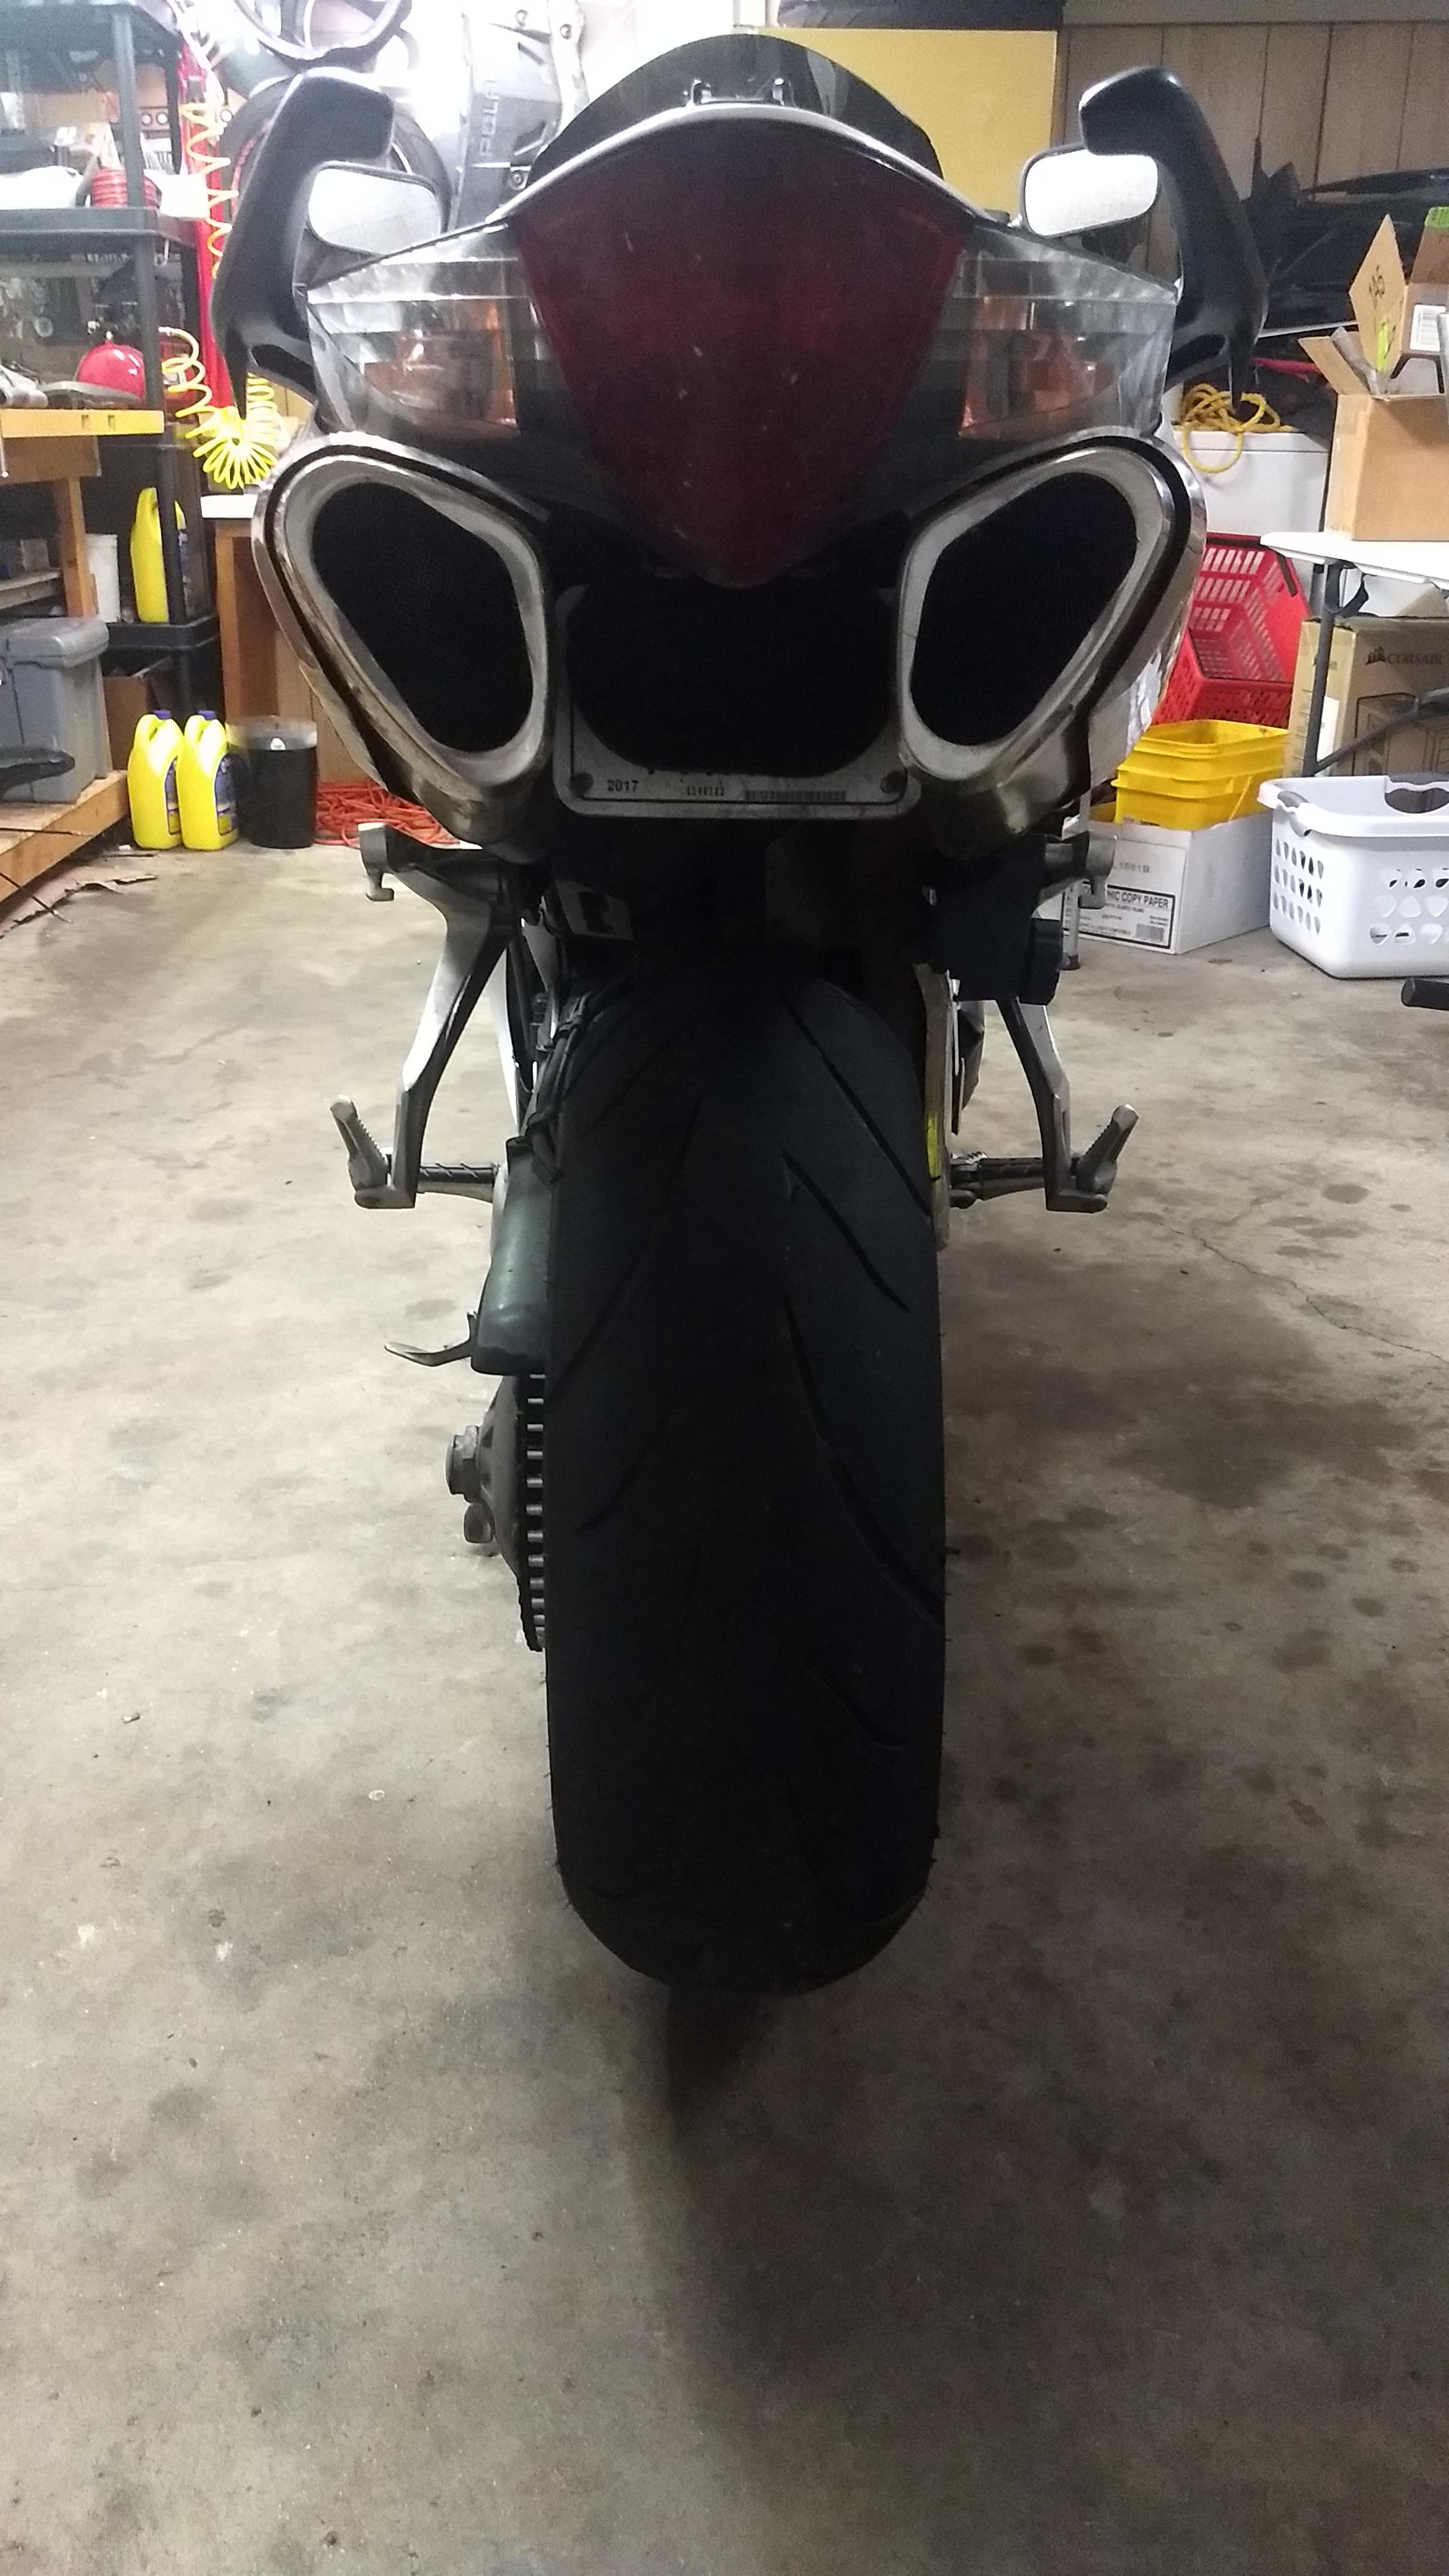
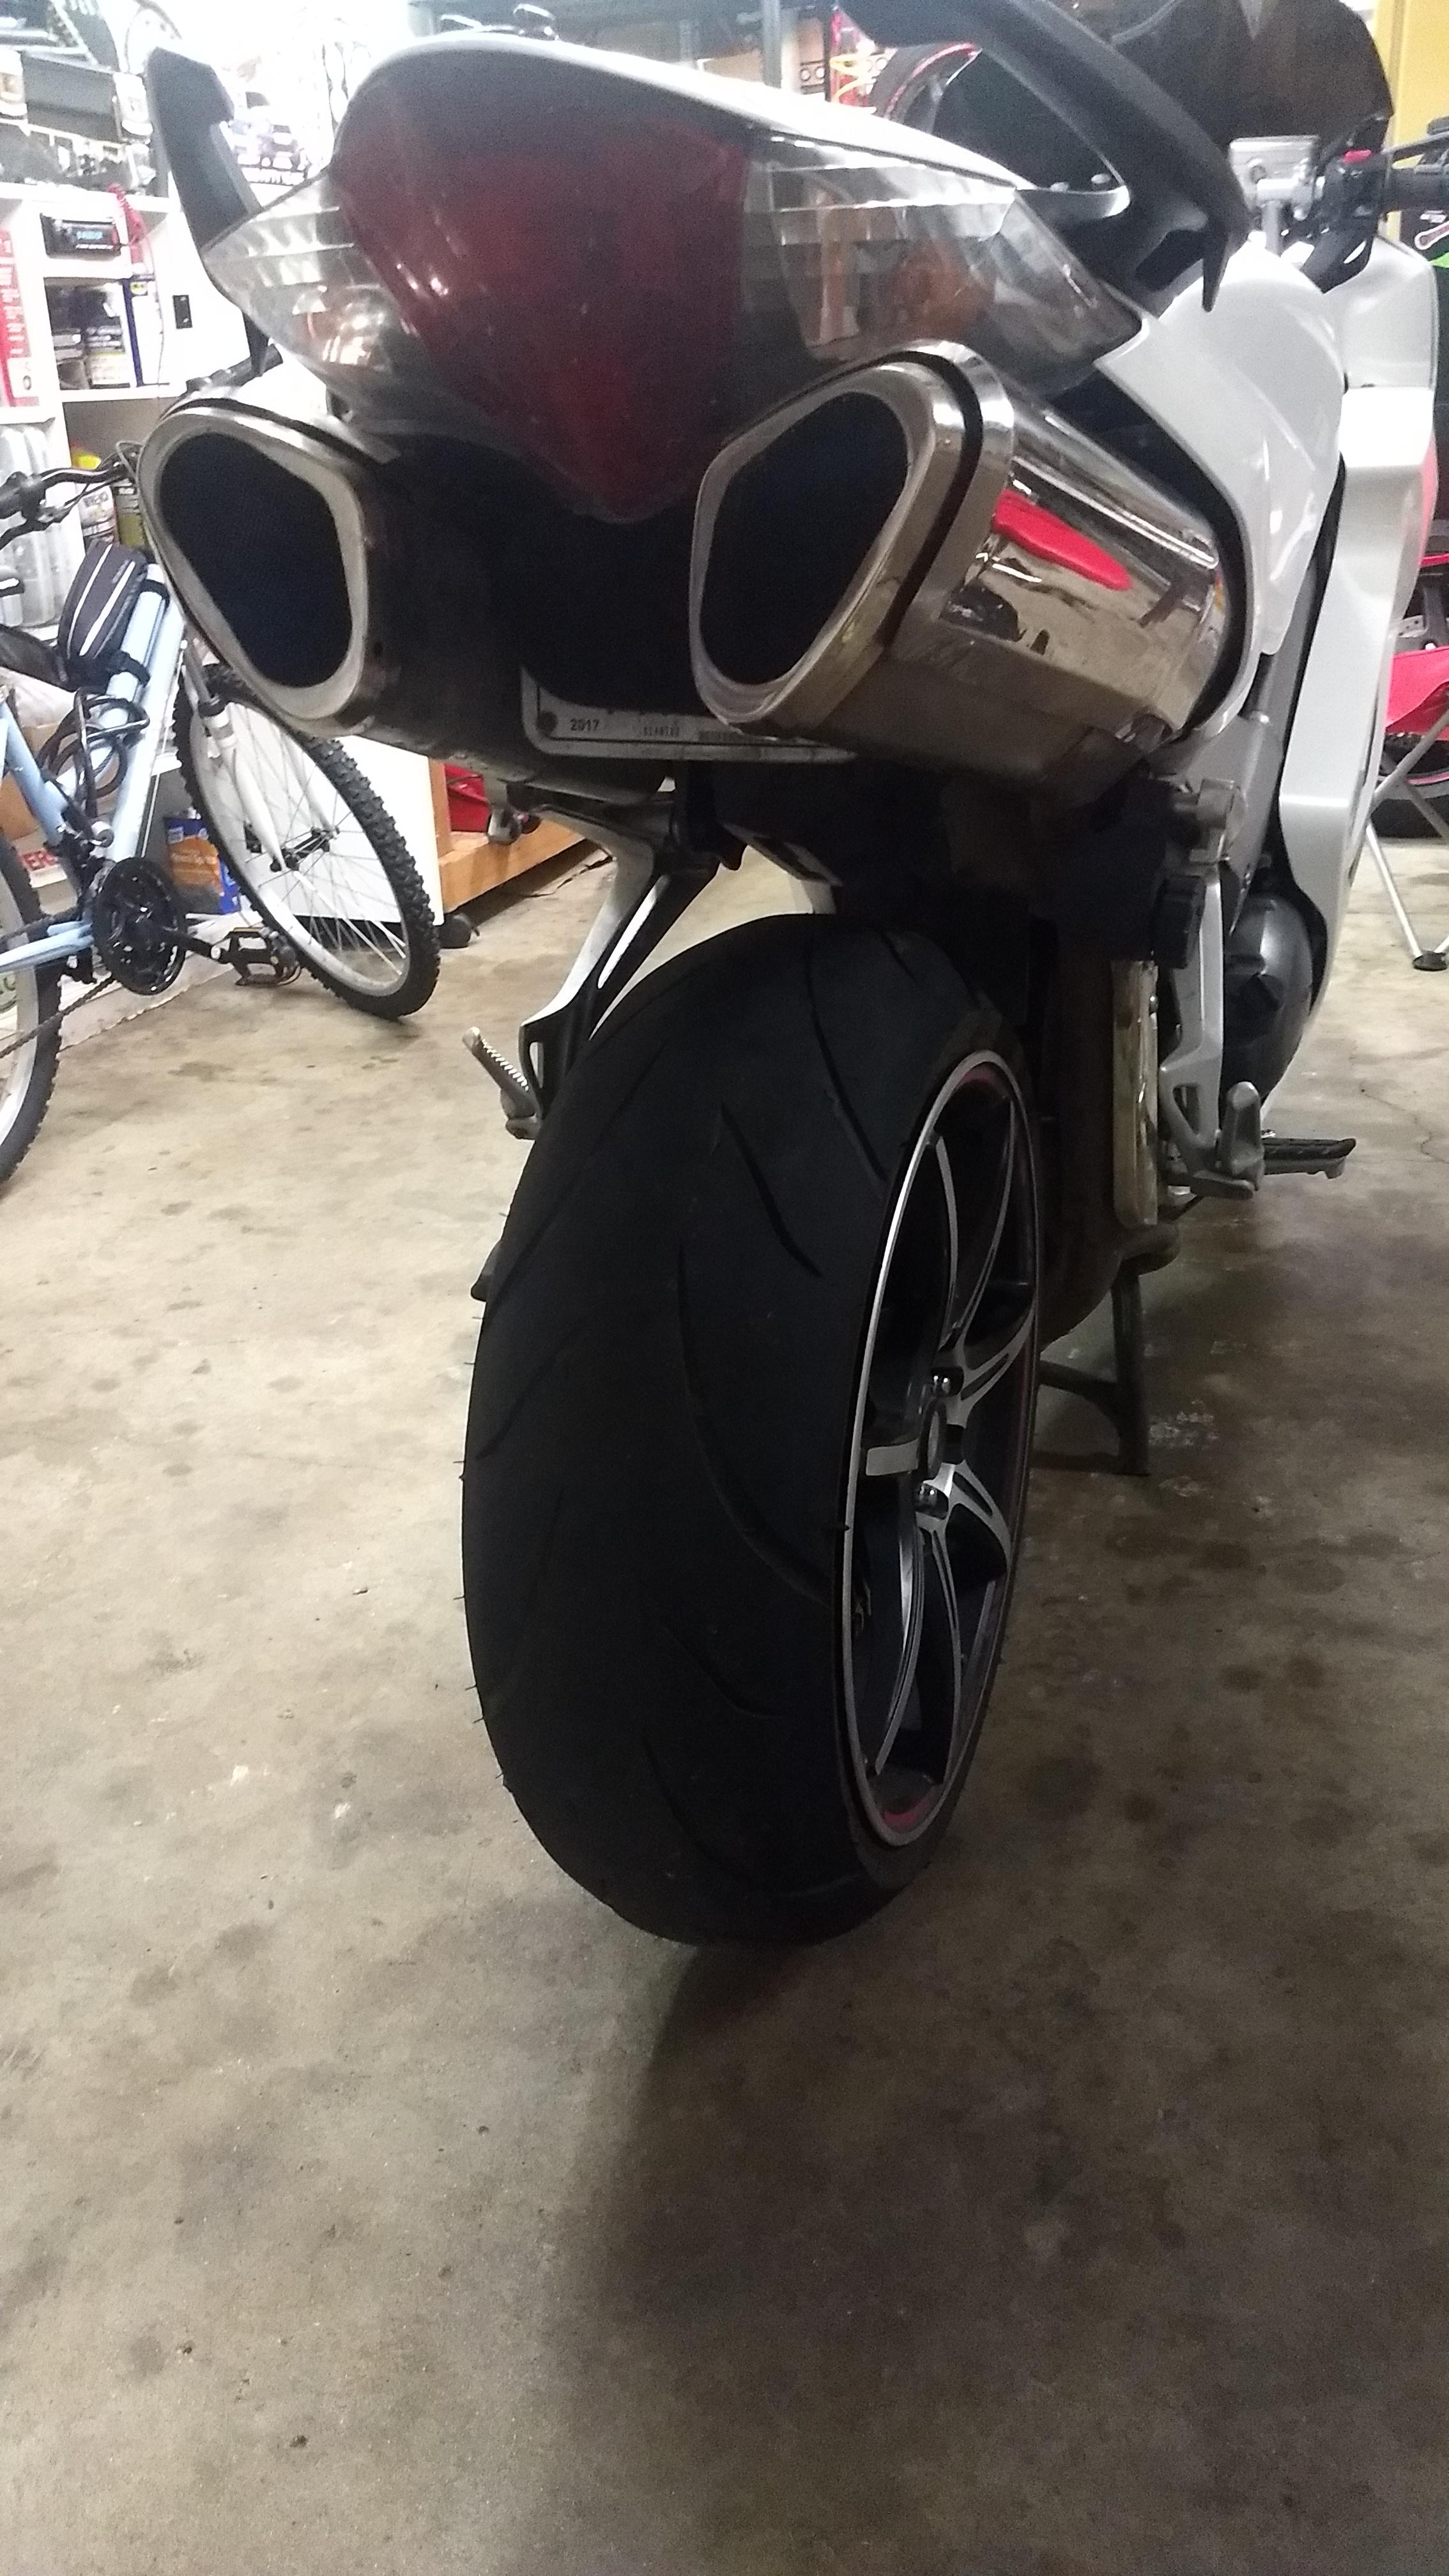
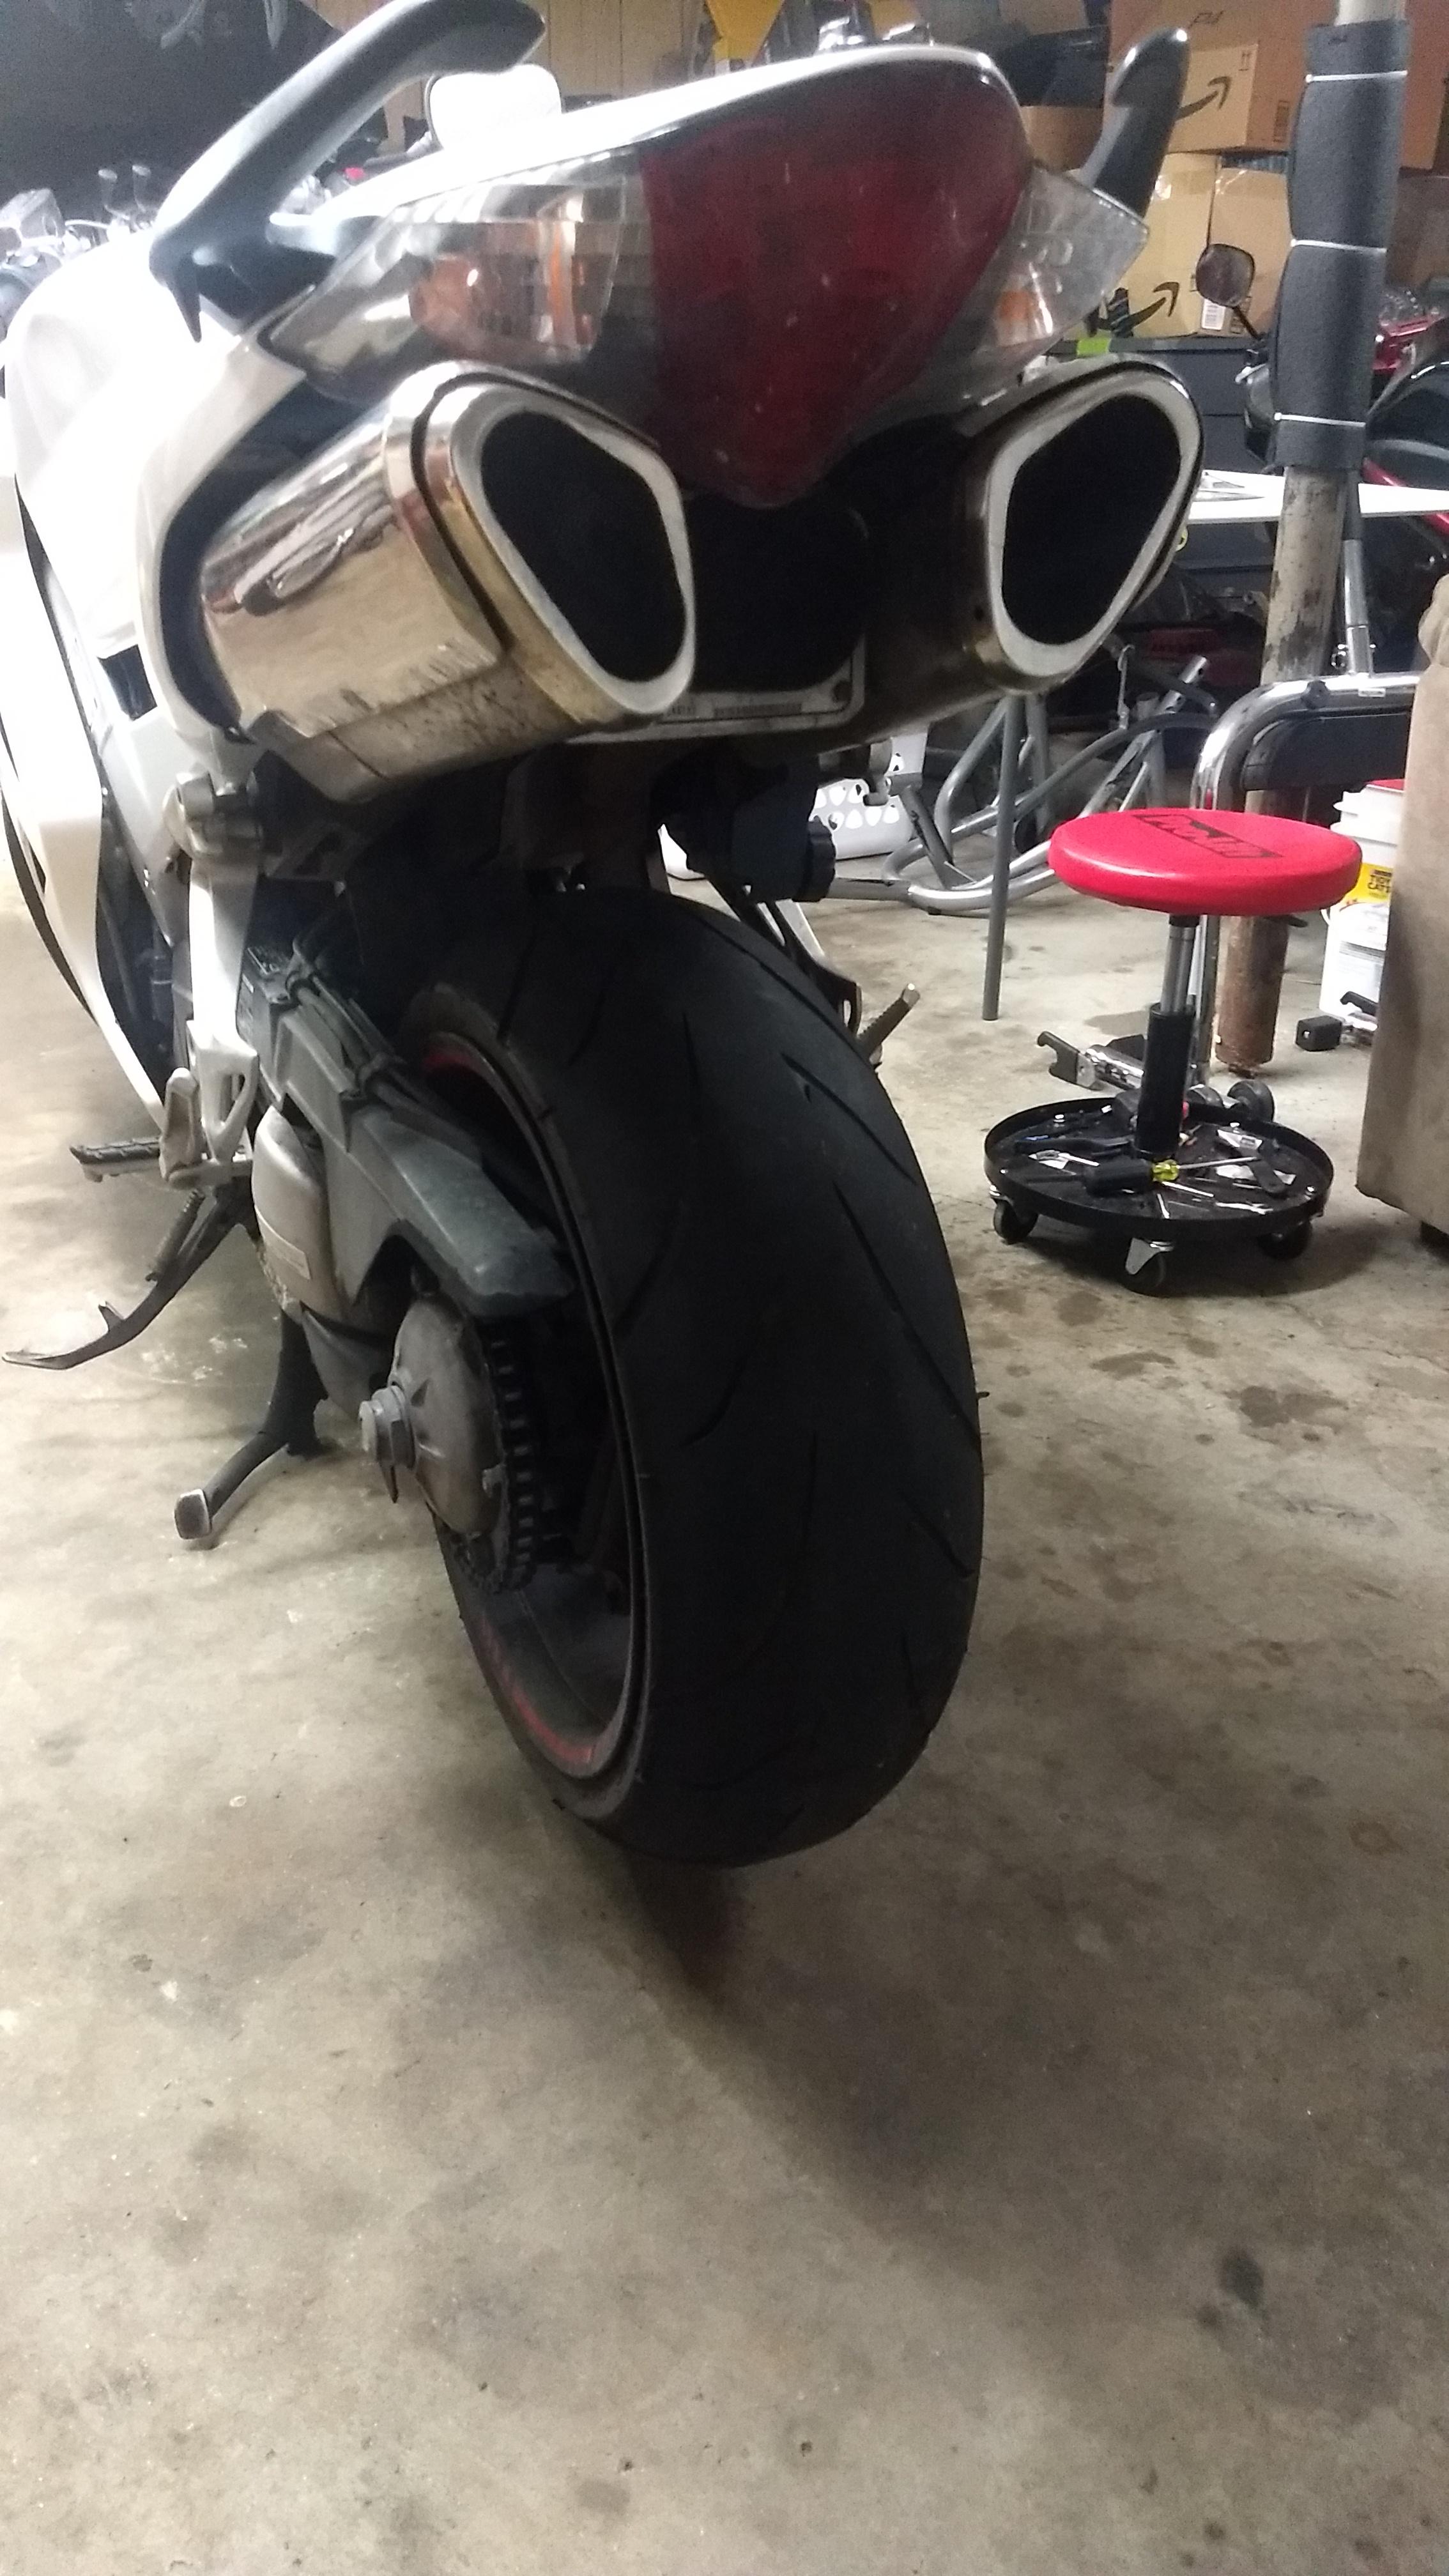
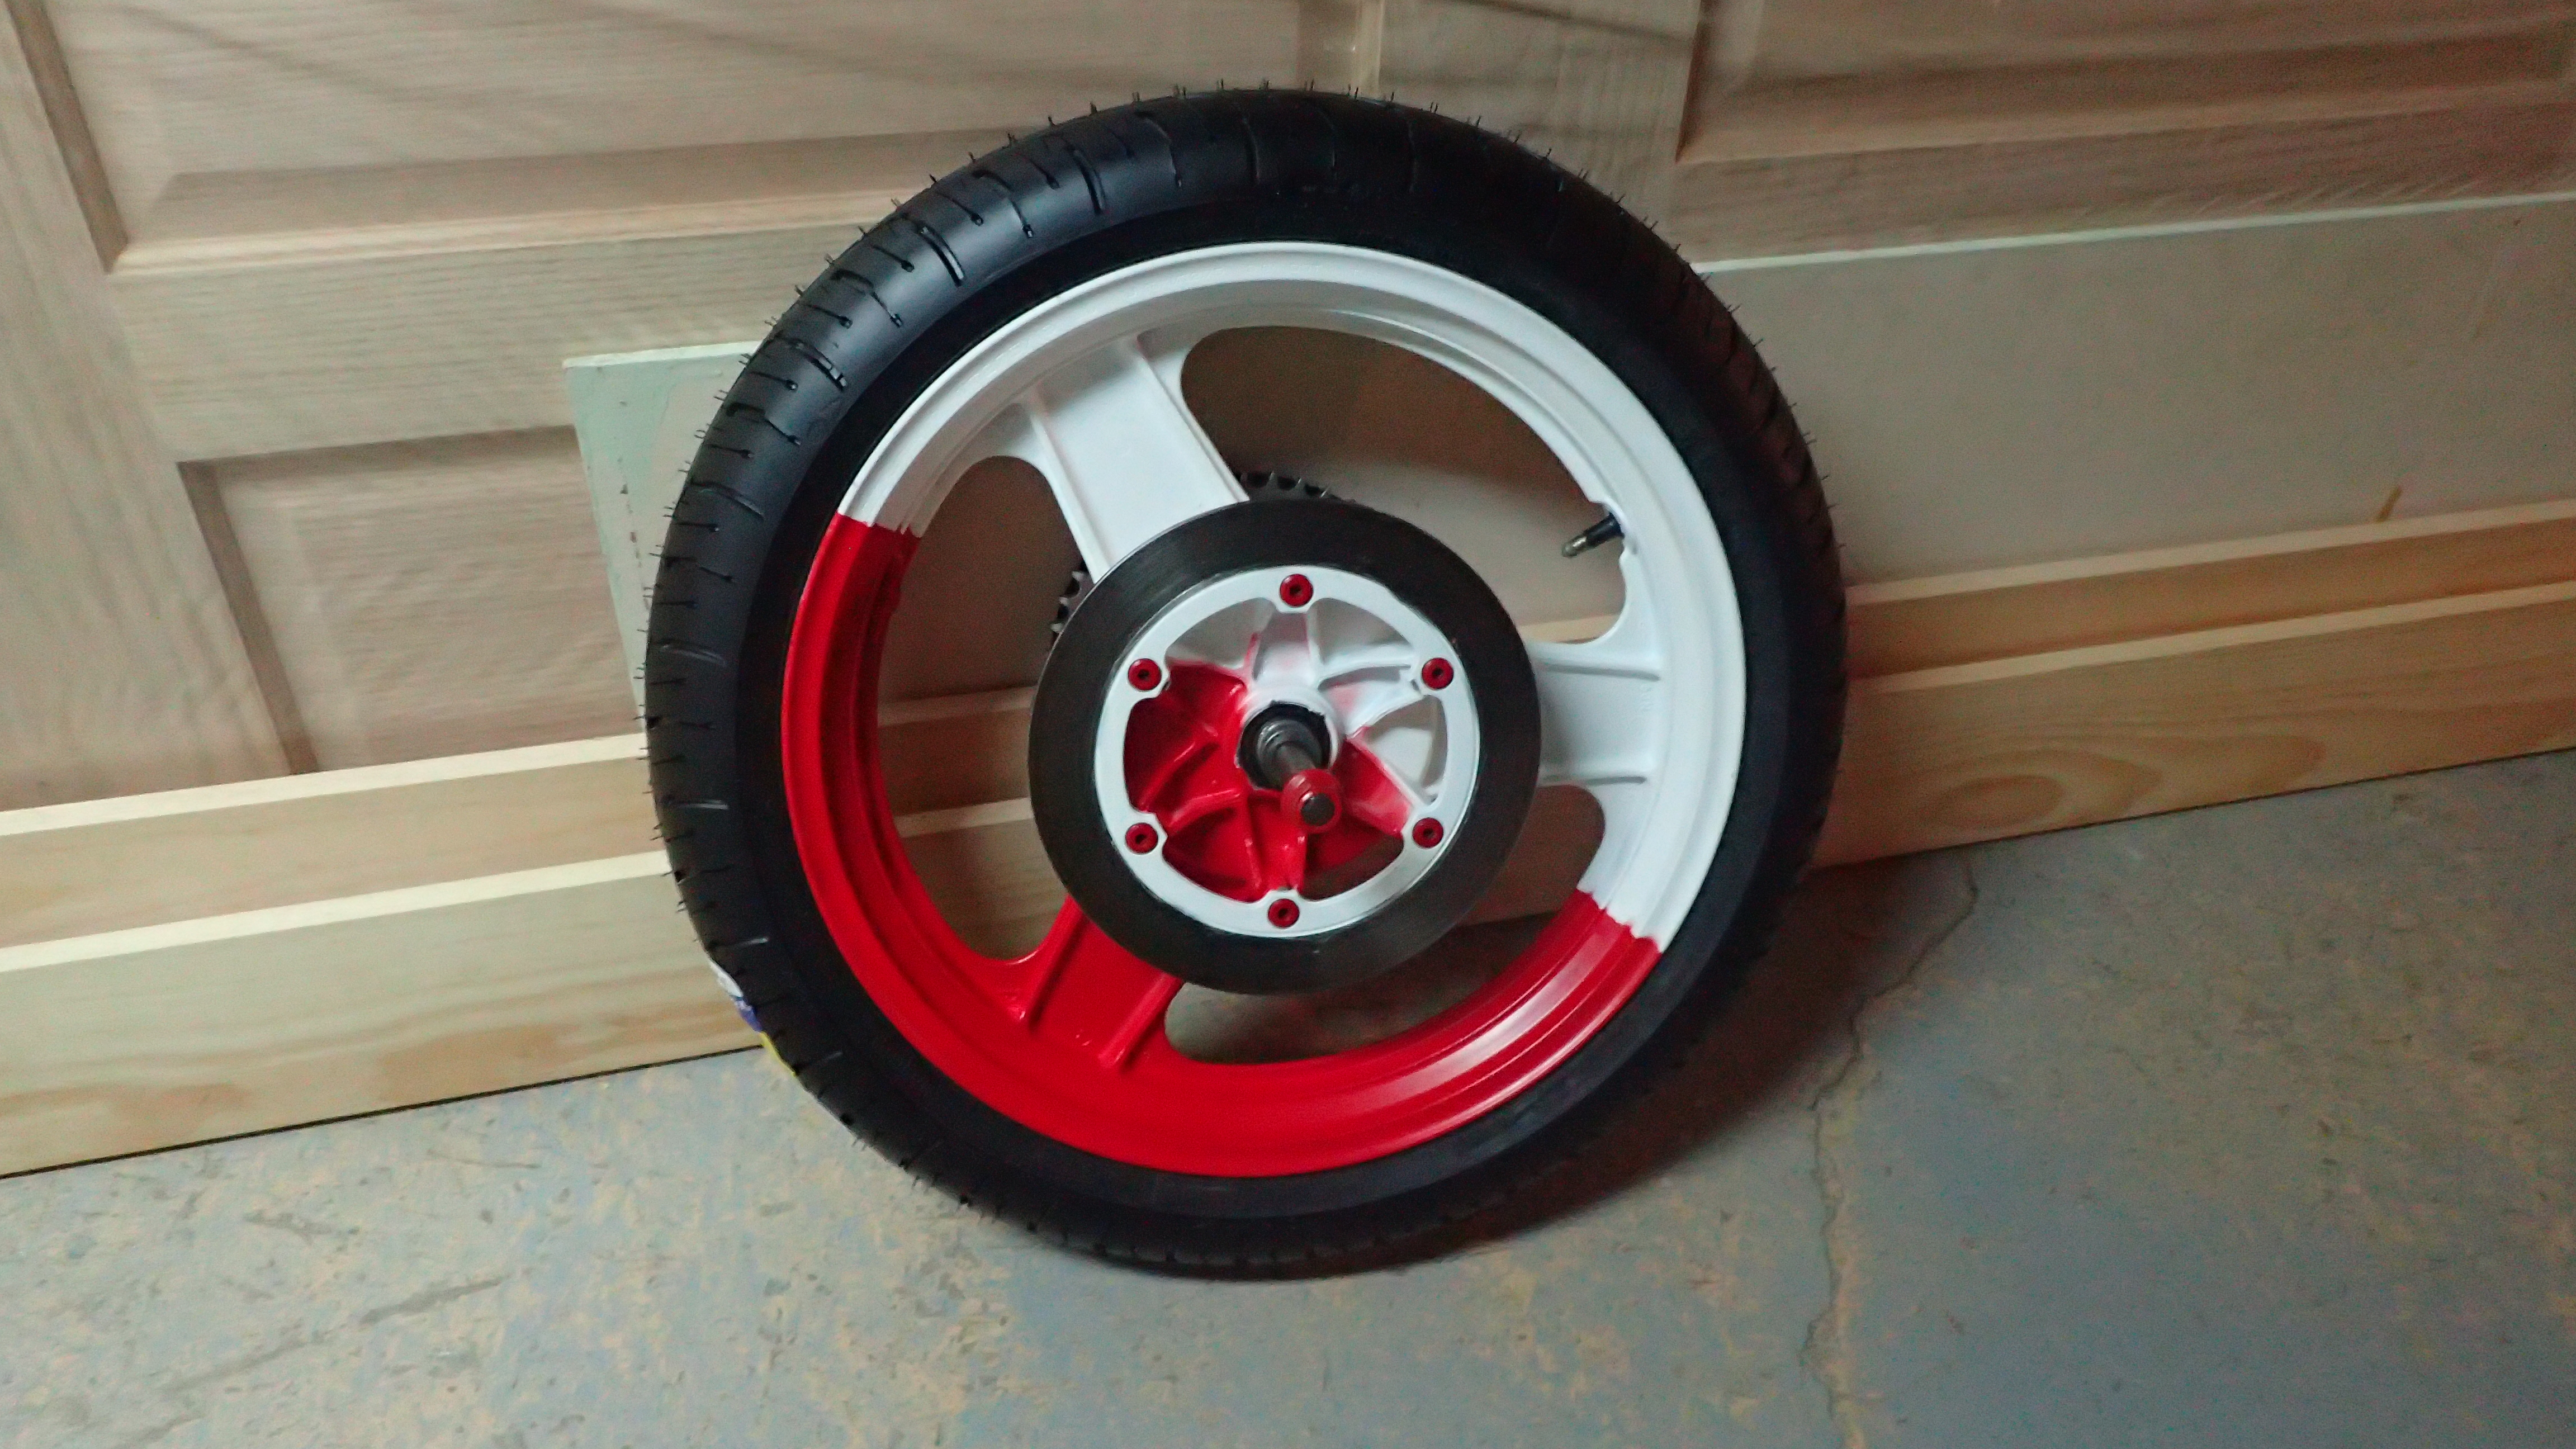
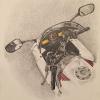
From the album: 97 VFR 750
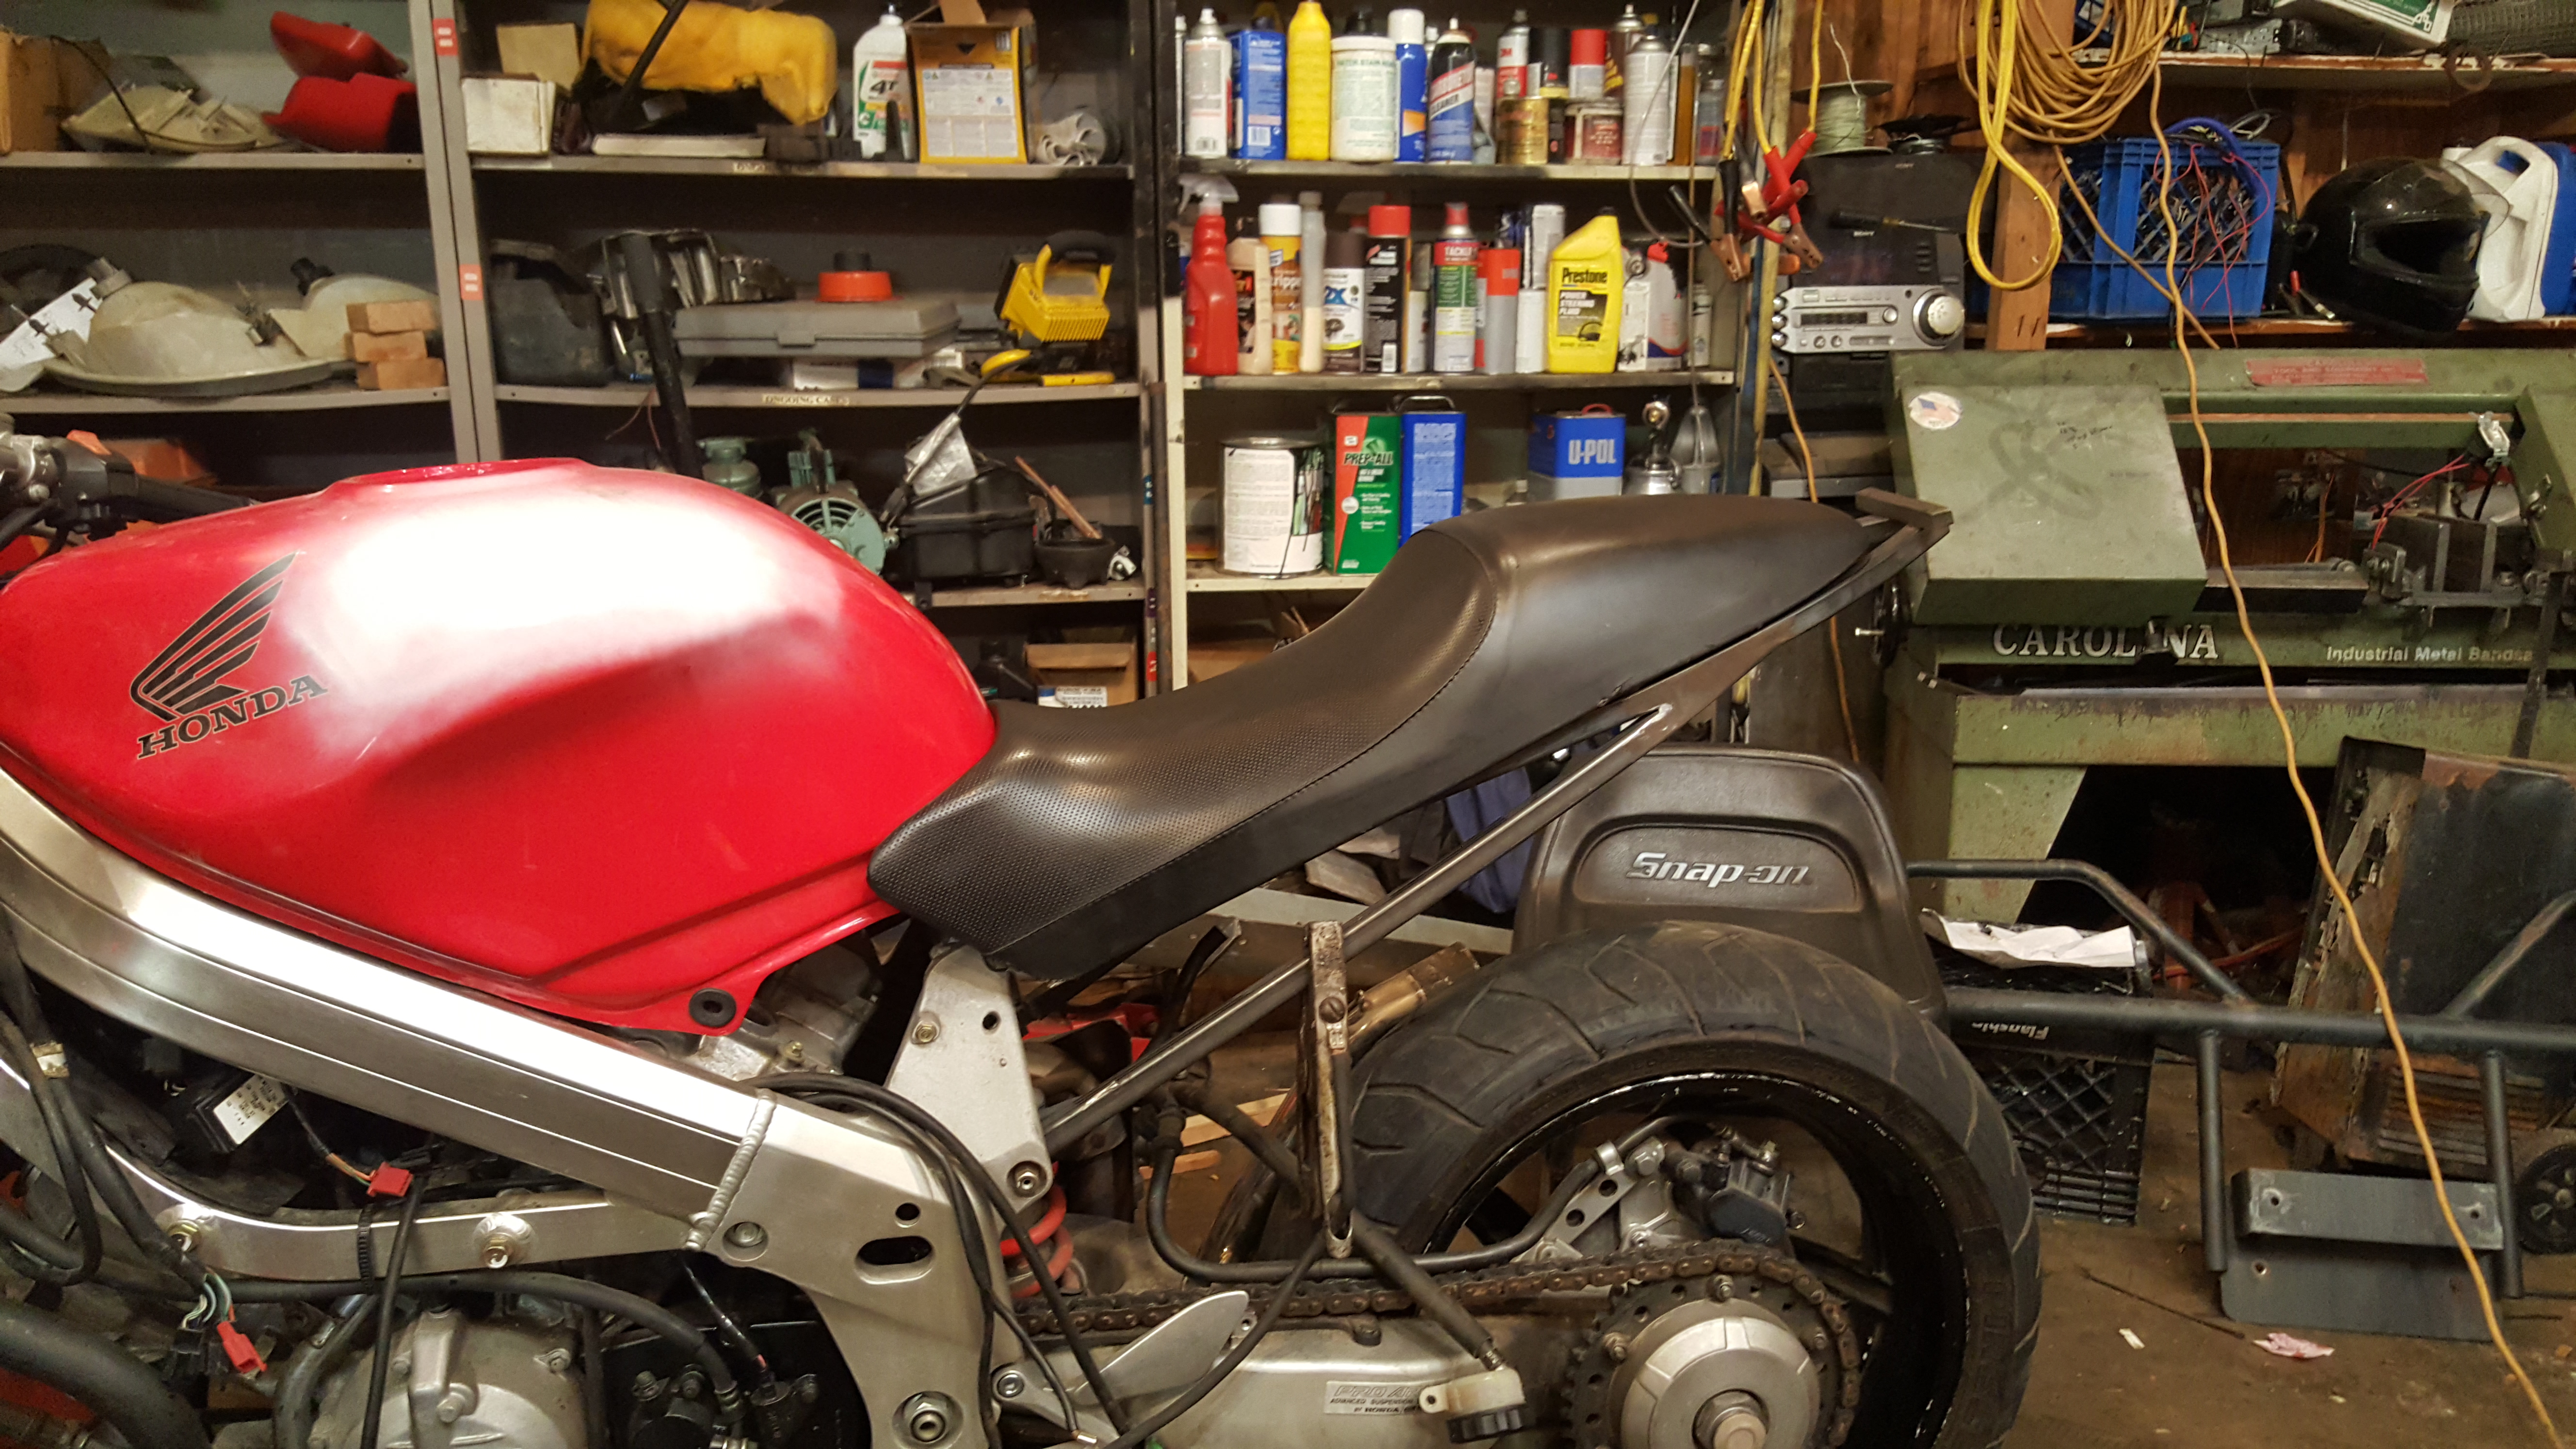
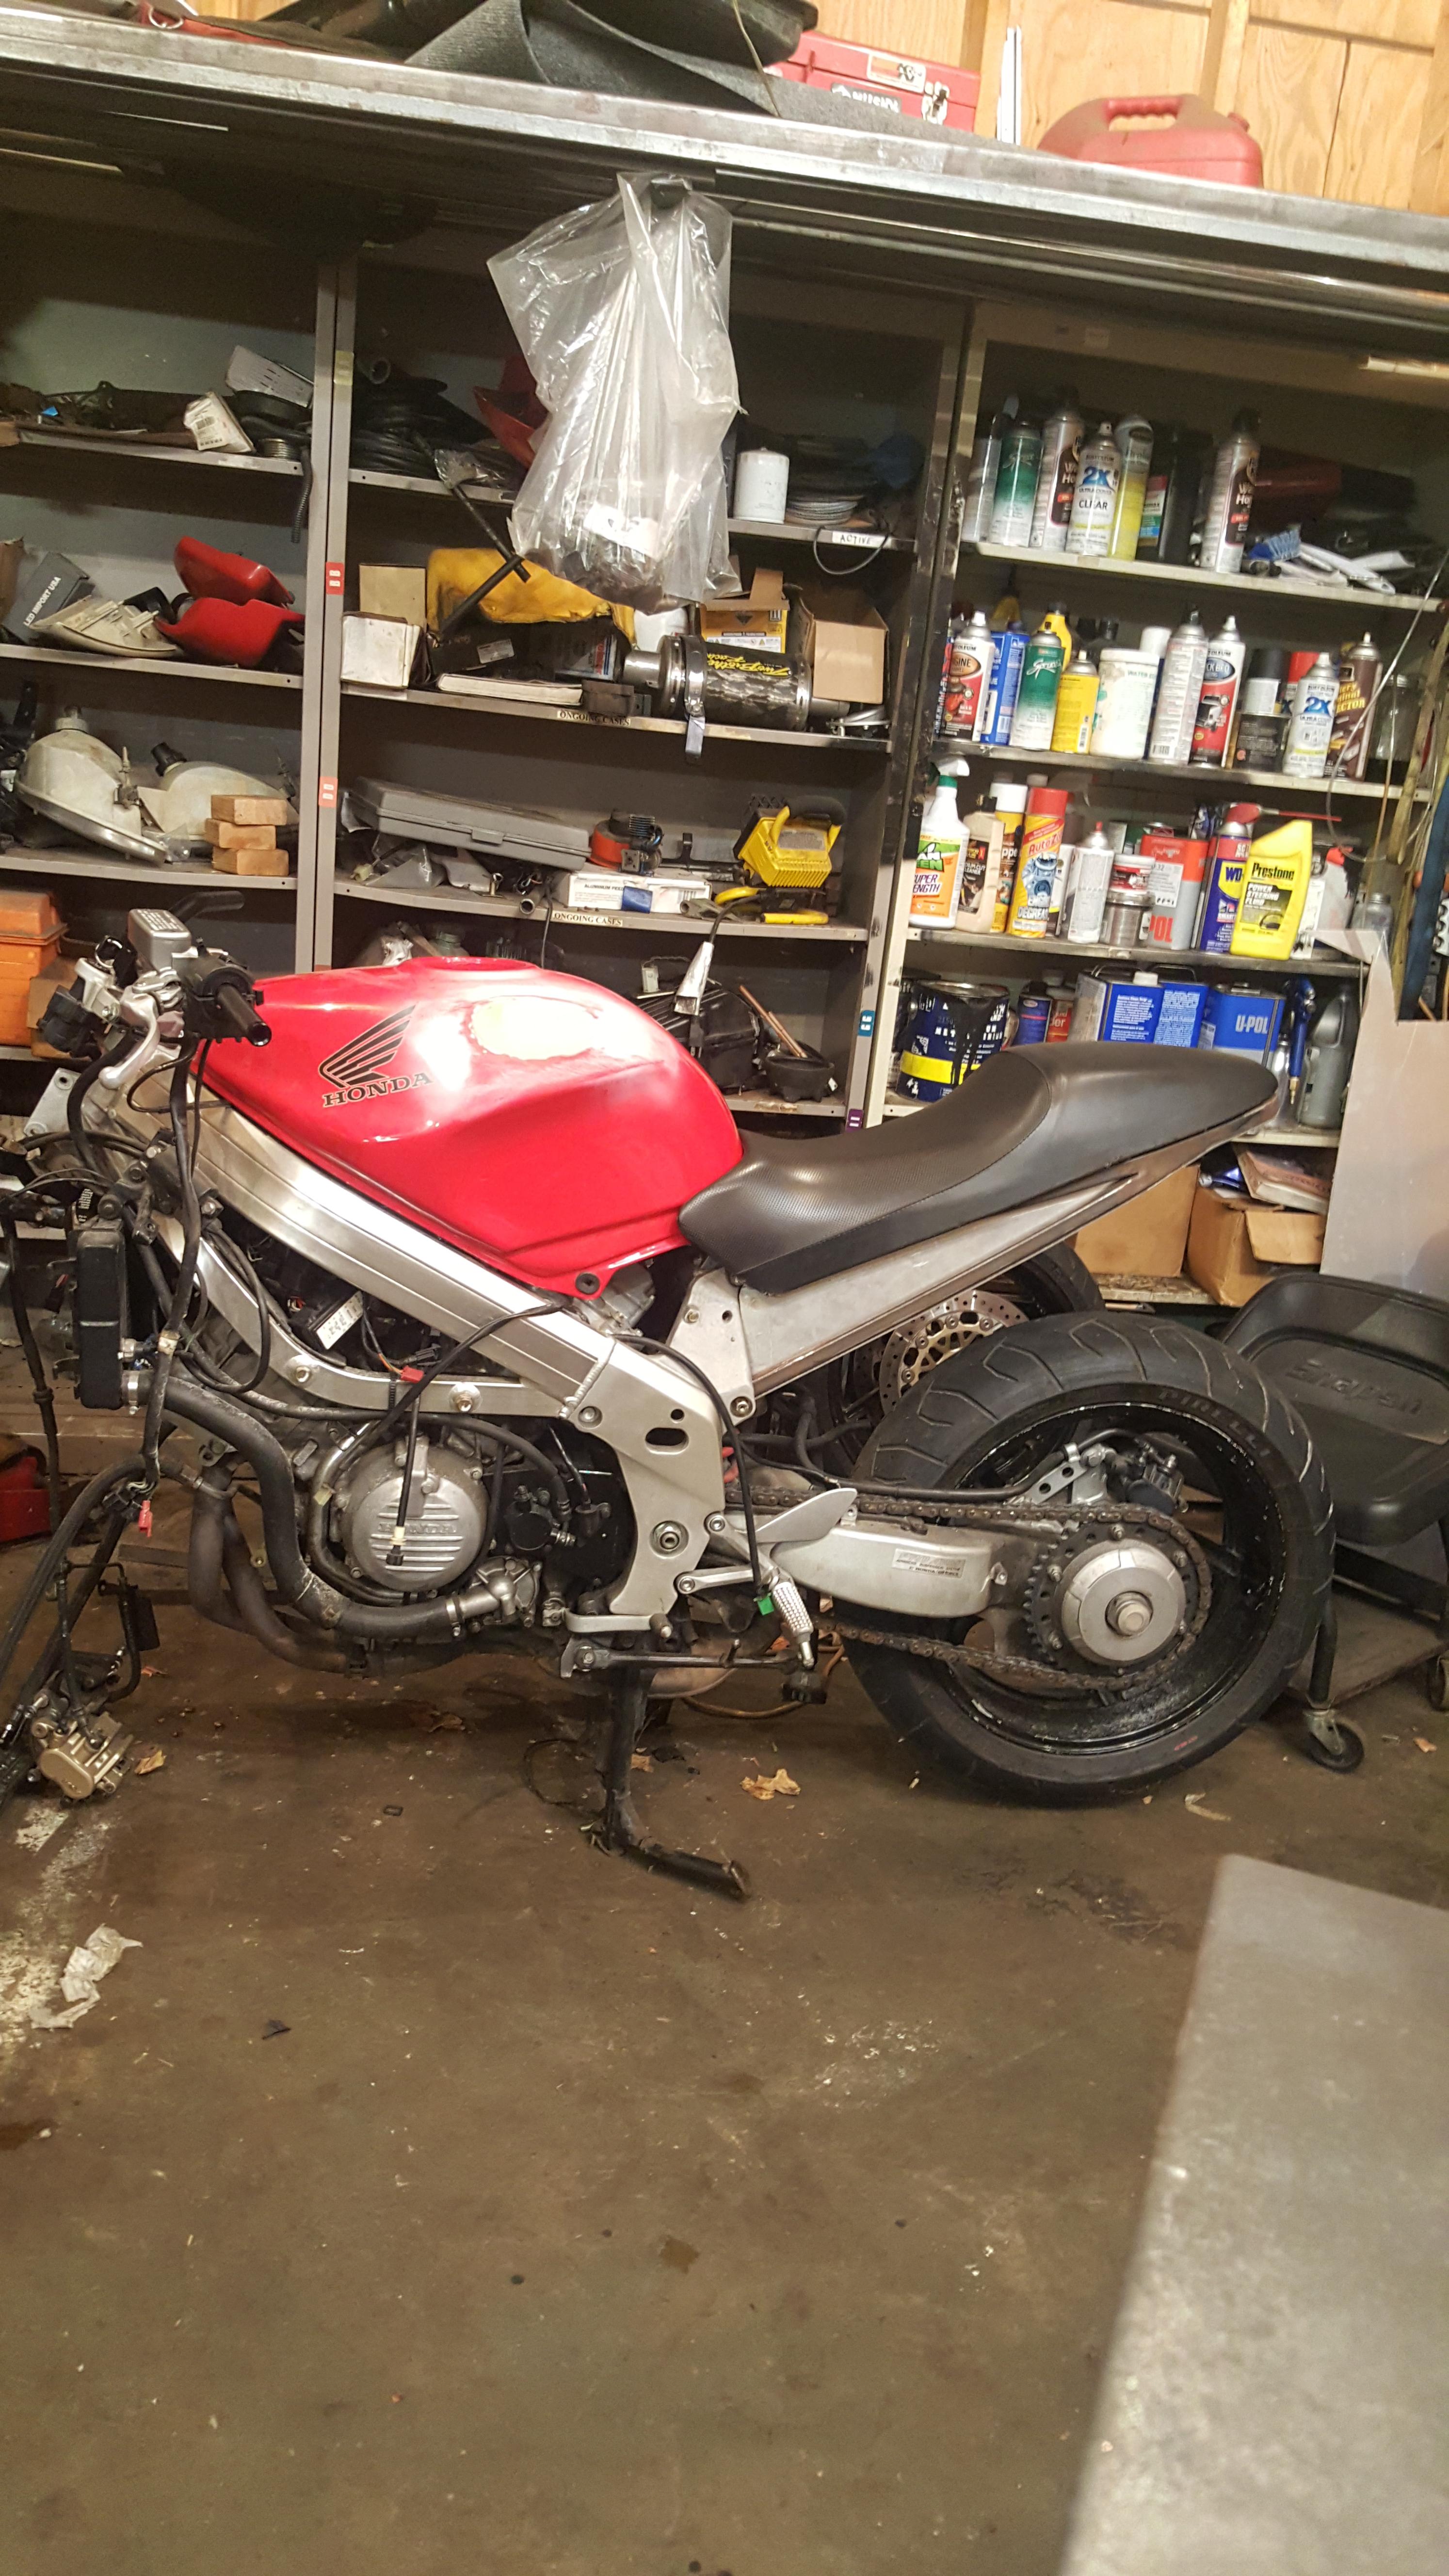
1997 VFR 750 Custom Rear -
 Hi, I'm considering purchasing a Scorpion EXO-900 Helmet, and they only come in solid colors. I was thinking of adding a decal kit to it - has anyone ever used this company before? http://www.harrisdecals.com/helmets/default.asp If anyone has any opinions on the Scorpion, I'd love to hear those as well (I'm wearing a Zox Modular helmet now). Thanks, --Walter
 -
Here we go. As I promised in my first post: http://www.vfrdiscussion.com/forum/index.php/topic/73879-hi-from-brisbane-au/ I am officially starting my build thread now ;) I was planning to do it when I get more time to spend on the VFR, but I realized that It will never happend as I am involved in a few other builds, as well as my main project at the moment which is opening a workshop in Brisbane YAY! So this will be very slow build I'm afraid :(