Rivcyko
-
Posts
1,300 -
Joined
-
Last visited
Content Type
Forums
Profiles
Gallery
Blogs
Downloads
Events
Everything posted by Rivcyko
-
try post 69?
-
Not so much a factor of trust, they are spot on each other. It's nice to talk to a human, and have somewhere to go, if a problem should arise. So I vote PPG. I'll have to see about #2. Find out how much your guy will need. Not sure about shipping hazmat over the boarder, as I'm not a distributer.
-
Here are 2 PPG paint codes, via there prophet system. In spite what I was told, by one fool, THEY DO NOT have a national data base, conglomerated with there prophet system. I had them mixed at 2 different distributers, and there lables are different. I don't know why. From the following info, I haven't had a problem getting more mixed, regardless of distributer. So, here they are for Deltron 2000. **ALL ARE FOR 1 PINT** ----R-157----'02-'04 red VOC: 5.8/% Lead: 0.00/ MSDS: DBC1 Tinting Guide: DBC75057 T DMD1677 332.4 DMD1609 42.9 DMD1692 19.3 DMD1684 4.3 DMD642 3.9 DMD648 2.1 DBX1689 40.8 ----NHA30M----('05 SILVER) Brand Code: 301274 DBC (Deltron 2000) DMD649 65.3 DMD1682 315.2 DMD1683 41.9 DMD624 9.1 DMD1607 5.2 DBX1689 65.3 ----'02-'04 ---- Force Silver DBC5464F BRIGHT SILVER DMD1687 Med. Alu 454.4 DMD1686 Fine Alu 9.4 DX685 Flatting 9.4 DMD641 Yellow 4.7 PRL93 Gold pea 3.2 DBX1689 Clear 23.5 ----'06 BASS BOAT BLACK---- DMD649 CLEAR1 18.5 DMD1683 BLACK 113.7 DMD614 BLUE 4.1 DX658 Urethane Flattening Agent 29.6 DMD1687 MED. ALUM 21.2 DMD624 VIOLET 16.8 DBX1689 CLEAR 192.1 -----5th and 6th gen. side case cover touch-up------ Dupli-color auto spray EDSFM 286 or upc: 026916122865
-
Installing Radar's Custom Sliders - Black Bases
Rivcyko replied to KanadianKen's topic in Modifications
Think they're installed wrong. :idea3: (This was posted in her thread). The shop put them on. -
All good advise. For the heck of it, toss in some FI cleaner, also. Slight chance that it may help.
-
Interesting blog. As I see a skull in your seat.
-
 Ding-dang-ol cute. AND, got it together. Have I ever mentioned,....You rock!?
 -
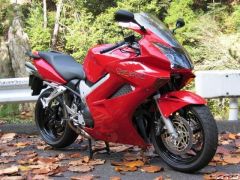
Enjoying a stop on the Cherohala Skyway
Rivcyko commented on Baileyrock's gallery image in Member's Gallery
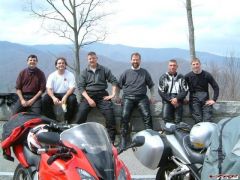 Bone! So that's what you look like, without a bandanna on.
 -
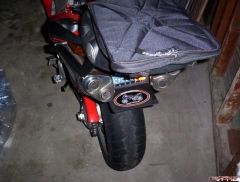
From the album: parts 'n' acc.
© ©vfdiscussion.com
-
Black and frosted it is. Give Lobster your hard earned cash, as gen-mars, aren't clear and cost more. :thumbsup: Love 'ya Larry. Thanks for the exhaust hook-up.
-
Got yellow and orange leds on order. Figured orange,in the long drill holes,as running lights. Andyellow in the short one as signal. They are acryic. SORRY. NOT IN PRODUCTION. My hands are full, now. Yeah, but it would be distracting for the rider (if used for indicators) or not good for your night vision if used as pilot lights. Ding! We have a winner! Still considering drilling a series of small holes, through out the light visable areas, (and perhaps a flat clear on the same areas).
-
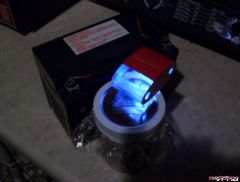
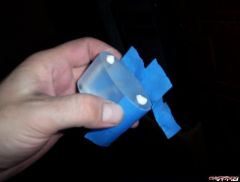
Well,............. I'm still waiting on paint to dry and my LEDs, BUT,... 1) Sanded down to the plastic. Sanded through the bolt holes, facing fwd. (for light defusion). 2) Drilled one .325" hole, .250" deep, .500", forward from the rear bolt hole. (Placing it back of the center of the extender). 3) Drilled two .250" holes, from the .325" hole, at two different depths and angles, (eyeballed), but trying to get the shorter hole, slightly more forward, than the longer hole. 100_3646.JPG 4) Sanded those holes. 5) PAINT PREP. Sand every surface with 400 grit. Tape the areas that will show light. ( I'm letting light through on 70%, of the bottom side, and 40%, on the top.) Trim the tape. Plug the holes. 100_3647.JPG 6) Two coats of silver plastic paint, (for reflection), five coats of black primer, (to capture any light wanting to escape). 7) After cure, carefully remove the tape. Coat with six coats of matte clear. Let cure. Retape the light showing areas, slightly shy of where the blcak edges are. (No need to trim the tape, this time). Coat with two coats of clear. This should help protect the black edge from chipping-up,when bugs and desbris hit it. ...............................preview,.....more to come.
-
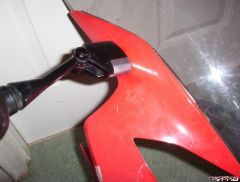
From the album: Riv's '02 mods'n'stuff
© ©vfdiscussion.com
-
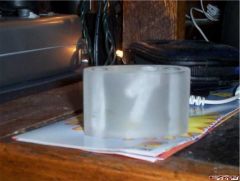
From the album: Riv's '02 mods'n'stuff
-
From the album: Riv's '02 mods'n'stuff
-
We have a winner!. LOL. But it was Lowe's. LOL.
-
Looks sweet PaPP!
-
Push it through the openings in the fairing, "bowing", it to the front side, of the fairing. Aluminum, clear anodized. Thanks!
-
A typo, that has been corrected. LOL.
-
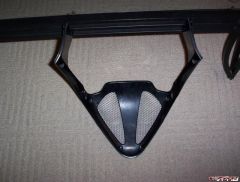
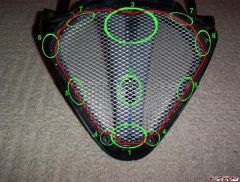
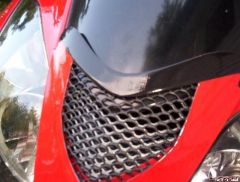
100_3632.JPG Well, I'll start by saying, this is an easy one. You'll need some epoxy, (5min Devcon®, works really well), grill material, tin snips, (or heavy material cutters), and some black or clear silicone. This mod is reversable, should you come to dislike it, at a later date. I had a different material on, before, but I wanted the same grill material, to match my Bug Buster. This mod WILL NOT cause your bike to run hot. I have found that it helps kee about 70% more road desbris from sticking to the head, block and headders. In my case, I wanted the grill to point downward, but the material was not large enough. So,.. I wired 2 pieces of it together, end to end. (Seen in areas 2 & 5). 1) Cut your material to size. Be sure it doesn't lap-up onto the boss of the plastic, where the bolts go through. (The fairing will be a pain to put back on the bike, if grill material is on the bosses). 2) Lay the grill on the fairing. and, "epoxy by the numbers", (marked by the green ovals), 1-6. Do each section at a time, NOT all at once. 3) After doing areas 1-6, and the epoxy being set, the area of grill at the top will be protruding. Working from the bottom to the top, of the fairing, suport the edge of the fairing with one hand, and push the grill material out through the openings. This takes a little finessing, and you'll probably have to do it a couple of times, to get it even. 4) At this point the protrusion at the top, (area 7), should be minimal to non exhistant. NOW epoxy this area. 5) This is optional. Marked by the red line, is where I smeared black silicone. You may not want the added weight. I did it to help insure overall adhesion, (in case of a big rock, or something hitting), to dampen any noise or vibration, and to keep from tearing my fingers to ribbons, when removing the fairing. :thumbsup: grill how to.jpg
-
From the album: Shop photos
-
From the album: Shop photos
-
 Look at all of the stock-y, un-moddedness. I remember those days. LOL.
 -
From the album: parts 'n' acc.
The difference between stock windsreen and universal Bug Buster.© ©vfdiscussion.com
-