toro1
-
Posts
470 -
Joined
-
Last visited
-
Days Won
2
Content Type
Forums
Profiles
Gallery
Blogs
Downloads
Events
Everything posted by toro1
-
Wow. 100,000 views. :rolleyes: Thanks everybody -- I promise some fun things in the next 3 weeks.
-
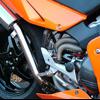
I second that opinion. Another fun material to machine is titanium -- drills and endmills love titanium. If magnesium is not coated, yes, it eats away over time from the elements. I have certainly noticed this on the unpainted areas of my front wheel.
-
Hey guys, sorry I haven't posted here lately (lotsa work + big decisions = lost time). I'll try to answer some questions for you... The development period has been extended due to forces out of my control. While the kit has been completely designed & engineered, I'm still awaiting key components needed to get the bike running again. It's always been my intent to update progress once I had enough to show you all, and I still intend to do just that, so stay patient. In terms of power, I don't want to stick my foot in my mouth here, but I expect the updated kit to put down an honest 150hp at the wheel (depending on exhaust choice & dyno, of course). Brandon, the Busa will kill this bike in the torque department, but the power-to-weight ratio should be quite close. In the real world, the bike never feels underpowered. Even lugging it in 6th gear, it feels like it's a gear down and power is at the ready. It will instantly loft the front wheel from any rpm in 2nd gear, and comes up with ease in 3rd (granted, I do have steeper than stock gearing, but I could never do the things I can do now with the stock setup). John, the beefier clutch springs have been installed, and while the lever pull is tougher than stock, it's not too bad. I can't report yet on how much better it performs with them installed, though. Nymbyss, believe me, I was not trying to pull a wheelie in that video as my camera was precariously mounted. Nevertheless, the huge bump in power caused the front end to rise like it did. Oh, and my speedometer has been calibrated with the speedohealer, so what you see is not fudged by gearing. The acceleration is so much fun to experience since the boost never stops building -- where with the stock setup the power plateaus and falls off, the supercharged setup gives the sensation of neverending power. It's addicting. I really hope to have some nice new pictures to show in the upcoming weeks, so until then, everybody have fun riding (because I know I won't be...:rolleyes:)
-
For anyone wondering about the price, remember this -- the supercharger itself is close to $2000, and there are over 25 different parts being CNC'd, with the total number of machined parts numbering at least twice that. Throw in the hardware, anodizing, filters, o-rings, etc. etc, and then a tiny bit for me, and you can start to see where the expense is coming from. I could make this kit cheaper by outsourcing parts to China, but I personally don't believe in doing that and very much like to support the local shops. I can guarantee that you will never once have to worry about the quality of this kit, and I have invested far too many engineering hours for it to be anything but perfect. Just remember that you get what you pay for, and in this case, that means a 50% power boost.
-
I had a similar problem when I first got my bike. The brake light circuit kept blowing fuses -- not the bulbs, but the fuses -- and it was driving me crazy. Turns out the controls were rotated down a bit much and the brake light switch was making contact with the fork tube. Somehow it was grounding through the rubber boot, so I wrapped it with electrical tape, turned the controls up a bit, and I haven't blown a fuse since. I'd start at the beginning -- does it blow the lights when either switch is activated, or is it related to a specific one?
-
Price point: Unsure of that right now (if I have to ballpark it, plan on price landing somewhere between $4-6k, with a possible discount for the initial run of kits) Timeframe: I hope to have my bike up and running & the first 'experimental' kit out within the next 1-2 months -- production 5th-gen kits will follow shortly after that, and once I can get my hands on a 6th-gen, that kit will follow as well. Just keep you eyes peeled here for more info regarding progress/pricing. This is going to be the ultimate bolt-on you can purchase for your VFR.
-
Steve, I can photochop any shape you want. Here's the first one: steve.jpg
-
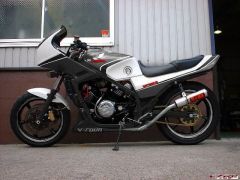
From the album: etc.
-
Happy Birthday... red.jpg blue.jpg
-
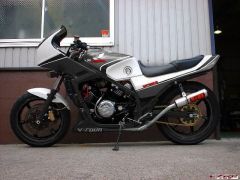
From the album: etc.
-
From the album: etc.
-
Mike, I had a very similar problem when I was trying to get my bike up and running. You can read about it here. Turns out, when I removed the throttle body, I forgot to plug the wiring harness back in, which in turn somehow affected the operation of the fuel pump. Before you go any further, go back and double check to make sure everything is plugged in. I felt like an idiot after spending 2 days wondering why I couldn't get my fuel pump to prime. Also, if your bike died after using the horn, that sounds like an issue to me. Something very well might be shorting itself out (when I rotated my controls down, I kept blowing fuses -- turned out the brake light switch was making contact with the fork due to the extra rotation).
-
Rob, the Blackbird injectors would be perfect for this application. The problem is that I can't get them at a realistic price unless I buy vast quantities of them directly from Keihin (basically acting as an OEM). I've figured out a great solution for the Stage 1 kit, and have a good idea of how to fuel the Stage 2 kit as well. Now, if anyone has a connection/stockpile of Blackbird/S2000 injectors, we need to talk... Well, considering a single Rotrex can support up to 600hp, how fast would you like to go?
-
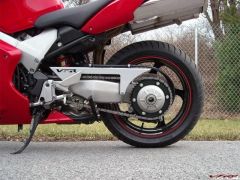
From working on my supercharger project and designing Harley open primary belt drives, I know how difficult this process is. My question is this -- how did you figure out the ideal center distance for the 30T/76T combo? Tensioning is so key with these drives, and after talking to Gates engineers several times, I know that they almost never recommend fixed center distances. The pitch length of the 172T belt is 74.488" and the pitch length of your 30T/76T combo with a center distance of 25.630" (651mm) is 74.605", thus you must be preloading the belt a certain amount. Gates has special formulas for computing the tension -- did you use these in determining the center distance? The part that bugs me about the belt drive is the varying tension in the belt as the suspension moves up and down. I'm guessing most manufacturers that do this set the tension to be ideal when an 1xx-lb. rider is on the bike, and any time the suspension moves, it varies slightly from this ideal figure. I also believe that Buell uses a spring loaded belt tensioner on their bikes, located on the slack side of the belt (which can be seen here, and the patent is here). I know Gates does not recommend using outside idlers on ribbed surface Poly Chain belts, so I'm not sure how Harley gets away with this one. They also do not recommend using spring loaded tensioners. Anyway, here is the actual PolyChain manual. Pertinent engineering data begins on page 40. If you have not yet contacted Gates, I suggest you do. It's a pain to get a hold of their engineers, but once you do, they know their stuff (I can personally recommend Jack Timmerman). Best of luck, as you don't need to give up hope yet. :thumbsup:
-
Seb & Kev, your guesses might be closer than you realize... The 6th-gen will have its very own kit developed for it. In no way, shape, or form will I try to just slap on a 5th-gen kit and market it for VTEC bikes. The success of this kit is attributed to thousandths of an inch (and in some cases, tenths) accuracy and I fully plan on obtaining a bike to design a kit around. Many parts are the same, but far too many are different: obviously the fairing is changed, but did you know the throttle body is different? How about the valve covers? The frame is slightly tweaked and the big coils are gone. All this means that some of the parts I have already designed will need to be redesigned, though the majority of parts will interchange. A Power Commander is an absolute necessity. If you do not already own one, you will have to buy one to use this kit. Also, I'm really not too concerned about VTEC. Remember this, for the majority of the time spent riding your bike (and especially while cruising), the engine sees only vacuum, thus the standard tune is only slightly modified to work with the supercharger. In the same way that tuning can smooth out the VTEC transition, so can tuning help nullify the VTEC effect with the blower. With the purchase of a kit, a customer will receive a fuel map 90% optimized for their bike. Much like the predetermined fuel maps that come with a Power Commander, the fuel map I provide will be solid enough that further tuning is really more of an option. These fuel maps are tuned with real-world miles, not just strapped down to a dyno in a closed room. To do this, an actual 6th-gen bike will be used to fine-tune the fuel mapping and make sure that a bike with one of my kits will perform out of the box. All this will come after I introduce the 5th-gen kit, however, but it should not be long after that.
-
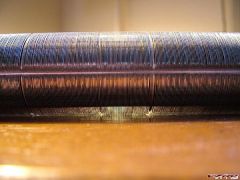
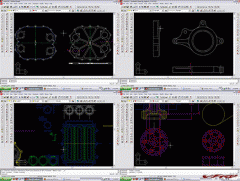
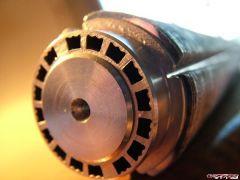
Okay. Alright. I can tell some folks are getting anxious. I'm still very much involved in this project and quite honestly, the majority of the big design hurdles have been cleared. Machining of the updated parts should start quite soon, and once that's done, all there will be left to do is test the thing. Speaking of parts, something showed up here the other day. Not quite sure what it is, but maybe it can be used in the kit somehow... mystery_object1.jpg mystery_object2.jpg These things have a bunch of fins with holes in the center...who knows what they're used for. I also found these files on my hard drive, not sure if they can be of any use, but they sure are interesting looking. preview?.gif Just a few more months guys...
-
From the album: The New Mods
-
From the album: The New Mods
-
From the album: The New Mods
-
I think I'll have to go ahead and agree with you there. I'm not even sure of the price yet, but I guarantee the $/hp margin will be better than all but the cheapest of slip-on pipes. Let us also not forget that the average customer will be able to install the supercharger kit themselves without having to take the engine apart.
-
Oh it's coming. Basically, I've ironed out the parts of the kit that needed redesign, and I'm working on some cool features that will put this thing over the top, so just wait my friends - just wait. I can assure you that you will like what you see. I'm probably going to need another month to get all the details finalized -- after that, well, hopefully this will all turn to reality.
-
Okay, here are some more iterations: White wheels seb1.jpg Plain Black wheels seb2.jpg Black w/ Polished Lips seb3.jpg White w/ Polished Lips (came out terrible, but try to imagine) seb4.jpg If you can think of anything else you'd like to see, let me know and I'll do my best to visualize it for you.
-
From the album: etc.
-
From the album: etc.
-
From the album: etc.