Search the Community
Showing results for tags 'mod'.
Found 12 results
-
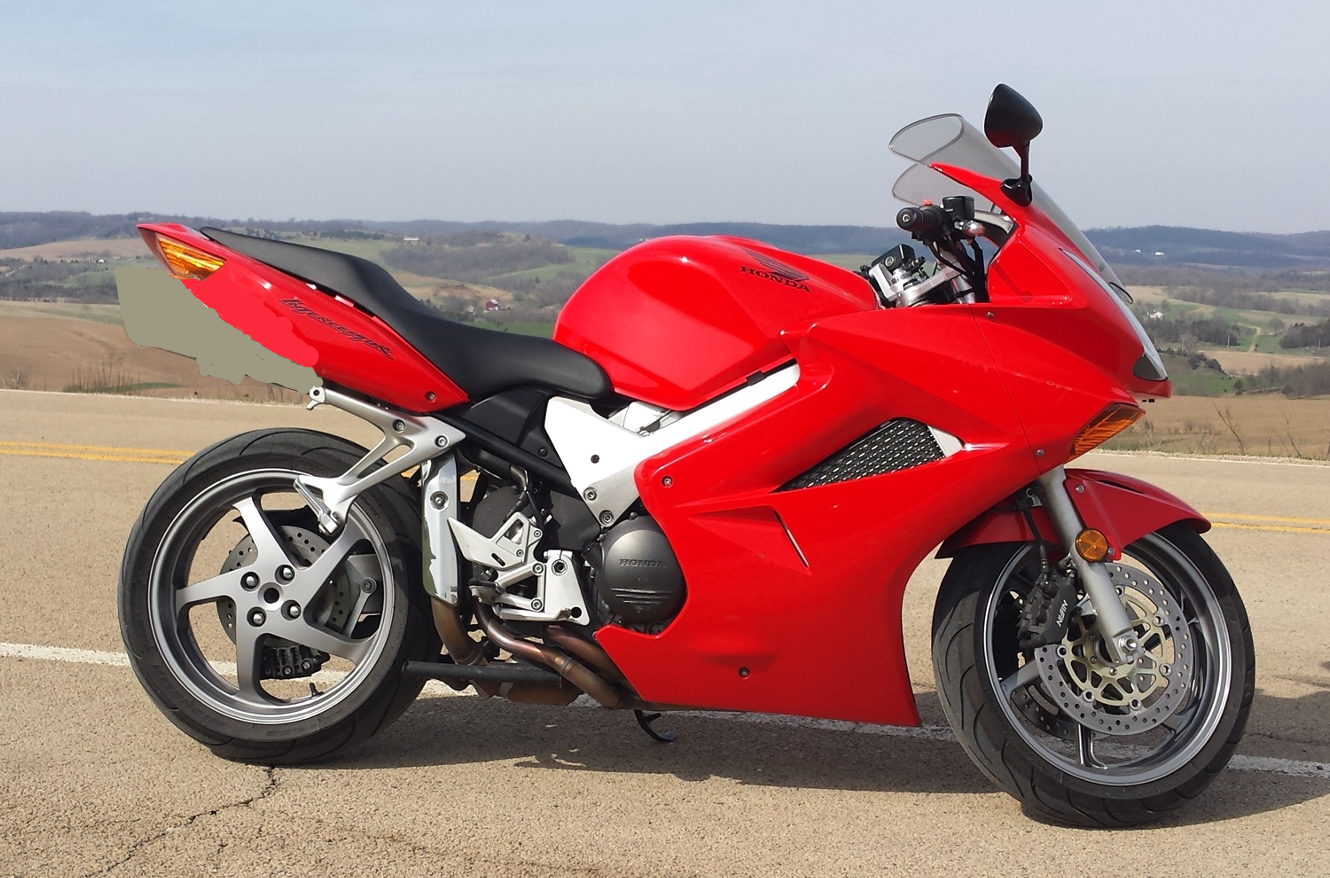
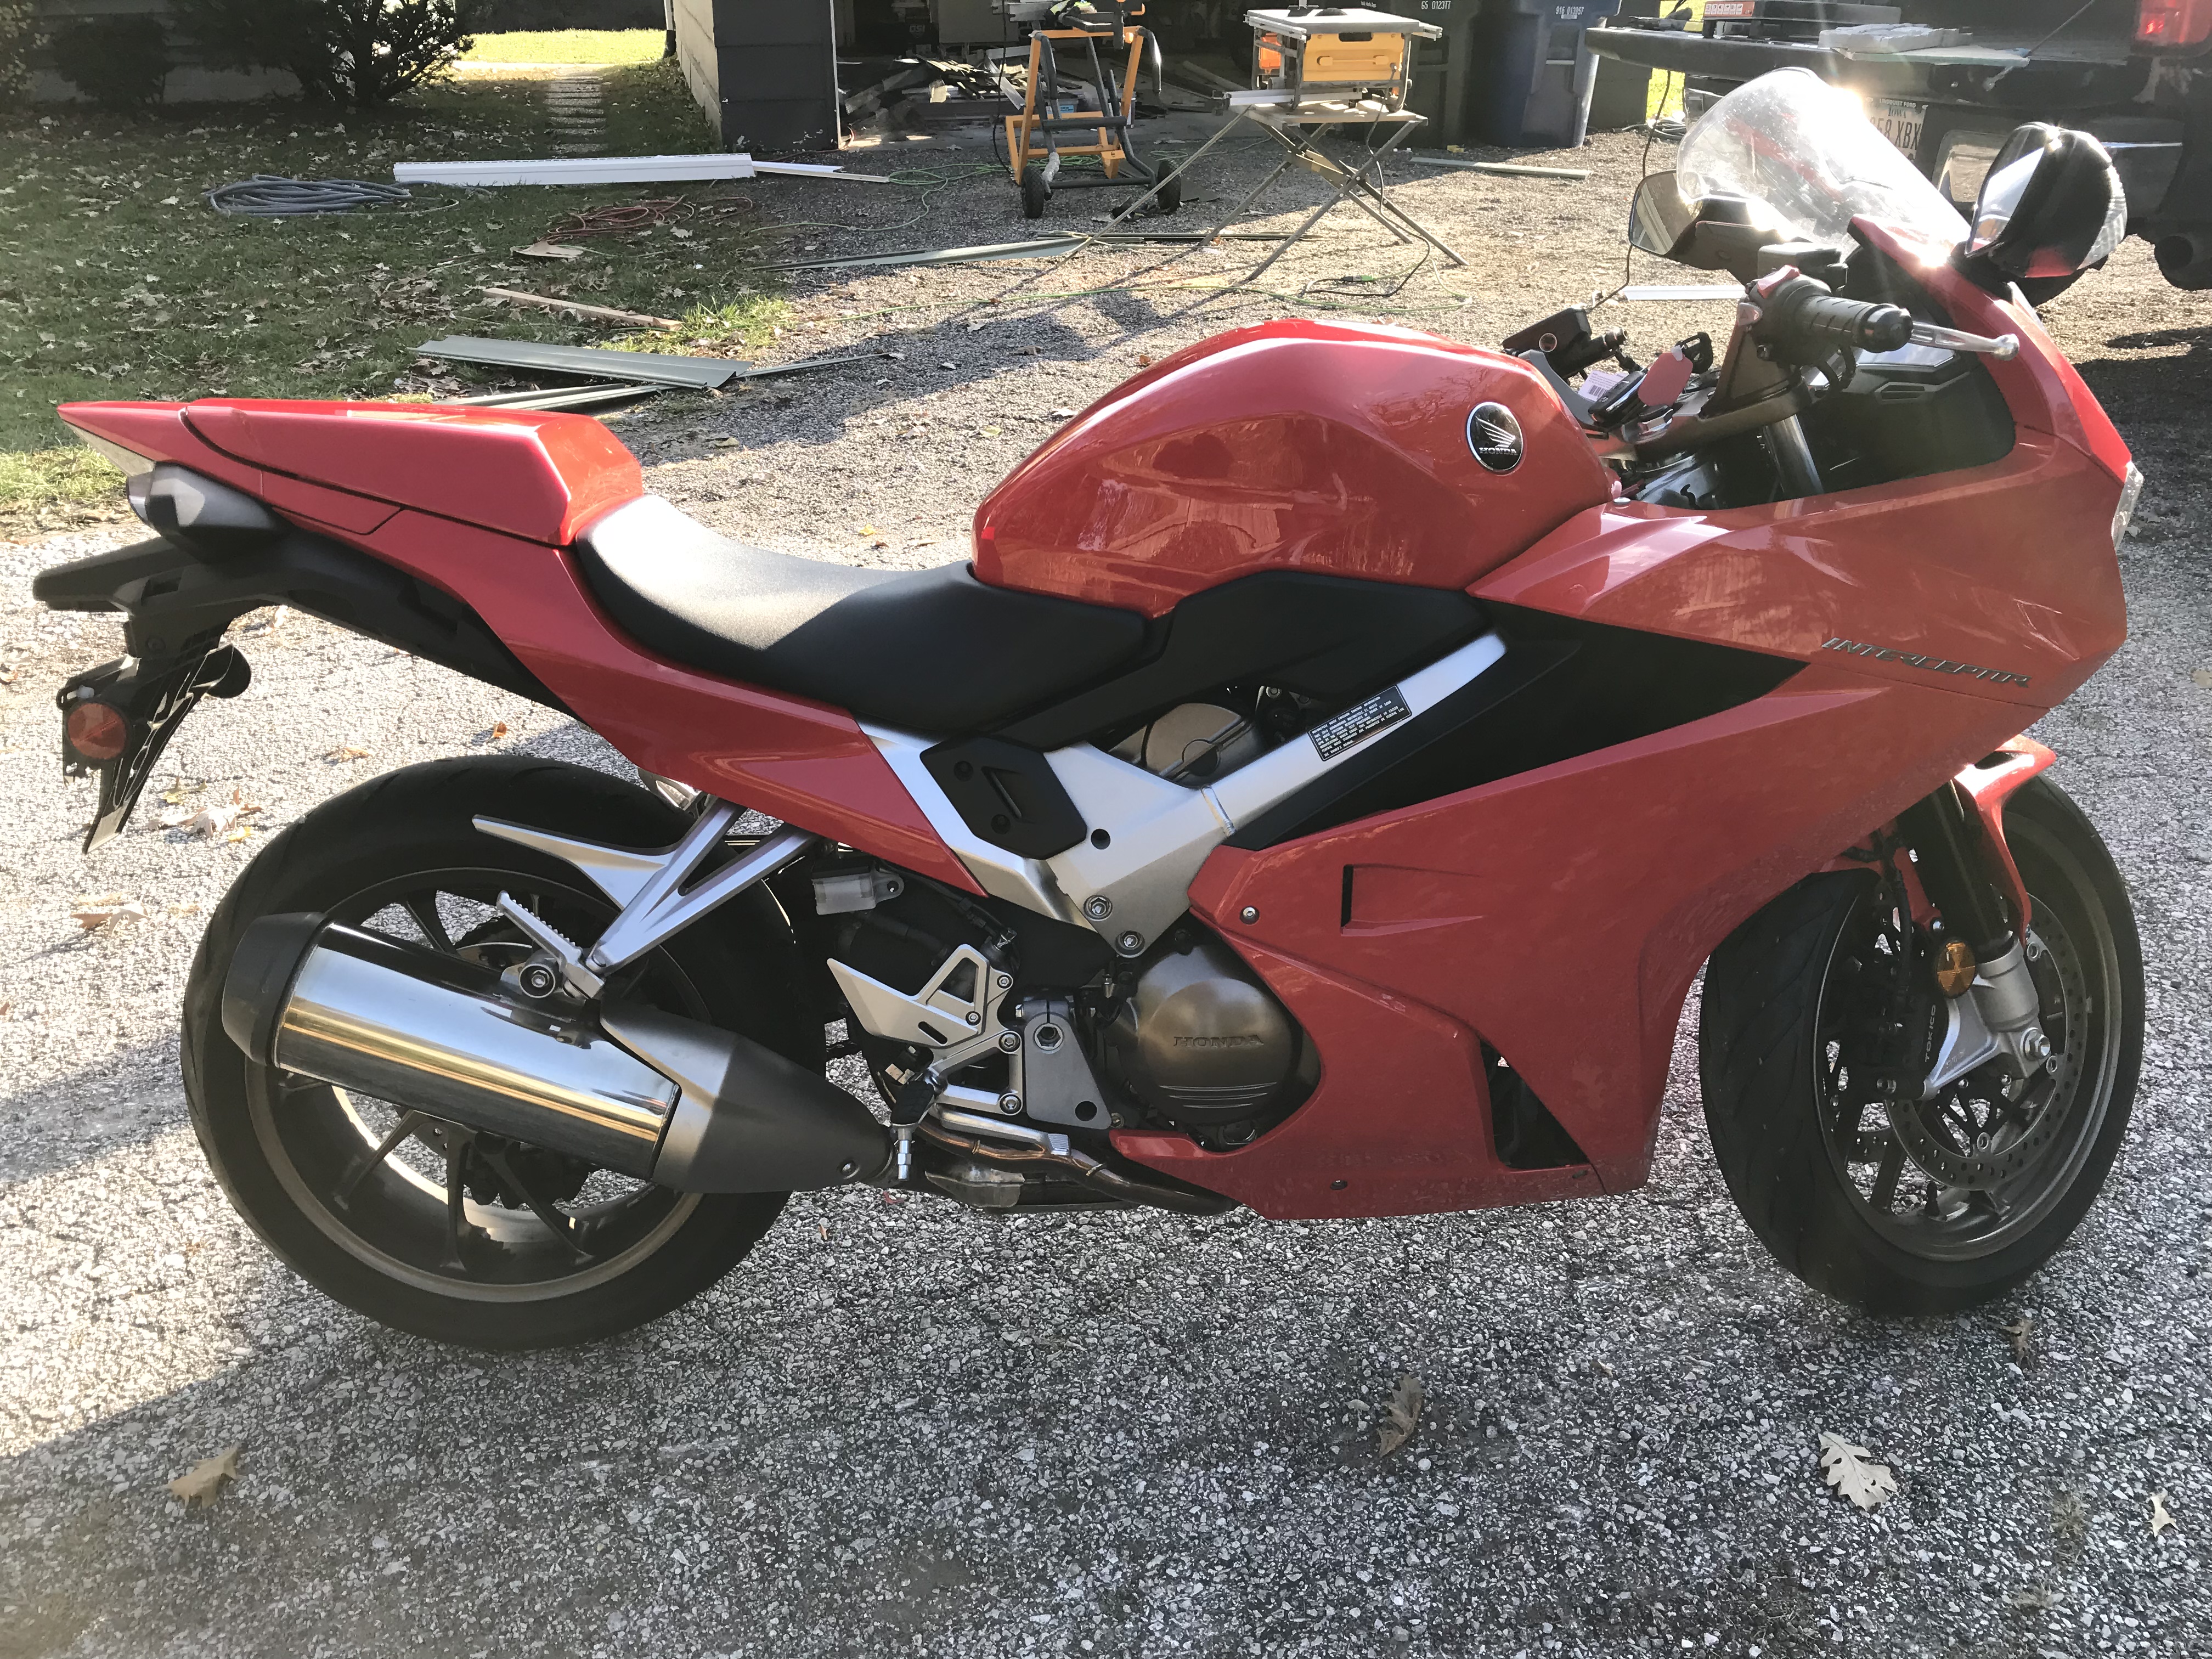
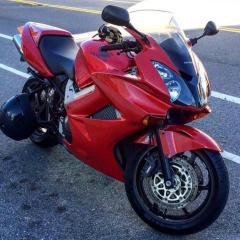
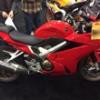
 I recently purchased a red 2002 VFR800 and I am absolutely loving it! It hides its age extremely well except for one thing (which tends to be an eye sore for me); the big outdated under tail exhausts. Another issue I have with my motorcycle is it is just no loud enough. I run with a Stain-tune cat back exhaust (without the baffles) and also have the stock exhaust. Now I know I can have a custom exhaust fabricated or use a more modern style rear exhaust setup (like repurposing a R1 or Ducati TOCE setup for the VFR) and this would fix both of my issues (make it louder and get rid of the dated look, but I am a university student on a pretty tight budget when it comes to throwing money on a bike. The alternative to this is running with a cheap slip on exhaust which comes out the side. The issue with this would be the gaping hole under the tail where the old cans used to be; this just makes the motorcycle look like something is off about it. What I am proposing is to get an affordable slip on and put that on the side, and fabricate a piece to go under the tail. I would fabricate this by first making a mold around the empty tail with cardboard, filling it with expanding foam, shaving it down to fit the bike, going over the foam with fibreglass, and finally paint matching with the Italian Red Honda paint. I could also have the fibreglass part painted at a shop if it would be cheaper. I have listed the rough price estimate and a getto mock of the final product (slip on not included in the mock up). I would love to get your guys opinion on this, the level of difficulty this would be, and if this is a pipe dream or something that is actually realistic and a good idea. Thanks. Cost Estimate: - Shorty Slip On Exhaust - $100 CAD - Expanding Foam - $10 CAD - Cardboard - Free - Sandpaper and Files - Free - Fibreglass Repair Kit - $40 CAD - Primer - $10 CAD - Honda Paint - $35 CAD - Clear Coat - $15 CAD - Total - $210 Motorcycle Mockup:
-
Hi, I'm new to this Honda Specific/ V4 engine forum and I'm glad to be a part of it for some help!! Soooo... I've been doing research on aftermarket exhaust slip-on systems and been looking all over the place. I've been coming back to one company and that's 'Black Widow'. Any opinions on the brand and the type of exhausts they sell??? How they fit? Sound quality? Reliability? Reviews on them? I'm looking for a good sounding exhaust and if you have any recommendations I would really appreciate them! Here are the slip-ons I'm stuck on possibly buying: 200mm: https://www.blackwidowexhausts.co.uk/vfr800-98-03-rc46-hi-level-silencer-kit-with-200mm-oval-carbon-fibre-silencer--carbon-tip-20745-p.asp 300mm: https://www.blackwidowexhausts.co.uk/vfr800-98-03-rc46-hi-level-exhaust-silencer-kit-with-300mm-oval-carbon-fibre-silencer--carbon-tip-20747-p.asp ALL exhausts that fit the bike: https://www.blackwidowexhausts.co.uk/high-level-style-rc46-631-c.asp Thank you!
-
I recently modded my stock vfr800 exhaust! Check out this viseo to see how I did it! Let me know if you have any questions!
-
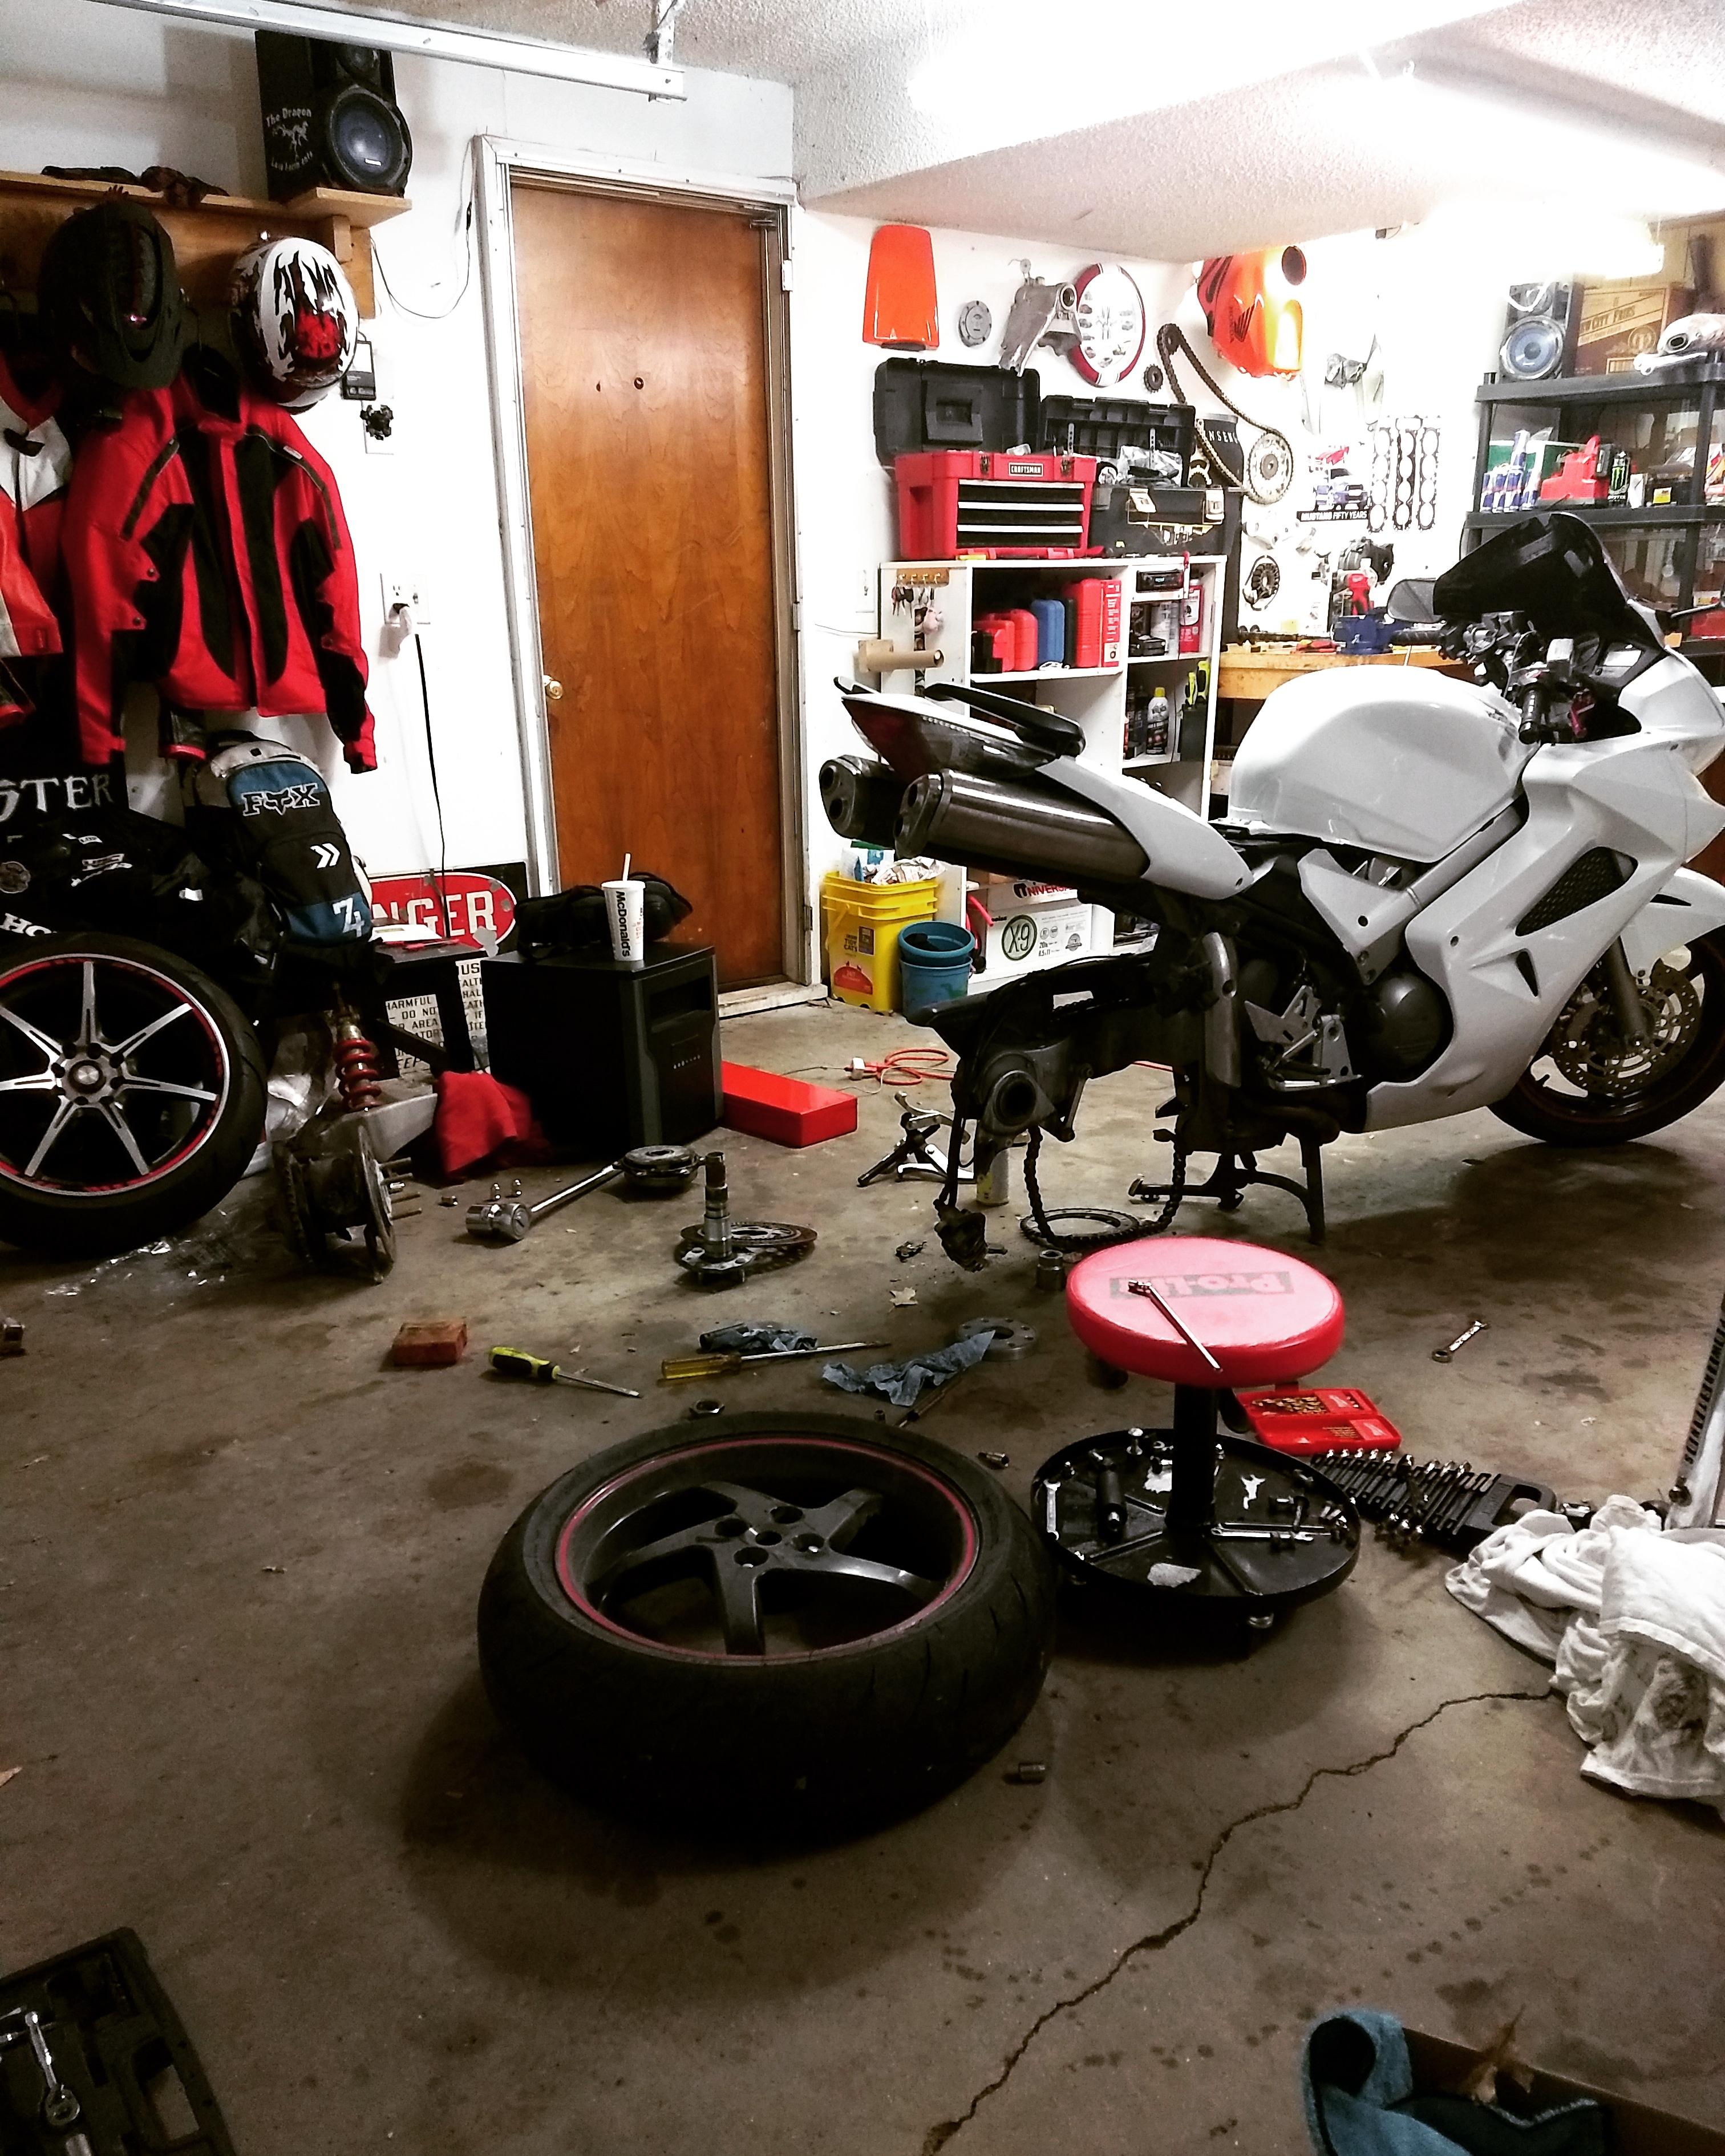
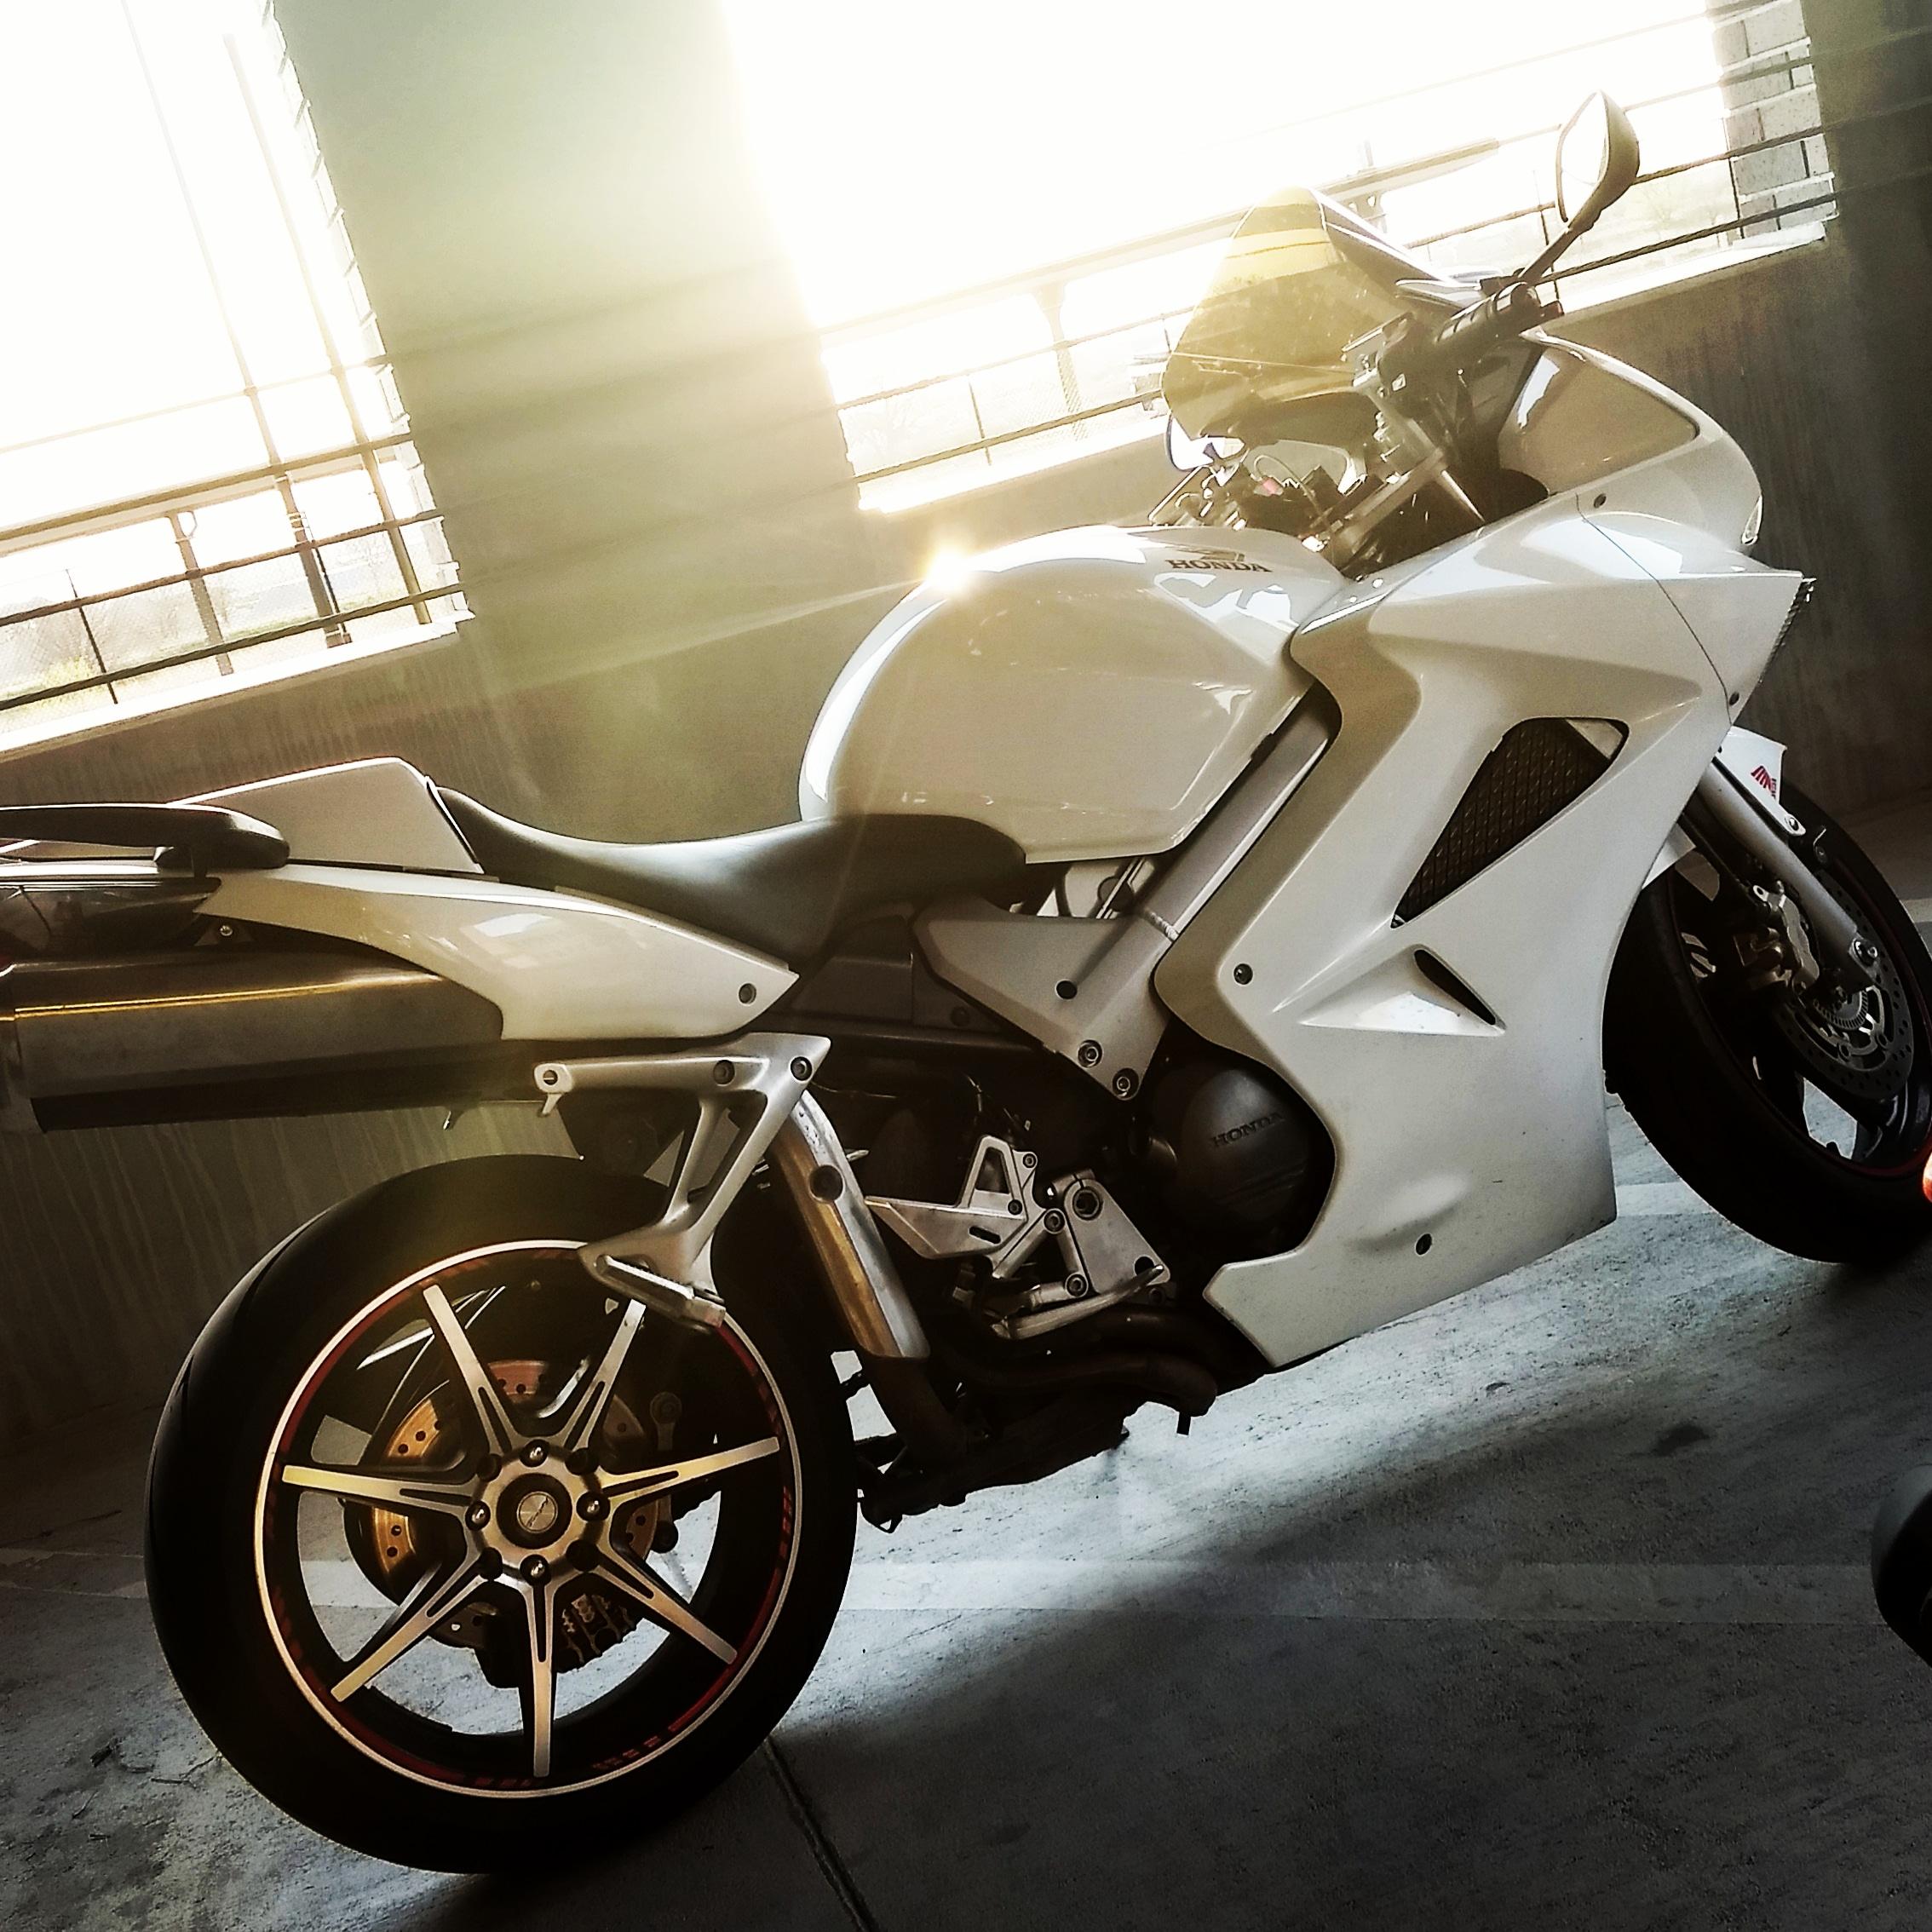
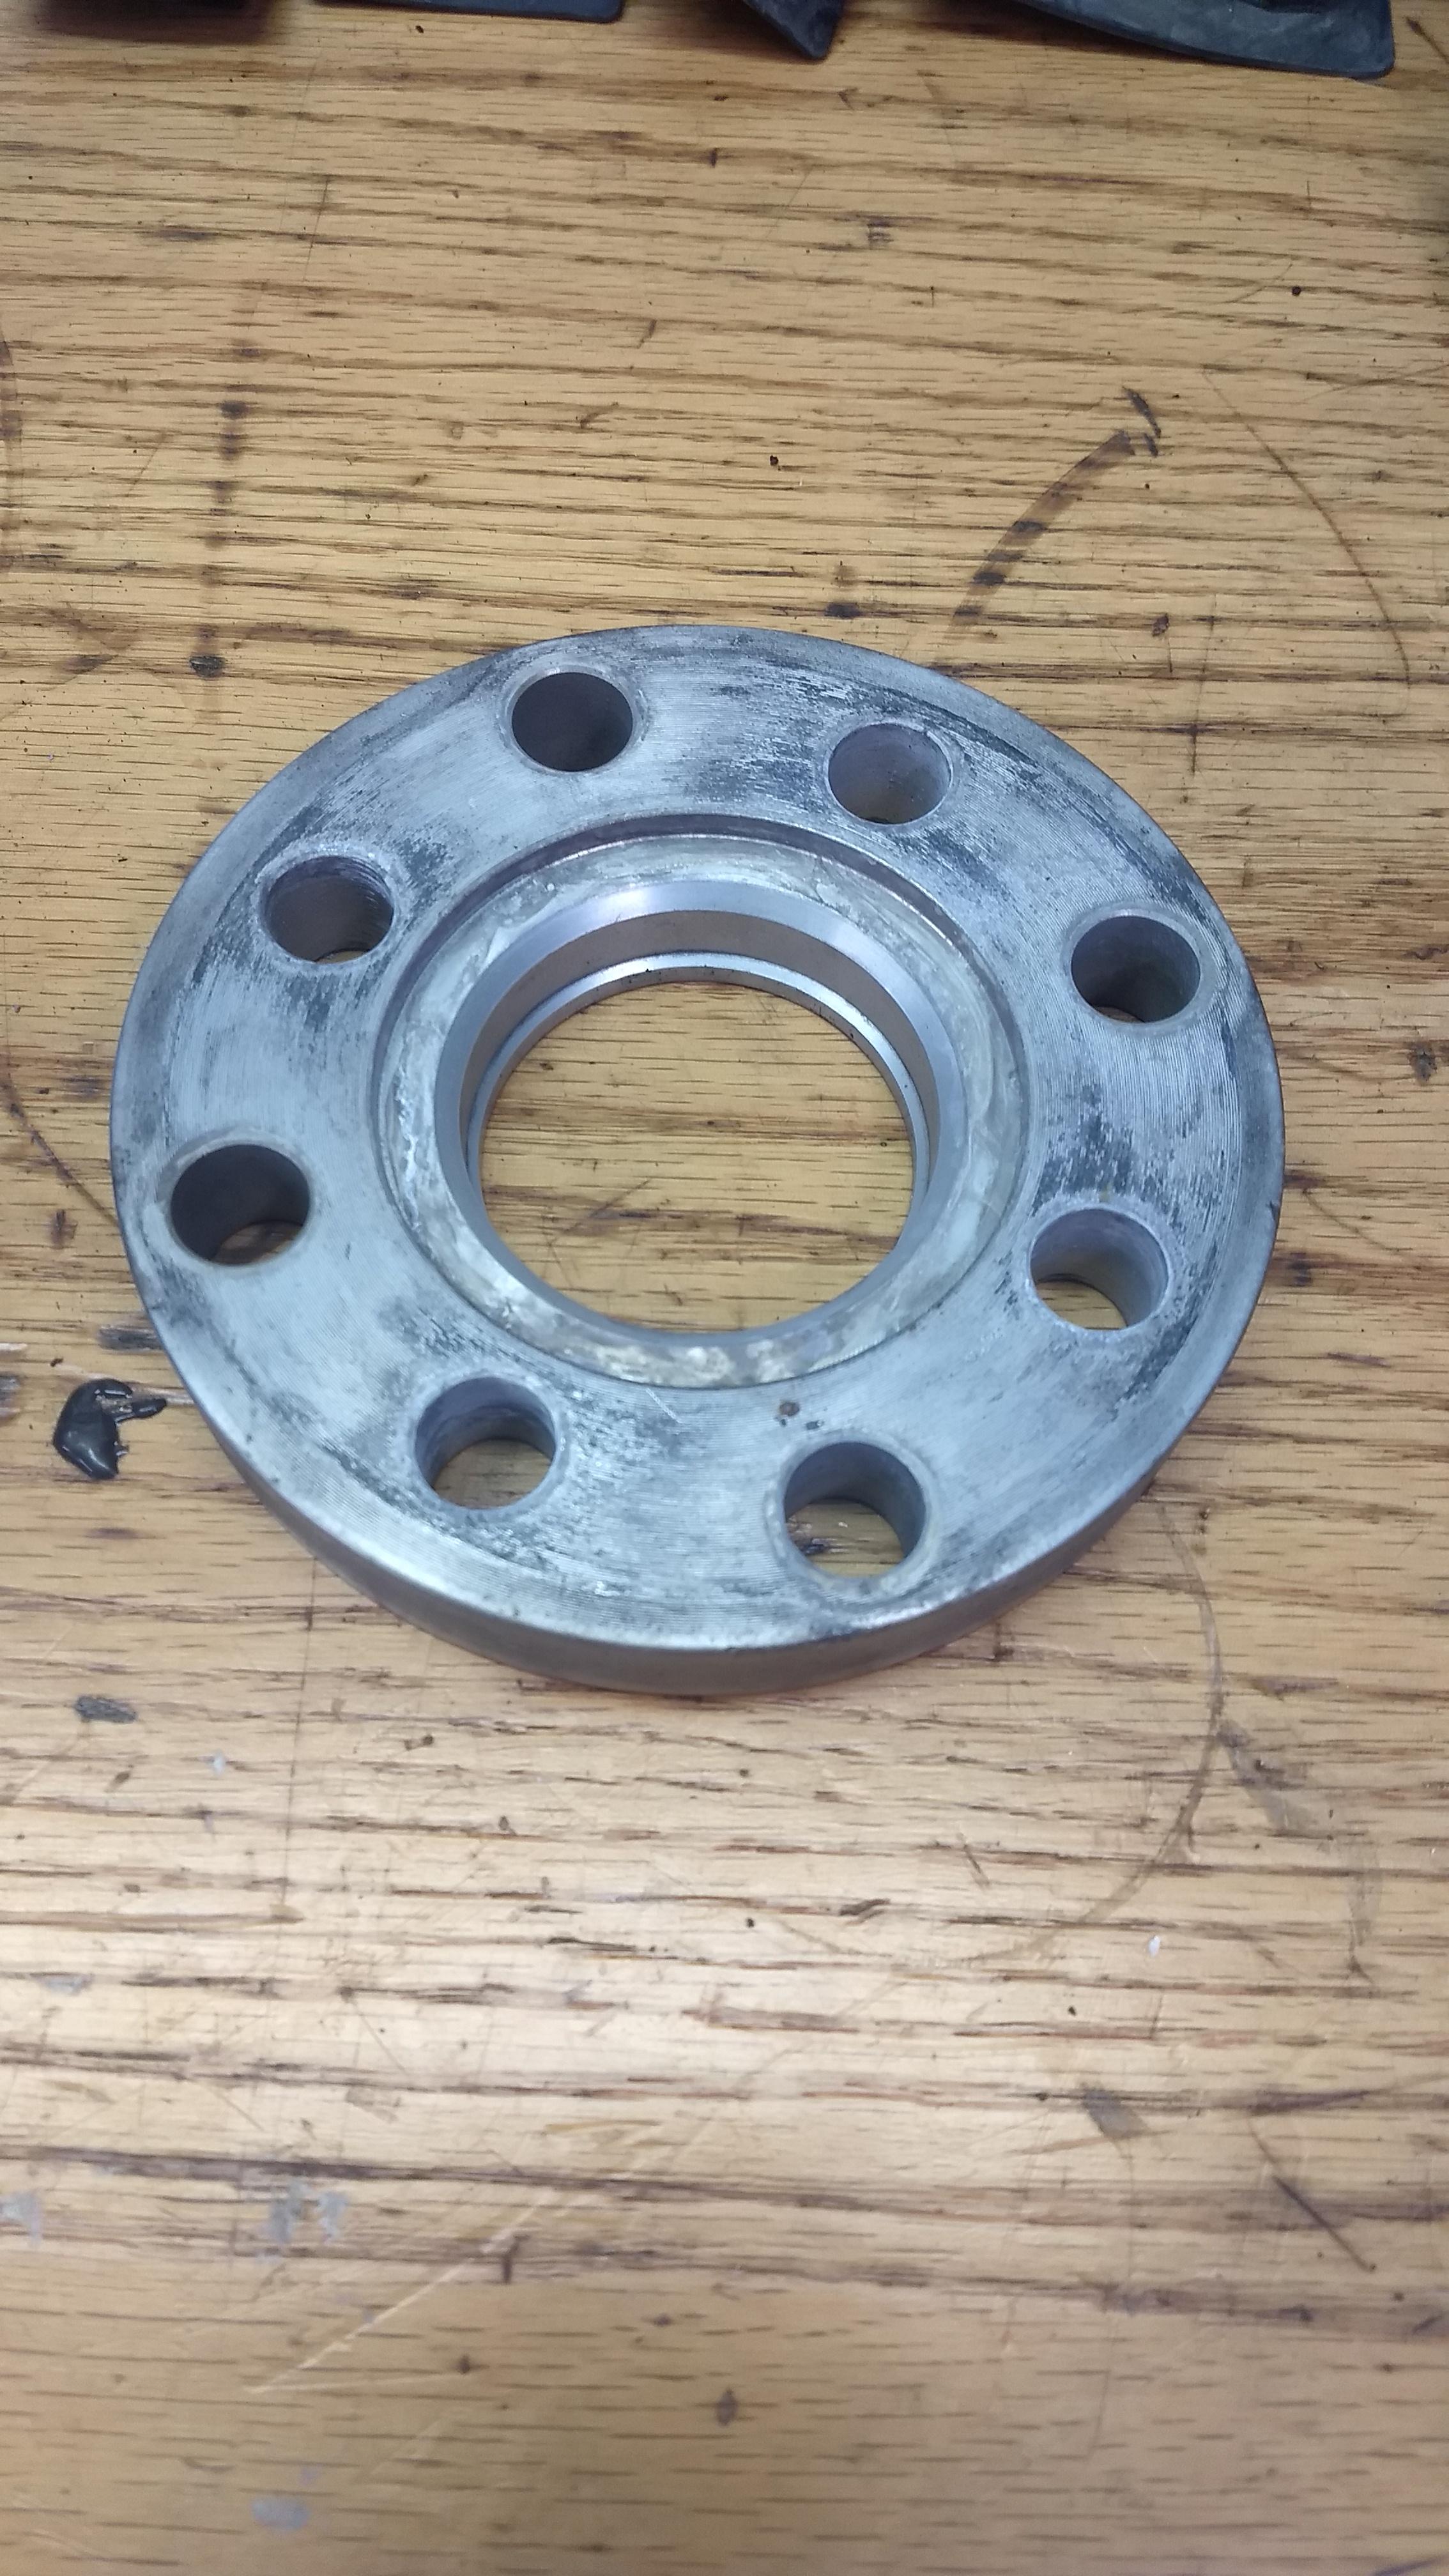
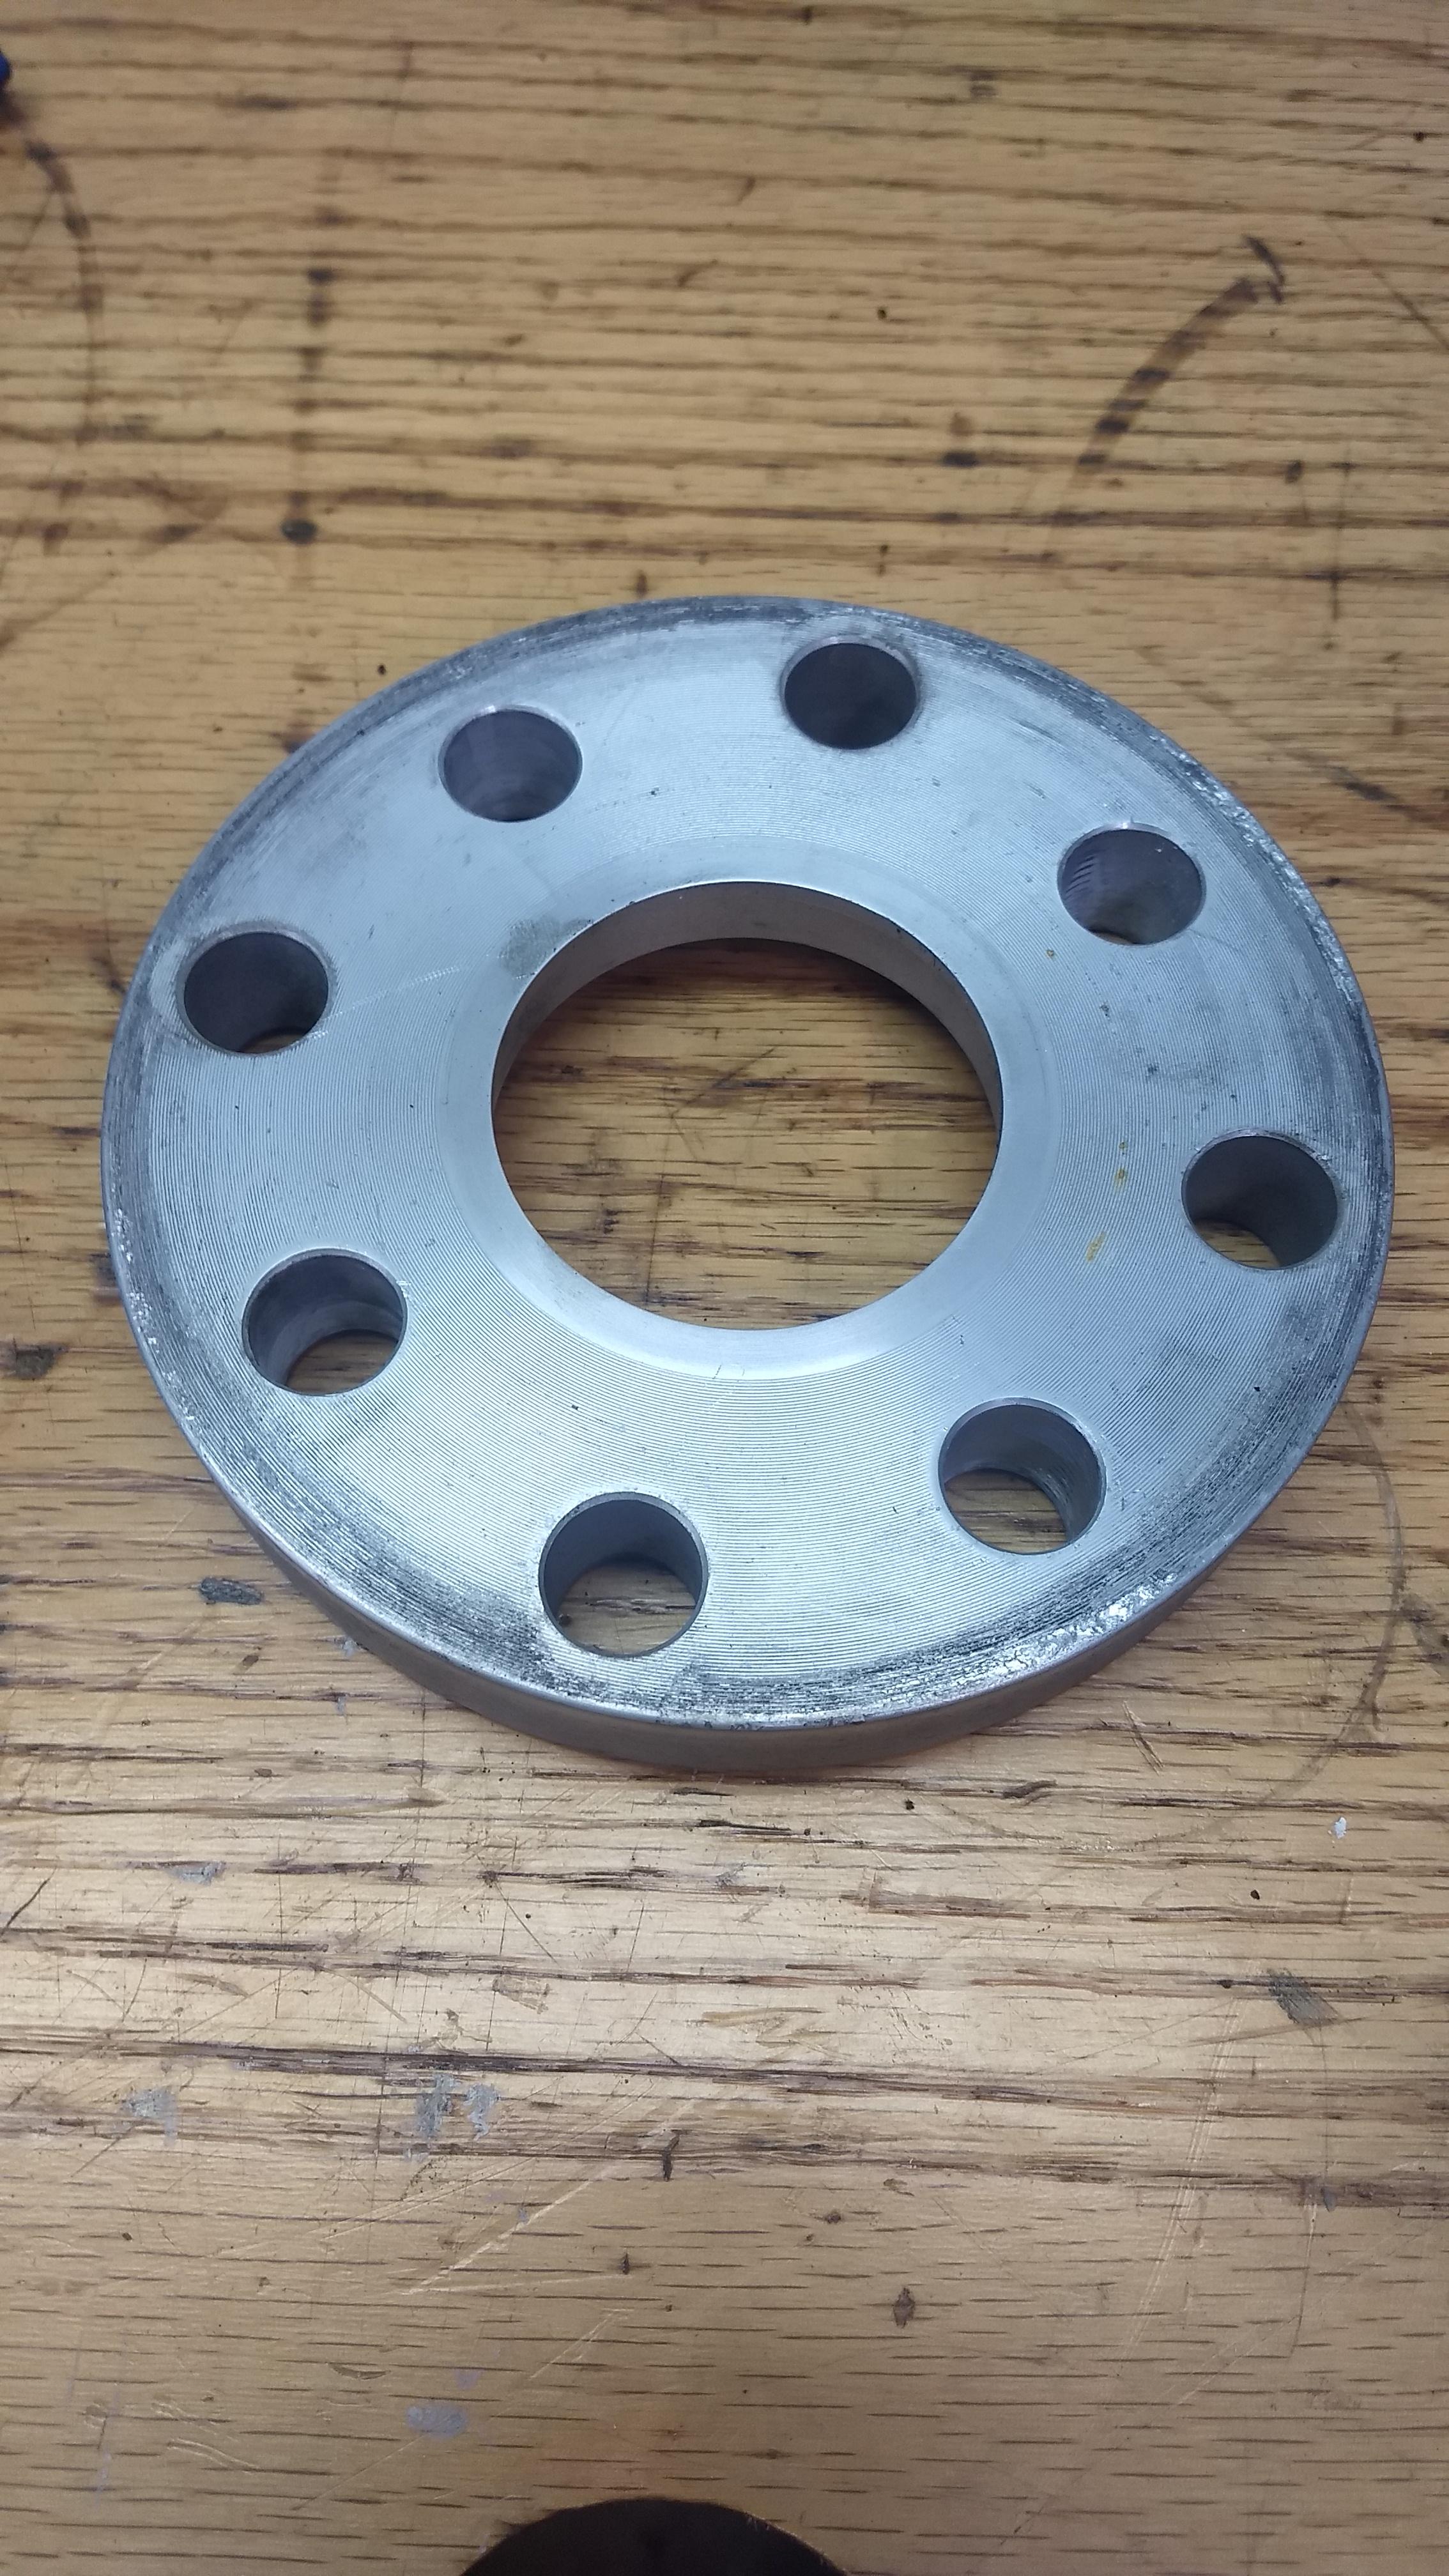
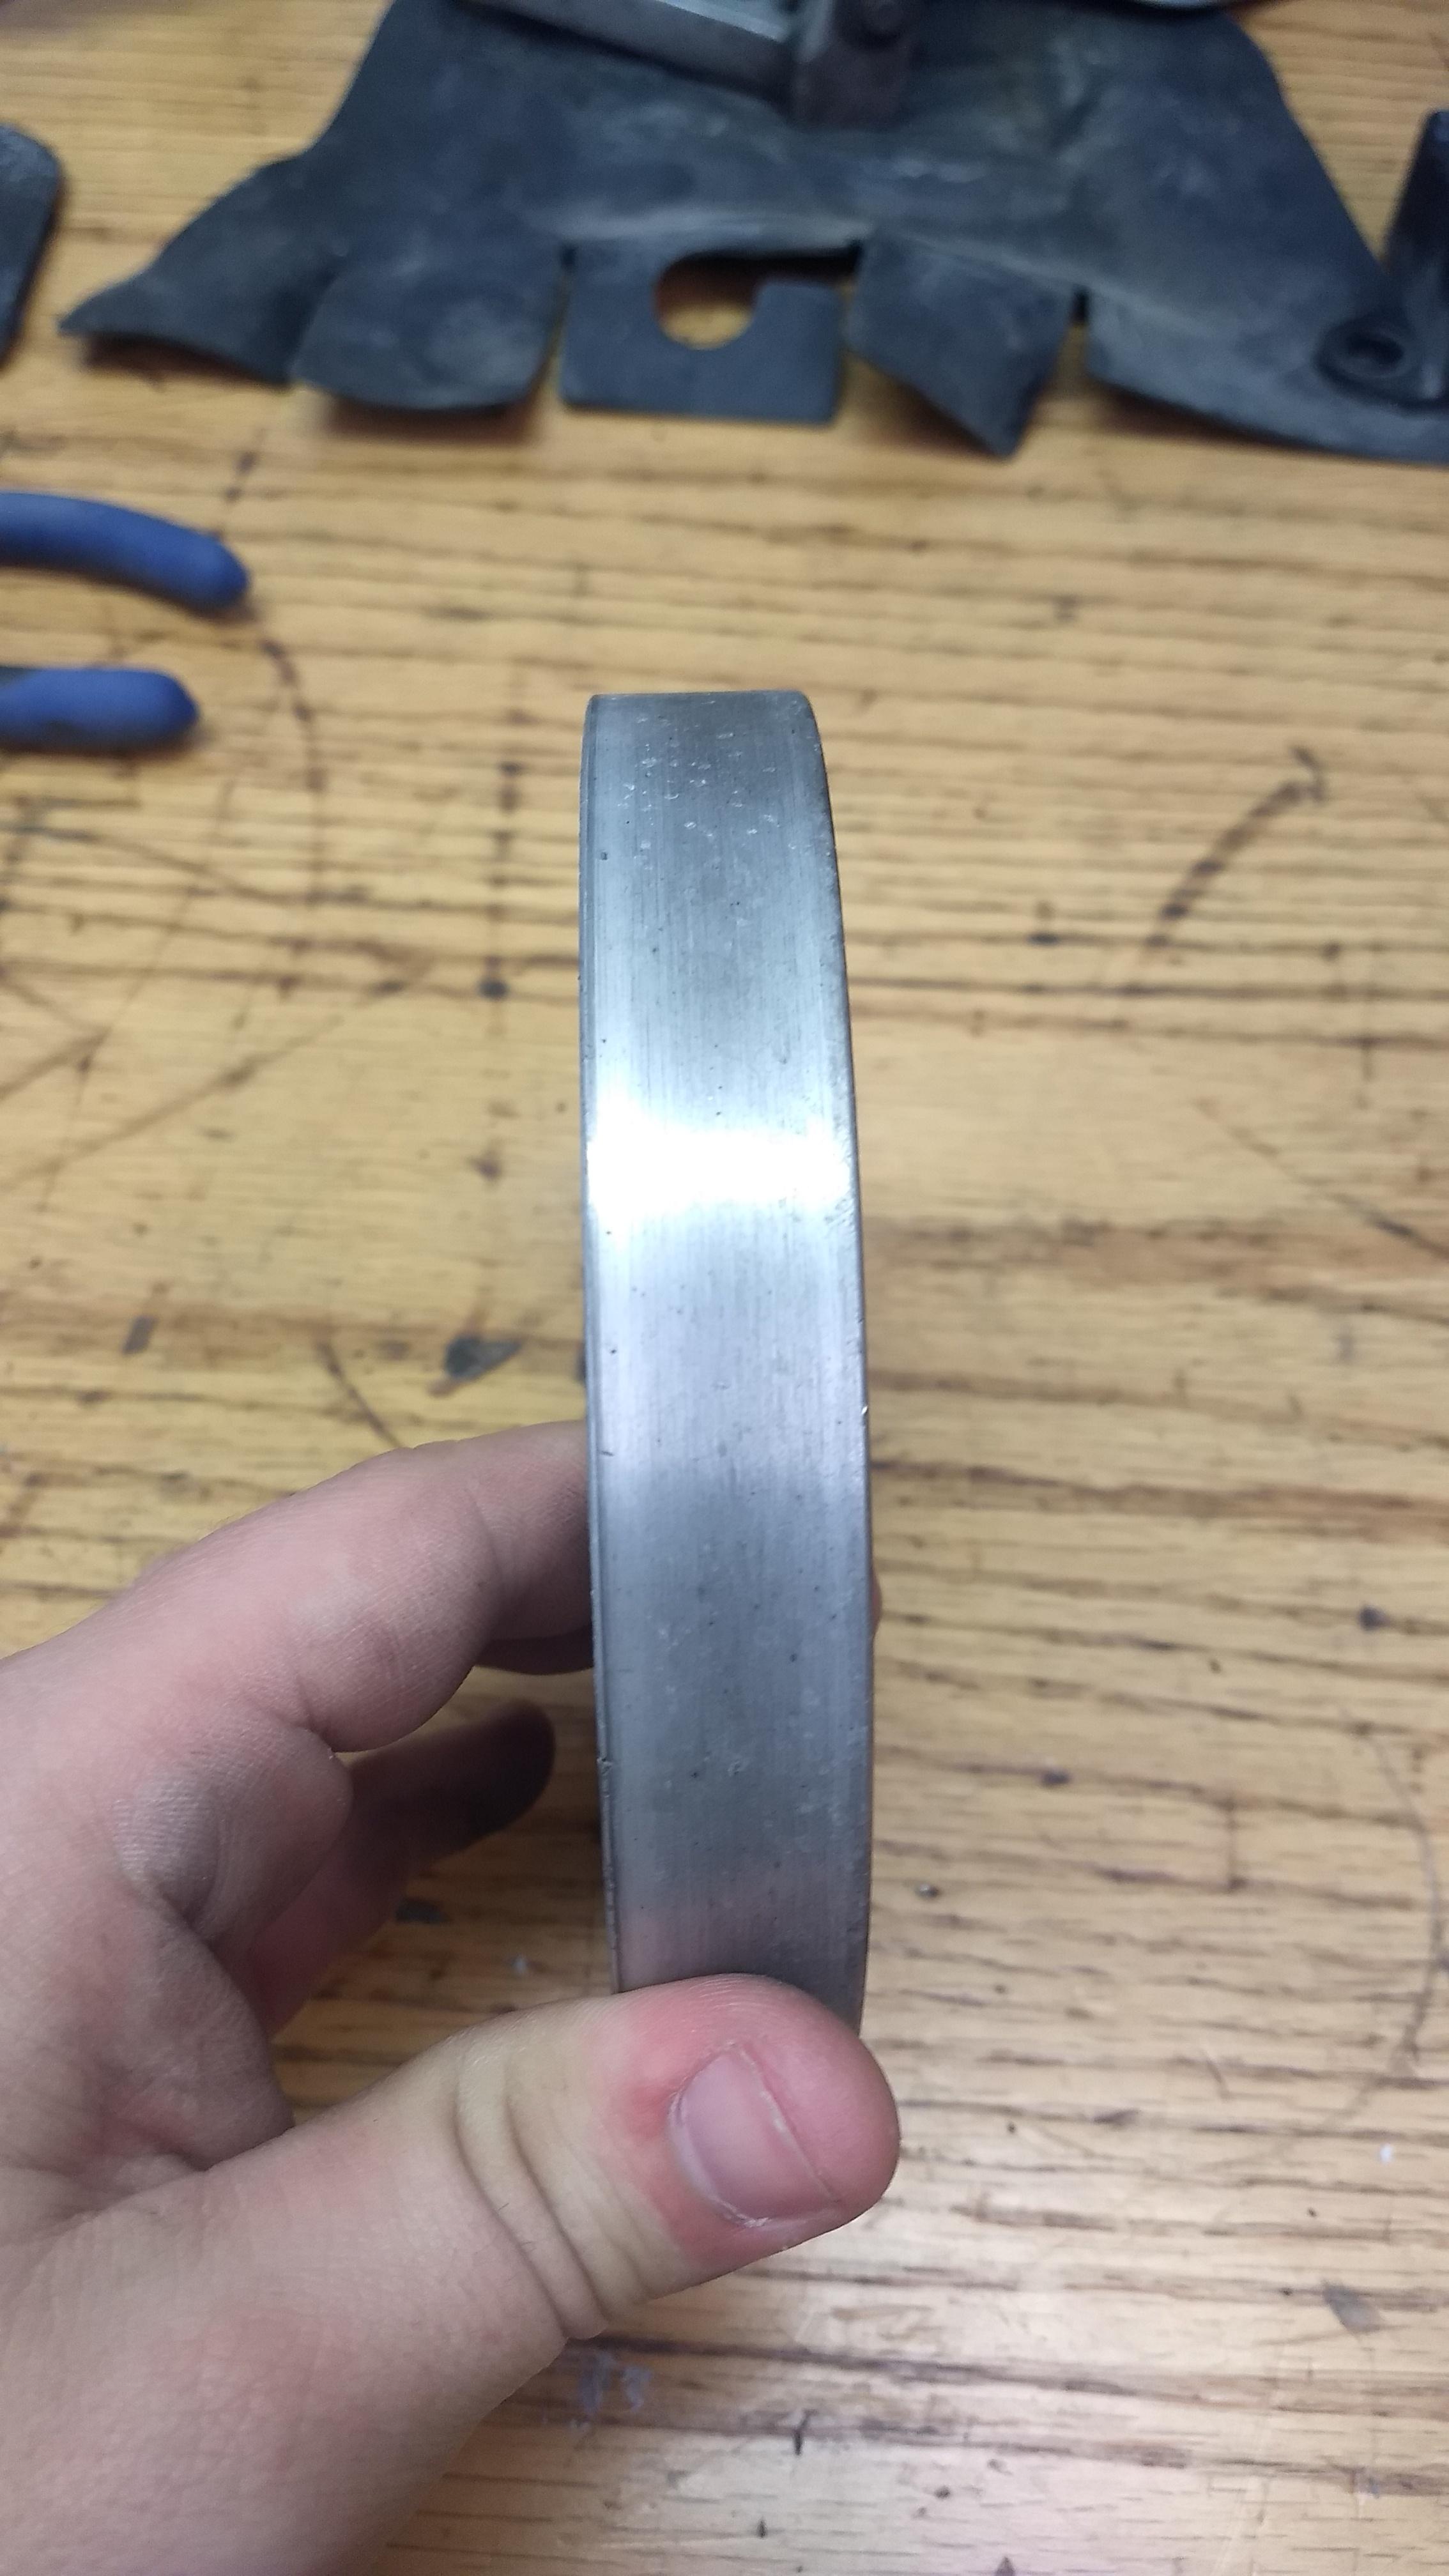
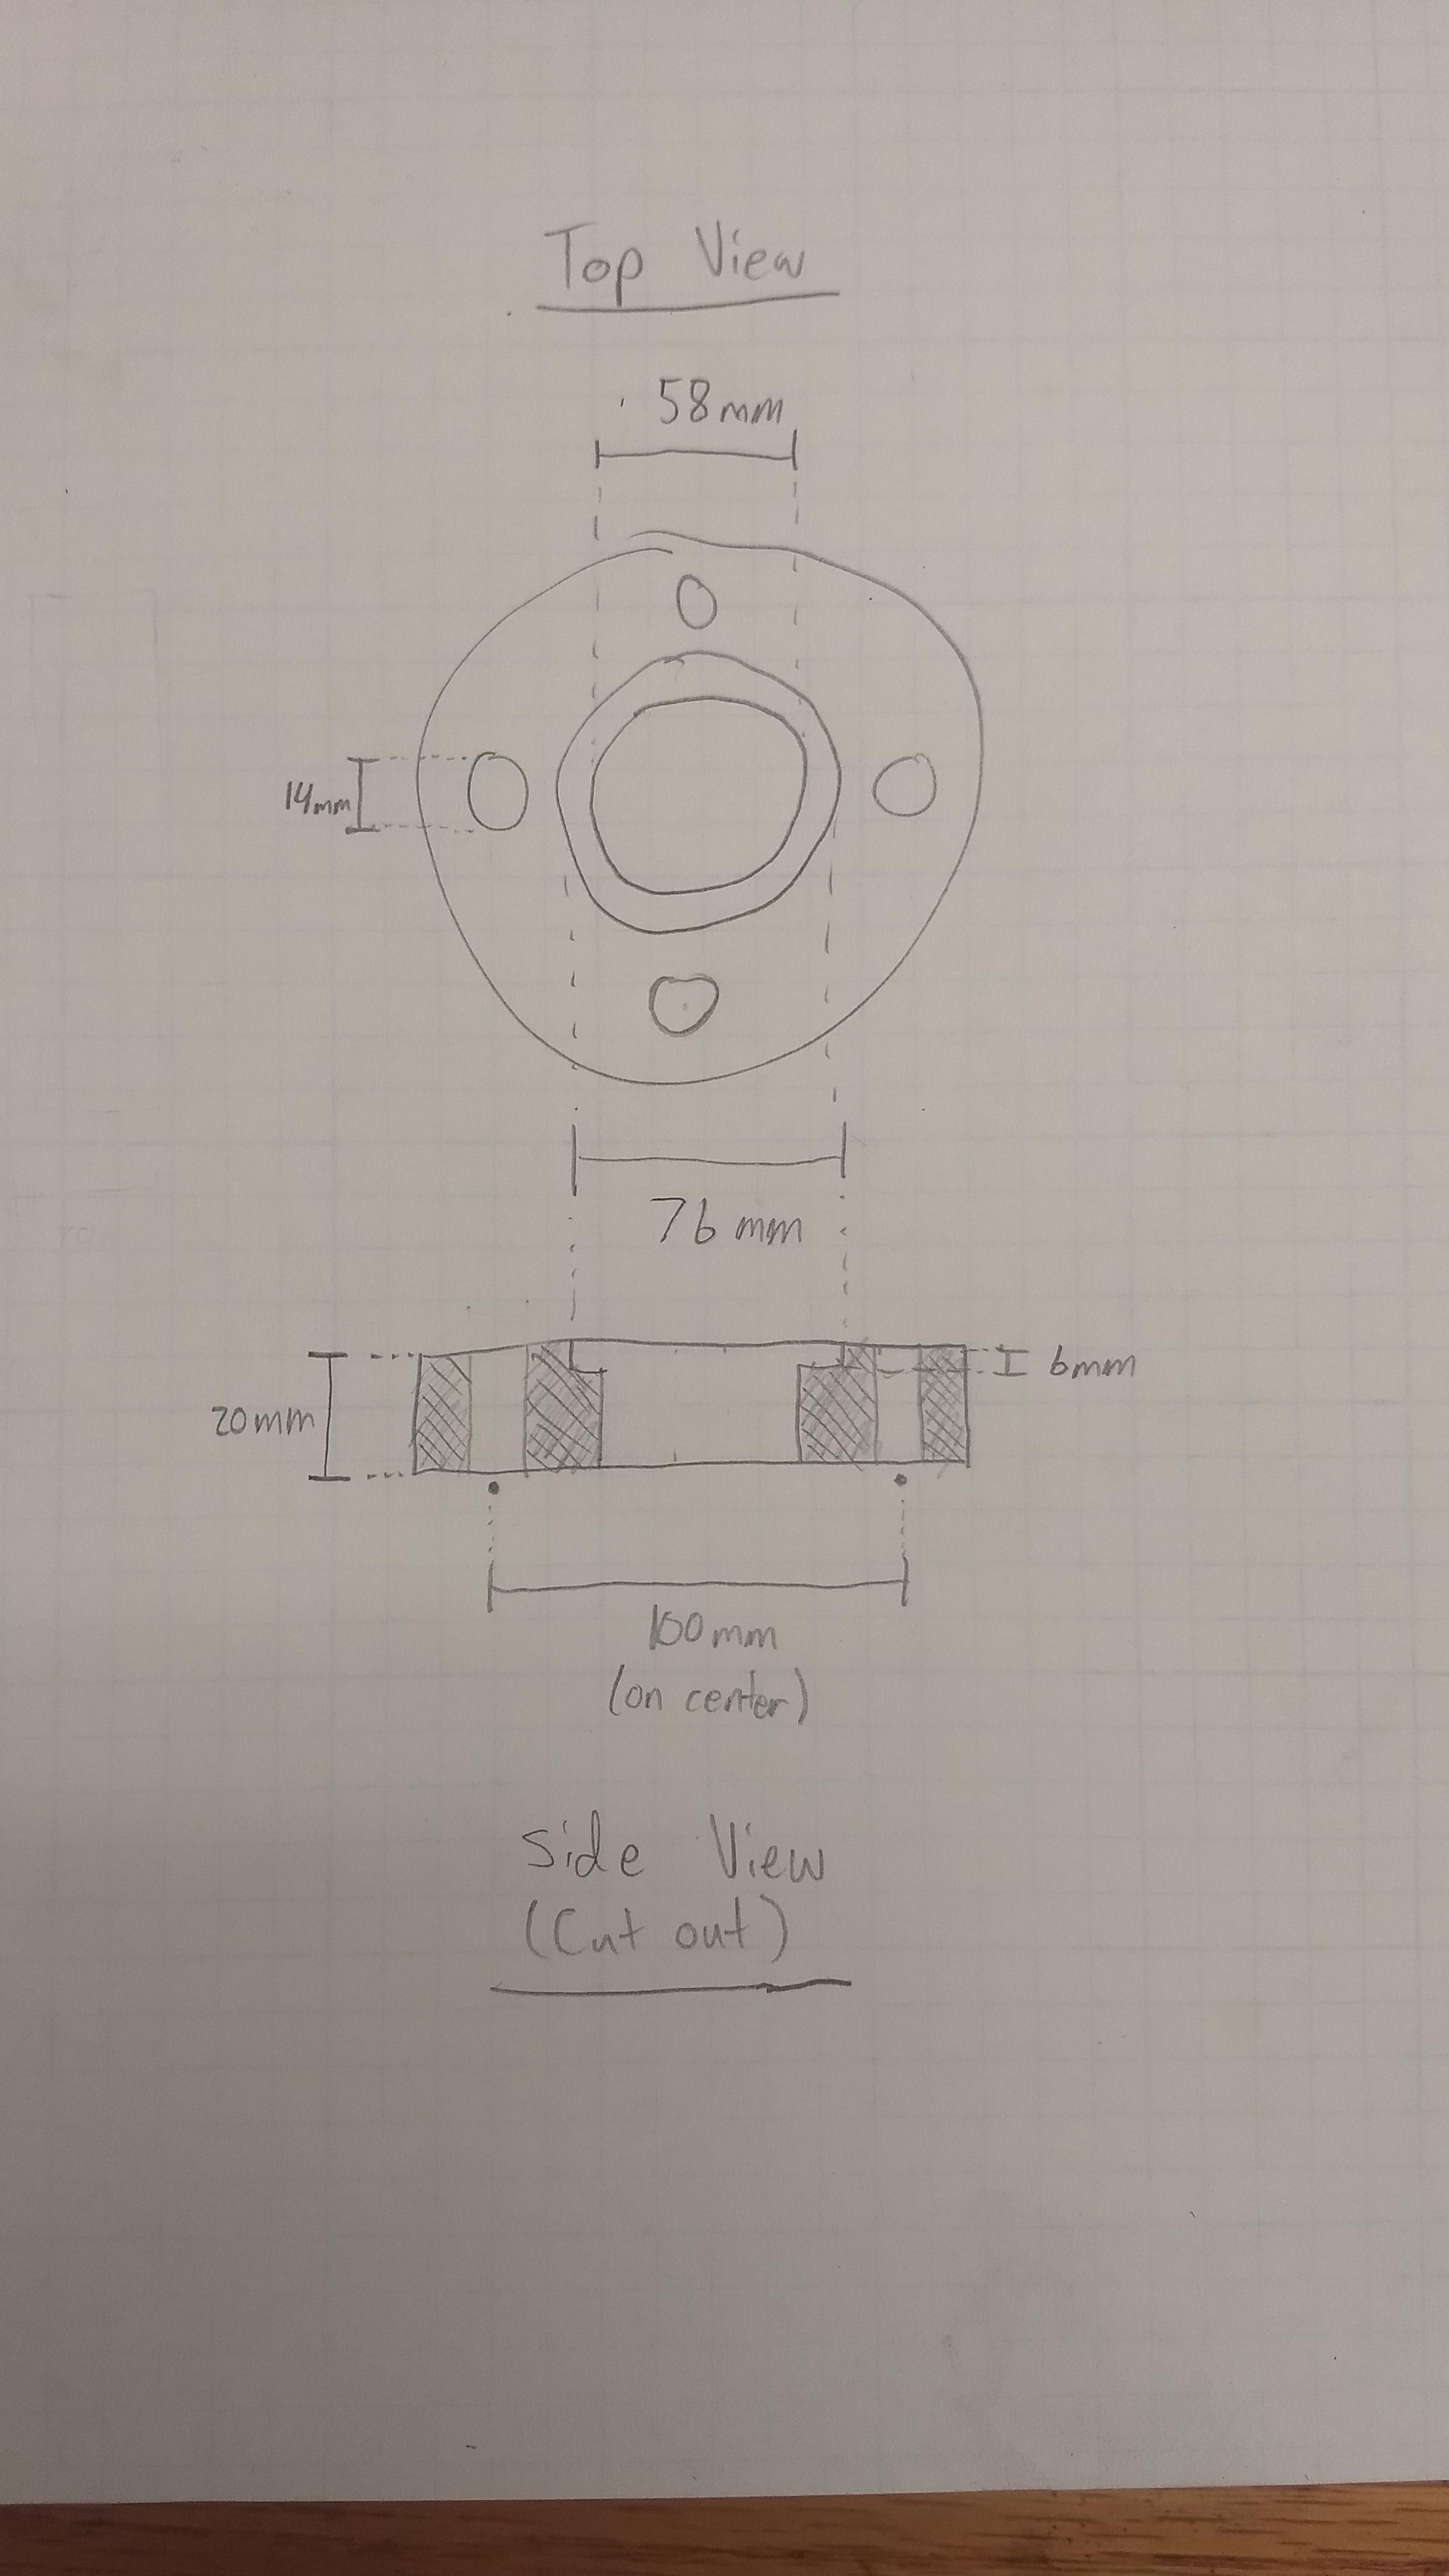
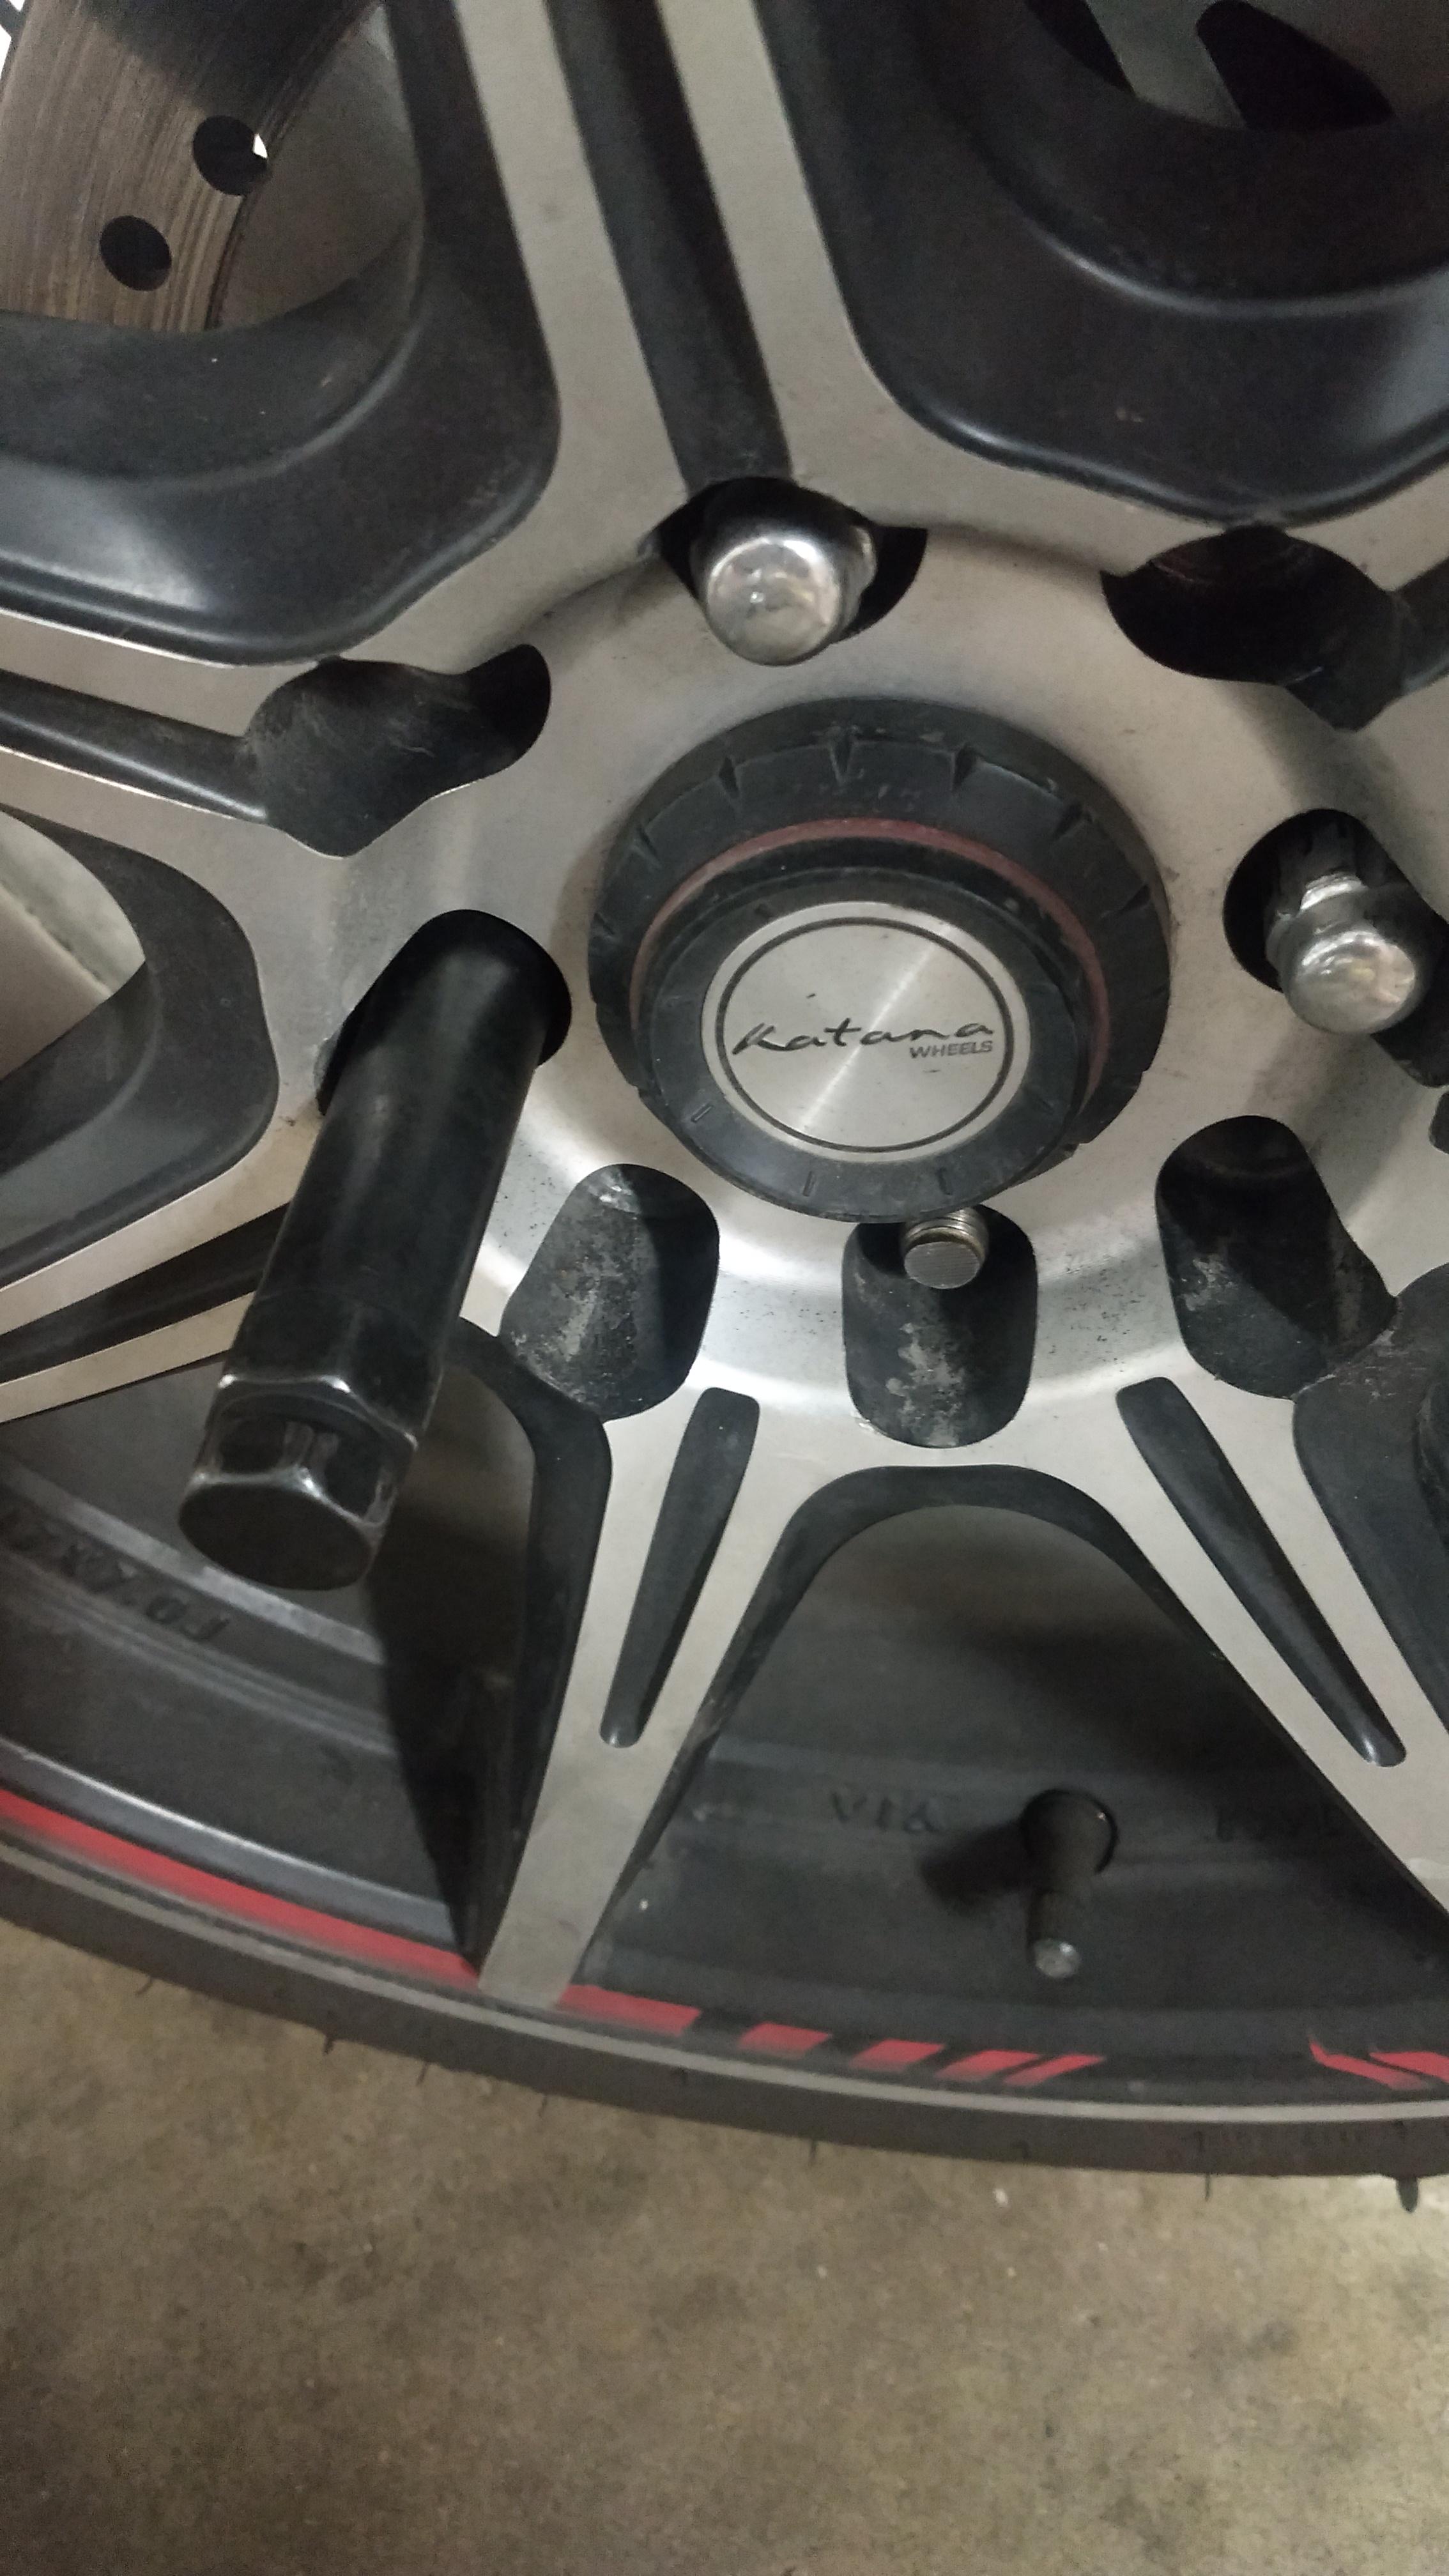
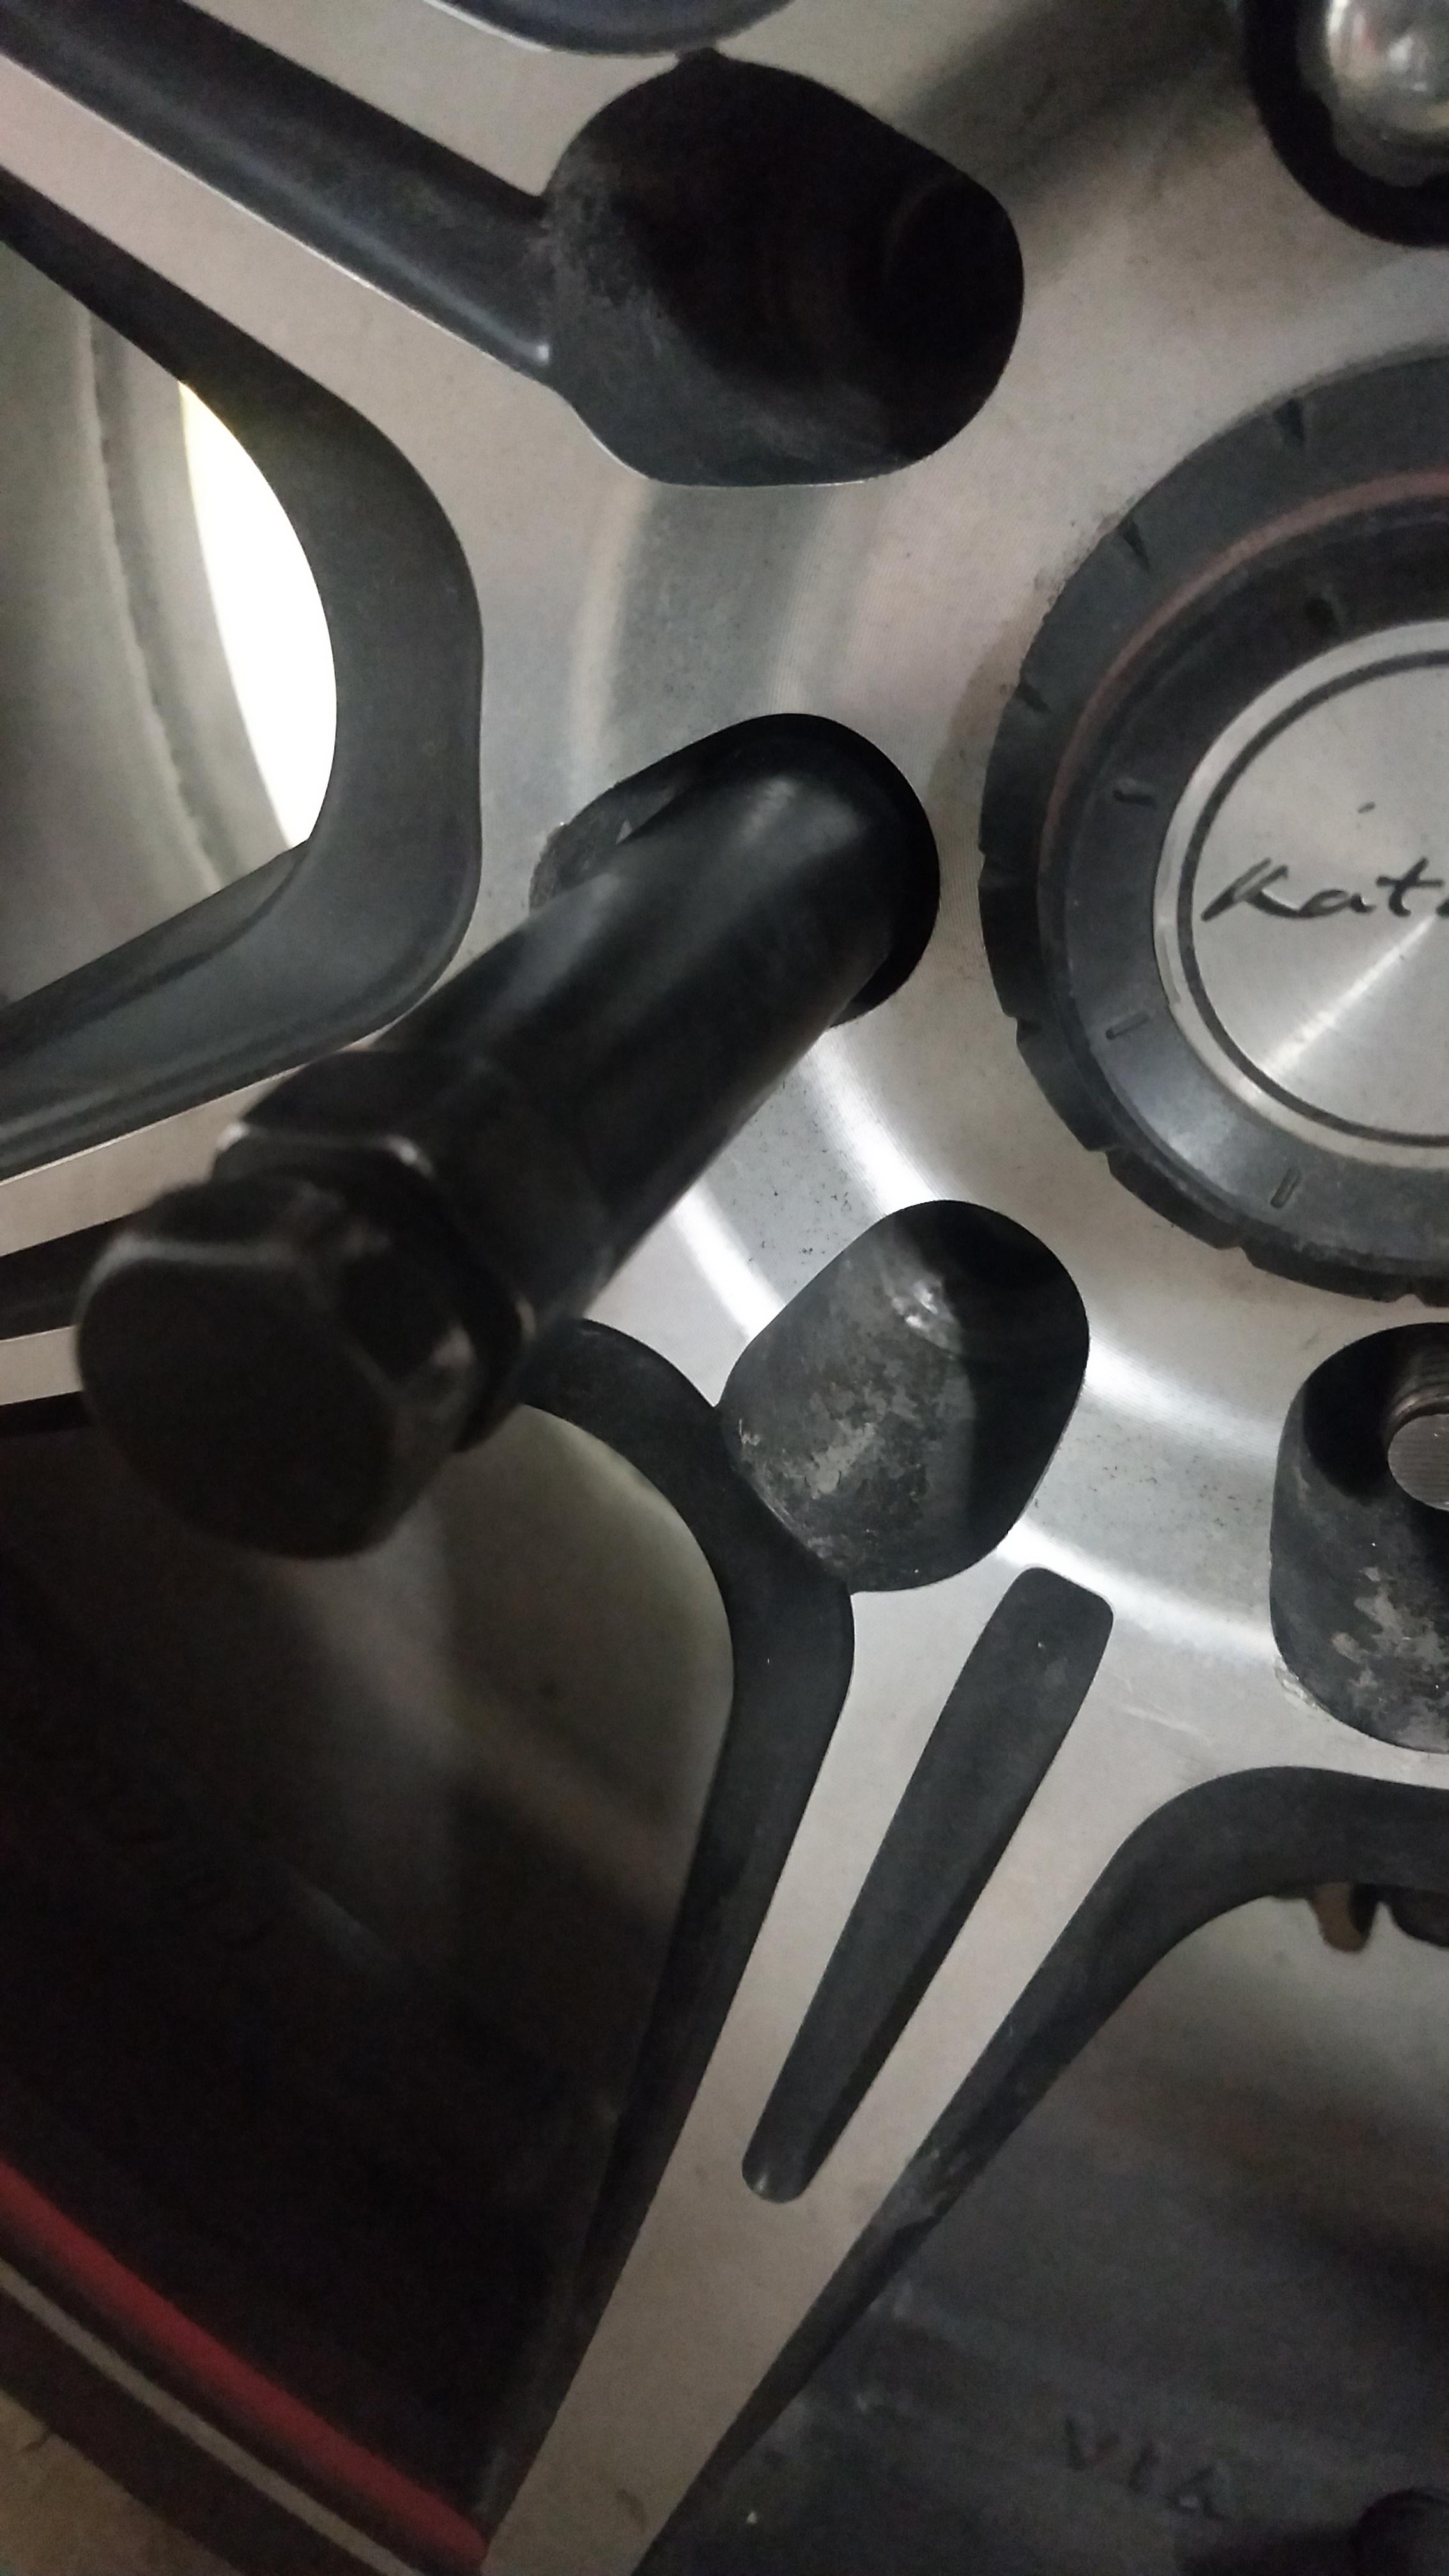
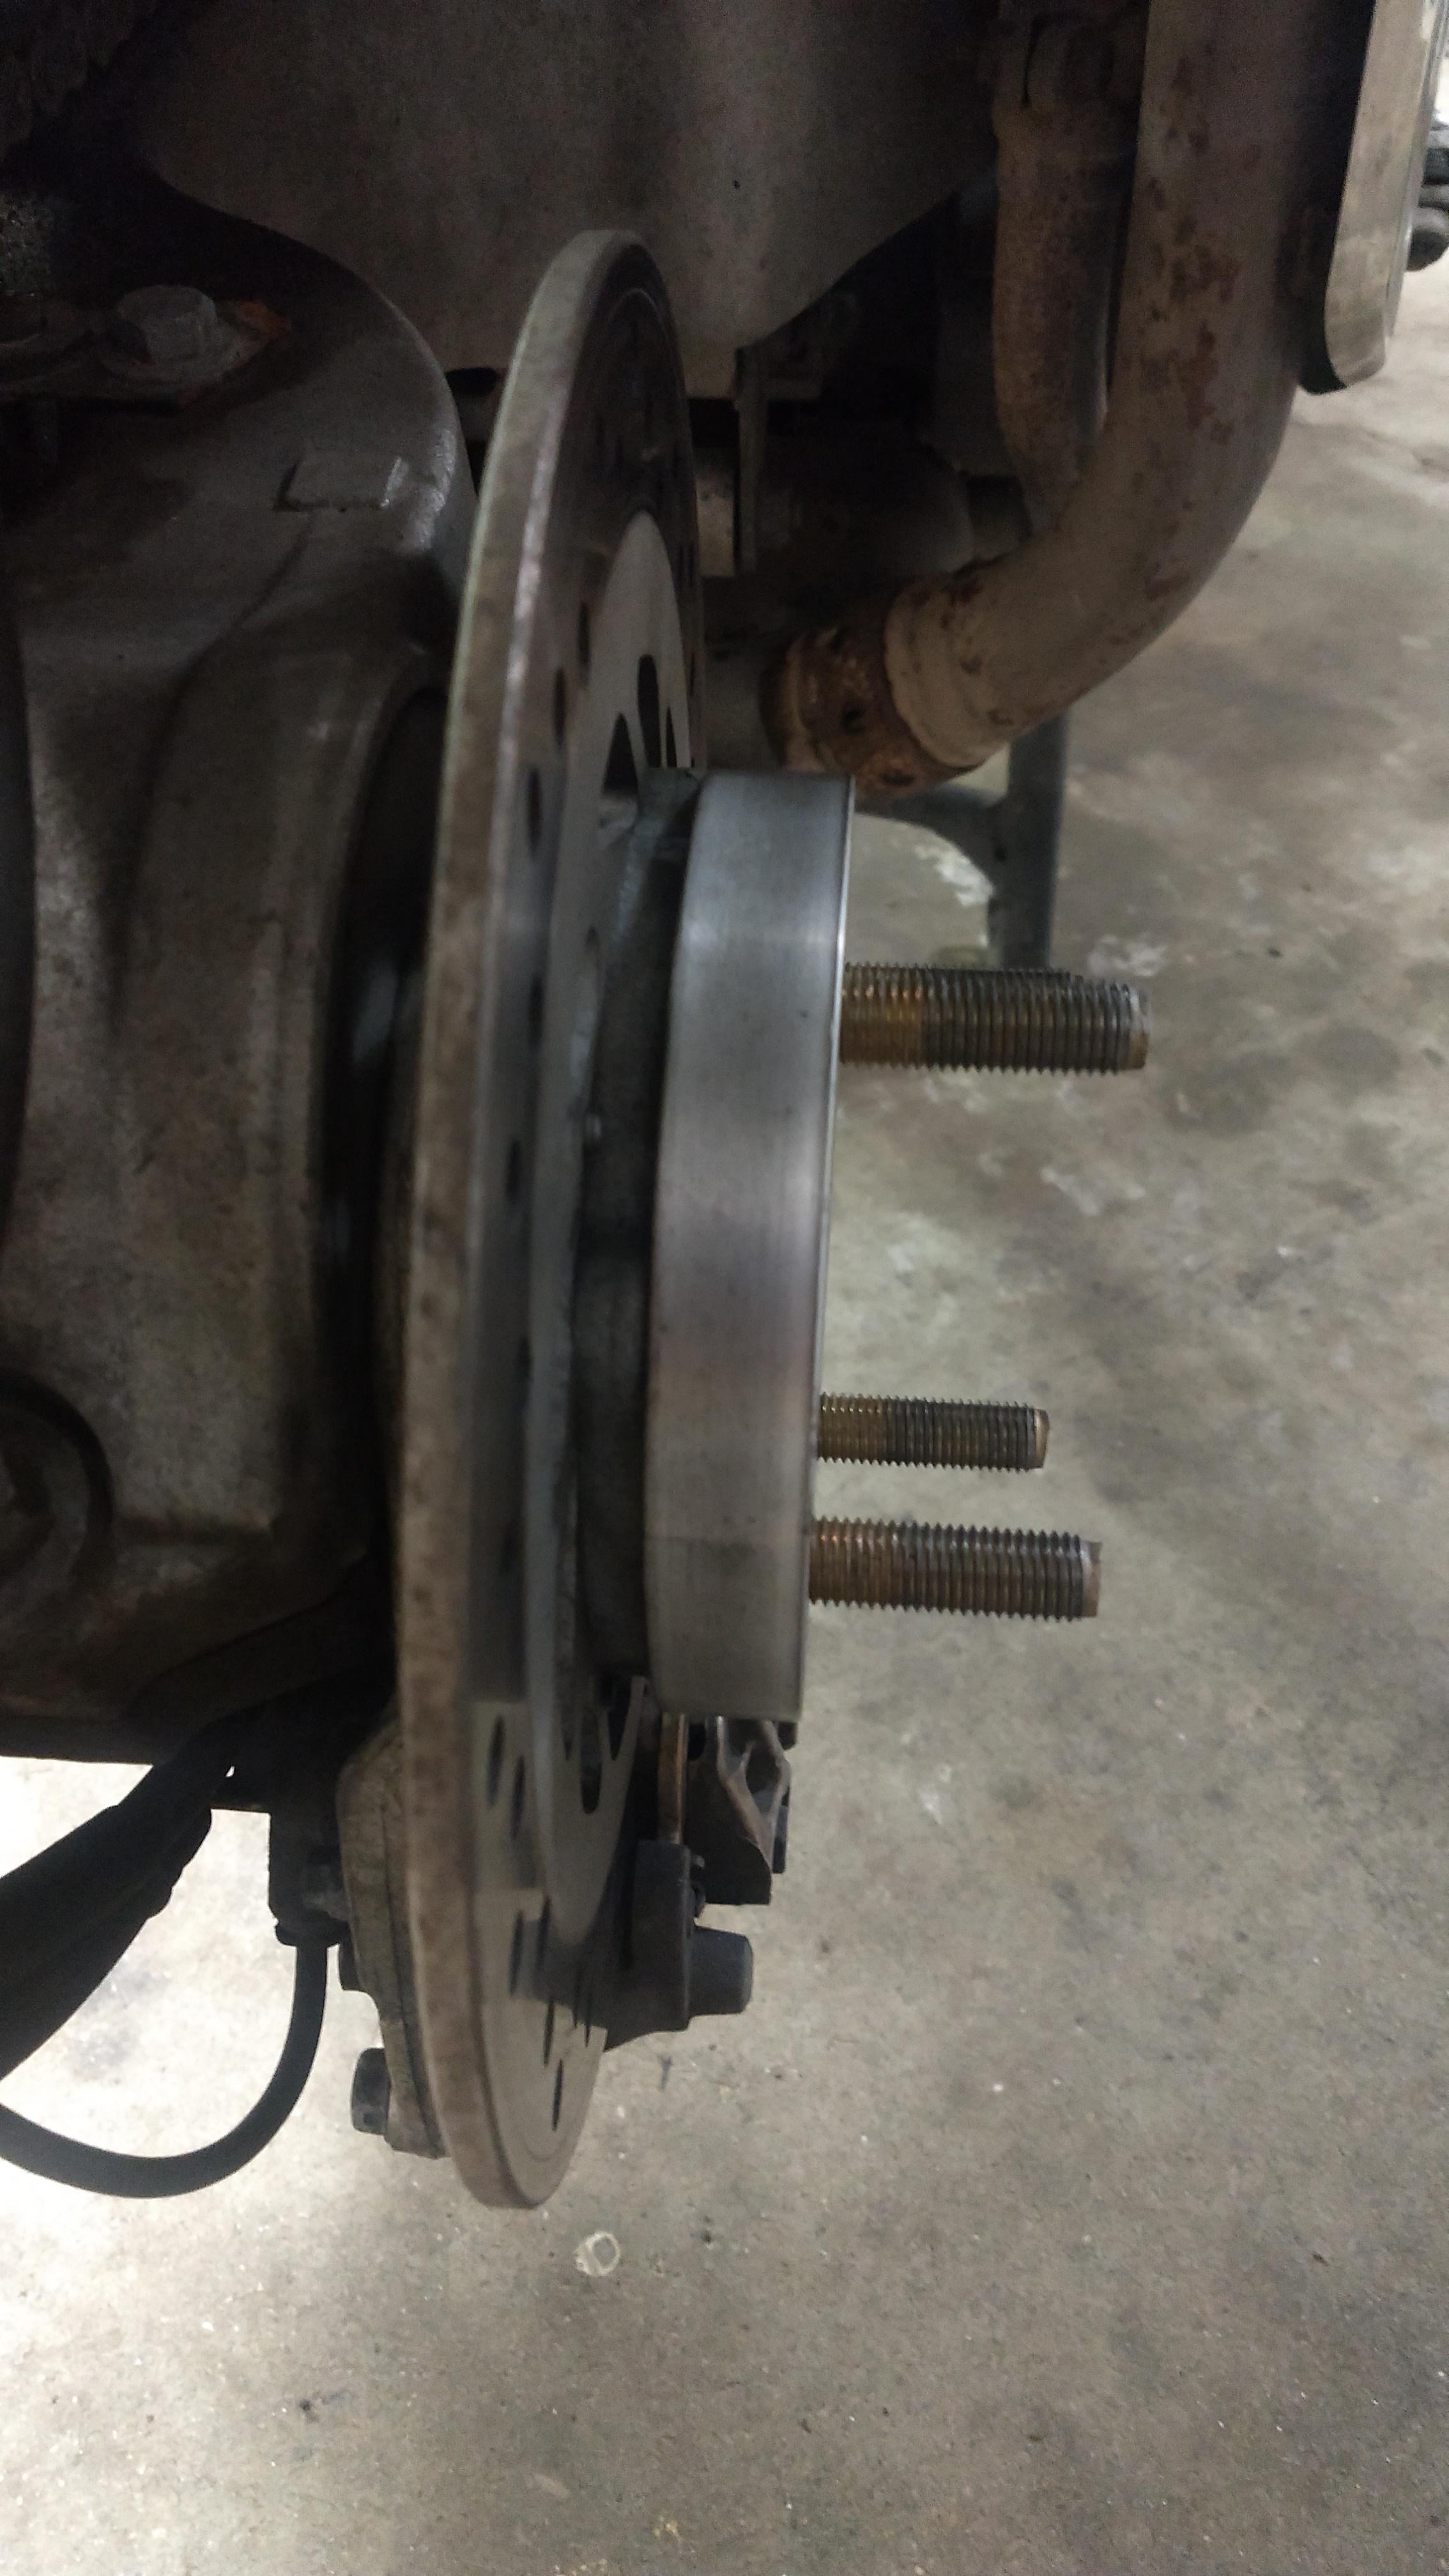
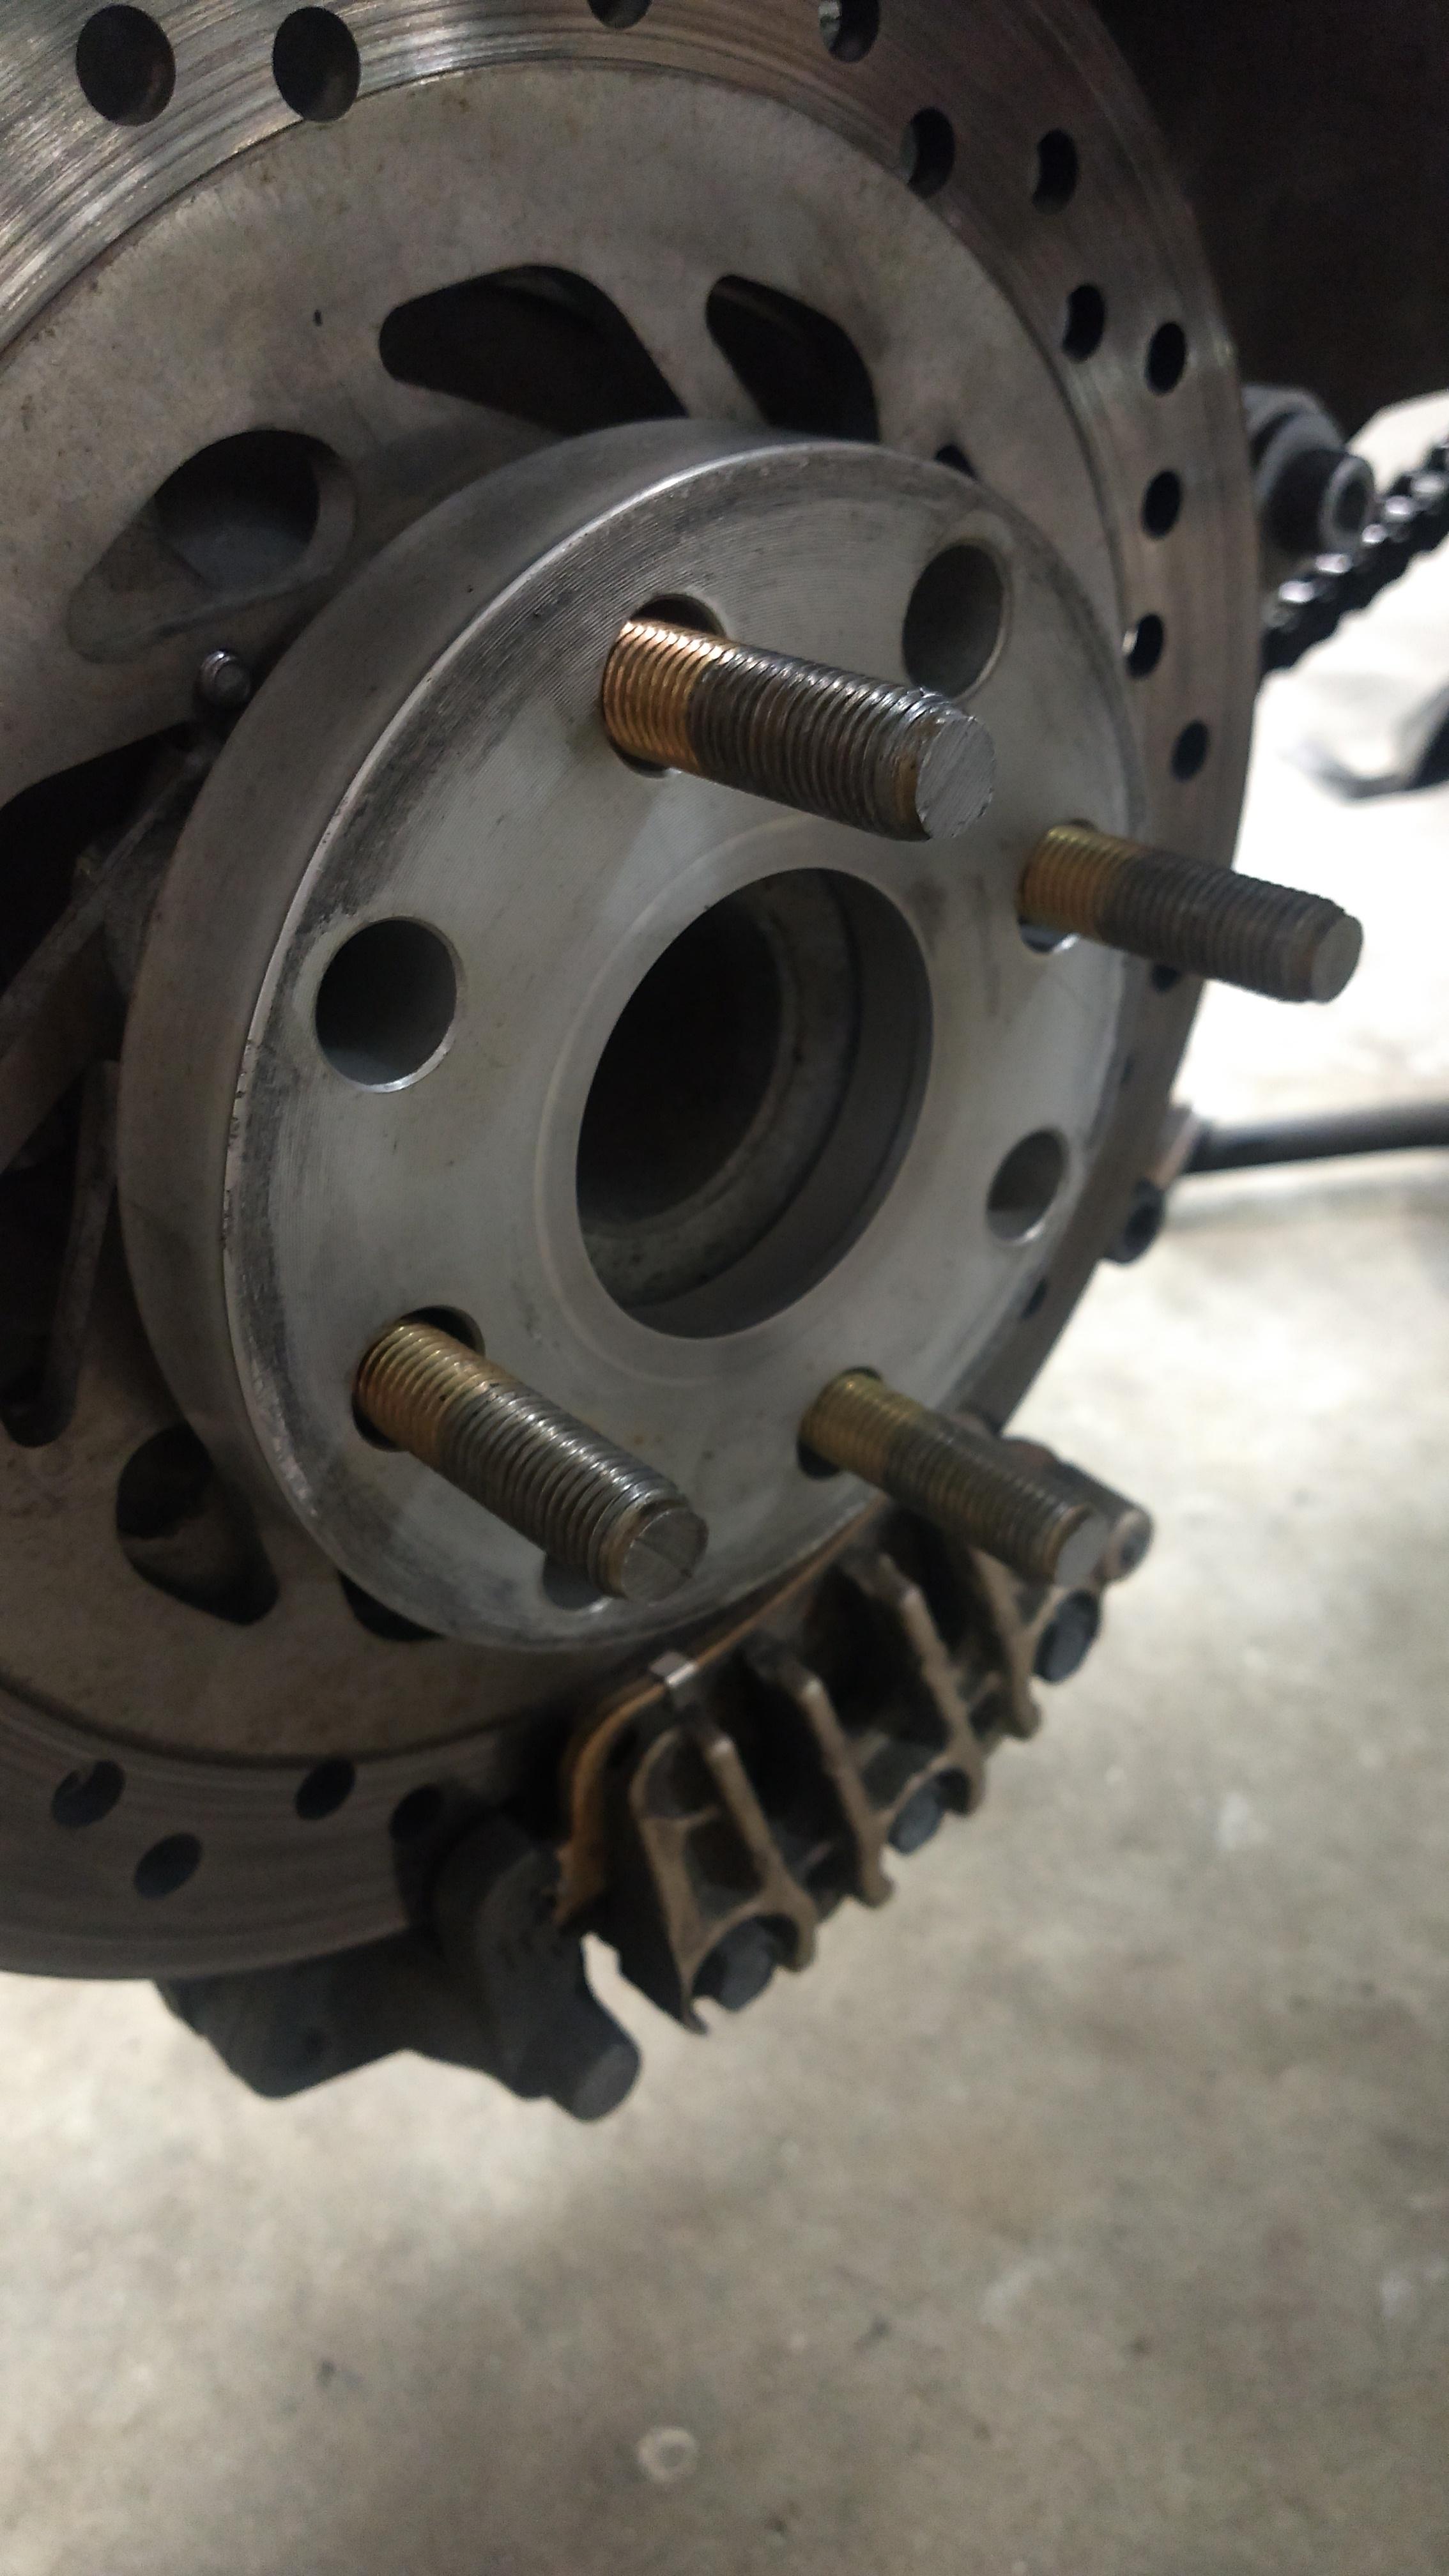
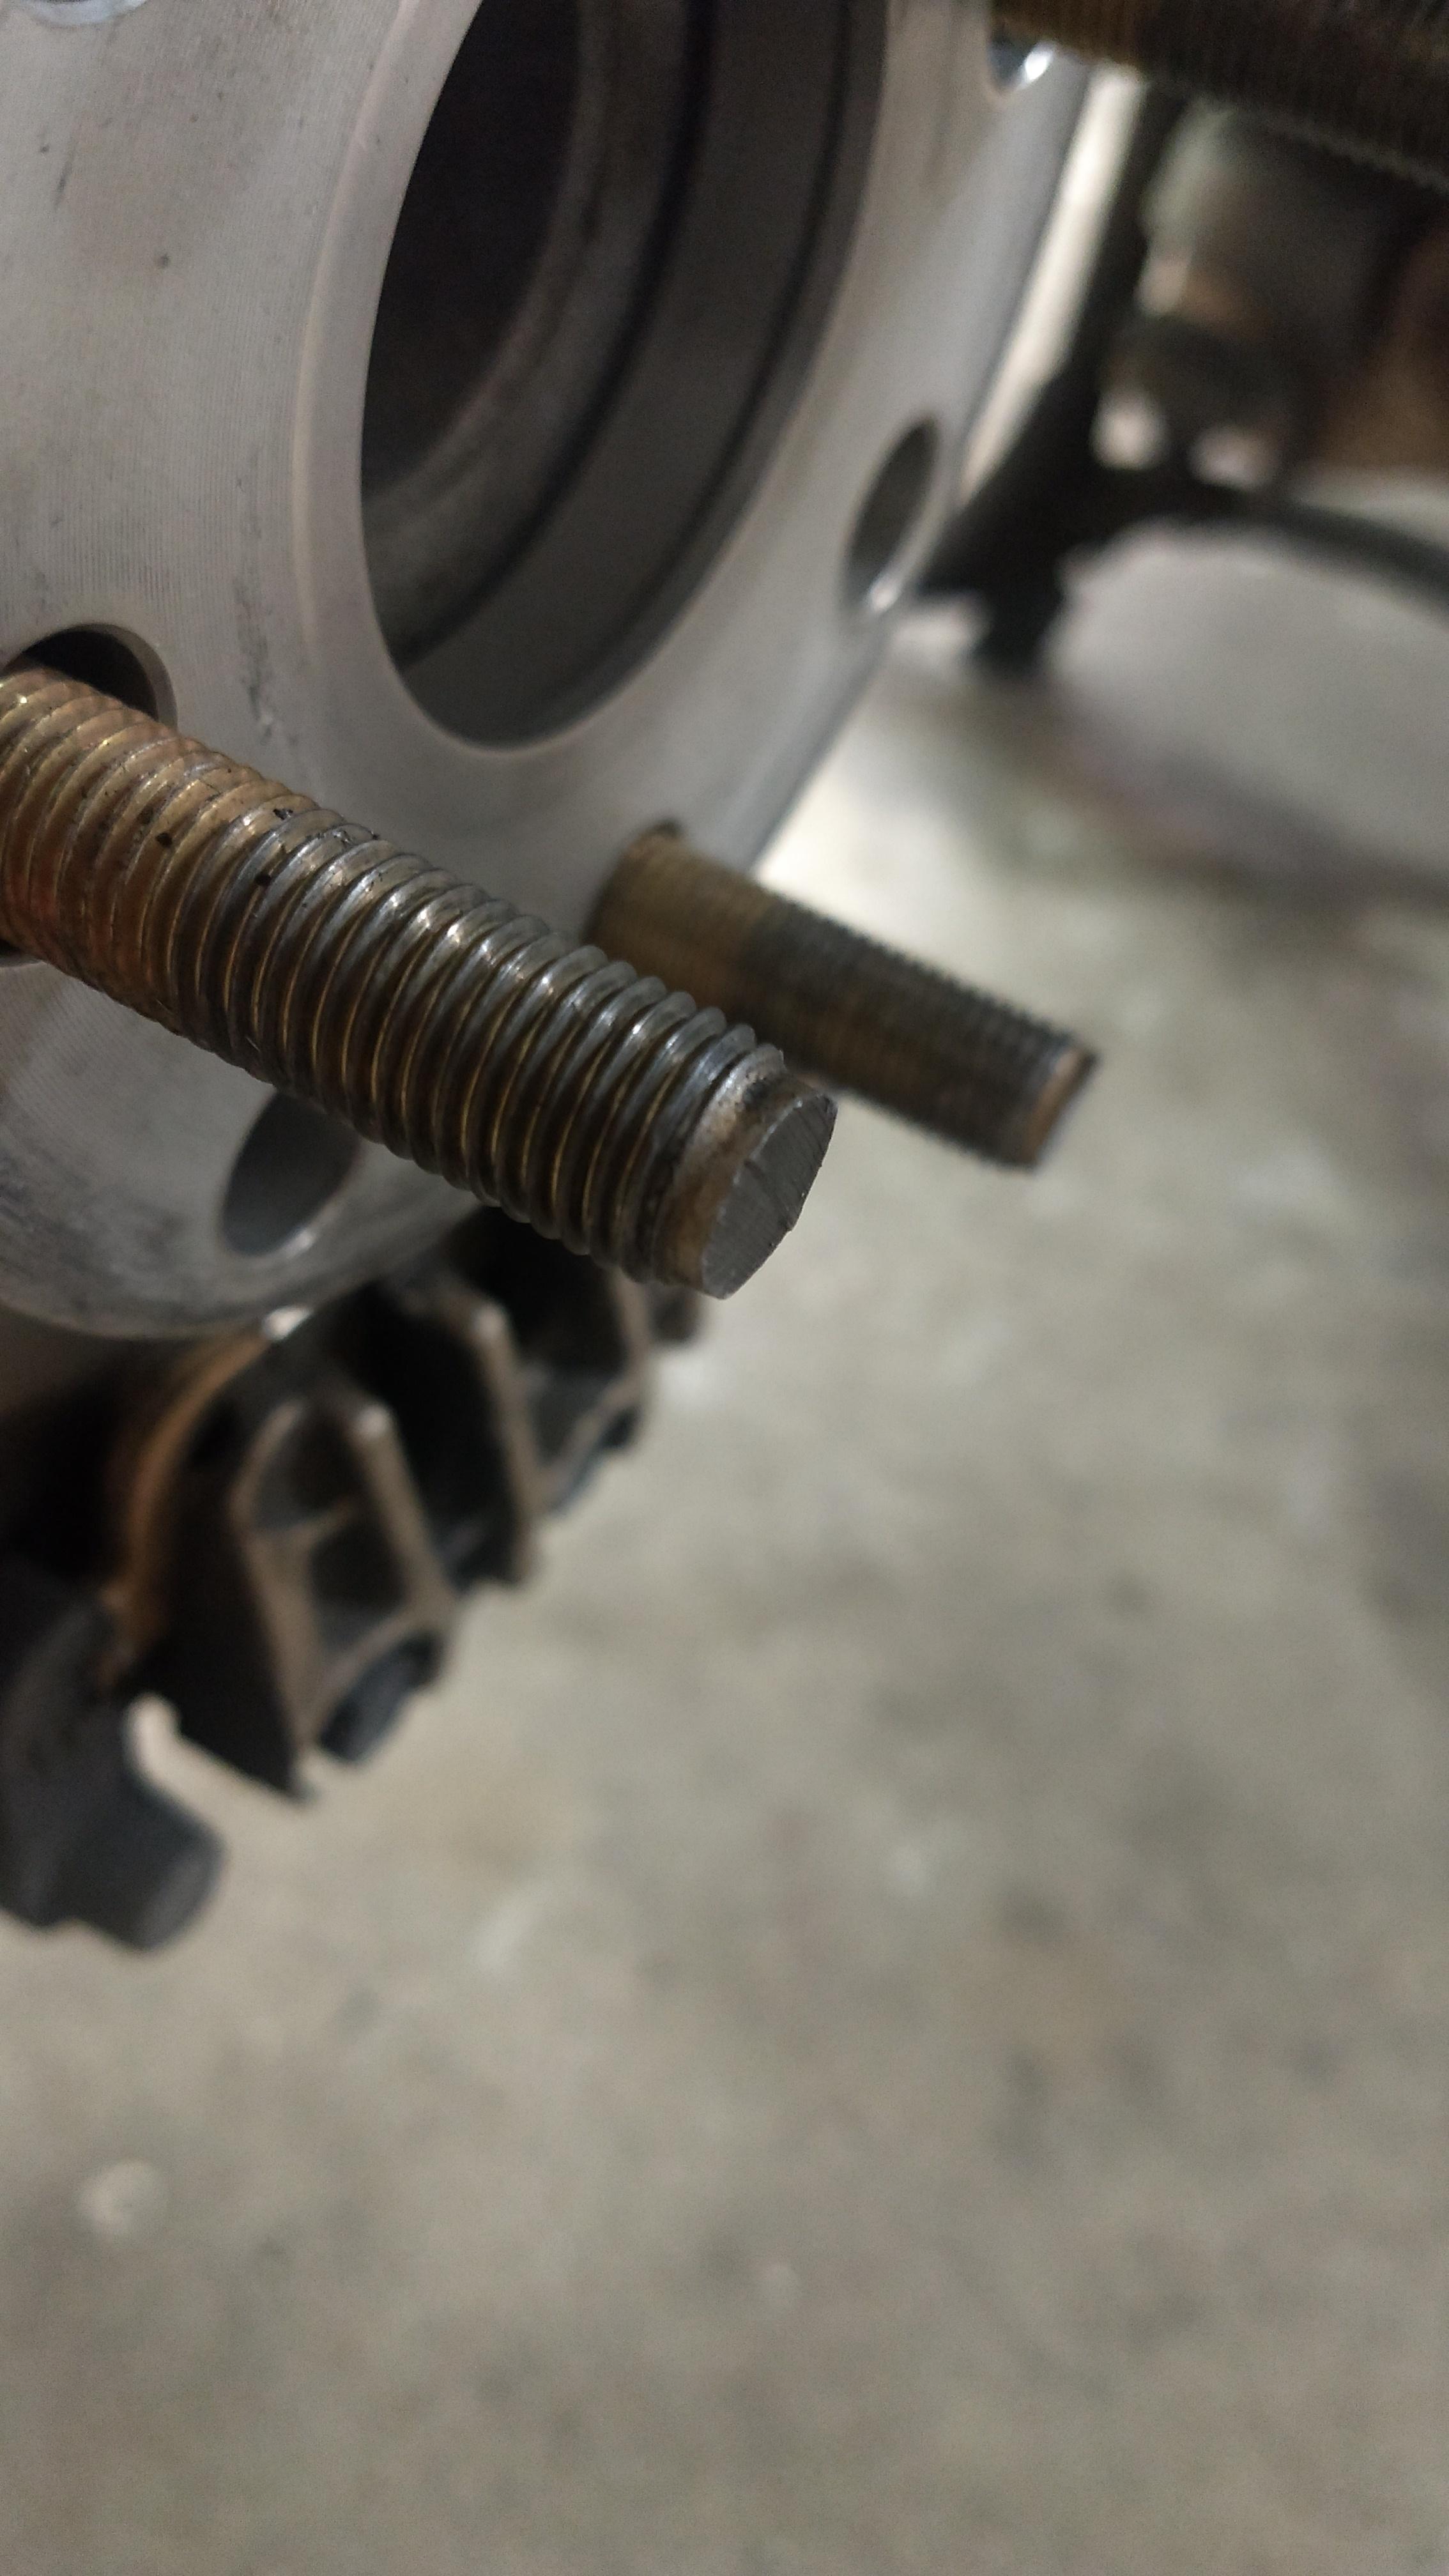
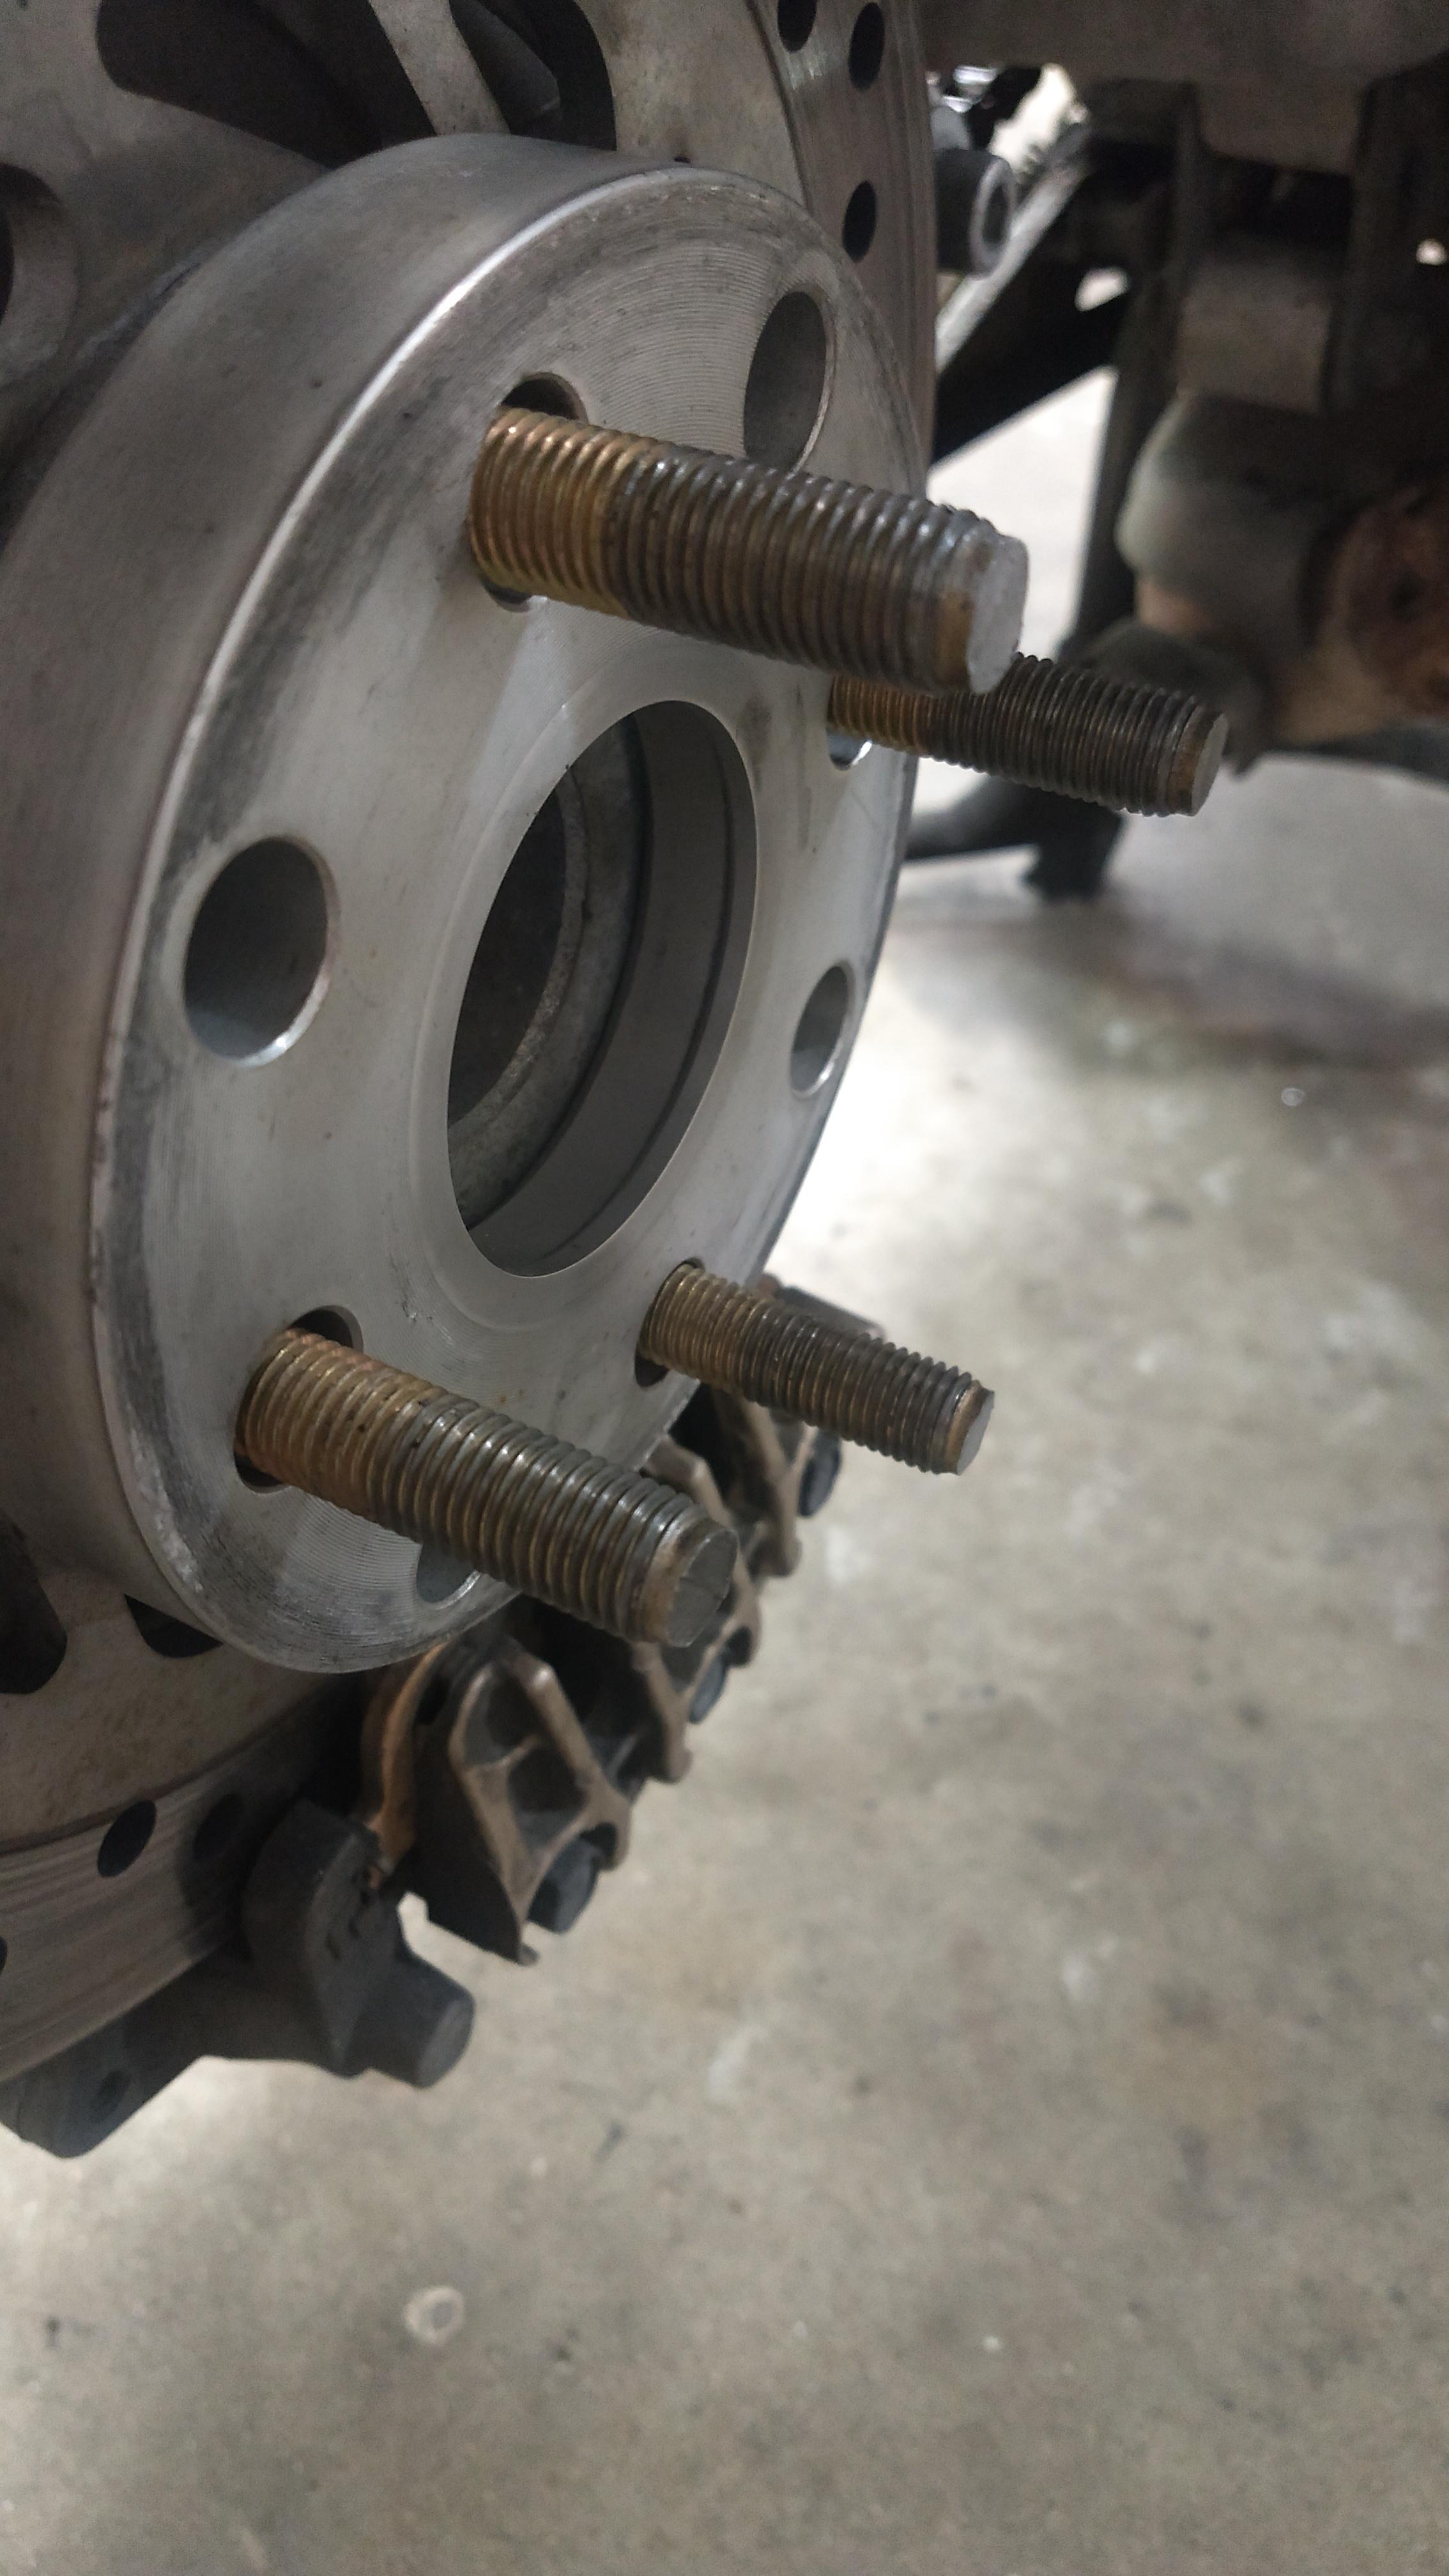
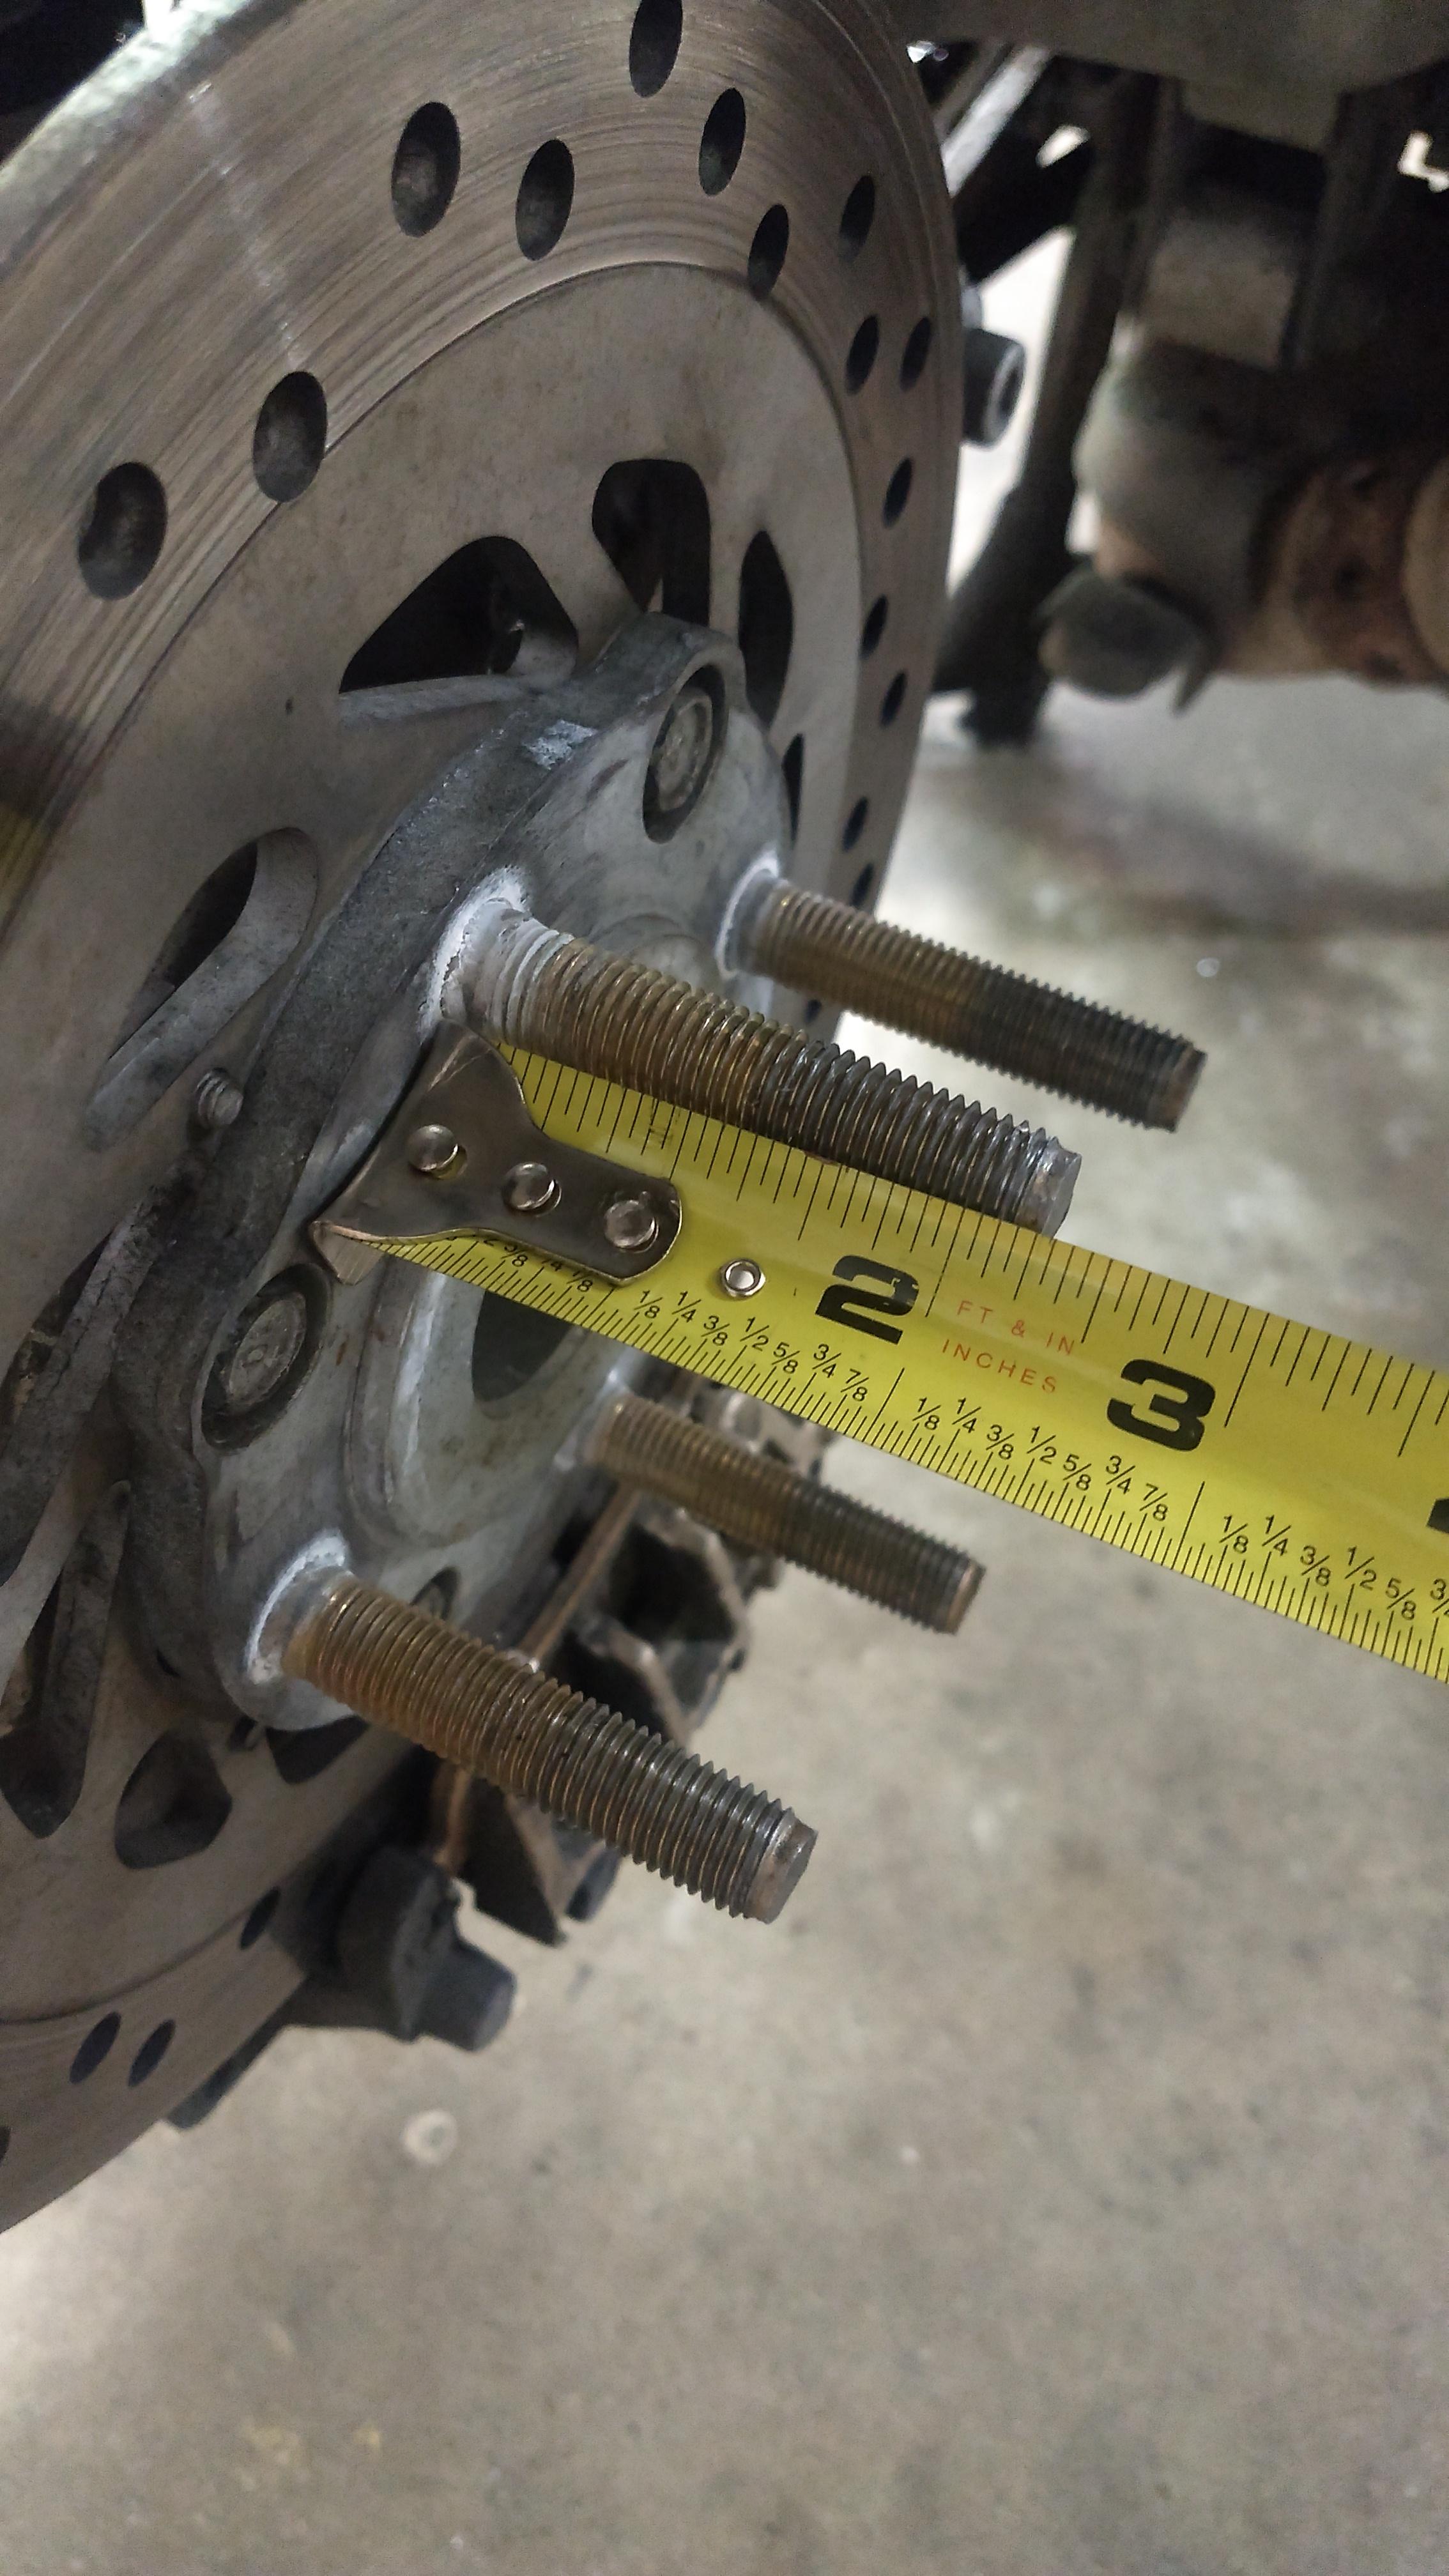
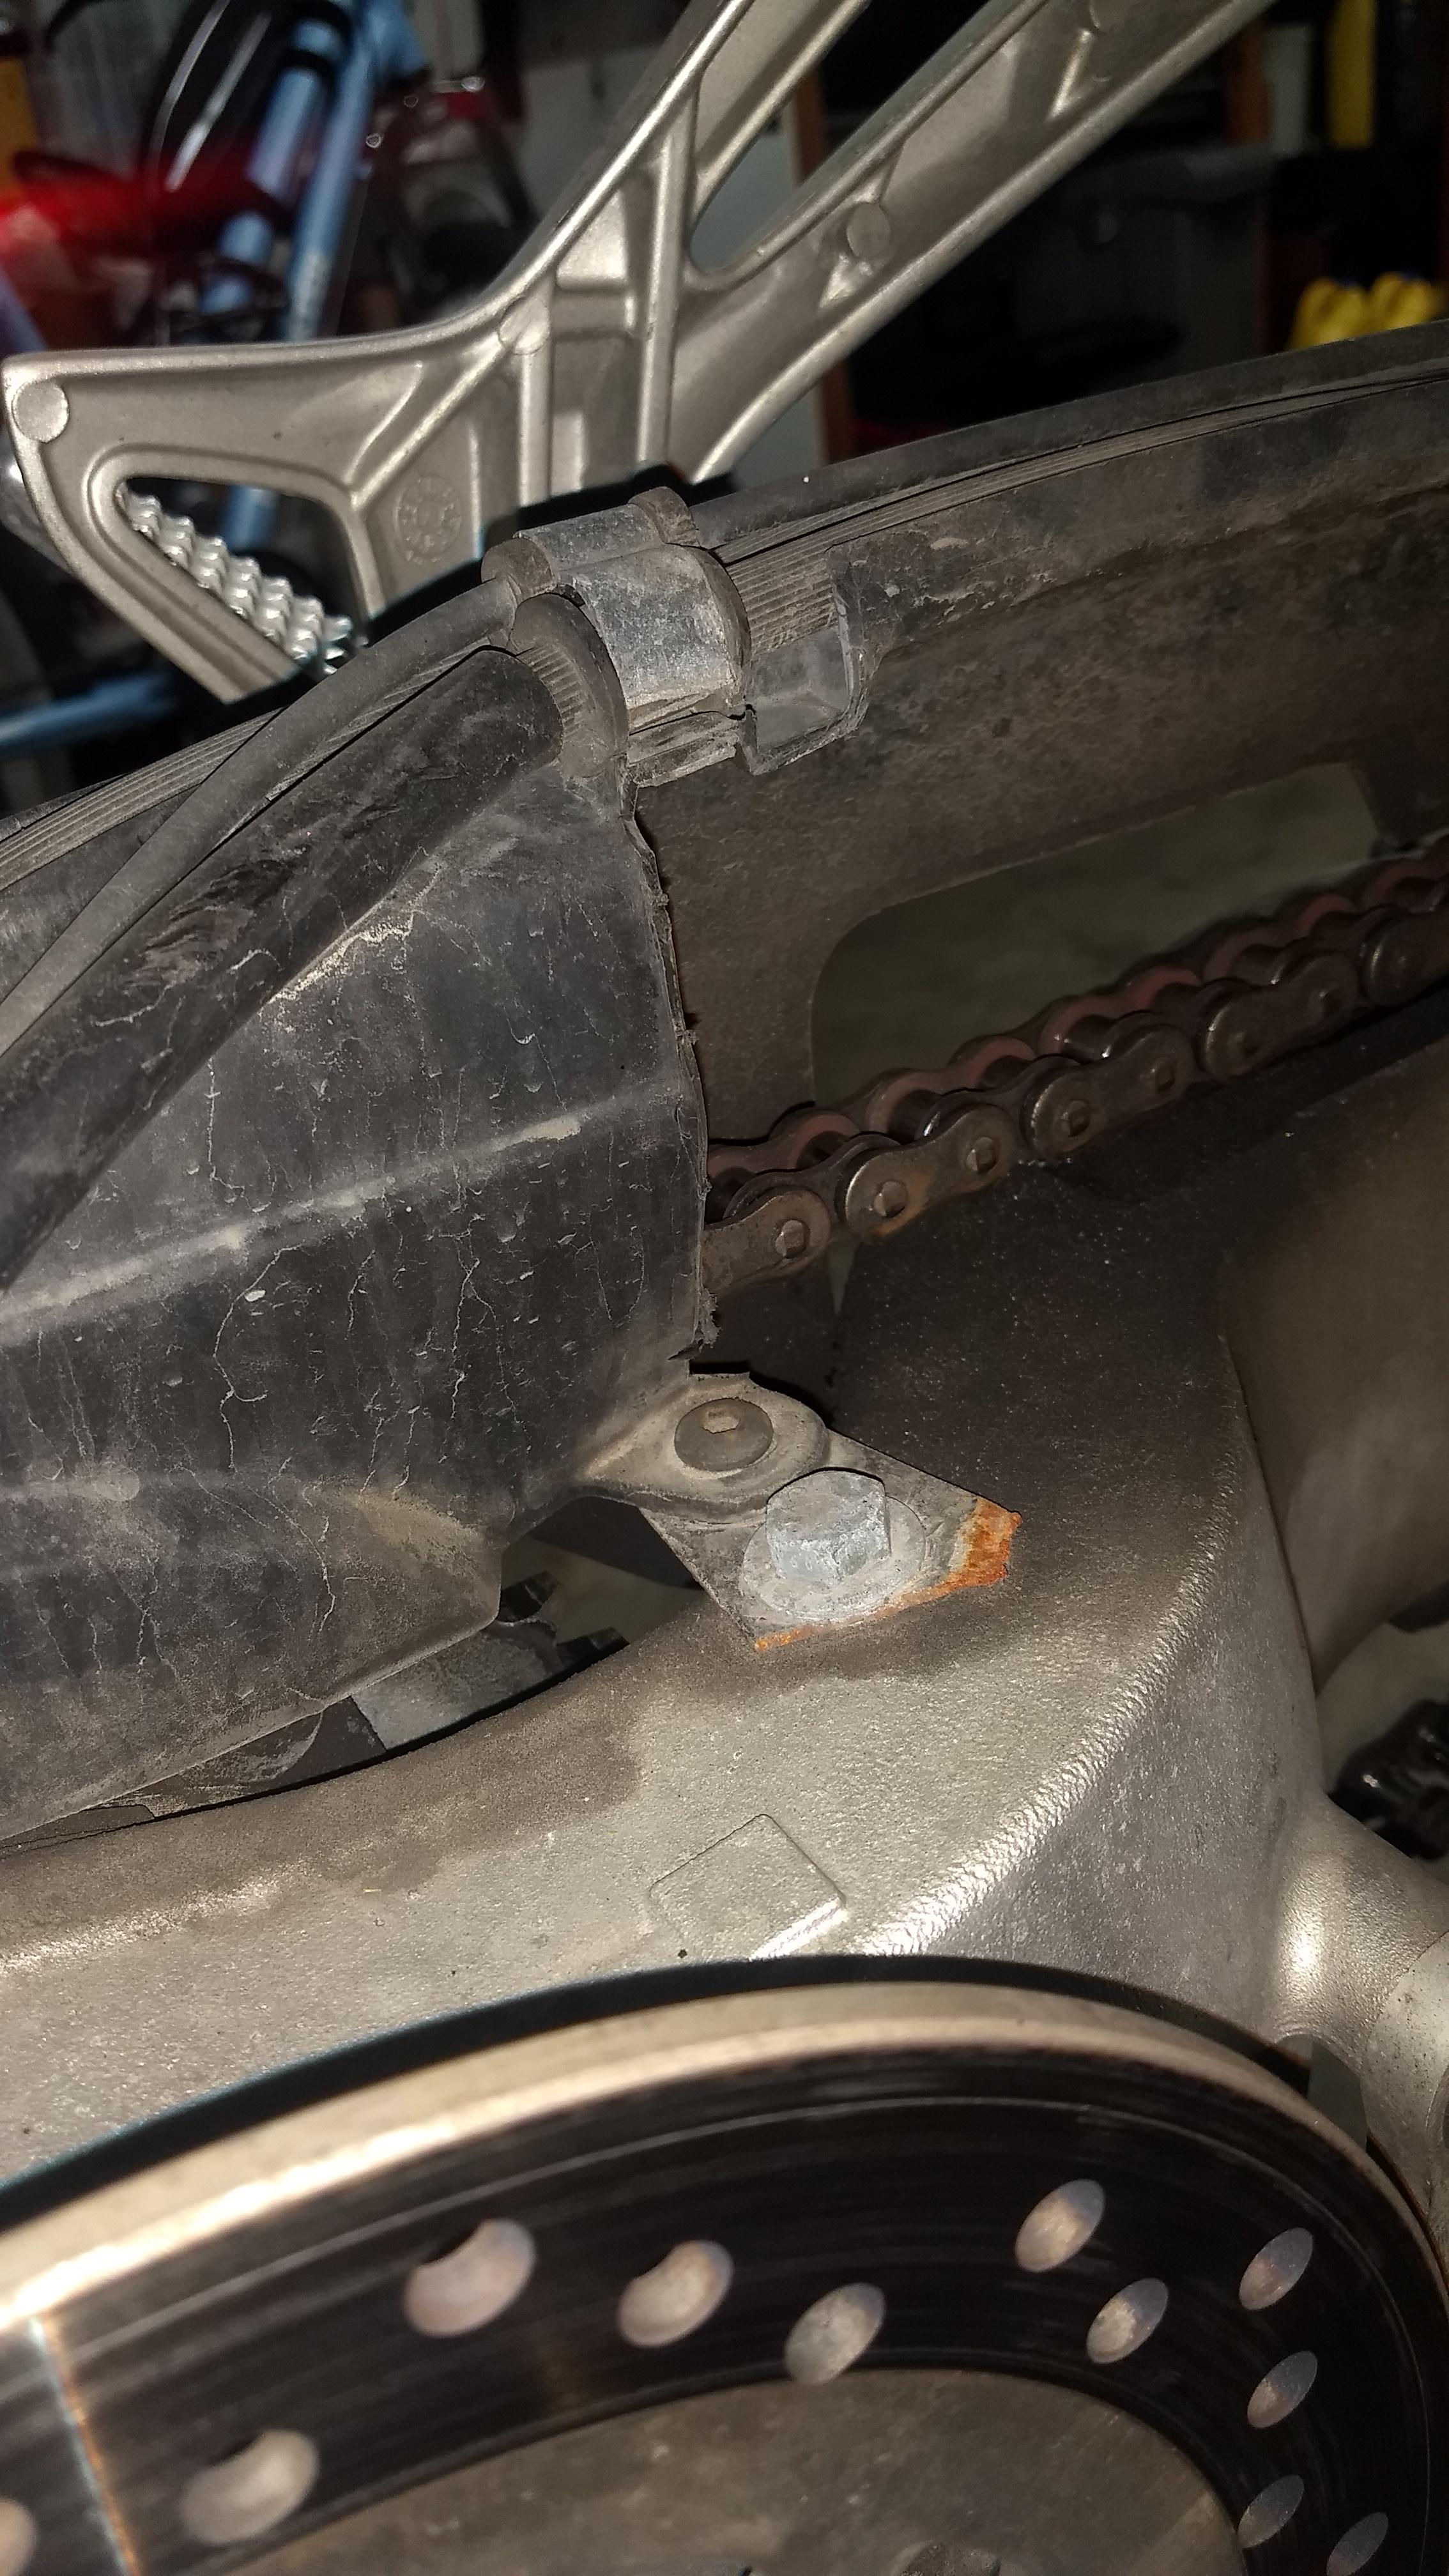
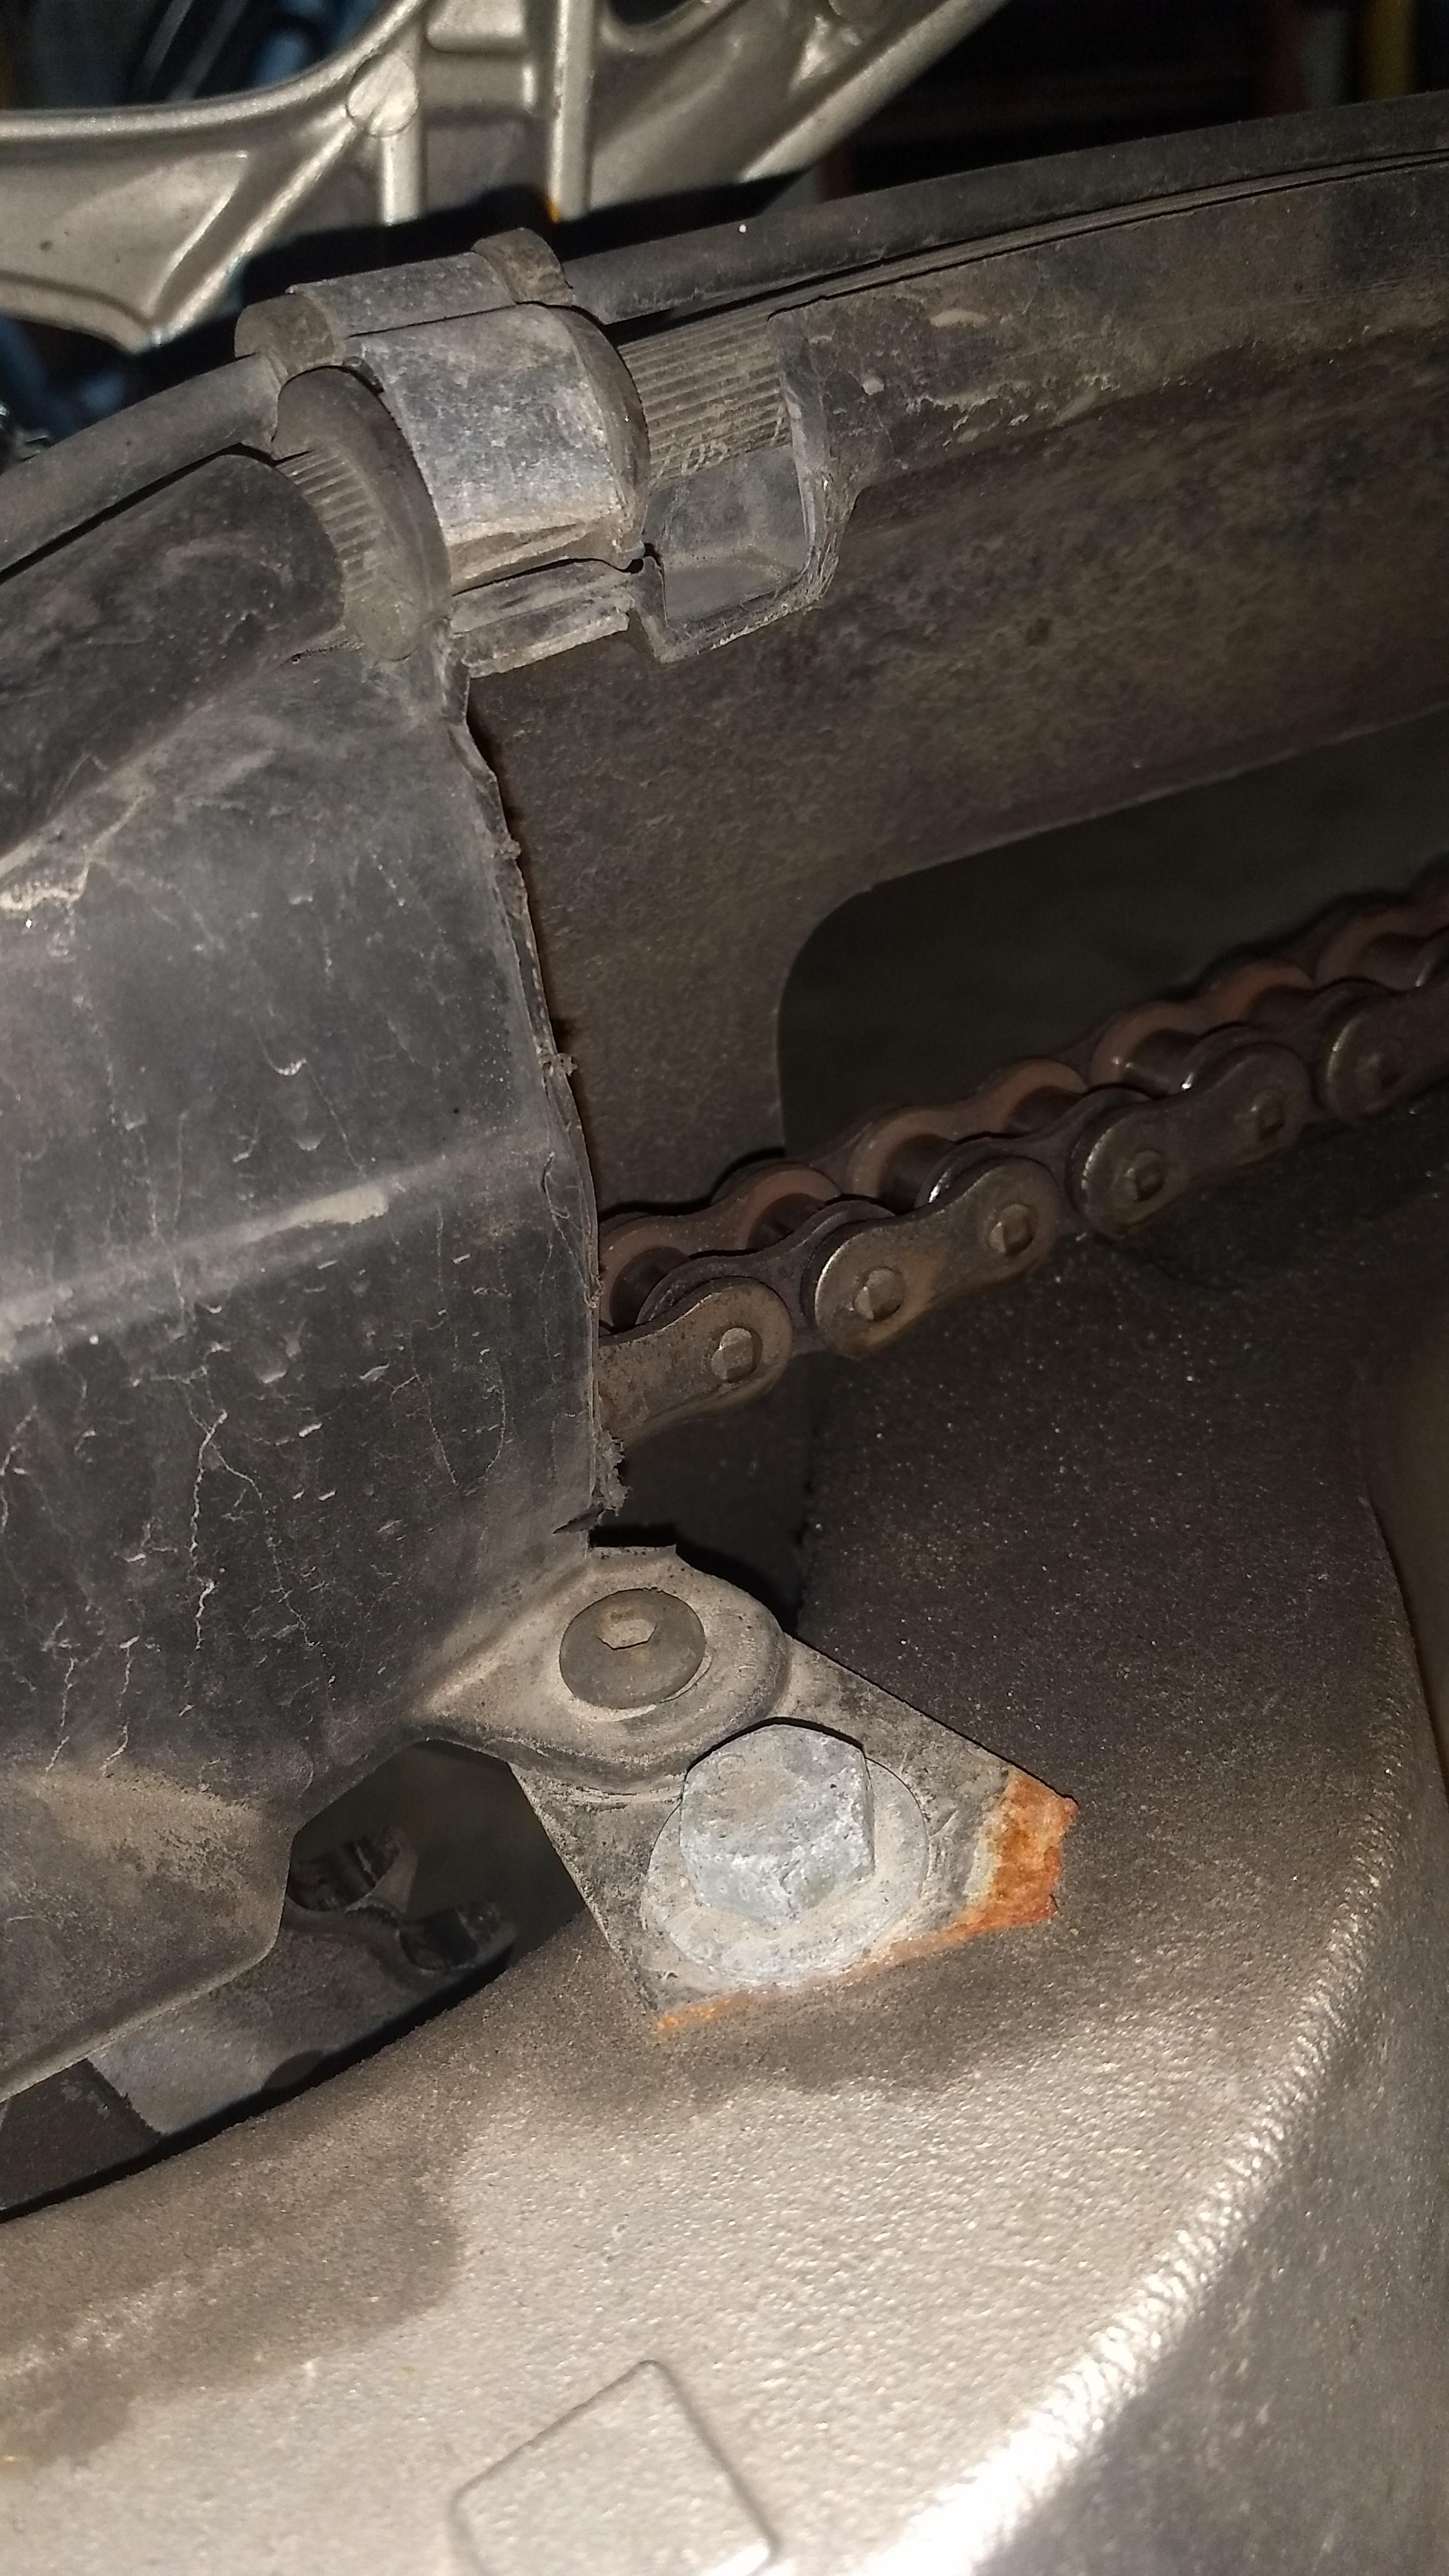
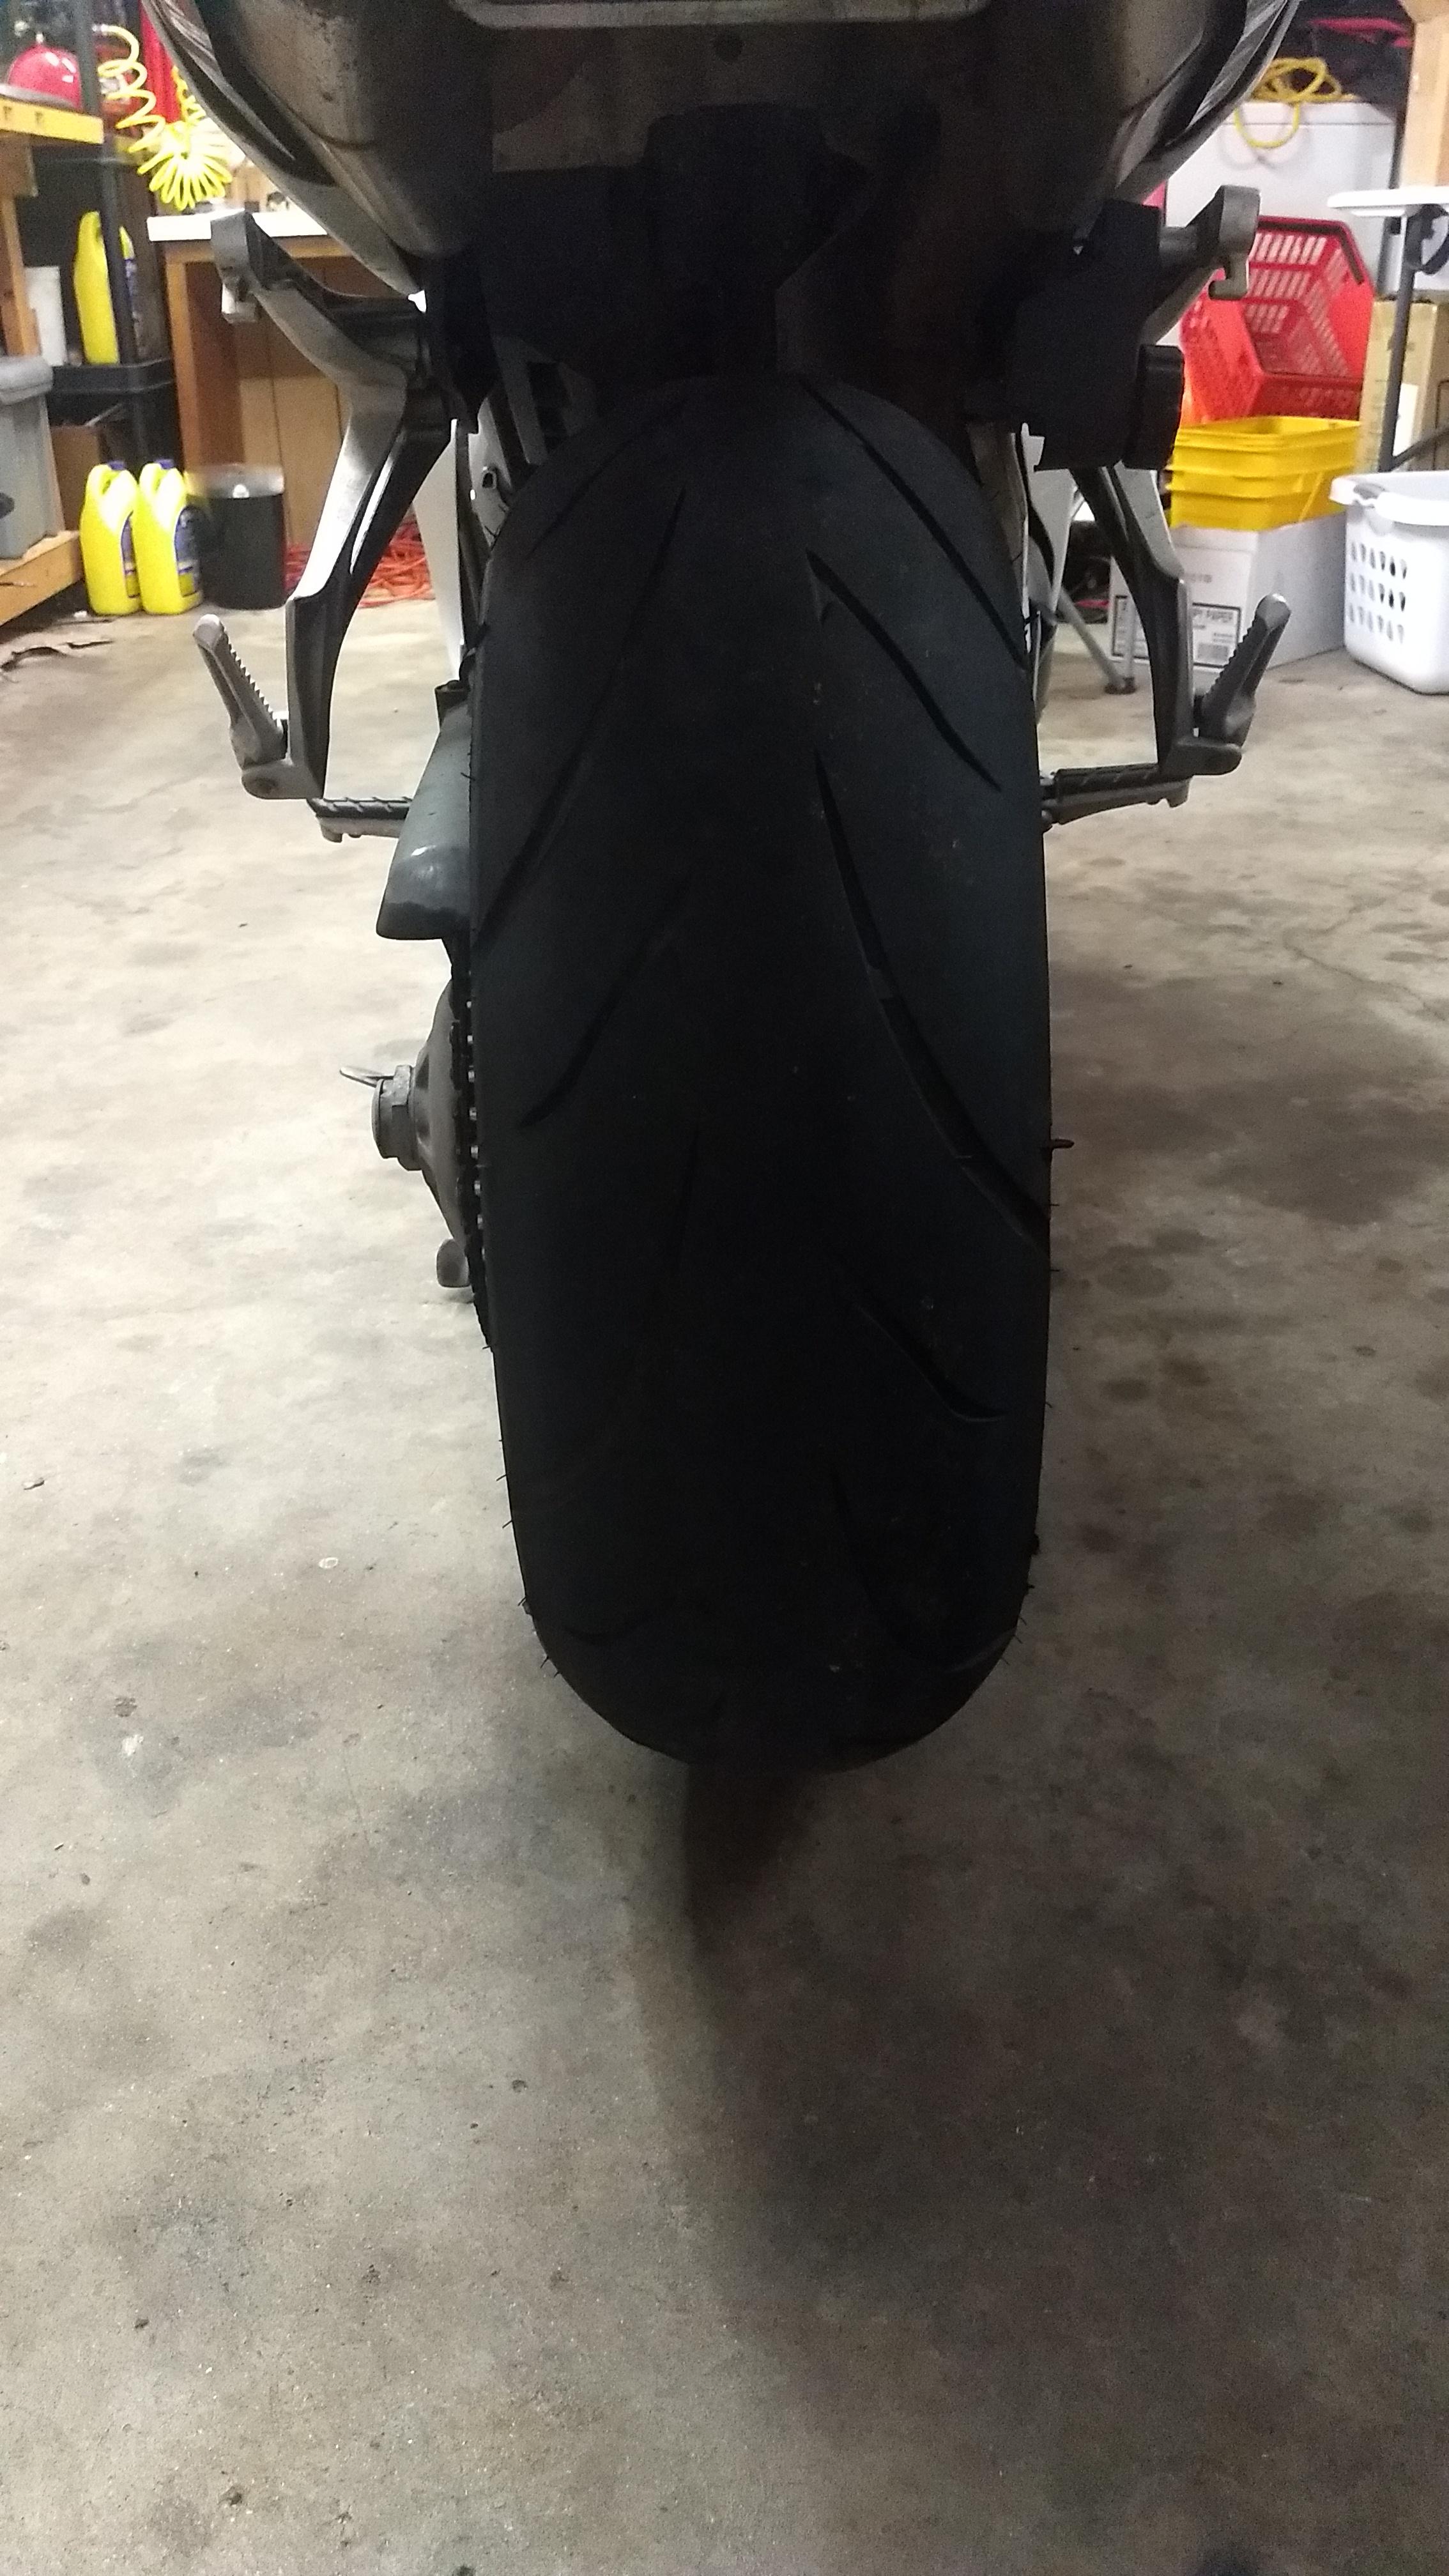
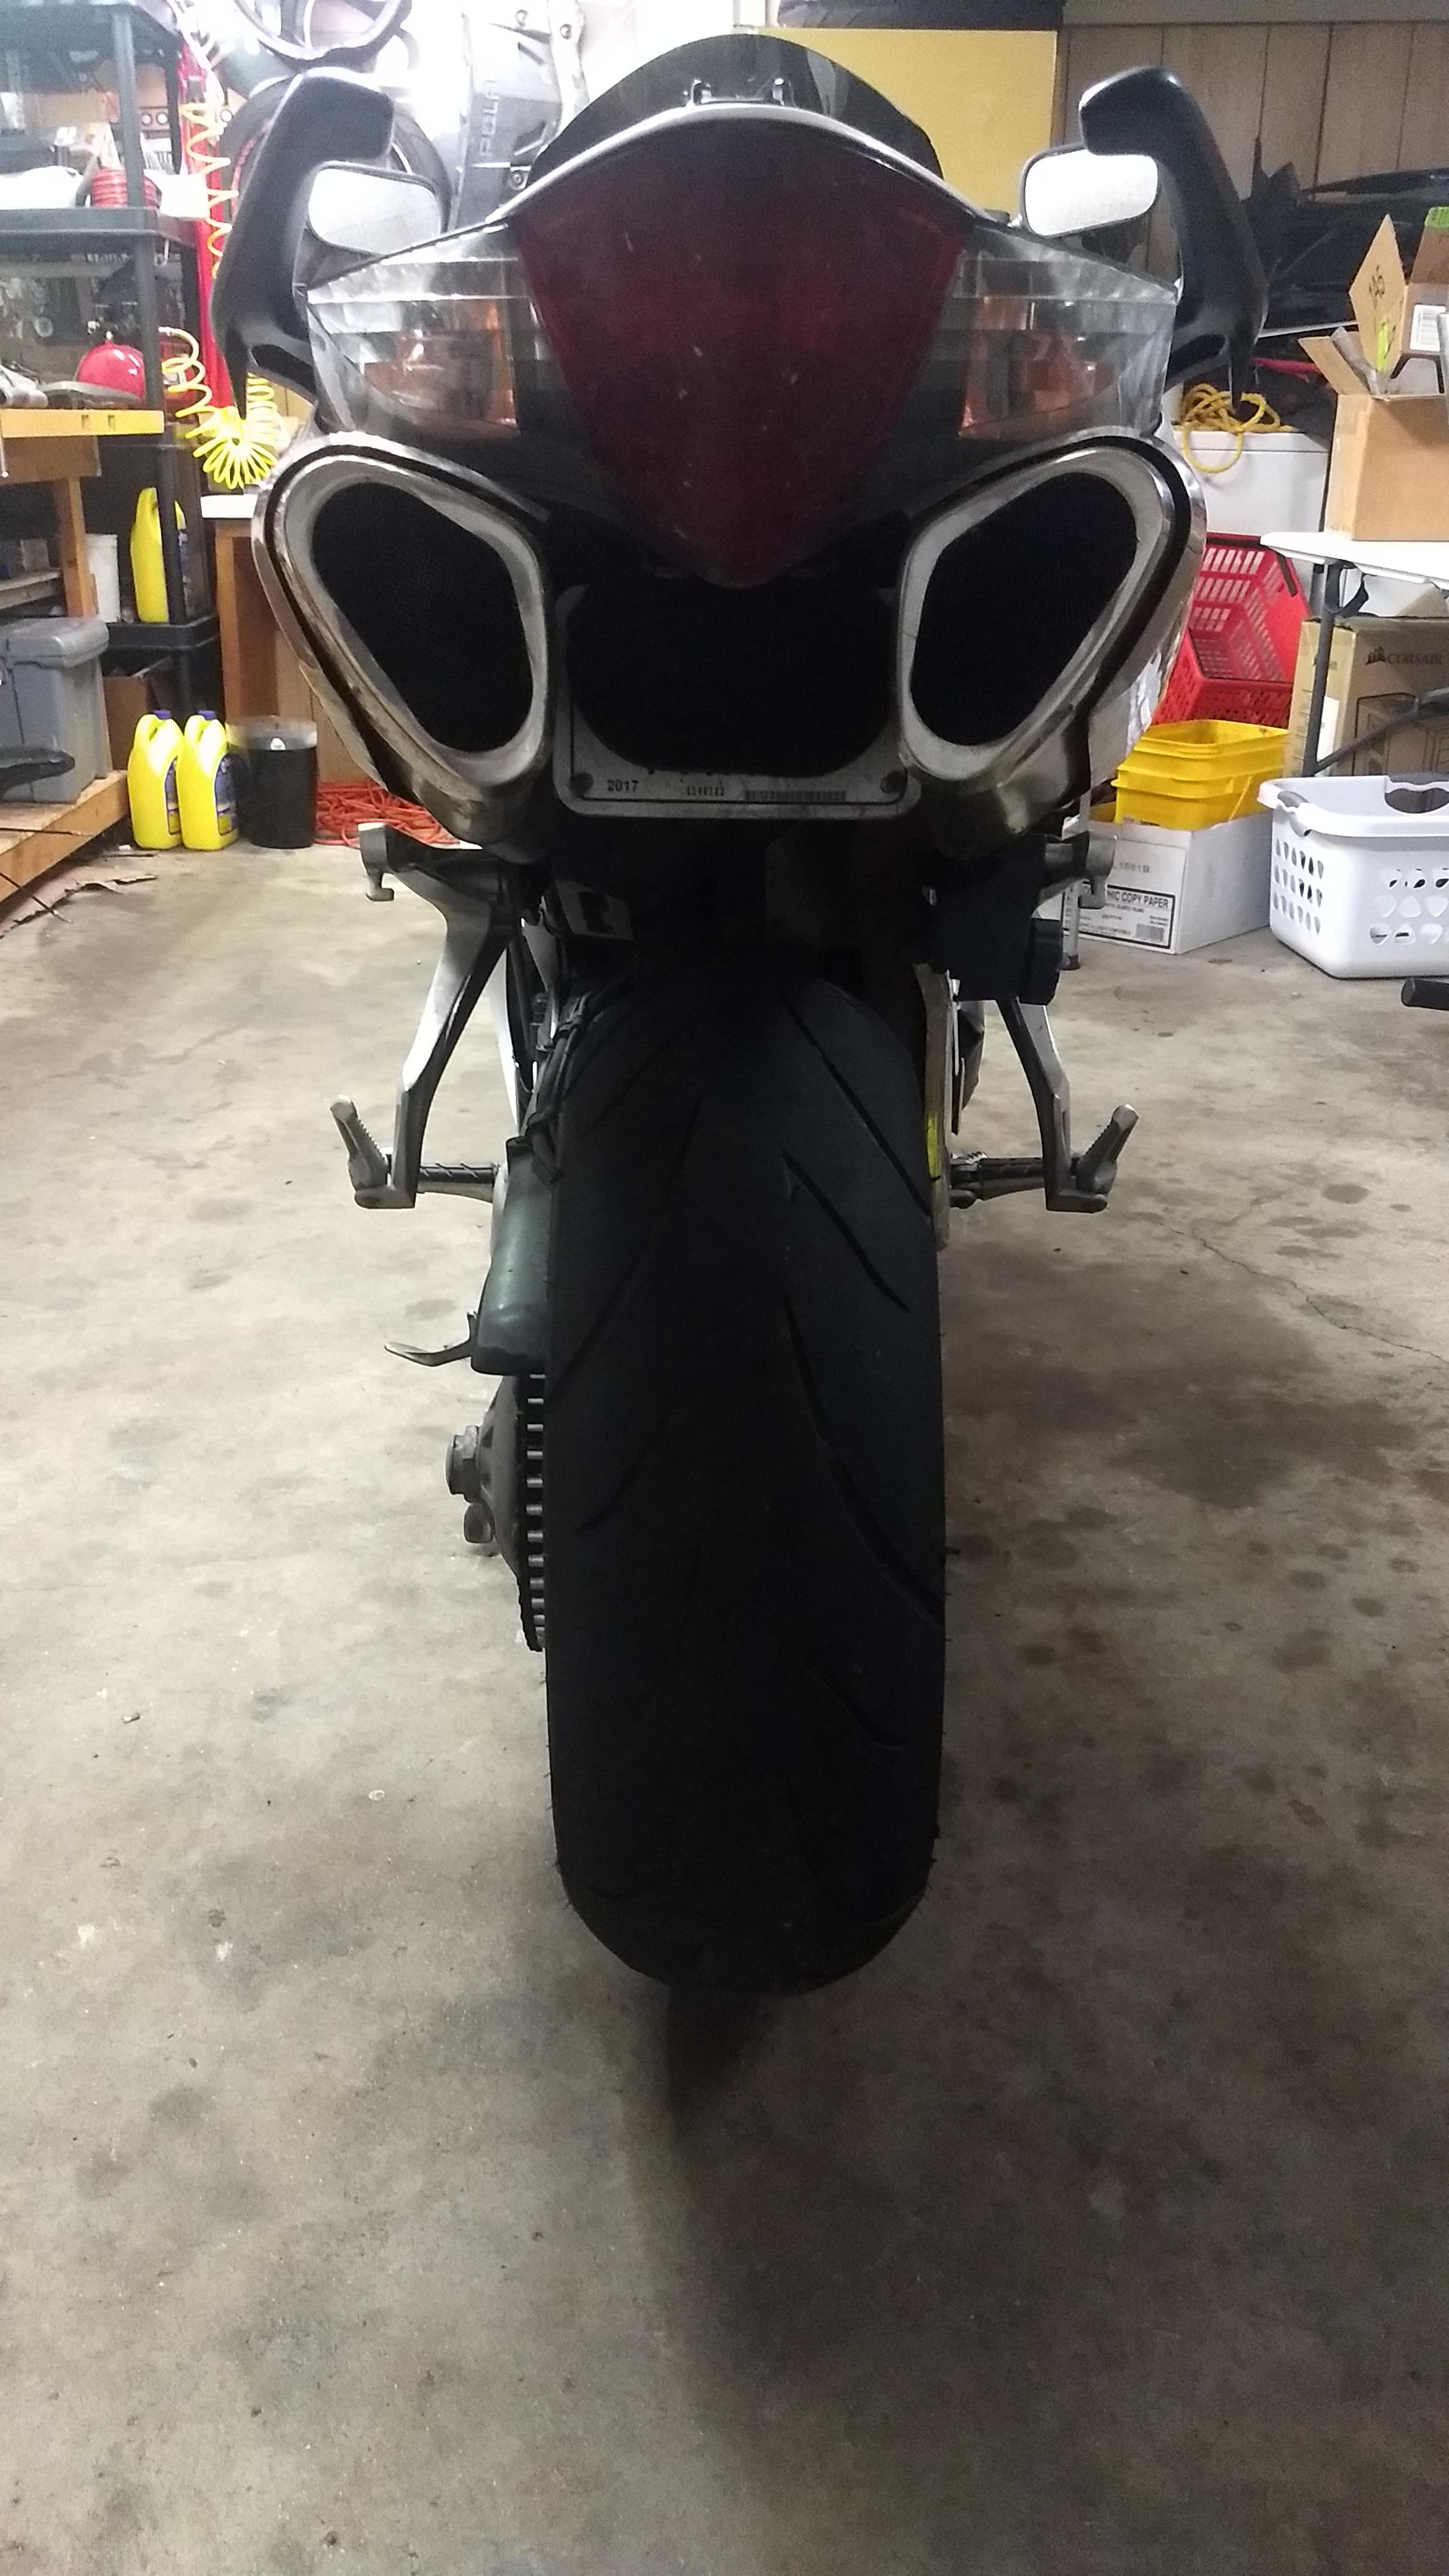
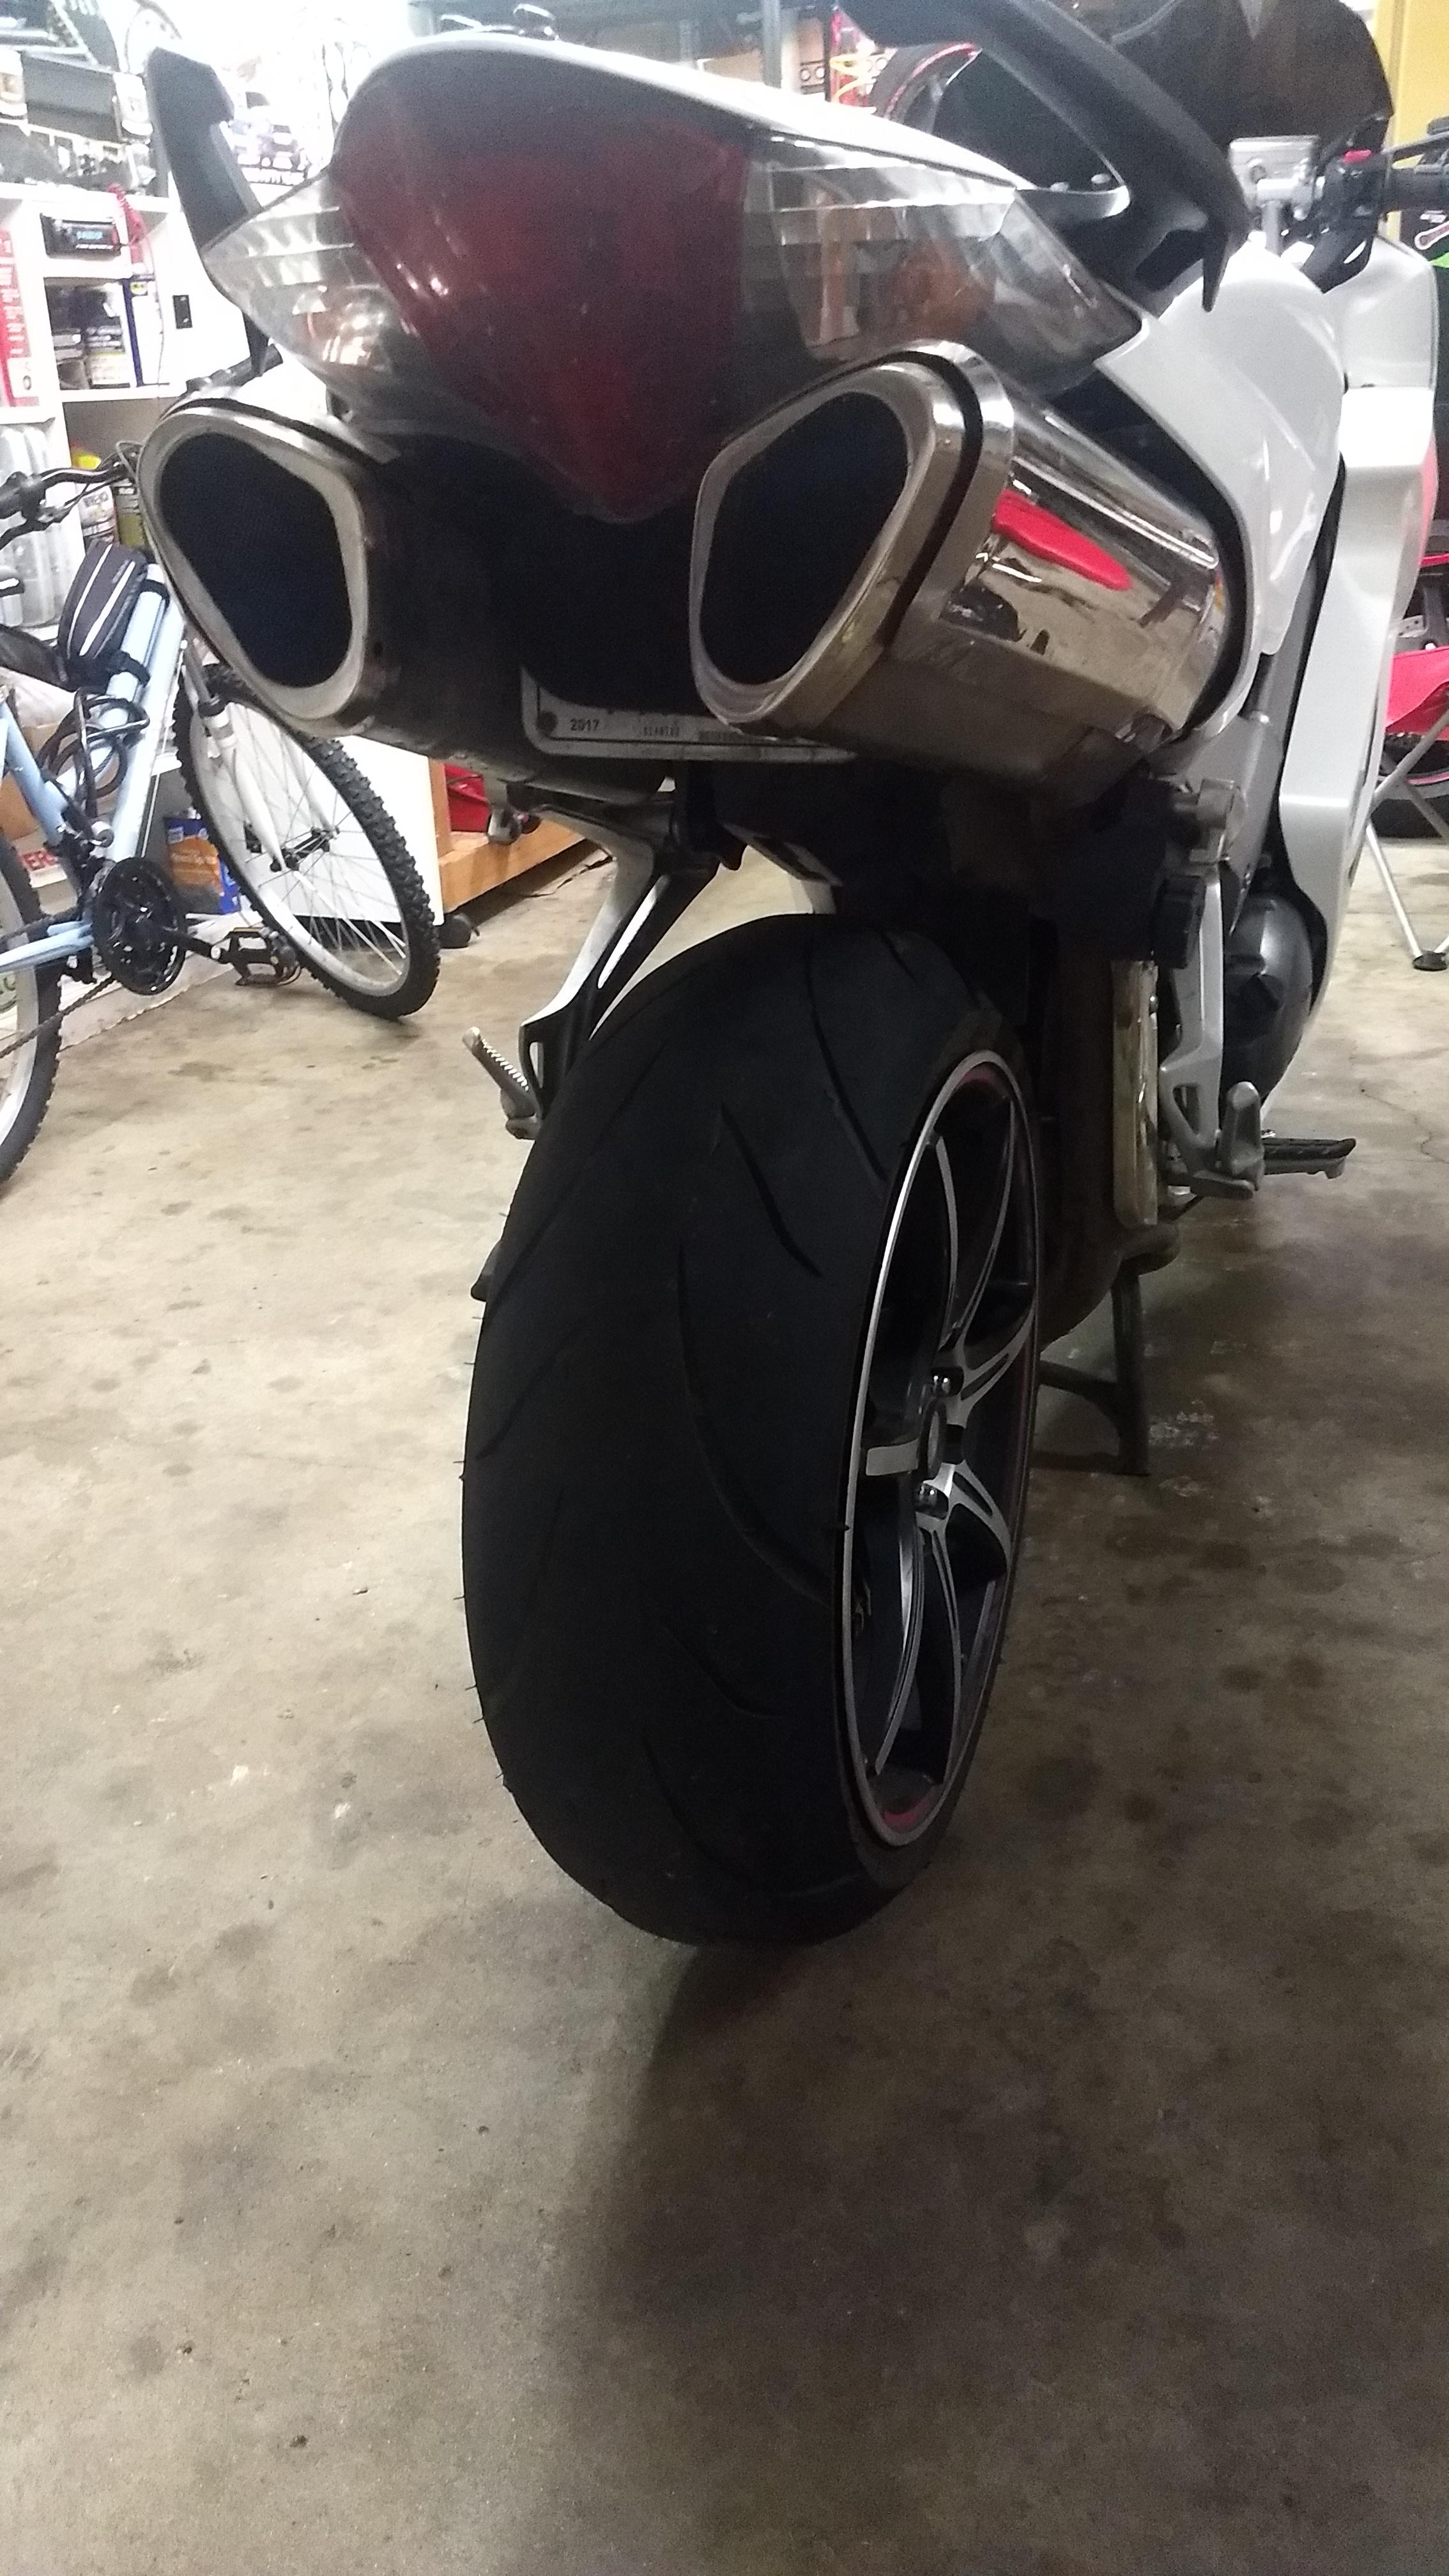
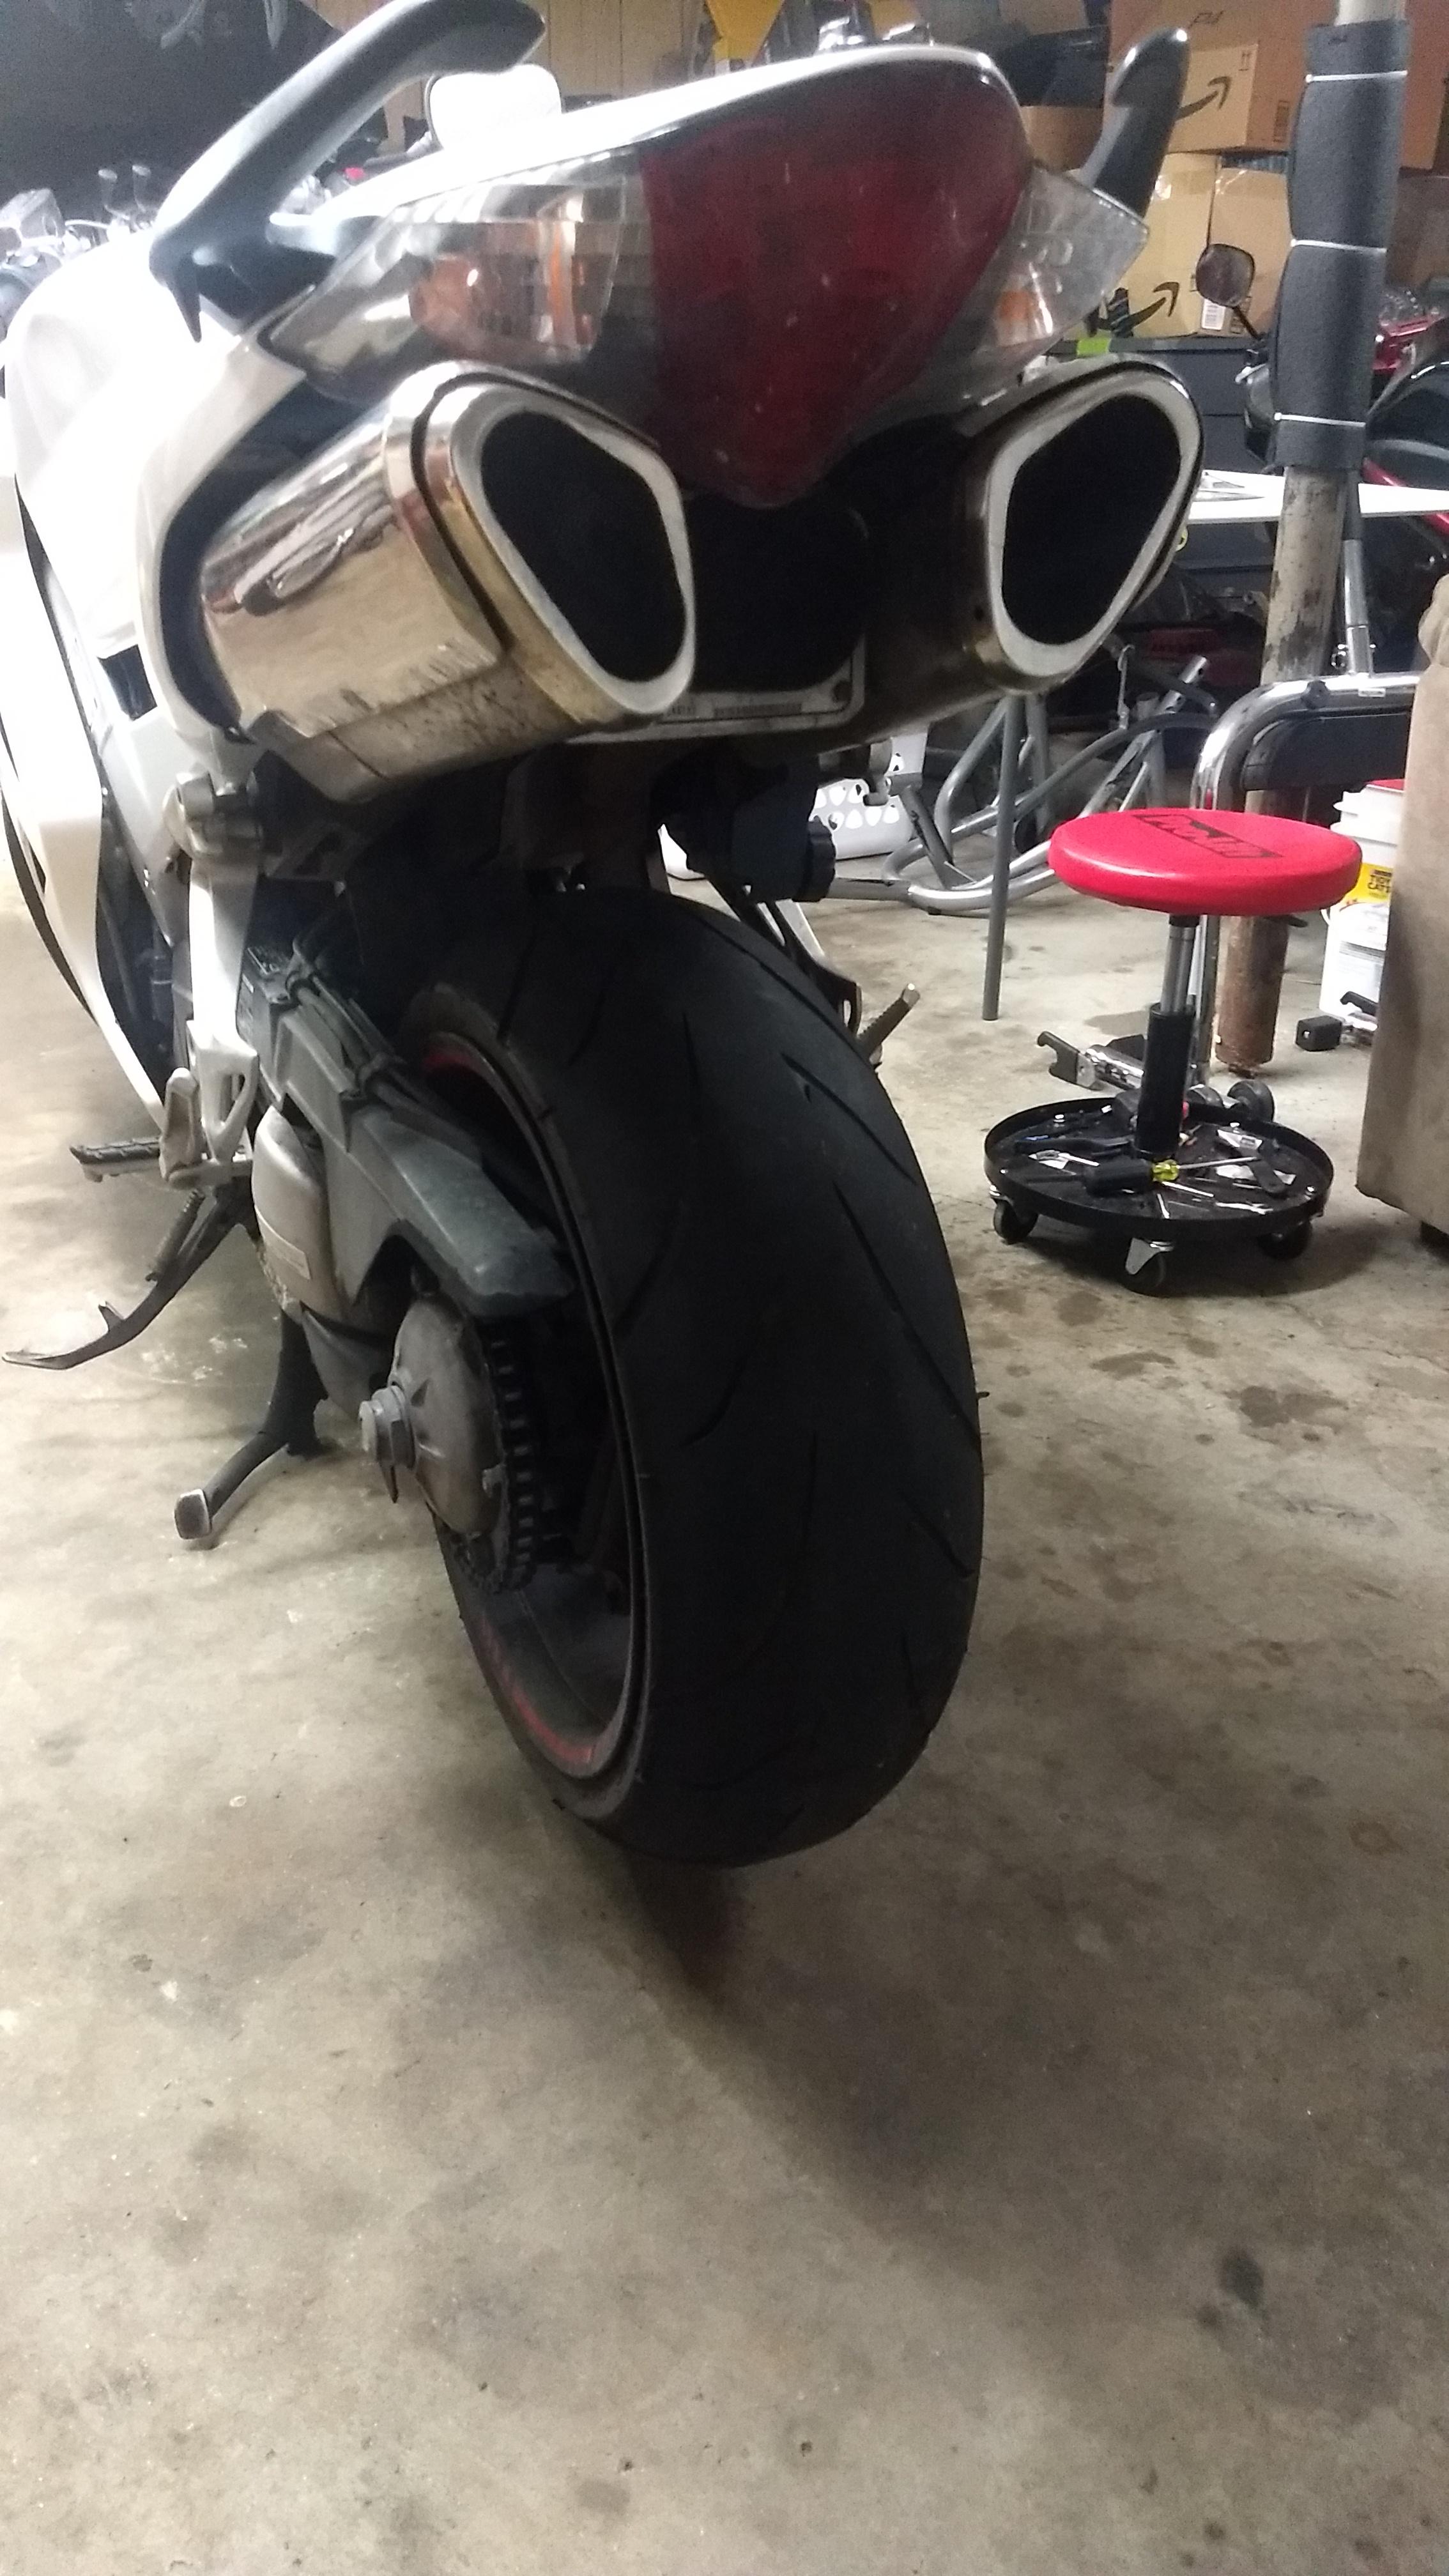
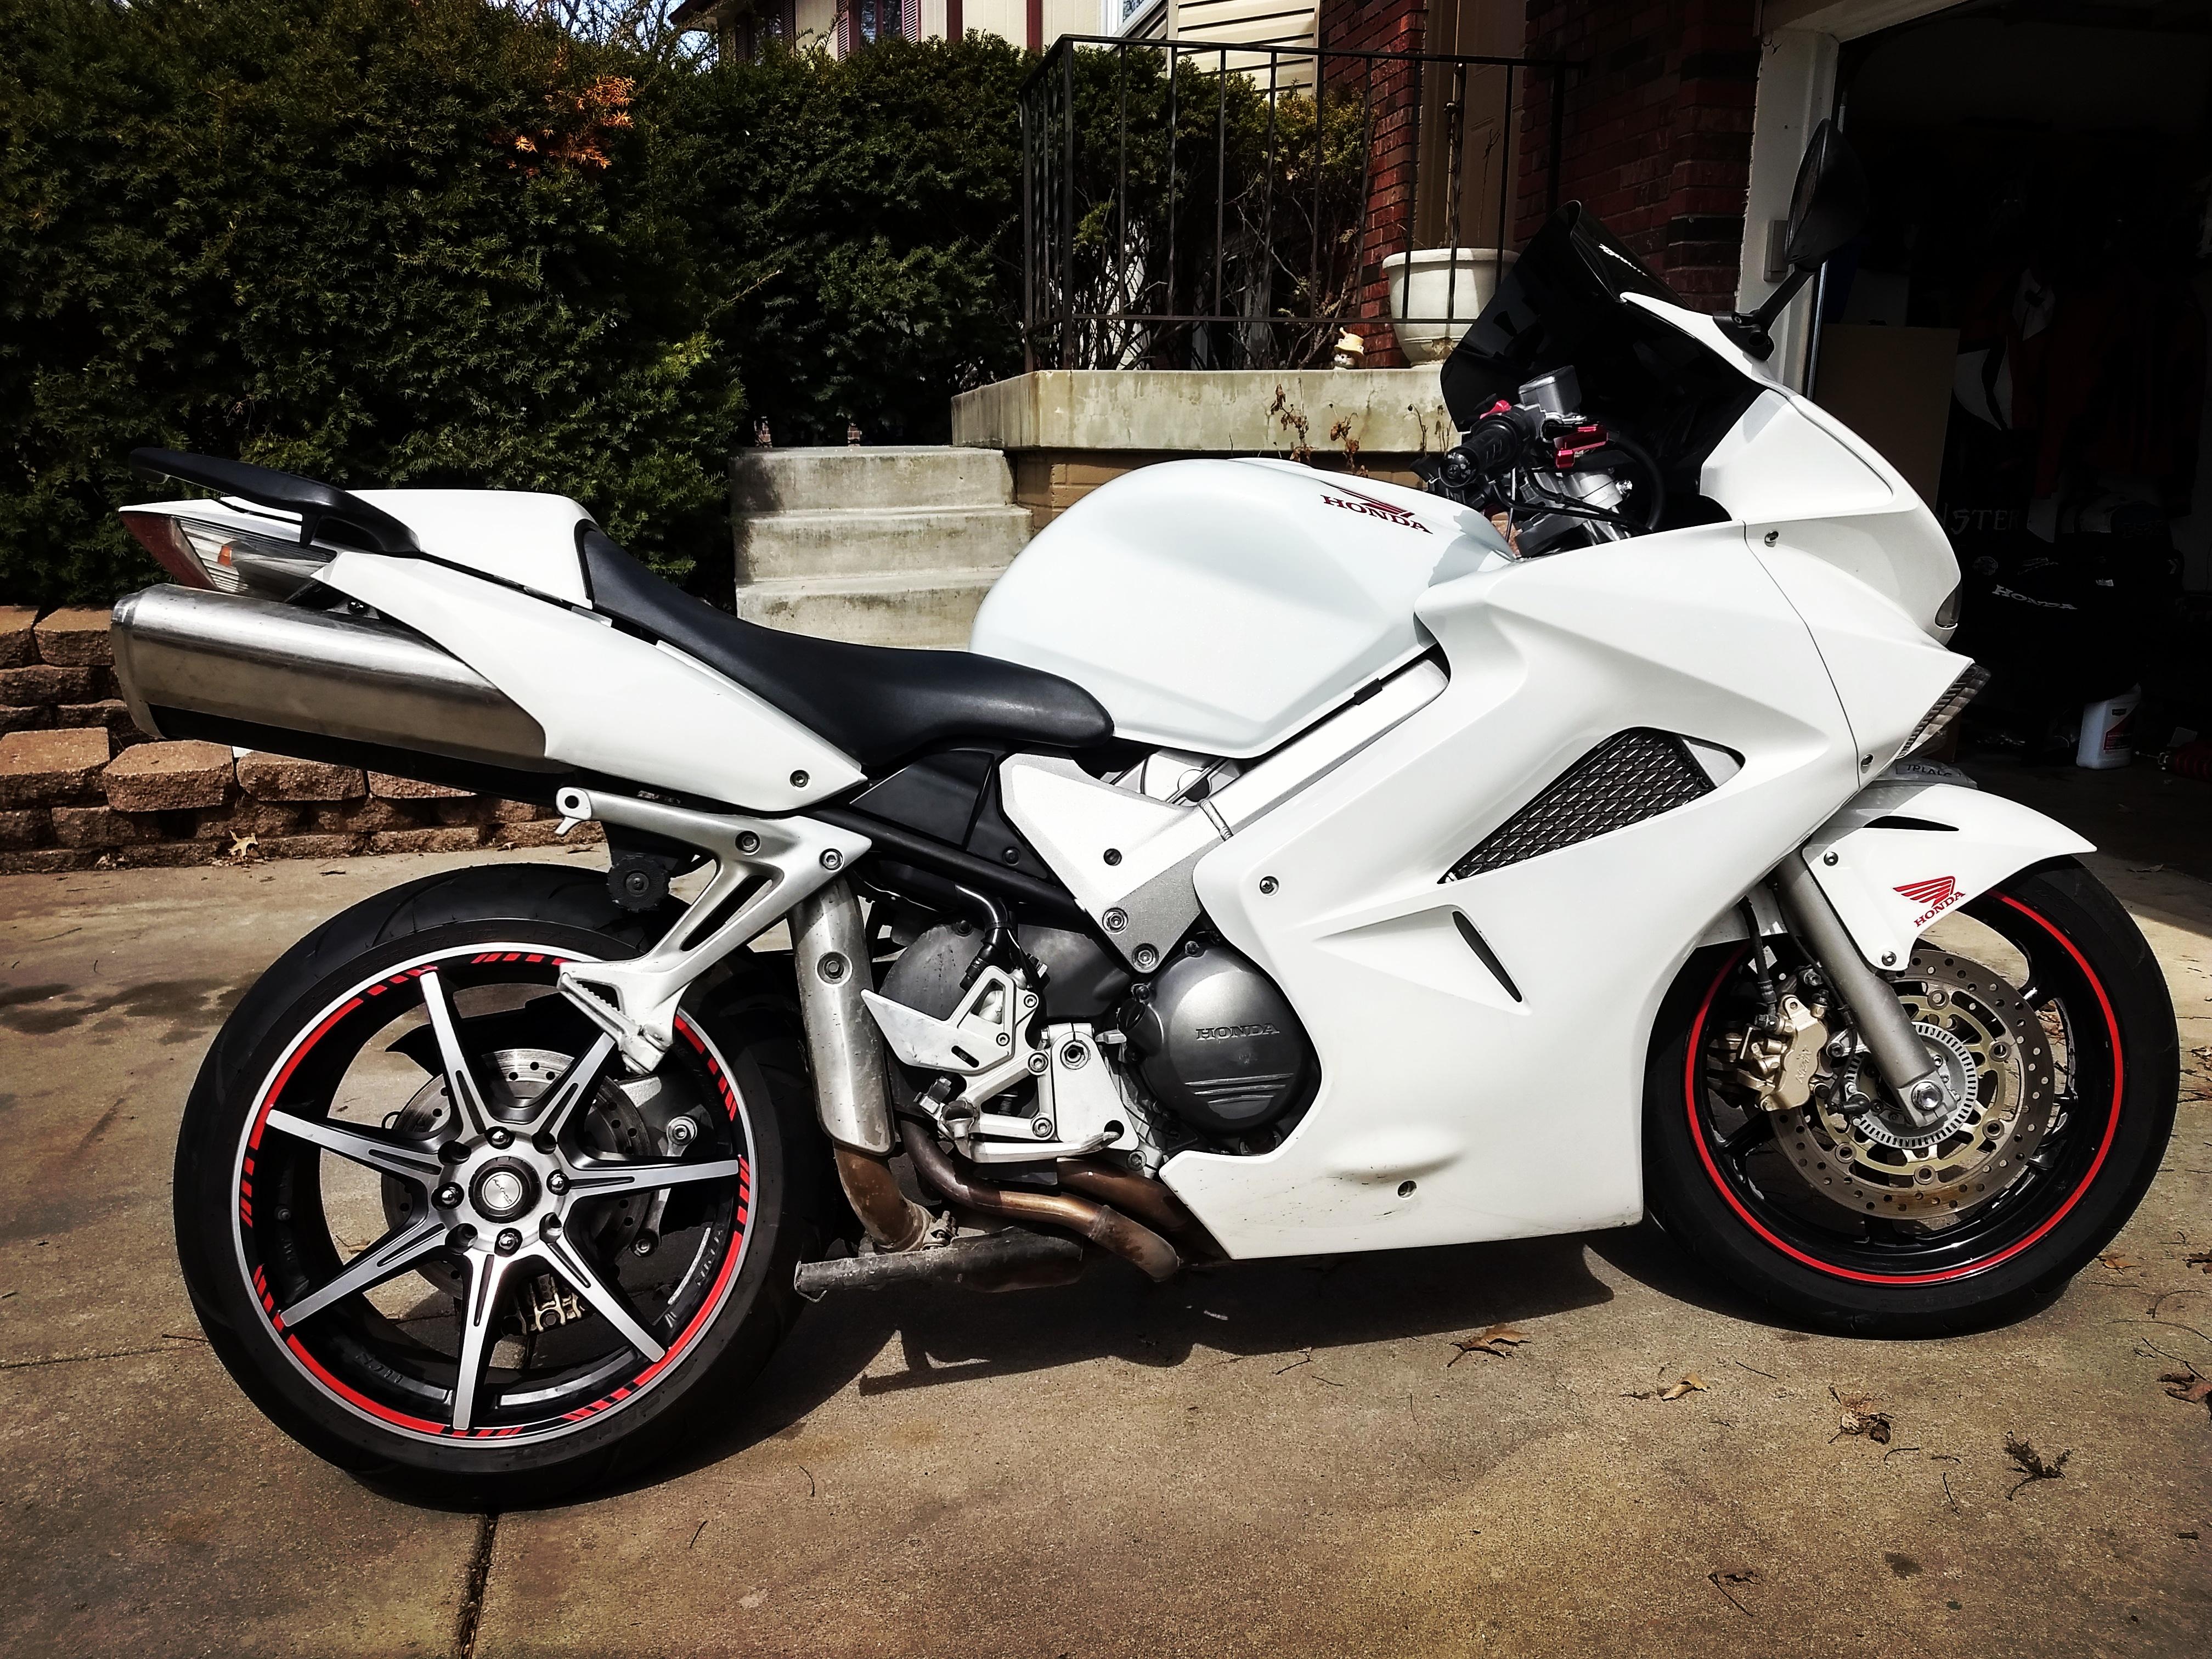
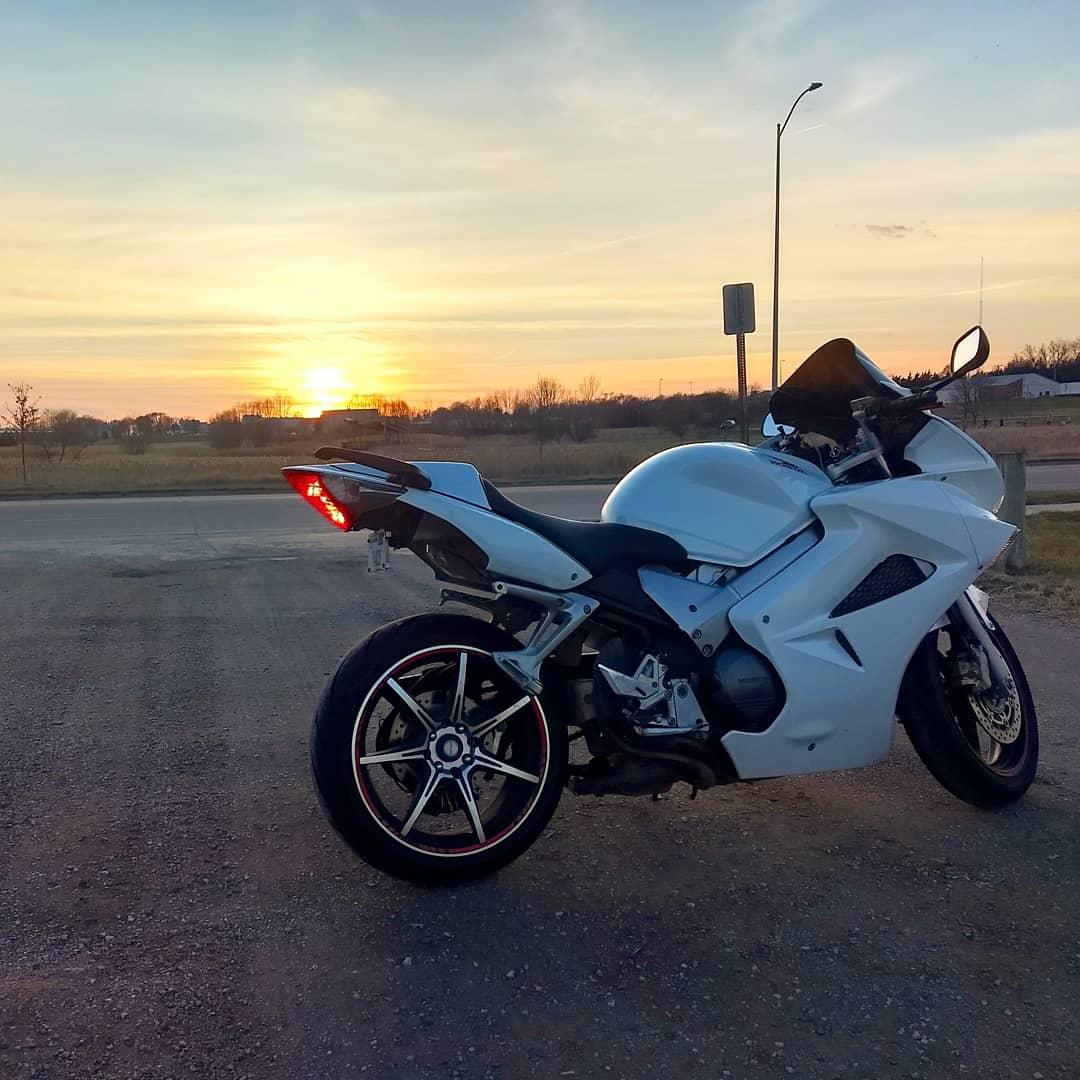
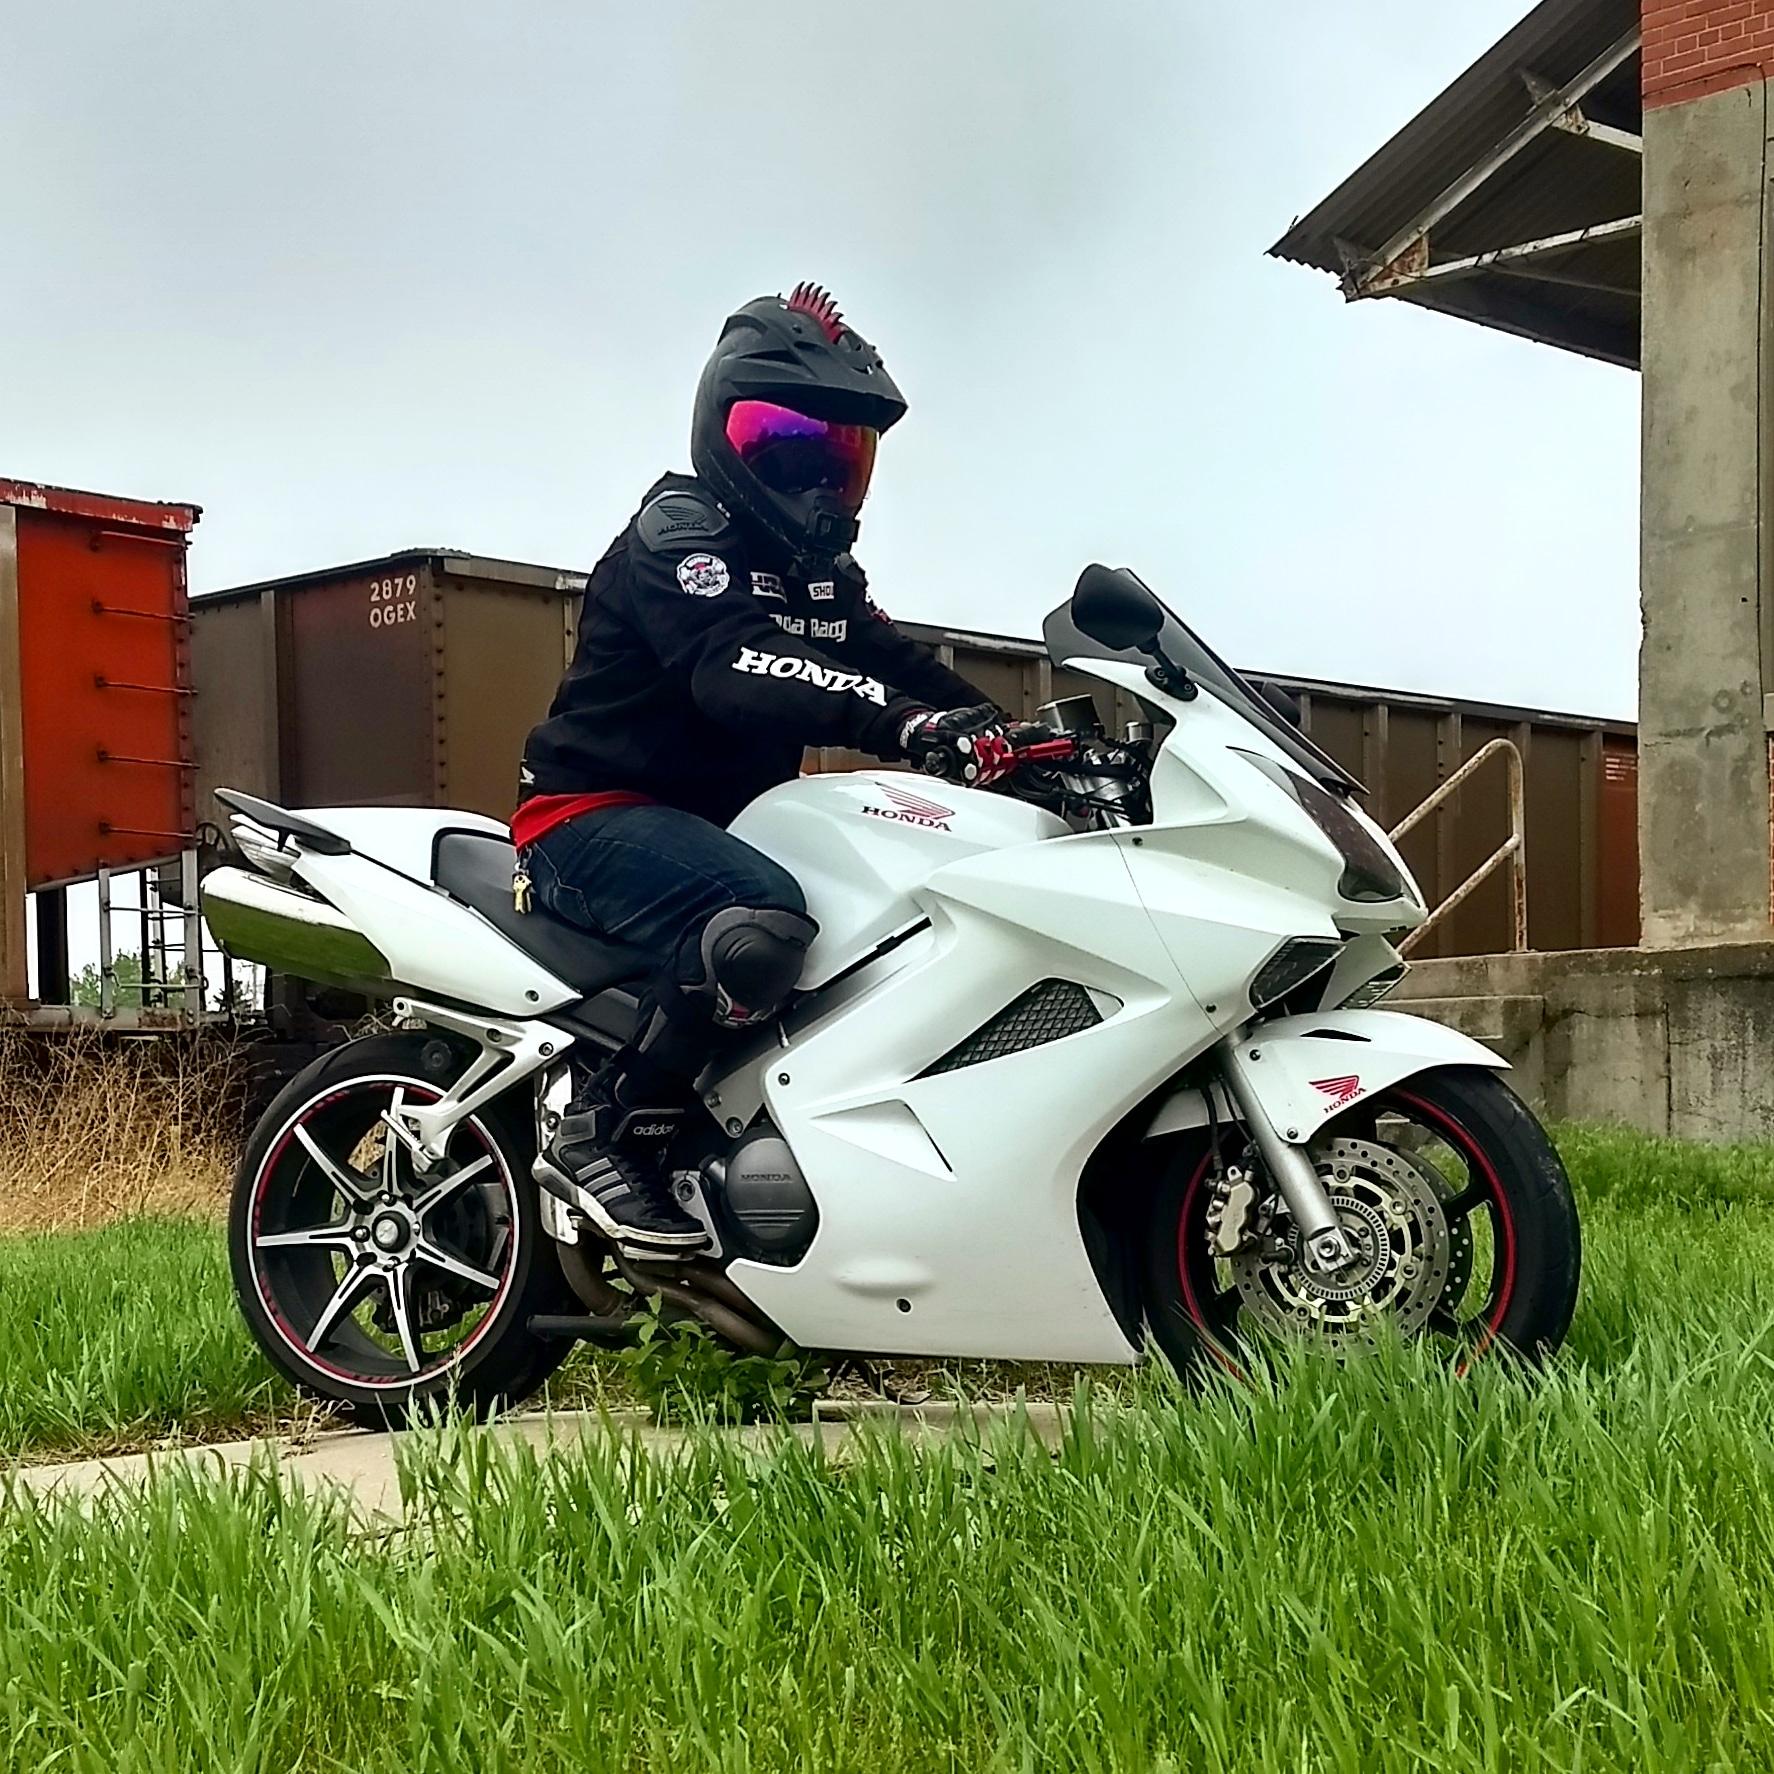
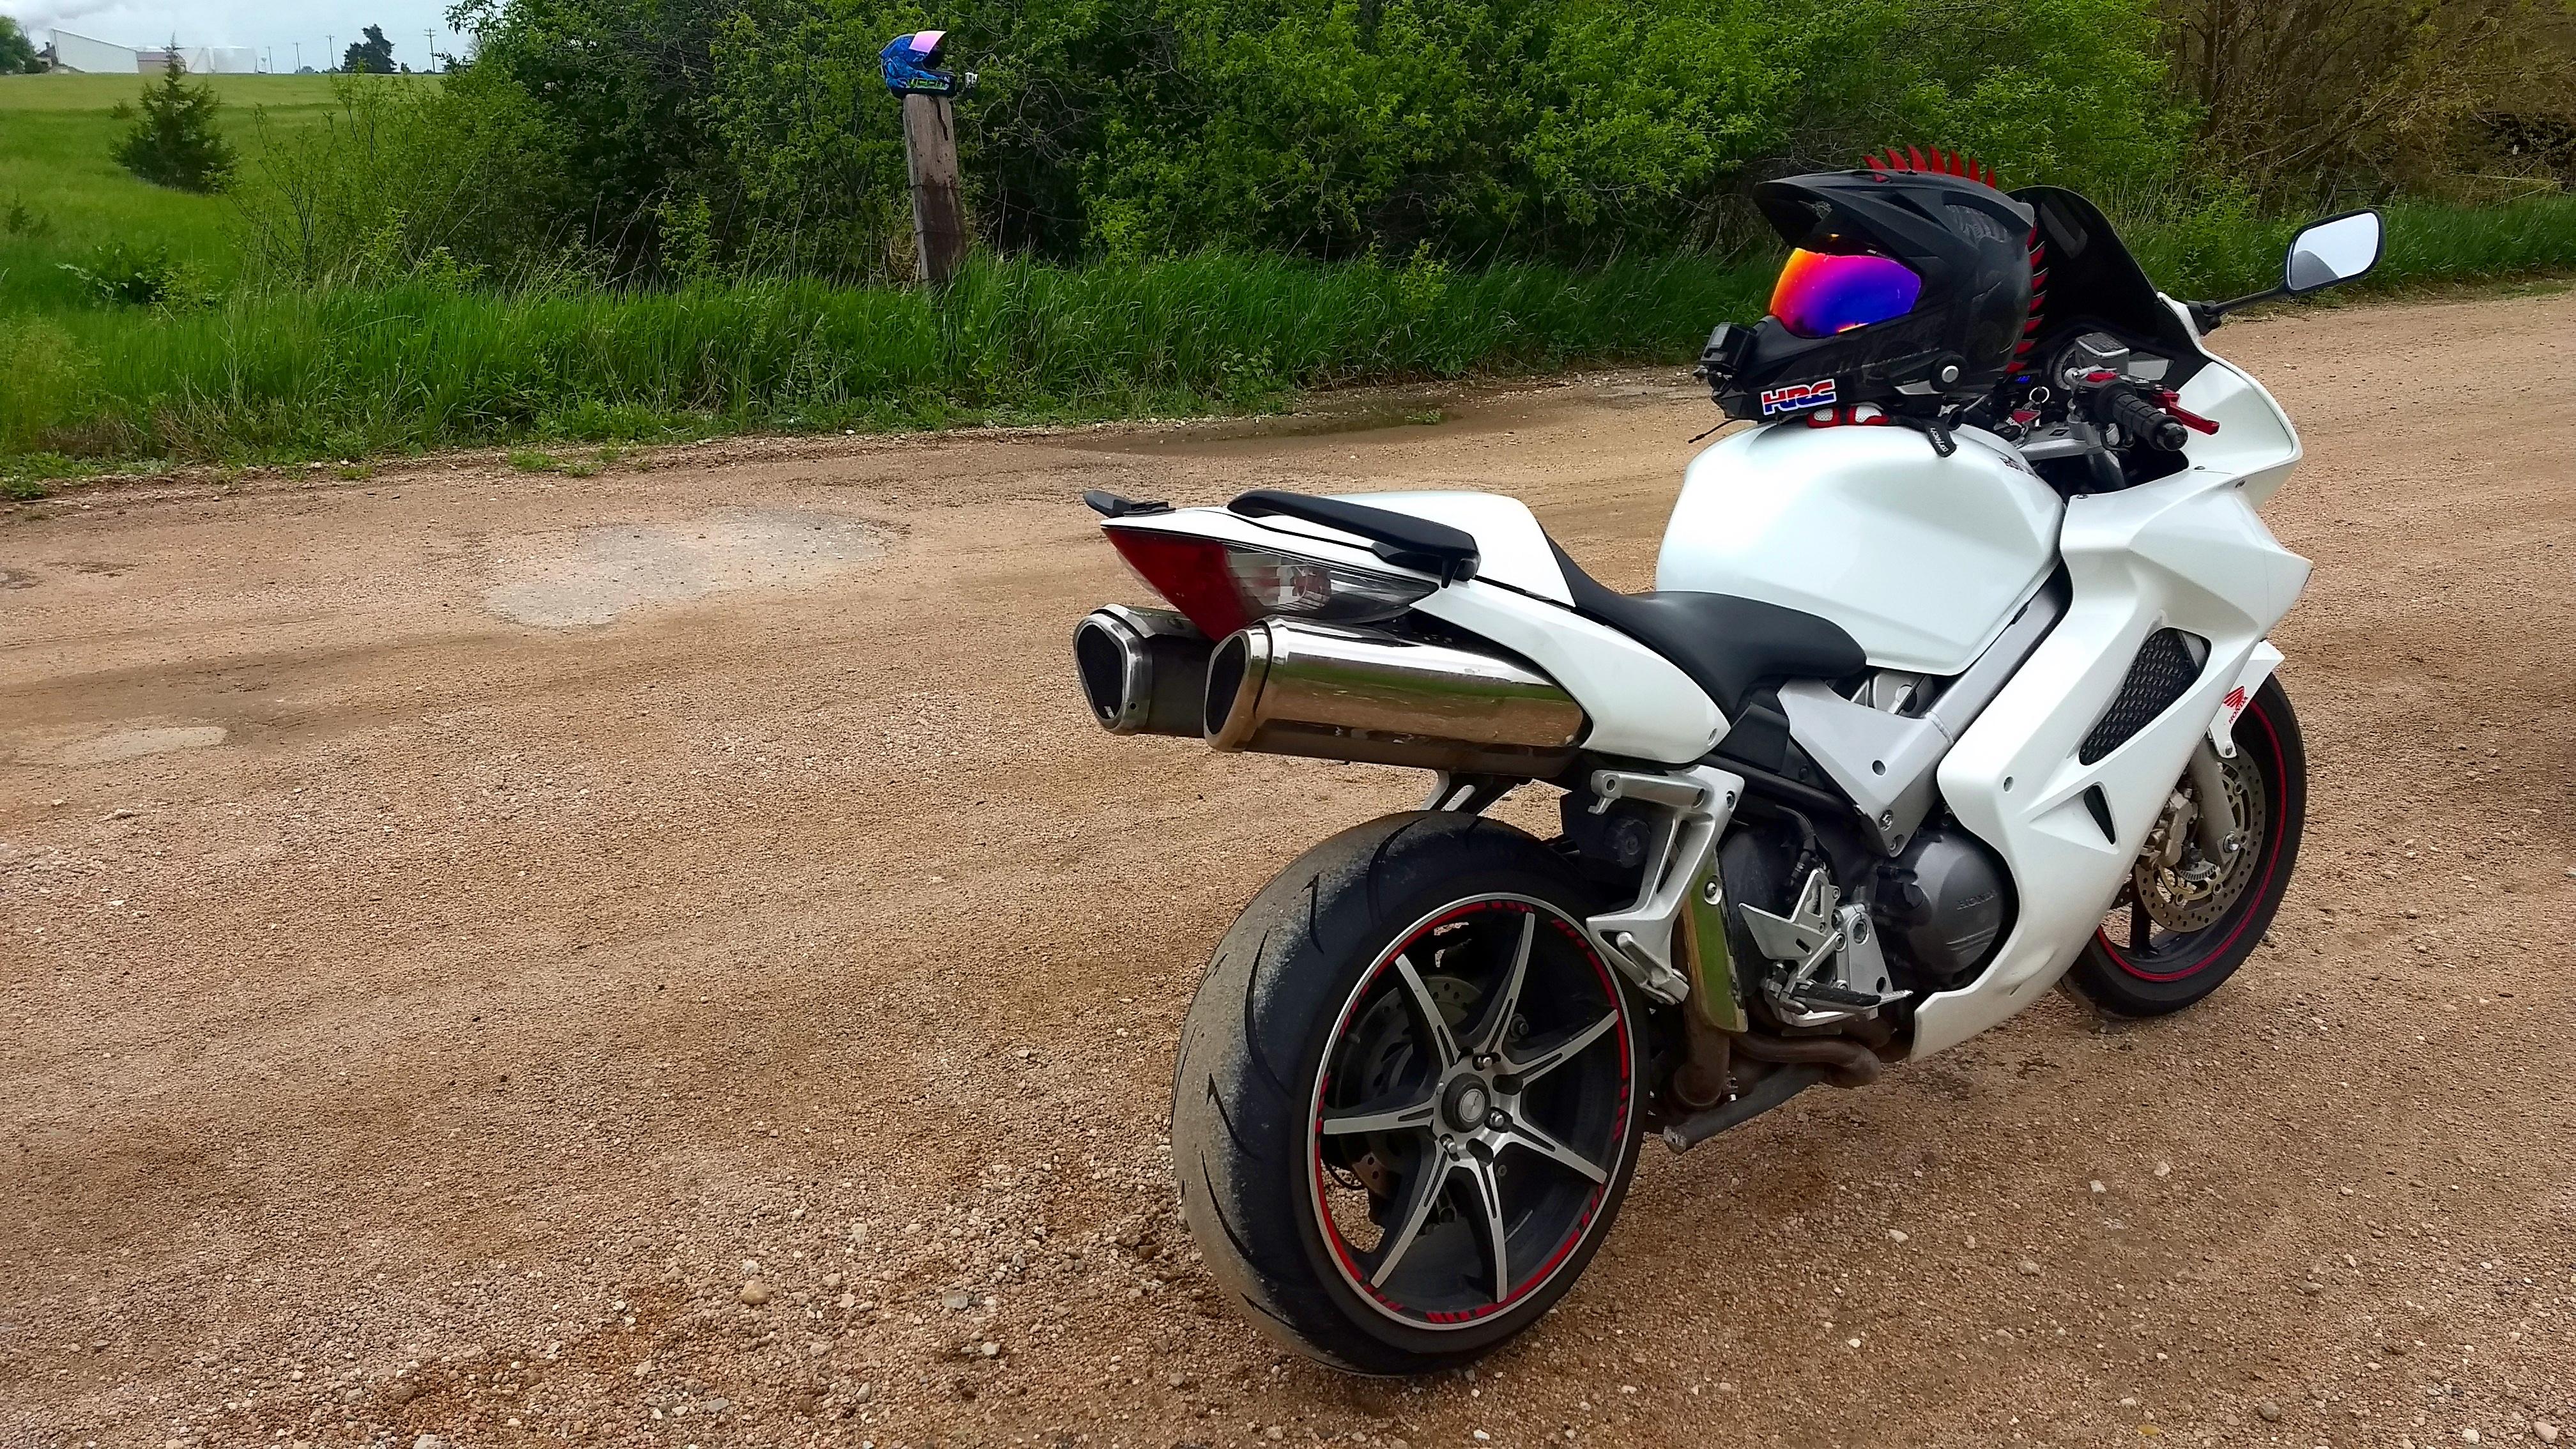
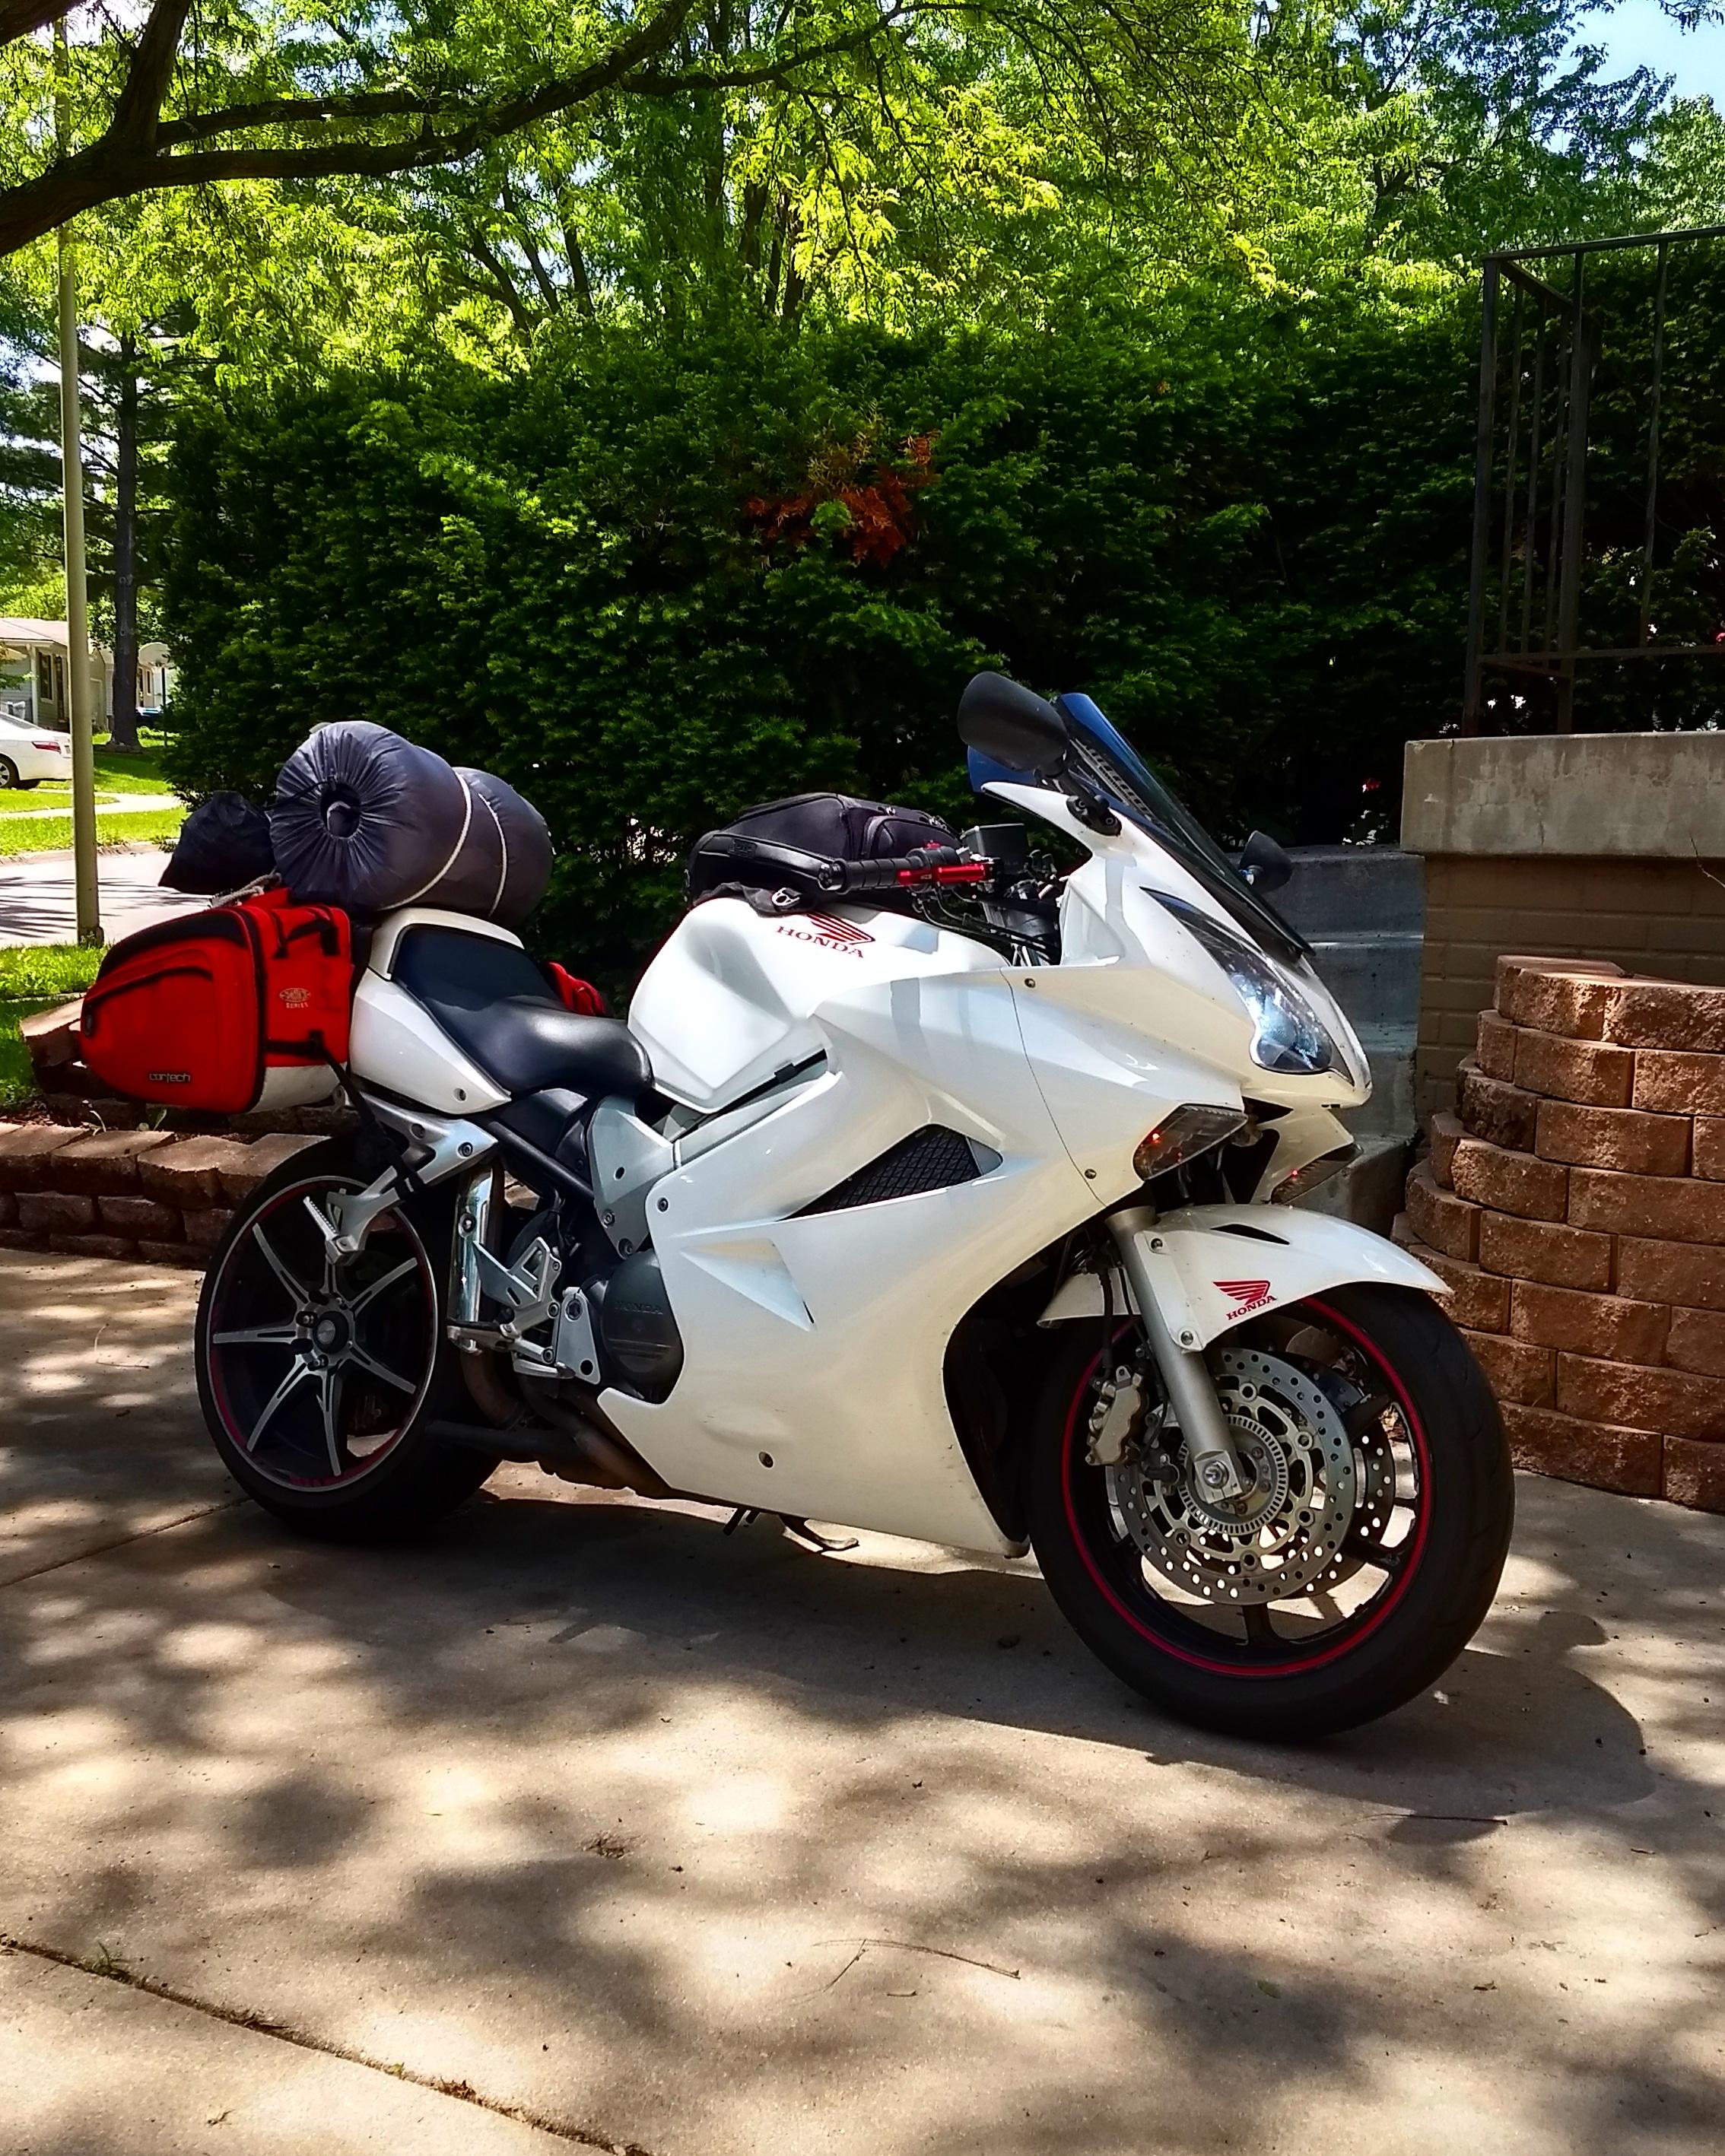
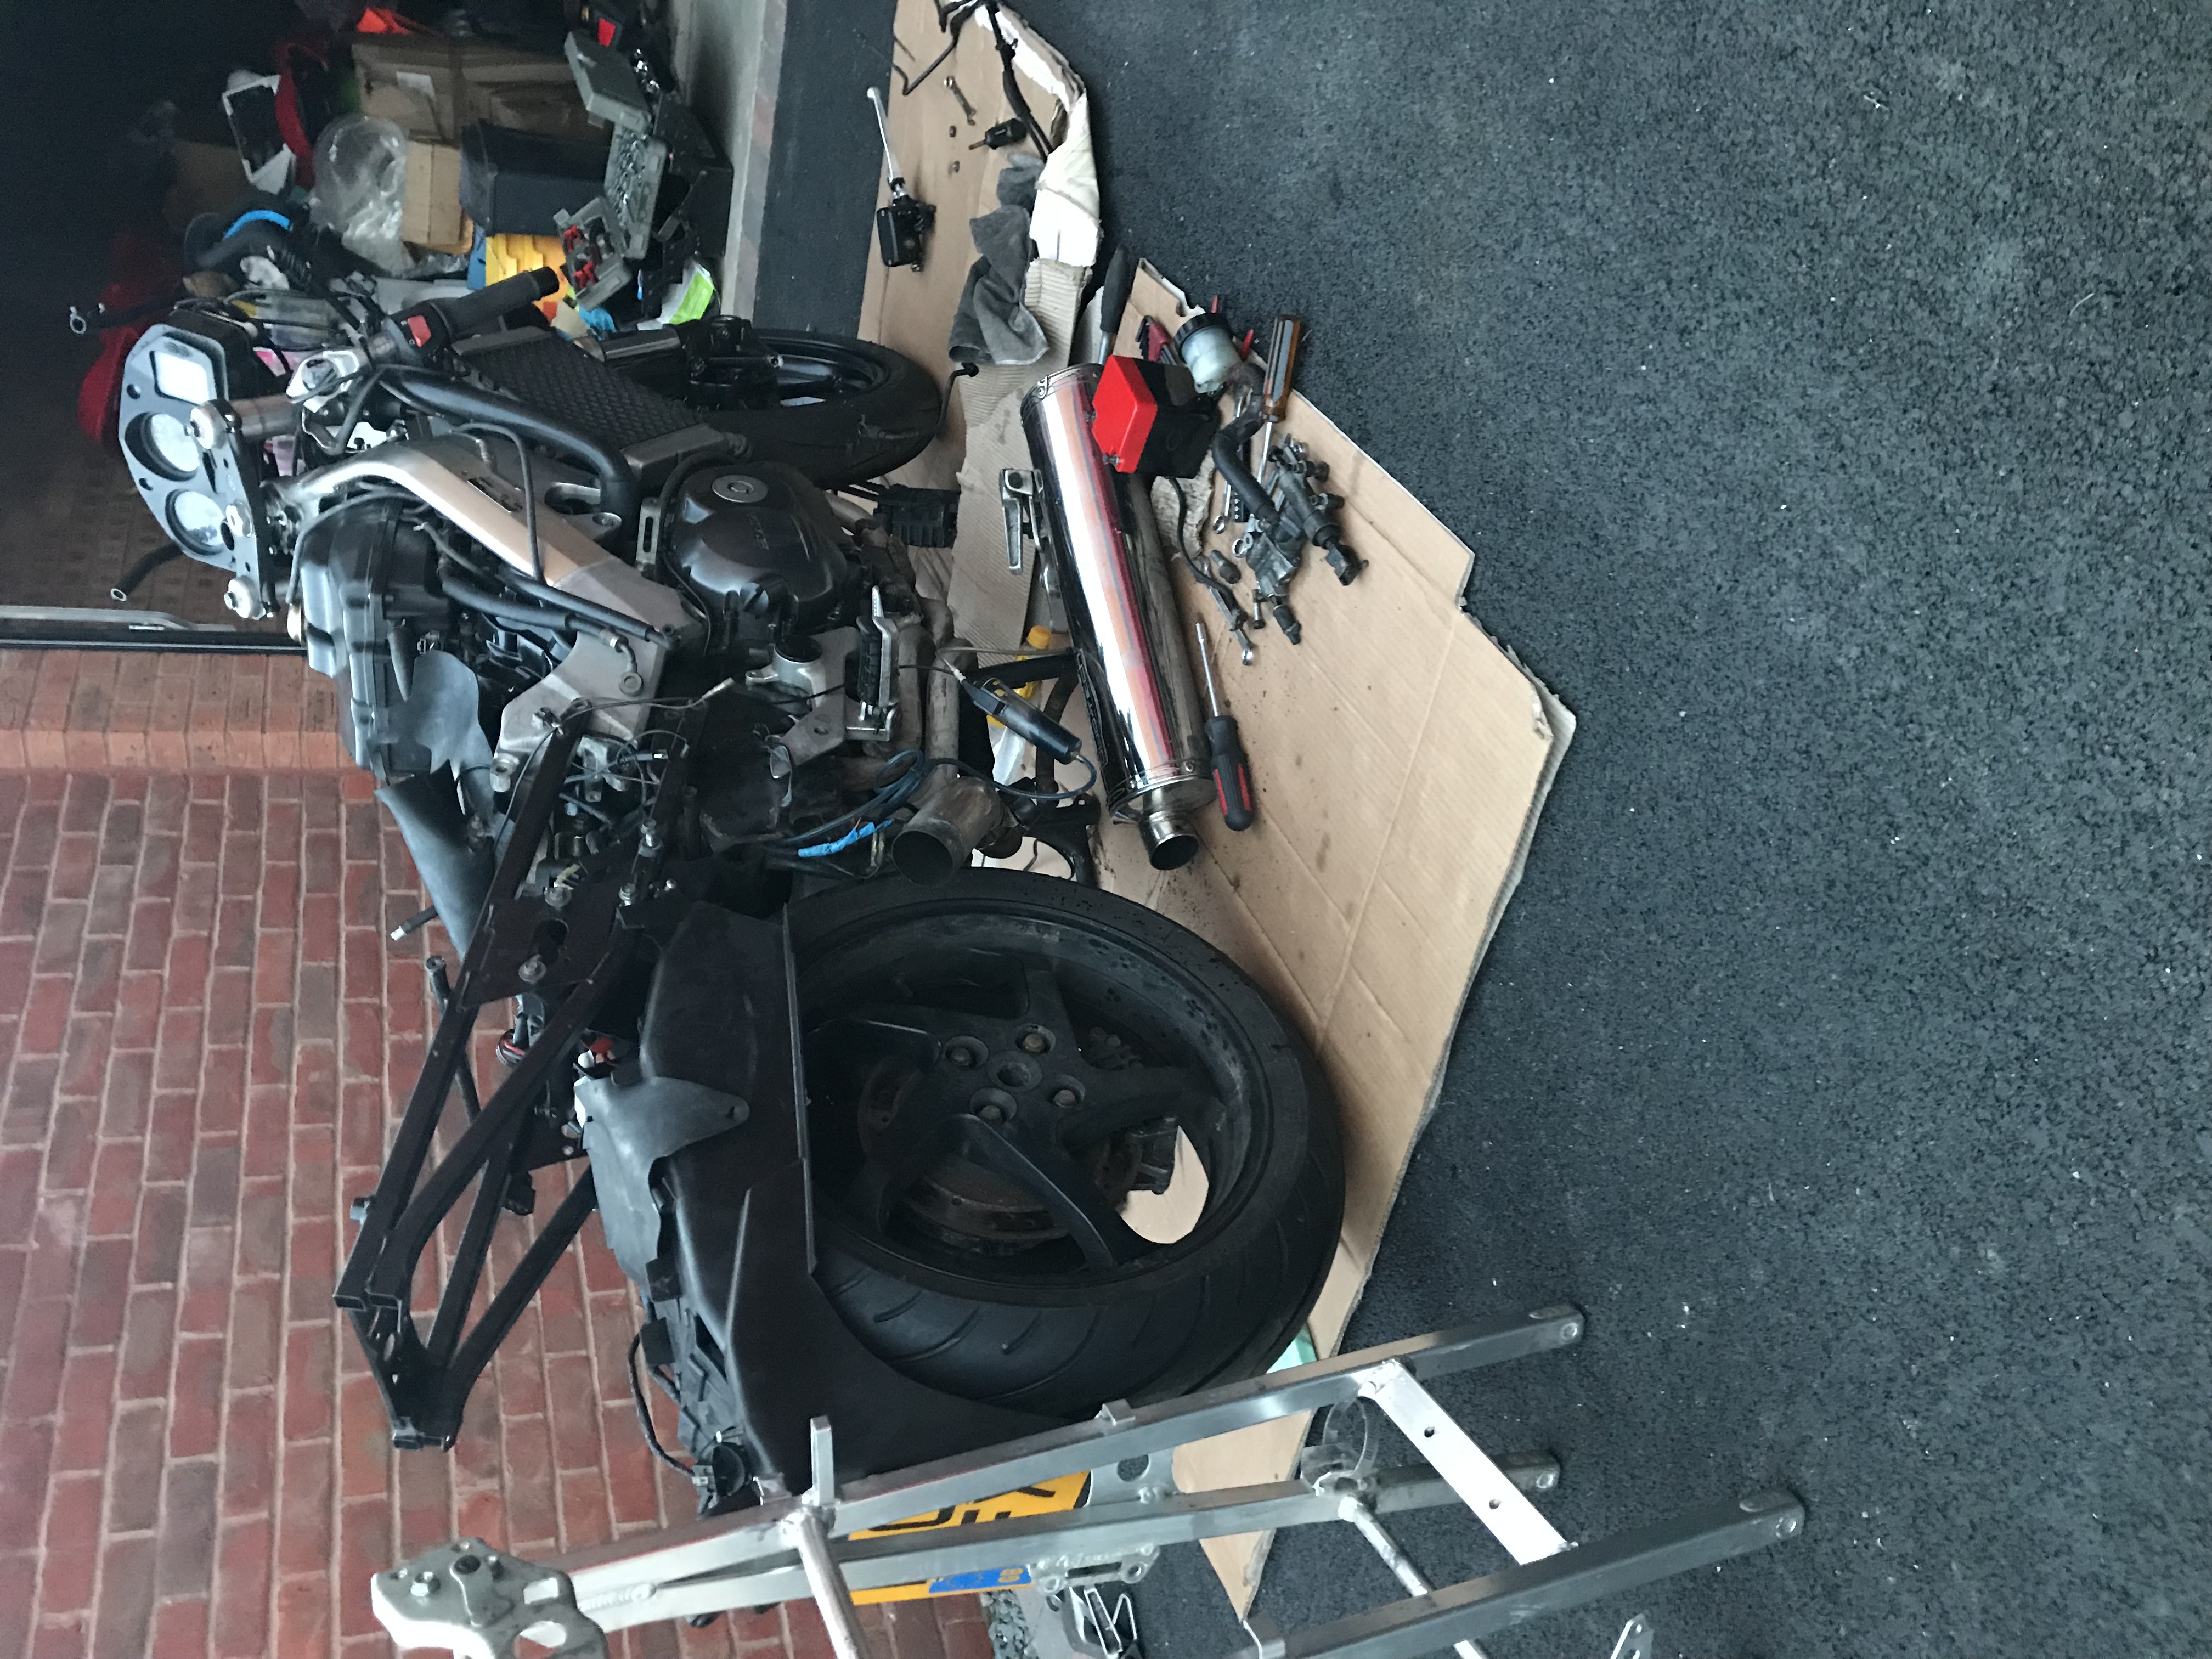
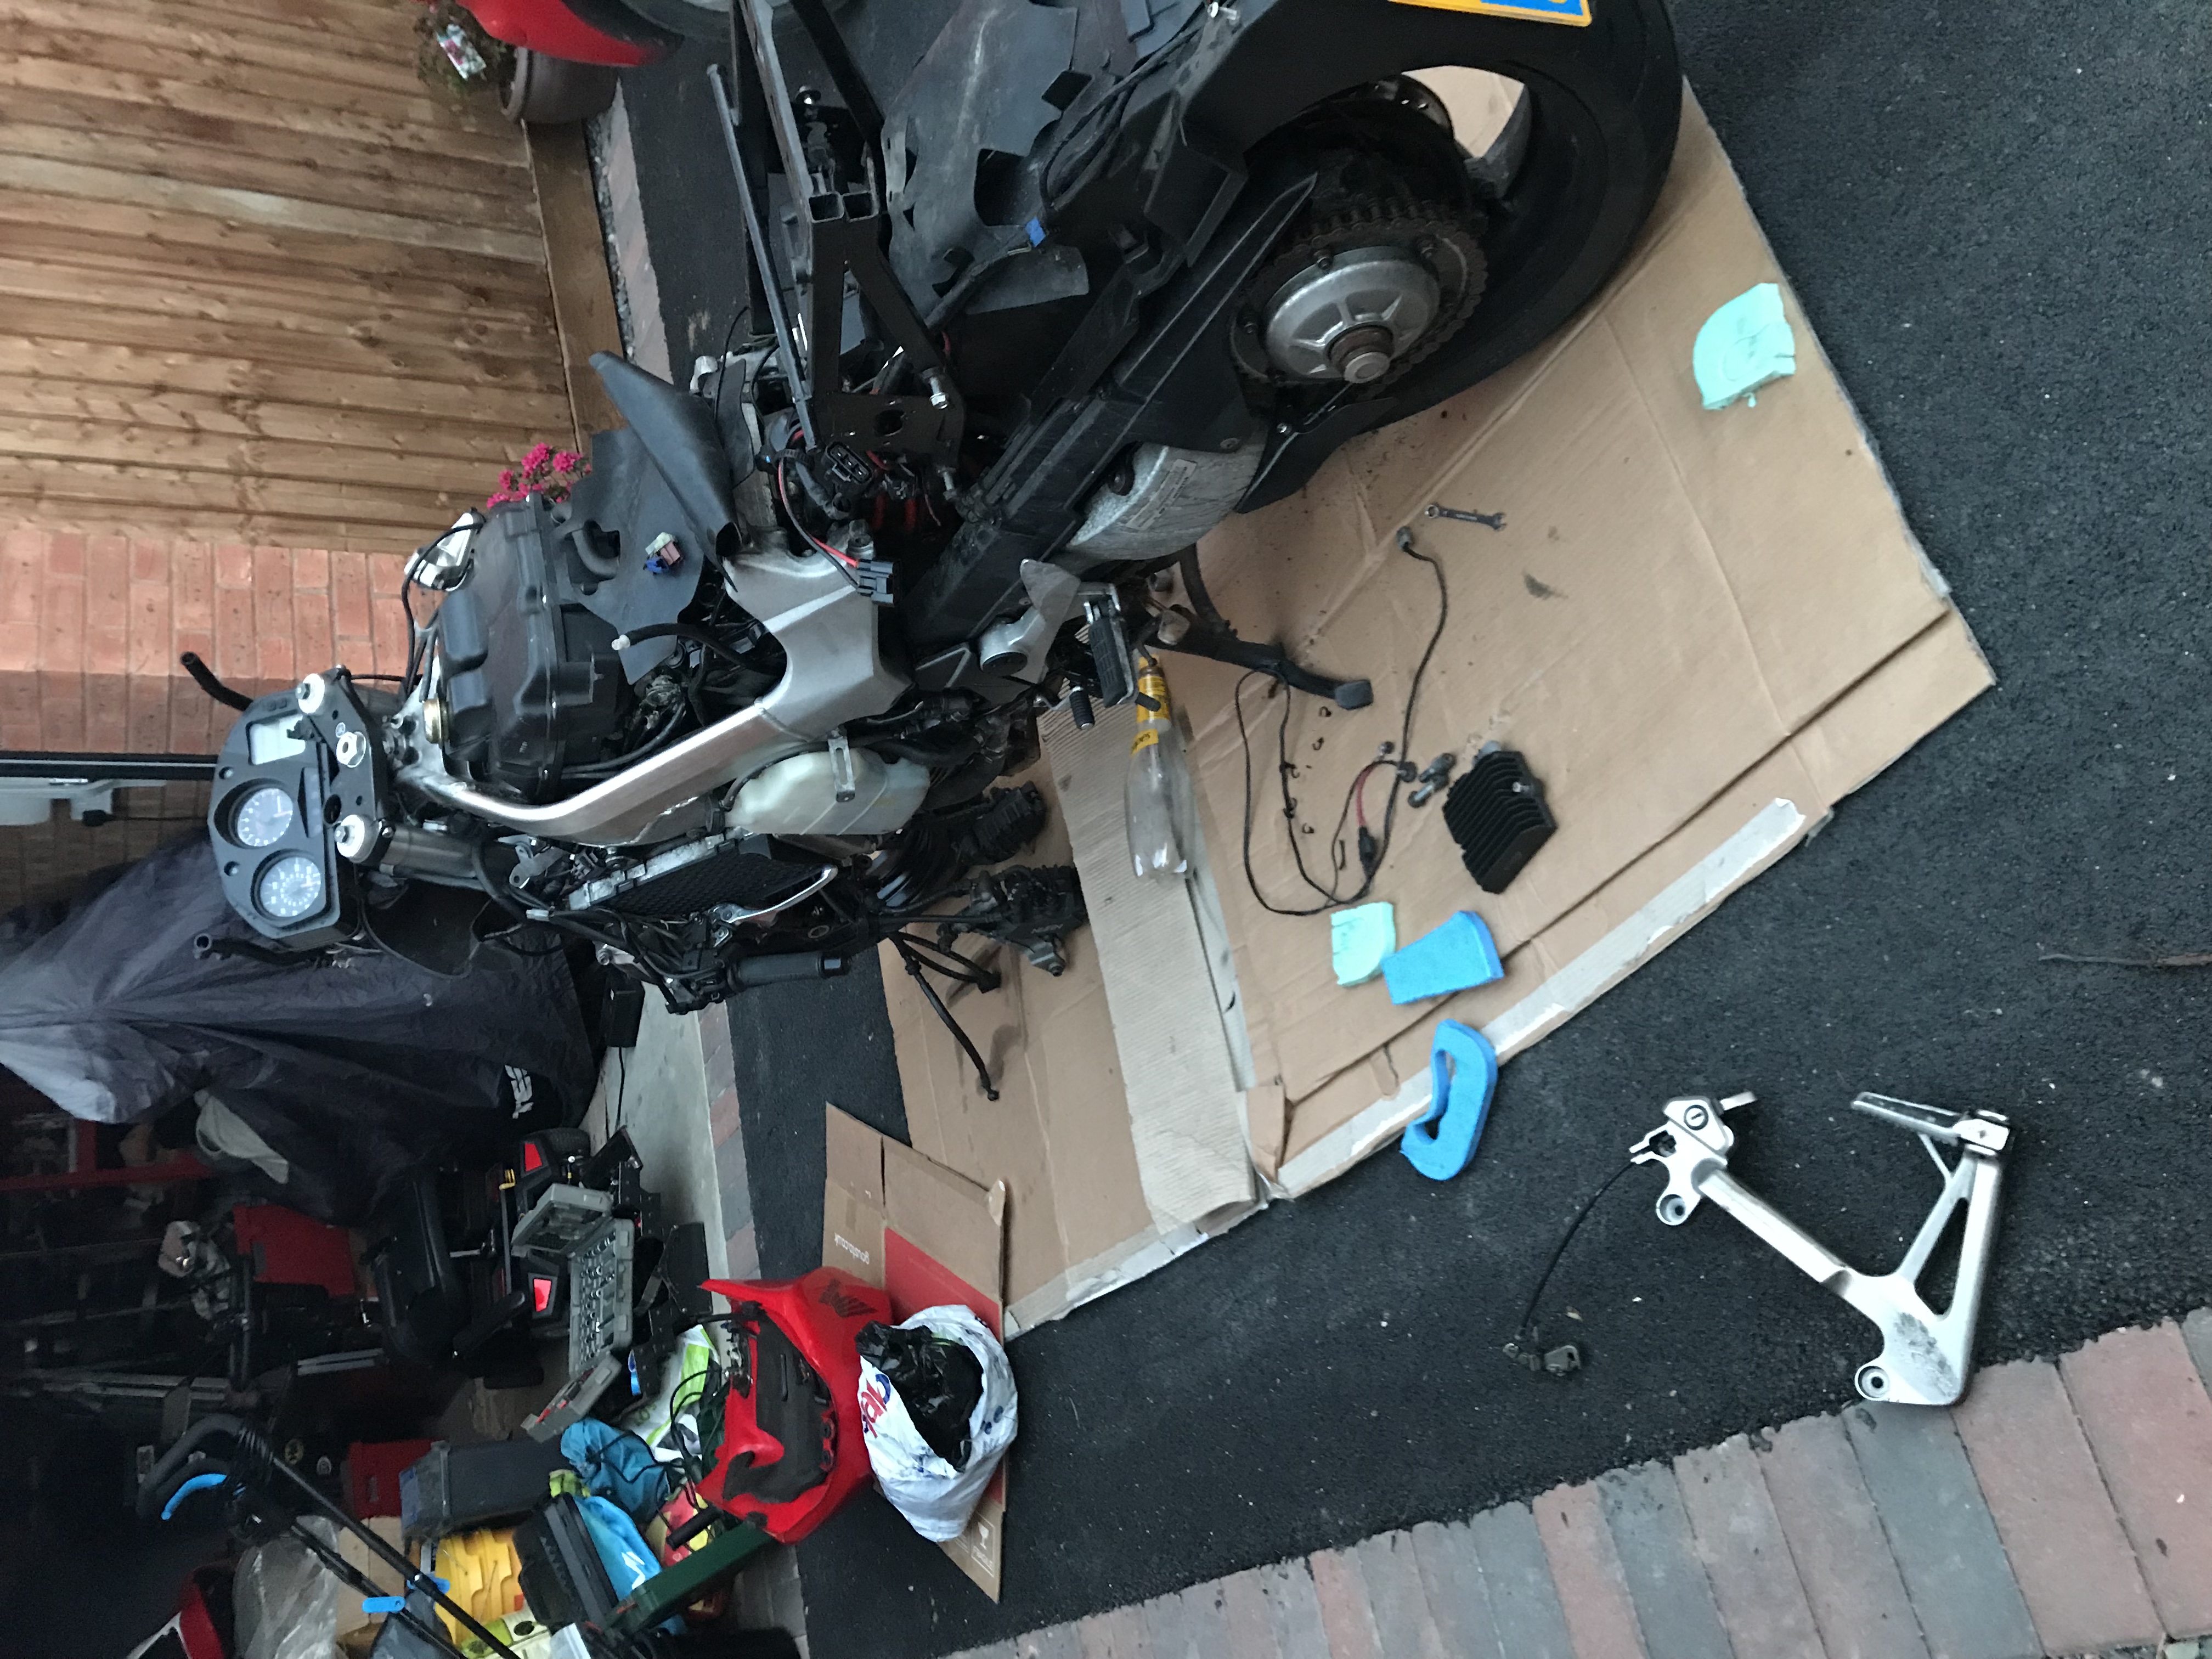
Hello all! So I did this mod a couple years ago and I've absolutely loved it! I originally did it to my first vfr800 which was a silver 2003 non-abs model. I put about 17,000 miles on that bike with about 8,000 - 10,000 of those miles after I did this mod. Unfortunately I was in an accident and the bike got totaled. I skipped between a couple other bikes but eventually bought myself another vfr! My lovely white 2006 abs viffer I currently ride. I swapped the aftermarket rear wheel from my old bike onto the new one right away and I've put 3,000 miles on it since then! If done right this mod works amazingly! I trust my bike any distance on any road, from the city to highway, and even the mountains to the canyons! Rain or shine! When it comes down to performance, I've never noticed any less after the mod was done as compared to stock. With the new rim I went with and the wider tire, the rear wheel for me weighs about 3 pounds or so more than the stock one did, sure That may make an incremental difference to a very experienced track rider but these bikes aren't designed for track only use and they are far from the fastest bikes out there, so to me, the extra weight is well worth the look! And again all that being said I've never noticed any kind of performance loss, I've burned trough my chicken strips with easy and the bike seems to have all of the get up and go that it did before. So I definitely recommend this mod! Before doing this mod I referred to many of the other forums where people have discussed this. And I took a little bit from each of them to get it done. I still recommend reading through all of those as well as this one to get as much of an understanding of it as possible. The biggest problem for most people was finding a good rim that worked well with a motorcycle tire. I don't remember exactly what brands, but there are some brands that you definitely want to avoid and others that are very safe to use. I found that out from reading those other forums and hearing how some people struggled while others did not. This issue comes from the fact that you are using a car rim with a motorcycle tire and they aren't exactly designed for one another. That being said each rim manufacturer varies somewhat from one another so some rim work great while other not at all to mount the tire to. The rim brand I went with is NinjaWheels, and the exact rim I bought was the Ninja NJ11. My tire guy had to use a little extra elbow grease to get that tire on there but it went on without any problems and hasn't caused me a single issue since! Now the rim I bought was a 17"x7" rim with a 40mm offset. This offset was too large to fit center when mounted to the hub. So in order to correct the offset, a spacer was necessary. I took a spacer I already had and had it machined to fit my application. I drew up some specs for it in the picture below. Its a 20mm spacer with the 4x100mm holes drilled for the studs to go through and the center cut out in a way to maintain strength and cut weight. (This particular spacer also had 4x114.3mm holes drilled in it that are unnecessary). It may be worth noting that this 20mm spacer was required since the rim used was a 40mm offset. If you choose a different rim with a different offset, the spacer and stud length will need to be adjusted accordingly. With the VFR, I wanted a good sport touring tire, and with the rim being a 7 inch wide rim, my options were limited. That being said I found an amazing tire (that I've bought again for the rear and the front) which is surprisingly, the Shinko Verge 011. Now yes, you dont got to tell me twice about the general perception of shinko's, I know that alot of them are just trash, BUT NOT THE 011 VERGE!!! Haha Since I was searching for a 200/50r17 tire, the Verge kept popping up as one of the few sport touring tires offered in this size, and after reading countless reviews almost entirely 5 star rating, I was sold enough to give it a shot. Now I've used dunlop Q3's and Pilot Road 4's before and they are both amazing tires, but the Verge is honestly just as good! It's a dual compound tire so it's center offers incredible longevity while the sides are very soft and sticky allowing for excellent cornering in the twisties! Plus it does absolutely amazing in the rain! And on top of all that, you just cannot beat its price point of ~$140! Lastly, since you are using a spacer for the rear rim you will need longer wheel studs to account for that. I went with ARP Extended Wheel Studs. Now I used 12.5*1.5 wheel studs that were 2.5 inches long but I ended up having the cut just a little bit off of the tips so that my lug nuts could secure all the way tight. If you can find 2 inch long wheel studs those would probably work, but for the peace of mind that you have as much threads in there making contact with the lug nuts, you can do what I did and just remove any extra as necessary with a hack saw. Also, With this specific rim, there was not enough space for normal lug nuts to fit so i bought a 4 pack of splined lug nuts with the special splined socket that came with it. These are slimmer in profile and fit into the lugnut holes into the rim perfectly. This may or may not be a problem for you depending if you bought the same brand rim as me. One thing worth noting here is that the rear wheel studs are pressed in and will require you to take the hub (once its removed from the bike) to a shop where they can then use a hydraulic press to press out the old studs and press in the new ones. There are ways to do this at home but with this sort of thing I didn't want to risk messing up anything or damaging my hub, so I had a friend at a shop do it for me. After all of that the final thing you need is to slightly modify you chain guard by cutting off on small part of it so it will not rub on your rear wheel. The wheel will have about 1/4 inch of clearance between it and your swing arm when its all done and tight. The slight modification done to the chain guard can be seen in the picture below. Summary List of Parts Used: Ninja NJ11 Rim, 17"x7" size, 40mm Offset, 4*100mm bolt pattern 200/50r17 rear tire, Shinko Verge 011 Custom made, 20mm thick, aluminum wheel spacer (as seen in pictures above) Extend ARP Wheel Studs, 12.5*1.5, 2.5 inches long (with some of the tip of the bolts removed for secure fit) Slight modification to the chain guard (to eliminate any wheel rubbing) The exact process of doing this mod consists of: 1) With the bike on its center stand and in first gear (and possibly with the help of a friend holding the rear brake) brake loose the large hub nut on the left hand side of the swing arm 2) Remove the rear wheel and real break caliper 3) Remove the large hub nut on the left hand side of the bike 4) Loosen the chain bolt and then put all of the slack in the chain 5) Pull the chain off of the rear sprocket and let it hang down onto the ground 6) Pull off the left hand side of the rear hub assembly (the big bowl like piece the sprocket is bolted to) 7) Slide out the rear axle/hub out the right side of the swing arm 😎 Replace the wheel studs as described above 9) Reassemble in reverse order of the steps described above with the new wheel And here's Just a bunch of pics of the bike with the wheel! Please wheel free to ask any questions or comment below!
- 15 replies
-
- 1
-

-
- aftermarket
- custom
- (and 8 more)
-
Hello All, Just done a brake delink and removal on my 5th gen and it was a real b@llache. Had to unbolt and reposition rear subframe to get the mid section proportioning valve out. All I wanted to do is adjust the gear lever but then... I was thinking to trial fit the CBR600 F4 subframe while everything is apart but can’t quite figure out how to remove the old subframe. It seems stuck on bits of undertray and electrics. Hoping to reuse use the battery tray/undertray so don’t want to butcher it. Any tips from those who have removed their OE 5th gen subframes? Thanks in advance, Stray
-
I love my 8th gen but I want to personalize it. I want to make it my own. And I want to change its performance and cosmetics. I’ve heard of swapping the forks to lower the front, swapping the tail of a cbr onto it, and knowing the right mechanic that can whip up a turbo for it. I’m also wondering if anyone’s ever swapped fairings from a different bike. Overall I still want it to be my interceptor at heart. I’ll also do the basics like power commander, flapper/pair mod and quick shift. I love the handling, the performance and the comfort. I’ve read a lot about weight reduction but have determined instead of shaving off 10 lbs I may as well try and increase the power of the bike and lose 50 lbs of my body fat. Anyone drop any suggestions for me on what’s possible?
-
Hi everyone. I have been contemplating getting my exhaust shields powder coated black to match the rest of my bikes powder coated items. Such as my rearsets, swingarm, head cover, bars, levers, clamp, etc. Has anyone ever done this before and would the heat from the exhaust effect the powder coat at all. Thanks for looking. In my opnion the guards being black would completely change the look of the bike.
-
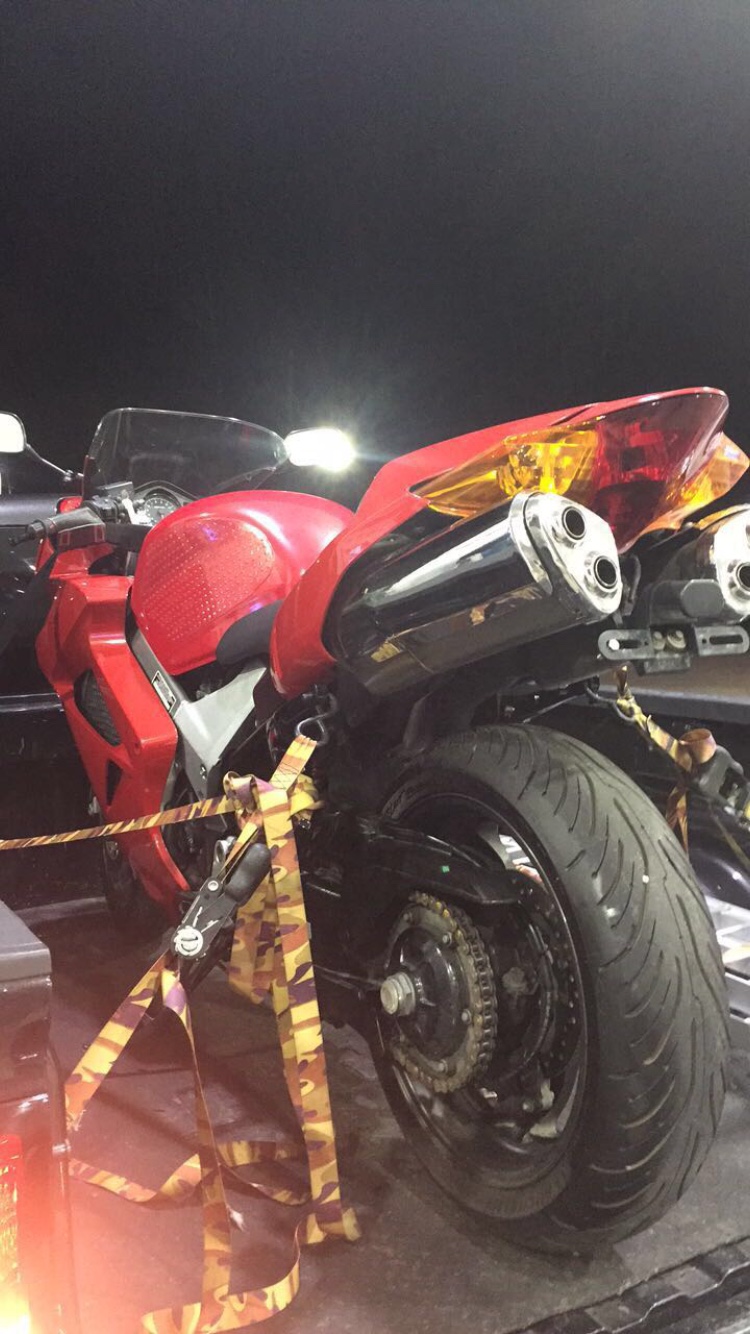
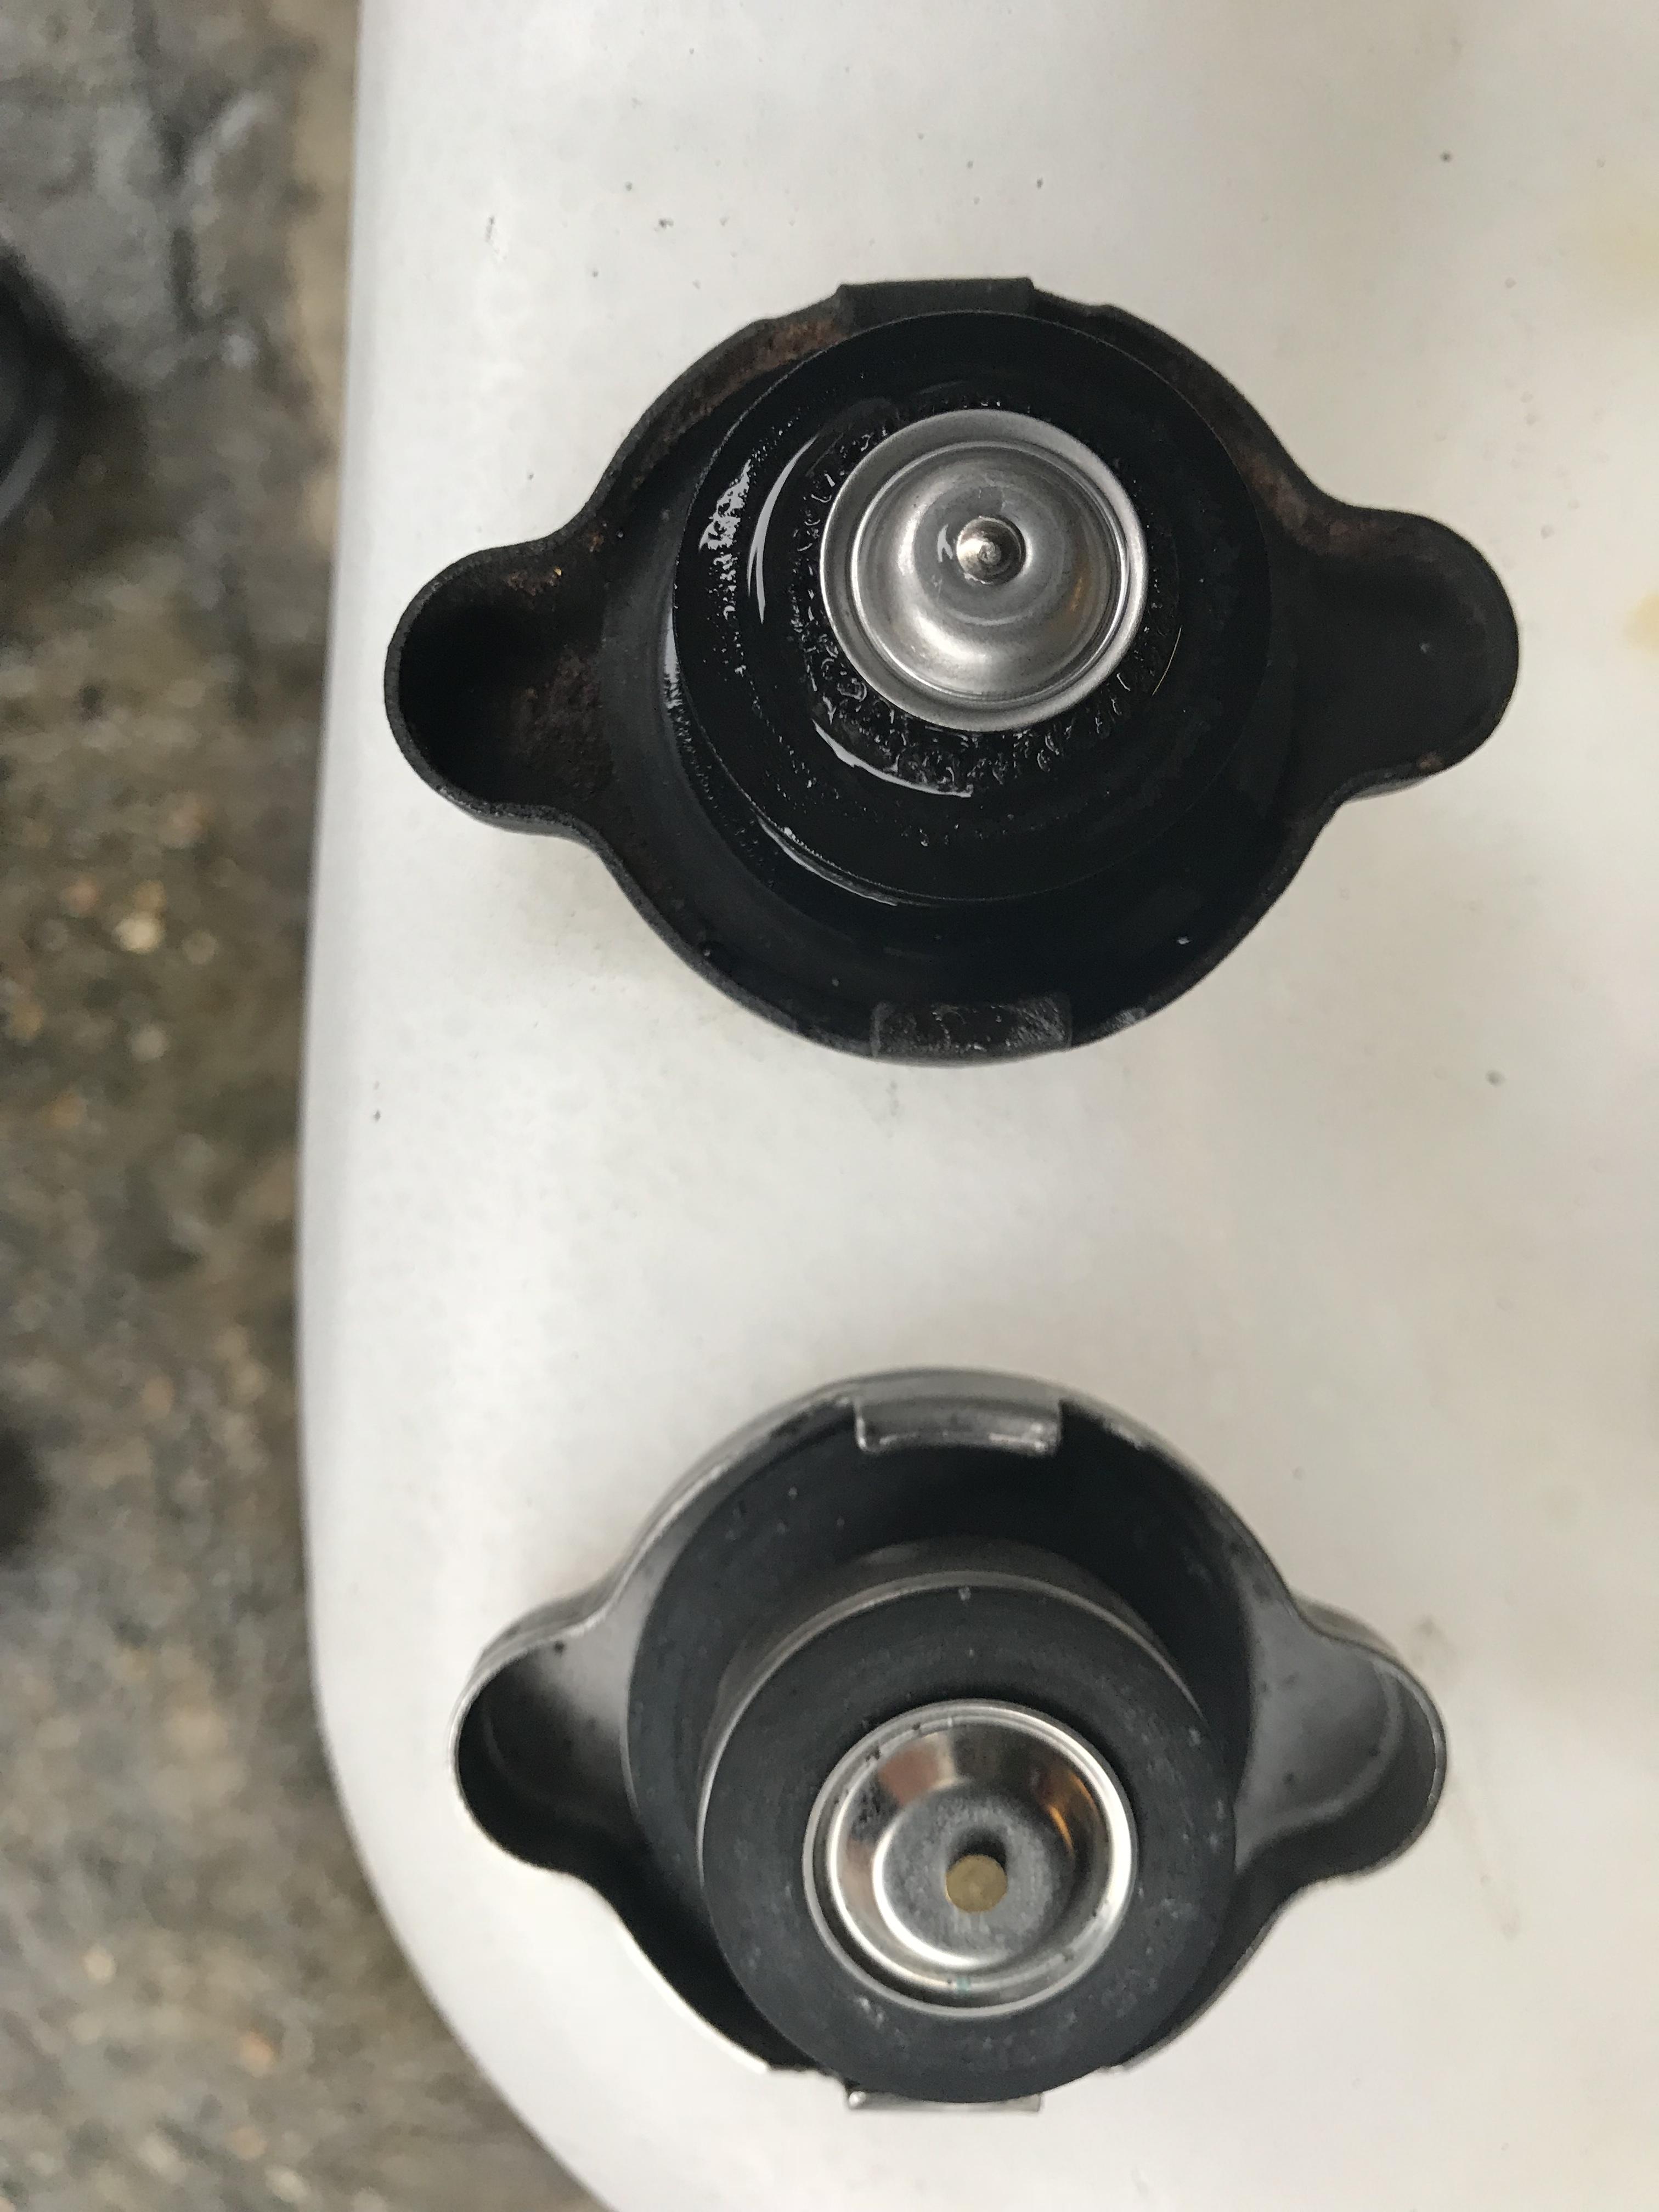
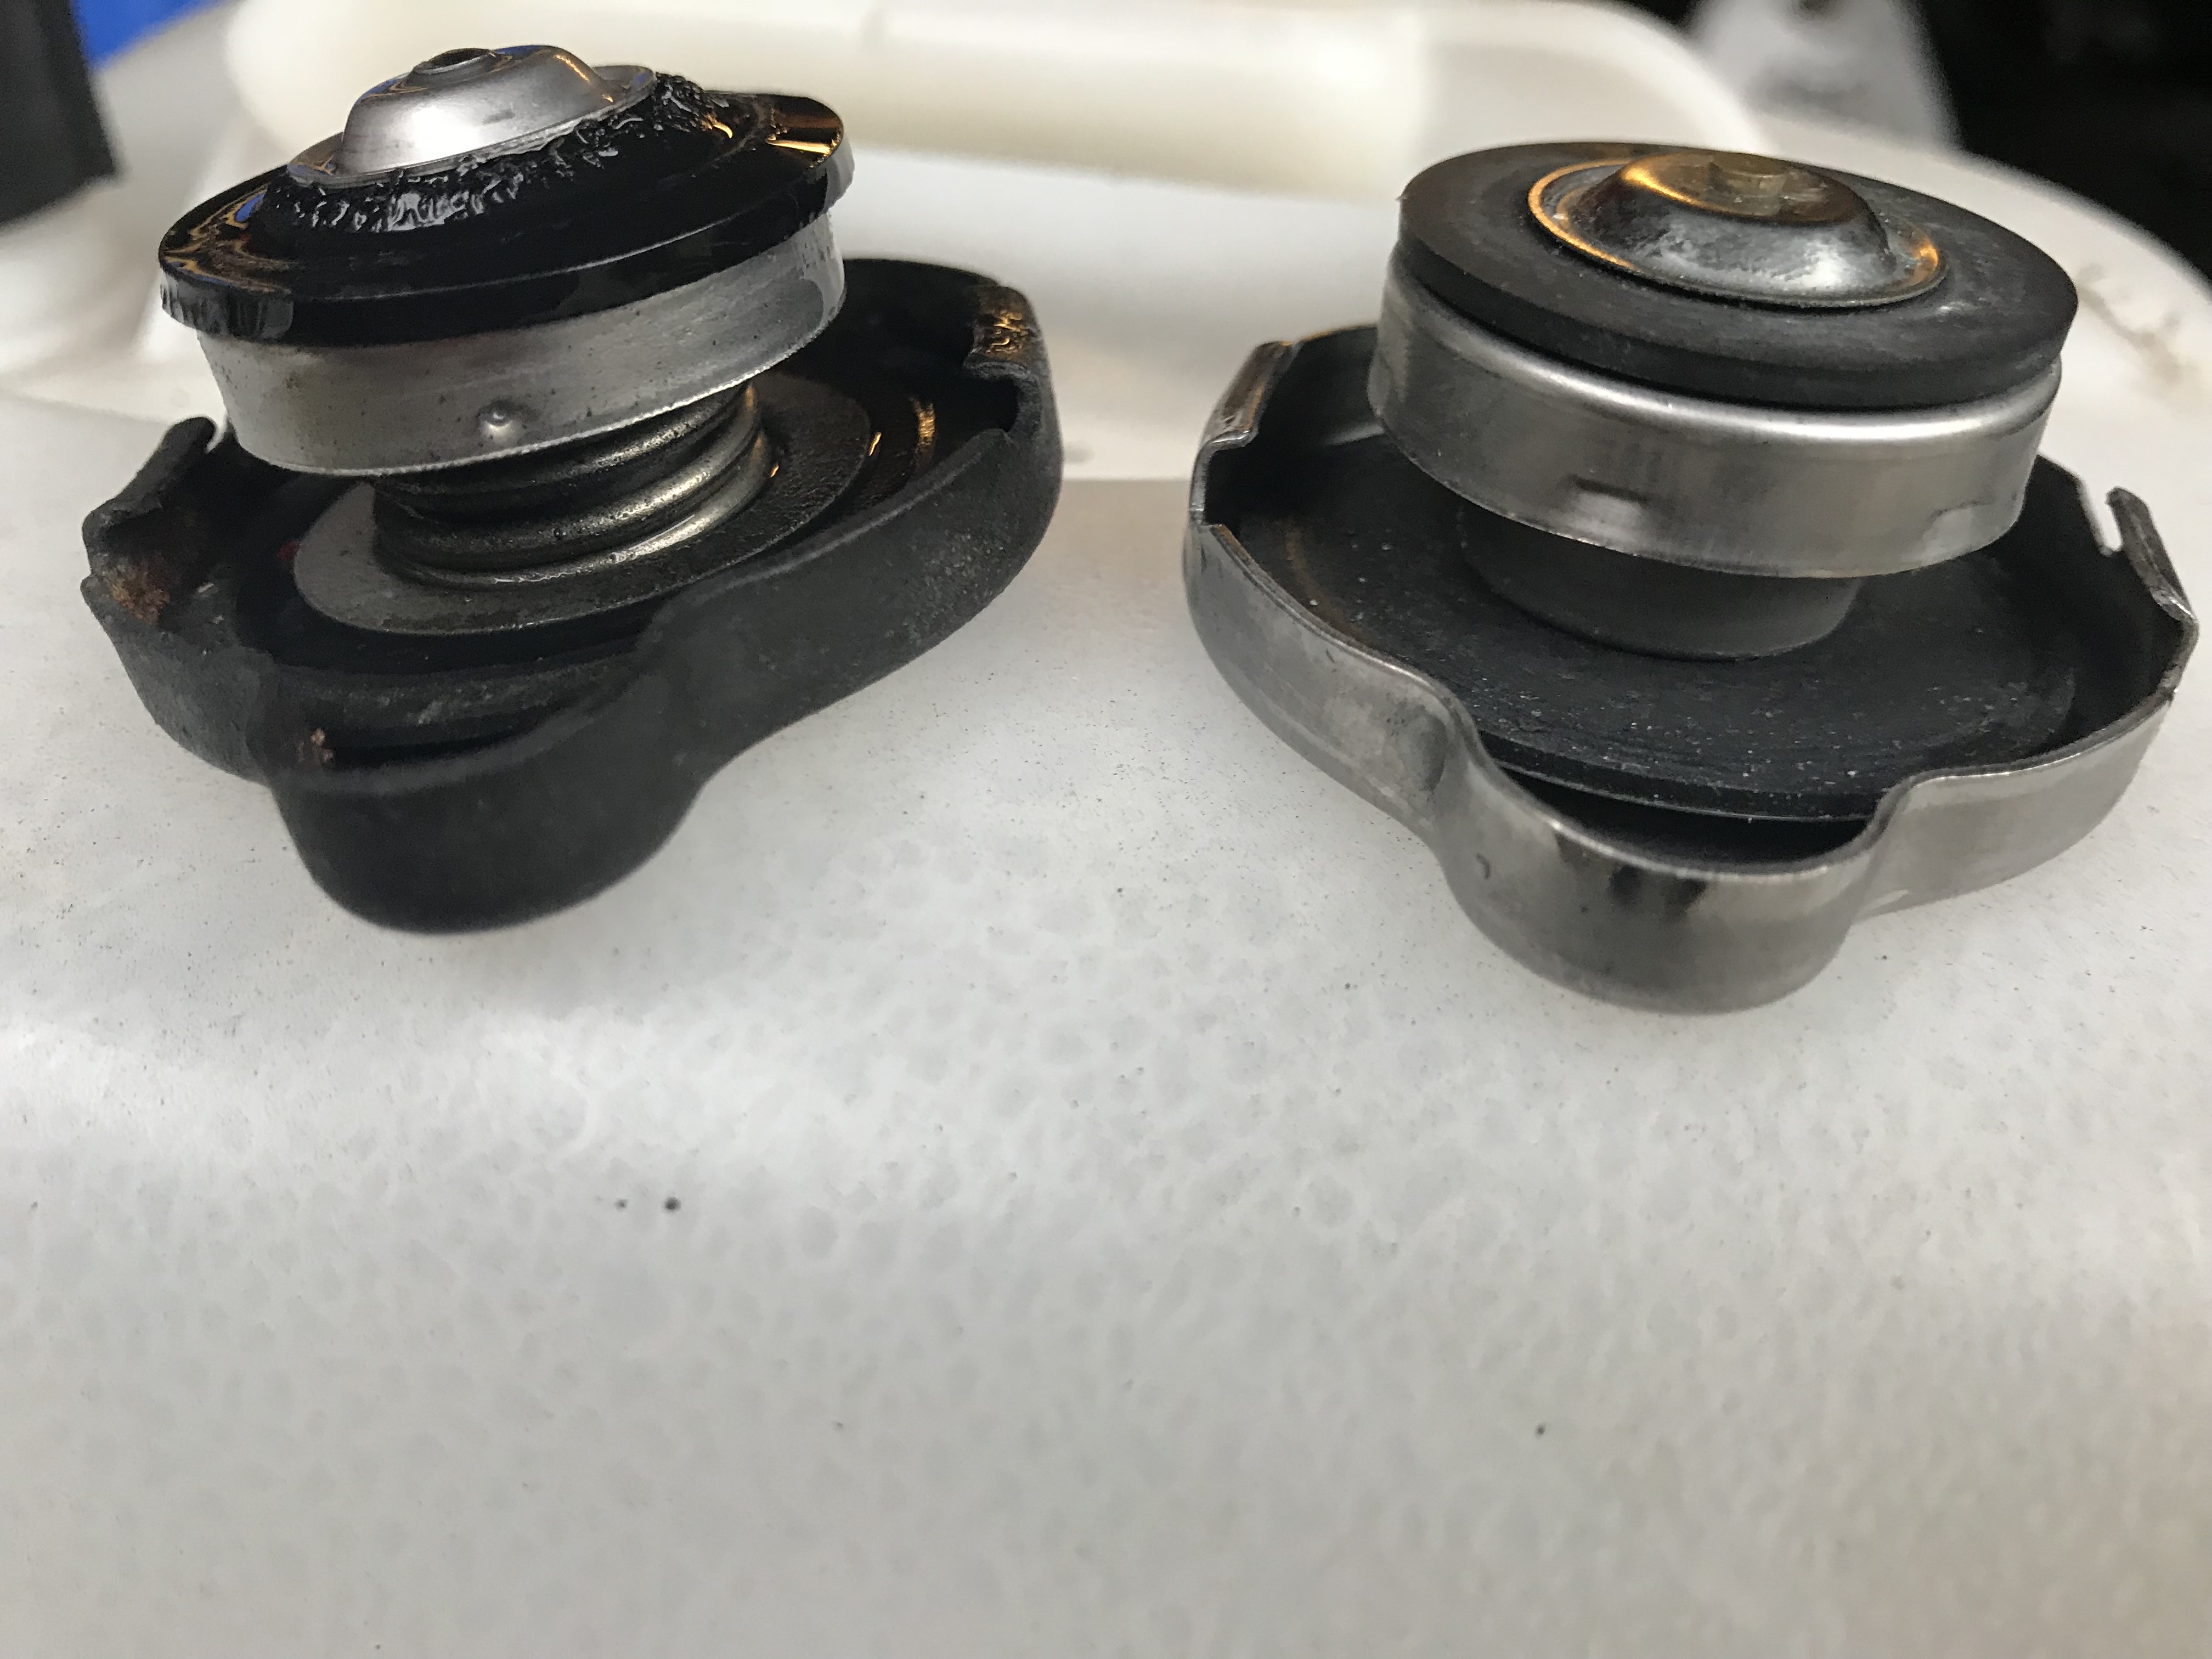
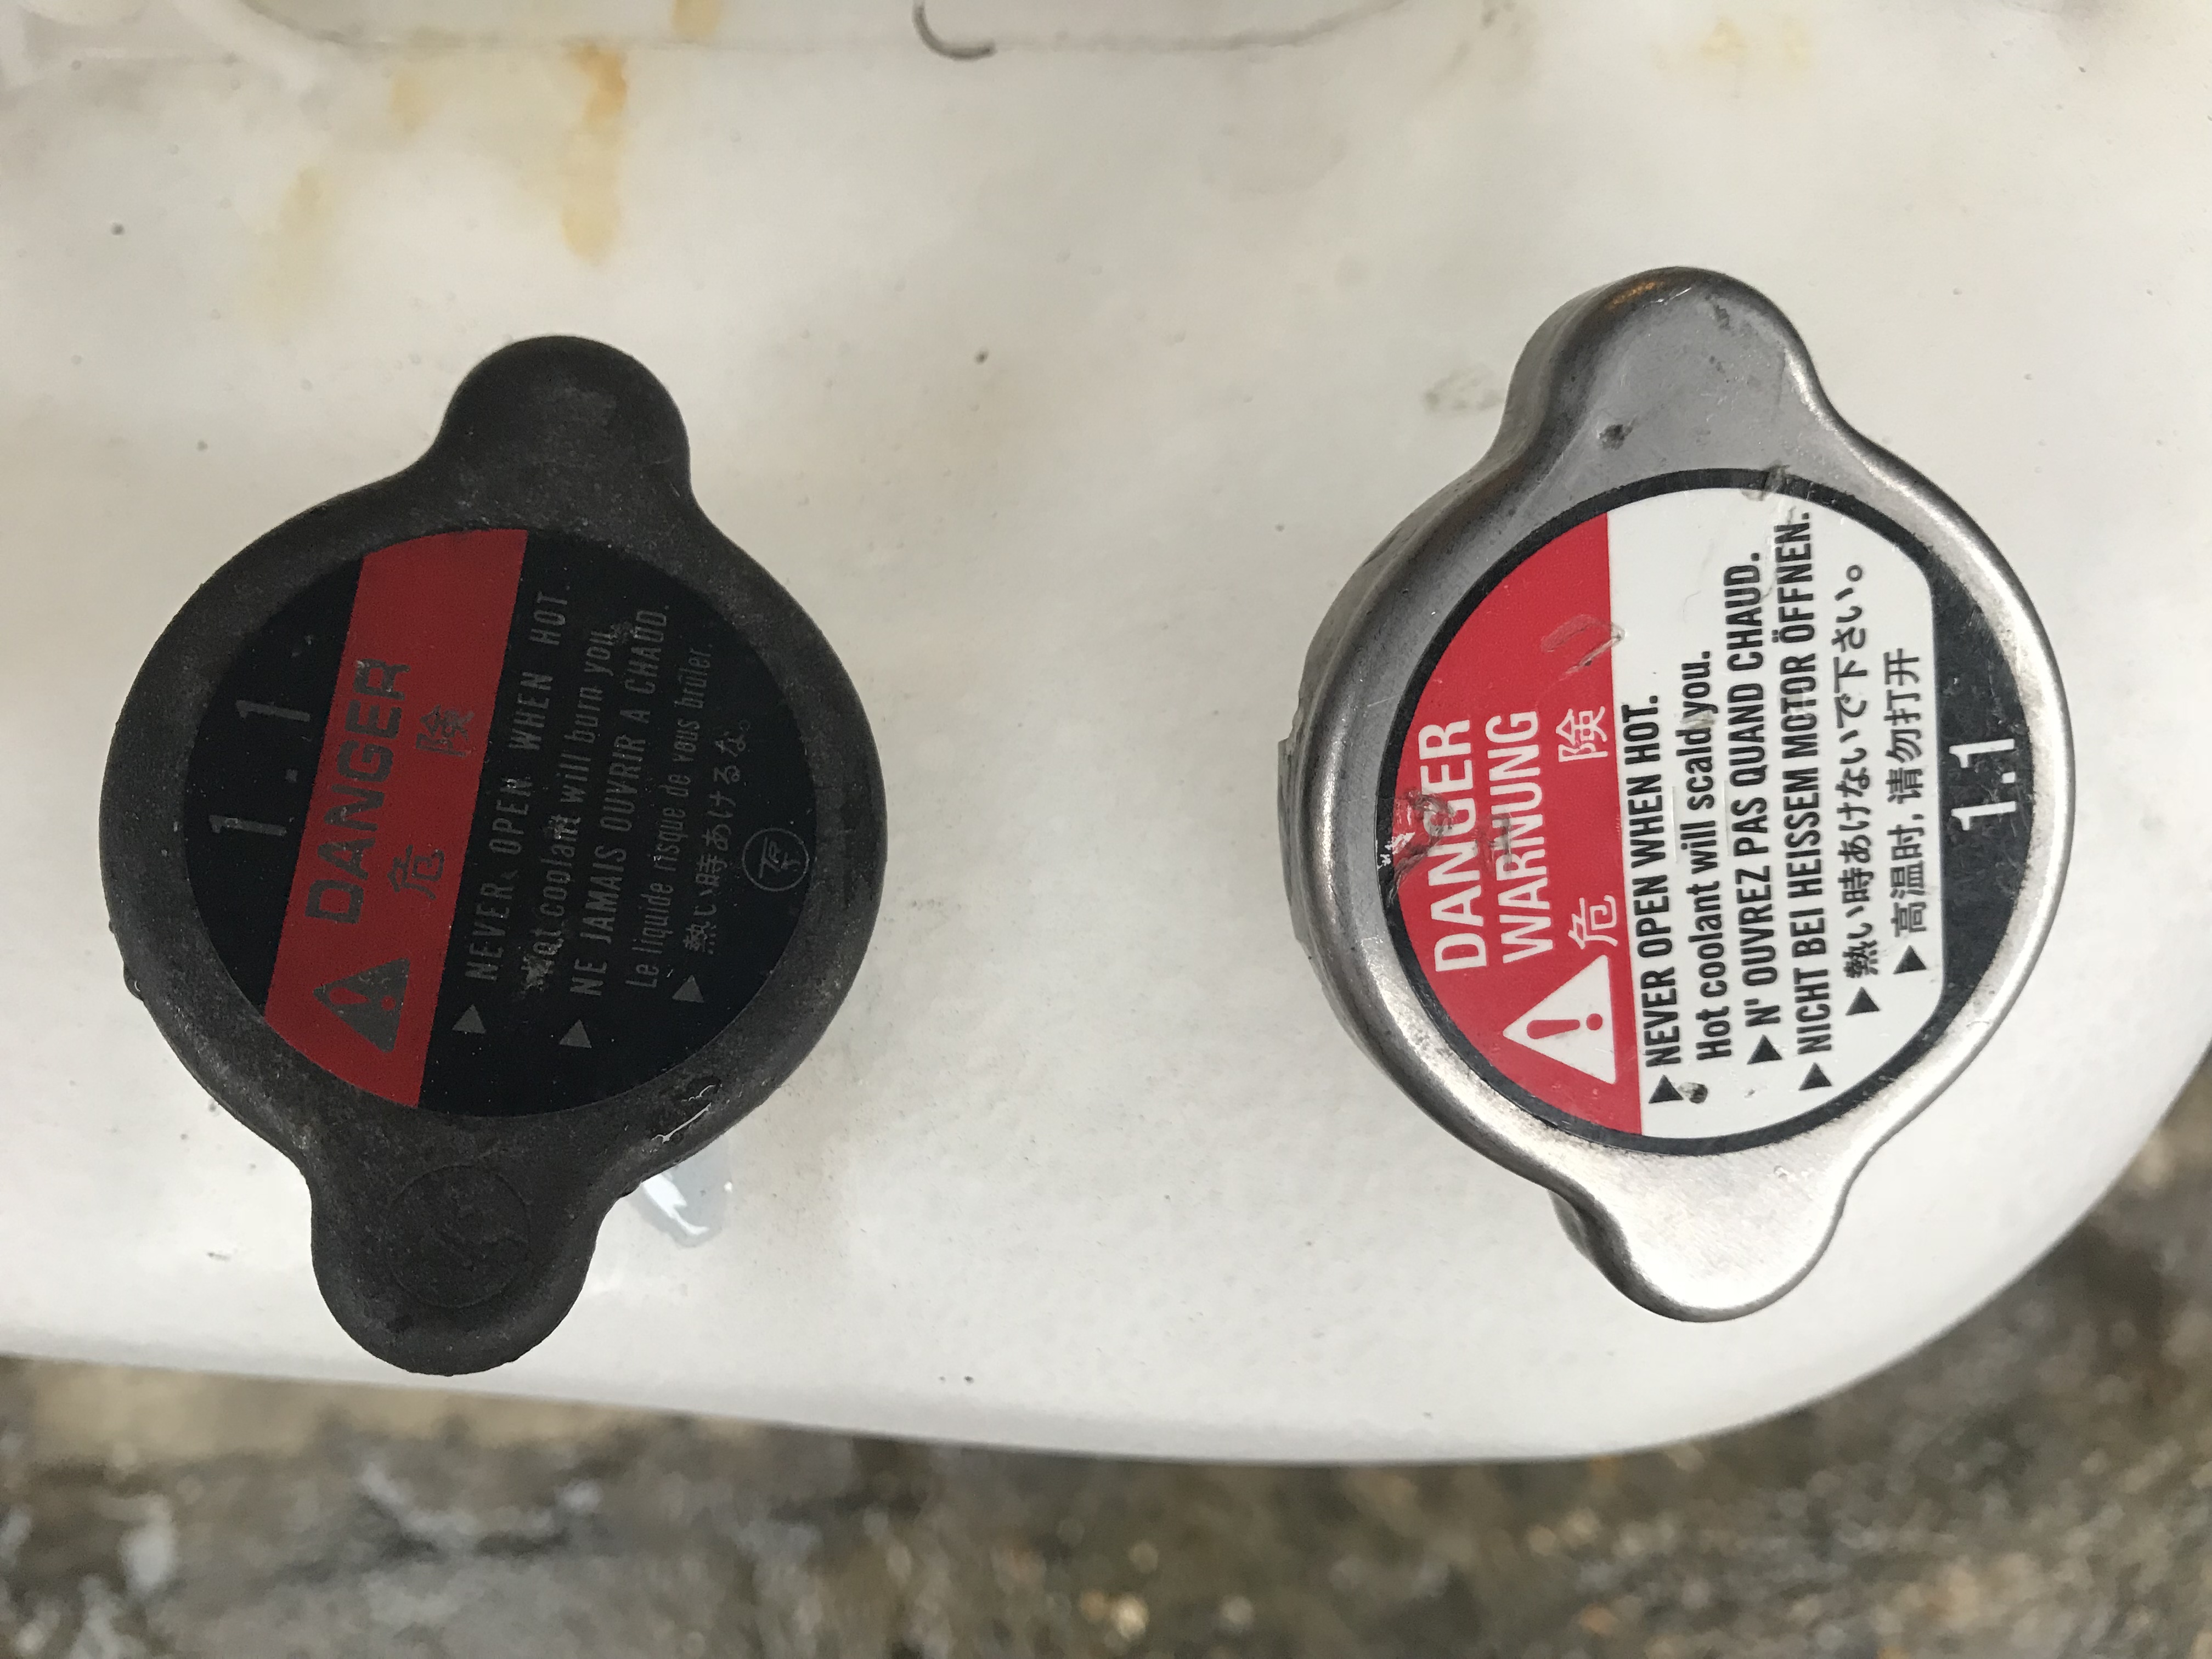
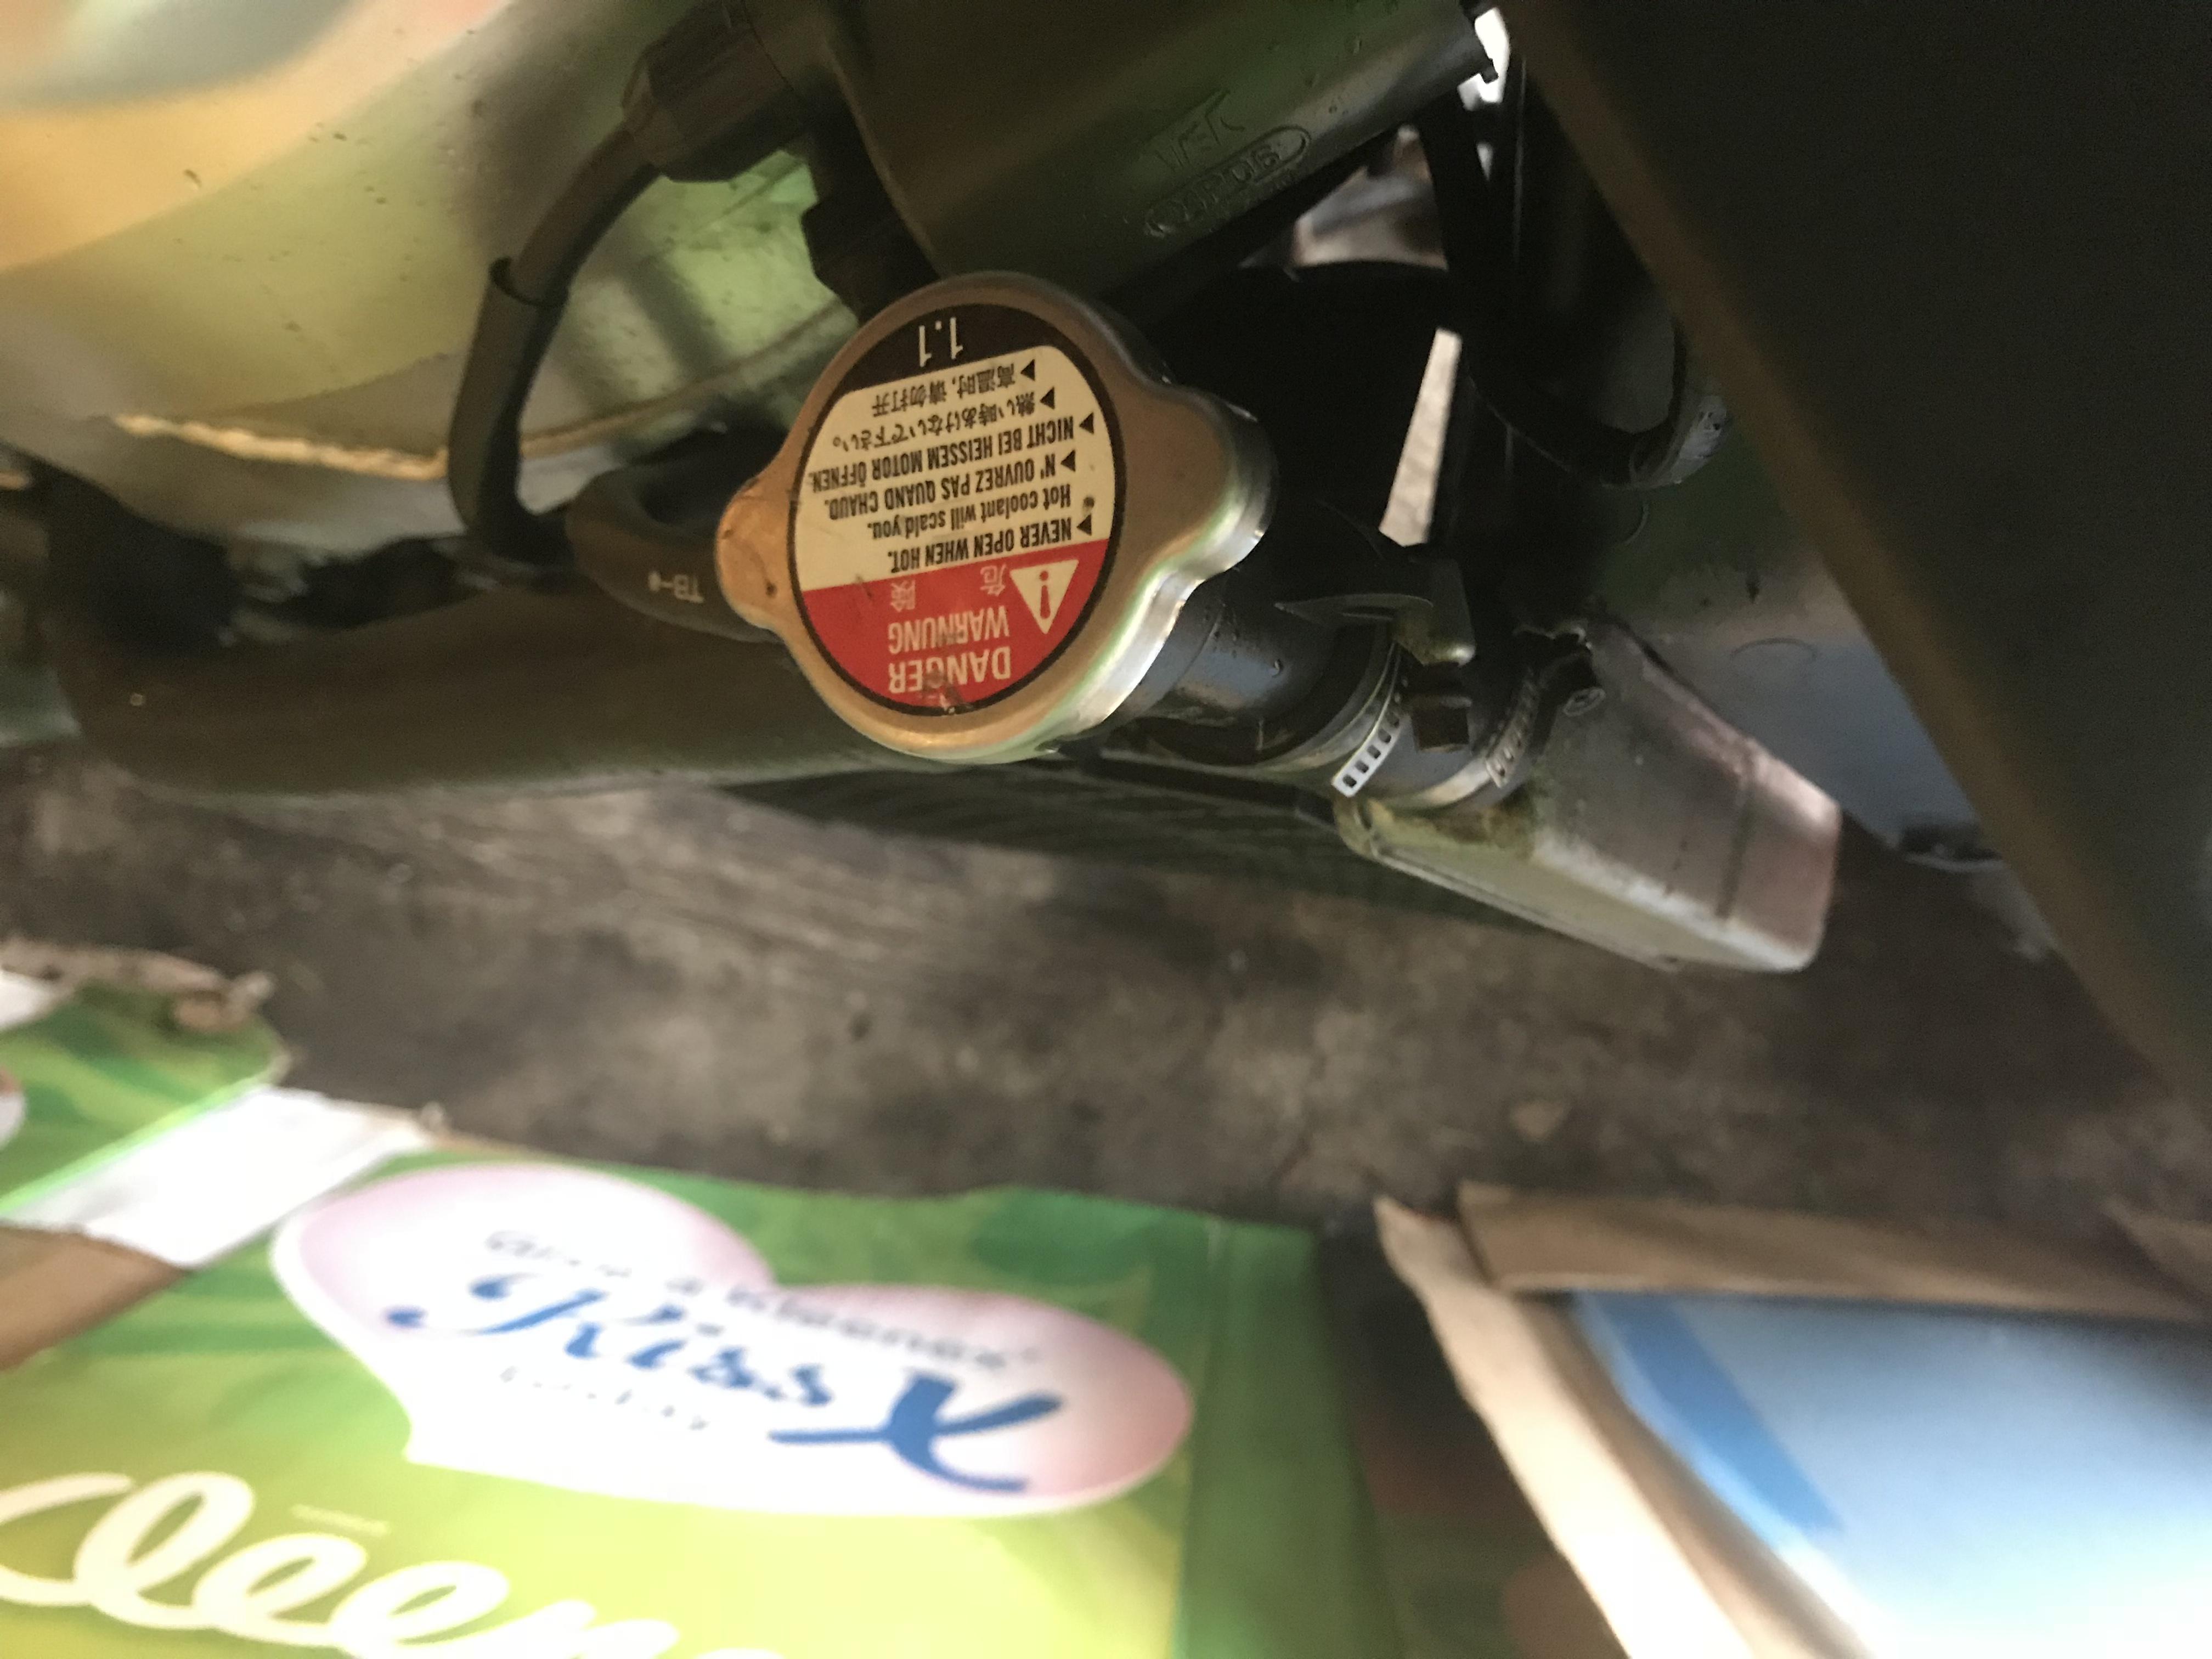
Hello All, I bought a VTR pusher fan to replace the puller fan on my 5th gen (thanks to this forum!). The seller had a 2011 Yamaha R1 BIG BANG coolant cap on the shelf so I grabbed it for £5, just for a laugh. Well, it fits the 5th Gen (and probably other models too)! Here are a few side-by-side pics. R1 cap is brighter and VFR cap is darker And here is the R1 cap fitted. I’m guessing this has to be worth about 15HP at least? Maybe more with a Power Commander? At least my 20 year old filler cap has been replaced with something much newer. Pressure settings are the same (1:1 on both labels) but R1 spring and rubber seal are fresher. Now I'm off to win a few GPs... Stray
-
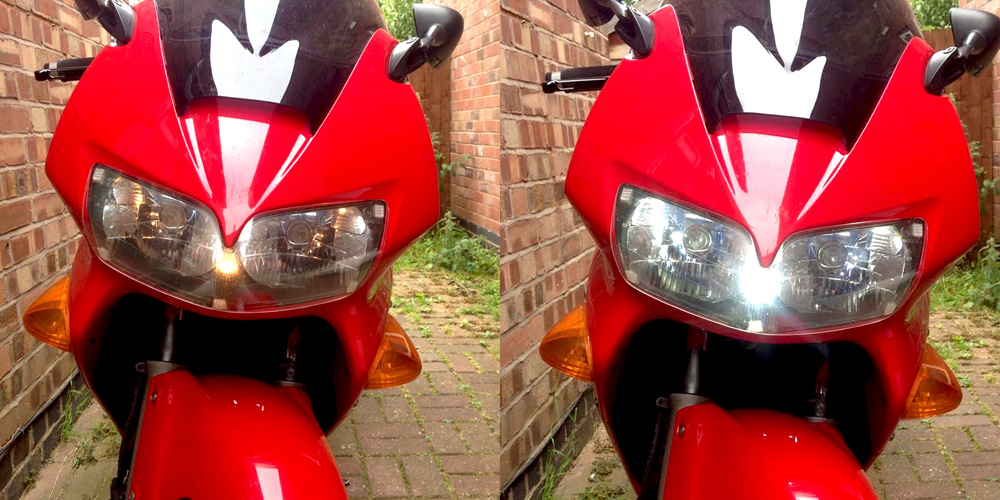
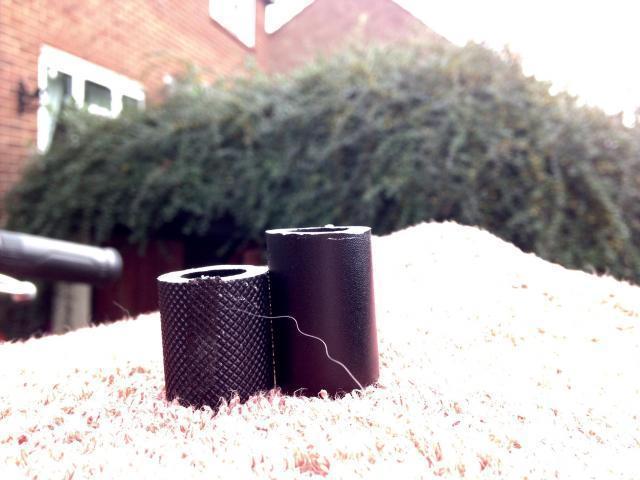
 Got myself one of these from good old ebay. The idea was to turn the parking light in to a daytime running light, and maybe a more effective parking light for the same power draw. Not that i've ever needed the parking light... (required in the UK when parking on a road with a speed limit of 40mph or more, but i'd just park off the road). I also bought one of this type of LED to try. Couldn't really get it back in to the headlight without dislodging it from the housing, and i had concerns about the top mounted LED causing heat problems as it'd be less than 5mm from a plastic part directly above the bulb. Next up: Brake light LEDs.
-
I measured the sound level with dB killer in using my iPhone app and at idle right behind the rear tire it is right around 85-86 dBs. With the dB killer out it is at 95-96 dBs. A whopping 9-10 dBs louder which is quite a lot for sound levels. So I took the dB killer and cut 1 inch off the length of the tube. Results are: a lower tone which is what I am after and now getting 88-89 dBs which is not too loud but sounds better. I will ride like this for a while and decide if I want to shorten it any more. what have others done to their Akra?
-
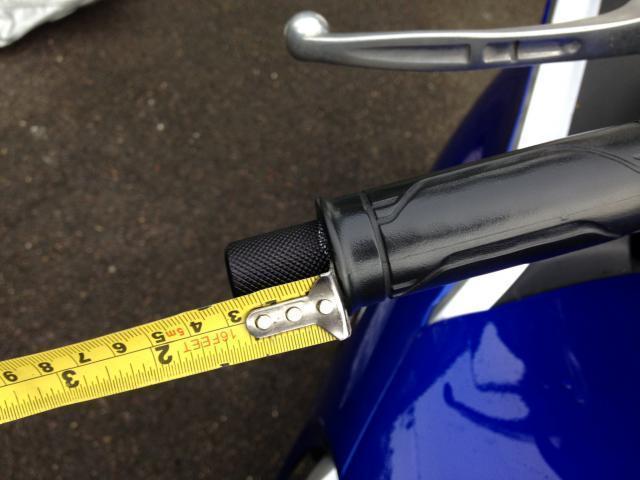
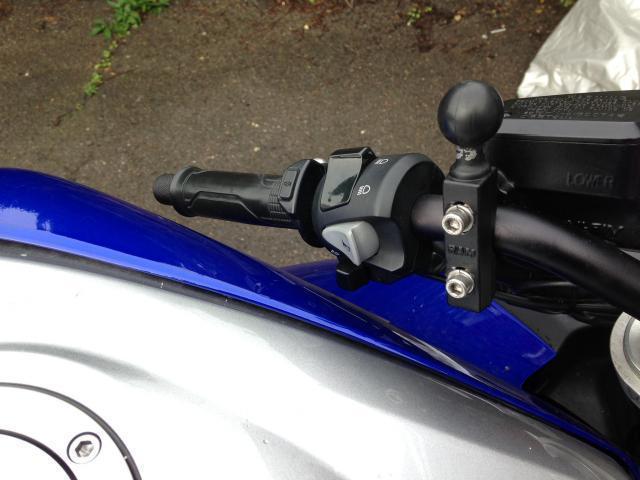
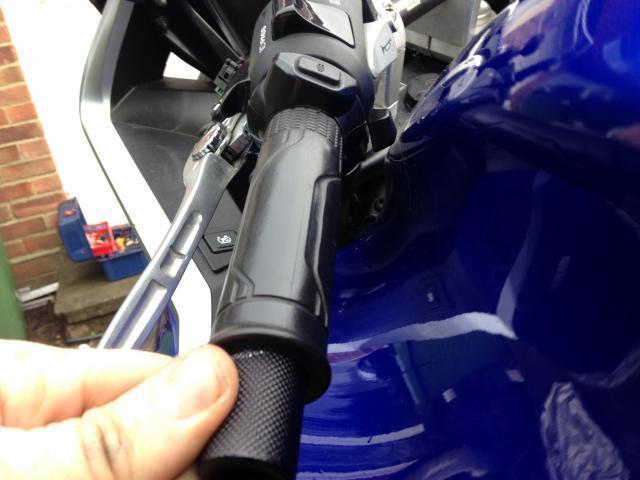
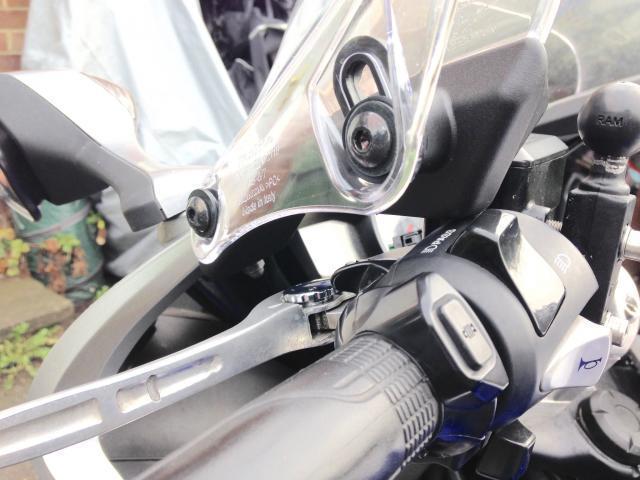
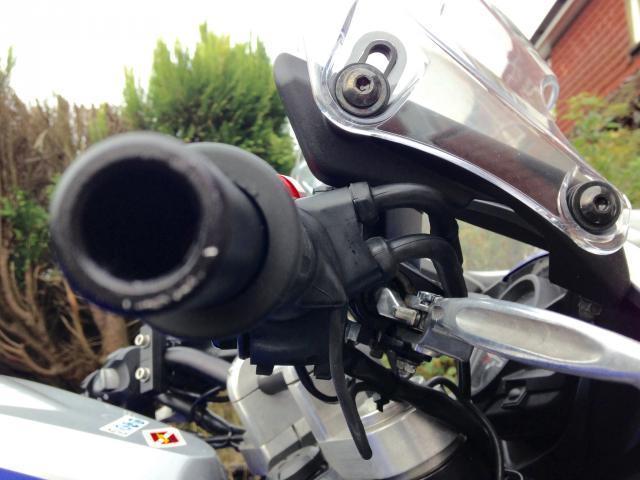
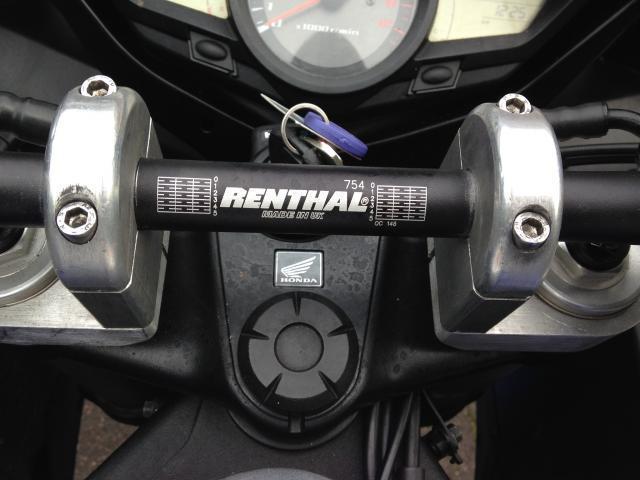
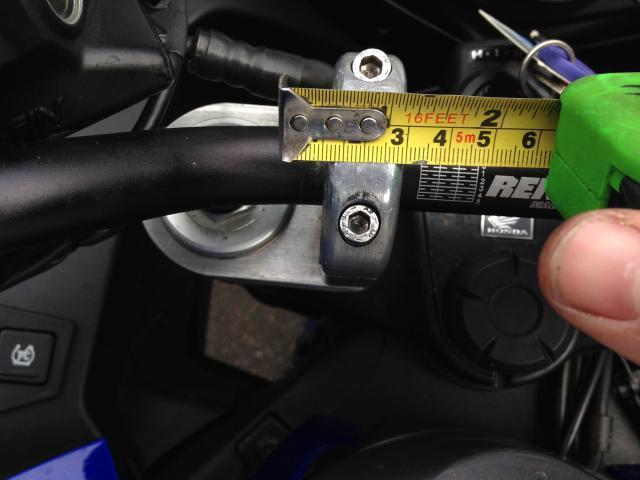
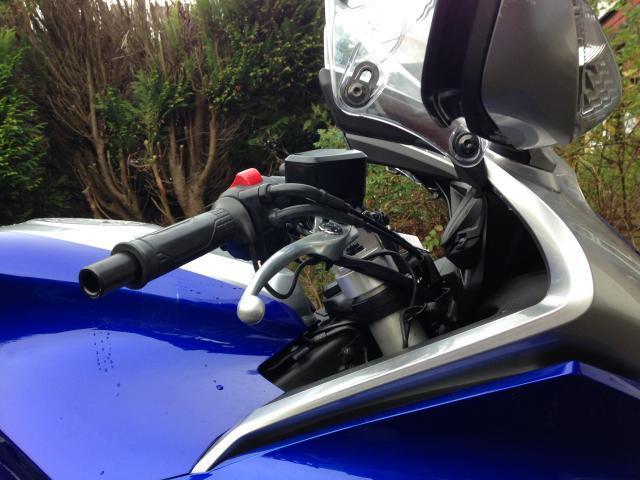
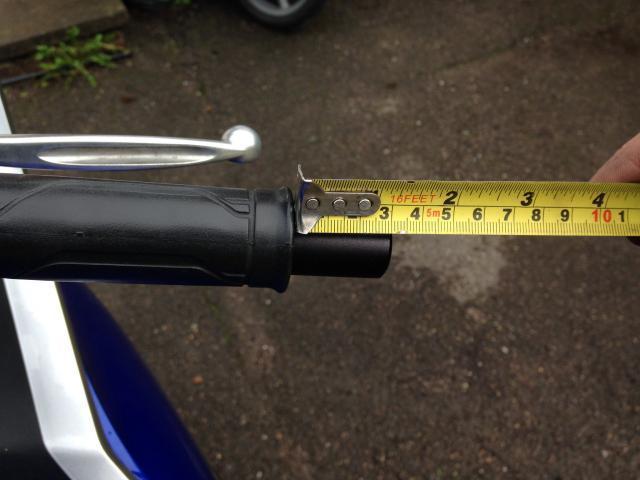
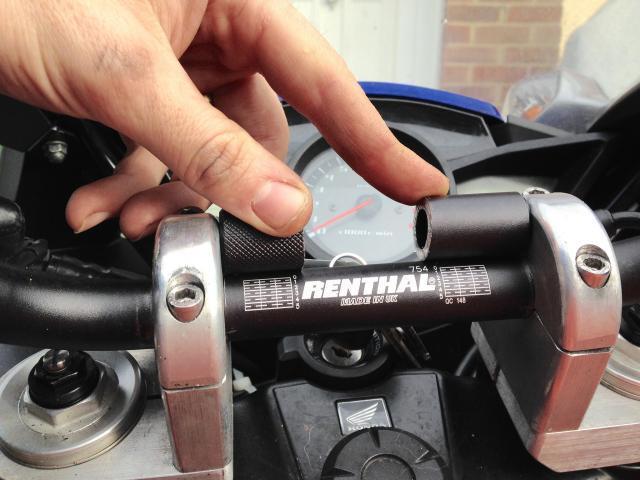
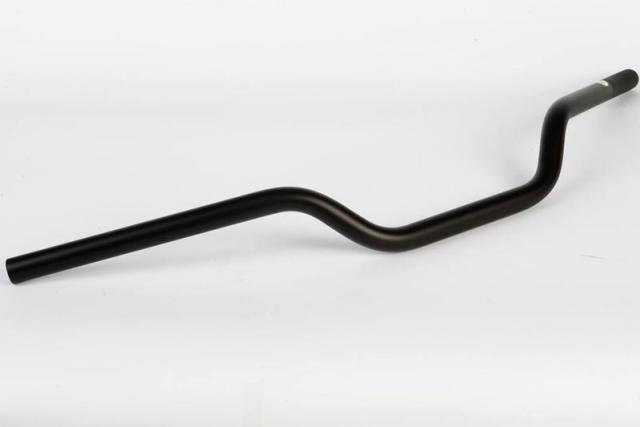
Hello VFR Discussions, This is my first post here, long time VFR Owner - I started with a 1999 yellow 800FI about 5 years ago and still have it, but it's now 'resting' while my 2012 VFR 1200f takes me around. I've found the bike to be (nearly) all that I hoped once I made a few important modifications: 1. The exhaust flap now stays open (cable removed), now it sounds like a motorbike. 2. Most importantly the changing of the standard bars to a set of handlebars. Still to come is the Z-bomb and maybe some R&G protection. Onto the Mod: The Handlebar conversion was pretty easy once you get down to it. First a warning: I’m not a mechanic and you’re taking your life in your hands here, I don’t take any responsibility for your actions or mistakes in this procedure. It’s just a note of what I did. – disclaimed! I didn’t buy any fancy new top-yoke or a kit. I picked up a used set of street-fighter raisers which clip onto my forks. I paid about £15 for them delivered #bargain. You can buy them new from ebay for about £70 search for “handlebar clamp raisers” your local shop may have some in stock M&P in the UK have them at this time. The set I got were reportedly 50mm (could be wrong) inside diameter which is the outside diameter of the fork but they’re a little tight, needing a bit of spreading with a screwdriver to move them. You may want to try a 51mm. Perhaps when someone tries this with a new 50mm set they can confirm. The bars I used in the end were a set of Renthal Road Low, you can pick these up for about £30 #bargain! I first tried a set of Renthal Road Highs but they didn’t work – mostly because the control part of the bar was too short and caused impact with the screen / fairing. Bar-ends, if you want bar-ends that look right for the diameter of your grips take a look at R&G – try searching “Renthal road R&G bar ends” they come with a bit you change if you scratch them. So there’s your shopping list in full (notice no brake pipes): Renthal Road Low bar £30 Handlebar Clamp Raisers 50mm (though 51mm may be better) £70 R&G bar ends for Renthal Road Bars, 14mm diameter plug. £25 (you could go without these) That’s all you’ll need for hardware, you may want to get some new crush washers for your brake and clutch – that’s your call. How to do it (roughly): put a nice big towel or something over your tank so you don’t damage that nice paintwork Getting your left grip off may be a PITA, I ran the bike put the heated grip on, blasted it was a hairdryer, squirted WD40 up there then gave it a wiggle. It came off easier than I thought. Take your switch gear off (remember the clutch and brake sensors – 2 each), take the brake and clutch off, slide off the old bars from the tubes and put them on ebay – you’ll not want those anymore! Put your new Clamps on, I found that if you put the retaining clips on the forks (over the clamps) and slid the clamps up to them you’re about right. Put the heated grips / Throttle on now if you have them before attaching the bar and see if you can free up any extra cable for the switch gear, brake pipe. Clutch etc. Now set the bars off about 5mm to the left (as you low forward on the bike), use the Renthal graphic as a guide, it’s not ideal but you’ll not notice it. You’ll space out the components on the bar to make up for it. Bar offset to left Bar offset on right side Bar offset on left side 7.You’ll have to choose a compromise between height, and lean back. Your brake and clutch cylinder will go inside the screen when turning the bars, you’ll be restricted by the top fairing, the tank and mostly the brake pipe. When you get it right your brake will line up ok with the bars, if it’s wrong your brake will be a bit wonky to the bar. This will take some time. I’ve managed to get mine so the starter and the indicator don’t foul the tank on full lock but it’s very close. Brake lever lines up Fairing clearance left Right fairing clearance Clearance of the indicator 8. Notice in my photos that the grips are away from the levers and there’s a space between the switches and levers too, is because you’re mostly restricted by those brake and clutch pipes and spreading them out was better for me. 9. Your brake and clutch lines are going to be a little taught at full lock, do what you can, you could always drop the clamps down the forks if you’re worried. You may get a few MM by losing the pipes off the master cylinder and re-orientating them. You may need to bleed your brakes if you do that – I’d recommend you do for safety sake, you should probably change the crush washers too. This is your ass so do it right.You cannot just replace the Honda brake line it goes to a weird connector, you’d have to make something special for this. 10. Don’t forget to glue your left grip back on – Super glue works well, do this before you put the levers on and switch gear properly so you can put the glue down and slide the grip back over it. 11. Once you’re set, clamp everything down (really clamp down the raisers – they need a good amount of torque) and ride around for a week or so. When you’re happy with it get the hack saw out – again with a big towel over the bike and cut down the rest of the bars, perhaps file off a bit too for a neat end. You may find there’s a bit more of a gap on the bar end because you’ve (Carefully) cut close to the grip. If you know someone with a lathe you could get it turned down on the bar but it’s no biggie. 12. Make sure your throttle returns to closed without any problems Comments and questions welcome. Sorry to the companies who make these kits for £300 but you don’t need that. Also Renthal are cool right – and British! Ant.
-
I'm trying to upgrade the stock brake system on my 1200, but I'm not sure if it would interfare with the ABS system. I'm looking at a few things for it so far: Brembo master cylinder [ http://www.oppracing...ster-cylinders/ ] that website is not that good since it dosnt list a master cylinder for the 1200 or a way to figure out what size could you use, this one does through explain "how to" [ http://www.cyclebrakes.com/html/brembo_cylinders.html ] that one is one of the parts Im not so sure would fit right due to the ABS, any one swapped theirs? Thinking about getting one for the rear later on as well. Stainless steel brake lines front and back [ http://www.galferusa...ng-motorcycles/ ] I'll need the stock dimensions to get those made, if theyre not in the manual than it will be a little bit of searching around and measuring with a string to do... Brake pads EBC Sintered Double-H Rated Pads front and back [ http://www.perfectbr...ts.asp?cat=4083 ] Since calipers from Brembo are like 2000$ for just the front set and rotors are around 600$ a pop I decided to stick to stock with those... Do any of you know where is the ABS chip connected, and would swapping the master cyliner impact it in any way?