


HispanicSlammer
-
Posts
6,954 -
Joined
-
Last visited
-
Days Won
61
Content Type
Forums
Profiles
Gallery
Blogs
Downloads
Events
Everything posted by HispanicSlammer
-
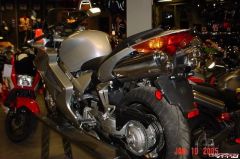
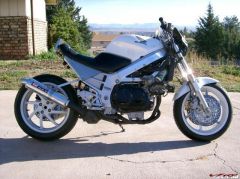 I can say without a doubt I hate the way that bike looks, considering it was once the classic 93 pearl white VFR its been snubbed into that thing?? The Dew can lends it some trashyness even more!
 -
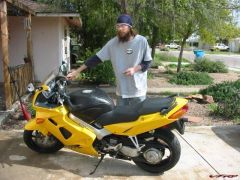
 Yea Downy bought it off him! he is the guy who owns that shop in LA young asian guy who offered us some discounts last year. MC-CYCLE.com I dont think he ever got his website going. its been bored out to 880 or somthing like that almost a 900cc, lots of mods! Downy has improved it too
 -
 This picture reminds me of a similar photo taken on a certain Pacific Island 50 years ago.
 -
Thats Downys bike!!
-
 That looks just like Castle Rock Colorado, but thats Texas right?
 -

KevinSwantzMrRC45.JPG
HispanicSlammer commented on BusyLittleShop's gallery image in Member's Gallery
 Oh one of Swantz too!! "If I could ever just make a living out of riding a motorcycle that would be the coolest thing known to mankind" - KS
 -
 I have seen that place before, I think Ghostrider posted a picture of it with him and Cheez
 -
KennyRobertsMrRC45.JPG
HispanicSlammer commented on BusyLittleShop's gallery image in Member's Gallery
 Shakein hands with the Kingster!
 -
When you first get a bike, or when you replace a control part like a brake lever or foot peg, you must adjust your controls for best placement. Shift Lever Here is a picture of my foot on the peg, notice my foot is resting with out straining up or down, to throw the shift lever requires little exertion to accomplish this (never mind my shop shoes they are rags) Down-shifting Up-shifting If you have your foot at an extreme angle like this to shift your bike you must make an adjustment in order to get better control. The foot should not have to flex too much. The VFR shift lever can be adjusted by removing this bolt and popping the lever off its spline then replacing it in a better position. 8mm bolt Rear Brake Lever As you can see here my foot is flexed too far up, this is not comfortable and can lead to unnecessary fatigue or inadvertent brake pad wear. The adjustment bolt is located in the rear of the footpeg under the brake master cylinder, it has a pinch bolt that allows limited adjustment up or down. By turning the pinch bolt as far in as I could I lowered the brake lever by 1/2 inch, this was as far as it would go but is much better on the foot than before. Brake and Clutch Levers Sit on your bike, stretch out your arms, and feel how your wrist is flexed when you extend your fingers to grab the lever. See in the picture below the angle my wrist has to make in order to engage the brake lever. I placed a yardstick and rested it on the handle bar and the lever and took note of the angle, then compared it to the angle of my arm as I reached for the lever. An adjustment had to be made so I loosened to 2 8mm bolts that hold the lever and angled the assembly down. There is only so much adjustment that can be done before the assembly binds on something but it was a much better angle. Now you can see how much closer the 2 planes almost parallel. Now I don?t have to flex my fingers up as much as I did before, this also allows you to use the 4 finger control method, 2 fingers on the brake lever and 2 on the throttle for fine throttle control, if the lever is too far upward that method becomes impossible since your fingers are too far spread apart.
-
 Now wait a minute - you cant use MY pic for the contest?!? <_<
 -
The VFR on the Howard Park Causeway
HispanicSlammer commented on a gallery image in Member's Gallery
 I thought the Migs stuck out too far in other pictures but they look great in that photo - Long way to send for a set of carbon cans though all the way from France - Me I would have used a domestic brand, I like HMF pipes these days. Too bad they dont make a VFR kit, but the cans are packed with ceramic fiber instead of glass so they dont blow out and cystalize like fiberglass does. I have been looking to replace my D&D its all blown out again, and well the city is cracking down on loud exhaust so I gotta get a quiter one soon.
 -
 OK his mode of dress is not good enough for your standards but I see him in a JR jacket, draggin jeans over the ankle shoes, armored gloves and full faced helmet. Thats not a squid uniform! But I dont recommend that he buy the cheapest gear on the market? I have seen just how good JR gear is when it comes to meeting the pavement on a motorcycle - where it counts - (GOD forbid it should happen to anyone). For my money JR gear just dont cut it! The way he is dressed he's protected much better than the average motorcyclist on the road on any given day. He would be able to participate in any MSF course in the country dressed like that. I am just debating here, his dress isnt good enough for your standards, and well JR isnt good enough for mine IMHO
 -
Joe rocket mesh gear is better than draggin jeans? I havent seen anything from JR thats quality, save the full leathers they clad their racers in.
-
Just to the store and back? what was it I read last year 49% of all accidents are within 5 miles of your house.
-
 Vern, In my day we did not use those new fangled Starter Buttons, we could have to use a kick starter............And we liked it!!!
 -
98VFR_RearsetsBrake.JPG
HispanicSlammer commented on BusyLittleShop's gallery image in Member's Gallery
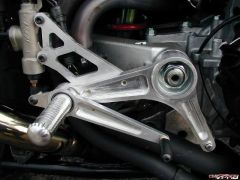 Billet!!! I take it you made that yourself on your machine?
 -
Columbia river sunrise at Vancouver WA
HispanicSlammer commented on a gallery image in Member's Gallery
 Off content but since its only one and it its a good bike destination, pretty pretty
 -
 Get the feeling your being watched??? They only eat pork round here - none of that foo foo rice stuff!
 -
 I love that picture, featured
 -
 OHH the Vtec has a throne to lord over the lesser bikes.
 -
 I kept hearing reports that the taliban was buying motorycles but up till now I never believed them LOL. He only looks like a *part time* Evil Doer.
 -
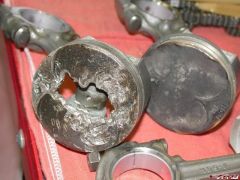 Looks like you bent a vavle, broke it, and it dropped in there.
 -
 OH yea thats peg scrapin country
 -
Static Voltage Test Remove the seat, unhook the battery cover. You will need some type of multi testing meter, I have an Equus that I bought from Checker Auto parts $79 that has Ohms, Voltage, DC Amps, Diode test, Continuity test buzzer (kind of like the old operation game), digital tach, Dwell, duty cycle its an all around testing tool. Steps Switch your tester to Voltage and place the positive probe on the positive (red) battery terminal, put the negative probe on the ground terminal. Take a voltage reading it should be fully charged at 13v-13.2v mine was at 12.5v. If your battery is under this voltage then put the battery on a charger before doing any further testing. If the battery will not hold the voltage after charging then your battery is defective. Leak testing - will indicate short circuts Start with the key off , set your multimeter to amps at about the 1mA range. Put the (positive) +probe to ground cable, and the (negative) -probe to the battery (negative) -terminal. If you get more than 1.2mA leak then you have a short somewhere Steps Remove the rear Cowling 4 hex bolts and disconnect the tail lights Remove the ground cable from the battery, switch the multi meter to amps, connect the + probe to the ground cable, connect the - probe to the - battery terminal. measure for current leaking, if it is over 1.2 mA then you have a short somewhere. As you can see below the bike is fine Charging Voltage Charging voltage should be about 15.5 - 13.5 volts at 5500rpm with the Hi beam lights on, volt meter across the battery with the correct probe (positive probe/positive post) on the correct post. Connect the volt meter before switching on the bike. Start it up then run to 5500rpm hi beams on. If Charging voltage is lower than 13.5 volts it could be the RR or the alternator. You should charge your battery before performing any of this test with a battery charging device. The procedure is the same as testing the static battery charge test, however the motor is running at 5500rpm and the Hi beams are on, my battery was at 12.5v not running you must have a fully charged battery, and the motor must be at normal operating temp in order to do this test correctly, but I did it just for the sake of this post.You can see it is at 13.5v the motor was shaking so the image is blurred. IF this test produces good voltage your charging system is fine! Charging voltage at 5k rpm Alternator Test To check the Alternator disconnect the alternator RR connector and check the resistance of the 3 terminals to the alternator, KEY OFF resistance should be between 0.1-1.0 ohms and then check all three terminals for ground continuity, there should be no continuity Steps Find the RR wire harness connection to the stator shown here. Side note - also check the red main buss wire as well for signs of burning or corrosion, that big red wire connection above my finger this seems to be a common problem with VTEC models, the main buss wire burning up Disconnect the natural connector #3p of the harness The connector (natural color #3p) with the 3 yellow wires connects to the stator/alternator switch the meter to ohms and check the resistance between the 3 wires to each other should be between 0.01ohm - 1.0ohm mine was 0.3ohm which is fine with all 3 wires Make sure you check the the resistance between all 3 wires Now check for continuity of all 3 to a ground (bike frame) There should be no continuity! Mine did not have continuity ( a buzzer sounds if it does ) that means the alternator has burned up the windings and is shorting out and must be replaced. My alternator checked out ok. Check the #3P connector for corroded or gunked up wire connections. Testing the Regulator Rectifier This test should be done if the charging voltage is not withing spec listed above and your alternator has passed the above tests. Now disconnect both connectors the Natural #3p and the Black connector #4p at the harness. Inspect the connectors for corrosion and gunk on the wires. On the Battery side of the same harness the wires red/white + and Ground - should show the same as the battery voltage around 13 volts fully charged (same as the static voltage key off) Steps Positive probe to each of the 2 red and white wires the other to the frame, mine tested .3v less than the battery on one and the same on the other. Ground wires green wire to the positive probe and ground the black negative probe, should have continuity. My tester buzzes and show 0.00 when there is continuity, it was good. Testing logic If your static battery charge is good then you need not go any further, if its low then you either have a bad battery or your charging system is not working, or it just naturally discarged over time from lack of use. Charge up the battery on a battery charger and then test the voltage again. If its good then go on to your charging system. It would be best if you could use a battery load tester to test the battery, an auto parts store will have one. Test that your charging voltage has enough Voltage to charge your battery. If its good then you need not go any further. Now test the alternator its its not shorted out and the resistance is good then the last possible part of the charging system must be a bad Regulator Recitfier. Do a few further tests indicated in the Regulator section to insure its is not the harness, and then replace your RR. My system checked out good right away with 13.5 volts charging at 5k rpm. If you discover a bad battery and replace it - you should still continue on with the charging tests to ensure that either one of the two other componets are good. A bad rectifier regulator can ruin a battery so its best to replace the battery and then test the system after its installed to make sure you dont ruin another battery. Sometimes you have to replace both, the chances of a bad alternator are slim. But it does happen, mine burned up when my radiator fan malfunctioned. I overheated the engine and some of the wire caseings burned off and shorted out one of the alternator phases. Basically it deep fried the plastic off the wires in hot motor oil. :: note for 6th generation owners if you have bought a used 02 make sure that the Alternator has been replaced due to a general recall on the alternators for that model year. ************************************* RR modification In an attempt to stop the unit from burning out I added a $9 computer 12v fan to it, I hooked it up to the license plate lighting wires that only work when the key is on it draws less power than the light did. Steps - the idea came from AustinVFR so credit goes to him! Drill holes in the RR to wire the fan to the fins, then I used some wire to fasten it. Wired the power for the fan from the licence plate light
-
From the album: Help Gallery
Mitch doeth protest too much!
