Presson
-
Posts
343 -
Joined
-
Last visited
-
Days Won
7
Content Type
Forums
Profiles
Gallery
Blogs
Downloads
Events
Everything posted by Presson
-
Novice looking for maintenance/restoration guidance
Presson replied to arnie3020's topic in Fifth Generation VFR's
If you want part numbers and OEM, I find Fowlers of Bristol very efficient https://www.fowlersparts.co.uk/manufacturer/honda/bike/vfr800fi/year/2001/country/england/colour/all-colours Alternatively, WEMOTO are reliable and provide good quality https://www.wemoto.com/bike/honda/vfr/800/2001/3410 For brake lines, try HEL Performance if you want to go the braided line route ( not cheap mind) https://www.helperformance.com/honda-vfr800-fiw-fi1-1998-2001-standard-replacement-brake-lines-hel-stainless-steel-braided -
2008 daily driver getting hard to start... sometimes
Presson replied to Scott45's topic in Sixth Generation VFR's
Grum is an electrics ' god' who seems to have departed this firmament -
Novice looking for maintenance/restoration guidance
Presson replied to arnie3020's topic in Fifth Generation VFR's
Bejeezuz, from the few photos, that's in need of some work. Welcome to the forum. If it runs well, then that's a good start point. You need to change those brake lines for new ones, either OEM rubber or braided and you should check the rotor thickness with a micrometer; I wouldn't mind betting they are thinner than minimum spec. This is a critical safety issue. Check the brake pads as well, you need at least 3mm on them and even that's a minimum. The chain and sprockets need replacing. You can see that the sprocket on the rear wheel is hooked which suggests that the driven sprocket at the engine end is shagged. Have a look. I'd suggest downloading the relevant manual from the downloads section so you get the right sequence to do stuff and the correct torque settings. The lines to the oil cooler are looking very corroded. A close inspection is needed. Is it just surface rust or should those lines be replaced? The rear wheel bolts and general finish are probably just cosmetic issues. I'd seriously get the mechanicals sorted before you start concerning yourself with pretty stuff. Others will chime in with advice..... -
Look in here
-
Does the fuel pump prime when with the kill switch at run you switch the key to on ? You should hear it
-
Yep, can hear it now and especially clearly when you hold the revs at just over 3k. It does sound like a bearing that has failed. I think you are going to have to do a teardown check of tolerances. Personally I wouldn't be inclined to keep riding it until the problem has been identified and fixed.
-
I've run through the videos a number of times and I don't hear what was described either. I'm normally hypersensitive to higher frequencies. I had taken the earplugs out as well....
-
Does the fuel pump prime when you turn the key to start? Ignition spark at the plugs? Fuel pressure regulator? Blocked injectors? Those are the things I would check Sorry, grasping at straws here. I'm sure others with more experience will chip in.
-
Great if you want to do it. But, I wonder if this is the first case of a VFRD member seeking additional unnecessary weight on the VFR. 😂 Most of us like to trim it off!
-
You haven't made a mistake. The VFR doesn't need the GT version. I'm assuming you don't regularly take a rhino as a pillion.
-
For starters, your description suggests that the bike continues to idle fine with the side stand up but when you put the bike into gear and still have the clutch pulled in it stalls. Please say if that's correct or give a different description. You didn't say why you replaced the clutch master and slave. Was the clutch actually dragging or was it a shot in the dark? In the meantime I suggest that you look at the side stand switch; make sure it is clean and the plunger moves freely. If you have a multimeter and know how to use it you could check the switch is operating correctly The other obvious thing to check is whether there is air in the clutch line - especially as you have replaced both cylinders. Give it another really good bleed through.
-
Implied only when operated
-
Seriously I'd get some copper grease on the back of those pads. I've only ever had brake squeal once before I routinely did this and never had the problem again.
-
Great advice from Terry and BLS as usual. If your temps were fine before the coolant change, and you didn't mention there was a problem before, it might simply be a case that you haven't burped the system properly (BLS point 4) Remember to burp you cooling system by blipping the throttle hard a couple times and massaging the hoses. Cranking the bike over sideways also helps get air bubbles out. This could also lead you back to BLS point 2.
-
If it were my bike, I would put the backing plates back on with a smear of copper grease both sides and see what happens. The backing plates are there for anti-squeal as well as heat dissipation. I have some doubts that your Honda guys will know any better if you've already checked everything over; could be money wasted.
-
If you go with the grease, it's just a thin smear. I second the advice from VeeEffArah about cleaning up with a toothbrush though. Let us know how you get on (with or without grease and or backing plates) so it can be added to the bank of knowledge here.
-
Well it all looks good as you say so strange. you didn't mention the state of the discs; I'm assuming they are within thickness wear limits. The only other thing I can think is high frequency vibration in the system when the brakes are applied. Perhaps try some copper grease on the pad pins and backs of the pads. If that doesn't help you might be forced to try a different pad compound
-
Just a thought. I understand the EPFA pads, while stated as ok for road use, are primarily aimed at track riding so need heat to perform well. There's a number of riders on the GSXR forum that have not had great experience with them for road use - reports of wooden initial bite and noise. They returned to the normal HH compound and the problems went away You didn't mention whether the brakes are dragging which would indicate seal issues but then that would also be putting lots of heat in so I'm assuming that's not relevant.
-
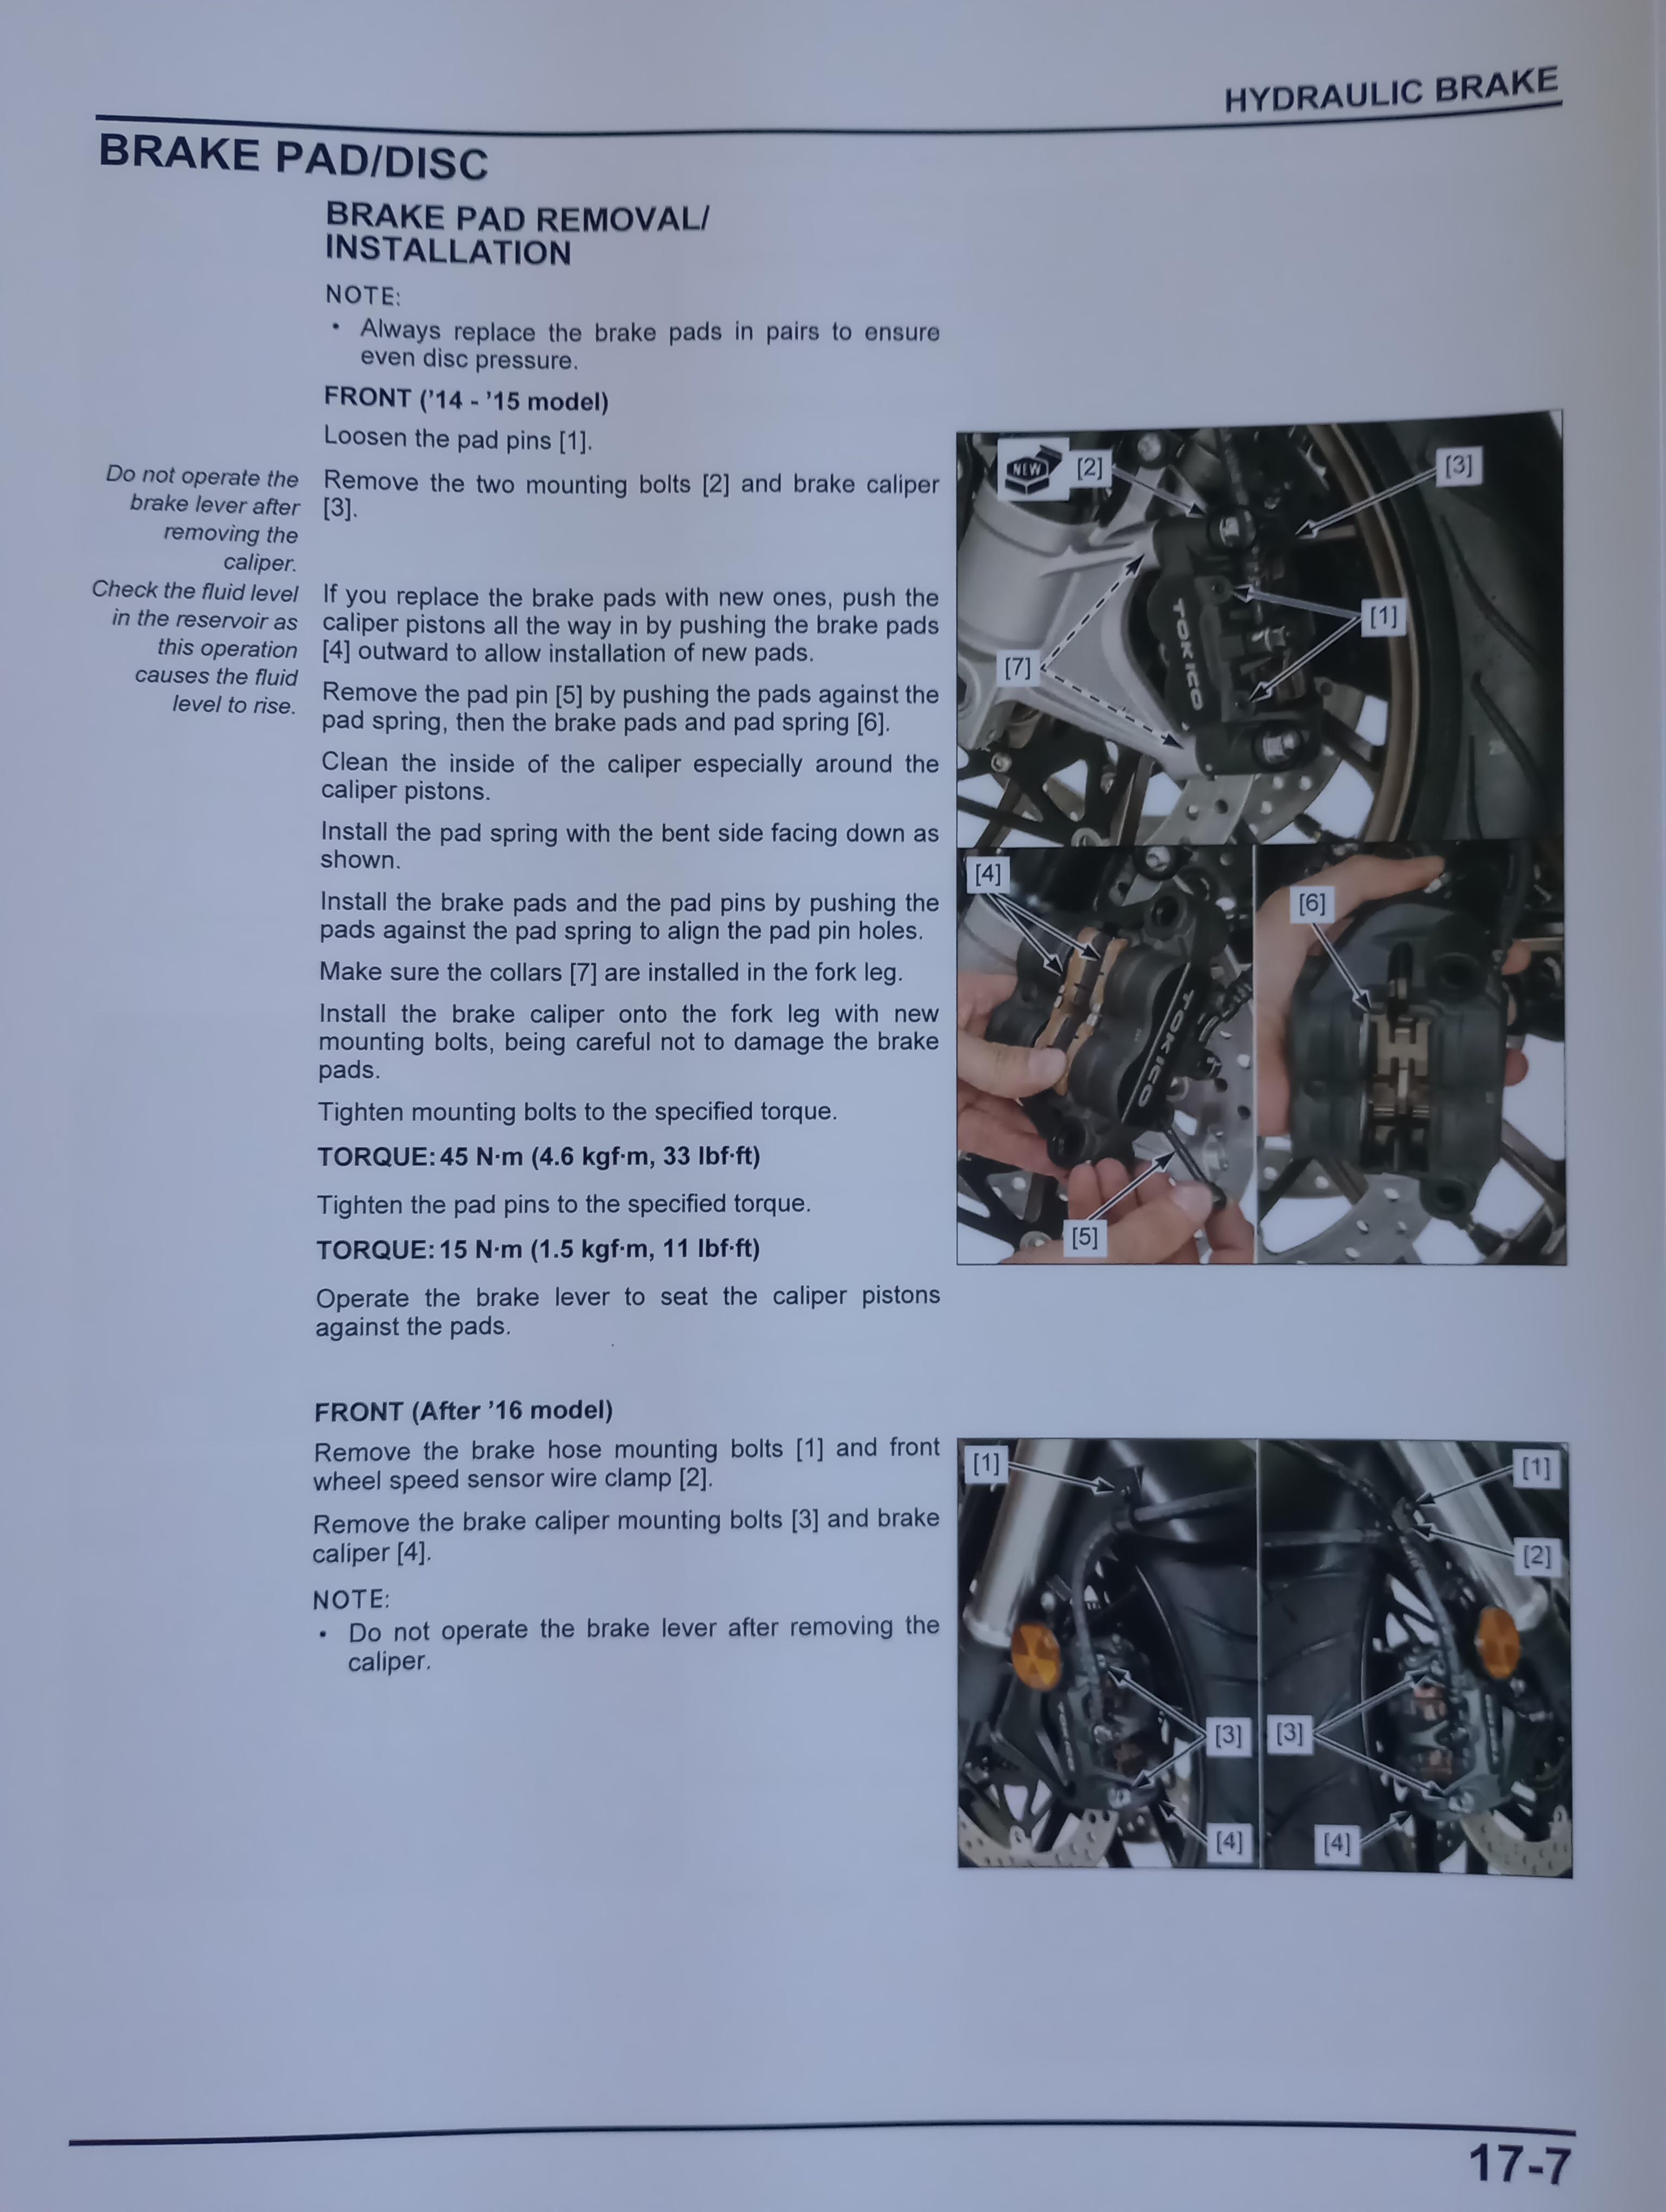
Well that's not right by the sound of it. I'd take the calipers off and redo if I were you. Check: Pads aren't contaminated with grit. Pad springs are the right way round. Pads are the right way round! Discs are clean and contamination free. Photo of the procedure from the manual for the 2014 model attached.

-
How about going to the download section of this site. Download the service manual and then follow the fault finding procedure specified by honda. When you've done that and you're still stumped, come back with your detailed results and someone here will be able to help.
-
 That's a beautiful classic bike. Good one Keny, keep it going.
 -
Hi Terry and thanks for the update. Those readings are tight and I suspect many of us have conveniently believed the myth because of a lack of symptoms. What was the mileage?
-
To sharpen the steering, the easiest thing to do is drop the yokes a bit and add a couple of psi to the front tyre. However, make sure you have set the sag right with the preload adjustment before doing anything. You might want to read through this thread https://www.vfrdiscussion.com/index.php?/forums/topic/112994-quicker-steering/&do=findComment&comment=1165637 I have found that with the front levers adjusted to an ergonomic angle on my 8 gen the maximum my yokes will drop is 5mm but it has made a noticeable difference without affecting straight line stability at high speed. Beyond that you are looking at jacking up the rear with a spacer on the shock top mount. Various members here have done this on other gens and report favourable results. Others will chime in with suggested amounts of lift but there are some details in the 'quicker steering' thread You might find this helpful for your service requirements: https://www.vfrdiscussion.com/index.php?/files/file/271-2014-vfr800f2015-vfr800x-service-manual/
-
You are very welcome Wilhermo to the family of VFR enthusiasts. You've got yourself a great bike there, probably one of the best. Enjoy the ride and ask away for advice on stuff; there is great expertise here and very little bullshit ( not quite sure what that is en francais - connerie perhaps? No)
-
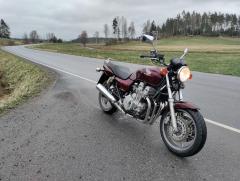
.jpg.104e4444aeeb86f850a3148ff1e67256.jpg) Talk about sideband fisheye. That looks like a Wheely machine. More seriously, I wish there was scenery like that round where I live in flat blandland
Talk about sideband fisheye. That looks like a Wheely machine. More seriously, I wish there was scenery like that round where I live in flat blandland