

KanadianKen
-
Posts
1,159 -
Joined
-
Last visited
-
Days Won
12
Content Type
Forums
Profiles
Gallery
Blogs
Downloads
Events
Everything posted by KanadianKen
-
Installing Radar's Custom Sliders - Black Bases
KanadianKen replied to KanadianKen's topic in Modifications
This might work for the 3rd Gens as well? BMV - lets cut some holes in that fairing!!!! -
Installing Radar's Custom Sliders - Black Bases
KanadianKen replied to KanadianKen's topic in Modifications
Hawglet - thank you - I'm glad you were able to follow my install - I tried as best I could to keep it flowing and understandable. I'm sure that others could smooth this out even better - but I enjoyed it. Get in touch with Darren at : radar88ster AT gmail.com -
Installing Radar's Custom Sliders - Black Bases
KanadianKen replied to KanadianKen's topic in Modifications
THe coolant tank has to be altered, I just didn't get that part done yet. If you go to the R &G website - they show what the coolant bottle looks like after its altered. Heres how it'll look once altered. -
Installing Radar's Custom Sliders - Black Bases
KanadianKen replied to KanadianKen's topic in Modifications
THanks Dude - with friends like you, who needs enemies? And for the record I'm not as big of an asshat mechanic as my good friends would have you believe, however I do still need a lot of help figuring out all this two wheel mecanix stuff.... For my next trick, I will coerce Dude and MCrew to "Assist" me in changing my sprockets and chain!!! :thumbsup: -
Installing Radar's Custom Sliders - Black Bases
KanadianKen replied to KanadianKen's topic in Modifications
All credit goes to Radar. Its his ideas. I just followed through with the plan. :thumbsup: -
Installing Radar's Custom Sliders - Black Bases
KanadianKen replied to KanadianKen's topic in Modifications
Heres a couple closeups of the slider base mount - on the frame - Seb had asked for a better shot. I mentioned in the write up that the shoulder on teh engine bolt had to be turned down - the base has to be able to mount tight and flush to the frame for strength. YOu can see that the slider base is flush and fits perfect. By the by - I went to the R&G site to snoop around. I watched a demo of the install for those sliders and it seems like there is WAY TOO MUCH room for error using a dremel tool to get the holes "just right". After doing this install with specific tools, and drill bits and hole saw - there is no way I'd even think about using a dremel on a fairing - no chance!!! THis method is precise, measureable, and consistent. Way to go Radar!!! -
Installing Radar's Custom Sliders - Black Bases
KanadianKen replied to KanadianKen's topic in Modifications
Hey - if you guys want to talk about a set of sliders that is on Lady White Lightings bike, please start a new thread - I'm just trying to help out a guy with a great product idea, and share this super easy install method. Those Sliders on Lady White Lightnings bike look like they'll be a great sturdy point to balance the back half of the bike onto the front turn signal :joystick: . Sorry - they look like they are in the worst possible location for a crash impact - also - wouldn't the knees be hitting them? Now go talk about other sliders elsewhere. This thread is reserved for the good stuff!!! :warranty: -
Installing Radar's Custom Sliders - Black Bases
KanadianKen replied to KanadianKen's topic in Modifications
For what its worth - if there are any GTA / SOuthern Ontario or other folks close enough that want me to do this install for you, I'd be pleased to help you out. Get your bike to my place, and an hour later you're bike will be done. We'll likely still be shooting the shit, but it doesn't take too long. :thumbsup: -
Installing Radar's Custom Sliders - Black Bases
KanadianKen replied to KanadianKen's topic in Modifications
Radar can be reached on this site, and I know that he'll post up Sunday night or Monday as to how to get a set of these from him. He does top notch metal work, and I believe he is a gunsmith by trade so his precision must be very good. He's in Saskatoon, Saskatchewan, and he contacted me to try this out on my 6th gen - to see how it would work and to do a write up on it for the install portion. -
Installing Radar's Custom Sliders - Black Bases
KanadianKen replied to KanadianKen's topic in Modifications
What is the "lady white lightning" ? I haven't touched the holes to clean them up at all. THe holes are very clean, my damn camera takes really good closeups and it exaggerates the finish. THe holes are perfect, and the plastic "Strings" will easily come off. :beer: -
Installing Radar's Custom Sliders - Black Bases
KanadianKen replied to KanadianKen's topic in Modifications
Good points Seb, Darren and I talked about the engine bolts as well. I think that would be the way to go. As for the centering plugs - I think he plans to include a pair with each set of sliders. I'll try to get a couple of up close pics of the base where it attaches to the engine bolt. I know that Darren has a couple extra sets turned of the bases, and he was about to turn the plastic. He's away for the weekend but I'm sure he'll chime in next week. :thumbsup: -
Drilling for Sliders Radars Sliders and Installation And how to drill your fairings without having a nervous breakdown. For product availability EMAIL RADAR AT : radar88ster AT gmail.com I was the test for Radars awesome sliders, and finally I got fed up with the cold and snow, and went into the garage for about an hour today. The results below are very good, and I think Radar (Darren) has hit a home run with the products he makes. Read on.. Its long and photo heavy - but I hope it explains how this was done, and the simple tools that were needed. 1) You will need to acquire the “Basic†goods from Radar (Darren in Saskatoon, Sk., Canada). Get yourself the slider mounts, the bolts, and the sliders themselves. The trick to this installation is based on two very simple – yet custom turned centering plugs. These plugs fit snugly into the holes where the front engine bolt goes through. Darren turned these, and sends them with an o-ring installed to snug up the fit. 2) From your local hardware store, you need to pick up a few things. You will need an 18†long ¼†inch drill bit, a 1 1/8†hole saw, an arbor to hold the hole saw, as well as a length of ¼†“drill rodâ€. 3) Ok – first things first. This would be a very easy install with an extra set of hands and eyes helping out, I flew solo on this cold winter day – but it all worked out perfectly. Strip off the side fairings, and remove the coolant bottle. On the bottom of the coolant bottle is the spout that the hose attaches to – cap that with a rubber cap so it doesn’t leak out all over the floor. Put the coolant bottle out of the way for now. Back to this later. 4) Next – remove the front engine bolt. This bolt passes from the left side of the frame, through a “floating†spacer/big ass washer, through the engine, and exits through the frame on the right side. You will need to take this bolt (which on 6th Gen’s is hollow) and get the inside tapped on both ends about an inch deep to fit the bolts that Darren sends. (I’ll edit this after I get the exact specs back from Darren). This is ultimately where the Slider bases mount to the bike – by far the strongest location on the bike. Here’s the bolt – after it is tapped. 5) Insert the Centering plugs into the holes from the engine bolt. The following picture has the drill bit going through the centering plug, but you get the idea. Spray some aerosol lubricant into the center of the centering plug – it’ll make the drilling go easier. 6) Now reinstall the right side fairing, and put the Honda securing bolts back in and tighten them up. You need the right side fairing to be held securely, as the first hole that is drilled, originates from the left side, and uses the 18†long ¼†drill bit. The drill bit is slid in through the centering plug on the left side, through the floating spacer/big ass washer – and then carefully through the right side centering plug. Hook up the bit to the drill, and take a deep breath. Get the drill going about half speed, and gently start to push it into the fairing. You may feel the drill “skip†depending on where it’s touching the inside of the fairing. Have your helper gently press against the fairing – in the direction of the drill bit. The drill will pop though, and you should have a clean ¼†inch hole like this. 7) Now – retract the 18†long drill bit, and get the 1 1/8†hole saw, and the length of drill rod. I had to buy 36 inches of drill rod – so I left it that length. You could cut it down to 18†and be just fine. Install the drill rod onto the arbor for the hole saw. The arbor I used already had a ¼†centre drill bit in it, so I removed the drill bit and installed the drill rod. It is simply used to keep the hole saw cutting in a perfect circle – as it is guided by the centering plugs on both ends. 8) From the RIGHT side of the bike, insert the drill rod through the already drilled ¼†hole, and get it through the engine, and out to the other side of the other centering plug. Here’s what it looks like on the other side with the drill rod slipped through. Again – get the drill spinning about half speed – and with easy pressure – cut the hole in the side of the fairing. The centering plugs will keep the hole saw from skipping or jumping. It only takes a few seconds, and you’re through. One down, one to go!! 9) Now take off the right side fairing. You can take some fine sandpaper to the hole on the right fairing and gently clean up any plastic “strings†that didn’t come off clean. (Leave it off for now – engine bolt has to be re-installed.) 10) Before you re-install the left side fairing, prop something under the spacer (I used a pair of pliers). 11) From the RIGHT side of the bike, you slip the 18†long ¼†drill bit through the centering plug, through the engine and out through the left centering plug on the left side of the bike. Once the drill bit is just through the left side centering plug, re-install the left side fairing. This just makes it easier to guide the drill bit through all the holes, before it gets down to business. From here – you are going to repeat the same steps as you took to do the right side drilling. Create the pilot ¼†hole on the left side, then using that pilot hole – use the drill rod installed on the hole saw arbor, and make the second 1 1/8†hole. At the end of the drilling you will have two holes in the perfect locations for the sliders to be installed. After the left side holes are made, take off the left side fairing. I’ll skip ahead and show you the steps to install the slider bases, and the sliders themselves. Using the magic of time lapse – you have by now had your engine bolt tapped on both ends to accept the thread size of the bolts that come with Darren’s kit. (Again – I will edit this after I confirm with Darren what the exact thread size is – I believe the finished kits have 5/16†Coarse thread bolts.) The machine shop that did the tapping for you, will also have to turn down the shoulder on one end of the engine bolt mounting nuts. I apologize – I will have to edit this also – after I get the correct size from Darren. This allows the slider base to slip over the tightened engine bolt without clearance issues. 12) Re-install the engine bolt. 13) Reinstall both left and right side fairings. 14) The threaded end of the slider base stays on the outside of the bike. Slip the bolt into the slider mounting base from the threaded end – and it screws into the newly tapped and reinstalled engine bolt with a light amount of blue loctite. I’m unsure as to the torque value to apply – I will edit with correct values. Then – apply some blue loctite to the slider mounting base threads, and screw on the slider itself. Do the same on both sides, and enjoy your finished project!!! RADAR will be providing details of his kit, and it fits both 5th and 6th Gen VFR’s. The coolant bottle needs to be cut and resealed - I haven't done that yet - but I will add that portion to this as soon as I'm done.
-
SO - how much of the "Brown" in the original post - was oil? Looks like a damn fine job! :thumbsup:
-
Trace - the man with a strippers pole in his garage gutted a 5th gen cat..... pretty nice job as well! :thumbsup:
-
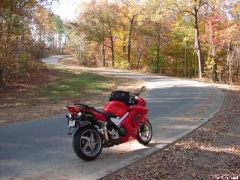
the bugs, and dragonfly's help keep her warm in the garage - no way I'm cleaning that stuff!! Bike is made to ride, not be a pretty garage queen. Lemme know if you need any other pictures. ANy excuse to take her out is good for me!! :beer:
-
Sebspeed asked me to check the horn install I did on my bike in the spring, to see if there was any "surprises" that I might not have noticed. I just took the biek out, and had a close look. Everything looks great. No rub marks on any lines, the horn is still tight into the bracket, alls good. Heres a bunch of pictures - more for Seb to get anidea of how it fits. I go the Stebel off of Lobster, and he was kind enough to epoxy a screen over the output area, so that it wouldn't get filled up with crud.....
-
 bunch of miscreants!!! I want summer back!!!
 -
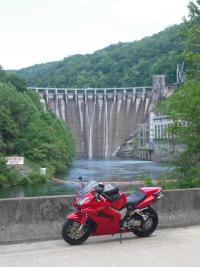
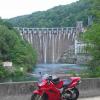
 Nice shot of one of our Canadian roads Zep! you weren't supposed to share it though!!! :goofy:
 -
Topbox mount brackets installed over pillion seat
KanadianKen replied to KanadianKen's topic in Modifications
heres one - no rider on it - but it might give you an idea. -
Vtec electrical problems info post
KanadianKen replied to Baileyrock's topic in Sixth Generation VFR's
I pulled the "Blue" connector apart today (the one that is on the left side of the bike, above the left Rad). I was looking to see what kind of shape the internal connection was on the GREEN ground wire terminals. It was absolutely perfect. No buildup of any corrosion or crud, immaculate. My 02' had the beginnings of the 30 AMP main link wire burning up issue, but I snipped it and spliced in a serious duty 10 gauge wire and heavy duty fuselink about 18 months ago. I wonder if the preventive measure I took on the 30 AMP link, had something to do with the Green ground terminals inside the BLUE block being in such good shape? THe blue block is easy to seperate - just push the tab in, and using a small flat head screwdriver, gently split the connector in two. Piece of Cake to inspect, and worth your time - I did it cause I changed the oil and had the fairing off today. :thumbsup: -
 that sail has GOT TO GO!!!!!!!!!!!! looking good Doctor!
 -
Travis - thanks for keeping that - I forgot I made that short clip. I have to say that after putting about 4,ooo kms on the gutted pipes, I absolutely love the sound. Its not obnoxious, but it is noticeable. NO rattles, not tinny sound - just deep growling, soothing small block chevy with a cam kind of sound. I love the result of the full gut treatment. :beer:
-
Topbox mount brackets installed over pillion seat
KanadianKen replied to KanadianKen's topic in Modifications
Good question - easy answer.... It would look totally unfinished without the grab handles in place - as you would see the mount location, and the bars for the side bags. I left them there only for appearance sake mostly - and to keep water from getting into the under seat area. -
Topbox mount brackets installed over pillion seat
KanadianKen replied to KanadianKen's topic in Modifications
THese aren't finished (as in apray painted and pretty'd up) but here's the TALLER version that I had made. I can get the seat off with these in place....... border='0' alt='user posted image' /> border='0' alt='user posted image' /> border='0' alt='user posted image' /> border='0' alt='user posted image' /> border='0' alt='user posted image' />