Lobster
-
Posts
288 -
Joined
-
Last visited
Content Type
Forums
Profiles
Gallery
Blogs
Downloads
Events
Everything posted by Lobster
-

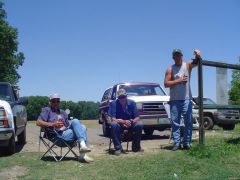
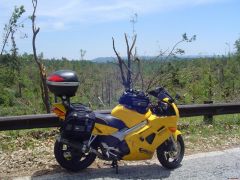
From the album: Lobster's Trip South
© ©vfdiscussion.com
-

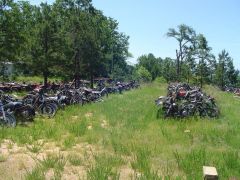
From the album: Lobster's Trip South
© ©vfdiscussion.com
-
 Jeff, Don't you EVER sell that bike! ...and if you do...please call me first!
 -
I think it looks cooler than hell! Clearly the guy has too much time and money on his hands, but it looks nice.
-
 Great shot! Since you can't see the side stand it looks like he's balancing the thing by himself!
 -
From the album: Lobster's Trip South
-

From the album: Lobster's Trip South
-

From the album: Lobster's Trip South
-

From the album: Lobster's Trip South
-
From the album: Lobster's Trip South
-
From the album: Lobster's Trip South
-
From the album: Lobster's Trip South
-

From the album: Lobster's Trip South
-

From the album: Lobster's Trip South
-
From the album: Lobster's Trip South
-

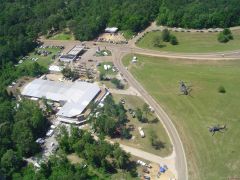
From the album: Lobster's Trip South
© ©vfdiscussion.com
-

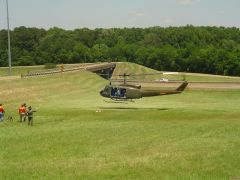
From the album: Lobster's Trip South
© ©vfdiscussion.com
-
I can now officially speak from experience. I just got back from 3600 miles in 7 days with a Givi V46 mounted to Ken's Solo Rack. Rock solid...you'll never even know it's there...one of the most handy little adds I've ever done. I know Ken persoanlly and can tell you he's a stand up guy. This is a good product...buy one if you're even half thinking about it. You will be delighted.
-
Travis (Rivcyko) is the only one who made a lighted pair, that I am aware of. PM him for more info. He used a set of my extenders and worked from there, so if you have a pair of extenders, he might be able to mod them for you. He does good work and he's a good guy, so give him a shot. He truly will not let you down.
-
Lobsterman. I want some of your extenders. How can I order a pair? I have sixth gen. No lights necessary. I have enough bling for now. How can I order a pair? Just sent you a PM. I have a 6th gen pair already packed and waiting for a new owner!
-
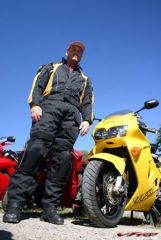 Pat...looking tough, my man!
 -
Thanks for the props, guys. A couple comments. As for the drilling on the 5th gen extenders, Citizen is right...it's not seen at all once they're mounted. I make the bolt holes large on purpose for a couple reasons. First, it compensates for the holes if they are not 100% perpendicular to the face. Second, it allows my customer to "float" the extender just before it gets cinched up so the customer can decide just how the joint between mirror, extender, and fairing looks. Third, the 5th gen extenders require a tapered counter bore to clear the mounting pegs on the base of the mirror. (It actually took me a couple pair when I started before I realized this...) So once the counterbore is machined, I have to go back and manually chamfer the edge to allow the mounting peg to sit fully inside the counterbore, thus allowing the mirror to sit completely flush on the extender. If I don't do this, then there would be a slight gap between the mirror and the extender and it will "rock" a little bit. I check every one I make now against a back light to make sure there is zero gap...some have bigger chamfers than others...but again, it isn't seen. As for the bolts, I make sure to include stainless steel bolts so you don't get rusty heads. I would honestly have no idea where to get black stainless bolts or maybe powder coated bolts, and in the small quantity I use they would likely be cost prohibitive...and again...they're tough to see unless you're looking for them. Most people don't even notice the extenders much less the bolts. As for the finish...nothing special. I've seen some of these things really polished, but honestly, they take a beating on the road, so I don't really see that as necessary. If some of you are more gifted at painting / polishing than I, it would be VERY easy to simply lightly sand off my Rust Oleum finish and finish to your liking. Rivcyko even mounted lights in his... I'm also not in this to get rich. If anyone from VFRD doesn't like them, I would be happy to provide a refund if you send them back. (I haven't had anyone ask yet..) I honestly love these things for riding, and I hope everyone who's bought a set does too. I'm not trying to be cocky...I truly want you guys / gals to like them, and I don't want anyone to be stuck with something they don't like. I have a couple more pairs for 5th and 6th gen left, and even a couple pairs of "not quite worthy to sell for sull price" if anyone is interested. Just check out the FS thread and send me a PM.
-
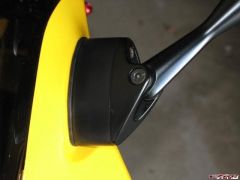
From the album: mirror extenders
-
I'm surprised about all the responses of folks using synthetic. I thought the manual said not to use oil with certain kind of friction additives or something, and every synthetic I've seen has them in the oil?
-
I'm not sure if I am one of the first to put the VFRness on a 2000 VFR, but Tightwad was looking for some fit / finish information for how the kit worked on the 2000/2001 models and I promised him I would take notes and post a quick how to. Overall, the product is well made and Tightwad was helpful in answering a few of my dumb questions. I still need to ride around on the bike for a few hours with the new harness just to make sure all is OK (don't ask...work has been hellish) and I also want to check for the signal wire issue and check the charging voltages. I haven't had any R/R problems yet (knock on wood) so I don't expect any issues post install. Sorry is a few of these steps are "duh" in nature... Remove the seat. Remove the tail fairing (six allen bolts and four wire harnesses to the tail lights) Remove the battery box cover. IMG_0389.JPG Disconnect the battery wires...watch the little nut on the bottom side of the connector! The R/R is located on the left side of the bikle under the tail fairing. This should be pretty obvious once the fairing comes off. IMG_0388.JPG Remove the two bolts holding the R/R in place. be sure to watch for the nut on the back to fall off, or be prepared with a long, twisty magnet to retrieve them when they fall...ask me how I know that one. IMG_0387.JPG There are two wiring harnesses coming from the R/R. You only need to unplug one of them...the clearish colored one. Leave the white one connected. IMG_0390.JPG I also took the time to gently push / prod the stock wiring harness as much out of the way as possible. You can see here I zip-tied the harness to the frame rail. Take a few minutes at this point to clean things up, wipe off dirt, and generally try to straighten up anything which looks "hangy" or loose. IMG_0392.JPG Plug in the connectors of the VFRness...one goes into the factory plug, and the other goes toward the R/R. They will only fit one way. Now it's time to start thinking about where you want the extra wires to route. Honestly there isn't a lot of room to play with, and I recommend playing with a few options until you get something neat and tidy with no kinks in the wires. I guess you truly don't have to unbolt the R/R completely, but I think it helps to have that loose to play with wire route options. (The two loomed wires in the center are the new harness.) Step 1 IMG_0393.JPG Step 2 IMG_0394.JPG Step 3 IMG_0395.JPG Tightwad recommends bolting the harness ground to the R/R itself...I'm sure to save some wire and some space. I double checked the ground there and it was present as long as I scraped a little paint off things to get a good contact (although the wire has a ground through the harness anyway...I also found). You could perhaps grind some paint from the sub frame and make a new ground if you like. The "extra" 20 amp fuse has plenty of wire to be put somewhere you feel comfy with. I chose to put it more or less right next to the stock 30 amp fuse. (Don't forget to change the 30 amp fuse to the supplied 20 amp fuse.) IMG_0397.JPG IMG_0391.JPG I also purchased the access plug panel, and with the Sargent Seat I had plenty of room to install it just aft of the battery box. Install is pretty easy...the purple wires connect the relays to each other...then just wire up pos and neg to the battery terminals. IMG_0399.JPG Getting the extra wires onto the battery terminals using the stock screw took a little effort. I stuck a small pick under the nut on the terminal so it would be held up high enough to allow me to start the bolt and cinch everything up. I also had to trim a little of the battery box cover away to make it fit over the new VFRness wires. IMG_0396.JPG Once you get that done, you're done. Check to make sure all the electrics work and the bike starts. Do the charging test (as recommended by Tightwad and many others here...) and then put everything back together. I will update this post with my charging test results and the sensor wire fix (if necessary) as soon as I get a chance. If I missed something, or you have questions, please chime in.