
SEBSPEED
-
Posts
22,517 -
Joined
-
Last visited
-
Days Won
103
Content Type
Forums
Profiles
Gallery
Blogs
Downloads
Events
Everything posted by SEBSPEED
-
We had a bluebird 50f day here today, would have been rude not to wheel the bikes out and knock some dust off. First fire & neighborhood noise making of 2023... 😎
-

New 5th/6th/8th gen performance header now in production in USA
SEBSPEED replied to sfdownhill's topic in Exhaust Systems
I'm sorry that I had to bow out. Just not in the cards for me, at this point in time. I know I'll regret it. Someone buy an extra and save it for me... lmao -
Thank you! I wish I could report some numbers... I tried to get in at Wheeler's during my trip south, but his dynos were both down. I don't have any local to me, and the nearest want way too much for a simple power pull. I was hooing to get a tandem run with a stock VFR800 and mine on the same day/same machine for a true comparison. I do have a great lead on getting an accurate weight - I have an in with a local scrapper who will let me roll it up on a scale. I didn't get to it last year, but later this spring I will.
-
That fan absolutely crossed my mind as I was pondering all the mods. In the end, I decided against it for a few simple reasons. 1. I'm using the oem fan location as an auxiliary, so top efficiency is less important. 2. In stopped or slow traffic, it makes more sense to draw outside air in, and that's when I'll be using that fan. 3. Cost of adding another part 4. Internet evidence suggested a small chance of catching debris between the fan blade and my (now very custom) radiator made me most hesitant. No room left to add a debris shield. Thankfully, the choice worked out. It was in the mid to high 80s and pushing 90f during the spring ride & very humid too. I had zero overheating issues. I did see some higher temps, but nothing I hadn't seen with the stock VFR.
-
Thank you
-
I was expecting that, but no he never turned around. I quit while I was ahead, turned around and parked it.
-
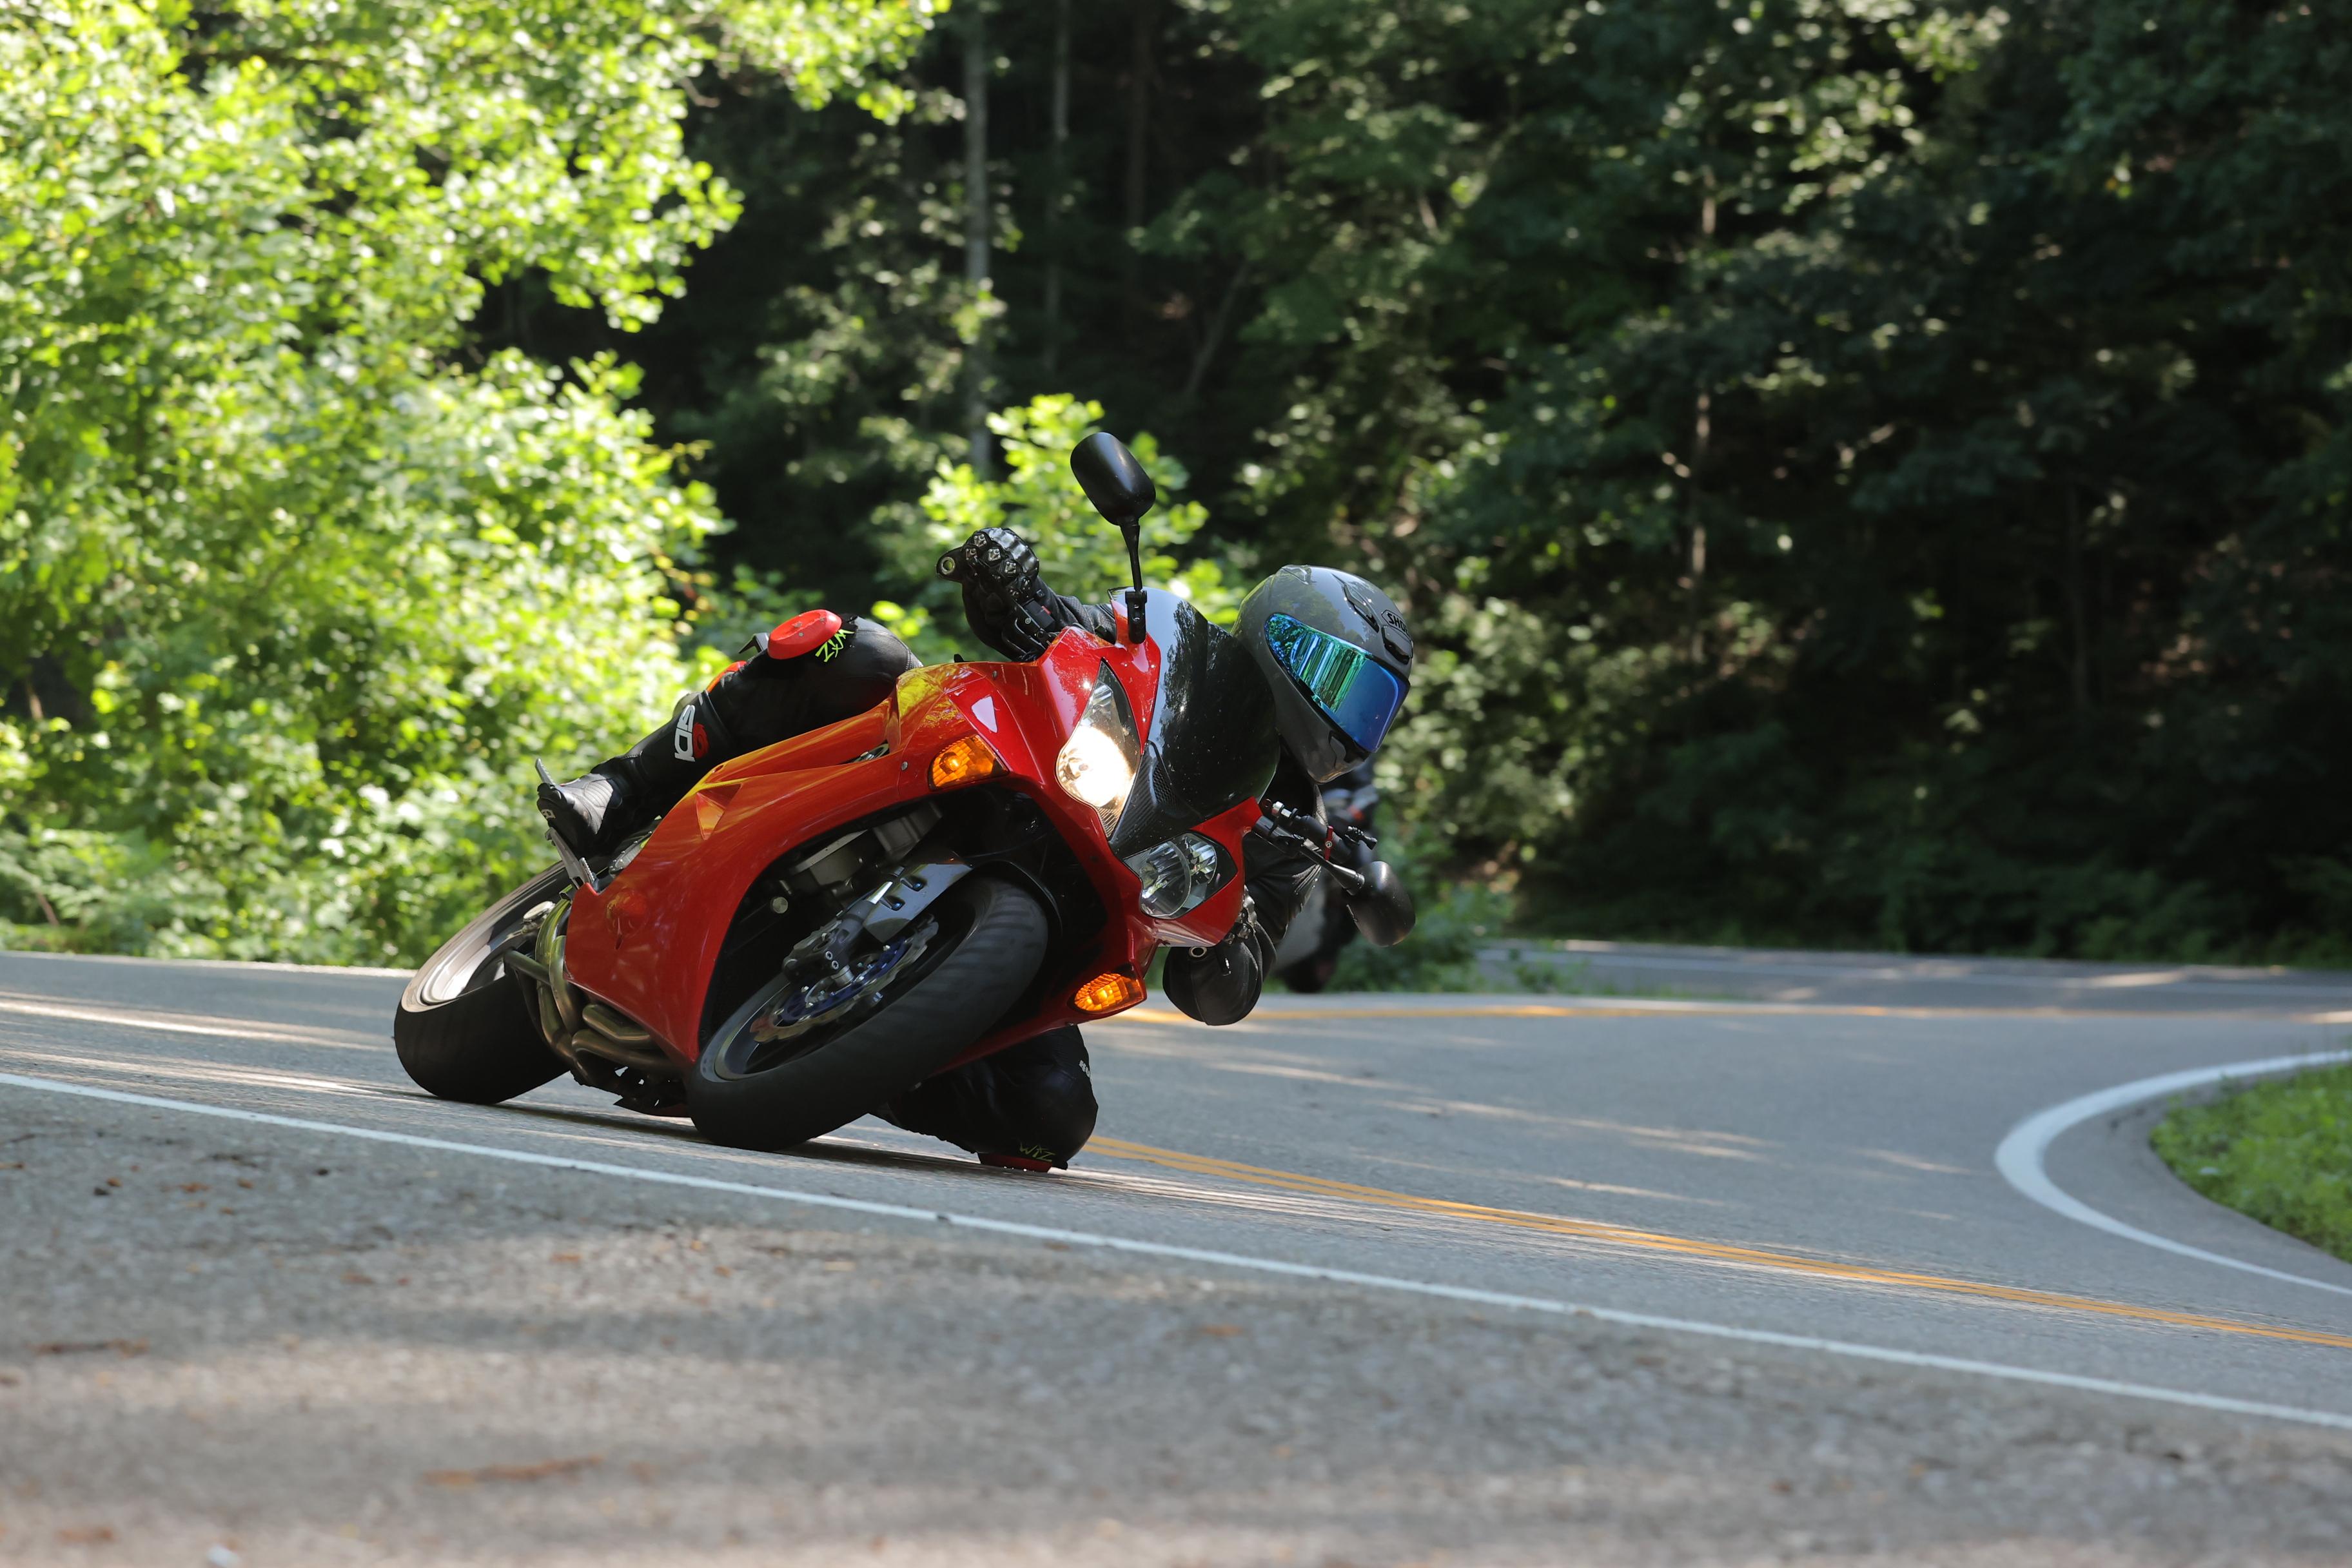
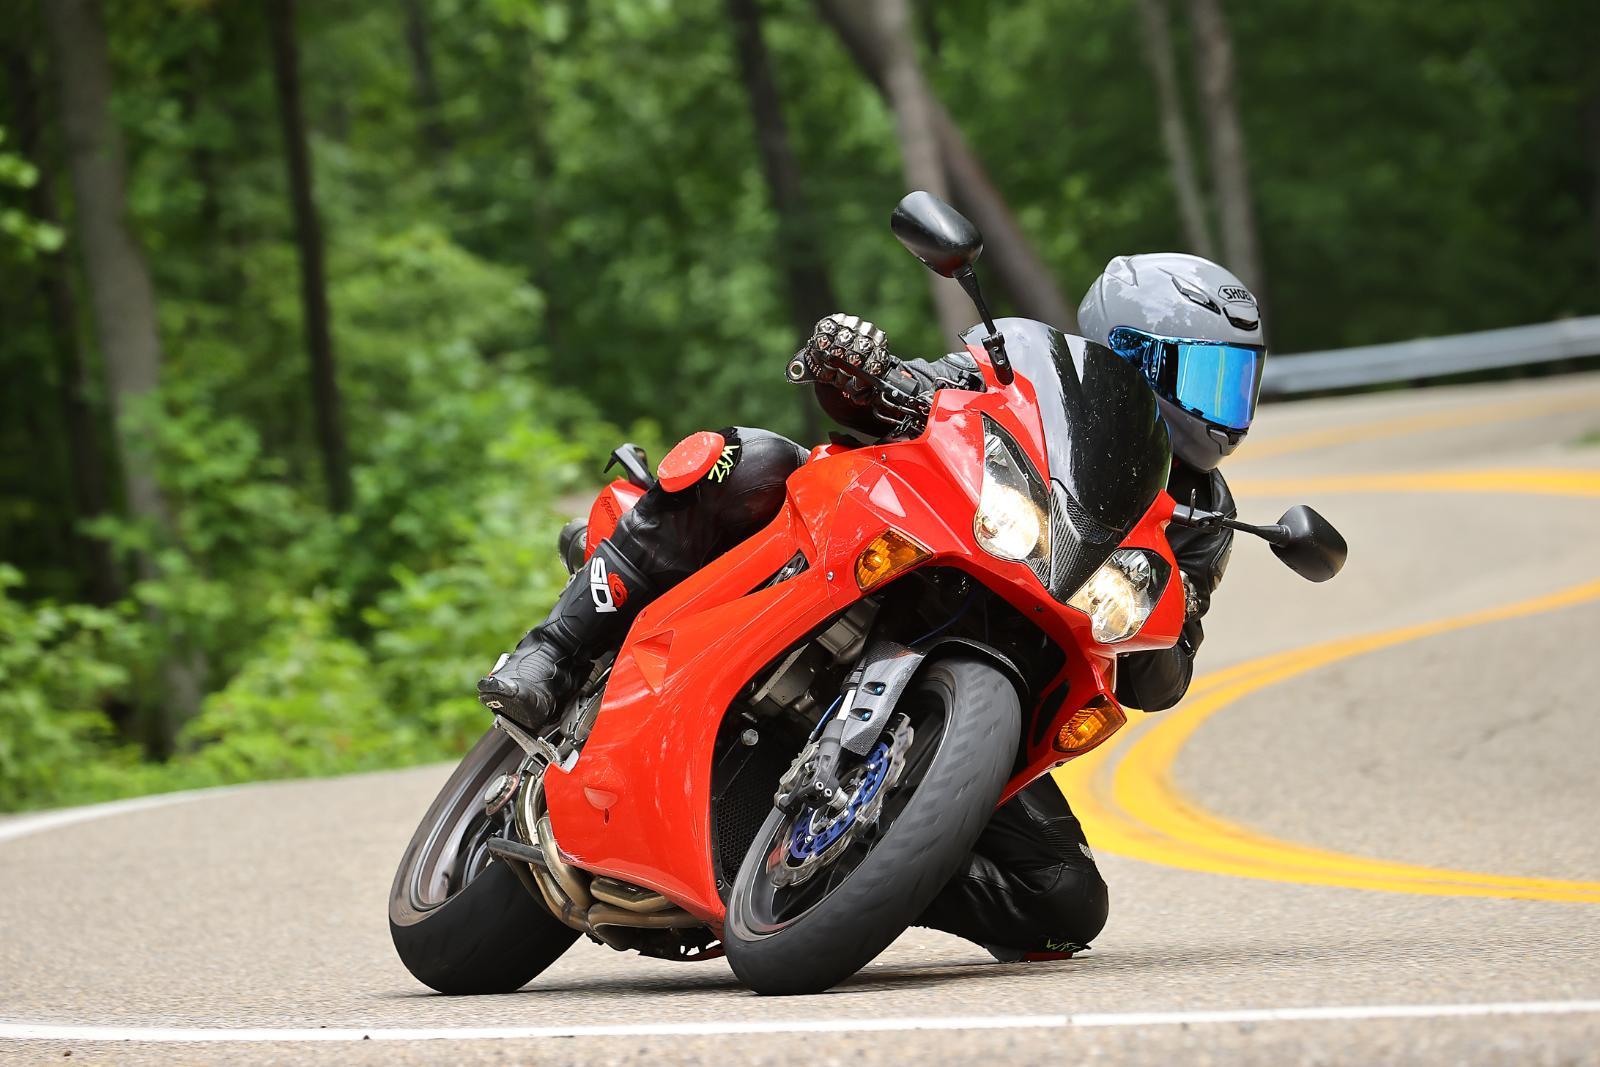
One of my Dragon runs with my buddy Travis chasing on his GasGas supermoto. Unfortunately the camera cut off toward the end, just as things were getting spicy. Watch in hi def and you can see the rubber stripes being painted on the corner exits 😎
-
Short pull through the gears, shifting on boost
-
Manual fan operation
-
I stuck with the same -1 front/+1 rear that I had before. It pulls out of corners very well without revving too high on the highway. I did have to go with the aftermarket 520 conversion to achieve that, as the biggest oem-fit Ducati sprocket only went as high as a stock VFR rear.
-
I didn't take it as a bad thing... is Trigger's broom akin to grandpa's axe?
-
Original, untouched and unmodified parts? Not much... motor, swingarm, taillight... some brackets and hardware?
-
Thank you
-
You're not wrong...
-
Who wants videos? https://youtu.be/LIMFTeyRGUY
-
Grab a bolt with pliers, heat it with a torch until it changes colors. Practice on a handful till you get a feel for too little/too much heat, and what colors you want. If you polish the bolts first, the colors will be brighter.
-
I've thought about it, but havent yet. I do have a carbon 5th gen heat shield that was made by someone else. If you pm me your email or phone # I'll send a pic and price
-
Thanks. It's hard to assign a value to individual parts when so much has been changed at once. I went from full stock clutch to the RCS + ss line + slave + 99lb clutch springs, so it's all quite different. The system does work very, very well and I'm sure the slave helps with that. I went with the larger size piston to make the pull easier. Even with the stiffer clutch springs, the pull is lighter than stock with a much better feel. I can easily modulate the clutch and brakes with 1 finger if I choose.
-
The bolts I colored are stainless, no need for corrosion protection. I just colored them because I could. And to be different.
-
Ah, yes... I love my mountains at home but these are so much more exciting! After arriving at the infamous Chateau Noir, the 190 was quickly mounted and axle covers installed... I have yet to fine tune all that fancy suspension, but I have to say, this is by far the most composed, best handling, best braking, best shifting, most comfortable and outright fastest VFR I have ever ridden. And I rode an HRC-built lightweight Ohlins equipped RC30 just prior to boot. This lowly VTEC knocks its socks off in every department except static weight. The new tire wear says more than I can, after a lap on that road everyone loves... And especially after a few laps of my favorite section of road, the top of 28 before the old closed Texaco, aka the shitty gas station
-
No minute like the last minute... I could have sworn I had a brand new right side panel in my shop attic... apparently I used that one already... so mad dash to get my old one scrubbed down and sprayed just in the nick of time! And then another little disaster... extremely inaccurate packaging... what a piece of garbage. It took almost 5 months, but I did end up getting my money back from ZG. I ended up going with my oem 06+ screen for the trip. Mileage correction recorded... Hey @Rivcyko ... remember these? lmao So, here is why a 180 on a 6" wheel is a bad idea... Check our front "chicken strip"... looks like it hasn't really done much more than a lap of a showroom floor... But! What do we have here? Nothing! Beyond margin for error! This was the first ride, not pushing anything in any way as I was just doing brake checks, cooling system checks, etc. I was out of time to order a new tire to my house, so had the proper 190 I needed shipped ahead to Maryville, TN where we'd be staying for a few days prior to the spring ride in NC. Left side buttoned up... Yummy... Right side almost there... One more thing I felt needed doing, was some protection for the lower radiator. I got some metal mesh from amazon and worked up a screen: And then modified the 6g "V" inner fairing to delete the middle section. I trimmed it out and left myself some extra on the bottom edge to roll over for an oem look. Final assembly: I got a new filter sock for the intake as the old one was torn and dirty And then a nice little wax job And a quickie camera mount for my son's gopro I had just enough time for a few more short test hops before packing up for the big ride
-
Ooh, ahh... I spent too much time trying to figure out how to have the blow off valve make a funny noise, but short of zip tying a rubber chicken to it, I couldn't find any good options, so just let it be. But yes, that's how a bag of rubber chickens ended up at the Spring ride... Boost gauge adaption Looking more complete by the day So much work here, I can't even begin to describe most of it. THAT RED!!! WINNING!!! Here she is running some heat cycles in the yard. I did also Cerakote the Rotrex oil reservoir, and you can see the fluid level indicator hose doing it's job.
-
I'm a detail guy... gotta have them, I get lost in them... I moved the rear brake res to the footrest area to buy myself more room for the fuse box and RB install. Unfortunately couldn't get my hands on a translucent smoke colored res to match my bar controls, so I used this white one. The folks at Kurveygirl.com are trying to source me the one I need from Italy. I used one of my stainless mounts for it, and dressed up the bolts with a little torch heat treatment after lathe cuts. Also added heat shielding to the back of my carbon heat shield, but forgot to take a pic before install. That was fun, so I torched the titanium rotor carrier hardware too... Aaaand I swapped the clutch slave out for a red one, and torched those bolts too. lol Getting a little busy in there O2 sensor wires were a squeeze Another favorite little mod - these QD fuel fittings, thanks to sa1713 for the idea in an old thread As you can see, I opted for fancy oil for the old girl as well. Pump side Time to let the Japanese air out of the tank... Ah, that looks so much better... Accouterments installed... I had sent my rear frame sliders (oem luggage racks) to be powdercoated to match the frame and subframe. Got the mback, stuck them on, and found my new Remus arrangement didn't jive. Thankfully I'm handy... new part designed, tested, cut, coated, and stashed for future install. Oh yeah, tank on and other finish stuff happening too of course... double checking hose clamps, tightening bolts, etc My brackets put to use again With some mundane stuff like fluid fills and bleeds out of the way, it was time for a most joyous occasion. the first start. She popped right to life after cycle priming the fuel pump a bit. This was without the blower connected, just a proof of life and throttle body sync to start off. Coolant temperature held very steady, and below what I was used to seeing at this point. Very happy so far to see all that effort in those new systems paying off. I combined a selection of switches and pods from amazon to form this triple switch arrangement. Top switch is heated grips h/l/off, the bottom 2 are for the manual side radiator fan and for switching between Rapid Bike Map 1/Map 2. I even wired the lights to work properly. In case anyone needed to know, a mini fuse will fit & work in place of an old school fuse Rear wiring complete... I deleted the license plate light and used the connector for the fuse box relay trigger. Was feeling pretty chuffed at this point, nice to have more parts on the bike and less parts on the bench! However, still a fair bit of work to do. Both big and small, a clutch switch for example. Not strictly necessary, but an easy enough little project. the Brembo RCS masters do not come with a provision for mounting a microswitch, so I made one. Made & coated a tidy license plate mount And then for the fun part!
-
Big expensive box... So shiny... One of my favorite mods right here... Installing white leds and swapping the factory film for new polarized film to "flip" the lcd screen colors. It really makes it like a new bike. Unfortunately, it's the one thing I really goofed up on as I fully removed the lcd screens when I did not need to. I'm gutted to say I fubar'ed the original circuit board and I had to go buy another one. So although my mileage is now lower, it's not original and my badge of honor mileage is gone. I did mark the cluster with the original mileage so the correct mileage can be preserved accurately. Instead of removing the full panel as shown above, I should have just bent it out of the way like I did the second time here: Testing the film orientation: Done, off: And on: I actually ordered a custom gauge face from Throttlepimp, he did a great job on it but unfortunately the post office took too long delivering it, so it didn't make it in time to be included for the spring ride.
-
Inexplicable road rash that was present on the ebay caliper. I didn't bother polishing it off because it looks a lot worse in the pic than it does IRL. Don't ask me how they got it on the wheel side of the caliper...


