
magellan
-
Posts
381 -
Joined
-
Last visited
Content Type
Forums
Profiles
Gallery
Blogs
Downloads
Events
Everything posted by magellan
-
You've done an outstanding job taking care of my one big complaint with VFRs (most gens): big, heavy-looking tail-sections. Once you get the lines through the swingarm (something I'll likely do this winter too), you're gonna need a prettier wheel, 'cause you'll sure be showing it off!! I've never quite had the nerve to get rid of the chain-guard completely. I have visions of something getting dragged into the chain (I know, not likely). So I made my chainguard out of a free piece of L-channel aluminum: Mistresses.jpg
-
Nicely done. It's amazing how well the lines flow into the 6th gen tail :fing02:
-
Good things come to those who wait . . . . . but only what's left behind by those who hustle! Believe me, we are all abaited breath for what you have in store for us. Your attention to detail and perfectionist ways will serve to a great, reliable product. Now finish and share your toys :comp13: Figured I would stop by and give this thread a :bump: It hasn't seen any action in the last twelve days. I am slowing putting the money away for one of these kits for the sixth gen when it comes out that is. I don't think that there should be that many adjustments for VTEC as there are many boosted Honda civics out there with VTEC. VTEC on Civics is completely different than on the bikes. The way the VTEC kicks in on a 6th gen radically changes breathing. Therefore any SC kit will have to be tuned accordingly. Dyno tuning 100% required.
-
That's a really good idea. Should do for now (knock on wood), but if there's a next time...
-
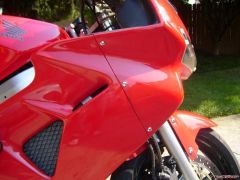
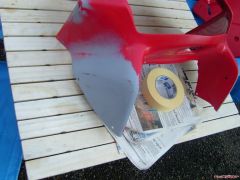
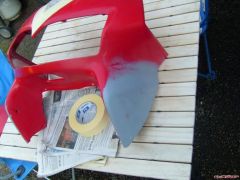
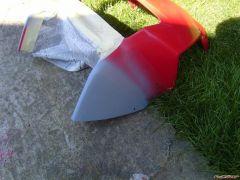
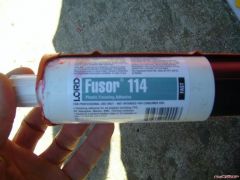
I filled the holes with cut-outs from an extra seat cowl, plastic-welded the perimeter, sanded to find low spots, cleaned the ABS with a swipe of brake cleaner on a rag, mixed epoxy, and smeared it on as thinly as I could and still fill any dips. On the back side I slathered on a good layer of epoxy too, for strength. After the epoxy dried it was simply a matter of sanding with progressively finer sandpaper. 500-grit wet-sandpaper still leaves sanding swirls that can be seen after clear-coating, so I'd recommend a couple of coats of primer and a final sanding with 1000-grit or so before painting.
-
Tim knows that. He's just trying to be funny. Try harder next time, Tim... :dry: :491:
-
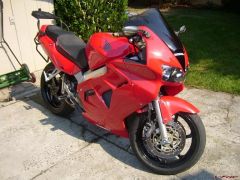
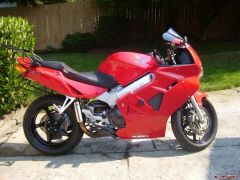
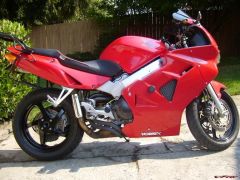
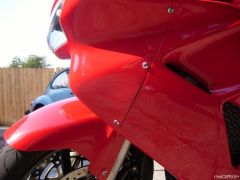
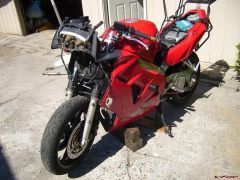
Well, I finally got my bike repainted to my satisfaction. After low-siding in June, I tried repairing and repainting just the right fairing and front fender (which I had cracked earlier with a dropped floor jack handle :biggrin: ). The color match was terrible and my paint job sucked, but I did learn a lot. I think I could now paint a bike reasonably well with a good spray booth (believe me, I know where every dust fleck is in the current paint job). I rode the bike in a semi-repaired state all the way to the Kootenay Hootenanny, but when I got back it was time to bite the bullet. Here are the results: S7000892.JPG A sad sight S7000890.JPG No more dumbo holes S7000891.JPG Great ABS plastic repair epoxy!! S7000894.JPG Lots of sanding... S7000893.JPG ...and several coats of primer S7000896.JPG Finally, painted, wet sanded, buffed, buffed, waxed, and buffed some more! You can see that I need to pull the side fairing and remove a blob of filler that's holding the front cowl out a bit. Later. S7000897.JPG The paint is a pretty good match after three tries at the paint store (DuPont), but not perfect. ColorRite is no doubt better, but they have no retailers in Portland metro. S7000899.JPG You might be able to tell that the front fender is 1.5" shorter and re-contoured for a slightly sportier look, but it's hard to spot. And the money shot: S7000900.JPG I'm pretty happy. Of course I toyed around with painting the whole bike a different color, but who wants to lose 10 HP?? :wheel:
-
From the album: Motoczysz
-
From the album: Motoczysz
-
From the album: Motoczysz
-
From the album: Motoczysz
-
From the album: Motoczysz
-
From the album: Motoczysz
-
From the album: Motoczysz
-
From the album: Motoczysz
-
From the album: Motoczysz
-
From the album: Motoczysz
-

From the album: Motoczysz
-
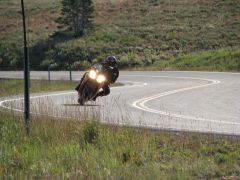 Finally someone posts up a cornering pic with proper body position! I was starting to think we were running a clinic on how not to do it :fing02: :laugh:
 -
 What tires were you running?
 -
:491: , but why on earth is there a centerstand on that bike??? Trying to keep the center of gravity low? :491:
-
Oh, really? :biggrin: Baggage.jpg I thought quite a bit about putting a 6th gen tail on my 5th gen, but decided it would be easier to do an underseat exhaust and mod the 6th gen luggage frames. Now I wonder if I made a mistake... if the 6th gen tail can fit a 4th gen, it ought to fit a 5th gen too, right?
-
From the album: Motoczysz
-
From the album: Motoczysz
-
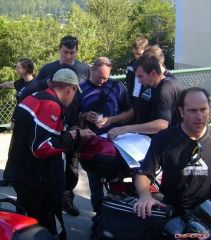
Whew, we got 'er done. :musik20: What Tim didn't mention was that we had to chase a very scary gremlin. Last night we fired up the bike and got an FI light. After putting out a call for help on VFRD I realized that I'd mis-located one of the pins from the harness to the black ECM connector, but after putting it right we still had the FI light and the codes wouldn't clear. Uh oh... ECM damage? I have to point out that the Honda manual was pretty damn lame at laying out a troubleshooting tree for the symptoms, but I won't bore you with the details. Suffice it to say that after already having replacing numerous damaged wires at the black connector (from last year's accident), we eventually found one more that was completely broken inside its insulation. After replacing it, VROOM!!! No more FI light. (BTW, Tim, I checked all the other wires on the connector very thoroughly for internal breaks or hidden damage. We're good now :fing02: ). After further thought, I'm voting for matching red. If not, matte black to match the fork lowers... :goofy: Either way, this is officially the sickest VFR I've seen yet.