

HispanicSlammer
-
Posts
6,954 -
Joined
-
Last visited
-
Days Won
61
Content Type
Forums
Profiles
Gallery
Blogs
Downloads
Events
Everything posted by HispanicSlammer
-
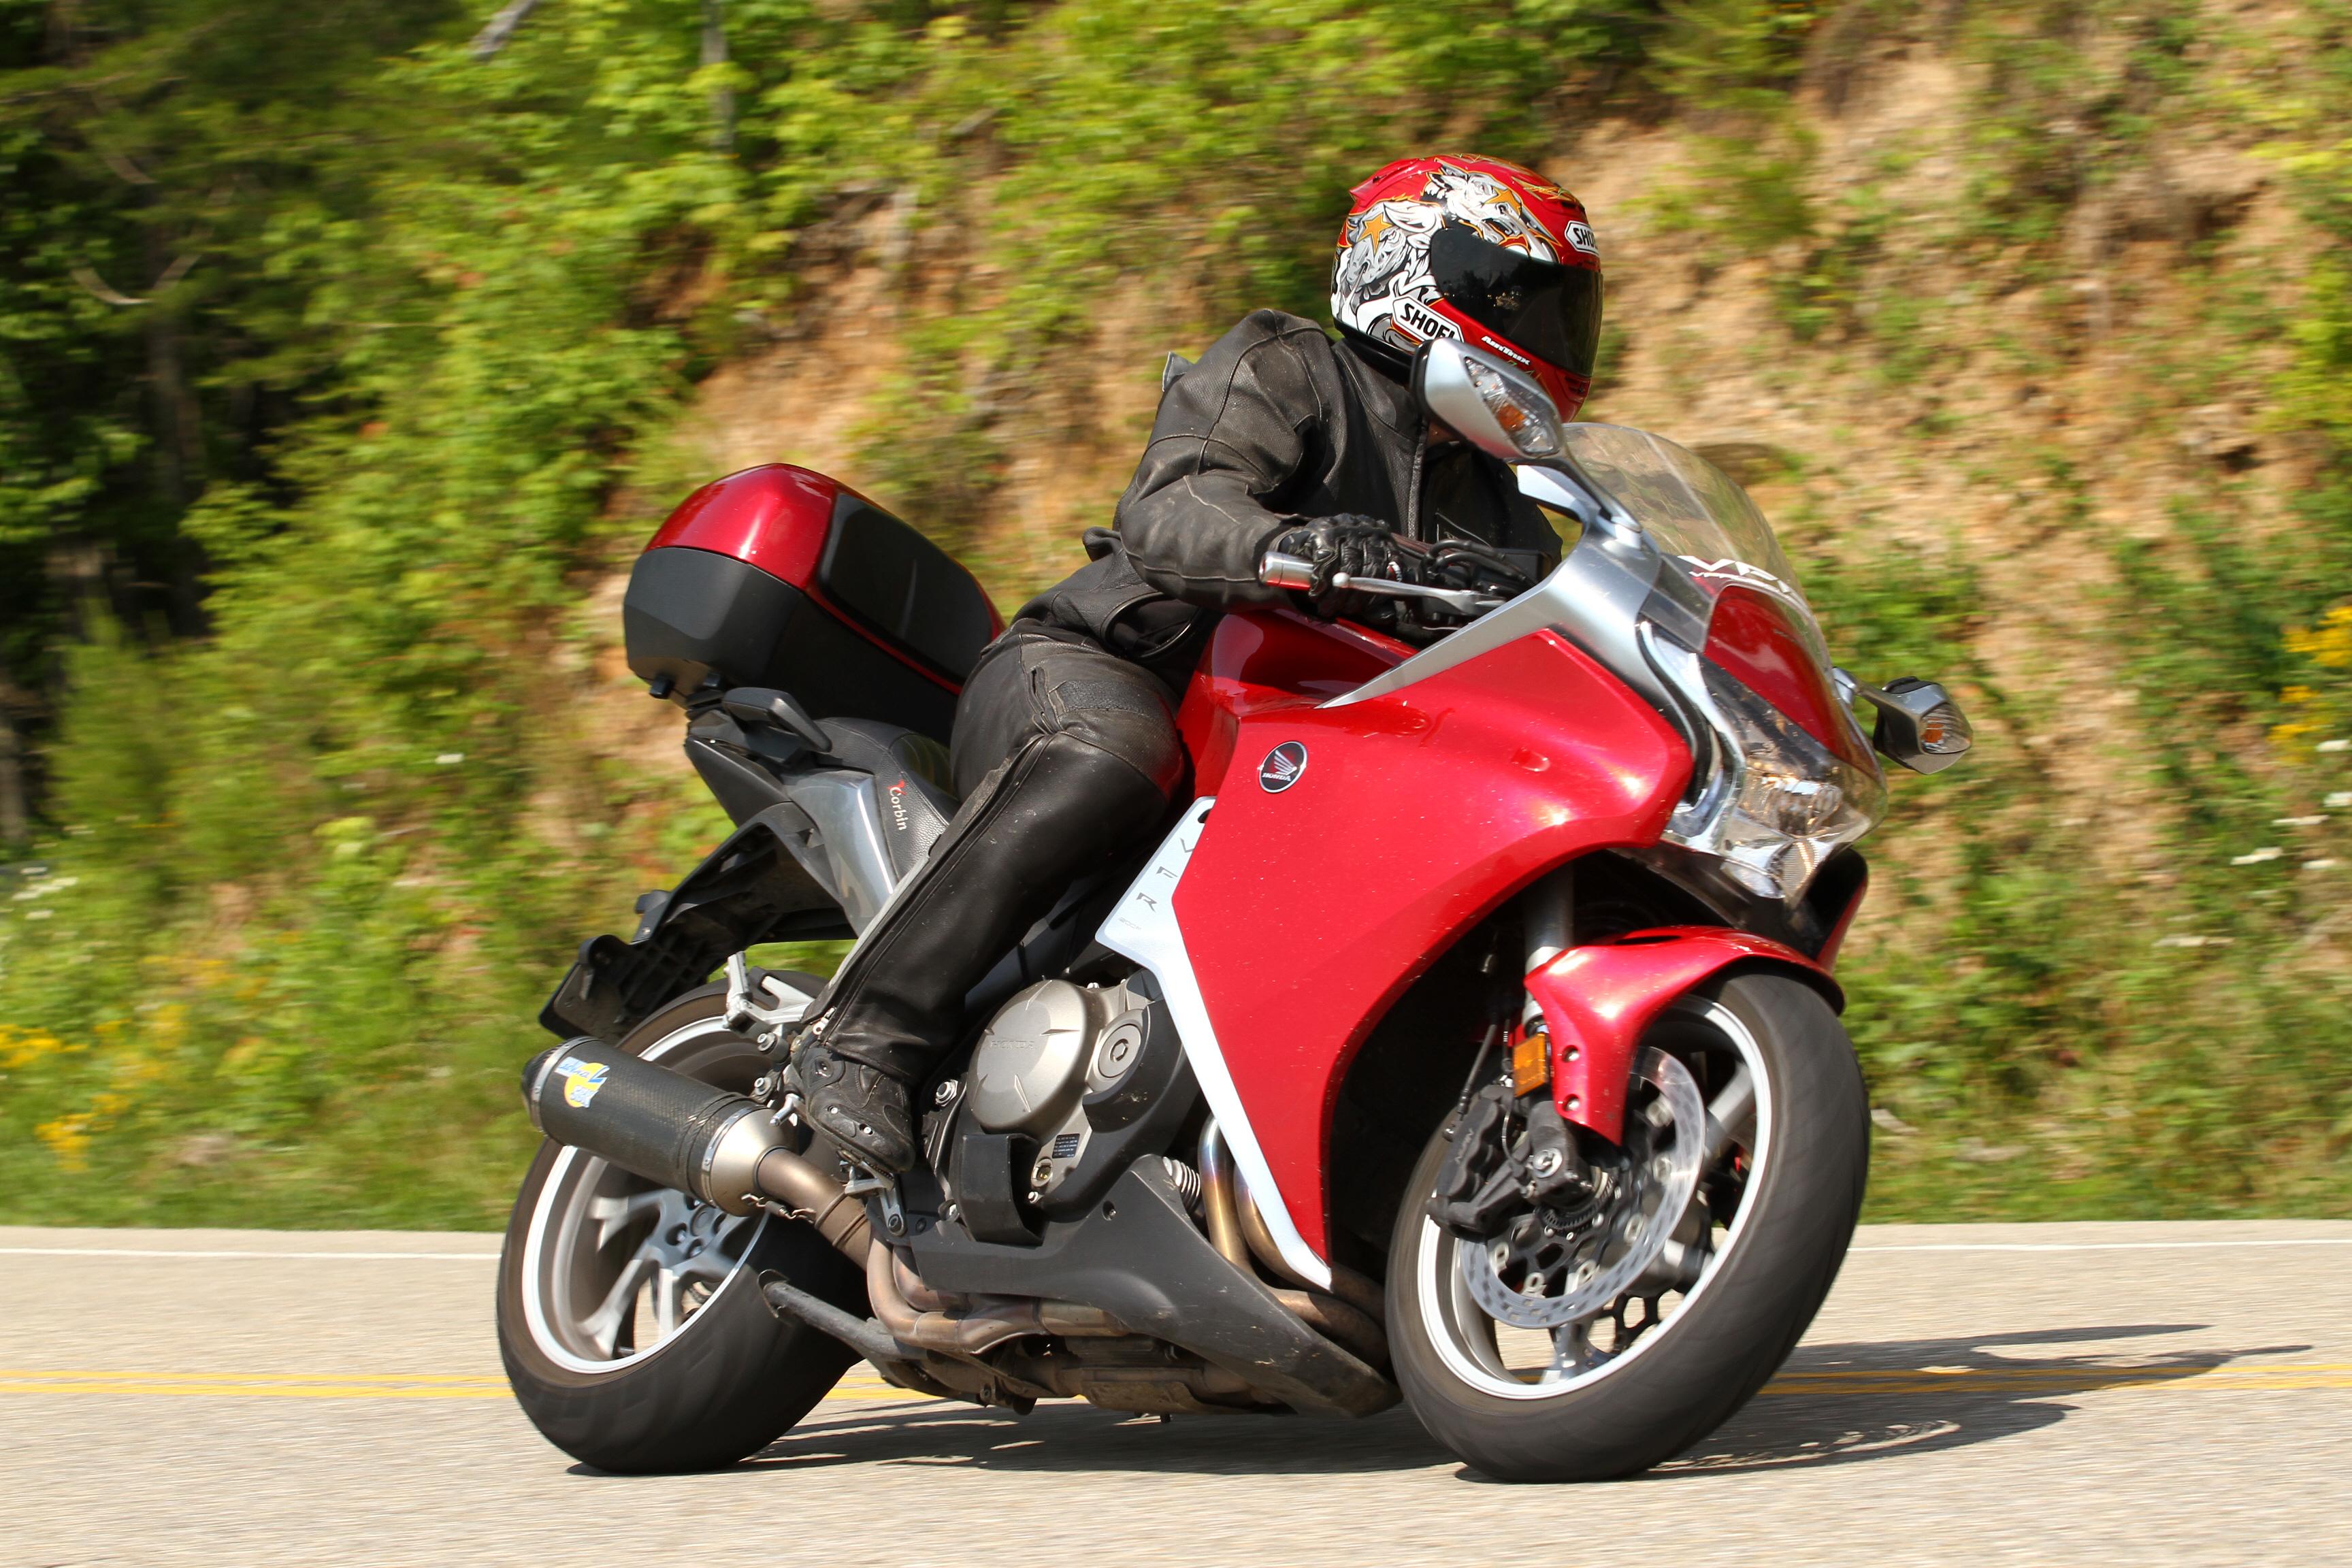
Farkles Farkles Farkles I got a few motorcycle items for Christmas this year in the form of gift certificates, one was completely anonymous, I thought it was from my sister but she denies it? I don't know who the GC came from perhaps even from one of you members out there?? Whoever it was thanks it was enough to add to my gps fund to finally get one. GPS Garmin Quest I chose the Garmin Quest for its small thin size and ease of use, its a bit of a compromise, smaller screen, no expansion memory but its a darn nice unit, water proof and has Garmin quality. I just ordered the motorcycle kit from Gps City It came with an auto charger, home charger and a motorcycle charger with base and ram mount. I ended up using the ram arm and base but opted for an angled 1 inch ball with an angled hole that I screwed onto my handle bar at the clip-ons. I already had it and it worked great, much less bulky than the u bolt monster they sent me. I have never owned a GPS before so its a fun toy to play with, and useful for when I finally start riding out of state this year. I done rode all the roads around here time to start multi day tripping! I just plugged it into the switched fuse block/ground block I have already installed long ago and secured the wires with zip ties. Radar Detector I had a cheap Bell last summer that was worthless, I don't have the budget for a Valentine and saw this inexpensive Whistler remote radar detector on the net. Radar Detector Includes Remote sensors - radar and laser - various mounting tabs Whistler DE3500 I like the idea of a remote sensor since there is not many places to mount a radar detector on a motorcycle, this unit has a weather proof radar detector and a remote laser sensor. Remote radar sensor mounted Bolted on I used RTV sealant, brass screws, double nut pinch tightened, with rubber washers to protect the plastic. 1 inch drilled hole removed the headlight and drilled a hole for the laser sensor. laser sensor laser sensor installed The 5th gen light housing has a third light notch in the middle I used that space for the laser sensor it sets back in a bit and out of the head light beams, getting a full 180 degree sweep for laser detection and stealth. Mounted it came with a metal mounting tab that I screwed into the base, then I used a rubber tire patch to cover it with and sealed the whole thing tight with RTV silicone. Front view of both sensors This unit has a temperature probe and also displays the battery voltage when programmed to do that. I like that feature to monitor my RR when on the road. My beef with this thing is that when I finally got it mounted and plugged into the fuse block it would not communicate with the remote sensor, I had to move it around and play with wires and test them for continuity. I also don't like the sound plug, you have to use this proprietary speaker that gives voice alerts for another $40 bucks, F-that I soldiered a couple leads to the speaker and made a little sound lead for it myself, works great. Both the GPS and the Radar detector are wired into my mixer isolator box I bought off the net. It was available for a short while but is no longer being sold?? Its just a box with 2 mono inputs and 1 stereo input with a jack for my ear-buds. It mixes the sound and isolates the signal so it wont damage your electronics. I like it but it cuts my mp3 player output in half I have to crank it up to hear it. Its nice to hear the radar detector and listen to music on the slab, now my gps tells me to turn here and there too with a fake computer voice. I had a link to the mixer box in the links section but the guys website disappeared so I think he went out of business, its a simple little box solid state isolator mixer, no frills unit. I have my mp3 player attached to the right side master cylinder its easy to adjust volume and flip songs/mute. Hey now I AM A GEEKED UP VIFFER FOR SURE NOW! Dash Displays Whistler DE3500 Remote radar Detector, Garmin Quest GPS unit
-
 I am still trying to figure out why a French Canadian is Named Miguel? But then again I am half Irish so? Top of the morning to ya Meho!
 -

Kevin Schwantz signing my autograph.
HispanicSlammer commented on DarrenC's gallery image in Member's Gallery
 Who was this for? "To the guy who I can lap in my sleep?" Signed K. Swantz
 -
Roger Hayden coming out to sign my poster.
HispanicSlammer commented on DarrenC's gallery image in Member's Gallery
 The family has to have at least one ugly member
 -
Mat Mladin doing an interview for Speed.
HispanicSlammer commented on DarrenC's gallery image in Member's Gallery
 Announcer "why are you such an A$$H&^!" Matt "Cause I Can"
 -
 Damn looks like some kinda bondage kink or somthing?? LOL owch that looks like it hurts!
 -
fixed the photos, I am getting around to fixing all the photos in these old how-to's. First I have to upload them to the server, that is if I can find the backups. Some I have to rename cause they have old file names from the camera I used, but then changed the names when I originally posted on the ikonboard forum. Then some have html in the post I have to remove, sucks ass to do that bunch of gobbly gook code I have to remove first, and some are all out of order after I redo them and they come out looking out of plac. Some have the descriptions on top of the photos instead of on the bottom. Its a mess, the old photo server I was using just dropped my account for no reason and so there are a lot of these old posts with dead pictures. It takes almost more time to redo them than to just delete the darn thread and start over.
-
fixed the photos
-
 What is that Yamaha??
 -
Trackday Phillip Island 2/3 Nov 05.
HispanicSlammer commented on gingle's gallery image in Member's Gallery
 Custom seat, made in AU?
 -
fixed the photos
-
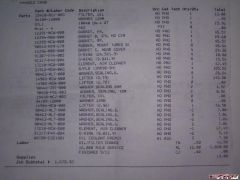 Jebus I am glad I am a do it yourselfer!! 1k in labor?? 100$ spark plugs?? gouging comes to mind!
 -
Stiction is measured by doing multiple sag measurements and then comparing them, if there is a lot of difference then you probably need to replace your seals, and check the tubes. From what I learned rebound control is strictly a function of the spring stiffness while compression is related to the wieght of the rider, spring stiffness, and flow properties of the valves in the oil. So yea you need more rebound control with a stiffer spring but at the same time less compression cause your not compressing the springs as fast. bottom line to get back on track here - I think adding 20 wieght oil to a stock fork is a big mistake and it will ruin your ride. If you add stiffer springs and 20 w fork oil its gonna be like welding the fork tubes together.
-
When I put in the stiffer springs I used the standard 10w oil withthe standard oil measurement. Ride was harsh and bumpy, with the front wheel hopping out of bumps much too stiff. I figure the extra stiffness of the springs take more energy to move so less damping is needed, the rider was the same and the bike was the same so the stiff springs made it too stiff. I found 5 wight gave it a much more compliant ride than the 10w for a guy of my wieght (230lbs). Not too much difference from the racetech valves and oil combo I am using now. Its slightly more compliant now, but with suspension a little goes a long way its perfect now.
-
10w fork oil is standard for the 5th and 6th gen vfr, I actually use 5w oil now with stiffer springs, the springs dont need as much damping action so a lighter wieght oil is better.
-
 Striking photos, I love the contrast, ....... pinned them to be featured!!
 -
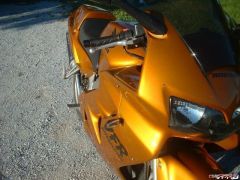 I like the Gold paint, my old school colors are Black and Gold. You painted the dash too? Mine is all rough did you have to have it sanded first to get that glossy paint on?
 -
Whats he got in those bags???
HispanicSlammer commented on VFR_Texan's gallery image in Member's Gallery
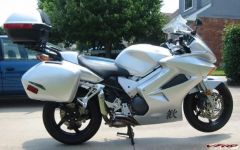 Nobody notice the front where lofted off the ground, he must have a body in those bags LOL!!
 -
Fixed
-
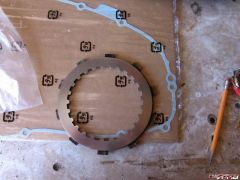
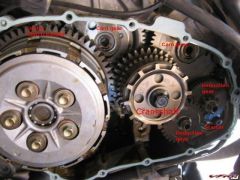
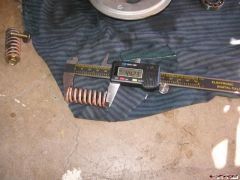
Last week I rode to New Mexico and stayed with my sister in Santa Fe ( read the Sandia Classic Post) Anyway she had a big rock in her driveway and as I was pushing my bike into her back yard for safe keeping I hit the clutch cover and it must have cracked the cover. I noticed it leaking oil so I decided to remove it for inspection. November 2003 I lowsided on a patch of ice and slid on the clutch cover for about 40 feet, so I am sure the damage was done then and the rock just made it worse. Cracked Clutch Cover Started this whole mess!! Anyway I ordered a new one and hopefully I will get this bike back up and running within a week!! I have had a clutch pack for over a year cause I thought it would need it soon. So I decided I should replace it while I have the cover off. The manual tells you to remove the cam pulse cord from the plug under the airbox, thats a total pain in the butt to remove for a job like this so I left it on and just babied the cord. Clutch Cover bolts removed I removed several bolts and wrapped them in some masking tape, they are all the same size. Bolts wrapped in masking tape WHAT IS INSIDE Clutch Assembly Crankshaft, Starter, two reduction gears, Clutch basket. You have to soak the new friction plates in oil before assembly. Now is the time to also change your oil too!! Soak New Friction Plates Soak in motor oil before assembling. New Parts One Friction Plate A (smaller to fit into spring seat), 8 friction plates, 8 clutch plates, one gasket, one replacement pressure plate spring (not needed). Clutch Plate over Friction Plate Clutch Plate engages the inner basket, Friction Plates engage the outter basket HOW THE CLUTCH WORKS Its pretty simple really there is an inner and an outter basket, the outter basket is connected to the crank by some gears, and the inner basket spins with the transmission. They are independant of each other, then there are friction plates that have teeth that engage the outter basket, and metal clutch plates that engage the inner basket, you throw in 9 of each of them together staggered, and push them together with a moving pressure plate. The pressure plate is spring loaded by 5 springs. So When you pull on the clutch lever a piston pushes on a rod on the other side and goes through the engine and pushes on the lifter piece, which lifts the bearing which lifts the pressure plate and it takes the pressure off the 18 plates so the two baskets can spin free of each other. Let it out and the springs push the friction plates and the clutch plates together and then you have power to the rear wheel!! :media: See The video Pressure Plate Removed Inspect the lifter bearing for wear. Pressure Plate Removed 9 total friction plates, 8 clutch plates, 1 friction spring, 1 spring seat. Inspect the Clutch Plates Look for discoloration, place on a flat plane, glass or whatever, and use a feeler gauge to measure any warpage. 0.33 mm or 0.012 in is the service limit. I just replaced mine. Inspect The Outter Basket Teeth Marred but not damaged, check for broken pieces or deep impressions where the friction plates meet. Inspect the Inner Basket Teeth Mine were slightly marred but not damaged If the teeth are damaged you will need to replace the basket. I did not remove the basket or inspect the needle bearings holding the baskets, there is a lock washer for that and it must be replaced with a new one when removed. The oil pump has a chain drive on the assembly too you should inspect. I did not get that involved I just replaced the pack. Actually my old friction plates were still in spec but one metal clutch plate was pretty blued. I did not measure it for warpage but replaced them all anyway. Measure the Springs 1999-98 vfr 42.6 mm, 99-01 vfr 43.7mm is the service limit. The spring bolts are only 9 ft/lbs so dont crank on them too hard! remove the old gasket matierial from the cover and engine case and replace the gasket. The torque for the cover bolts is 9 ft/lbs Now how do I keep from going crazy as I wait for a new clutch cover??
-
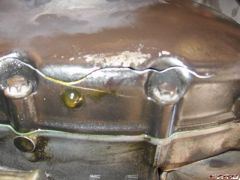
From the album: Repairs
Started this whole mess!! -
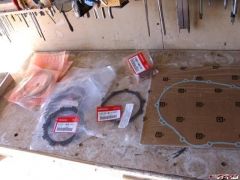
From the album: Repairs
One Friction Plate A (smaller to fit into spring seat), 8 friction plates, 8 clutch plates, one gasket, one replacement pressure plate spring (not needed). -
From the album: Repairs
Clutch Plate engages the inner basket, Friction Plates engage the outter basket -
From the album: Repairs
Crankshaft, Starter, two reduction gears, Clutch basket. -
From the album: Repairs
1999-98 vfr 42.6 mm, 99-01 vfr 43.7mm is the service limit.