toreckman
-
Posts
145 -
Joined
-
Last visited
-
Days Won
1
Content Type
Forums
Profiles
Gallery
Blogs
Downloads
Events
Everything posted by toreckman
-
@BusyLittleShop make's them.
-
Welcome. Thats some collection you have 😍
-
I completed this process today on my 5th gen. It went smoothy, except during the soda run, the fans would not come on, even at 110C (230F) even with blips of the throttle to remove air. I switched it off at that temp. All the other runs were fine, fan kicked in around 95C-98C. I used some Prestone coolant at 50/50 concentration. Thanks for the guide.
-

All-Balls Racing Fork Seal and Bushing Kits
toreckman replied to vfrgiving's topic in Fifth Generation VFR's
Thanks for the feedback. I just ordered the dust cover and Bushing Kits 😂 -
Interesting. how come some bikes fair better than others? Is it variation in the oem stators/RR's installed? Or climates etc.? I have seen some fried with less than 20k miles.
-
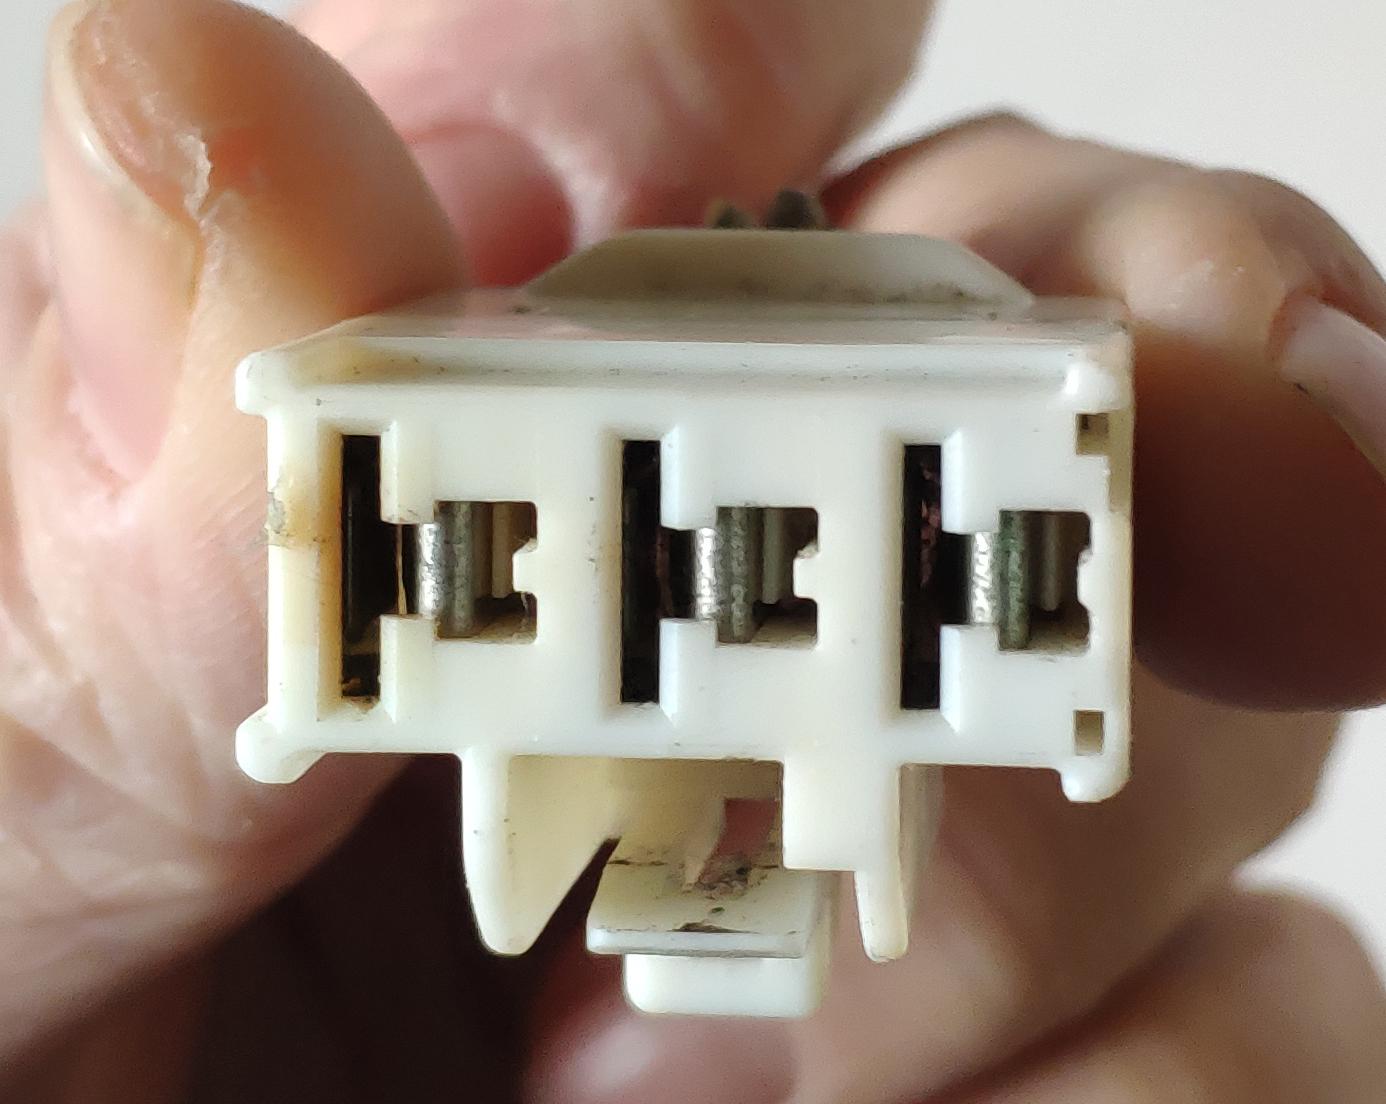
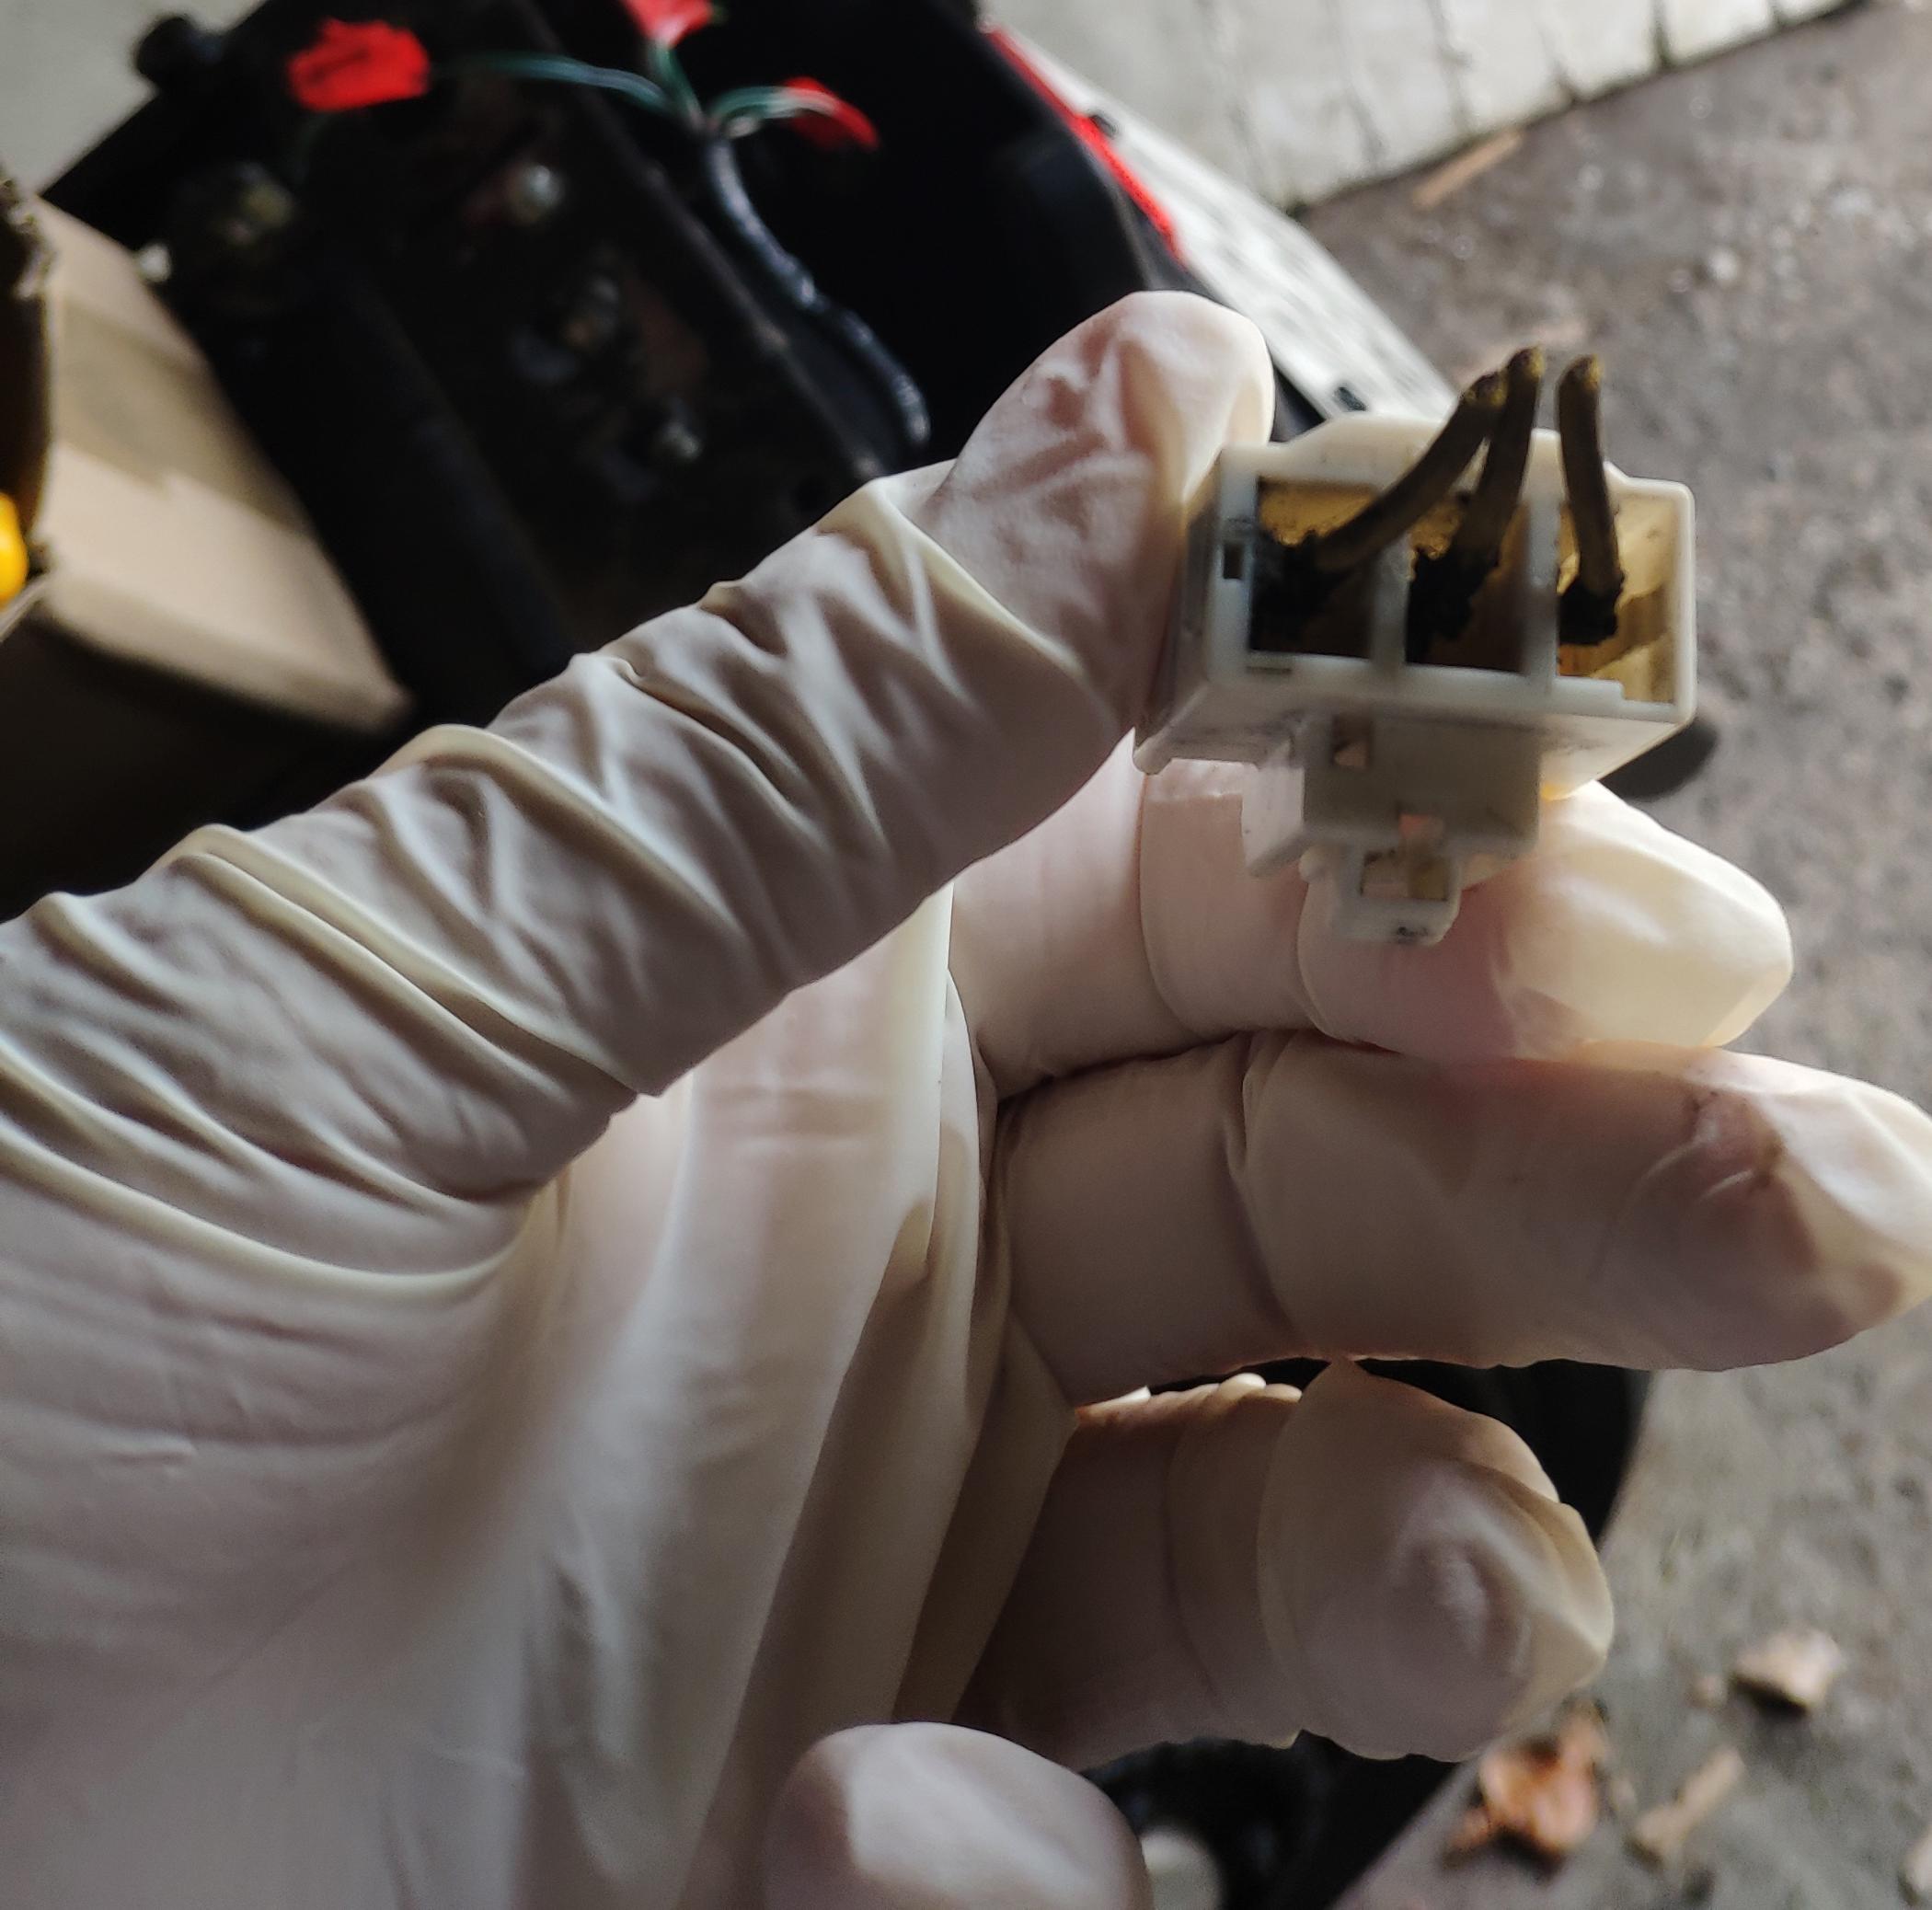
The kit comes with fused direct wiring on the battery side. @vfrcapn: how many miles were on your bike when your original stator plug got that fried? After 30k miles, mine had no damage, except a tiny bit of yellowing on 1 of the pins:

-
Thats lots of bedtime reading. 😄 At a quick glance through some of the temperature tests, there seems to be a nice drop with the sh847.
-
🤣 Really good info, thanks. That's a good job on those connectors. Can a "less perfect" splice hold up at all, if properly crimped? The ones supplied that I used are these. I will keep an eye on the crimps I used, when I get the bike fired up. I still have a few things to finish before its ready though.
-
Thanks for the input. I'm going to sound like an idiot, but what is that orange connector actually for? 😕 I have been wondering since I saw it 😂 I am still in the middle of upgrading/restoring my vfr, so nothing is final yet. I have a can of silicone, I could coat the tape, to keep water out? Or is there anything else i could use to wrap around them?
-
Hopefully it doesn't get as hot as the old one.
-
I have a voltage meter installed, so I will be keeping an eye on it. Do you have any links to stories of burnt crimp connectors/odd voltages? I would be very interested in reading up on that.
-
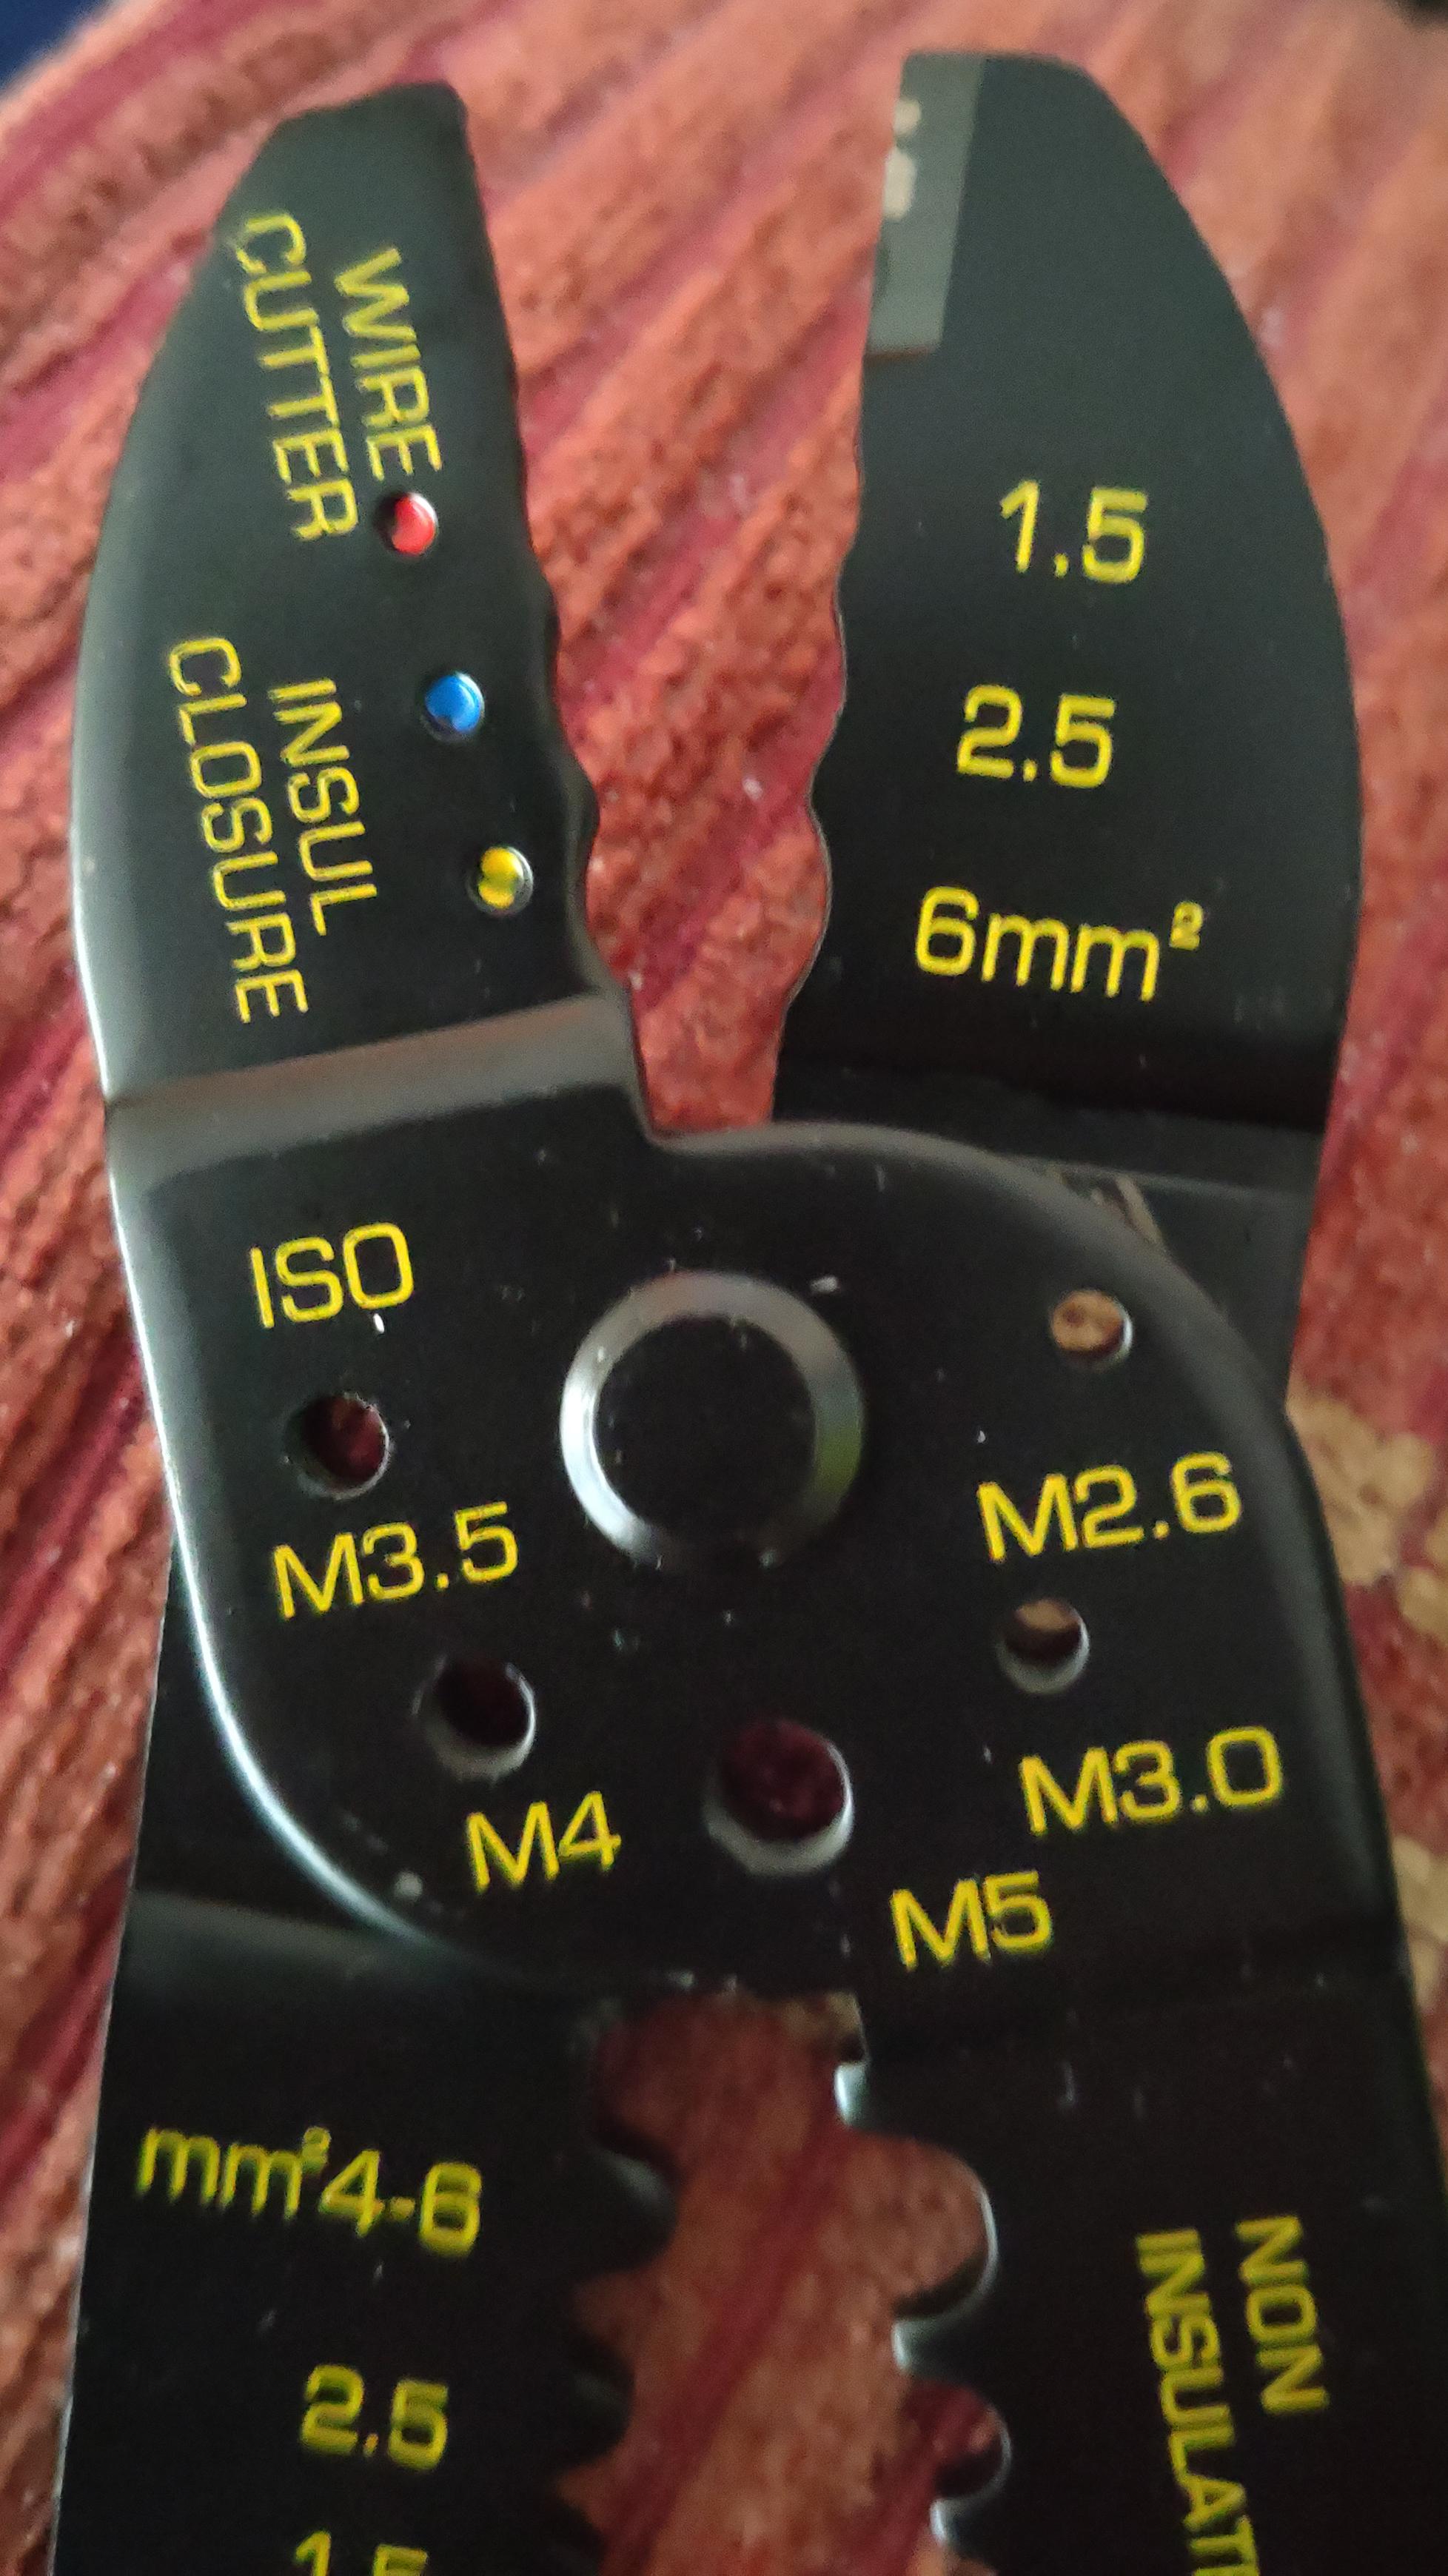
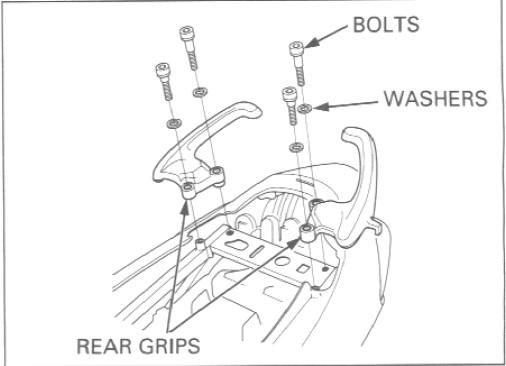
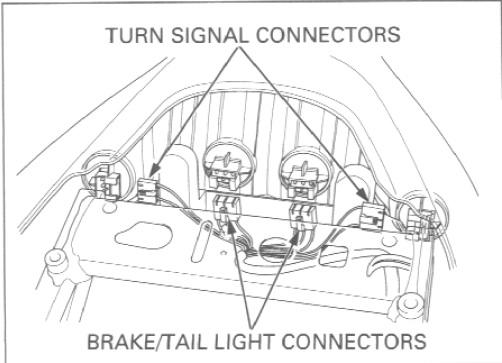
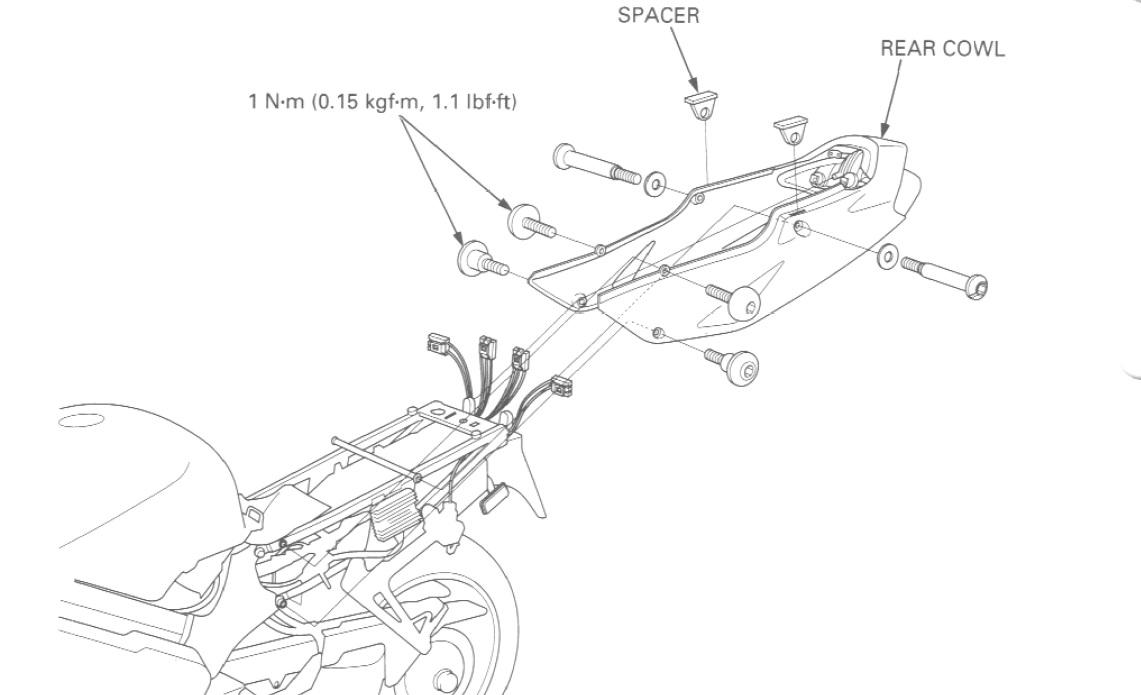
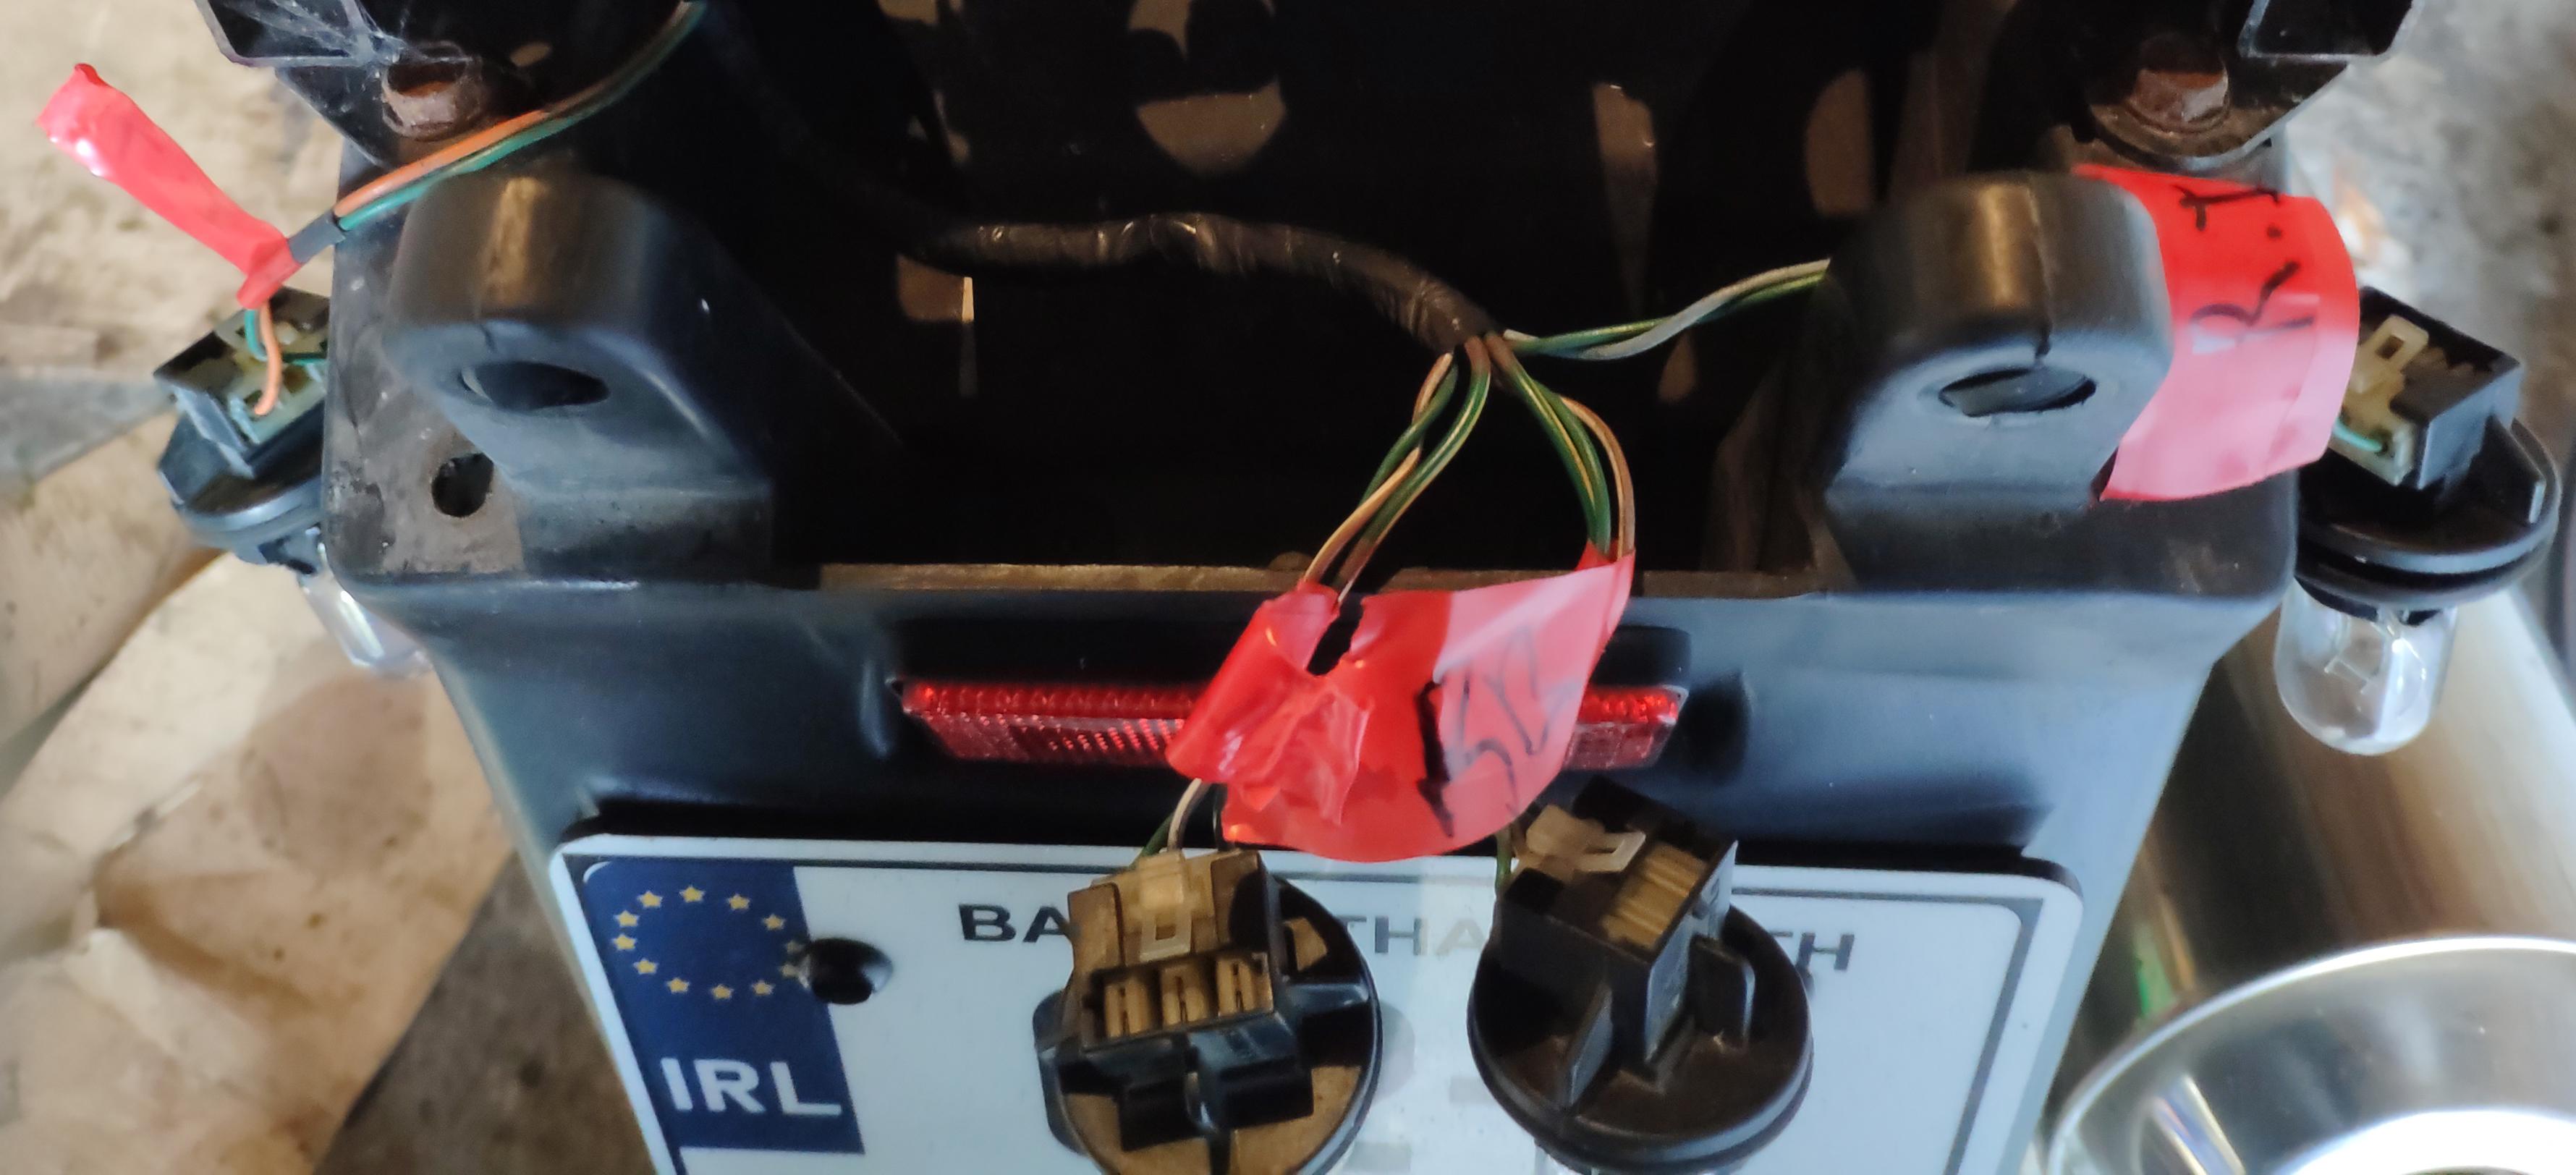
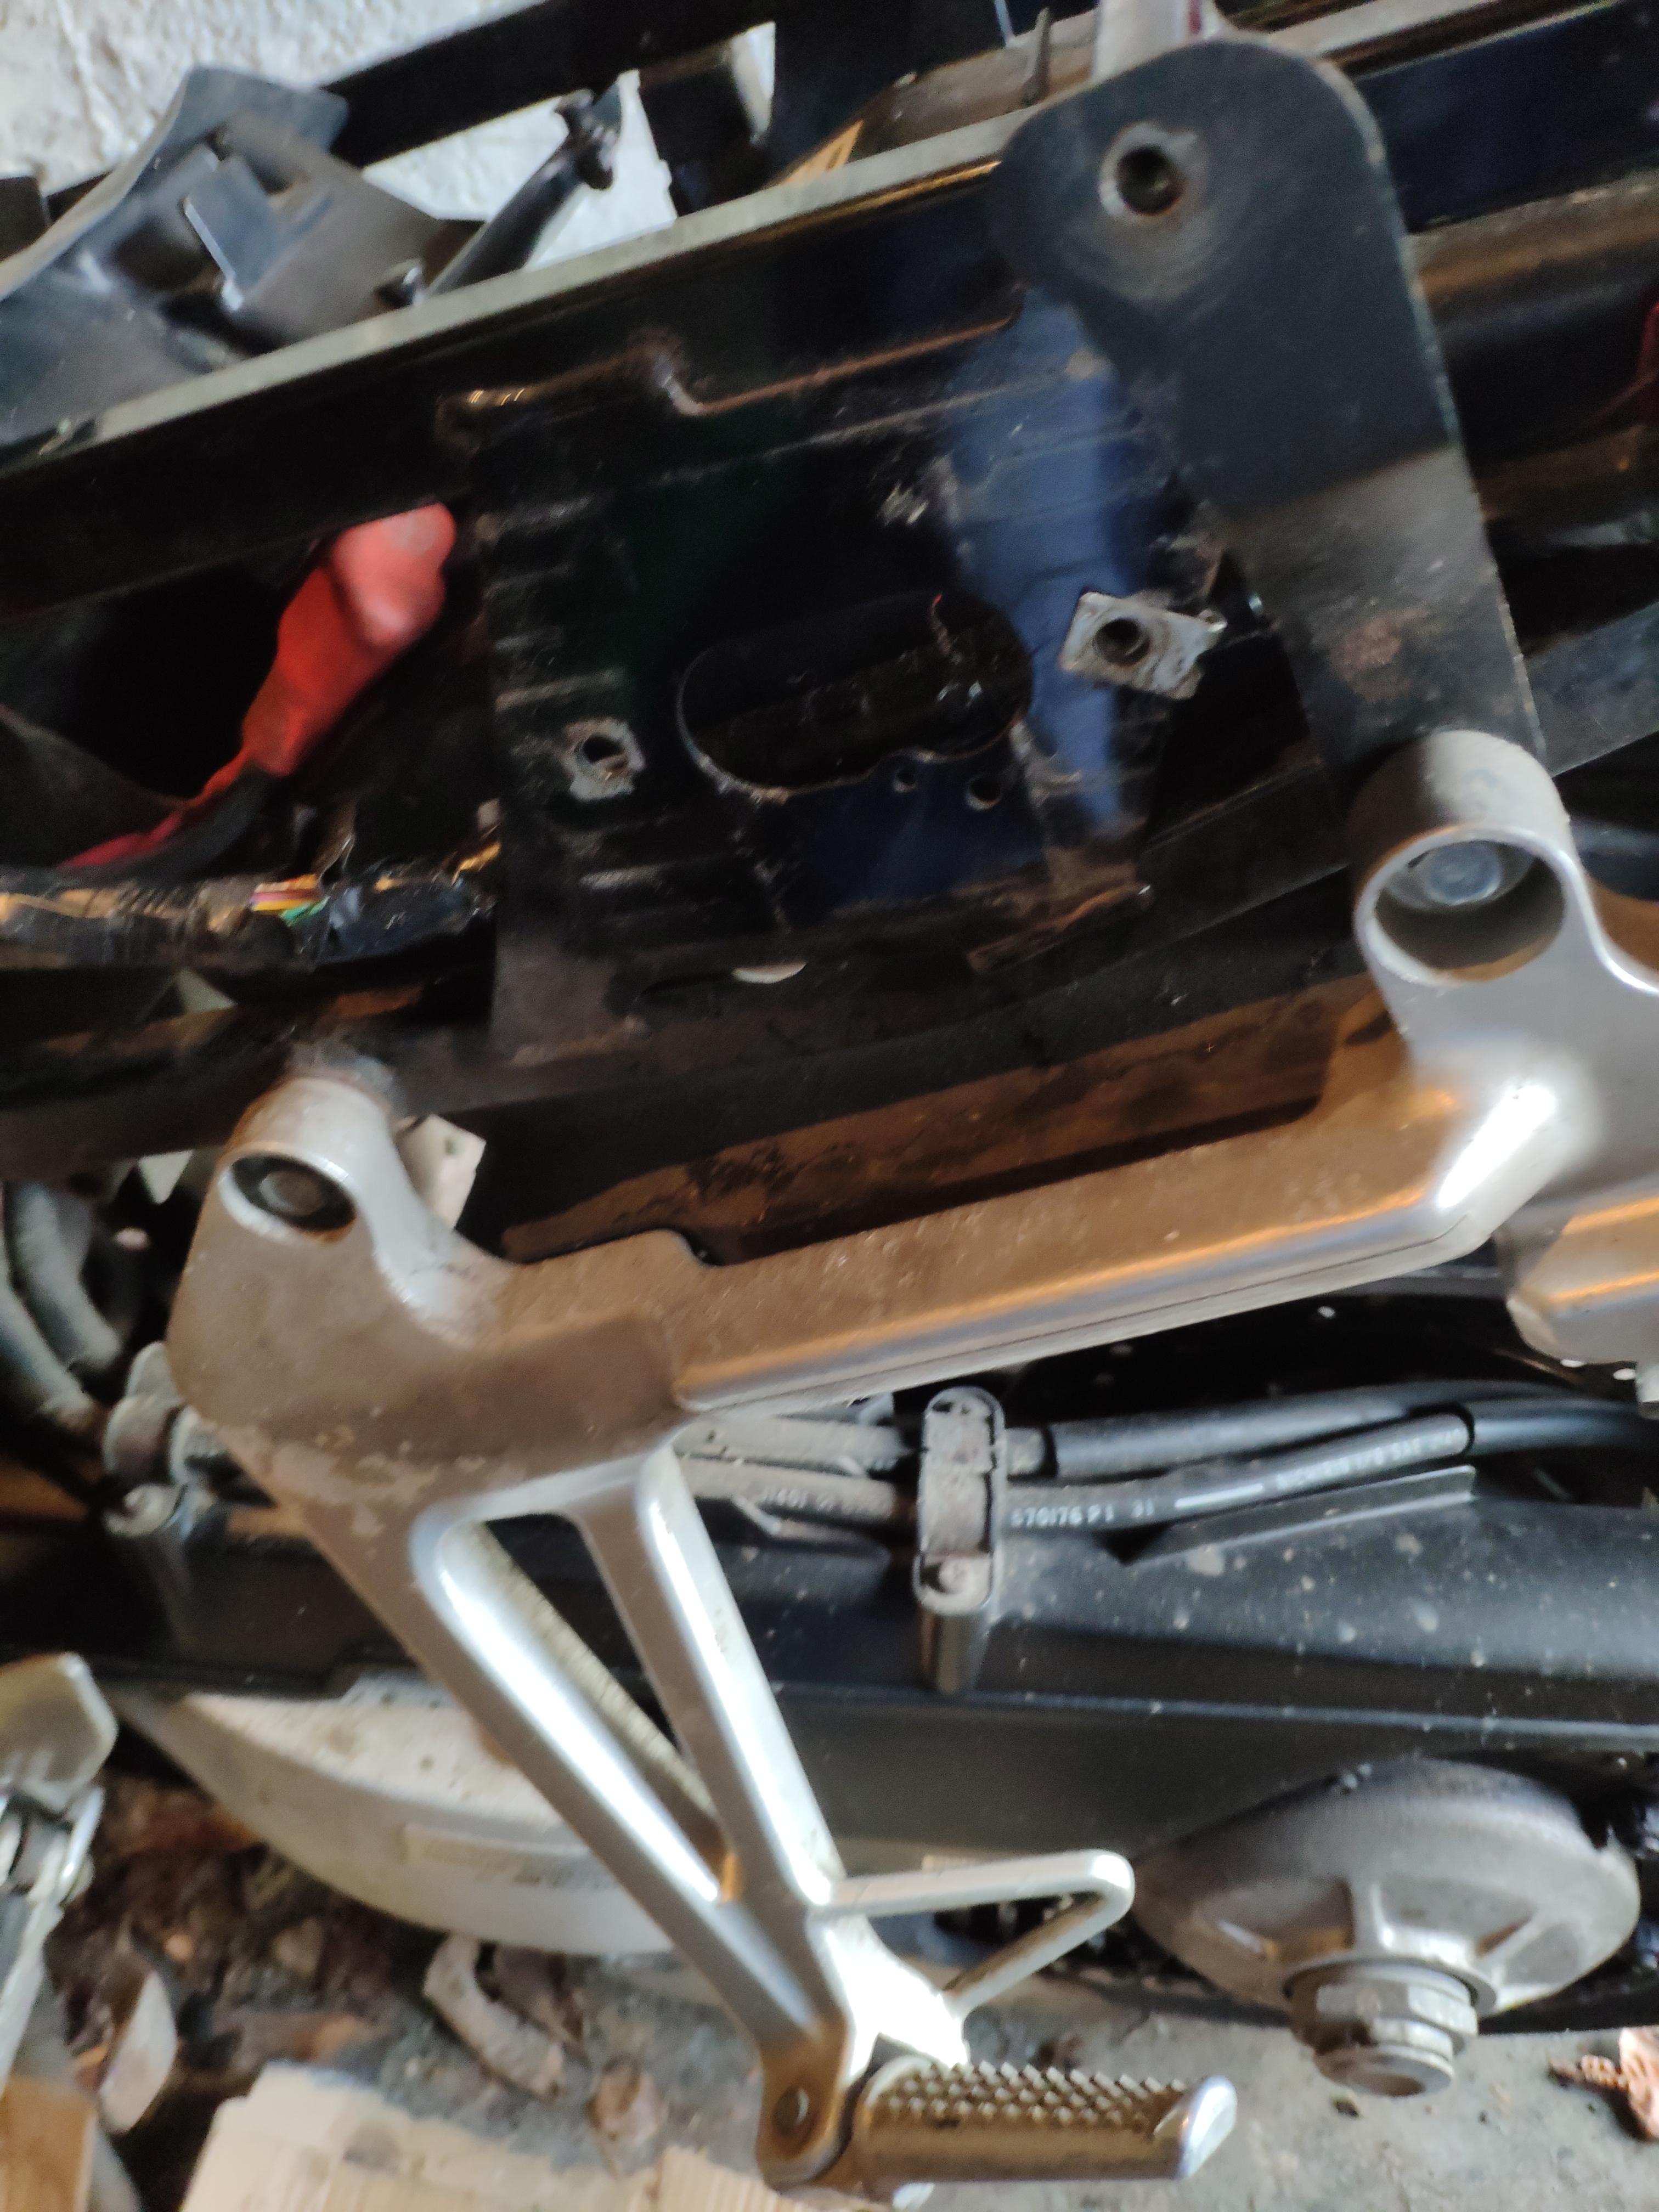
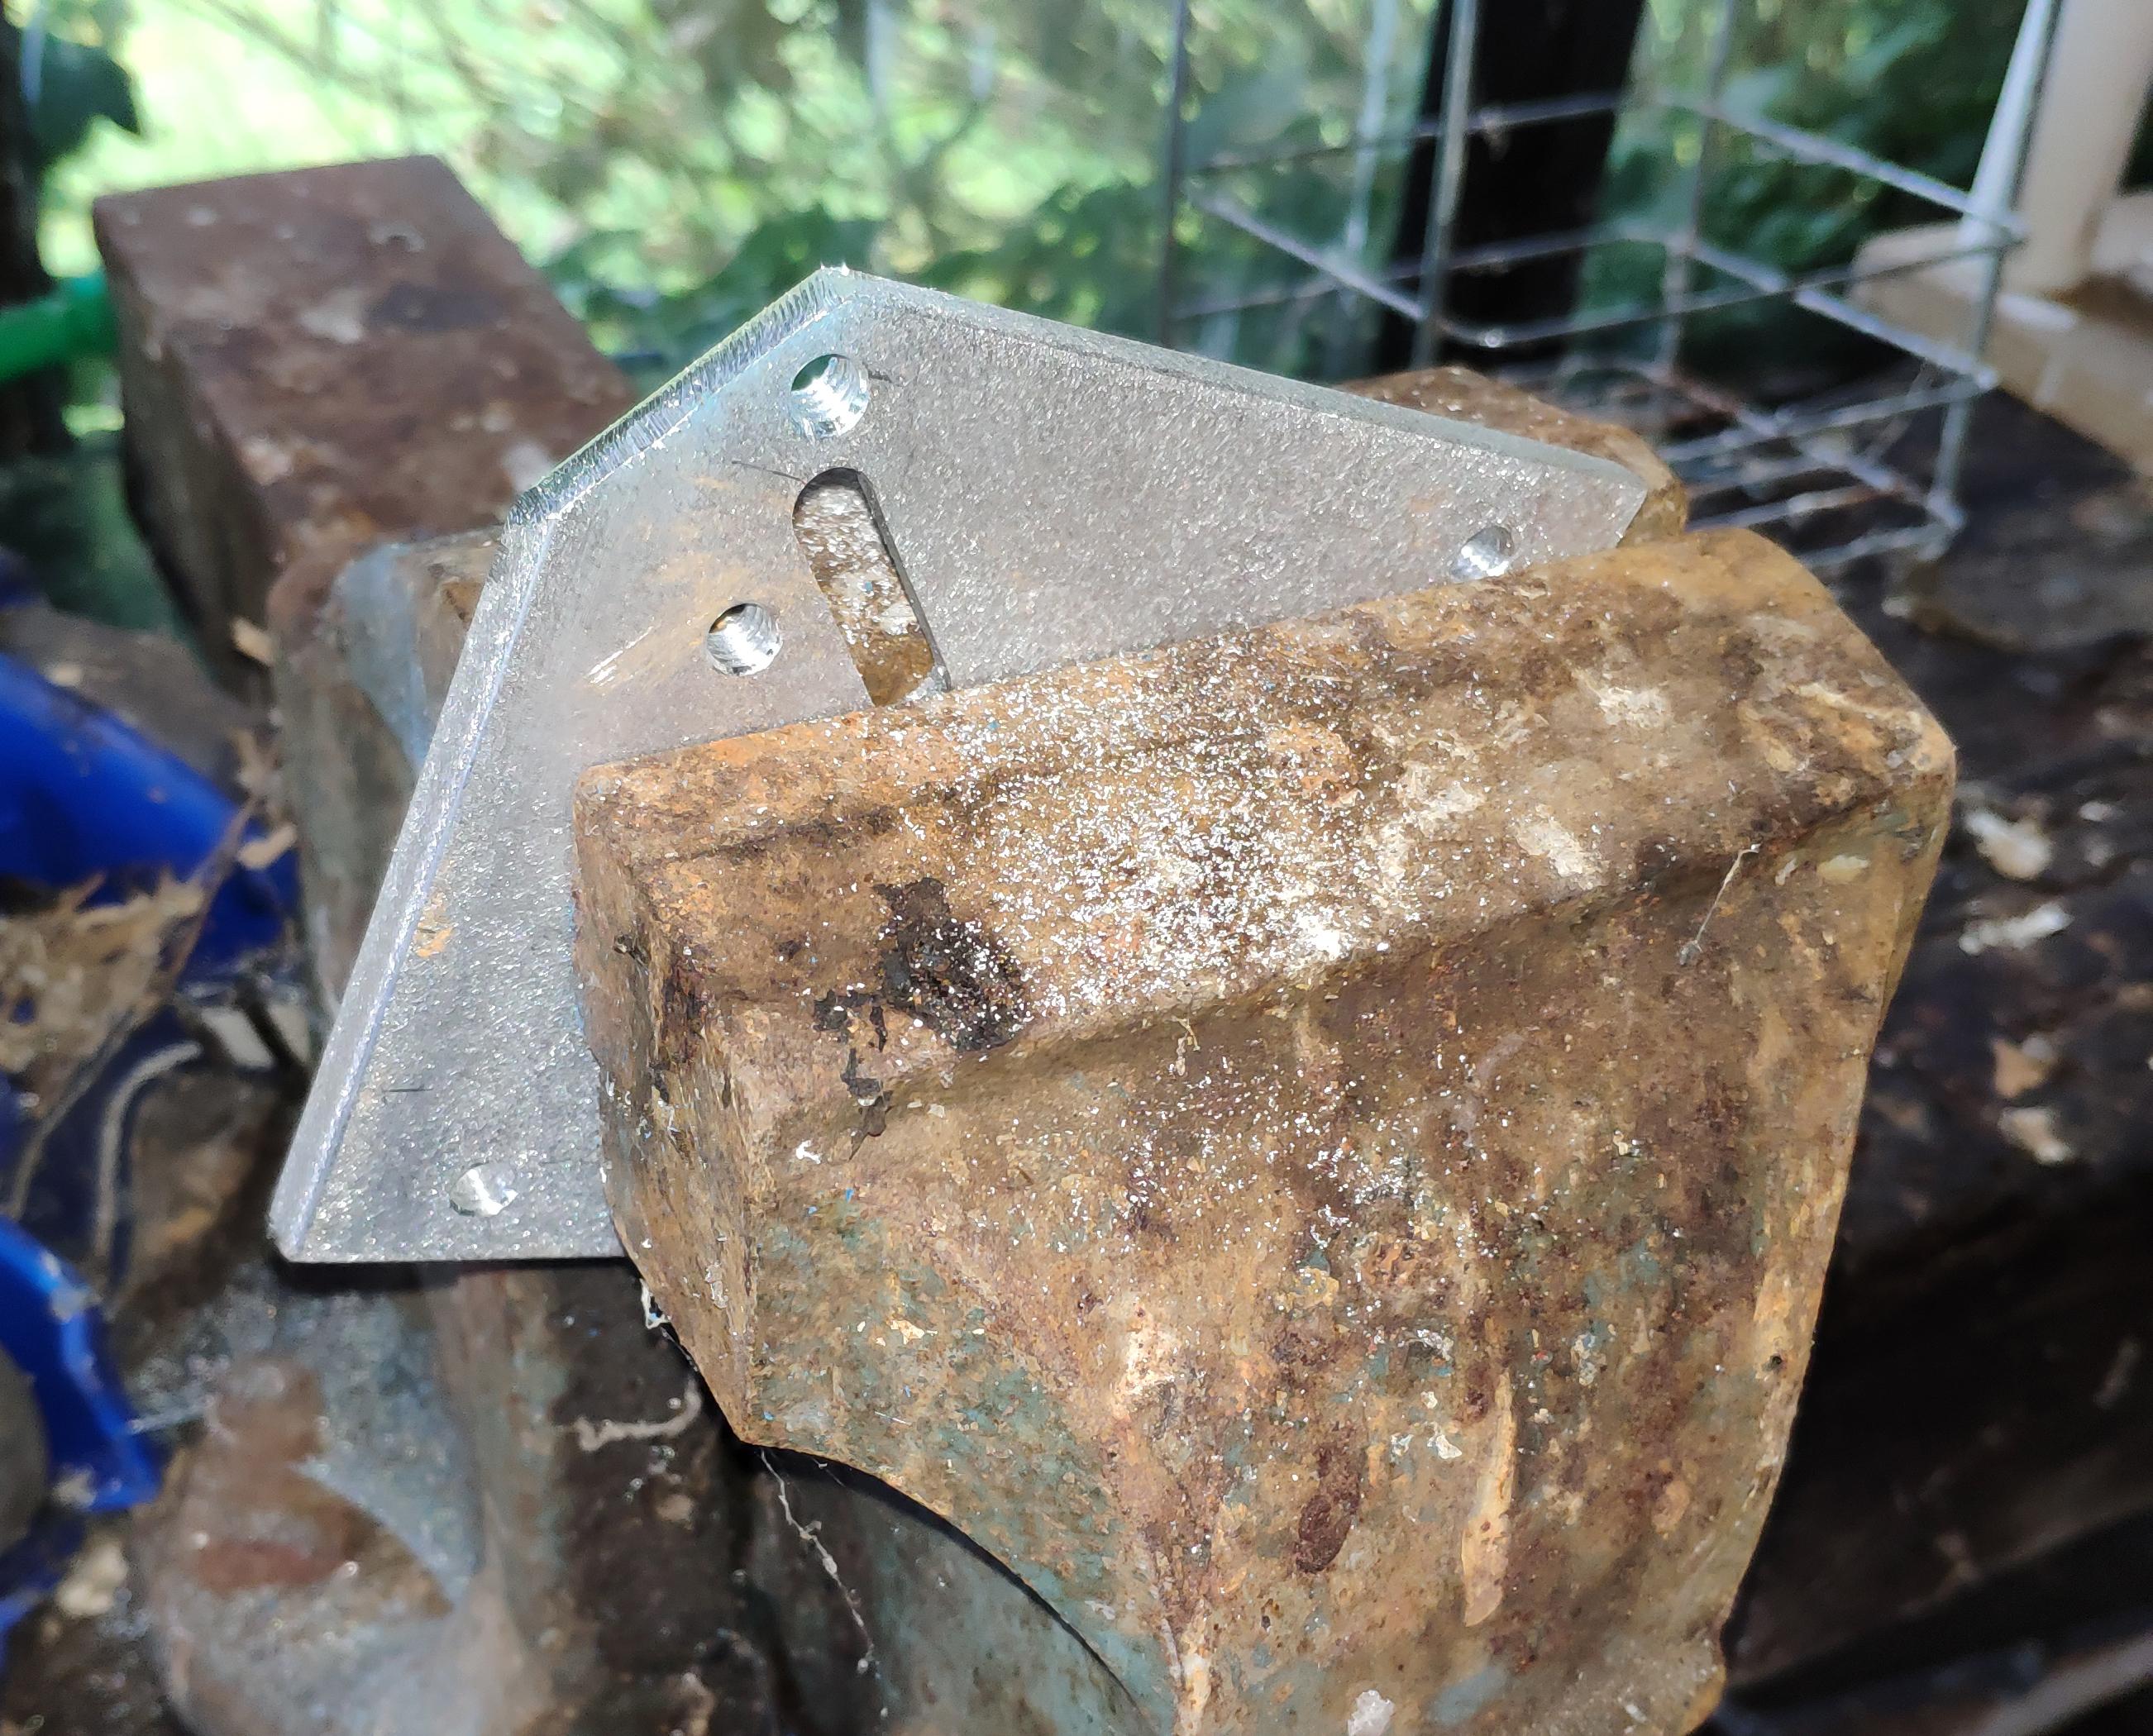
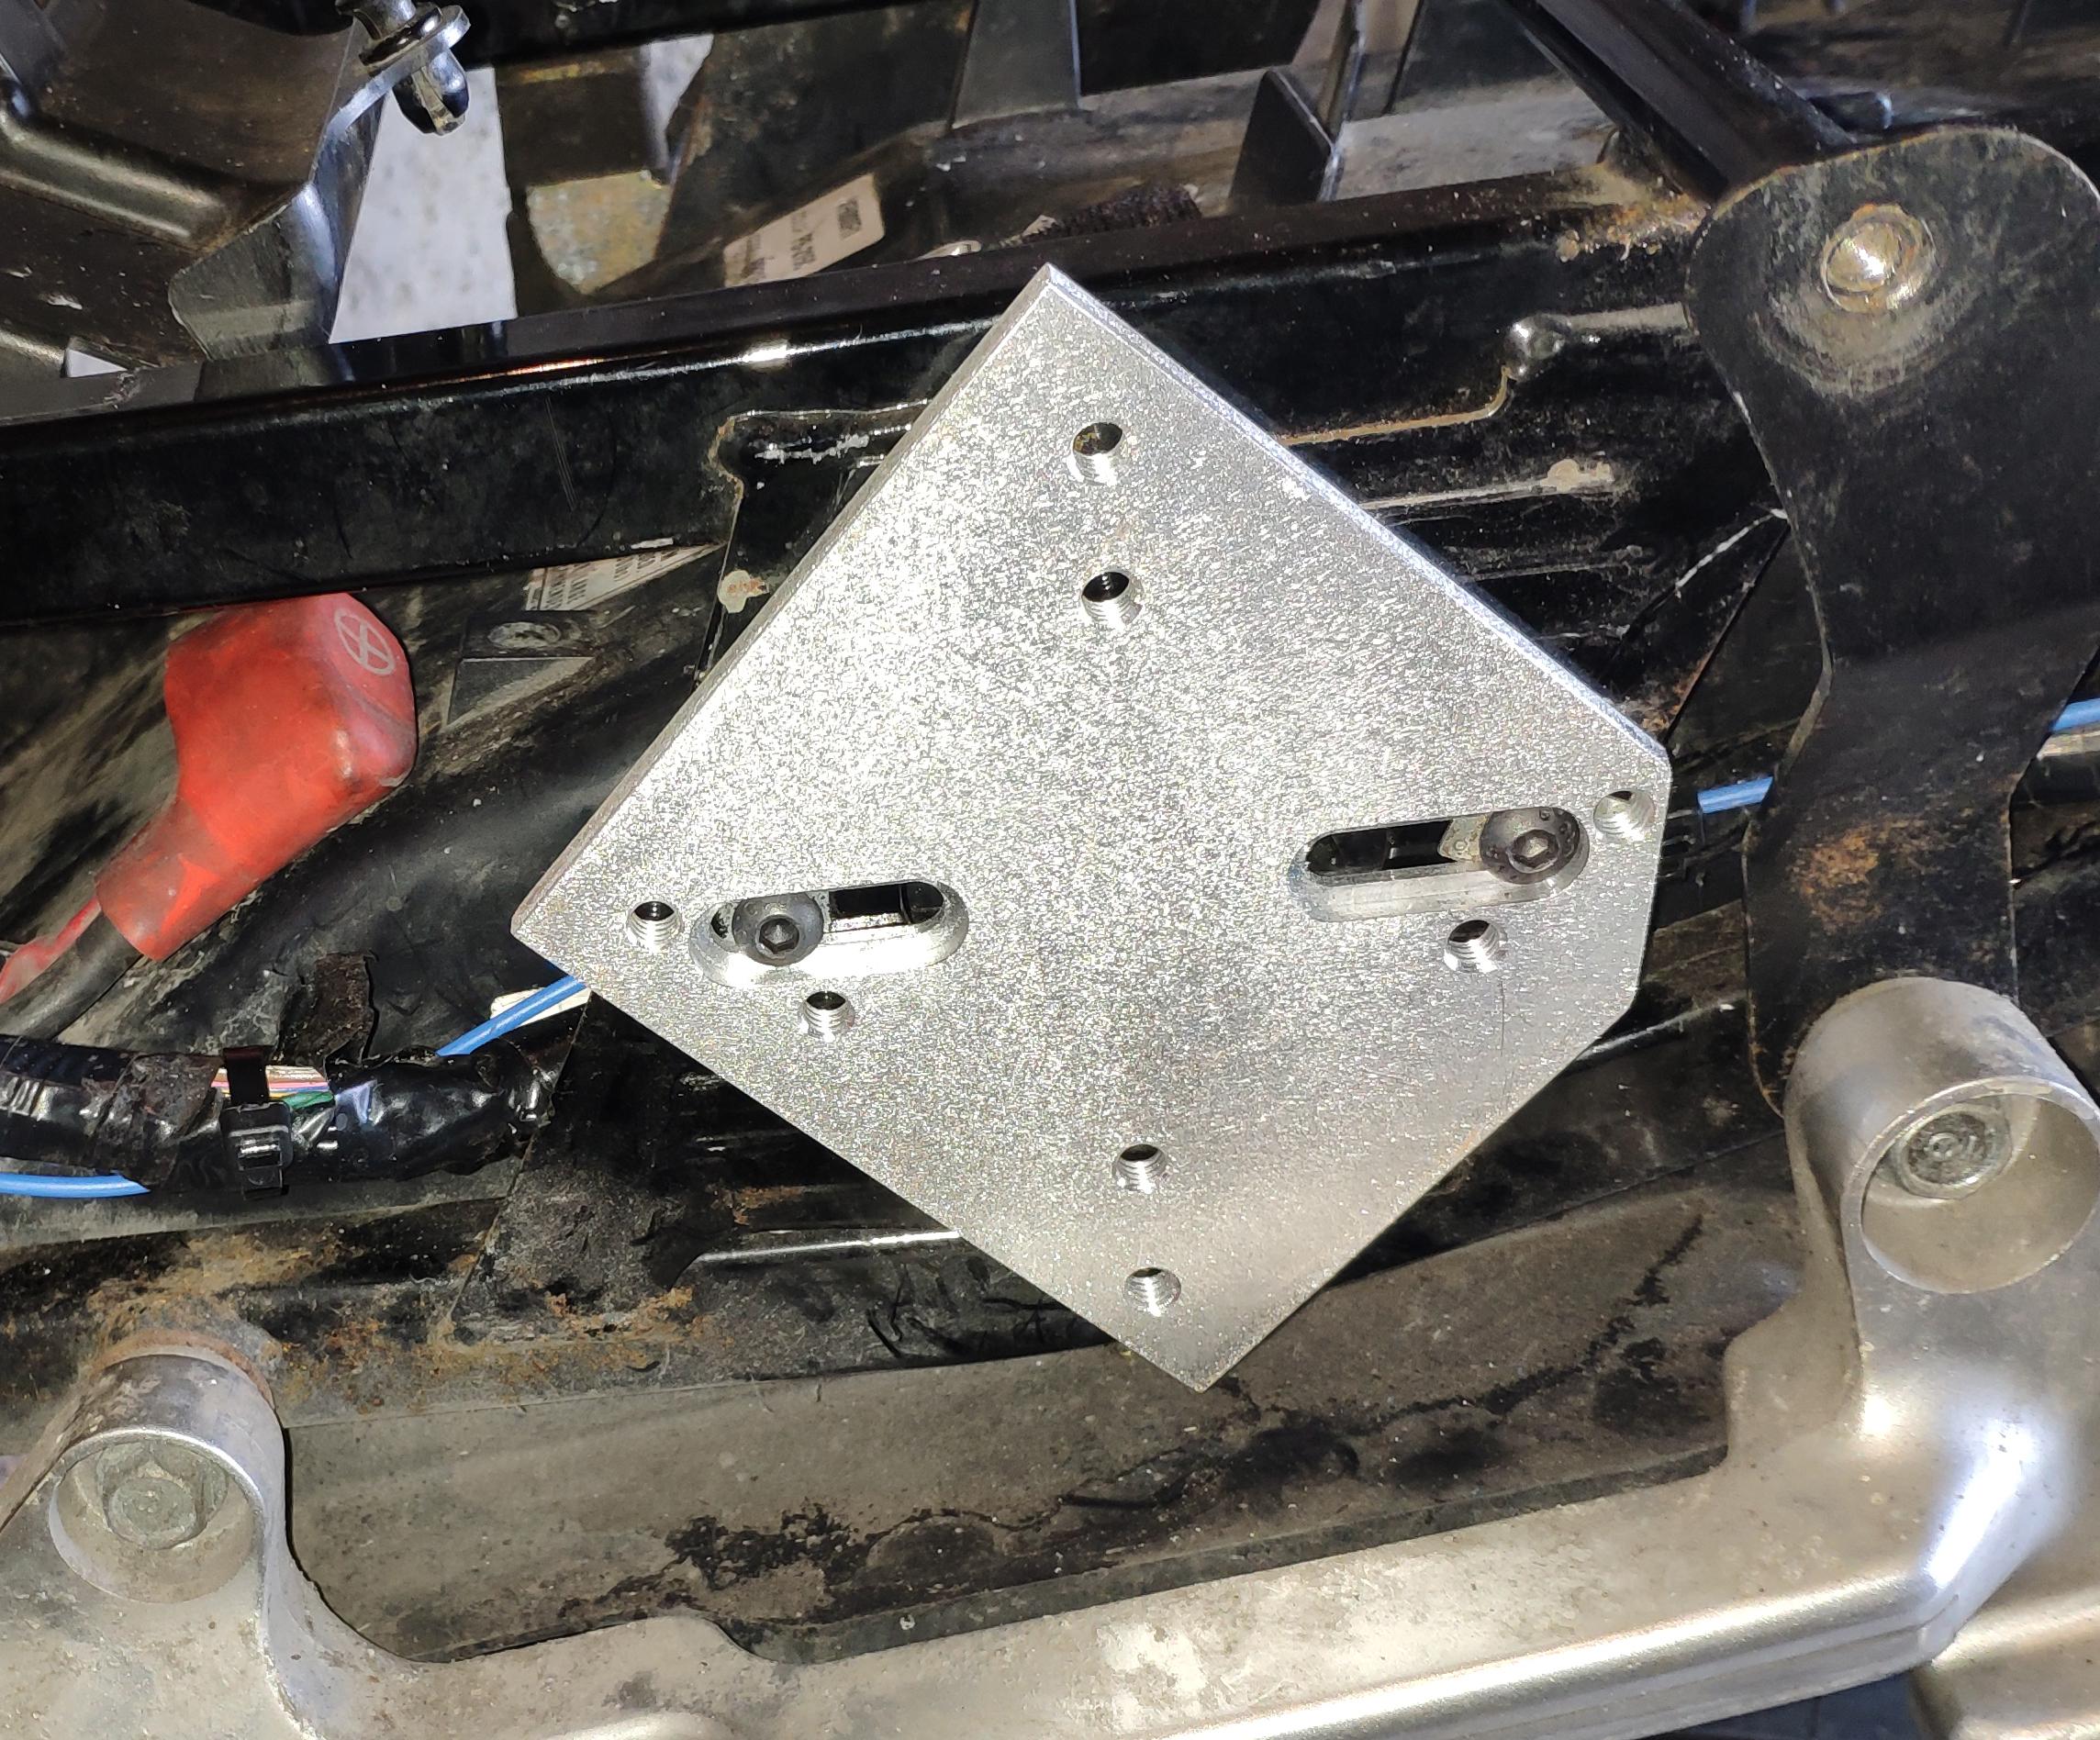
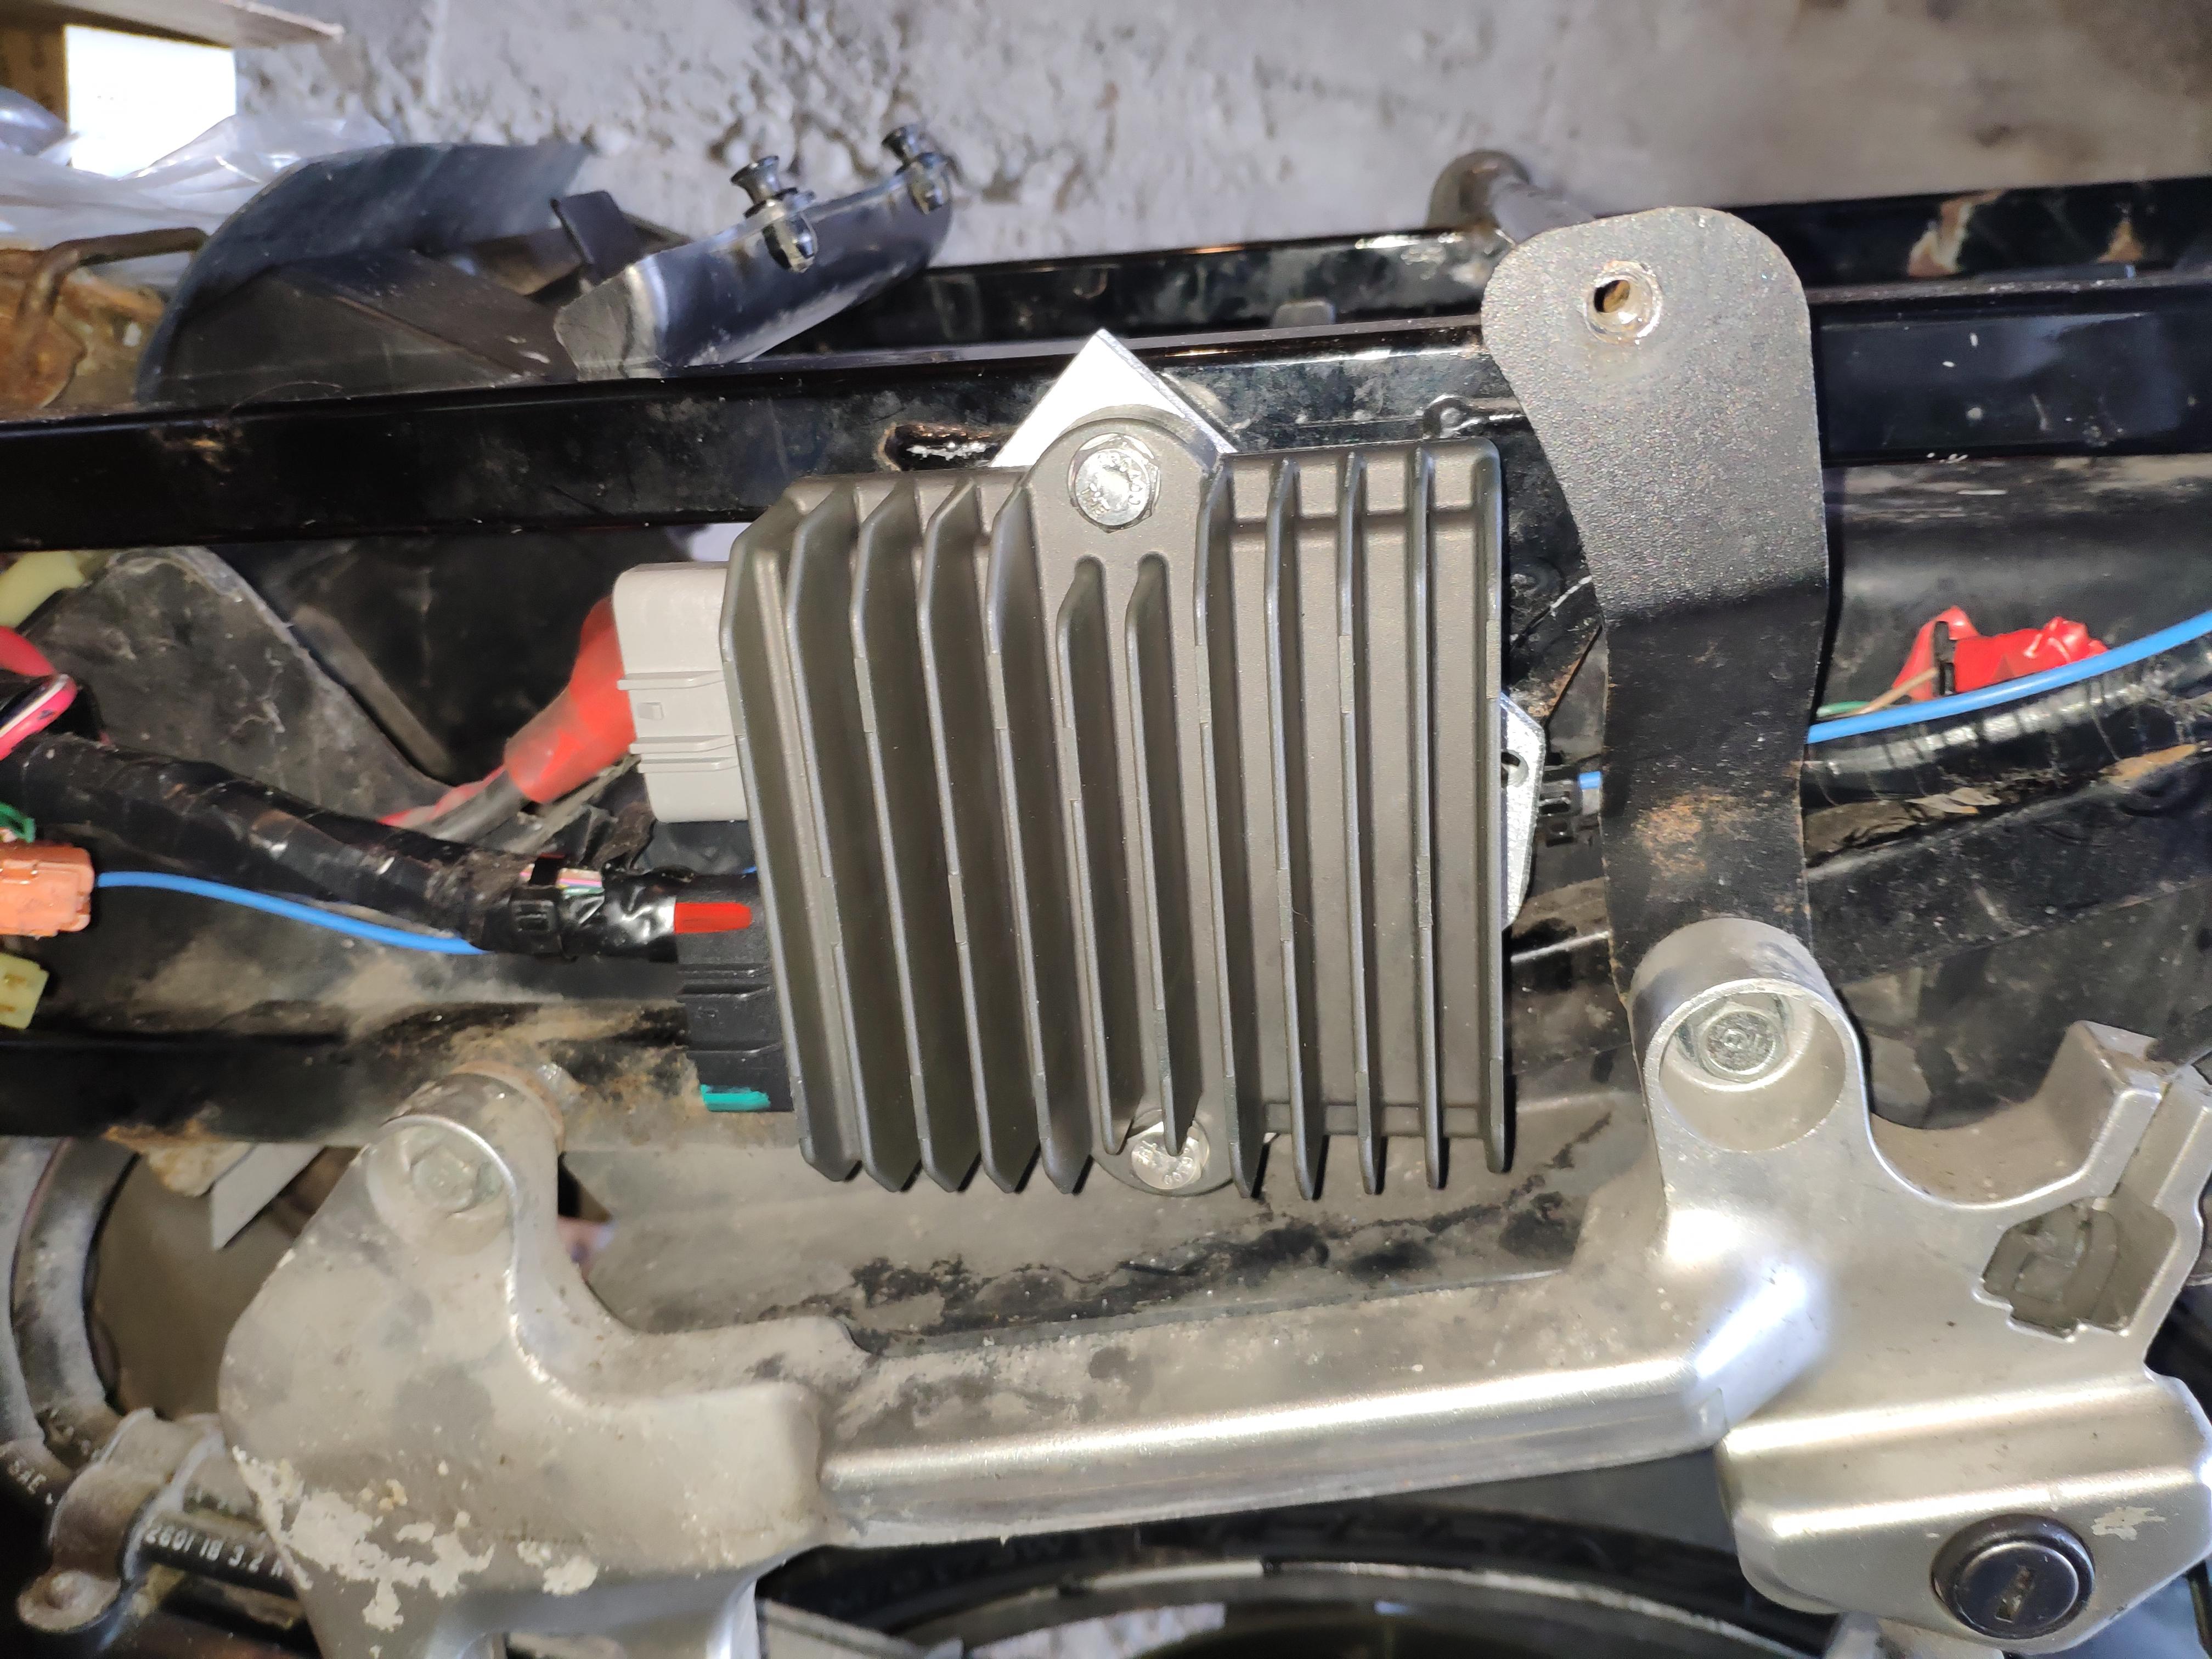
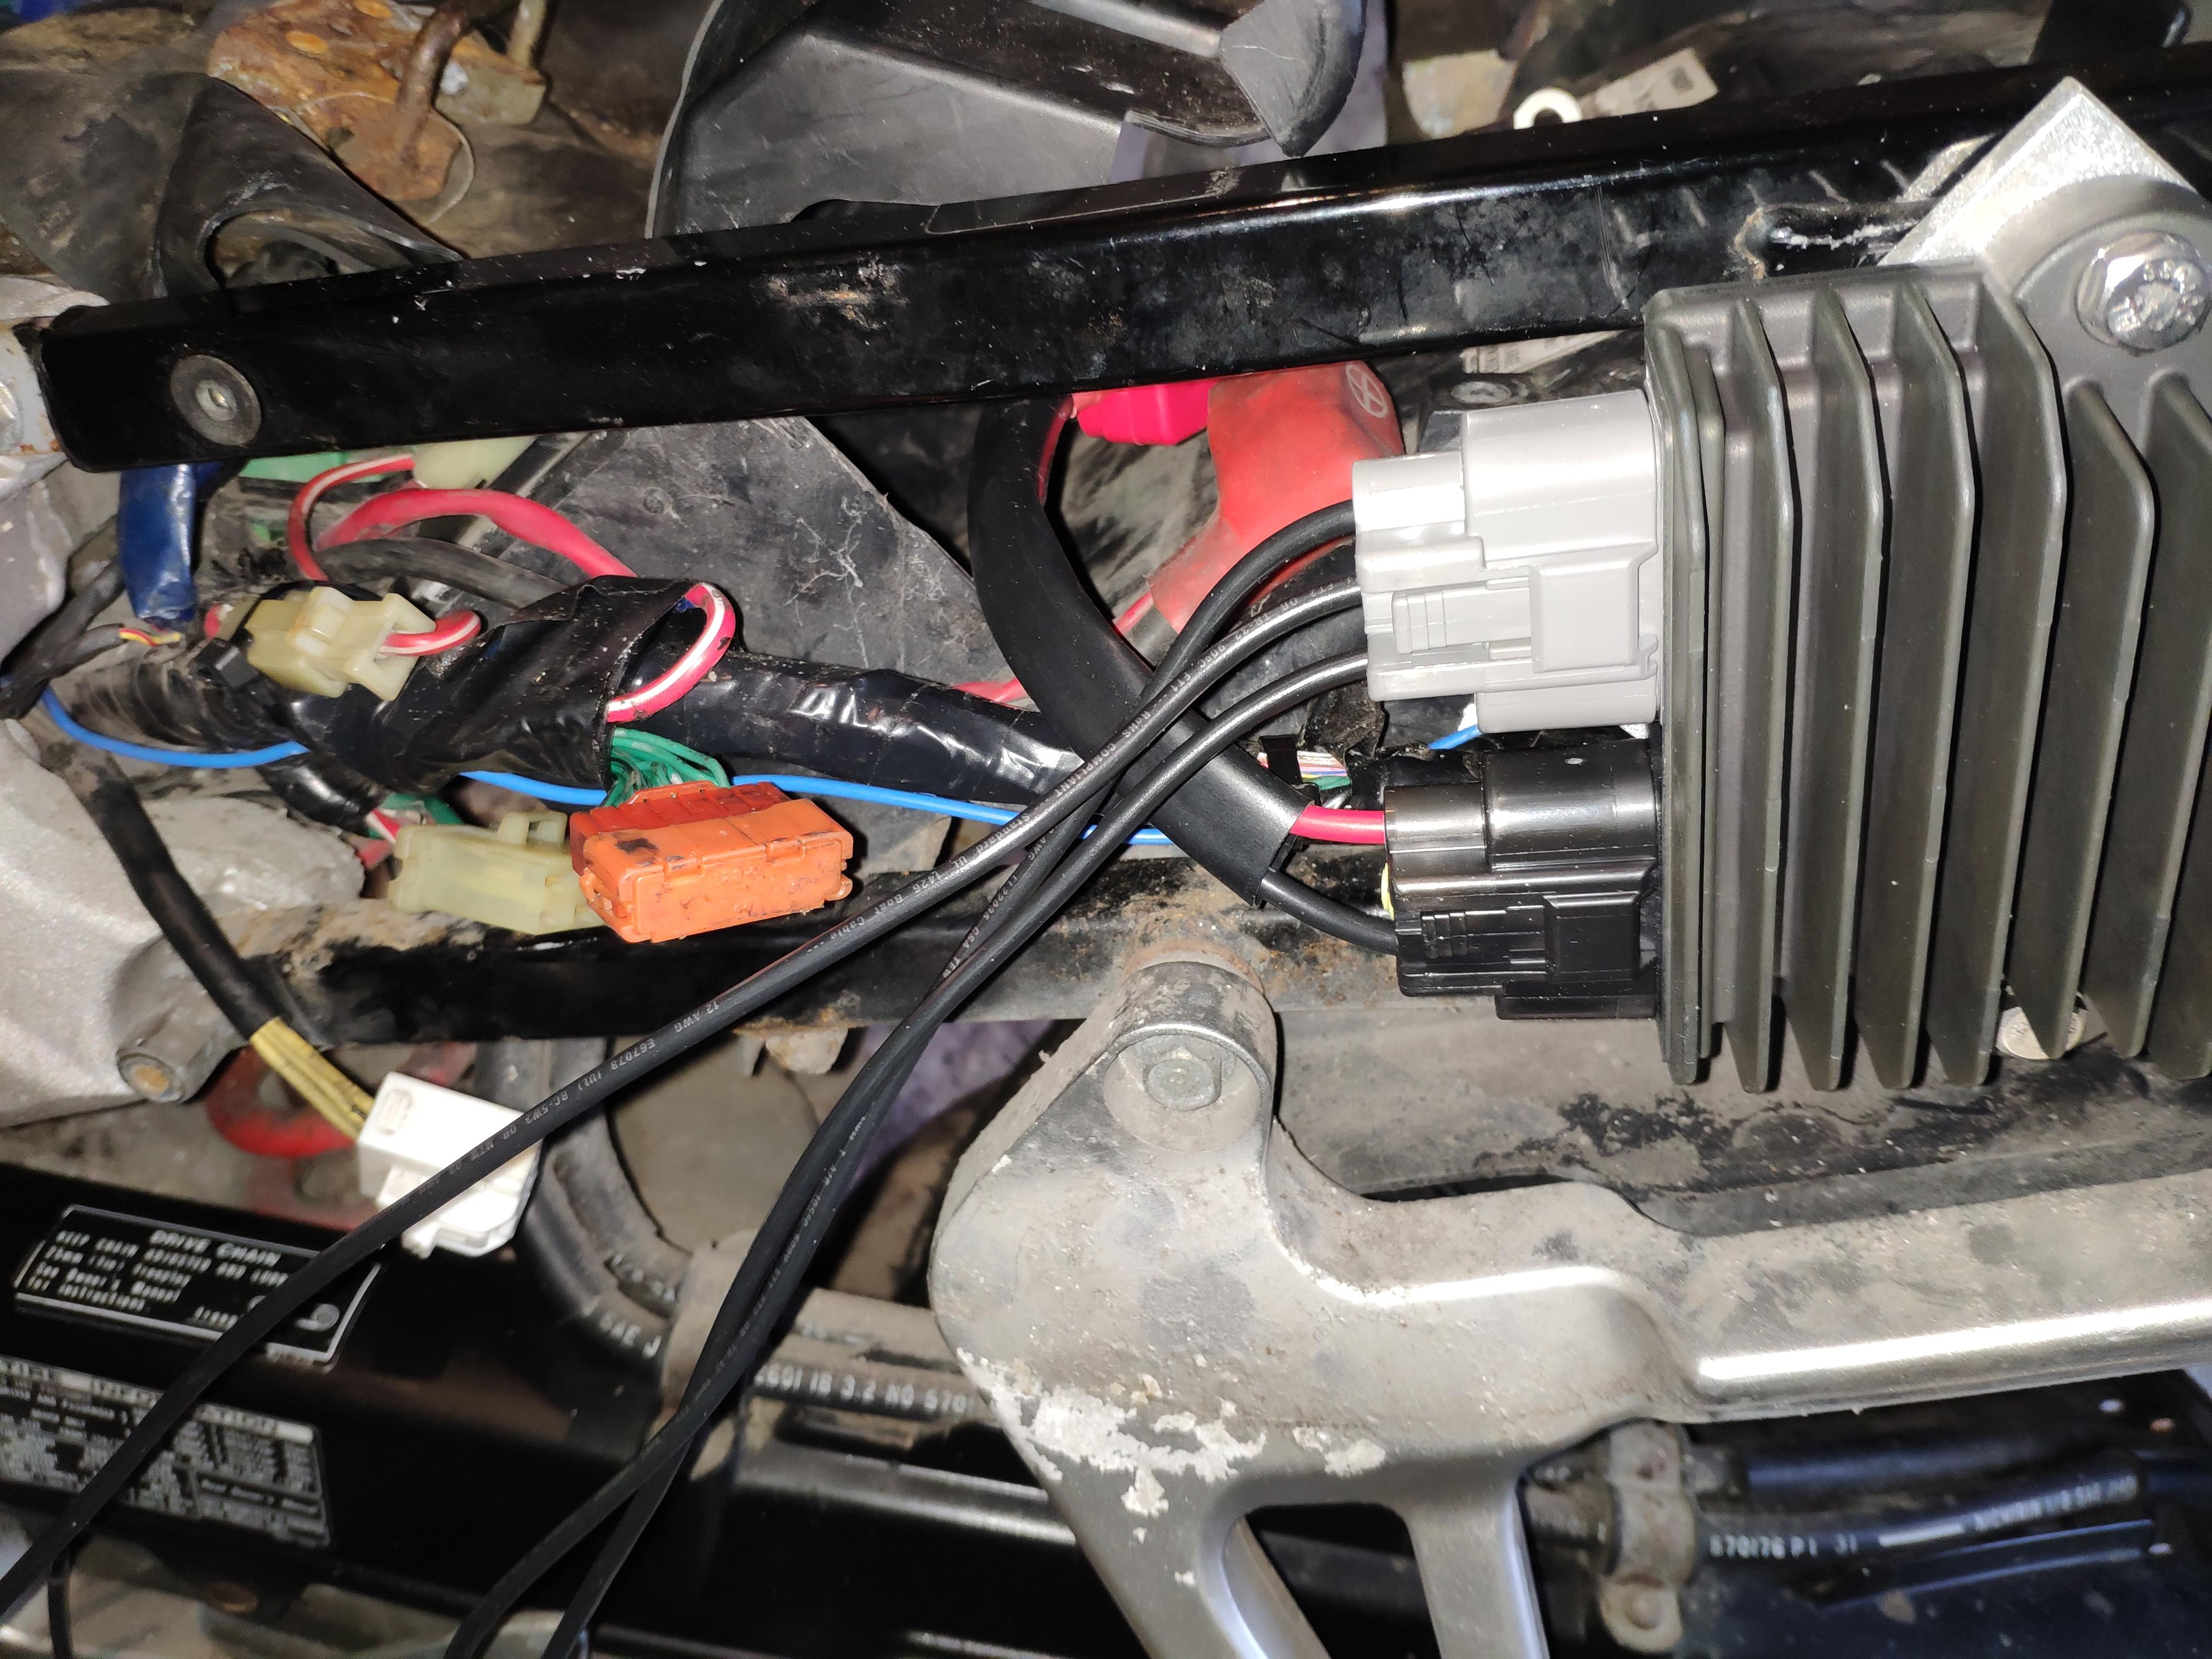
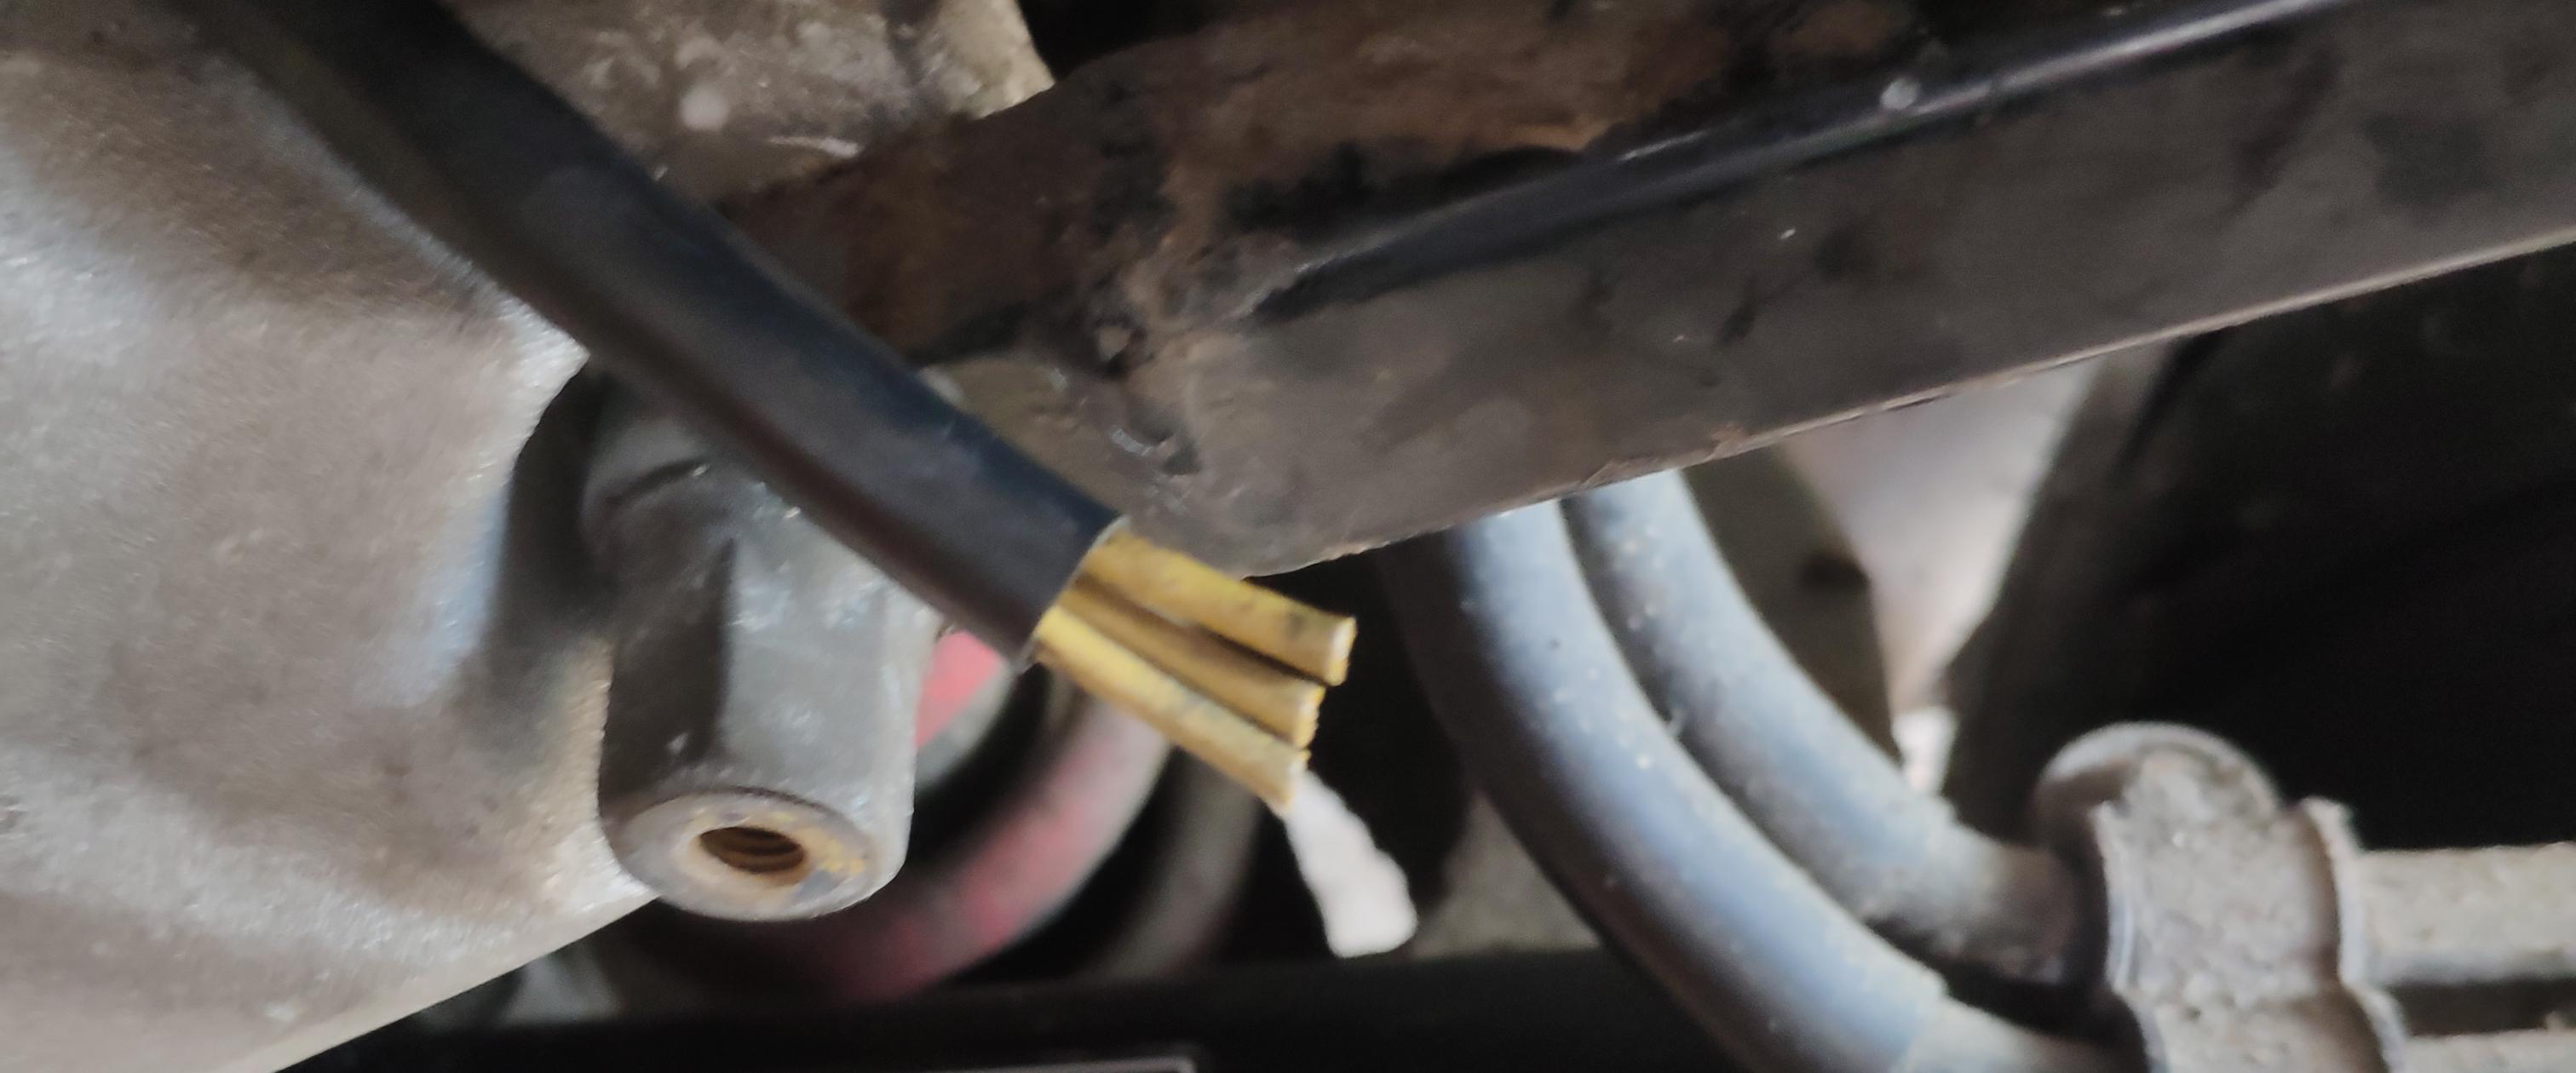
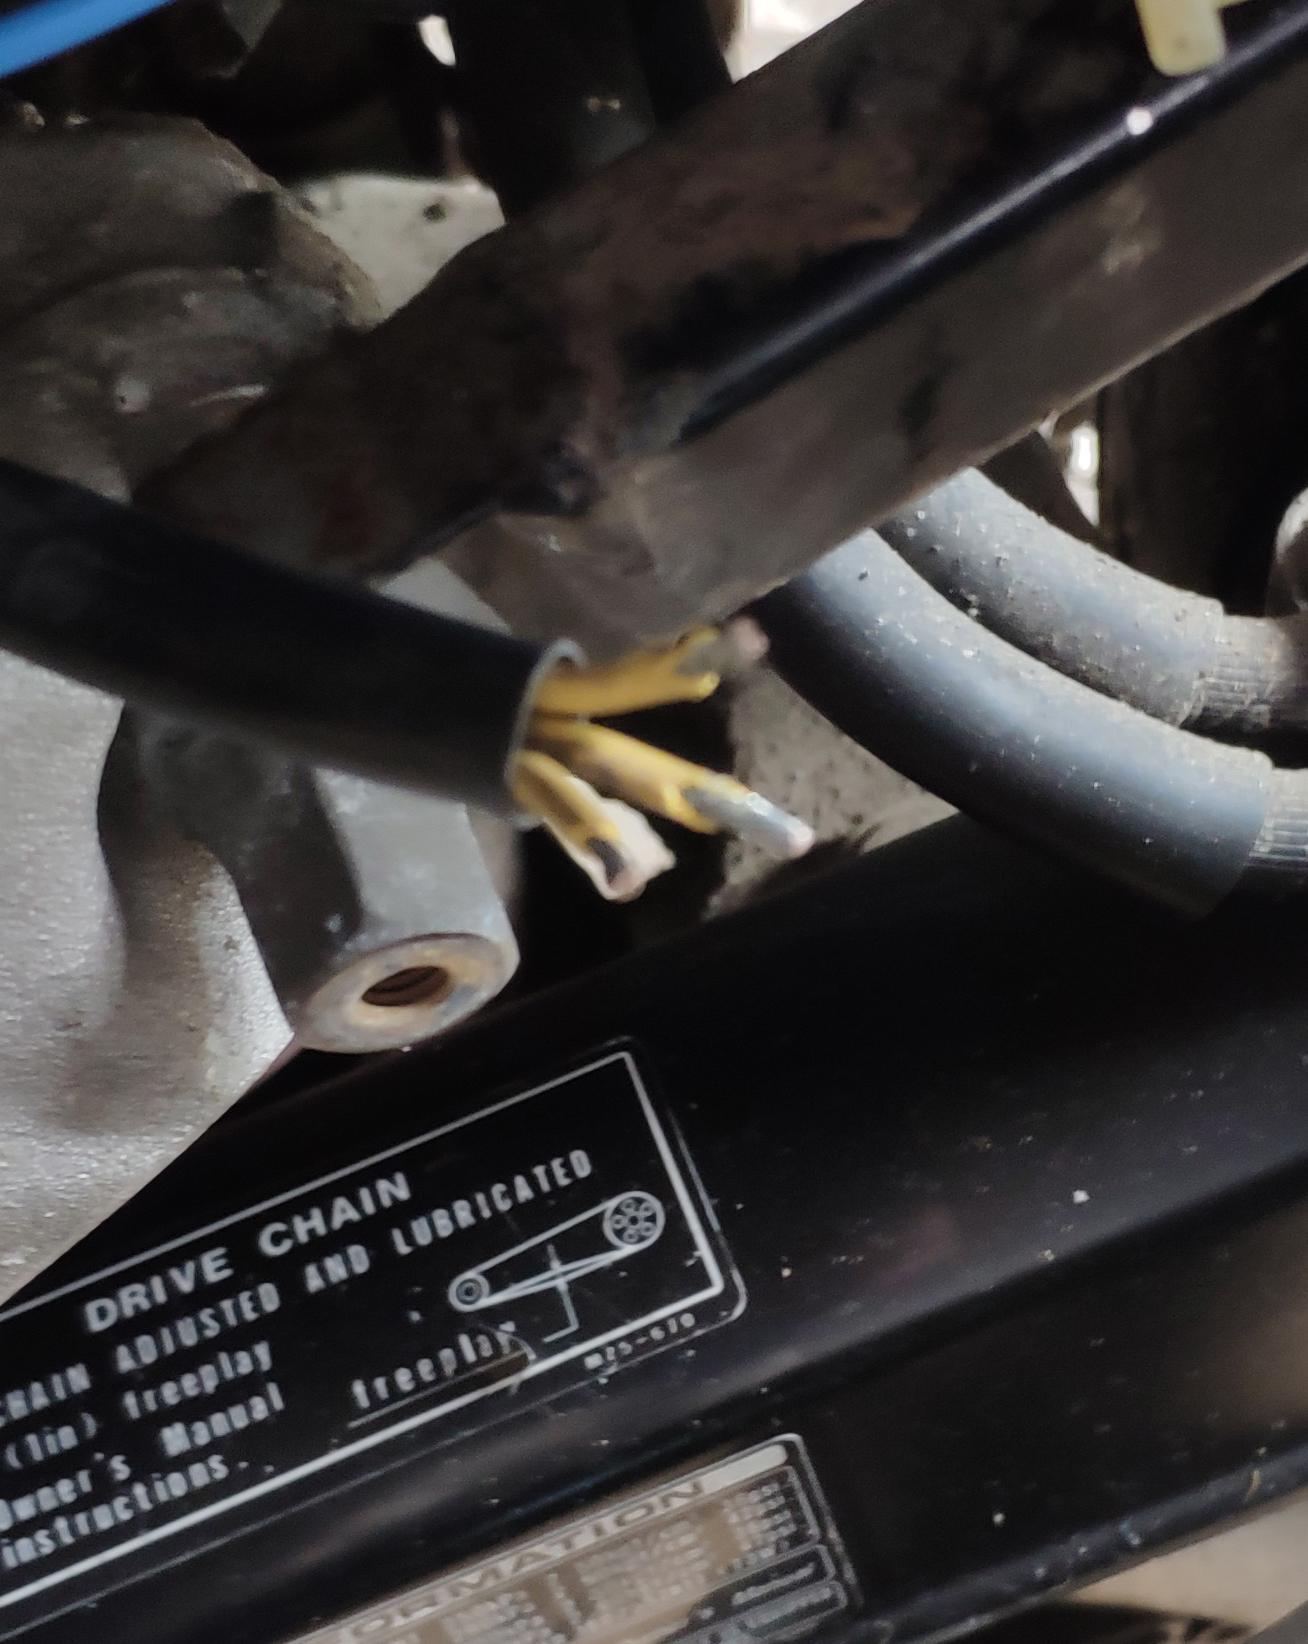
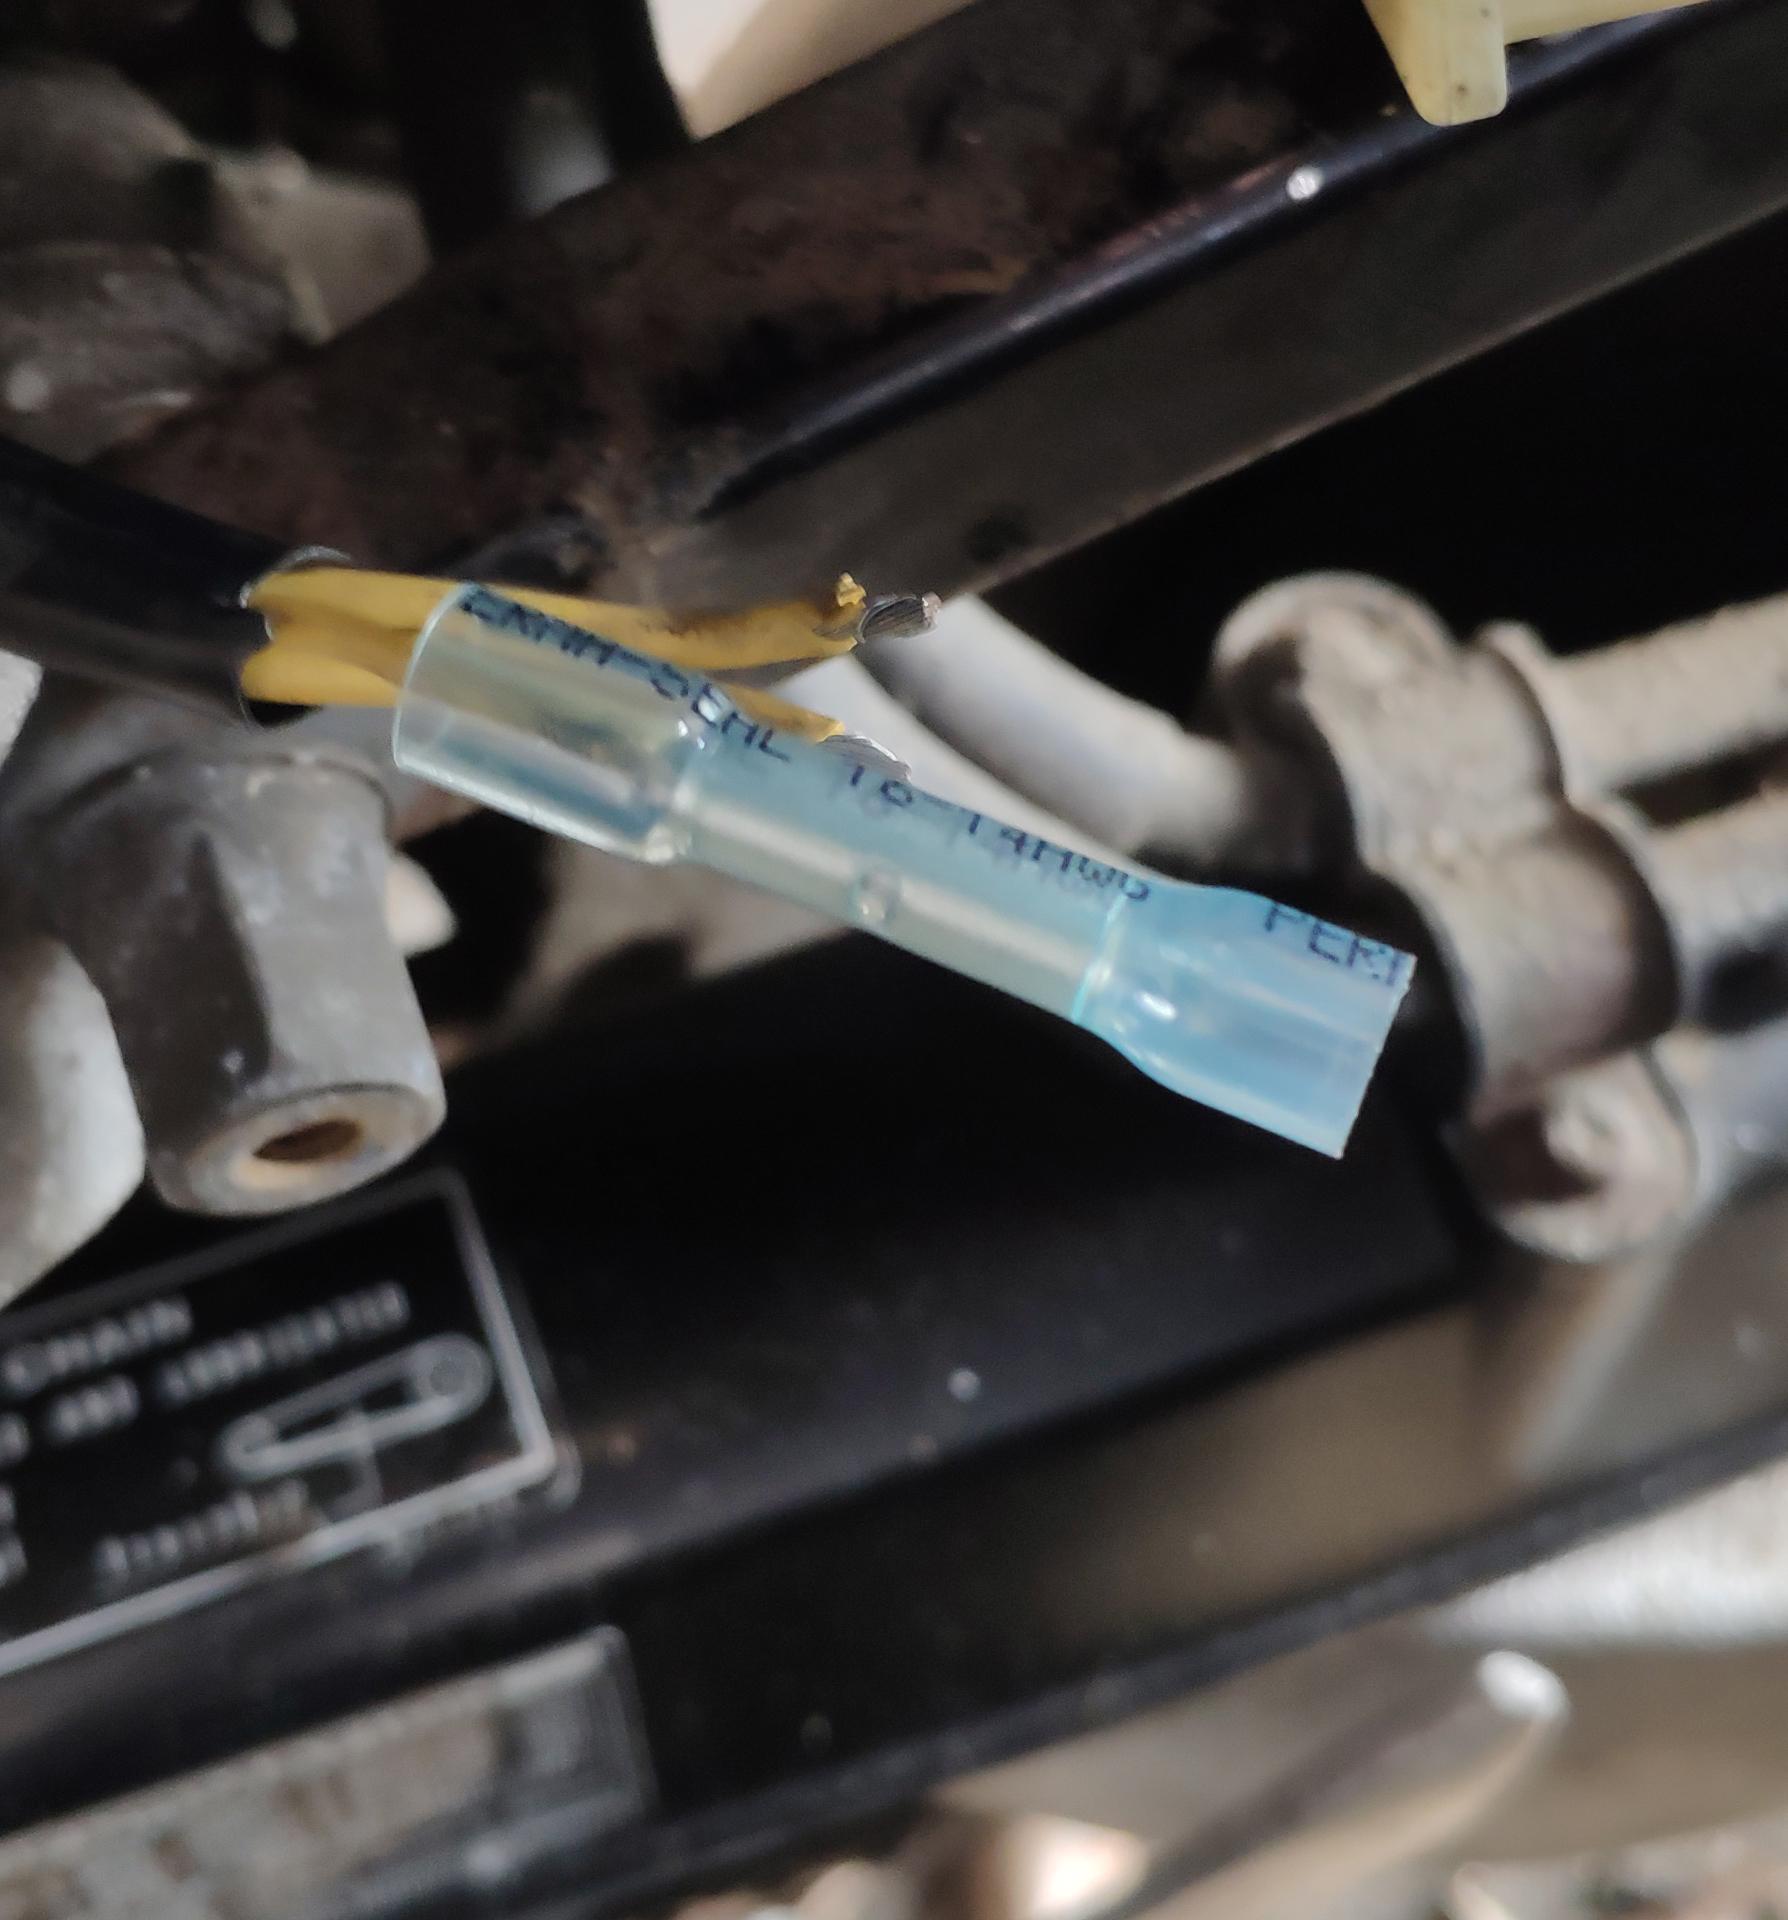
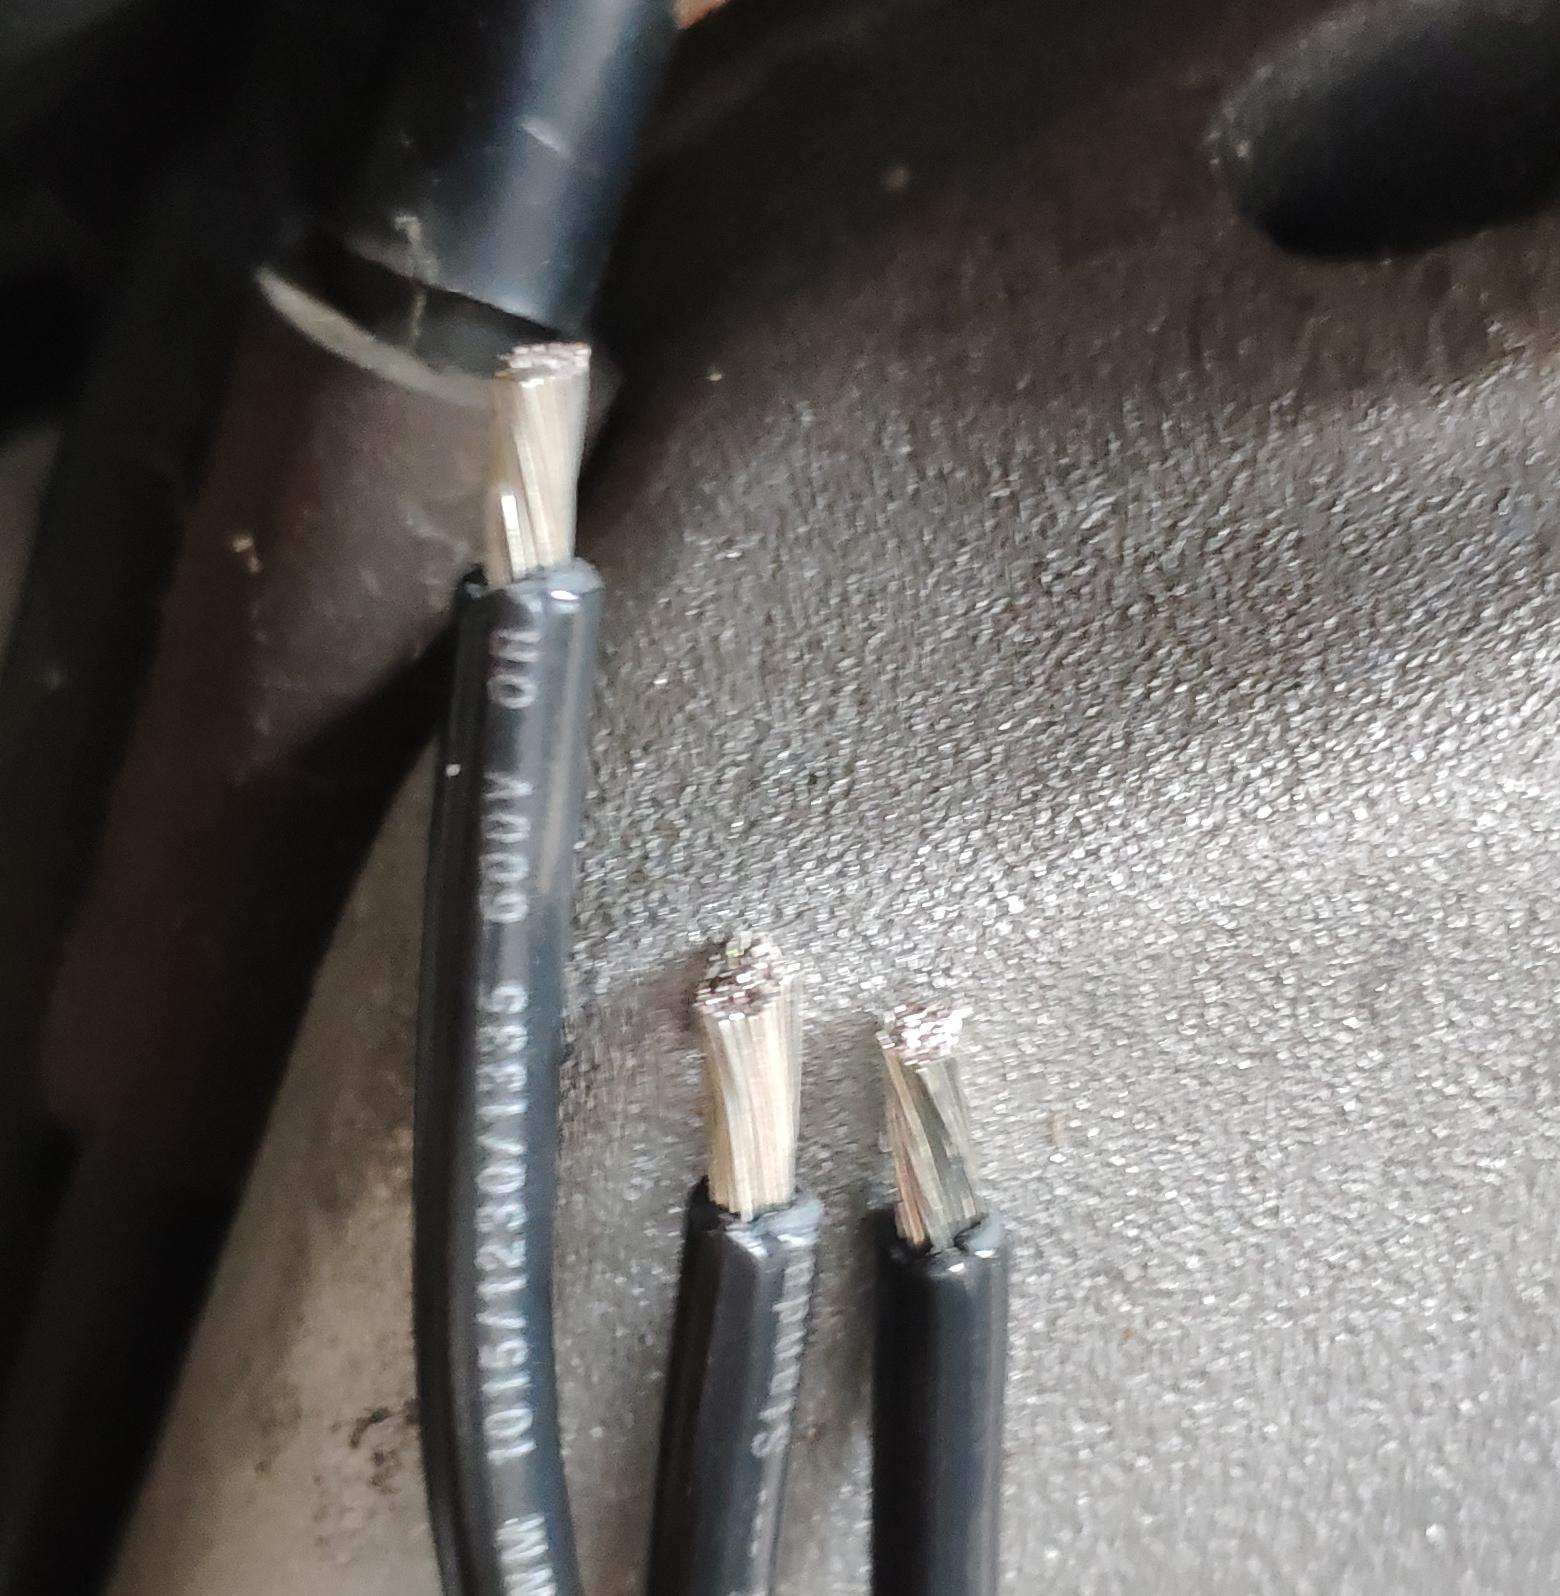
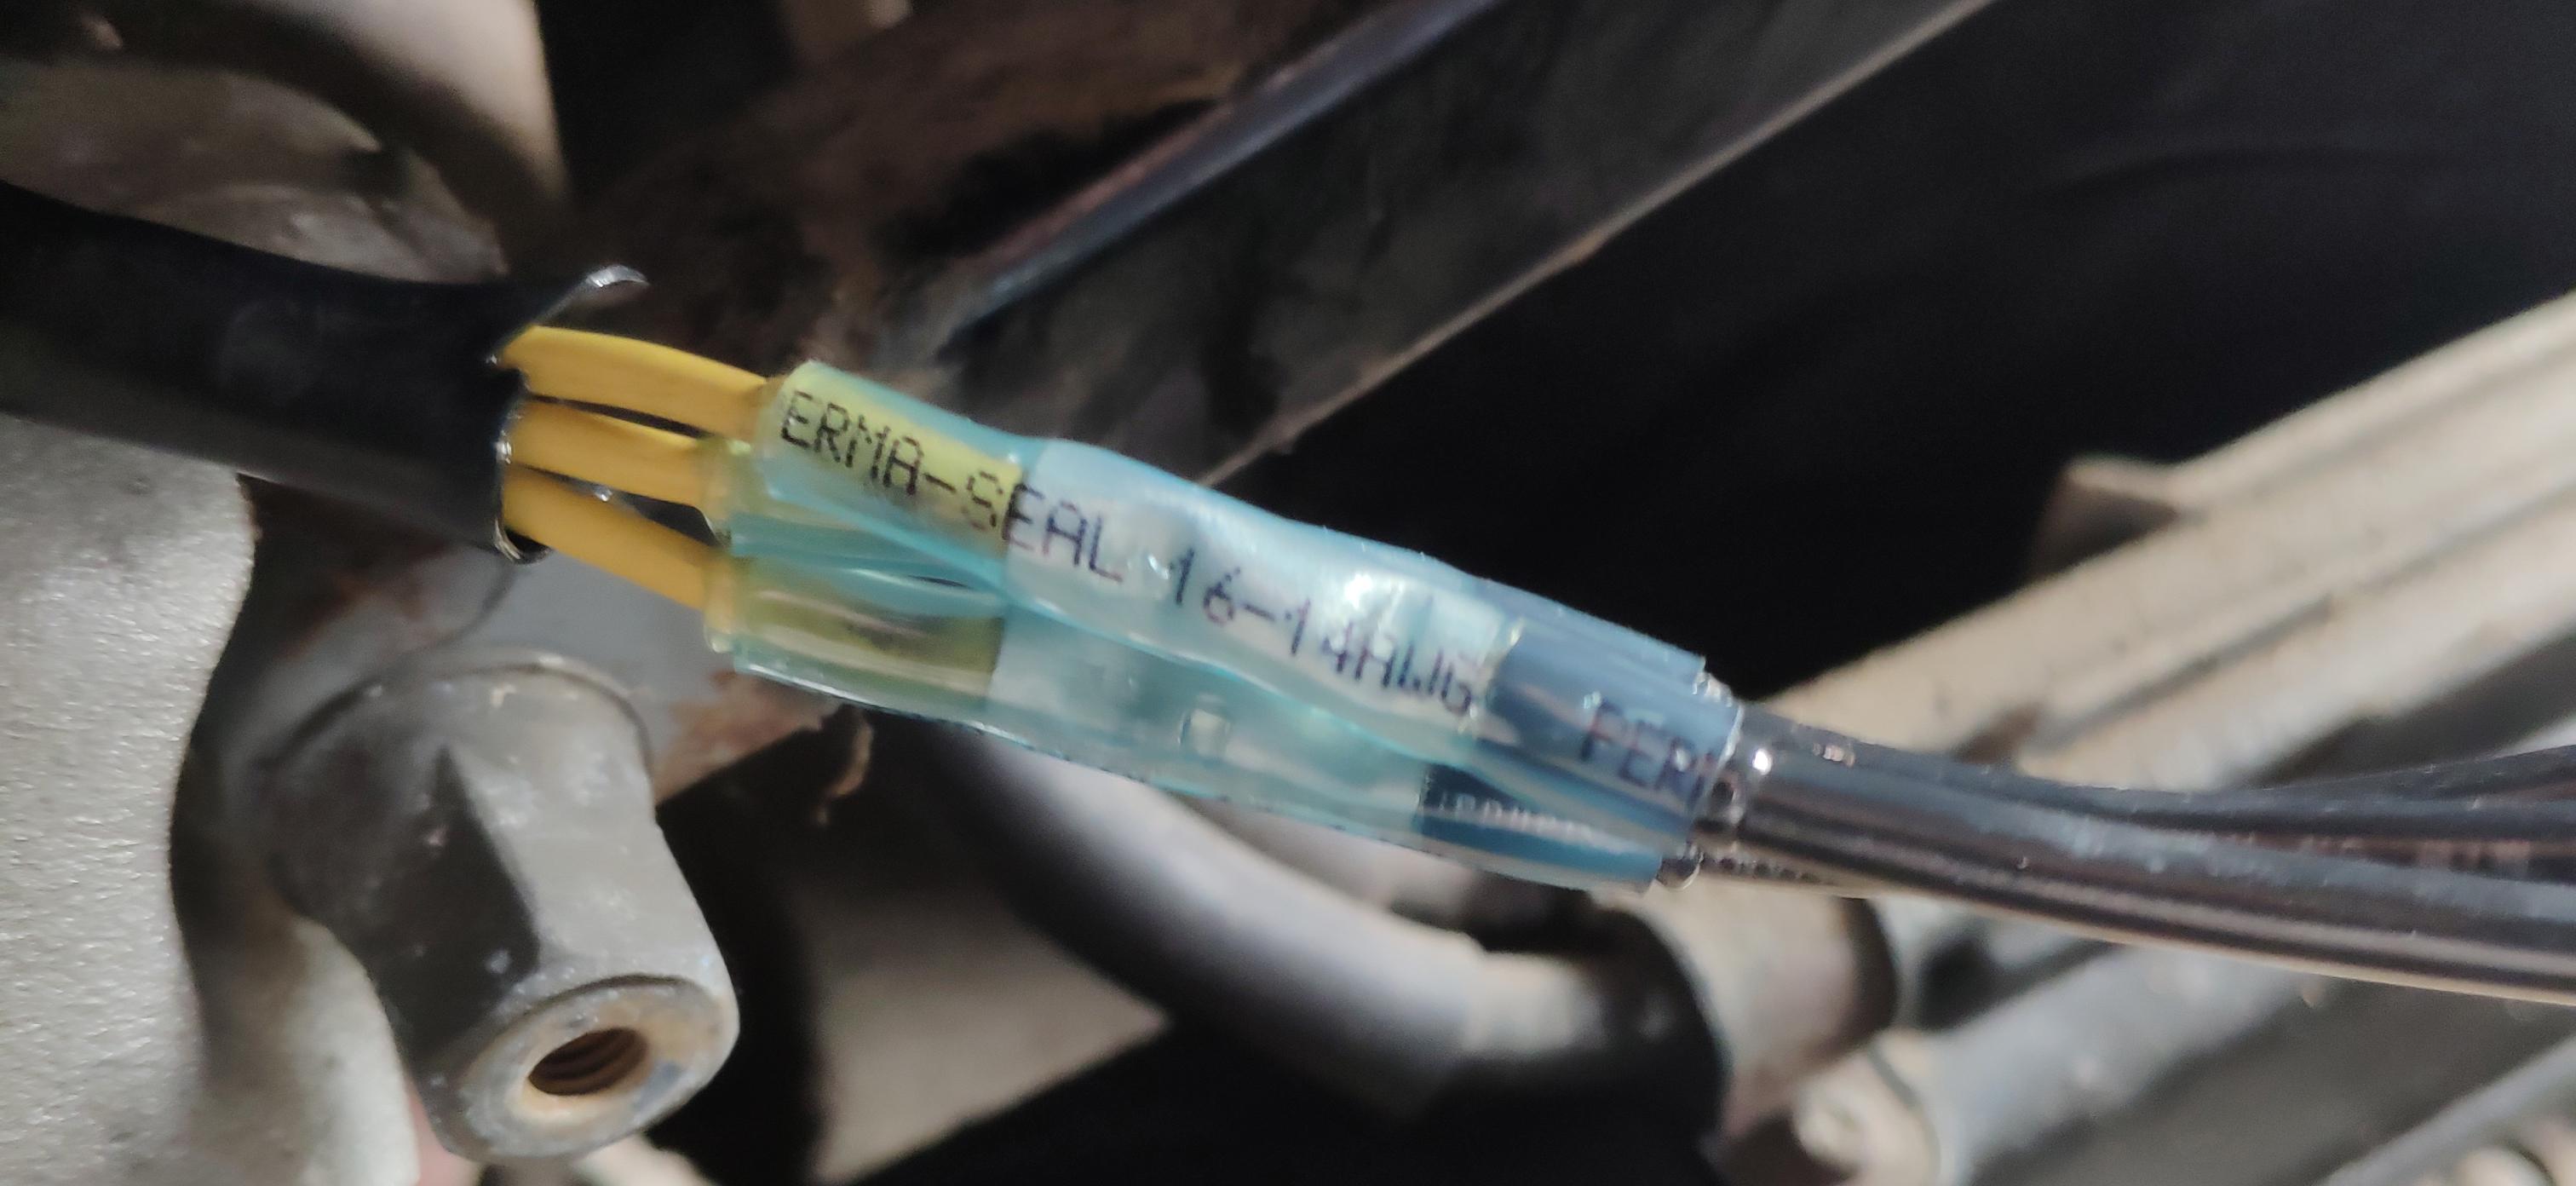
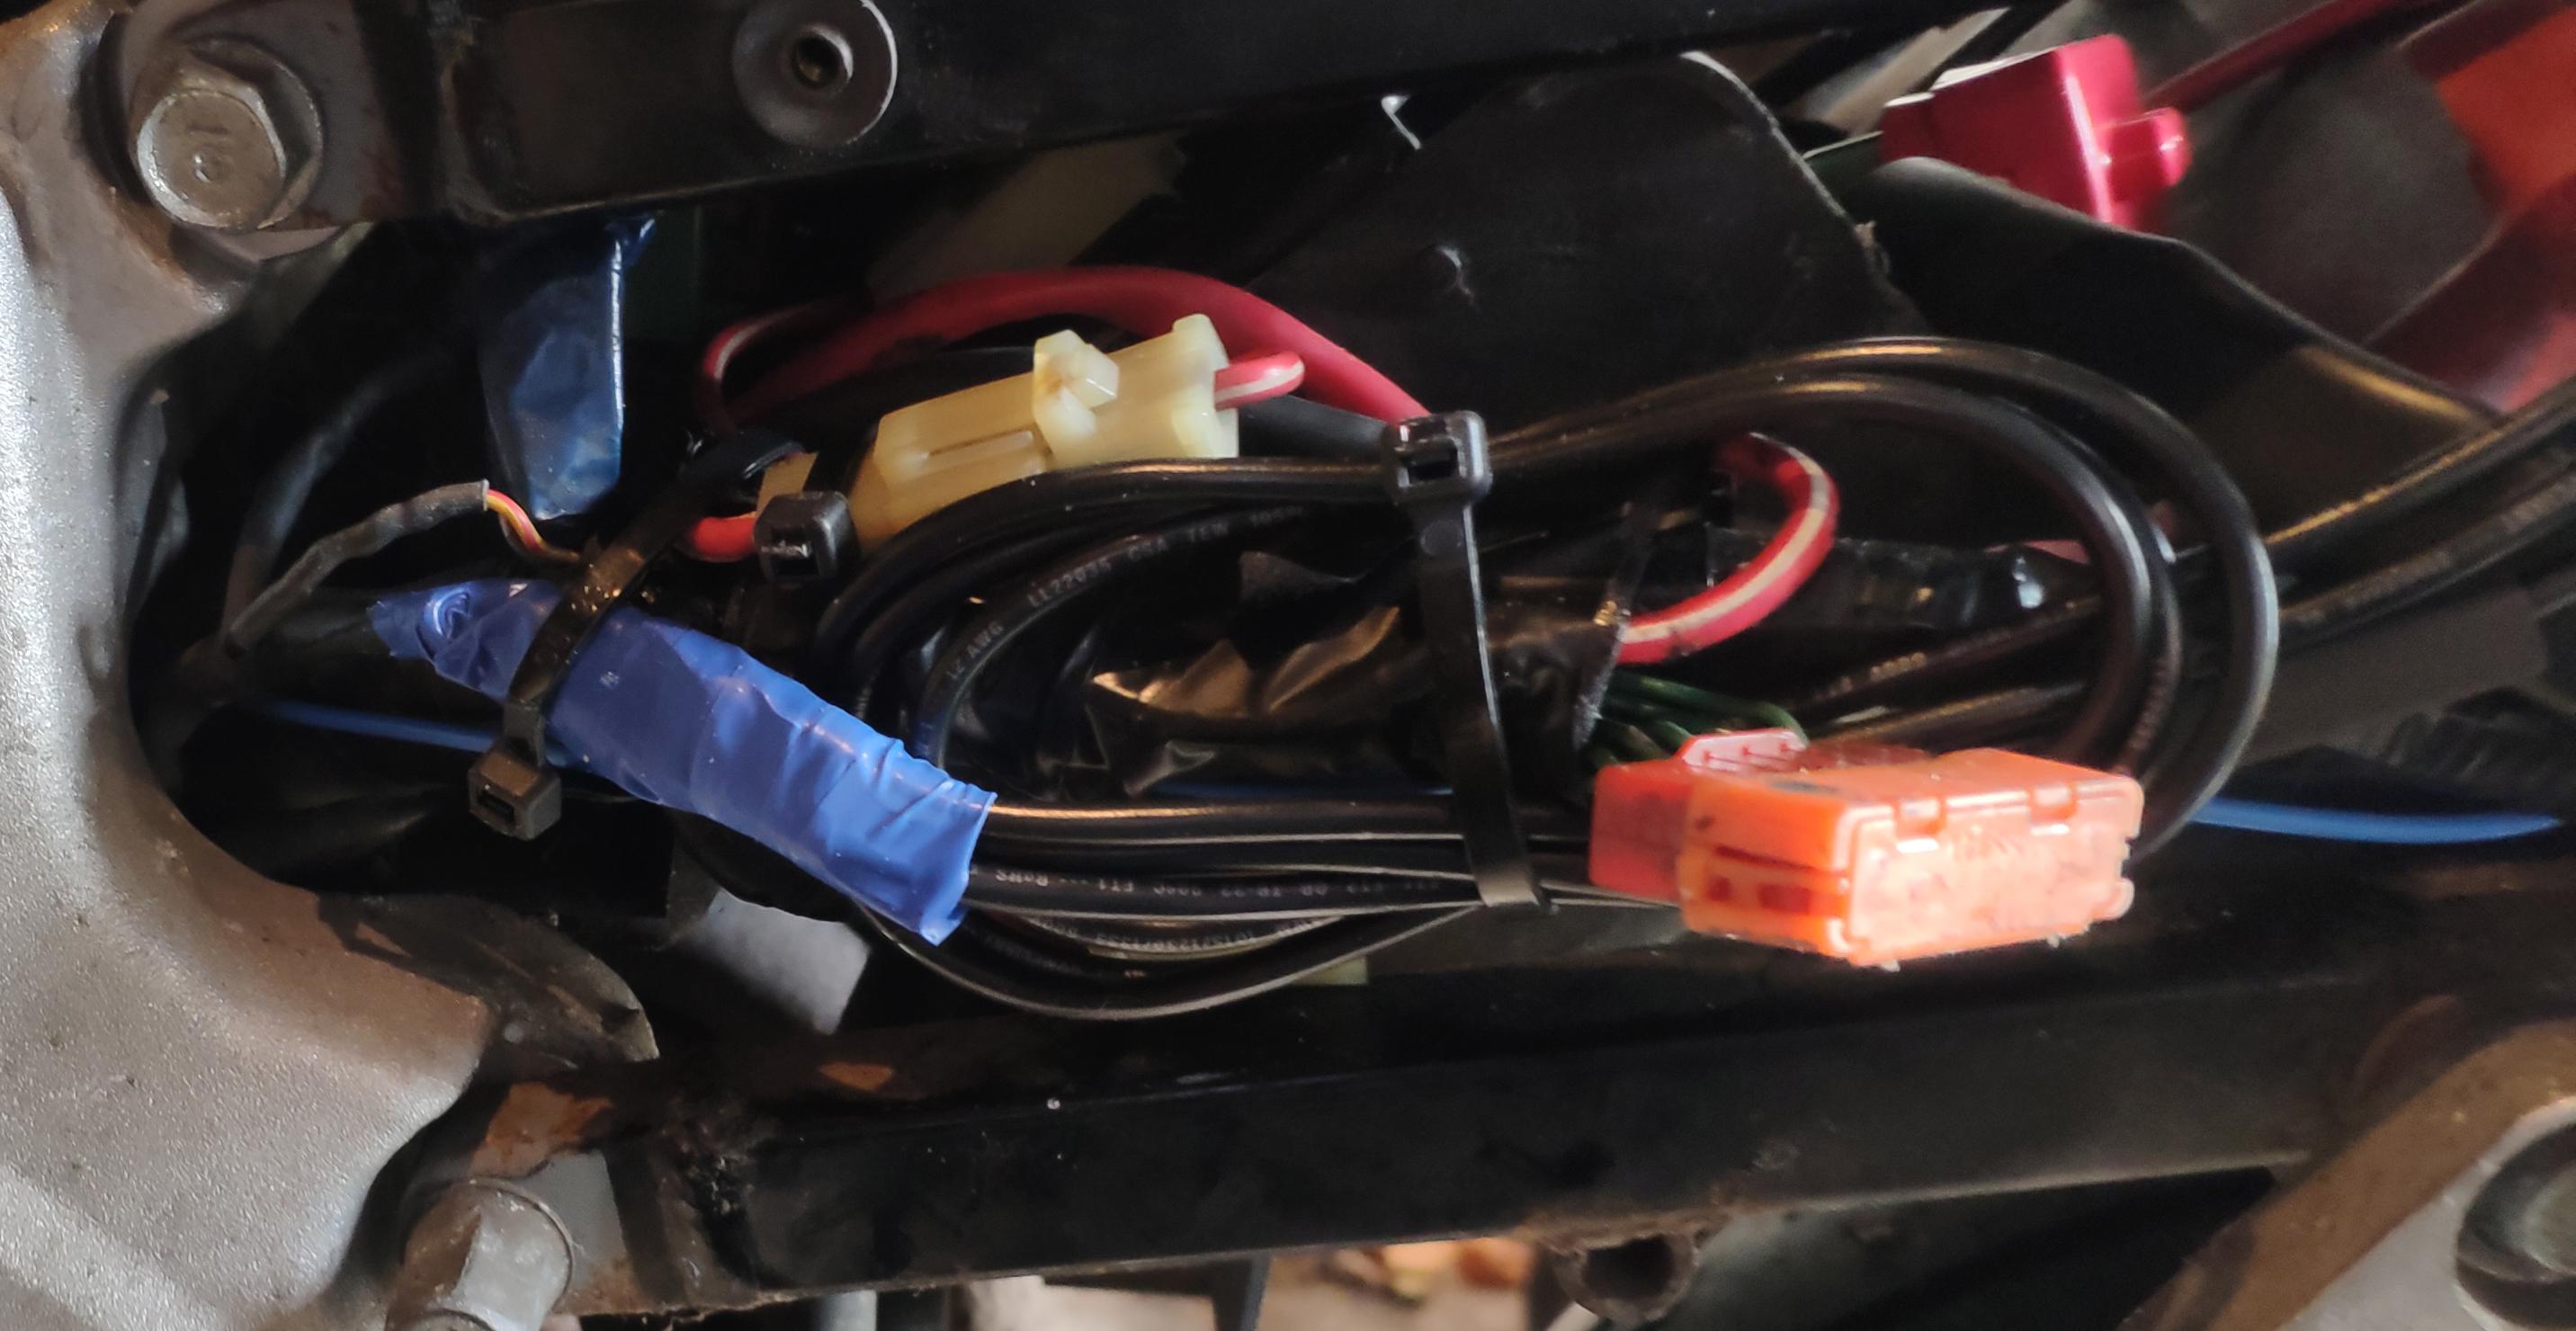
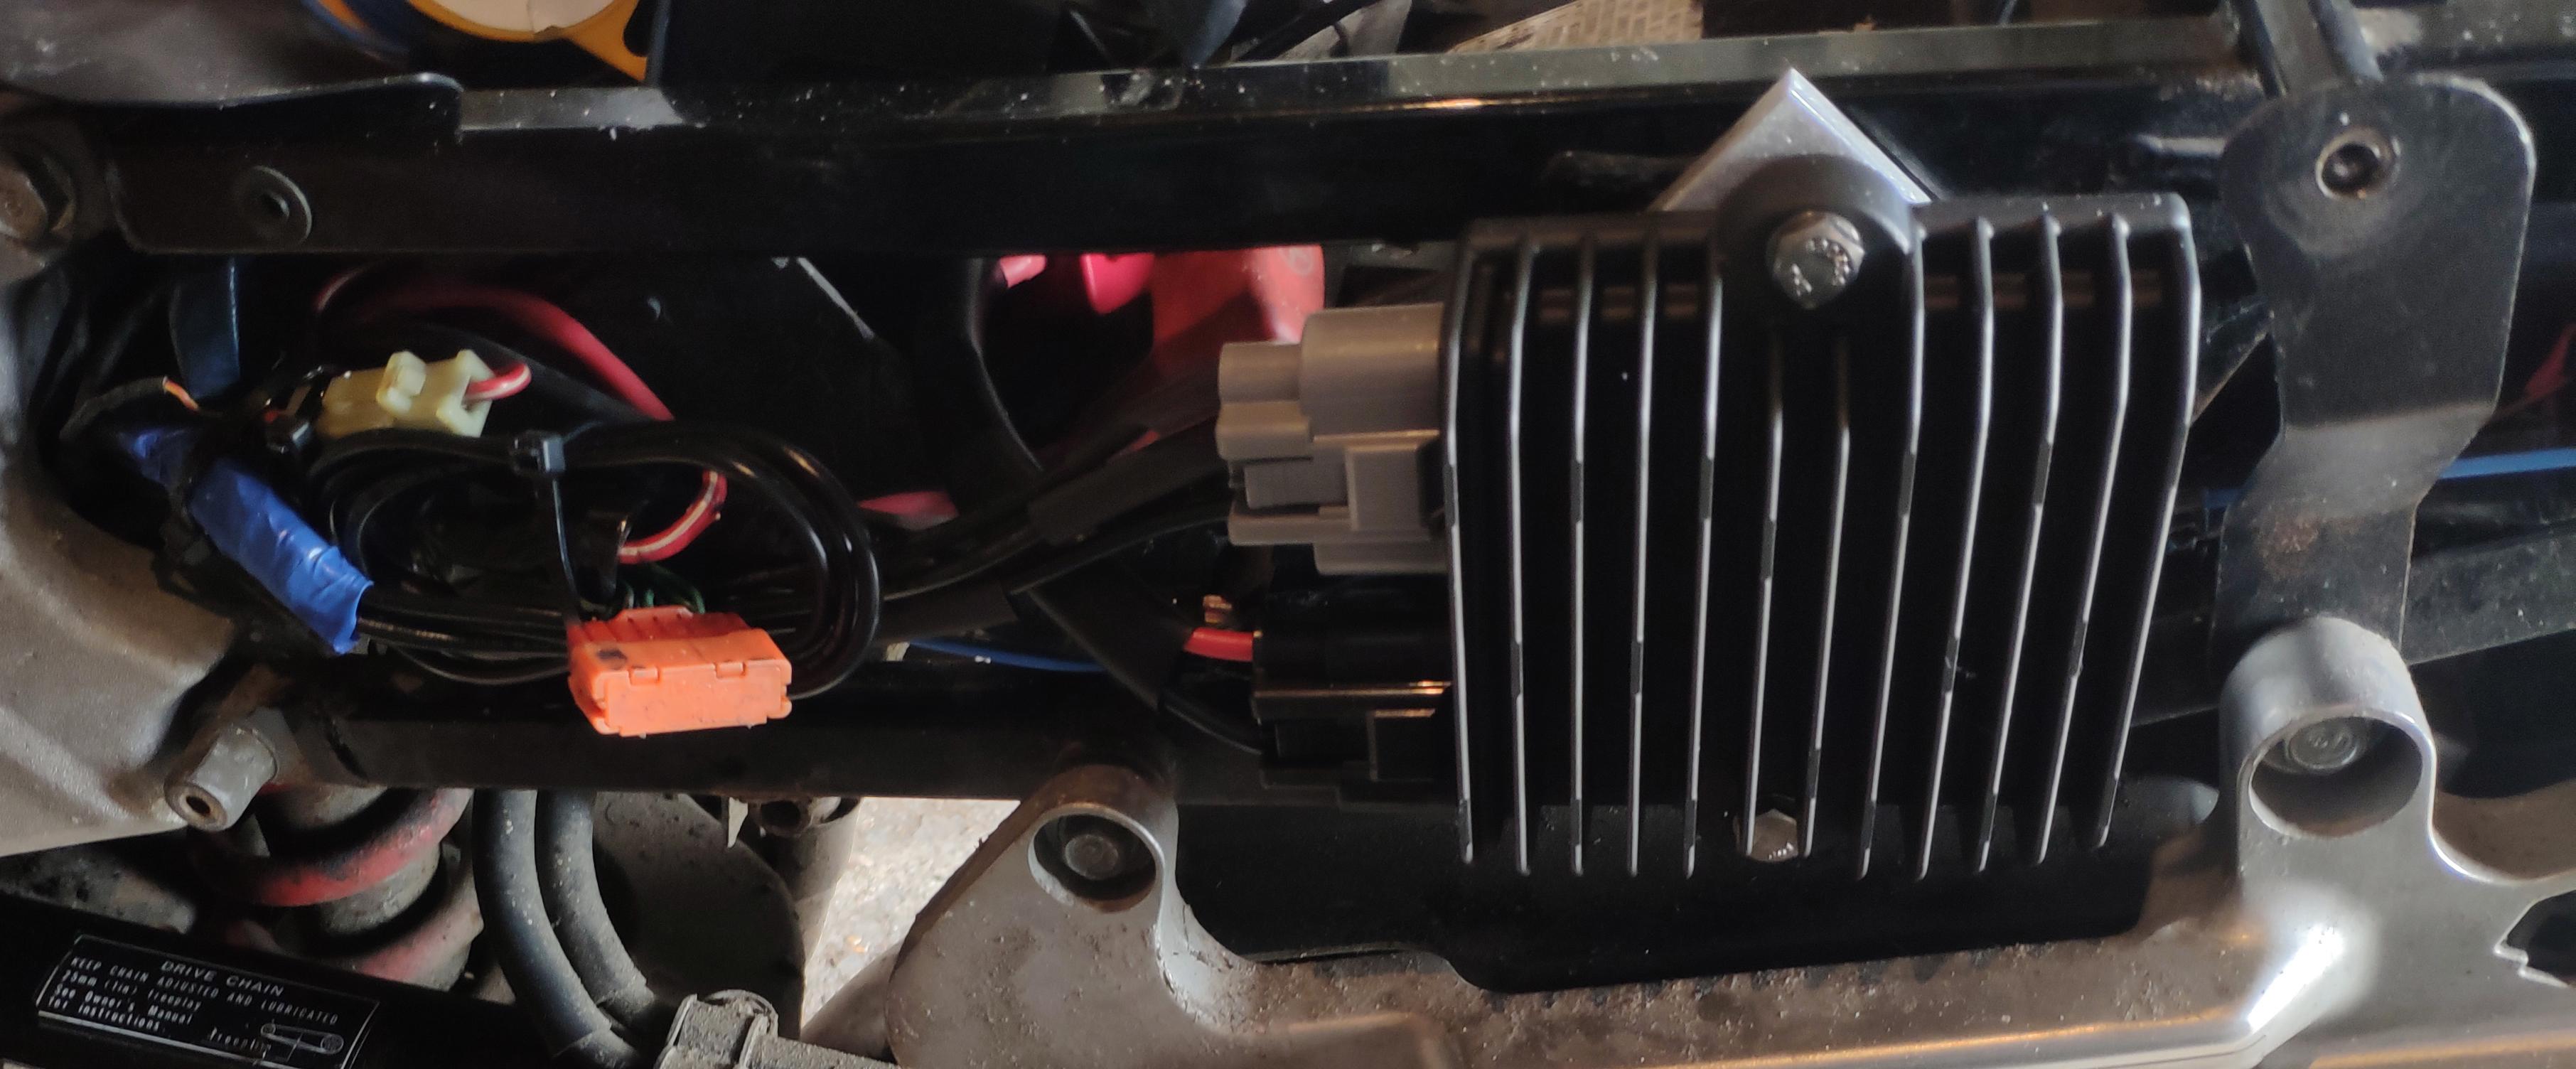
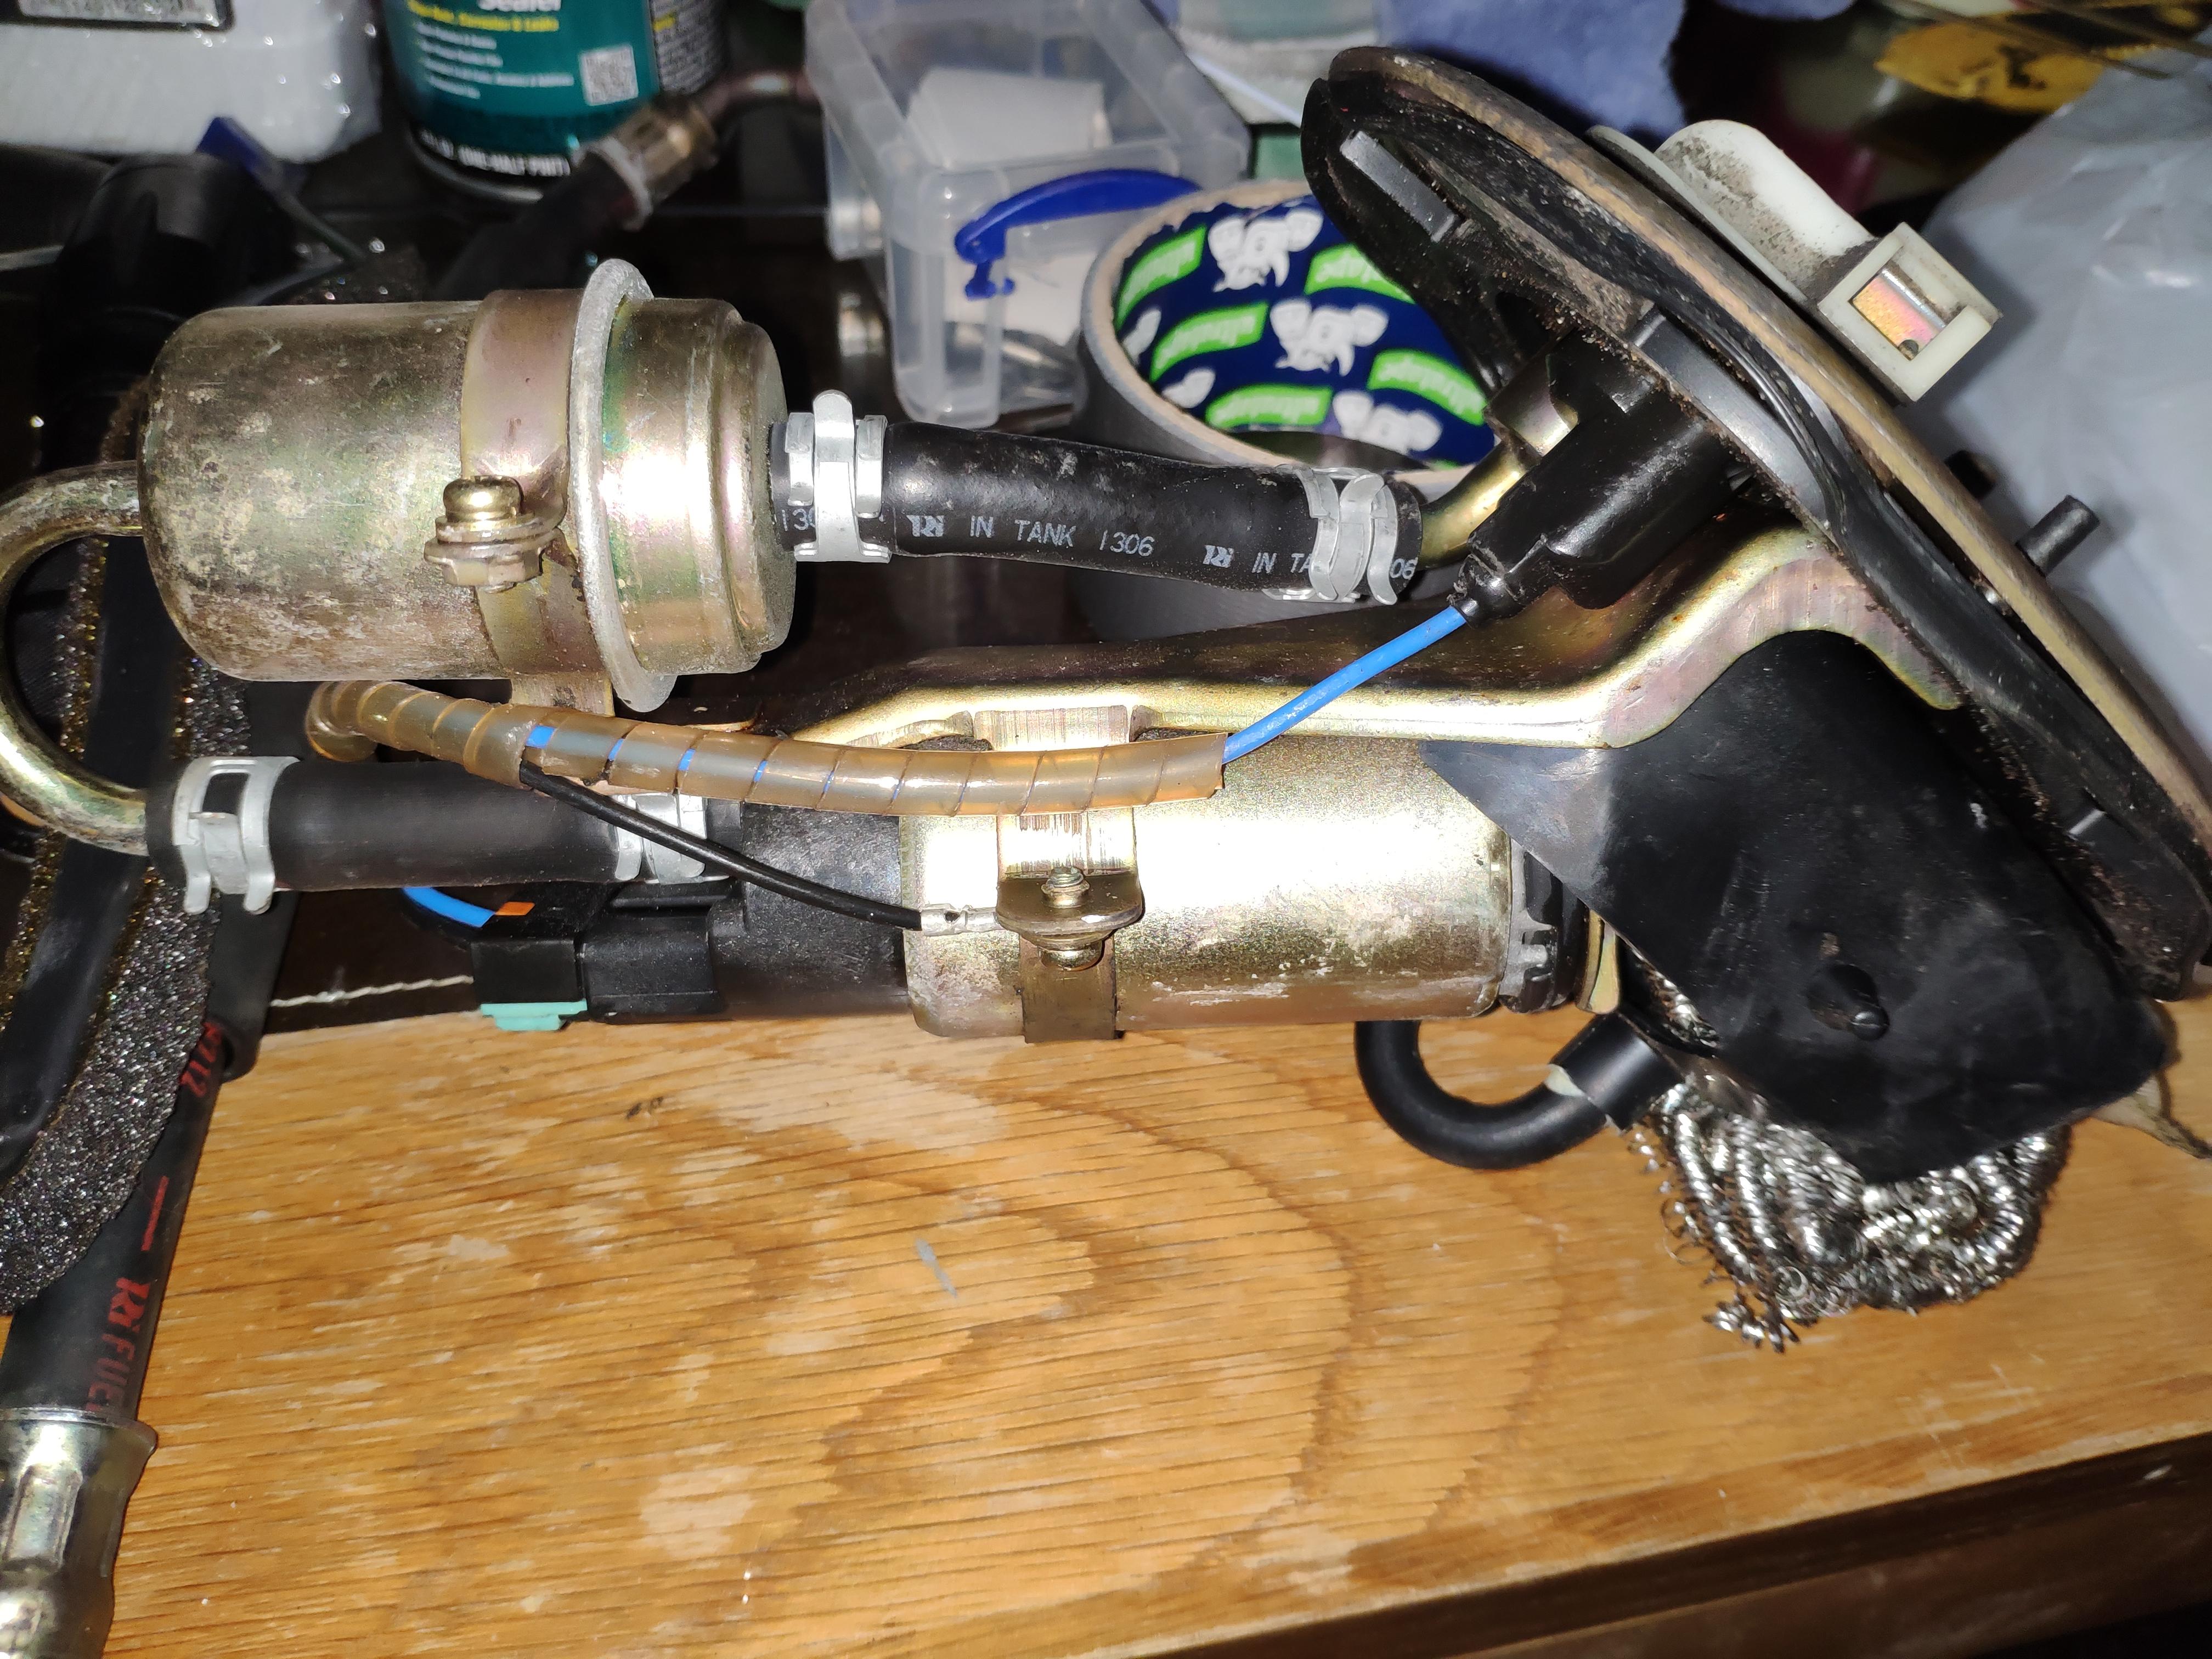
The Problem: The 5th gen VFR’s are known for having questionable Regulator Rectifiers (RR) that can suffer from overheating (other gen VFR's also suffer from the same issue). One preventative step that can be taken is to replace the RR with a mosfet (FH020AA) or series (SH847) RR. I went with the SH847 option as I want to run LED’s and I think this would be the best option for that. Not all bikes suffer from overheating, however I decided to do it as a preventative step on my 5th gen. Parts/Tools Required: Parts List: · Shindengen SH847 RR Kit from roadstercycle.com. It comes with crimp and solder type connections. Mine only came with the crimp style connectors, so I used them. For 5th Gen VFR’s you need 12” battery cables and the default stator cables are 24” and need to be cut to length. · 4 Way Mounting bracket from roadstercycle.com (Optional) Tools: · Crimping tool with insulated crimping capability like: Soldering iron (if you decide to use the solder connections) Hex tool for mounting the bracket (I can’t remember the exact size) Screwdriver + Spanner (10mm) + Socket. Heat gun or hairdryer Electrical Tape & Cable Ties (Optional) Tools required for removal of Rear Cowl Steps: 1. Remove the Seat. 2. Remove the rear Grips 3. Disconnect rear turn signals and brake lights. Turn them counter clockwise to loosen. It can be tricky to get a good grip, so take your time. 4. Remove the rear Cowl. 5. Label the lights as they are left dangling (Optional). Remember to remove when reinstalling 6. You can now see the old regulator Rectifier. Remove this by removing the 2 bolts. On my bike, 1 could be removed by the front bolt, the other had a nut that needs securing as you remove the bolt. Access is great though so you should have no problem. Tape up the old power connector, you wont need this. You will be left with the following: 7. I used the 4 way mounting bracket to mount in the stock location. You will be required to cut off one of the corners and file it smooth, like so: 8. Mount the bracket using the supplied hex screws. I had to use a bolt on the rear of one of them. 9. Mount the new RR onto the mounting bracket. The cooling fins do not have to be parallel to the airflow for this type of RR. 10. At this point you should check clearances by loosely reattaching the upper cowl. If it does not fit, move the mounting bracket as required, or relocate to a different location. 11. Plug in the new cables. 12. Cut the old stator plug. 13. Strip a small length off each stator cable 14. Slide the crimp connector onto one of the cables, if using the crimp style connectors. Otherwise use the solder type connectors. 15. Crimp between the midpoint and the end point. 16. Strip a small length off the new stator wires. They will need to be cut to length first. I left a little spare, just in case. 17. Slide this into the other end of the crimp connector and crimp between the midpoint and end point. 18. Do this for all 3 stator cables 19. Test by starting the bike and checking voltages, it should be 13V’s at idle and over 14V @ 5k rpm. If all is ok, continue. 20. Use the heat gun or hairdryer to heat the heat shrink around the crimp connectors. Use tape around them (Optional). 21. Cable tie the cables out of the way (optional) 22. Reinstall the upper Cowl in reverse order.
- 26 replies
-
- 4
-

-
- regulator rectifier
- sh847
- (and 1 more)
-
Thanks, I'll take a look on Amazon. They will come in handy
-
That sounds very useful, as I did drip a few speckles on the outside, though I was able to get them off with some elbow grease. Keeping the outside in good condition is key, i put 1 or 2 light scratches during the process. I bought a matching paint kit to fill these in and any existing dings..
-
No problem. Your welcome.
-
Thanks. Some plugs would be very useful, if I could have gotten some locally, I definitely would have bought some. Whats the price on the plug?
-
😂. It is a lot of work.
-
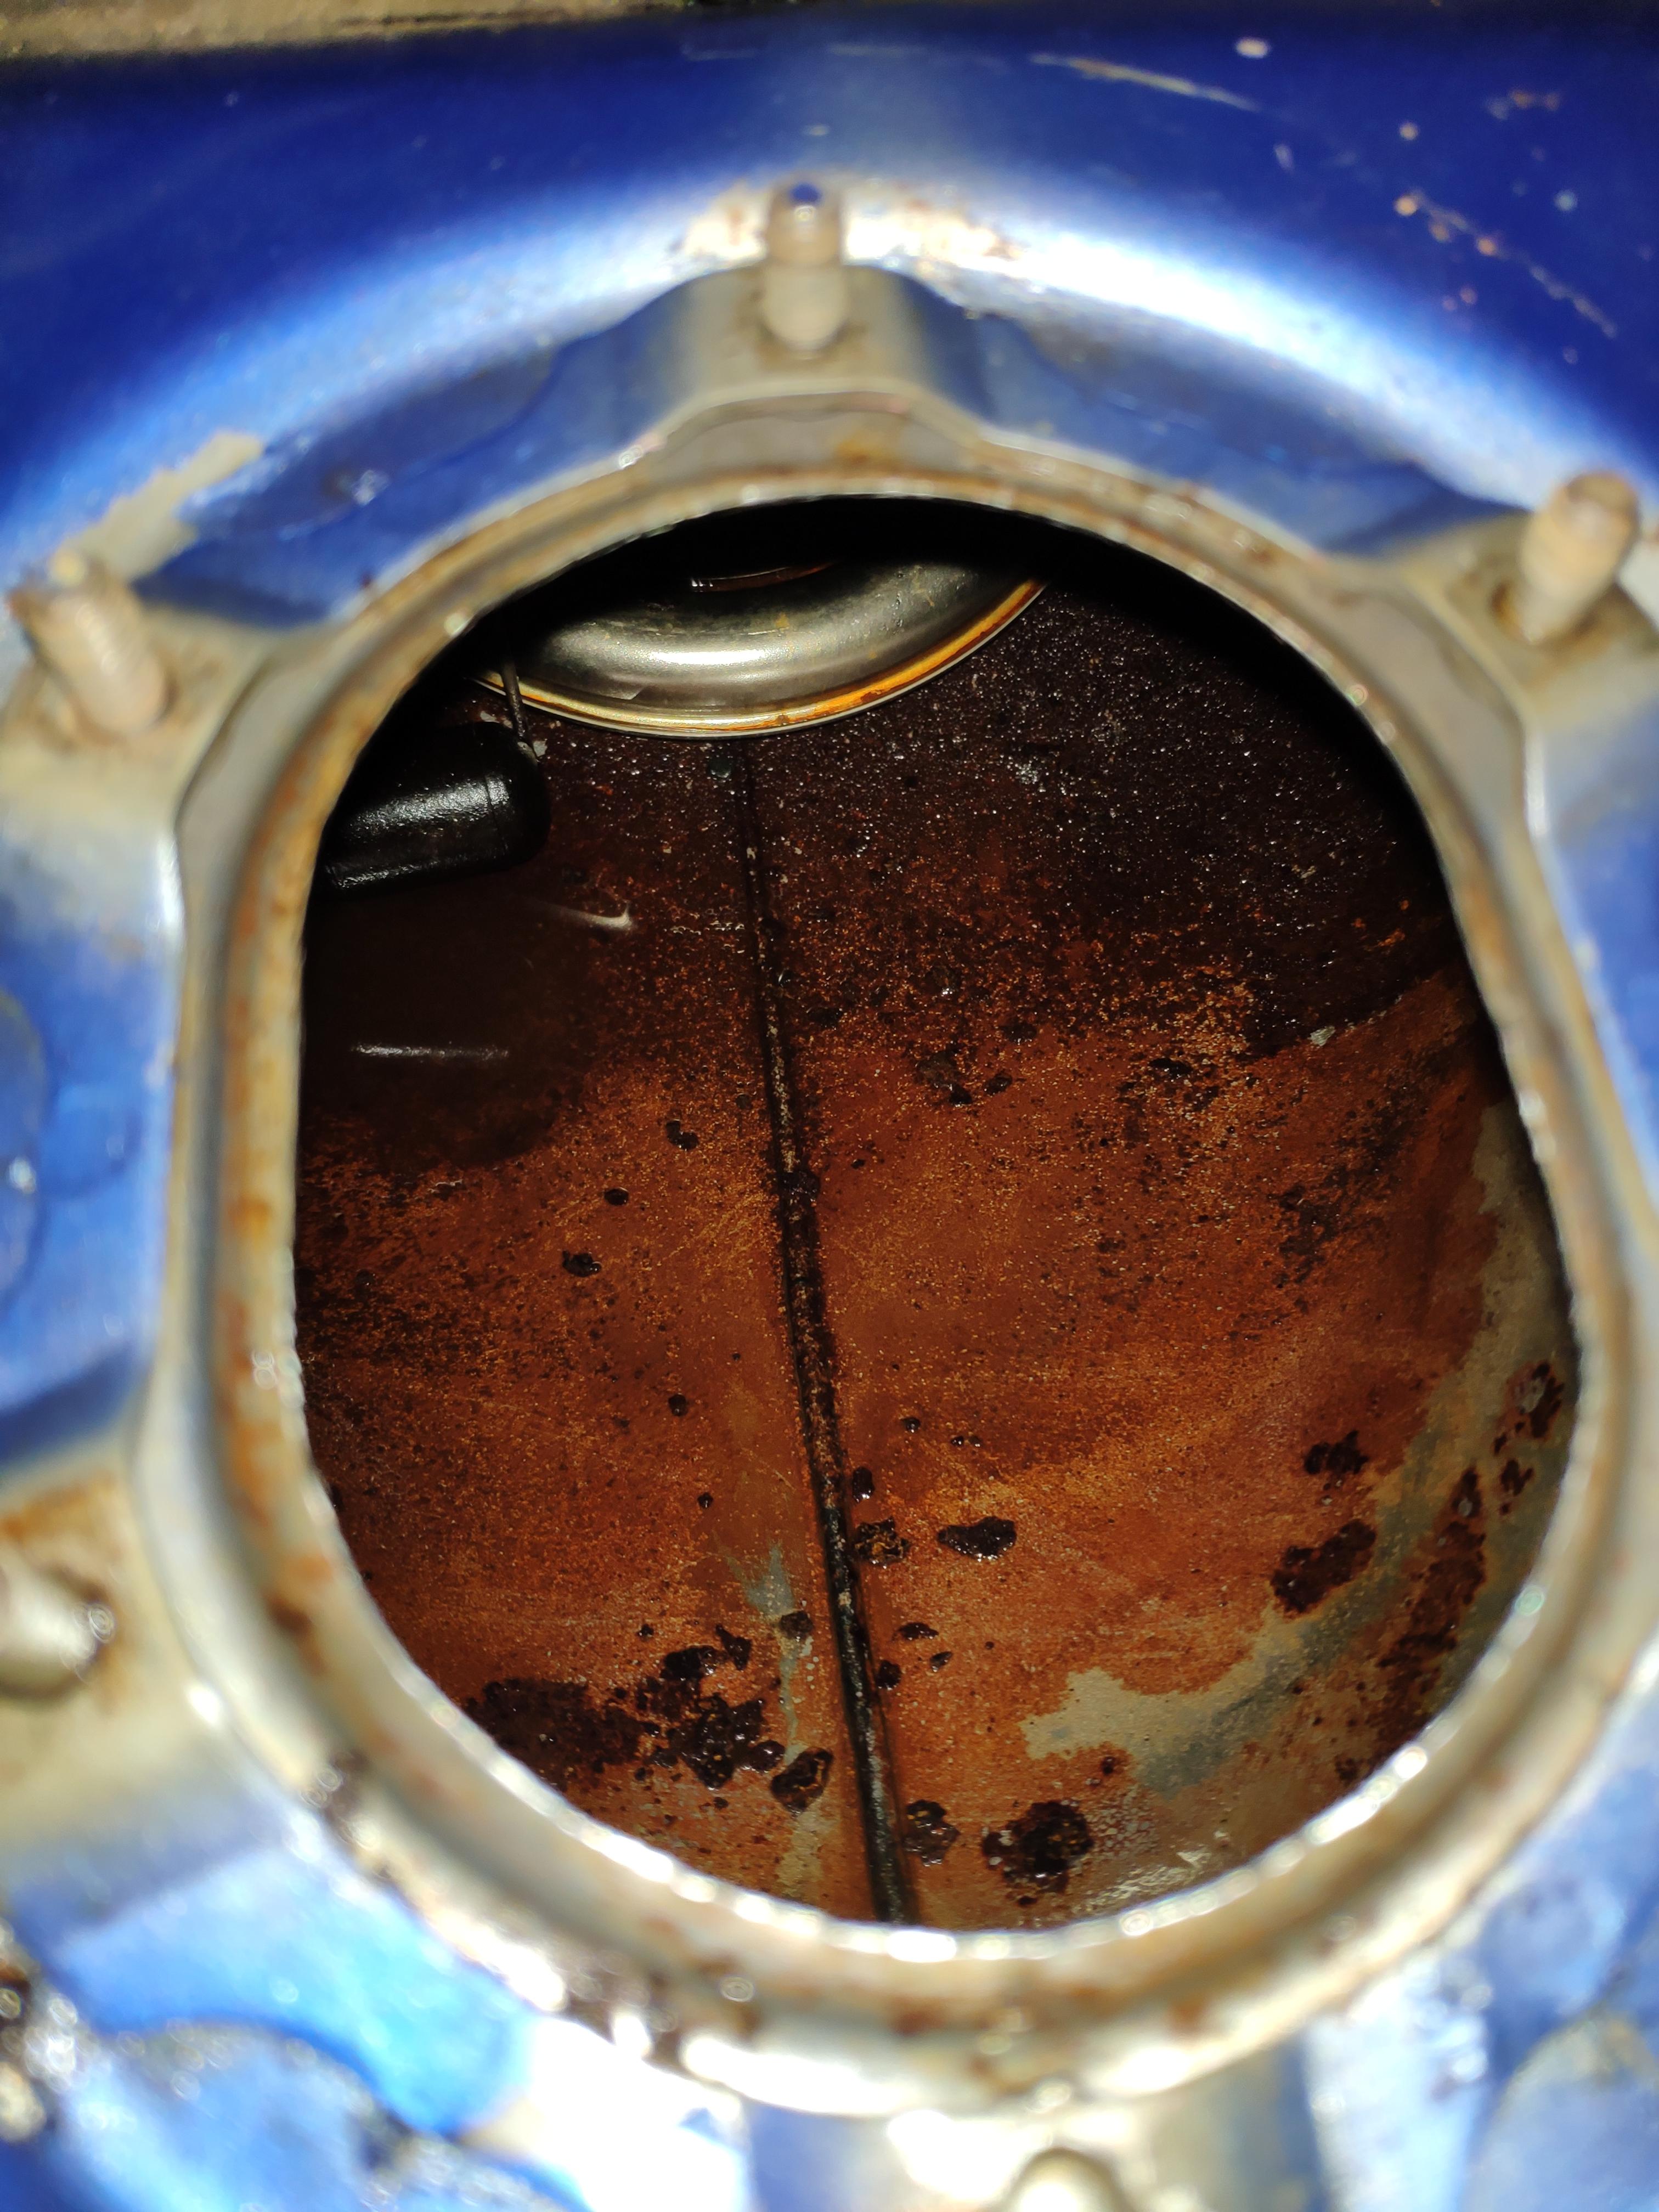
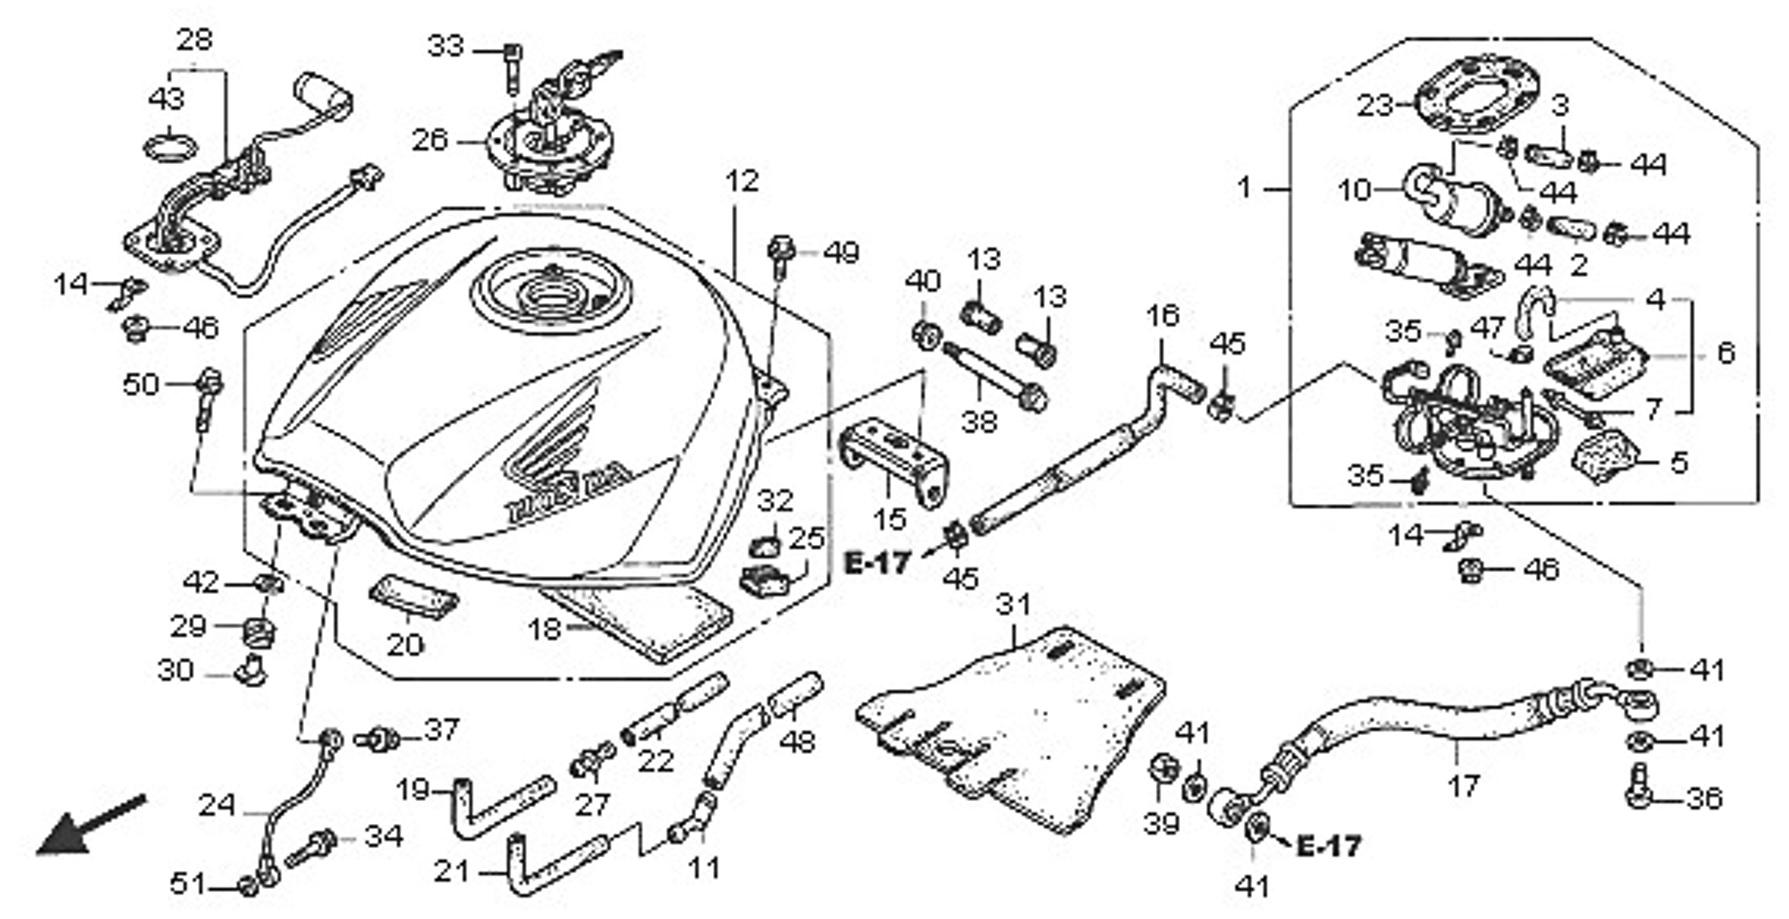
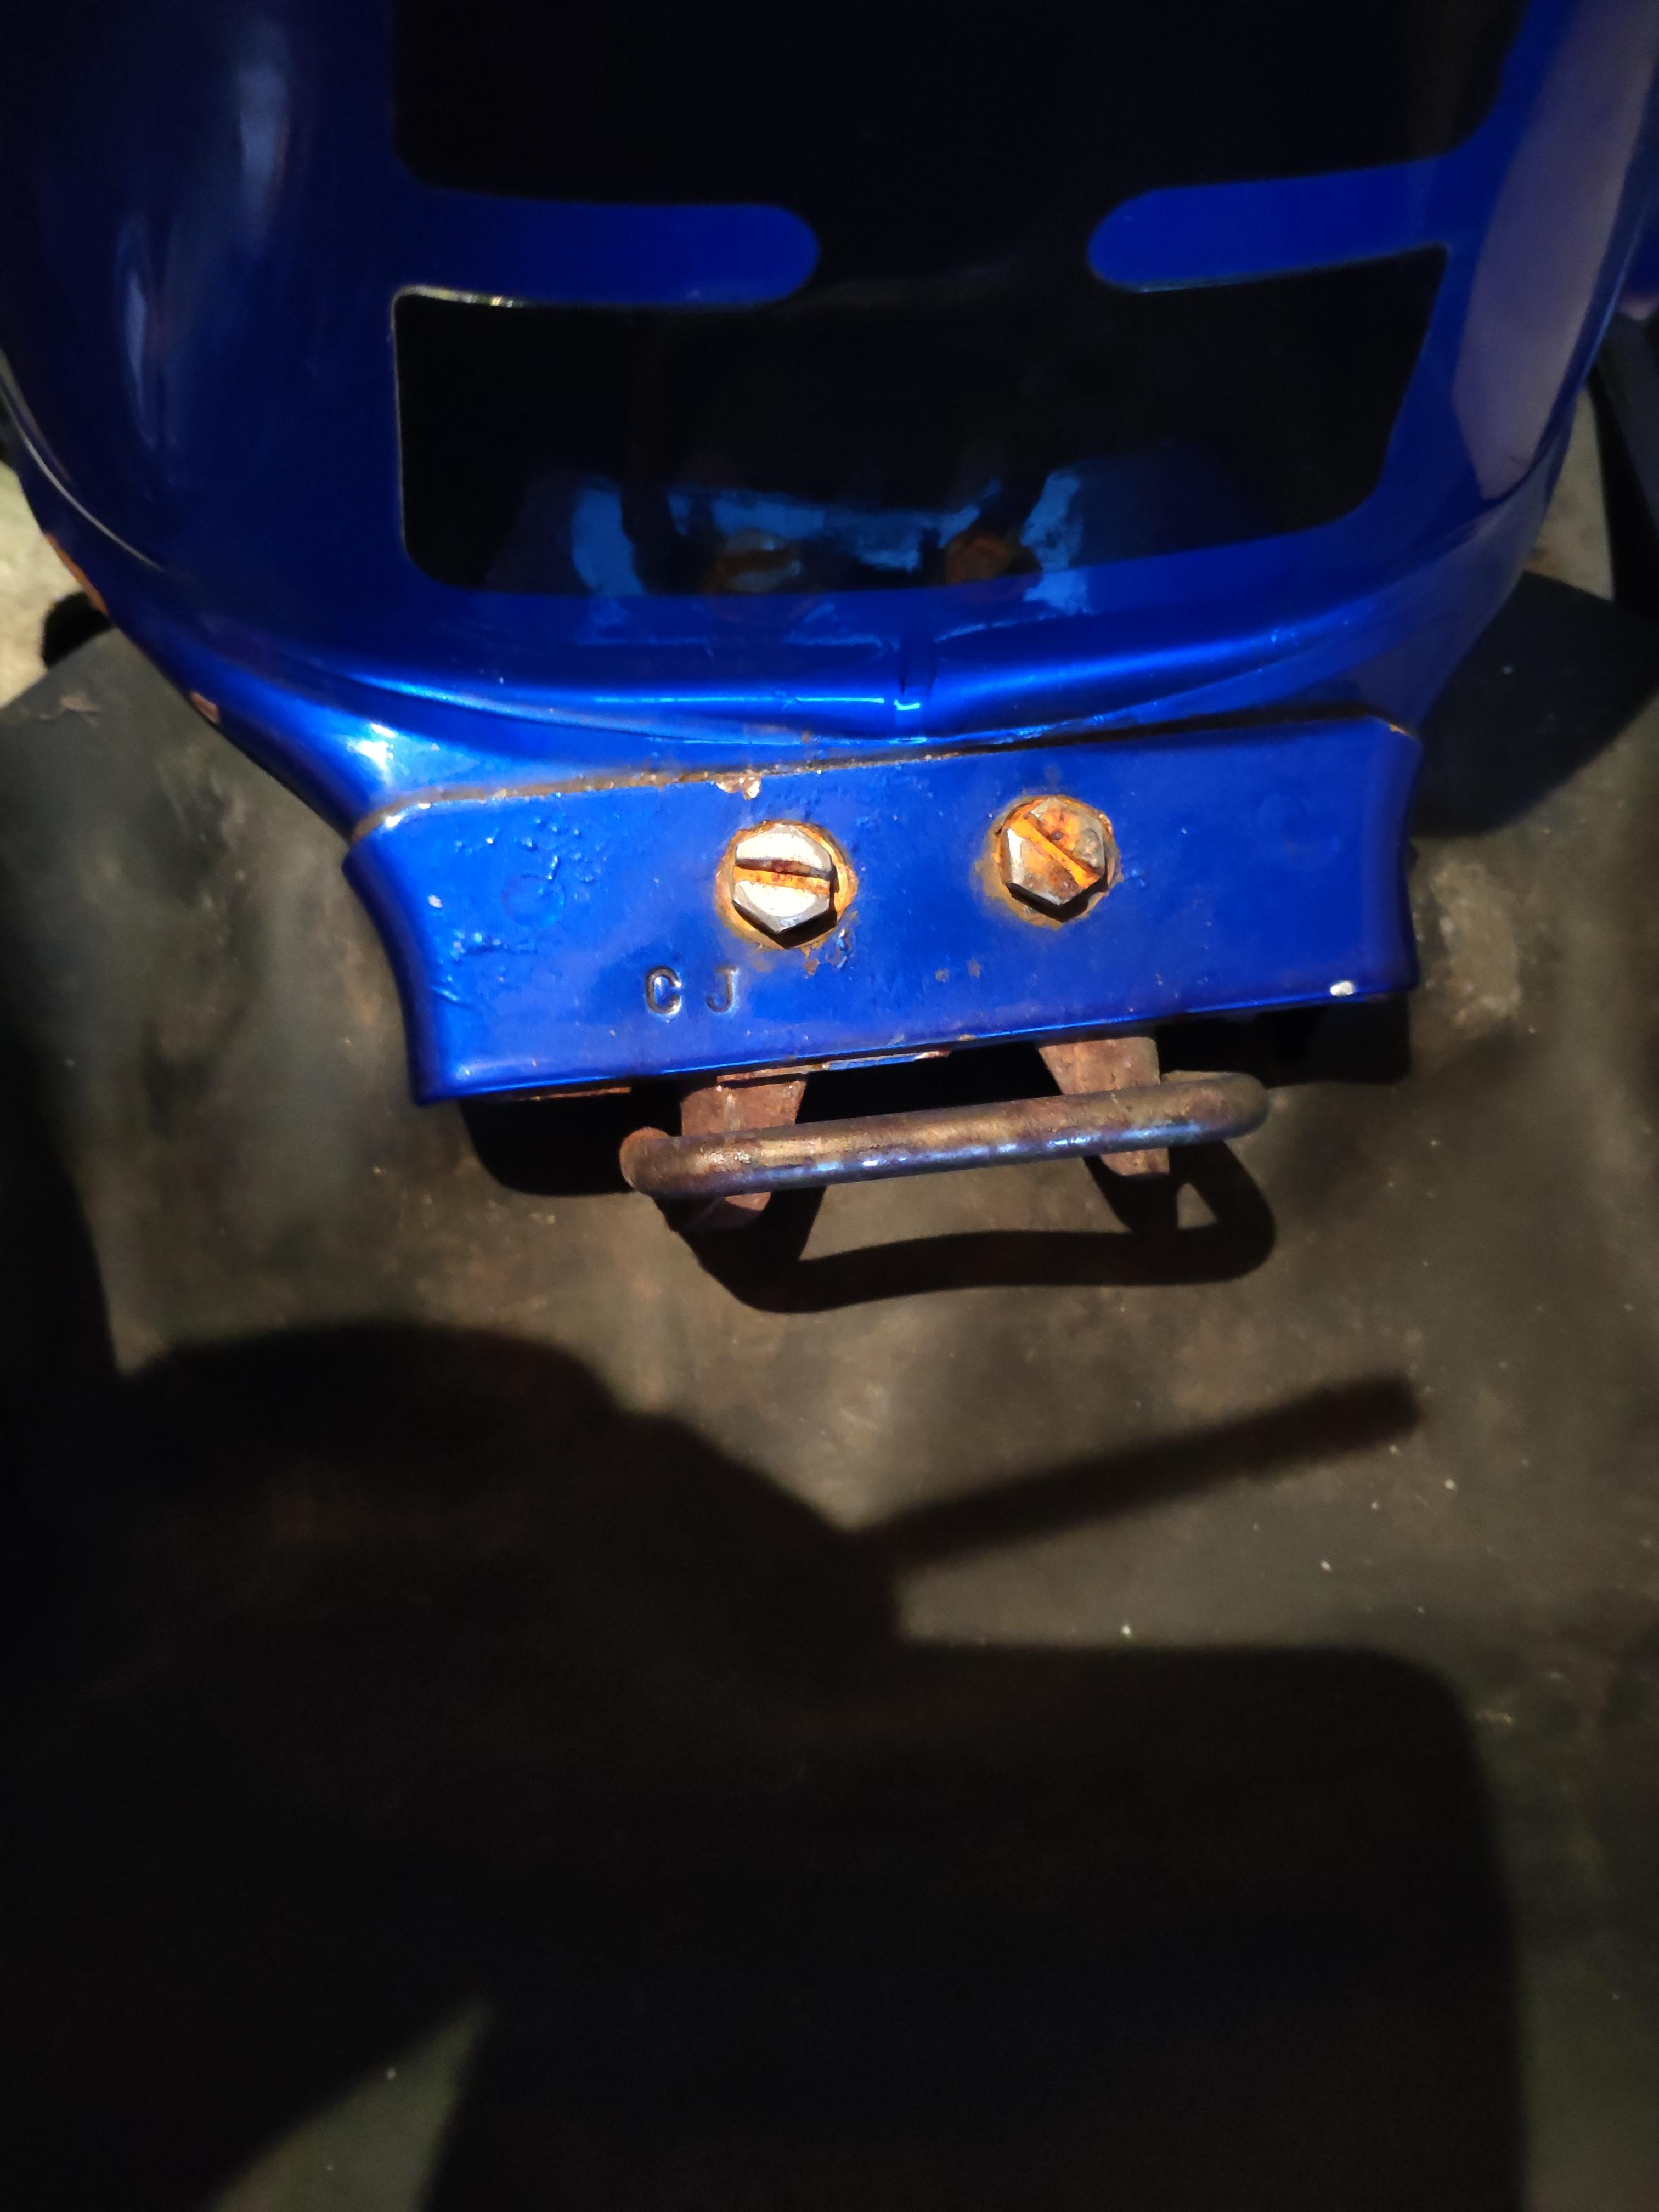
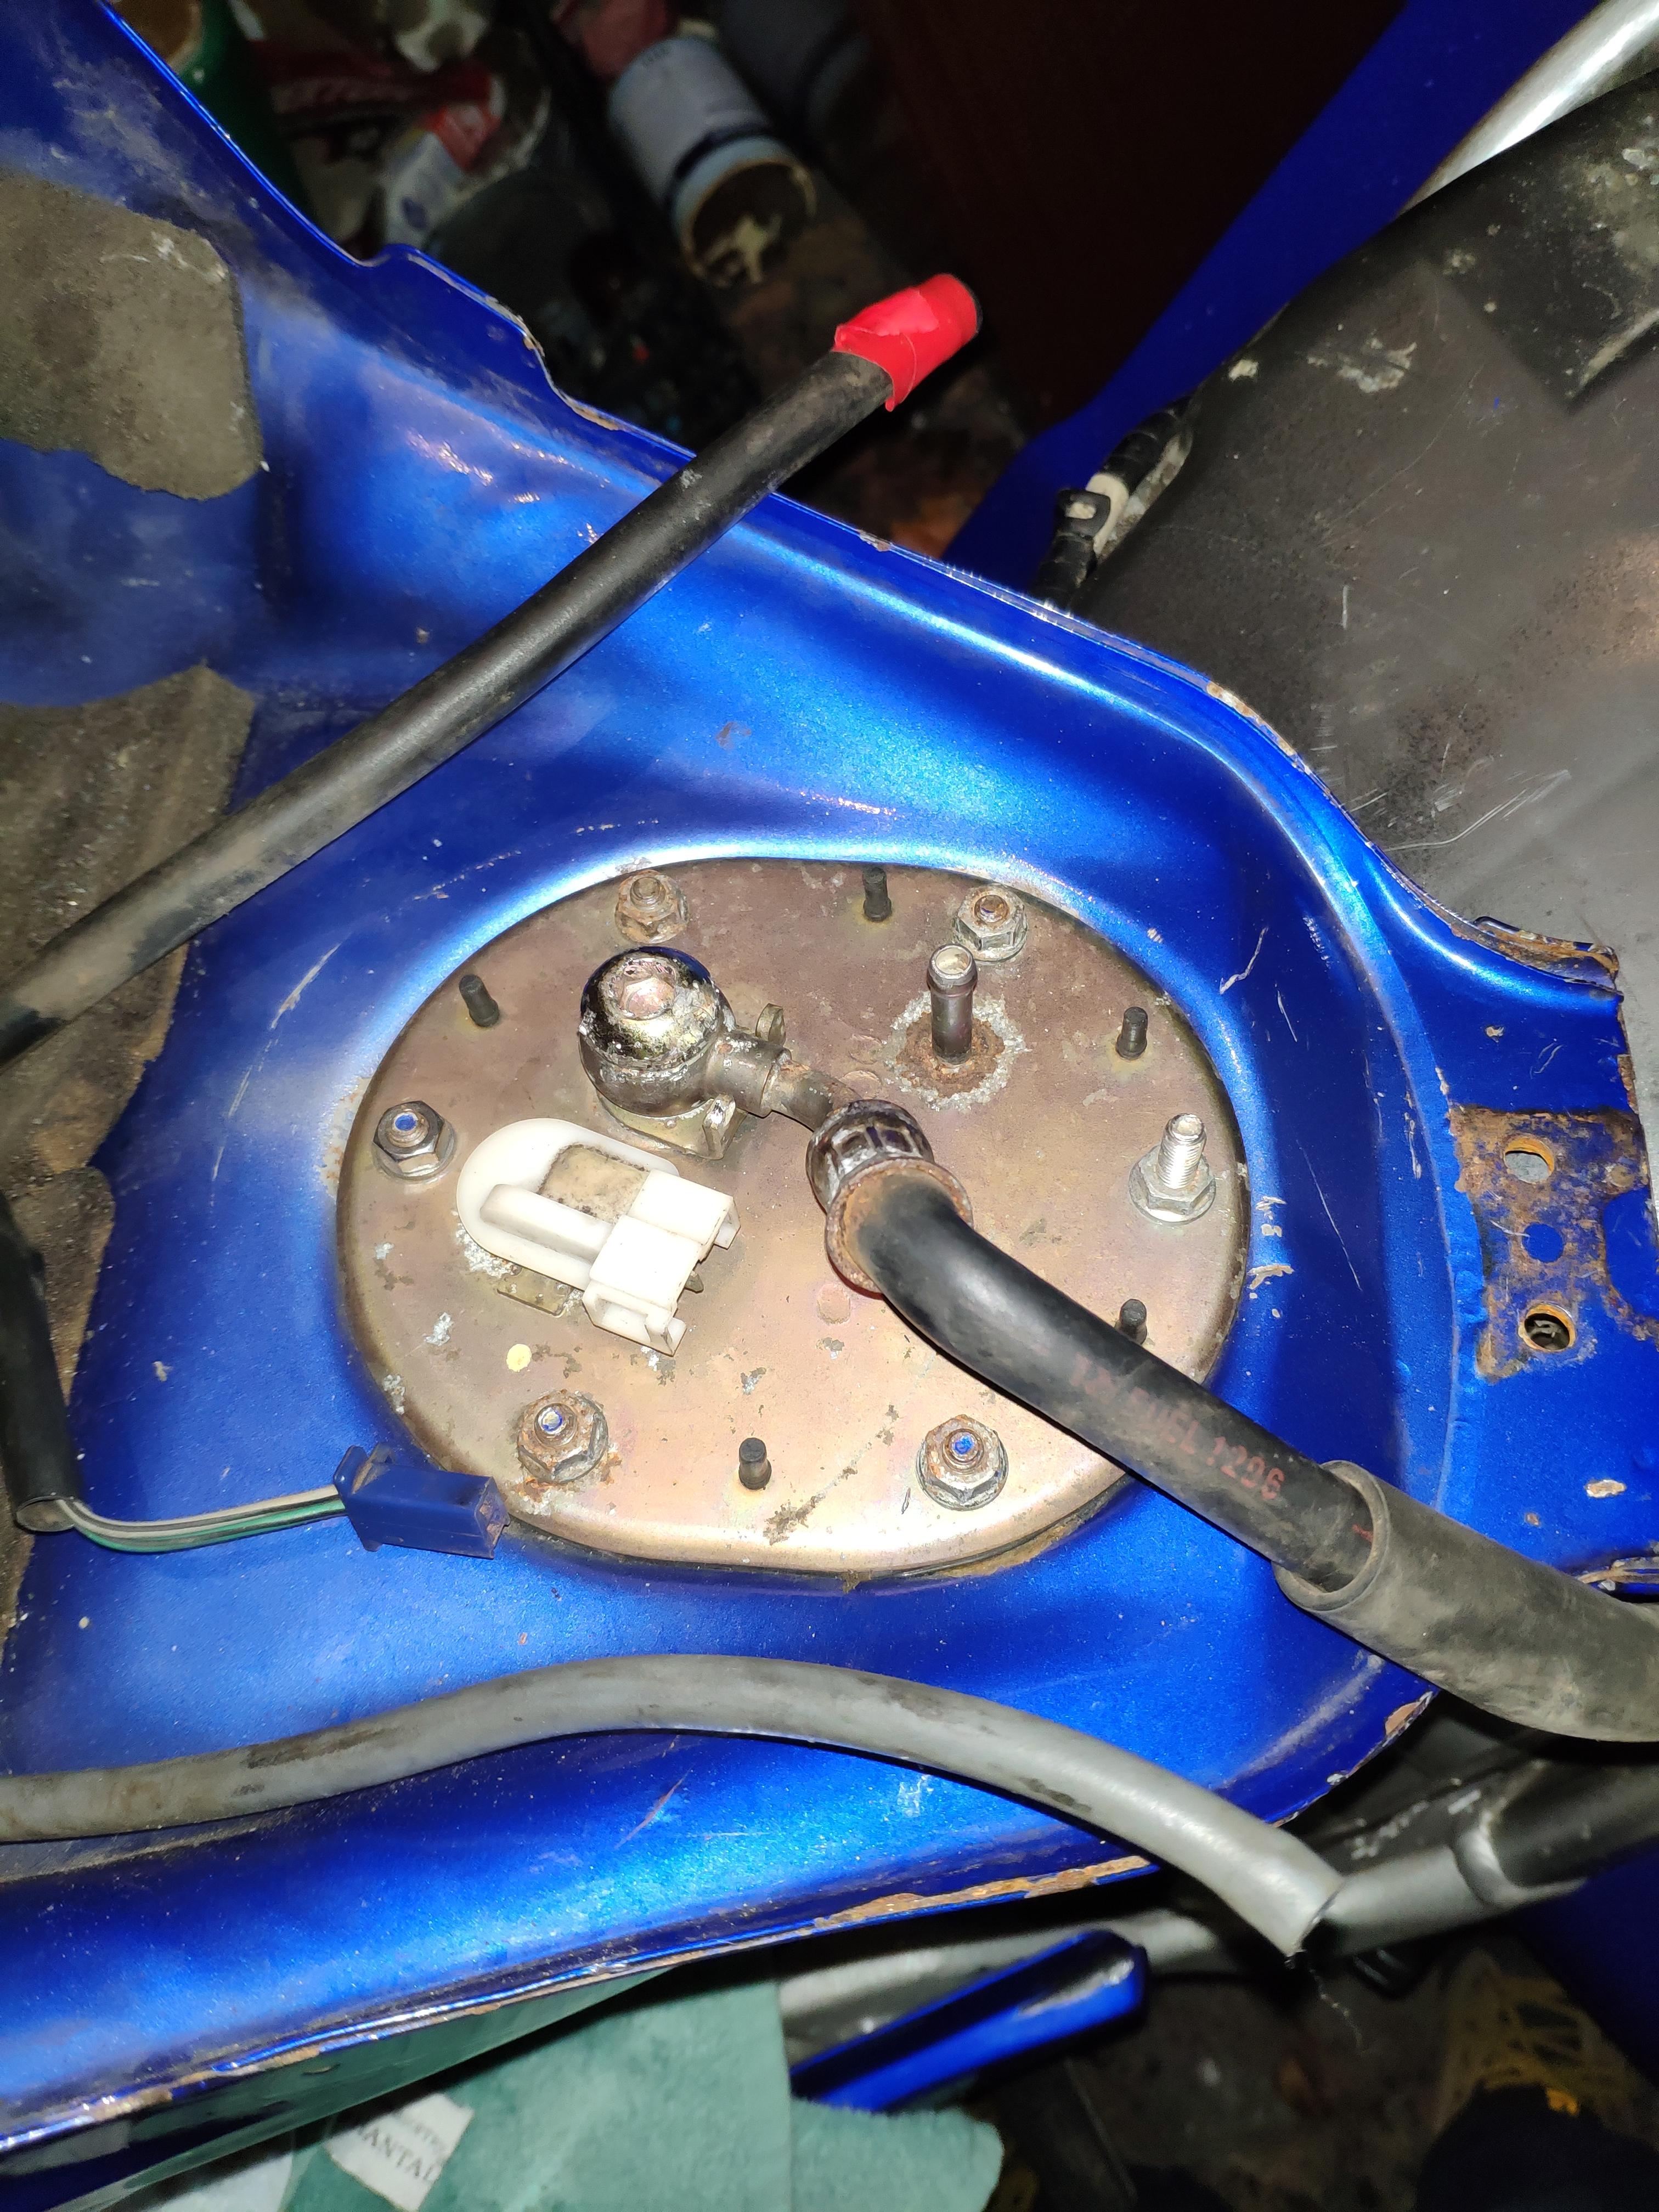
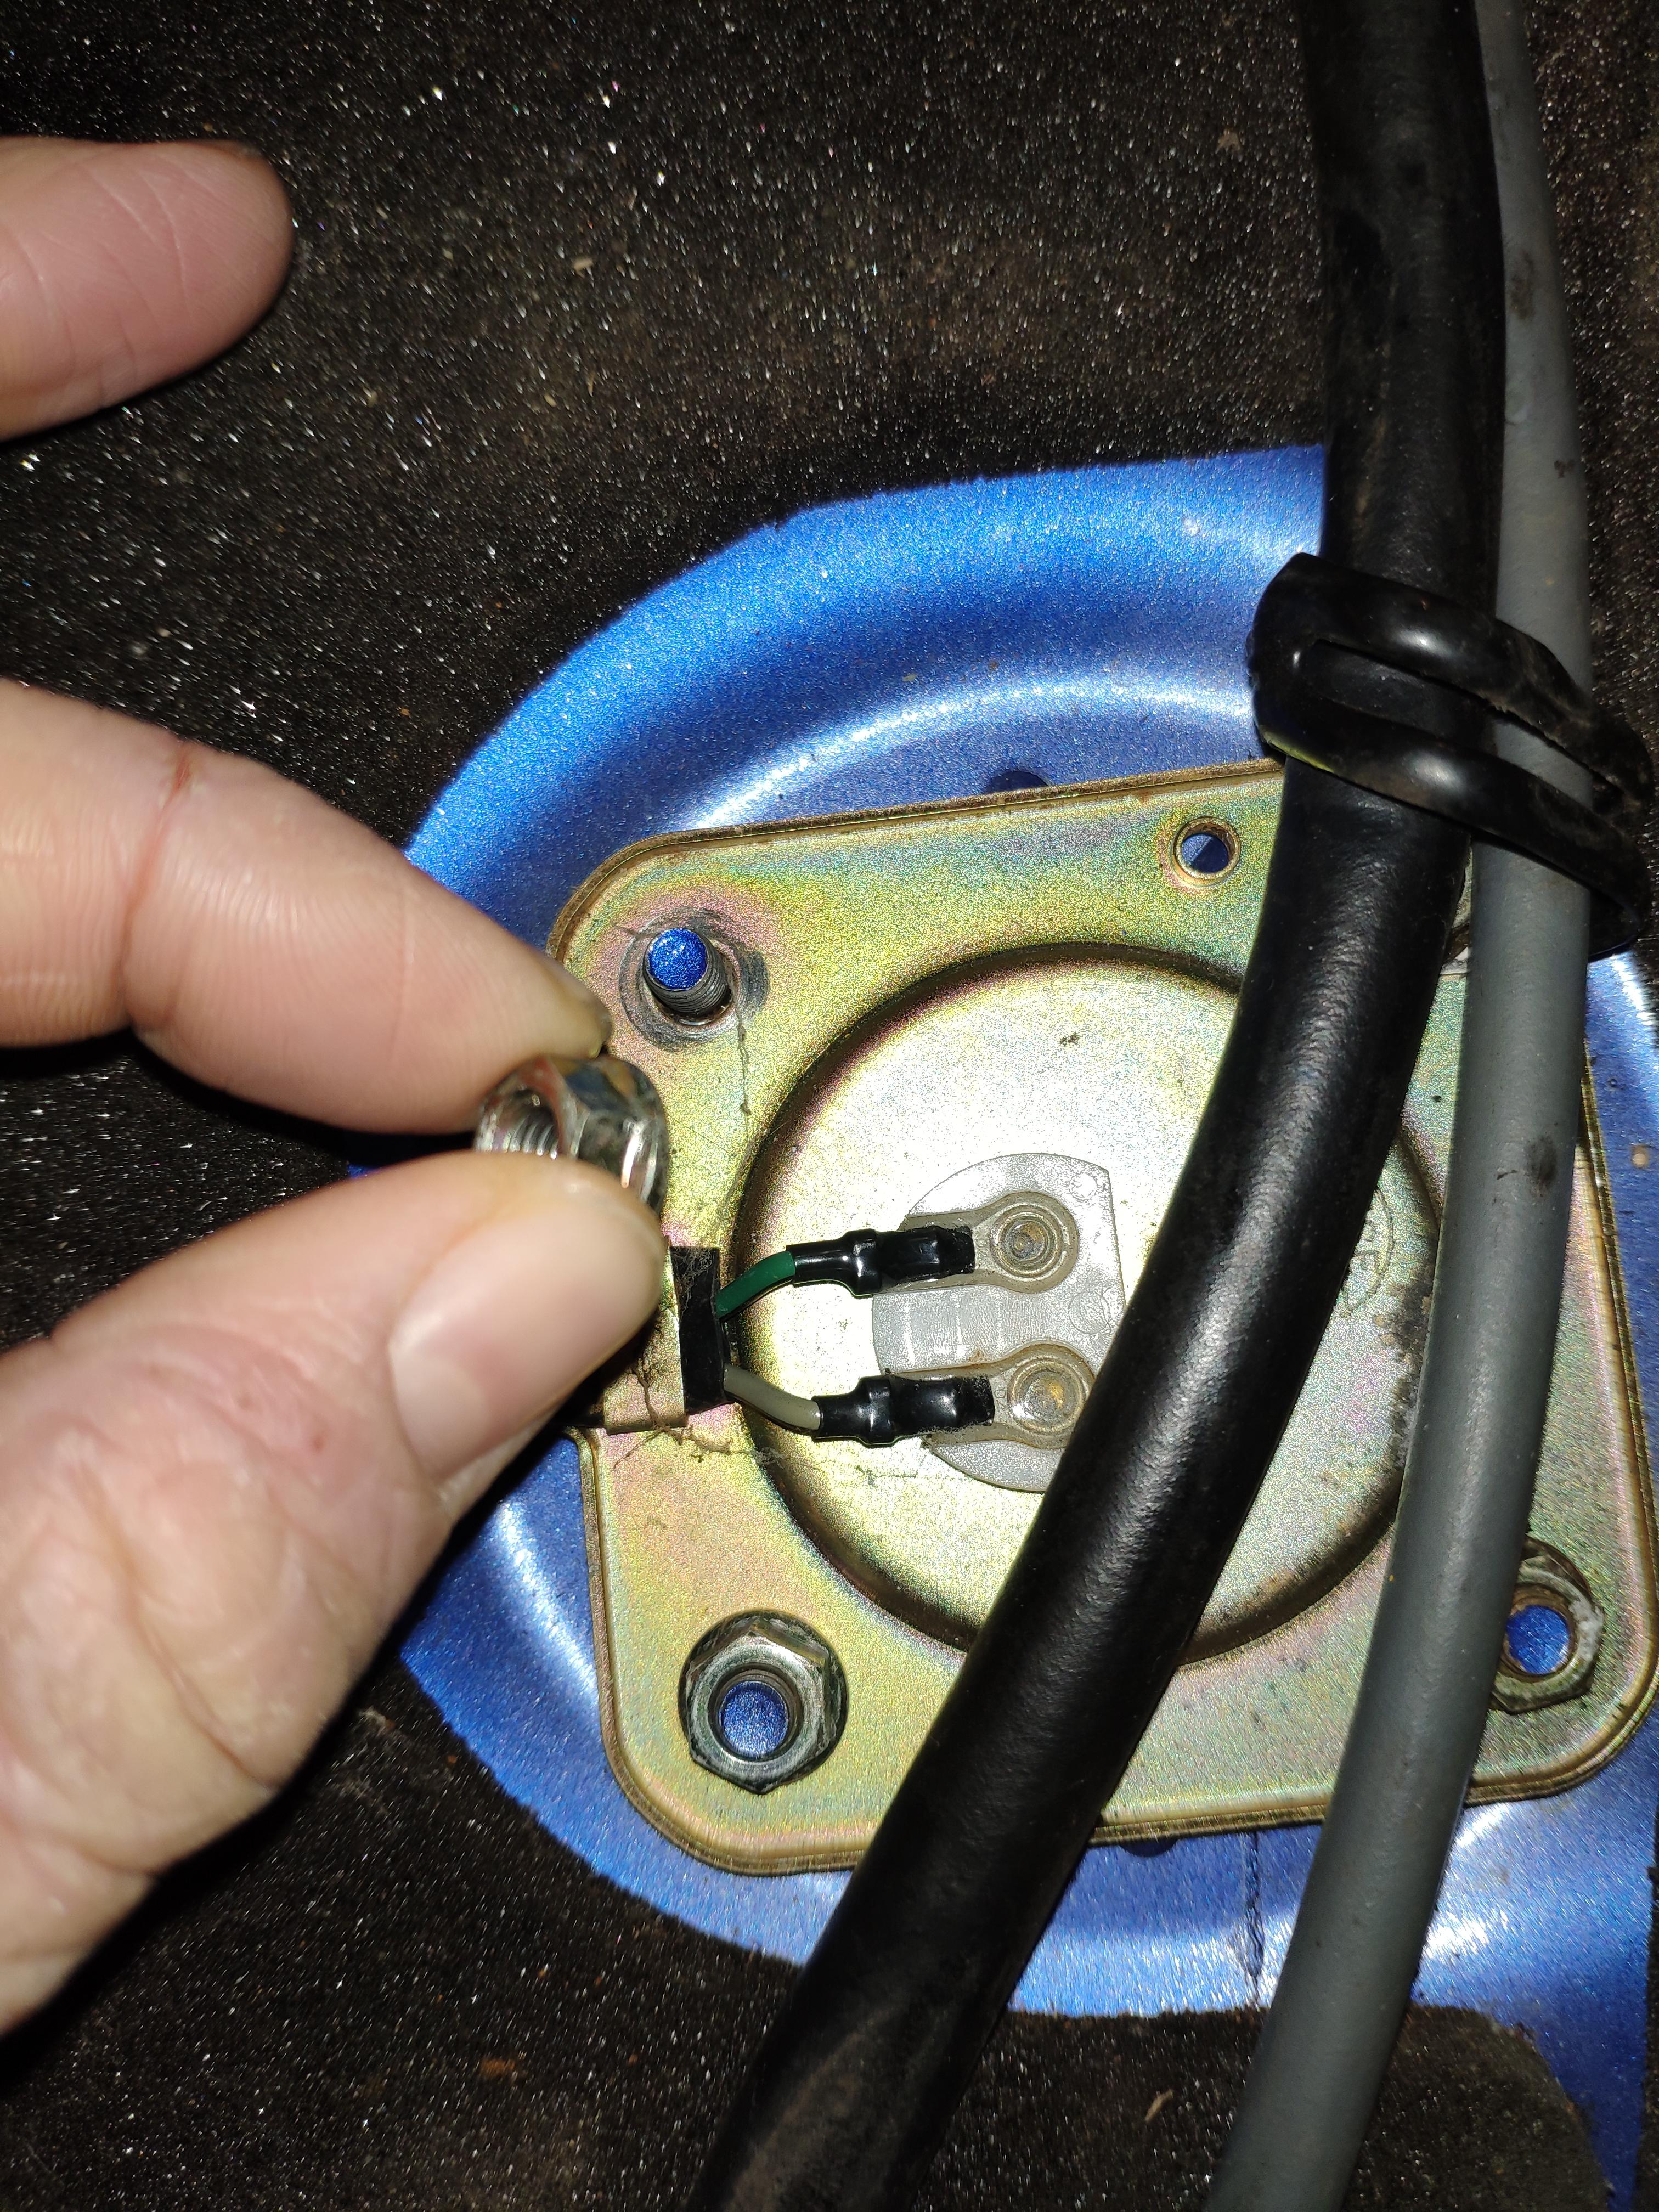
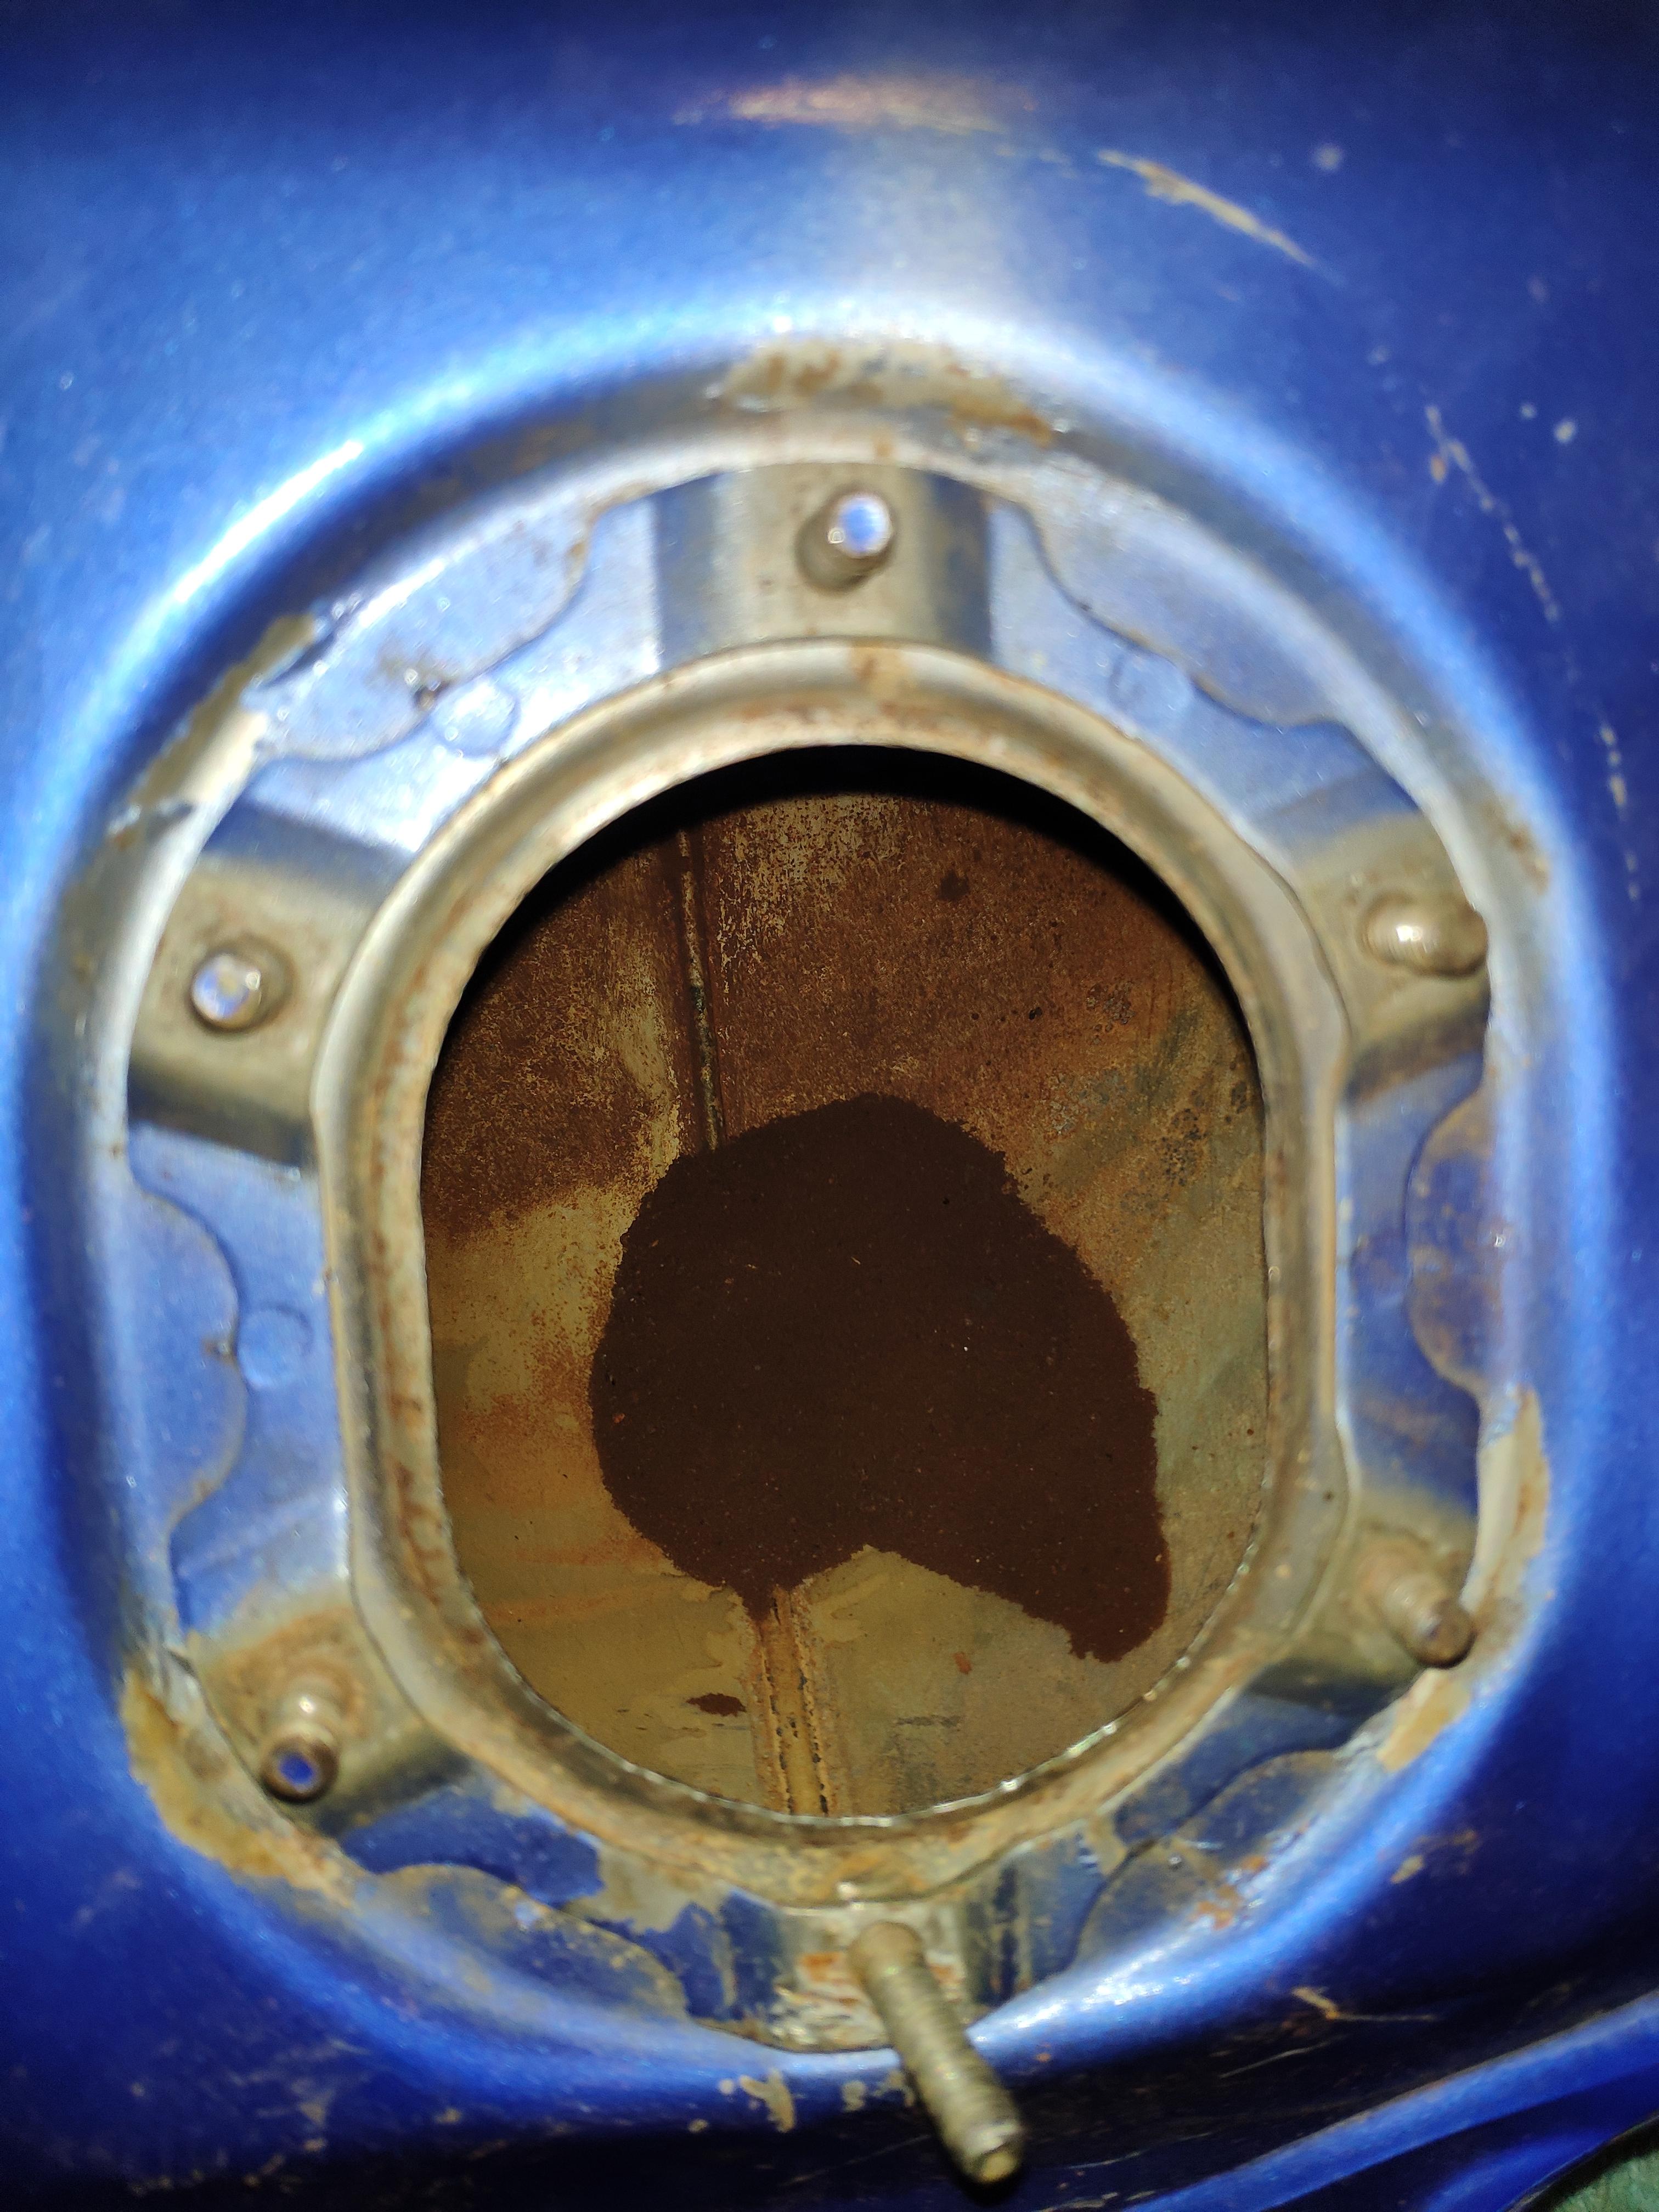
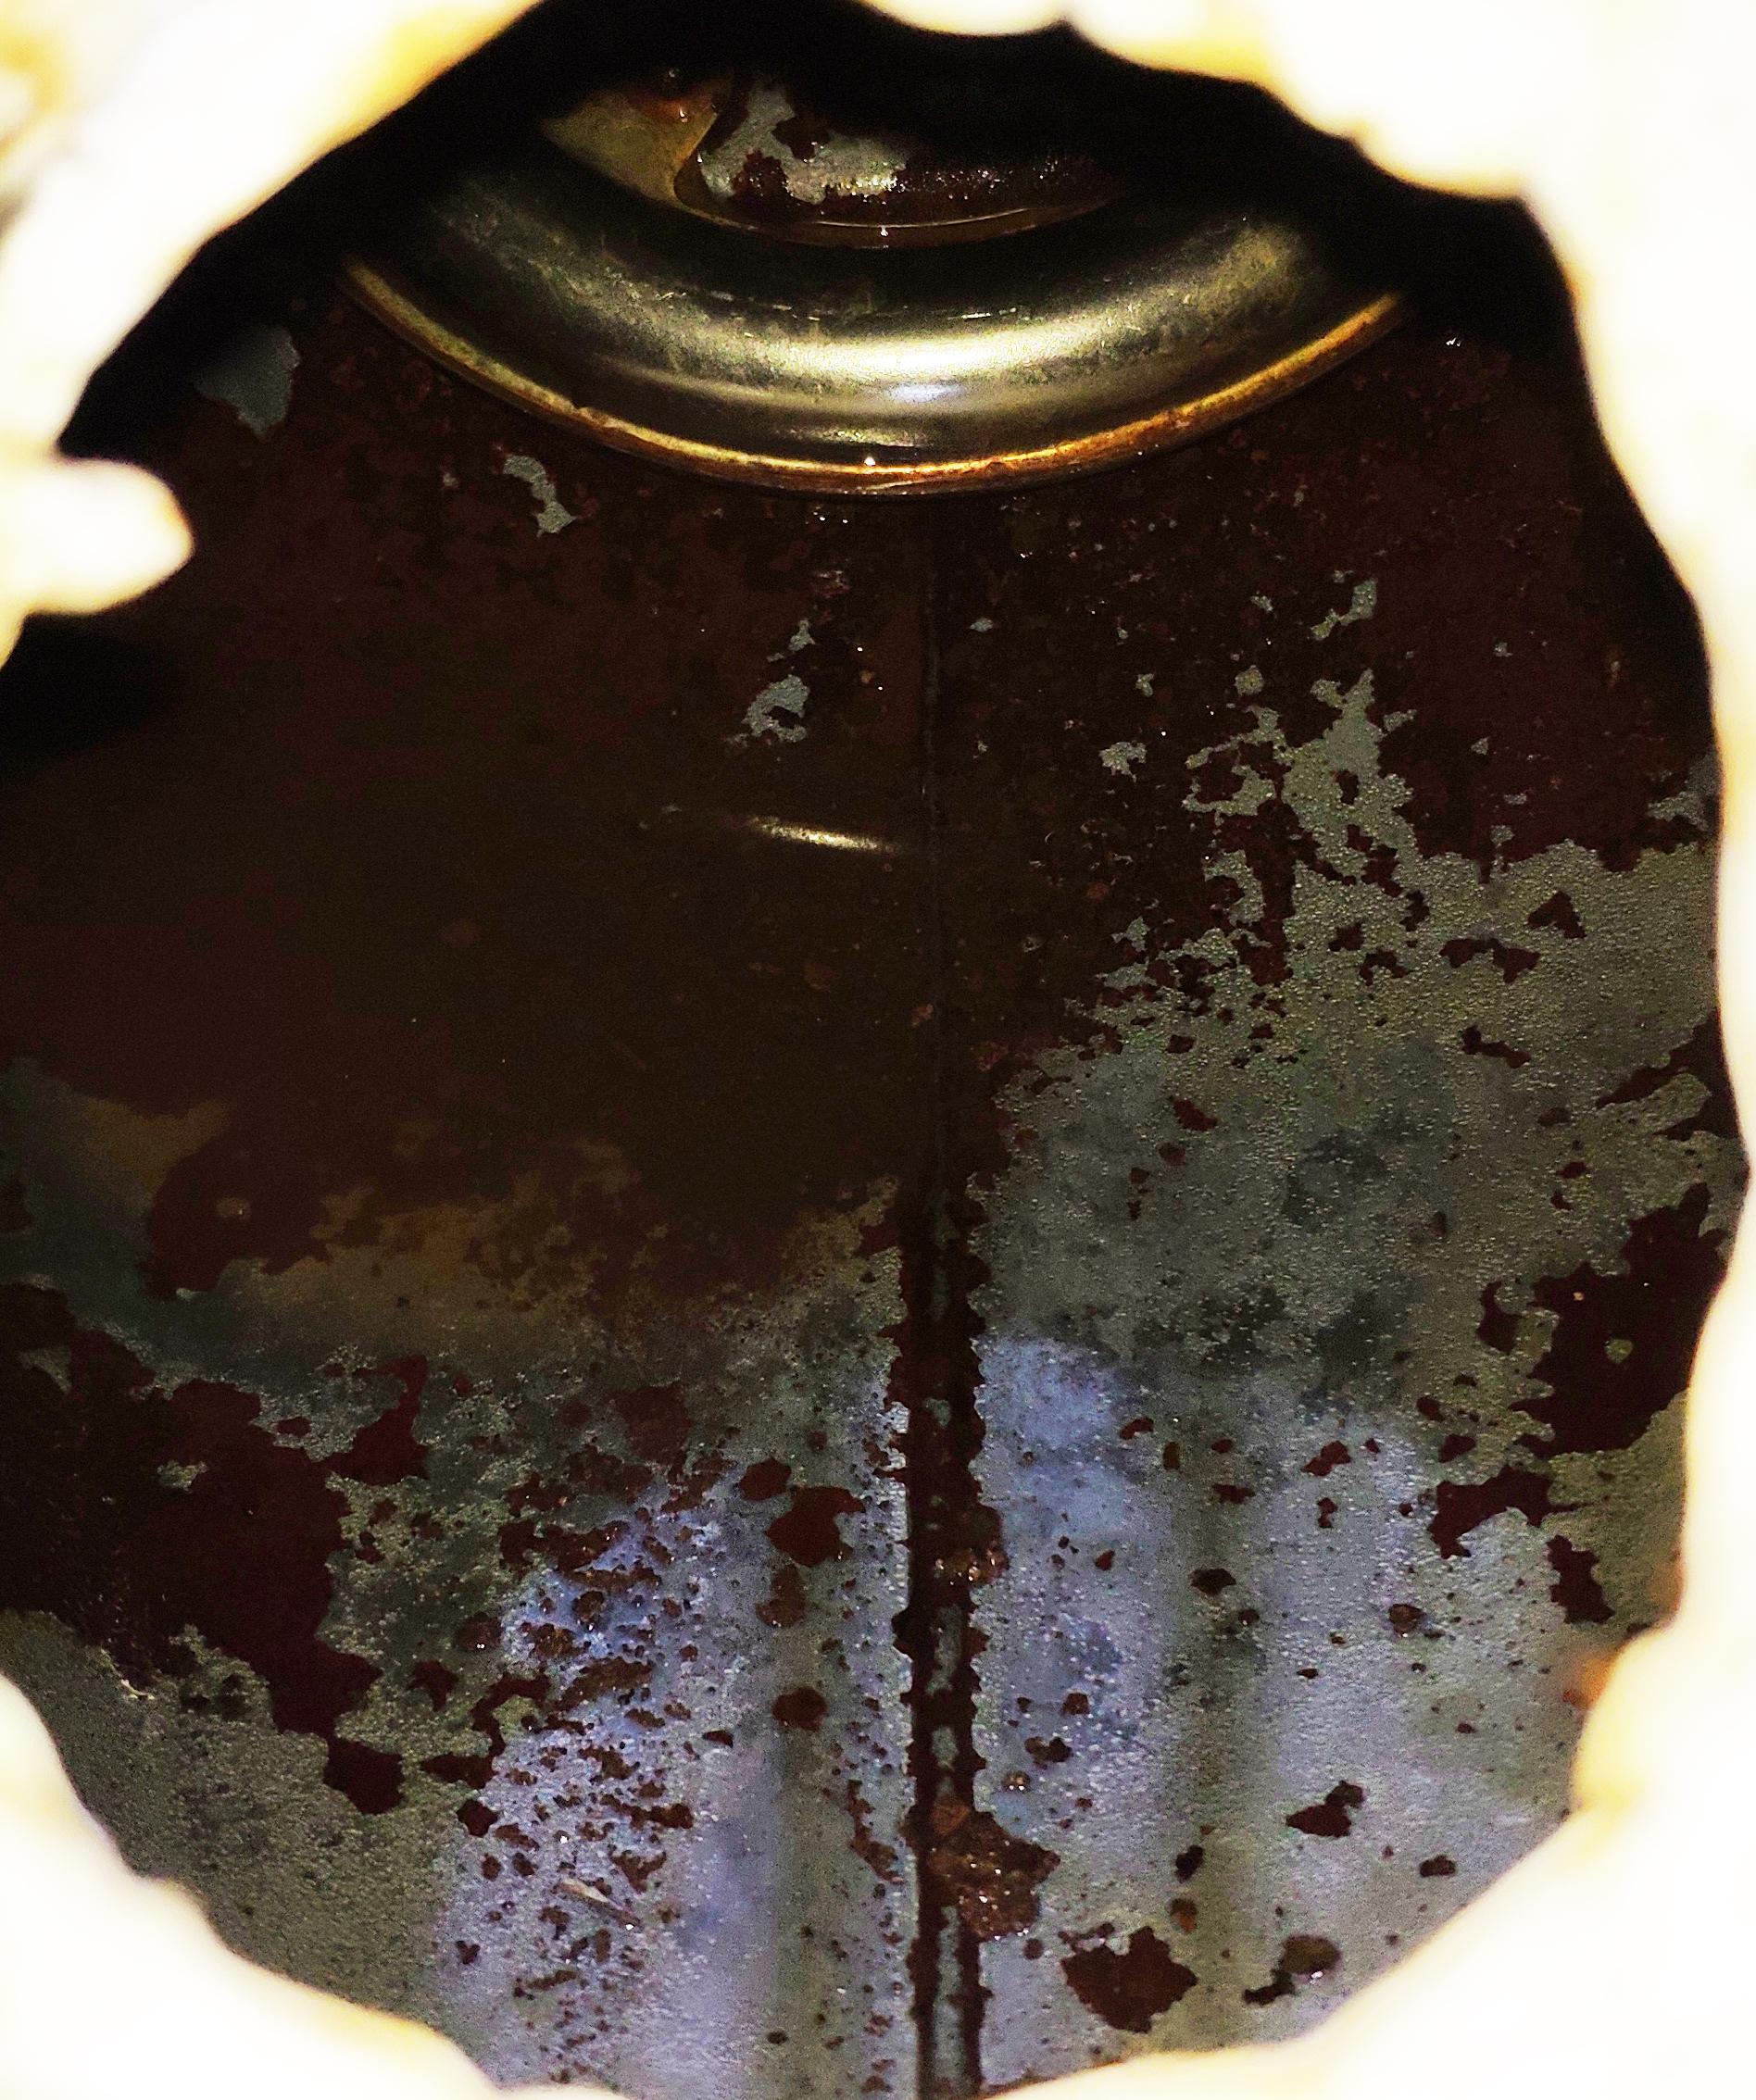
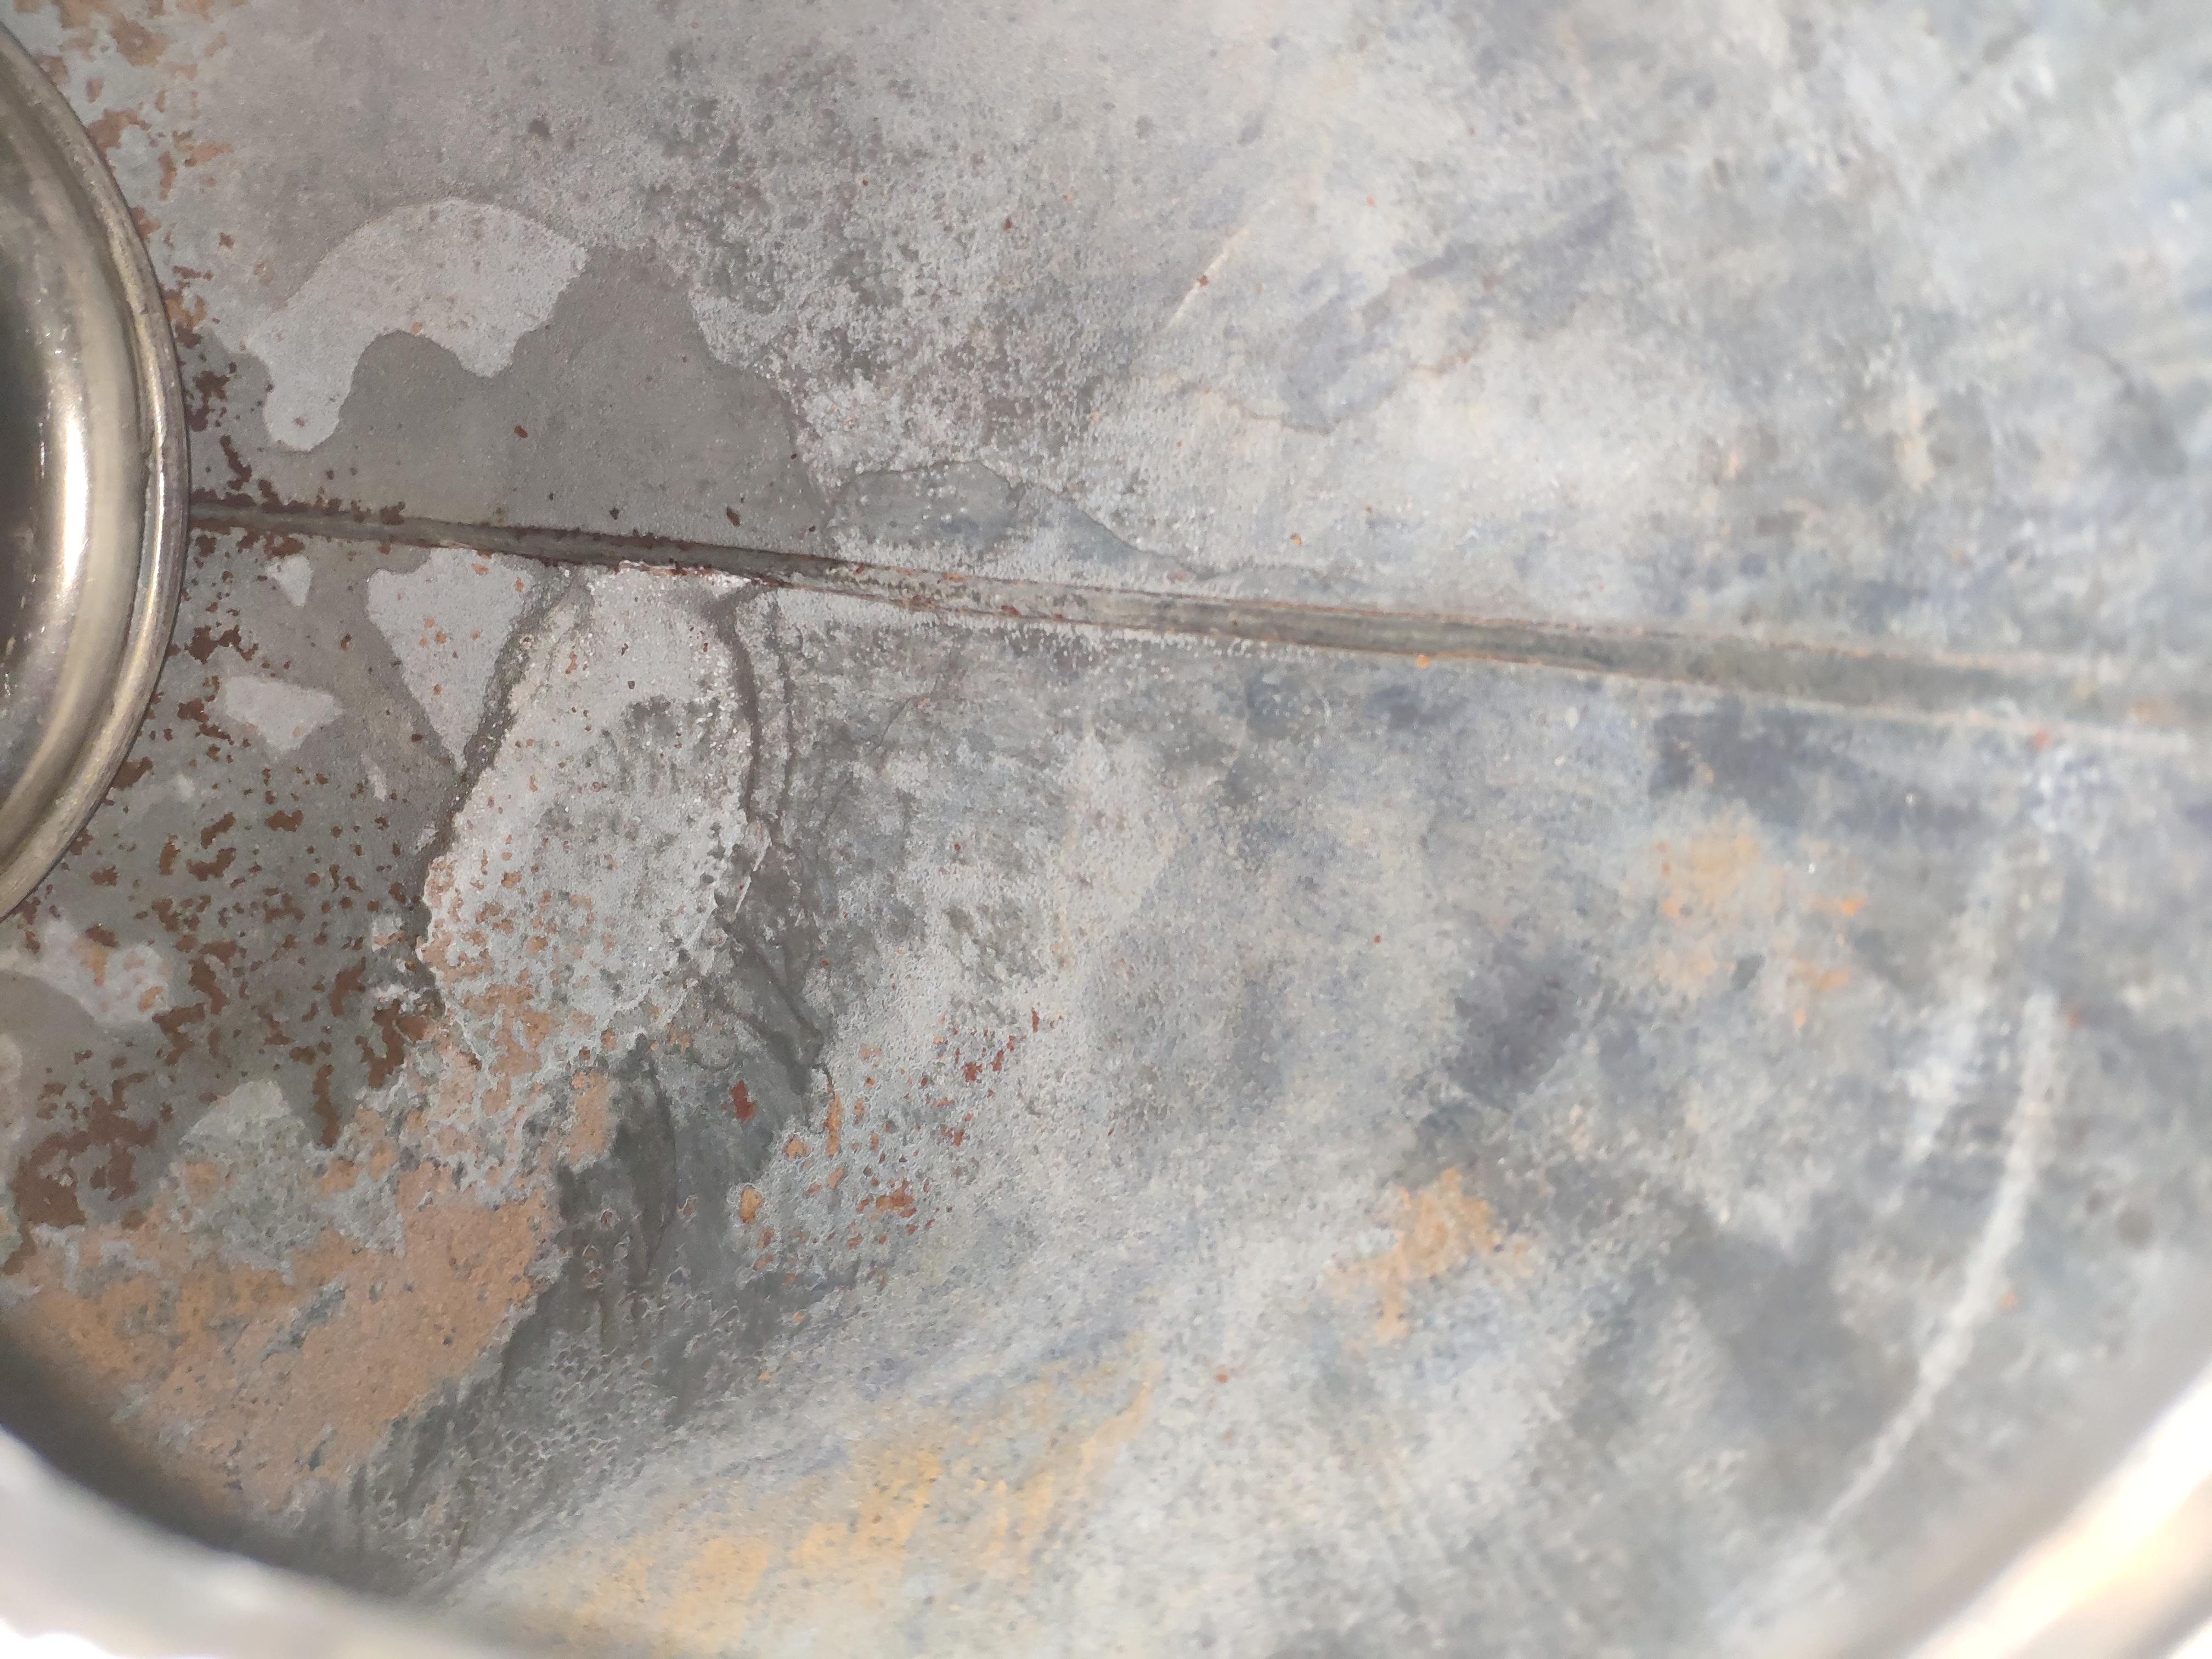
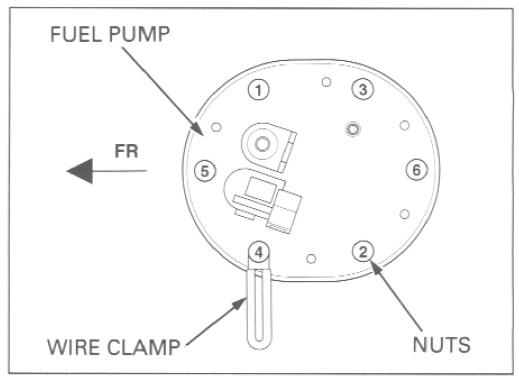
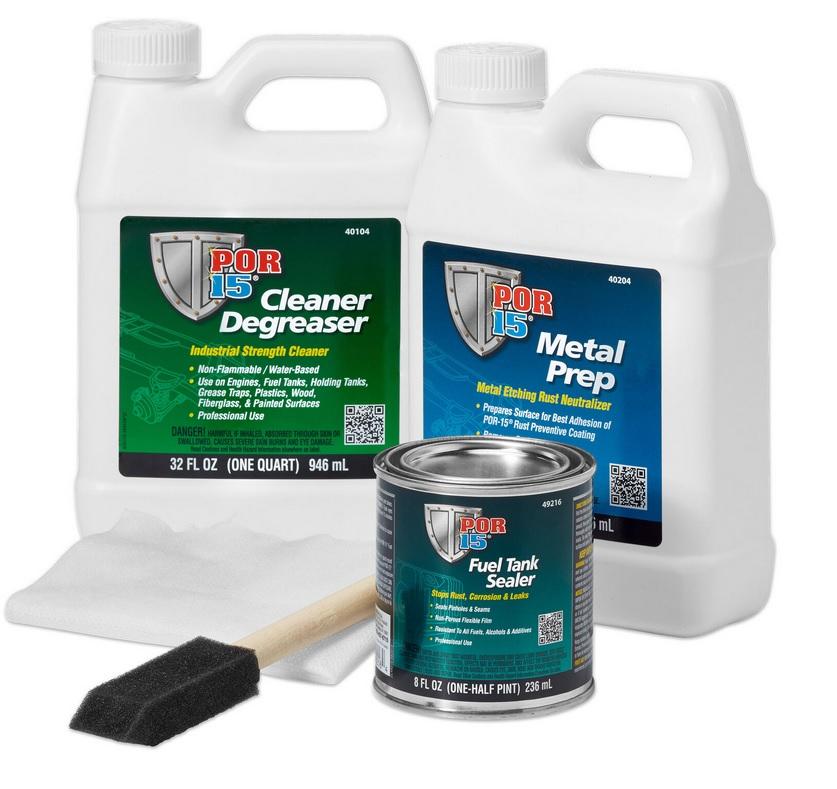
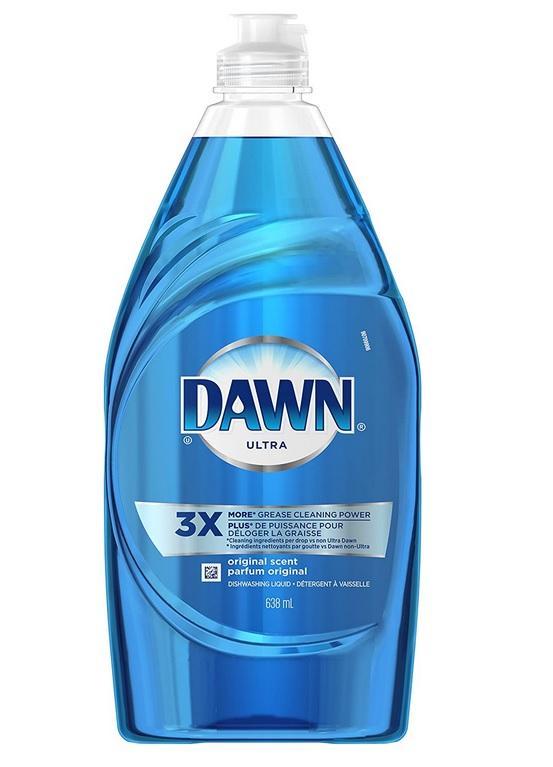
The Problem: If your tank has rust or needs a clean out, this guide is for you. Although I used the POR15 kit in this guide, any similar products can be used (degreaser, metal etching acid or similar and a tank sealer paint), please follow the instructions for your products used. This guide was performed on a VFR800 Gen 5, but the steps apply to any tank, with just the disassembly / assembly steps and specific bike parts, will be a little different. Prep: Required: · 20 Litres White Vinegar (Optional) · POR15 Motorcycle Bike Fuel Tank Sealer Repair Kit (or similar treatment kit). · A bunch of old screws/length of chain. · A heat gun or hairdryer. When it says dry the tank, it is always force dry using either the heat gun or a hairdryer. · 10mm socket or spanner. · A long thin piece of metal like a brazing rod (if any of the ports are clogged) · Dish soap. · A syringe · 2 metal or strong plastic plates , sized and drilled to cover the 2 bottom ports ideally. Or anything that will seal the ports and not leak. (I personally used the bottom of a plastic paint bucket cut to size and sealed with silicone for the small port. I used the fuel pump assembly plate itself as I was replacing it, for the large port, it was not ideal, but it sealed well). · Duct Tape · Bicarbonate of Soda (1 cup will do) Parts List: · 91305-MC7-000 (for gen 5 VFR800, or equivalent fuel tank sealing o-ring). No. 43 in parts list. · 17574-MN5-000 (for gen 5 VFR800, or equivalent rubber base gasket). No. 23 in parts list. Safety: Wear eye protection when using any cleaning/prepping agents. Perform all steps in an adequately ventilated area, ideally outside. Wear correct gloves for metal prep and degreasing stages. Follow all labels on chemicals used. Steps: Remove the tank: 1. Run the bike until there is 1 or no bars on the fuel gauge. You want to have as little fuel in the tank as possible. 2. Siphon out any remaining fuel. 3. Remove the seat. 4. Remove the 2 front bolts holding down the front of the tank. (No. 50 in parts list) 5. Prop up the tank with something. I used an extendable window cleaning squidgy. 6. Disconnect the battery. 7. Put a cloth or similar under the tank area, to catch spills if any. 8. Put the tank on its side before removing the supply & return lines 9. Remove all tubing and electrical connectors from the bottom of the tank. Wrap in cloth to avoid spills. 10. Unscrew the 2 screws on the back of the tank. (No. 49 in parts list) 11. Remove the tank. 12. Remove the fuel pump assembly and fuel level sensor assembly using a 10mm spanner or socket. 13. Carefully remove the fuel pump assembly, it can be tricky to get out, so take it slowly. Rock the assembly gently back and forward to loosen it. You may need to compress the metal sponge slightly, that’s ok it is just like a sponge. Be careful not to damage the rubber surrounding the metal sponge. 13. Remove the fuel tank cap lock assembly. No.26 in parts list 14. Only 3 bolts need to be removed to get it out (see parts list) Clean out the tank: 1. Remove any fuel from tank using a siphon or syringe. Assuming the tank is rusty/dirty, dispose of this accordingly. 2. Rinse the tank very well with dish soap and water, then rinse out at least twice with clean water (warm is best). This is to remove any fuel remnants. 3. Dry straight after using the heat gun (on medium setting) or a hair dryer. I found using my heat gun on medium heat for ~2minutes blowing into each opening of the tank to be just hot enough, but not too hot, cycling between each side of the tank and letting cool between. Be careful not to get the tank too hot it will damage the paint. 4. Once the tank is bone dry (this can take an hour or more), dump some screws, a piece of chain, bolts etc. anything metal will work into the tank. This is to remove any surface rust. Make sure you know exactly what you put in as they can get stuck. 5. Shake the tank well with the metal pieces inside. Do it for as long as you can. I think I did it for around 1 hour. 6. Remove all the metal pieces you put in and all the rust. You can use a hoover to suck it up from the large port on the bottom of the tank. 7. Rinse the tank again with water to remove the last bits of surface rust. 8. Fully dry the tank again immediately with the heat gun/hairdryer. Soak tank in Vinegar (Optional): 1. Seal the bottom of the tank with whatever you have chosen. Tape up the 2 tubes on the bottom. 2. Pour the vinegar into the tank from the top. 3. Use duct tape to seal the top. 4. Leave to soak for a few days. Keep topped up. (I left it soak for 5 days). If your tank is really badly rusted you can leave for a lot longer and also replace with fresh vinegar after it becomes inactive. Once you keep the level full in the tank it will not rust any more with vinegar inside. After 5 days the level of vinegar in my tank had not dropped at all, indicating the tank was sealed well. 5. If the return port is clogged, now is a good time to use a long thing metal rod to unclog it. 6. Remove the vinegar and dispose. 7. Wash out the tank with some bicarbonate of soda and warm water. 8. Rinse out well with water. I personally removed the large cover to allow quick flow of water out of the tank and ran a hose at the top for about 5mins, moving the tank back and forward. 9. Dry immediately if not moving straight on to the next step. Degreaser: 1. Follow the POR15 degreaser instructions or degreaser of your choice. 2. I used the whole container of the POR15 degreaser with 1 equal container of hot water and sealed the tank. 3. Shake the liquid well, leaving to sit for 1-2 hours on each corner of the tank. I let it sit overnight on the bottom of the tank aswell as doing maybe 1 hour soaking on each end of the tank. 4. Rinse the tank out well again. 5. Dry immediately. Metal Prep: 1. Pour the metal prep into the tank and seal. 2. Shake around the whole tank for at least 20 minutes, making sure all surfaces are coated. 3. Pour the metal prep back into the bottle, it can be reused. 4. Rinse the tank out well with warm water. 5. Dry the tank immediately again. This time I actually left it beside a radiator after force drying, for a few days to make sure it was bone dry. Shake the tank around a bit while drying, as water can get trapped in crevices. Tank Sealer/Coating: 1. Take off the lid and stir the sealer very well until it is consistent. 2. Make sure the bottom of the tank and all bottom ports are sealed. 3. Pour the sealer into the tank, seal the top with duct tape. 4. Roll the sealer all around the tank. I did this for around 30mins, allowing it to sit in each corner for a few mins also. Make sure the tank is well coated. 5. Let the excess drain out of the tank if possible. For the VFR800 gen 5 tank, there is no way to do this due to the design of the tank. 6. I used the syringe to remove any excess sealer. You will need to do this a few times as the excess eventually flows towards the back of the tank. You basically want an even coat on the whole tank with no pooling. 7. Remove all port covers. 8. Allow to dry for at least 4 days, not force dried. I left mine for a week as you want this to be 100% dry before use. Reassembly: 1. Depending on how much corrosion/debris was in the tank and whether it got into the fuel system, you may need to clean your injectors/tubing etc. or replace the fuel filters. If this is the case you should do this before reassembling the tank. 2. If you need to install a new fuel cap, see here for removing the lock mechanism. 3. If you need to install a new fuel filter see here. 4. Assuming you are ready to reinstall the tank, using the new gasket and o-ring, reattach the fuel filter and fuel level sensor assemblies. They should be torqued to 14 N.m and apply a star pattern when torquing. 1. Screw back in the lock mechanism. 2. Follow tank removal steps in reverse. 3. Put a small bit of fuel in the tank maybe 1-2litres. Confirm the fuel level sensor registers the fuel. Start the engine. The process is now complete.
-
2000-2001 VFR Power Commander Maps
toreckman commented on HispanicSlammer's file in Power Commander Maps