


VARIABLE9
-
Posts
387 -
Joined
-
Last visited
-
Days Won
7
Content Type
Forums
Profiles
Gallery
Blogs
Downloads
Events
Posts posted by VARIABLE9
-
-
Did this today. Because, well, I could.
ProBolt, purchased via eBay from ‘Brooks Barn’ (UK).
Note - per ProBolt use 30% less torque on this when tightening.
-
On 8/27/2018 at 3:31 PM, N8sVFR said:
BINGO -- that's the spot. It's actually more under the side panel, as you can see from the image, but obviously you have to remove the seat to get to it. Not sure if yours will be there or not, but that's where it belongs!! 🙂
Ironic that I knew about that spot and used the ‘clips’ molded into the undertray to route my relay harness wiring. Never thought it was for the handle. Because it makes no sense to me to be stored separate from the tool kit. Honda logic.
-
Another slow day, trying to determine what’s next. StompGrips? Front springs? Speedo correction device?
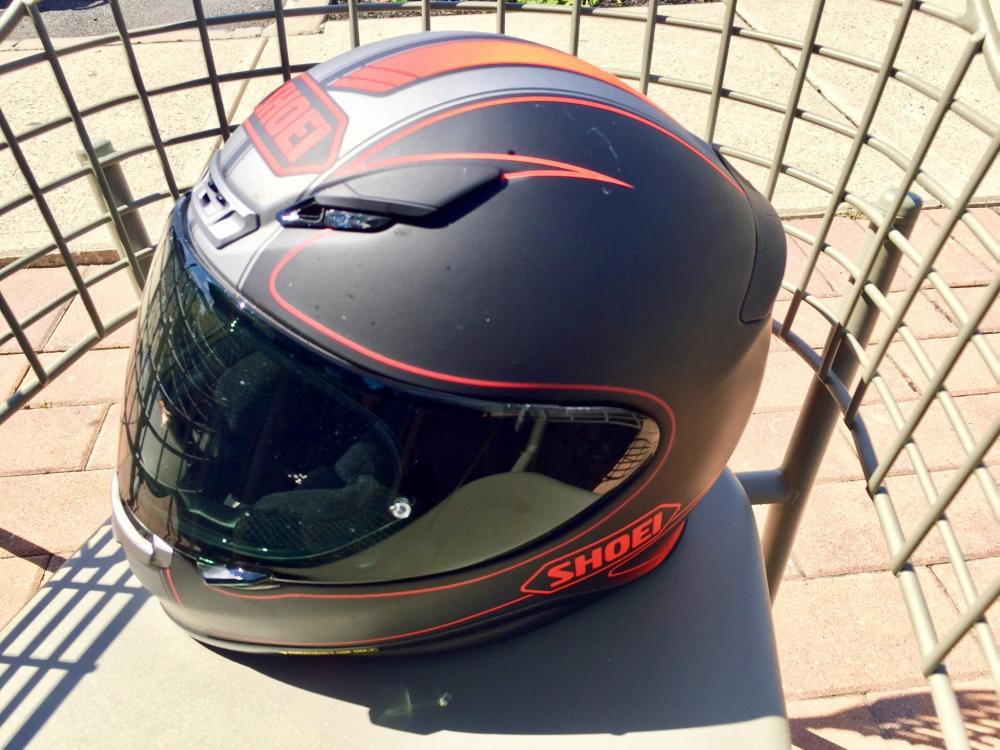
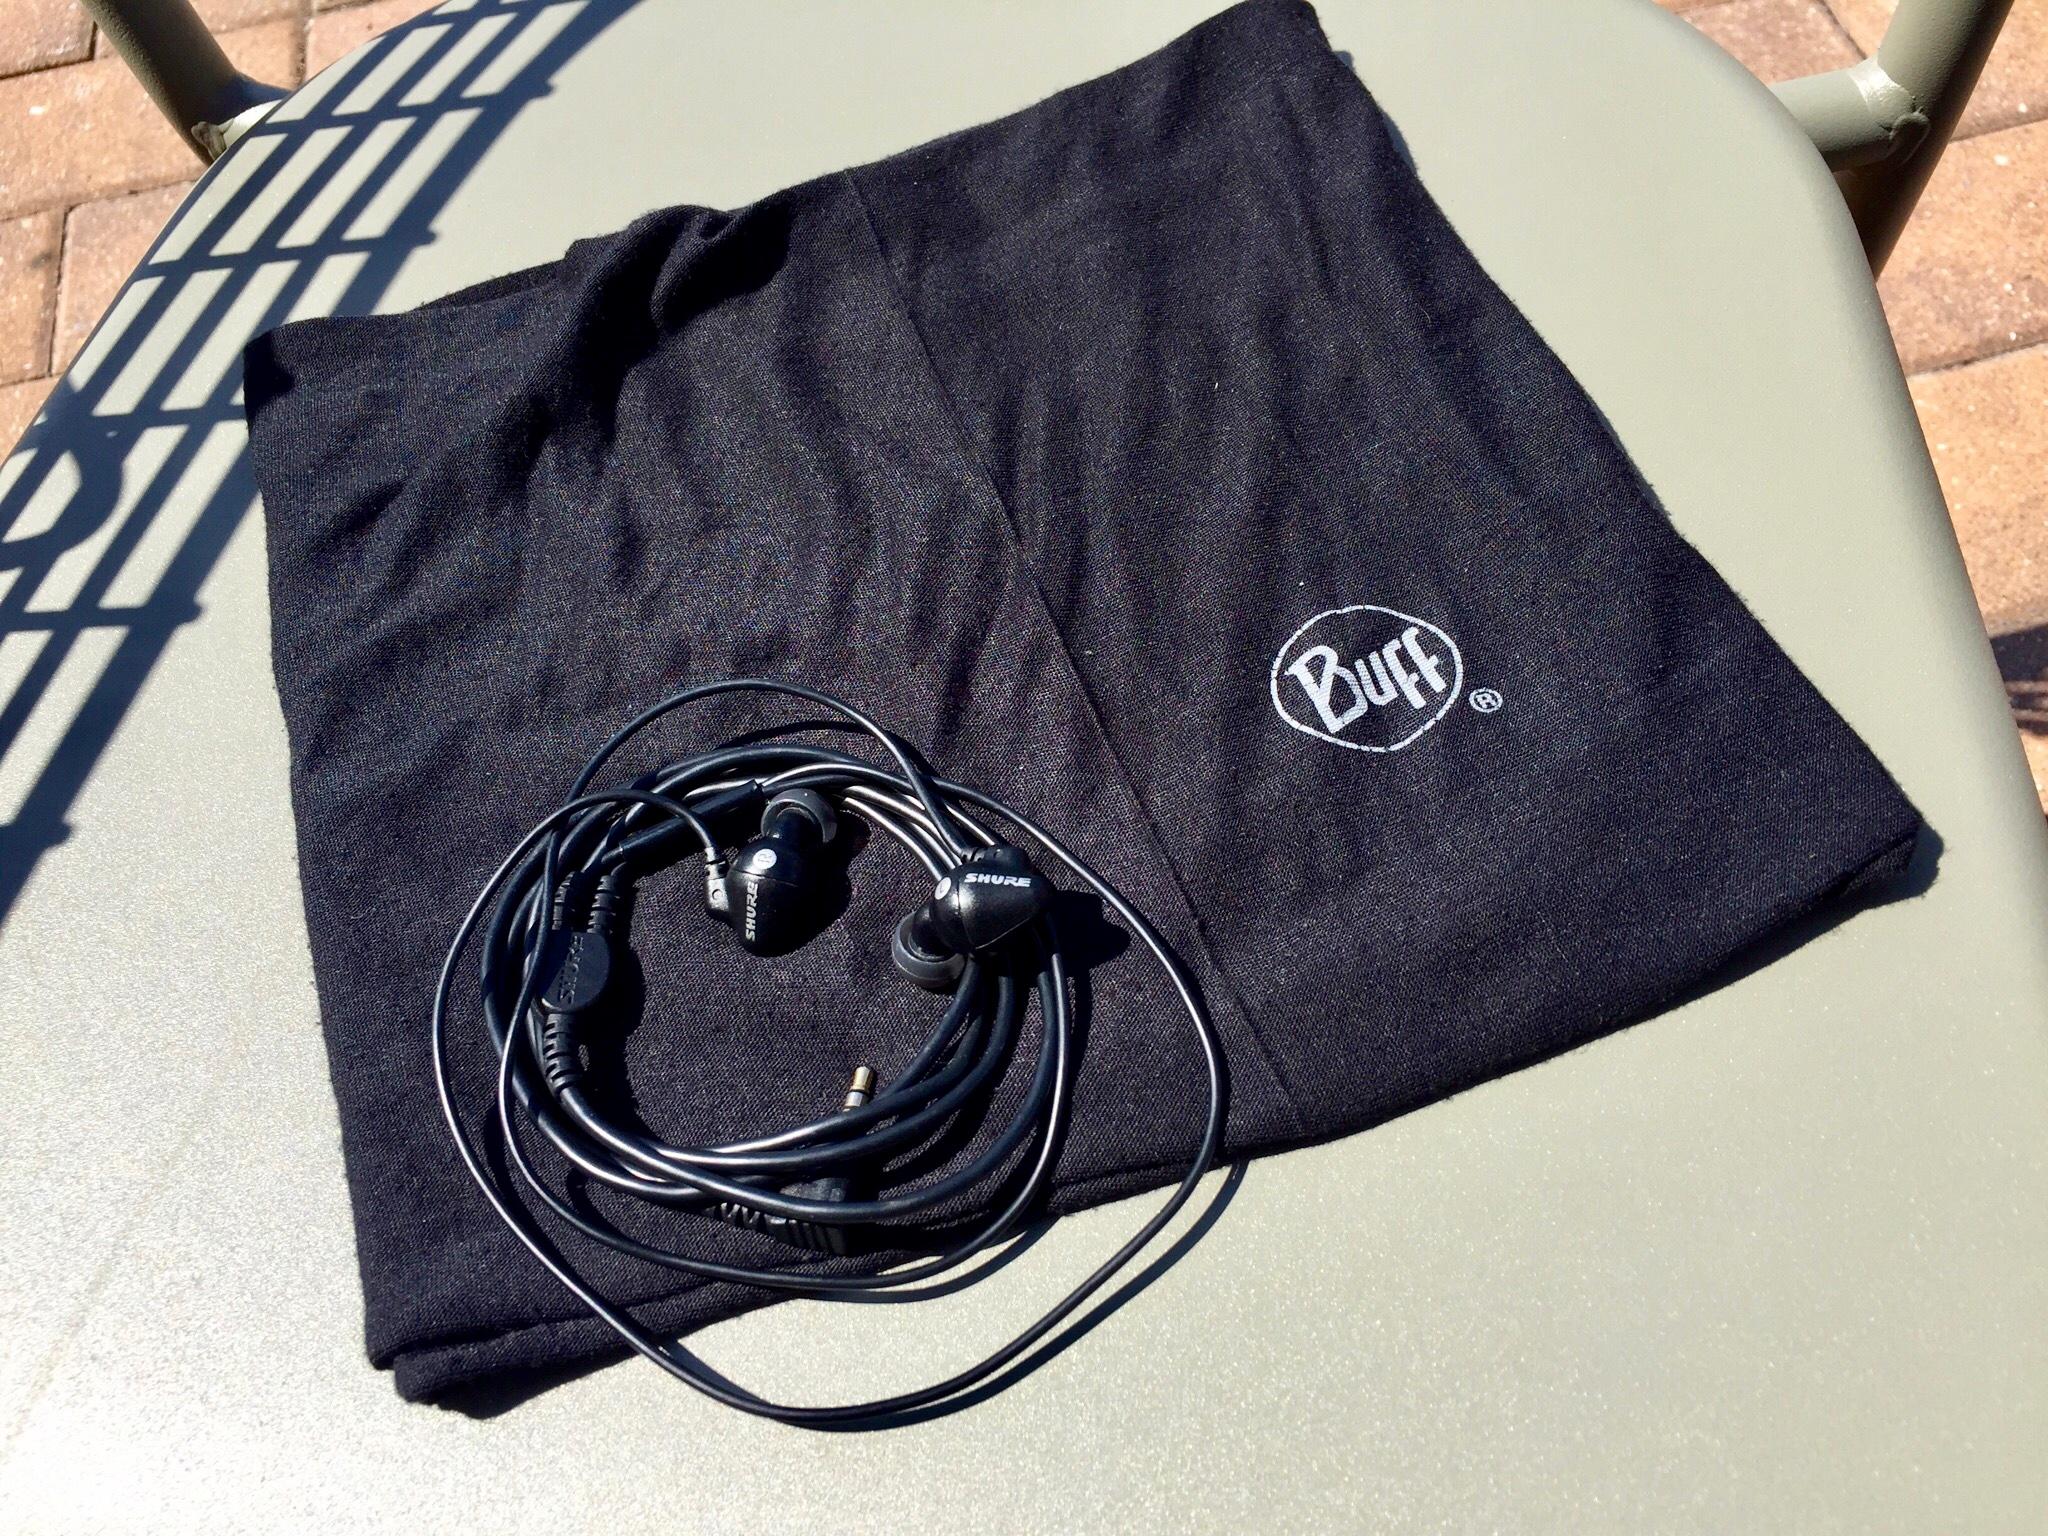
I posted elsewhere about my new Shoei RF1200, a Flagger TC-1, so thought I’d add it here too. Purchased new as an open box ‘warehouse deal’ from AMZN, paid about $200 less than anywhere else and there was just one little scuff on it near the top right vent. I could live with that for the $$ savings. The fit, finish, venting, optical clarity, and overall comfort is superb. I added a dark smoke visor because sunglasses restrict FOV, and so unless you need glasses for vision correction I would recommend against glasses in a helmet. The latch system for changing the shield is ridiculously simple to use. The Pinlock is a nice feature, albeit a PITA to install, luckily you really just have to do it once for each shield.
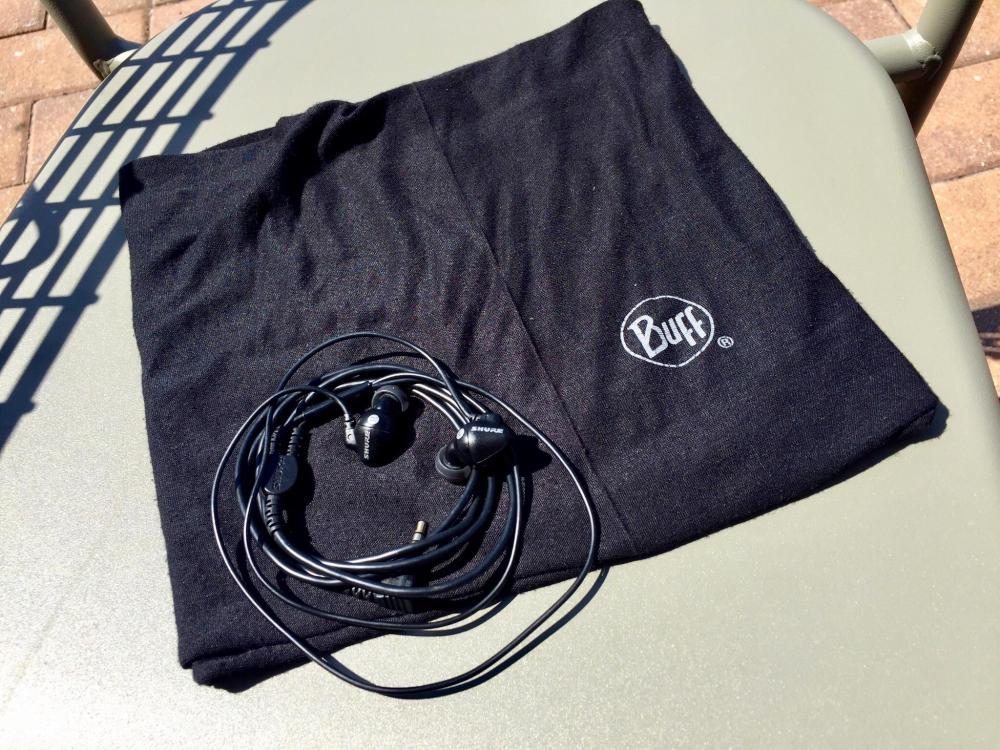
I wear it it with a Buff covering my hair, I find it helps control sweat and odor in the helmet liner. And I use a set of Shure in ear monitors on the super slab, although I usually take them out and use regular ear plugs on the backroads.
-
17 hours ago, Grum said:
Hey Variable.
Does this help, check out the location of Item 2. Straight from the 6gen owners booklet. As mentioned I just found it easier to place it where I showed you with the Yellow arrow, your choice.
Cheers

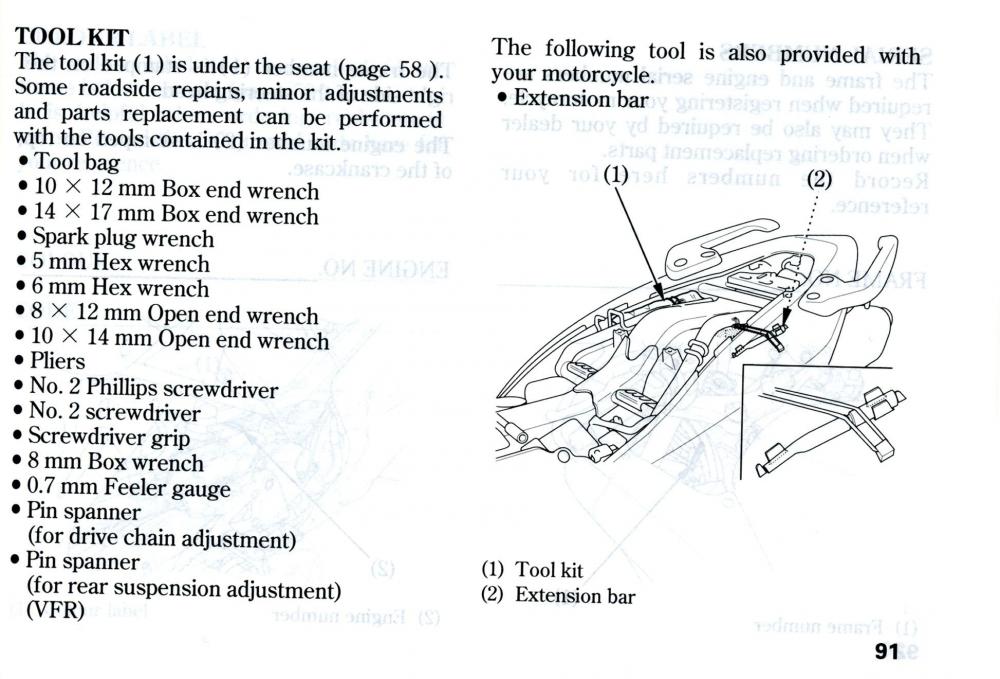
Nice find! Thank you! It made no sense to me that a) it’s not included in the OEM Tool Kit, and that b) since it wasn’t IN the Kit that Honda didn’t have a special place for it somewhere. I did look underseat, however not out in the periphery like where it seems to be in the drawing above. In all the searches for ‘tool kit’ and 6th Gen VFR Owners Manual et cetera via The Internet I wasn’t ever able to find an image that showed that location (Hondaaa!). TIL
-
29 minutes ago, N8sVFR said:
No, Variable. I understood your question, and was trying to tell you the specific location where the spanner handle is stored. I’ll have to take a pic of my 6th gen tomorrow and post it. There IS a specific location where the handle is stored, and it’s not in or with the rest of the tool kit.....
Ok thanks for clarifying. My understanding is that there is a band for the tool kit, and a band for a disc lock. There’s also the spot for the Owners Manual. I’ve not been able to find any answer otherwise, and I had no Handle squirreled away anywhere else under seat.
-
That’s right in line with my Q&A, thanks everyone ( @Grum j. I didn’t want to purchase another if Honda hid it somewhere ‘special’. And especially now that I have it, stuffing the tool kit into the well between the subframe rails and undertray seems a ‘tight fit’ to put it mildly.
-
12 hours ago, N8sVFR said:
There's a dedicated little spot that it goes in under the seat, I believe on the left side. Held in by something akin to very large o-ring rubber band typ thing. Check your bike. . . .might still be there!!
Thanks for the tip but that wasn’t really the question. My VFR had no tool kit, confirmed. I was aware of the underseat storage location, and it’s vacant of tools and owners manual. I already purchased an OEM tool kit via eBay to rectify this, however that did not come with the spanner handle. So my question was Is the spanner handle stored somewhere else on the VFR that is not underseat. And the consensus response was No, it’s usually found in the OEM tool kit bag with all the other tools.
-
Tip of the day. Labeling your accessory wiring would be a lot easier if done prior to installing the wiring on the motorcycle.
-
 3
3
-
-
On 8/19/2018 at 1:31 AM, Zarquon said:
That, on the pillion peg, is the vacuum actuator that controls the thottle. Its off a car and too bulky to fit behind the front headers where alot of people put them. If the road trials go OK I'll hunt up something less bulky and hide it a little better. It's ok for now.
With regard the electrics, I think the best bet is to add a little conductive grease to the plug connector pins each time you separate a plug and socket and take good care of your negative junctions and earth points. Also, try not to over do it with the pressure wash or put your baby to bed wet!
Z
I thought it was some crazy MadMax horn arrangement! Got it now.
As as for the electrics, what most people don’t understand is that most settings on pressure washers are for taking graffiti off concrete and removing paint from battleships. Not cleaning vehicles.
17 minutes ago, headshrink said:What is this witchcraft? What is the purpose of that mod? What was wrong with OEM? Am I correct in understanding that vacuum doesn't CONTROL our throttle, but is a byproduct of twisting the throttle as the butterfly valves open, sucking in more air, venturi effect, etc.???
Check out above, it’s for his adapted auto unit cruise control.
-
2
-
-
6 hours ago, Zarquon said:
The CC installation self tests fine and works after a fashion on the stand but it needs to be loaded up... a road test... and I'm just a tad nervous about this part.
The unit cost me $7.51AU at auction on ebay plus another $50 in plugs, wire, heat shrink and tape.Then about 20hrs to reverse engineer the wiring to fit the VFR and build a little hardware for monting it.
Man your bike looks super shiny under the seat.

Thats awesome! Man you’re way more motivated than I am. You should do a write up and detail it out.
Whats that on your muffler/peg bracket? A horn?
Clean under the seat - yep when I bought it I noticed that. Inside the fairing lowers they look new. I don’t think the PO’s rode in inclimate weather. That’s good for me because I like clean, and it reassures me the bike hasn’t had too much weather on it to stress out Honda’s electrics.
-
-
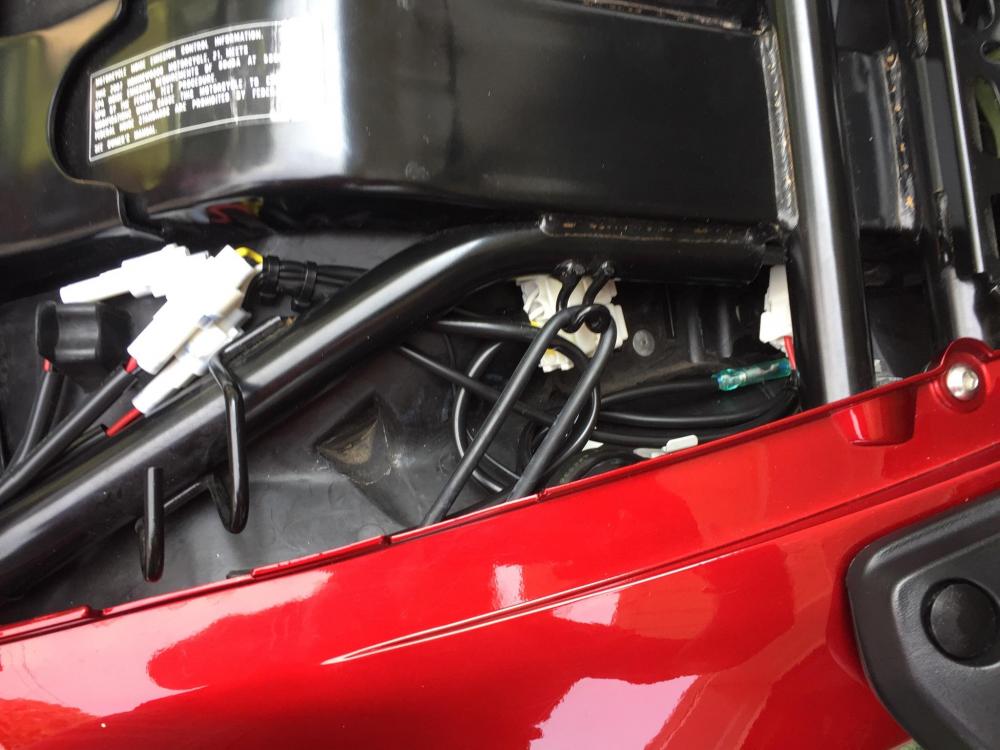
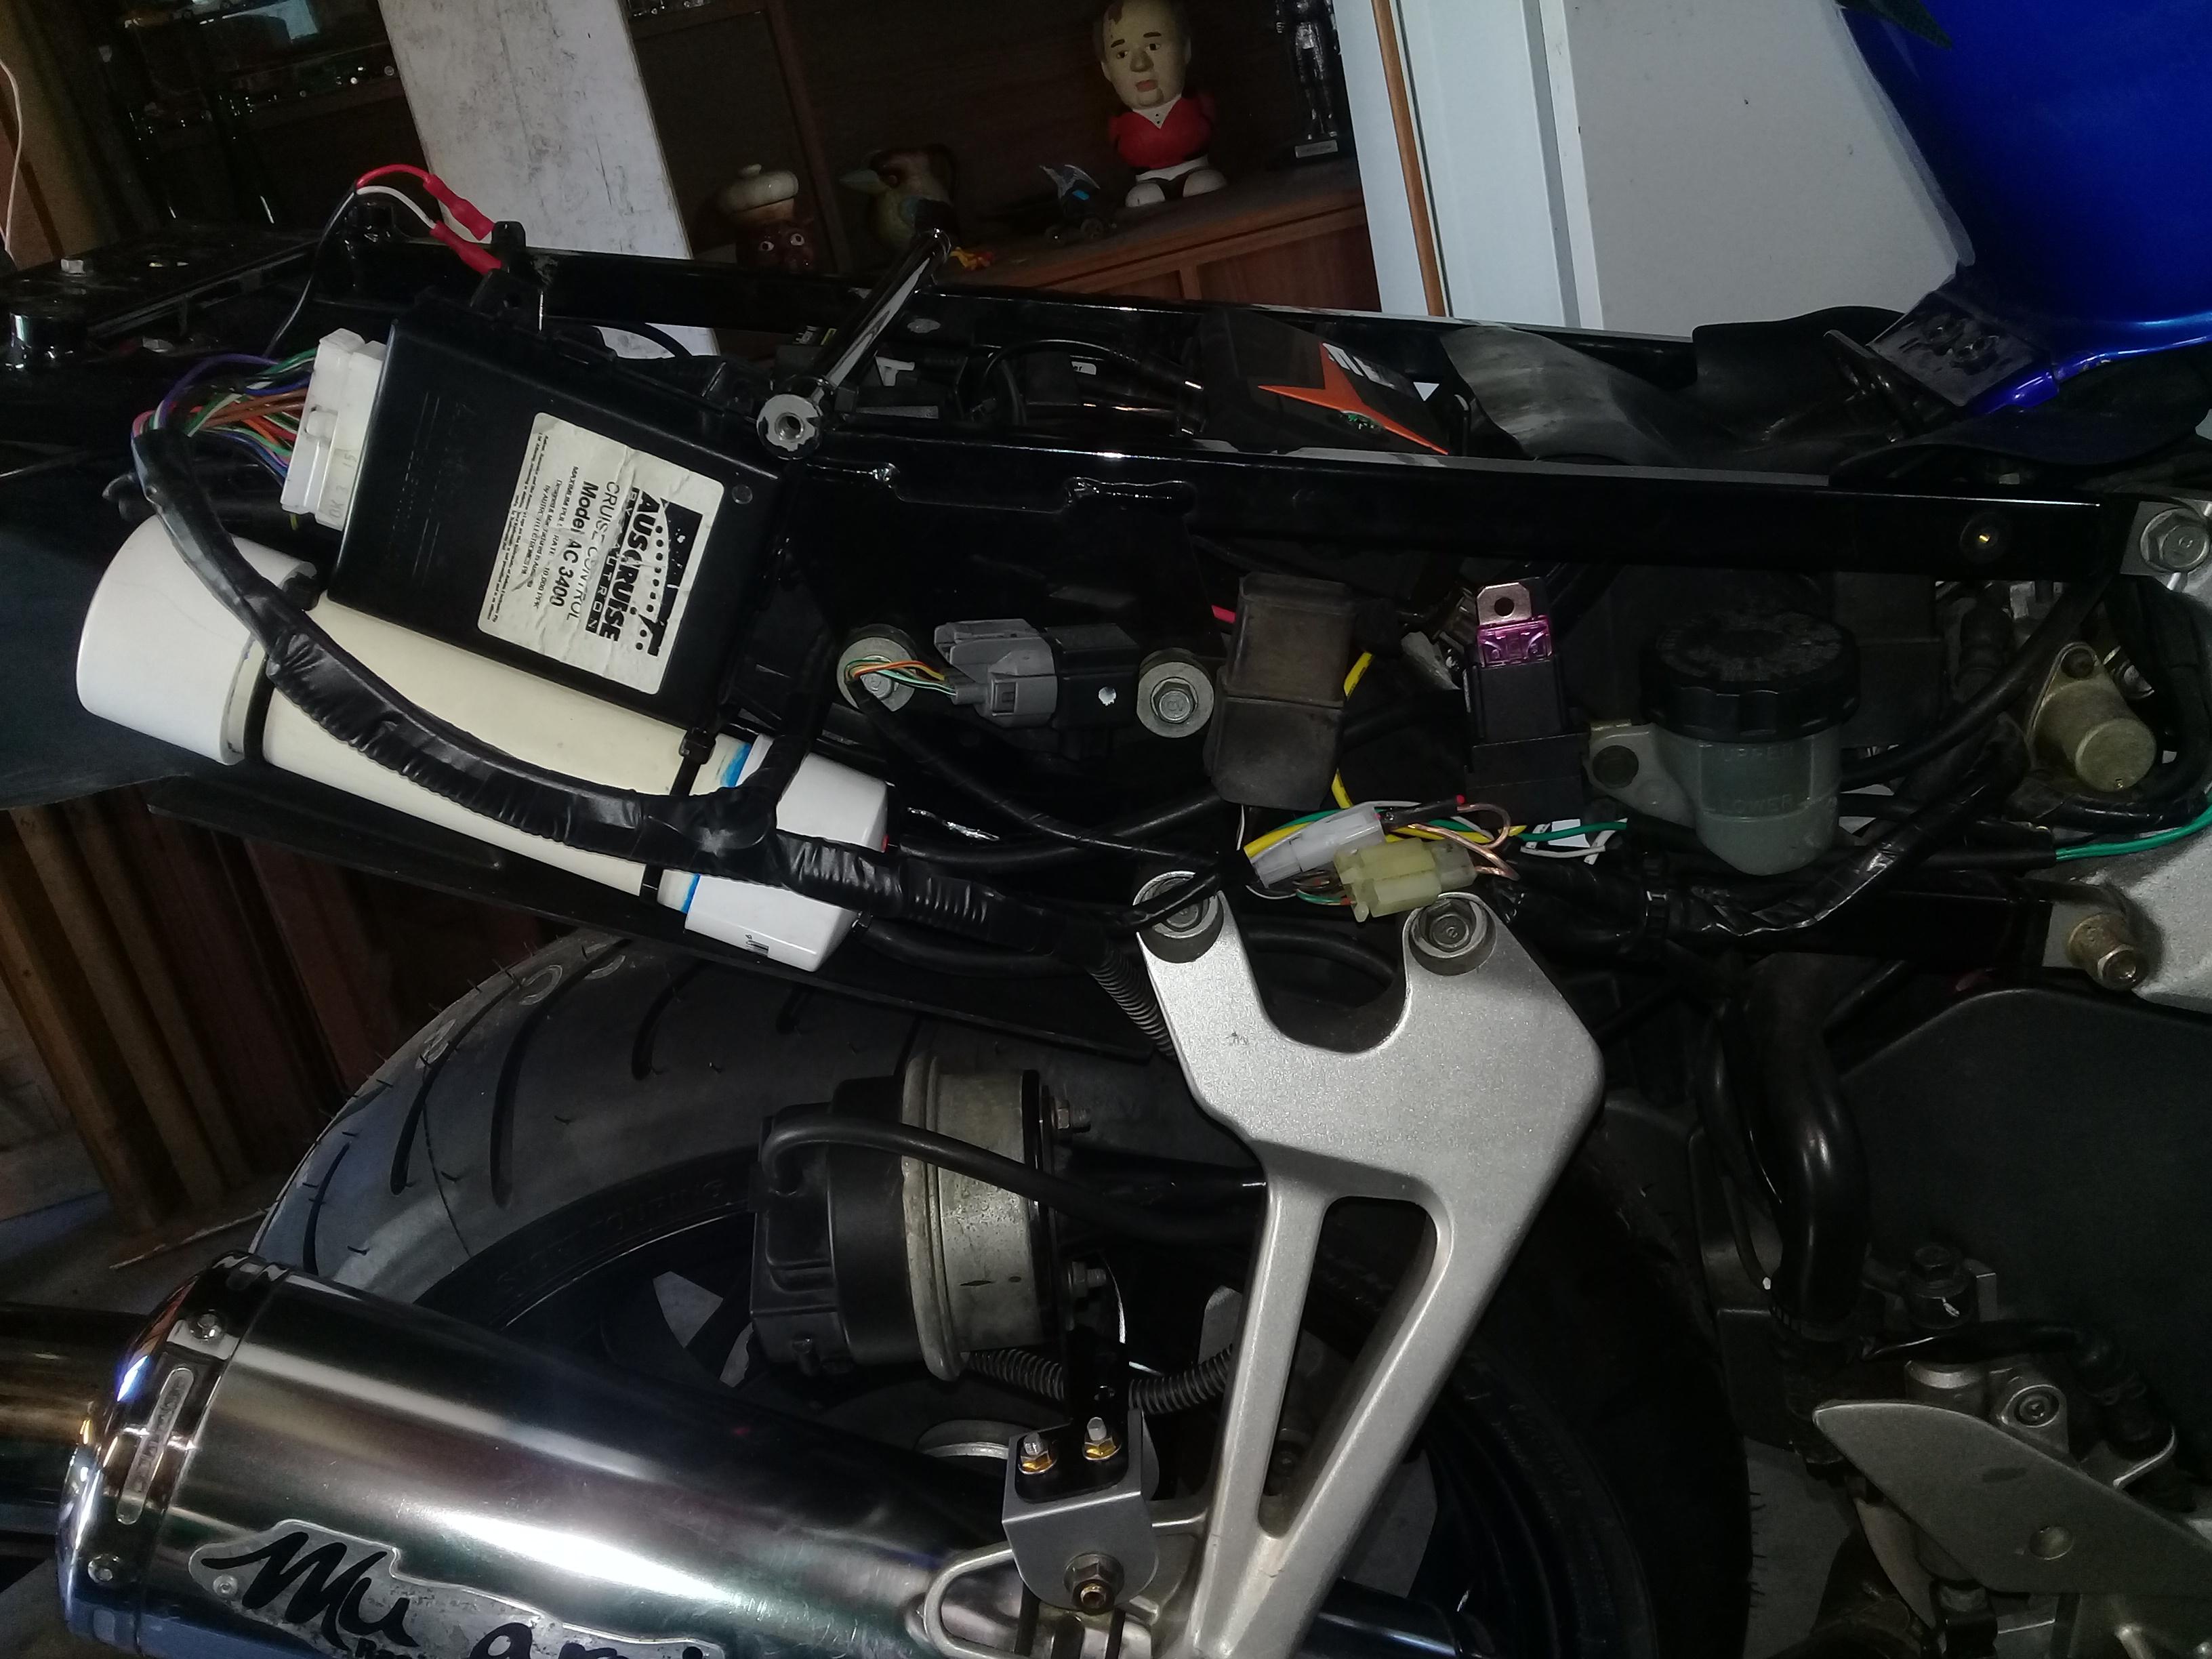
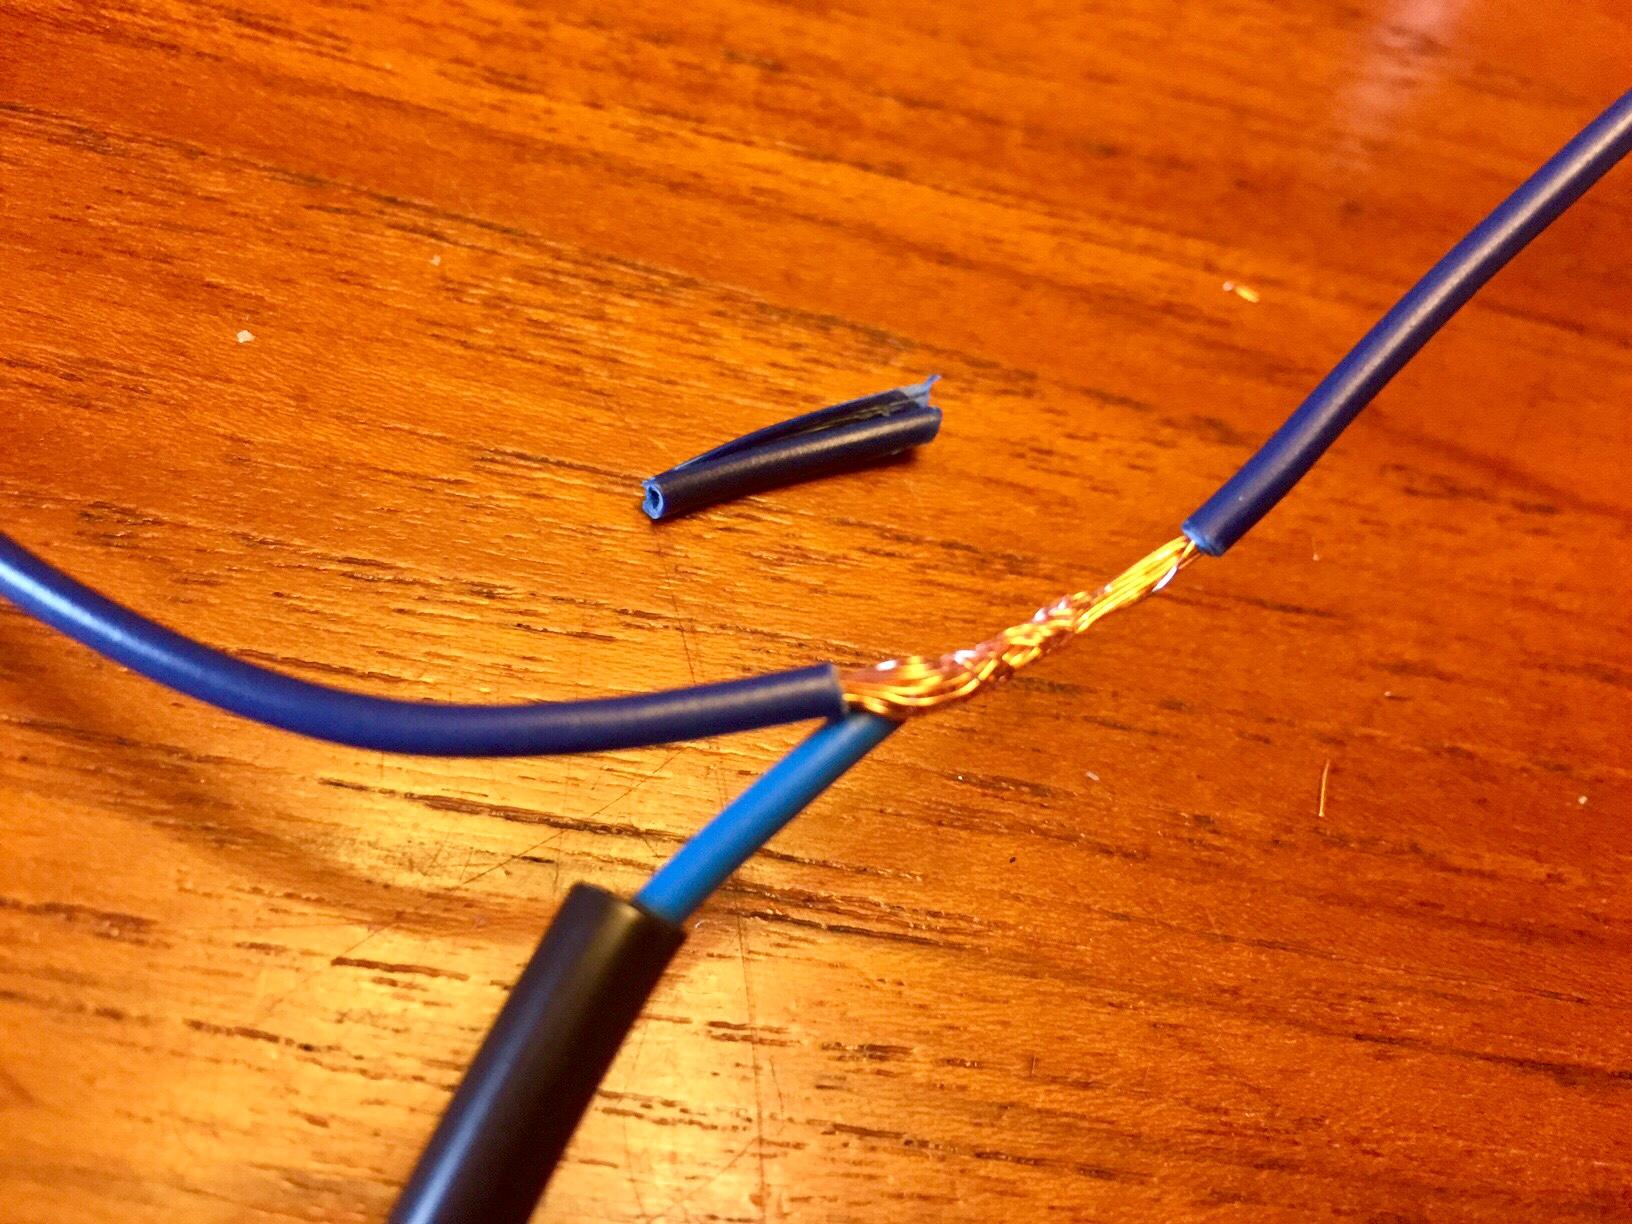
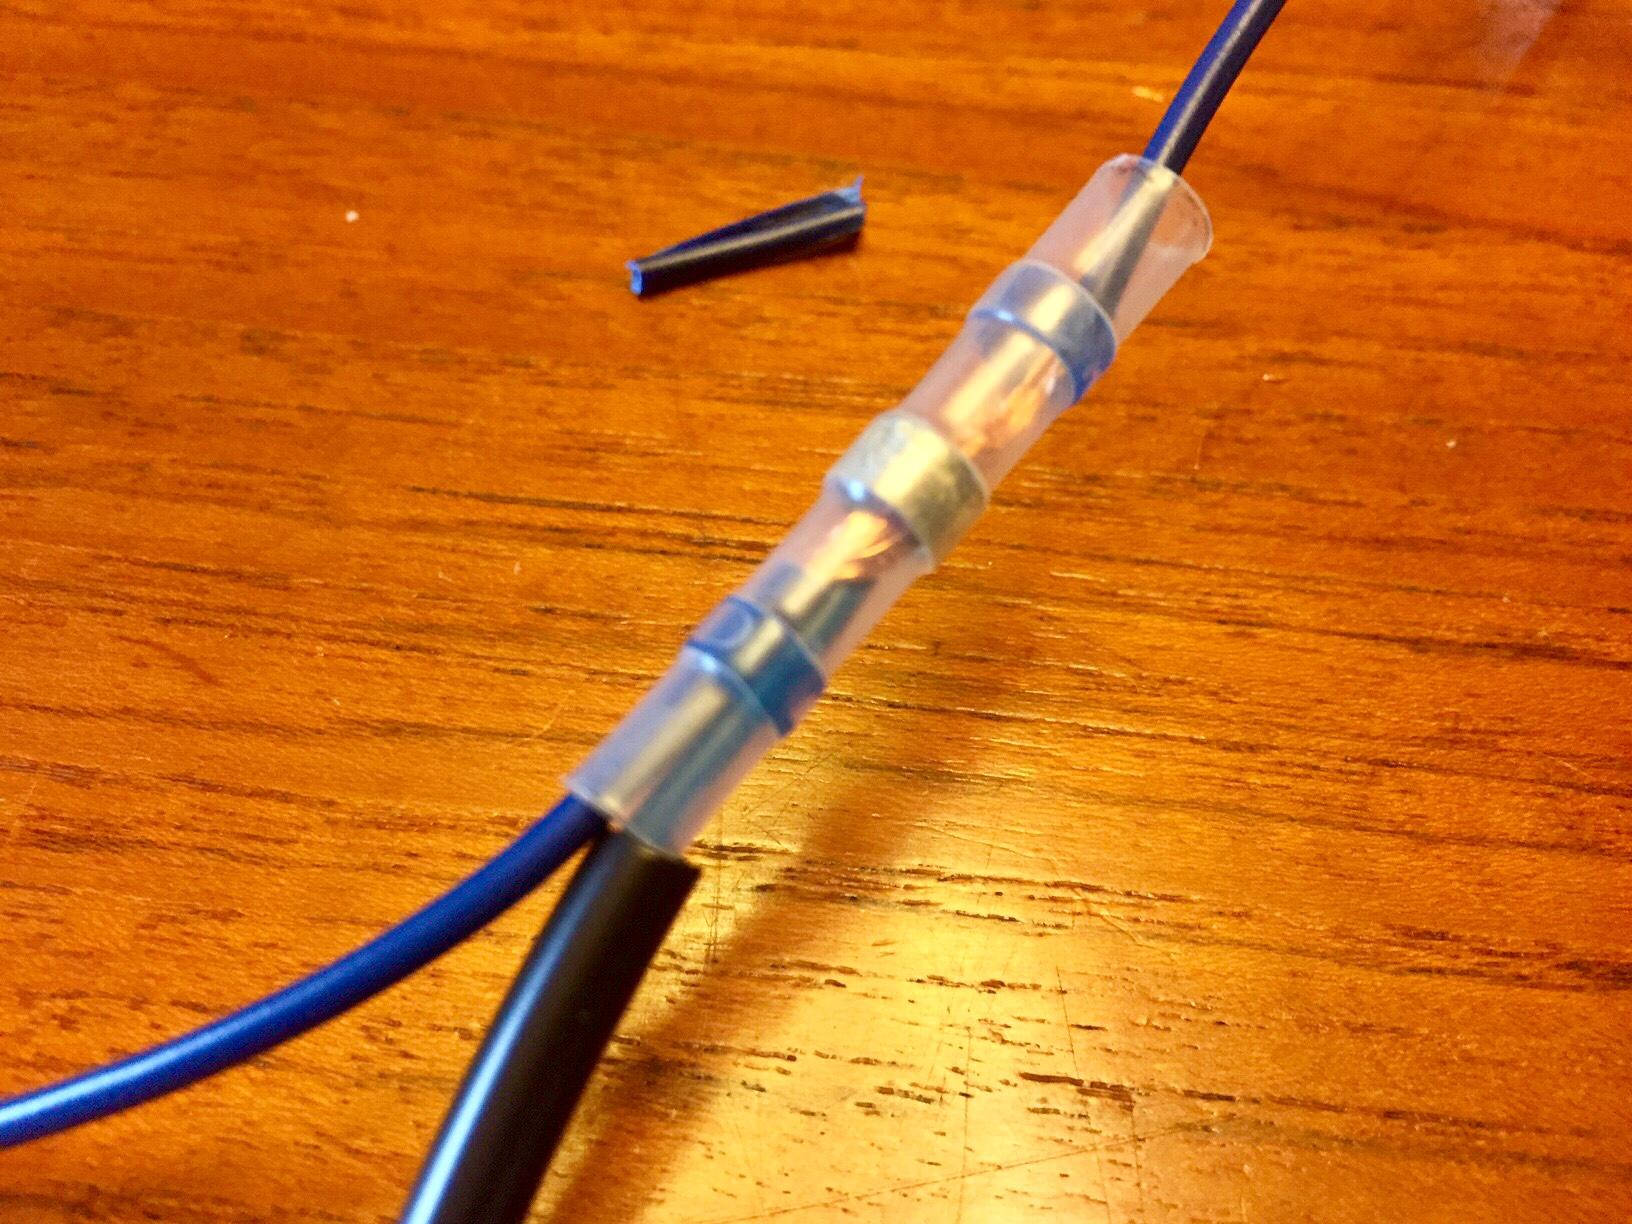
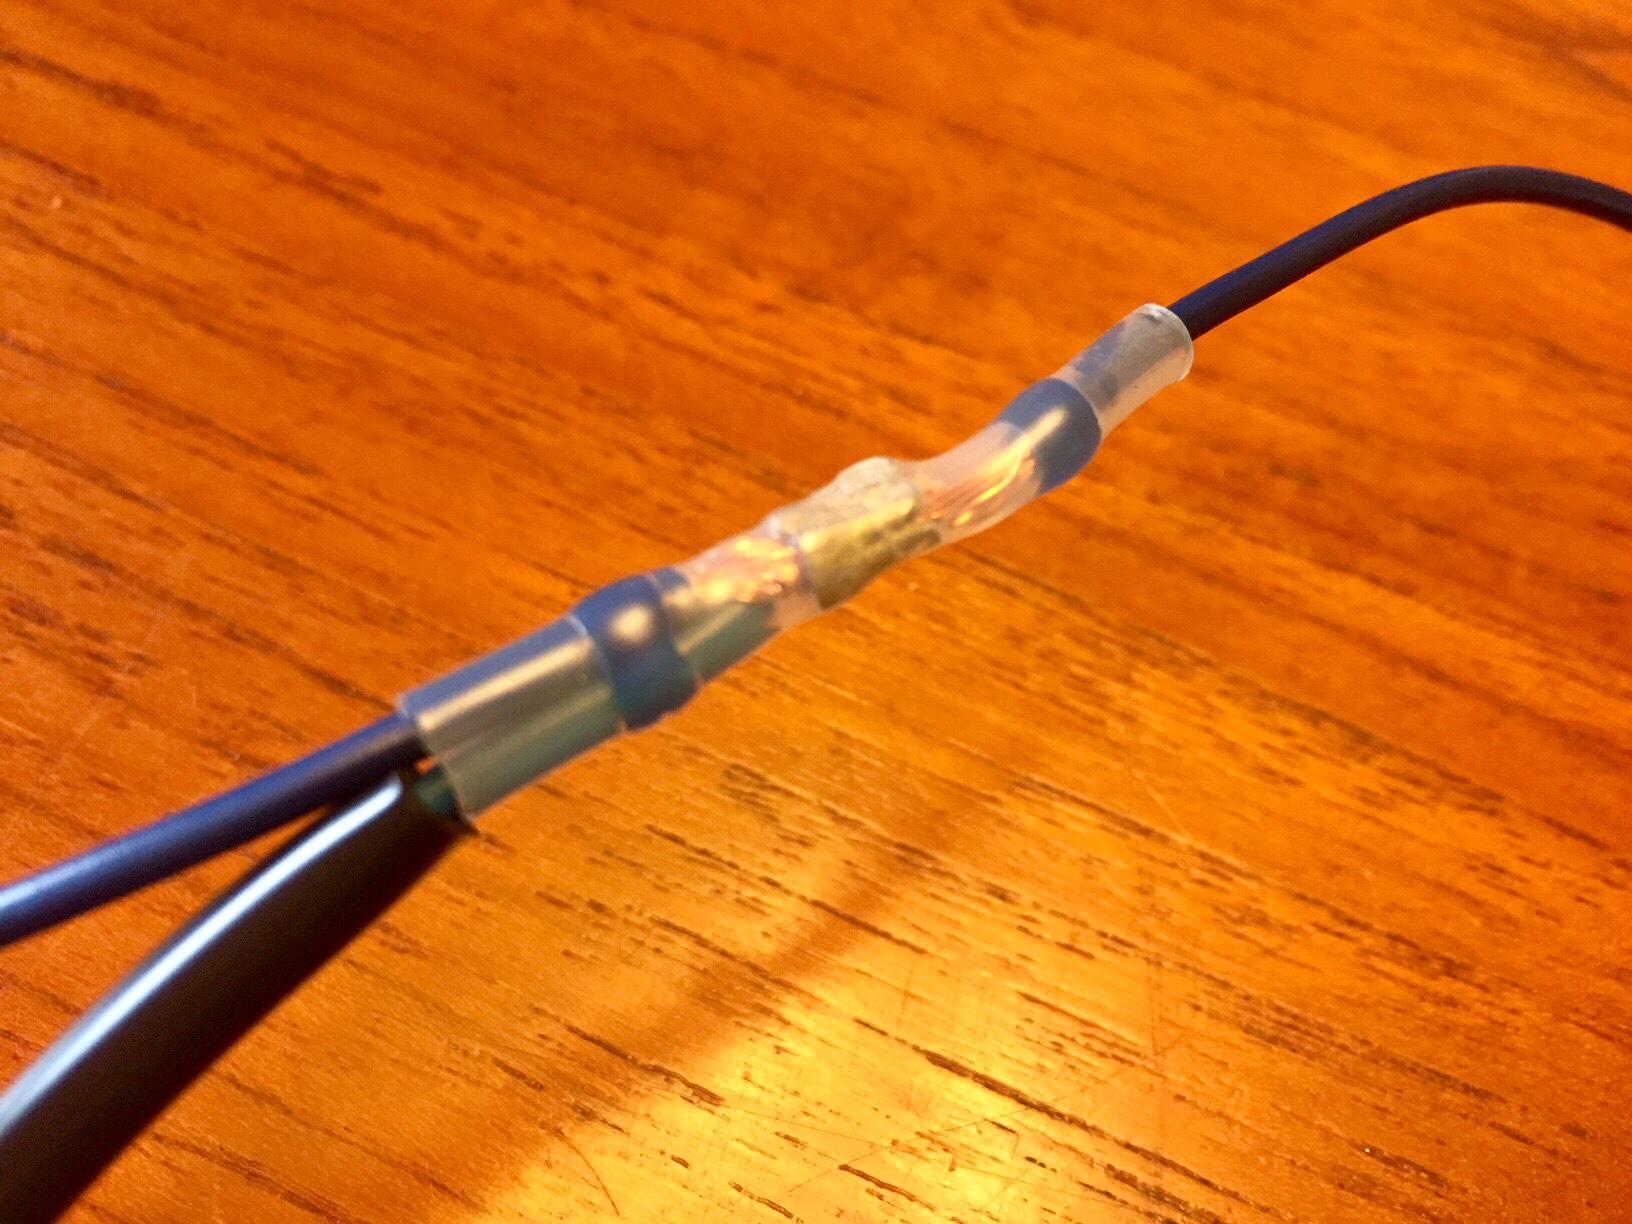
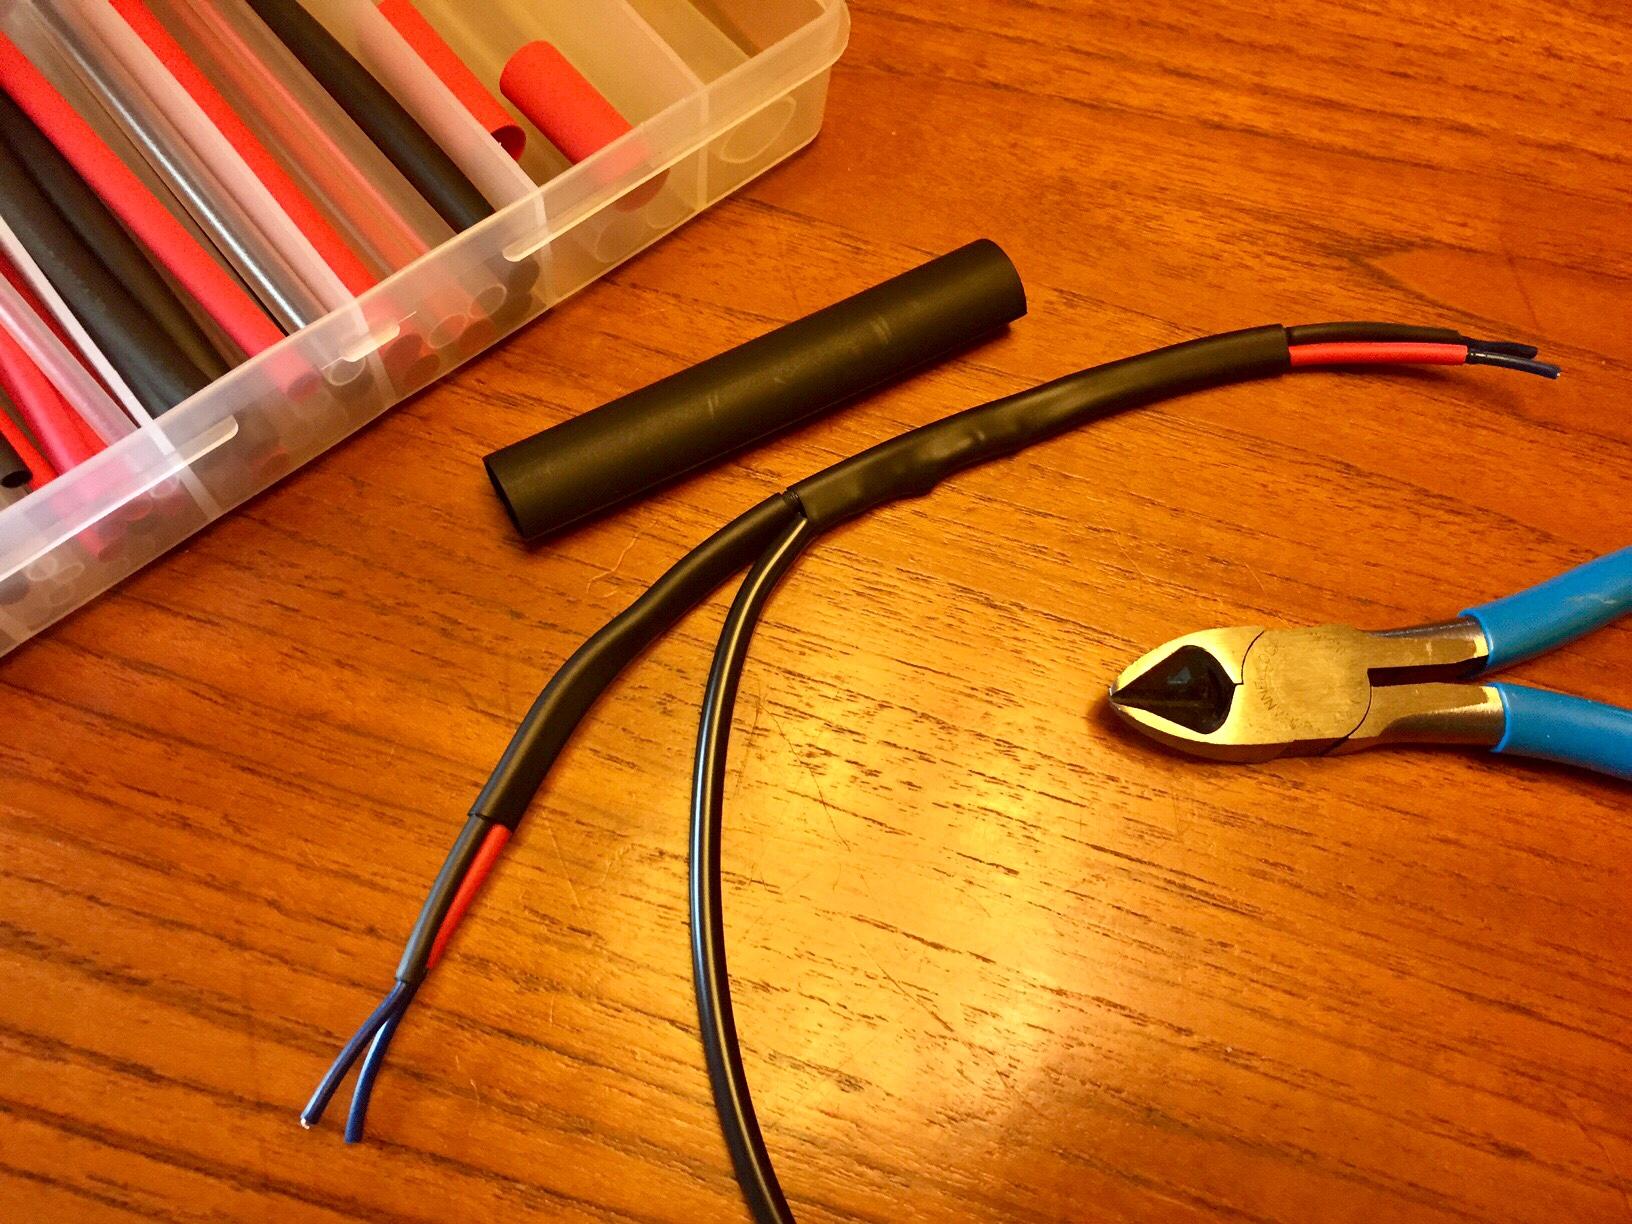
Here is the plug and play adapter I made for switched power. Two lengths of wire for pos and neg, two mating connectors for the license plate light connector (the orange bits), the corresponding pins, a solder seal connector, and shrink tube (the kind with the adhesive inside); the third wire lead that runs to the relay harness is part if the Eastern Beaver harness itself and has a bullet connector built in to disconnect if needed.
I did did not want to solder the third wire in and also wanted to avoid a three way crimp, so I removed some sheathing from the switched power line and wrapped the EB lead through and around it then used a solder seal type connector over the splice. Now it’s spliced in without cutting. Then three layers of the shrink tube both secure and protect the connection.
The wire connector pins require ridiculously small crimps, so I used a Hozan P-706 to aid in assembly. The shrink tube and solder seal connector I had on hand from previous vehicle projects and probably purchased from AMZN. The connectors for the license plate light I found at Cycle Terminal however EB does also seem to have them I found out later.
Thanks to EB and Cycle Terminal for great service and products.
http://www.cycleterminal.com/index.html


-
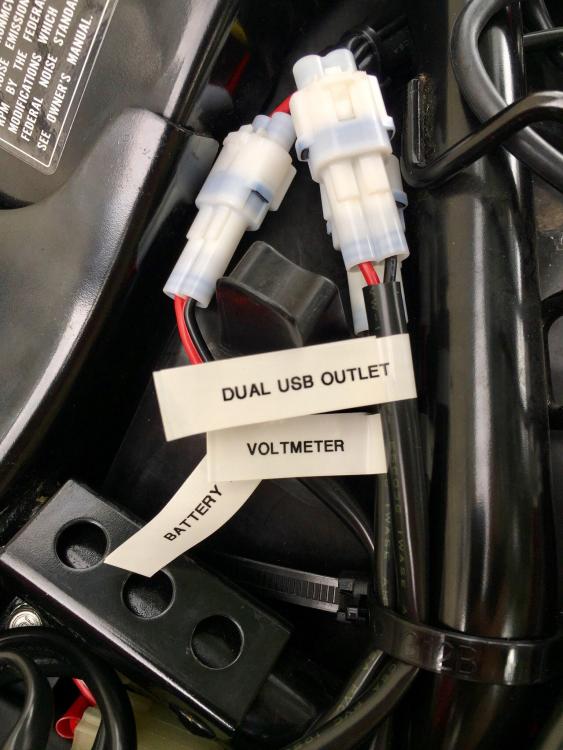
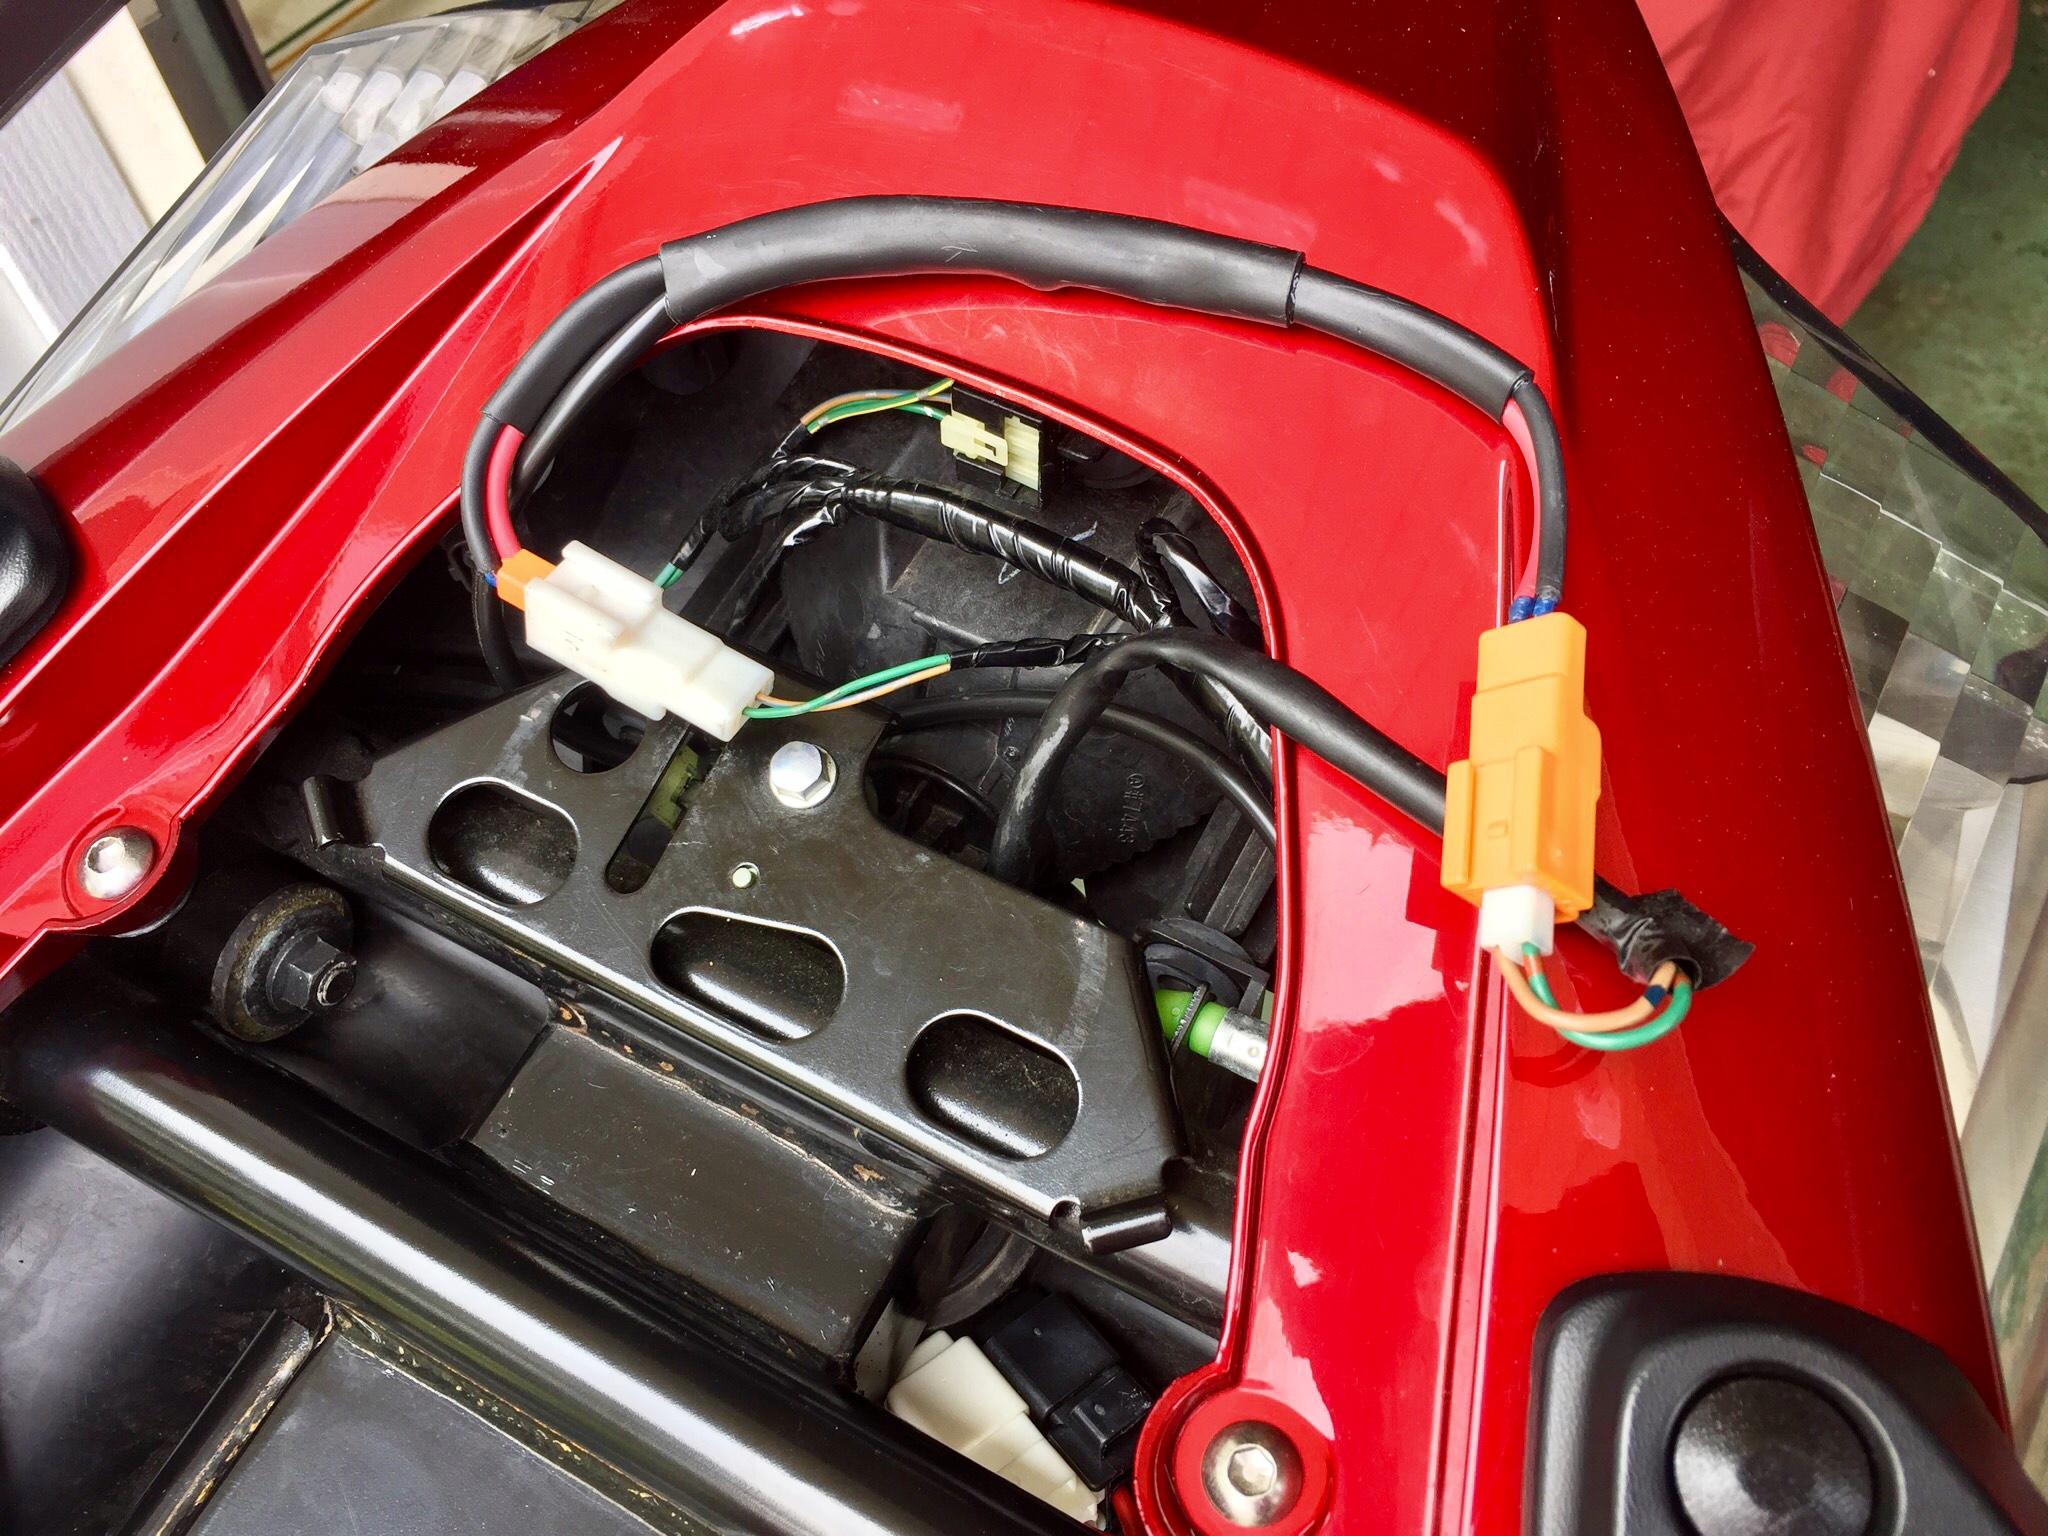
Ok so this is what I installed for running switched and unswitched power for accessories. Finally finished this up yesterday, after having to wait on some electrical connectors to make it plug and play (no cut into OEM harness) to make it from Japan to the USA.
3 Circuit Solution (3CS-S) Sealed
I have the one fuse unswitched version. Two fuses switched for voltmeter and a dual USB outlet for my GPS and phone. And the fuse that’s unswitched is for a trickle charger. I also am using the Powerlink adaptor version so if I ever need to give/get a jump start I can disconnect all my accessories at the plug and plug in a set of purpose built jumper cables.
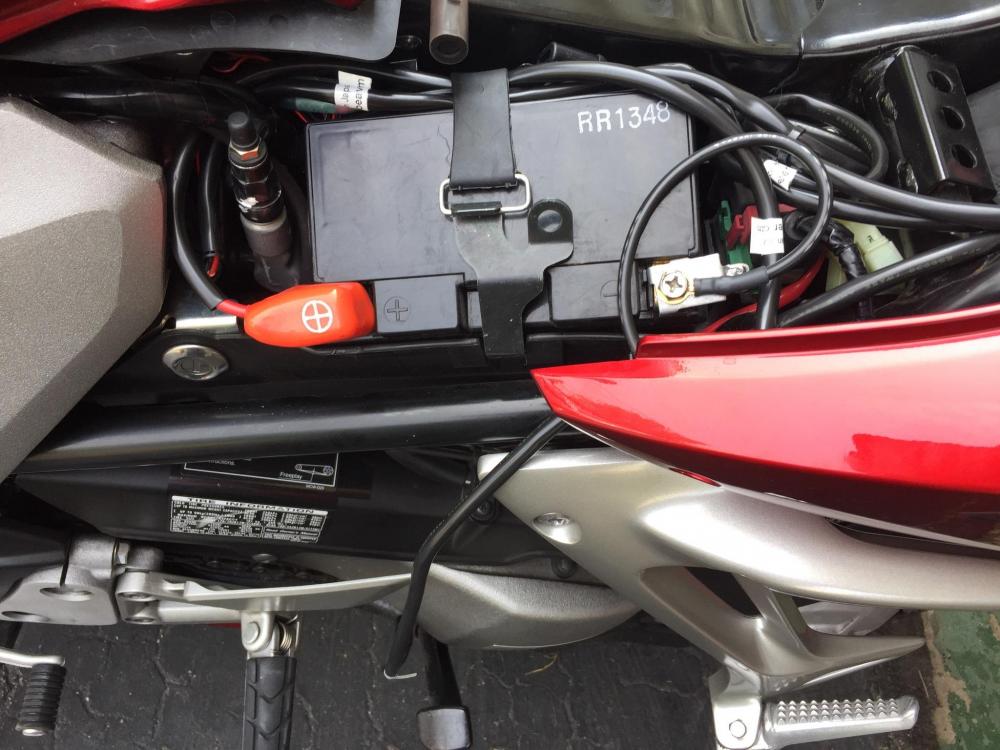
It it all fits in the undertray below the subframe rail on the left cubby that I think is intended for a disc lock. I ran the wires below the subframe to keep them from rubbing/contacting the seat pan. I used an adhesive cable tidy clip to mount the unit to the undertray, and removable zip ties to secure the power leads to the subframe near the battery, and regular zip ties to tidy up the cable lengths.
Ill show how how I made it plug and play in a following post.

-
On 8/16/2018 at 5:35 AM, Zarquon said:
Where is the wheel nut wrench?
Read your thread end to end, nice ride btw. I need to get a cover!
I've just done a wiring relay/distro mod on my own gen5. Switched the relay using the tail light wiring, main power is direct from battery with 10 amp fuse in line. System runs voltmeter, phone holder, usb outlet and lithium multi function jump starter.
Current project... cruise control mod... (not so easy adapting and wiring 2nd hand car unit)!
Enjoy
Z
Funny you inquire about the wheel lug nut wrench, I wondered the same thing. I carry some additional tools on distance rides, I added a deep 19mm socket JIC. More local riding I doubt I’d benefit from having it versus fixing a flat or getting a flatbed.
I just finished up the wiring project yesterday. Going to update some pictures here later today.
‘Real’ cruise control, now that’s a beneficial mod! Good luck with that!
Thanks for reading!
17 hours ago, Grum said:6gen tool kit never came with a wheel nut wrench. Don't think my 8gen has one as well.
Thanks for the info Grum!
-
Well in the absence of anything to do to the VFR (still waiting for connector pins from Japan), I cleaned this off and took photographs of it to sell. Also rode it around the block, wow what a seating position compared to the VFR! Now I remember why I’m moving on from it....
-
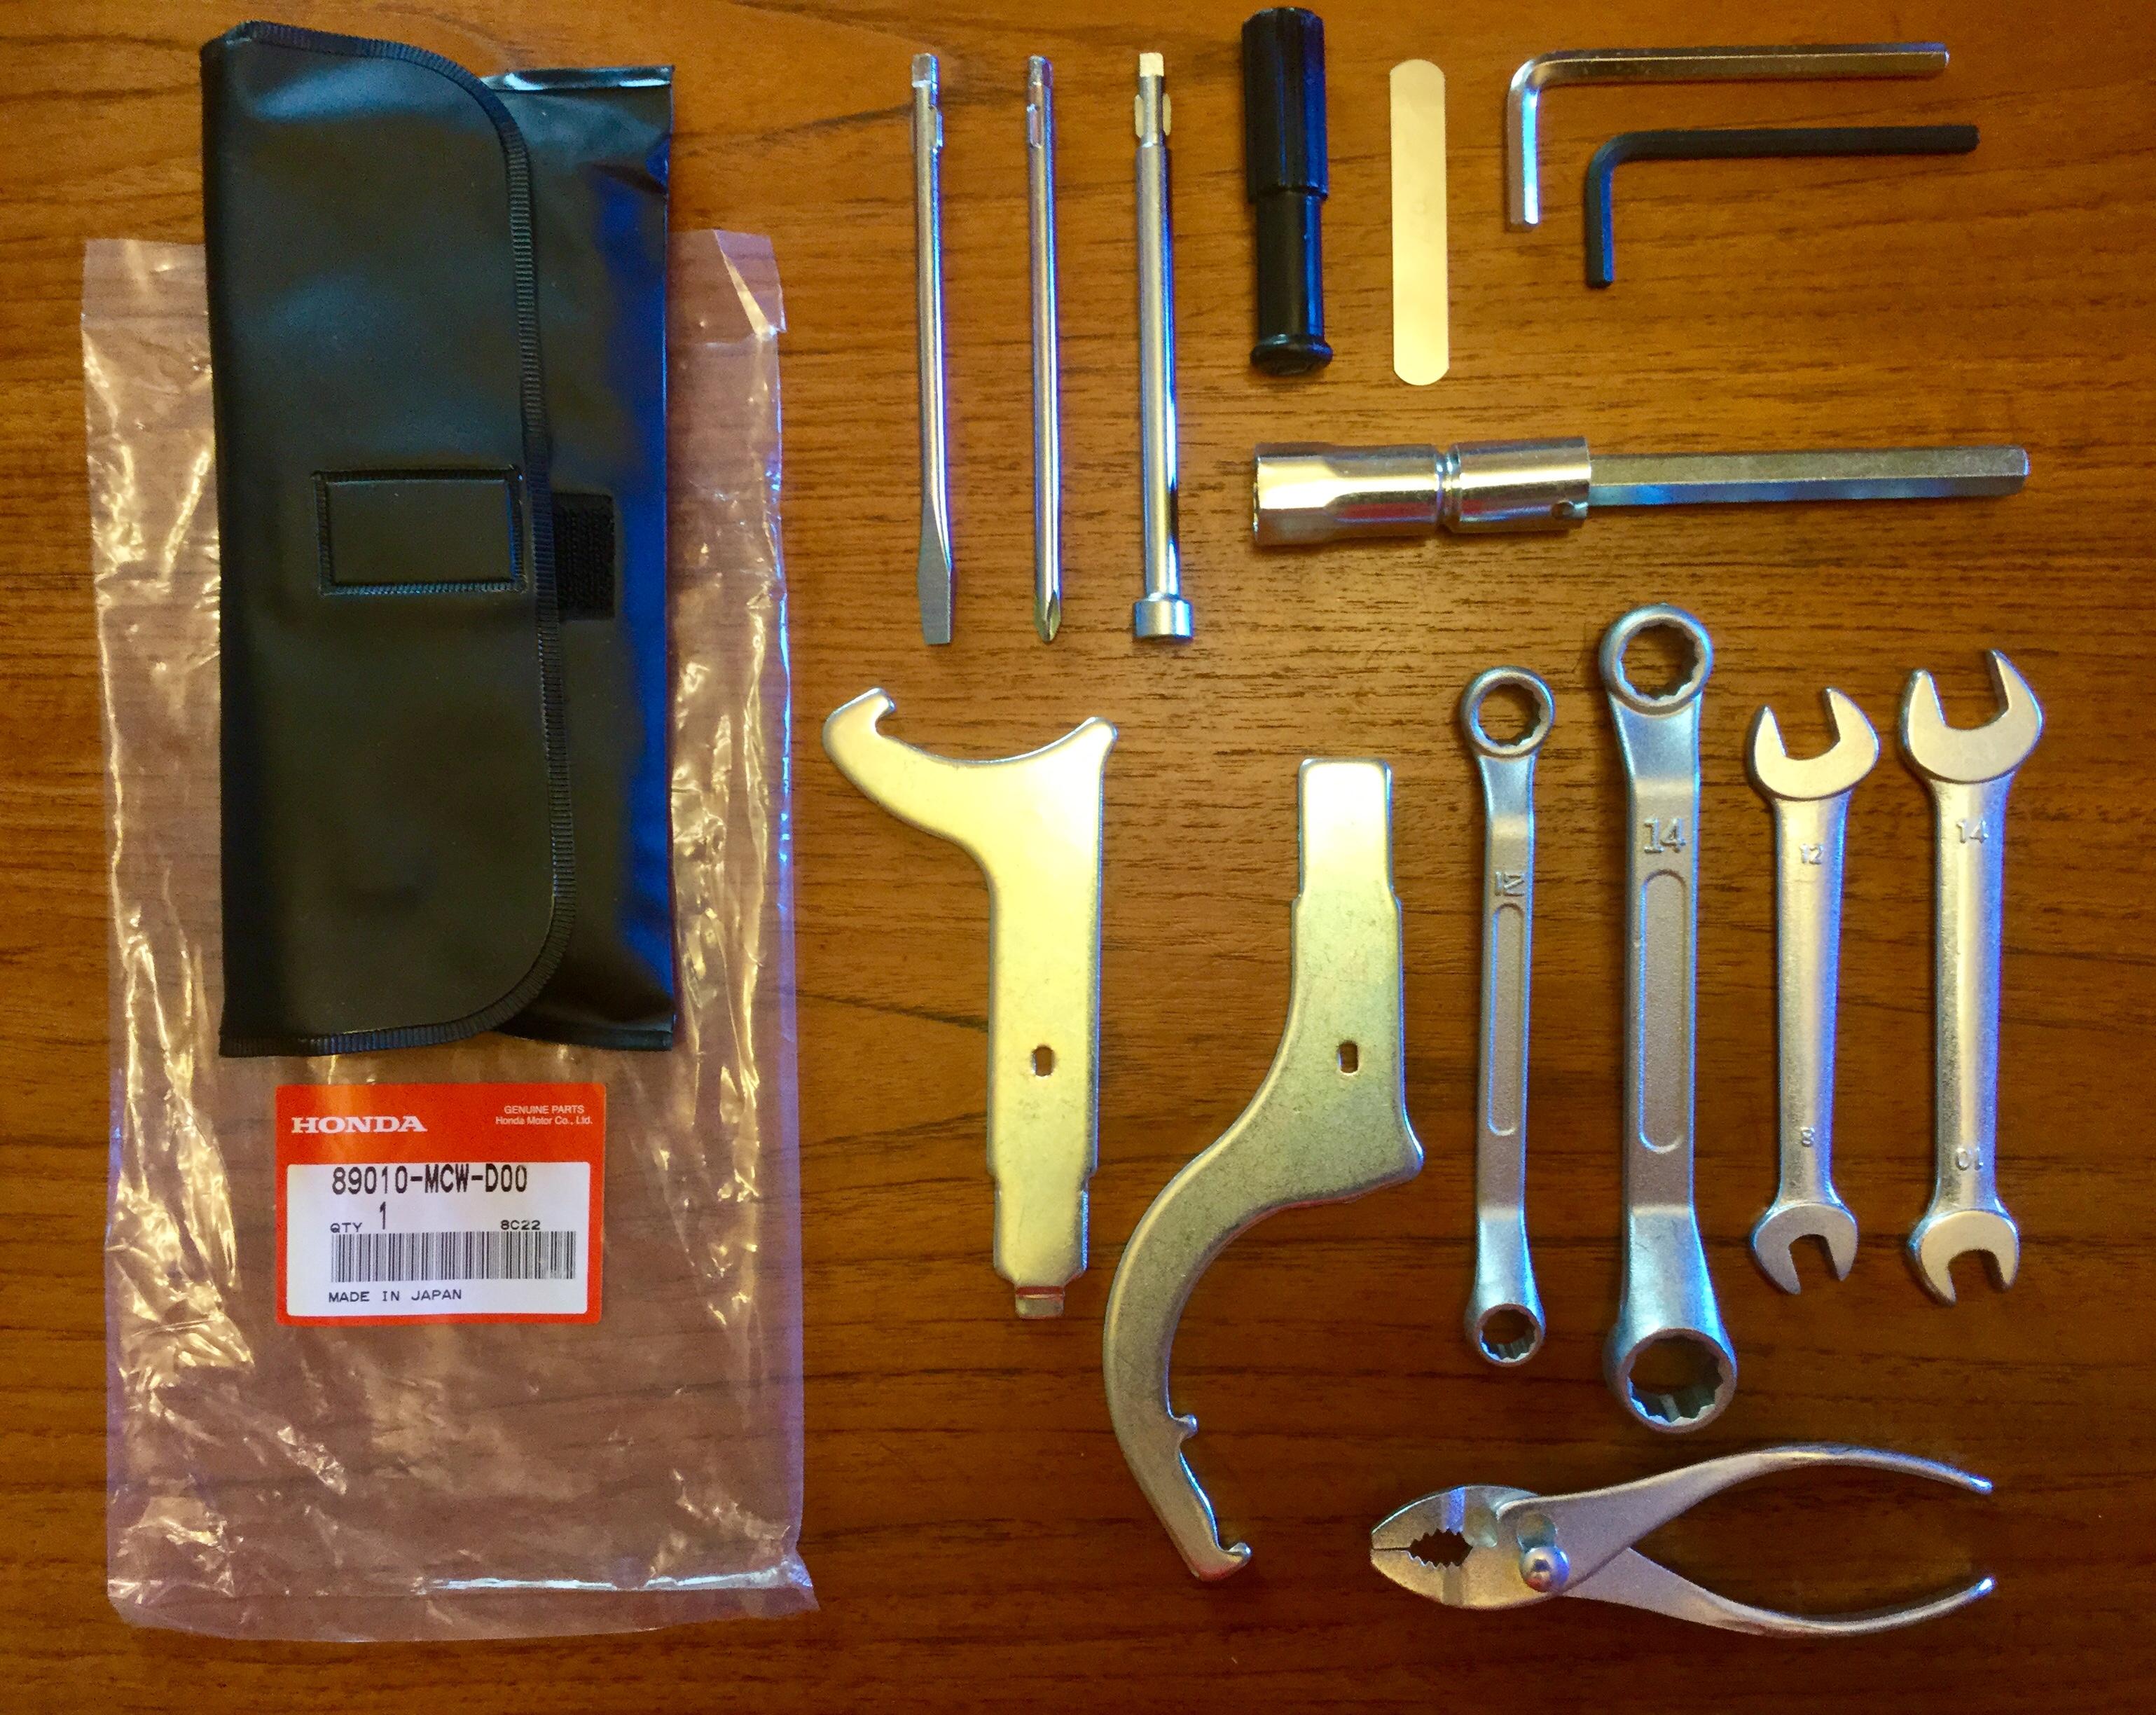
My life, I mean my OEM tool kit, is now complete...
-
 2
2
-
-
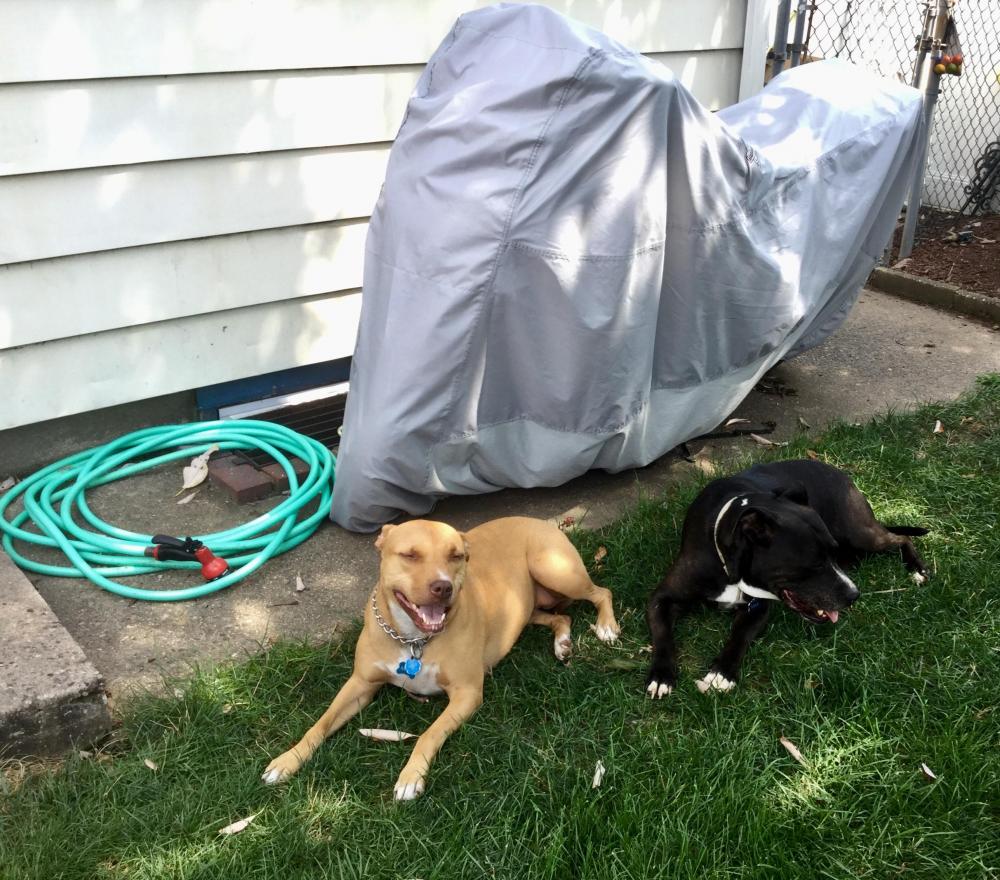
Not much going on with the VFR due to the oppressive heat and the fact that I’m still waiting on connector pins from Japan to finish my accessories power relay harness. Might get a ride in this weekend, fingers crossed on the weather being ‘reasonable’. That said, here’s a recommendation for a good cover if anyone needs one for their ride. About $75 via AMZN.
Dowco Guardian by 50003-03 WeatherAll Waterproof Indoor/Outdoor Motorcycle Cover: Grey, Large

-
On 8/4/2018 at 7:44 PM, duccmann said:
Congrats on the very nice find, when those puppies wear out try these
Been using these for almost 8 years.
Sent from my iPhone using TapatalkThanks! Appreciate the tip. Good to know there’s options. The GP’s are still doing well and help with the comfort.
-
1
-
-
On 8/4/2018 at 3:23 PM, smurfbud said:
Nice bike Variable and a beautiful colour (the best I think) ....
Thanks! I agree on the color! 👍🏻
-
On 8/4/2018 at 2:30 PM, MaxSwell said:
Mine goes in the plastic envelope with the rest of the stuff.
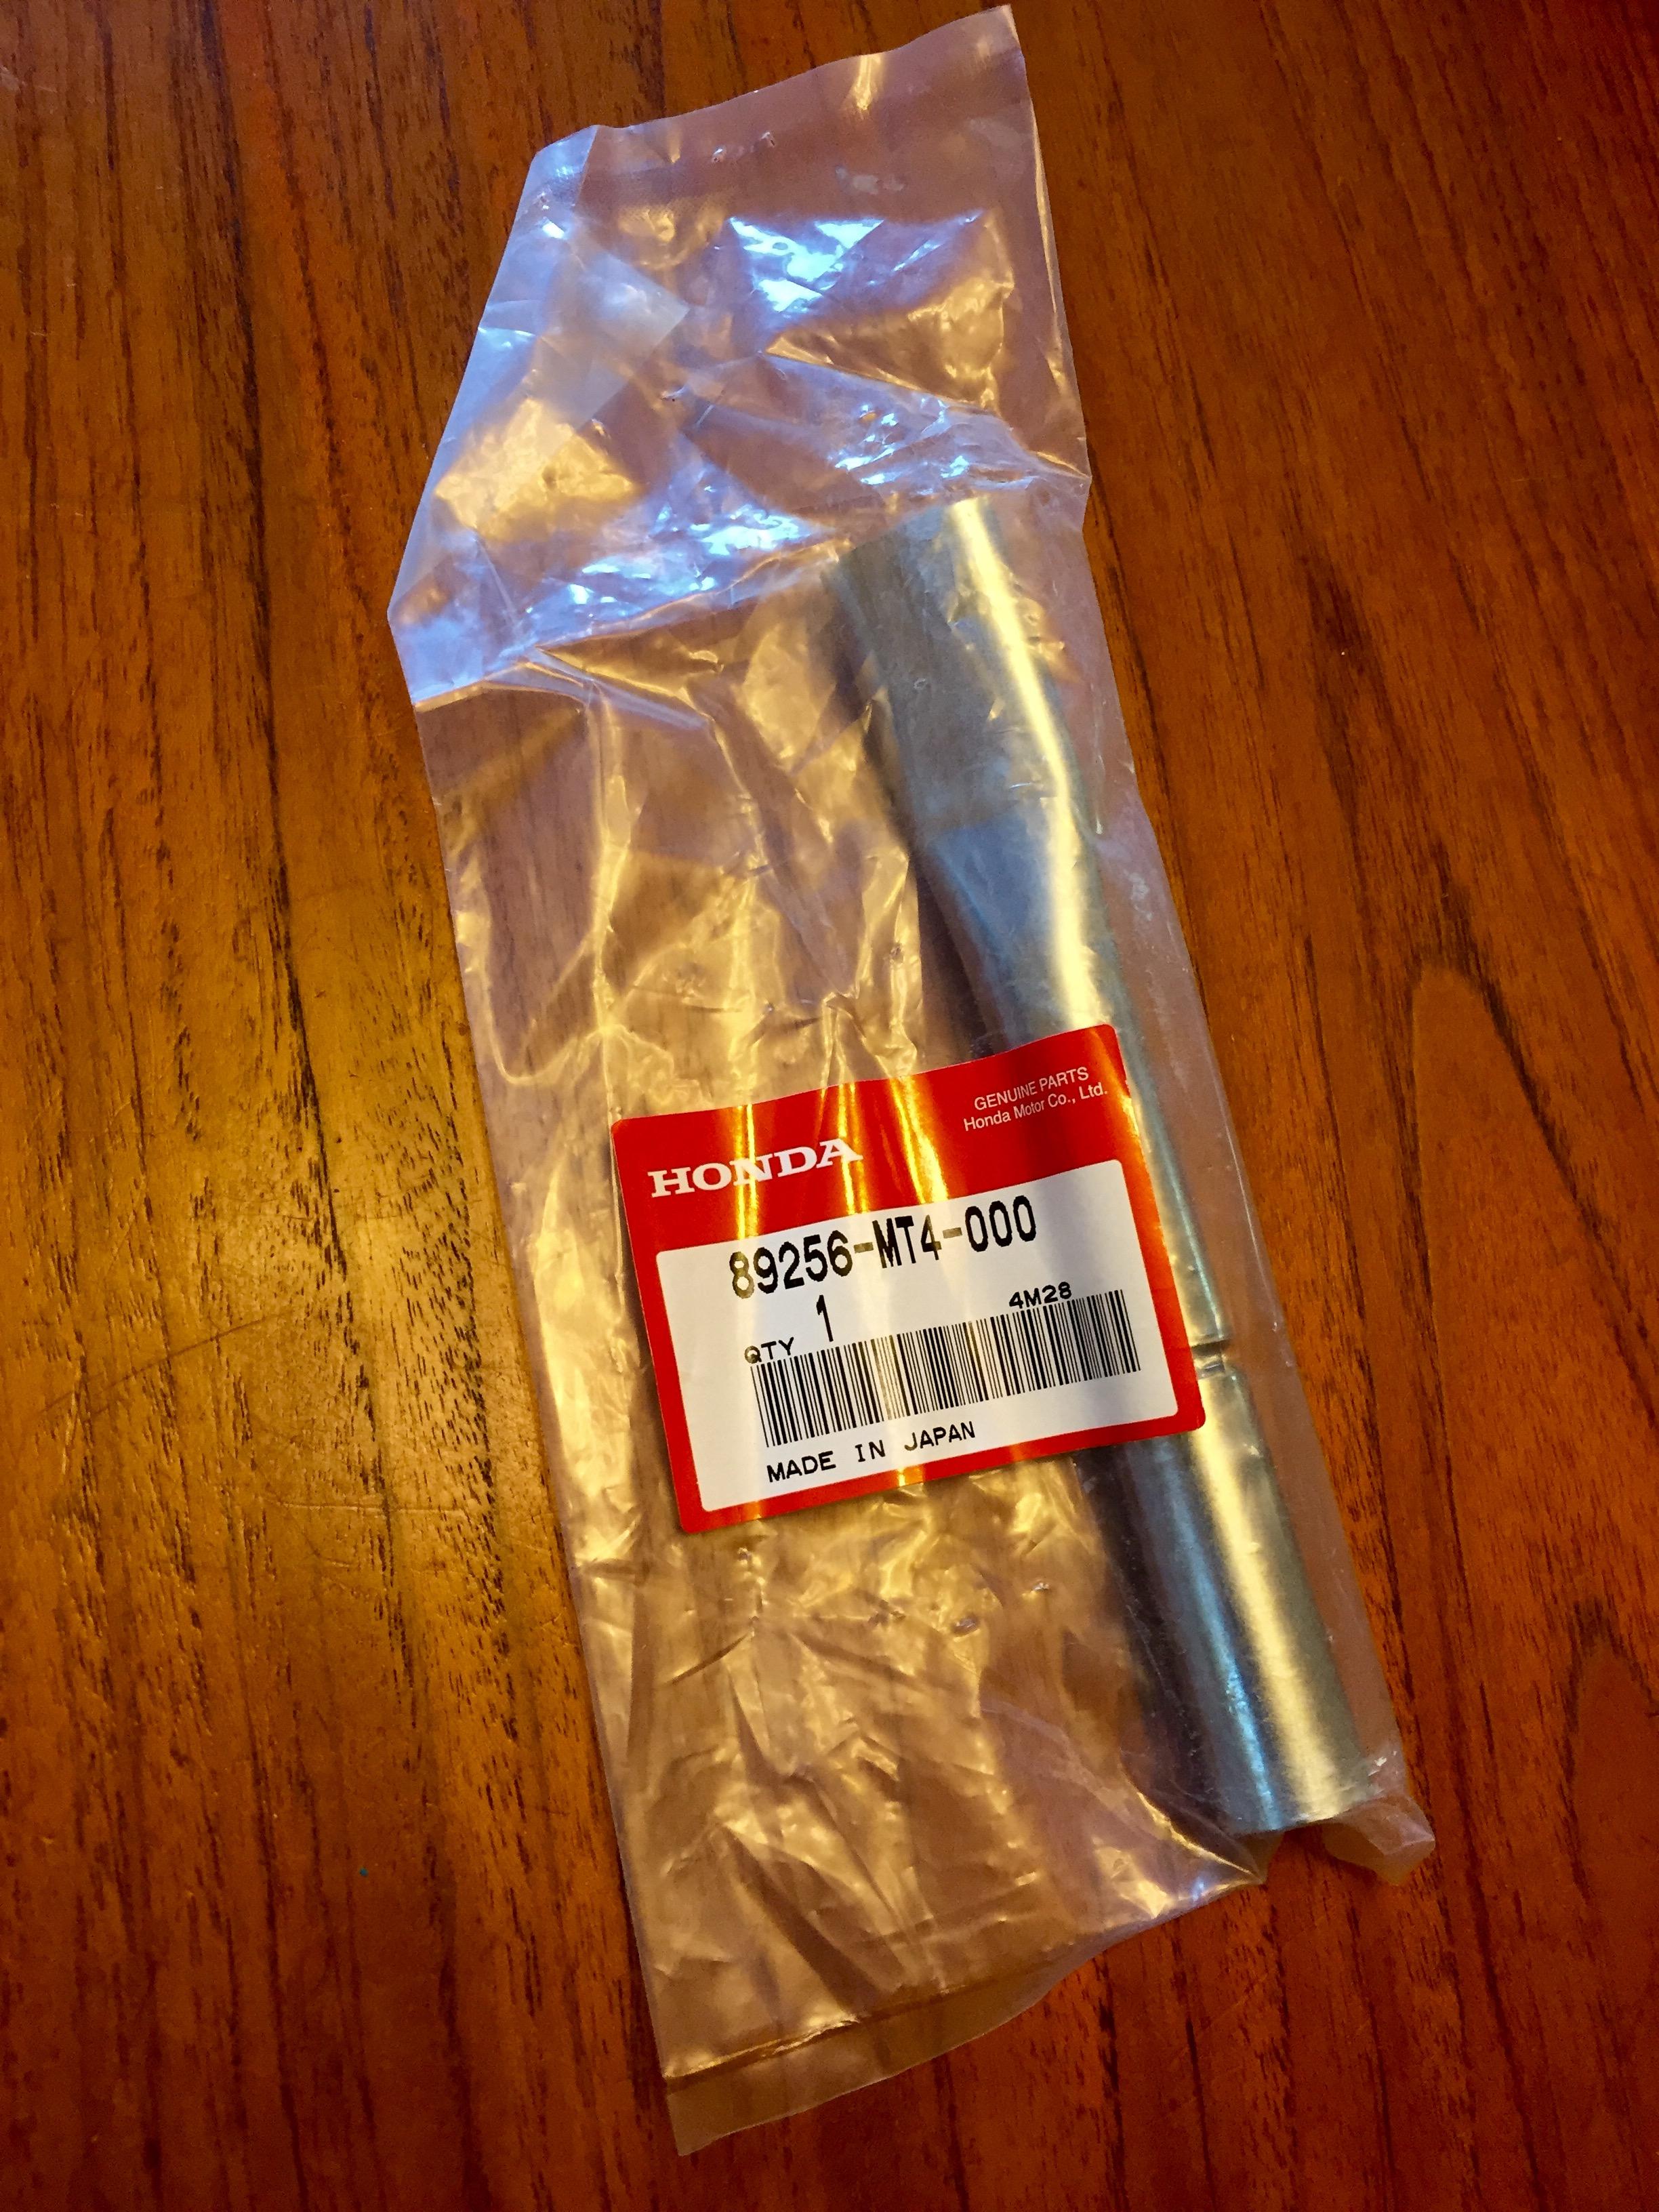
I’m sure it will fit in there from the looks of it. My question is really “where was this item stored on the VFR when it’s delivered from Honda”. Seems odd it’s not part of the actual OEM tool kit part number, so I was thinking it had a separate location on the bike. Ordered one from eBay for $14 and will see soon enough.
-
@Grum can you advise where is this part stored on the bike? Is it usually in the tool kit? Or is there a dedicated location to 'clip' it in elsewhere?
-
@Grum thank you!
On the fiche it’s a separate part to the tool kit itself. Looks like I’ll have to find one.
-
2 hours ago, Grum said:
Something is missing................The extension handle for the C spanners, coupled with the chain adjuster it makes for a maintenance strut for raising the fuel tank, apart from being essential for normal use of the C spanners.

Lol, which one is the chain adjuster?
And can anyone post a picture of this missing tool? I'll have to try and find one on eBay.
-
52 minutes ago, Urbanengineer said:
People are dumb and remove them for some reason I’ll never understand.
It’s not the worst OEM Tool Kit I’ve ever had:


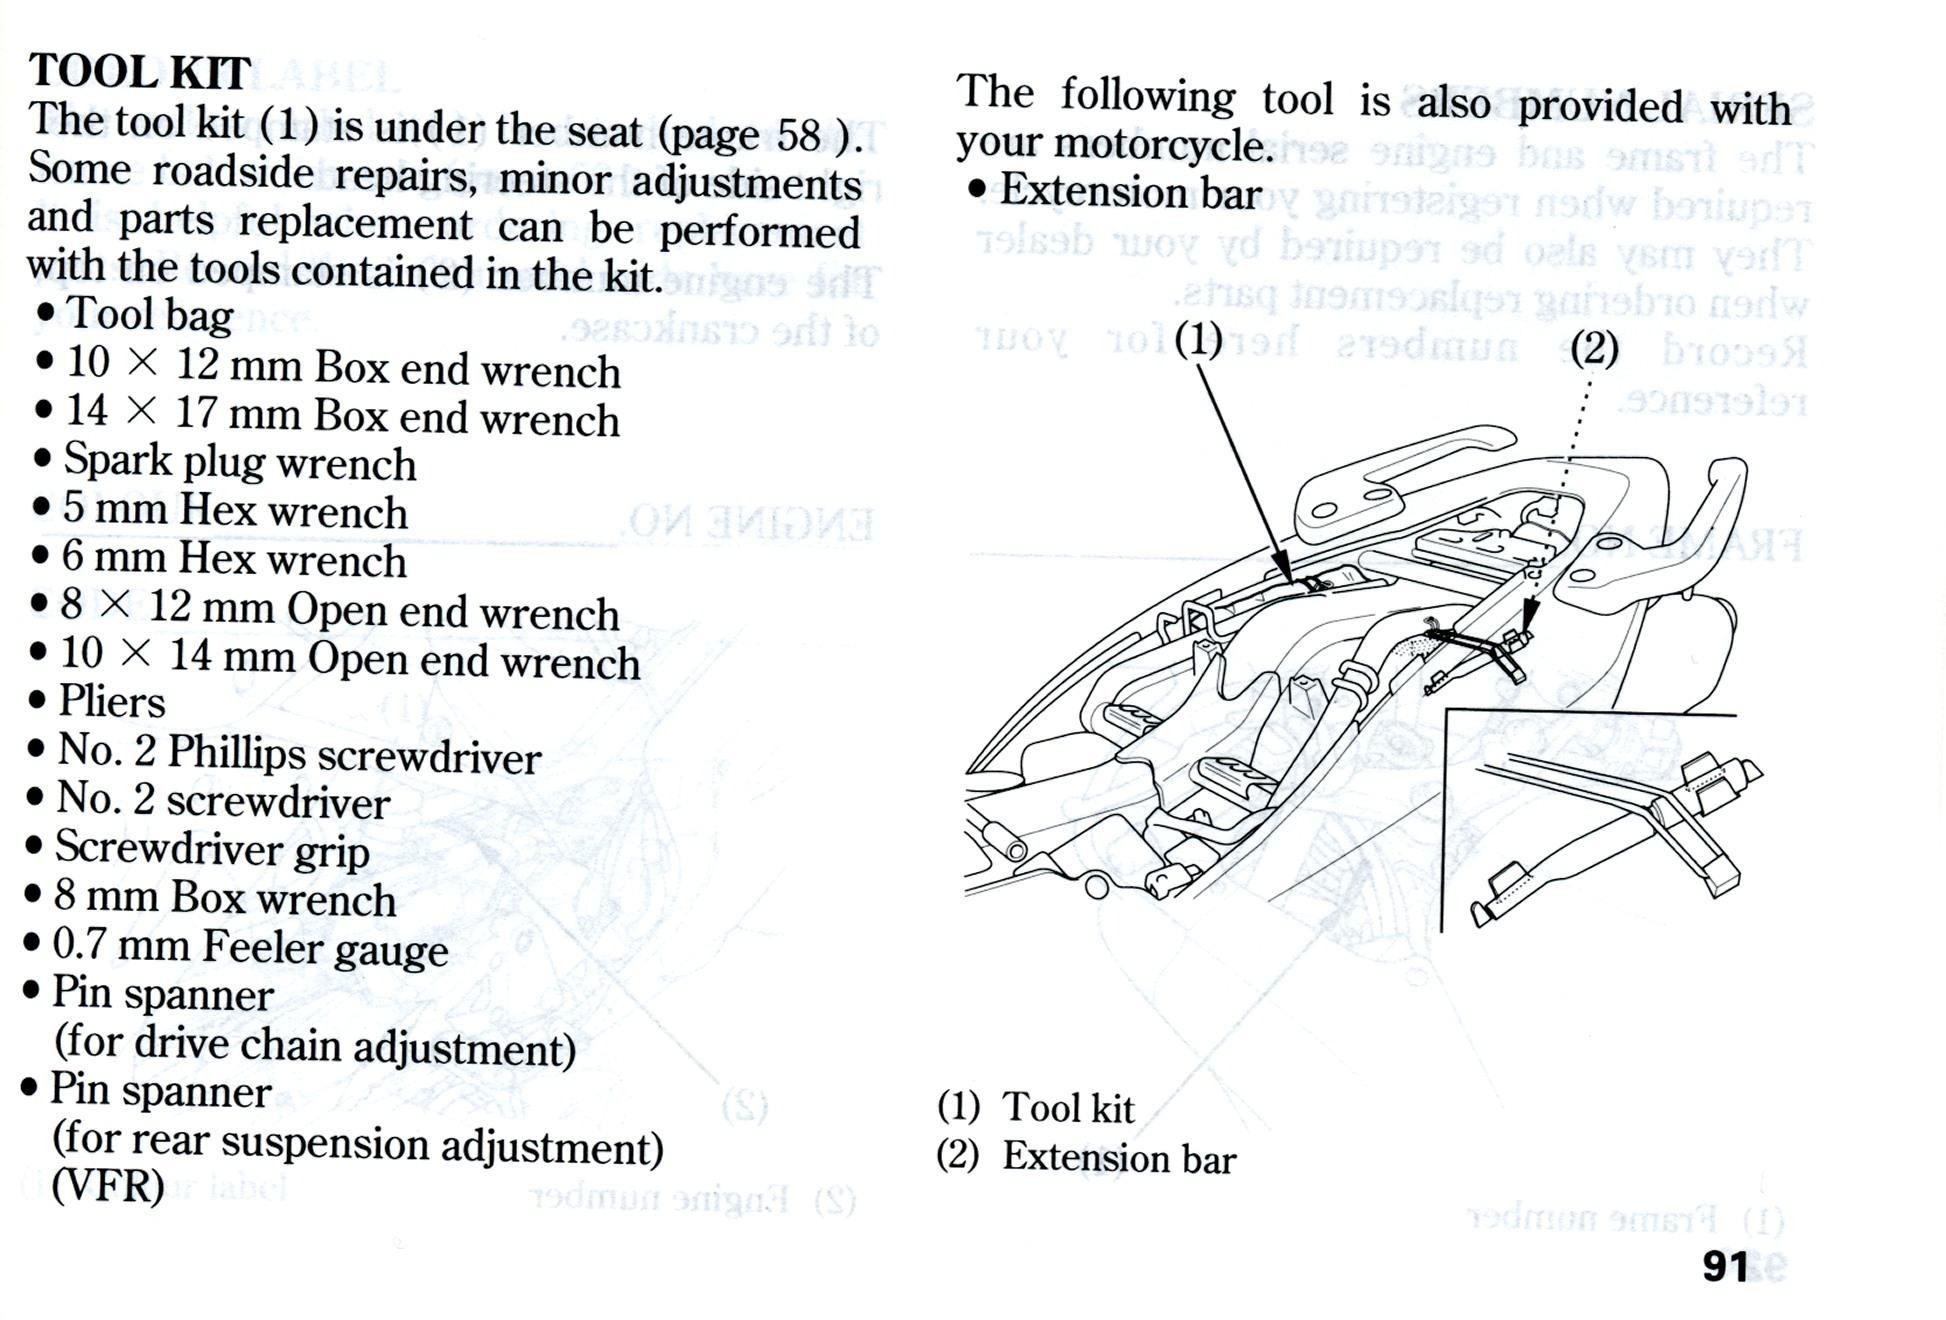


VARIABLE9’s V4 VFR VICTORY
in Sixth Generation VFR's
Posted
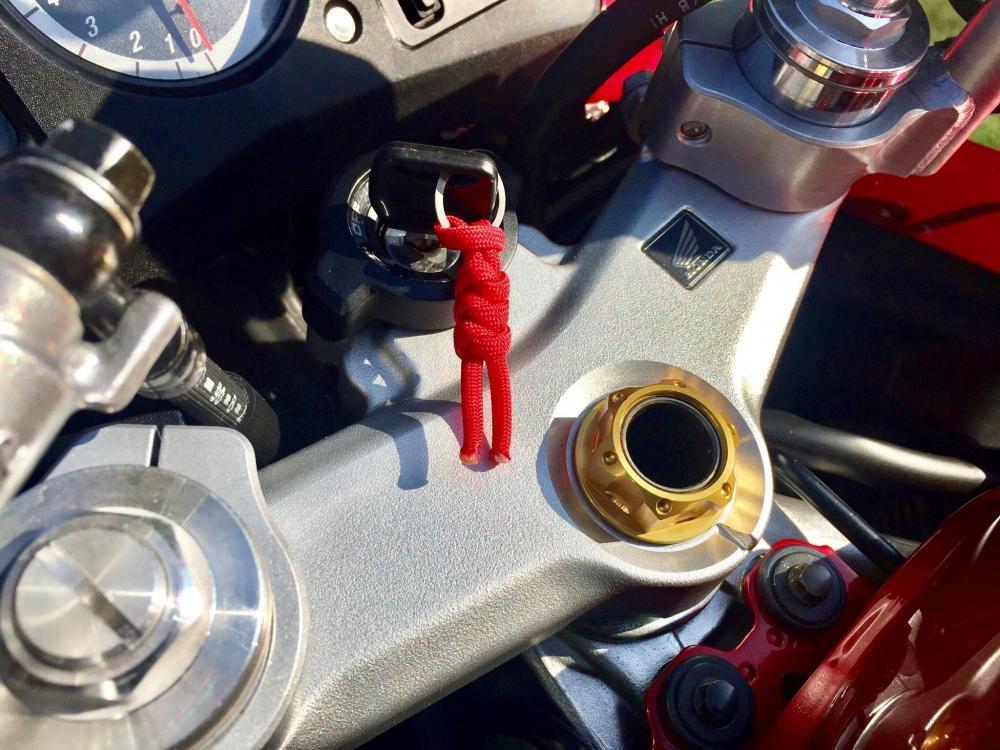
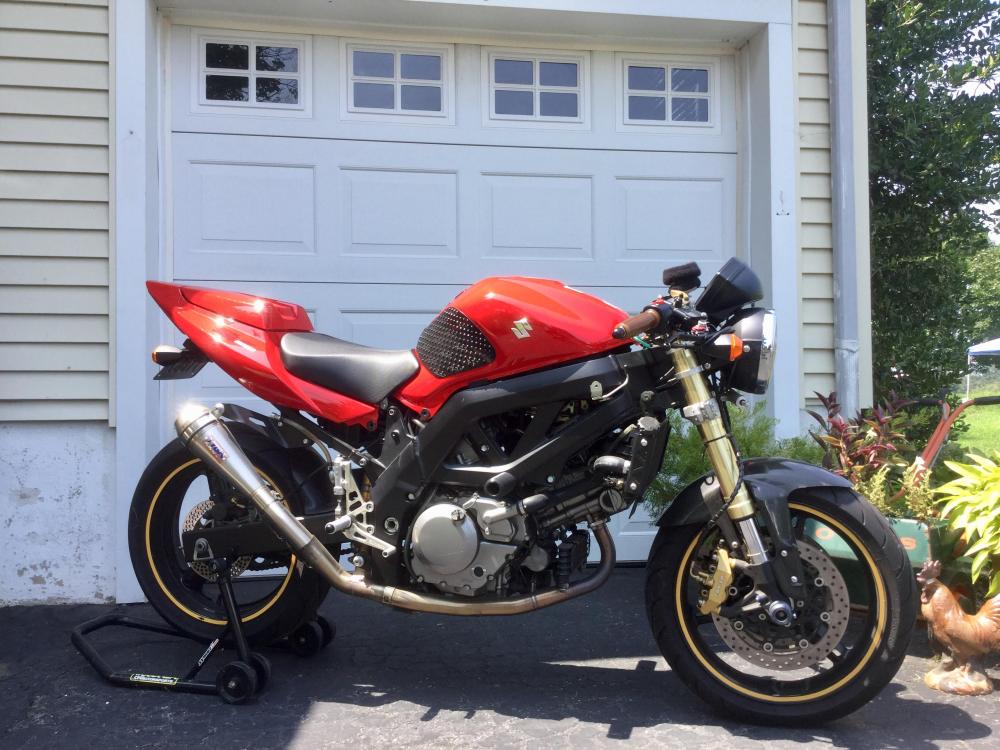
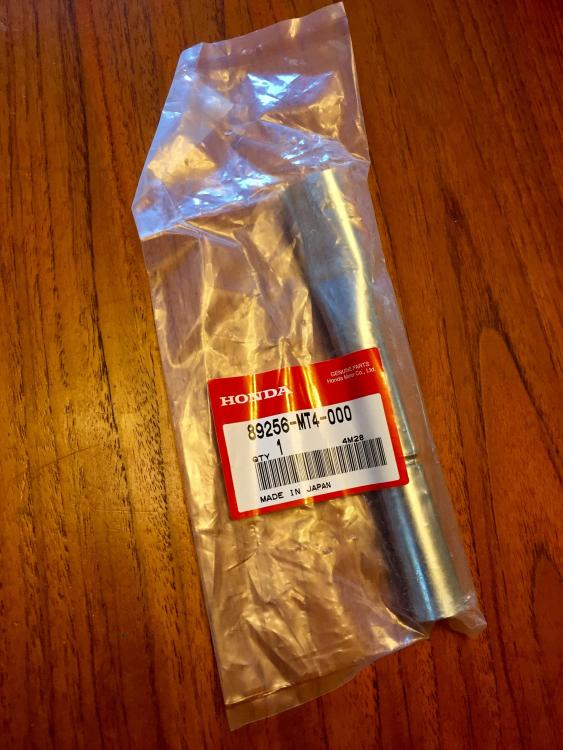
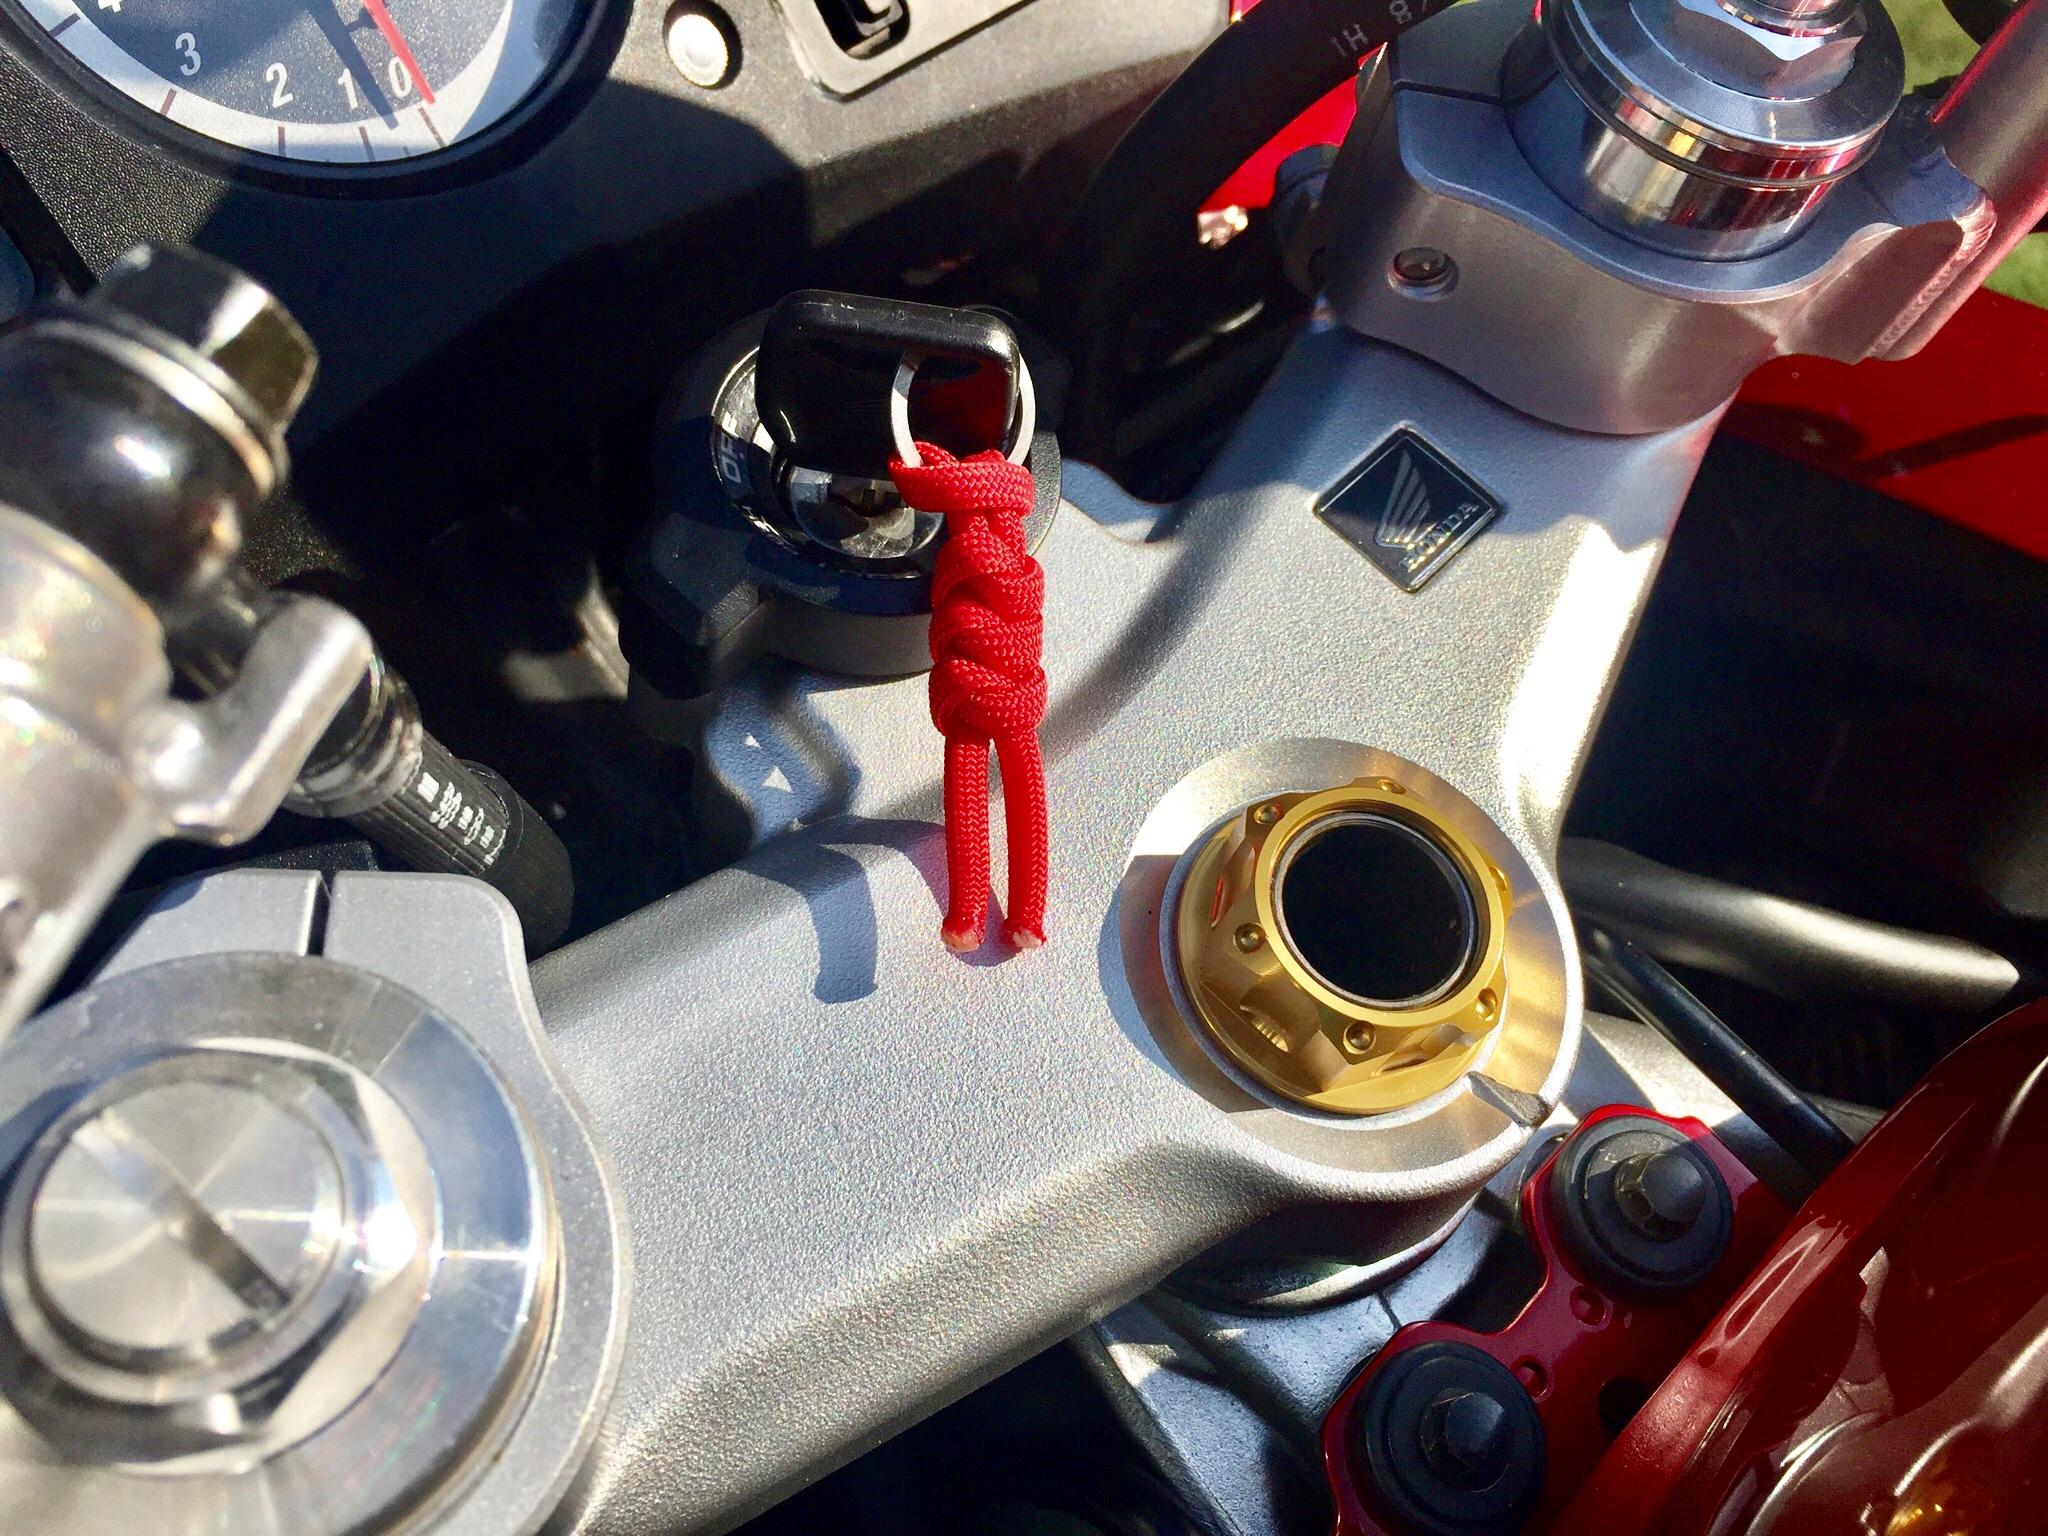
I’m in the process of stripping all the aftermarket parts off my 2nd Gen SV650 so I can sell it now that I purchased the VFR, and when it came to these QR fuel tank pins I thought they’d work so I tried ‘em.
I love the tech of MotoGP, and WSB, and World Endurance. I raced a bit in AMA and WERA in the 90’s and like to incorporate race machine touches into my builds whenever possible. Little things like this let me tinker and think about the glory days when I’m riding now.
The Sato pieces are just the gold bits and the cotter pins. (On the SV build) I added the wire retention lanyards and the tubing sheaths. The tubing lost its original bluish color and clouded up a bit, so I’ll replace that with some Tygon 2075 soon to freshen them up. The picture of the packaging shows the Honda parts the Sato pieces replace.