
Terry
-
Posts
1,805 -
Joined
-
Last visited
-
Days Won
59
Content Type
Forums
Profiles
Gallery
Blogs
Downloads
Events
Posts posted by Terry
-
-
I've use the HotCams 7.48mm shim for my engines with no issues at all. Just note that they come in 0.05mm increments, where the OEM shims are available down to 0.025mm increments. The difference here will be apparent to the OCD sufferers on the forum, as the allowable range is +/-0.03mm. That means in practice there is only one HotCams shim thickness that will get you into the allowable range, and it might be at the very top or very bottom of the range; if you want to get right in the middle, that may not be possible.
The HotCams kits (mine at least) came with 3 of each size. From memory I needed 4 of one particular size...YMMV. They do sell refill kits with 5 of a specific size, once you know what you need it is easy to top up the required bits.
I also have a cheap set of digital calipers which are really useful to check the old and new shims thickness; sometimes the thickness markings get worn off or obscured.
-
 1
1
-
-
I doubt you would have any issue with 55/60W bulbs as these are very common in other headlights so it seems likely that the standard H4 plug would be specified to be used with these. I have had past experience of a plug melting issue with a single 80/100W H4 bulb however.
The headlight fuse is 20A so that will be enough for 240W total at 12V; as you switch from low to high I guess it is possible you could have both sets of filaments live instantaneously so 230W max, just below the fused rating.
Like Maxswell I happily used 55/60W bulbs in my bike without any consideration for its electrical health.
-
 1
1
-
-
I guess it is obvious that the pinch bolt needs to be tight to stop the eccentric rotating in the rear hub. What is not so obvious is the bolt must have the washer/brake hose carrier installed, if not the bolt can bottom out without pinching hard on the eccentric.
-
1
-
-
I've got APE brand manual CCTs in my VTR1000F, on that bike these are a compulsory acquisition as failure is sudden and deadly to the valves.
I manually tensioned them with the cam covers off so they have 7mm of freeplay between the cam sprockets.
-
2
-
-
Does your FI light blink or stay on? Have you tried the diagnostic procedure to read the malfunction does?
-
I don't think there is specific torque for all those bolts; the generic fastener setting in the manual is 10 N-m for a 6mm flange head bolt.
BTW, you don't have to drain the oil for a clutch plate replacement, if the bike is on the sidestand the oil level is below the opening.
-
12 N-m for the springs. What do you mean by the clutch plate cover?
-
I would recount the number of links very carefully; sounds like the new chain is 2-links longer than the OEM. There's no issue with using it like that provided you have enough adjustment left in the eccentric to maintain the right slack as it stretches.
Or maybe someone has moved the wear indicator sticker?
-
Sorry to hear about your bad experiences Alain. If you were still looking for a new wiring harness here is one for about US175 that is new.
http://www.trademe.co.nz/motors/motorbikes/parts-for-sale/electrics/auction-1166275868.htm
-
Stormshadow, I think you will find it hard to get the oil-lock piece to slip back onto the damper from the top. Maybe you can fish the oil lock out from the top with a long piece of wire, magnets won't work as it is alloy not steel. If you get it out, stick it back on the end of the damper with small dab of grease to hold it during reassembly.
-
I put a shift kit into my 5th gen as I found the shifting sloppy and slow. There is no question in my mind that the shift kit made a huge difference to my riding enjoyment, my VFR is a joy to shift as a result.
-
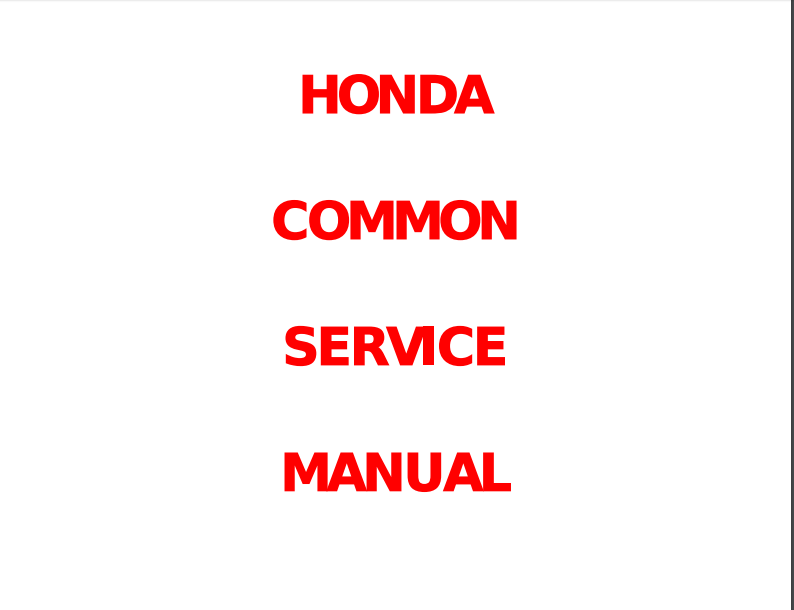
Honda Common Service Manual 1988
Indexed version; great background info on how bikes work.
-
Submitter
-
Submitted04/28/2016
-
Category
-
-
MCN 30 Years of VFR Comparison
Article scan from MCN April 20, 2016
-
Submitter
-
Submitted04/25/2016
-
Category
-
1
-
-
I have done pretty much what you're planning (front forks re-sprung, revalved, brake de-linked, CBR929 shock installed), but on a 5th gen, and have also changed the suspension and brakes on my VTR1000F.
For the fork you could buy RT parts (specifically a compression Gold Valve which comes with a handy bag of shims) and work out your own shim stacks (RT provide some good guidance), and make up spacers as needed to suit the springs that you have. You can use PVC pipe for spacers, very easy to cut and cheap. As long as the springs you are using aren't too long (ie they stick out the top of the extended forks) then they'll be fine with the correct spacer. For the shock you could make up an extended clevis to offset the shorter shock, and try the standard spring first.
Or...you could buy all the correct parts from Jamie Daugherty who will provide you with the specific bits to suit your weight and preferences. He modifies the shock itself to make it longer, and alters the shim stack as well, and provides a rider-specific spring. IMO his fork part pricing is the same or a little below RT, for very similar parts, and his modified shocks represent very good value.
One thing that may help your bike turn in is raising the rear and/or dropping the front to steepen the geometry. You can slide a spacer between the shock clevis and the frame (up to 5mm is pretty common) which will drop the back wheel by around 25mm, and the forks can be slid up through the clamps by up to 10mm before any hard parts make contact. This will make the steering livelier and more eager to drop into bends without affecting high speed stability too much. However in the first instance I'd make sure that you were running tyres that aren't badly worn e.g. squared off at the middle, as that will have a big effect on turn in.
-
4
-
-
If by "winter projects" you mean projects to undertake during winter on a frozen lake with at least 3 feet of ice, then I'd say it would (just) be fine.
-
1
-
-
Looking at the service manual it says to remove the sensor from the air cleaner housing, then temporarily connect the sensor and the vacuum hose. So the sensor is detached from the air cleaner but still connected electrically to the harness and to the intake vacuum, which means the FI system will be happy even though the airbox is off.
Should have got a 5th gen!
-
I have one of Jamie's CBR929 shocks. I think he uses an off the shelf Hyperco spring of a suitable diameter and rate, plus a custom aluminium spacer to get the length right.

-
Naah, mix the Coke with bourbon, consume as needed until your eyesight fails and the old pipes look like new!
-
The RaceTech products are a bit on the generic side, in that they are selling a spring of a certain length, rate and diameter that could fit a wide range of bikes with varying lengths of forks. You will need to do some calculations. If you've got the same RT instructions as me, the VFR fork has a type D fork cap.
Put the springs and flat washers washers into the forks when fully extended, make sure the washers are sitting flat on top of the springs. Now measure down the inside from the top of the fork legs to the top of the washers, with the fork fully extended. Lets call that length A mm.
Next grab your fork caps, and screw the preload adjuster to its minimum position (fully out). With the fork cap screwed onto the damper rod in its usual position with the locknut in place, hold the cupped washer against the underside of the locknut as it sits when assembled, and measure from the underside of the lip of the cap (the bit that bears on the very top edge of the fork tube) to the underside of the cupped washer. Lets call that length B mm.
If you subtract A-B you will have the distance from the top of the uncompressed spring to the underside of the cupped washer, so with no preload that is the length of the spacer. But RT says you need 15mm of preload, so you need to add another 15mm to that length.
I'm making the numbers up, but say length A (top of extended fork to top of washers on spring) is 200mm, and length B (from top of cap to underside of cupped washer) is 50mm, then the spacer to cut would be 200 - 50 + 15 = 165mm.
If one of the spacers that you have is within say 0-5mm longer than the calculated length I would try those, otherwise grab a hacksaw and cut the supplied tube to the right length. Try hard to make the cut square to the tube, and finish any ragged edges with a file, then clean off any swarf so you don't contaminate the fork innards.
Once you have the fork assembled back into the bike you'll be able to check the sag numbers, you're looking for something like 25-35mm. If you can't get into this range with the available adjustment in the preload adjuster, you might need to make a longer or shorter spacer, but at least you can swap out spacers with the forks in the bike.
-
Have you checked continuity in the wires to the ECU?
Sent from my iPhone using Tapatalk
-
A MAP sensor problem could be just a bad/loose connector or damaged wire. The MAP sensor on the 5th gen is on the back of the airbox, before launching into parts replacement I'd suggest you just try unplugging and reconnecting the wire. The service manual shows a procedure for diagnosing whether the sensor is faulty.
When the FI system detects a fault in a sensor like this, it defaults into a "limp home" mode that ignores the sensor. That will mean that the FI system won't be running at its optimum setting, so might run rich and make less power than usual. The MAP sensor is detecting the air pressure/vacuum in the intake system, so I would think when this malfunctions there would be significant effects.
-
1
-
-
Shift Star Shipping from Factory Pro -
We were down to 1 or 2 vfr stars in December. The OP just missed getting the last one.
We ordered replacement star stock from our machinist 6 months ago.
With the complexity of the job, it's a complicated to run and we can't just run to a different machinist.
Anyway, finally, the end of May they get machined and sent out to heat treat - back at Factory Pro on about the 2nd.
Many many retail and distributor orders to fill and by the 5th of June, we had all the distributor orders and most of the retail orders shipped. We specially prioritized a few orders.
Distributors usually have immediate stock in-house to sell from and they can get it to a dealer in a day or two and that's at least as quick as we would do (and def less expensive).
In this case, I could see how a completely out of stock item would take longer to get to a dealer and then to a customer.
We might have to ship (5 days) to an east coast warehouse, checked in (1-2 days) and then to a dealer (a day or so).
As far as a "tipping point" to order vff800 (and rc45) stars - nope - we reorder when we get low.
Best Regards
Marc Salvisberg
Factory Pro Tuning
800 869-0497
Marc it is great to see you posting on here. I've bought a few of your products (RF900 jet kit, ignition advancer and emulsion tubes, VFR800 shift star kit). I've been extremely impressed with every one of these, they have always been a considerable improvement on the OEM product.
Coming off a Suzuki onto a well-worn '99 VFR800 (50k miles), the baggy transmission stood out like dogs balls. The shift star kit was a HUGE improvement, easy to fit and with no downsides. If anyone is unhappy with their stock transmission and on the fence about installing one, Just Do It.
-
1
-
-
I never had this problem on my 83 VF750F, but the cam chain and tensioners were rubbish! I didn't keep it long enough (30000km) to develop any cam issues that I knew about, but I did have to get new chains and tensioners in that time.
It is good to be able to see that Honda learned their lesson with later engines, the cams and buckets in both my 99 VFR800 and 97 VTR1000 look like new after 90 and 70,000km respectively.
However, the camchain tensioners in the VTR are STILL RUBBISH!!! Installing manual tensioners was my first upgrade, more like an insurance down-payment.

-
The last Gold Valve I installed was in my RF900 so I don't have access to specific instructions that relate to the VFR. However the RF instructions specified that a drilled bleed hole was only needed if there wasn't some other fixed bypass there already. So on the 5th gen the hole is needed on the compression valve but not on the rebound.
If anyone has specific instructions for installing a Gold Valve for rebound I'd be interested to read what they say about this.
Sent from my iPhone using Tapatalk
-
1
-


New donation from Terry
in 2018 Operational Budget topics
Posted
Hi Terry,
Thank you for your donation of 15.00 USD. We look forward to improving the forums with your donation.
Thanks VFRDiscussion