Fastdruid
-
Posts
171 -
Joined
-
Last visited
-
Days Won
7
Content Type
Forums
Profiles
Gallery
Blogs
Downloads
Events
Everything posted by Fastdruid
-
Fingers crossed! According to the HBoL[1] the pickups are the same resistance from 86-89 and 91-97 (90 is apparently an oddity). I think they should work but my worry would be that the physical location of them to the starter clutch might vary *slightly* and hence would affect the timing because the 87+ use a totally different way to do the ignition. The 86 has a very simple trigger/pulse generator, the 87+ is an actual crank position sensor that uses a missing tooth wheel to work out where the crank is. [1] Although that says they all have slightly different ignition timings while the Honda manuals all say they're exactly the same!
-
Between yellow and yellow/white for one and blue and blue/white for the other. The 86 & 87 wiring is slightly different to the 88-97 but only in the loom after the connector from the pickups (it joins the blue and yellow).
-
Are they totally failing when hot or are shorting to earth? My 86 manual says they should be 450-550 Ohm. I guess there is little risk in taking it off and investigating the wiring itself or even investigating aftermarket replacements of just the coils themselves. Might be worth asking Electrex for example if any they make would work. https://www.electrexworld.co.uk/acatalog/Online_Catalogue_Pick_up_Coils_403-p1.html Between the pickups failing and the trigger wheel/sprag clutch housings breaking there are a few common failing but unobtainium parts for the 86 bikes now in part because they updated them for the later bikes and then kept them the same for many years. It's not particularly helpful to you right now but I really should get my arse into gear and swap out the pickups and trigger wheel from my 86 engine for the ones out of a RC35 engine I have, if only because then I can sell them on to someone else who needs them to keep an 86 bike going! Personally in your shoes I'd go for the upgrade, pickups from a 88-89, trigger wheel from a 87-97 (unfortunately they *ALL* have a reputation of breaking the sprag so they're a bit in demand), a 88-89 ECU, fuel cut relay and tacho. Rewiring is pretty trivial as you can pickup the connector shells easily pop out the pins and swap them over to match. You could probably even go for RC36 pickups and ECU as well, despite what the HBoL says, timing is the same on all of them (according to the Honda manuals) although the wiring would be harder as it's a totally different connector. Not entirely sure what the difference between 88-89 and 90-97 pickups are, different part numbers but might just be in the connectors/wiring and even work with an 88-89 ECU as well.
-
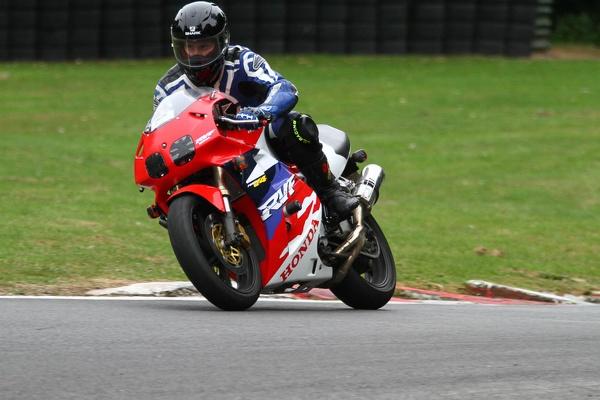
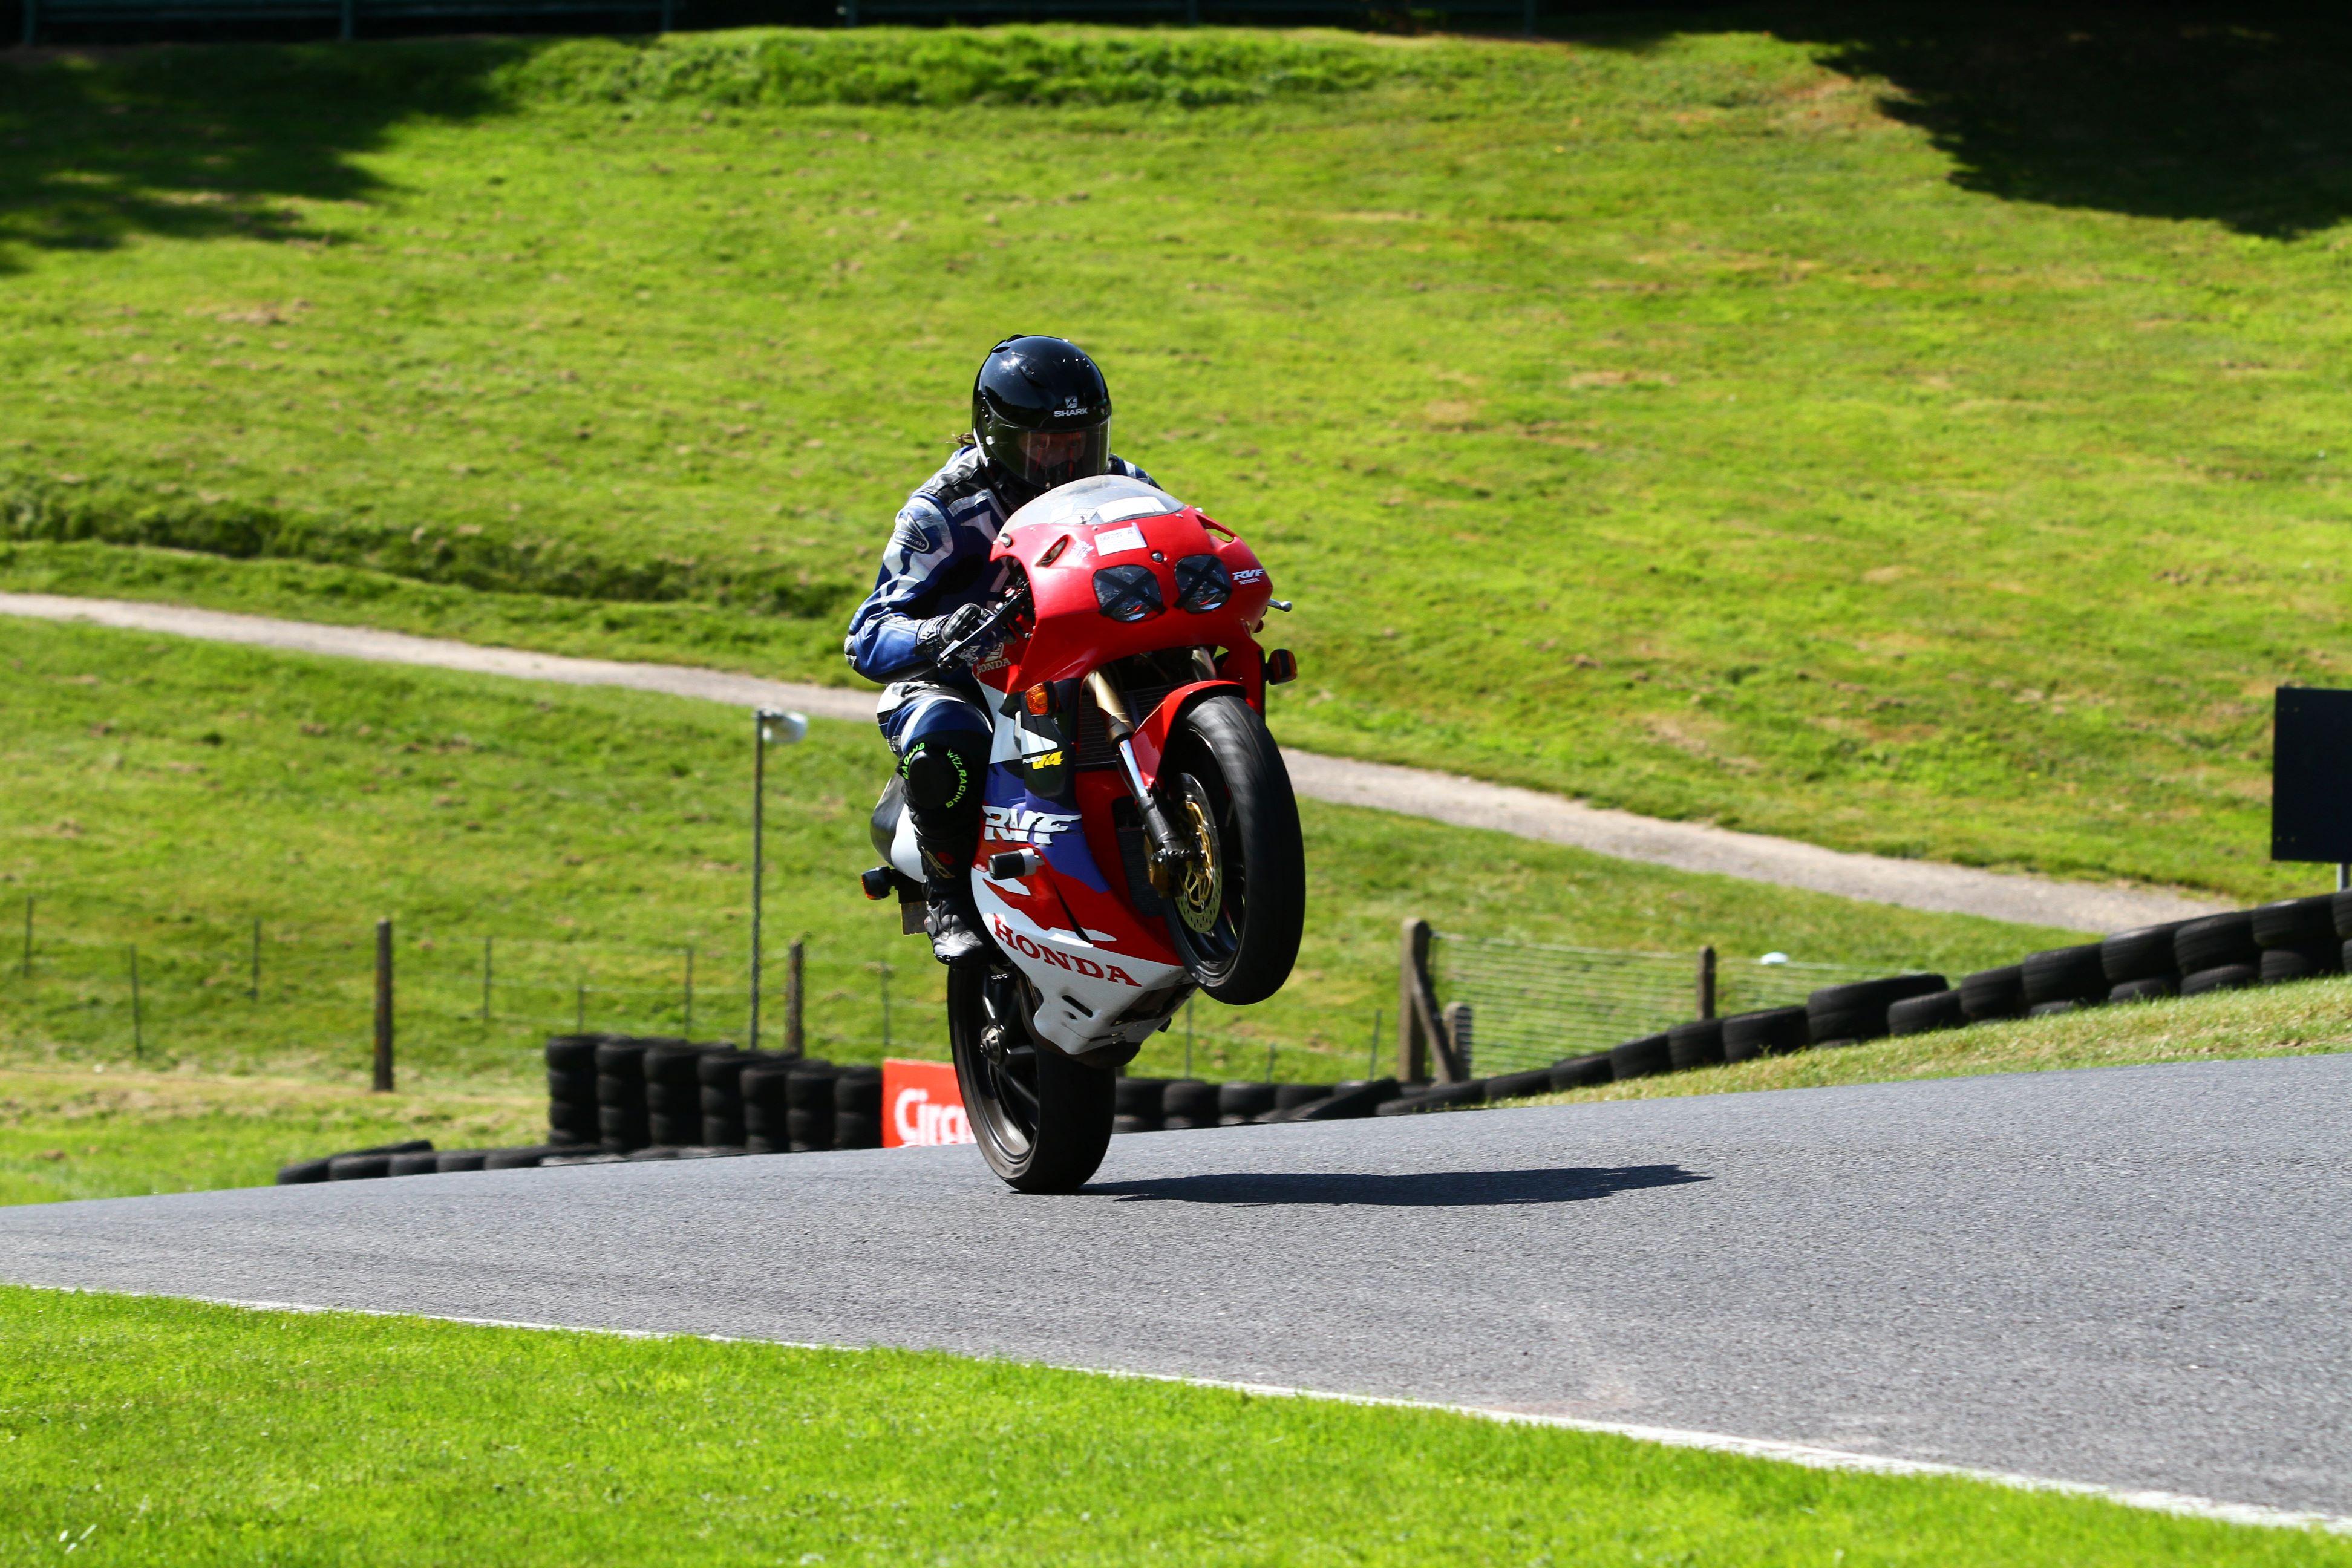
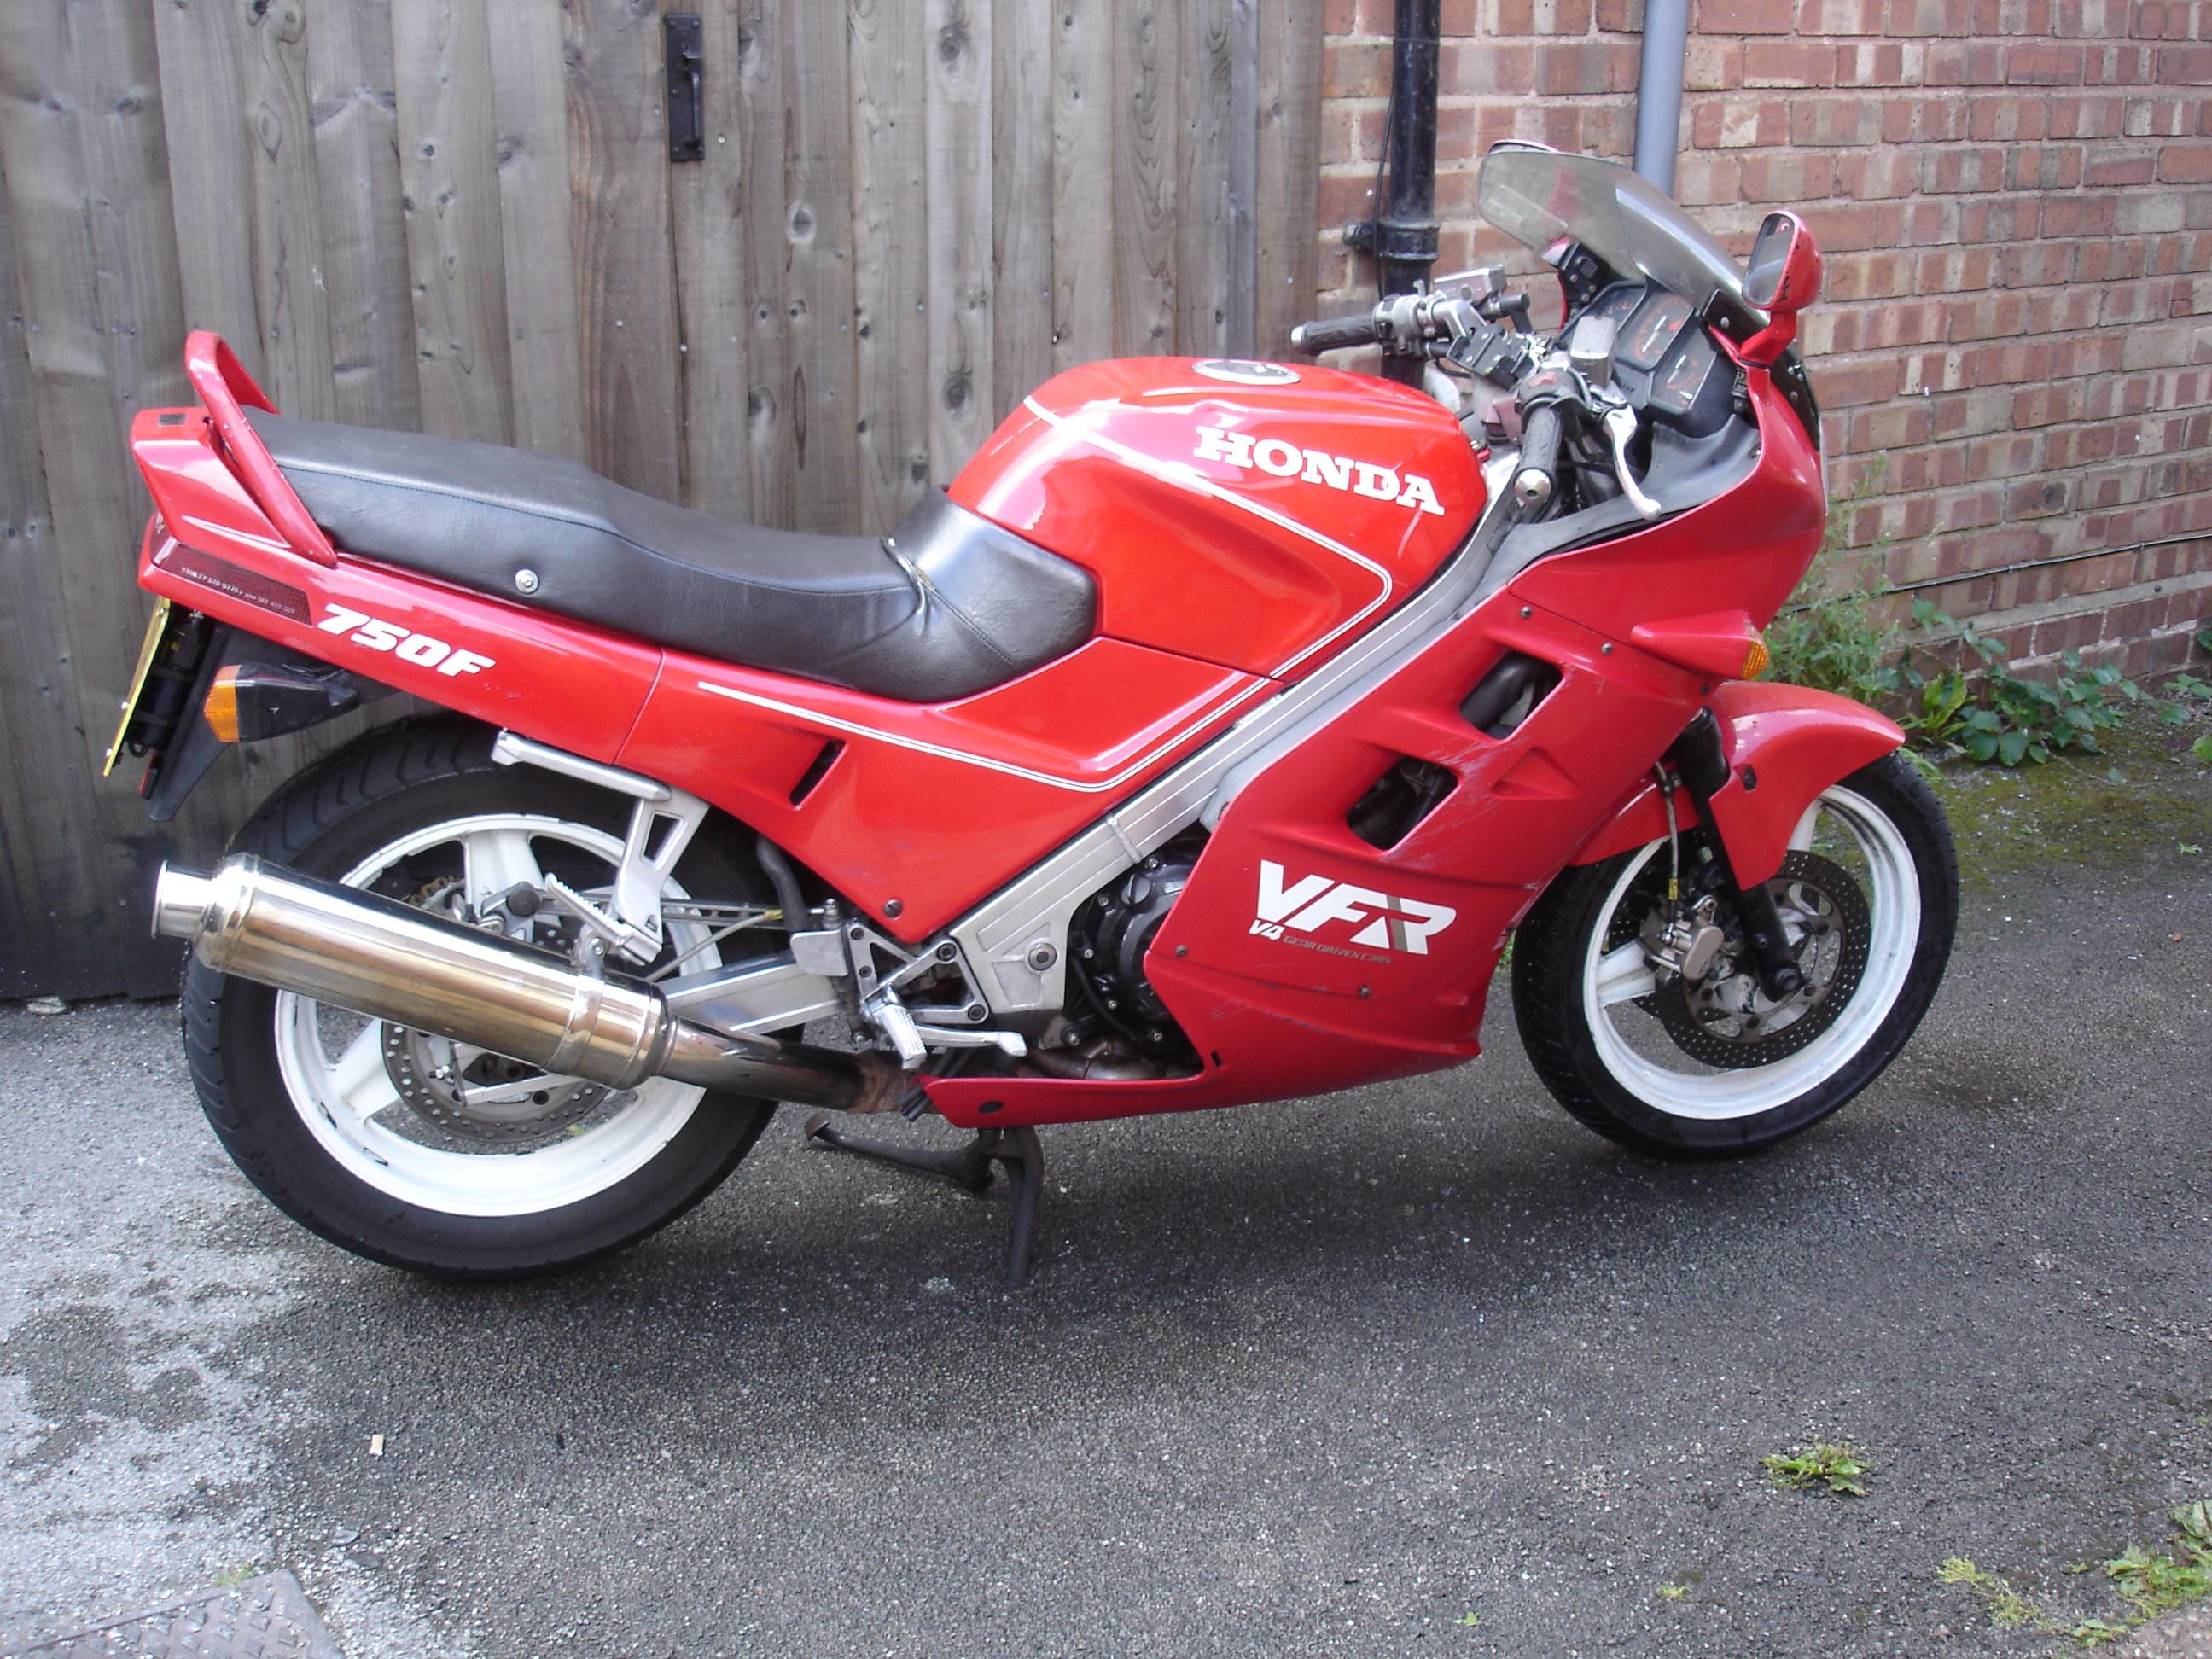
So, track day. Didn't embarrass itself and I rode it a lot (because the track bike developed a misfire). Didn't do anything to it over the two days other than check stuff and add fuel! Something still isn't right with the clutch....but...it's not unusable. Still enough drive to hit 130-135 on the clock down the back straight & start finish straights at Cadwell Park. For context I've seen 140 there on a 1999 R6 and 138 on a 1997 CBR600F. With less clutch oddity/issues it would be quicker (and to be fair if it had more ground clearance and I could enter faster). Pegs touch down early, unsure what touches down next and its a road bike not a track/race bike so full length hero blobs left on and treating them as the limit! Massive hanging off to avoid pegs down which resulted in a first of getting my knee down on it! 🤣 Just to set expectations here, it's always been a road bike, track/race bikes are for knee down (and I've done plenty of it) but on the VFR I've never ever even *tried* to get my knee down! Brakes worked well, only pootling round in the intermediates but its such a stable platform and the suspension improvements have let me really use them to their best. Good enough on the brakes to embarrass a few much, much newer bikes though! Need the longer shock before I try again though.
-
Strange you should mention that but equally you may be unsurprised to know I have an 86 linkage sat waiting. The 86 linkage has a lower ratio (I think roughly 3:1 vs roughly 4:1) so needs an appropriately softer shock, proper figures are hard to to find but I found something like 140N/mm vs 160N/mm so you can't just throw in the linkage without taking that into consideration (although equally it could be fine if you already *WANT* a stiffer shock). It does however allow a *longer* shock than the 87-89 linkage as they'll (apparently) hit the frame/swingarm sooner. The limit (I'm told) is roughly 285mm for the later and 295mm for the earlier linkage. The 86 has a 130/80V18 which is 665mm in diameter with a 270mm shock. The 88-89 uses a 280mm shock but with a 655mm diameter tyre. 5mm extra at 4:1 would give roughly 20mm of extra height so that's roughly 4mm more than we "need" (the 623mm 160/60ZR17 drops the back by 16mm). 280mm (stock 88-89) at 3:1 would increase stock height by ~30mm over original 86 and ~25mm over the 88-89 (we have to take off the difference between the 86 and 88-89 tyres!). So 9mm more than "stock" with the 160/60ZR17. That would nicely reduce trail and steering angle without the loss of ground clearance that dropping the yokes down the forks would. The major issue is that most of the aftermarket shock manufacturers just made one for the bike they had... so USA manufacturers *ONLY* cater for the 86, European manufacturers its a random assortment between "fits 86-89" (it doesn't) and a couple that *actually* know the difference. YSS do one for 86-89 for example, too short at 275mm for the 88 and only a bit longer than stock for the 86 but with no idea what the damping/spring rate is set for! The plan is to get a Nitron shock setup with extra length and sprung/damped appropriately for the 86 linkage. Probably 285mm and it has +7mm available on the height if desired.
-
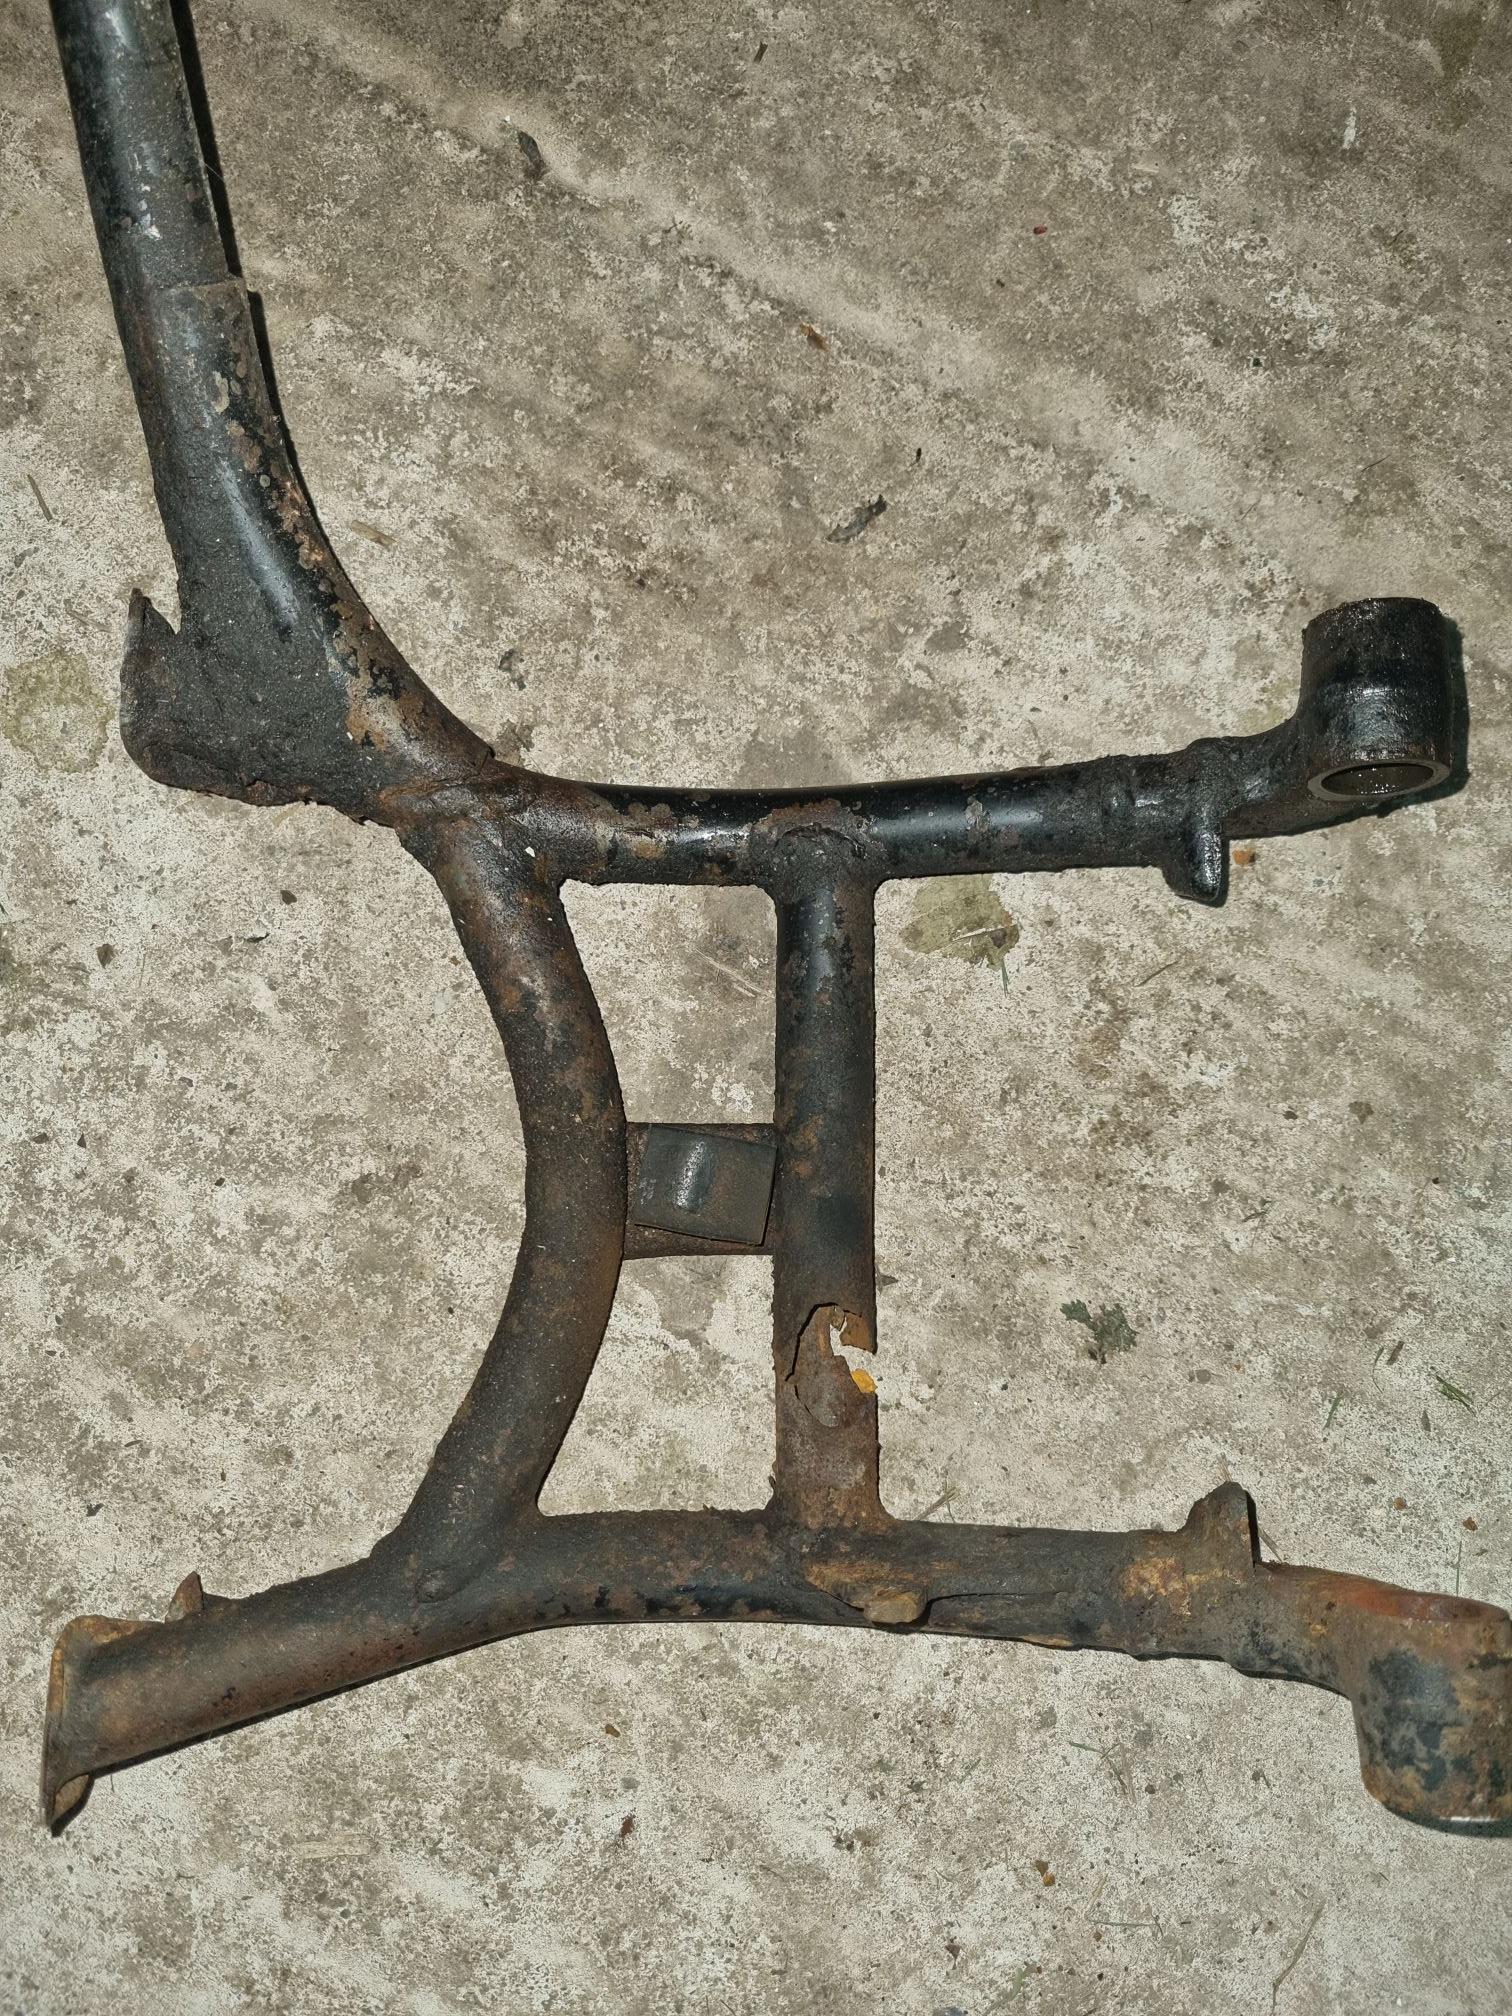
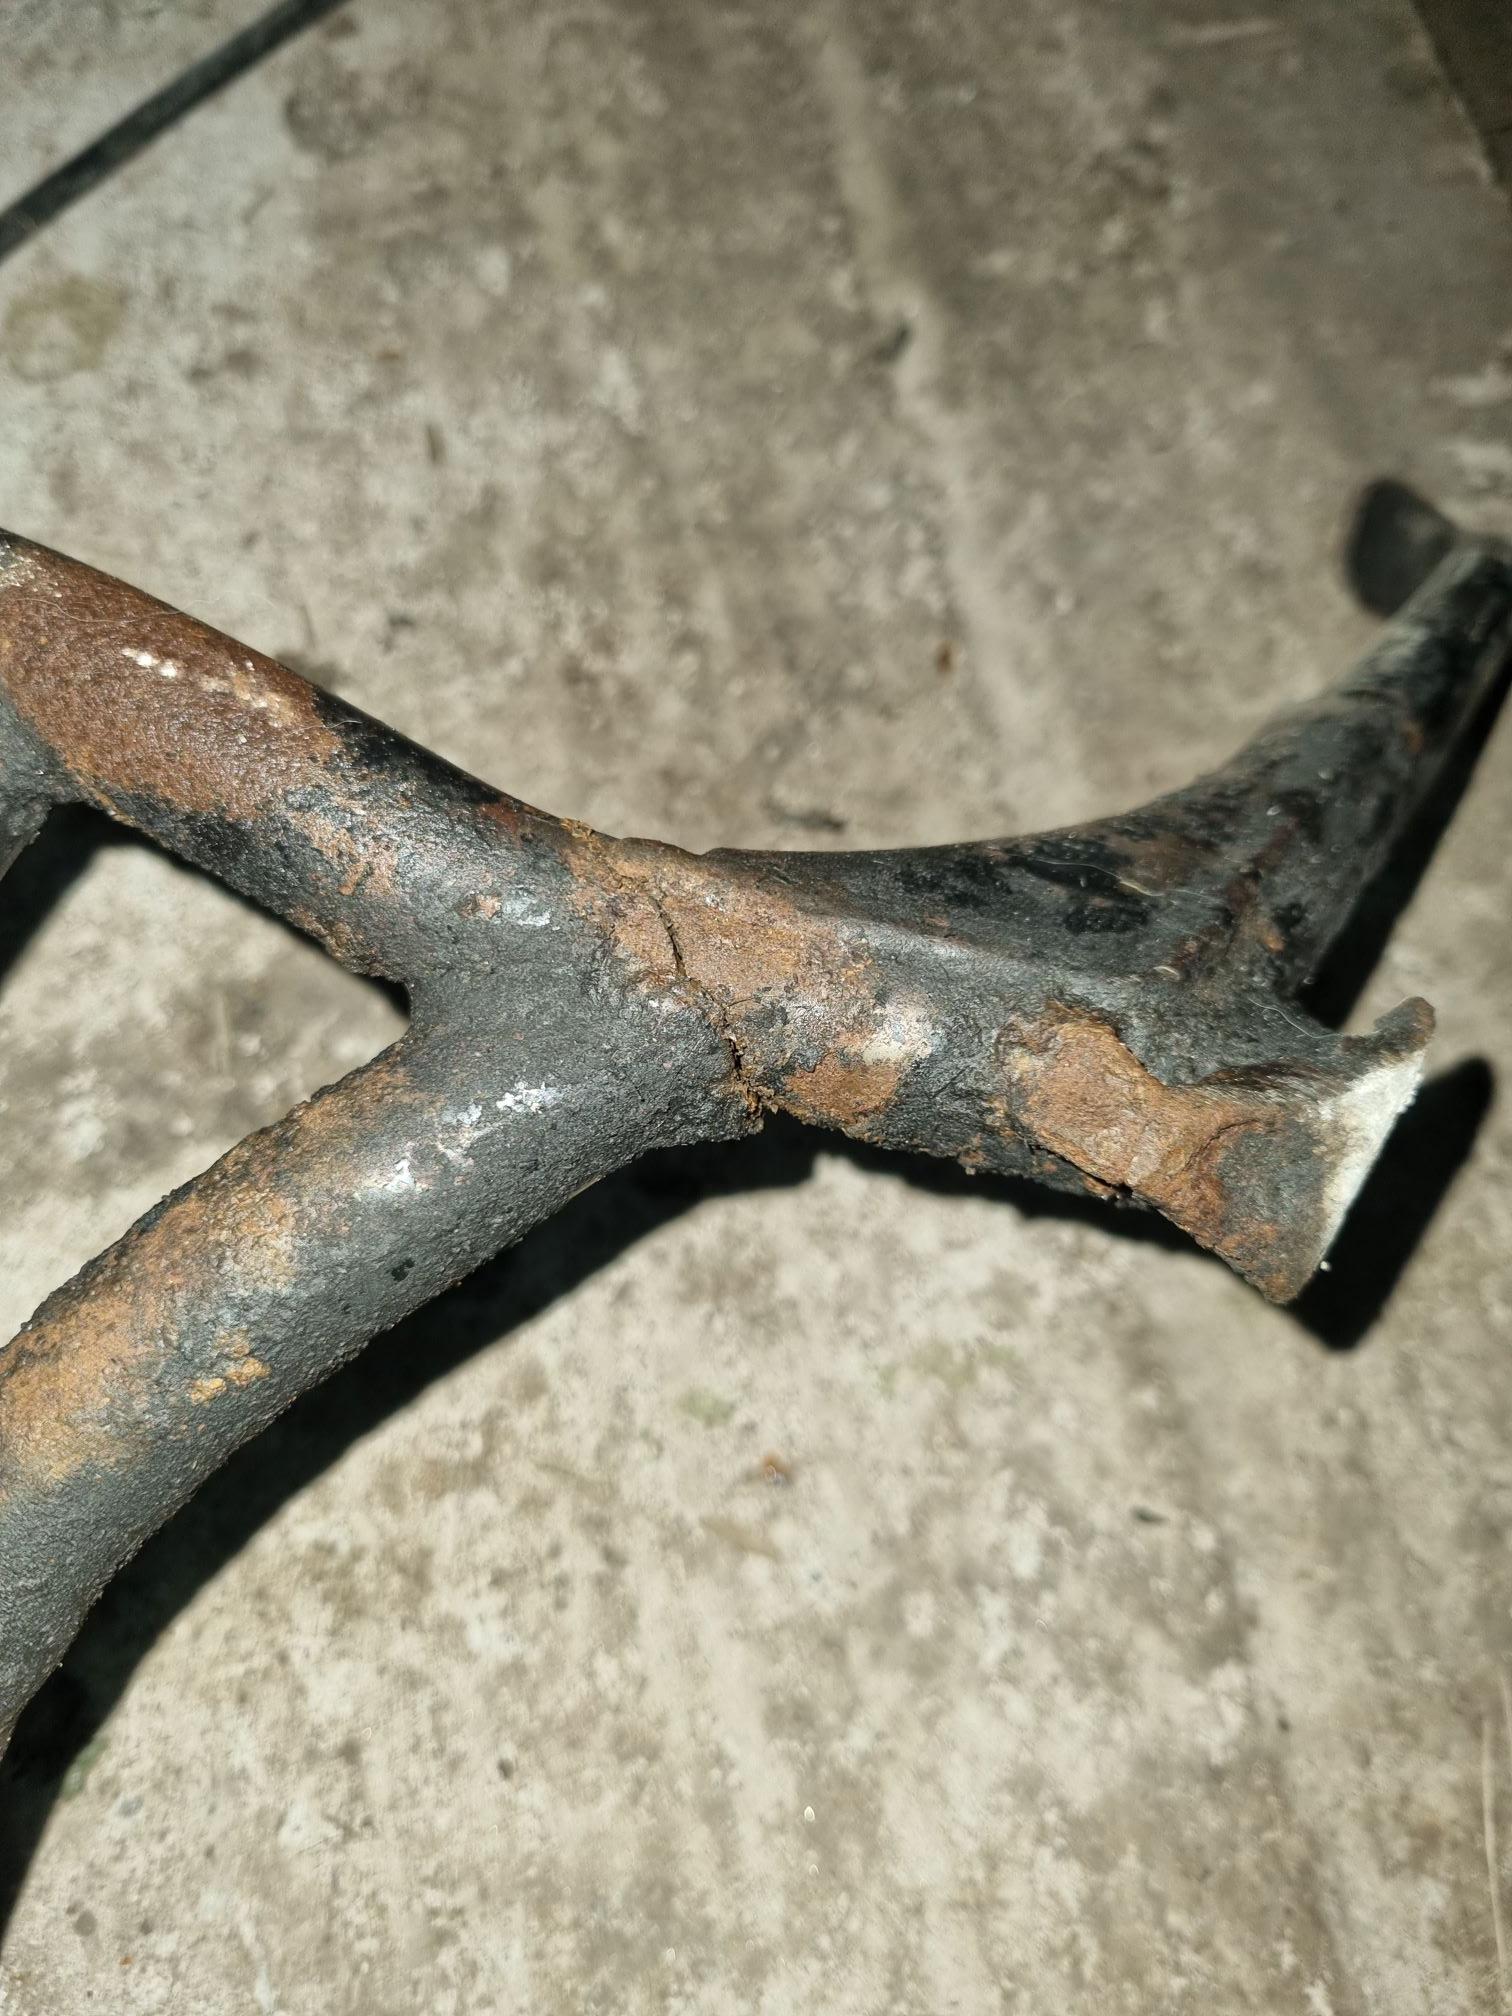
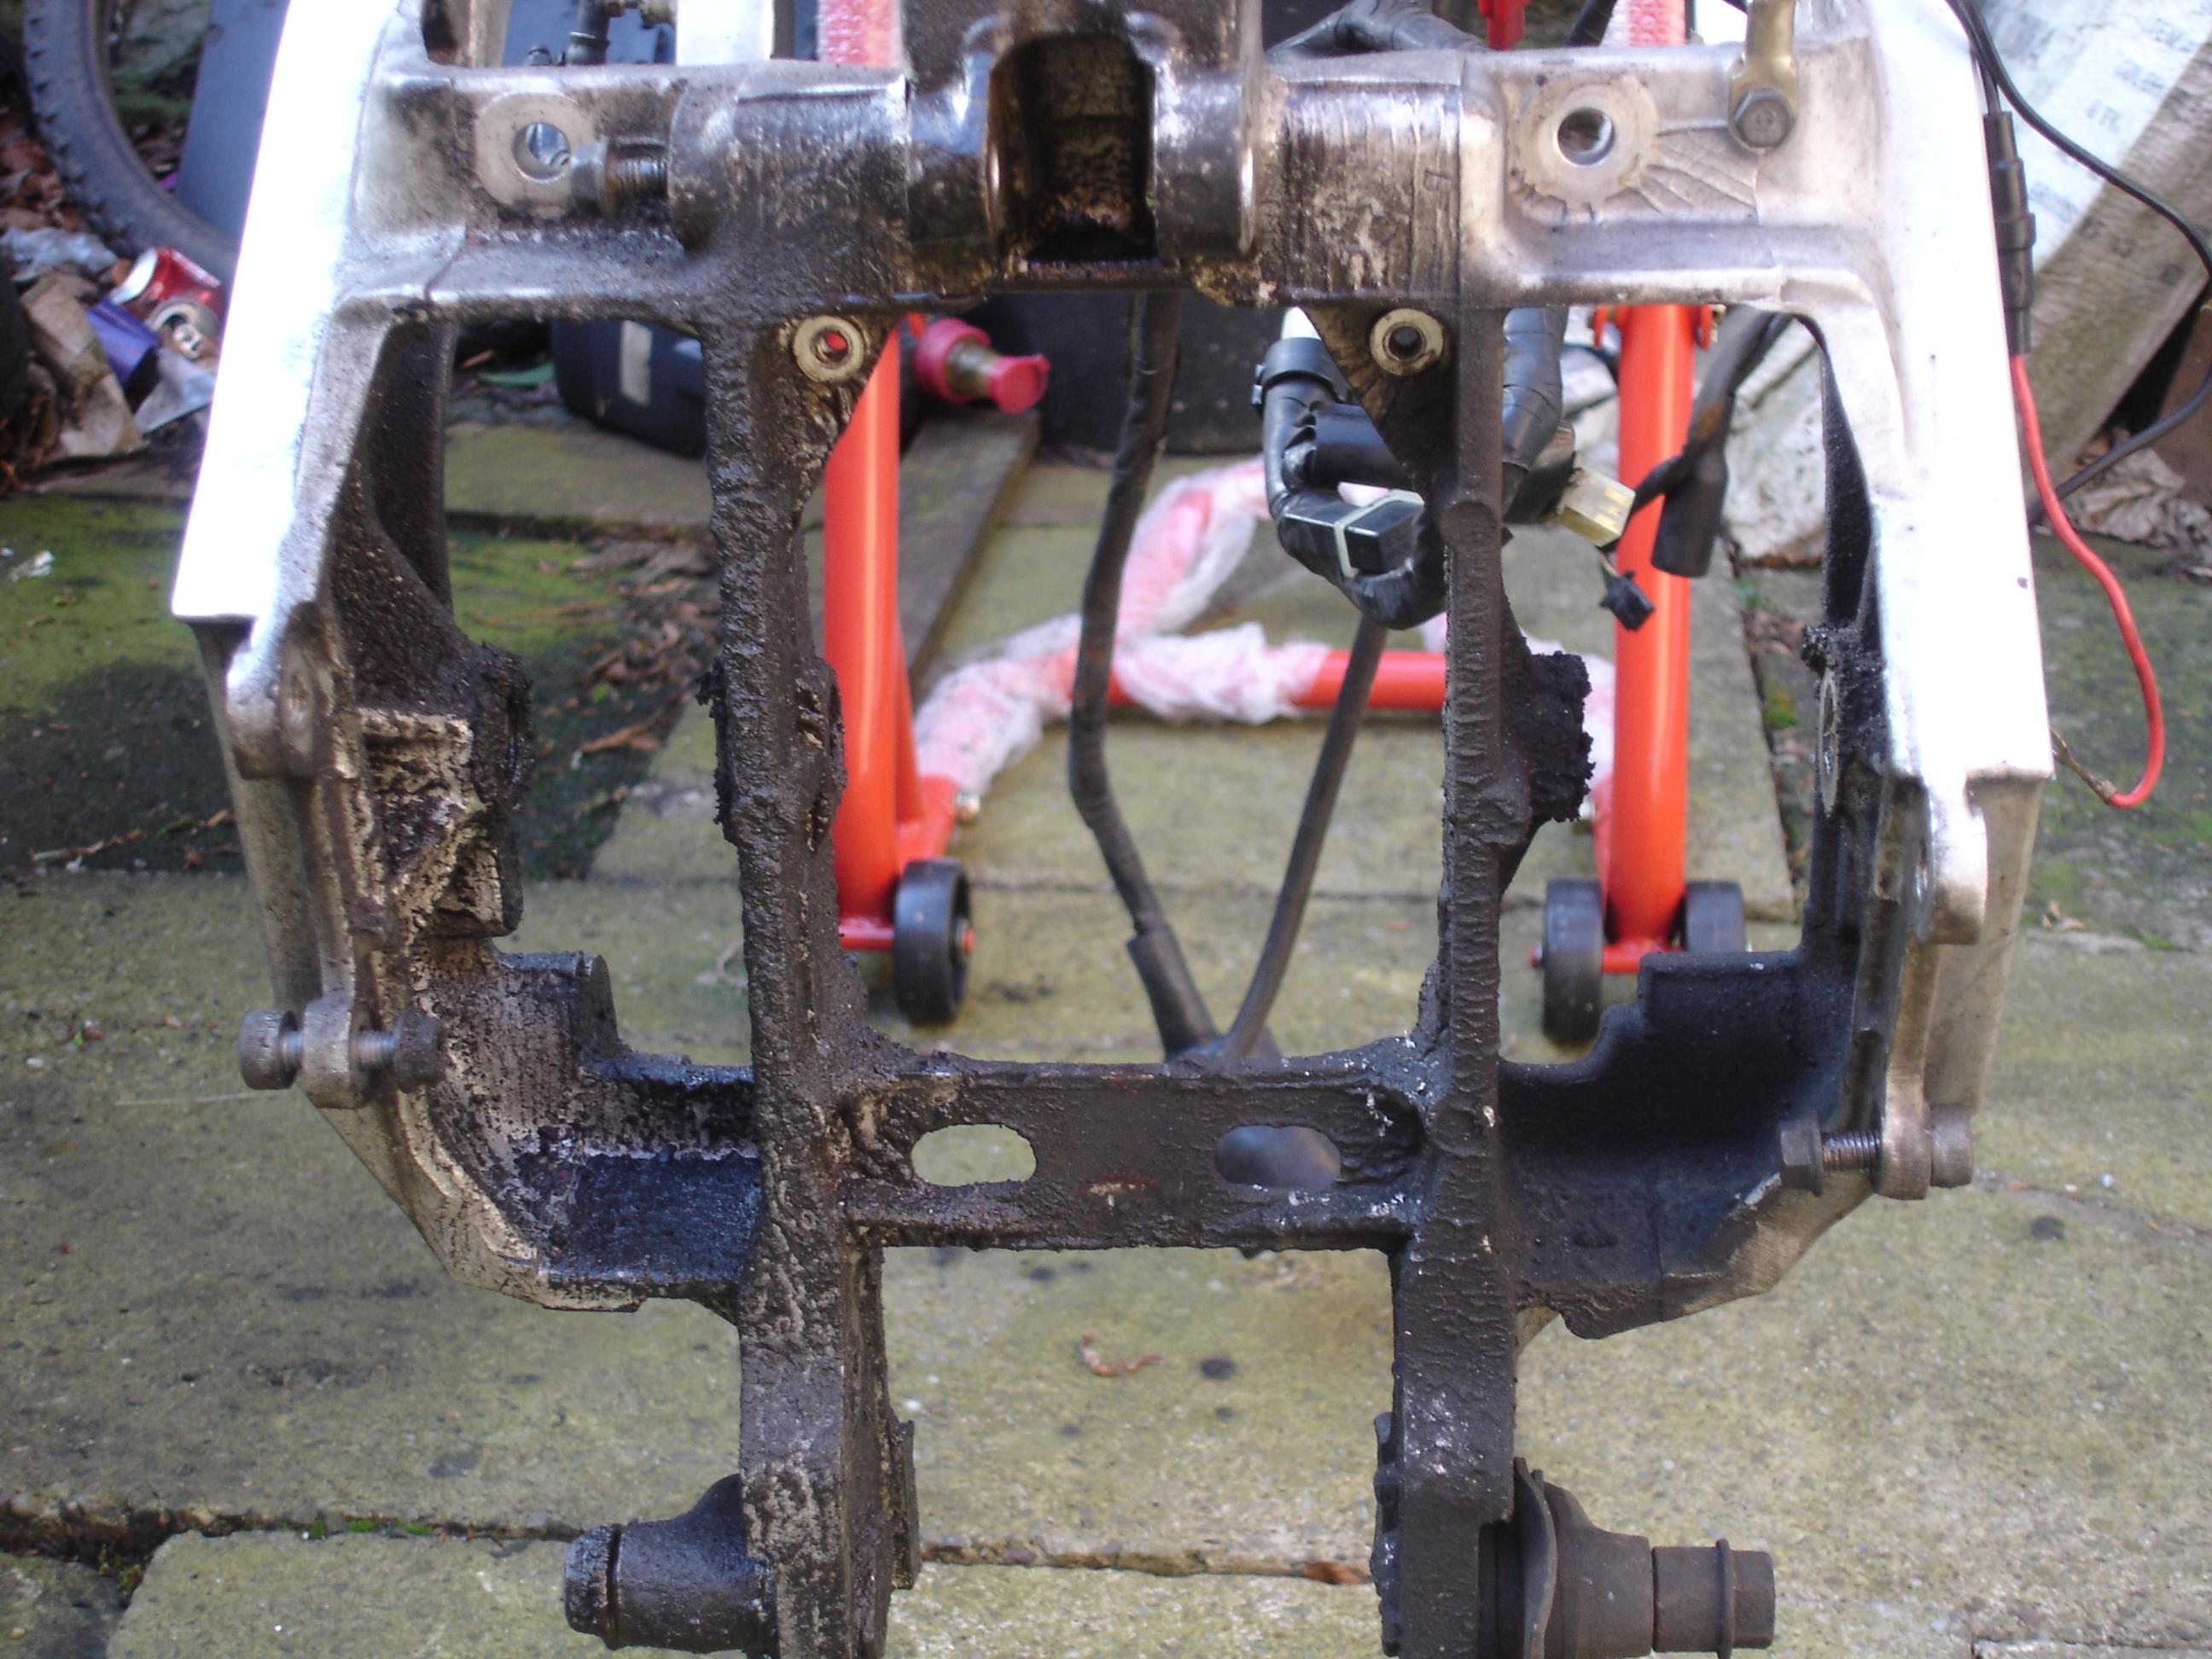
With a trackday approaching I took off the centre stand, I was a little worried having never taken it off before that the pivots would be seized and snap. Thankfully (and having consulted the manual to make sure I know which was the RH and which the LH thread) they came off easily. I knew the centre brace was looking somewhat er missing. but the massive crack in the left leg is rather more of a concern! I won't be sticking it straight back on, either a replacement if I can find a better one or I'll fix this one.

-
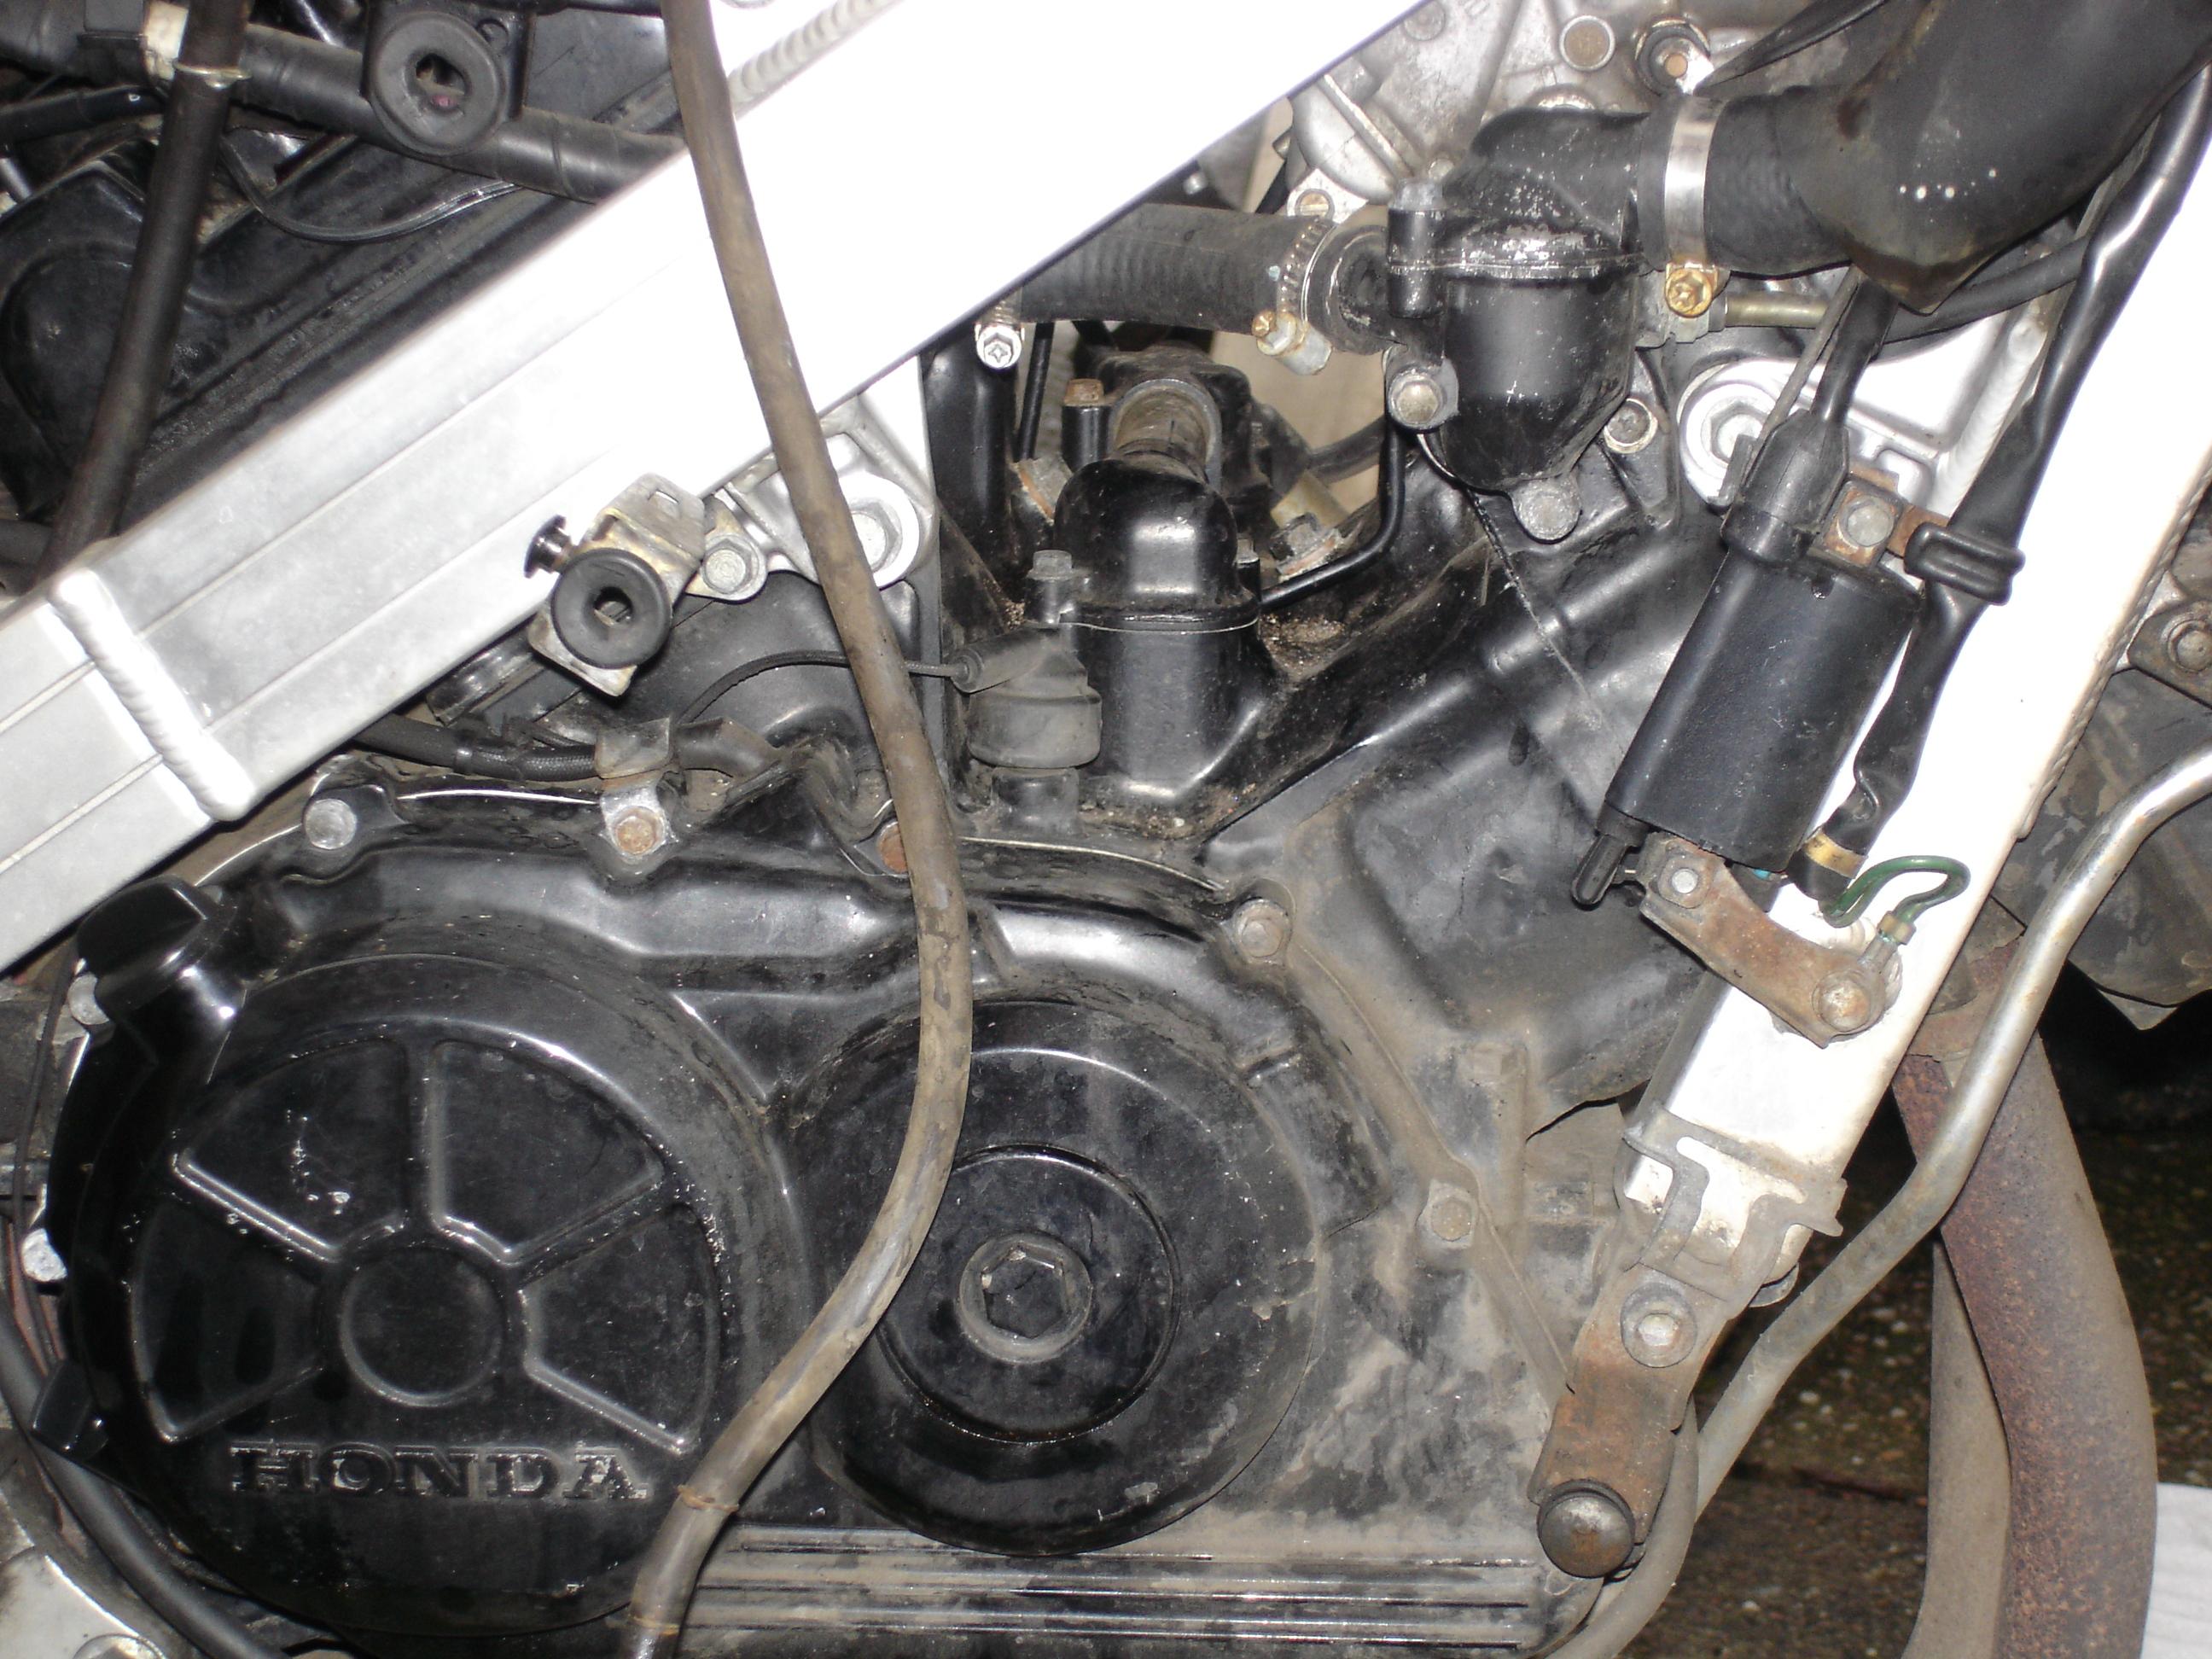
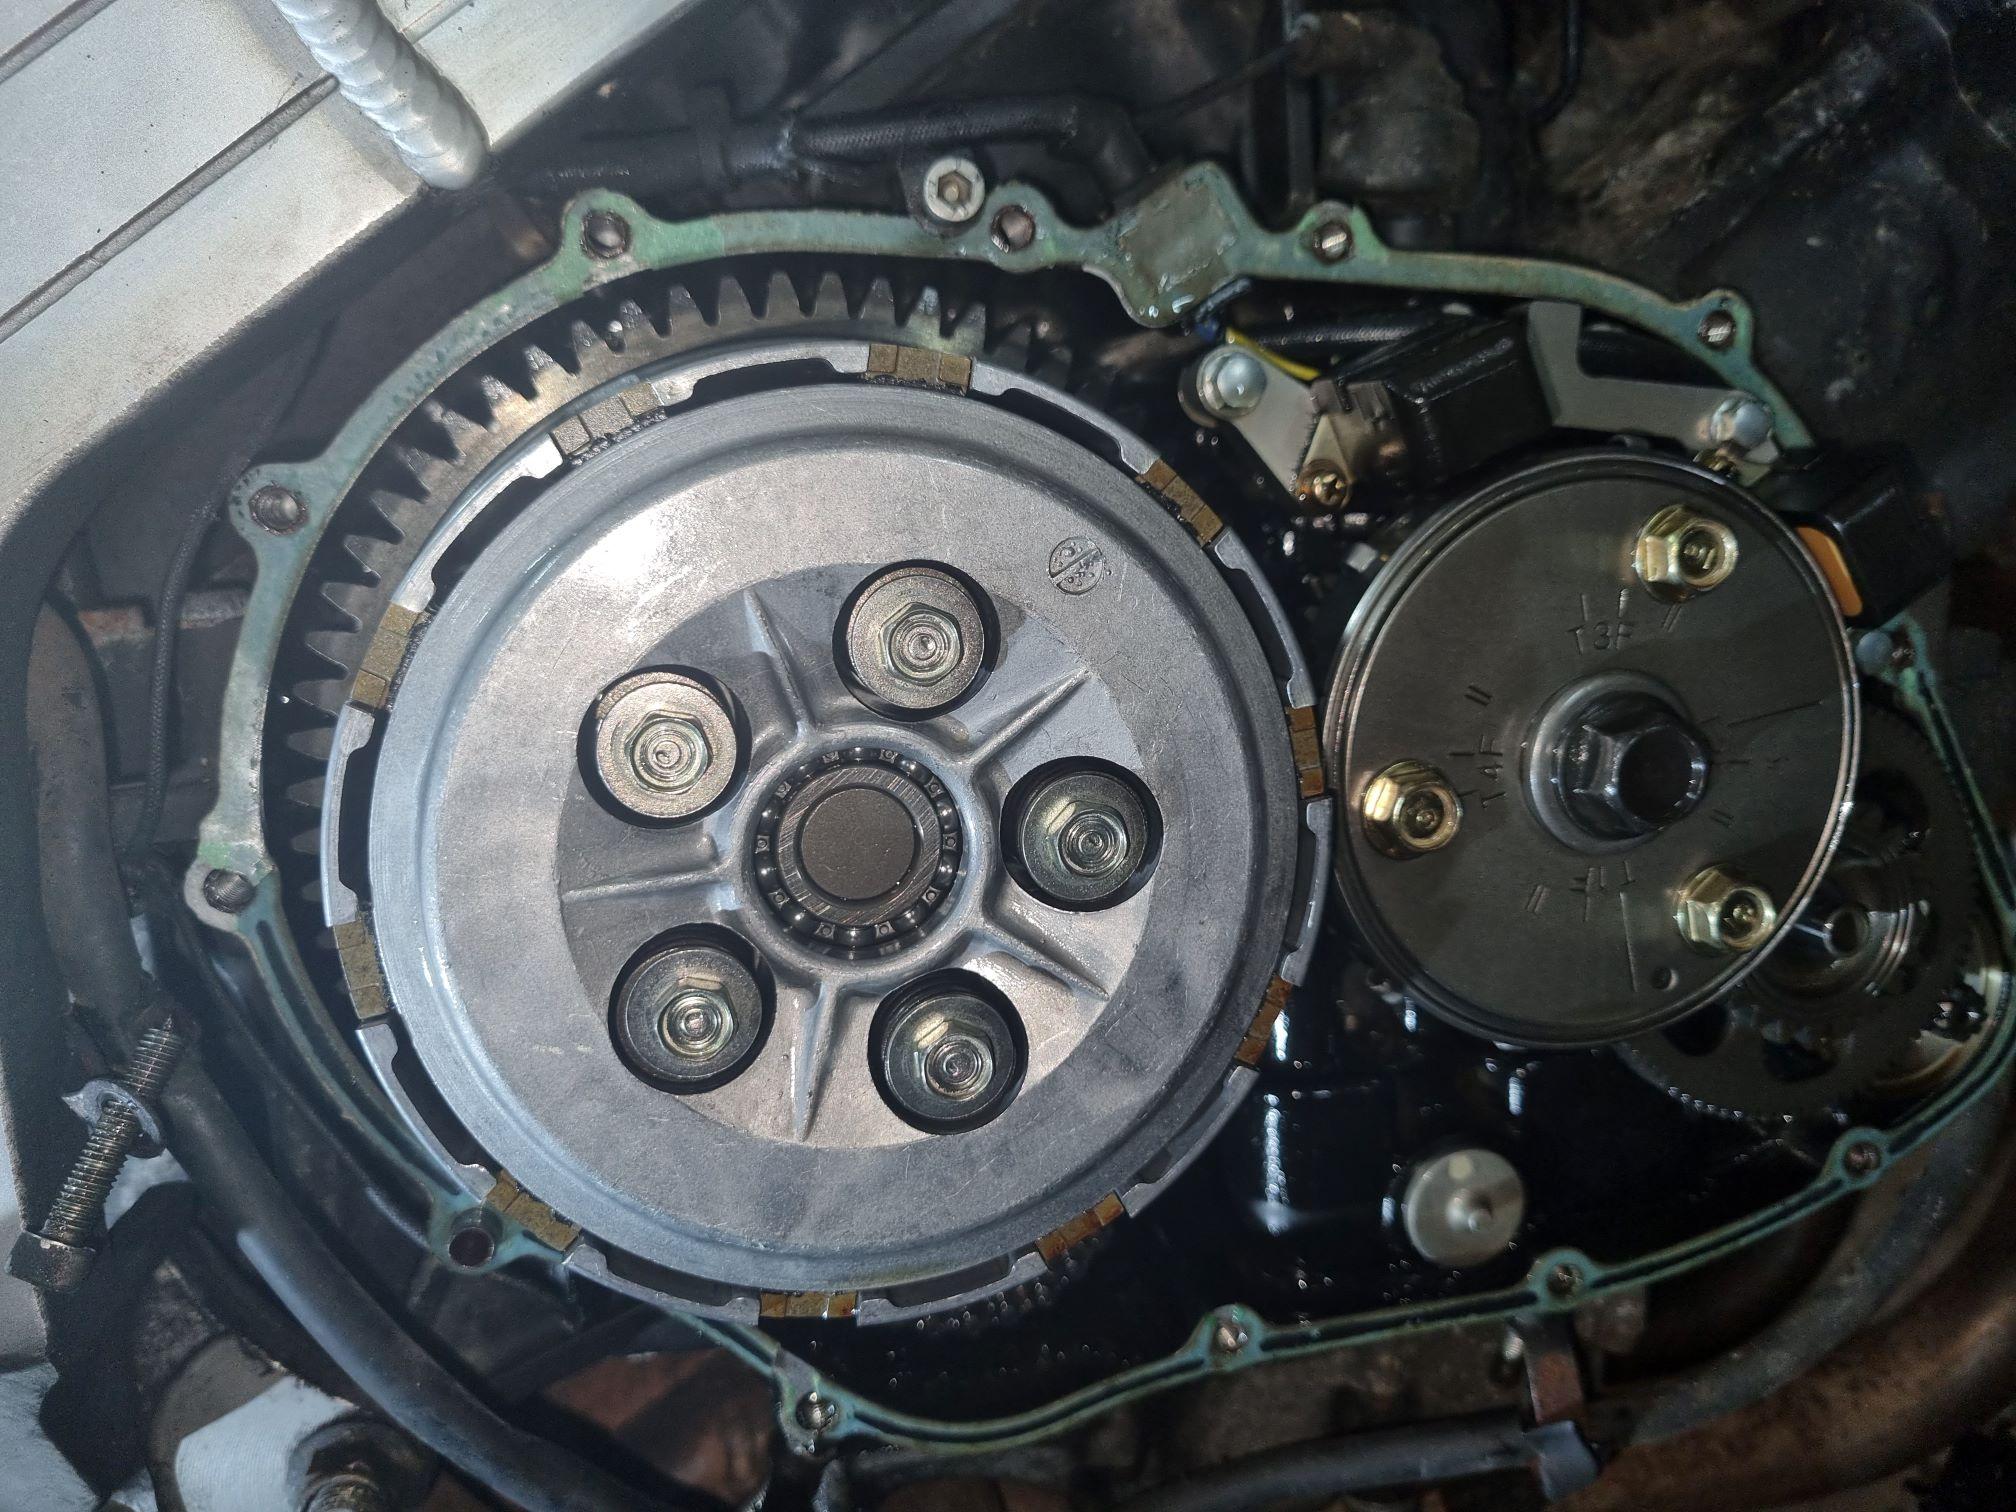
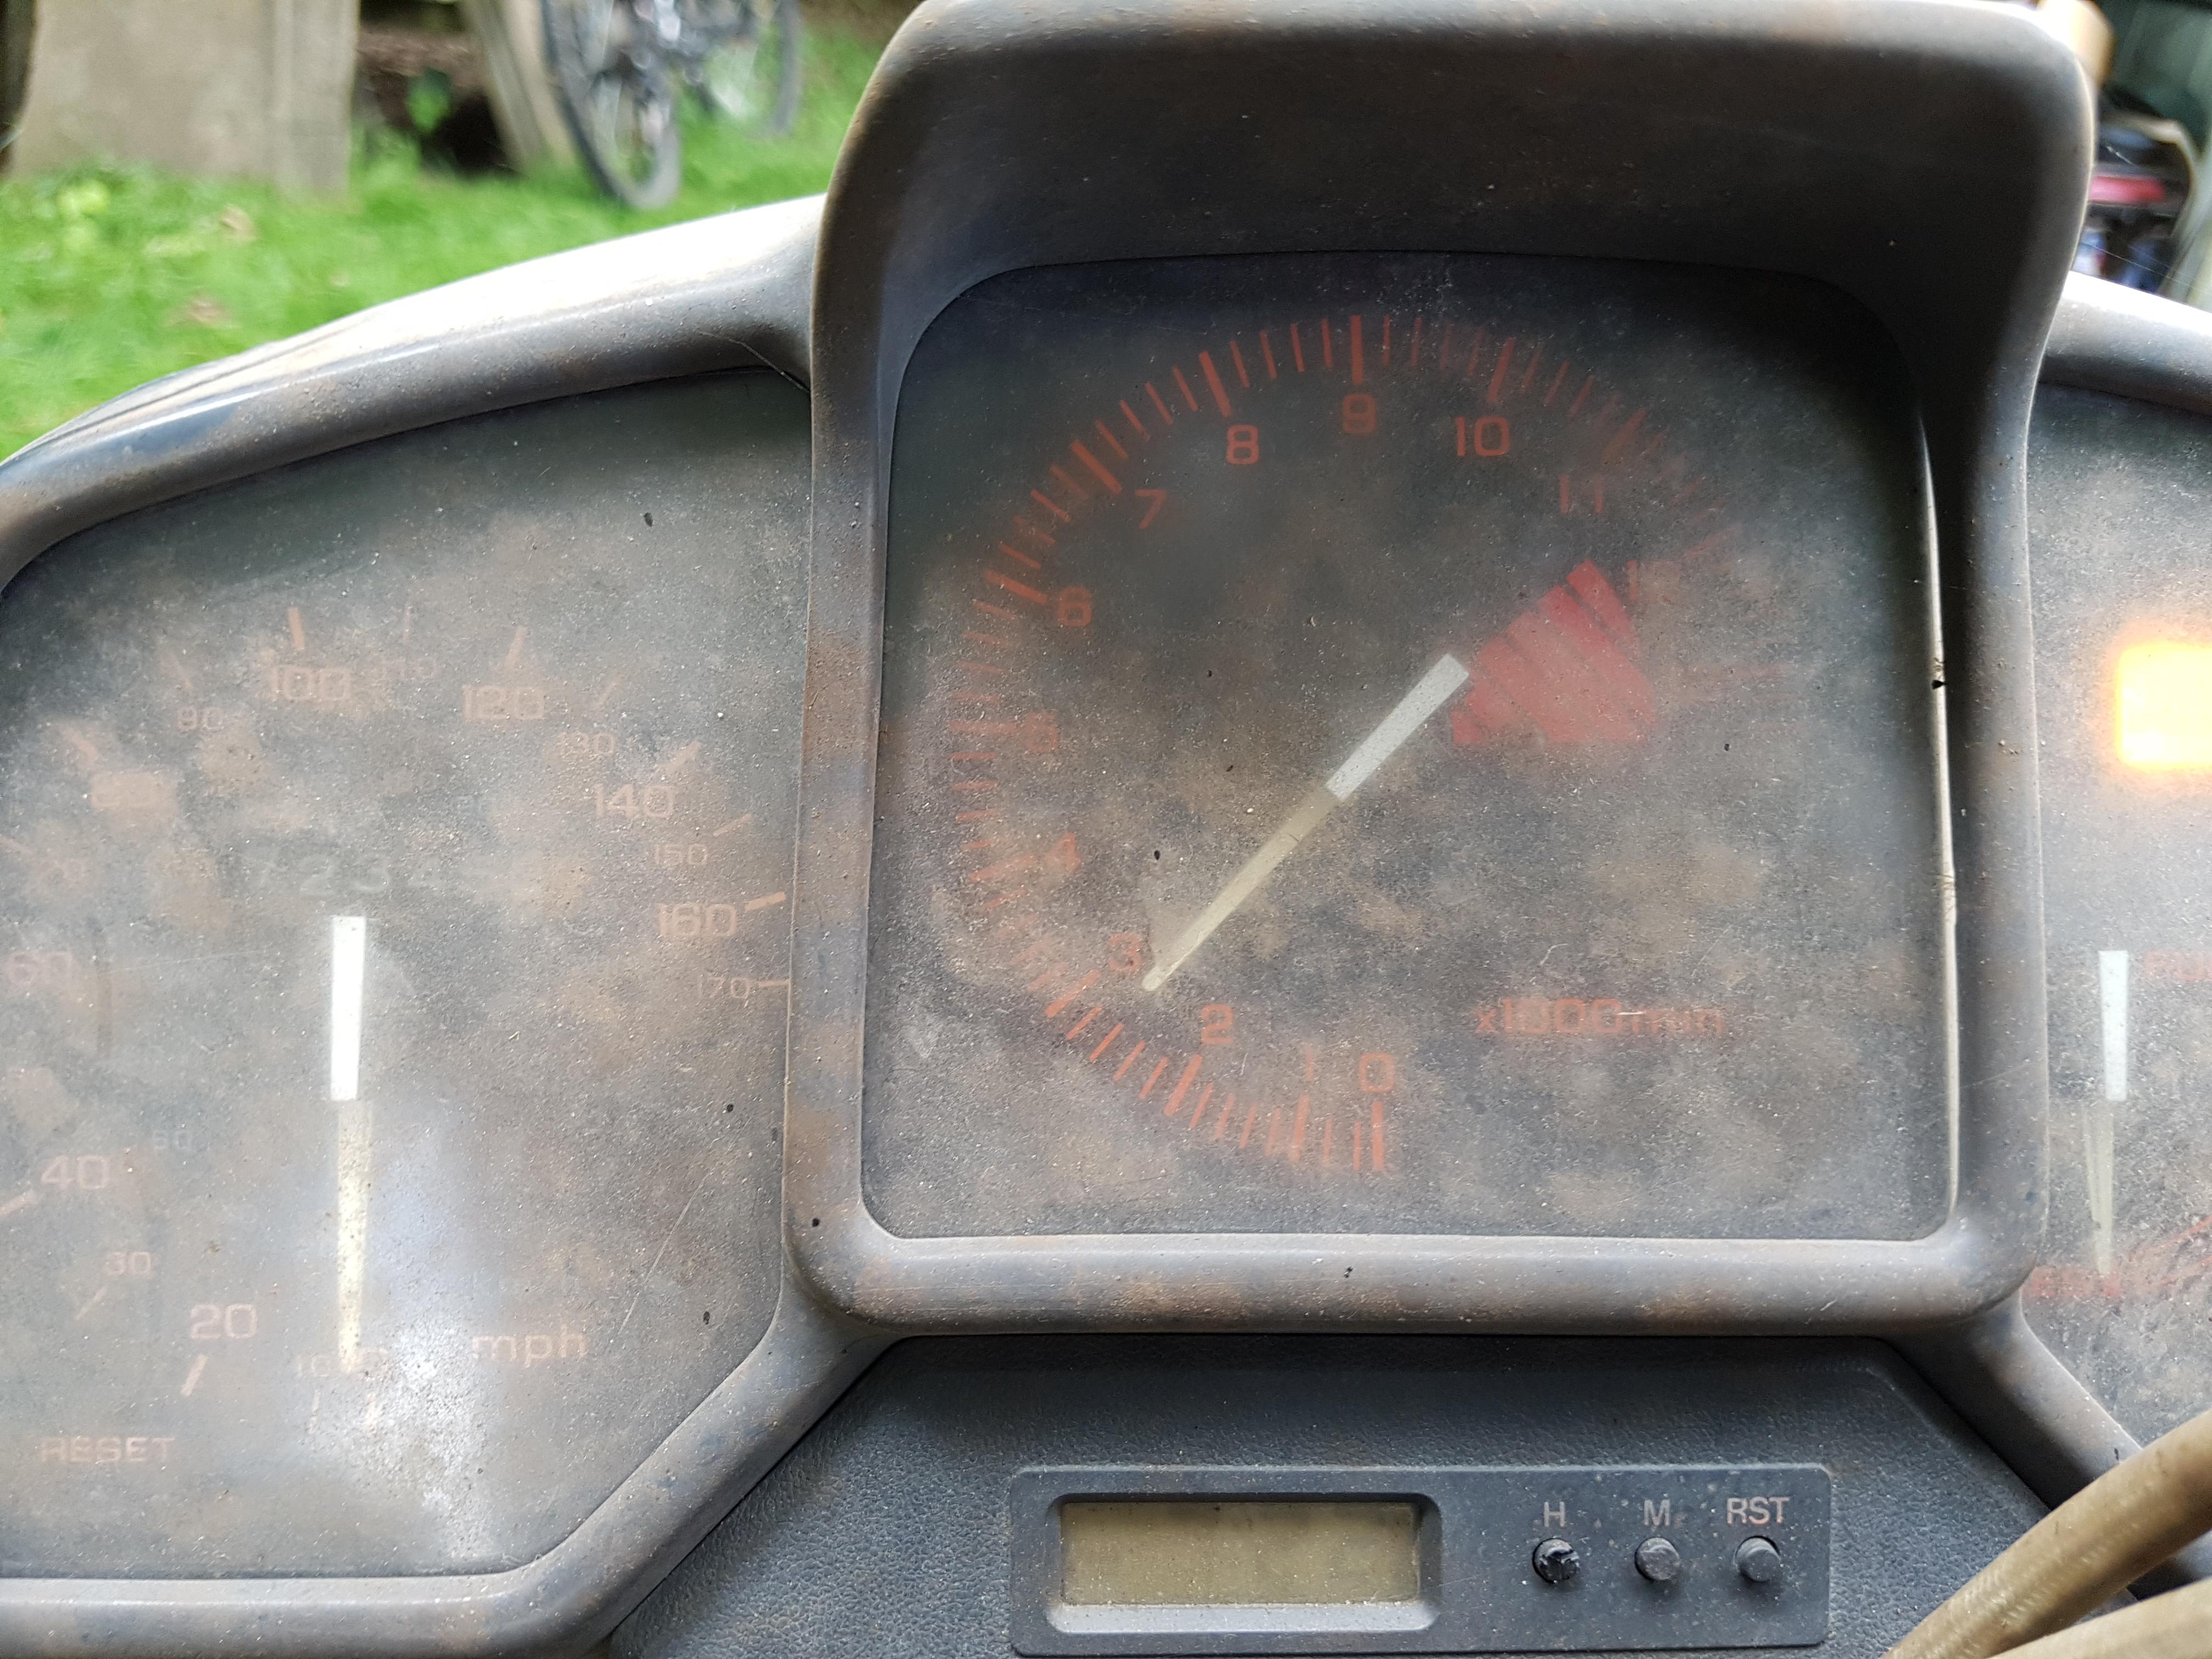
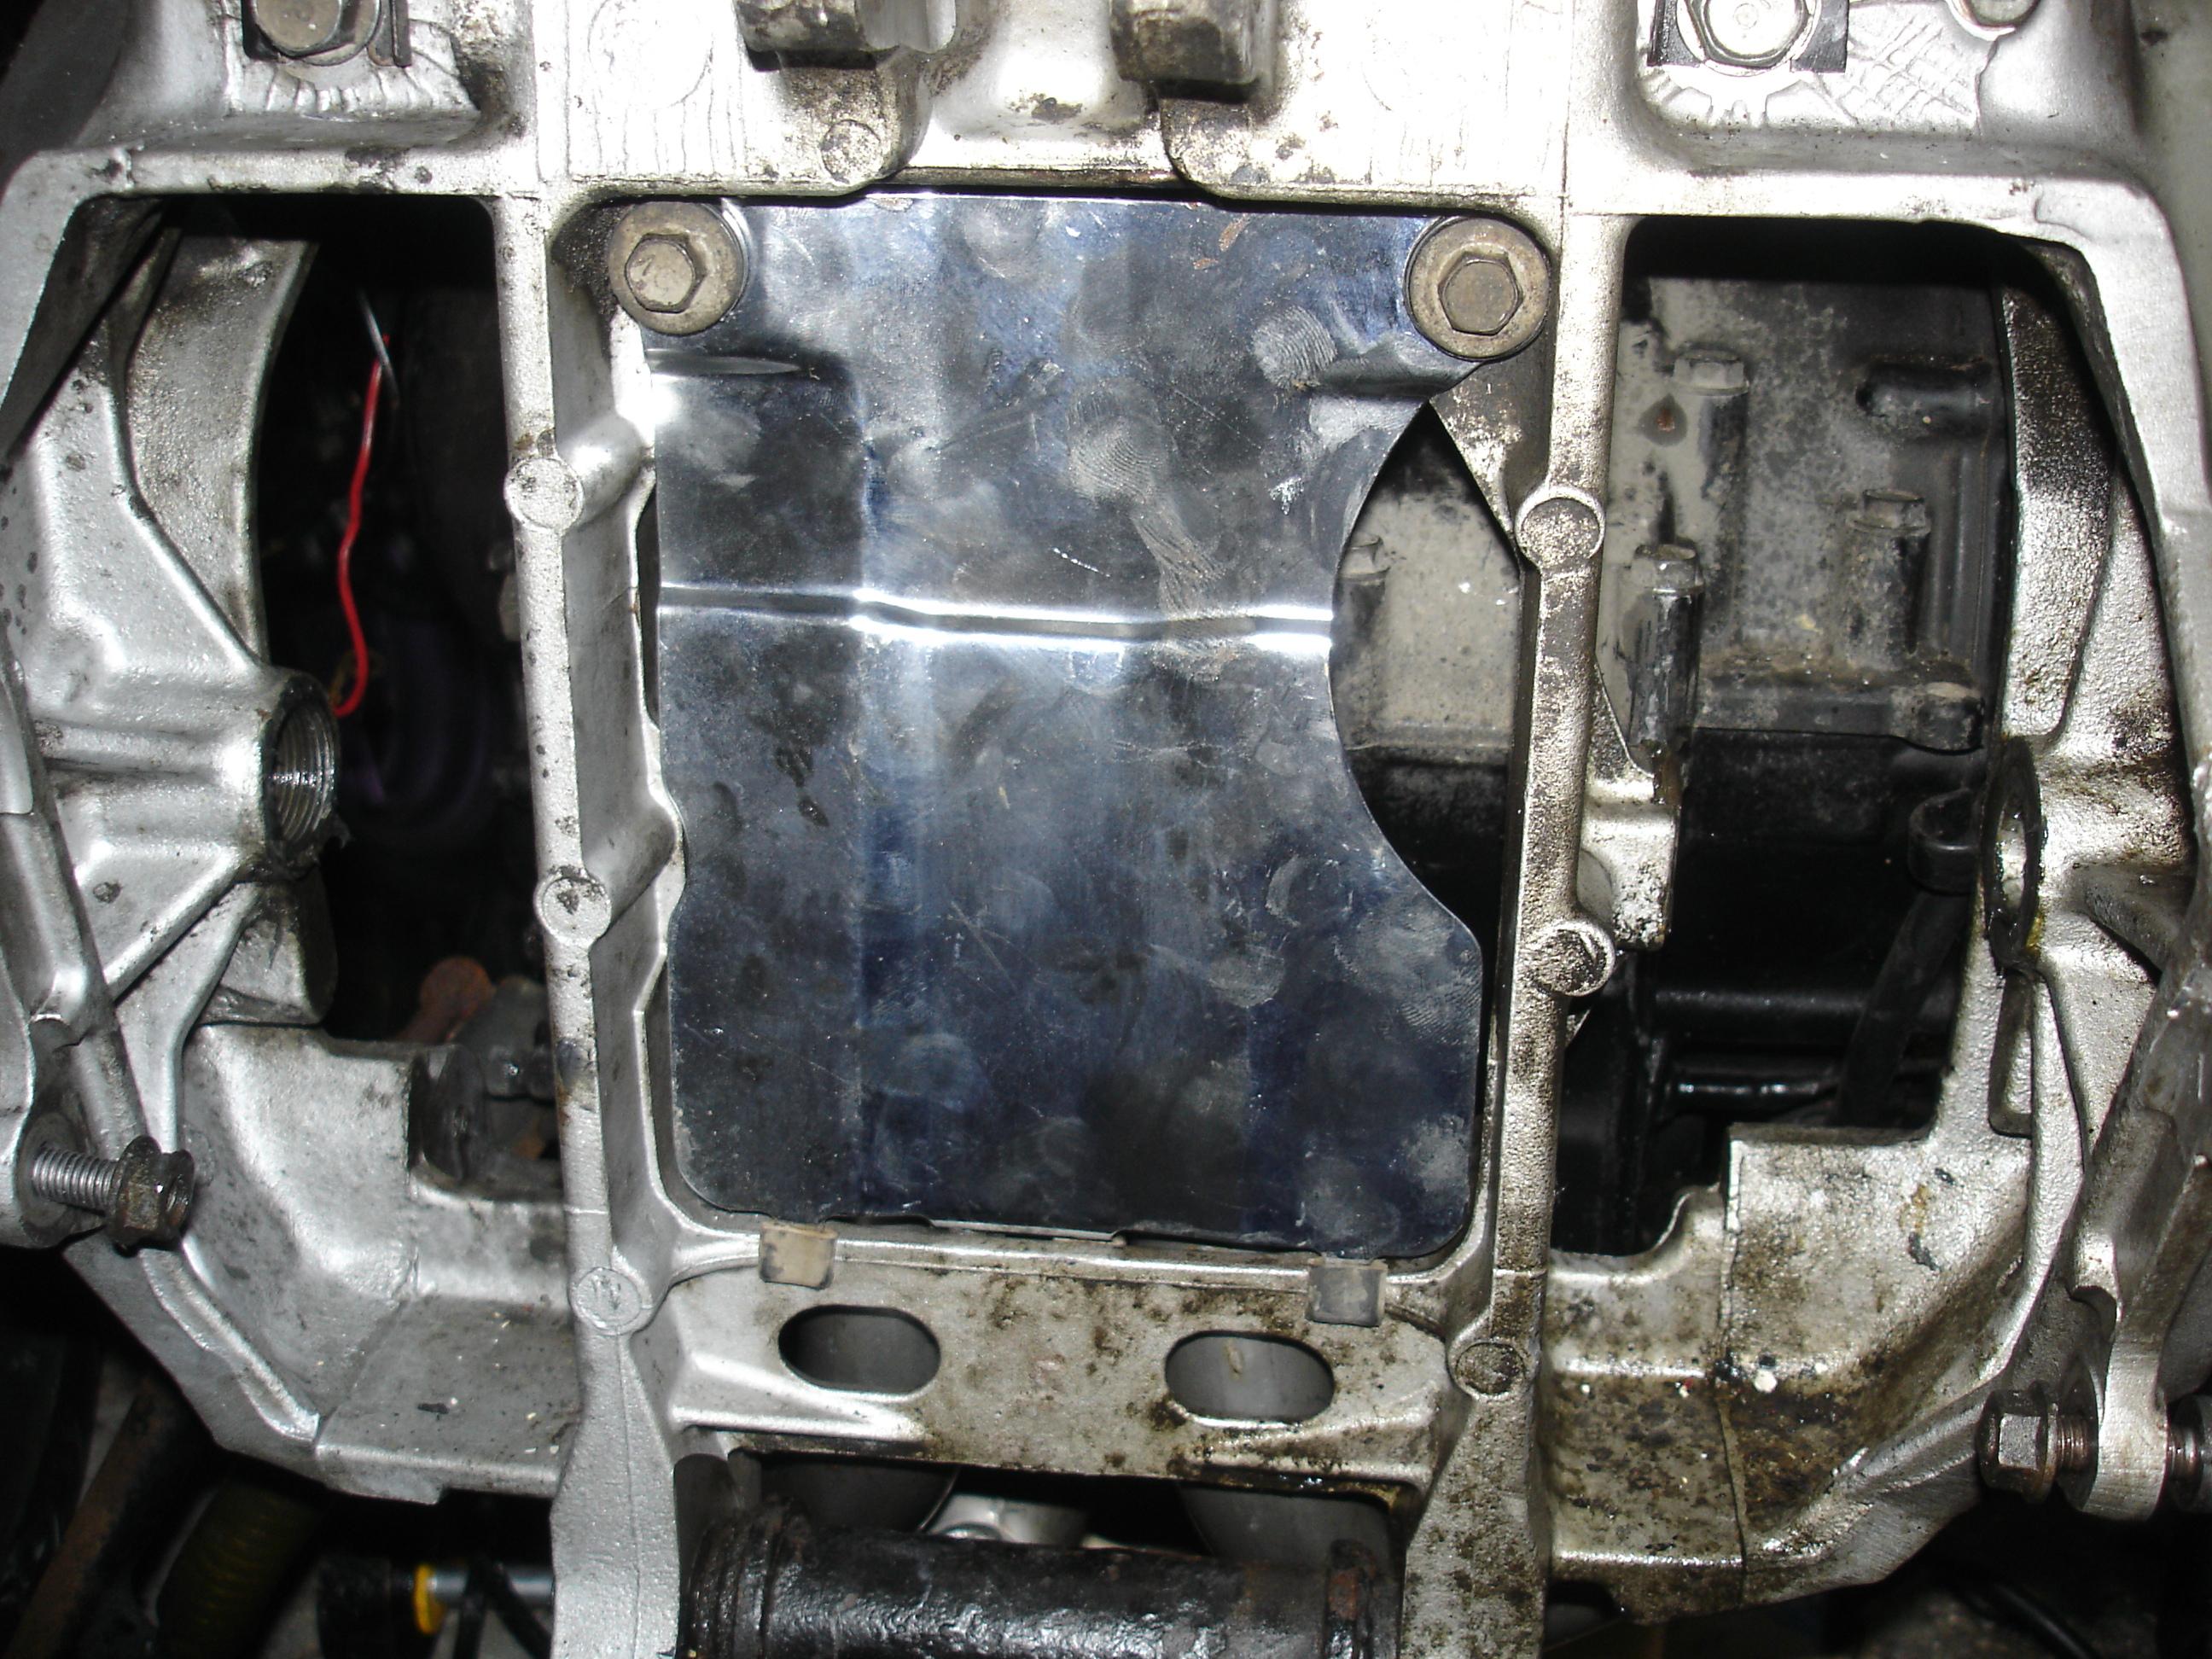
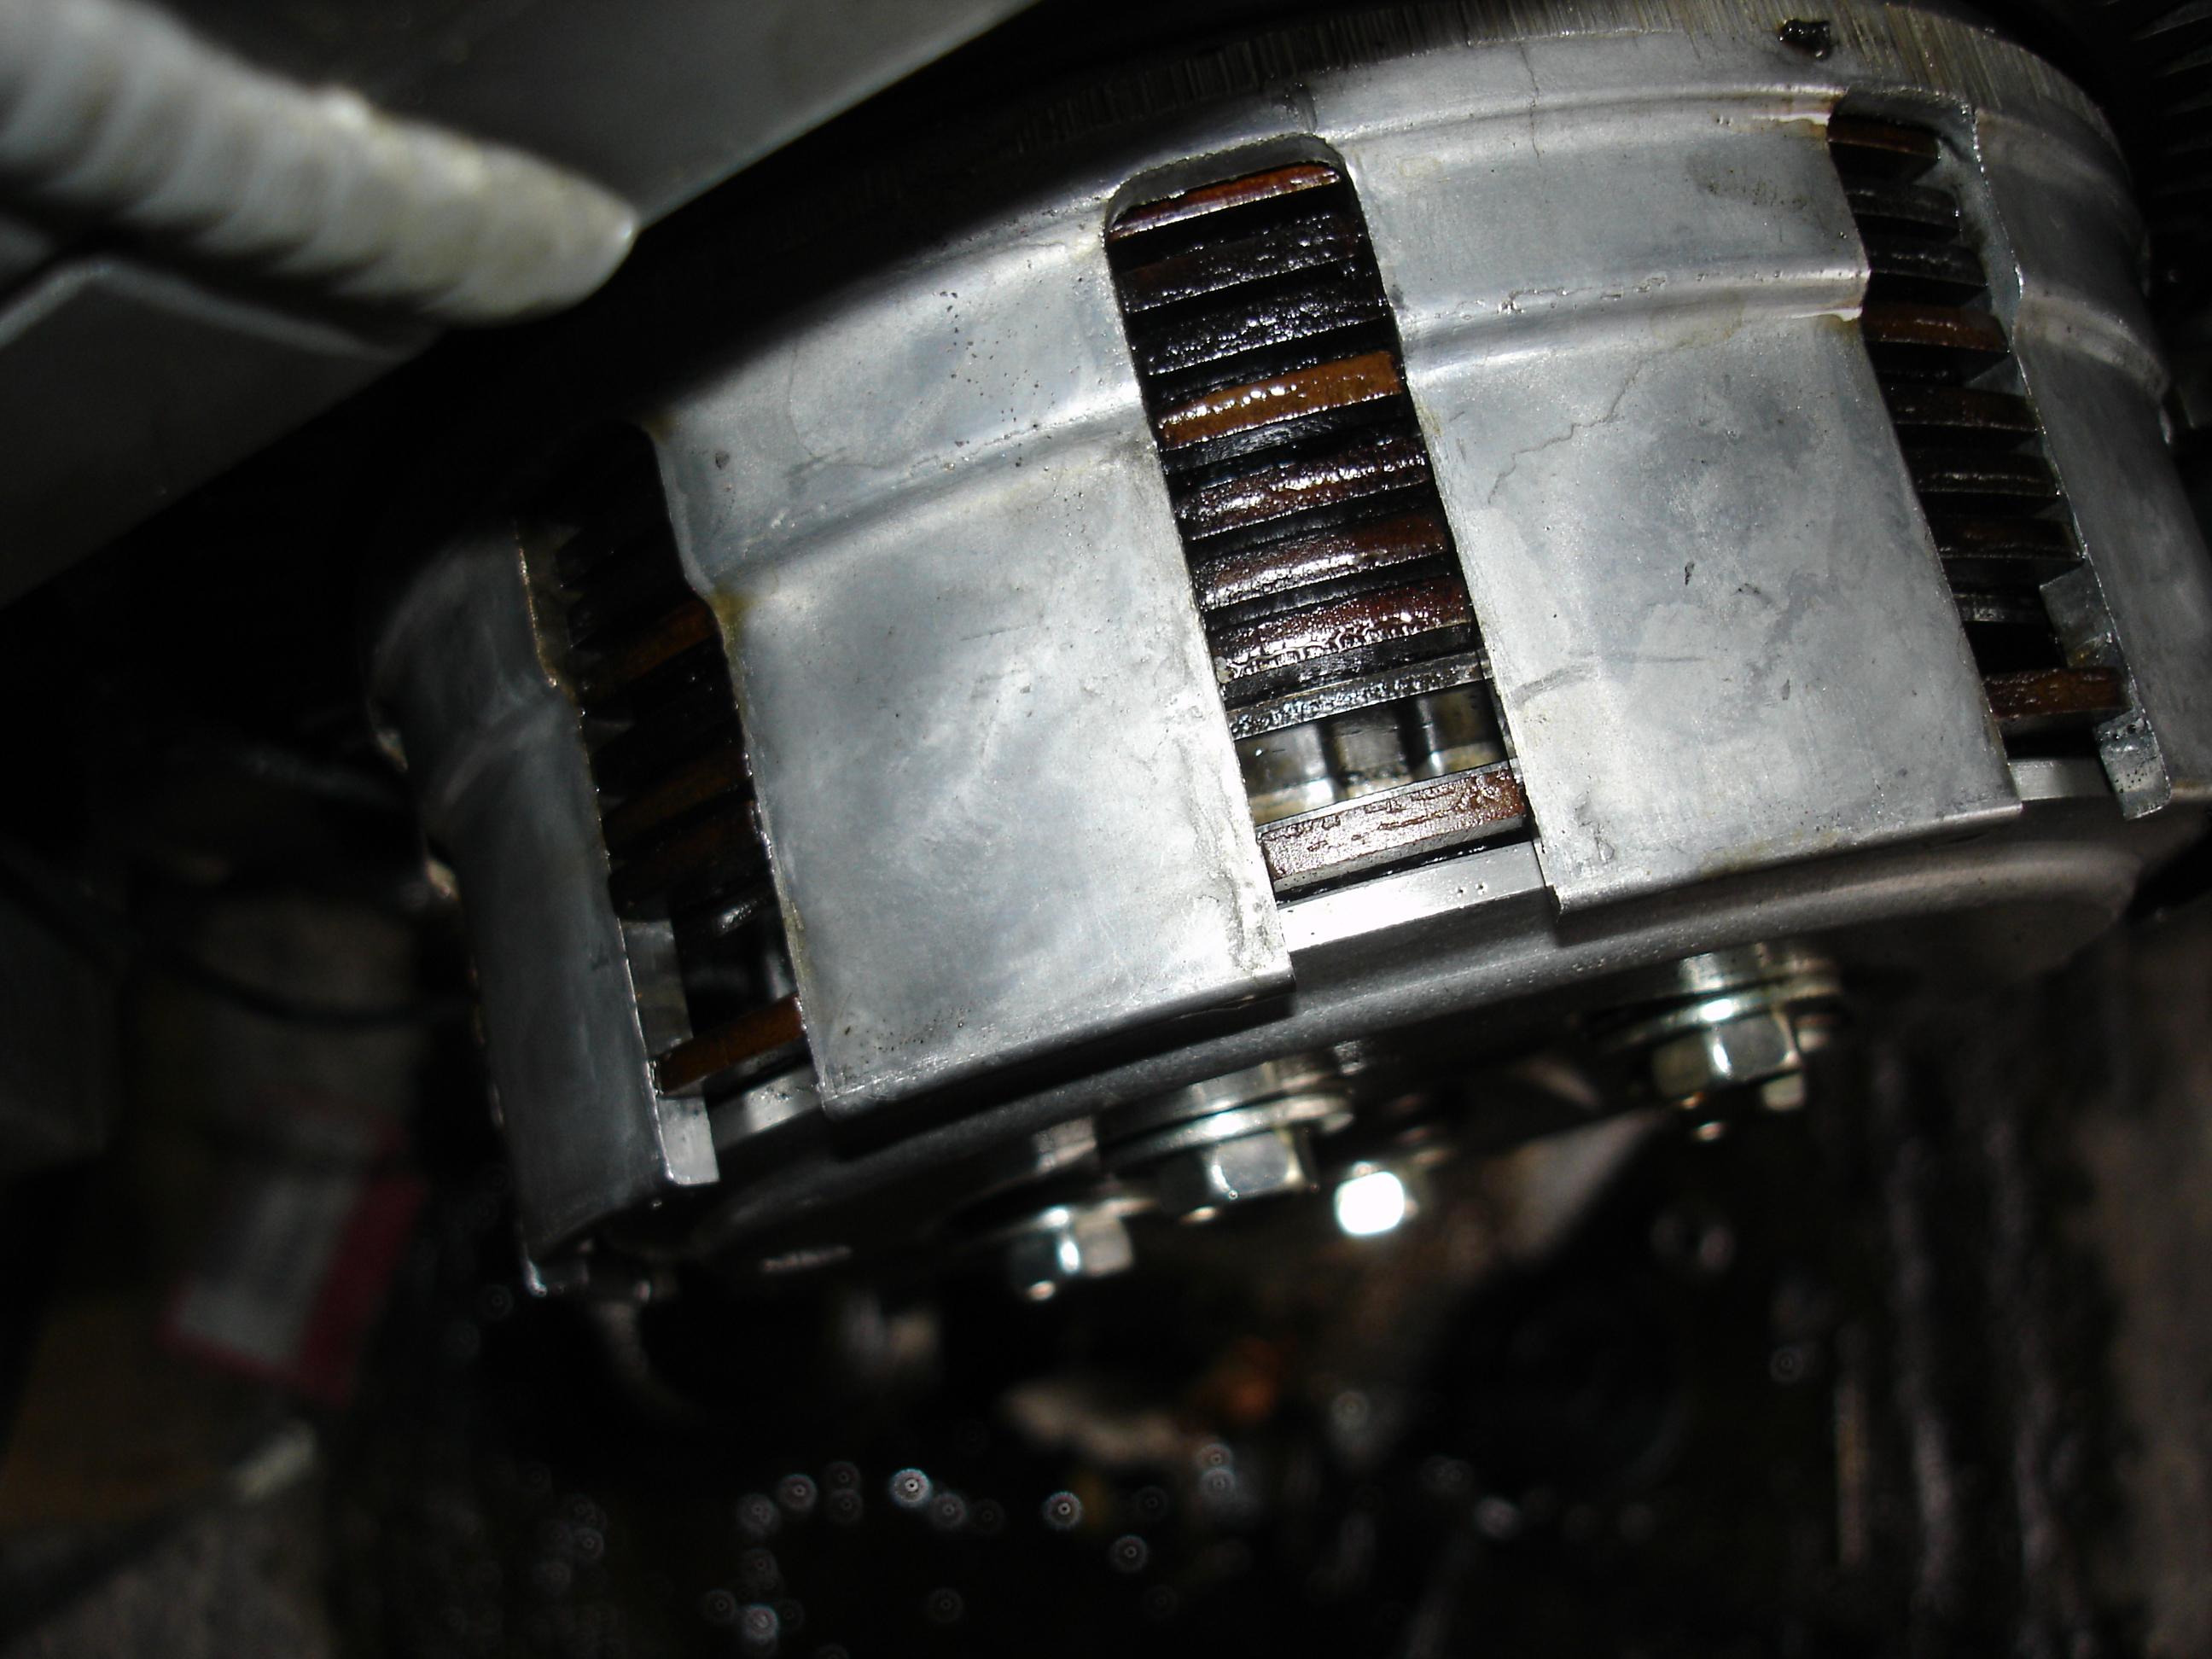
This brings us pretty much up to date...and so onto the clutch saga. Last night I took the cover off and had a look. I'm glad to say as I fitted the engine the front engine bolt just unscrewed 😍 (on the 88-89 models the fairing bracket is held on by the front engine mounting bolt and gets in the way of taking the cover off). A very old picture (of my original engine) to show the bracket. Anyway, cover was a bit of a pain to break loose but came off eventually. Everything inside looked perfect. Way back when I looked inside the engine with the failed clutch the noise damper on the crankcase cover was rusty. I was a little bit concerned that the same might have happened with so long spent in slumber... Didn't take a picture but my fears were unfounded. Absolutely perfect, clean and shiny. The starter sprag has a known weakness on all the VFR750s, no cracks visible however so all looks good. I took out the springs, they measured approximately 42.7mm. That's within the service limit (minimum 41.2mm) but a good way under the standard figure (44.4mm). Clutch plates were all within the standard limit (2.92mm-3.08mm) but to the lower end of it. All under 3mm, worst was 2.92mm, best only 2.94mm. Steel plates all looked good. No measurements given in the manual for thickness but they're ~2mm. Thinnest was 1.998mm. I could push the centre in by finger pressure alone so it's not "stuck". I threw in the "better" spare set that measured all at 3.08mm along with the EBC springs. Not only are they 15% stiffer there will be a significant amount of extra preload due to the extra length over the springs I took out. Clutch doesn't feel too heavy but only time will tell while riding it. It took longer to clean the remains of the gasket off than it did to swap the clutch... Next up the hydraulic system. Pulling the little tab off in the M/C and on pumping the lever I get a nice "fountain" of fluid so that can't be blocked! 🤣 The bleed nipple was utterly clogged however, I had to take it out and I swapped in a spare. The only thing I will note is that there was a little bit of "odd" behaviour when bleeding it through, normally you'd "pump" the lever while opening the bleed nipple, hold the lever closed while you do up the nipple then release the lever and repeat. The next "pull" of the lever however didn't feel to build pressure until 1/2way down the stroke. Pumping it a couple of times however and it felt normal again. I'm not sure if this is an oddity because of the way the piston is sprung or an issue. It's been so long (about 15 years) since I've tried bleeding it this way. No air bubbles in the res or the pipe *BUT* of course I removed the bleed nipple and there might have been some in the initial flow before I fitted the replacement. Fingers crossed its sorted but I didn't find any real smoking gun. I suppose that it could just have been a combination stacking problem, springs too short, plates a little too thin but surely it should still work as long as things are over the minimum limits unless the limits are an either/or?
-
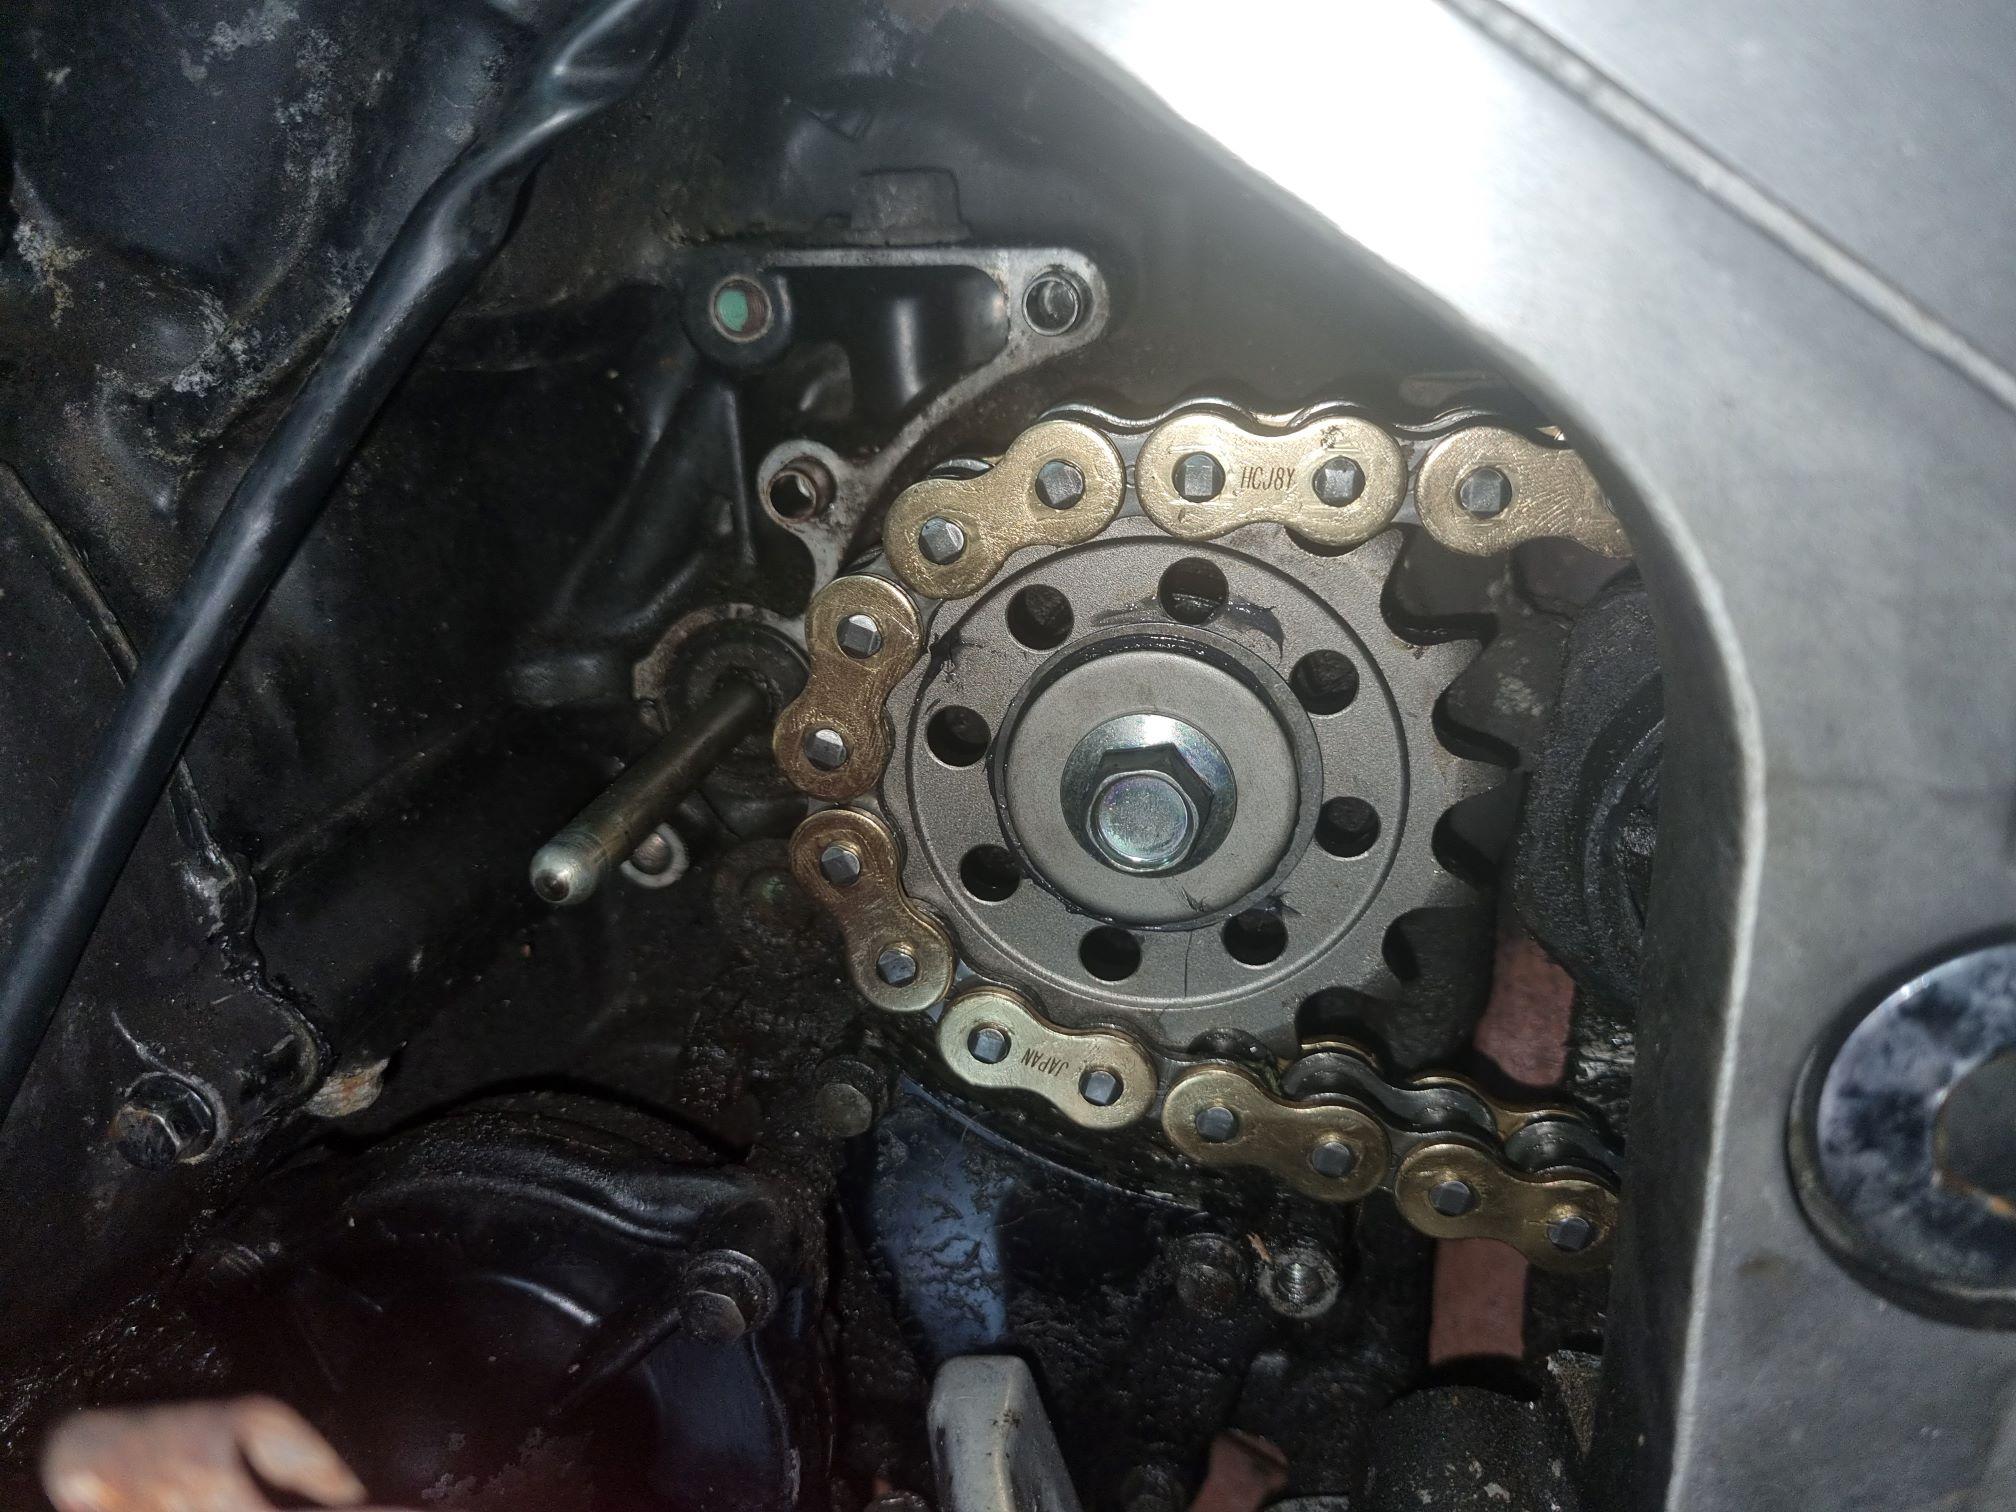
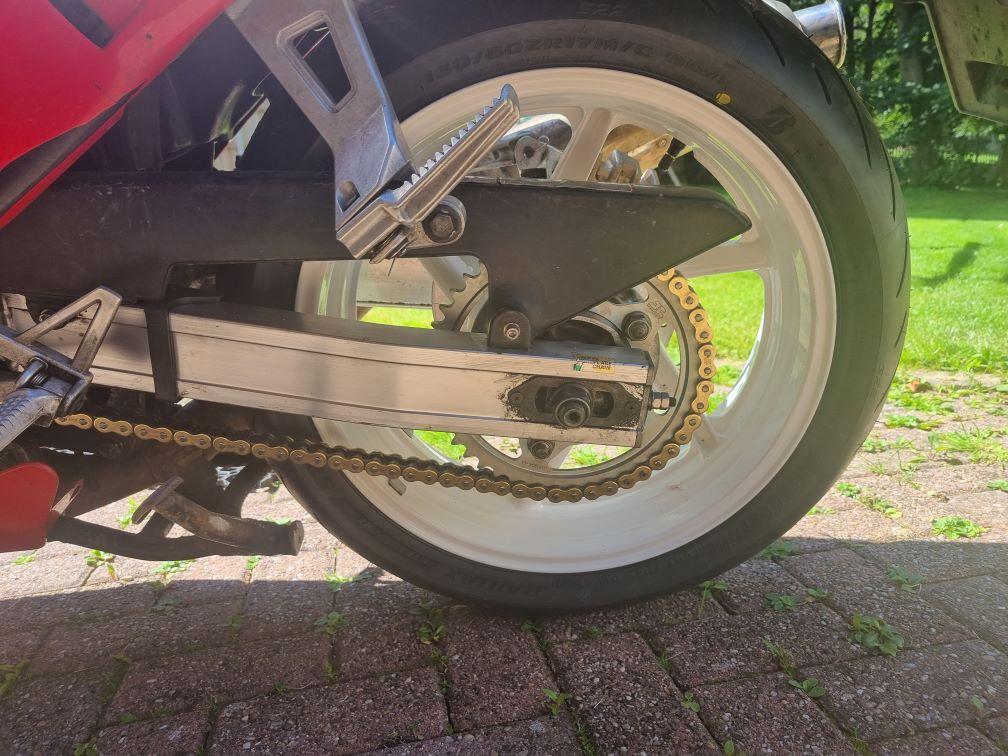
Onto the drive train... After very careful measurement I made it that the dished "face" of the original CBR600 sprocket had moved to the left 1mm (20.5mm from the swingarm from 21.5mm) which meant that a 530 sprocket would both need to have the dish on the opposite side, potentially required machining or making a custom sprocket and a very thin mounting surface. Equally I could take the studs out and machine down the sprocket carrier (have lathe, will create swarf!) but that's a whole load of effort if there was a "bolt on" option. The VFR obviously uses a 530 chain & sprockets, the CBR600 uses a 525. Thing is though more modern, more powerful bikes *ALSO* use a 525. Hell the 1987 VFR750R uses a 525. So I looked at what the options were and what do you know. A VFR750R front sprocket is almost perfect. It's slightly narrower and although the sprockets don't actually do up "tight" there was a little bit more axial free play than I was happy with so I stuck some shims in to reduce it down to ~0.1mm. Just enough so the washer beds down on the end of the shaft rather than the sprocket. Incidentally as I have a small pile of RC24/36/37 related engine parts I measured the length on the output shaft. It varied between a hair under 17mm and 17.5mm so there is either wear or significant tolerance there. The one mistake I made was in going for a 45t rear sprocket. I ordered it without thinking to get the "original" gearing but of course I have a smaller rear tyre! To get original gearing I'd need a 43t. Its not massively of concern. It does mean it'll no longer do over 150mph as the top theoretical speed is now 149.6mph vs 157.3mph! 🤣 I did run into a very slight issue in that the chain guard rubbed on the edge of the tyre. A couple of spacers behind it moved it just enough to stop it.
-
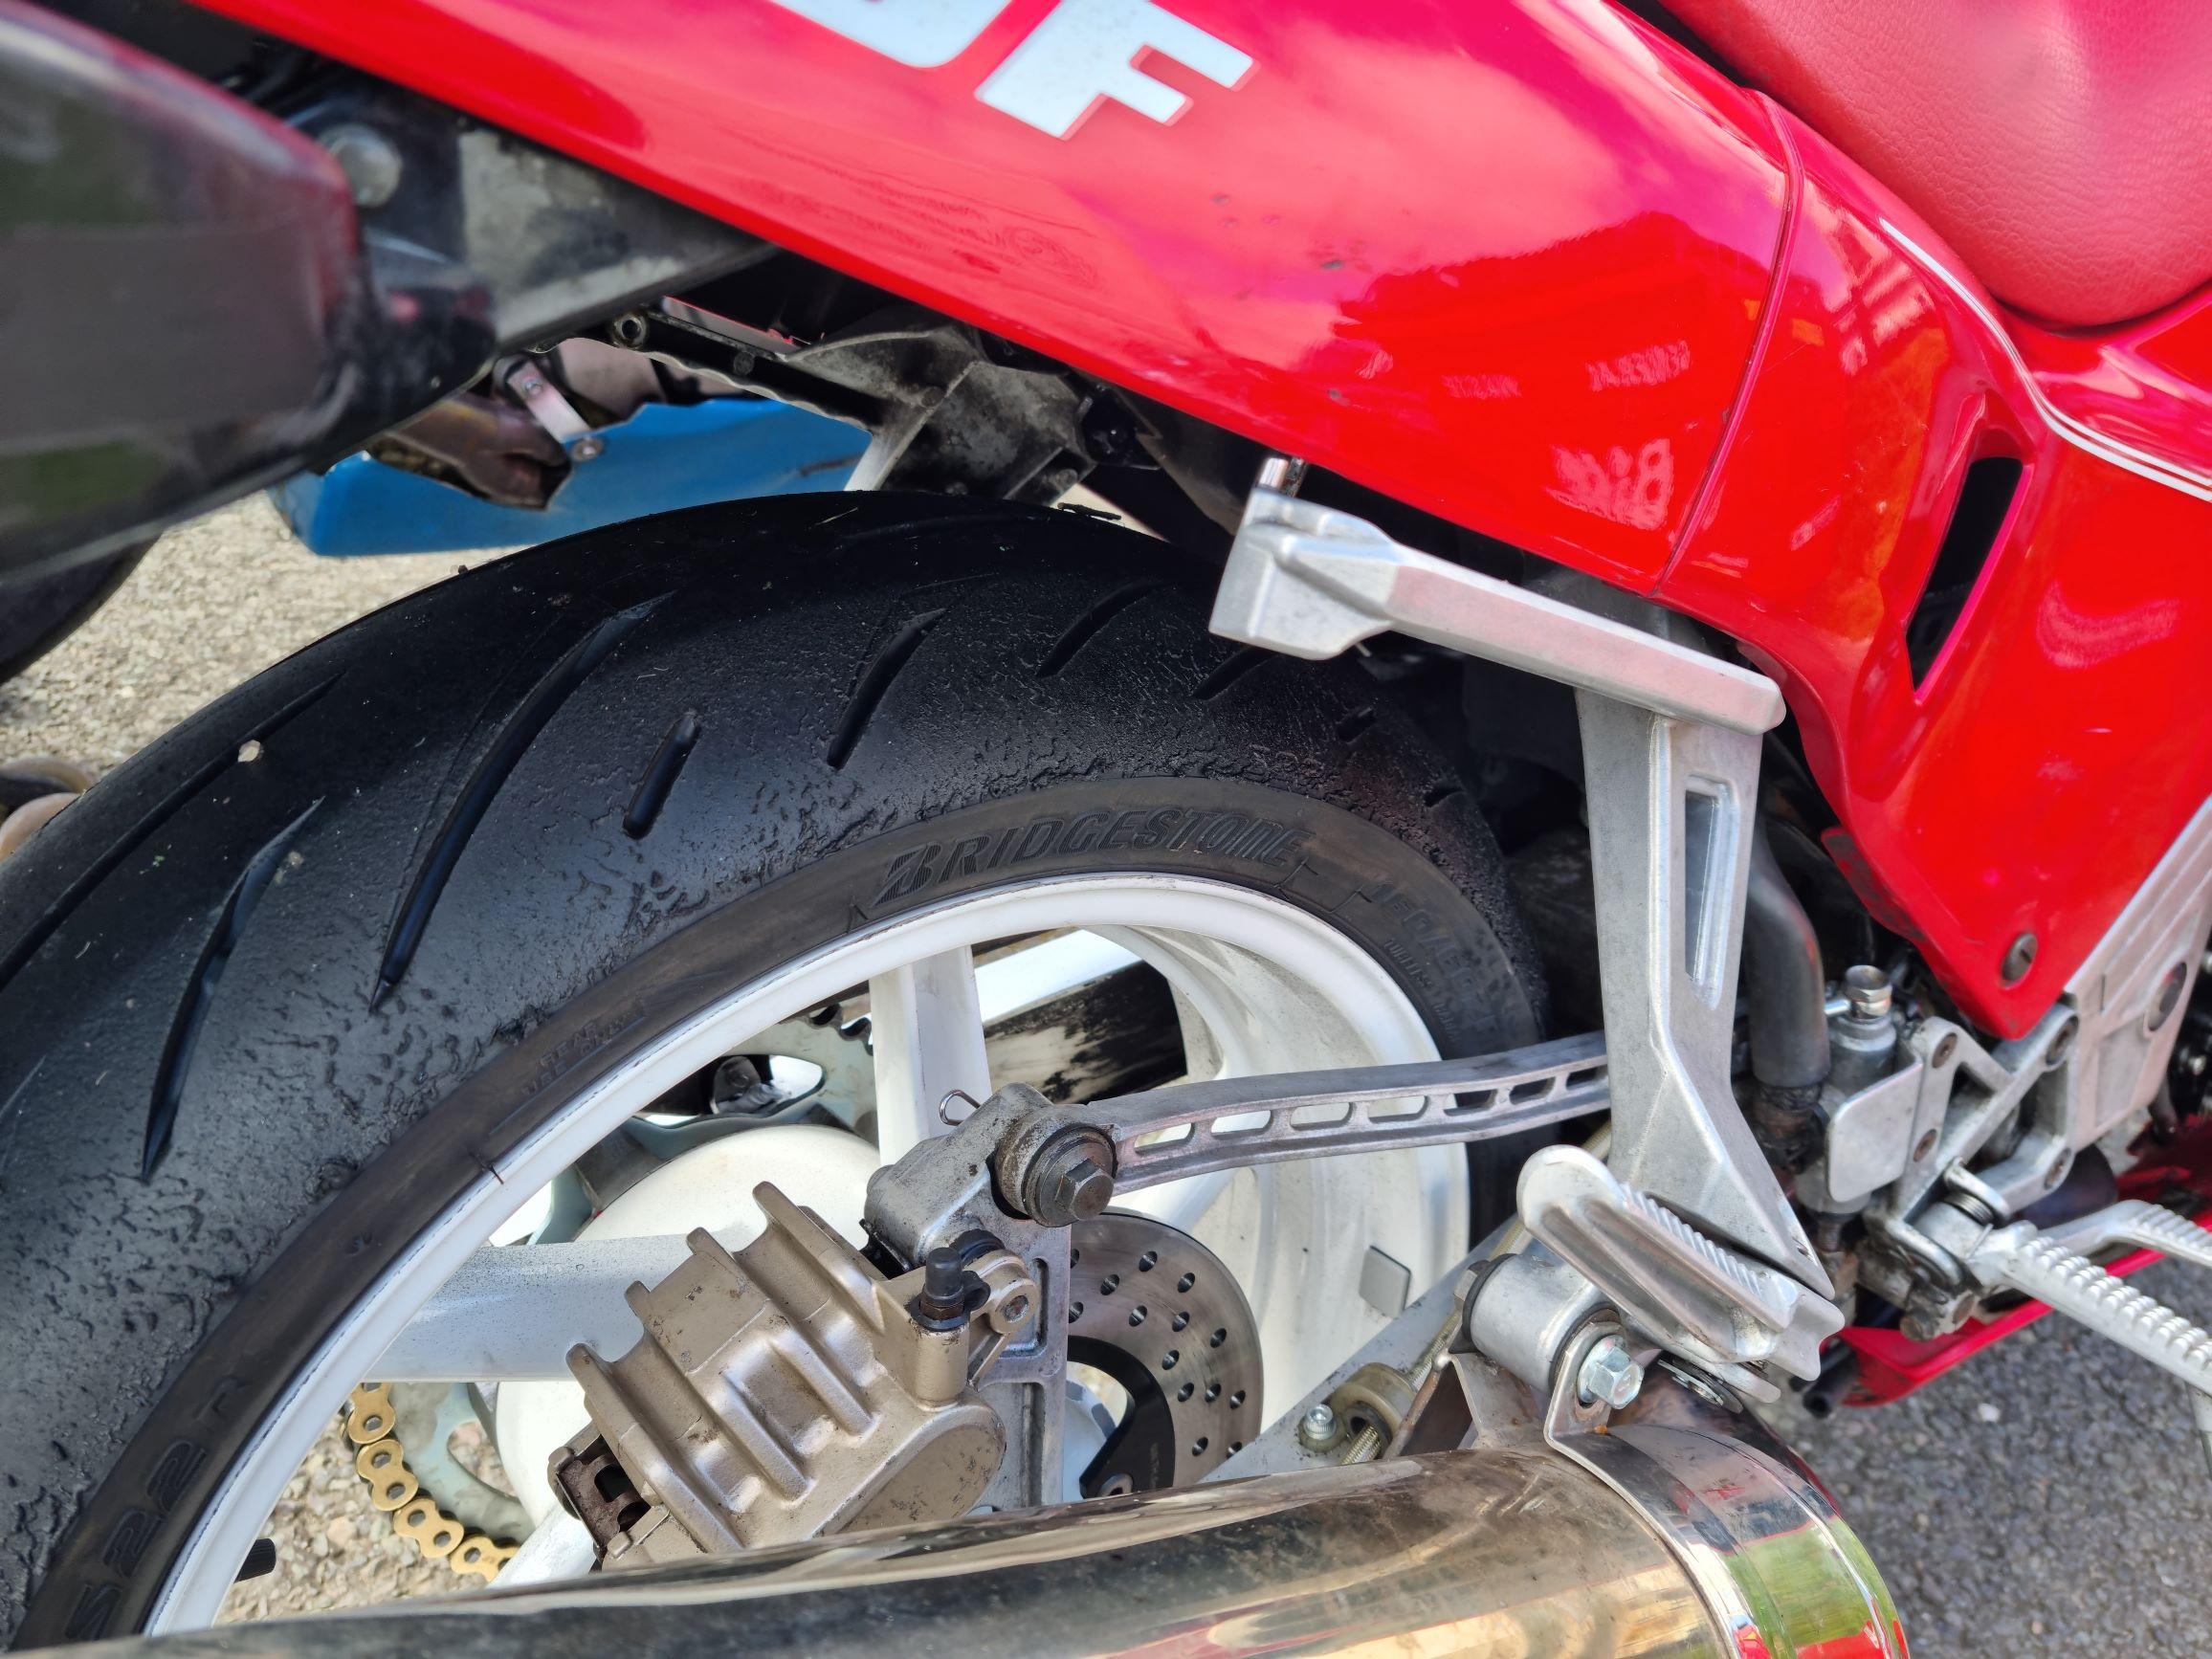
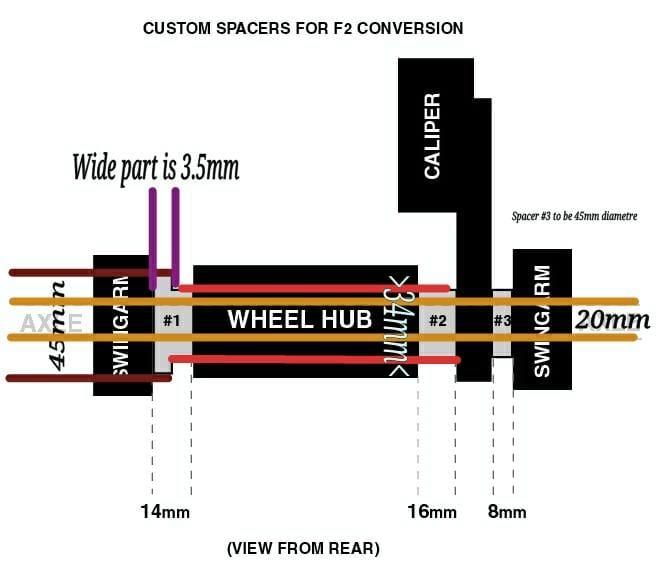
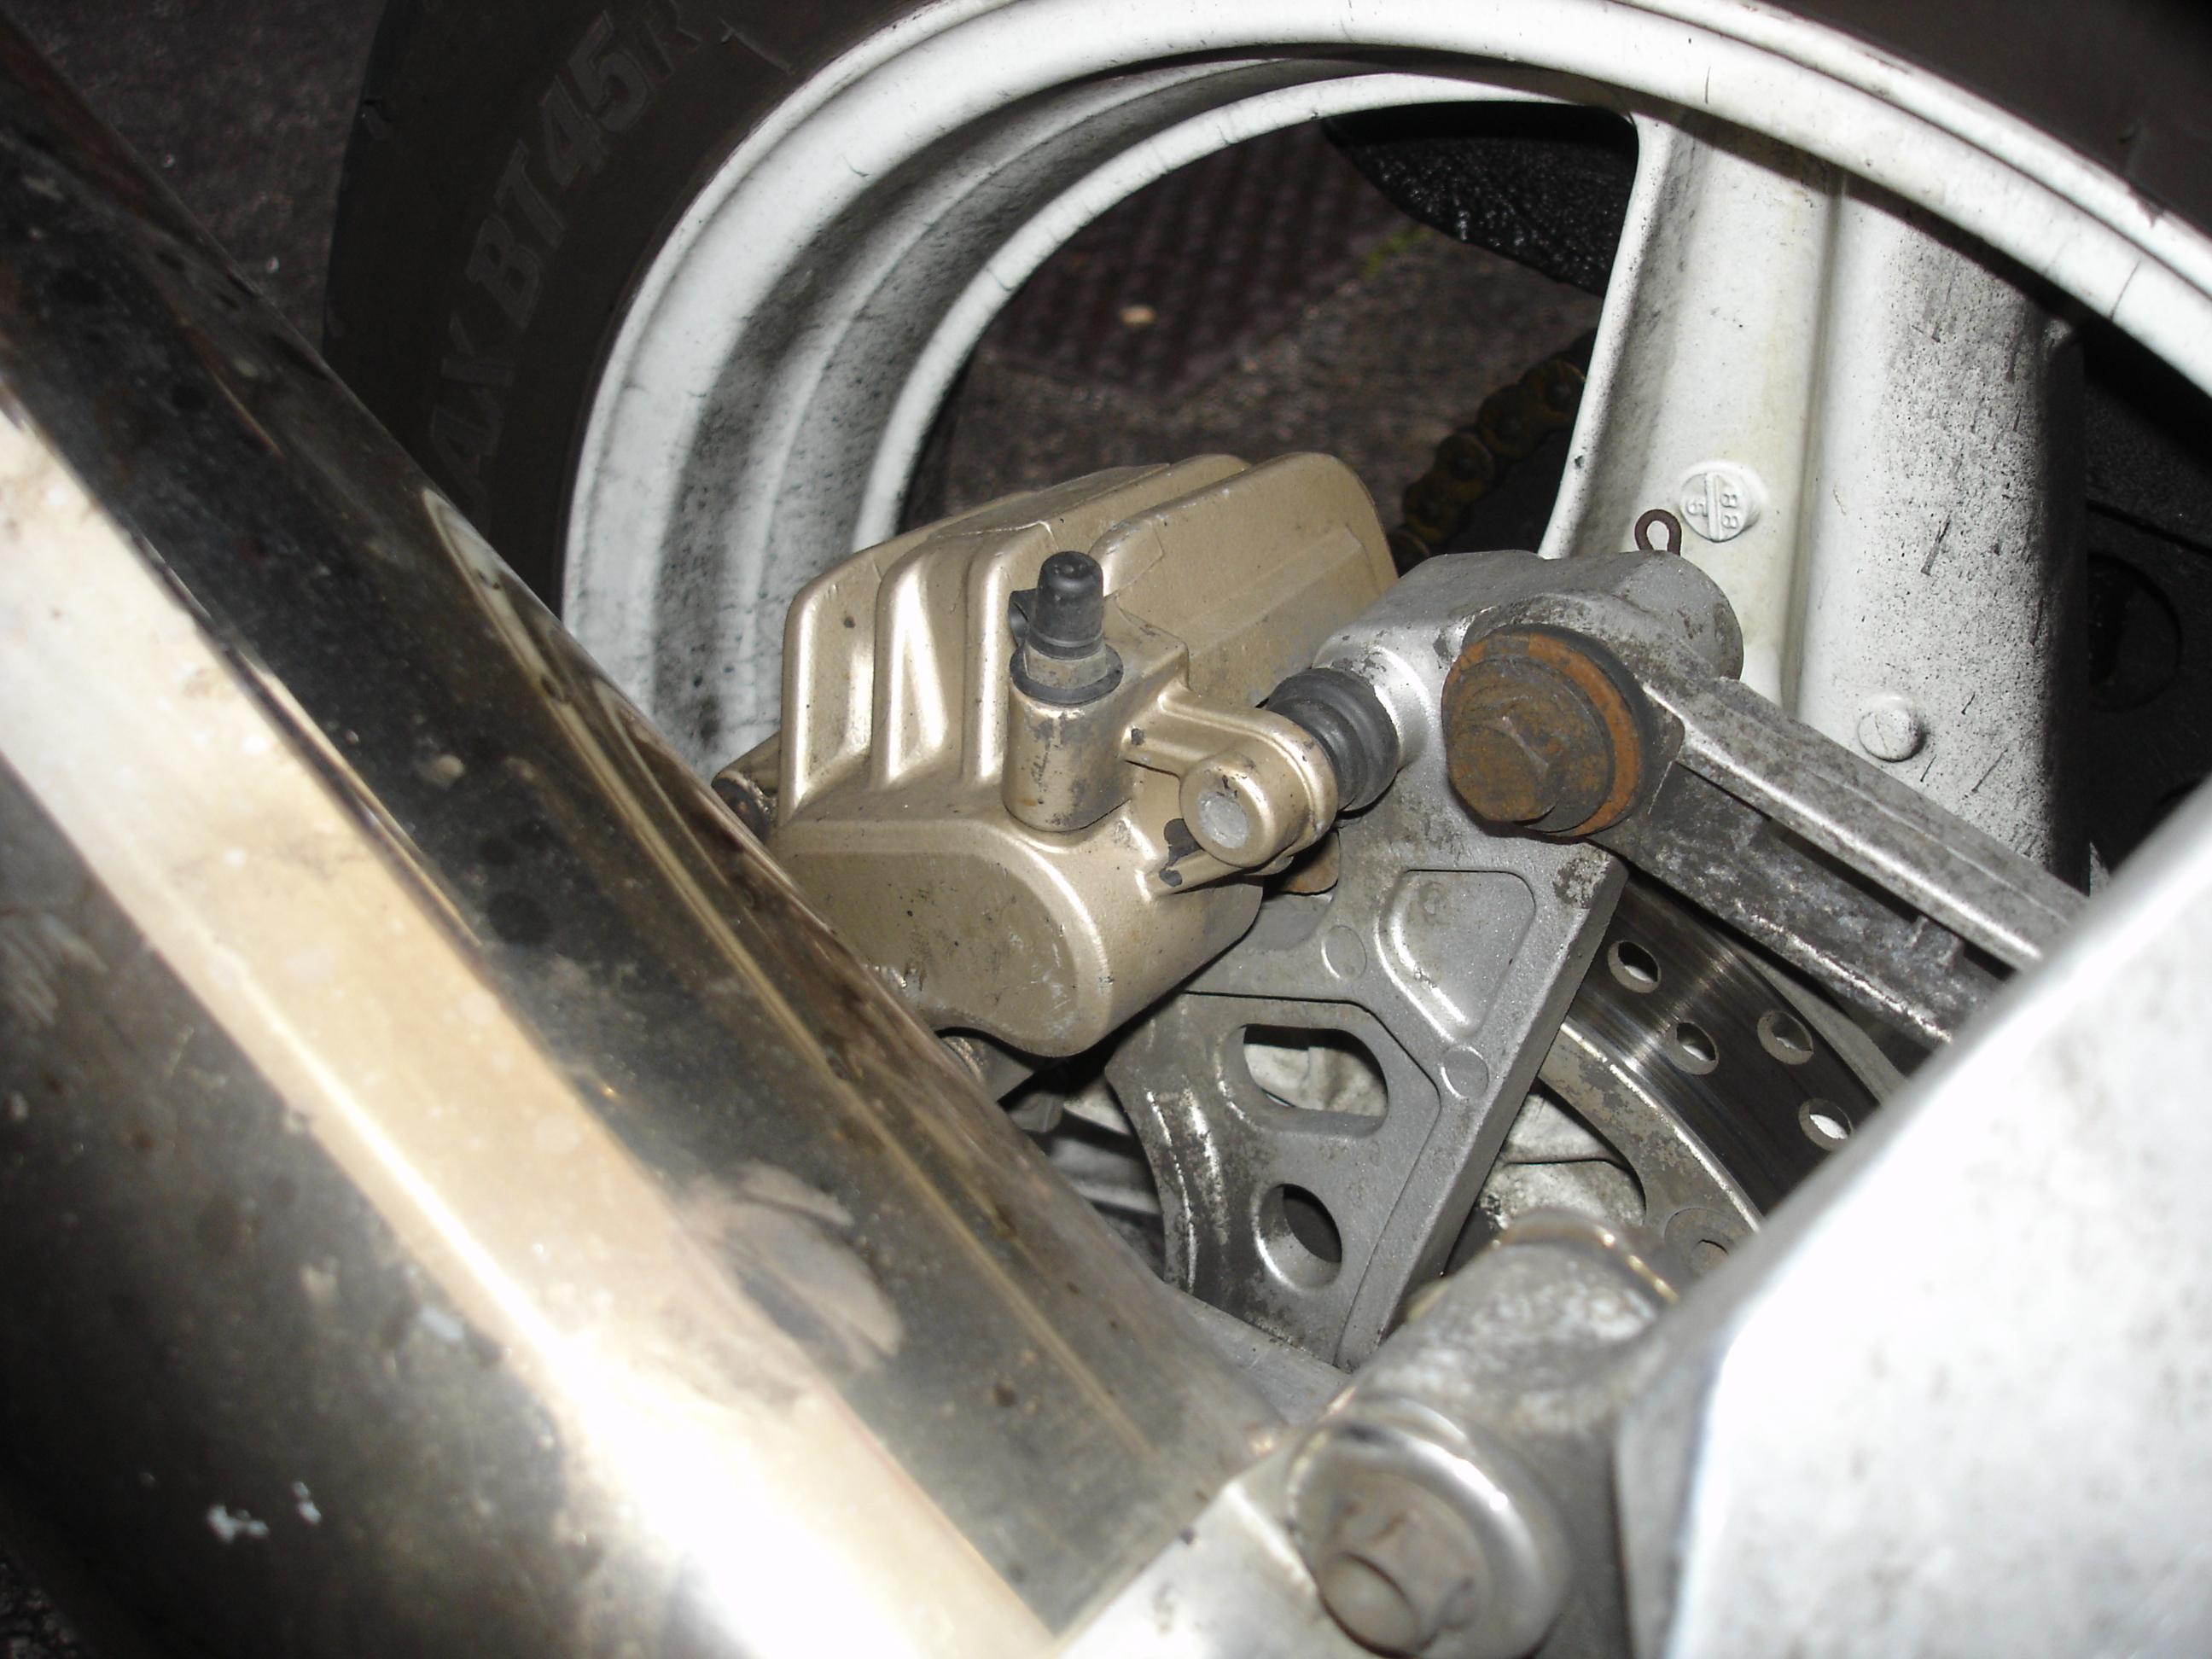
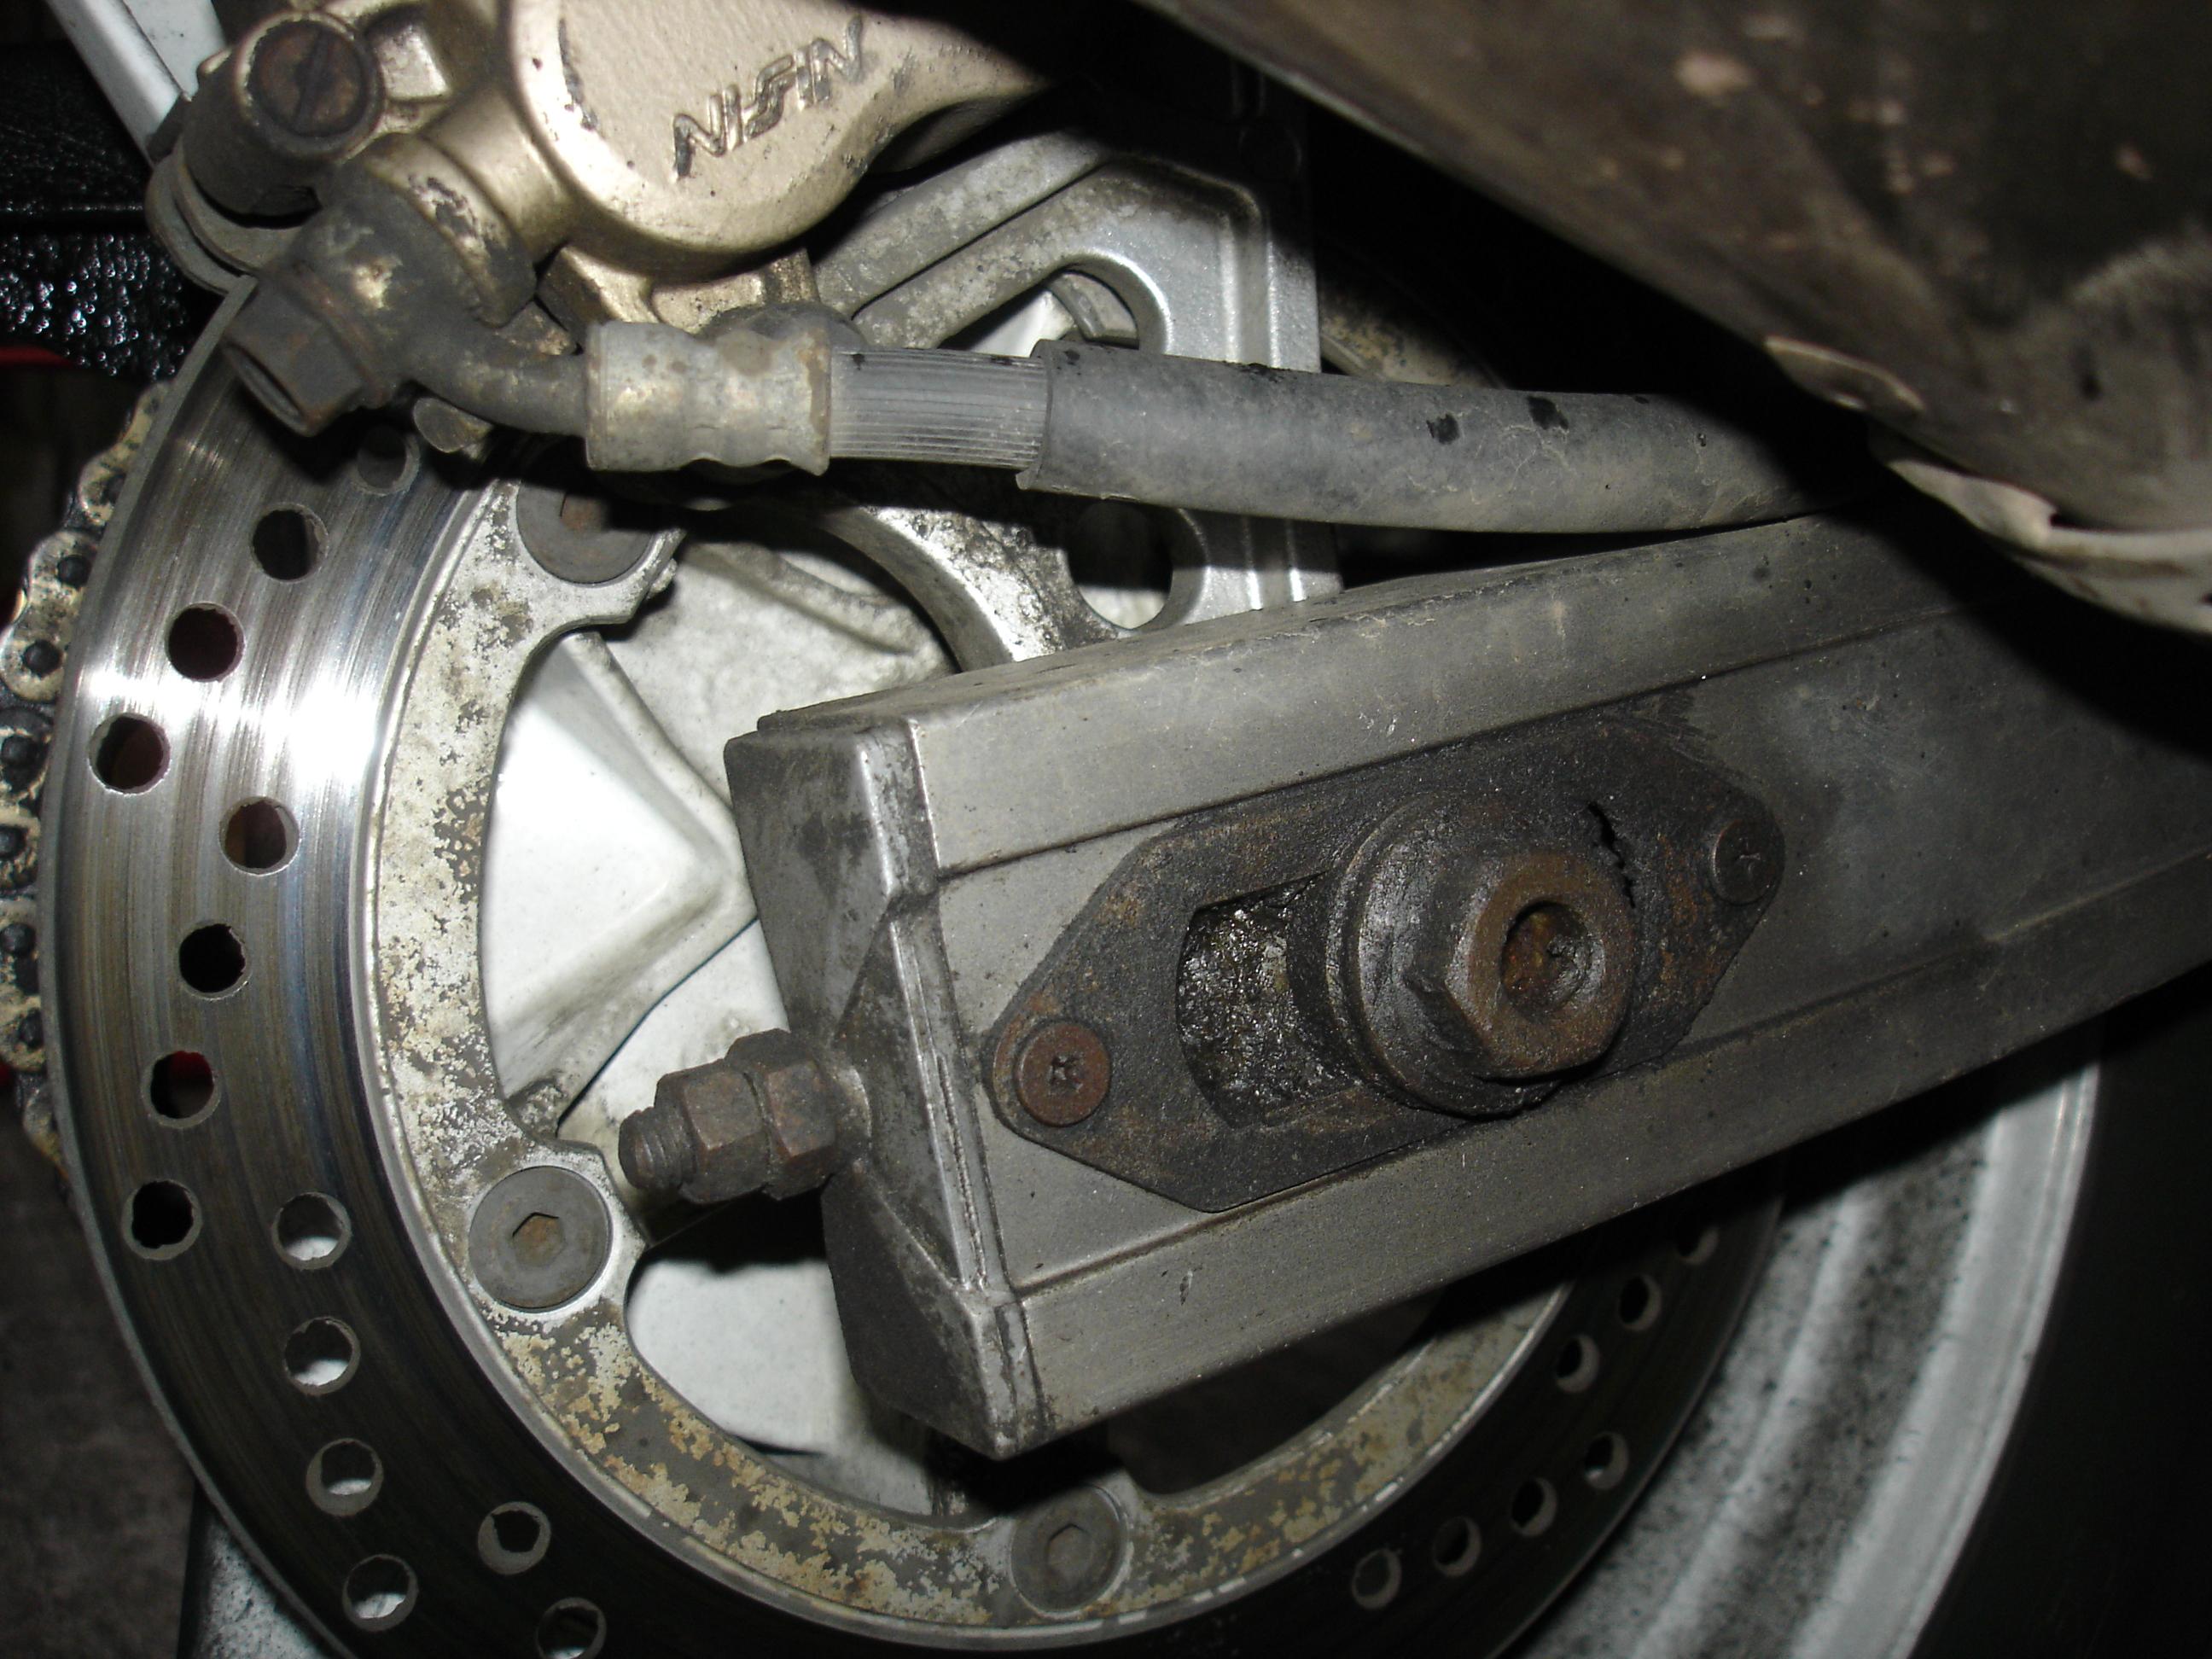
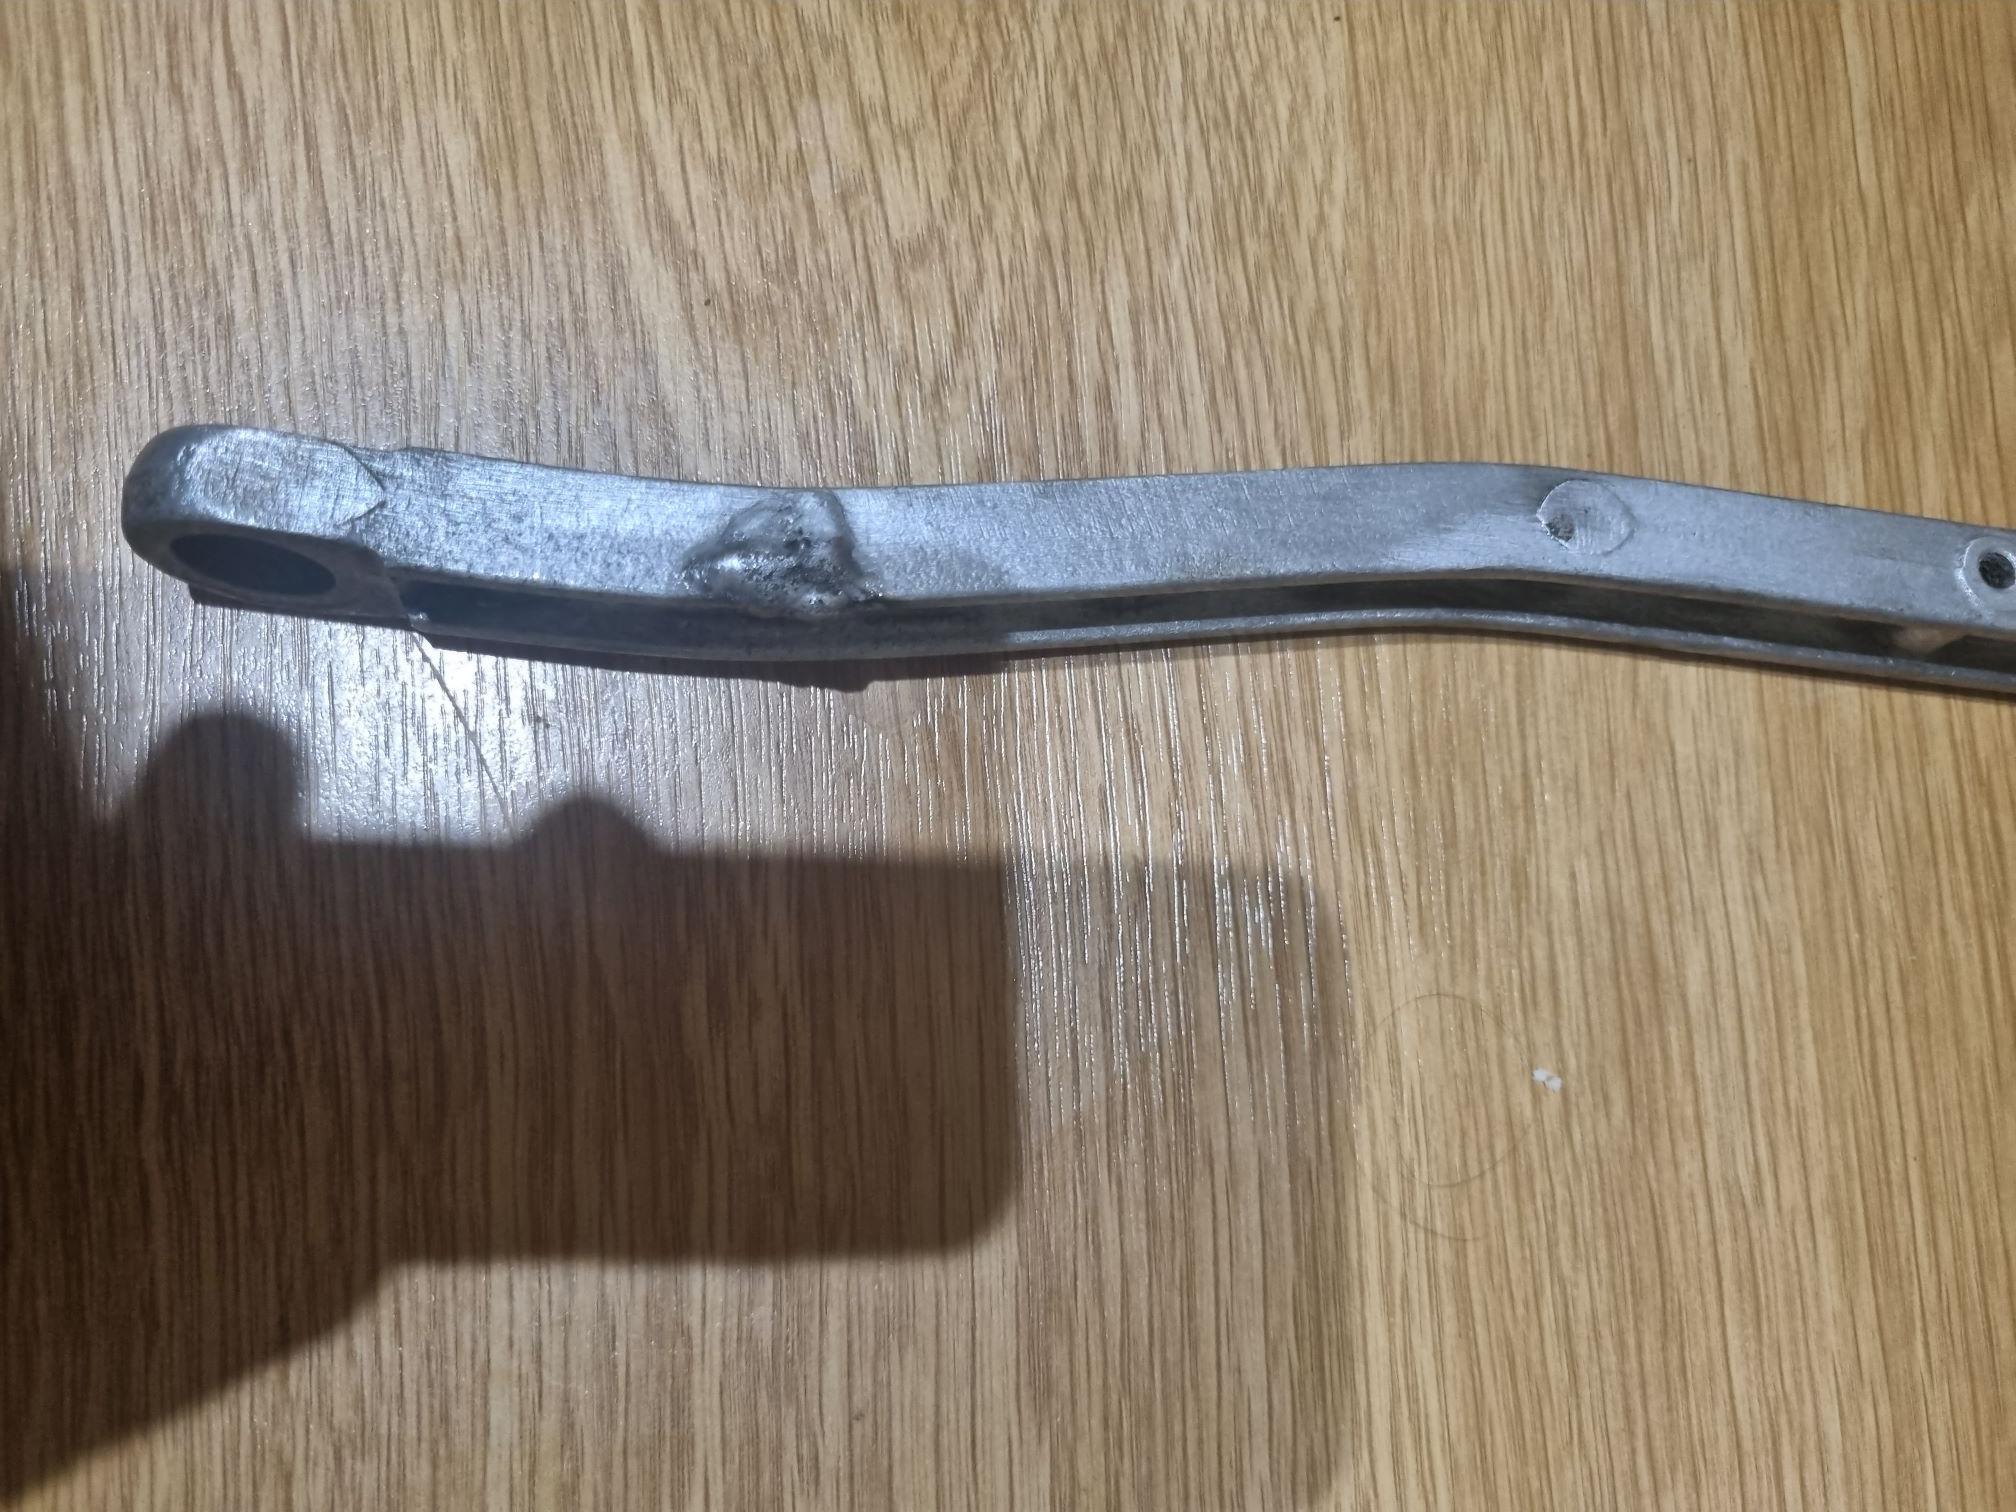
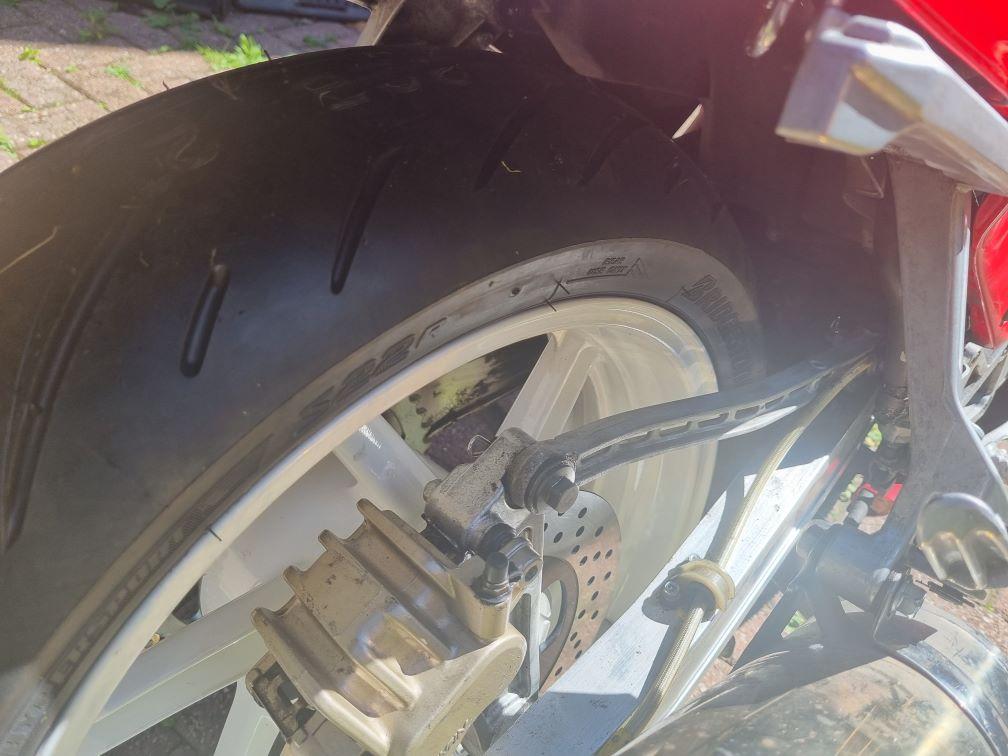
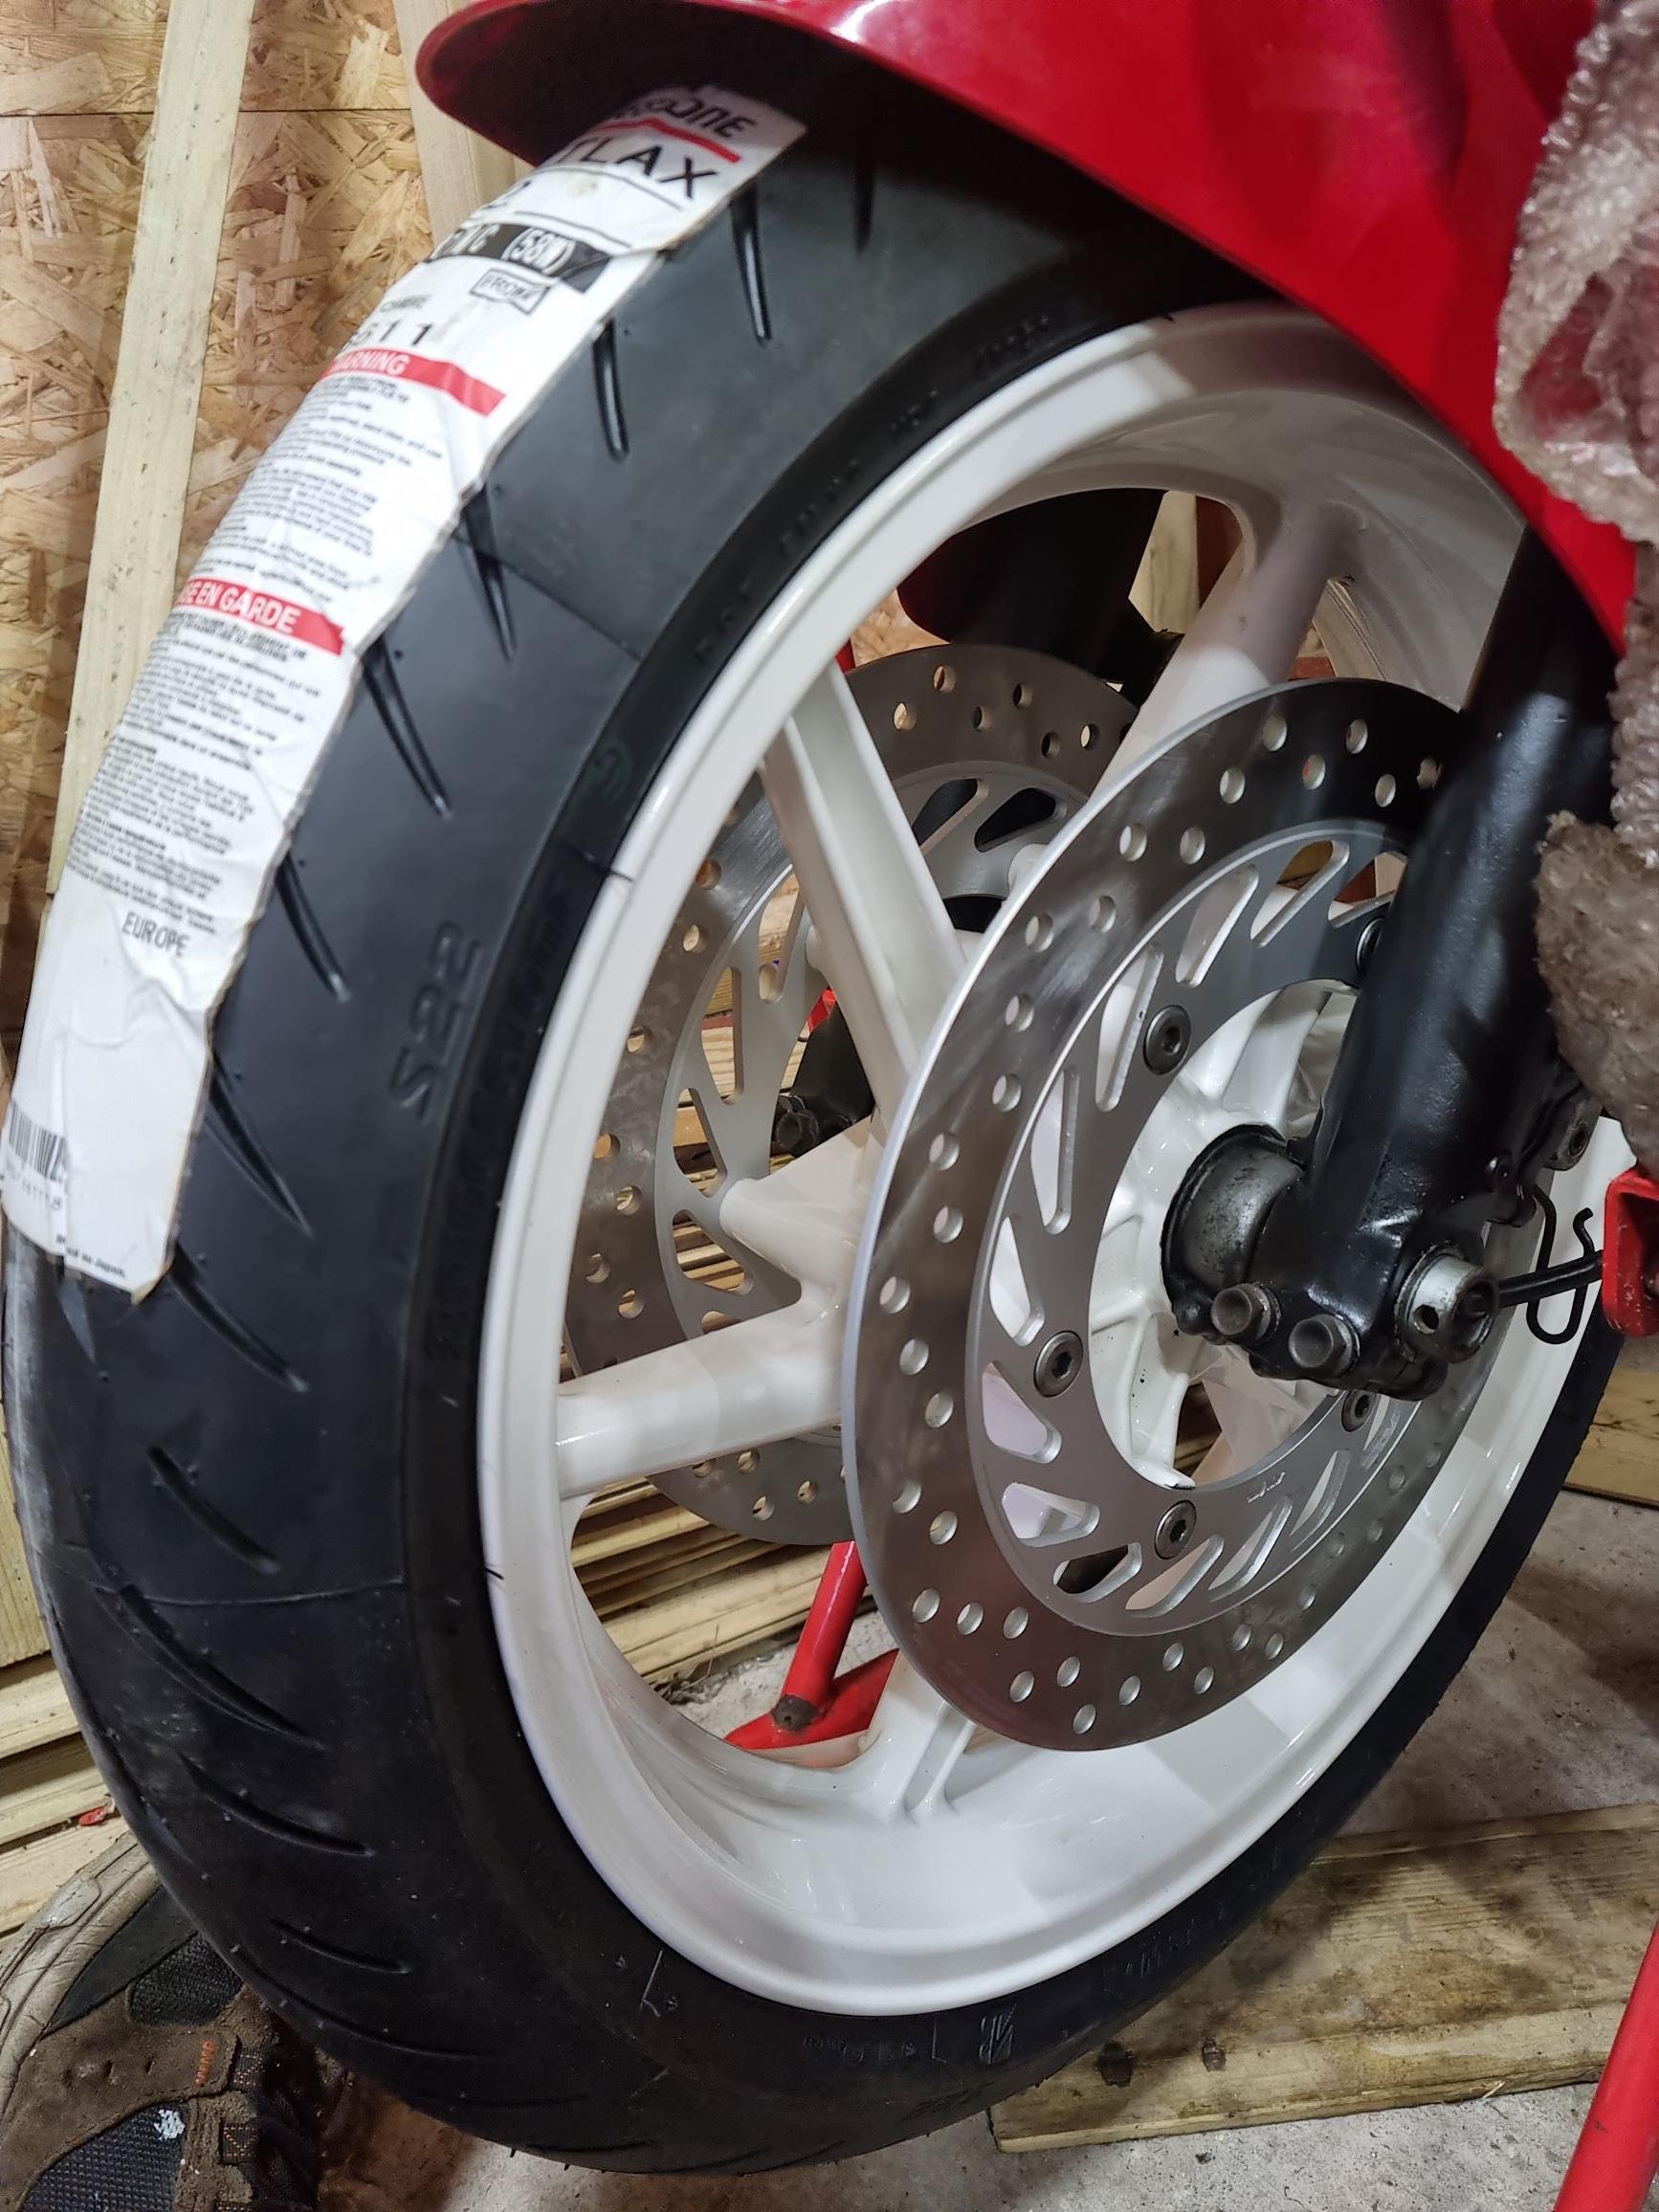
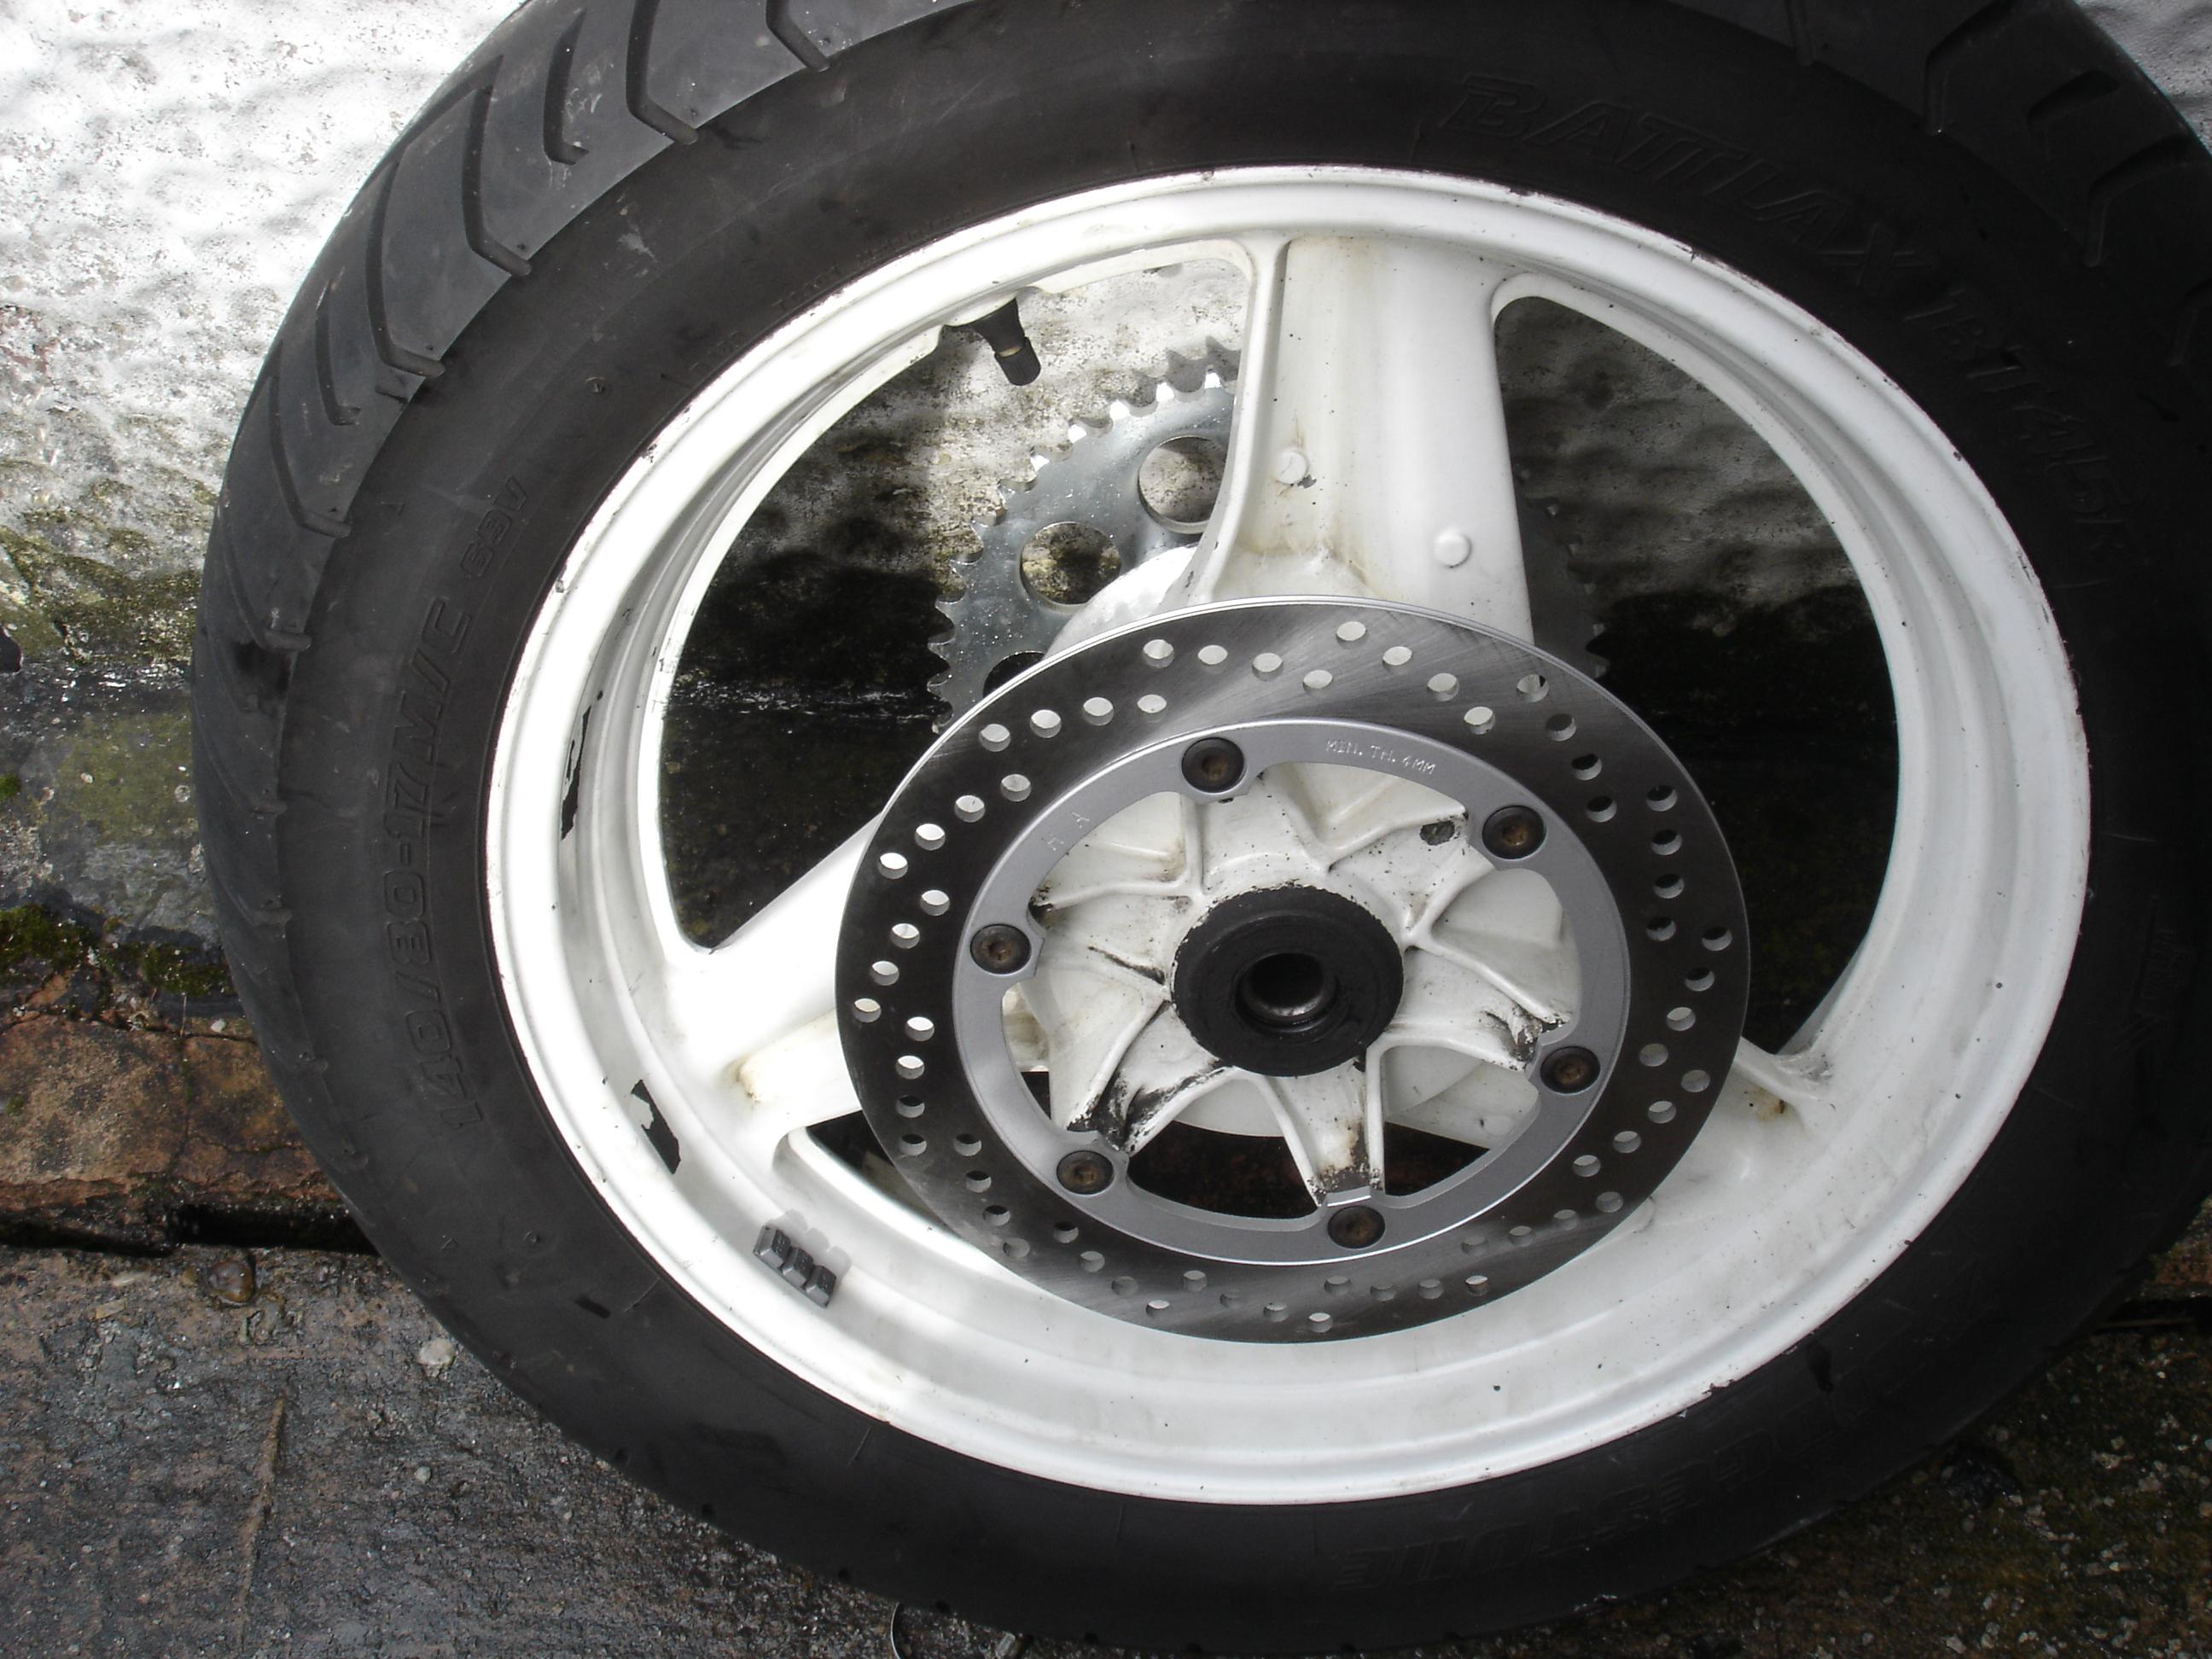
Rear wheel. Original wore a140/80V17 which is 655.8mm in diameter. I went with the later 5" wheel to keep my options open. This was originally fitted on the CBR600 with a 160/60ZR17 but gives the following wide range of tyre sizes and diameters. 160/60ZR17 - 623.8mm 160/70ZR17 - 655.8mm 170/60ZR17 - 635.8mm 180/60ZR17 - 647.8mm 190/60ZR17 - 659.8mm In an ideal world I'd go with a 160/70ZR17 because its identical to the original diameter while still being close to the same width as the original. Tyre availability however in that size is poor. So I went with the 160/60ZR17. This obviously does have a slight issue in that its 32mm smaller and sits the back end of the bike 16mm lower but that is a bridge we'll cross in a later episode... For fitment I went off this diagram for the spacing and the widely held "myth" that "the F3 wheel is a direct replacement for the F2" and made up some nice spacers. What "the internet" doesn't make quite so clear is that if you're swapping them you need everything as the spacers are not the same diameter! Of my lovingly turned spacers only the 8mm one fitted as the 1995-98 CBR600F uses 30mm seals instead of 34mm in the older model. 🤦♂️ All was not lost however, the original left spacer turned out to be 14mm anyway and I made a new 16mm spacer for the other side. Of course I then realised I was an idiot and as I was replacing all the bearings and seals anyway I just got the seal for the earlier CBR6 sprocket carrier and used my spacer anyway rather than the grotty steel original! For the brakes there are two options. Either use the original CBR600 disc and brake caliper and somehow mount something to the arm to retain it or use the original brake caliper with a bent arm and a different disc. I went with the original caliper option. I fitted a 255mm disc instead of the 256mm disc from this list of bikes: Bonneville 790-01/06 Bonneville 865-12/13 Bonneville 865 SE/T100-12/13 Q-Bike-12/13 Scrambler 865-06/13 Steve Mc Quen 865-12 Thruxton 865-04/13 The Runner-12/13 Sprint RS 955-00/04 Sprint ST 955-98/04 Speed Triple 1050-12/13 Speed Triple 1050 ABS-12 Speed Triple R 1050-12/13 Sprint ST T 1050-05/11 Tiger 1050 / ABS / SE-07/13, I should mention that even with the original disc, the pads don't go to the outside as can be seen from the substantial "lip" on my original disc some years ago Despite losing 1mm in diameter the pads *still* don't go to the edge of the disc. For the torque arm there are two problems, the first is that the caliper has moved 8mm inwards. The second is that the tyre is too close to the arm. To get round this problem I moved the arm from the left of the swingarm mount to the right and stuck an S bend in it. Not 100% successfully I should mention as it slightly cracked, however have TIG, will melt stuff so welded it back up. The arm now nicely clears everything.
-
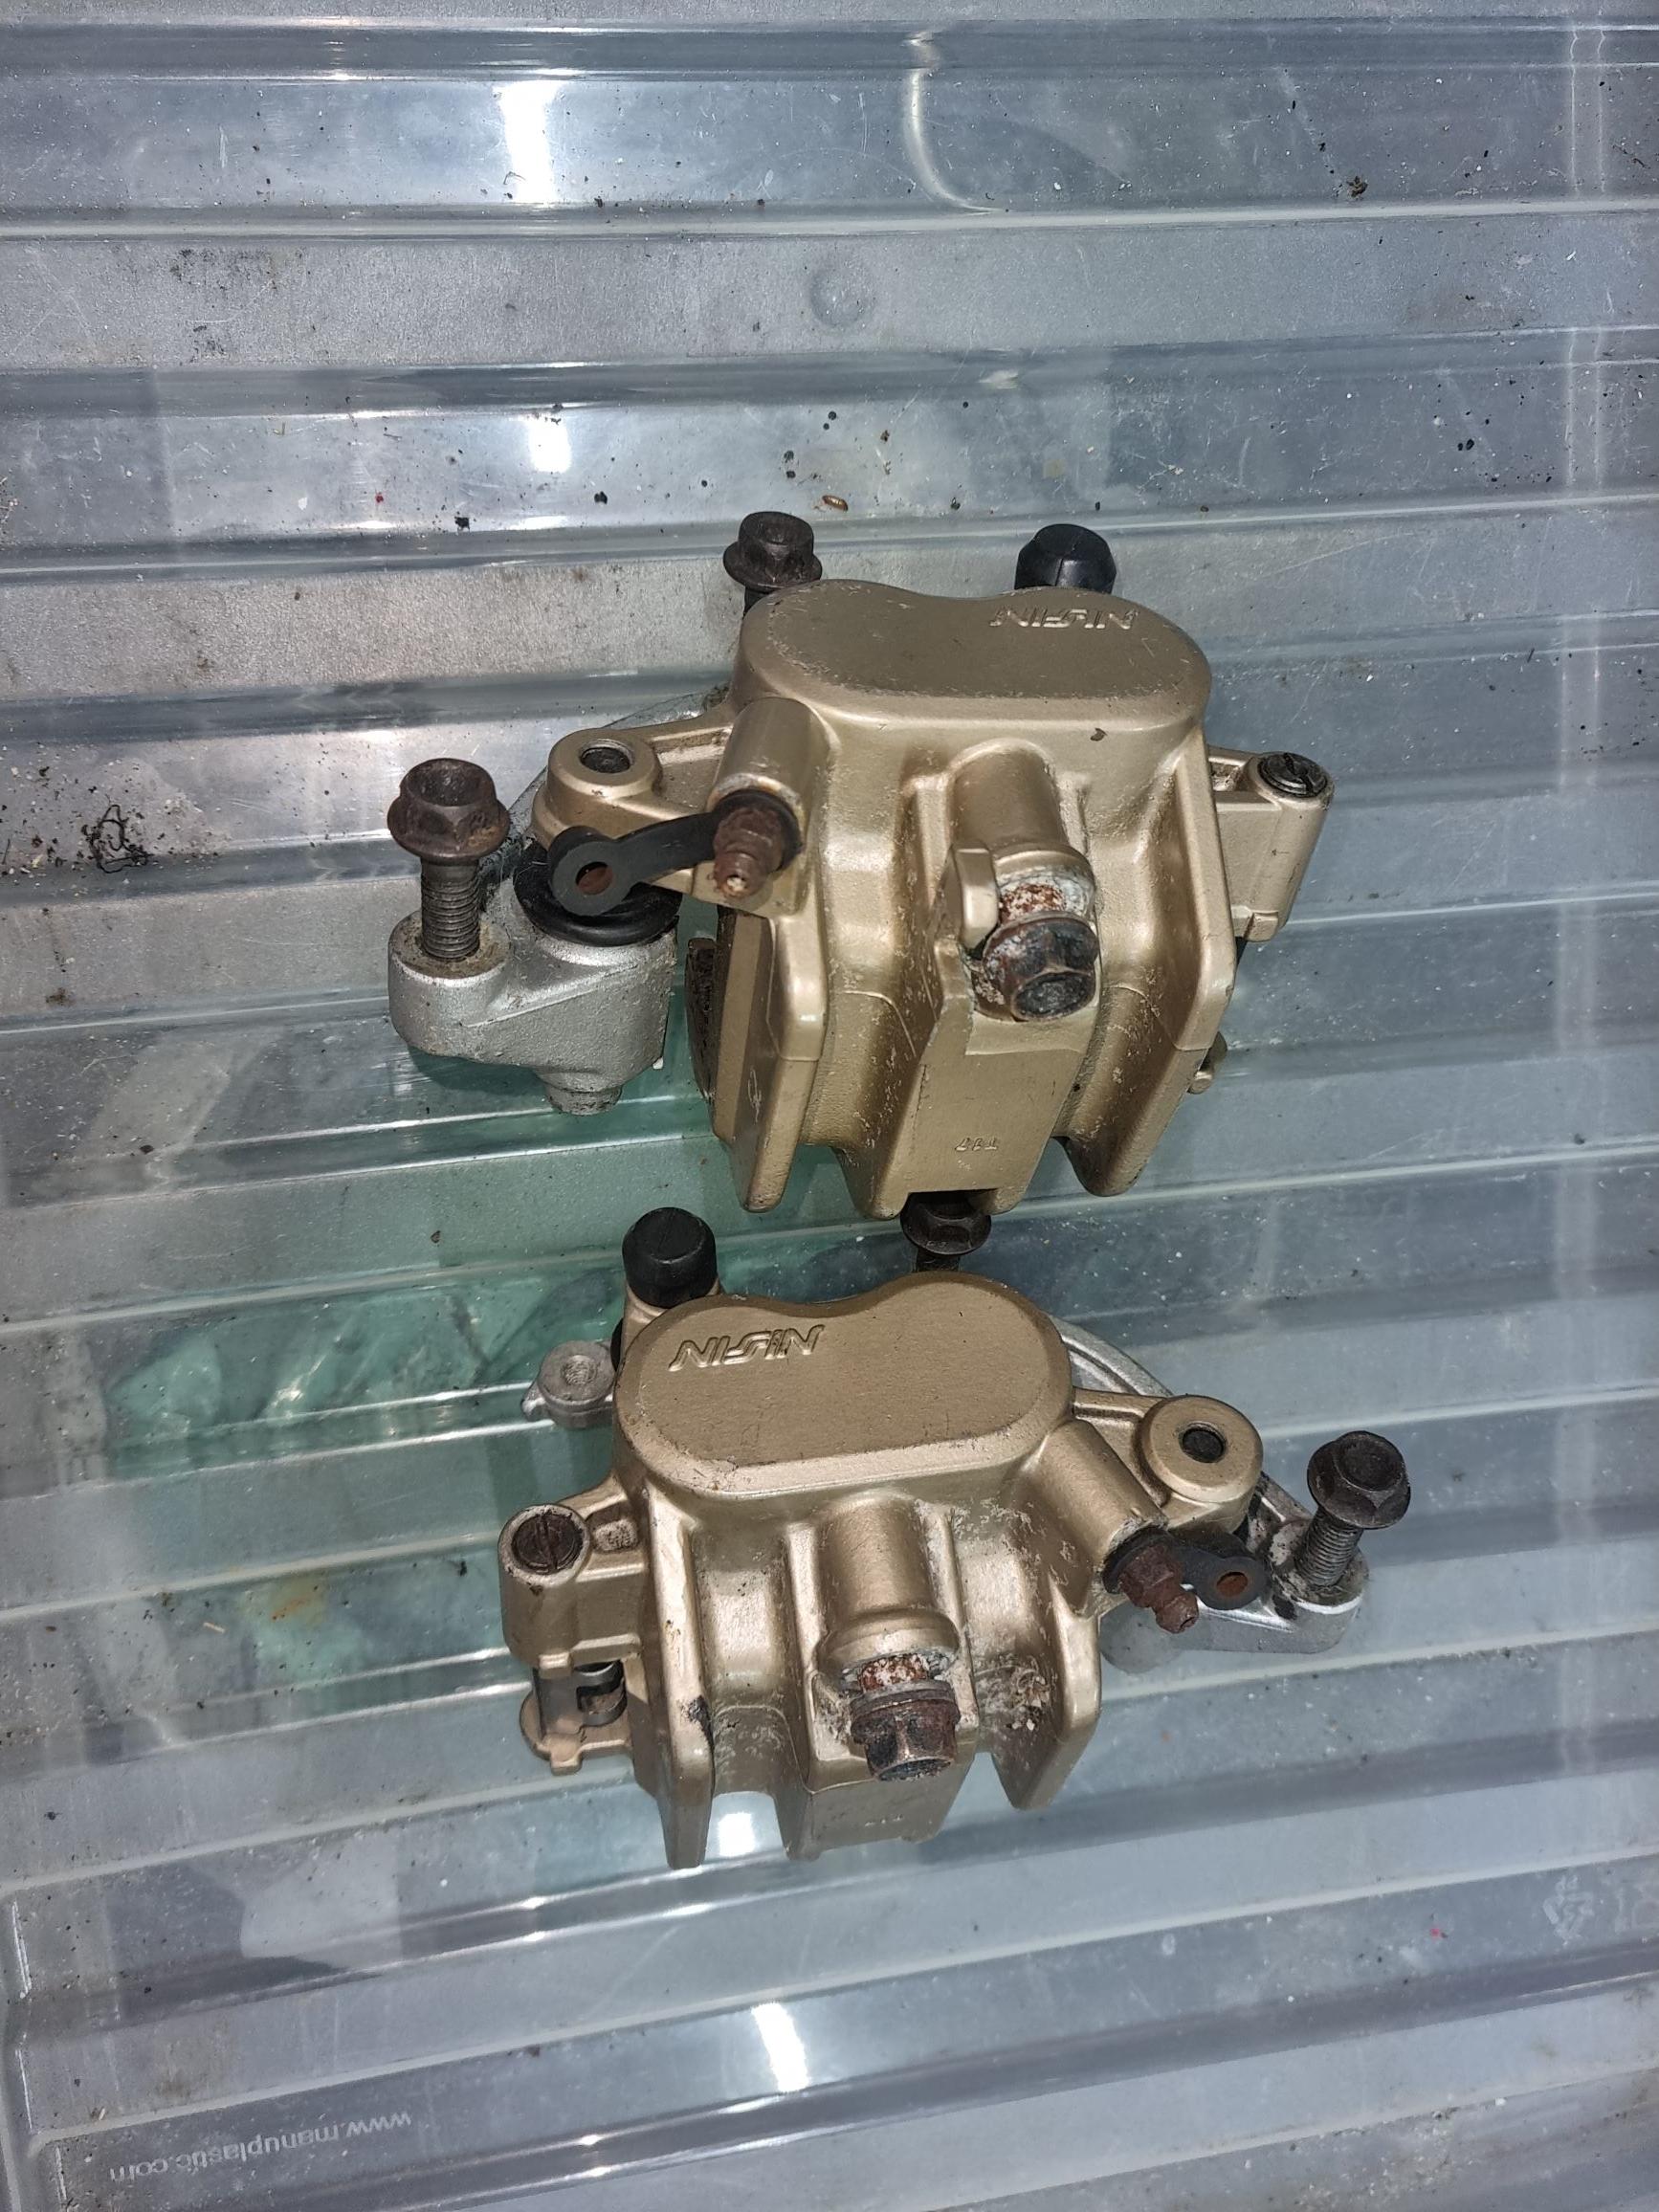
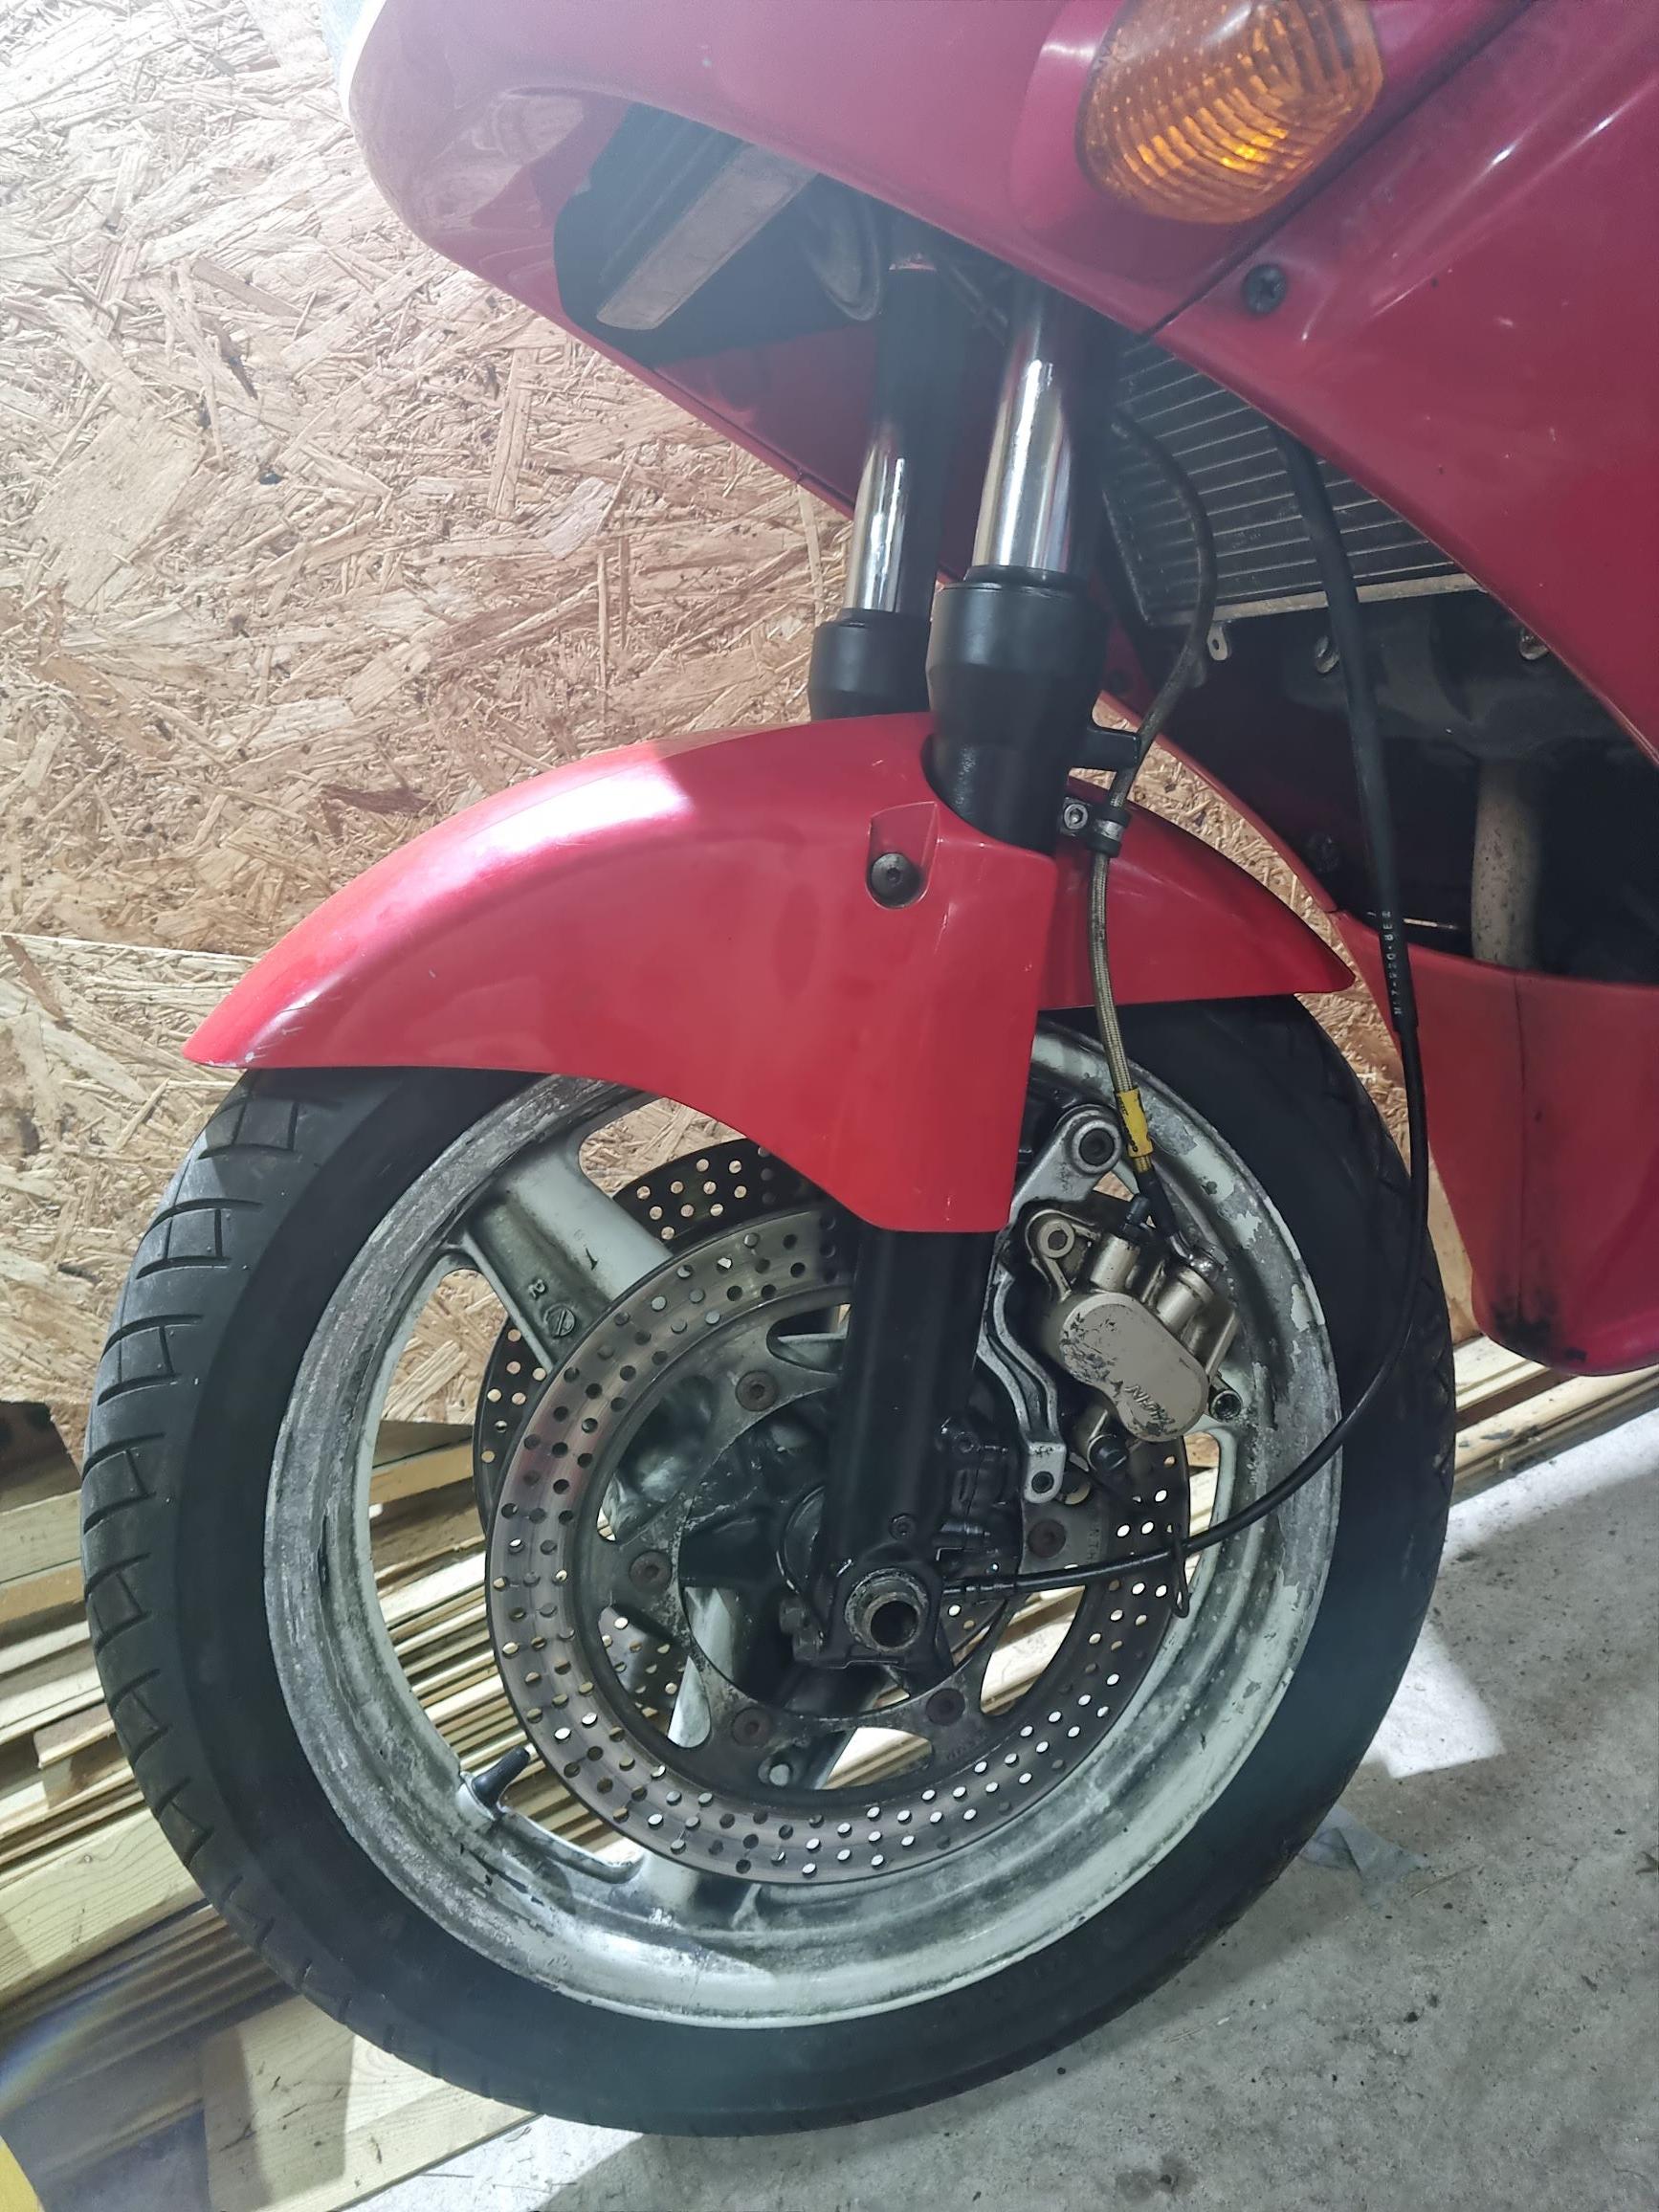
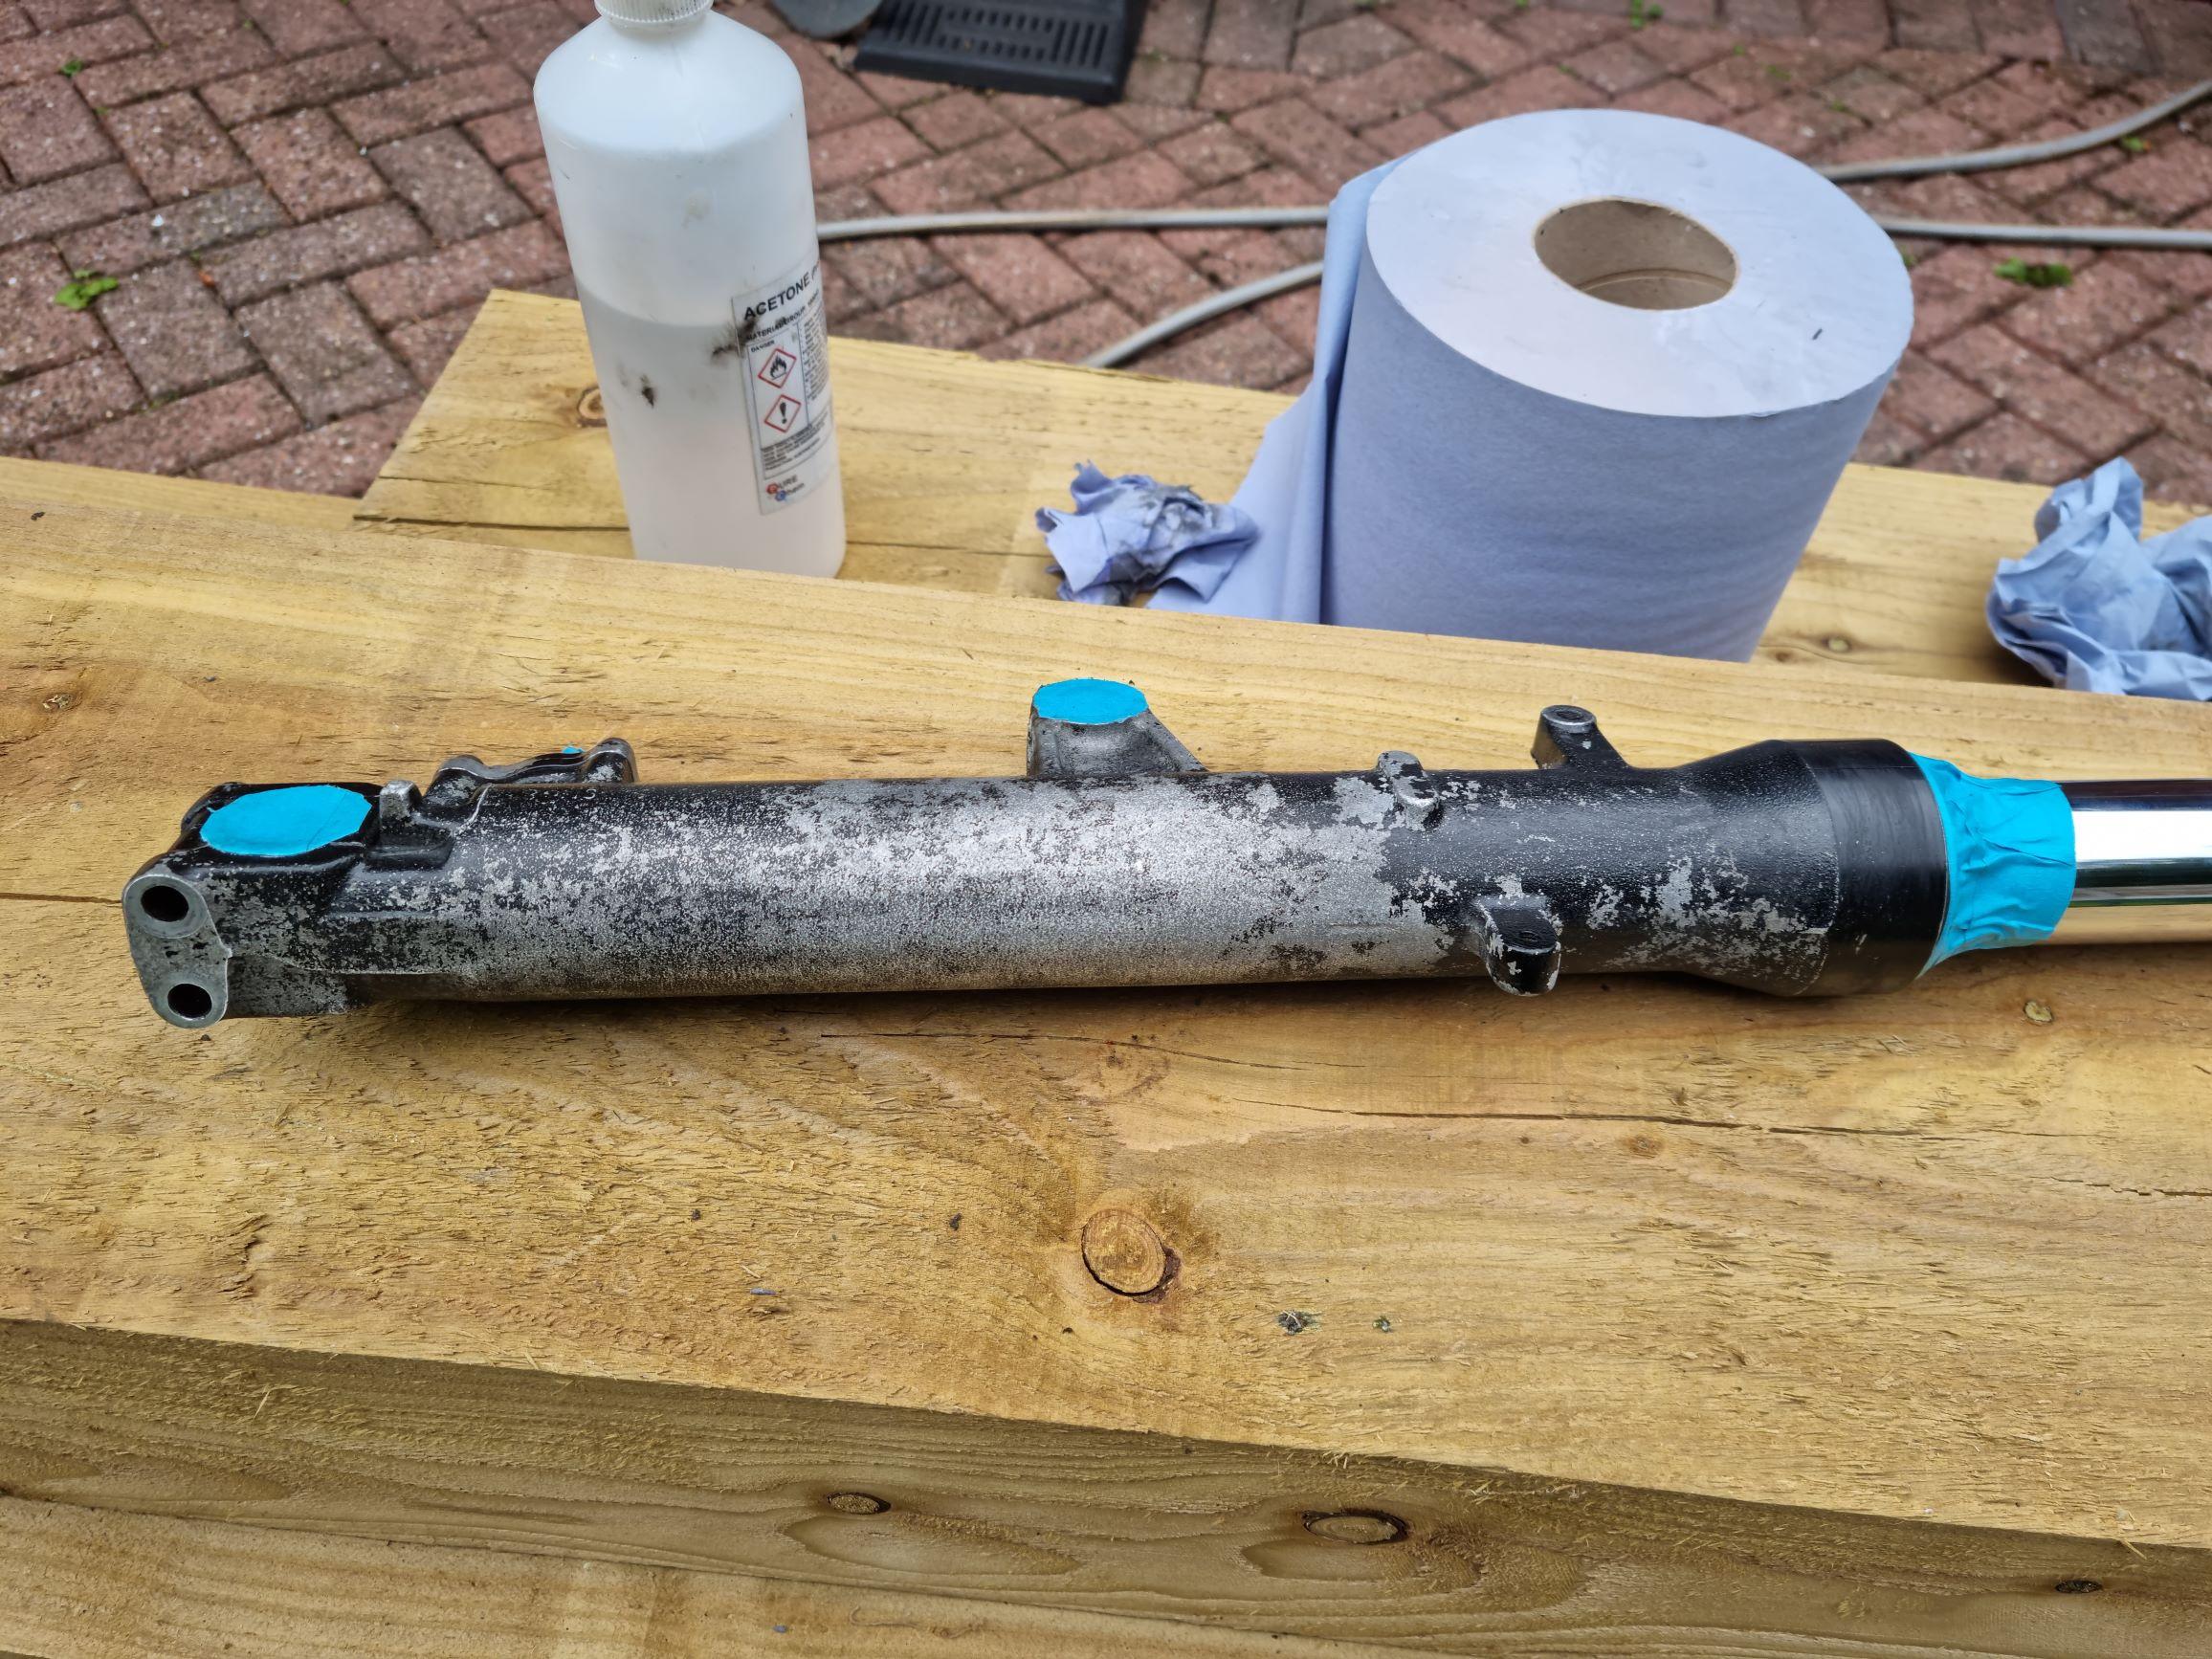
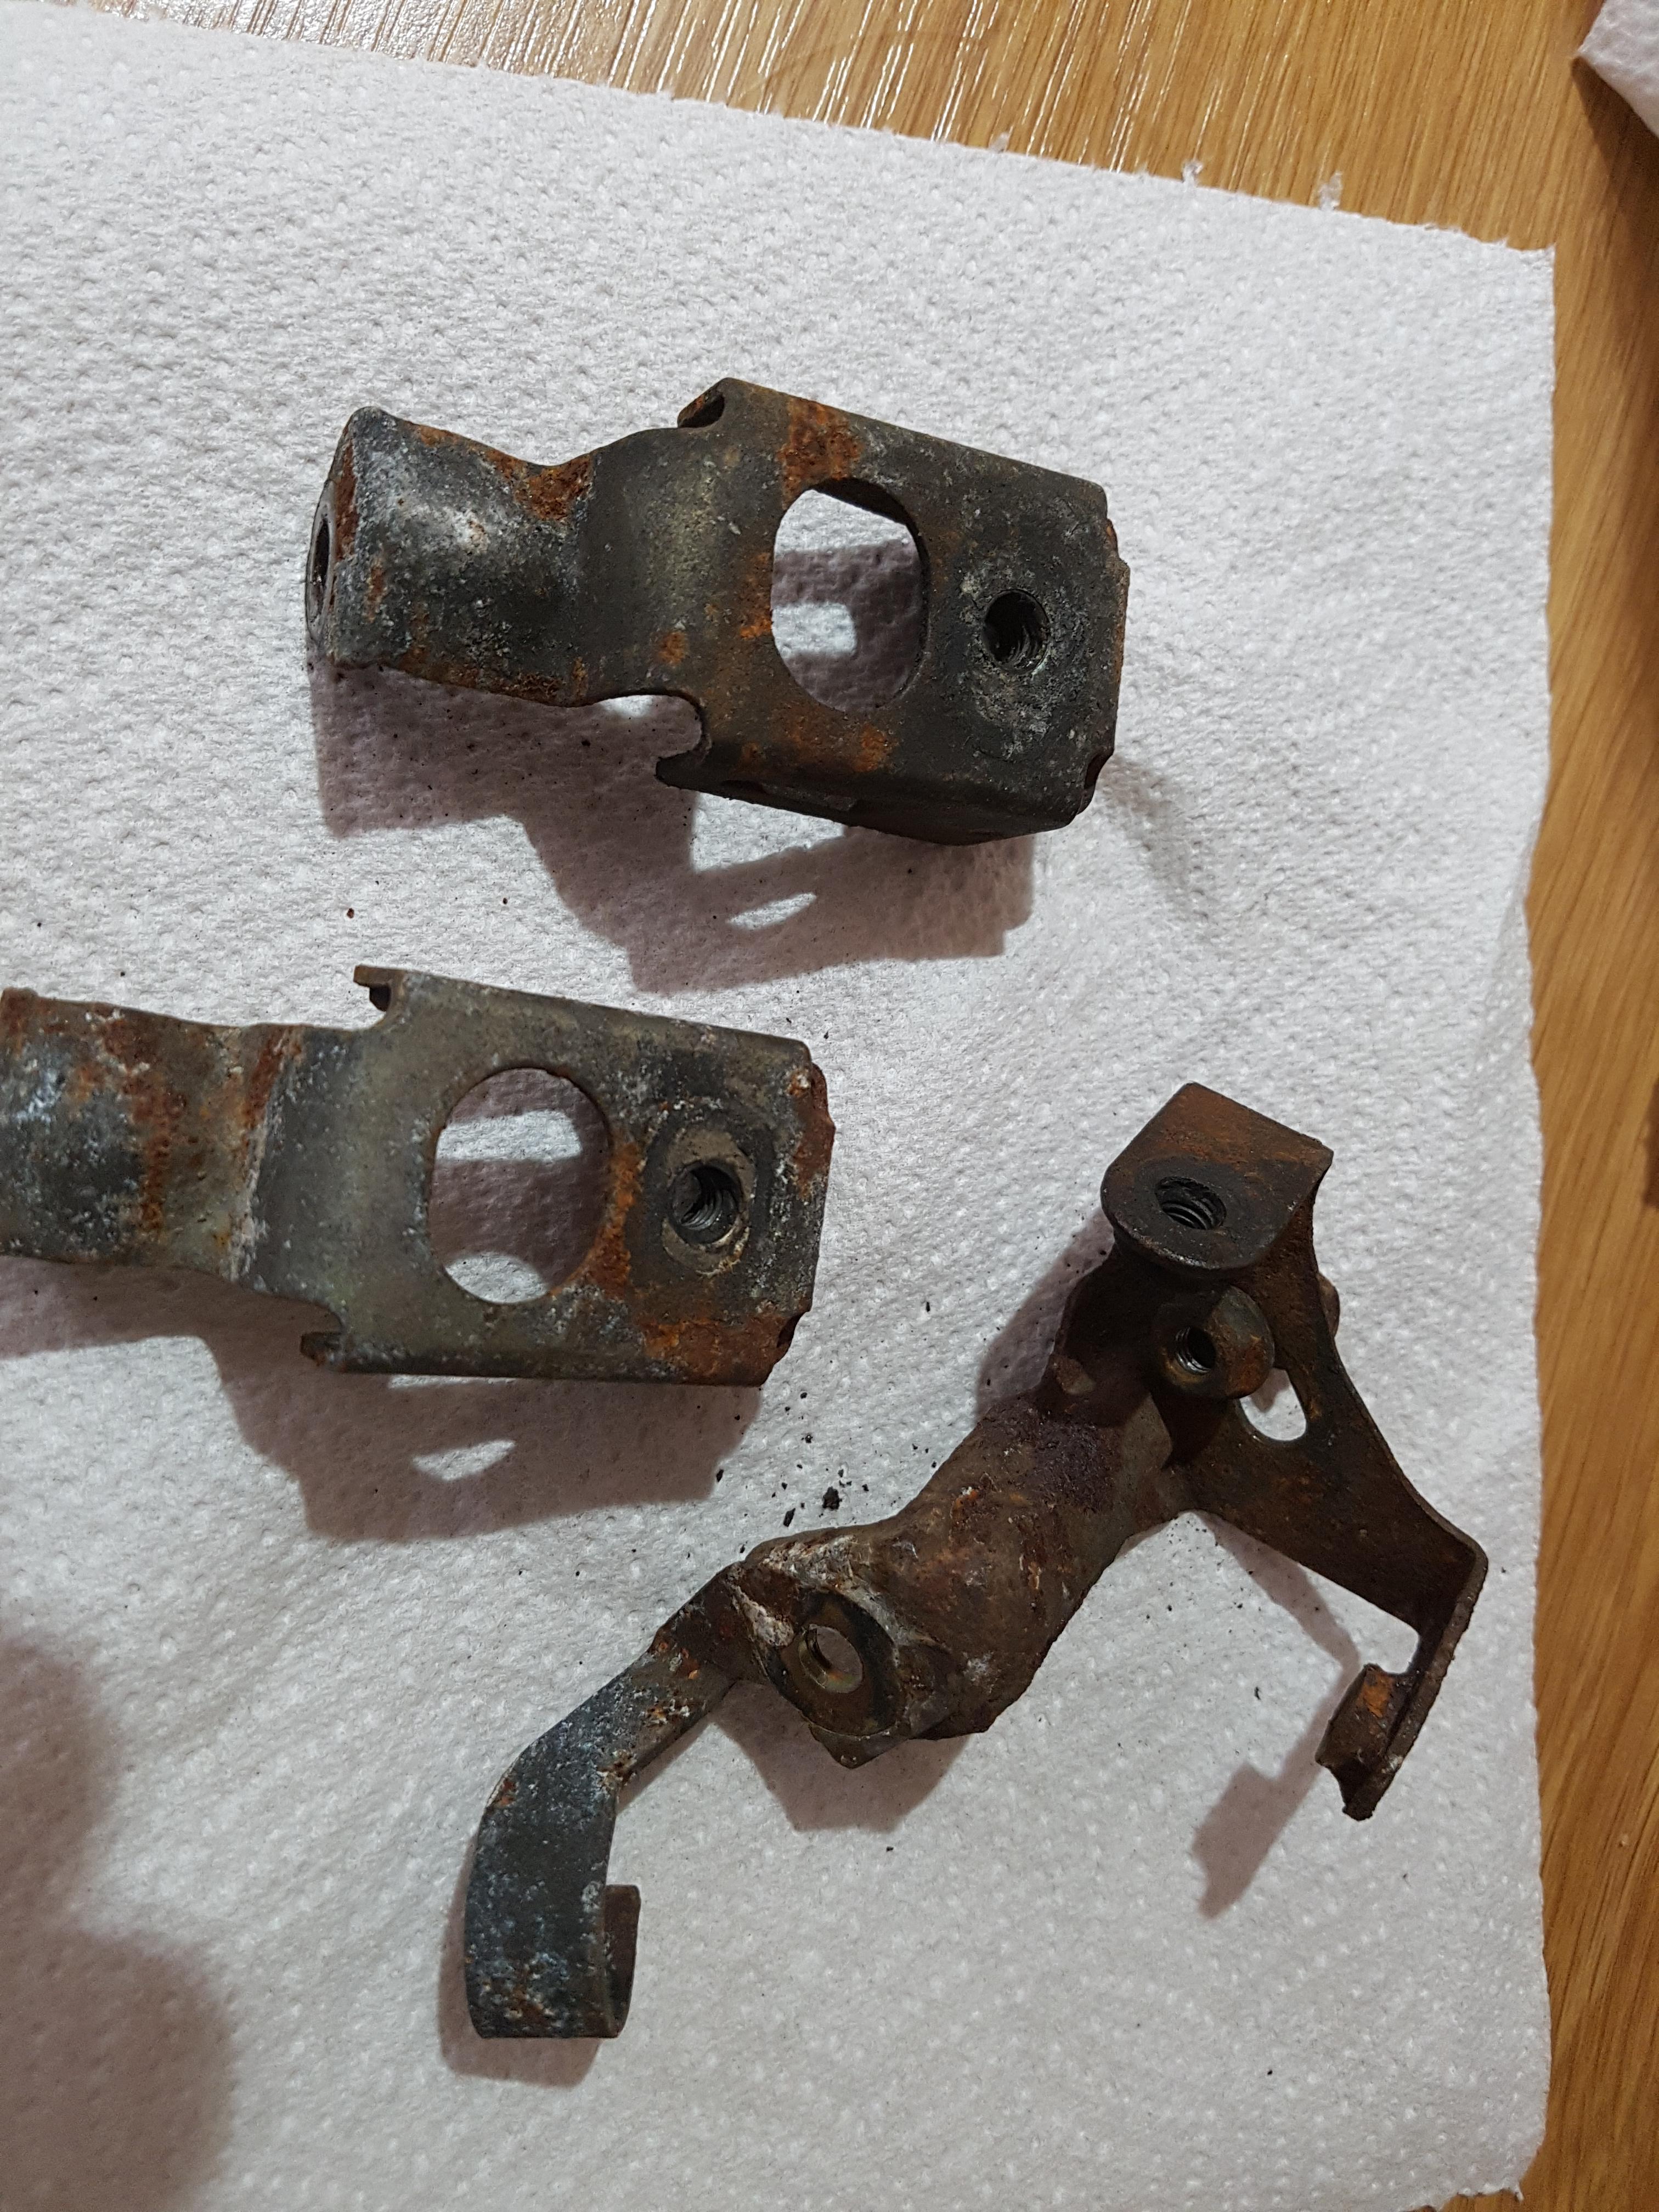
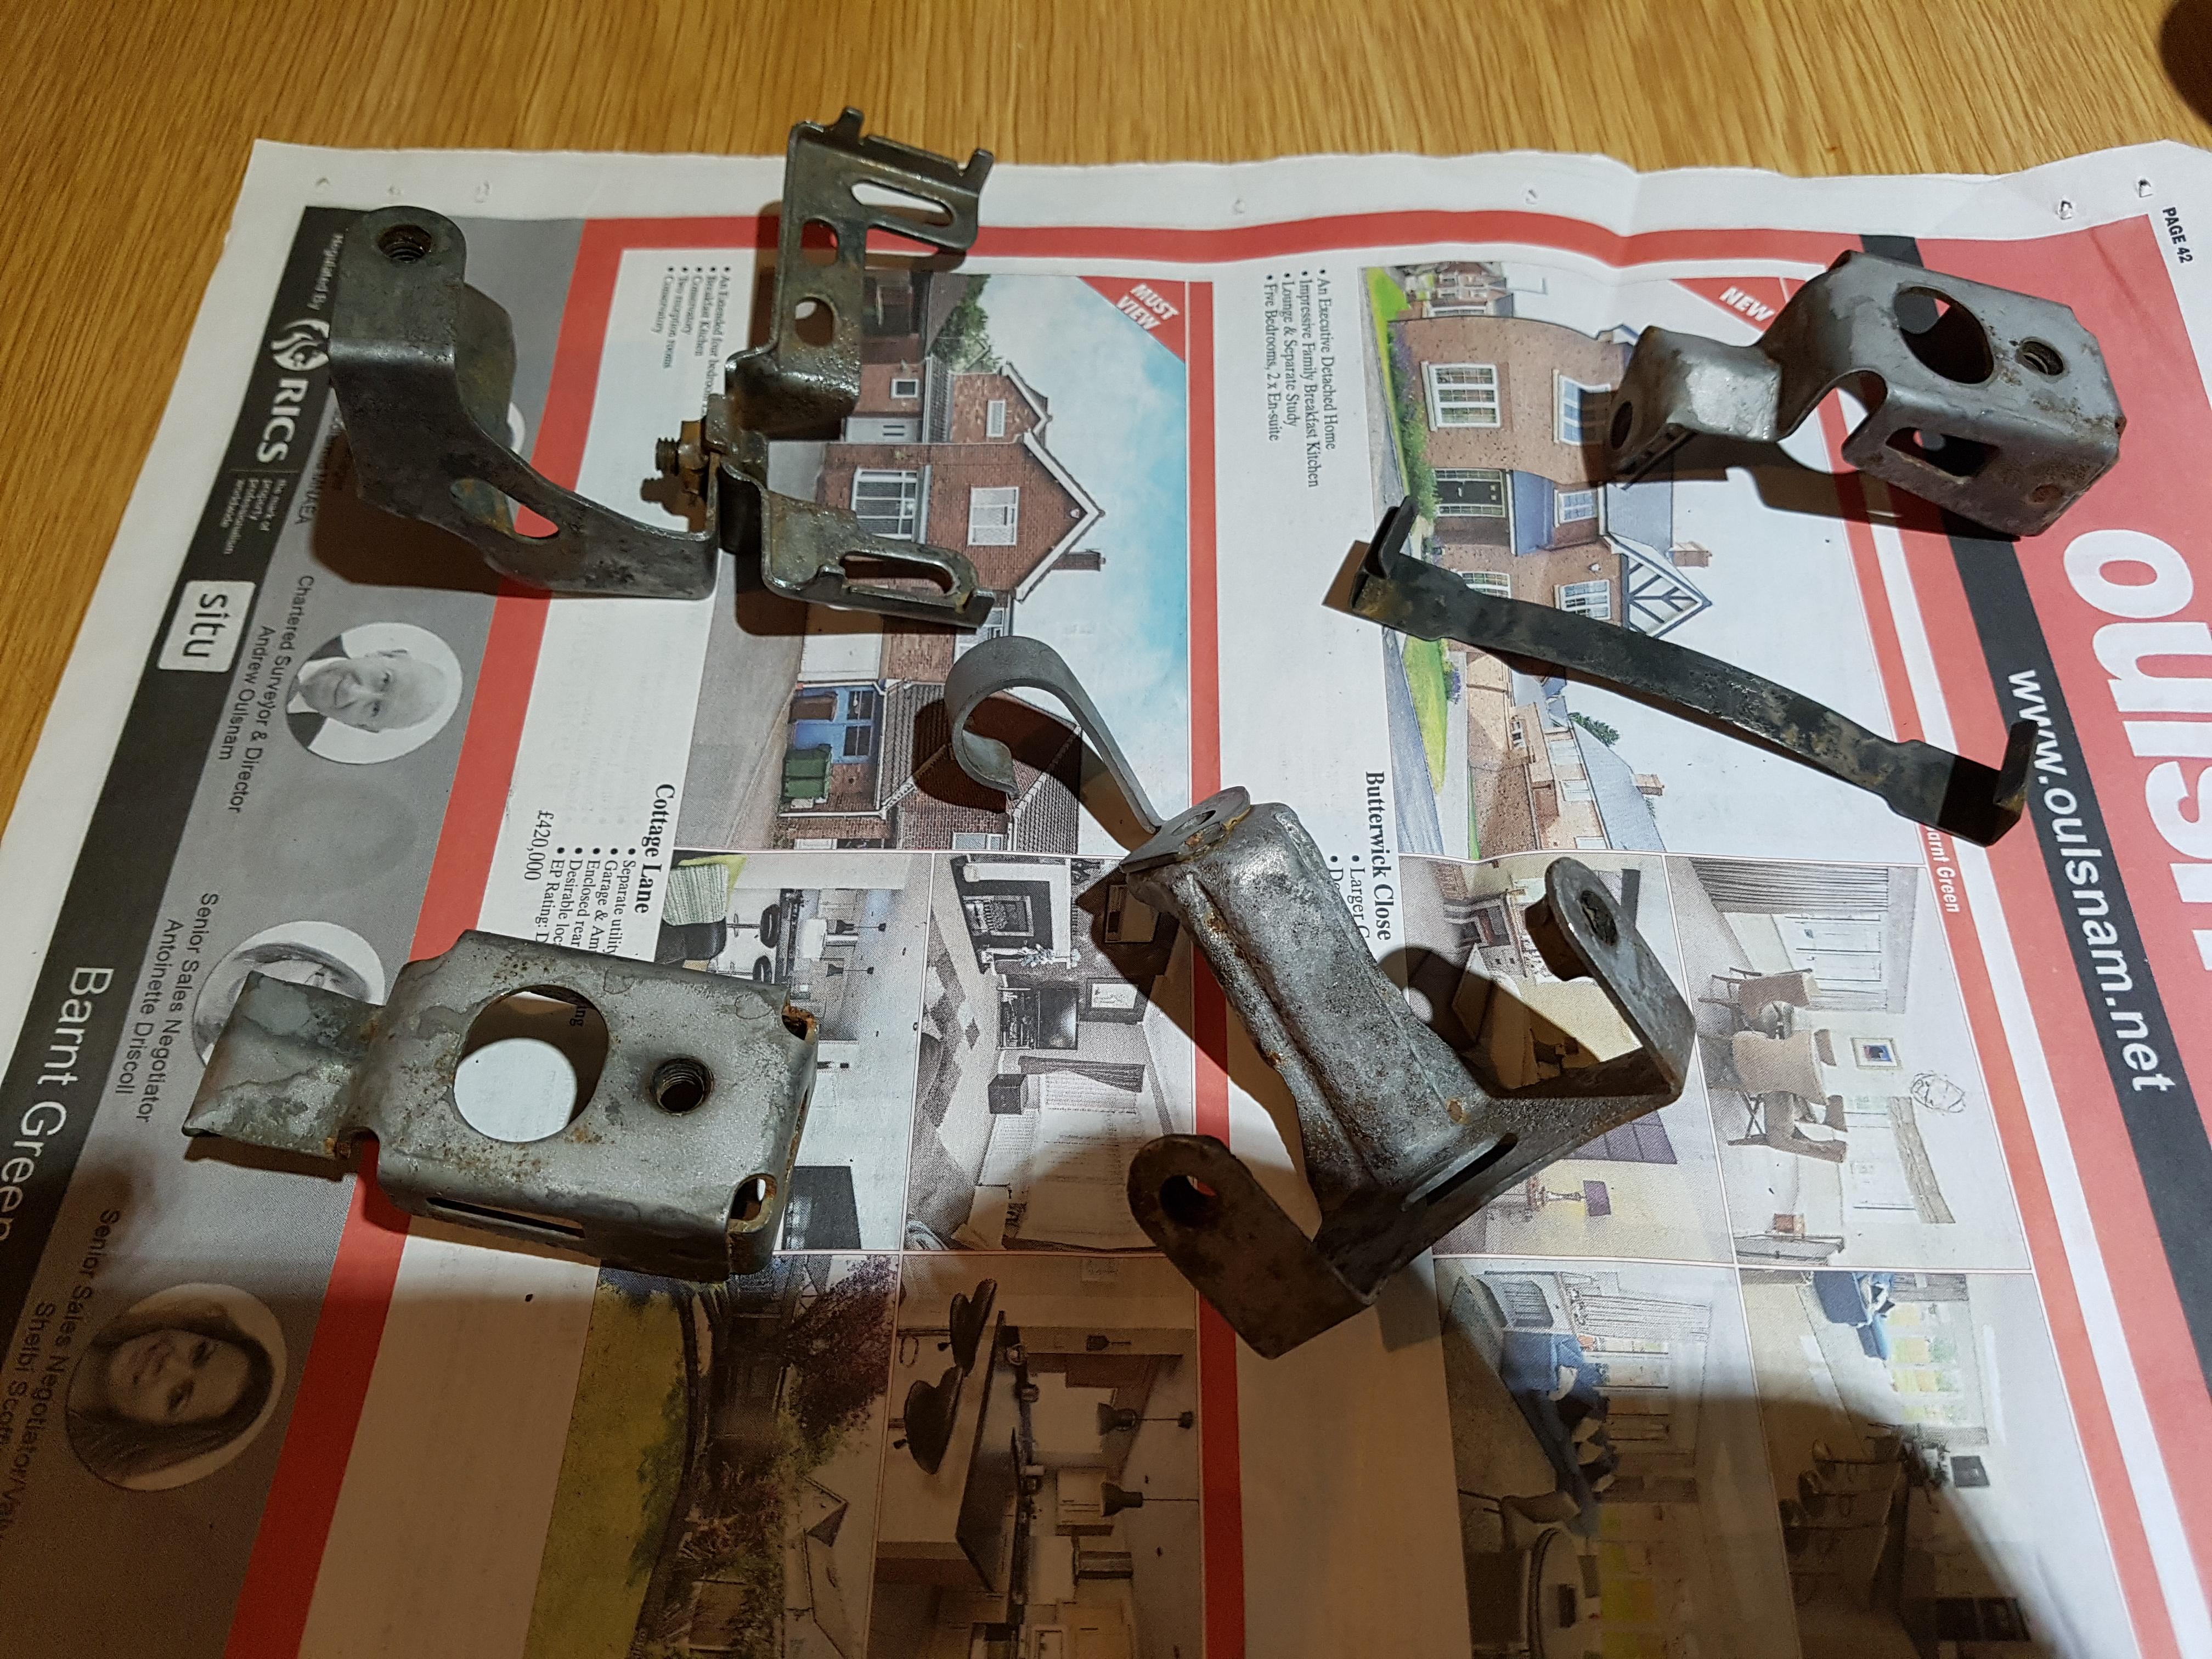
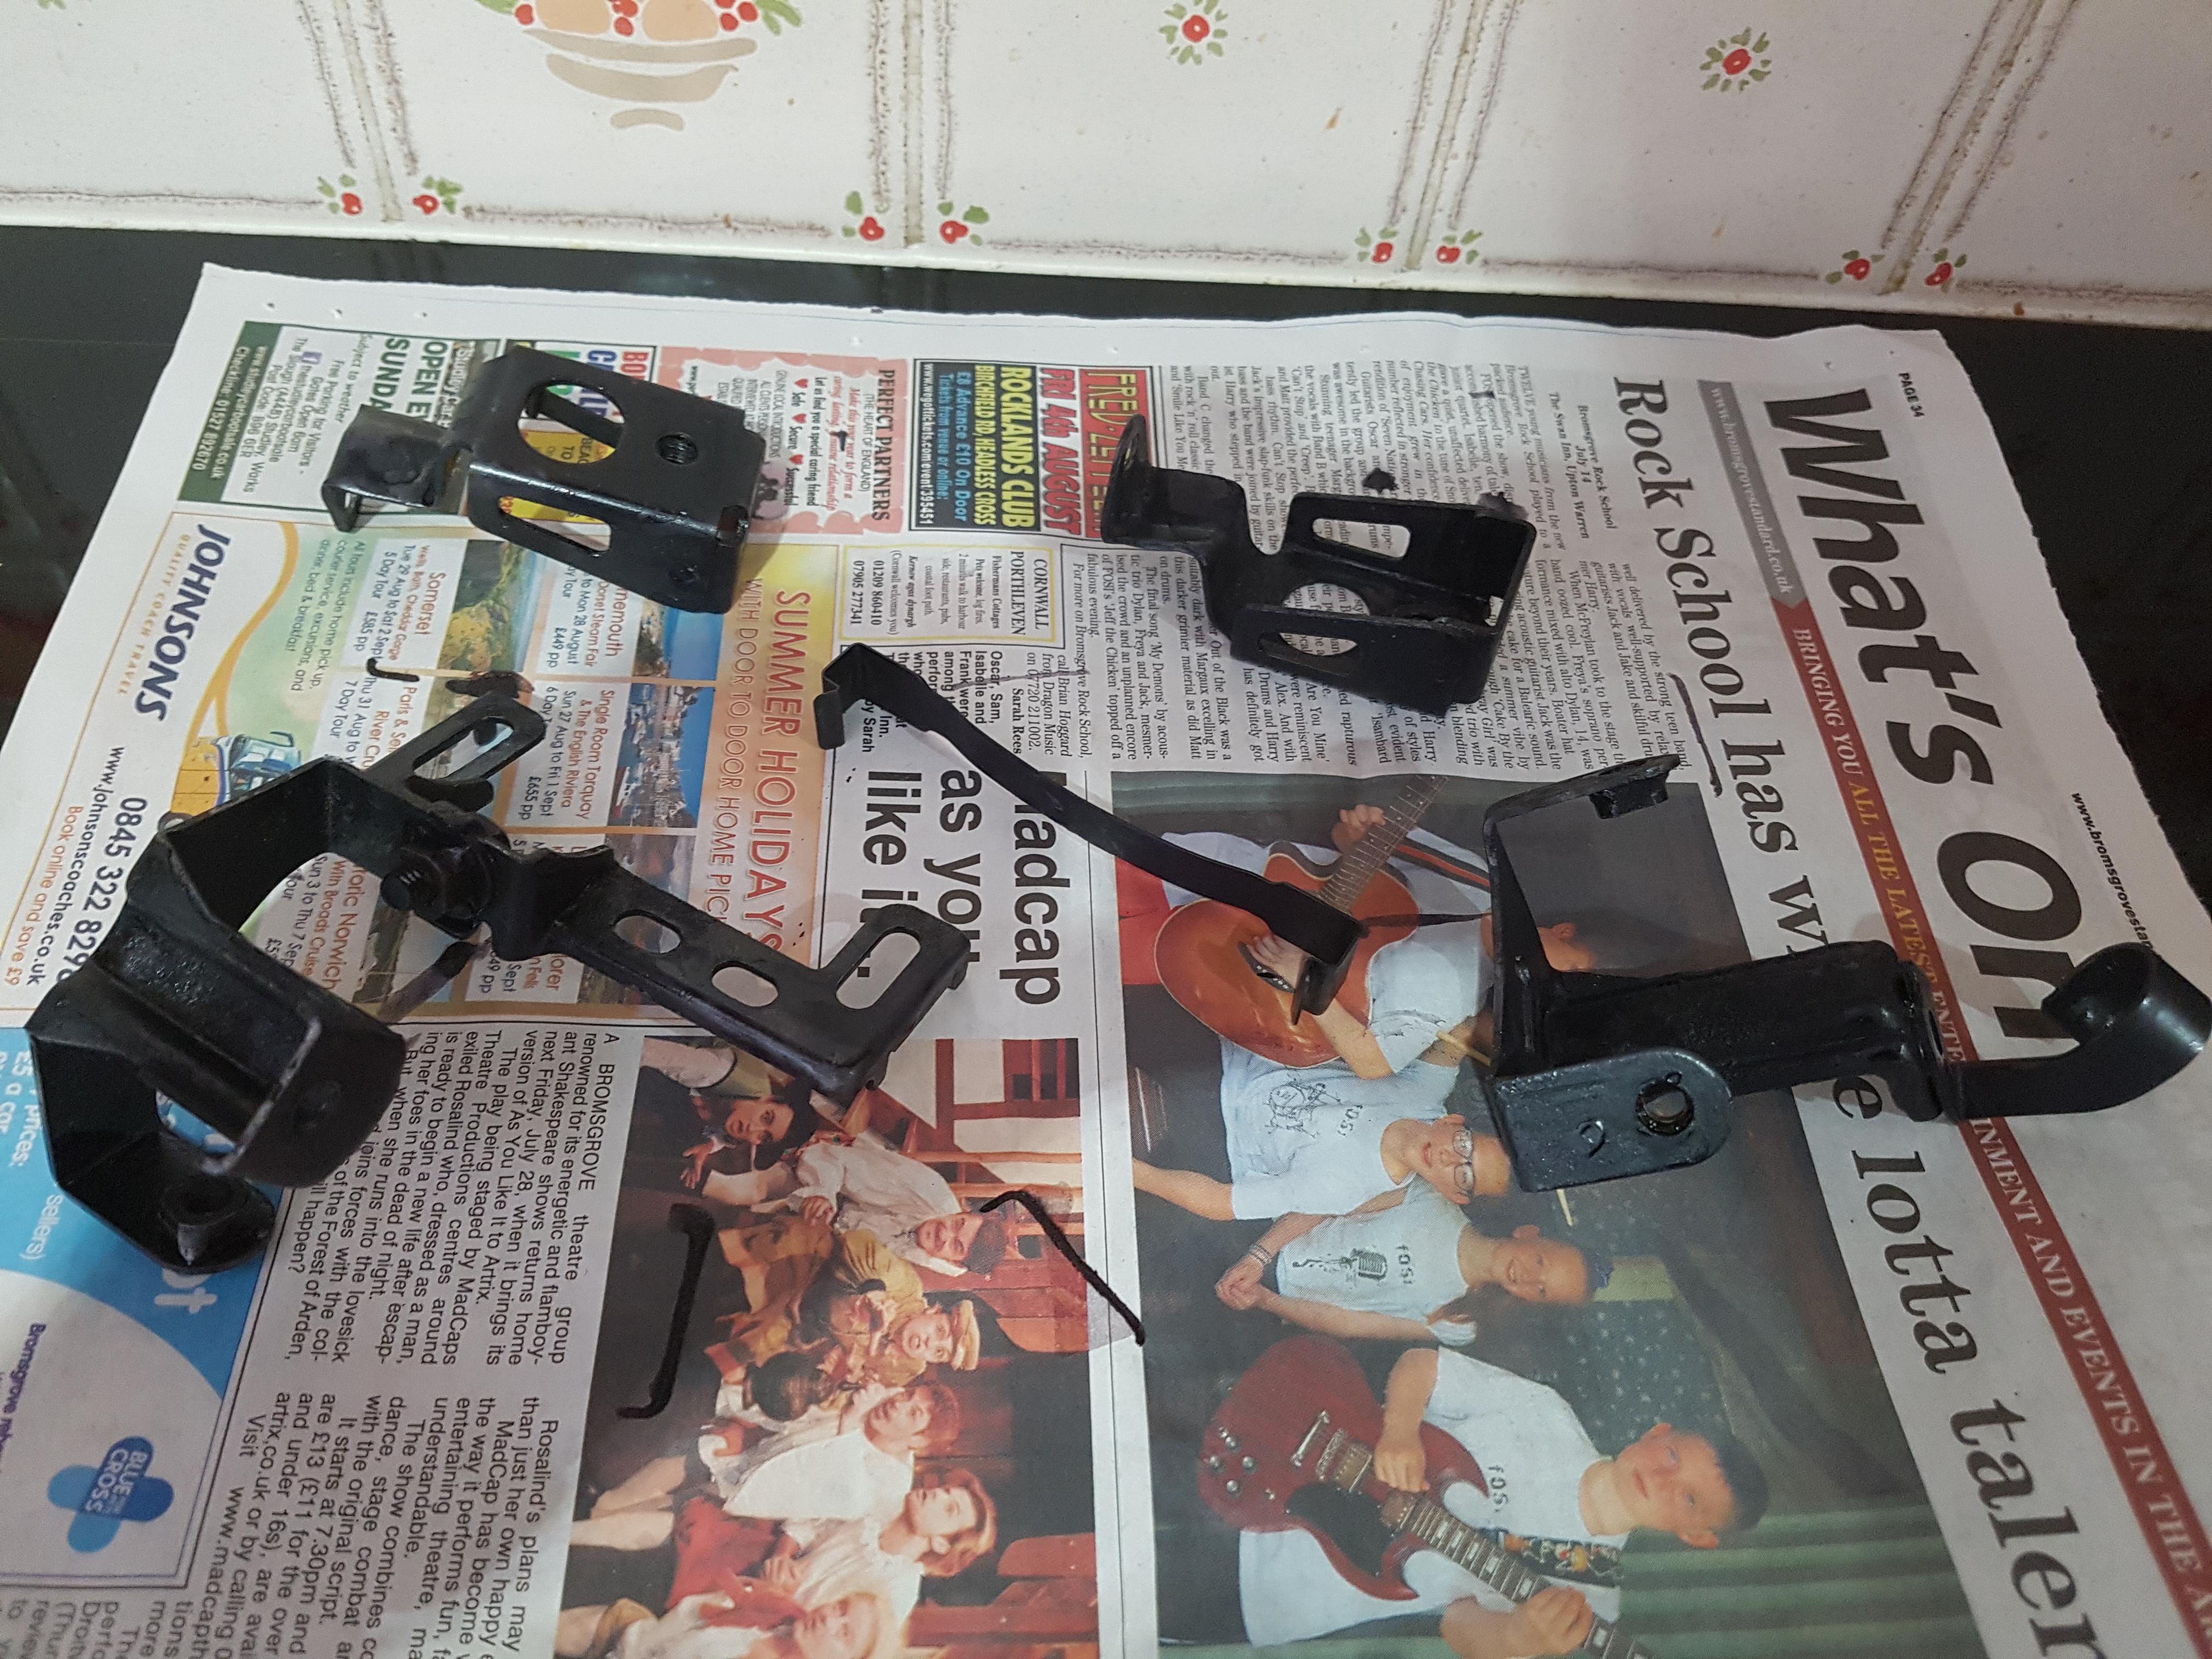
After sorting out the front suspension the forks were looking better...but that front wheel! To fit the new front wheel first I did a whole load of research and some careful measuring. Firstly the tyres, the original is a 110/80V17, this is 607.8mm in diameter, a 120/60ZR17 is 575.8mm in diameter and a 120/70ZR17 is 599.8mm in diameter. Most modern bikes are going with the 120/70ZR17 and the 120/60ZR17 isn't always available for all tyre models. Also sticking a 120/60ZR17 on will leave a bigger gap between the tyre and mudguard and as the VFR mudguard already isn't particularly close you end up with a monster gap. So a 120/70ZR17 is closest to original and preferred for other reasons too so that's what I went with. Onto the fitment. Sticking the wheel in, using the original CBR600 spacer on the right and the original VFR speedo drive and it fit perfectly in the forks. Next up was the brakes. The original 88-89 discs measure 130mm across, they're 4.5mm thick and have 0.5mm damping shims either side. The brake caliper mounts are 134mm across at their widest and roughly 7mm thick. The minimum clearance brake disk to caliper mount is 0.7mm The CBR600 front wheel is 124mm across the disc mounts. Add the discs and shims and you get 134mm which is too wide. Leaving off the shims brings us down to 133mm. This is 0.4mm off. I took a file to the caliper mounts and very carefully opened up the slot on the left (because the left side can't move) and the mounts on the right. Just enough to bring things to spec. Now a word about brake discs. The aftermarket (eg EBC) will sell you a set of brake discs that "fit" the VFR750F 88-89 as well as the VFR750F 90-93 and a host of other bikes. What they neglect to mention is the thickness! The original discs are 4.5mm with a wear limit at 3.5mm. RC36 discs are 5mm with a wear limit of 4m I believe ST1100 are 4.75mm with a wear limit of 3.75mm. All of them will fit with the original wheel. They're too wide with a CBR600 wheel! I needed original discs only. Which is a problem because: a) The originals were down to the wear limits. b) I didn't actually want to take them off as that would make the bike unridable. After extensive searching I found NT650 V Deauville discs were both a perfect match and still available new from Honda for a not unreasonable price. Not cheap but not ridiculous either. They (unfortunately) look like RC36 discs rather than RC24 discs but in all other ways they're perfect. 4.5mm, wear limit at 3.5mm same as the originals. https://www.bike-parts-honda.com/honda-motorcycle/650-MOTO/DEAUVILLE/2000/NT650VY/Frame/FRONT-WHEEL/13MBLWE1/F__1000/2/6746 Next up damping shims. I needed to lose them. There is no consensus as to what these are for, I'm of the opinion that Honda doesn't do things for no reason so if they weren't important why fit them? After some consideration on the name I tested the difference between a disc fitted with them and a disc fitted without them, on the same wheel. The disc without them "rings" like a bell if you give it a tap with a metal bar, the one with them doesn't. I'm of the opinion they are noise damping. There to reduce ringing in the discs. It's obvious however that later bikes using the same design (eg, the Deauville!) don't use them (ie see the fiche image for it below) and plenty of people have reported leaving them out with no issues so they're obviously not critical. With that in mind I felt happy to leave them out. The finished result Unfortunately because I was fitting new brake discs I needed new pads and the calipers really needed a rebuild with new seals and thats where I ran into an issue. I snapped one of the brake bleed nipples off the right caliper. Good news however! RC36 calipers are 99% identical. The only difference (somewhat ironically) is the bleed nipple which is a slightly different design that omits an O-ring. I just so happened to have a set of RC36 calipers in the piles of spares. # I will deal with the broken nipple at a later date so I still have a spare caliper but I'll probably buy a set of stainless pistons and do those at the same time.
-
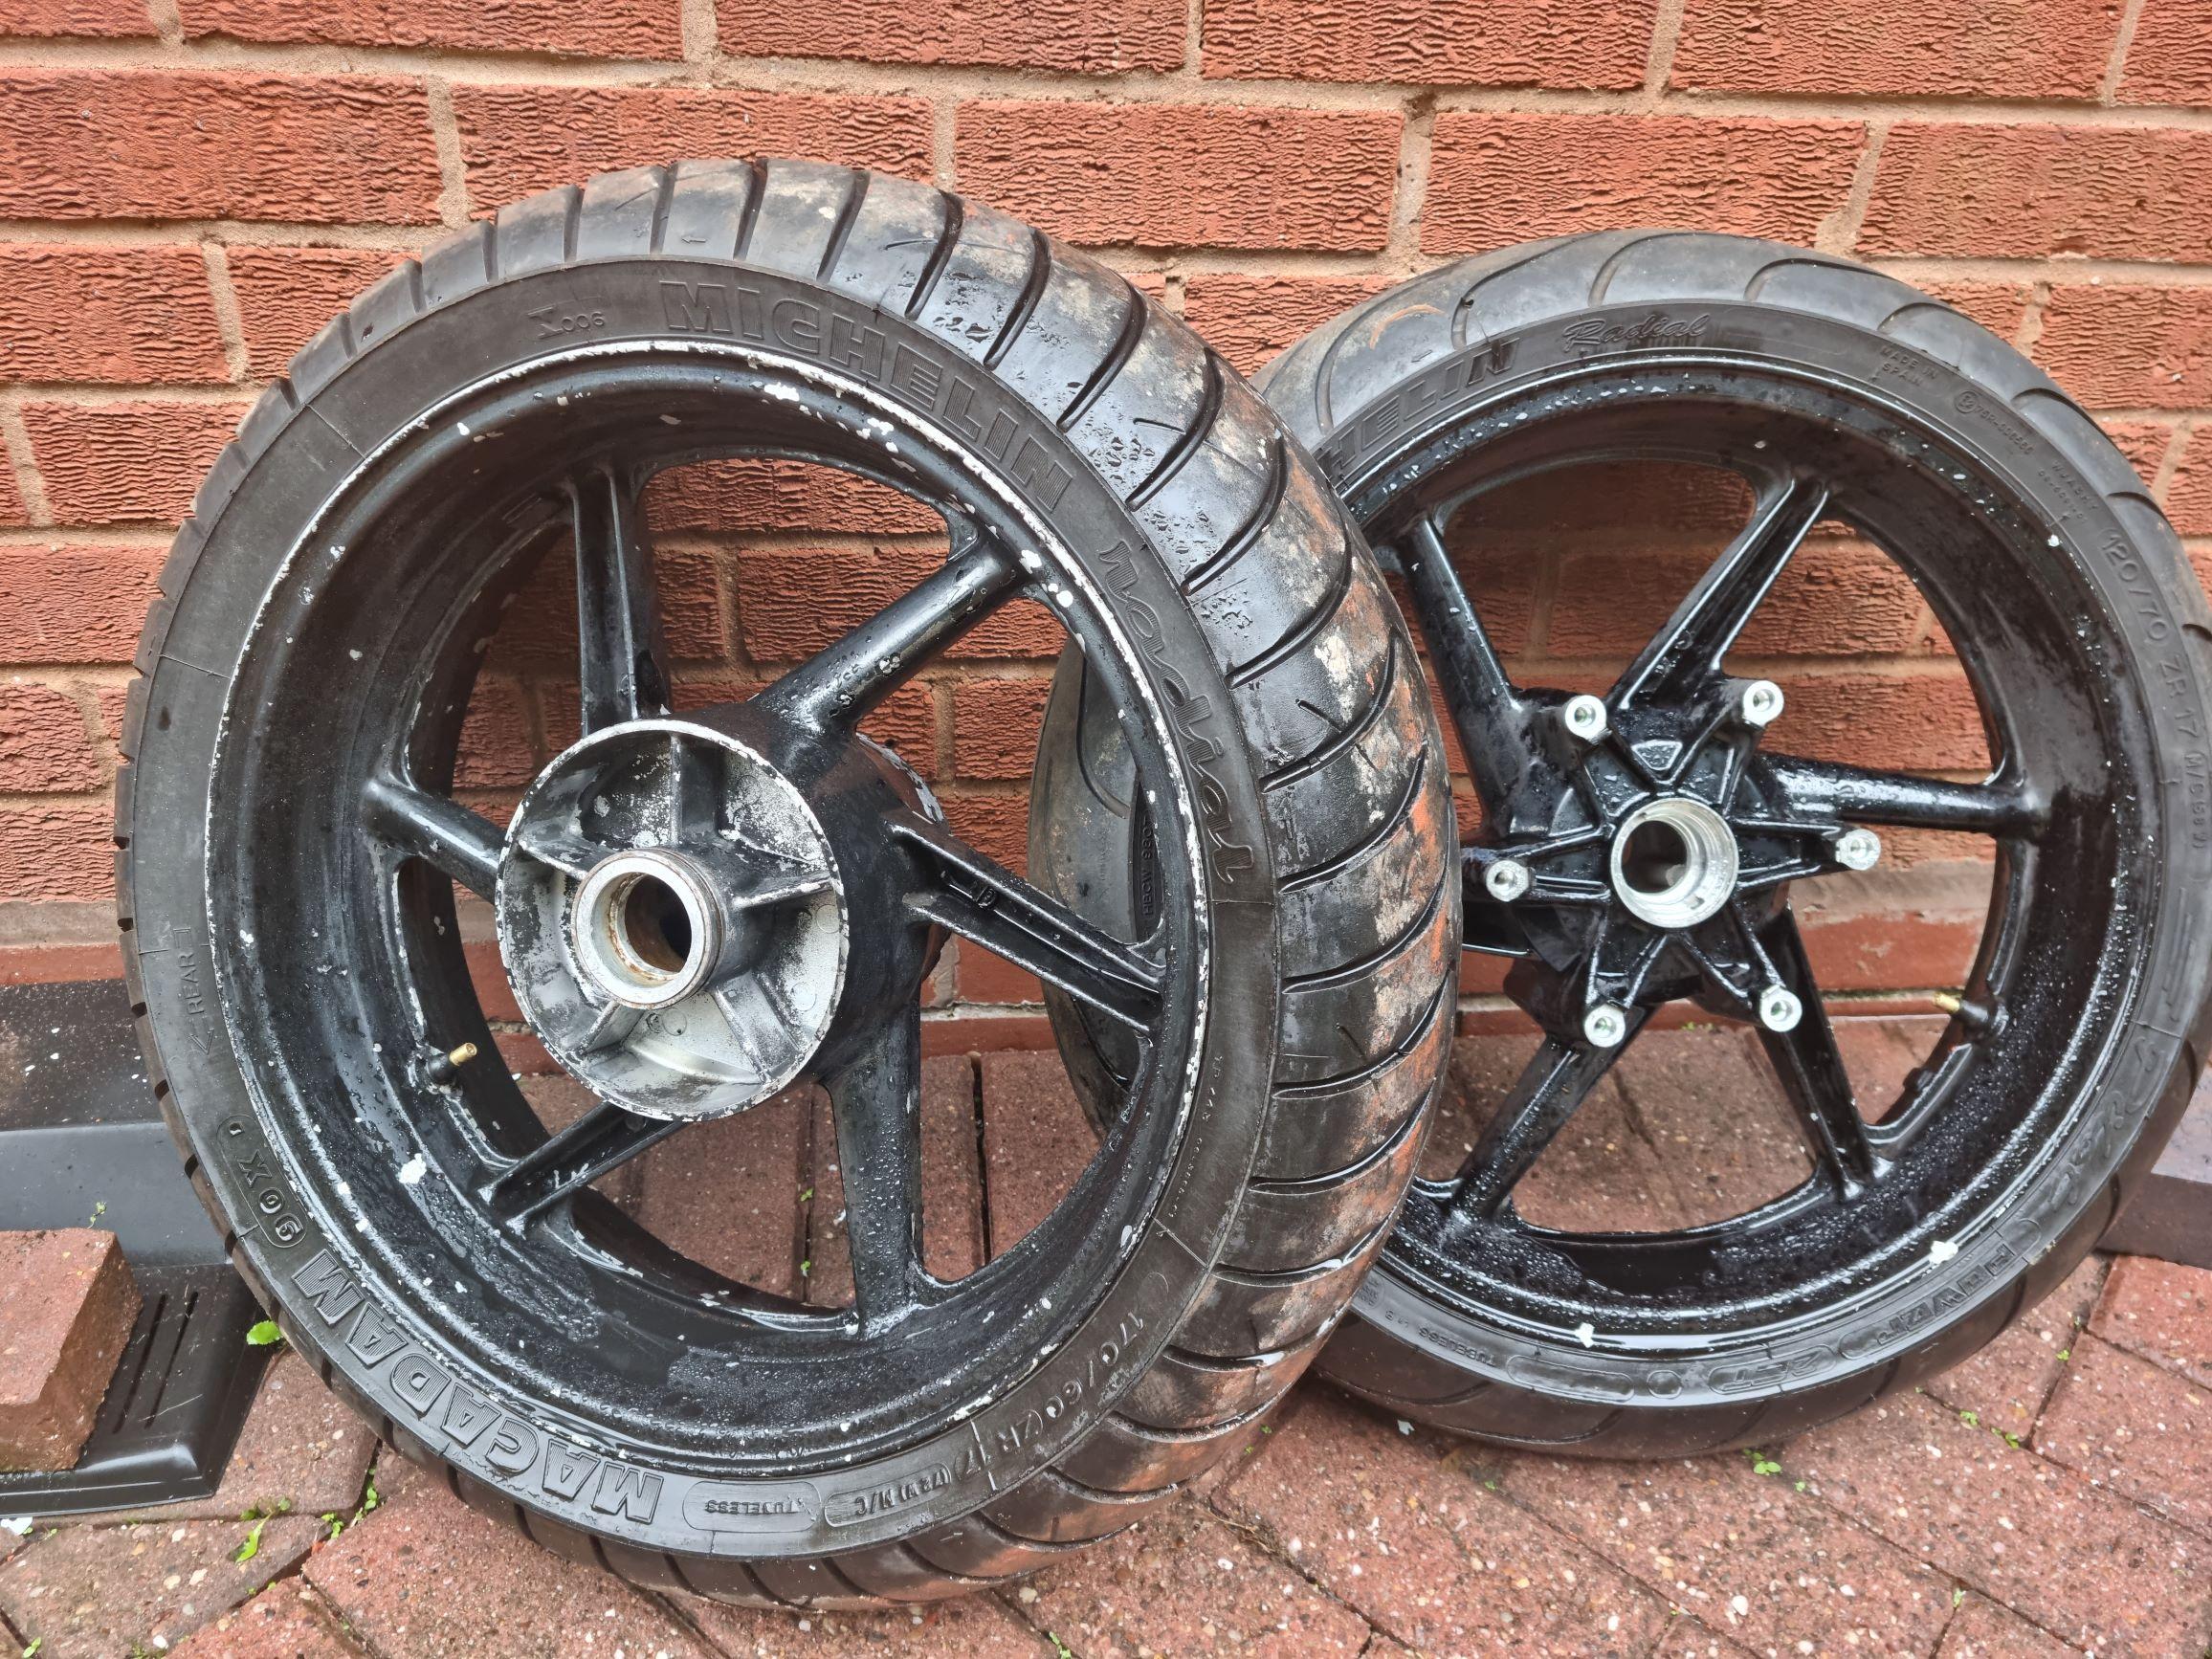
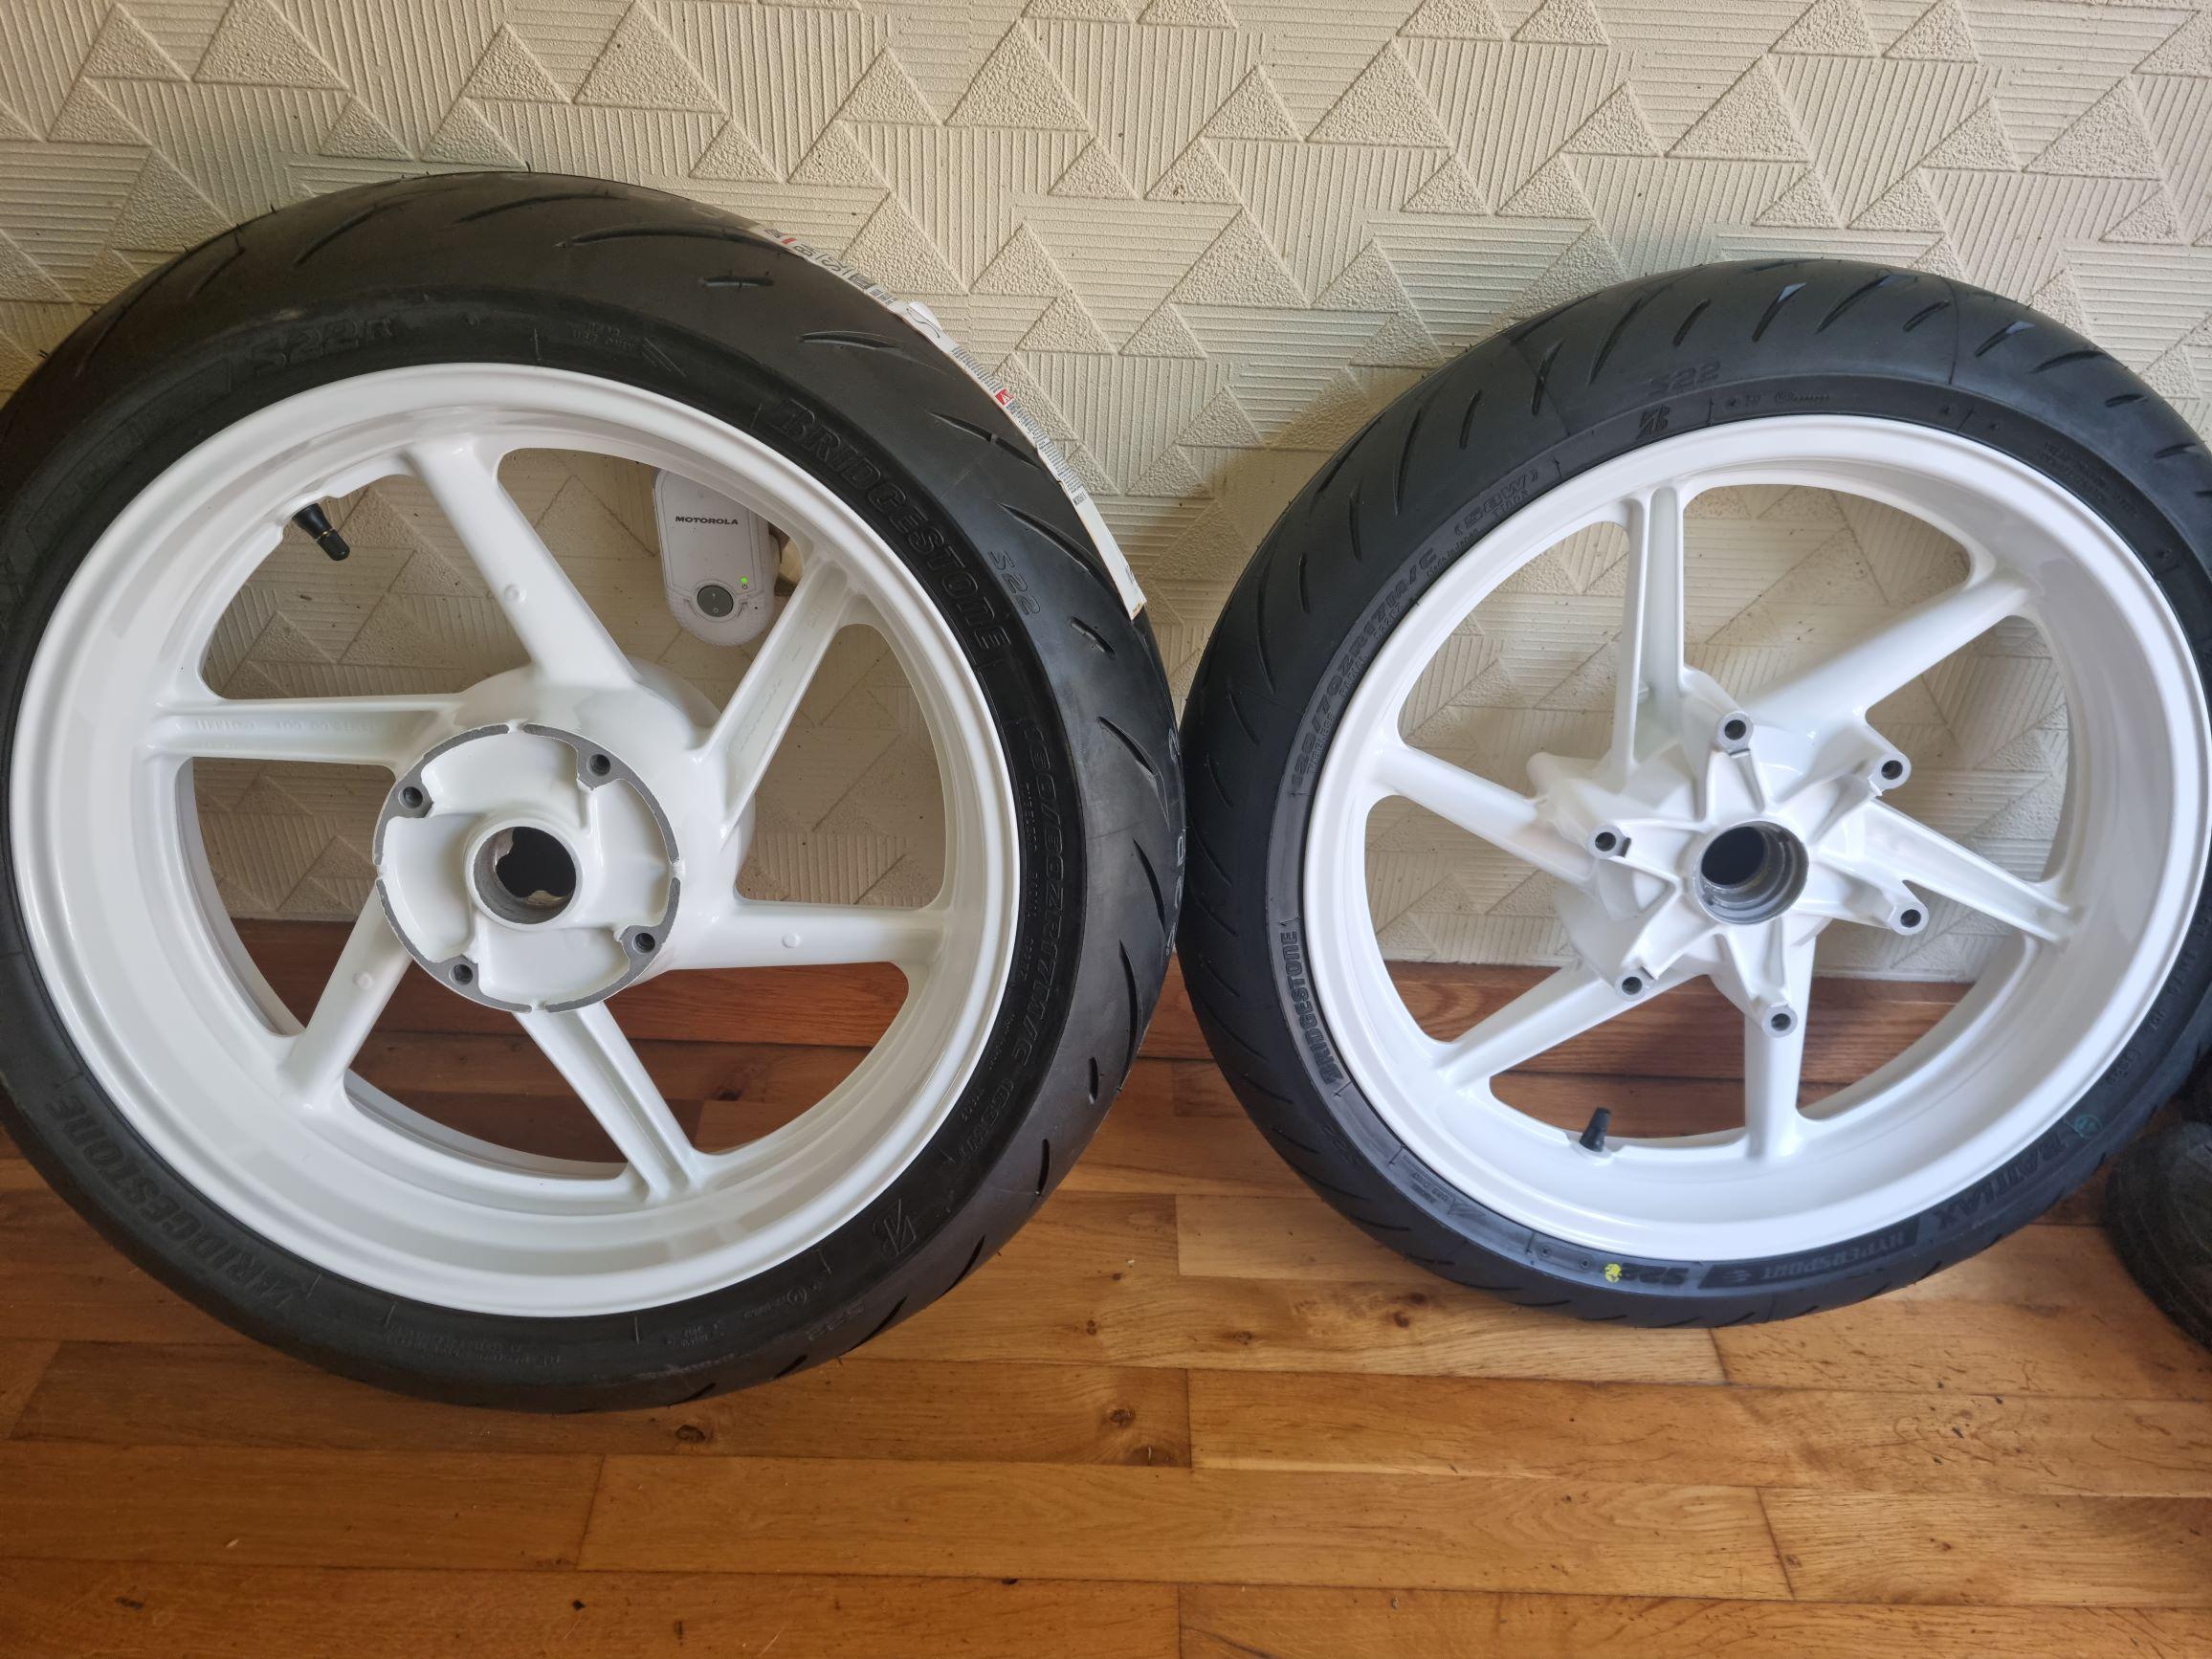
As the wheels needed re-coating/painting, and new tyres and the front brake discs were down to close to the wear limit (about 3.7mm) and there isn't much point *not* doing the bearings and seals while you're in there the cost difference between sticking a set of CBR600 wheels on wasn't really that much. It was basically the cost of the wheels which were cheap (£60 for the front from a 1994 CBR600FR (CBR600F2R in the USA) and £65 for the rear from a 1996 CBR600FT (CBR600F3R in the USA) plus a new disc. I did consider the later wheel, it gives floating discs etc but loses the speedo. I decided however that I wanted to keep it as close to original but with a sensible upgrade to allow more modern tyres. So one set of tatty wheels later, bearings removed and cleaned before sending away to be painted. I spent an *age* agonising over the colour. White was original but its hard to keep clean, looks dirty really quickly...but the race bikes had white wheels...and it's the original wheel colour. White it was then! Wheels went off for powdercoating and then it was time to turn my attention to the suspension. I considered a fork upgrade, the issue being that the RC24 has abnormally long forks and if you fit shorter forks then you have to fit "superbike" bars but then different forks allows you to have better brakes. While the brakes on the 88/89 RC24 aren't the latest and greatest they're still essentially the same as fitted up until the 1997 VFR750 RC36. The main limit for braking IMO was the suspension, on anything other than super smooth tarmac the forks would bottom and the tyre would "jump" over any ripples. I decided to stick with the original forks and fit uprated springs and emulators from RaceTech. Unfortunately of course Racetech being in the USA they only have details for the 86 which has 37mm forks however after some consultation with PDQ and using the RT calculator for the older model I settled on 0.95kg/mm springs, 20wt oil and a 130mm air gap. Anti-dive is now bypassed and I intend on fitting a small spacer to prevent the small amount of movement on the left leg. Of course new seals were fitted, bushes were still absolutely fine. Fork legs on the other hand not so much. So they got a fresh coat of paint. Eventually (actually less than three weeks later) I got a call to say my wheels were ready!
-
Correct on the disc, Triumph disk. Ish... I'll cover that in a short while.
-
Yeah. Sorry about that. Consider that the TL;DR. Started with the current condition and then went back in time!
-
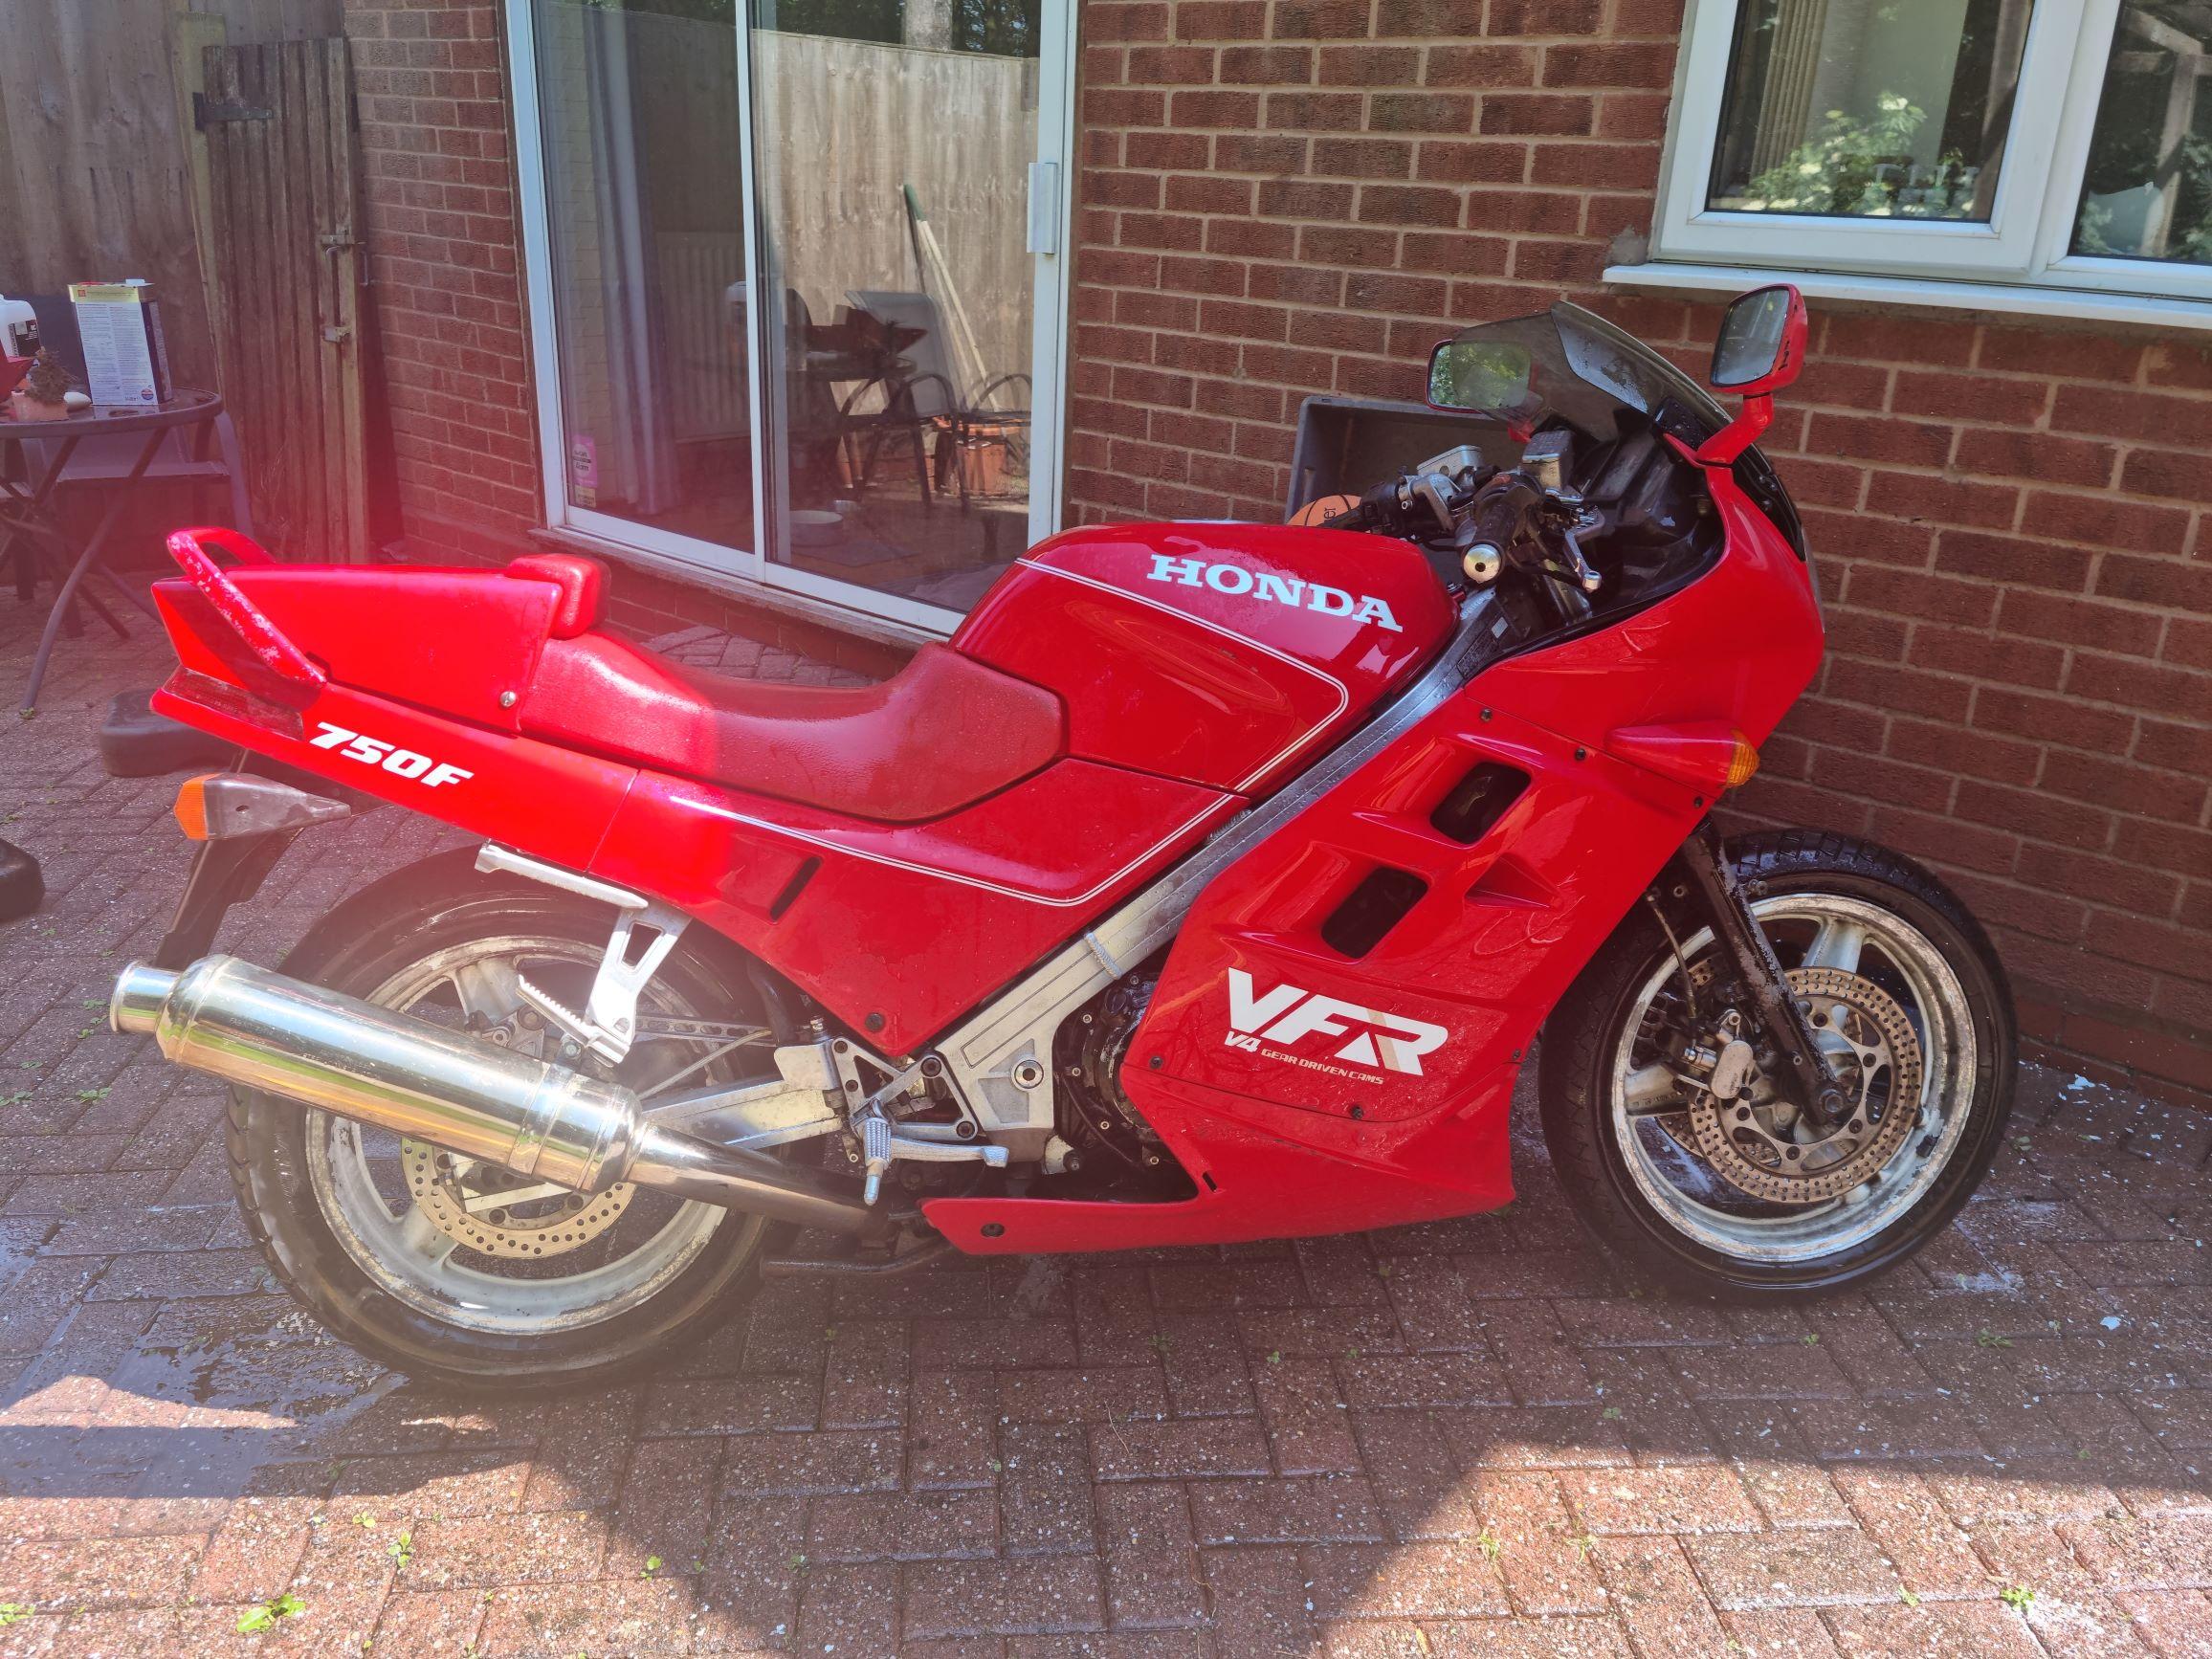
Back in one piece now I gave it a wash. The wheels have suffered massively, the alloy has corroded under the paint and lifted it. The front tyre won't hold pressure for more than a day (its leaking from the rim)....but it was enough to take it for an MOT. Which was the first time I'd ridden it since 2012 and a whole 78 miles since the previous MOT. MOT passed and on to sorting the remaining issues before it could be ridden more. My intention at this point *WAS* to do stuff, ride it, do some more stuff, ride it etc. Unfortunately in the UK July had other ideas. This summer has been a washout. Almost every time I've had any free time its been raining.
-
By now it was 5 years since it last ran so the very first thing was to see if it would start. It's a Honda VFR though so of course it did. It wasn't entirely without problem, on the first attempt fuel pissed out of the fuel pump. An RC36 fuel pump was bodged into operation (connectors are reversed and the barbs are straight rather than bent). I didn't have a working spare RC24 fuel pump but what I *did* have was one where the points had worn out. Removed the points from the leaking pump and fitted them to the other one and we now have a fuel pump that works without leaking. Next issue was the clutch. Many moons ago I'd gone to swap the levers for an aftermarket set but because the clutch pivot etc were worn I'd bought new ones yet not fitted them. In the meantime the little push rod had become lost and the dust seal was just a tattered mess. It needed a rebuild and a while back I'd already bought a rebuild kit! The pushrod by itself was a horrific price from Honda (for what it is) so I bought another rebuild kit that was both cheaper than the pushrod alone and included the pushrod. During the rebuild however I realised that the bore was corroded so bought a second hand master that had been "refurbed" with new seals. It of course came with a push rod. 🤦♂️ I've now got two spare rebuild kits! Brakes front and back had seized so both had a rebuild. Rears had new pads. Fronts didn't for reasons I will expand on later.
-
That was 2018... didn't do much on the VFR although managed another trackday. RVF now back in its original colours (albeit a somewhat dodgy rattle can job on the track fairings) and again being borrowed for a session or two! 😍 2019 was a wash (as regards working on the VFR) for other reasons, 2020 was killed by Covid. 2021 was another trackday. This time unfortunately my wife hurt her back just shortly before so she didn't ride. I still took her bike round though. 2022 was again a wash....Which brings me back round to this year, 2023. I decided that I would take the VFR on track. That gave me a firm date to get it sorted by and a list of stuff that needed doing.
-
It wasn't intended to be a damp shed but made the mistake of putting up a metal shed, the condensation was horrendous. The replacement "shed" is a wooden one and it is massively better.
-
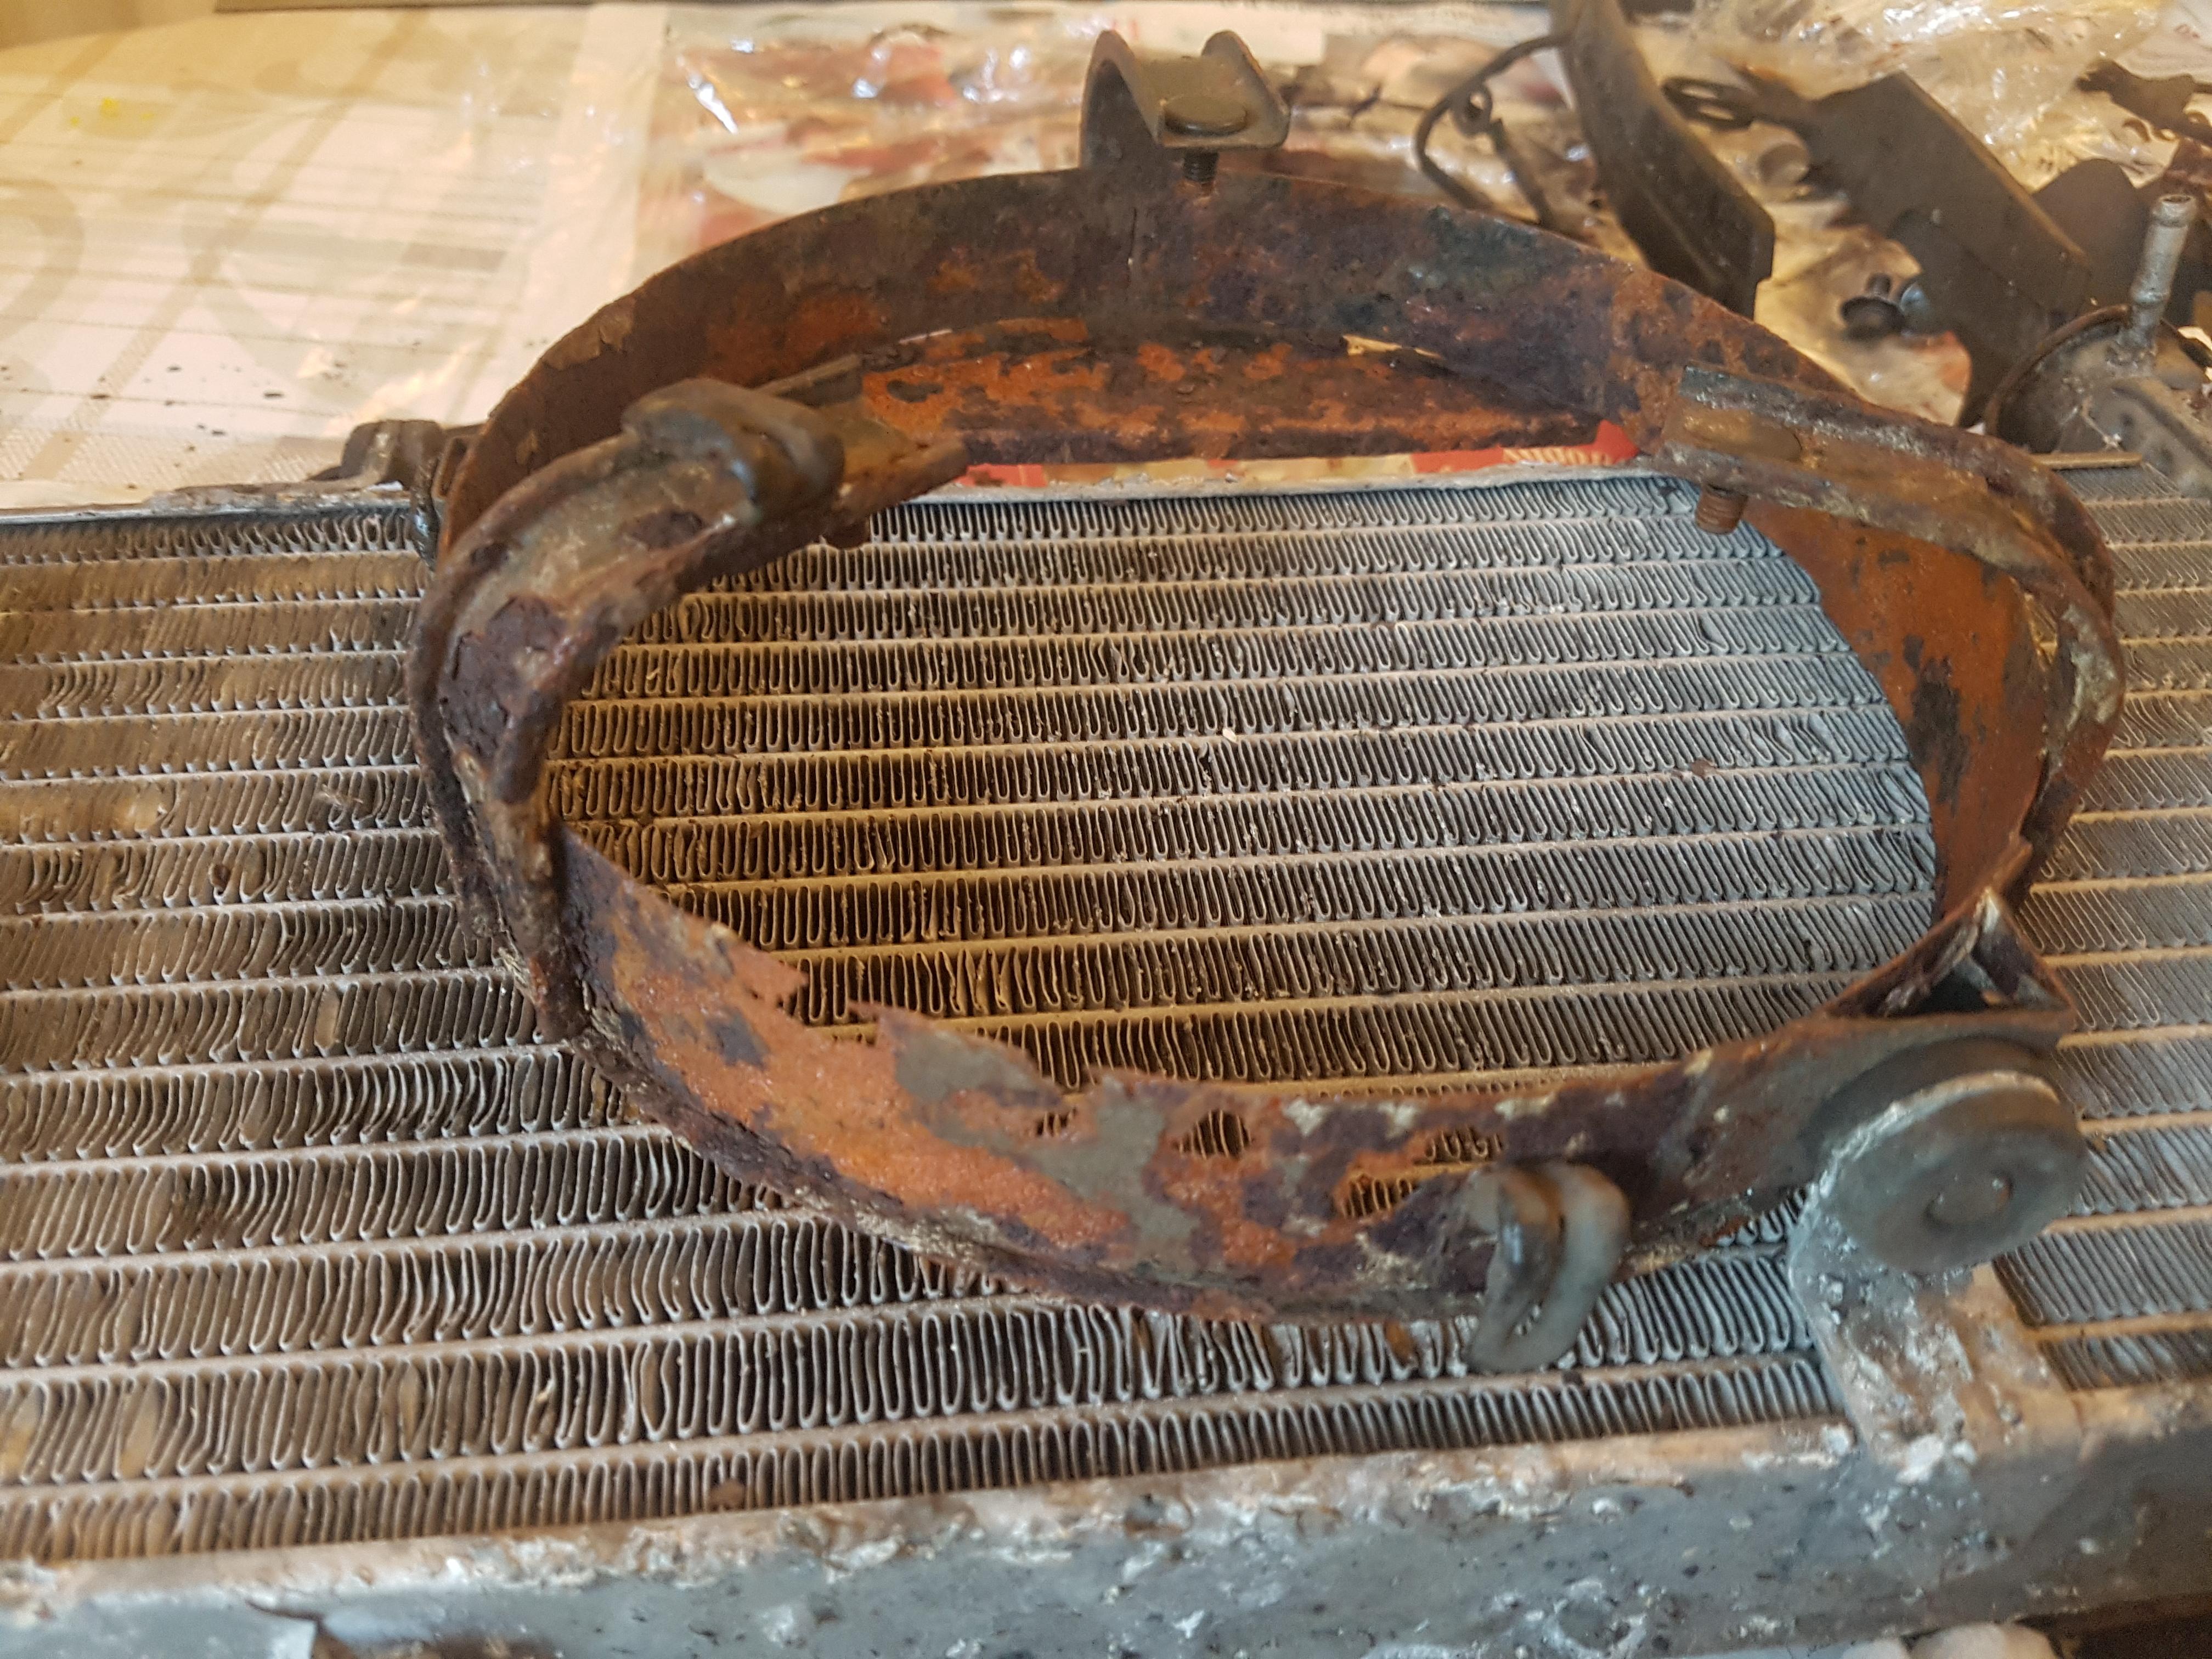
Way back when I was commuting on it, one of the radiator grill mounts had snapped off, the grill had then flapped loose and worn a hole in the radiator. I fixed it with some epoxy but the radiator was now weeping from the fins. Not an easy fix. While I might be able to get it repaired it was looking very corroded, the fan bracket was frilly and generally it was past it. I'd tried, multiple times to buy "decent" second hand rads but they were all junk. Bent, leaking or in one case both. I curse that many years ago I didn't buy a brand new Honda rad at a bargain price of £140 (which even then was about 1/3 to 1/4 of the "list" price) which DSS had for sale. So I bought a Chinese rad for it. Some time was spent sorting out which of the fans still worked, cleaning it all up, repainting it and then getting it to fit. Pretty much the same issues as documented here: With the added problem that the top tabs on mine were square so needed filing back as well.
-
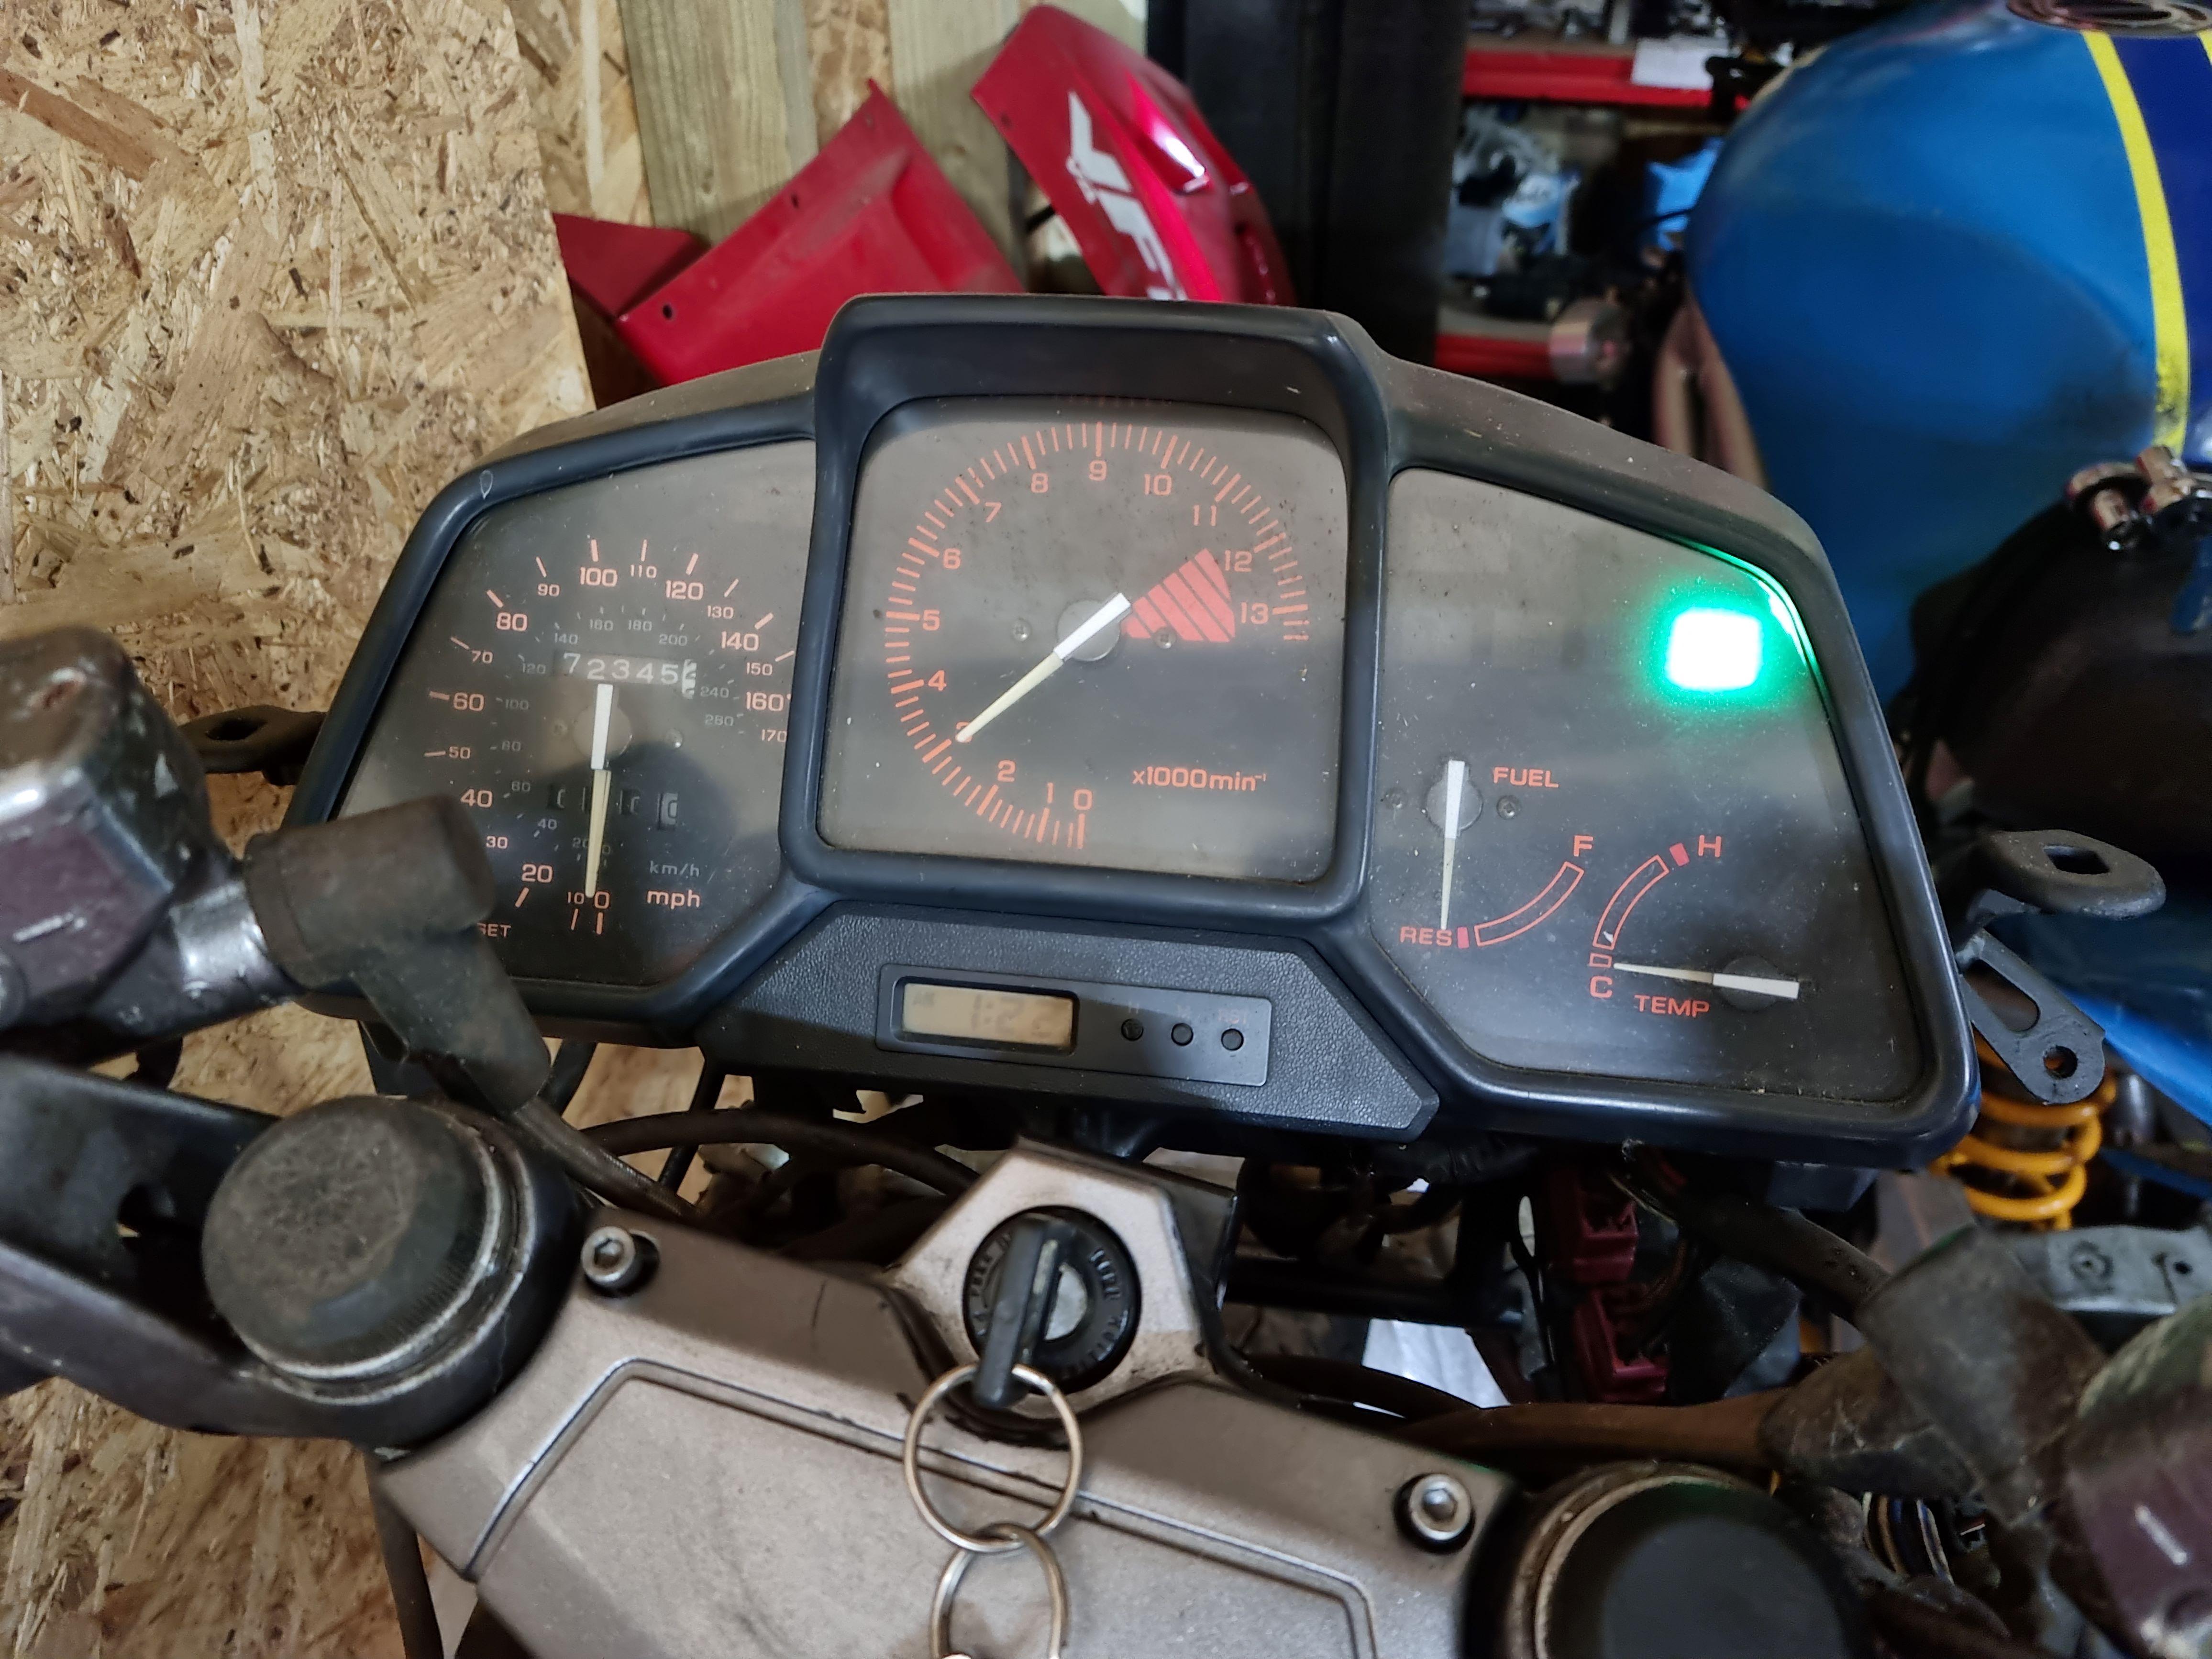
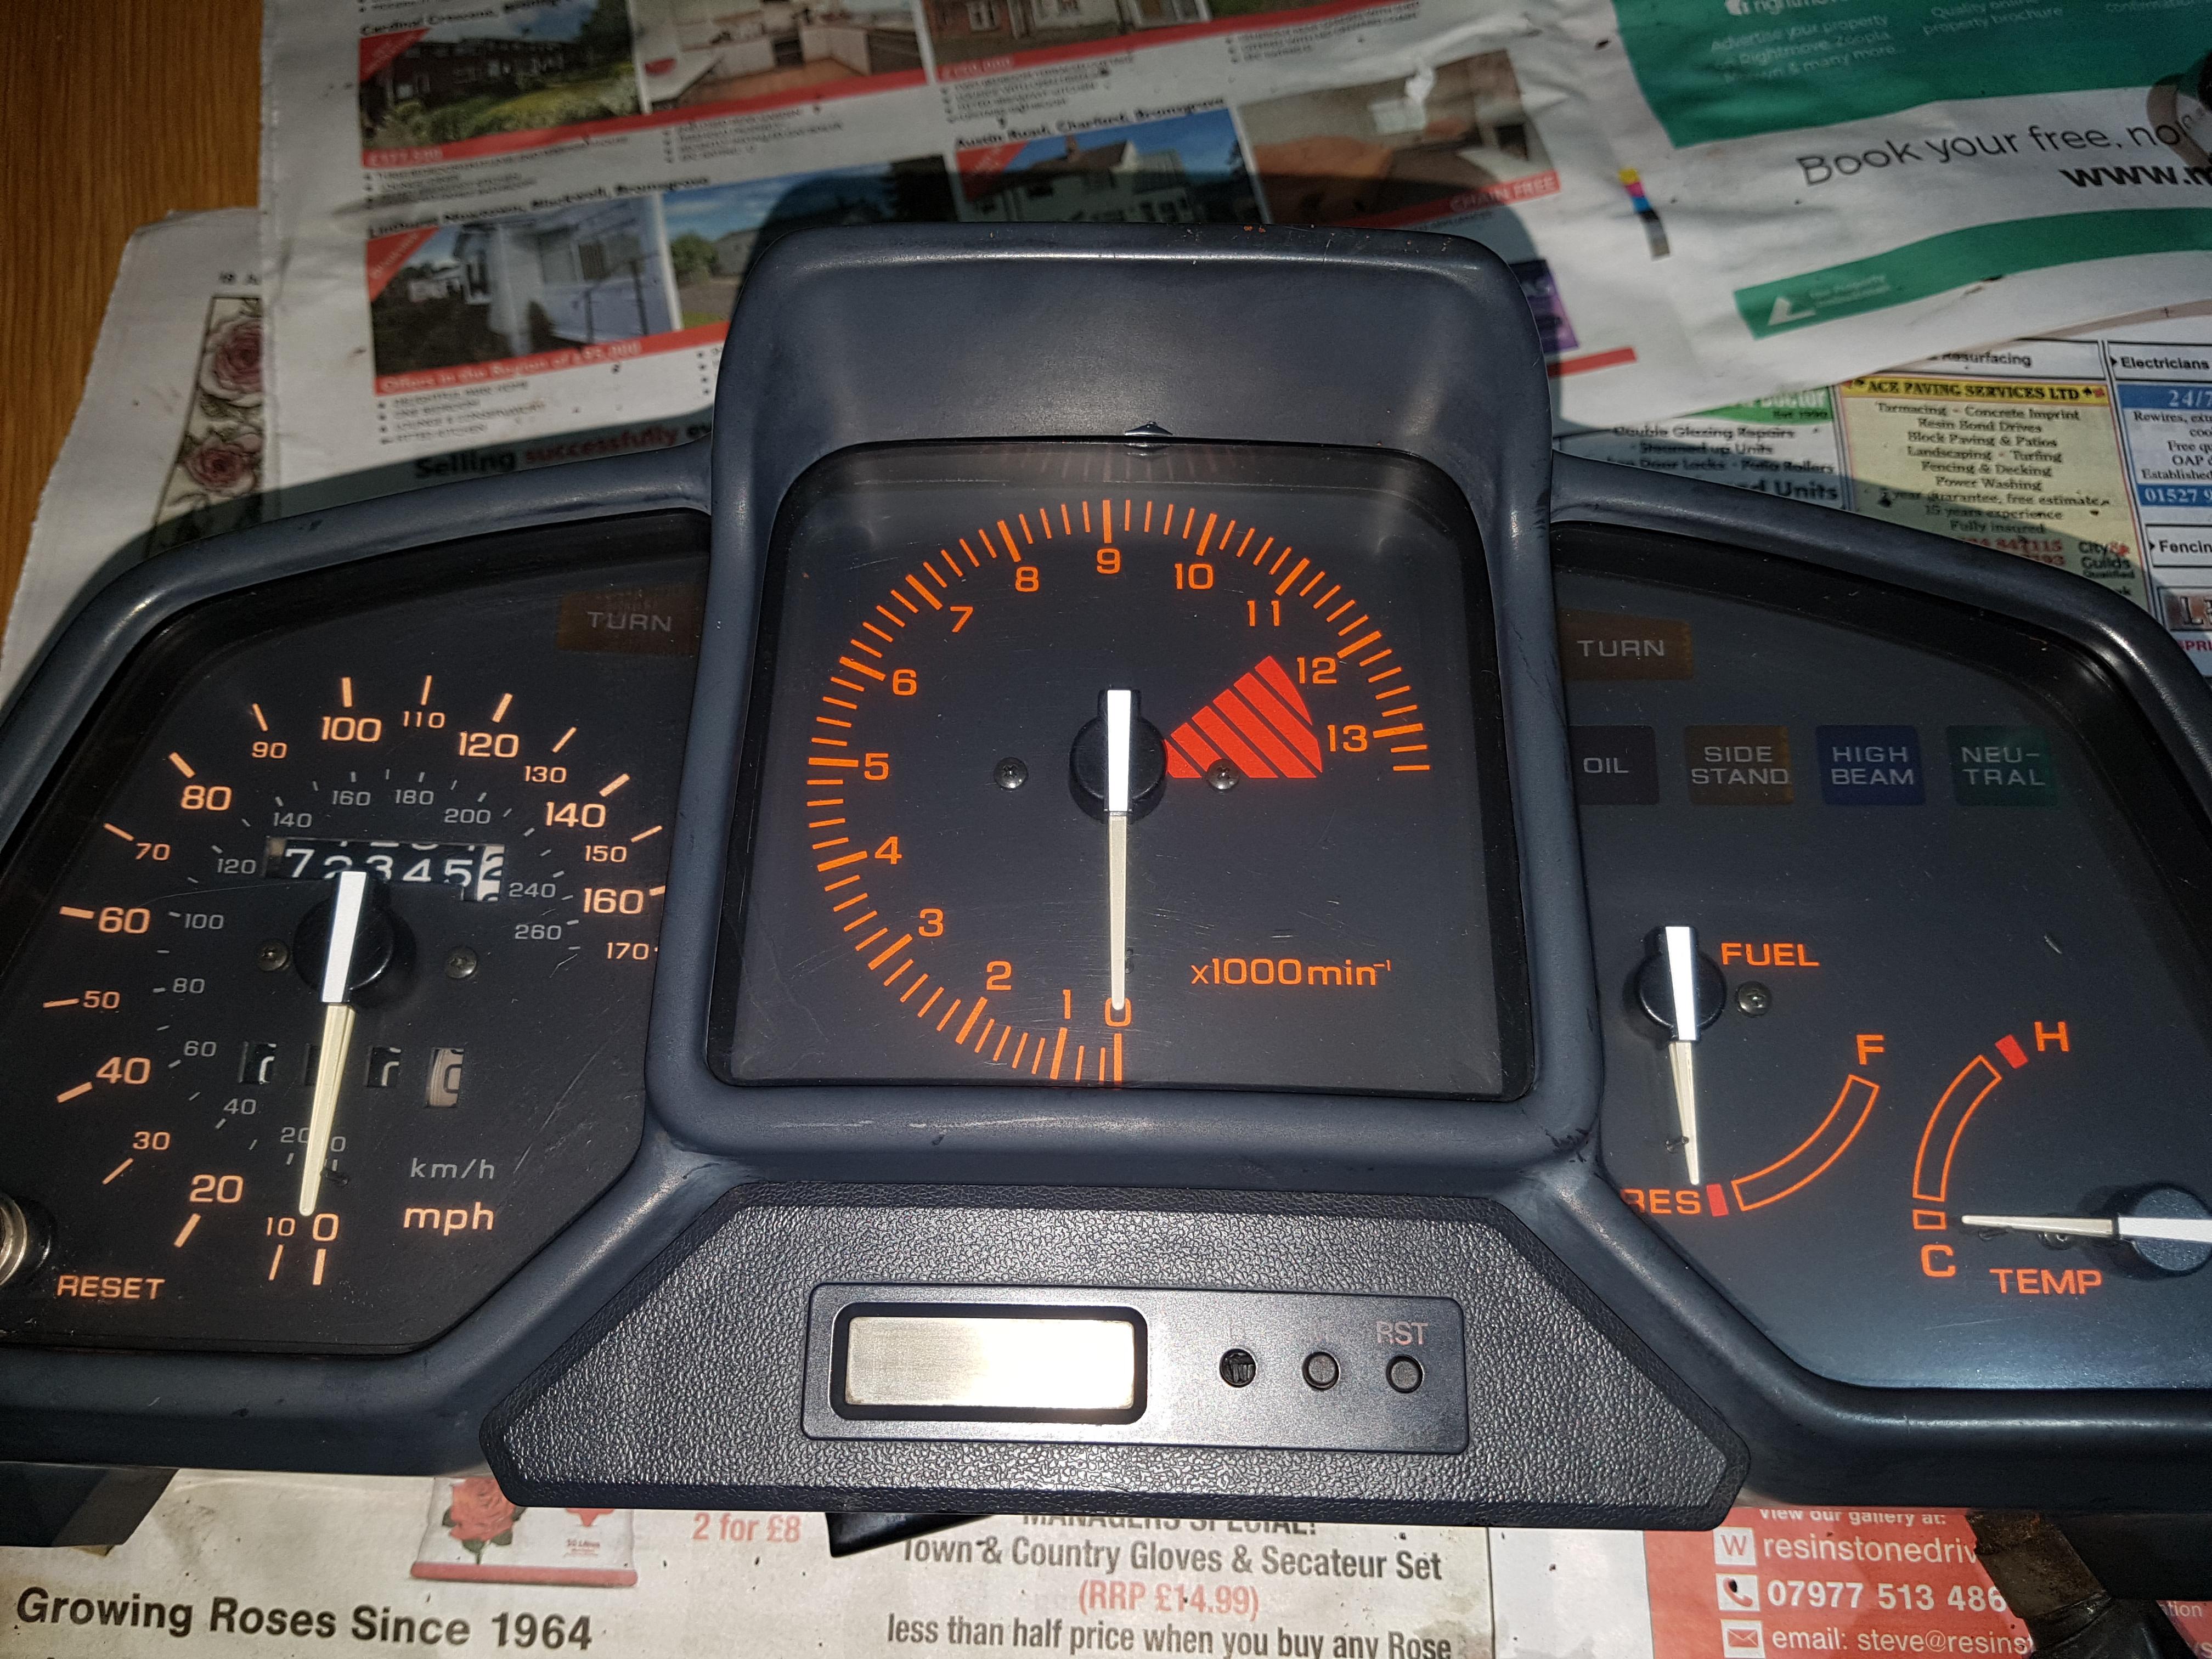
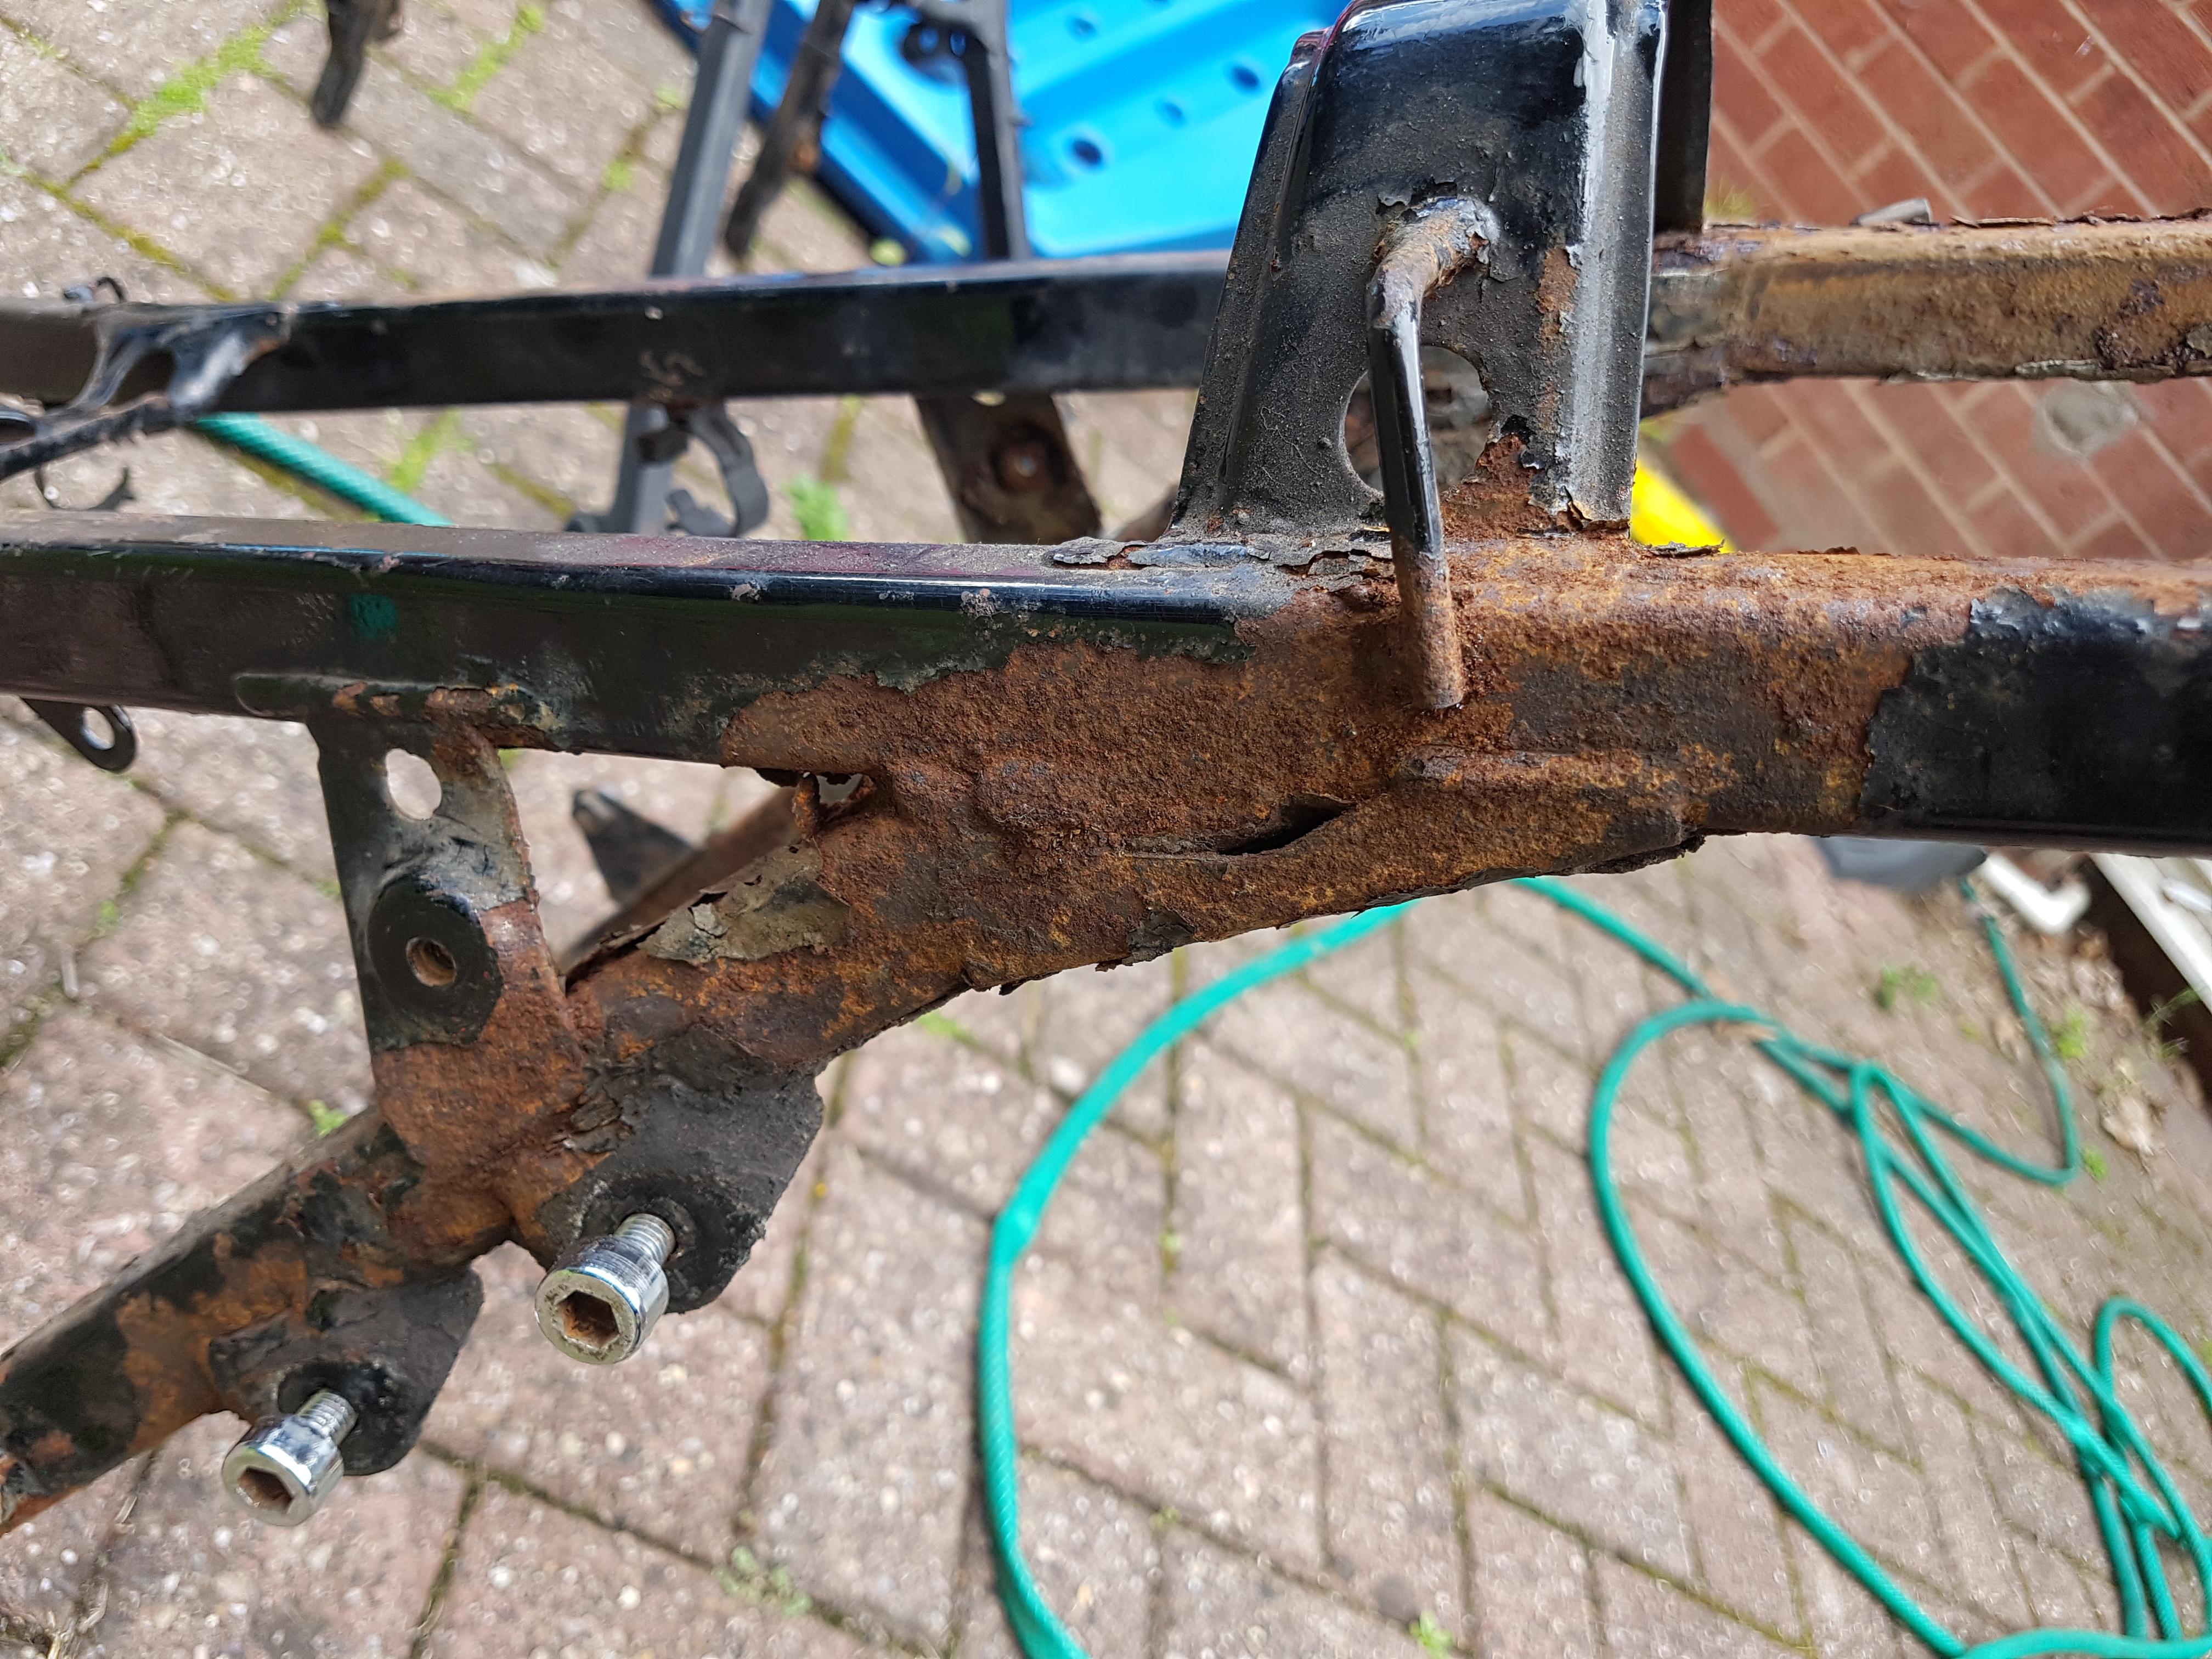
6 years later and we managed another trackday. We'll gloss over my trackbike as it's a Suzuki 😬 🤣but I borrowed my wifes RVF again for a session or two... Anyway, enough exotica. 😍 I dragged the VFR out from the damp shed it had been relegated to and the time it spent in there hadn't been kind to it. But of course it's a Honda VFR so.... From here we started the long road back to being back on the road. Lots of cleaning but although nothing "wrong" when it was put away, a number of problems had arisen while it was stored. First problem was electrical. Almost all the connectors needed taking apart and cleaning. One of wires to the the back lights on the dash had corroded off. Clocks however cleaned up nicely and a second hand set donated better condition parts. All the aluminium parts had furred up. They were all cleaned up. All the brackets were rusty. These cleaned up nicely in Evaporust. Then painted them to protect them. I'm not trying for a restoration btw hence not bothering to get them recoated. A far bigger problem was the subframe. I wasn't happy with that amount of corrosion so found a better condition second hand subframe for it.
-
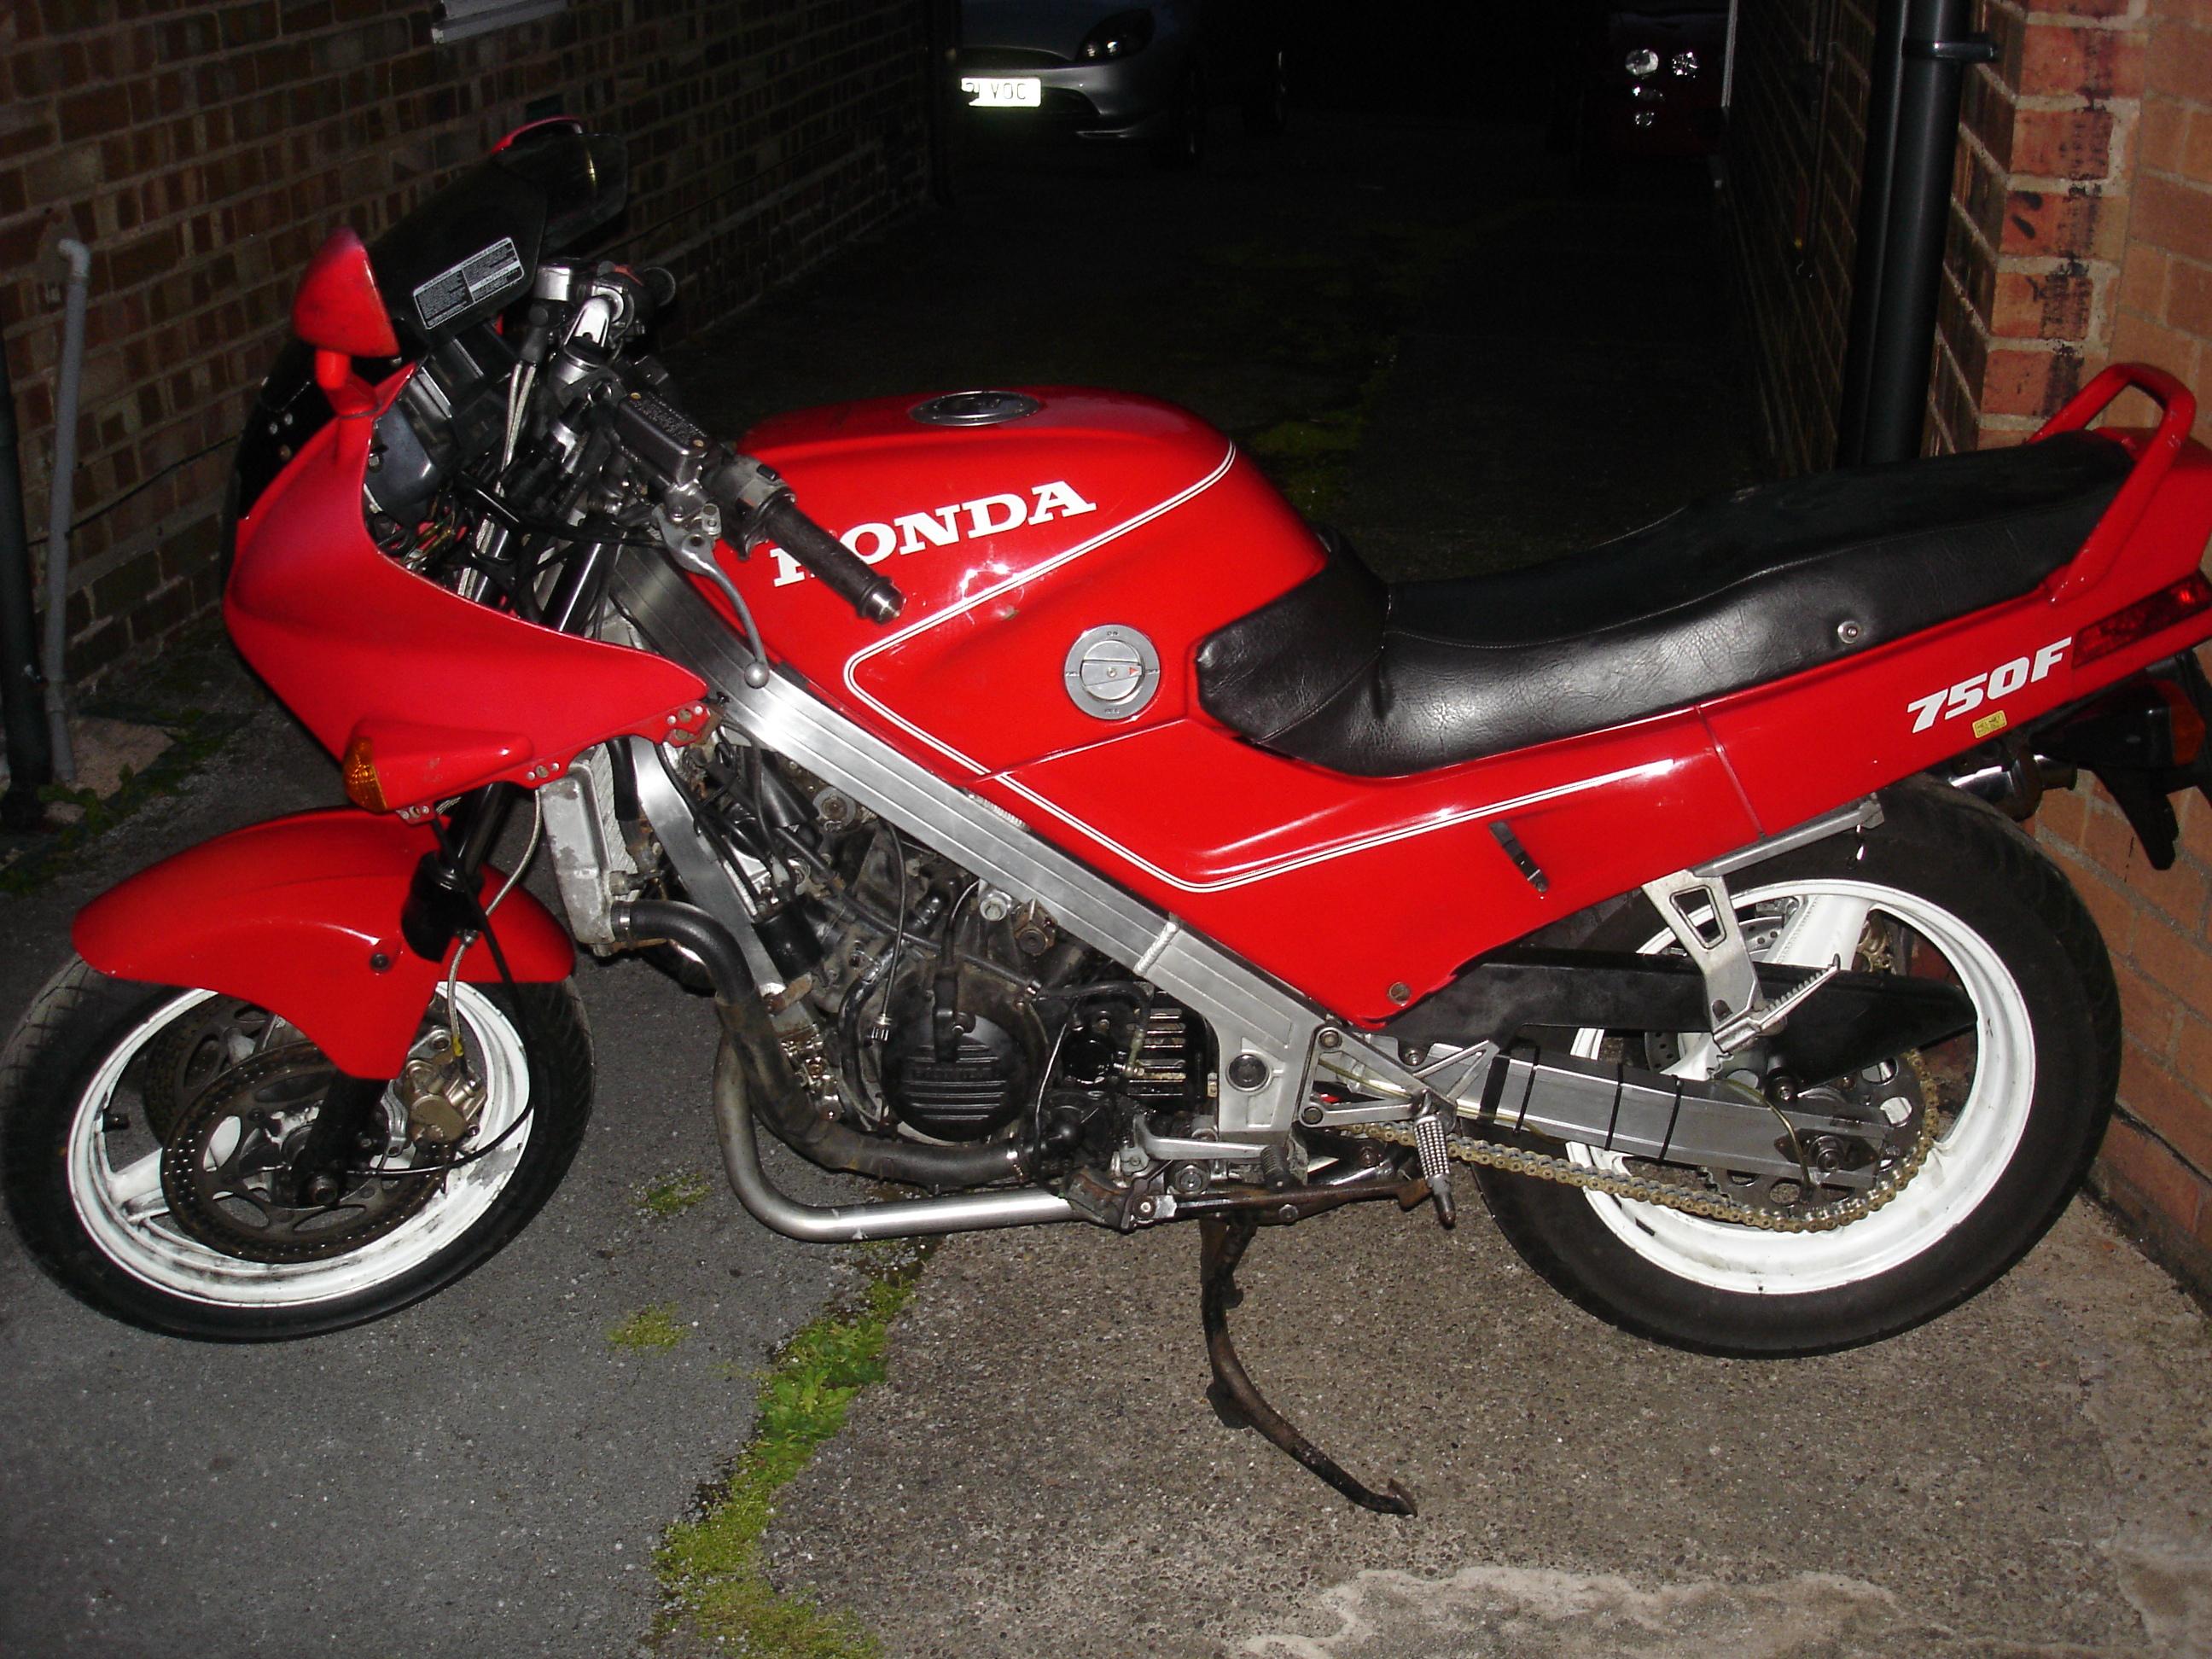
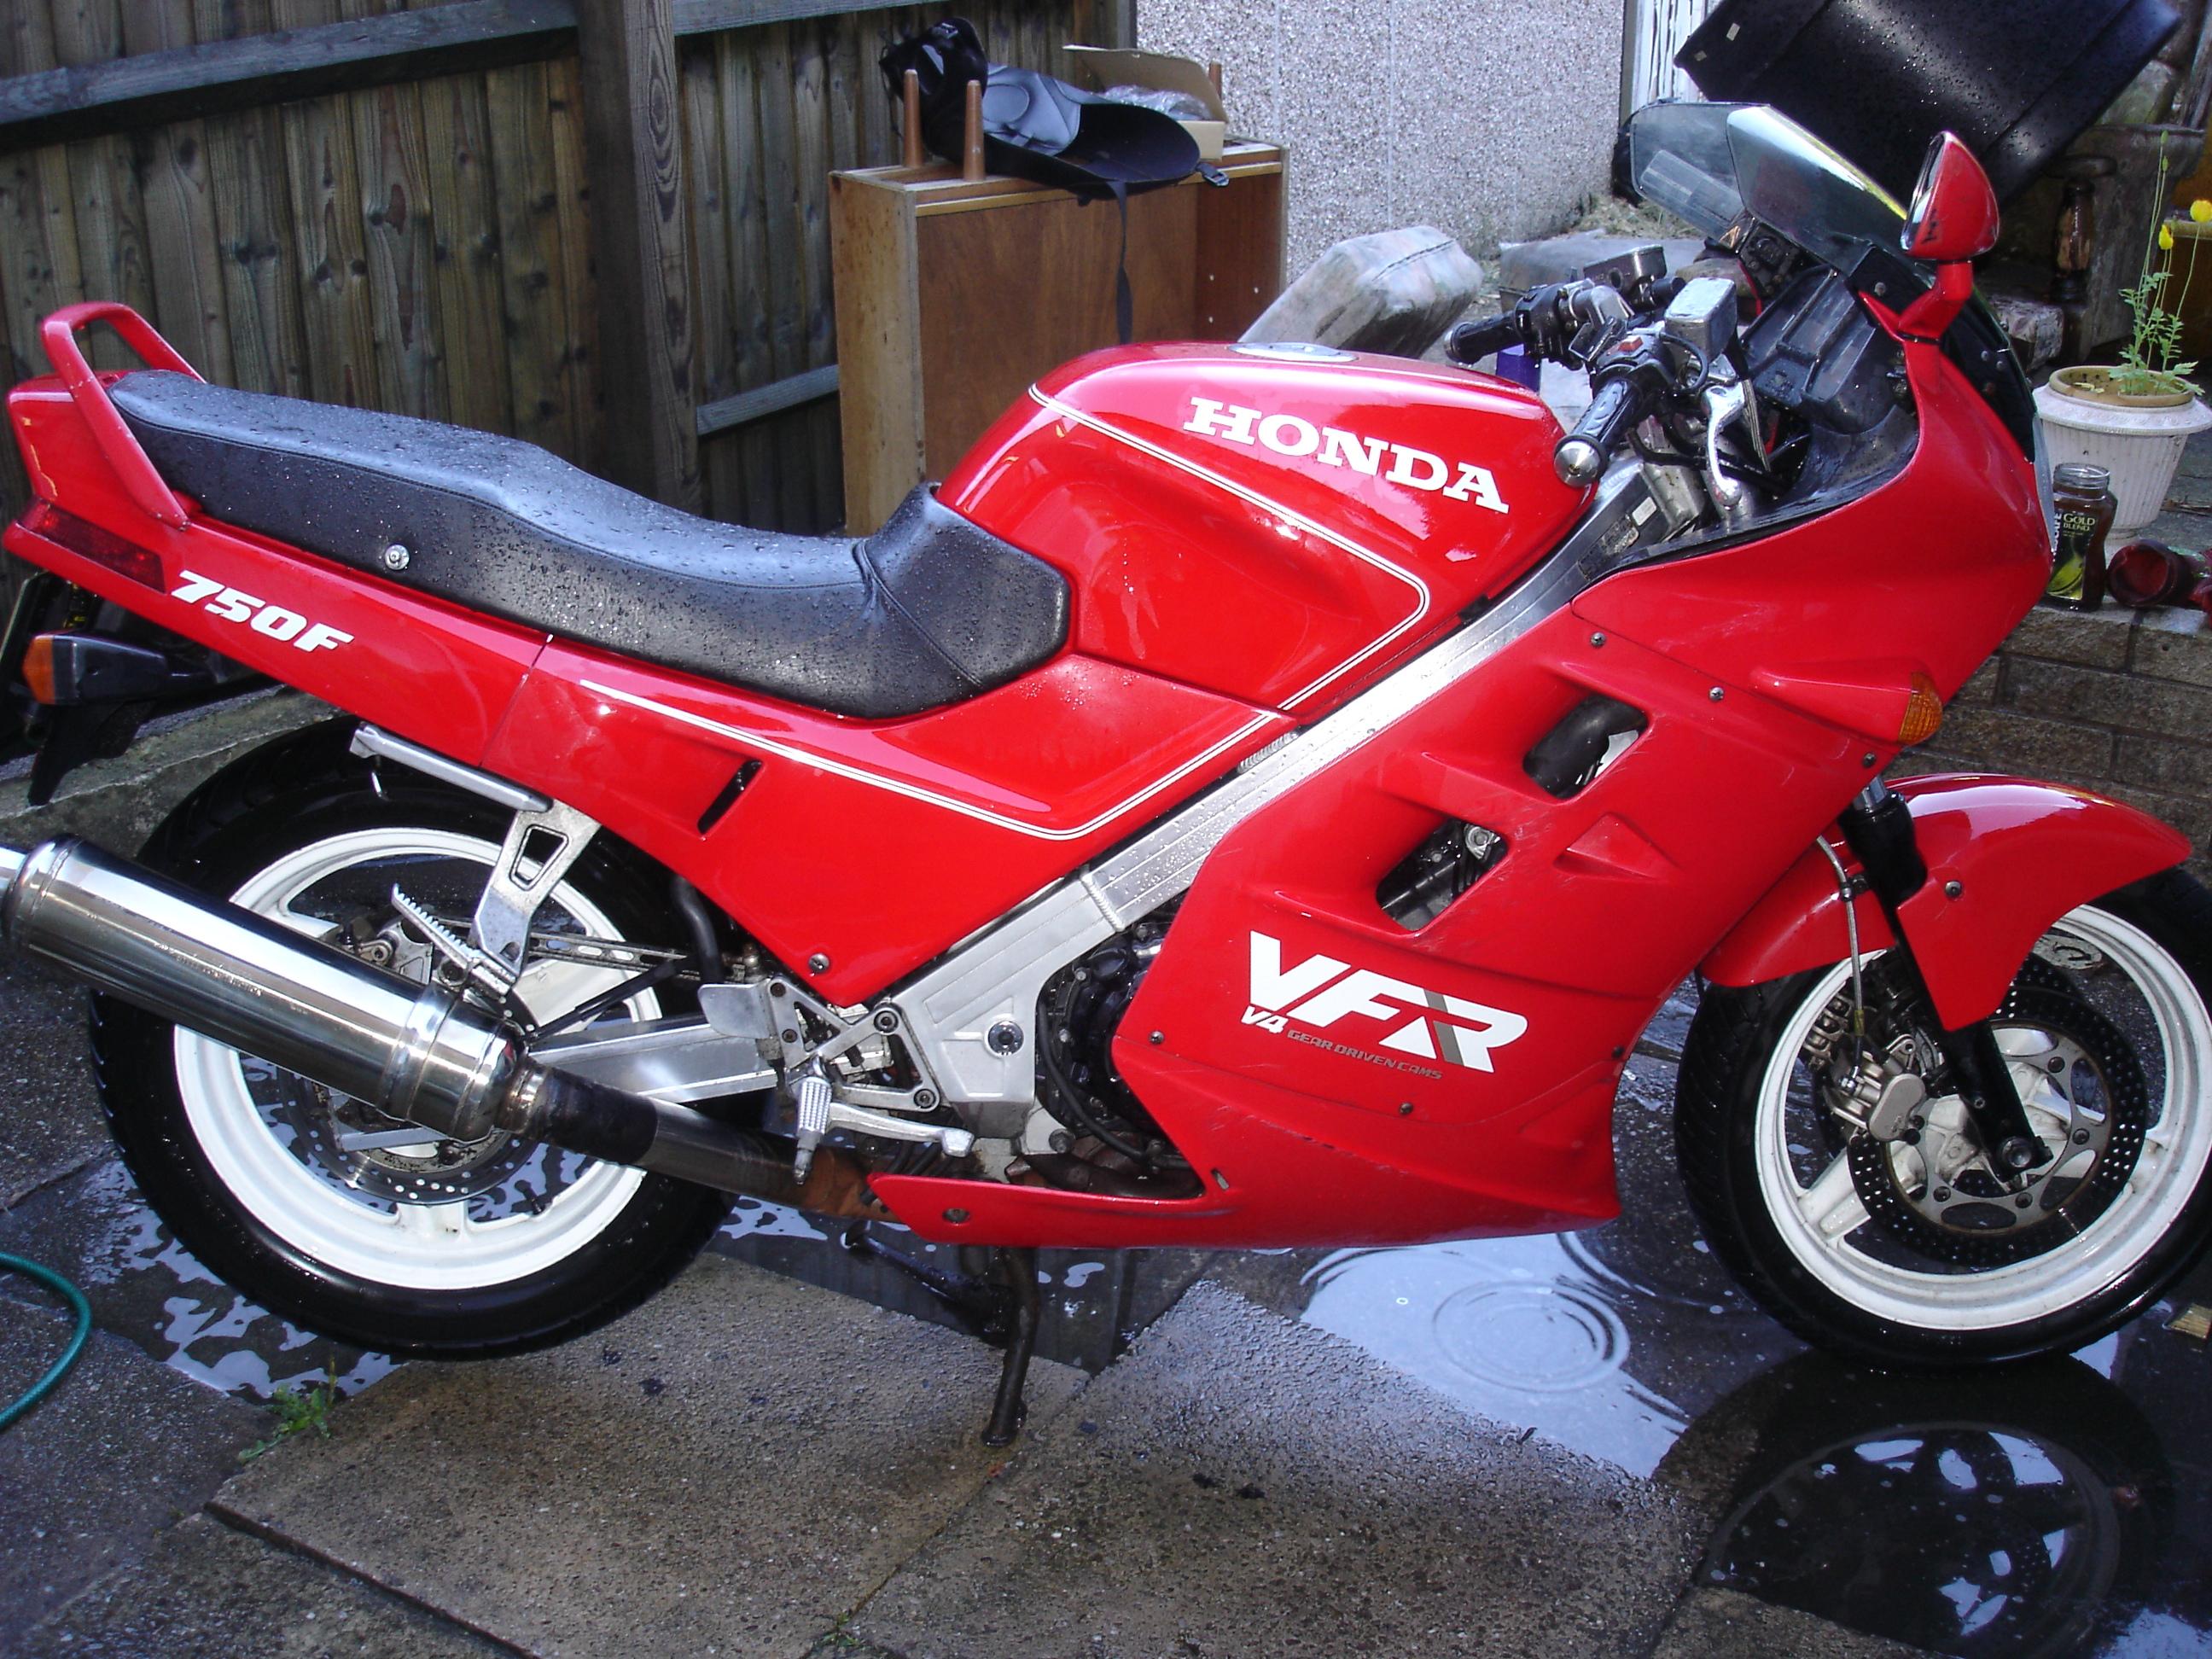
And that brings us to 15 years ago and 67k on her. By this stage it was no longer my primary transport as I'd bought a car so it was "sunny" commuting instead of all year round. This meant that over the next three years I only racked up ~5k (rather than 14k/year)...and then along came our first born, a move to a new house and a new job. The new job office was closer but 80% of the time was now working from home and the journey to work both wasn't a fun one by bike and it didn't save any time either. Commuting by bike was effectively at an end. Free time was limited and with my riding partner now looking after our baby our weekend rides stopped. Still managed a trackday together in 2011 when #1 was 1 year old (and seeing as her bike is also suitable for this forum here she on it) Then came along child #2. Nether of us gave up riding, if we had we'd have sold the bikes....but...we just didn't really have the time and it just fizzled out. The MOT and then the insurance lapsed on the VFR and the longer it sat the more needed doing to get it back on the road. Probably the last photo I have from when it was road legal in 2011 (and with my wifes bike already hibernating). ...and that brings chapter one to a close.
-
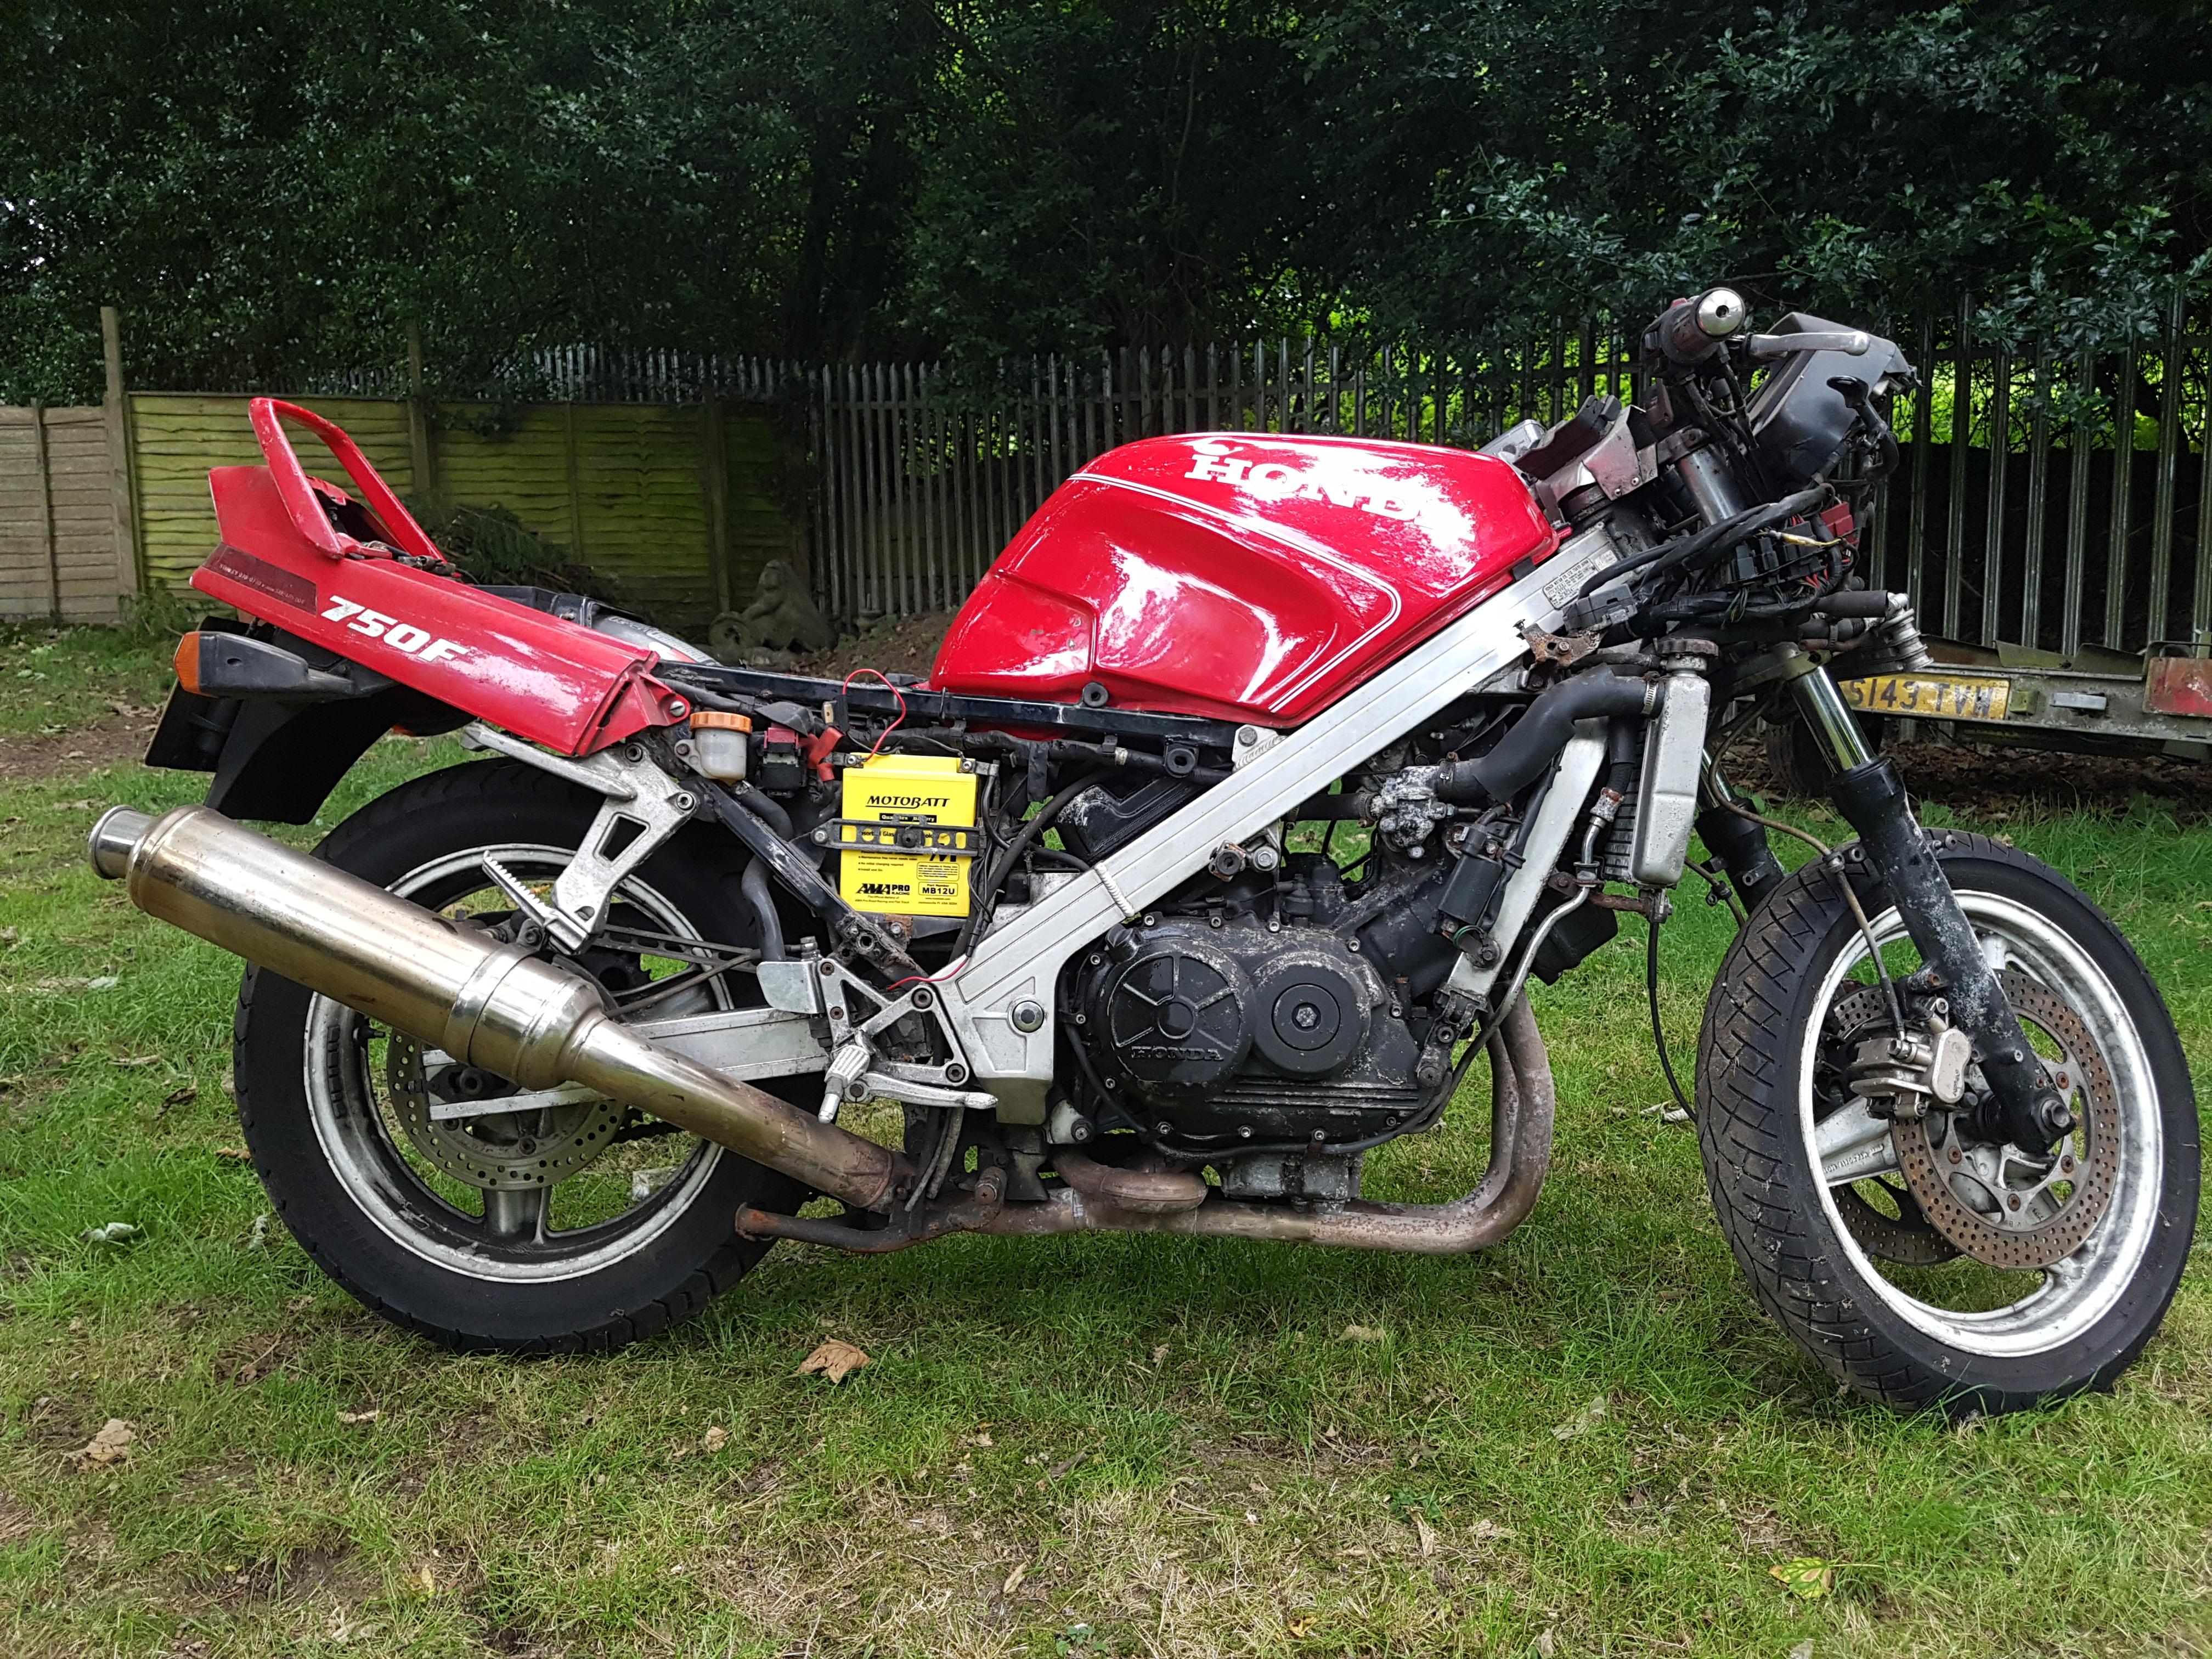
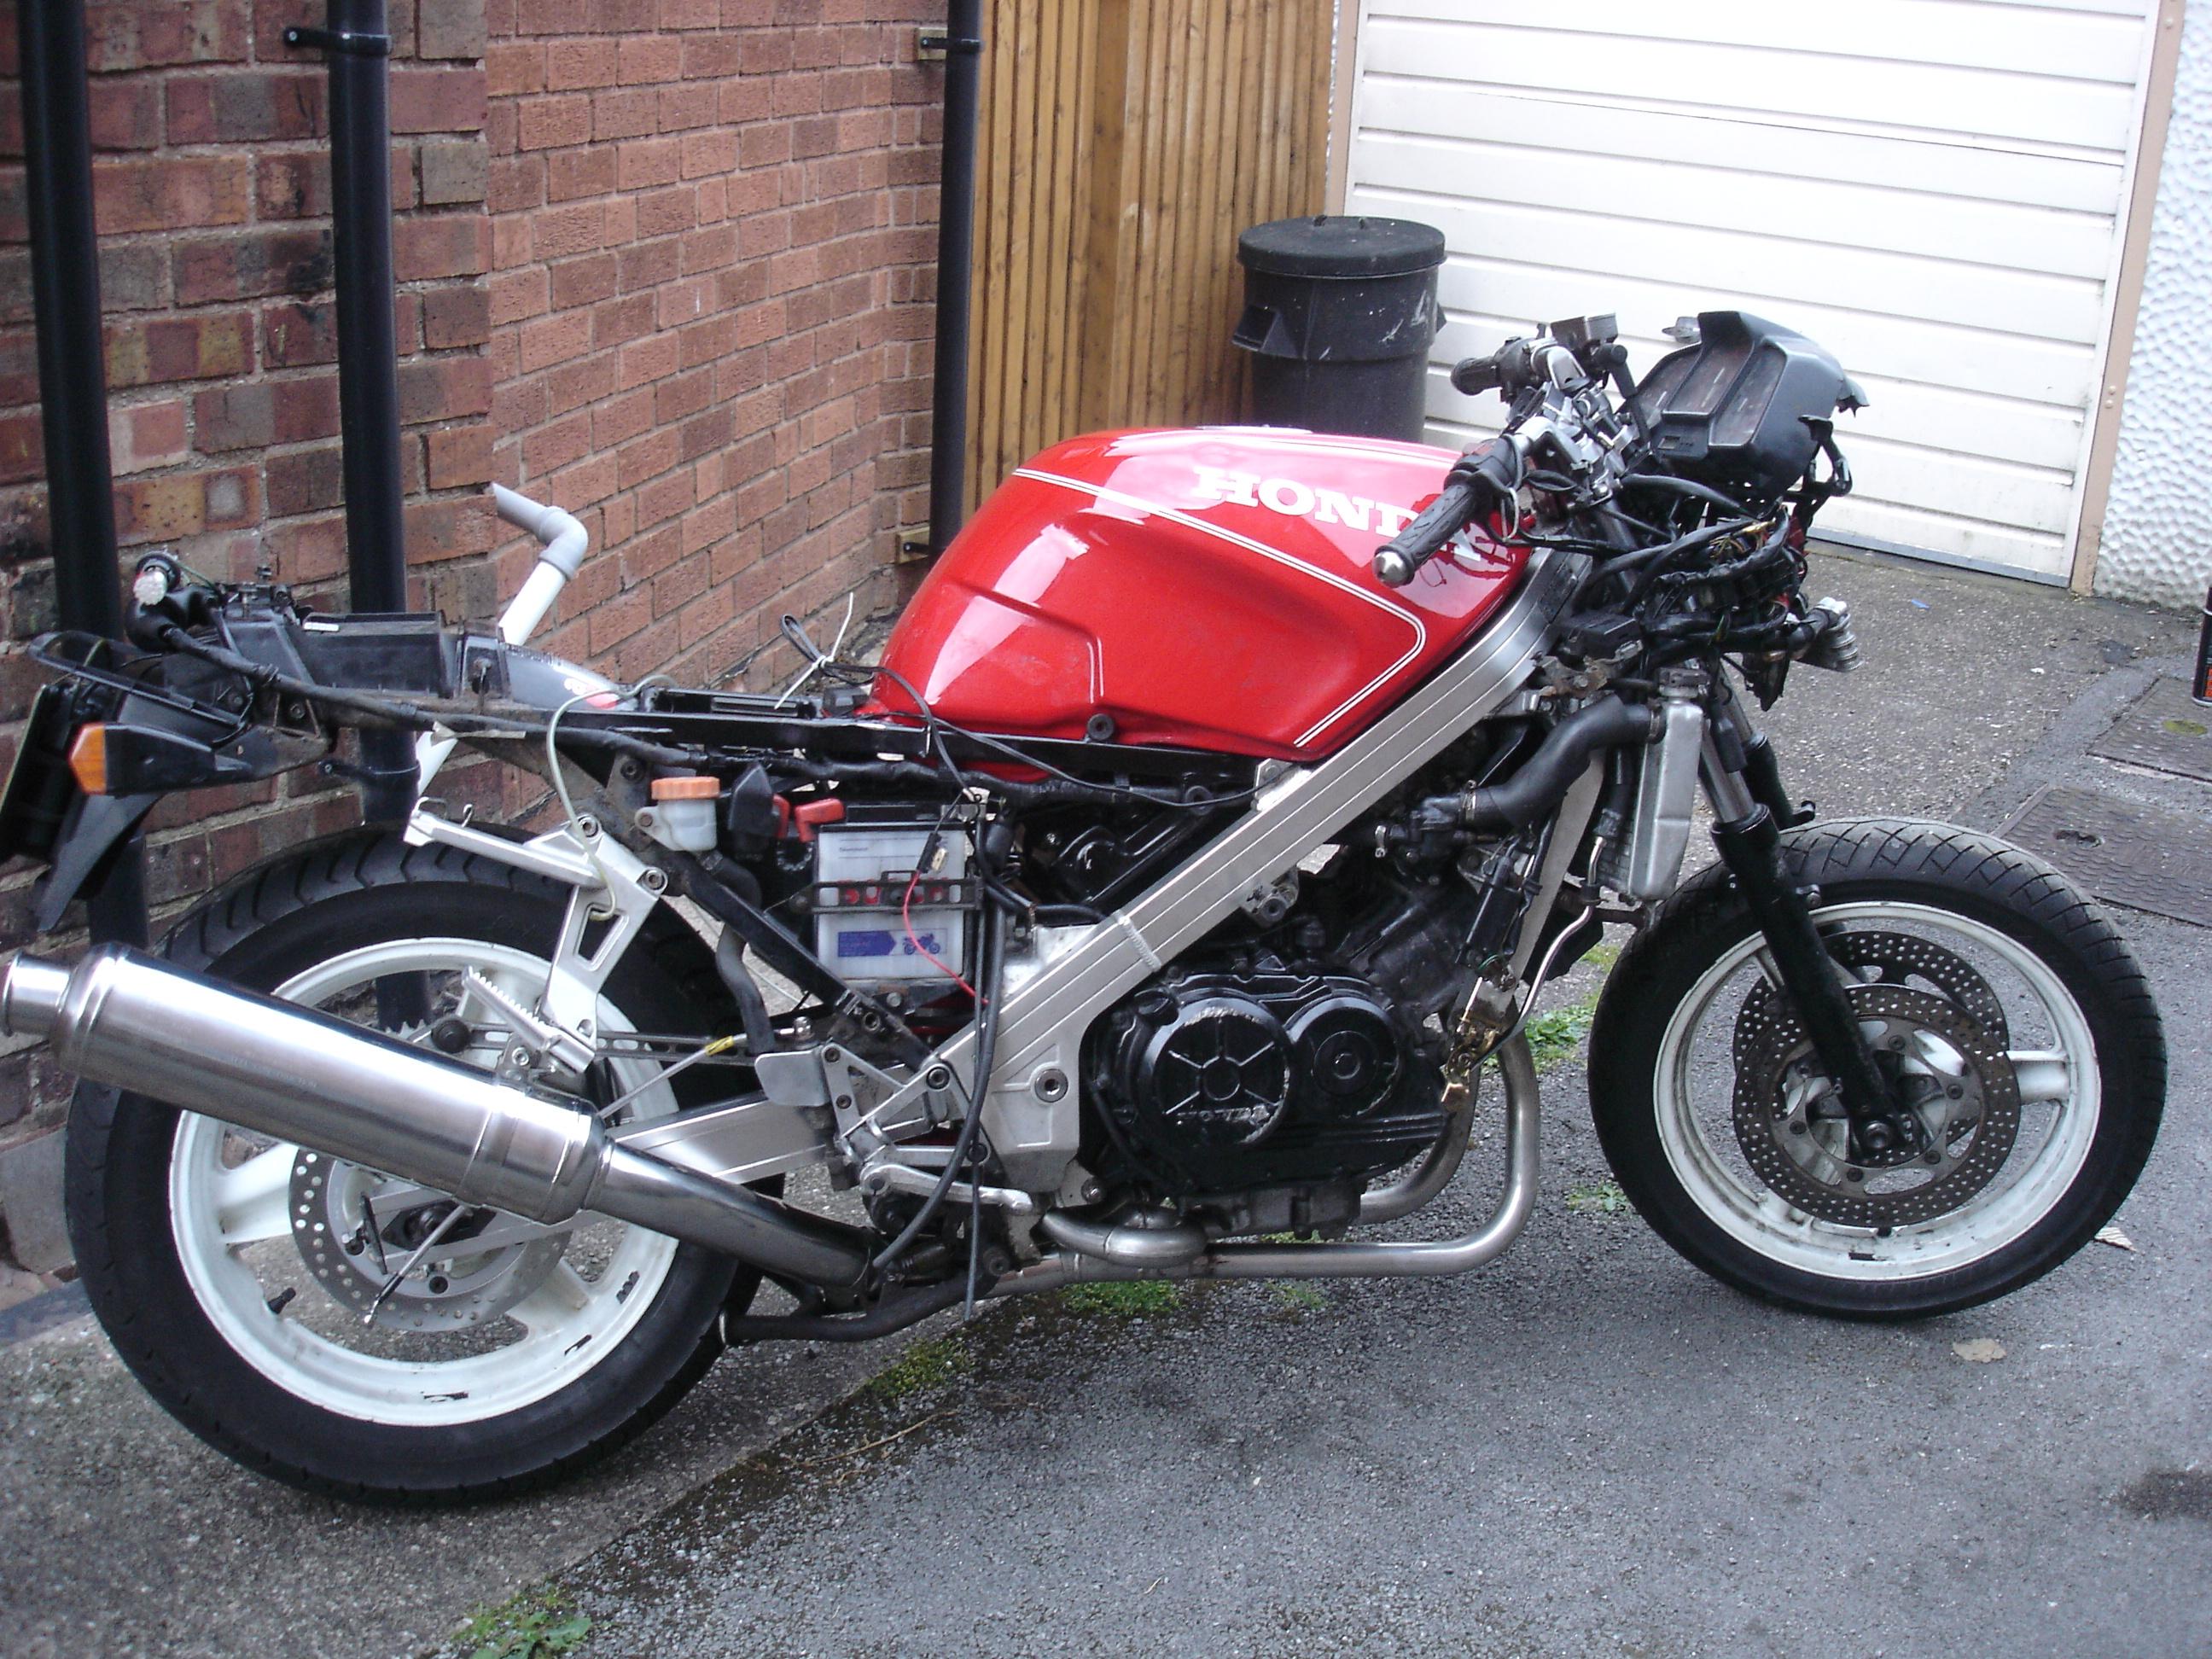
From a rolling chassis In went the "new" engine Subframe on. Exhaust & radiator refitted. New rear brake line. Brakes on, plastics starting to go back on.
-
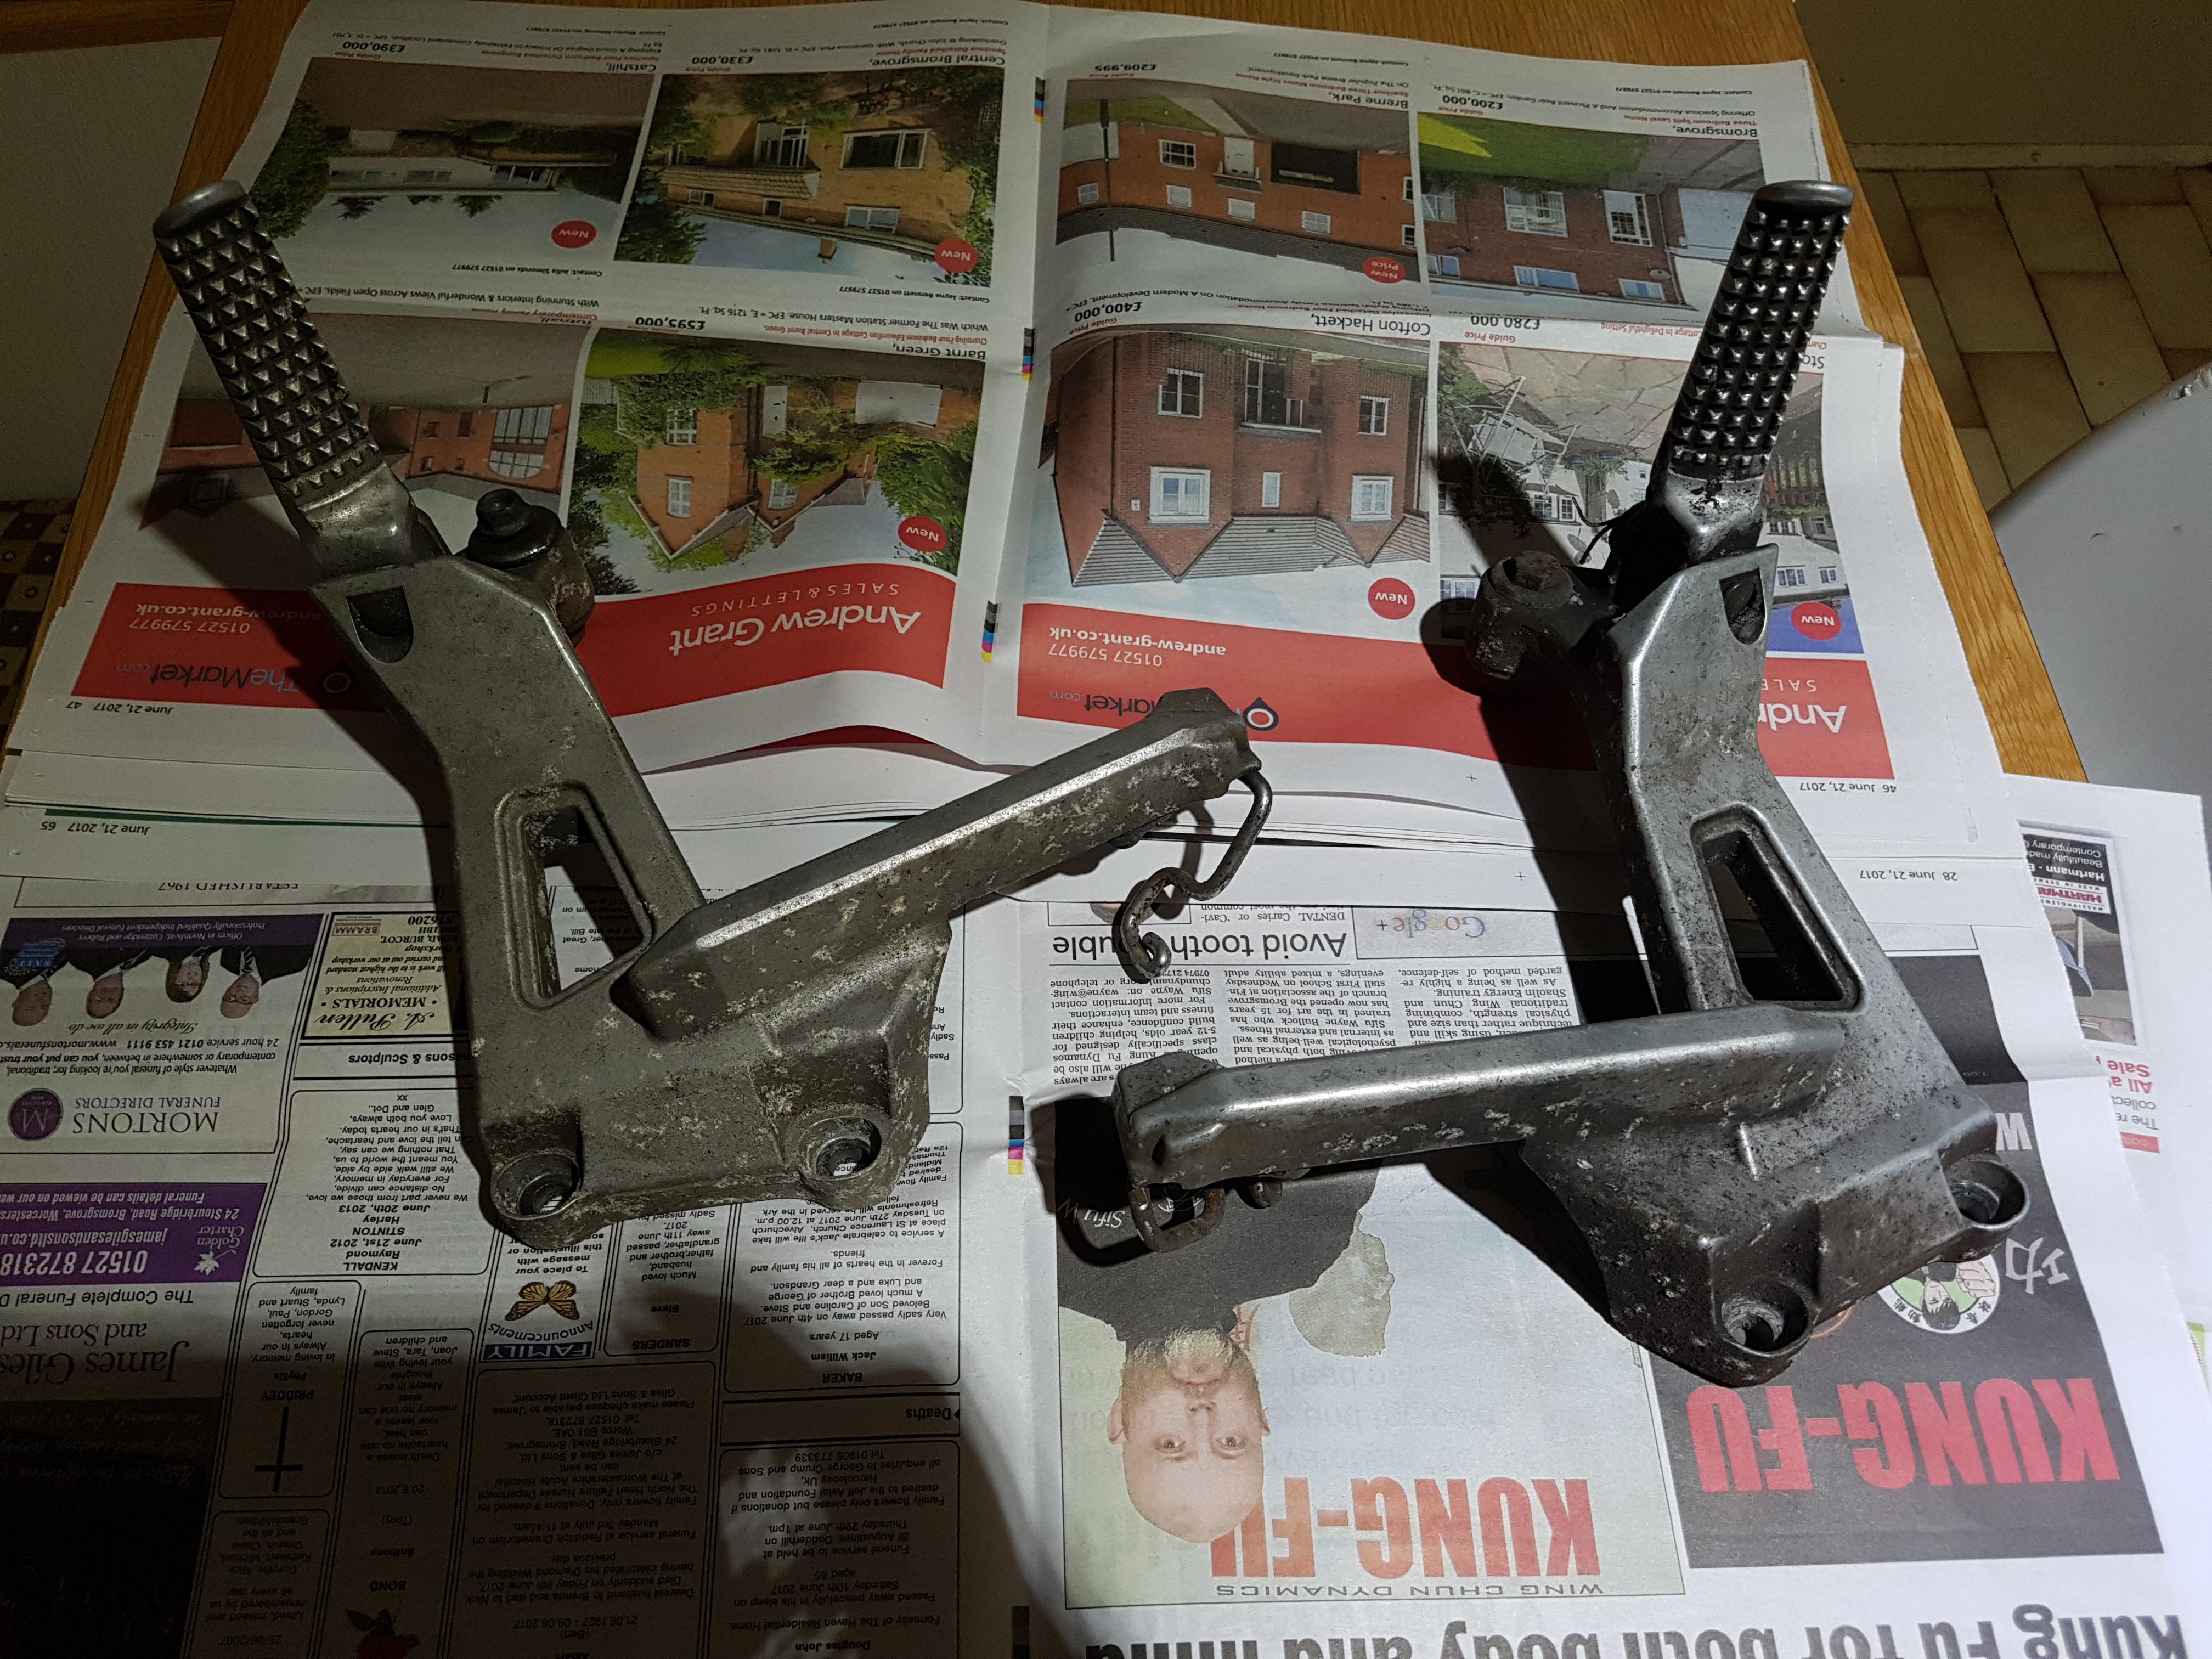
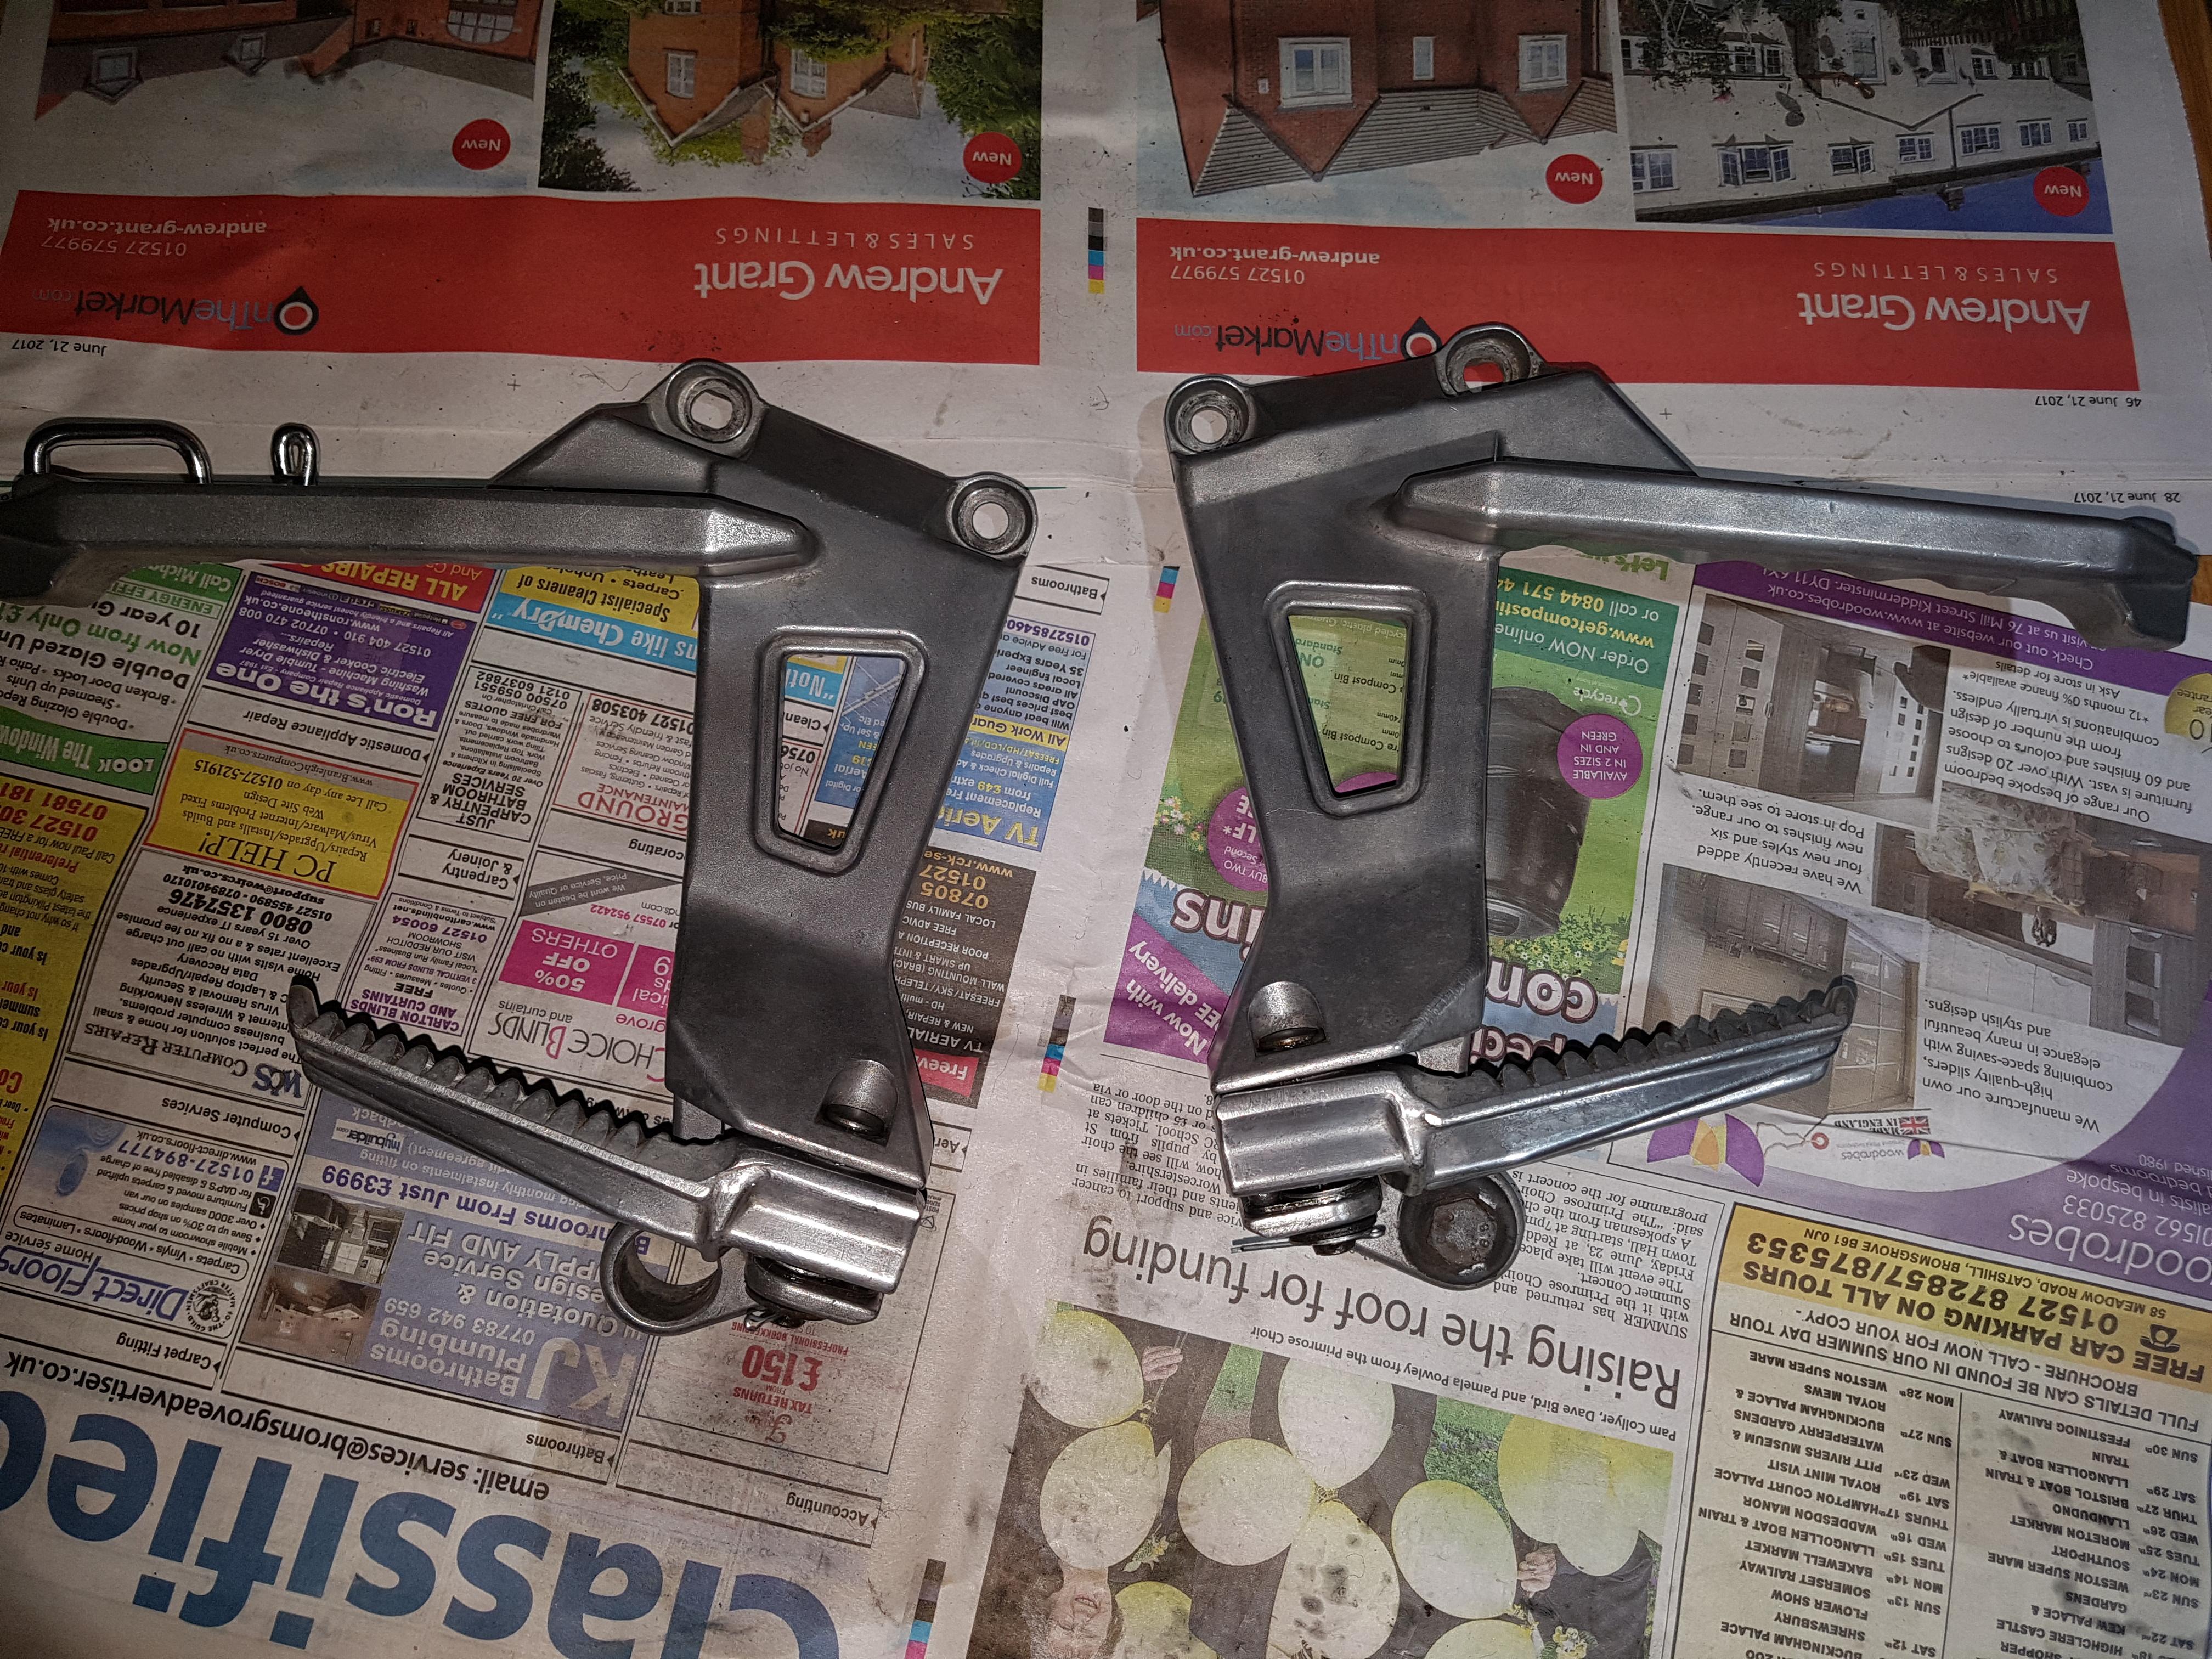
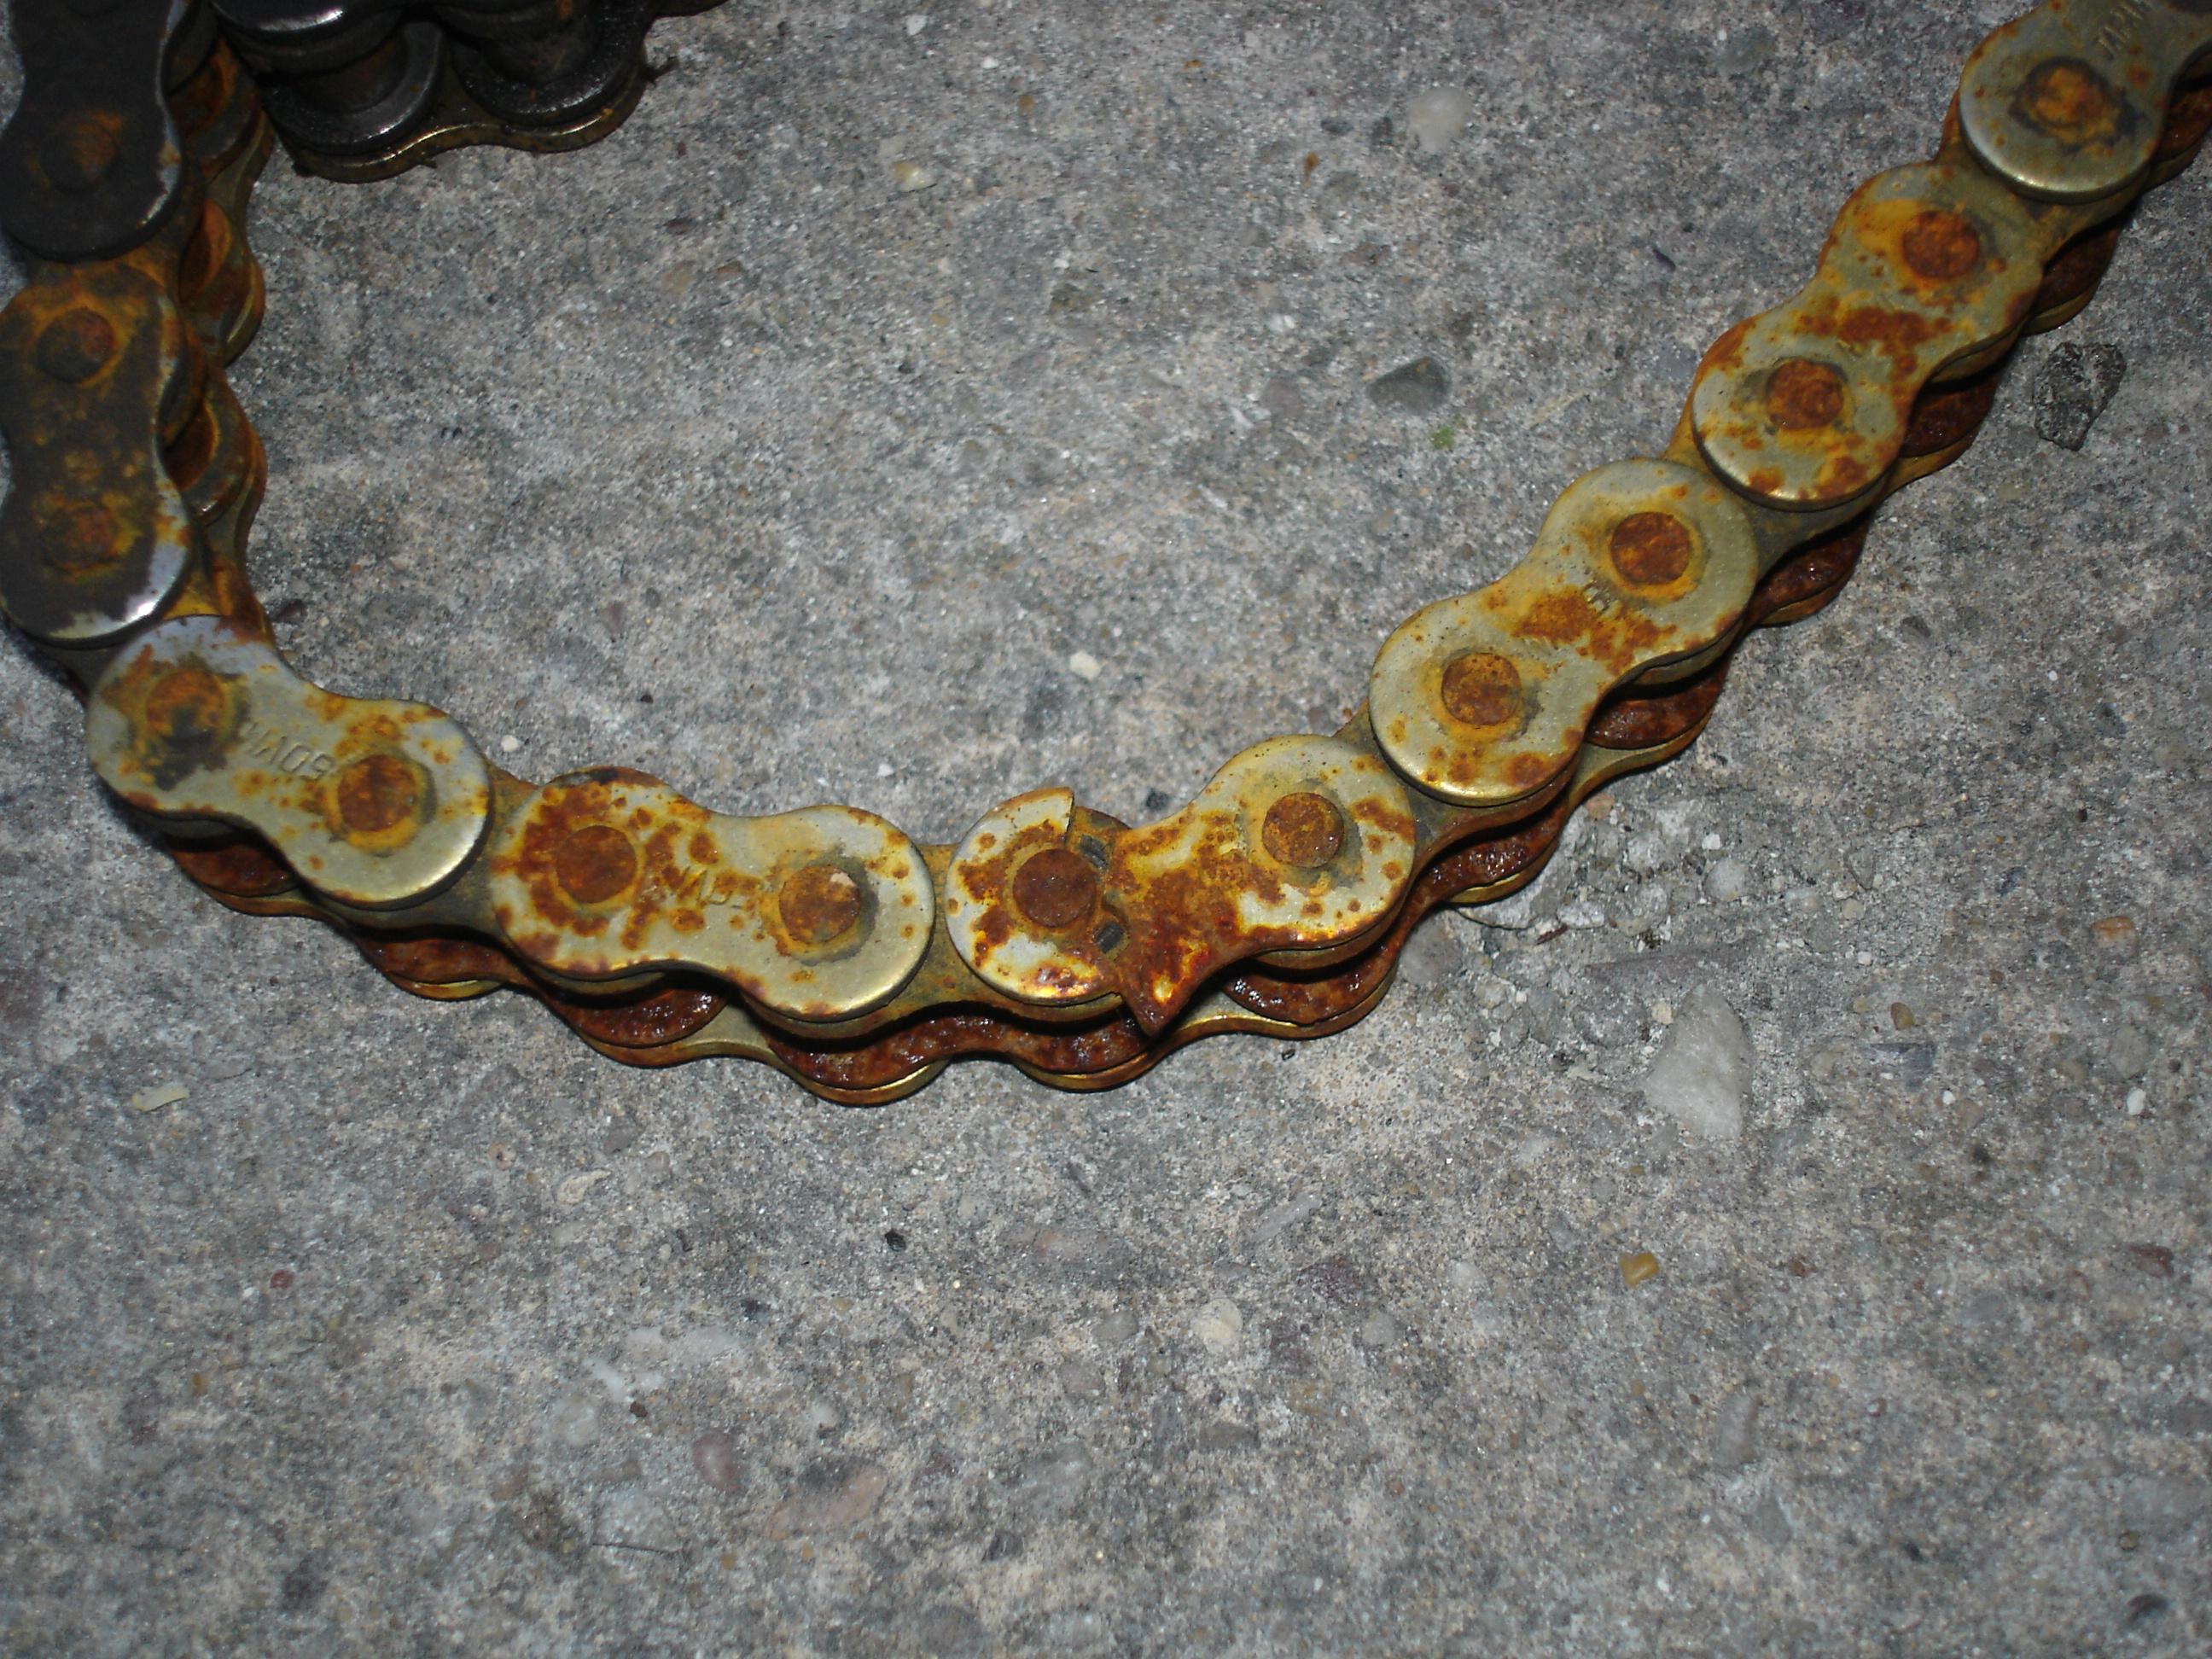
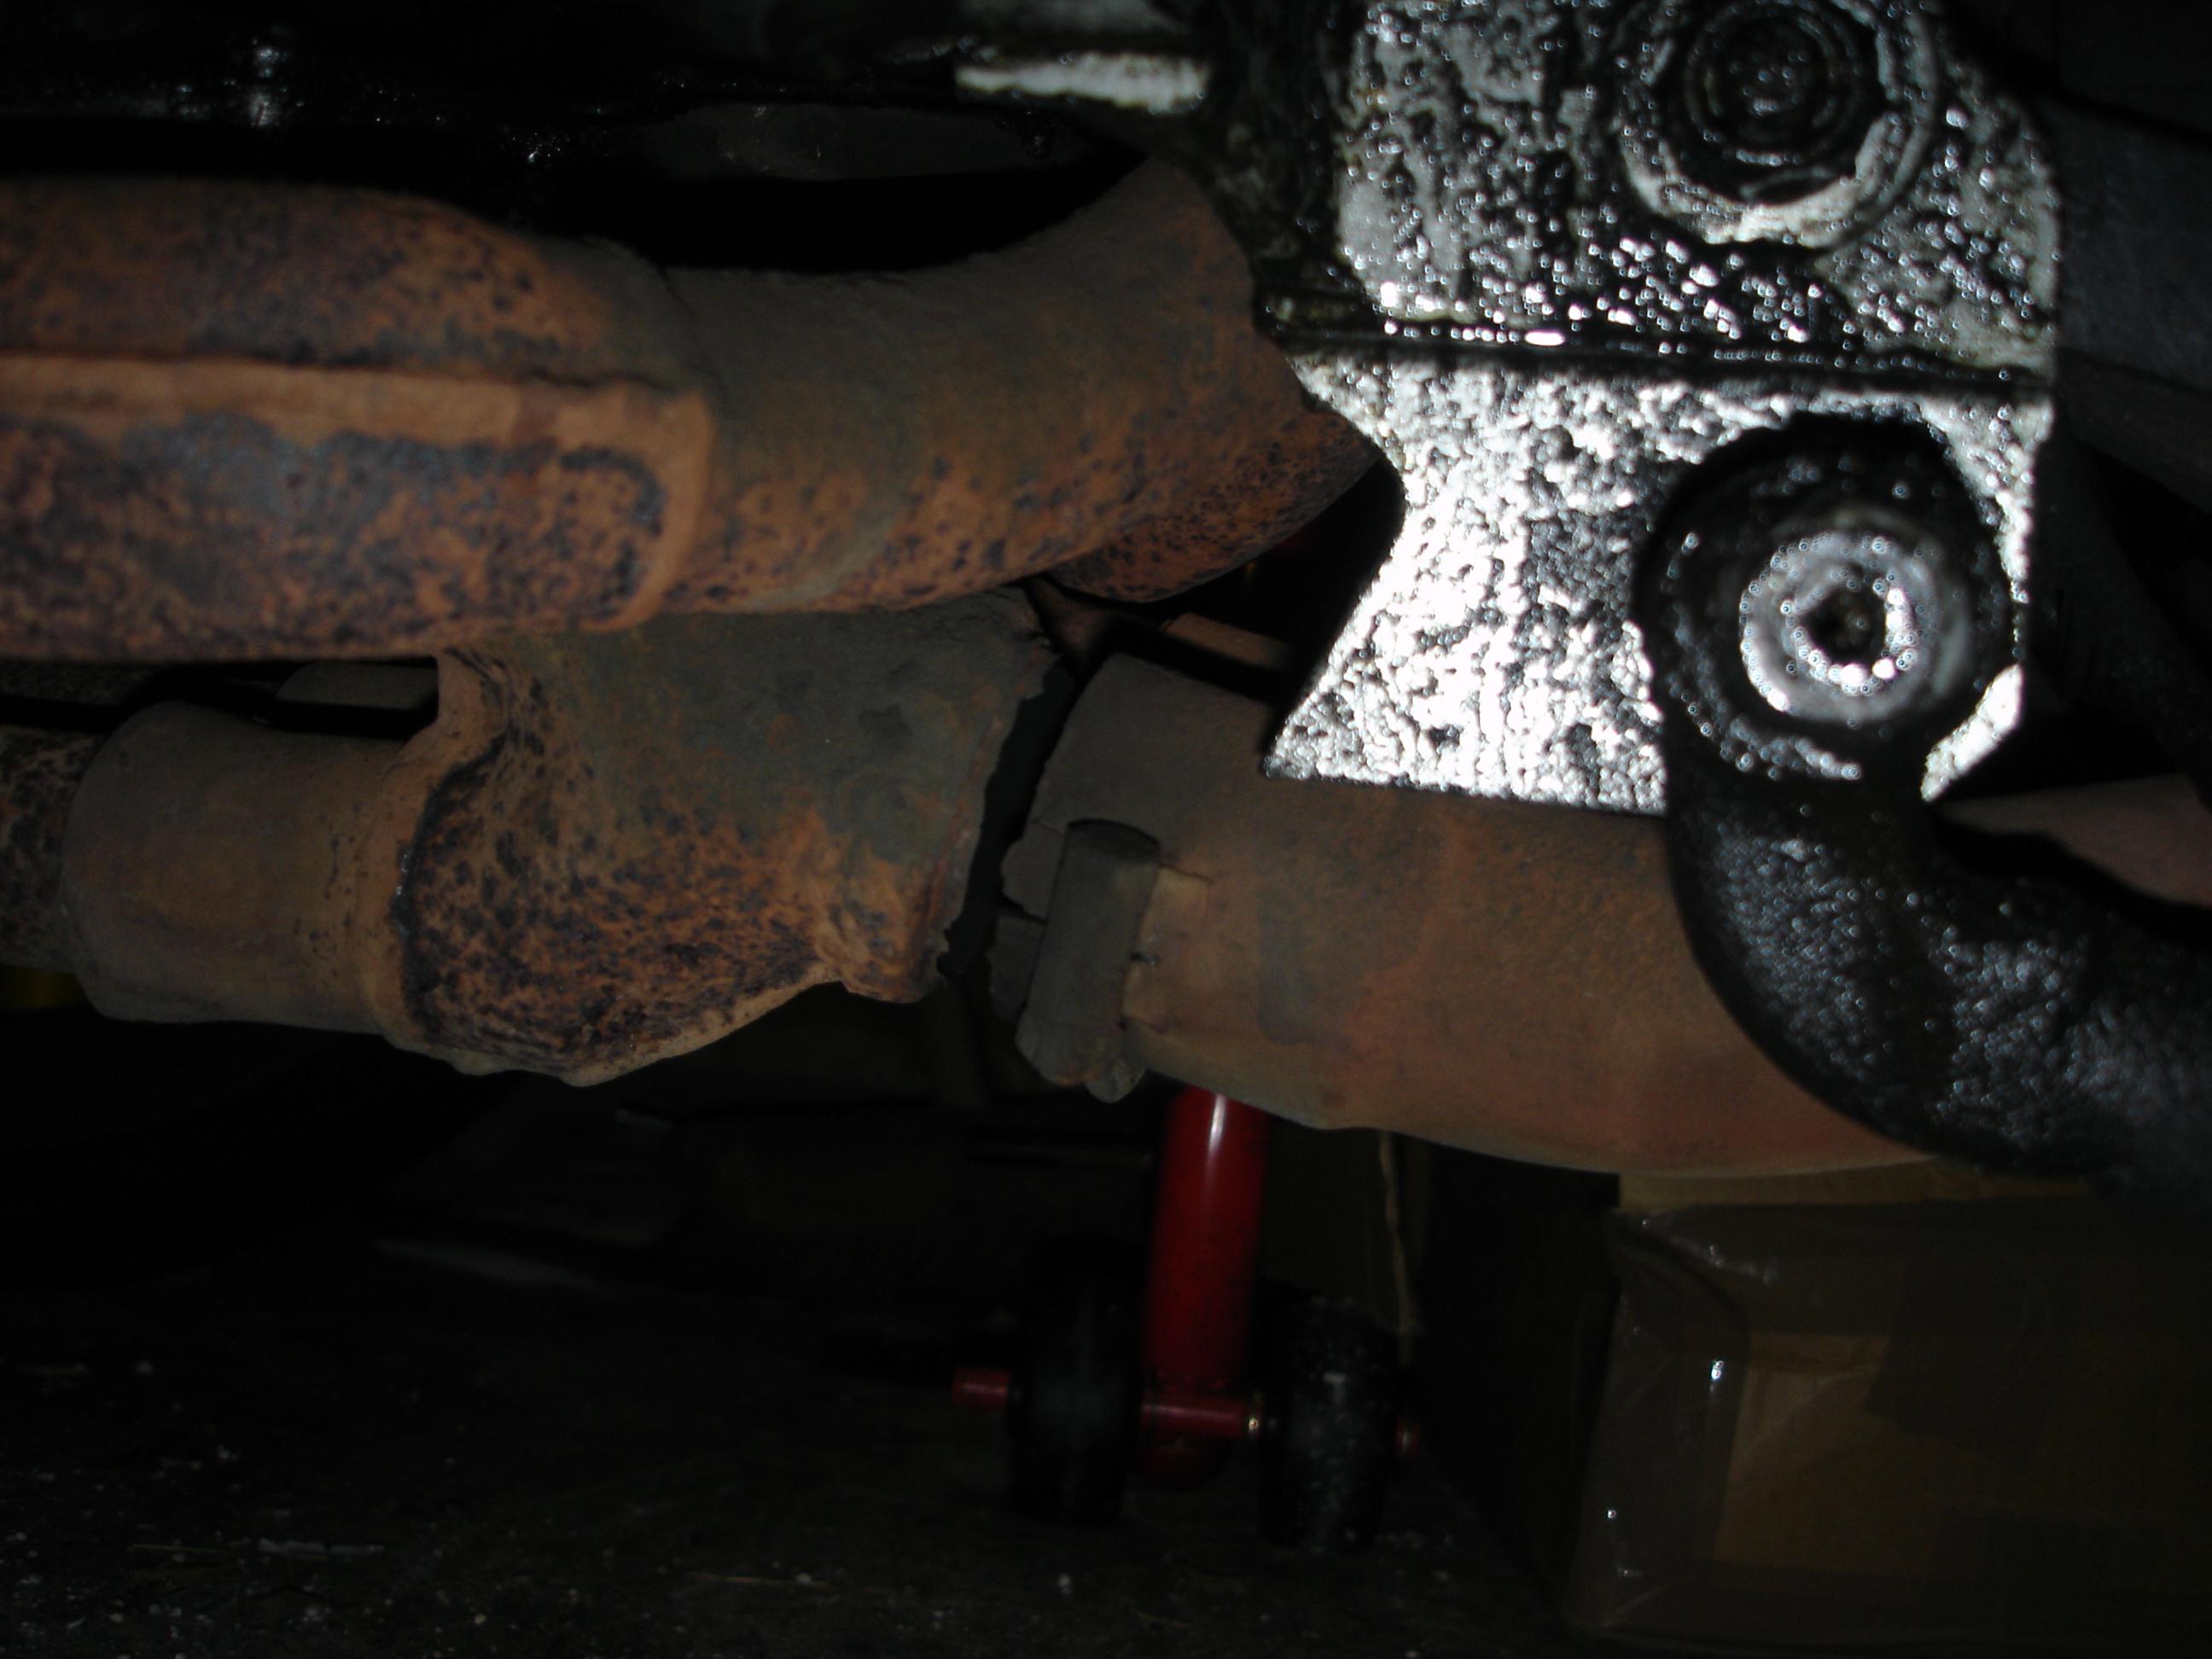
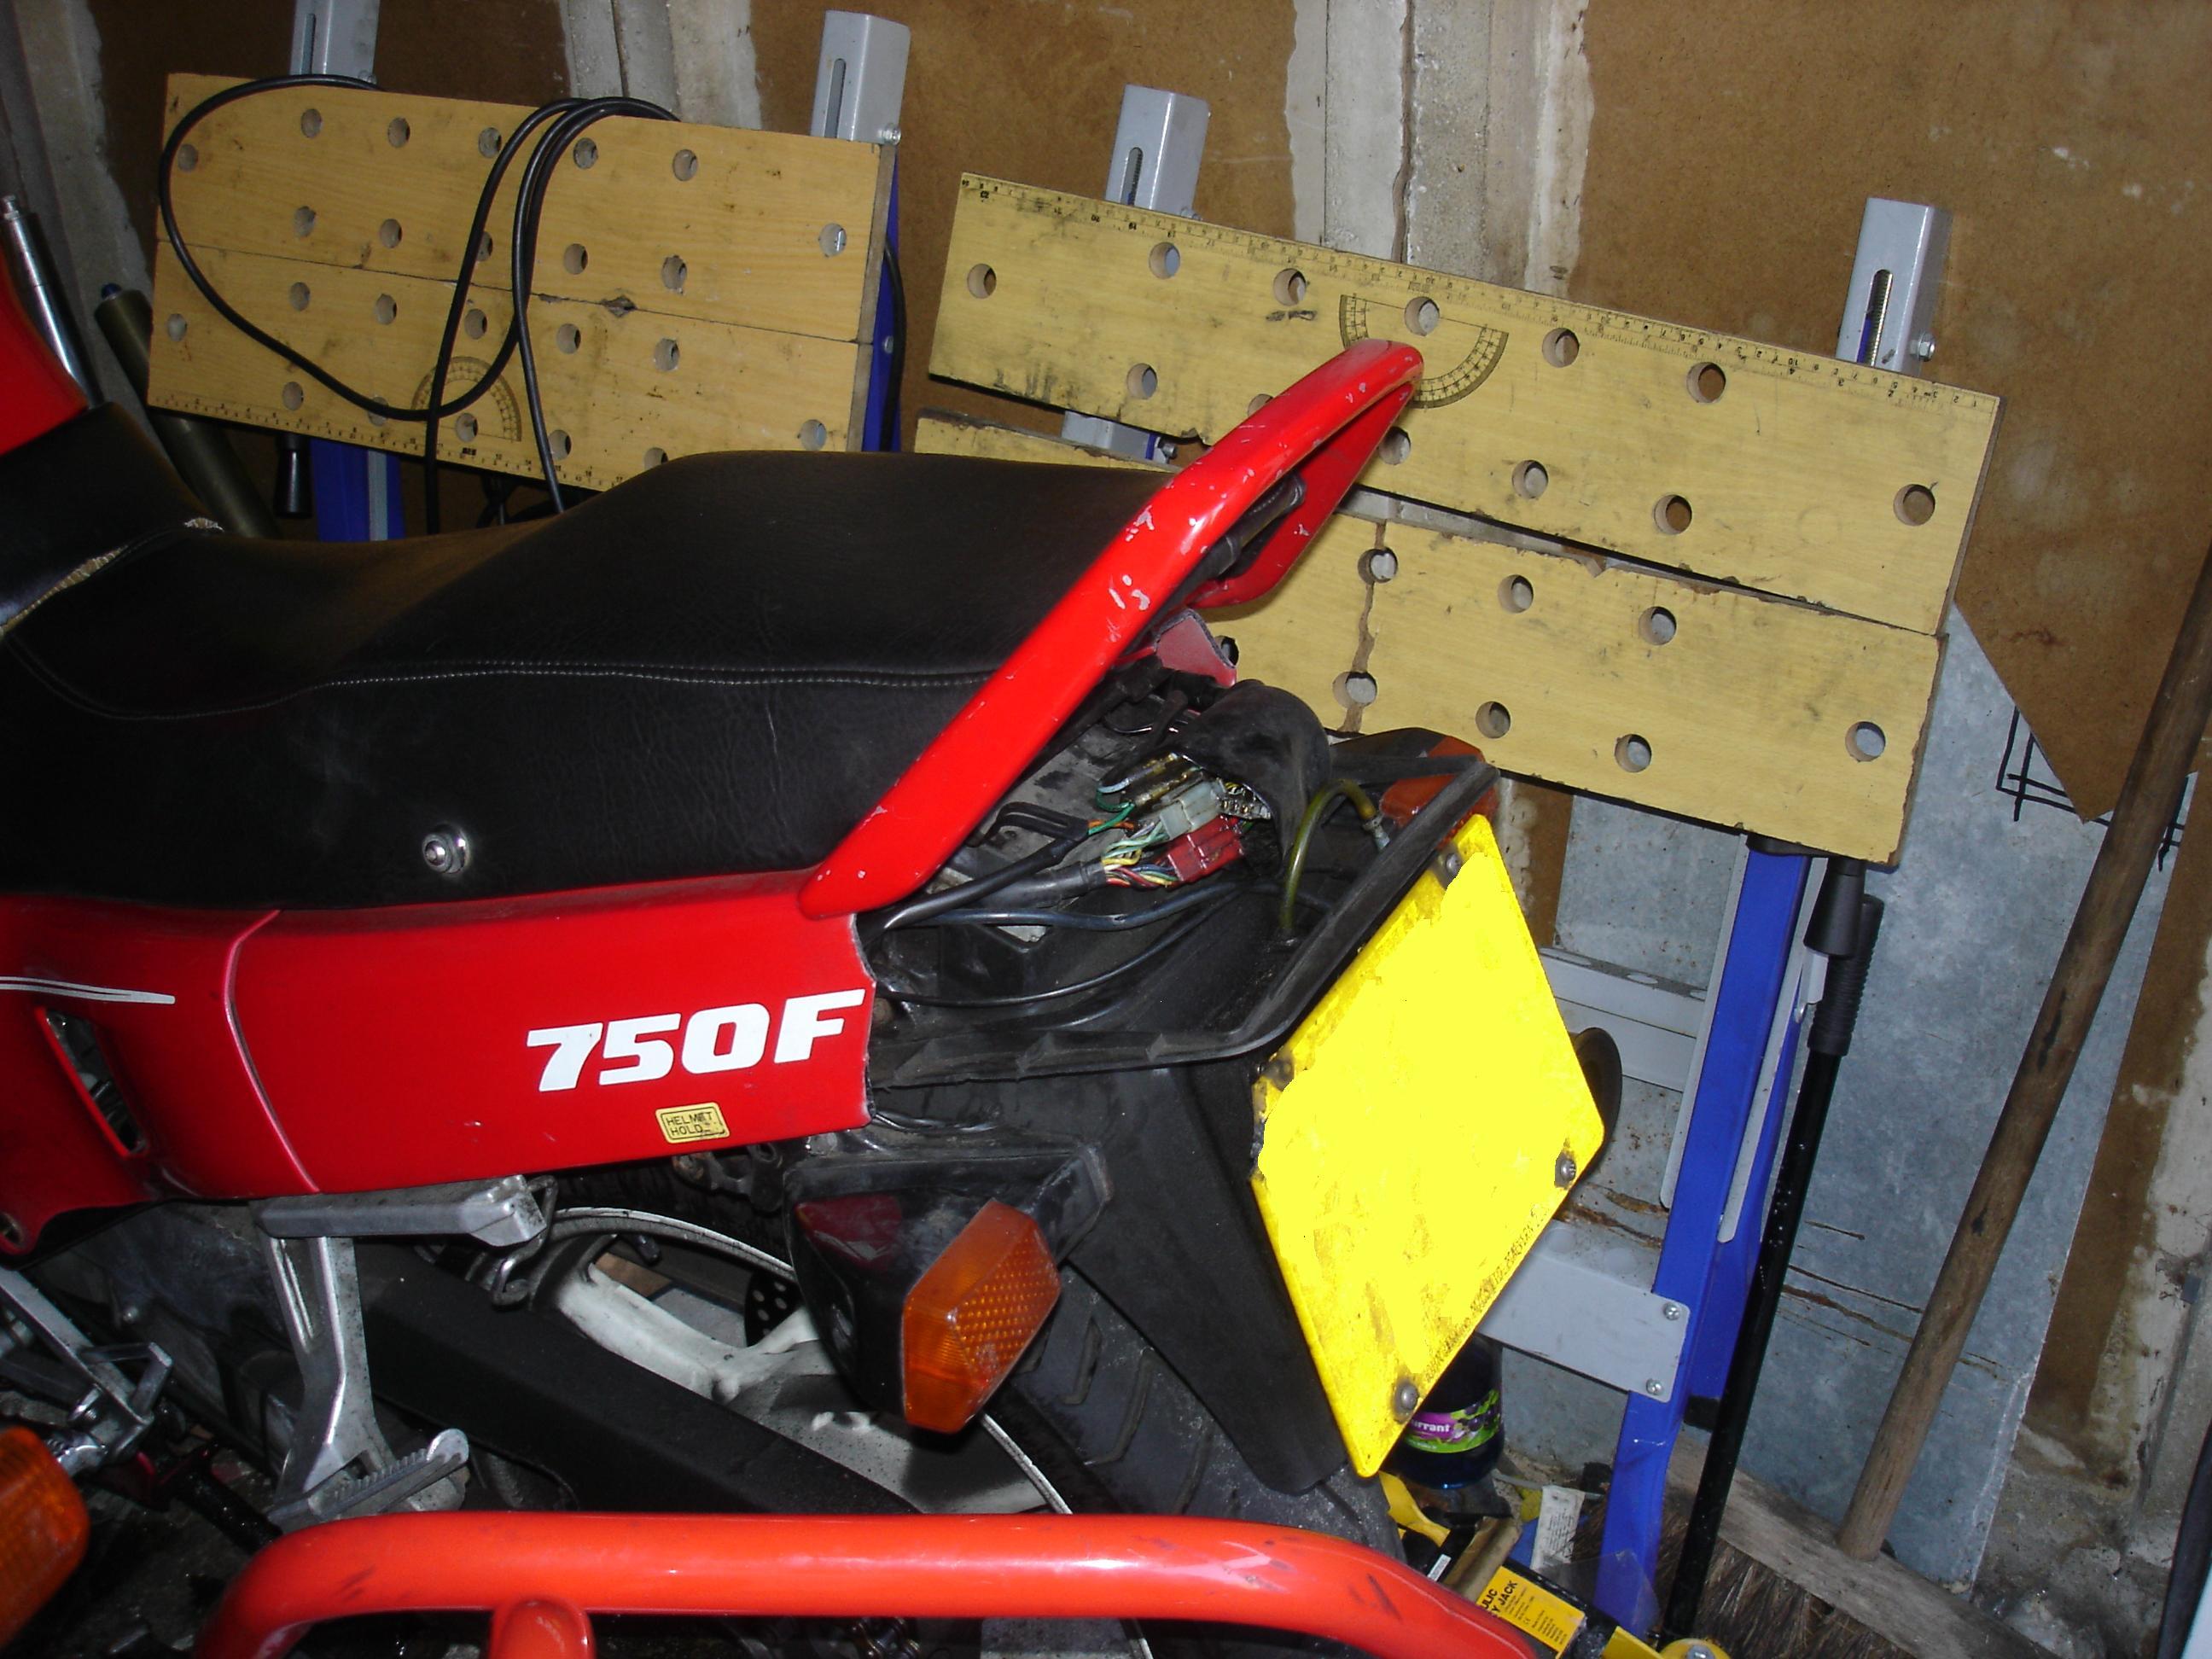
By this point the bike had been stripped down to frame and a few remaining items. After 67k of use all year round it was as grotty as you might expect. There were a lot of new bits fitted. I replaced the rear heatshield Along with a new Motad silencer. For two reasons. First one was that there was a hole in the previous one (if you look at previous photos you'll see the black bandage round it) but also because whoever had originally fitted it had modified one of the clamps and it didn't fit the Motad downpipes. Unfortunately it seems like all my photos of that are blurry so I won't bother with them. Also brand new rear disc, with chain and sprockets On the subject of chain and sprockets when the exhaust went I also discovered I'd been rather lucky. The chain had broken a side plate (photo btw taken months after the chain came off and left outside in the "take to the tip" pile which is why its so rusty) and undoubtedly would have failed soon.
-
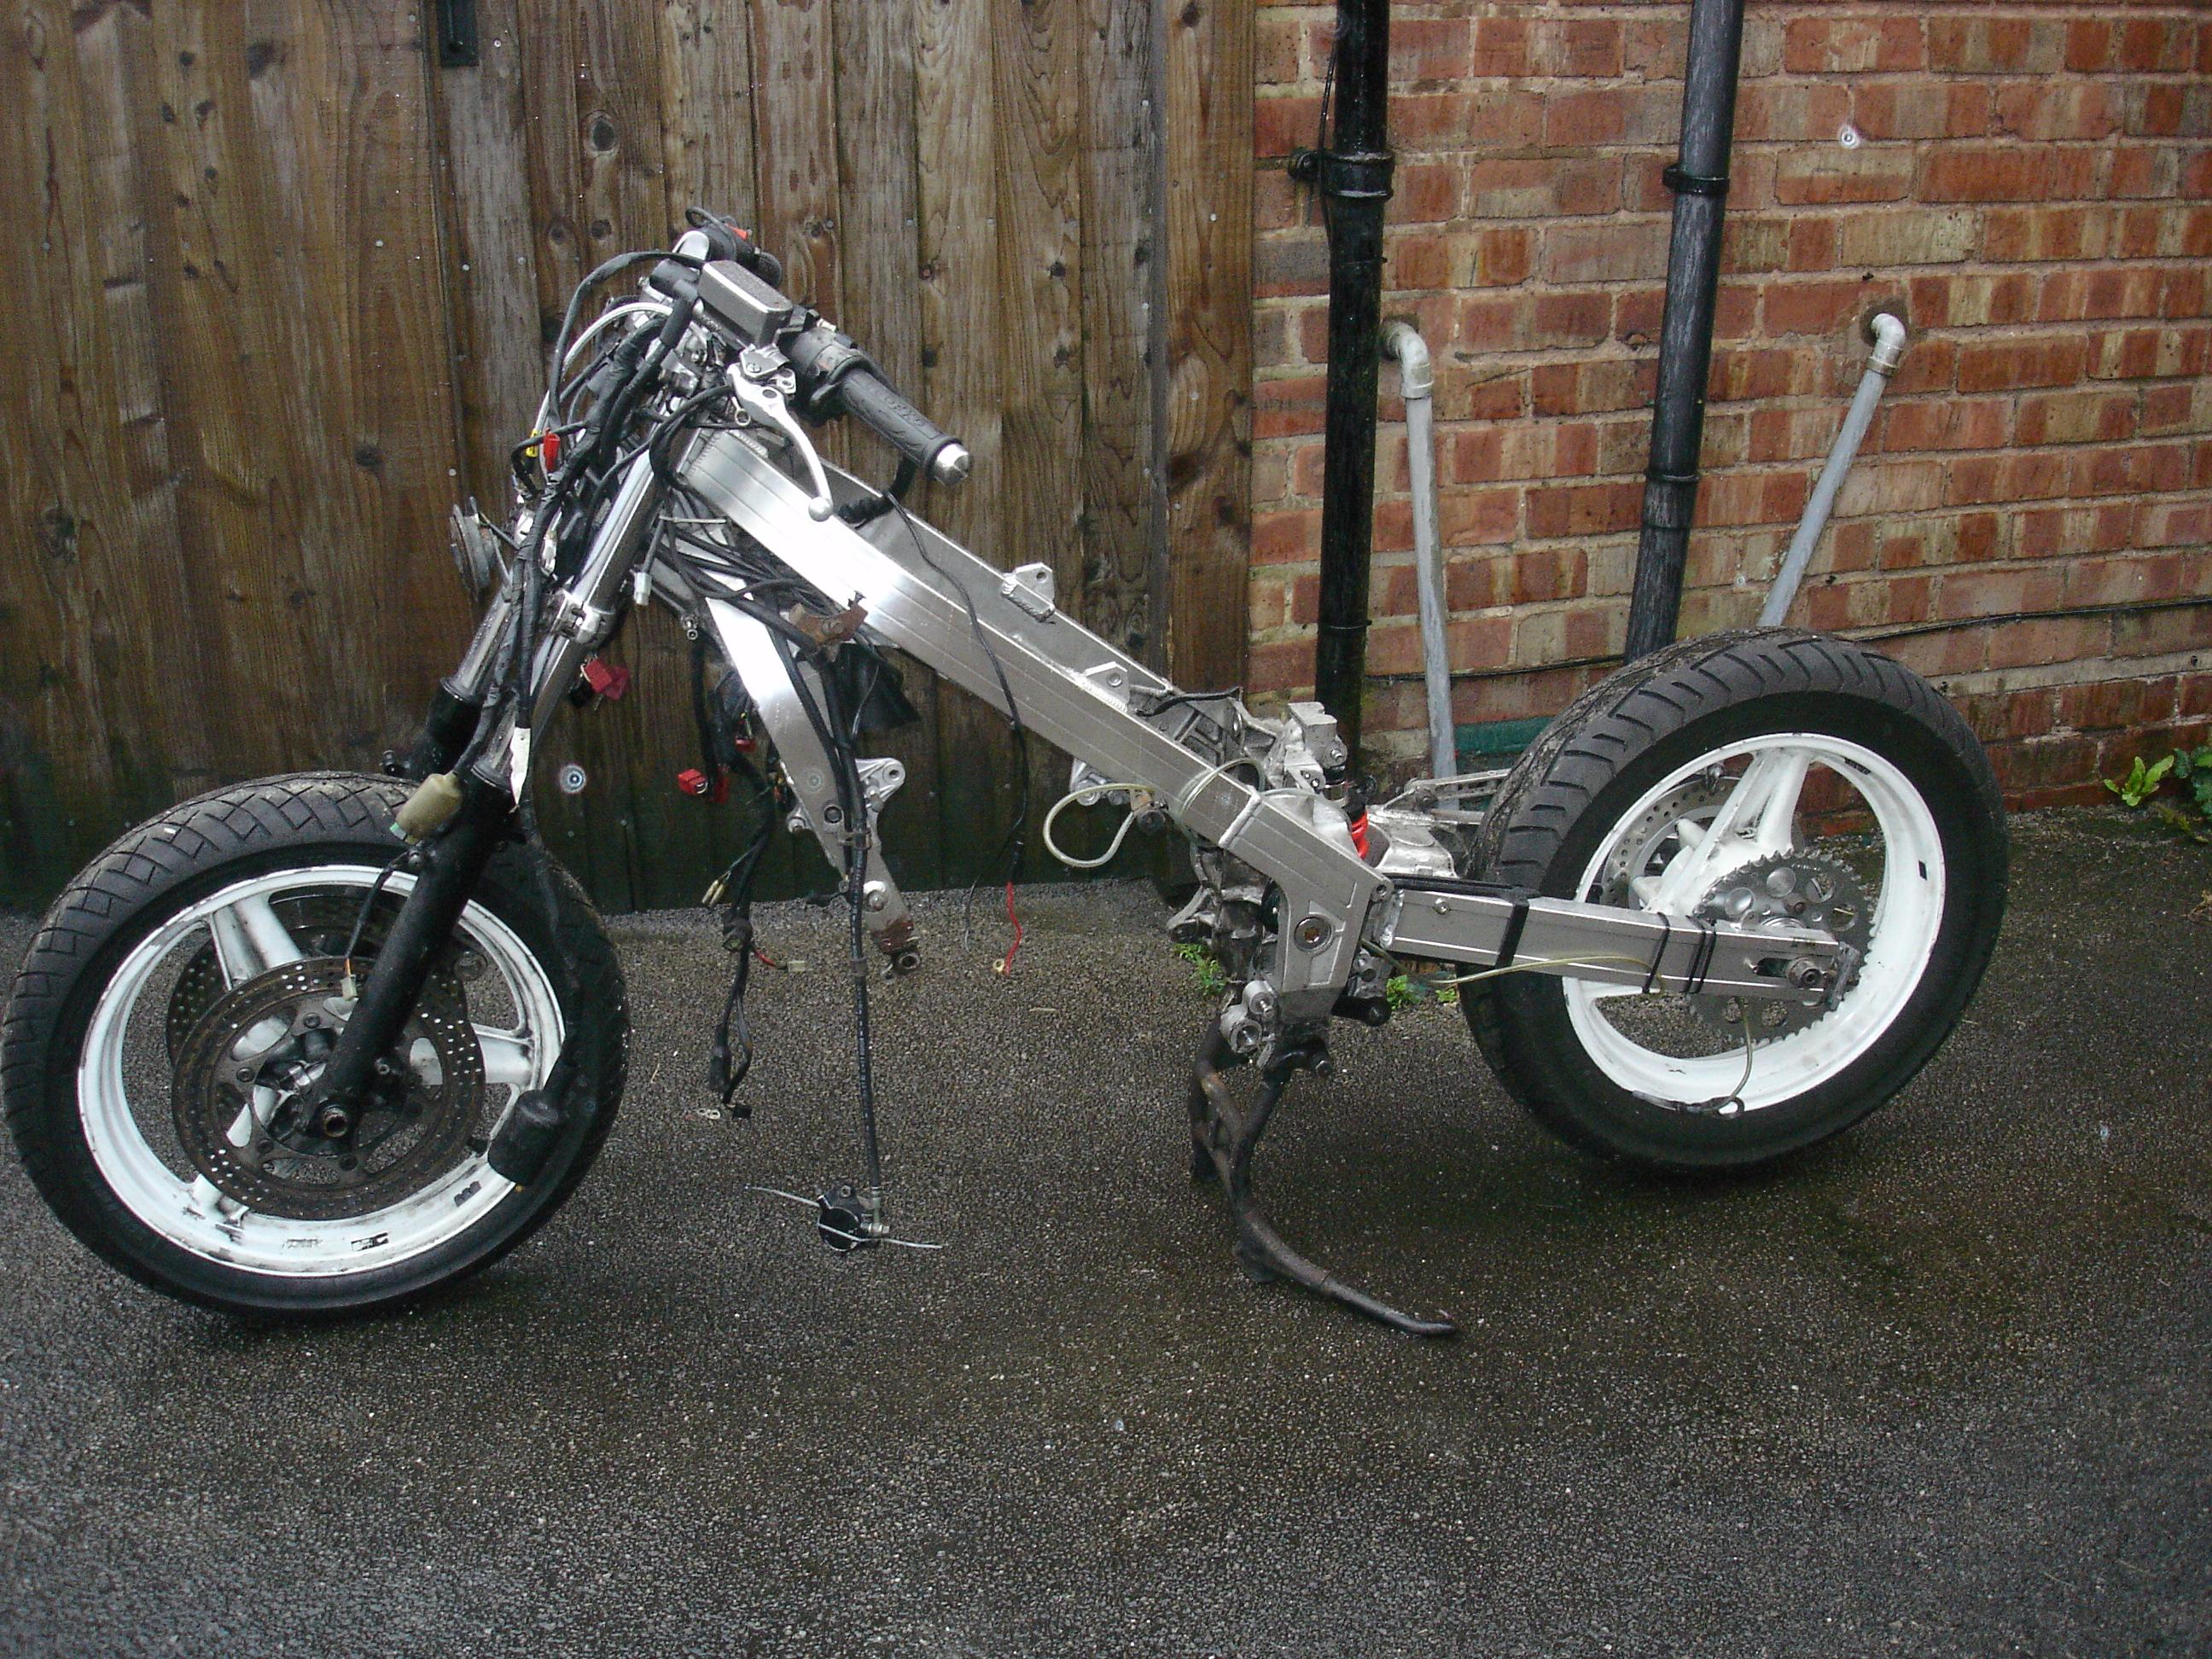
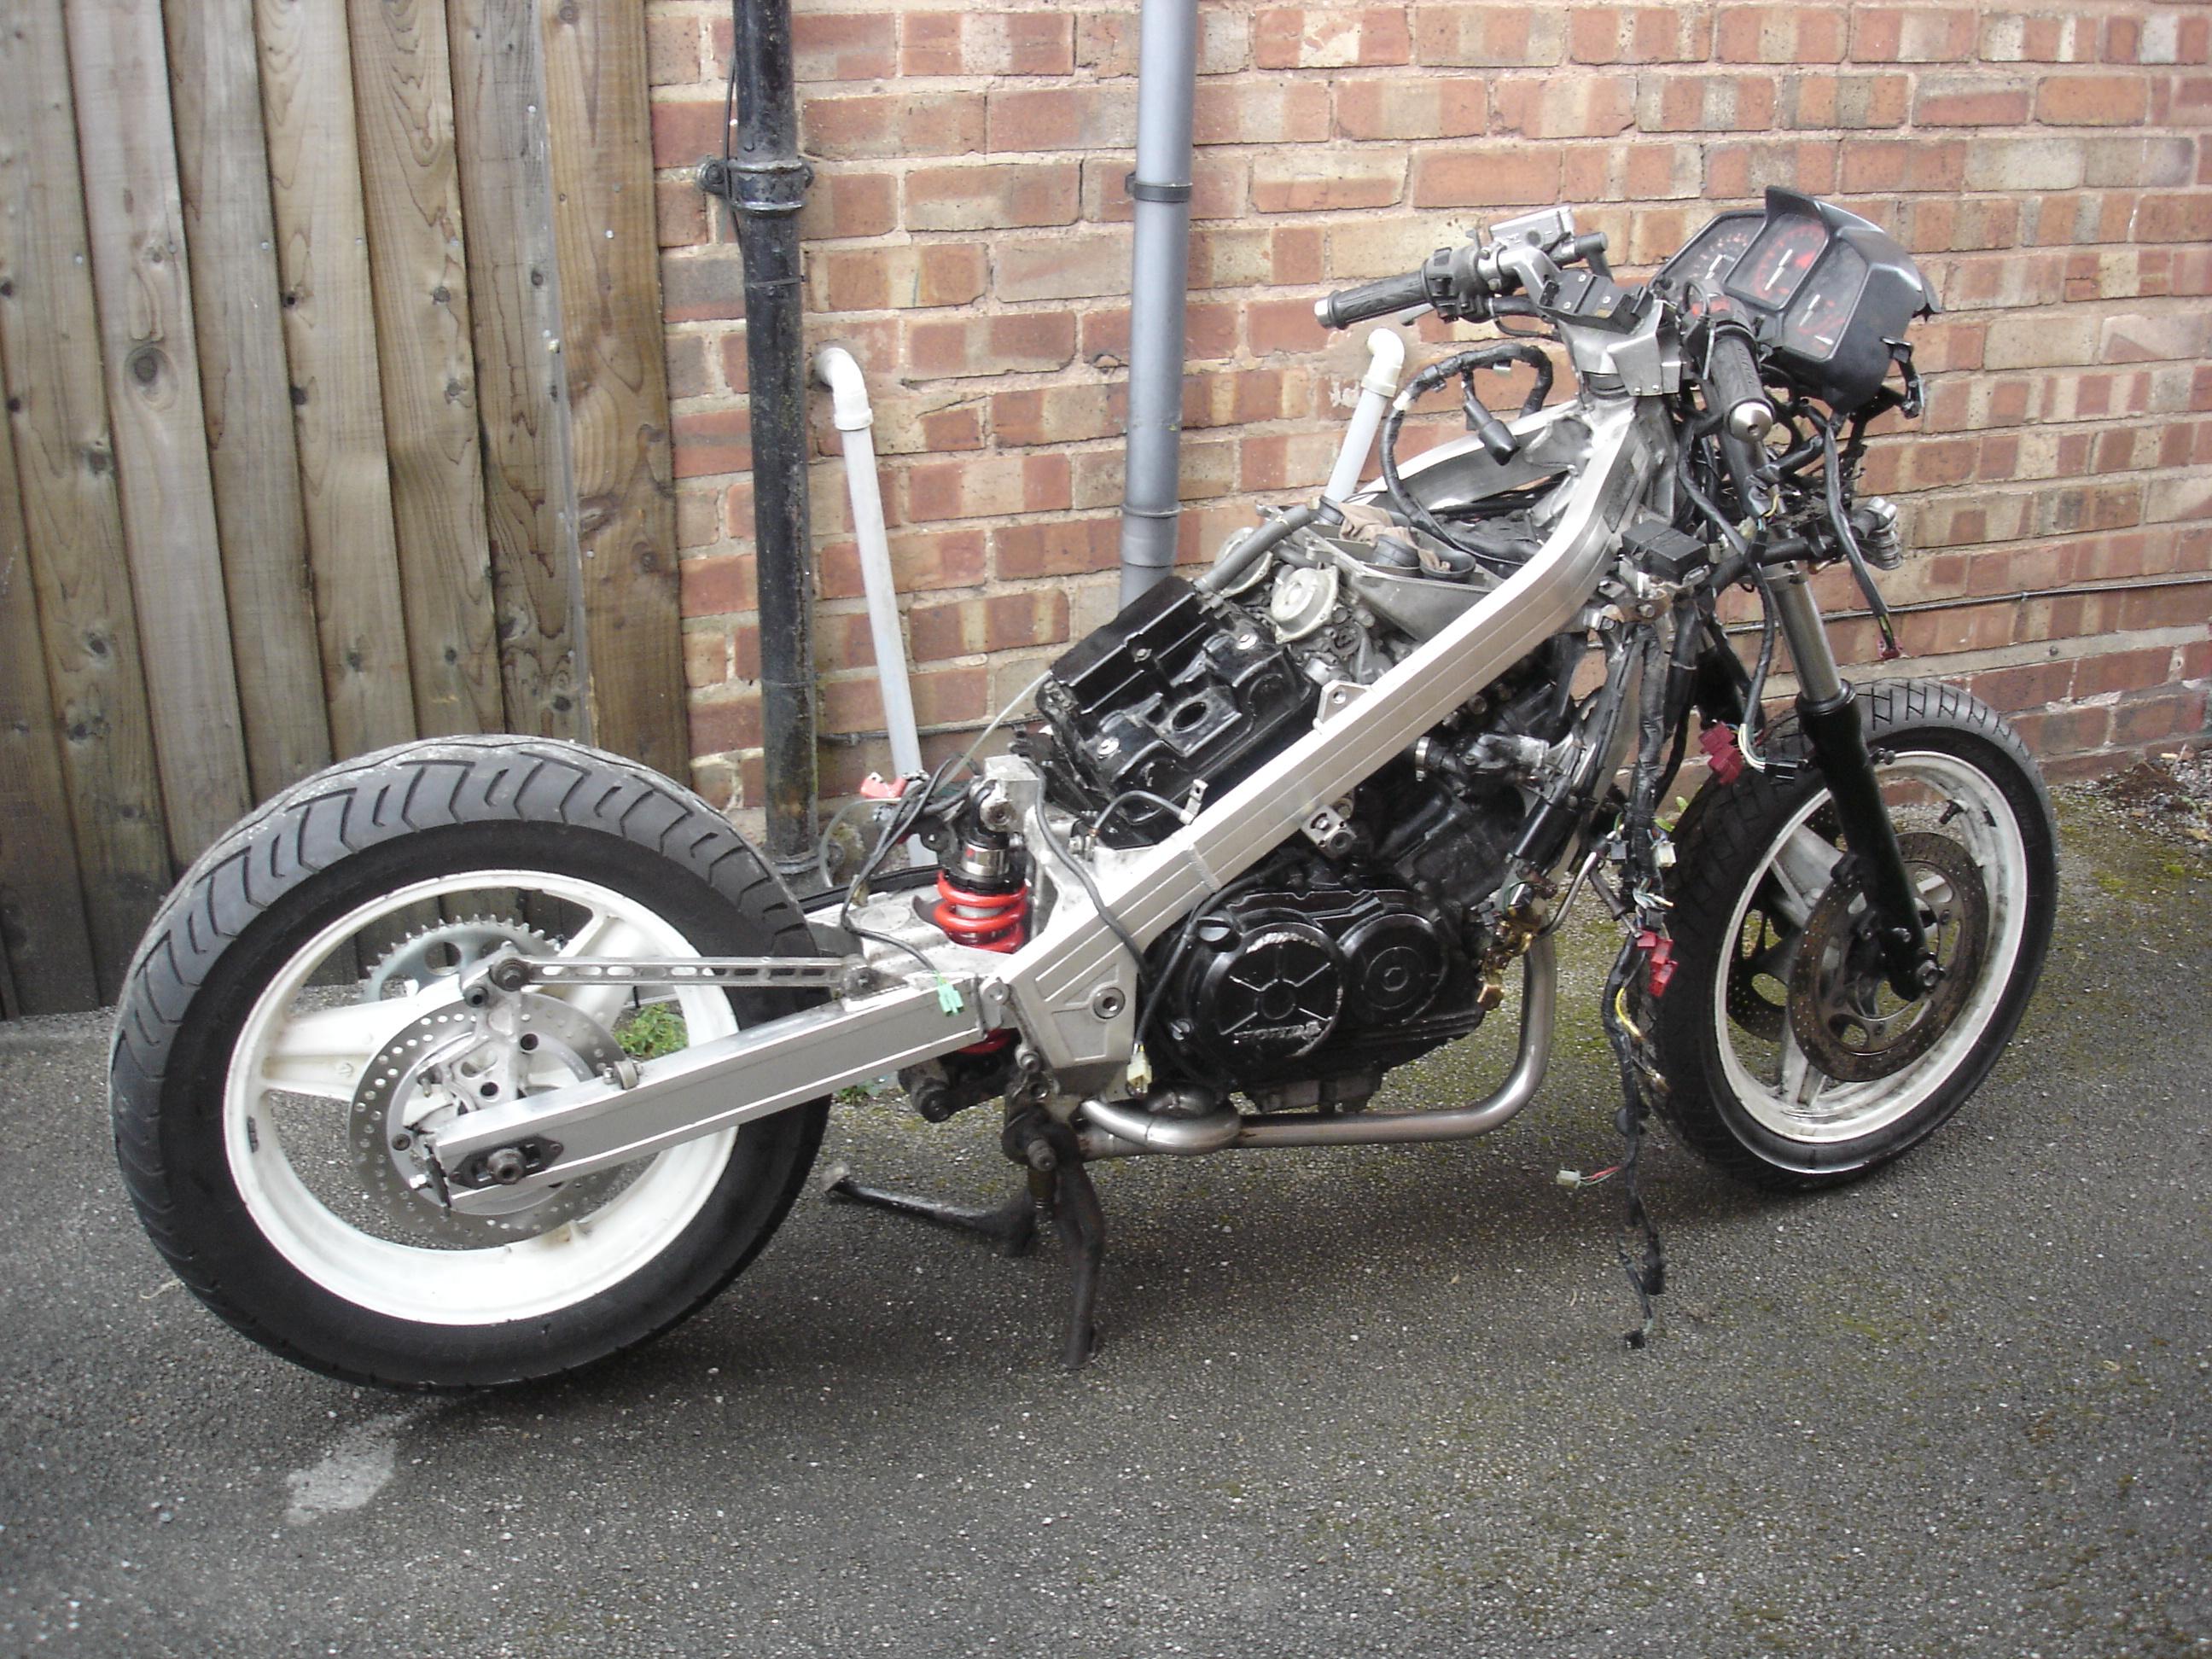
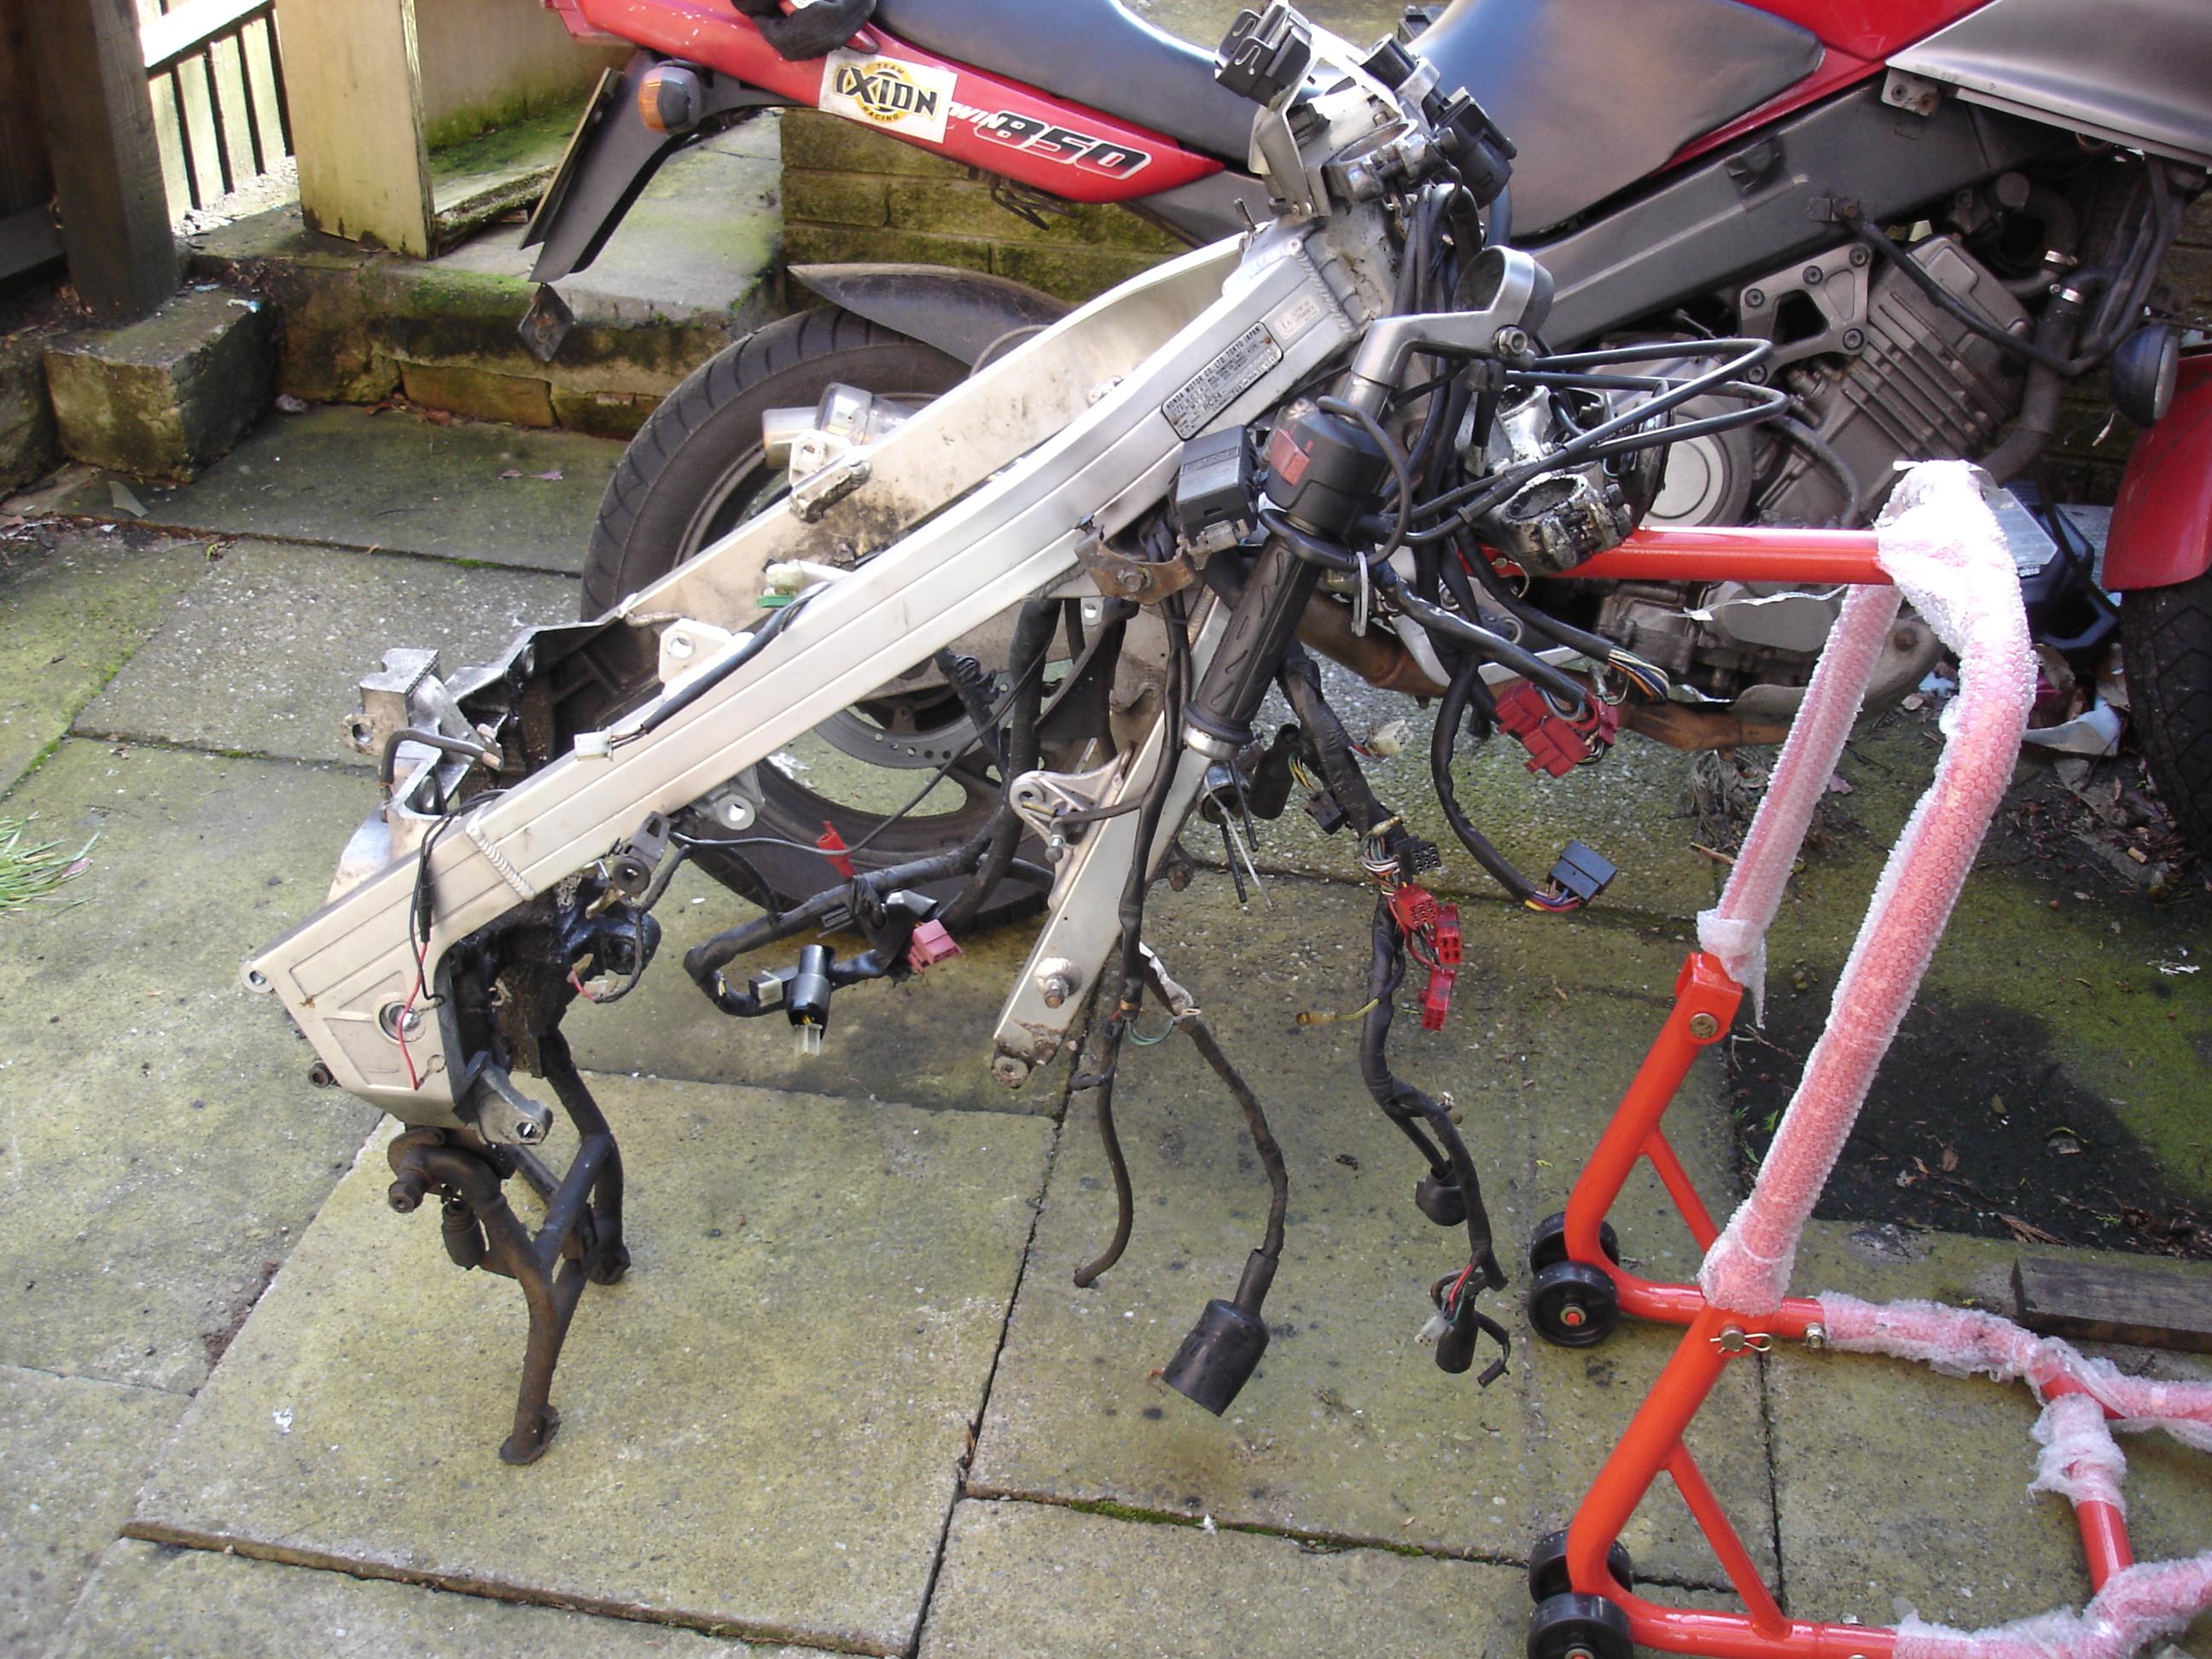
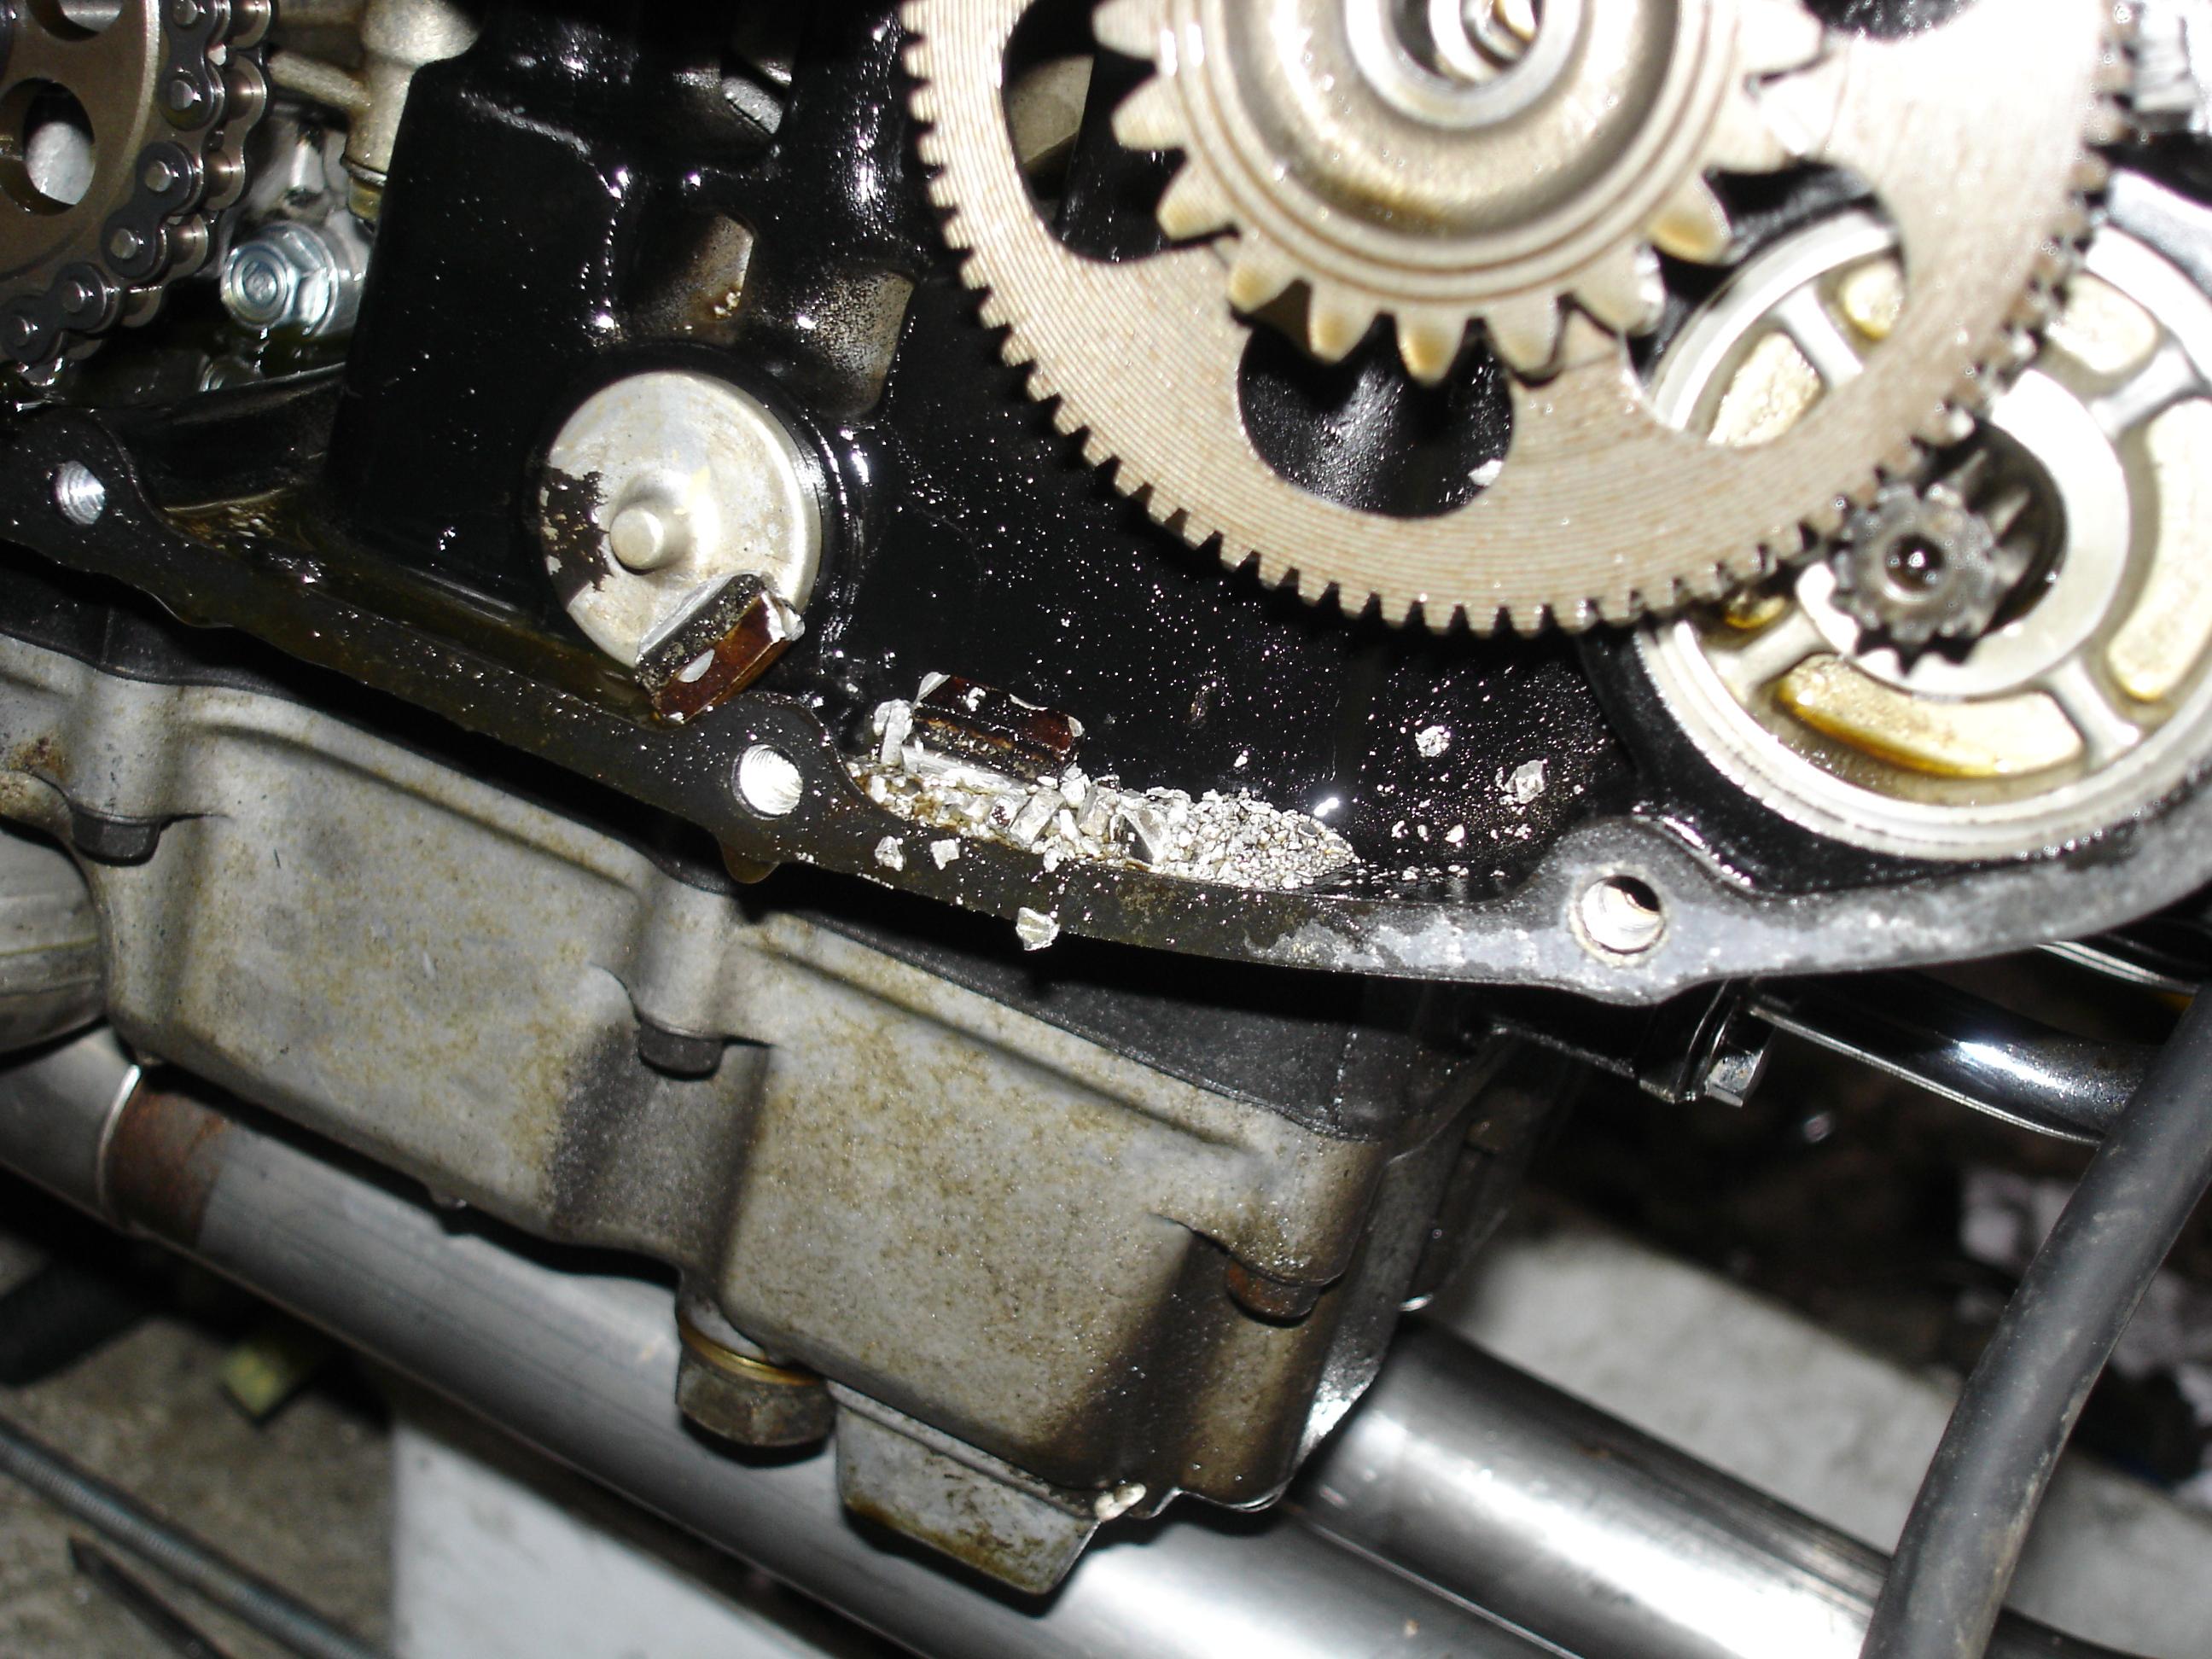
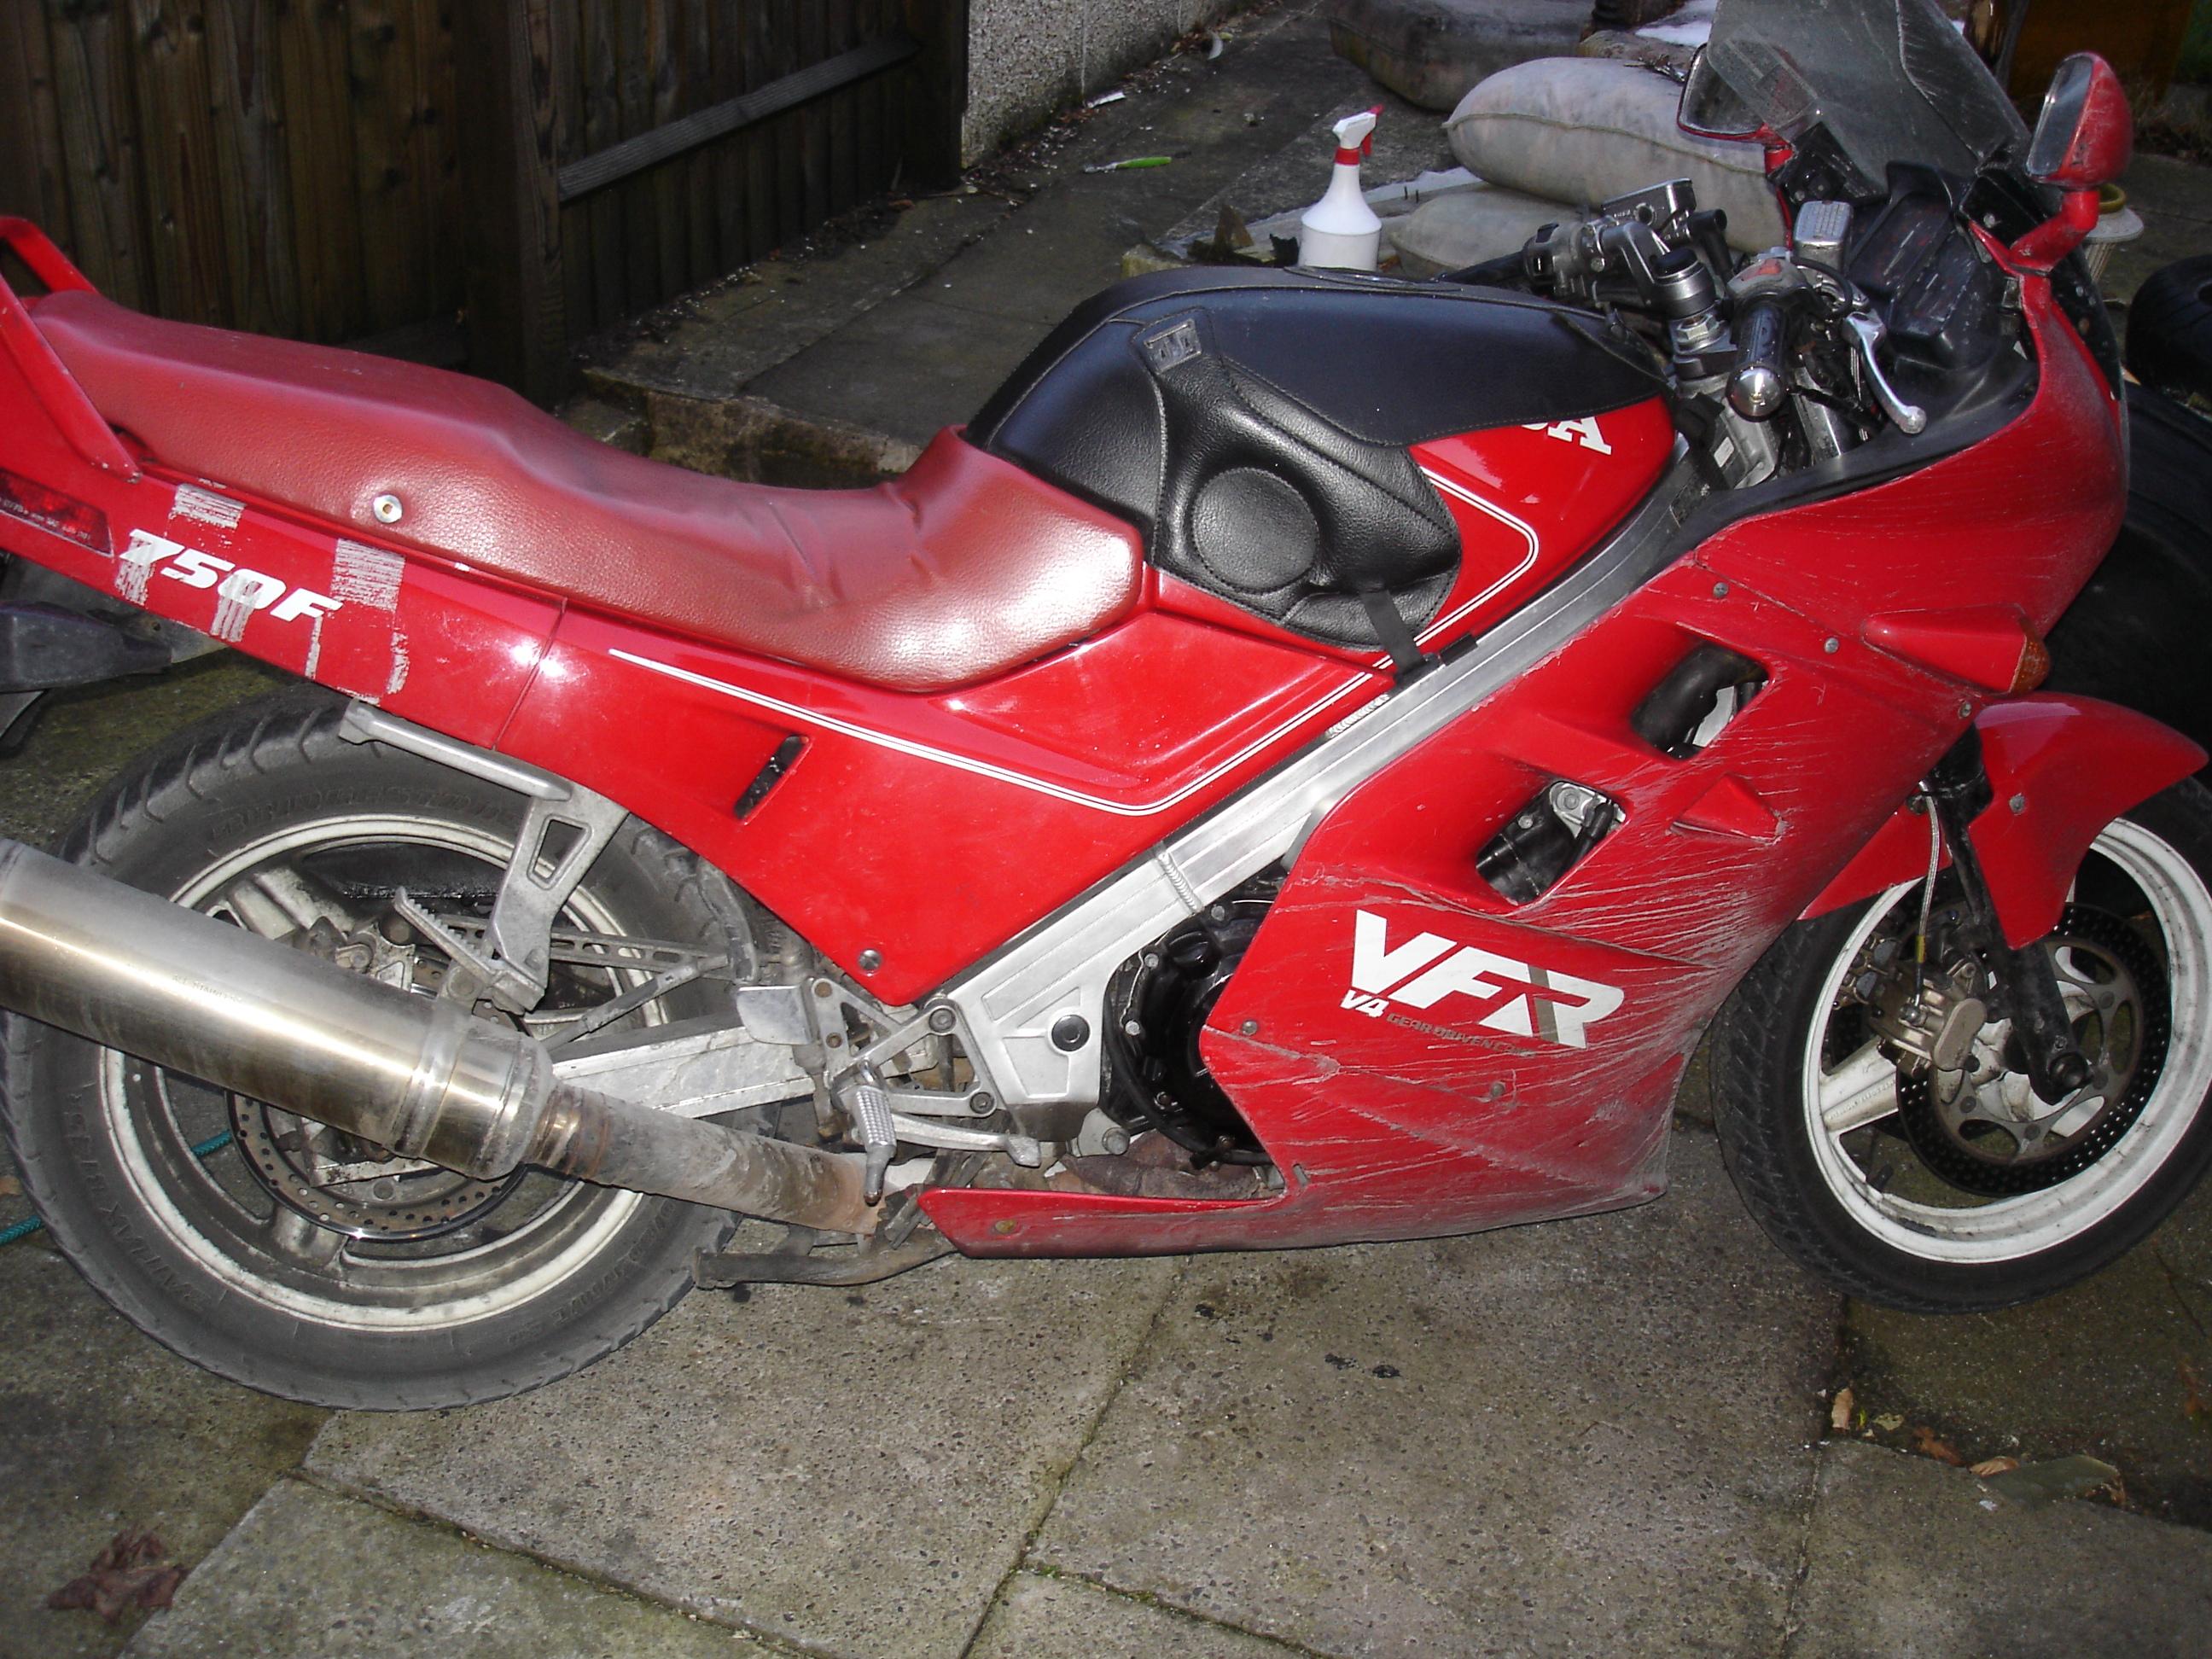
Removing the engine did not entirely go to plan. Firstly I snapped a number of exhaust studs. Somewhat expected but still annoying and something I'd have to deal with. Worse however was that the front and rear engine bolts *refused* to come out. The fronts rounded off the internal hex. I ended up drilling the heads off, pulling the frame legs apart slightly and then hacksawing the remnants. The rear is a stupid tiny internal hex for a great big massive bolt. I snapped two tools in it before I gave up and cut that one off too. At this point I had an engine with two seized bolts and a number of broken studs. Second hand engines being cheap I figured it would be easier to get another one than deal with the issues. In theory it would have been. New Engine #1 had eaten a clutch. No idea how far and wide the debris had spread. Of course I found this out *after* I'd fitted it... That engine went back for a refund. New Engine #2 turned out to be an RC35/37 VFR750K (my bad in at the time not understanding the difference between a VFR750FK and a VFR750K). New Engine #3 was the winner. Lower mileage and out of a FK. Fully intact with carbs and all ancillaries
-
Figured rather than more boring talk of clutches could have some more pictures... So, way back in 2004. About 27k on the clock. Crappy digital camera back then. A couple of years later from the other side (and a better camera). At this point I was commuting ~60Mi a day on it all year round... A few incidents along the way...such as when my taillight fell off... And the time the tank rusted through and started leaking fuel everywhere (this is why the current tank has dents, I didn't cause them!) Until suddenly in 2007 it sounded rather louder. Thankfully I'd picked up a second hand but never fitted and "as new" set of Motad downpipes for the miserly sum of £37 (when Motad were still going and new they were £330!) The HBoL says that to replace the exhaust you need to remove the engine. Apart from this being wrong it was somewhat of an issue.