

mello dude
-
Posts
2,416 -
Joined
-
Last visited
-
Days Won
27
Content Type
Forums
Profiles
Gallery
Blogs
Downloads
Events
Posts posted by mello dude
-
-
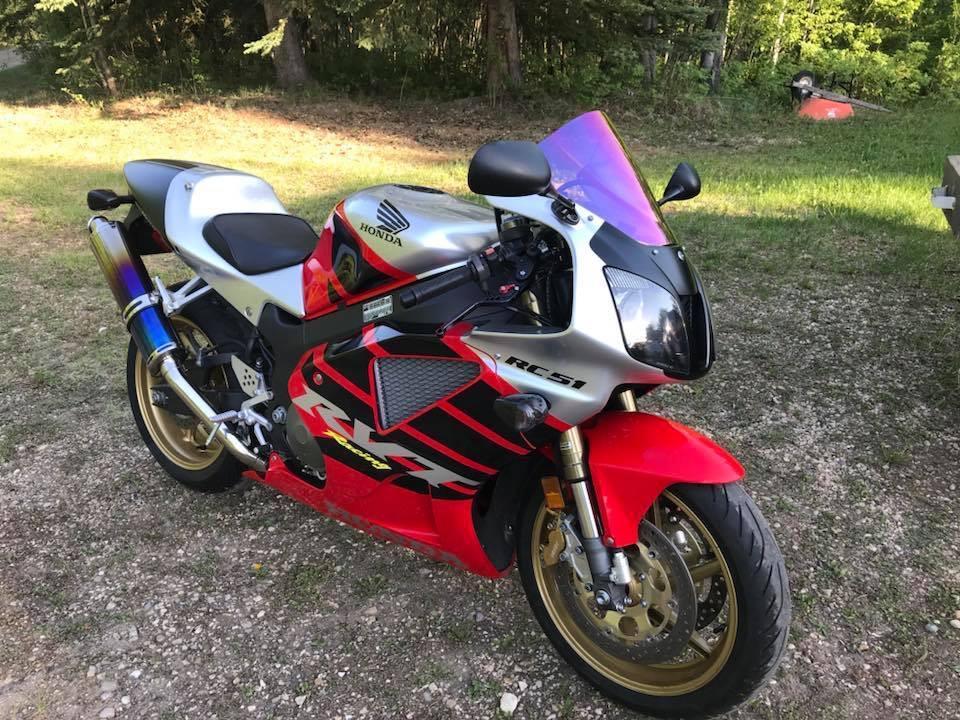
24 minutes ago, Veefer800Canuck said:
Well, I’ve had it two years now and I’m loving it. It’s such a weapon, handles so nice.
The 190/55 rear tire is the BOMB. Raises the rear and makes the bike steer crazy good.
Hard to ride it for more then than two hours at a time, but I’ve lost 40 lbs over the winter and gotten MUCH fitter, hitting the gym an hour a day, so perhaps year two will be easier on the old frame now that I’m in shape???
So just curious... assuming I still would want to grab one of these... is there any reason to prioritize a SP2 vs a SP1?
-
 1
1
-
-
My butt and my bladder couldnt hold out for the full tank of gas on a setup like that. For me, the gas breaks with the stock tank are good....

-
1
-
-
16 minutes ago, gig said:
I haven't been following closely, so forgive me if this has been discussed, but pipercross filters have complete filter coverage like the elusive HA-8098
I think candyredrc46 mentioned that pipercross was his preferred filter..
...just for info, I'm running a BMC filter, that's full width - seems to be fine.....----skip the k&n..
-
Hi mello dude,
Thank you for your donation of --. We look forward to improving the forums with your donation.
Thanks VFRDiscussion
-
On 1/7/2019 at 2:56 PM, MiniCarver said:
Now that 8th gen parts are becoming more and more available via ebay. I was able to do all 2014 suspension/wheel/rotors with Brembo monoblocks.
Hey MiniCarver --- I think you may have the near ultimate VFR there with the 6th based and 5th engine plus 8th wheels and monoblocks..
>>>>Wow, just frick'n WOW! --- If I get your way, I would love to see it in person.
You Carvers blow me away..
-
1
-
-
Got the factory service manual? You can download from this site.
-
I think I will do the triangle cutout on my stocker guard.
- But also - post up pics of your aftermarket chain guard. -- (The stocker is kind of a wart.)

-
On 8/13/2018 at 1:35 AM, Stray said:
Pricy...but good...but pricy...
Well, you know... a good beer buzz and a credit card can justify anything...
-
 1
1
-
-
On 08/12/2018 at 6:39 PM, FJ12Ryder said:
Are the spacers/standoffs OEM or did you order them with the bolts?
Ordered from Partzilla, worked out ok...

----There's only 10,196 collars in the Honda parts search..
-
Want to give a shout out for Pro Bolt on their excellent fasteners. (And a little fun while I’m at it.) Kinda pic crazy...
I have a tendency to strip my ride at any little annoyance, and from that I have worn the paint off the front fender. Ok, no mas... So I wanted to go to something that doesn’t rotate against the paint every disassembly like the stock OEMs. – A trip to Lowes and I found these nylon washers, and had on hand some Honda collars that could stay fixed when the fastener comes off.
I was searching around for a dome head fastener that could work, and I remember something Mohawk mentioned ProBolt, so I checked ‘em out. Well, there’s nothing more dangerous than a Saturday nite beer buzz and a credit card, and I found ProBolt had titanium 6mm Dome heads that looked perfect. ---Jeez, you know, sometimes a guy has just has to have gold titanium fender fasteners – right?😁
Ordered a few stainless too for other purposes. Got the parts in and they deserve a “wow.” These things are jewels of a fastener. Its not too often you get something thats way better than you expect. And they give you other useful nylon washers that will come in handy. -- Definitely on the go to list, when the need is there. Cheers

Pics


-
2
-
-
2 hours ago, RhINO said:
Just a bit of add to this, it's a 16mm marble that's needed (0.62", whatever that turns into 342423/34234234 inch or something :P) (I put a tigershark marble in, makes me feel faster)
/R
Hi - Why screw with marbles n stuff, just yank the damn thing outta there!
As a btw - I miss Kaldek and all his incredible detailed work he did on his bikes. Was great reading!
-
2
-
-
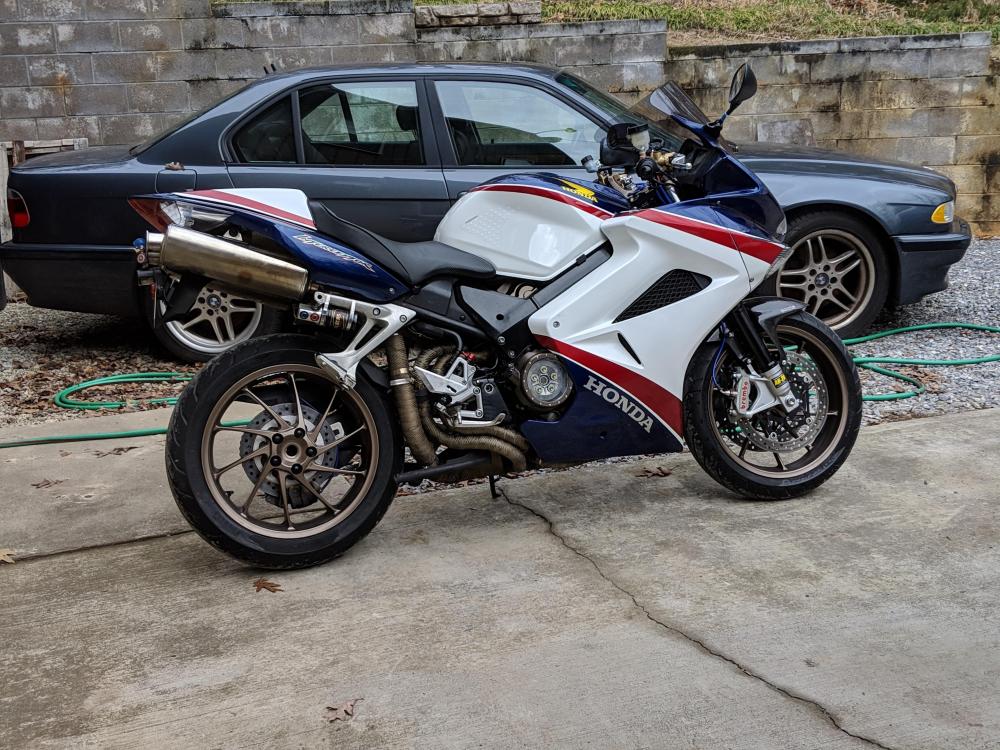
11 hours ago, Veefer800Canuck said:
Riding great fellas!!! This thing is a rush!
WOW! Holy bike lust!
-
2
-
-
On 11/21/2017 at 11:24 PM, MooseMoose said:
On mine the back end of that screw to hold the reeds in place wouldn't let the cover plate tighten down all the way. I had to pull the reeds to get the blockoff plate tightened down.
Gottta give Moose a kudos for catching this - the reed screw hitting the plate if you dont take out the reed assembly..
-
Bumping this up for guys who recently got the pair valve kits.
-
1
-
 1
1
-
-
^^^^^ Congrats! Cool! -- You gotta post pics when it shows up..
-
4 hours ago, JZH said:
I've found the adhesive weakens after a while, so you might have to do something to keep the edges in place later.
Ciao,
Thanks for the tip
-
Not one to leave much to chance - the seat would get hot so- a what the hey.. .did the seat too....
Used ThermoTec material...

A convenient chess board turned out to be great template material....

Template

First pieces fitted...

Progressing....

The whole deal completed.....

So -- I can say that all the fuss did the job and worked out fine. Got in longer rides at end of season....
- Maybe in the spring I wont take it apart again and get some solid trips going!
Sources...
https://www.heatshieldproducts.com/automotive/auto-heat-shield-guide
http://www.designengineering.com/
https://www.thermotec.com/products/heat-shields-and-protection
Cheers
-
Working on a few brews.. I find it ironic its 3*F outside... Brr -
 And I'm writing about heat shields...
--- Anyhoo this fall one of my "to dos" was to beef up heat shielding on the 5th gen. For some reason, the last few seasons, it would cook my ass to hamburger and limited time I could handle on it to a couple hours a shot with out a break....
I used several products on the market --- DEI Engineering / Heatshield Products flex transmission covering and ThermoTec - all have great stuff....
Photos photos photos -- also an excuse to get more practice with this SmugMug photo site.. Need to figure out to reduce photos before posting, but I'll get there later....
Starting out - I pulled the back end of the tank loose and pulled the stocker rubber shield parts. Used Heatshield Products formable transmission cover with adhesive and cut that to shape on the front rubber shield...Being stiff aluminum and foam, it was very tricky to get it shaped and stuck down. There is a perimeter tape that ensures it stays put. -- the battery cover is from DEI - a more flexible material. That one was fairly simple.


Backside look......

After 3 or 4 - cut fit, cut fit, cut fit, --- got it installed to a good fitting..... fits good, looks good too.

Right side....

Battery cover -- no brainer - ez

-
-
@RC51 Nick, and @RobF -- hey thanks guys...
-
2
-
-
Now go button it up and go try it out.... No more Pop! Pop! Pop! Heh heh...
I assume on a 6th gen or possible 8th, the job wouldnt be that much different....
Cheers all...
For real, I sell the cover plates at $29.95 plus $7.00 shipping (US) --I make these... Perfect laser cut, deburred and hand finished by yours truly..
..Stainless Steel socket bolts included.

-
5
-
-
And the victim...

-
Tape up the connector and next you can pull that sucker outta there....

-
Clip any zip ties on the long hose going to the rear on the pump .. typically it has one or two clipped to the harness....
Also next step is to get the frickn connector loose from the pump to the harness. On the 5th gen, its on the left front side...


Its a royal sumbitch to get apart!!


front f4i fork/brake swap = rear f4i brake cylinder?
in Modifications
Posted
For a delink job and going to different front forks, .. for the rear you do need to change out the master cylinder to a 14mm diameter. Options.. F4i, VTR1000, RC51, CBR600RR. All use the same base castings. - I just bought a '02 RC51 m/c new, I didnt want to have to rebuild. --- The rear caliper pistons need to be working together. I used a bridge line that works fine, and one OEM brake line from the m/c to the caliper, I think I still have pictures in my gallery. - Other guys have just used 2 OEM lines to the caliper and then even others have just drilled out a path in the caliper so just one line is needed, and then one hydraulic port is sealed.
All work fine.
Please dont forget this step, your rear brake will be crap if you dont.
Photos -- I have been running this setup a long time now, and it still works well.
Cheers