

Captain 80s
-
Posts
1,860 -
Joined
-
Last visited
-
Days Won
122
Content Type
Forums
Profiles
Gallery
Blogs
Downloads
Events
Posts posted by Captain 80s
-
-
That's pretty cool. Nice job. Def unique.
-
 1
1
-
-
Smush for the win! Nice.
-
 1
1
-
-
2 hours ago, tsmitty said:
yea just disregard that last one, its late...
Too late... smush it. You don't lose any strength in the same plane and it's a much nicer install. Plus flat on flat is a better engagement to hold it's position.
Maybe there's a machine shop near you that will let you have 5 minutes on their press. But if you have a big enough vise and a torch, it will go easy.
-
 1
1
-
-
So do I. Smush and then hole drilled in the wall of the cowl stay?
The angle to the mirror mount is better for staying in position, but that is a cleaner looking install.
-
Doable. I personally would be running to the mirror mount for strength. The clocking is easy and can be fine tuned after the fact. I usually have to do a little tweaking for final fitment. I also think you want the bracket away from the bike so you can throw some serious heat at it. It helps a lot on the smush.
-
1
-
-
The problem with sandwiching anything fairly thick on top is that the mirror spacing is designed to apply pressure to hold the cowl securely.
Why don't you dremel away a "relief" in the rolled over lip of the mirror mount just wide enough for the bracket to run thru and be flush to the underside.
That short of a bracket bolted in that manner will be very secure.
-
If the dies are mirrored, it self centers. If you need a "flat" side, like for up against bodywork at a shallow angle just stagger the dies as needed.
-
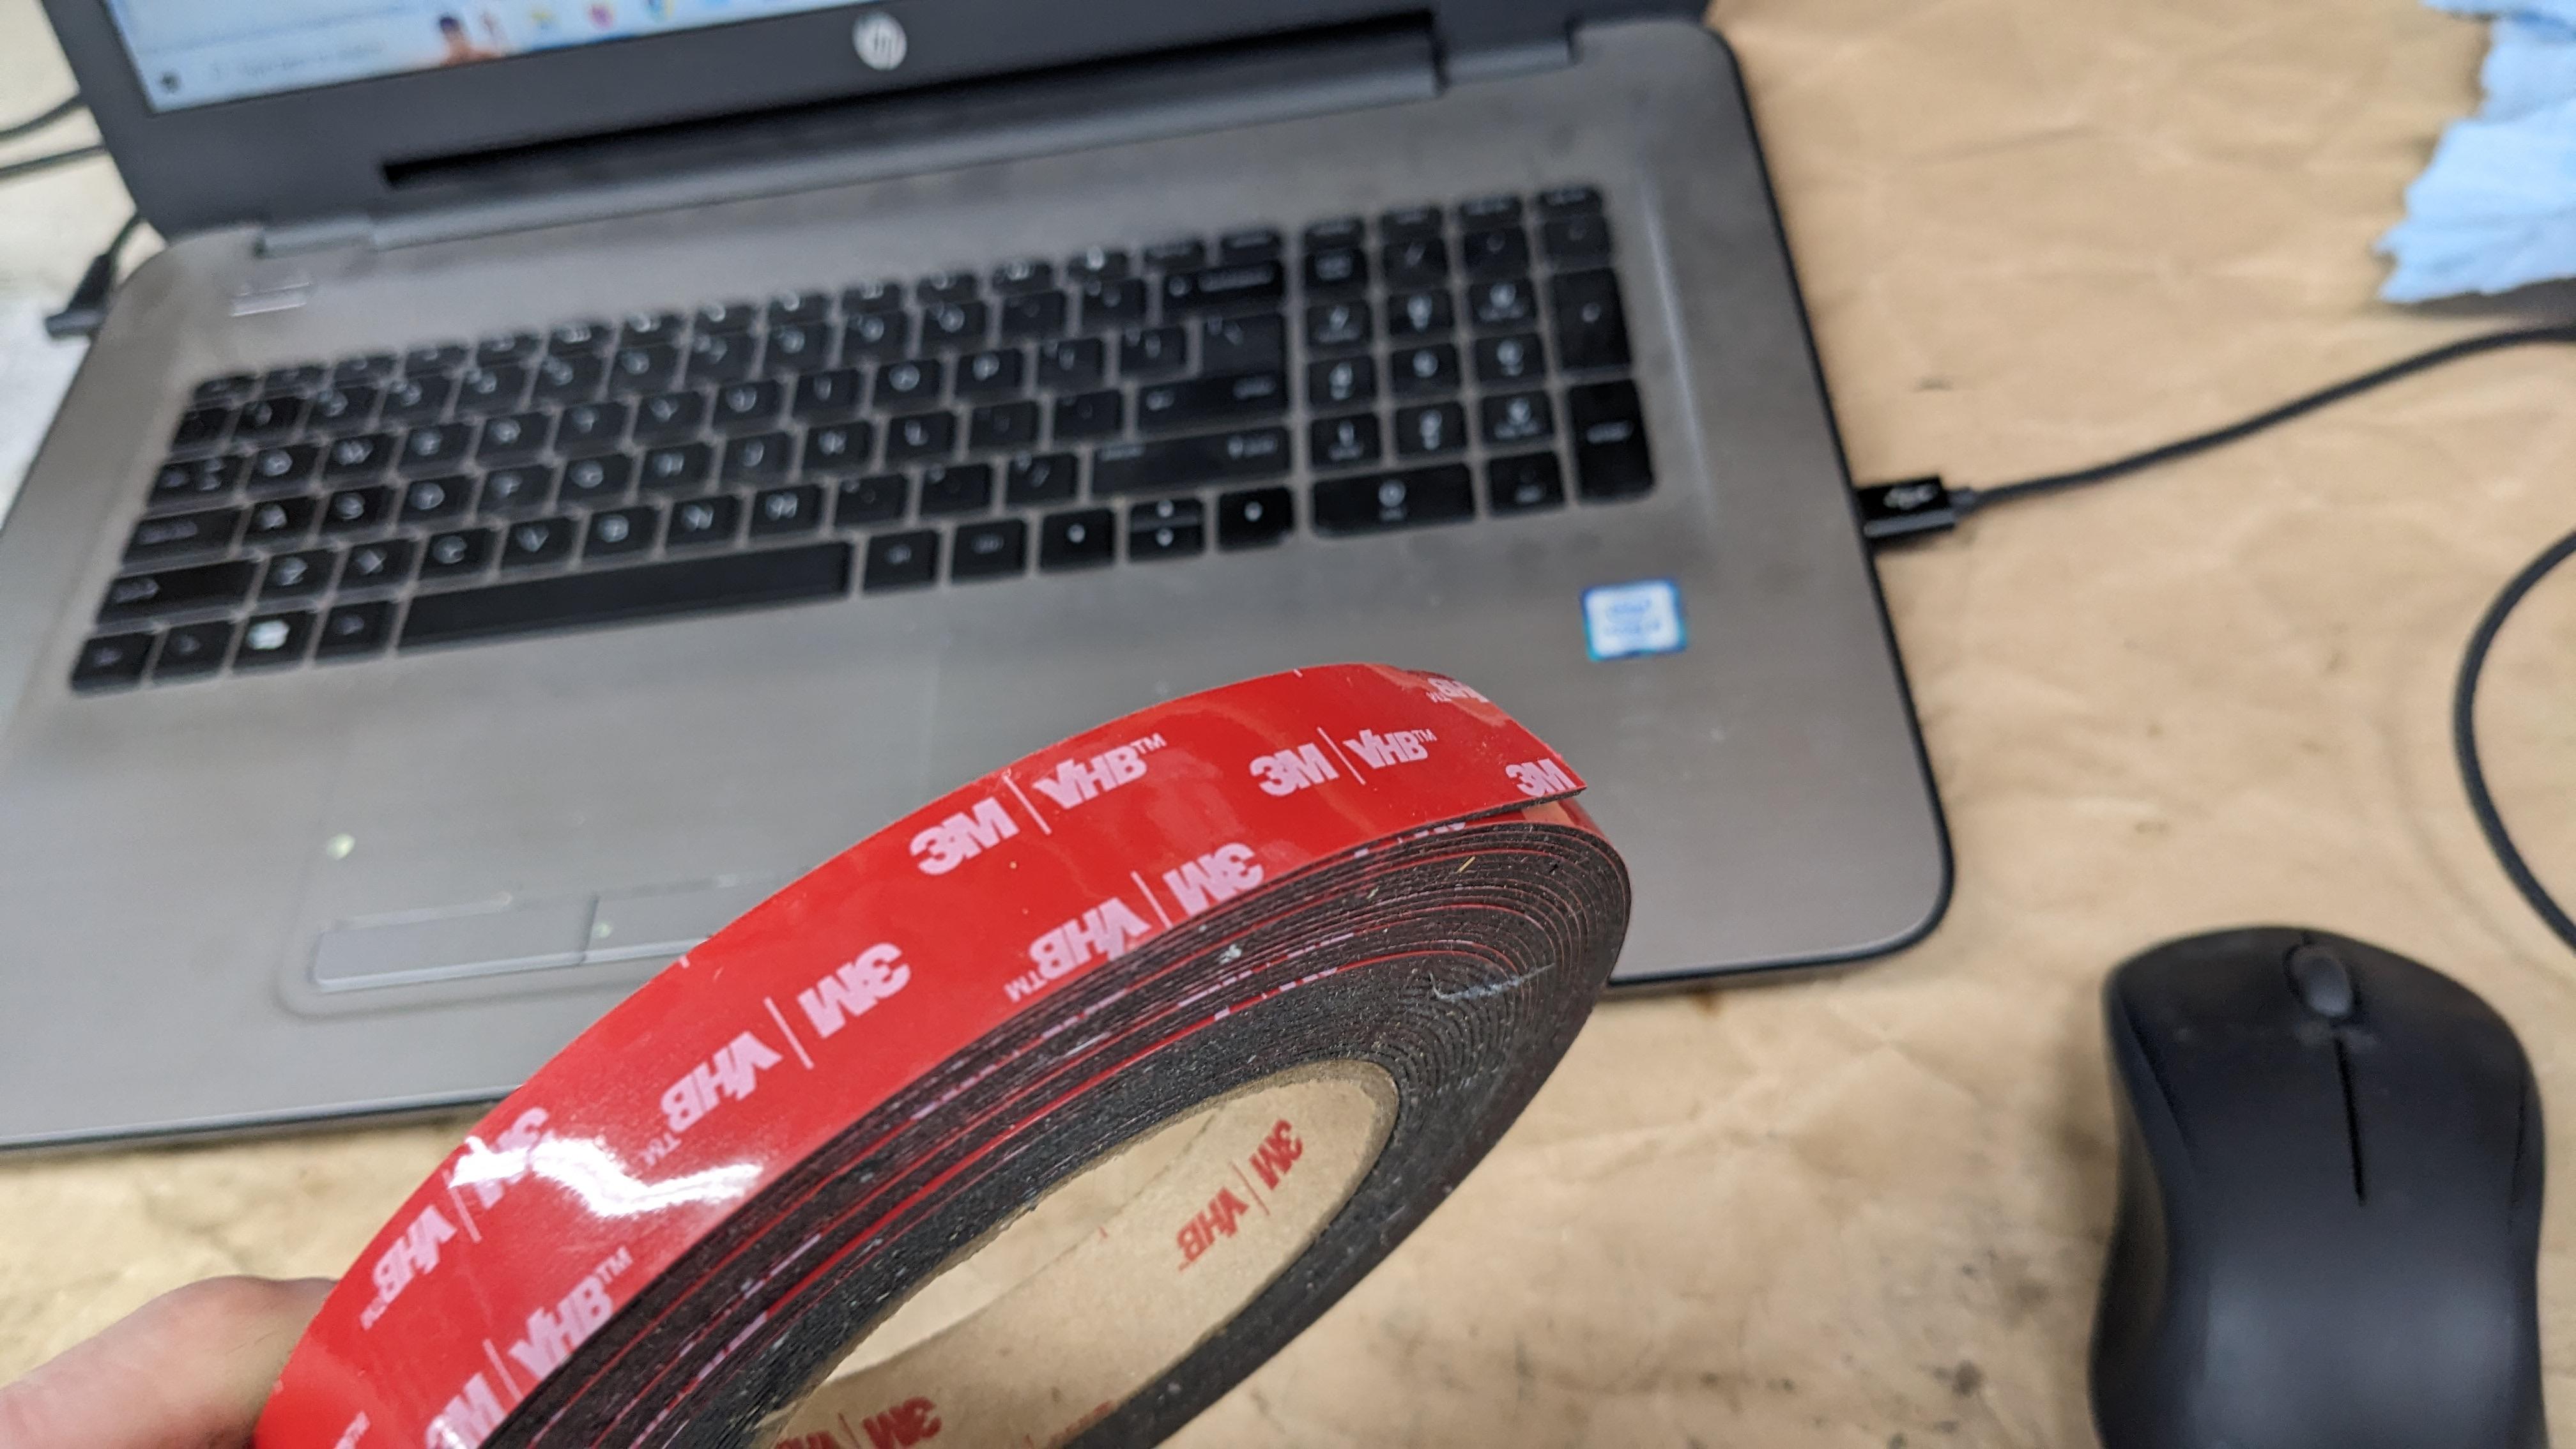
Maybe you could supplement the bracket and 3M the new piece to the speedo housing. It would take some stress off and help with vibration / shaking, a lot.

Oh, and here's my dies. They are scheduled for replacement. They've smushed A LOT of brackets.
-
6 minutes ago, tsmitty said:
that mirror stay is 1/2ish so a smaller 3/8 tube might be good looking.
Chrome Molly?
Whatever mild steel shit they have with the square tube, angled and flat stock in the bins is perfect.
-
1
-
-
I think 3/8 after smush has enough real estate for a big enough hole. And likely matches what the upper cowl stay is made of.
-
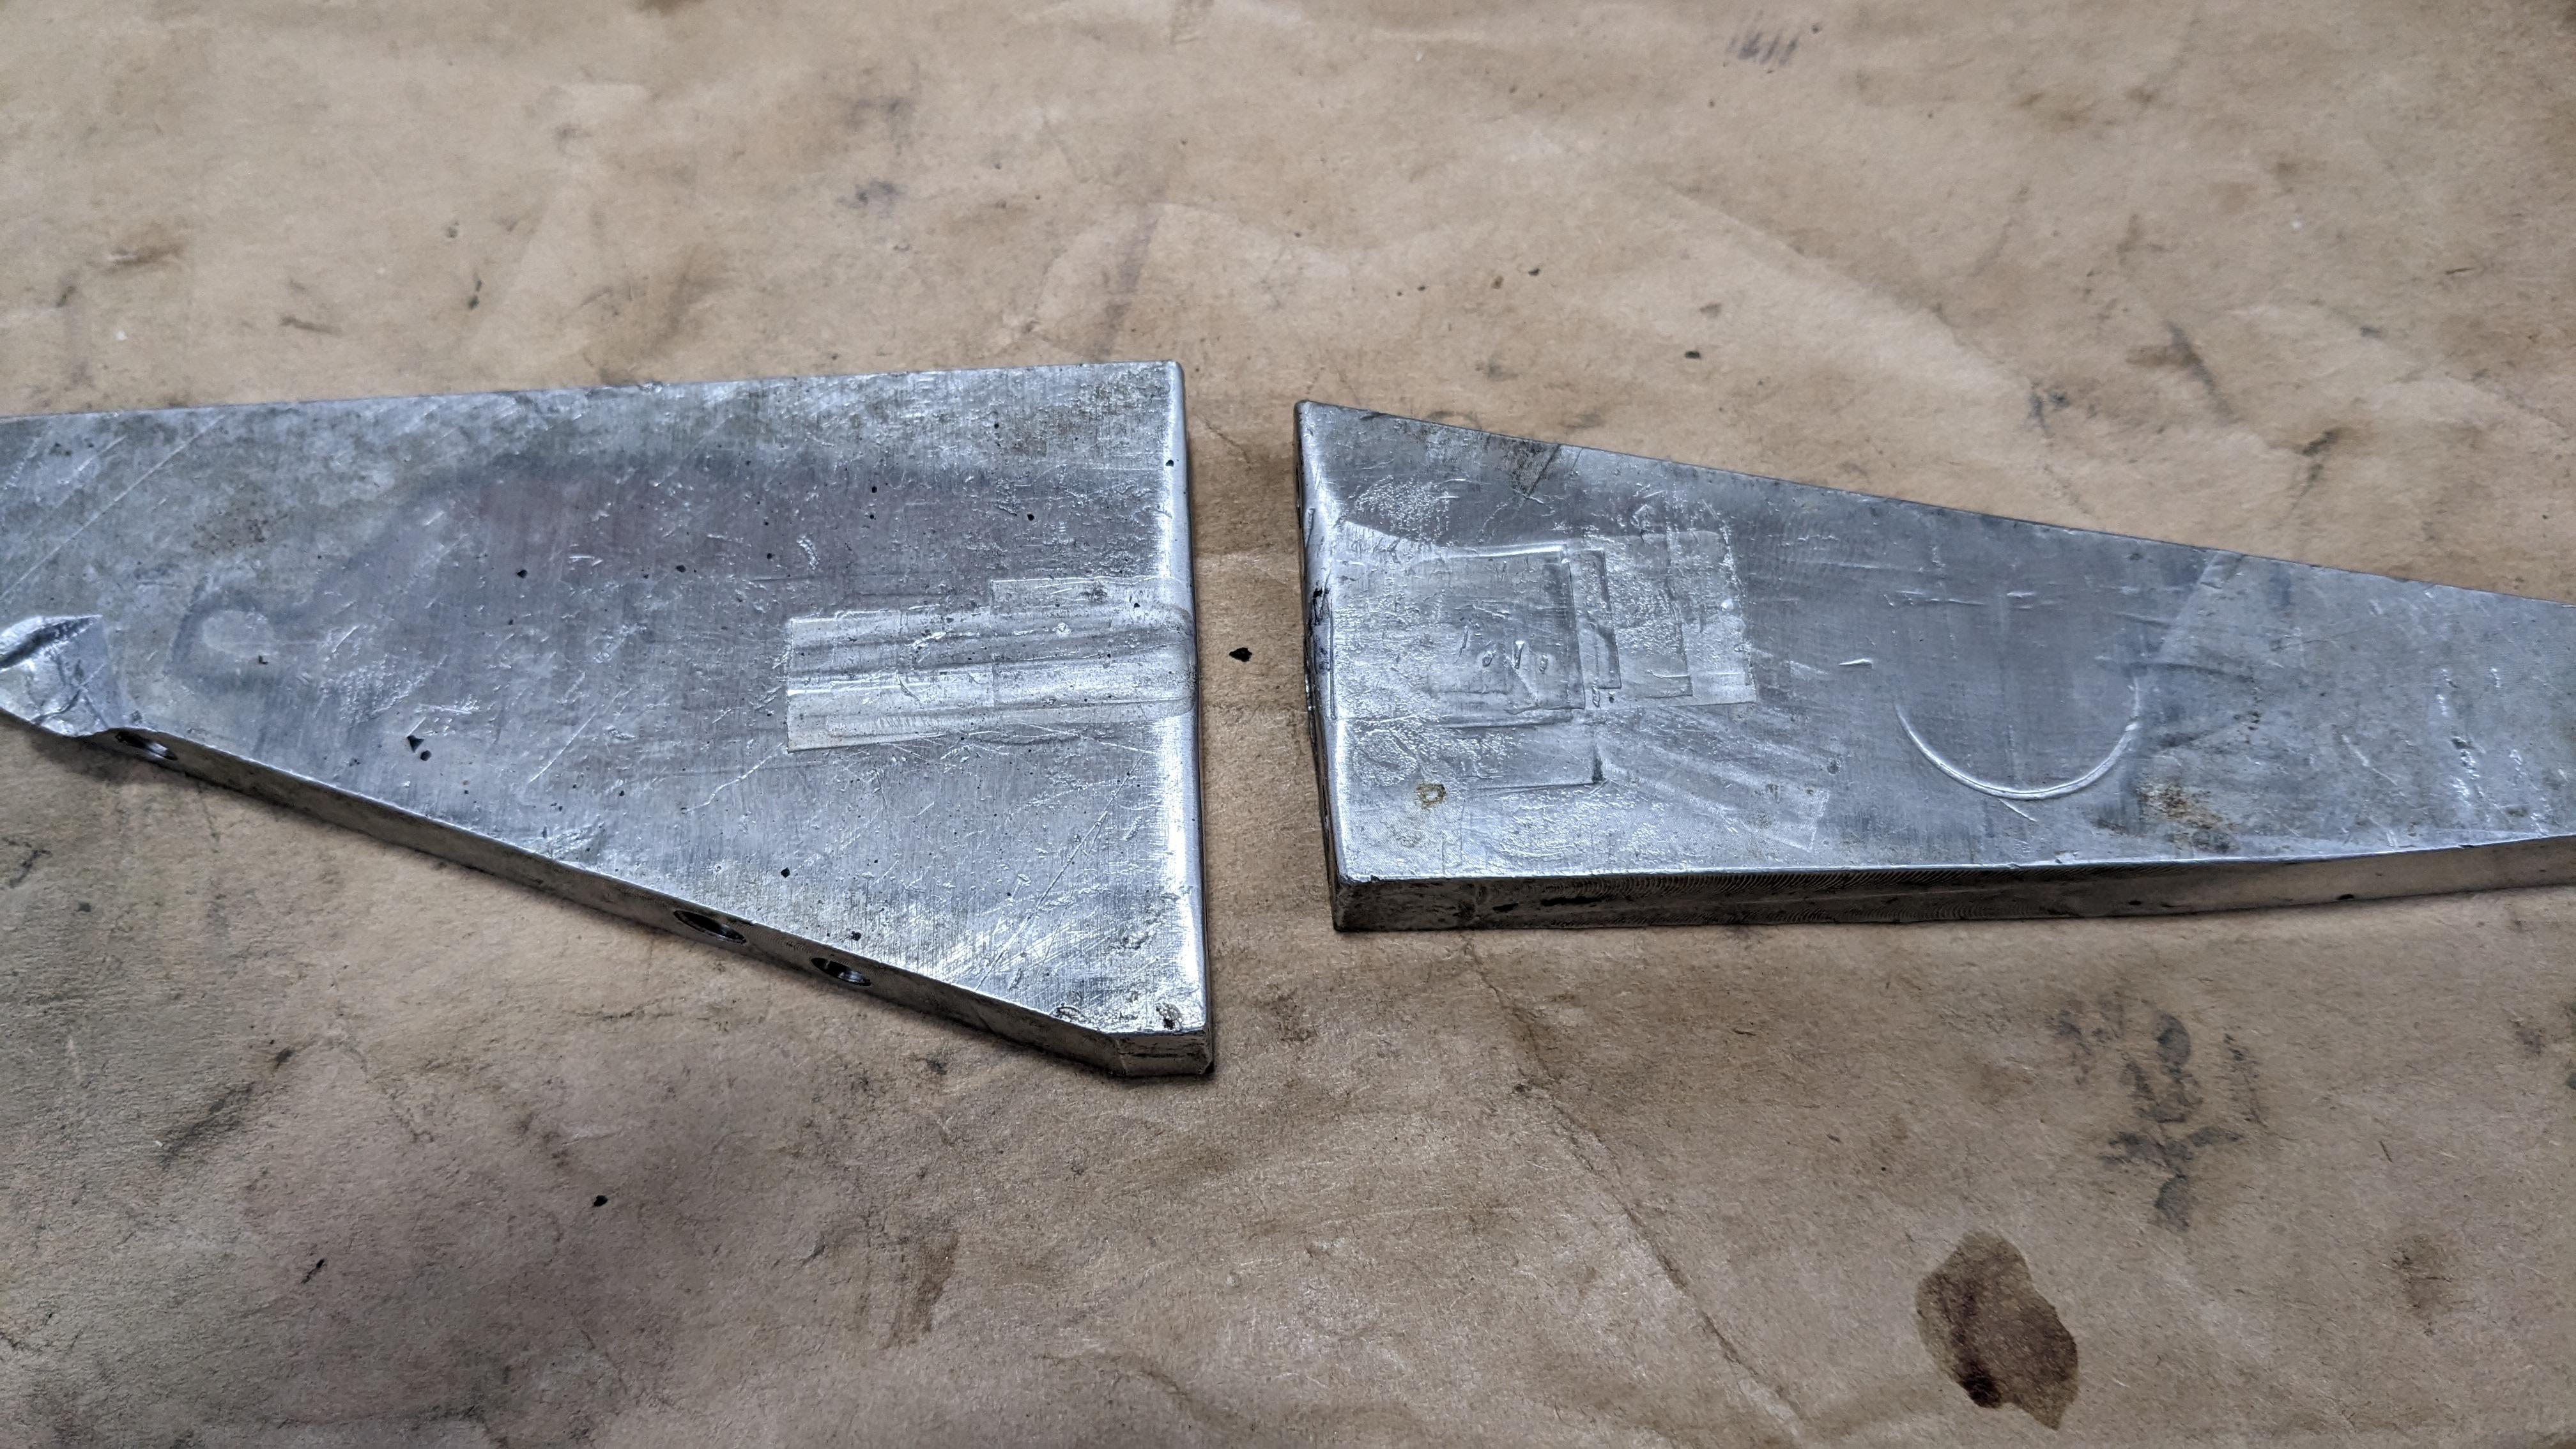
Yeah, I touched on it earlier. Alum blocks that I radius the edges a bit on for my "dies".
Get the tube set up in the press at the depth / angle / rotation I want, heat it up good and smush the fuck out of it.
The mild steel tubing you can buy at Home Depot or Lowes works really good, but the inventory on it has been low in the last couple years. I ordered some from a local steel supplier, but didn't like the composition as much. It wanted to crack a little on the edges of the smush.
Aerospace titanium on the other hand smushes real nice, but shaping and drilling after isn't as easy. And it doesn't paint as nice.
-
You can also L bracket with some thin stainless sandwiched in the mirror, and then come over with whatever. I do that quite often too as the extra joint gives you some adjustability.
-
1
-
-
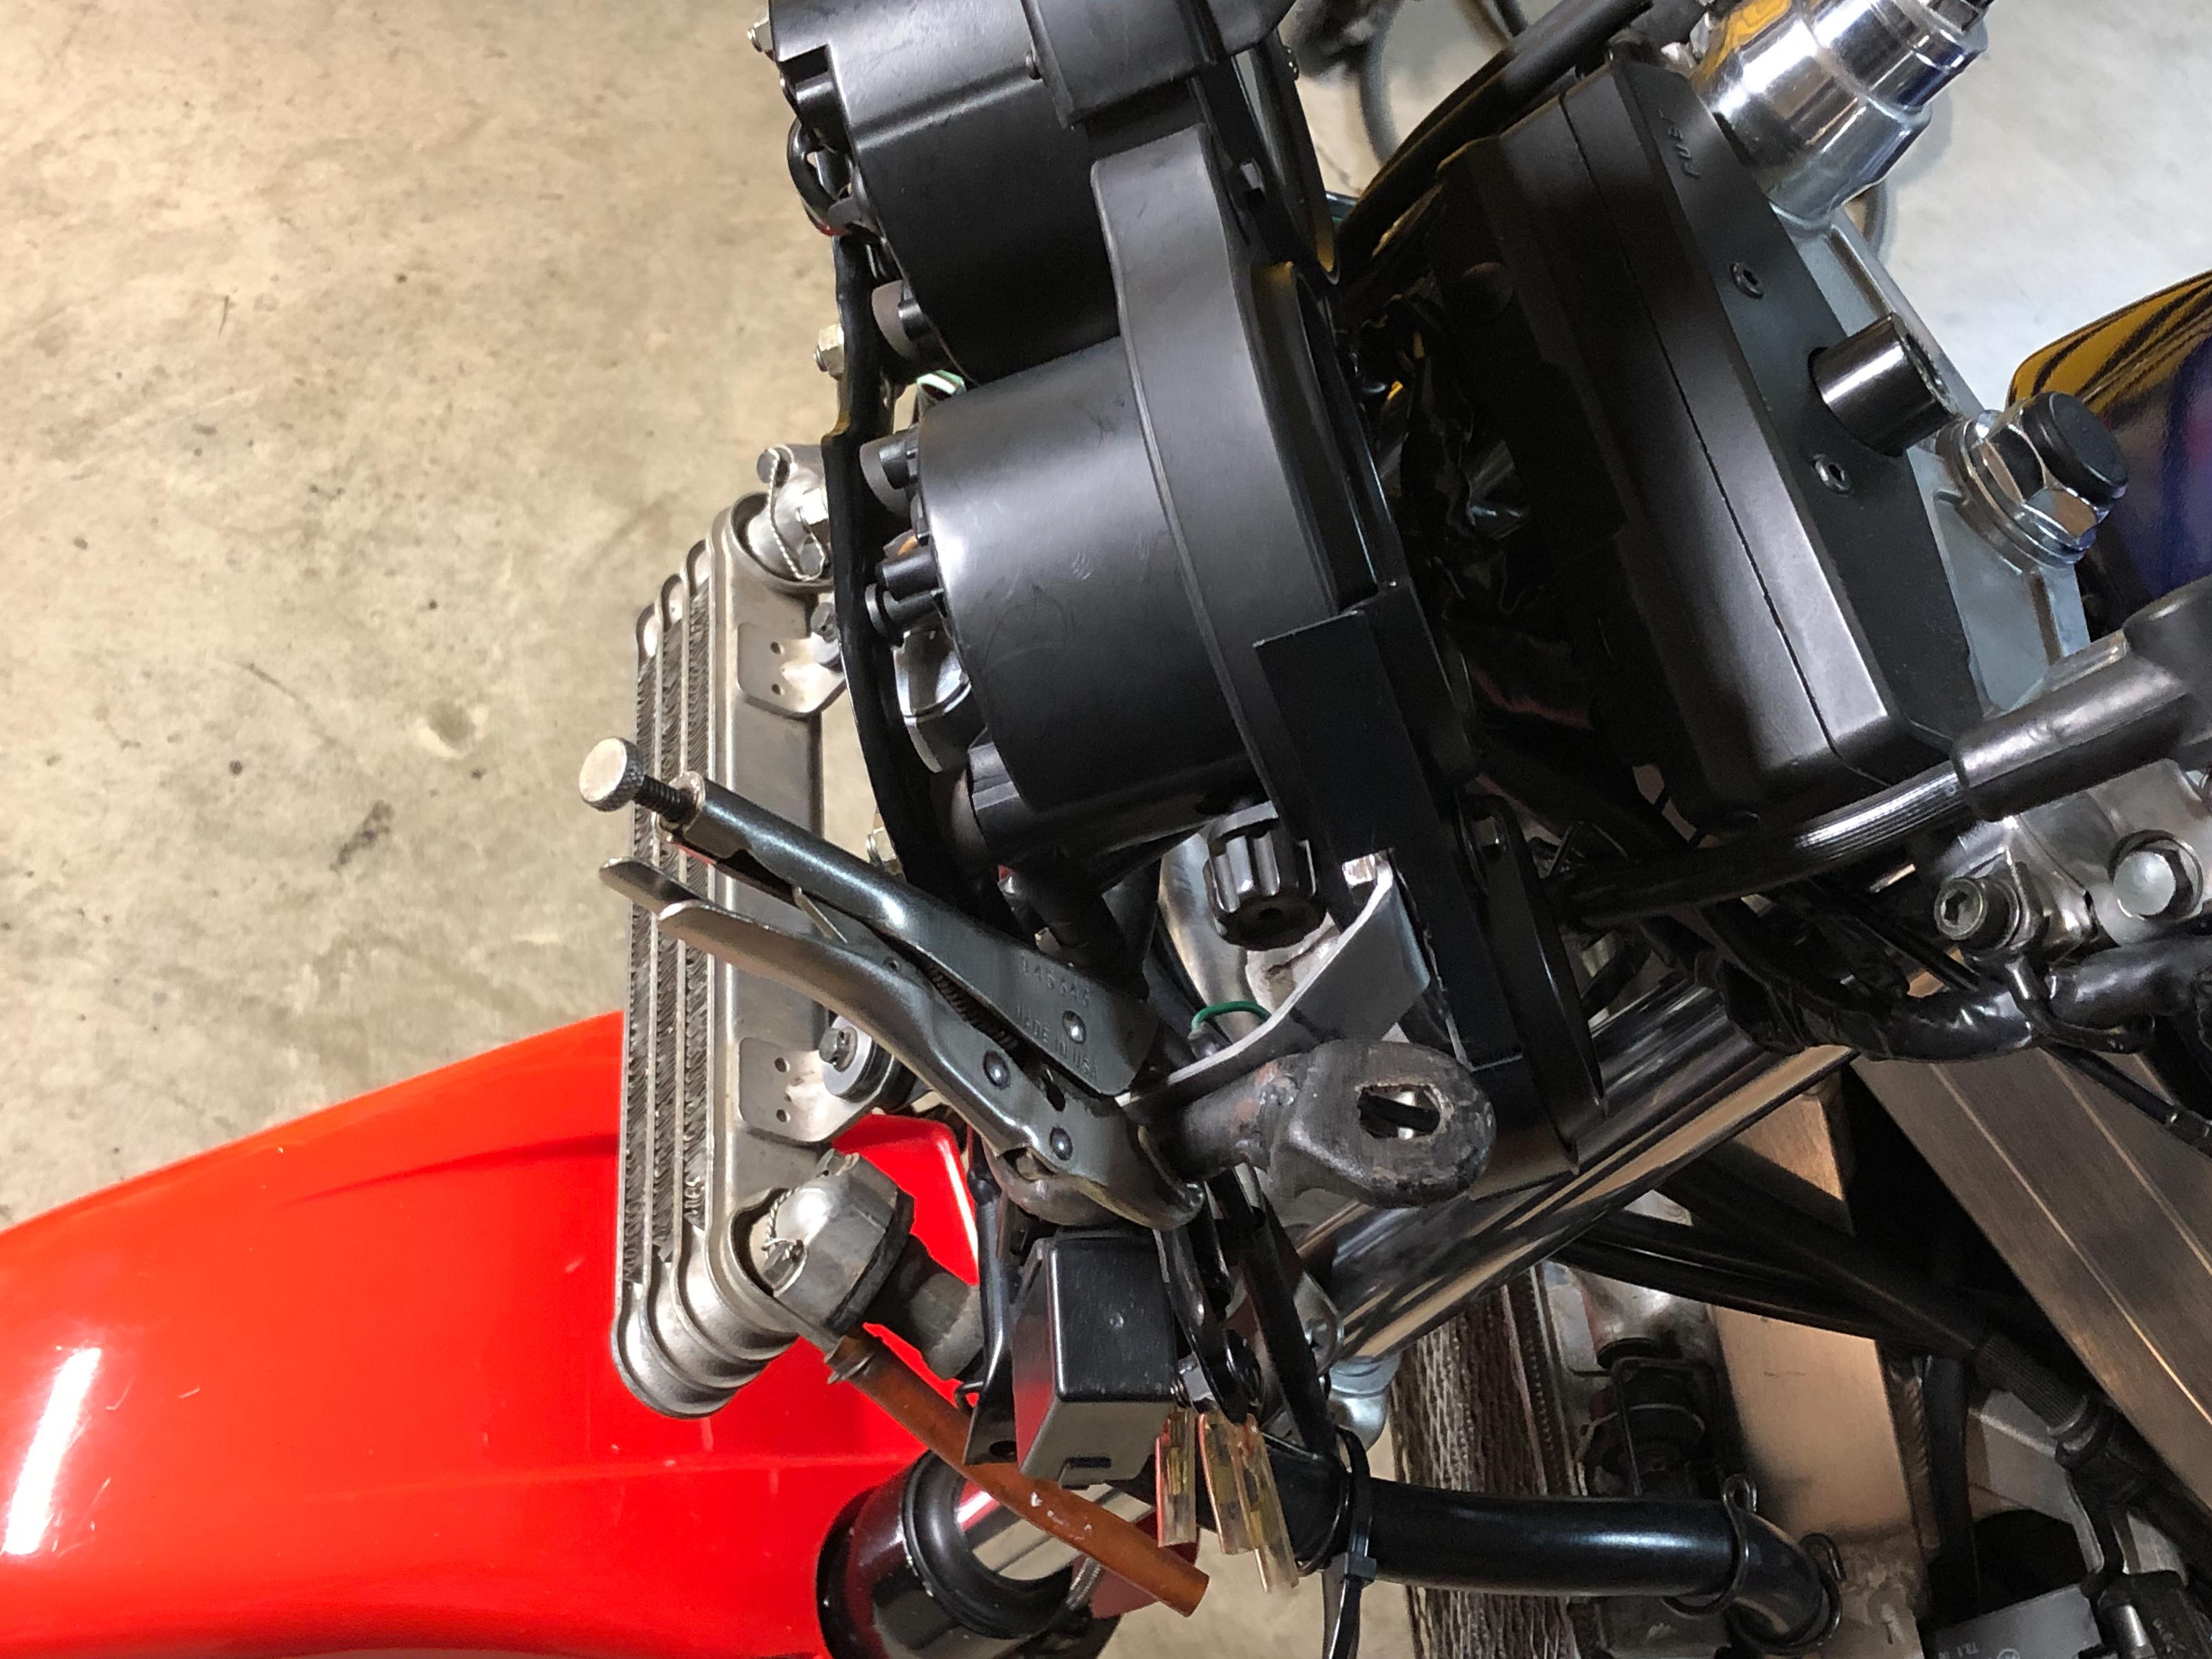
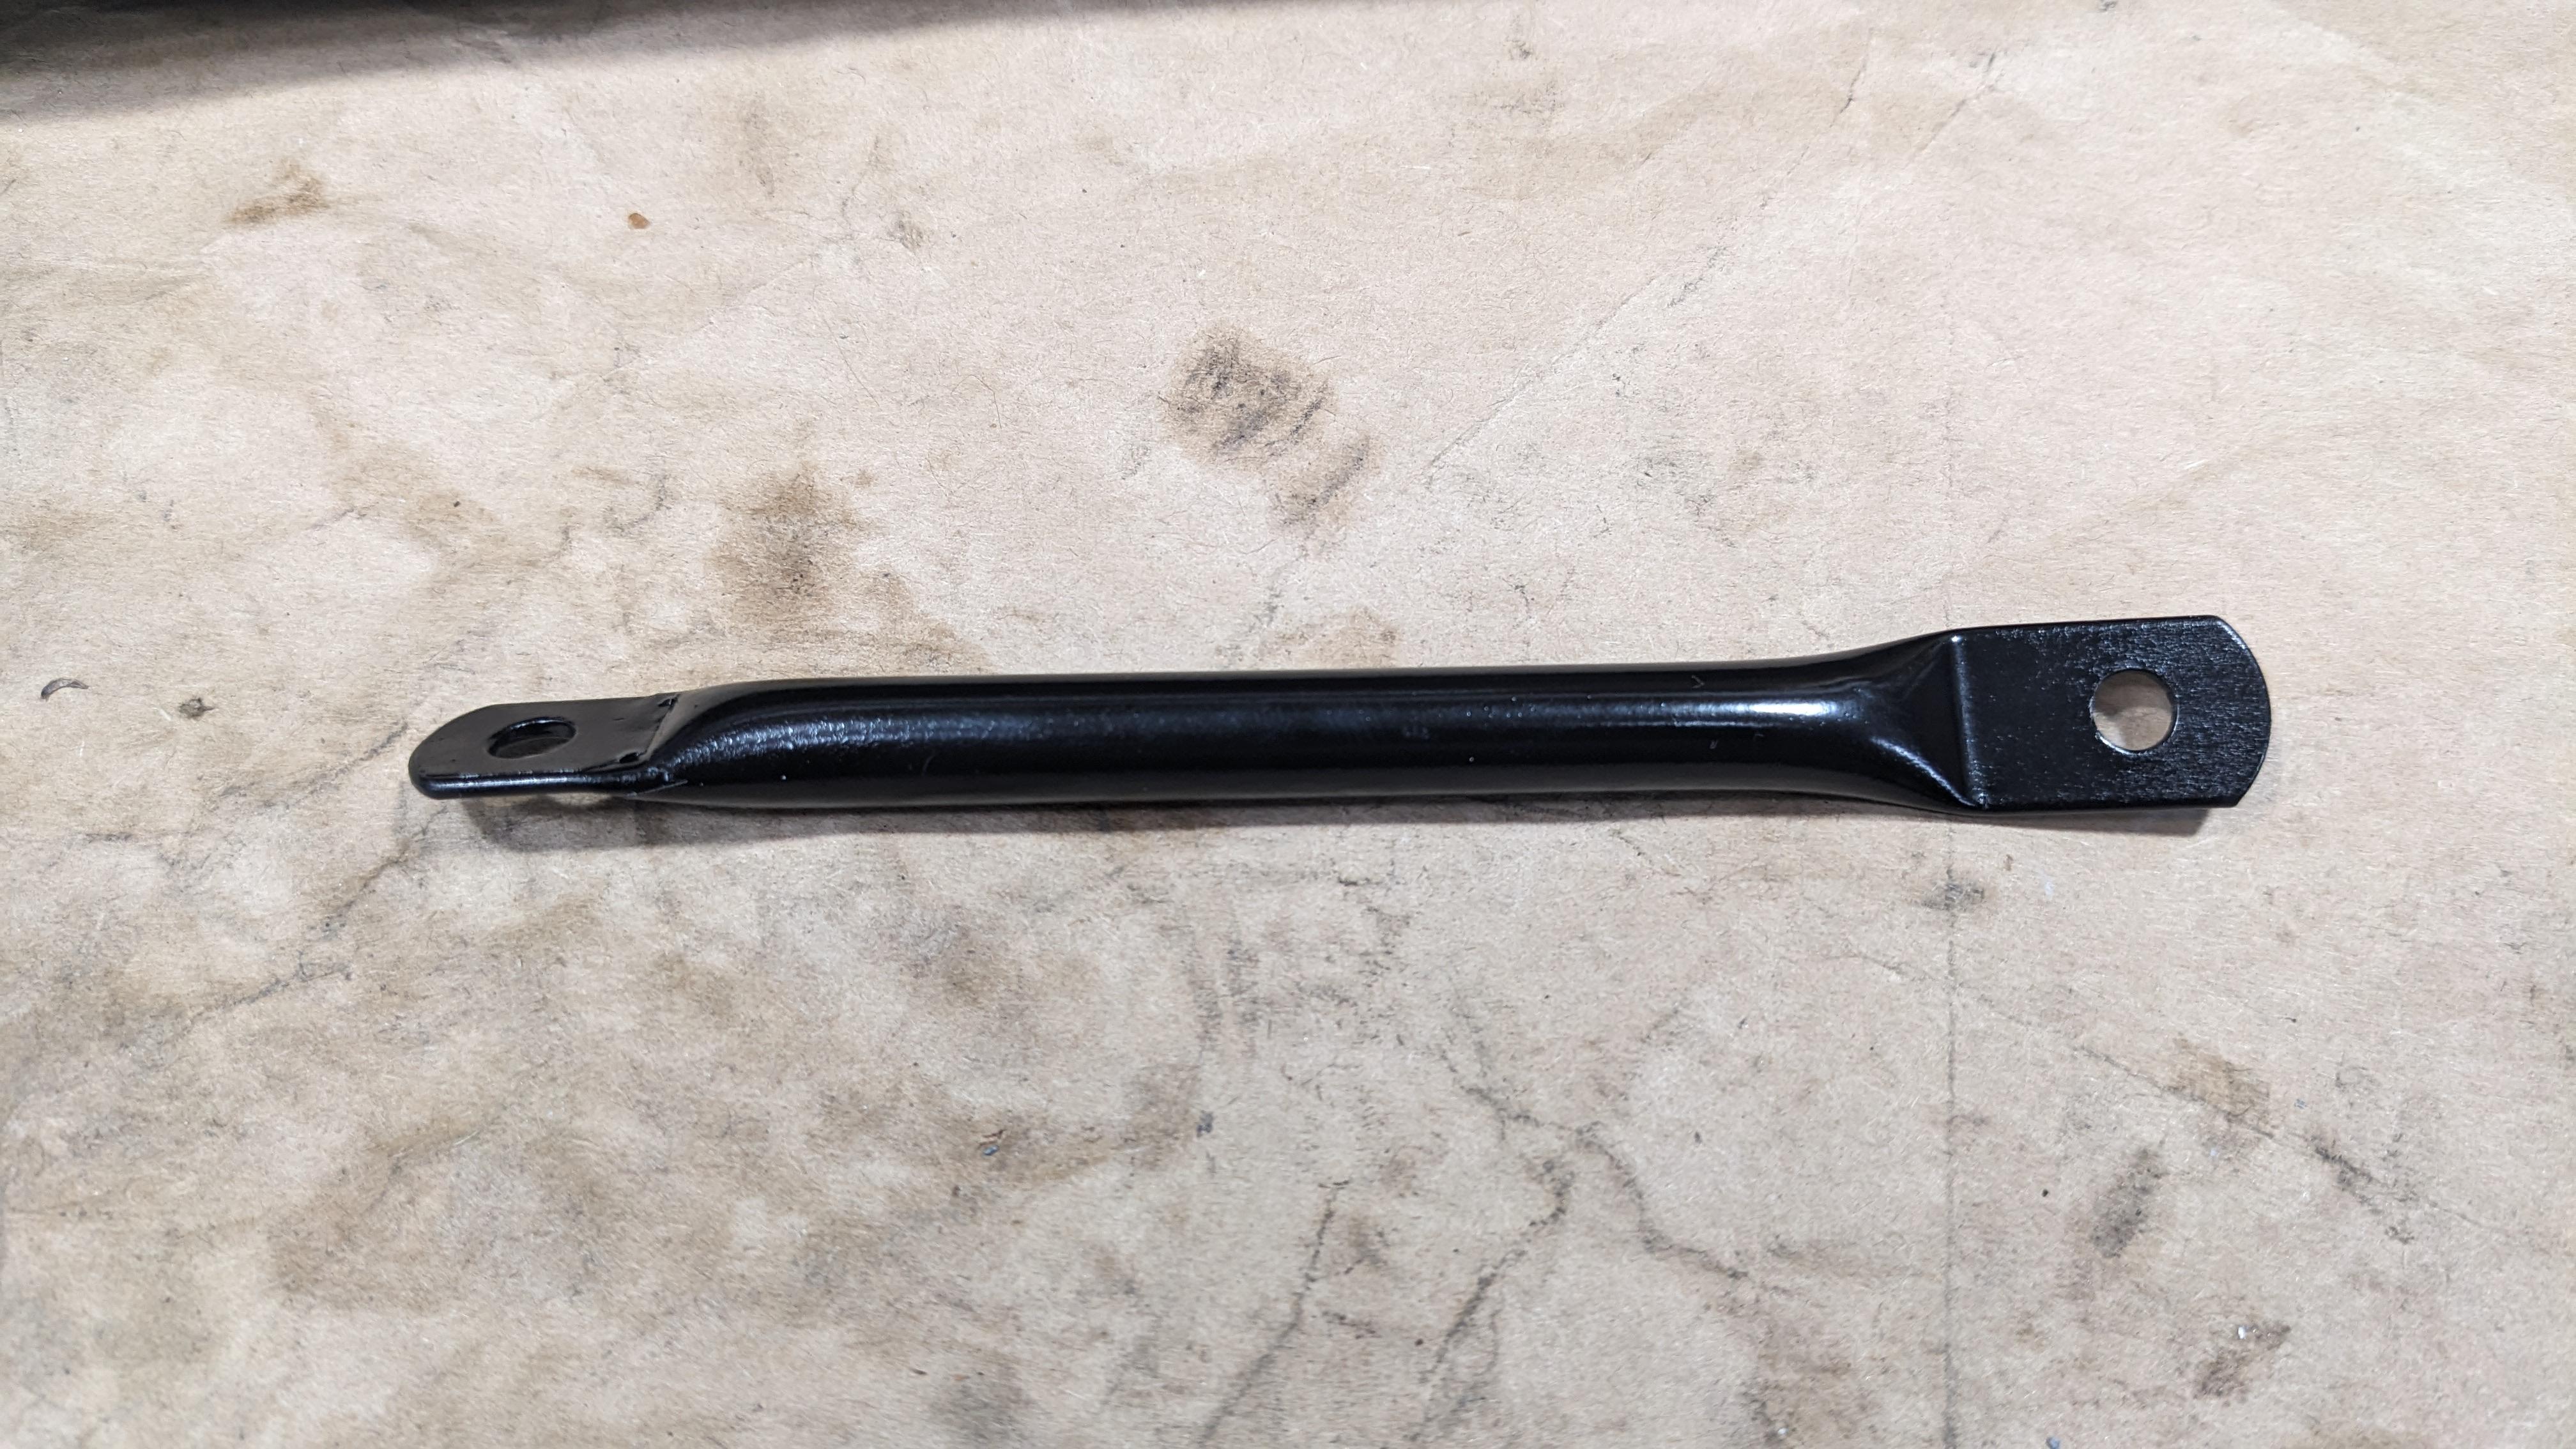
That sure looks like a pretty straight piece with a ~80 deg rotation.
-
I think the vise grips should be a perfect place to mount a skeleton hand mirror...
No hose clamps. Don't sink to that level at this point.
Here's an idea and it's simple, effective, strong and something Honda does.
Get some mild steel tubing. Heat and press flat with some aluminum chunks, radius them for a smooth "smush" transition. Then figure out the rotation / length to connect the meter and the mirror stud off the bottom.
Here's an example from something I did for the 92
While the tubing is still in the "presses" and warm you can best guess an angle, but can be adjusted later.
-
22 minutes ago, frostypupil said:
I was doing this project with my brother and he took care of the rear lines so I KNOW he installed them incorrectly.
Fixed it for ya.
Cheers!
-
4
-
-
35 minutes ago, frostypupil said:
It leaks from the washer between the banjo and pcv no matter how much I tighten it.
Ive tried using the stock banjo bolt and the new one from the kit.
You keep saying "banjo". Do you really mean that? Cuz that hole (and internal fitting style) doesn't take a banjo bolt and crush washer(s).
-
1
-
-
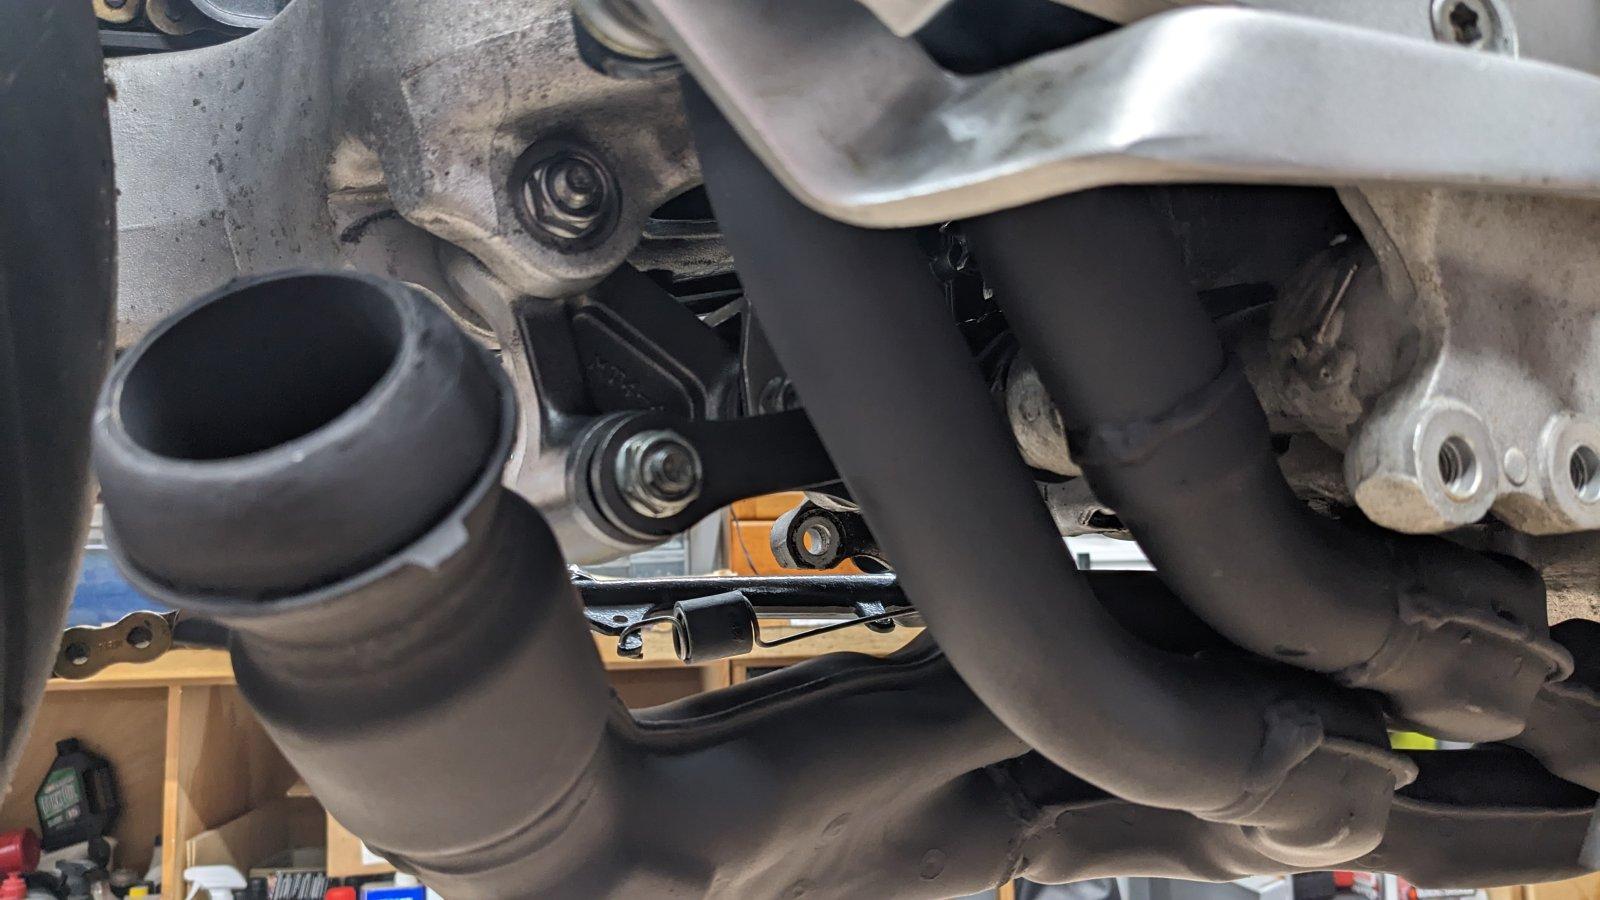
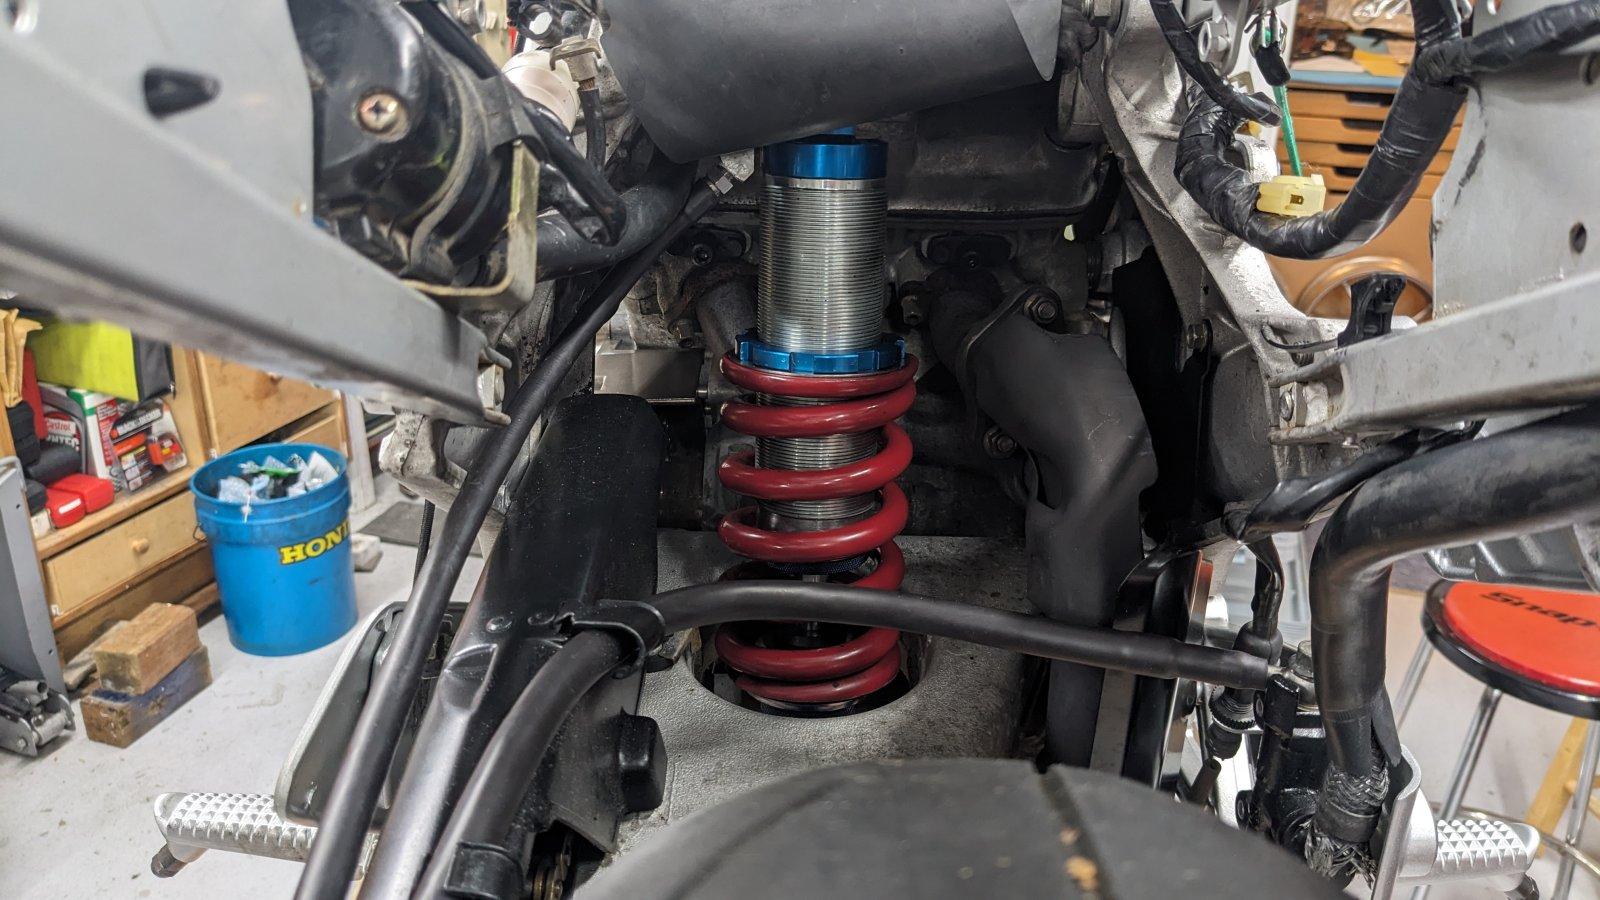
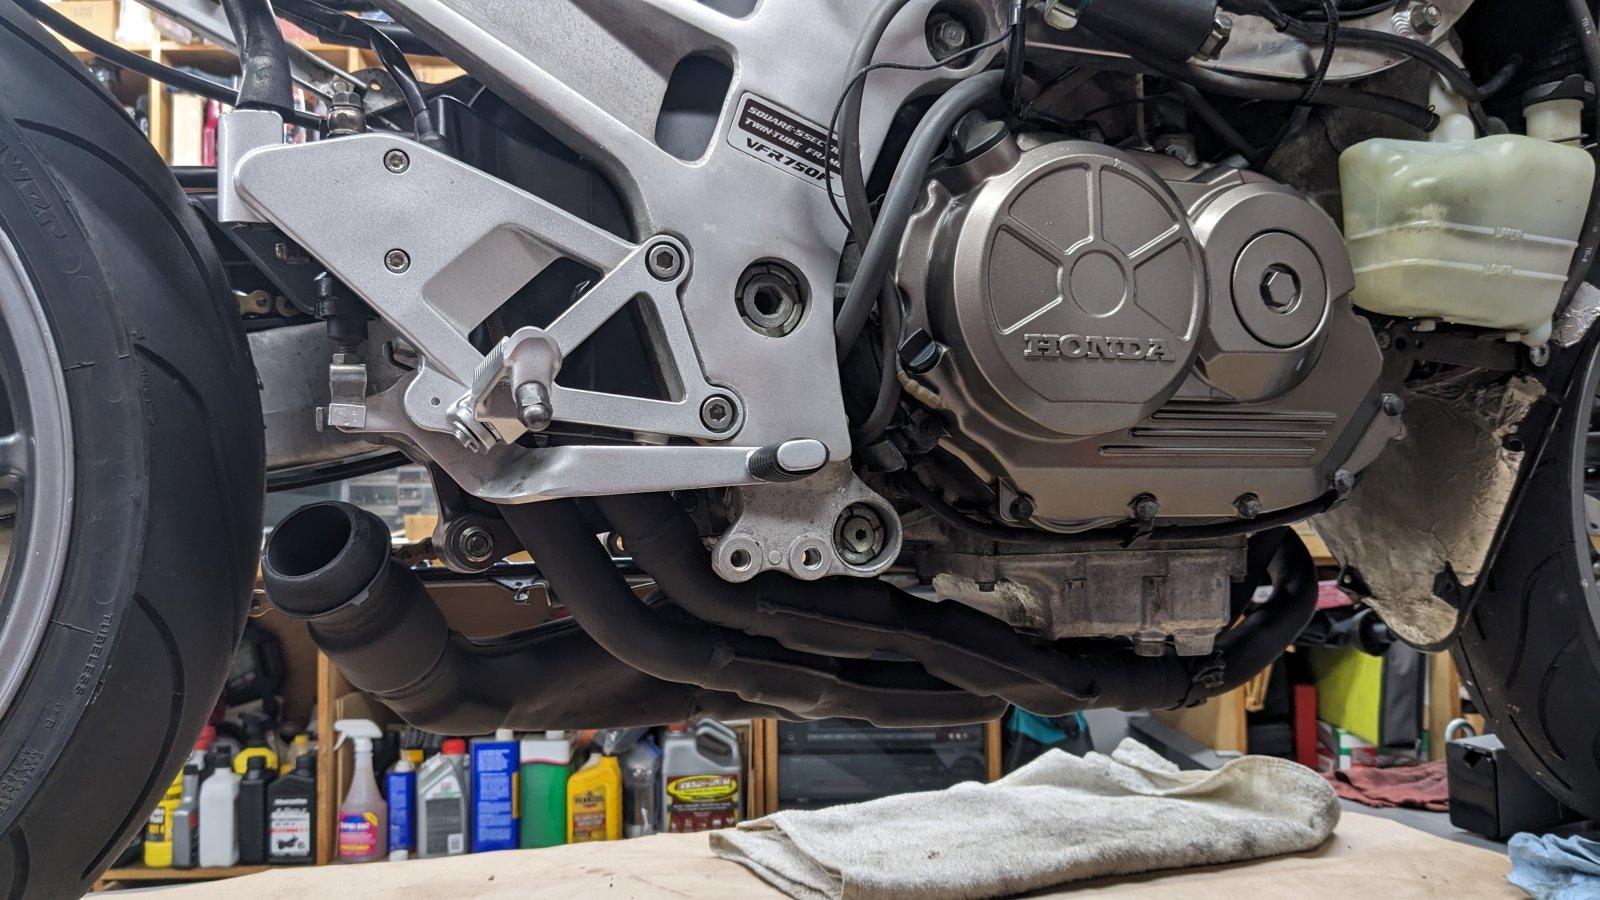
Exhaust system, fresh linkage, rebuilt Fox installed.
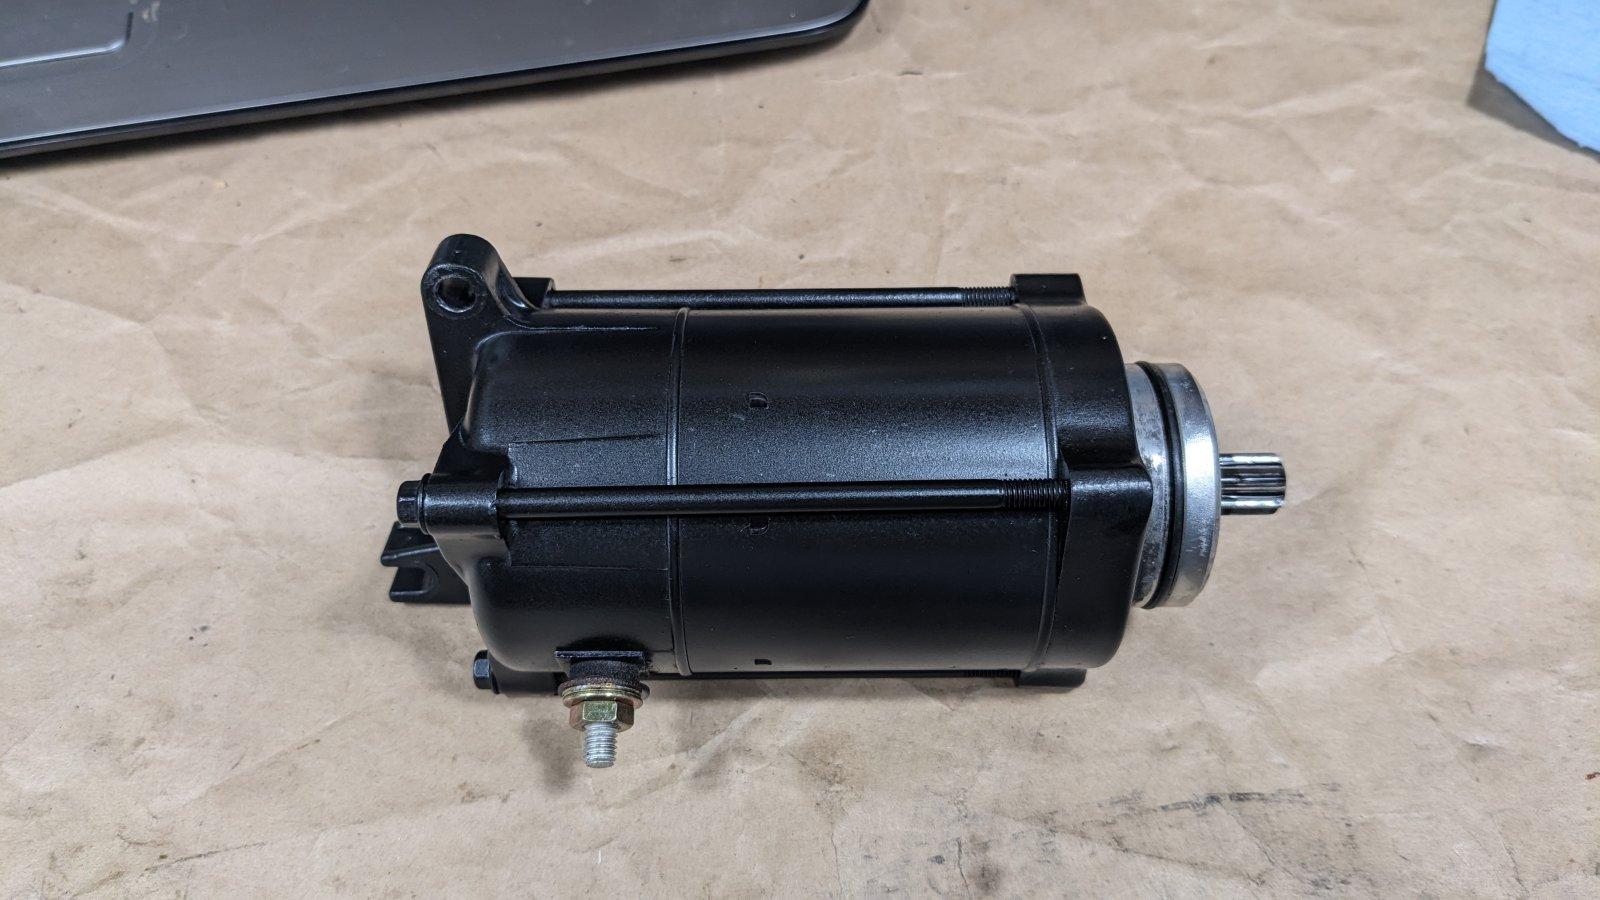
Disassembled the clutch, scuffed and cleaned the metals, installed new EBC springs. Installed the serviced starter motor.
-
3
-
-
6 hours ago, Titanium2000 said:
Yes Captain have other good batteries plus bikes, so in knowing that a good battery would not start it, I was chasing forwards of that.
Little did I know the battery was so old, as it started the bike over winter..with good pace plus strength.
Got it!
-
1
-
-
38 minutes ago, Lorne said:
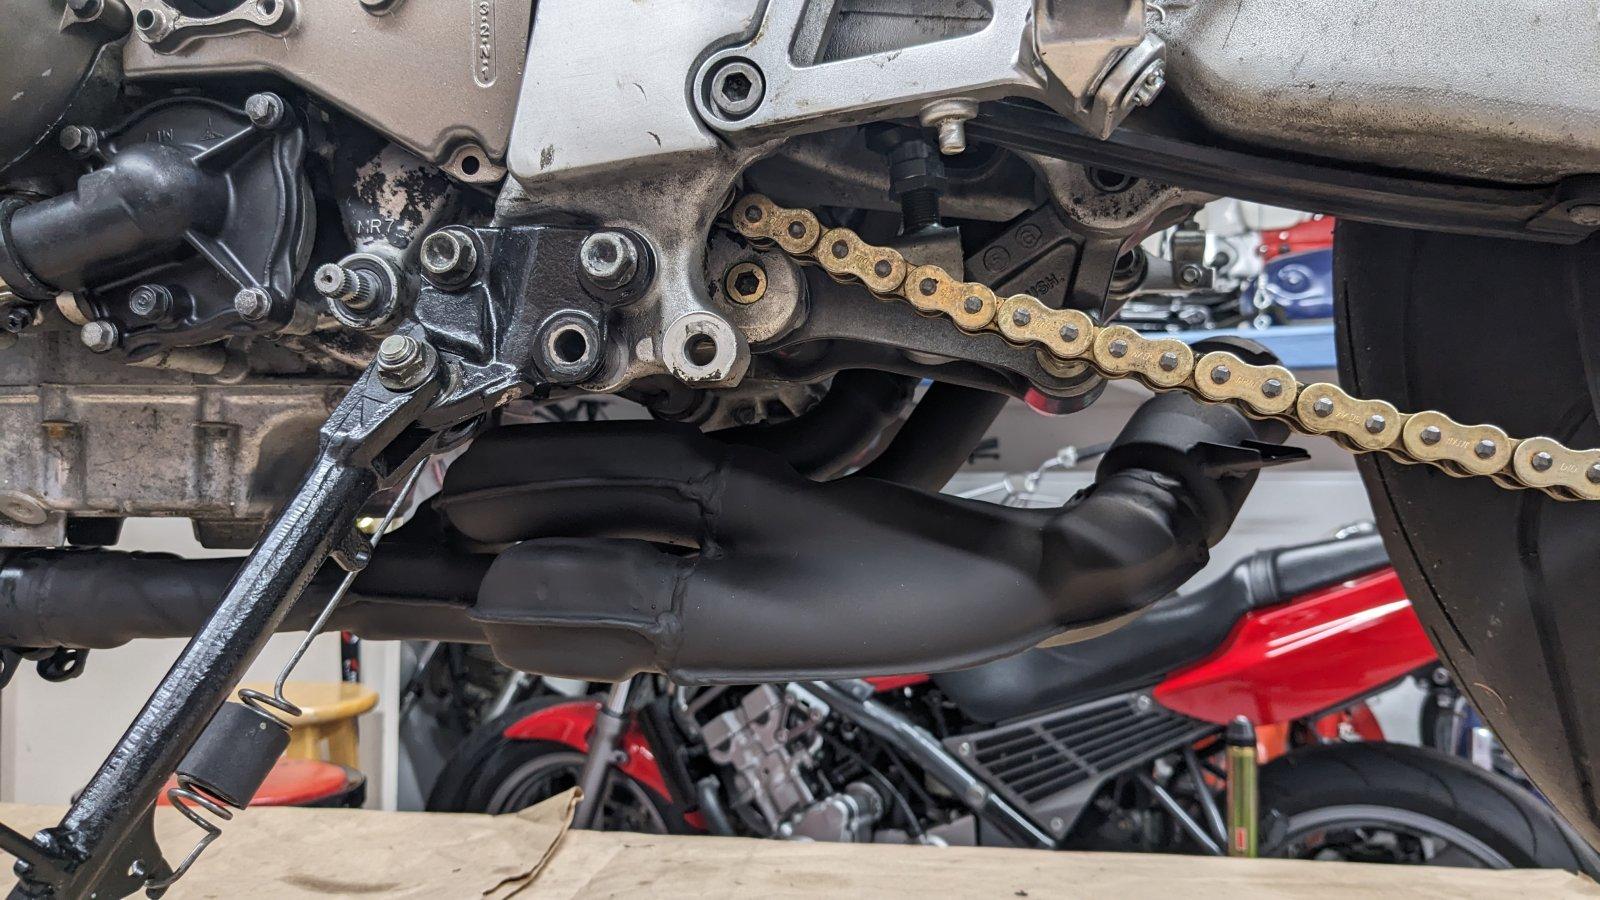
That's fine work you're doing on your '92. Will this make it more difficult to fit the muffler?
Thank you!
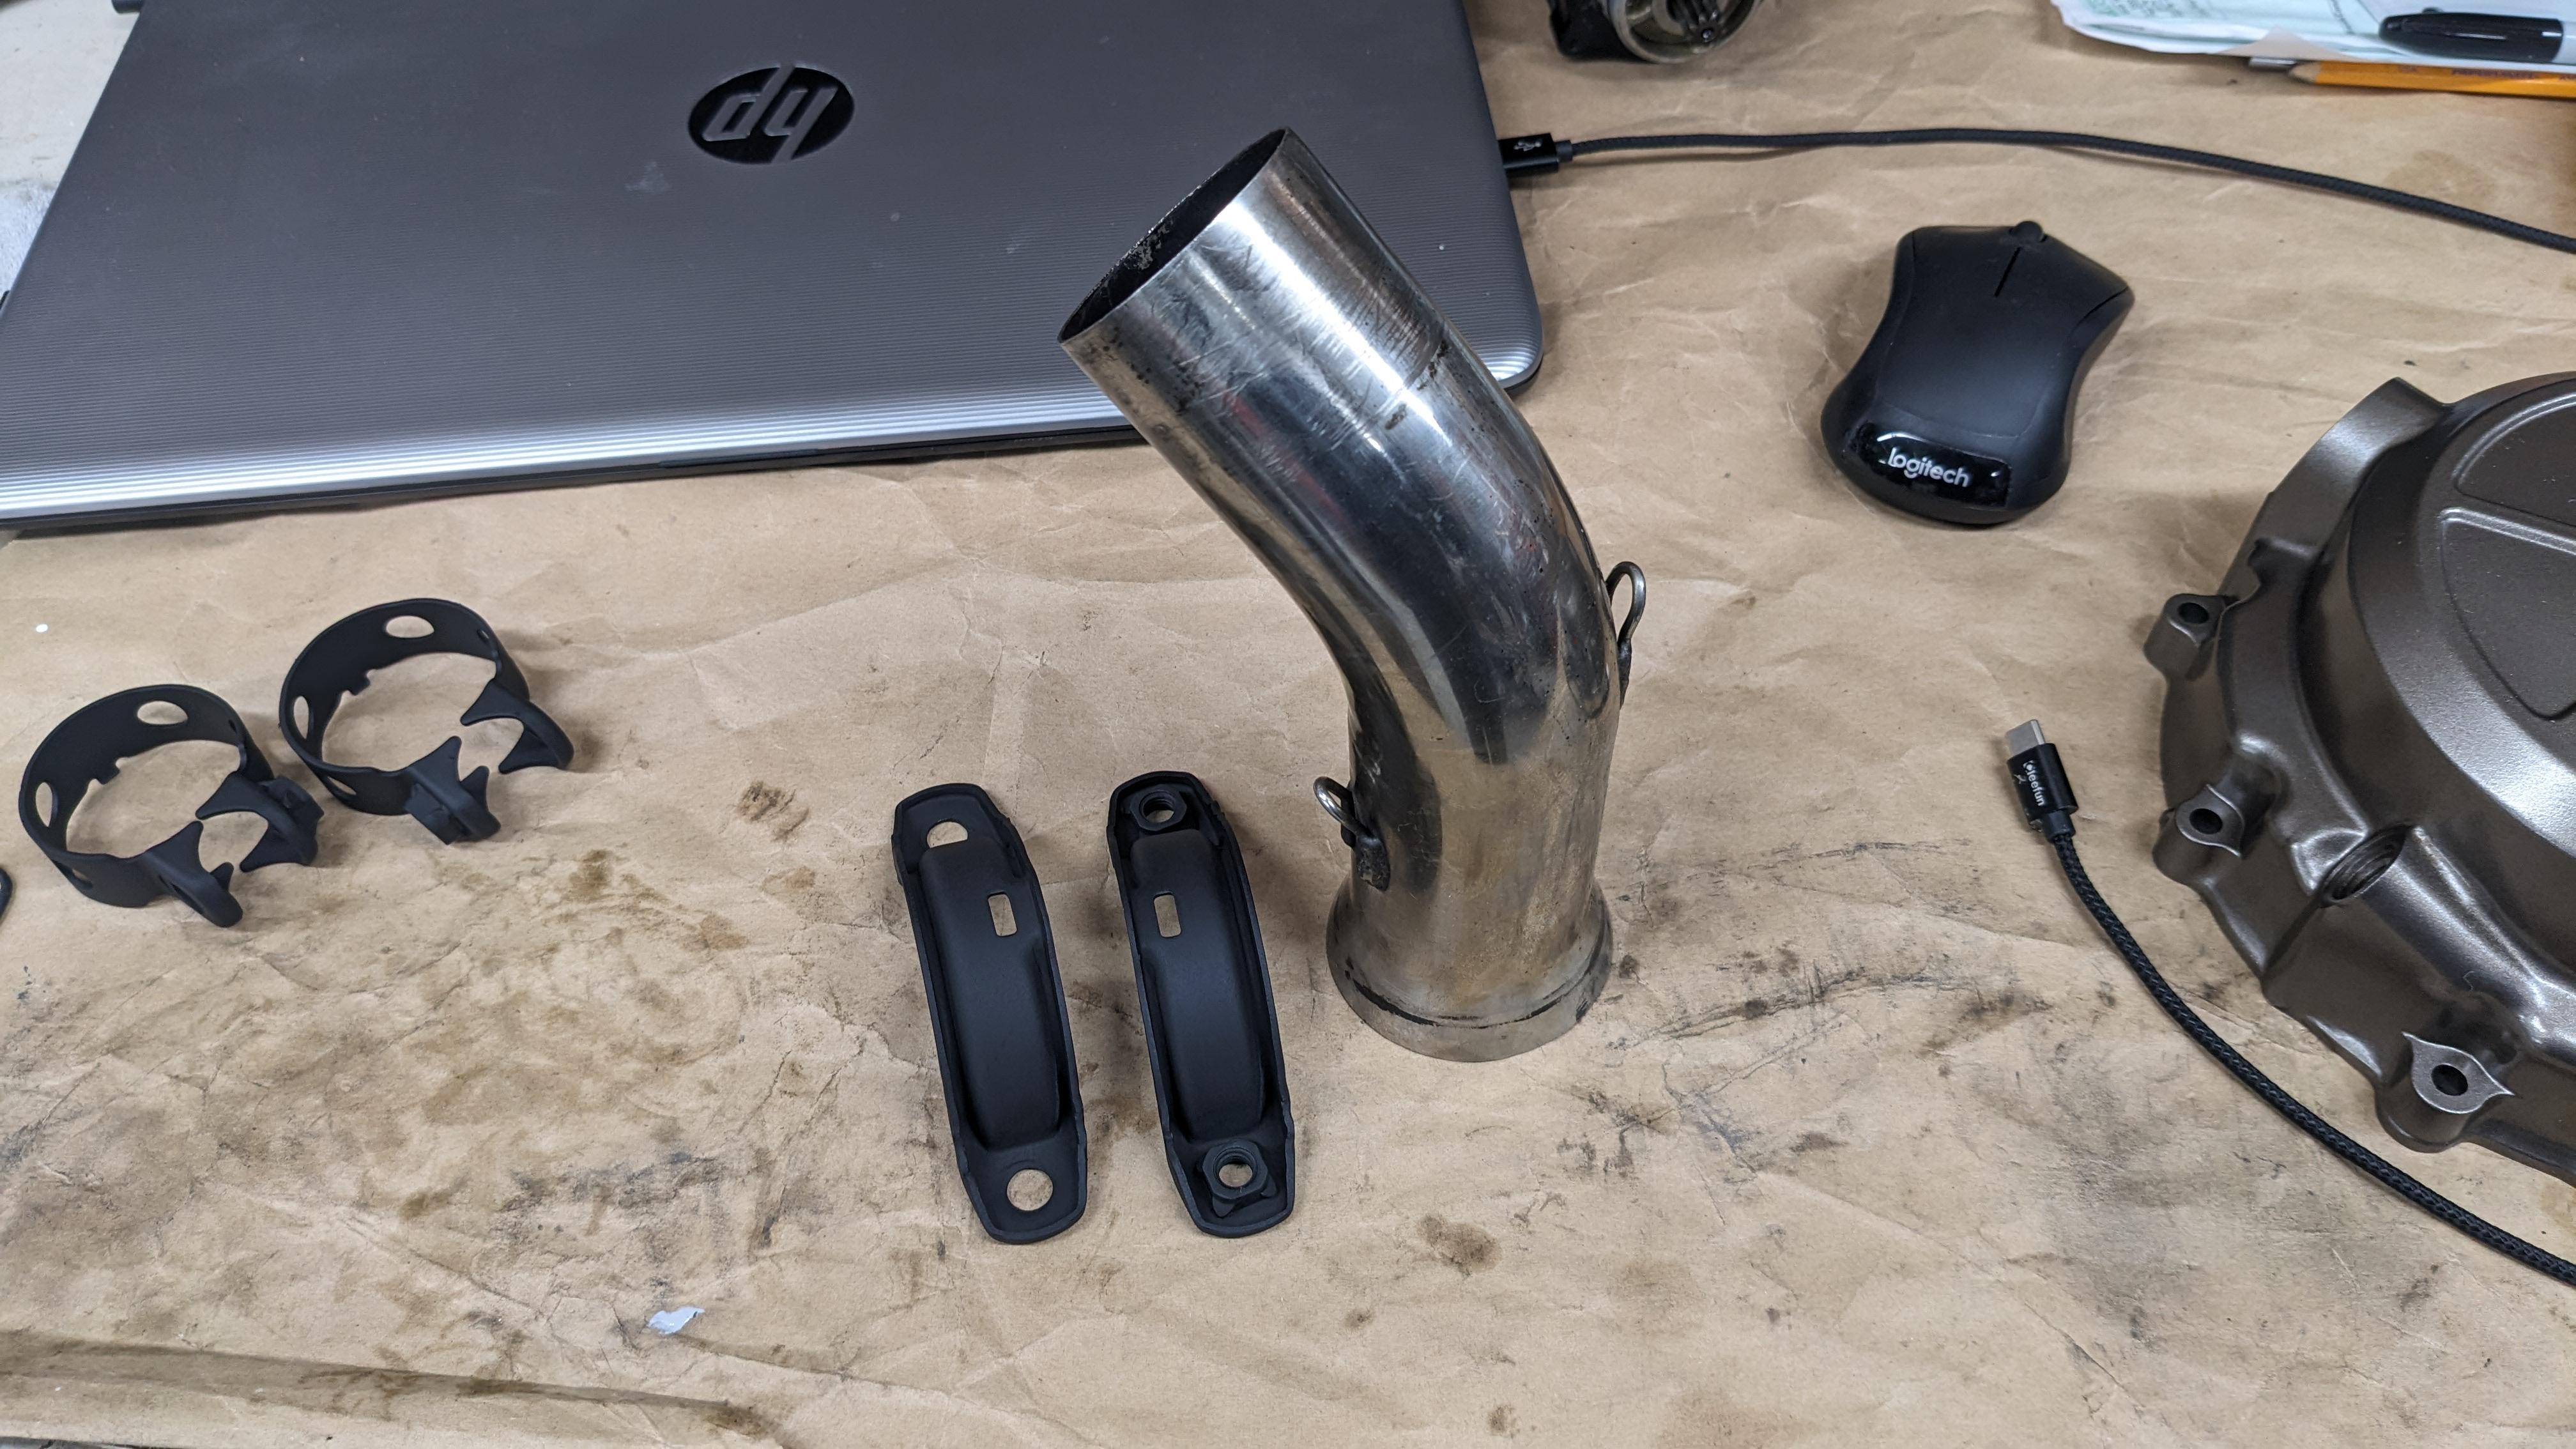
A pretty big incentive to start this whole thing was the deal I found on the exhaust system. It was complete, even with an aftermarket connecting pipe and clamps, which I needed. Less than $100 shipped.
I test fit everything before I restored the exhaust system. Muffler still has a great angle and I might be able to incorporate some springs, albeit mostly for looks.
Stoked. Hopefully by this weekend.
-
1
-
-
I was just about to say the same thing, I'm confused. So this is/was a bad battery the whole time? Bad enough that even with a jumper battery it still wouldn't crank. Or was your independent "good" battery also not good?
Typically a relay that can "click" is not the problem.
-
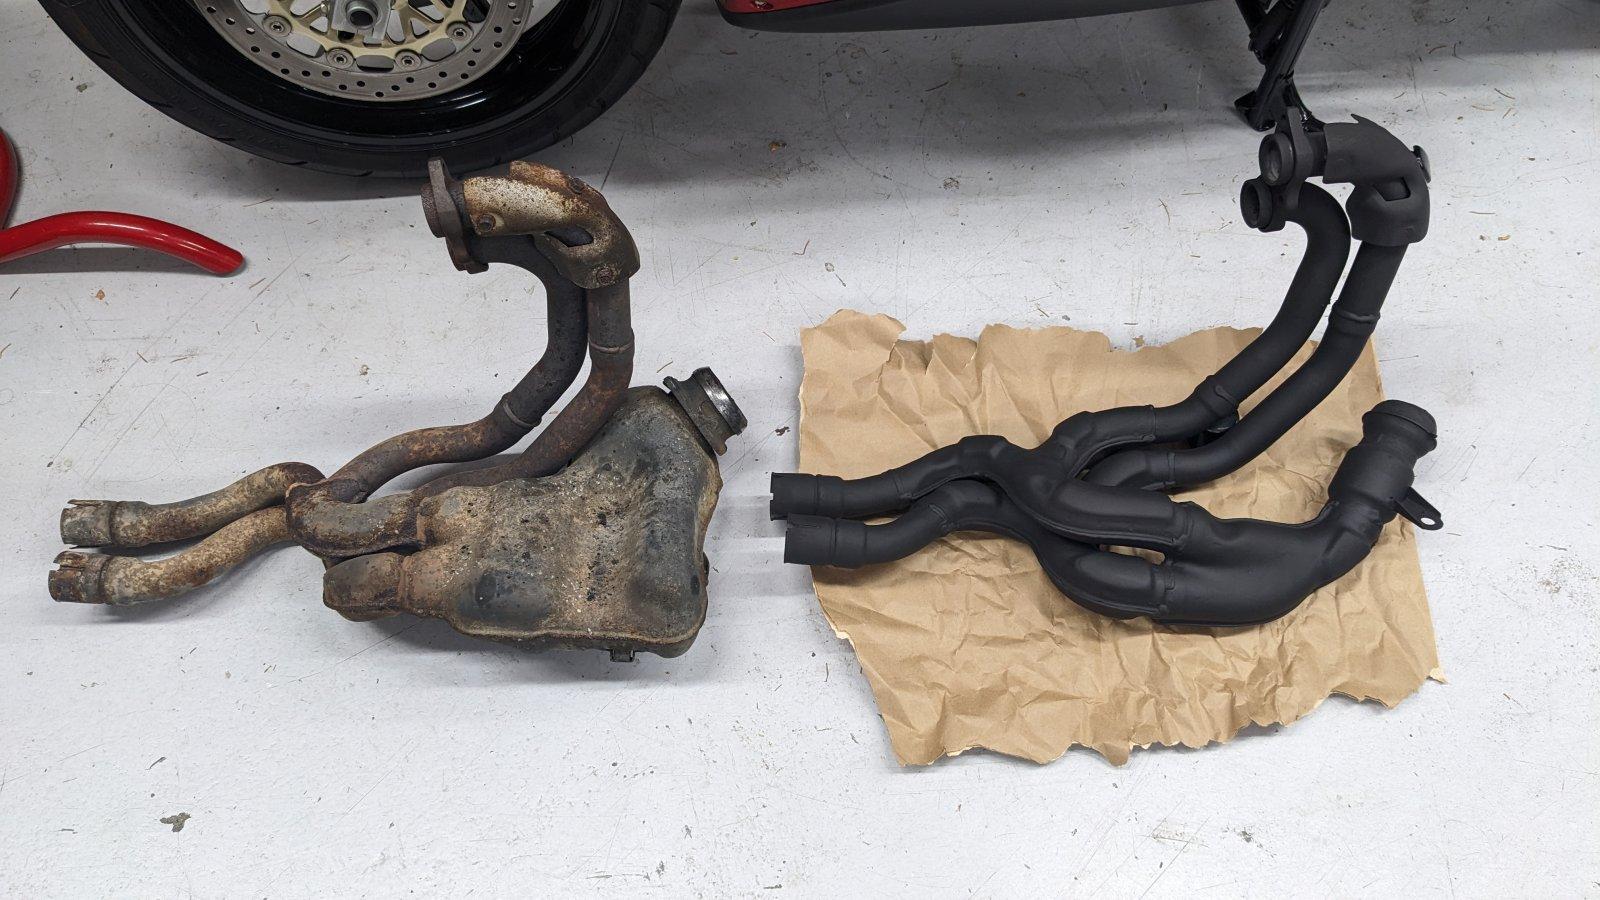
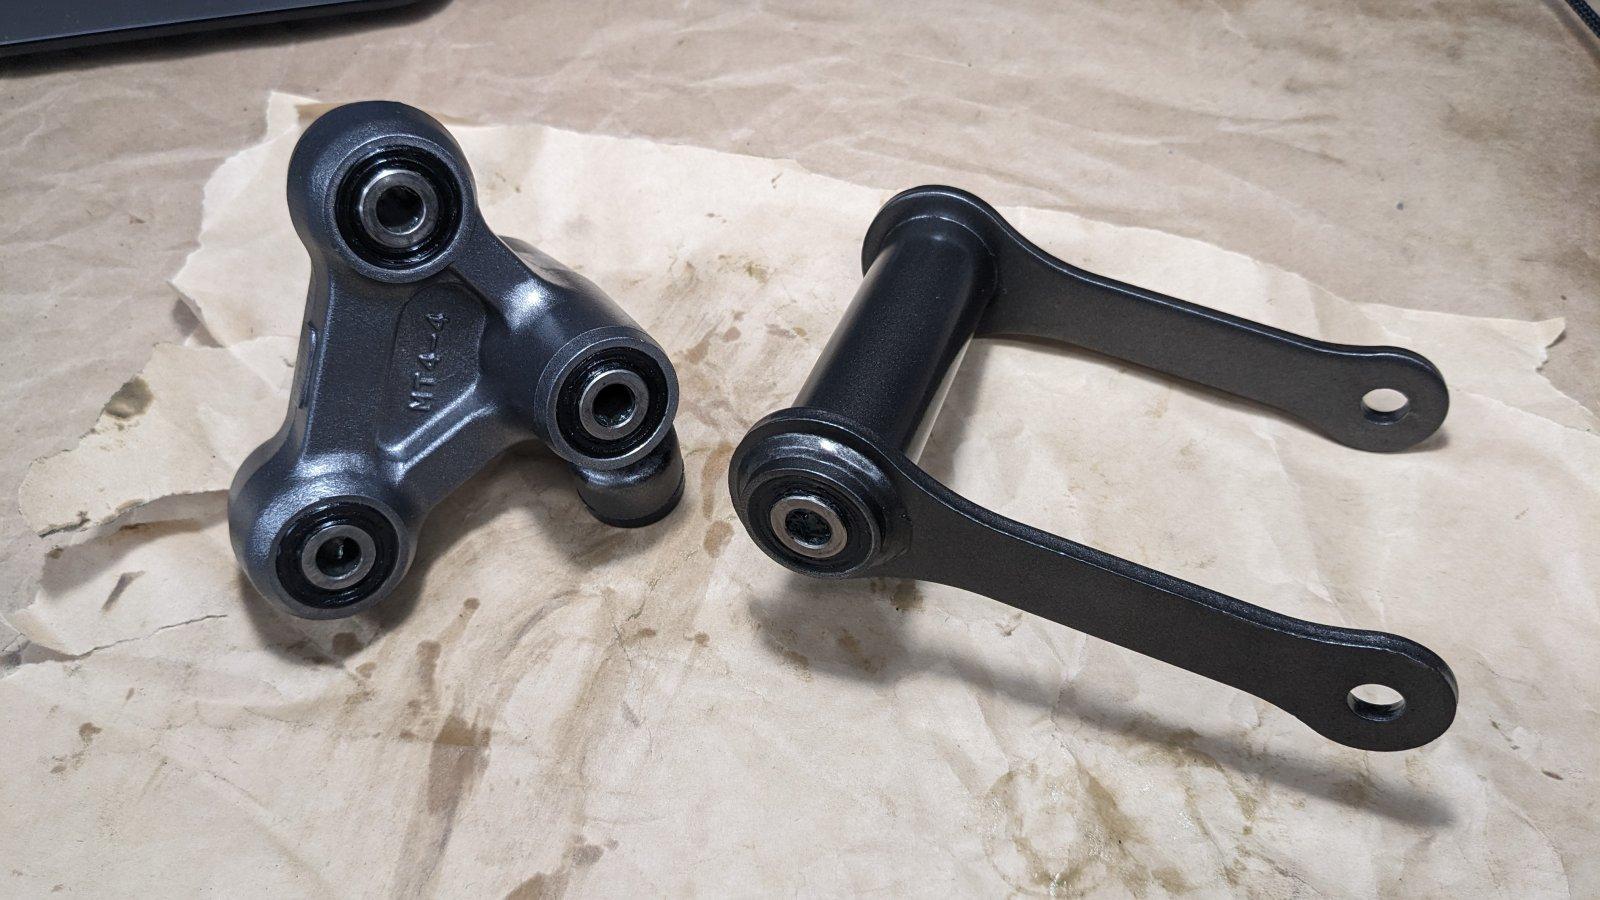
Goodbye 1992 collector (14 lbs), hello 1997 4-2-1 (9 lbs).
Linkage cleaned, painted, repacked for the rebuilt Fox TC.
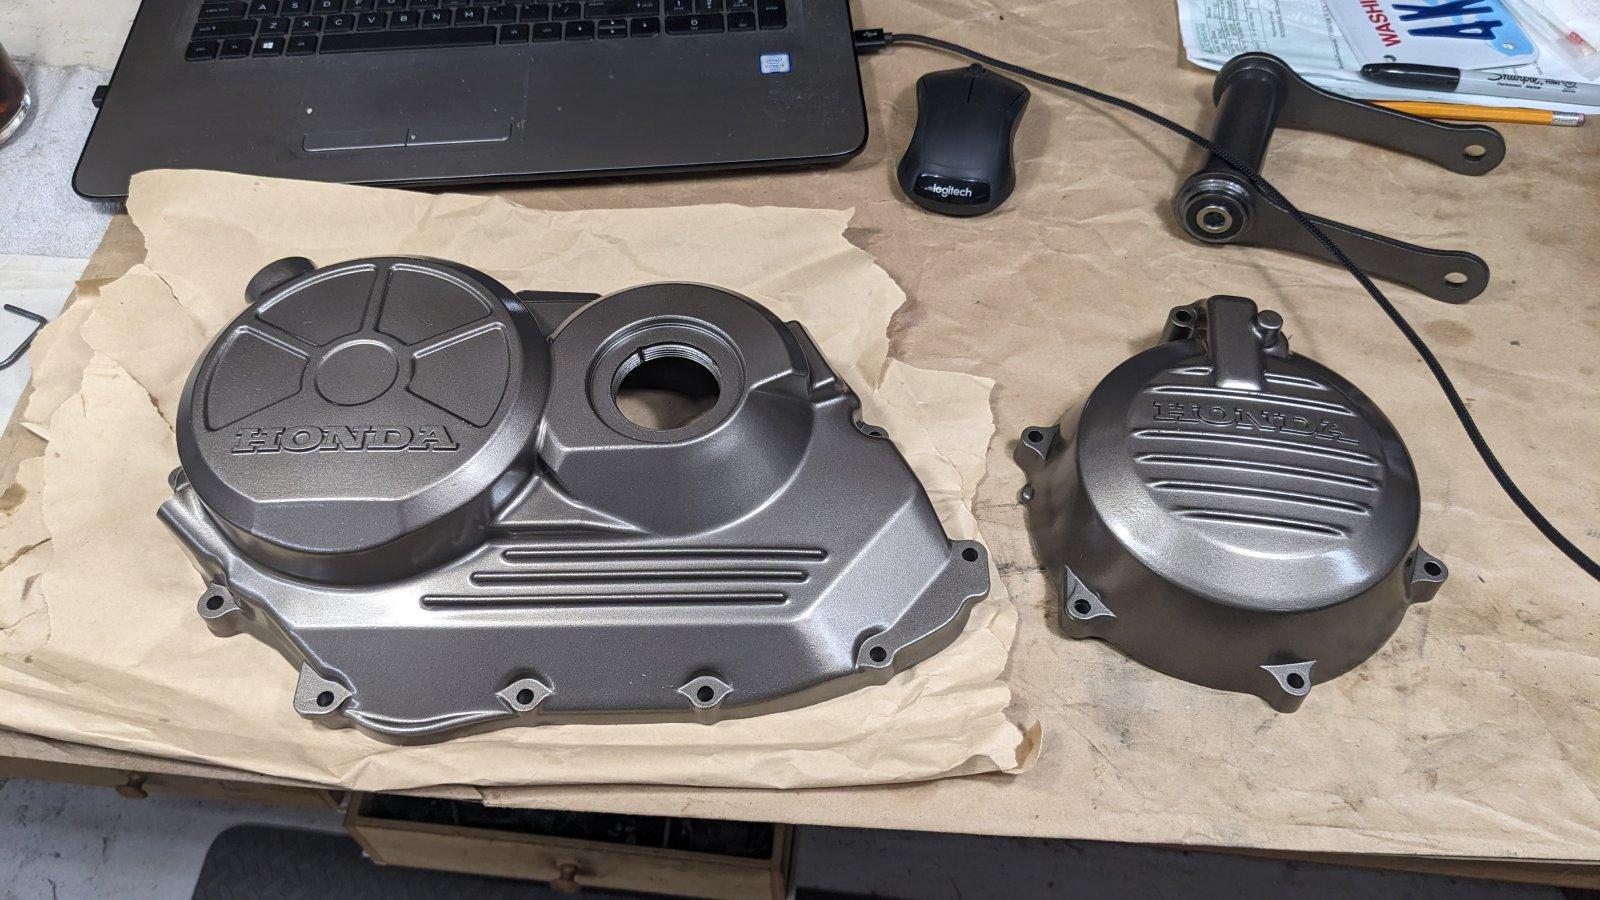
Crankcase covers sandblasted, Bronze base, Dark Bronze Mist Metallic color coats, 2 coats gloss clear. Sprocket cover was also done.
Starter disassembled, cleaned, brushes dressed (plenty left), coat of satin black.
-
2
-
-
I would try and independently mount it from the upper cowl / mirror stay area personally. And / or try and bridge across form the area the tach mounts to.
-
I think it's gonna be cool and unique.
What are your attachment points, on the gauge and bike?
-
Duplicolor has a good automotive primer in a can that I've used.
Probably 1500 to 2000. There might be a 3M pad made for that as well. You want to knock the shine off, remove small imperfections and give the clear something to "grab" to. It's so fine the graphics will adhere no problem.
You might need to repeat the primer-sand process a couple times in that petcock area and fair out your sanding to get the transition as smooth as possible. Everything "shows".
No need to worry about pin-striping type masking tape for visible mask lines, the line will be hidden by the graphics.
I would find a suitable piece of old body work and go thru all the steps and practice your technique. Duplicolor now sells a 1K clear (1 part) that isn't as expensive but should "act" like spraying a 2K. But I would def use 2K on the actual tank and graphics.
-
1
-
86 VFR700F Retool or therapy or both
in Earlier VFRs
Posted
You're gonna throw a little paint on that bracket tho... riiiiiiiiiight?