
SEBSPEED
-
Posts
22,523 -
Joined
-
Last visited
-
Days Won
103
Content Type
Forums
Profiles
Gallery
Blogs
Downloads
Events
Posts posted by SEBSPEED
-
-
OK then, one gripe.... where are the NACA ducts!!???!!!!

Buy the bike and I'll add at least one for you...

-
 1
1
-
-
Thank you guys
-
Does the dirt bike muffler quiet it down enough for those of us in the city /subdivision?
The bike is louder than my VTEC with unbaffled Staintunes. It seems loud to me, and I will try to quiet it down a bit with a Yoshimura baffle I have in my bin. That said, after polling about 20 people to ask if the bike seems obnoxiously loud, all have said no. It isn't anywhere near an ear bleeding level, and certainly can't be compared to any open-pipe Harley.
I have noticed that it turns a lot of heads - riding through towns in a group, I could see people picking up on the unique sound.
-
2
-
-
FOR SALE?
How could you put a price on 5 years of labour?
And what's the skinny on the exhaust system that Timmy was talking about?
I really can't. But, I know what I'd be willing to sell it for, if someone wanted to buy it.
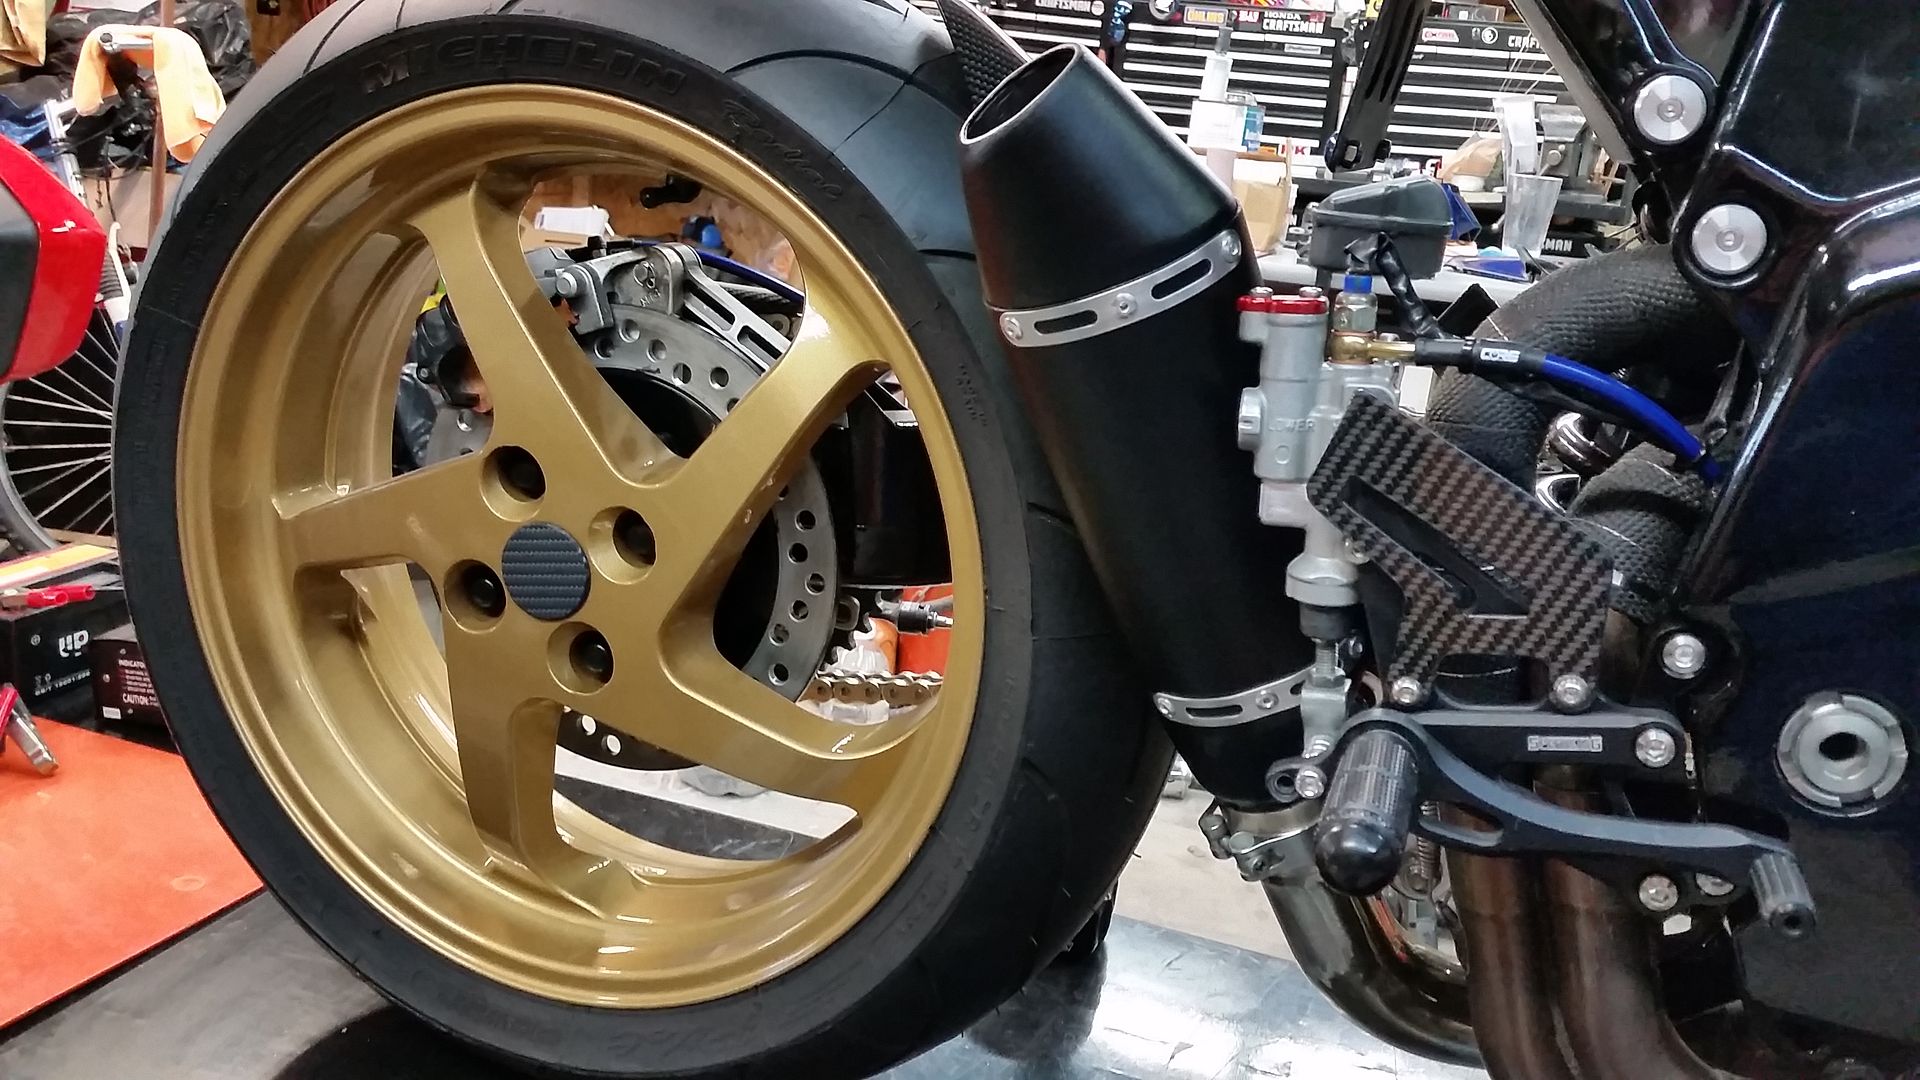
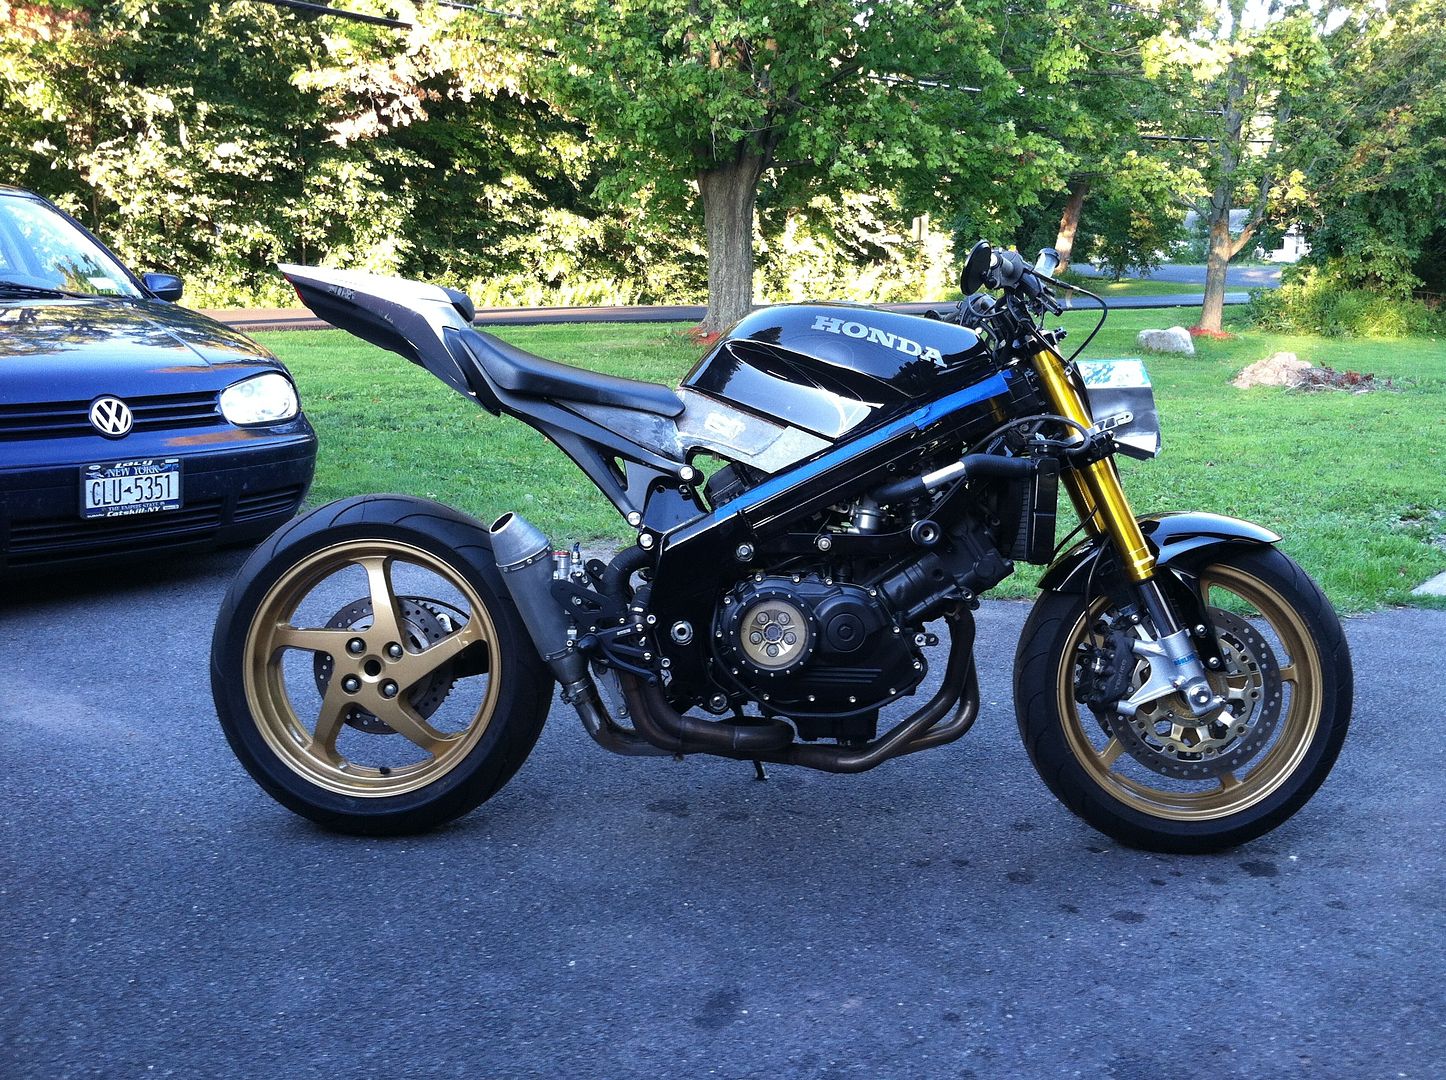
The exhaust is a Two Brothers right exit header with my own mid pipe and can. The shape of the dirt bike can gives it a very different tone than most other VFR pipes.
-
1
-
-
-
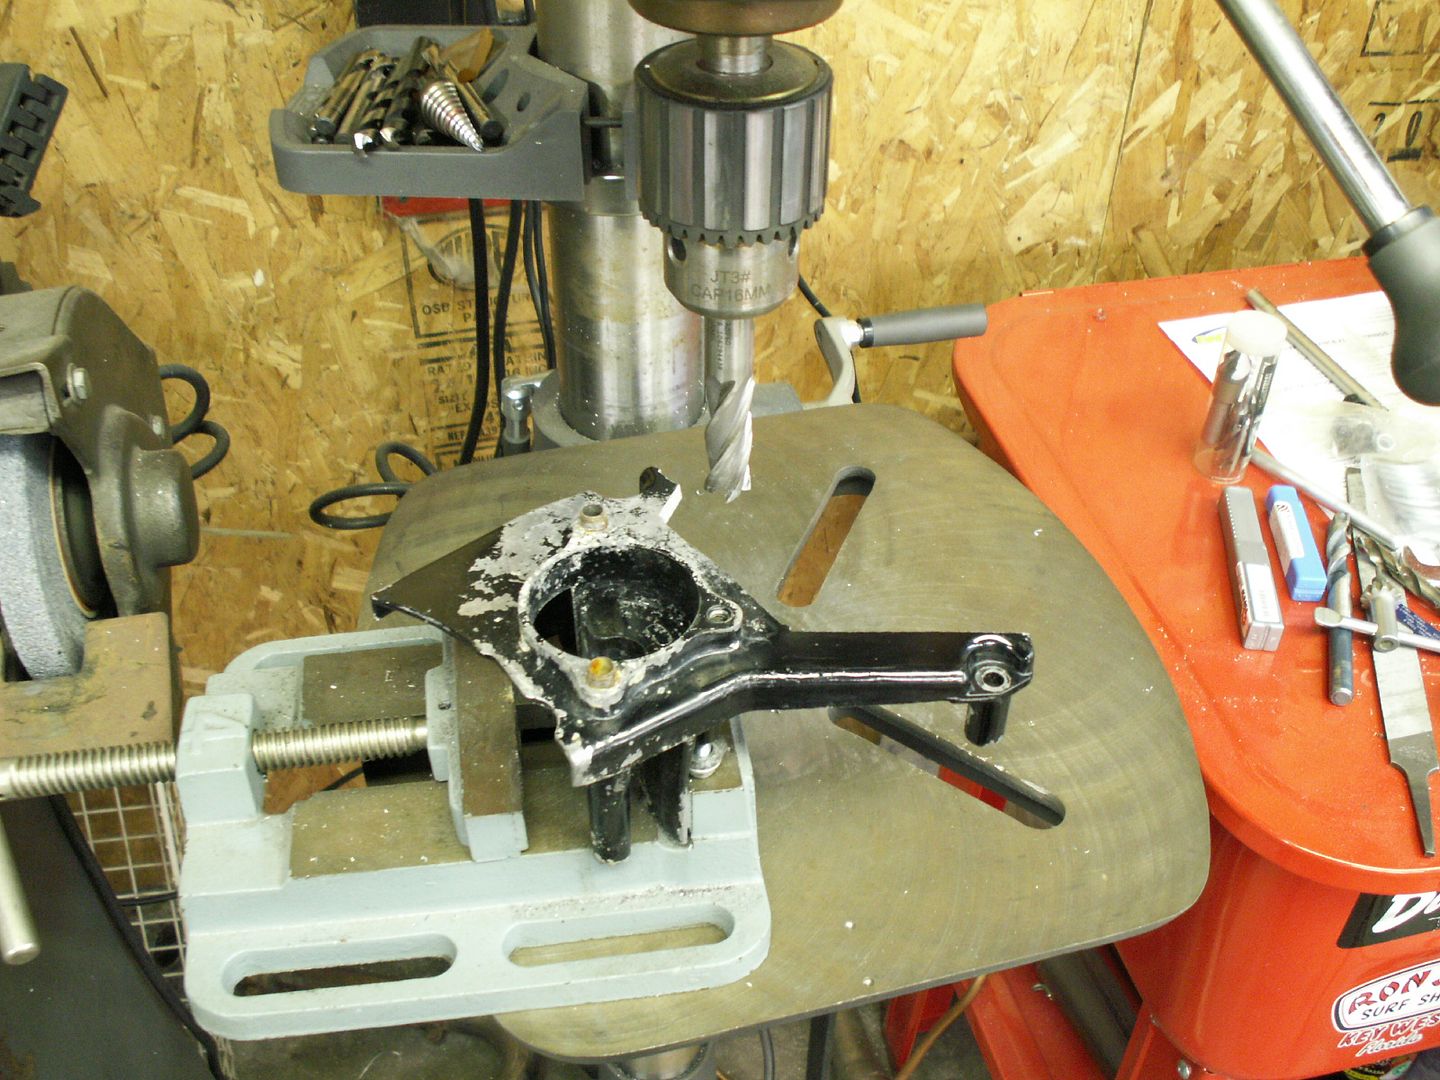
I never showed my full hand, just kept tossing a few cards out.
That is pretty much it for the build pics. I have more, but a lot of them are redundant or obsolete.
I'll update in a week or so with some action shots from the Dragon. I seem to have misplaced my SD card with all the video on it...

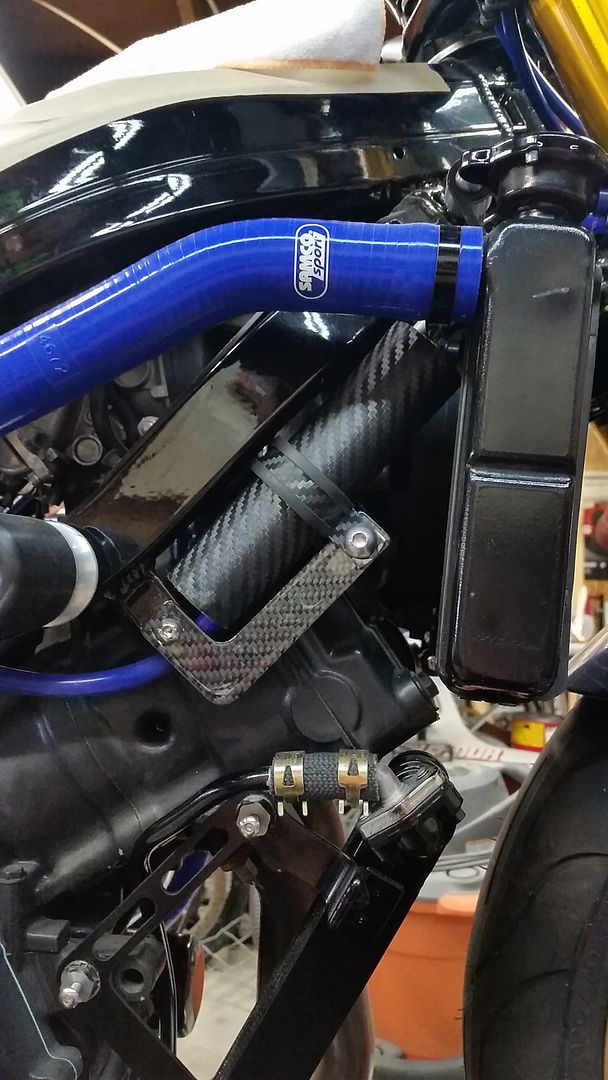
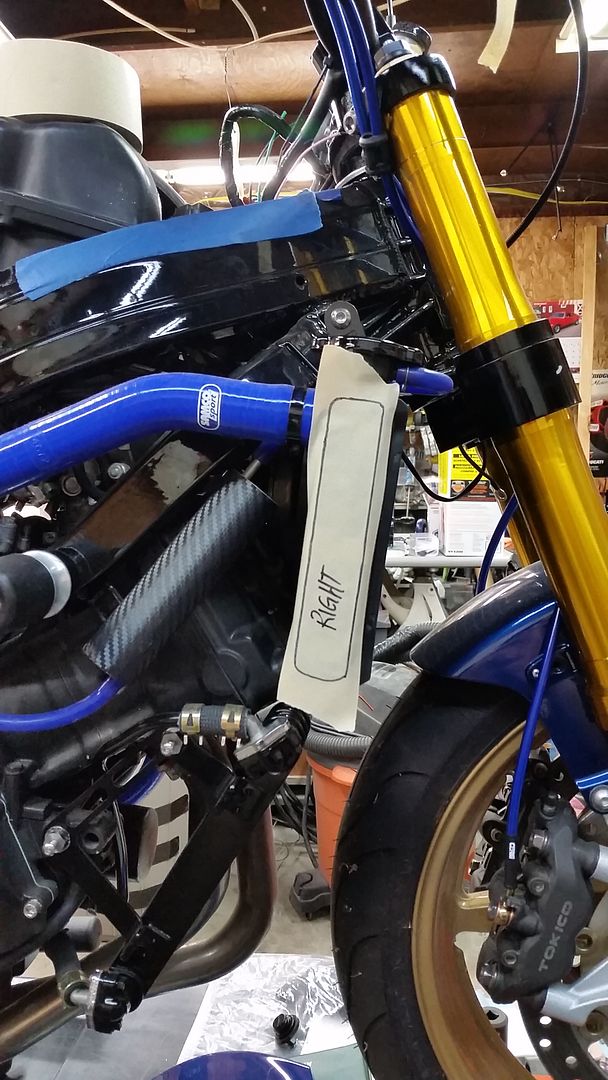
I will be revising the oil cooler fittings to remedy a small leak, and I noticed a bit of a coolant leak on the last day of TMAC that appears to be coming from the small pipes in the "V". Might be the hose clamps for the Samco hoses settling in after a few heat cycles? We'll see.
I'm also in search of a smaller rear brake caliper.
After that, it may just get a "for sale" sign...
-
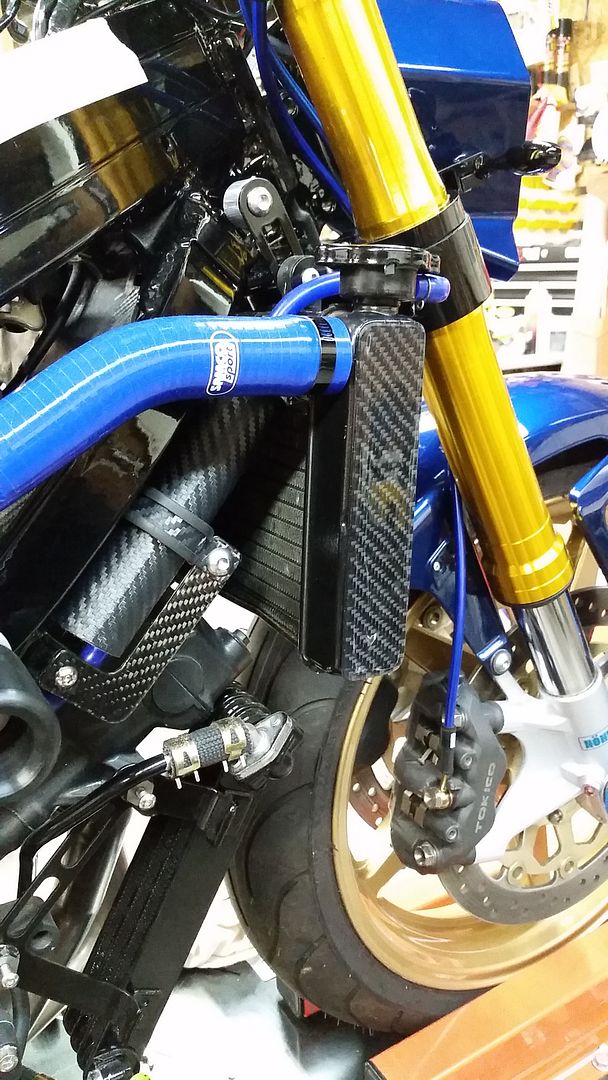
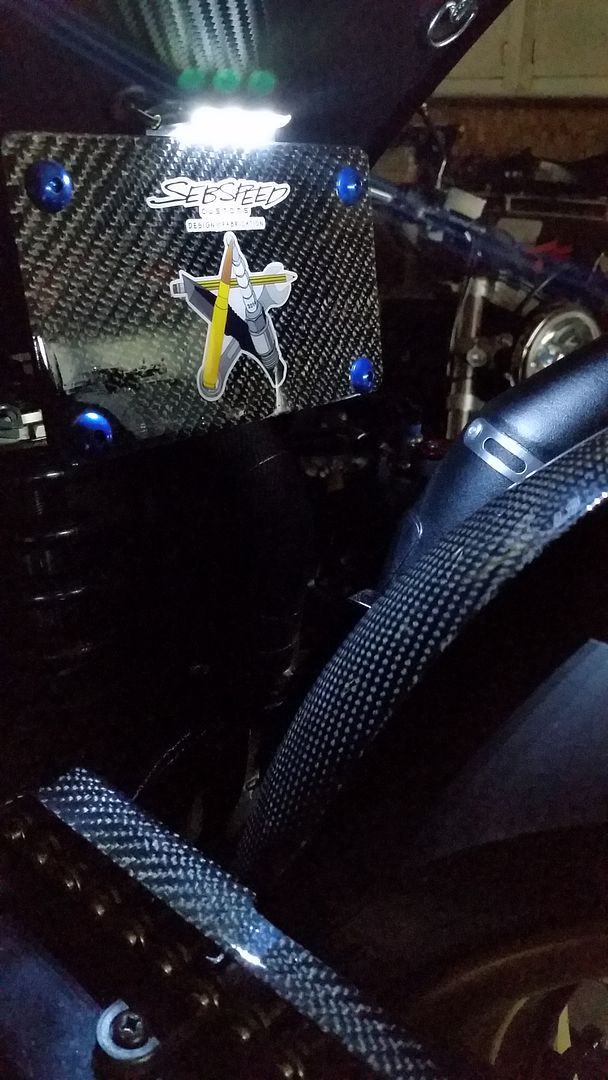
Another quick piece of carbon sheet contrasts nicely with the vinyl wrapped overflow cannister and holder:
Yet another became a pair of radiator end caps.
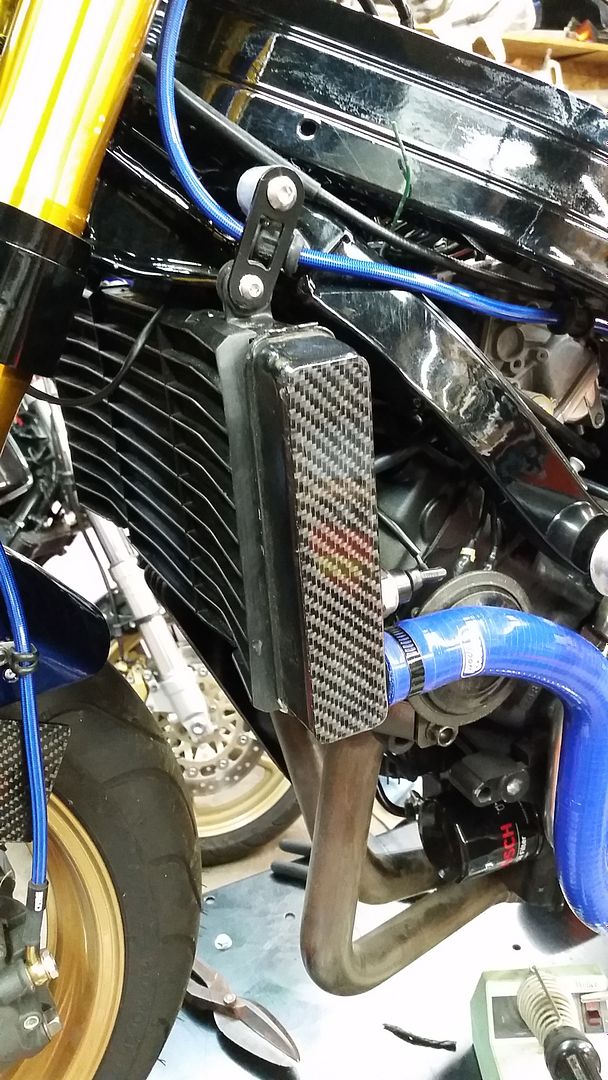
Choke was moved to the thermostat bracket, choke is from an RC51 iirc.

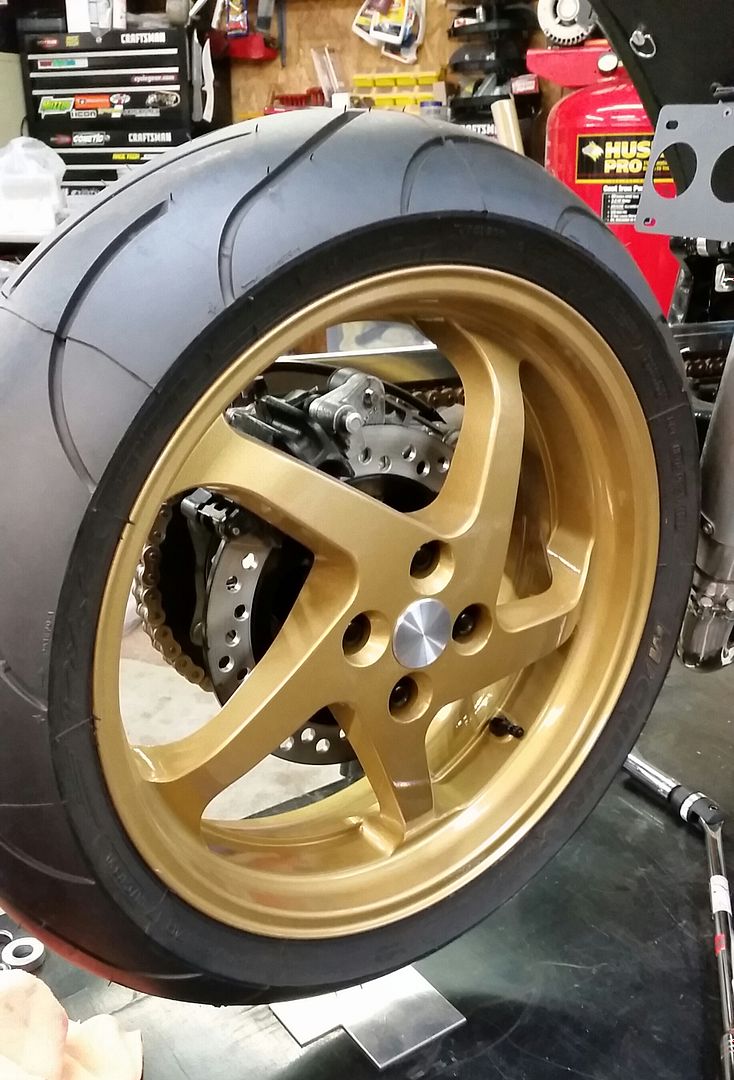
Wheel plug was wrapped in carbon vinyl, lug nuts are black Civic parts.
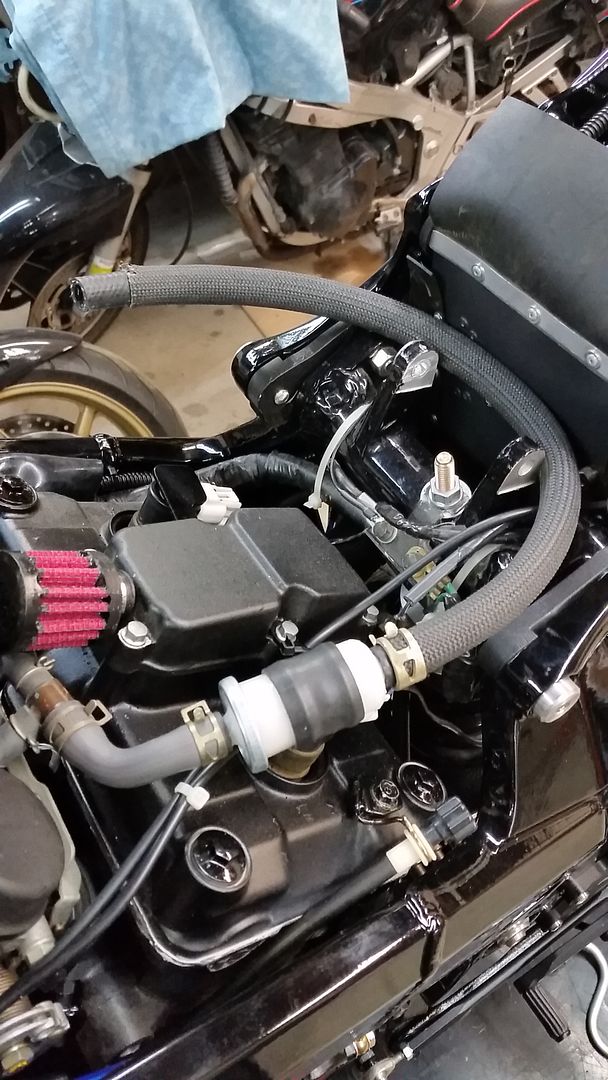
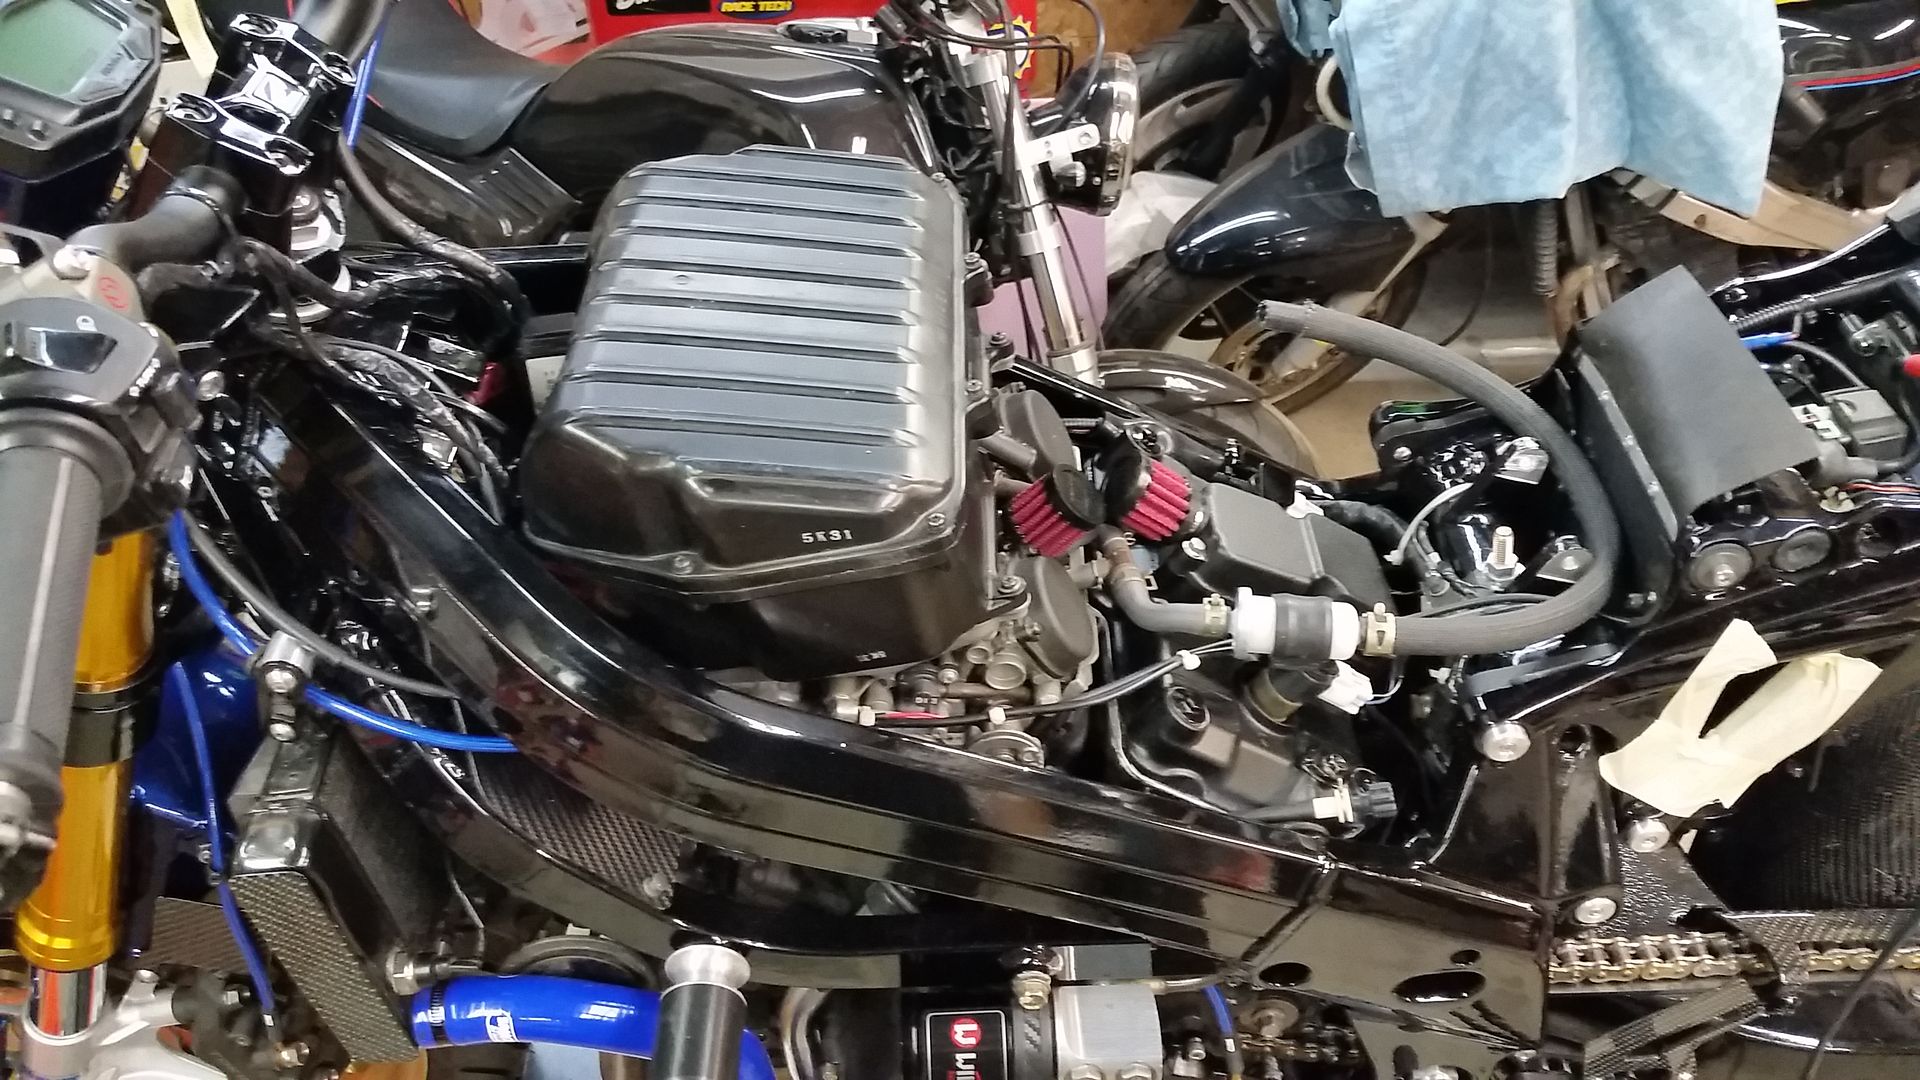
Secondary air filter was eliminated to help clear the harness on the right inside frame rail. It was replaced with a UNI crankcase breather filter. The actual crank breather hose that fed into the airbox from the rear cylinder head was also replaced with the same UNI filter.
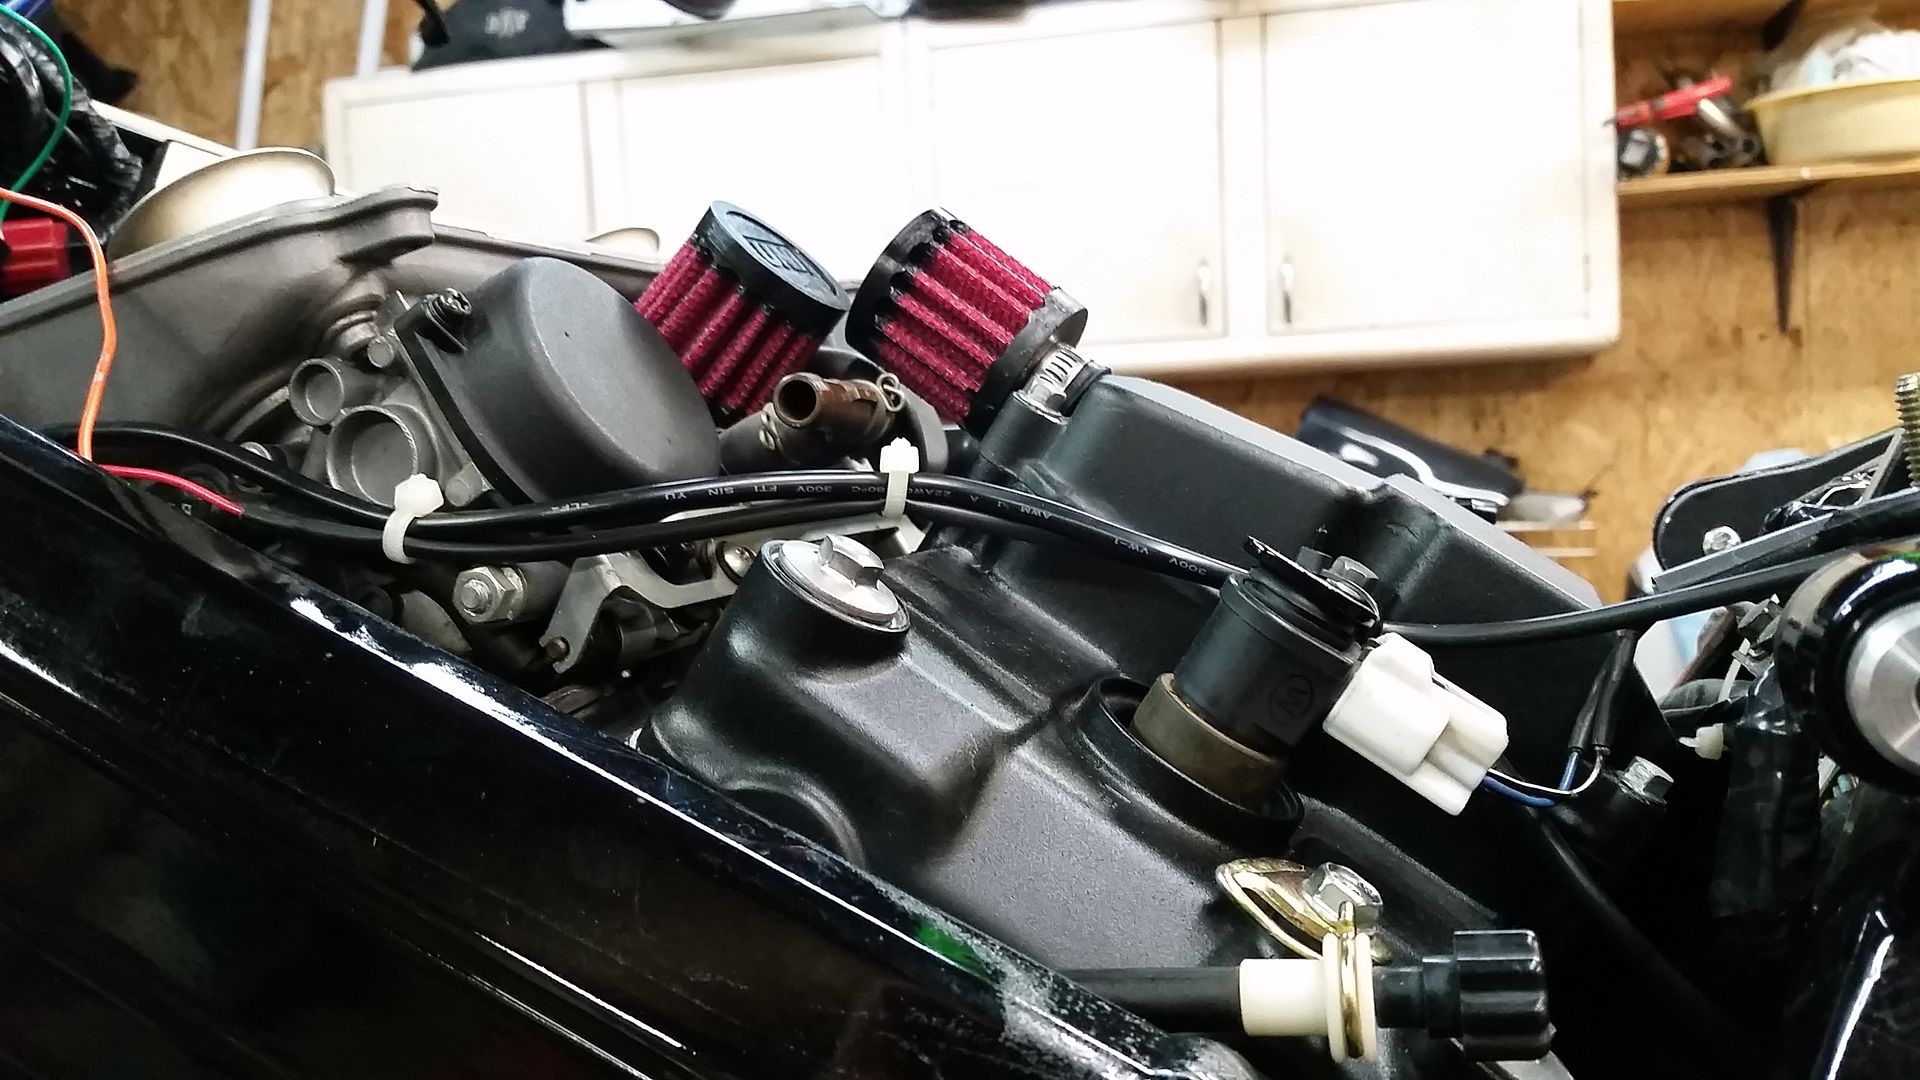
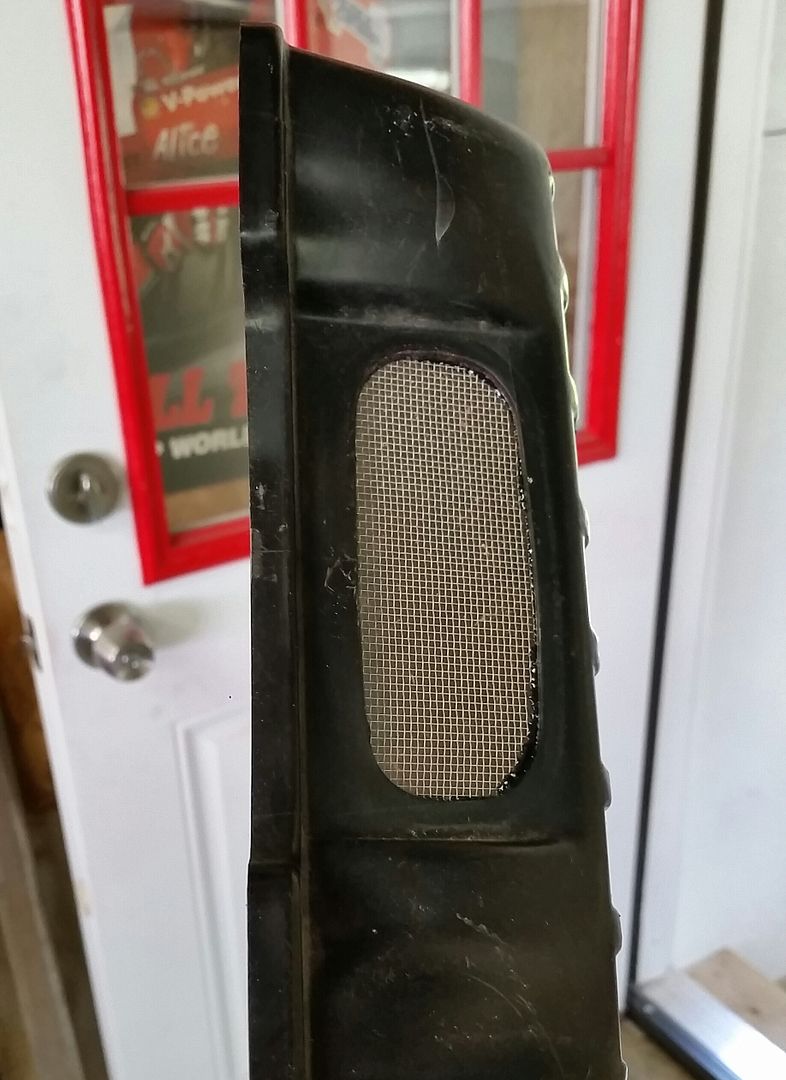
Snorkel was eliminated with some screen
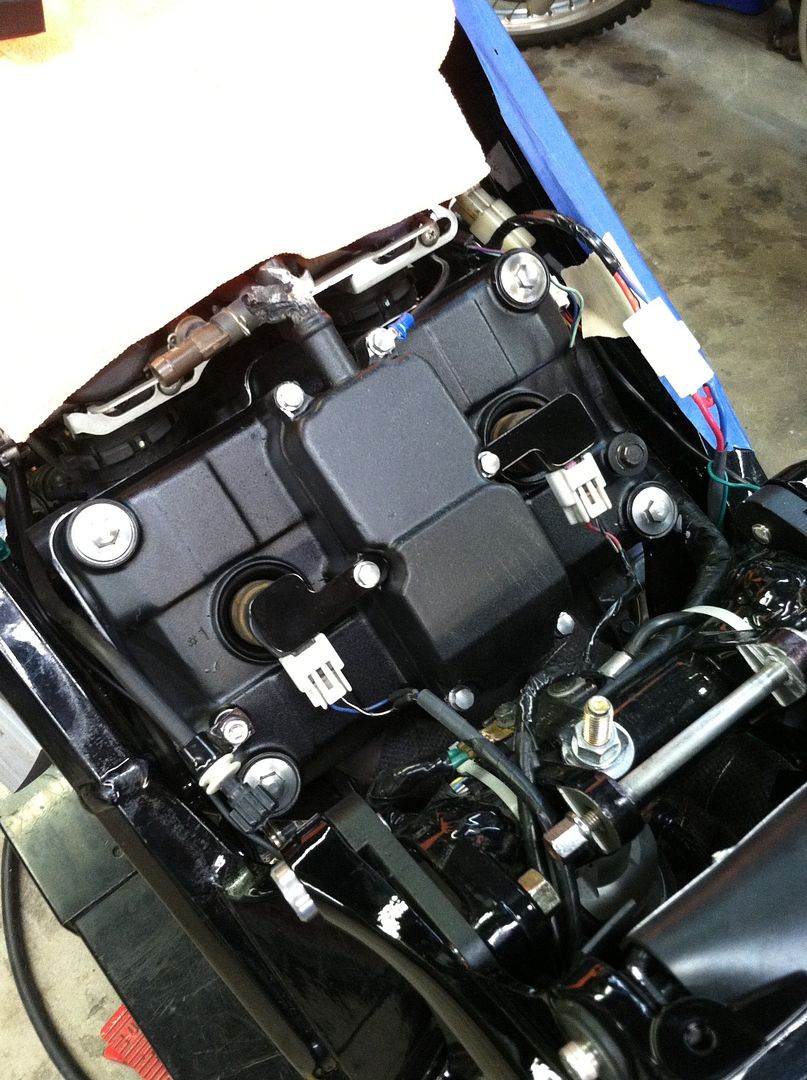
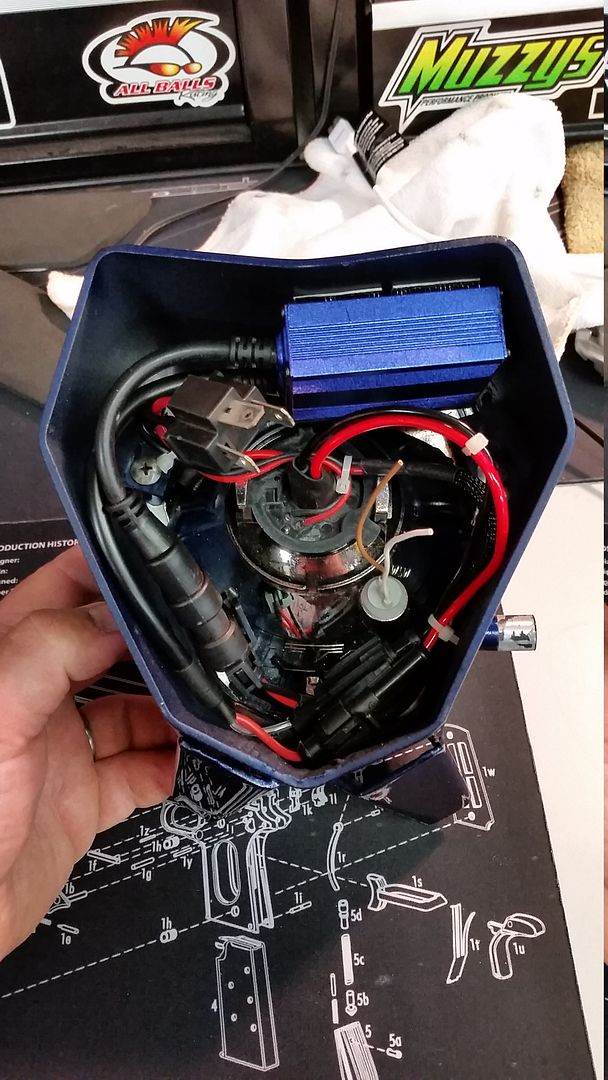
Headlight unit is tidy, all wiring sorted nicely.
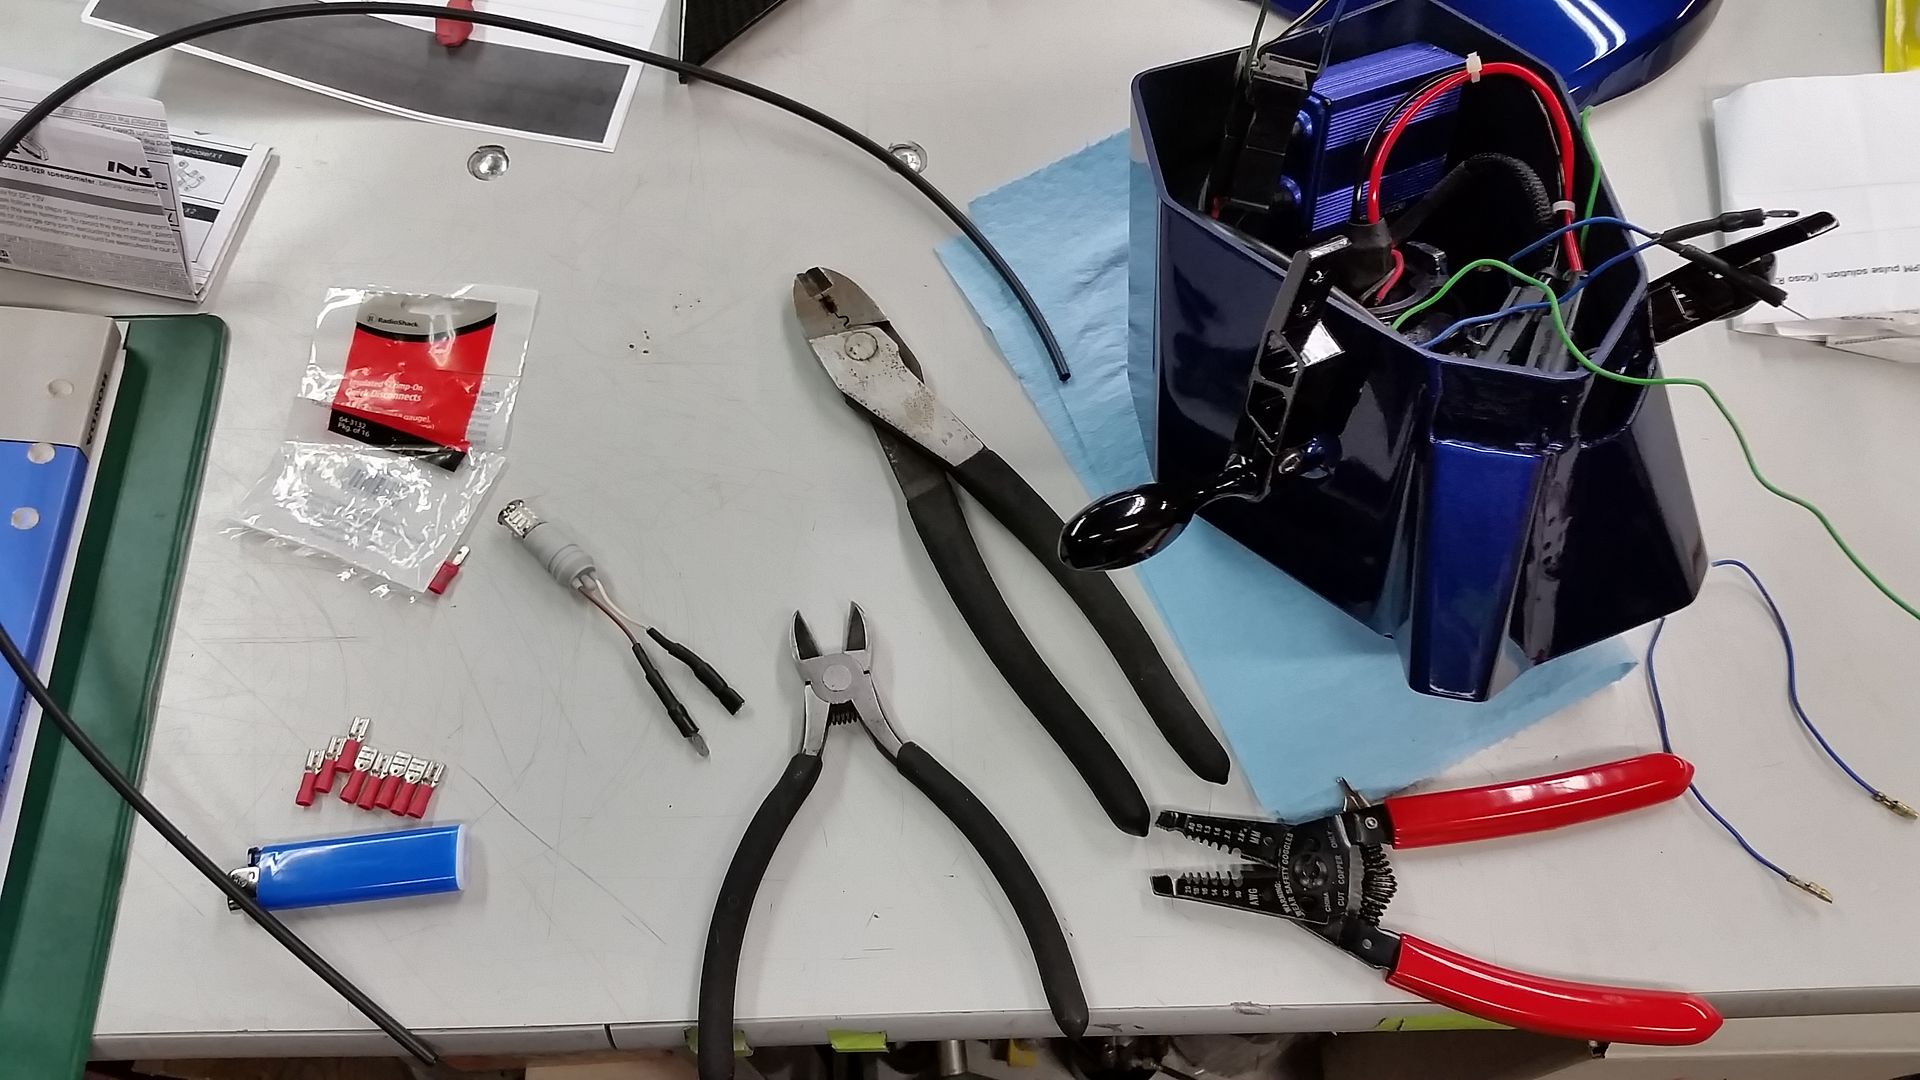

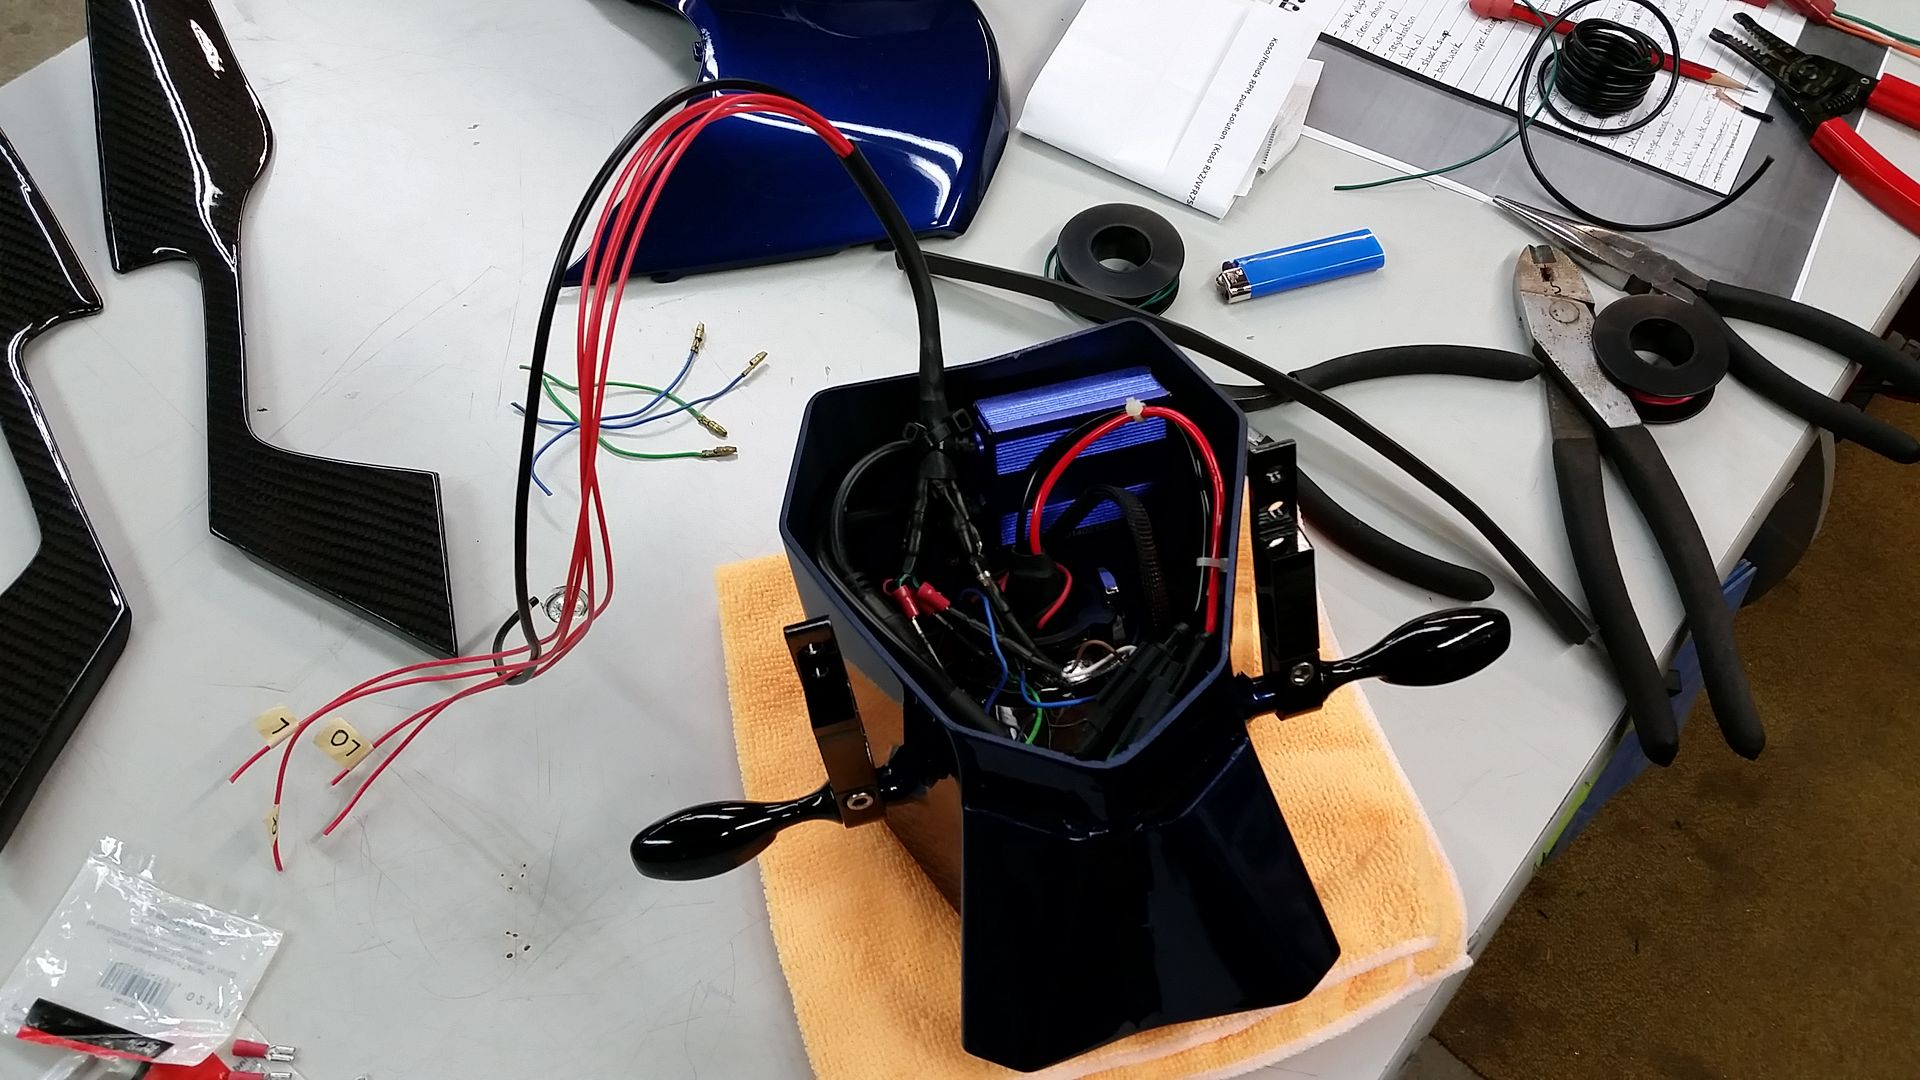
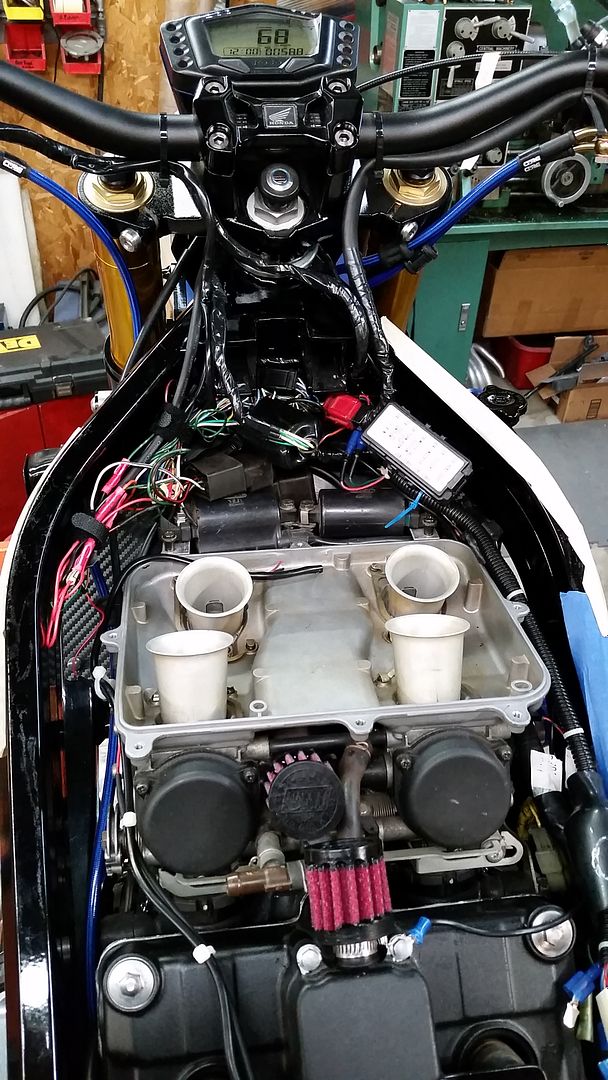
Most of the important wiring is gathered up in front of the airbox
This is how I test fired the bike
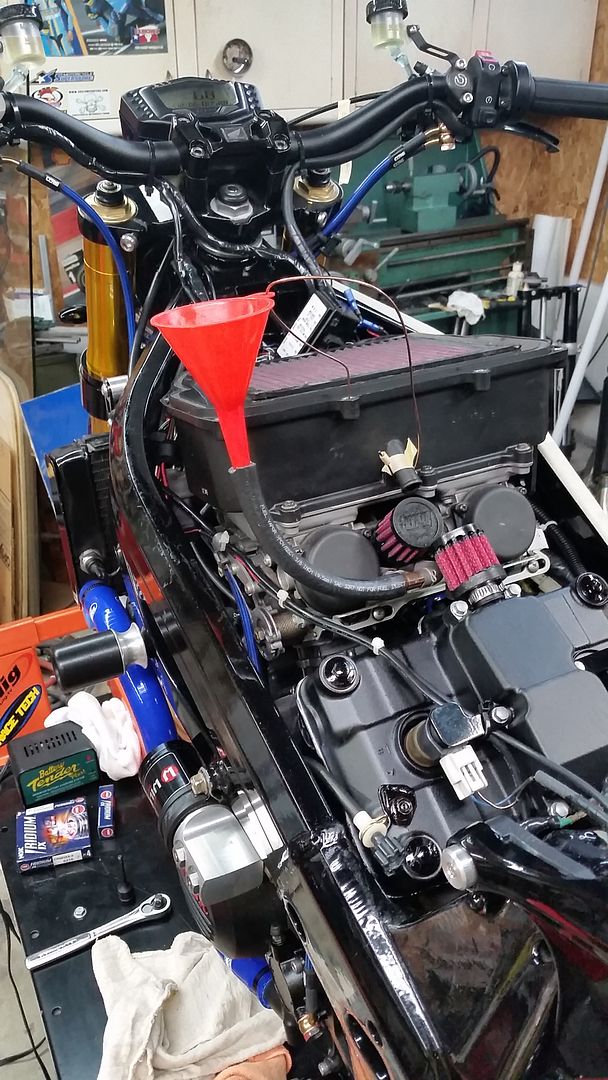
This is the fuel line. The factory fuel pump is gone, it runs on gravity only, through an oem filter.
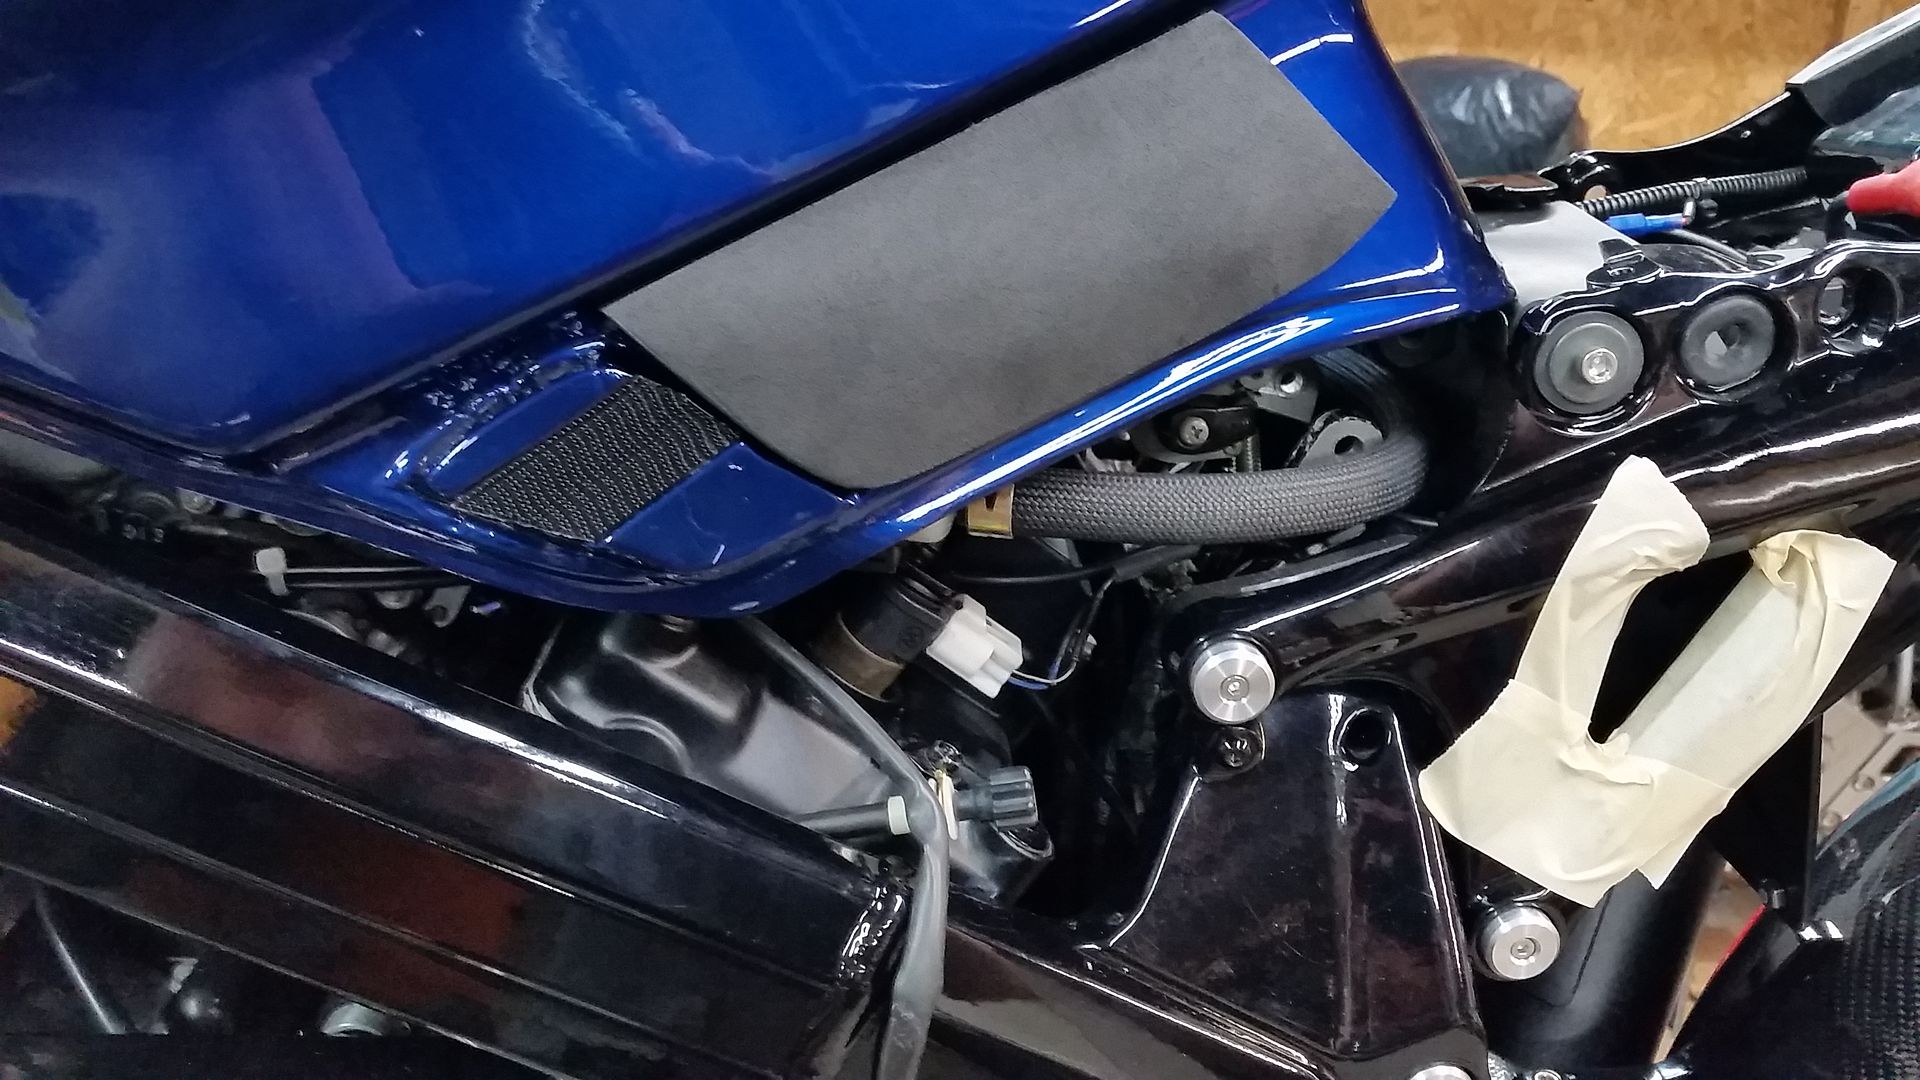
Foam knee pads are glued in place. Also seen here is one of the velcro mounts for the front of the side filler panels.
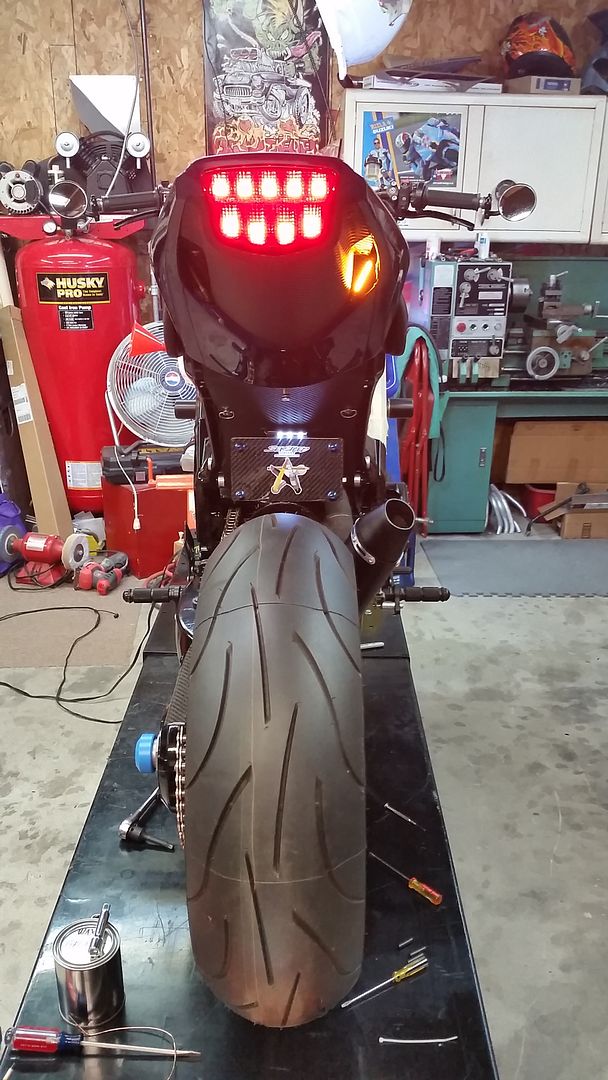
Rear turn signals
-
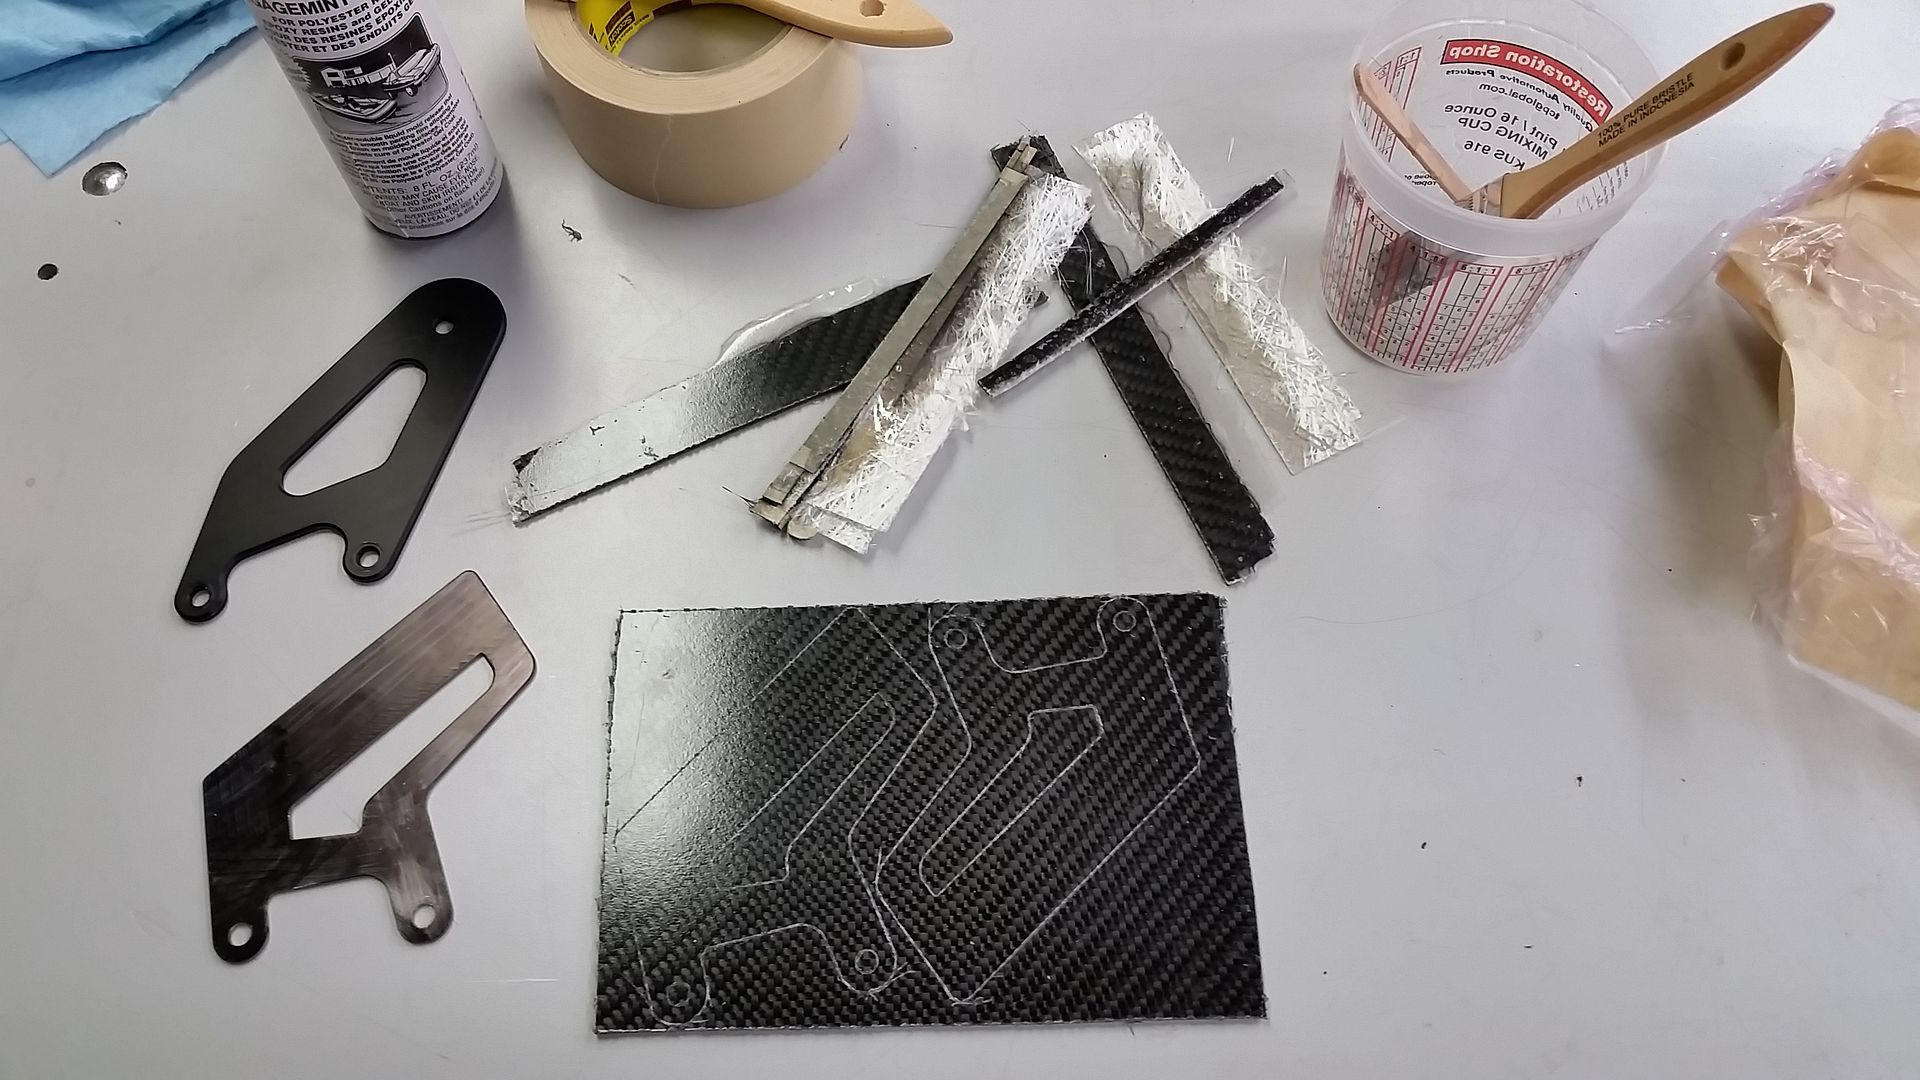
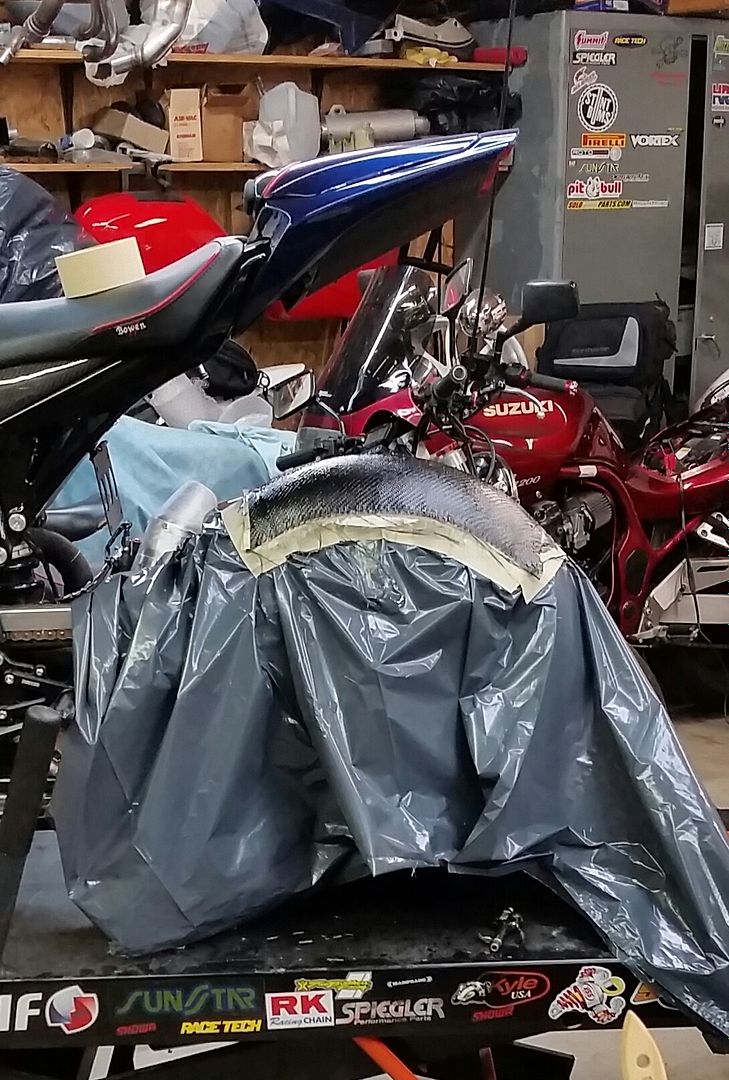
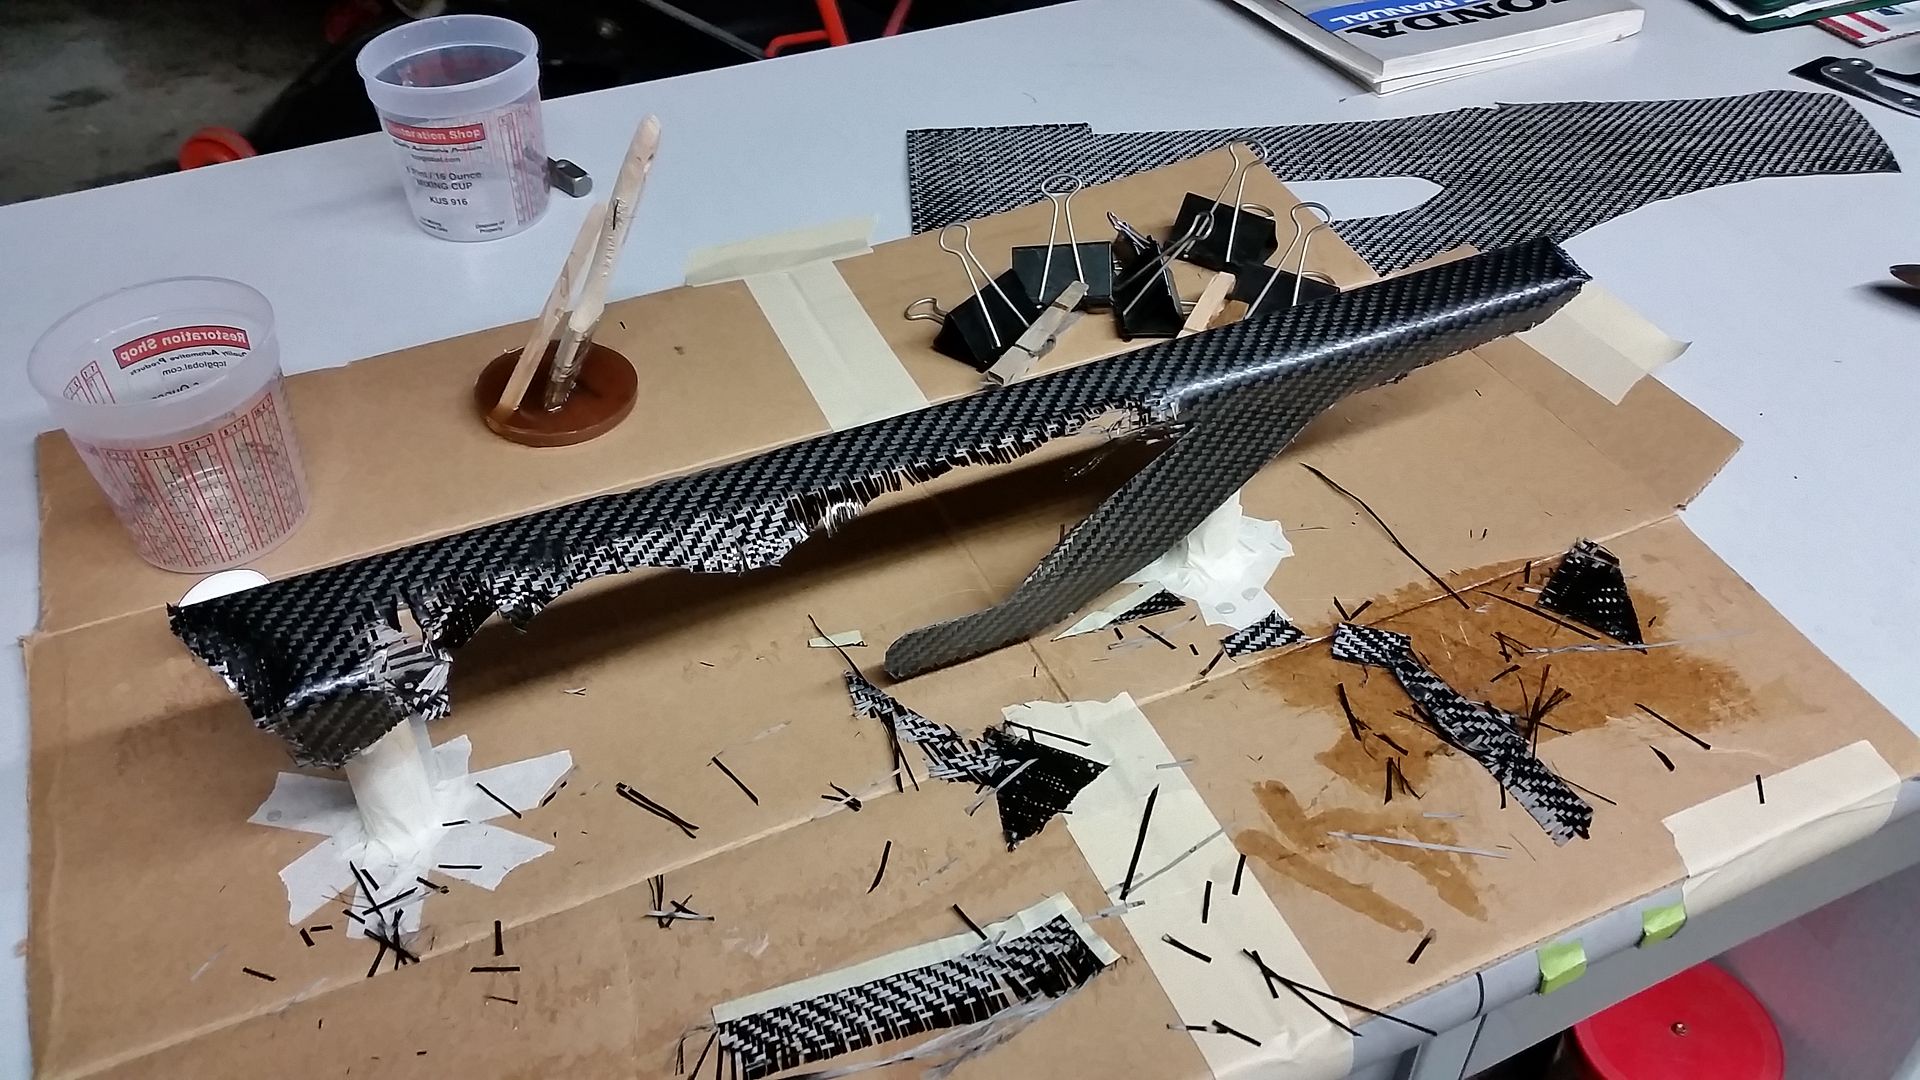
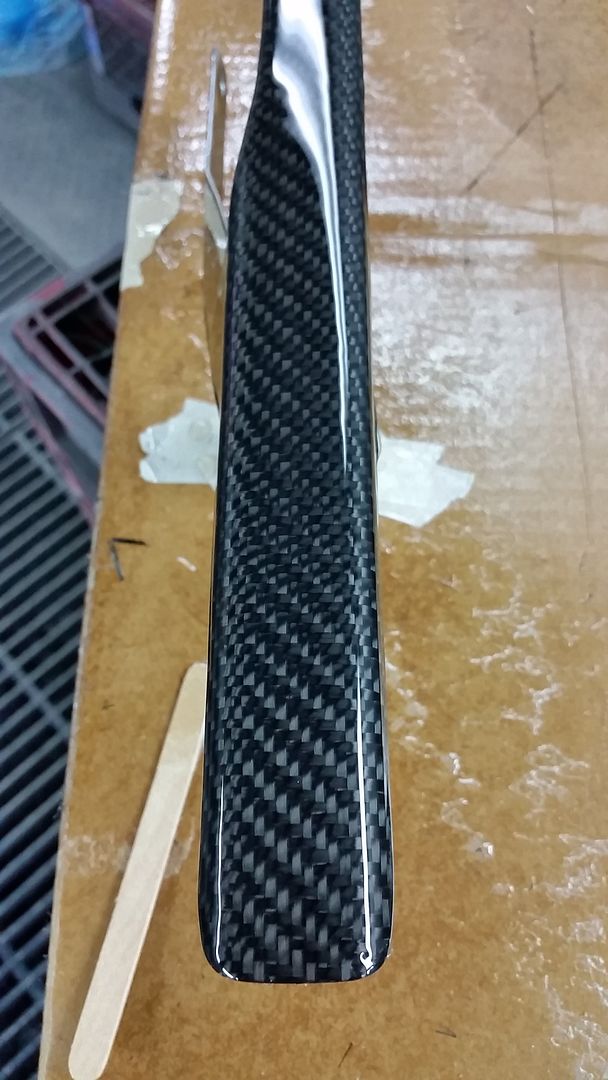
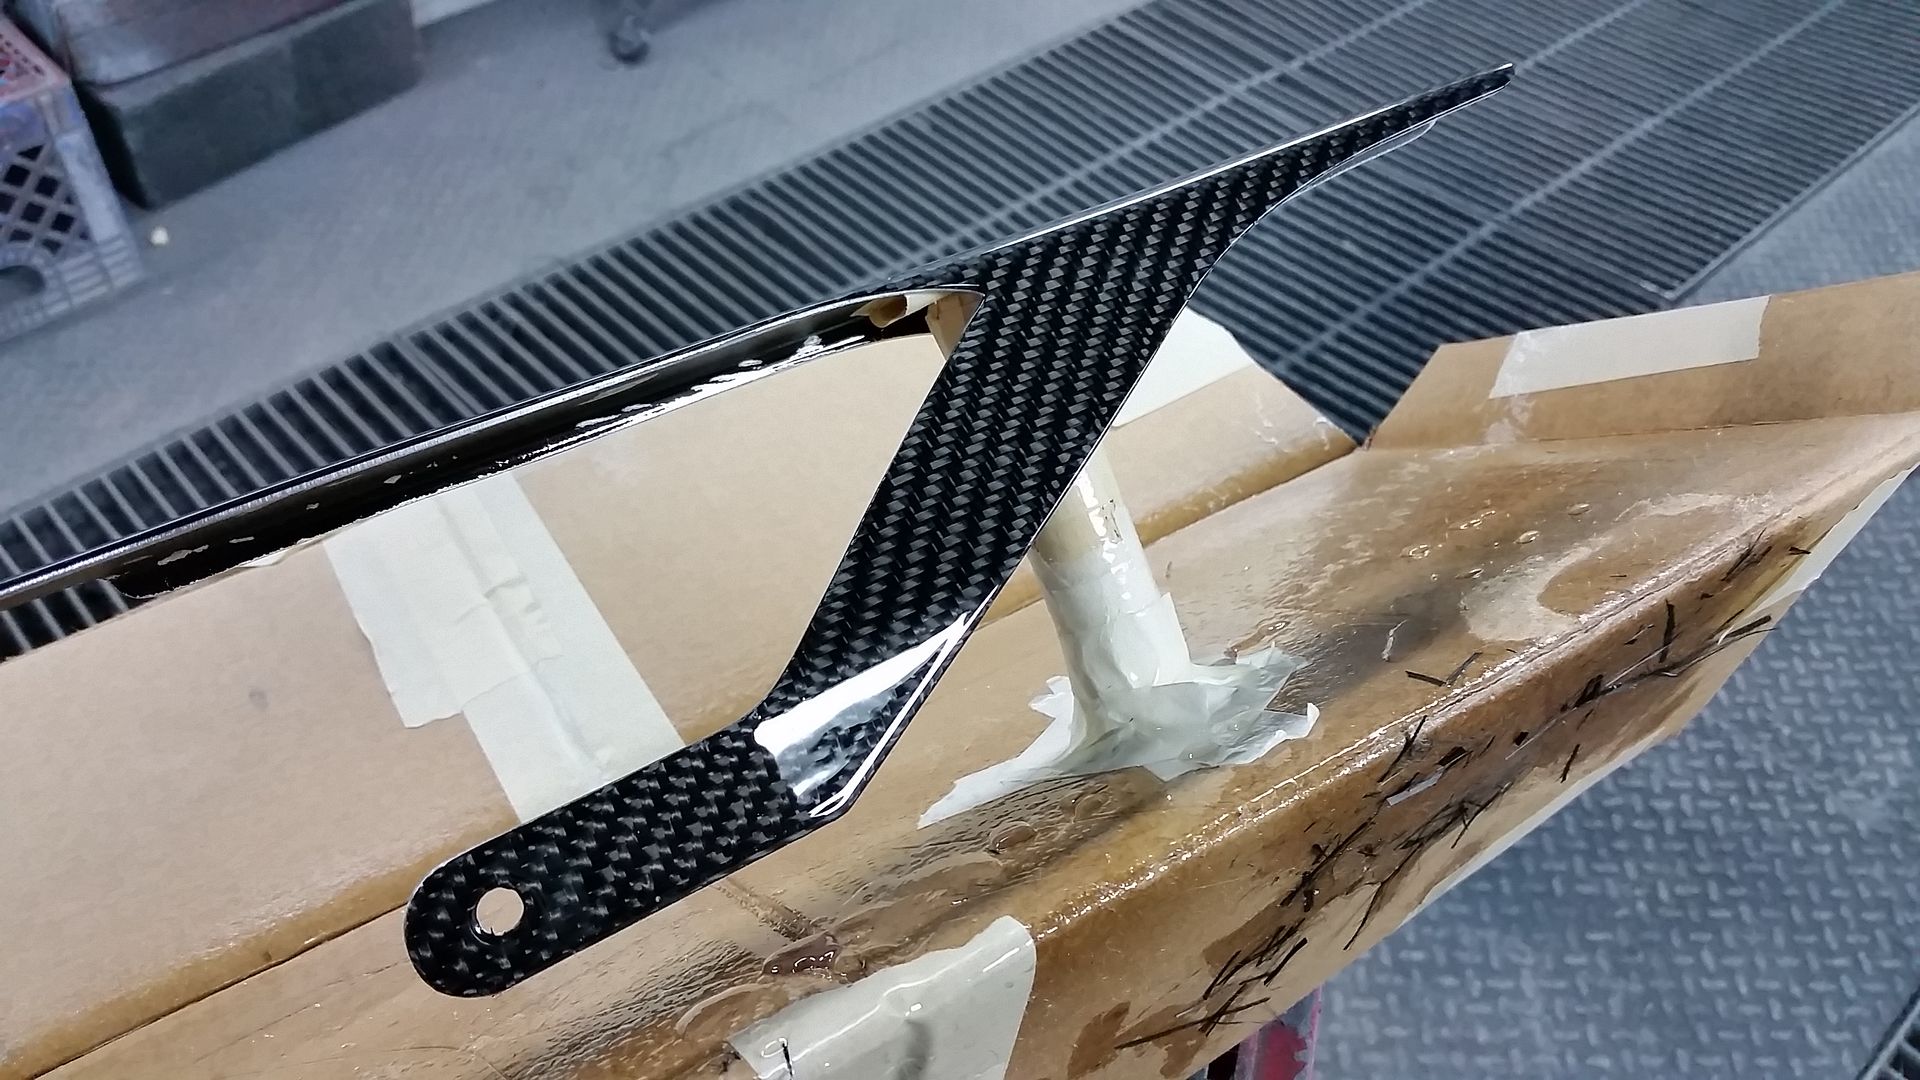
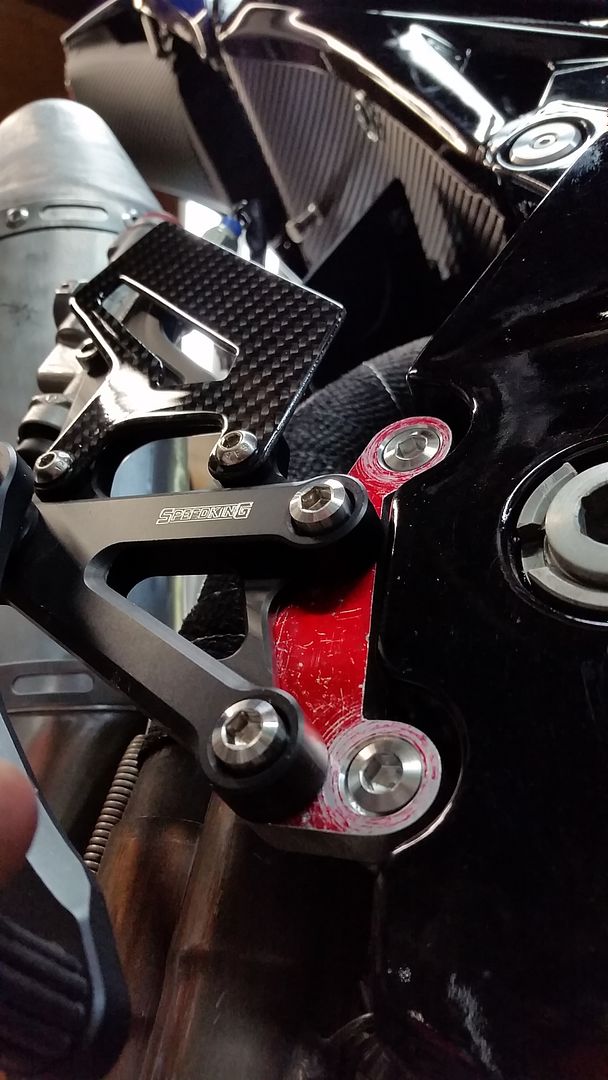
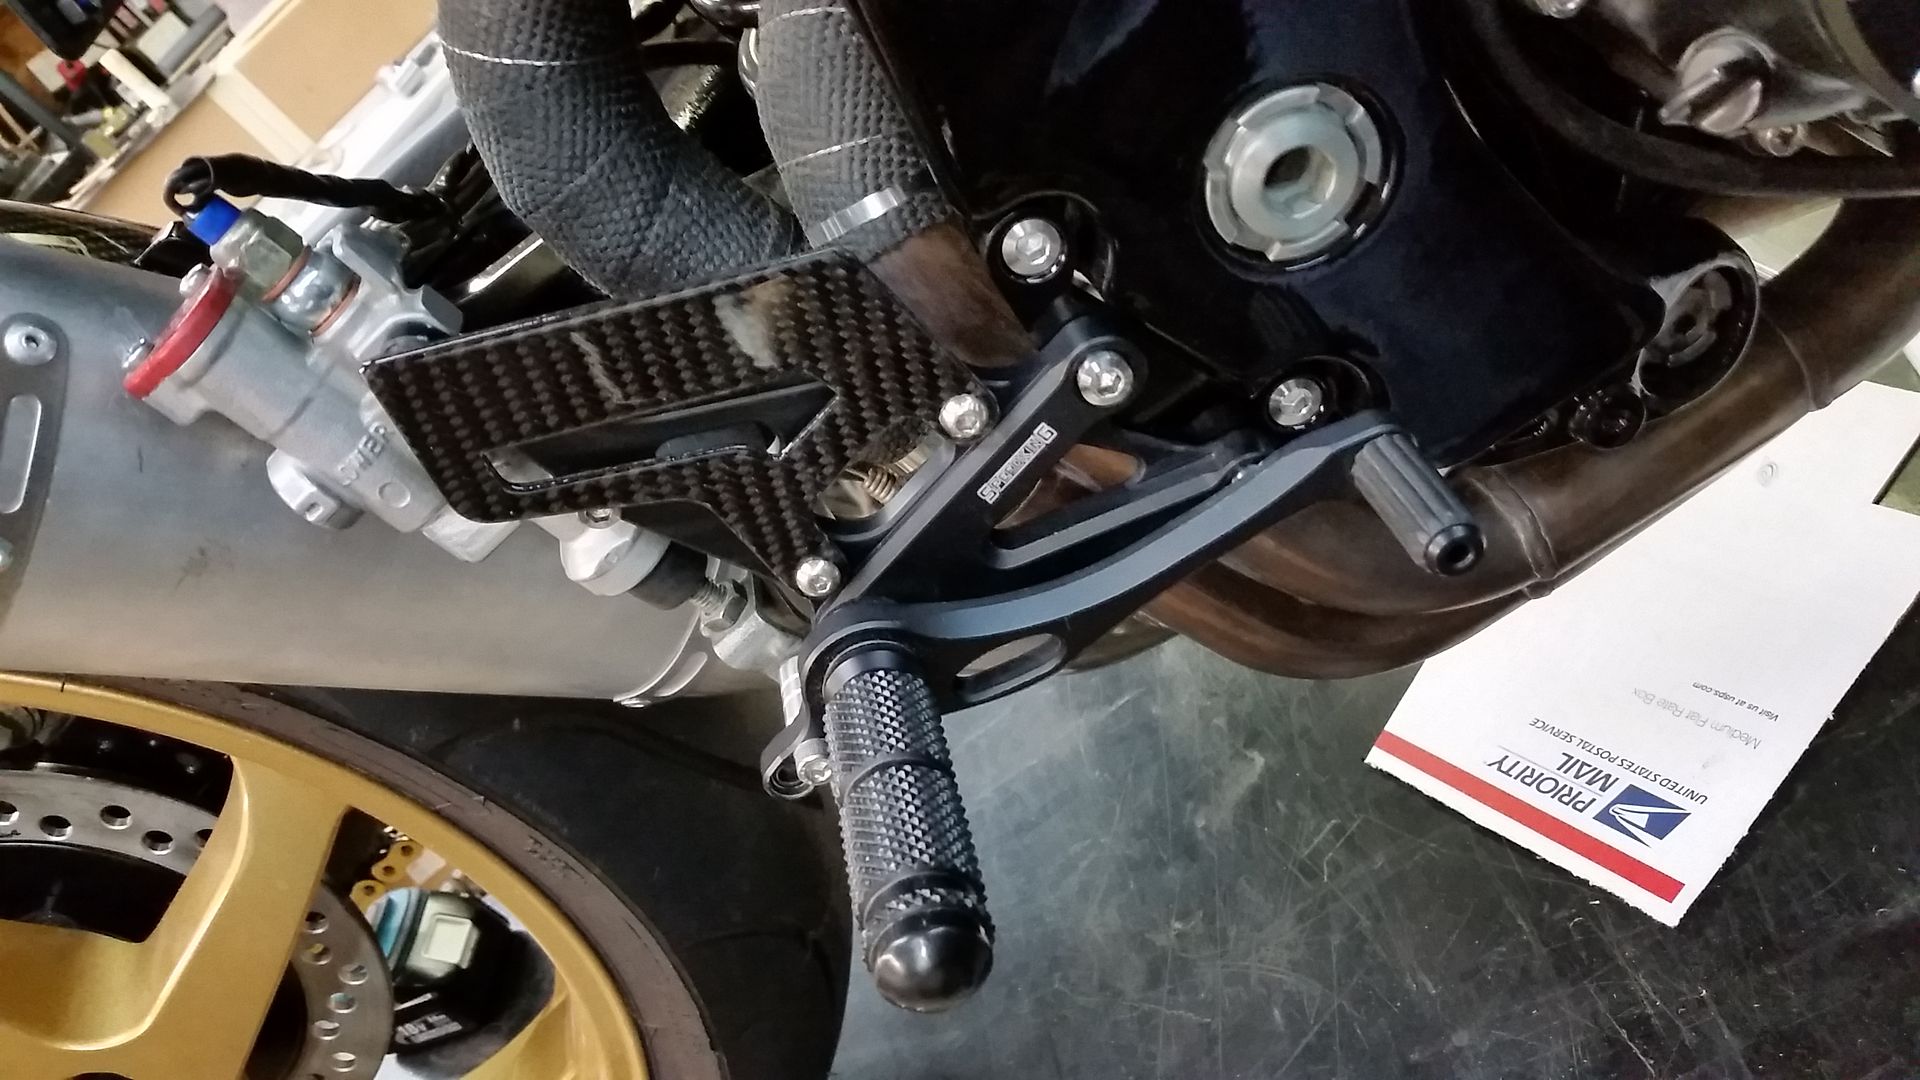
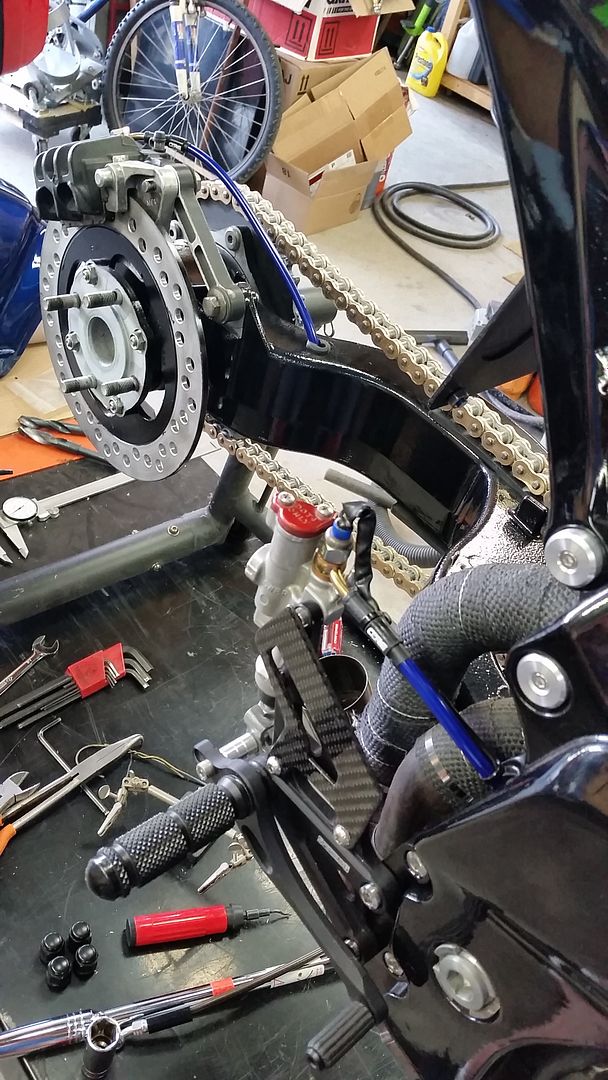
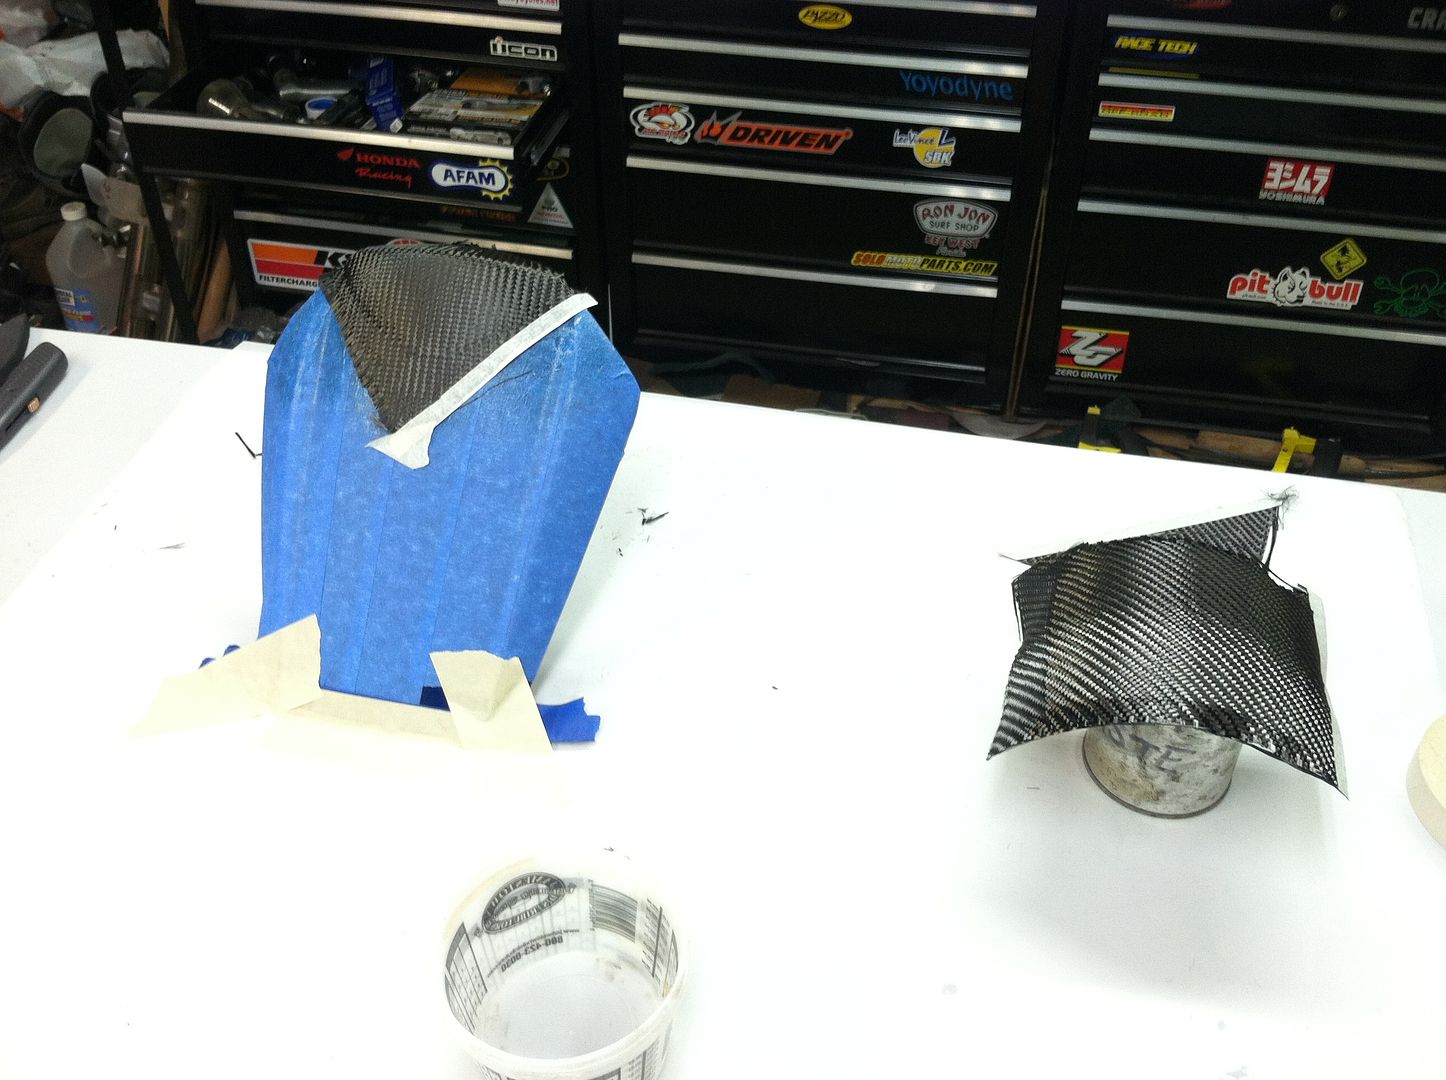
I wasn't happy with the look of the heel guards that came with the rearsets, so I made new ones from a sheet of carbon I laid up using 2 plys of fiberglass mat sandwiched between 4 plys of carbon.
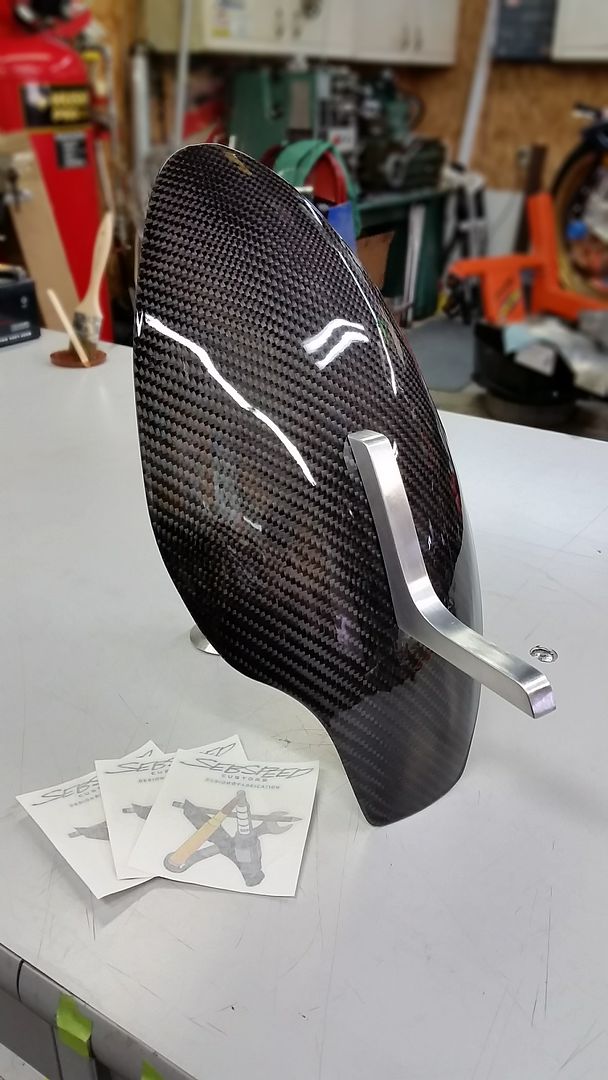
Test fit before clearcoat:

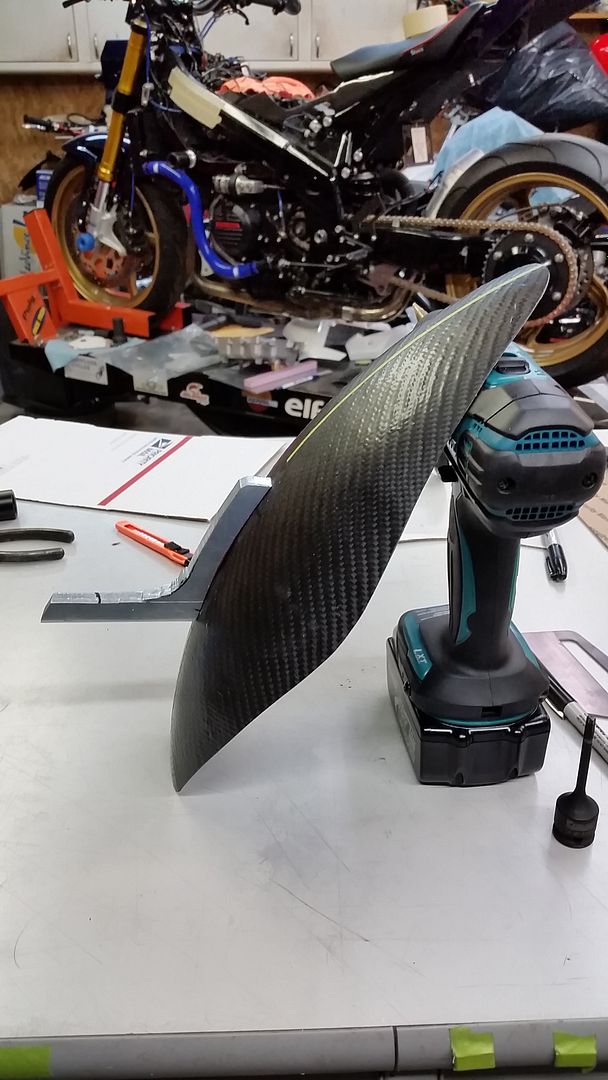
One of my favorite parts on the build... this hugger. Believe it or not, it took longer to figure out the mount than making the mount and the hugger itself.


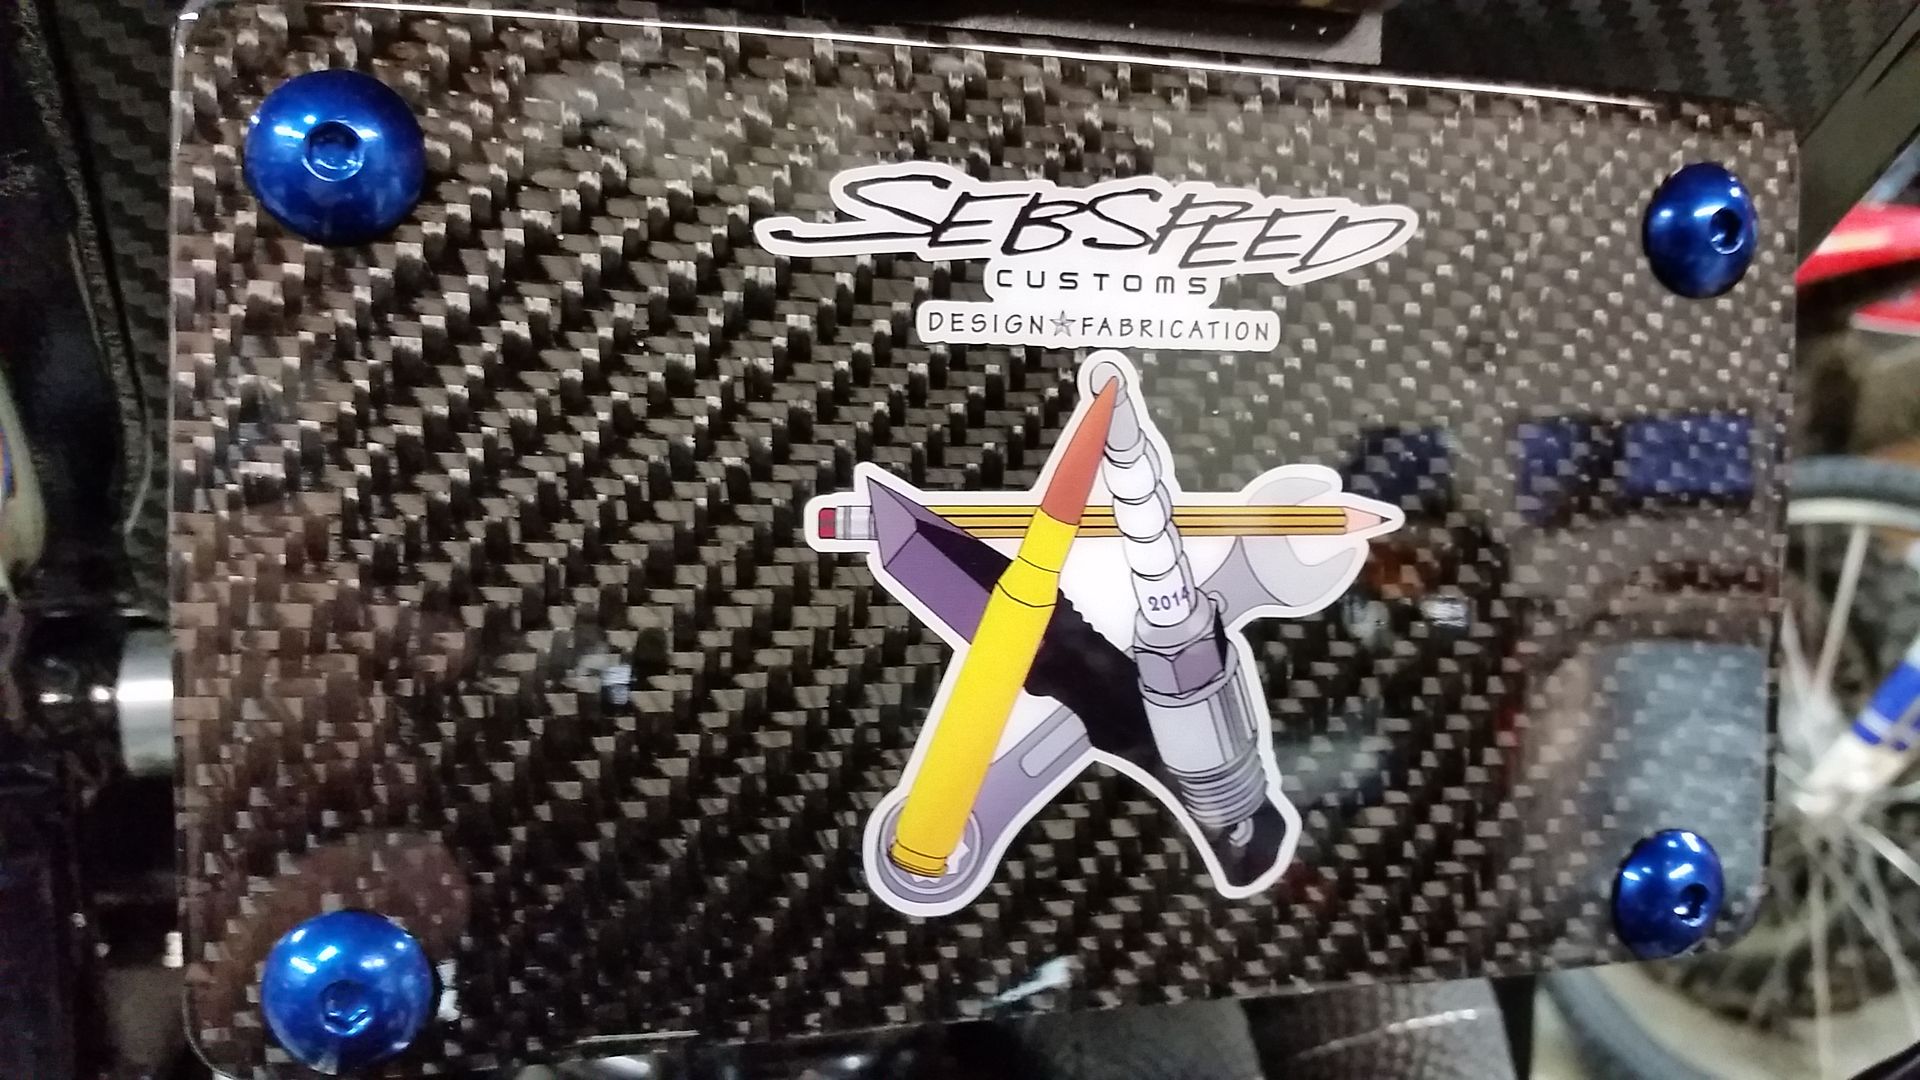
Another piece of carbon sheet became a fake license plate for the photo shoot
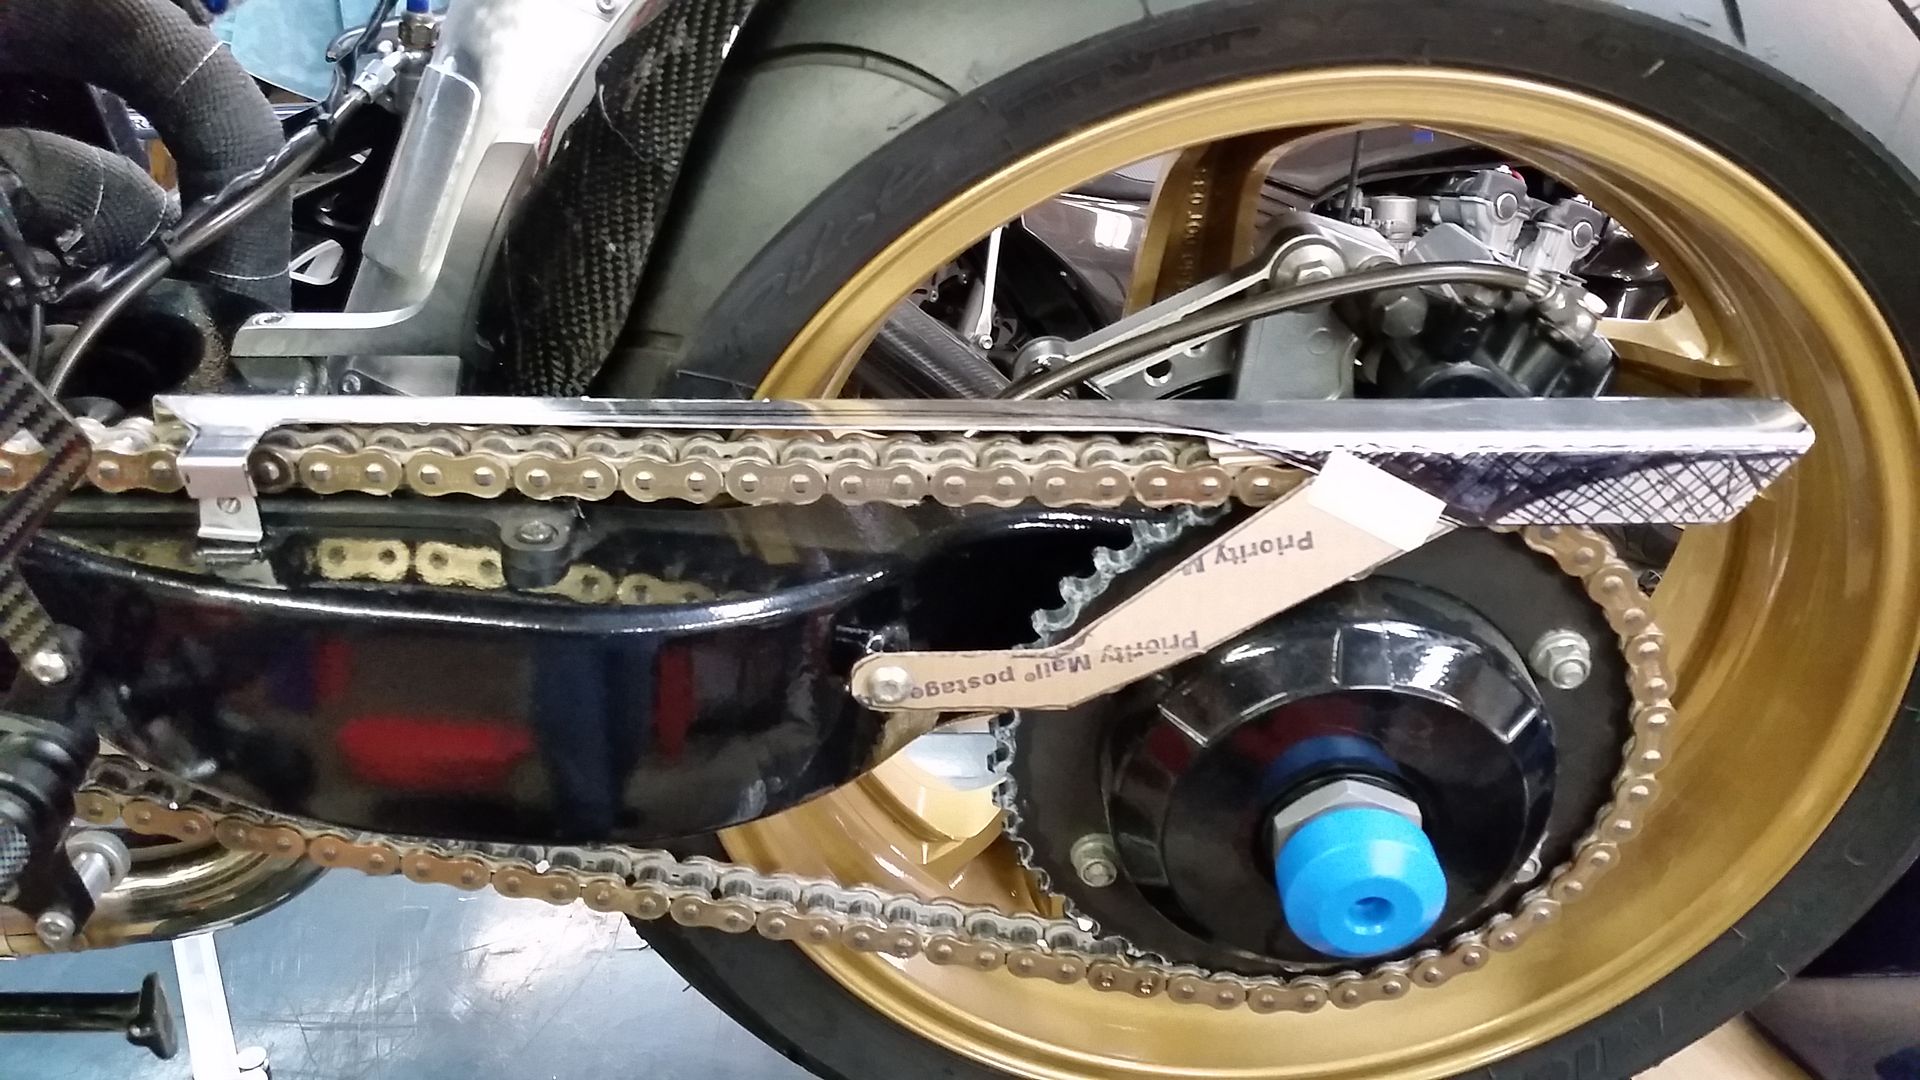
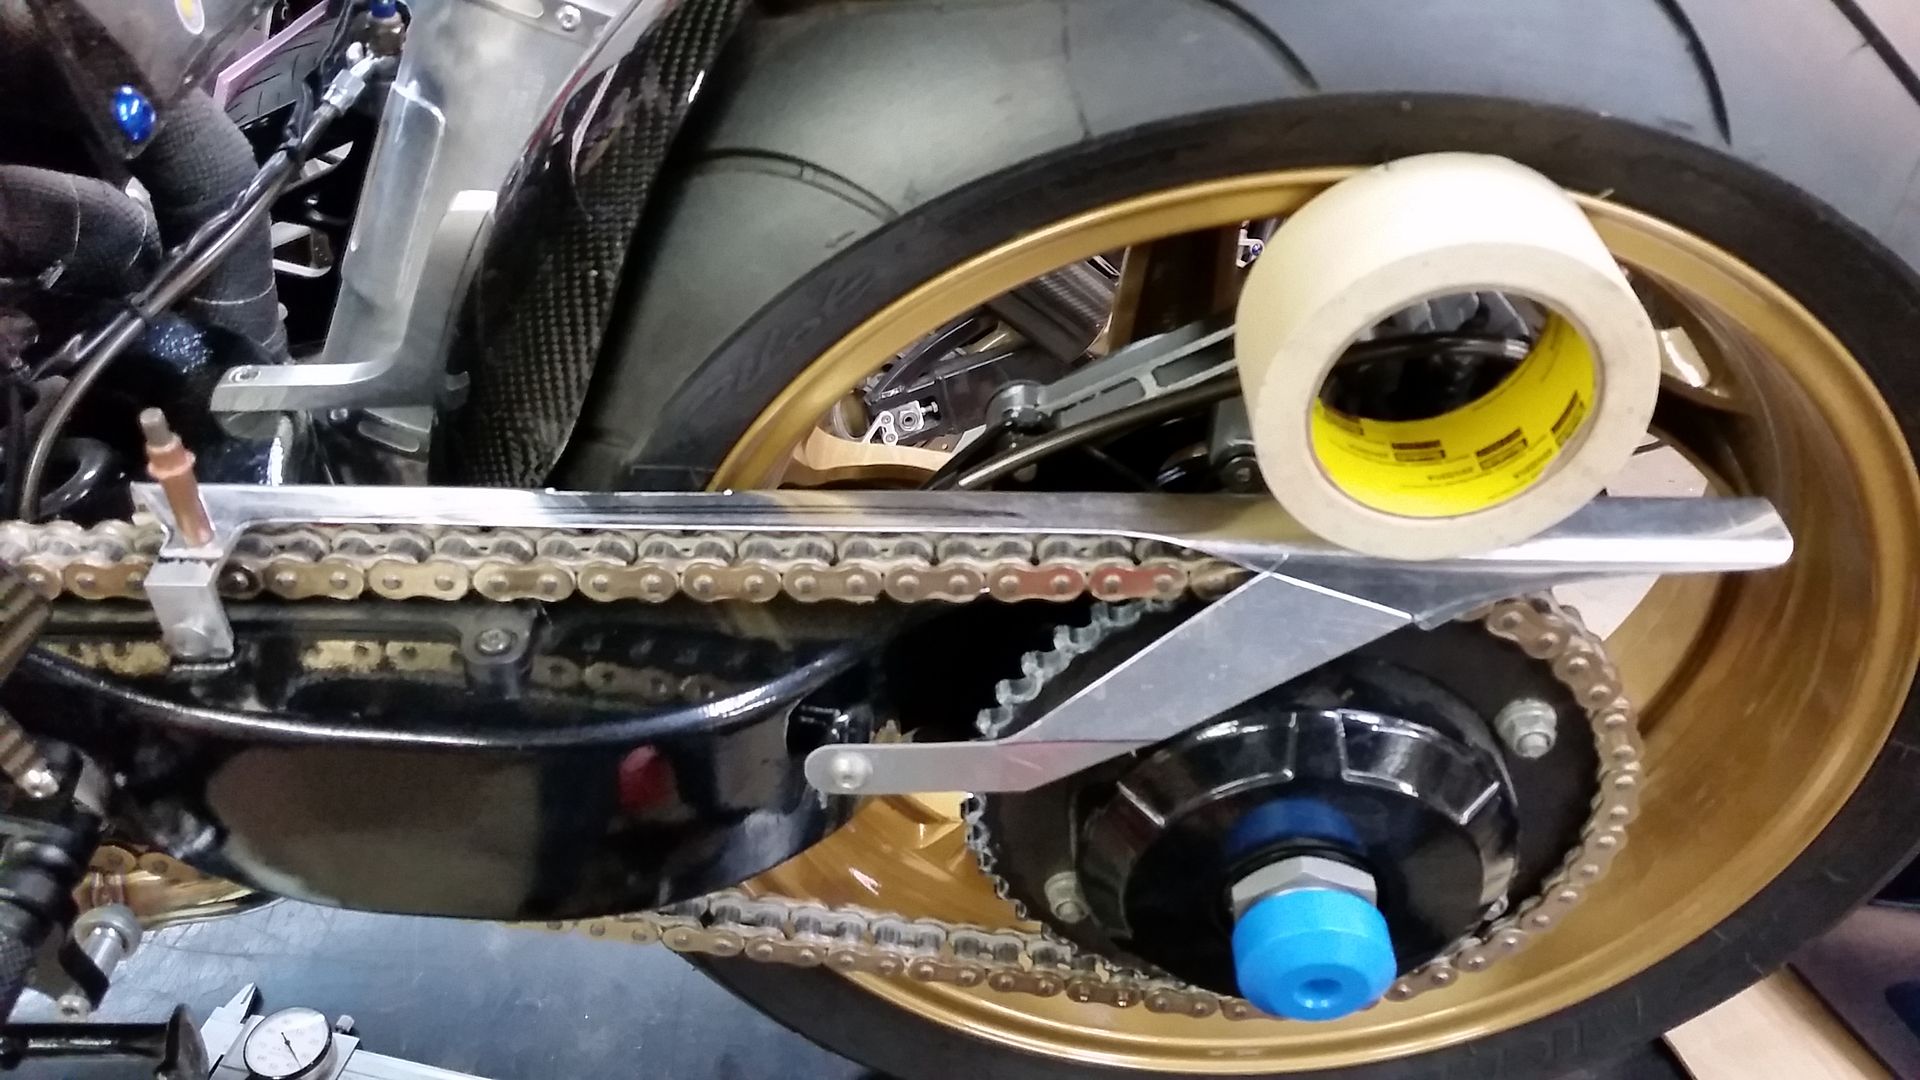
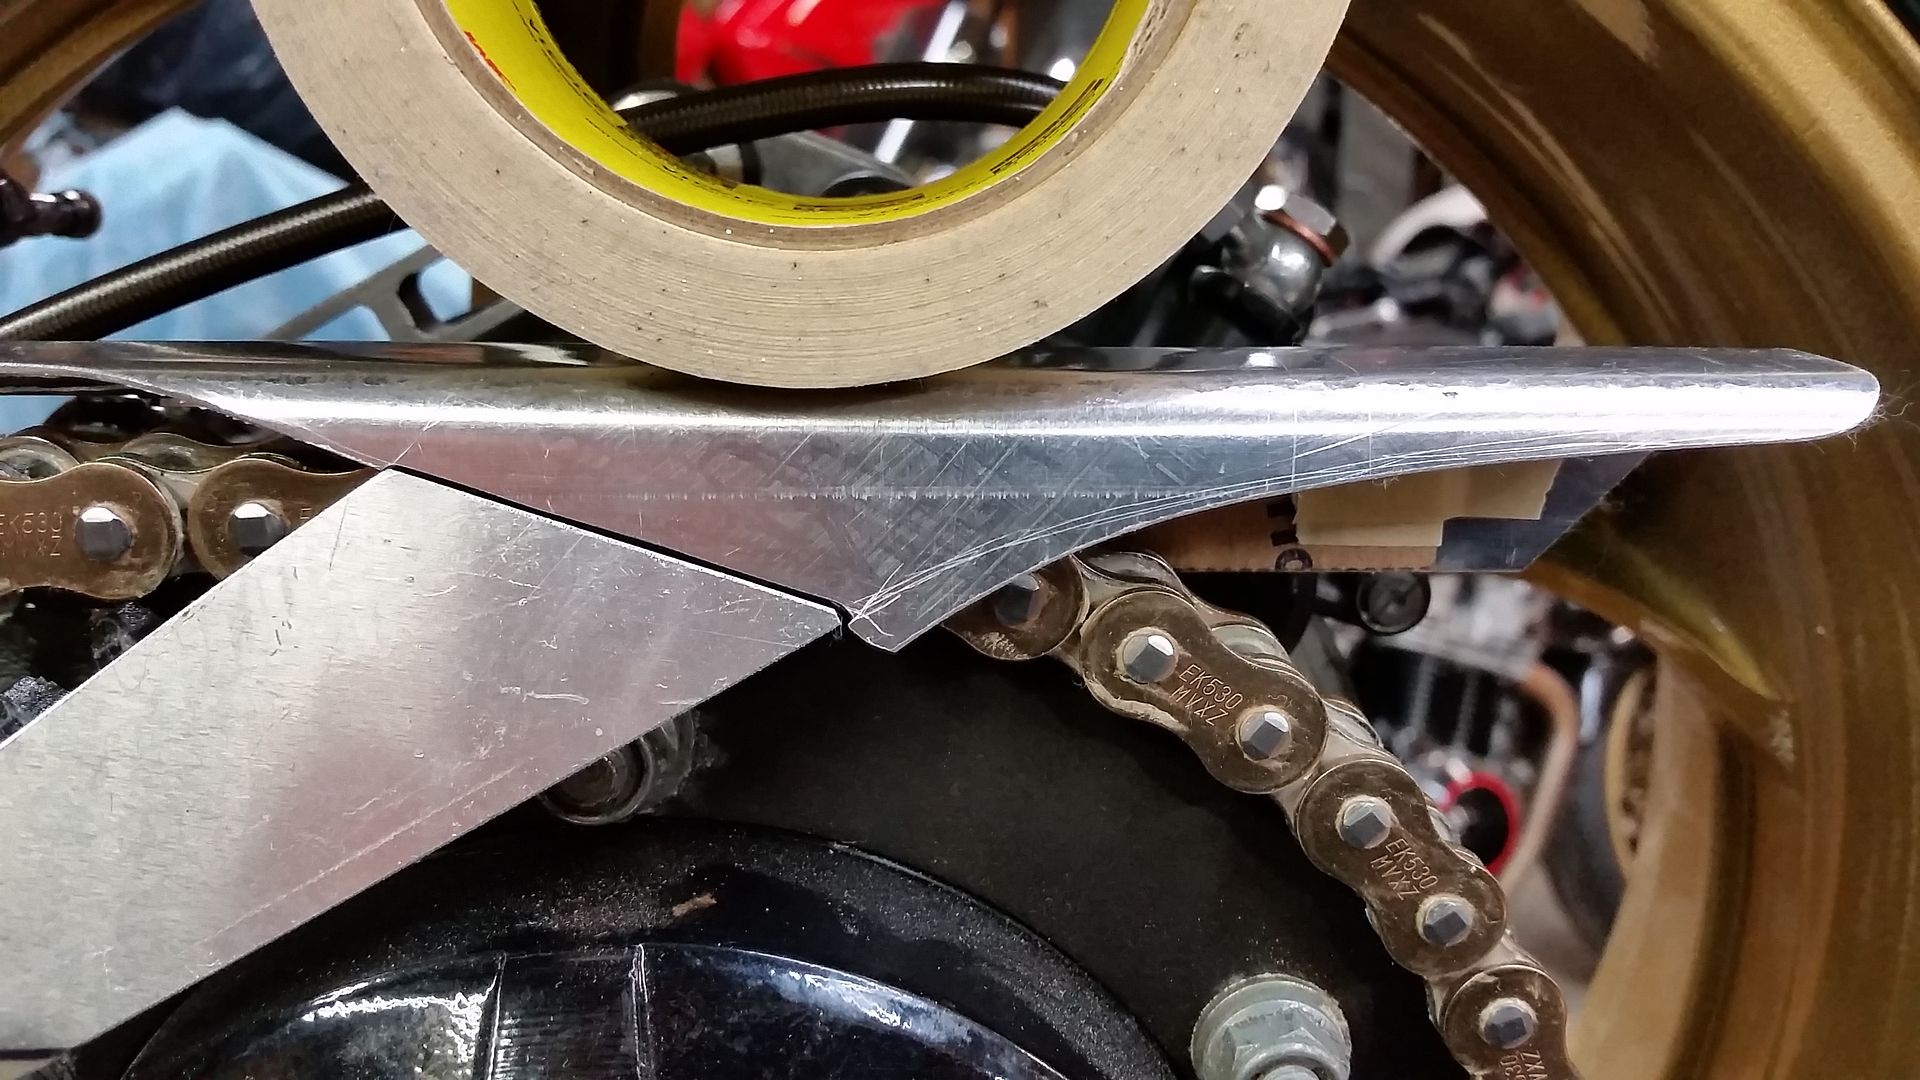
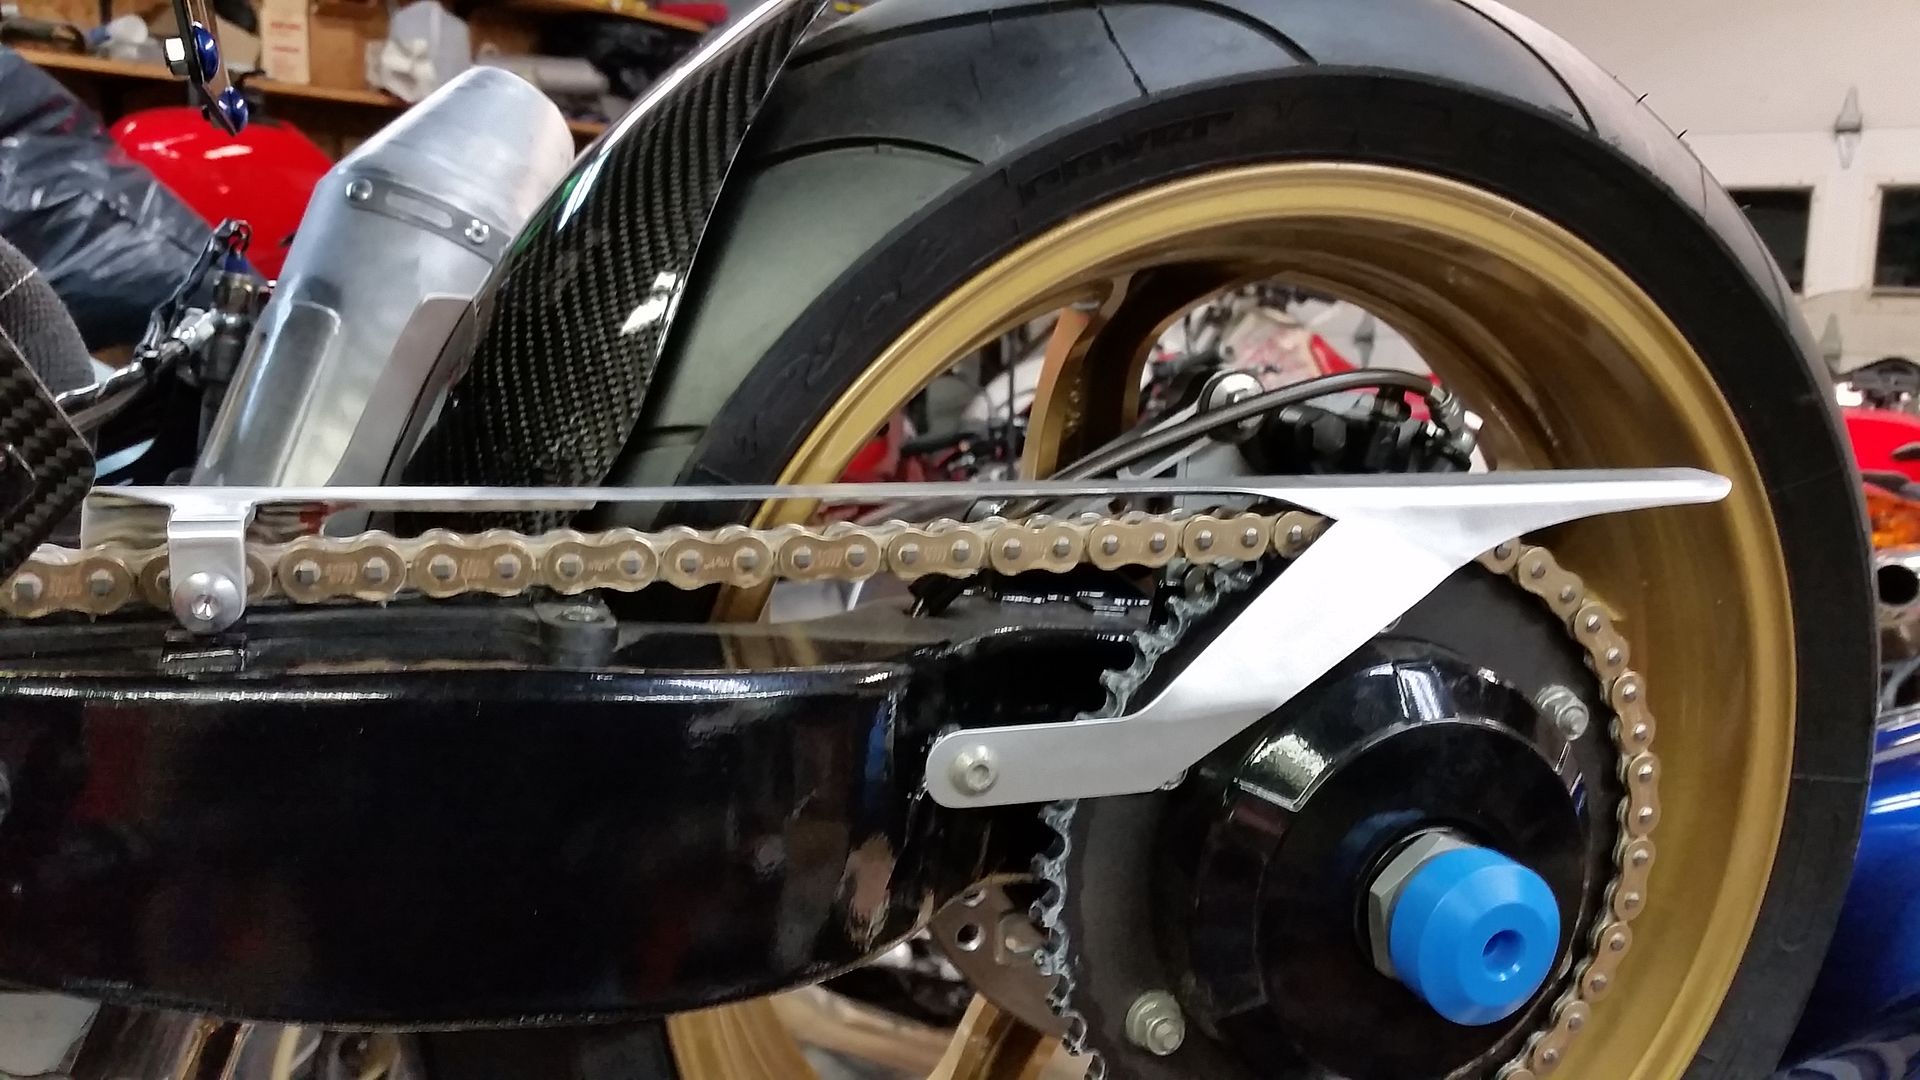
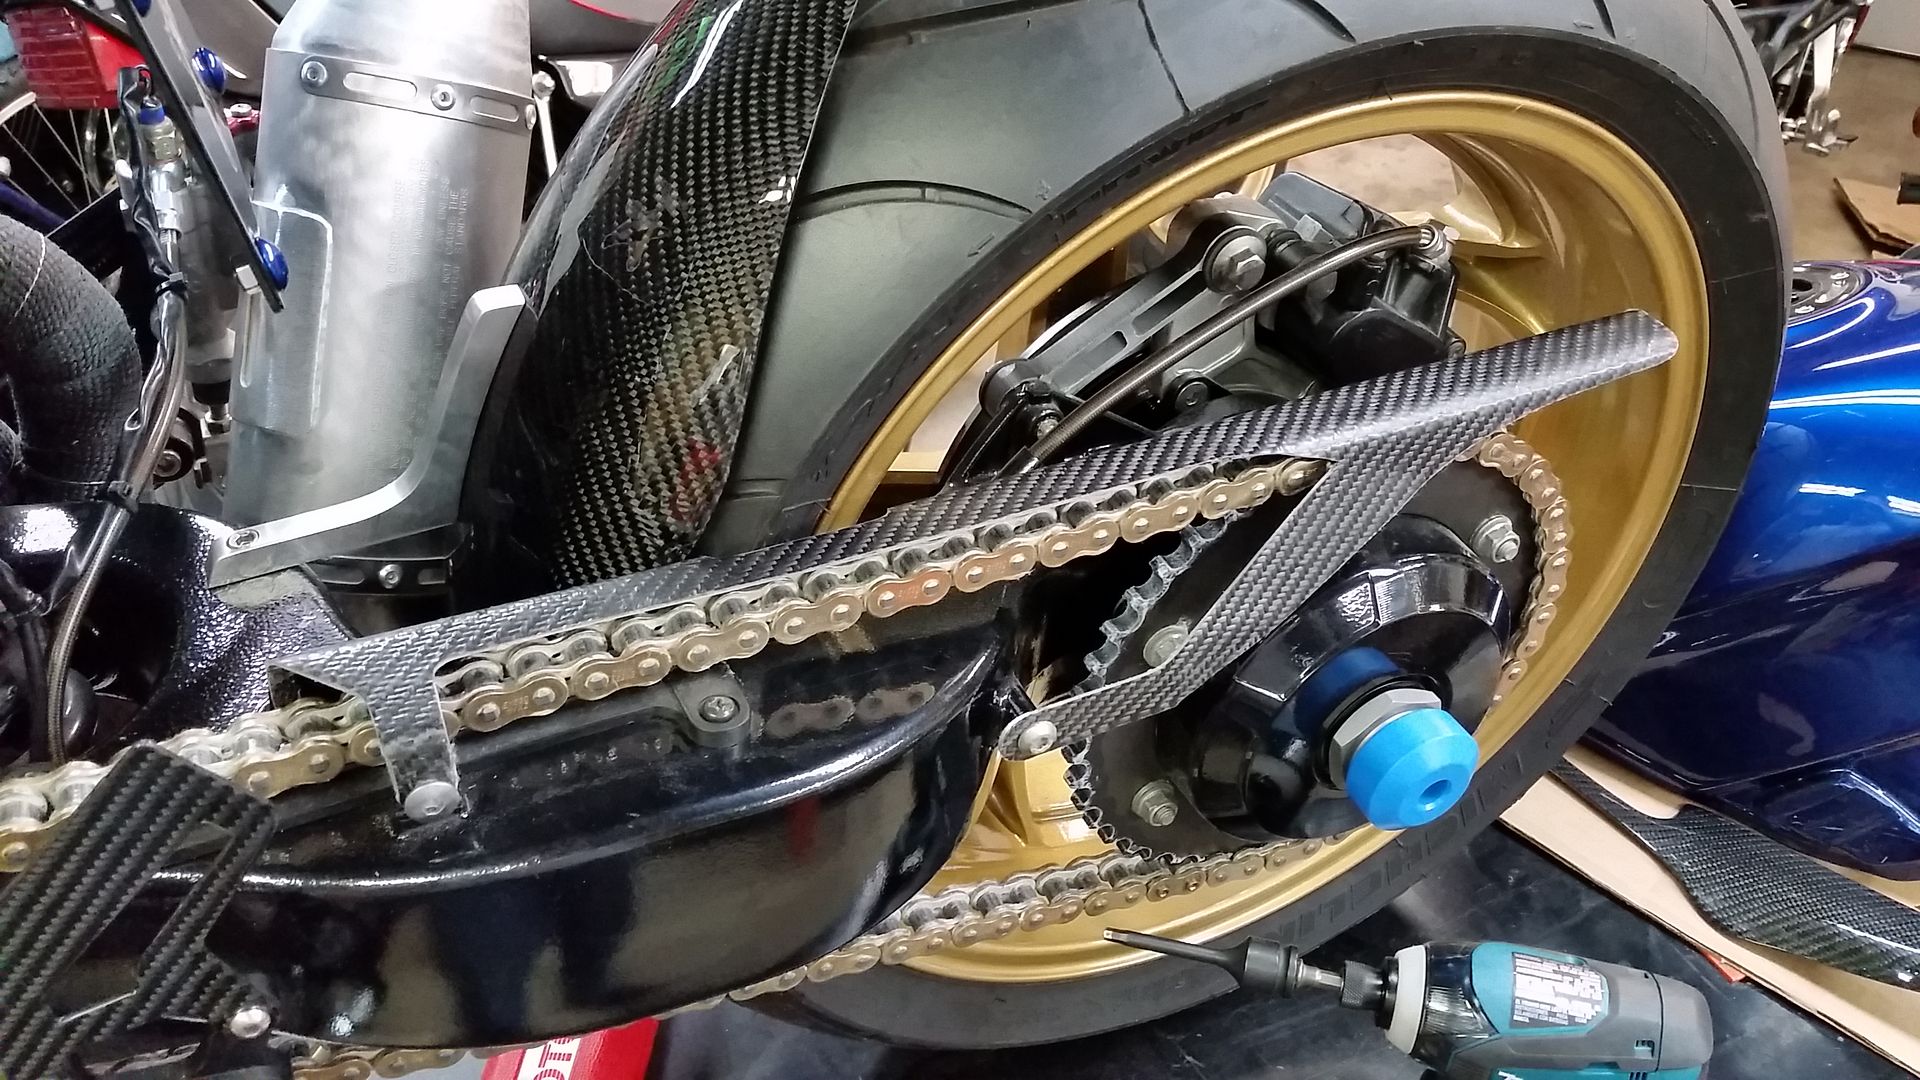
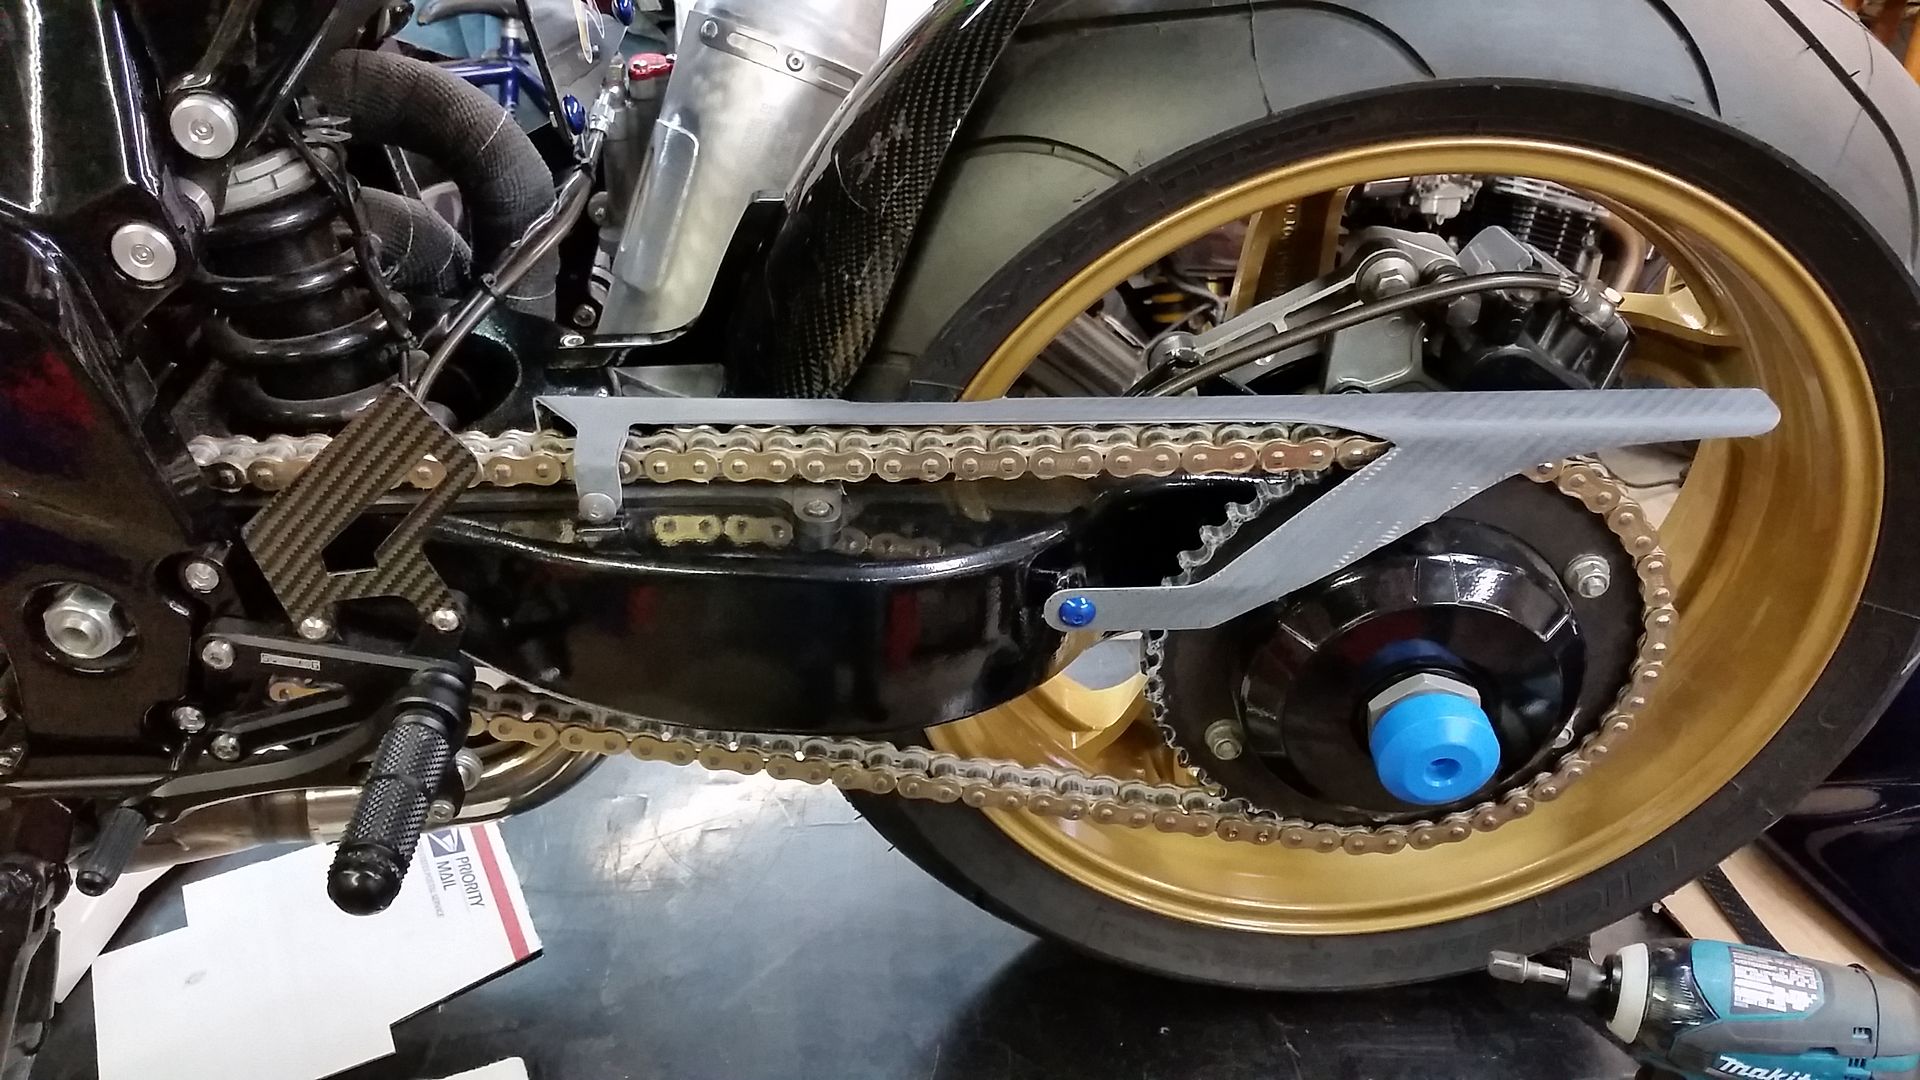
The chainguard... another of my most favorite parts.
Started out as a piece of aluminum sheet, bent into a channel and then cut and shaped. A bit of templating for the connector piece, welding that on, then covered in carbon.
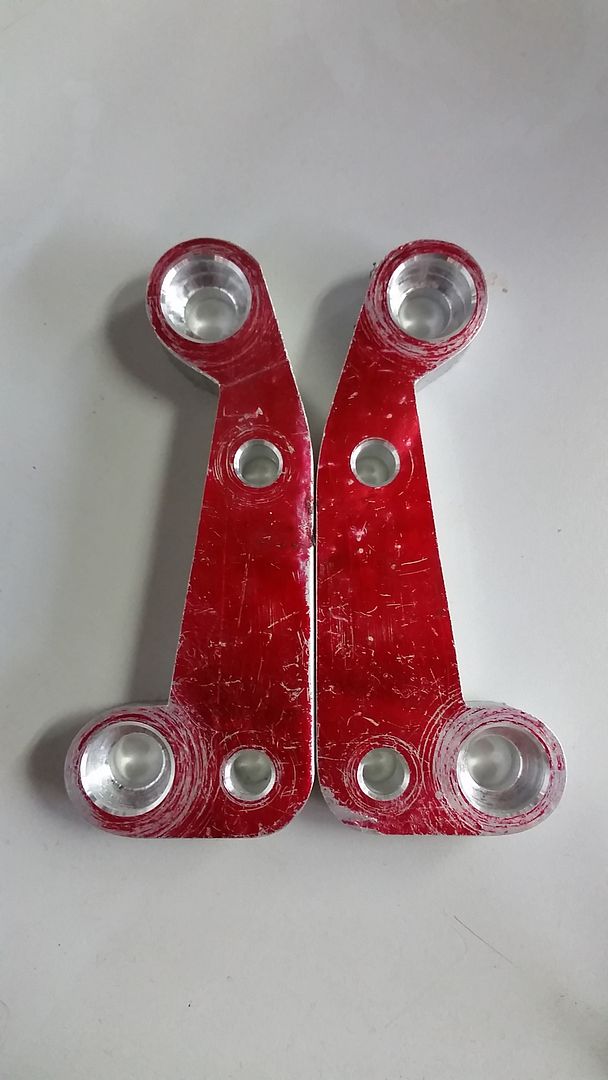
Another thing that had been bugging me was the footpeg position. So I made new adapter plates to replace the ones that came with the 900RR rearsets. I cut them from 1/2" thick aluminum stock, the same material the others were made from. I was able to shape them to follow the lines of the frame, so they blend in pretty well. I painted them to match the frame.

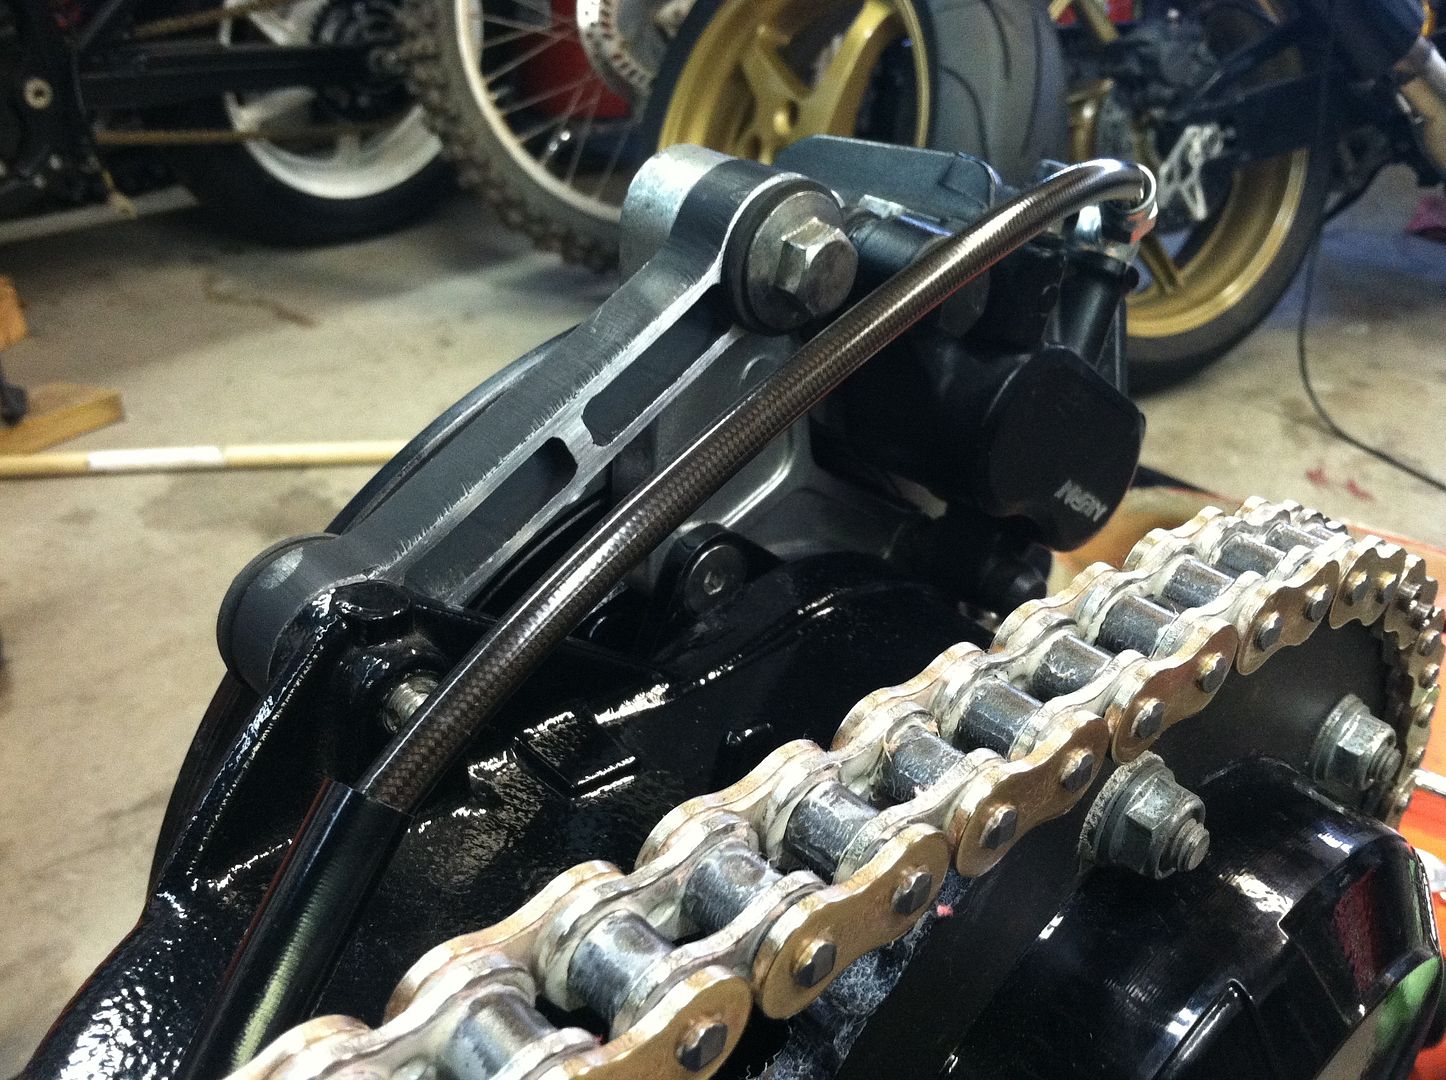
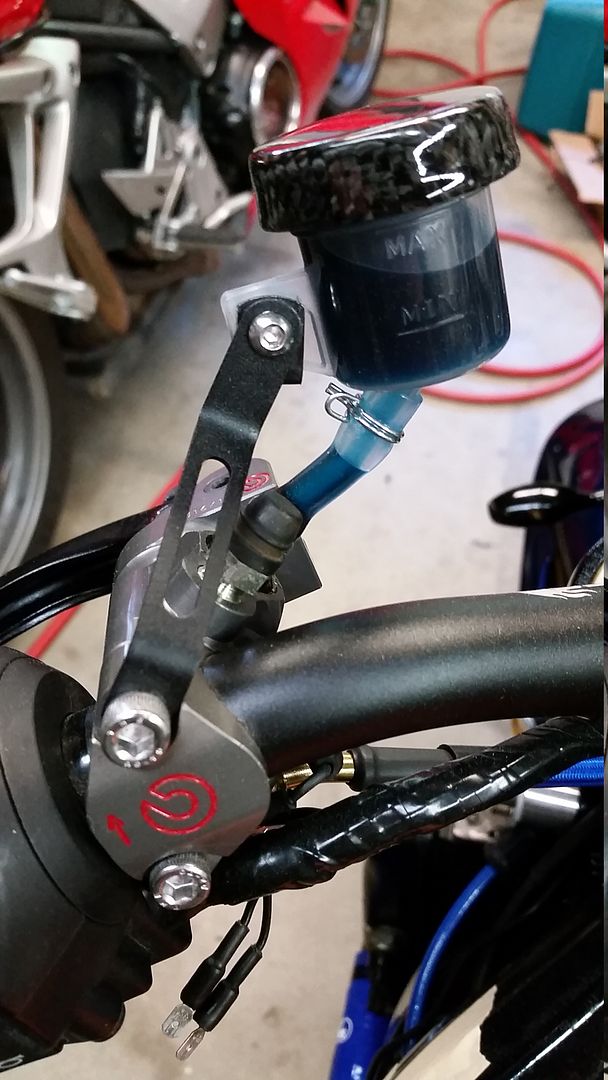
I upgraded the rear line to a color-matched CoreMoto line.
-
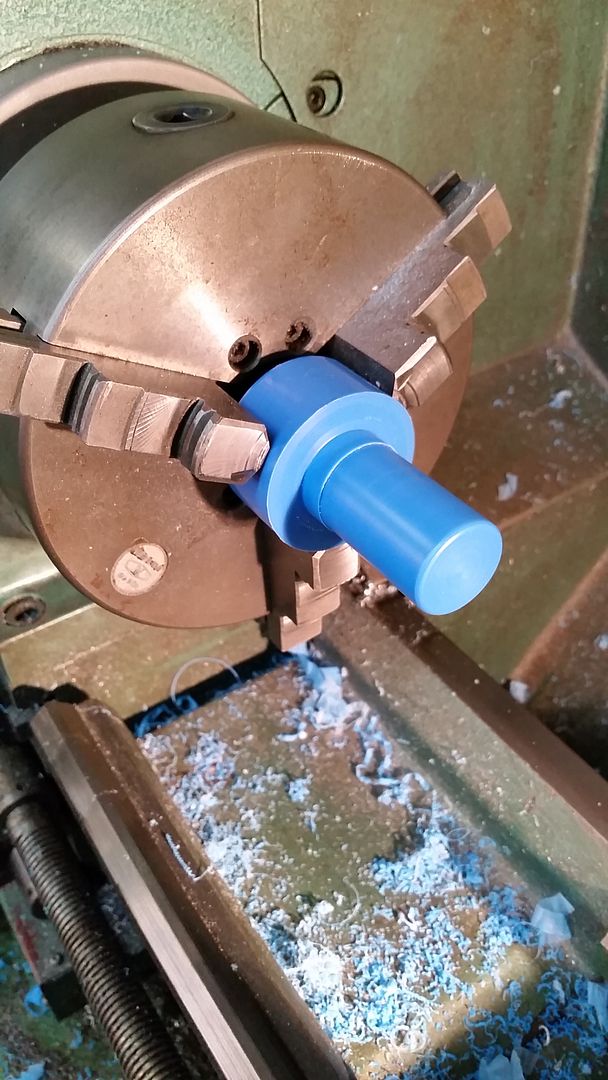
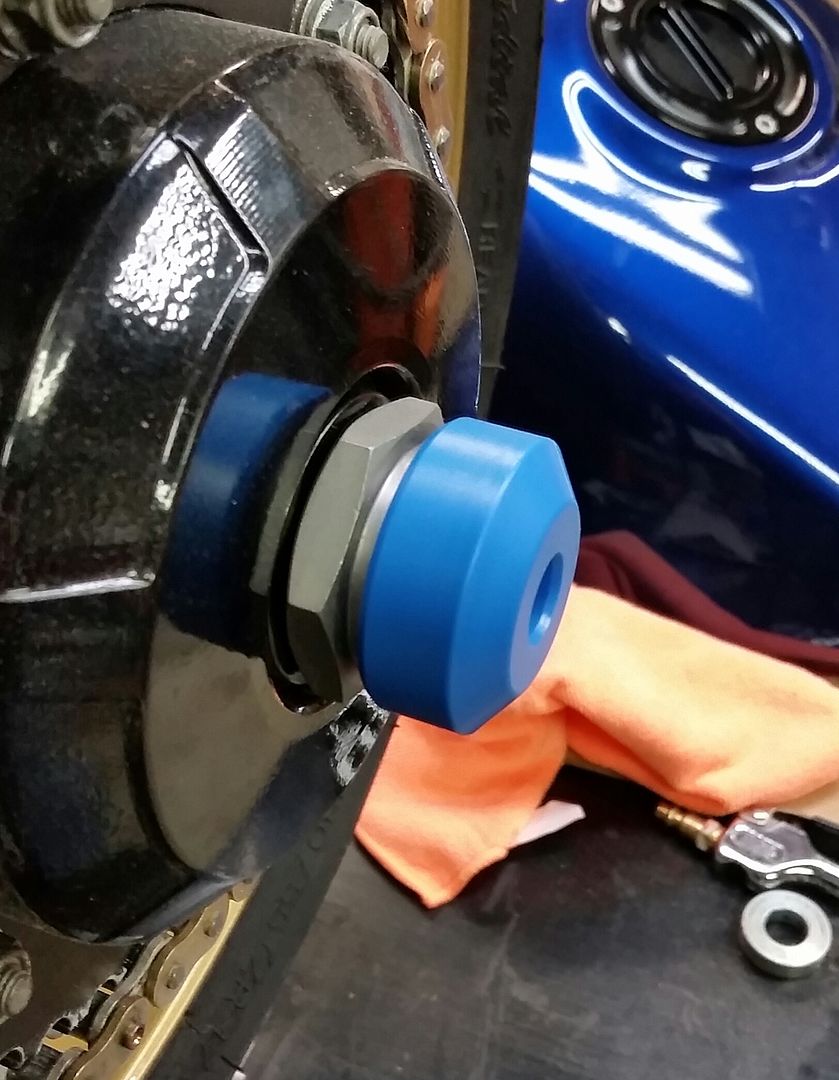
I got the idea to make some fork sliders... ordered some blue Delrin. I was expecting it to be darker blue, but I like how it turned out.
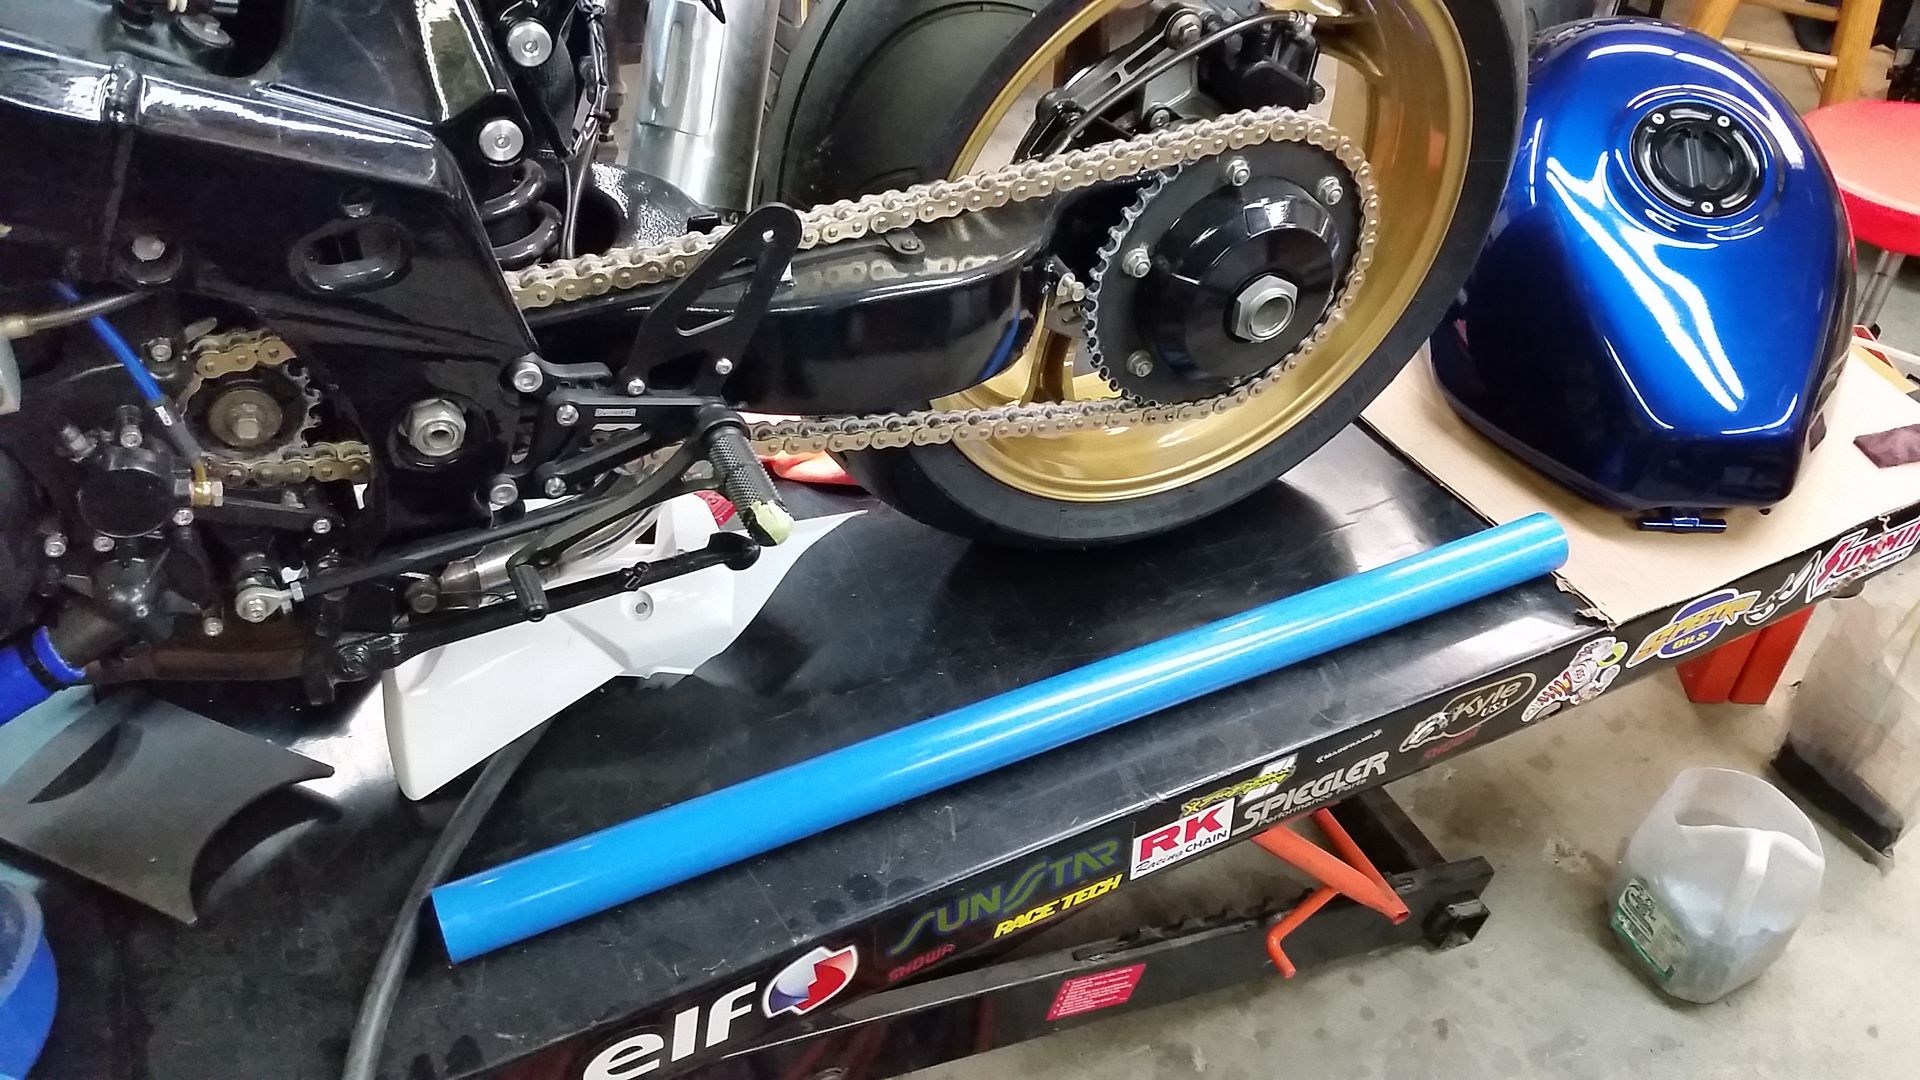
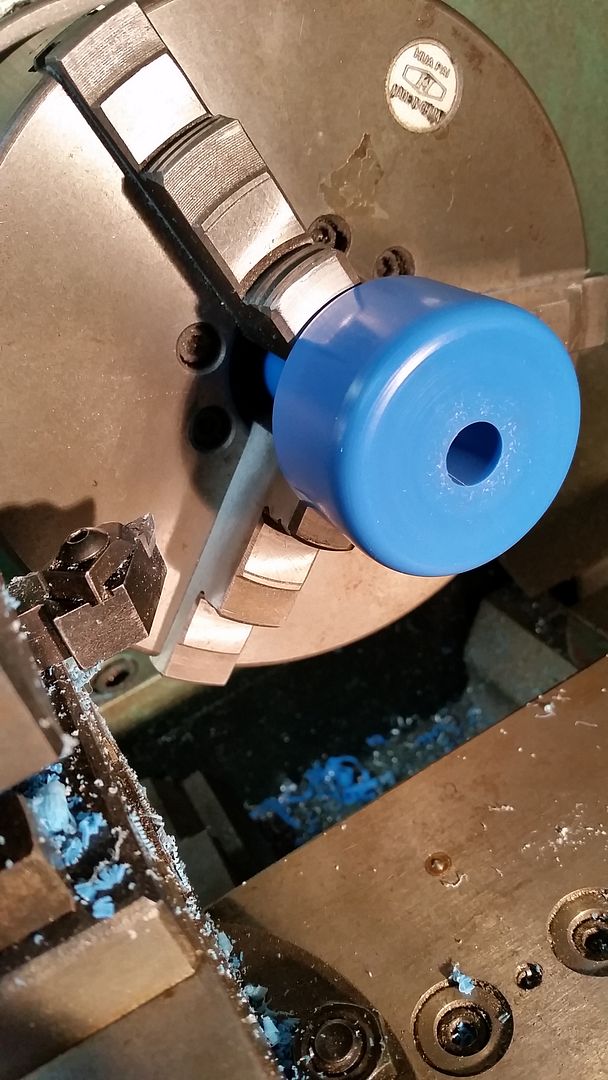
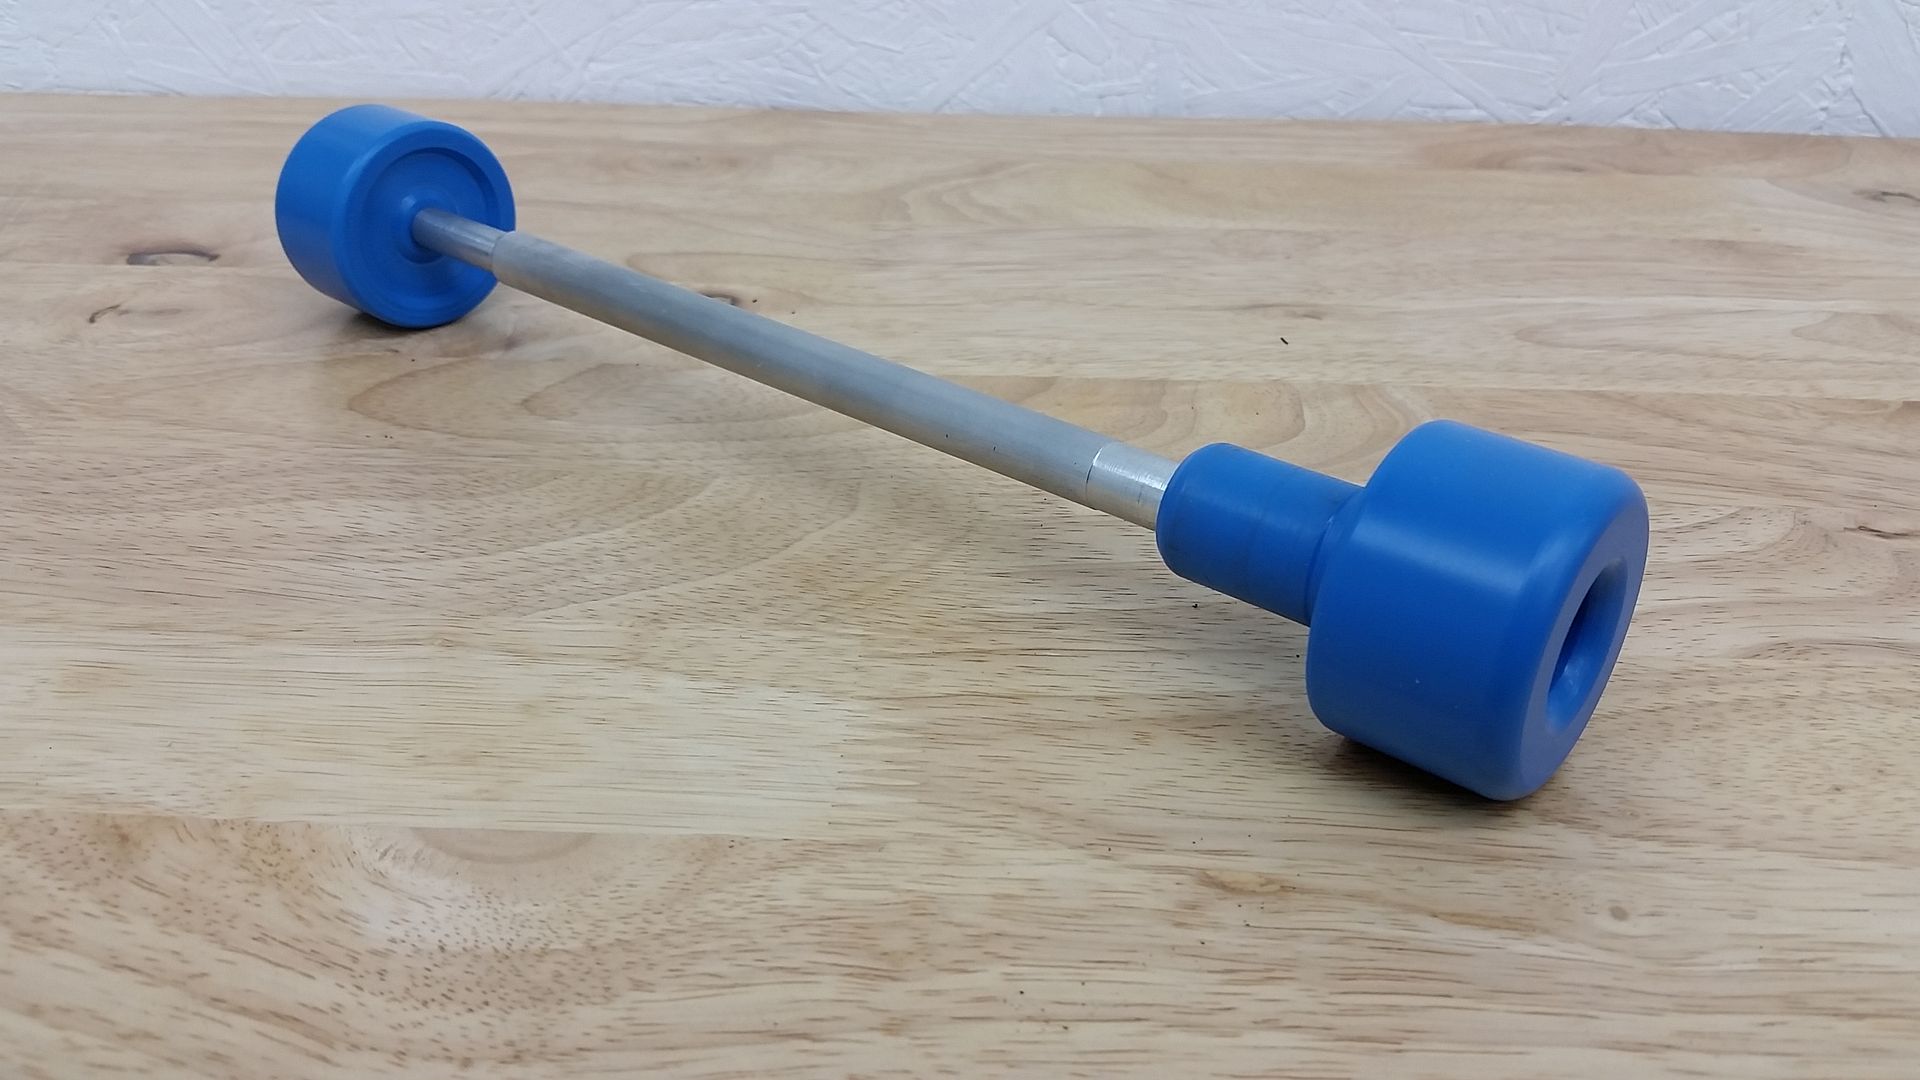
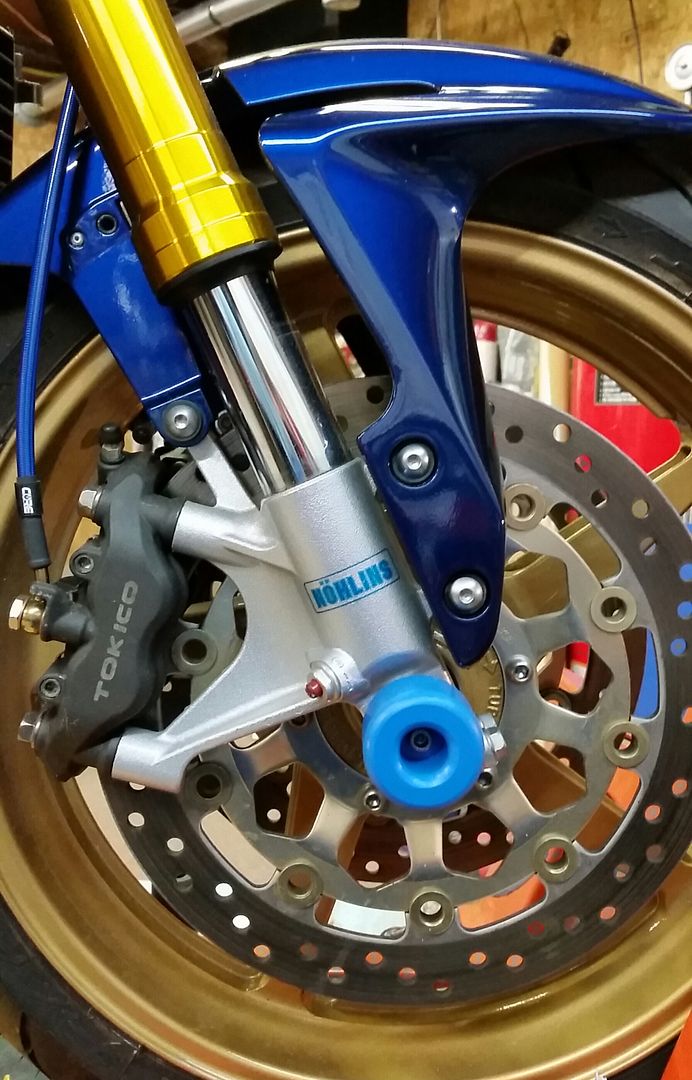
While my mind was on functional dress-up items, I thought up this wheel plug/hub slider combo.
-
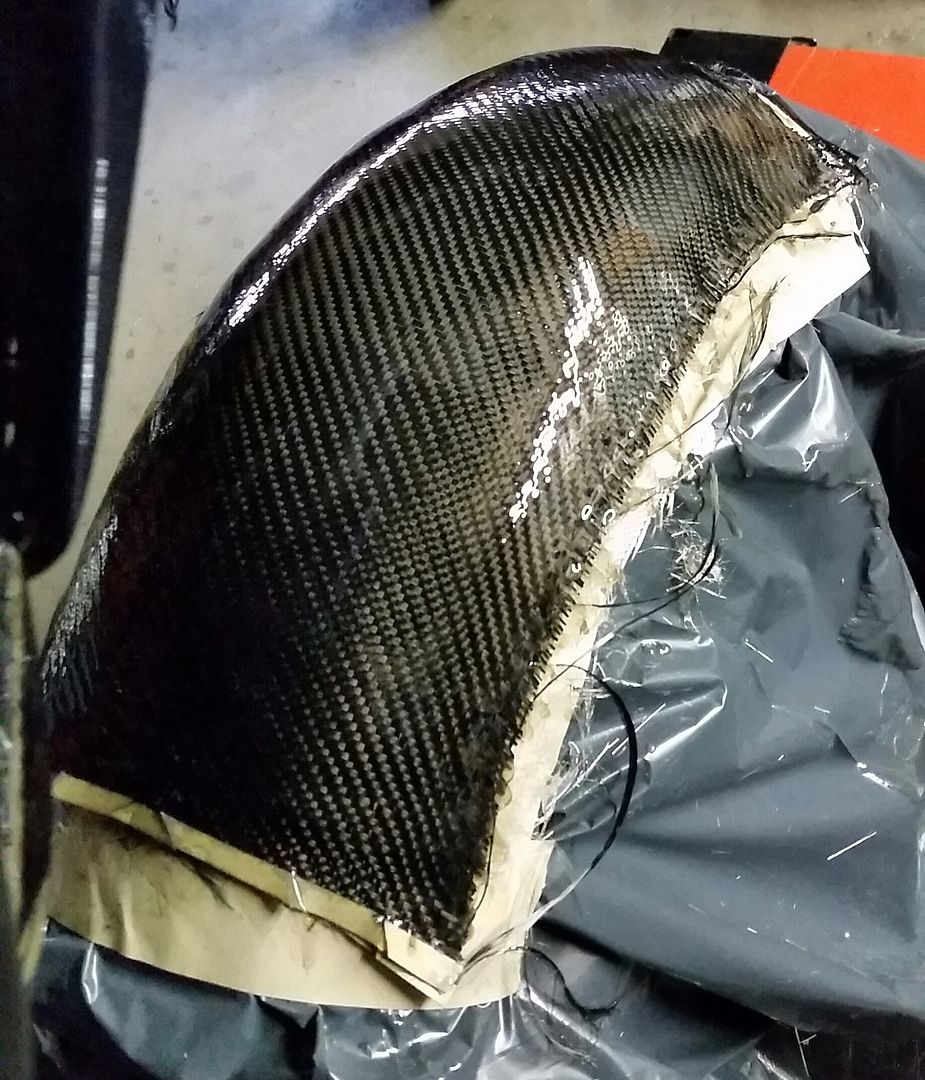
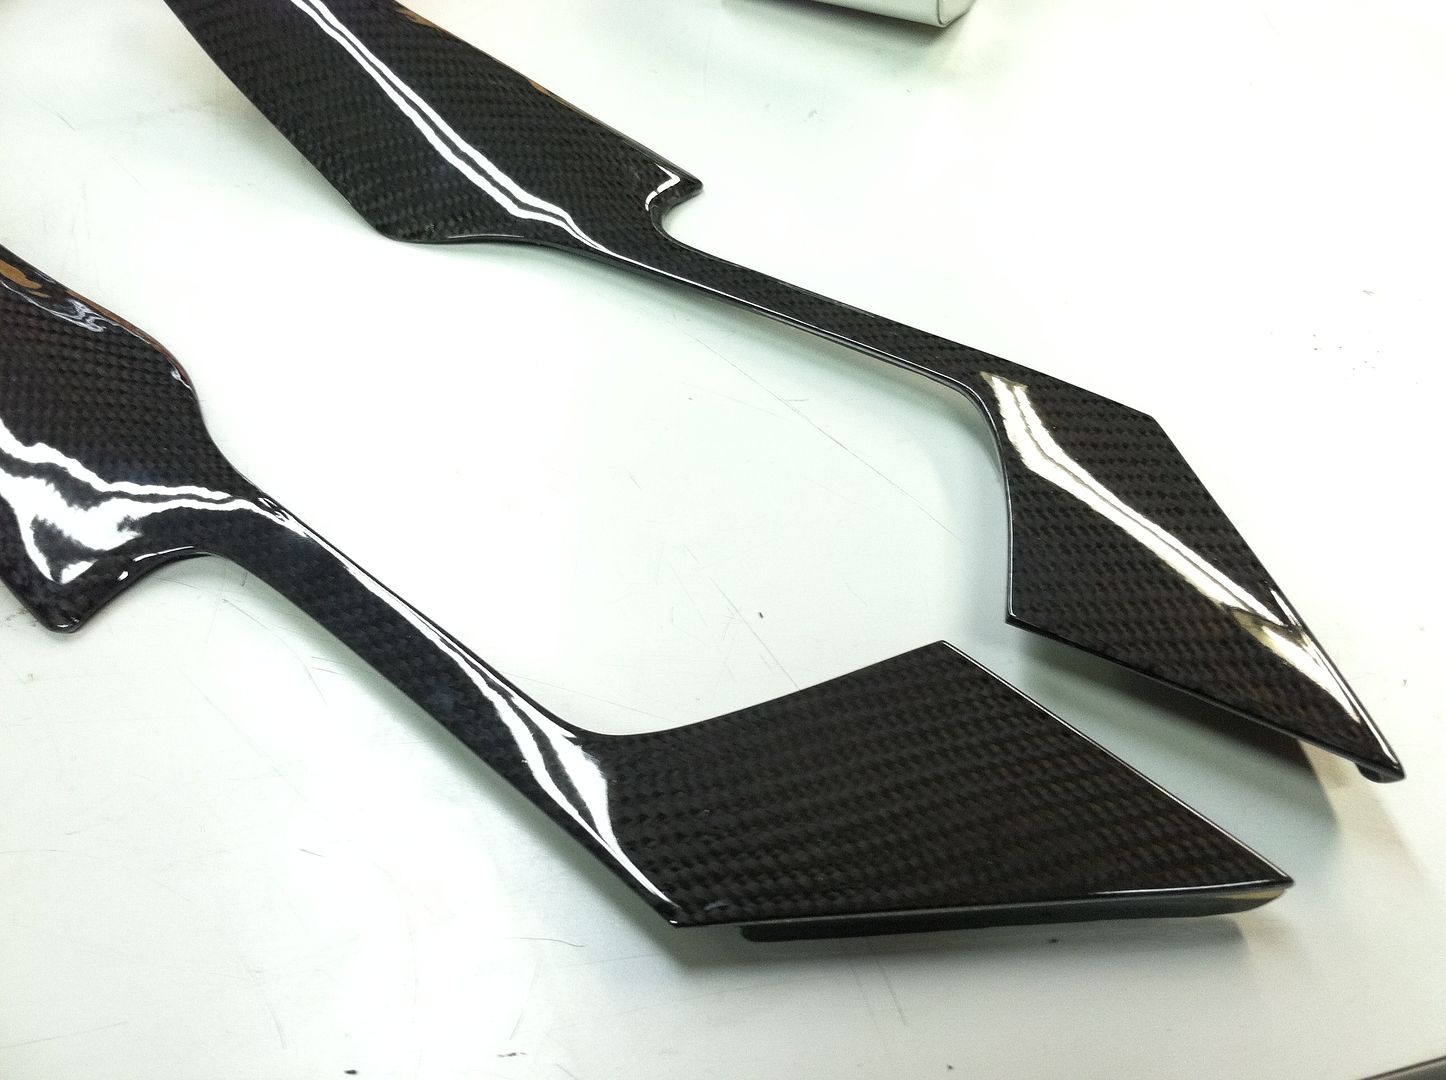
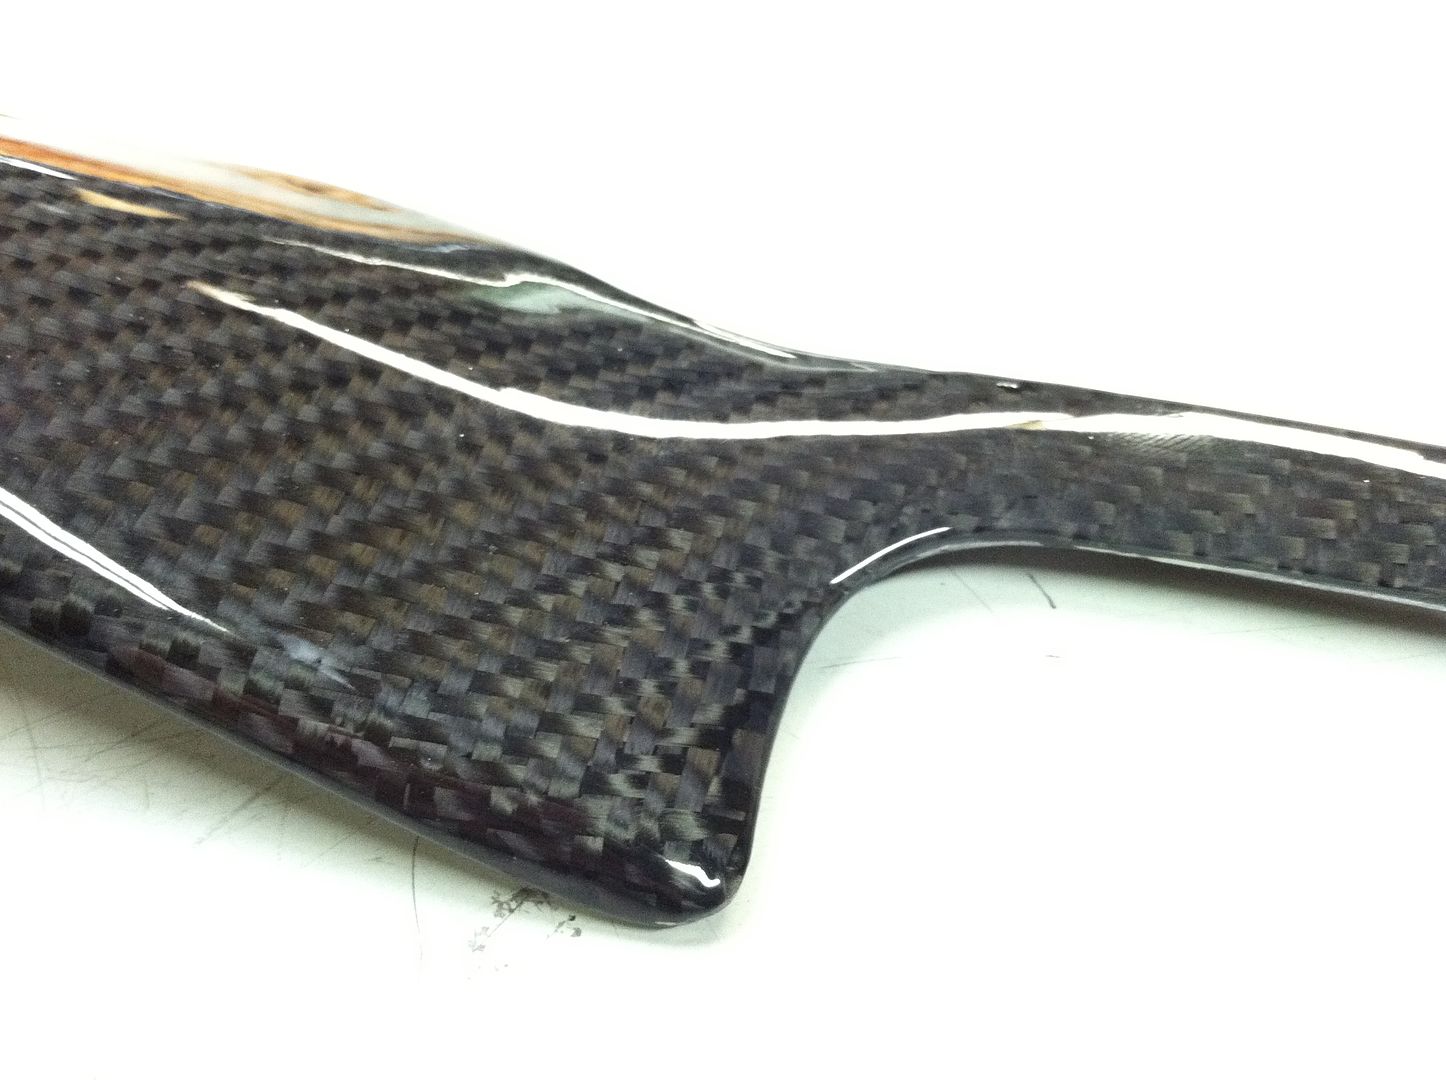
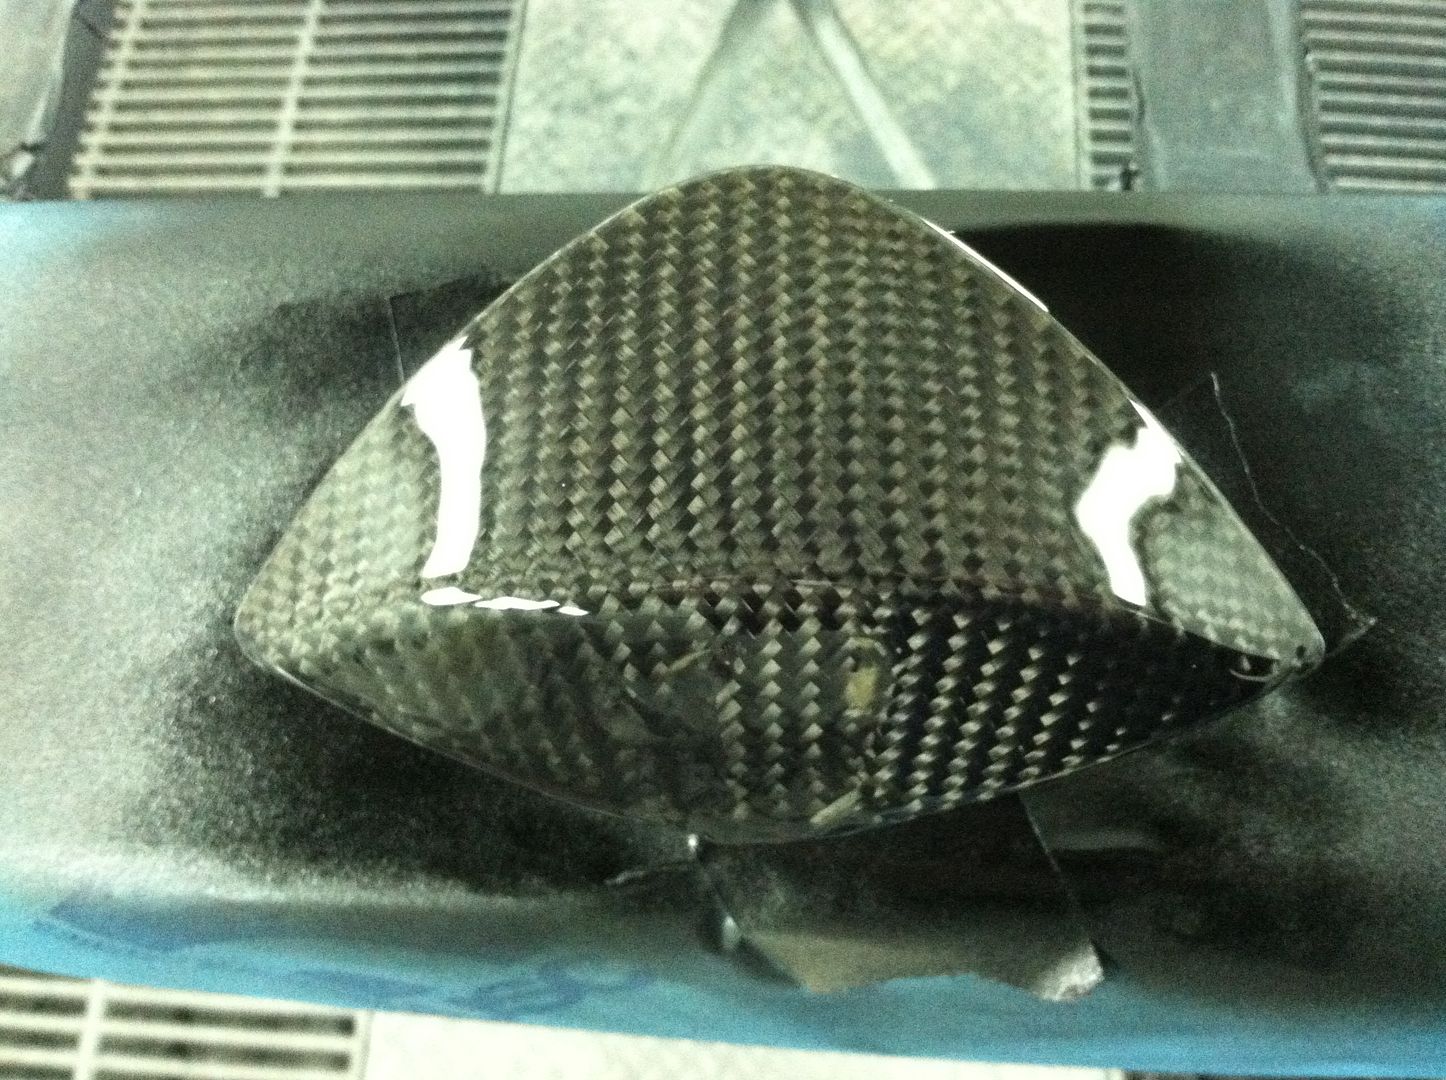
Time for some carbon fiber fun...
All my parts were cosmetic, so a simple overlay process was all it took to score a high end look.
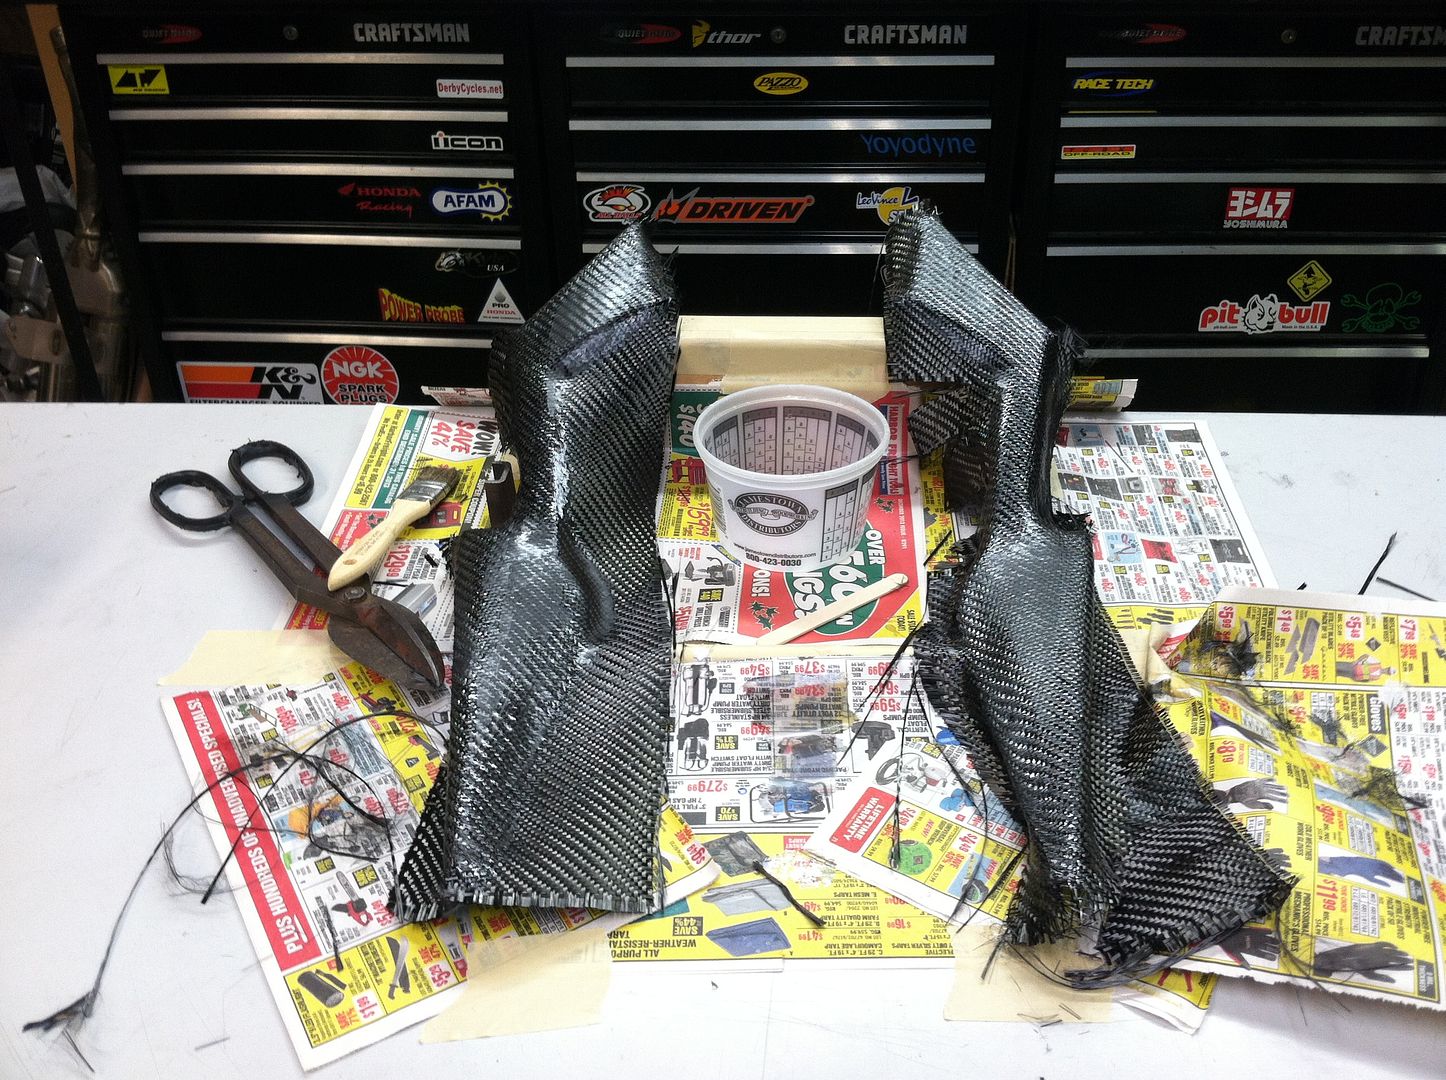
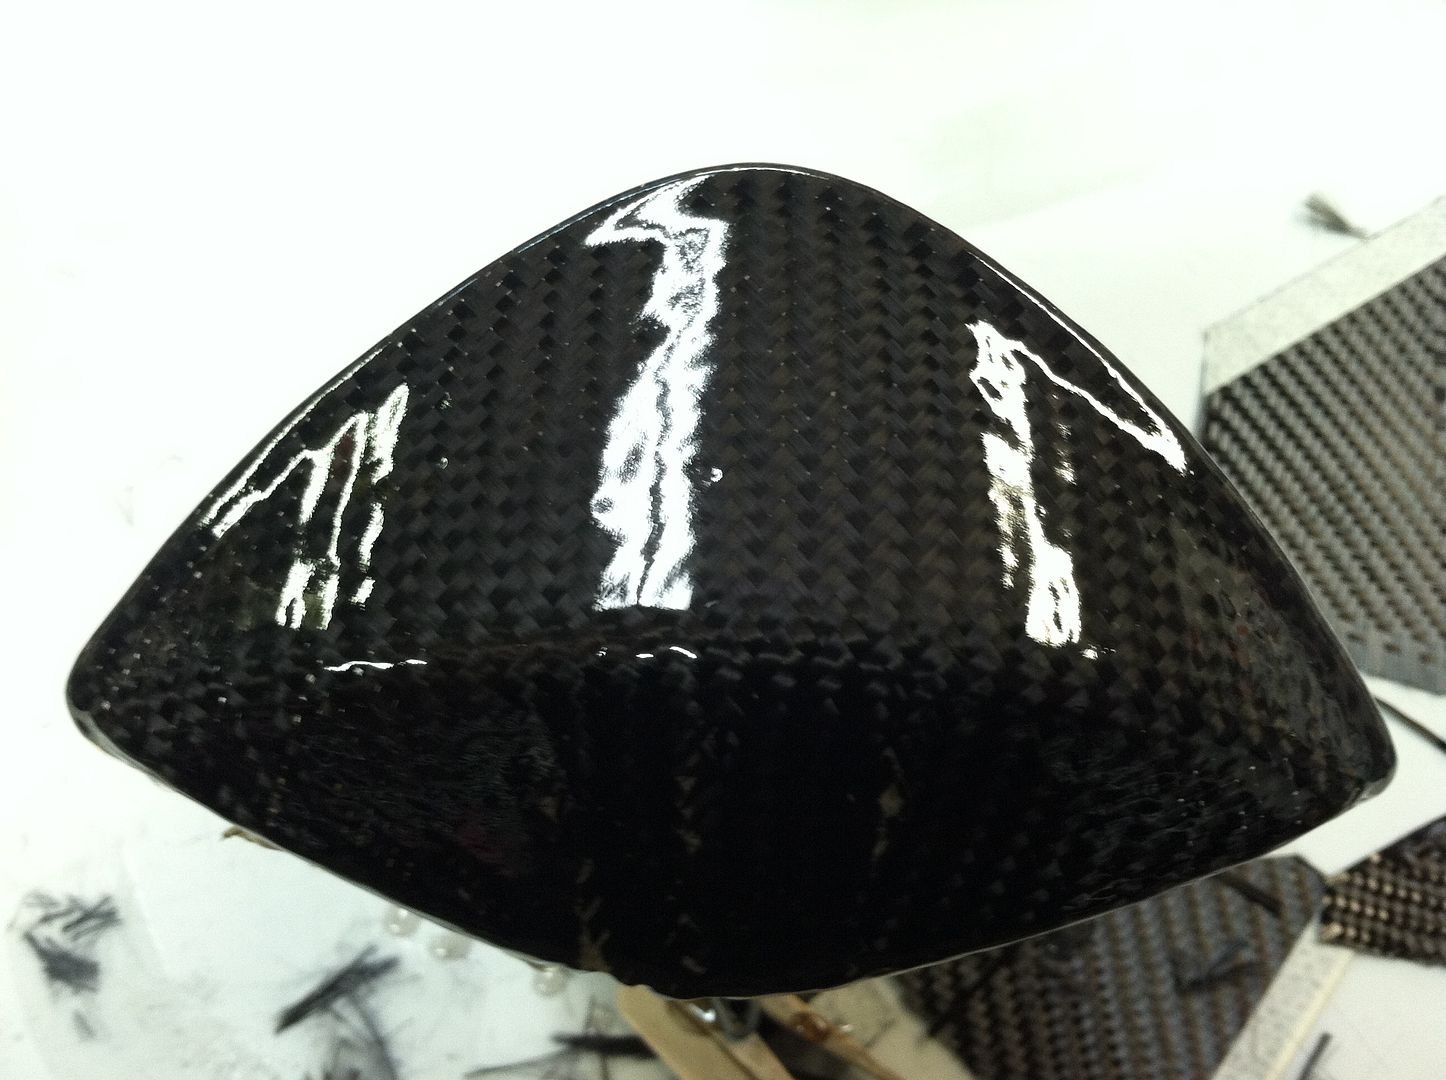
Sanding and a coat of auto grade clear adds UV protection and brings out the depth that carbon is known for.
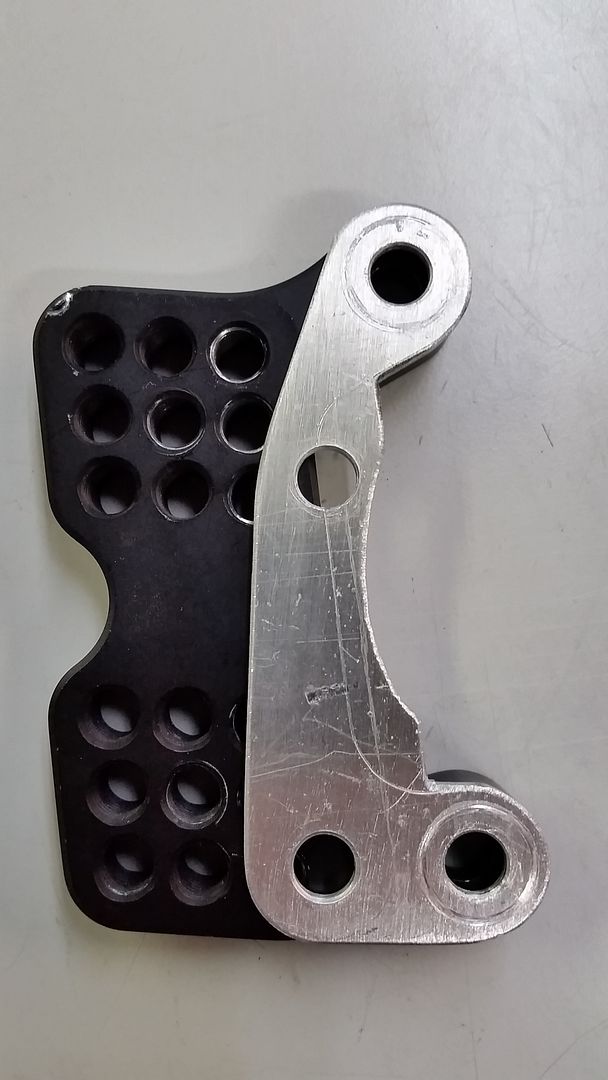
I didn't like the heavy steel caliper torque arm the factory provided, so I made a lighter one from aluminum.
Rear cylinders got coil-on-plugs from a GSXR (600, IIRC) to get rid of the bulky stock coils that I didn't really have room for.
Seat lock lock hole was filled in
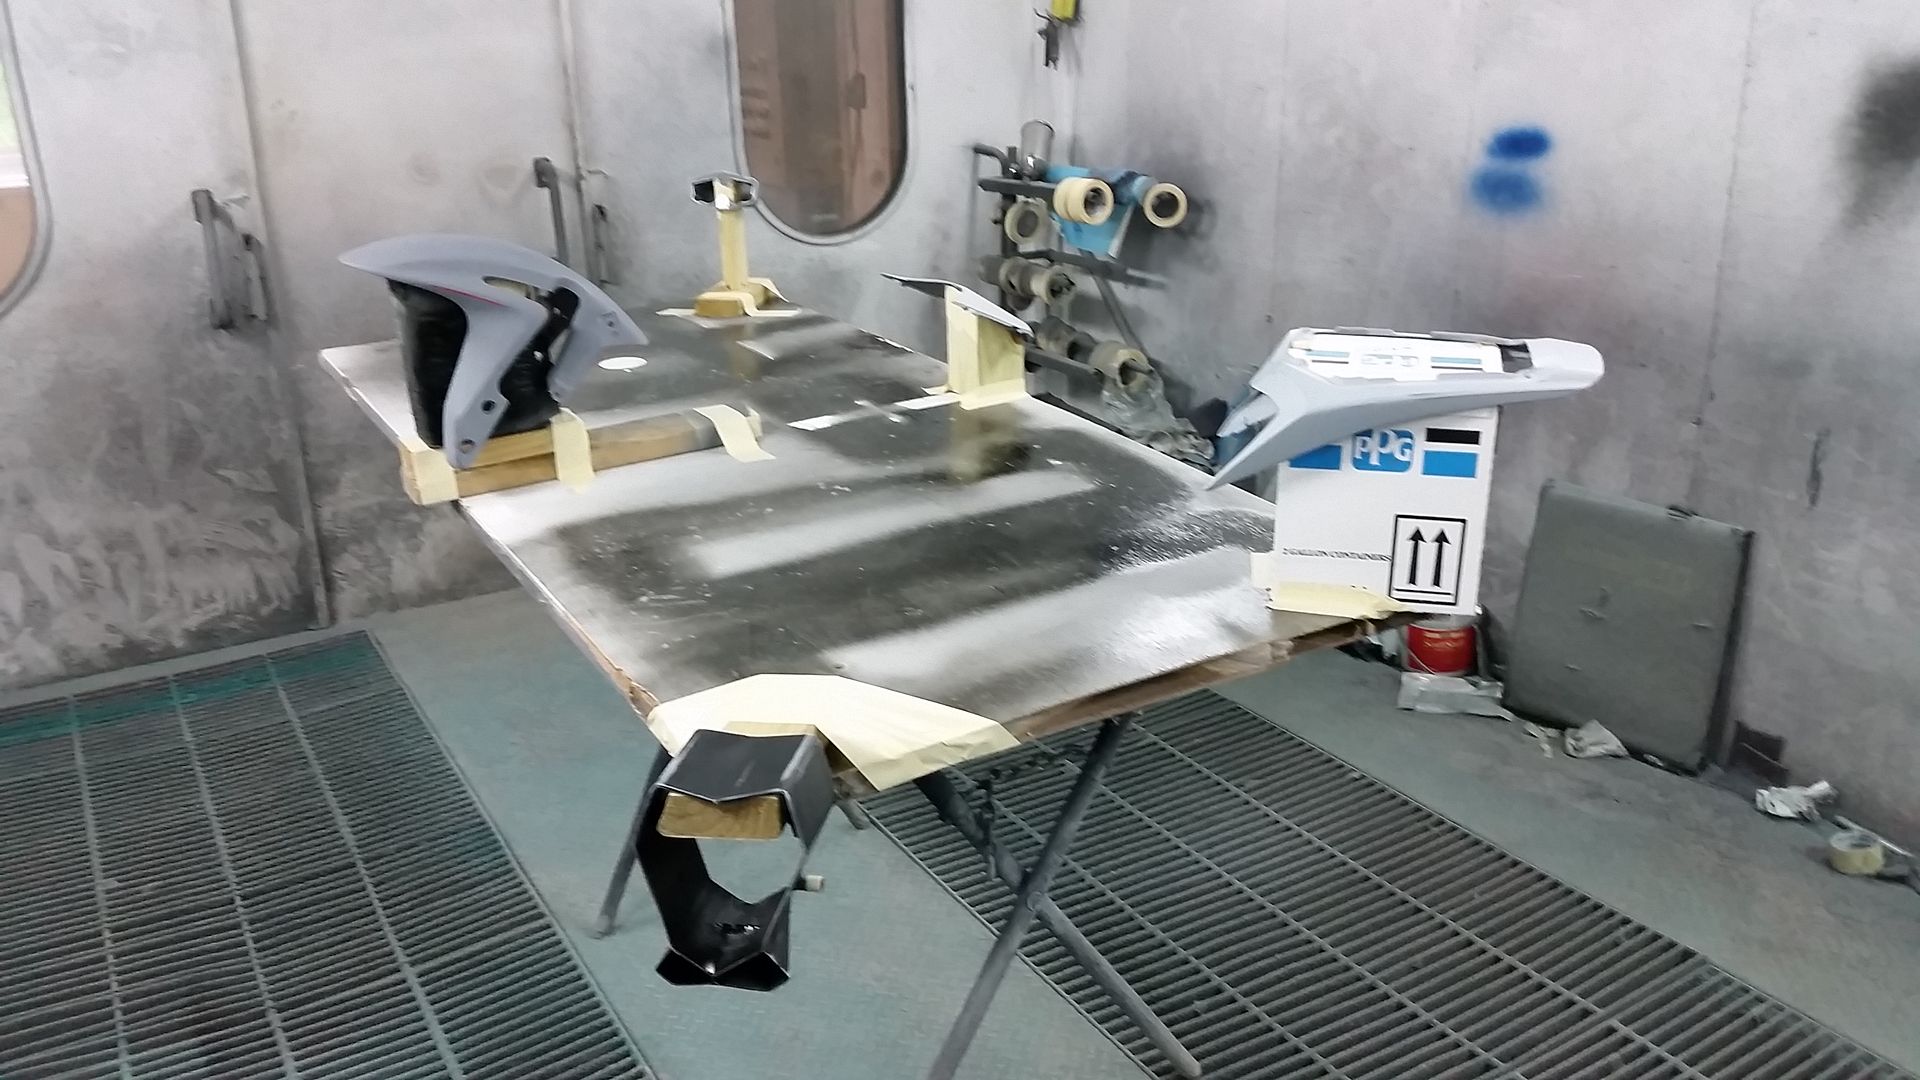
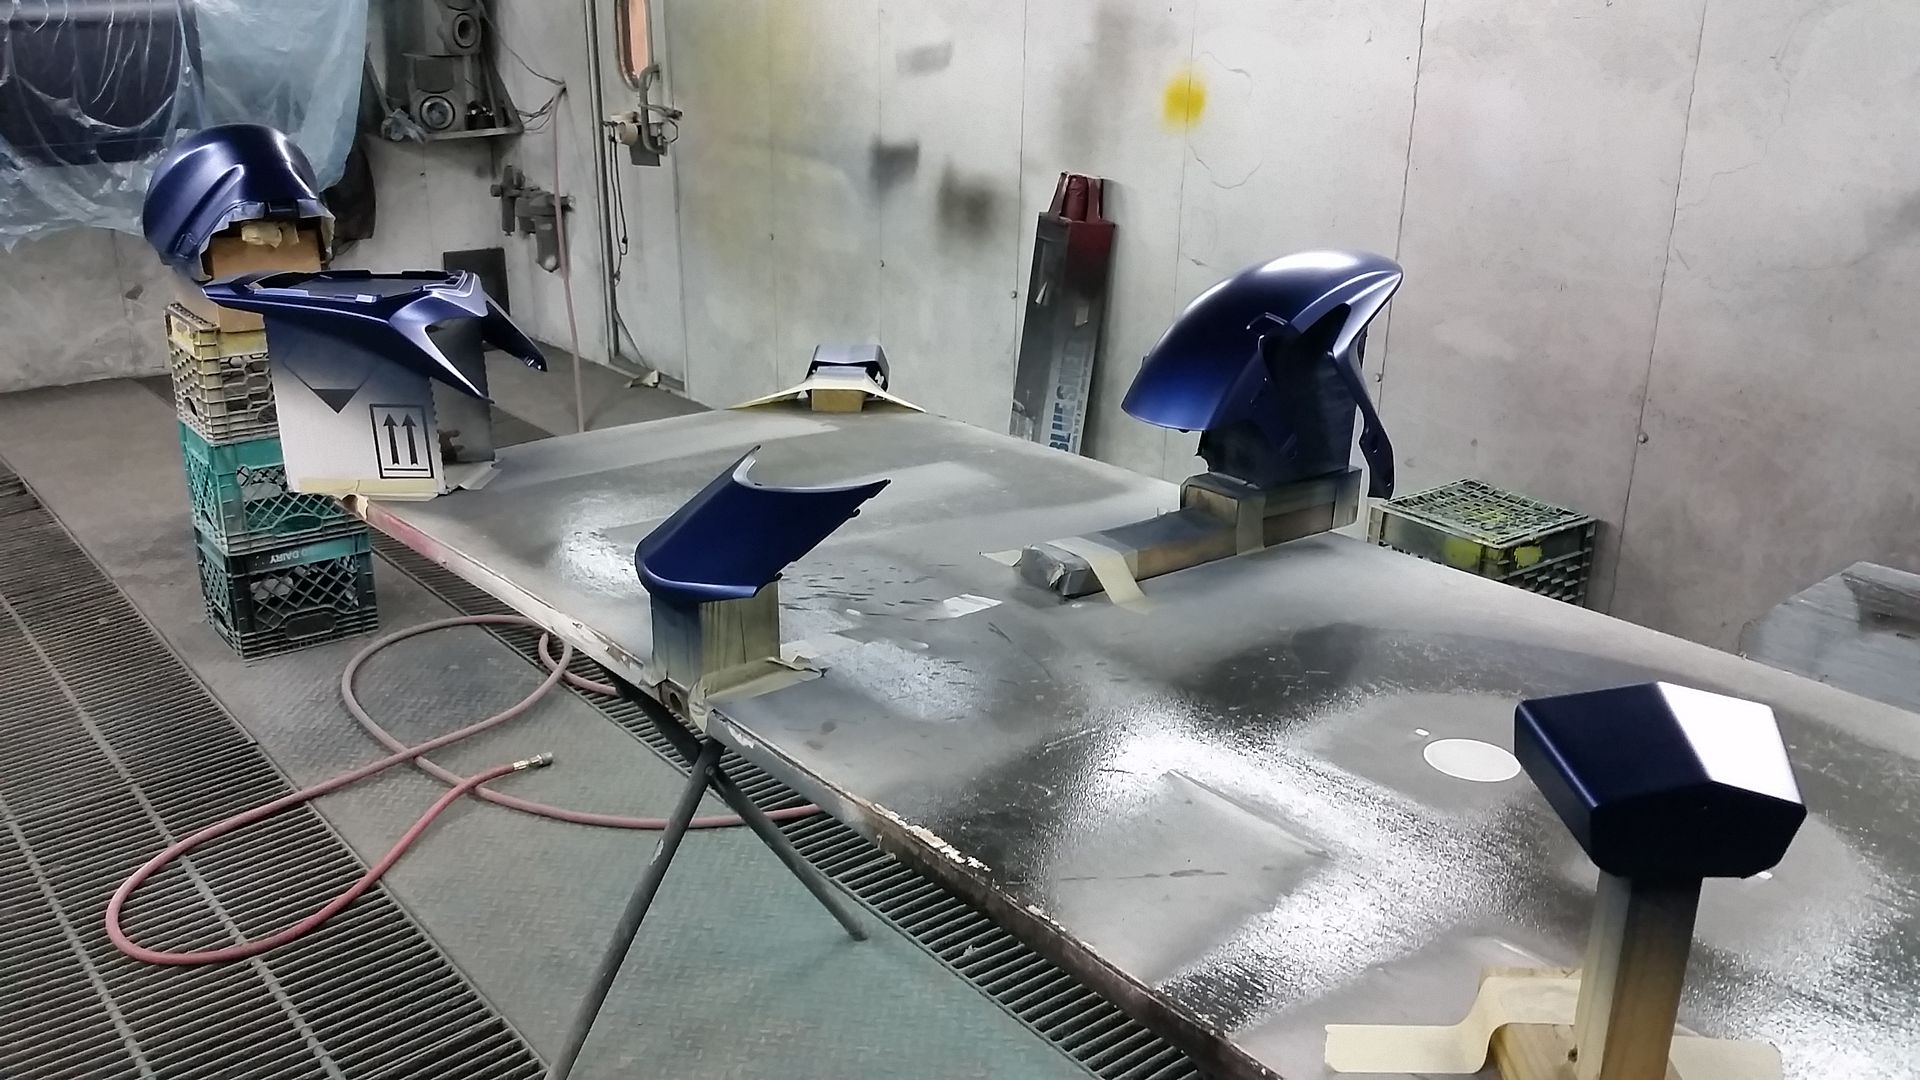
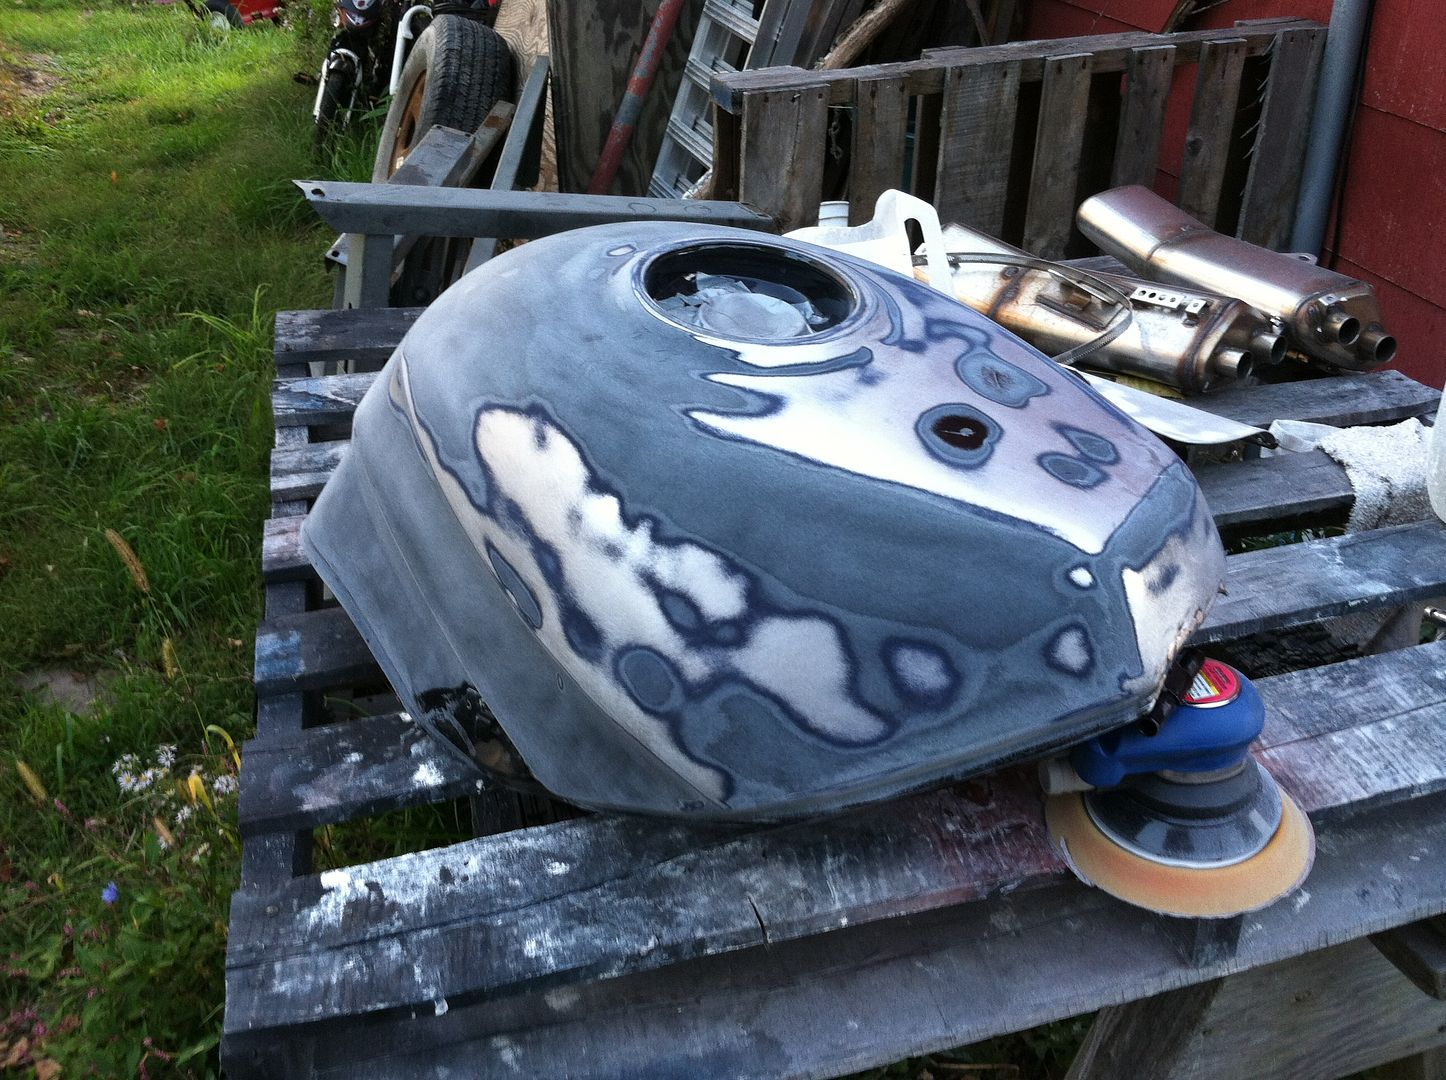
Last year, I painted all the parts.
Digital slim ballast HID hi/lo kit goes in here:
Made my own brackets for the fluid reservoirs
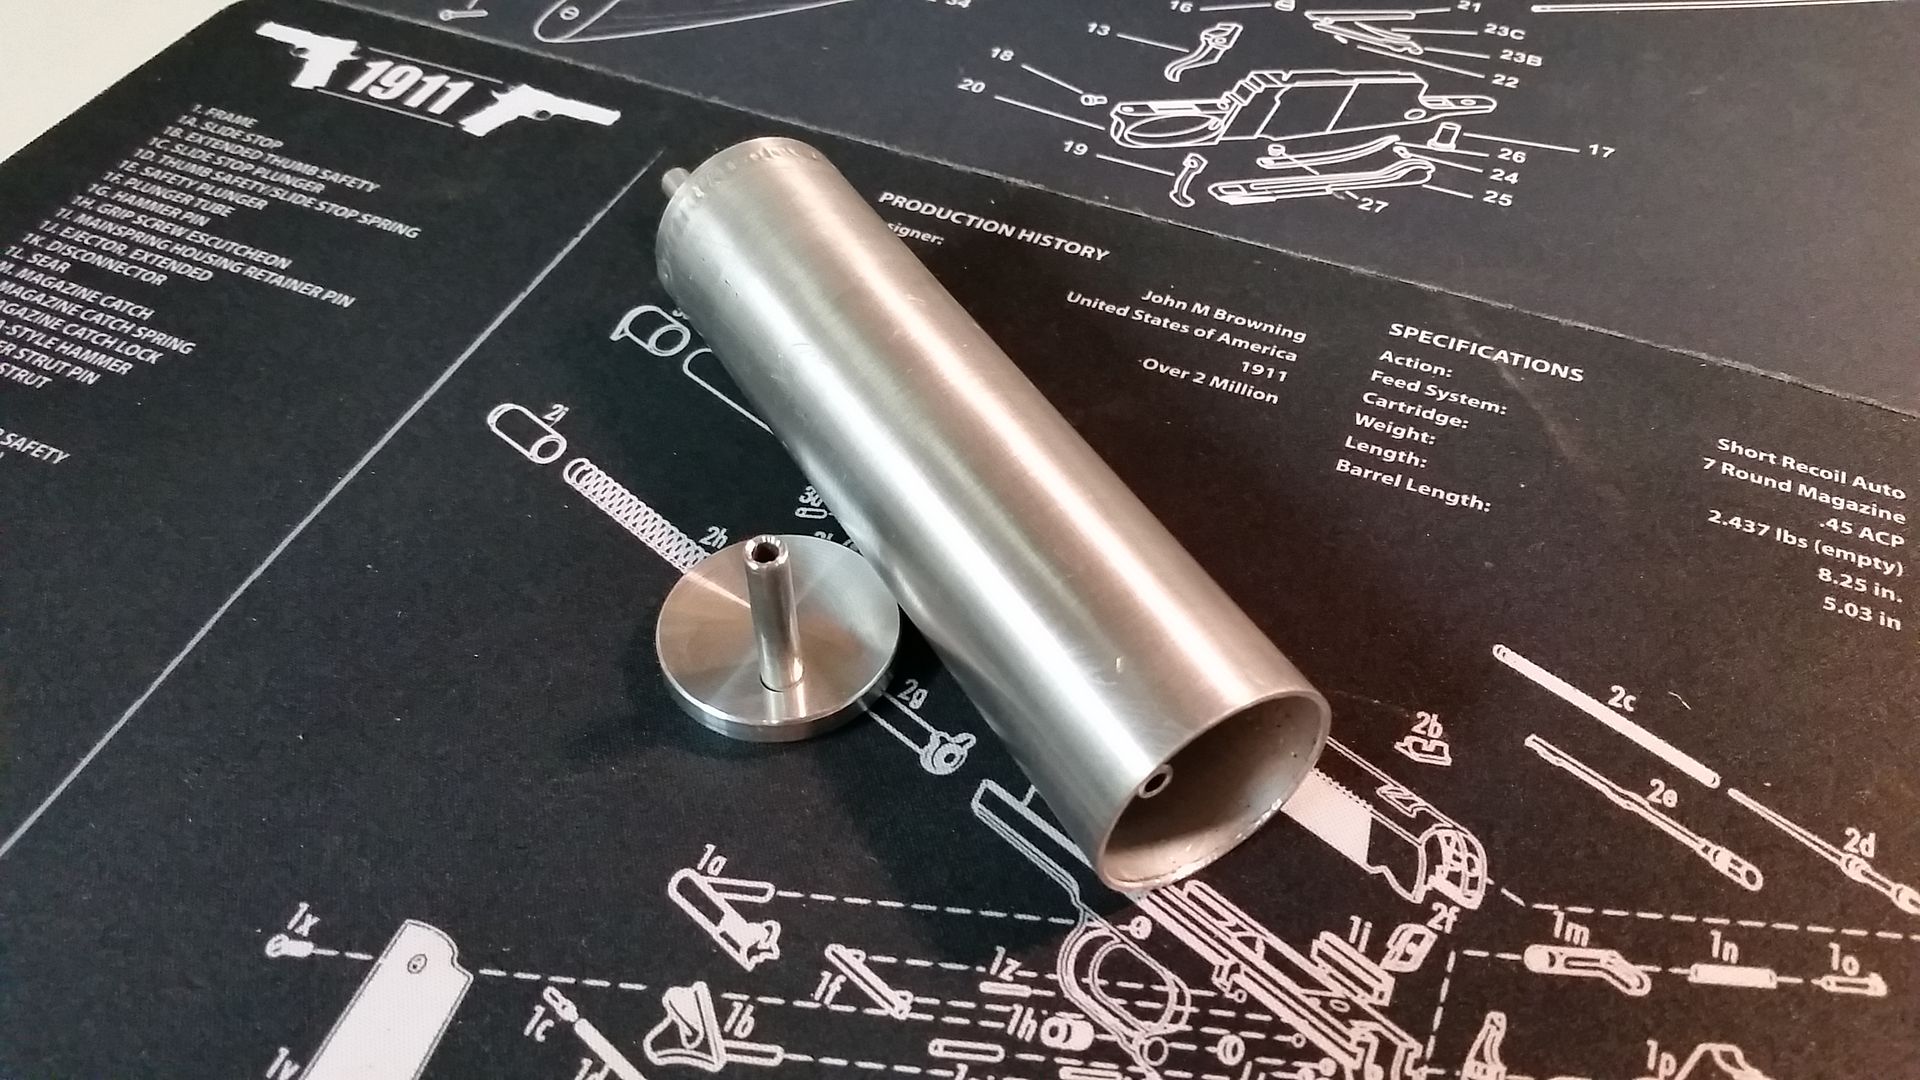
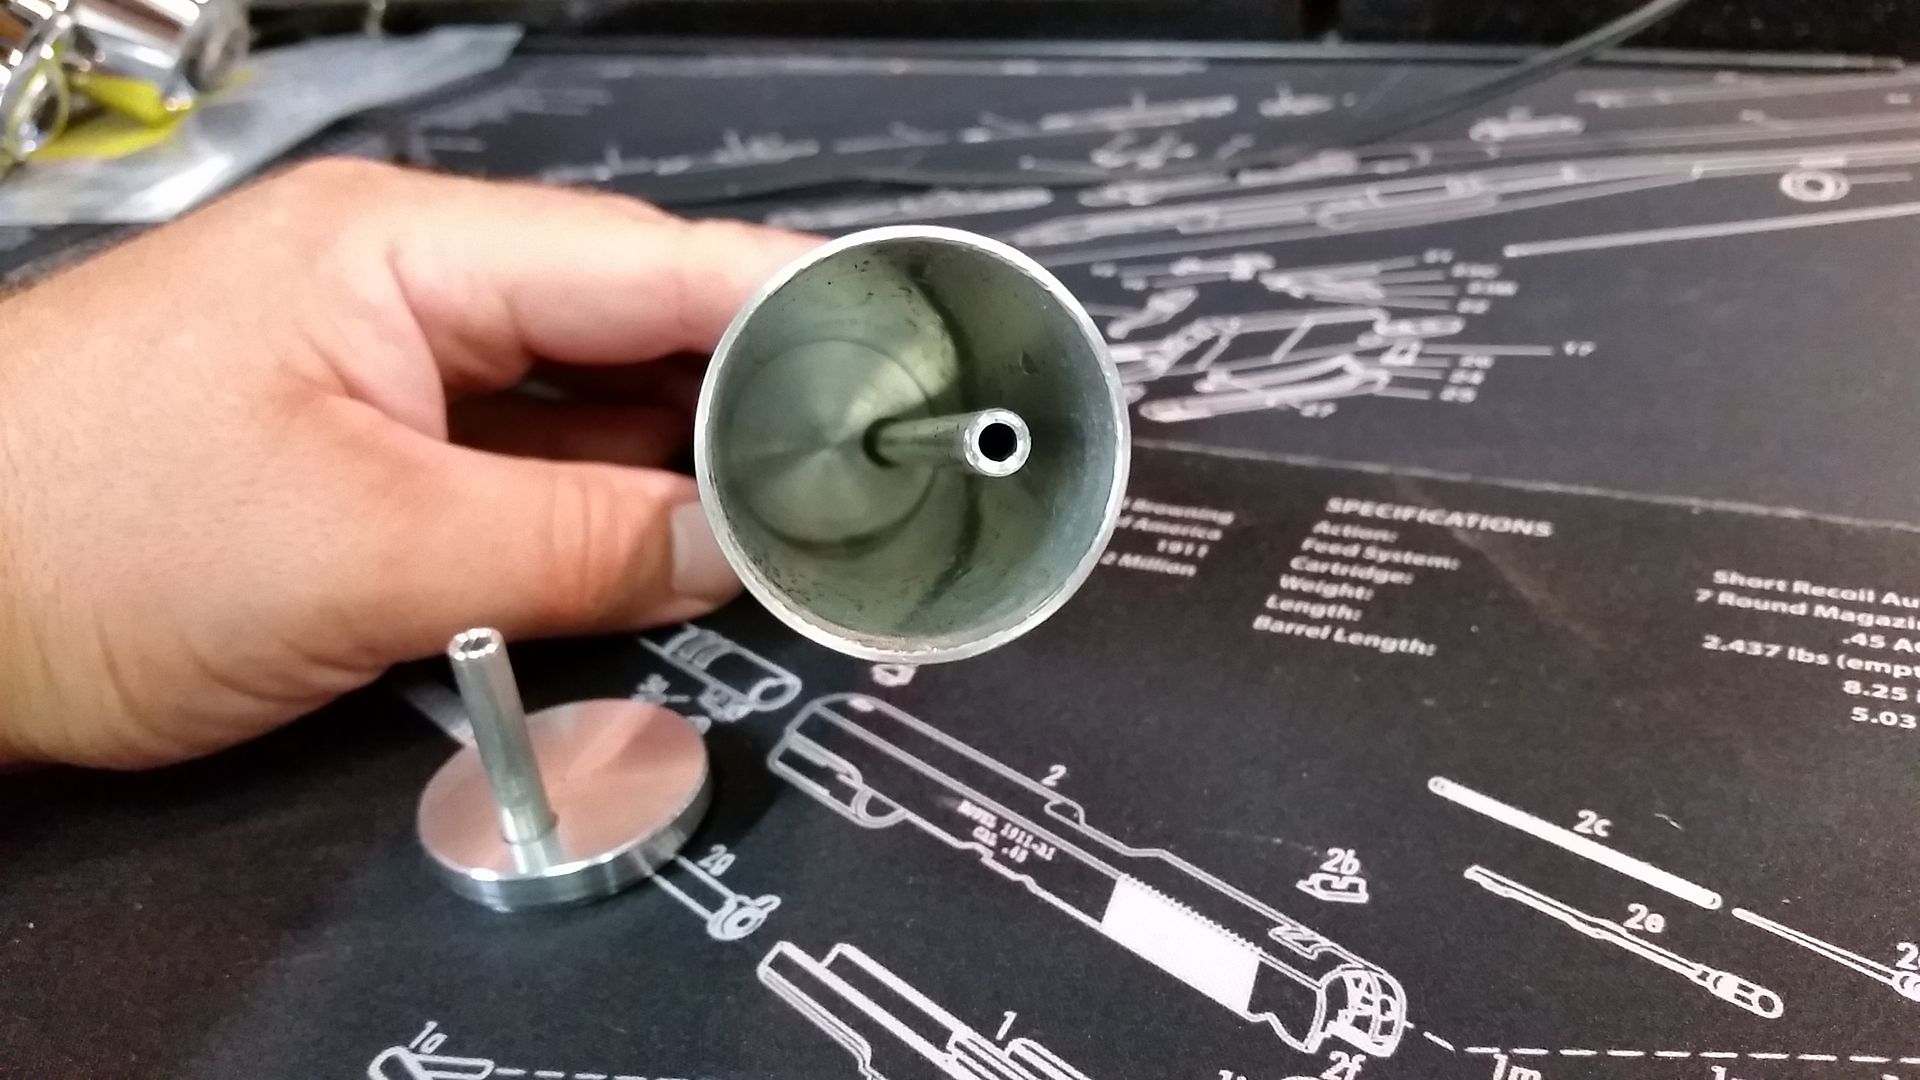
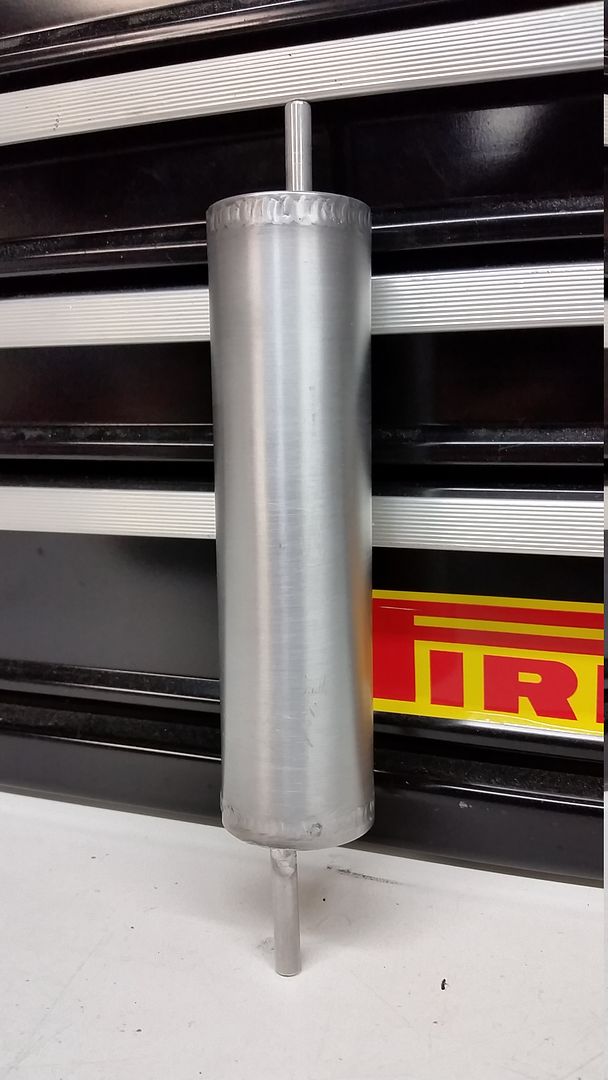
Made a coolant overflow tank

-
I still can't believe that I spent an entire 8hr day making the release for the solo cover. But I did, and it works very well. The entire bike is keyless.
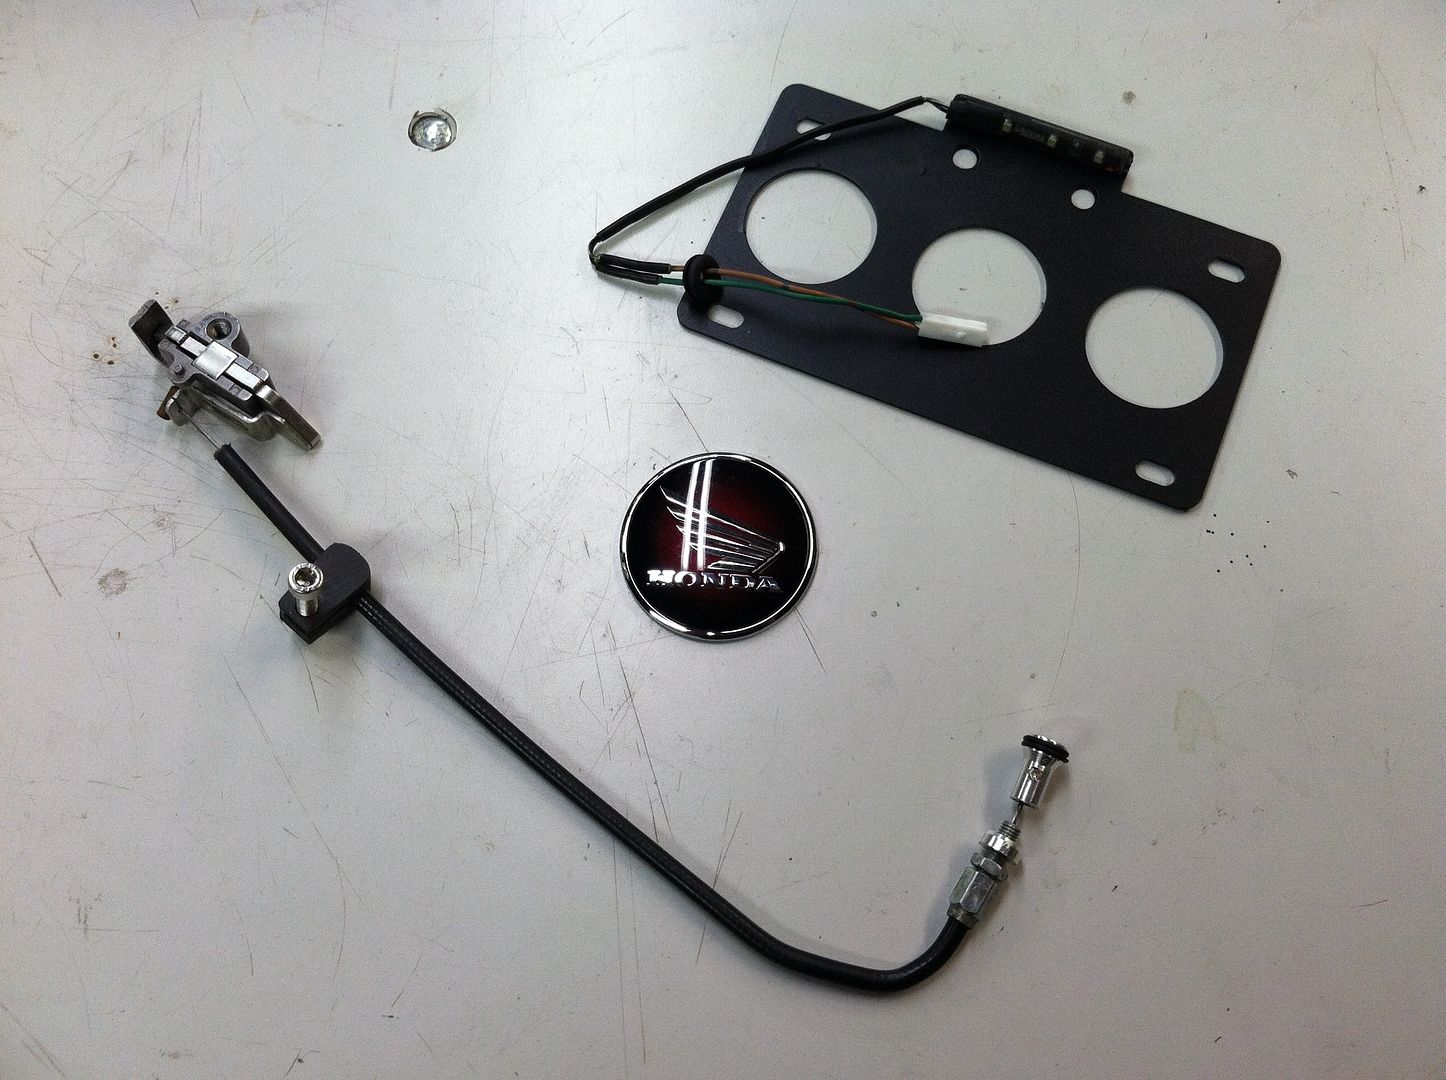
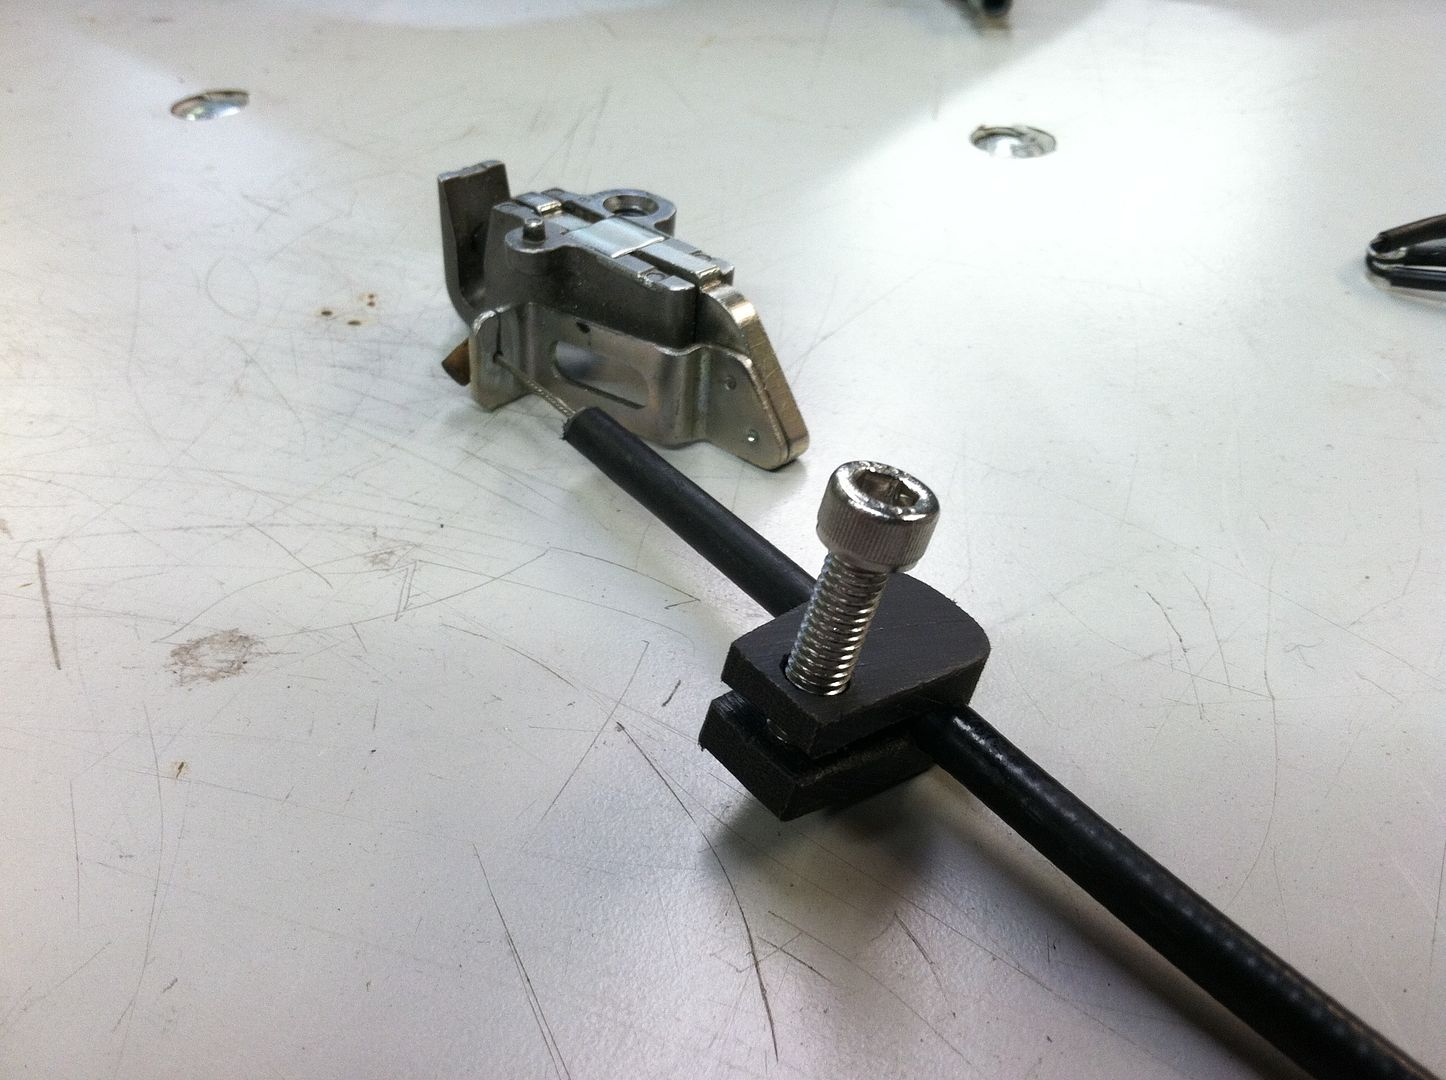
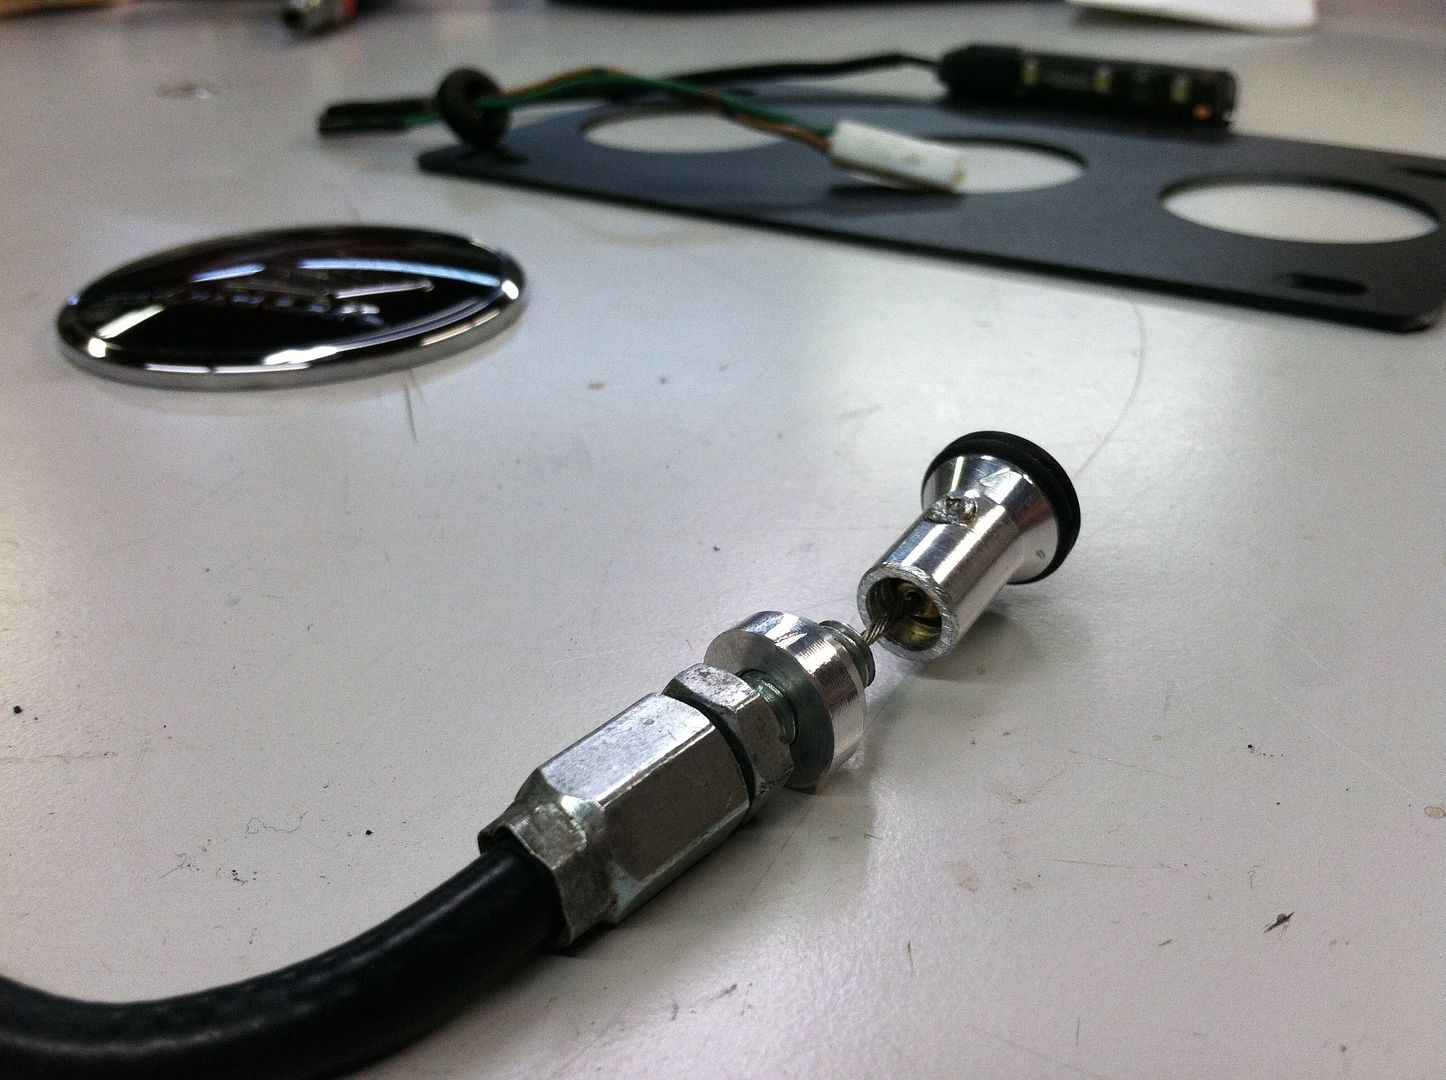
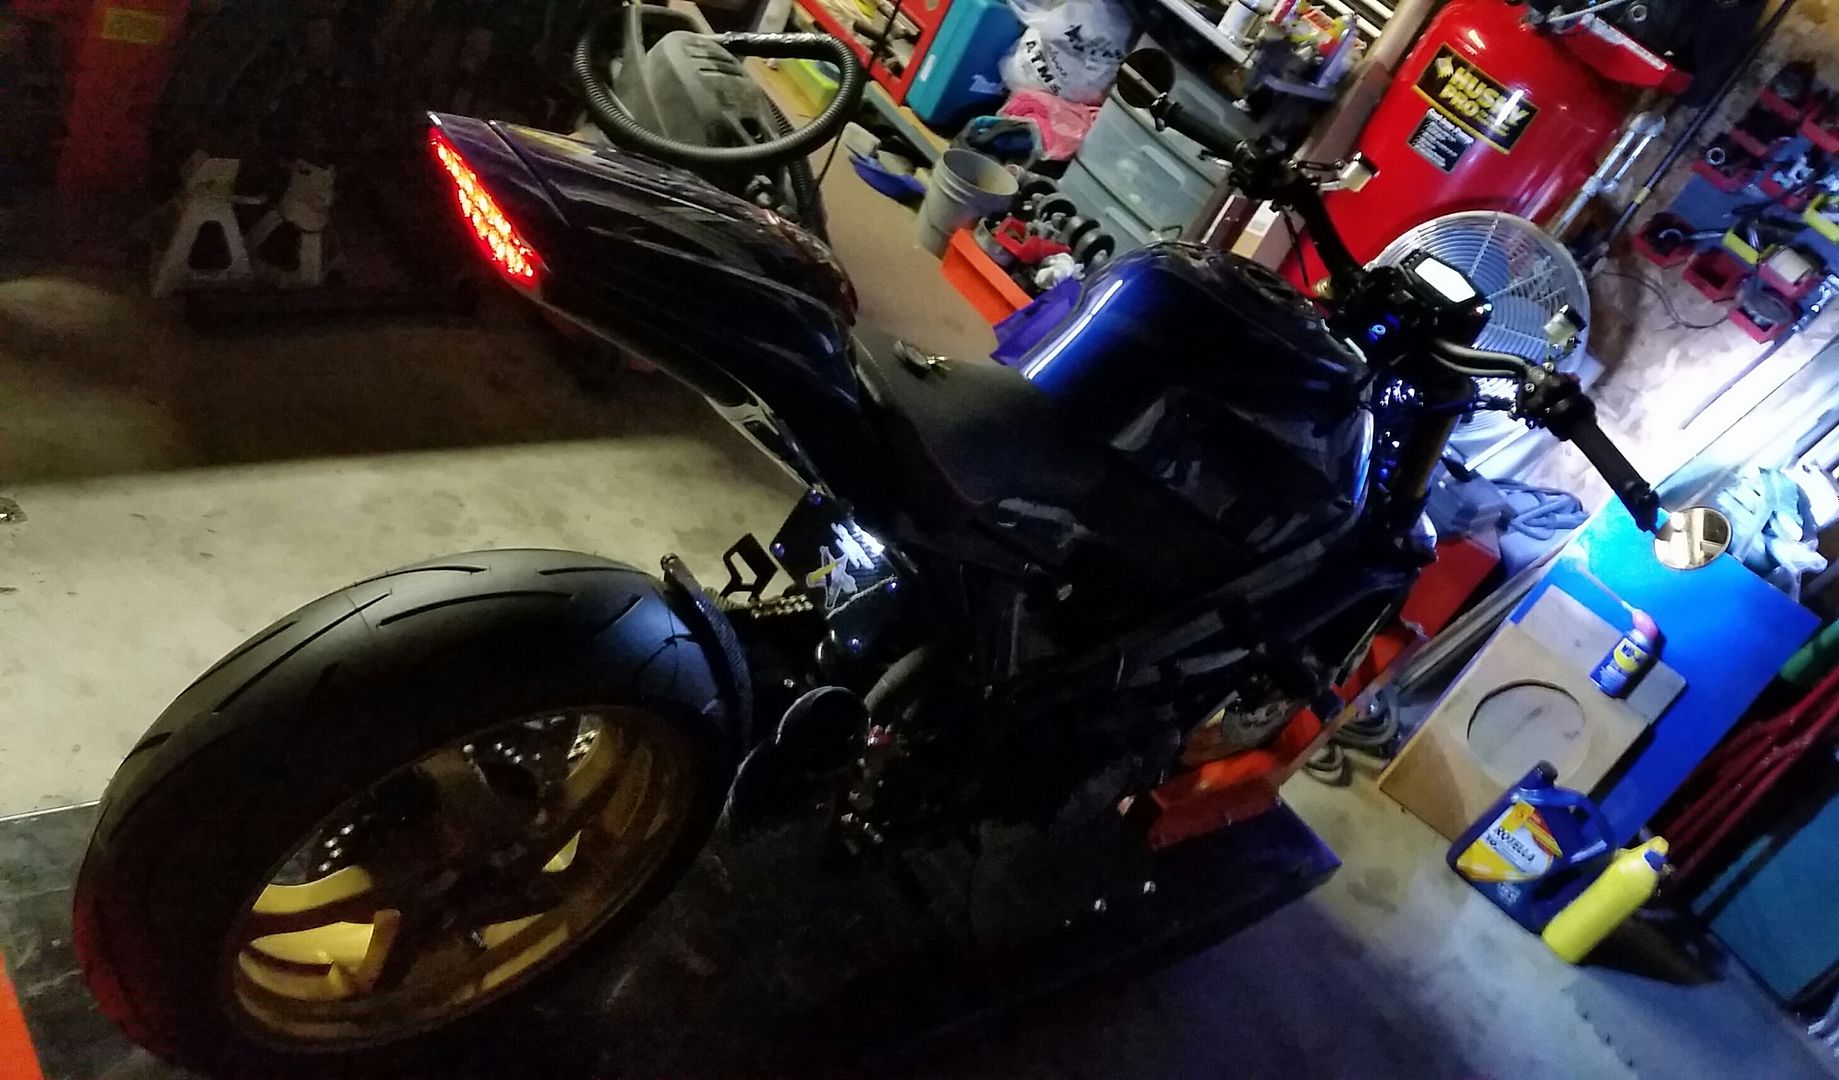
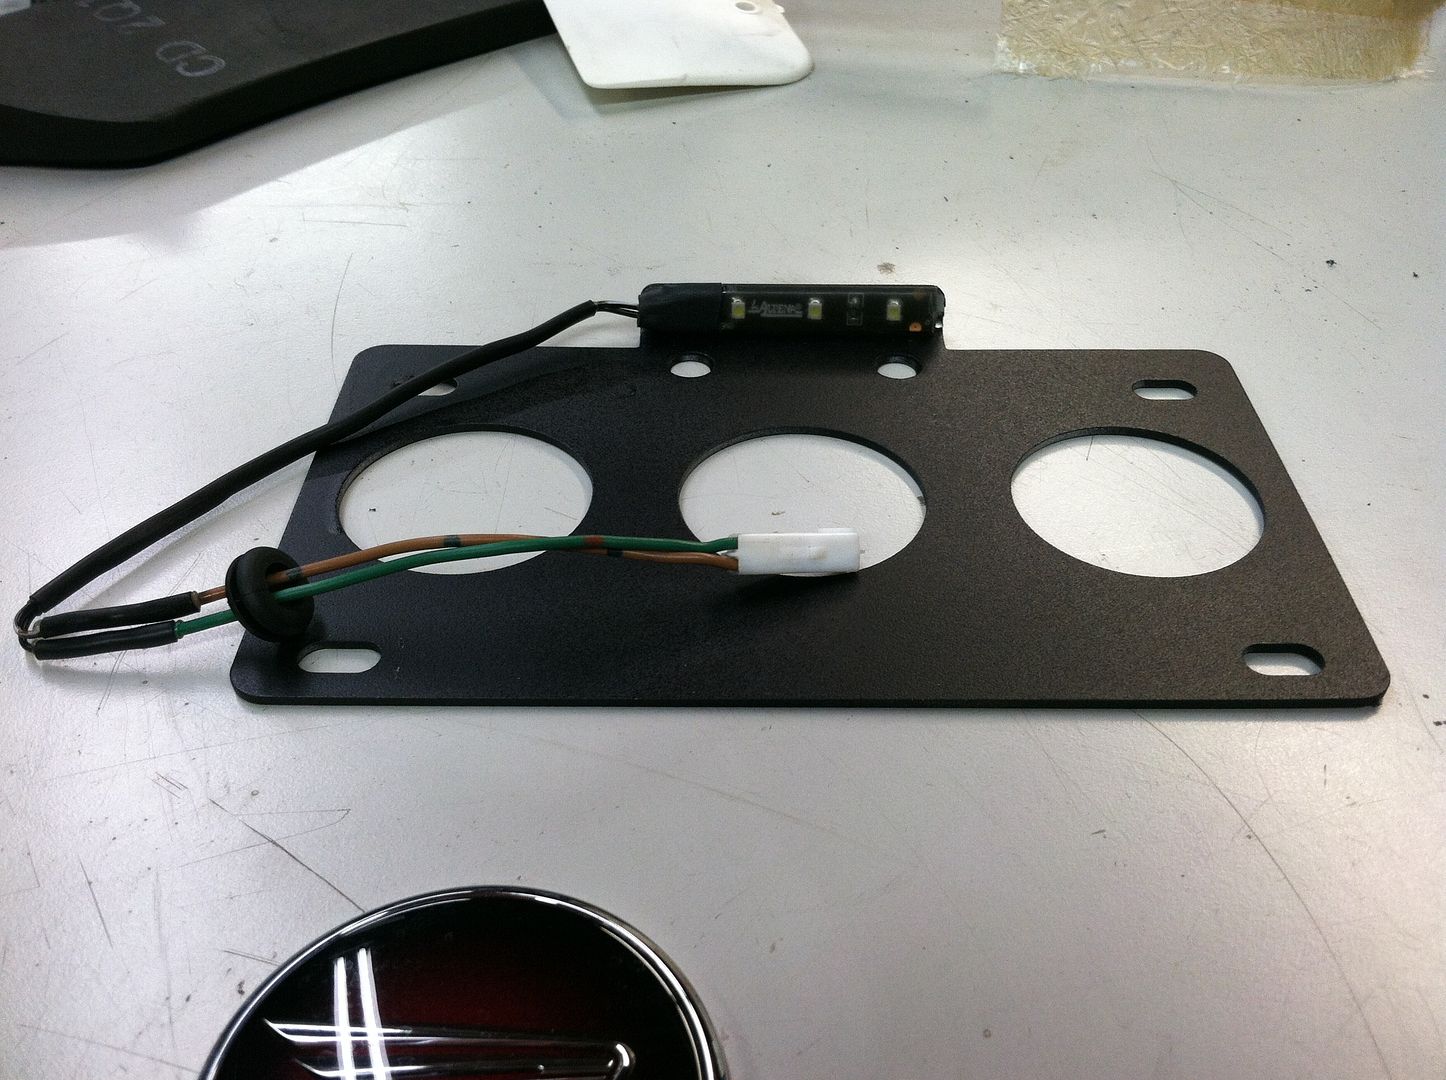
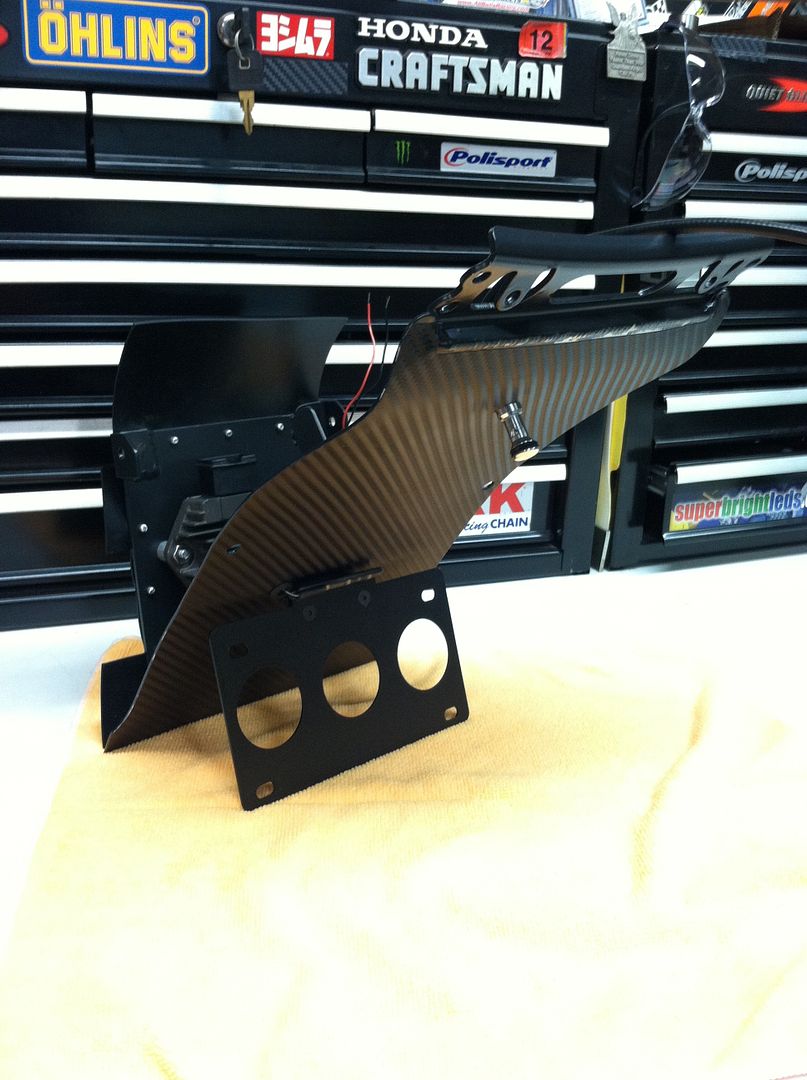
License plate holder was fabbed from aluminum sheet. Light is an led strip.
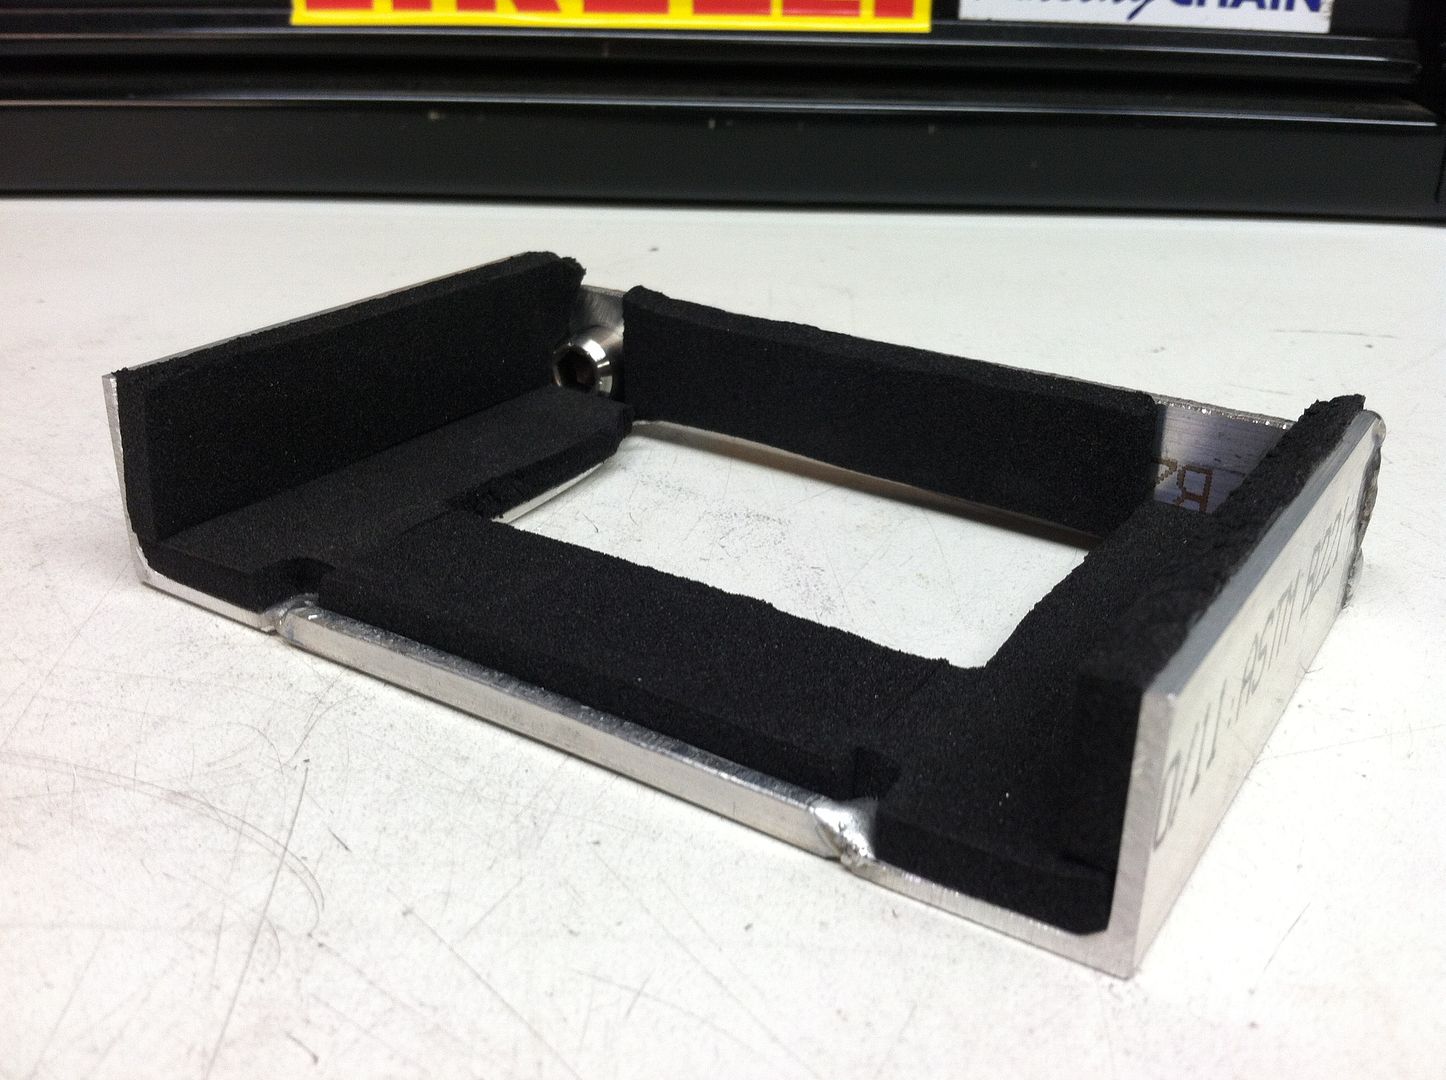
Battery tray made from aluminum angle and foam

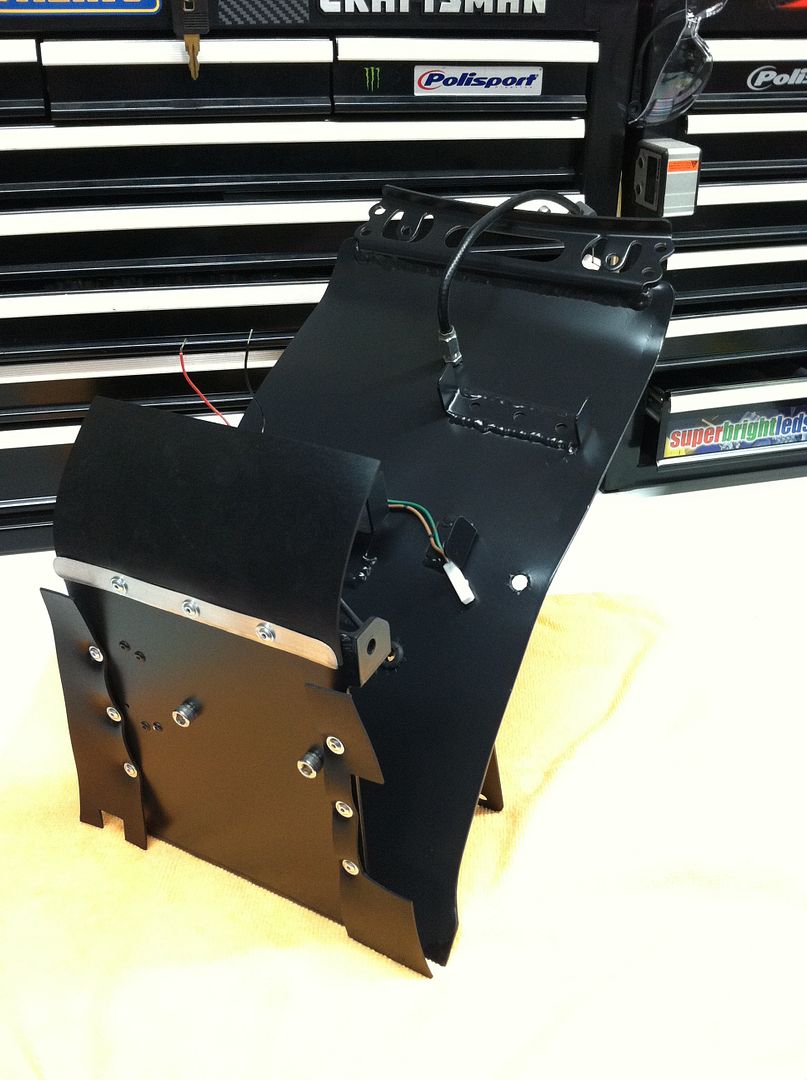
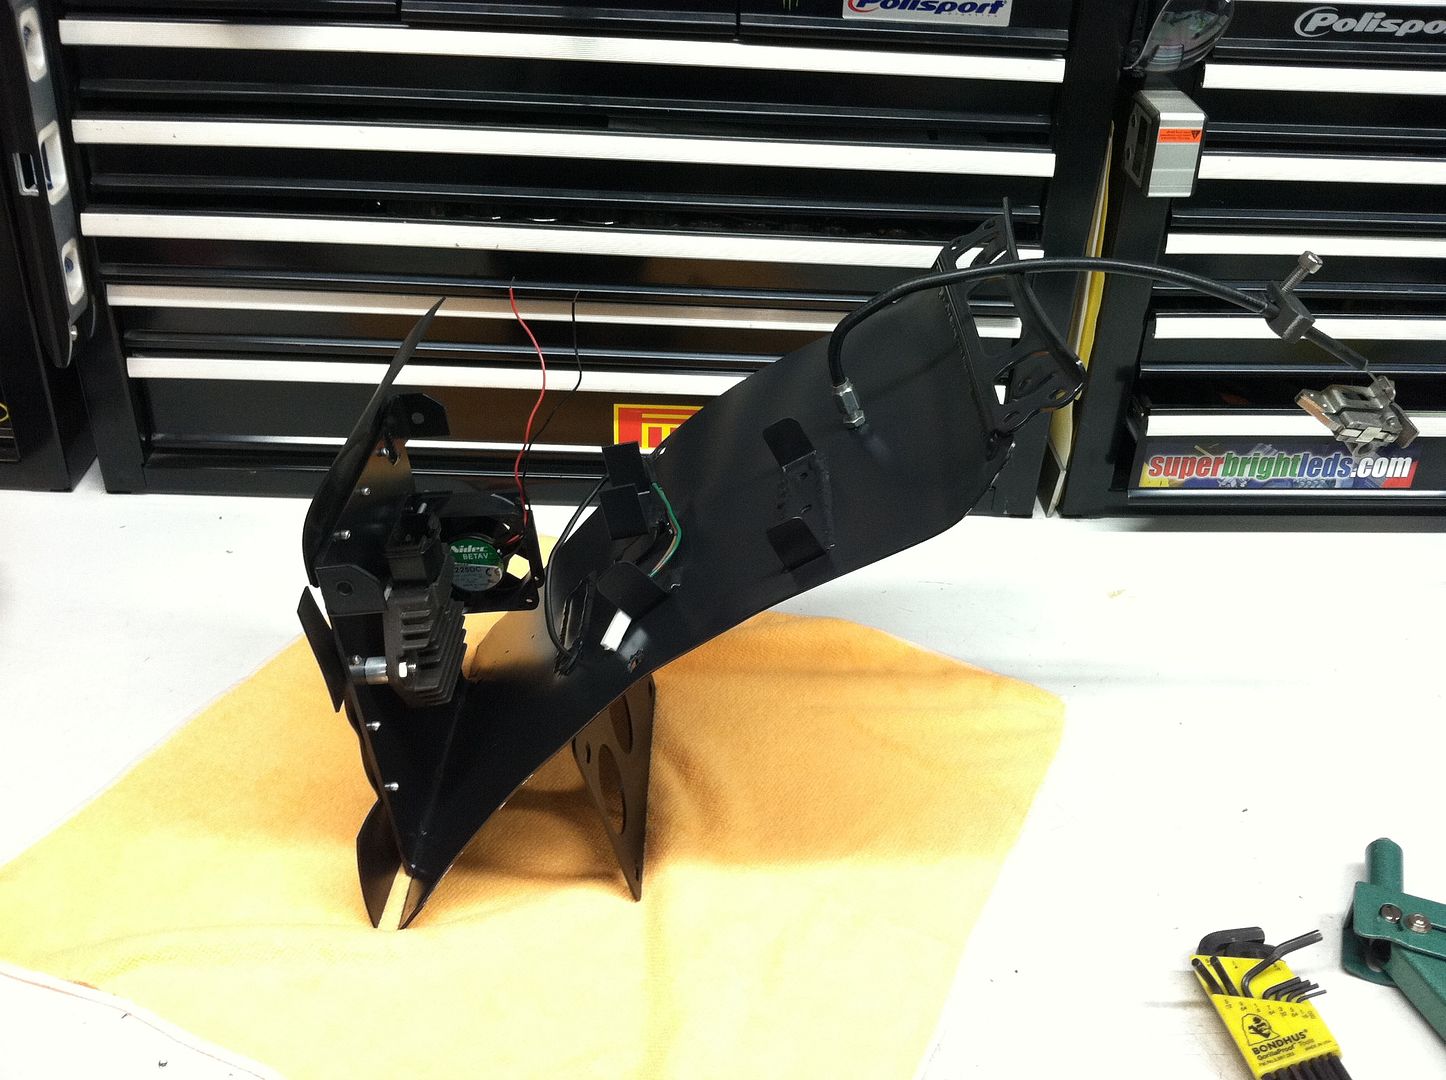
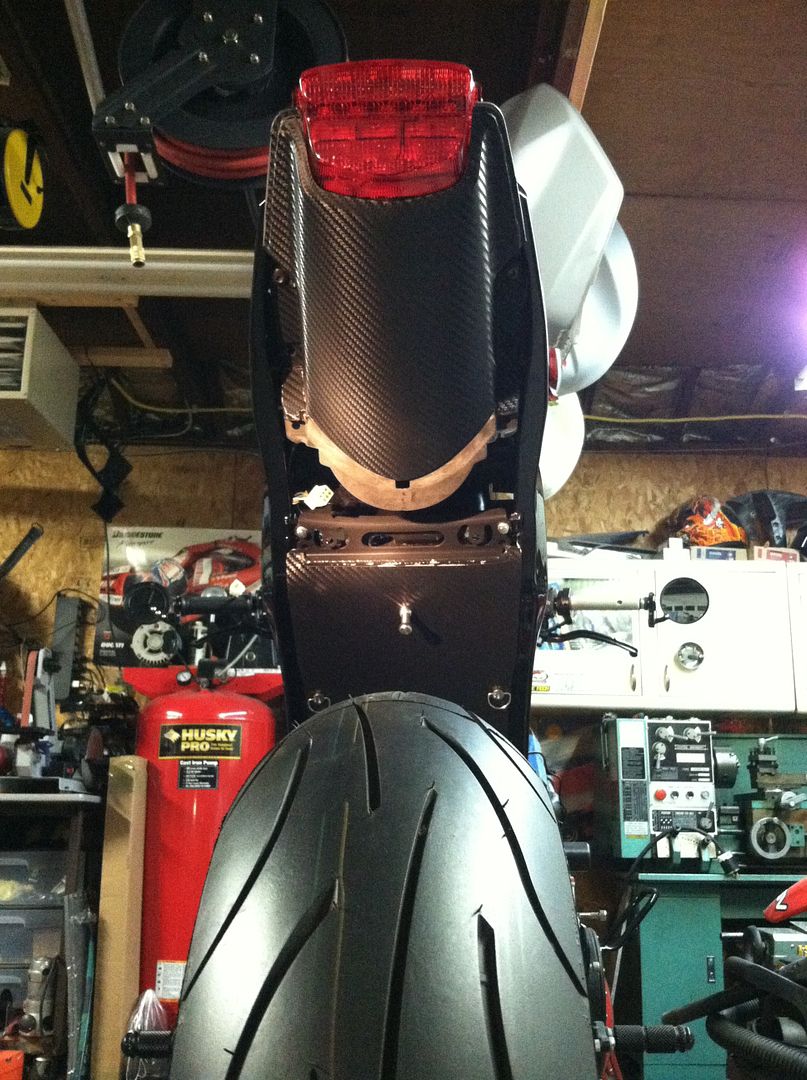
It attaches directly to the subframe, in one of the passenger peg mount holes. It is completly independent of the undertail.
A pc fan turns on with the ignition to cool the r/r
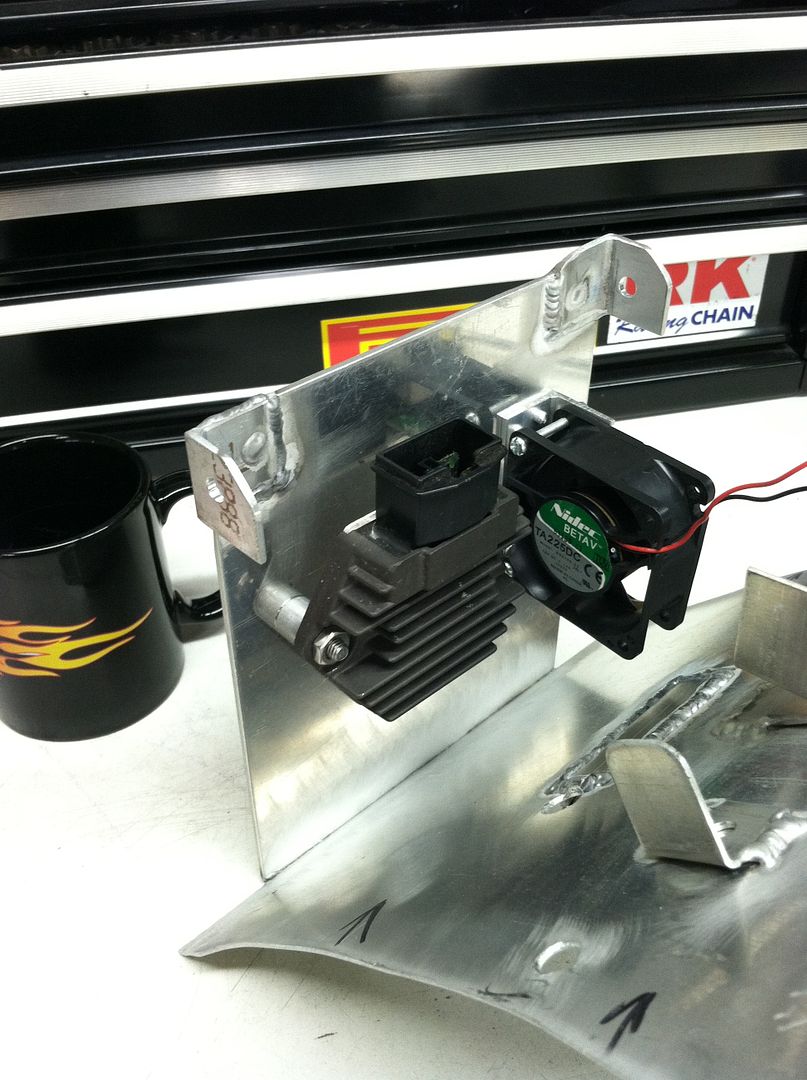
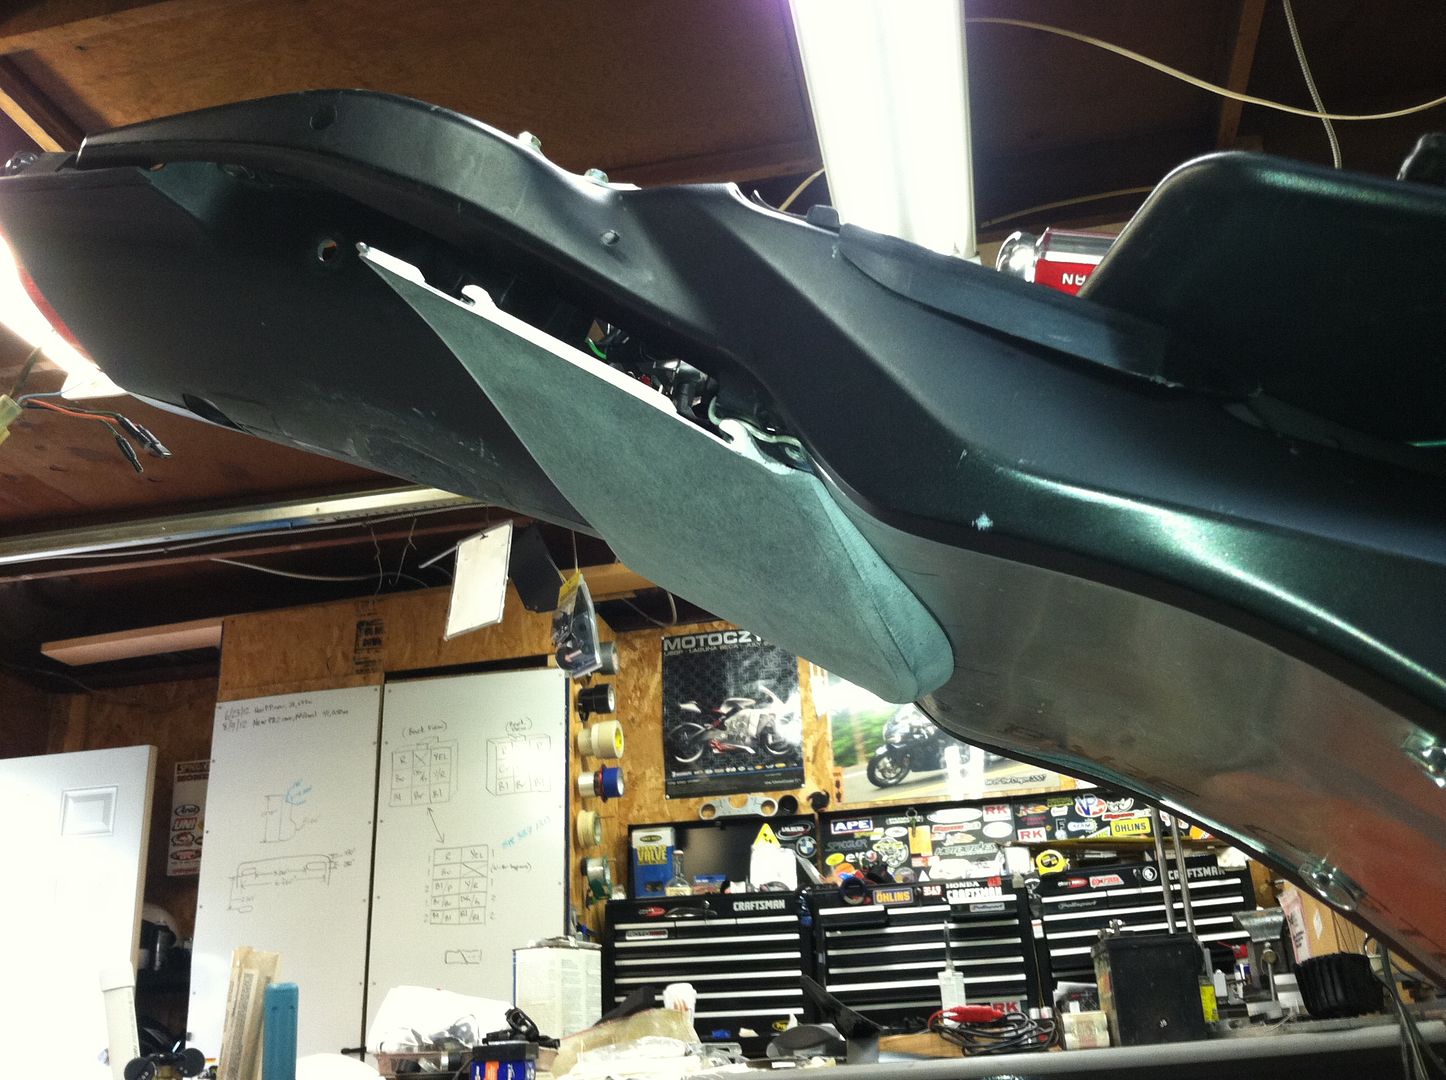
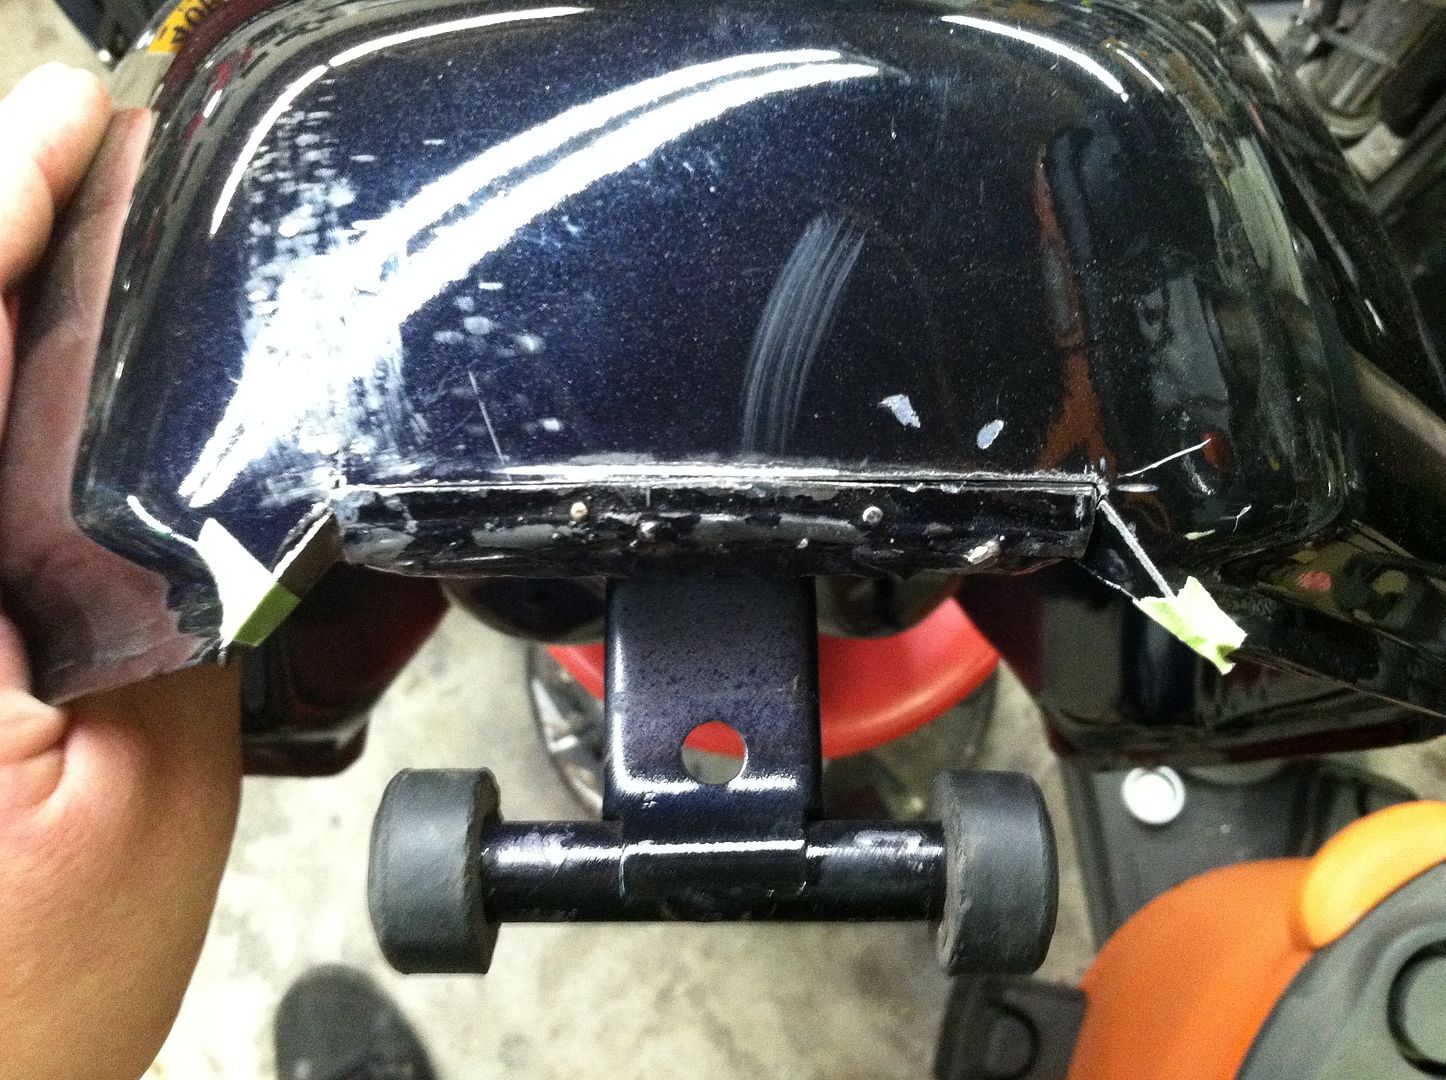
Here is the completed undertail assembly.
I took the 2 piece factory trunk sections and molded them together. I also filled in the signal and license plate holder holes, and then shot it with primer. I decided to wrap it with carbon vinyl for ease of cleaning down the road.
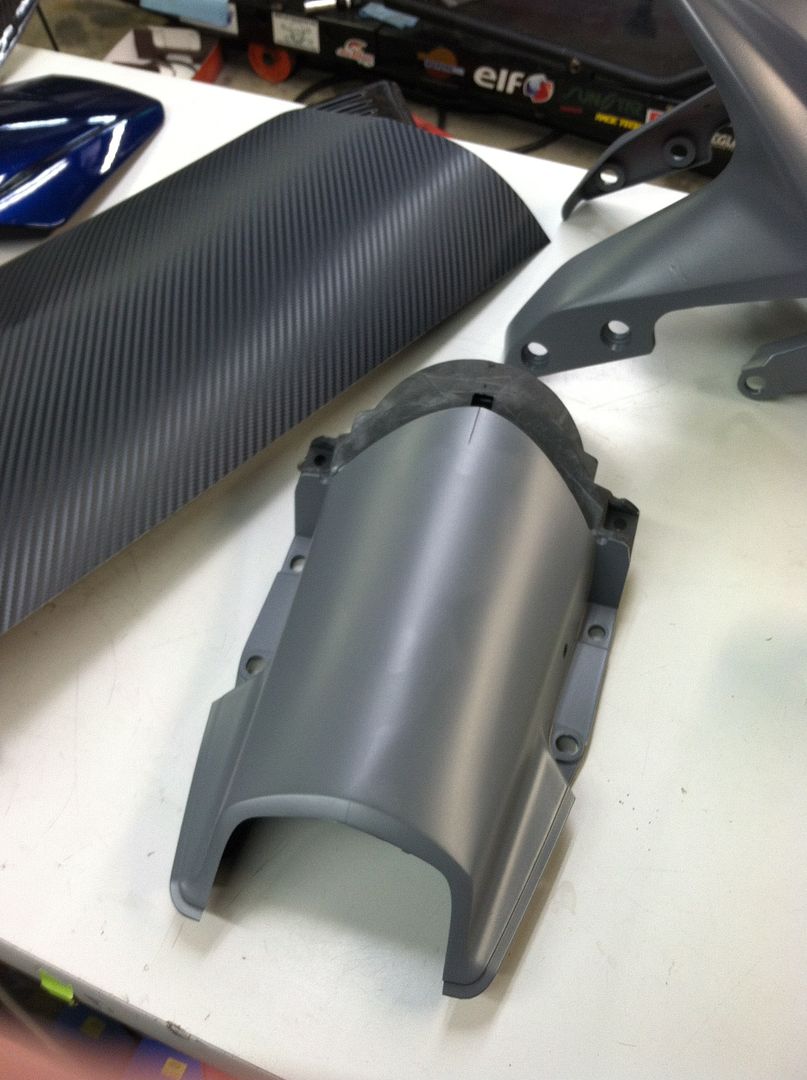
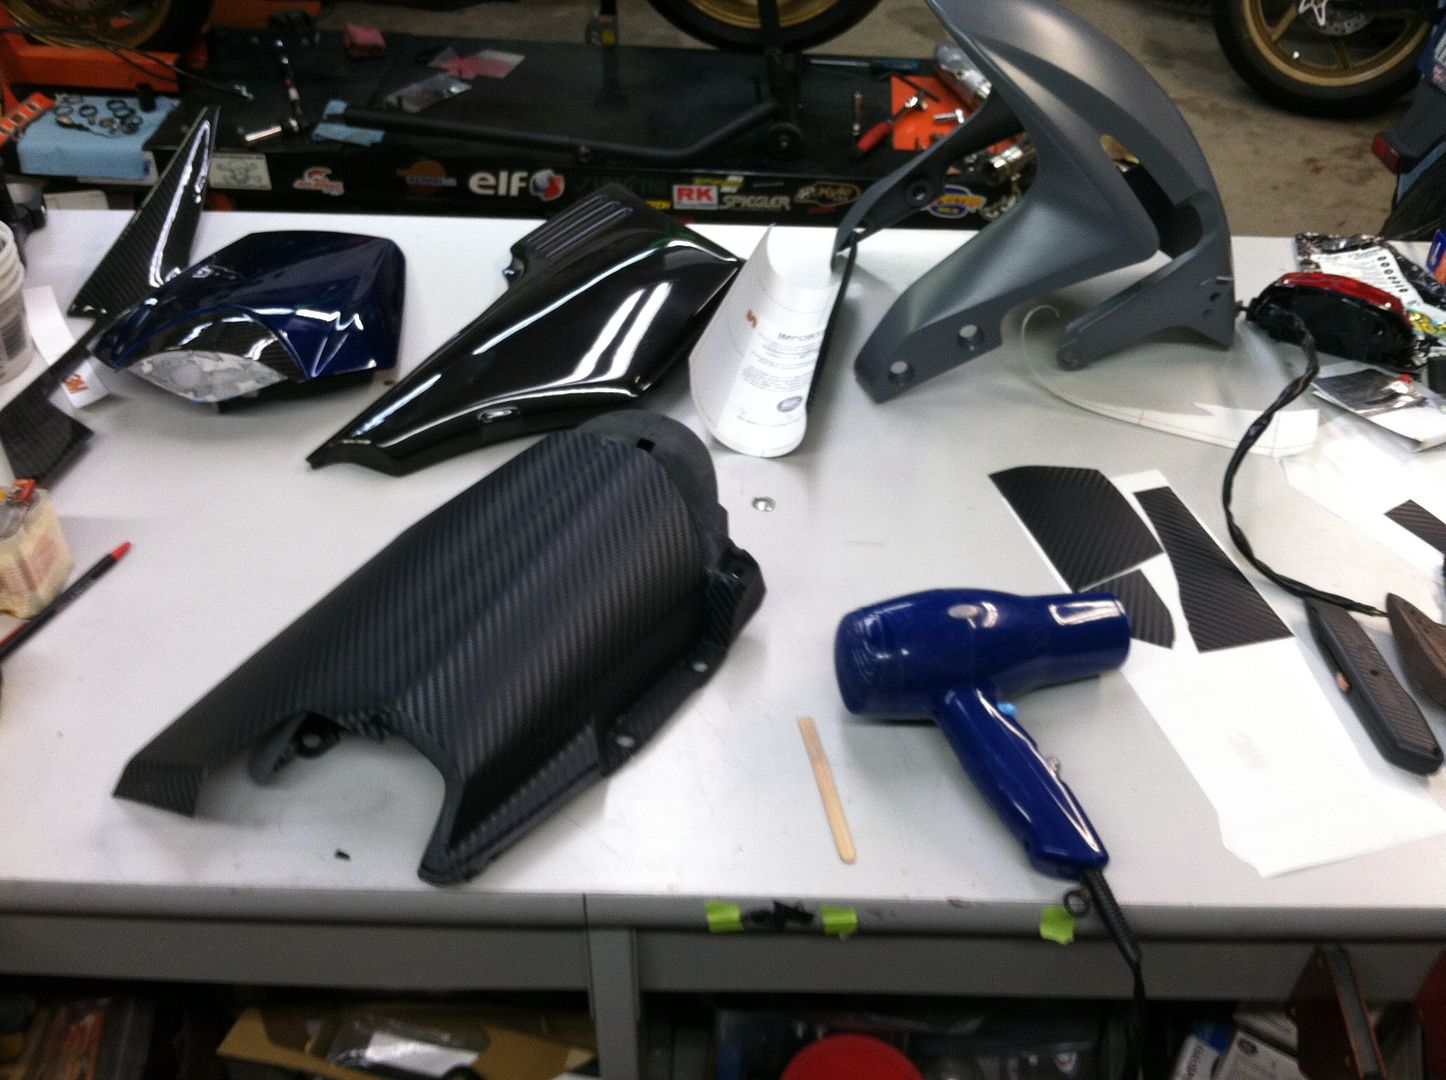
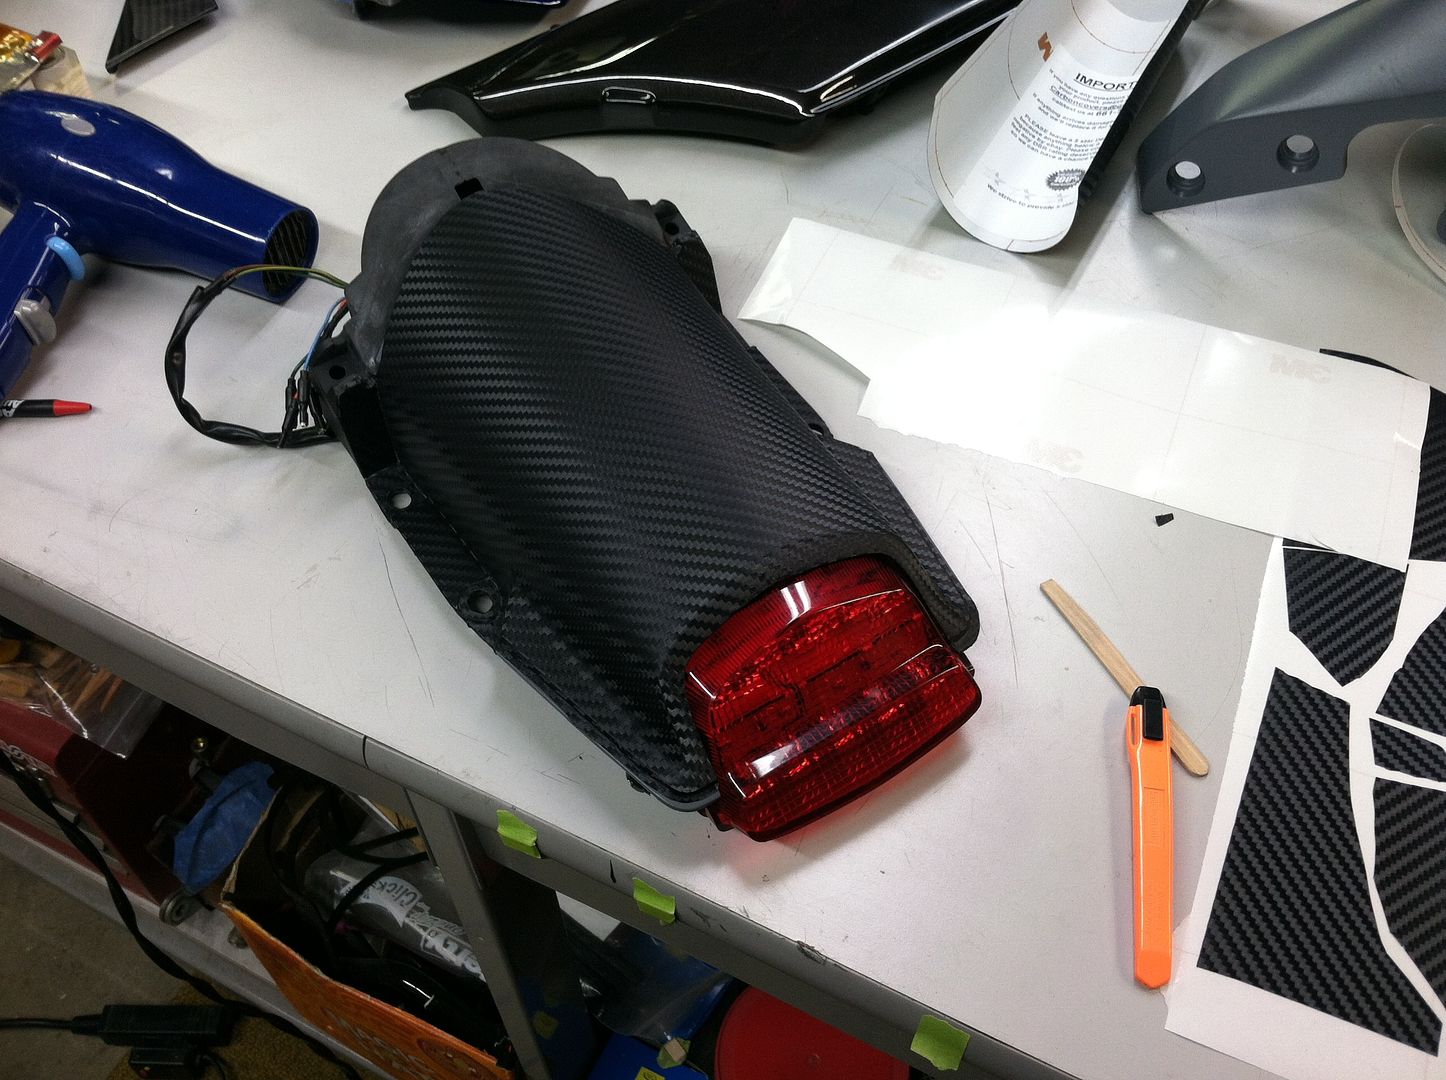
The carbon vinyl was very easy to work with, I highly recommend it!
-
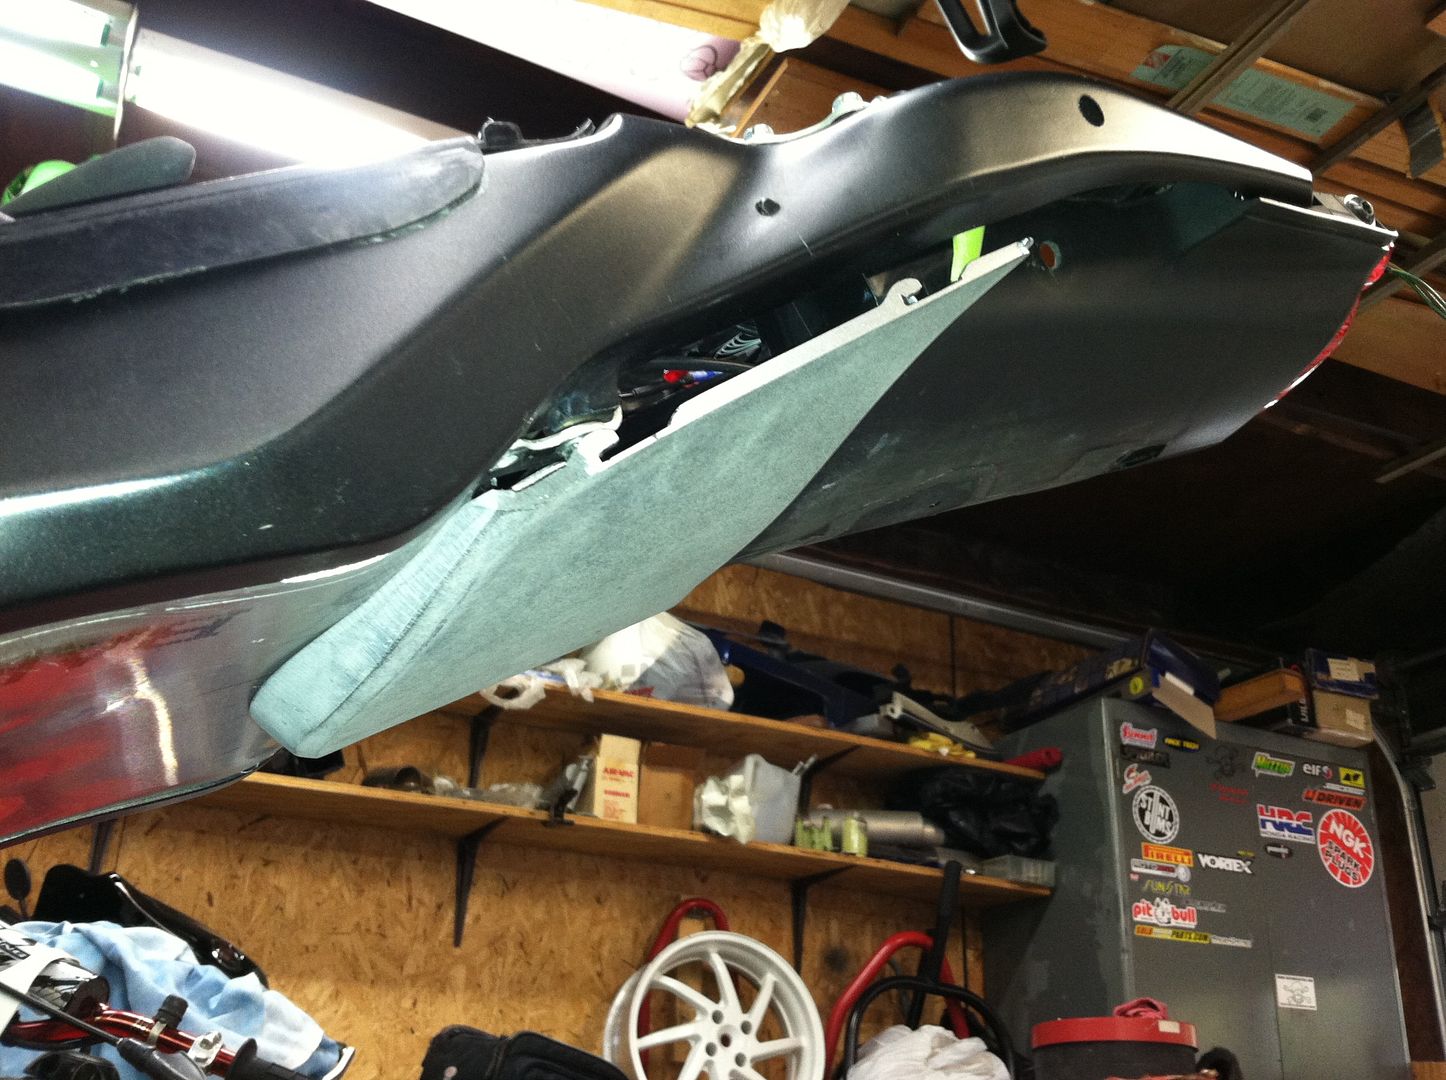
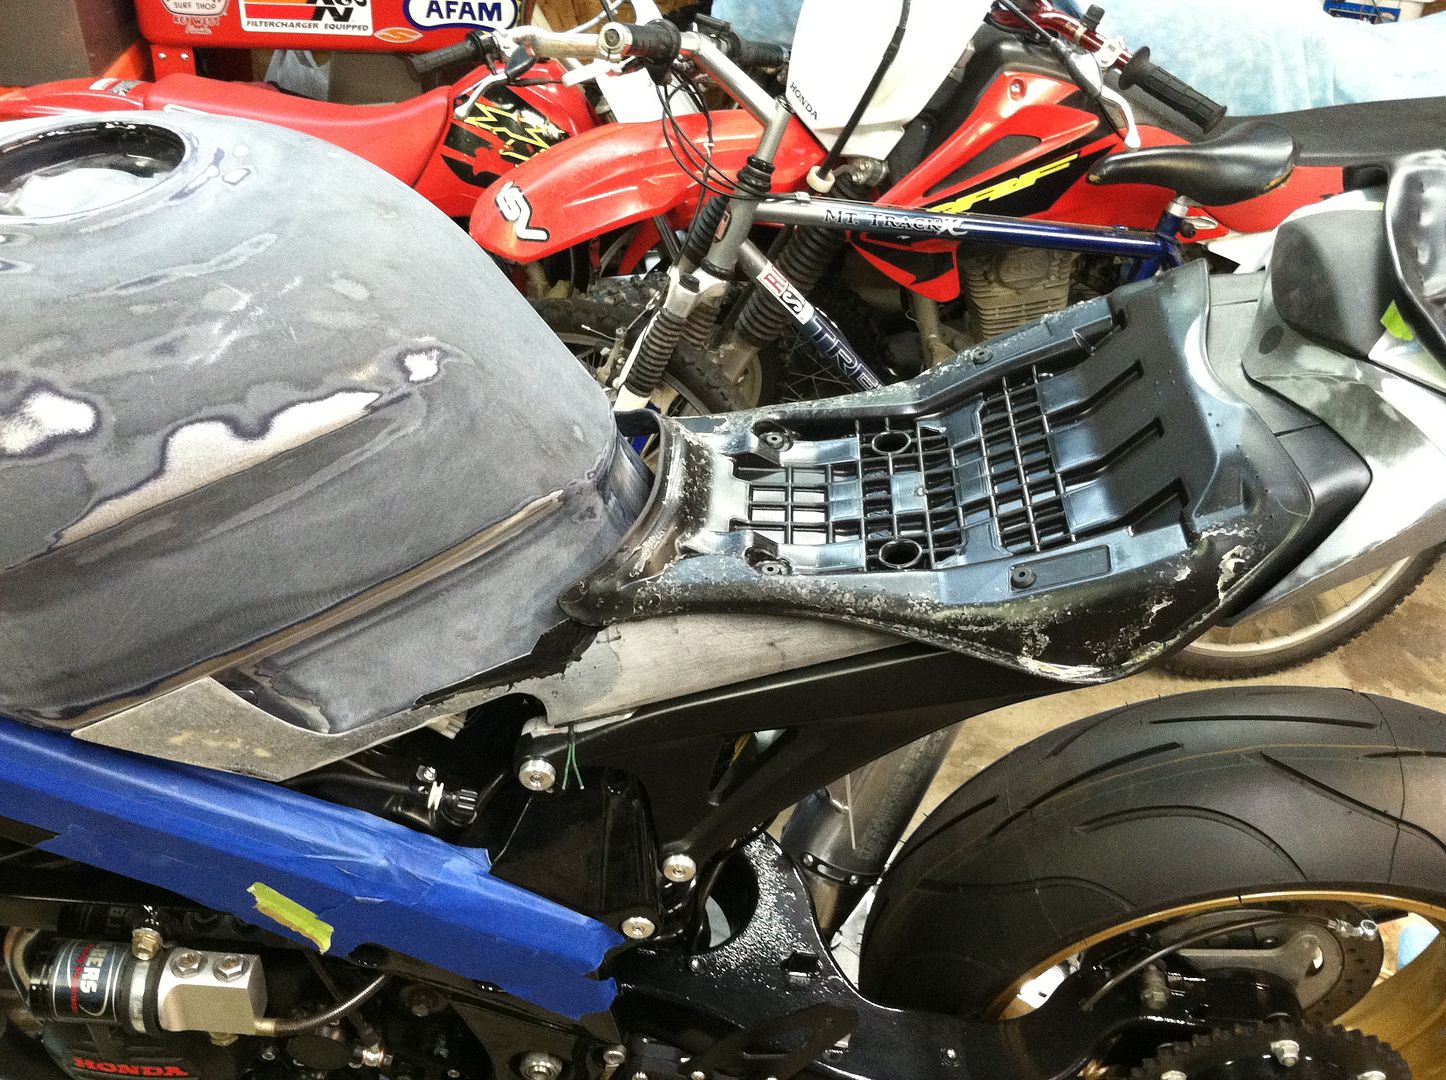
The subframe needed an undertail, the stock plastic tray would not do at all. I couldn't fit all my parts in it, and it was unsightly.
So I made a new one from aluminum sheet. I attached it with 2 DZUS fasteners, and welded it to one of the factory braces.
Doing this caused a new issue - the bodywork on the underside of the tail no longer fit flush to the undertail.
Plio Grip to the rescue! I wish I had taken some before pics, but I was on a roll that day.
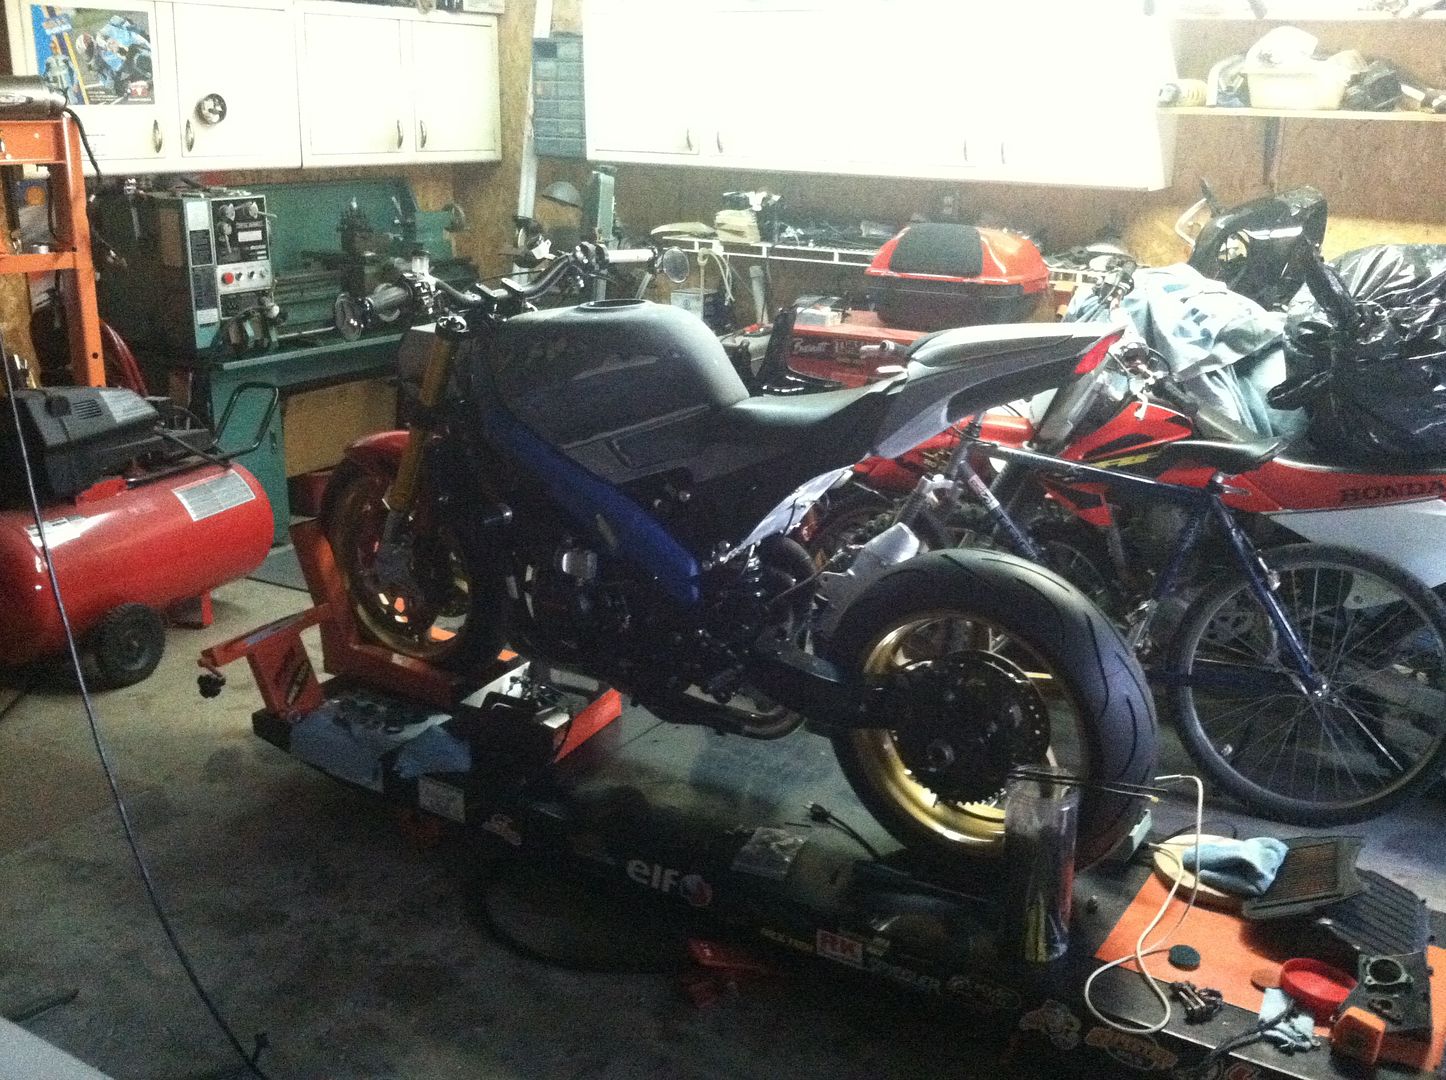
It was really starting to come together at this point
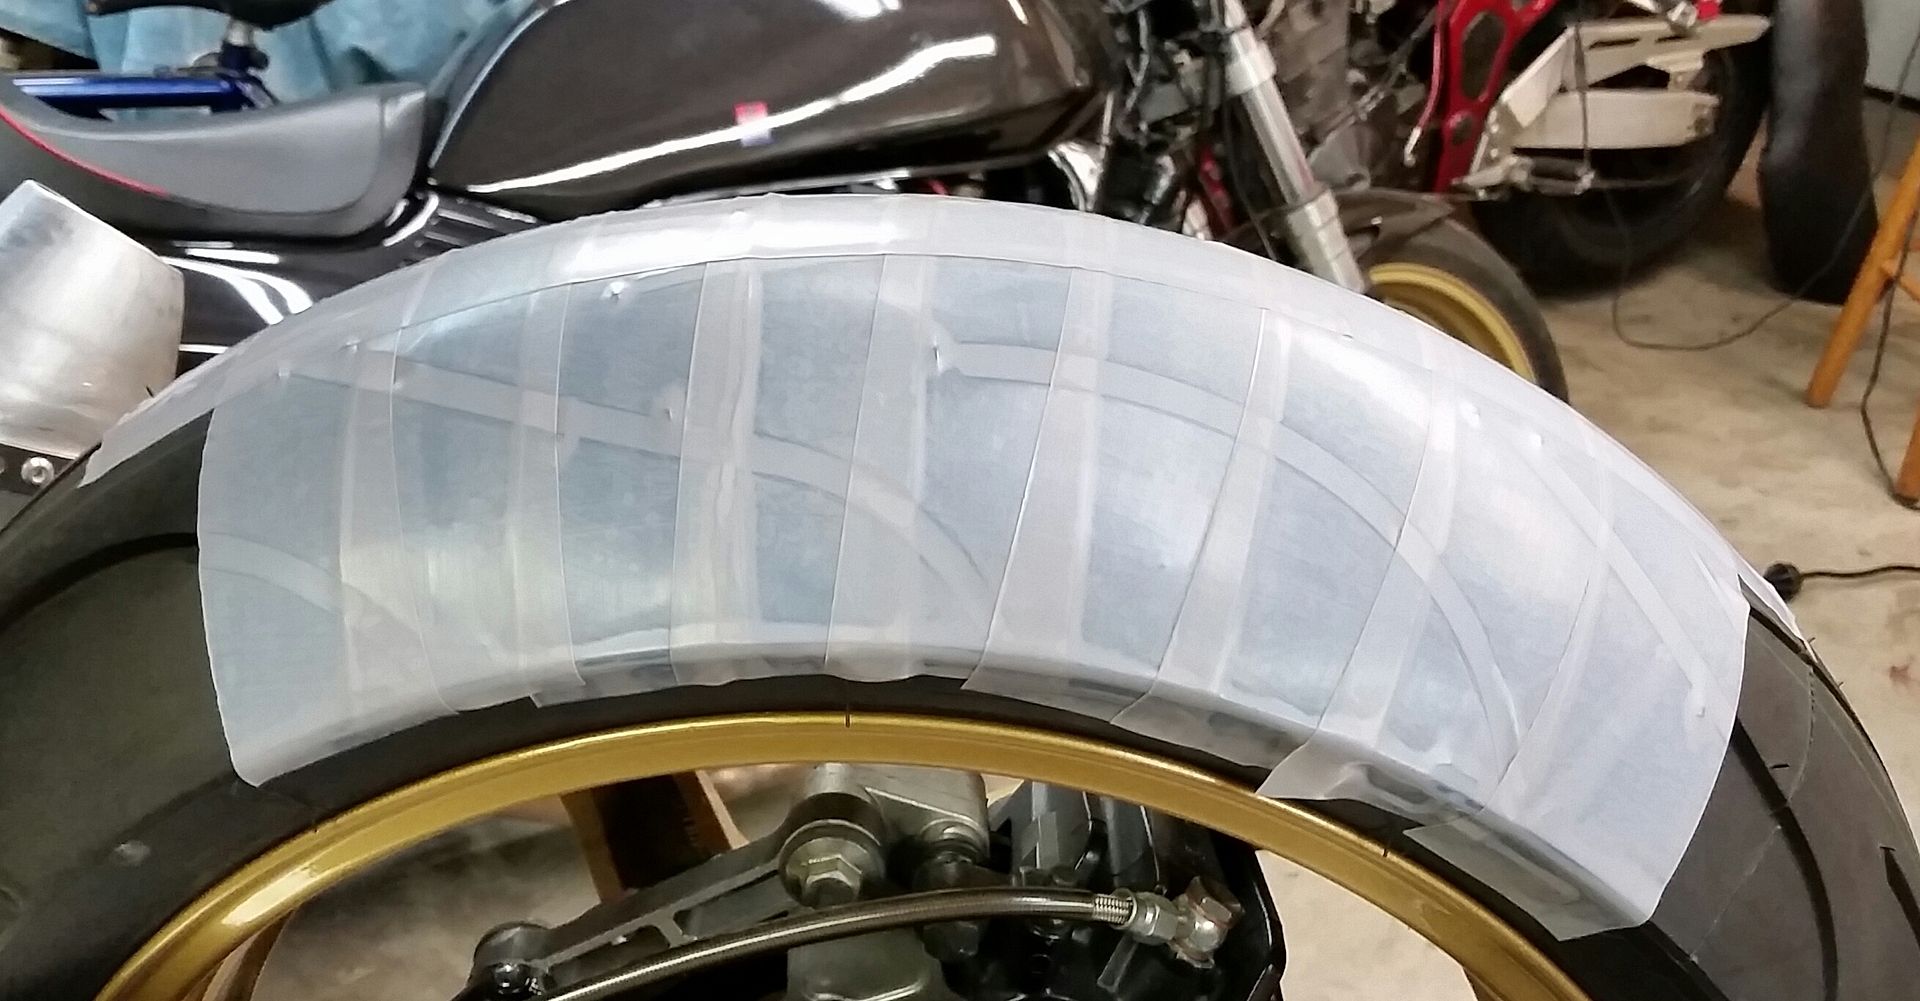
I found a 600RR fender with a few cracks on ebay for little money, repaired it easily and improved the look IMO
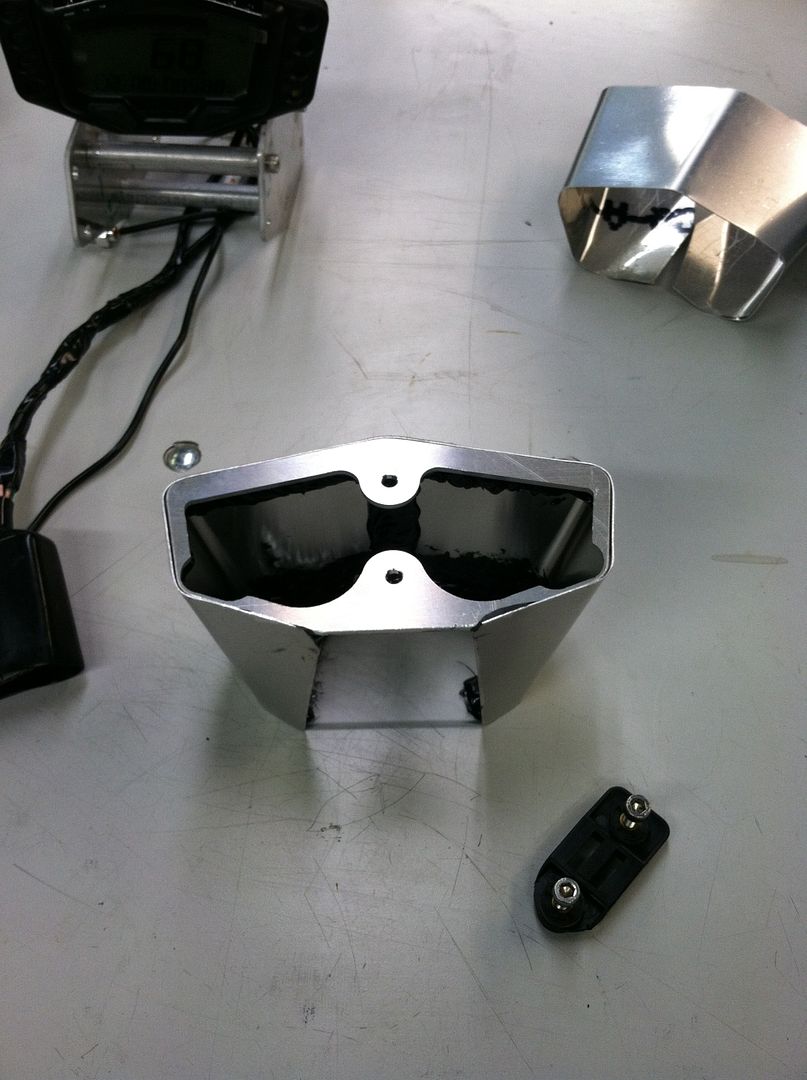
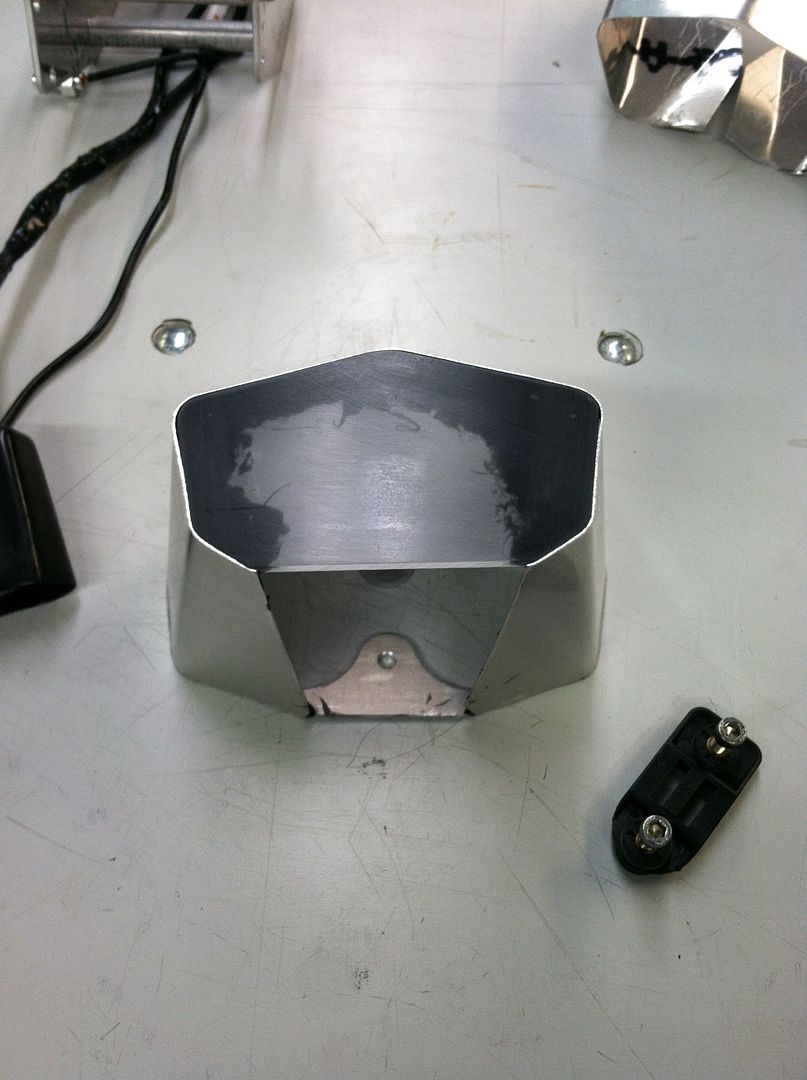
Began mocking up the gauge mount and pod
Made a buck to form the final configuration to
And the part, just before being prepped for paint.
-
1
-
-
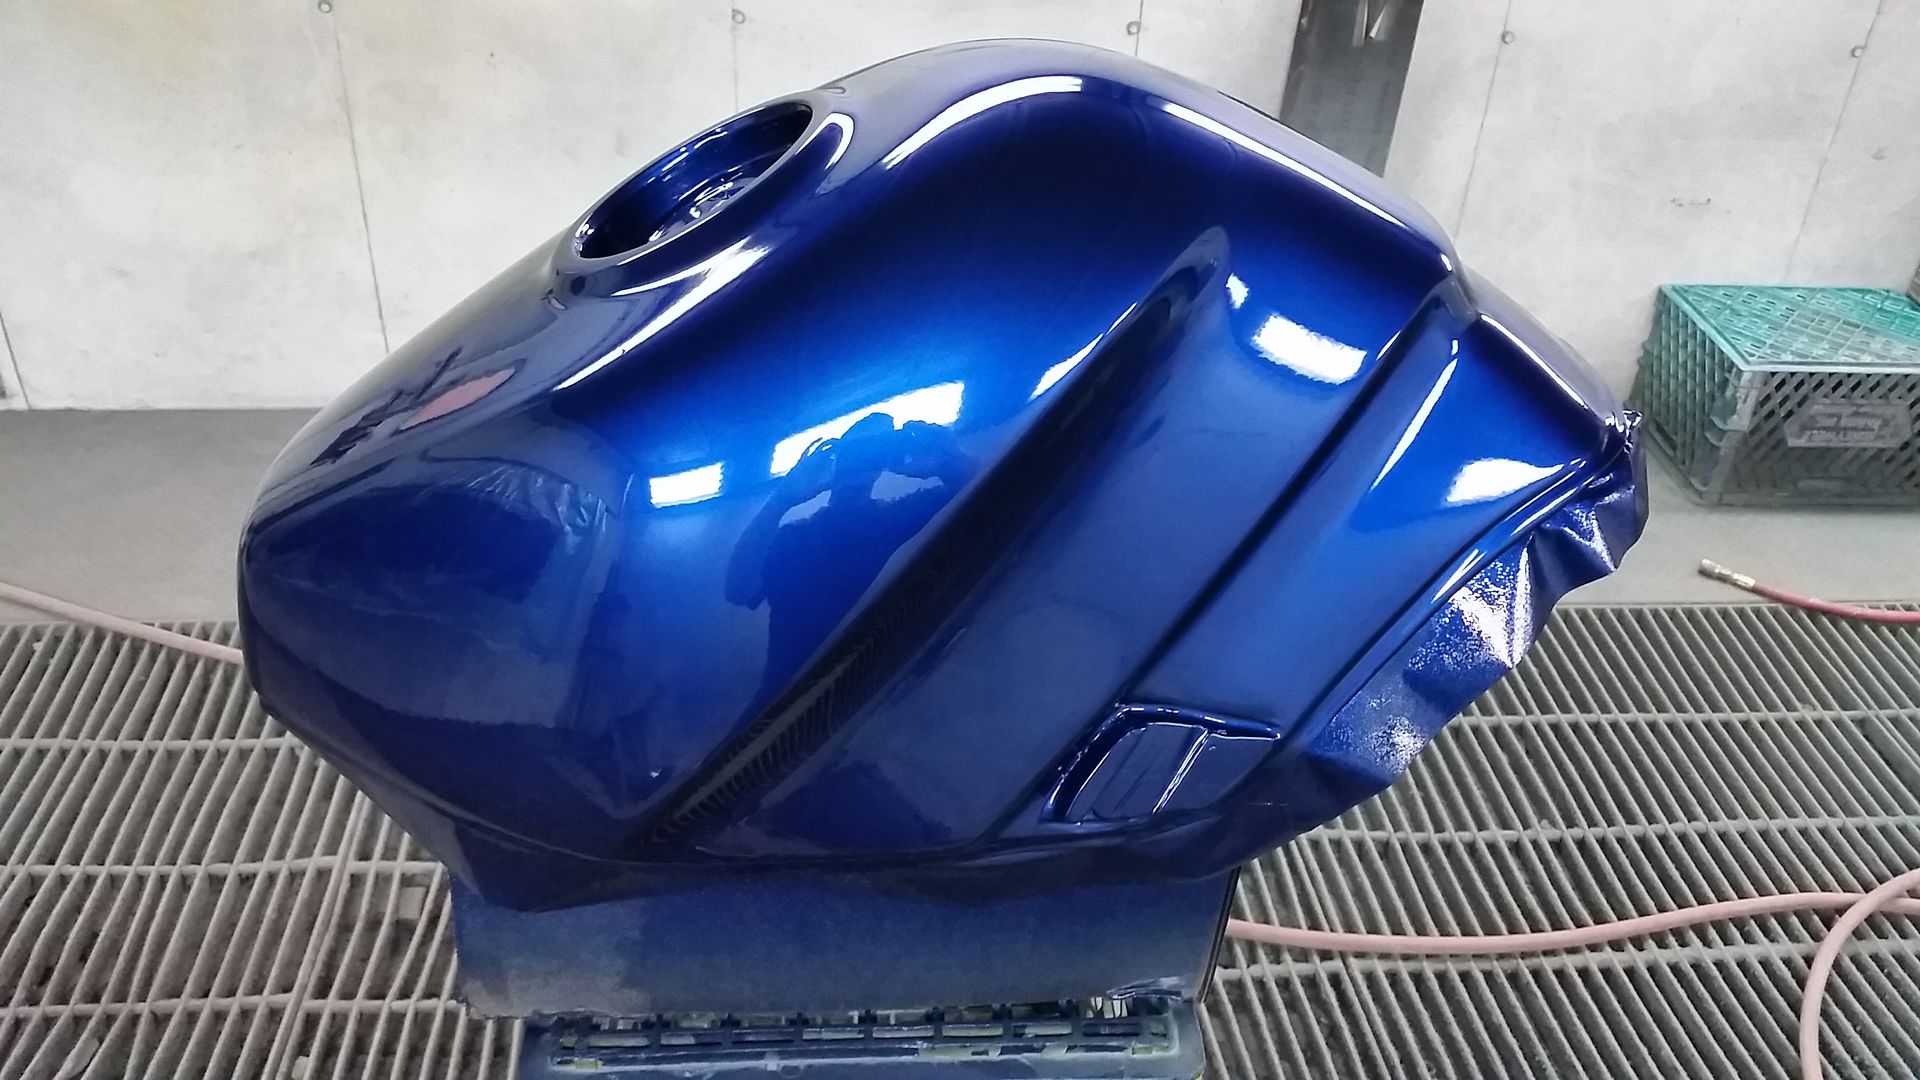
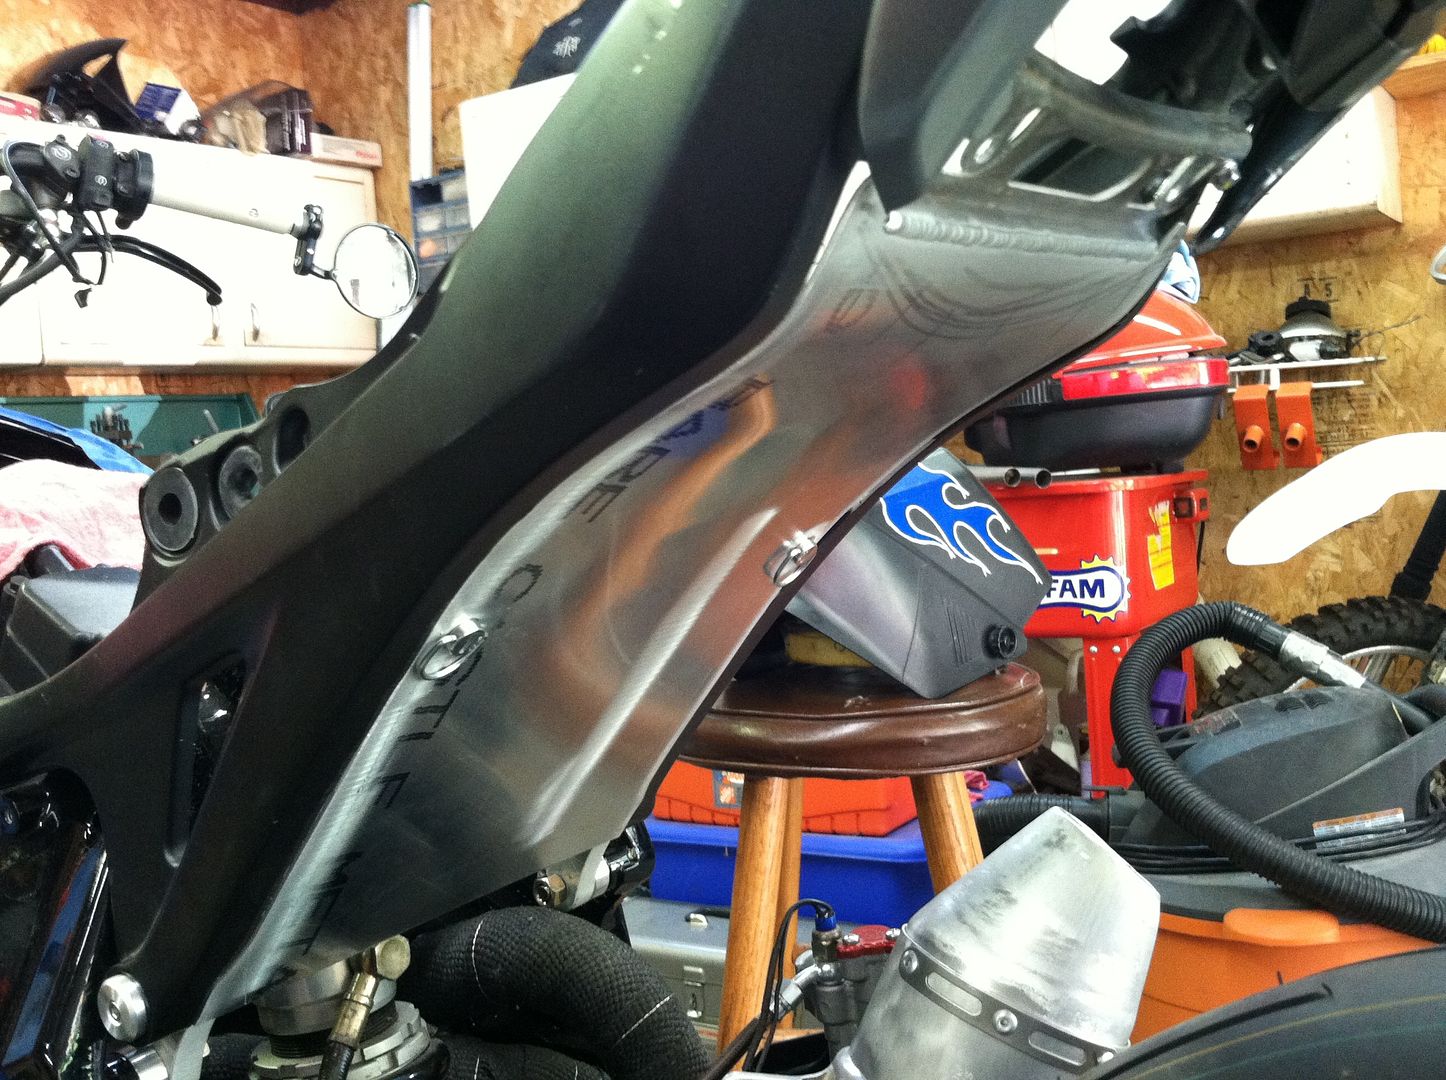
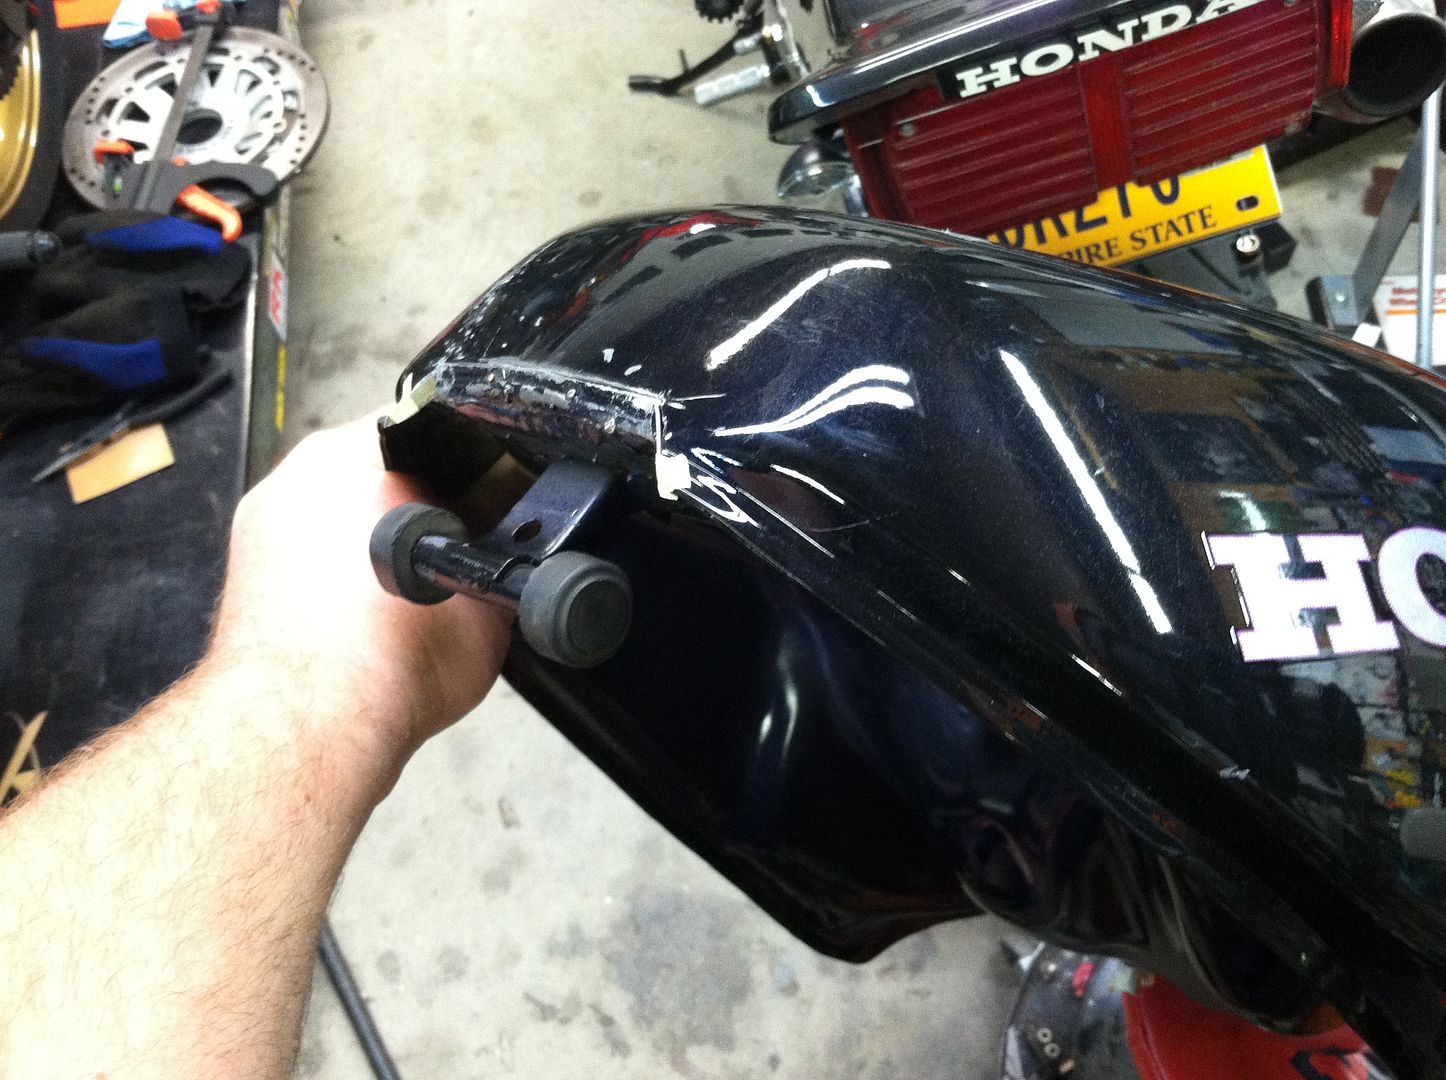
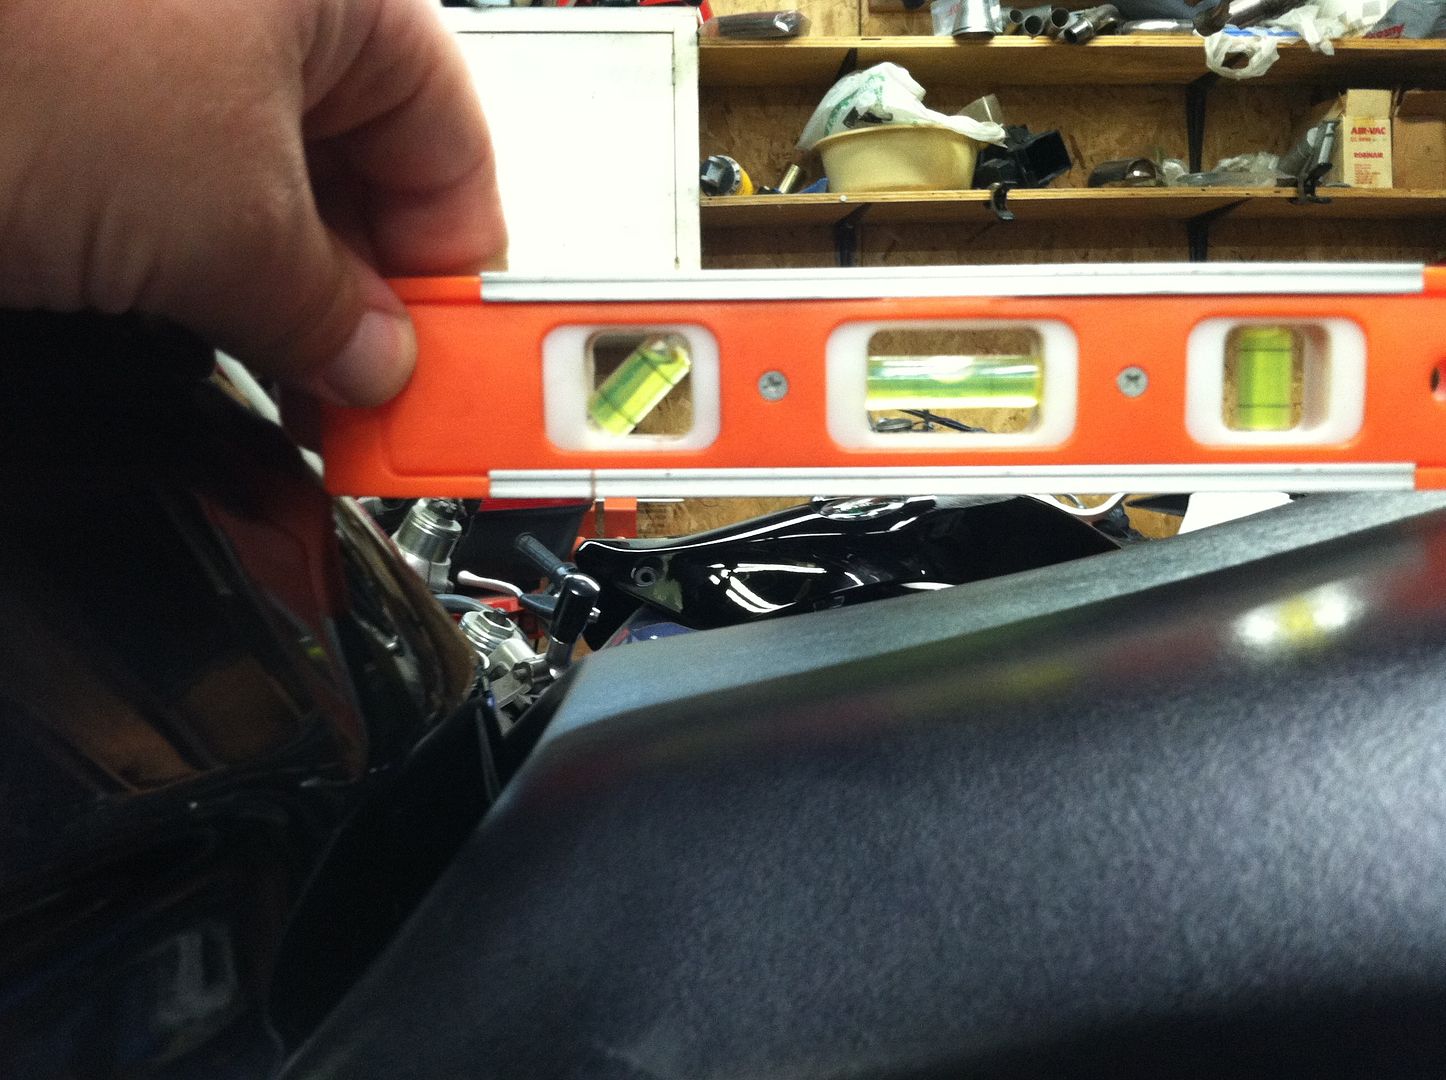
The wiring needed to pass from the handlebars into the area in front of the airbox... but the lovely clean lines of the VFR tank prevent that... so I had to cut & shut the front of the tank.
-
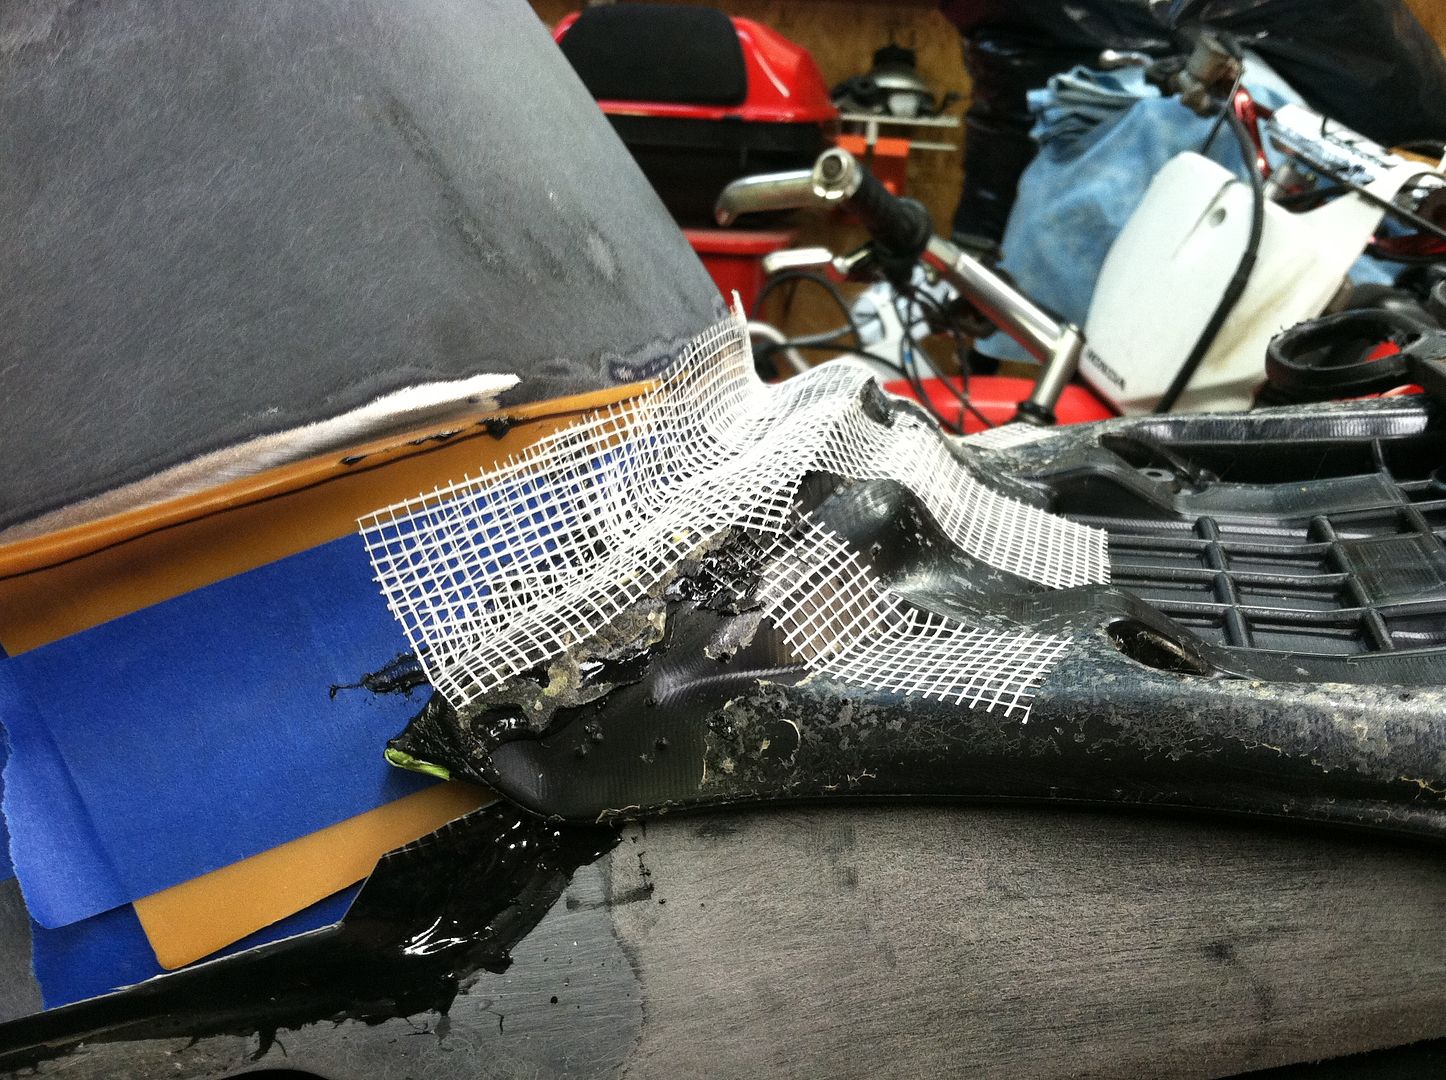
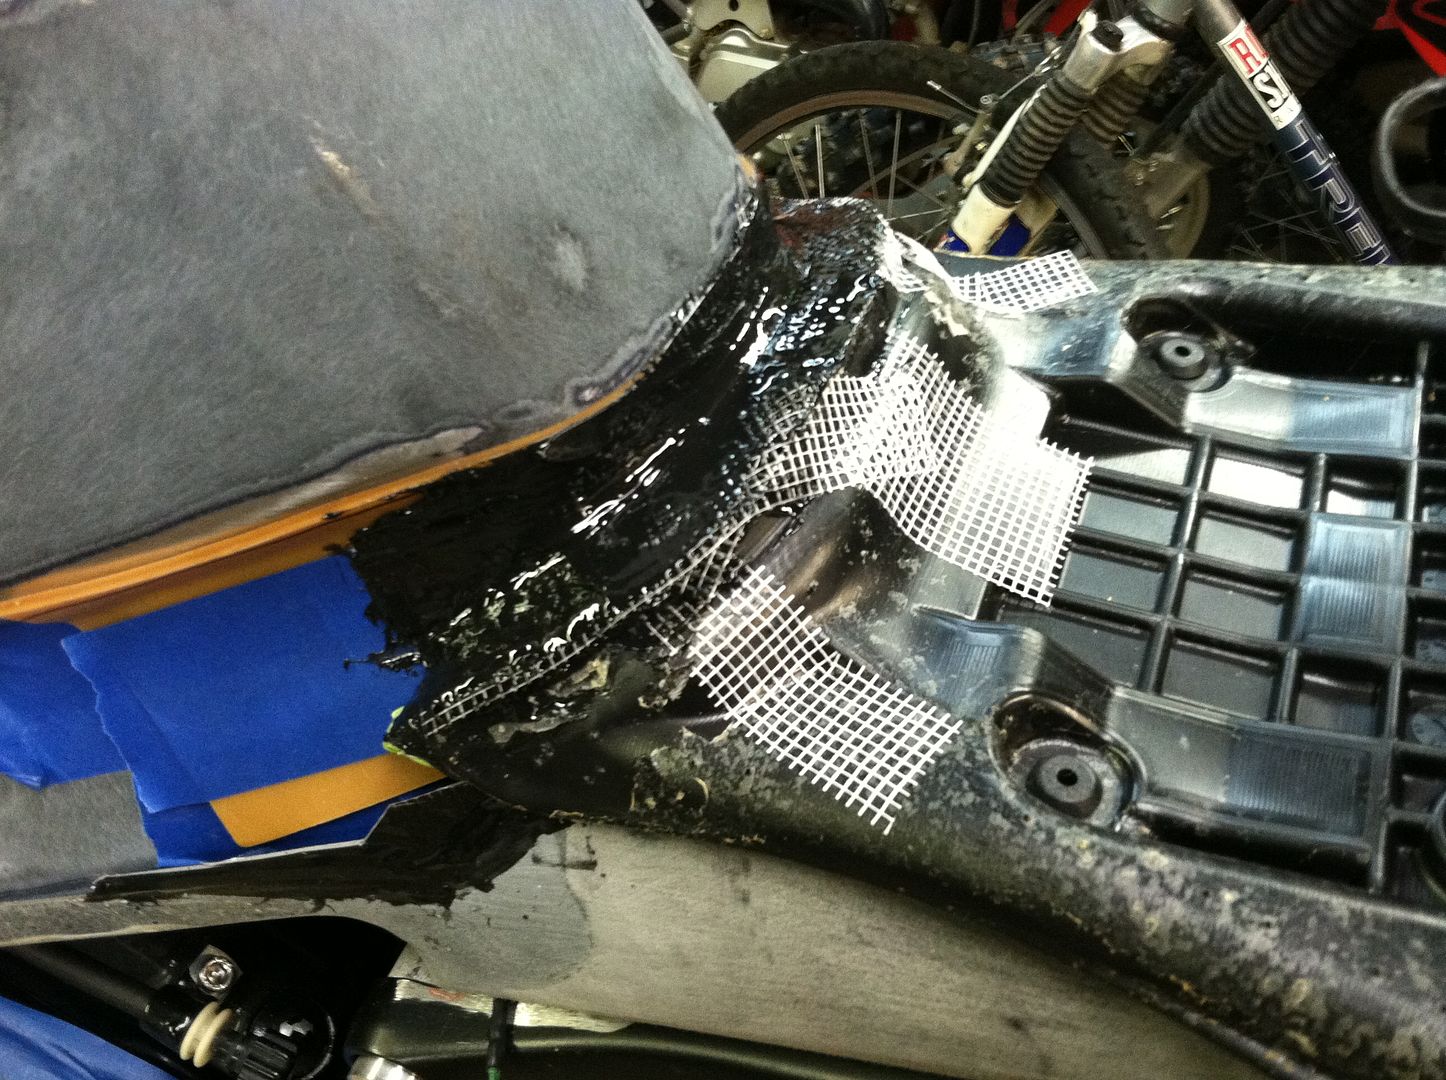
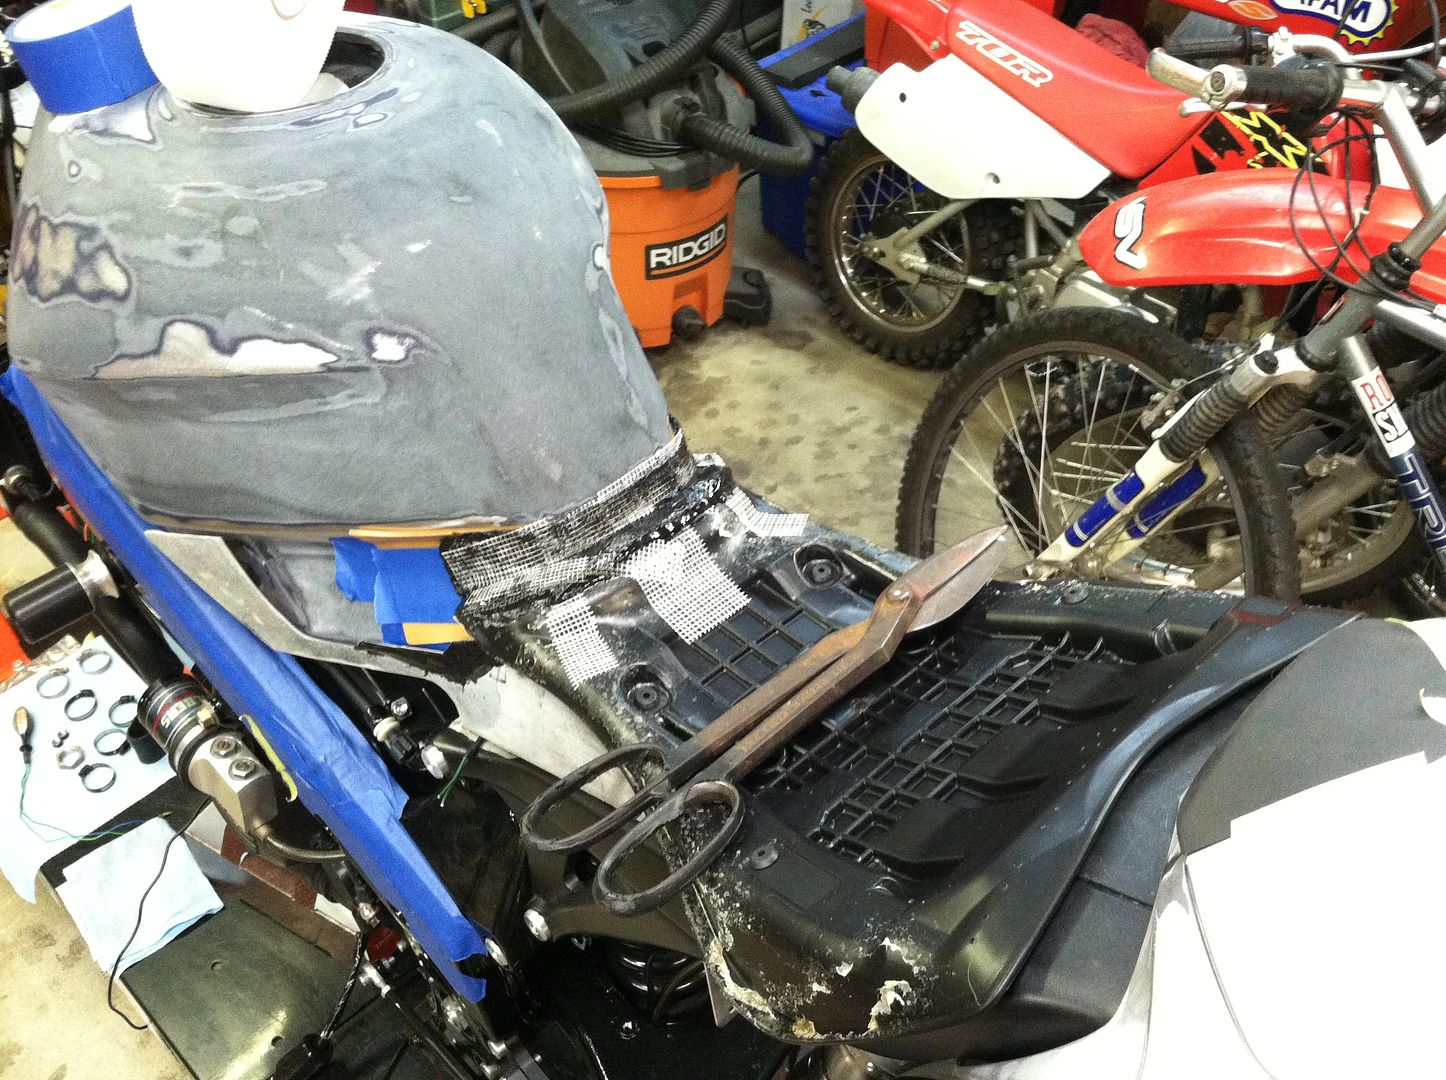
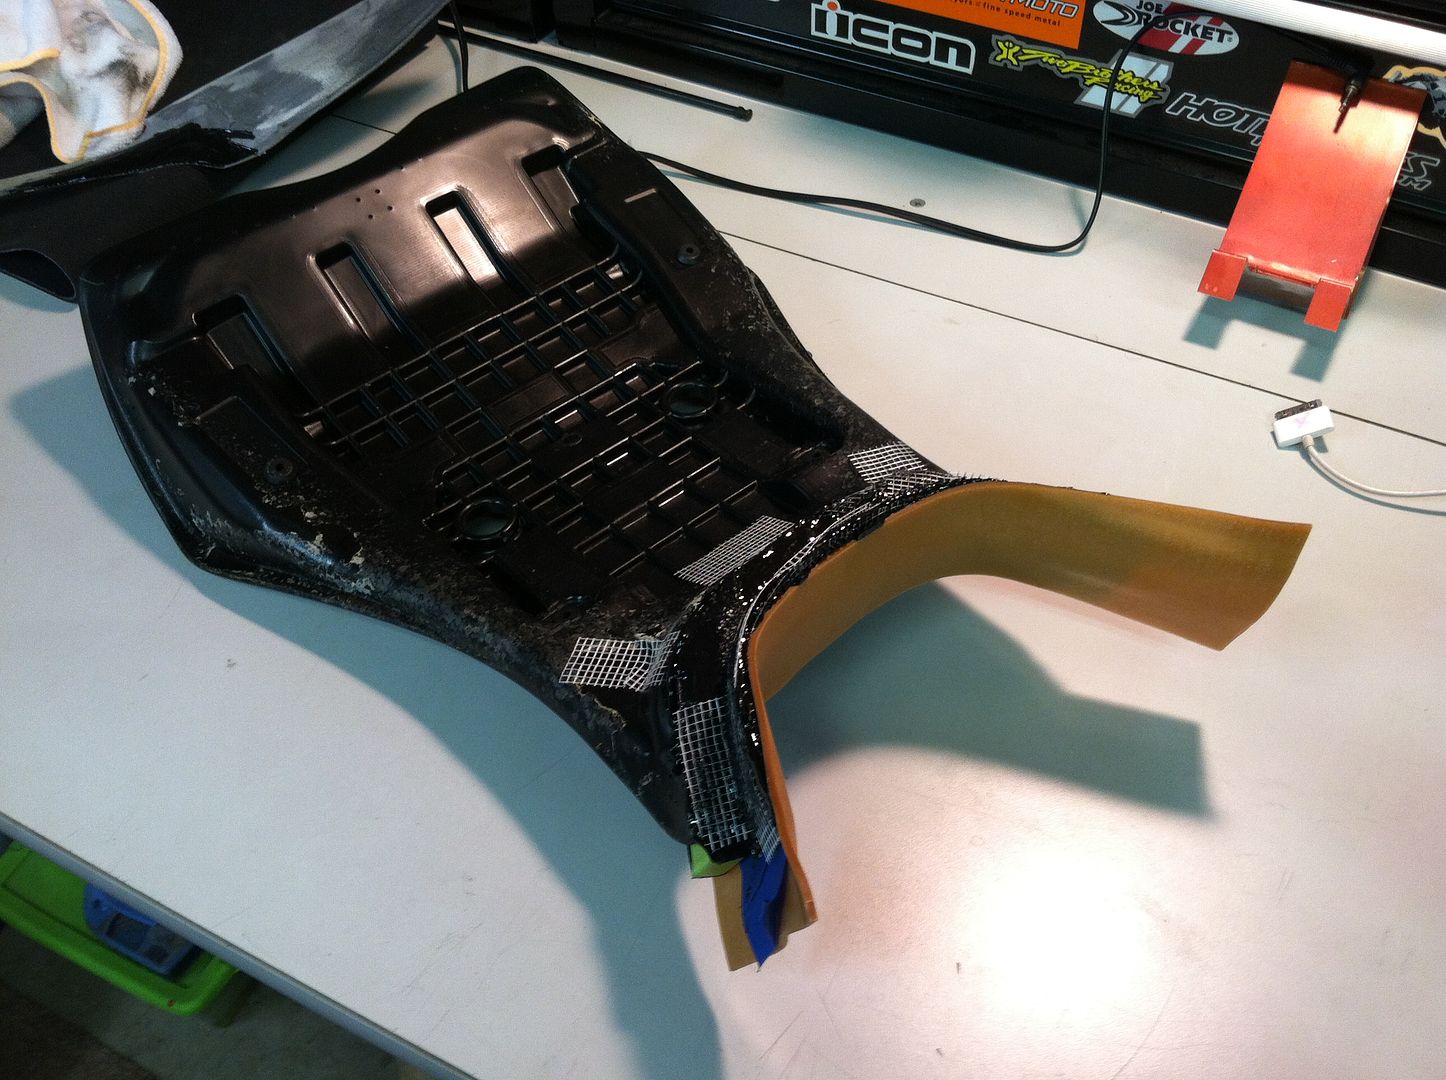
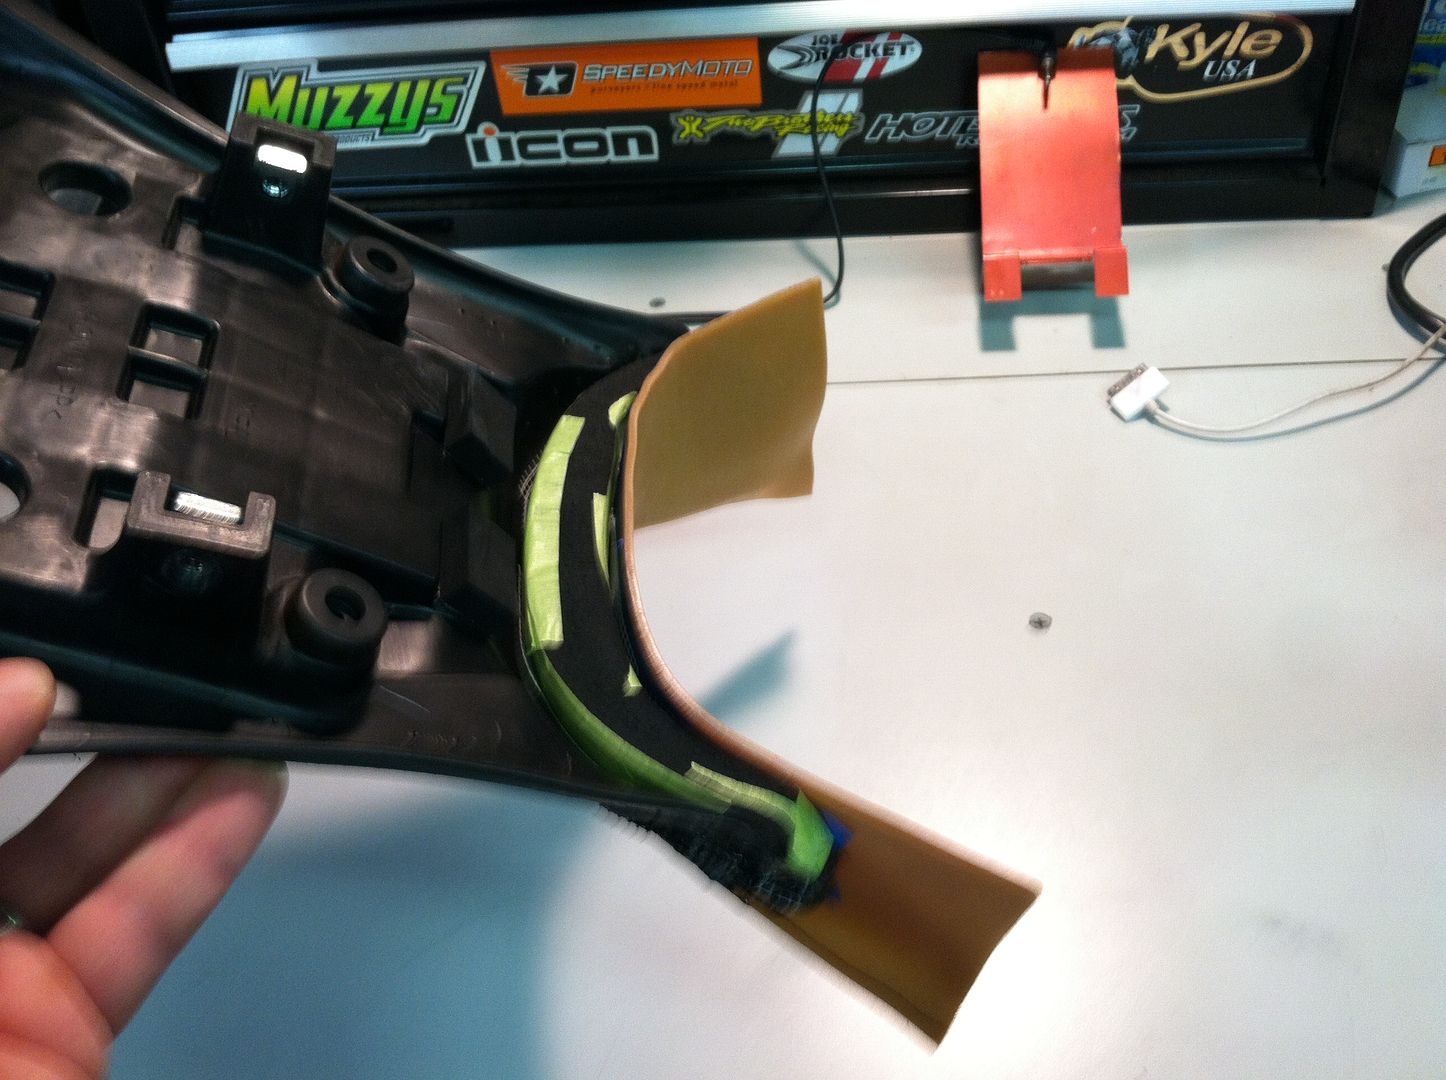
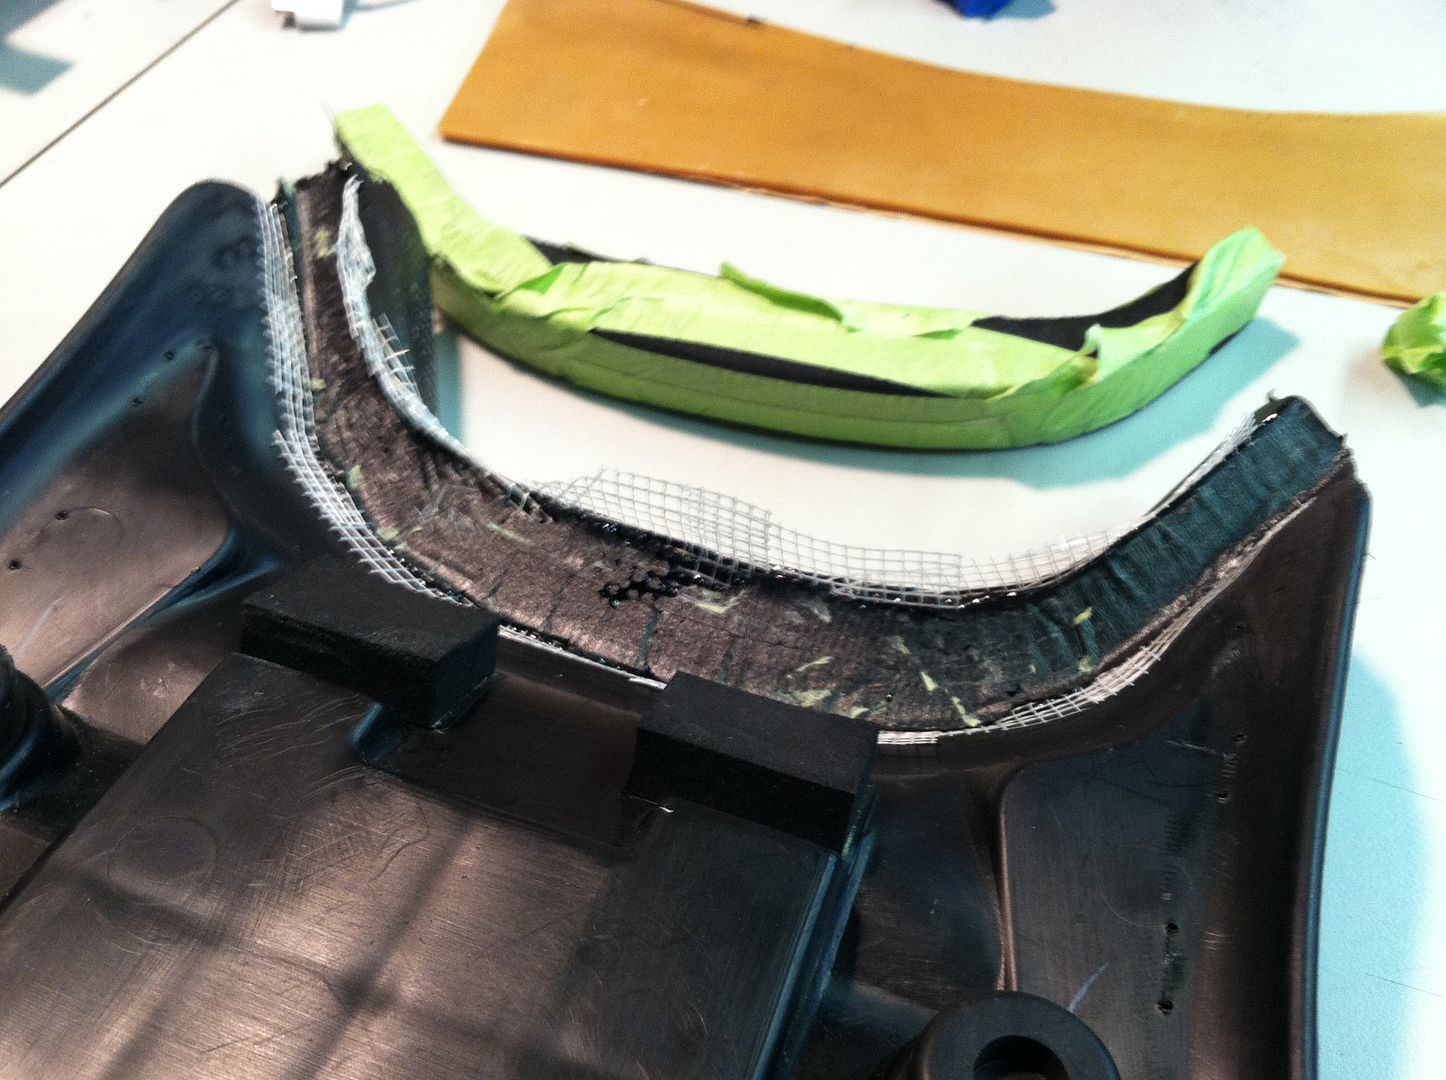
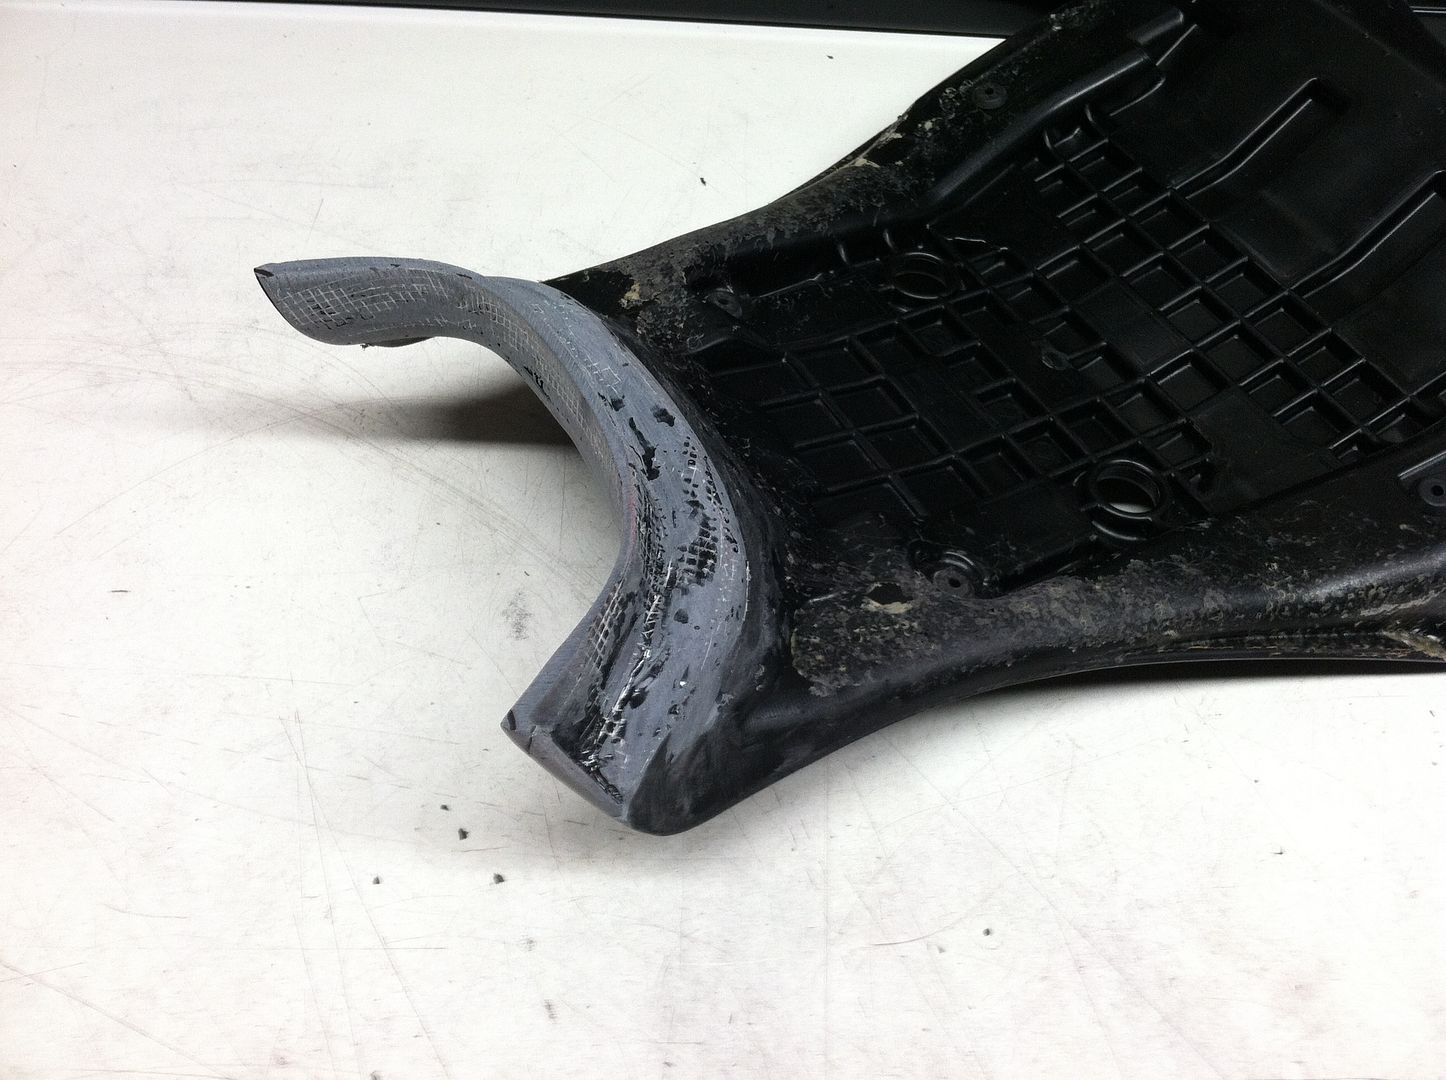
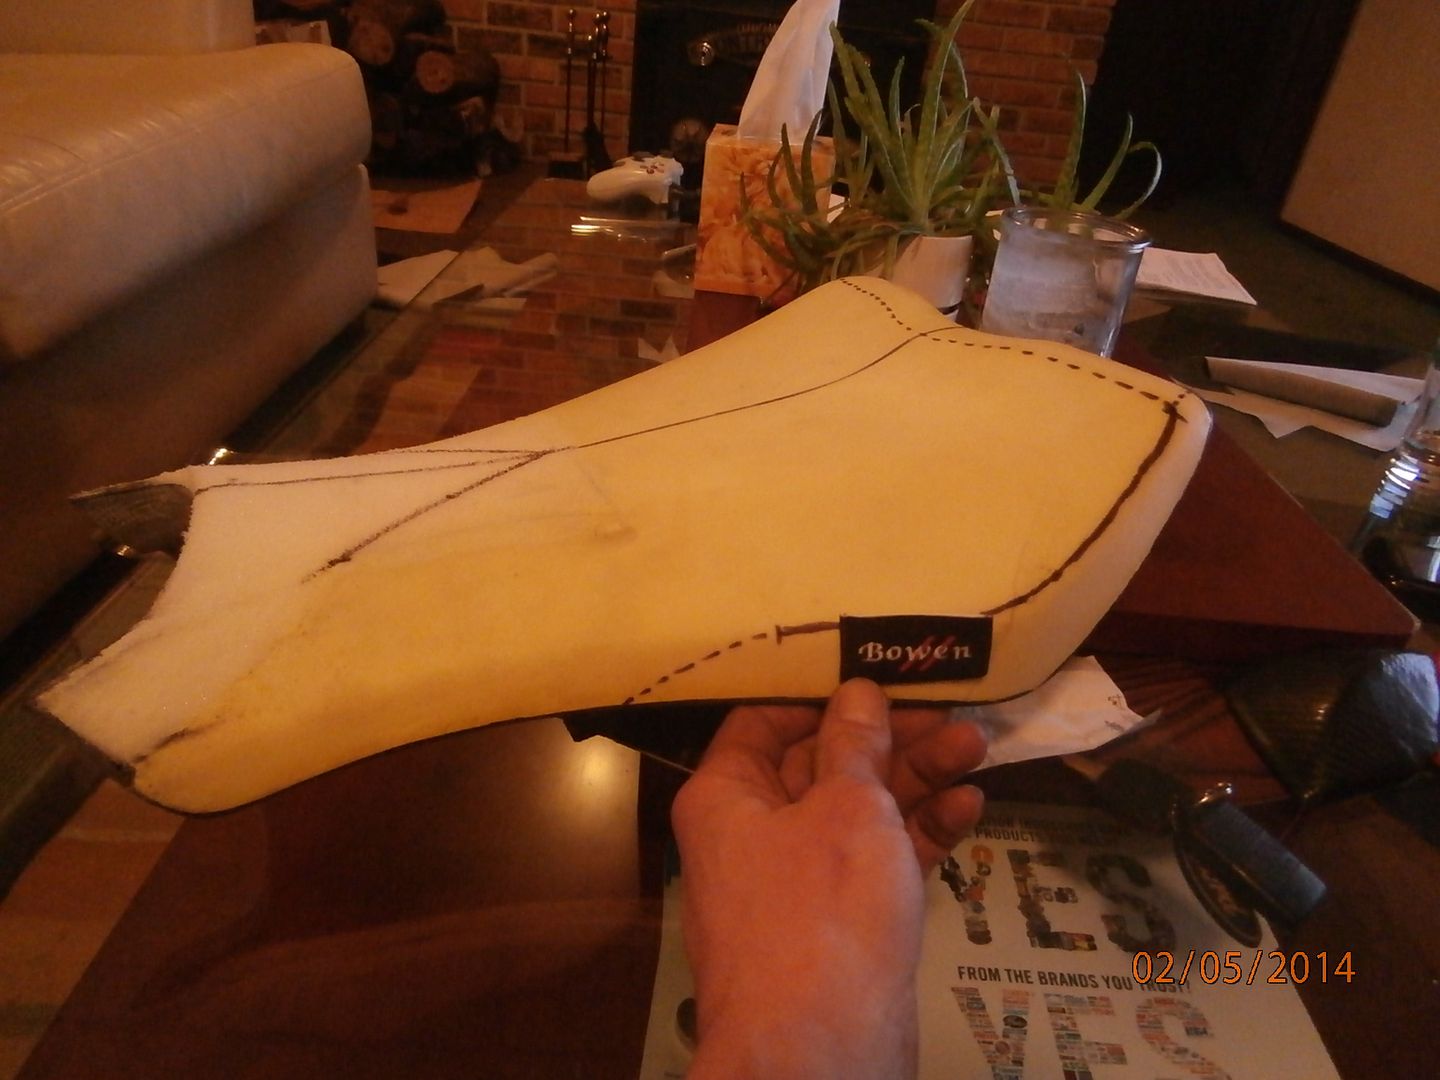
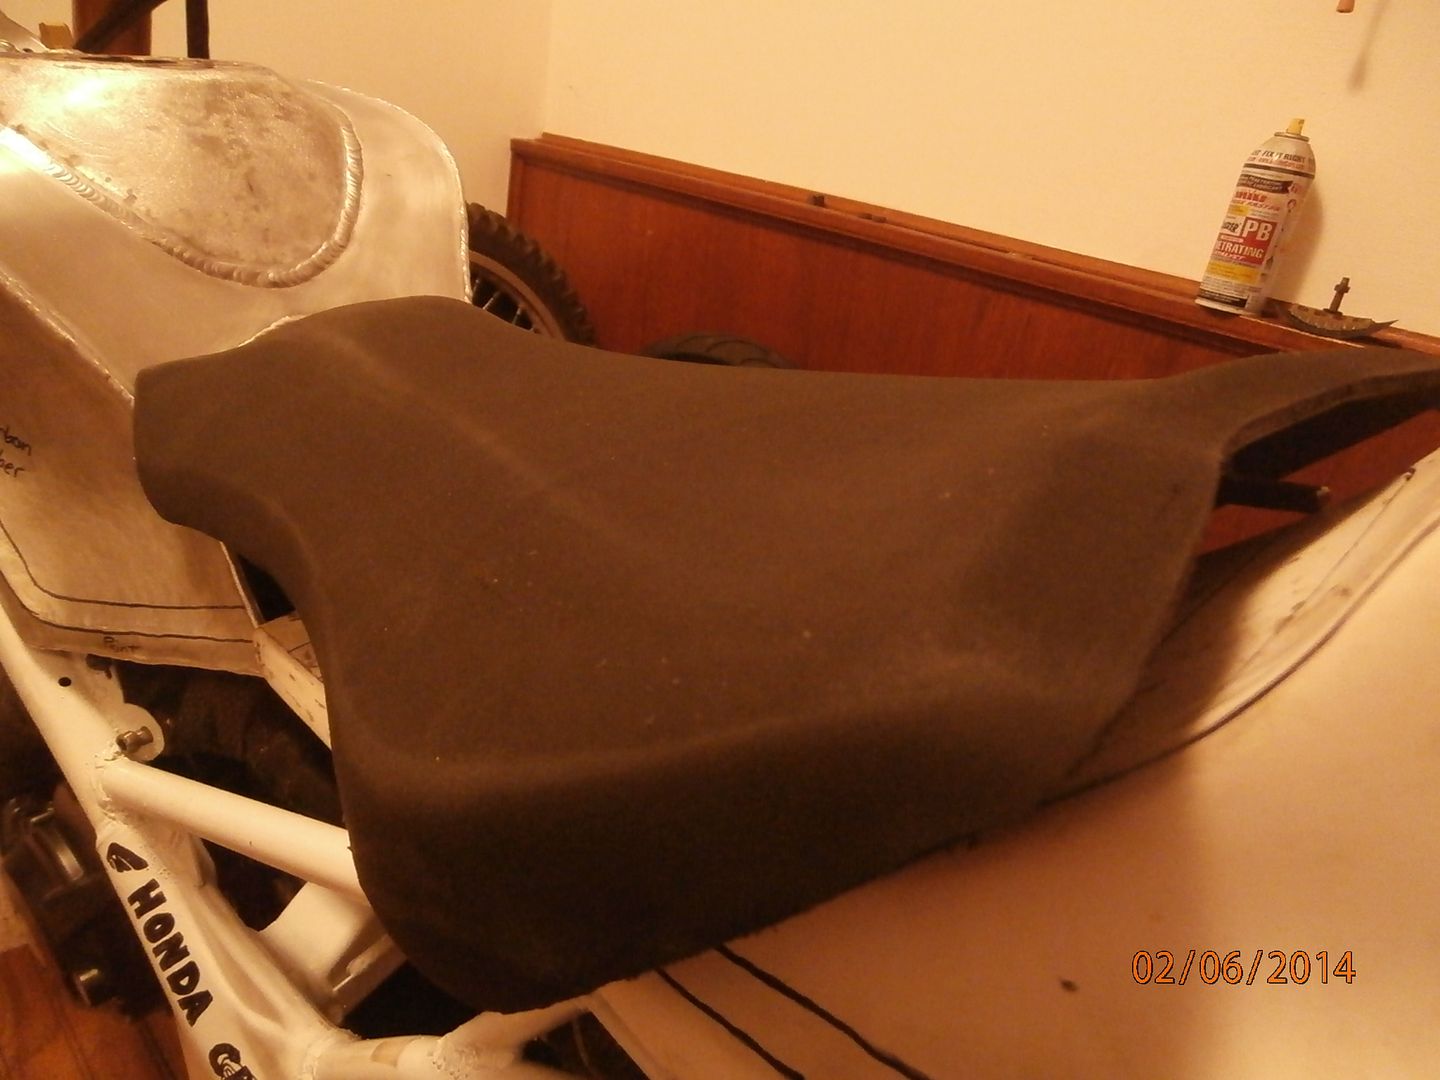
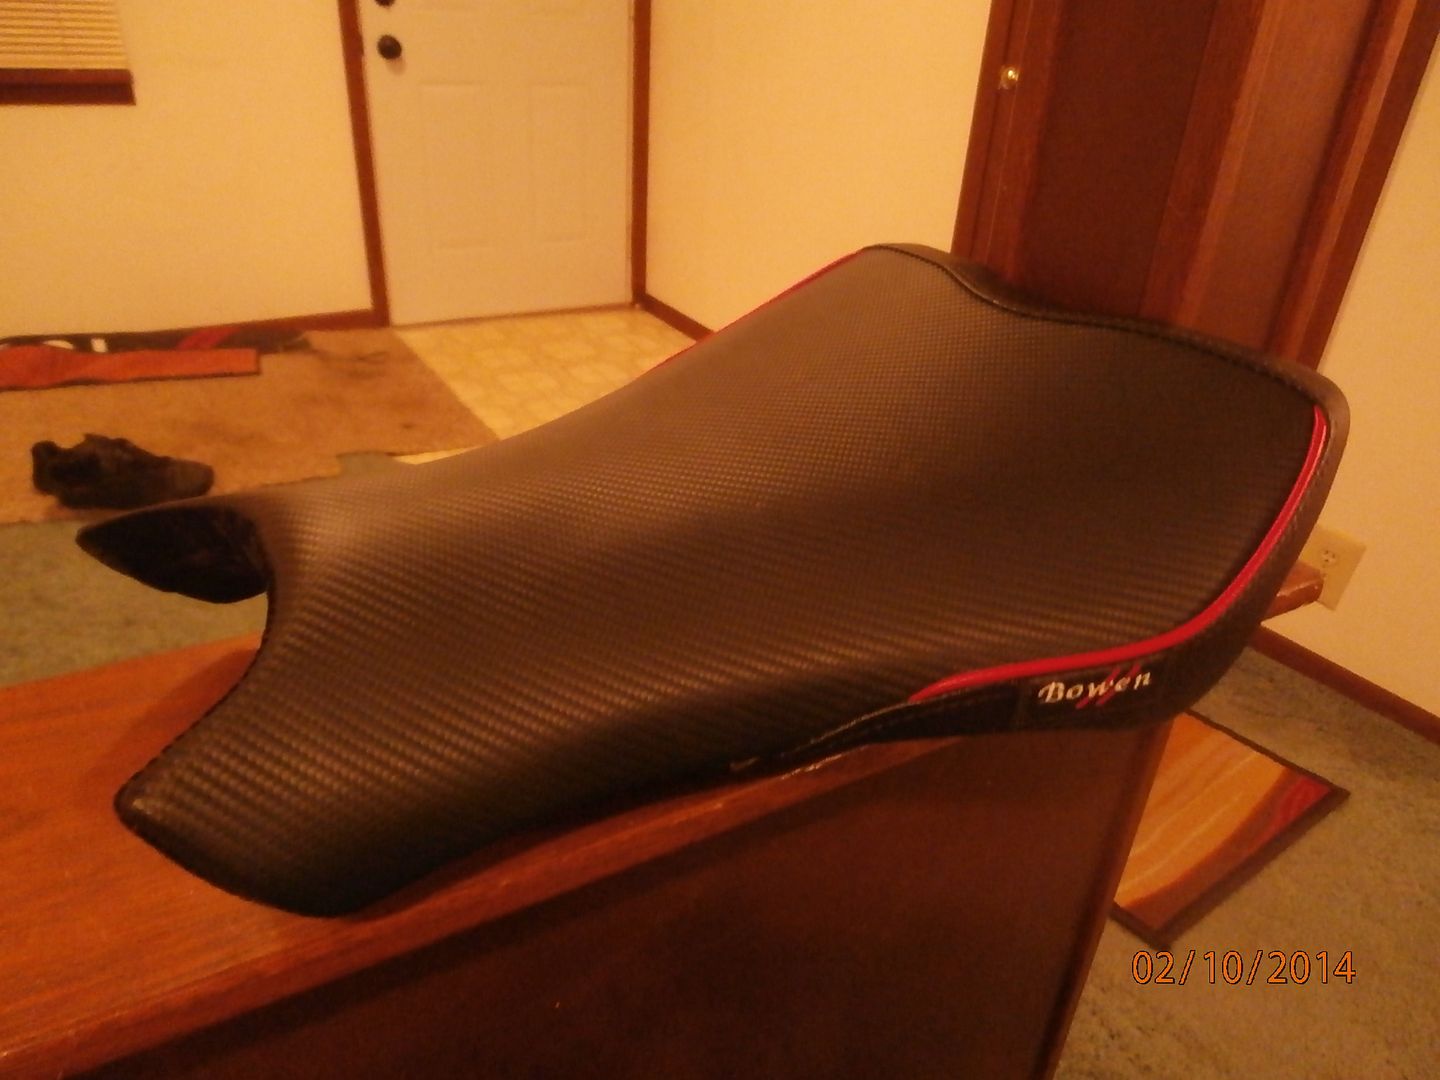
Now for the seat... I'm really happy with how this turned out. I used Plio Grip and sheetrock mesh tape to create the extension. This material can be stapled into when cured, just like the stock pan.
Here is a pictorial sequence of the process:
Wax was used to create a gap for the future seat cover to fill.
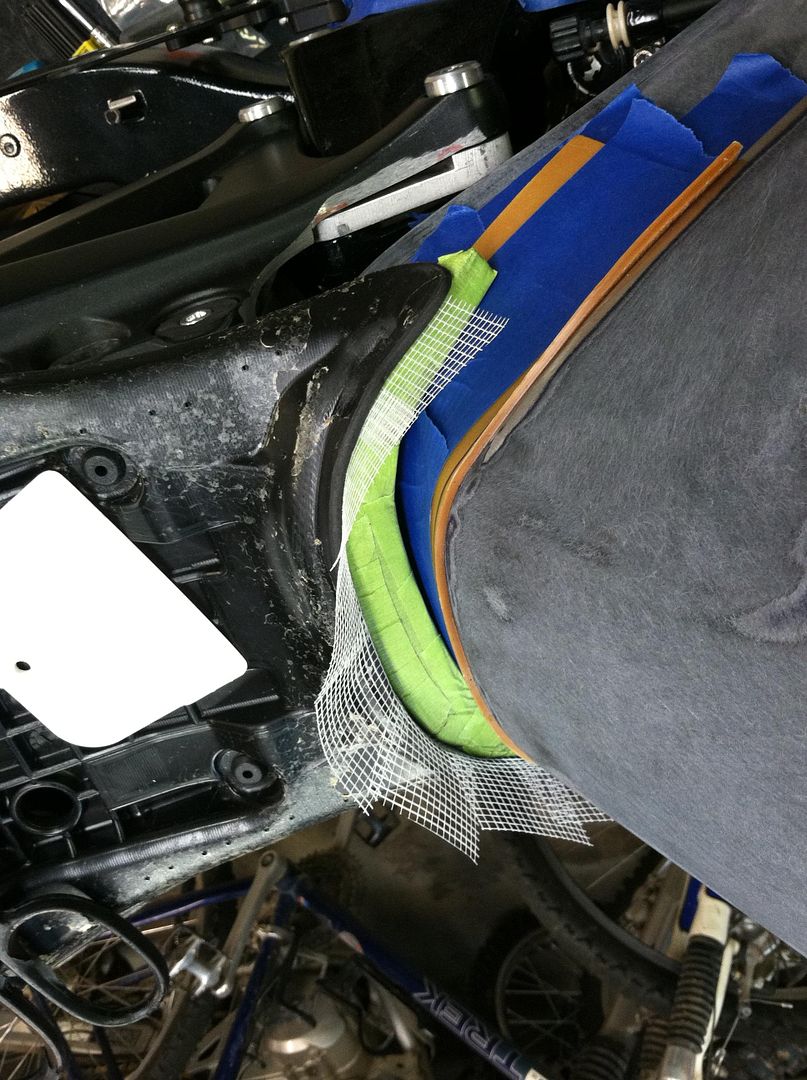

My friend Travis Bowen of Bowen Upholstery in Wisconsin did the fantastic work on the foam and the seat cover. We worked together on the design, and he made an extra section of red welting to be used on the solo cowl later.
-
1
-
-
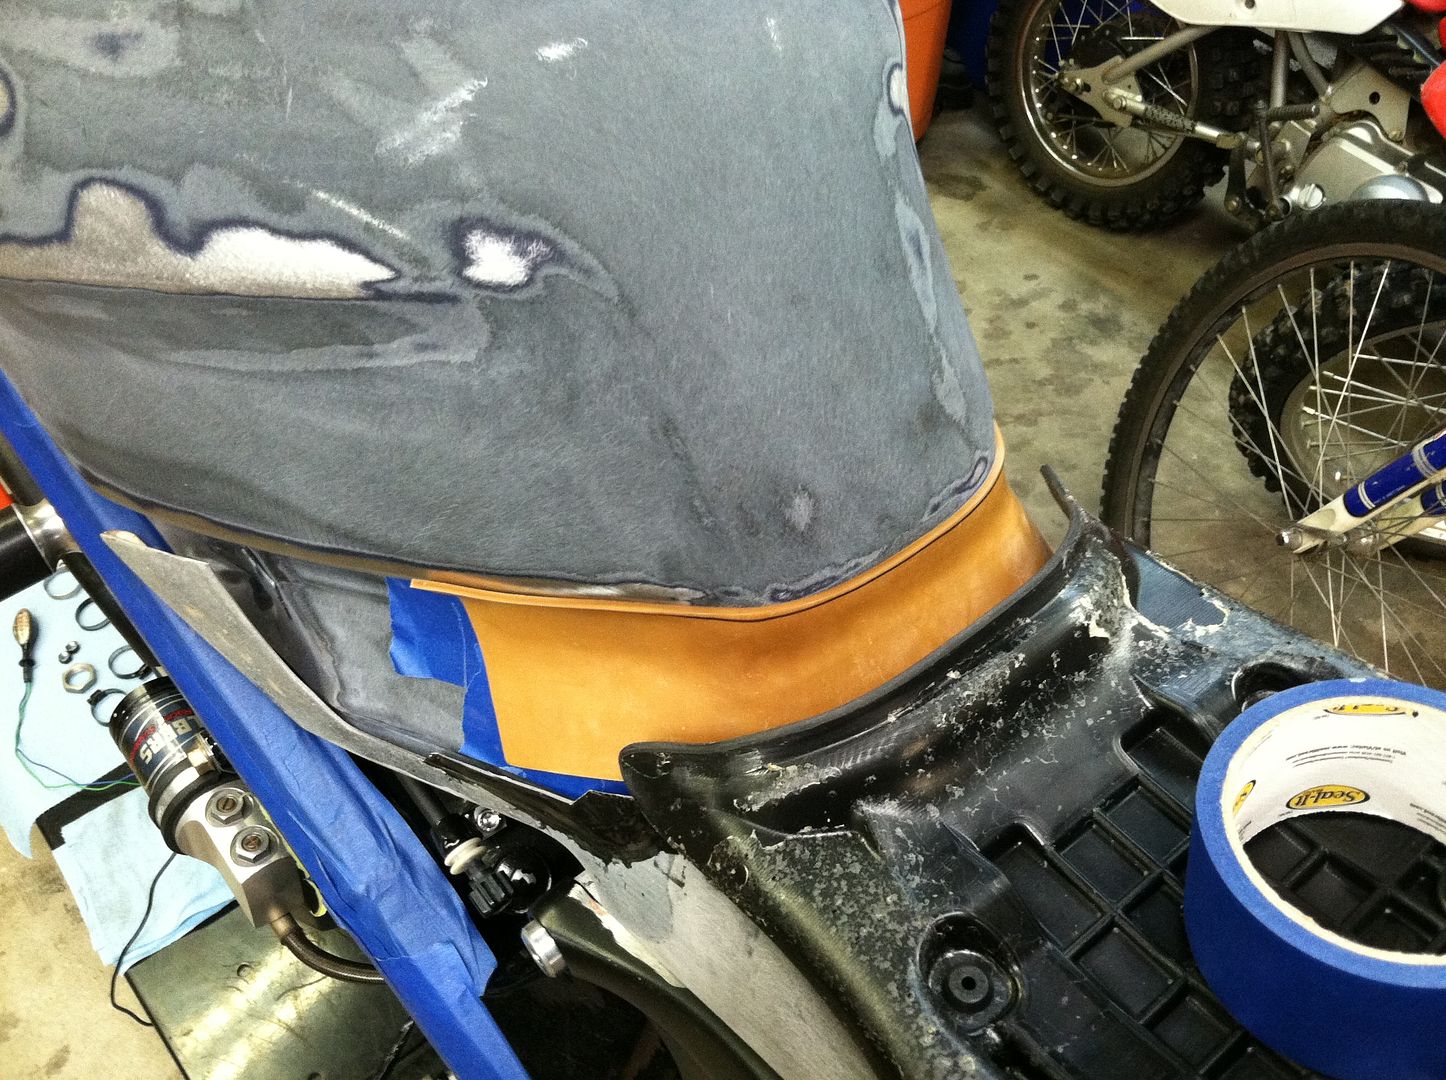
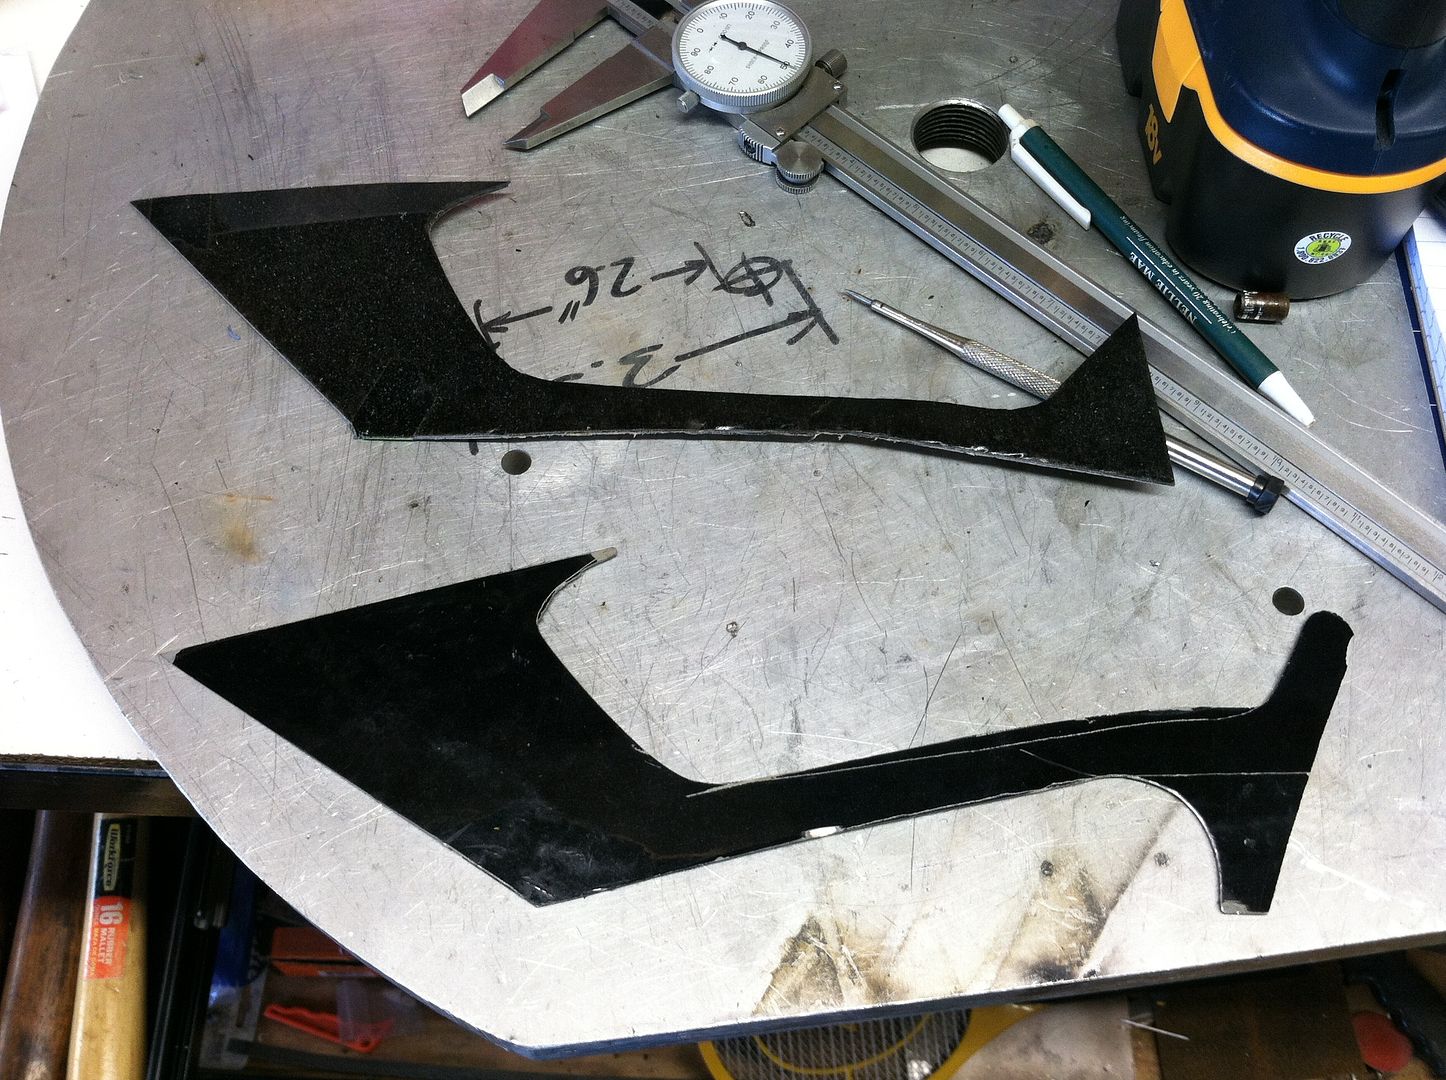
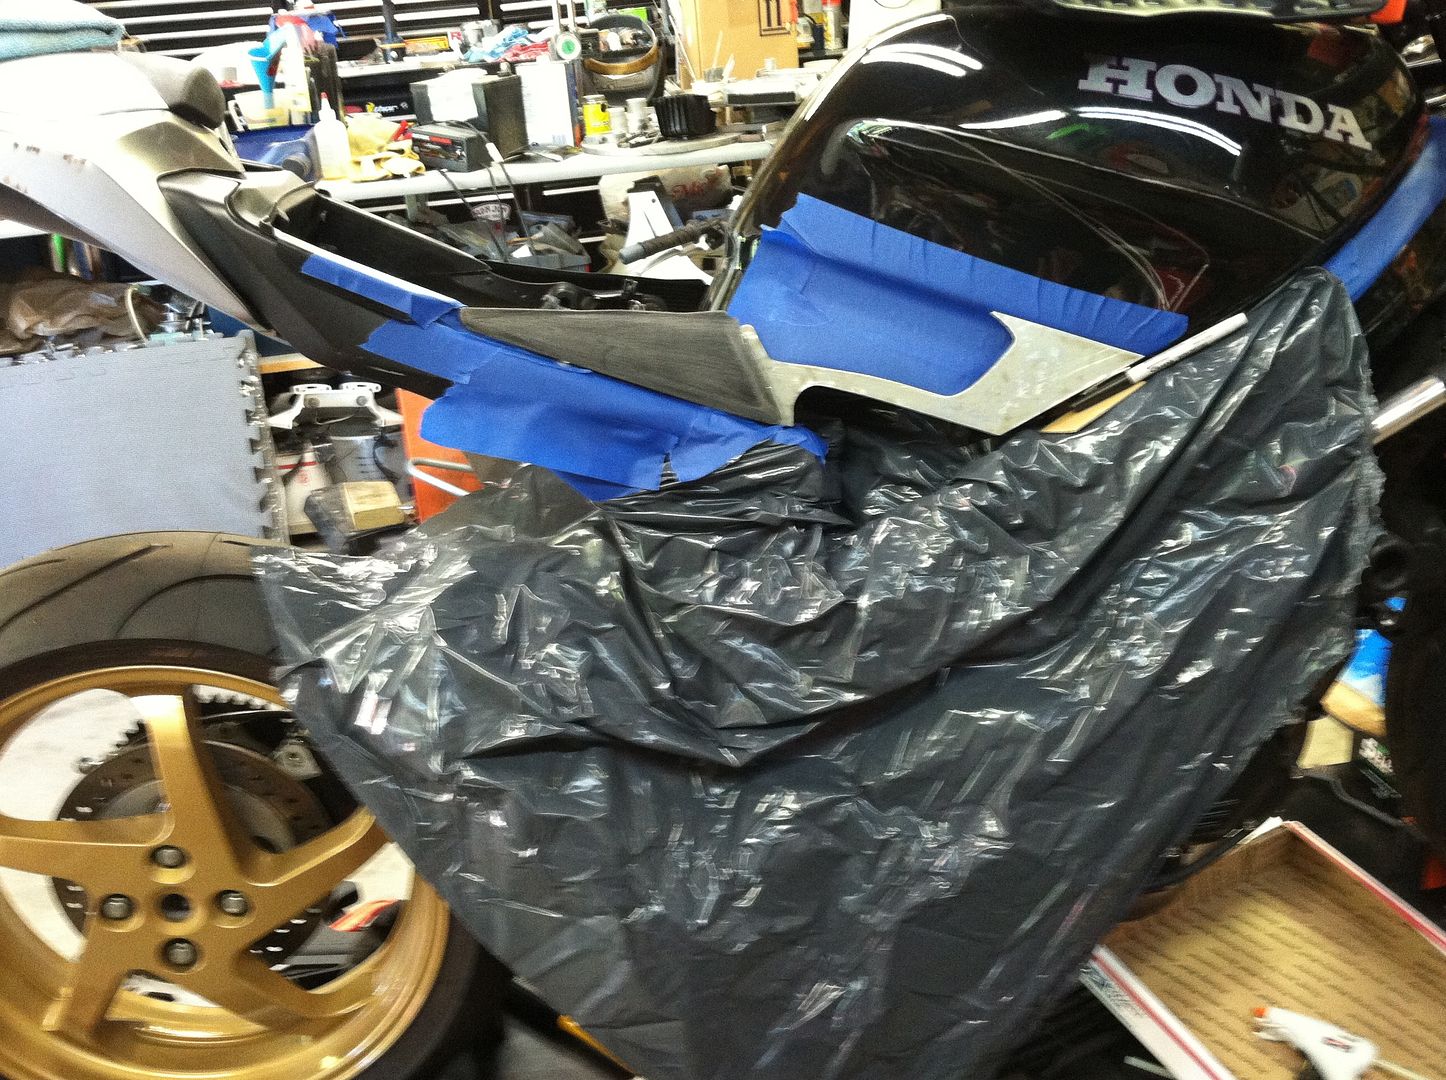
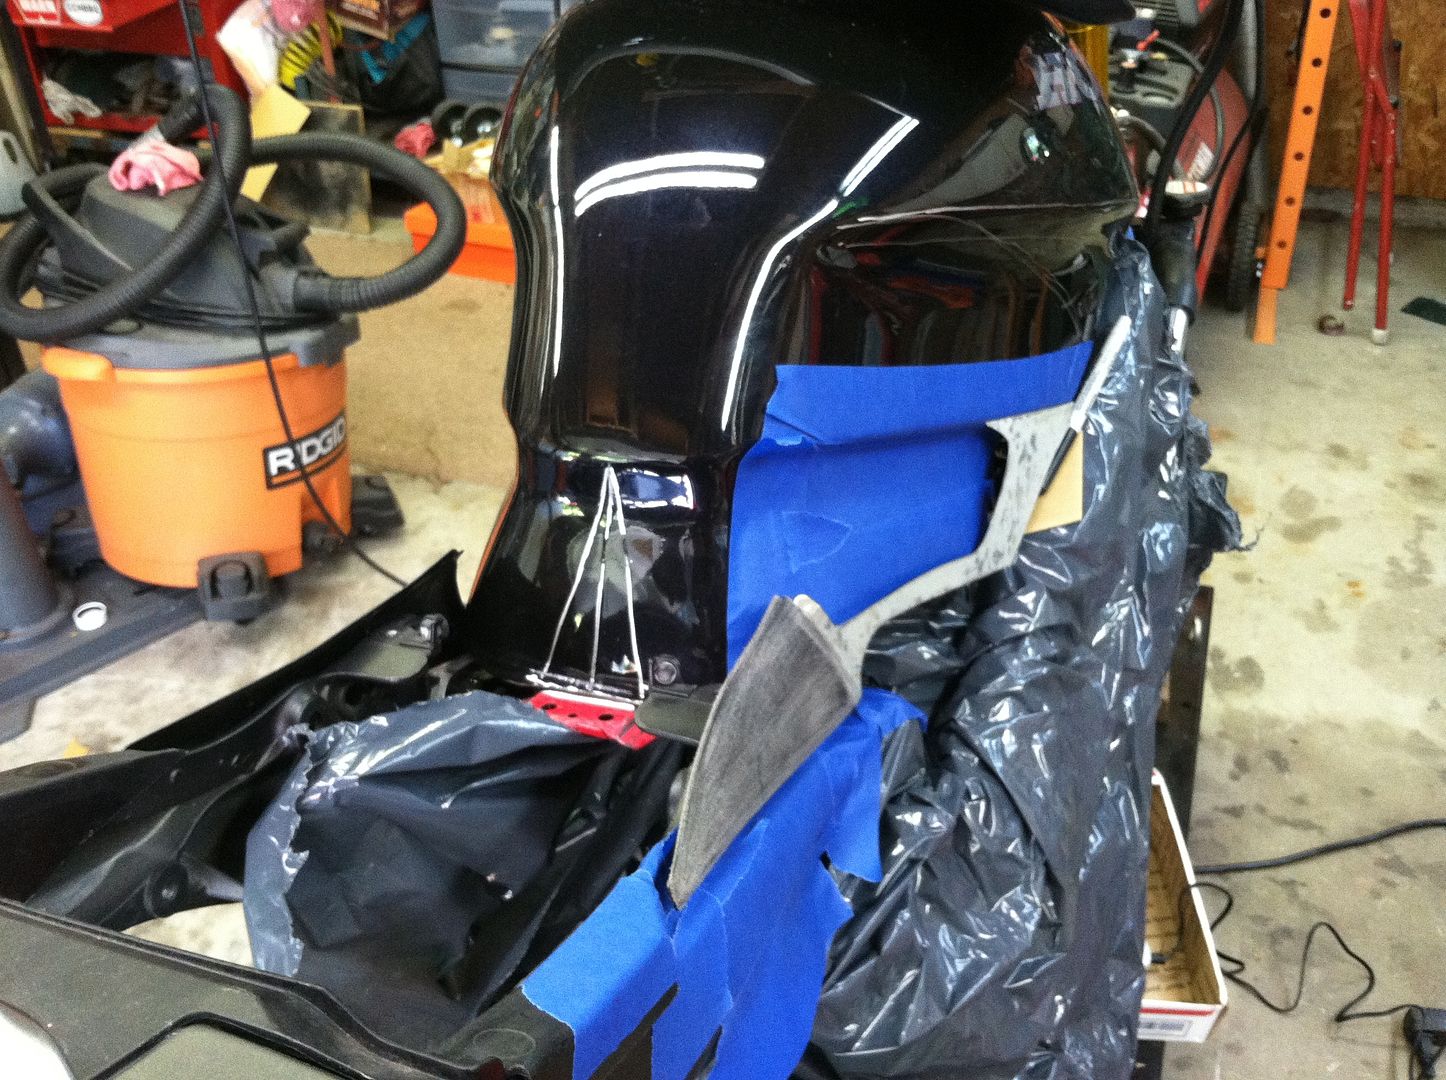
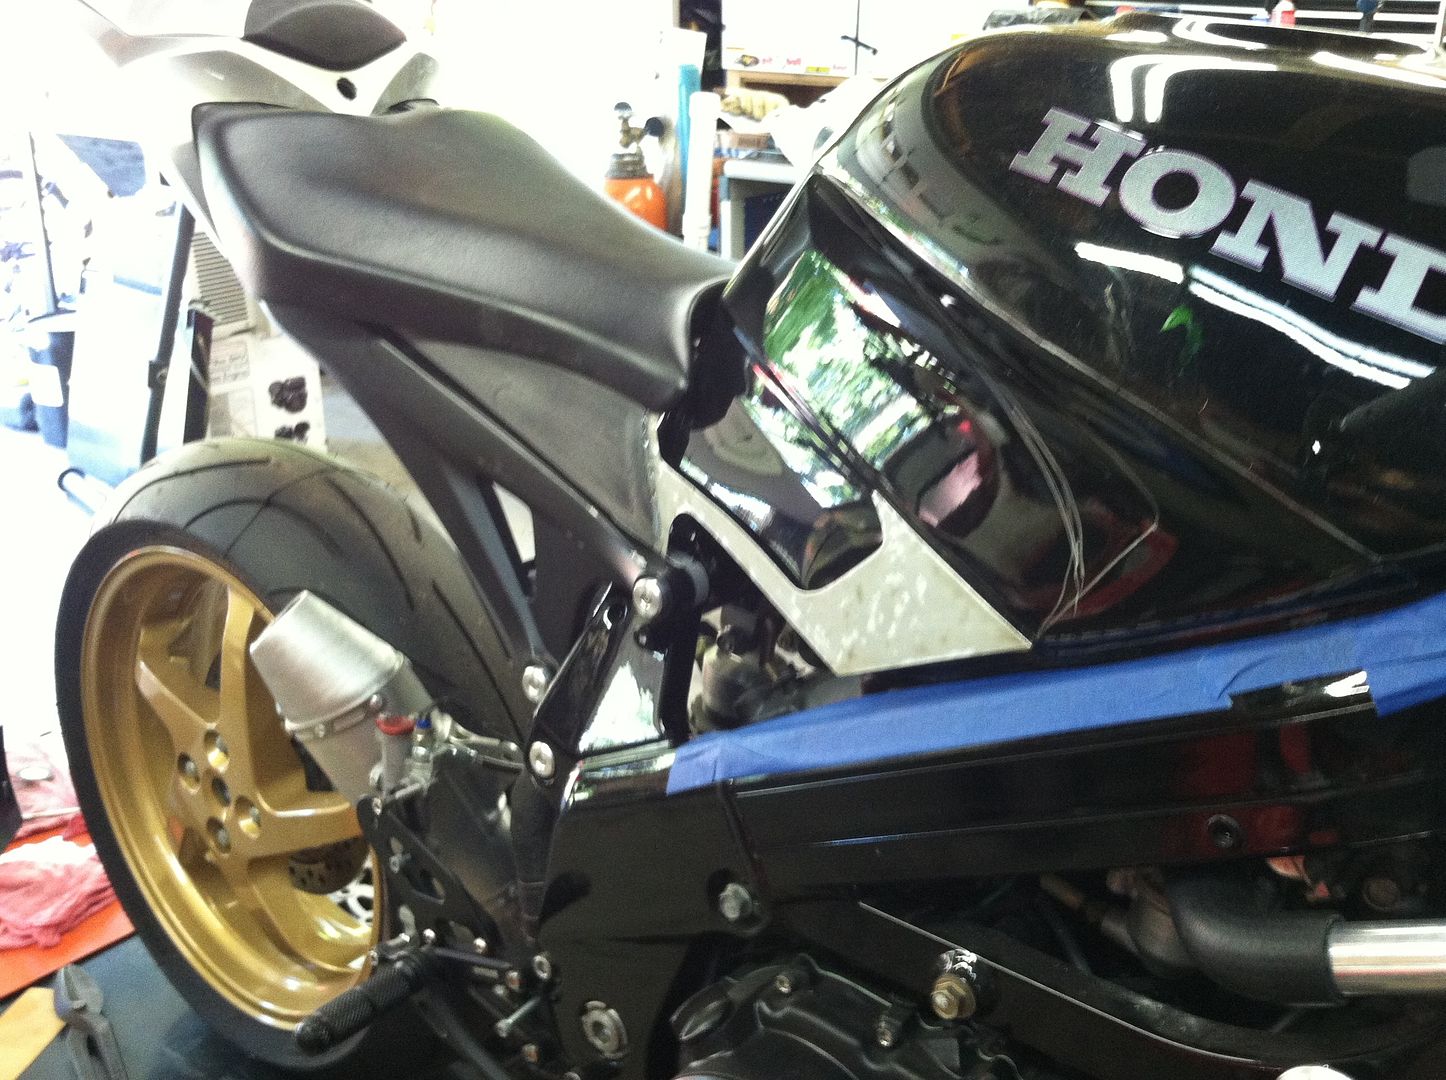
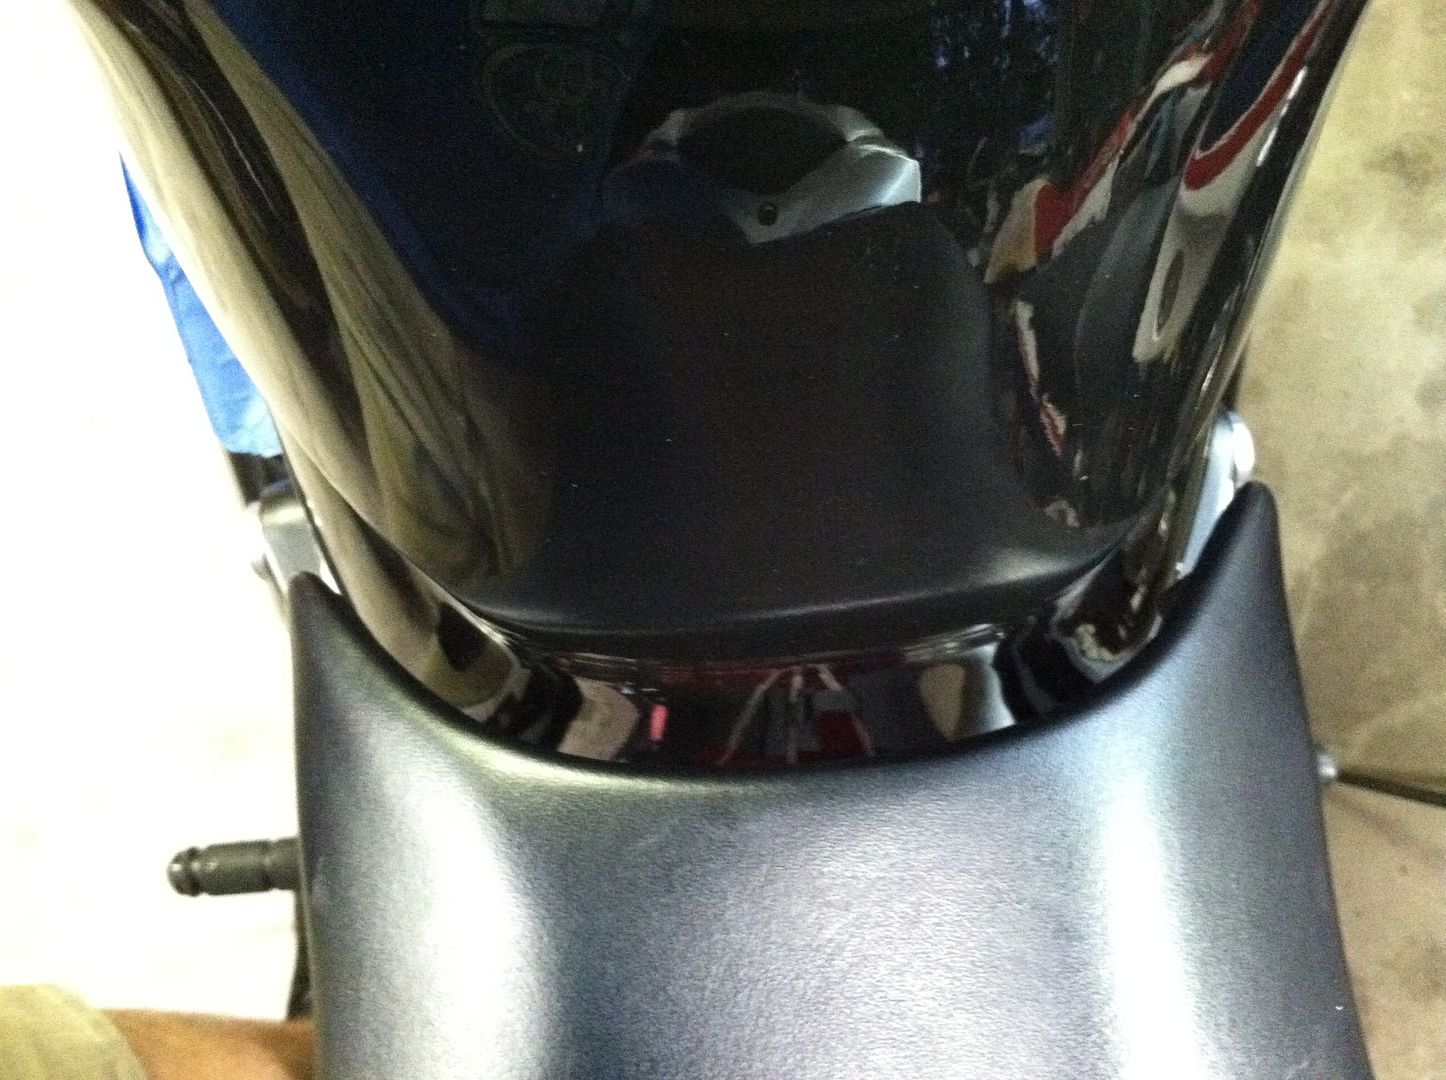
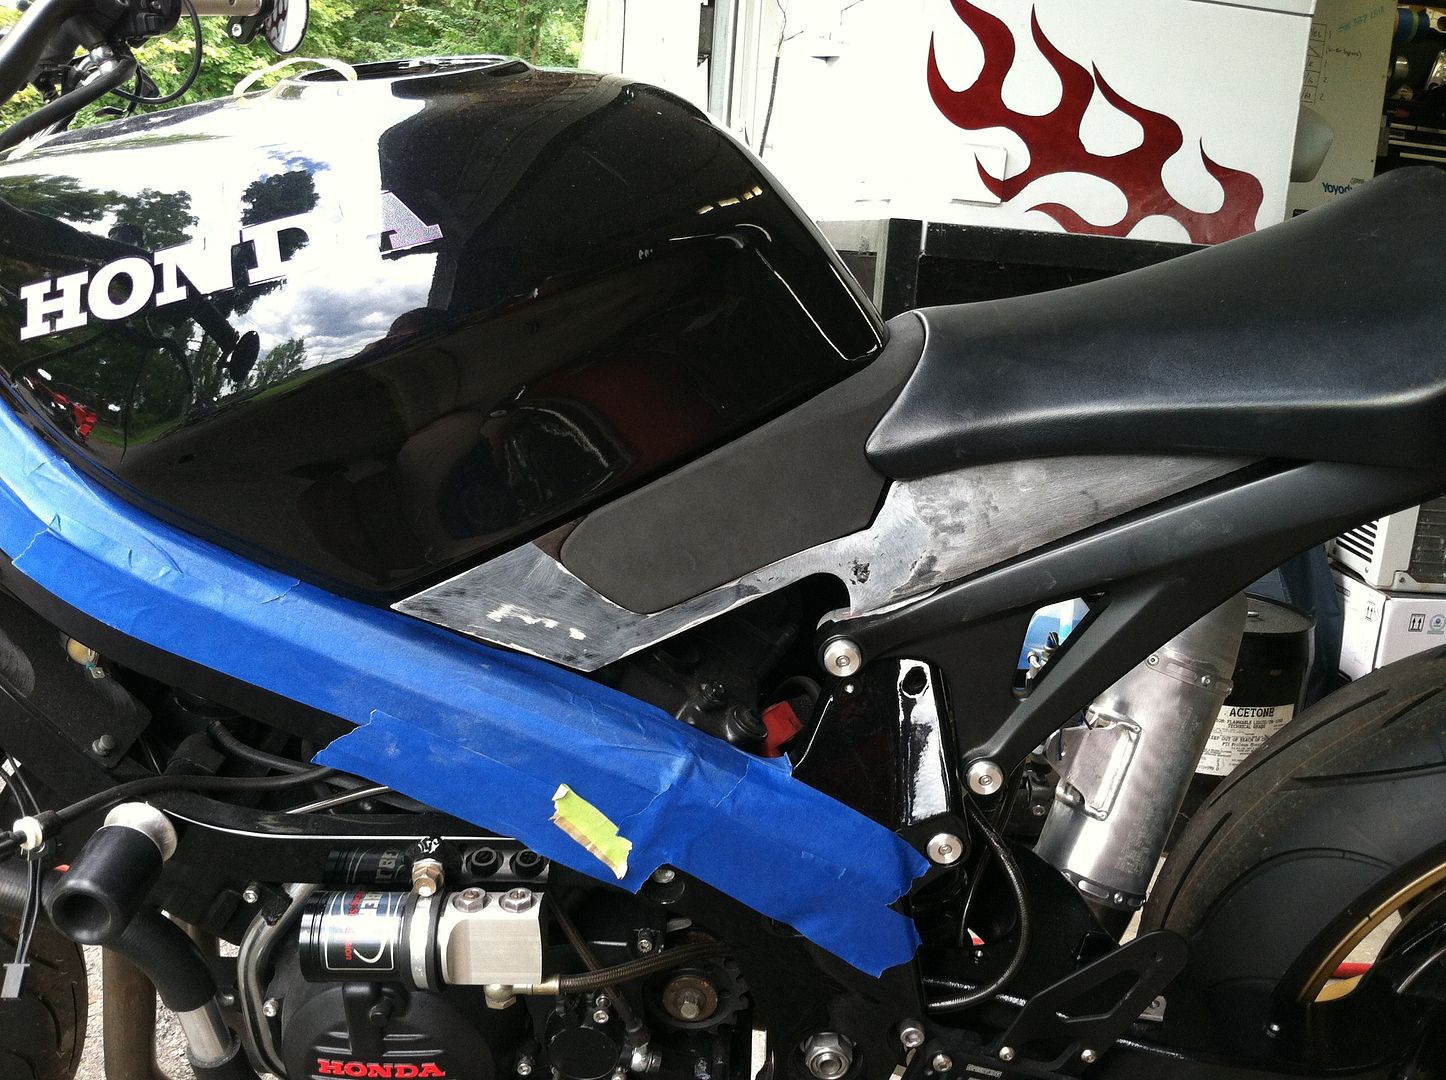
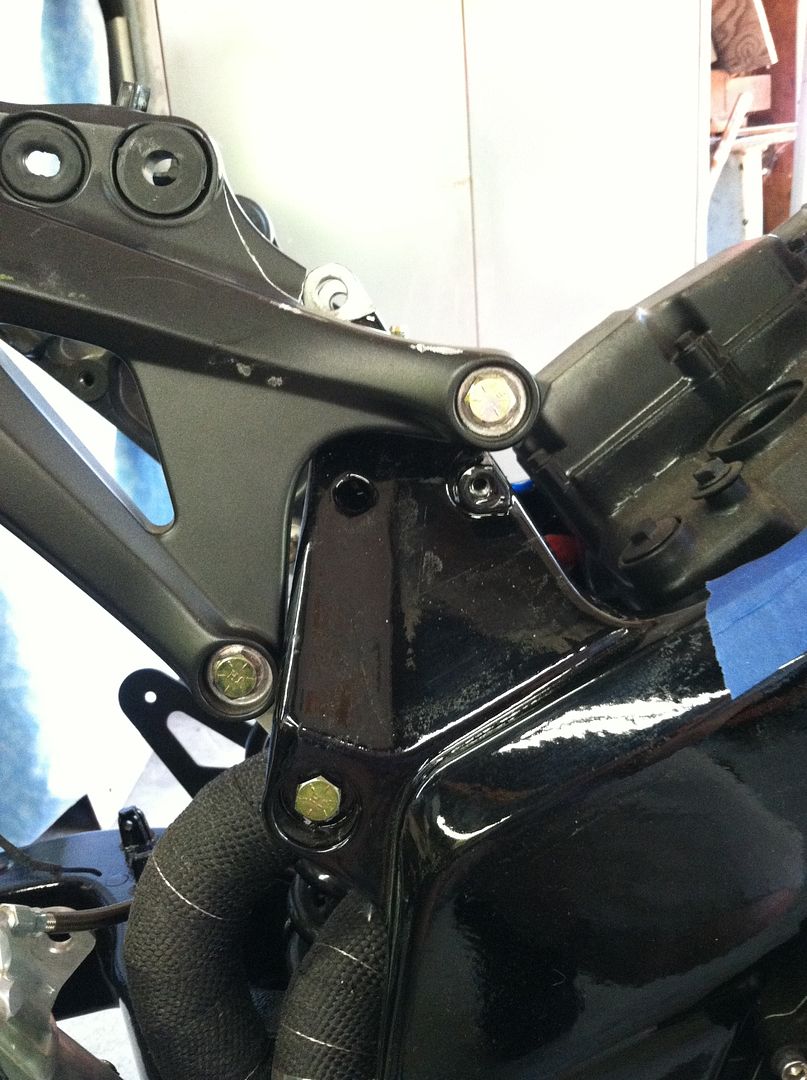
After fitting the subframe, the next step to having a clean finish was to transition the bodywork from the tail to the tank, and then fit the seat to the tank.
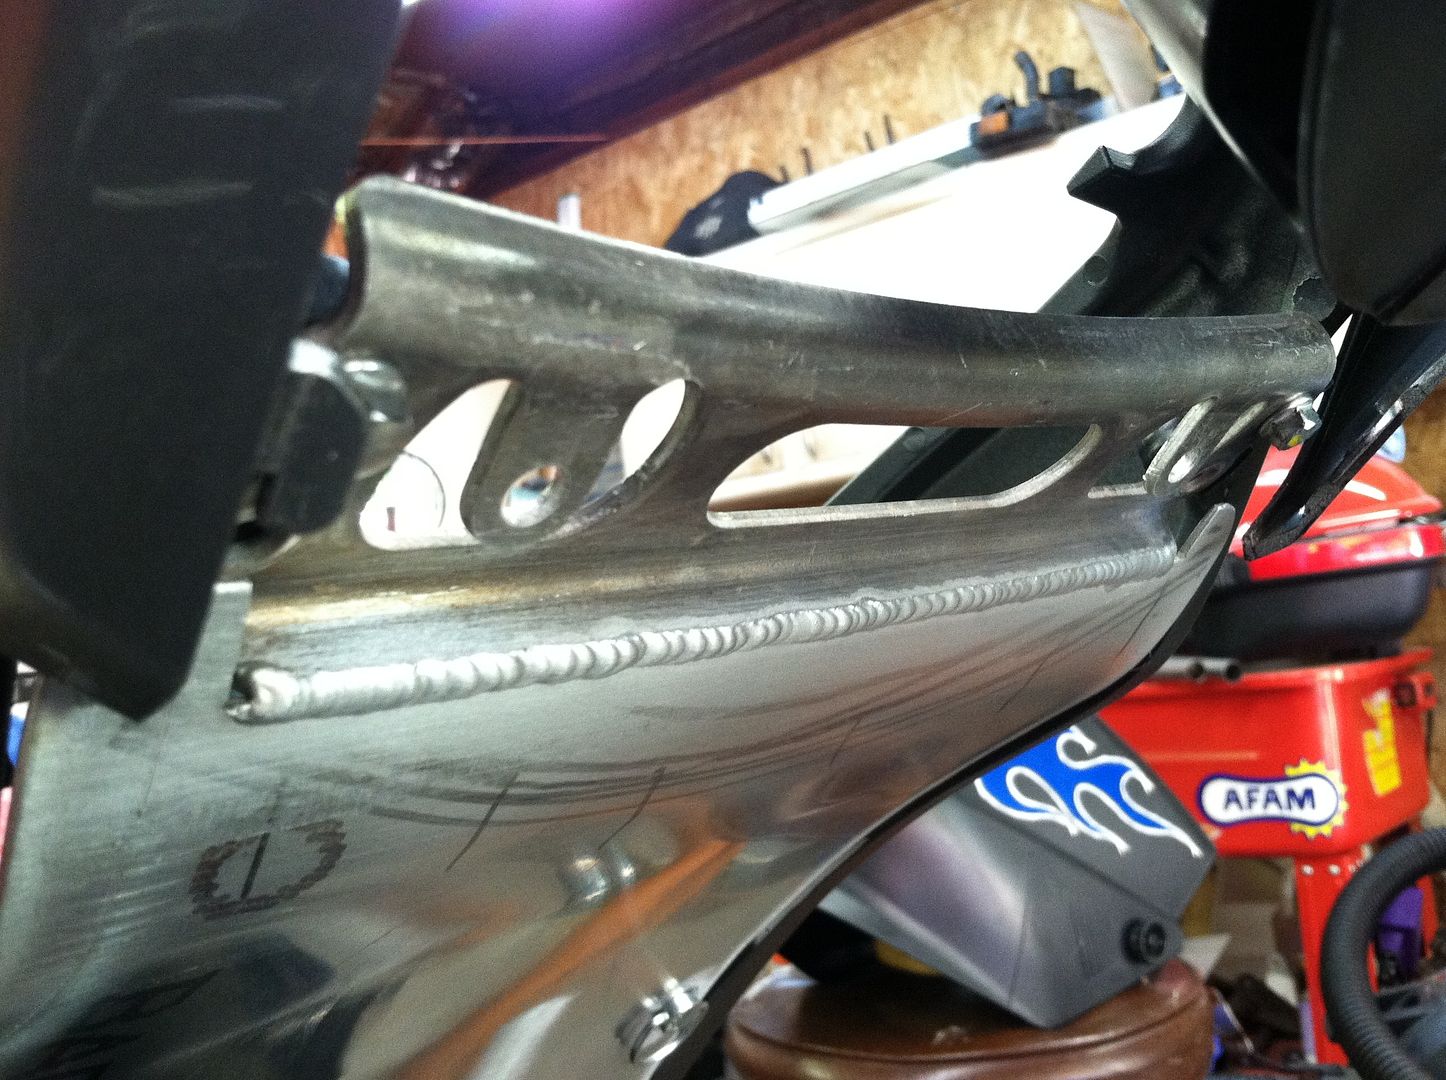
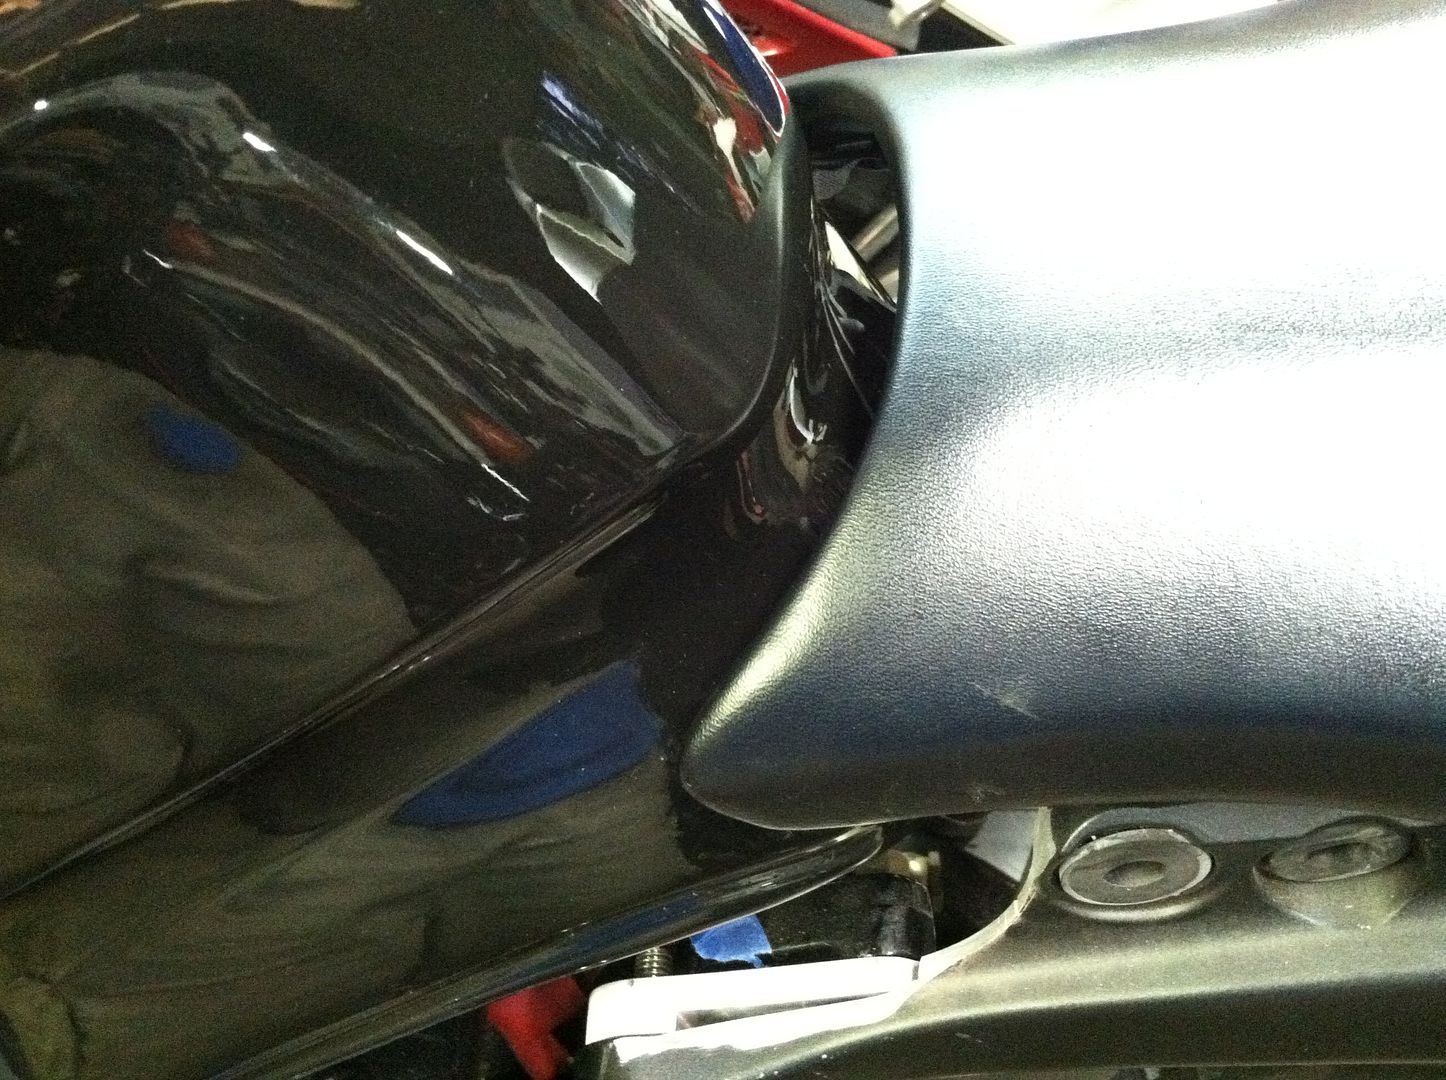
I used the stock CBR side filler panels as a starting point, and created a cardboard template to bridge the gap between the tank and the filler.
I was fresh out of aluminum sheet, so I cut a pair of parts from a steel car fender.
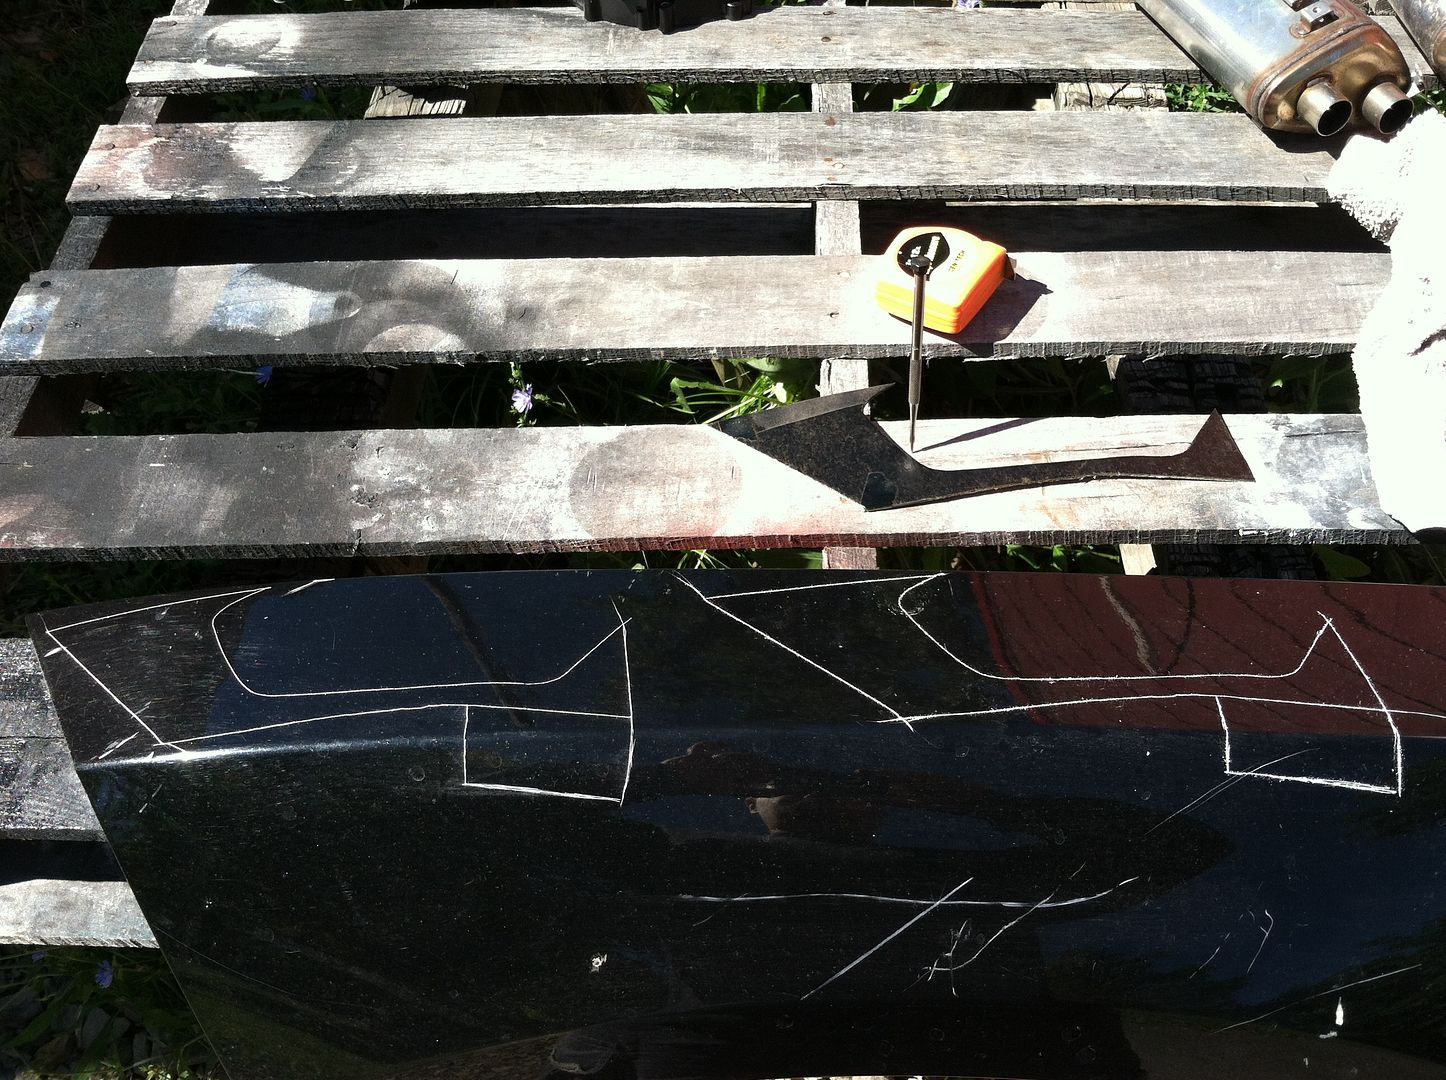
There was a bit of an evolution as I was cutting them, the creative juices were flowing and it turned out well. Cut, check fit, cut, adjust shape, cut again, etc.
Seat angle was a touch too steep...
Although the shape was similar, the gap to the tank was wholly unacceptable.
I made an attempt to fill the gap with race foam, but I found the results to be less than desirable.
-
1
-
-
Got some more process pics posted, hope to get the rest up later today.
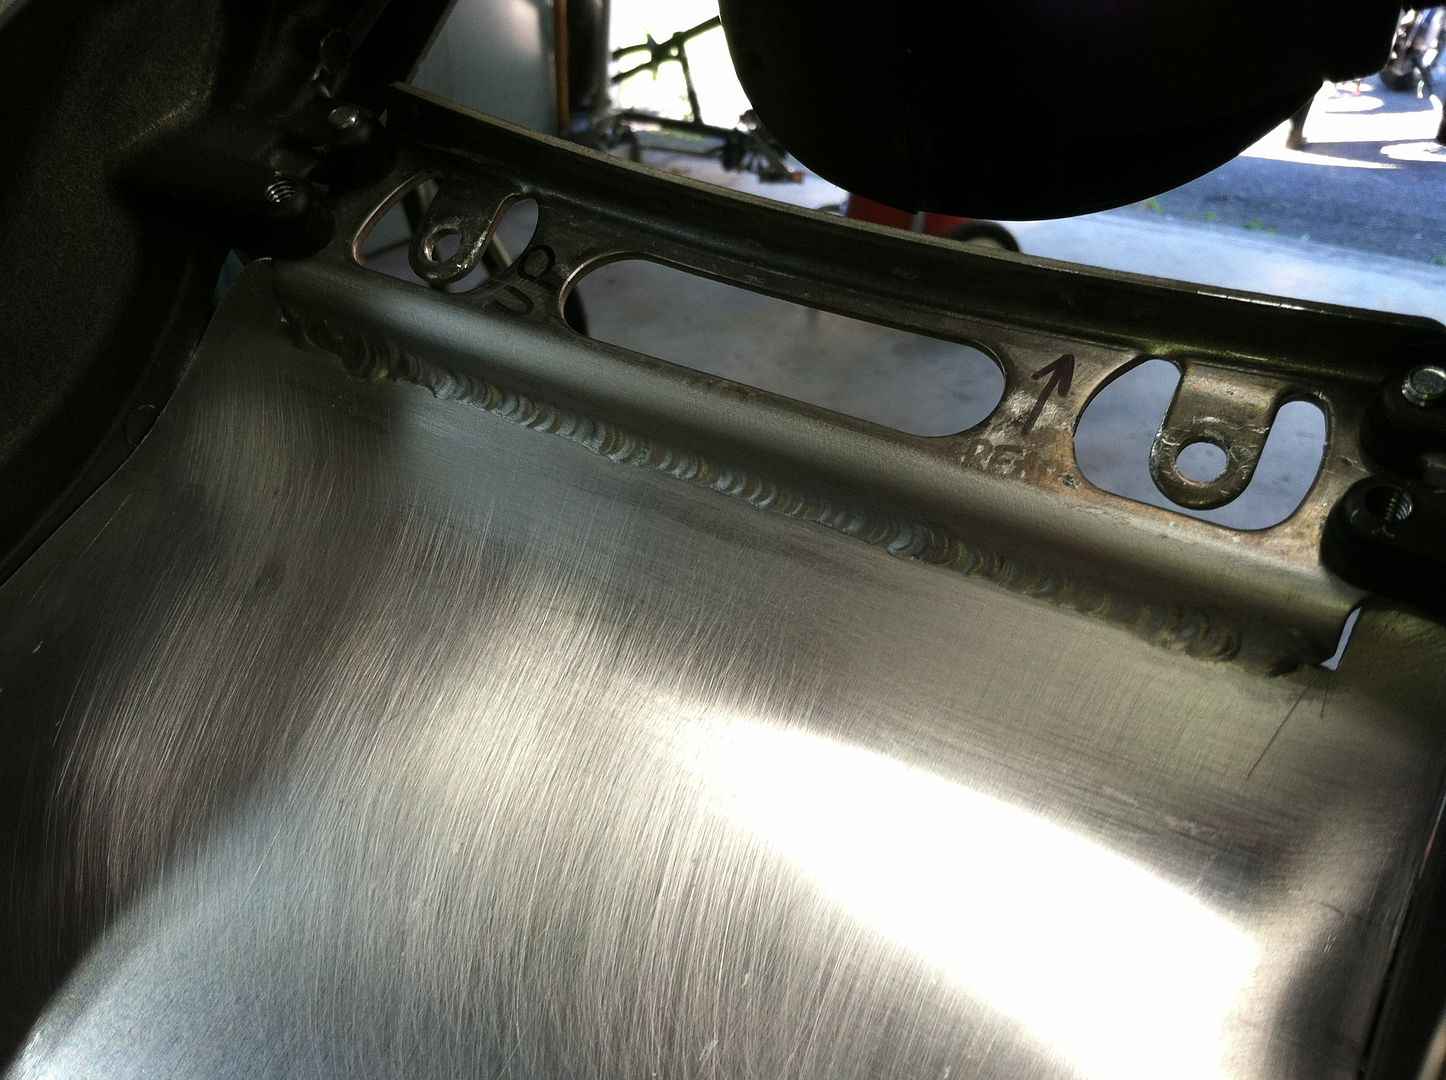
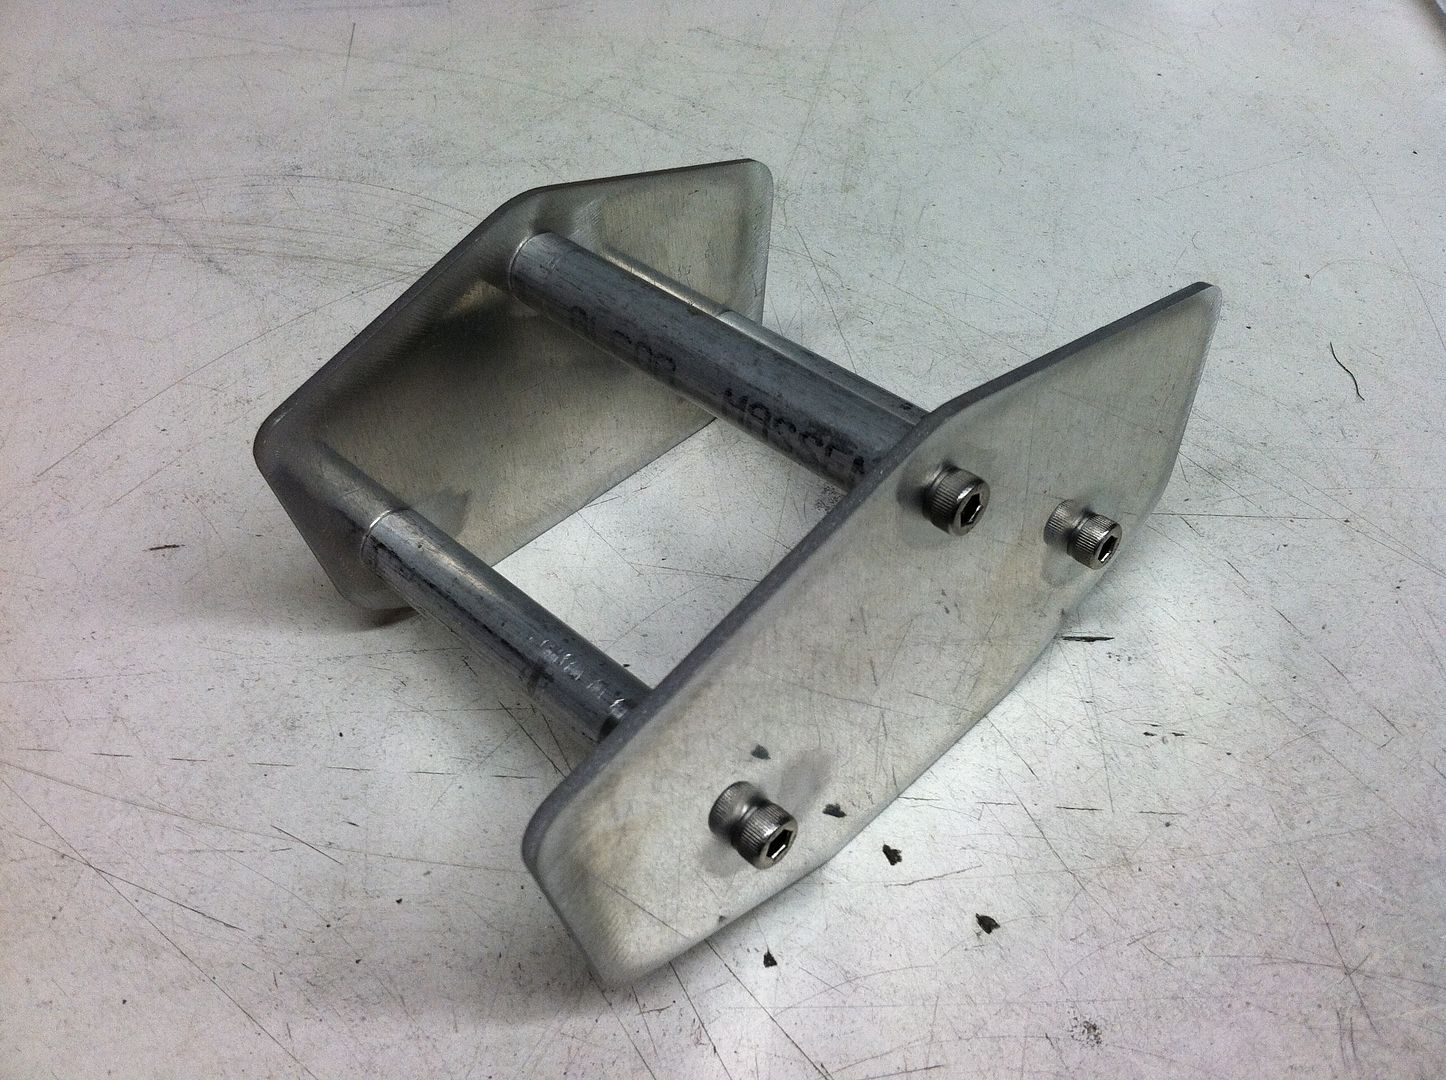
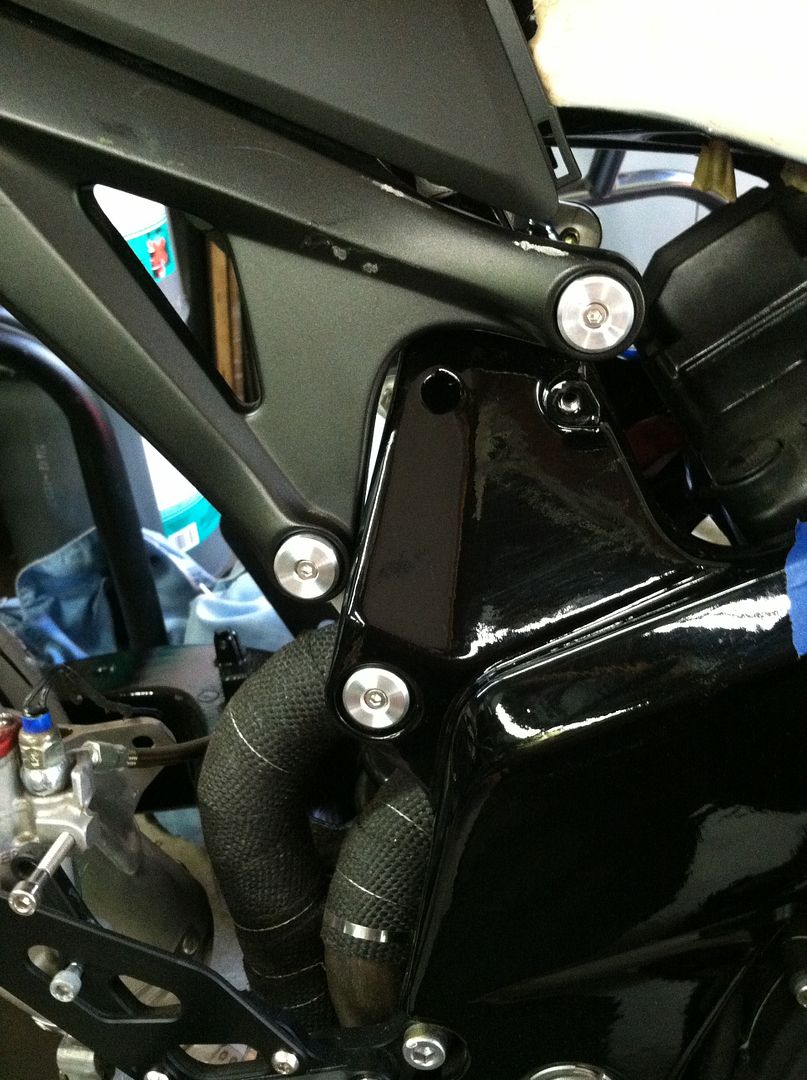
I liked the 08 CBR1000RR subframe from the first moment I saw it on the new CBR. It was an inspiration from the beginning, and once I made the decision to use a factory subframe vs a scratch built one, the search began for a CBR setup.
I found a complete tail section on ebay from a guy that was parting out his bike. After a few minutes of eyeballing all looked well, so with a few cardboard templates mocked up I went ahead and cut some aluminum adapters.
The aluminum dogbones attach the subframe to the mainframe with grade 8 bolts.
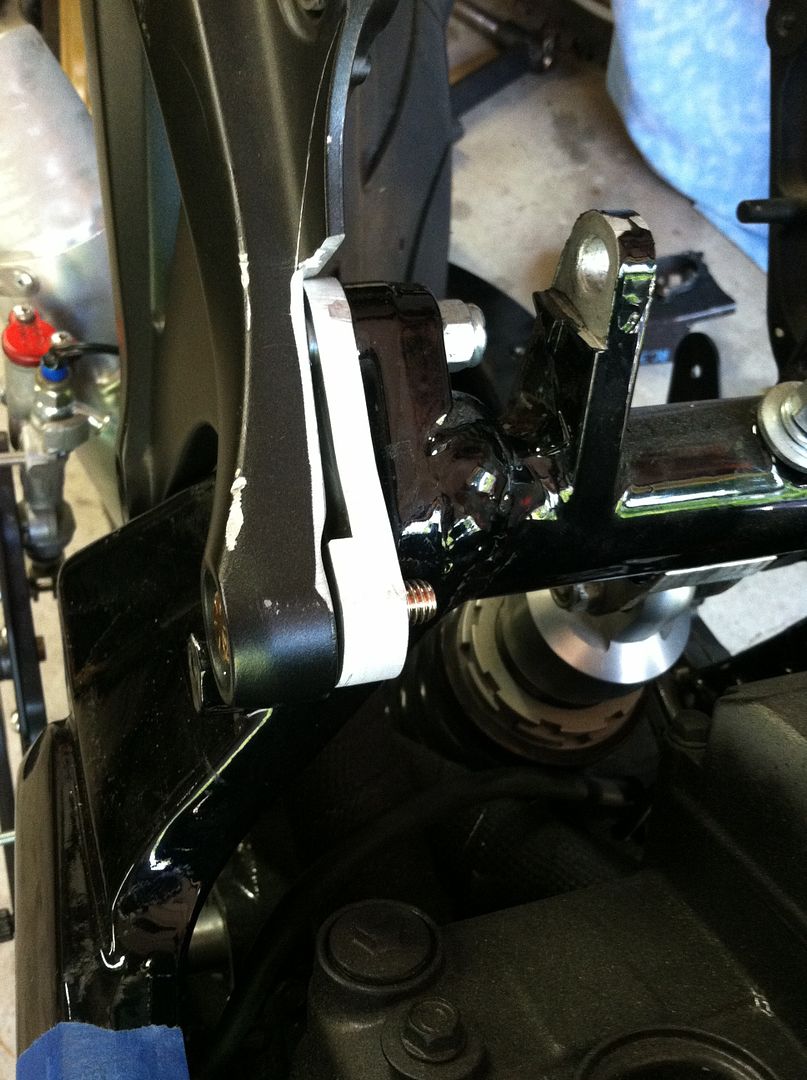
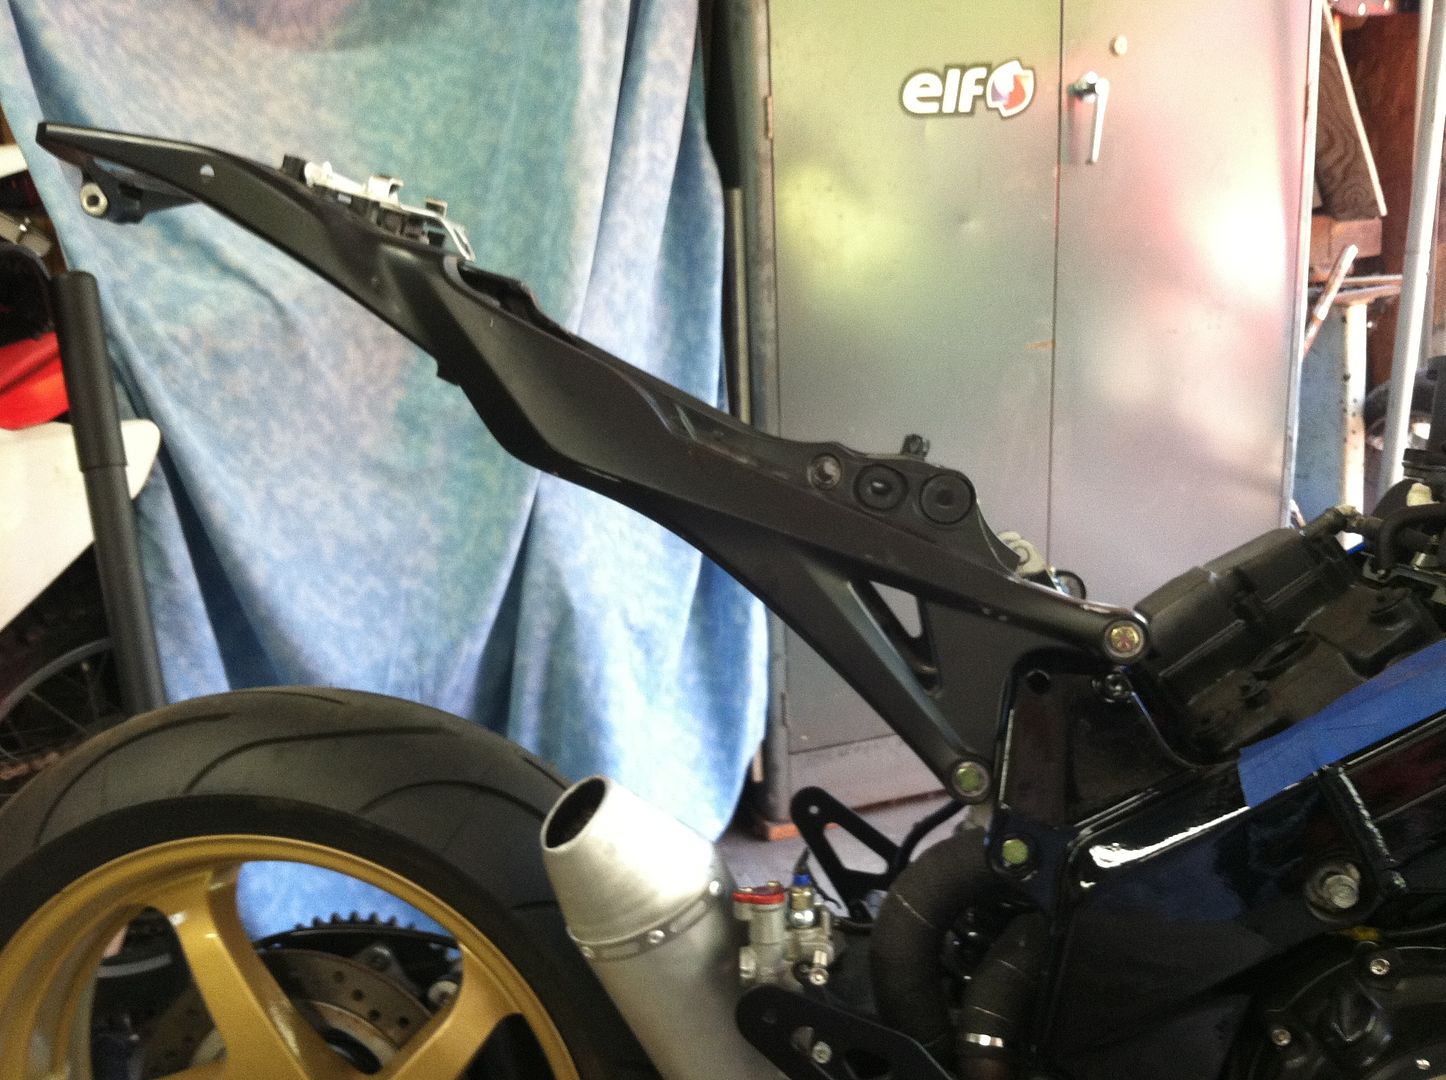
Those Grade 8 bolts were quite unsightly, so I made up some dress up caps.
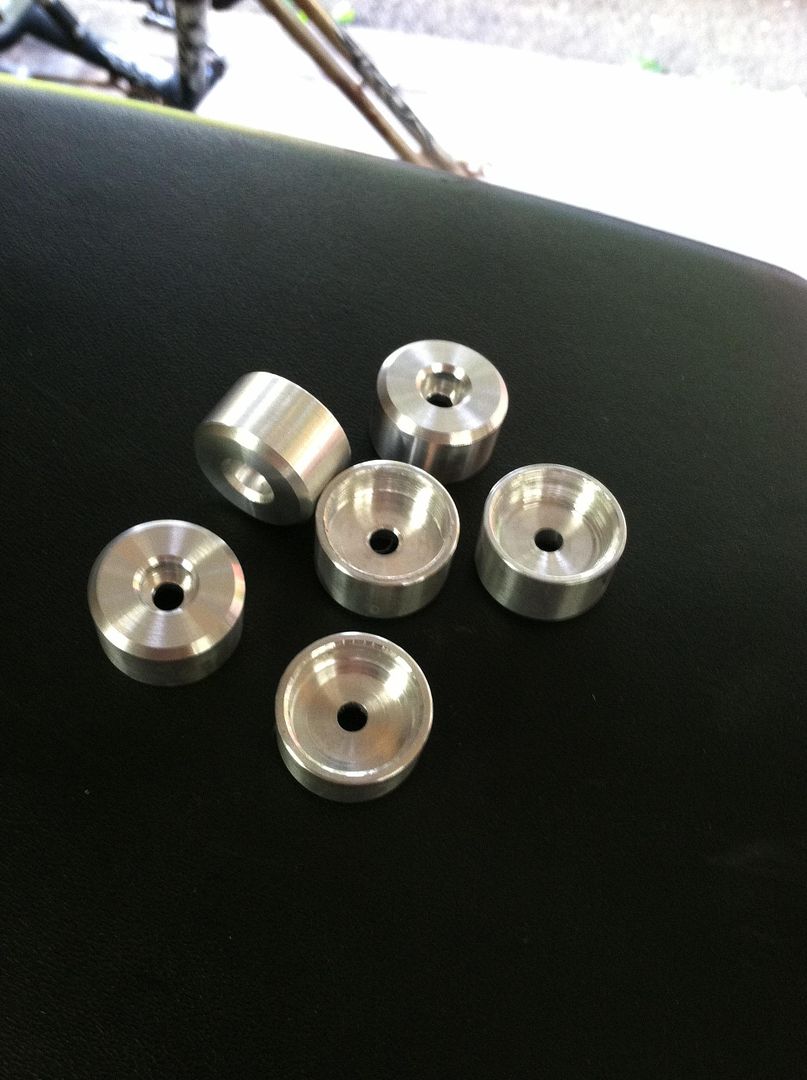
I attached them by drilling & tapping the heads of the bolts.
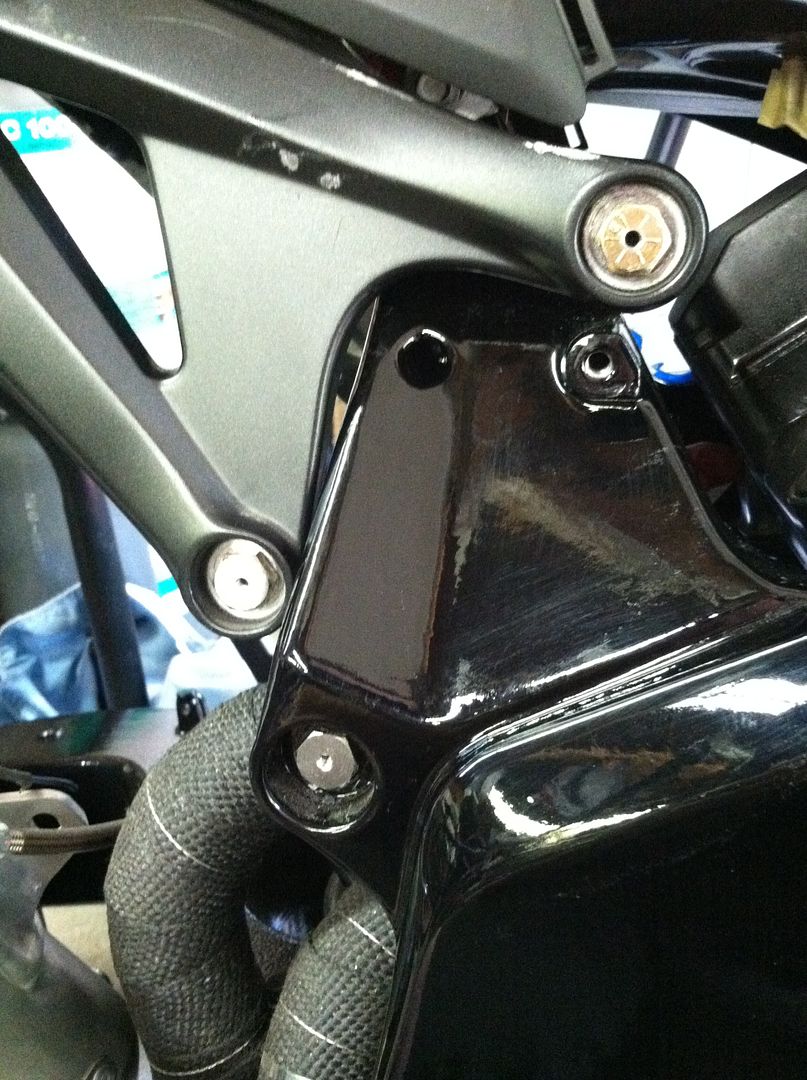
Attached with stainless cap screws.
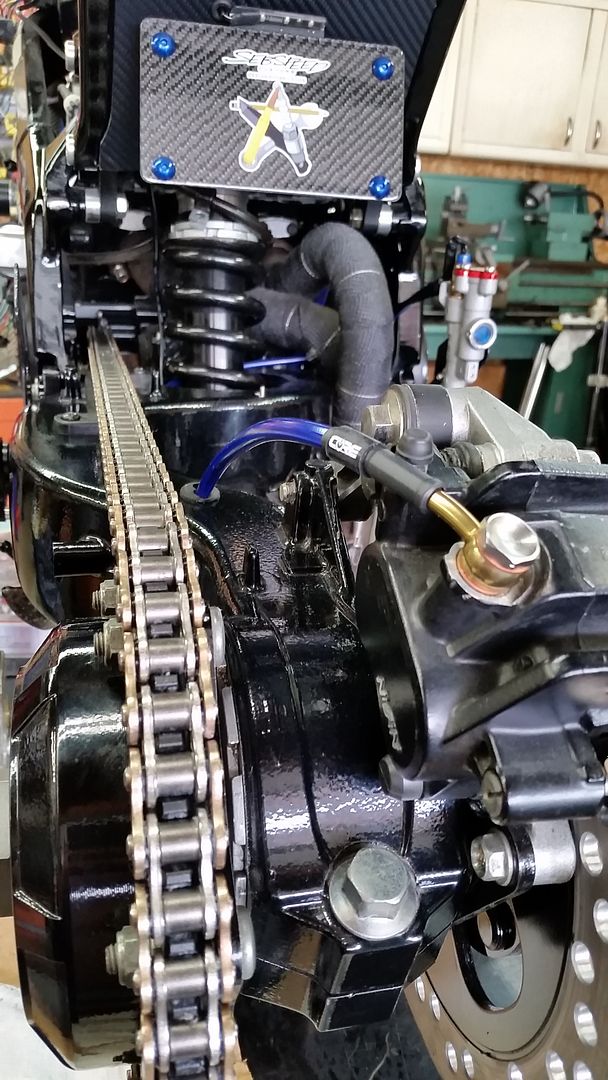
I also modded the front sprocket cover to remove some material and offer a racier look
-
1
-
-
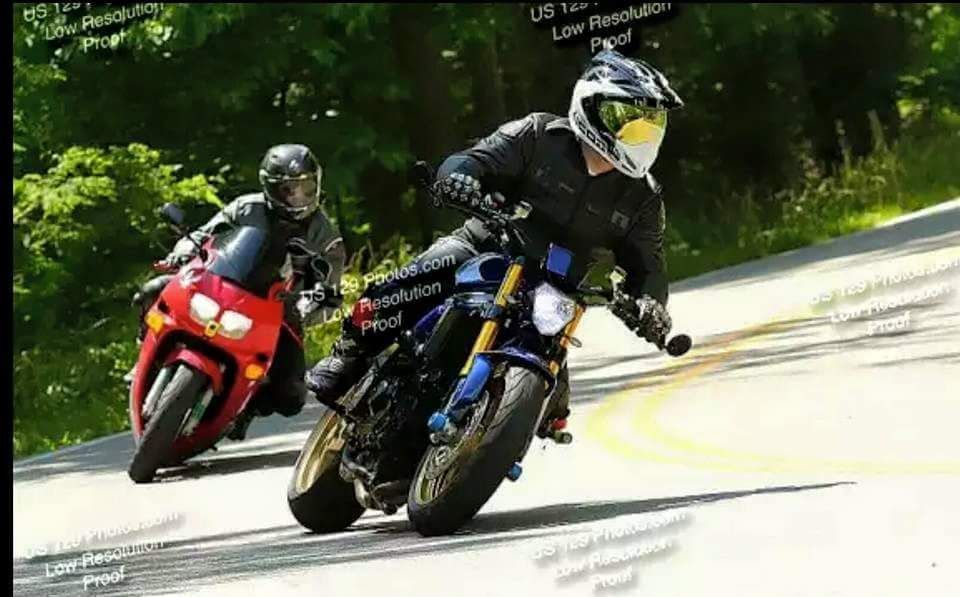
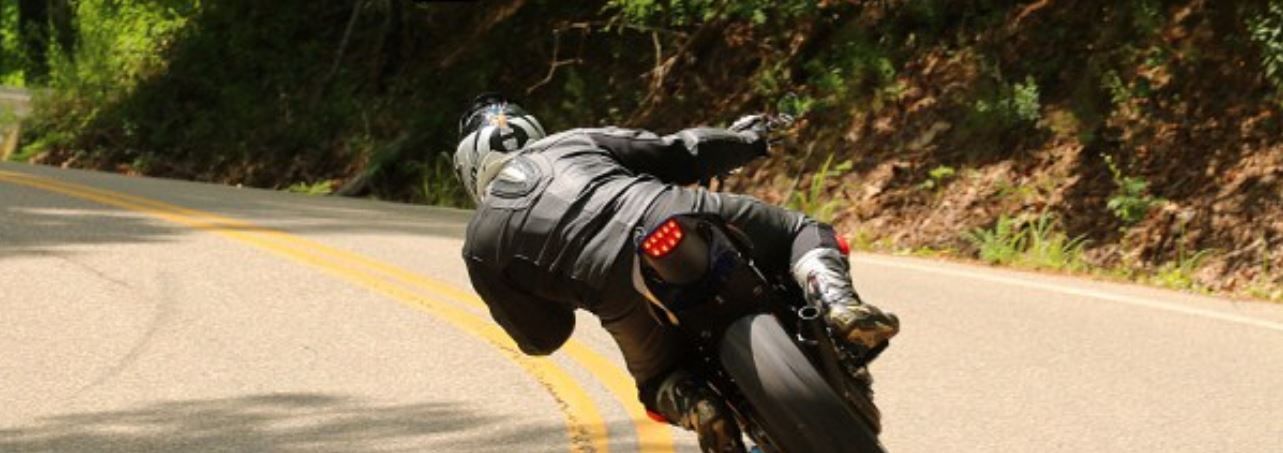
I will try to get a Dragon video on Saturday. I will post more pics and story early next week. I'm a bit preoccupied with riding and with hanging out and drinking cold beer here in Franklin at the moment :-)
-
2
-
-
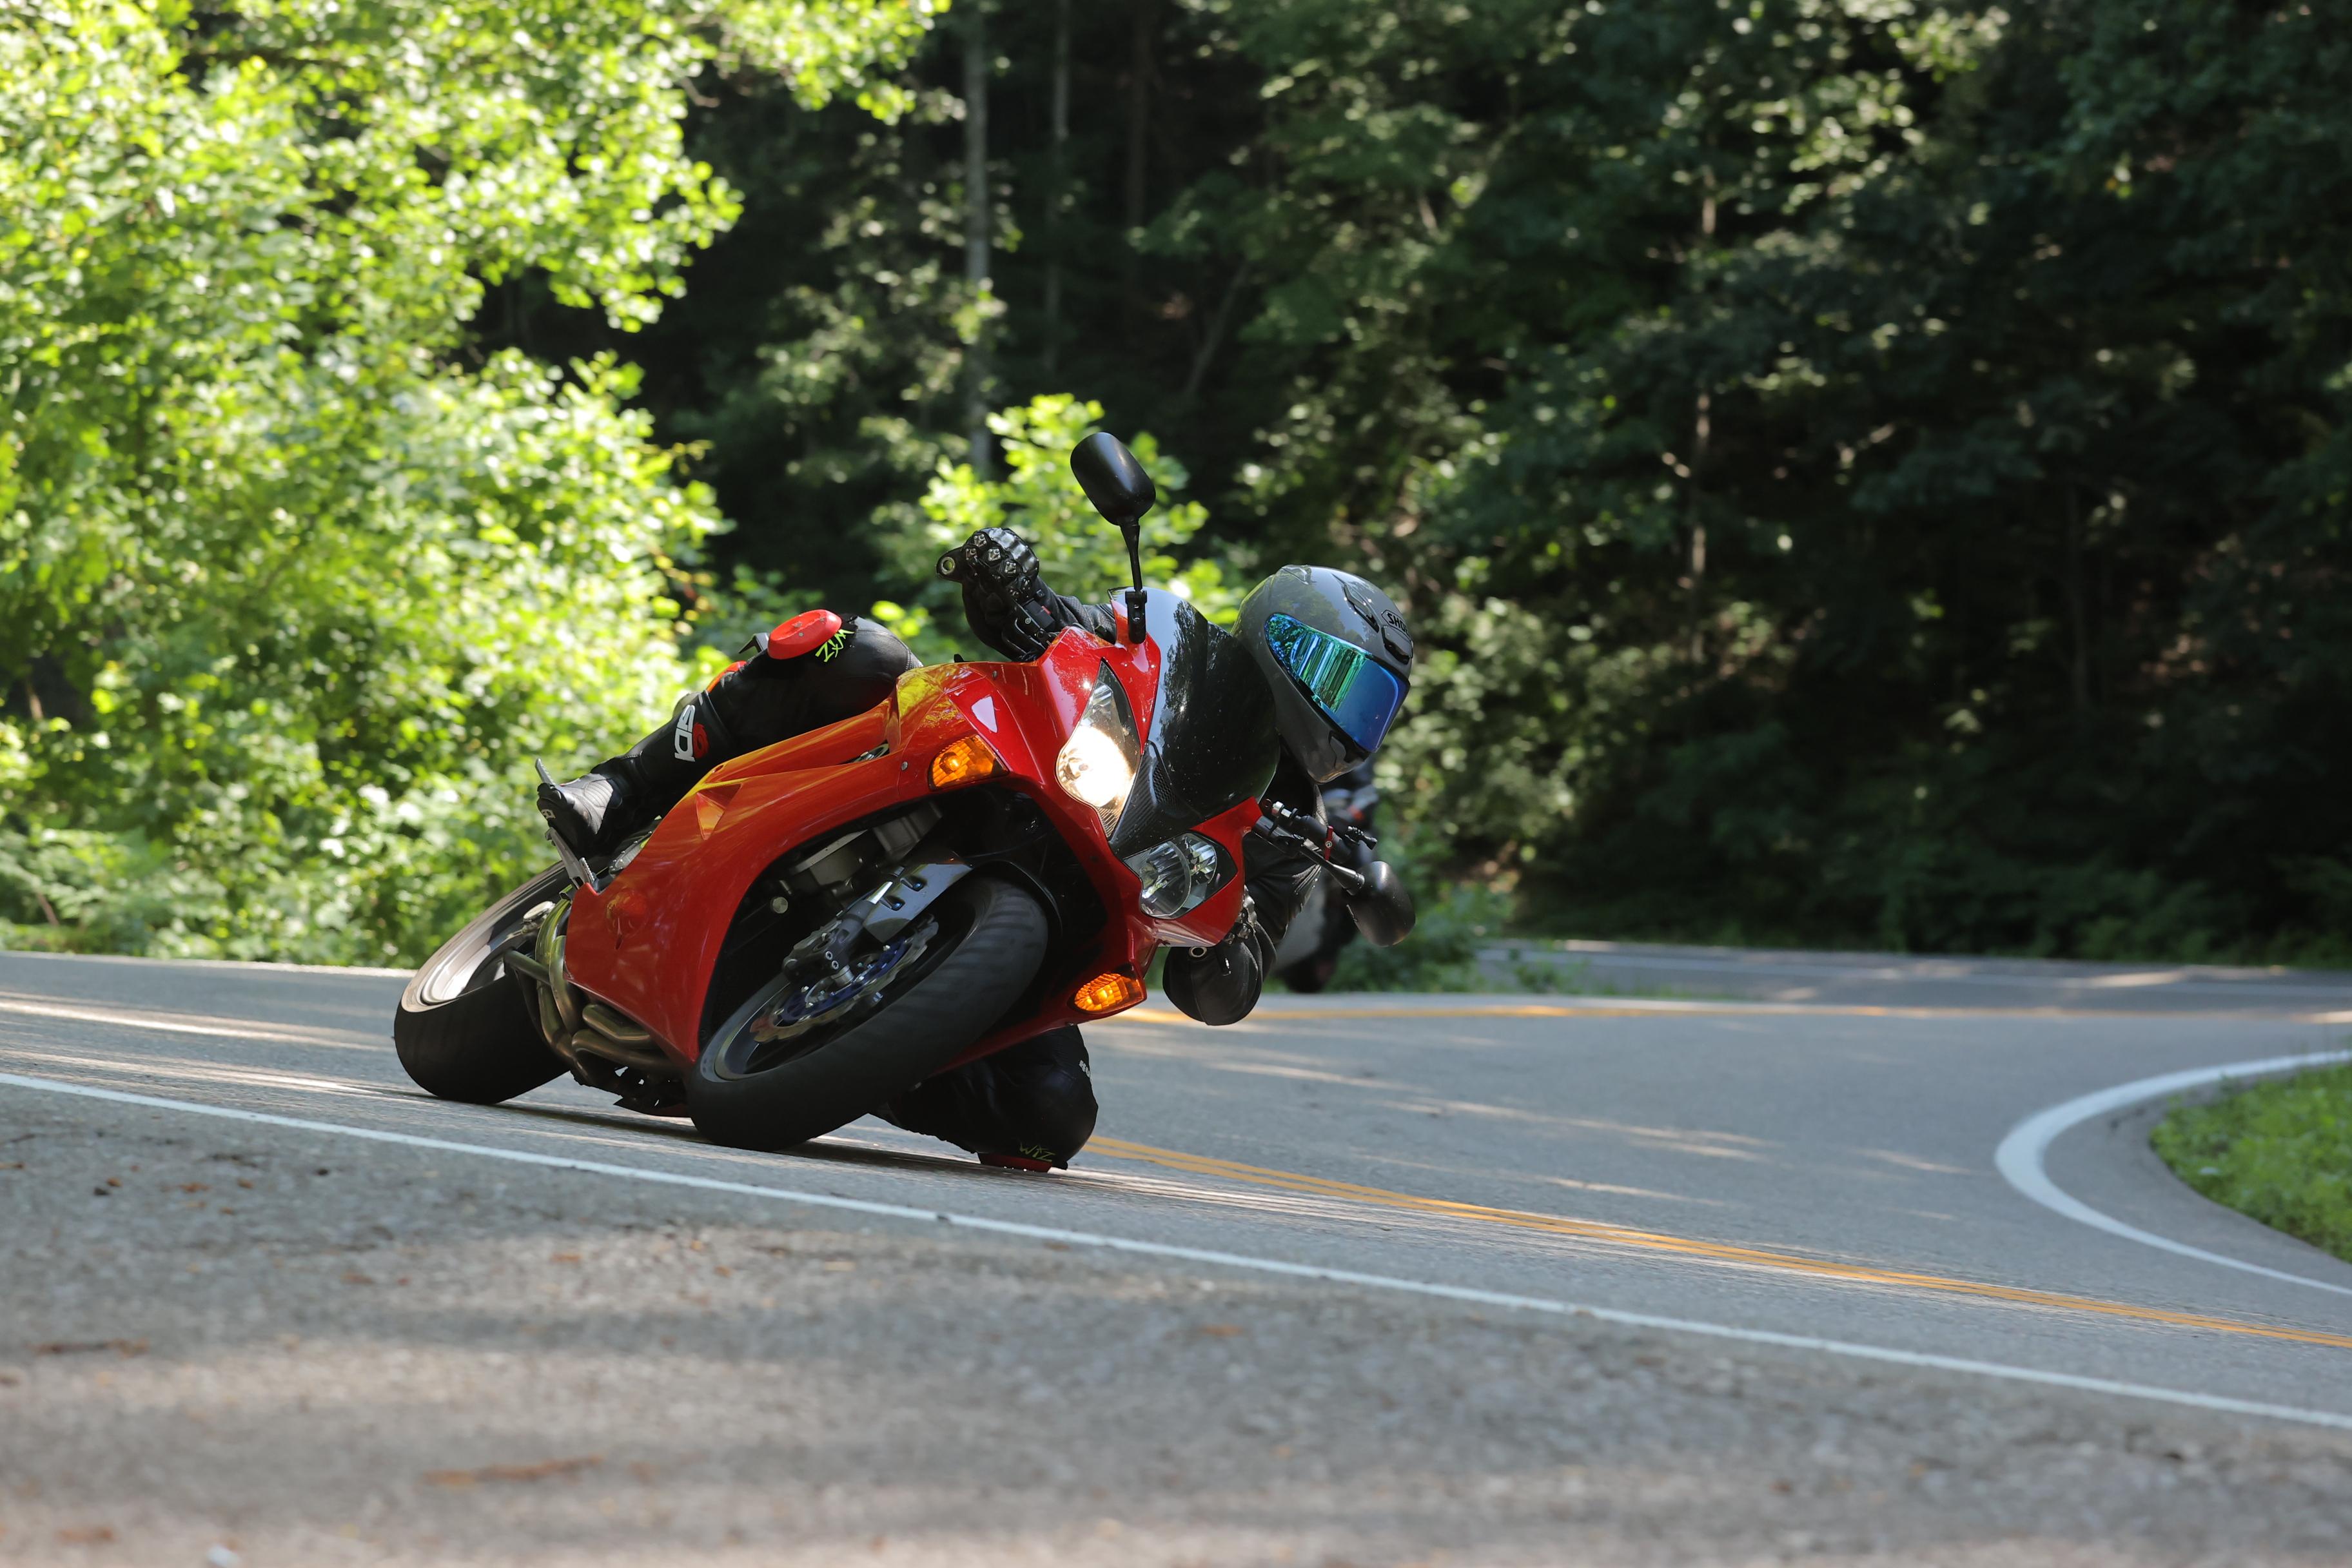
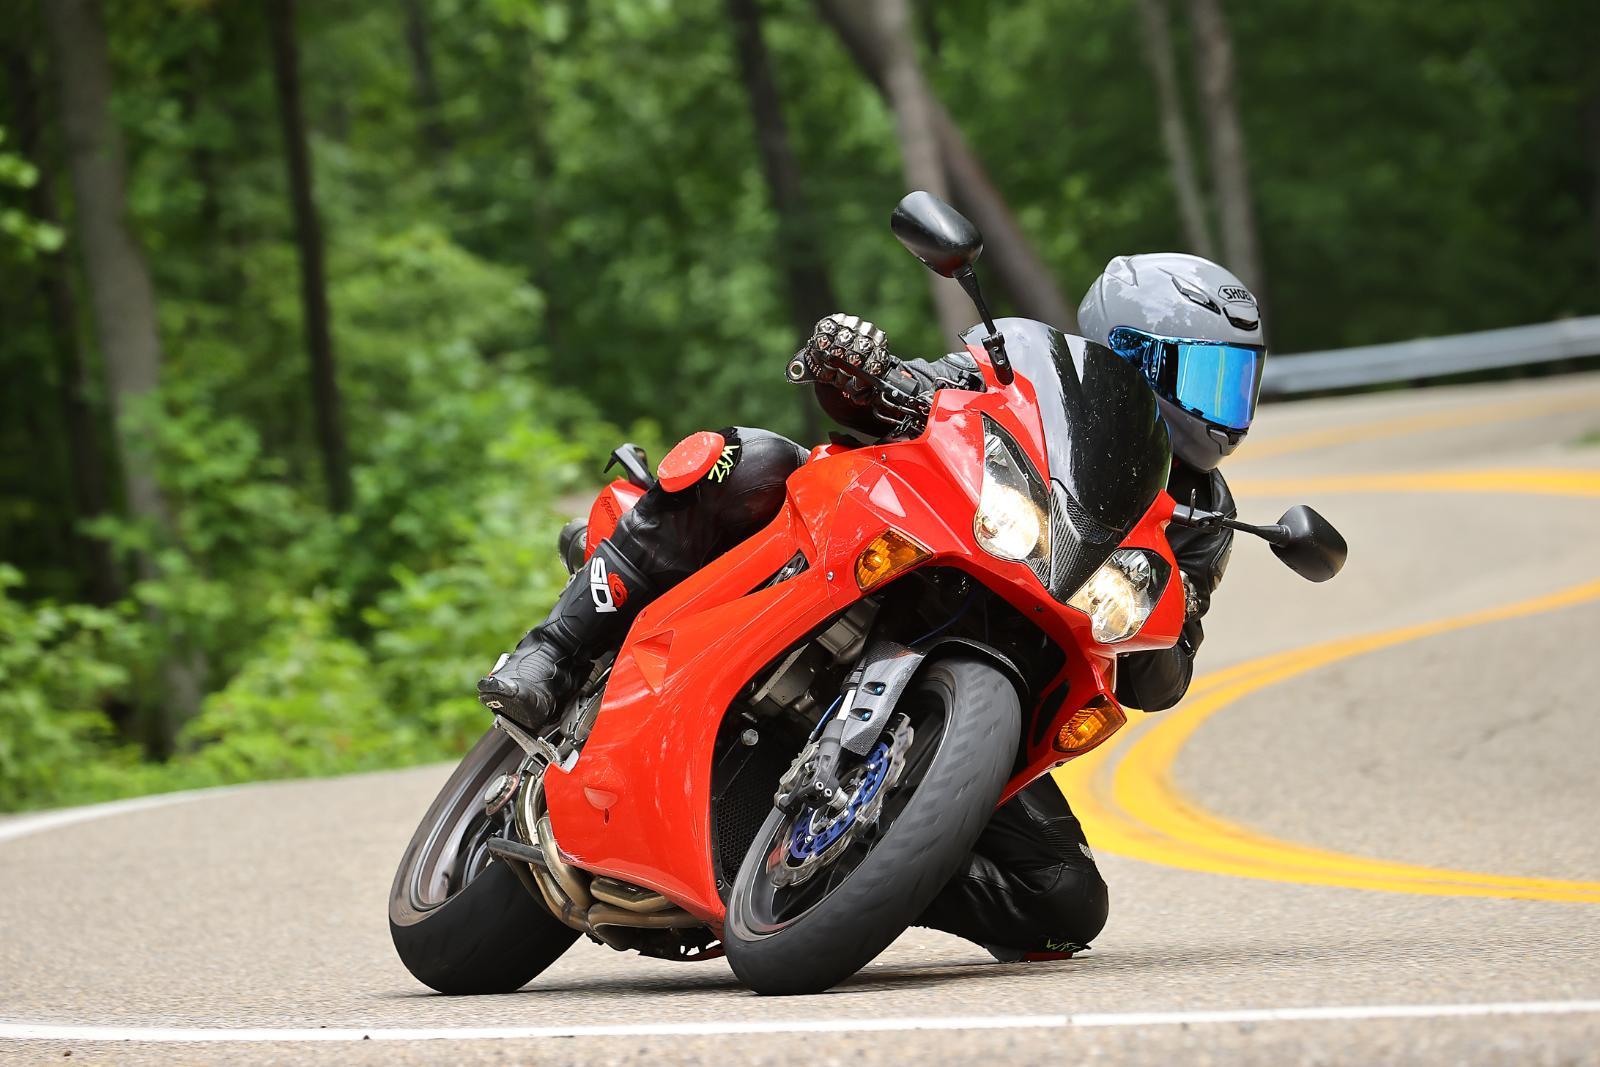
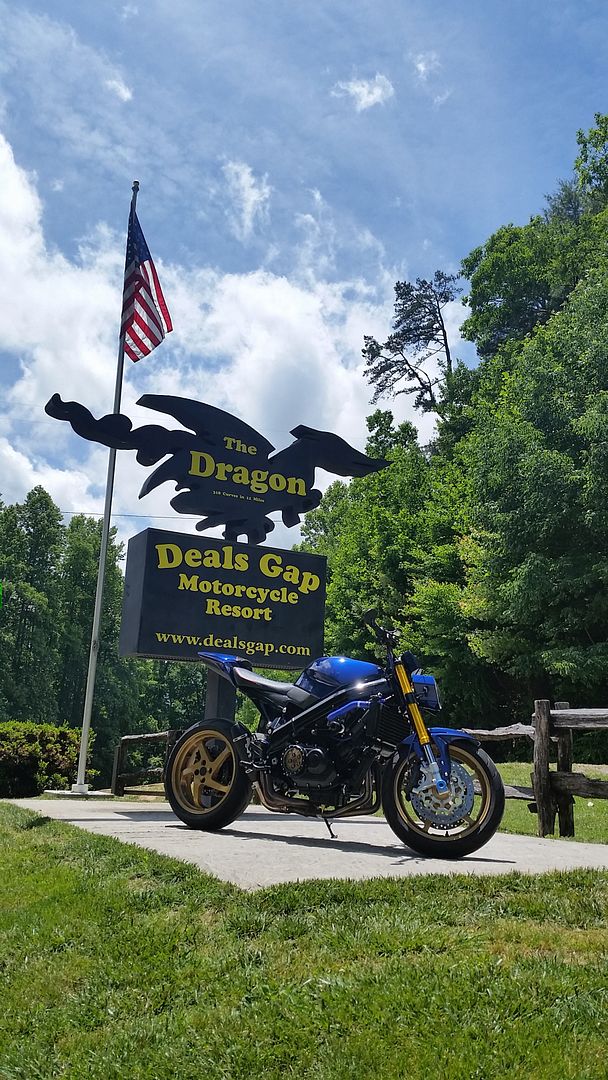
Baptism by Dragon! Bike did very well!
-
4
-
-
How do I submit to those blog thingies?
http://www.bikeexif.com/submit-your-motorcycle
For example. Can't say I know anything beyond what they say about having good lighting, etc. Reading a few of the other featured bikes gives an idea of how much detail they'd look for.
Edit: here's Pipeburn too.
http://www.pipeburn.com/submit-a-bike#.VWJhWU9Viko
Both sites seem pretty sticky on not having overlap, so getting on one pretty much nixes the other.
Thanks. Once I bring you guys up to date on the build, I'll see about submitting to one or both of these.
So this is the special project, now I will be very honest as we all like different things I'm not a fan of street fighters, cafe racers or naked bikes, my idea of a naked format is a MX or enduro that I can cover in mud in the bush. But what I like about this bike that appeals to me is 1. it's blue my fav colour. 2. the gen5/6 rear wheel I'm sick of everybody thinking the gen 3 rear wheel is the bee's knees, again my fav is the gen 5/6. 3. the CBR 08> tail it is again in my opinion the best looking stream line tail, it is a shame on the CBR the front is pig ugly. 4, attention to finishing everything with detail.
Great work seb but were is the gun holder, some of your gun modifications are my fav mods you do outstanding :-)
Thank you sir. I realize it's not for everyone. I've wanted a SF for a while and I'm so glad I was able to pull it off with a VFR.
No built in holster, but there is just enough room in the tail that I could stash my Sig if I had the desire.
-
How do I submit to those blog thingies?
-
Is that Mrs Seb in the picture?
As a matter of fact, it is...
Roland Sands, step aside. There's a new builder in town. Beautifully finished. Can't wait to see more pictures.
I think RS has firmly secured his place in the world, but thank you!
I will try to get more pics up soon.
-
I do love how the 92 tank line matches the flares on the headlight.
I have back-to-back pics of the tanks, I will try to get those posted tonight. -
Thank you Rob, for your praise and your silence. lol I did leak some glimpses here and there as I sometimes needed a bit of fuel to get through the more trying times during the build.
I've started adding background pics and story to the first post, it will take a while to cover it all.-
1
-
-
First ride went really well! Couple little issues but that was expected, nothing I can't fix this weekend in time for the trip to TMAC 2015.
Tomorrow I ride it to the dealer for its annual inspection, then a quick cleaning and it will be ready for the mountains. Trial by Dragon!
No Ken, my blue is much darker.
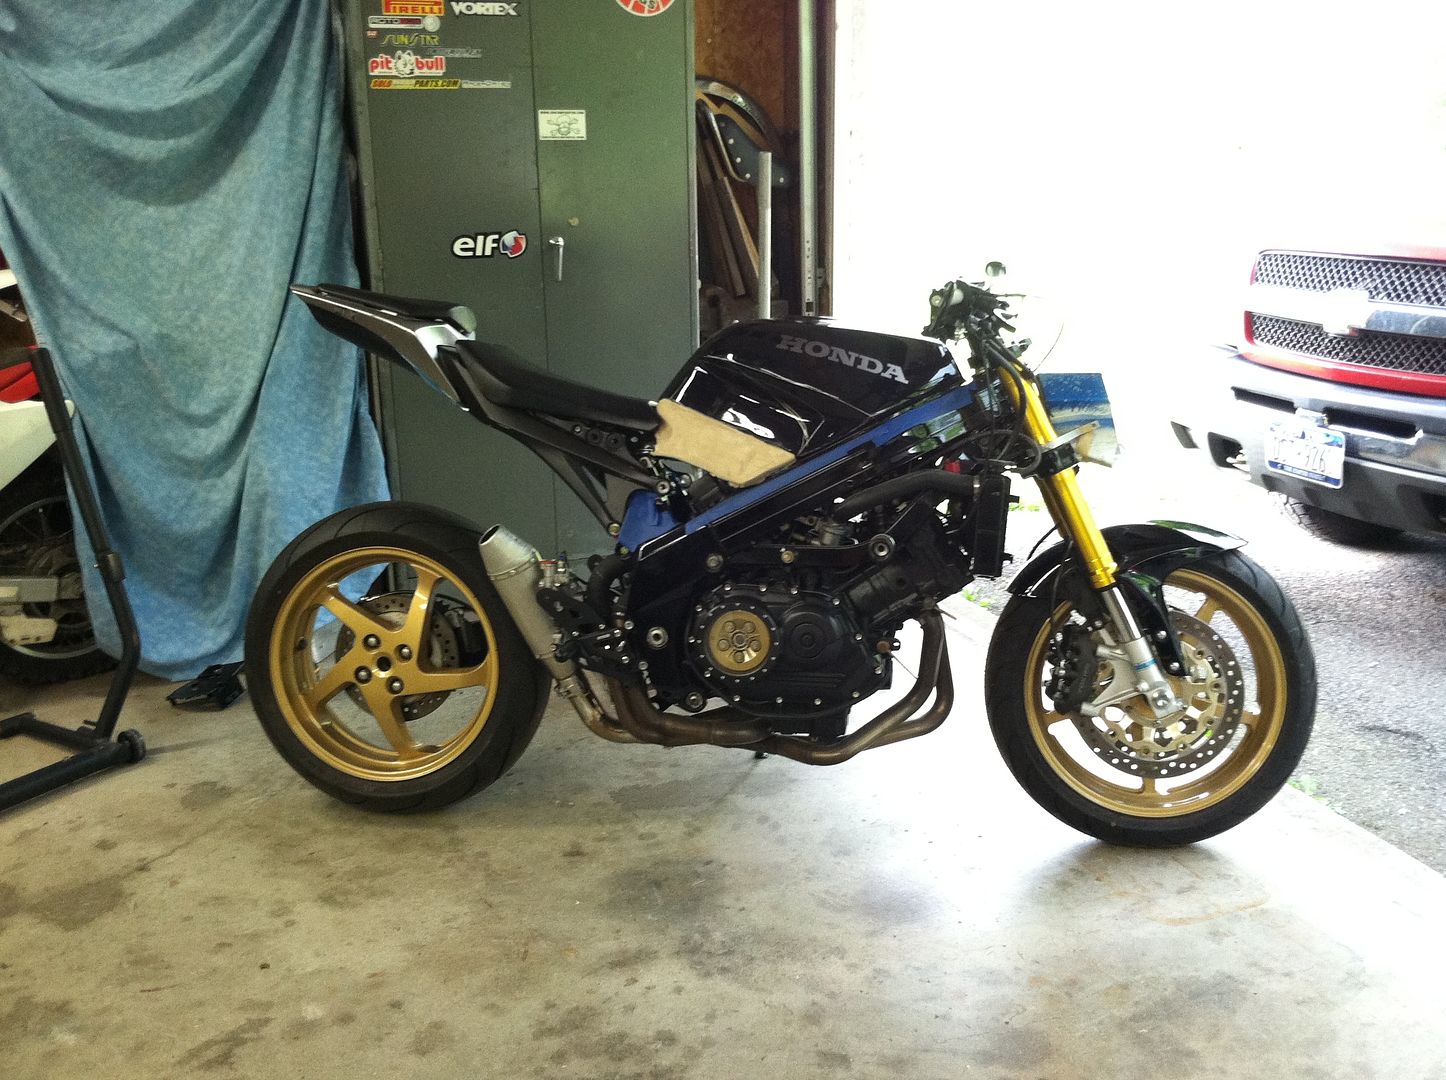
My 1996 Vfr750 Streetfighter
in Modifications
Posted
Thank you guys, I appreciate it. Now let's see if this thread has capacity for this much awesome...
Andy's
Mine: