

HispanicSlammer
-
Posts
6,956 -
Joined
-
Last visited
-
Days Won
61
Content Type
Forums
Profiles
Gallery
Blogs
Downloads
Events
Everything posted by HispanicSlammer
-
From the album: Tire Repair
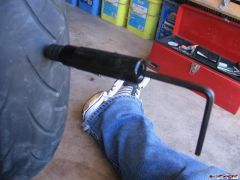
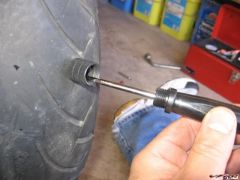
make sure the plunger is backed out first - screw the plunger onto the nozzle - tighten down on the plunger using the hex wrench till the mushroom plug is pushed into the tire through the nozzle then back out the hex wrench and remove the plunger tool nozzle and all© ©vfdiscussion.com
-
From the album: Tire Repair
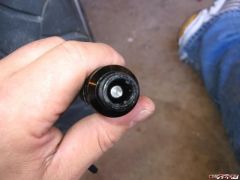
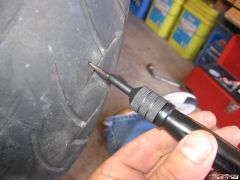
there is a shaft that screws in and out from the inside using a hex wrench© ©vfdiscussion.com
-
From the album: Tire Repair
I found it is easier to put the plug in by hand rather than loading it into the plunger tool.© ©vfdiscussion.com
-
From the album: Tire Repair
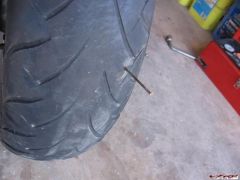
unscrew the needle tool and remove it from the nozzle© ©vfdiscussion.com
-
-
From the album: Tire Repair
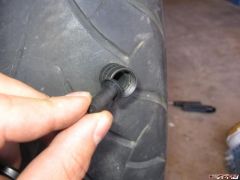
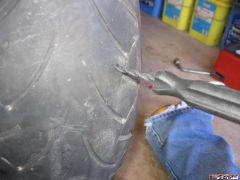
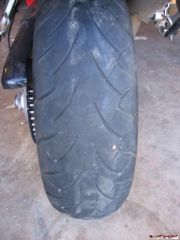
ream out the hole by twisting the rasp and enlarge the hole wide enough to insert the nozzle© ©vfdiscussion.com
-
From the album: Tire Repair
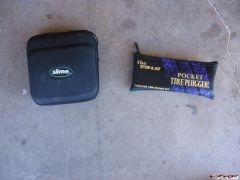
This could be tricky if you dont stock a plier or a multi tool© ©vfdiscussion.com
-
-

From the album: Tire Repair
Rasp/Reamer, mushroom plugs, Nozzle, Needle tool, press tool, blade, Hex wrench© ©vfdiscussion.com
-
-

Crossroads Of Time - Texasmac 06 Video
HispanicSlammer commented on HispanicSlammer's blog entry in HispanicSlammer
I really liked my trip to Montana, its a wonderful state, and the folks were friendly but not nosey. I cant describe the awe I felt when I visited Glacier National Park, the open range of the Blackfoot Indian Nation, watching the sun rise over the double mounain range south of Kalispell was impressive, that windy mountain road wedged between the two sawtooth mountain ranges was a wonderful site to behold with a cool mountain lake every few miles in between. Seems Montana has it all for the outdoorsman. -
video preview I was putting away some of my videos into boxes for storage today and came across this slice of the Texasmac ride from 2006, it is footage from Deals Gap to Fontana Village. I tried to identify all the riders in the video and I think they are as follows, perhaps sombody can correct me if I am wrong, Baileyrock, mq105, jeremy556, vtecal, vfrmonkey, intAceptor, and Billyjackjimbob who was in front of me. I think it was from the first day Thursday right after riding Deals Gap - Enjoy the video! :media: Crossroads Of Time Video 5 min runtime, wmv 1mb/sec sample, music by the "Smashing Pumpkins - Rocket" 32mb file size google earth route
-
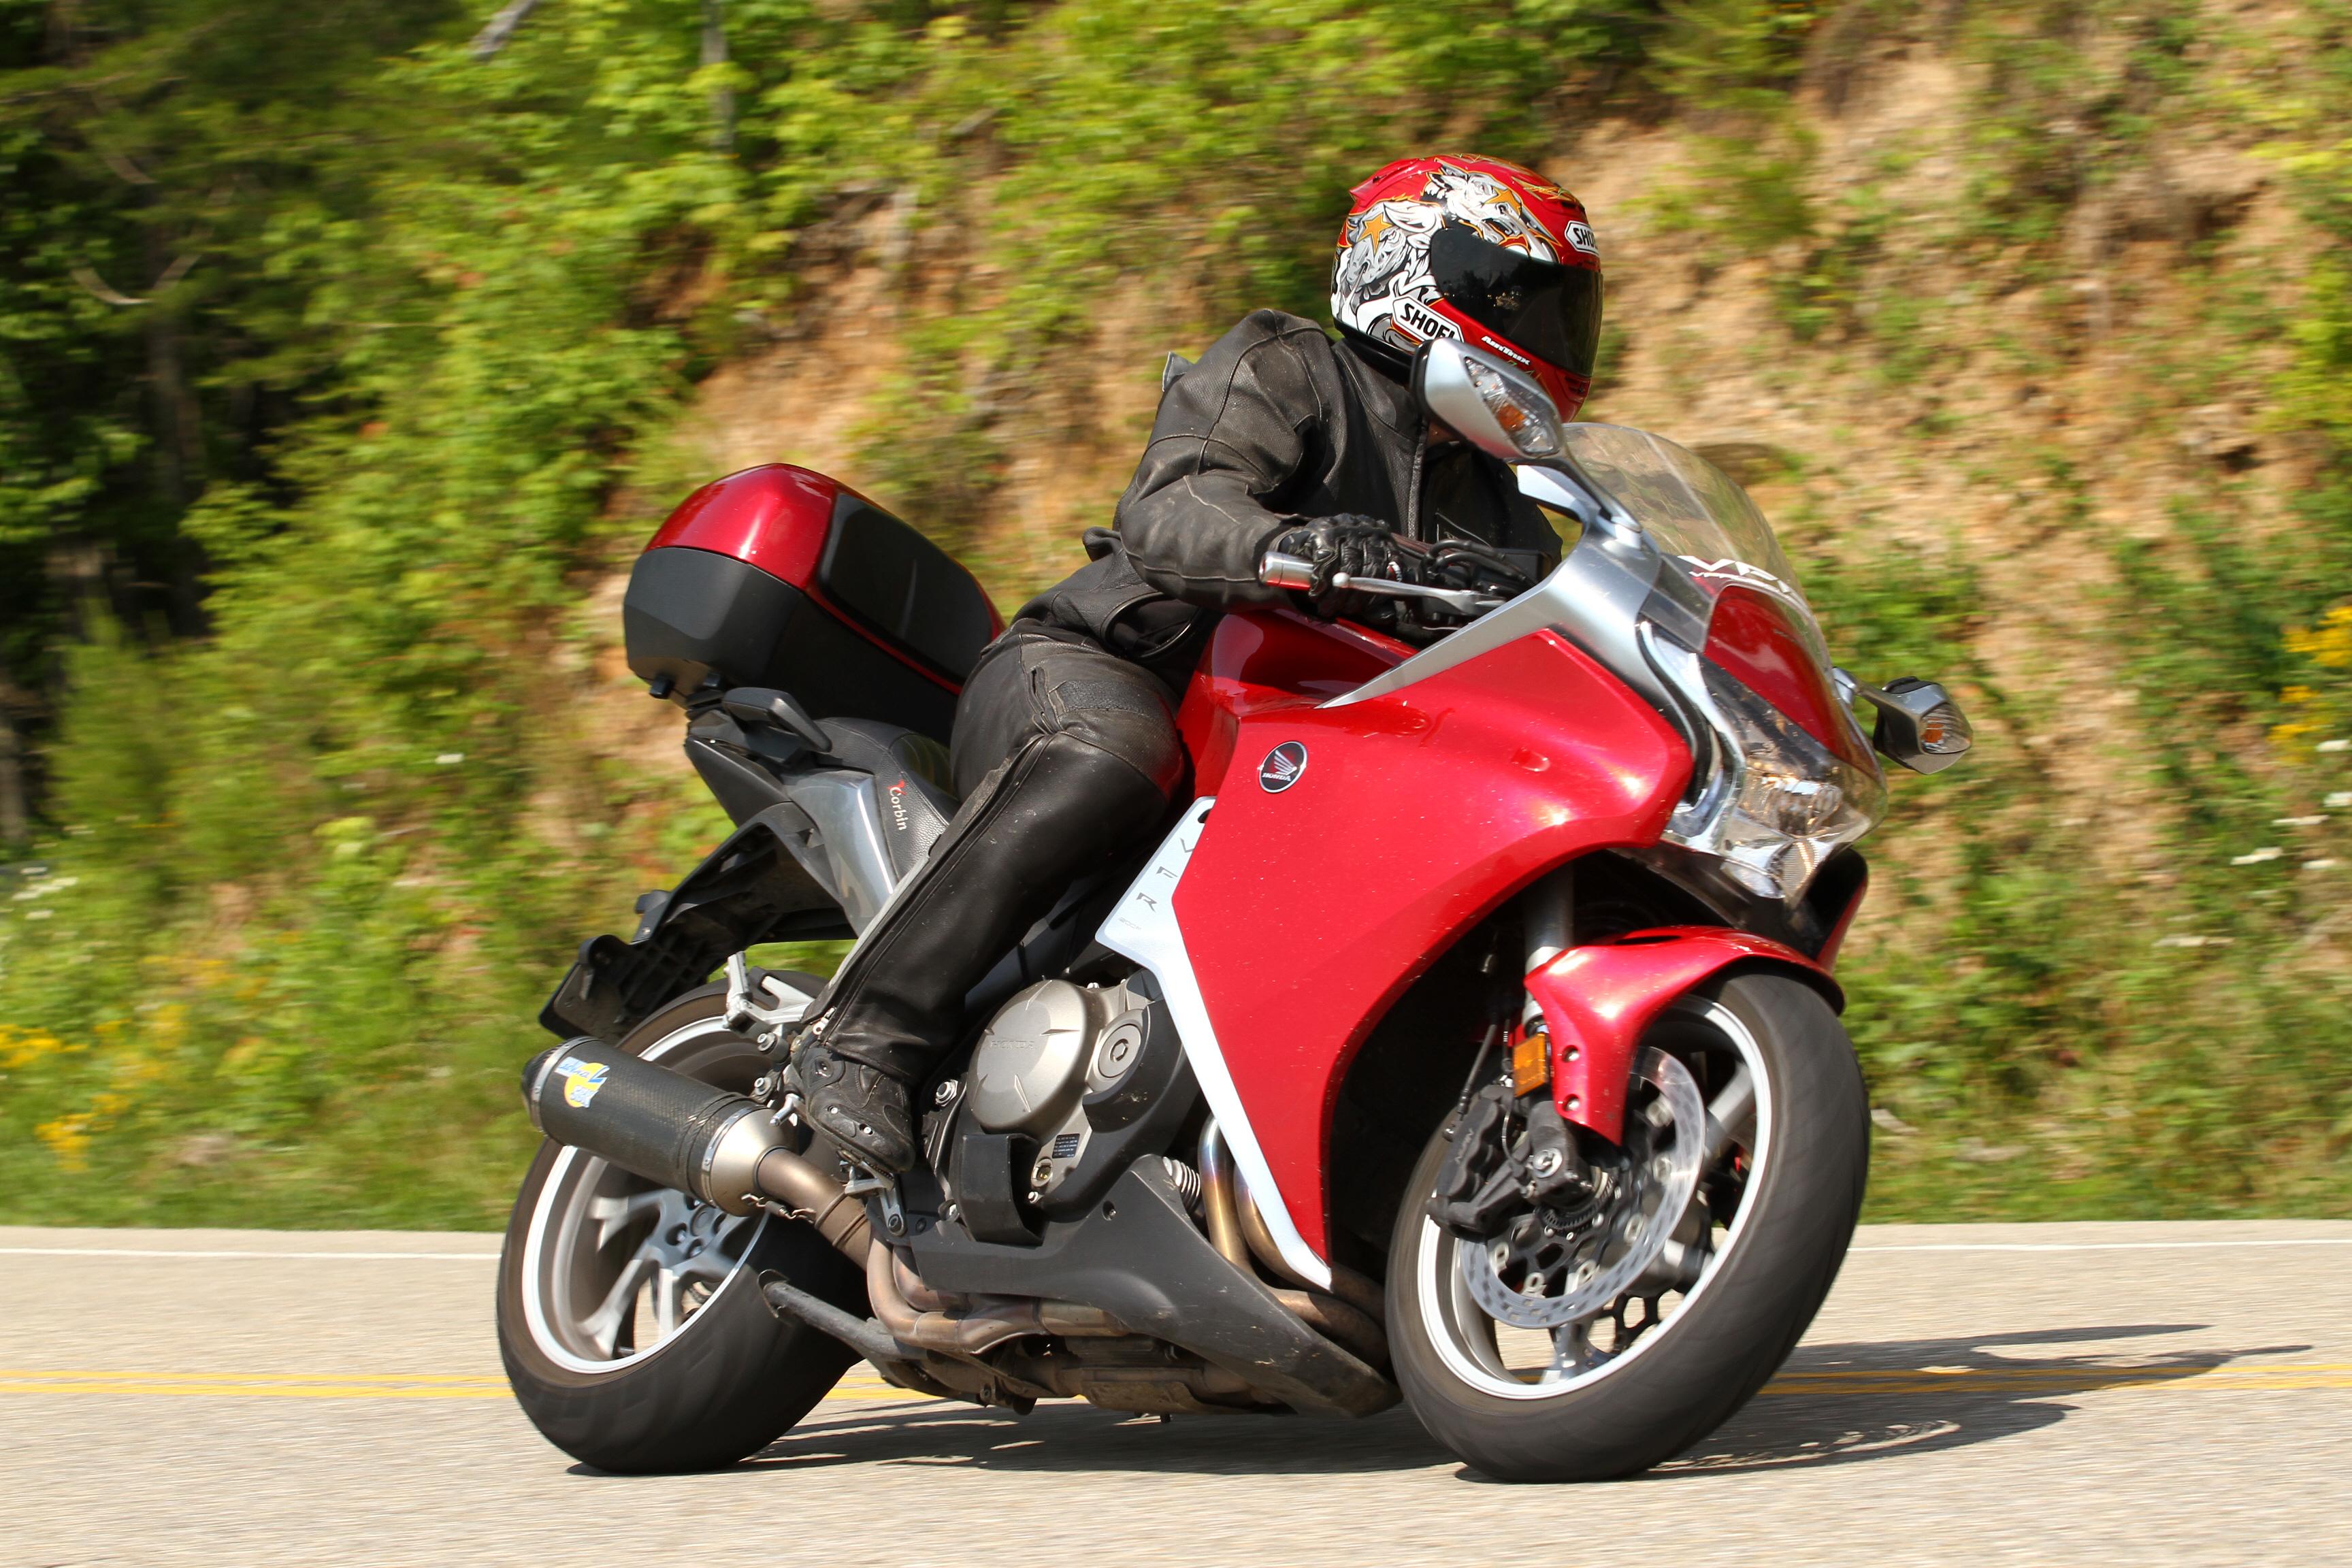
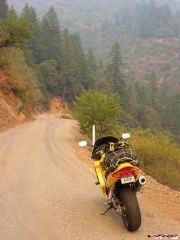 I would swear that this road was Gold Camp road in Colorado Springs - but I know better.
 -
I would pin this but there are too many open questions on exactly how you did it, and there are quesitons as to why you bypassed the main bus fuse? If you could perhaps draw and scan in a diagram or use ms paint? or take some digital photos of how you did it so we can plainly see whats involved - pics solve a lot of questions that are difficult to explain. there is a great how to in the maint section > how to guides on how to perform a linemans soldier splice its easy to perform, is secure and does a good job of making a solid connection.
-
If your rear cowl is on - frankenbolts included - go right ahead and try to remove the seat without removing the frankenbolts?! Unless you have a 6th gen? You have to take off the rear cowl to take off the seat, which means remove the frakenbolts. Not a big deal if your not needing to get under the seat all the time. Frankenbolts require you to carry a hex key or a flat head somewhere (not under the seat with the toolbag)! For me it was just easier to do the mod, after having lost a frankenbolt on the road, after not torquing it enough with my crappy flat head screw driver in my tankbag.
-
Well it looks like to me from the backside that the top two and the bottom two leads of the switch are bridged, just looking at the printed circuit on the board. You can just pop off the switch with an iron, stick lead wires in either of top or bottom - using one wire in the top set one wire in the bottom set. Basically its two wires with 4 holes - 2 holes for each printed wire. its a redundant switch the way they designed it, probably cause its a bulk switch or it mounts better using 4 soldier joints instead of just two. If your really an anal kind of guy you can take off the led and mount it remotely as well! HEH planting seeds here!
-
Rewiring The Farkles! & Scott Filter
HispanicSlammer replied to HispanicSlammer's topic in Modifications
1000miles seems a bit too early I usually go a month or 3k just not cost effective and 3k oil pretty much standard thinking for high reving bikes, 5k being a safe upper limit. I can rack up 3k in one trip seems like with all these great vfrd adventures I like to do. change tires change oil is about right for me. -
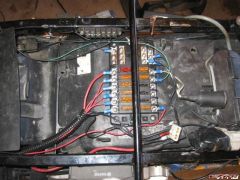
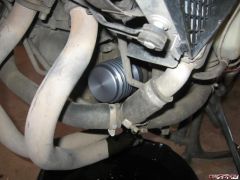
Blue Sea switches and hot grips controllers After two years of my previous wiring effort, my el cheapo fuse block - aka checker autoparts special corroded and fell apart, leaving half of the block powerless. Perhaps it was the placement of the unit that caused it, probably I had it up front by the left radiator! So I decided to replace it with a better block and put in some new switches to boot. Anybody who knows me or has seen my bike knows it built for long distance touring, with heated grips, heated seat, and heated vest! What can I say I don't like getting caught in the cold - out here in Colorado it gets cold at a moments notice! Surprising cold like my trip to Montana last summer where it was down to 35 degrees on the Black Foot Indian Reservation, my heated stuff really came to my rescue! That comes with a price though, a burned out stator for example. So my solution is to remove a head light from the equation! Thats 55 watts for me! So I put the right bulb on a switch so I can shut it off at will - like an RC51 headlight! That frees up some much needed watts when it gets cold! I cant count how many times I have been hundreds or thousands of miles away from home in the cold and alone! NOW TO THE REWIRE! Blue Sea fuse block with built in ground block http://bluesea.com I bought the big fuse block cause I have a ton of stuff wired radar detector - el cheapo scorpion target special heated grips - dual stars heated seat - do it yourself with kimpex element heated vest - widder (soon to sell for aerostich bladder) signal dynamics voltmeter - heads up single led display relay trip power - for my headlamp wiring job cigg adapter seat - for my camera gear cigg adapter fairing - for compressor lots of crap, which are used sparingly at best, except when its cold to the bone when I am using the heated stuff allot! I positioned the block under the bar so I can't use the lid, that way I can fit my tool roll, my tire patch kit, and my compressor under the seat. Blue Sea switches and hot grips controllers The switches are double throw, on the right I have my the headlamp off switch down, and the manual fan bypass (turn it on at will) up. The right switch if for my dual burning headlight mod for the 5th gen, turns on hi and low at the same time for extra light when needed! The nob's are hot grips pulse width controllers for the seat and my vest! I had them on a single controller but the seat would be too hot and the vest too cold so I put in a second one and separated the circuits. Signal Dynamics Heads Up Display LED up voltage display and multi color indicator led for heated grips which I custom made from a multi lead LED two resistors, two heavy duty diodes, and wired it to my headed grip wires. It burns green for low, and red for hot. Stealth position for Radar Detector for when radar detectors can get you a ticket. I have to give credit to Dutchinterceptor for this idea, he has his Valentine one in a similar position, I took my el cheapo target special (scorpion) detector apart hit it with a soldiering iron to remove the laser sensor and wired up an extension wire, put a switch on the right hand side to turn the detector on and off, wired up a lead to the remote speaker, which I have routed into a passive mixer (listen for radar beeps and my ipod at the same time) I found out that in Amarillo Texas its illegal to have a radar detector so I put it in a hidden spot behind the fairing, sure its blocked but radar can go right through the fairing no problem, its mounted sideways but I tested it on one of those city speed signs with a radar that tells you your speed! It works. It never was a top tier detector anyways. Removed Laser sensor and rewired to face forward removed and hardwired laser sensor to face forward out from behind the fairing. I found an LED casing that I can glue it into for added protection later, I just wanted the laser sensor to be able to work unhindered by the fairing. BLING! Eagle Eye II 1157 led bulb replacements I am always burning out standard taillights so I found these led units on the web Link, they are supposed to be the most powerful led bulb you can get, and they have an enormous heat sink on them, and wiring inside to handle the voltage. They are just pop in replacements. Hopefully these will last! I had to rewire the leads cause they corroded and were hanging by a single thread of wire, one had come apart completely, so I popped the connectors off and soldiered in new wires. I need to replace the connectors but now it works! 5th gen brake lights have a tendency to work loose and burn out, I tried to remedy the situation by wrapping electrical tape around the mounting posts to make it fit snug so it wont rattle , then rewired the connectors, replaced with sturdy LEDs bulbs - I hope I don't have another rider come up to me yet and again to tell me that my tail light is out - AGAIN! SCOTT OIL FILTER Scott Oil Filter Reusable micro screen filter & magnetic oil plug. I also changed my oil and installed the Scott filter I ordered months ago, its a spring loaded unit with a billet machined body, a 35 micron stainless steel filter good up to 600 degrees! And it also has a built in rare earth magnet on the front of the filter to attract metal filings from crankshafts or whatever magnetic stuff would be floating around in the oil, (cam shaft lobes, crankcase bearings etc) - also installed a blue anodized magnetic oil plug, its a dirt bike plug but it fits just right! smaller bolt head thats 12 mm instead of 17mm, it torqued up fine. Stainless steel filter material 35 microns superior flow Installed Scott includes a filter wrench that fits over the machined filter body looks nice the rest of the bike looks not so nice!
-
Removed Laser sensor and rewired to face forward
HispanicSlammer posted a gallery image in Member's Gallery
From the album: Rewireing the Farkles
removed and hardwired laser sensor to face forward out from behind the fairing.© ©vfdiscussion.com
-

From the album: Rewireing the Farkles
for when radar detectors can get you a ticket.© ©vfdiscussion.com
-

From the album: Rewireing the Farkles
and multi color indicator led for heated grips© ©vfdiscussion.com
-
Blue Sea switches and hot grips controllers
HispanicSlammer posted a gallery image in Member's Gallery
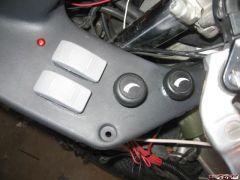
From the album: Rewireing the Farkles
© ©vfdiscussion.com
-
-
From the album: Rewireing the Farkles
© ©vfdiscussion.com
-
From the album: Rewireing the Farkles
the rest of the bike looks not so nice!© ©vfdiscussion.com