


HispanicSlammer
-
Posts
6,954 -
Joined
-
Last visited
-
Days Won
61
Content Type
Forums
Profiles
Gallery
Blogs
Downloads
Events
Posts posted by HispanicSlammer
-
-
The reason I never went about doing this mod is I like to try different tires, Dunlops, Bridgestones, Avons, ect to find the best setup. I understand the speed sensor is run off of the same shaft as the front sprocket. There is no permenent way of calibrating it since tires wear down, esp rear tires, front tires spins a different rate as the rear around corners.
Say you install the yellow box and calibrate it to some outside source like a radar gun or a GPS (set up hi or low from the dip switches 5%,10% or more) and then you ride it for 3000miles it will be off again because you wore off 1/4" of rubber, so now the tire profile is smaller your going slower than indicated because you calibrated it with a tire that was 1/4" thicker in diameter. So you put on new tires again and the dynamics change yet again. There is alot of uncertainty in the whole idea!
nah I can deal with the little bit of inaccuracy! But still show us the pictures of your install! I am interested in the whole thing!
-
I got an email from Andy at Kiasan tech I will share with you.
Hi Miguel:signalMinder has been upgraded completely.
microprocessor control
running light conversion built-in
running light intensity programmable for two levels
4-way flash function
Test mode (wig-wag) function
Brake input for extended time-outs
Brendan, who did the write-up, does have the new version - except that it's
in a plastic enclosure. The current version is packaged in an aluminum
extrusion and had (2) additional RJ-11 ports for driving our vectraLIGHT
product.
Anyway, to answer the beeper question:
It's possible that humidity may cause the transistor, which controls the
beeper, to stay on. The best way check out your unit is to unplug it and
keep it in a warm, dry place for about 24 hours. There's a very small, tiny
hole on one side of the plastic enclosure for vent. Keep that hole pointed
up. Once dried out, you can put a tape over that hole and use it.
Stop by sometime during lunch or something. Don't be a stranger.
Andy
**********
Hello,
My name is Miguel Mayo I came into the shop on Lake Plaza drive last summer and purchased a Signal Minder I just live a mile away. I am webmaster at http://www.vfrdiscussion.com one of my members has recently installed a signal minder, pathblazer and trailblazer on his 2002 VFR and did a nice write up on the installation with pictures, visit the website to see it. Maybe you remember me?
I wonder if the product has been upgraded since I purchased this one for my 98 VFR. I was in San Francisco last summer for the races at Laguna Seca and encountered a strange problem with the unit. It is very foggy there and whenever I would turn on the signal the unit would not beep but rather give one long continuous light! as soon as I moved to a drier area it would work again.
I wonder if there is a simple remedy to prevent this? I thought of taking it out of the plastic casing and putting epoxy over the circuits? I have had it over a year now.
Also whenever the unit shuts off a signal you have to push the turn signal button in as if you were manually canceling it in order to get it to blink for the next turn. Has that been changed?
Thanks Miguel Mayo
-
Brendan,
Yes that is true, all you get on the hi beams is the same 45 watt output as lo. its just aimed differently. Take a look at the bulb in the picture see how they use a diffuser cup to spread the light out for the lo beam.
My mod just turns them both on at the same time, its much cheaper than buying a set of outboard lights and gives a much wider field of view with greater depth. You can upgrade the bulbs to 55x55 watts and get even better lighting I did and the voltmeter does not drop significantly.
Once I had my heated vest on hi, the heated grips on hi, and my headlights duel lighted and the volt meter stayed at 13.5volts, no dipping of light when I stopped at a stop light either. It was really cold out and dark that night, my visor was practically iced over. 30 degrees out but still dry thank God, no snow or icy conditions. Worked well, out on a lonley highway heading home from Denver, nobody on the road but me.
-
Nope works like a charm, man you really dug this one up from the dead! I posted this last July! It has a switch that you can turn it off or on, plus I dont ride with my brights on! maybe daytime but not superbrite!
I have a voltmeter on the dash and when it turn it on its right about 13.5 volts, which is about normal for my bike.
-
I popped your write up on the news page!
-
Yea while I was in San Fran the fog would make it beep funny and the turn signal would light up constantly, as soon as the weather would clear up it would work agian, it does it when I wash the bike too.
I still would rather have it than not I might take it apart and sqeeze some epoxy on the circuits so it does not short with mositure.
-
My unit still cancels the signal but in order to turn on my blinker again you have to manually cancel it, I understand that you have a running light override however when the unit cancles your signal can you just switch the signal on to get to blink again or do you have to push it in first (manually cancle it)
My unit would freeze up in fog too, just one long light!
-
OH ok your unit is different than mine I thought it was somthing else.
What the signal minder does is when you turn on your signal to go left or right, you have to cancel it manually to get it to shut off. If your like me you will leave it blinking for miles! The minder shuts it off after a programmed amount of time like 10 sec or 1 min, so you dont look like a jerk riding down the freeway with your merge blinker on the whole way to work! ?I have one of the first ones, what I dont like about mine is that if the signal minder turns off the signal because I forgot to, I still have to use the button like I was canceling the signal manuall to get it to blink again, hopefully they adressed this with your unit.
They also have a brake light interupter so that when you are at a stop light signaling to turn, as long as the brake is set it wont cancel, for those really long stop lights.
I hope you bought it off the website because the group gets a 10% discount for all Kisan products. Their shop is only a mile from where I live!
-
Is this a signal minder or a head light modulator? my signal minder was a simple plug into the old socket type of thing I am not sure whats going on here, why is that wire getting spliced? for the brake light interuption? I assume your not done adding comments?
-
Oil Change and Radiator Flush
I began by first removing the 2 lower fairings with the bike on the center stand.
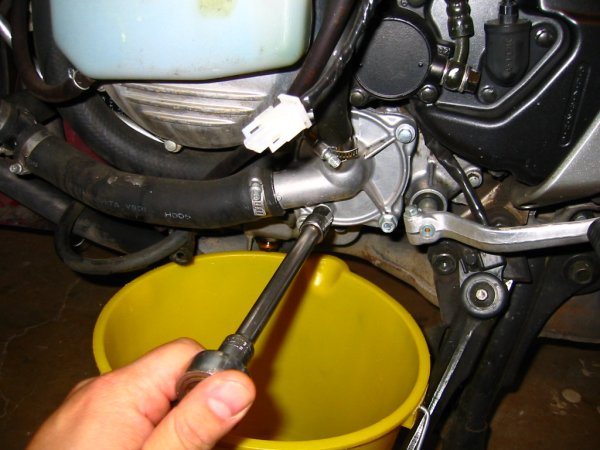
First I drained the oil, position the drain pan below the oil plug.
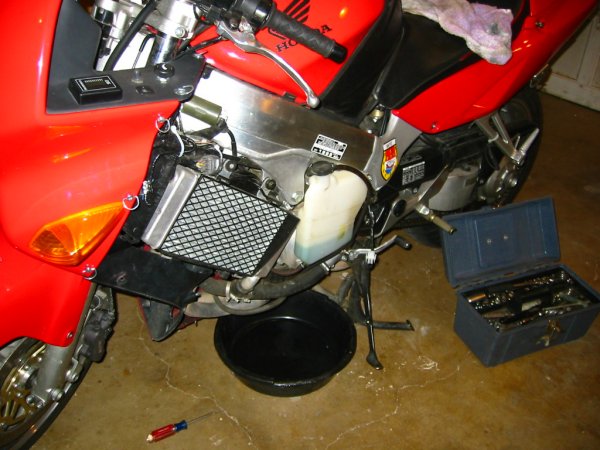
The manual says to warm up the engine to get the oil to flow better, I don't do that since I like my skin unburnt, I just let it flow out for a very long time! Remove the drain plug 17mm, Inspect it for pitting the soft metal washer might need to be replaced if it is pitted.
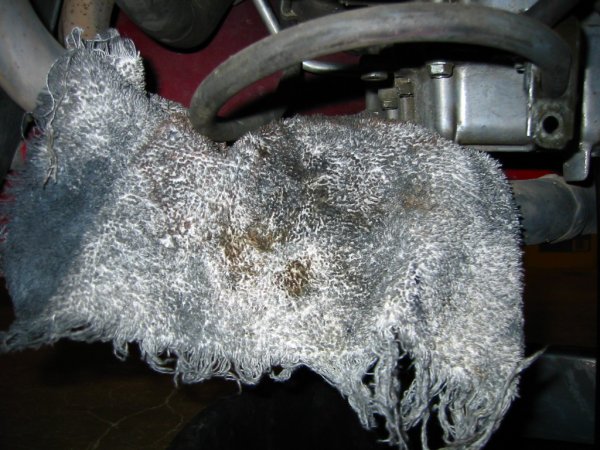
When replacing the oil filter it is best to put a rag over the headers cause oil always spills out onto them.
It is difficult to remove the oil filter by hand or using a ring type wrench, I use this Honda filter wrench $7.00
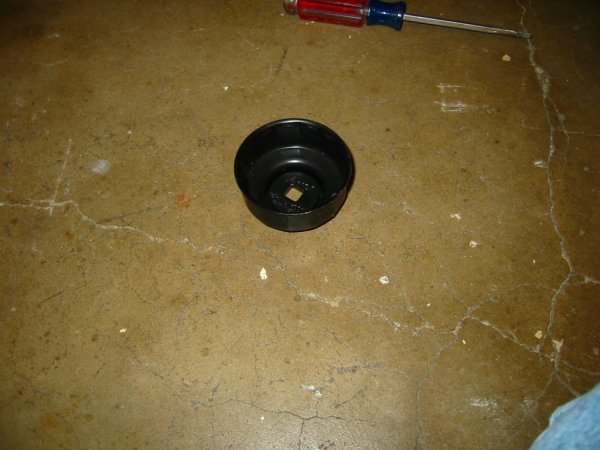
I removed the old filter but did not replace it yet since I need the room to do the radiator flush. I did however replace the oil plug.
Flushing the Radiator
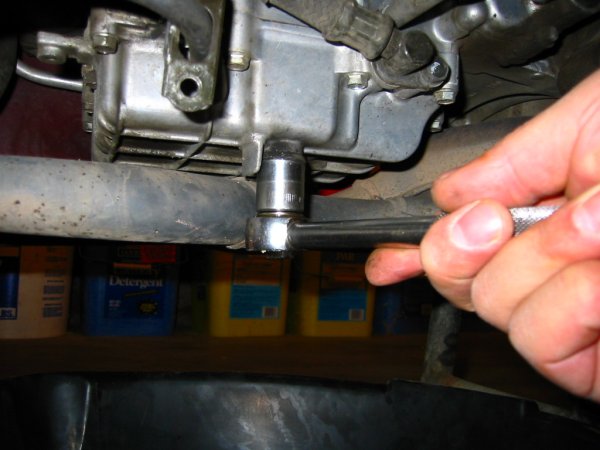
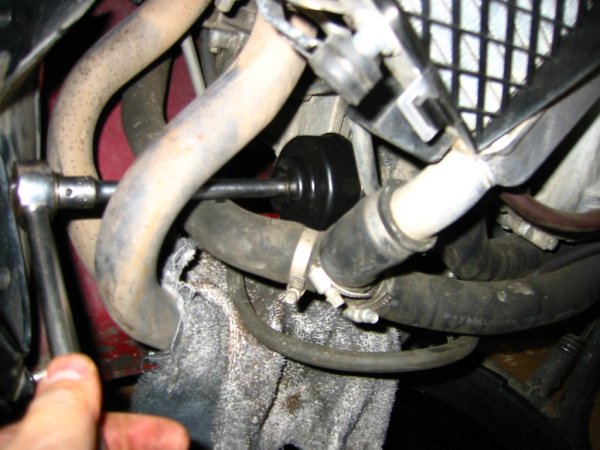
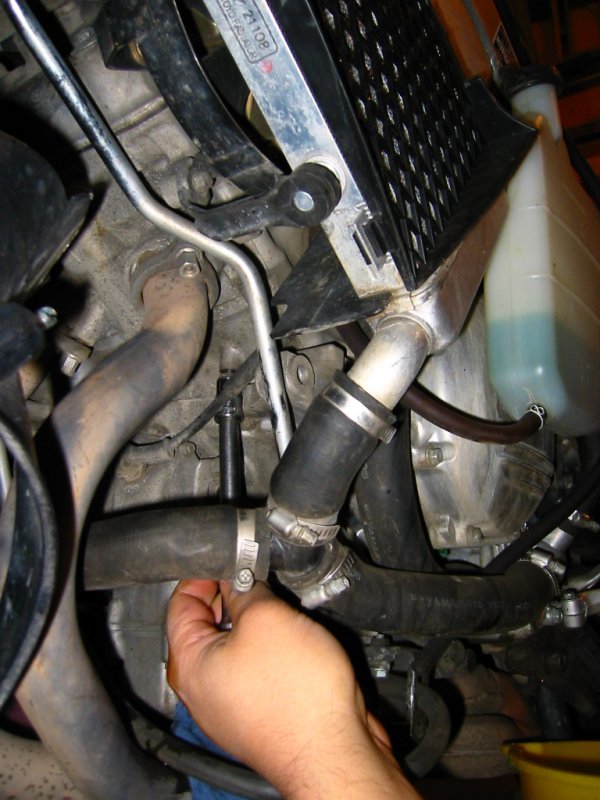
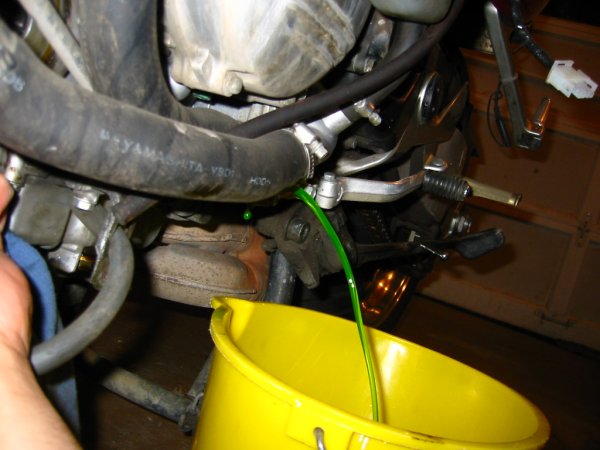
Remove the drain plug from the water pump, make sure the bike is not hot! You will get burned! The bike was cold here, the fluid will not come out until you introduce air into the system.
I drained the cylinder plug now, you can see why I did not put the oil filter back on, because it was in the way, make sure your bucket is positioned cause the old antifreeze squirts out about a foot and a half.
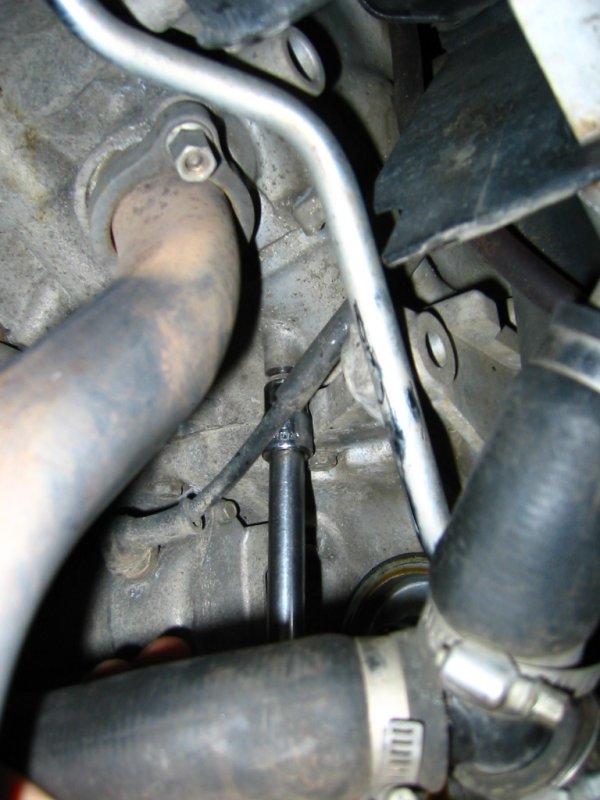
Here is a better view of where that plug is
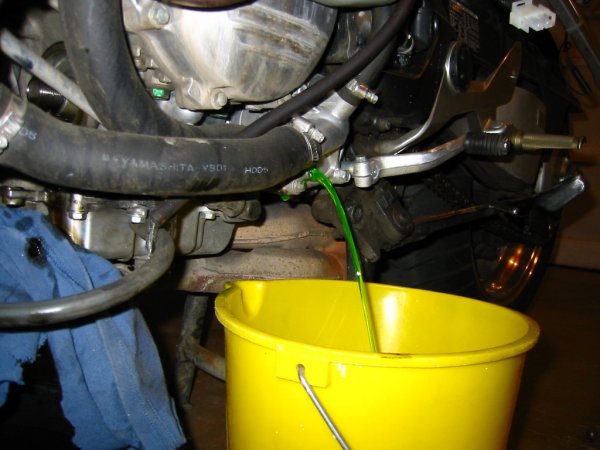
It just starts gushing out, once its almost done go over to the other side of the bike and open the radiator cap, more will come gushing out.
radiator cap open now
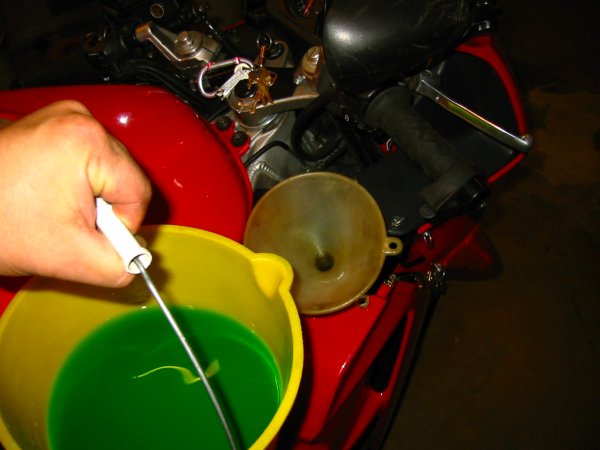
At this point I began pouring in distilled water into the radiator cap, and watched until the fluid coming out was clear!
- put both drain plugs back in
- screw on the oil filter 7ft/lbs
- screw on the oil plug
- fill the oil up 3.5 quarts approx
- fill up the radiator with distilled water
- start the motor till it warms up then turn it off
- wait until it cools down
- check the motor oil level top it up to the level in the sight glrear
- remove the drain plug and radiator cap and drain out the distilled water
Once all the water is removed from the radiator replace the drain and mix the antifreeze.
I used simple ethylene glycol, Wall-Mart brand, its aluminum block radiator/motor safe, and it contains no silicates, you don't want to use a brand that is not rated for aluminum engines. Silicates can damage your water pump, most major brands do use silicates so read the label. You can use the Honda brand, its made by the same company that makes Citgo gas (Seven Eleven stores brand), Citgo also makes the Honda brand oil. The Wal-Mart stuff is fine, aluminum safe and no silicates (read the owners manual its all there).
I mixed it 50% antifreeze and 50% water, that 70/30 is the best concentration for the greatest temperature extremes. 50/50 is as low as you want to go but gives the best cooling in the summer. DON'T USE TAP WATER the minerals will build up and cause blockages, use distilled water.
I poured it in my 50/50 mixture about a gallon till it filled to the brim of the cap, I also poured out the overflow fluid and replaced it with new fluid in the over flow jug.
put the cap on start up the motor and rev it a bit, turn it off and check the level again, top it up if need be.
A word about oil
I usually change my oil about every 3000 miles, when I do I always change the filter too, I don't use expensive synthetic stuff since that oil is designed not to break down over longer periods of time, if you change your oil as often as I do the oil is usually still fairly clean, its a waste of money to use expensive oil. As long as it is the right weight 10w 40, no molybdenum or graphite additives as it harms the wet clutch. They say your oil does not need additives, don't use castor based, or non detergent, vegetable oils!
Also since your riding a bike that has a wet clutch the friction plates of the clutch are soaked in oil, you want to change the oil often since the friction material of the wet clutch wears off and circulates thru the filter, don't wait more than the recommended 6k miles to change it.
-
 1
1
- put both drain plugs back in
-
Nice how to, you know if you get hot soldier burns on your wifes placemats she is gonna kill you! ?:D
-
Nice Modifications and pictures - Thing of posting pictures what kind of camera did you use.
Thanks
Cannon Powershot S330 Digital Elph.
It takes short movie clips too.
-
-
It takes some of the pressure off my knees, being lower, however I had to adjust the brake and shifter to bet better control, there is a pictorical on that too somwhere, I have a better feel for the road now I can feel the tires gripping better now.
The pegs are good. :idea:
-
Very Interesting mod you say the cost was about $1000 or so? Including the lights you have mounted on the mirrors.
-
FWIW, I did the same mod on my dear departed '86 and it worked great for when you got stuck in traffic. Switch the fan on BEFORE the motor gets hot. It seems to help if you get a jump on the heat.
Yea that was the whole idea, turn it on before it gets overheated, next time I am tuning my PC2 or somthing I just switch on the fan, or before I overheat in the stop and go traffic. It seems to be much cheaper than the $40 replacement thermo switch.
I would like to point out that having the fan on at speed is counter productive since it sucks air into the radiator from the side vents, once you get going at speed the air goes from the the wheel well and out thru those vents the opposite way! Having on the fan would just work against the the natural flow when your riding at speed.
-
The switch does not bypass the radiator fans normal operation cause the circuit is still the same, however with the bypass I can turn it on whenever I need it. All that it does is bypass the thermo switch when I turn it on, so the fan goes on. The way I wired it the fan will still go on if the thermo switch kicks in. Like I said before it was not coming on until the bike was already well over the normal operating temp, I need to replace the oem switch, but the dealer does not carry them in stock, at least this way I can turn it on for the $2 I paid for the parts. The replacement OEM part is $40 and it takes at least a couple of weeks to get the part. The manual switch was already on my dash, from an old project I took apart and rewired.
-
When I was syncing my starter valves my motor boiled over, I had a burned out fan fuse. I replaced it and then started up again, the fan would not come on till it reached 260 degrees. Hell with that I will turn it on myself! I need to replace that thermostatic switch, but even when it was running right it would not come on till it was 215f , I just want to be able to turn it on no matter what.
-
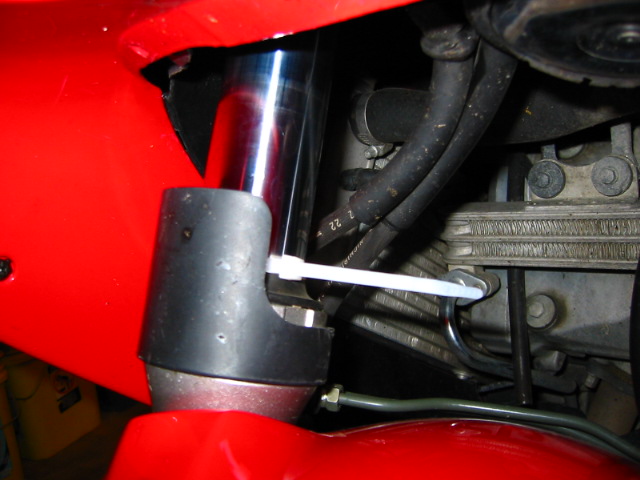
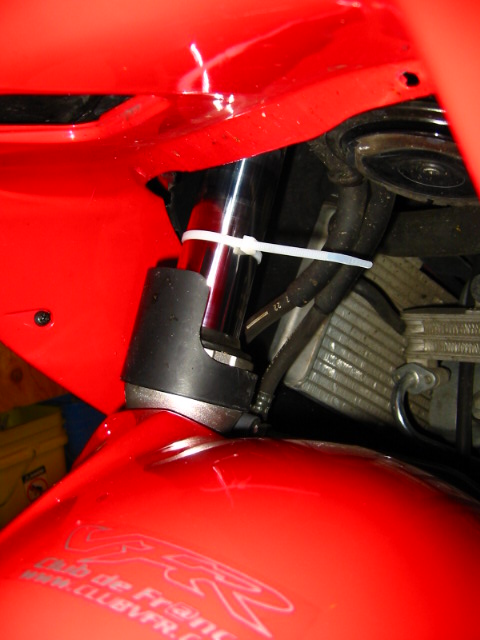
Fan Override switch.
The purpose of the switch is to be able to manually turn on the radiator fan. ?I did it out of necessity since my fan thermo switch wasn't working properly and I didn't have $50 to get a new one at the time. ?Priorities prevented it, so I took some wire a few connectors, a switch and wired up a bypass.
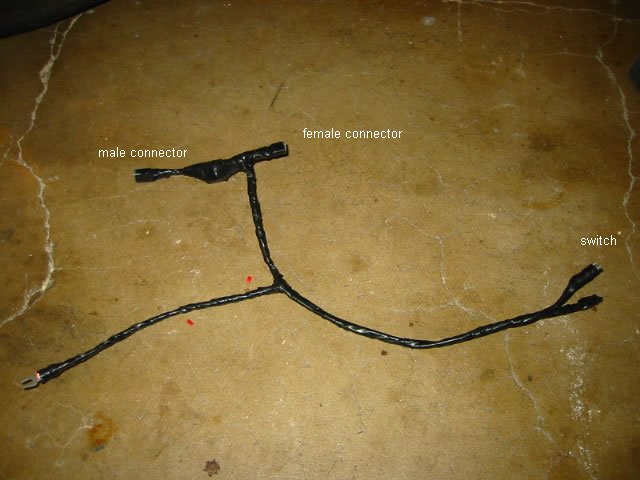
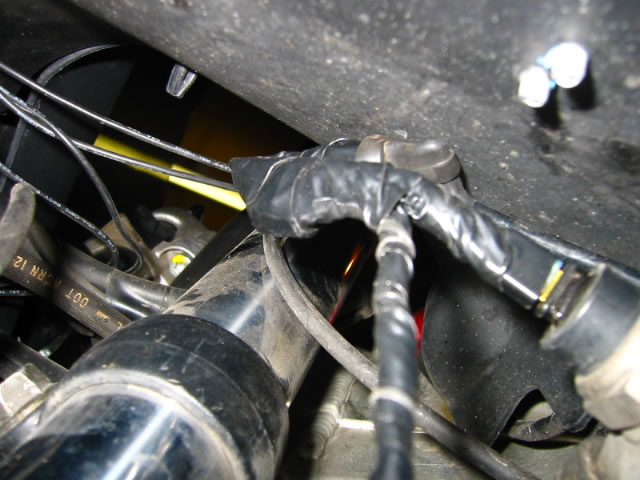
It is a ground trigger switch, all it does is ground the fan power, it is tied into the existing thermo switch so that will still work. If you take the power lead off ?the thermo switch and touch it to the body of the radiator the fan should come on, thats how it works the thermo switch gets hot and the circuit is completed.
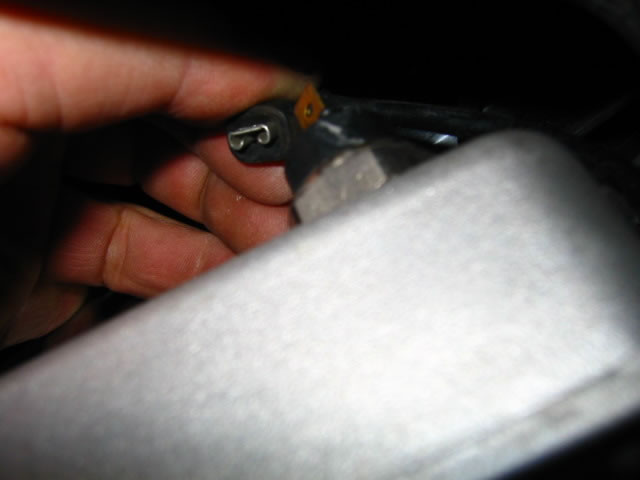
Unplug the female connector from the thermo switch on the left side radiator, It is actually on the radiator threaded into the radiator.
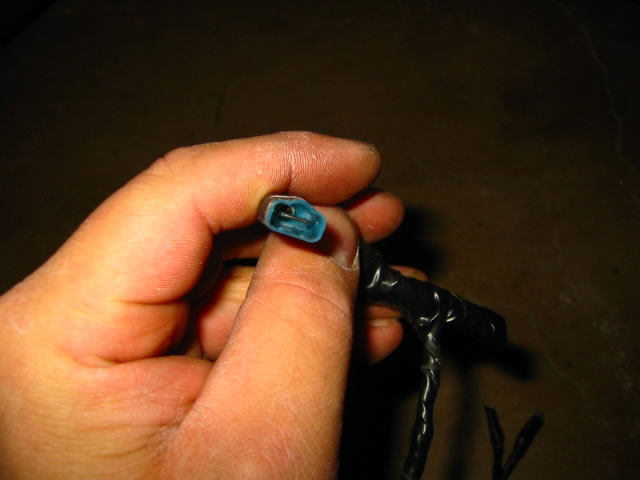
I made a wire extension that male connects to the female connector, the other end is a female that goes back on the thermo switch its a female connector
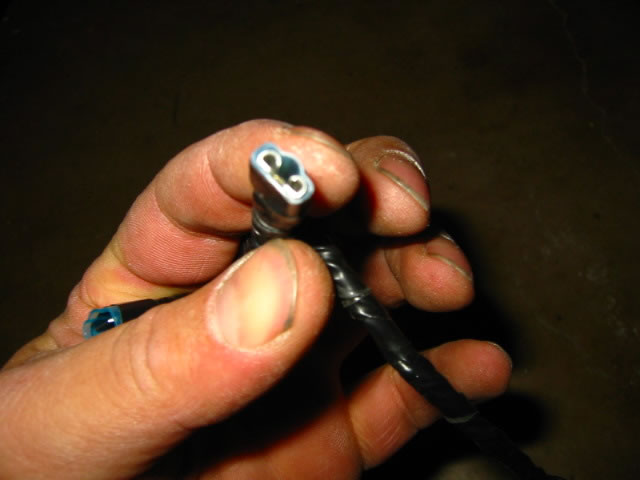
Its only about 2 inches long and is just an extension, I used a tee spice in the middle of it to be the ground source
Here is the connections to the switch, one end is tee spliced to the extension wire the other is connected to a ground source on the frame.
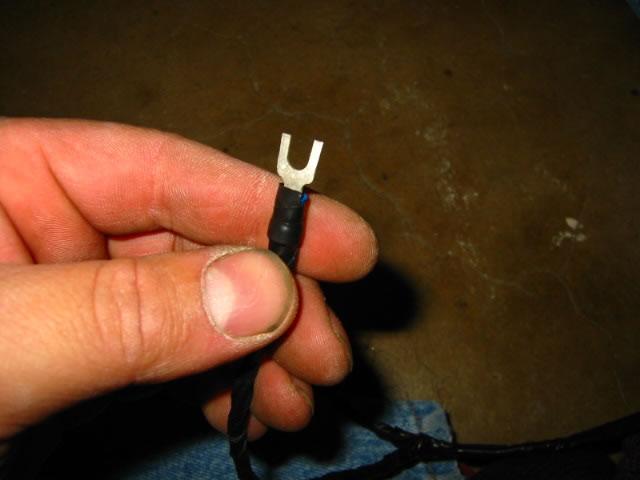
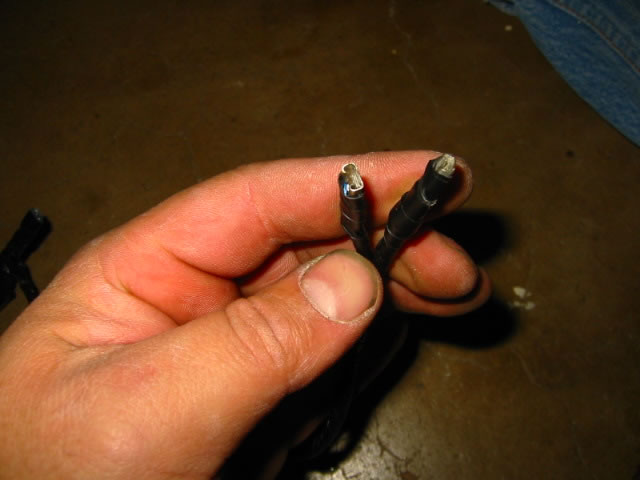
This end is the ground connector it is run from the manual switch to a ground
I made it so I can pull the whole thing out without much trouble no splicing to the original wires.
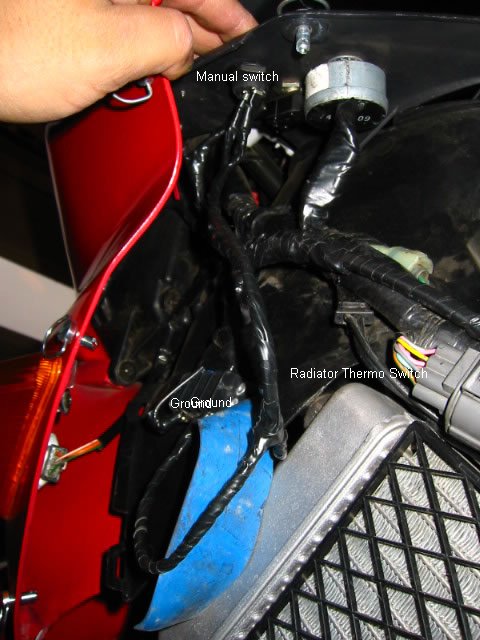
You can see where the manual switch is located and where I grounded it (a common ground buss)
-
I usually have a friend around, but I like to work on my bike when ever I get the notion. Which means an extra hand is not always around. It usually takes 2 or 3 people to measure sag, one to hold the bike, the rider to sit on it, and one to take measurements. Most folks skip the holder and have the rider stand on his tip toes while holding the bike up.
I decided to give it a try SOLO with some ingenuity I came up with a plan that WORKED! The front sag can be done with a zip tie solo. However the back is what presented the problem.
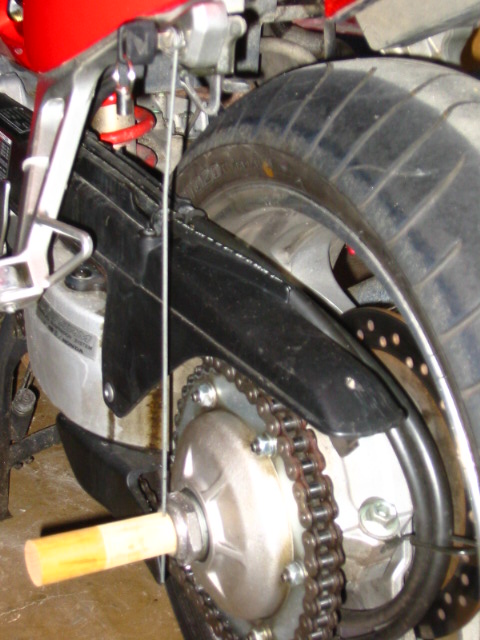
HERE IS MY SOLUTION REAR SAG
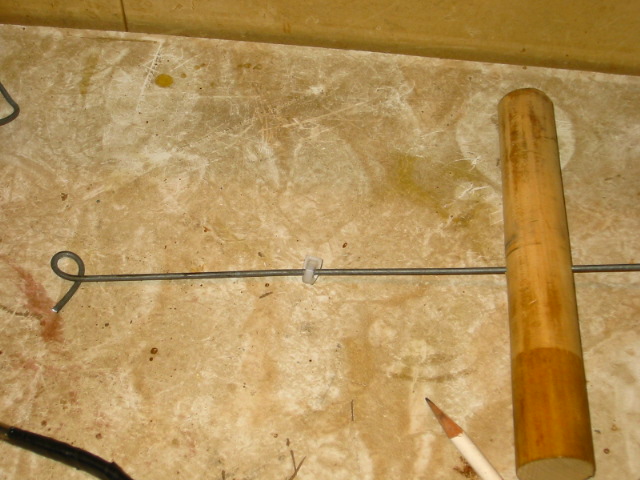
It consist of a conical shaped table leg, a long hard piece of wire (flexible to bend but not soft), and a zip tie.
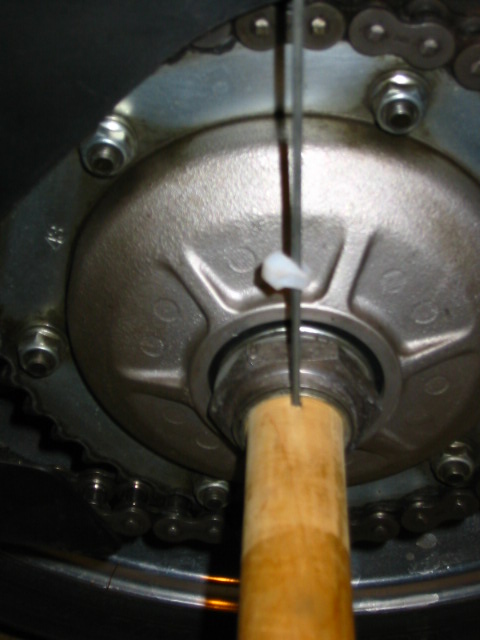
I wrapped one end of the wire around my key, tight enough to not move too much, hardly at all, I took off the plastic cover on the wheel and stuck the conical wood piece in and marked a spot for the wire to go thru, then I drilled a 1/8 hole all the way thru it. I attached a zip tie to the wire and tightened it to stay but move then it was touched. The key in the helmet lock is a great place since it is directly above the center of the wheel (98-01) and it is far out enough to be a strait drop down to the piece of wood.
There was a slight amount of free play in the wire but only about a mm, it hardly moved at all.
With the bike on the rear stand I marked the point where it came to rest, (shock fully extended)
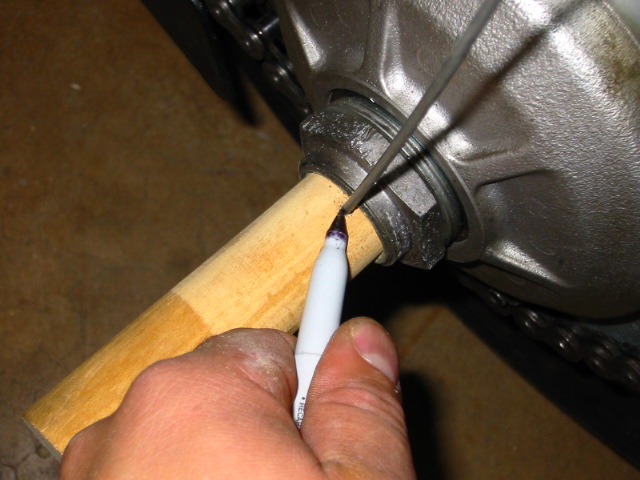
At this point I let the bike down to the kick stand, it sort of bounces, then I set the zip tie all the way down to the wood to recalibrate it, gently sat on the bike, and for a moment lifted up my legs to get full sag reading, gently sat it up and then back onto the center stand, this is the result.
I marked it with a pen and took off the wire to measure it.
43mm from point to point, give or take a mm for free play.
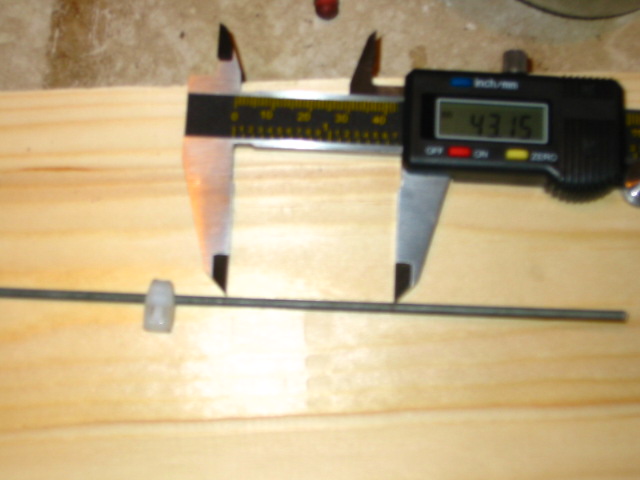
I added a click of preload and remeasured (39mm) then 2 click more preload (and now I am correct at 32mm) I have my rear preload 4 clicks from full soft now to get the recommended 32mm of rear sag. My half arsed tool worked great!
FRONT SAG
This is way easier to measure, this only requires a jack, a zip tie, and a ruler or something to measure. I have a sliding metal ruler with a stop on it that moves.
Begin by placing the bike on its kick stand, and place a zip tie around the fork like so. reach in and push the zip tie all the way down.
Now gently get on the bike and sit her up, you can see the zip tie thru the opening near the handle bars, if you accidentally bump it too much then just push it down from above, then sit down and let it come to a rest, gently get off. The zip tie should stay in place if you put it on tight enough.
Now I put the bike on the center stand and then jacked up the front wheel to get my sag measurment.
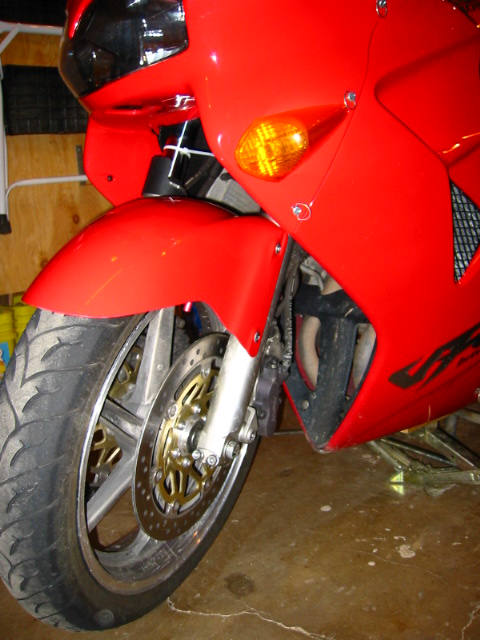
The distance from the oil seal to the bottom of the zip is the sag! Mine was at 43mm so I cranked the preload down 3 full turns till it came to 32mm.
-
Those vests are silly looking but they are required on US military bases, I had to have one each time I went to Fort Carson on my Motorcycle, and when they say 25 mph they mean 24.99999999 and nothing over, or some 19 year old gung ho MP is gonna give you a ticket.
-
Well I sure didnt, Last time there was a thread on the subject it was ugly, but then again this thread is not about that.
I wonder Hav, just how much did all that stuff wiegh? ?I took maybe half that much on my 2 week trip to Laguna, I eneded up not camping at all except the first day, it was way too hot to camp by the time I would find a spot to camp I could have made another 100 miles to my destination.
I could have cut my side bags, and went lighter. ? I wore my Stich so I did not bring Jeans, but rather these lightweight microfiber pants, they pack about 4 to 1. ?I could have left some of my electronic gizmos at home too. ?
My mp3 player has a hard drive and just couldnt take the shock of the motorcycle. leave that at home, bring my phone but not the motorcycle adaptor, I have a mini laptop which was great. ?All in all I could have packed probably a tank bag and a a rear bag no side bags, perhaps a ventura pack or a hard bag like a Givi.
-
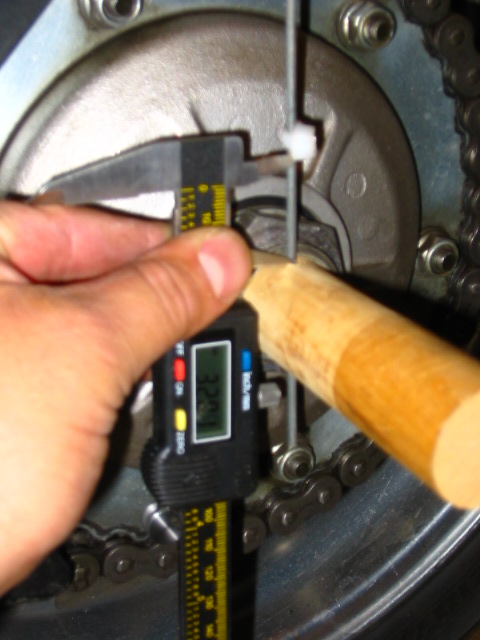
There have been a few post on pulsating brakes, one cause is a warped disk. It is not a very common thing with floating disks brakes because they float on a band of rings and the rotor itself is heat tempered. However a dragging brake pad can heat up a disk and warp it. I have been getting alot of pulsation in my brakes as I begin to apply them, I suspected the rear brake, it is difficult to tell, so I put the bike on the rear stand and turned it to see if it was rubbing, I could not feel any rubbing so I turned next to the front wheel. I jacked up the front wheel and this time I could feel the brakes rubbing as I turned the wheel, somthing was wrong.
There were several possibilties, due to the fact that it would only rub at a certain position, It could have been a warped disk or the axel was bent.
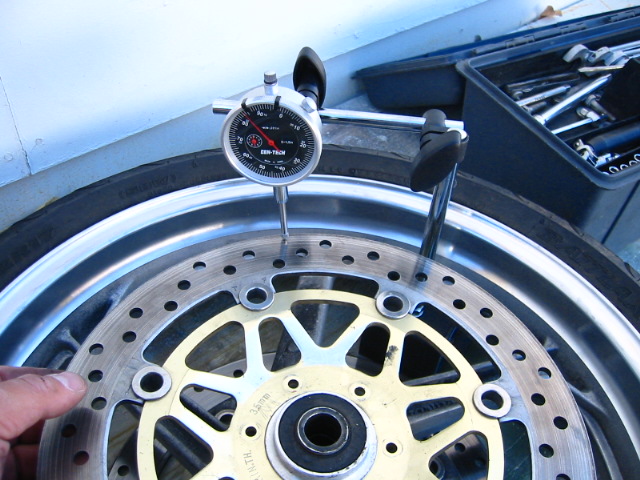
I dont have a truing stand so I used my handy dandy Miguel special, 2 jack stands a rod and a bunch of clamps, I have a dial indicator I bought for around $30 bucks some years ago when I was going to rebuild a car engine, I removed the wheel and set up a way to turn the wheel smoothly.
Here is my setup this is from behind.
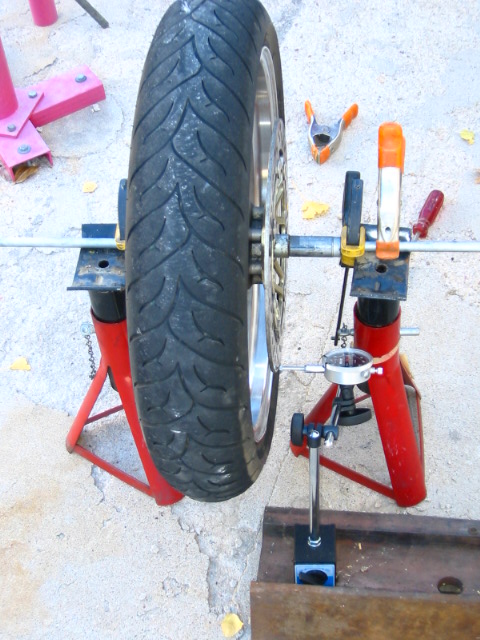
It worked great, no false readings from the stands moving. The clamps worked well, I had my magnetic dial base on a heavy hunk of rail road rail.
I measured the right rotor first
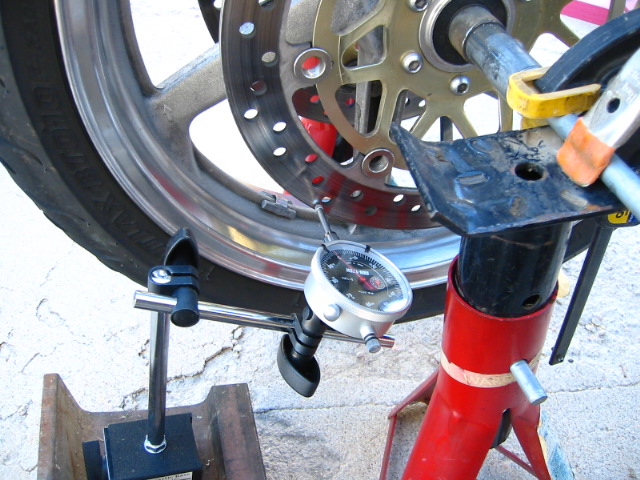 >
>Here you can actuall read the measurements in the next picture it was within 0.010 inches of play (the service limit is 0.012")
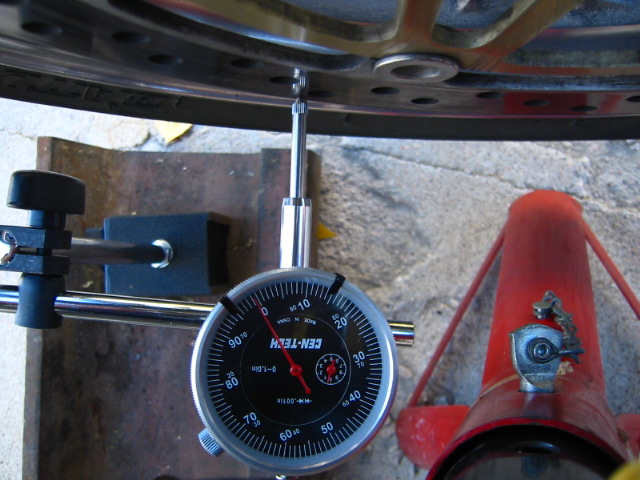
The other rotor told a different story much more runnout and way out of spec! It was the warped one! 0.034" much more than the service limit
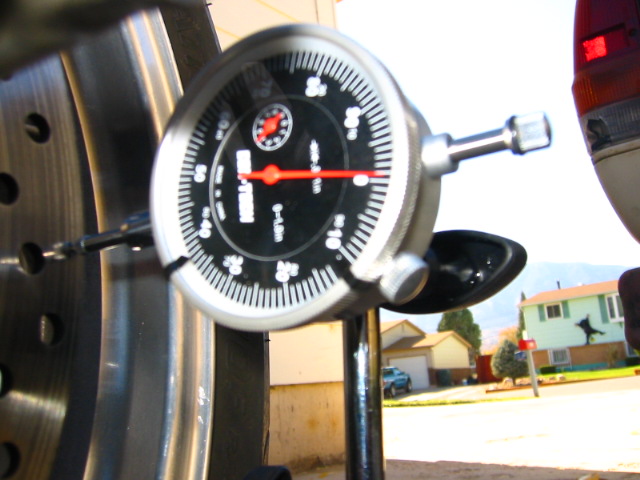
For good measure I tried a different measurement by taking off the bolts and sliding it where it was mounted, the measurements were the same.
I took it to the salvage shop, they did not have one in stock, but there are a few bike that share the same rotor for a 98-01 VFR, unfortunatly they cannont be machined, they must be replaced, I priced it out at $249 retail, and around $190 for discounted price, salvaged price varied from $120 to $175 ouch!!
CBR 600 F4 (99-00)
Valkerie GL1500 (97-02)
CBR 900 RR (93-94)
MFG: 45220MBG003
I recently tried prying a warped disk back into spec with a large crecent wrench, as long as the carrier is not bent out of shape the floating disk can be tweaked a bit one way or another to get it back in spec.
I tried it on my wheel balance station with the dial indicator there to show me where to pull or push on the disk, then run the wheel around and remeasure until its within spec.
It might warp again but a few times of this and it will stay, this will only work if its not too far out, and the carrier is not bent.
-
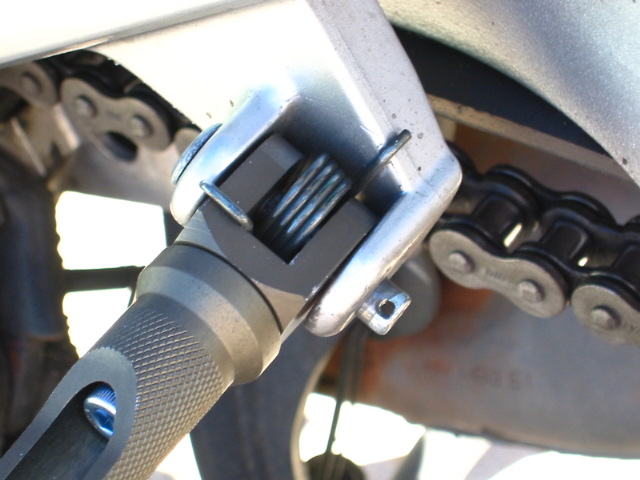
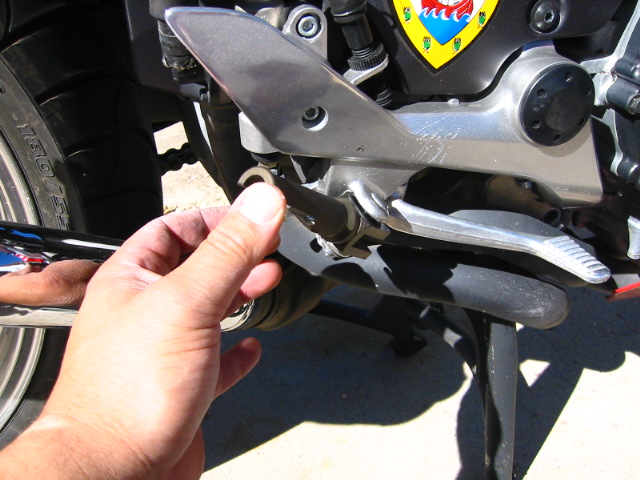
After tearing off my right OEM footpeg, I decided I would replace them with light wieght Lockhart Phillips adjustable foot pegs. Completely remove the old peg, take out the cotter pin, remove the holderpin and washer.
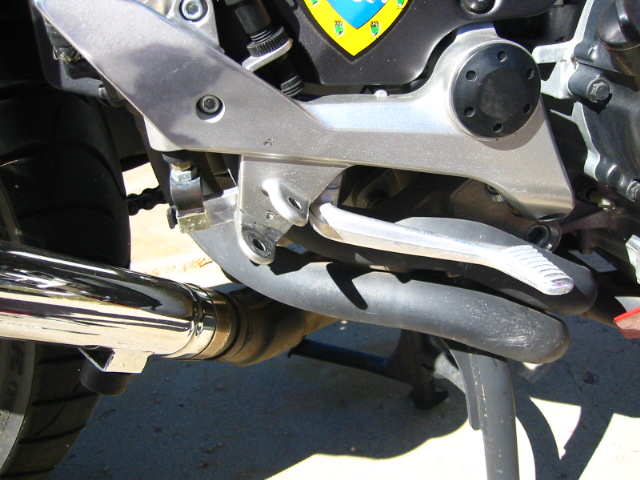
The Peg is camberd to allow it to pivot.

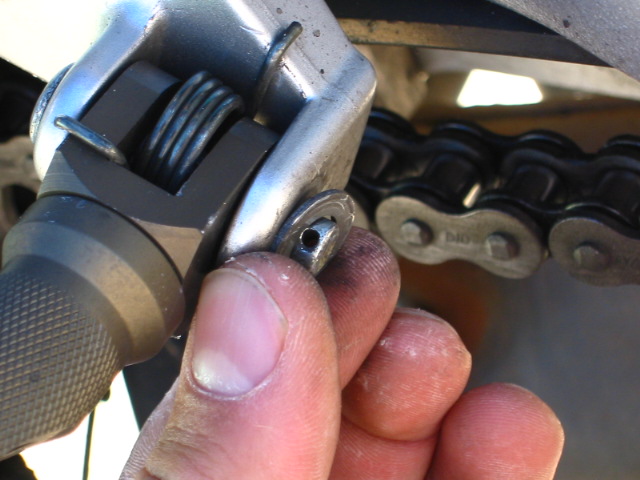
I put the footpeg in place then slid the holderpin just far enough to hold the peg.
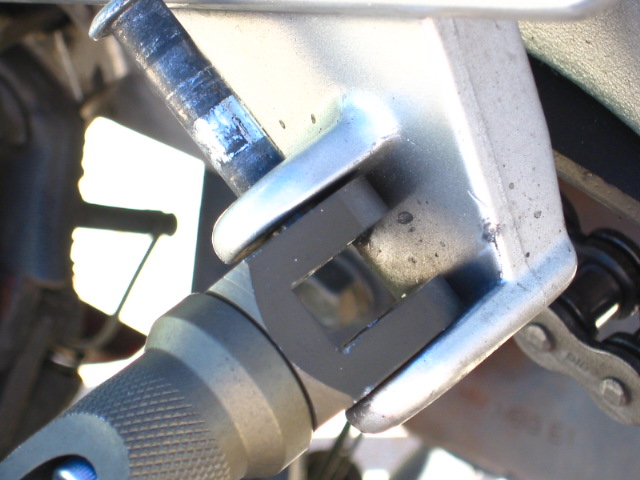
Push the spring back in place like so
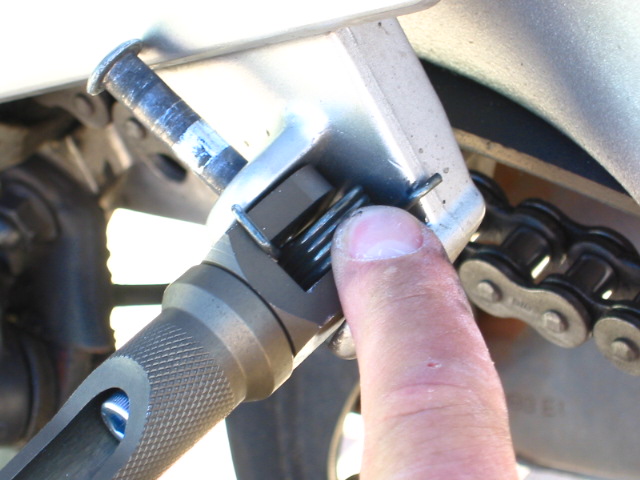
Slide the holder pin all the way down.
Replace the washer
Put in a new cotter pin and bend it around the holder pin.
Turn the adjustable foot peg to the desired postion
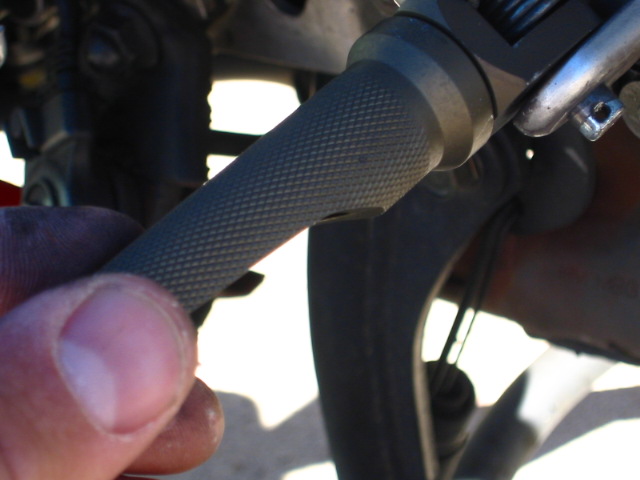
Tighten the allen bolt
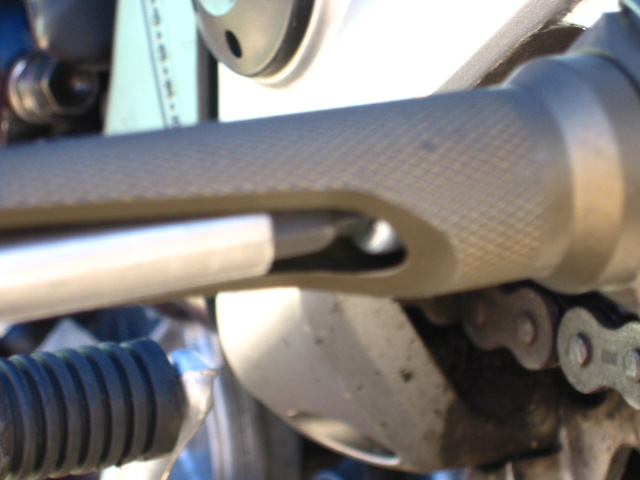
Check the peg for freedom of movement, it should be able to pivot easily
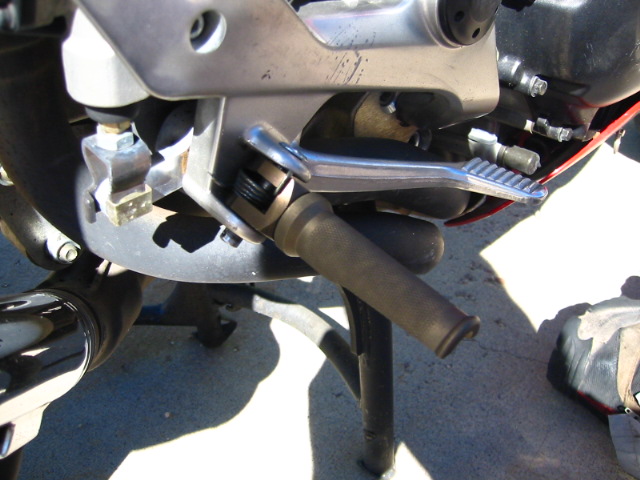
There were some issues with the new pegs the required me to adjust the control surfaces, since these pegs ride about half and inch lower than the OEMs.
Install a yellow box speedo correction
in Modifications
Posted
ROTFLMAO........... put some playing cards on the spokes, bannana seat. heh
Put the sensor on the rear swingarm and the magnet on the inside of the rear wheel out of sight. There is a how to with a picture of how somebody mounted his on the front disk brake.