


BusyLittleShop
-
Posts
2,400 -
Joined
-
Last visited
-
Days Won
45
Content Type
Forums
Profiles
Gallery
Blogs
Downloads
Events
Posts posted by BusyLittleShop
-
-
Mercy! A R/R from a stinky inline-4 hung off the sculpted side of Mr. RC45?
What is the world coming to? What's next? Human sacrifice, dogs and cats living together - mass hysteria!
What's next???... Buell belt... Carbon Fiber wheels... composite matrix brake dics... Mr.RC45 will never been done...
It's OK Rob... I give the Yamaha ha ha R/R a acetone bath... it don't smell like stinky inline any more...
-
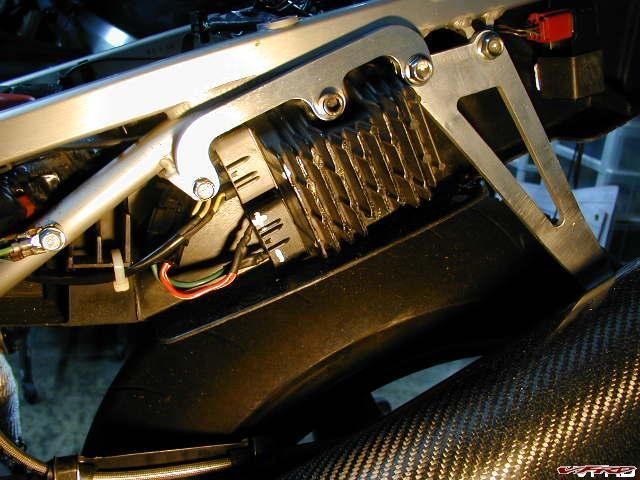
After trouble shooting for year and buying a new R/R and a new Stator Mr.RC45 still operated as if it were
a total lost system... so I also copied the R1 rec reg mod... major job as usual on bike this tight for extra
space... had to mill off 1/2 inch off the fins and then design and machine a custom aluminum hanger... now
I show a constant 13.7 to 14.2 volts... credit goes to Origional007 for the idea and my thanks goes to Chris
for all the help... I shall recommend this mod to other RC45 owners...
(Note to Chris... are you sure your + - is correct on your wiring diagram???)

-
Just finished my R1 rec reg mod... major job as usual on this bike... had to machine 1/2 inch off the fins
and then cut a custom aluminum hanger... now I show a constant 13.7 to 14.2 volts... thanks Chris for the
idea and all the help... I shall recommend this mod to other RC45 owners...
-
Well, bad news. The stator wasn't all of my problems. After installing the new stator, all of my numbers got better by about 3/4volts, however as HS stated above, the droping voltage vs. increasing RPM's seems to be a bad RR. My theory on this is that when I began having problems last summer, probably started with the stator being bad, the bad stator then fried the RR which I replaced with a new oem. However since I still had a Bad stator it cooked the new RR as well. At this point, I can only speculate, but I sure hope that the new RR fixes the issues. I picked up a Yamaha R1 regulator from a 05, huge fins and looks to be a much more robust unit. I searched the squidly forums, and lots of folks with R1's from around 03 and earlier had RR problems, but the 04's and up the problem was corrected. My new RR should be here on Monday or Tuesday, so I'll report back then.
Bummer...
Some Yamaha's use a generator instead of an alternator... ask Rick about using their RR...
The RC45 RR is robust and sports big fins...
-
Mr.RC45's stator was this discolored at 45,000 mile mark... replacing it with a new one didn't produced any more volts... it's possible that my old dark brown stator is still good...

-
BLS, when you replaced your parts, did you use OEM, or aftermarket? Also did you check the flywheel, I have seen notes on the flywheel actually going bad, unlikely but possiably.
With so few examples world wide there are no aftermarket parts for the RC45... all the parts are OEM... I've swapped flywheels with another RC45 in my shop... still no joy...
-
I have been having lots of problems tring to figure out what is wrong with my charging system. Thought it was the RR, wasn't. Thought it was the battery, wasn't. Thought it was the wiring, wasn't. Thought it was the stator, wasn't ..................... But wait, maybe it is.
Lets get all the facts on the table.
Battery Voltage = 12.3v
Charging voltage at Idle = 13.2v
Charging voltage at 5k rpm = 12.1v and lower as time goes on.
Mr.RC45 shows the same voltages at the same rpms... I've gone through extensive trouble shoot procedures and even changed the R/R twice and stator once... no joy... I'm not so hot when it comes to electrics so I'm watching the thread... right now I can't go 3 days without a external charge... it will just quit running...
-
That is a better solution in my opinion.
Well with all do respect to Bailey... it's not a better solution in my opinion... subtracting
metal from the critical casting where the bearing race plugs into weakens the design...
not to mention the insert has to made thin and thin metal will not hold up to hammering
and sooner or later the bearing race may work loose... also there's is a liability question
when you sell a bike and don't informed the owner that the frame is not 100%...
Welding and machining the hole to Honda's original dimensions is by far the safest and
best fix...
-
http://www.vfrdiscussion.com/uploads/1130622839/gallery_4545_662_462991.jpg[/img]
I wanted to post this under ?Adventures with my VFR? but that is limited to ride reports. It could possibly go in maintenance 'How to Guides' but really it is intended to show what NOT to do and I hope no one else has to do this.
Grinding the upper bearing to size.
WOW... I'm impressed... nice job... you brought that frame back from the dead... not
only will too much torque do that but also collisions... flip forks are so strong now a days
that the weakest part is becoming the frame... I've witness broken bearing seats and
elongated bearing holes as a result at the Fameman's shop...
I about fell out of my chair at the sight of you grinding a bearing race... mercy man I
would never tackle that problem... I think you're about one step away from machining
your own steering stem and triple trees...
BTW... did you weight the frame???
-
Good post. Have you, or anyone else here, done much significant suspension development work?
I've done all my own suspension work... including making my own internal shock
parts... to revalving... to servicing my own rear shock fluids...
Any particular tips for working with the stock forks? Any good references, or is it mostly trade secrets?VFRD members can advise you better than I on a number of shock shops that have
brought them joy on their VFRs... I will say that to improve the smoothness of a
fork's action and to minimize stiction there are a number of ways offered to a tuner...
Ti Ni(Titanium Nitride gold coating)...
BDC (Black Diamond Carbon)...
GOFHP (Good Old Fashion Hand Polishing)...
As far as stiction, my buddy says the fit and finish of the tubes, bushings, etc. are pretty important, and that's a lot of what you get with nice parts like Ohlins.As far as stiction goes your buddy is right... fit and finish are paramount... I spent a
couple of days sanding and polishing my stock RC45 fork legs to reduce stiction... I
pull the forks apart and chucked the leg up in the Lathe... I employed a 600
crankshaft polish strap around the leg... got the leg wet with Acetone and spun it at
750 rpm's... I worked the strap evenly up and down the leg until all the marks were
gone... I was mindful not to go below the surface hardness of chrome... I was
successful in establishing a smooth uniform finish over the length of the leg...
 border='0' alt='user posted image' />
 I removed a number of scuff marks...
 border='0' alt='user posted image' />
 I decided to go it alone and tackle the polishing job by hand with the
help of the Lathe... I use Nevr-Dull magic wadding under a trimmed down
section of black PVC... in about a day I had one leg polished up real nice...
 border='0' alt='user posted image' />
 In conclusion... I estimate a 25% drop in stiction as a reward for my hours of labor...
I still got hammered as a result of race track ready suspension settings but now to a
lesser degree... I can't cry about it as I prefer to sacrifice a bit of comfort for a
volume of control... that all change for the better after I swapped the stock forks for
for a set of R/T Ohlins... currently I have more control and much much more
comfort... well my version of comfort that is...
 border='0' alt='user posted image' />
-
 1
1
-
-
Stiction is measured by doing multiple sag measurements and then comparing them, if there is a lot of difference then you probably need to replace your seals, and check the tubes.
That's one way but I think stiction is best felt with the hand...
First raise the bike enough to free the front suspension...
Then turn both fork caps until they're free from the fork tubes...
Finally grasp front wheel and raise and lower suspension 3 to 4 inches and note if
you feel abnormal amounts of stiction... basically your front suspension should free
fall with gravity...
If it doesn't free fall then unloosen axle pinch bolts and check free fall again...
Still not free falling??? Next check fork tube alignment by unloosing the left and right
two bottom pinch bolts on the lower triple clamp only... check free fall...
Once you have eliminated the axle and fork alignment then it time to go inside the
fork...
Check the upper and lower precision rolled copper bearings and not if any of the
gray Teflon is rubbed down to the copper... replace as needed...
-
1
-
-
I figure the extra stiffness of the springs take more energy to move so less damping is needed, the rider was the same and the bike was the same so the stiff springs made it too stiff.
Extra stiff springs due take more energy to compress and they also rebound with a lot
more energy as well... consequently compression dampening needs to be greater to
slow the compression of the extra stiff spring and then rebound dampening also needs
to greater to slow the rebound of the spring...
I would check the forks for abnormal stiction... do you know how that's done???
-
I actually use 5w oil now with stiffer springs, the springs dont need as much damping action so a lighter wieght oil is better.
Actually the stiffer the spring action the more dampening it will take to control it... I'd
recommend trying a 10 weight over the 5 weight HS... you may favor the more control
feel the extra dampening will afford...
-
Thought that was her....when I had my Z's made last year she took most of the measurements .....She's very....... tall :P
You can say that again... Debbie is about my height... about 5'11"...
 border='0' alt='user posted image' />
 -
Nice Larry Moved to the How to section of the Mods forum
Thanks HS... your site is top shelve... I'll provide more details to anyone who wishes to curve out a Temper Foam seat... if this stuff is good enough for Space Shuttle... it's good enough for a rider...
-
When can I test out your seat tester??? :salesman:
I'll introduce you to Debbie at MotoGp... maybe you'll get lucky???
-
Nice Job!
Just out of curiosity, is that one of the Z Custom Leather Daughters?
Thanks Das Bone...
Yes... that's Debbie... daughter of the proprietor of Z Leathers... she has her own dirt bike and she races... I think her parents must have been having some great sex in order to create such beauty...
 border='0' alt='user posted image' />
 -
BusyLittleShop
Where can I sign up for the try out of the Mr.RC45's seat? :P
You can try out the seat anytime...
-
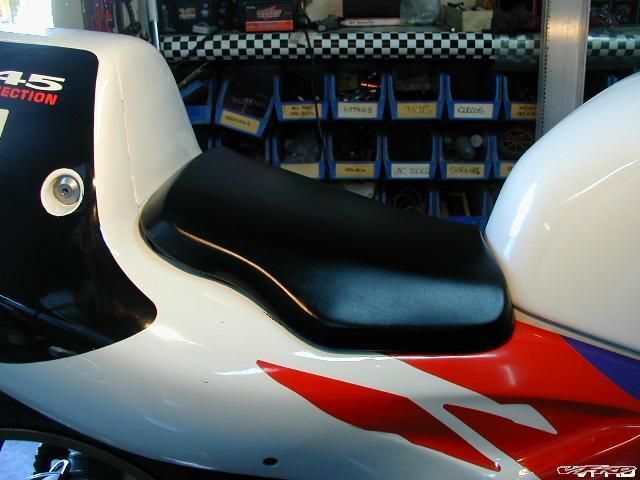
How hard was it to cut and shape? Did you use the stock base plate or make a new one?
I used the stock seat pan and traced it on the foam...
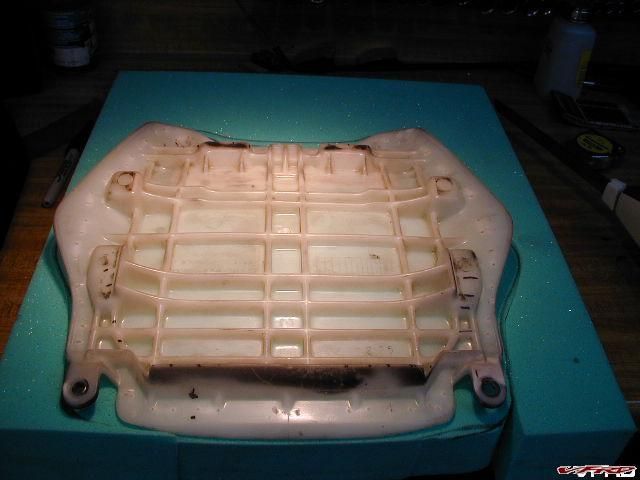 border='0' alt='user posted image' />
 I employed a electric craving knife to cut out the outline and then beveled the bottom 1 inch to allow a more level seating position...
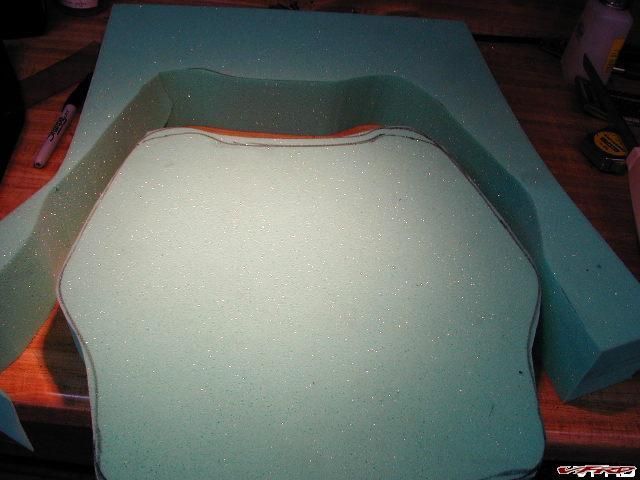 border='0' alt='user posted image' />
 I finished the rough cuts with a hand held air driven sander...
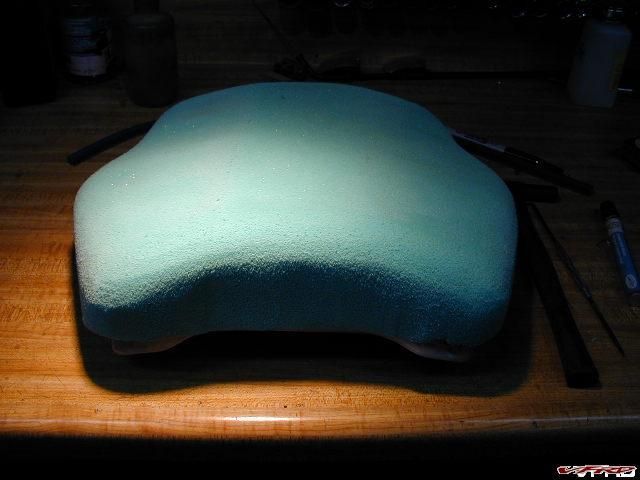 border='0' alt='user posted image' />
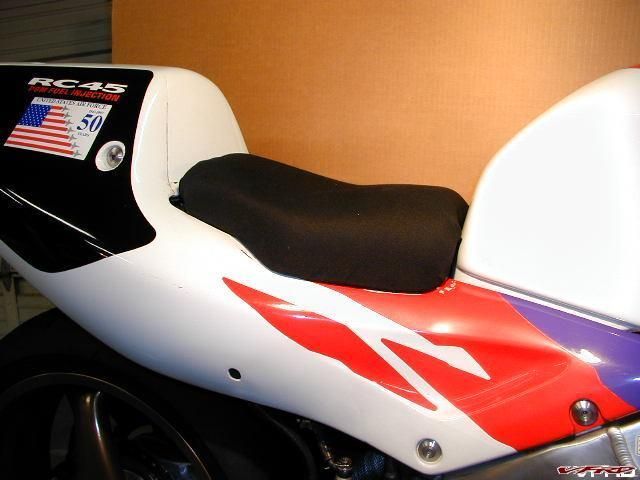
 I made the cover out of black canvas and popped rivet it on...
 border='0' alt='user posted image' />
 Not the greatest but it works... it took about 4 hours of time and about $100.00 in materials...
-
True to their racing heritage Mr.RC45 only comfortable for about 30
minutes in the saddle... I don't have a titanium butt so I built my
own custom seat of 3 inch block of temper foam... this mod afforded
enough comfort to travel 600 miles in a day...
"Temper Foam® is a temperature sensitive foam which gets softer and
more malleable when warmed and firmer when cooled. Similar to a liquid
gel, becoming firmer upon impact, yet feeling soft and fluid to the
touch. It is a visco- elastic material ideal for orthopaedic and
prosthetic applications. With its firm elastic flow and non-stick
properties it eliminates soreness and pain caused by long periods of
pressure."
http://www.keesgoebel.com/t.foam.htm
I started with a shinny black board Honda calls a race saddle...
I laid the stock seat pan over a 3 inch block of T47 extra firm...
I cut the basis shape using a electric carving knife...
I glue the foam to the plastic pan with 3M Weather Strip or Gorilla
Snot if you will... next I shaped the foam with a air driven sander...
Behold... I went from a racing seat to a 600 mile seat... old guys
know comfort and know how to get it too...

-
Larry of Busy Little Shop will tell you the RAKE is also important for stability and ability to turn or not to turn.
Great narrative Vince make that trail not rake... changing the triple tree off set does not alter rake... it will increase on decrease trail accordingly... it works like this... more offset less trail... less offset more trial...
Question??? did your new triple clamp allow you to still use your steering lock???
-
If you put the clipons underneath the triple clamp on a VFR750/800, the control cables and levers would contact the innner fairing shroud and gauges
How about aftermarket bar risers that mount under the triple clamps but afford control cable and gauge clearance???
-
It's fine on a race replica like your RC45, but there is not as much clearance between the bars and fairing on the VFR. Besides, most VFR owners prefer a less racy reach to the bars to begin with.
I'm not clear how mounting the bars below the triple clamps interferes with the fairing???
I also prefer a less racy reach to the bars... after all a big part of my riding plans are long distance tours...
-
Combined with the CBR929/954 'gullwing' upper triple that dips down approx. 30mm, you get an inverted fork that you can still mount clipons above the triple clamp.
Mounting the clip ons below the triple clamps is not desireable???
 border='0' alt='user posted image' />
04-06 R1 Rr Installation How To
in Modifications
Posted
Bad as in bike flambe... (Note this in not Mr.RC45... rather it's a pic from a female RC45 owner over in
England... and as you can guess it was one hot ride... she almost roasted her fanny... and such a sweet
one at that...)